Glitched Aberations: Drawings from the work of Jon Cates, Rosa Menkman and other glitch artists, this project will explore the aberations, failures, and artifacts that signify this artistic form.
In Class Project
The following alterations are intended to show the results of “hacking” an image by altering its code as text. The idea is to show what lies beneath the surface of an image and to understand the process of how images can be manipulated simply by adding to substituting its code. This method of deconstruction is crucial to a better understanding of the “fragility” of our media as well as the aesthetic results of intentional deconstruction.
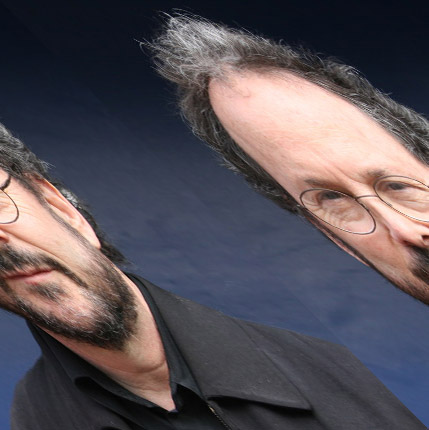
- Create a new post so that you can share your work as you go along. First, Choose an image to subject to a series of transformation. Be sure you are not using the original, make a copy. Add this image on your blog post. Here is the image I am using:
2. Open the file in both Preview and TextEdit to carry out a series of hacks into the file’s code. You will be able to go back and forth to see the alterations. Don’t alter the top section, which can “break” the file. Work your way down the file, cut, pasting, typing, etc. until you see different parts of the image changing. Note the difference between these different types of hacks and how they alter the image in various ways. Although this is not an exact science, it seems that if you cut/past at the bottom of the file, you will shift the bottom, the top of the file alters the top. Cutting can change colors and add abberations, etc. When you are satisfied with the results, add to your post.

3. Make a copy of your file and keep going. See how far you can cause it to break down until it no longer resembles the original. At a certain point, you may see something quite radical happening: blocks of pixels, severe color changes, or just a swath of color:

This is an amazing process that you can refine (if that’s allowed in glitch) by going deeper and deeper into the structure of the file until it has become something completely transformed. It may even look different in Preview and when you open online. Here is one more for good measure.
4. Ultimately, this is about process, about your interaction with the code of the file, understanding at a system level how code operates on an image or a sound, etc. The images are also quite beautiful, impossible in many ways to create in any other way. They even seem to go beyond filters, which allows you to do this with more control. But it is the loss of control that is interesting and provocative.
Take Home Project
Choose another image and use Photoshop to turn it into a raw image. Here you will be able to see how various file configurations operate on an image. We are not using filters in Photoshop, we are manipulating the information at a very fundamental level. See A Vernacular of File Formats by Rosa Menkman for additional information on this assignment.
1. Open a jpeg or photoshop formatted file in Photoshop. I am using my now image below:
2. Now save the file as a Photoshop Raw file and open it again. When you open it you will see a dialogue box with the width and height dimensions, the number of channels (3 is default), the bit depth (8 is default), and the header size (0 is default). In the following version of the image, I set the channels to 2. Now save the mode to grayscale (since it is now without color) so that you can save it as a jpeg and post it to your blog. Close your .raw file without saving so you can mess it up again, even more.
3. Now we will alter the width of the .raw file by just one pixel smaller. Note that Photoshop will tell you the file is now smaller, but you can open anyway. If you make the size larger, you will not be able to open it. Open the .raw file and in the dialogue box change the count of channels back to three so it turns to color and save your file as a jpeg. Close the .raw file without saving. Not that the smaller width (only 1 pixel) has disturbed the alignment of the image so that it becomes wavy. Incrementally smaller width sizes will have a more dramatic effect.
4. Open the .raw file again and put the width back to the original, keep the channel count 3, but change the interleaving to noninterleaved. This changes the way the RGB information is being stored in a file, reordering it so that the color values are altered, producing some interesting effects.
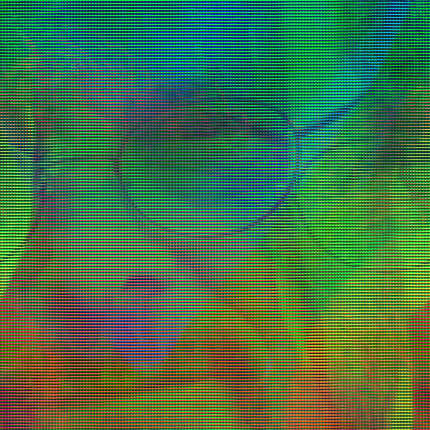
5. Now for the grand finale, try narrowing the width and the height by a more substantial amount, say around 50 or more pixels. The result is an image that is no longer representative of the original, rather it has become an abstraction. Note that the image still has 3 channels and is noninterleaved, so the color palette resembles the image above.
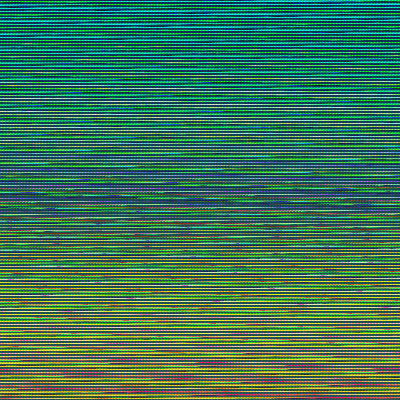
6. Try some other configurations of the .raw settings and experiment. Remember, it is the process of discovery and deconstruction that is the critical purpose of the glitch aesthetic.
7. Lastly, upload a few of your best images to our Flickr Group feed.