Week 2 – Mark Making – Monoprint
Description
15 August
Lecture: Mark Making -Monoprint
In class: Working in class/print studio. Please wear old clothing and shoes for this class.

Monoprints and Monotypes
Monoprint Also known as the most painterly method among the printmaking techniques , a monoprint is essentially a printed painting. The characteristic of this method is that no two prints are alike; although images can be similar, editioning is not possible.
The appeal of the monoprint lies in the unique translucency that creates a quality of light very different from a painting on paper or a print, and the beauty of this media is also in its spontaneity and its combination of printmaking, painting and drawing mediums.
Although these two terms are used interchangeably, there is a big difference between one and the other.
A monotype is essentially ONE of a kind: mono is a Latin word which means ONE and type means kind. Therefore, a monotype is one printed image which does not have any form of matrix. On the other hand, a monoprint has some form of basic matrix.
The process of creating a monoprint or a monotype is the same, but when doing monotypes, the artist works on a clean and unetched plate; with monoprints, however, there is always a pattern or part of an image which is constantly repeated in each print. Artists often use etched plates or some kind of pattern such as lace, leaves, fabric or even rubber gaskets, to add texture. In this case, having a repeated pattern, we have a monoprint.
Monoprints and monotypes are created by manually adding (additive method) or removing (subtractive method) ink from a plate which is then printed using a printing press. Many effects can be achieved in monotypes that are not possible with any other technique.
In the subtractive method you cover a surface (metal or plastic plate) entirely with colour (usually with etching or litho ink), then you remove the ink partially or wholly to expose areas of the picture being made. This process can be carried out using brushes, toothpicks, cotton swabs, foam rubber, fingers, rags, etc. With the additive method, you start with a clean plate and apply the ink or watercolor media in various ways, but as etching ink is a fairly unmanageable substance it is hard to achieve the intended effect. If the ink is applied too thick, it will spread from the pressure when printed, forming a blot. If too thin it won’t show up at all.
References: “The Art Of Monoprint” and “About Monoprints”
How to Make Monoprint
Please refer to Making a Monoprint Step by Step
Homework
- Scan your mono print(s) at 300 dpi minimum
- Scan your most successful sketches, ink drawings at 300 dpi
- Keep drawing- but use pencil, pen and ink- for refined drawings scan at 300 dpi
- Bring your laptops
- take photo of your mark making tool
https://oss.adm.ntu.edu.sg/chalim002/category/2015-dn1002-g6/lines/lines-journal
Document the process.
 Continue with monoprint and/or automatic techniques.

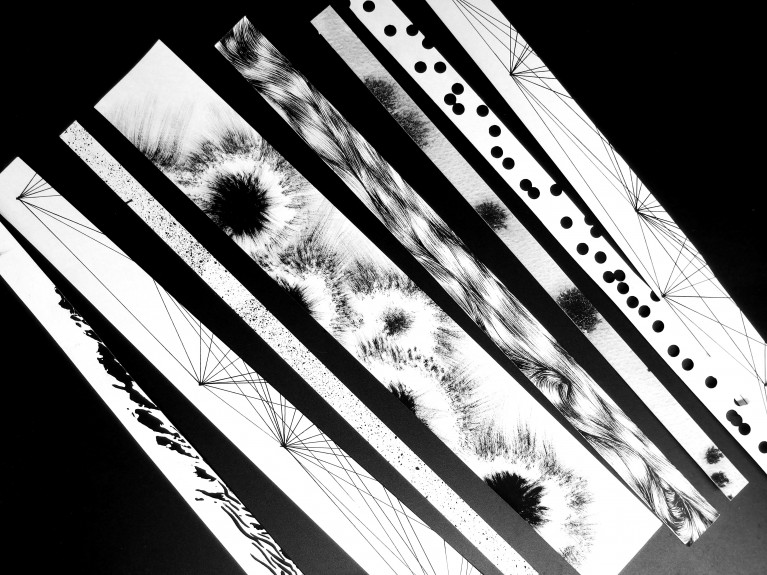
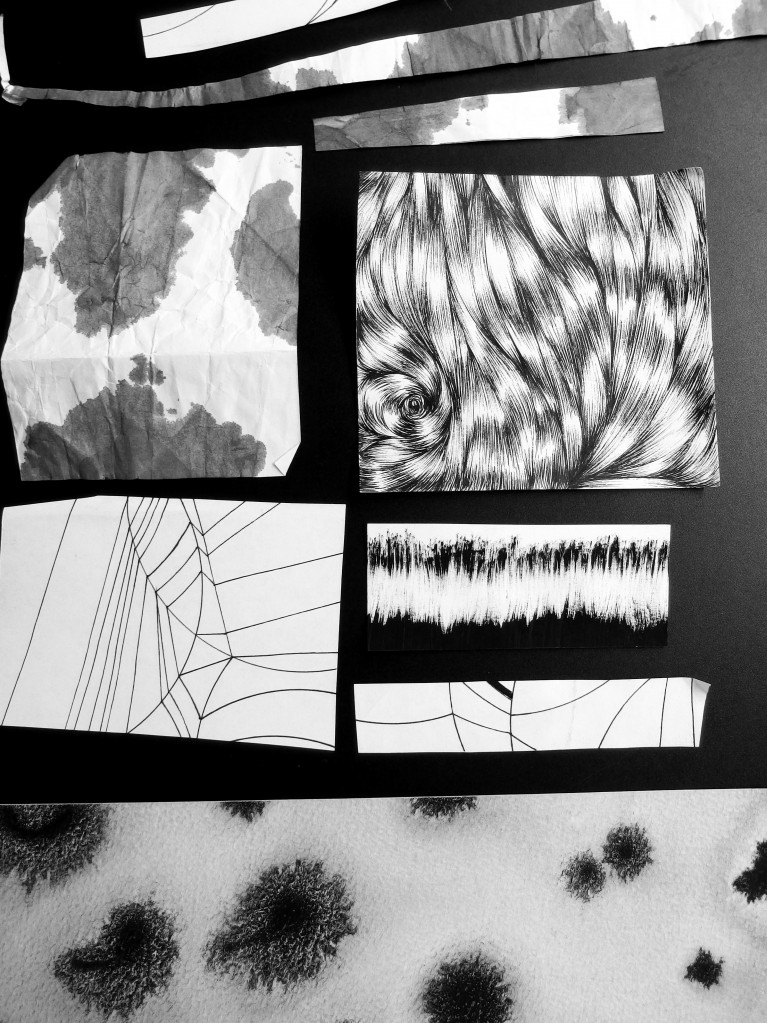
Here are some examples on lines:
For more please see posts
https://oss.adm.ntu.edu.sg/chalim002/category/2015-dn1002-g6/lines/lines-journal
Journal
Keeping-up with your Journal
https://oss.adm.ntu.edu.sg/kohg0007/category/2015-dn1002-g6/lines/
