
Overview
For this update, I will be addressing more about the results I have from the first prototype. There are many findings which may alter the design and the functionality of the final outcome of the project. I did not start with a sketch and went into the project head on by modelling the wearable.
3D Modelling
I created a 3D model to let me have a feel of the dimensions and functionality of this design. Notice that there is no eye cover and sensor holder added into this design. It is because they are a rather easy tackle. As you can see there is a linkage mechanism that will allow the muff cover to be detached from the main body. The 3D model is below:
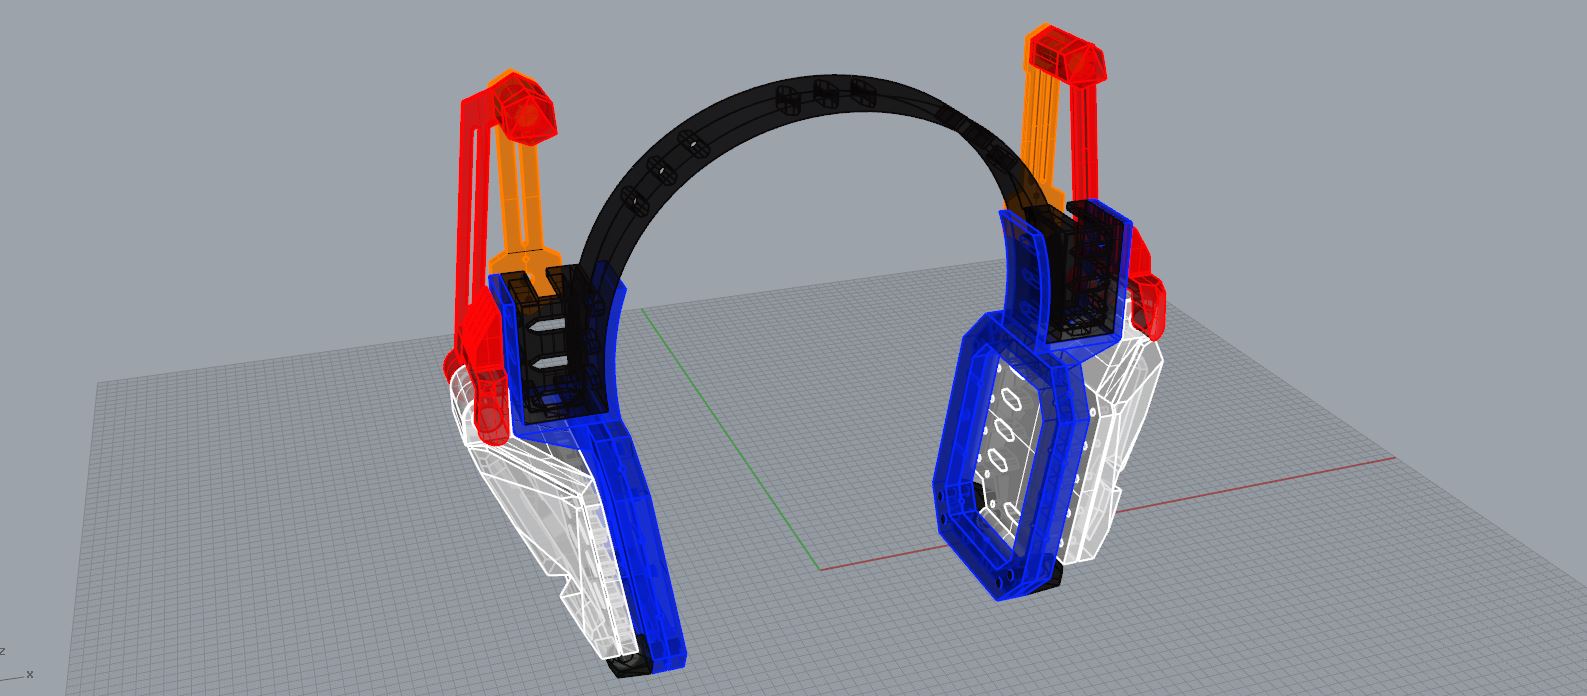
The following are the parts of the head set and the colours representing them.
Black – Bridge (for resting on head)
Orange – Motor arms
Red – Linkage mechanism
Blue – Ear Frame
White – Ear Muff Cover
Construction
I used 3D printing to get the whole prototype done. The Gif above shows the process of the build. As there were many parts, it was extremely complicated to design it. The linkage system opens the muff covers so that they have enough strength to push against the sponge into the ear frames.
Rotation

This is a rotation around the fully assembled head set. (Have not added sponge yet) Notice that the size is extremely big as the linkage system is the main cause of the bulky size. There are also many problems with this design. Firstly, the headset is quite hard to put on even without the sponge. Secondly, this headset is very loose without the sponge. Thirdly, it takes adhesive to assemble. I hope to not use any adhesive for my final model.
Motor Testing
This part is to test if the motors are able to take the load of the ear muffs when laying down and standing up. As you can see from the above Gif, the motors are able to handle the stress put upon them. Notice that I changed the PIR sensor to a ultra sonic sensor because it take extremely long to calibrate. I took 1 hour to calibrate in the night then it works nicely. But when I woke up the next day to try it again, the sensor is not working again. Even if I calibrate it again, it doesn’t seem to work.
Three Motor Testing

As I will be adding another motor, I tested the set up with a third motor which is for the controlling of the visor (or eye piece).
Adding Sponge

I added sponge to it so that it is more comfortable to put on. I think that the overall functionality will be on point with more configuration of the code.
Ergonomics and Comfort
This is me trying to see if it fits on my head. With some tweaking and a better cut sponge, it will feel more comfortable.
Conclusion
I feel that this is prototype is a good gauge of the overall dimensions. I will be using a similar design in the final one as I think that it looks fine when it is worn.