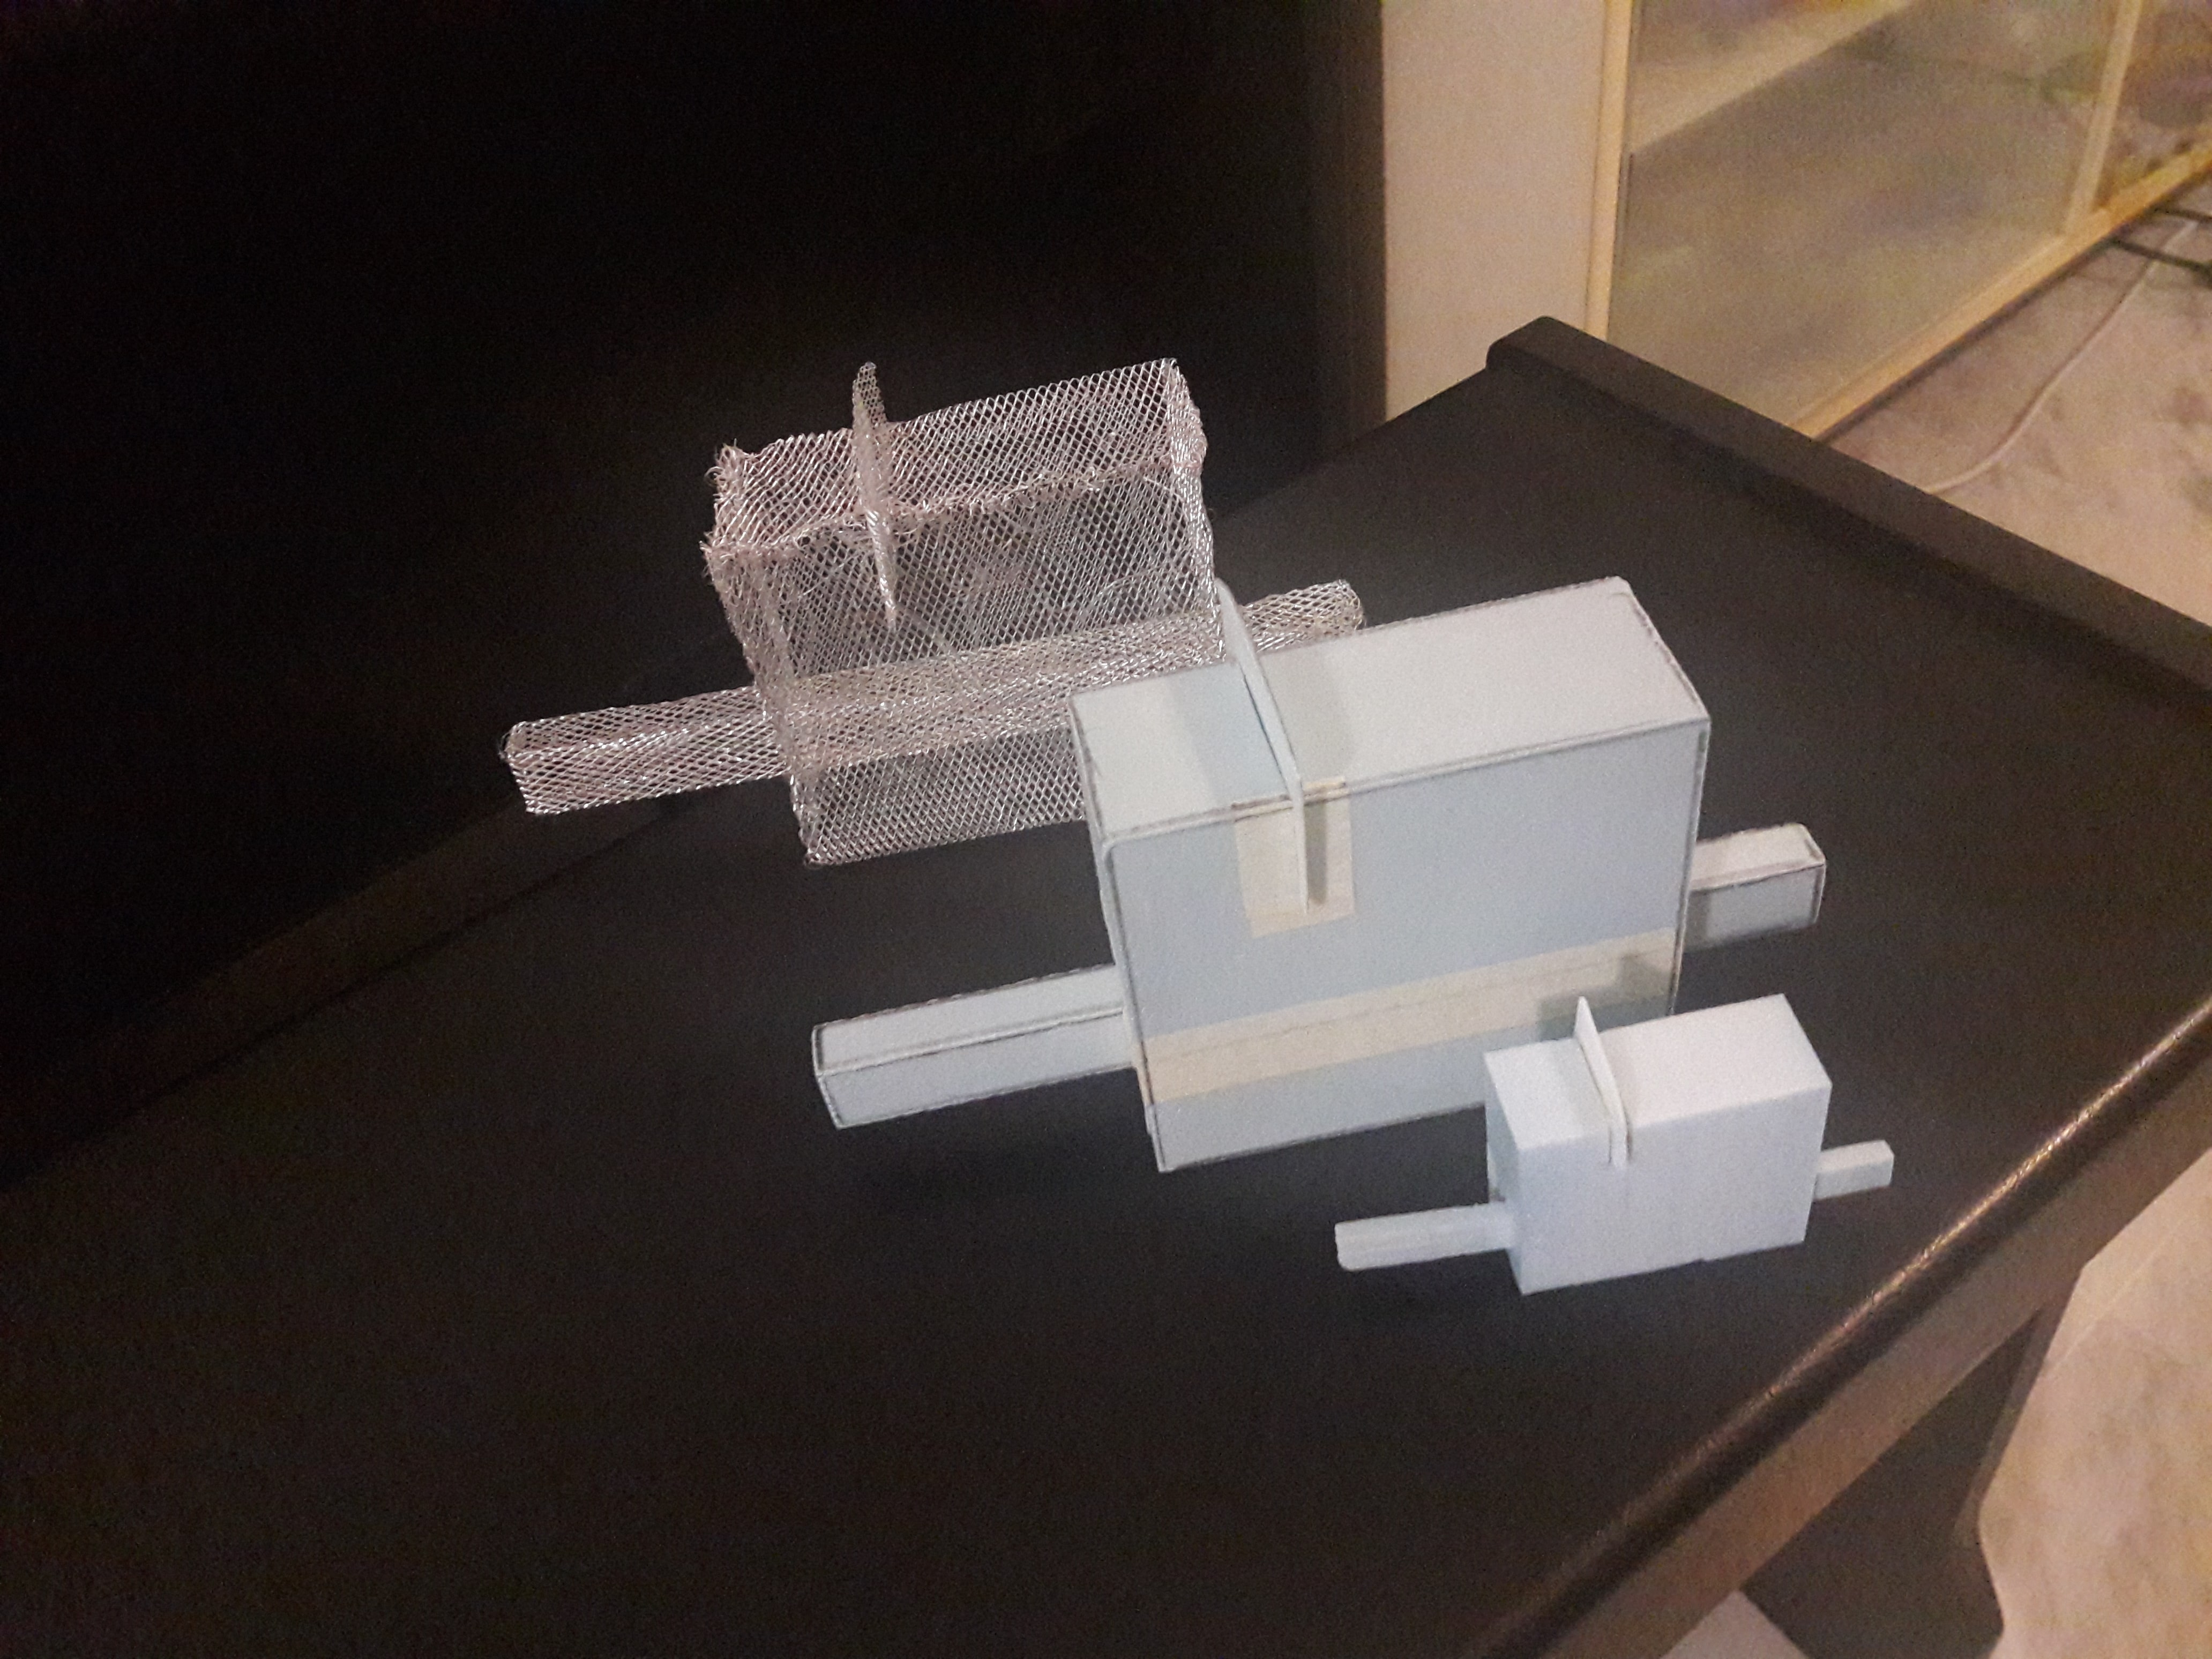
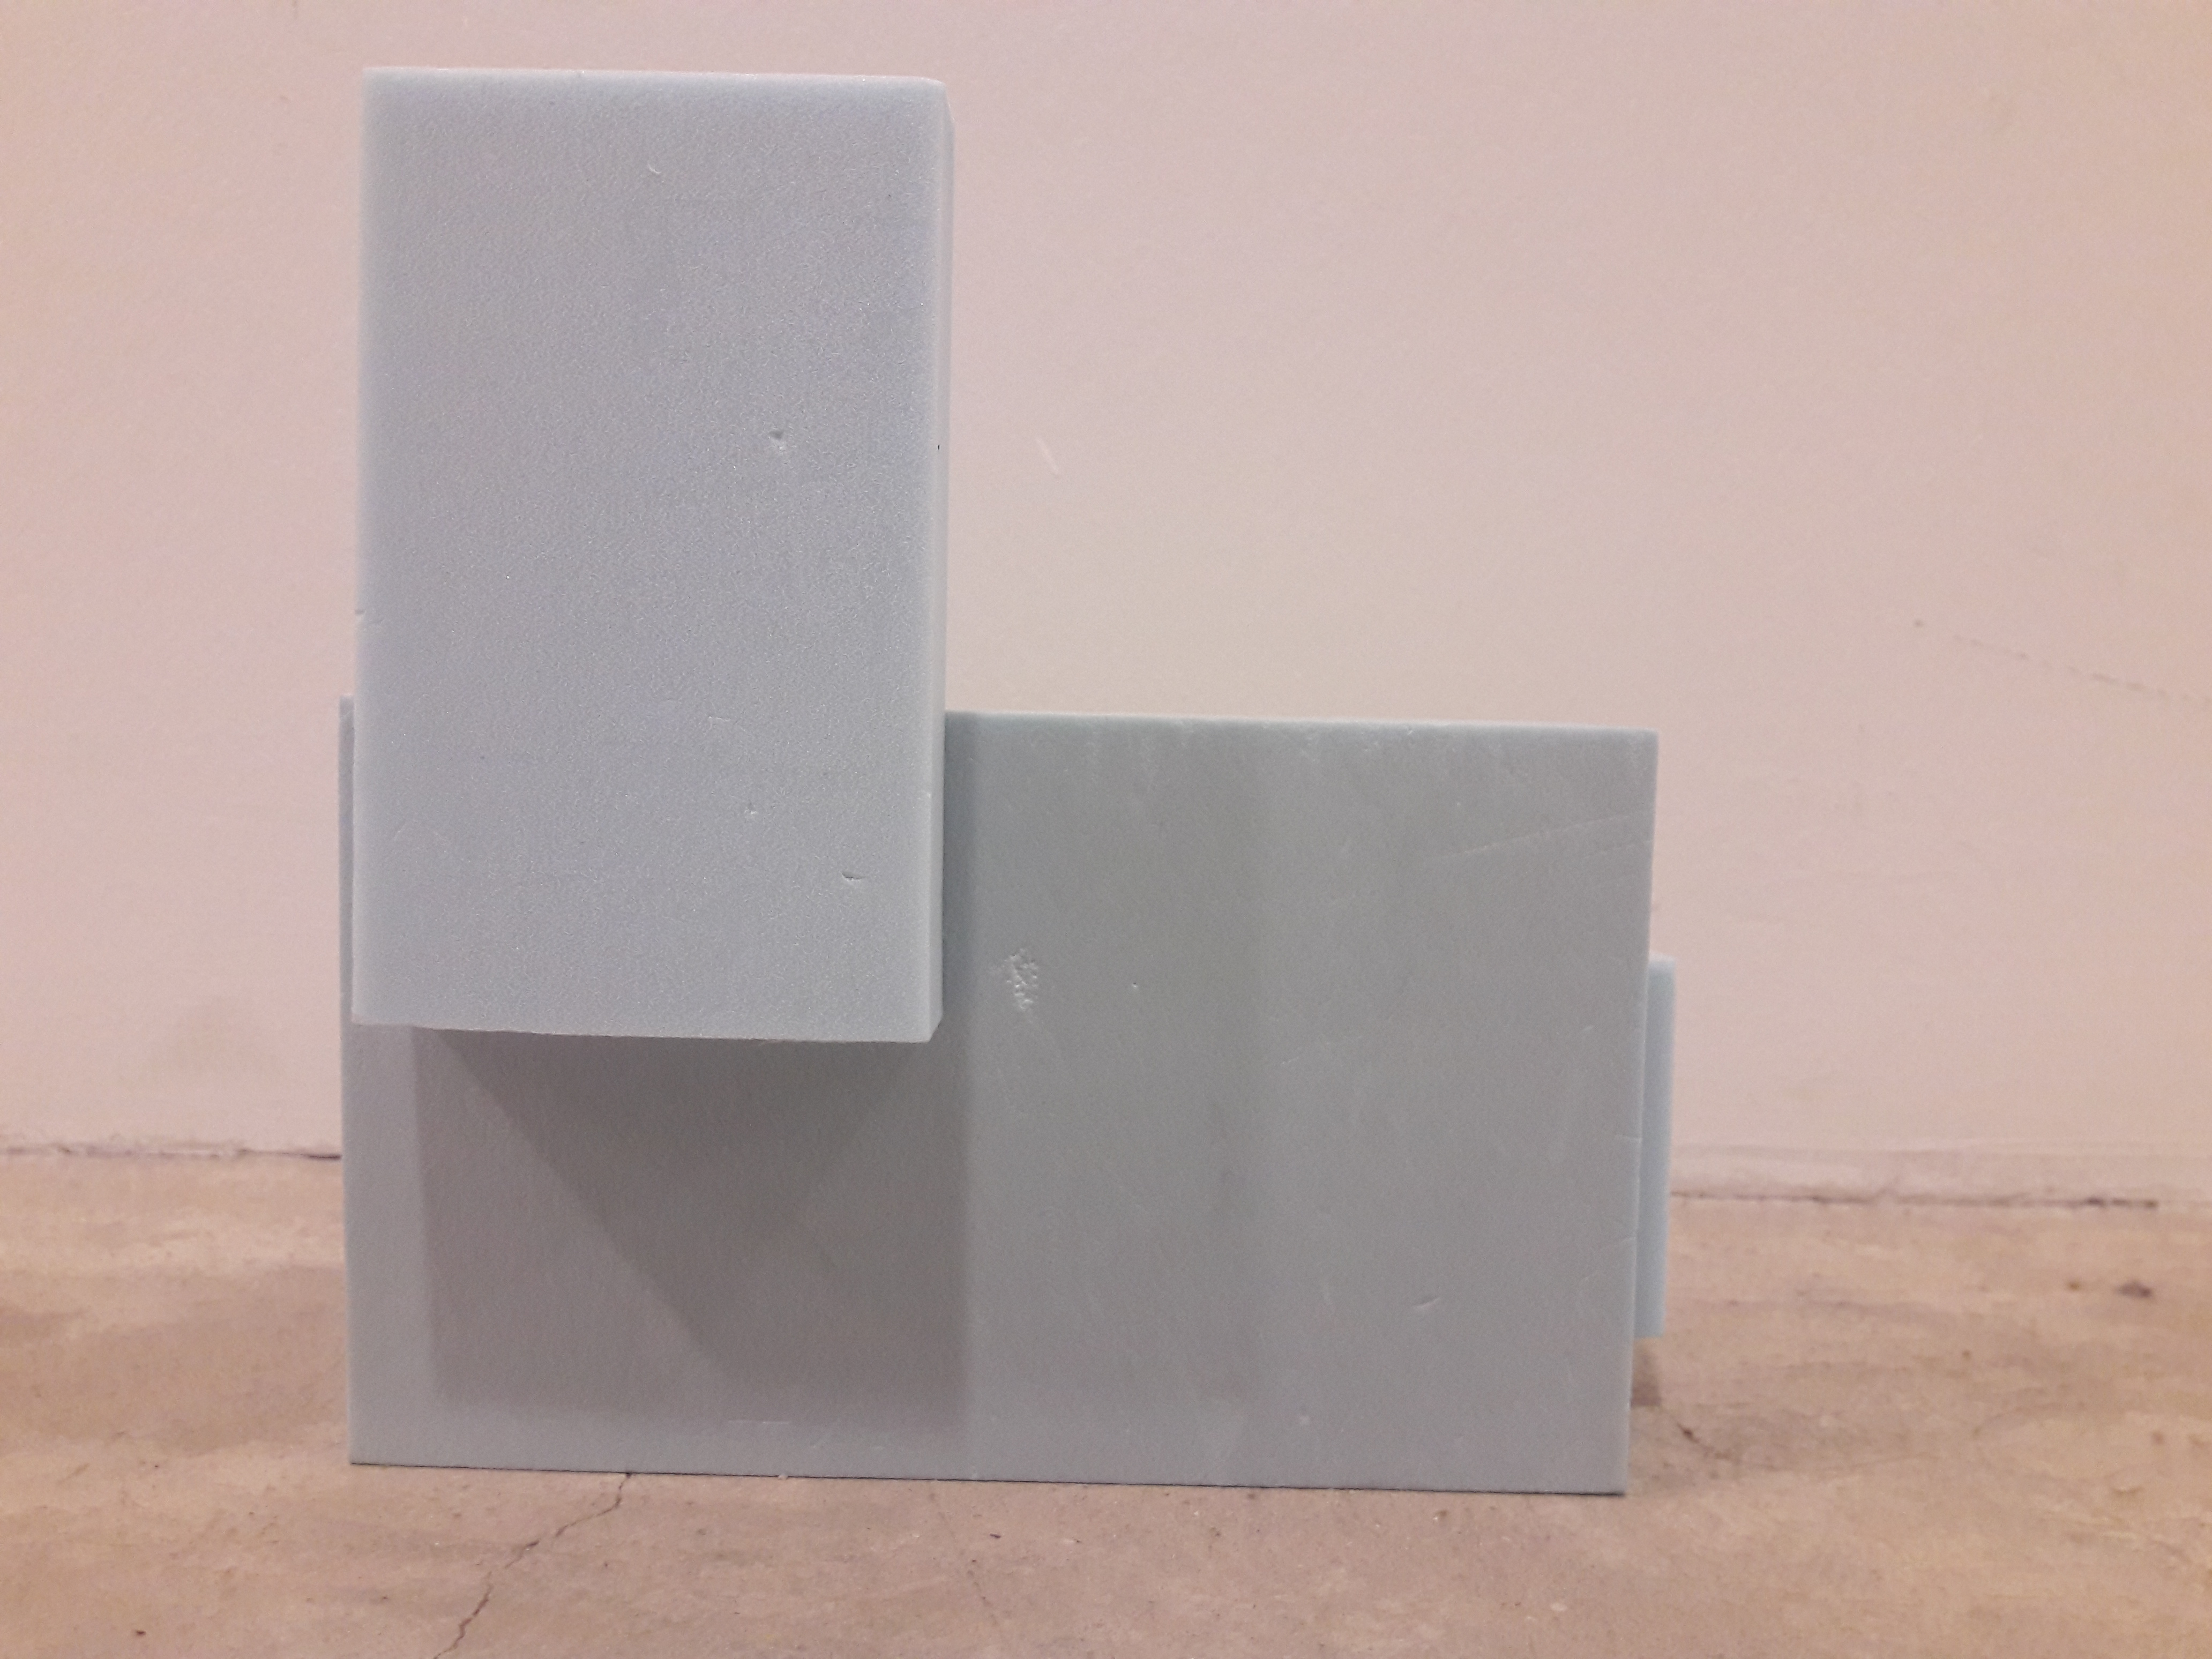
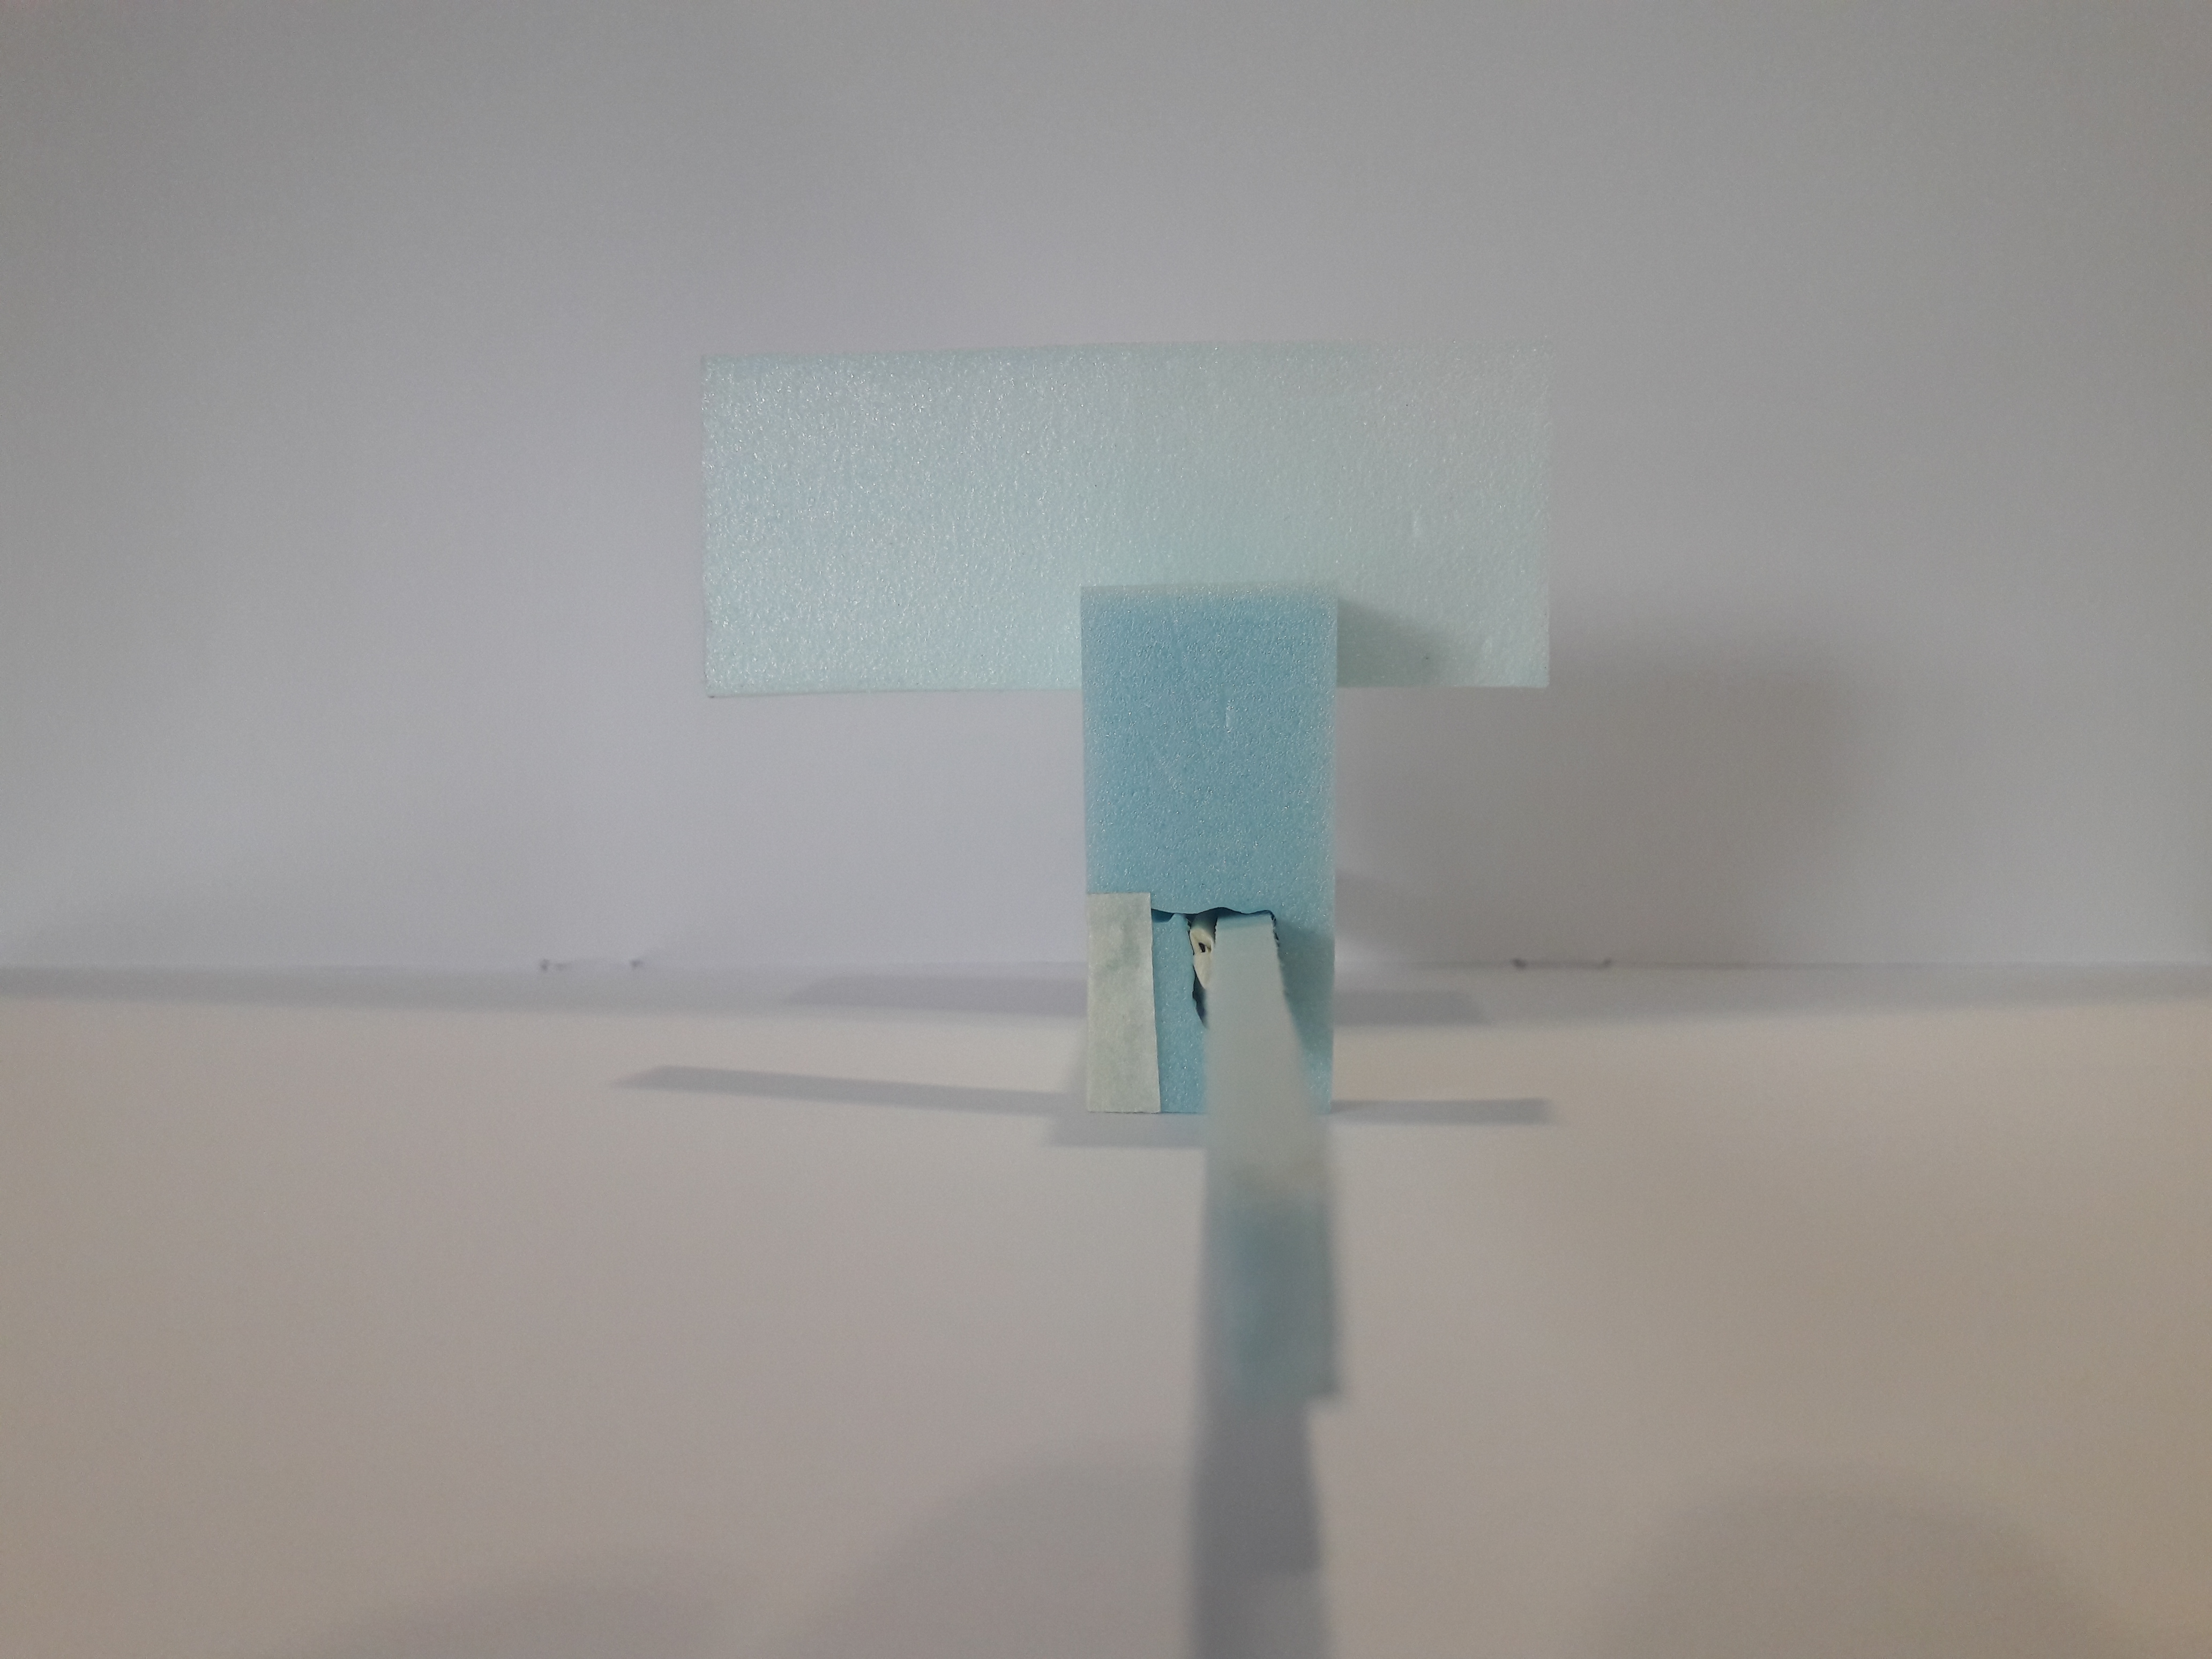
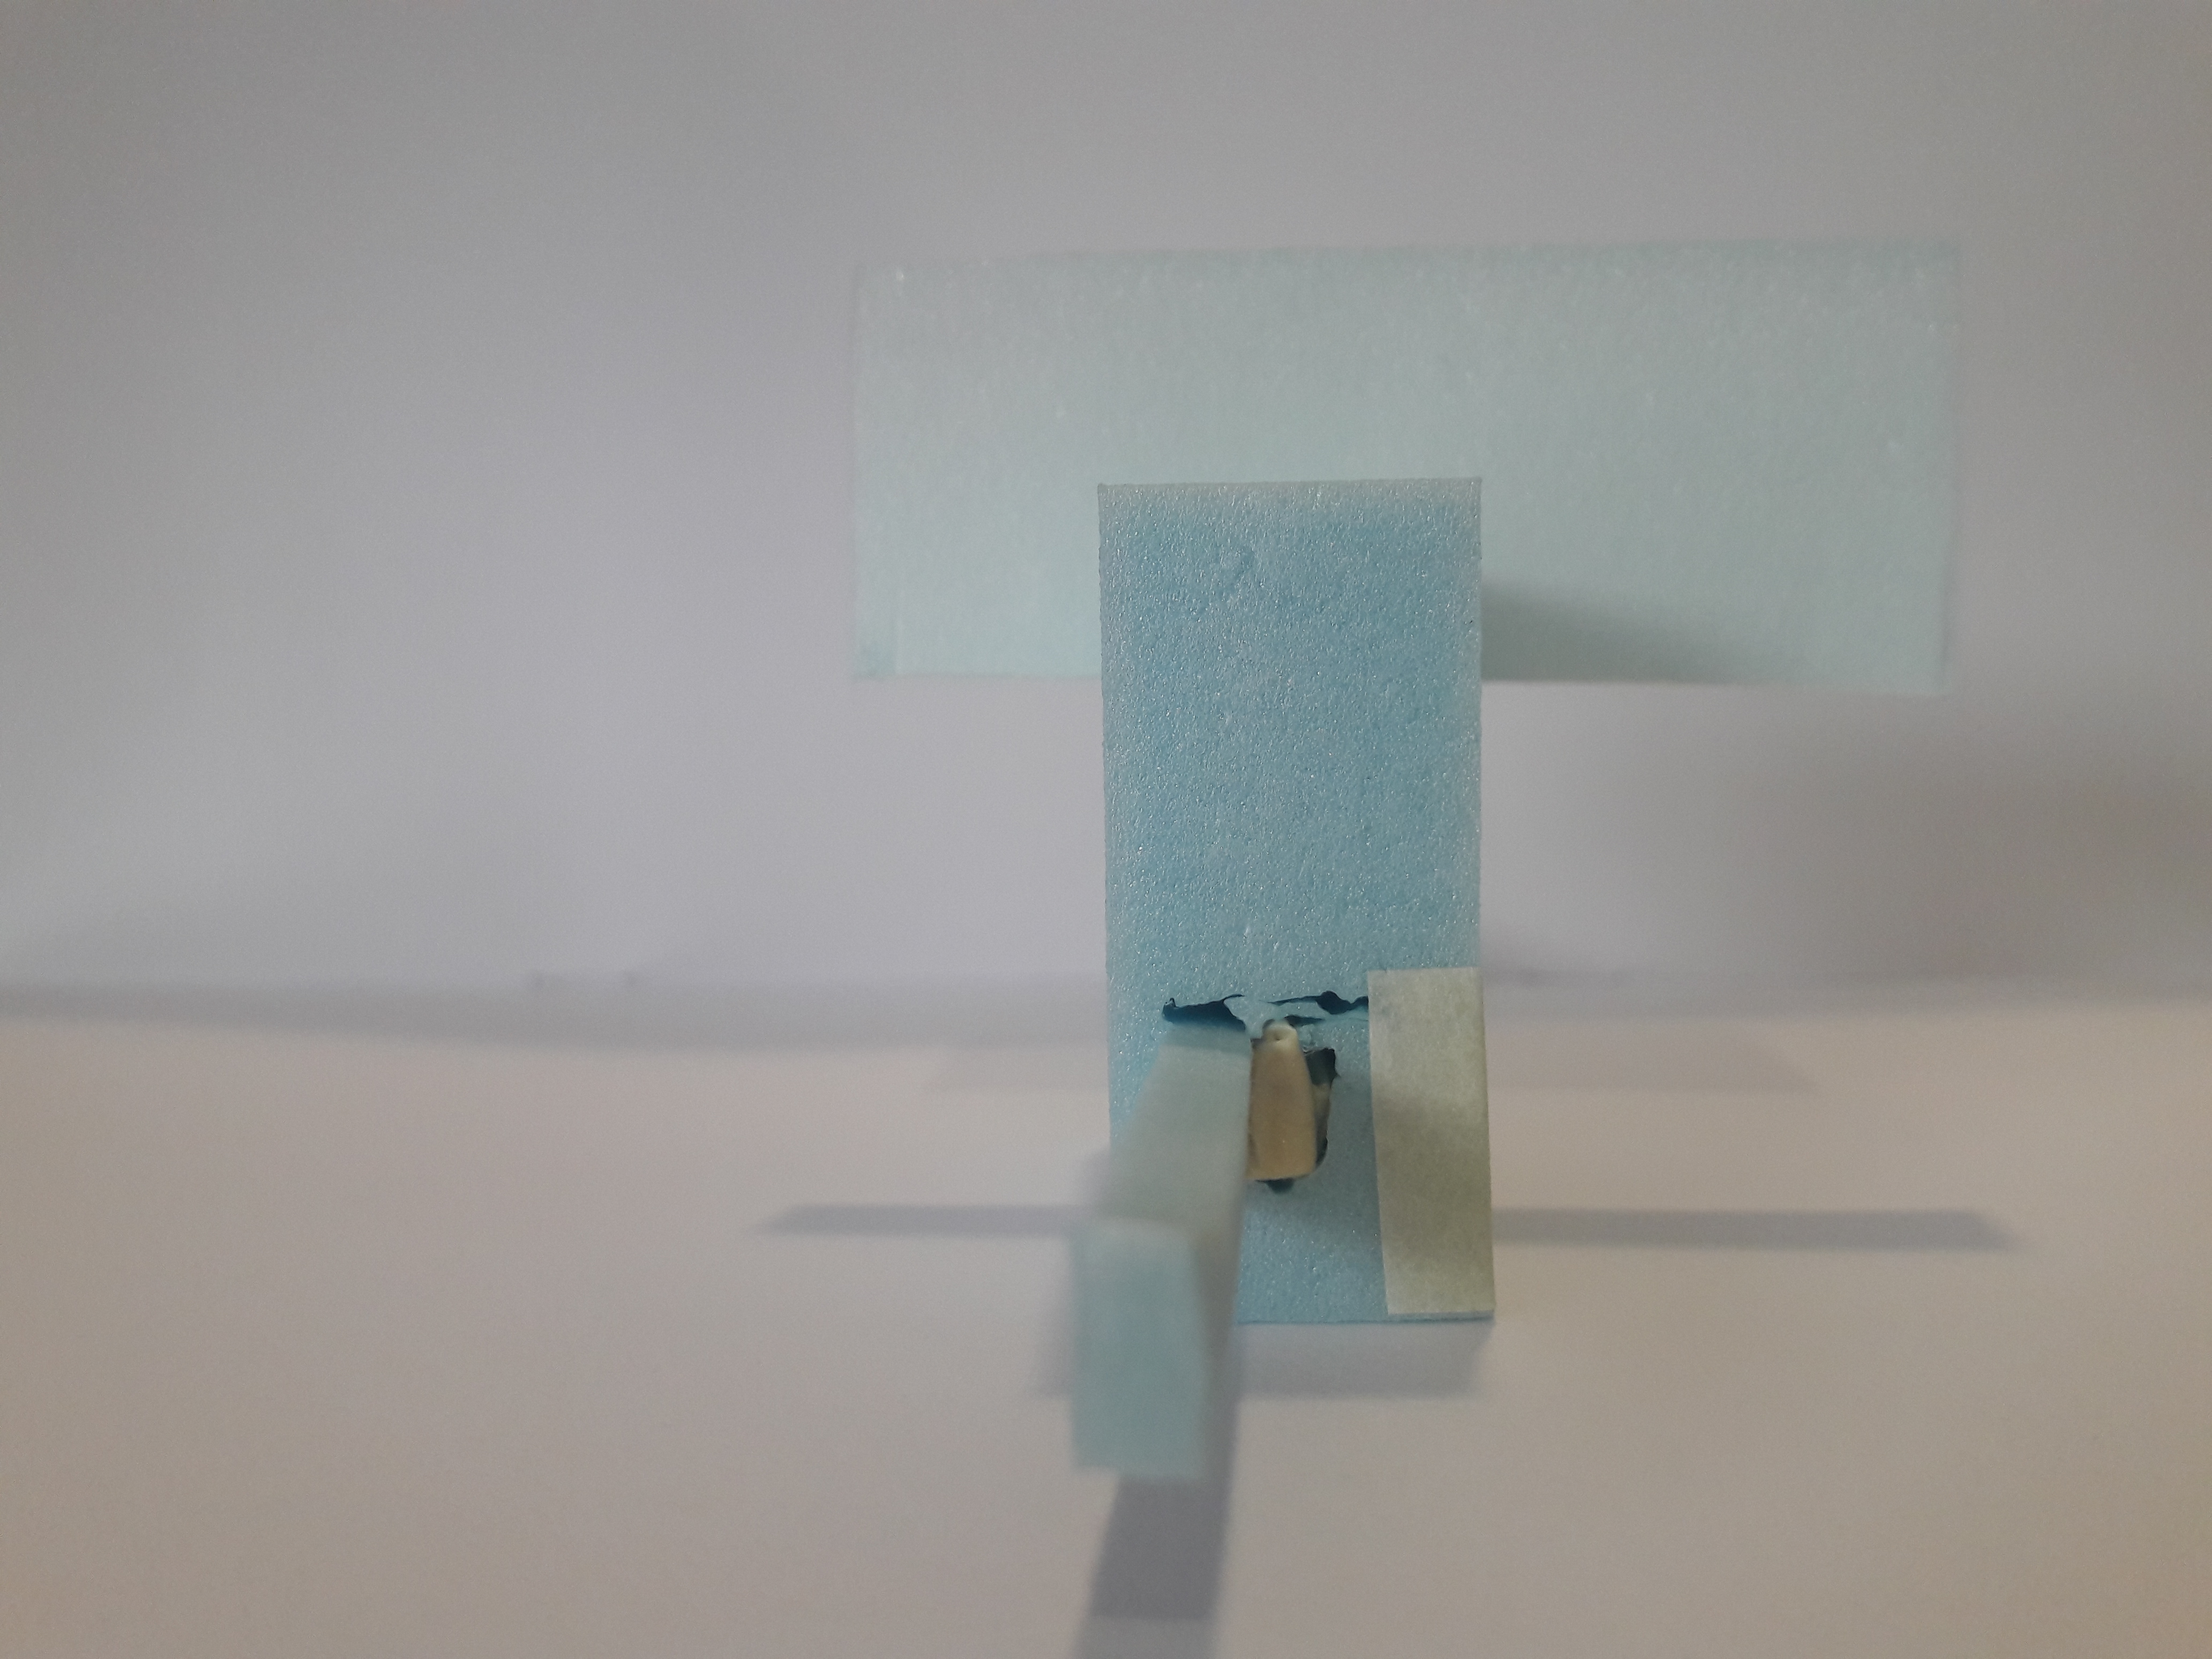
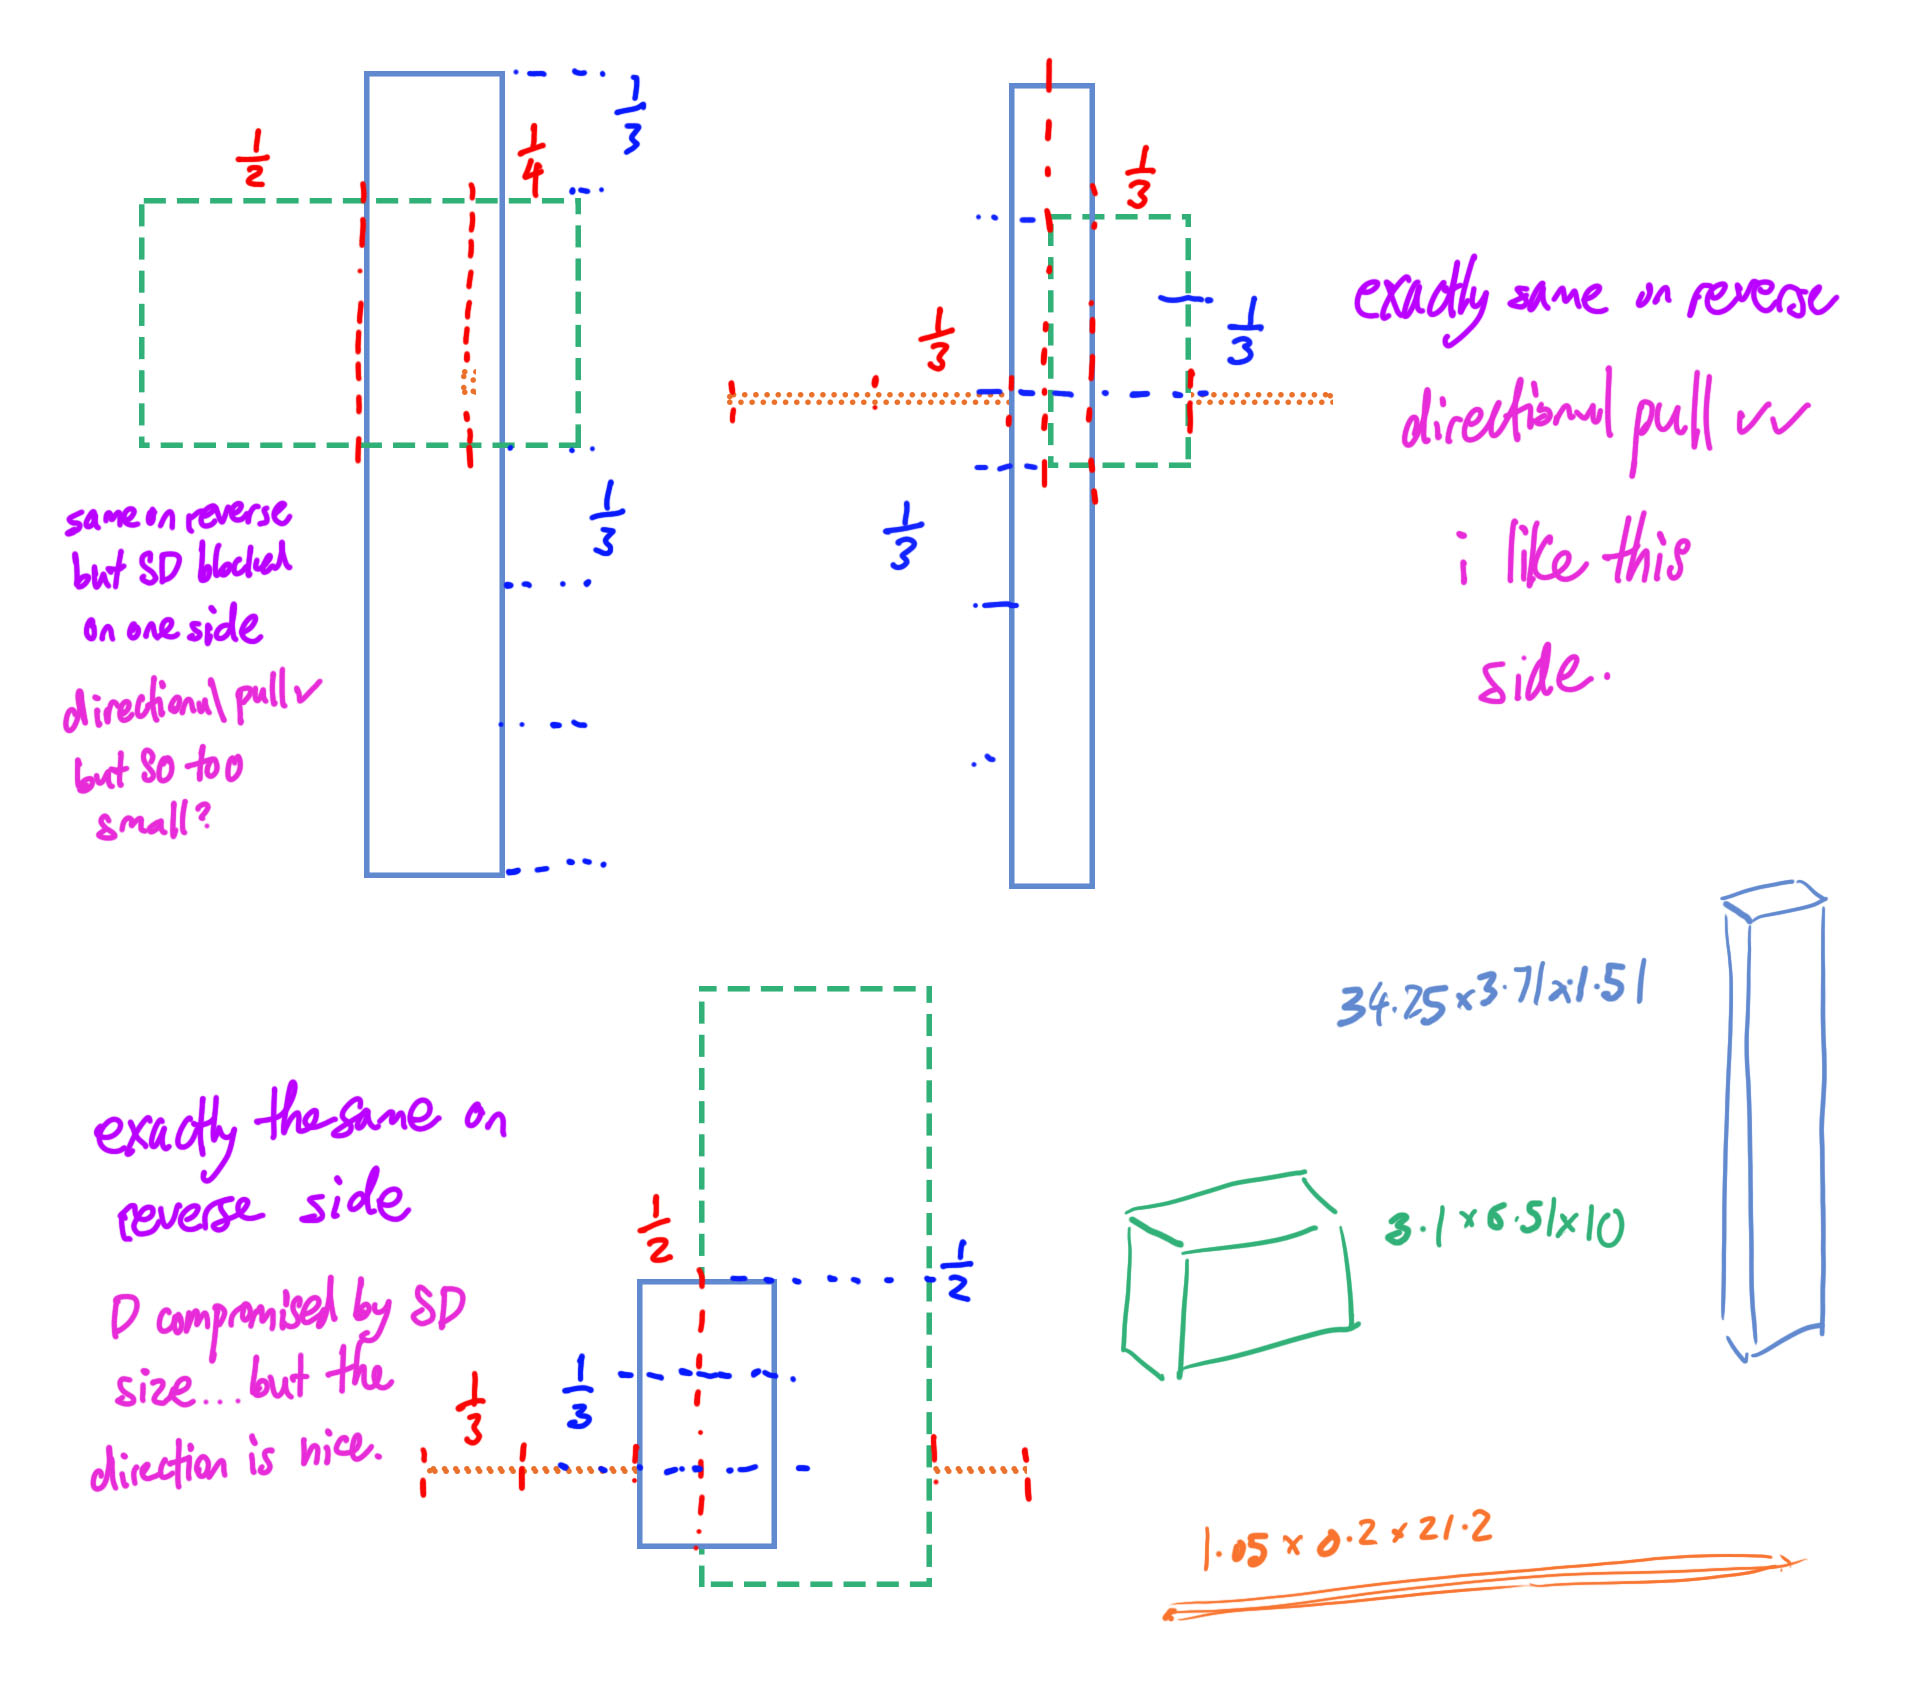
My final model was based off the 2nd model in this post. I increased the overall size since I realised that the reason why I couldn’t adjust the dimensions of my boxes (lest they have “similar lengths”) was because they were all too small. The final dimensions were about 10×9×4, 19×1.7×1, 6×3×0.1 (cm).
Twice the size of the original
My word was XYZ axes. Initially, I left the subordinate larger in size to emphasise the 3-dimensionality, but the advice was to trim it to emphasise hierarchy rather than 3-dimensionality. So I did. Then the remark was that it wasn’t 3-dimensional enough… T_T
me </3
I guess the moral of the story is to take everything with a pinch of salt. A piece of advice followed may resolve the current problem, but raise new problems… T_T
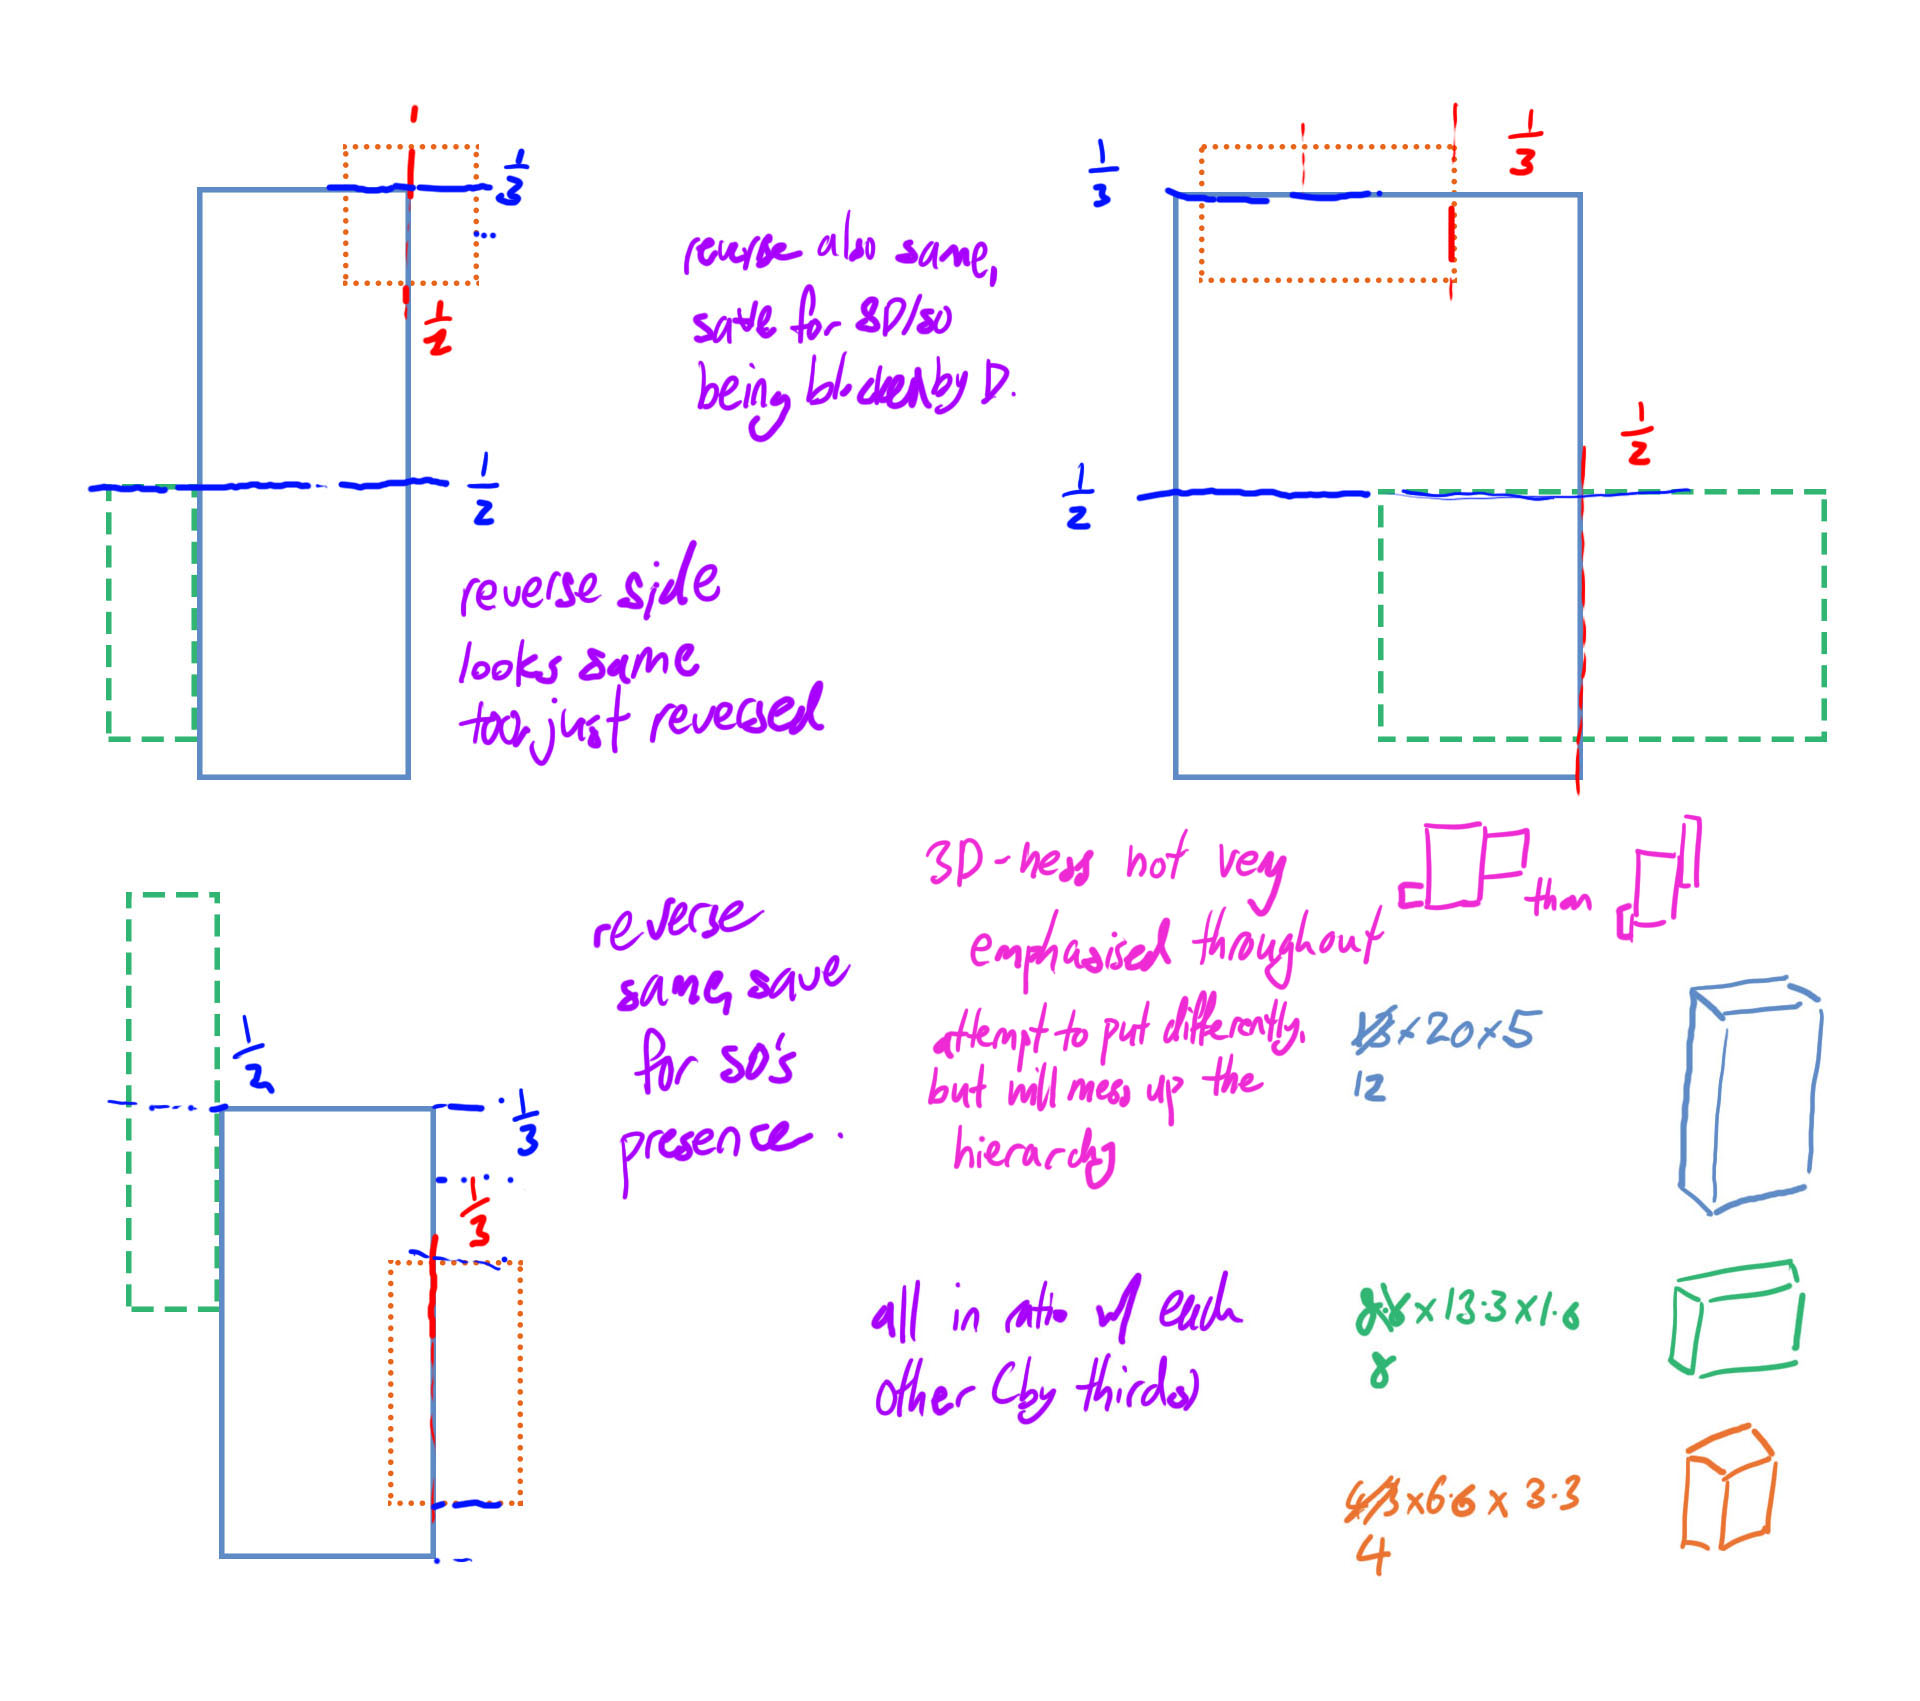
2D sketch analysis and 3D sketch models
The SD and SO are somewhat unclear here, but well…
Verily summarised version (see aforementioned linked post for more details on actual selection of boxes and reasons for joining together in certain way):
Purposeful extreme variation of rectilinears
Emphasis on “directional pull” in 6 directions
Material: Wire mesh and fishing line
The overarching idea was that planes are just a unison of many lines. Hence, the idea was to use a “transparent” frame, to see inside where many lines cross each other randomly.
Wire mesh was chosen for the fact that it was the best material for providing anchors to the lines (through the holes), where I could make the lines out of fishing lines, sewn in with a needle, while still vaguely giving that sense of lack of mass. I also used the same material because I personally feel that, more than being separate axes, all 3 axes are fundamentally the same (especially in that X, Y and Z are interchangeable terms.)
Fishing line, joining all of them together, was meant to re-emphasise that unity, while having the fishing line somewhat not visible as well to add to the lack of mass.
(Will update later when I have access to my journal, 3 pages on the step-by-step process of making with wire mesh)Written step-by-step process. I used an embroidery needle specifically for the length, relative thickness and hole size.
(Will update later when I have access to my journal, a page on contemplations of techniques to get what I want with acrylic) I also considered acrylic, which would have fulfilled the transparency criteria much better, but mostly discarded that idea by virtue of that I couldn’t think of a time and cost-efficient way to use acrylic, especially since I have zero knowledge of it as a material. At least wire mesh was malleable. And had in-built, evenly spread and decently-sized holes.
Possible Usages
Stilt house: Bamboo house with nipa doorstep-roof, a chimney-thing, and hardwood stilts (may come with windows, drive-through windows, etc)
My photoshop skills are poor, but I try
Weapon: Cannon, gun controls behind a gun shield, and a protruding end for manual swivelling (may come with ladder) (all metal)
Other ideas also include: elevator (SD as elevator shaft and D as elevator), lever-pulling-based exercise machine (SD as lever with elastic wire attached to SO)
Some work-in-progress shots
(to form the lines inside)
I bought extra 🙁 So I sold it off to some people in school who also needed it
I’m unfortunately a very trigger happy person (this always, inevitably works against my favour), so all emotions focused a lot on natural forms, where I didn’t control much as opposed to trying to aim for a certain state while making, and letting the marks turn out as is (as long as it generally looked ok).
The key ideas were both of these:
Emotion quality
For me, emotions are often not clearly separable. To avoid too many visual similarities, I narrowed the quality of each emotion down based on 3 overarching criteria: intensity, protractedness and frequency. Intensity is associated with the strength of the emotion (typically once-off and large), protractedness, with the duration of the emotion (typically underlying and mild), frequency, with the occurrence rates of the emotion (typically short-lived and mundane).
Binary opposition
With three defining criteria, I decided to try to represent feelings sharing similarities, and work on using the contrast between both to bring out each other. Also just that 3 criteria and 6 emotions meant 2 emotions would have to share the same spectrum anyway. The linking quality is typically the paper, and the general shape of each mark.
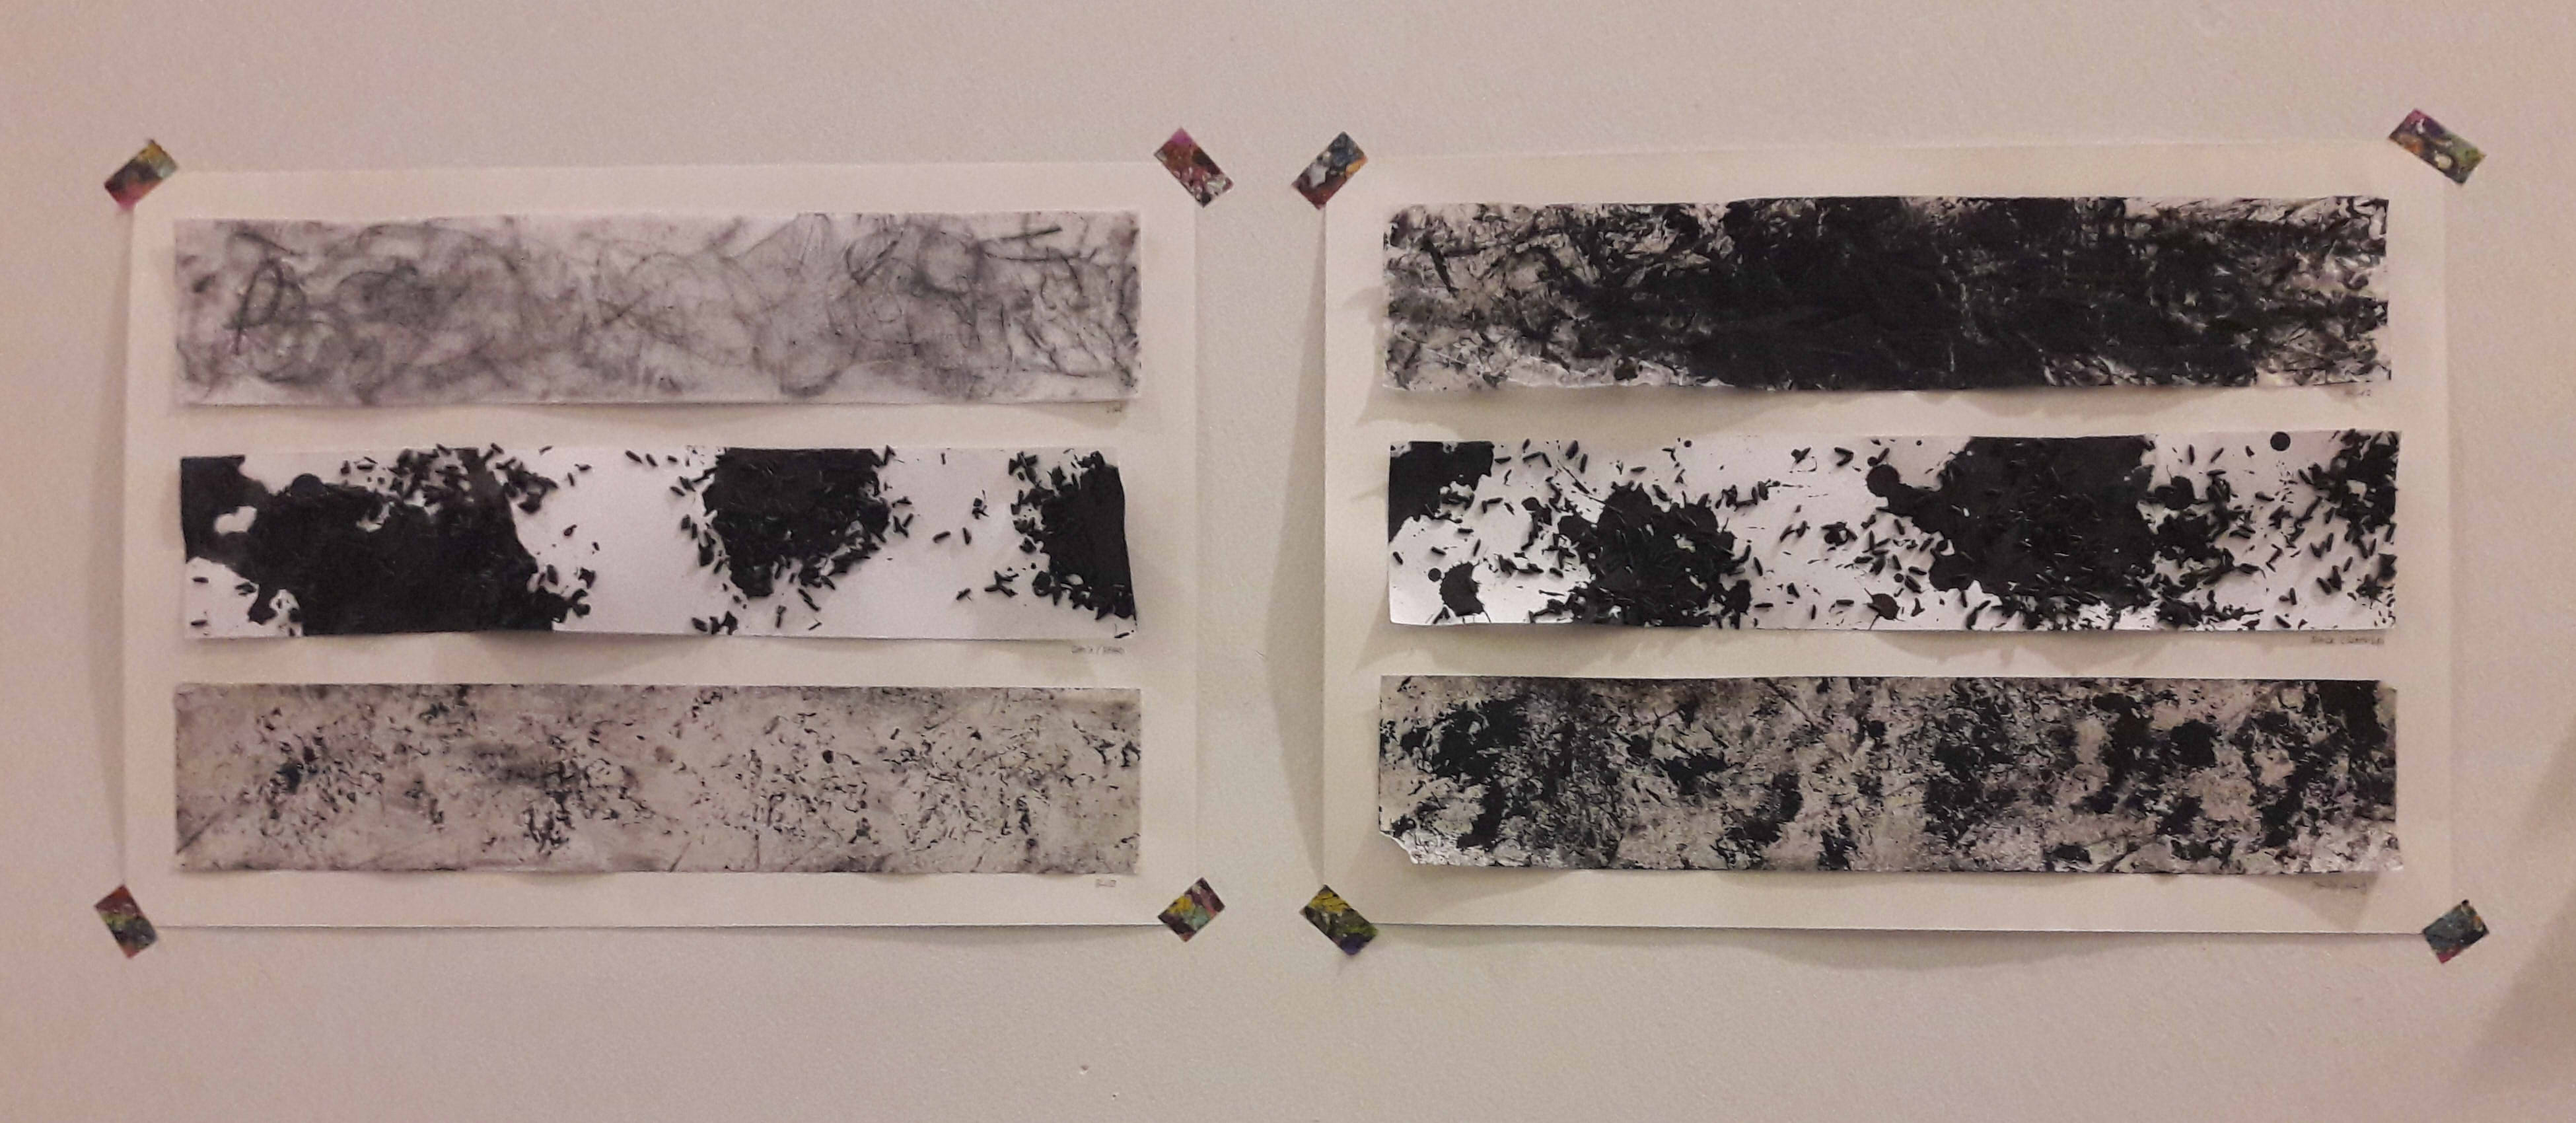
Consequently, the final emotions were as follows:
From left to right, up to down: Love, Anger, Shock (Fear), Shock (Surprise), Bliss, Melancholy
Love & Anger
Both are on tracing paper. I wanted to try gouache/cold-pressed watercolour paper for the texture and whiteness, but it worked really badly with crushed paper (what I presume is named froissage). Seeing ink seep through the tracing paper, I decided to go with that instead, firstly because aforementioned would actually worked, and because the idea of anger literally overflowing and staining was kind of interesting to me.
The key term is intensity, where these feelings are immense and overpowering. (As a byproduct, neither were renamed, since I couldn’t find a better word to describe this all-encompassing emotion.)
Intensity: Only one point of focus. Centralised to reiterate the idea of singularity
Immensity: Reflected in large concentration of positive/negative space
Overpowering: Overflowing from the focus, spreading out
Differences:
Both were pressed onto linoleum, but anger was pressed while there was a lot of ink, as opposed to love, which was pressed after I had dabbed off the ink (to have a much lighter imprint)
The focus is white for love, as opposed to black for anger (colour association). By extension, love features lighter colours (made by diluted Chinese ink) as opposed to anger, which used normal ink
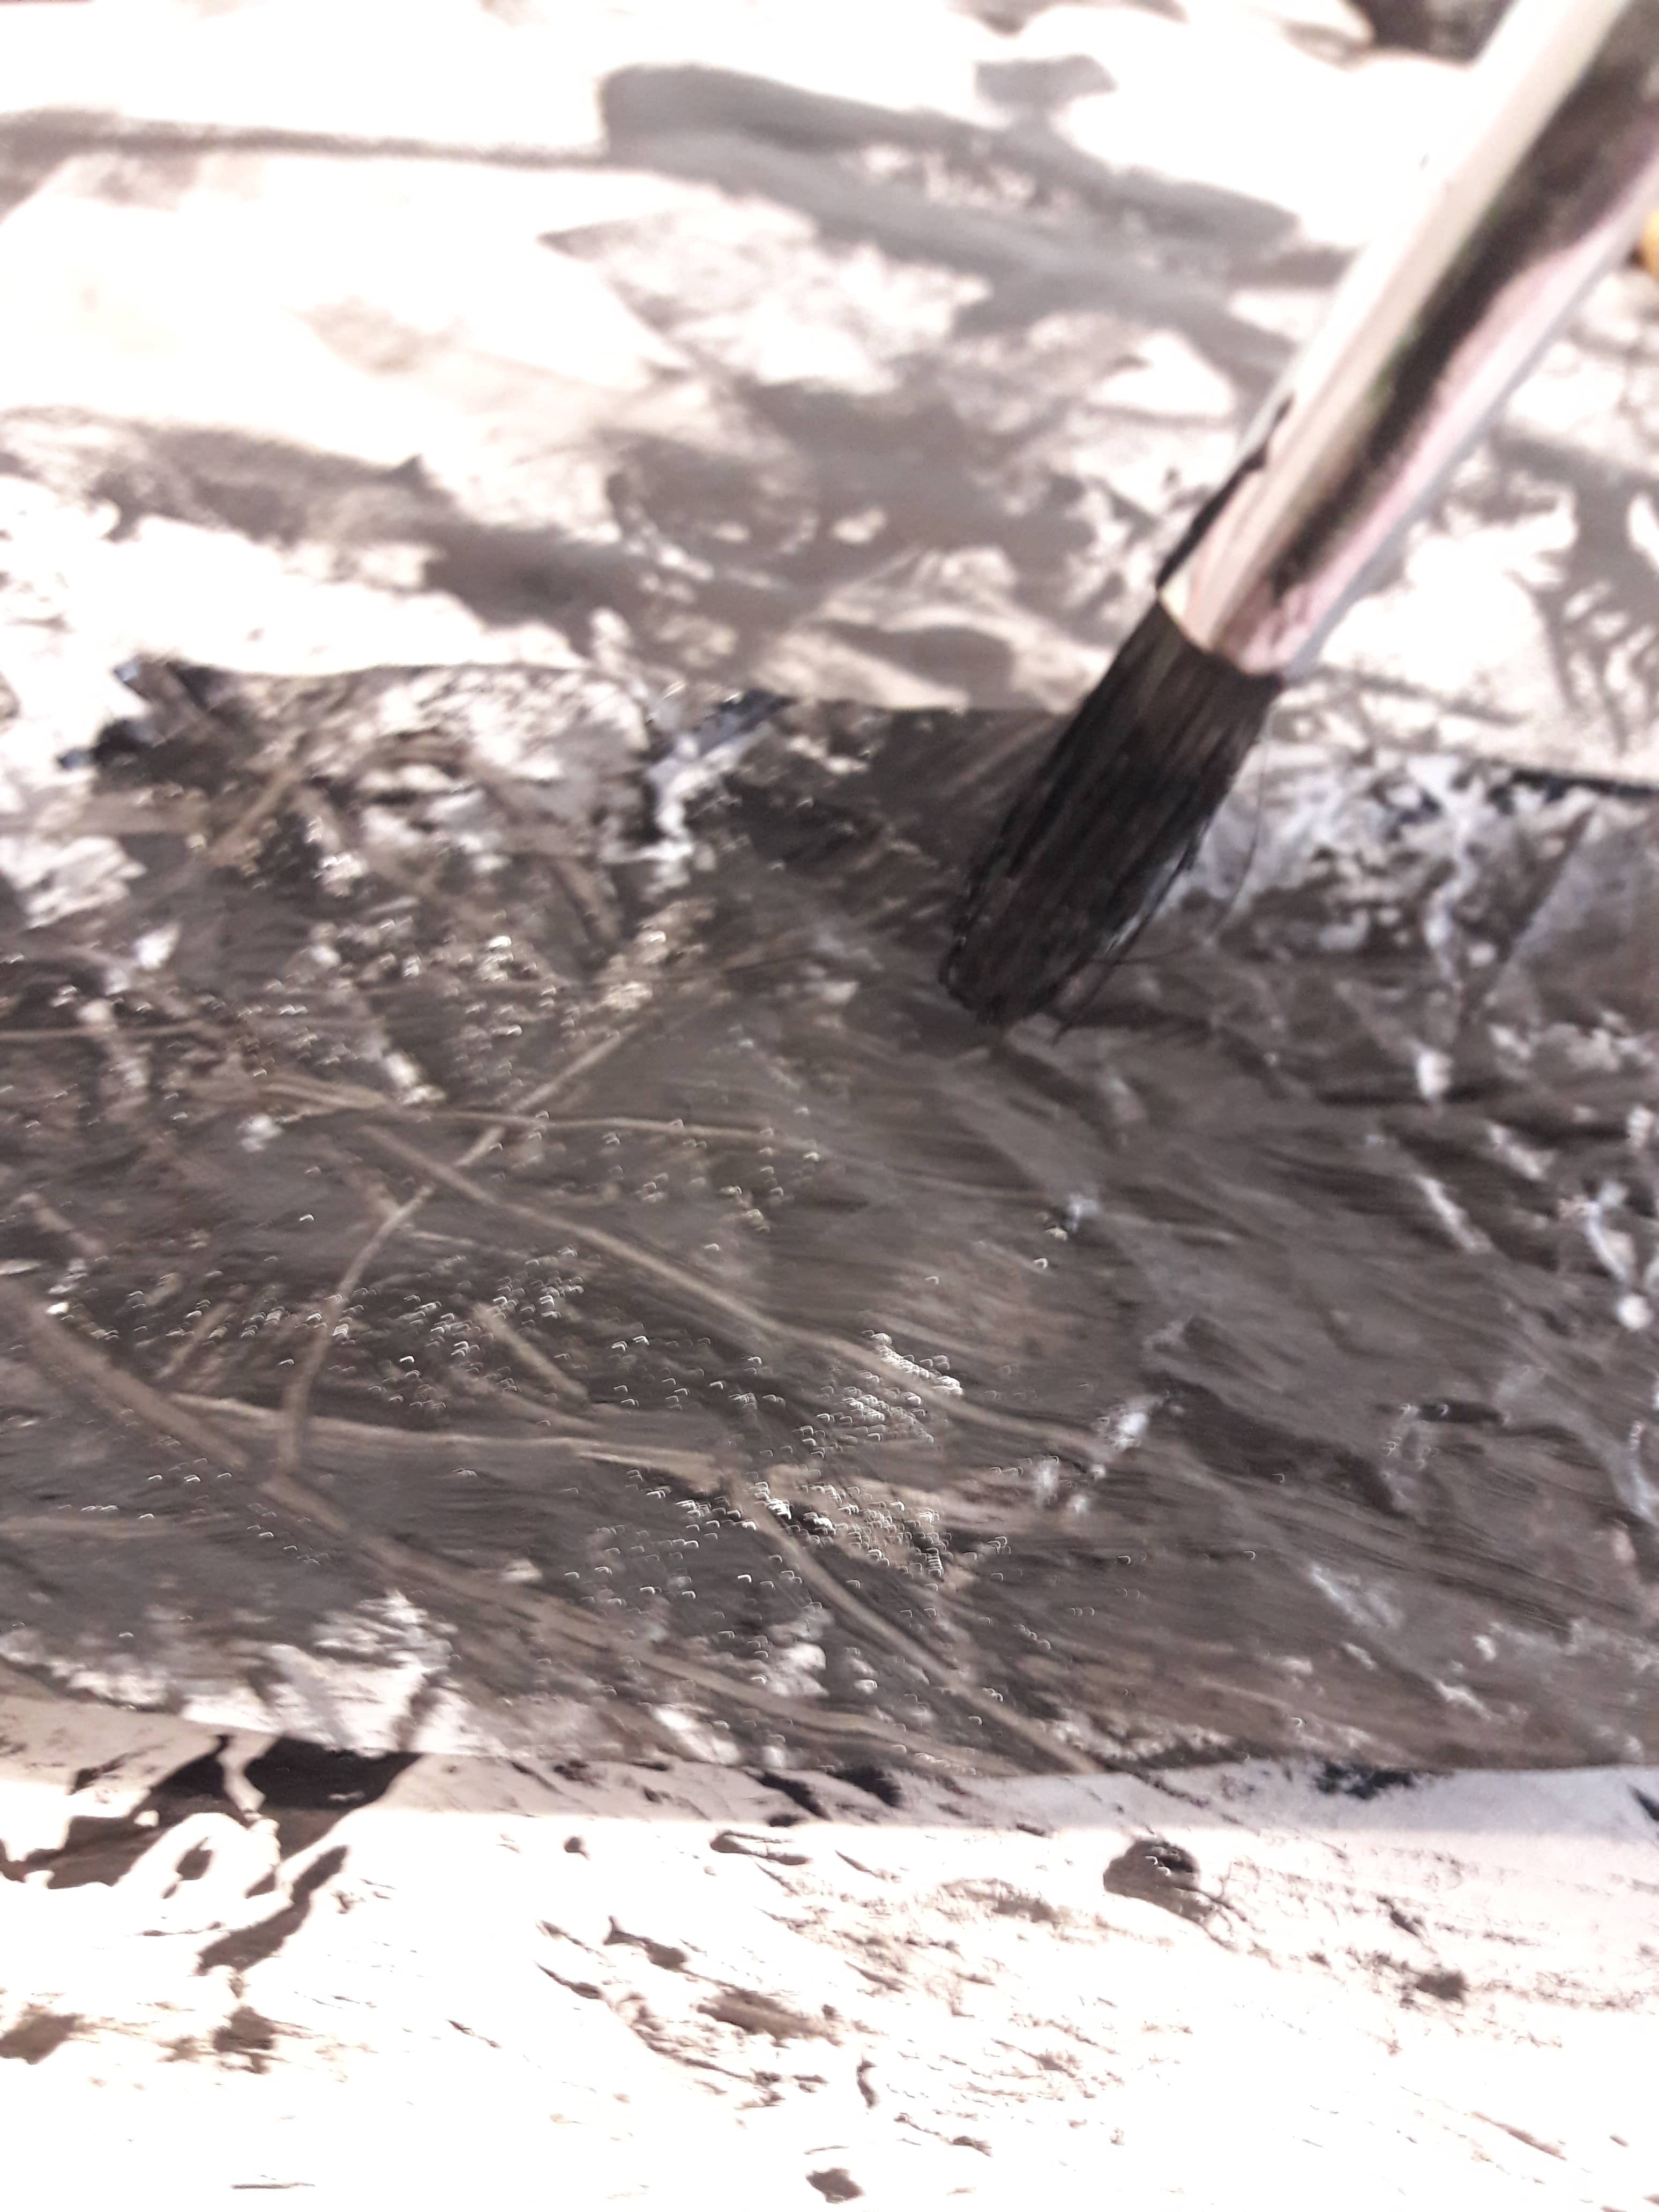
Love features swirly, smooth lines (automatic drawing with fingertips and diluted Chinese ink/leaf on linoleum), as opposed to jagged lines for anger (froissage/automatic slashing on ink with brush held with a fist)
Paper for anger is crushed, as opposed to paper for love. Also, ink face is facing outwards for anger, as opposed to for love (smooth surface), and love actually has a 2nd layering of white paper underneath as opposed to anger
Shock (Fear) & Shock (Surprise)
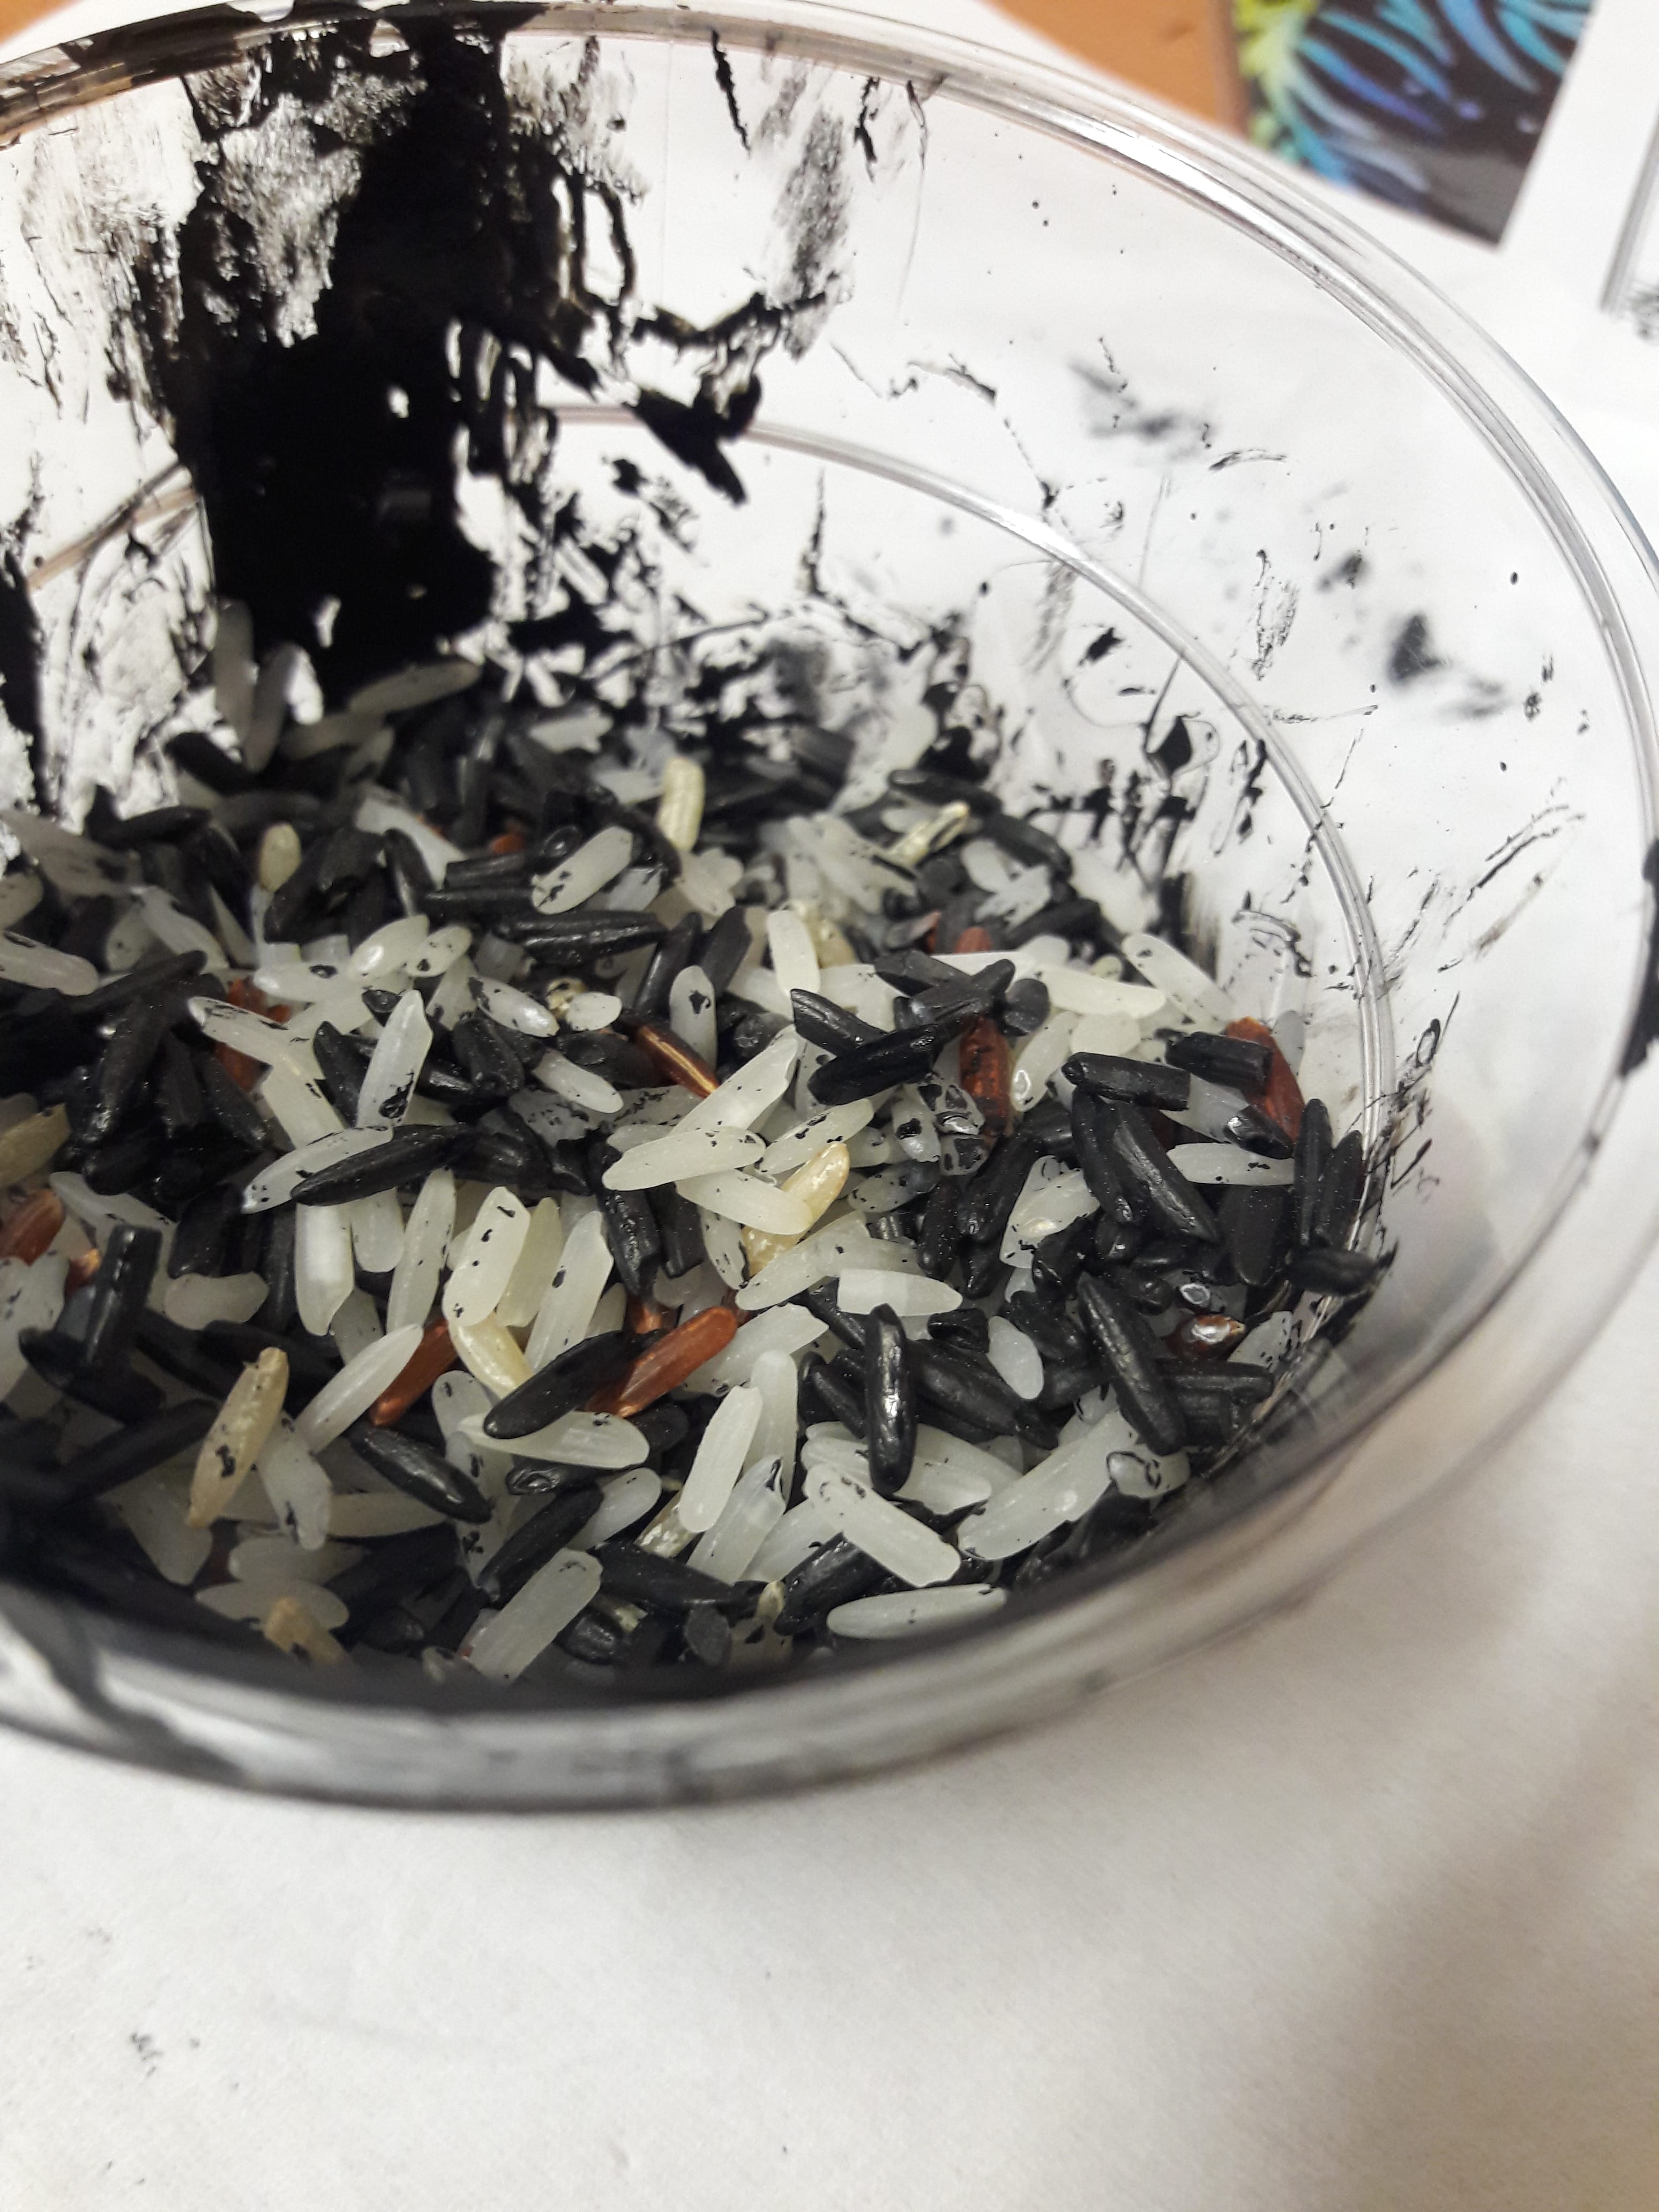
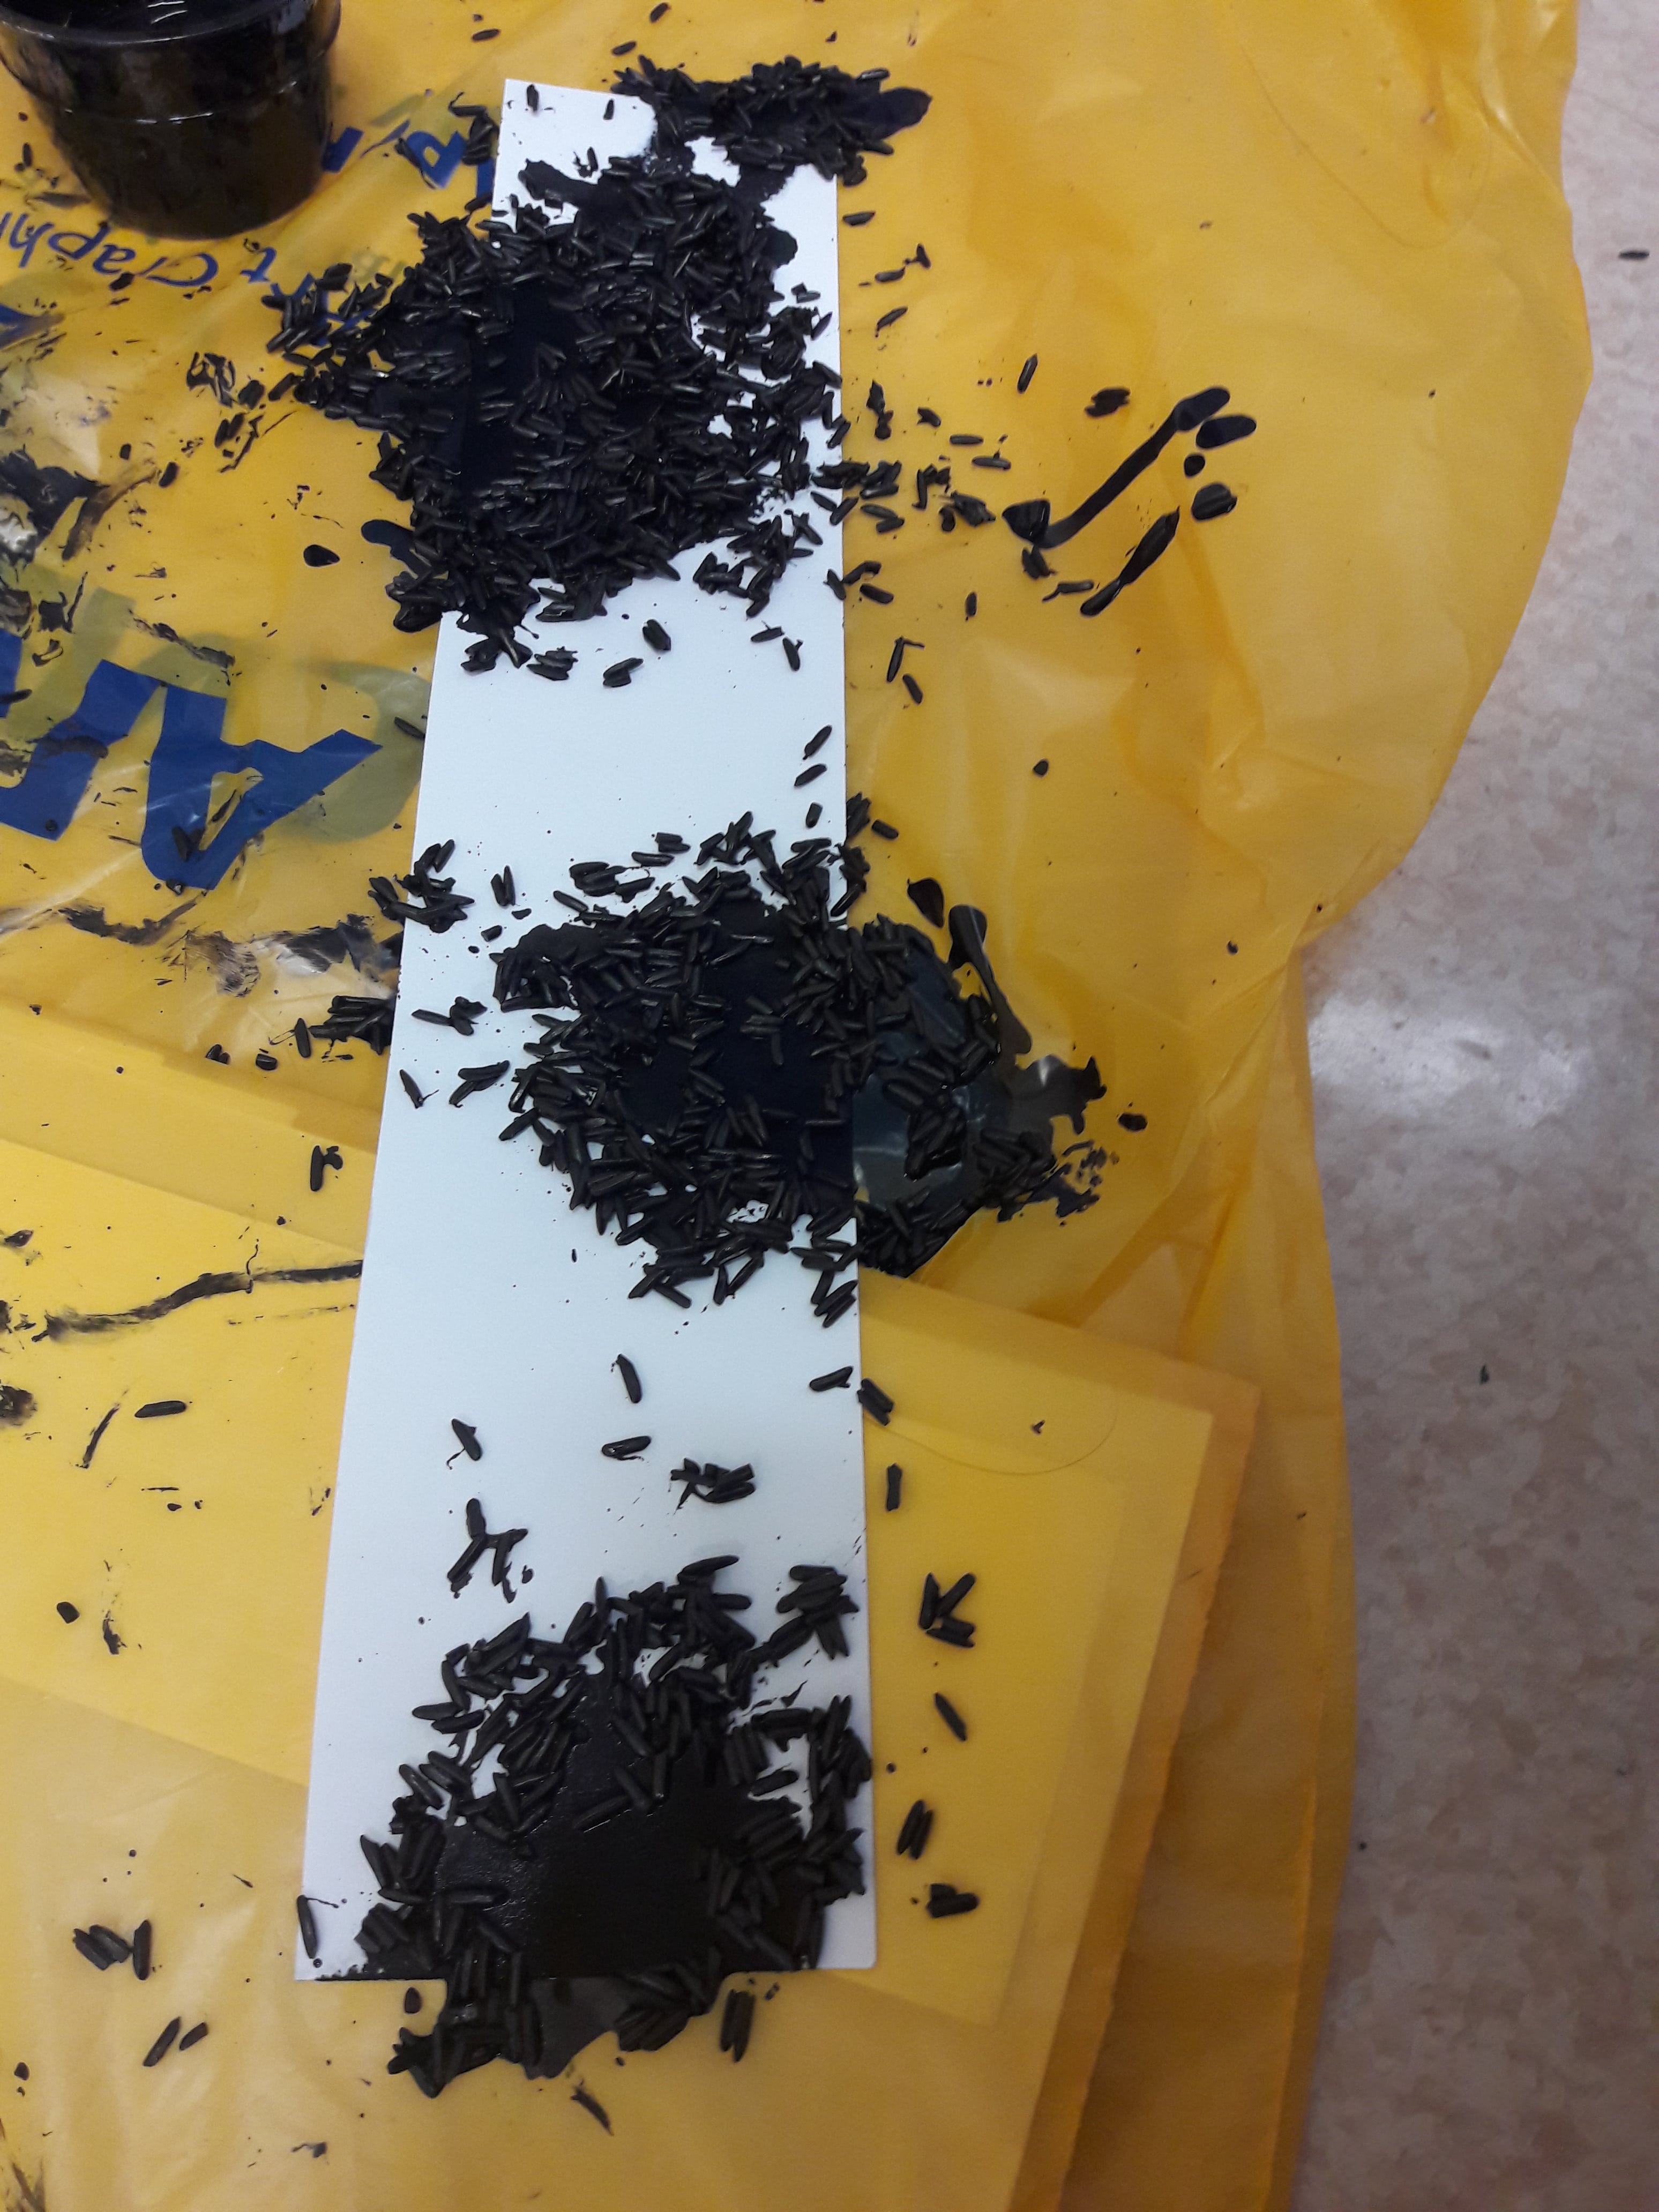
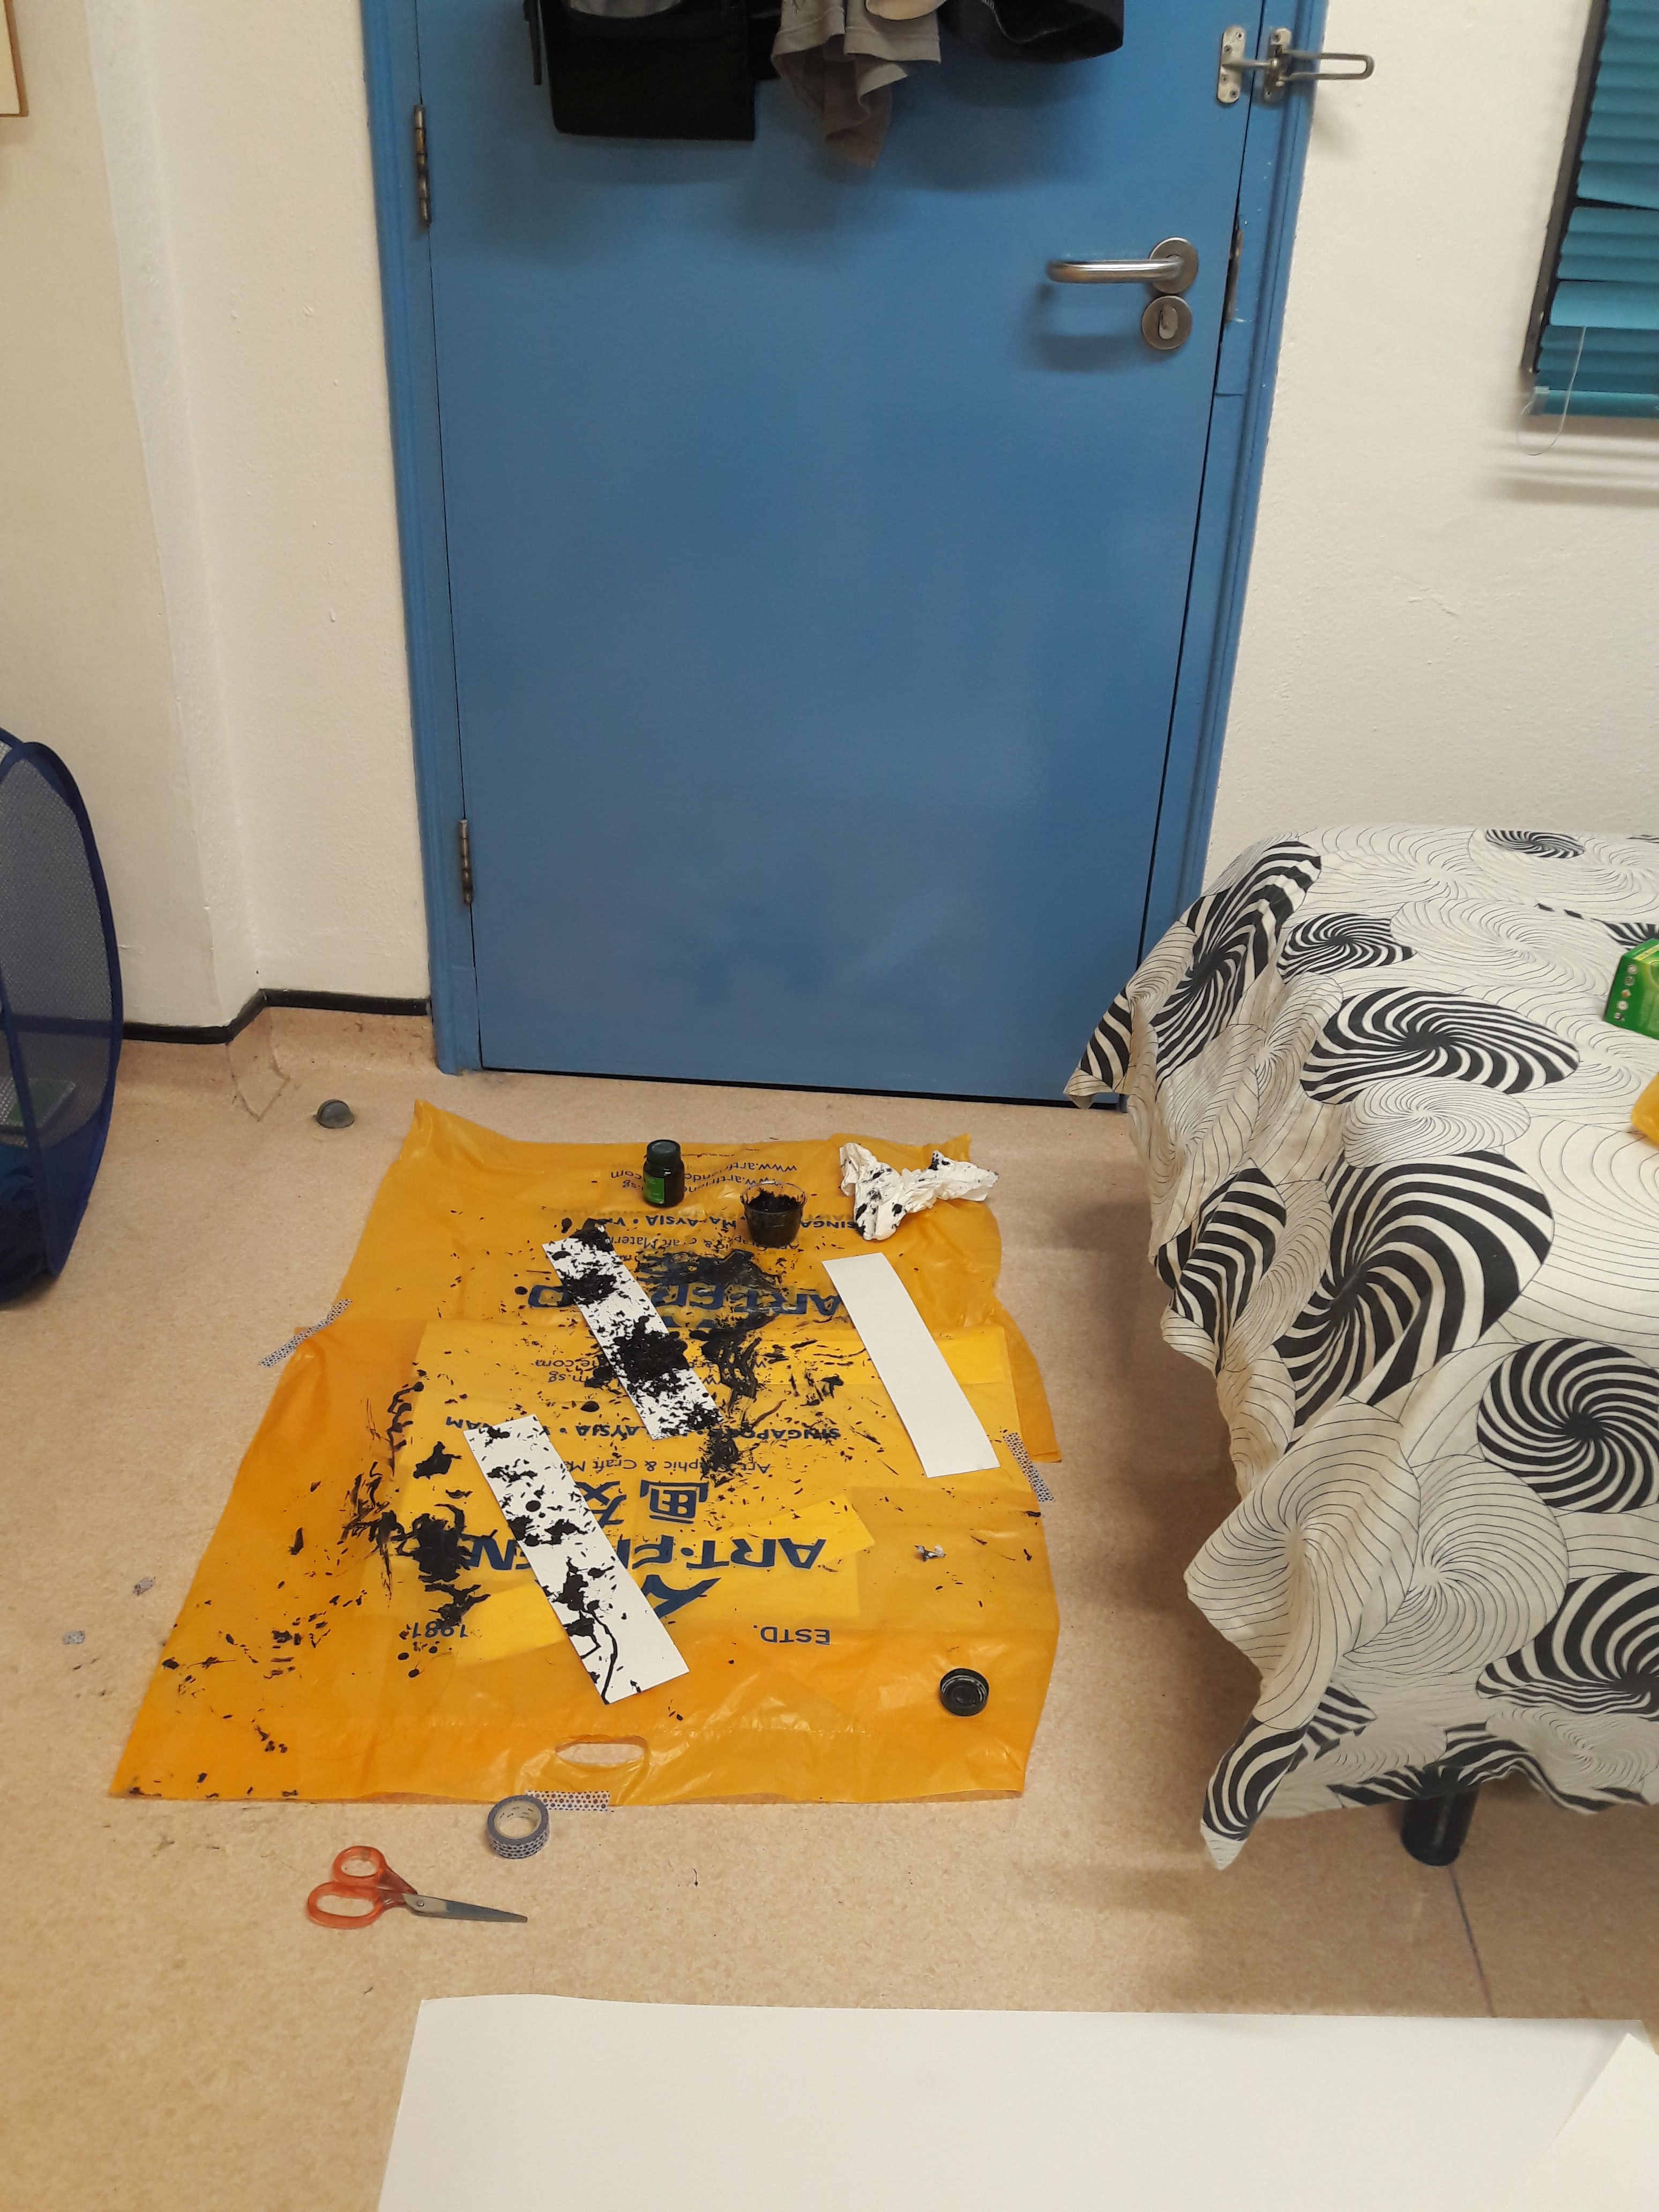
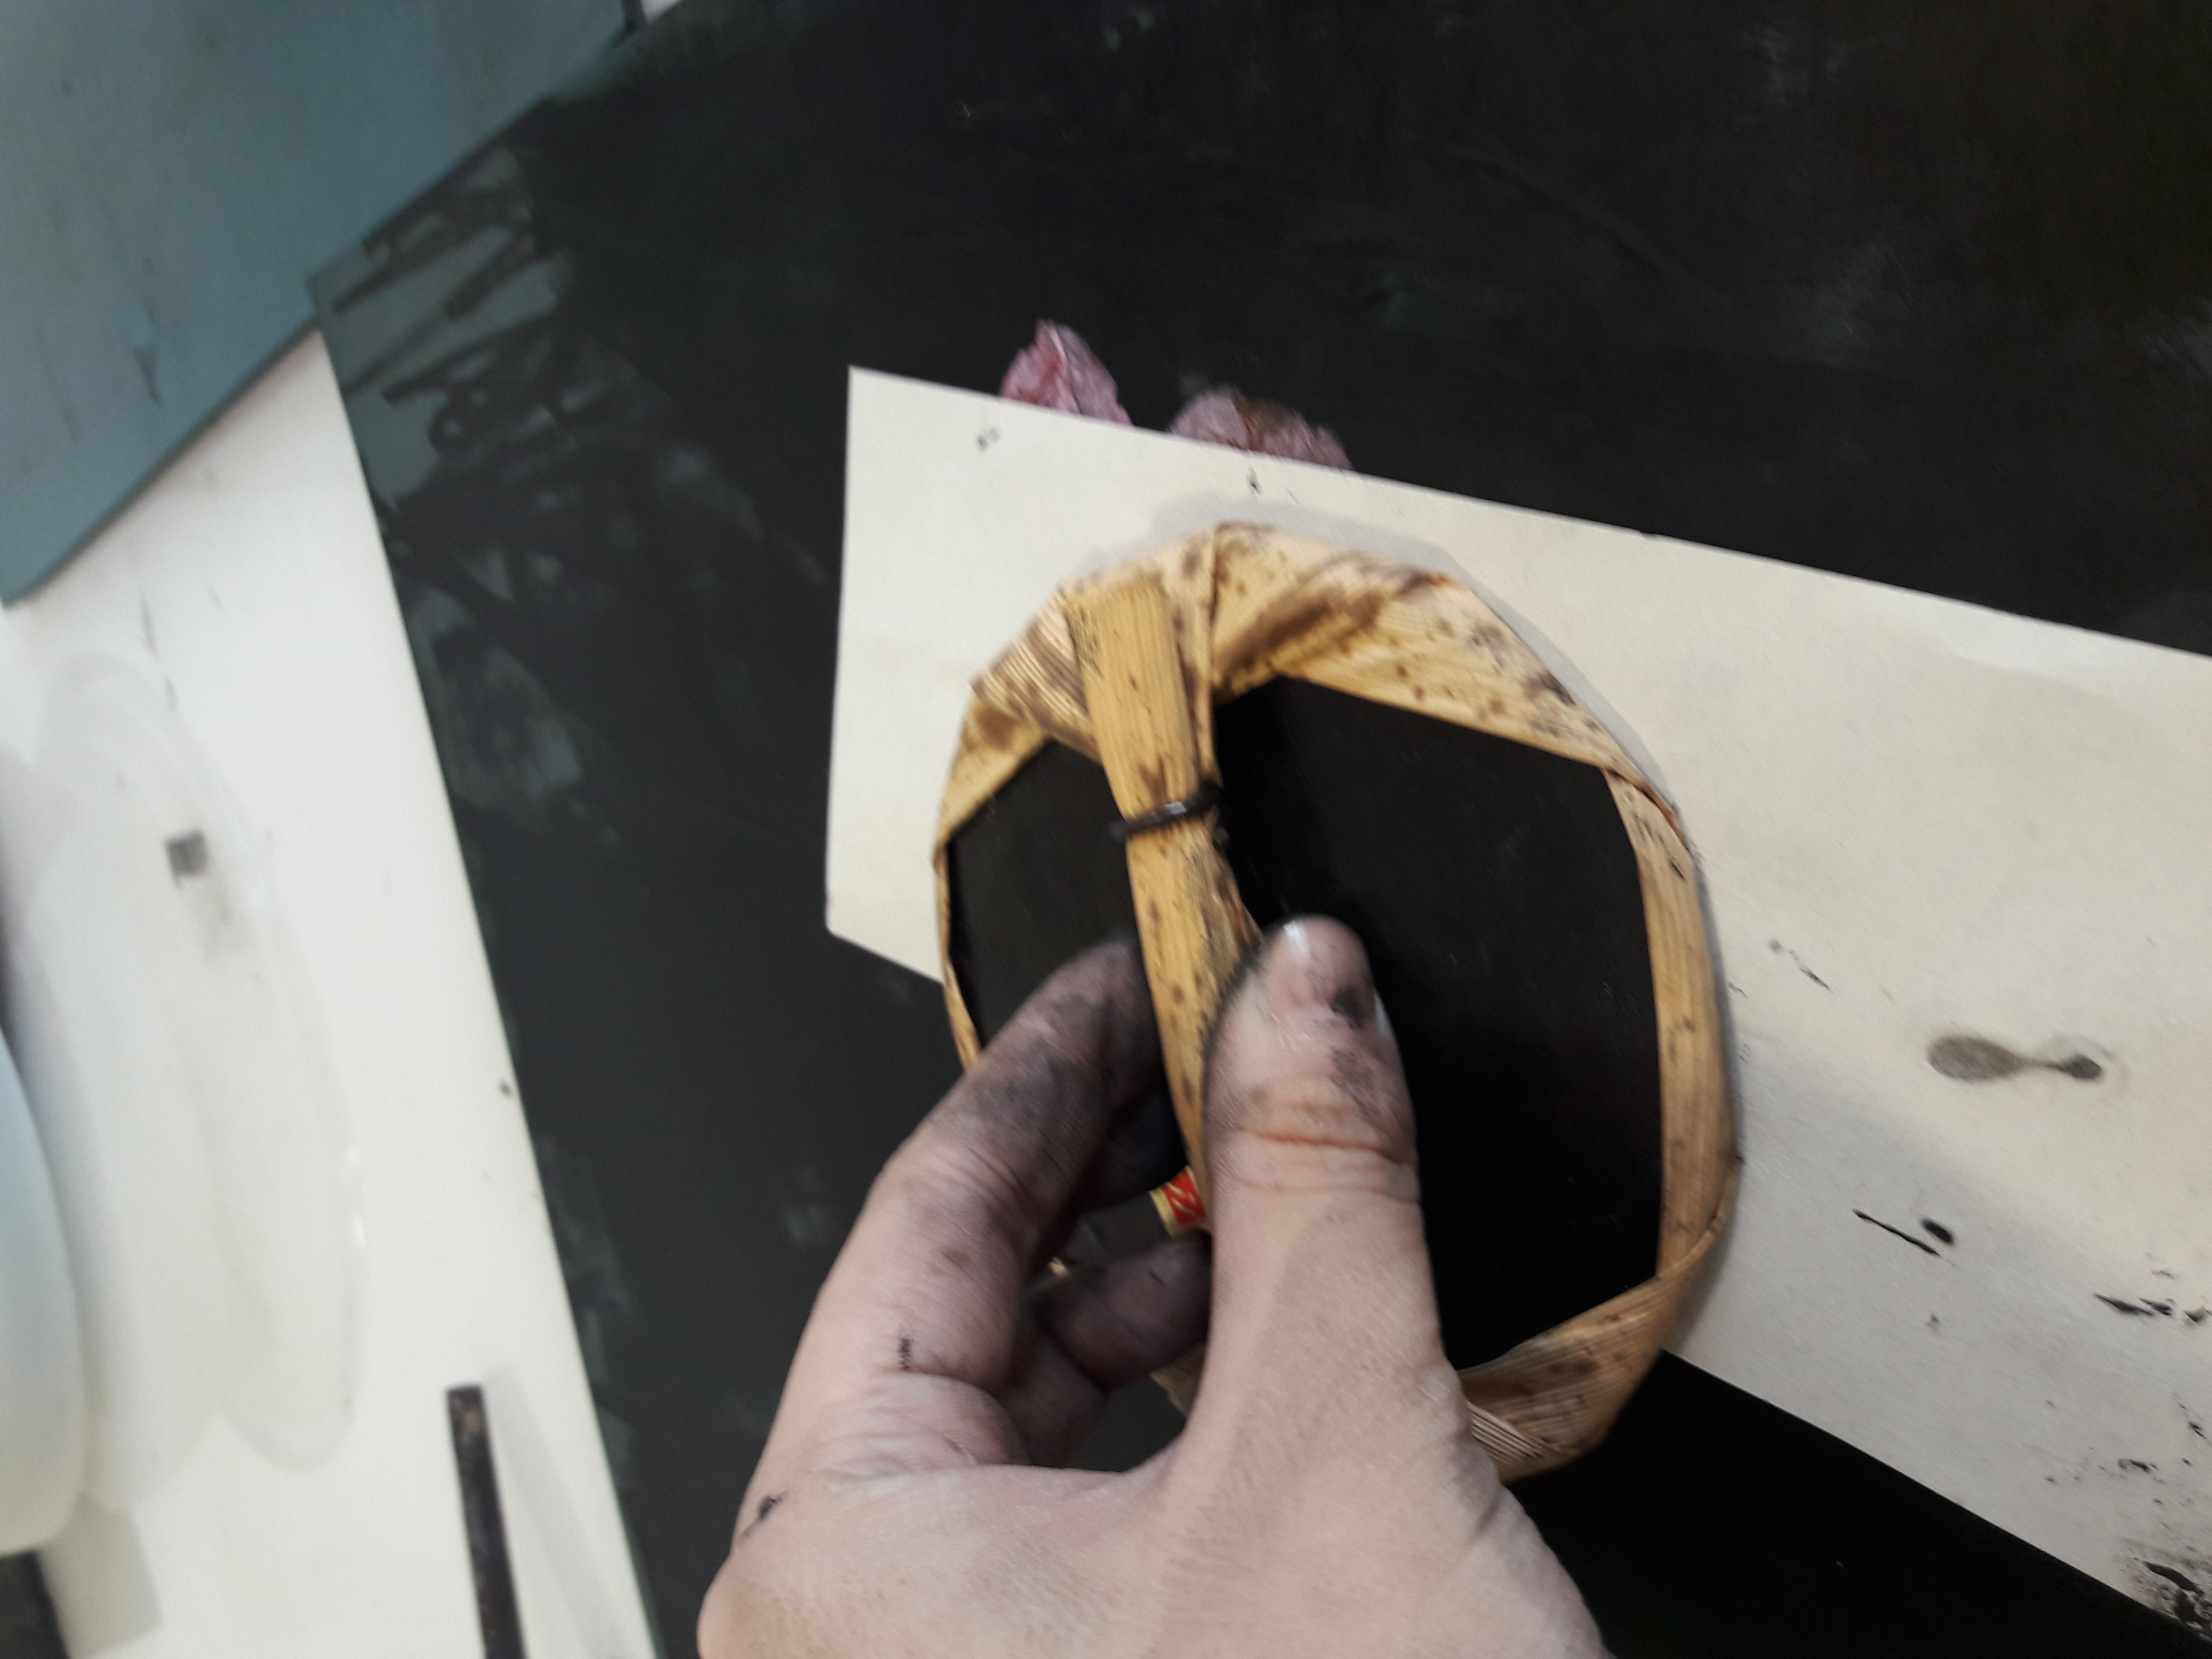
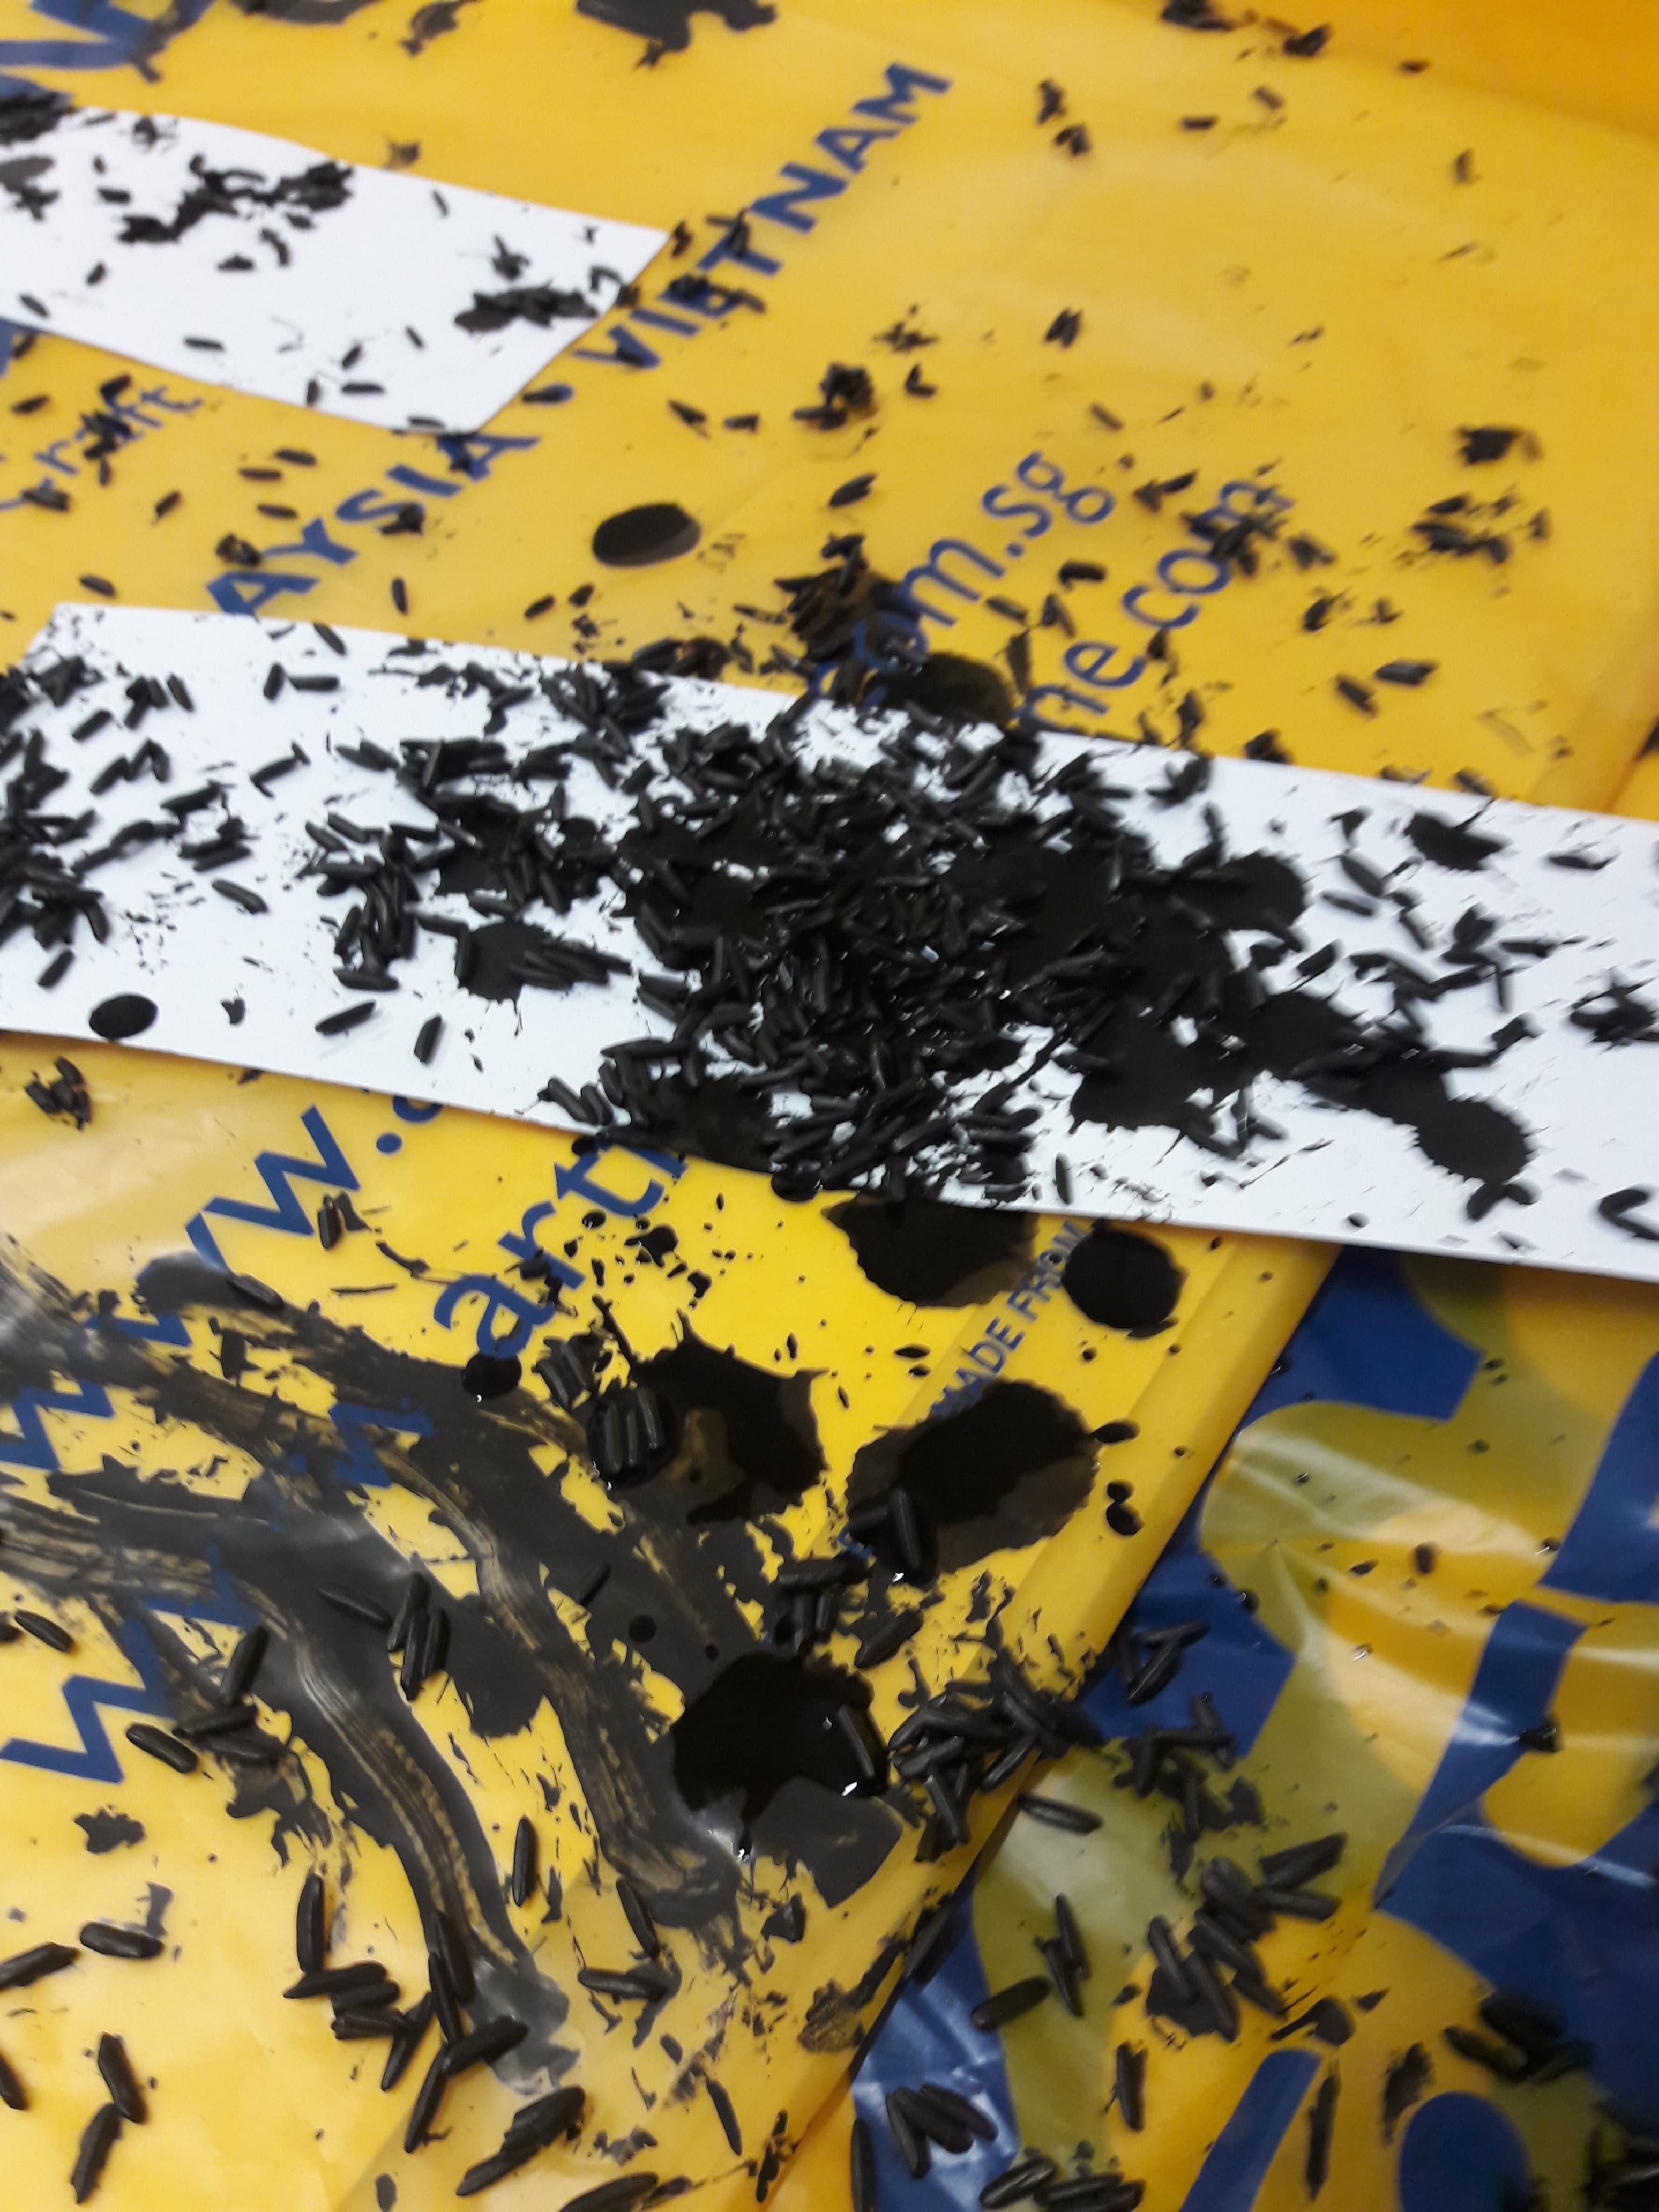
Both are on cartridge paper. I wanted to emphasise the intensity and shortlivedness by having very white paper to show the contrast between feeling and unfeeling. (The paper scrunched up and made it difficult to paste the lines though, especially where if I bent it excessively rice would fall off.)
The key term is frequency, where they’re of a relatively strong but short-lived nature, e.g. a jumpscare. (I opted to use shock for both purely because I have literally never felt surprise without some form of fear.)
Frequency: Unlike Anger & Love, multiple points of focus
Strength: Not as powerful, but still relatively strong emotions, hence still featuring foci
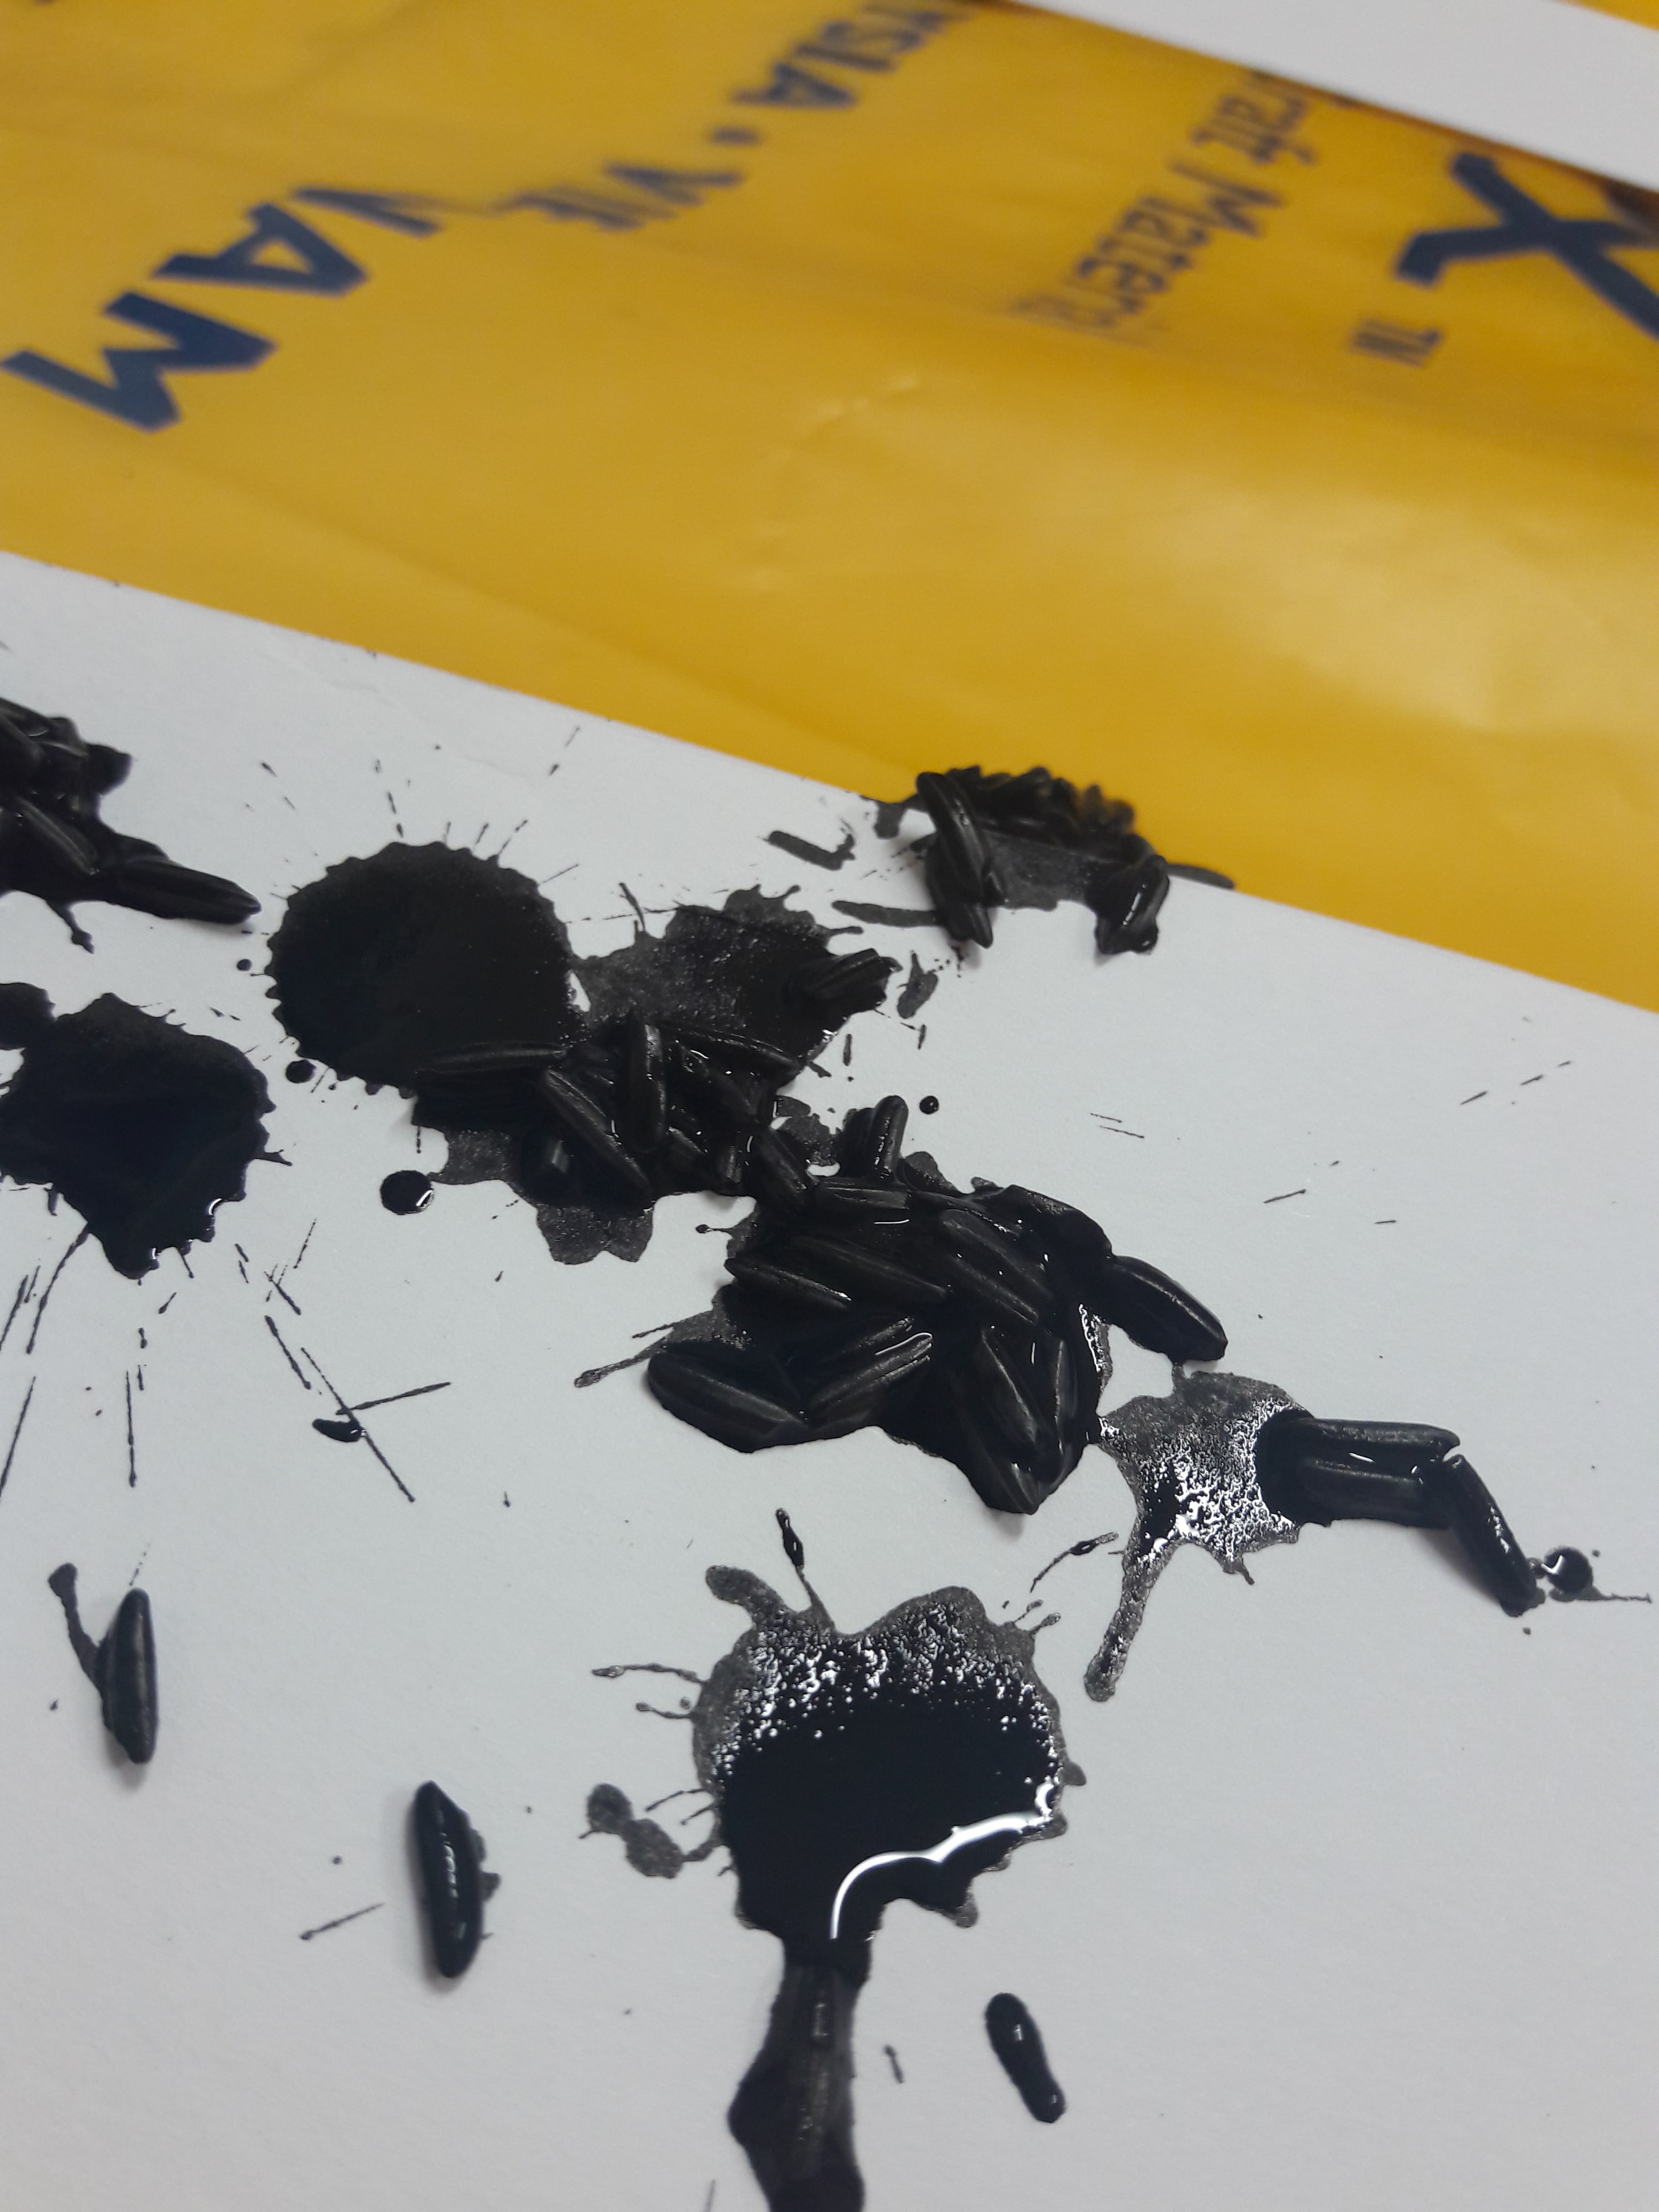
Short-lived: Small splatters, lack of grey as opposed to absolute black and white
Differences:
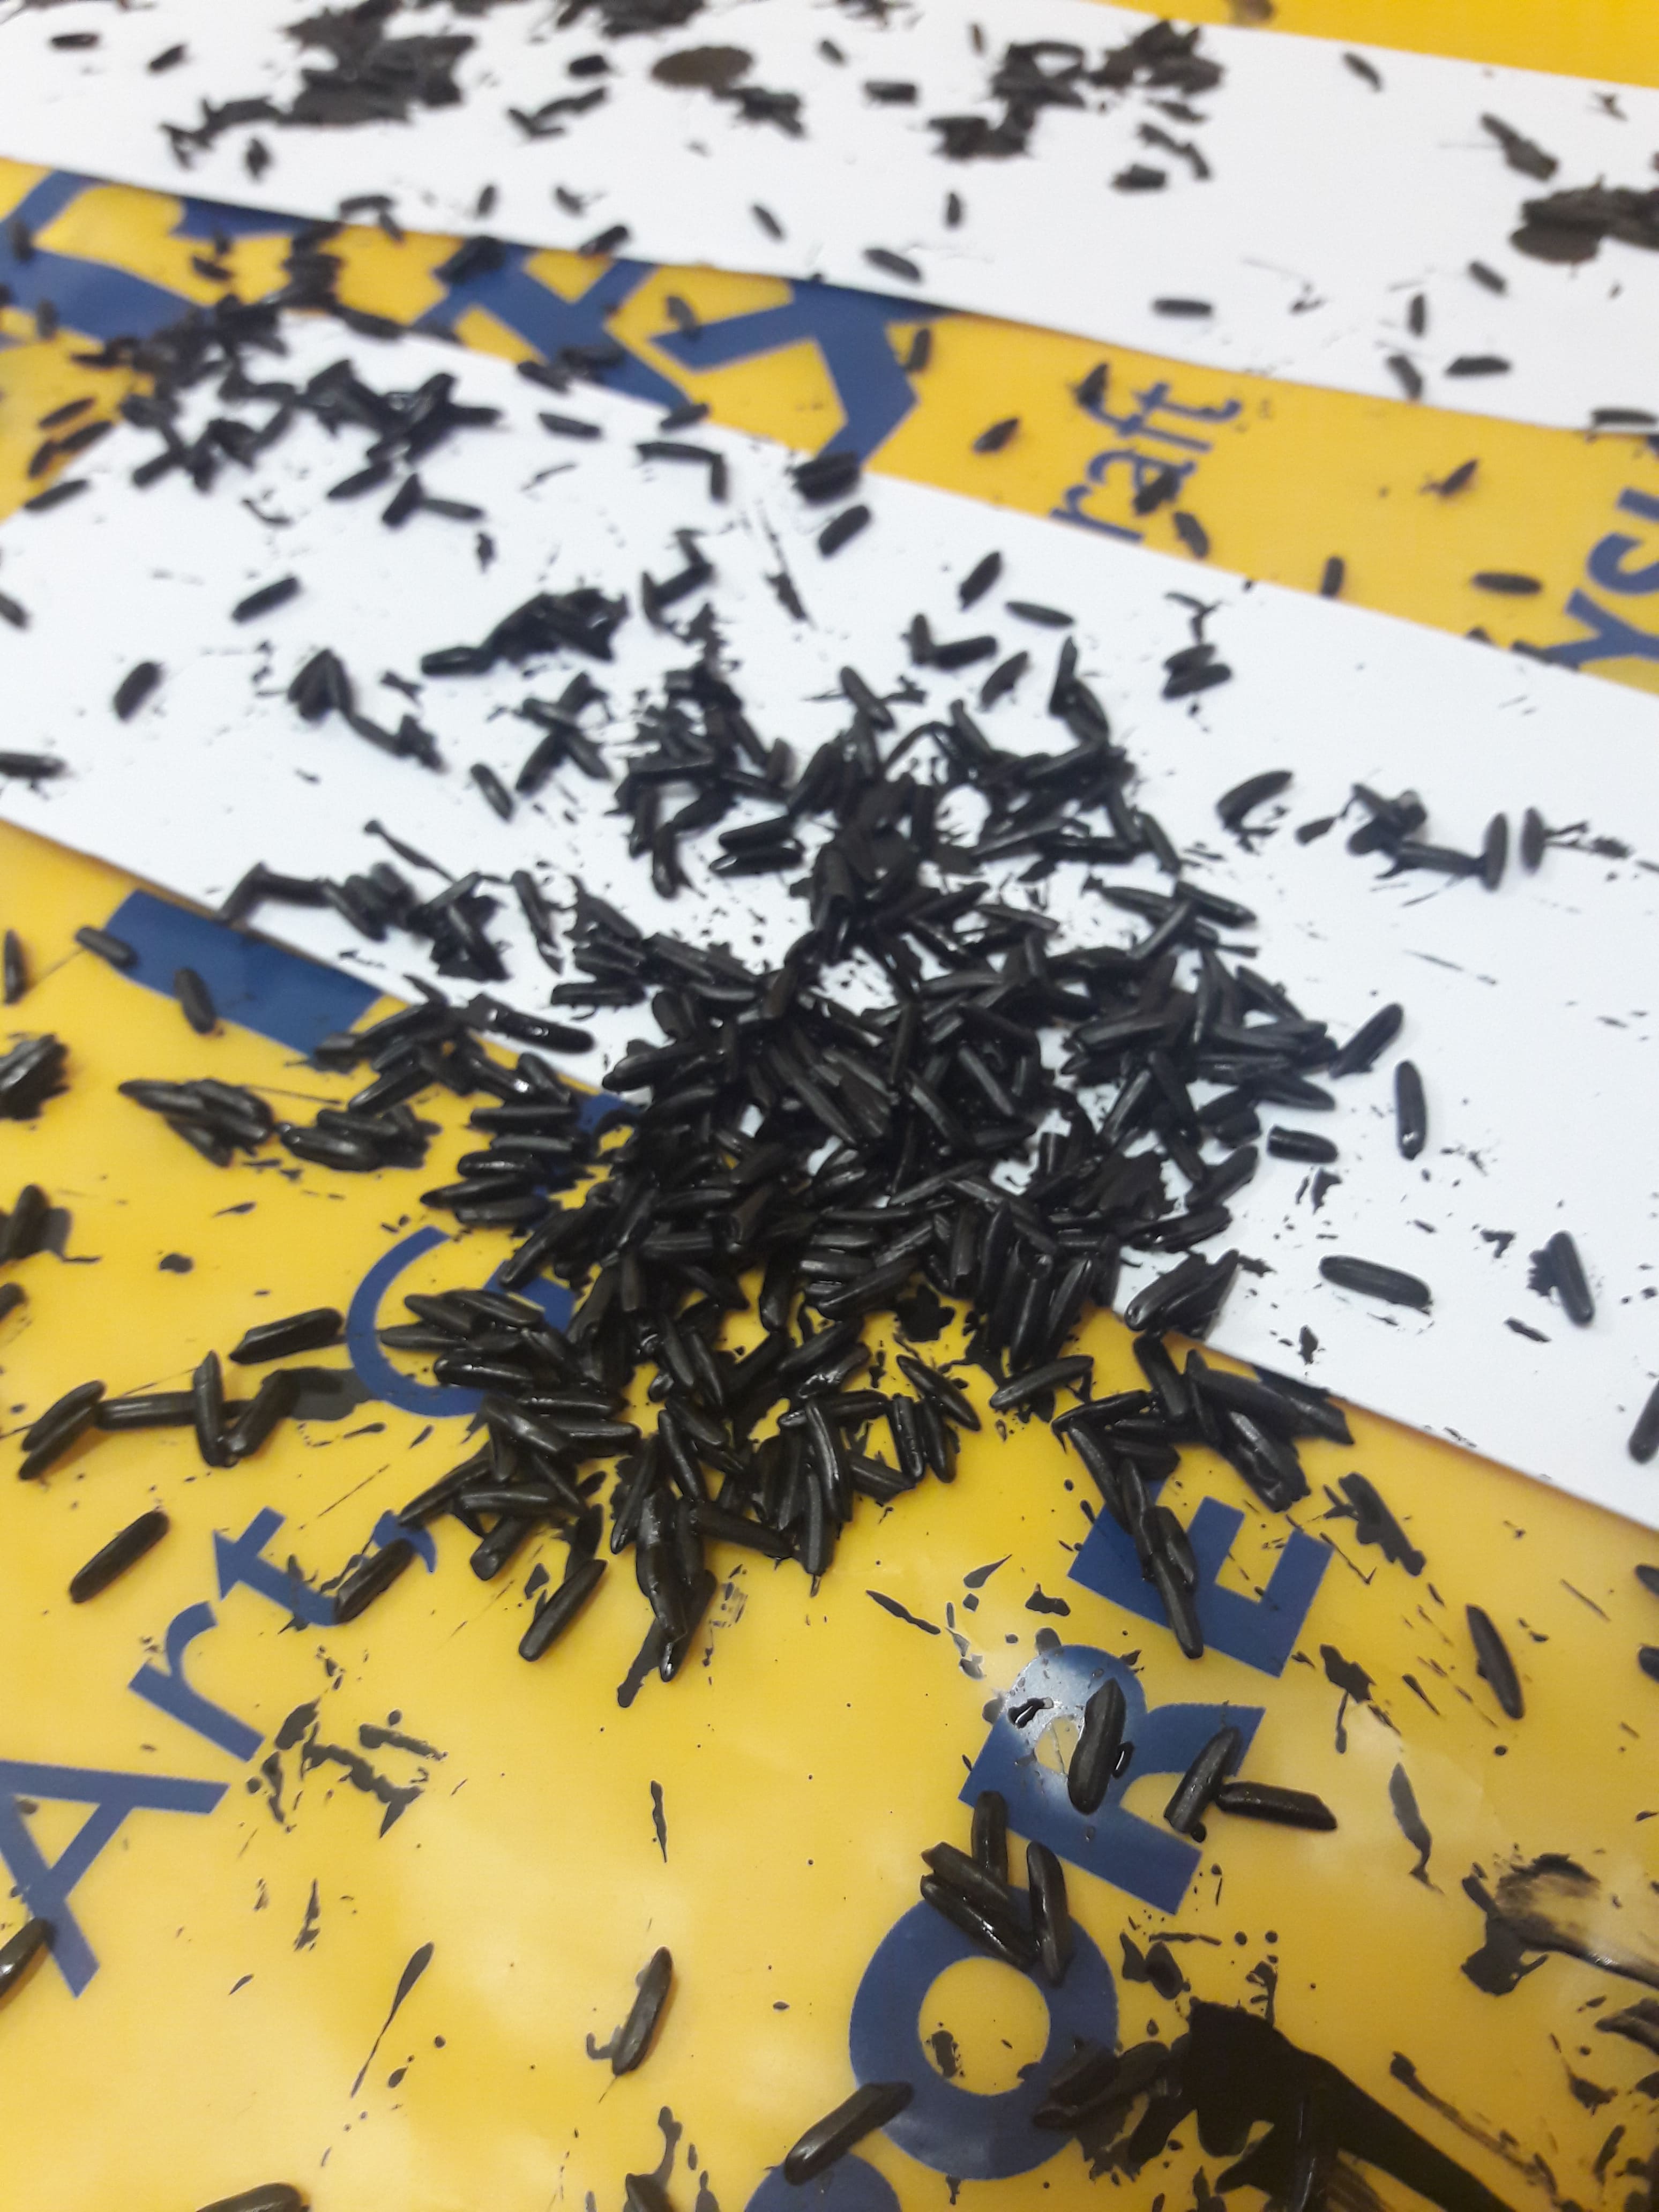
Both used rice to have the graininess reflect the antsy, fuzzy feeling of shock. However, fear has the rice mostly at the edges of the foci to reflect the sense of defensiveness of encircling oneself that arises with fear (protecting), while surprise has the rice centralised to reflect the sense of tenseness of recoiling (contracting)
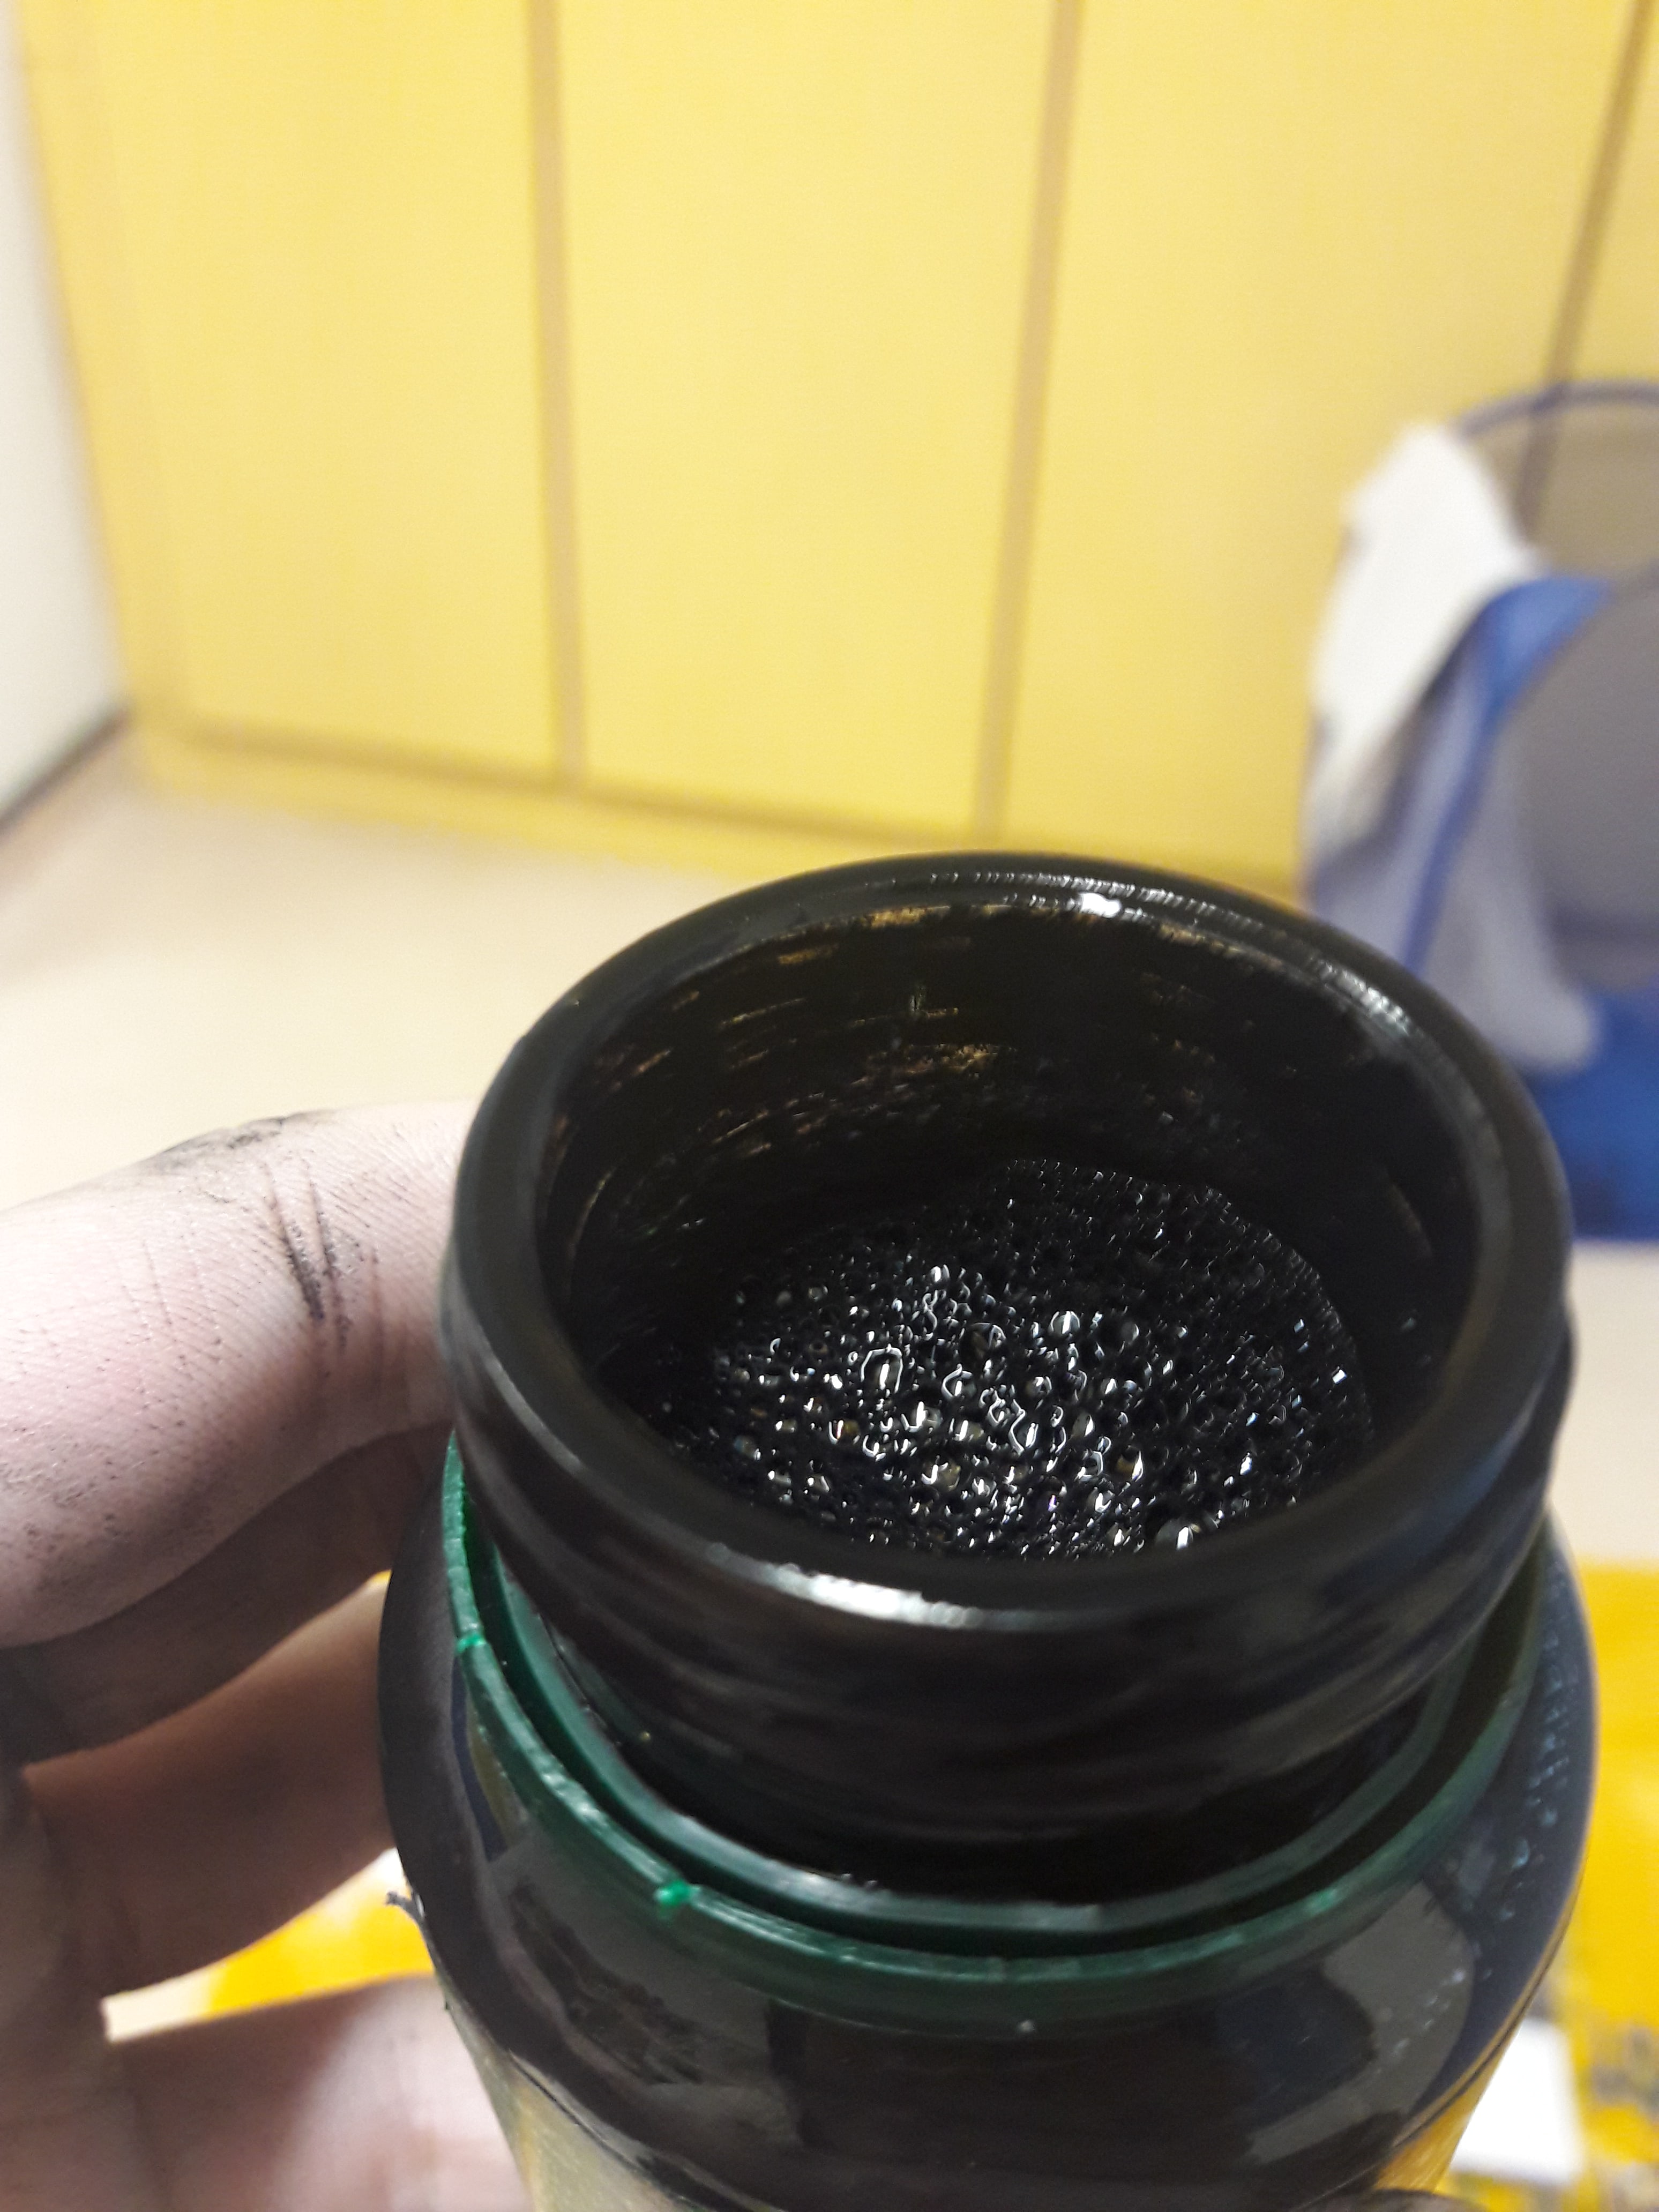
For both, I soaked the rice in ink, and slabbed on ink perpendicular to the paper itself. For fear shock, however, I slapped the rice on from a “me kneeling on the floor” height, versus surprise shock which was from a “me standing on my bed” height. Again, to reflect the different between containment and outward spreading.
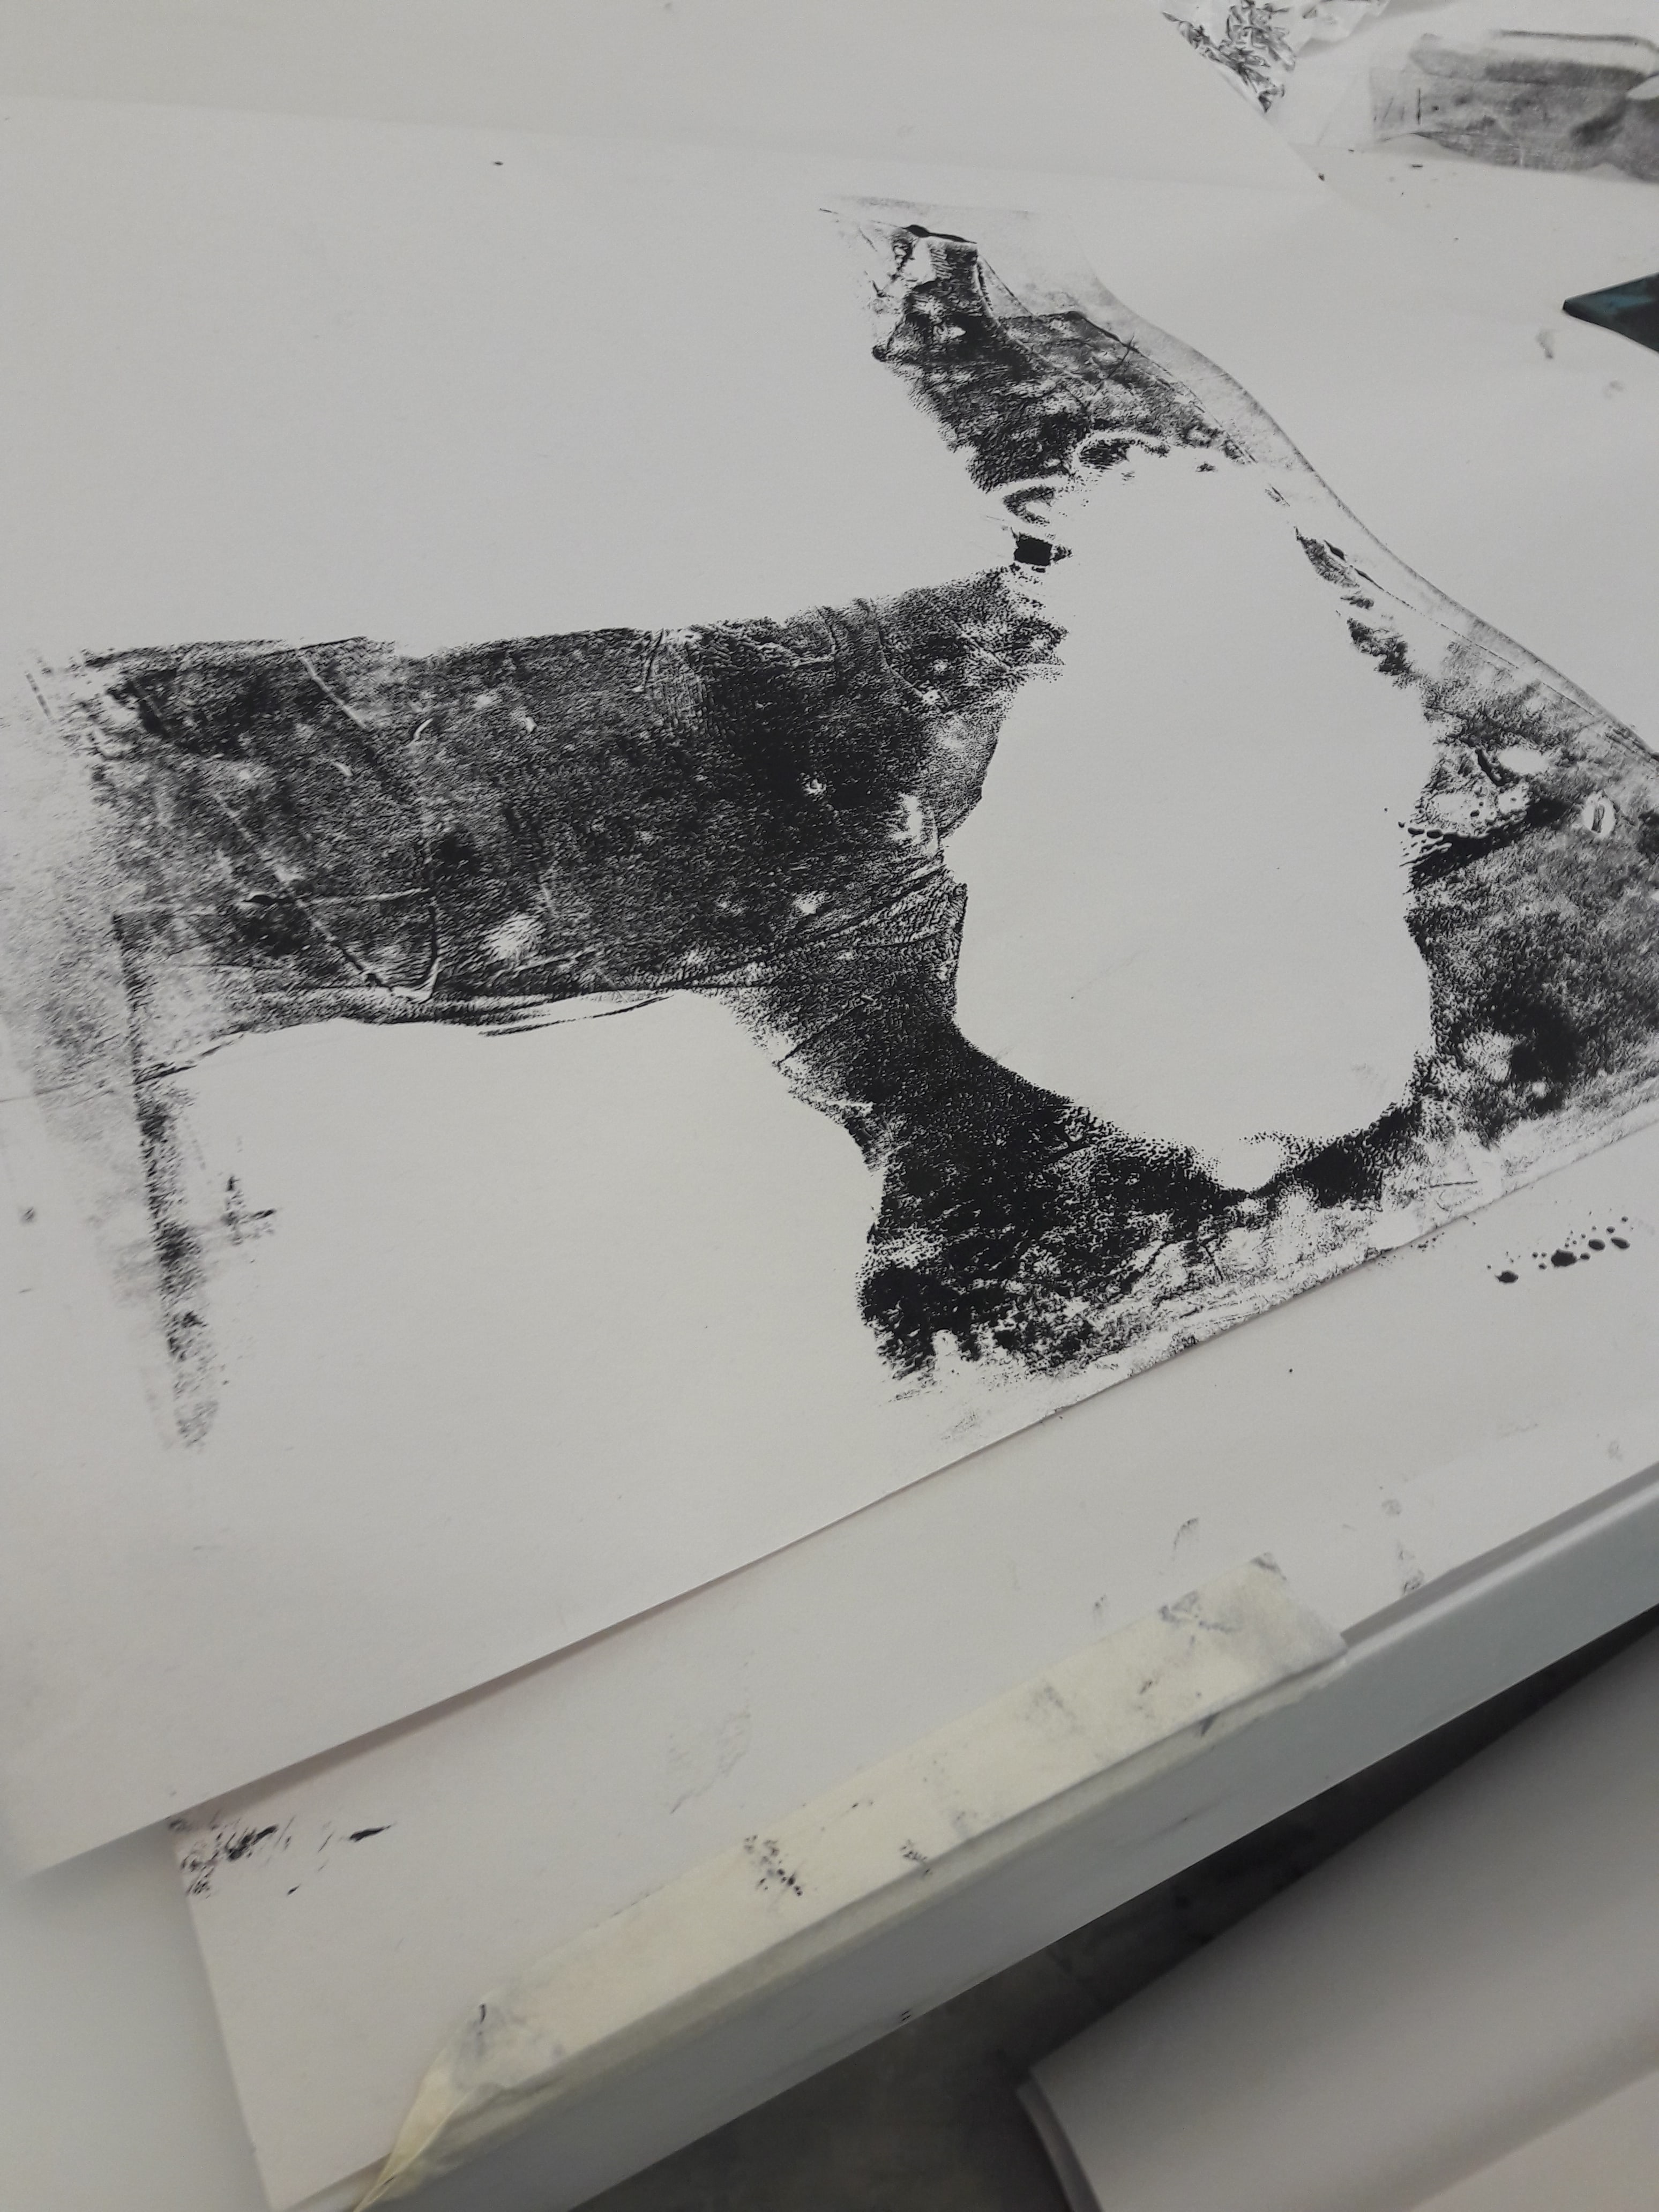
Bliss & Melancholy
Both are on newsprint paper. This paper was vaguely not-white, which I wanted for the dullness of the feelings.
The key term is prolongation, where emotions are mostly dull and weak (i.e. the after-effects of a trigger event, or unconsciously occurring feelings).
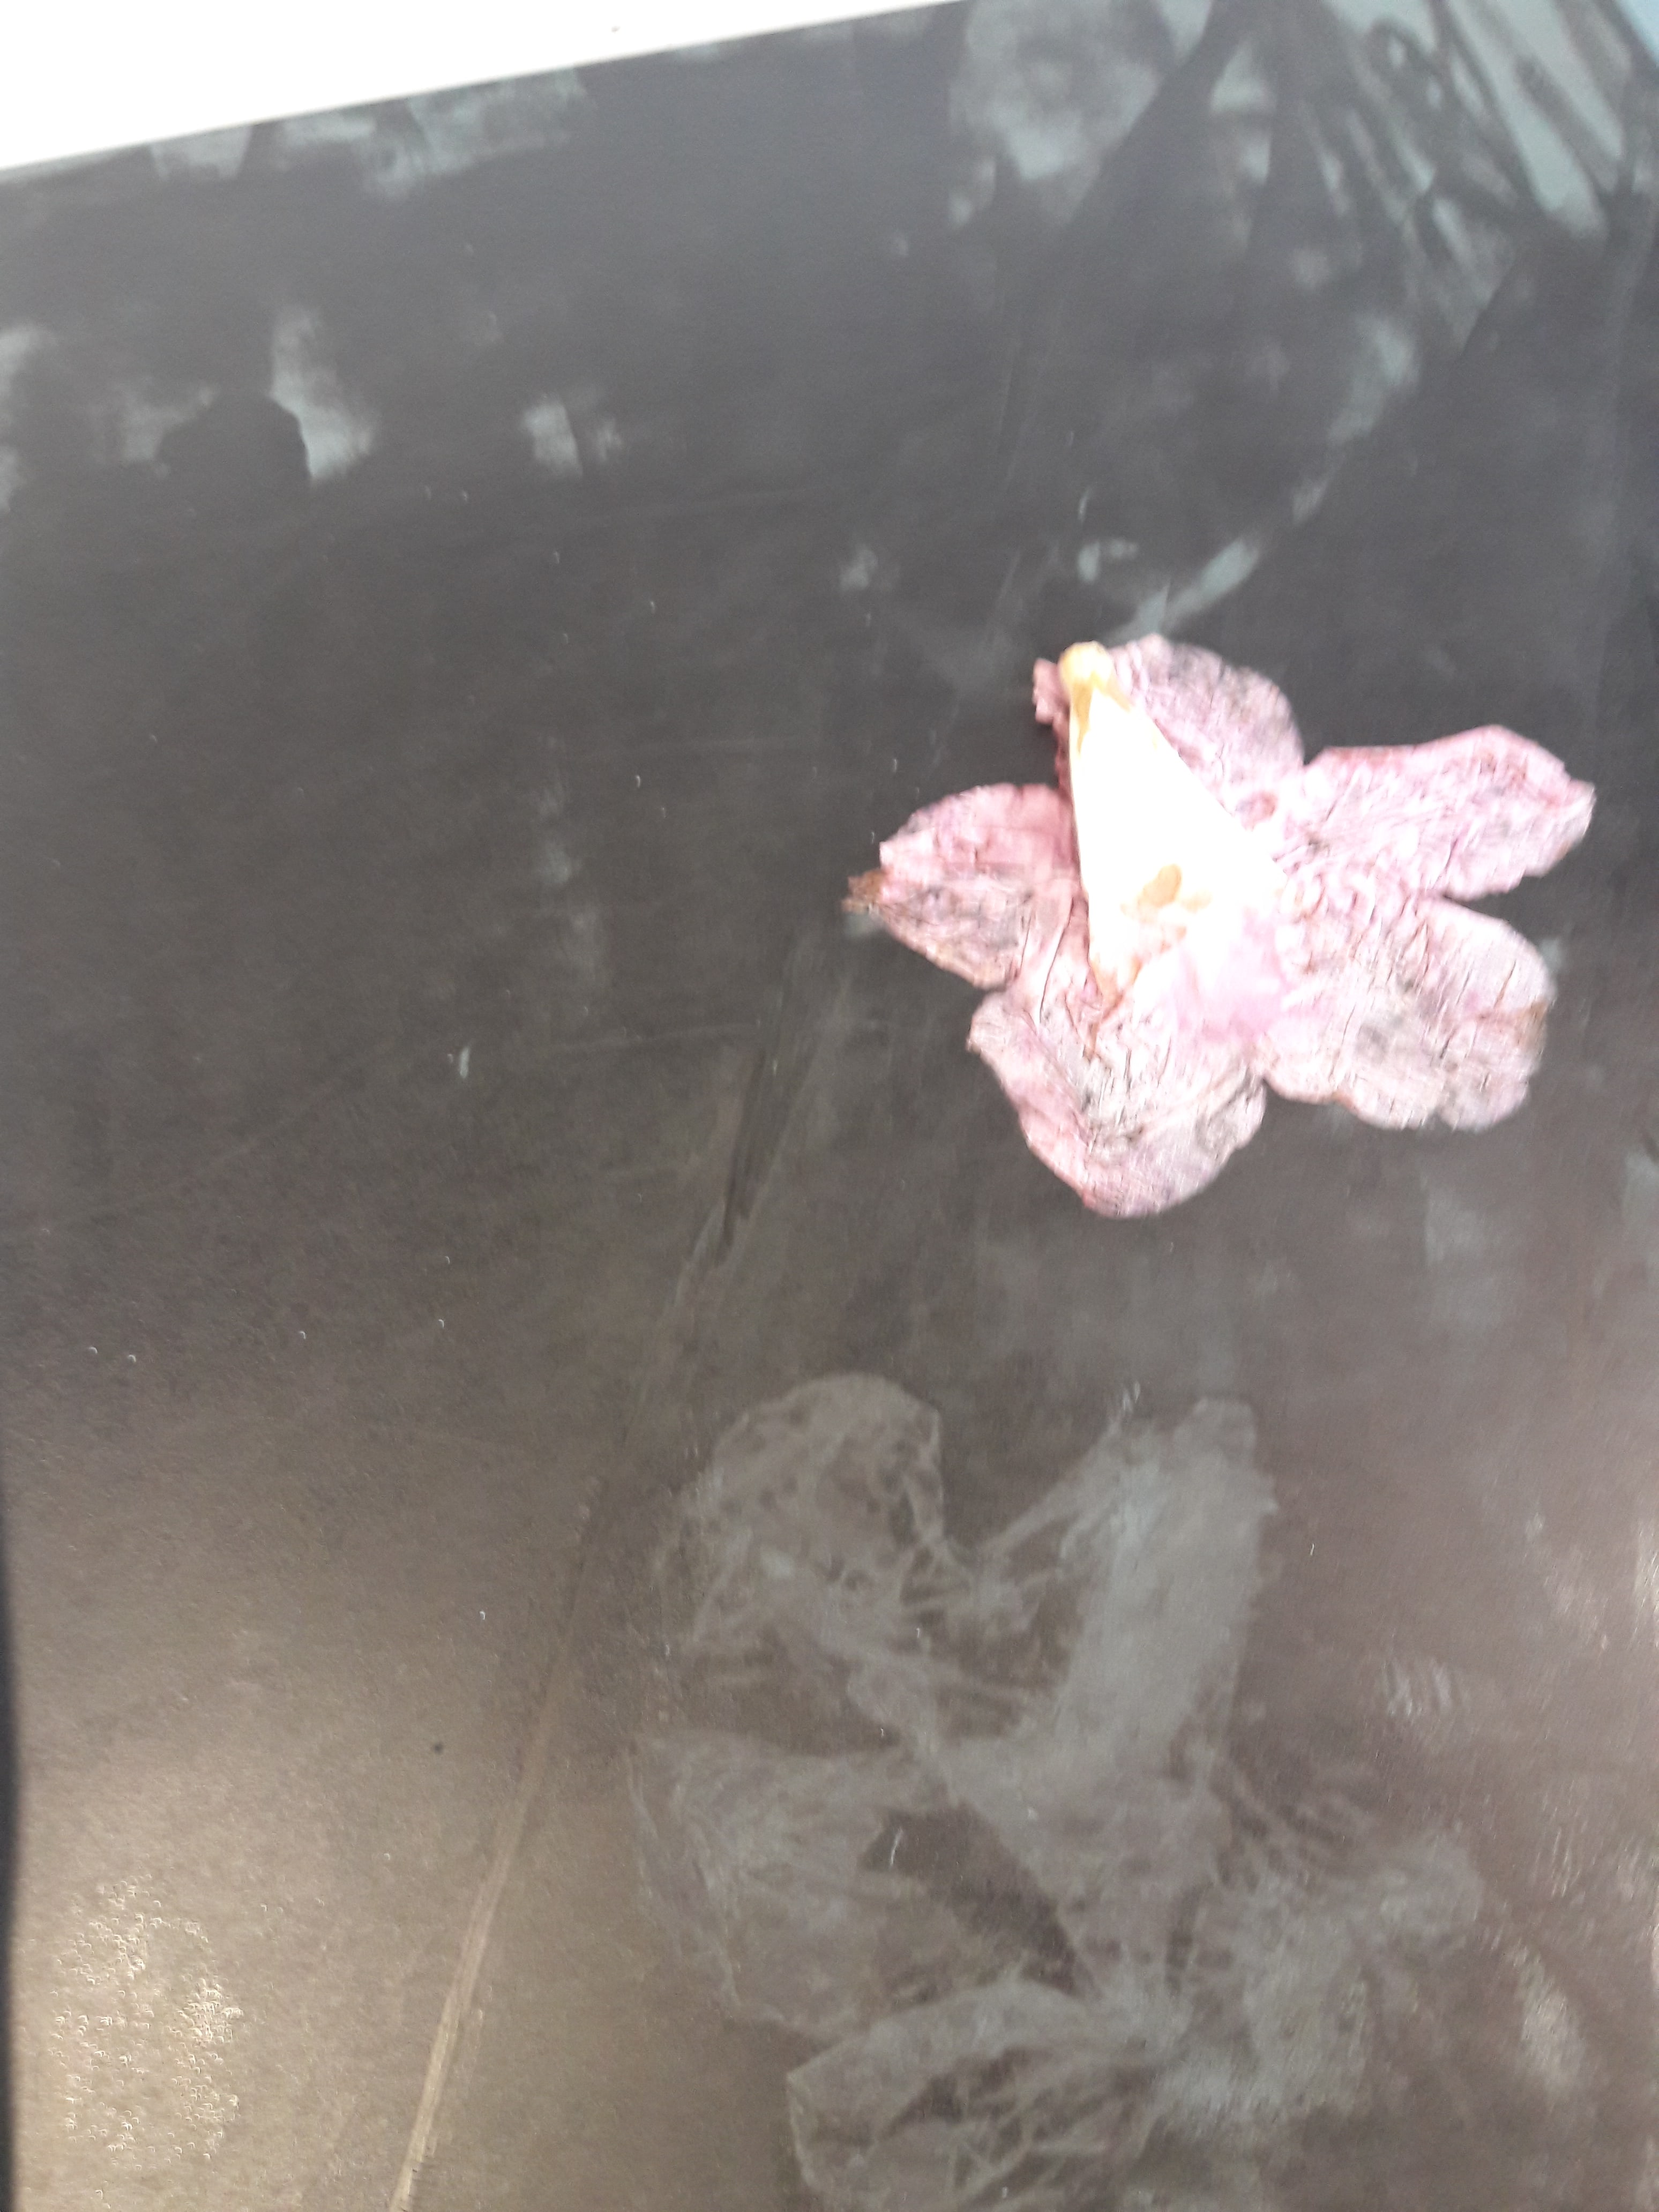
Prolongation: Reflected in consistency of repeated patterns. Underneath is a bordering layer of brayer rolls, on top, pressed shapes with linoleum, even more on top, hand-pressed flowers
Dullness: There is no focal point, with multiple layers of unrecognisable and indistinguishable marks
Weak: Colours are generally in the grey zone, than absolute black or white (also assisted by paper colour)
Differences:
Both used brayers as the base layer, but bliss used a lighter-coloured, wiped brayer as opposed to melancholy’s darker (but also wiped to prevent too dark) brayer rolls
Both used pressed shapes, but bliss used linoleum pressed with objects still present (i.e. creating white areas) as opposed to linoleum pressed WITHOUT (i.e. creating grey areas).
Objects were pressed onto white areas of bliss to avoid too much lightness, but pressed onto melancholy to result in darker colours
Overall, I think Joy was perfectly right in talking about craftsmanship when it comes to me. On a physical level, I never quite figured out how to flatten the paper while keeping the rice still stuck in place, and on an intangible level, I still feel like I couldn’t express what I wanted. Partially because my definition of abstract involves the absence of recognisable forms, or of representative qualities, as opposed to absolutely indiscernible forms, partially because I probably didn’t study or experiment enough, partially because my technical skills are w e a k. I suppose for the next project I should set my standards lower considering I don’t have enough technical expertise to actually meet whatever unreachable definitions I will set, and get over my general skepticism for copying artists.
(A bunch of photos and 1 video from throughout Week 3 while working on this)
My term was XYZ axes, and it immediately sparked tragic memories of a topic named Vectors in a subject named H2 Math, which I never quite managed to pass. On a brighter note, that prior knowledge was somewhat effective in assisting me. Here’s some of the things I still remember which vaguely helped me:
3 axes = 3 dimensions, the X, Y and Z axes
There’s 3 main features, the point, line and plane
I haven’t done this much Math since November.
I didn’t particularly think of this while working, and not all of it is applicable because we can only use right angles, but it was what unconsciously led me to thoughts on things like origin points, etc.
I really disliked my previous designs, especially where jointing wasn’t available yet. It’s a little hard for me to see the 3D-ness happen if I can’t joint to allow the edges to jut across all 6 sides, than just 3, which undermines the unflatness.
For versatility purposes, I decided to use foam rather than boxes, where my dismal collection of boxes didn’t seem to fit together well (and the colours were rather distracting). Consequently, I headed out to ADM, picked out pieces of scrap foam at random, and spent a wonderful late evening of foam cutting! (This was mostly just to straighten the edges, but it’s surprisingly therapeutic once you get into the routine.)
Backstory
The usage of the foam cutting machine, along with a pet peeve of mine (which involves the use of too many rules at once), led to me deciding to make this.
After the initial cutting therapy, I started to notice that there was 2 ways to cut the foam: one, by lining the part to be discarded on the left and the part to be kept on the right; two, vice versa. I know it sounds incredibly simple, and it probably IS very obvious, but I’m ashamed to say that my common sense also failed me similarly when it came to paper cutting for Foundation 2D. Regardless, prior to this I had only been using method 1 to cut, so with this epiphany I realised I could use the measurements to line up and cut the foam to certain dimensions as so desired.
I’ve previously mentioned that I have a certain distaste for similar shapes, similar meaning sharing the same ratio but just in a different scale. With that in mind (and Cheryl’s mentioning of cutting boxes to two-third sizes of each other), I hence decided to do exactly that, in a sort of masochistic, self-spiting way.
Initial Problems (and any refining actions taken)
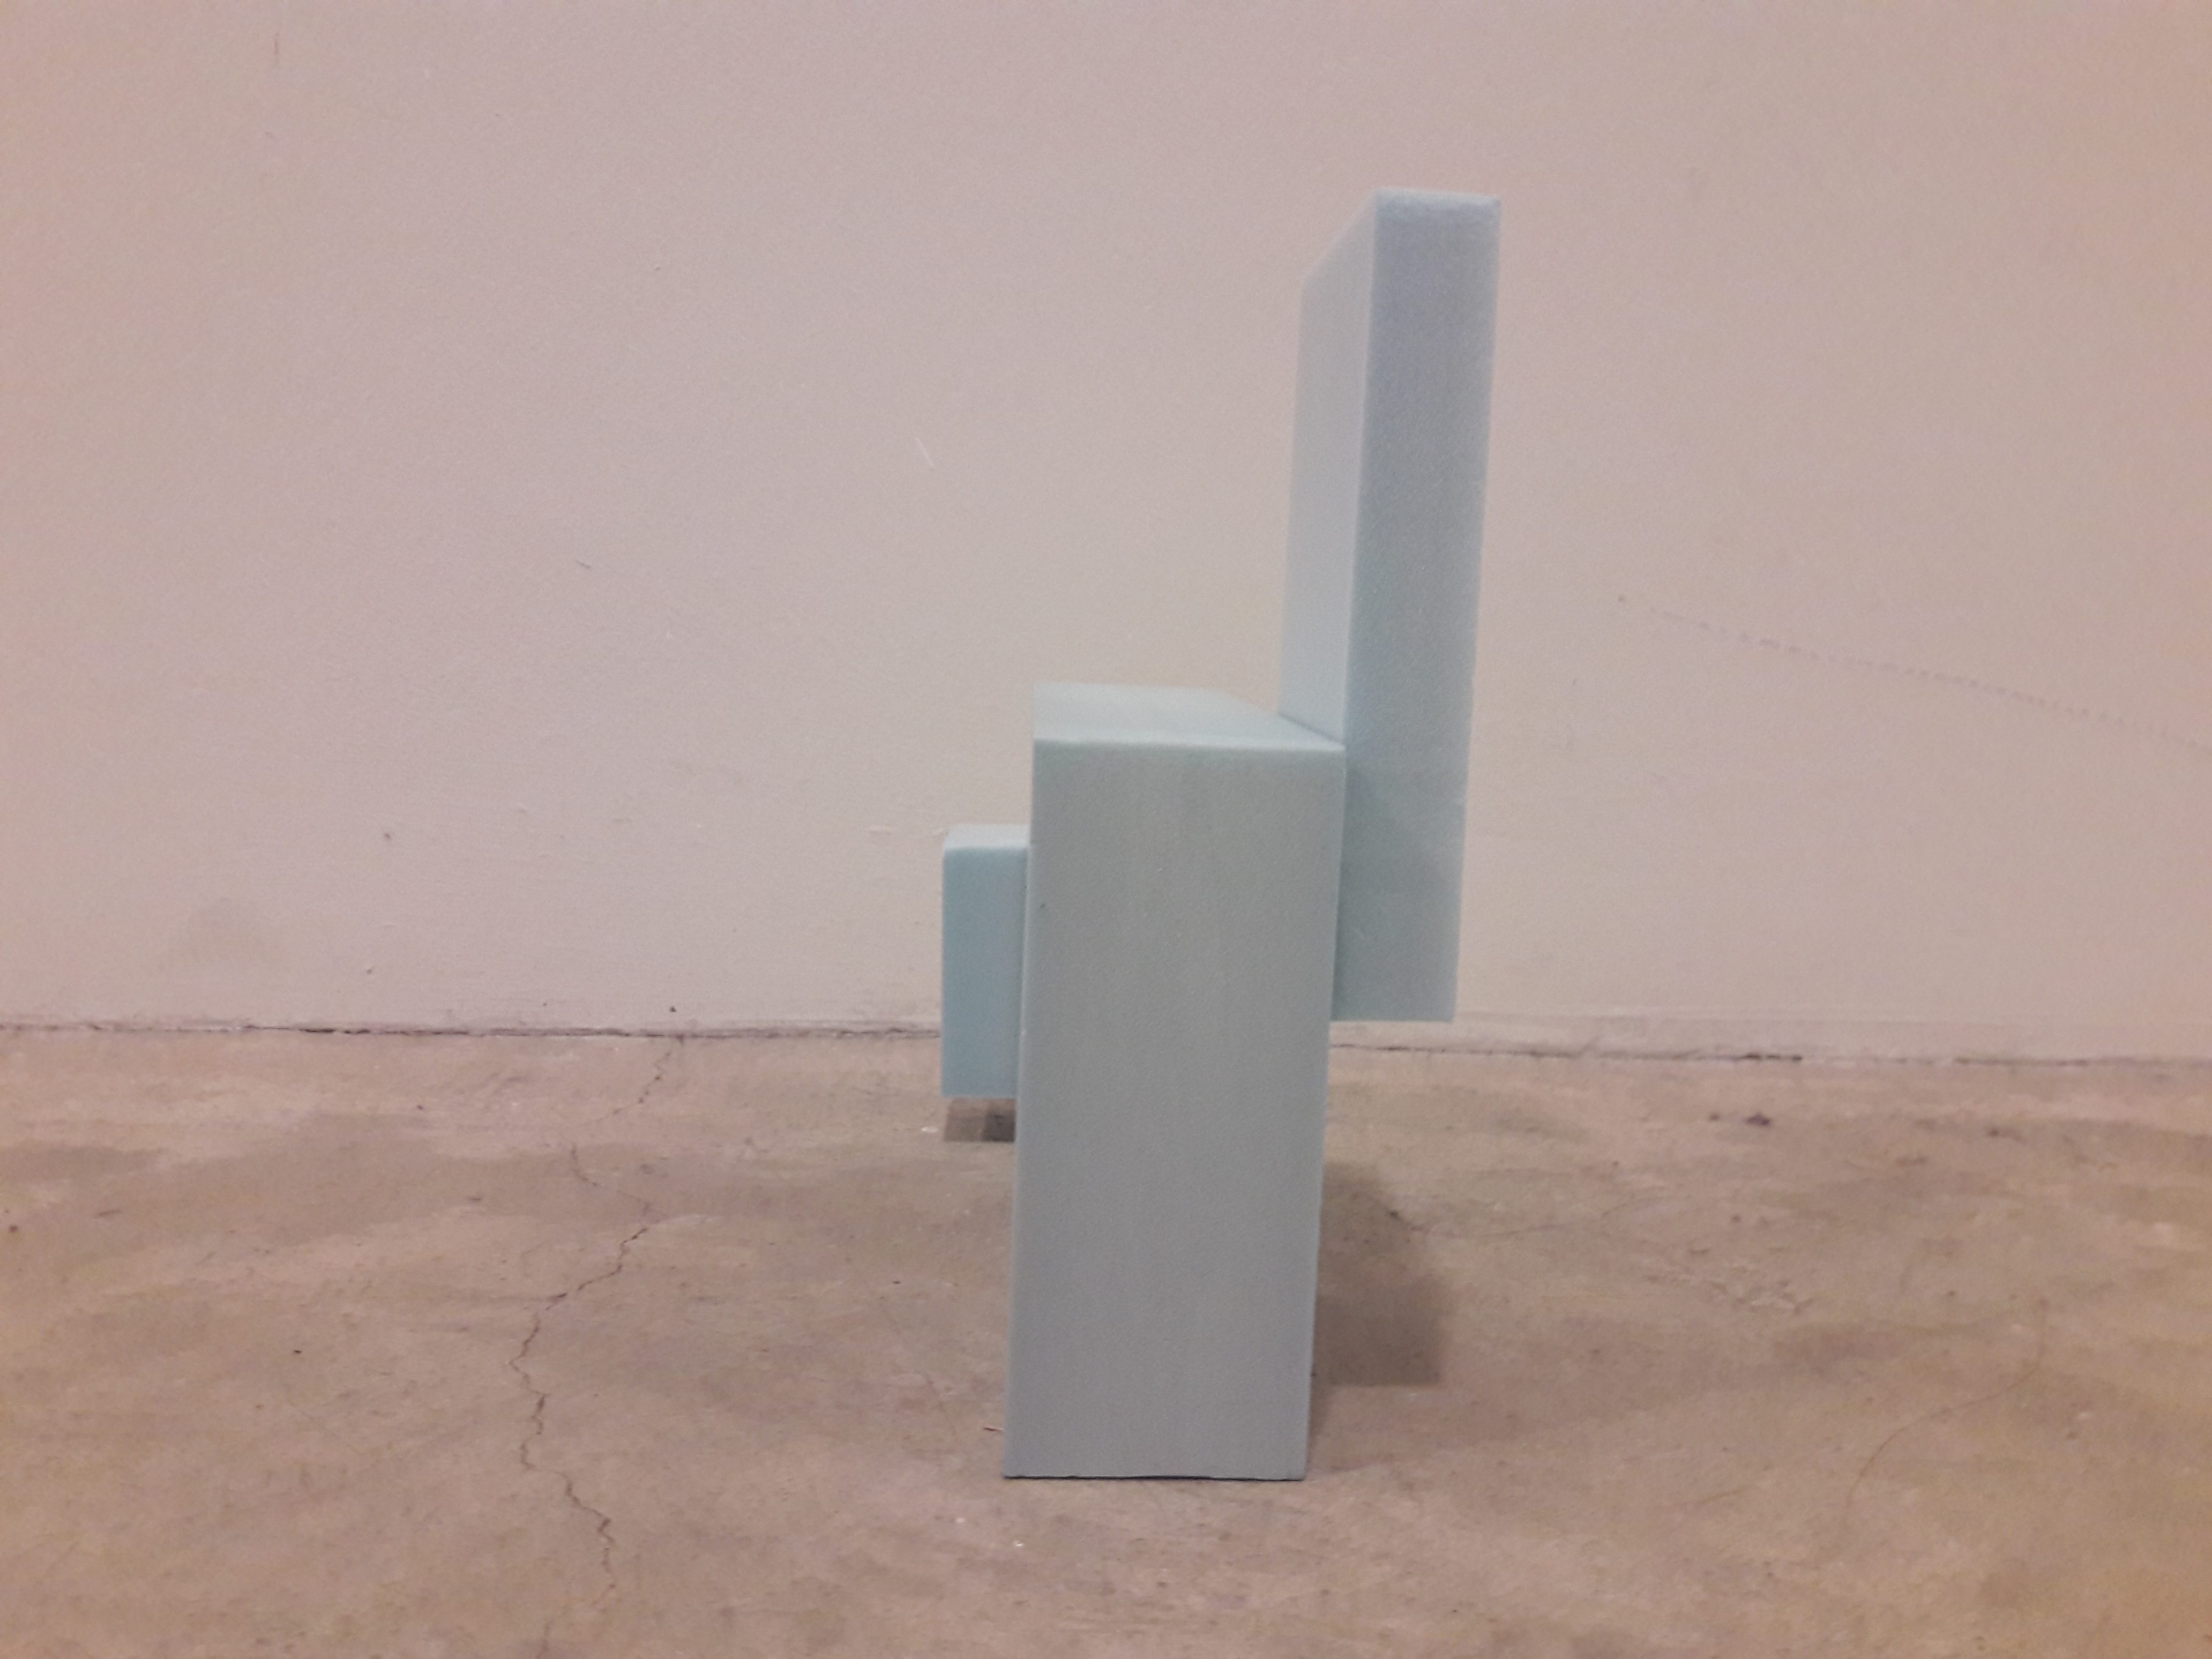
If I rotate the SD/SO to solve flatness problems, it causes hierarchical problems instead, so even with a 2D sketch it’s kind of difficult to find a solution anyway.
Measurements: The dominant was 13×20×5cm, the subdominant is 8.6×13.3×1.6cm, and the subordinate is 4.3×6.6×3.3cm (3:2:1;3:2:1;3:1:2) (I would have went for all round 9:6:2, or 3:2:1, but the lack of appropriate foam worked against me). Taking into account the fact that the dominant and subdominant were fairly close in terms of 13cm and 13.3cm, I decided to shorten the dominant’s X to 12cm (the only nearby number which would result in non-clashing measurements).
Without jointing
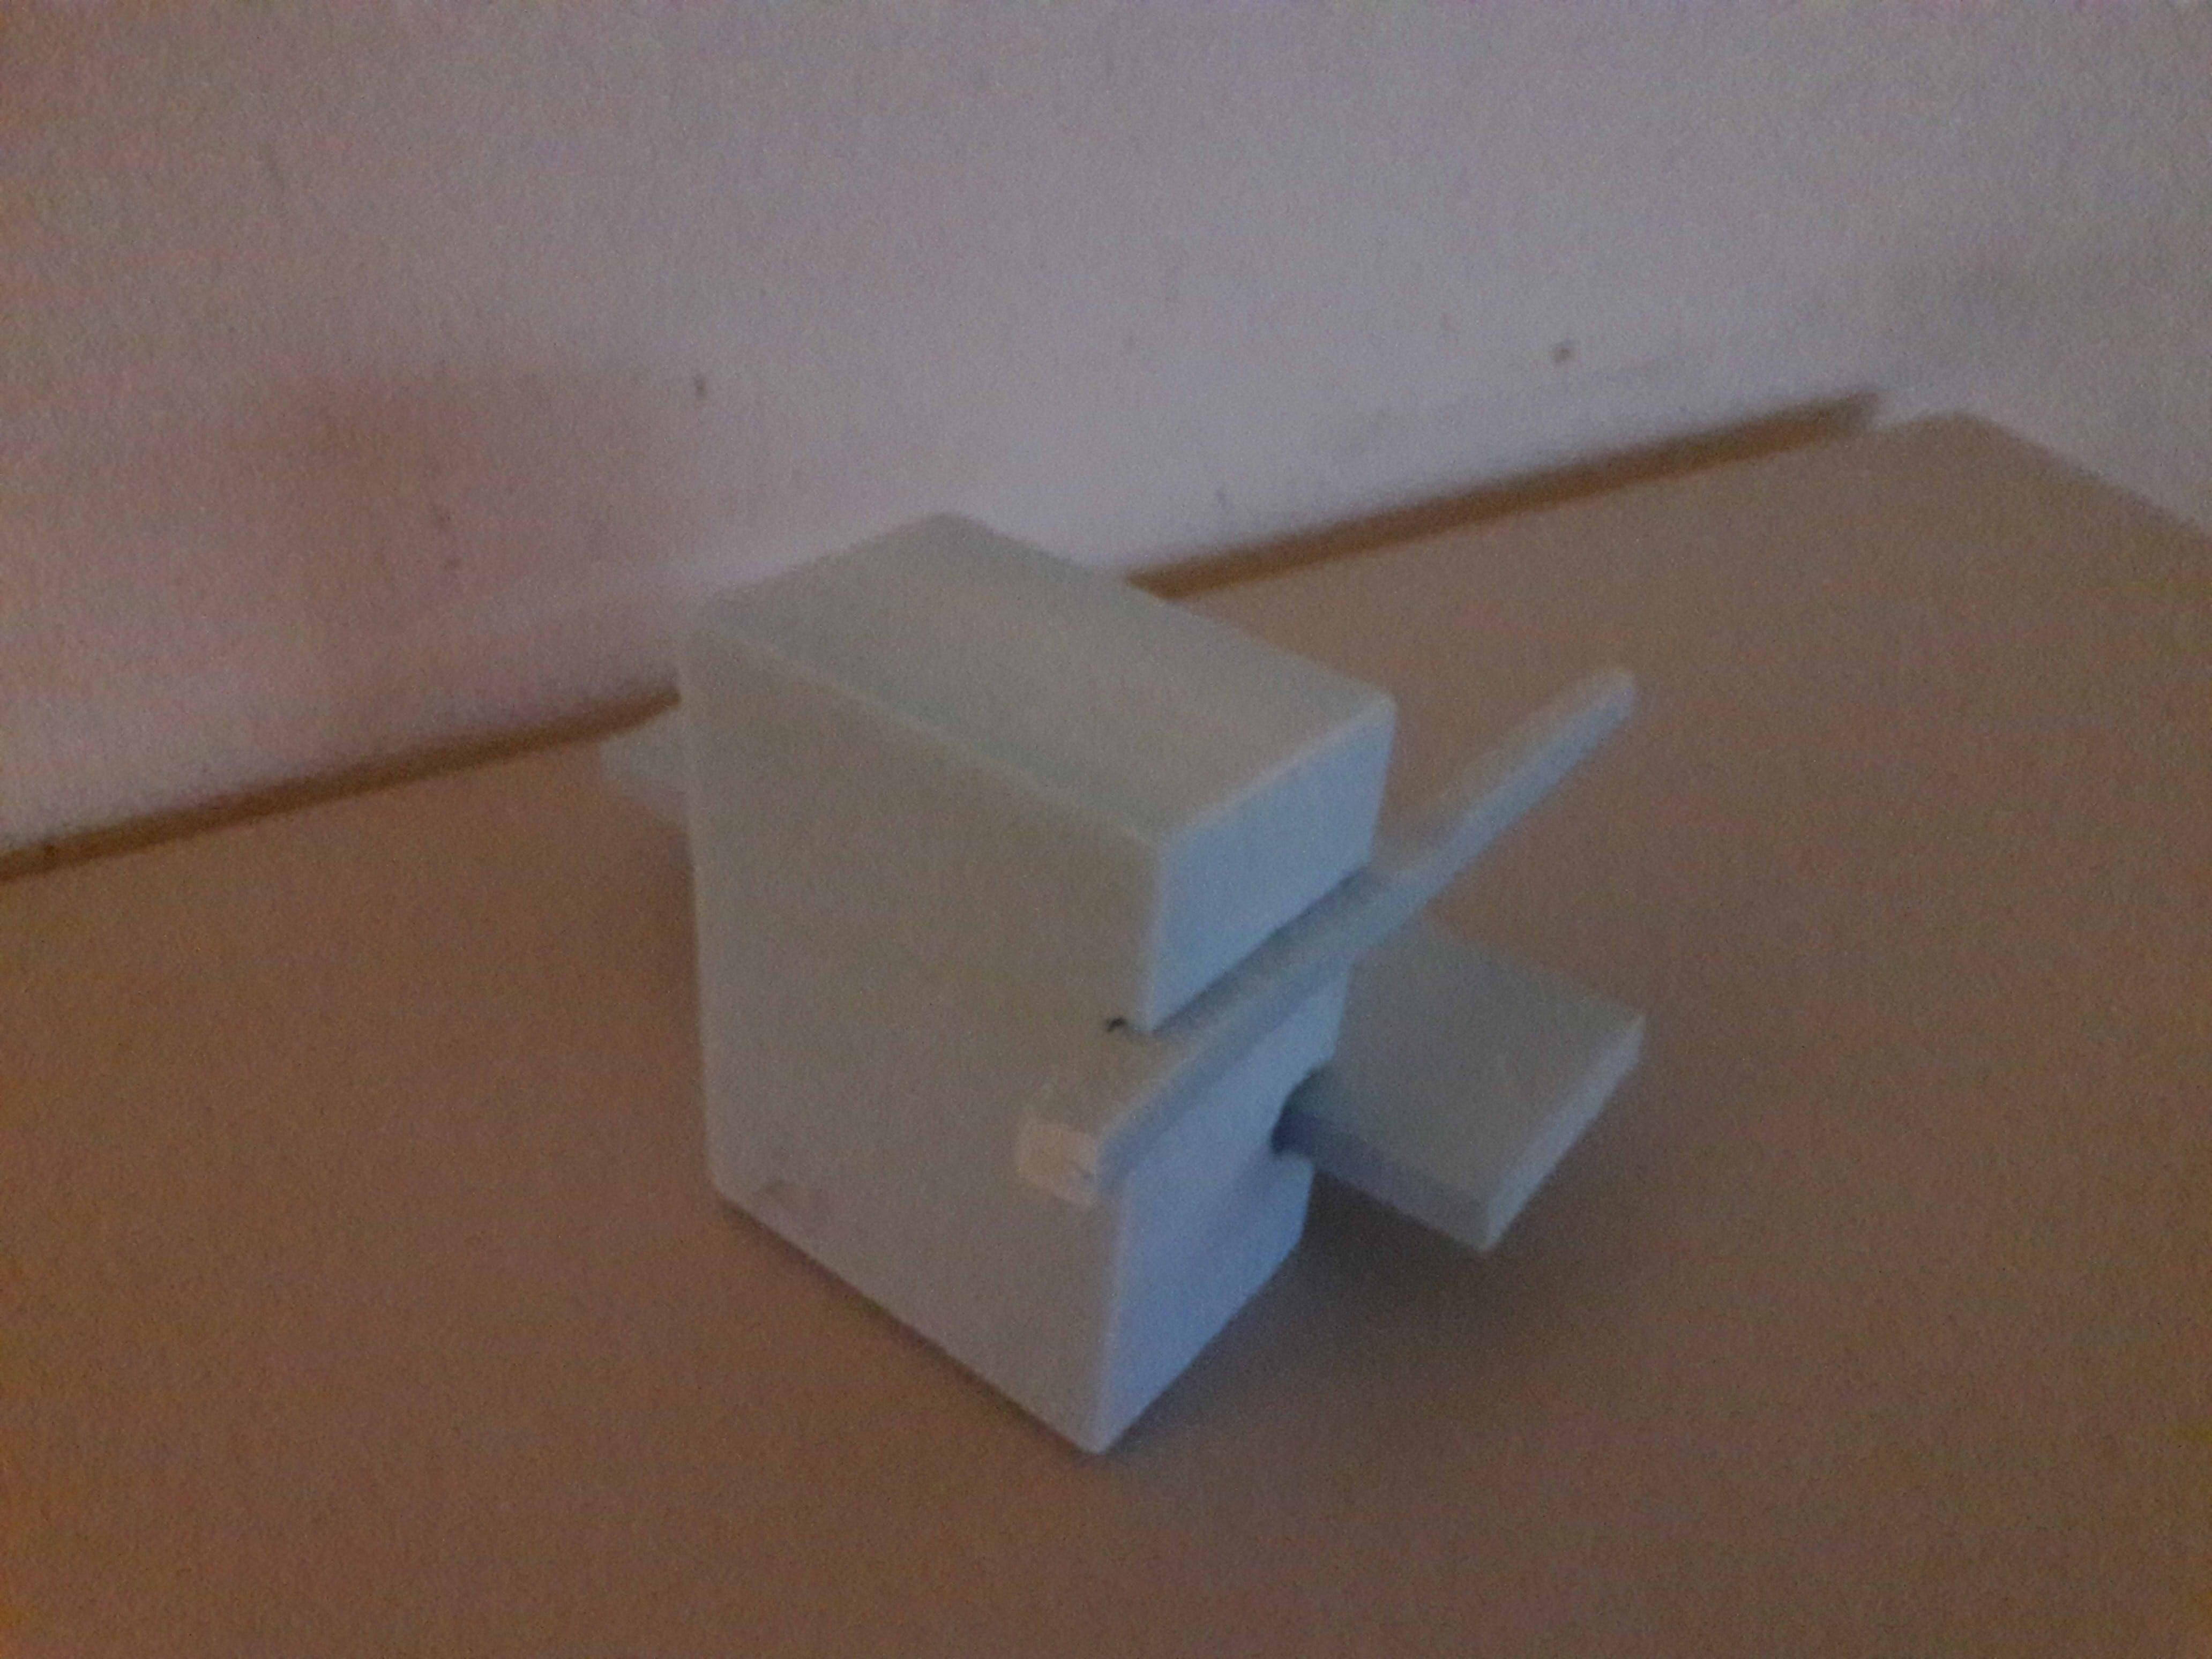
Splicing: I neglected to realise that I needed to factor in additional foam for things like wedging or piercing until I actually tried to put the foam together but when I tried to join them without jointing techniques, it seemed poorly executed. So, I tried using only wedging instead.
Why I wouldn’t choose this
Forms too similar, it plays by the rules but it’s boring (linked to comparative proportion?)
Difficult to adequately show 3D-ness without compromising hierarchy
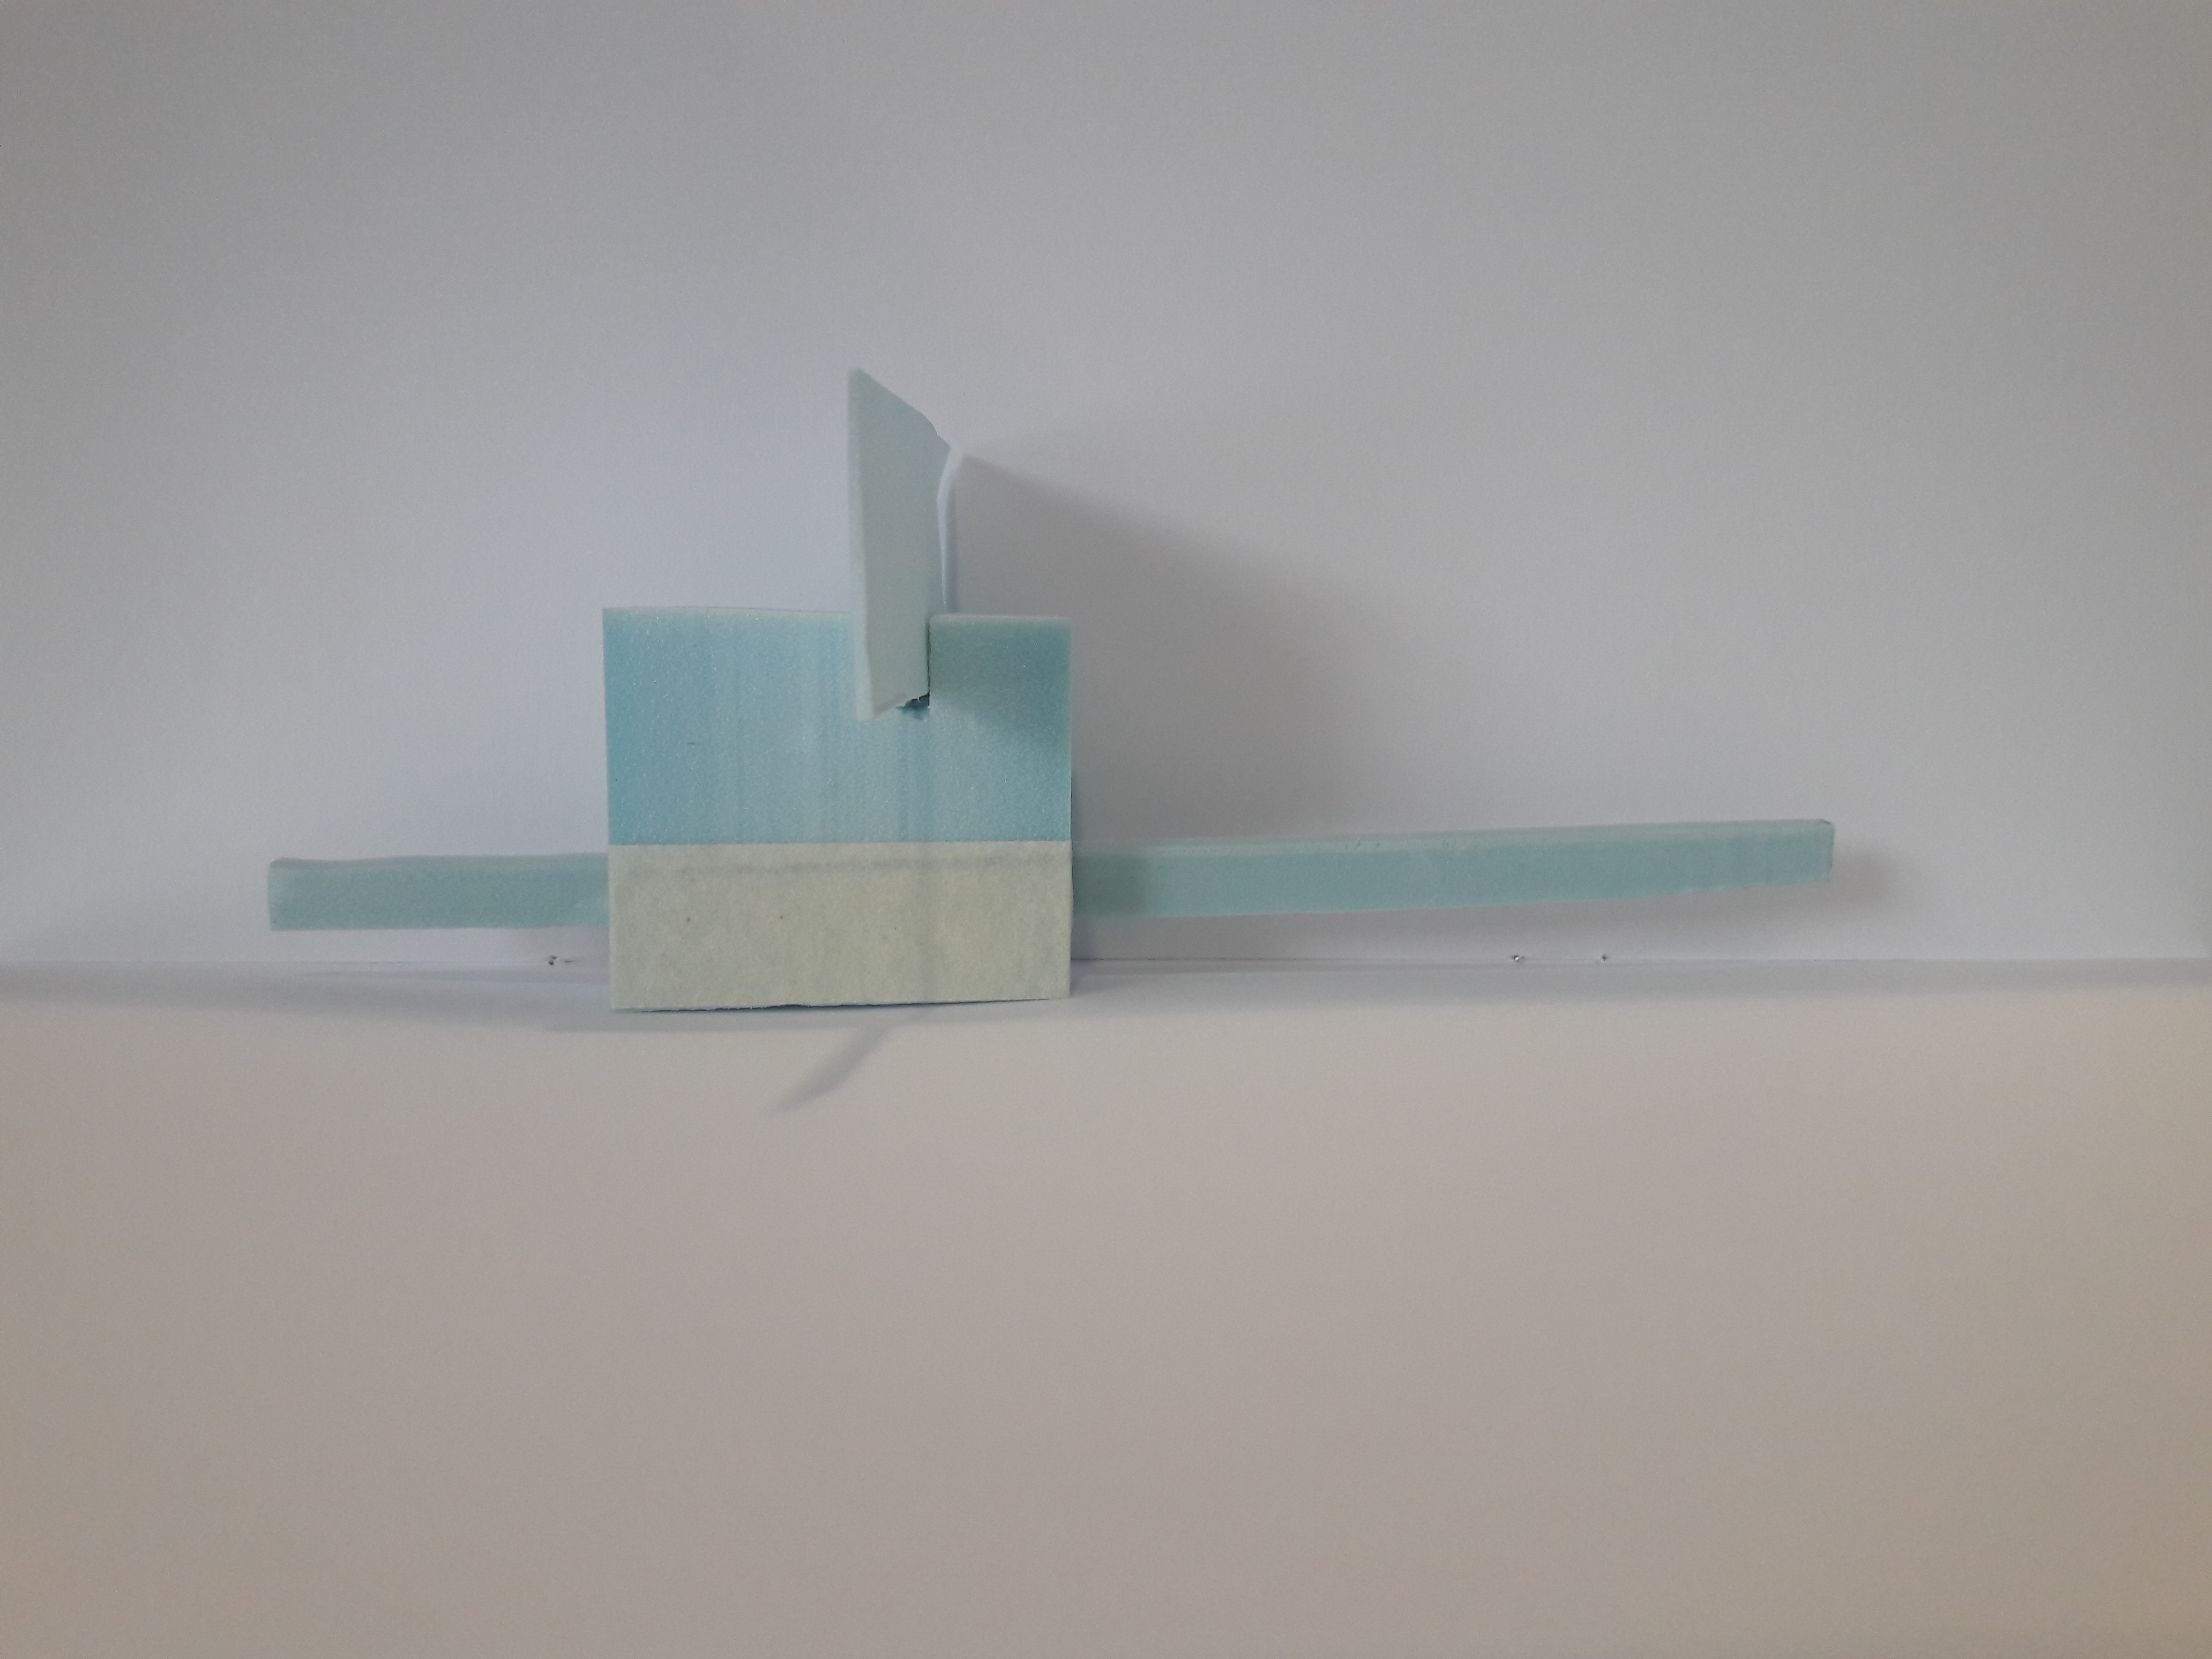
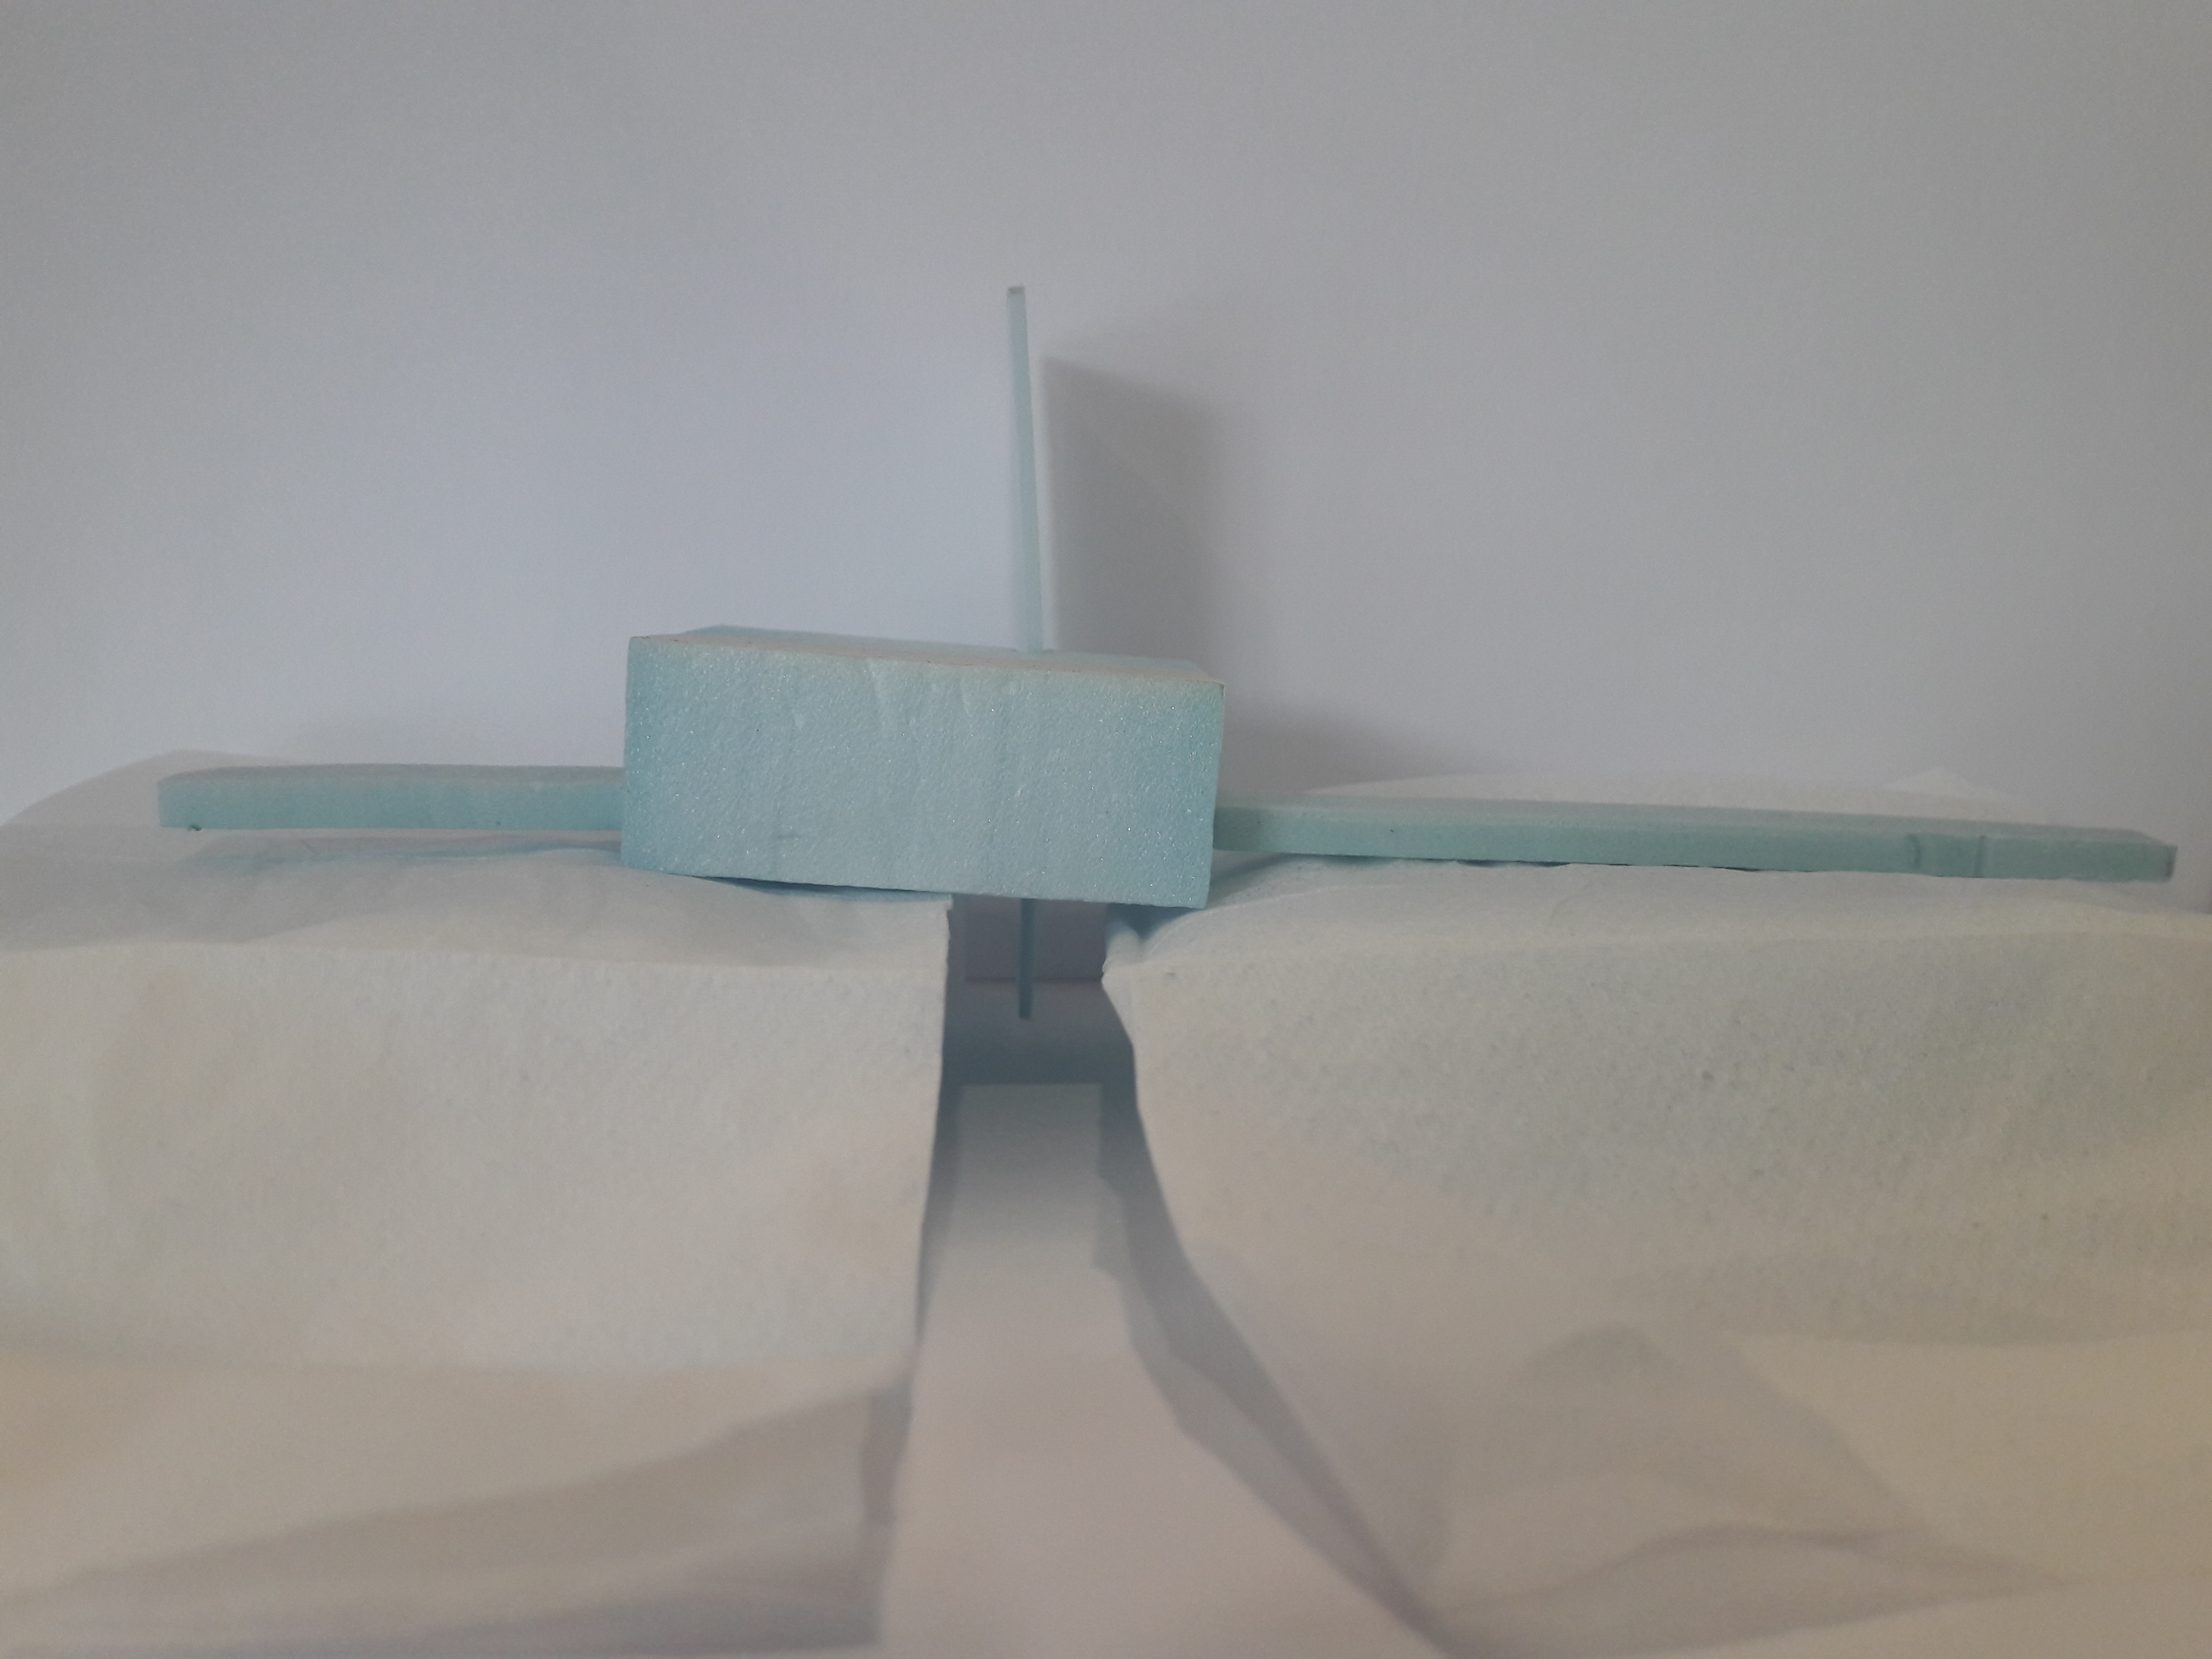
Backstory
Prior to doing the second model, I drafted the OSS post for the first one (as seen above). Writing really helps me to sort my thoughts out, and I noticed certain patterns in how I approached it. With this in mind, I decided to try avoiding what I did for the first model, to see what I felt would actually work.
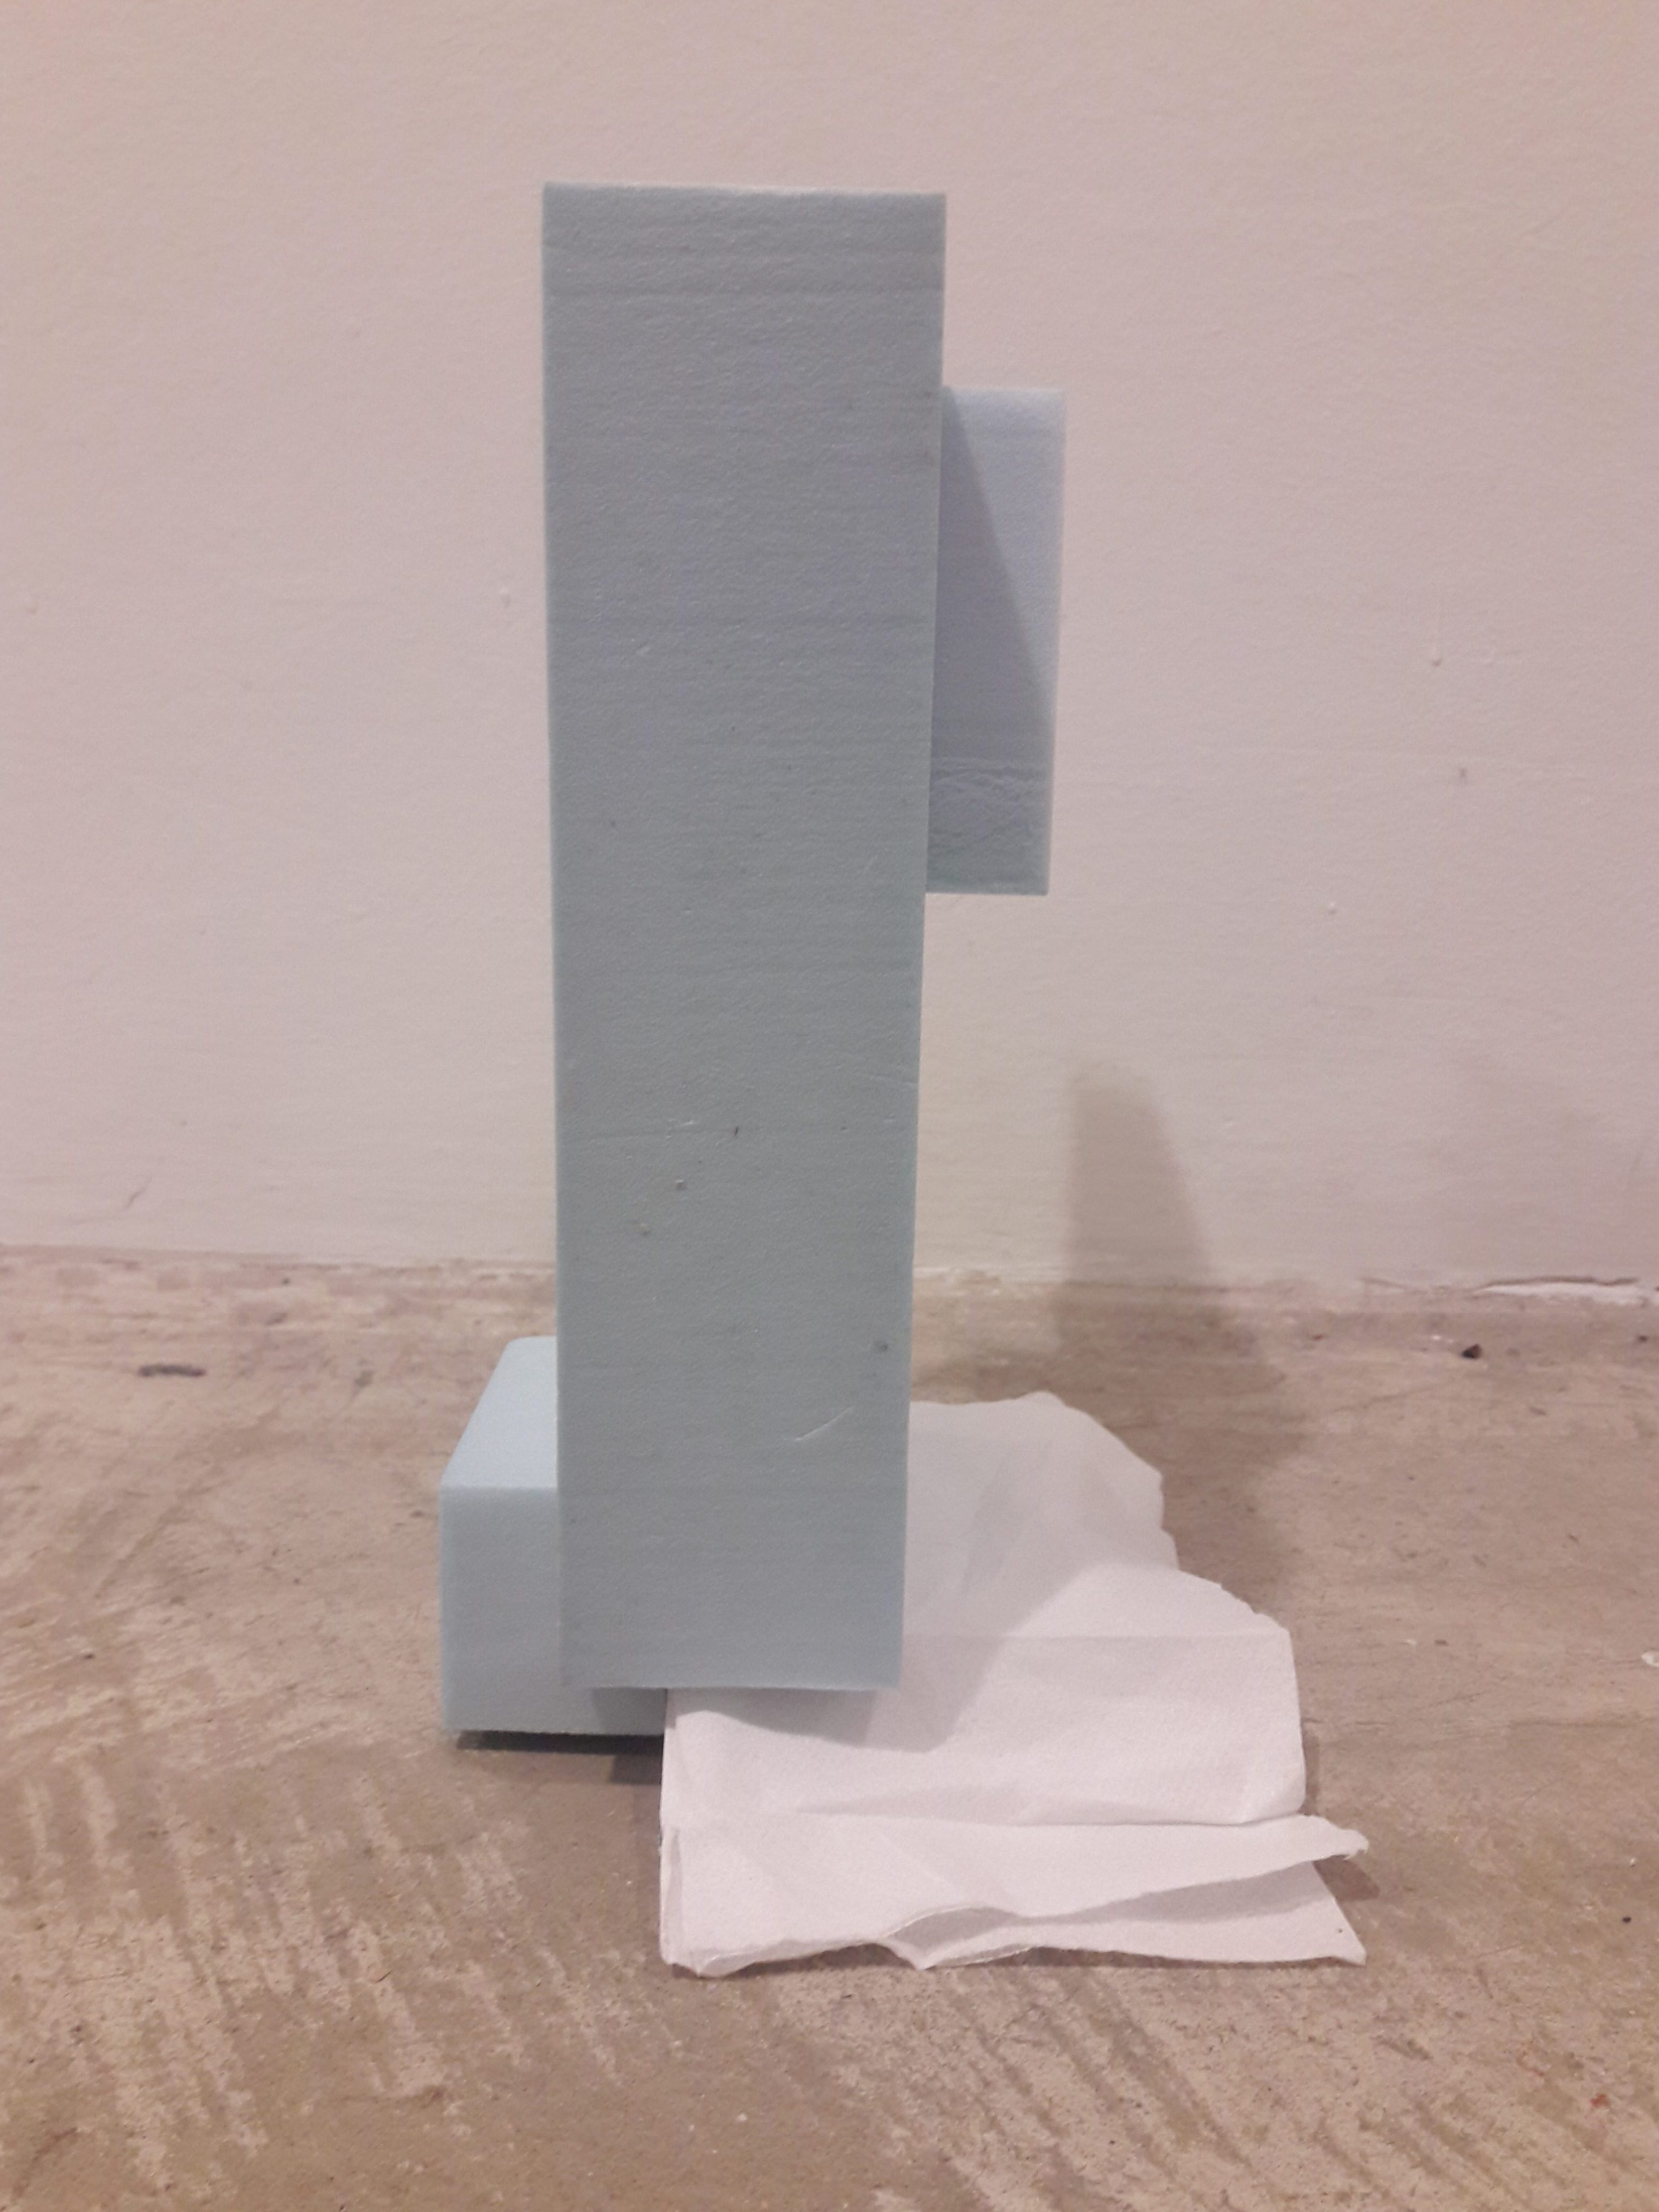
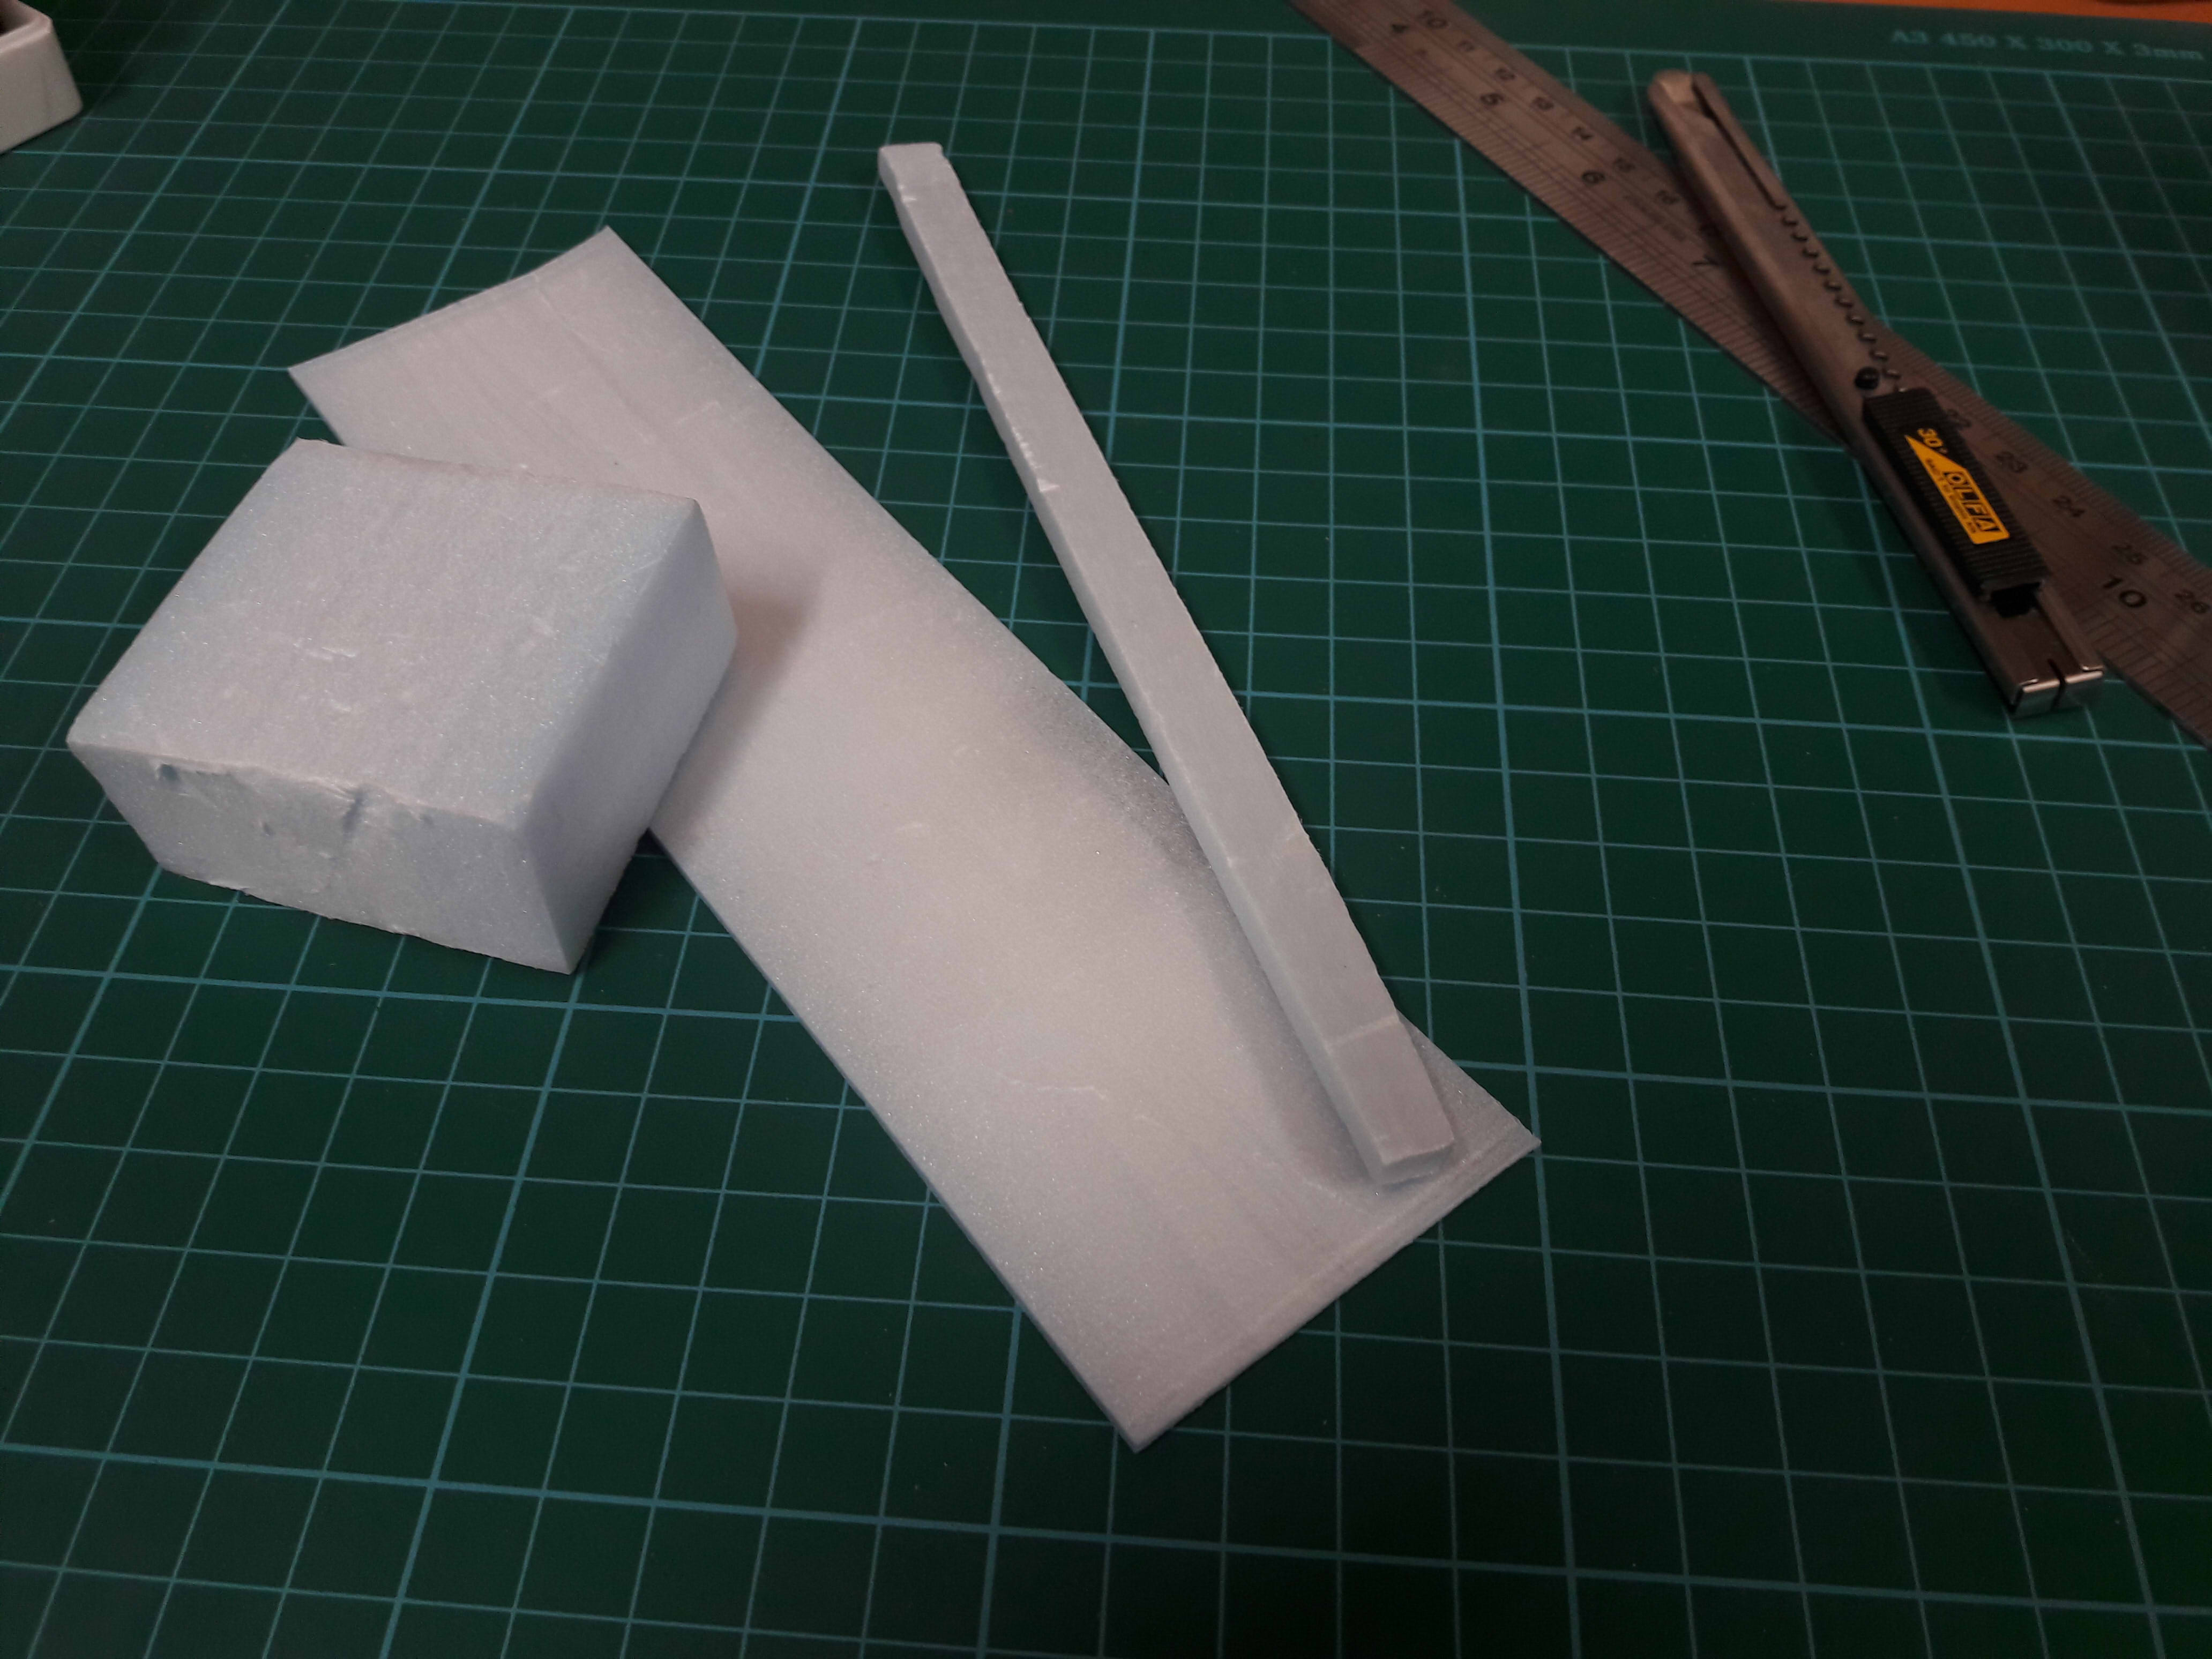
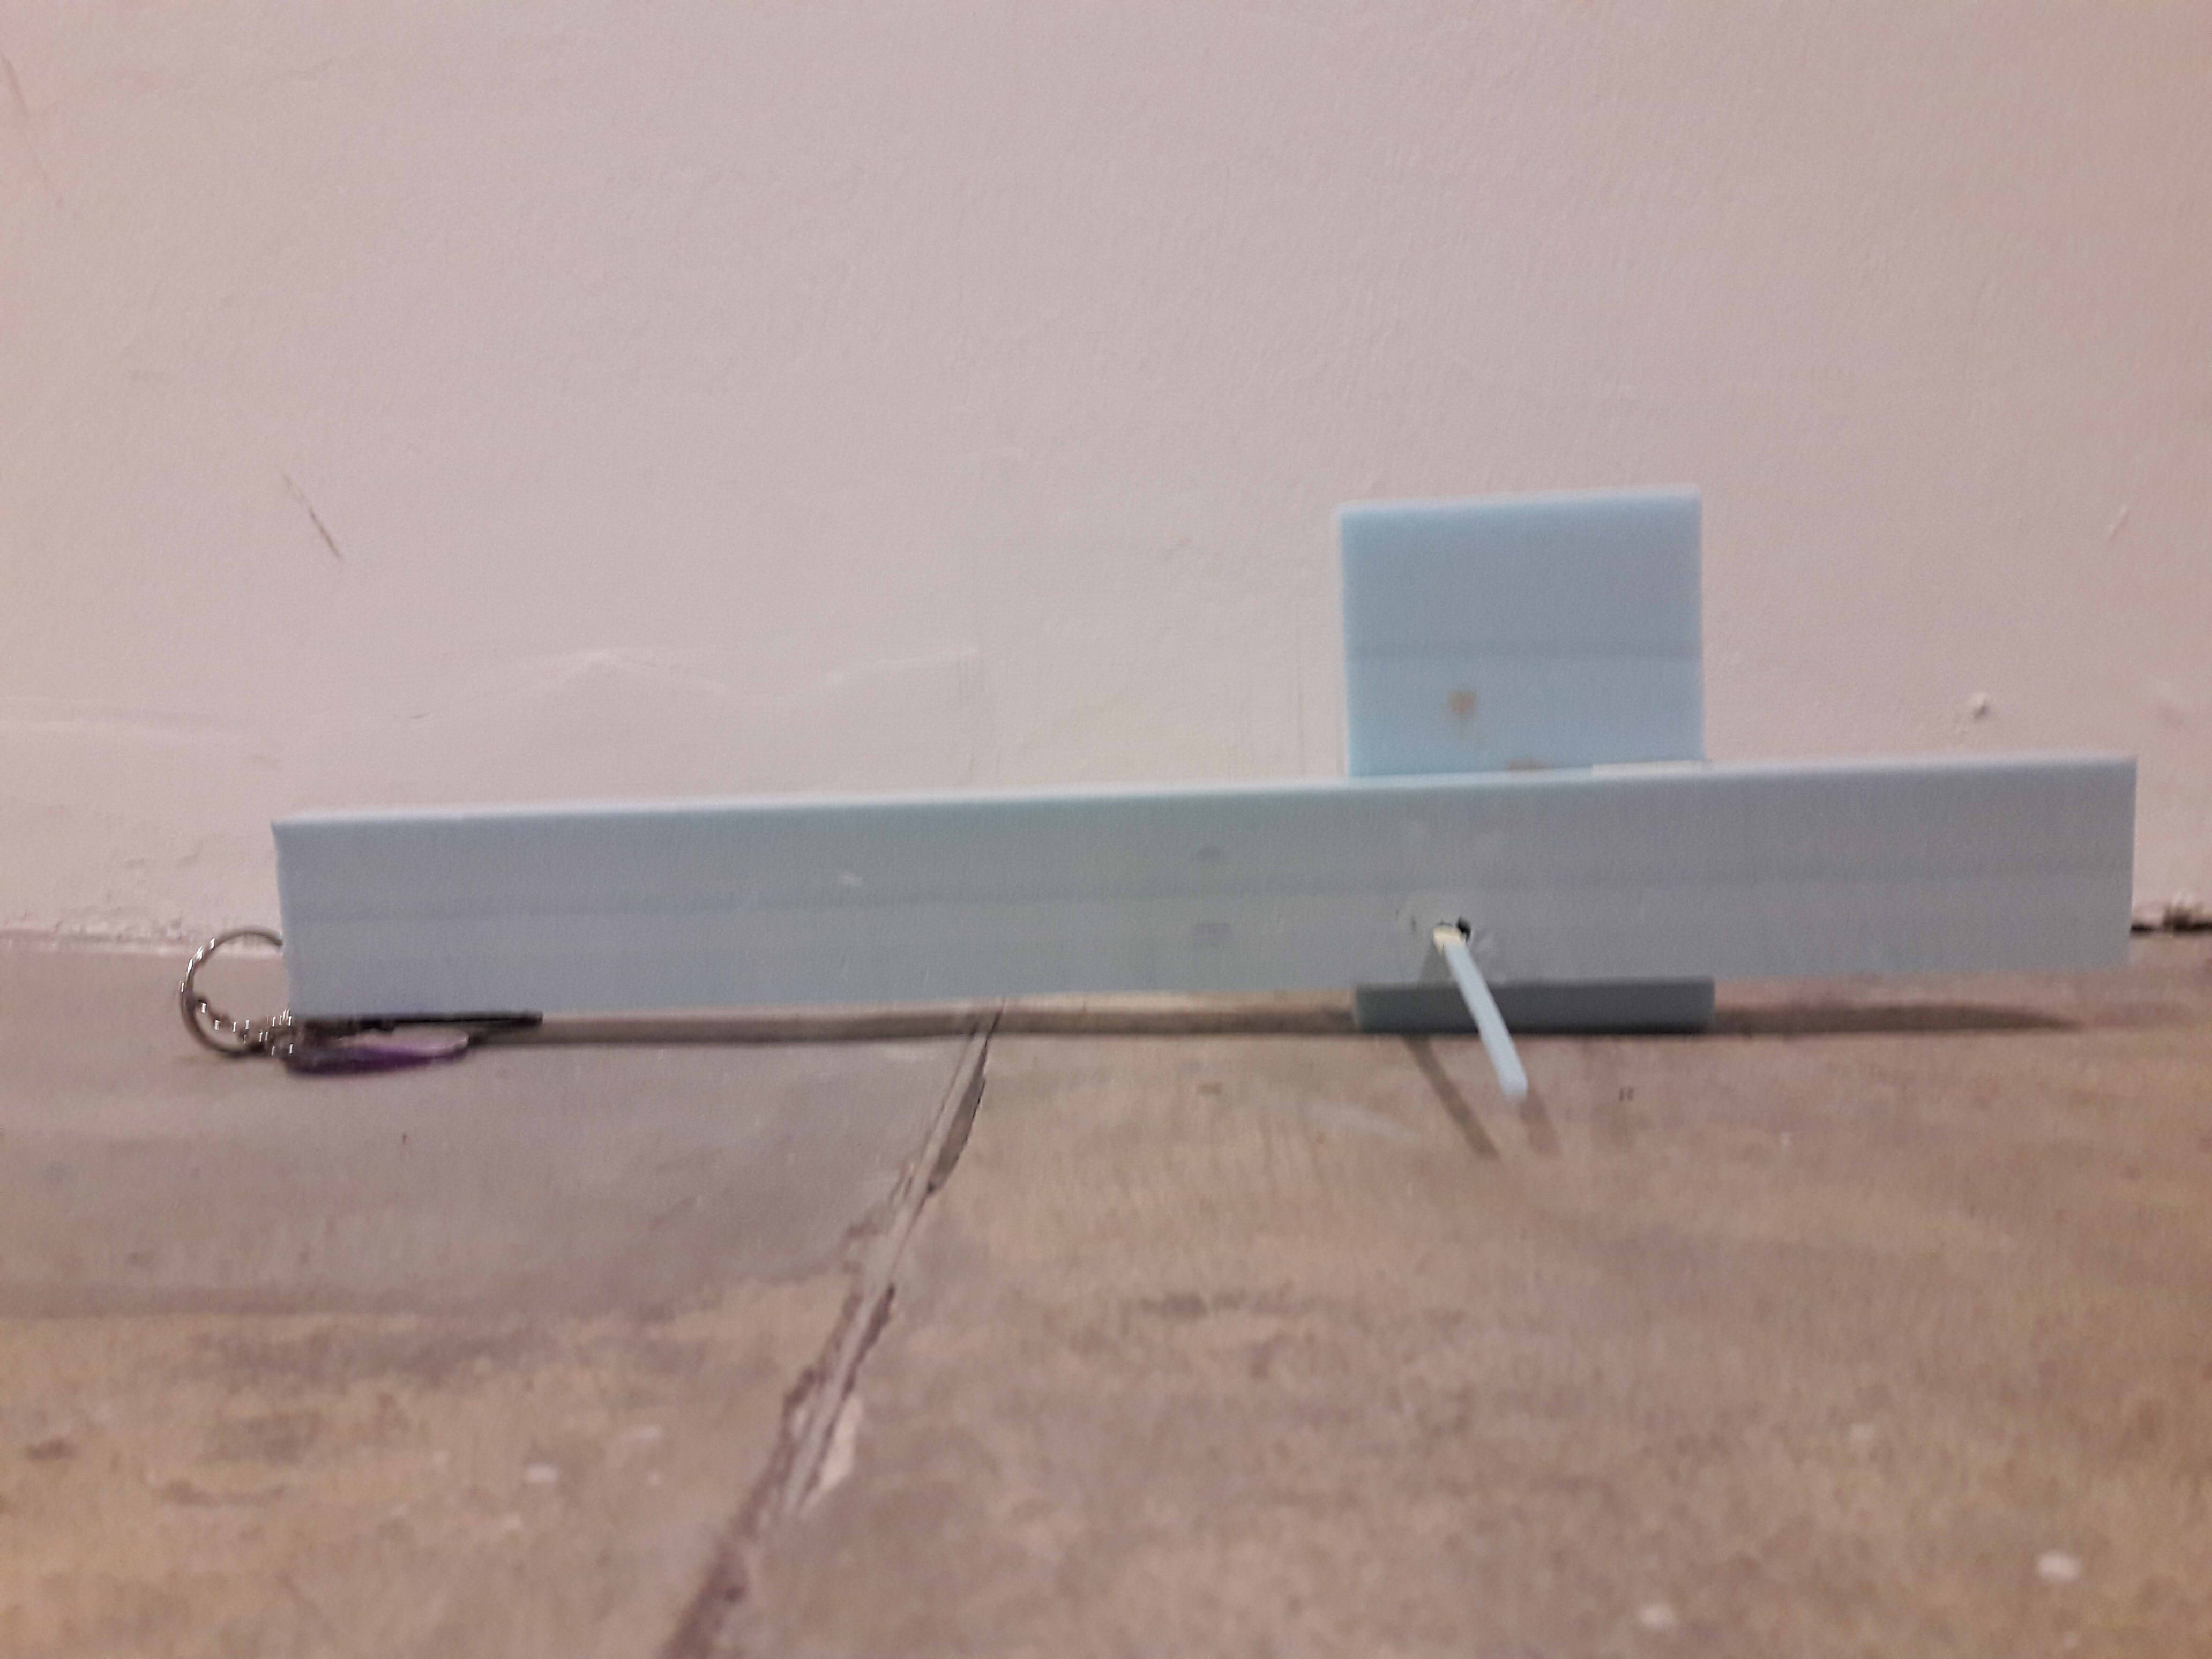
As stated in the brief, students are to cut “at least 12 rectilinear volumes” BEFORE proceeding to organise them. Presumably, this is either a negotiable point, or intended to ensure students avoid the methodical approach of measuring each box and making them already well-placed with each other. Hence, I decided to approach this less methodically, by refraining from doing any initial touch ups, and just picking 3 volumes which looked wildly different: 1 decidedly normal piece, 1 ridiculously slim piece and one looooooooooooooooooong piece.
(I happened to be in possession of many long and slim foams, results of the foam trimming therapy session)
Initial Problems (and any refining actions taken)
I like this one in terms of direction, but the subordinate is really messing up the subdominant on 2/6 sides
Measurements: I trimmed the subordinate from the start, of course. Afterwards, though, it was still rather big, so I sliced it into nearly half again to reduce the surface area, and wedged it to give the dominant more dominance in the bottom left sketch. (Then, the subdominant was also really long so I trimmed it from about 18.3cm to 15.4cm,)
It WAS really big.
Hierarchy: Natural problems arose from a too thin subdominant paired with the wide subordinate. If I were to rotate to counteract there wouldn’t be the nice 4-directional pull anymore, so I didn’t really manage to find a solution for this, but since it’s 2/6 sides maybe… It’s.. Passable?
Also mostly just that I randomly made it in class previously and kind of liked it, so I used a similar idea. Instead of wedging, I used both piercing and wedging though.
Why I wouldn’t choose this
I mean, I prefer this over the other two, so…
Backstory
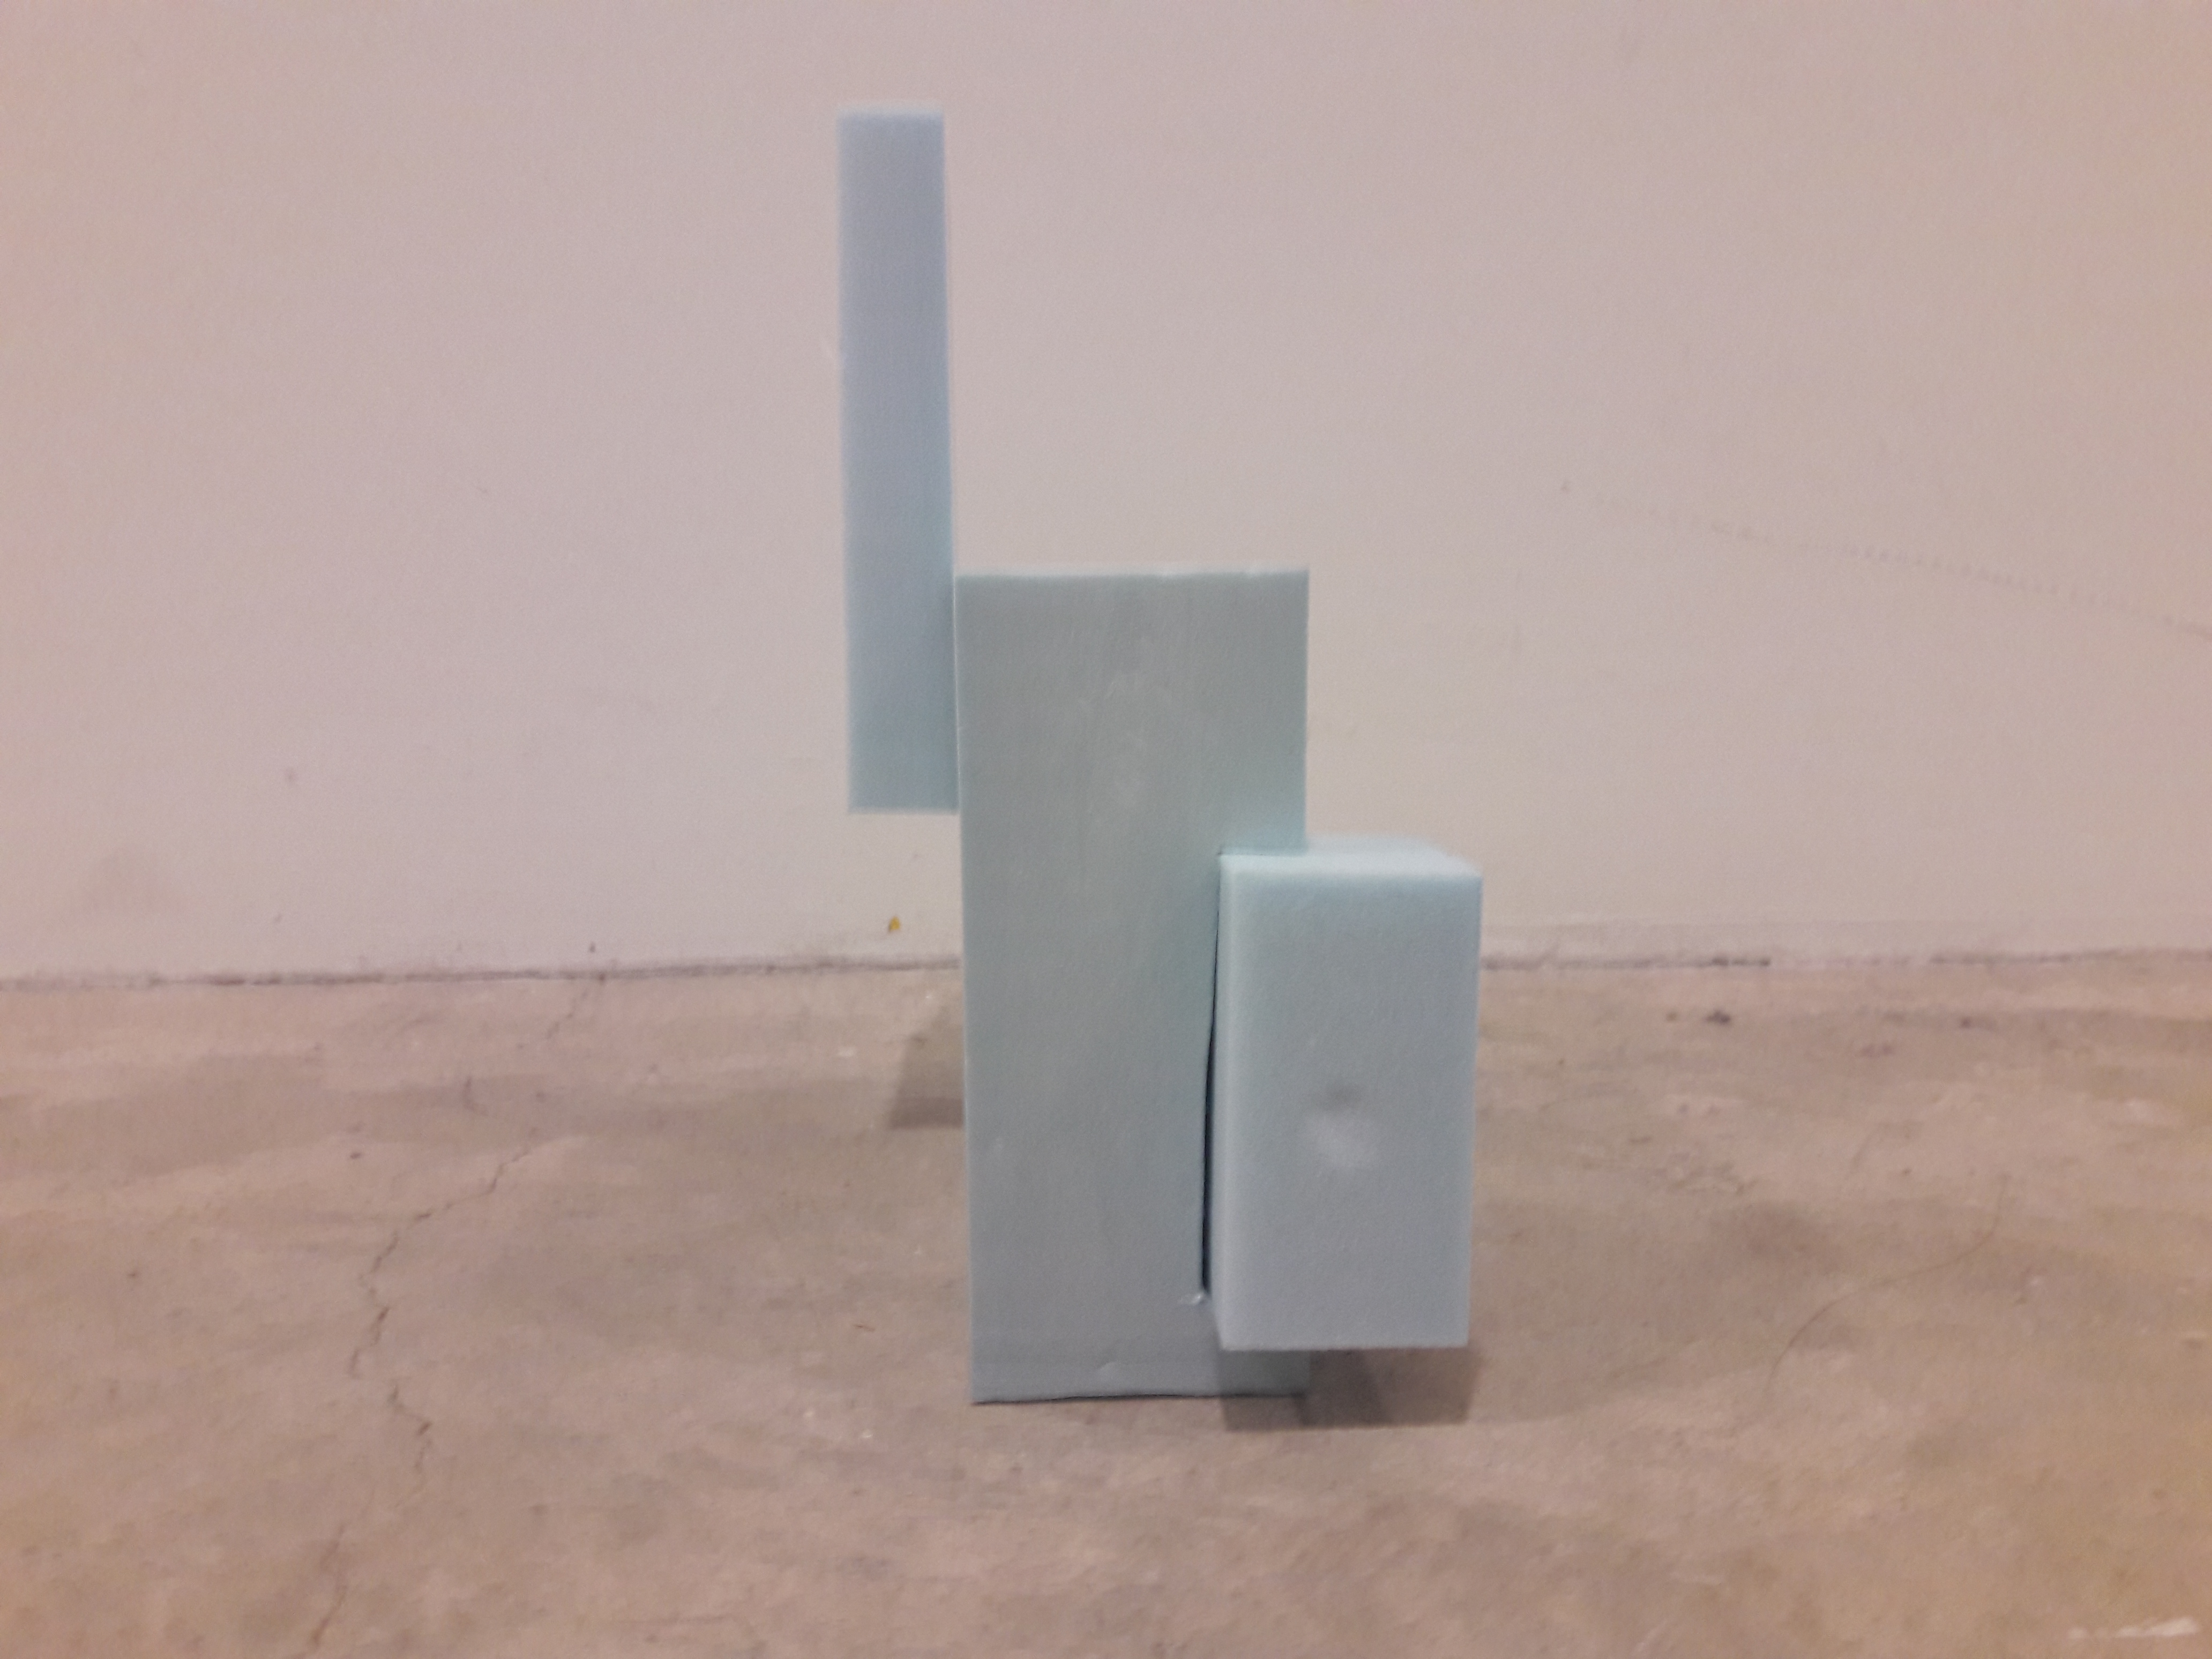
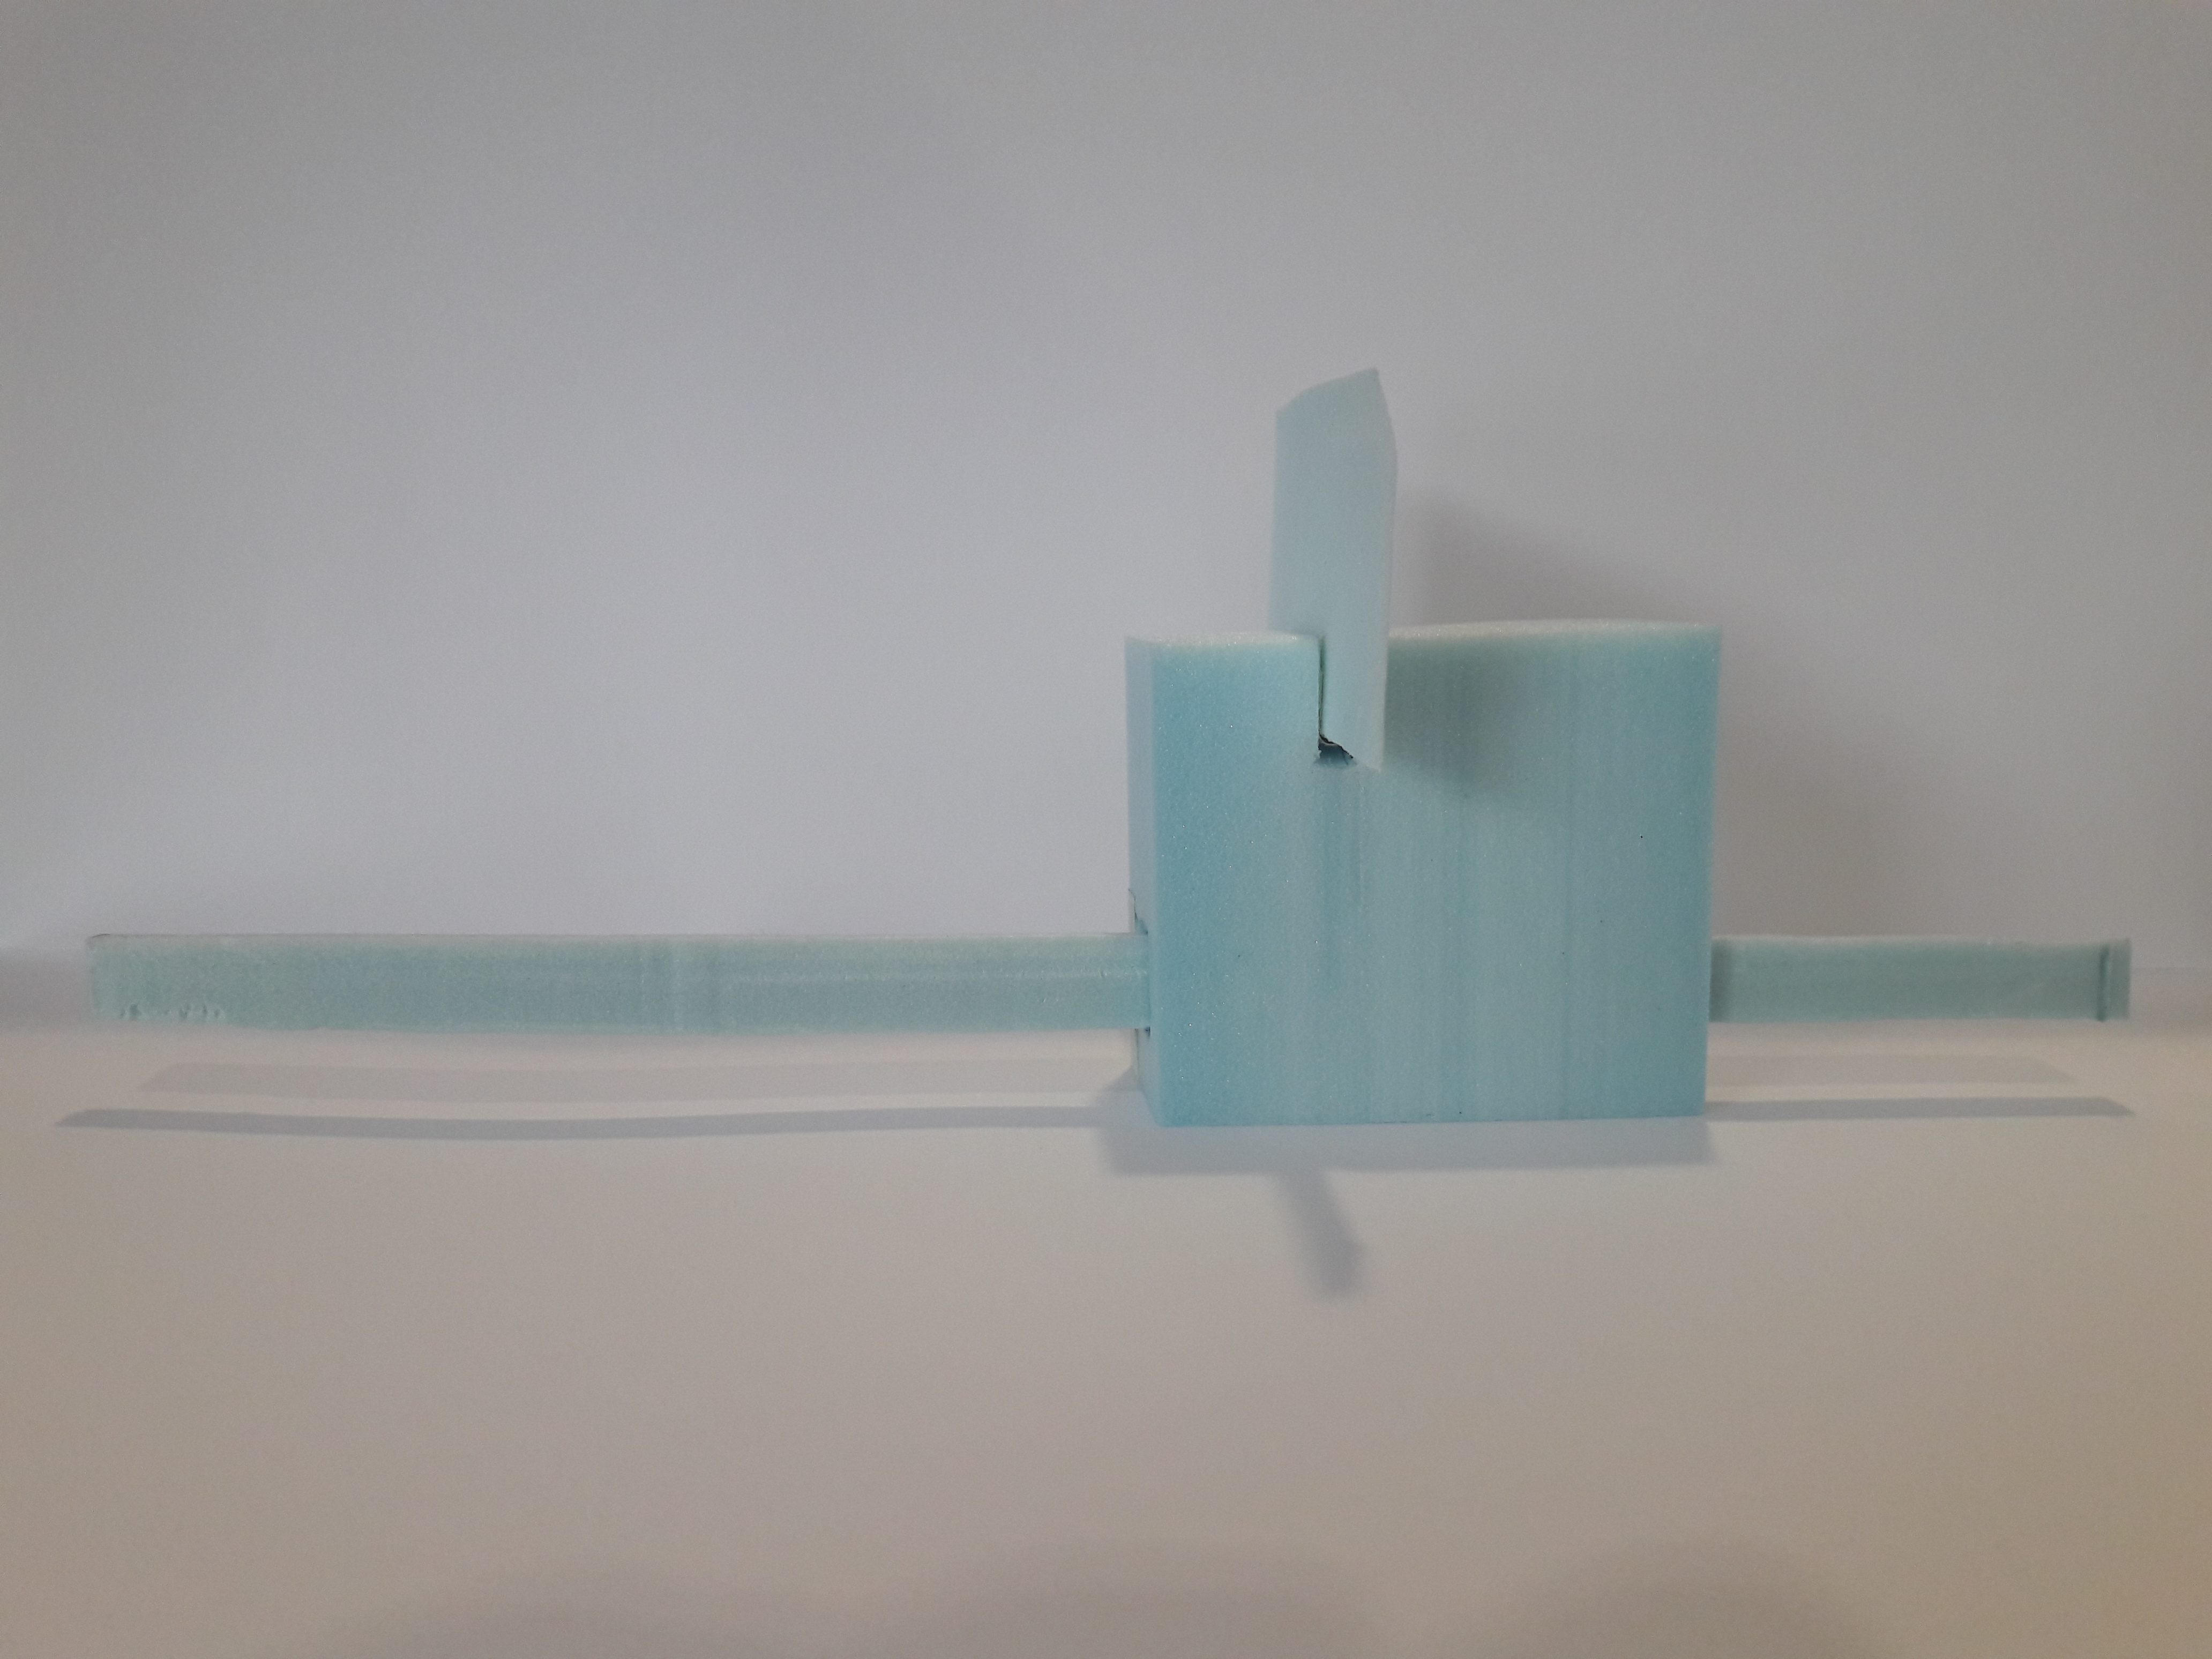
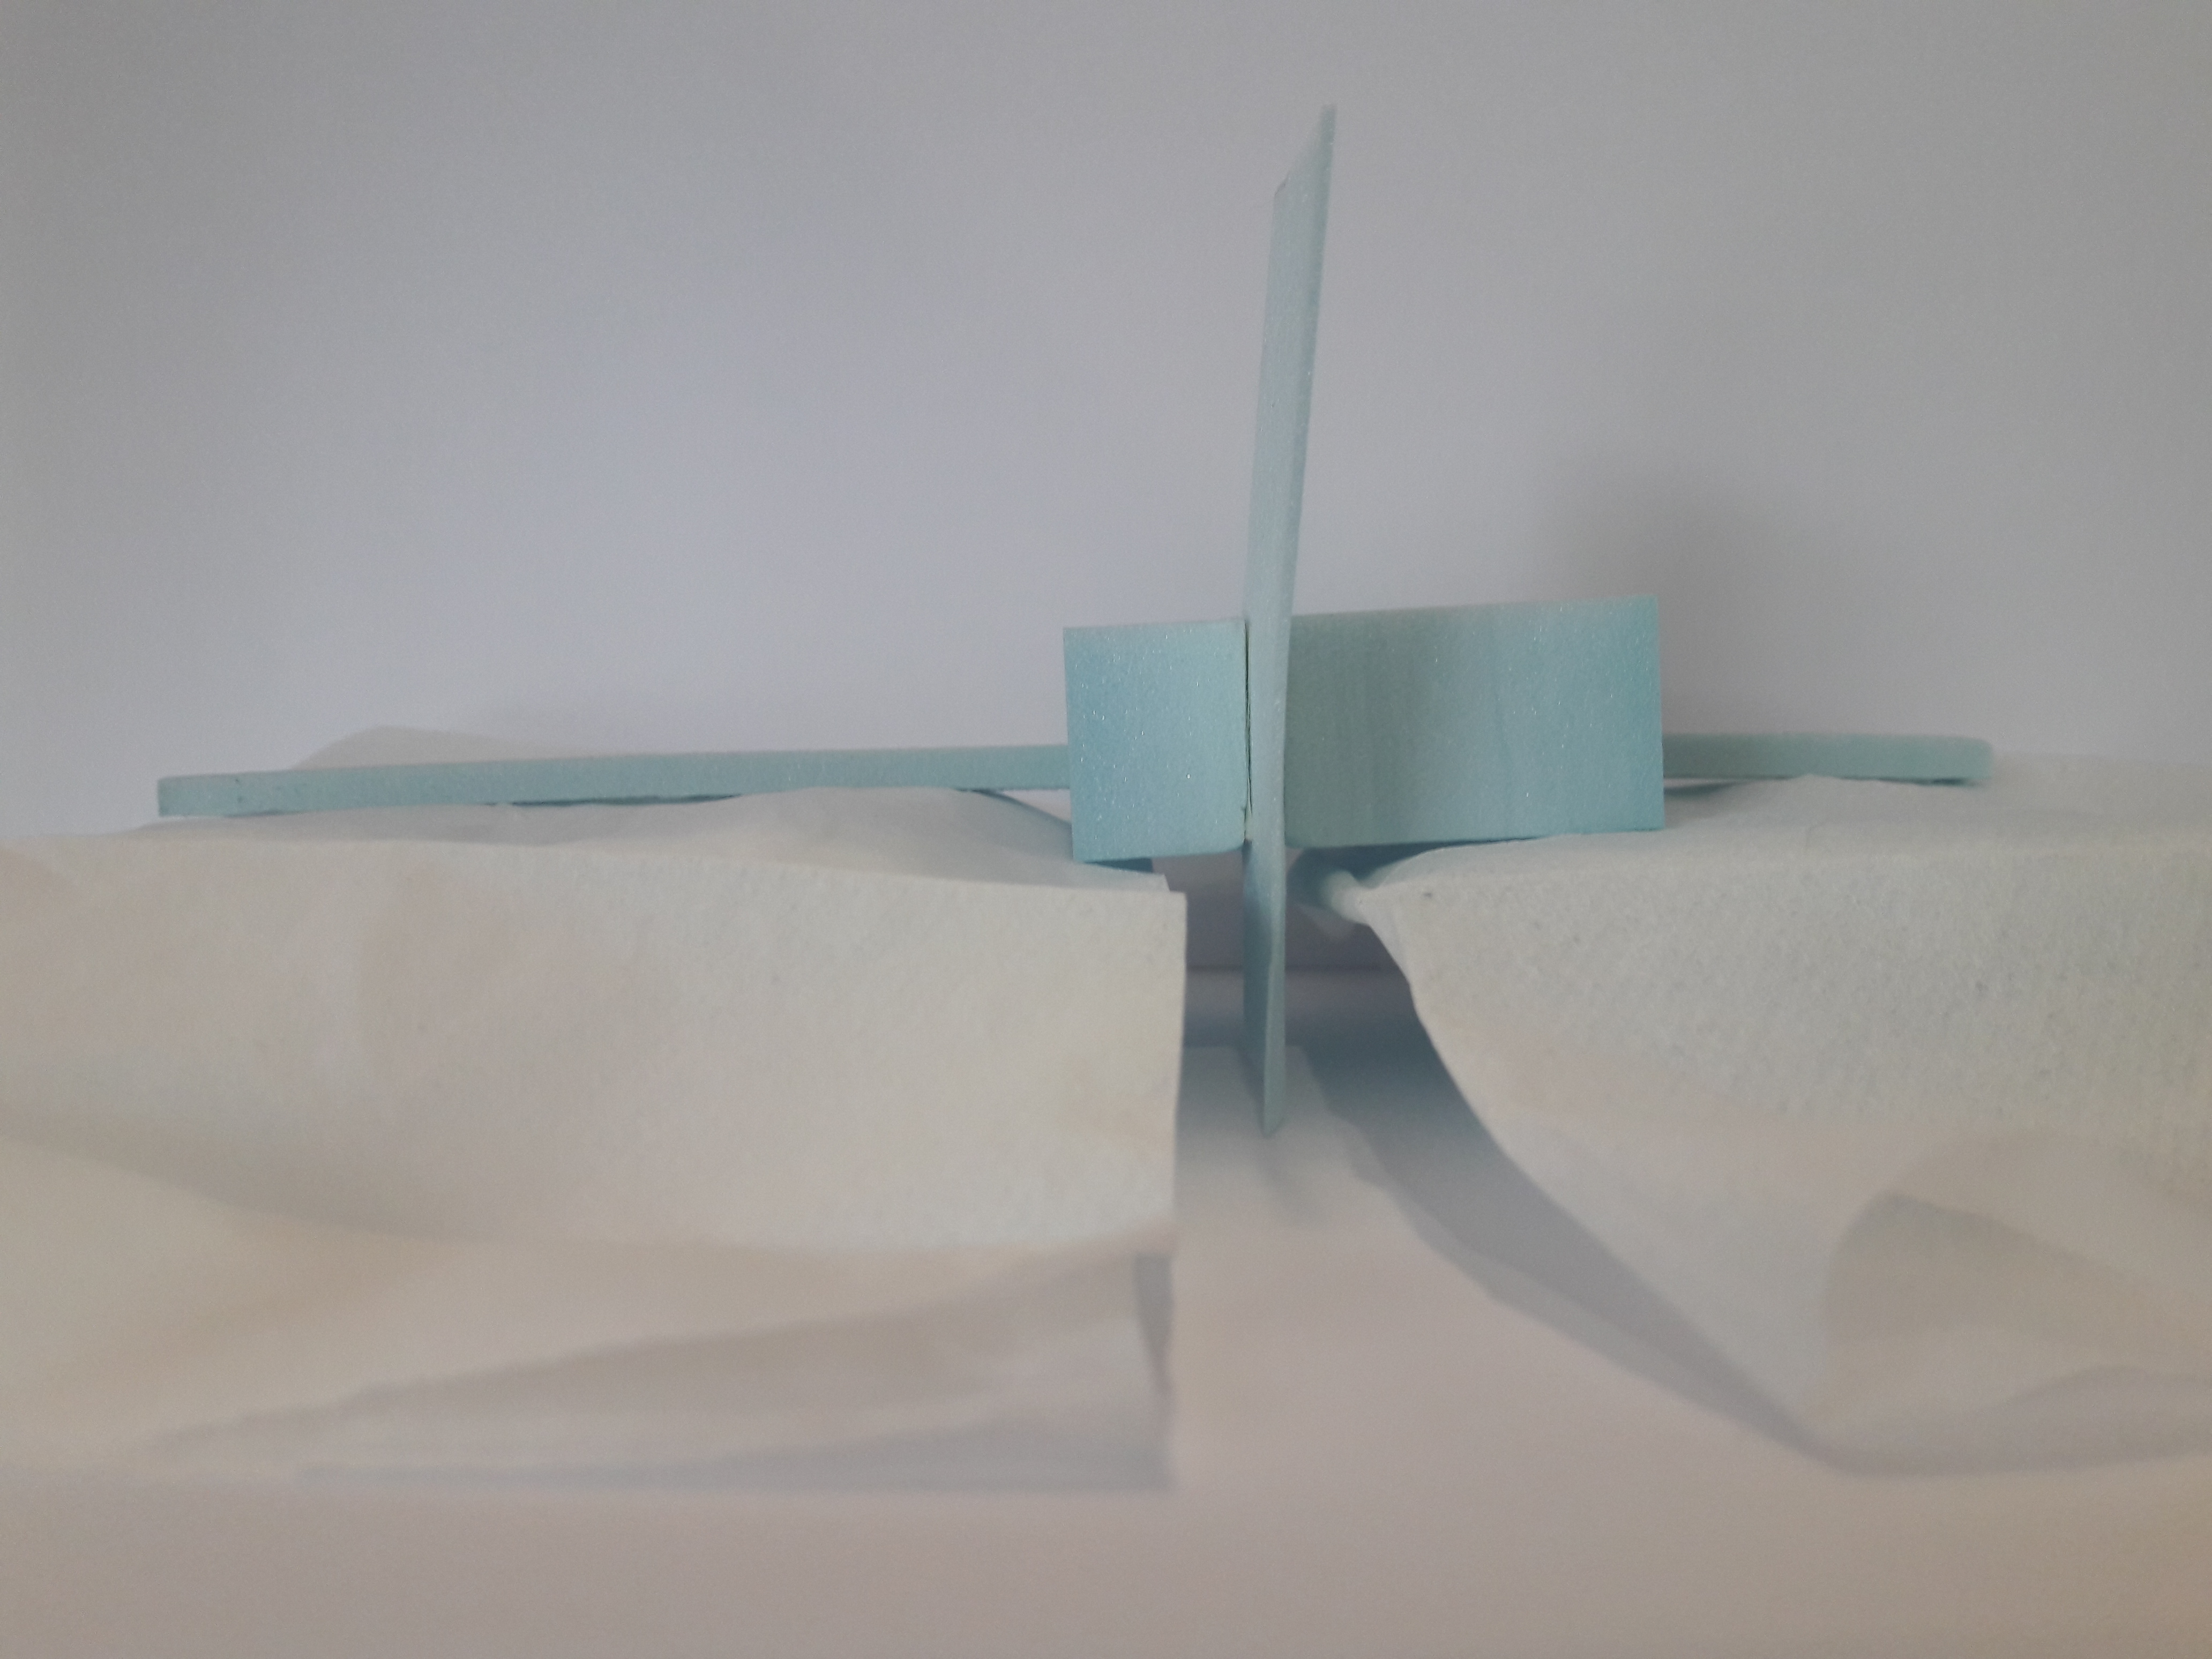
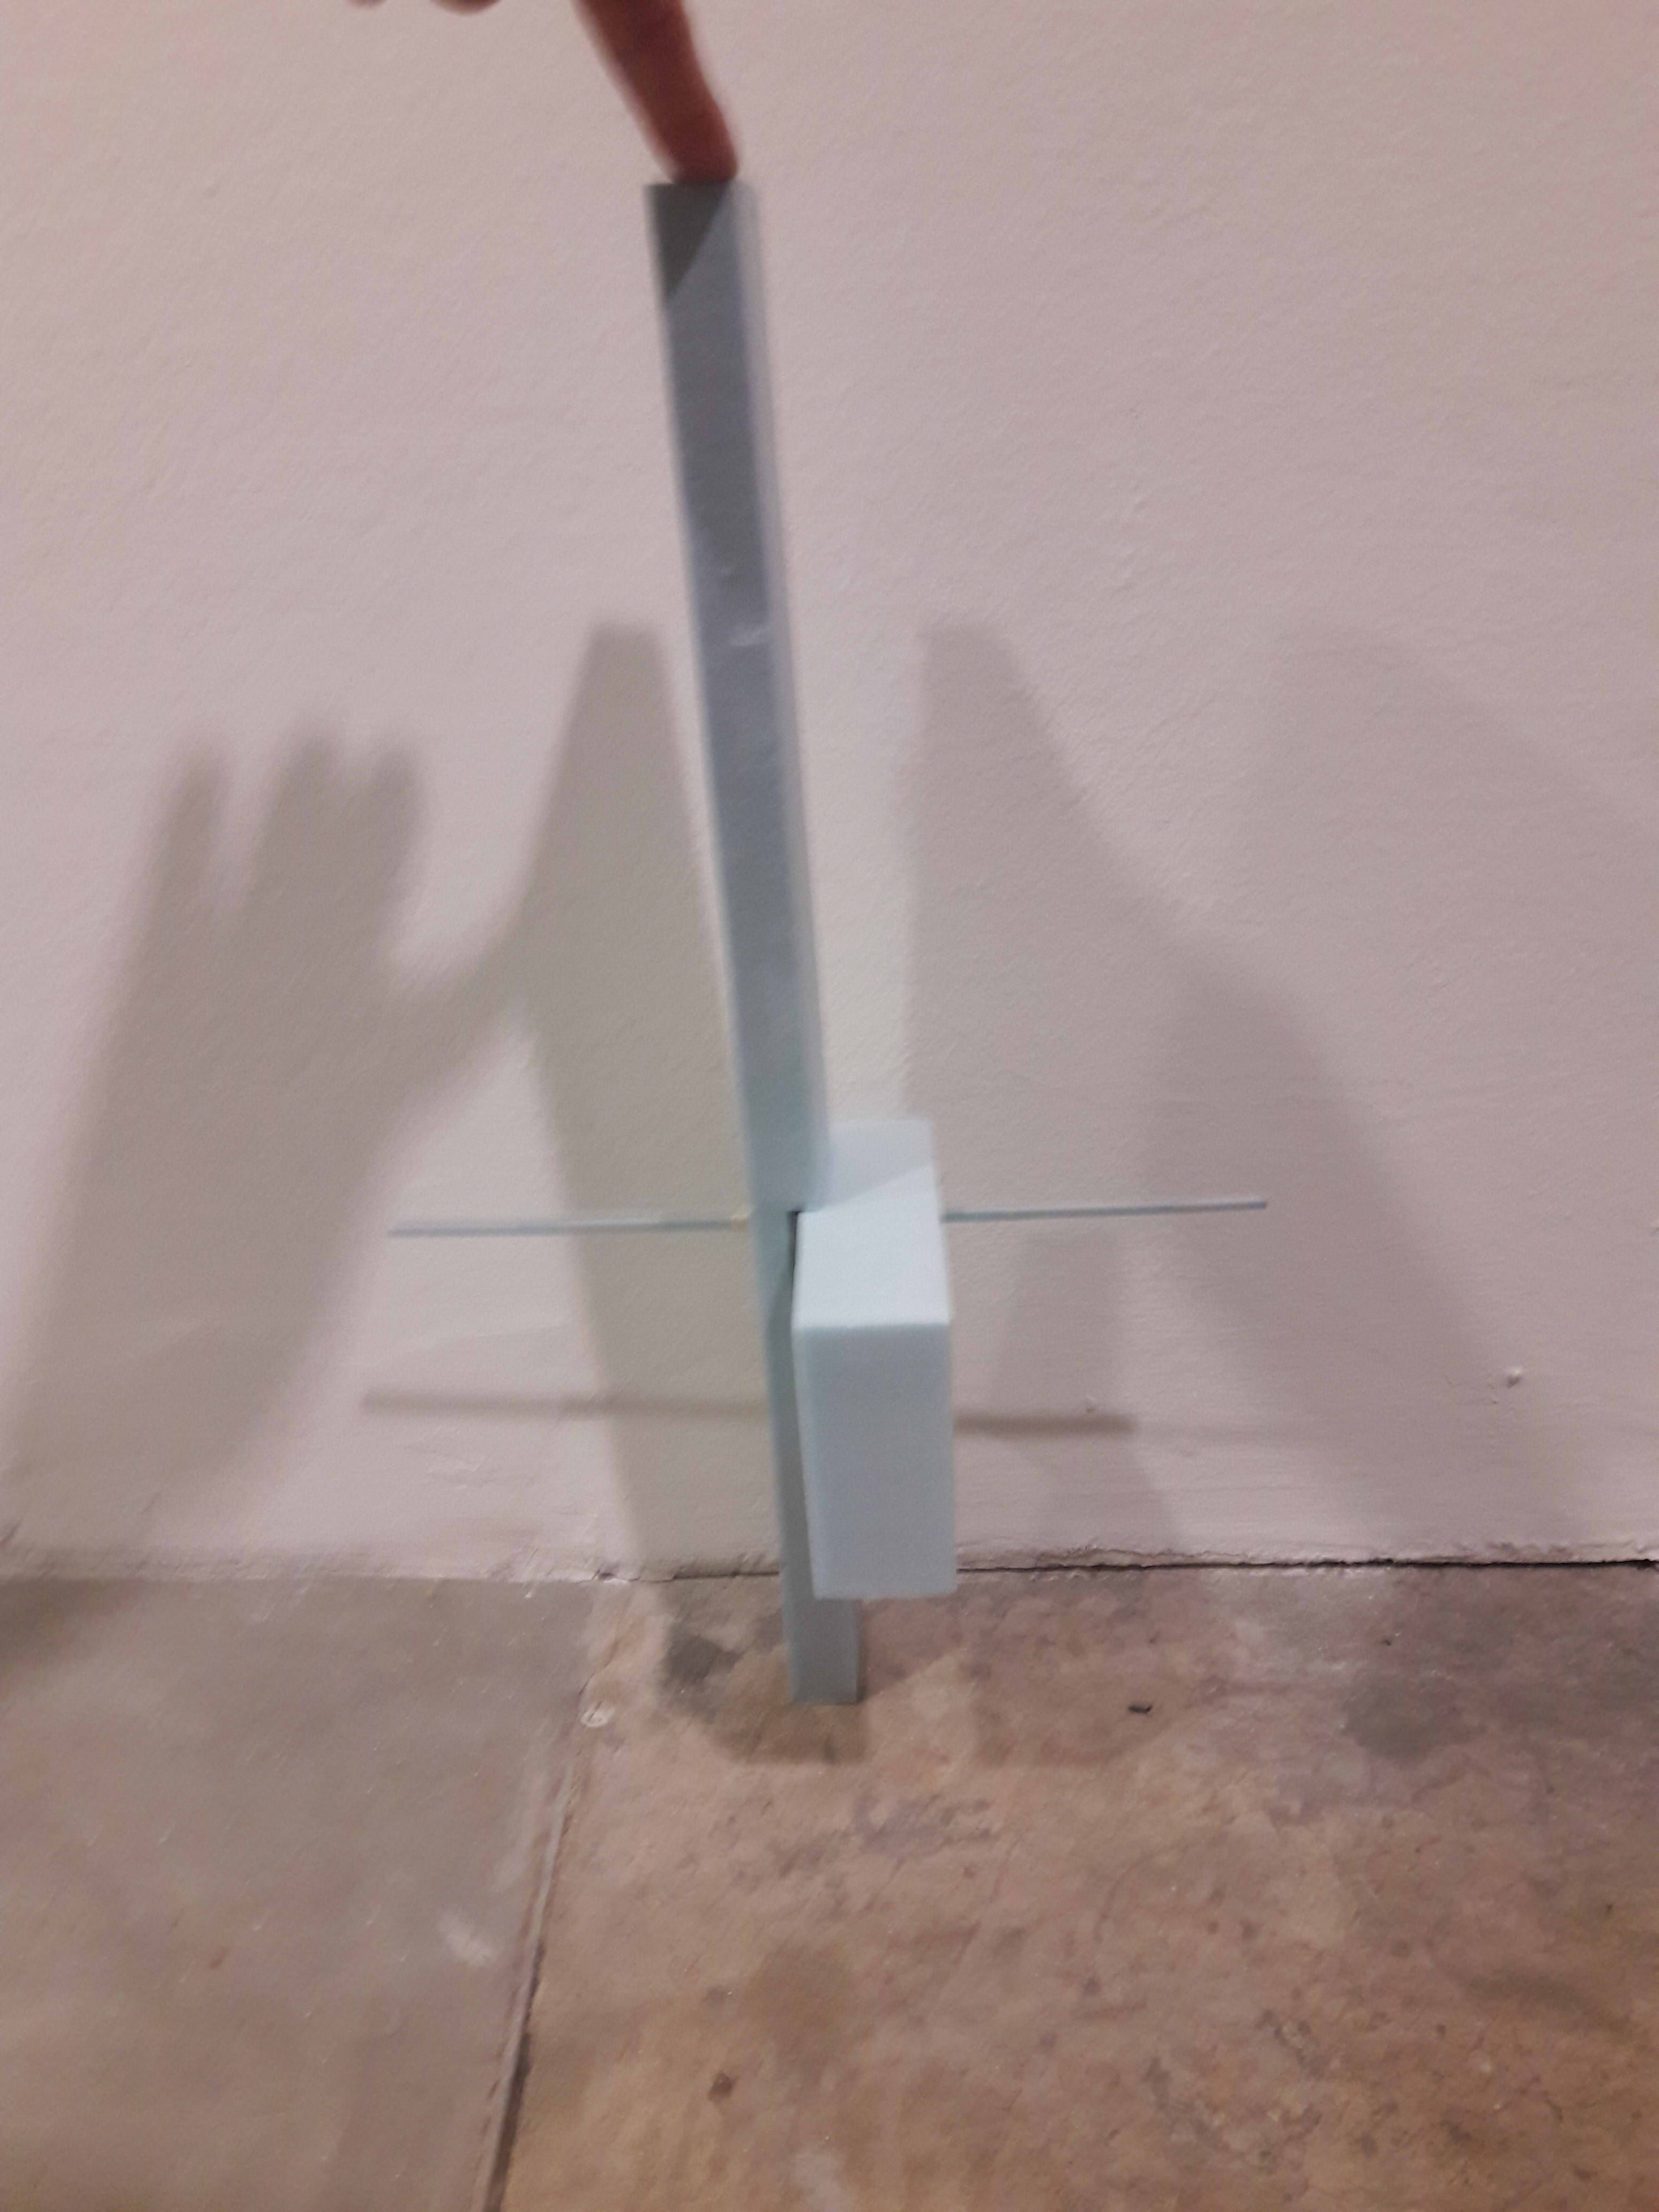
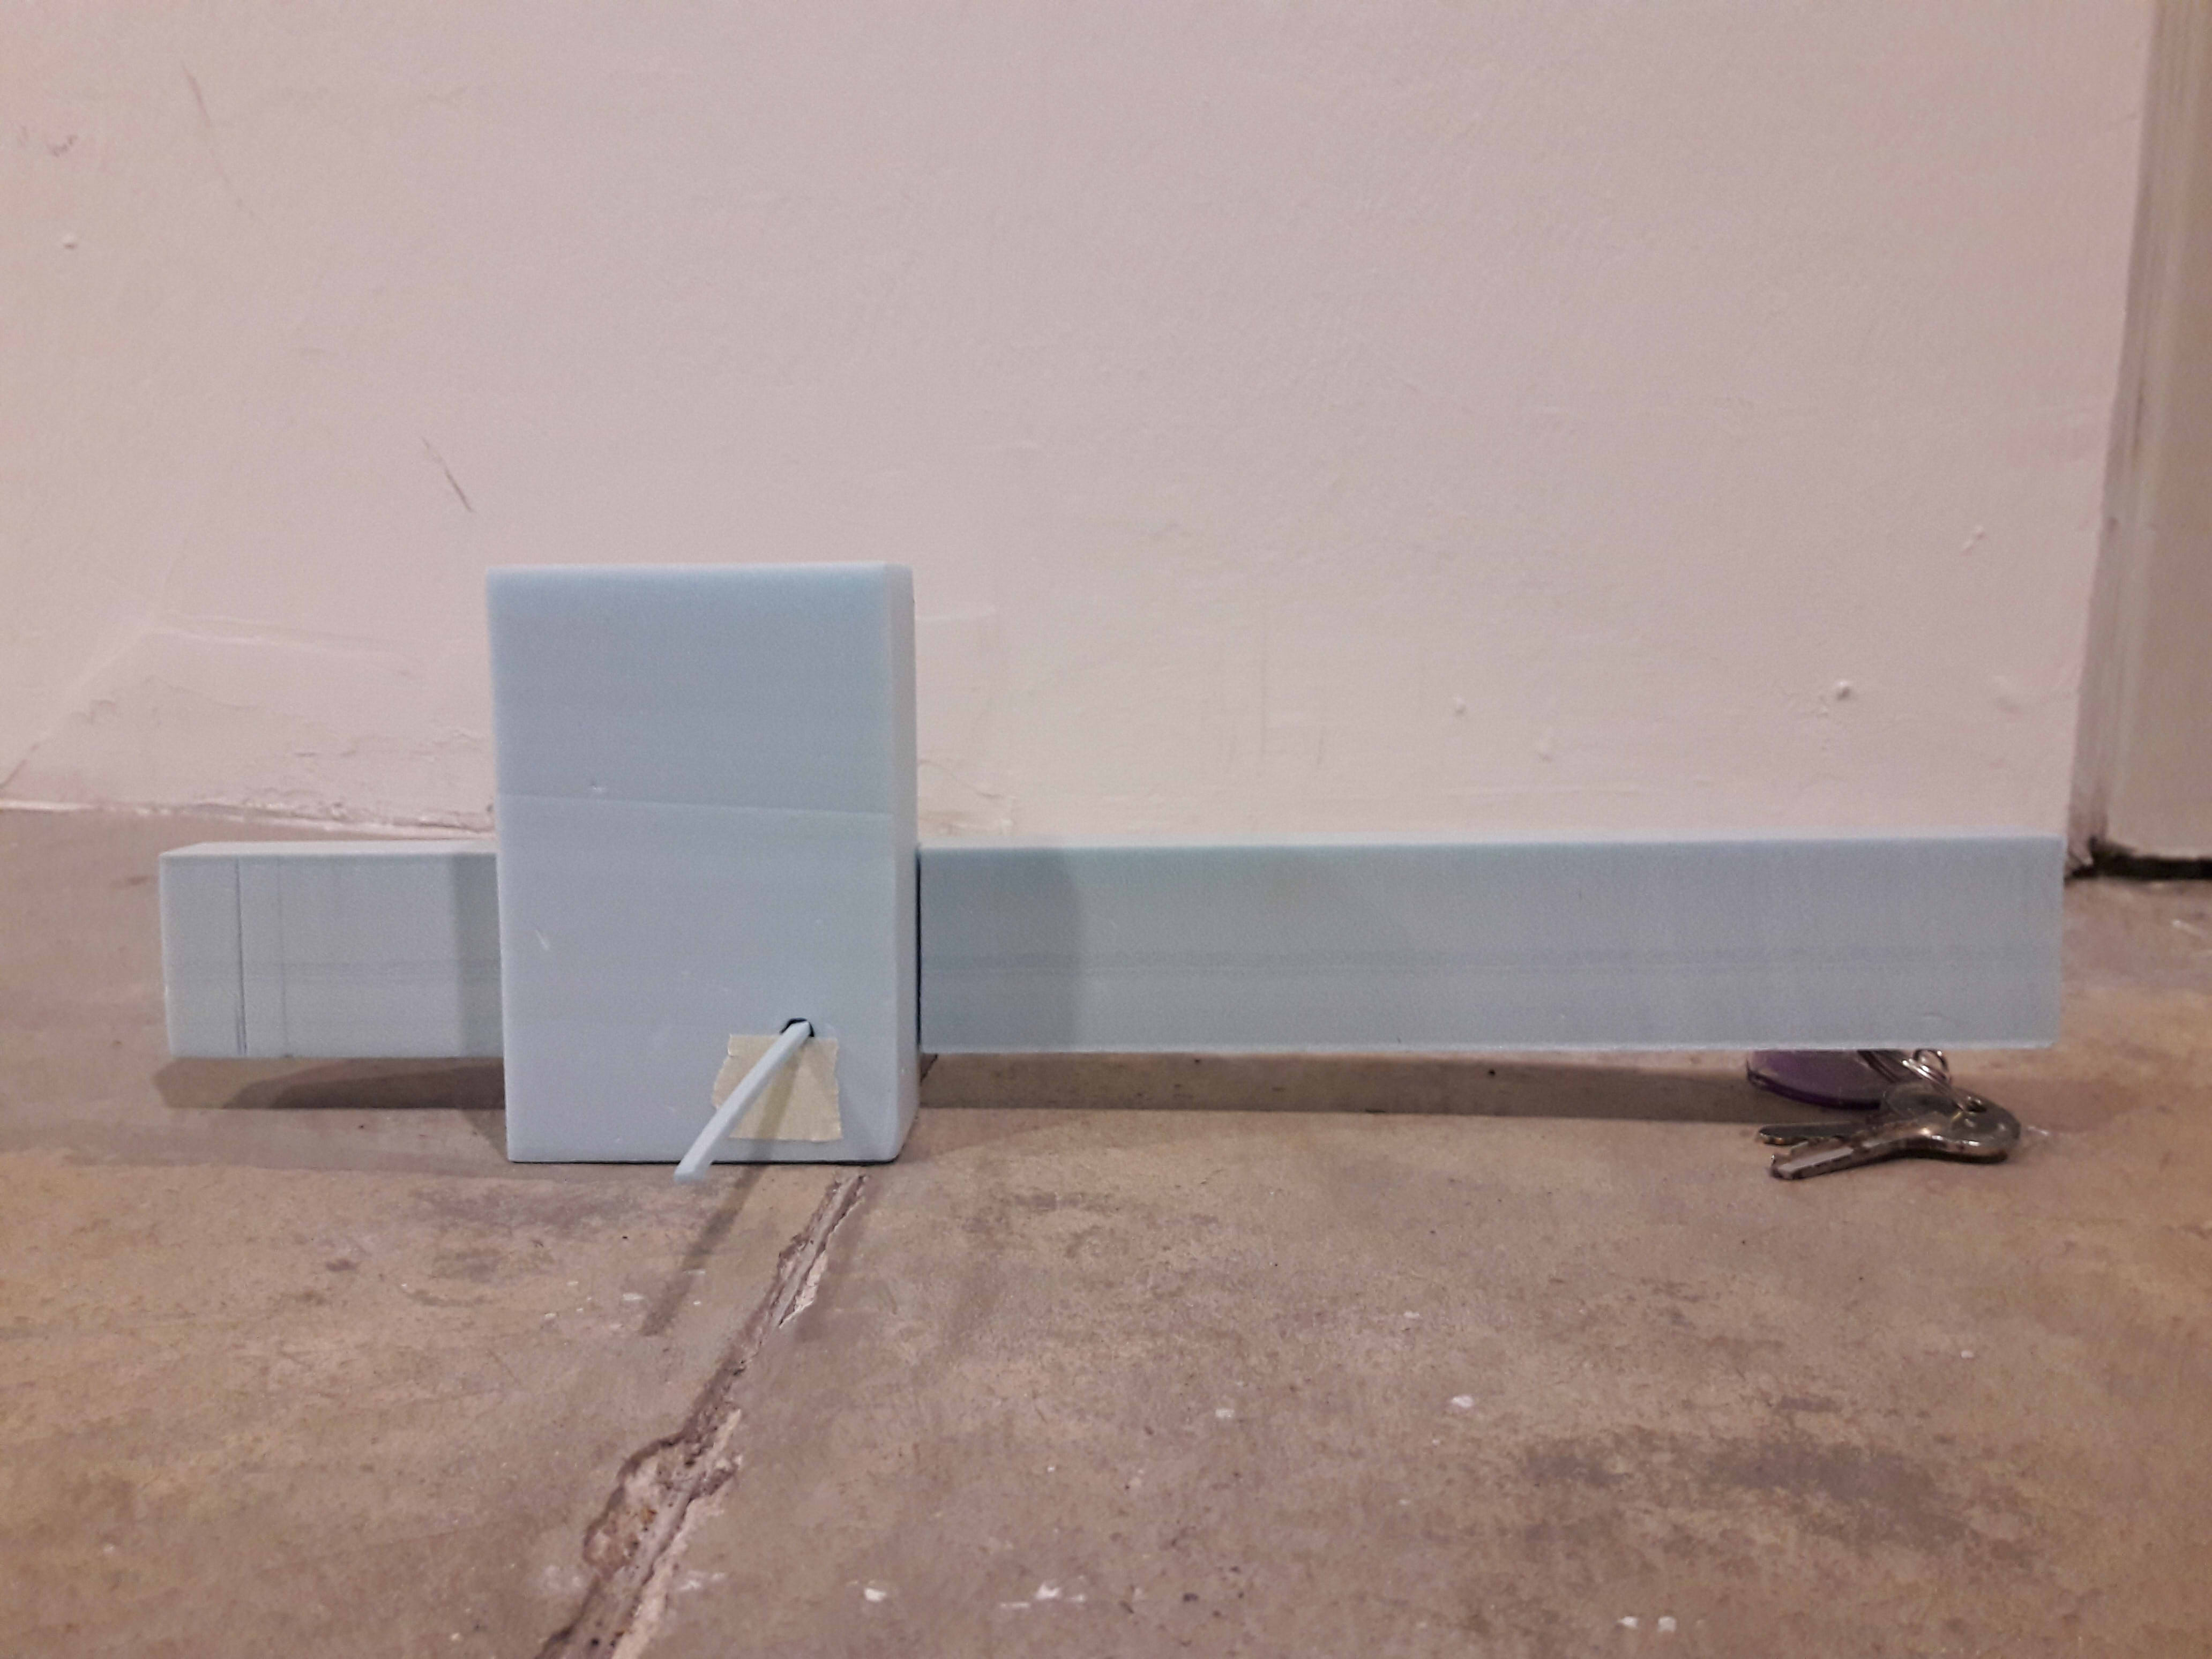
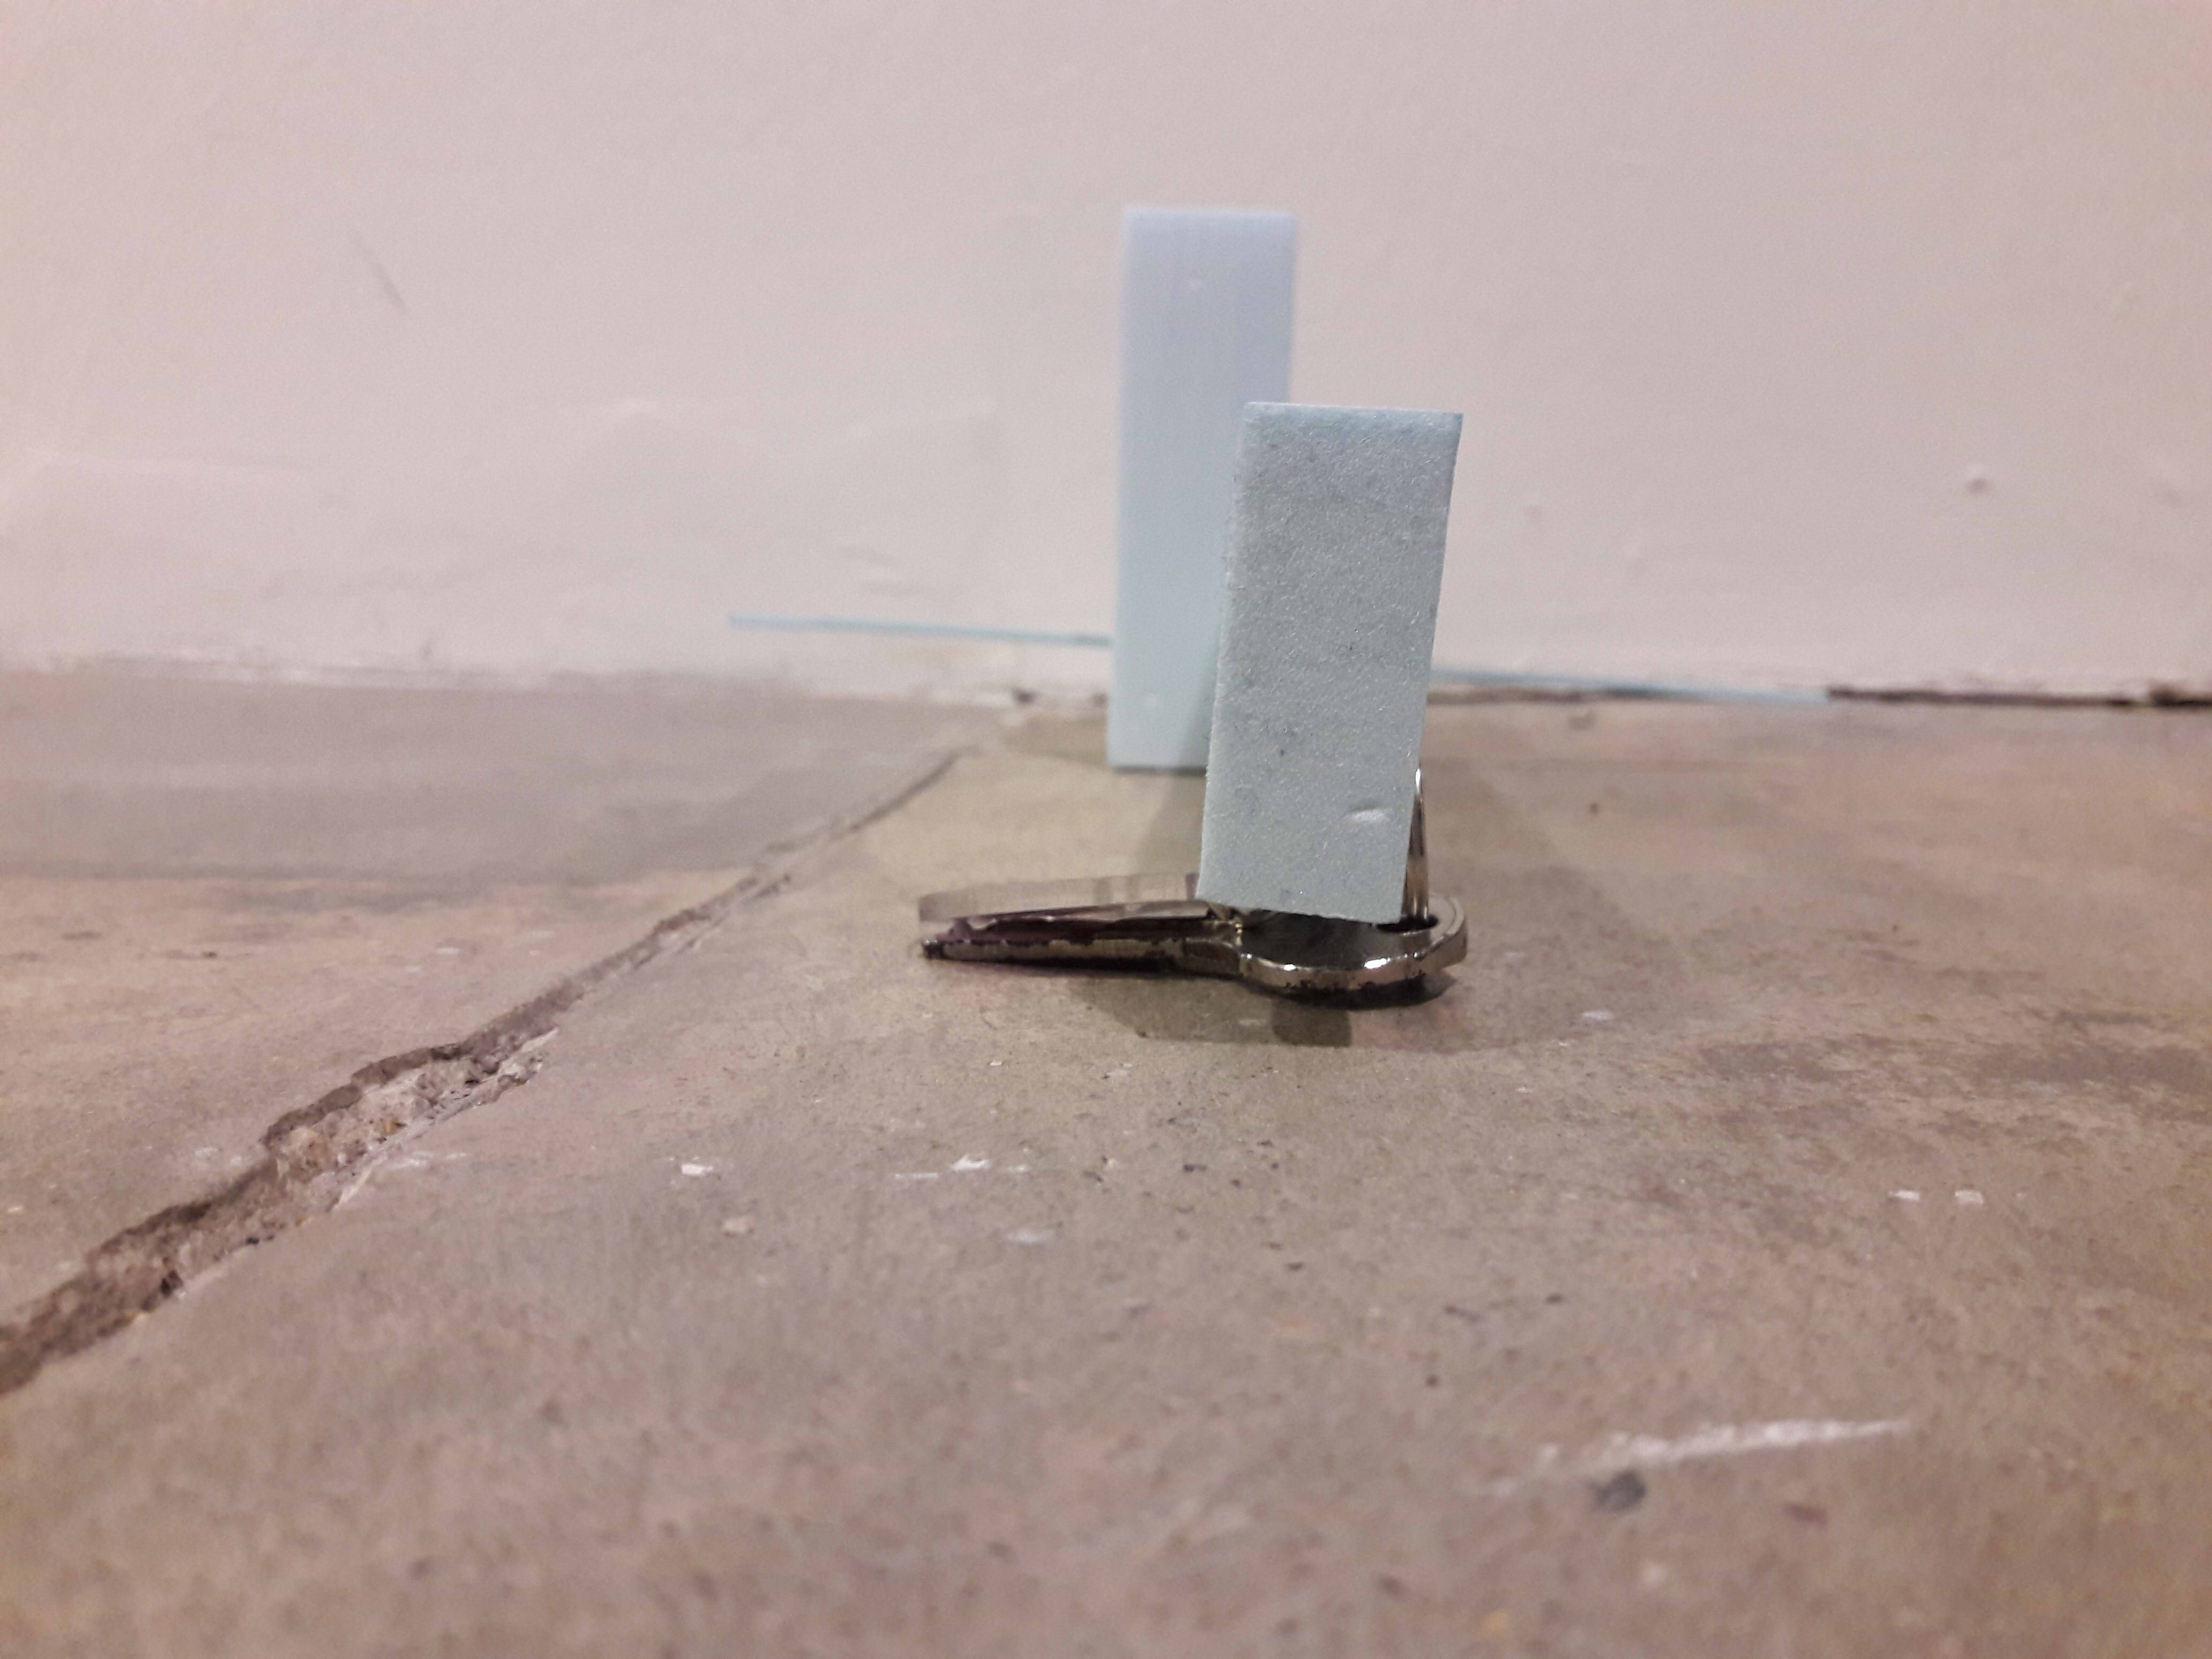
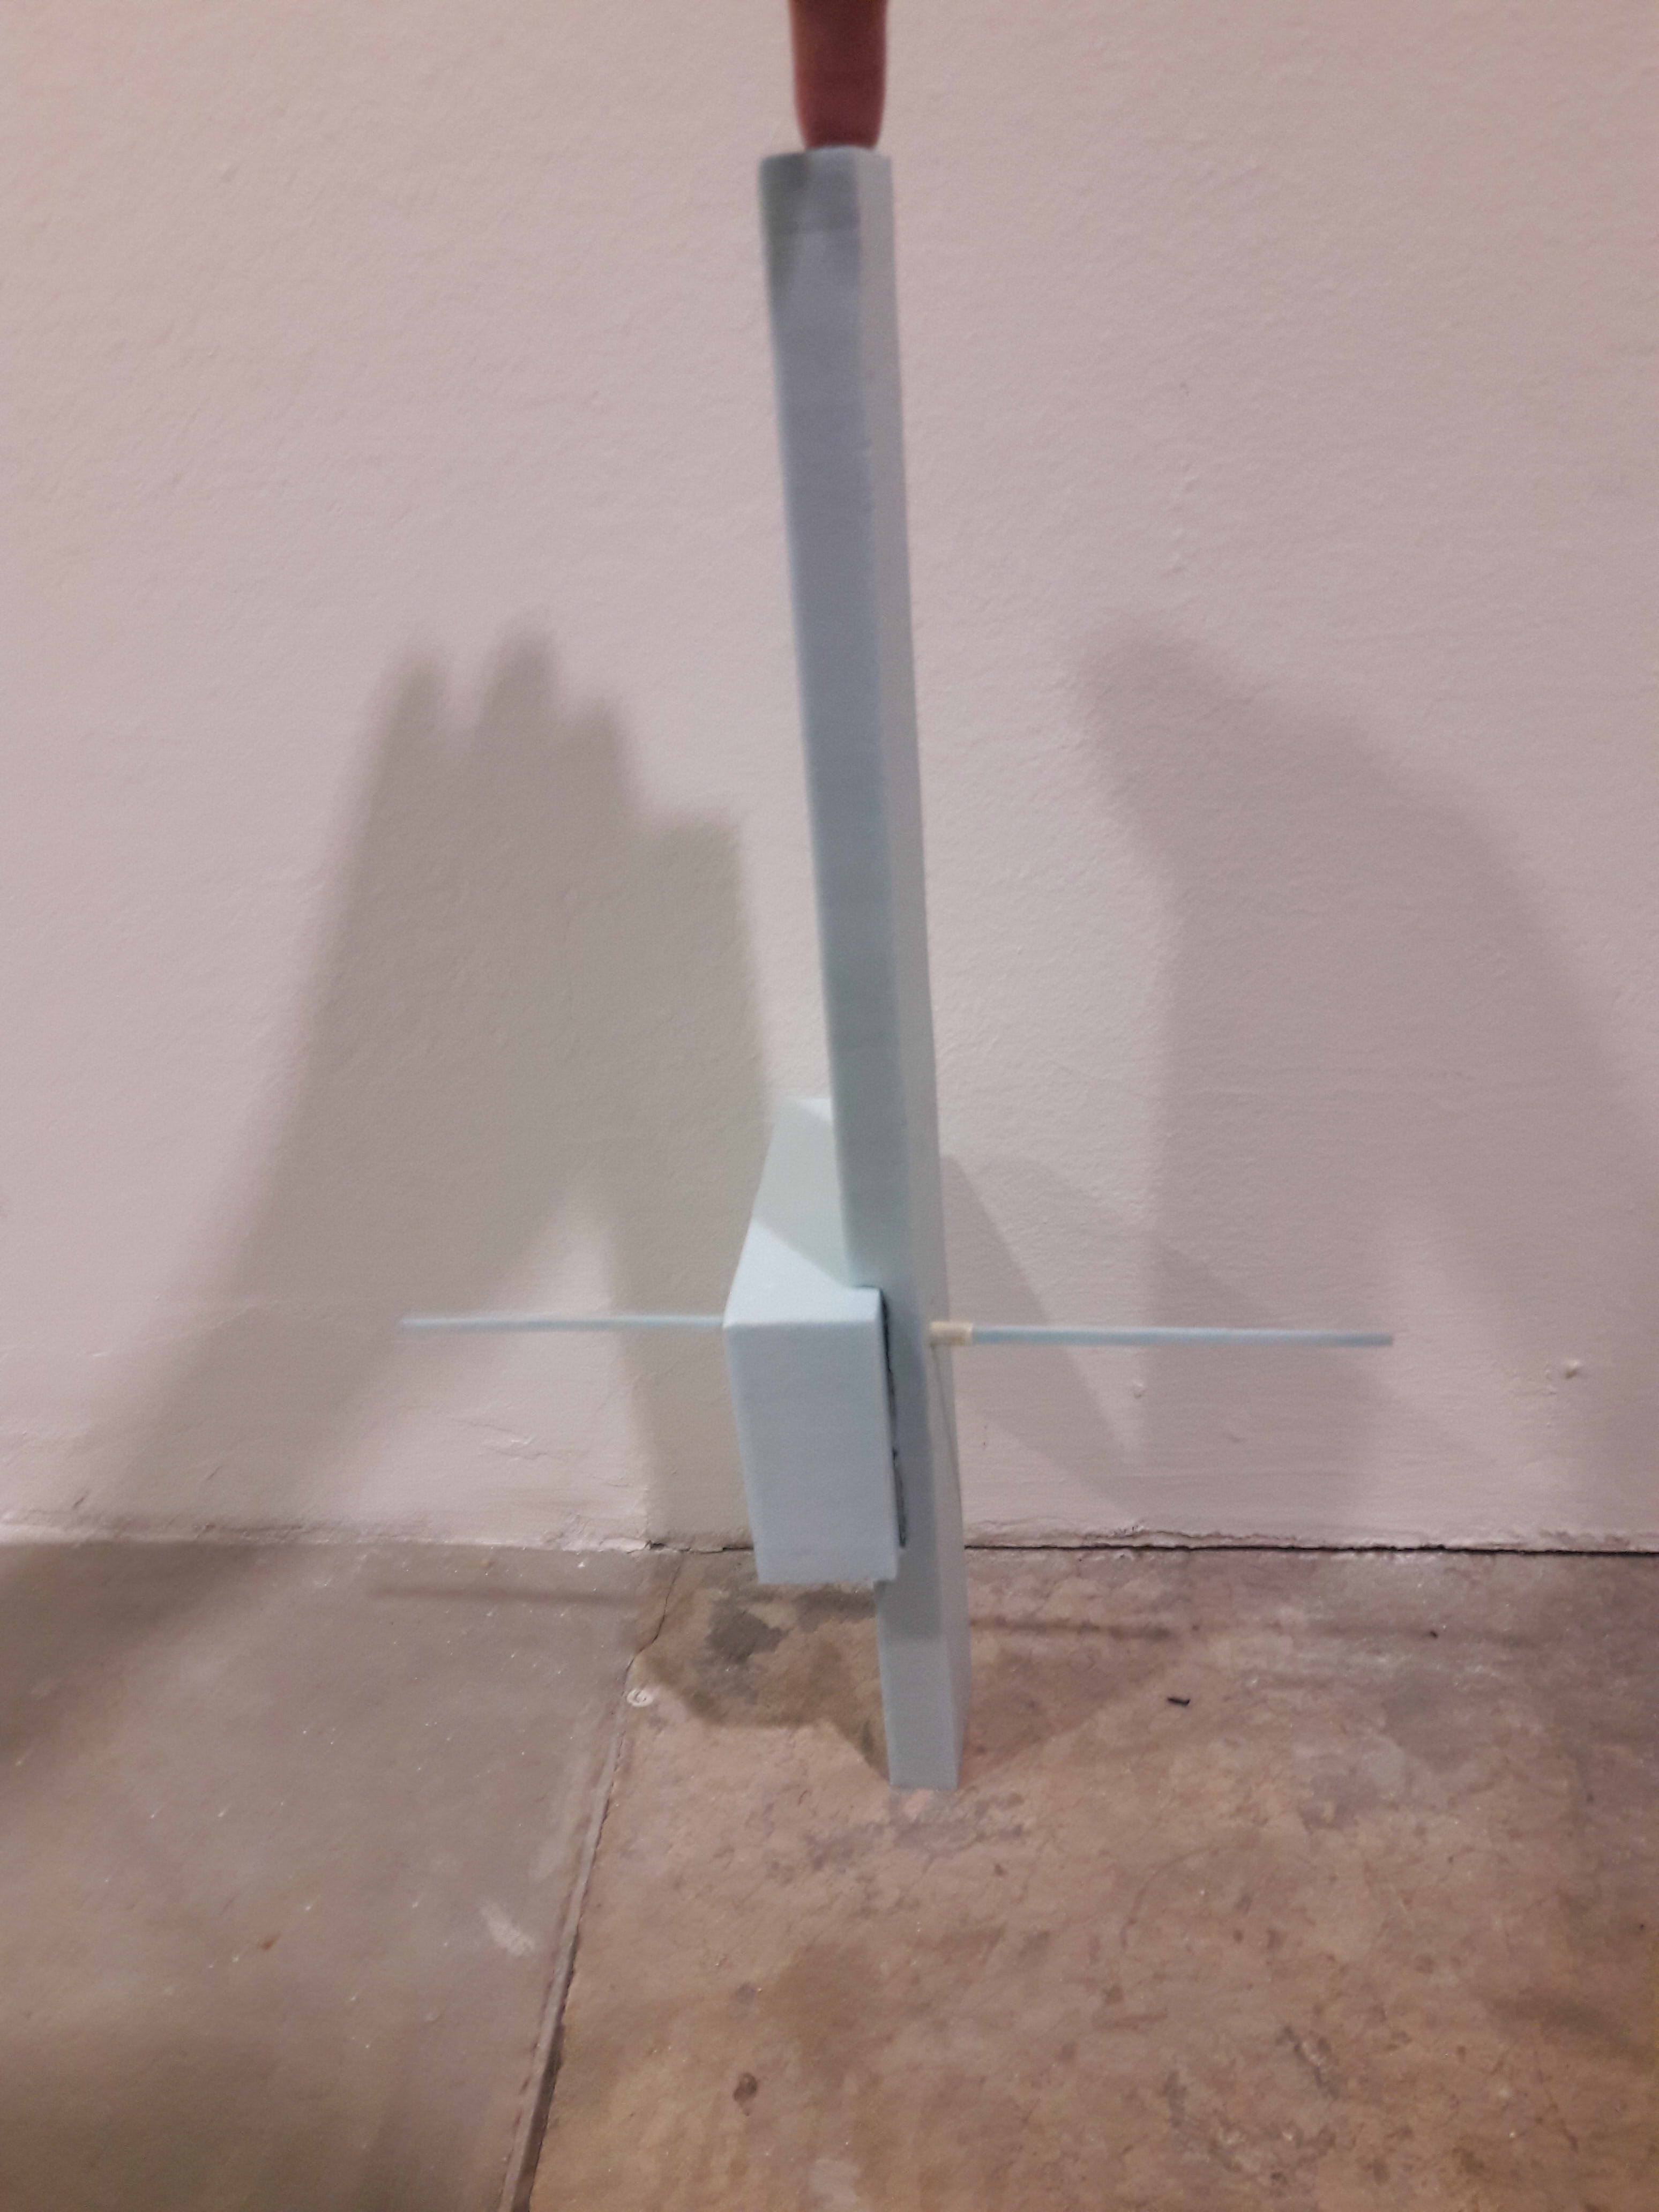
I tried to combine elements of both 1 & 2, 1 in actually considering factors like precise measurements; 2 in choosing seemingly “random” pieces (and also the general design, though this time I tried piercing through BOTH pieces than just one to create an “origin”, like XYZ axes typically have).
Initial Problems (and any refining actions taken)
Since the design is really similar too, I had similar problems to the 2nd one
Measurements: Surprisingly, nothing much. Besides the foam trimming therapy, I did almost nothing.
Hierarchy: I do feel the subordinate is somewhat underwhelming, especially from that one (two) angles where you see practically nothing (0.2×1.05 cm²). However, changing to a different piece might compromise the slenderness I enjoy for the other 4 angles, so…
Why I wouldn’t choose this
Purely just the subordinate problem; if I could resolve that, I would pick this over the second one, where the piercing/wedging cut the dominant enough to avoid excessively large, flat planes.
I made some other random stuff in class, but other than aforementioned under the second model, they were all mostly useless, and just cutting/jointing practice. I did make a sailboat with all planes intersecting at one point, which inspired me to try to make an origin point for the third model though!
I’m still vaguely confused as to if we’re supposed to have a critique… Today, or if this is the end of the project, or if we still have time to rework our things, but if I could, I might opt to use some kind of textured, wild surface, one that really emphasises the idea of unflatness. Like… Rock. Or something.
I realised that my self-rejected ideas takes up a lot of space in the final Project 1 post, so I decided to take it out and put it separately! Here’s a link back to the actual post.
TASK 1
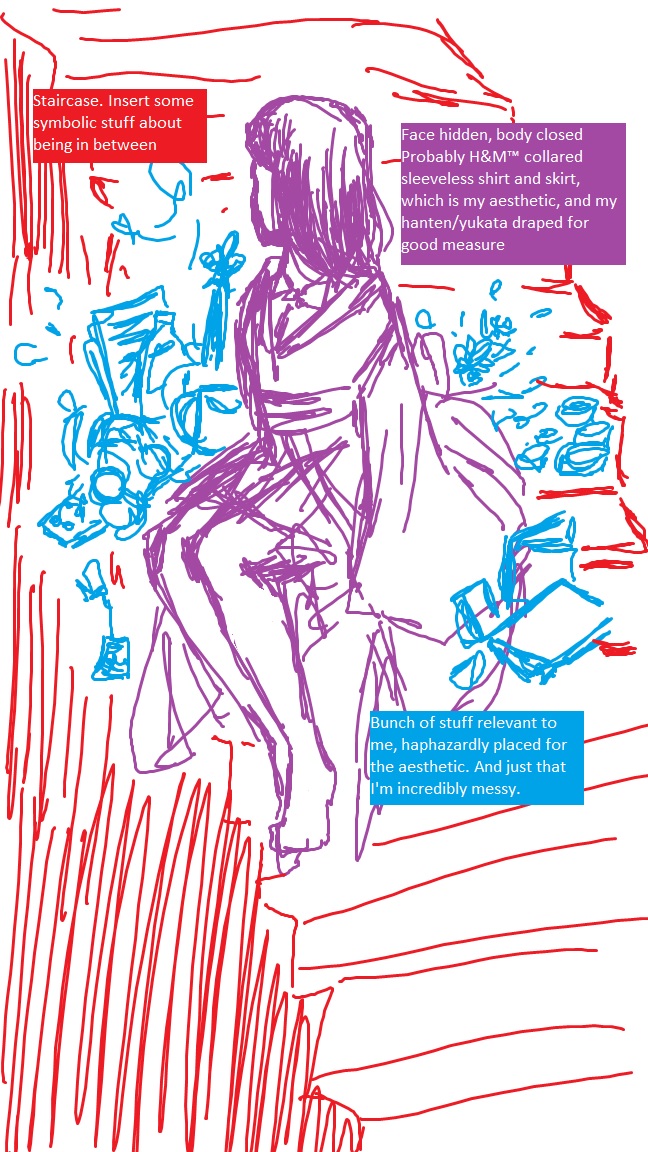
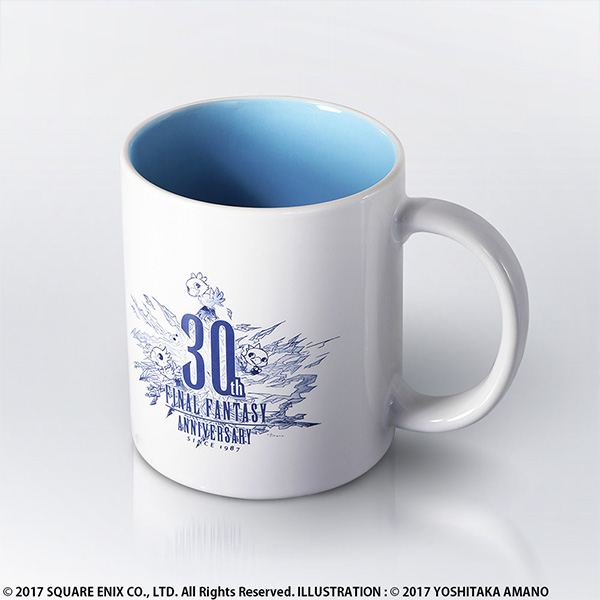
Similar in the idea of fragmentation, but with much more semiotics. There would be a lot of items laid around me, such as my Final Fantasy 30th Anniversary cup, headphones, mangabooks, Watership Down, and I’d be dressed in certain clothes to imply femininity, cultural alignment, etc. A very prominent reason for me ditching this idea was just the sheer level of preparation, where it felt wrong to be purposefully setting up a scene to paint myself as more than what I am.
Incidentally, I have a new computer and I still can’t figure out how to use anything beyond Paint, so this is about the best I can do right now. Forgive me.
The concept was to emphasise that multifaceted sensation, where the composition would all be the same, but differing locations and clothes would suggest different sides to me. I rejected this one for the sense of wholeness it would have, which would imply I am only those 3 identities, than something more than just that.
Look at this space above! I didn’t know you can’t scale beyond a set proportion in Paint!
TASK 2
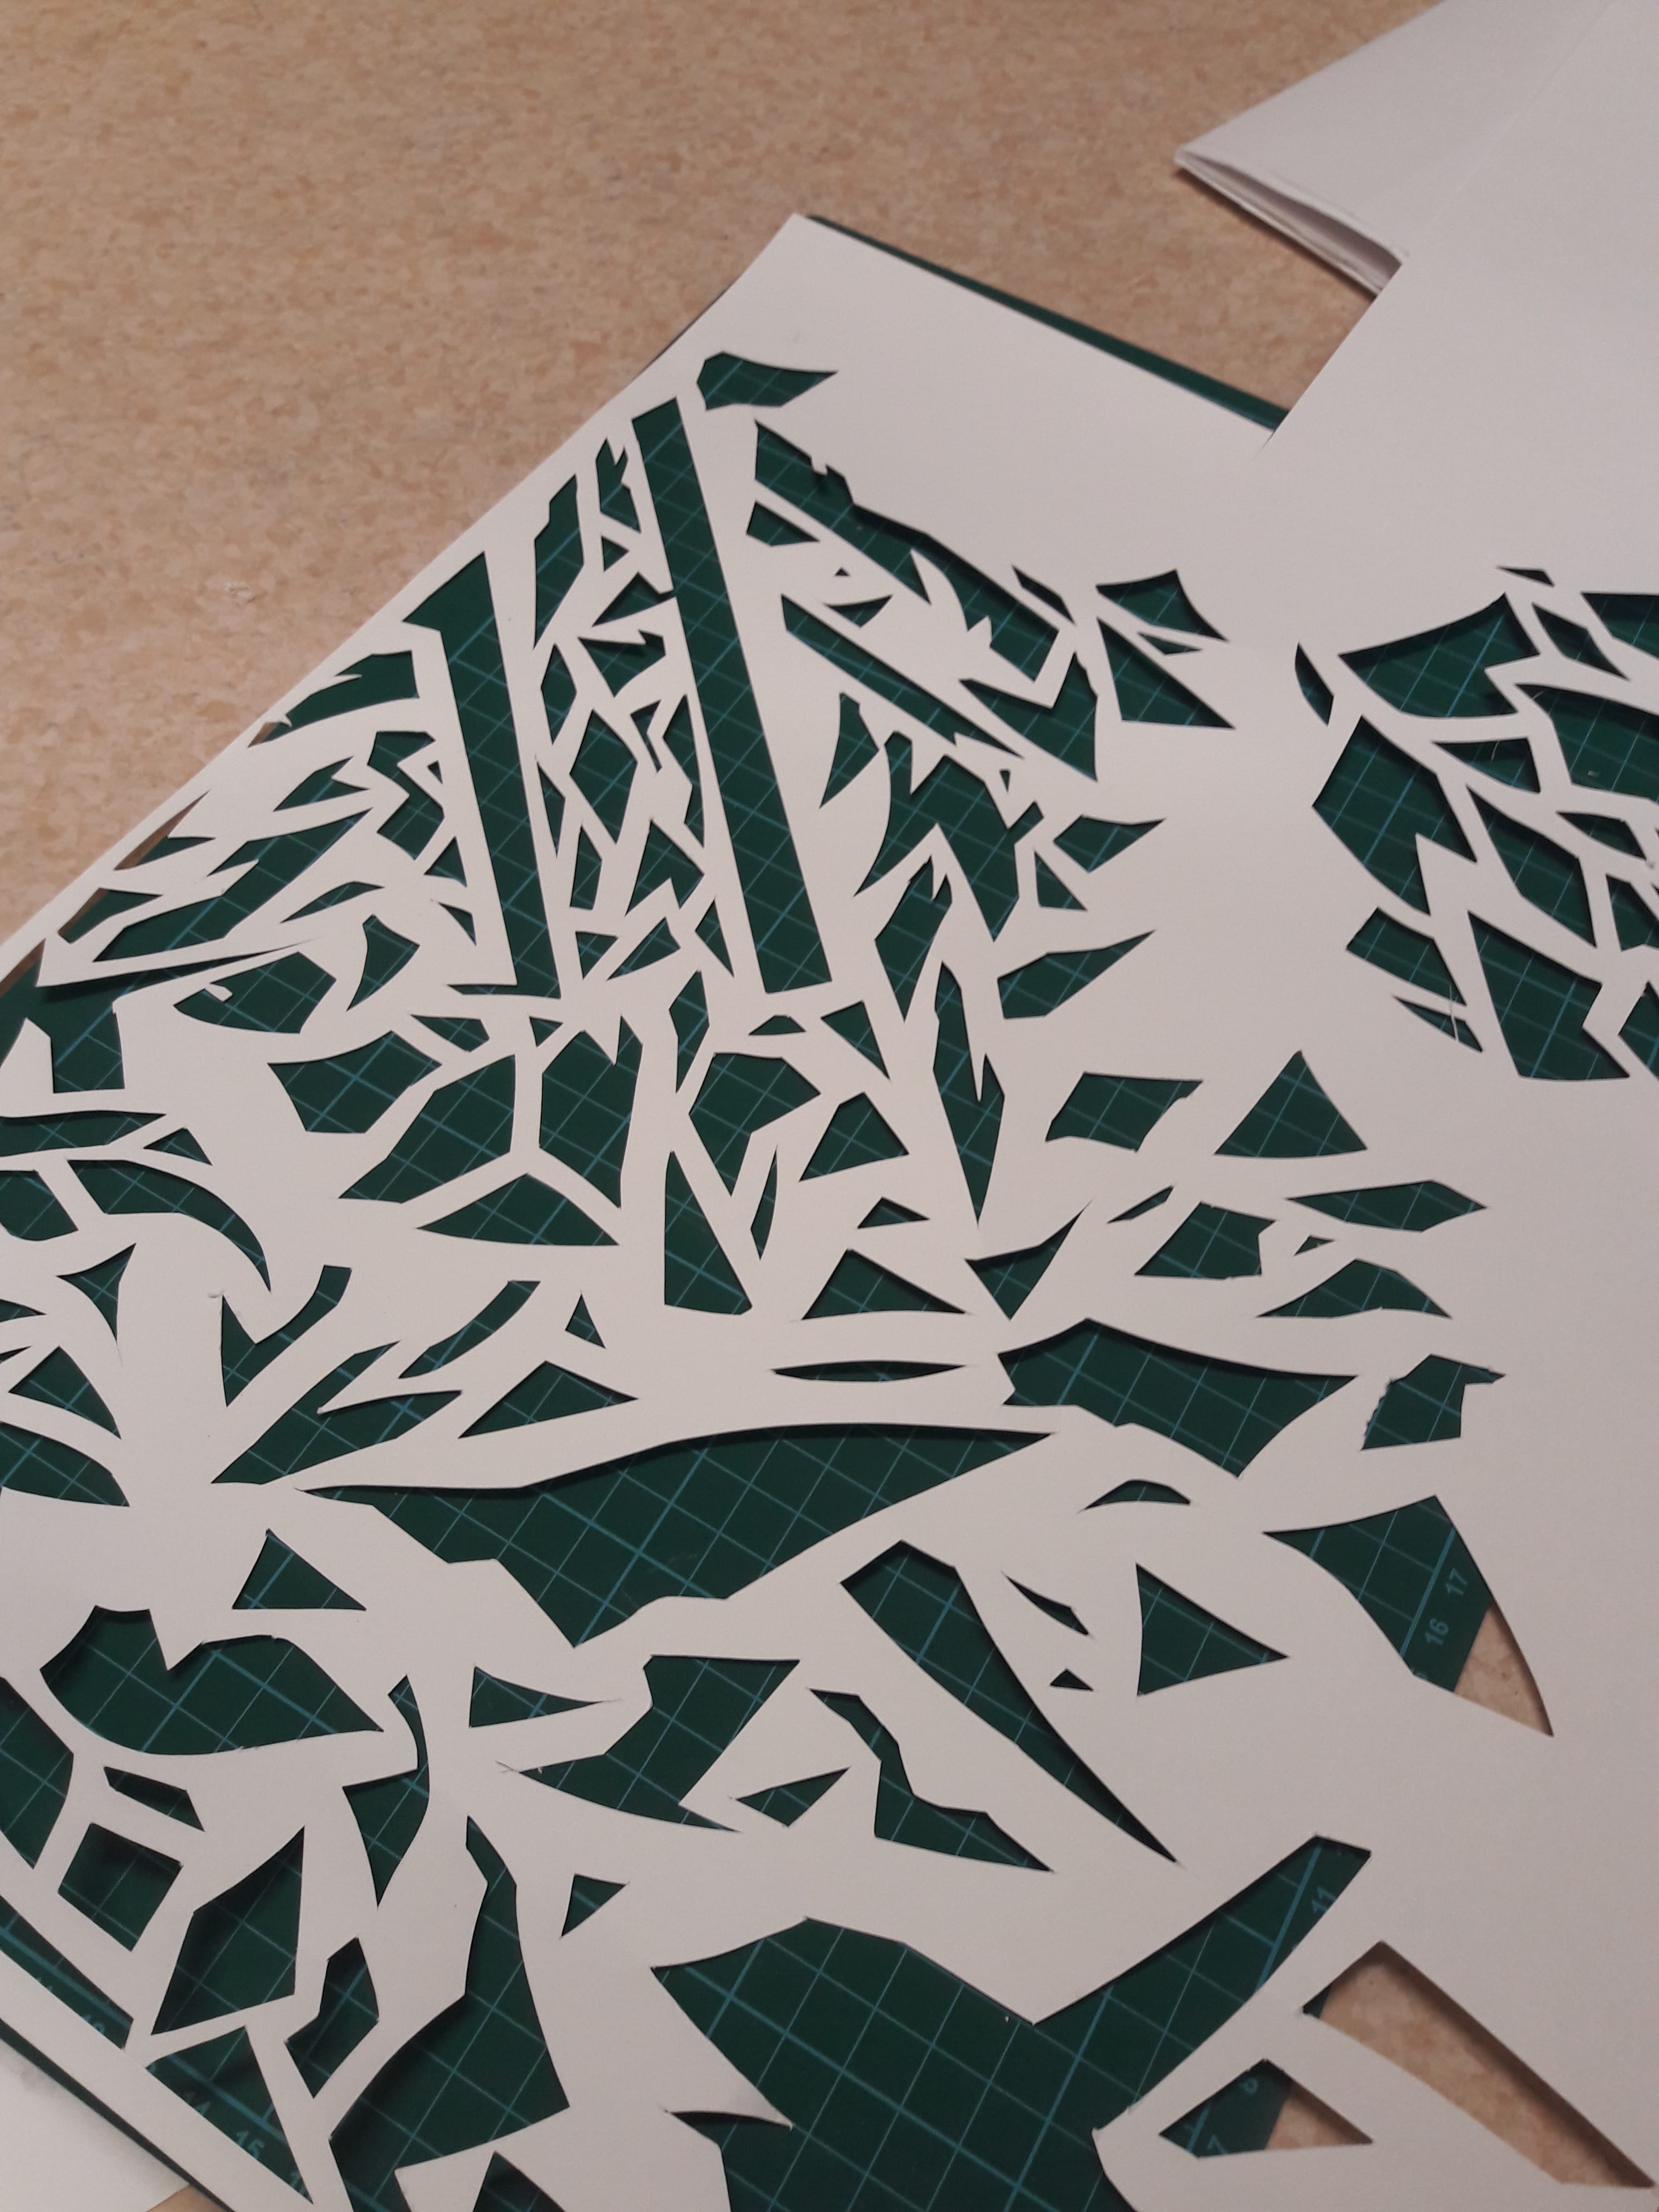
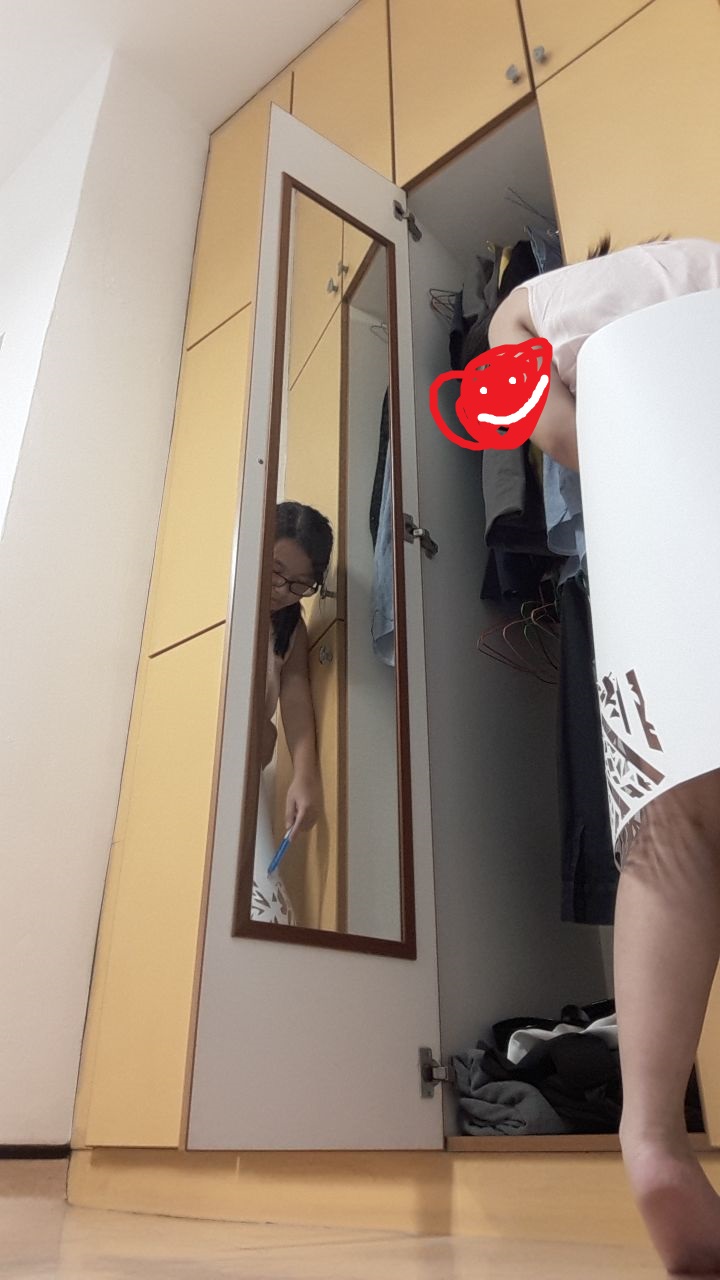
Before I really got into the attention level thing, I focused on different uses of paper. Same as aforementioned, but with some additional ideas like a papercut skirt/cloak/whatever. This was rejected upon the realisation that there wasn’t enough display of emotion, as opposed to just presentation.
My physics isn’t very good, so it took me a lot of trial and error to capture the reflection successfully. In hindsight, though, there really wasn’t any meaning to it.
(There’s quite a few other unused prototype shots, remnants of a time before I suddenly and violently thought up the idea of differing levels of attention.)
I initially intended to focus more on the omnipresence idea by shooting in varied locations. There really wasn’t any good reason as to why this was rejected other than my self-consciousness (I tried. I really did, but people taking photos of you being in stupid positions while you’re taking photos on a self-timer, it does things to you.)
People are naturally unhelpful.
TASK 3
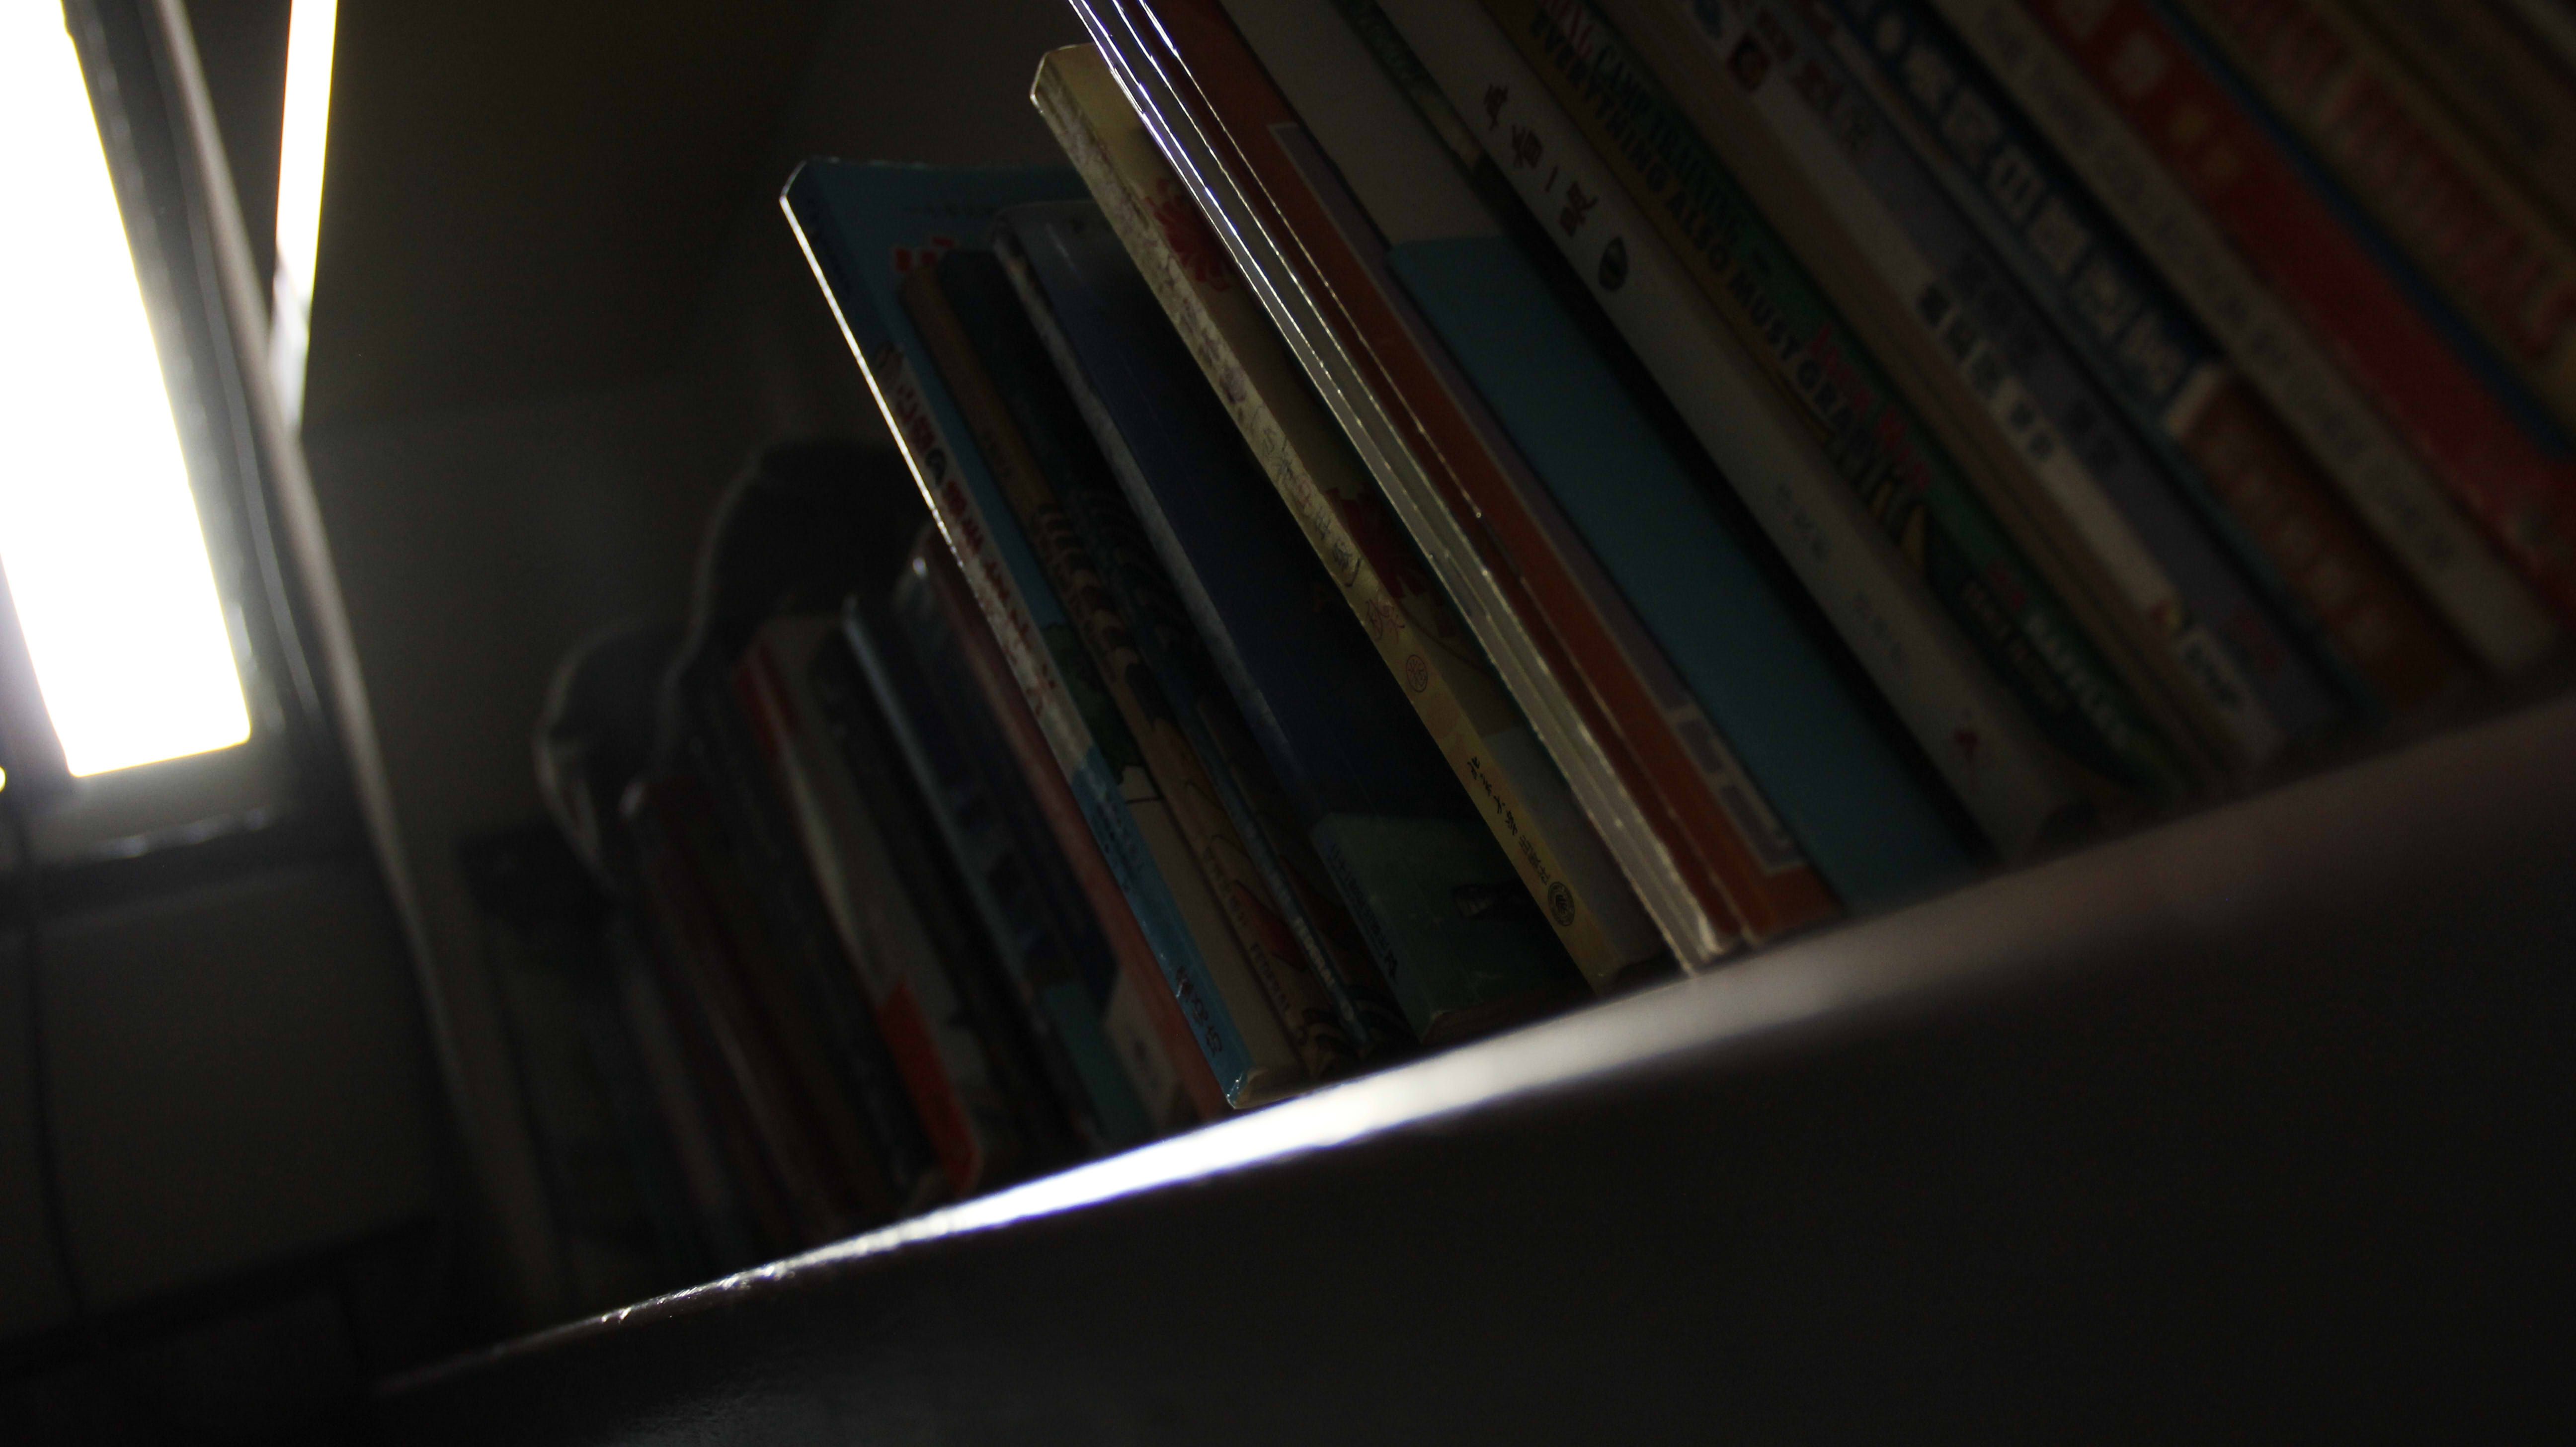
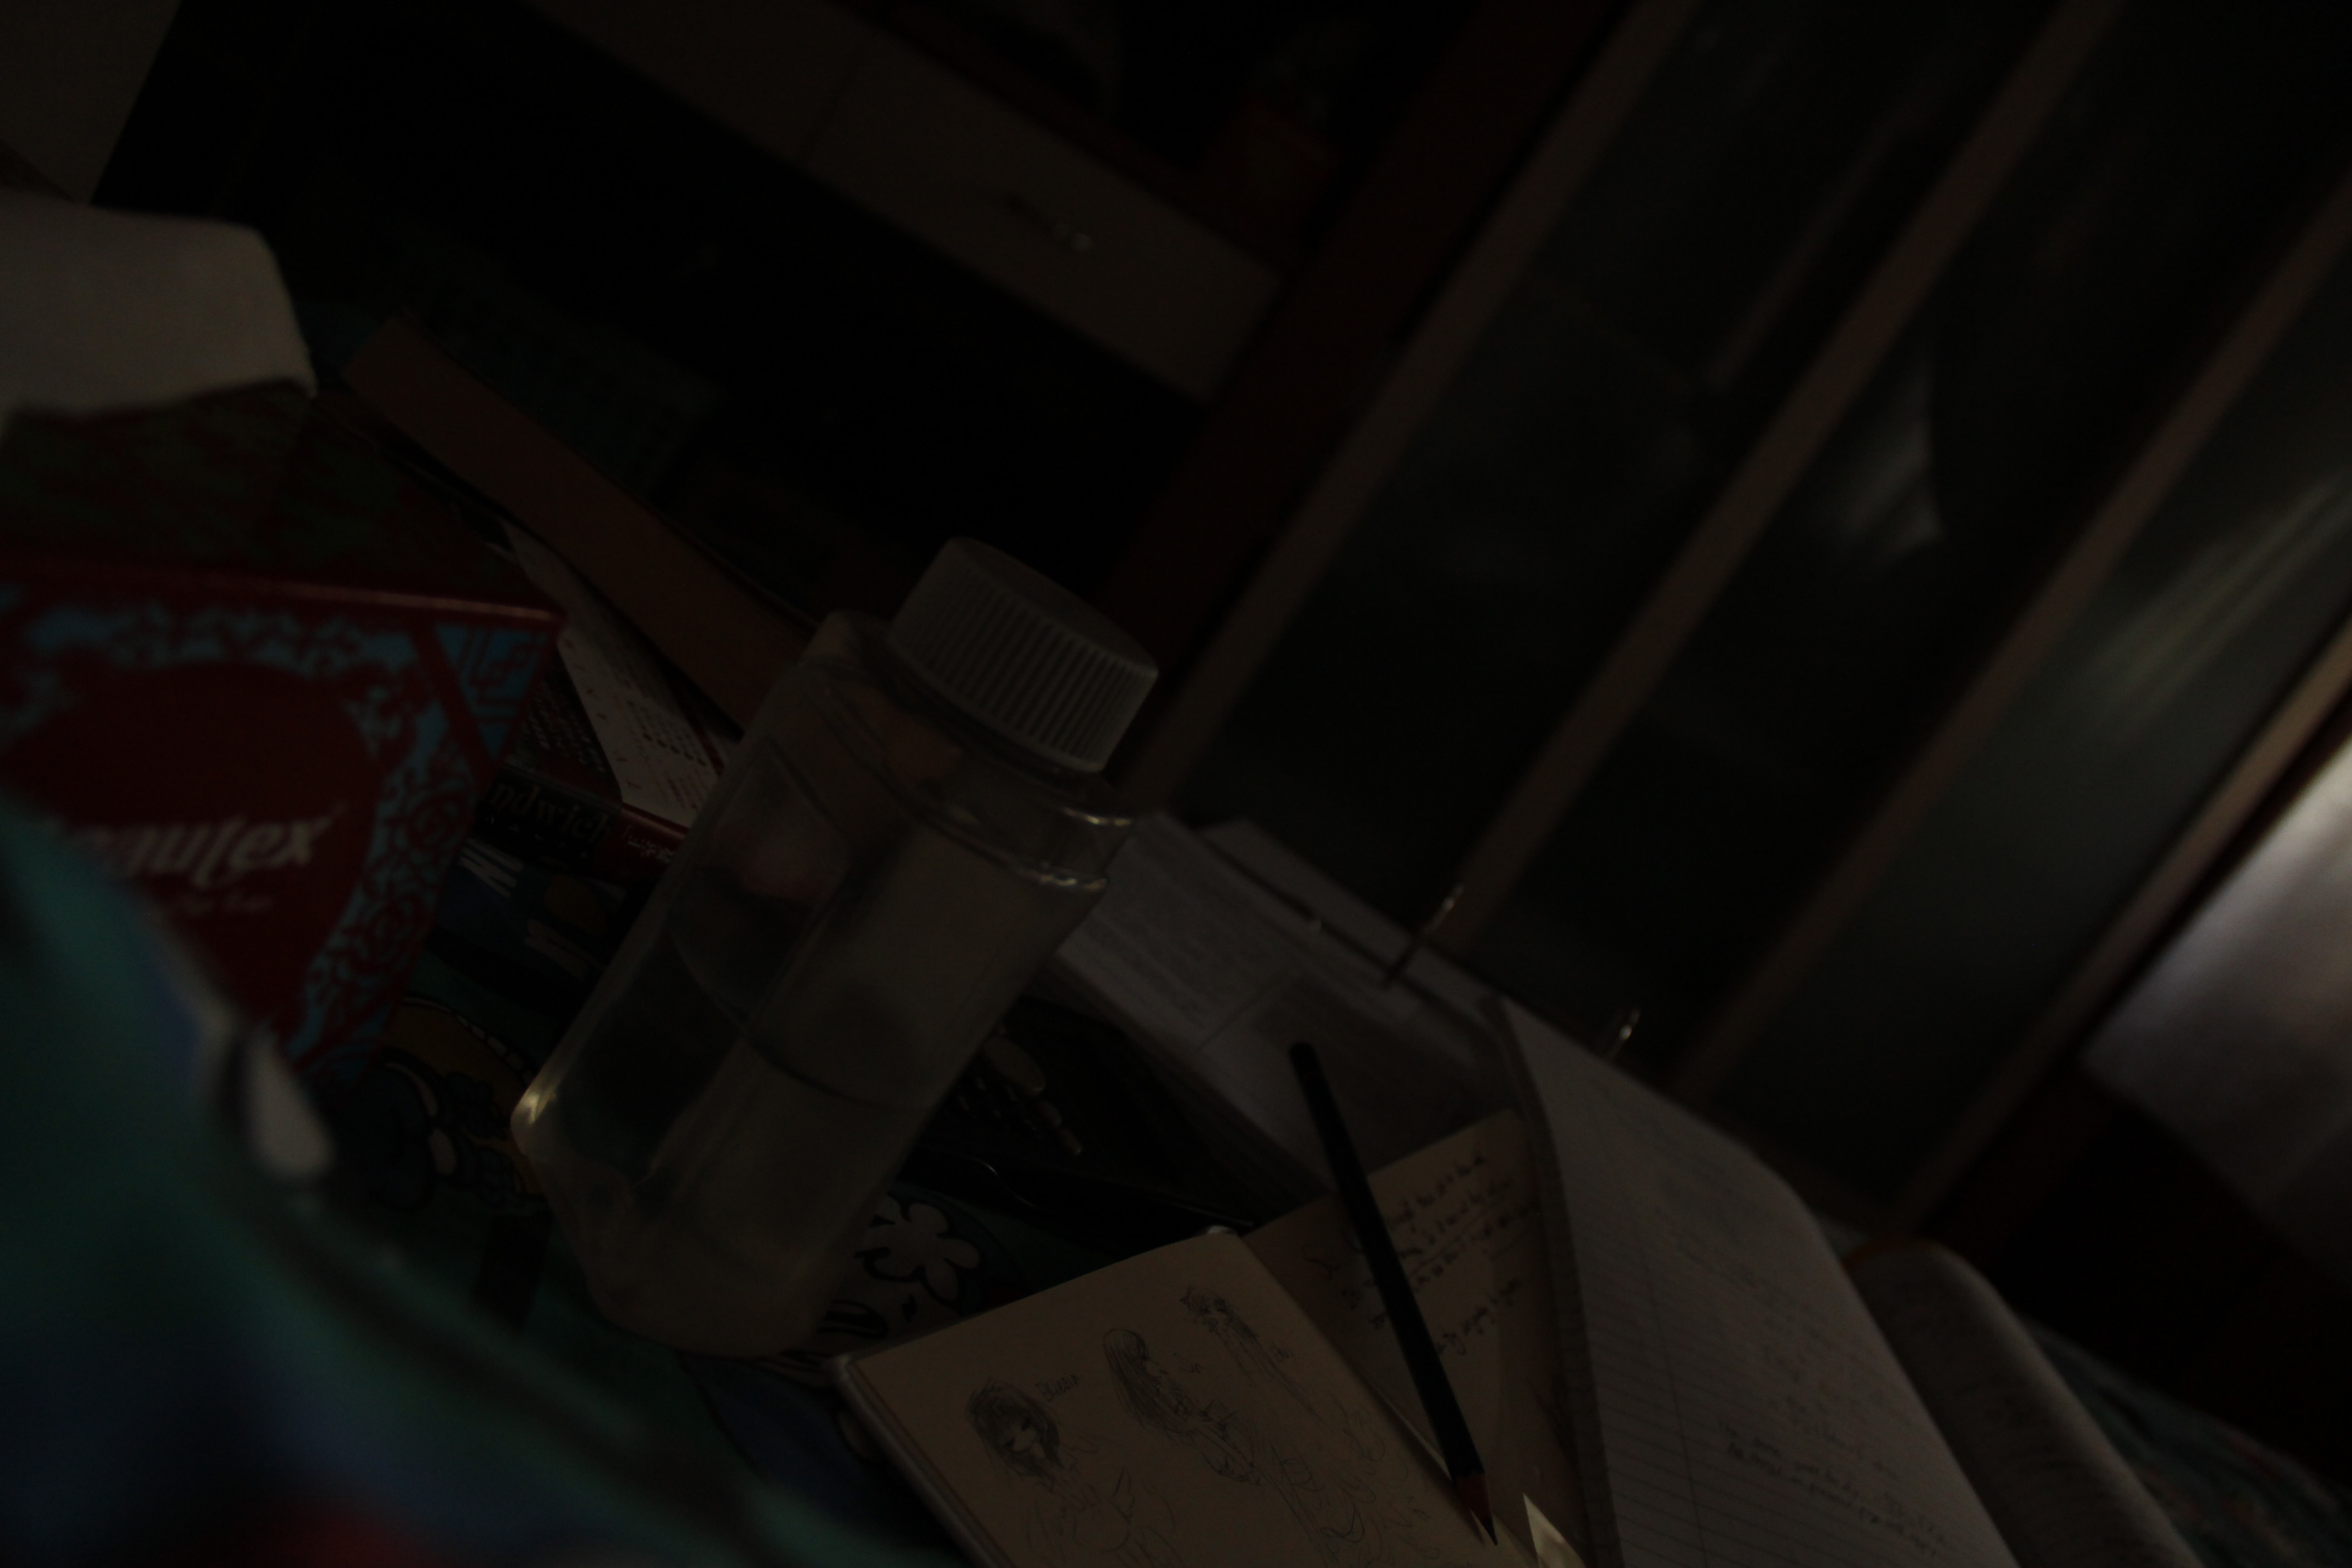
The bookshelf next to my bed is pretty important to me in that it provides easy access to any book, ranging from comics to Chinese comics to Japanese comics to one of those DisneyFairies books to actual literary works. I discarded this in the end due to the need to actually get up to be able to see the books (which breaks the angle consistency), and that I couldn’t find a way to fit it into the narrative.
I personally enjoy the geometry, but it just didn’t work.
Also, just leaving my bed in general.
FINAL REMARKS
Here’s a sample example of why I decided to leave all photos unedited.
Edited with about 6 different filters. Insert lengthy explanation on warm filter to show gentleness of the light, increased contrast/exposure/whatever to emphasise the brightness, heightened saturation to show greenness of bed, etc.
Original. I think the gentleness of the light is brought across, though it’s still evidently bright, also helping to bring across the feeling of the sheer curtain. The darkness of everything else accentuates that, though it’s still possible to make out certain forms and contours, and it feels natural and cosy in the lack of saturated colours or high contrast.
Then again, it could be that I’m just really, really bad at editing.
From the moment everyone started putting up photos, I started calculating to see if I could actually not fail. What a piece of work is a man!
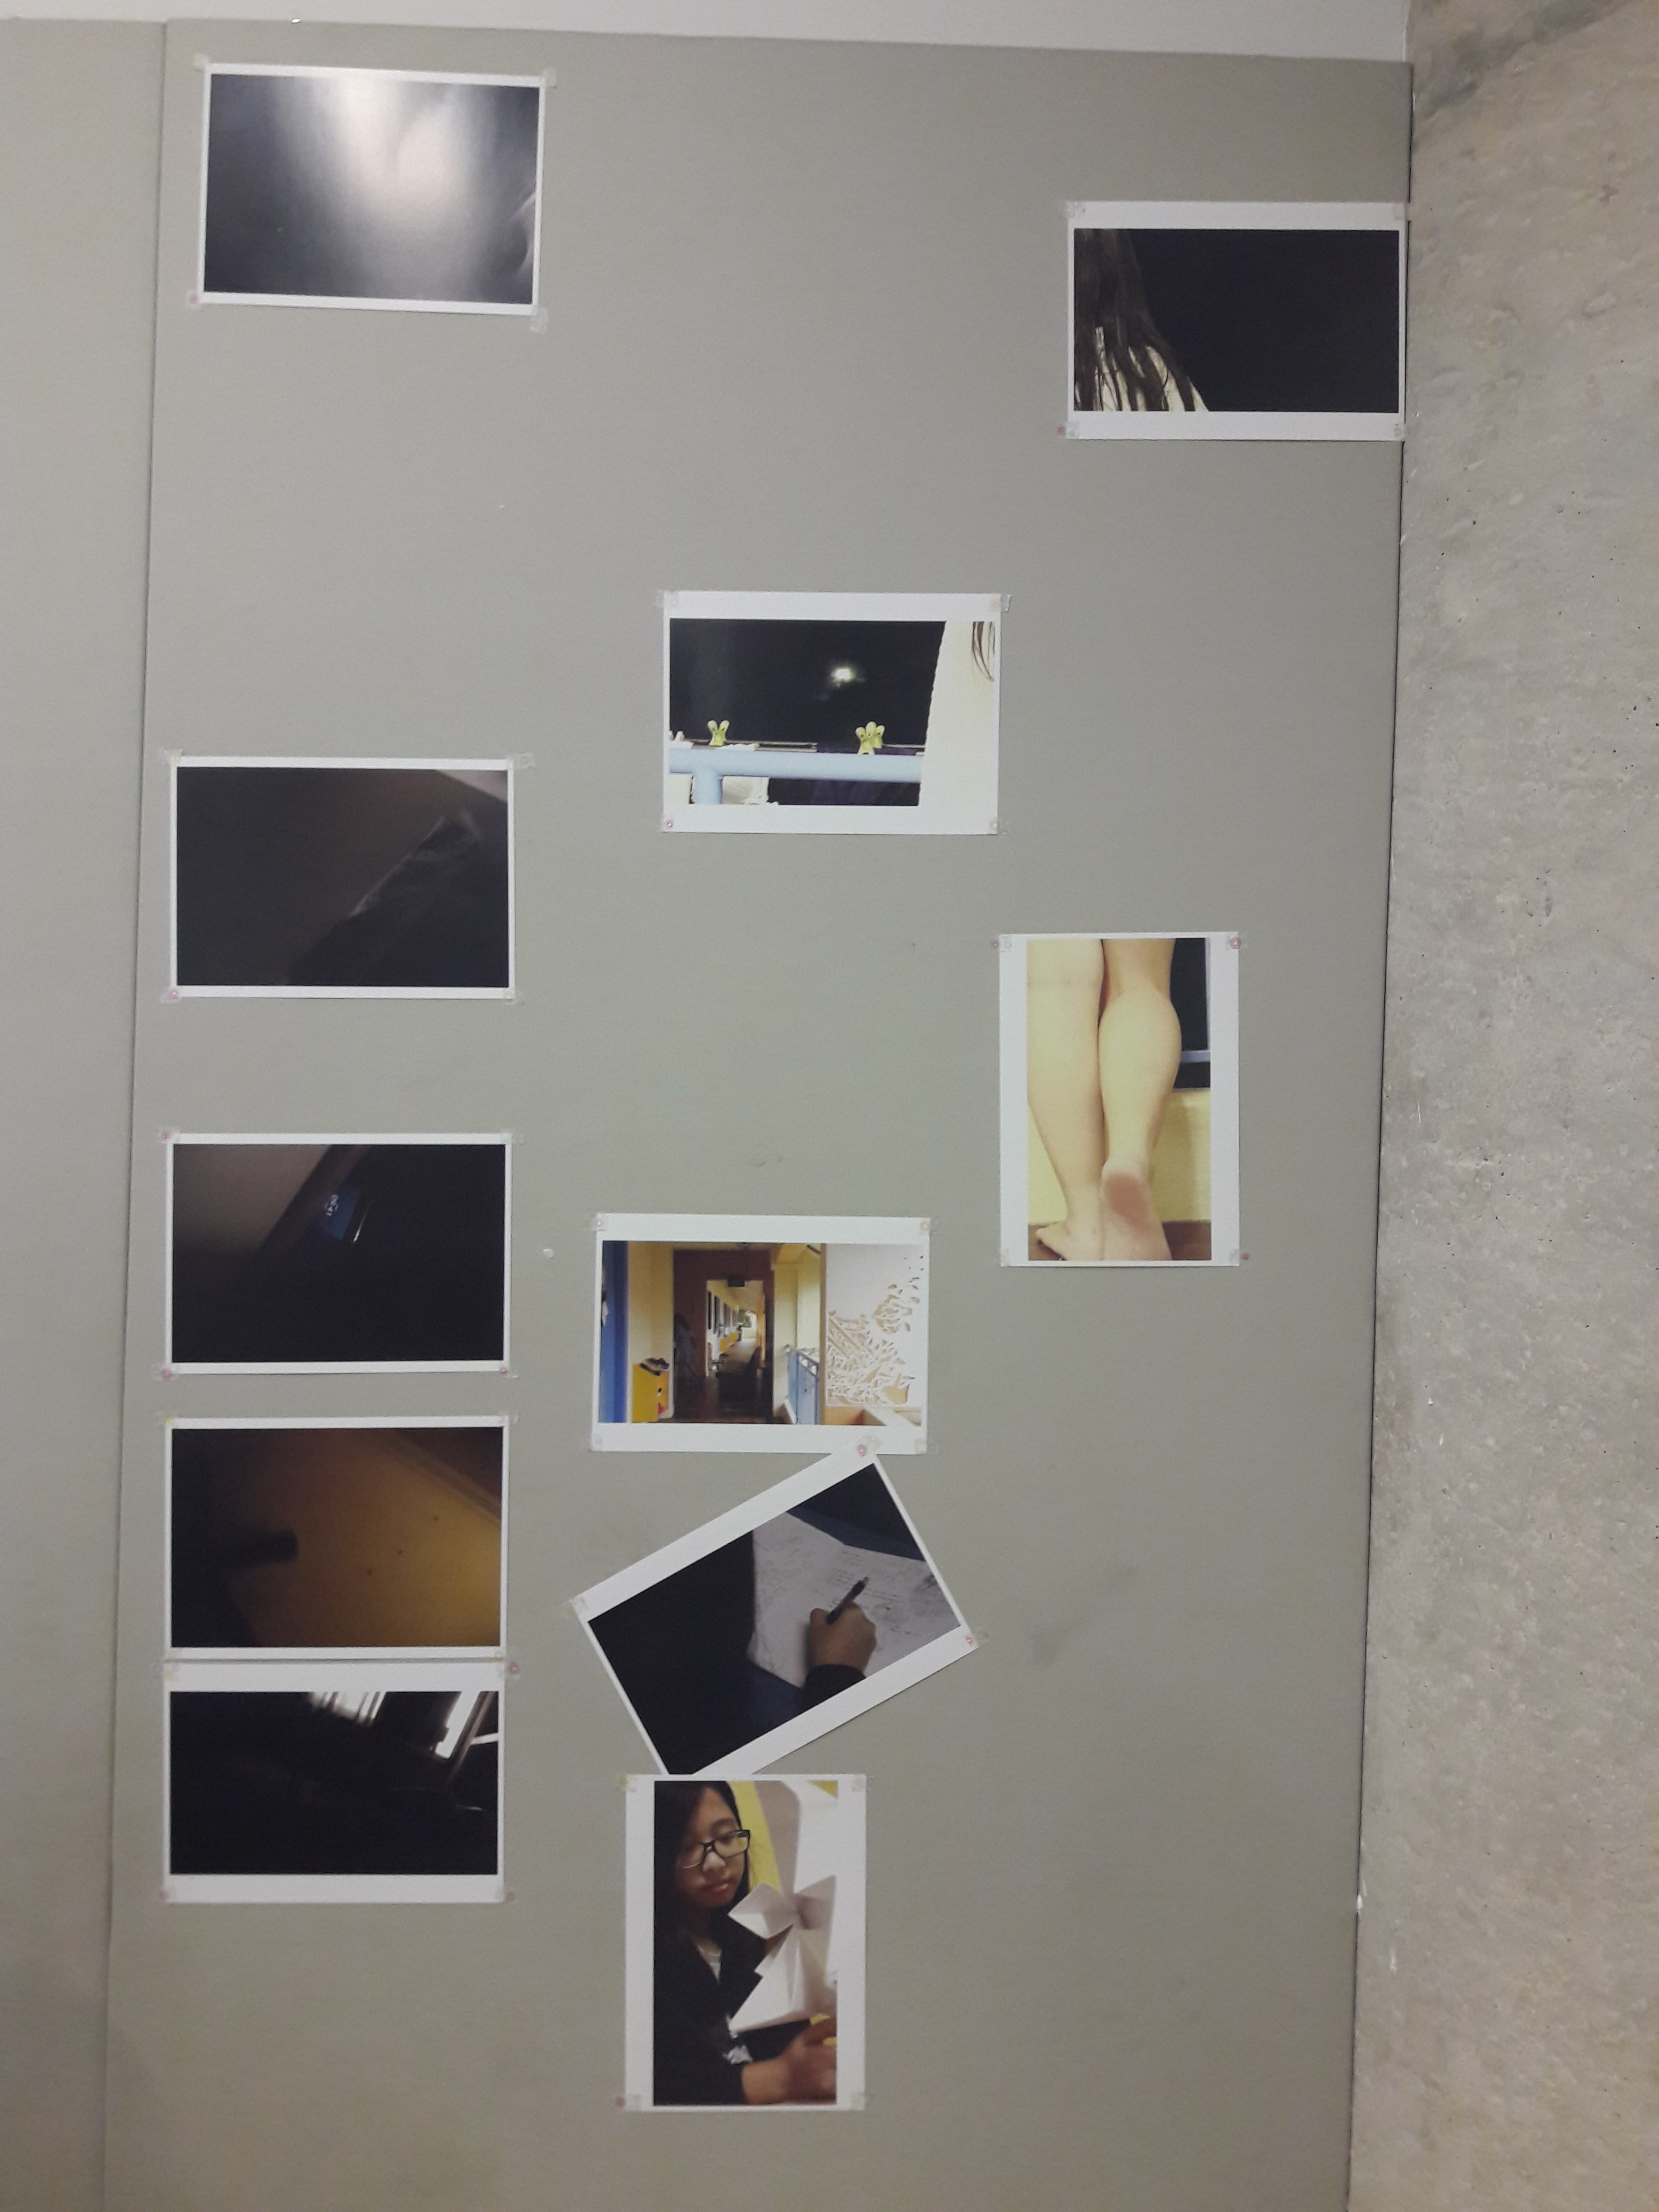
Here’s the final arrangement.
Final Display. While positioning within each task was intentional, overall positioning was a matter of me trying to actually fit everything in.
TASK 1
A
B
C
I don’t really know where I got this idea, it came out of nowhere, mostly. I suppose it was mostly based on the theory of positive and negative spaces, and how I’ve used a similar technique when doodling: draw a full fledged form, then use a penknife to cut out parts of the paper, leaving a still intact form, though missing certain parts.
Key Concepts & Ideas
If all of this is too long, I think this quote from Atonement by Ian McEwan is a pretty good summary as to explaining the feeling of infiniteness and nothingness which led me to this form. If not, then proceed ahead.
Fragmentation
Humans are multifaceted creatures ruled by change, where there is no derivable self from our flawed perspectives. Where the identity reshapes itself eternally and is too extensive, there is no way to express it tangibly. How can anyone comprehend me from only what they can discern? How can I know the unfathomable depths of my inconceivable lump of flesh? How can 3 photos capture the entirety of an intangible soul?
All that is visible is only what is perceived, but there are many things which cannot be seen. While it is easy to extrapolate and imagine you know what is in those fragments you can’t see based on what you CAN see, there is no certainty; there is only assumption. Consequently, in the lack of an ability to consolidate and present everything, I purposefully took a single photo, and presented pieces in a way that would make people assume it’s “me”, where that can still not be an absolute certainty, though it is likely.
Consequently, the final display has the photos at appropriate distances from each other to provide the idea of puzzle pieces in the right places.
To add onto that, I fall back onto presenting “nothing”:
Mundanity
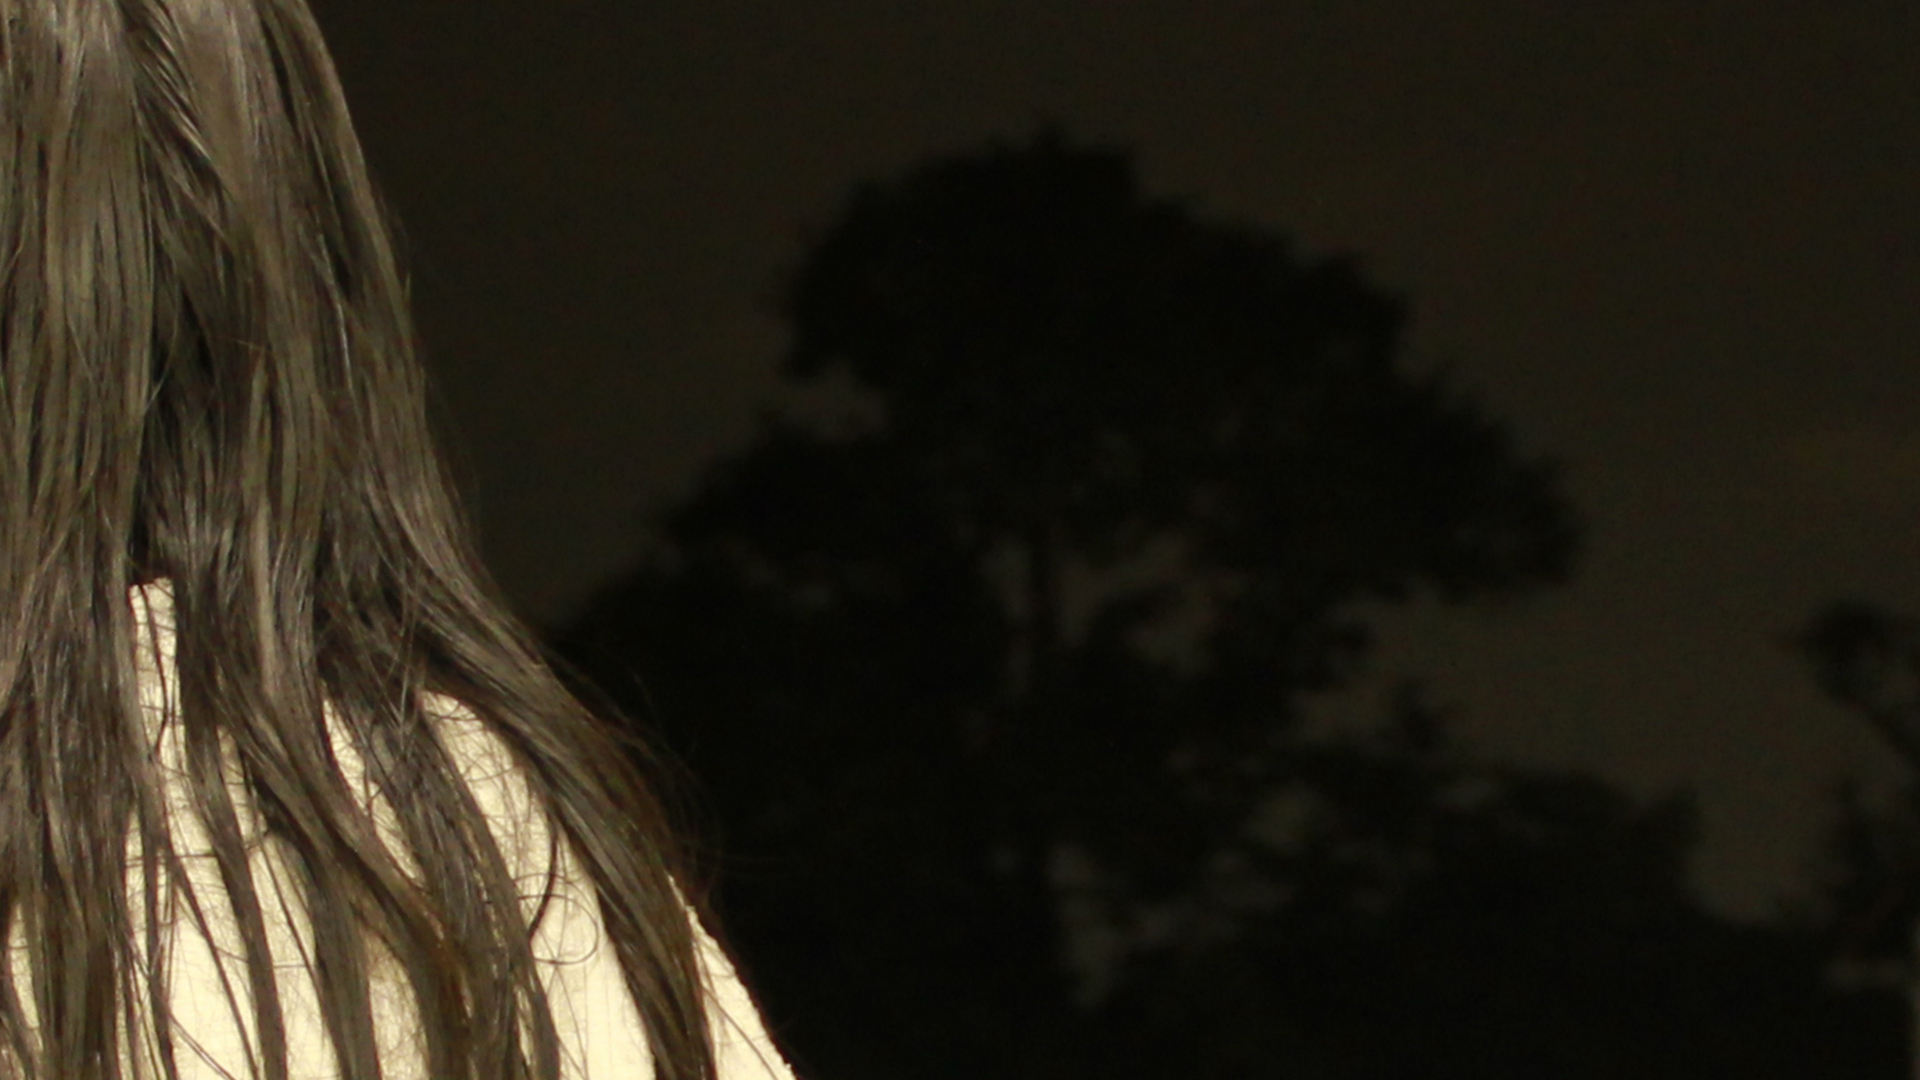
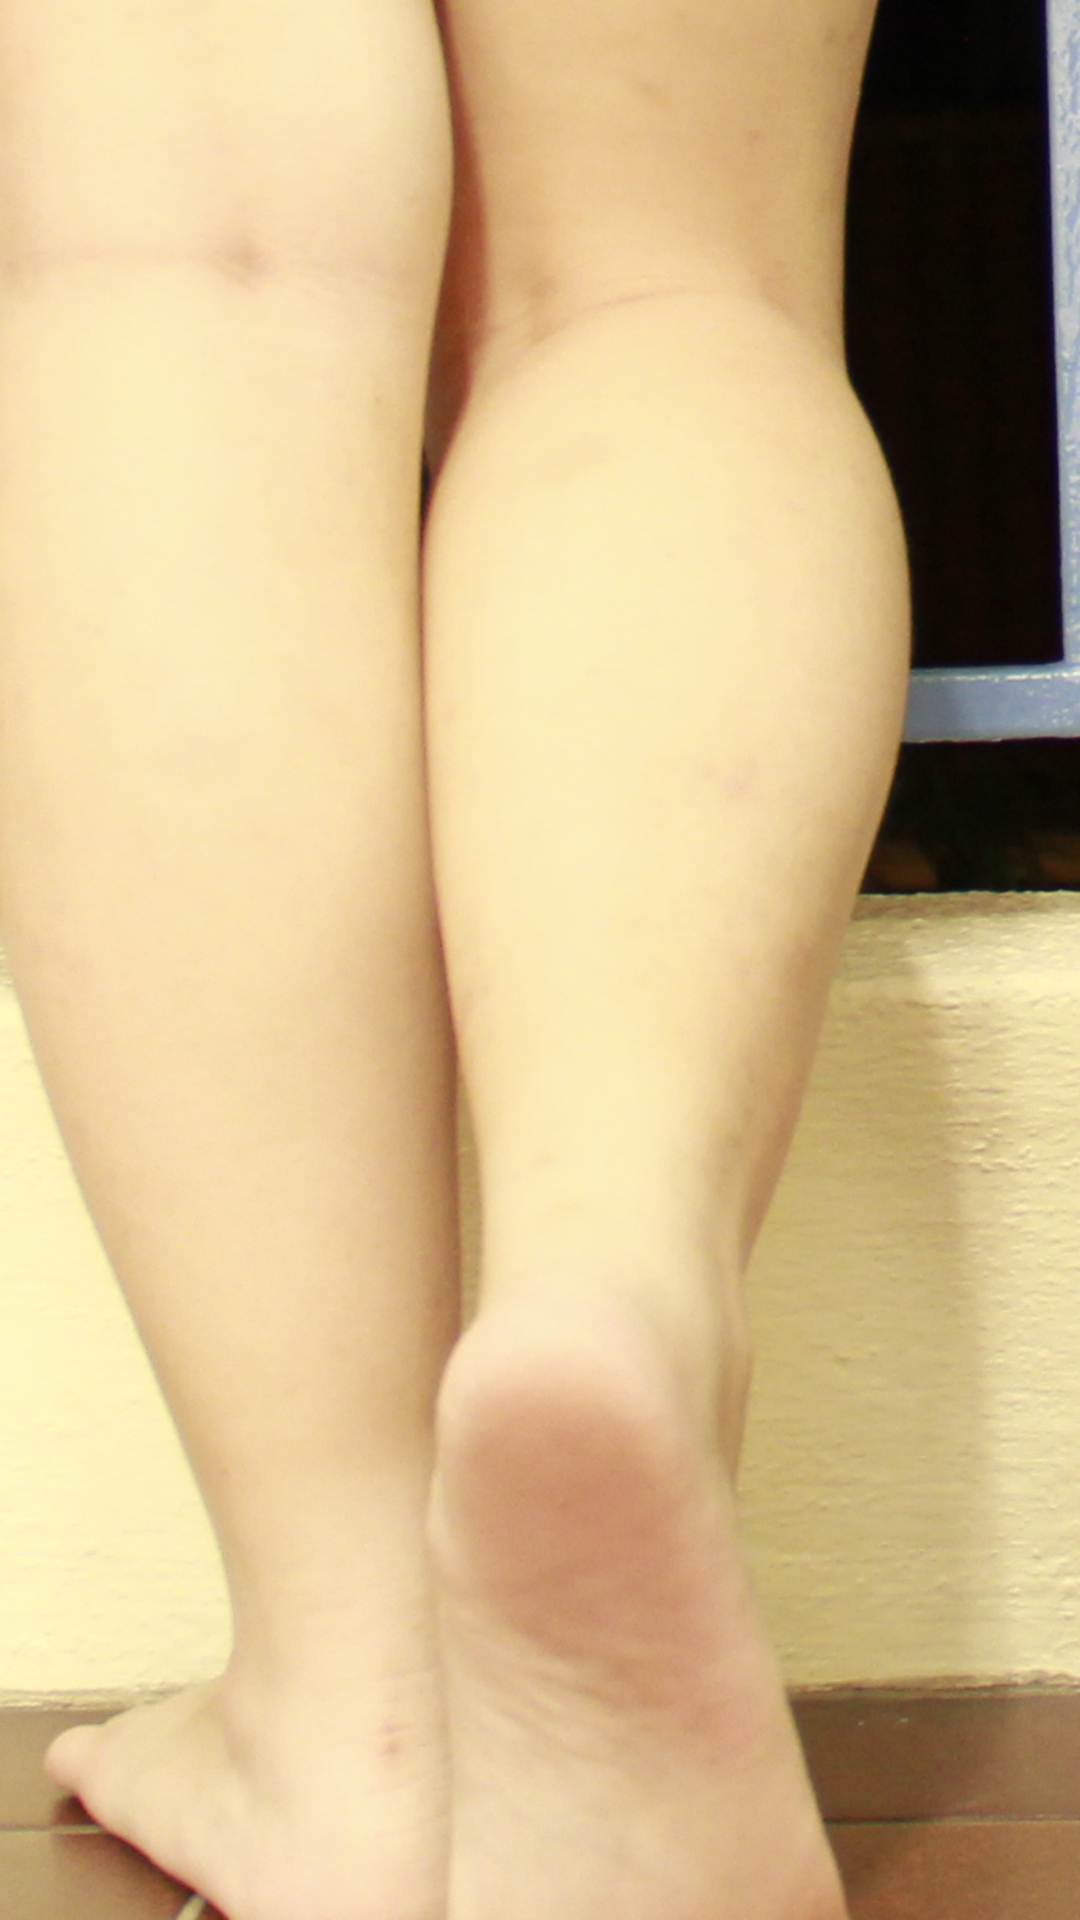
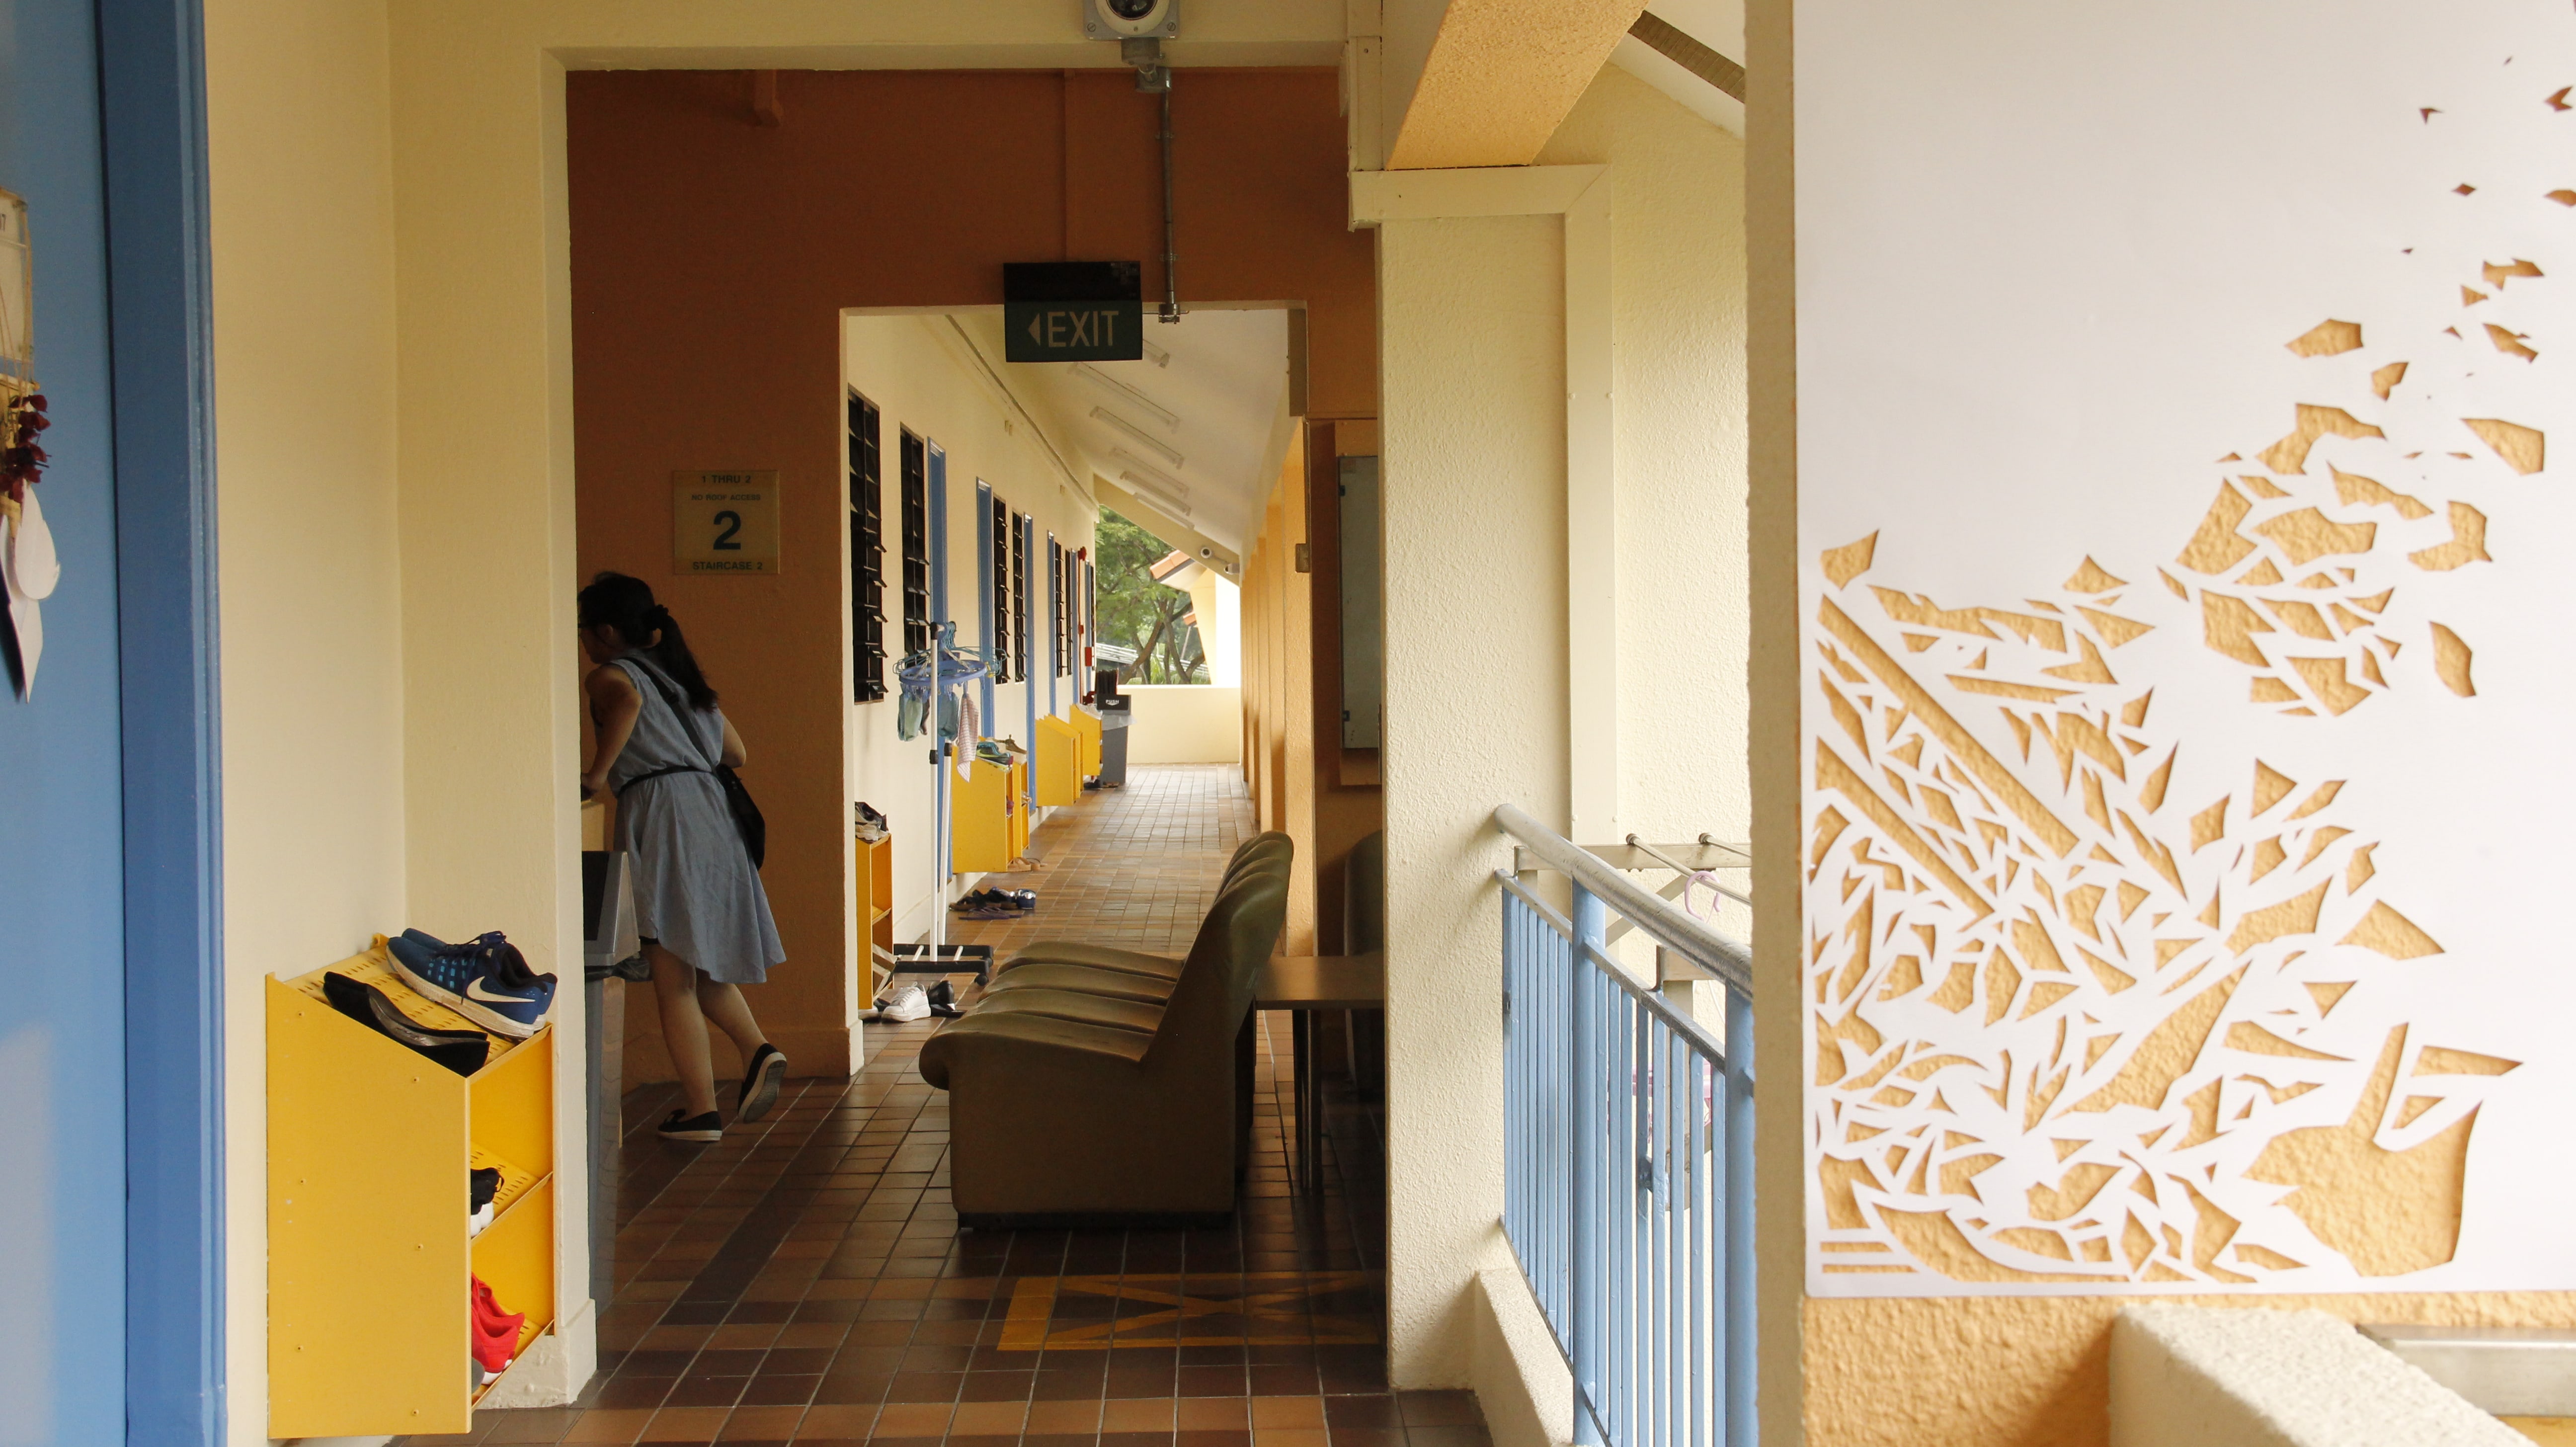
It’s very simply a view of me outside my room, where I attempted to, minimally, ensure each photo provided sufficient context. Photo A shows that it is night, and that my hair is wet; B, the laundry pegs and distinctively hall railing; C, bare feet standing comfortably. (Also, not incredibly clear, but a towel is draped over my shoulders.) As I mentioned in the tutorial, it’s meant to give insight into a regular occurrence in my daily life, that of me tending to shower at night before hanging my hand-washed clothes outside, where I am often too lazy to wear footwear (it’s really a very, very short distance and I refuse to expend energy on something so unnecessary). There’s a lot I could say, like how I’ve developed all these little habits of air drying my hair versus blow drying, or draping a towel, or showering only at night, or not wearing shoes… But no matter how you analyse it, it’s literally just me doing something ordinary. It could be special that I drape my towel around my shoulders and let my hair air dry as I leave my hand-washed clothes to dry at night in hall, or it could be meaningless.
It’s a reflection of the fact that I am a mere ordinary creature, one of many humans who believe they are “unique”, when we are fundamentally more similar than we think. I’m horrified by the state of the world! I’m depressed by the transience of life! I’m pained by the cruelty of humanity! We make infinity out of nothingness. That people express those feelings is sometimes a form of egoism, that “I am more human than another” simply because you assume you hold more depth of character.
TASK 2
P
Q
R
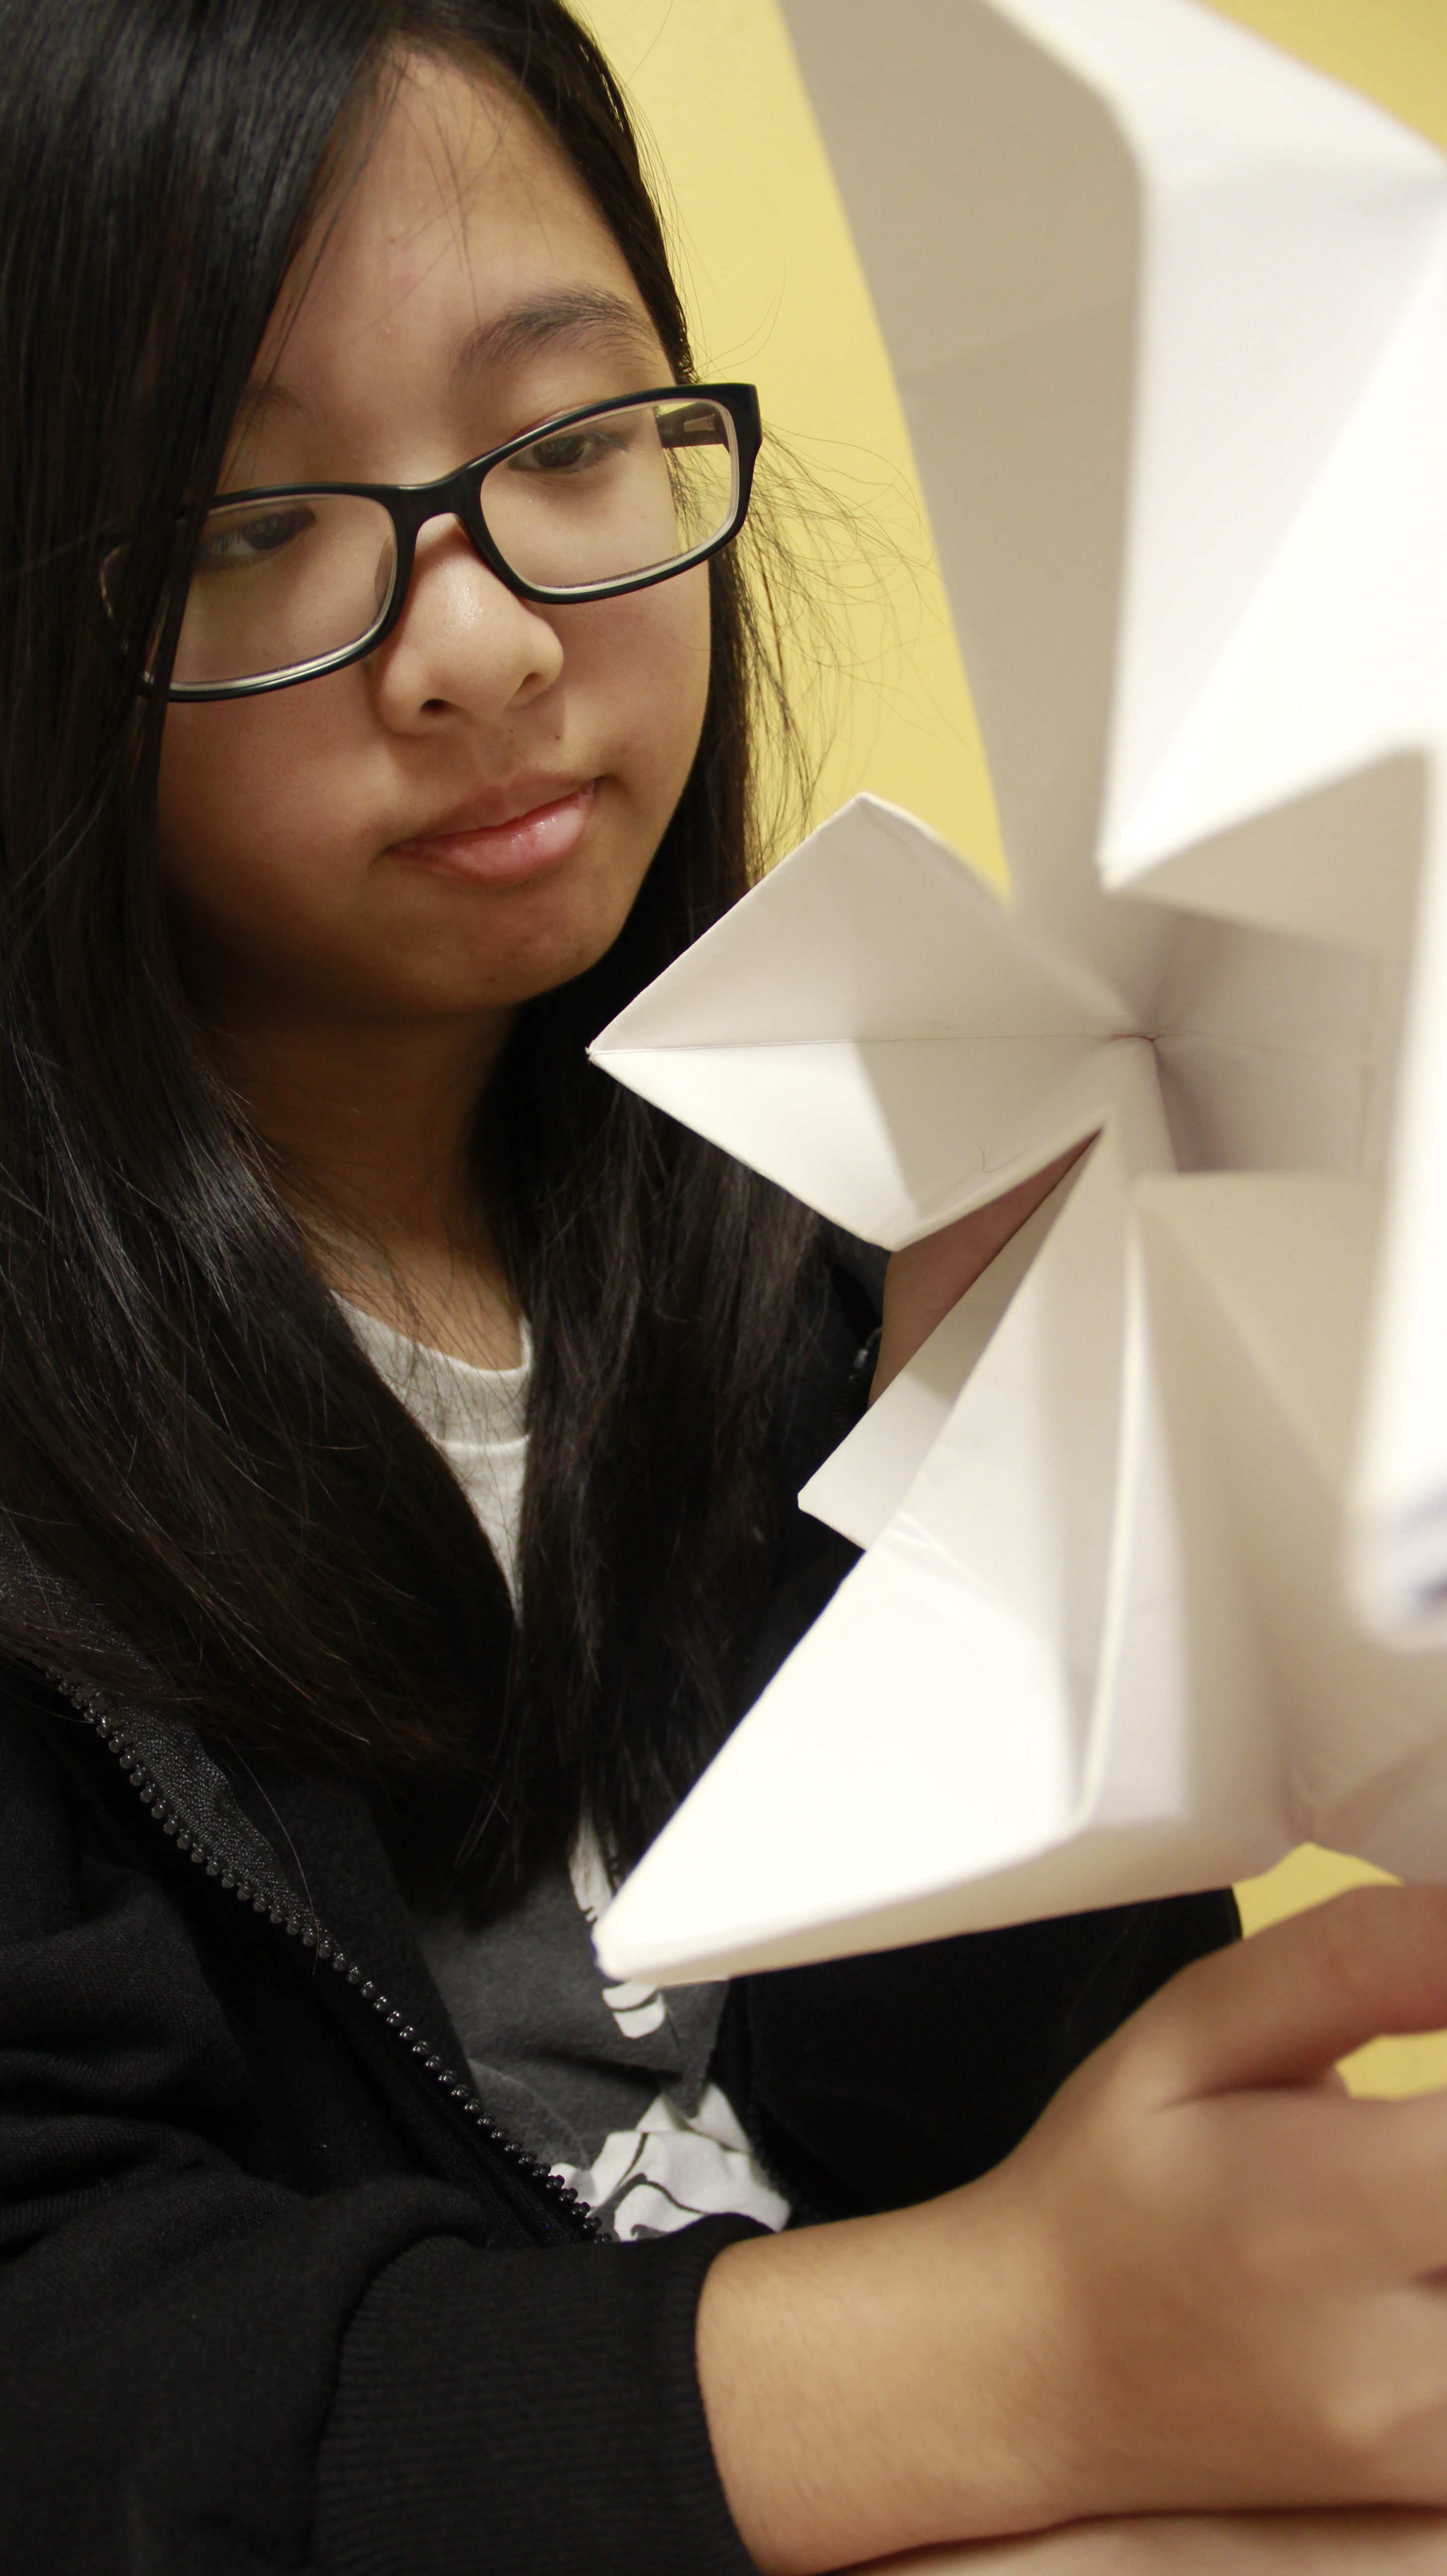
This was a much more ordinary idea which didn’t involve me utterly neglecting everything we learned in class about framing and shot. The idea for the object mostly stemmed from right after the project brief was introduced, and I instantly remembered a photo which was once taken of me, back in junior college (the photographer was my classmate):
It was my origami phase.
I feel like what struck me about the photo was the seeming tenderness of the hands, and the “purity” of the image. I have a thing against showing my face, especially where I dislike looking at my face, facial expression is far too unsubtle, and I seem to have difficulty making my emotions and facial muscles synchronise.
That’s also where I got the idea for paper.
Key Concepts and Ideas
Varying levels of attention (linked to shot scale)
Paper is rather omnipresent, from the flyers we ignore to the paper we use in Foundation Drawing. I tried to present a sort of spectrum of attention versus inattention, where the physical distance between the paper and I indicated varying levels of focus.
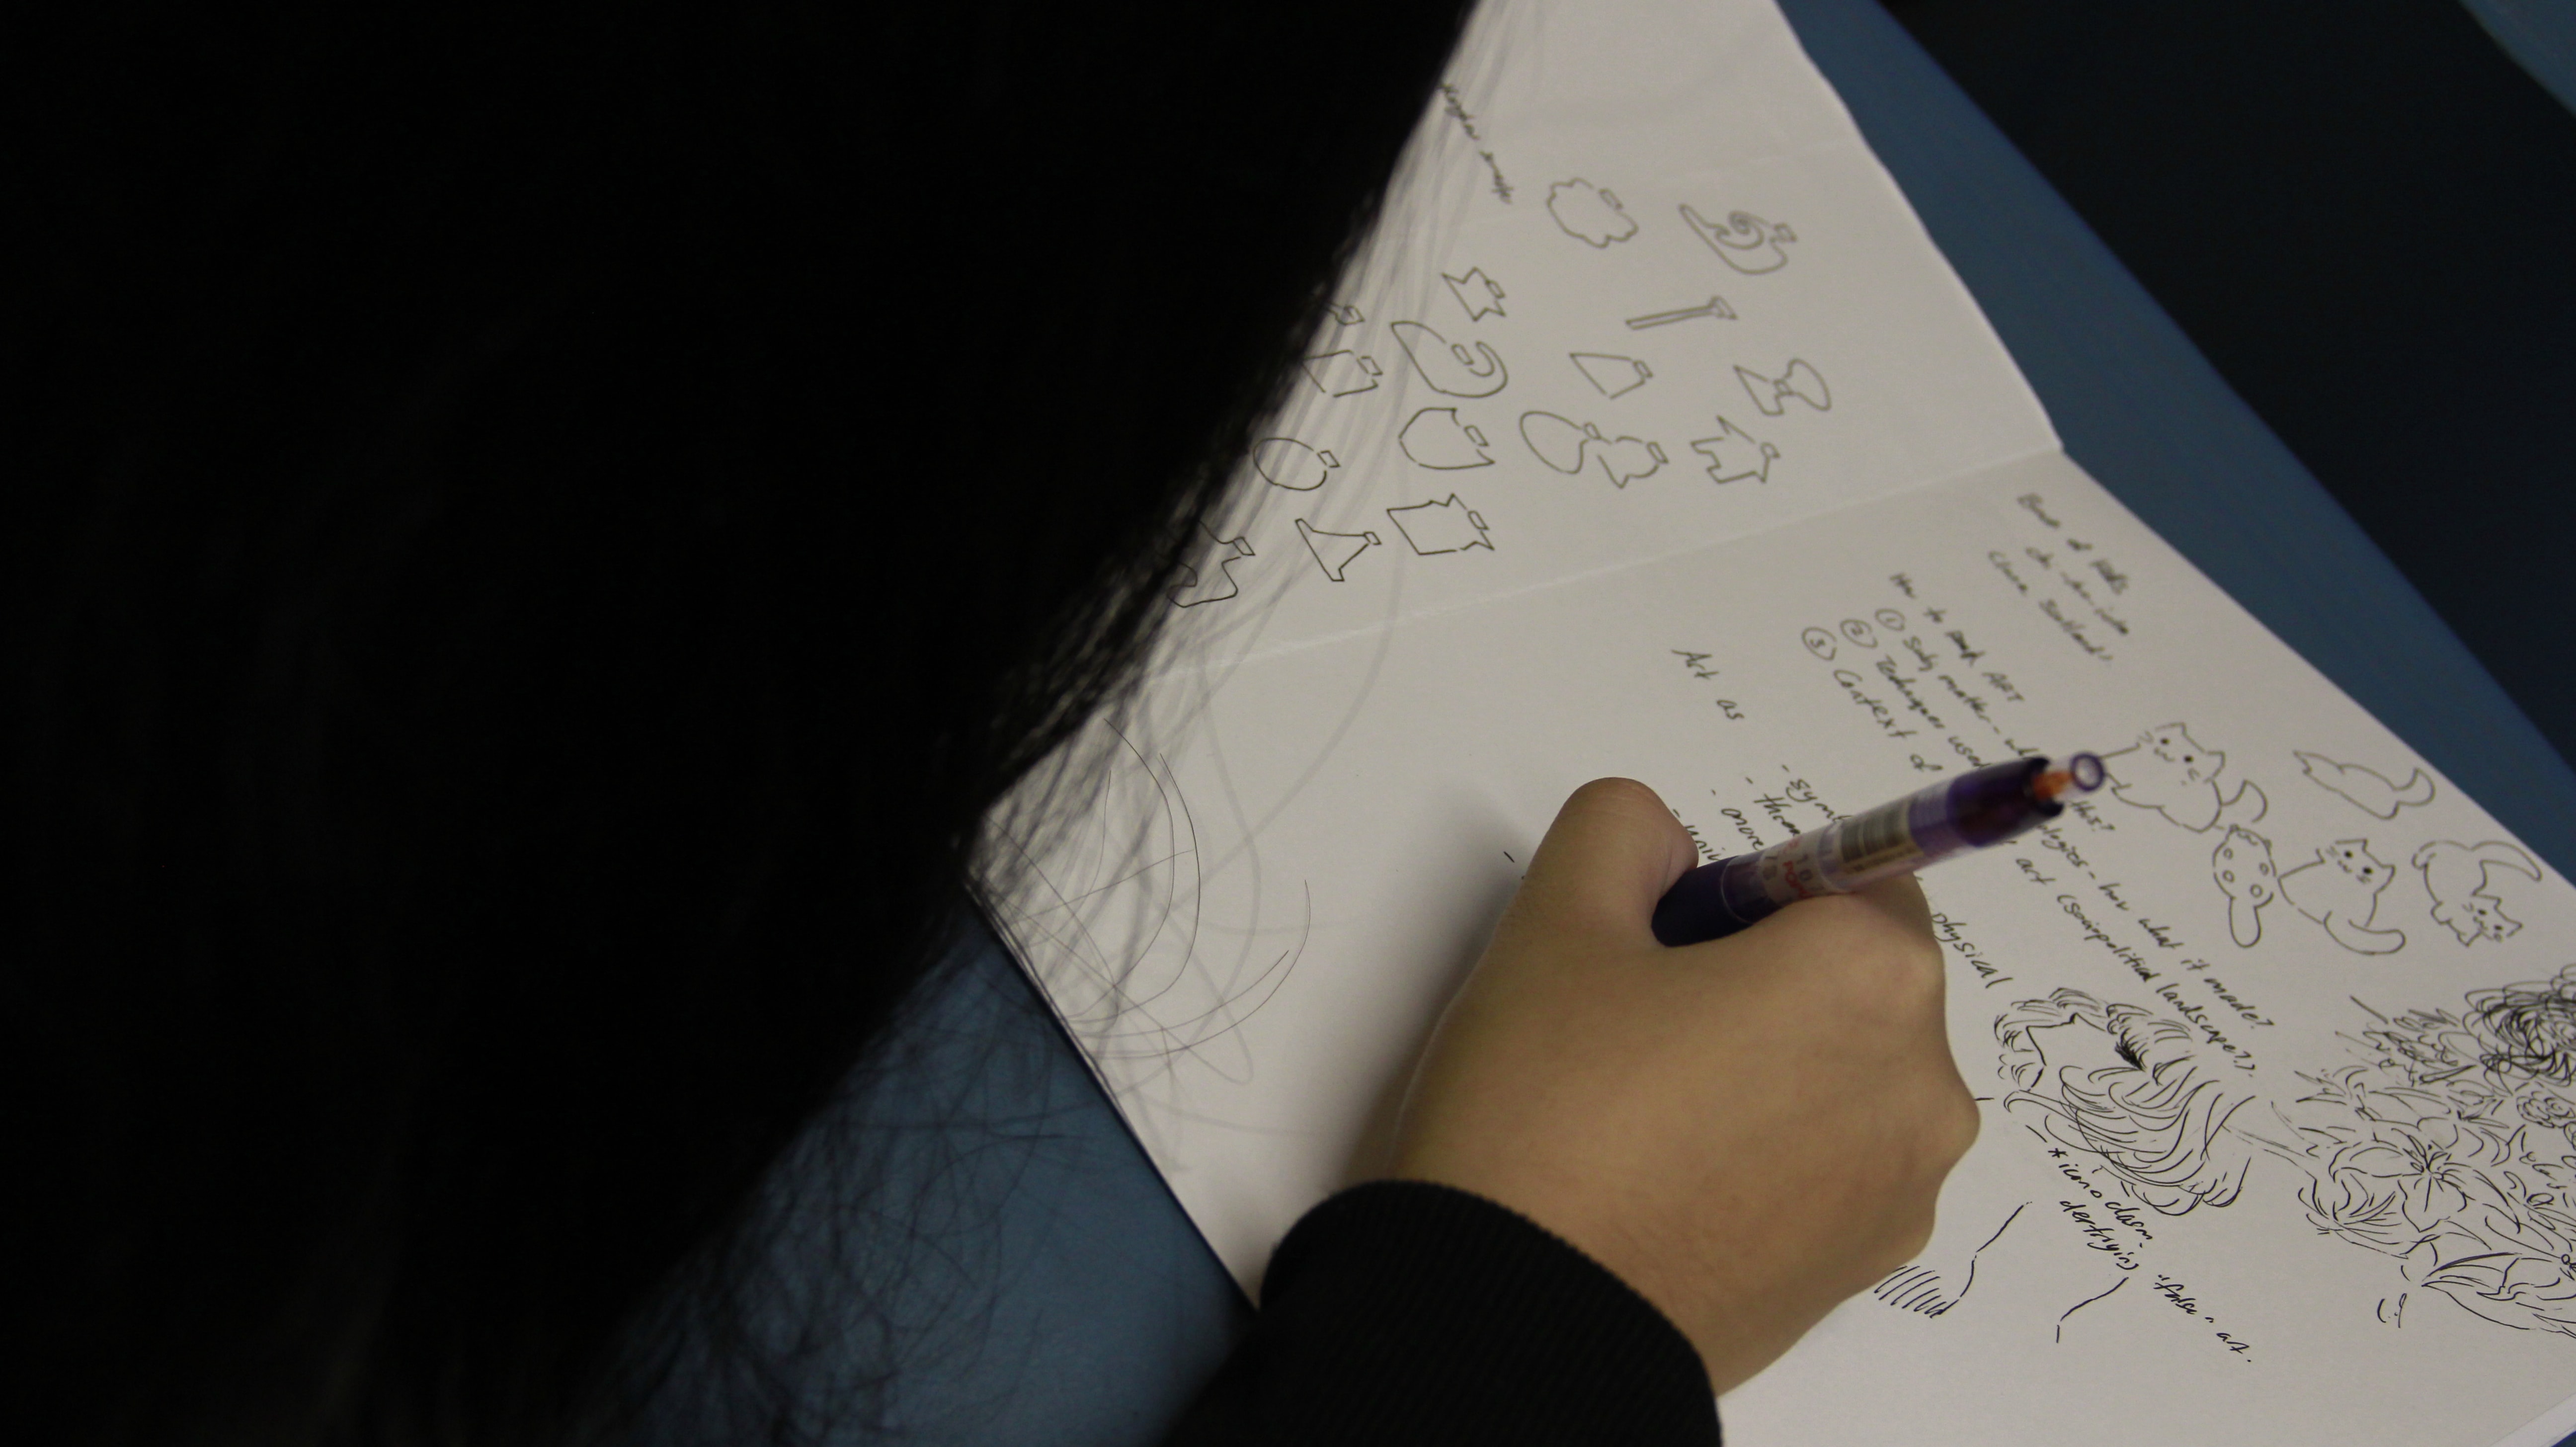
Photo P shows me far away, neglecting the paper in favour of a destination; Photo Q, me interacting with the paper, but not as an object in its own right as opposed to a medium for drawing and writing (also reflected in lack of direct touch as opposed to through a proxy, the pen); Photo R, me interacting with the paper directly (that’s the face I make when I’m casually focused on something). Another factor to present that is the “gaze”, where my eyes go from not even seeing, to looking at the marks of the paper, to the paper itself.
In the final display, I varied the photo orientation to reflect that spectrum, where landscape = distant, portrait = intimate. (Also why there’s that one photo which is 45 degree slanted, it was a canted angle on purpose to make it appear straight when physically placed that way.)
Versatility of paper
Again, I had difficulty choosing an object simply because there are many things in my life that could both qualify and not. So when I thought of paper, I immediately decided to settle on that, as it’s something prevalent in all our lives (have you seen the number of trees art students kill?), which takes many forms which I interact with on a regular basis.
As a result, there’s a proud display of paper in its various “edited” forms, from cut paper to marked and folded paper. (In all honesty, I didn’t particularly exploit camera angle at all, as opposed to merely aiming to effectively catch everything in the photograph, especially in the flat nature of the paper in Photo 1 and 2.)
TASK 3
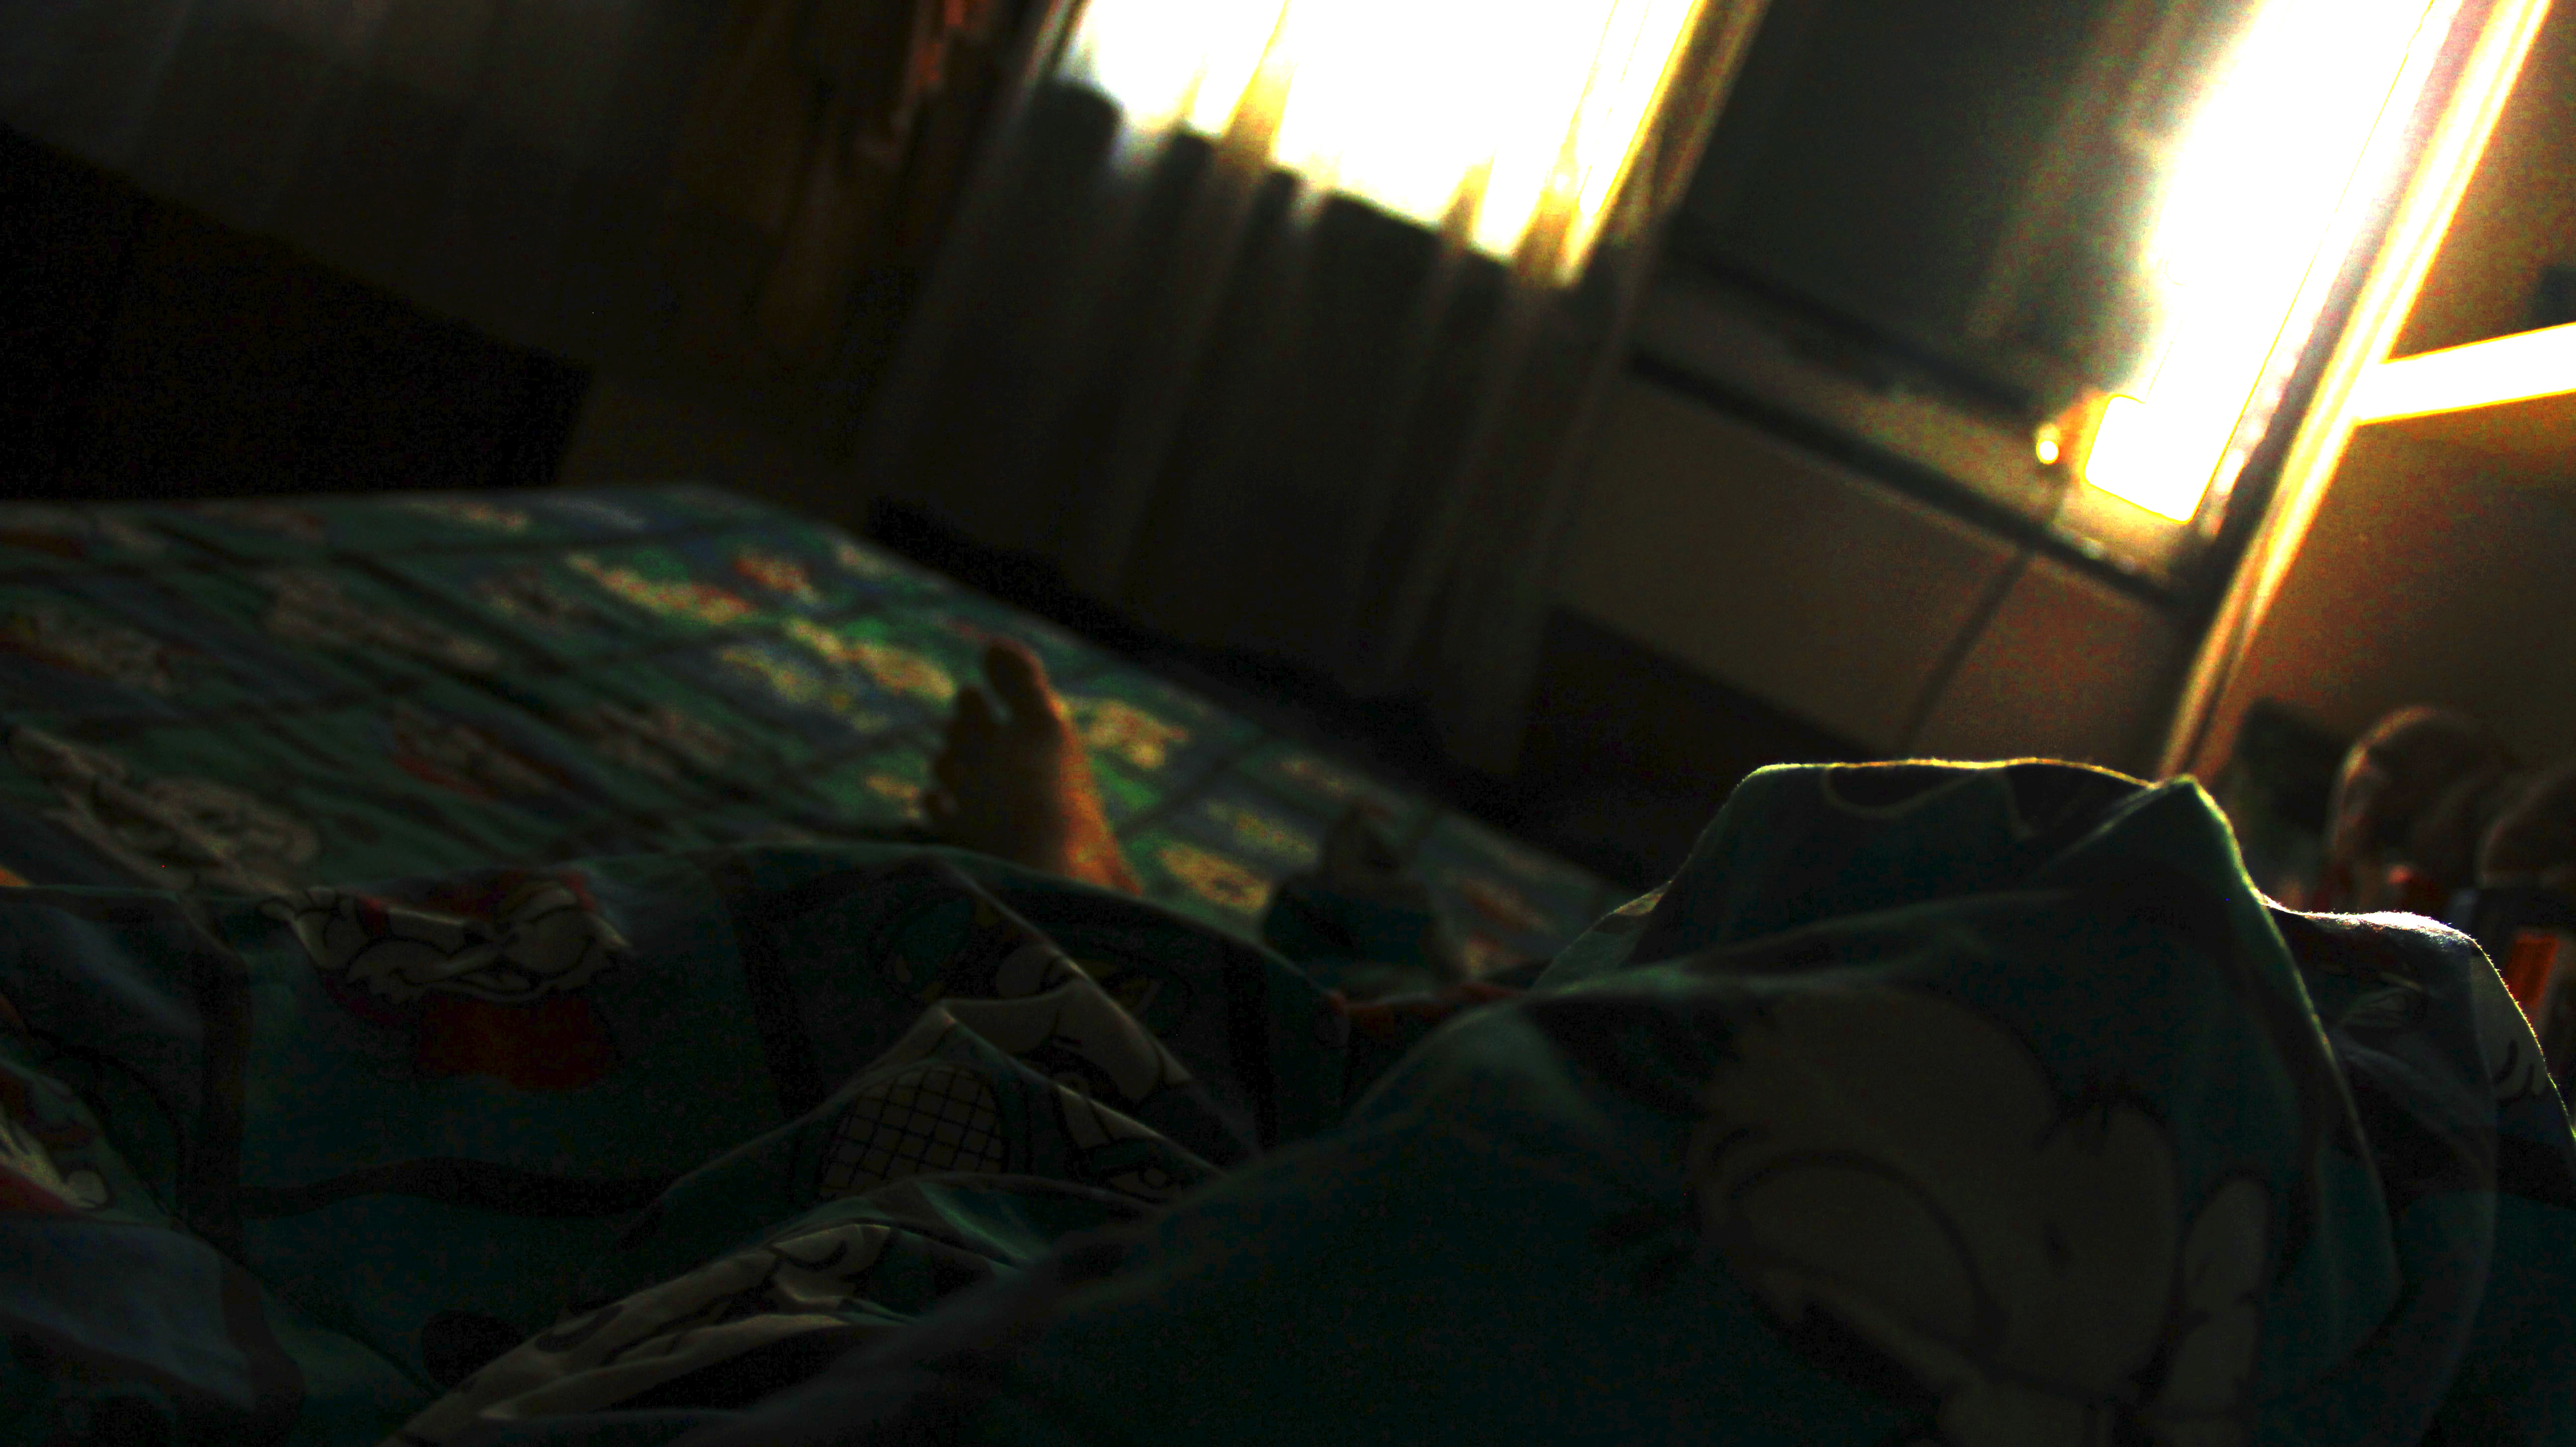
The bed was a natural choice, in that I spend most of my time on it. I’m a very mundane person: my daily routine is genuinely mostly bed.
0100
0700
0705
0710
0715
At first, I was very divided as to if I should use my bed, or the area below my HDB. The decision, however, was made for me when I woke up early to do my work, and decided I was too lazy to take the lift downstairs. Or even get out of my bed. As with Task 1, I attempted to “set up” the area and take photos with framing and shot in mind, but it felt unnatural, detached, curated. So I got back into bed and started taking photos with
Canted angles
Mostly to give that idea of lying down and just rolling around, without concern for proper shooting. At least it’d feel more intimate, in my opinion. (On a photography level, the shot scale is mostly irrelevant, but most things are extremely close by default.)
Blurriness
This was mostly unintentional in that things were far too close up for the camera to actually focus on it. Still, I like to think it worked out in my favour, in that it gives a feeling of just waking up, and everything being out of focus (especially where I wear glasses, but not to sleep).
Segmentation
My initial plan was to capture important aspects of my bed, without any repeated ideas. This also contributed to a few other photos, which eventually didn’t make it into the final product due to the presence of:
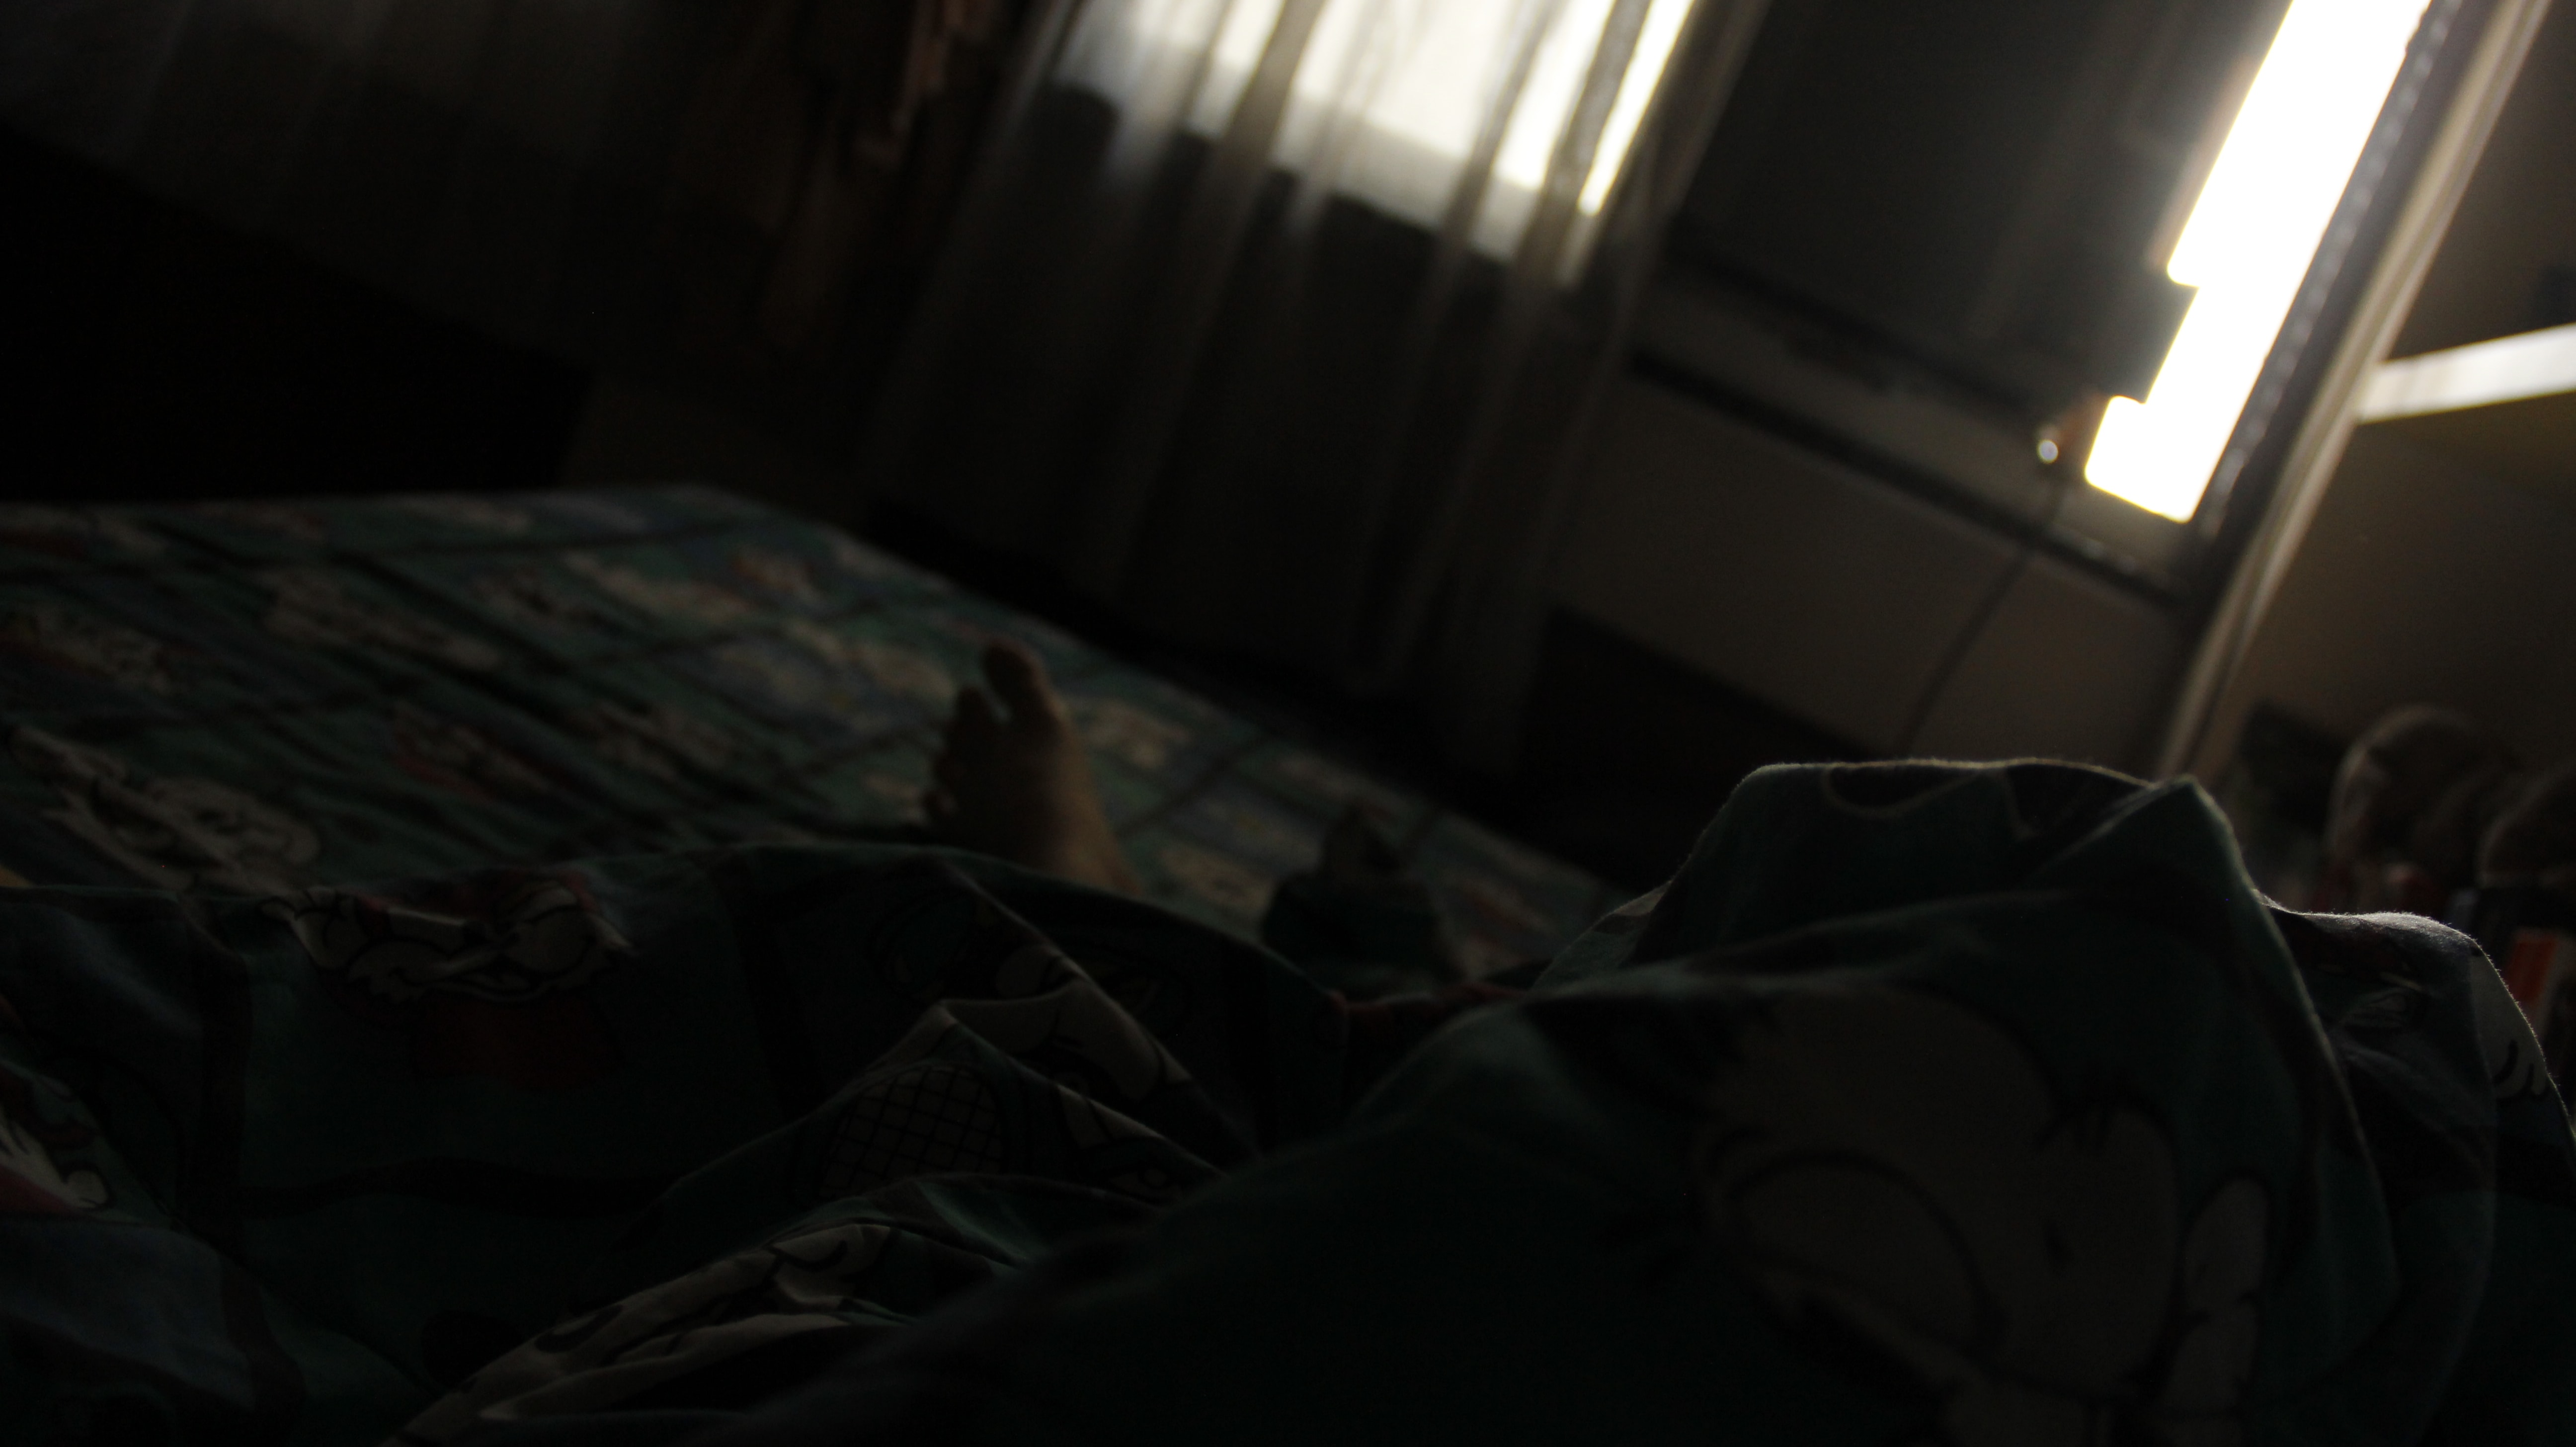
Time progression (narrative)
Again, this was not intentional, but happened to happen because I take photos slowly. Each photo has a timing on it (24 hour clock), which indicates a general timeline.
Going to sleep after doing work on the bed
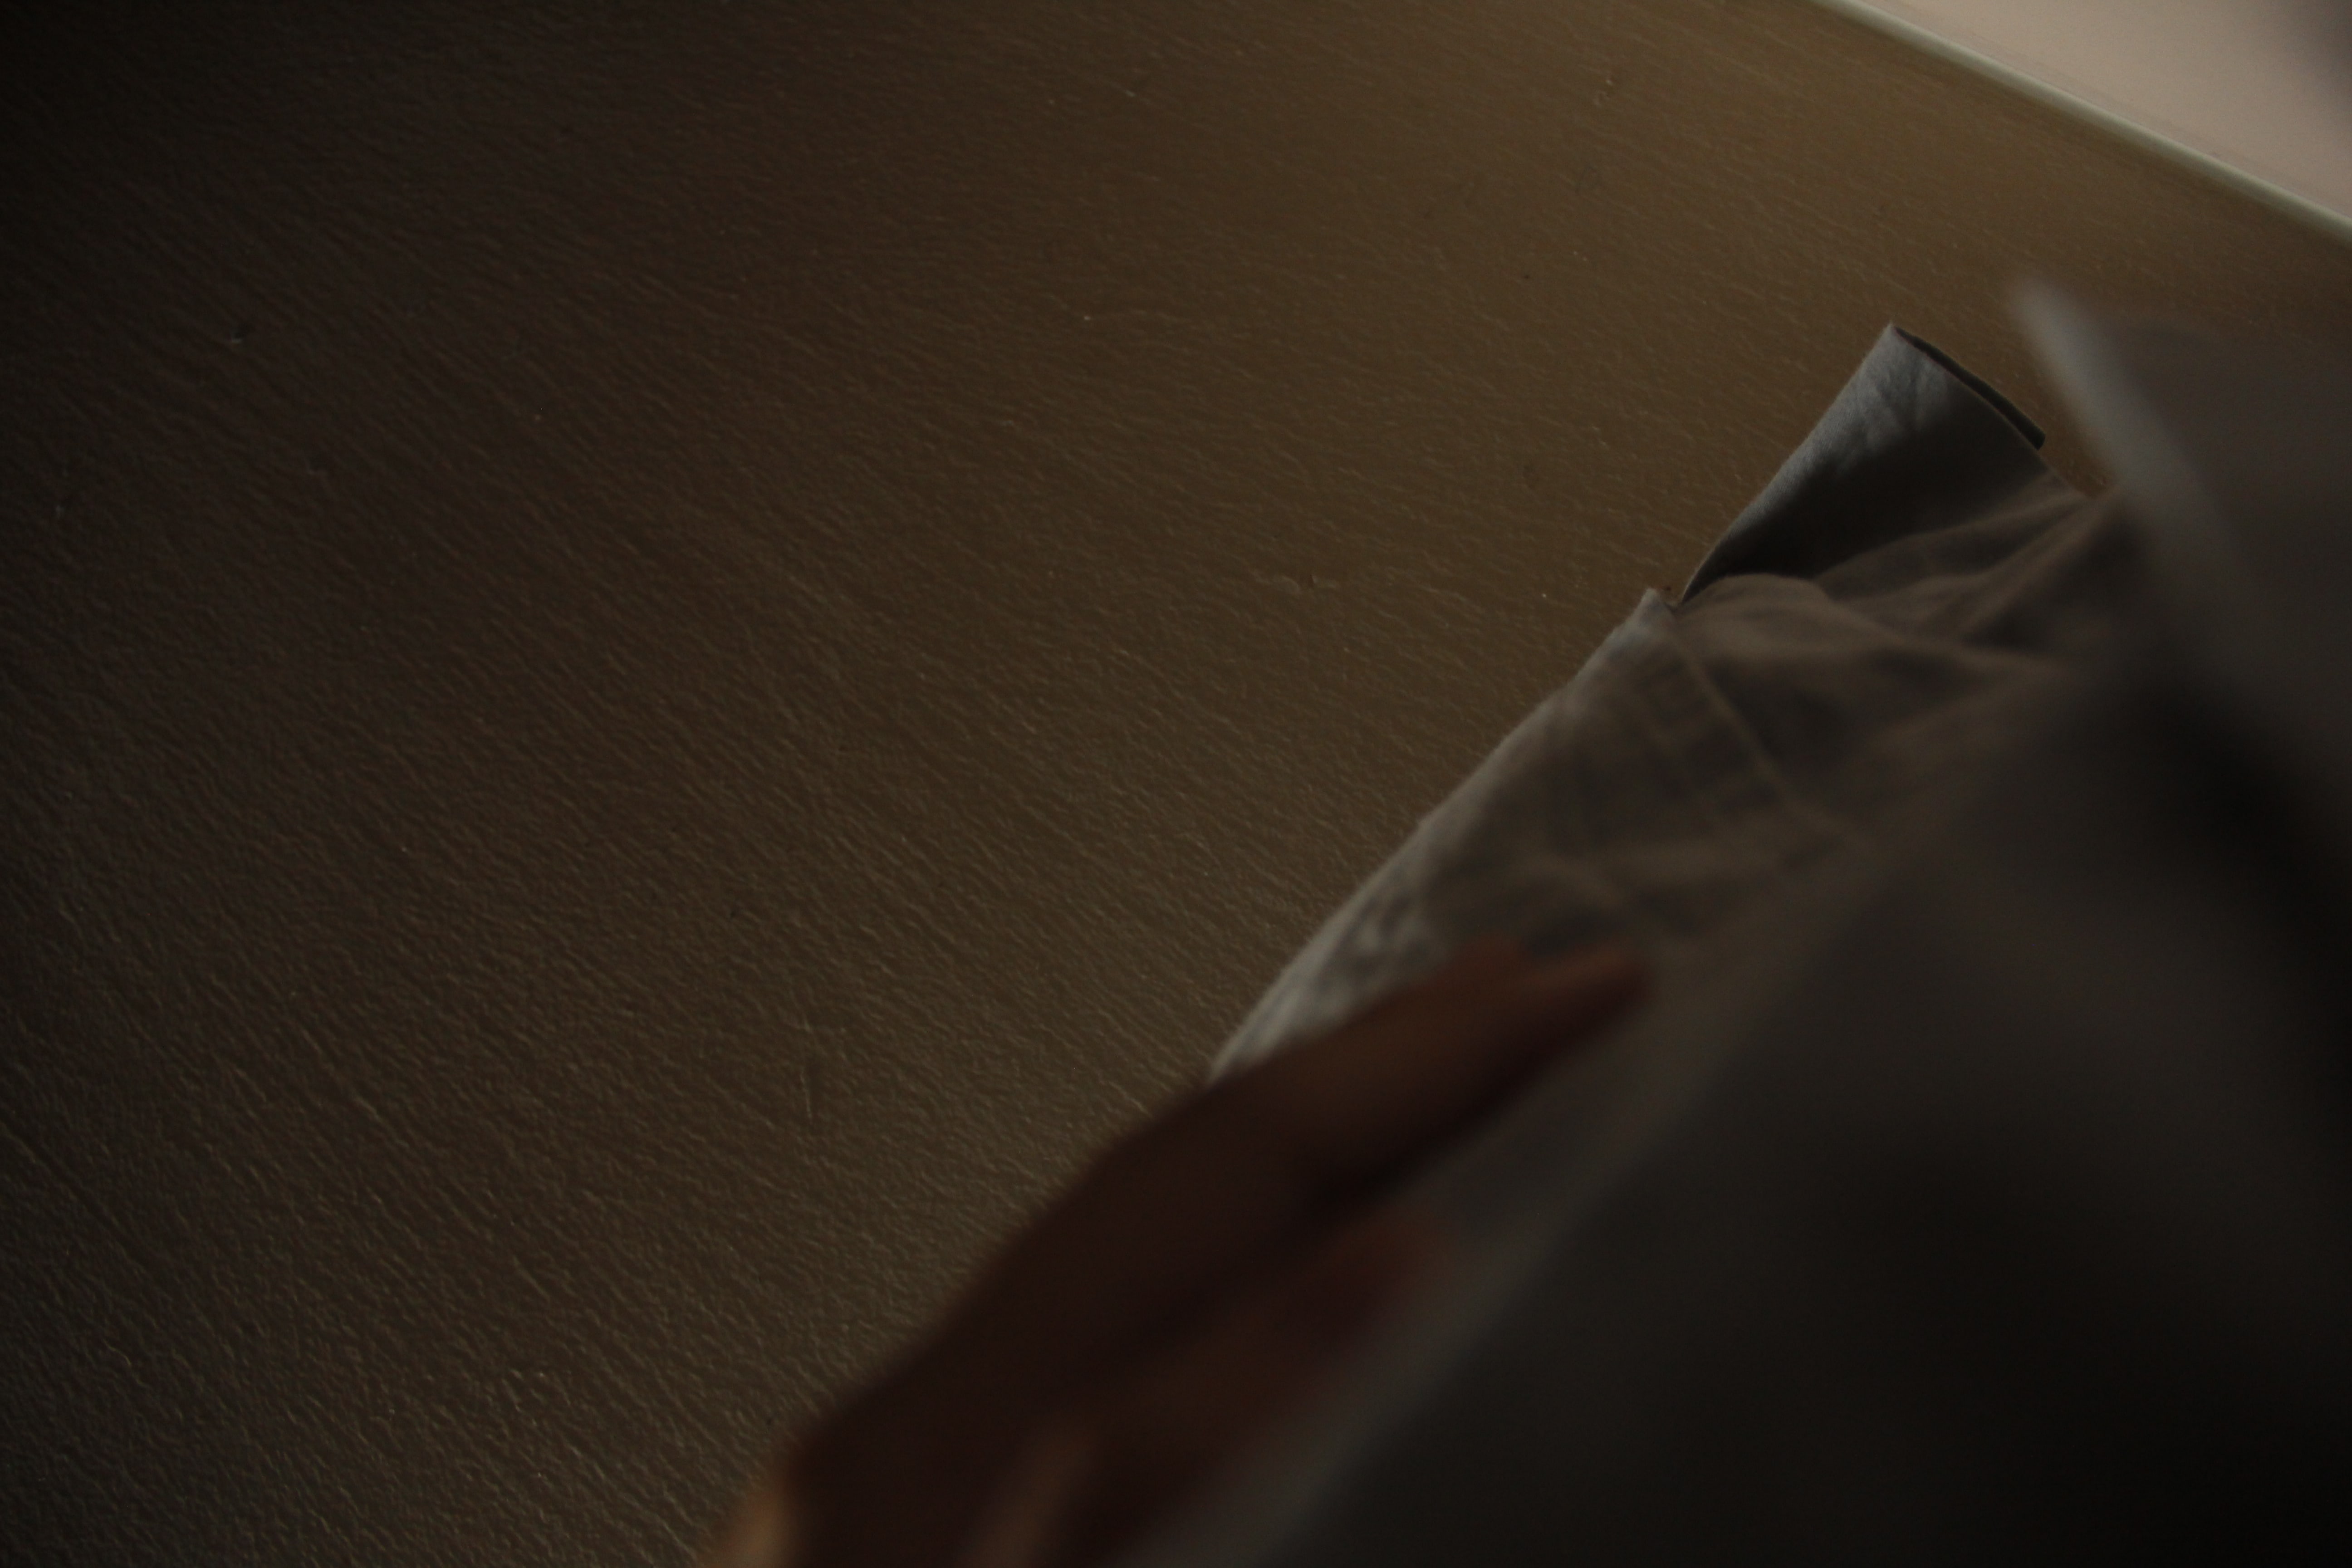
Blearily waking up to the sight of my hand clutching my pillow
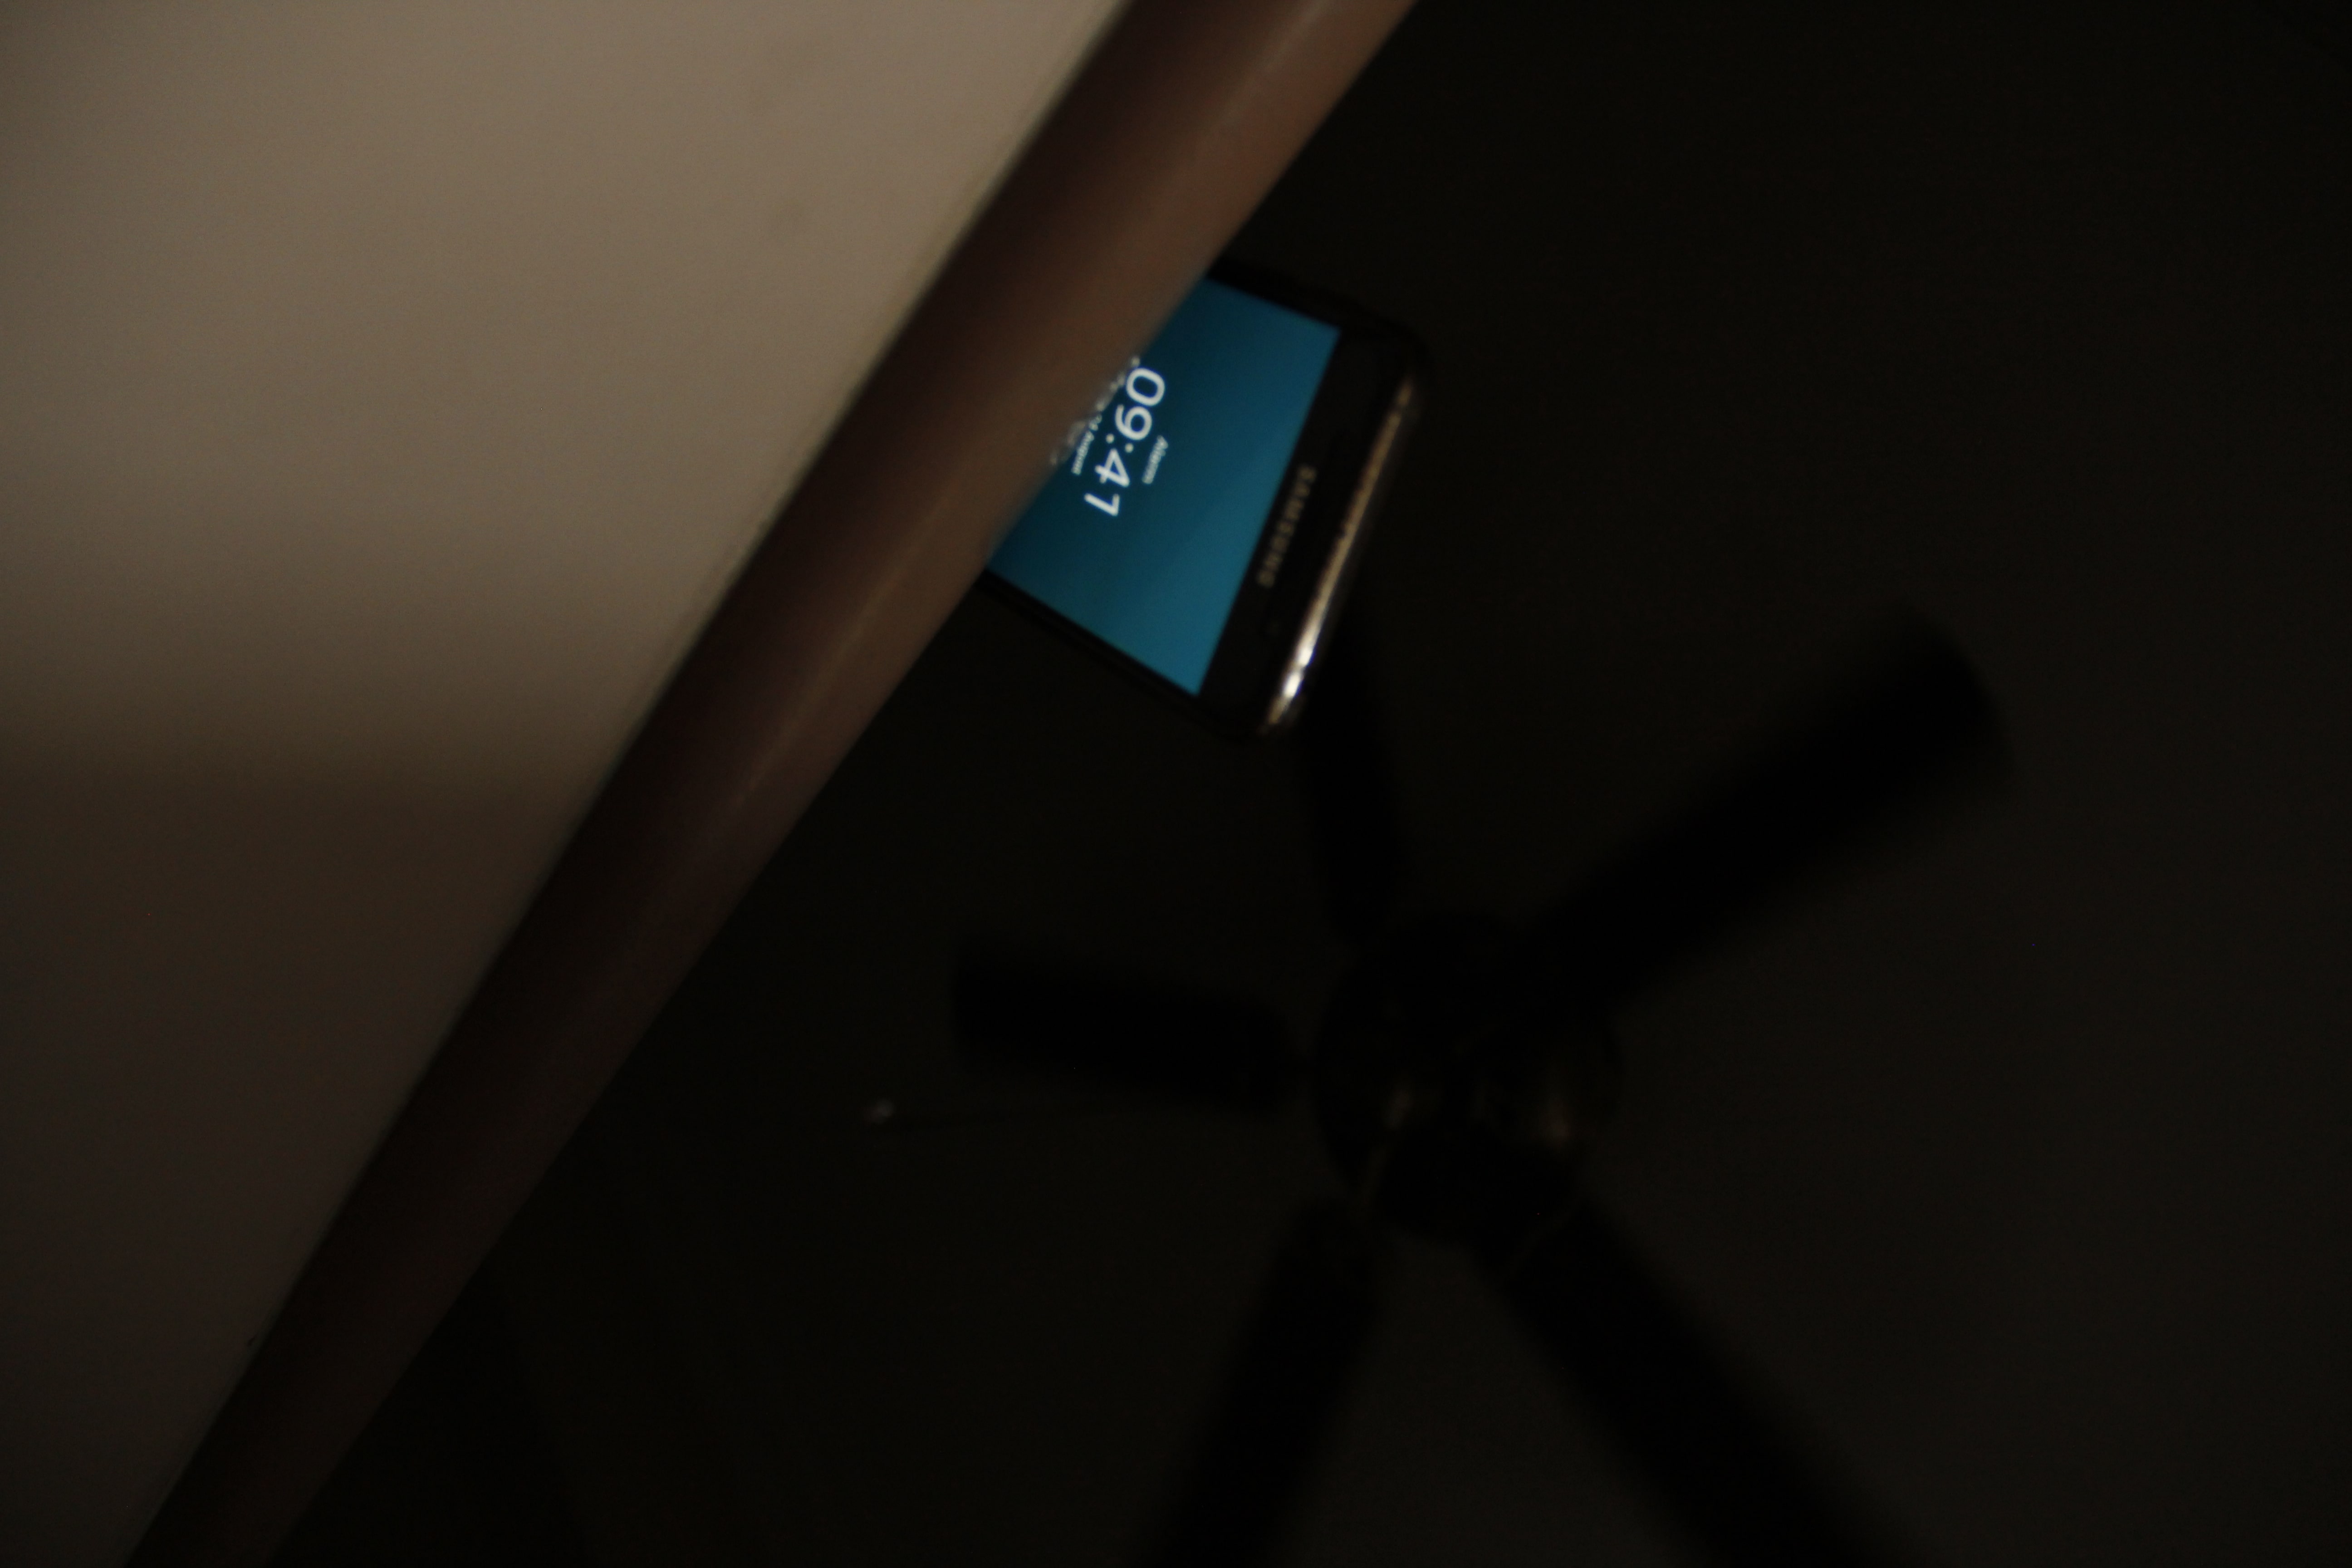
Looking up to see my phone alarm going off at the headboard
Looking past the phone to see the light on the ceiling
Looking at the foot of my bed to see the light streaming in from the window
In the final display I also varied the distance between each photo to indicate the amount of time between each photo (also why the 0100 photo was ridiculously far away from every other photo).
Everything above has mostly explained it, but to summarise, the Key Concept & Idea was the intimate and cosy connection between it and me, by providing a glimpse into a daily morning routine.
FINAL REMARKS & REFLECTIONS
All photos were left unedited simply because I opened the first photo in Photoshop, tried to put filters, and realised that I couldn’t find any good reason to edit the photograph whatsoever, in that nothing I did actually felt like it helped with what I was trying to convey, while the unedited versions actually brought across the sense of intimacy and normalcy I found important.
In the end, though, I feel like I’ve definitely tackled (or avoided?) the task in a really weird way, “curating myself” by “not curating myself”. For the next task(s), I’m vaguely curious to know if, when more divorced from the self, I’ll produce something which blends in seamlessly with everyone else’s.
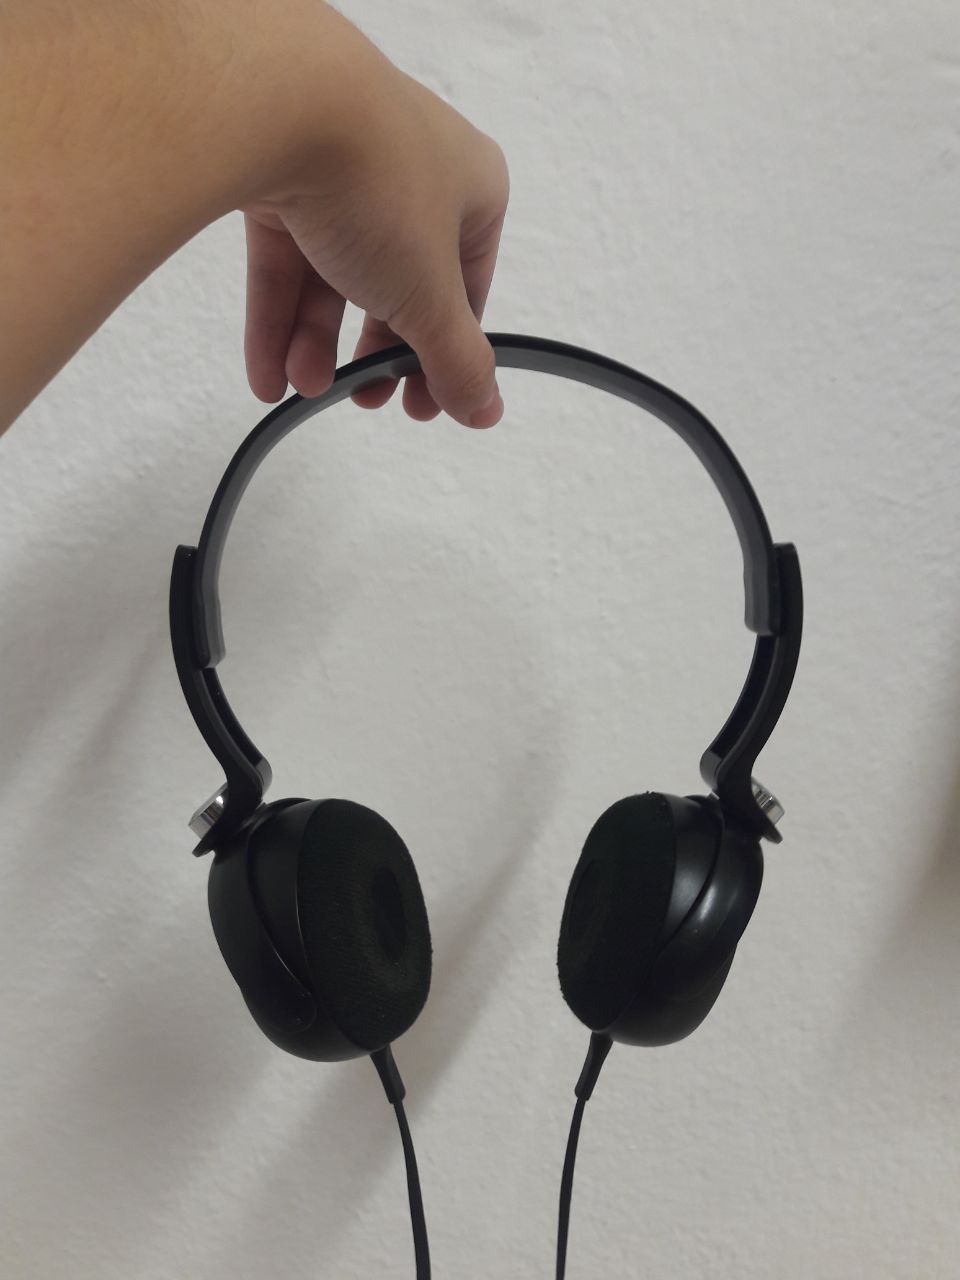
For the lesson, I brought my headphones, which was a decision mostly influenced by an overwhelming number of standard-shaped items, and the fact that my headphones are in fact quite a comfortable accessory which I like to bring everywhere.
Hi.
Personally, what I noticed first was
Colour
Symmetry (and Flatness)
Positive/Negative Spaces (and Circularity)
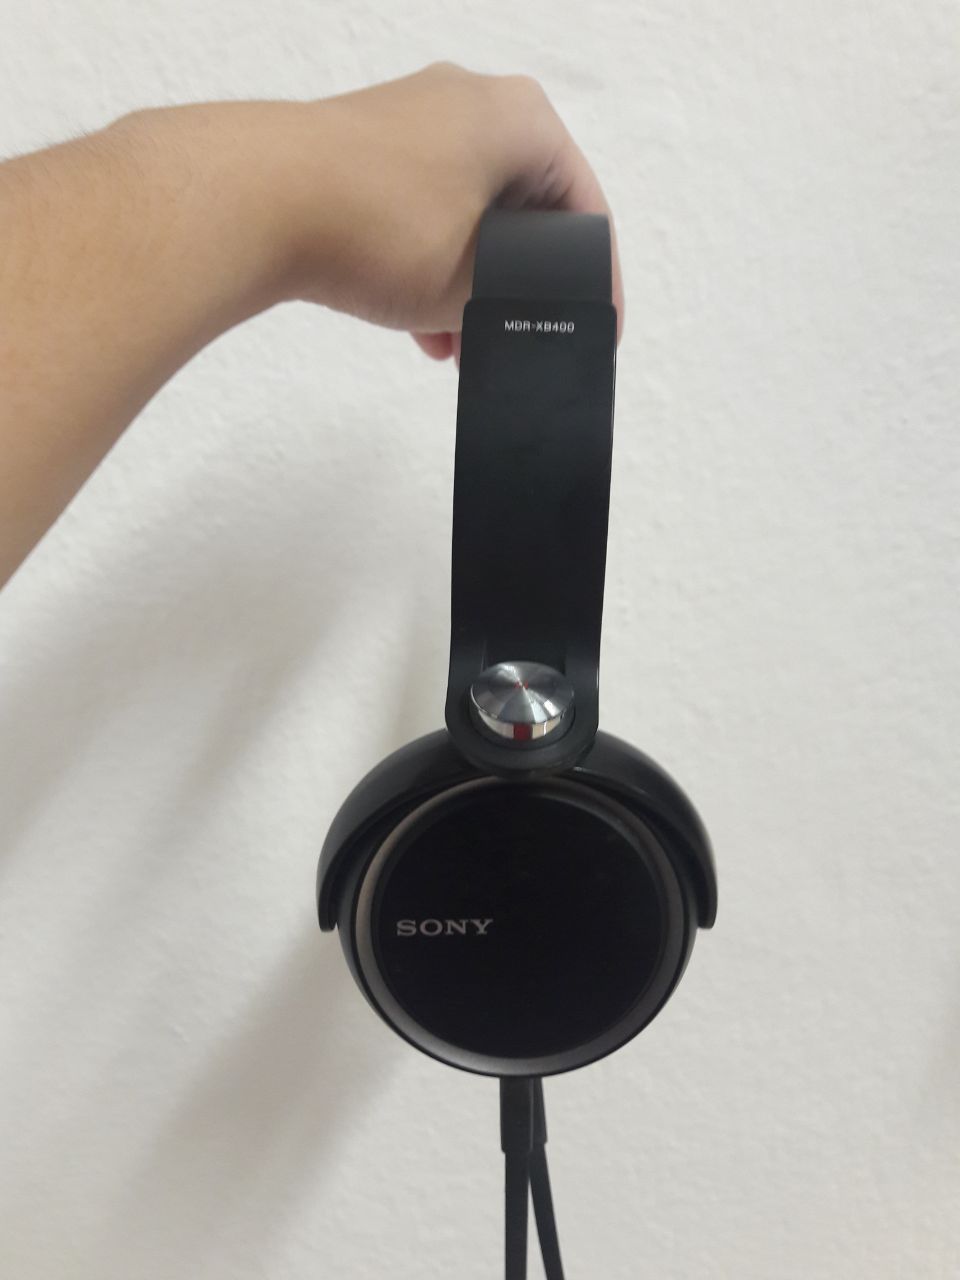
Other things that Cheryl (Ms. Heng? I’m still not used to the first name thing) raised, which I didn’t really notice, was the texture, and proportions AFTER extending it (I guess you don’t think too much about changing the state when you’ve been using something in a certain state for too long).
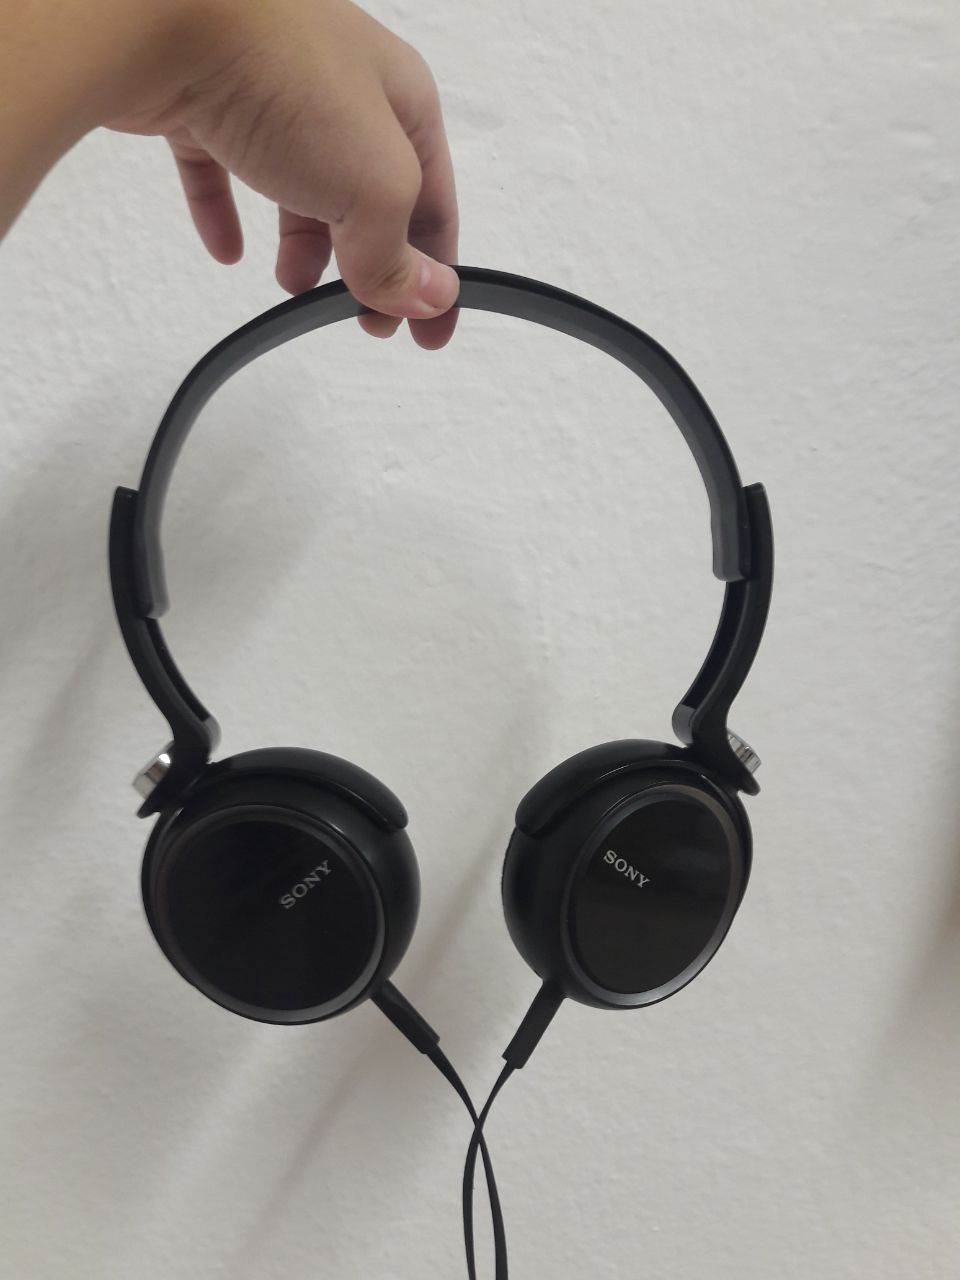
In terms of colour, it’s predominantly black, with silver as the subdominant colour. I find that there’re different silvers as well, with the silver button(?) being subdominant by virtue of how bright and reflective it is (I personally feel like it’s so bright that it’s trying too hard to be dominant, which really irks me). The SONY words are also subdominant by virtue of size (it’s a much more tolerable silver to me), and the silver linings are so dull they’re effectively subordinate. The model name is mostly just irrelevant by virtue of size.
Extension. The easiest way to see it is if the wires begin to cross each other.
Cheryl also noted that the black varies in terms of texture, which was such a prominent point that I mentally slapped myself for not seeing it. There’s the matte black of the headband, as opposed to the glossy black of the earpieces (I’m not too sure what to call the black of the wire, but it resembles the matte more). After extending, a lot of rule of third comes into play: the headband makes up 2/3 and the earpieces 1/3. The silver button(?) is at the 1/3 mark, and the model name is also at the 1/3 mark, along with the extension marker.
Symmetry. Turning the earpiece makes it flat.
Symmetry is also a prominent feature to me, where it’s obviously a practical decision, but also makes it look harmonious. This symmetry applies from practically all angles. If the earpieces are turned accordingly, the headphones also allow for a flat plane from almost all angles too. (Incidentally, this is something I enjoy about the headphones, that it can lie flat around my neck and it can be flatten and kept.)
Something else of note is also the contrast of positive/negative spaces. The headband traces a circular shape which isn’t filled, and, fun fact! The radius of the void is roughly the diameter of the earpiece. Meaning, twice the size. What I DON’T like, however, is how all the shapes are all similar. You have circular earpieces, circular negative space, circular button(? it’s not actually a button but I have no other word for it), and it’s incredibly overwhelming. Perhaps it was intended for a sense of unison, so I might just be the outlier.
(I do like the flat wire though, even if the headband shares a similar shape too.)
It’s probably really obvious that I have problems with photography too, isn’t it 🙁
(There’s some stuff in the 2D sketch which I didn’t cover above since it was all mostly straightforward, so if you’re feeling up to it you can see as above.)
If there’s anything I’ve truly learned from Lesson 1, though, it’s that you shouldn’t make assumptions. It’s sorely disappointing to have nothing to be critiqued on because you misinterpreted the limits of the prompt (and didn’t clarify it!) so I shall have to make an effort to work on that.
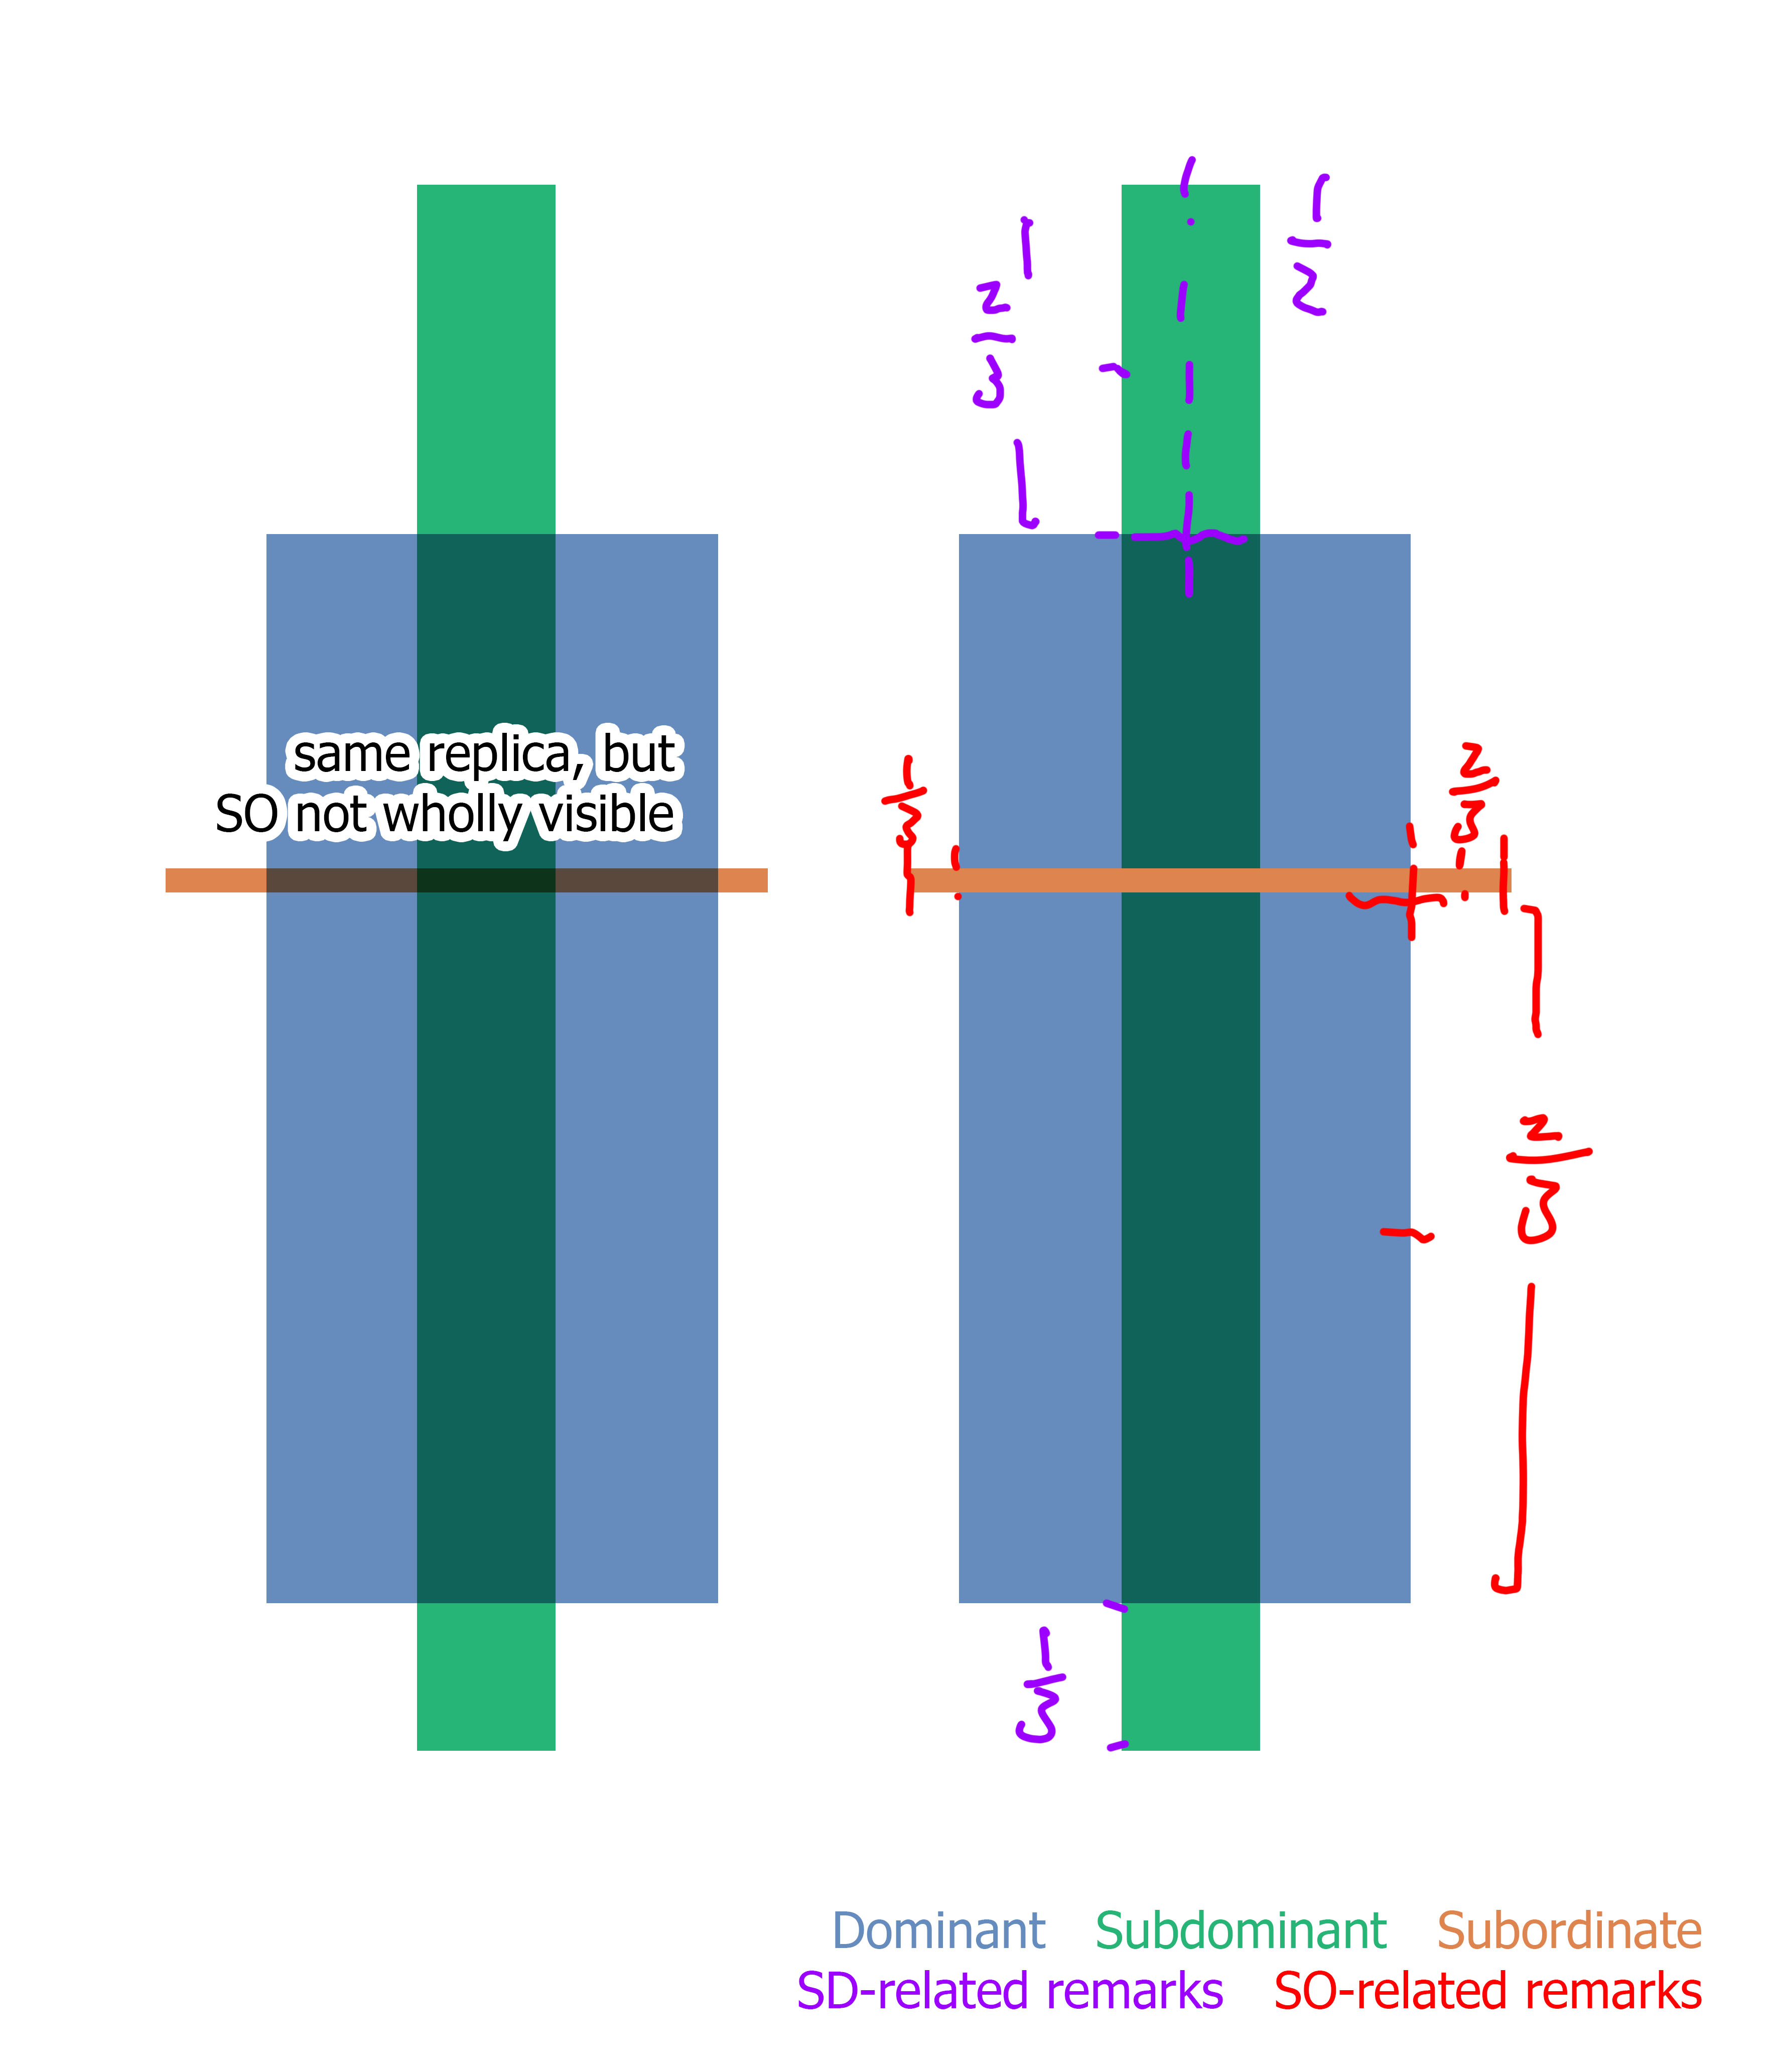
I was given the theme of X Y Z axes, and 1. I assumed you couldn’t use adhesives and could only stack 2. I assumed you could use all 3 together to form 1 bigger picture, hahaha hahah a ha…. ha………………………….. Needless to say, I failed magnificently. So I redid the models. Here they are! (While I had the foresight to use my hoard of A2 paper, I severely overestimated its ability to accommodate the dimensions… Time to hoard A1 instead)
While making them, I tried to keep in mind the various comments Cheryl gave in class to everyone, on trying to avoid using boxes with dimensions which matched, flushing boxes to each other, rule of 3, ignoring colours for now, et cetera. On a personal level, I also tried to avoid using similar boxes, similar here having the same meaning as for similar triangles/rectangles/et cetera.
(Note that the distinction between the subdominant and subordinate is not particularly clear, where this was the only configuration I could make where the boxes were of varying dimensions, at the cost of being able to use size to differentiate dominance. I probably need a better box collection. Or to learn to prioritise.)
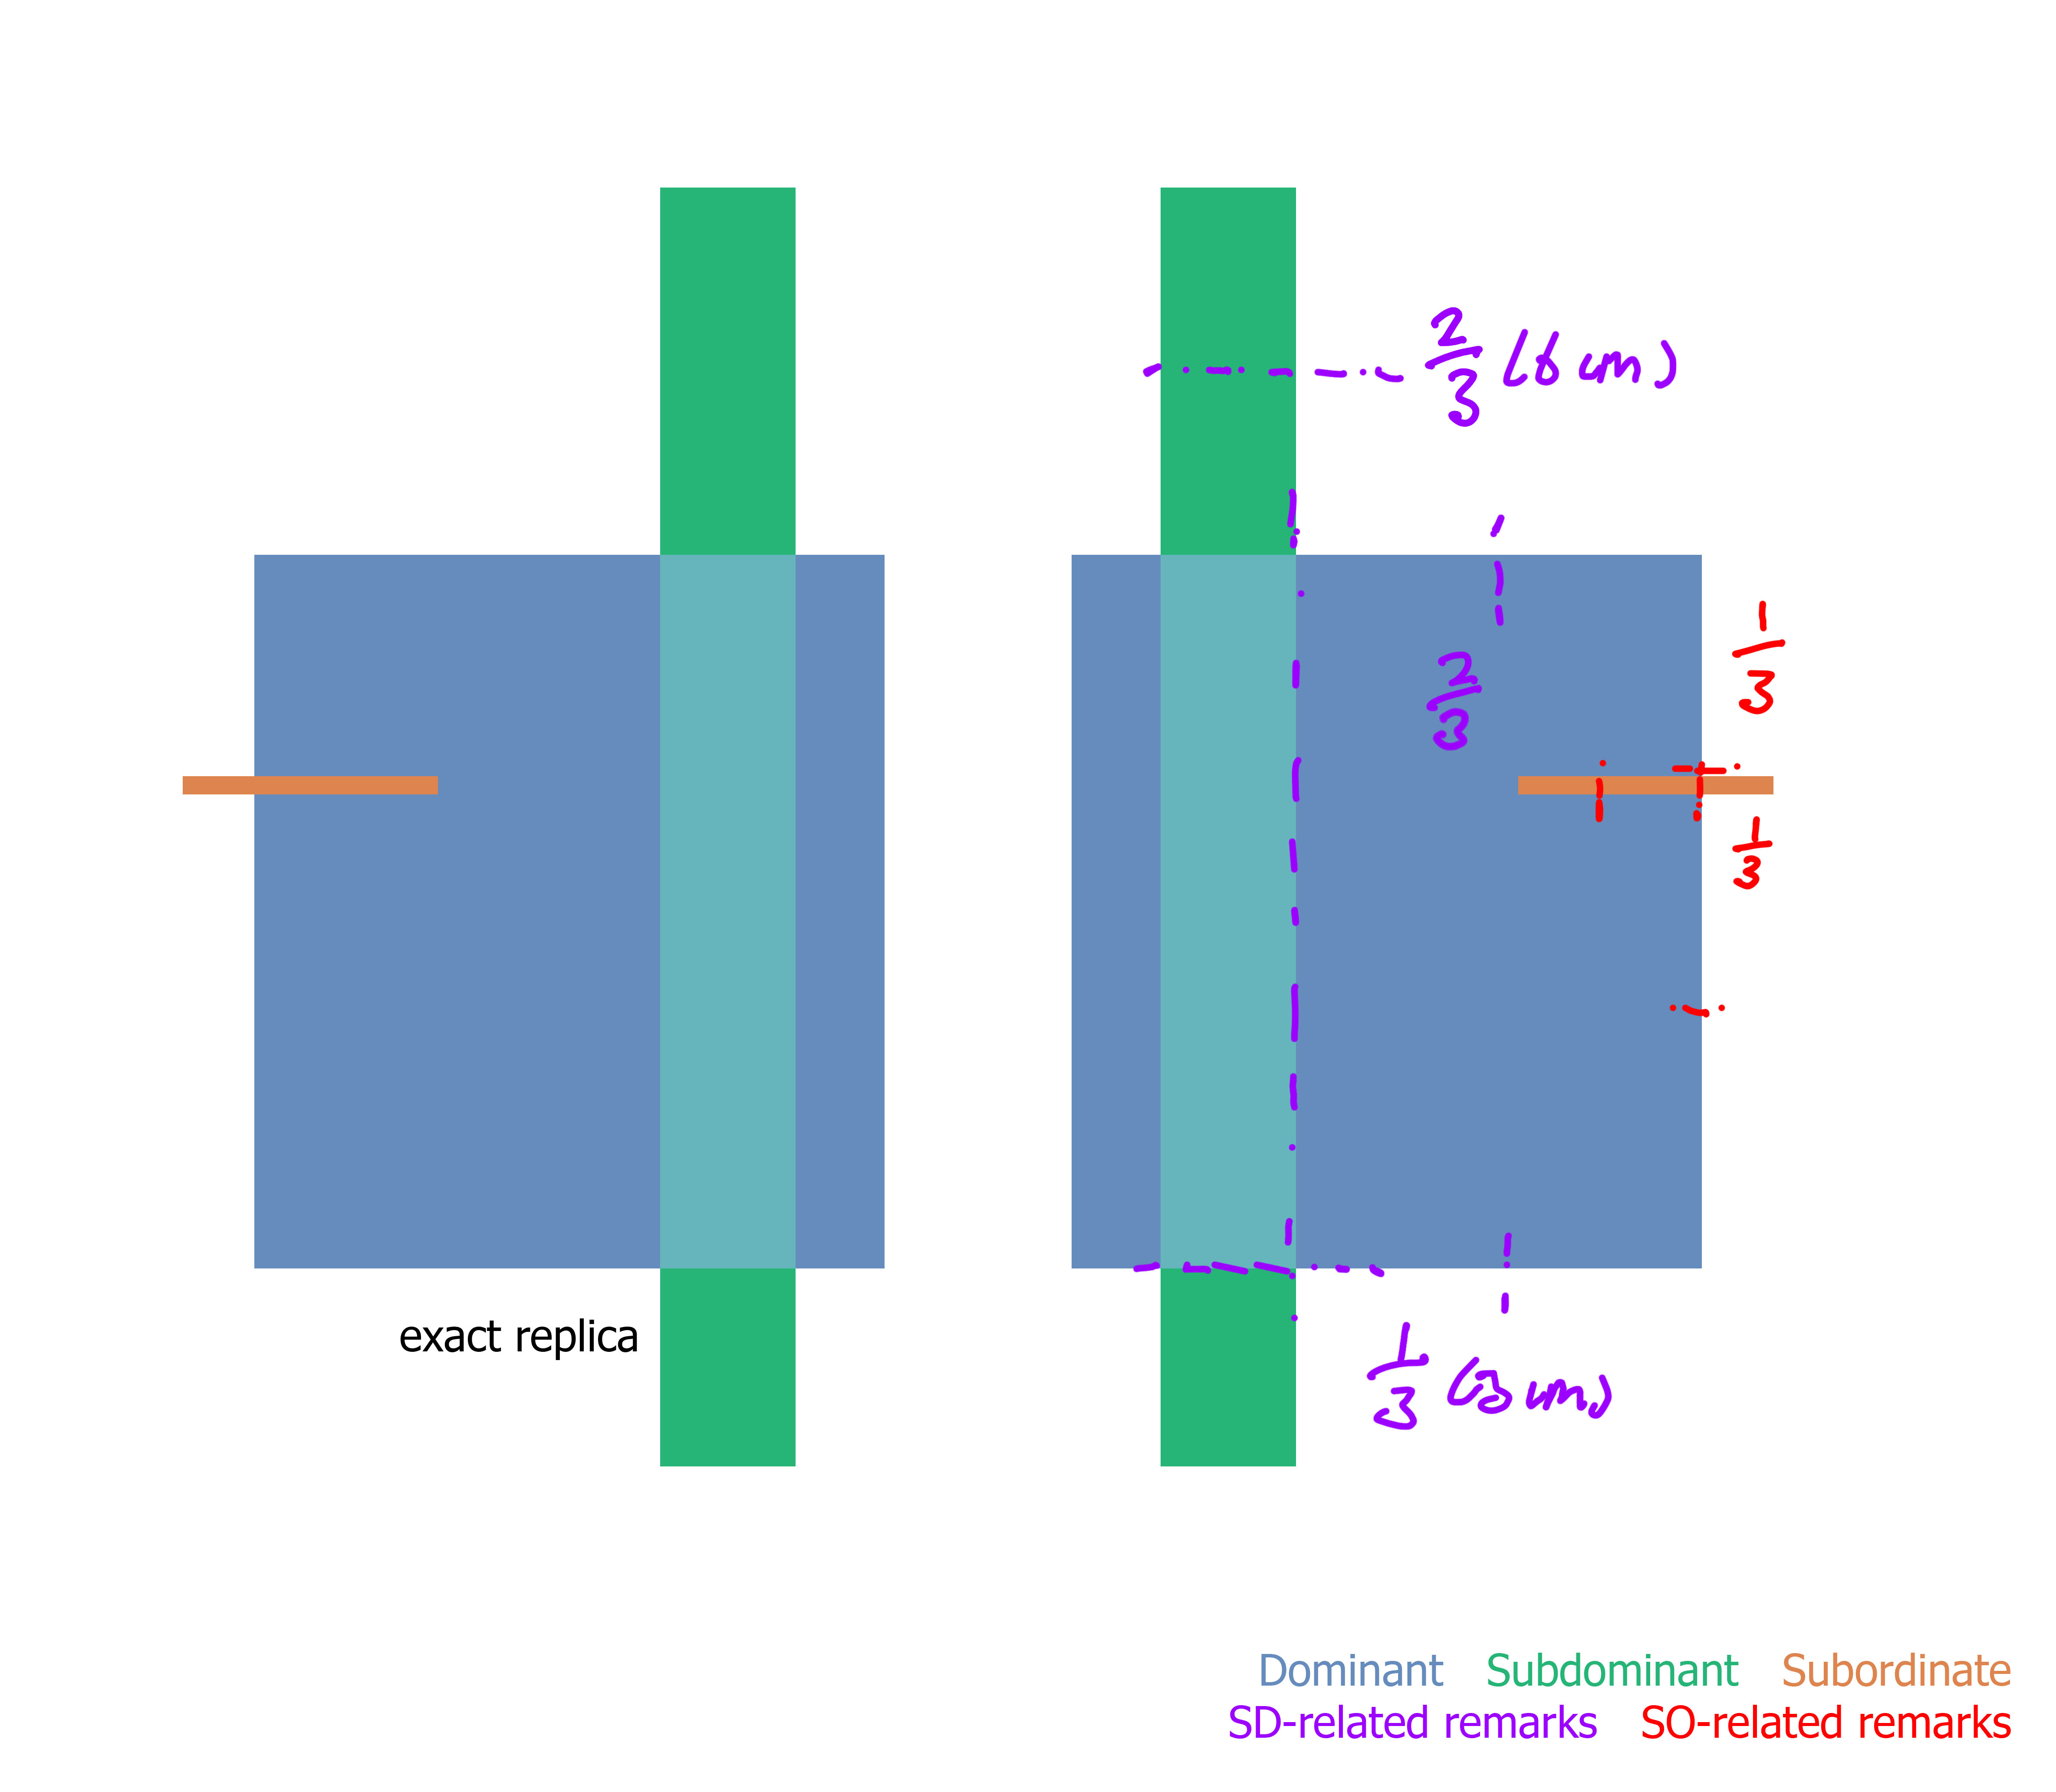
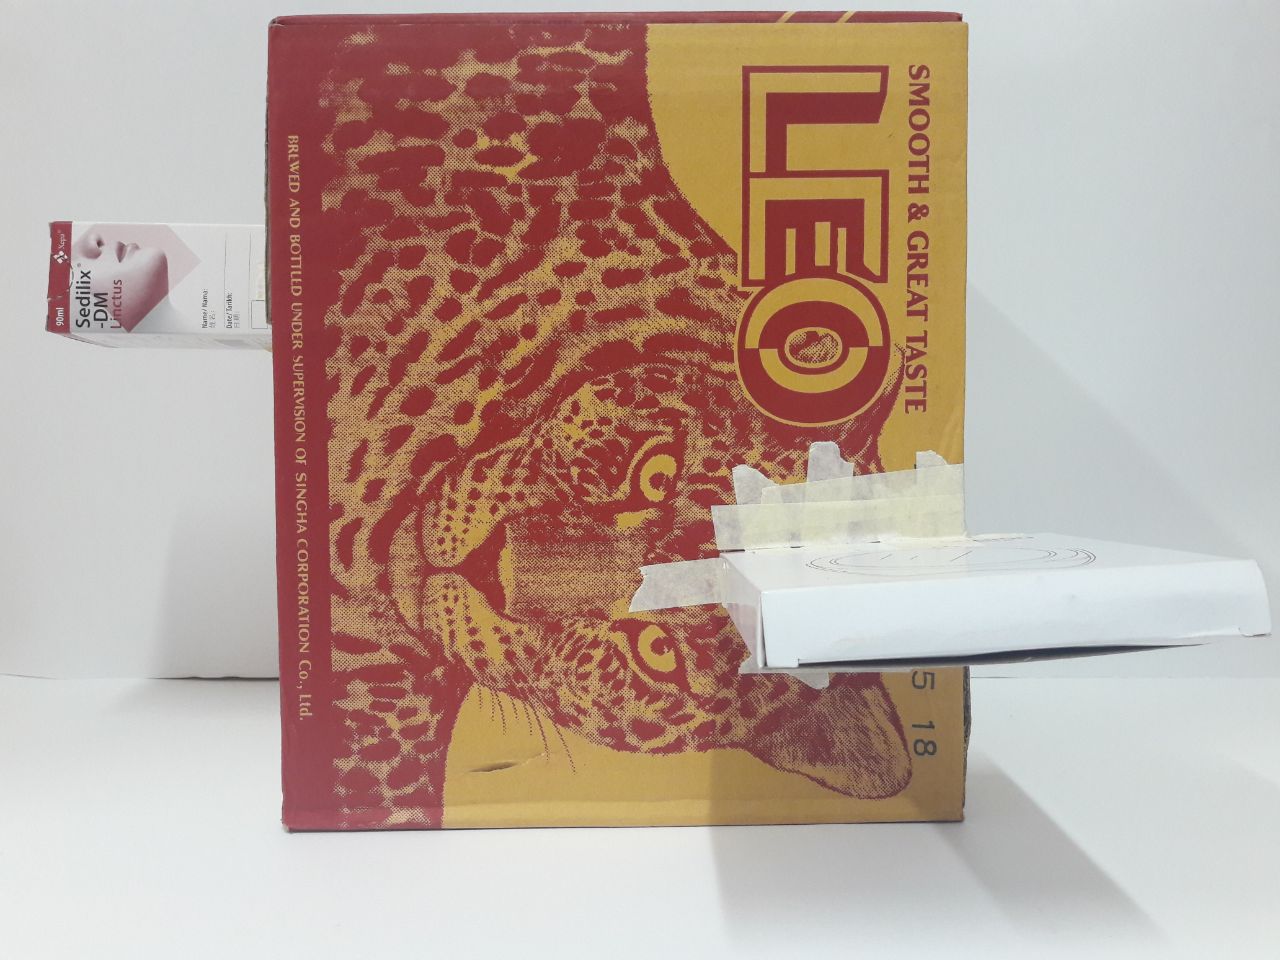
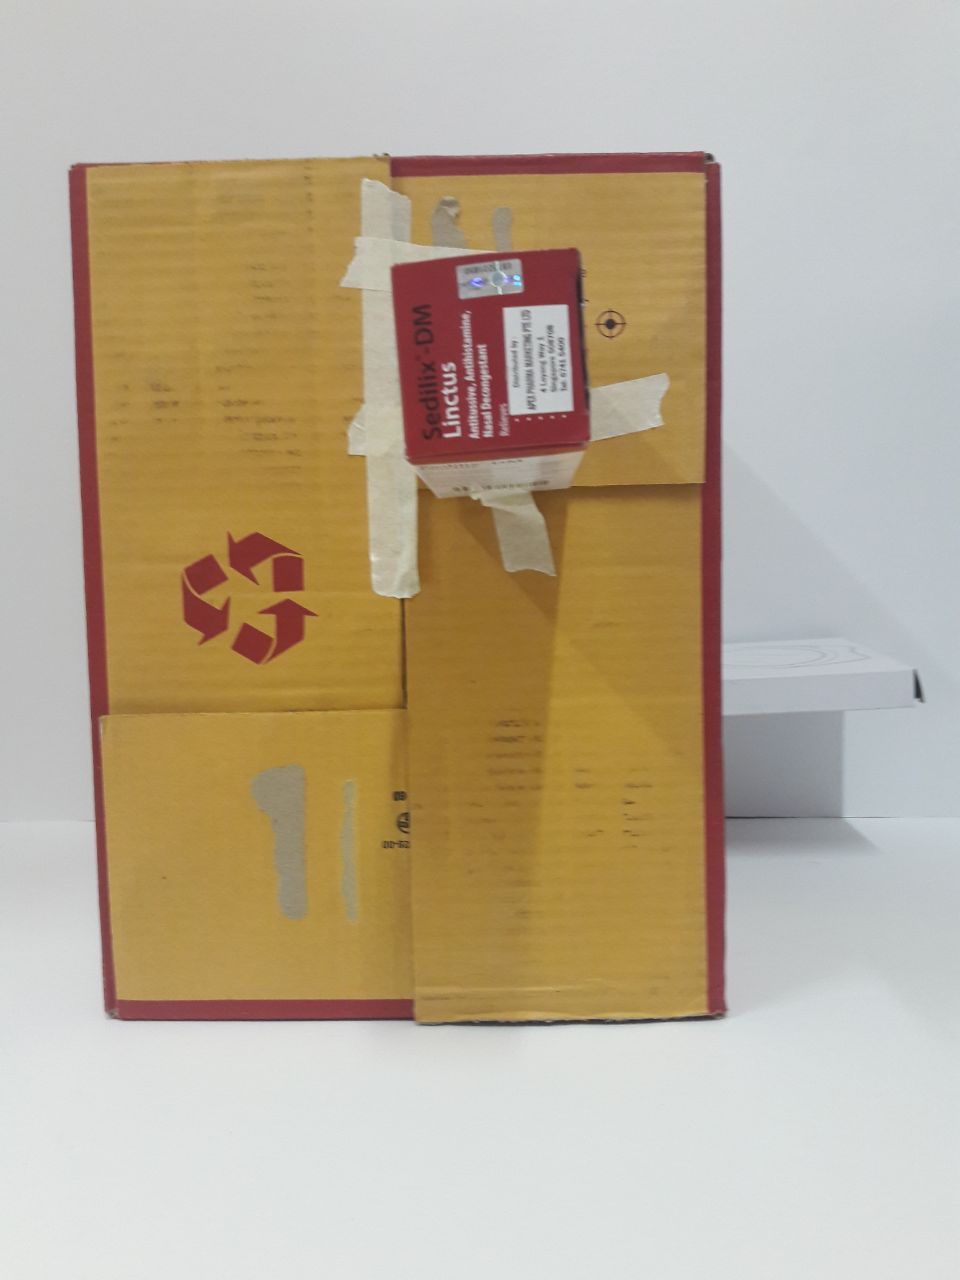
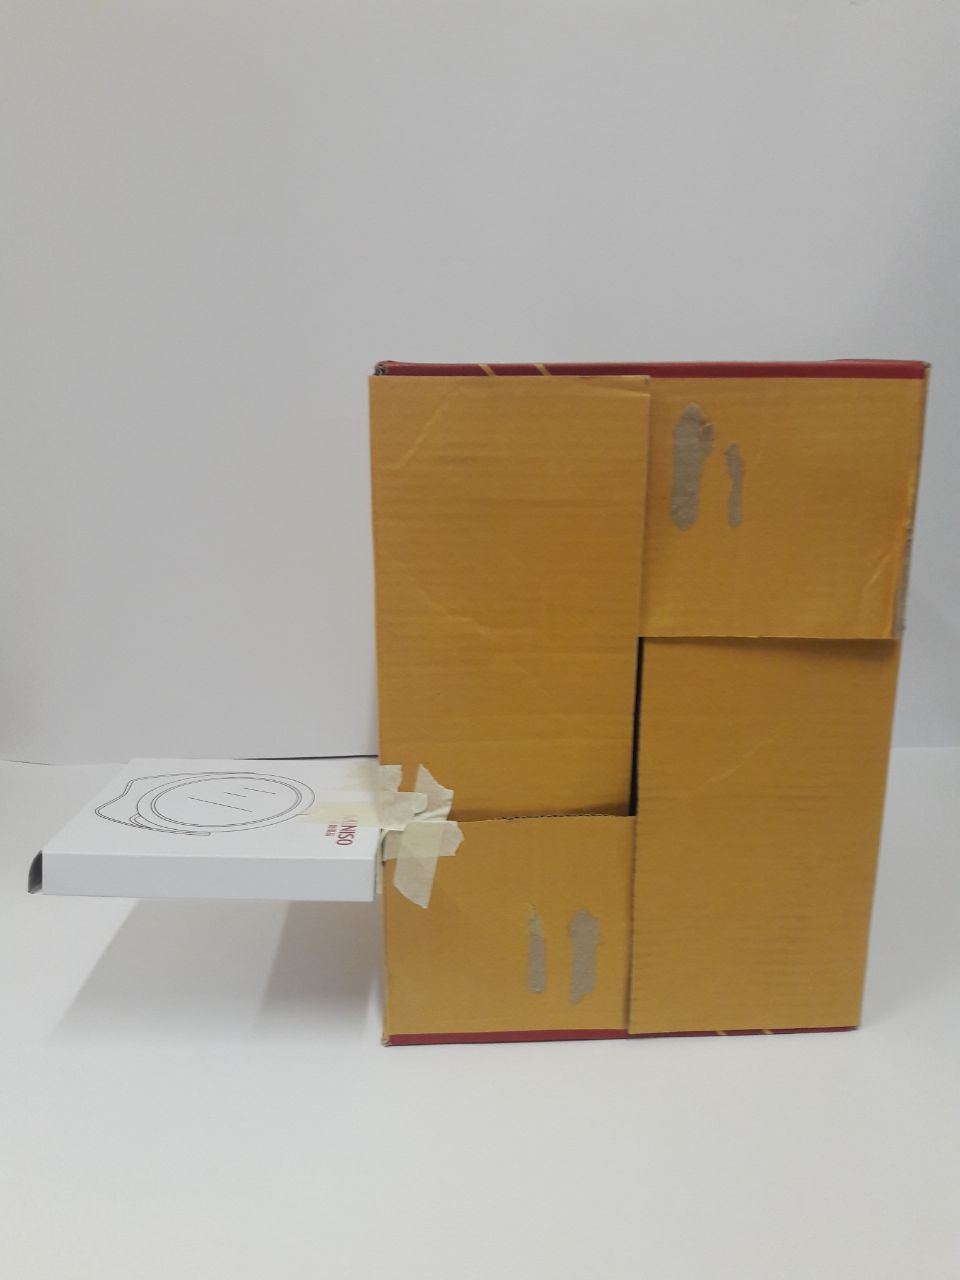
Side Front
Side Left
Side Back
Side Right
Dominant: Leo (L)
Subdominant: Mirror (S)
Subordinate: Medicine (XS) (but I think the longer width makes it almost equal size, in terms of volume, with the fairly thin mirror box)
For this, I tried to go with a more “random” feel, by spreading out the placement of boxes. That the other two boxes tend towards different edges of the dominant makes the dominant provide “height”, while the 2 other boxes jut outwards in different directions to form the other 2 axes. For no particular reason, I went all out on rule of third, so the mirror and medicine boxes are placed on 1/3 of the dominant box. 1/3 of the mirror box is not in contact with the Leo box either. (I personally find it boring, but that’s life I suppose.)
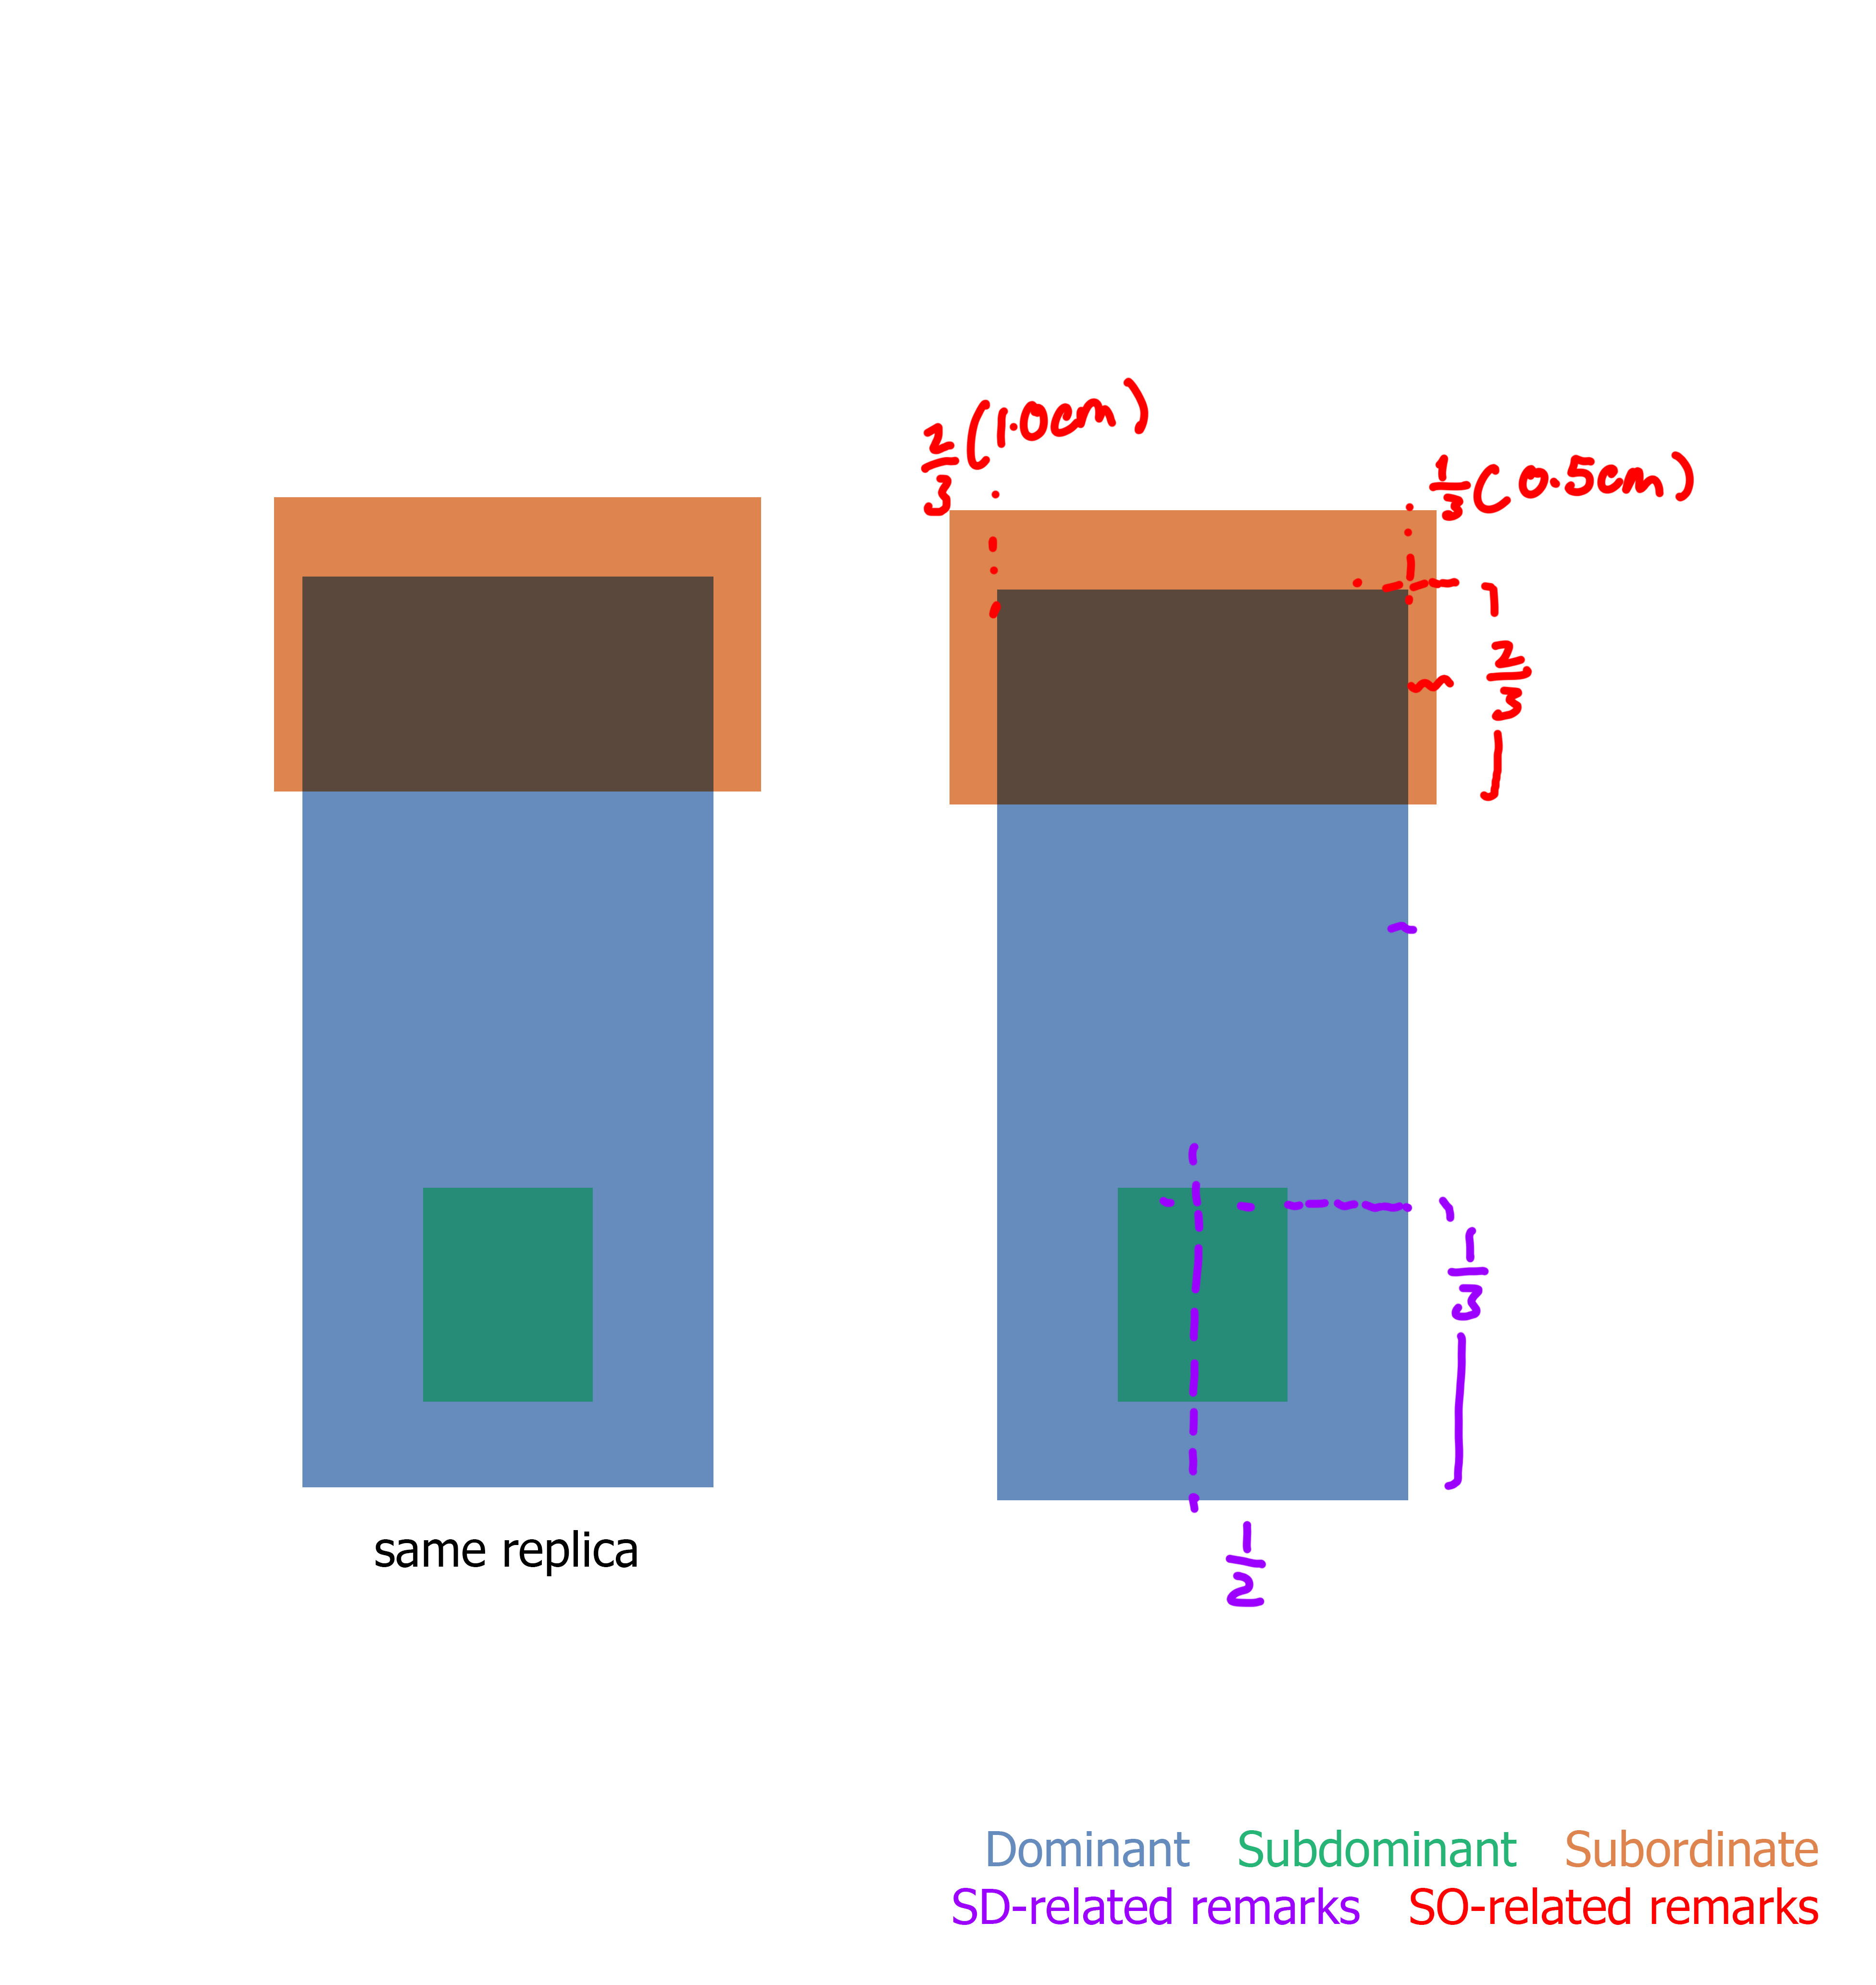
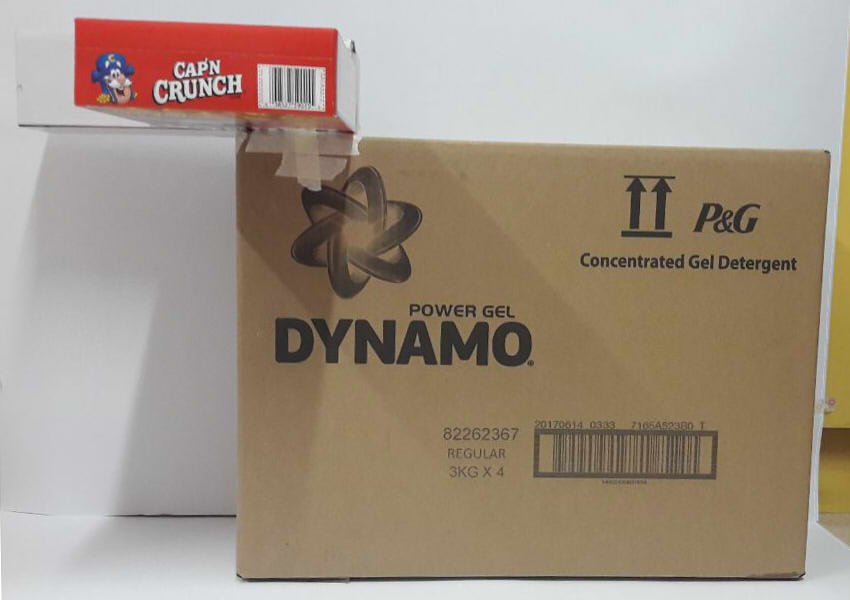
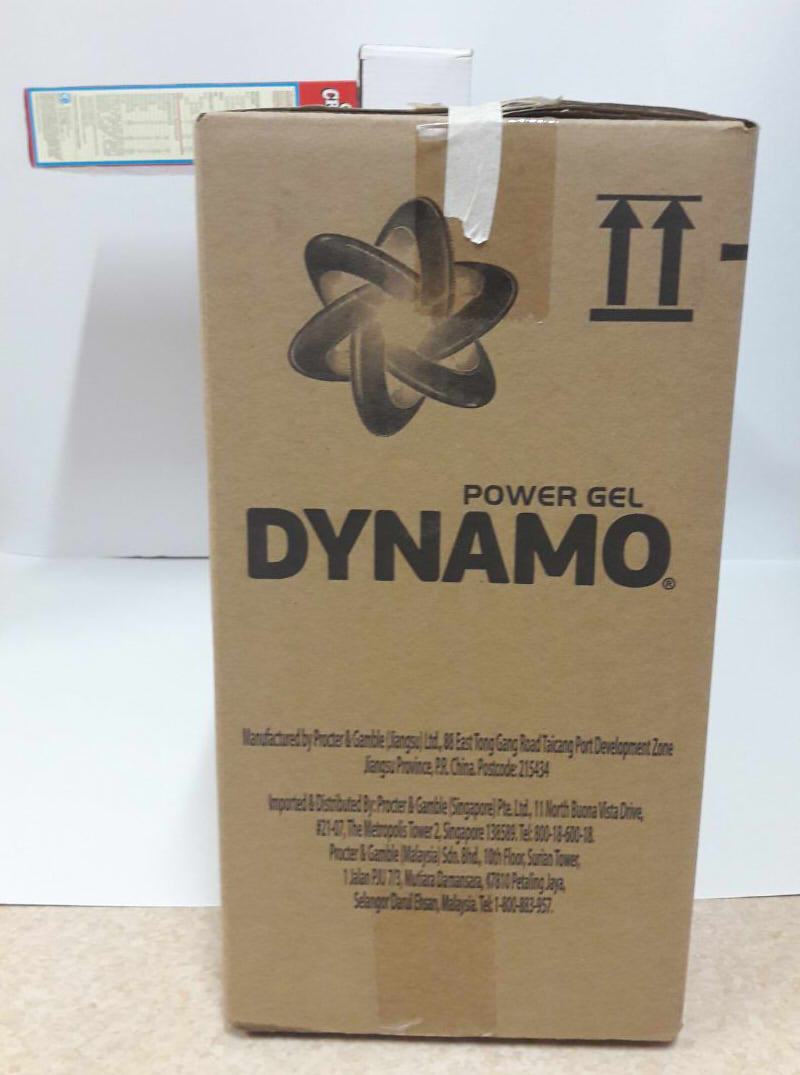
Side Front
Side Right
Side Back
Side Left
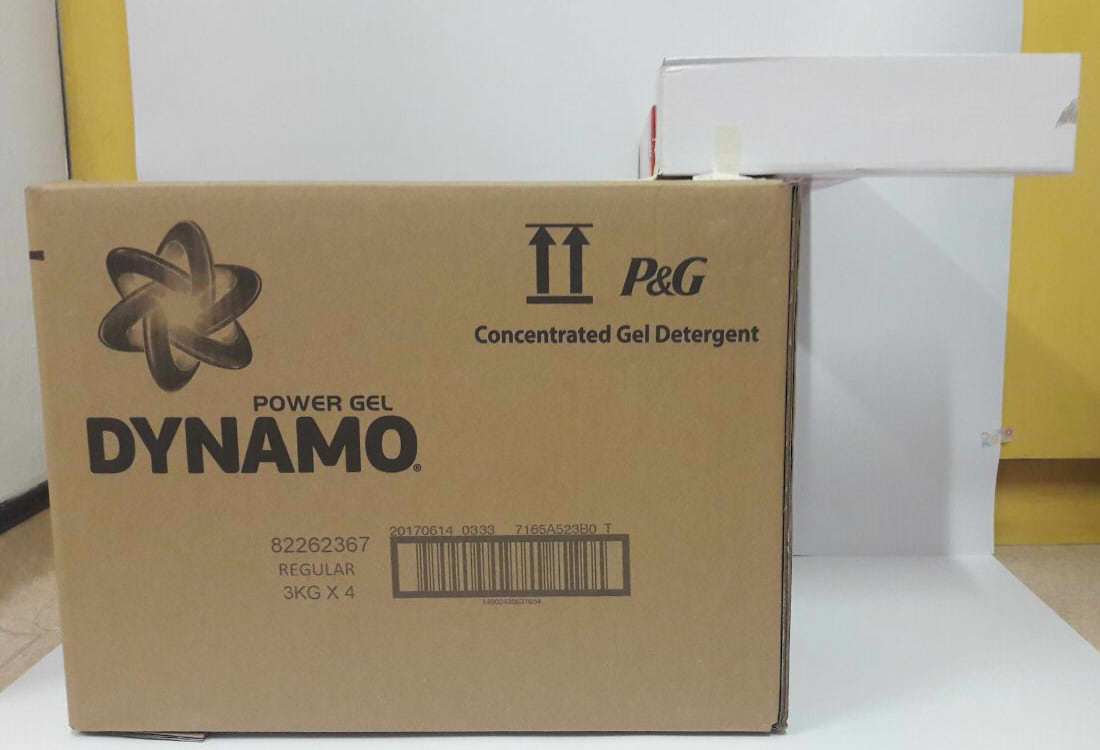
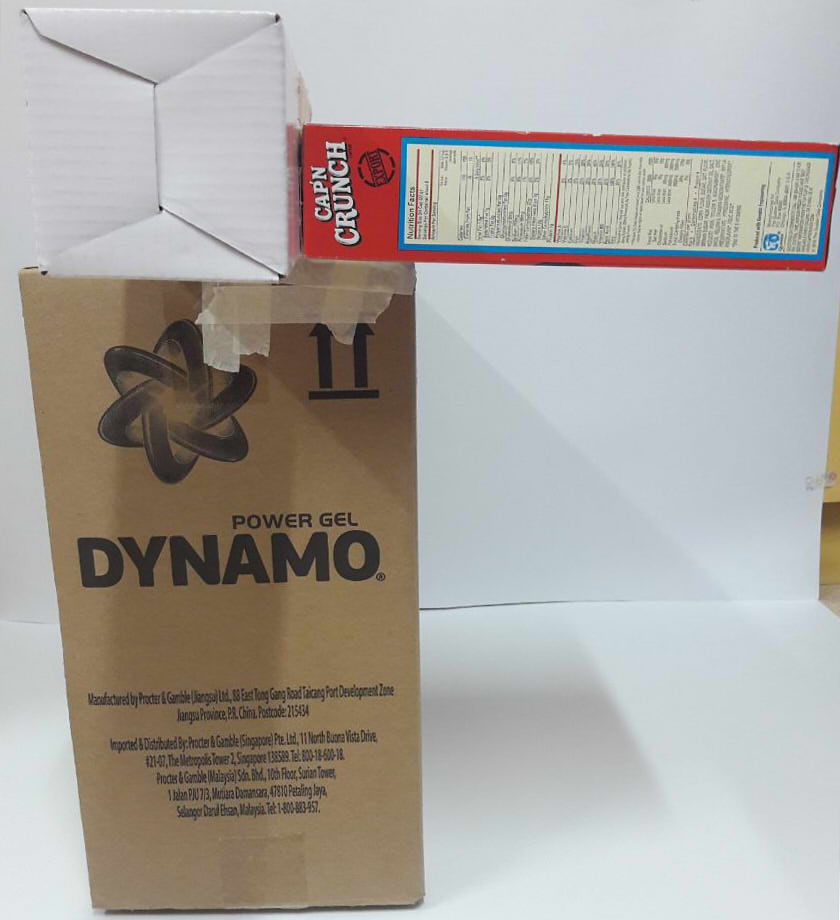
Dominant: Dynamo (XL)
Subdominant: Cap’n Crunch (M)
Subordinate: Whitey (M) (same issue. less length, but more height and width to make up for it)
For this, I neglected the recommendation to not flush boxes (a fair point, because the sheer amount of mass there is really drawing attention away from the dominant), but I wanted to try making an “origin”, the point of intersection for axes. I considered stacking all 3 on top of each other instead to form the point (while still having Crunch and Whitey jut outwards), but I felt like that would accentuate 1 axis far more than the others, so… In hindsight, though, the dominant is so big that it already makes 2 axes quite prominent, and leaves 1 severely lacking where the other boxes are unable to provide the same level of support, and especially where Whitey is making the already long length even longer. I have no idea how to rectify this, but to be fair the very poor selection of boxes and even more poor decision to flush the boxes had long screwed this one over. It’s always good to know what doesn’t work, I guess!
I’m atrocious with anything involving more than flat planes, so 3D is really looking to be a challenge, but I… Shall do what I can. Which is not a lot. But, as McEwan once wrote, “the attempt was all”.
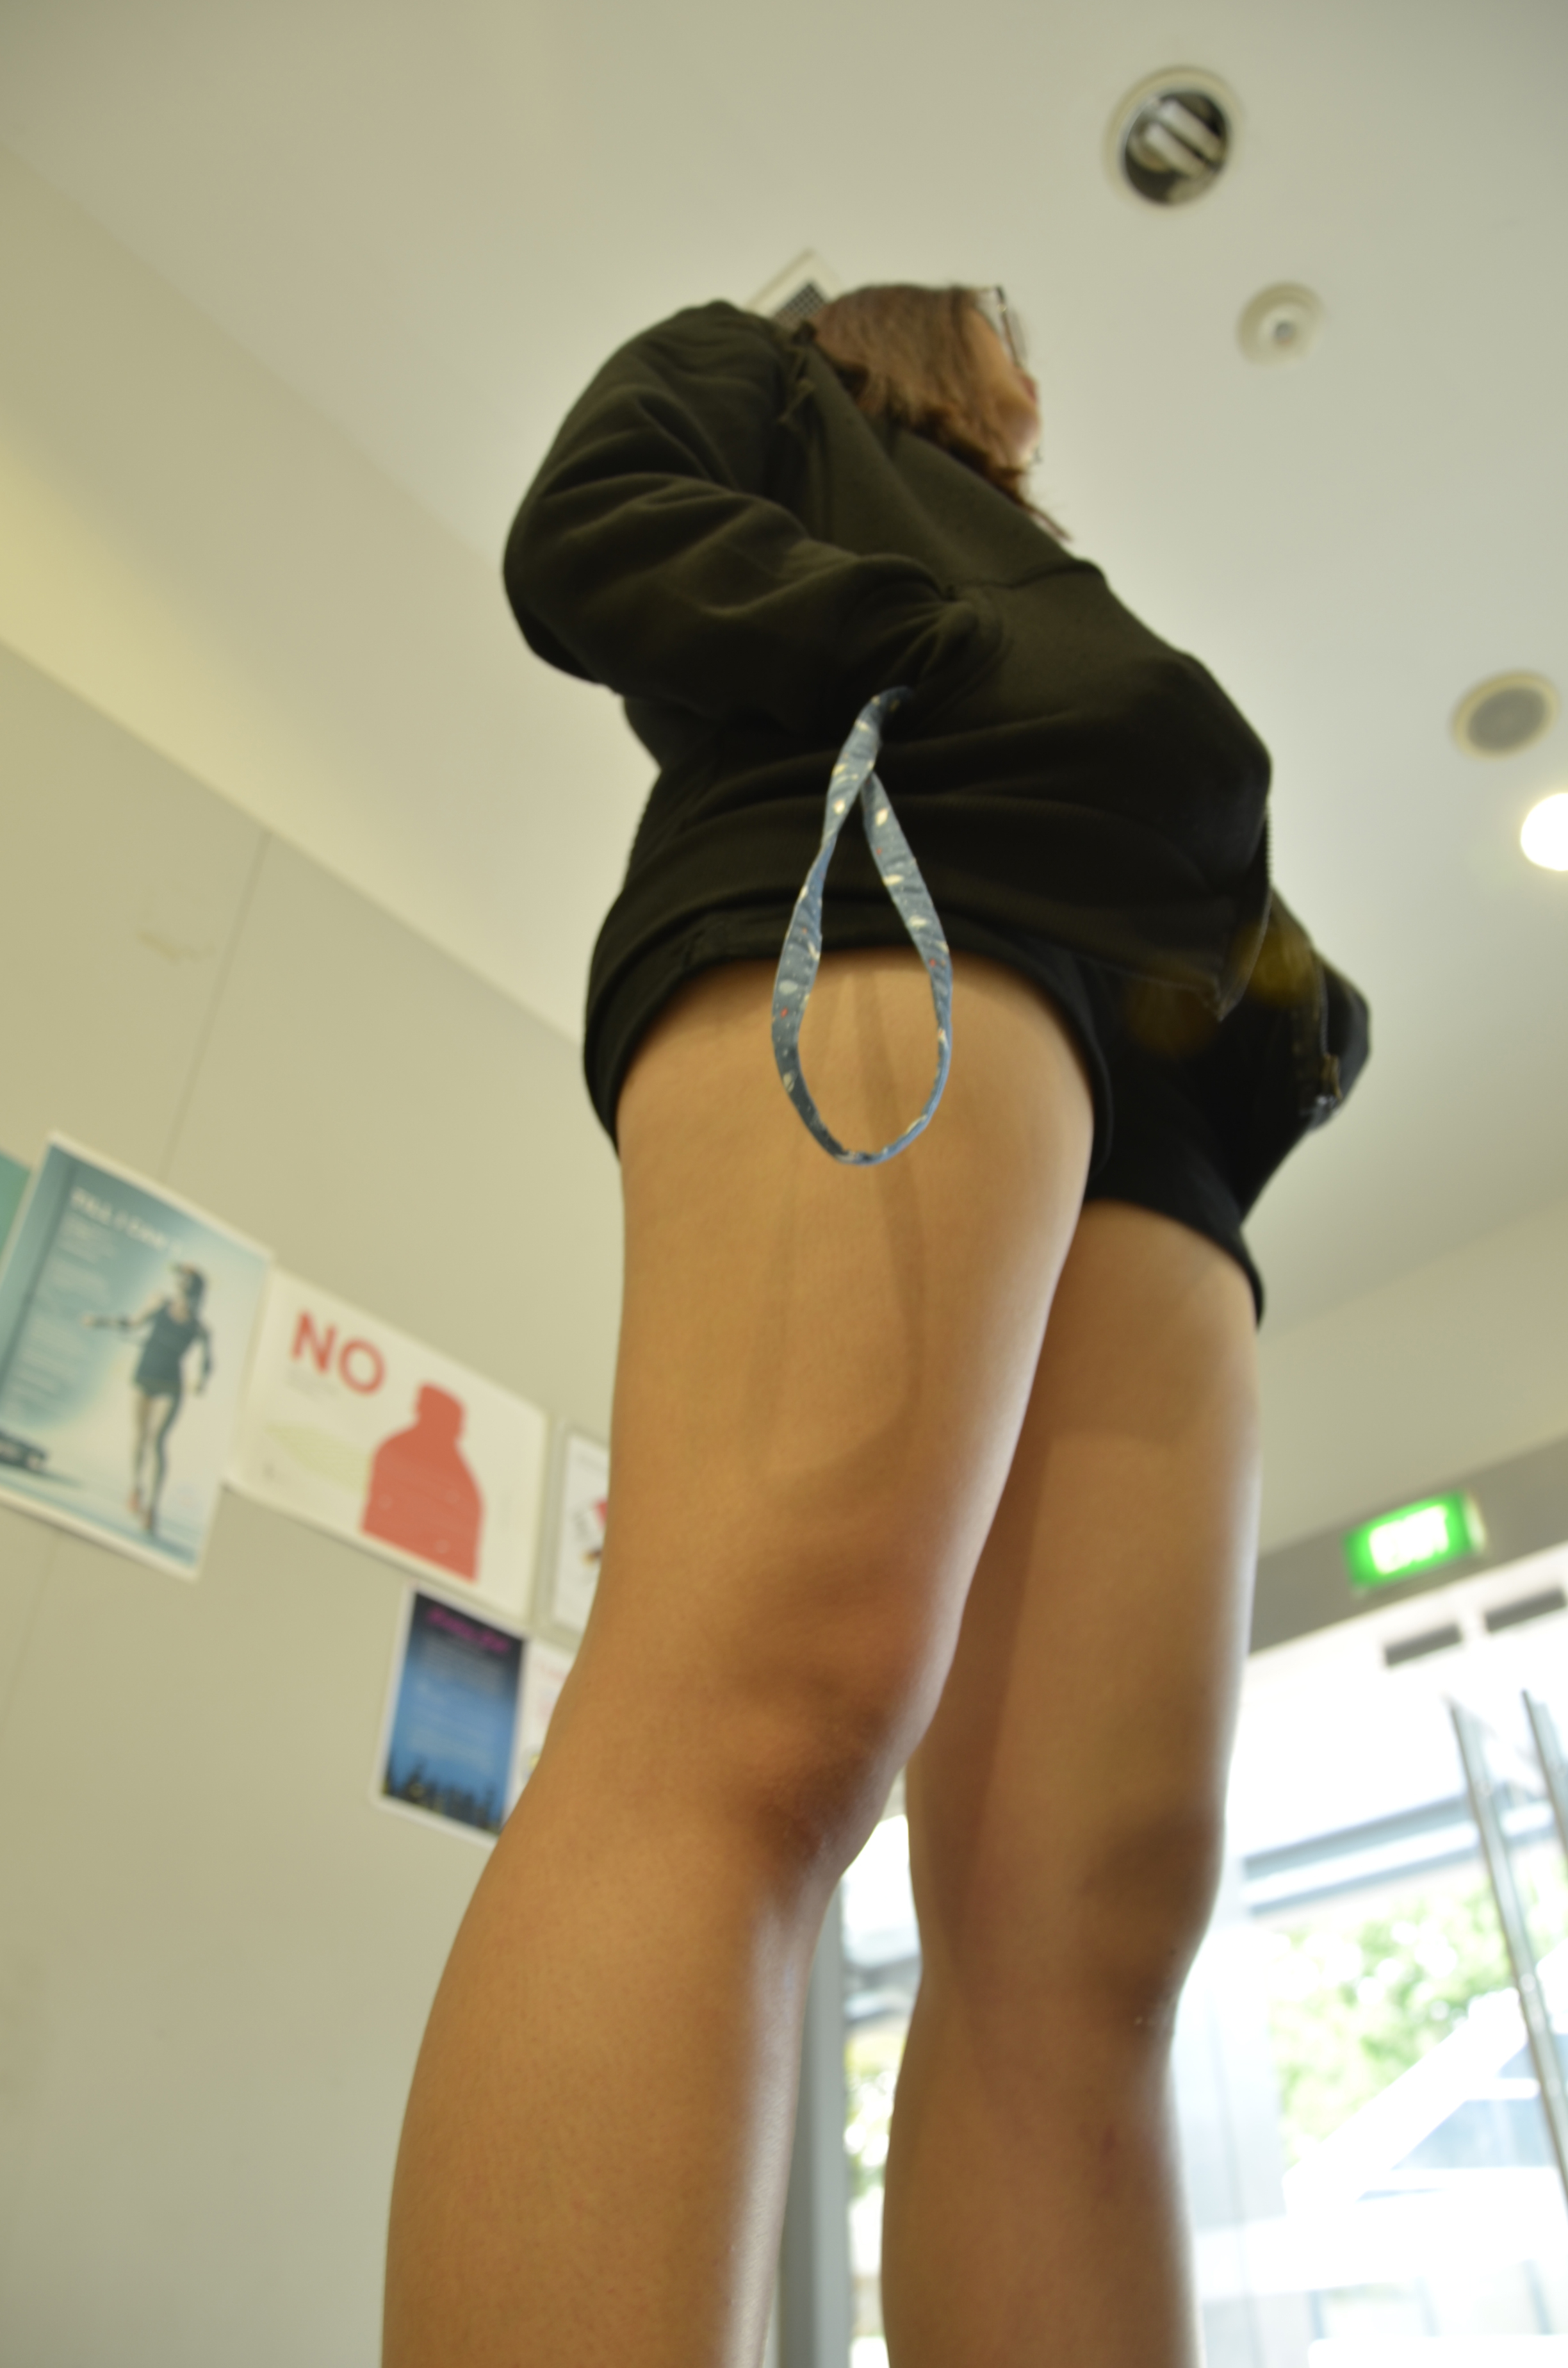
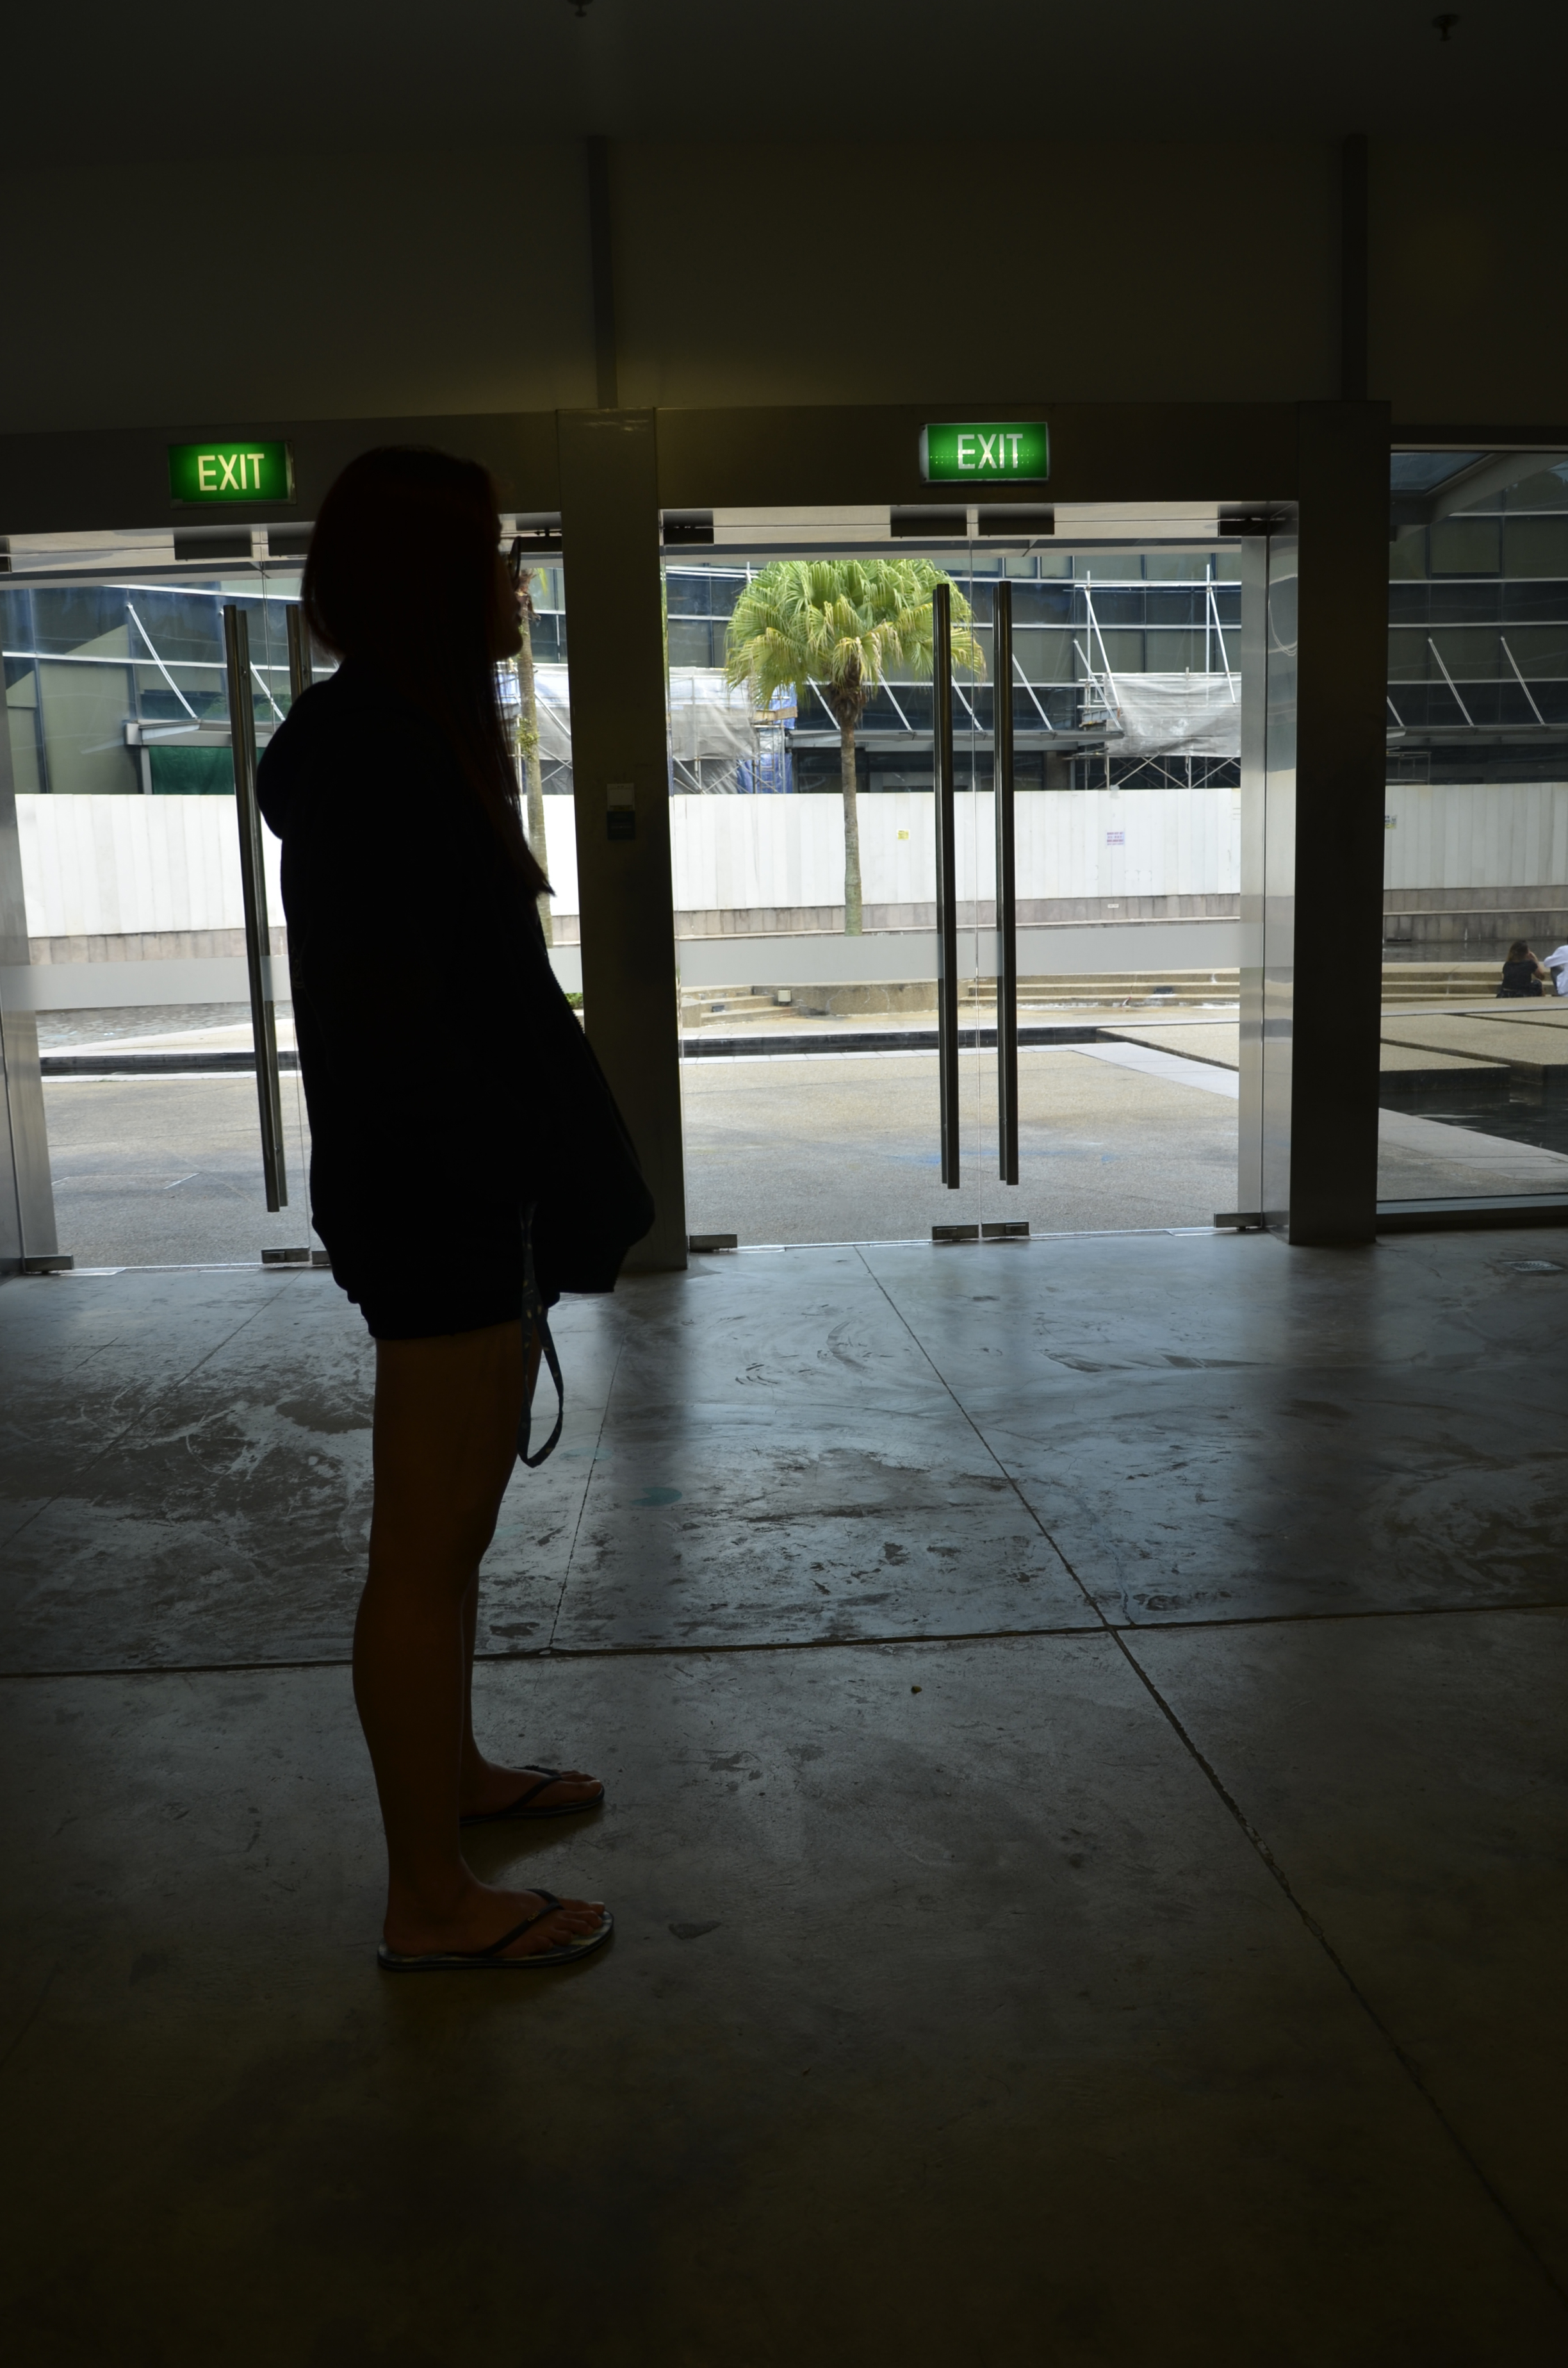
This is Niki! I don’t really know much about her because we only met about 12 days ago! But I generally feel like she gives off a very chill/casual/cool vibe, and her posture especially reflected that in this assignment. Consequently, I felt like mid-range shots worked best for her (to accentuate her stance).
I feel like the canted angle makes her look like she’s standing slanted, which is quite informal and “cool” as opposed to standing straight!The “cool” vibe is really coming out in my opinion because she looks so tall (she’s also actually tall. I couldn’t take any high angle shots)In my opinion that’s a really nice chill stance, especially with the casual clothes, hands in pockets and feet apart.
For Lesson 2, we engaged in mark making, also known as “use whatever you have with ink to create random things”. For convenience’s sake, I mention the material, methodology and conclusion for most of the results. Hopefully that will help if you’re reading this to gain inspiration. (Unless otherwise stated, all of the things I tried were unconscious decisions, where I randomly did whatever I felt like doing.)
Opting to work in a logical order, I began with my plant-related items, branches and leaves. These were picked up around school, mostly. (A humorous anecdote involves me holding my freshly-picked branches at the CCA fair, and a girl complimenting me on my “nice accessorising!”)
Initially, I attempted to mark by having the paper pressed from above onto the linoleum with branches and leaves. Sadly, I may have overzealously placed too many items, resulting in a tragic lack of… Anything.
I tried.
I quickly surmised that this style does not work well with my leaves, because it’s good for emphasising positive and negative spaces, and the unique edges, but not so much on the textures. Consequently, I attempted using the inked leaves directly, like a stamp of sorts. (After the initial tameness, I went more into trigger-happy leaf actions)
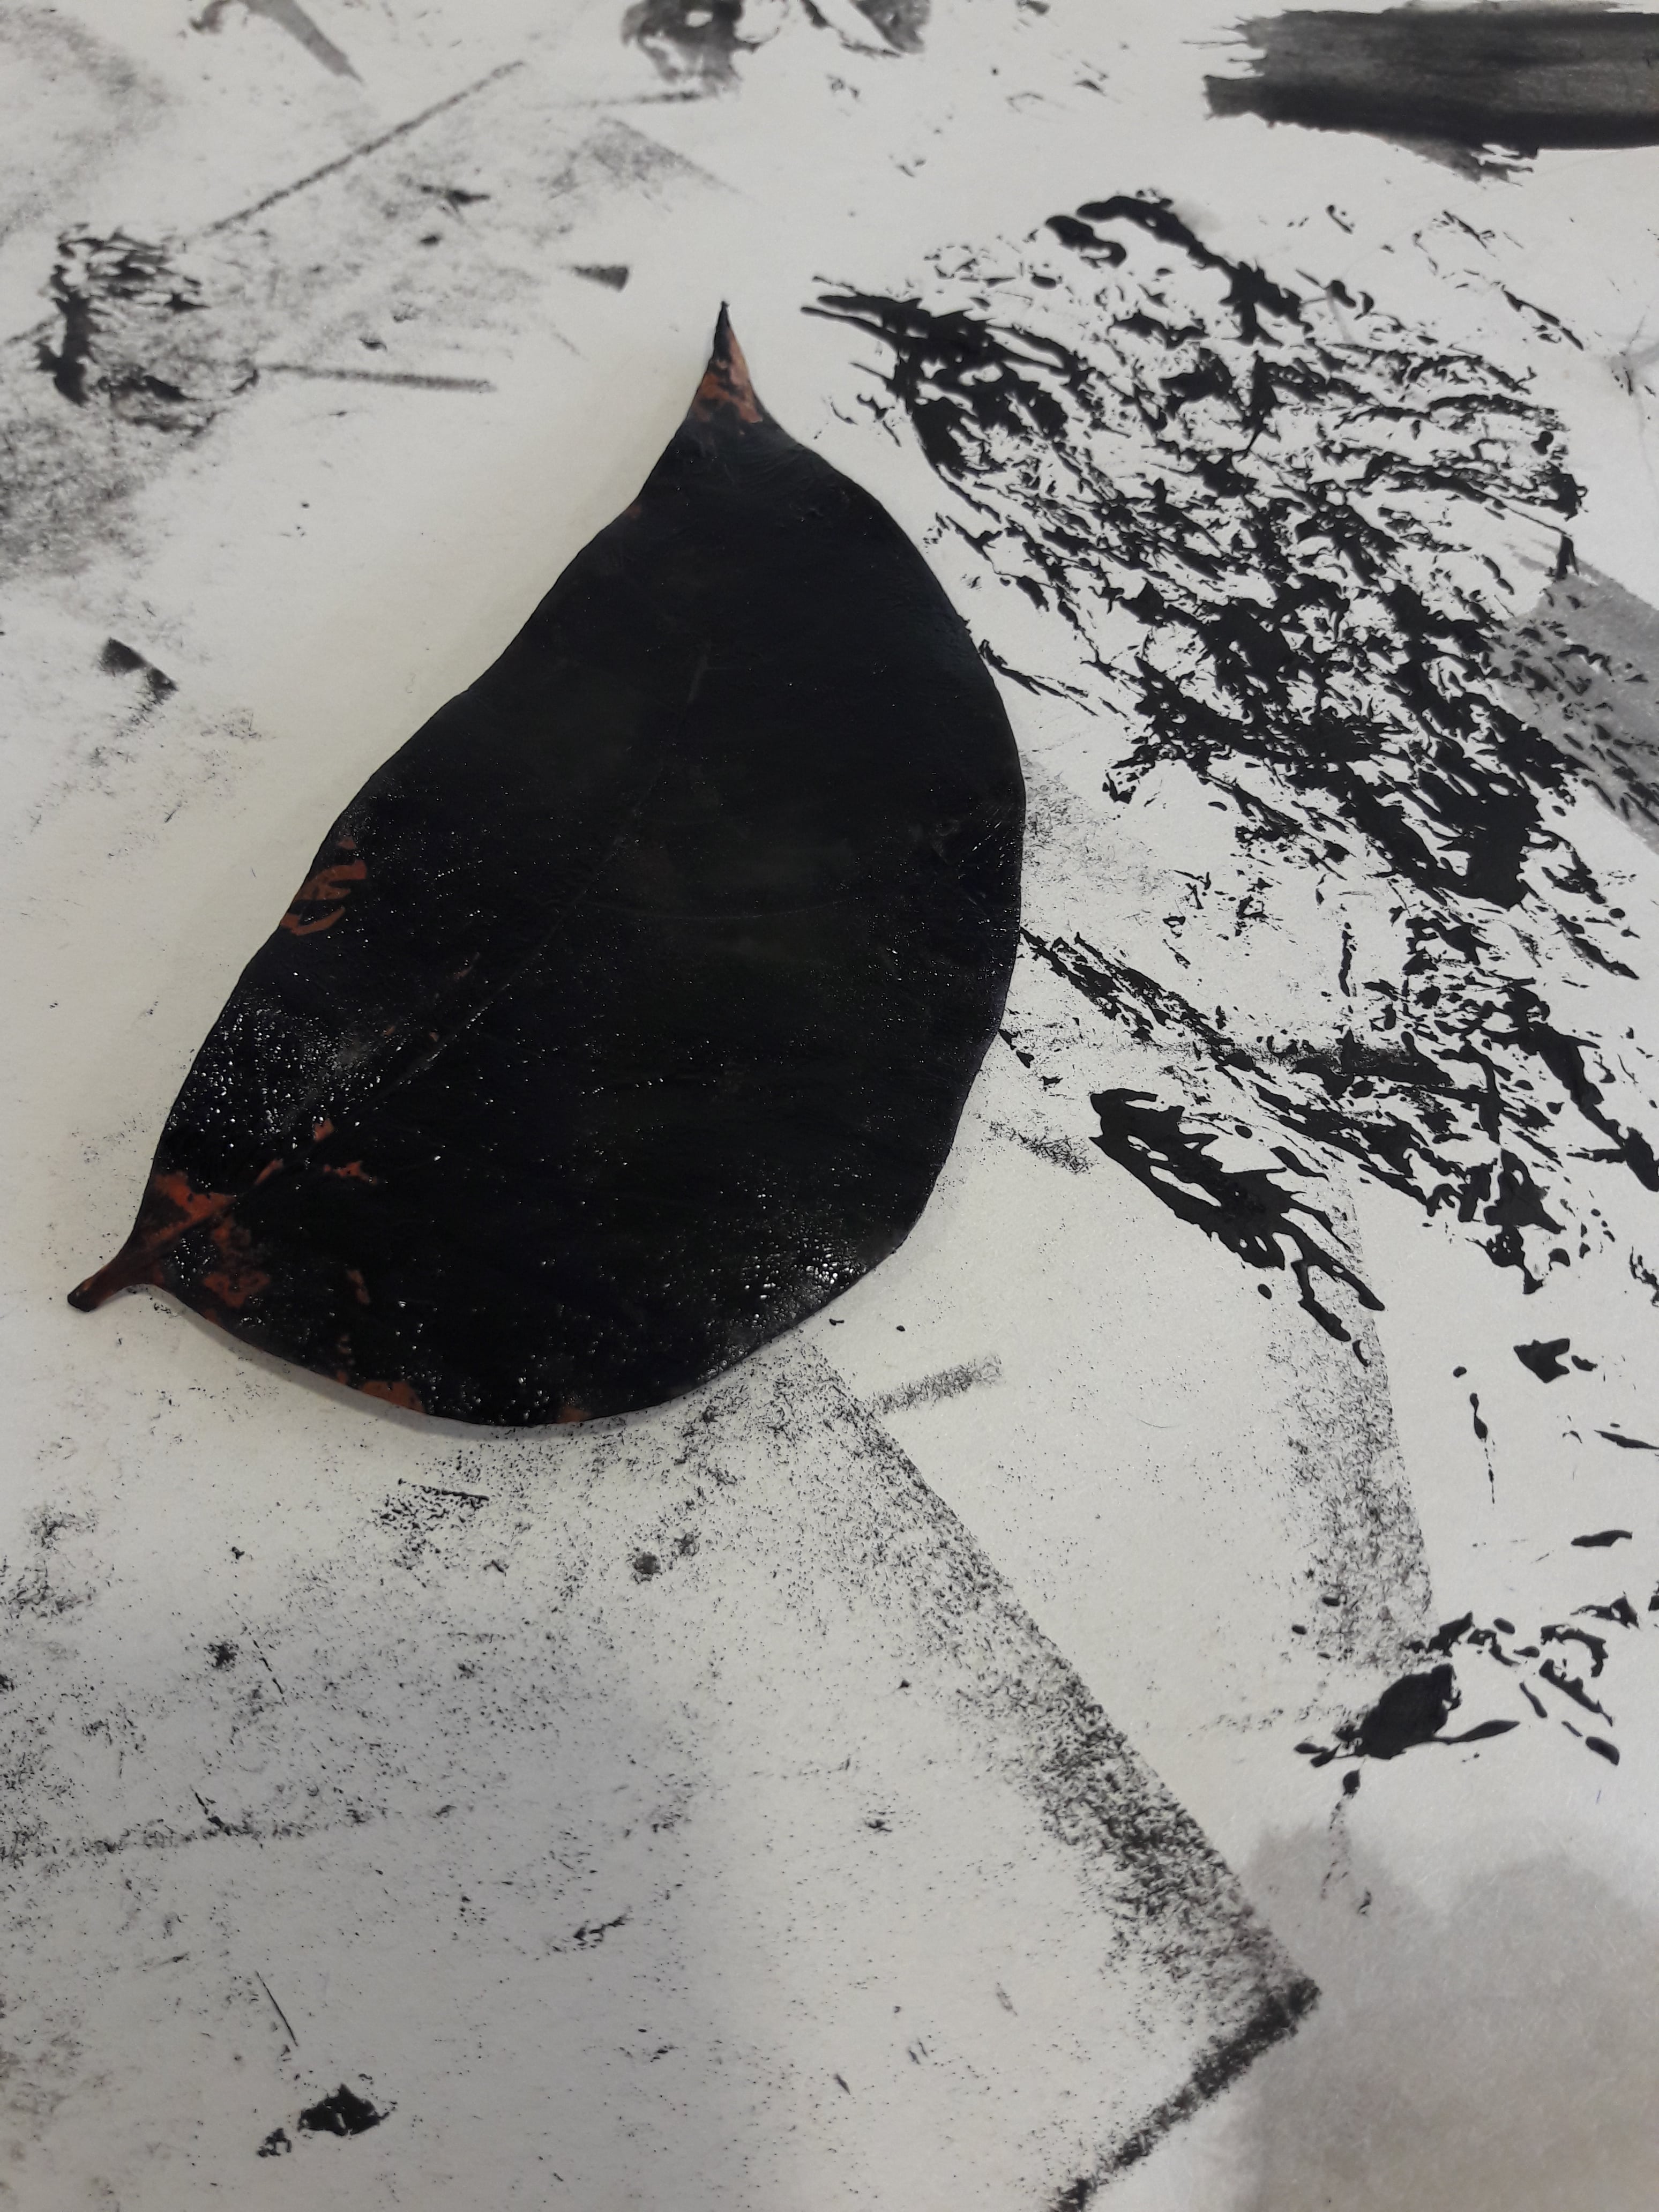
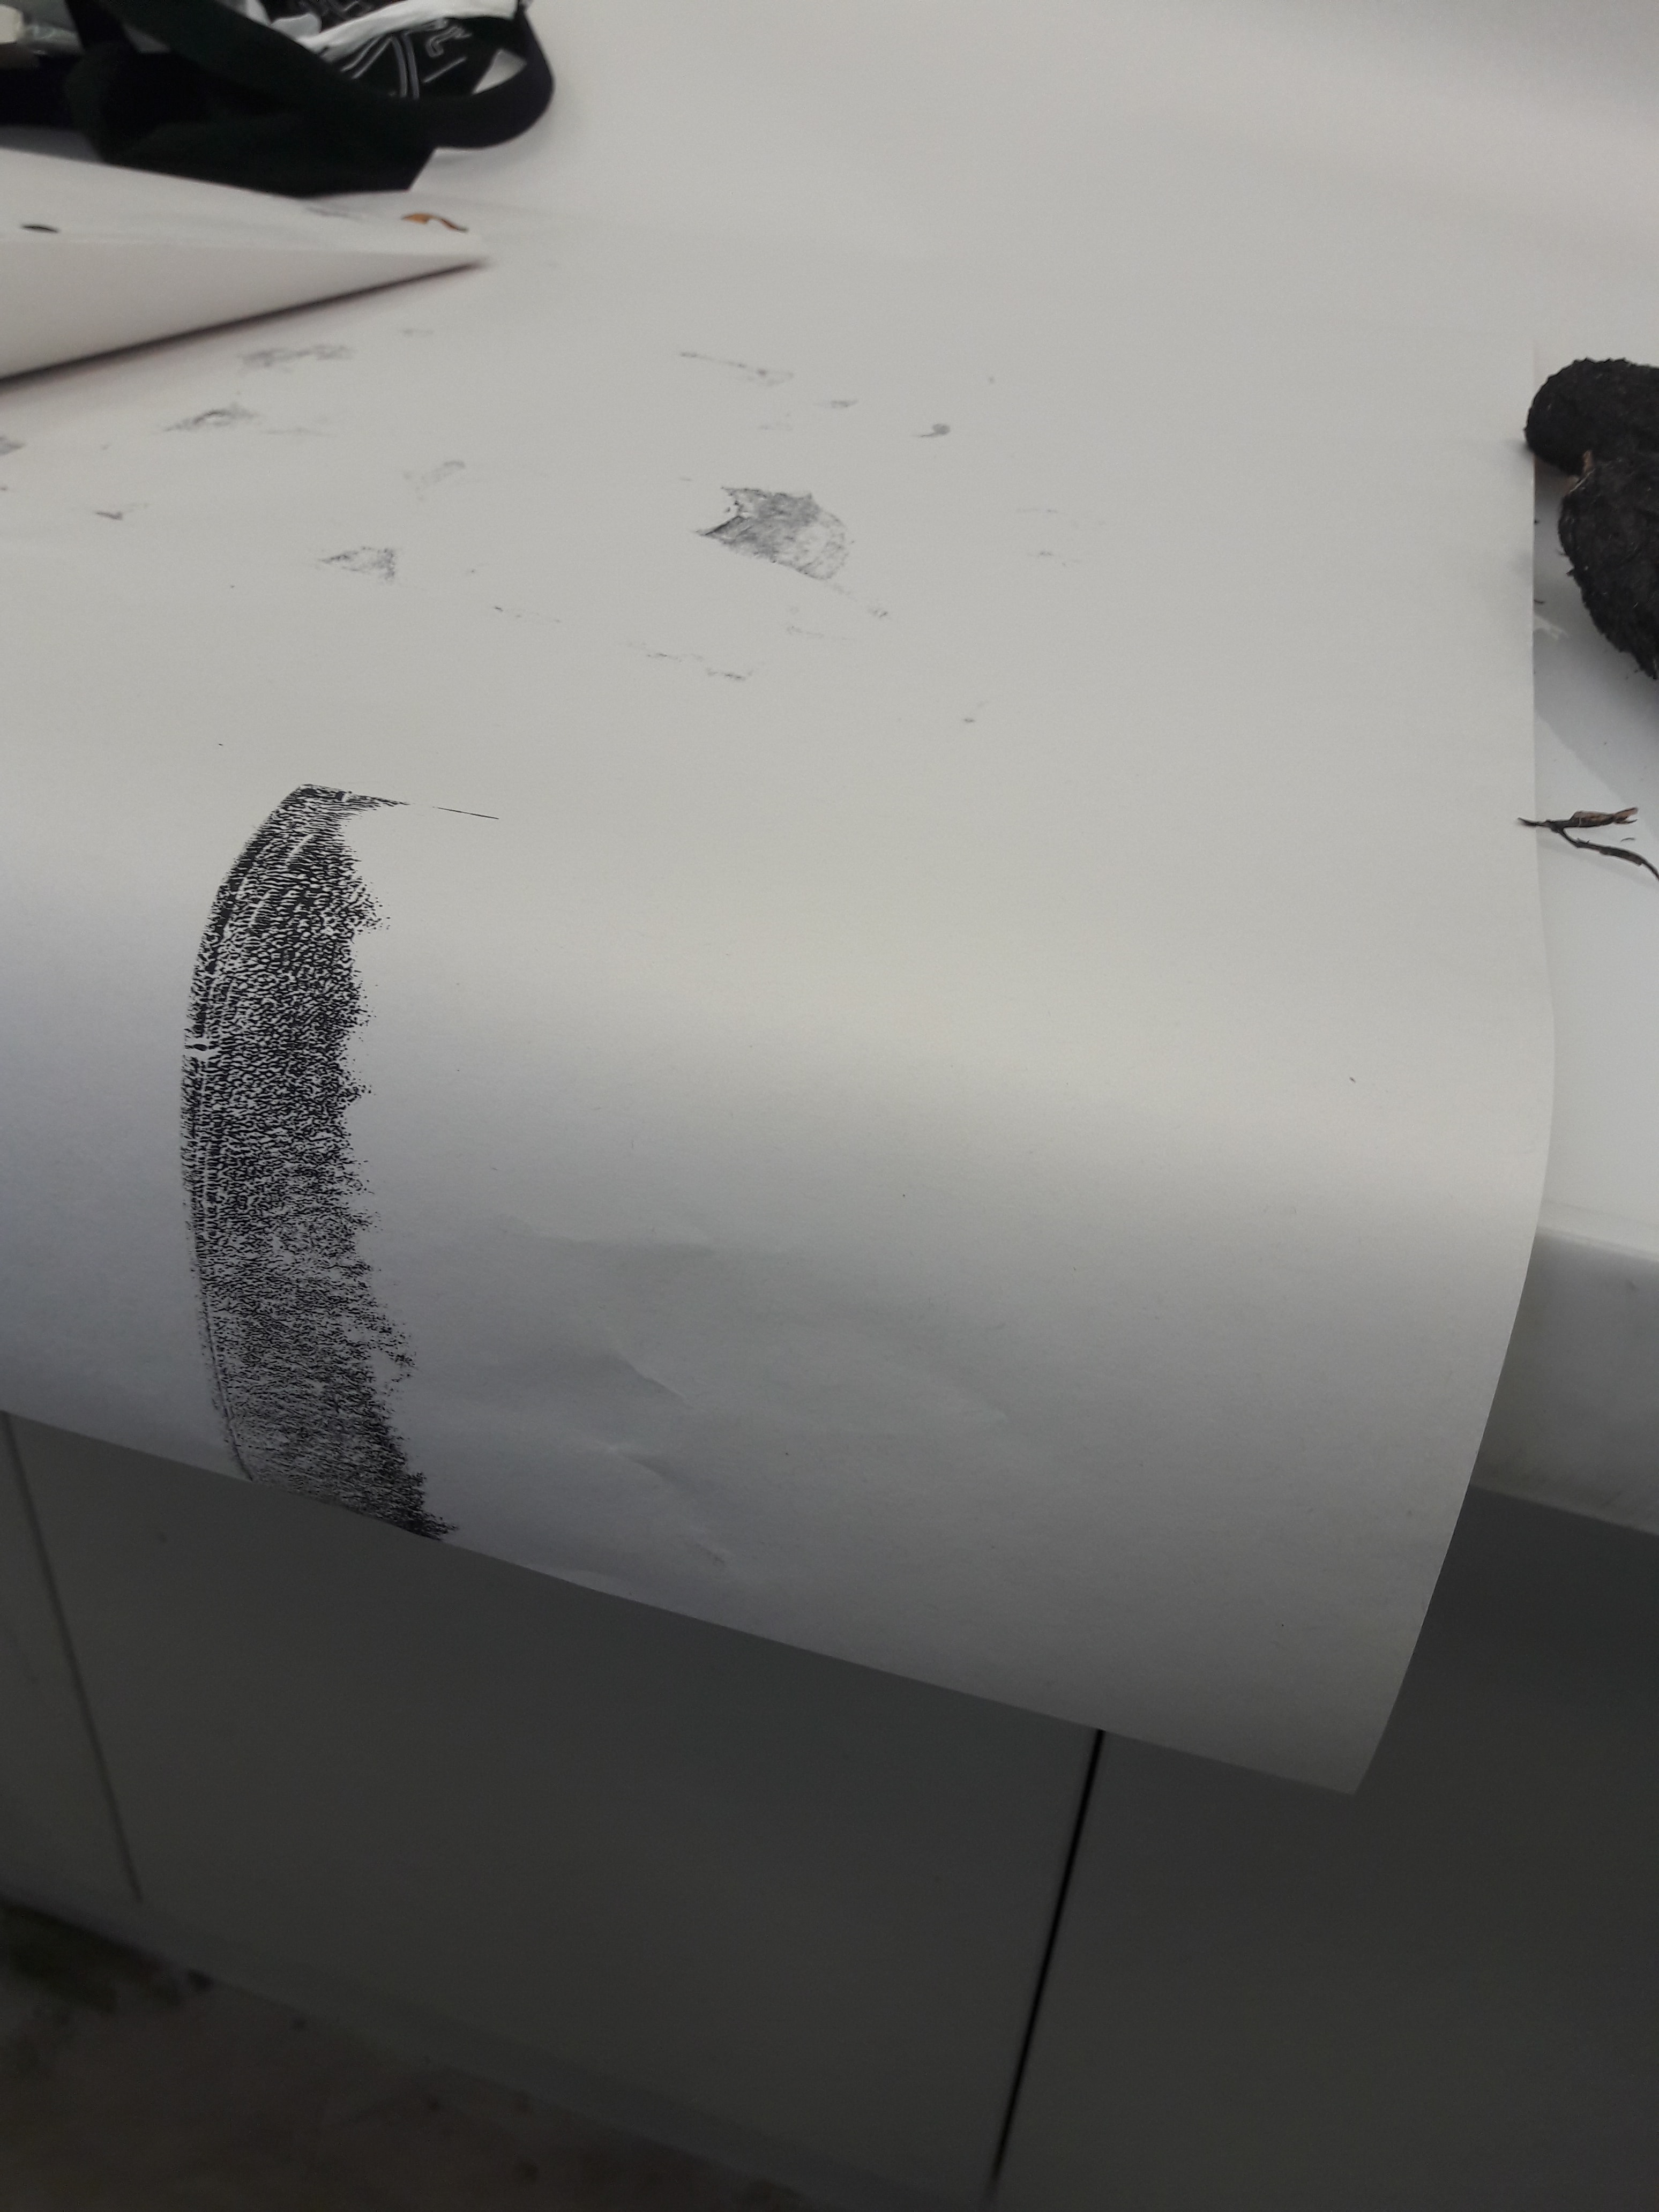
Material: Leaf
Methodology: Painting leaf with ink, pressing onto paper, piak-ing onto paper, circular wiping with leaf on paper
Conclusion: I like how the leaf has a certain symmetry, with the veins being the most prominent and forming a sort of skeletal shape. But I think it’s even more intriguing that, with sufficient pressure while circular wiping, the leaf loses most of its unique qualities (possibly because the ink dried too) while making nice arcs (when properly turned).
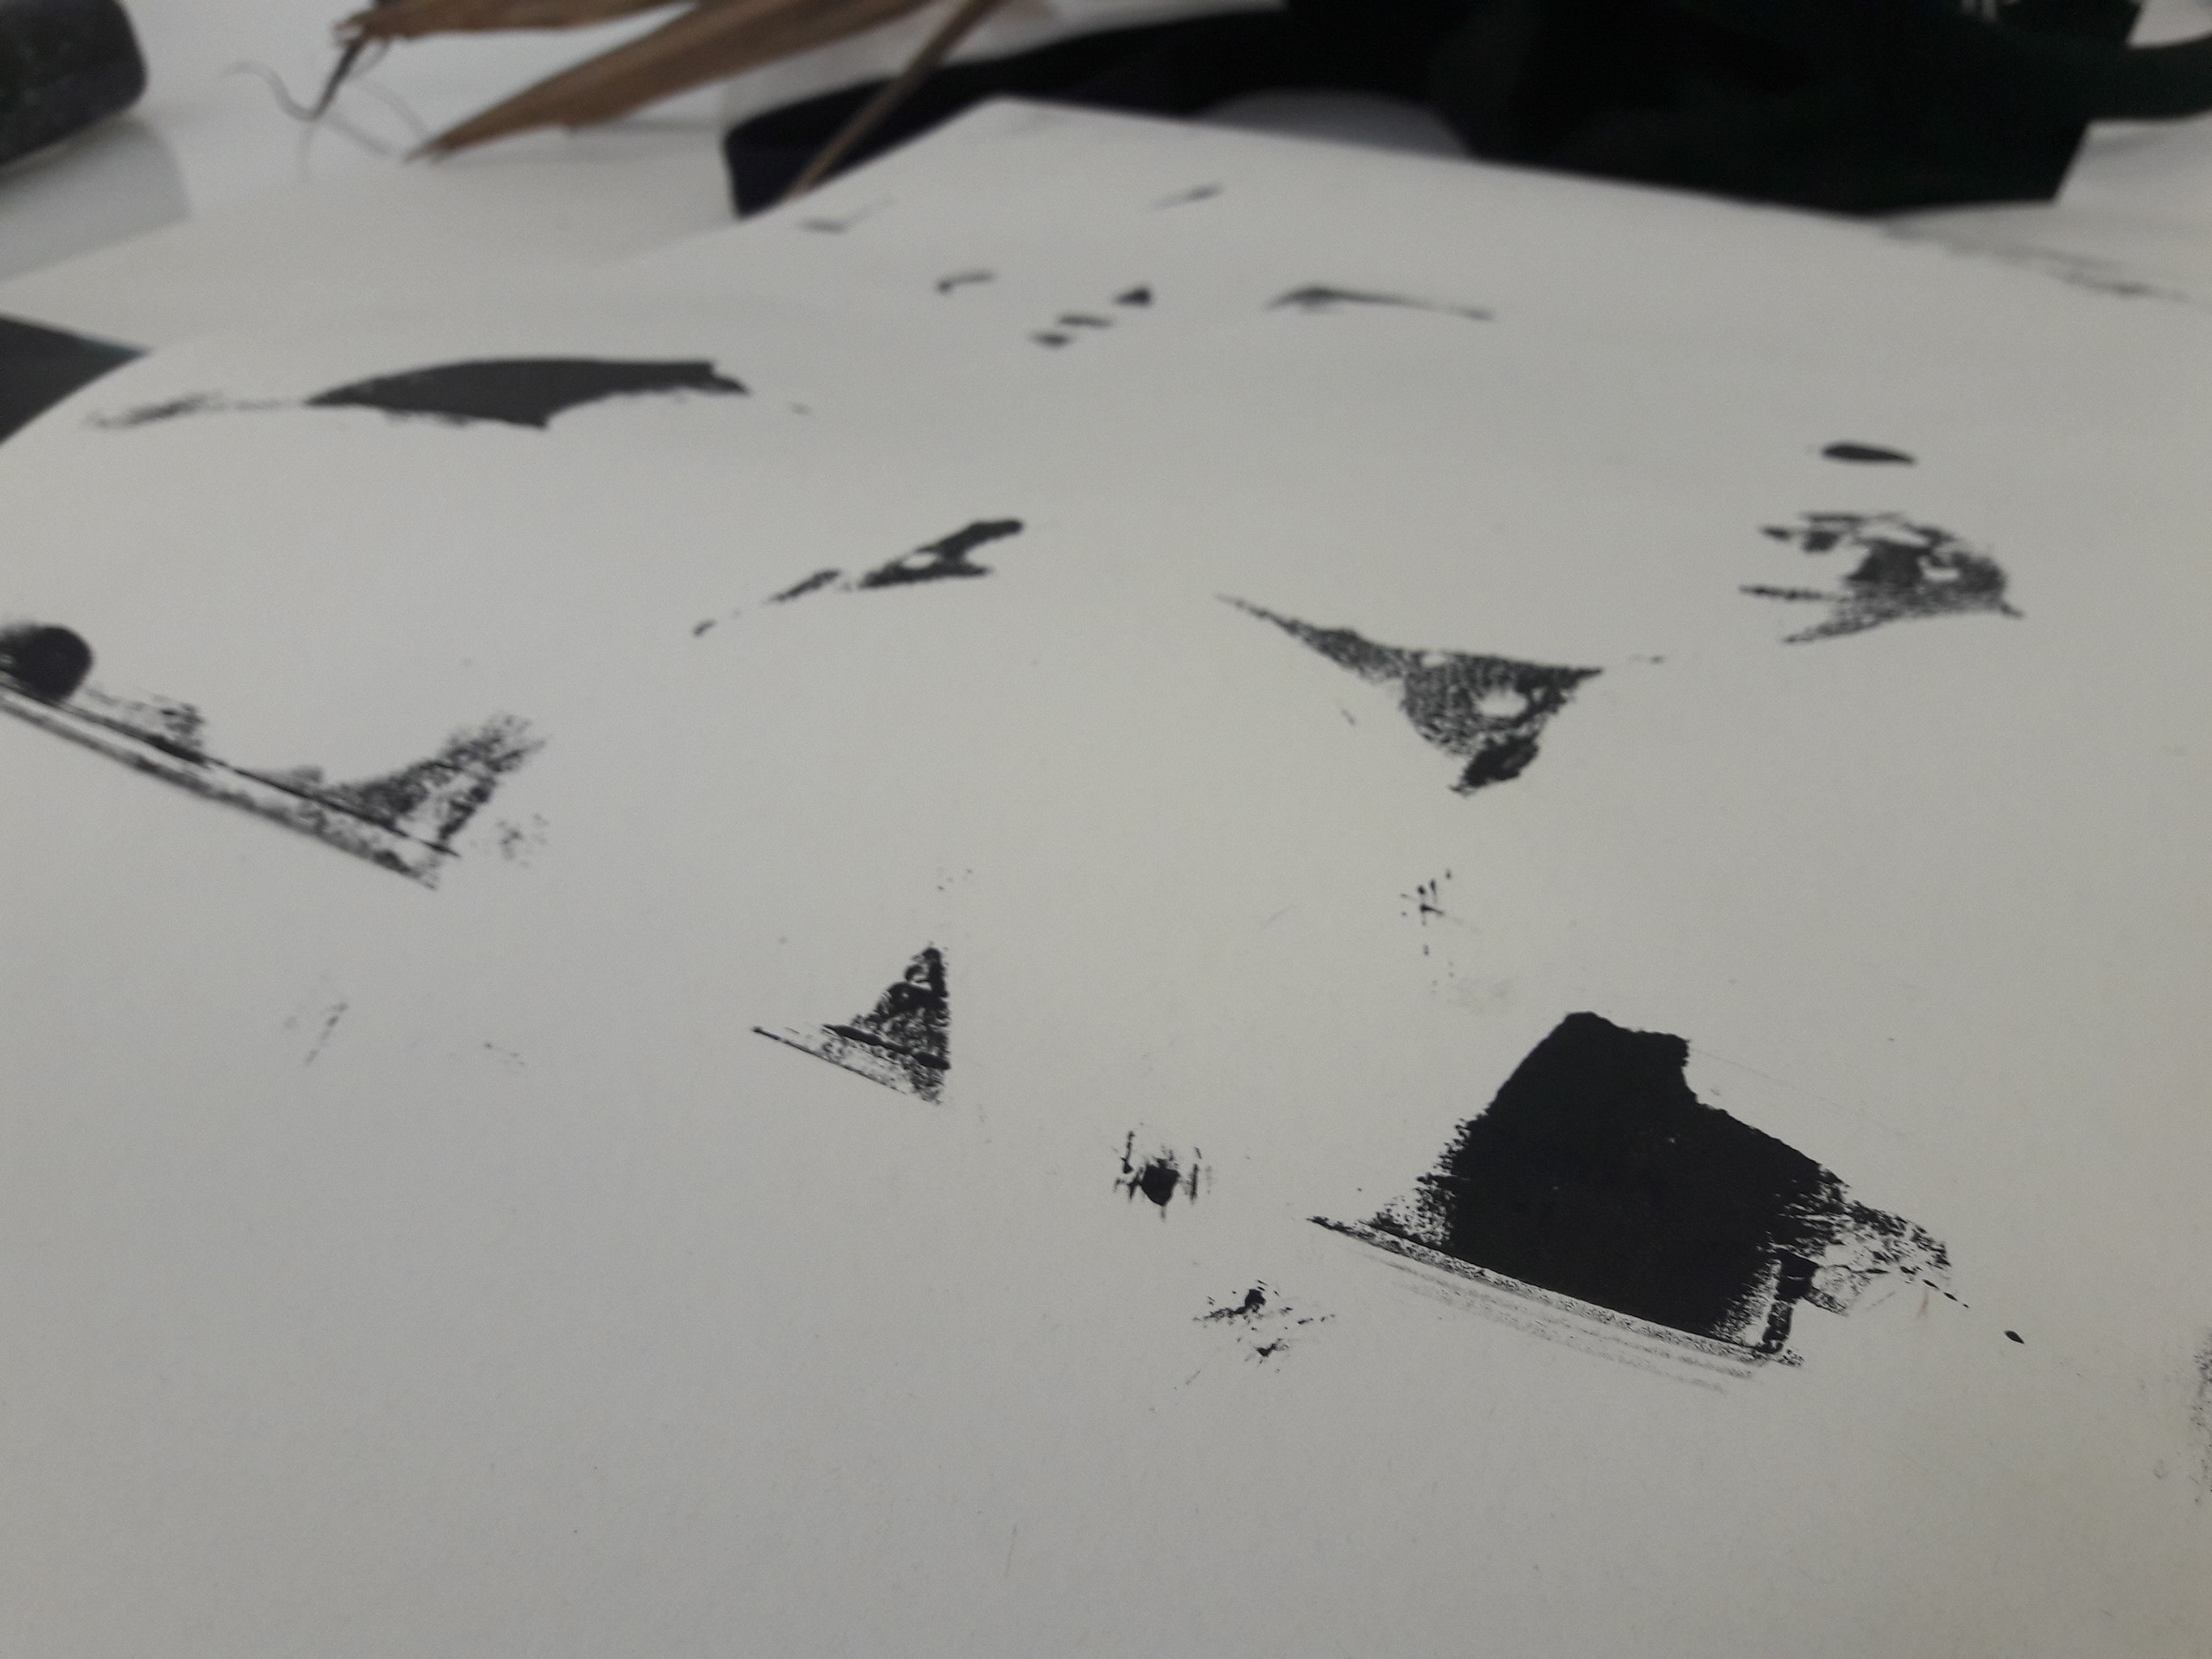
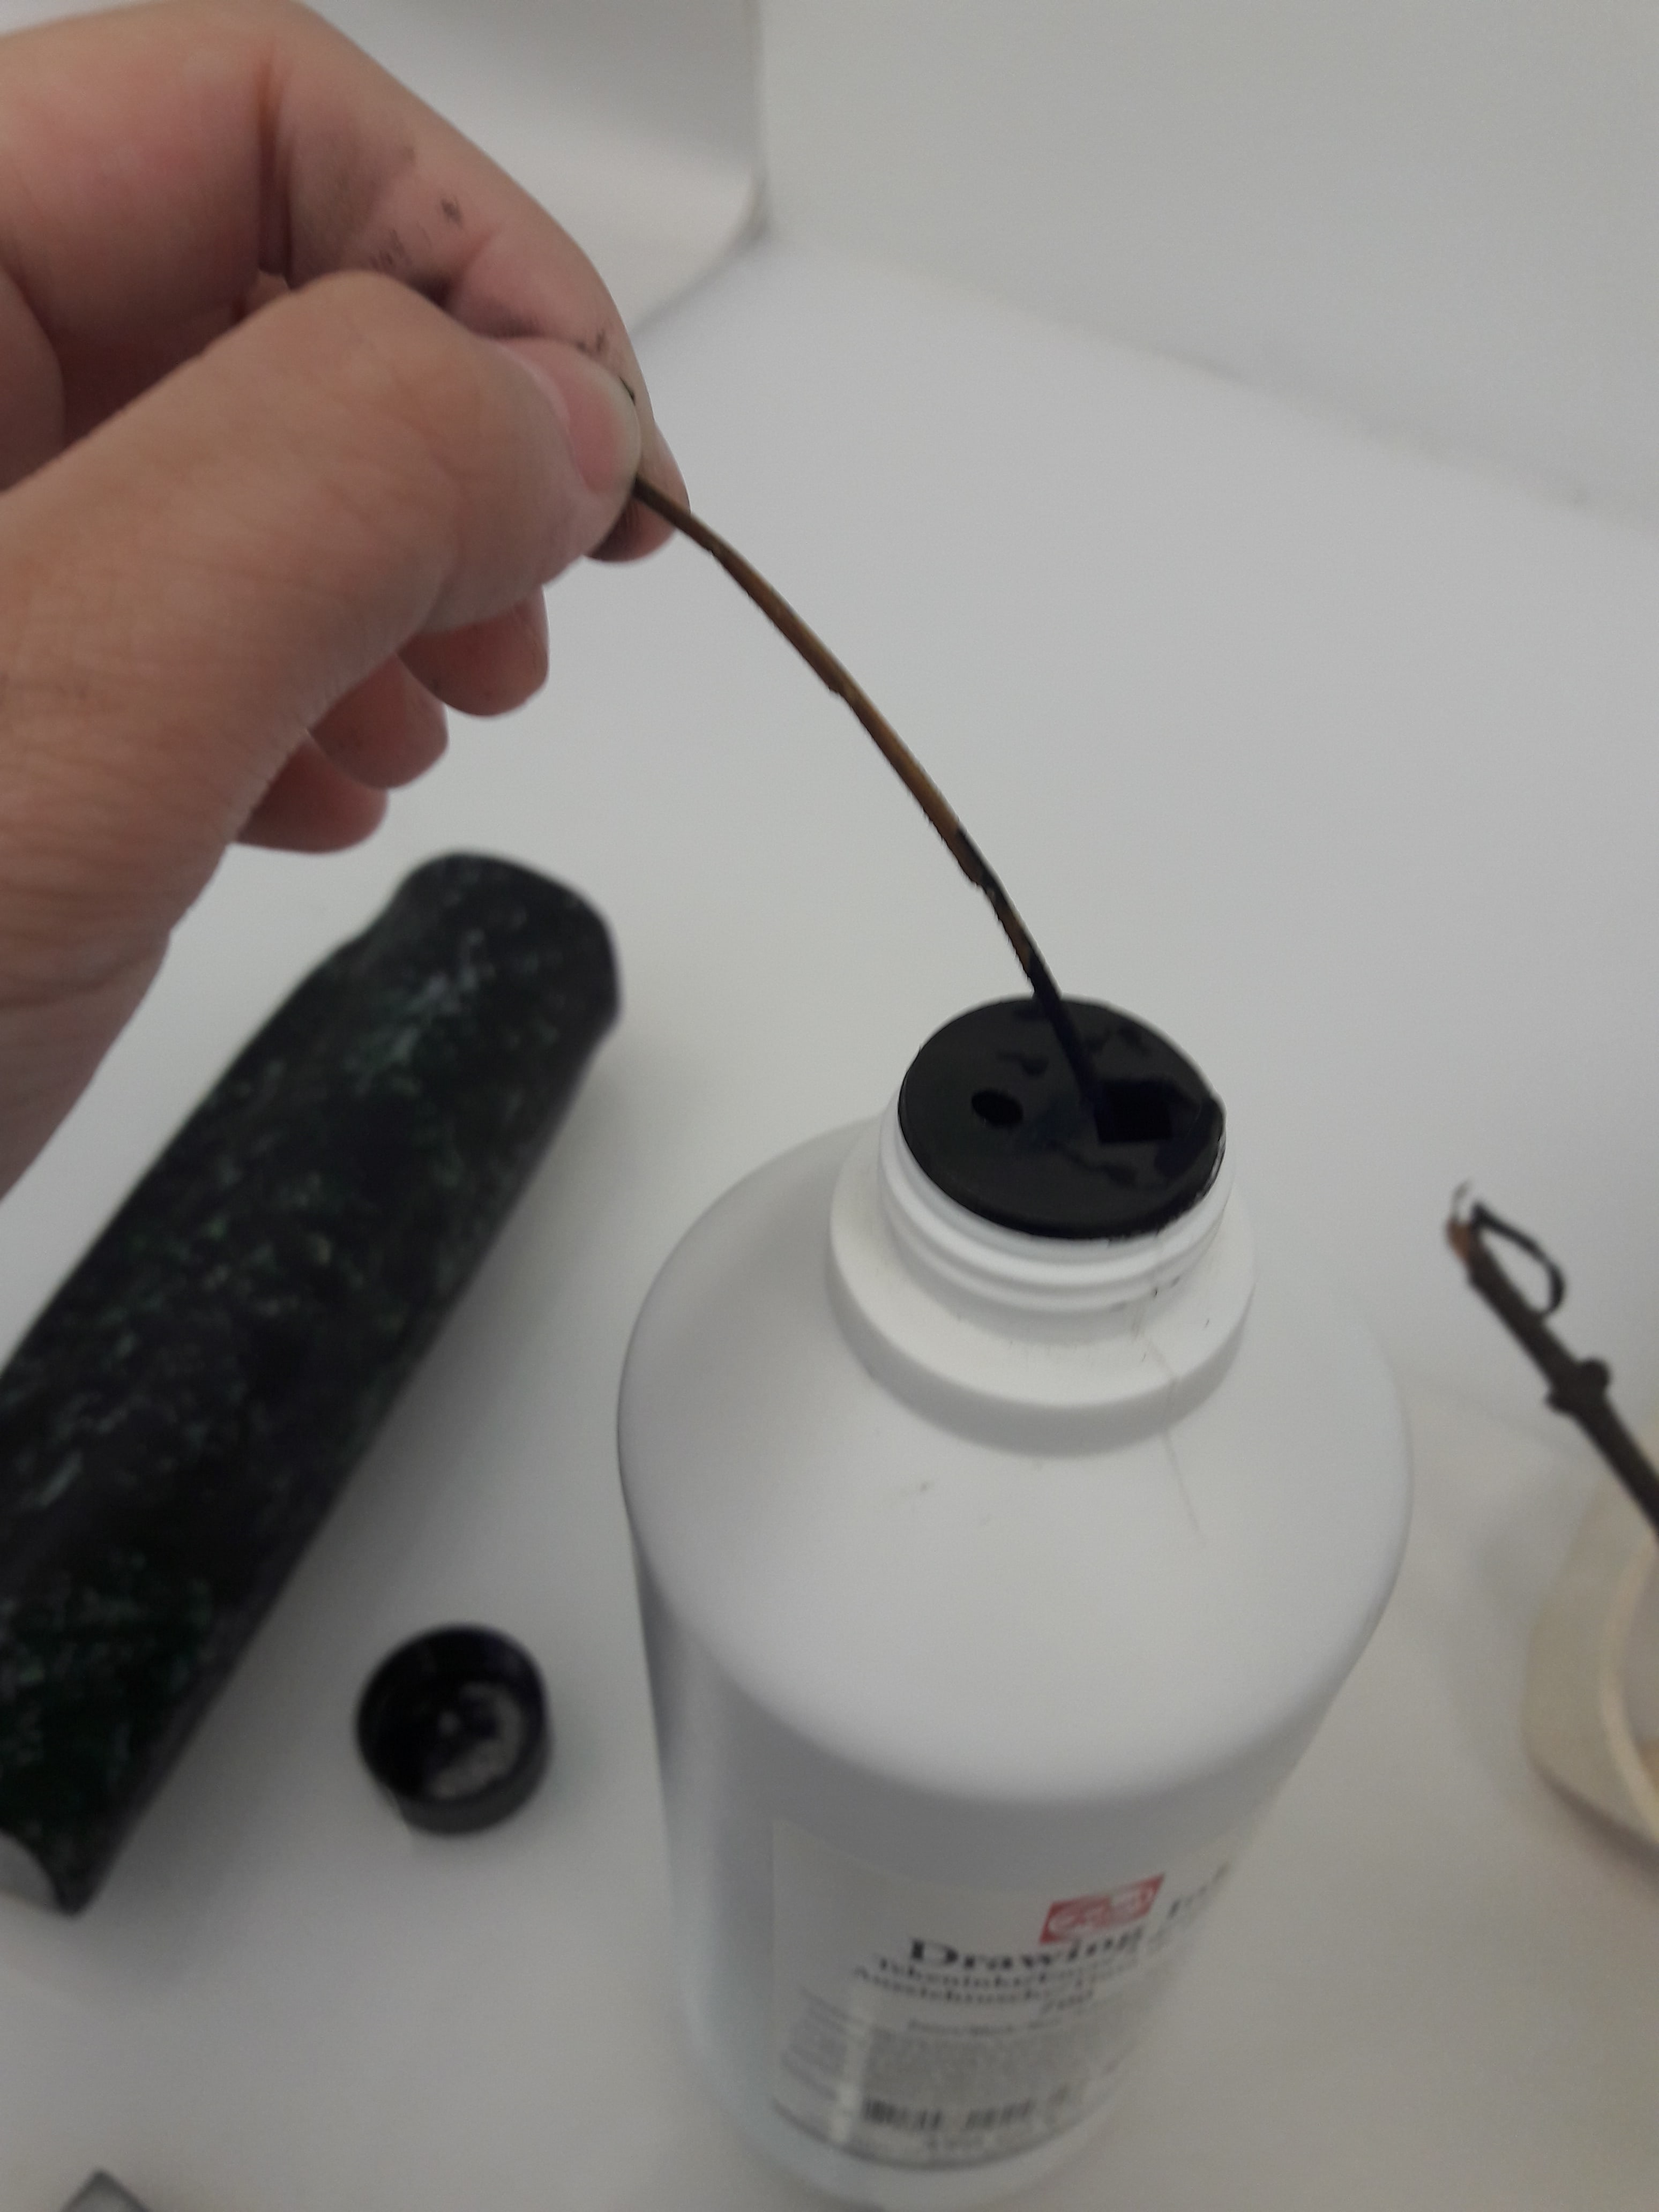
I had brought my own drawing ink as well, so I attempted to use a twig with it, like some sort of dip nib. Surprisingly, it became weirdly effective as a makeshift calligraphy pen when placed almost parallel to the paper.
Material: Twig
Methodology: Dipping twig in drawing ink, then grazing surface of paper with tip and side of twig
Conclusion: It’s difficult to control, but the variation in line quality is superb. The more it’s laid parallel to the paper, the thicker the stroke, and when filed to a point, a thin line. Sort of like what we learn in Foundation Drawing about hard and soft edges.
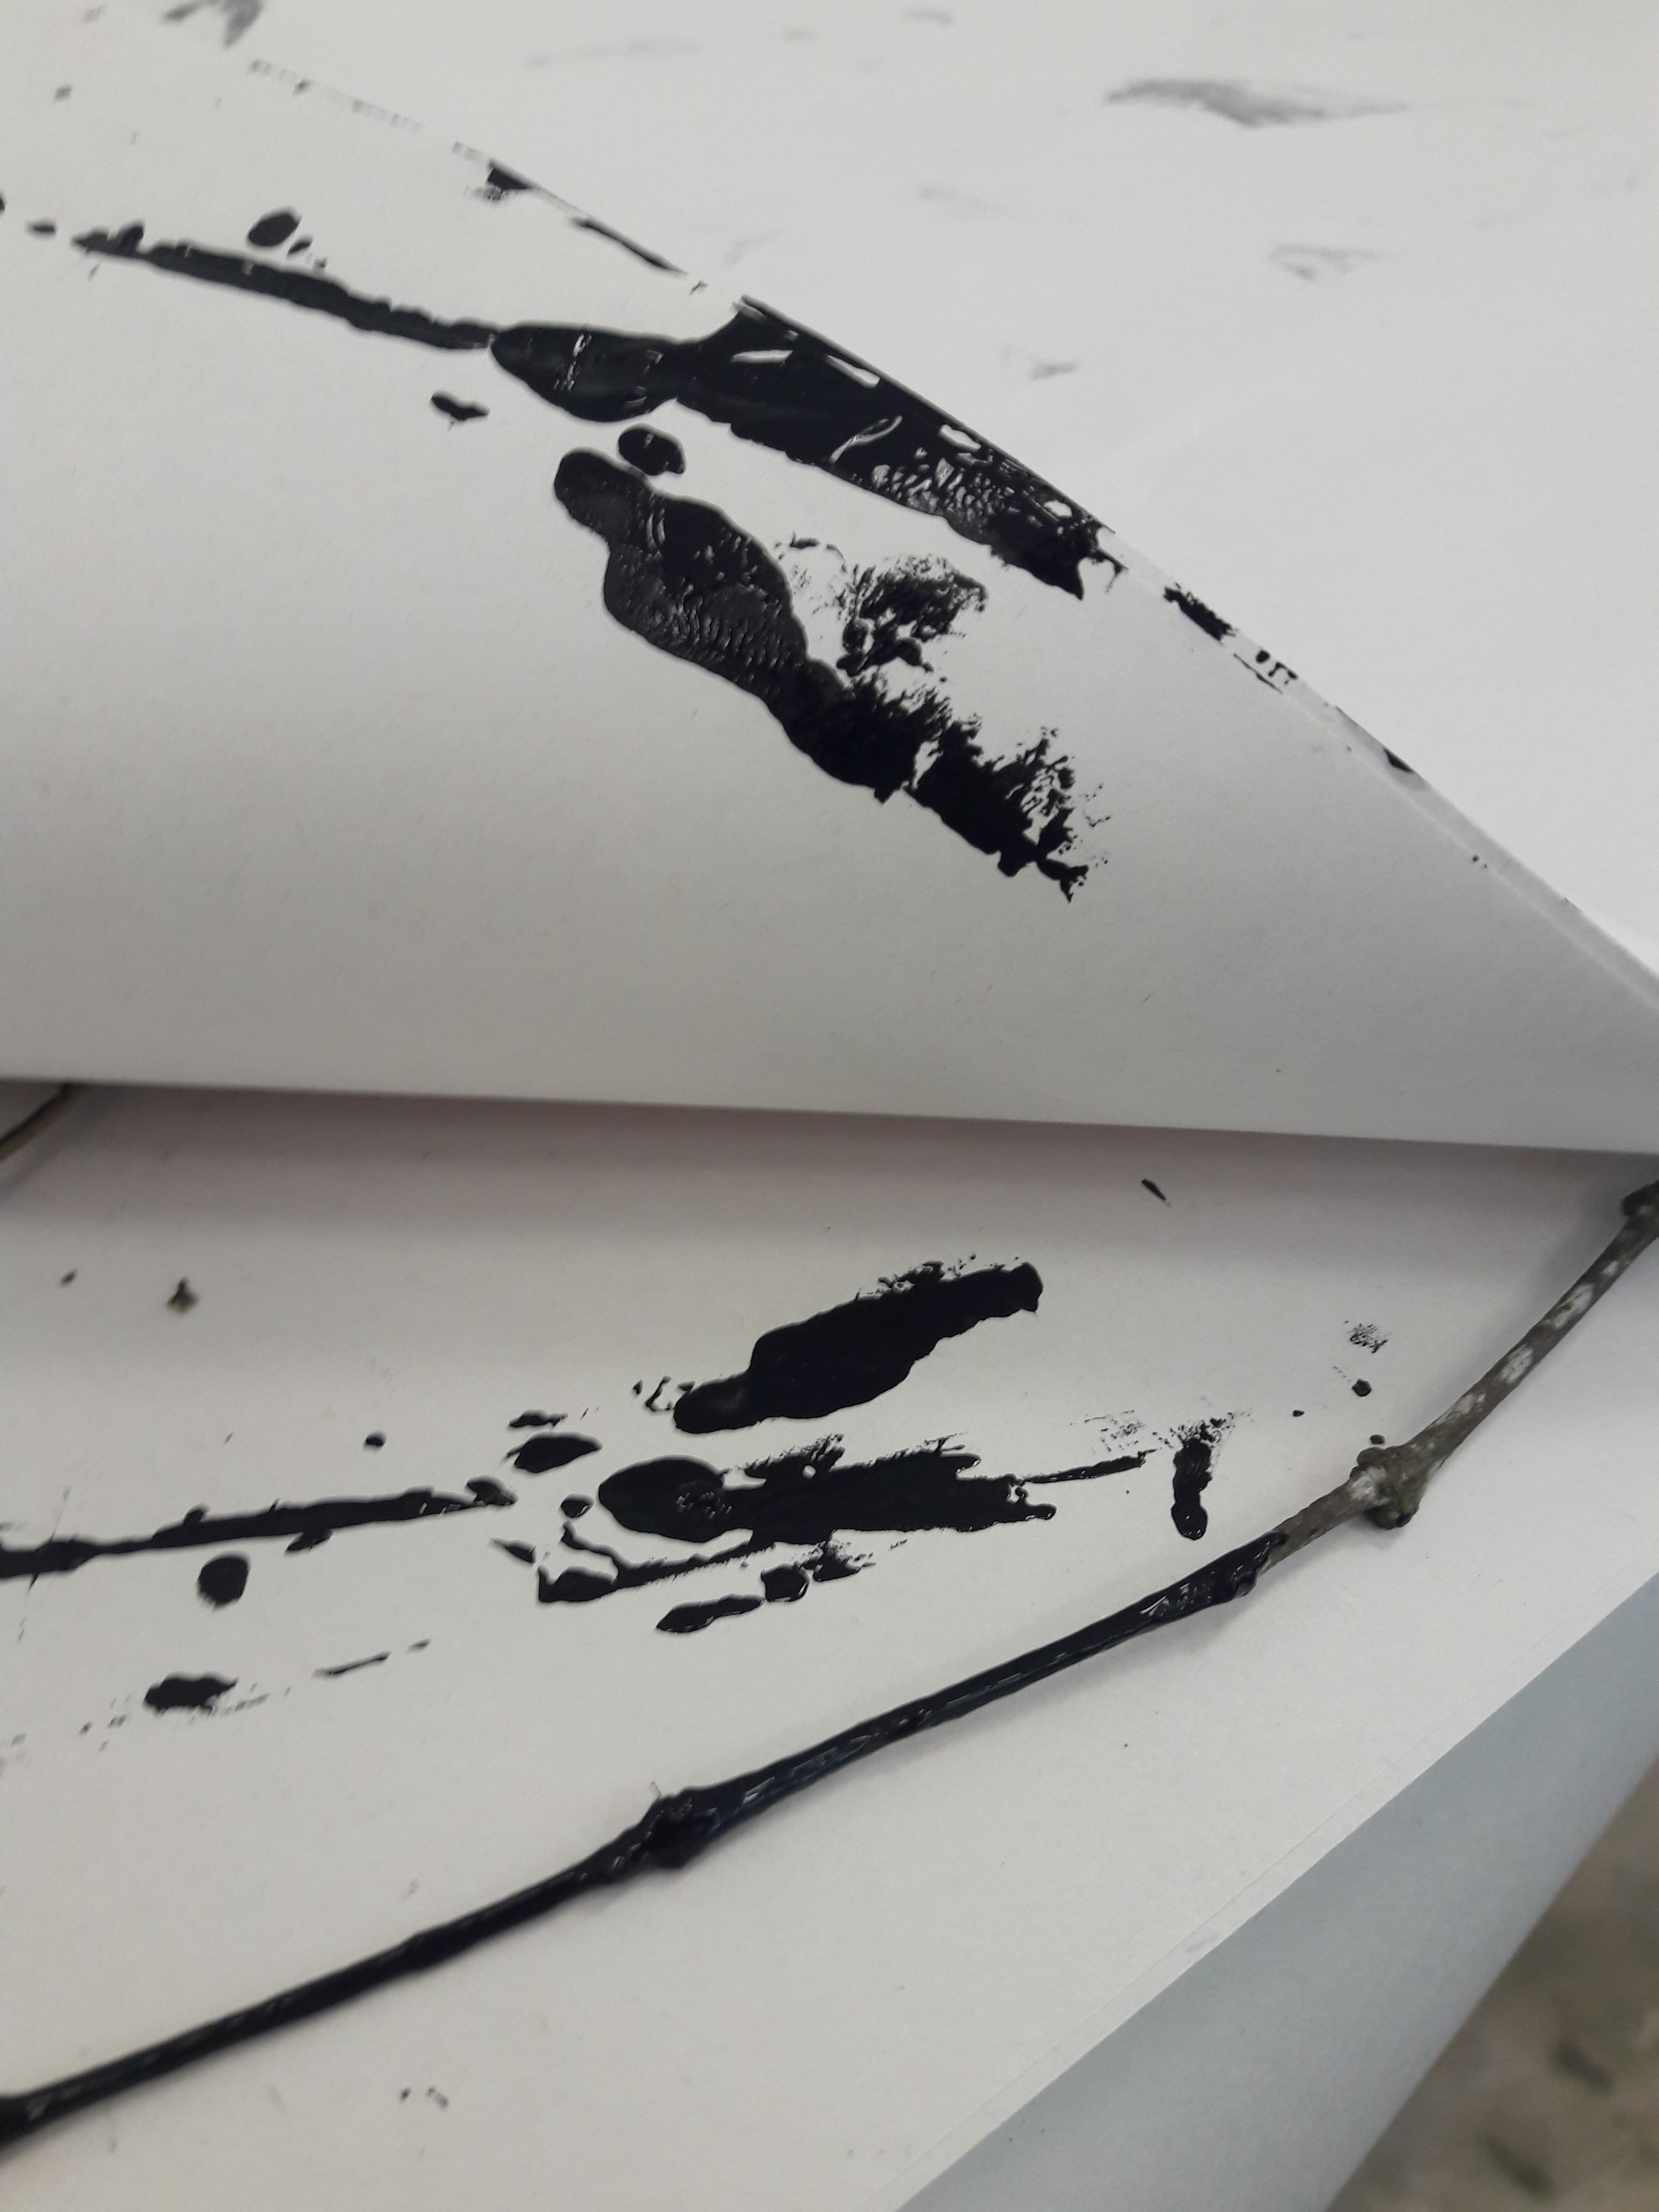
I tried this again with a different twig, and folded the paper to make space, while dumbly forgetting that wet ink would definitely transfer.
At least it looks kind of nice.
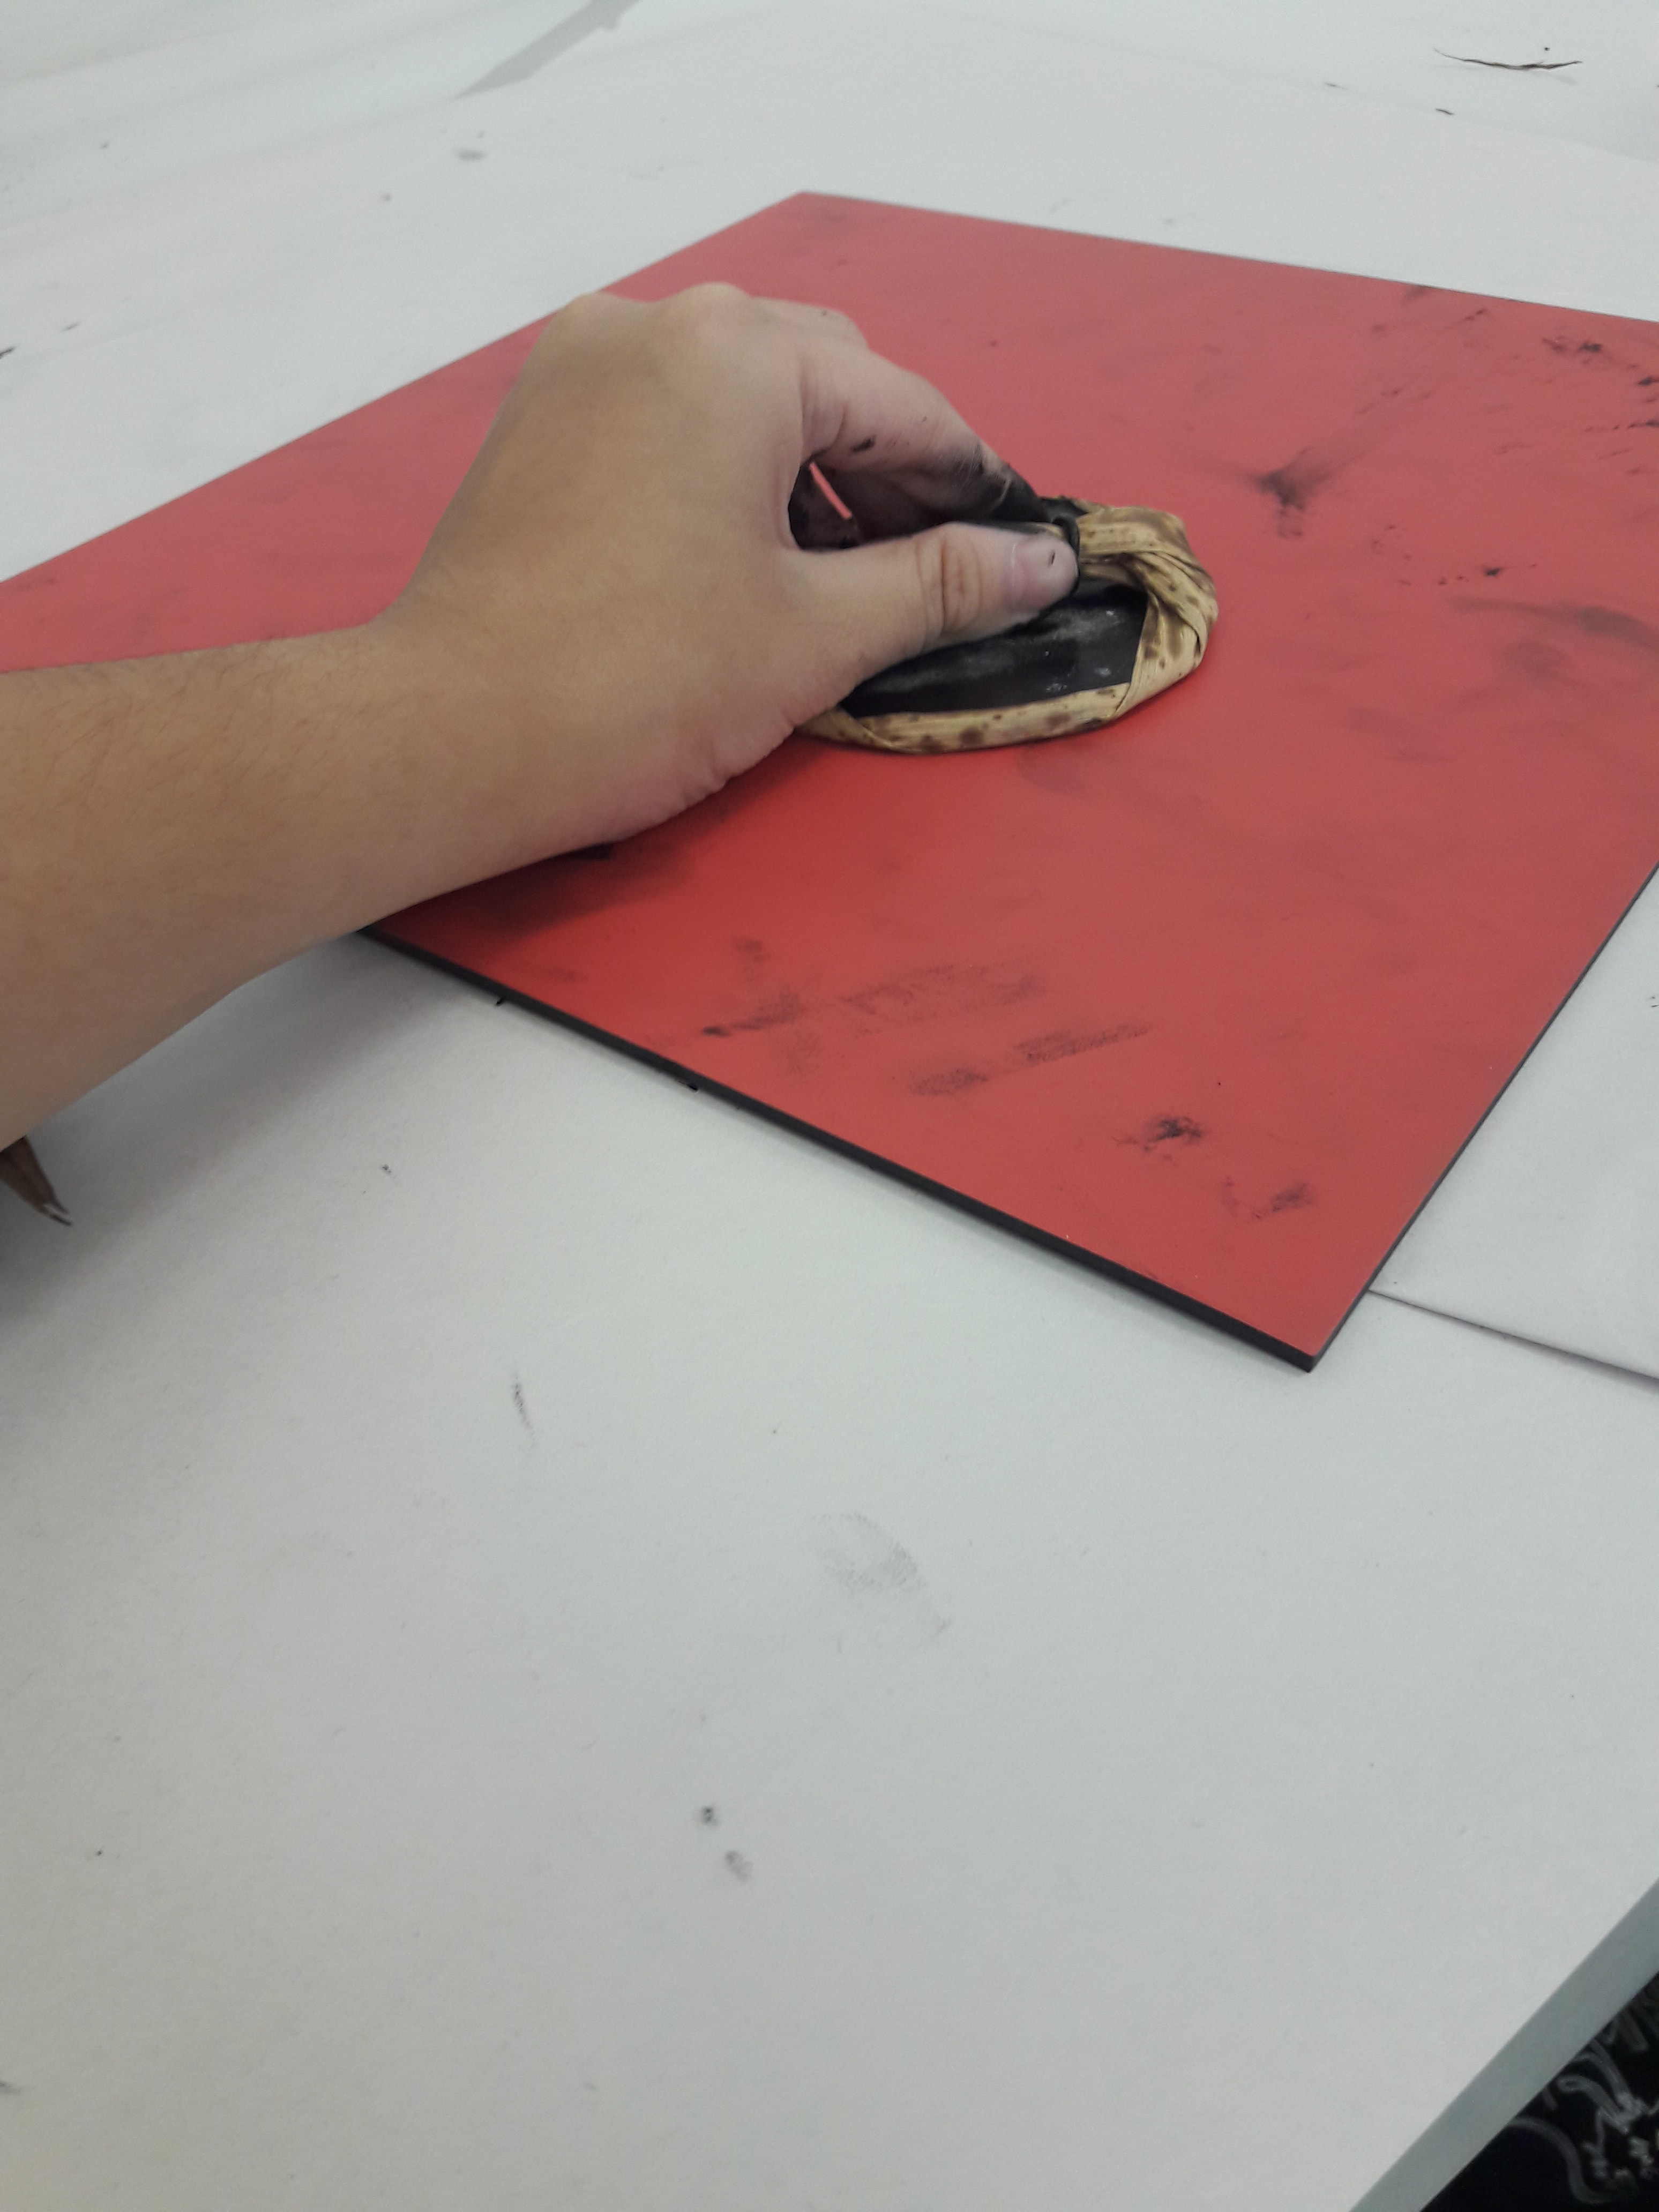
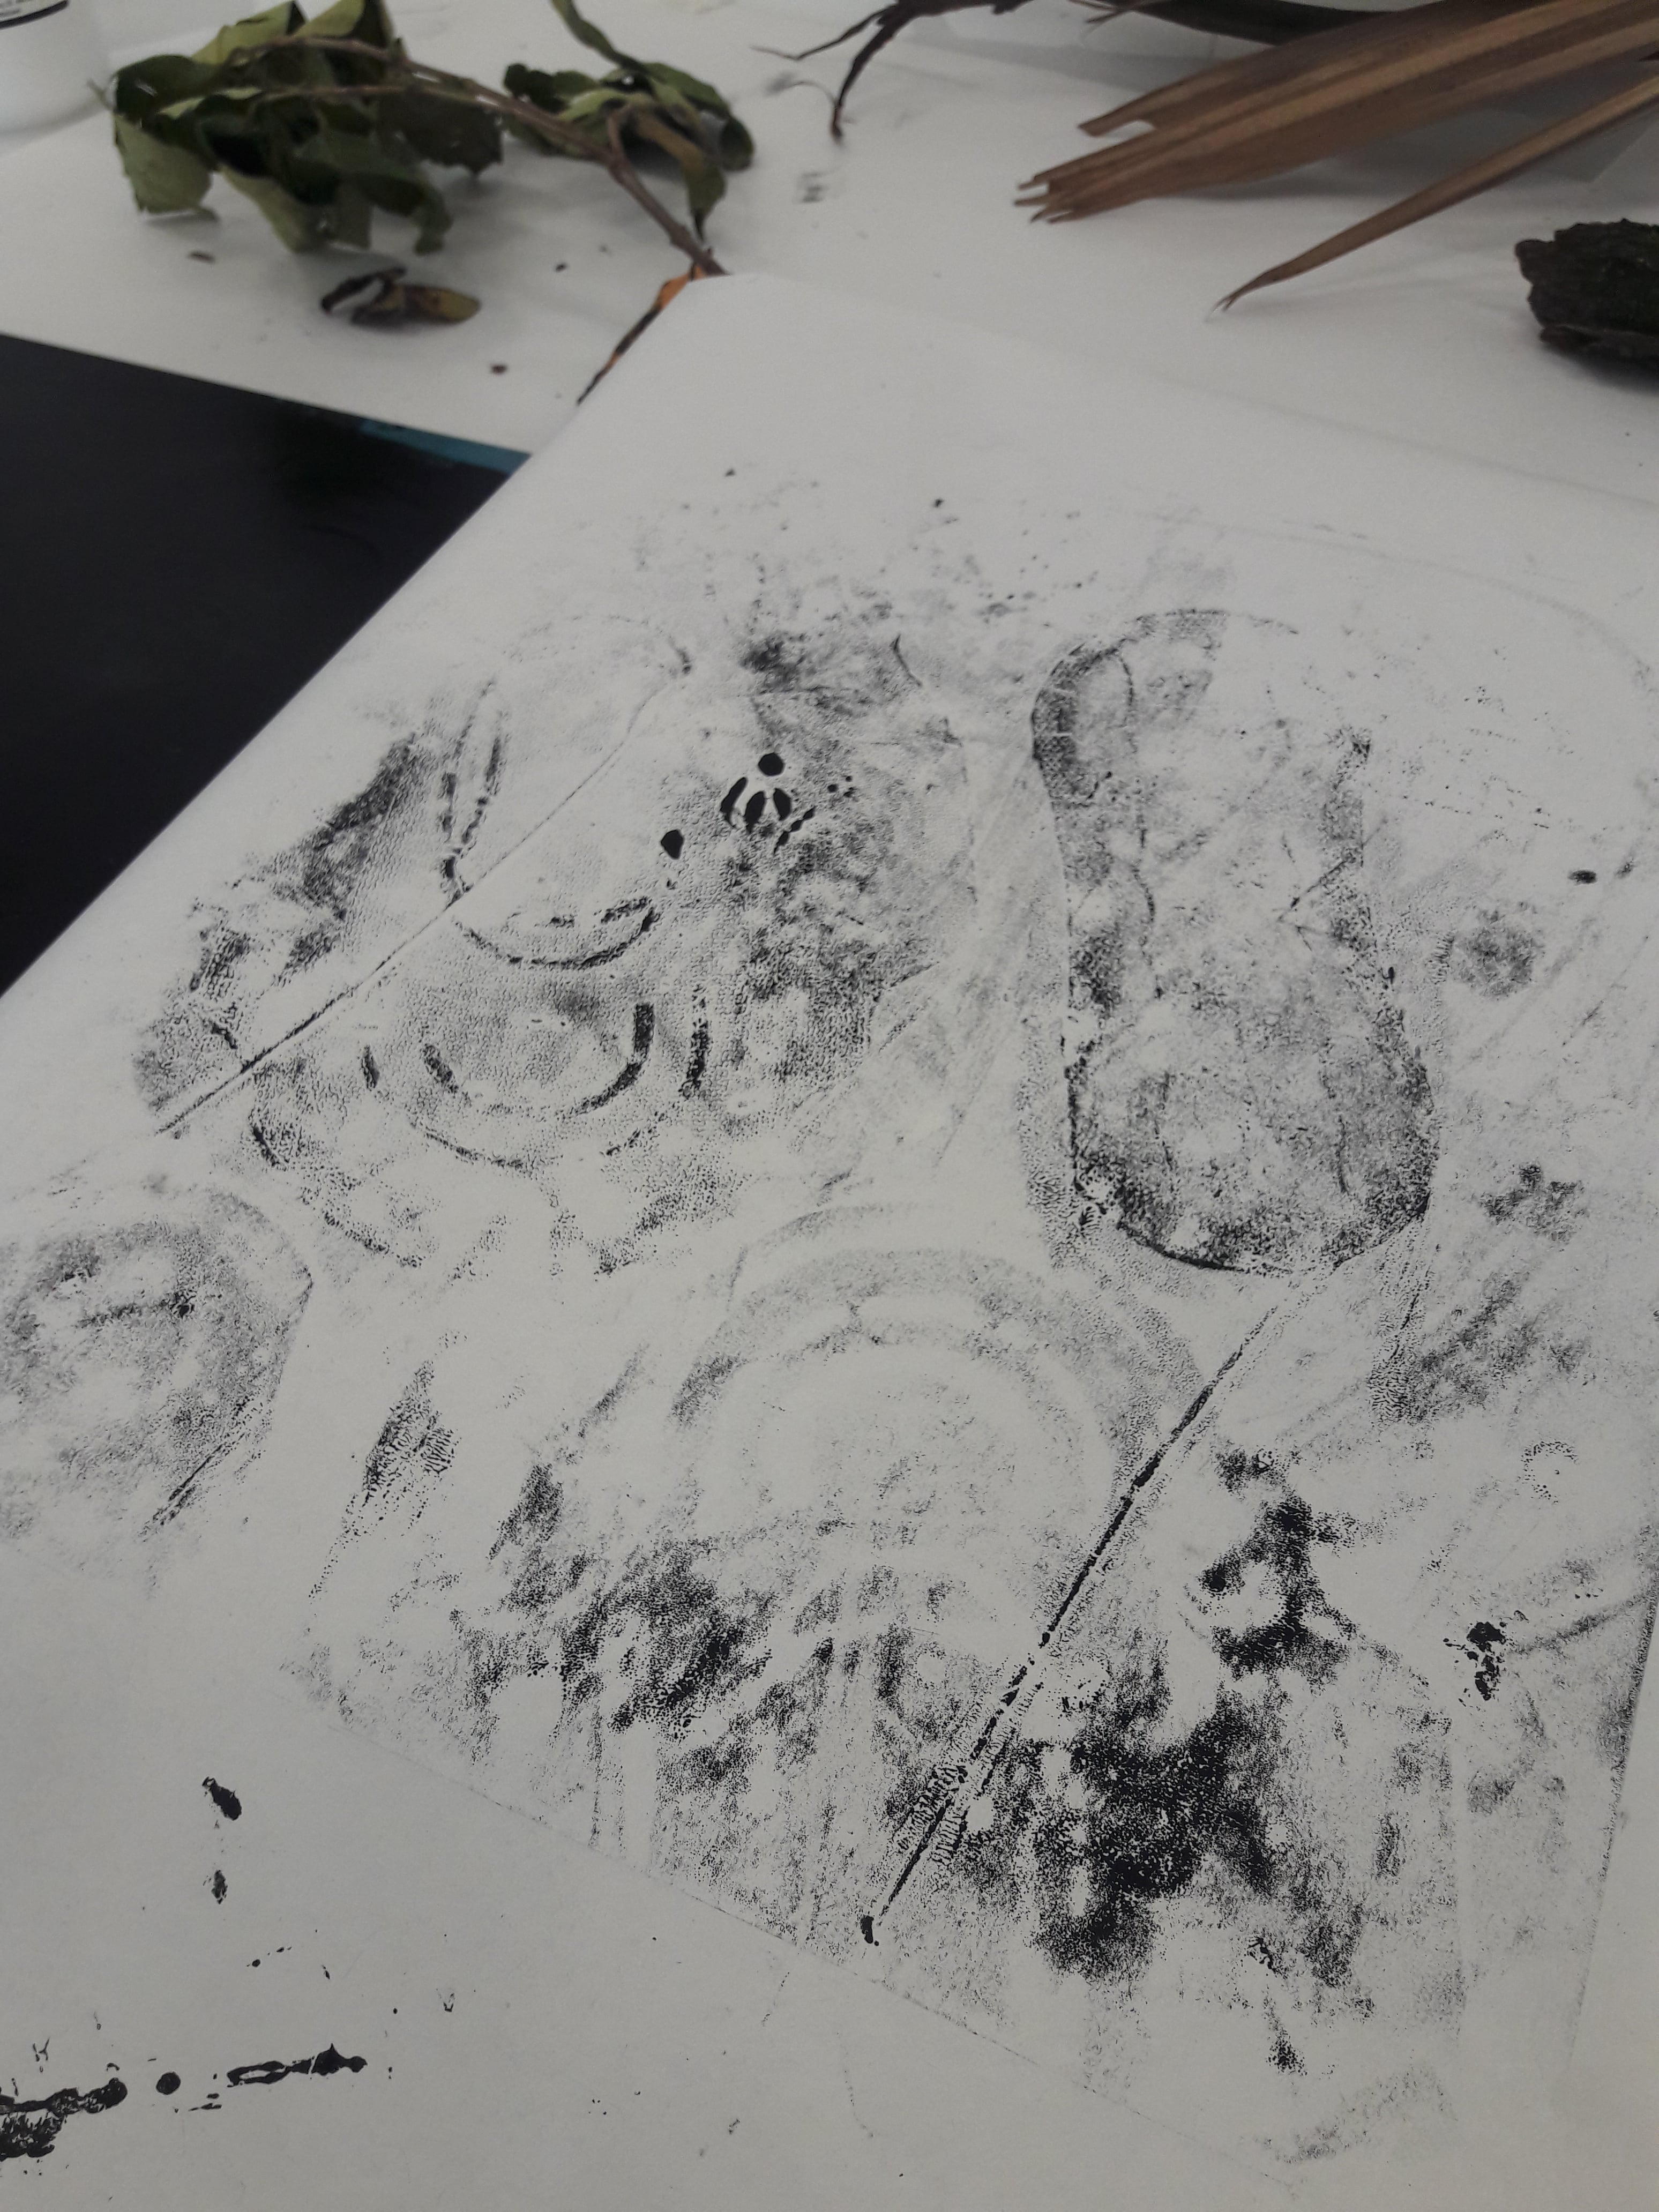
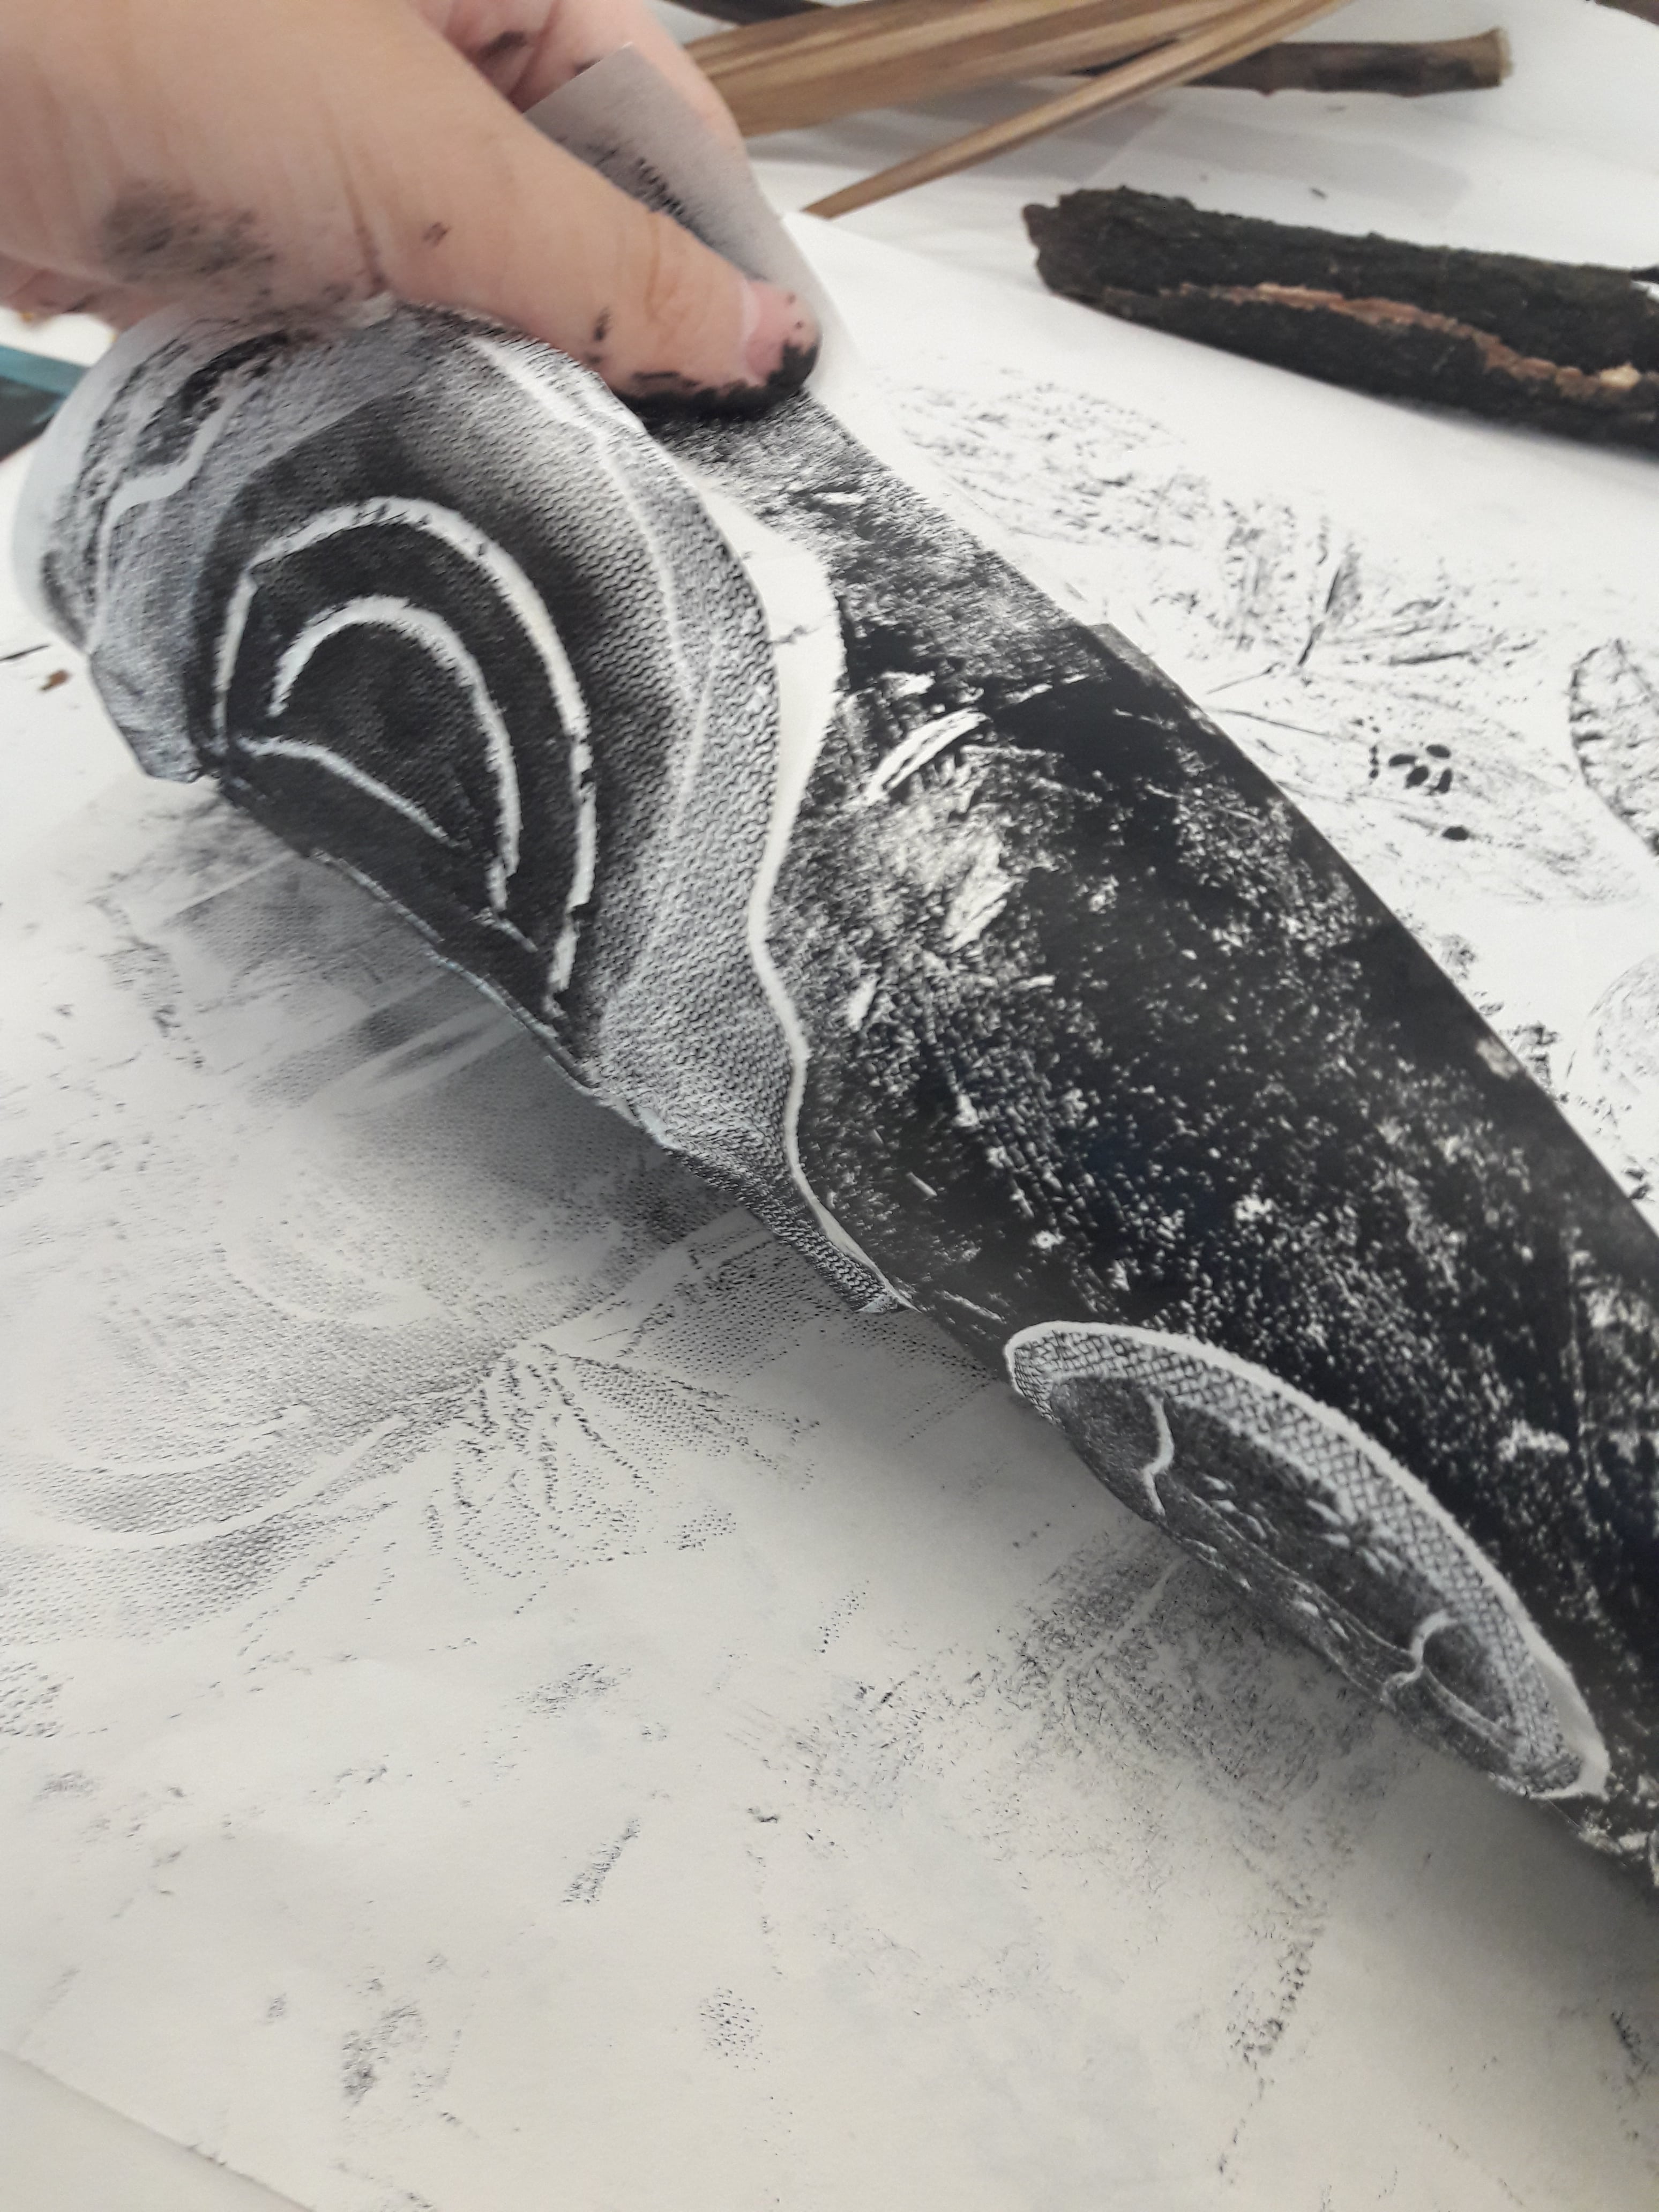
To my horror, the linoleum had bits and pieces of wood and natural sediments on it, and so I attempted, vainly, to lightly scratch it off the ink with a leaf. Note that “lightly” should never co-exist in a sentence with “I” in it, because I’m a “go big or go home” type, and my self-restraint is very low. I gave up trying to maintain an even spread, and opted to just use that to make more marks.
Yeah, I don’t really think that’s how it’s meant to be done, but it works.
It turned out pretty nice in my opinion.
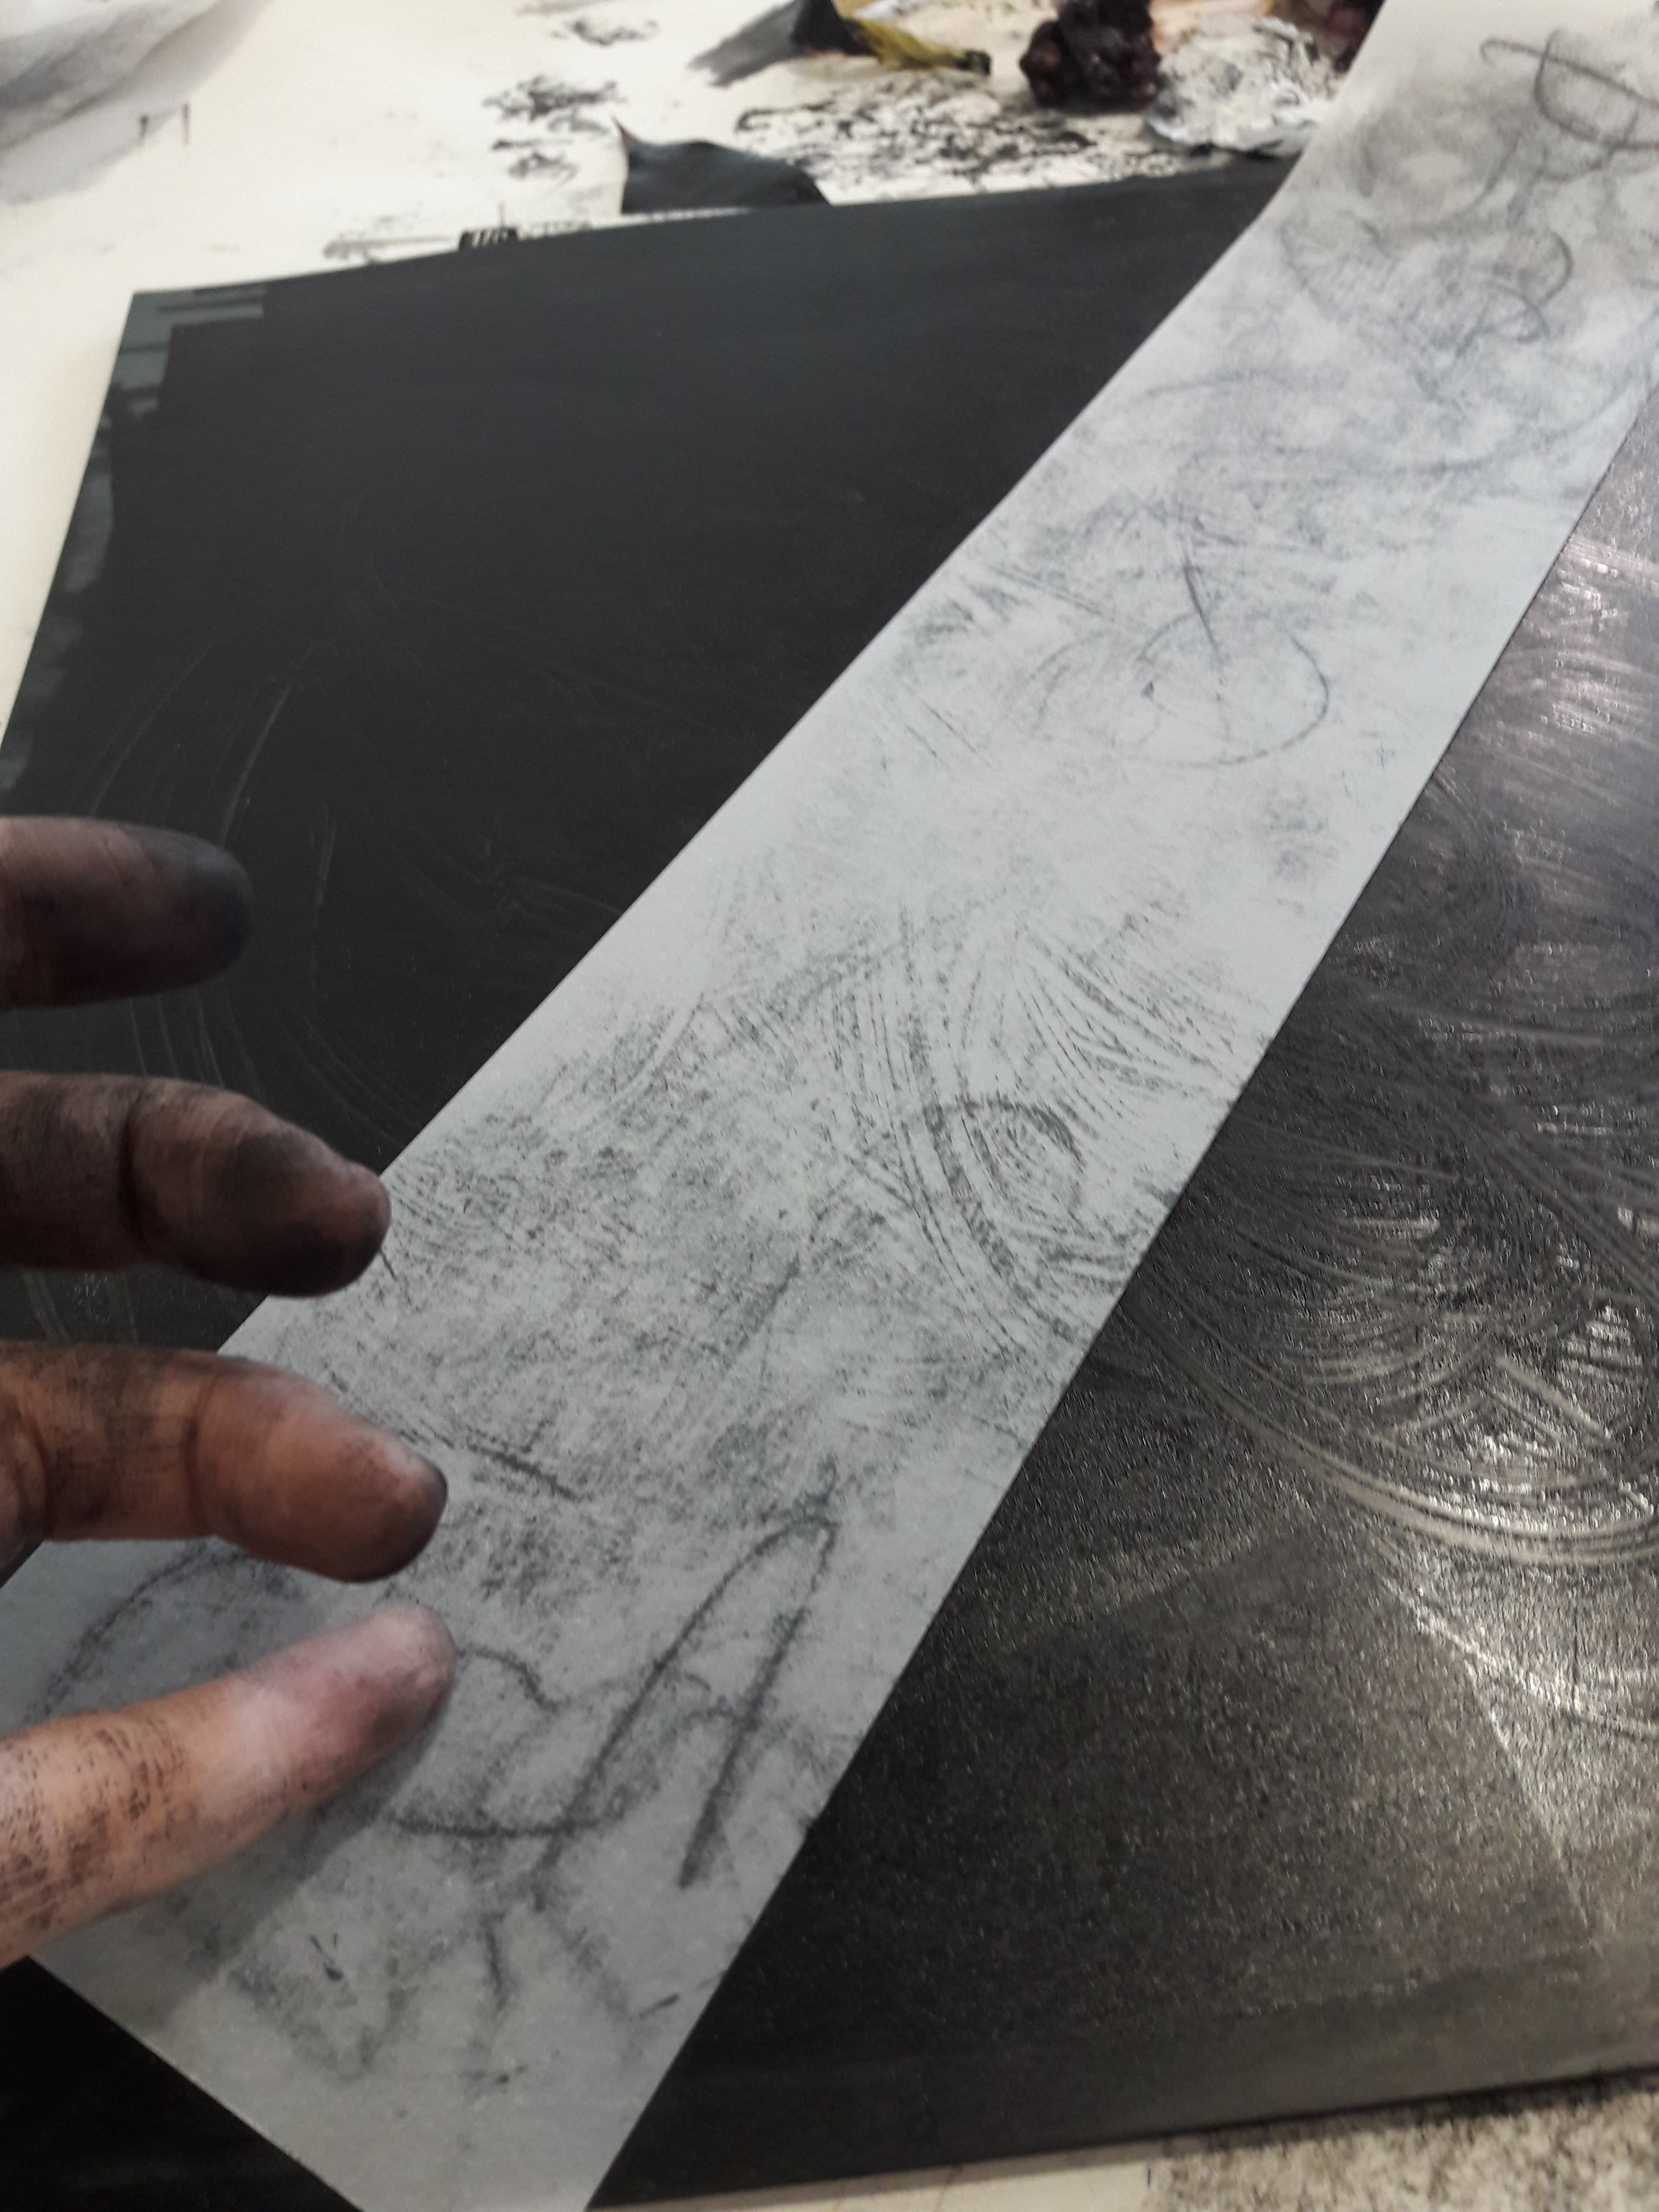
Material: Another leaf
Methodology: Scratching linoleum mindlessly, then pressing linoleum onto paper
Conclusion: The scratching pattern was very random, but I guess I tend towards circular motions. I like the mess of scribbly lines, especially against the unwashed linoleum with pre-existing textures. Especially because I was messing around doing it, this pattern gives me a vibe of energy.
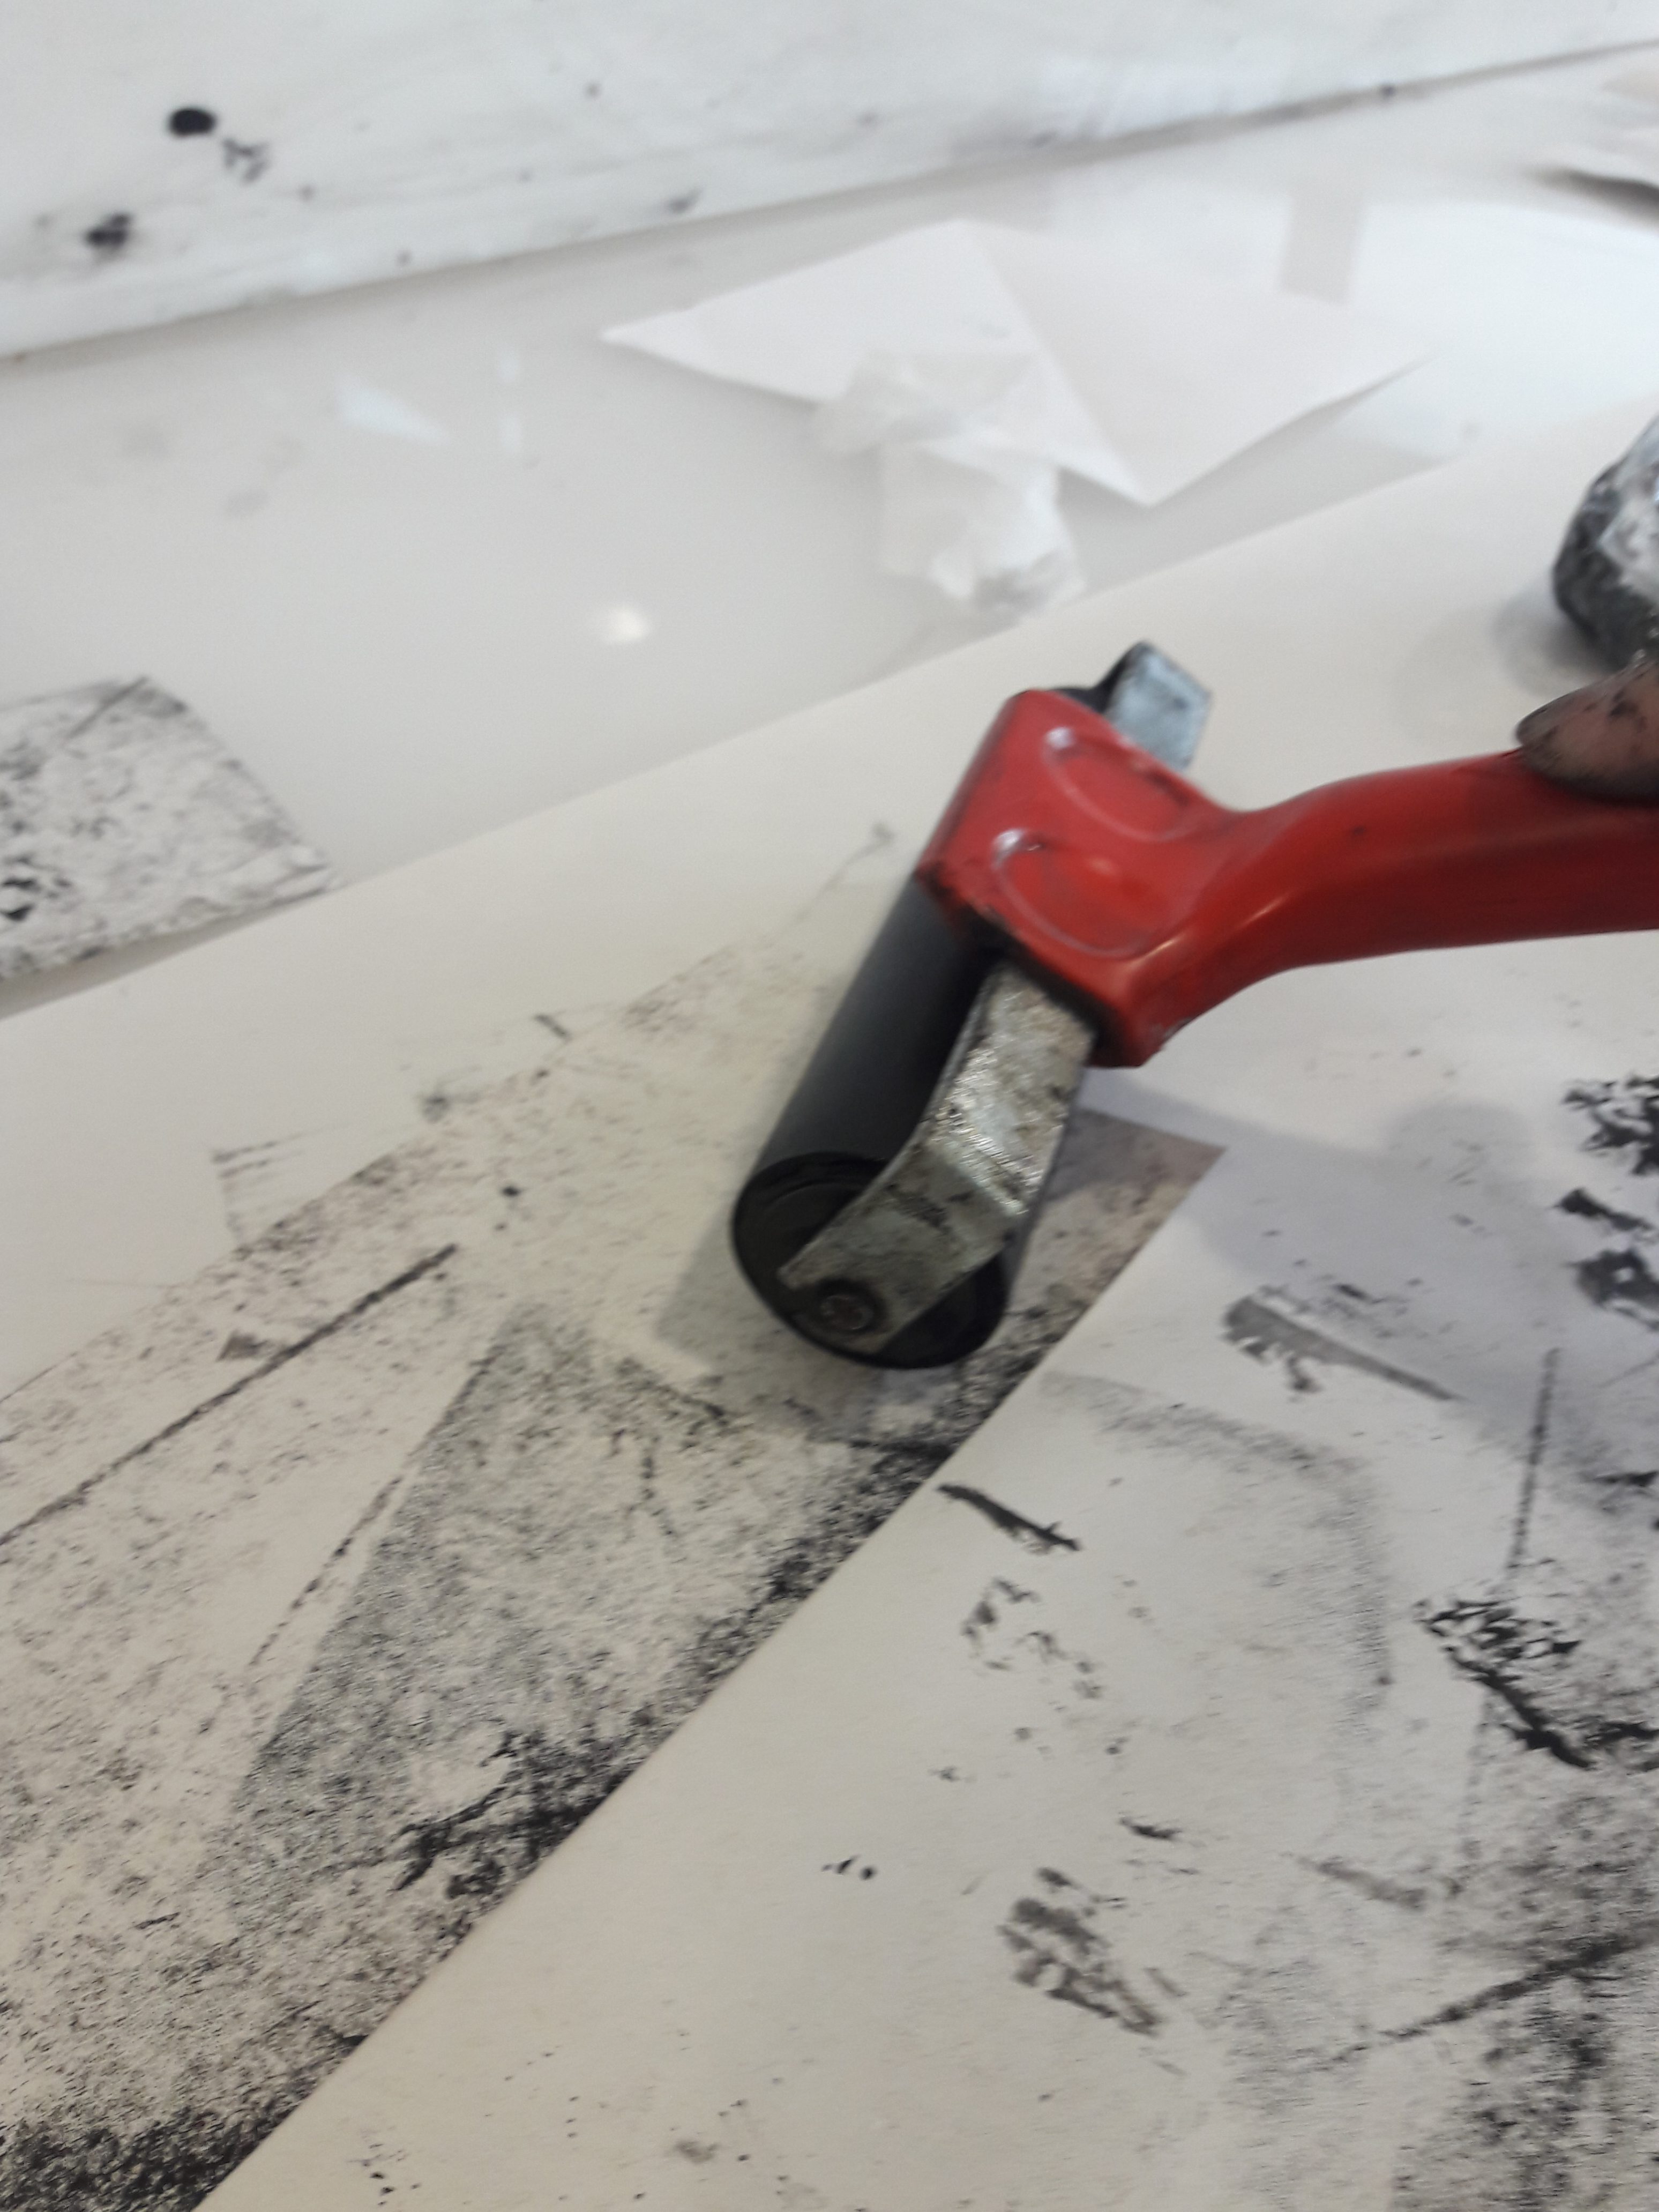
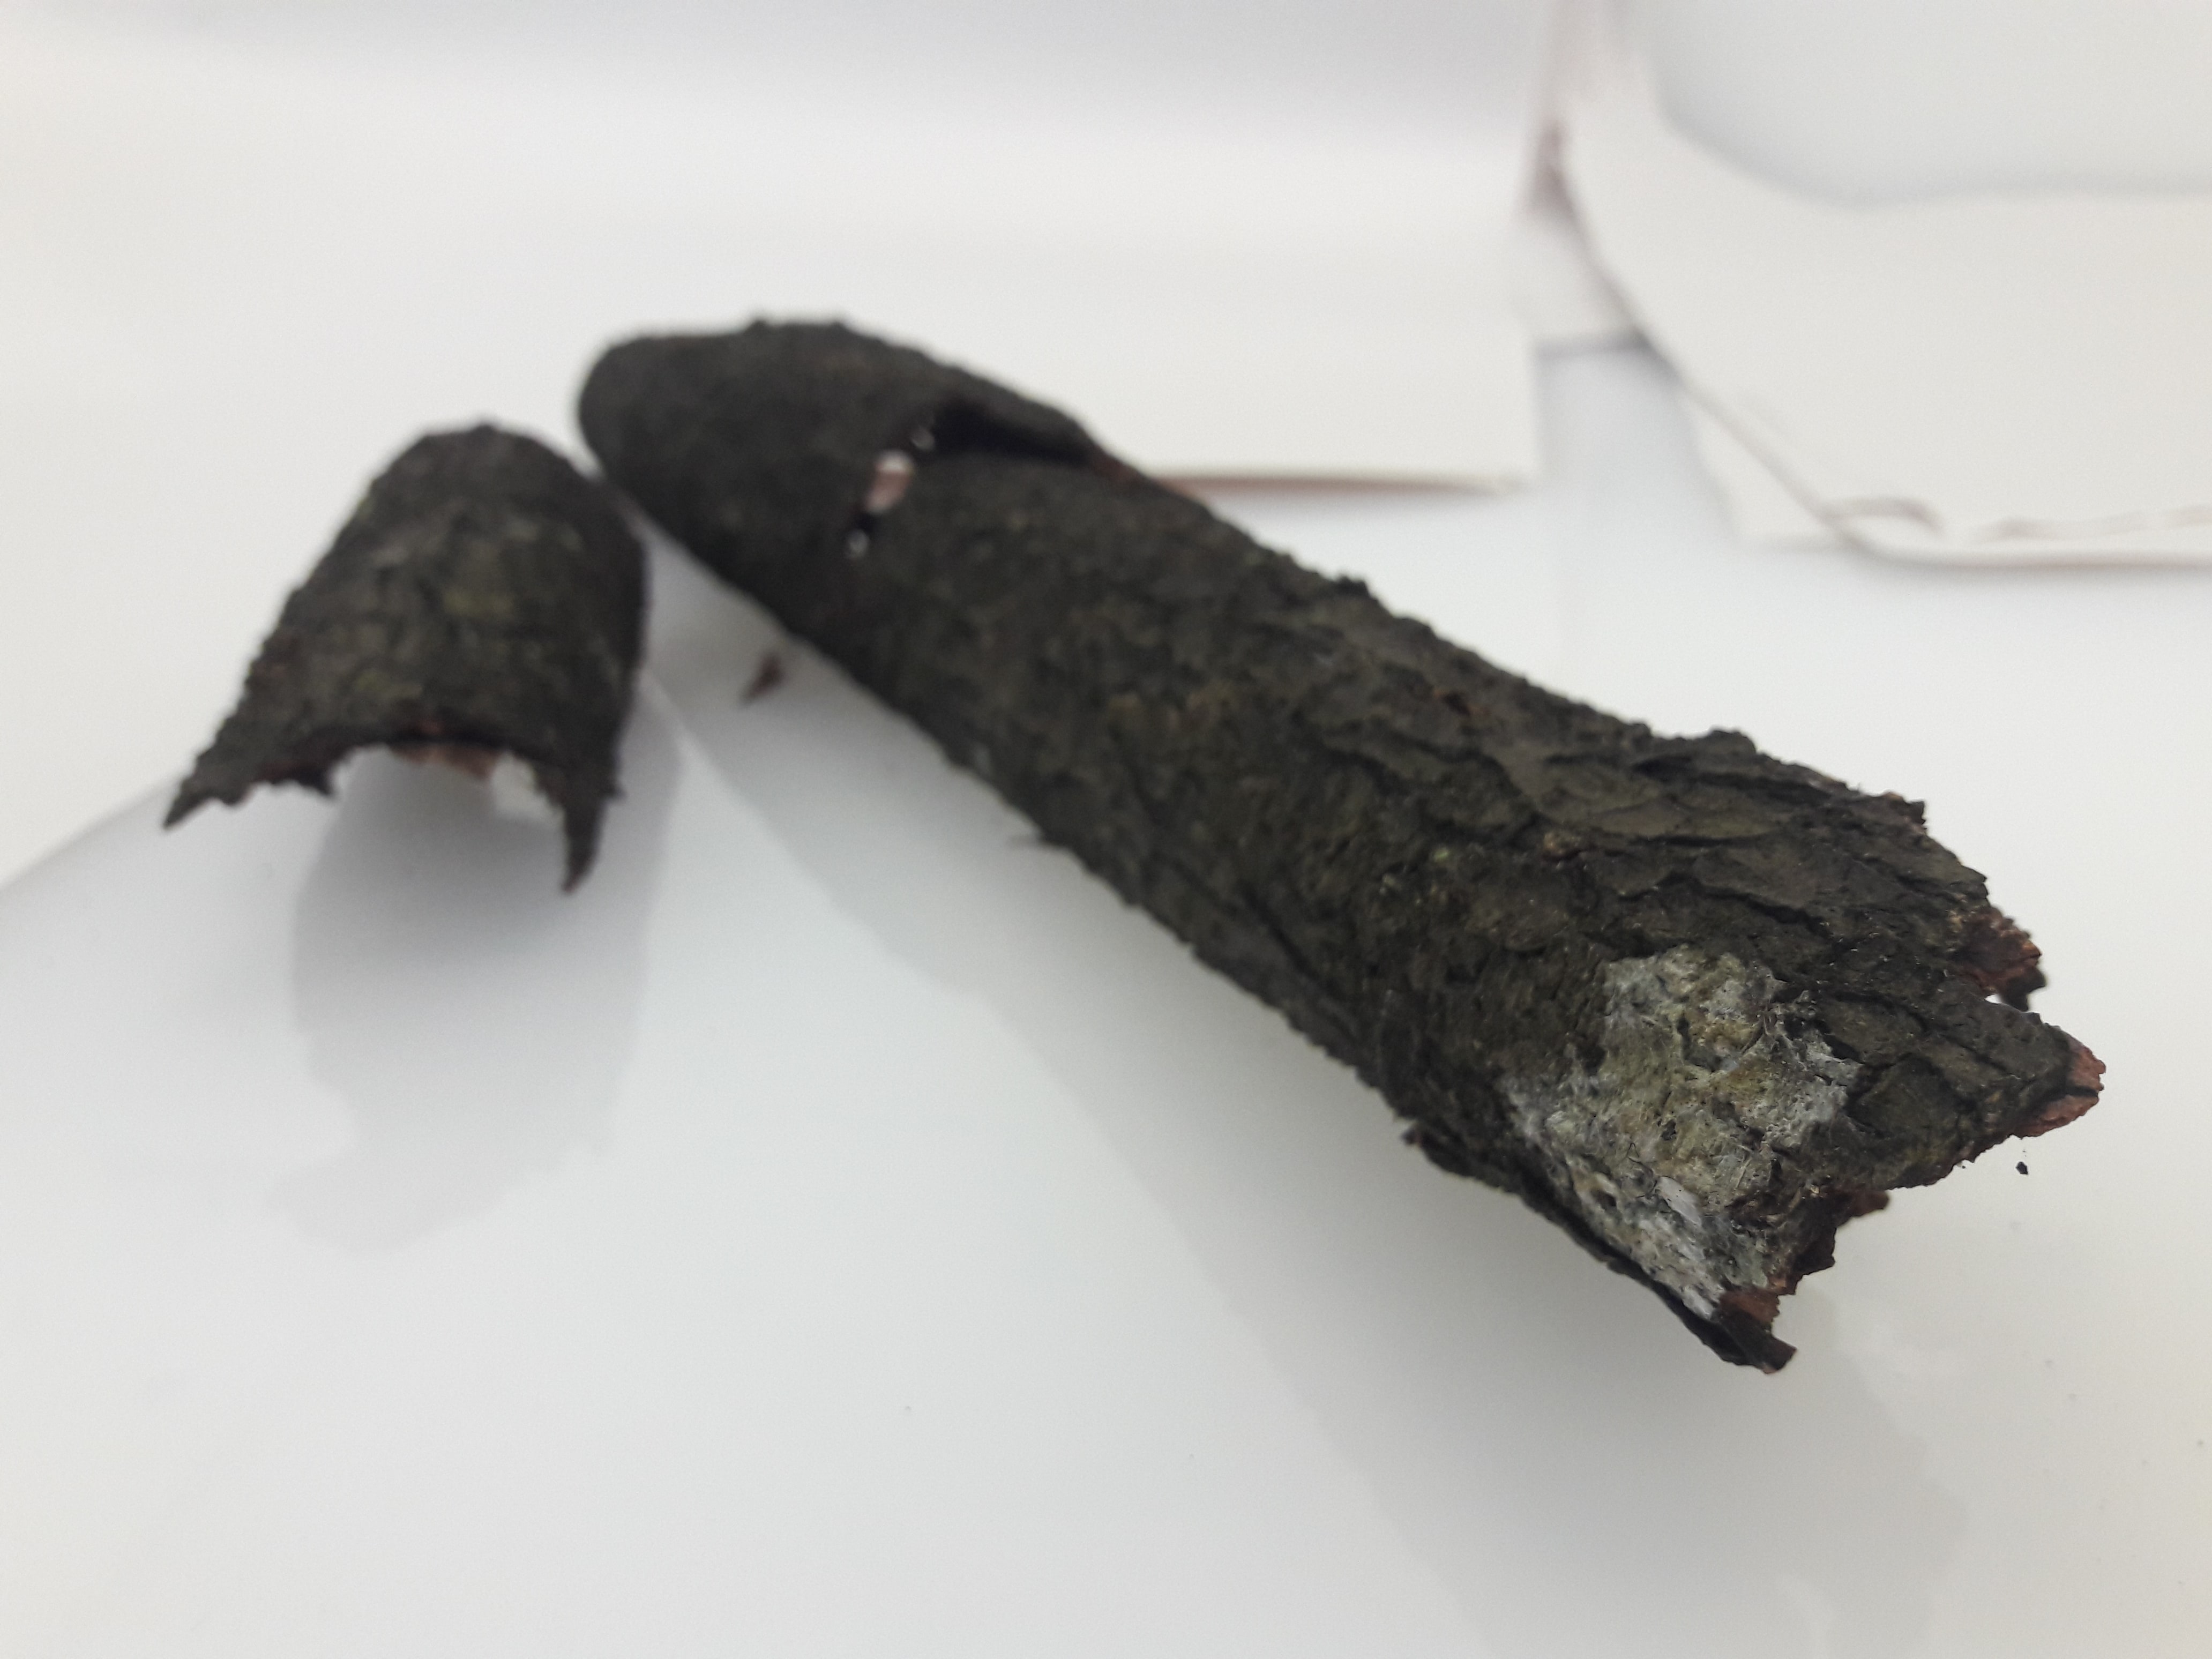
Next, I tried using the texture of the tree bark (?). This didn’t work out particularly well since it was difficult to apply sufficient pressure to make interesting marks without breaking the bark, but there was an attempt.
Material: Bark
Methodology: Painting bark with ink, then rolling bark on paper
Conclusion: I mean… It was an underwhelming result. I’m mostly disappointed. Maybe I should have tried pressing the paper onto the bark than the bark on the paper for more effect. Or slabbing on more paint.
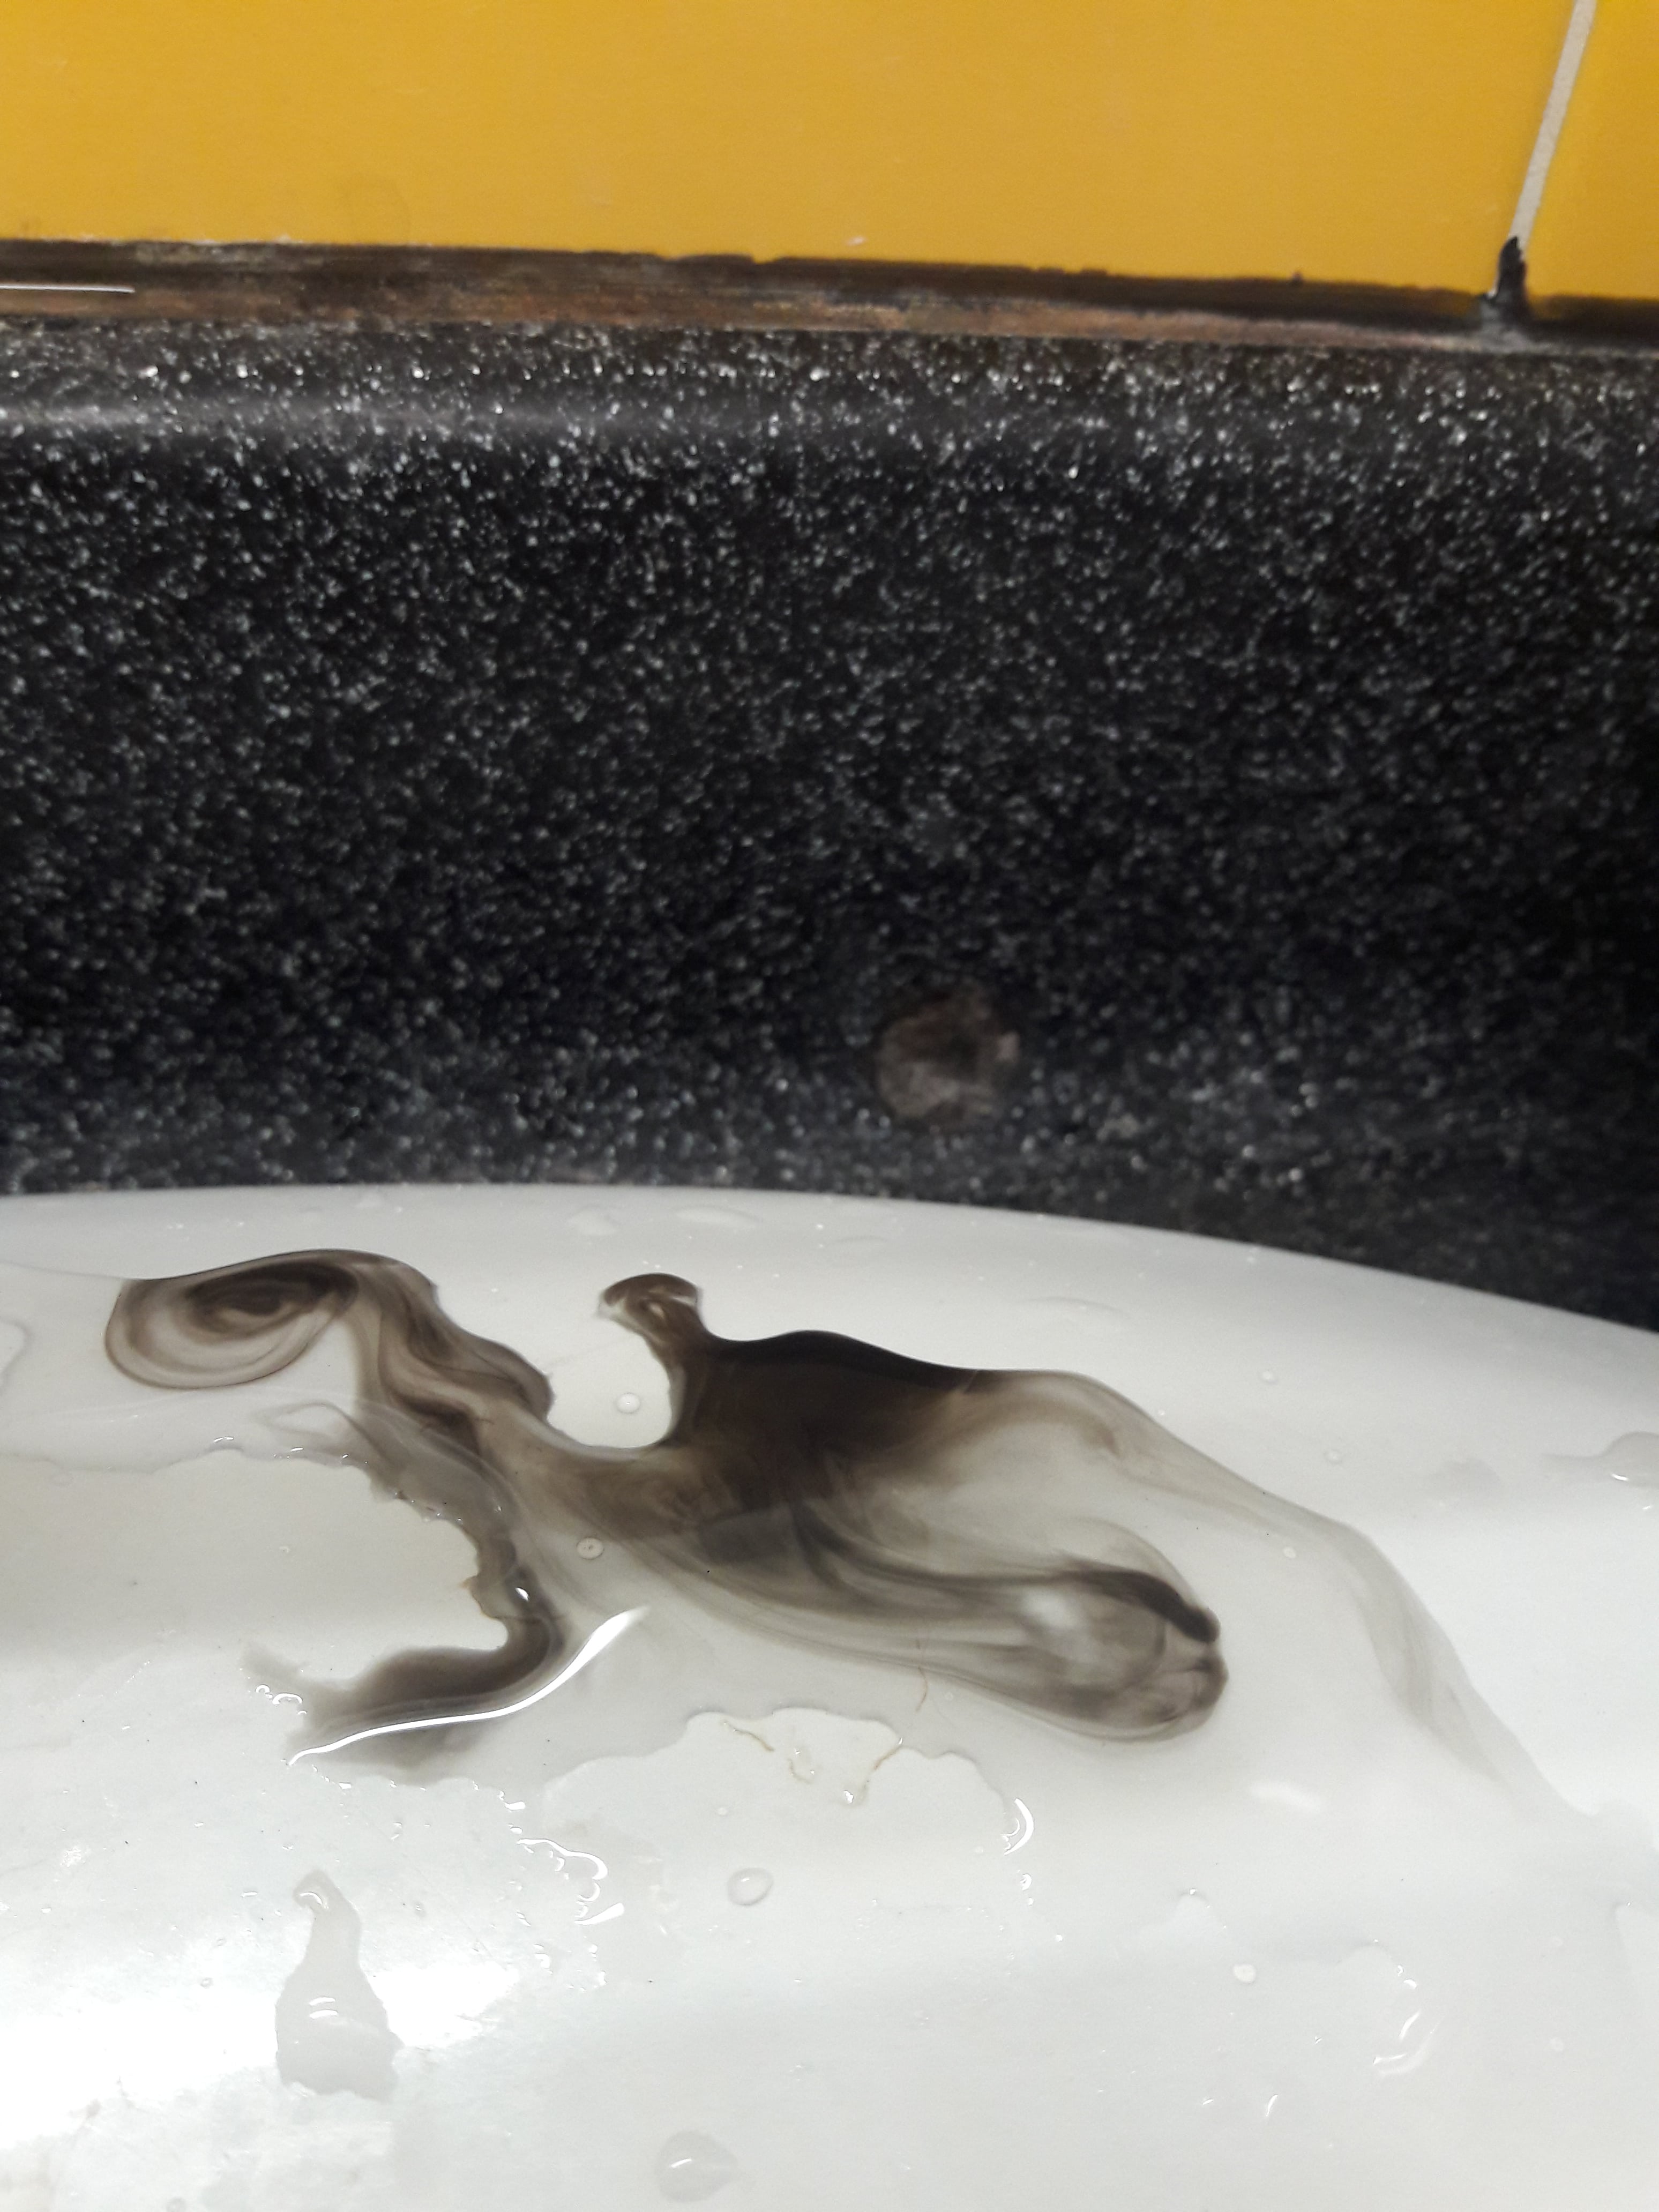
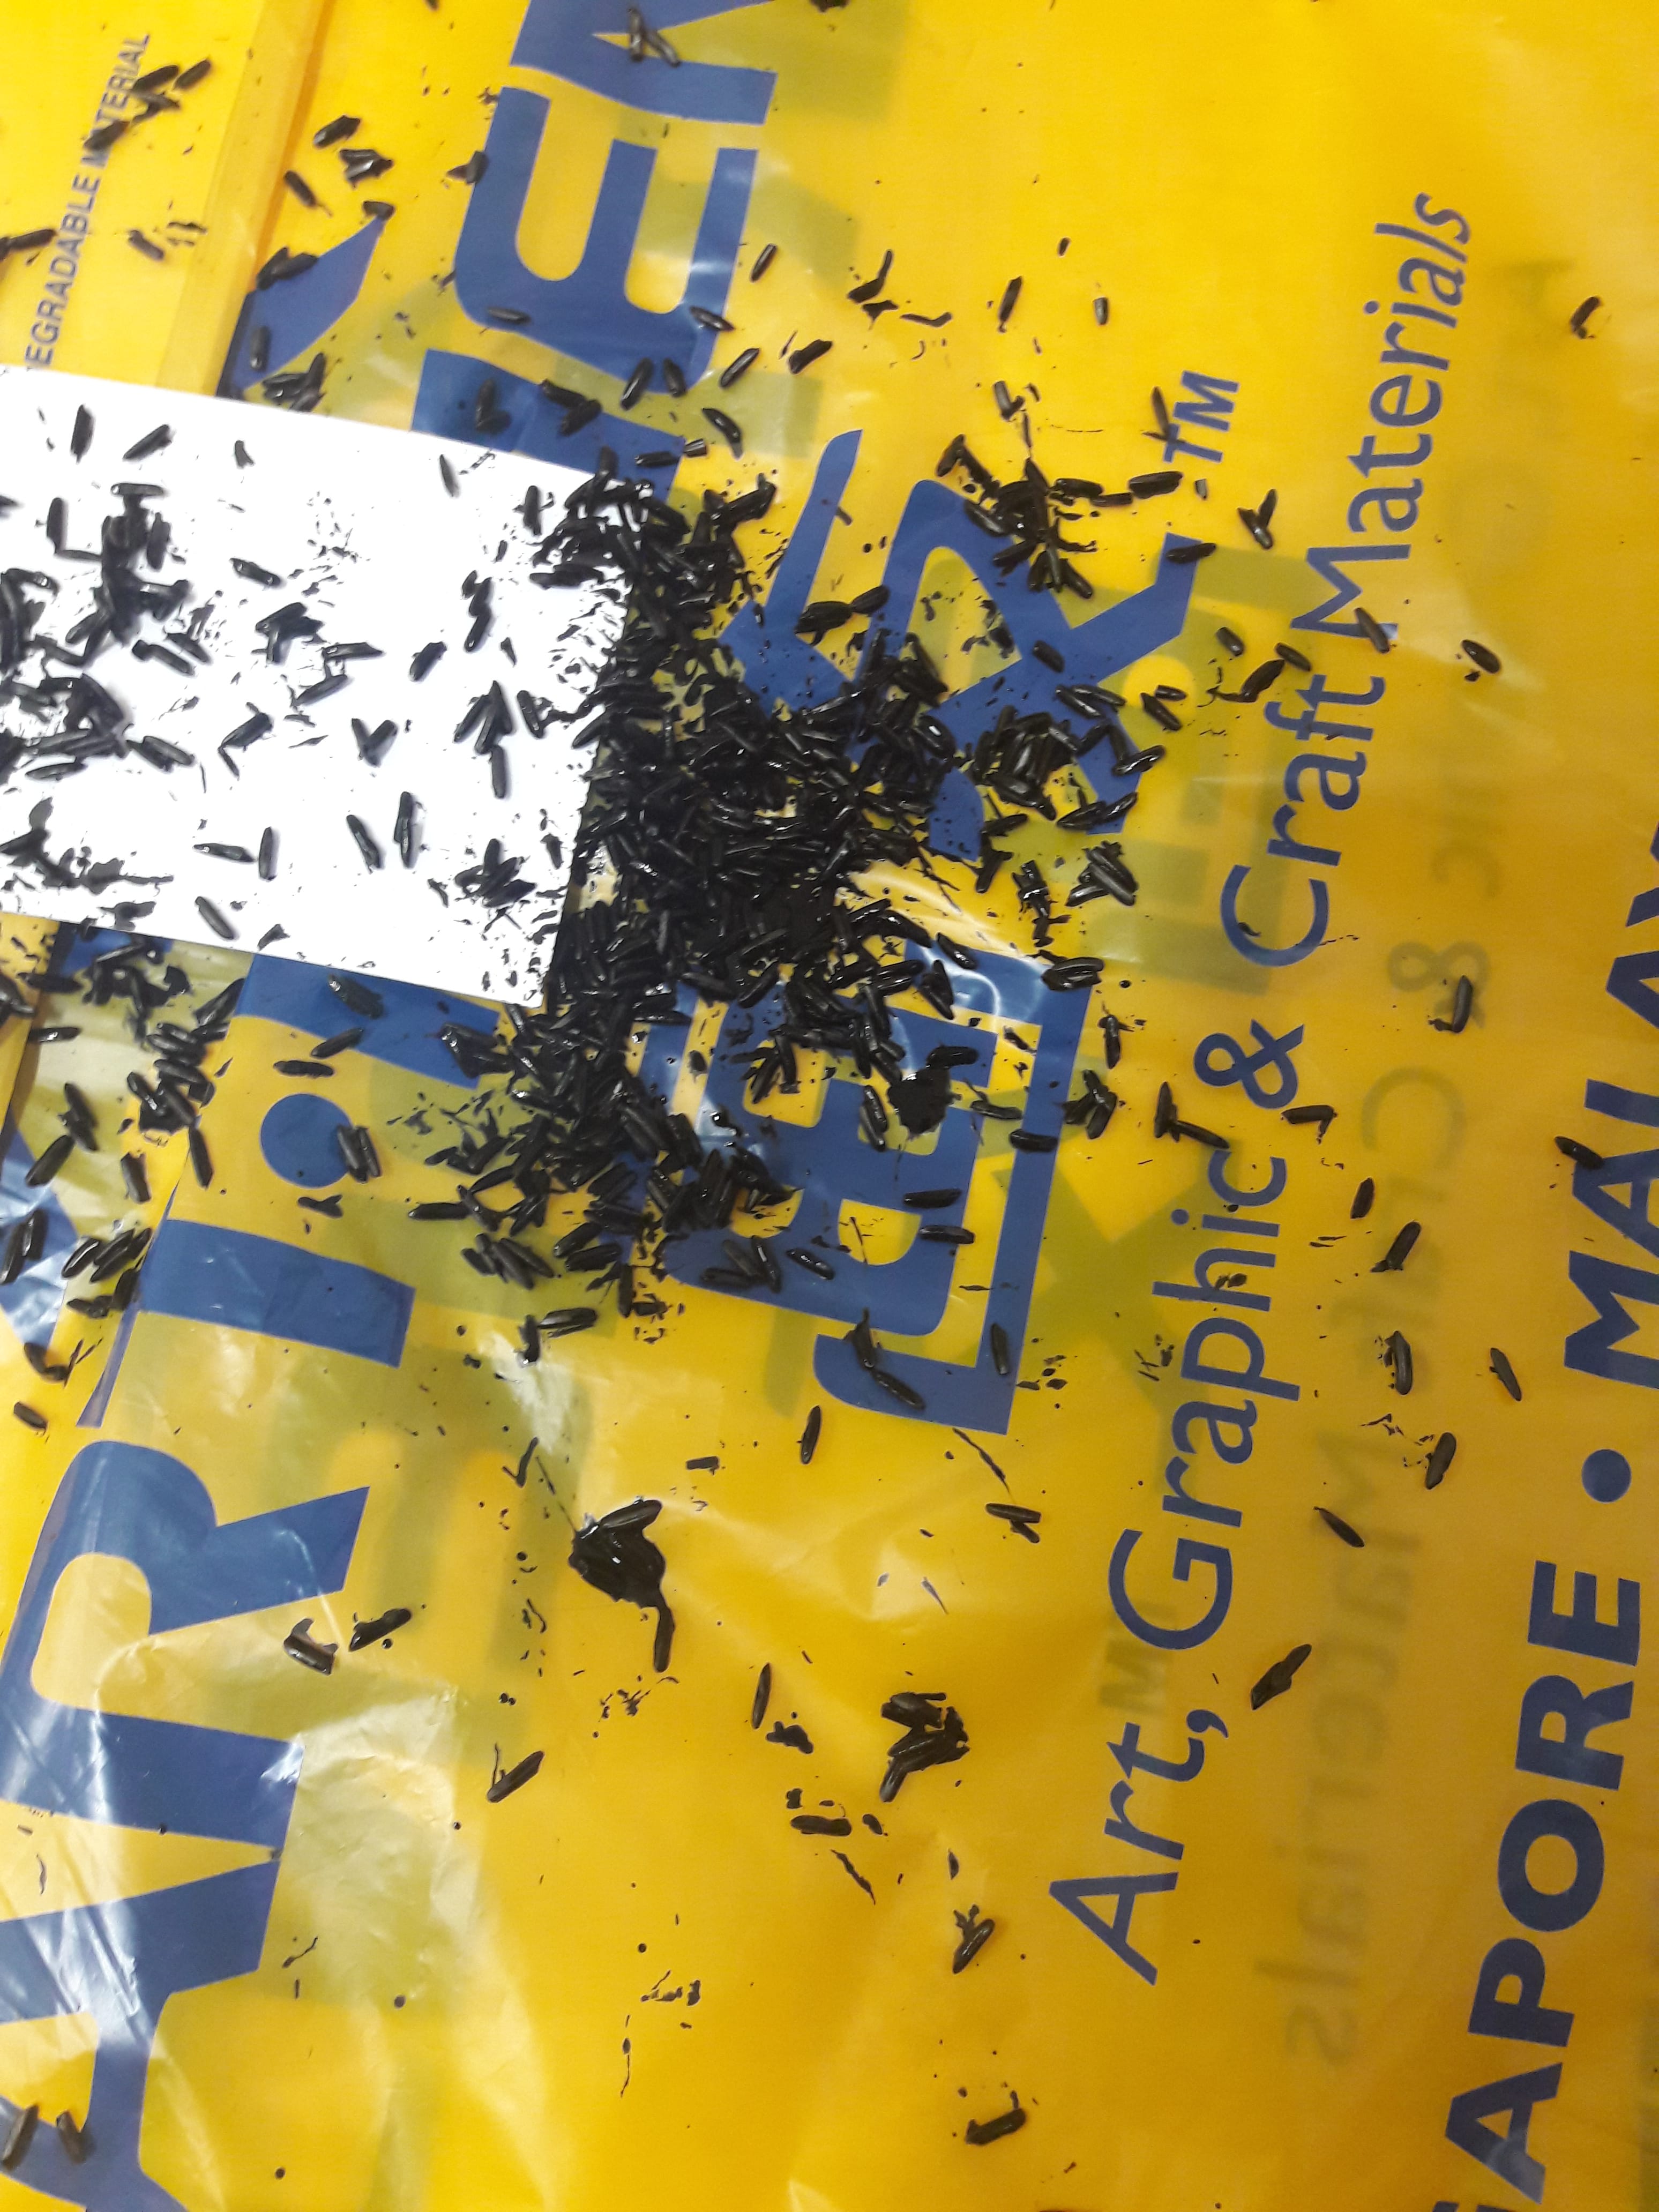
After all the plant-related items, I went into the more outrageous items (this next item is going to be awkward). For this, I did it the typical way, i.e. putting the material onto the linoleum, then pressing onto paper, then separating the linoleum and material and pressing both onto the paper separately.
Conclusion: After the initial disgust, this actually has a fairly interesting texture, and shapes. You can see the vaguely porous surface, and the patterns on it. While it’s absorbent, when pressed sufficiently the ink comes out only lightly, so it’s not as high contrast as the rest.
Other things I quickly tried before time was up was bubble wrap, various papers (tissues, toilet paper, Scotch Brite paper), and hair (acquisition of this material involved vaguely repulsive cleaning of a communal bathroom).
Material: Bubble wrap
Methodology: Wearing the bubble wrap like a glove and slapping it around the paper
Conclusion: I personally think the most interesting part is how the bubbles aren’t of even surface texture (I don’t know why I expected perfect circles, actually), and it provides a nice consistent pattern of evenly-shaped circles.
Conclusion: Again, I don’t find this technique particularly interesting, especially since all of these items don’t have particularly interesting outlines. Perhaps if I used something which was bad at holding ink, so it’d leak through?
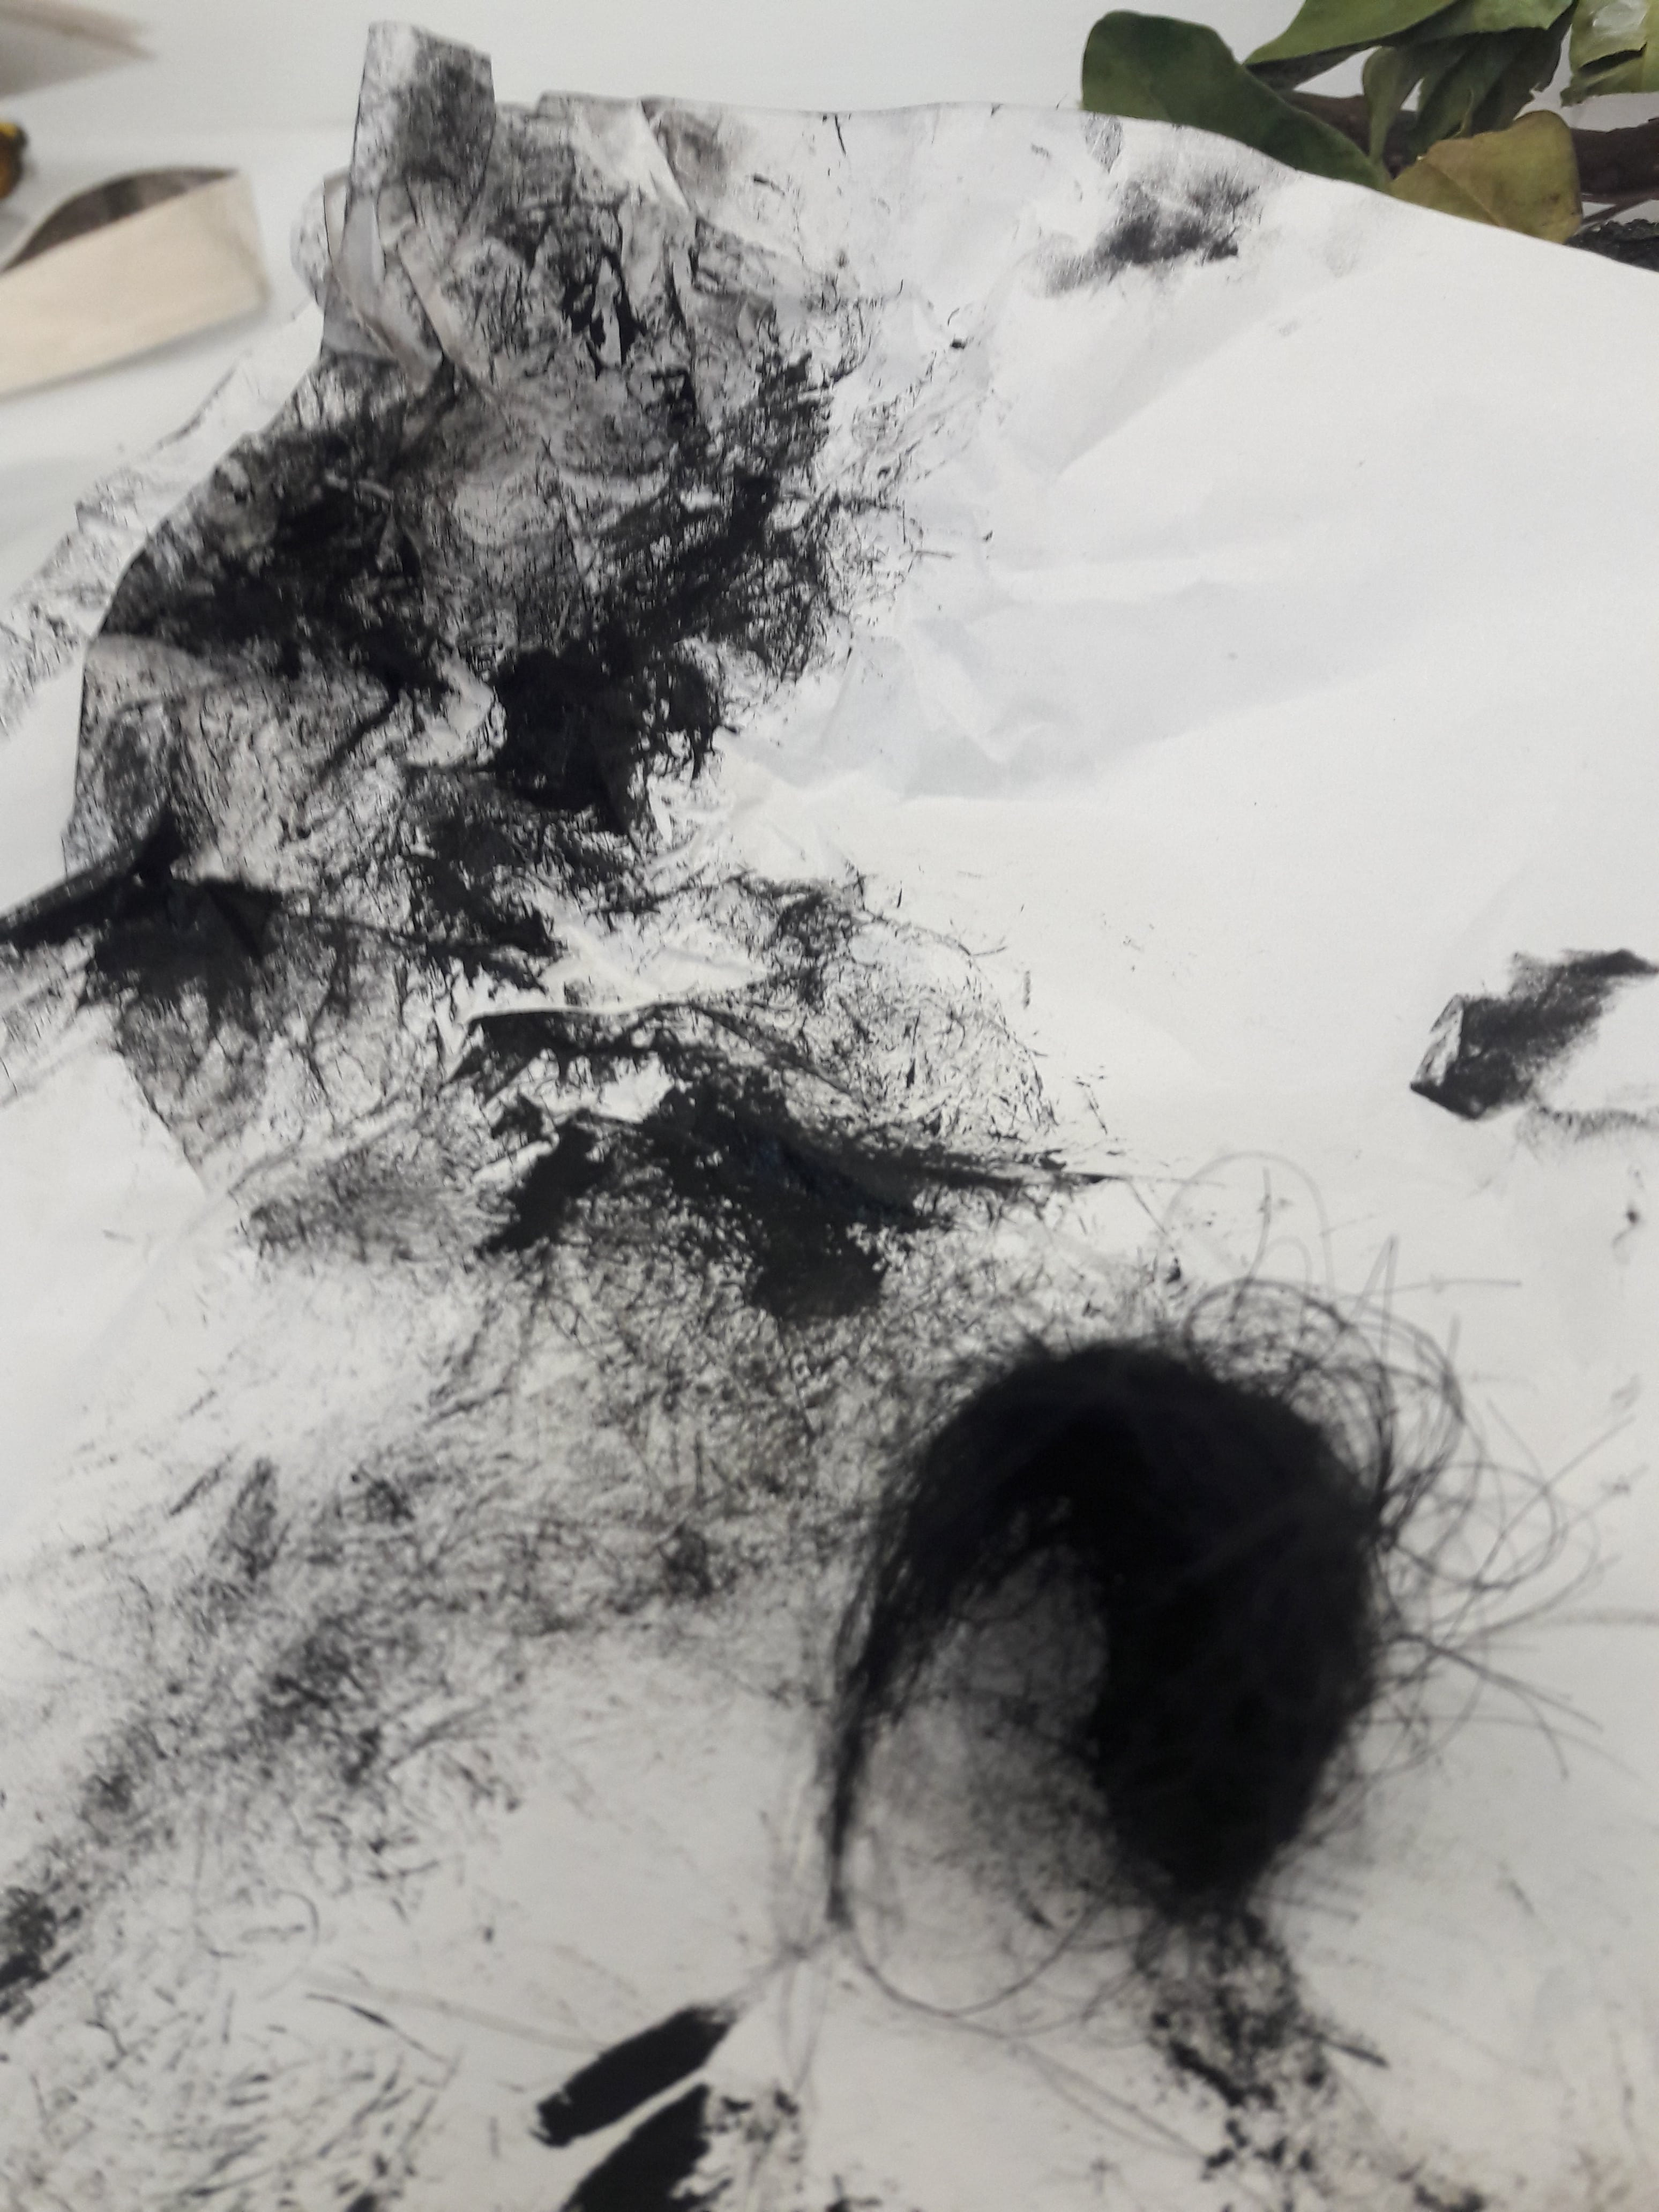
(Look, I went through a lot of internal turmoil to get this hairball, so I might as well maximise it.)
Material: Hair
Methodology: Soaking in ink, pressing and rolling it around
Conclusion: I liked how the density of hair showed clearly, with black splotches where there was a lot of hair, and stringy lines for stray hairs. Also how… Centralised it is, in having a core and then the hairs coming out
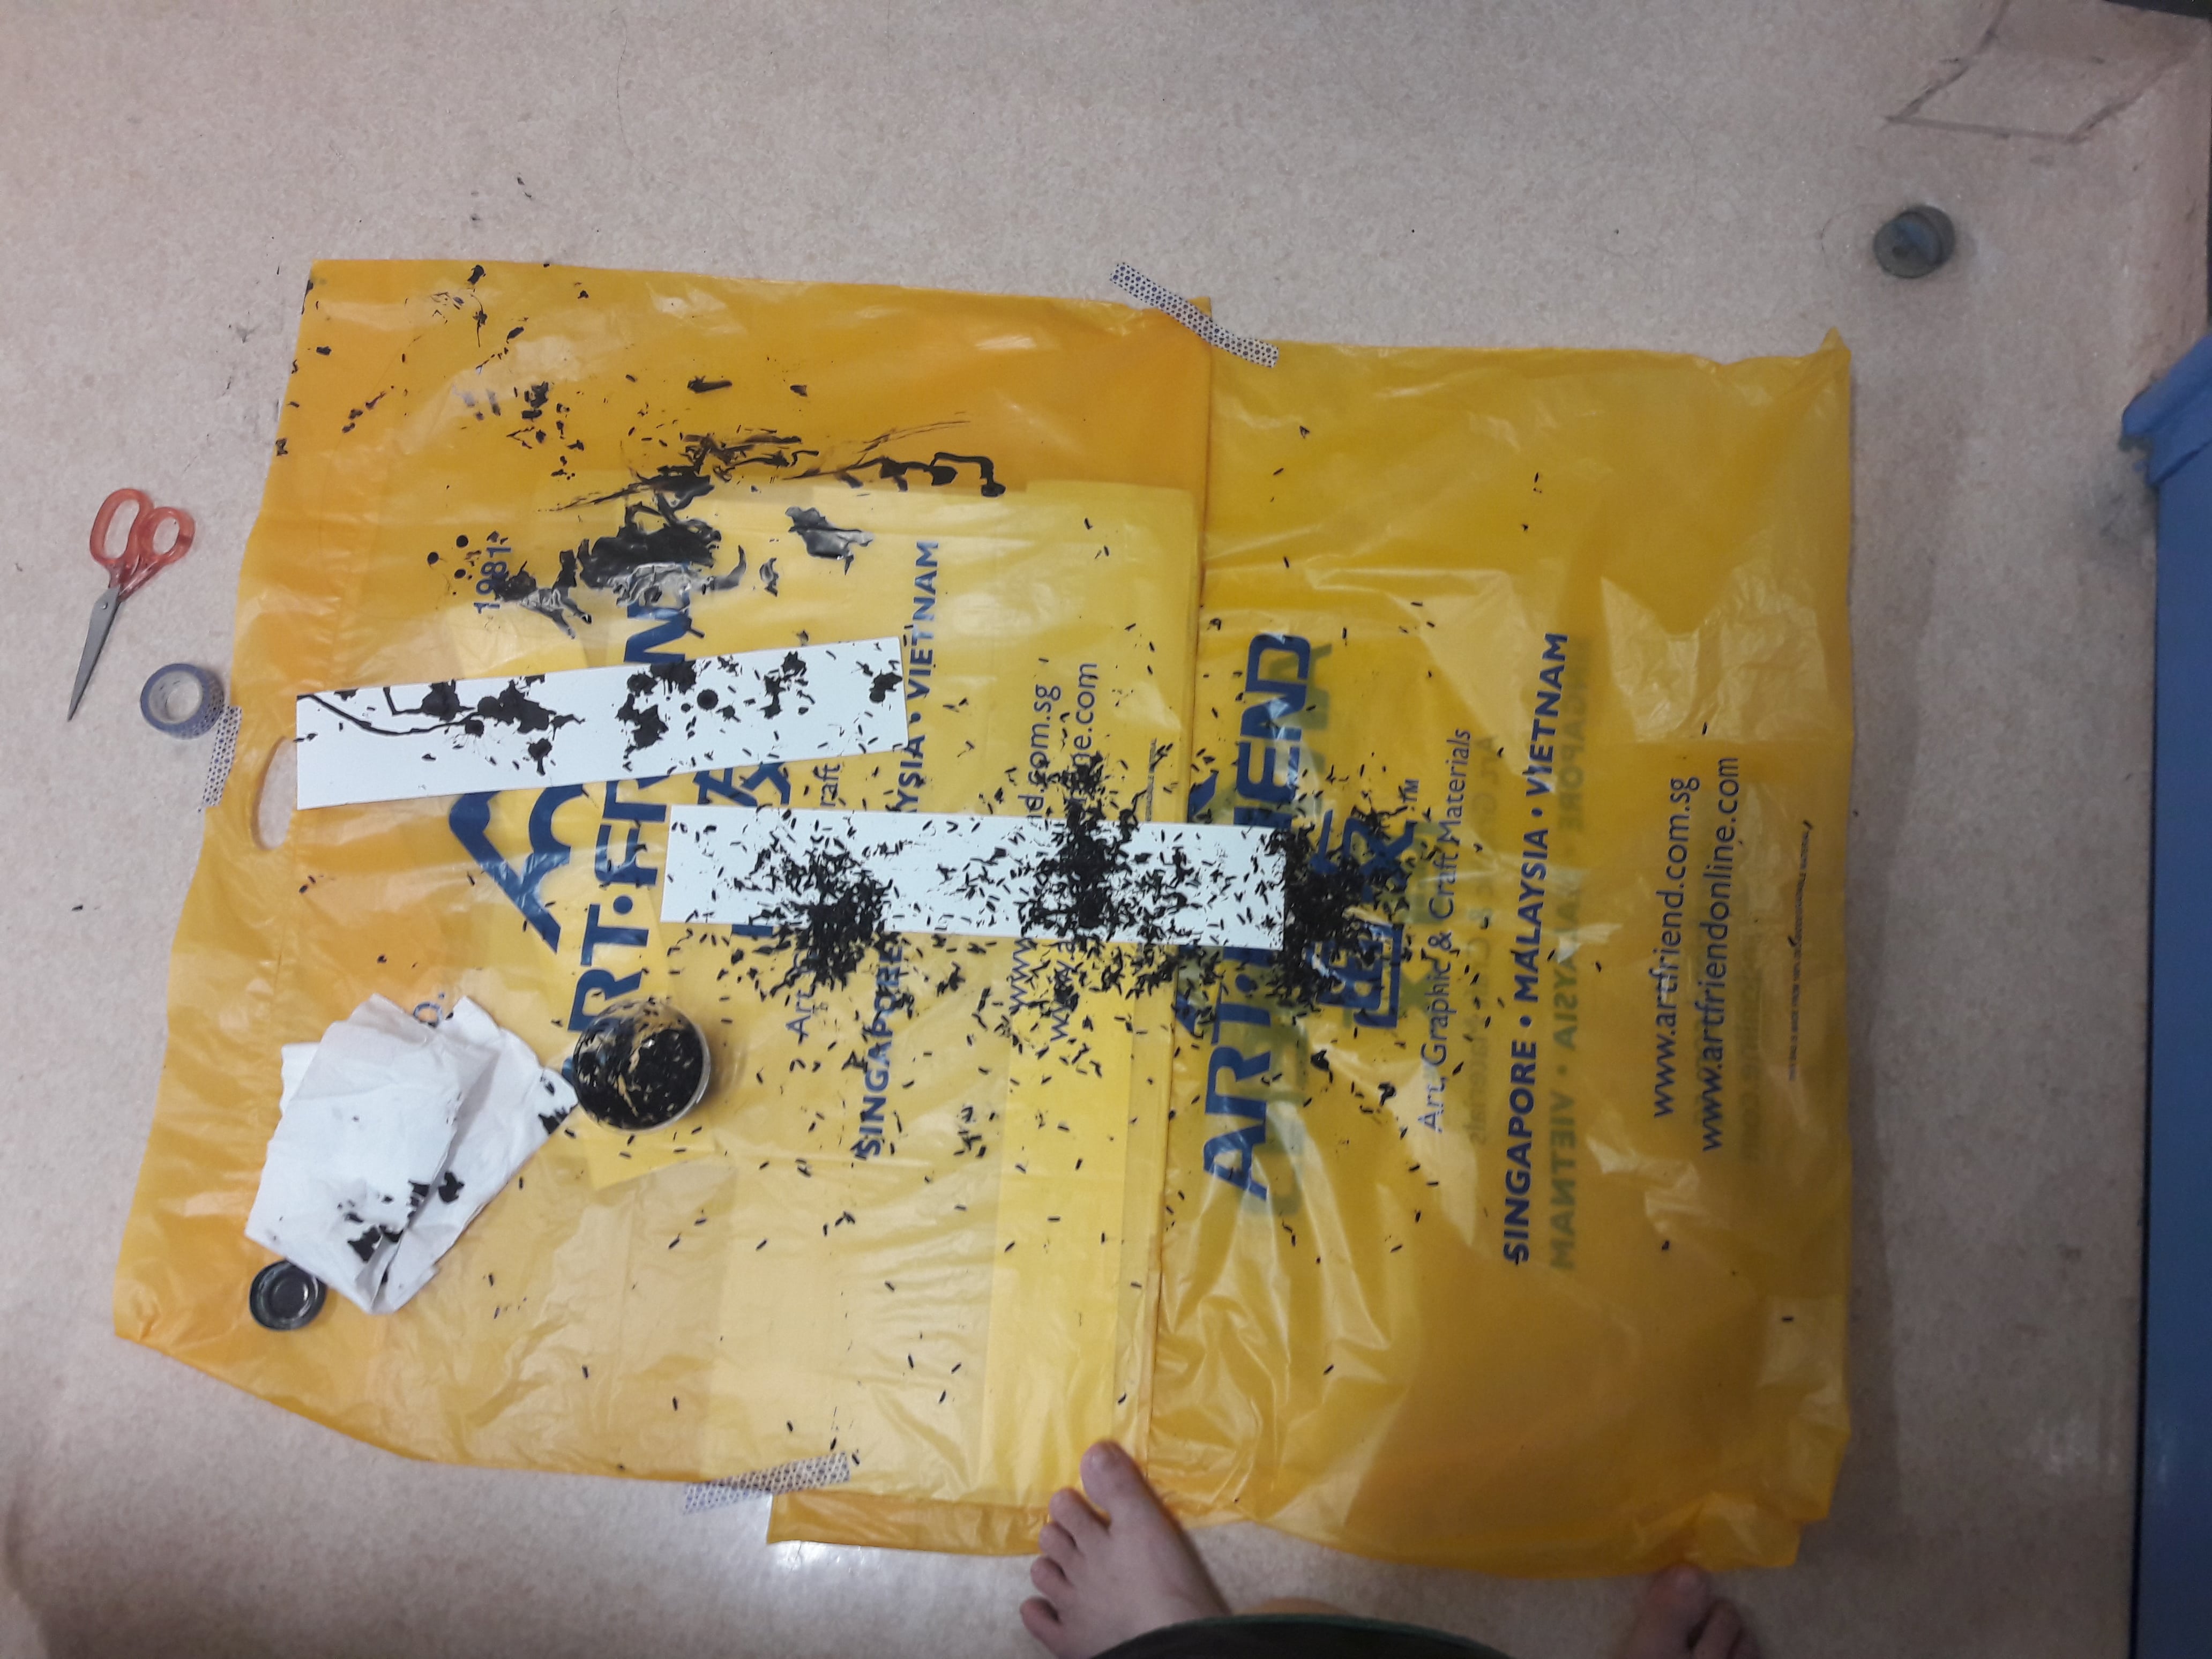
Somewhere at the start, I also decided to line the table with newsprint paper to avoid excessive staining. I also later discovered this also served as a bizarre way of mark making, and a convenient way of wrapping everything up when it’s time to go.
Hence, while clearing up, I took the opportunity to do some final marks:
(Had more fun than I probably should have…)
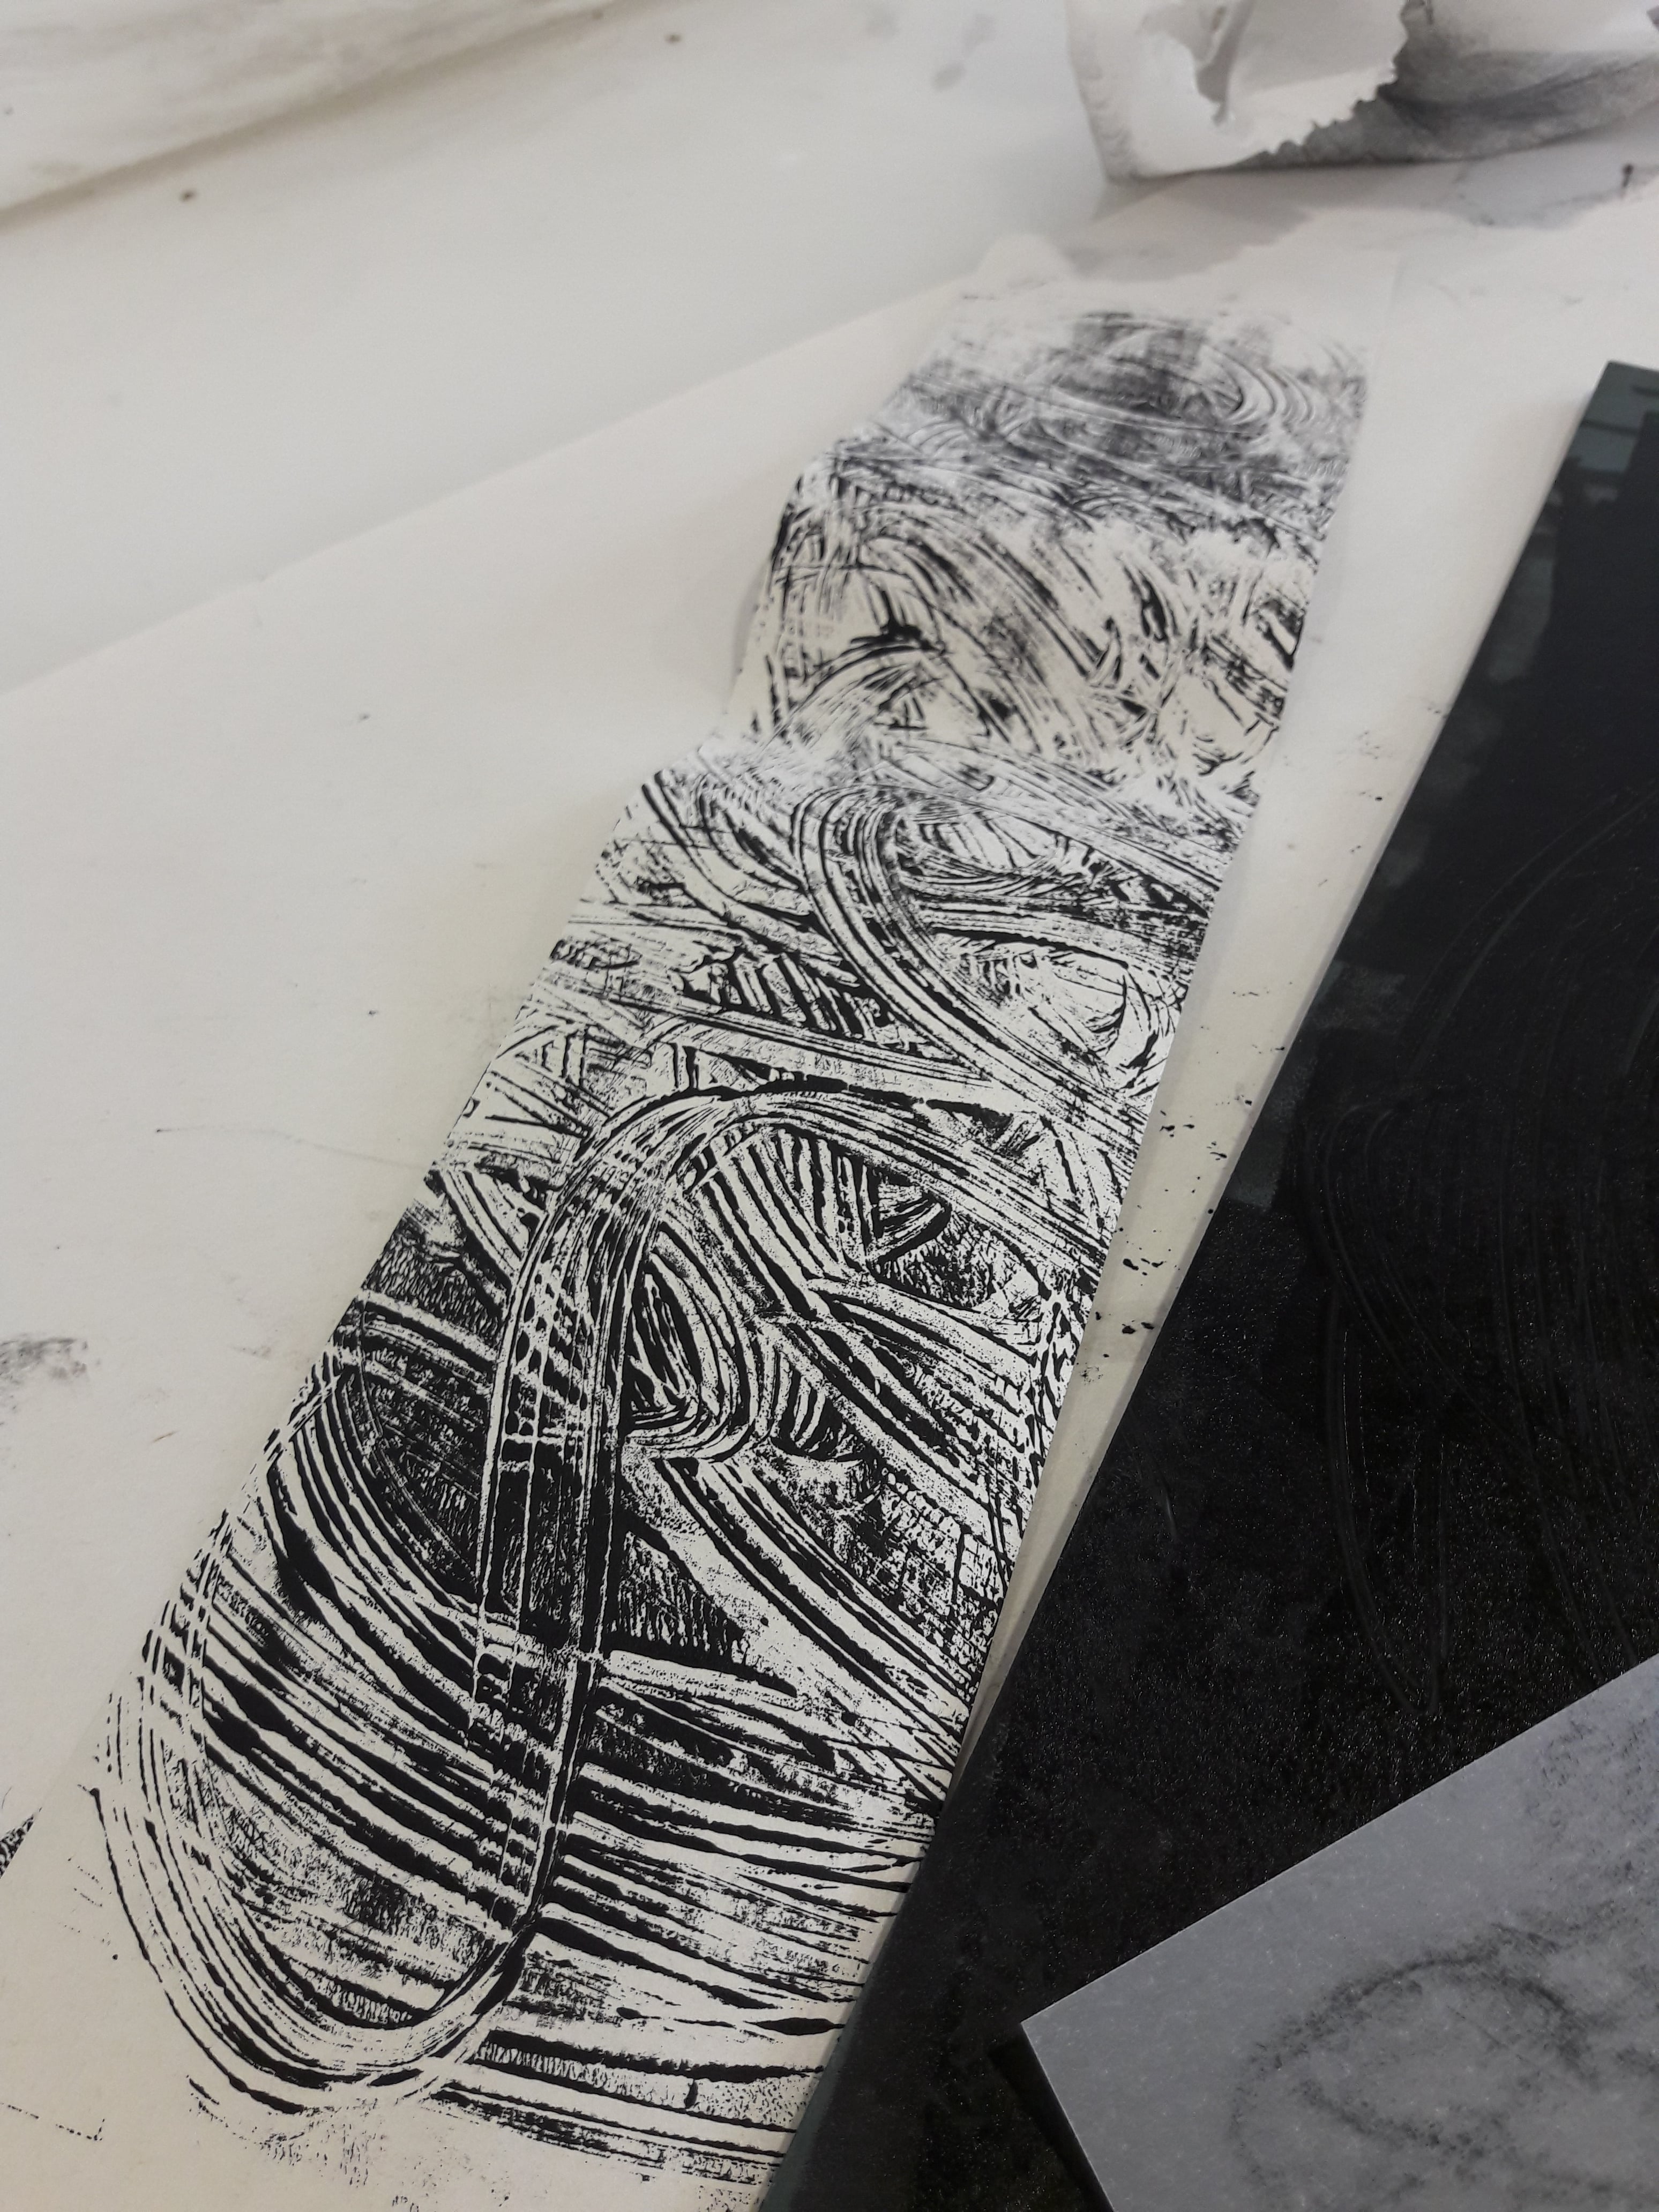
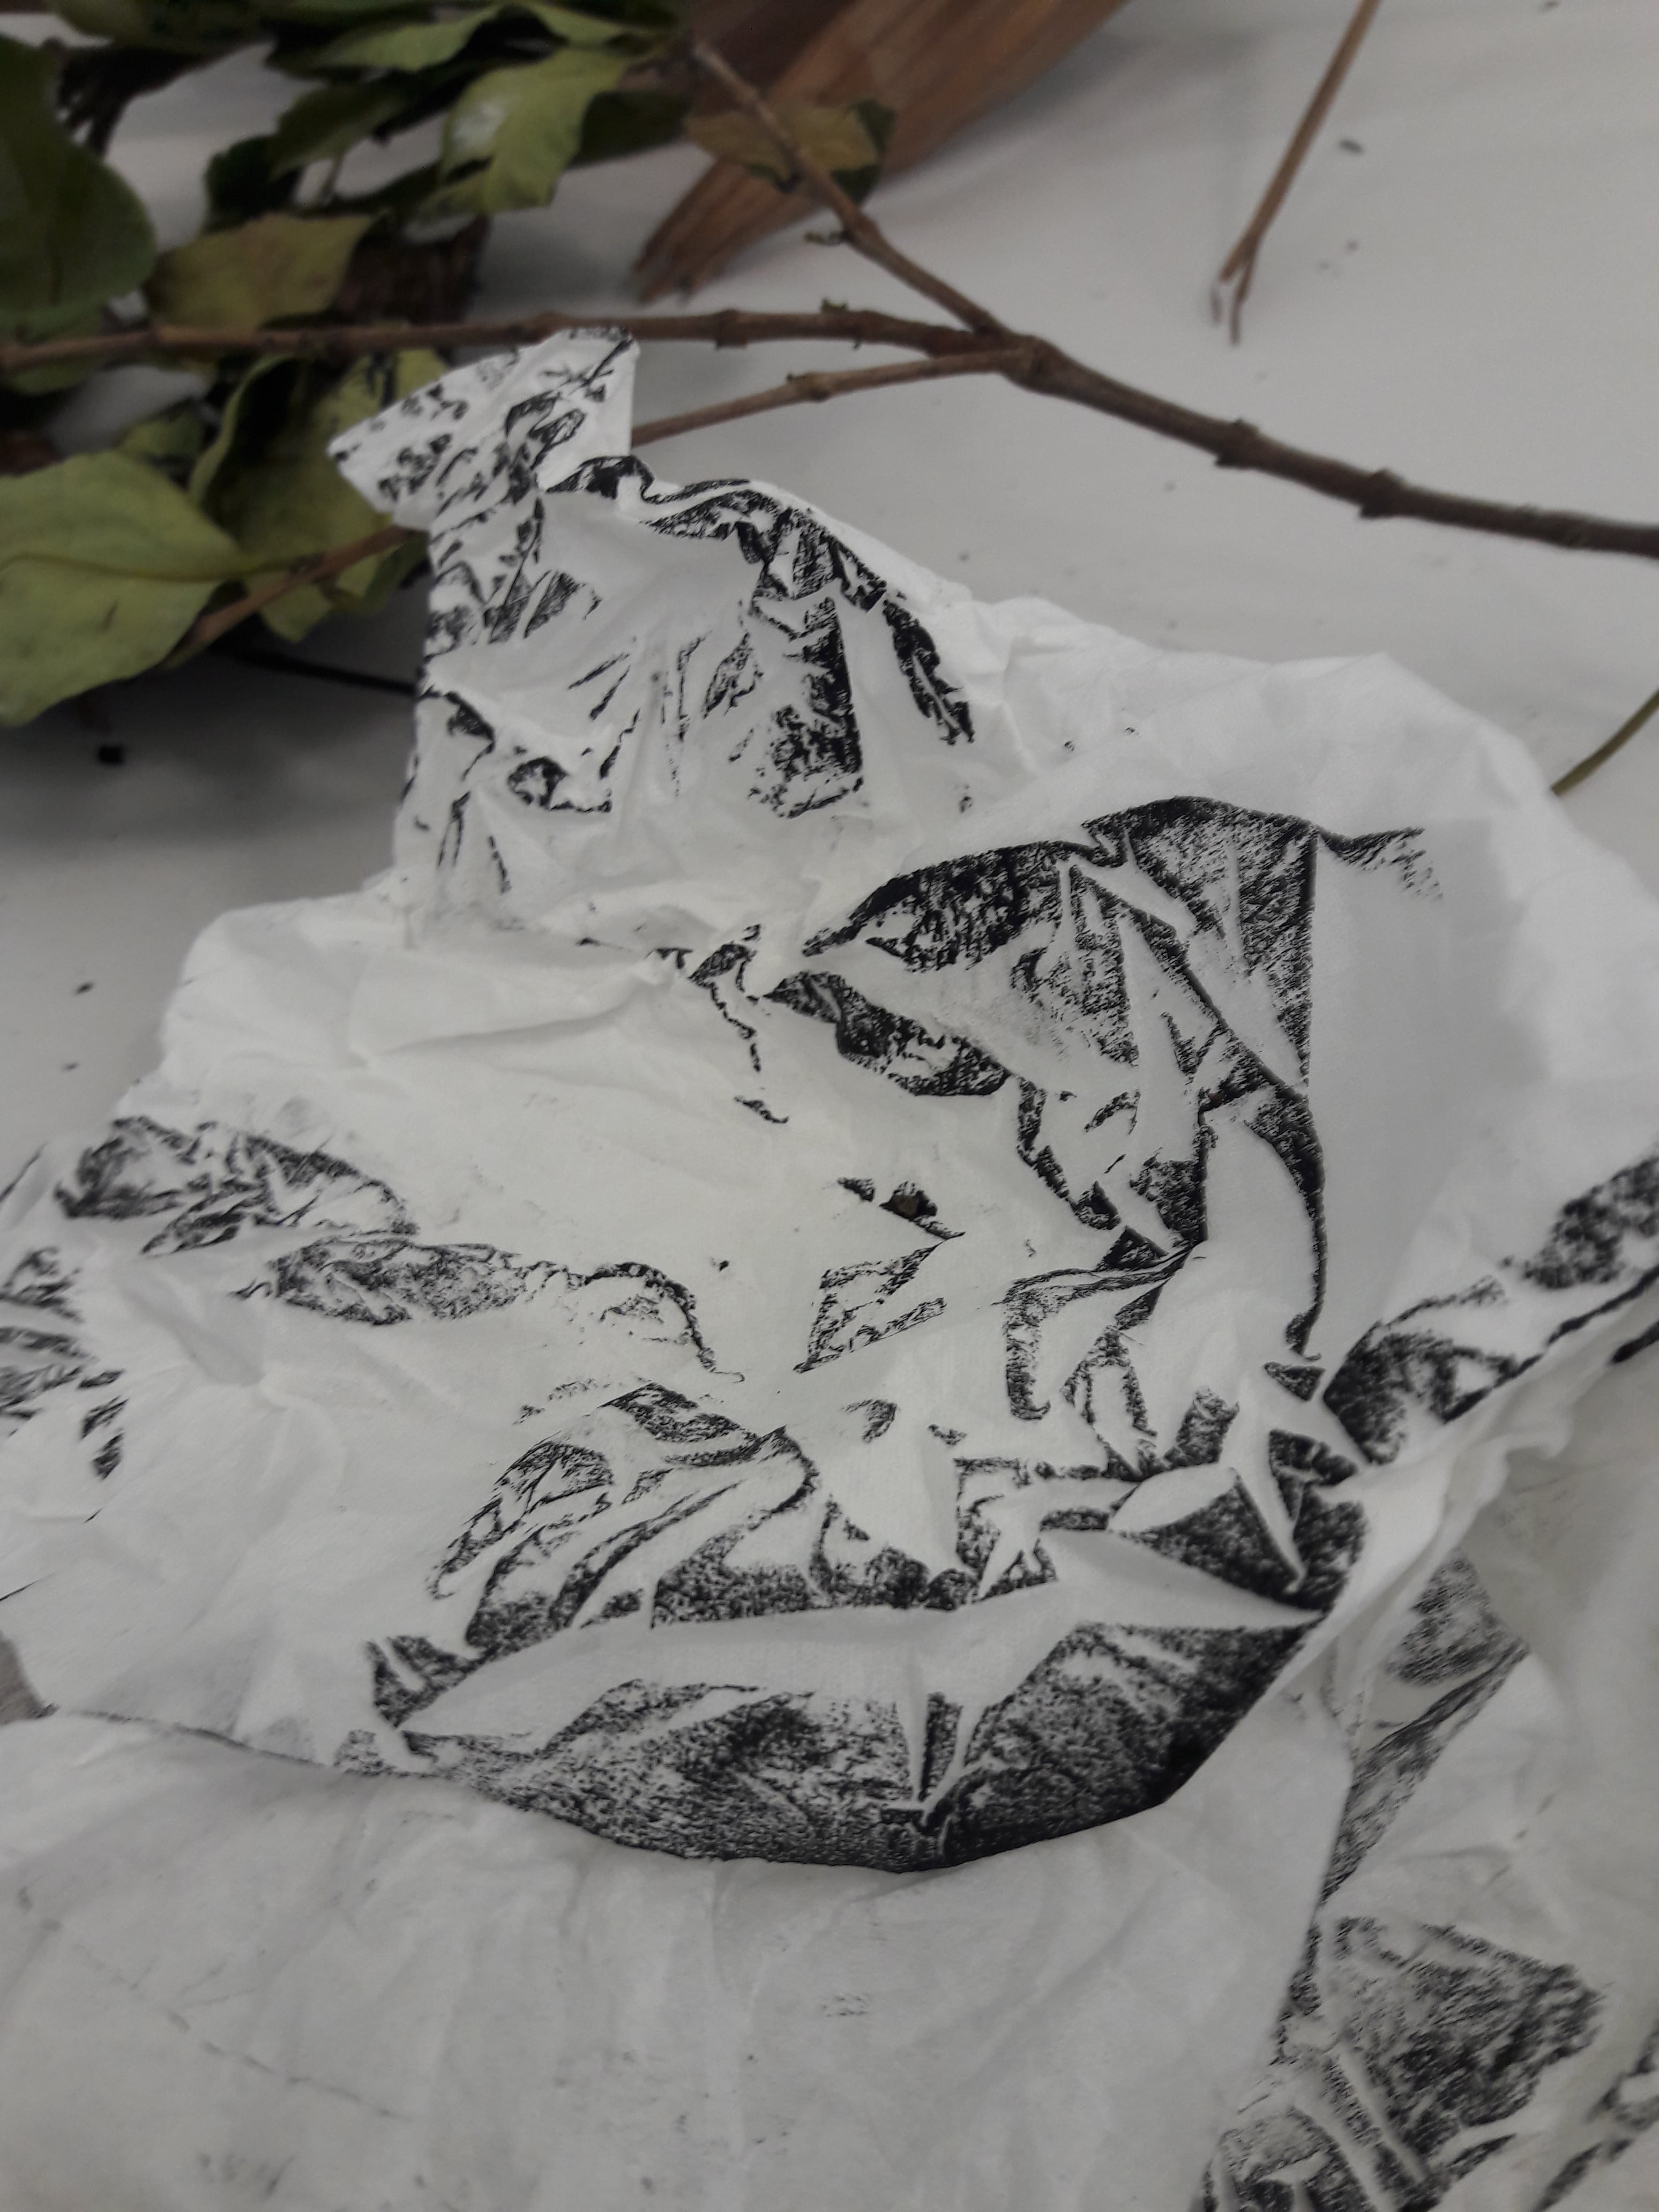
I tried to not waste ink by making more marks with it. I wasn’t too interested in yet another normal print, so I tried crumpling the paper.Close up
I really adore how it looks like branching veins. And on closer inspection, like a landscape, especially when combined with the 3D aspect of crumpled paper. Next time I might want to consider varying the level of crumple, since for this I was really extremely thorough in crumpling it to tiny bits.
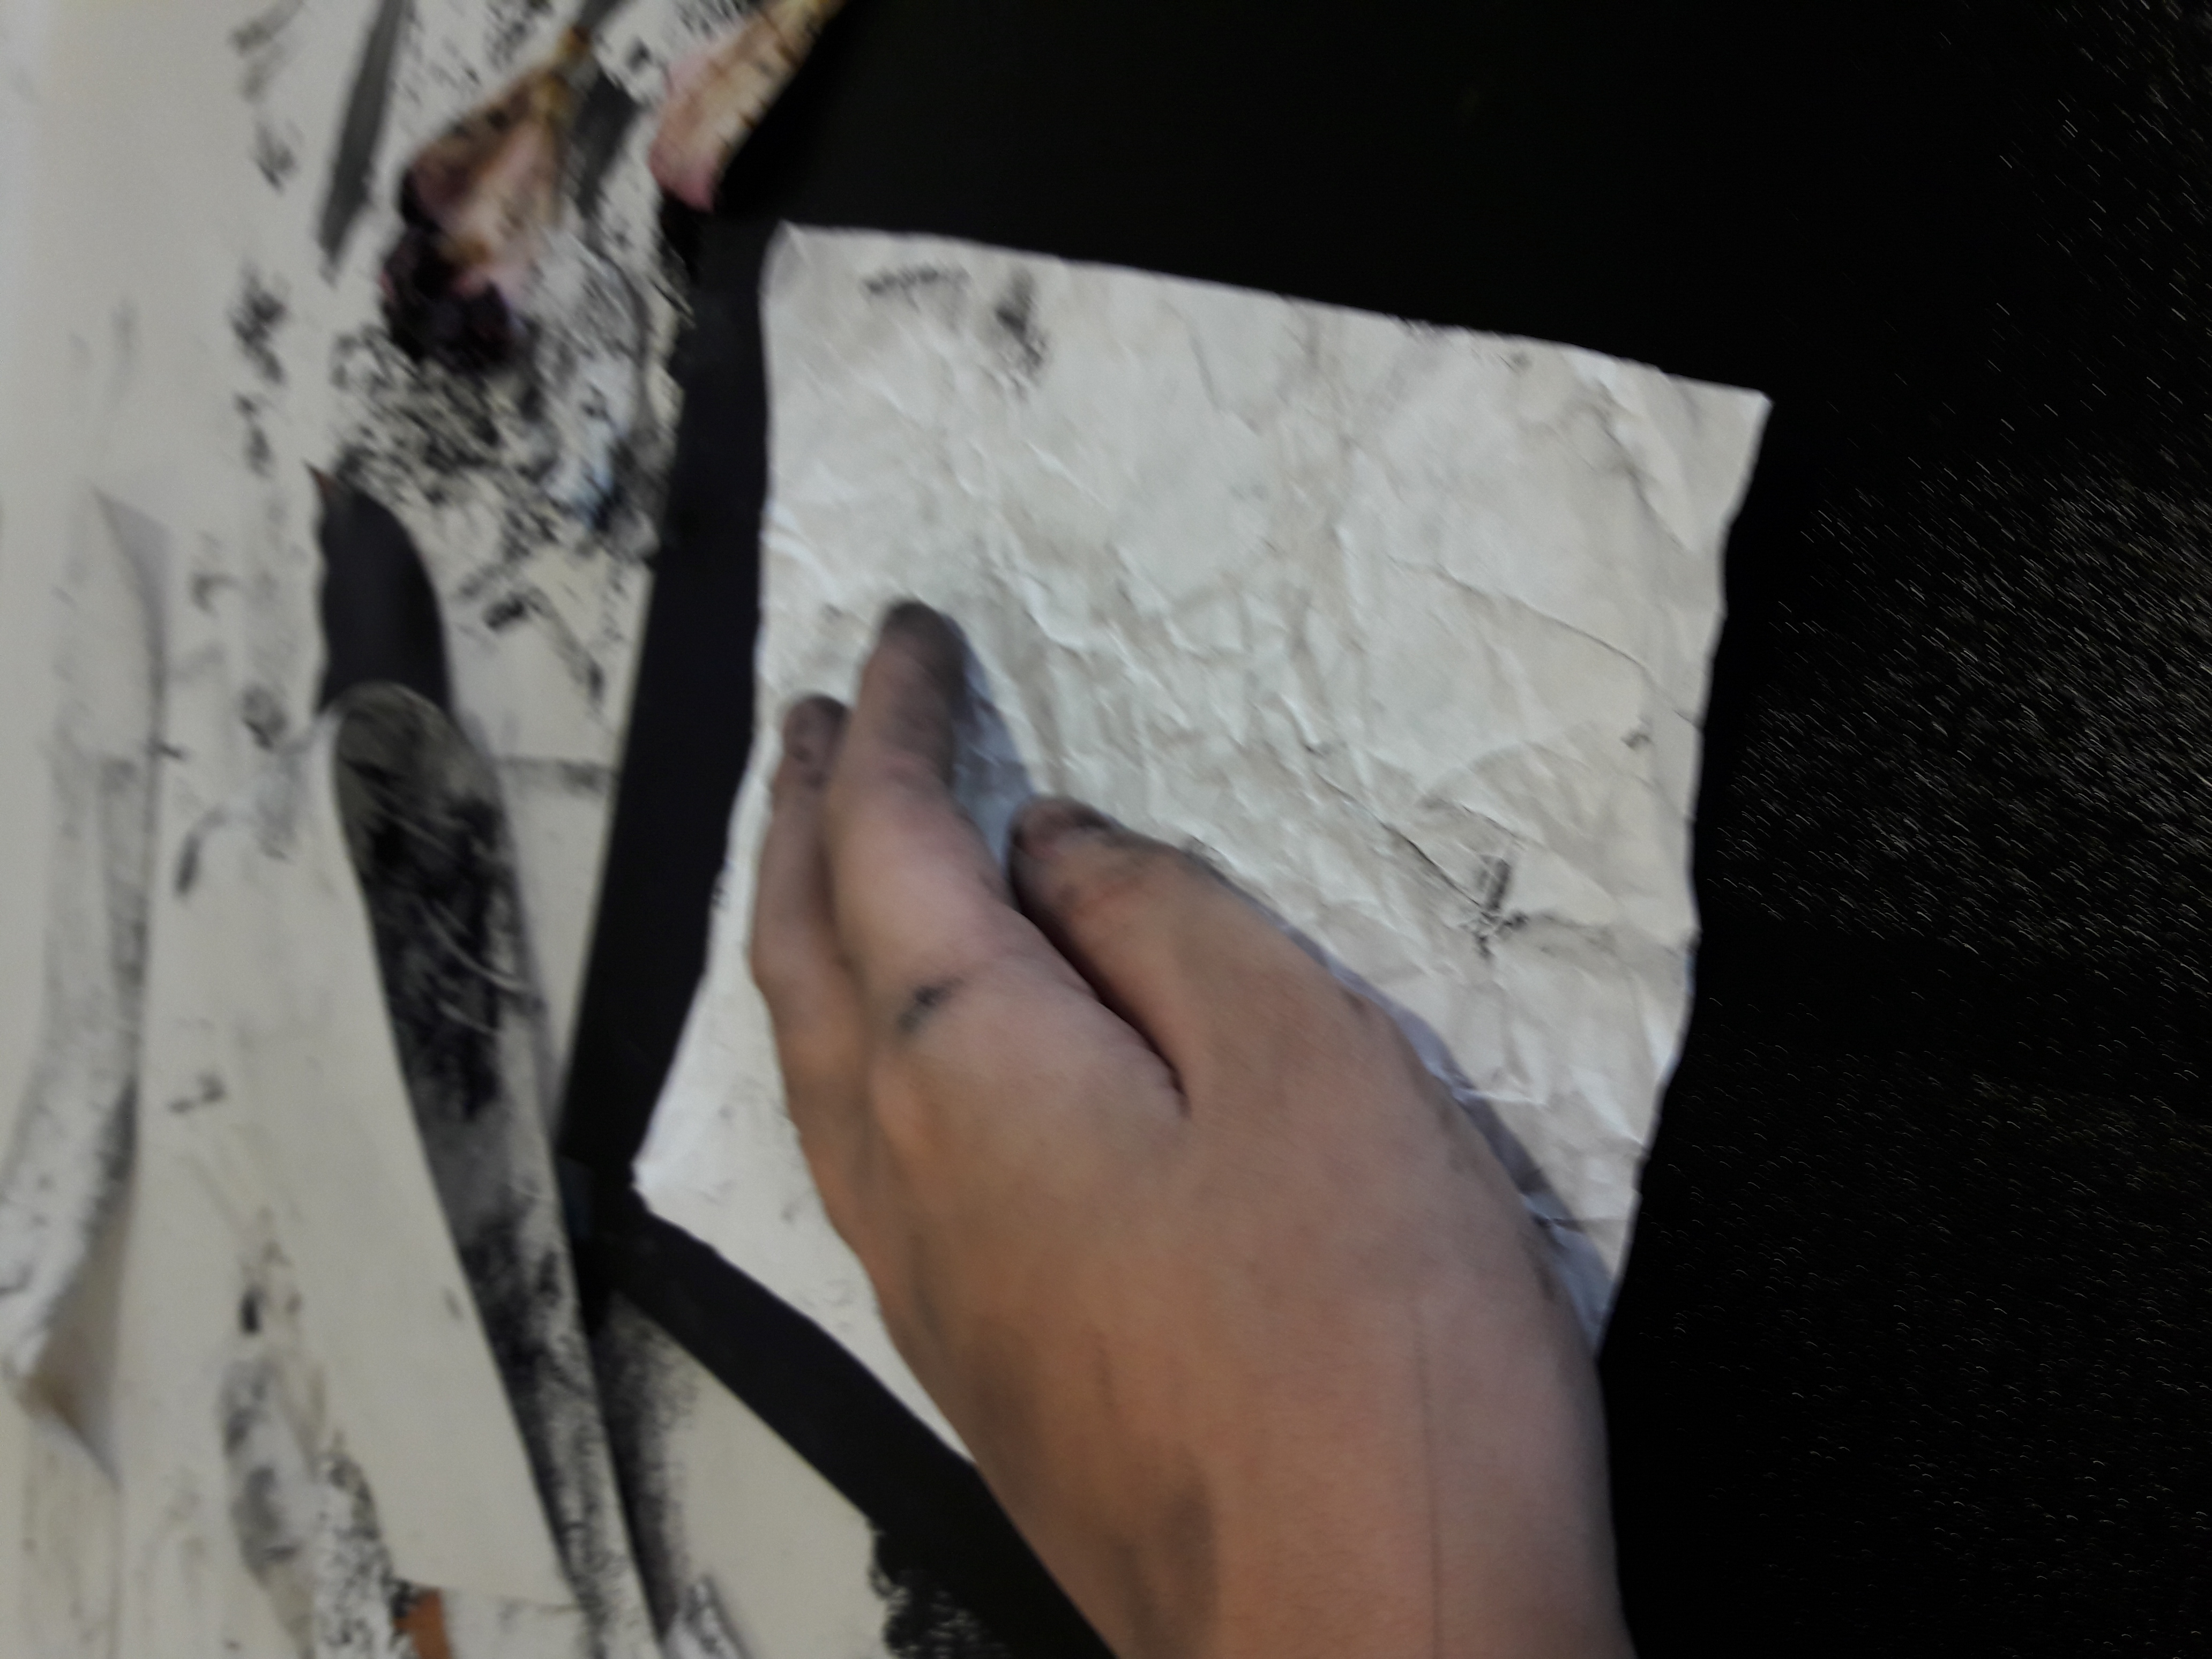
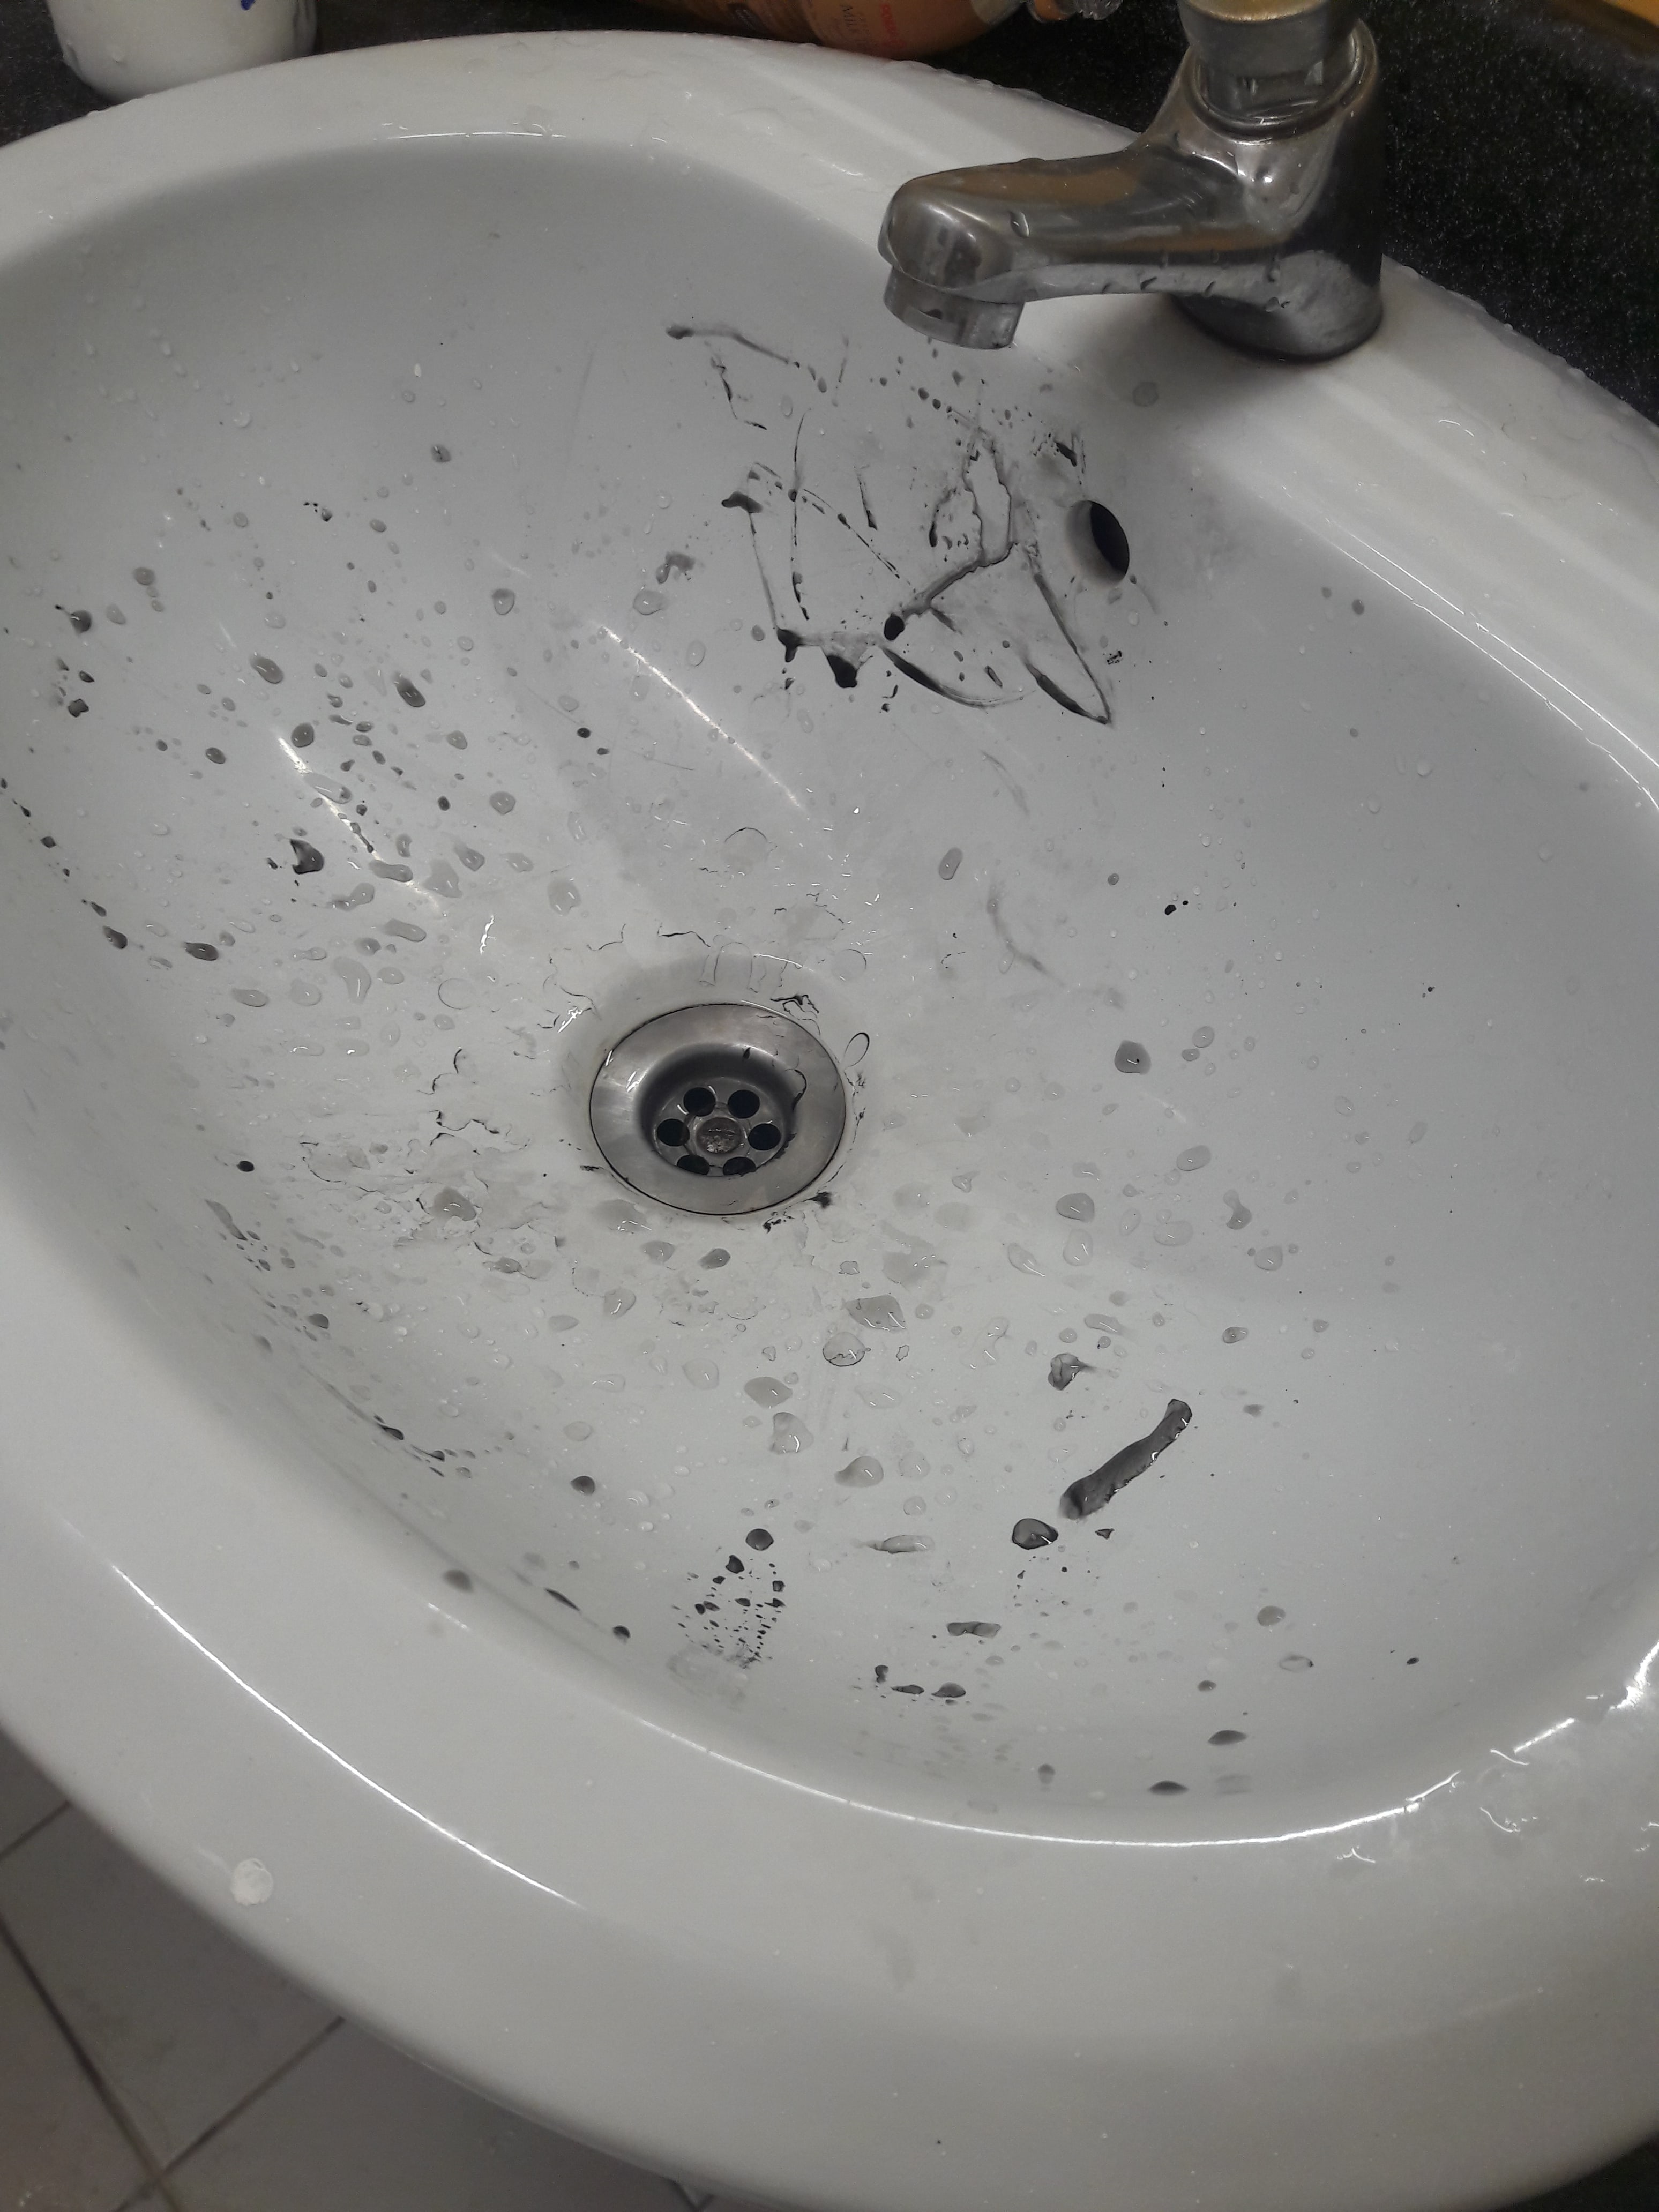
Here’s where I accidentally touched my linoleum with newsprint…
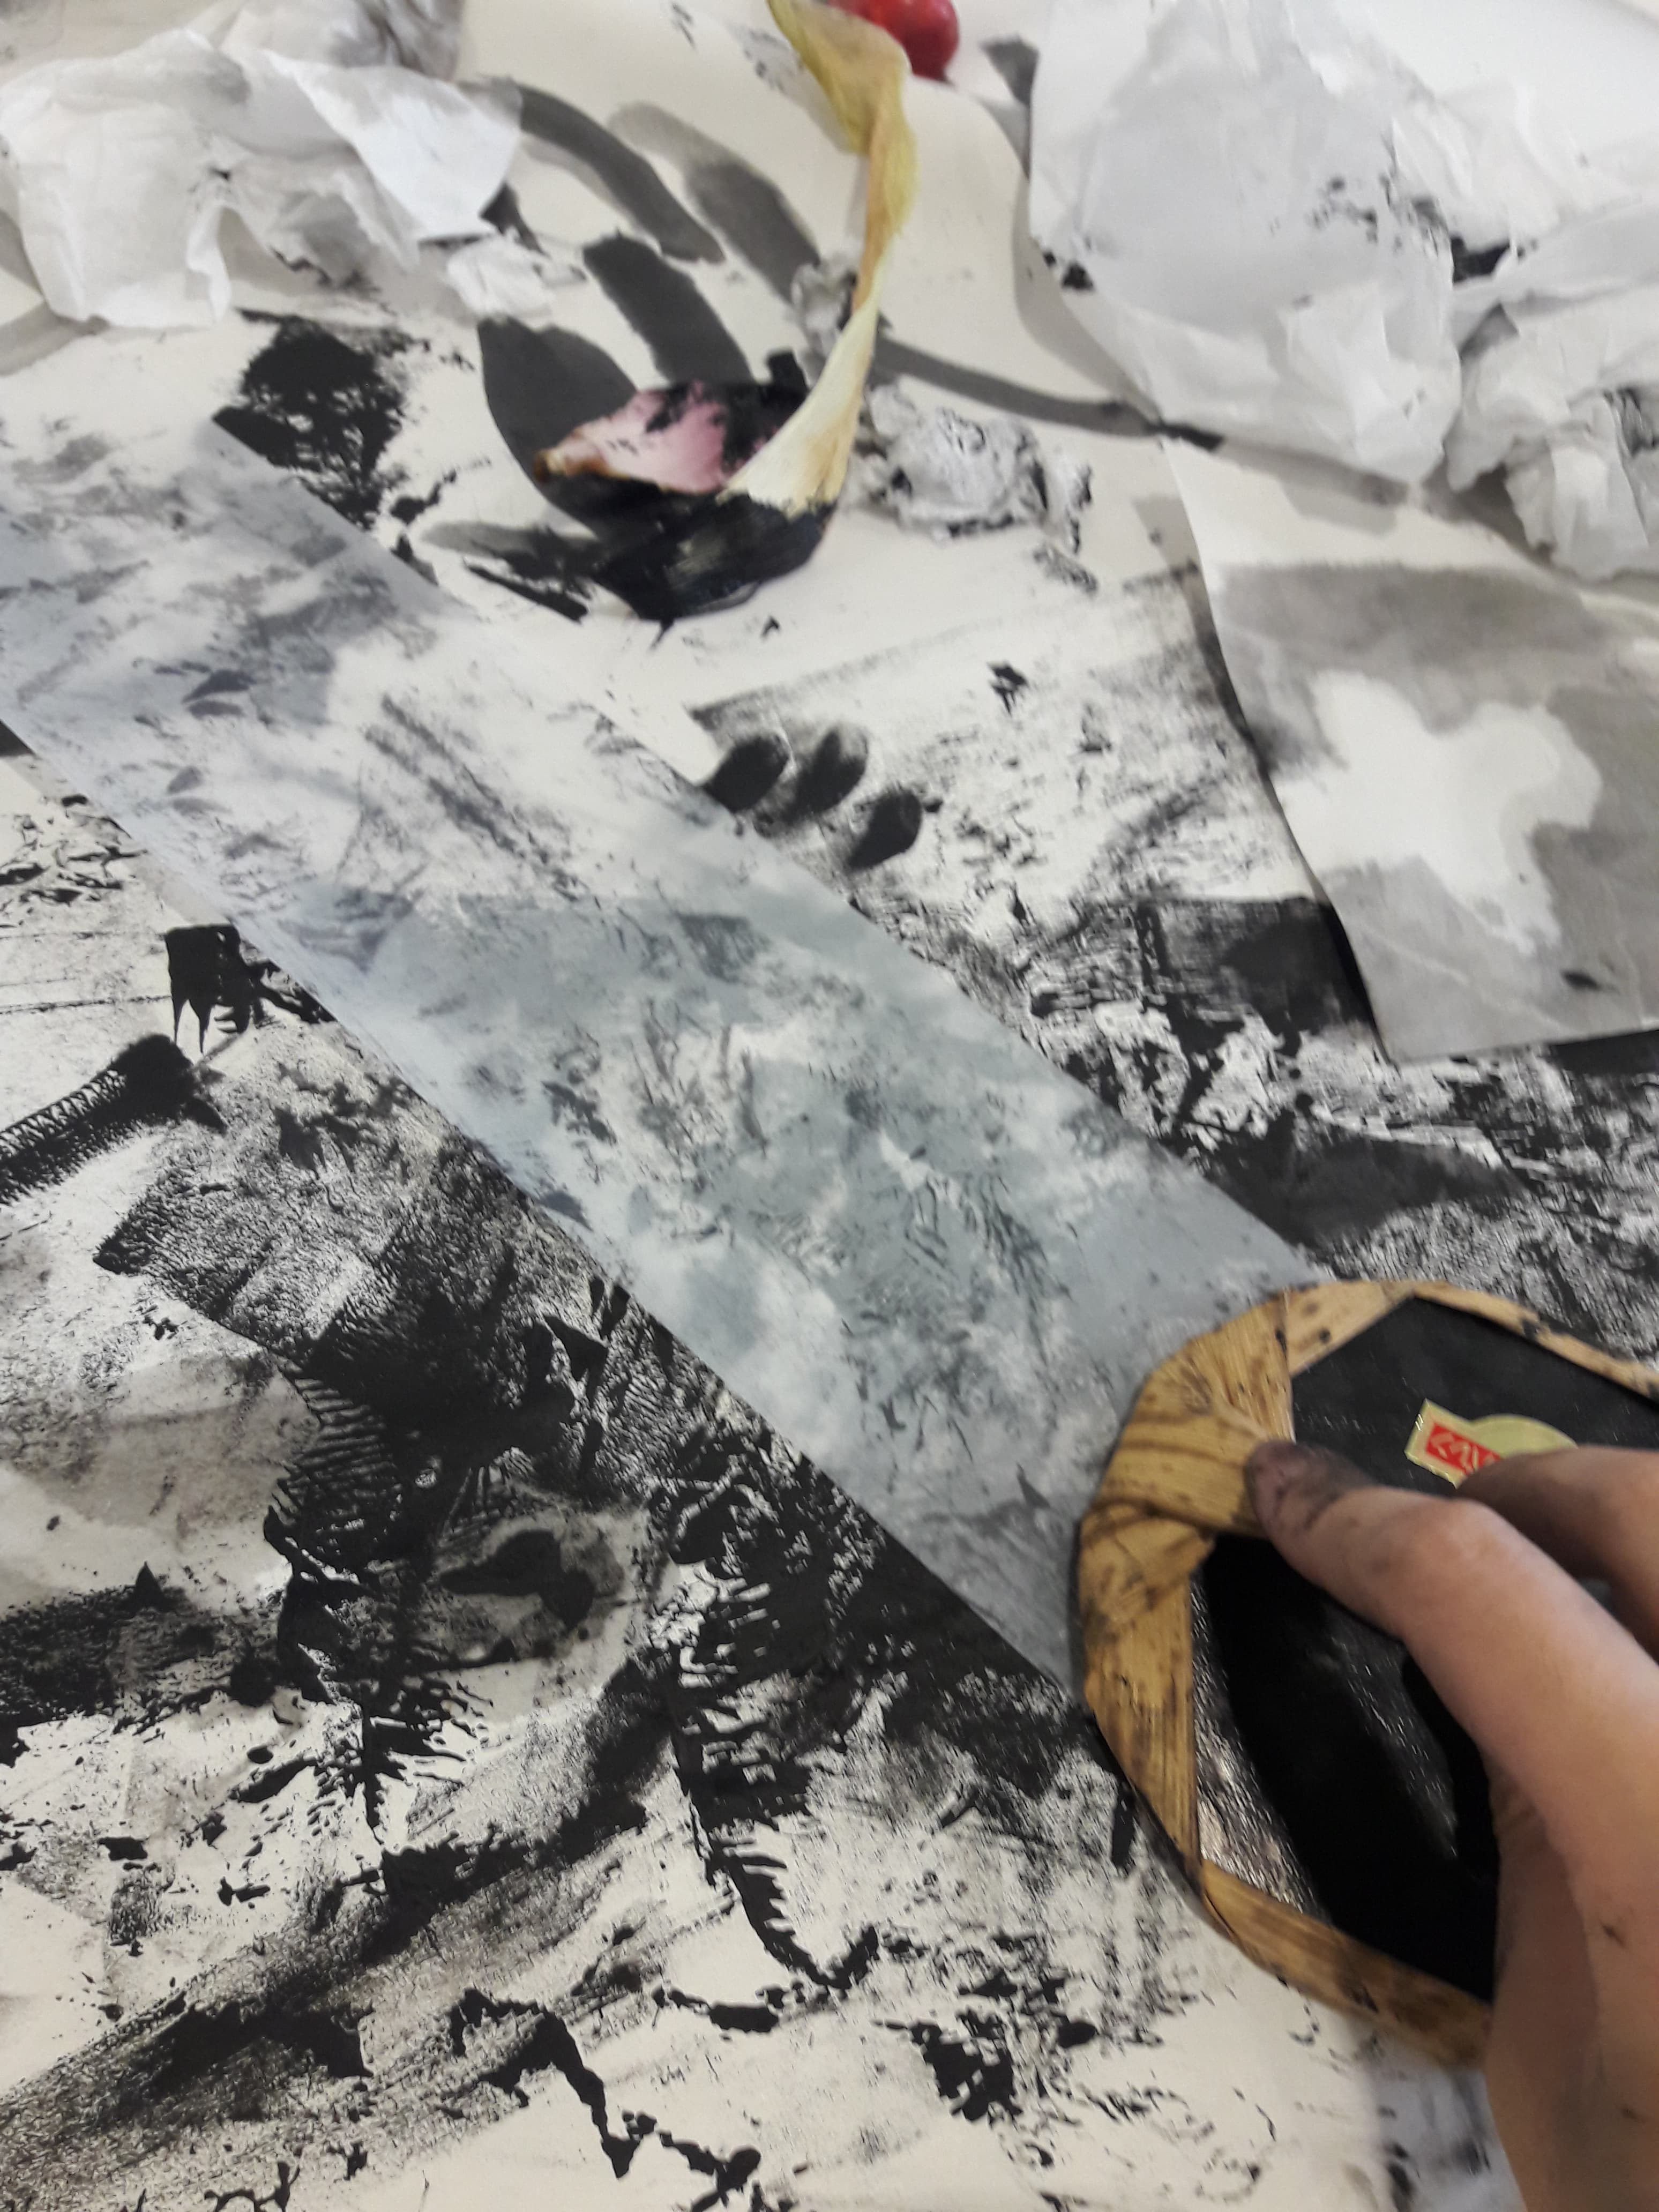
Me, wiping down my hands as best as I could. I like how it’s still textured, rather than smooth like if you were to wipe down a brush.
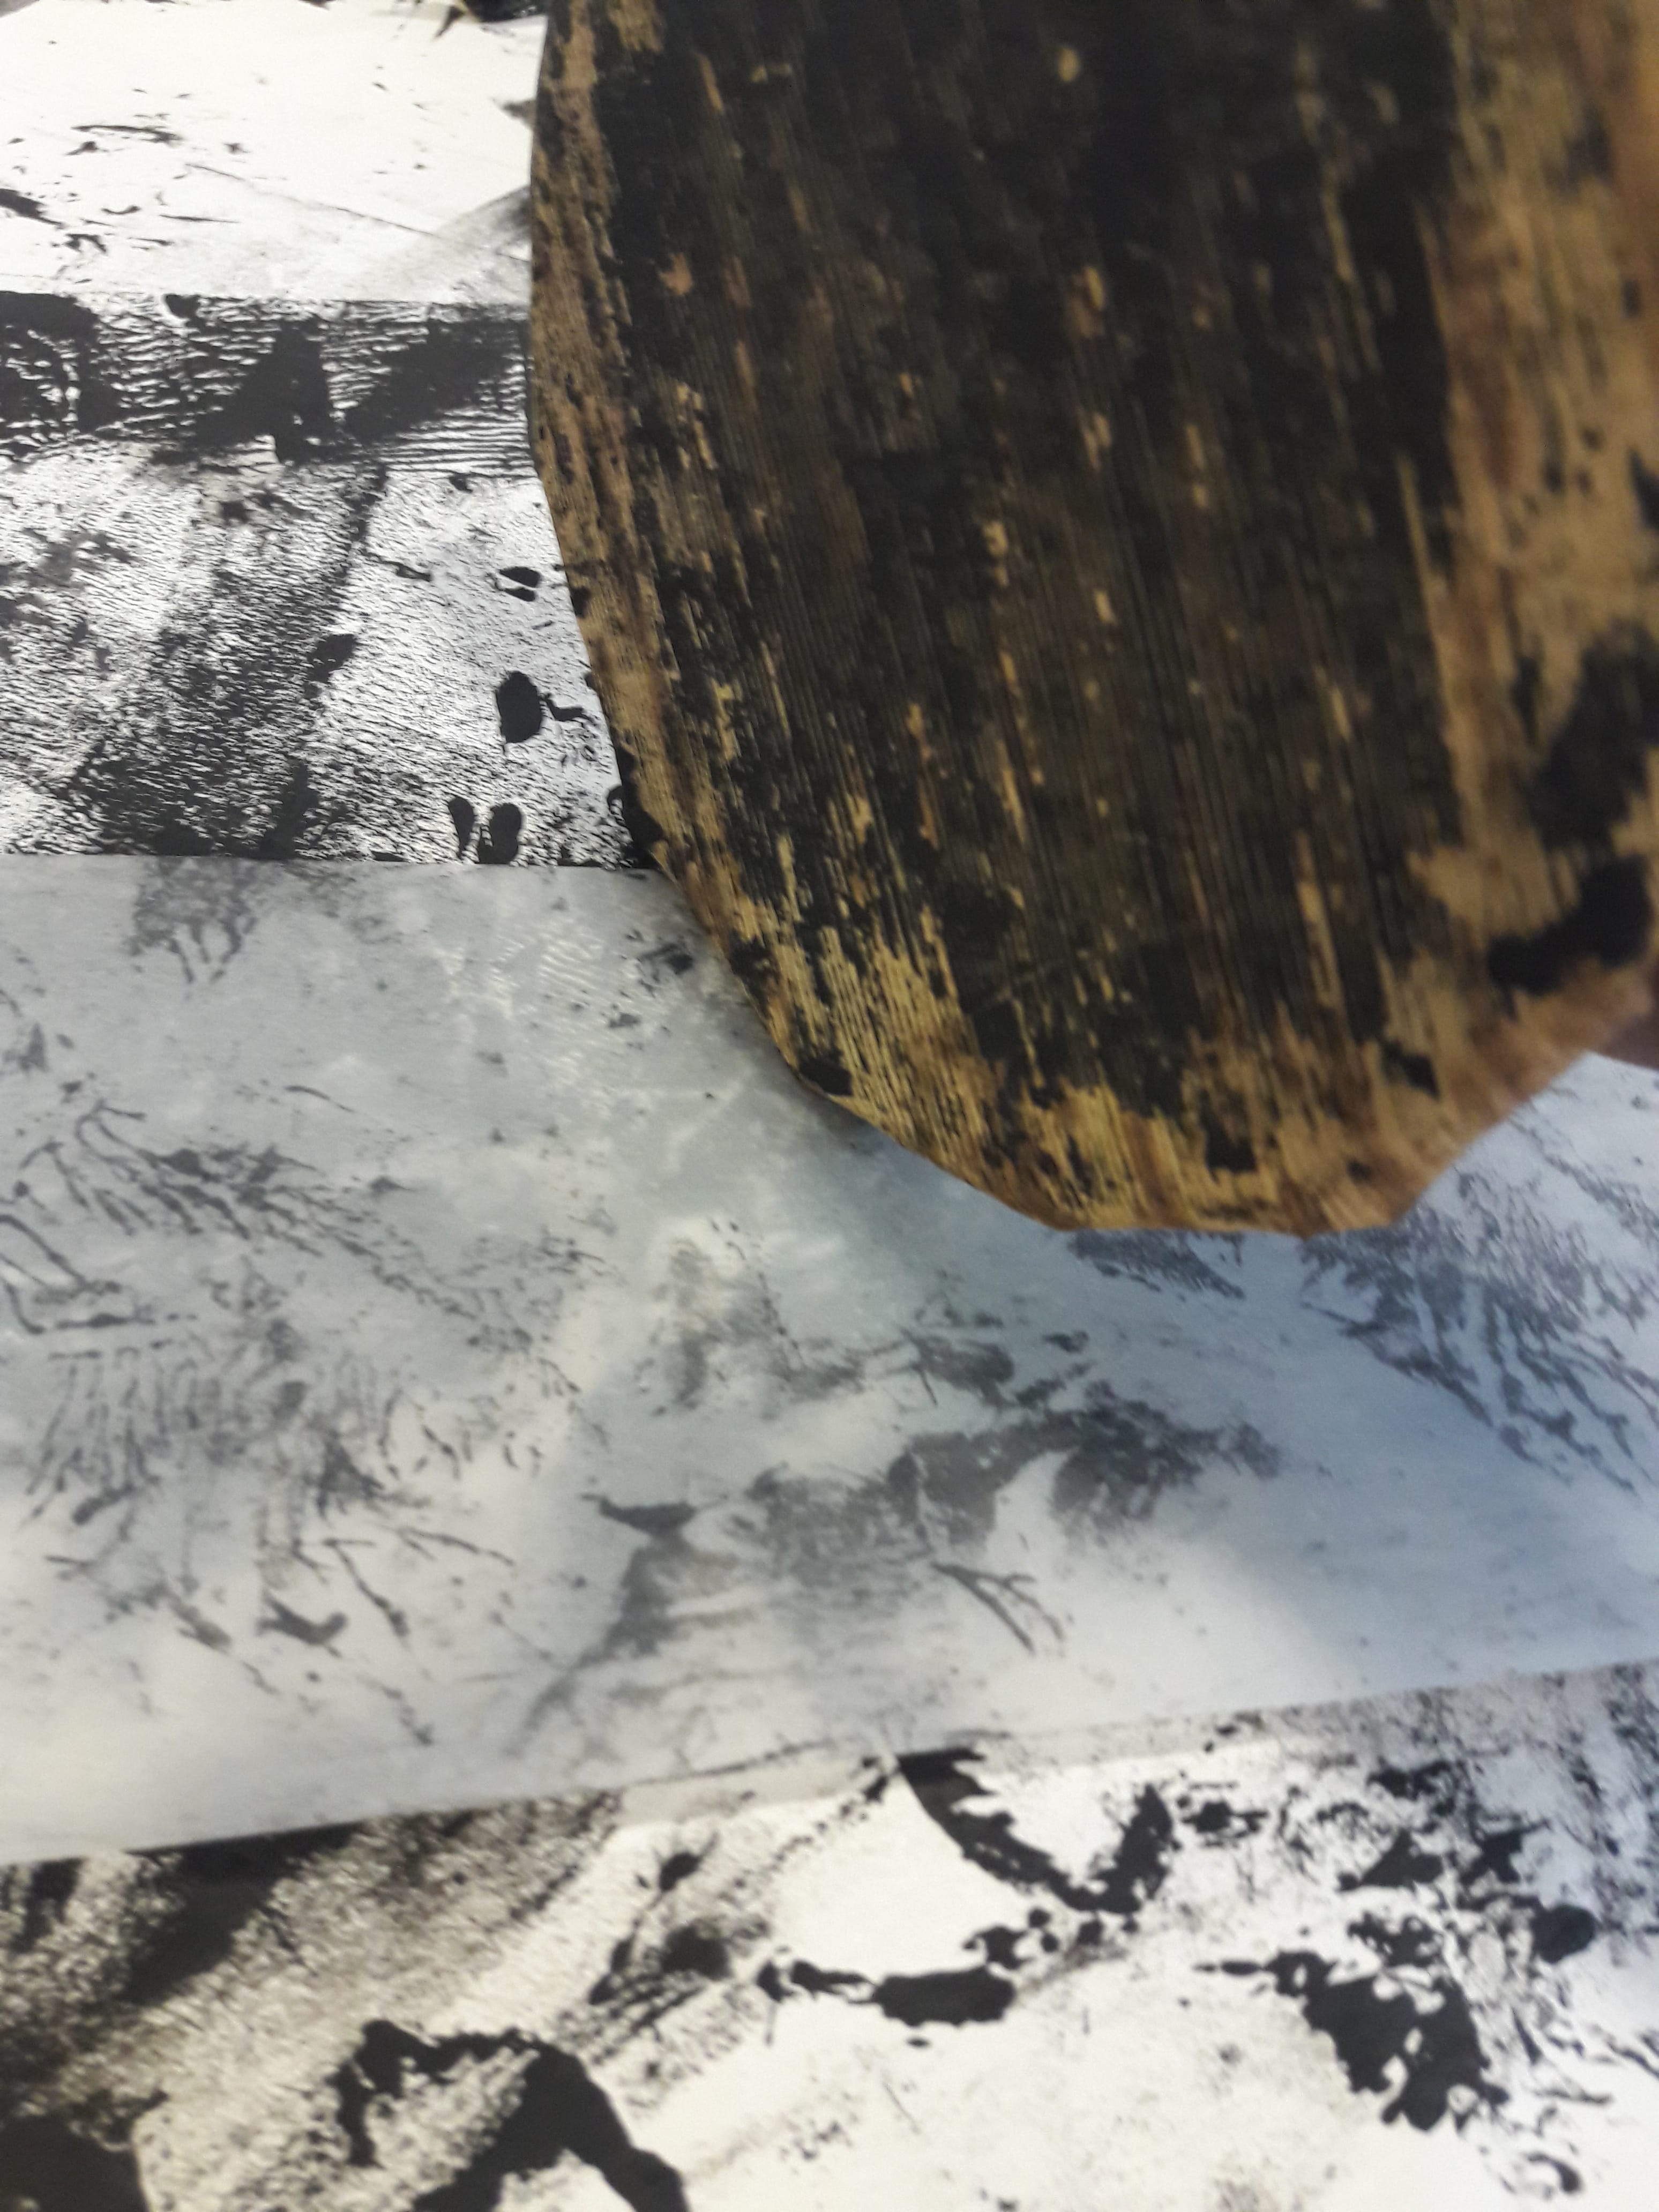
Where I tried to wipe down my used linoleum again. You can really see the straight edge of the linoleum.
Finally, a threnody for an abandoned item, my uneaten vegetables. As a person of dubious morals, I attempted a zero waste lifestyle by saving them for class. Unfortunately, they rotted. May they rest in peace.
RIP.
It was a very fun experience, but I still haven’t really analysed what these marks make me feel, and how, meaning I’m no closer to completing Project 1 than last week. Will probably try to do that in a separate post later, when I get back the physical papers.
This is a post about an artist from the list of artists for the Project Brief, Cy Twombly. I think his name is very “twirly”? In terms of the sounds, though a fun fact is that he’s actually called Edwin.
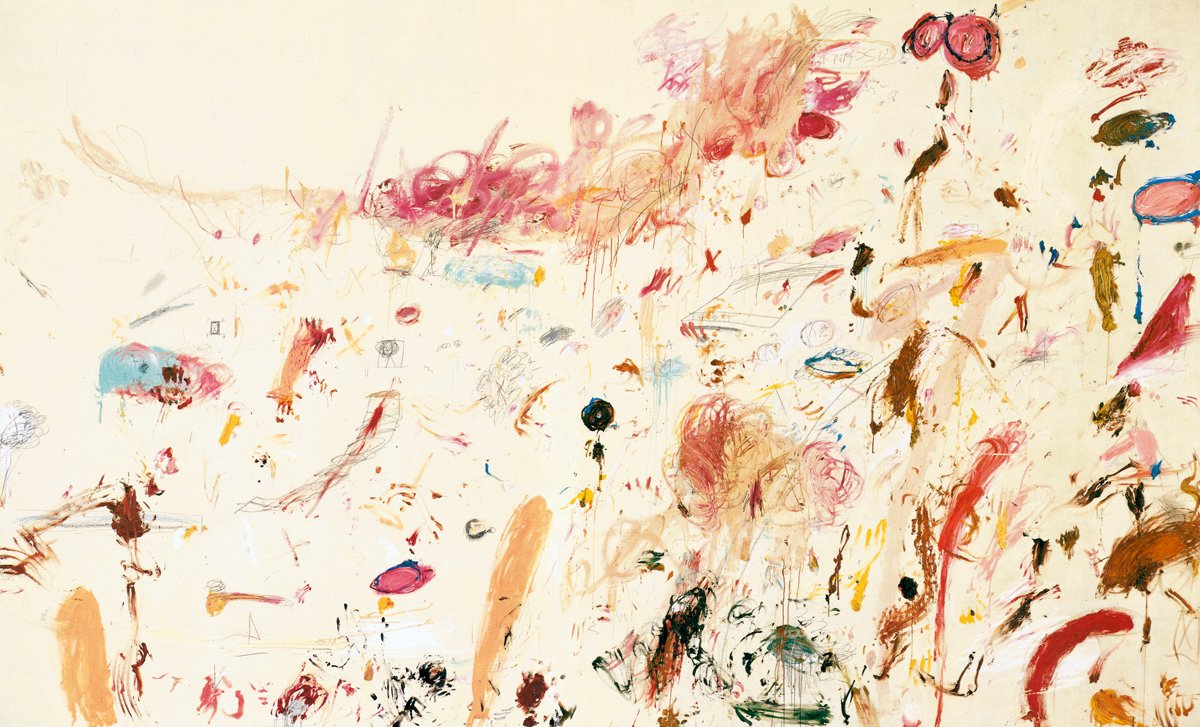
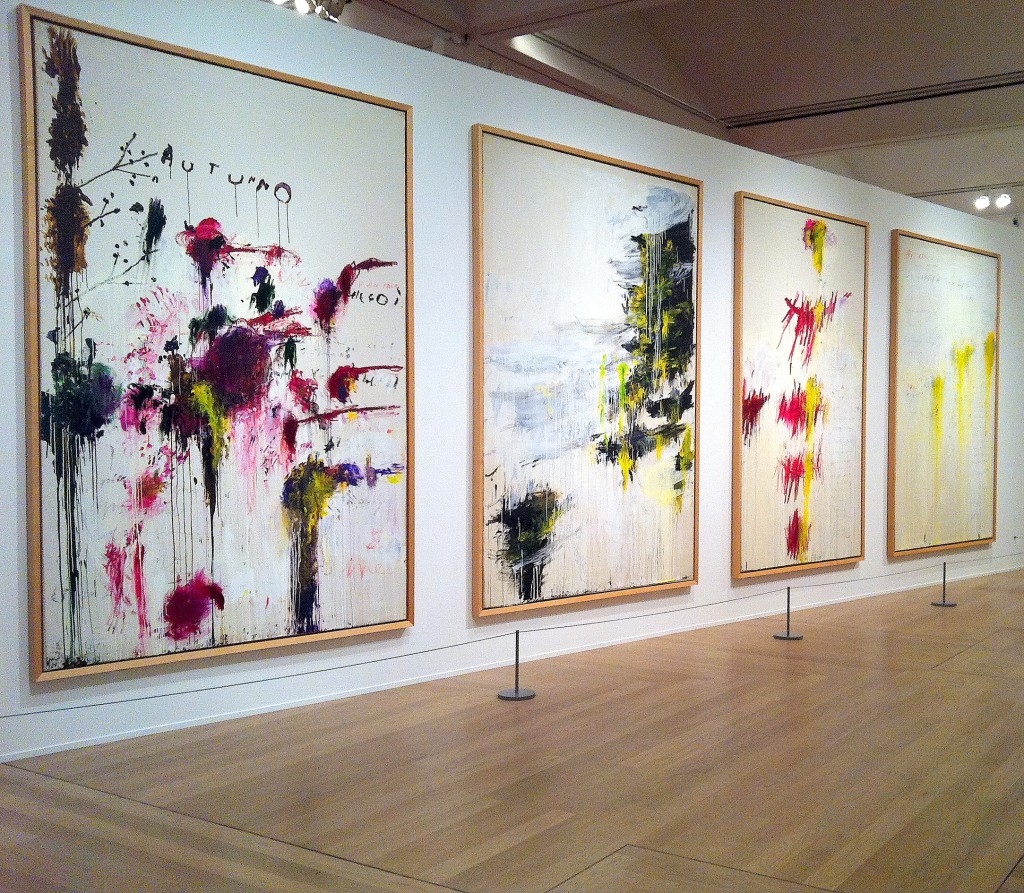
The work I’ll be looking at specifically is Quattro Stagioni (ITA; Four Seasons) (fun fact, Googling the Italian name gives you pizza). Some basic information to set the context, is that it was:
Worked on while he was living in Italy
From when he was around 65 years old
Completed between 1993-94
Done with acrylic & oil paints, along with pencil and crayon, on four canvas
Photograph from https://theartstack.com/artist/cy-twombly/quattro-stagioni
Personally, I find it useless if I just copy and paste what I understand by reading reviews by others online, so I will attempt to interpret it on my own. This will hence is incredibly speculative, and you can instead skip to this link for a professional summary which won’t be as longwinded.
For me, I feel like some of the most prominent characteristics which stood out to me were
Name
To start off, I found the preference for the Italian name intriguing. Did you know that he is an American, and only moved to Italy when he was about 30 years old? Wikipedia states that he was an avid pursuer of “romantic symbolism”, and in my opinion this is a way in which it is reflected: Italian is a language associated with love and beauty, especially when it is also not a native language, such that it has the exotic charm of the foreign. However, the official name of the work is never confirmed as to if it’s the Italian or English name, and I feel that that, in a way, also reflects the universality of the seasons, that it transcends physical borders, still “works” no matter what language is used.
Colour Choices
On a less Meta level, the colour choices are rather striking to me. When I look at it, I instantly identify that it has to do with a presentation of nature across seasons, possibly because the colours are mostly naturalistic colours than seemingly-synthetic colours.
Most of the canvases are minimally painted with a base coating of bluish-white, and feature the colour yellow in various shapes and extents. I feel that that’s a way in which Twombly seeks to unify the 4 canvases, and by extension, solidify the idea that the seasons are ultimately connected even if the form changes (i.e. the yellow and bluish-whites don’t maintain a constant shape across all canvases). In hindsight, perhaps the yellow is reflective of the sunlight, and how it highlights features, while the bluish-white indicates the sky.
Yet, to offset the idea that all seasons are the same, he uses different main colours for all canvases. Spring is associated with crimson red and summer features only yellow, while winter has a dark green. Autumn is the most colourful, from crimson red to magenta to dark green and blue.
I find this puzzling, personally, since it goes against many of the ideas I associate with seasons. Winter is often associated with barrenness, but here, the dark green gives off the suggestion of flourishing evergreen conifers (basically, Christmas tree trees), surprisingly also another sensible way to look at winter.
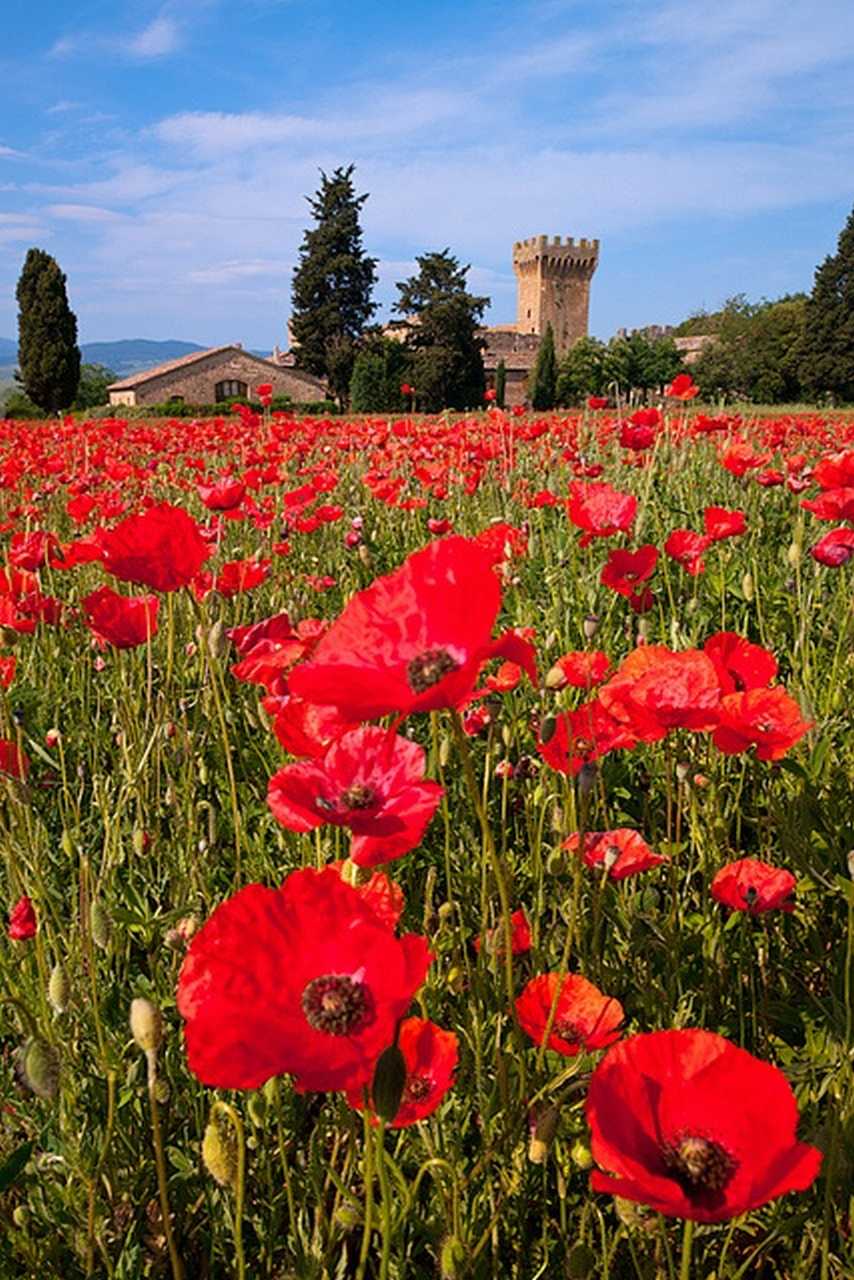
Photograph from https://pxhere.com/en/photo/120067
I consider summer a season for the thriving, yet unexpectedly there is nothing but the “sun” and the “sky”. Perhaps it’s because Italy is a Mediterranean country: supposedly, in that part of the world, summer is associated with dryness, and hence potentially barrenness. Even more challengingly, I would associate spring with beginnings and renewal, and henceforth pastel colours to represent that budding nature. Here, however, it’s red, for what I presume are flowers. Could this be another way of seeing the seasons through an Italian context? Red poppies, maybe, which are supposedly the first flowers to begin blooming according to this site, and which are associated with sleep and remembrance. Spring, the time in which flowers awaken from sleep, a remembrance of former glories.
Photography from http://point-of-no-23.livejournal.com/989036.html
Autumn, however, seems to make a lot of sense for me somehow: it is the season of change, and that is reflected in the harmonious union of various colours, reds and greens of fall leaves as they blend together.
Shapes
I personally find Autumn the most aesthetically pleasing, not just due to the colours, but also the shapes used. It’s not something I can explain, but I really like the variations in marks, from paint flowing down by gravity to brush strokes to aggressively-rubbing-brush-bristles-against-canvas (forgive the wording, I have no knowledge of painting techniques). There’s even a few markings which resemble little branches with berries on it.
All the canvases have rather different types of markings as well: Spring features repeated shapes of a horizontal line intersected by multiple vertical lines (I’d still like to think those are poppies, but it’s a very stretched notion); Summer, blotches with the paint flowing downwards; Winter, what appears to be a paintbrush haphazardly brushed in short strokes. I still don’t quite understand the reasoning behind the shapes of the marks, though, so maybe I’ll try to think of how they make me feel.
Autumn… Feels haphazard, like a mess of various different markings. That probably ties in with the idea of Autumn being the season of change. Again, Winter resembles wintry trees to me, with the rough leaves in the shape of a Christmas tree. Summer remains a mystery to me, but it makes me feel somewhat lethargic, like the paint rolling down lazily. Spring, too, is an enigma, it feels rather crisp, possibly linking to the idea of spring as a season of rebirth.
Negative Spaces
(I won’t really discuss negative spaces, which seem mostly to be a decision of minimalism in focusing on key shapes than attempting to illustrate in full detail.)
Words
Something else which remains puzzling to me is the presence of words. Autumn is clearly labelled, albeit in crooked handwriting, while Summer (and possibly Spring) features illegible chicken scratch. What do I make of this? Nothing, maybe. Maybe Autumn was labelled for the pure fact that he worried that people would not be able to identify it correctly without assistance, due to the vibrancy one might associate with other seasons.
Arrangement
In which case, Autumn may be the most important canvas of them all. After all, it is not always arranged in the order we always assume: Spring, Summer, Autumn, Winter. There is another order currently being used in the Tate Art Gallery, that of Autumn, Winter, Spring, Summer (this is allegedly his preferred order). Again, I am clueless: this may simply be a personal preference, where he sees autumn to be the “first” season unlike typical opinion.
In The End
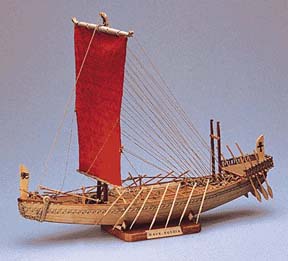
Reading actual reviews, I somehow managed to understand about 35% of the ultimate message despite getting the interpretation all wrong. I’m not surprised to see that I was incredibly off the mark in terms of interpretation, where many artistic choices were in fact shaped by Twombly’s personal preferences: for example, Autumn was inspired by Italian wine harvests and is meant to invoke a sense of relaxation. (Also, the shapes in Spring are supposed to emulate Egyptian war boats, which I still can’t see clearly.)
Image from http://www.hobbyworldinc.com/woodship79.html
All in all, I’d say the most crucial takeaway is that of “individual input”. It seems like a lot of the choices behind the paintings are driven by Twombly’s personal opinions, experiences and knowledge, which deviates wildly from my own, and as such I find it difficult to comprehend what he sees, relying on my own perception to form a meaning for myself based on my own experiences. I admire his ability to shrug off universal assumptions to input his own unique way of perceiving the world, though somewhat at the cost of understanding (or it could just be me). I suppose the key would be to balance between the standardised definitions set by the world, and one’s own meanings formed by personal insights.


