
EDIT (17/4, 1100h): Added peer comments.
(Final posting found here.)
On the last episode, we investigated a government coverup in a place where everyone had disappeared. This episode, we draft up a report for higher management, with extremely consistent assistance from Shirley.
… Or so was the underlying idea. Upon beginning the creative process for the zine, I contemplated 2 directions in which it could go:
- A conspiracy report on a mysterious, unexplained disappearance
- Drawing upon the aesthetic approach I took for the Project 2A slides
- Either a) a broad overview of all investigated portions (spray painting, trash, etc),
- or b) an in-depth analysis of a certain portion (e.g. spray painting only)
- A post-apocalypse journal on the landscape of after the end
- Drawing upon the idea of exploring a dead world

Eventually, though, I settled for the conspiracy report, considering that it would be more aligned to Part A, and that I had a clearer idea of how it would look.
After which, I considered two report styles: a typewritten report style, or a journalistic report style.


Eventually, I settled on the journalistic report, owing to more flexibility in terms of more dynamic compositions.
CONTENT
First, I established the flow of the zine through determining the content. At this point I had yet to decide whether to have broader or deeper content, and thus went for broadness first, assigning each 2-page spread (folio?) a specific content. The flow would then be as followed:
- Remains: implication that people were there, but are currently missing
- Corresponds to slide 9 of Part A
- Images of bikes and trash

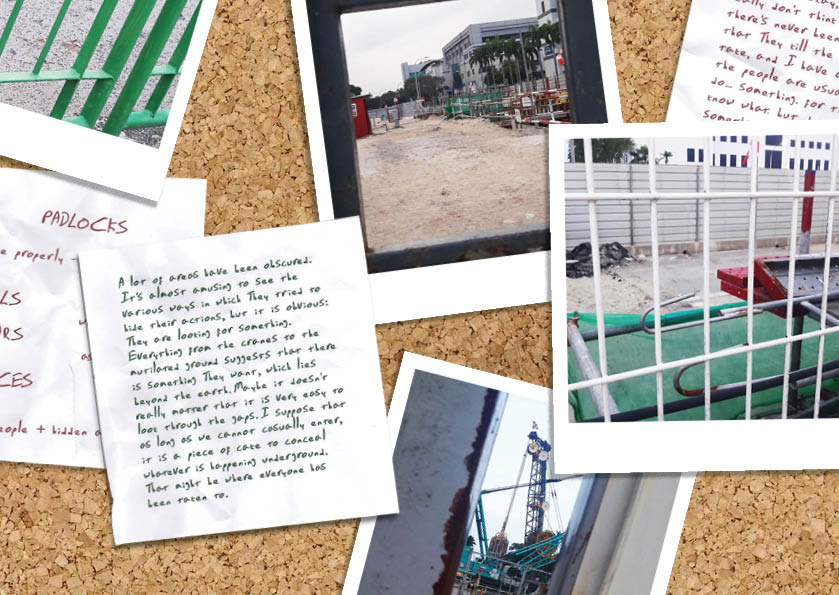
- Obscuration: implication that something is being concealed
- Corresponds to slides 13-14
- Images of fences, barriers, etc.
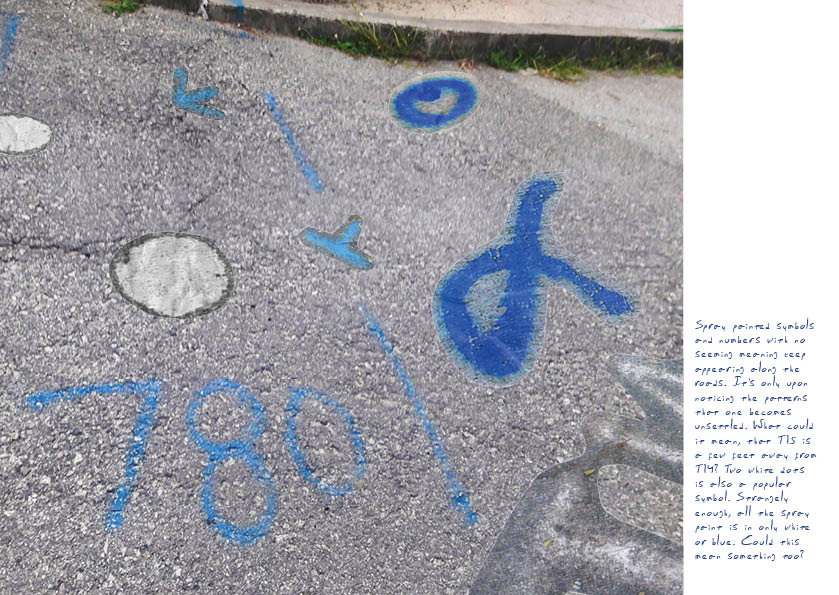
- Symbols: implication that there is an undecipherable secret message
- Corresponds to slide 11
- Images of spray painted symbols and numbers

For the first draft, I designed based around the many photographs I had, opting not to use many hand-drawn elements to emphasise the notion of “quickly taking notes” with photography than sketches. The second draft onwards mostly includes minor edits to make it look more realistic, as well as complete upheavals of design for certain pages.
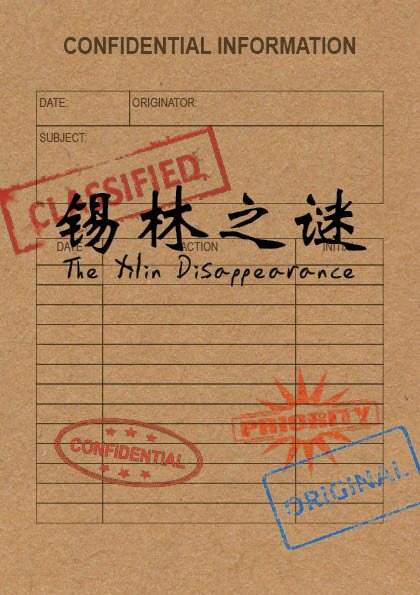
COVER
For the front and back cover, I was uncertain of what to do, and thus tried to think of it in terms of associated images. Thus, I considered the character 目, for the following reasons:
- As a Chinese character, it links back to the Chinese name of Xilin
- As a word related to “eye”, it evokes the eye of the Illuminati (conspiracy)
- As a character with “bars”, it resembles the many fences of obscuration
- As a character with three “windows”, each window corresponds to a folio of information

Shirley’s suggestions:
- Remove design elements which cannot be immediately understood without explanation
Thus, I shelved that character. After settling on the conspiracy report idea, I decided to go for a certain look, that of the brown case file folder.

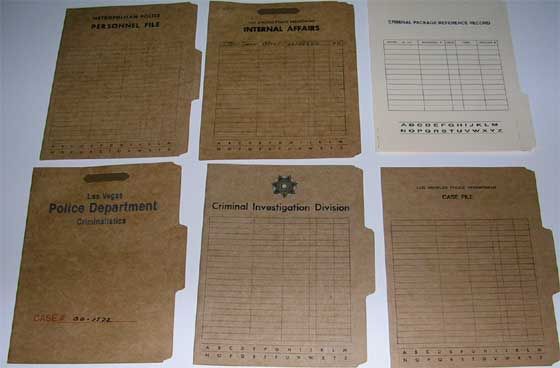
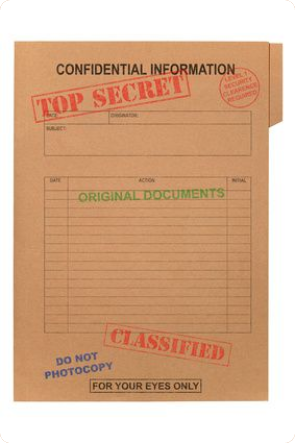
For some reason, the above designs instantly evoke an idea of the report, and thus I made sure to include key defining elements.
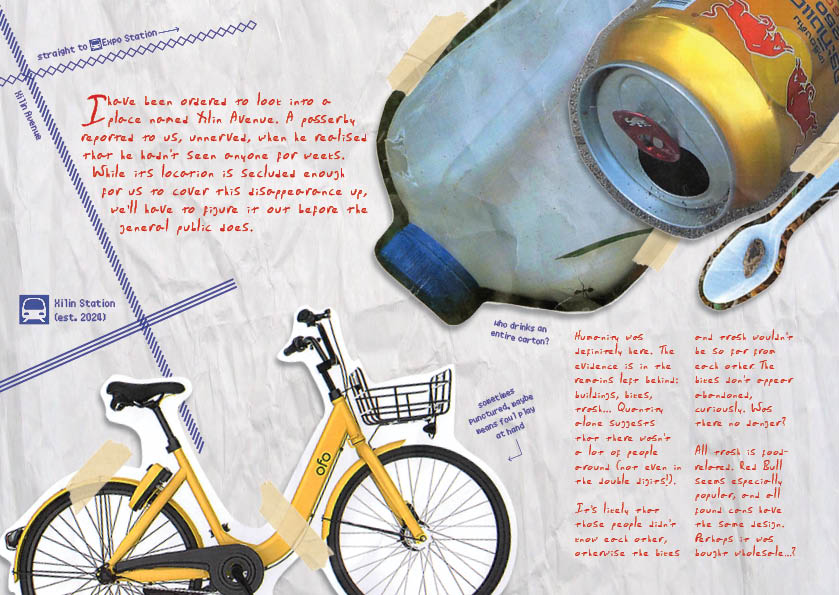
REMAINS
In this page, I was uncertain what to do, and thus opted to focus on creating suitable spaces for text through proper positioning of images. Consequently, I tried to have balance by putting the images diagonally opposite such that it wouldn’t be too image-heavy on any particular side. To incorporate the element of haphazardly pasting photographs in, I skewed the images as well.

Shirley’s suggestions:
- Insert a map (I decided this would be the best place to, and thus proceeded to do so)
- Have an introduction than jump straight into content

Shirley’s suggestions:
- Reduce opacity of masking tape, to appear translucent than opaque
- Too much vertical height of text without sufficient counteracting horizontal pull
- Lack of visual hierarchy
- Use drop caps to indicate the beginning of text
The images still appeared extremely unreal due to its flatness. Thus, I printed it out and slightly marred the papers by crumpling and folding them. For some, I tore the images slightly, or made a dog ear. Then, I scanned them back in.

Shirley’s suggestions:
- Have a conscious colour palette (e.g. triadic, owing to the yellow bike/can, blue milk carton cap, and perhaps red text)
- Only use drop caps for the first beginning
- Have varied fonts for dynamism (e.g. typewritten font for the map or annotations, font weight)
- Improve the map (logos to indicate MRT stations, reduce font size)
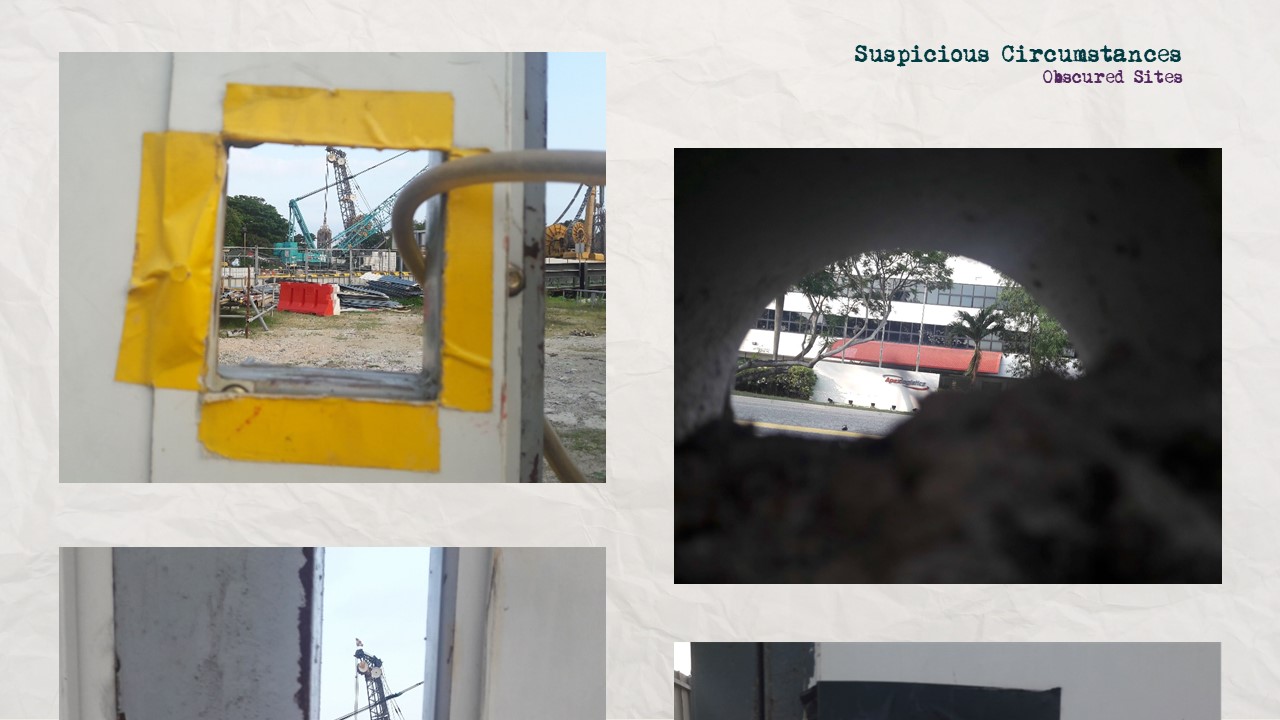
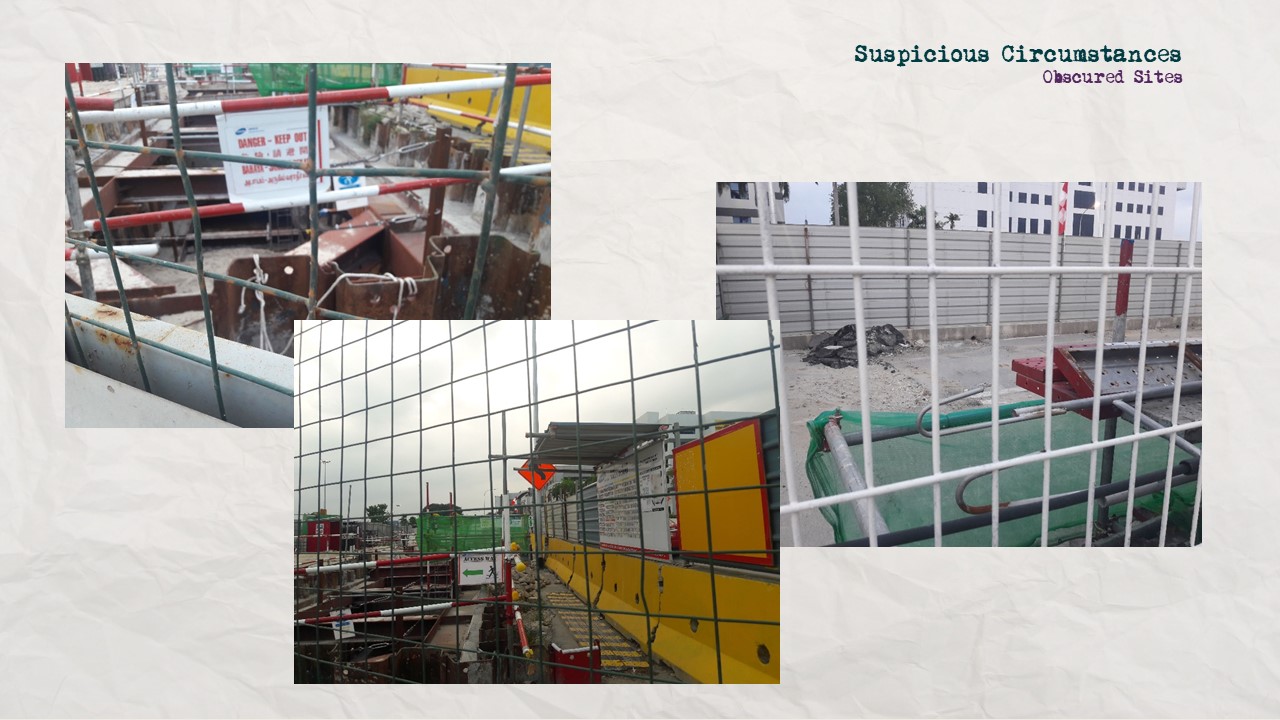
OBSCURATION
In this page, I considered a grid system, which would resemble the bars of a chain-link fence. At the same time, this would be helpful in limiting the amount of text while providing many spaces for images.

Shirley had no comments for this, and thus I went ahead with it.

Shirley’s suggestions:
- Change the design altogether, to something with a less orderly design

While I was concerned about the colours in this page, Shirley assuaged my doubts in pointing out a seemingly high level of green, accented by subtle reds, and the brown corkboard. I decided that it was important to try changing the text colour, regardless.
SYMBOLS
In lacking a substantial design idea, I followed the first spread’s idea of haphazardly putting images to reduce space. I considered the use of negative space, where I would have a scatter brush of graffiti as the border, leaving negative space as the text box.


Shirley’s suggestions:
- Use a concrete background instead for the texture

Shirley’s suggestions:
- Full-page image with 1 column of text on the side

Shirley had no comments for this specific page, but in line with her comments on colour, I figured to actively consider the colours on this page. The graffiti I have only comes in white and blue, and the concrete is grey.
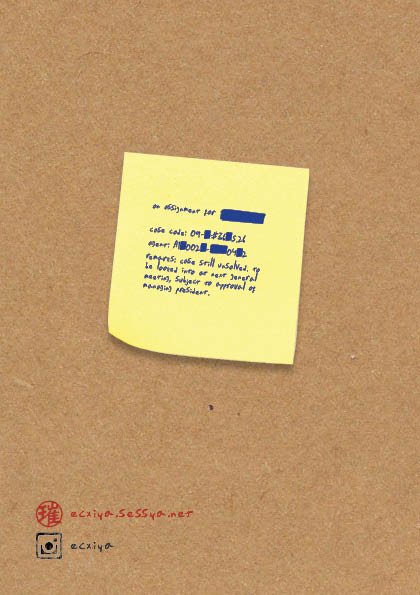
BACK COVER
I was uncertain as to what to do with the back, considering that there is typically nothing on the back of a report. Using my imagination, then, I figured that it was not improbable that one might put additional notes on the back, to be read after reading the report. As such, I attempted that.

Shirley’s suggestions:
- Place the content on a post-it note instead
PEER COMMENTS
Some of the more common comments:
- More high-res images
- wasn’t sure if it was high res enough, so good to know
- More plays on visual hierarchy, esp. on 2nd and 3rd spreads, e.g. by putting titles/more info
- While I’m unsure if it’s wise to add unnecessary information, point is taken :’)
- More sketches, doodles, annotations
- no tablet so a bit hard but good to know :’)
- Last spread not as interesting, not consistent design
- In hindsight, agree. Perhaps it might have been useful to let the spray painted images splay over the edges of the background image such that it looks less like a properly designed page as opposed to many scattered images placed over a properly formatted page.
- (varying opinions, some said it was good but a few said) font choice was slightly kiddish than strict
- Not sure what to make of this personally
- Consistency between cover pages and inside content, e.g. paper clips, post-its, folder tabs, etc
- Another good point in hindsight :’)
- More exaggerated narration, like Geronimo Stilton
- Which I have… Never read but point taken :’)
OVERALL
All in all, it’s amazing how many issues seem so obvious in hindsight, but went completely undetected by me. To me, the most interesting part was that of trying to “collage” successfully: unlike illustrations, it’s difficult to control the proportions, perspective, colours. This made it somewhat difficult to me, in that I had to find ways to make the images work in my favour. While I picked by gut feeling, it seems that somehow my instincts managed to choose images with consistent colour palettes, surprisingly, which made things slightly easier.
I also felt like I learned a lot about graphic design just through experimentation and Shirley’s remarks, from text hierarchy to style consistency to variety (listening in on other peoples’ consultations was also surprisingly helpful!). I’d like to thank Shirley for being so helpful throughout the entire project. Thanks Shirley for being so helpful throughout the entire project!