So whats magic? A quick online search will bring me to the definition:
The power of apparently influencing events by using mysterious or supernatural forces.
To put in context and my own understanding for this 3D Assignment, the object created has to be something unusual, definitely something that should defy logic and supposedly impossible, or to put it simply – magic!
Process & Development
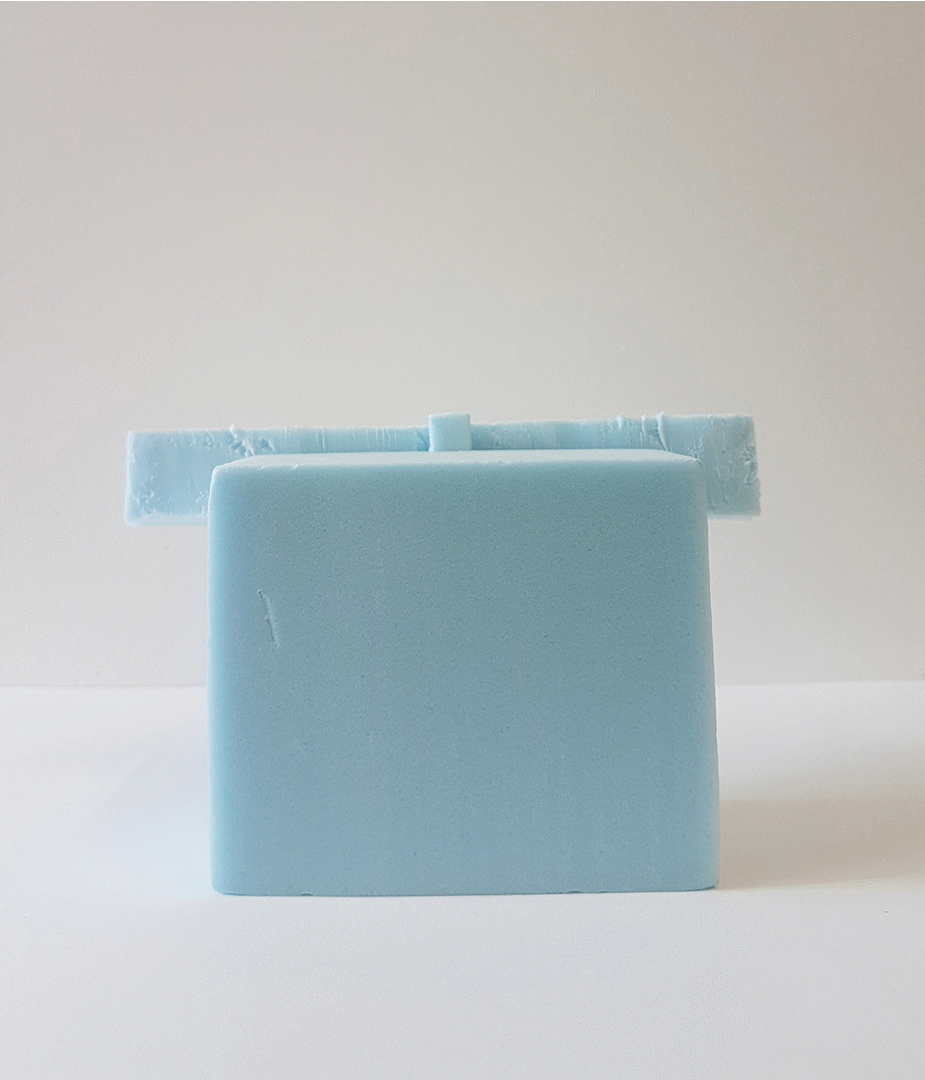
Model #1
The idea of the first model is a vertical Dominant, with a horizontal Subdominant, that looks like its “magically” floating there but it is actually held up by the small Subordinate. The Subdominant is also help up at the one-third point of the Dominant, while still looking quite balanced as a whole.

Front view
Top view

Side view
Legend:
- Red box – Dominant
- Dark Blue box – Sub-dominant
- Yellow box – Subordinate
- Green dotted line – Principle Axis
- Light Blue dotted line – One-third sections
Eventhough i feel like this model has a really good principle axis, I did not proceed on to use this model as I feel that the Subdominant and the Dominant are too closely and similarly shaped, and it almost looked like they are competing to be Dominant. I also find it hard to make the Subdominant to stay in a horizontal position without it tilting.
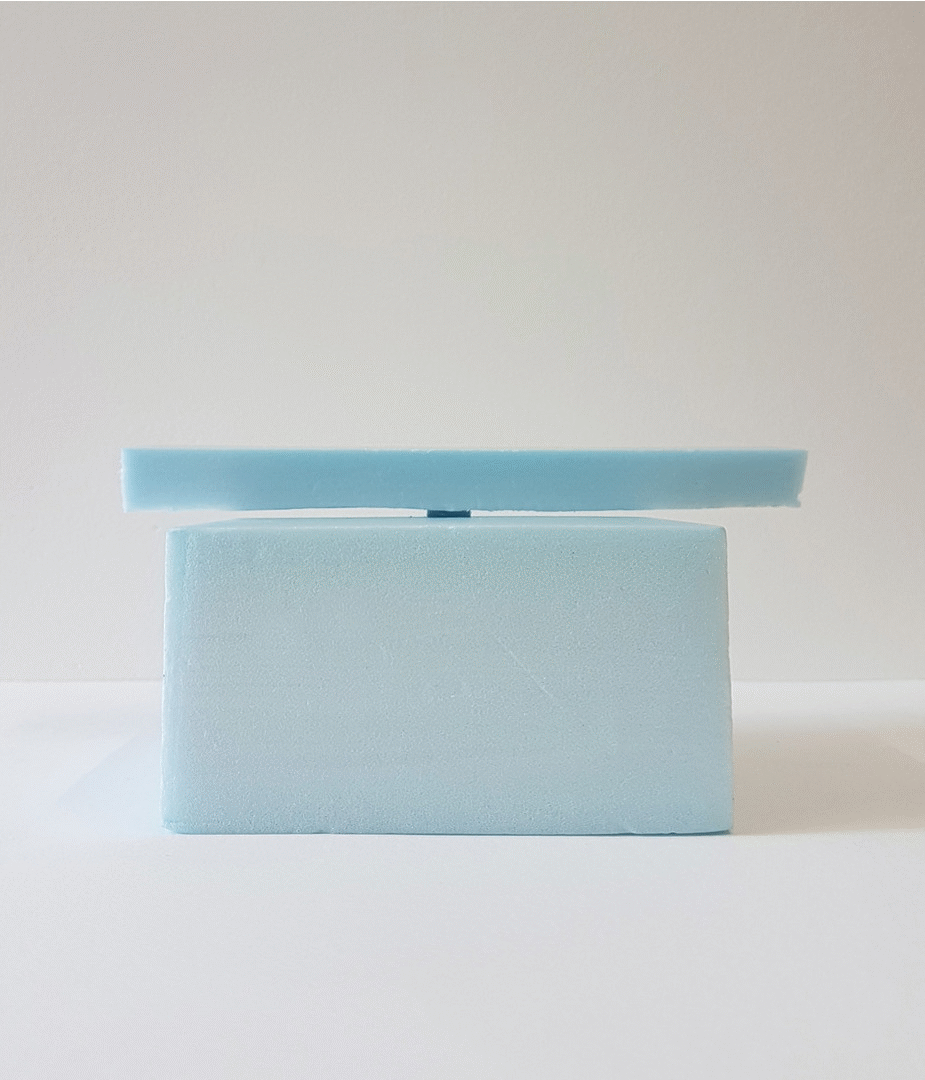
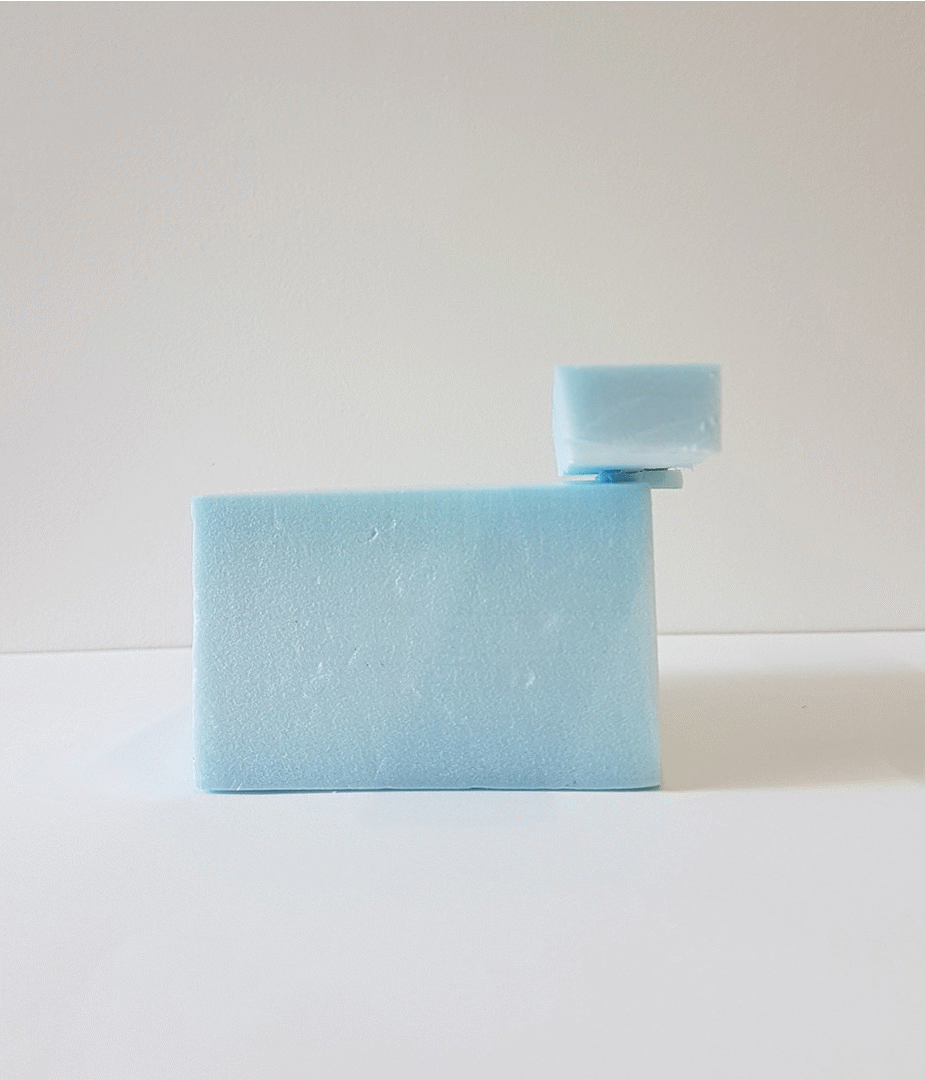
Model #2
For this model, I started from the Dominant first and worked with smaller pieces accordingly to fit with the Dominant. I had to keep cutting the Subdominant and Subordinate smaller and smaller until the sizes you see below. The idea here is to make the subdominant “levitate” on top of the Dominant.
Front view
Bottom view
Side view
Legend:
- Red box – Dominant
- Dark Blue box – Sub-dominant
- Yellow box – Subordinate
- Green dotted line – Principle Axis
- Light Blue dotted line – One-third sections
Eventhough I liked how symmetrical this model is, from the top view (not shown here) the Subdominant is visually overpowering the Dominant, so theres alot of confusion and conflict on which is the Dominant. The Subdominant is also hard to balance on the Subordinate, an it tilts and touches the Dominant, defeating the purpose of it trying to look like its “levitating”.
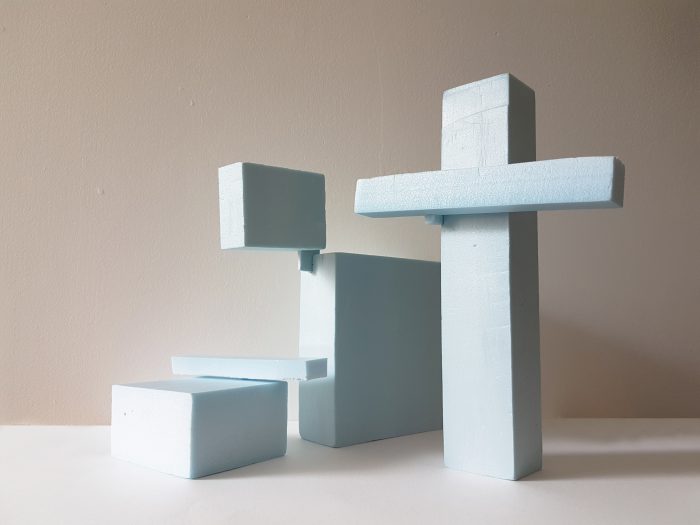
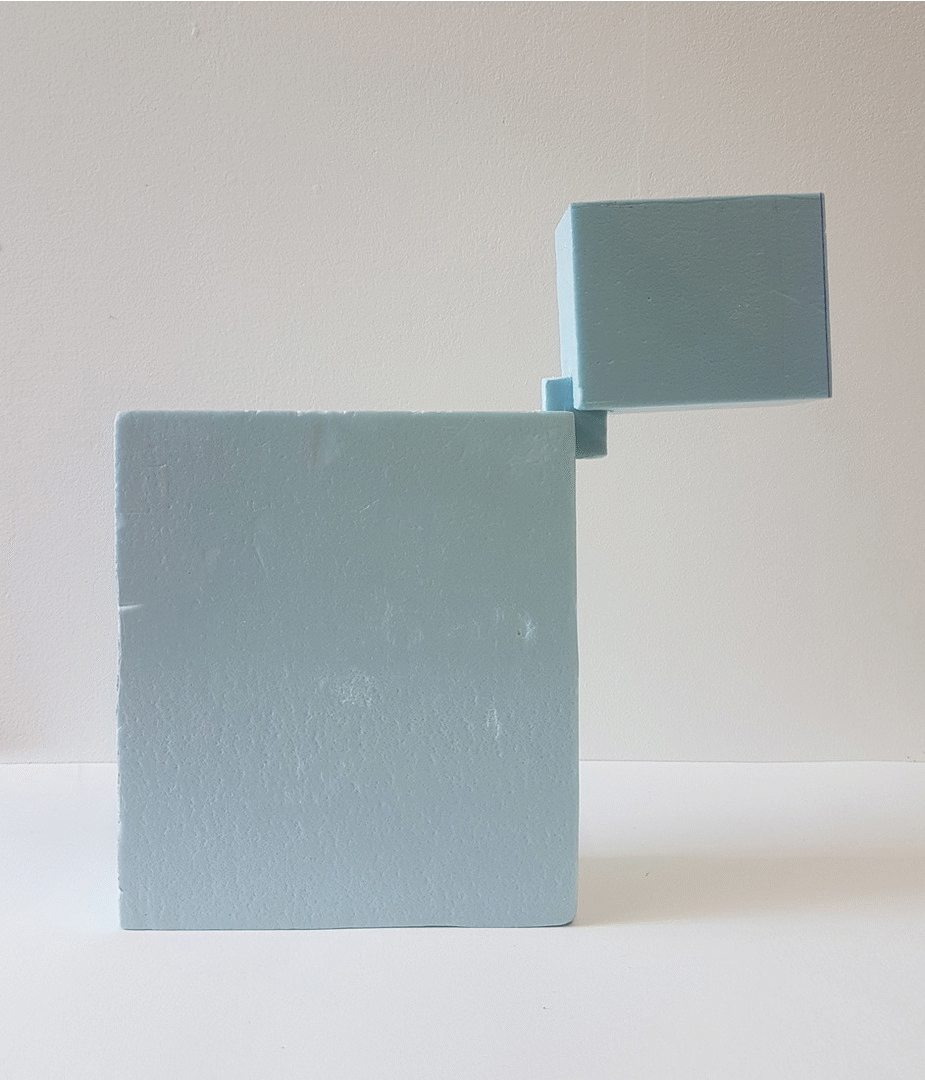
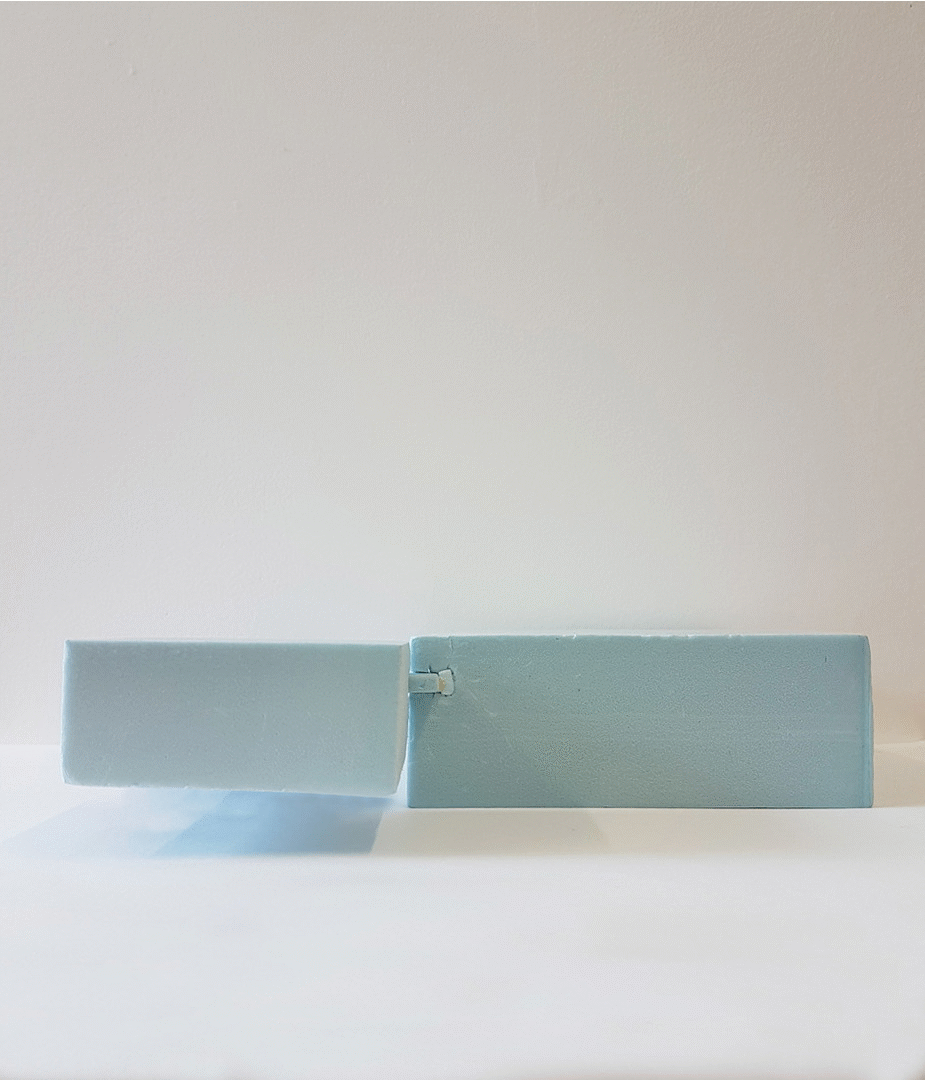
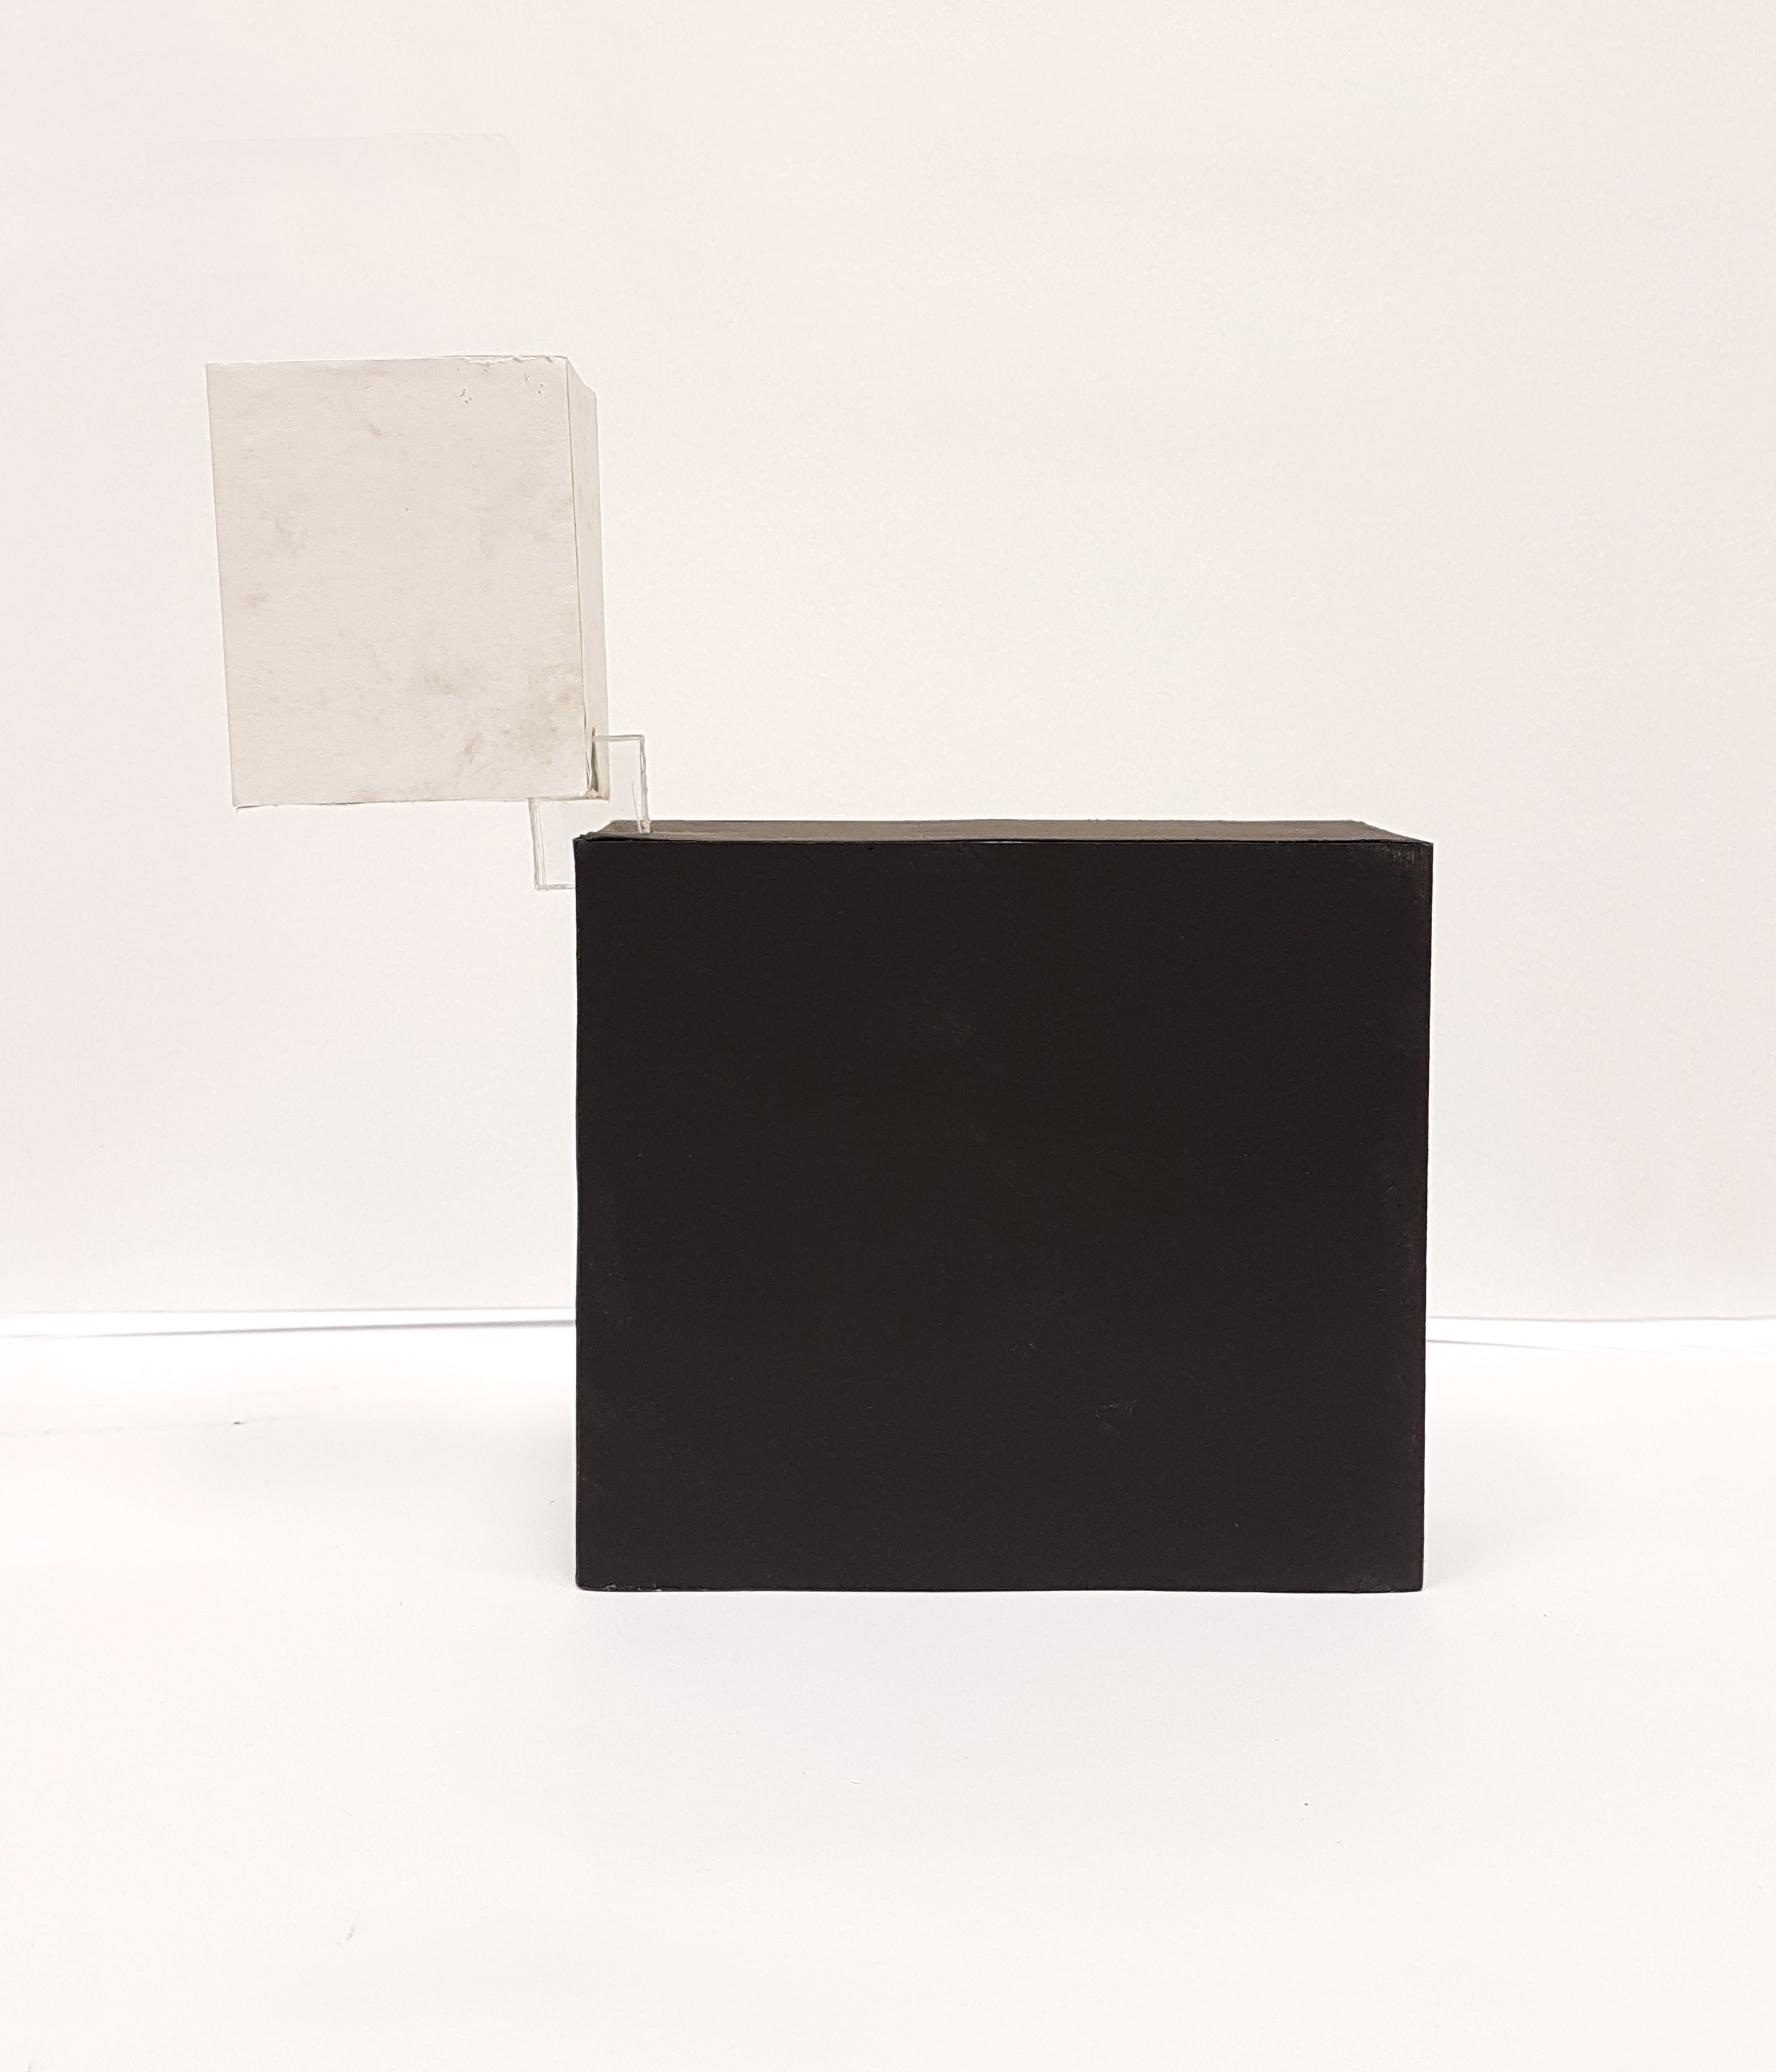
Model #3
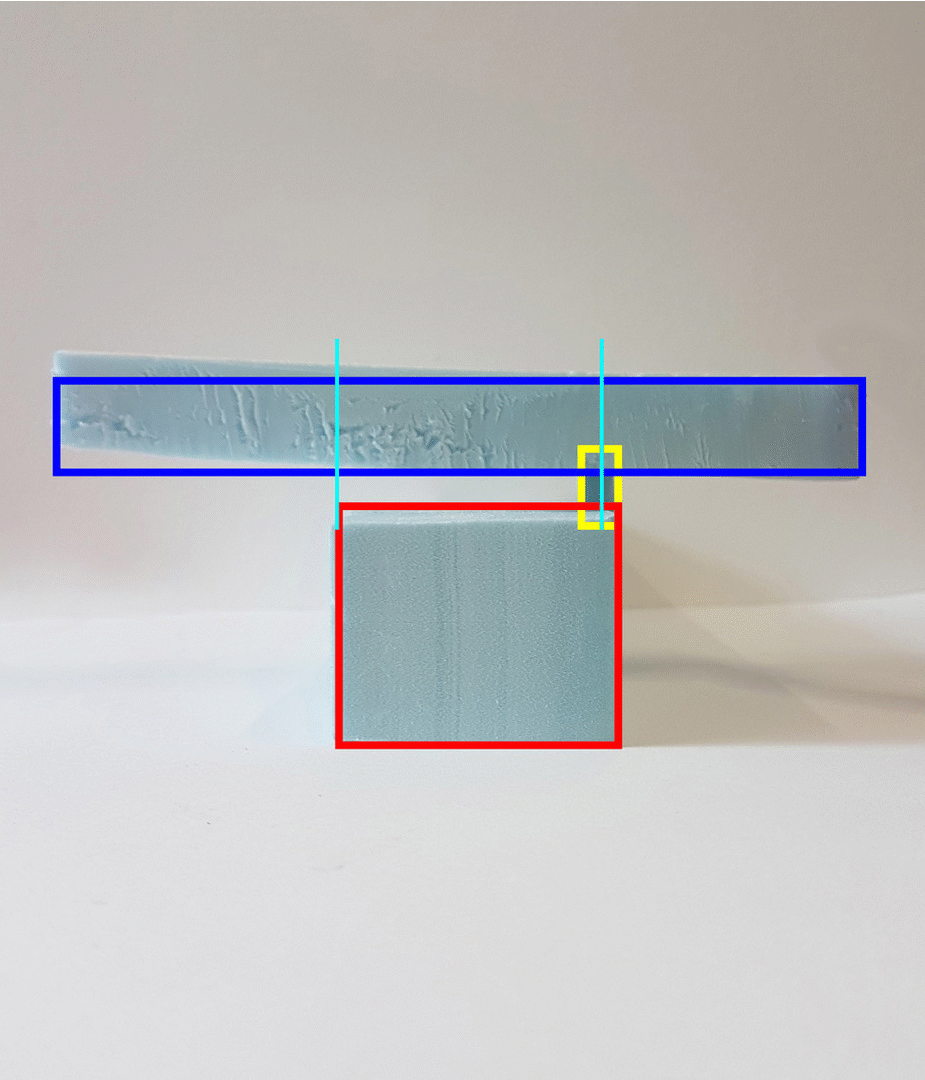
This is my chosen final model as I feel like it suits the word “magic” and it fits the Dominant, Subdominant and Subordinate well. The idea for this model is, the Subdominant is floating diagonally to the Dominant, but is actually held up by the Subordinate.
All 3 pieces are also wedged together, at one-third position of each piece. The Subordinate is wedged at the one-third position of the Dominant, while the Subdominant is wedged its one-third position by the Subordinate (as seen by the Front view below).
Side view
Front View
Top view
Legend:
- Red box – Dominant
- Dark Blue box – Sub-dominant
- Yellow box – Subordinate
- Green dotted line – Principle Axis
- Light Blue dotted line – One-third sections
To further develop it into the final model, the right materials would have to be chosen.
Materials
I decided to look at what materials would be magical. So I started to look at materials that are known to have magical properties.
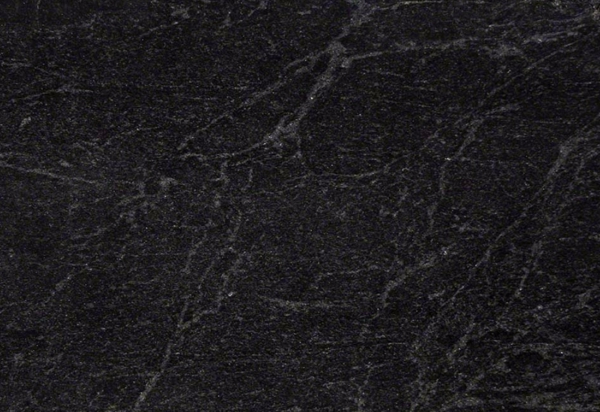
Black granite
First material is black granite. Other than the fact that it is known to have “magical” healing properties, I would use this as the material for the base or rather the Dominant as I would think that the Dominant should be a dark a heavy material to show the stability of the whole model.
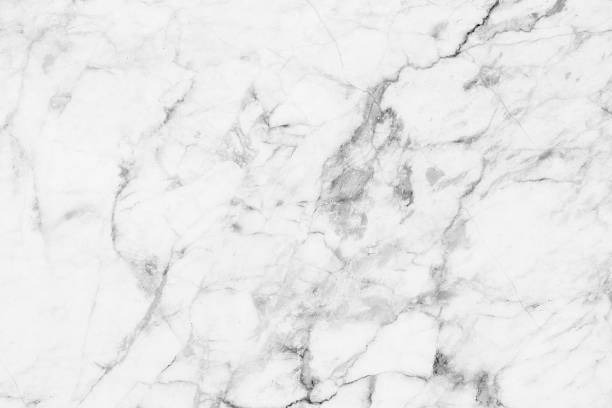
White marble
The next material I found is marble. A search on the material got me to the description for marble:
This mineral is used to provide both clarity and states of “suspension” in both meditation and tantric activities. Provides for strength of self control and mastery of thought. It enhances the powers of serenity. Marble can provide the “good common sense” in matters of the home, heart and one’s constitution. Allows for total recall of dreams as well as, provides protection, stability and structure both in the physical and emotional mind.
I have chosen marble for the Subdominant as I would like to feature a heavy material on floating diagonally to the Dominant, to make it seem like an impossible thing but also “magical” at the same time.

Glass
For the Subordinate, I have decided to use glass as a transparent material to make it seem like the Subdominant is really levitating away from the Dominant.
Also both the black marble and the white granite would be contrasting colours against each other, somewhat repelling the two objects away from each other, hence causing one of them to “levitate” away from the other.
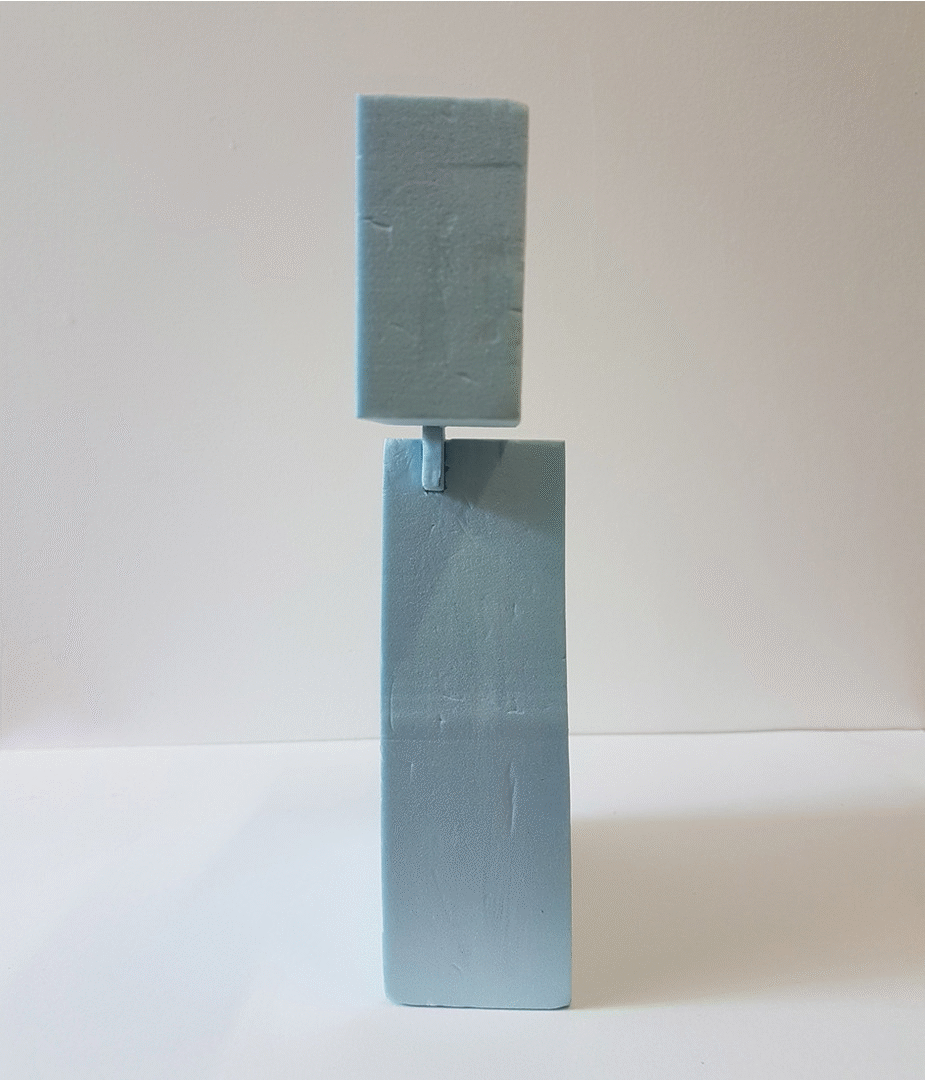
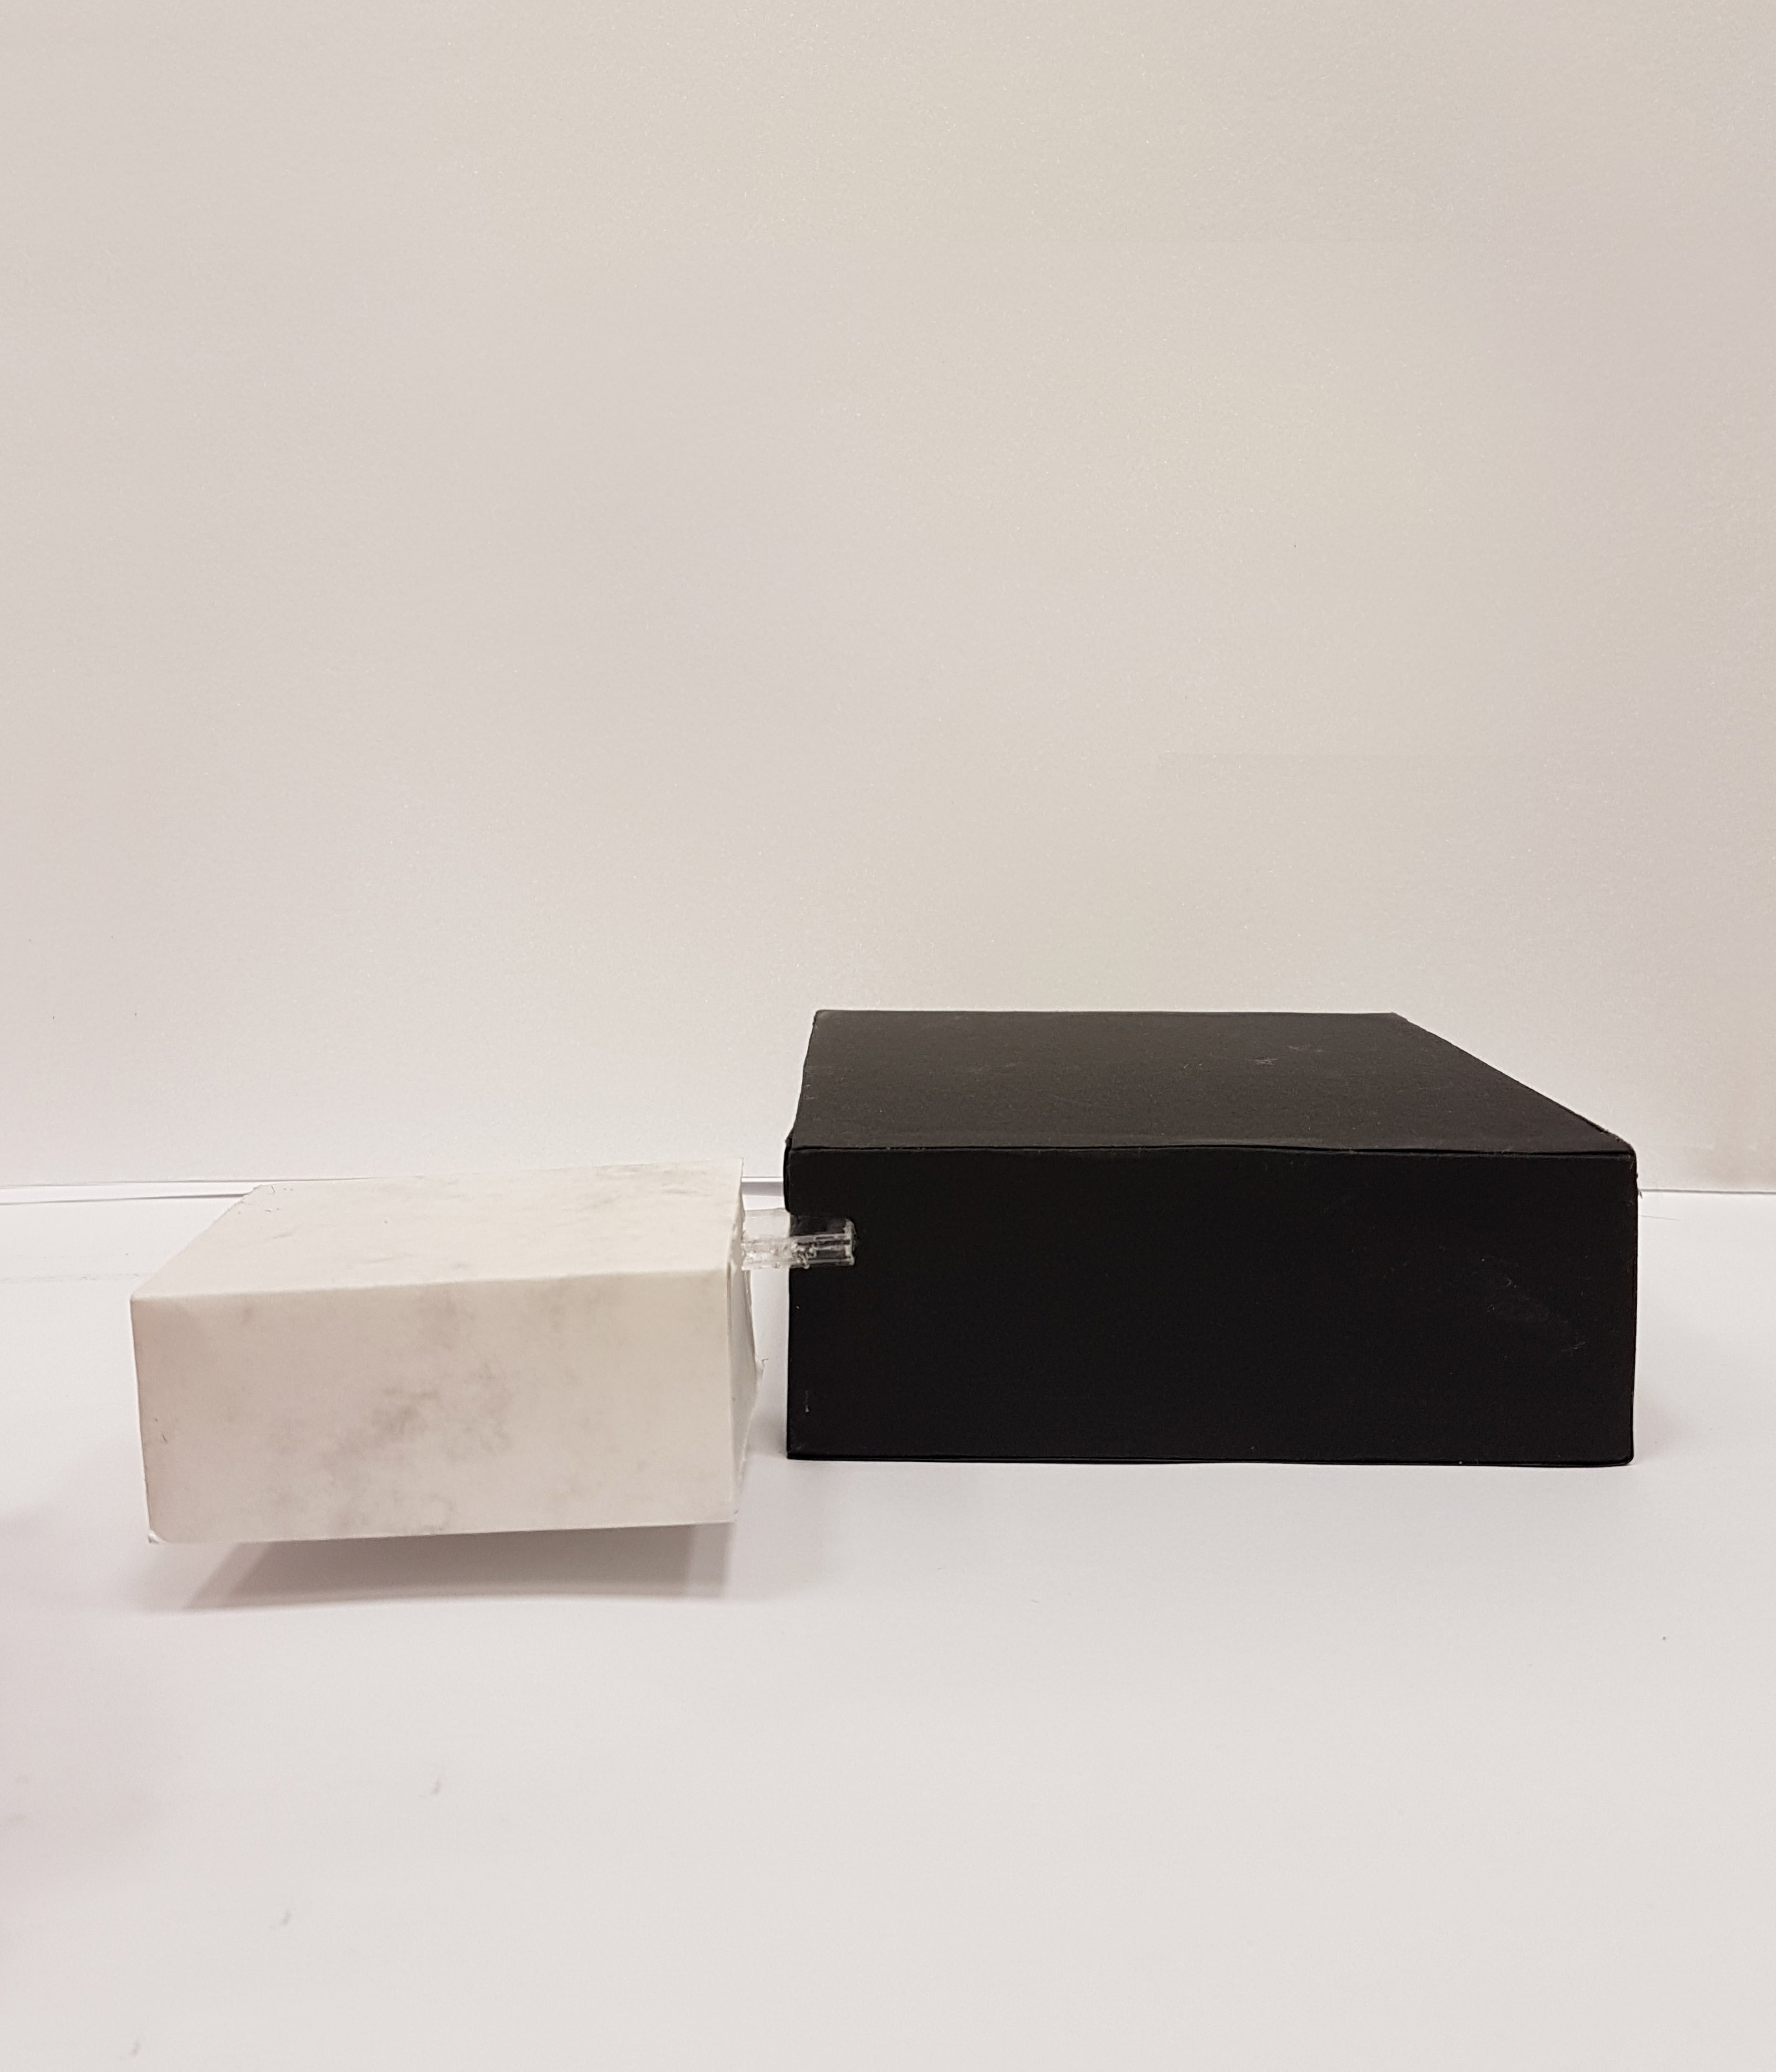
Final Model
I could not get the right materials for the models, so I got transparent acrylic to replace glass, matte black paper to replace black granite, and white marble paper to replace white marble. I wrapped the papers around the foam shapes, and cut the acrylic accordingly.
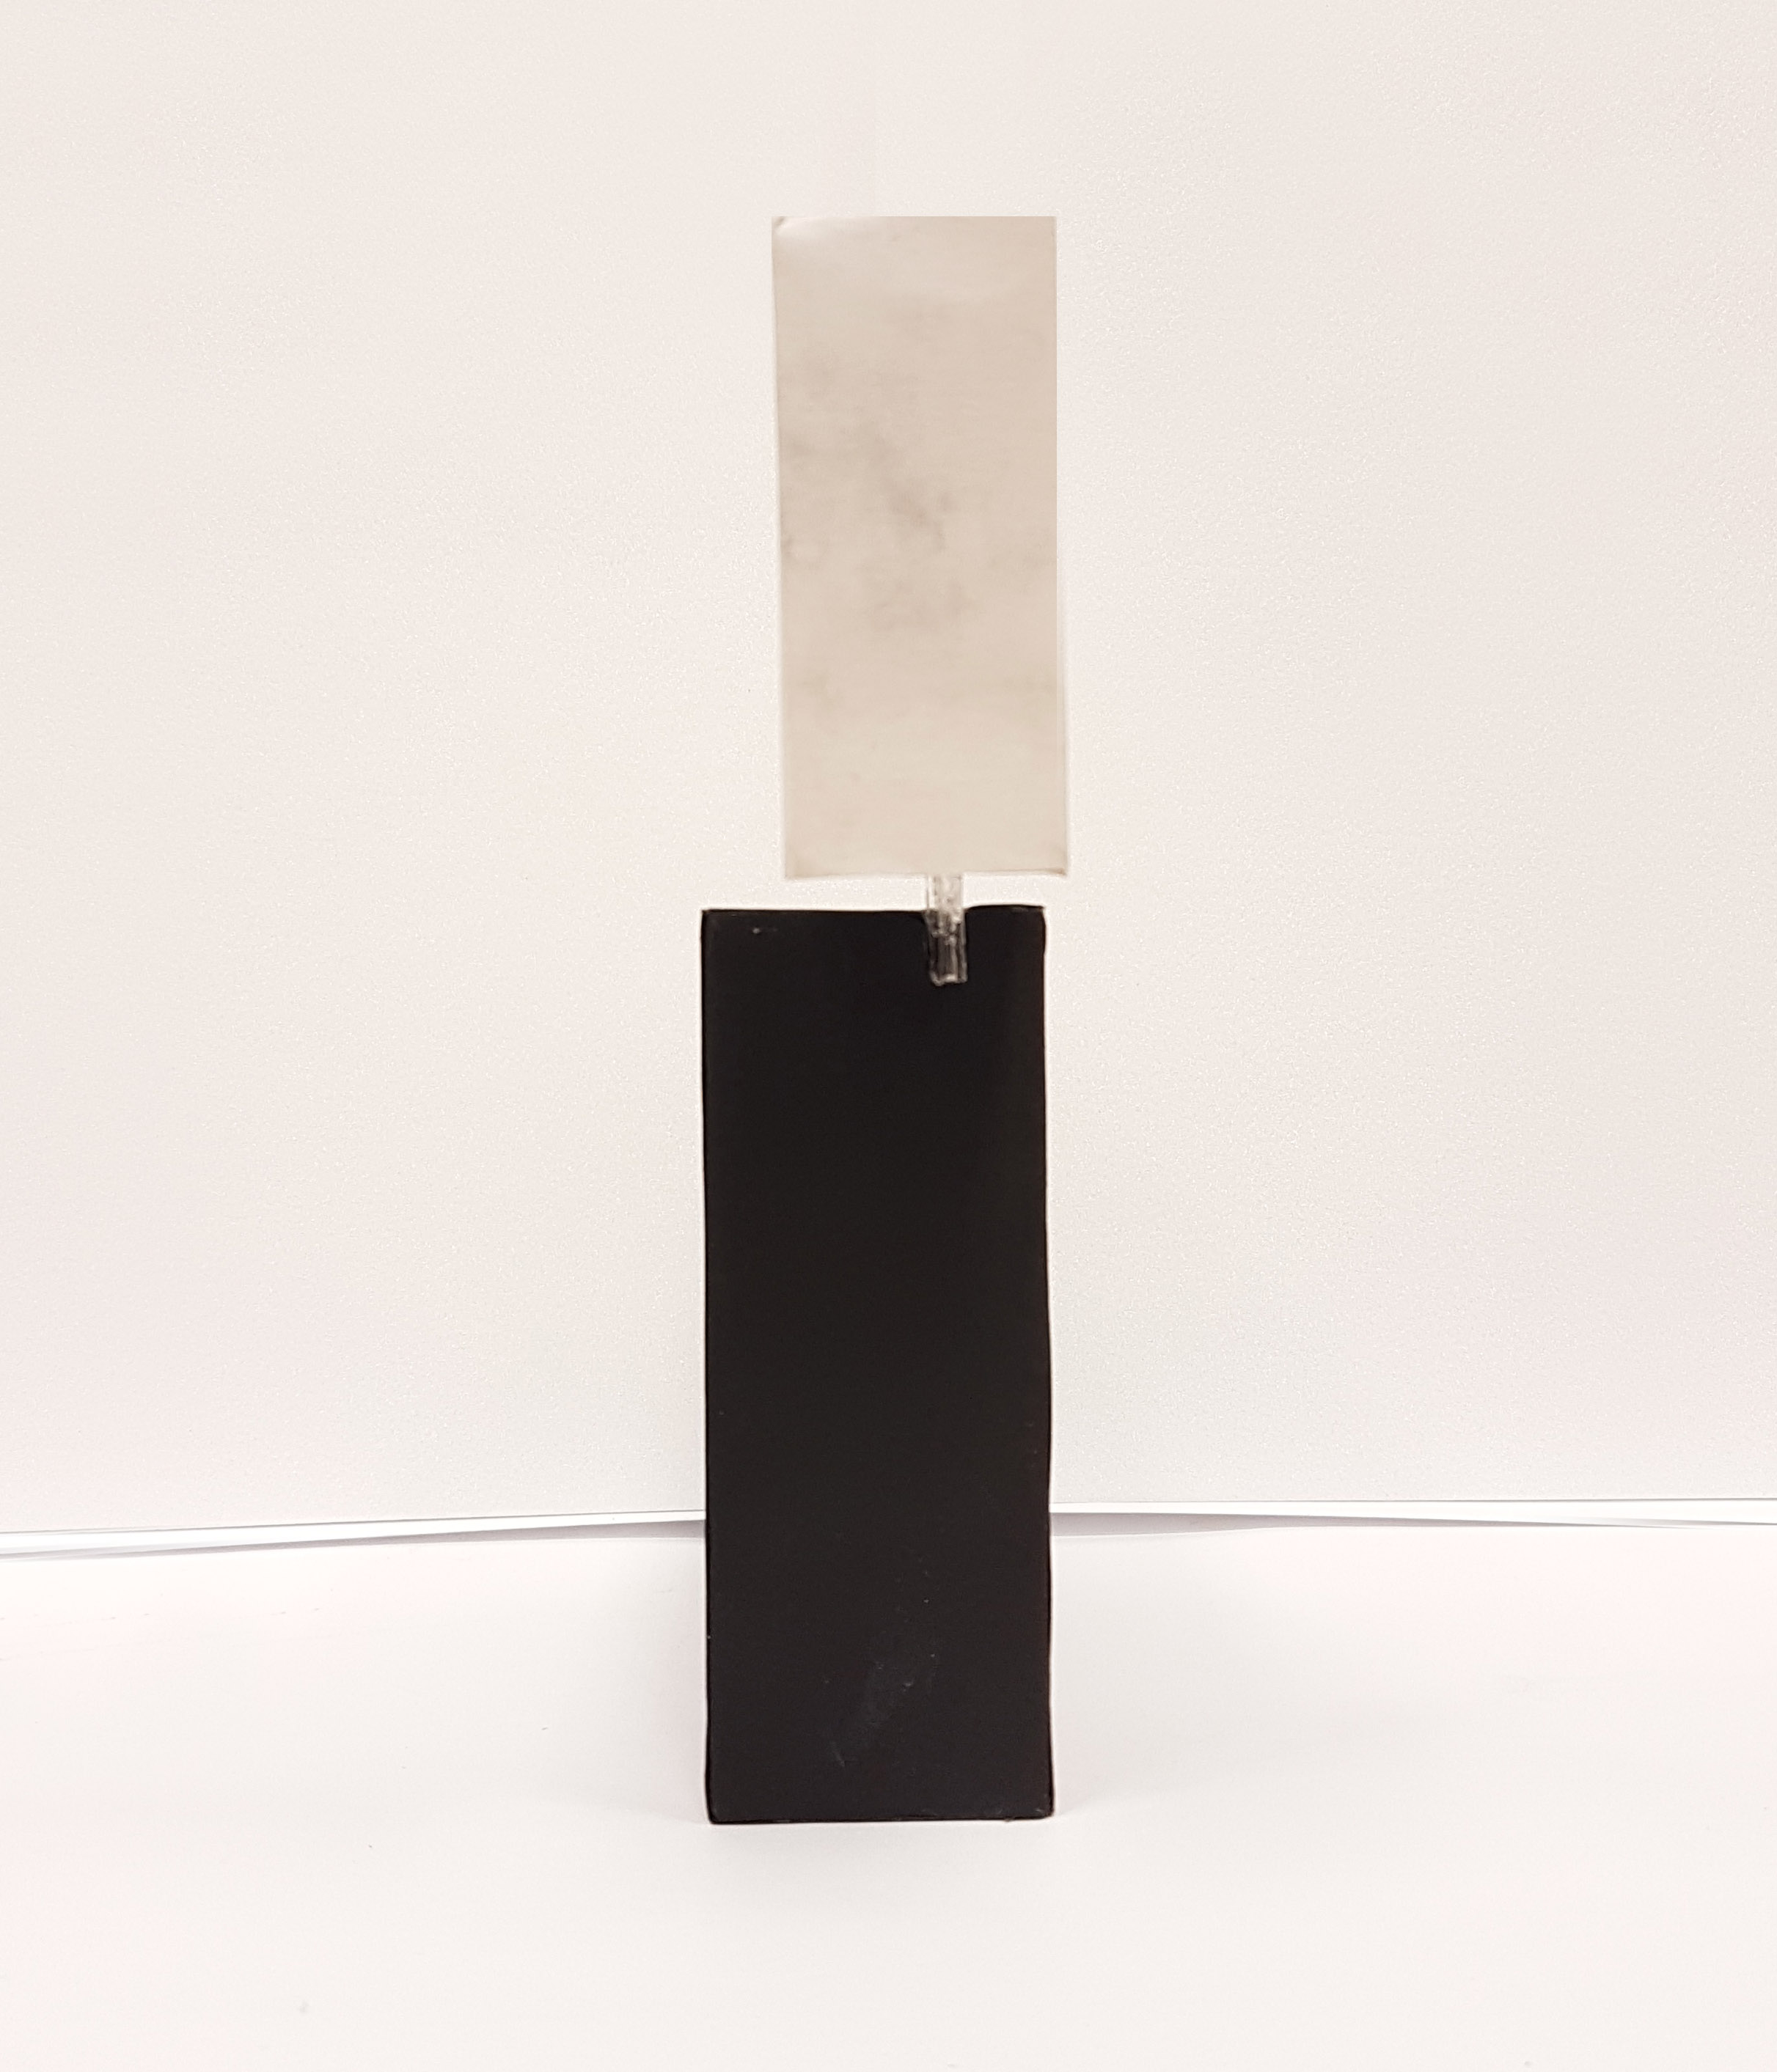
Front view
Side view
Top view
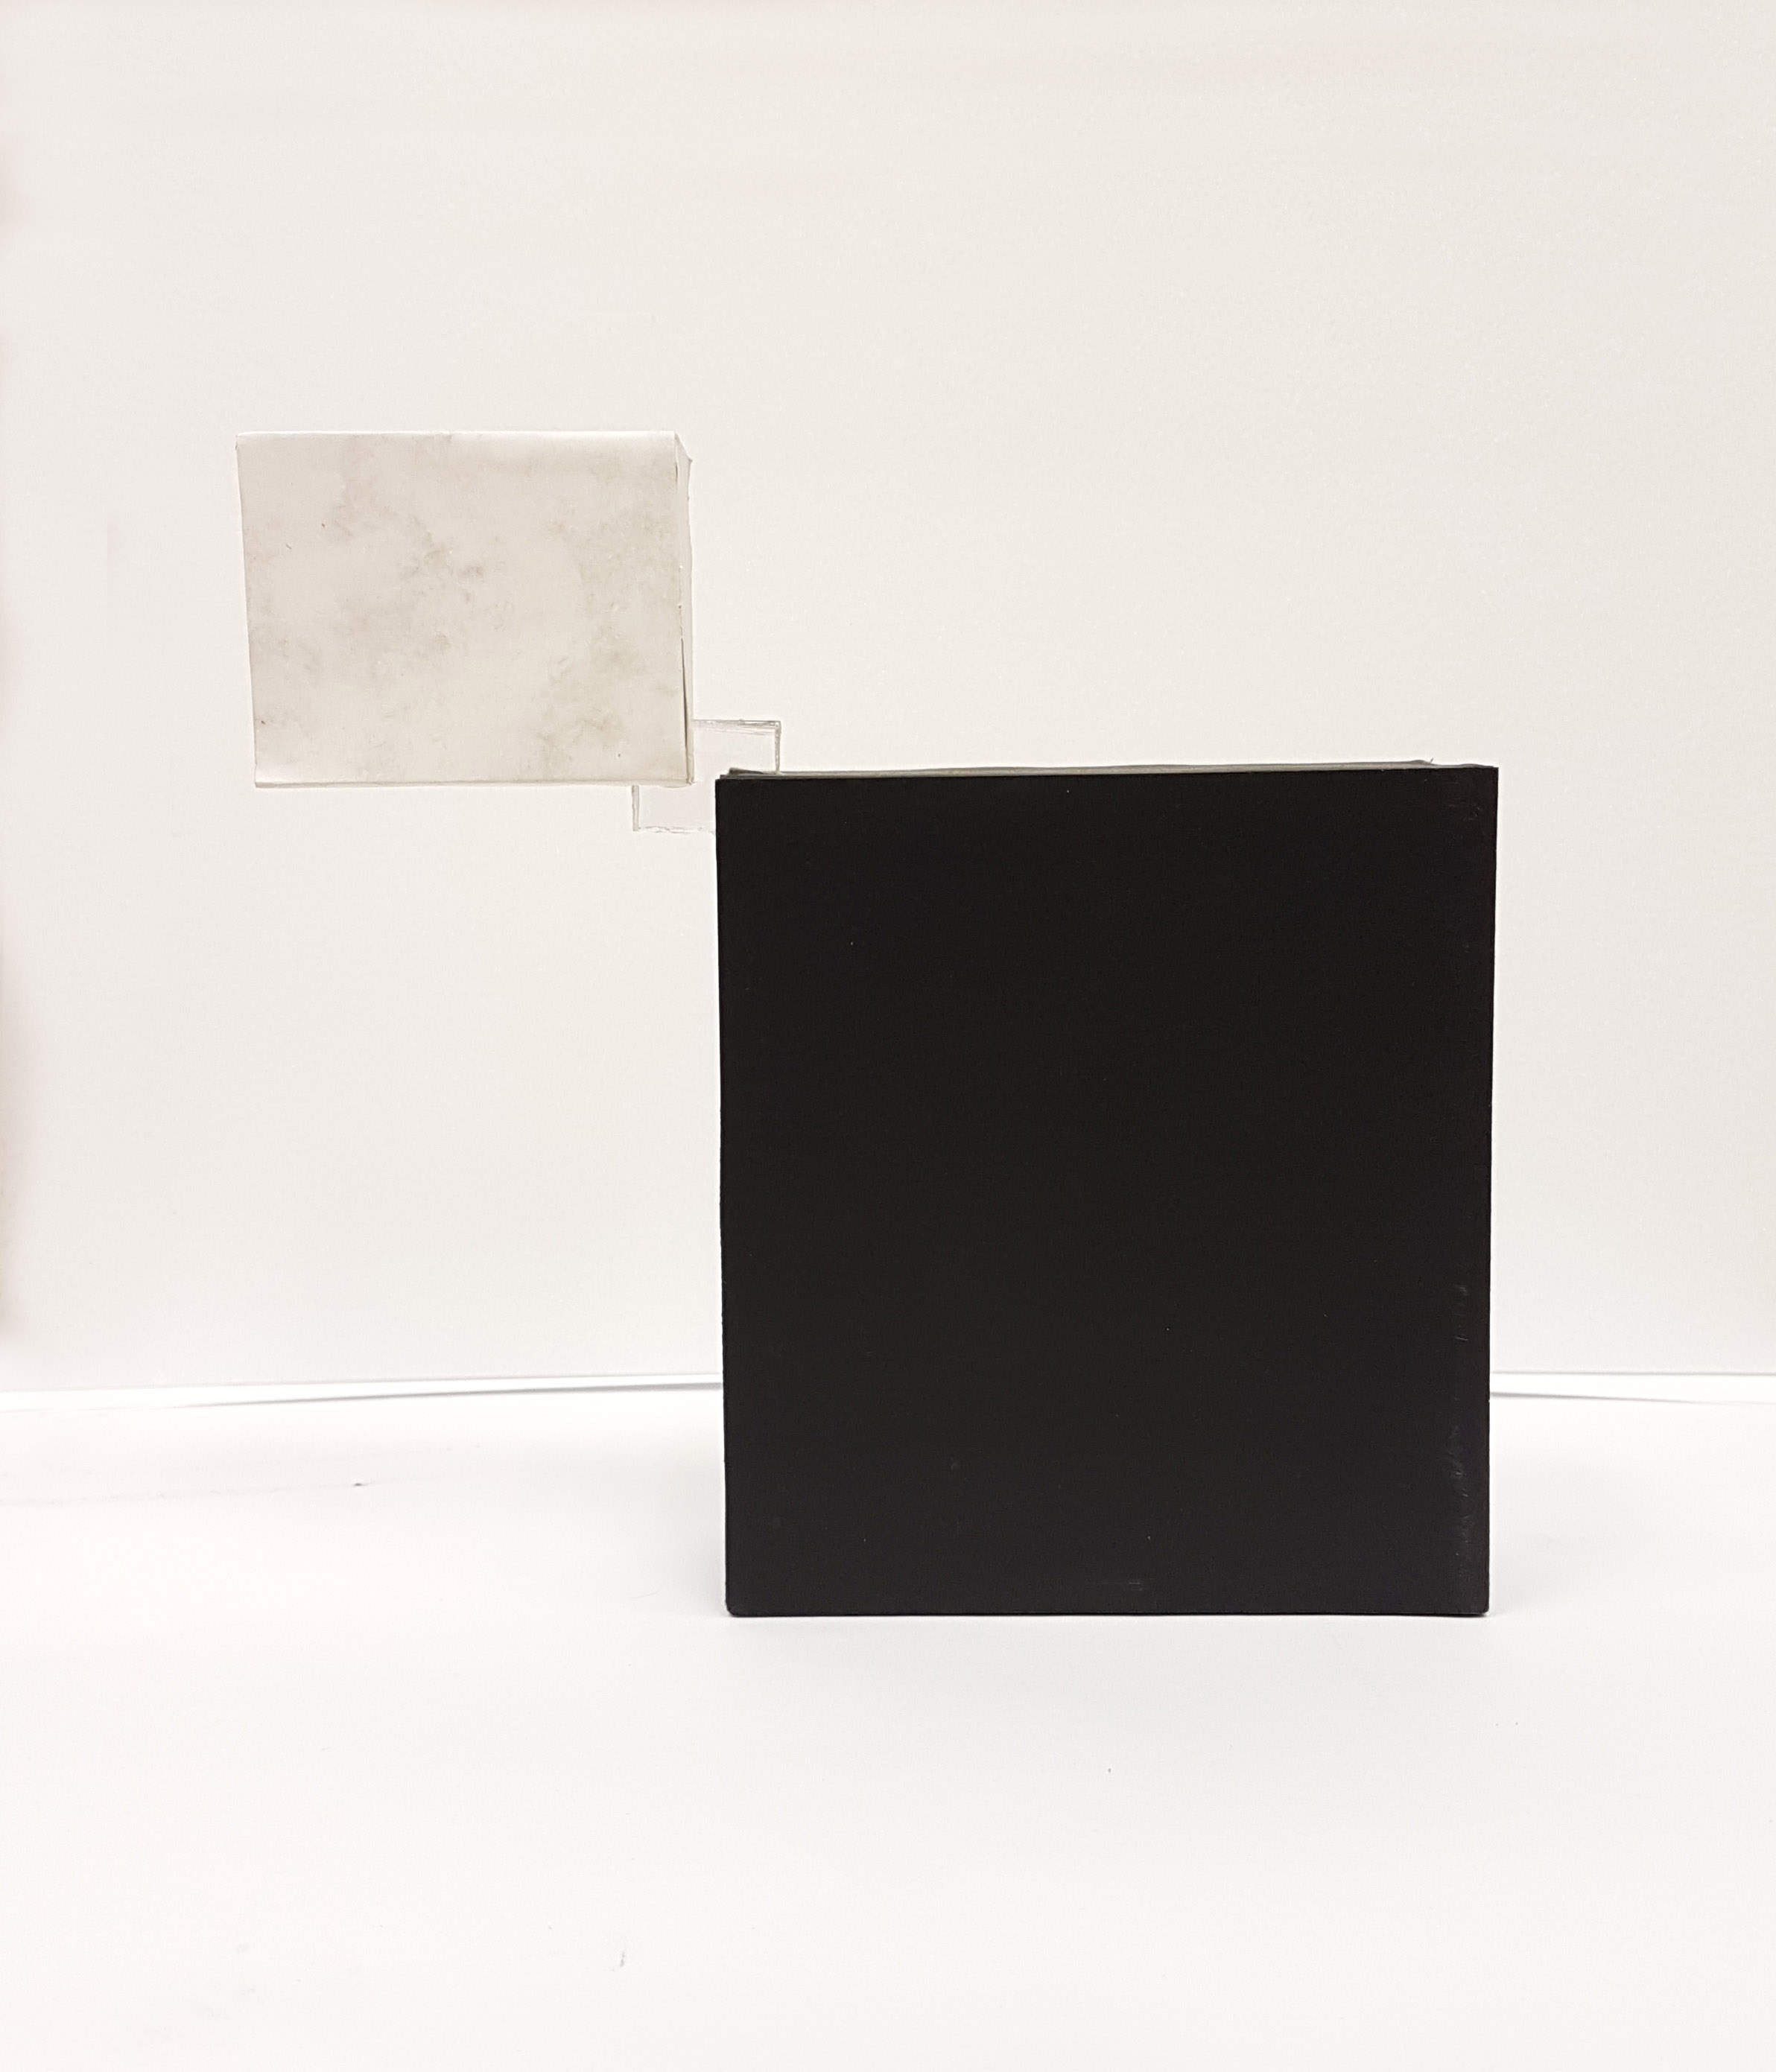
Side view 2
Application
One large and small application for the final model would be:
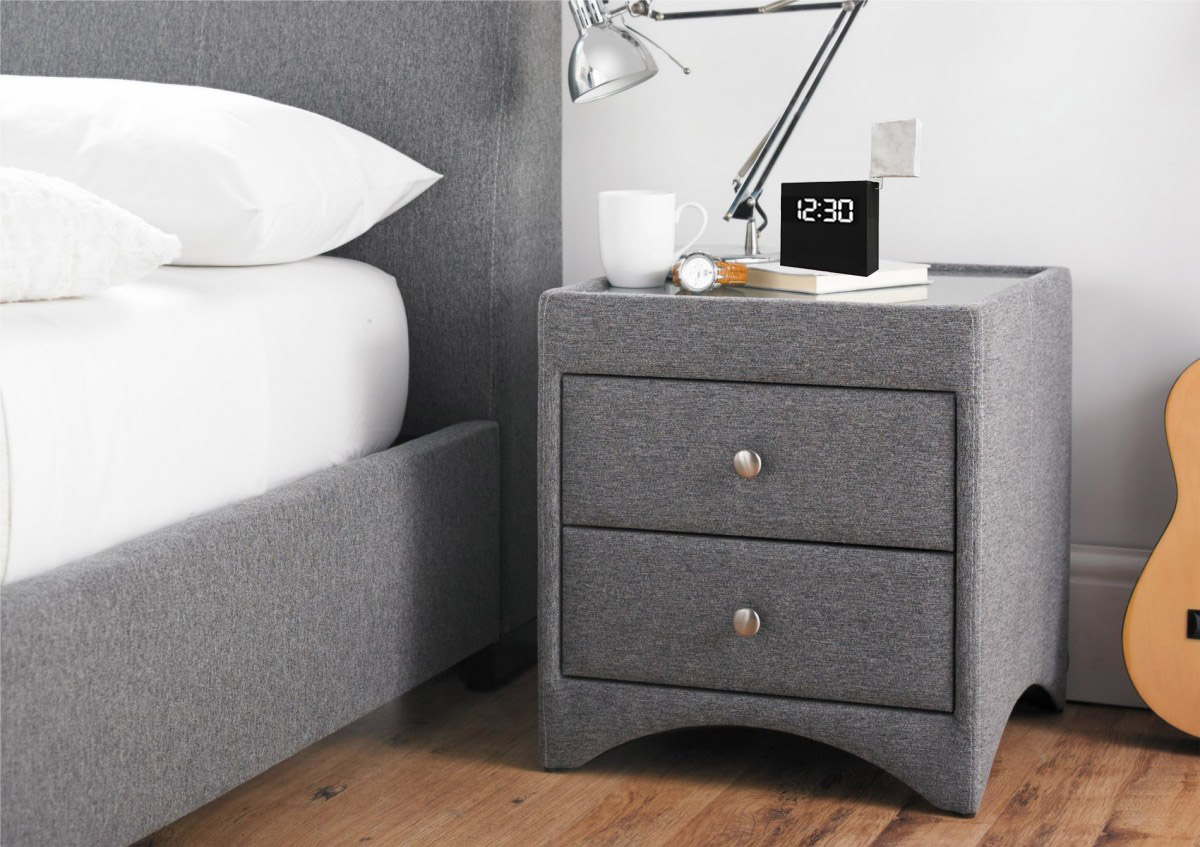
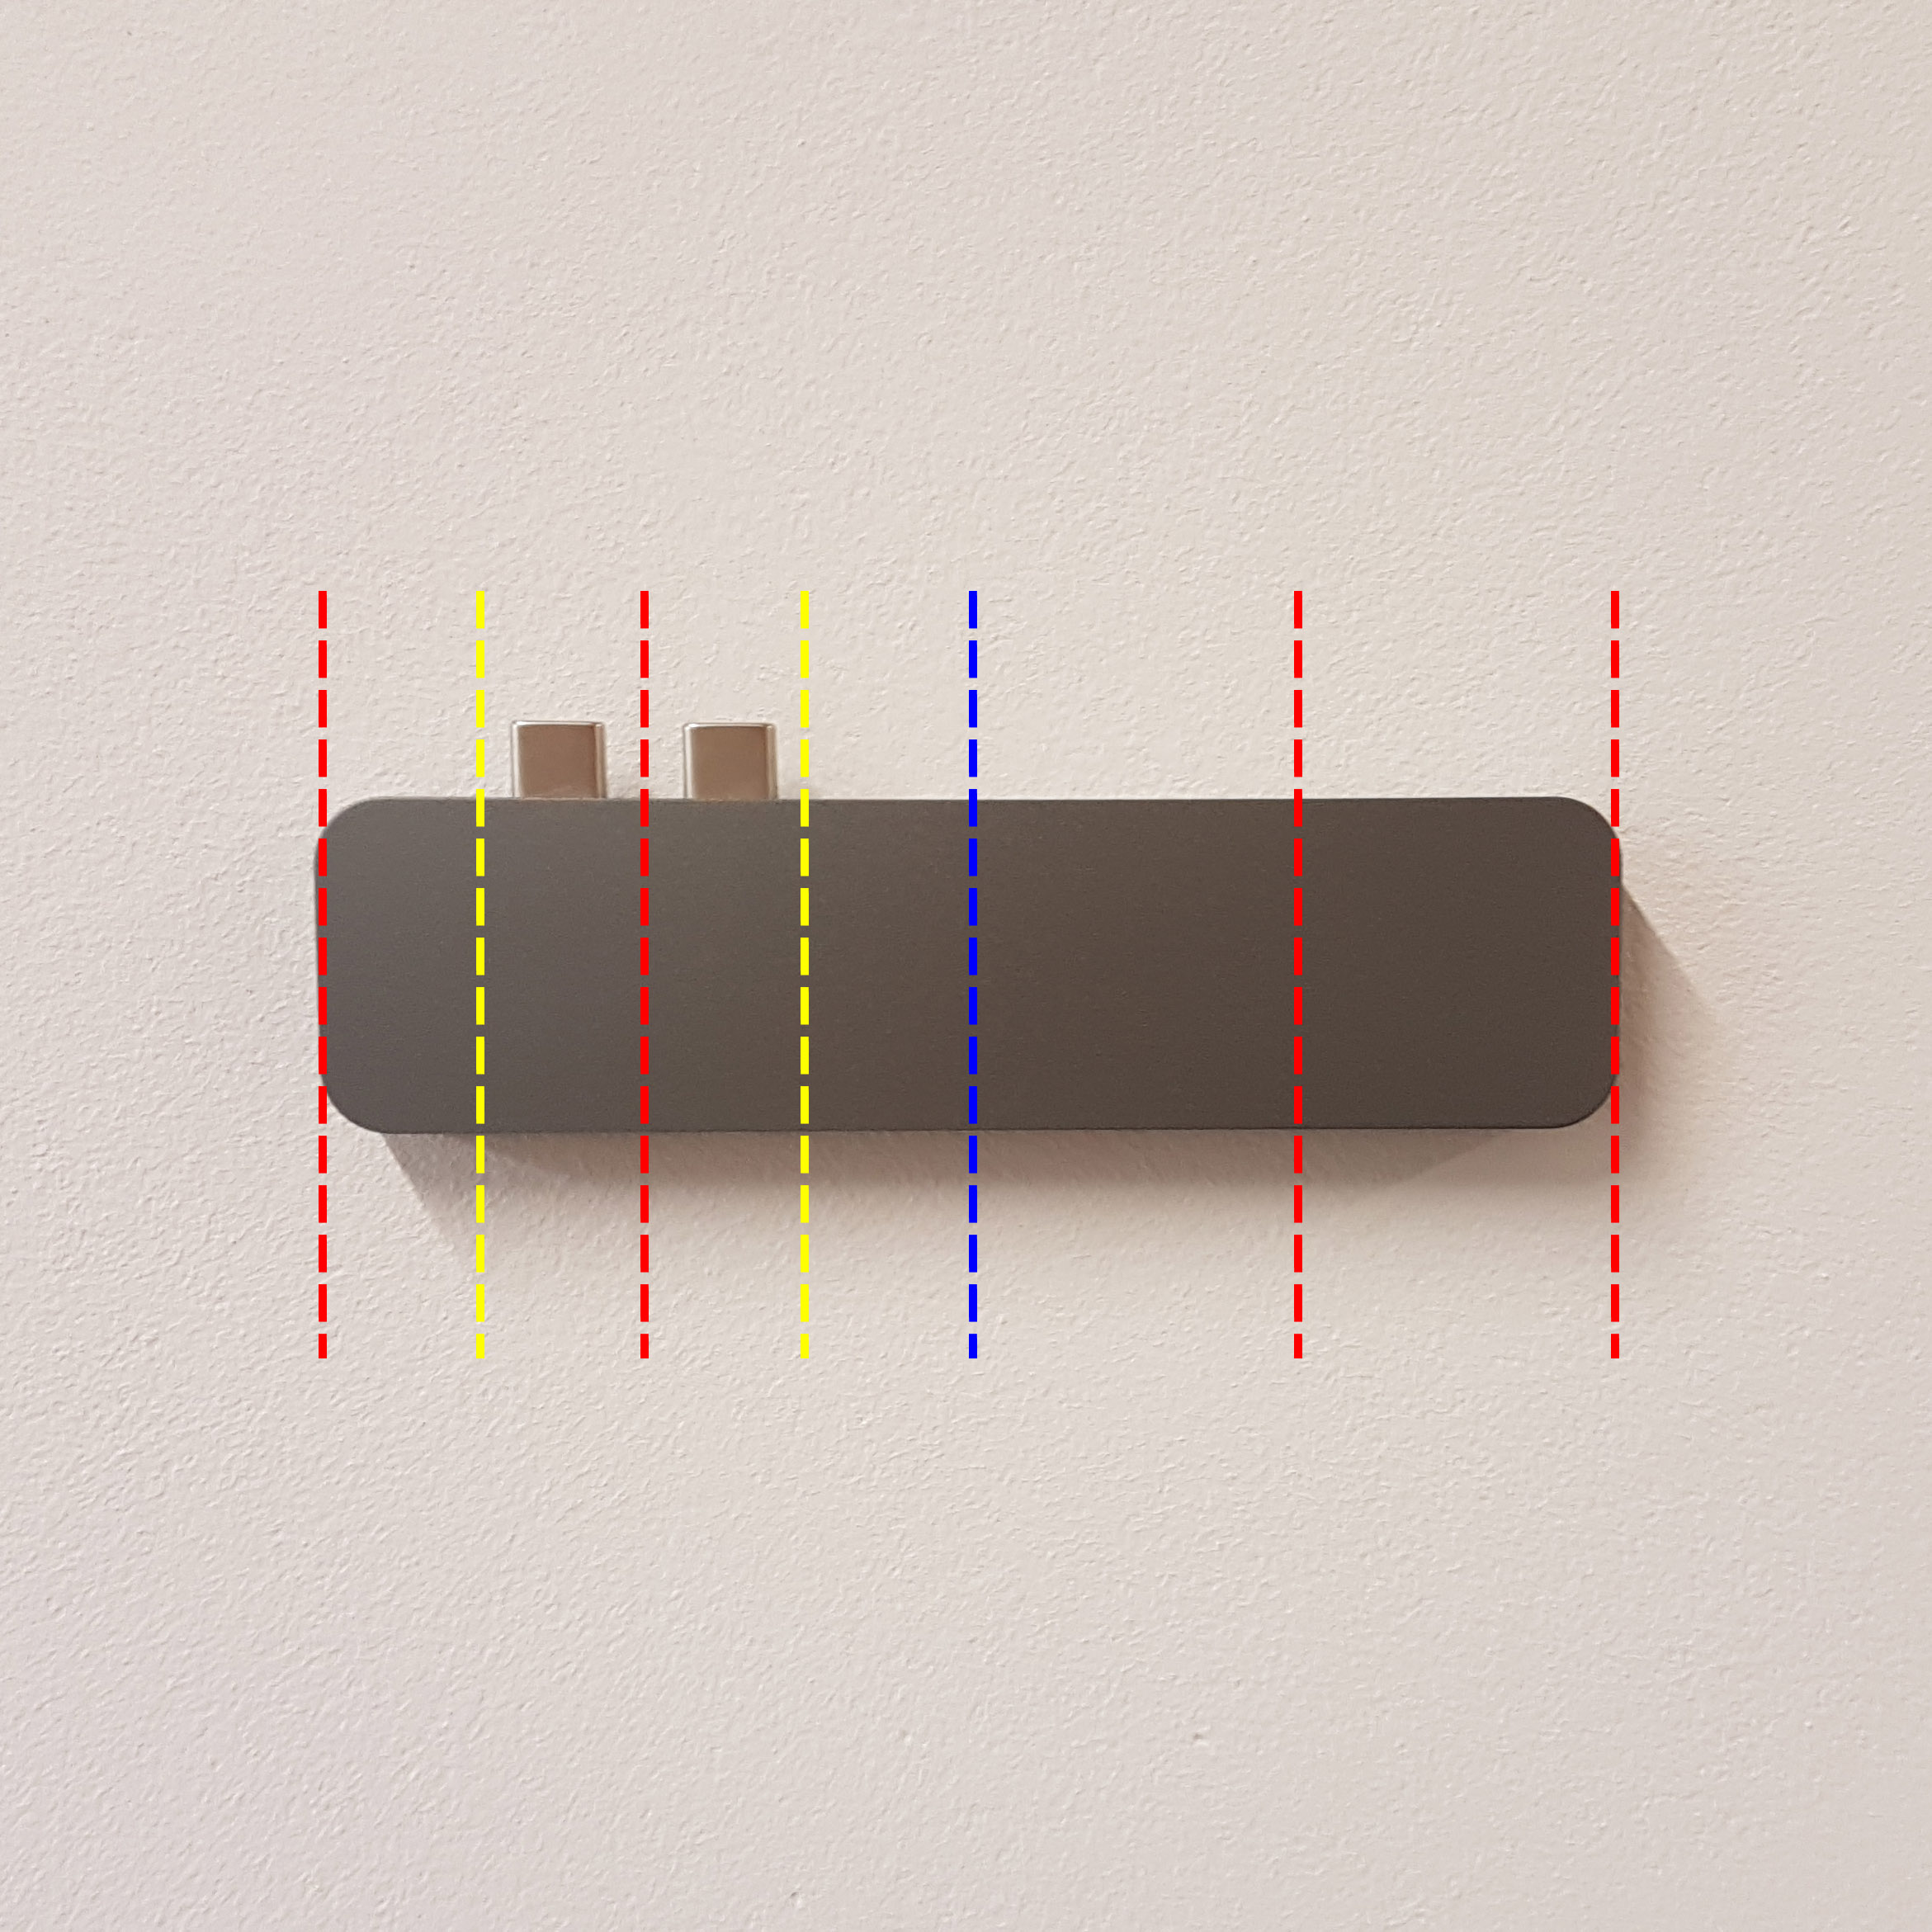
Bedside table clockA small application for the model would be a bedside table clock. The Dominant could be the main clock itself, with all the buttons and the digital face. The Subdominant, supported by the Subordinate can be a nightlight, activated with a button.
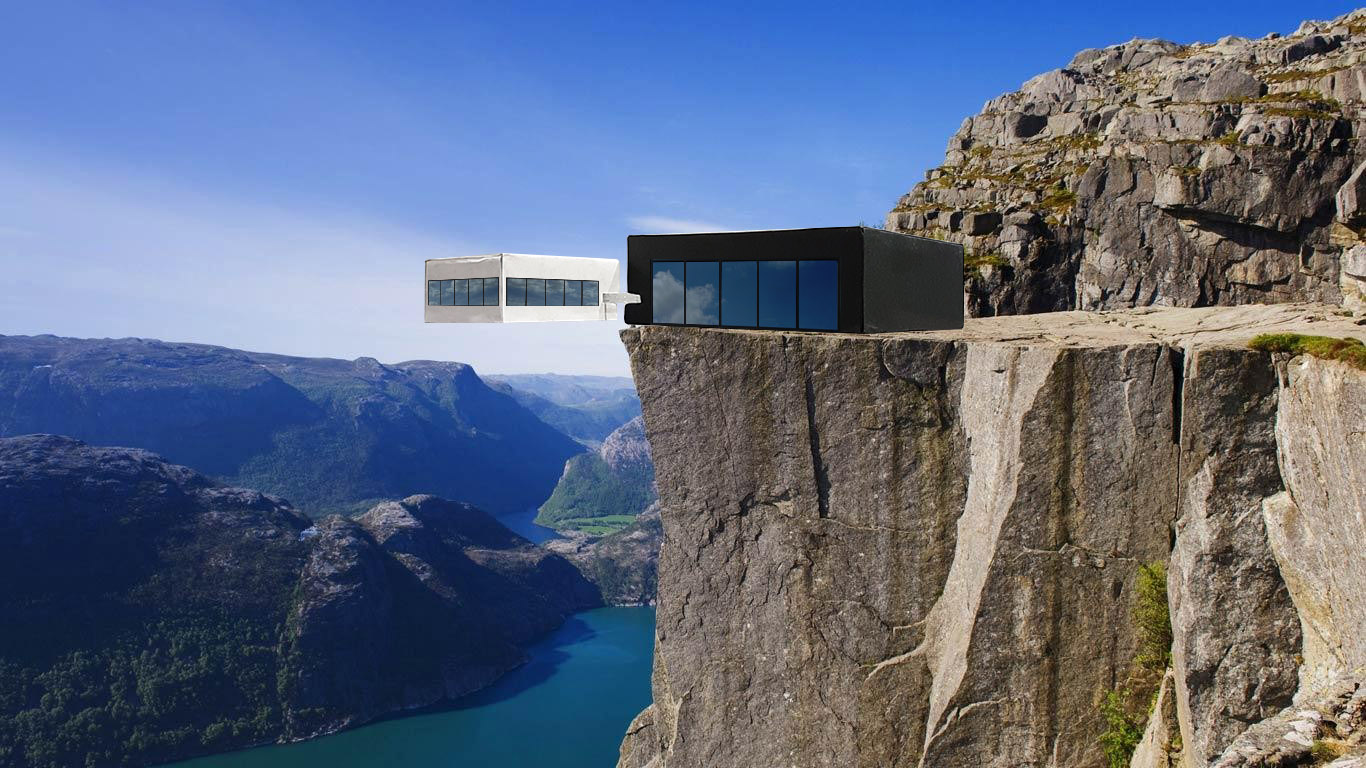
Observation Deck
A large application for the final model could be an observational deck. It could be located at a cliff, with the Dominant being the main entrance and the main center of the attraction. While the Subdominant, hanging over the cliff edge by the Subordinate, will be the observation deck itself, creating a thrilling 360 degree view of the area.