
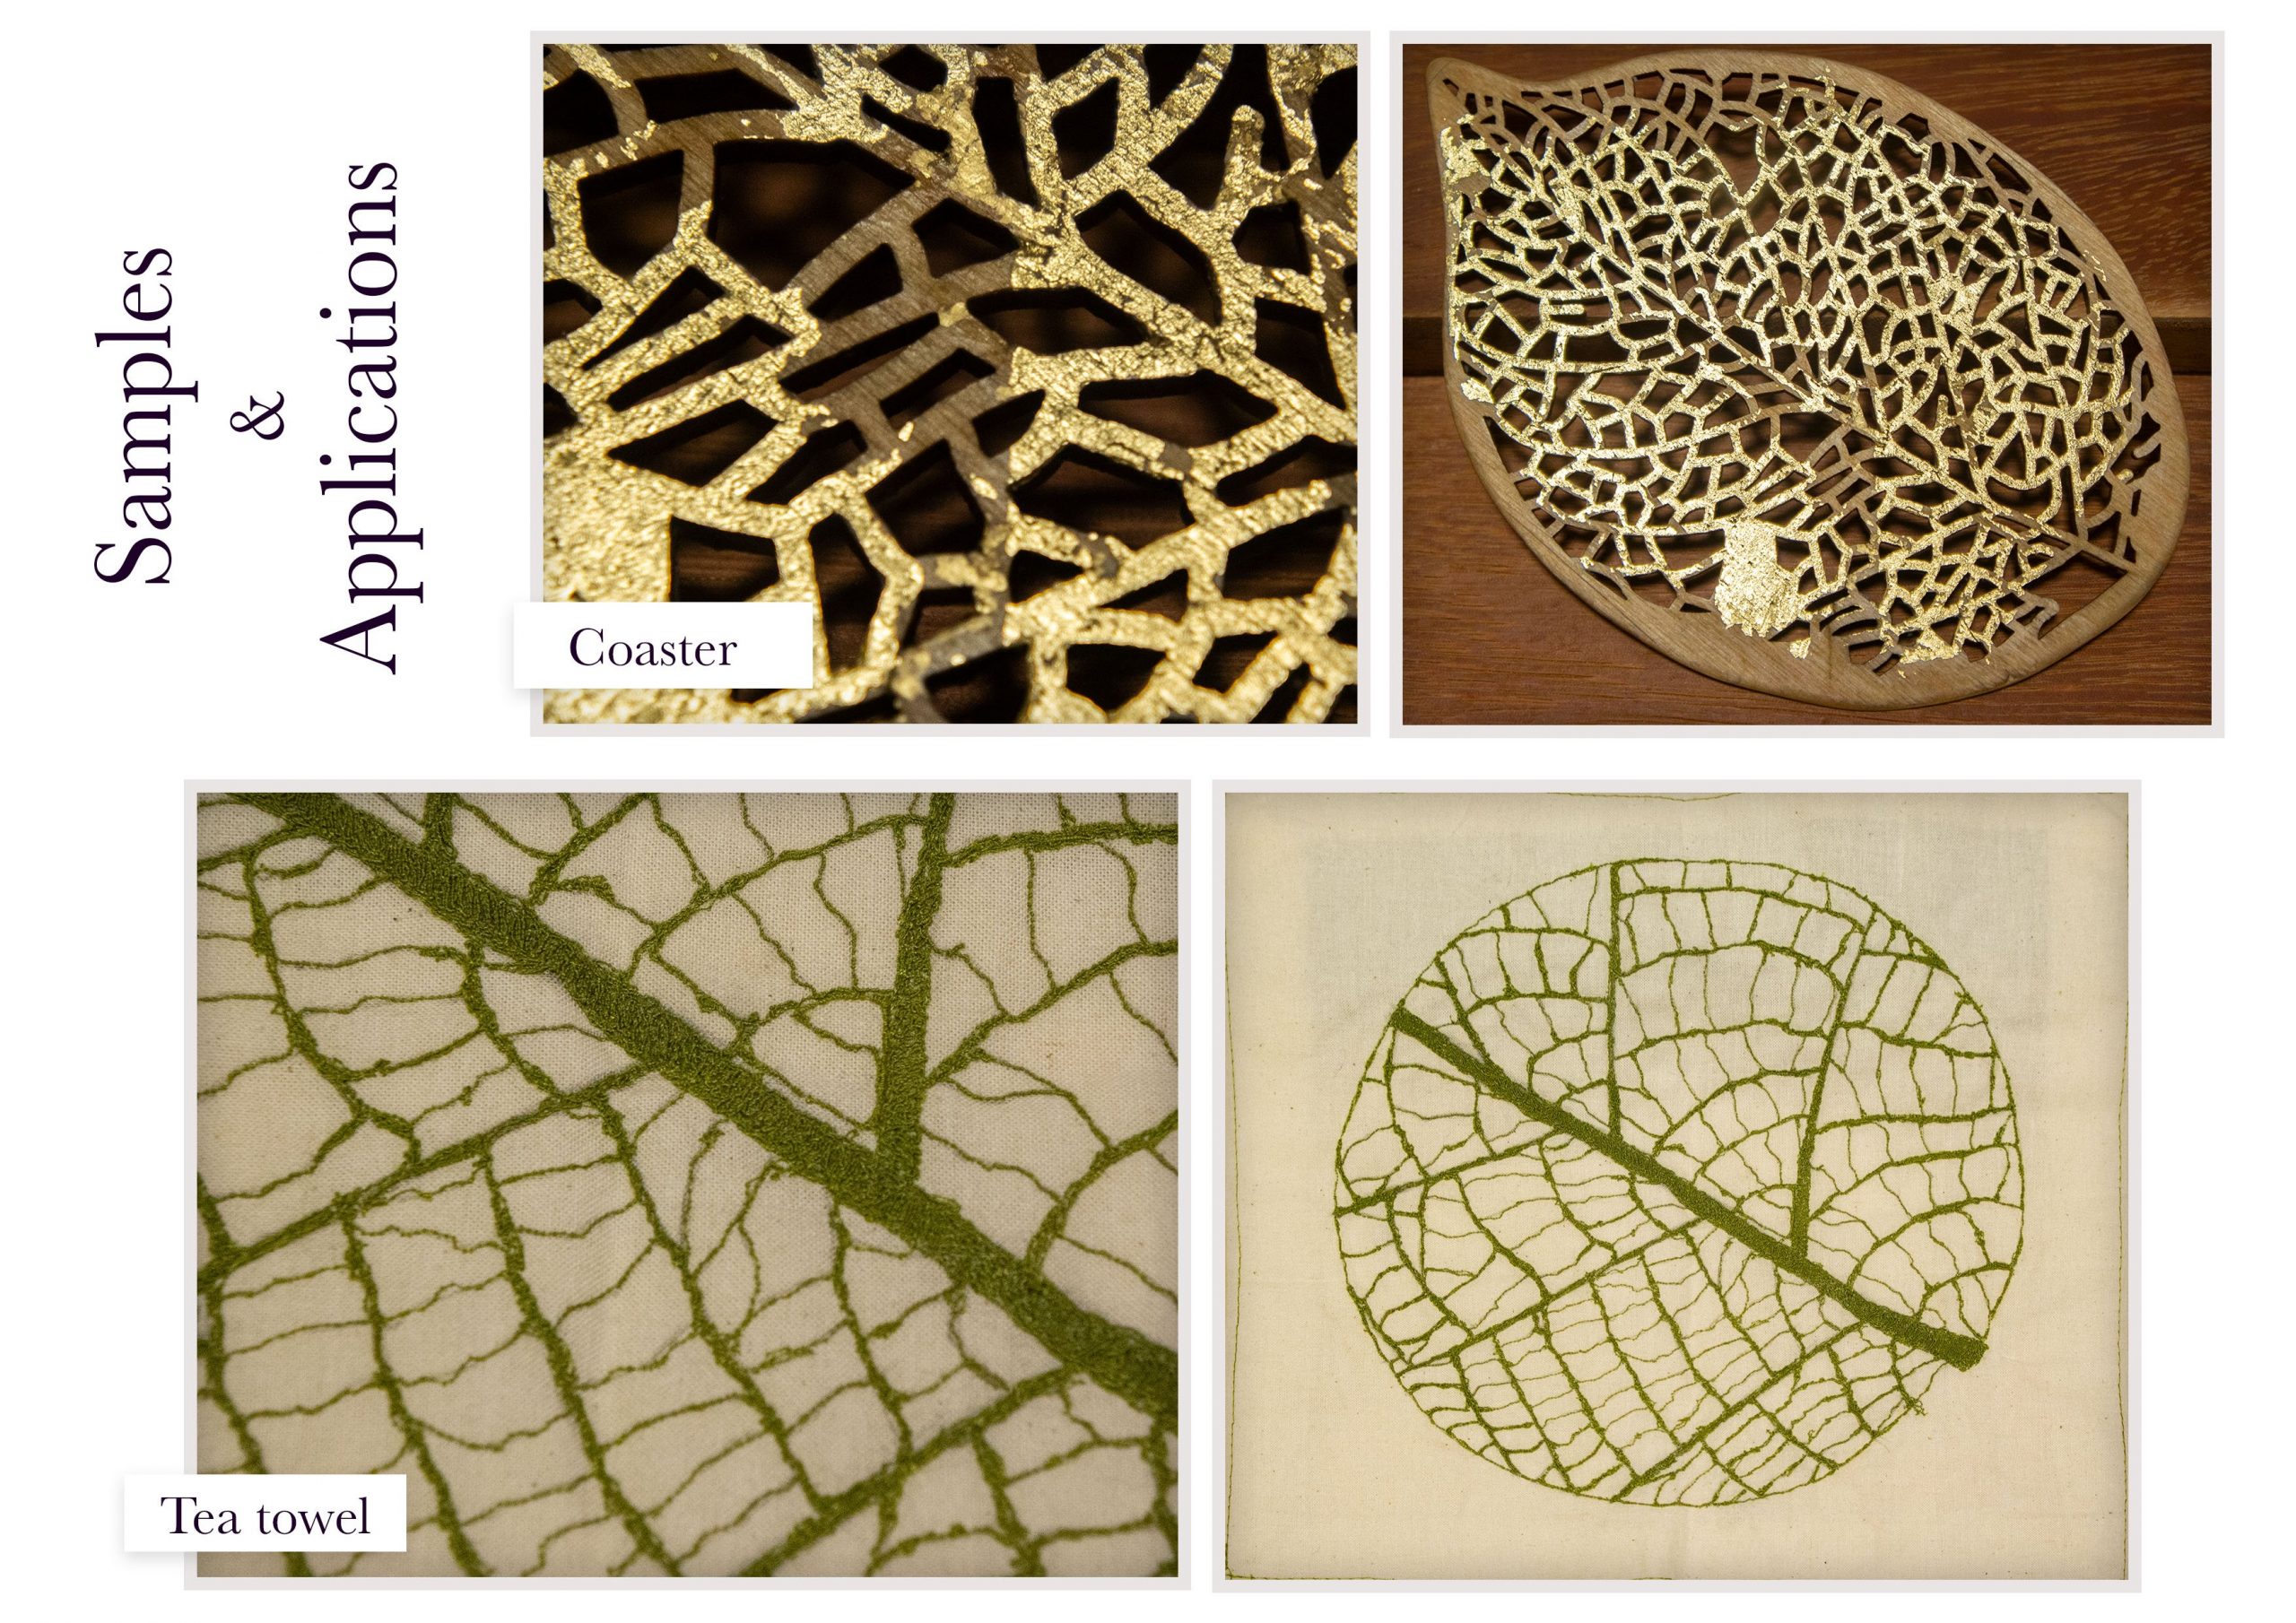
A picnic mat that keeps track of how many people is within the mat, and shows green when max capacity hasn’t been reached, and blue otherwise. The entrance also prevents entry after max capacity is reached.
How to book your equipment.
Pls check in your 3 motors. For non-ADM students pls approach me, I will do this for you.
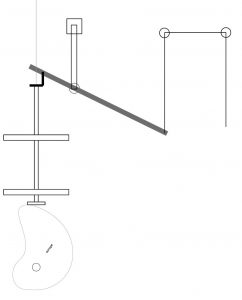
Sketches 1A
Sketch 1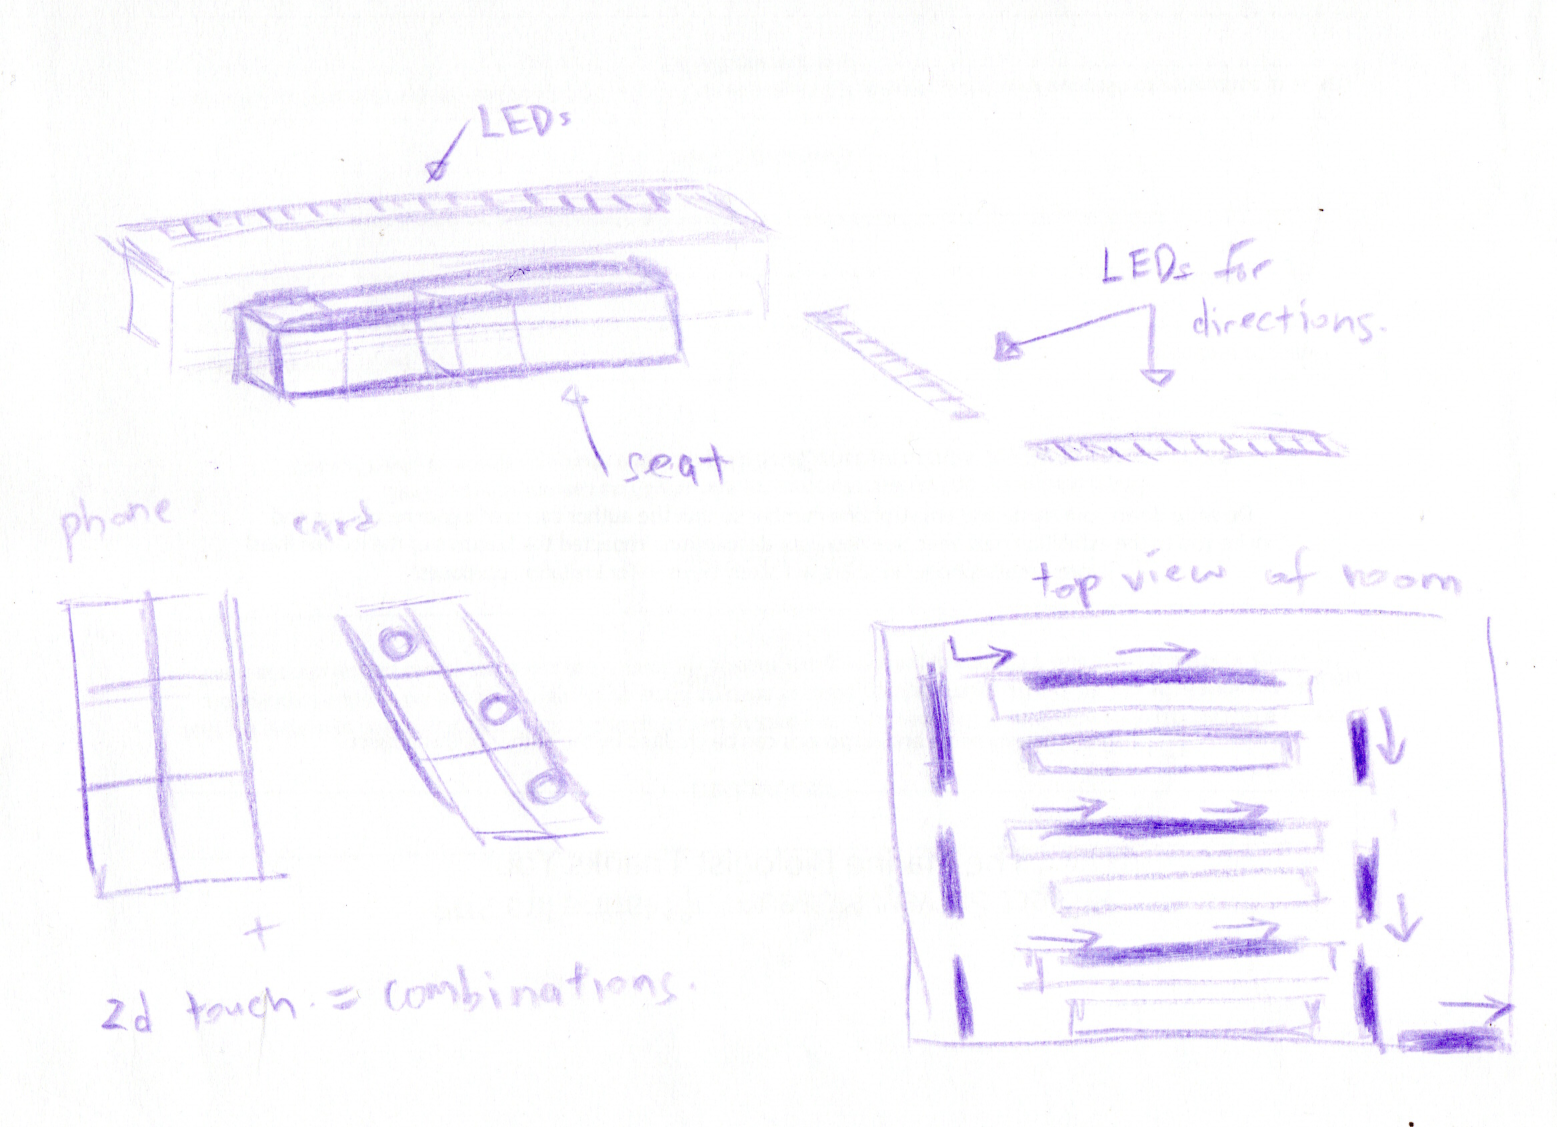
Use custom zigsim touch cards for safe entry to automatically light up the correct seats . After seated, customers can use the provided phone and corresponding touch cards to make different requests:
- like praise the chef for food
- ask for table service
- for bill etc
when requests are made, the lights will turn to different colour combinations so that waiters can respond accordingly
led strips on floor can direct customers to enter and exit.
Sketch 2

Roller coasting at home with family and friends. Basically a seat on gyro structure, with ropes for friends to pull. Phone with zigsim positioned around seat area that detects orientation and translates that to corresponding LED strips. LED strips are in chasing lights configuration, implying speed and movement. Add-ons would be a mounted fan in front of user
Sketch 3
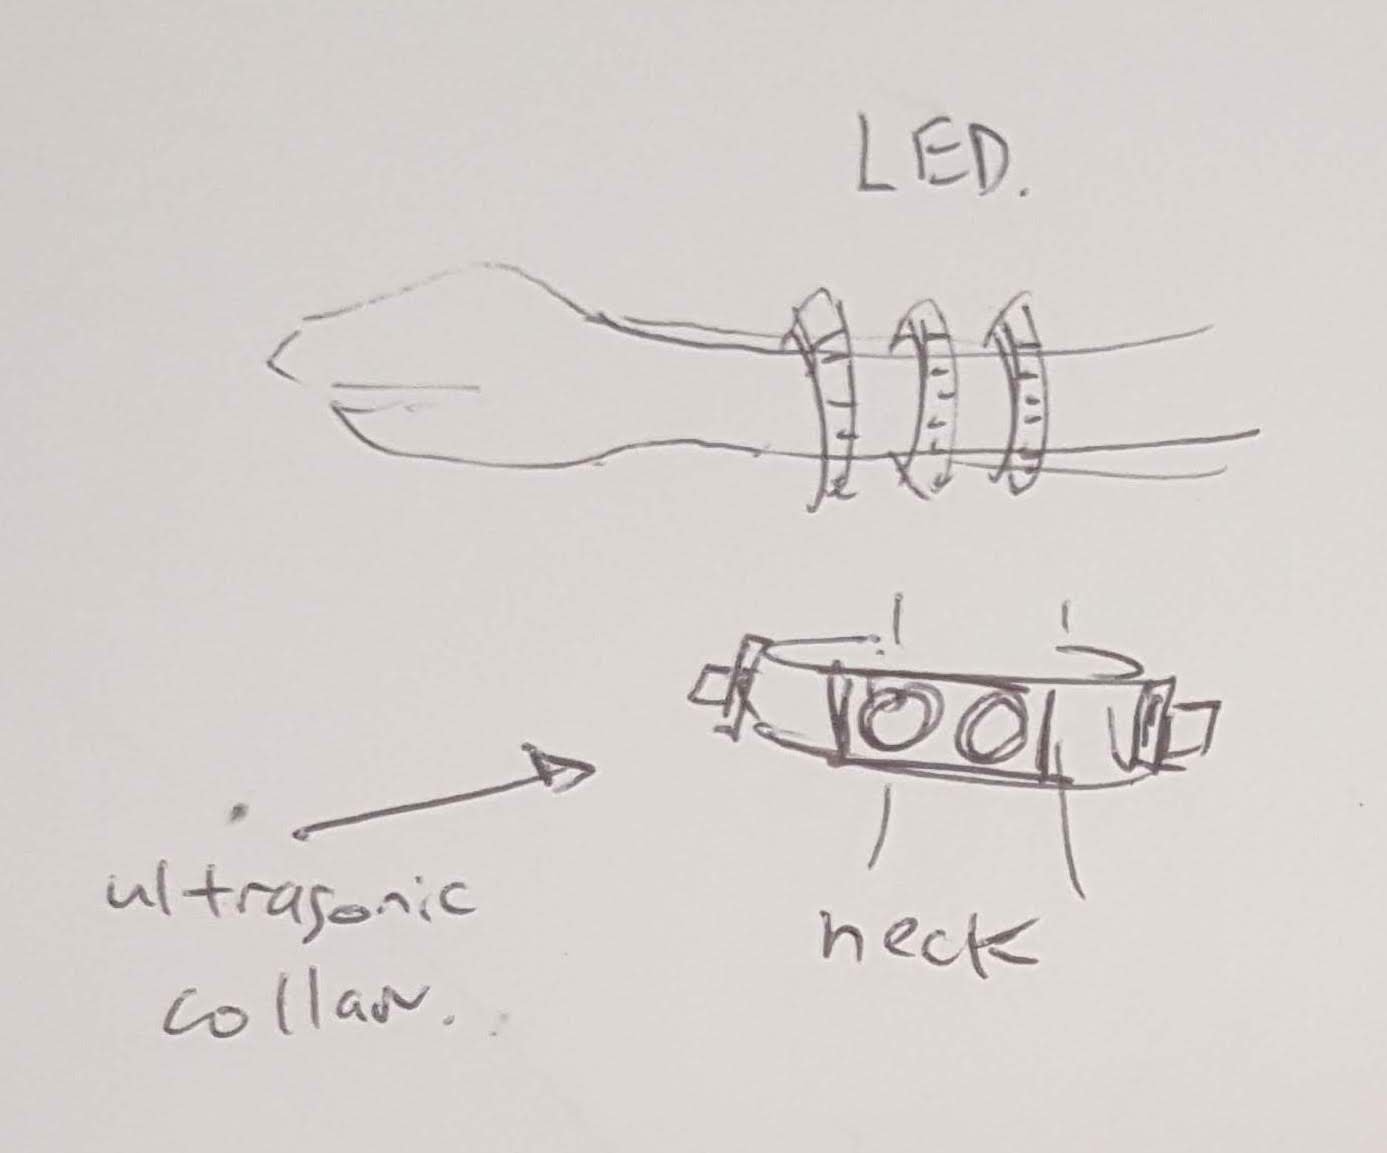
Neck gadget senses surrounding crowd concentration, and if its not ideal, bracelet will start pulsating in red, else green or blue.
Sketch 4
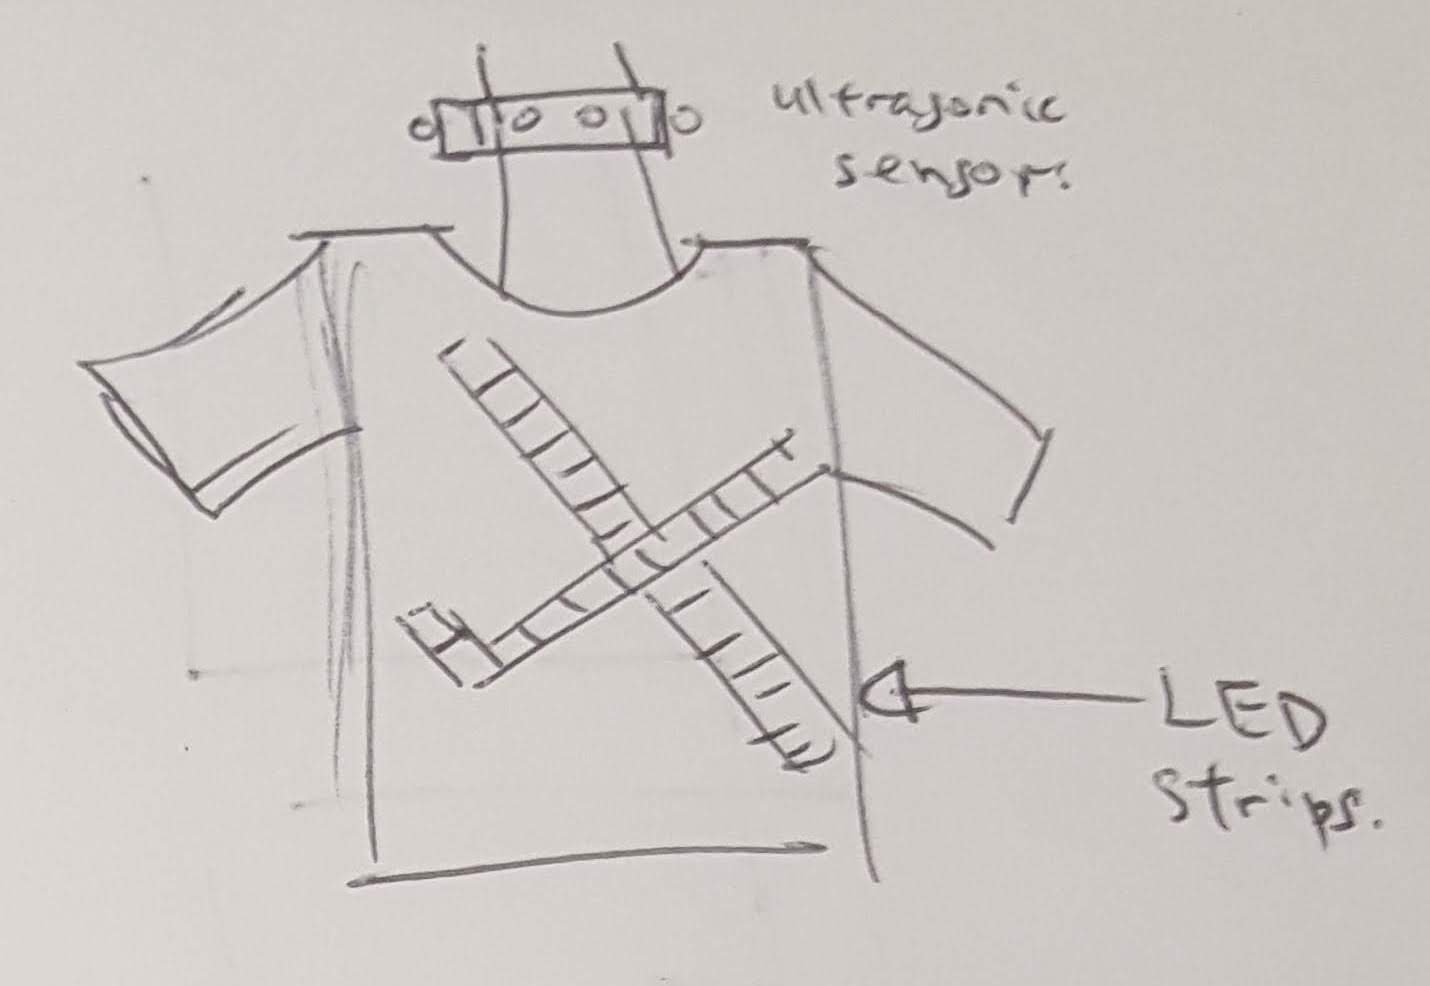
Same neck gadget, but this time output is to a shirt with LED signs, to ward people off.
Sketch 5
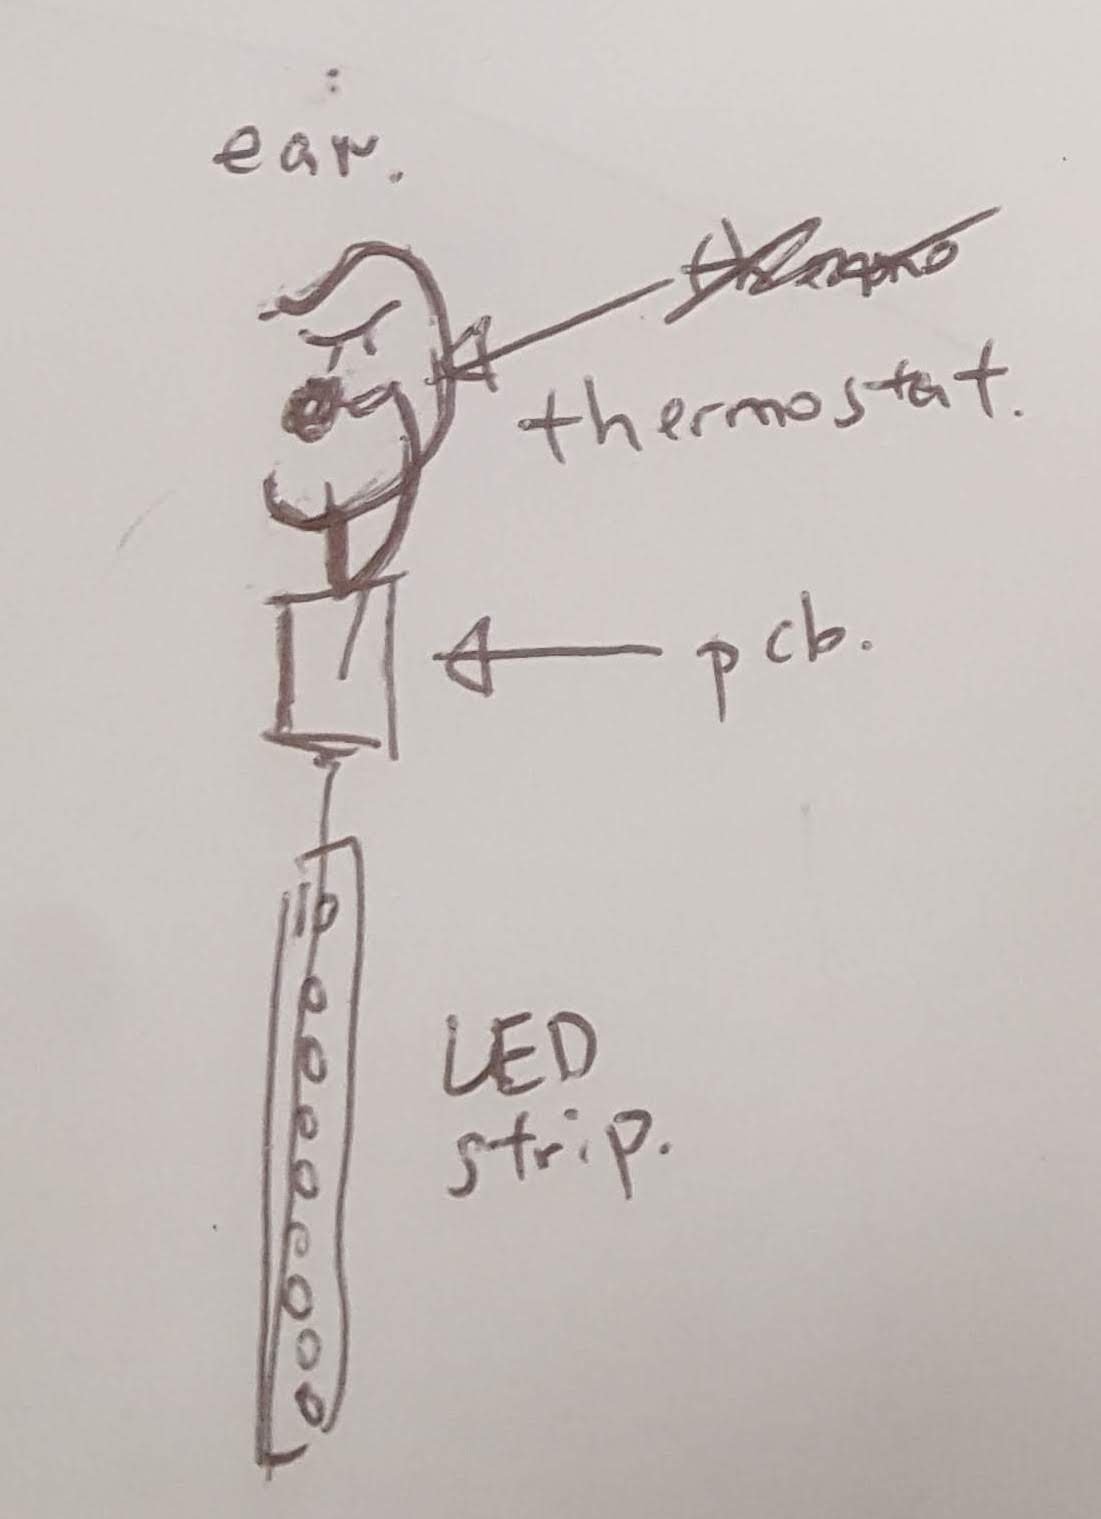 Earring to tell people your temperature, thus serving as a warning/reassurance to others. A thermostat is stuck into ear, and LED strip hanging from ear provides color indication of bodily temperature.
Sketch 6
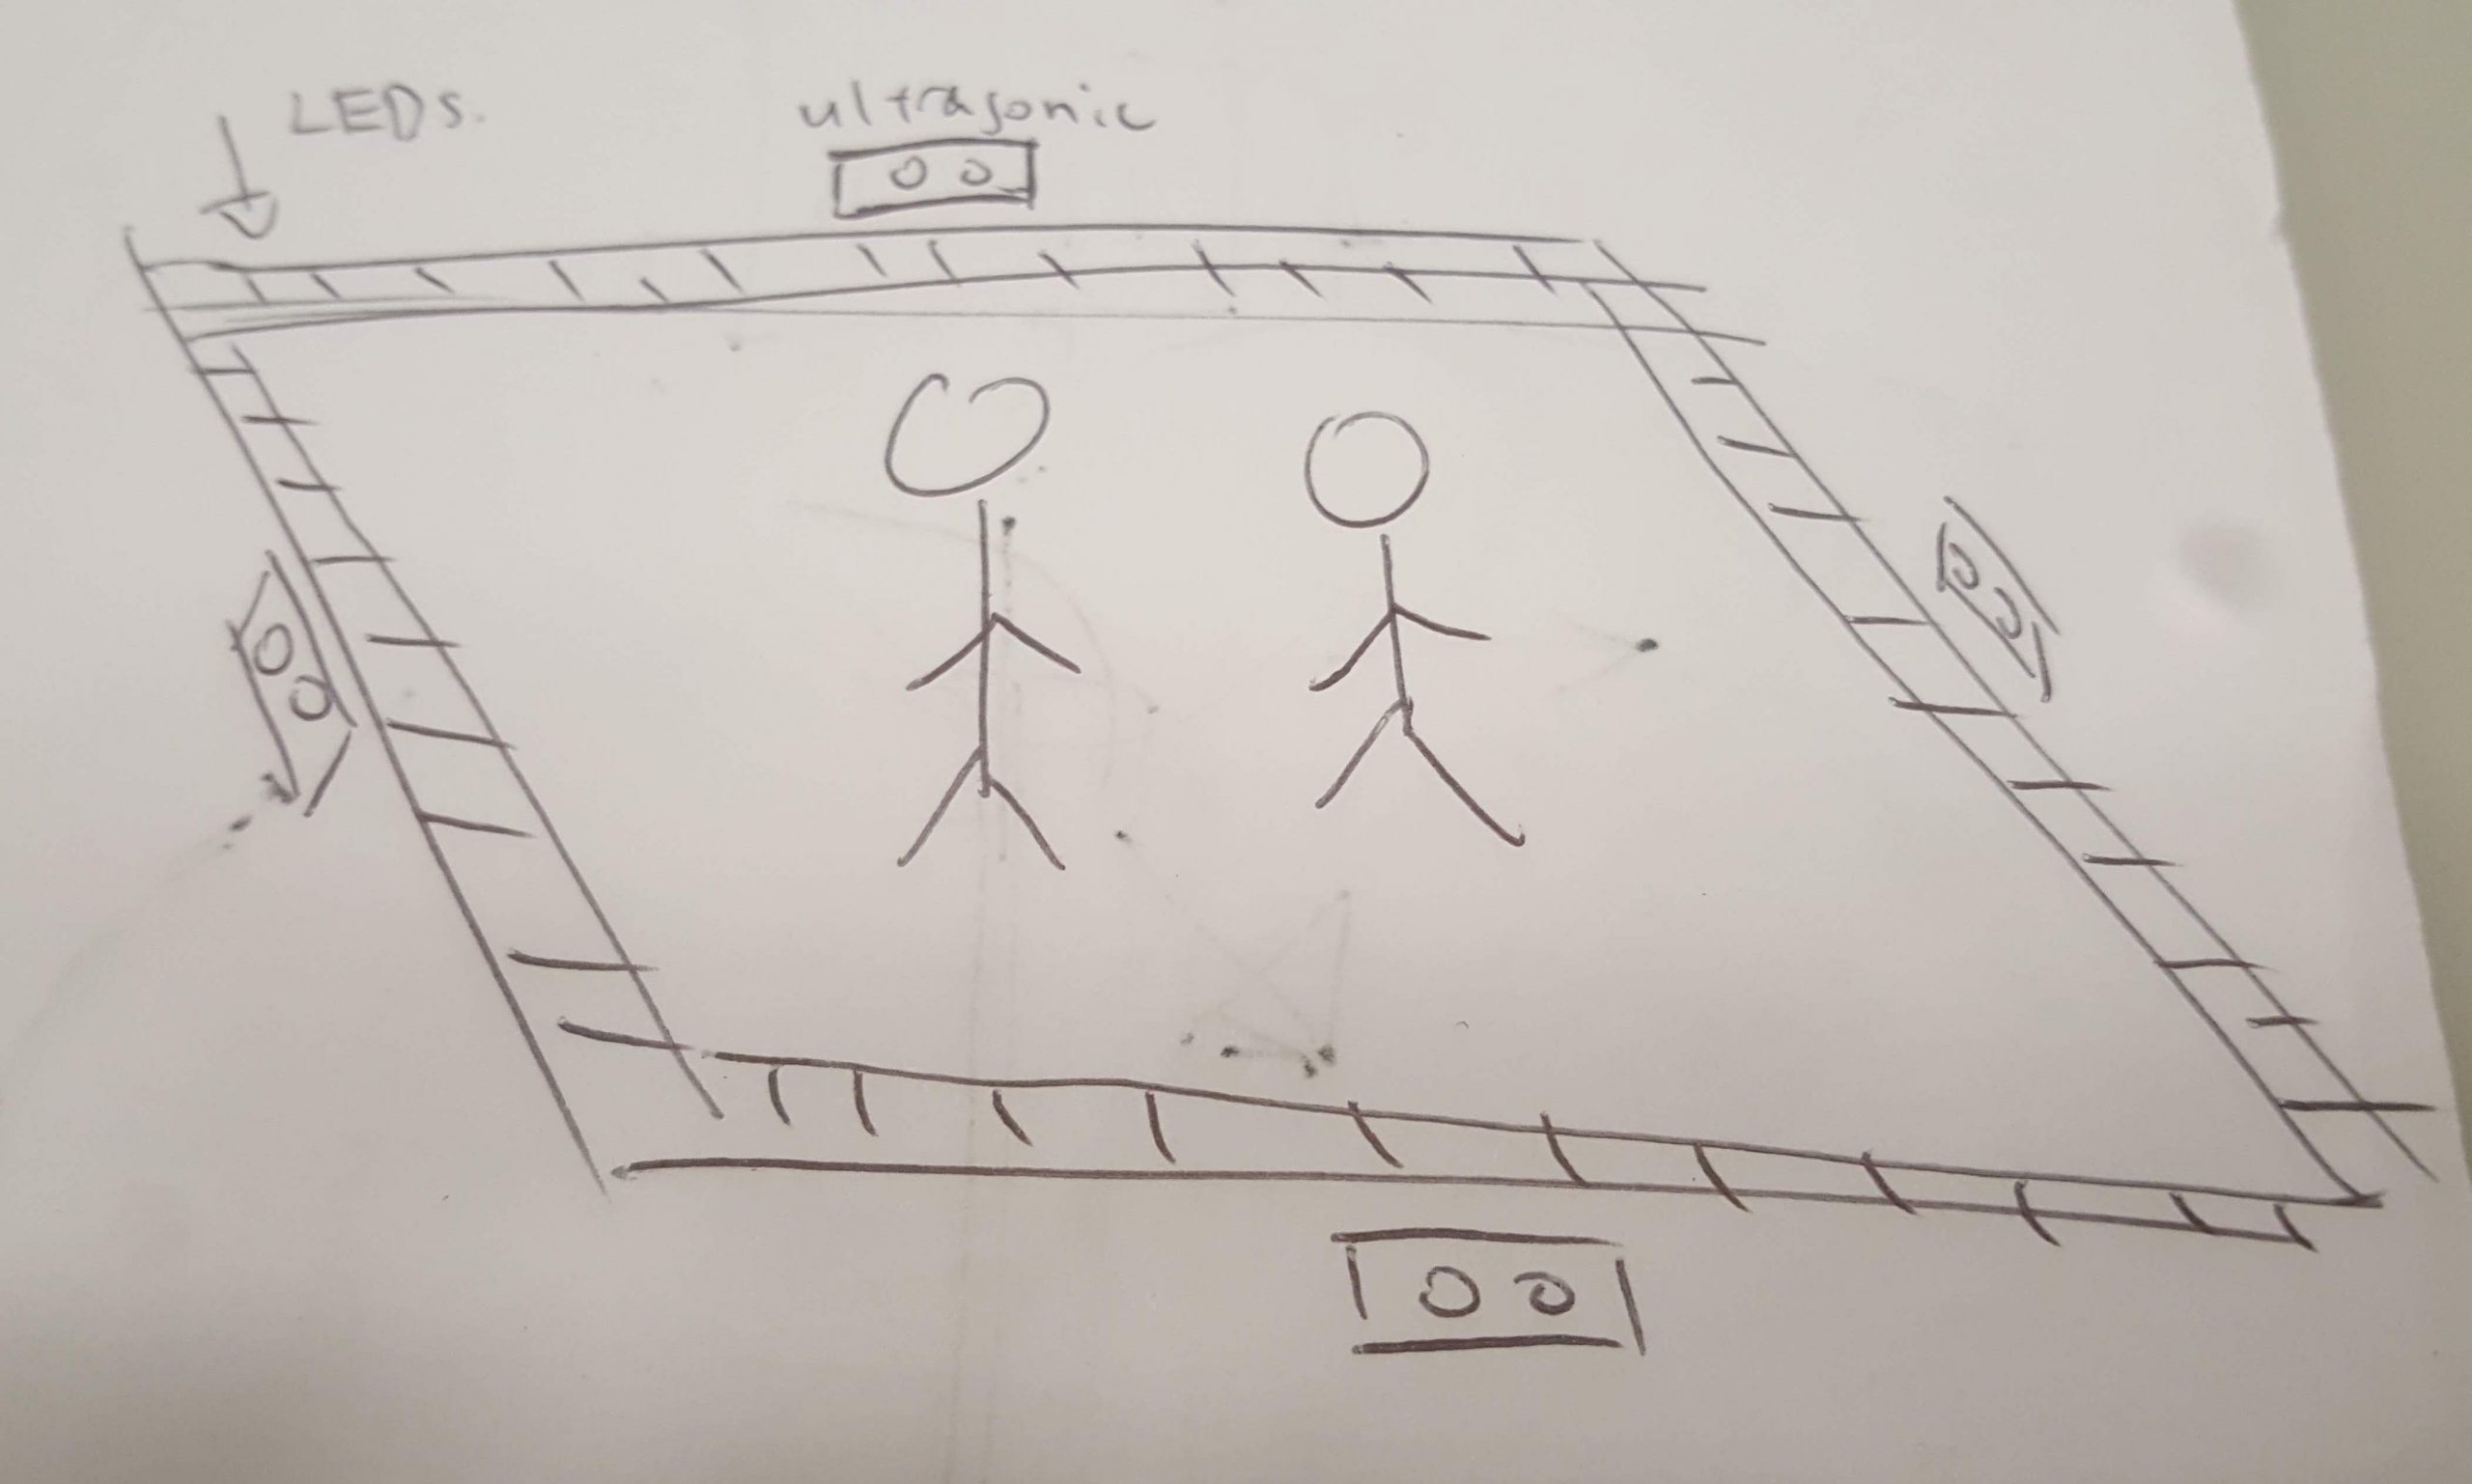
The safe distancing picnic mat. When people approach, the lights surrounding will start to pulsate faster in red, otherwise, it will be yellow and in slow pulses.
Wk10: Latex and resin


SEE: Sem Project
Concept
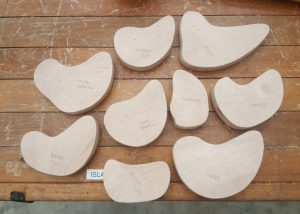
The initial concept started out as a visualisation of data points, namely the increasing mean temperatures of different continents. As I tried to work with these cam shapes, I was unable to figure out a way to make it work with the followers. So the concept was adapted to portray an ‘underwater’ scene instead, with the cams driving the motions of elements like waves, fishing rods, lights and sea creatures.
Process

Main cam and follower section
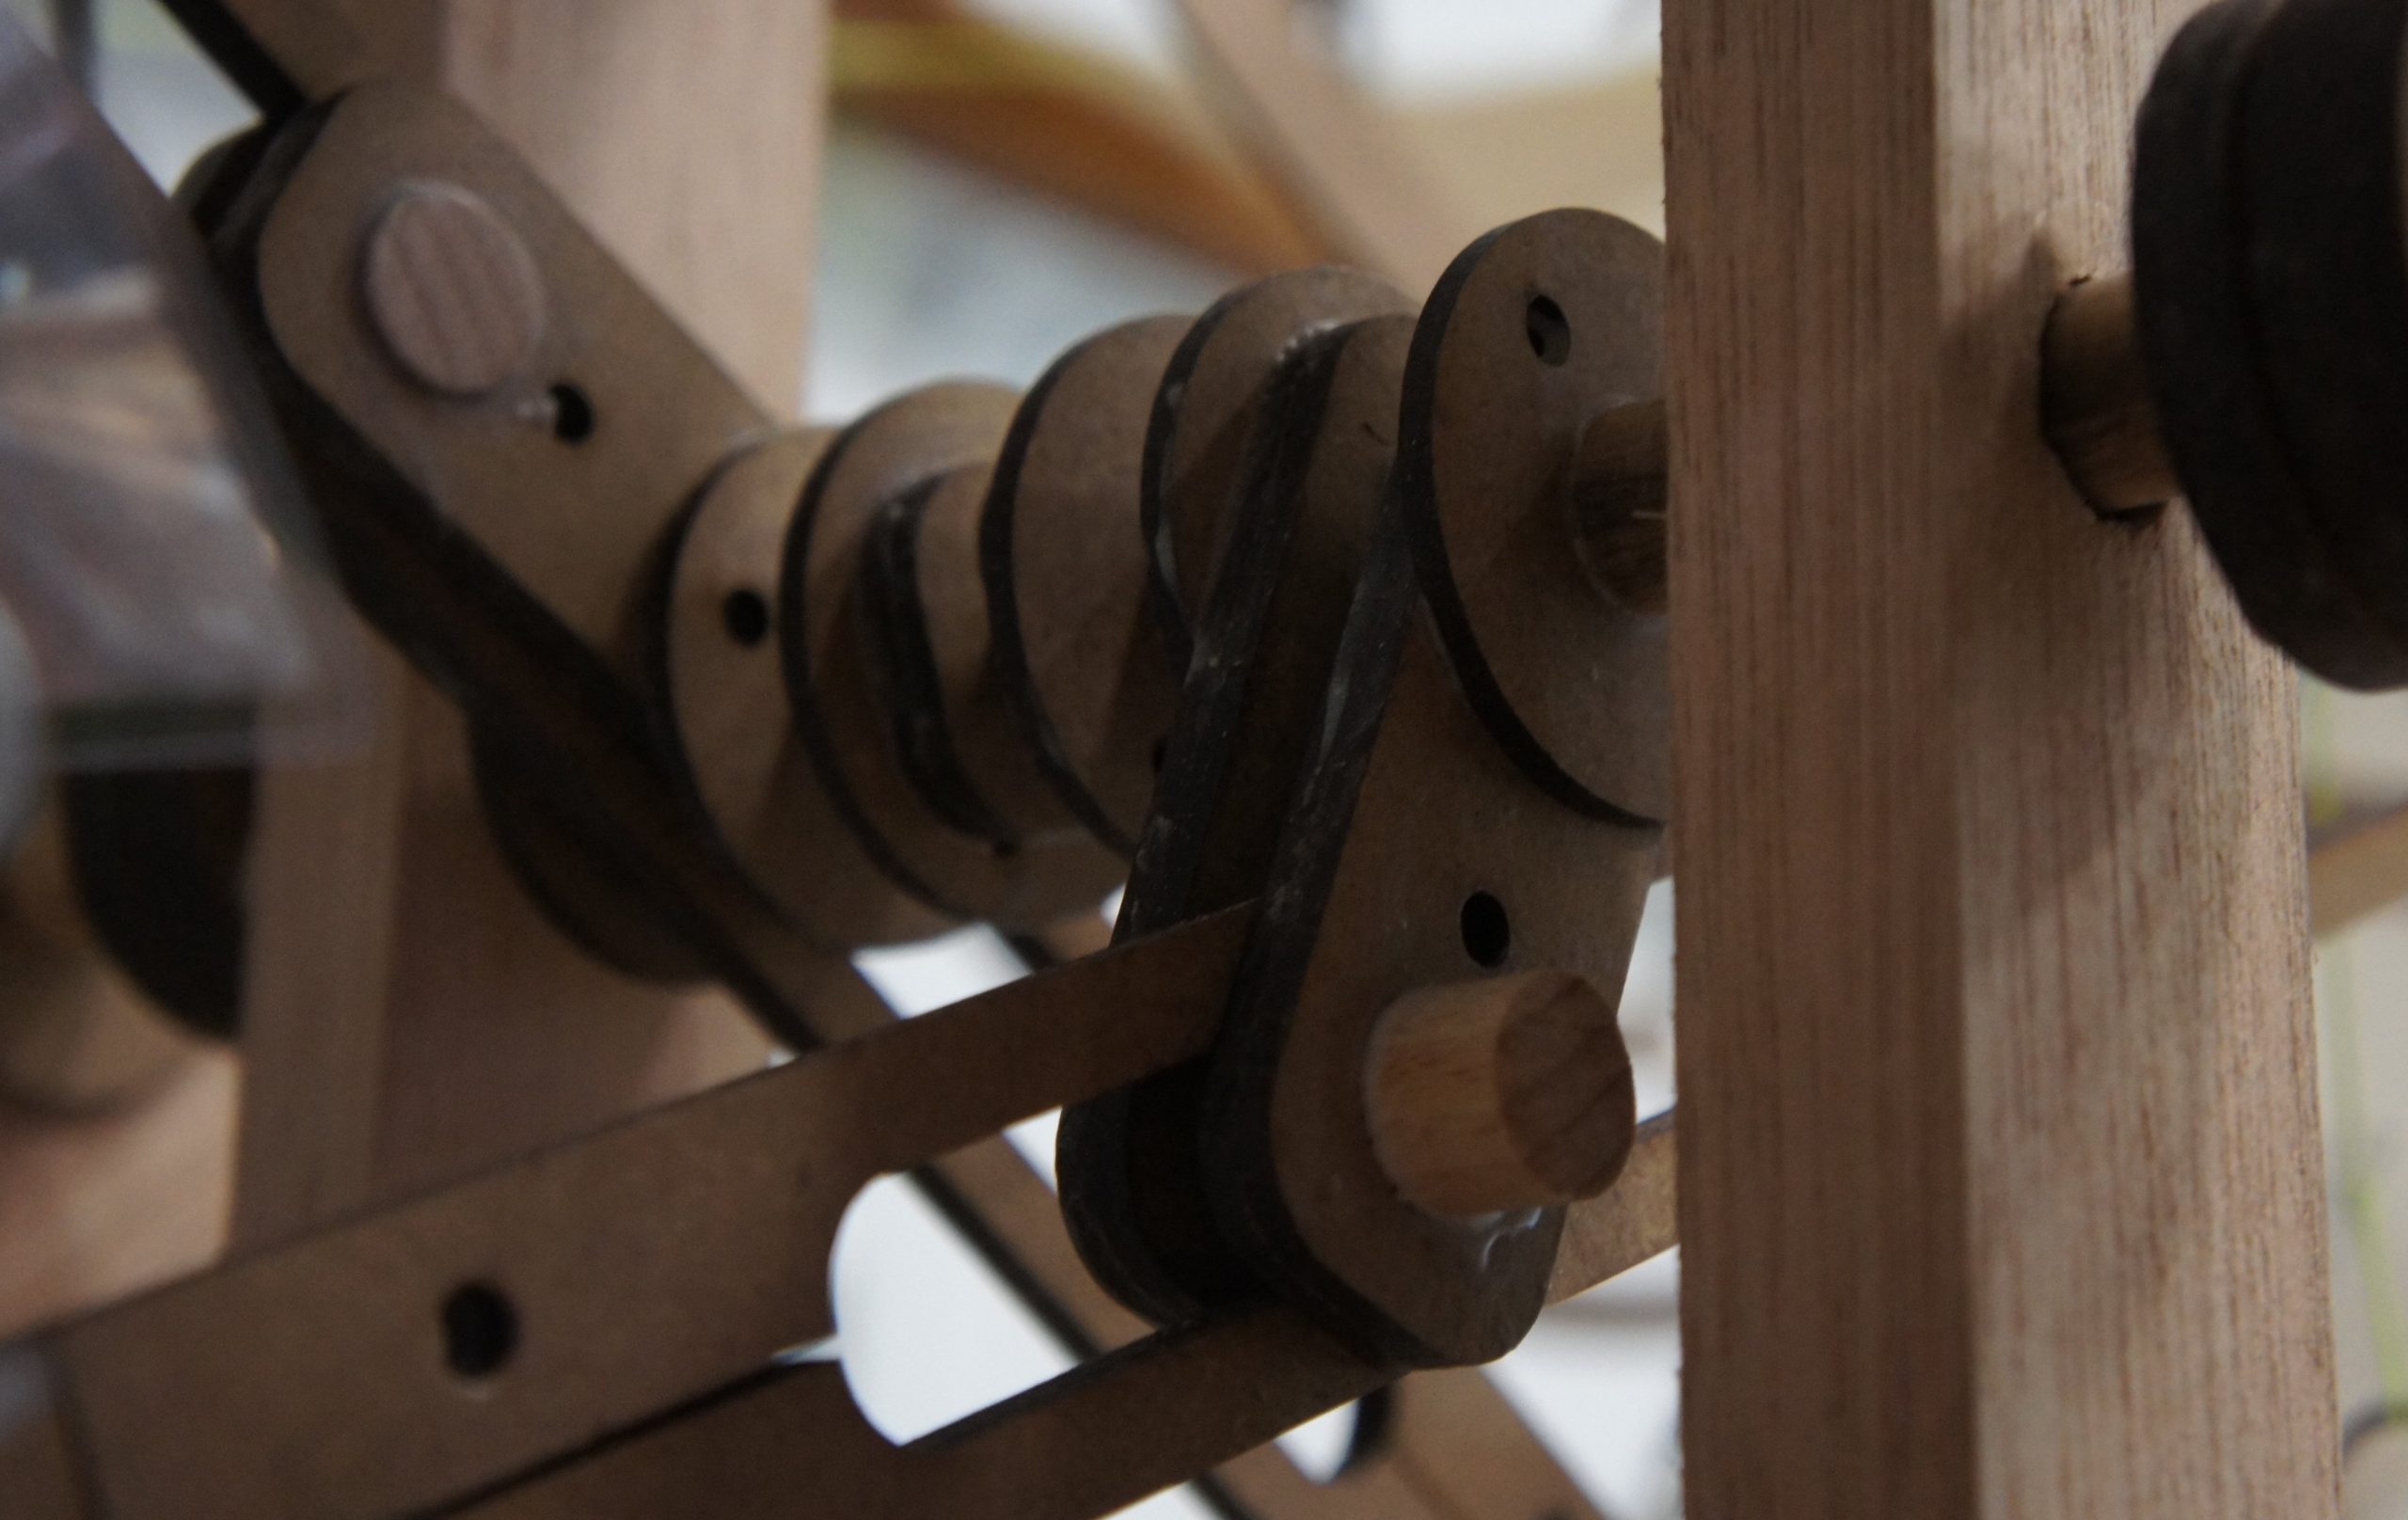
Cam and follower driving fishing rods and lights
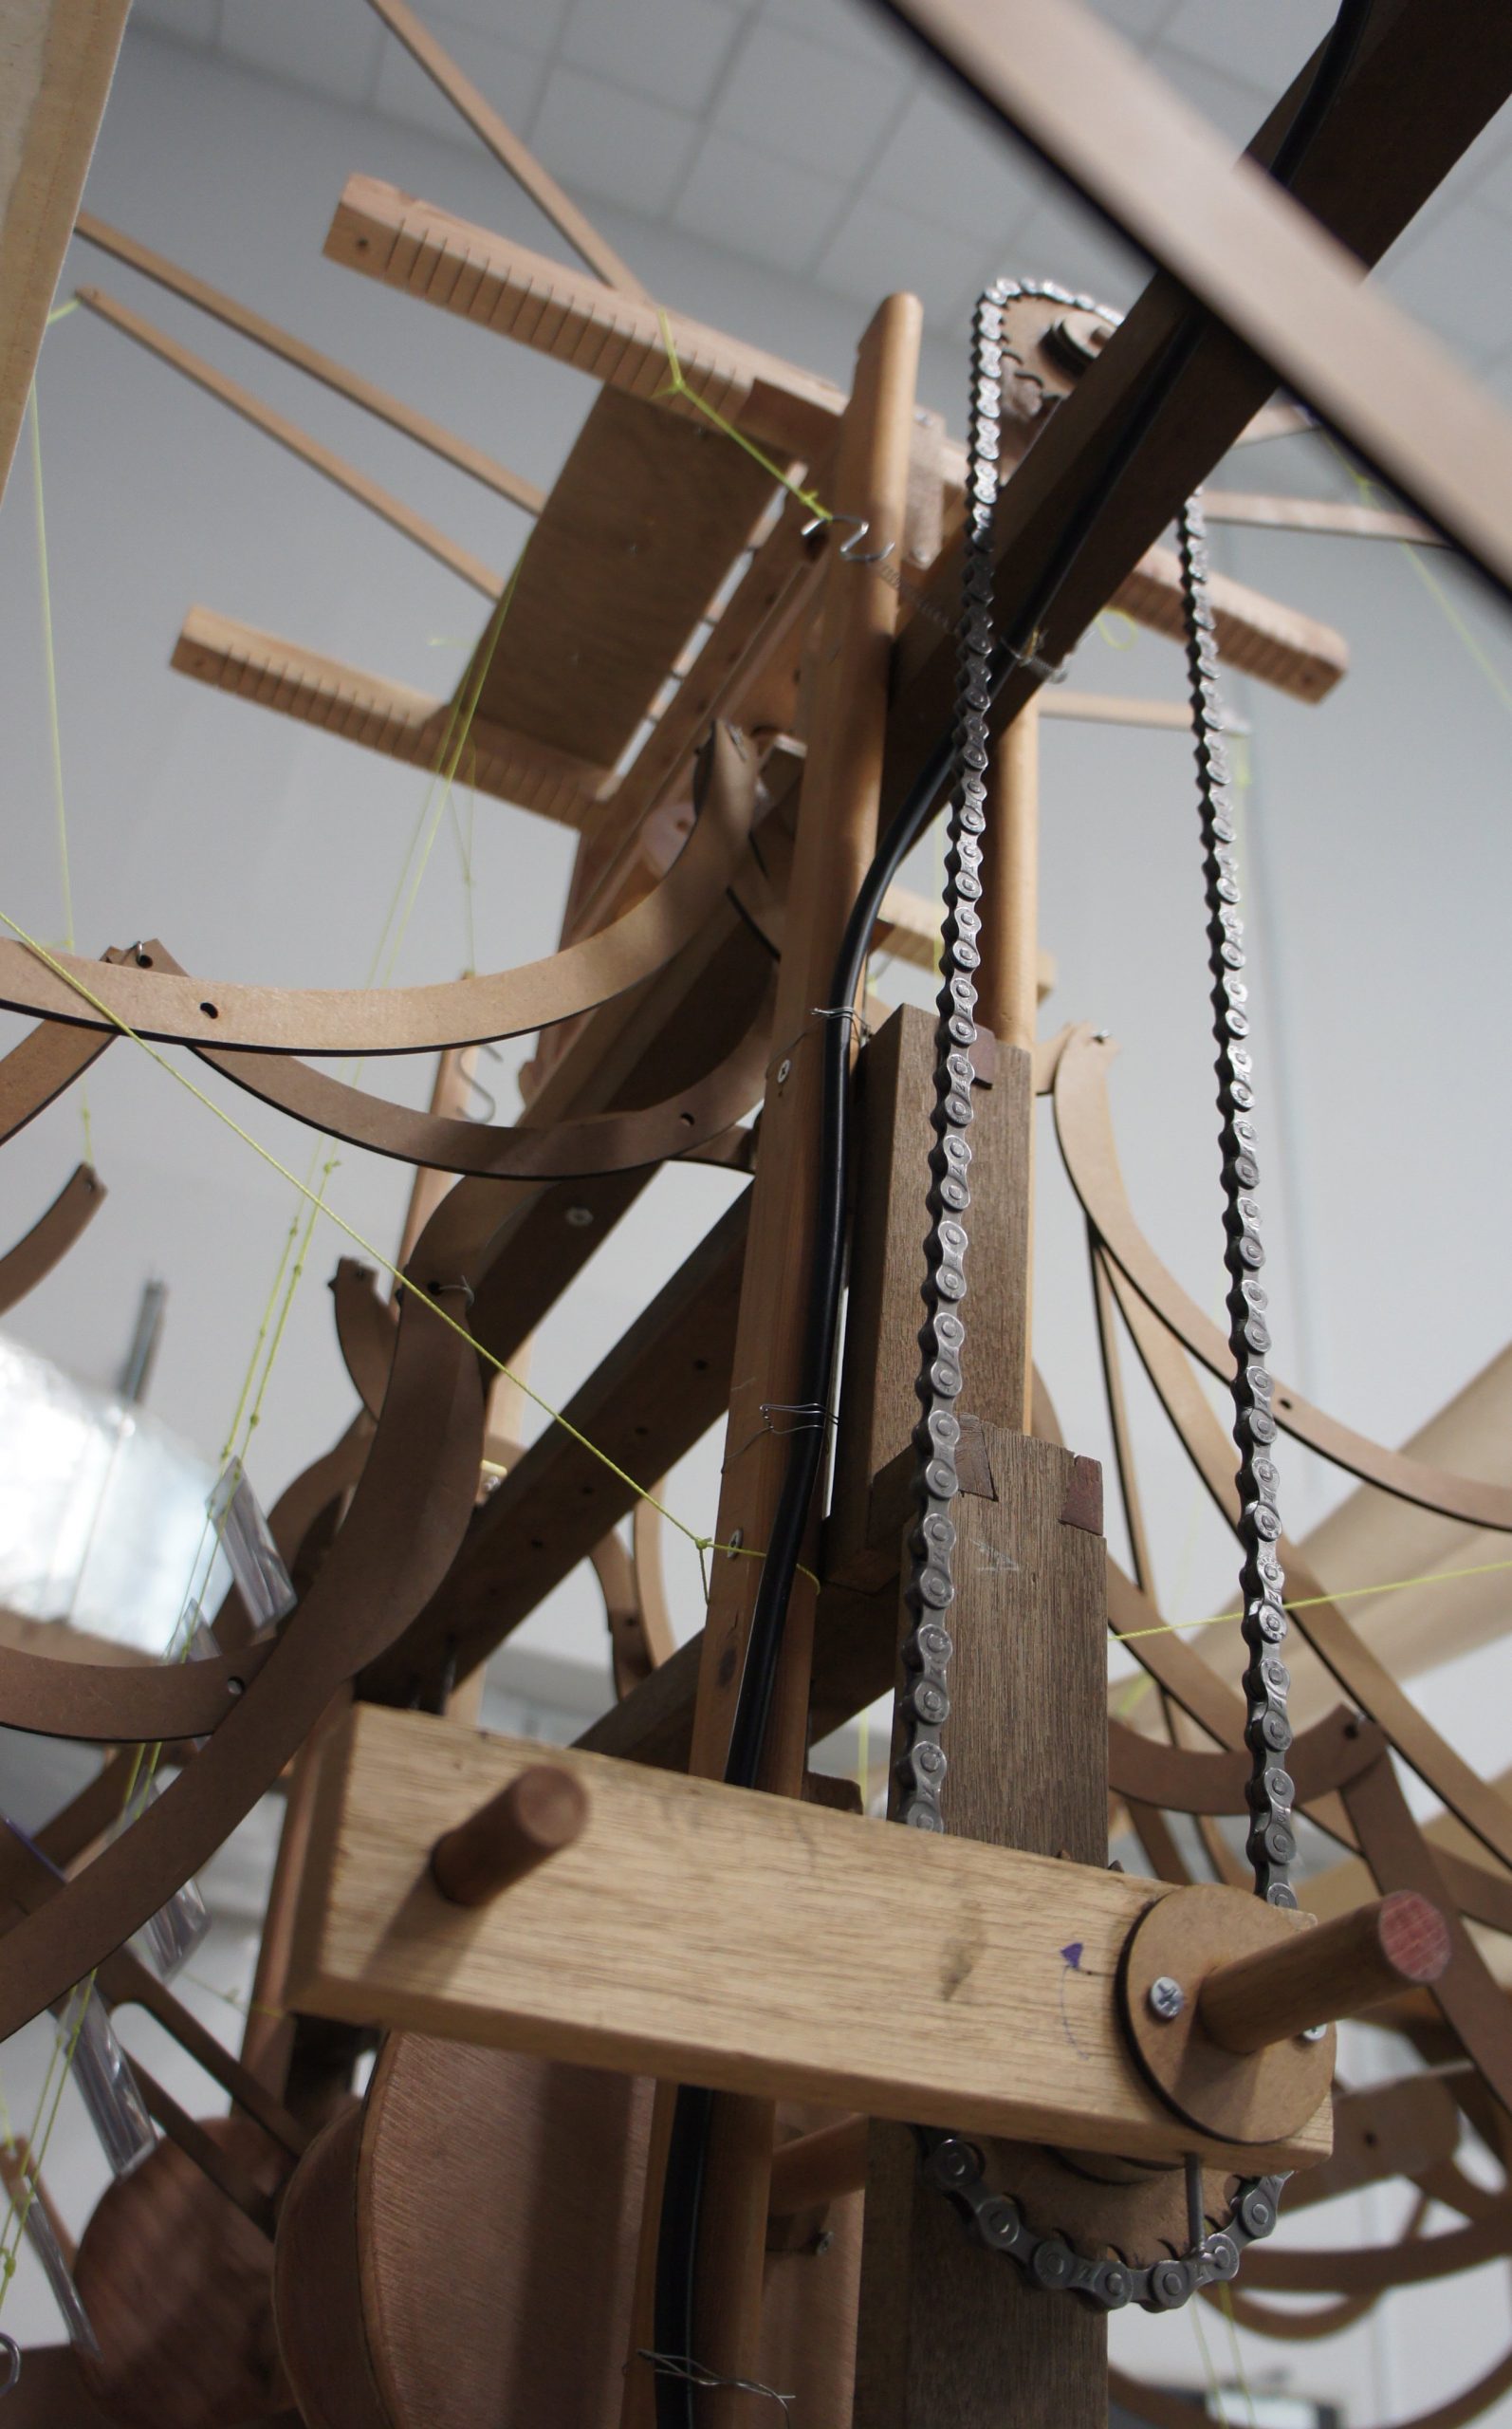
Chain connecting bottom and top mechanisms
Another cam and follower set driving the movement of waves and sea creatures
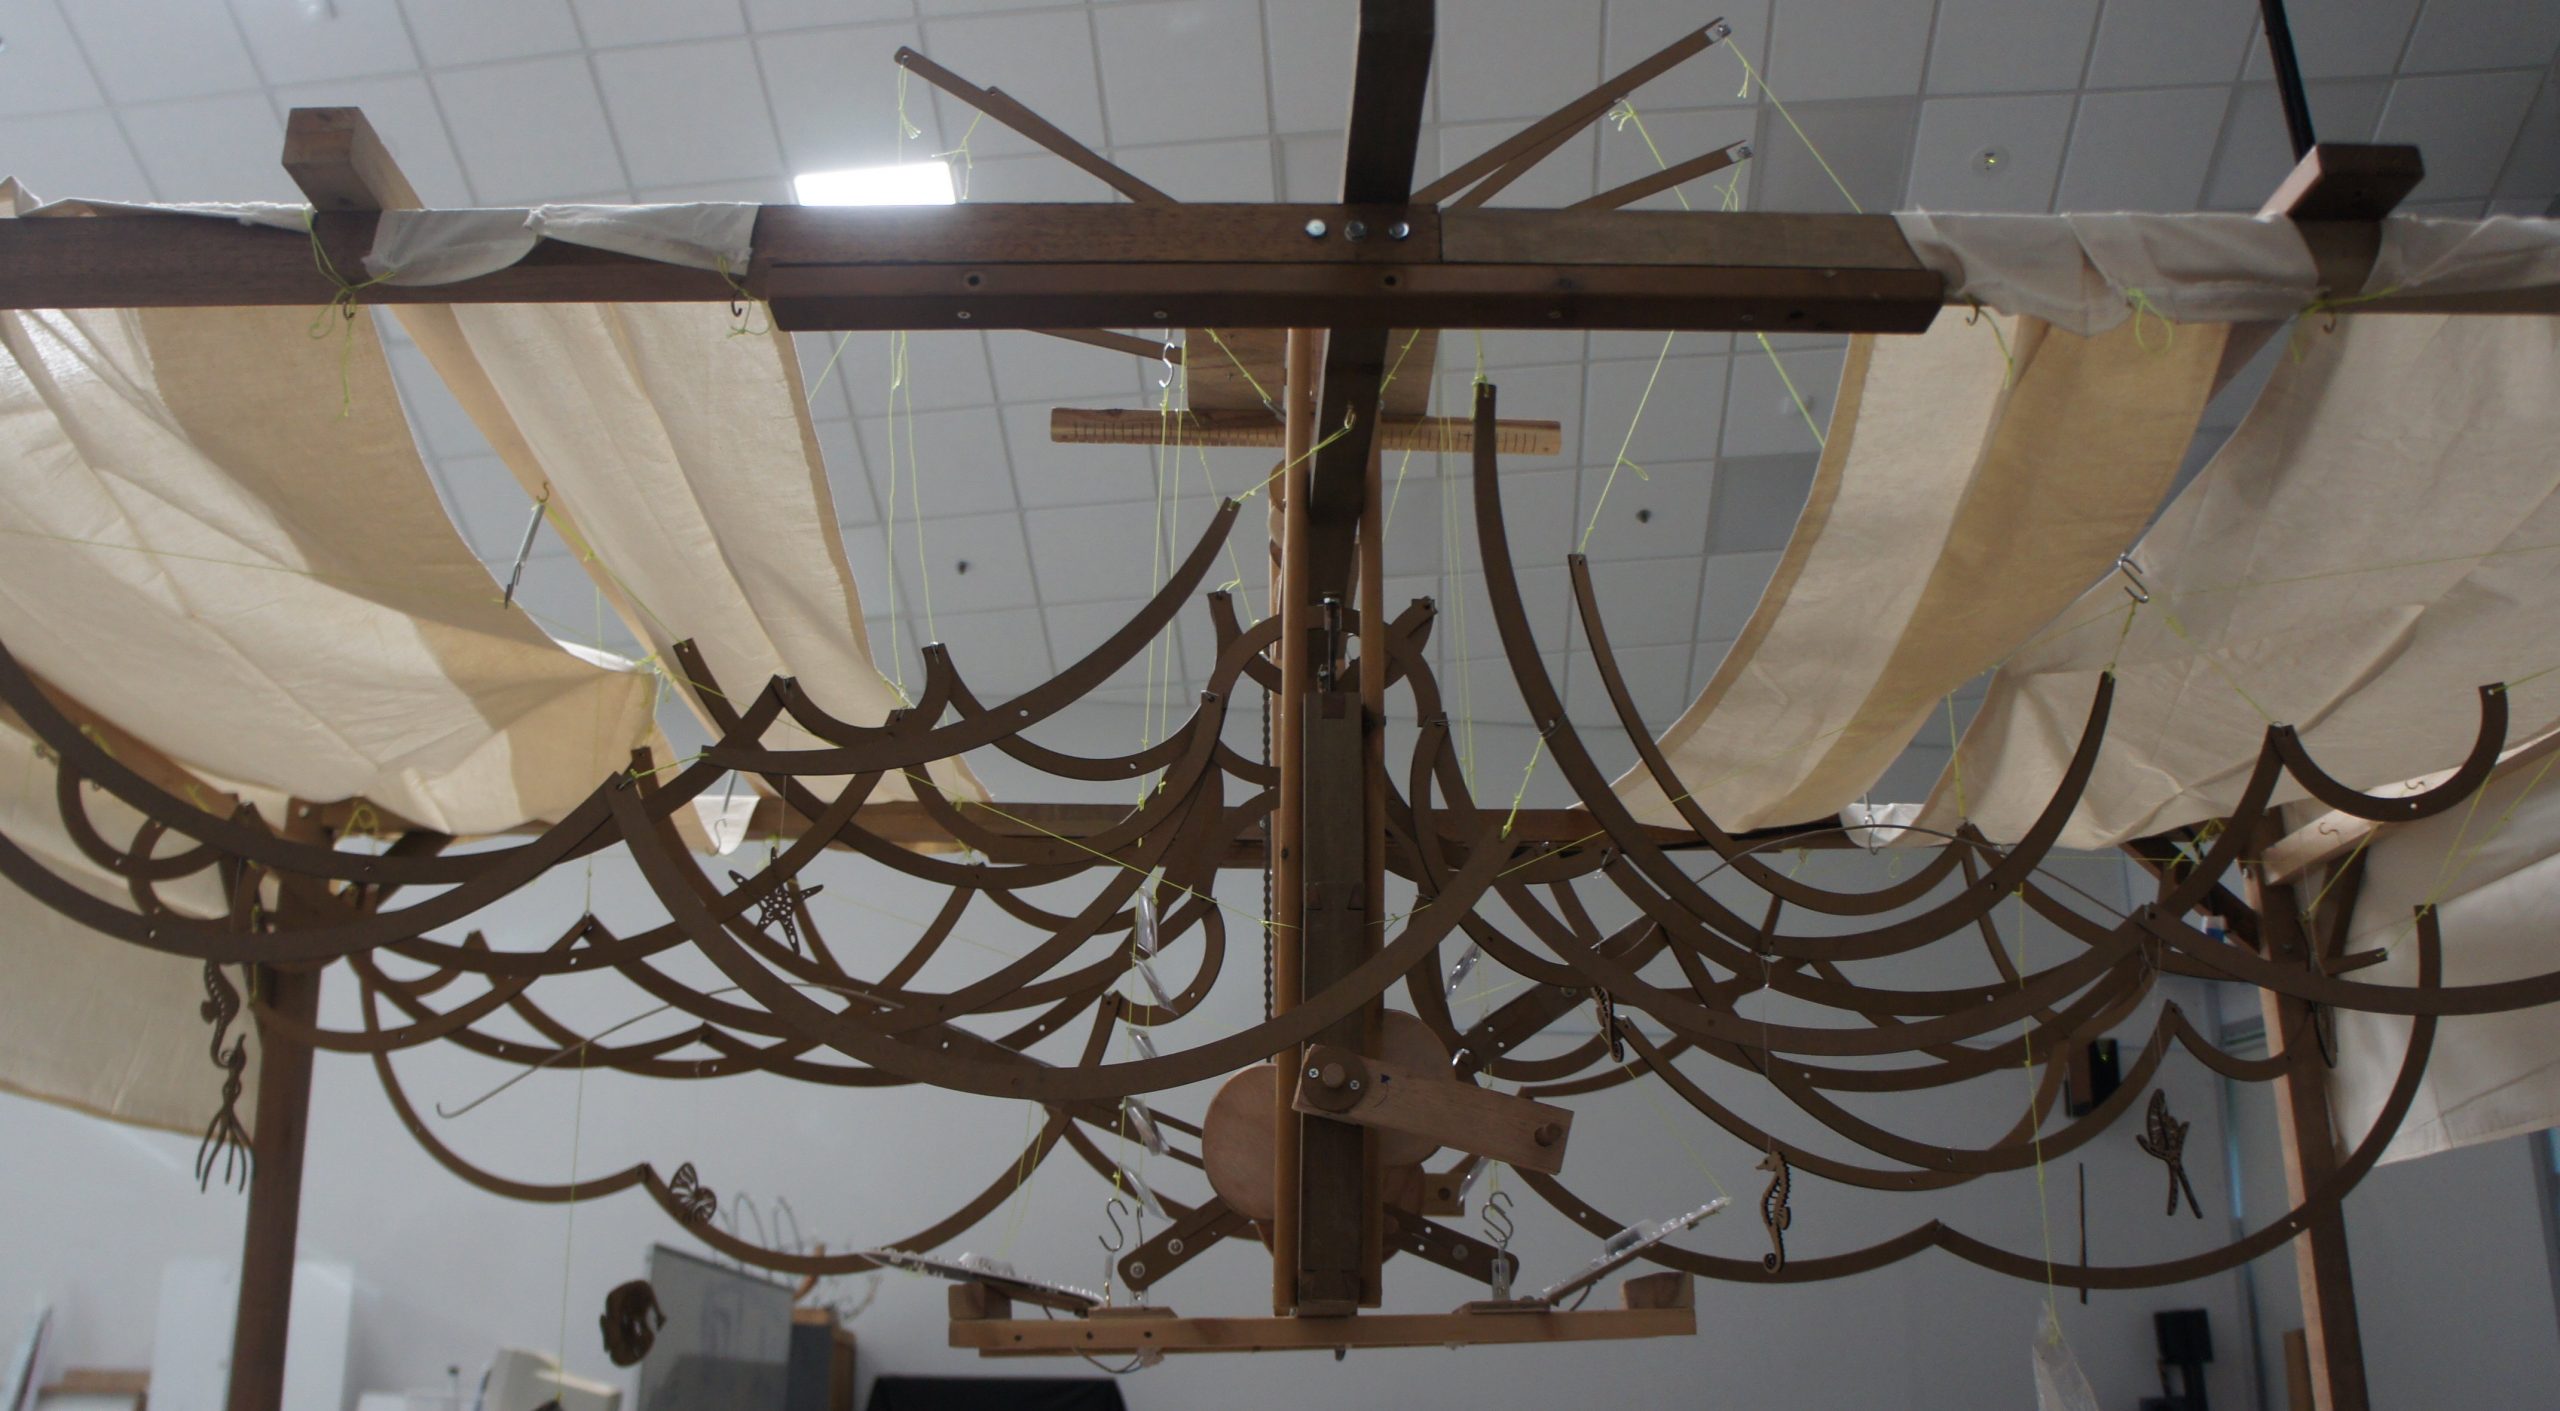
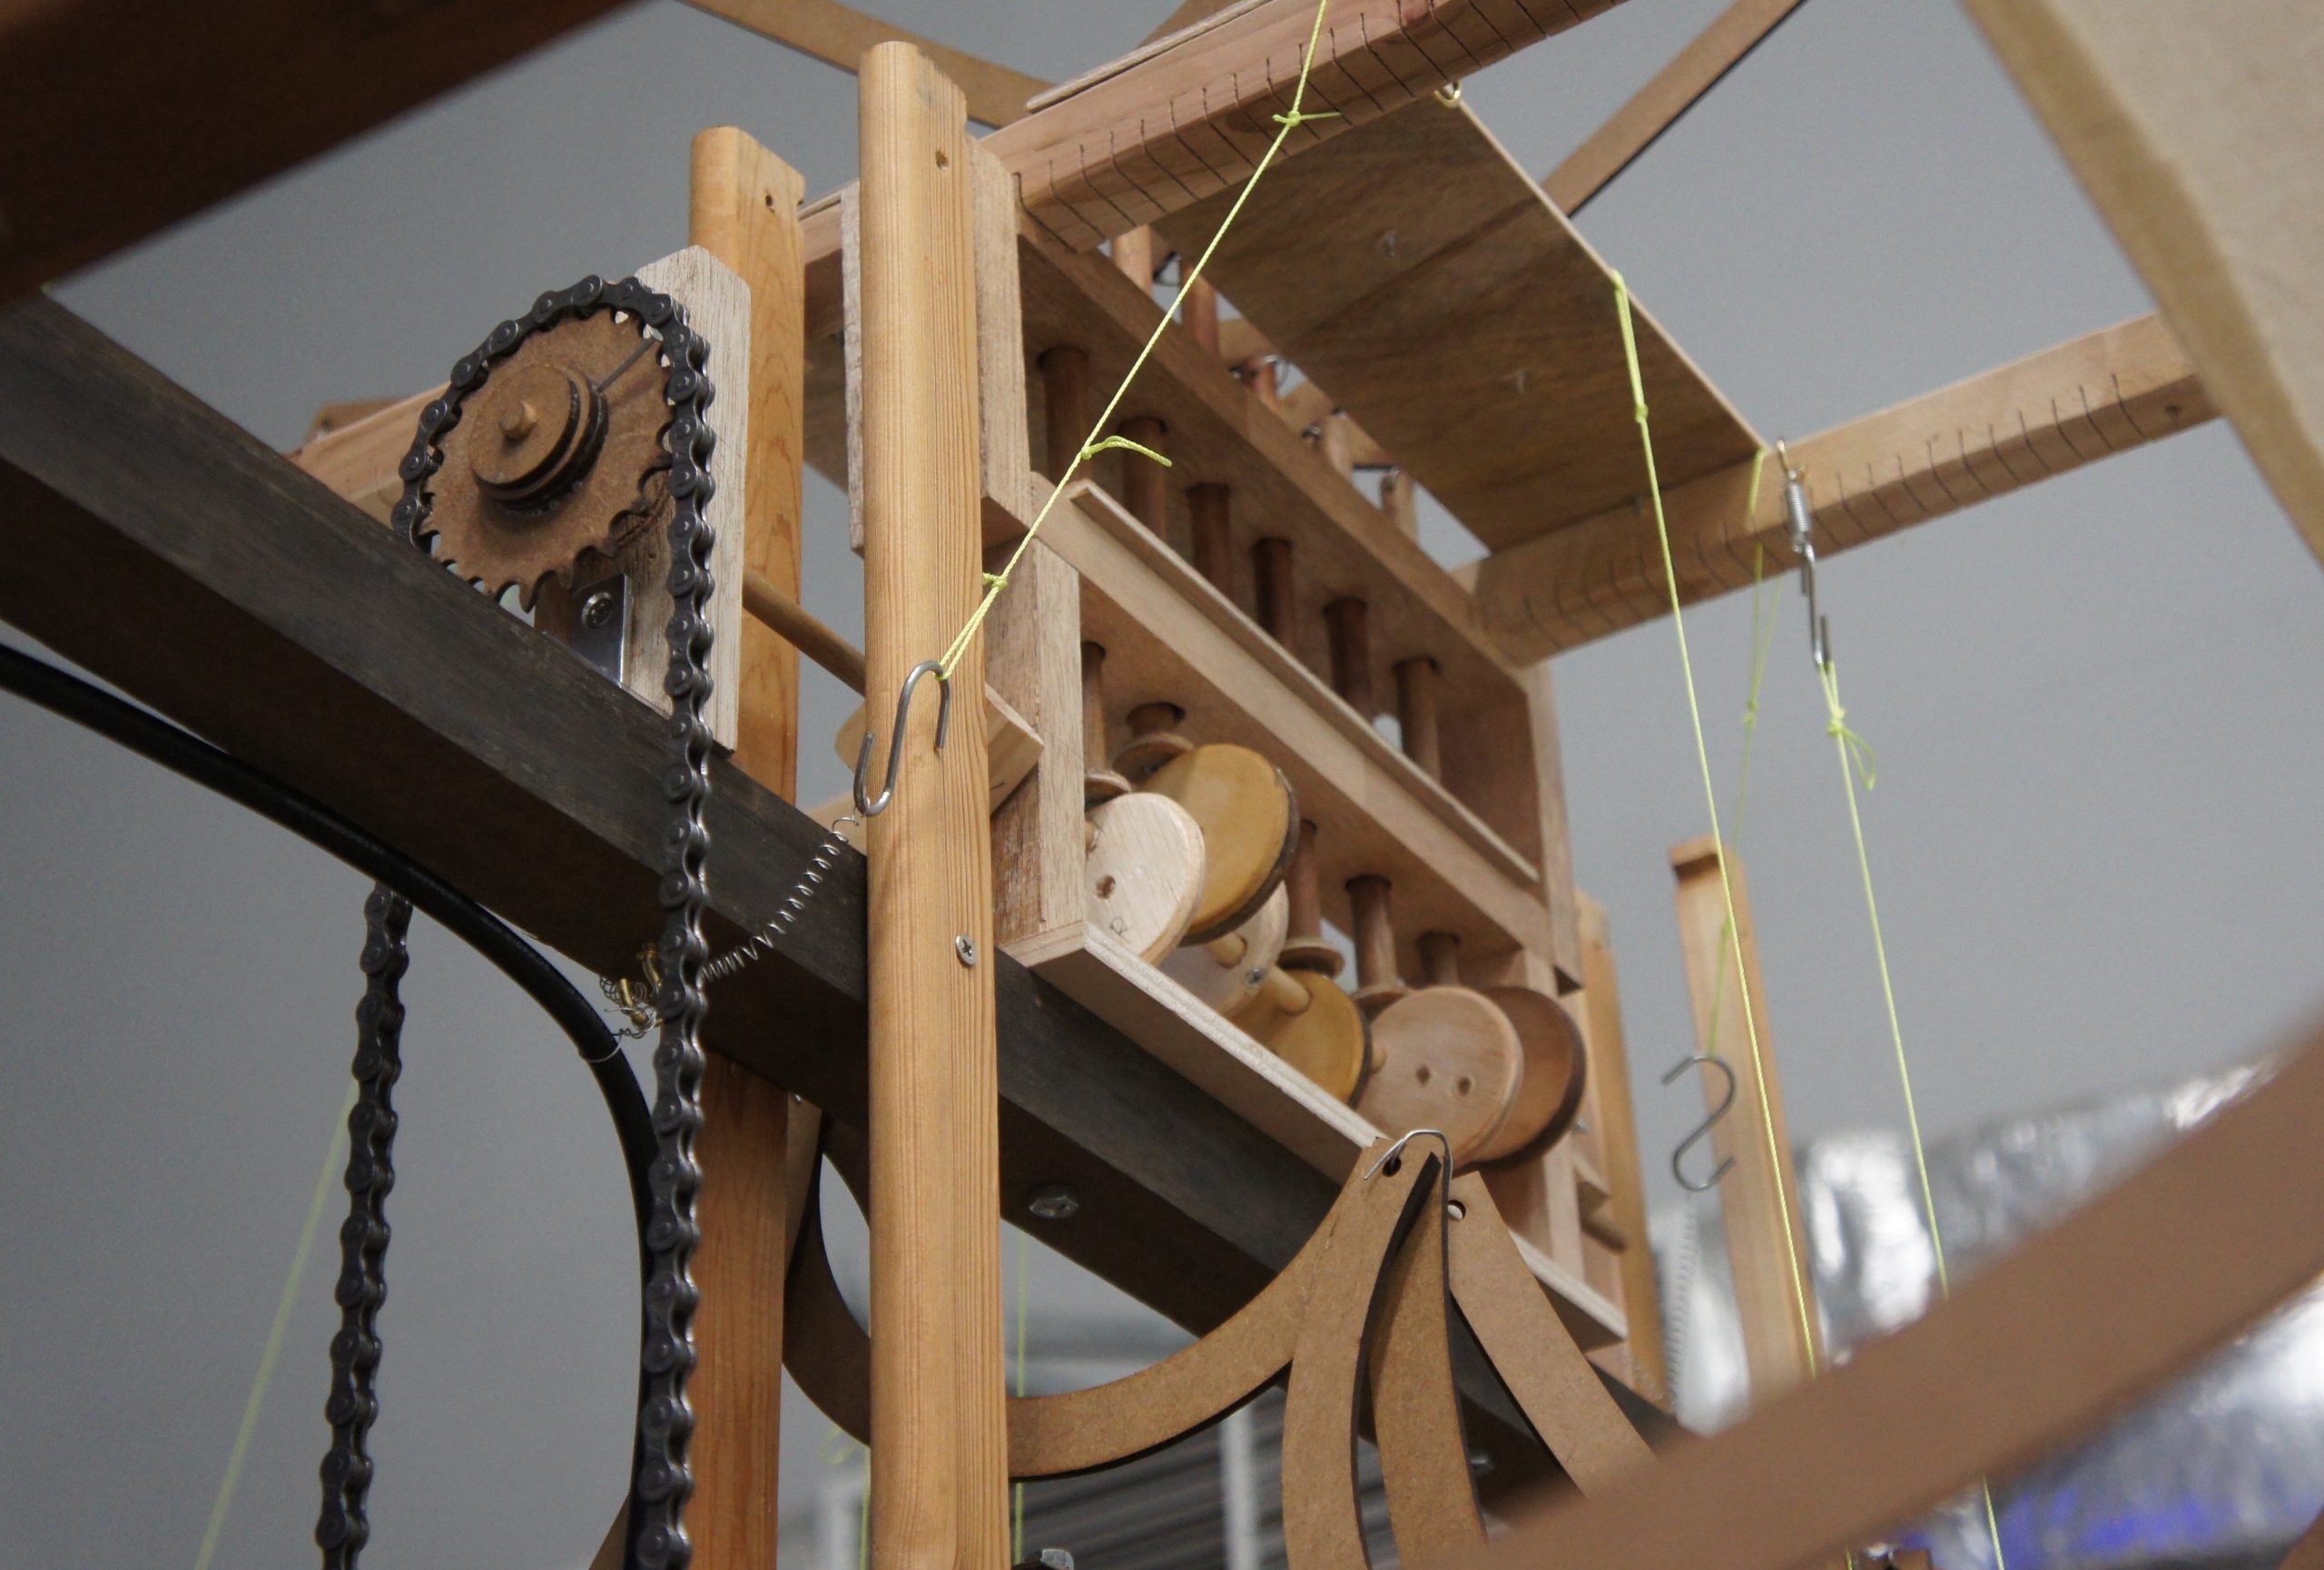
The waves are connected to both top and bottom mechanisms to amplify movement and create more variations
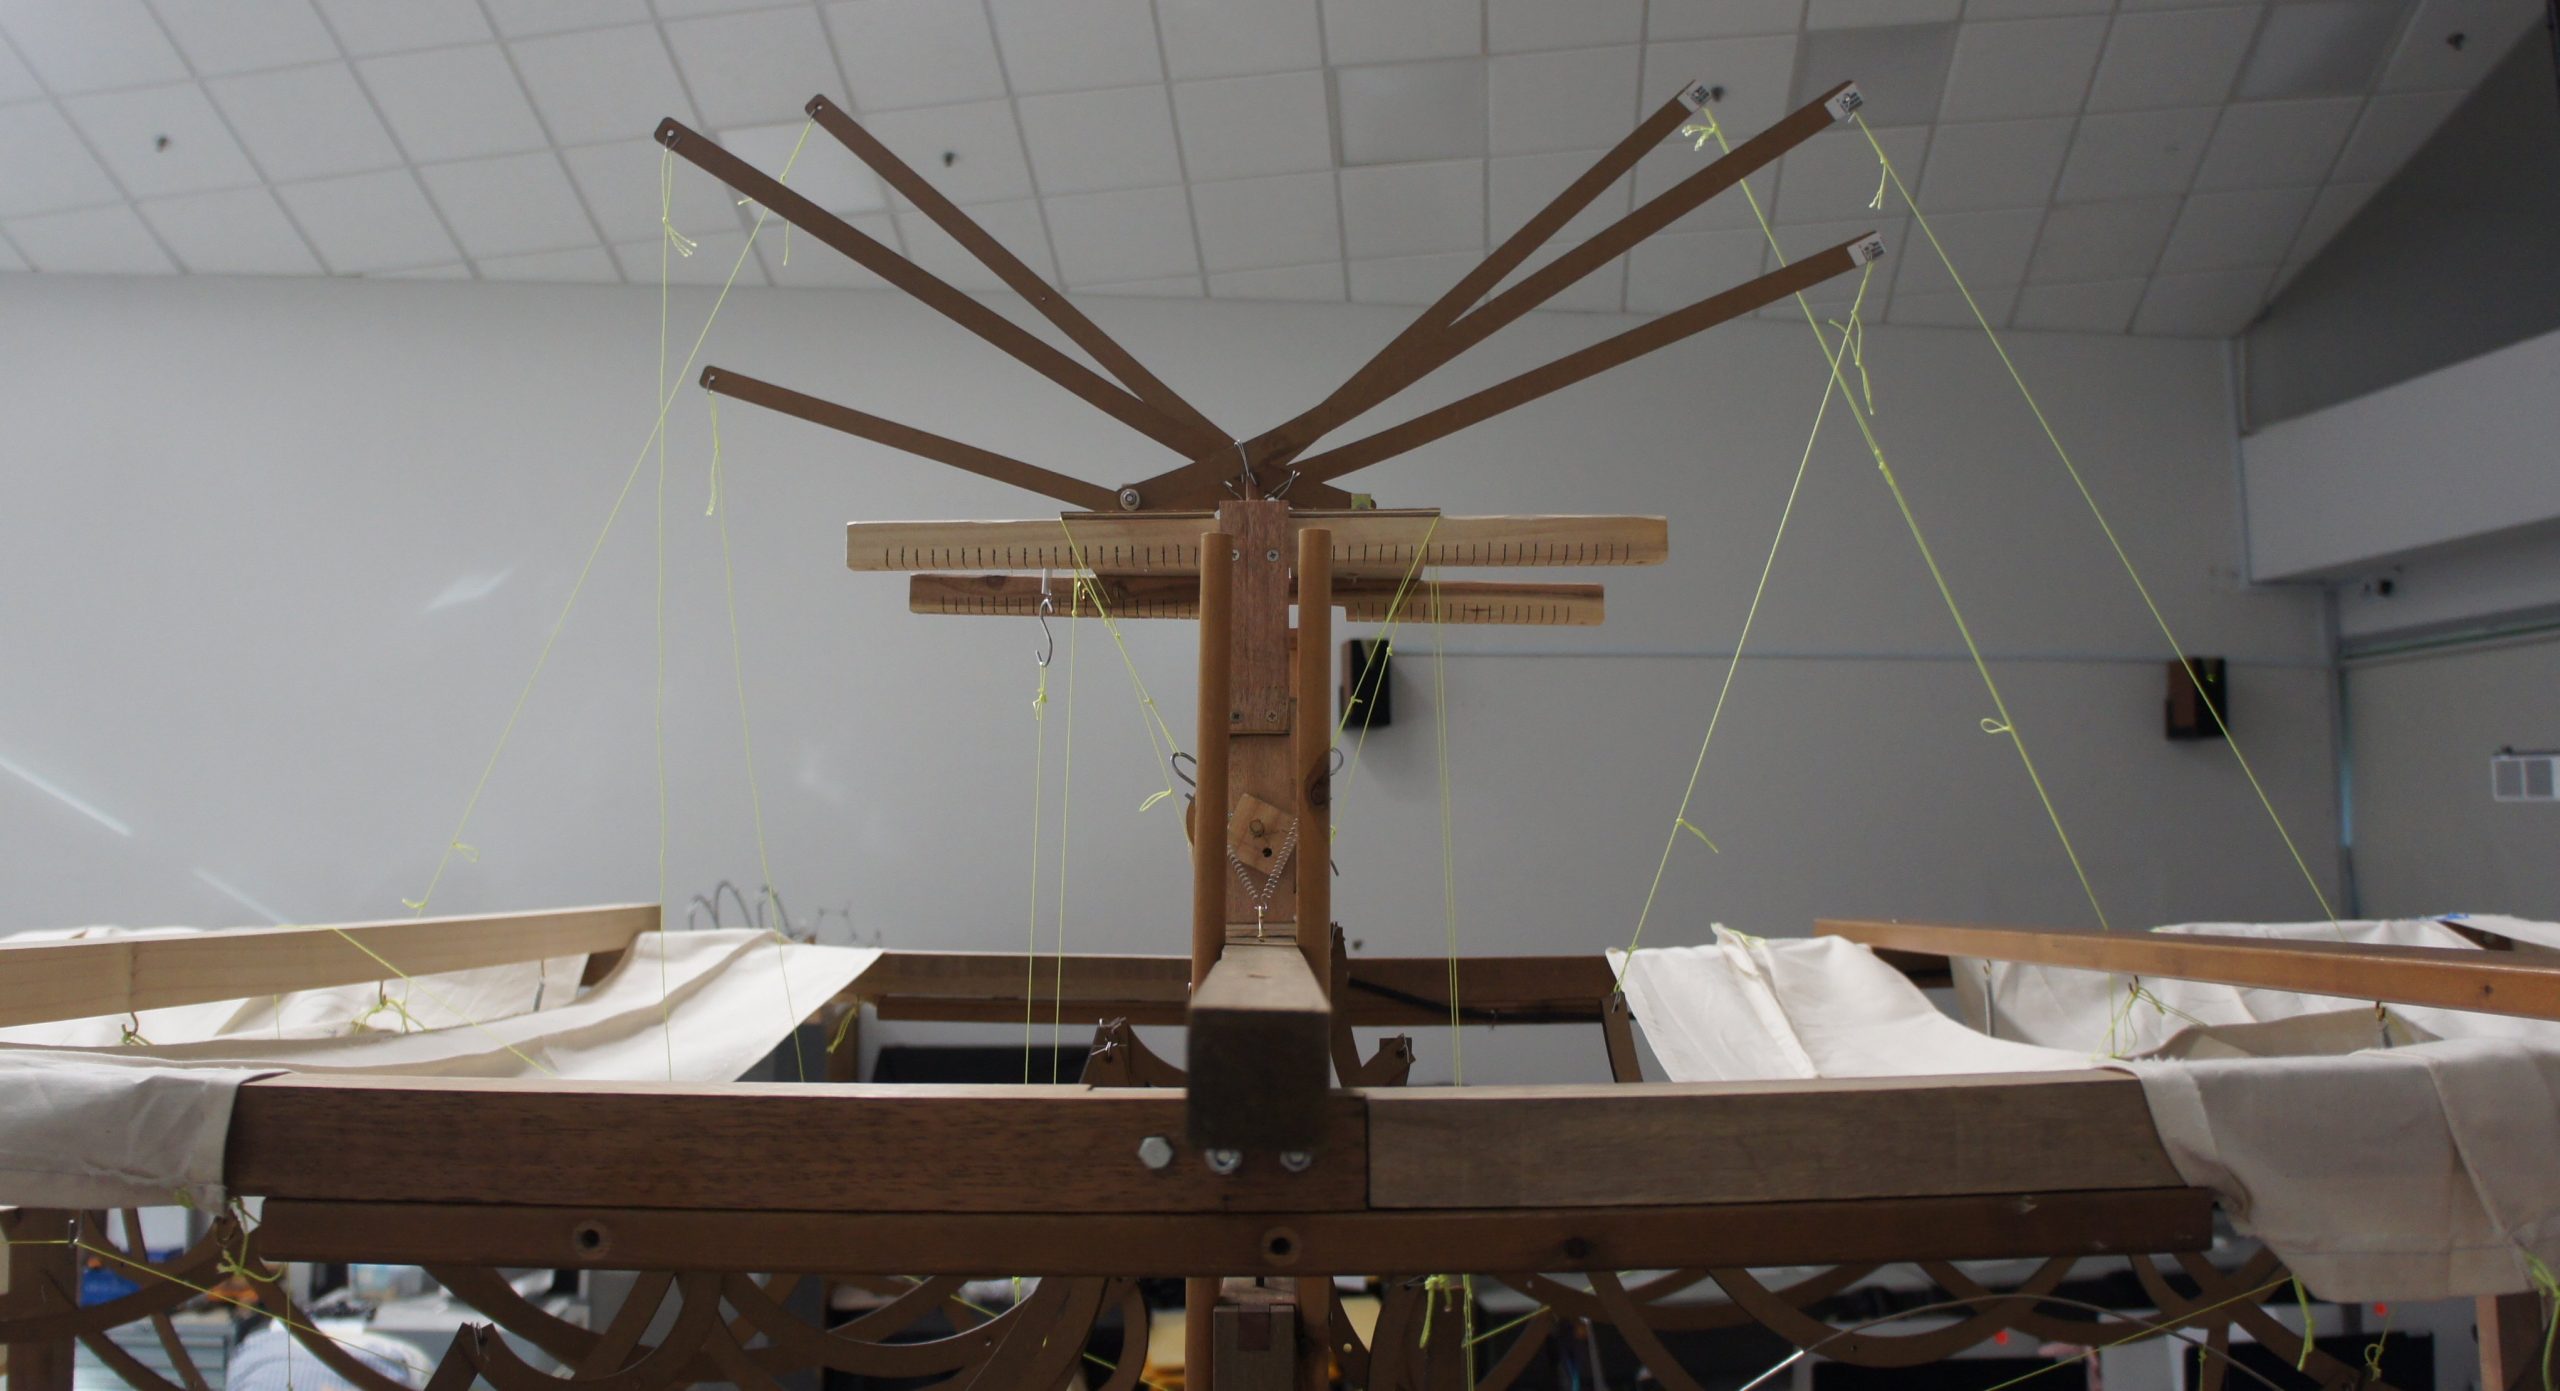
Overview of top mechanism with rods to amplify movement
Obstacles and lessons learnt
Initially there was the issue of not being able to work with the highly irregular cam shapes derived from data points. The follower rods also had to be tweaked to work with eccentric cams. It was a delicate dance to get the surfaces in contact right to work(sufficiently well). There was also a practical weight limit to how much the linkages could lift, as I found out during the last stages of attaching the waves. All in all, any one part that was added or subtracted tends to affect another part of the system in small or big ways. Extension springs were also good for stiffening parts as they allow for more leeway in terms of measurement.
Final presentation
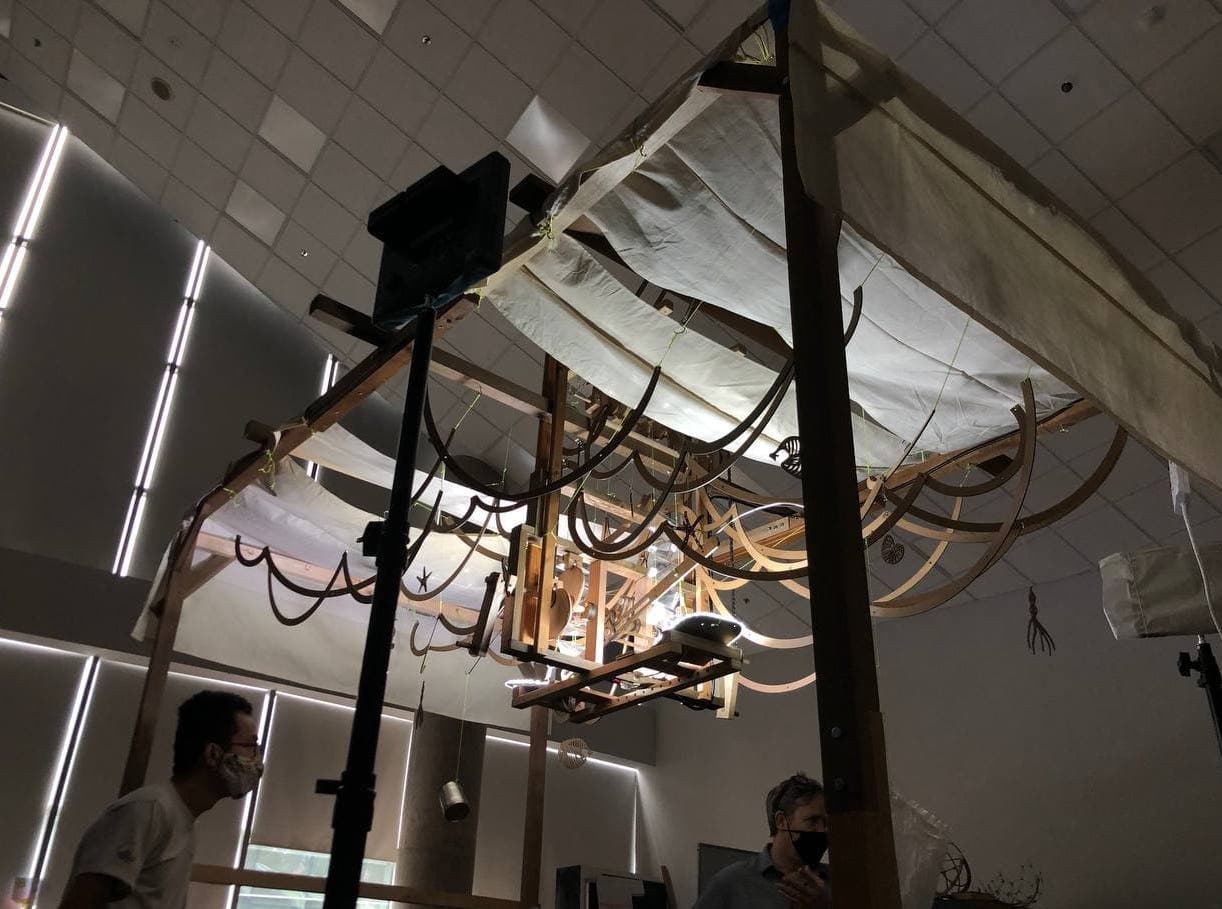
Image courtesy of Nasya
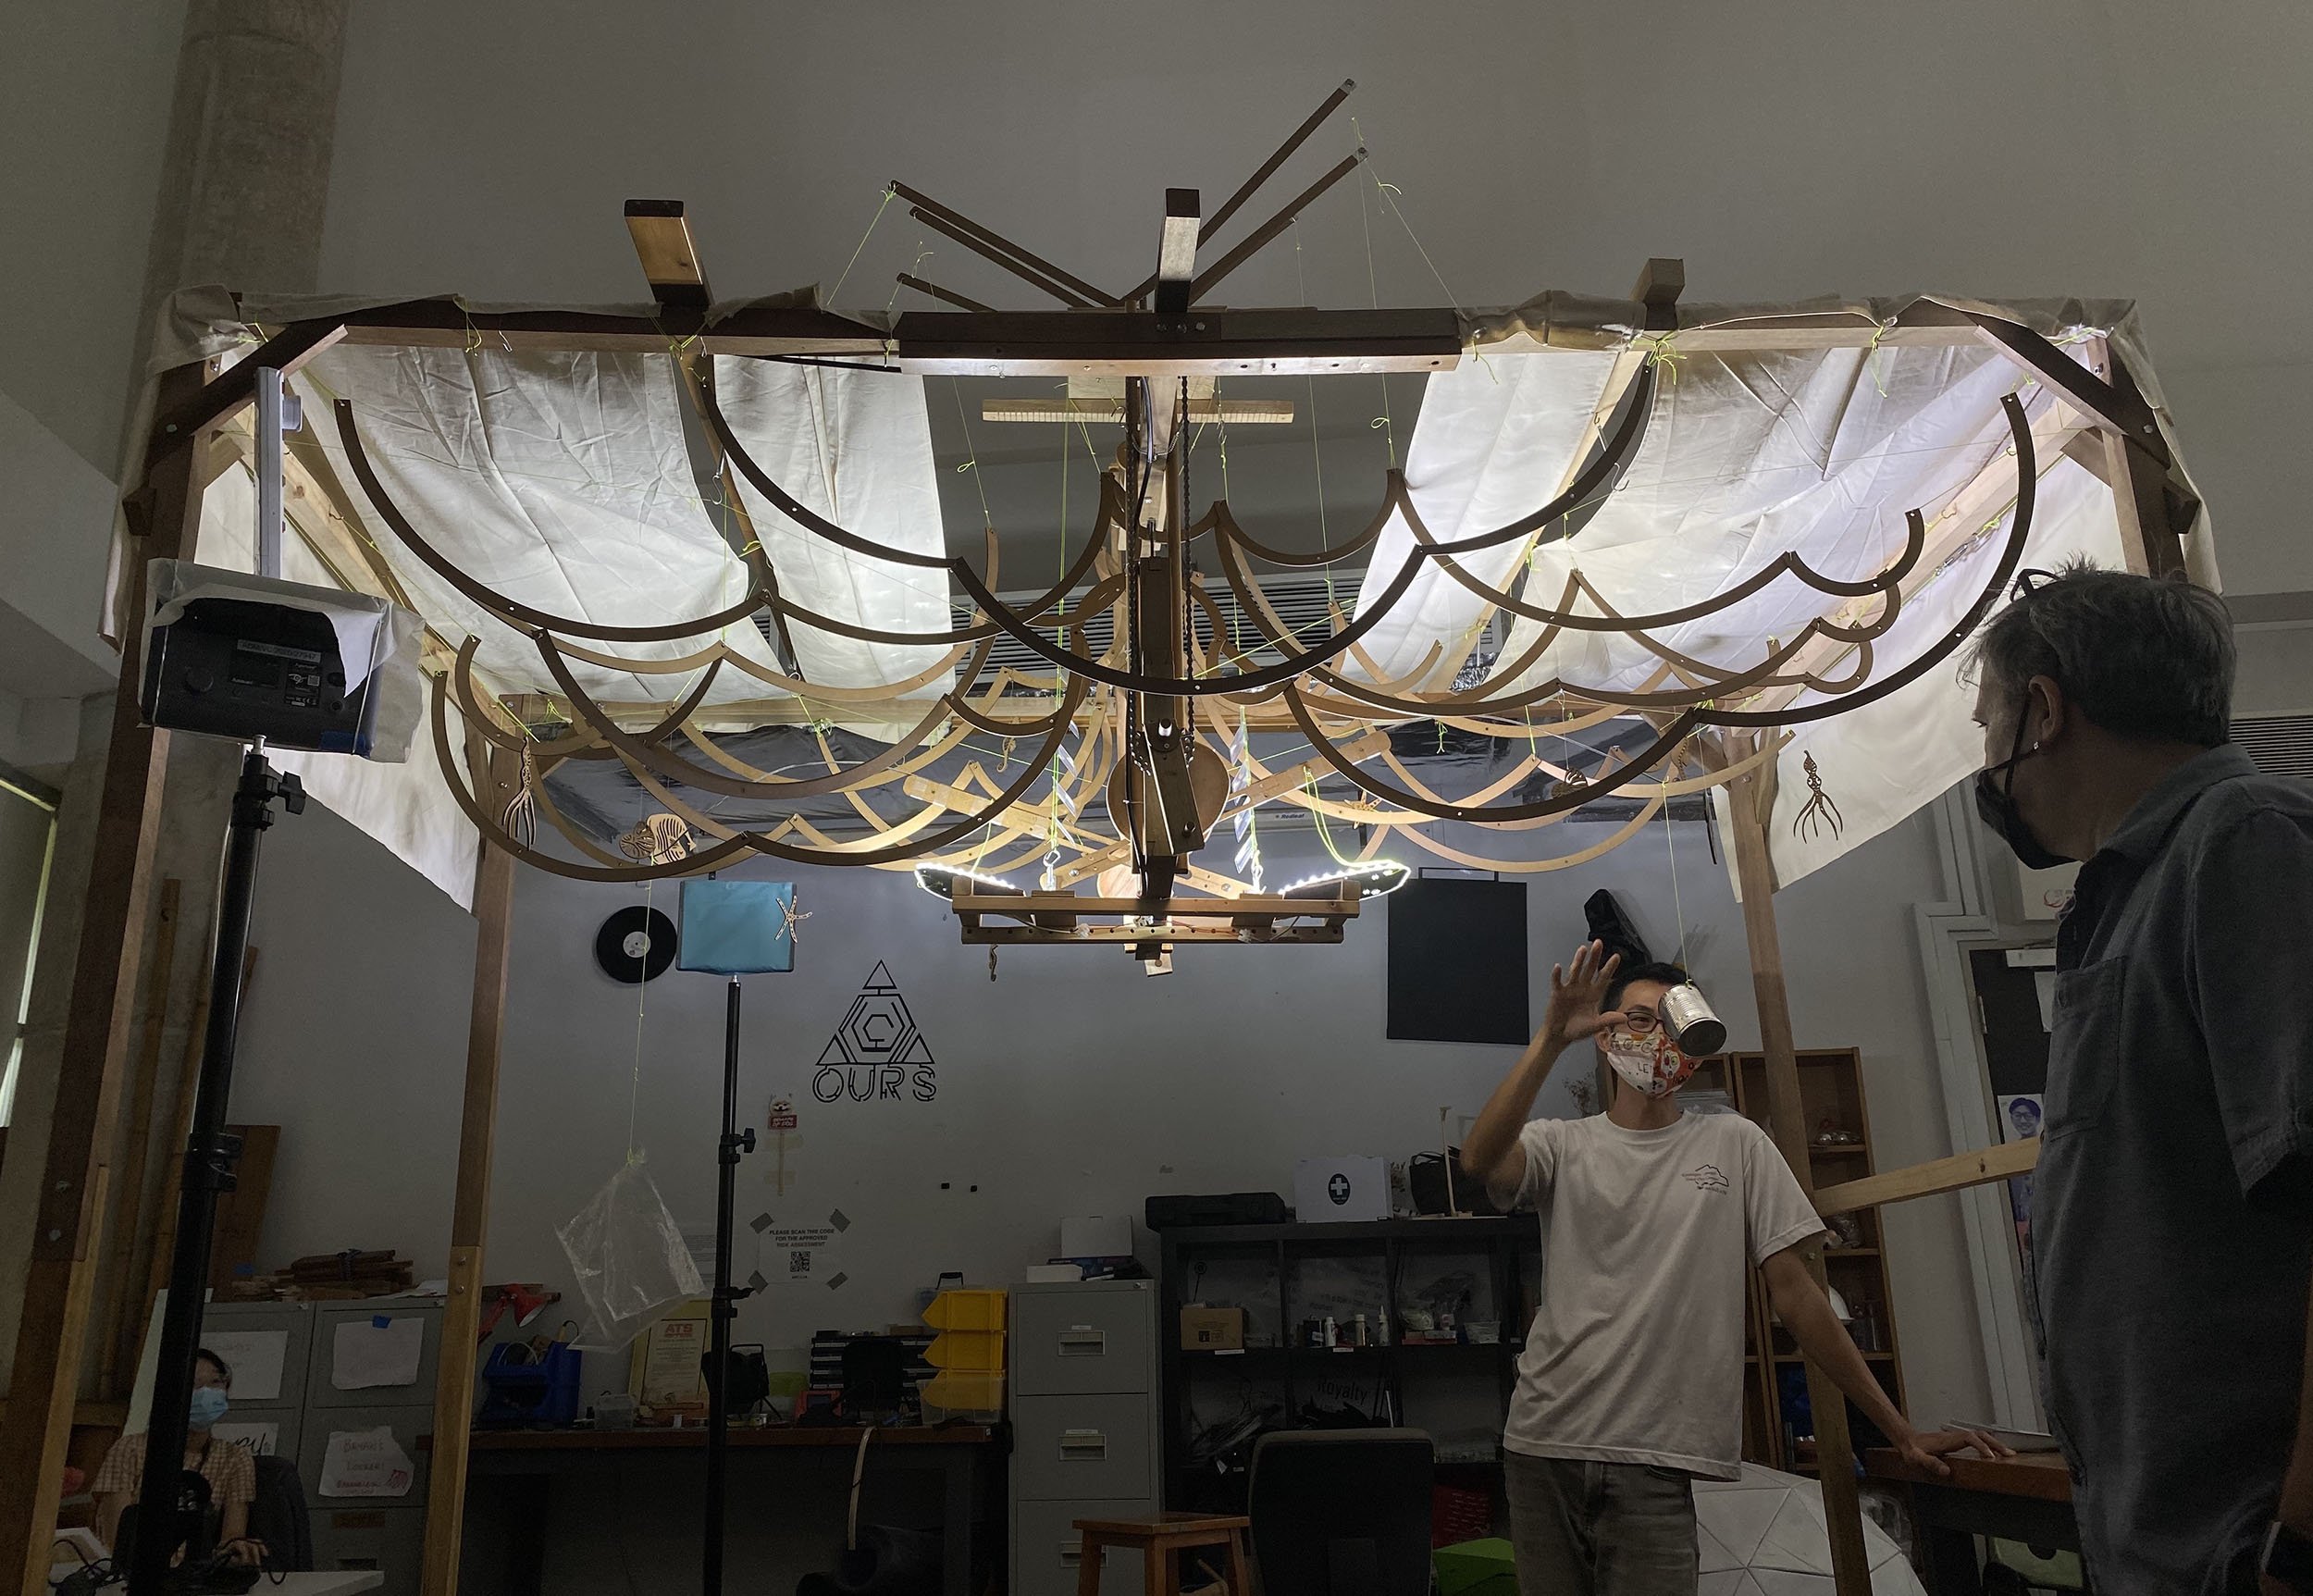
Image courtesy of Amanda
Final Presentation for FYP Pitch
Final Presentation for FYP Pitch
Final project

mood board

6 April Update
this has been a rough week, with the realisation after few hrs of fiddling that the current ‘follower’ setup cannot work with the highly irregular shapes I had produced 2 weeks before. So for now I am focused on using circles with an offset center, and produce some motion and adapt the original idea to output something visually interesting for the final.
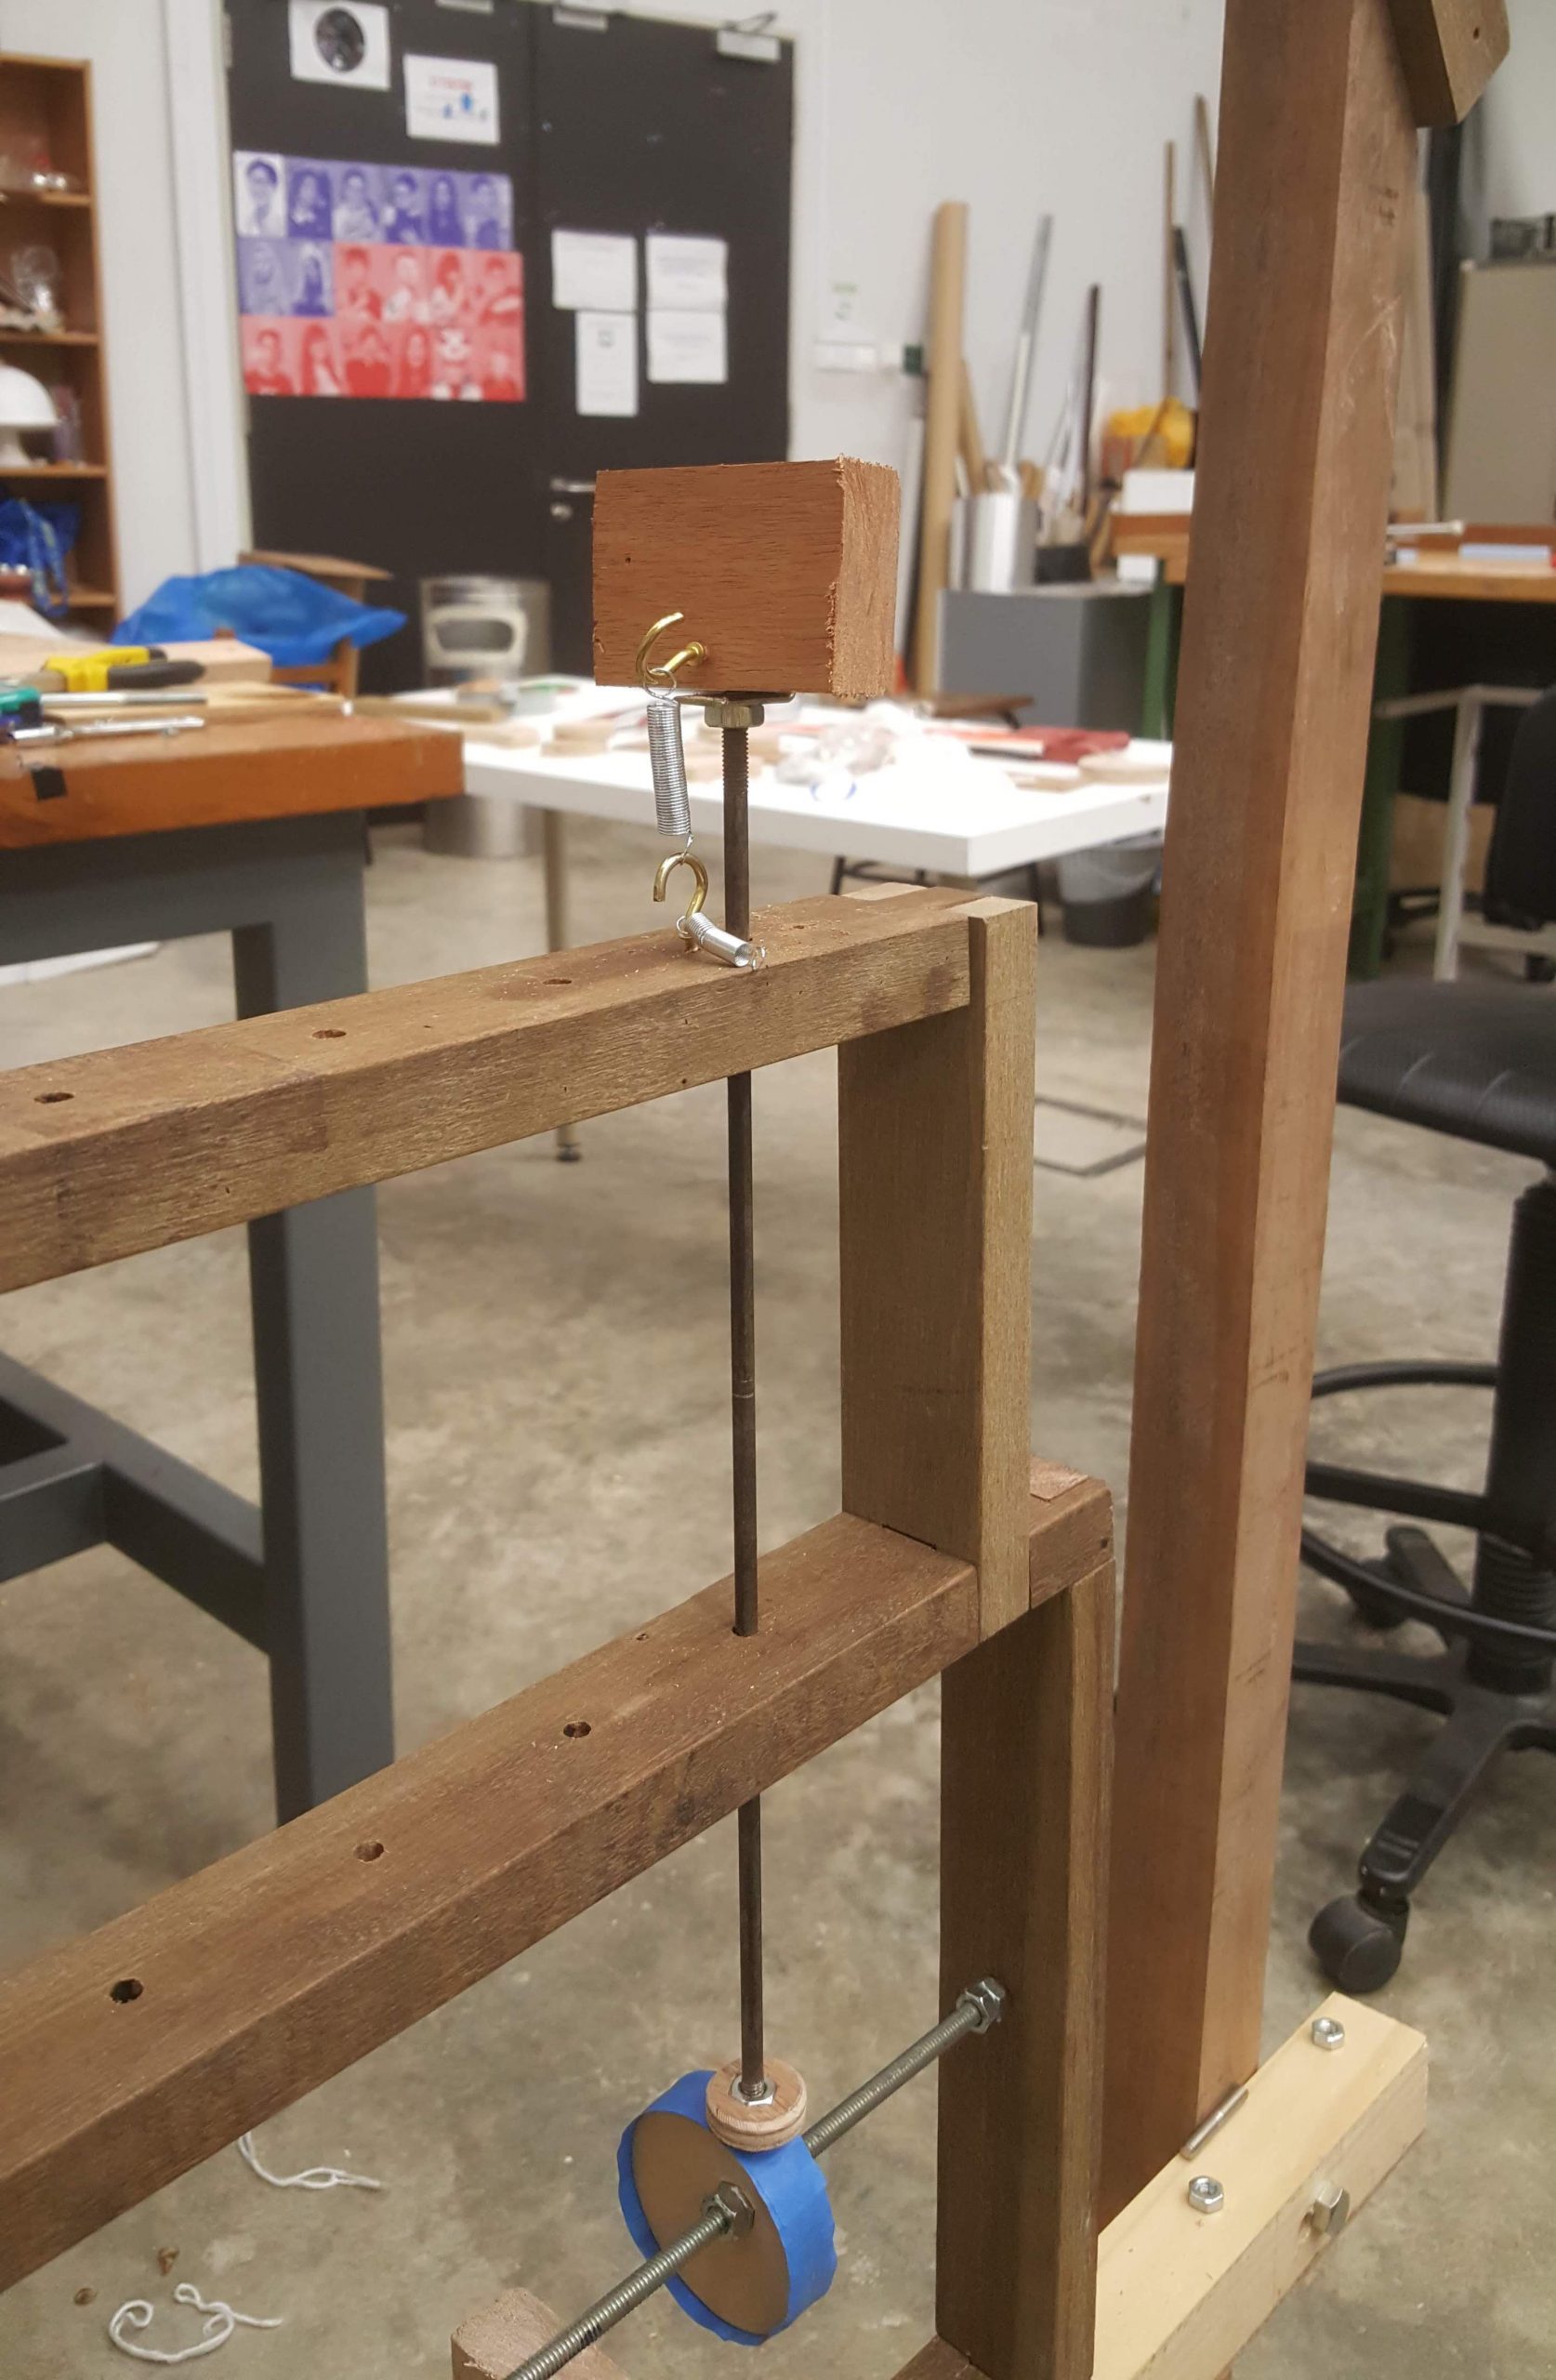
spring tests

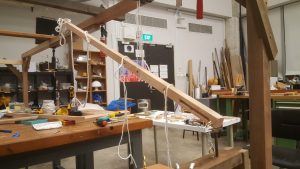
my idealised version of leverage system

leverage test for magnifying movement
the springs are needed to bring the followers down in contact with the cam, but it’s a tricky business of balancing the strength of the spring vs the load. More experimentation time is required, which unfortunately is quickly running out.

wax helps a lot!
When the simple circles were first installed, it did not work at all. the followers were stuck. thankfully, copious wax on both cam and follower helped everything moved along.

3 test cams & added supports in the middle
after the setbacks, I decided it is best I break down the process to incremental, simpler steps and also to avoid wasting hours on producing unusable parts.
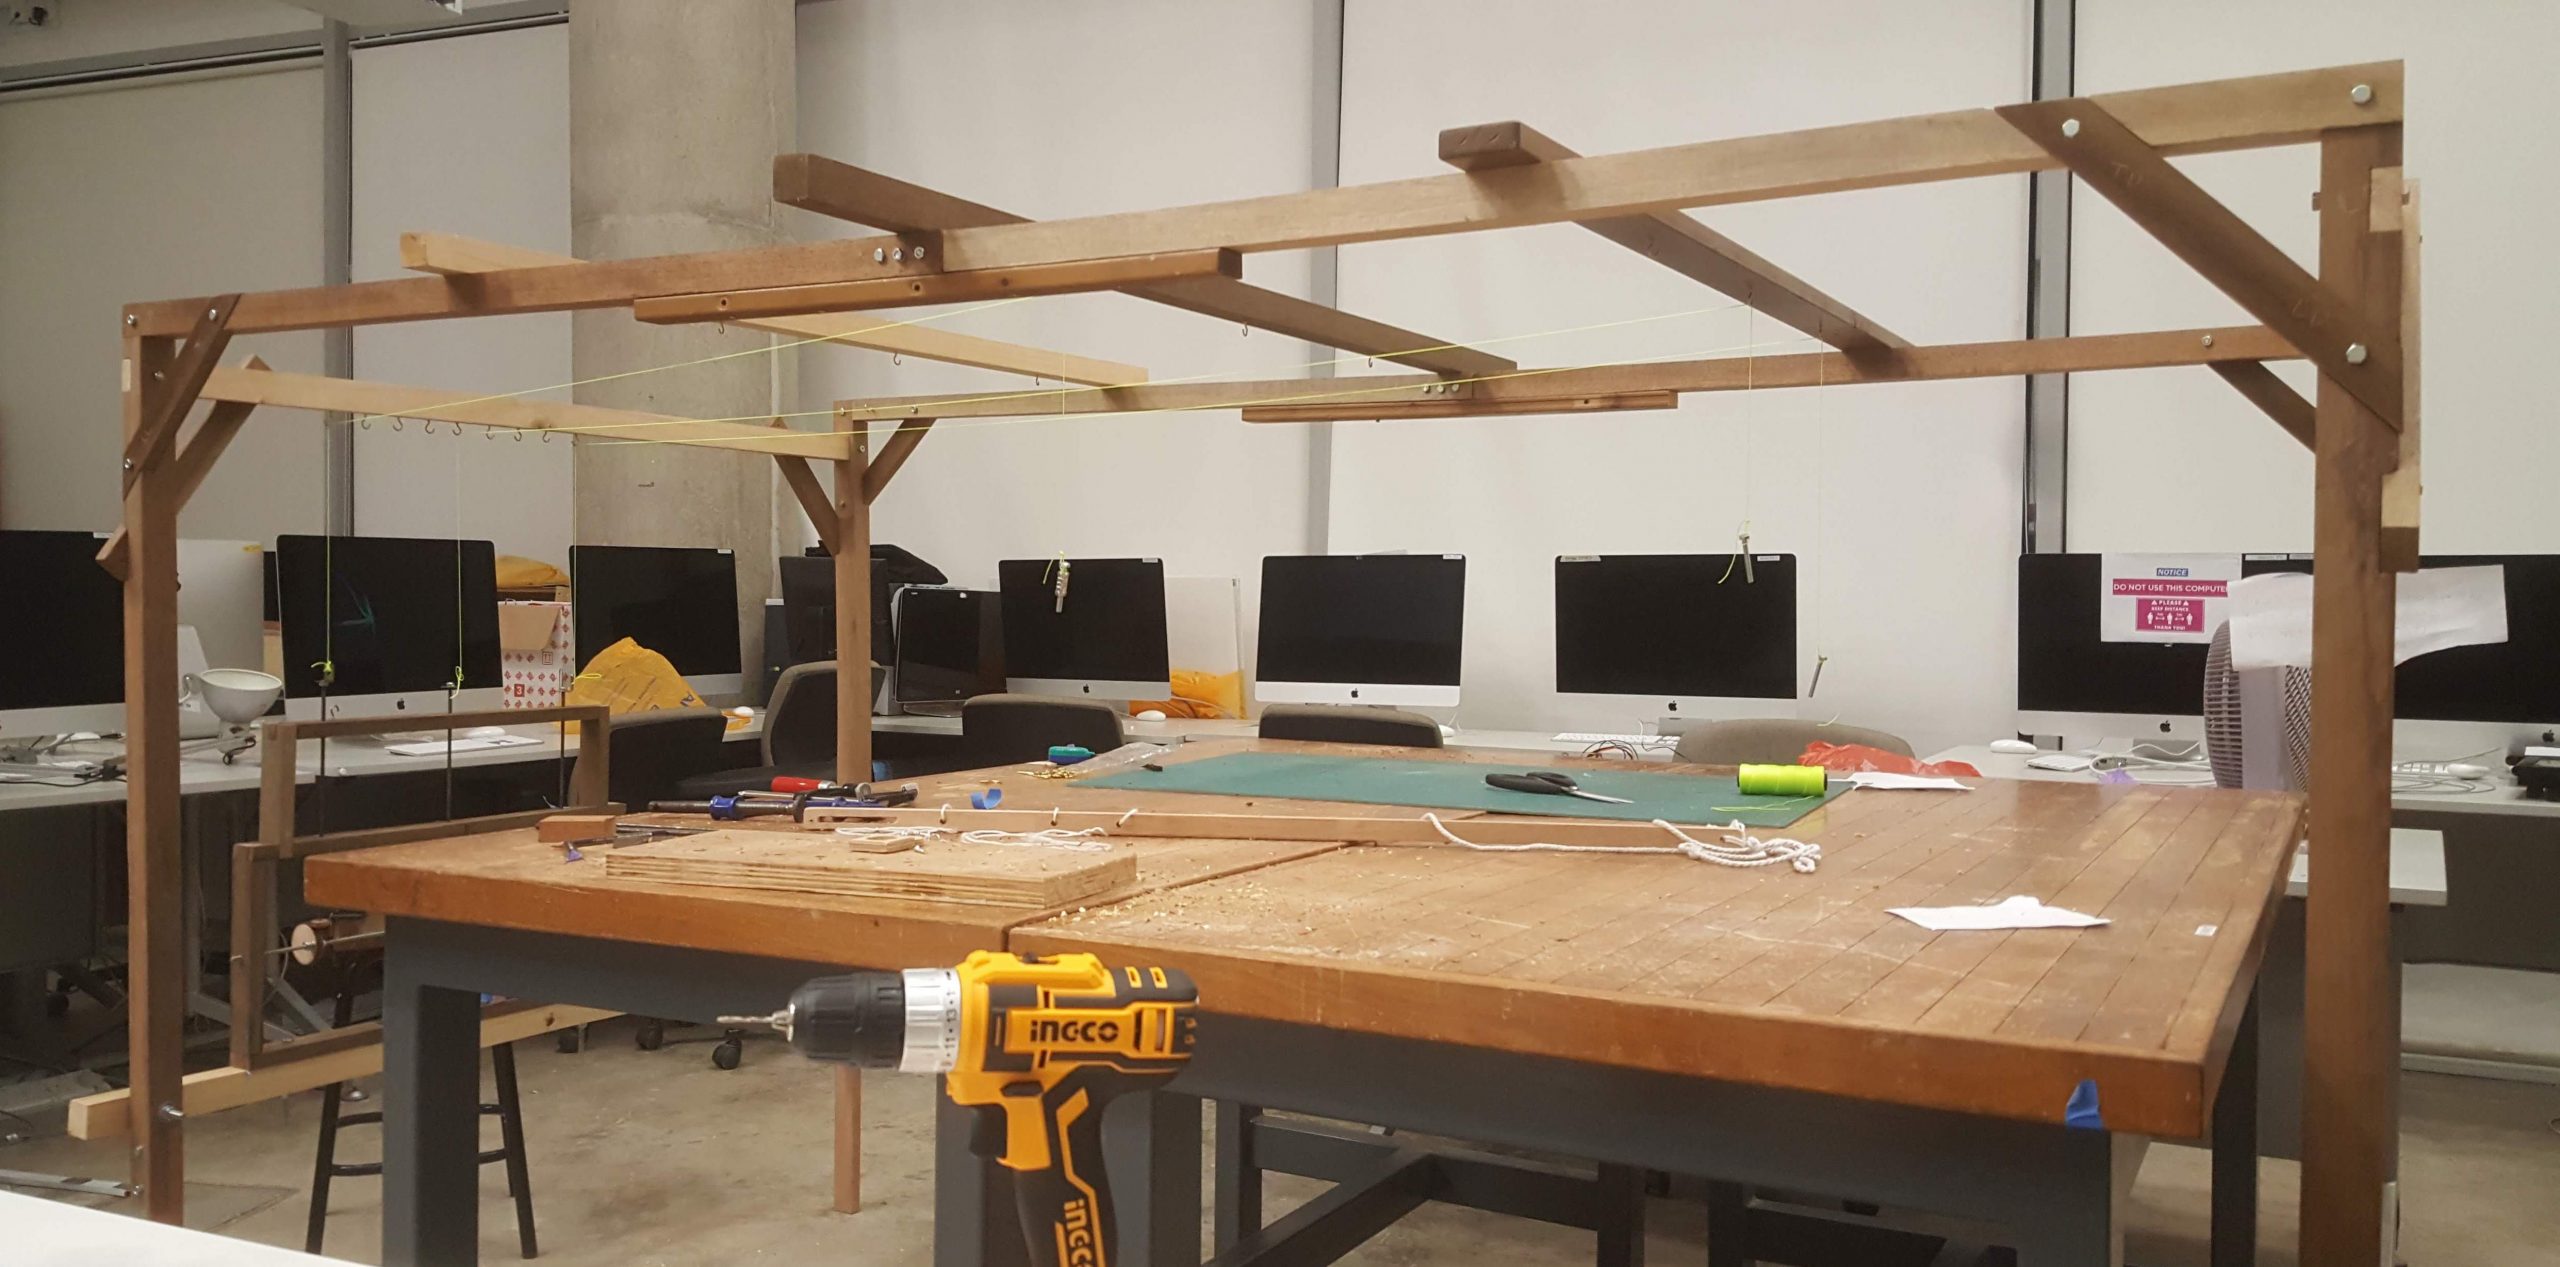
added top braces and hooks for strings
after getting 3 cams to work reasonably reliably, I placed some loads and setup the basic braces to get ready for attaching the cloth.
last week has been a roller coaster ride of sorts, first realising the original cam shapes had to be abandoned, and later the leverage mechanism I had imagined was much harder to put in practice.
also, the prototype I had constructed had too many differences from this final model. everything, from the main shaft length, follower lengths, size and shape of cams played a factor in whether it will work. the leveraging system was also non-trivial to achieve, at least with my amount of inexperience.
but all in all, I think it was a good lesson for me as all this(automata and mechanical construction) has been very new and refreshing for me, and it definitely required a change of mindset and perspective from traditional woodworking.
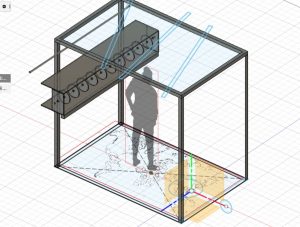
30 Mar Update for sem proj
Bought all the wood i needed, and dimensioned and cleaned them
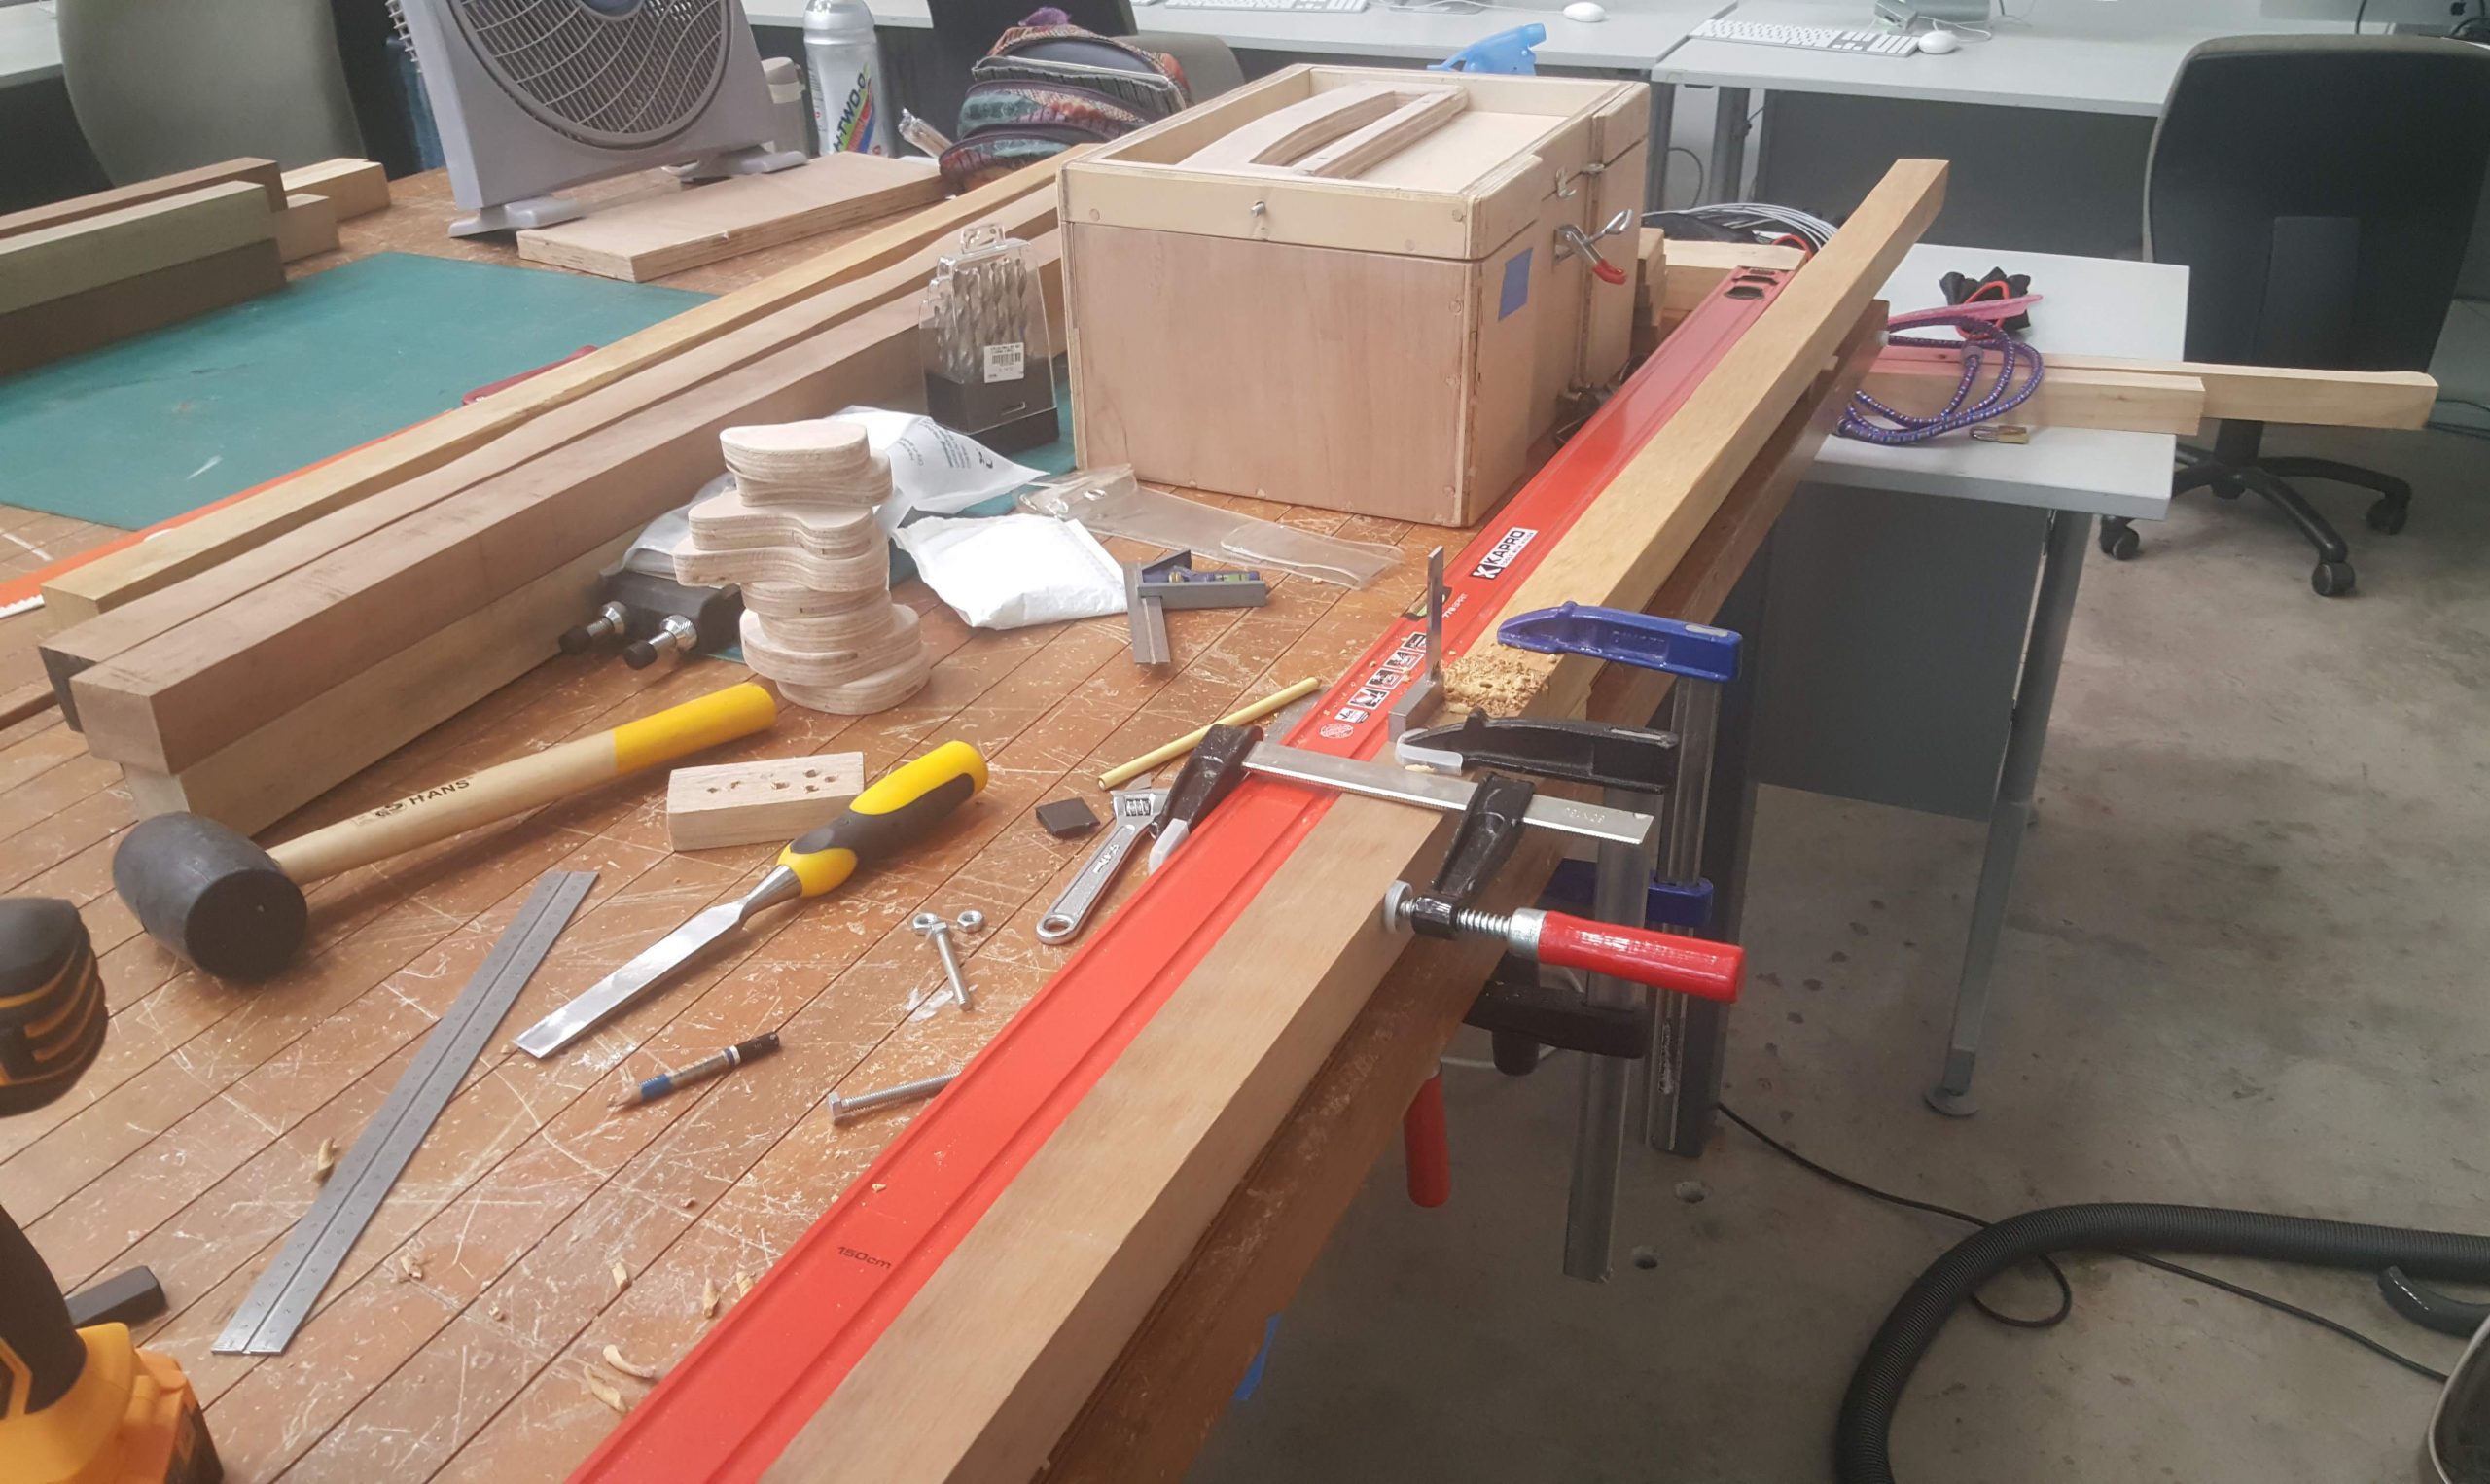
simple half lap joints for all long pieces

lots of half laps to cut
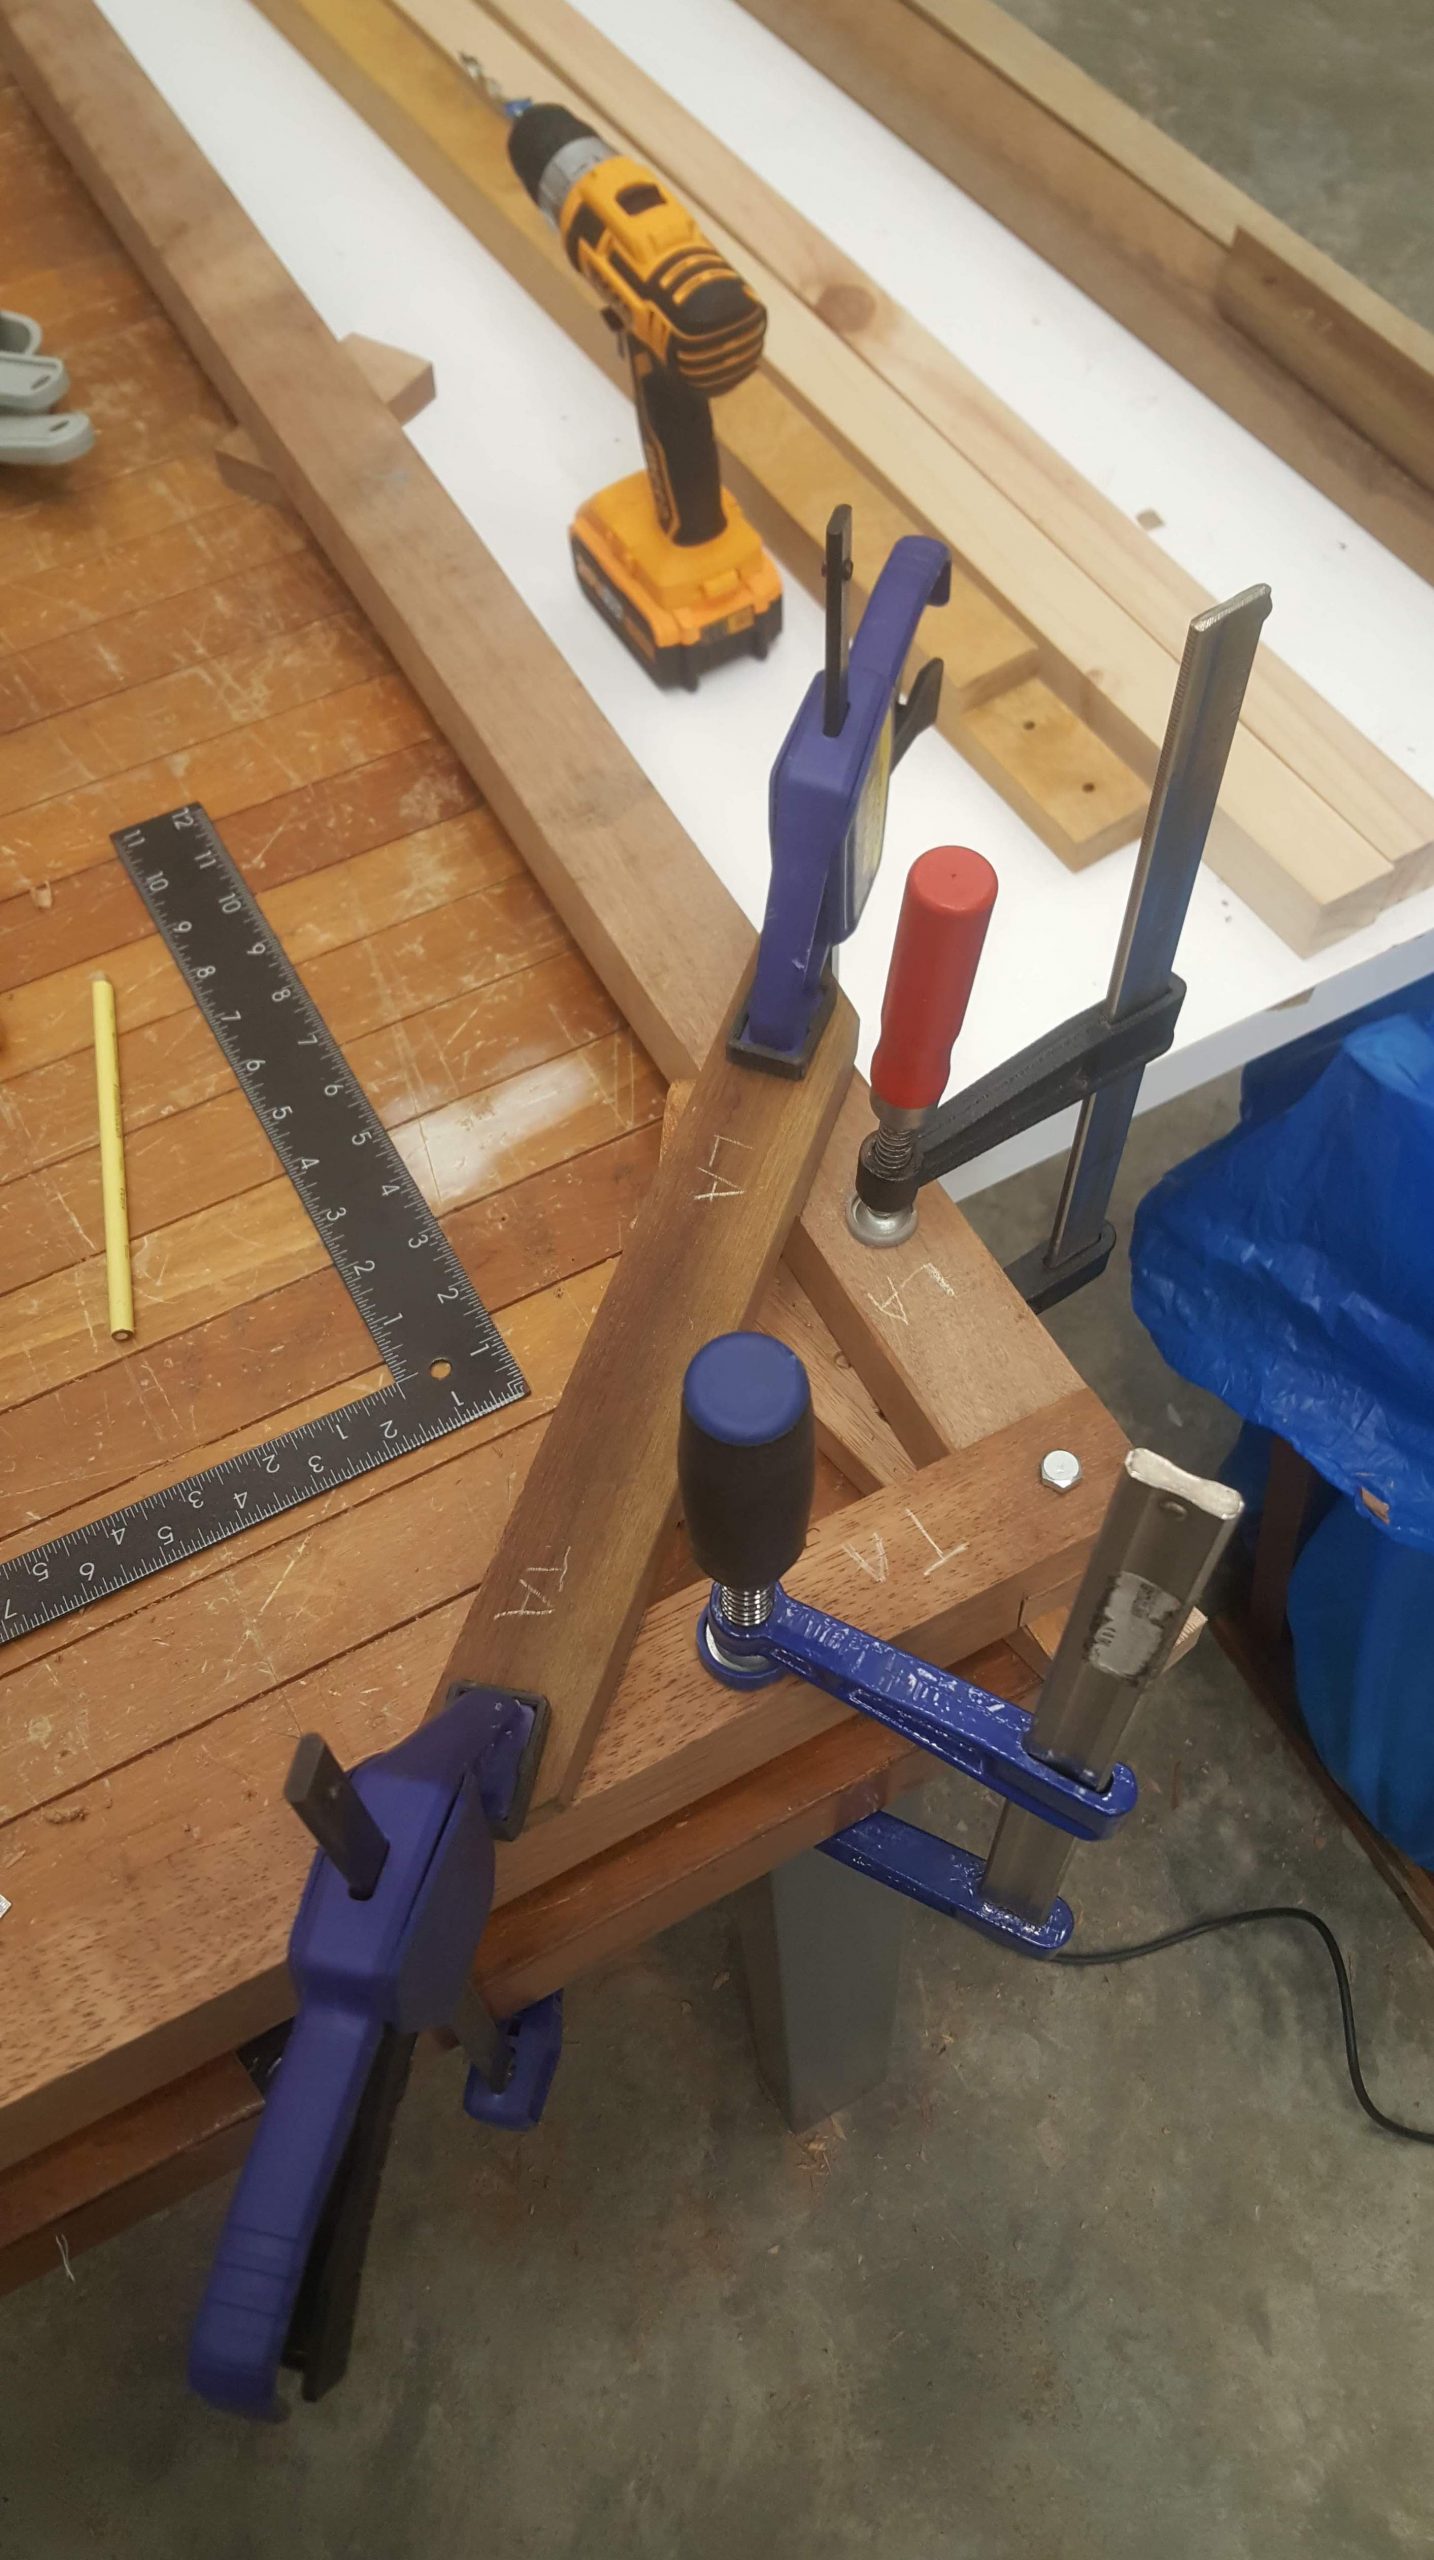
braces for keeping the frame square
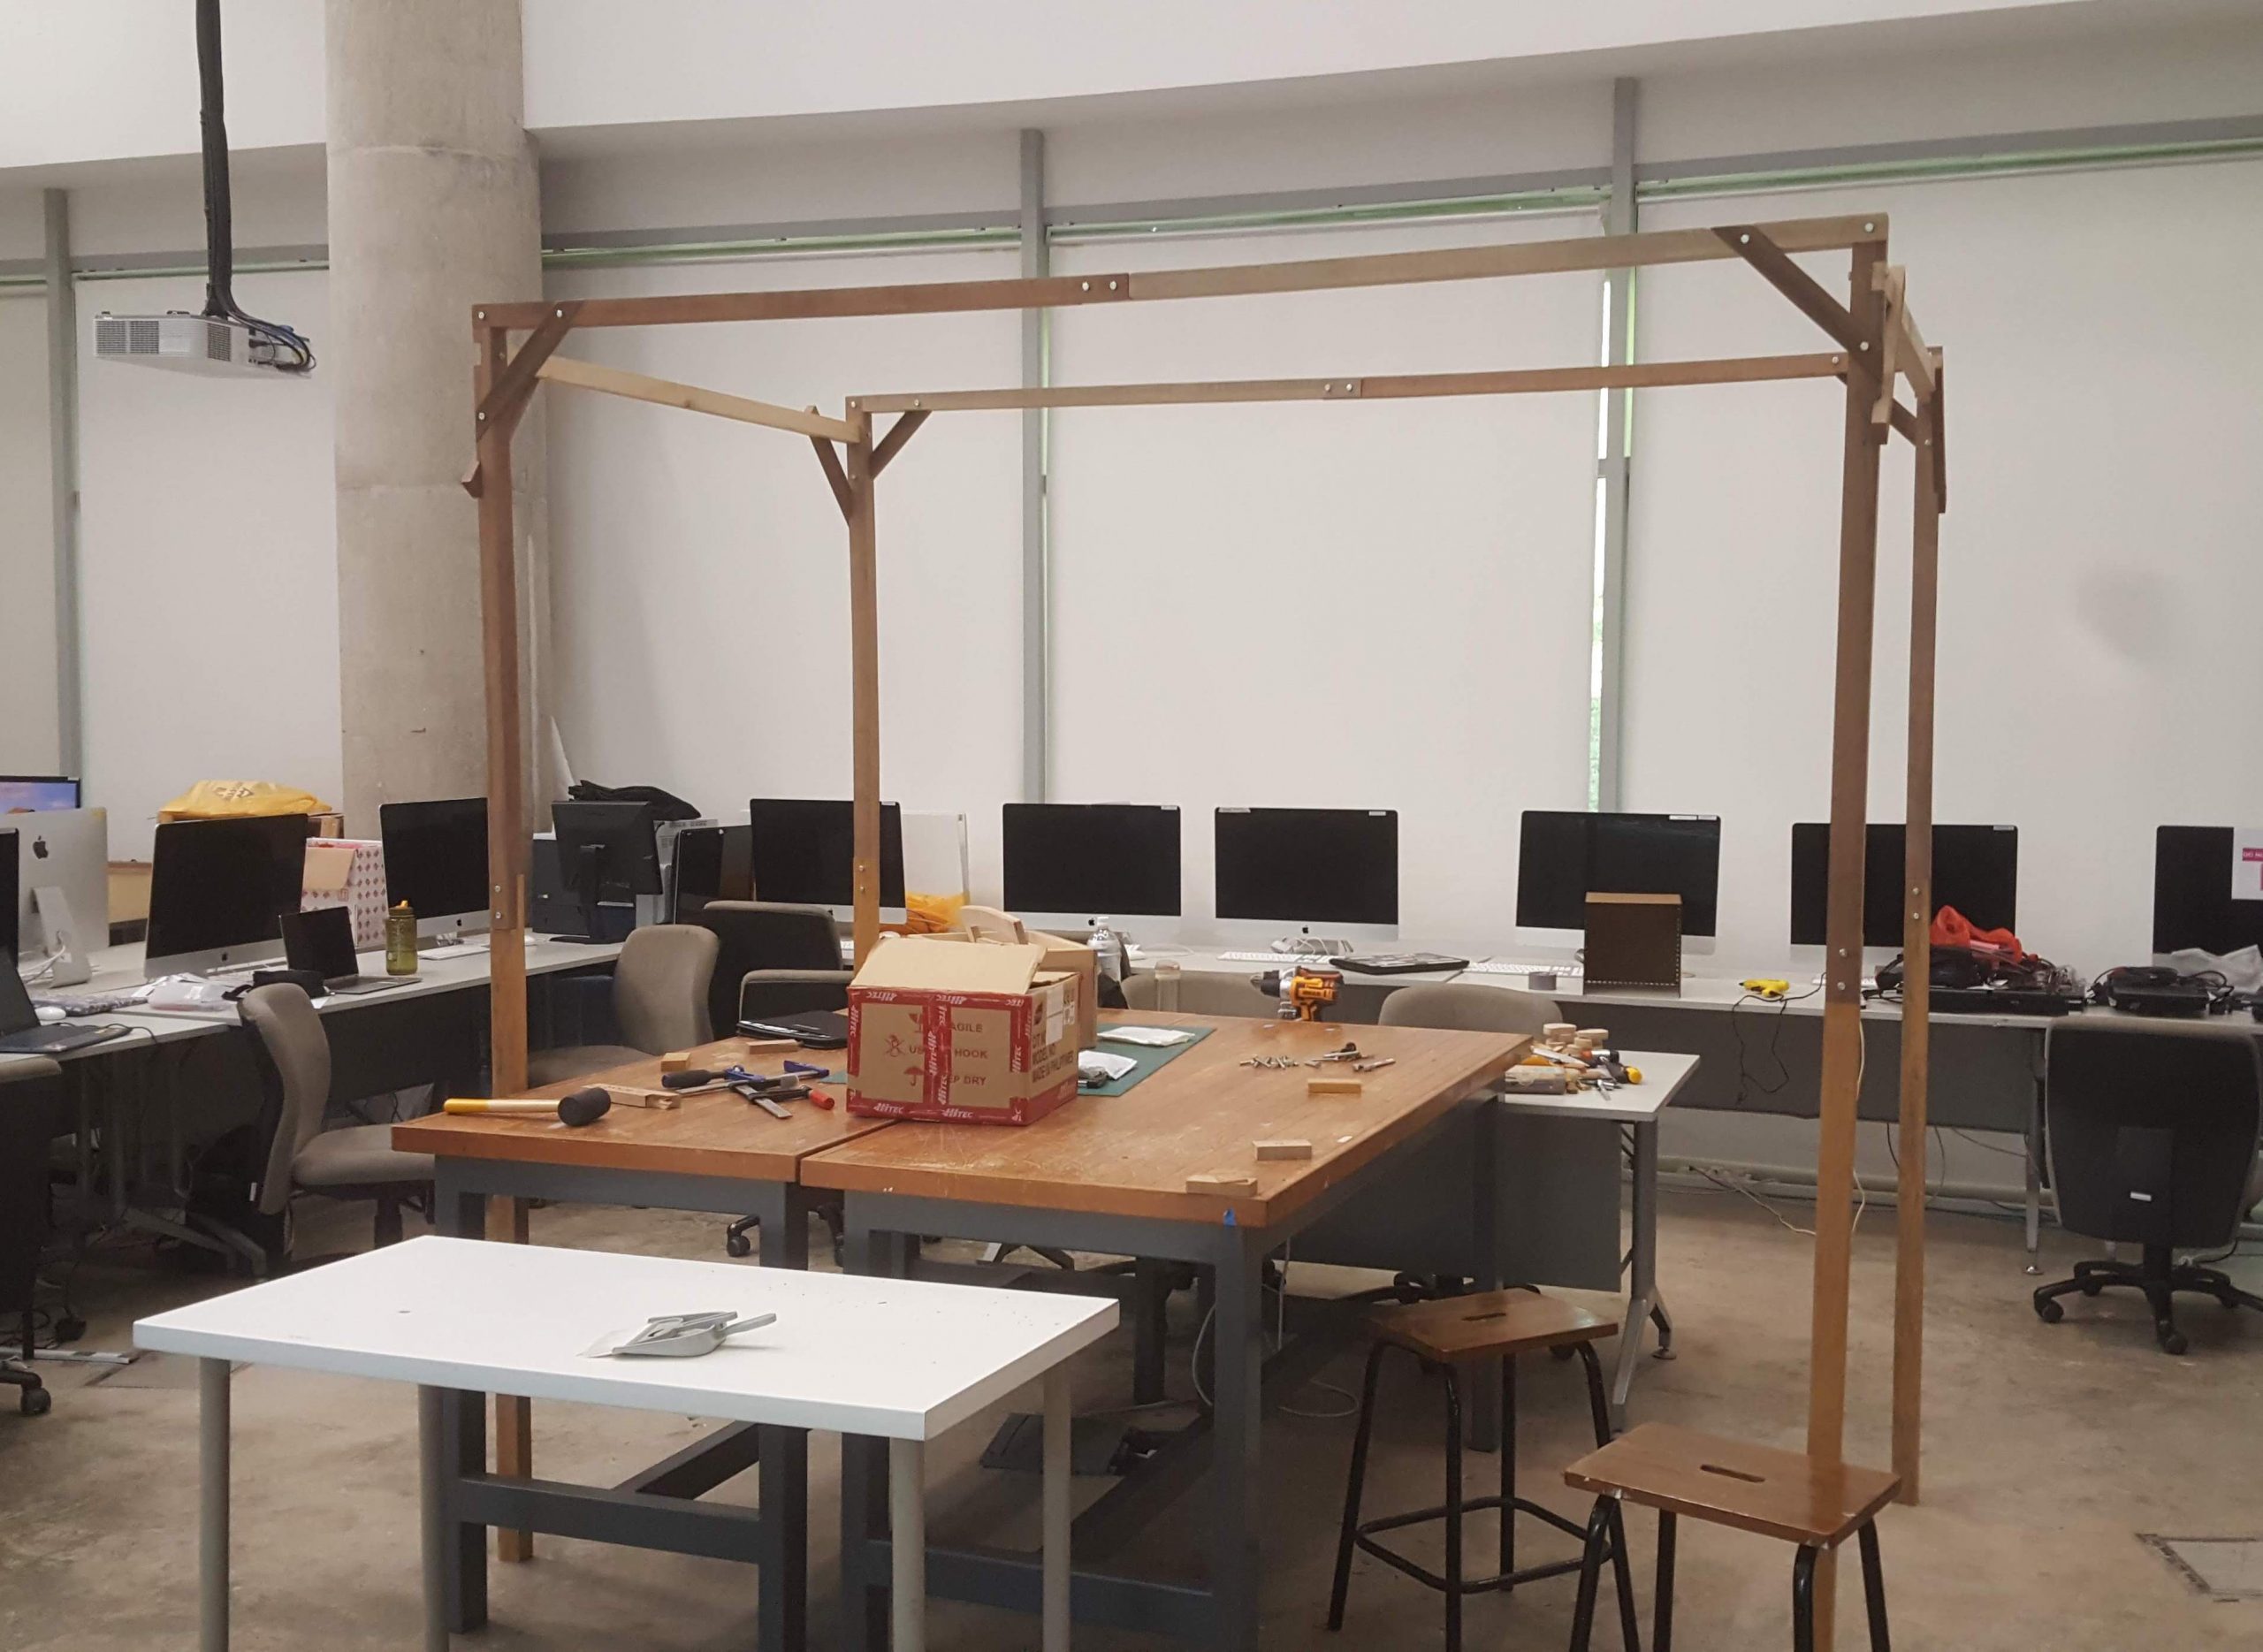
frame is more or less done, now moving on to the real stuff ?
Wk 9: Thermochromic ink


