Project 1 Final: My Lines Are Definitely More Emo Than I Am (I Just Want To Sleep)

Finally, after all the exploration and learning, I managed to produce my final piece. In this post, I hope to do a summary about my concept, overall approach, as well as the individual scripts and the reasons why they were curated as such.

OLYMPUS DIGITAL CAMERA
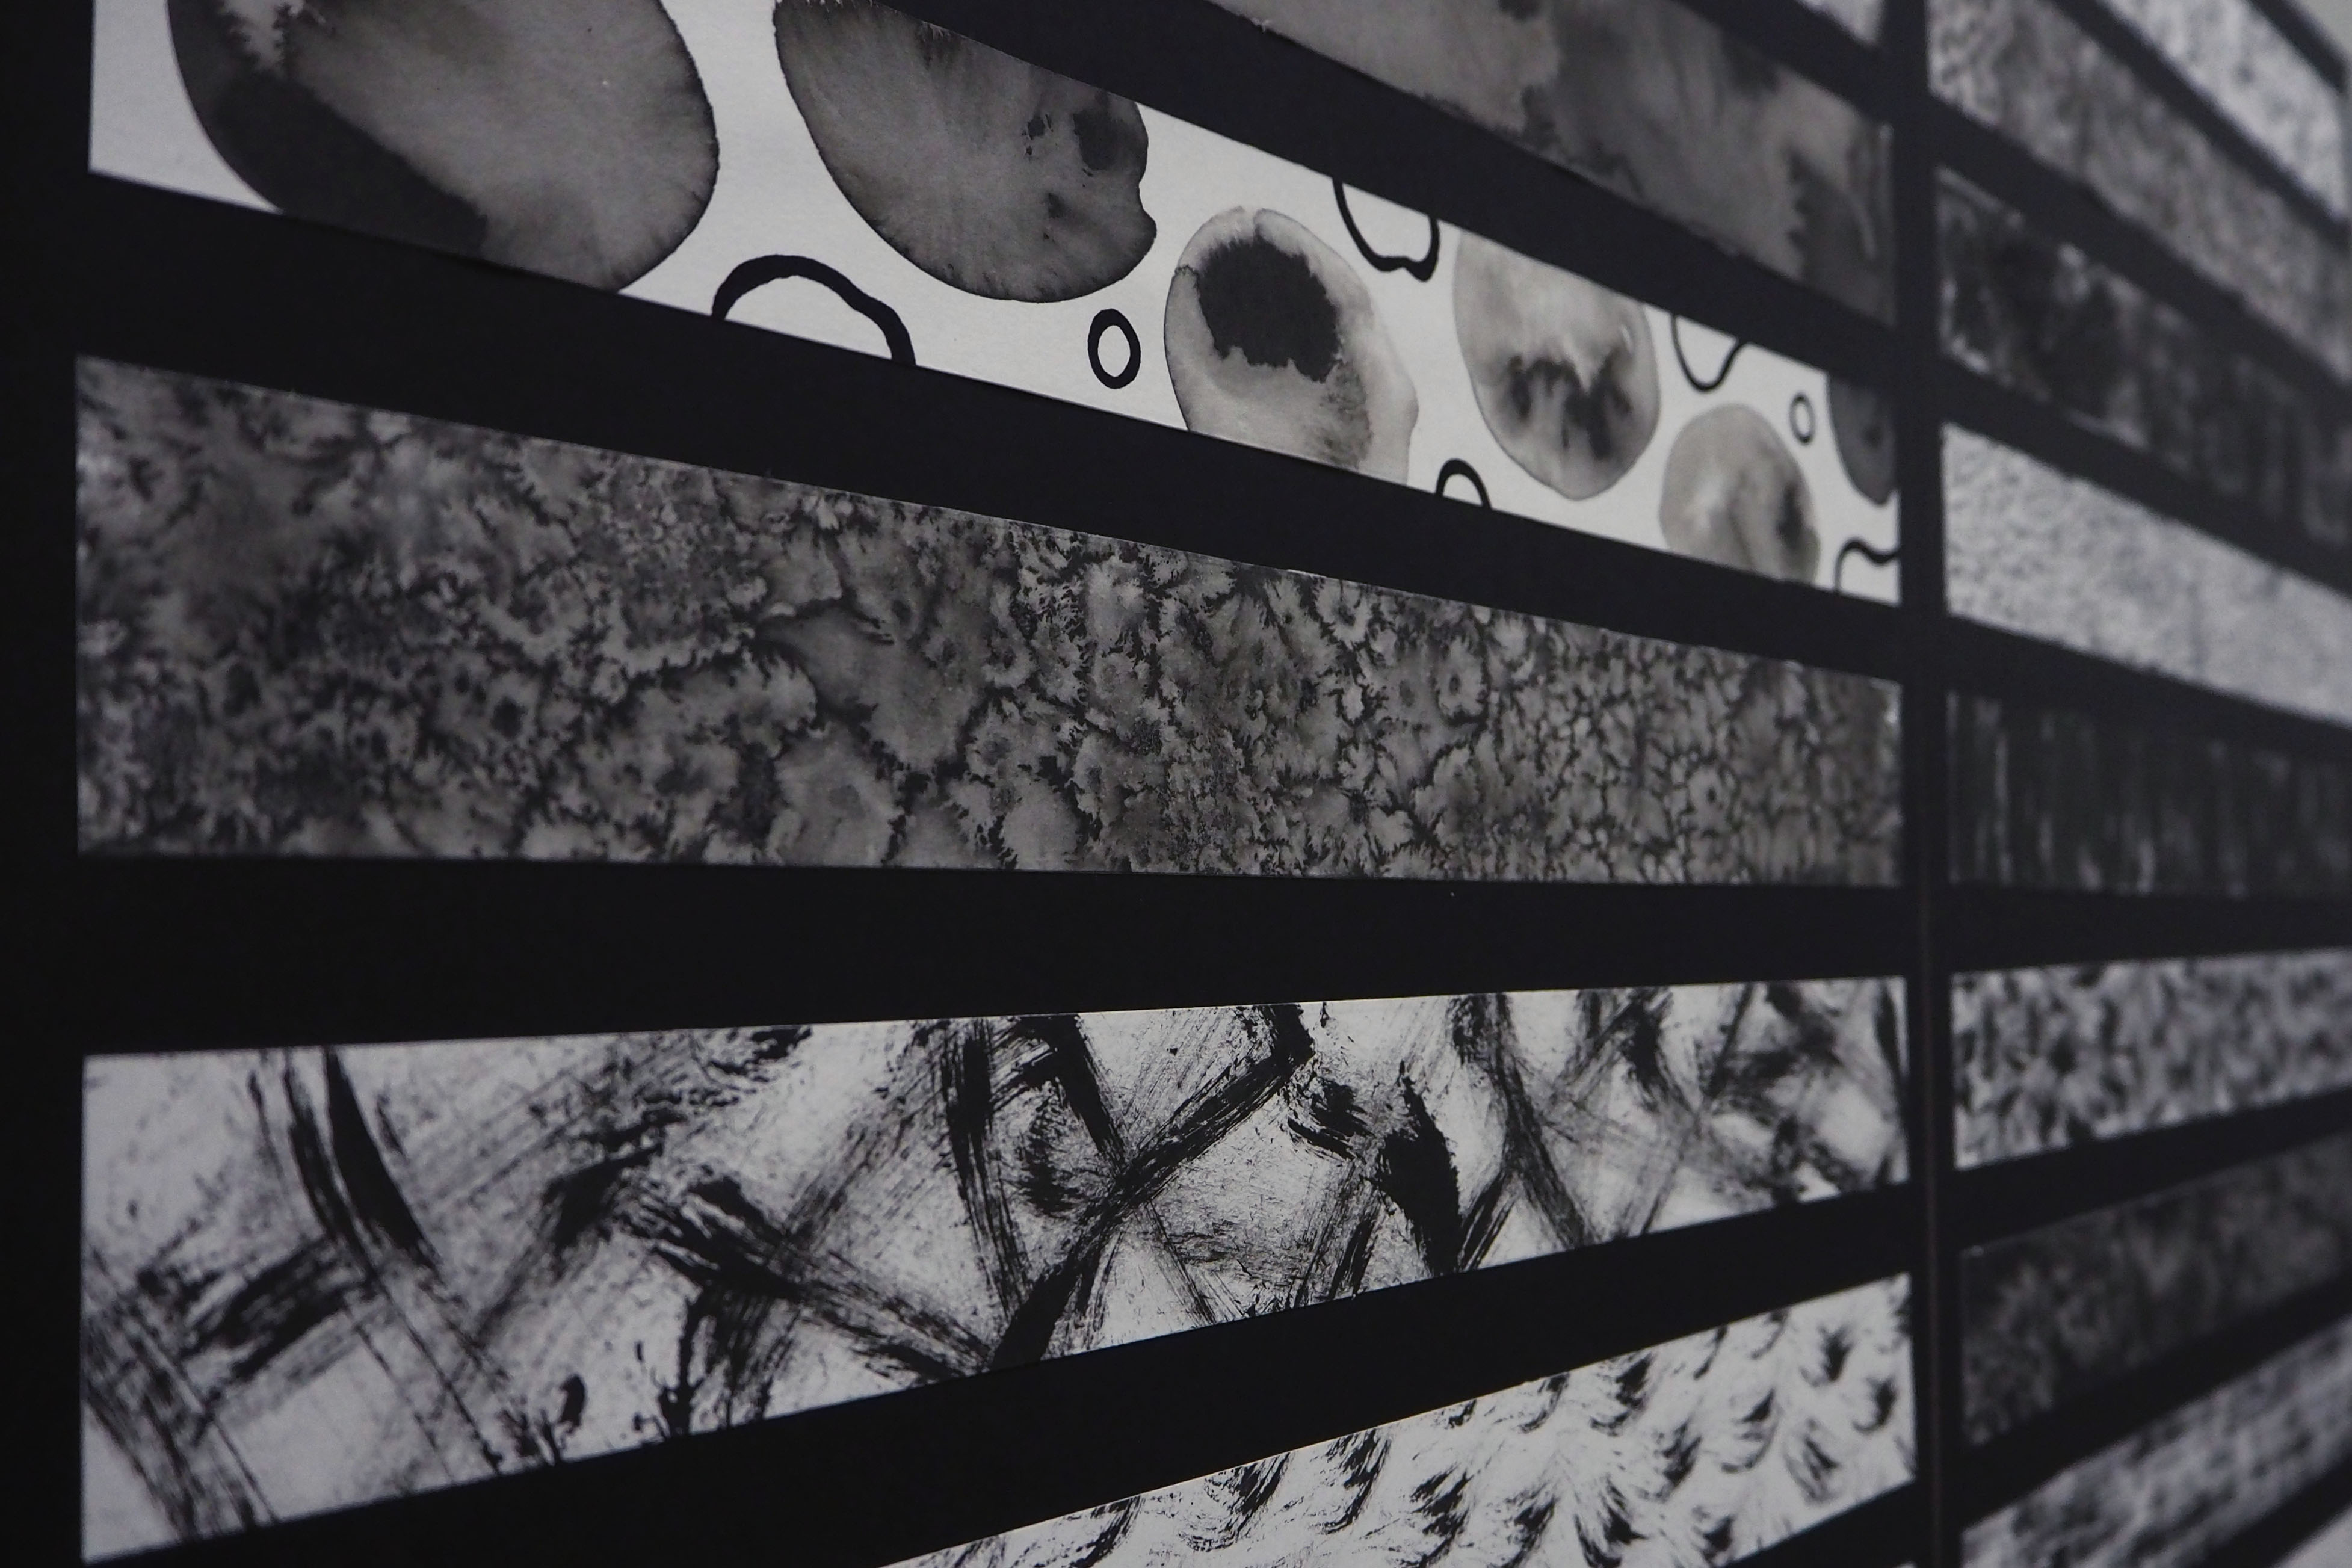
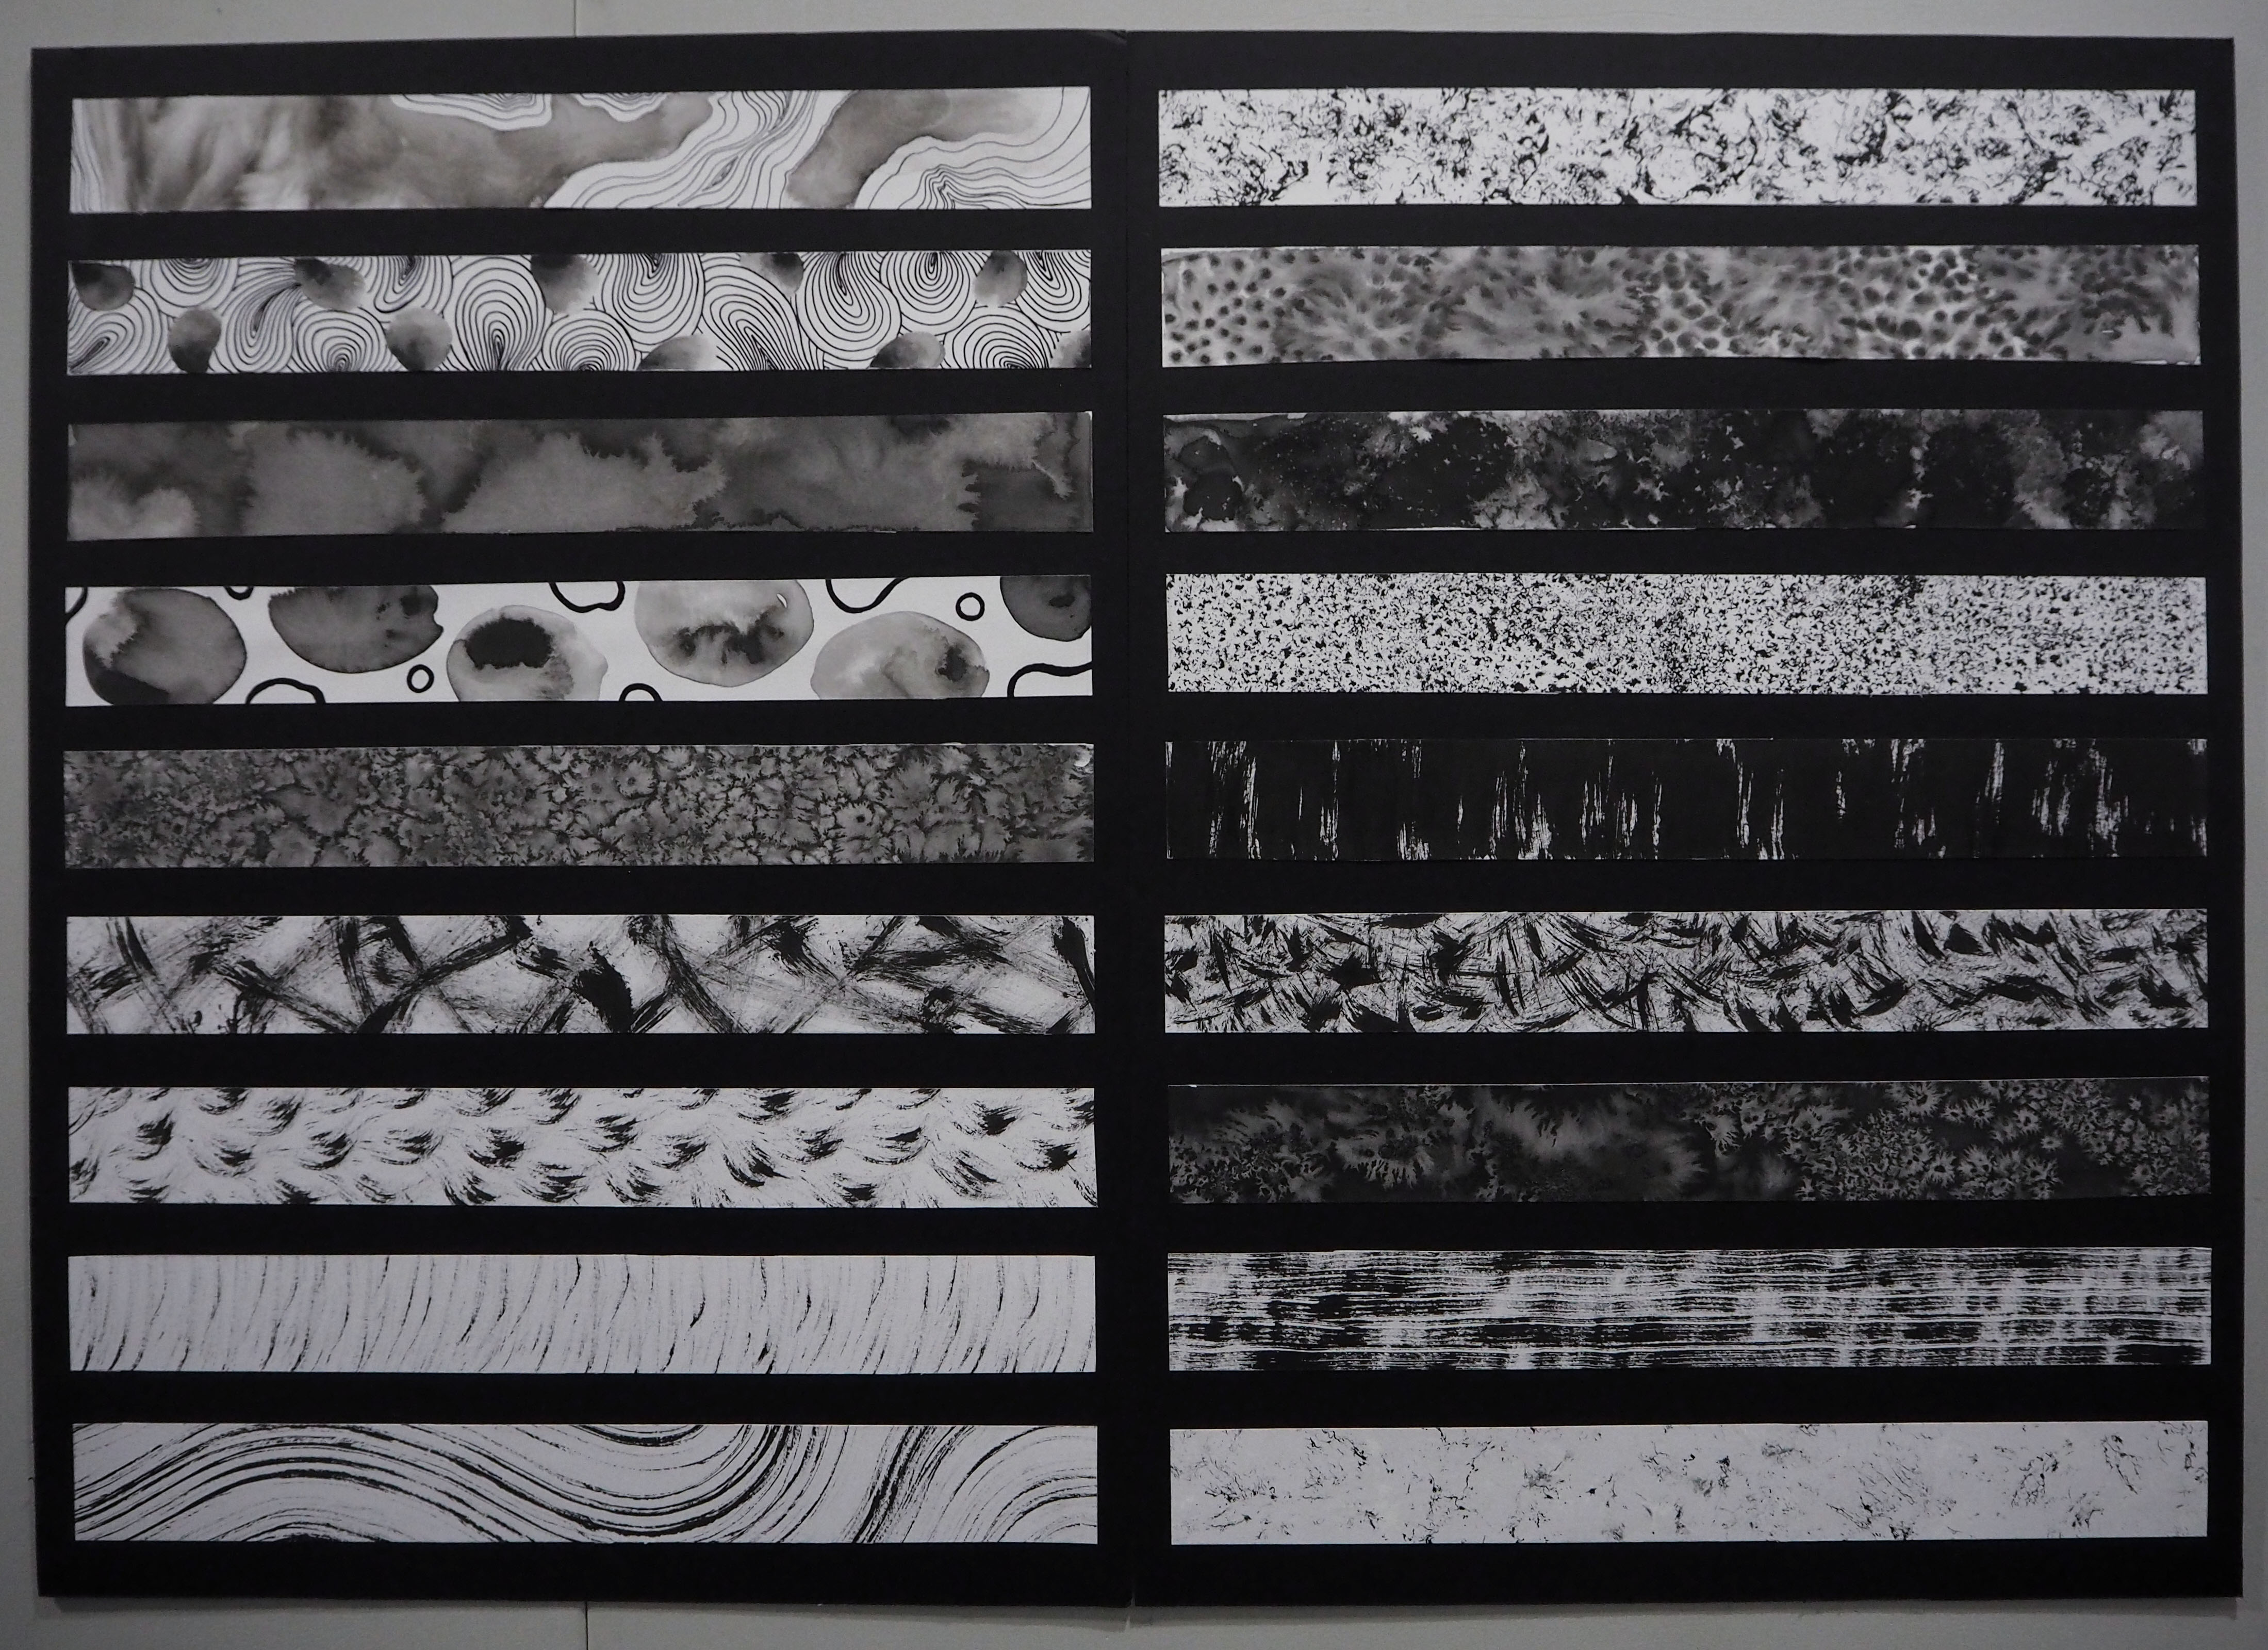
My Final Presentation of “My Line Is Emo”

Labels
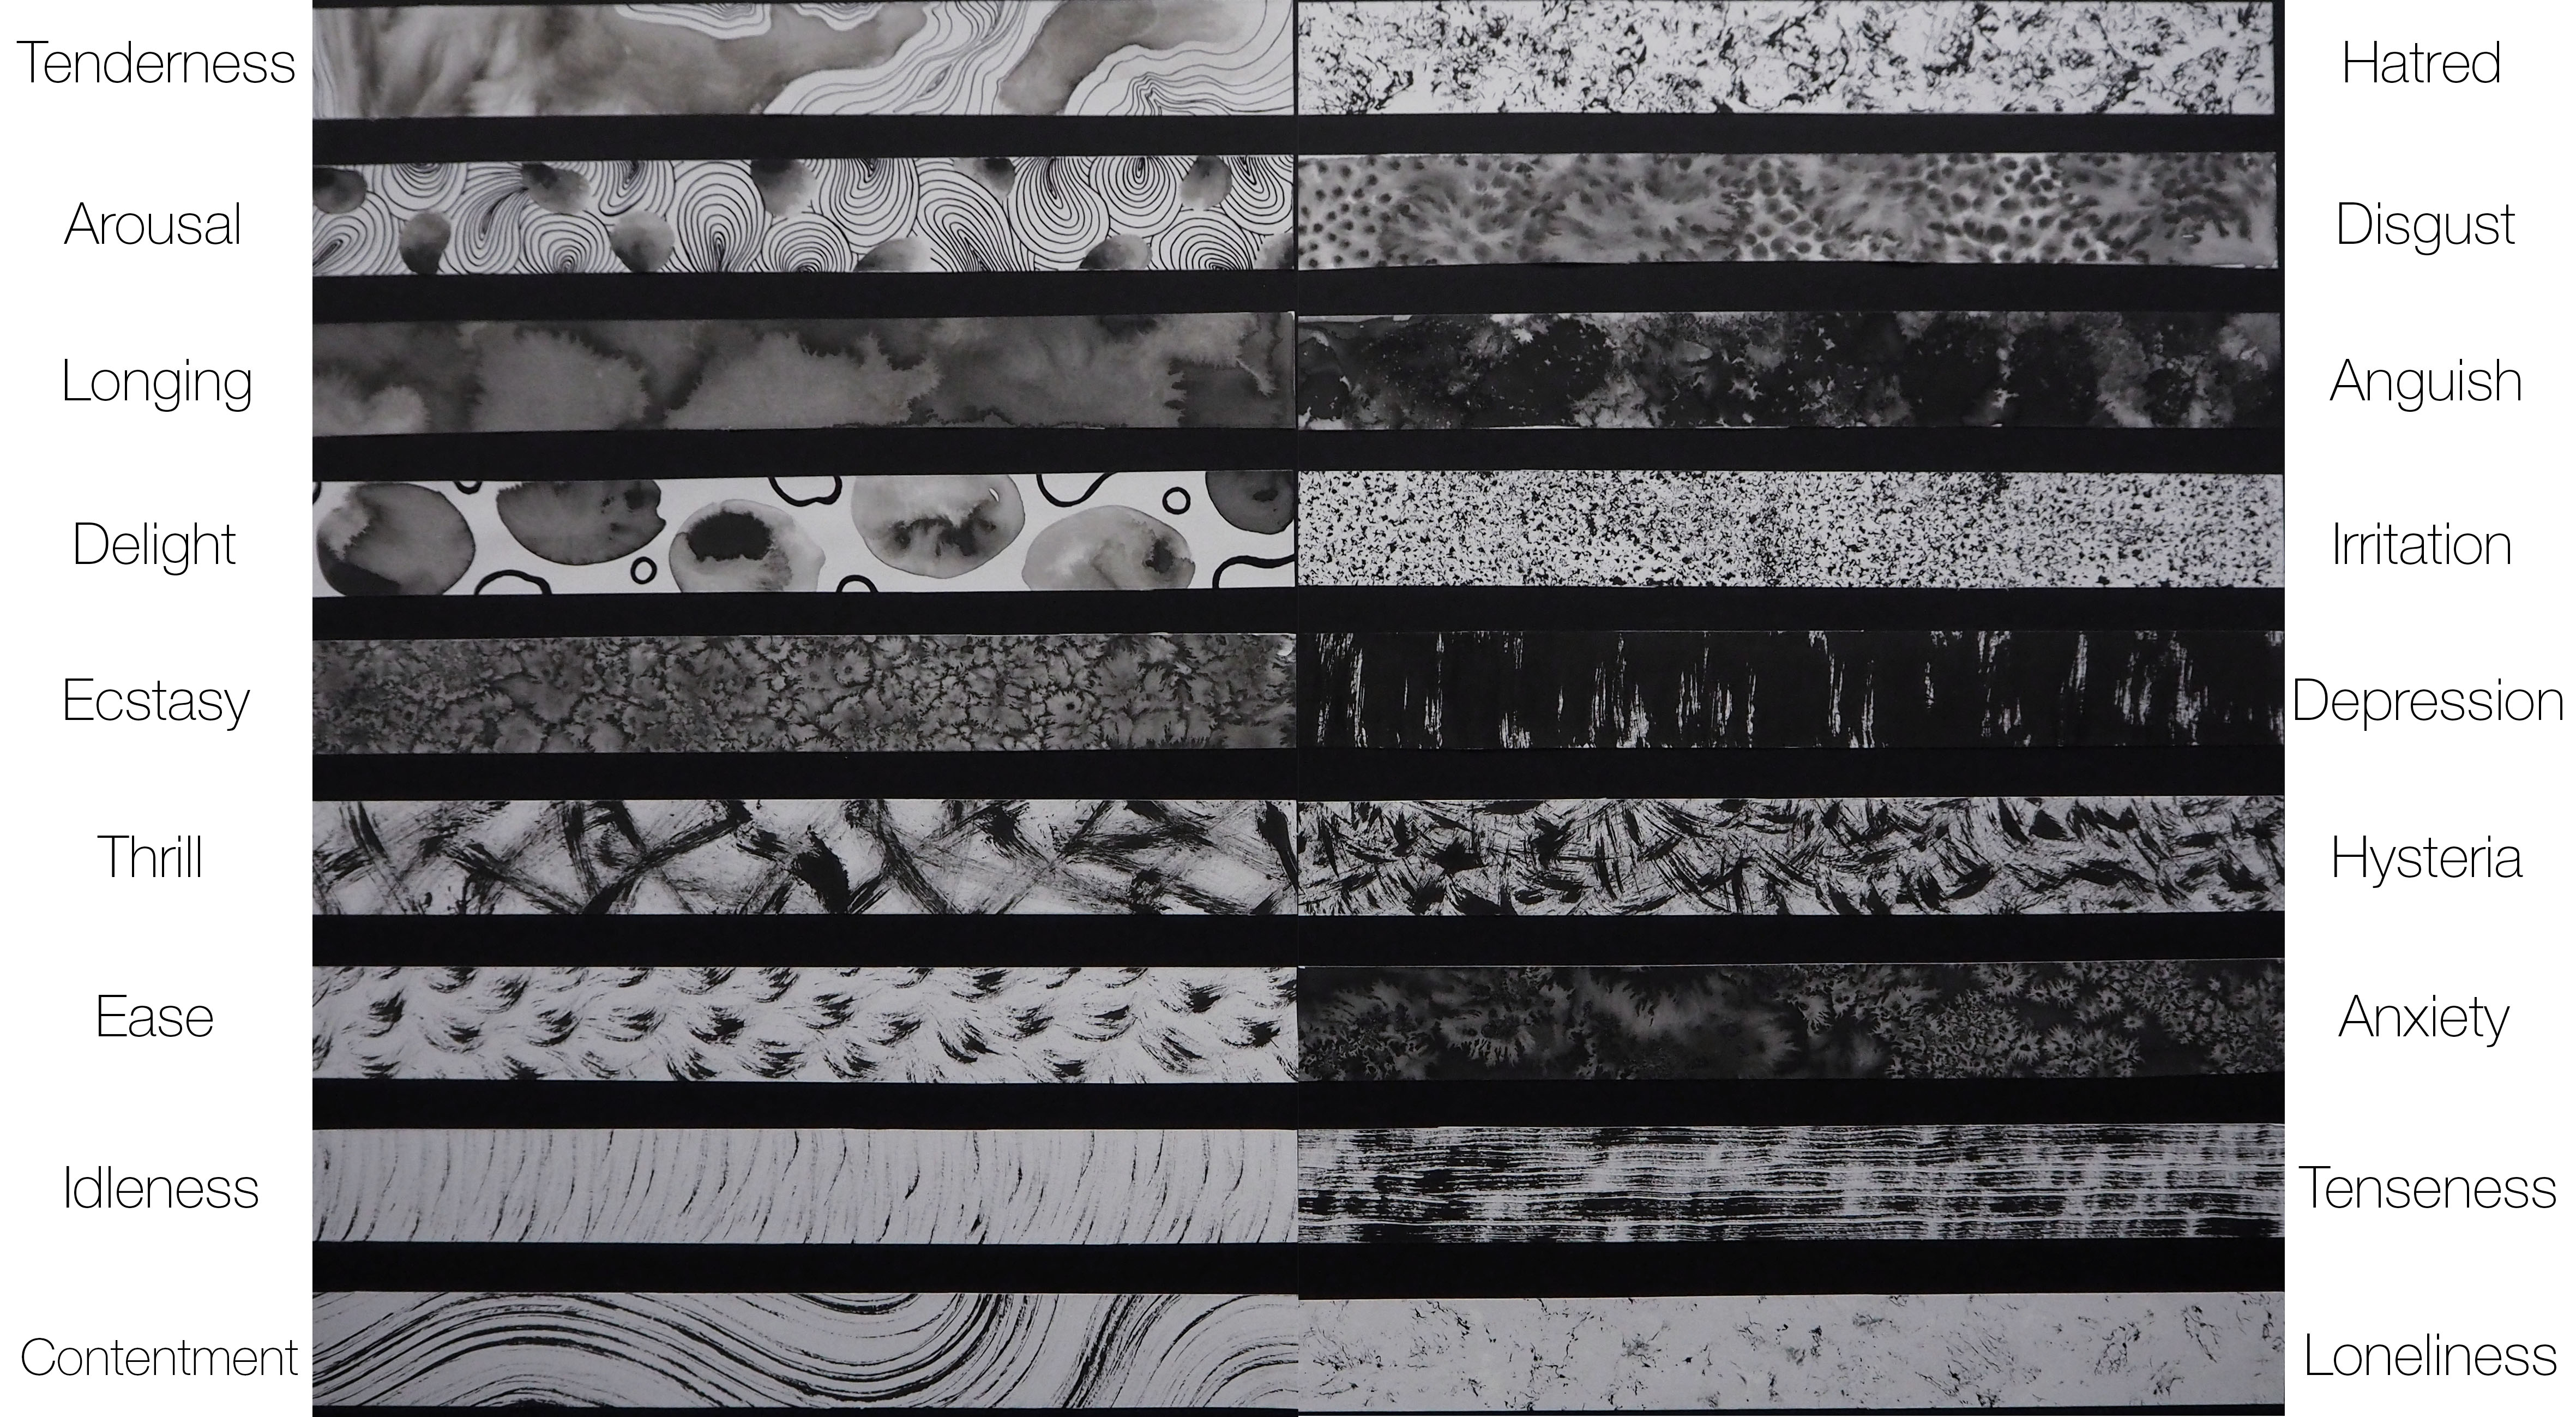
“My Line Is Emo” with labels

CONCEPT

My main concept is contrasting emotions. I feel that emotions do not exist as a singular entity. In order to portray emotions more apparently and realistic, the best way would be to place them next to similar or contrasting emotions, for both to complement and bring out each other.

My placement of strips follows my concept very closely. I started off by pairing negative and positive emotions off, usually grouping the emotions by their intensity, or relationship. From there I came out with this list:

Tenderness vs Hate
Arousal vs Disgust
Longing vs Anguish
Ecstasy vs Depression
Thrill vs Hysteria
Delight vs Irritation
Ease vs Anxiety
Idleness vs Tenseness
Contentment vs Loneliness

APPROACH

My approach was a blend of experimental and methodological. It started off extremely experimental for me to gain inspiration and insight into what mark making was about. Then, the methodological portion was when I paired off the emotions, and I would form an image of what I want each emotion to look like and how they should be created.

The approach I used could be summed up as one that was result-orientated instead of process-based. The process was not emotional, and does not imitate the body language of expressing emotions as it is focused towards producing an aesthetically pleasing piece that evokes the relevant emotions in the viewers.

I chose to standardise doing my marks on white drawing paper. As I wanted to limit my area of exploration to purely technique-based since mark making was already quite foreign to me.

18 EMOTIONS

TENDERNESS

Tenderness

I chose to use paper marbling to present tenderness due to its light value and organic water mark shape. The faded swirls within the water mark further enhanced the emotion, as to me they symbolised the stirrings of the heart when one feels tender affection towards another.

While the topographic lines were some sort of geometrical reflection of the paper marbling marks. The density of lines increases as it reaches the middle, creating an effect of a denser core of emotions spreading outwards. That I felt was the way in which tenderness was expressed.

HATE

Hatred

My interpretation of hate was not one of intense anger and aggressiveness. Instead to me, hate results from a sort of hurt and tenderness. Only when one cares, one would care enough to hate. There would be no reason to hate something you did not care about in the first place.

Thus, I wanted my hate to be presented in this rather delicate form of webbing. Where certain areas of the web are intensely darker, representing the tinges of anger in the hatred. While the other thinner lines branching out from the darker middles portrays the hurt and tenderness on which the hate is built on.

(TENDERNESS VS HATE)

OLYMPUS DIGITAL CAMERA

Similarity is found in how I chose to portray both emotion with patterns that have a darker core that spreads outwards, through the pen work in tenderness, and webbing in hate. The relationship these two share are extremely close, even though the prints turned out to be rather different in nature.


AROUSAL

Arousal

This one is similar to tenderness, but the pattern of circular lines grows denser towards the middle and is done repeatedly across the entire strip. This is because I think for arousal, intense feelings of the core are higher in frequency and urgency, thus the overlapping of the amorphous forms.

DISGUST

Disgust

The many dots of ink spreading within water creates a disturbing pattern reminiscent of trypophobia-inducing images or that of bacteria. I feel this appropriately presents the emotion of disgust.

(AROUSAL VS DISGUST)

OLYMPUS DIGITAL CAMERA

Both of these emotions are one that are of a rather physical nature. Physical arousal and attraction towards one could quickly turn into physical repulsion and disgust due to changes in circumstances. The contrast between these two would be while arousal is presented in large amorphous forms with dense cores, which are comfortable and hypnotising to look at; the small and dense nature of multiple ink dots instead evokes discomfort and irritation, in which disgust is founded on.


LONGING

Longing

The ebbs of light values within the darker value suggests a sort of warm and hope within the neutral space of darkness. Thus, I felt that it was appropriate in expressing longing. However, I would like to highlight that the overall value of this piece is still rather dark. This is because longing, as positive as it is, has an undercurrent of suffering, that of not getting what one wants and pining for it.

ANGUISH

Anguish

Dark circular ink blots suggests the pain felt in anguish and the web-like ink marks caused by salt on ink further represents the innate spread of emotion. The spaces with lighter values in between the dark blots of pain are used to create contrast between the dark blots and webs, and the background.

(LONGING VS ANGUISH)

OLYMPUS DIGITAL CAMERA

Both look similar but the difference in technique highlights the slight difference between the two. Longing is done through the manipulation of water, by dabbing parts of the inky water dry, while anguish is done through salt in ink. The salt gives the forms a more defined web like edge, while the edge of the forms in longing are less defined and thus seem softer and more positive in nature.

Furthermore, forms in longing are of lighter values as compared to their background, and this is a total opposite in anguish. I chose to contrast these two forms are they are extremely similar in nature, both being of pining for something, but one is of positivity and anticipation, and the other is of pain and torture.


DELIGHT

Delight
The circular forms of ink drips in water looks whimsical, and reminds the viewers of bubbles, something associated with play, to evoke a feeling of delight. I added circular forms in with pen to create variation and to make it seem collage-like, something lighthearted and delightful.

IRRITATION

Irritation

The density of irregular specks and marks creates a sense of discomfort, something that evolves into irritation when it reaches a point where it could no longer be overlooked.

(DELIGHT VS IRRITATION)

OLYMPUS DIGITAL CAMERA

I decided to compare these two emotions as they are both not extremely intense emotions, but more of an underlying feeling. This is seen by the amount of negative space both pieces have. However, the size of the circular print in delight is bigger and not dense all, giving a sense of peace and joviality. While, the size of the circular print of irritation is small and dense, resulting in a rather claustrophobic effect and thus more aggravating.


ECSTASY

Ecstasy

Ecstasy I felt would be represented through using extremely trippy optical illusion diagrams, as it disorientates the viewer and allows them to experience the adrenaline in ecstasy. The salt in the ink piece creates an effect of an optical illusiondue to its many tiny amorphous forms causing the same swirling effect optical illusion diagrams have.

DEPRESSION

Depression

The piece has an overall really dark value, and slices of negative spaces within the black are covered with dry brushstrokes suggesting a downwards motions. The combination of these two factors really creates an effect of gloom and pessimism.

(ECSTASY VS DEPRESSION)

OLYMPUS DIGITAL CAMERA

These two are very different in appearance, but they both have a sort of overwhelming energy and movement within the strips. Ecstasy has swirling motions and depression has an all-encompassing downwards sweep. Furthermore, both share overall darker values as both, even ecstasy, has an underlying tone of negativity.


THRILL

Thrill

The zig-zag dry brush strokes of the piece, creates an intensity and energy within the composition. The sharp turns connotes the speed of the strokes. These strokes are reminiscent of the speed of the roller coaster, something that is thrilling.

HYSTERIA

Hysteria

While for hysteria, the strokes are of medium length, criss-crossing in random directions and of varying thickness. The complex nature of the composition reflects the messy state of mind of one who has hysteria.

(THRILL VS HYSTERIA)

OLYMPUS DIGITAL CAMERA

I placed these two emotions in comparison as I felt they are emotions of similar intensity and energy, both running high on adrenaline. However, hysteria has the element of confusion and mess thrill does not have. Therefore, even though they are done in the similar style of dry brush strokes, thrill’s strokes are more straightforward, while hysteria’s are more complex.

EASE

Ease

There is an illusionistic texture of feathers created in this print. Feathers are associated with lightness, and thus effectively conveys the emotion of ease to the viewers.

ANXIETY

Anxiety

This is created by salt in ink, and the accidental unequal distribution of water. The tiny splatters of salt on the right side of the composition shows the underlying discomfort and panic. Then it proceeds to flow into larger fluid and viscous lines on the left side of the composition, evoking the sense of nauseous and dizziness one might have while having a panic attack.

(EASE VS ANXIETY)

OLYMPUS DIGITAL CAMERA

This two emotions are opposing emotions of the same nature. Feathery strokes are seen in both ease and anxiety, but within anxiety, the feathery strokes are liquidified into viscous strokes, thus making them take on a narrative of heaviness and suffocation, instead of the lightness of the dry brushed version.


IDLENESS

Idleness

The composition is made up largely of negative space with spiry brushstrokes all in an upwards motion. This was reminiscent of the lalang in the wind, a strong association with idleness.

TENSENESS

Tenseness

The irregular negative spaces within each long stroke across the strip evokes a sense of uncertainty. Tension originates from this sense of doubt and suspicion.

(IDLENESS VS TENSENESS)

OLYMPUS DIGITAL CAMERA

Both emotions are portrayed through the use of negative spaces. However, since they are completely opposing emotions, negative space is used to create a sense of freedom in idleness, but the constant switching between negative and positive space in teneseness is use to create a sense of constriction and restraint.


CONTENTMENT

Contentment

The calm satisfaction is conveyed through the smooth lines of the large S-shaped curves.

LONELINESS

Loneliness

The thin web-like lines lightly applied sparsely across the composition creates a sense of aching within the vast area of negative space which symbolises the emptiness felt when one is lonely.

(CONTENTMENT VS LONELINESS)

OLYMPUS DIGITAL CAMERA

Both are similar in terms of being emotions of emptiness. Thus, both have an overall light value. However, contentment is a peaceful and happy emptiness, while the emptiness in loneliness is sad and hurtful.

This concludes my 18 lines of emotions. I really enjoyed this mark making journey as I learnt a lot about this initially entirely foreign topic to me. Looking back, some things I wish I had worked on more was to be more daring in exploring the different techniques, as well as explore other techniques. Also, Joy mentioned that I could have labelled my work, which was one area I wish I had taken into consideration before presentation.

Regardless, I have no regrets as I felt that I did my best and had lots of fun learning and making marks. Now, it’s time to catch up on some sleep!!

Mark Making: Final Explorations (WIP Part II)

In this WIP post, I would like to share mostly about the methods and explorations I did while working on my final 18 strips. The techniques I used in my final work are loosely grouped into: Cotton wool dabbing, Salt in ink, Water in ink/Paper Marbling (and the ones with additional pen work), Dry brush, and a little bit of Mono-printing.

COTTON WOOL DABBING

This was a continuation from the initial explorations I did in the other post. There were improvements made in my technique to counter the problems I met previously. The issue was that the amount of ink in my palette had to be very little in order to coat just the surface of the wool. However, it was impossible to control the amount I pour each time. Therefore, I thought of painting a plastic surface with ink before coating the wool on that surface. That way the amount of ink would be appropriate.

OLYMPUS DIGITAL CAMERAPrevious attempts of hate

This was the print I visualised to represent hate. I wanted the entire piece to have a slightly darker value. I realised the trick to do so would be to re-coat the plastic surface each time I do the print, which was what I did in my last attempt.

Another emotion I did with this technique was loneliness.

Initially this was the print I visualised for tenderness. However, due to factor differences in coating of ink, I was unable to get the same effect I did in the previous times. Instead, the result I achieved reminded me more of loneliness. Tenderness and loneliness shared similar intensities, in terms of small ebbs of positive and negative emotions respectively. The difference lay in the nature of the mark. To me, tenderness should be portrayed by patches of faded dots, but this print had defined thin web-like lines, which was more suited to the more negative emotion of loneliness.

In addition, I was considering using this technique to create the emotion of longing.

OLYMPUS DIGITAL CAMERA

However, because I did it in inverse, white paint on black ink, I felt it was too incoherent with the rest of the strips, and abandoned the idea.

SALT IN INK

There was two main methods I used in this technique. One was to paint the strip with plain water first, drip ink into the water, then sprinkle the salt in. Another was to paint the strip with ink mixed with water, then sprinkle salt in.

The first method I used to express the emotion of anguish.

A few problems I encountered in these attempts was accidentally dripping too much ink resulting in the salt not being able to create the mark effectively.

OLYMPUS DIGITAL CAMERAExamples of my other attempts

However, I had to be careful not to drip too little or too apart. As all the ink drips in water created circular marks, and I did not want a polka-dotted print. So it was crucial to find a balance between the amount of ink dripped and the distance in which it is done so.

For the second method, I was very excited when I discovered it because it involved less variables as compared to the first method. I chose to use this second method to convey both esctasy and anxiety.

The only things I realised I had to be careful about was the amount of salt sprinkled and the duration in which the salt is left on the paper.

OLYMPUS DIGITAL CAMERAExamples of my other attempts

Esctasy was a beautiful mistake, the original print when the salt was just sprinkled did not have so much negative space. However, I was inexperienced and left the salt on the paper to dry. It was then I learnt that the longer the salt is left on the paper the more the ink would be absorbed by the salt, thus leaving even more negative spaces behind.

I had better control over the salt while doing anxiety, but not so much over the distribution of inky water. However, I think the affect turned out desirable.

WATER IN INK

Longing was the emotion I was trying to convey. I wanted to create spaces of lighter value within spaces of darker value, but did not want the salt effect. Thus, I decided to use a dry brush to dry up certain parts of the strip.

While for disgust, I created small dips of ink in water reminiscence of trypophobic inducing images.

I had to be very cautious while dripping though, as the water would flow which results in the concentrated ink spots to dissolve and dispersed, ruining the effect I was going for.

WATER IN INK (WITH PEN)

This was one of the emotions I had the clearest image of what I wanted it to be. I was convinced that the curvilinear pattern could best represent arousal but did not want it to be the only strip fully done in pen. So I decided to incorporate ink within it.

OLYMPUS DIGITAL CAMERA

Regretfully I did not manage to capture the process of creating delight (as seen above), but it was using similar techniques of ink and water with pen.

WATER IN INK (PAPER MARBLING)

This is one of the new techniques I tried. I did not think it would produce good results, as to my knowledge, paper marbling requires a certain kind of paint to make extremely distinctive marks. However, I felt that the light swirls of paper marbling could help me bring out feelings of tenderness. Thus, I decided to give it a try.

OLYMPUS DIGITAL CAMERAExamples of my other attempts

The first few attempts were really bad. I tried really hard to control the ink swirling within the water on plastic, making sure it was neither to sparse nor too diluted. It was also really hard to ensure that the shape of the water could fill the strip. Thankfully I did manage to get a pattern that I was satisfied with.

DRY BRUSH

I documented the process of creating this mark this time round. This is because I wanted to document how in creating thrill, a sense of fast motion strokes, my process of creation was filled with speed too. Thrill was one of the rare ones where the mark created revealed the process of mark making.

Tenseness was another one of such. While painting the strips out, I held my arm out unsupported, trying to draw a straight line as accurately within the strip as possible. I felt that the tenseness of my arm used to draw really reflected the emotion in the resulting mark.

Meanwhile, ease was a good example of how the process is different from the resulting mark. The process of creating ease was not slow, but brisk and precise. The required accuracy of the print made me really tense while making it. The brush had to be dry enough, but not too dry, to ensure a consistent and light print throughout.

For other emotions like hysteriaidlenesscontentment, and depression, I used the same techniques reflected in the last post, so I would not elaborate further, but instead talk about their characteristics in the final post.

MONO-PRINTING

Even though I said I would not be doing mono-printing previously, I realised that the print created by a foam piece really helps created the feeling of irritation with the irregular dense specks.

With this, I am almost done with Project 1 and my journey of mark making. Look out for my next post about my final presentation and basic summary of “My Line is Emo”!

Mark Making: First Explorations (WIP Part I)

We have finished presenting our first 2D task in ADM “My Line is Emo”, and I’ll like to do a little looking back on how I started my mark making journey in these weeks.

On our first lesson, we started our venture into mark making by learning mono-printing. I brought a lotus root for printing, as I was fascinated by the organic shape of the vegetable and thought that the creases on its flesh might make an interesting pattern.

Lesson 1

Lesson 2

However, the resulting effect was not what I expected due to the limitations of mono-printing. I was hoping for the ink to capture more texture of the sliced lotus, but the prints turned out to be a rather solid patch of colour.

OLYMPUS DIGITAL CAMERA

Next, I decided to try to print a netting and a binder. Both of which created really interesting results. However, I felt that none of the prints were what I was looking for in terms of the project brief in “My Line Is Emo”.

OLYMPUS DIGITAL CAMERANetting Print

OLYMPUS DIGITAL CAMERABinder Print

After realising that mono-printing was not the technique I was looking to do in my project, I decided the best way to continue was to try out some mark making techniques. Some techniques I explored were the dry brush technique, cotton wool dabbing, water with ink, and salt in ink. In exploring these different techniques, I had important takeaways that would eventually define my final work.

At first I was just trying out different strokes of the brush. As I continued, I realised there was a specific way I approached this mark making, I would constantly work on and improve the same print I did if I felt that the result I got was not desirable. Thus, I had a lot of pieces done in similar methods, but had differing resulting effects.

Here are some examples:

Comparison 1

This two pieces were created using short brisk dry brush strokes that were done by flicking my wrist. However, after doing the first piece, I felt it was too messy and wanted to see how it would look like in a neater format. Thus, I immediately did the second piece.

It was then I started to realise how the contrast between the two brought out different emotions. For the first piece, as it was brisk and messy, possibly suggesting emotions of hysteria or agitation. In comparison, the second piece looks calm and the illusionistic feathery texture it created gives it a feeling of lightheartedness and ease.

Comparison 2

While for these two, they were both created using cotton wool, repeatedly torn to ensure consistency in texture, then dipping into my almost dried-up ink palette before dabbing onto paper. The difference in this two prints was actually an accidental creation. I wanted the prints to be light, but after dipping the wool in ink, the first dab would definitely be too dark in value. Thus, one piece of paper was used for the first dab, before dabbing the second piece of paper. After doing so, I observed that the piece lighter in colour in photo two brought out emotions of tenderness and love. The piece darker in colour in photo one, in contrast could possibly evoke feelings of hatred and loathing.

Through this exploration I had my first takeaway: Drawing contrast and difference in prints can better bring out the emotions the mark is trying to present, and this would be something I would like to use in my final project.

Here are some other marks I tried that did not really resonate with me:

Others

Some evoked emotions, while others were just pleasant to look at. I also tried contrast within compositions but I did not really like it.

Next, I tried a more directed approach in trying to form emotions. One experiment I did to attempt to create the emotion of surprise was to ask my friend to “surprise” me at random intervals. I would start off by drawing a continuous line and each time she said “change” I would flick my wrist upwards.

OLYMPUS DIGITAL CAMERA

OLYMPUS DIGITAL CAMERA

The results were an interesting pattern albeit a little messy, but I felt it did not really present the emotion of surprise to the viewer.

I also tried to create several patterns of anger by physically imitating the body language of anger.

OLYMPUS DIGITAL CAMERAMaking harsh angry strokes across the paper

OLYMPUS DIGITAL CAMERA
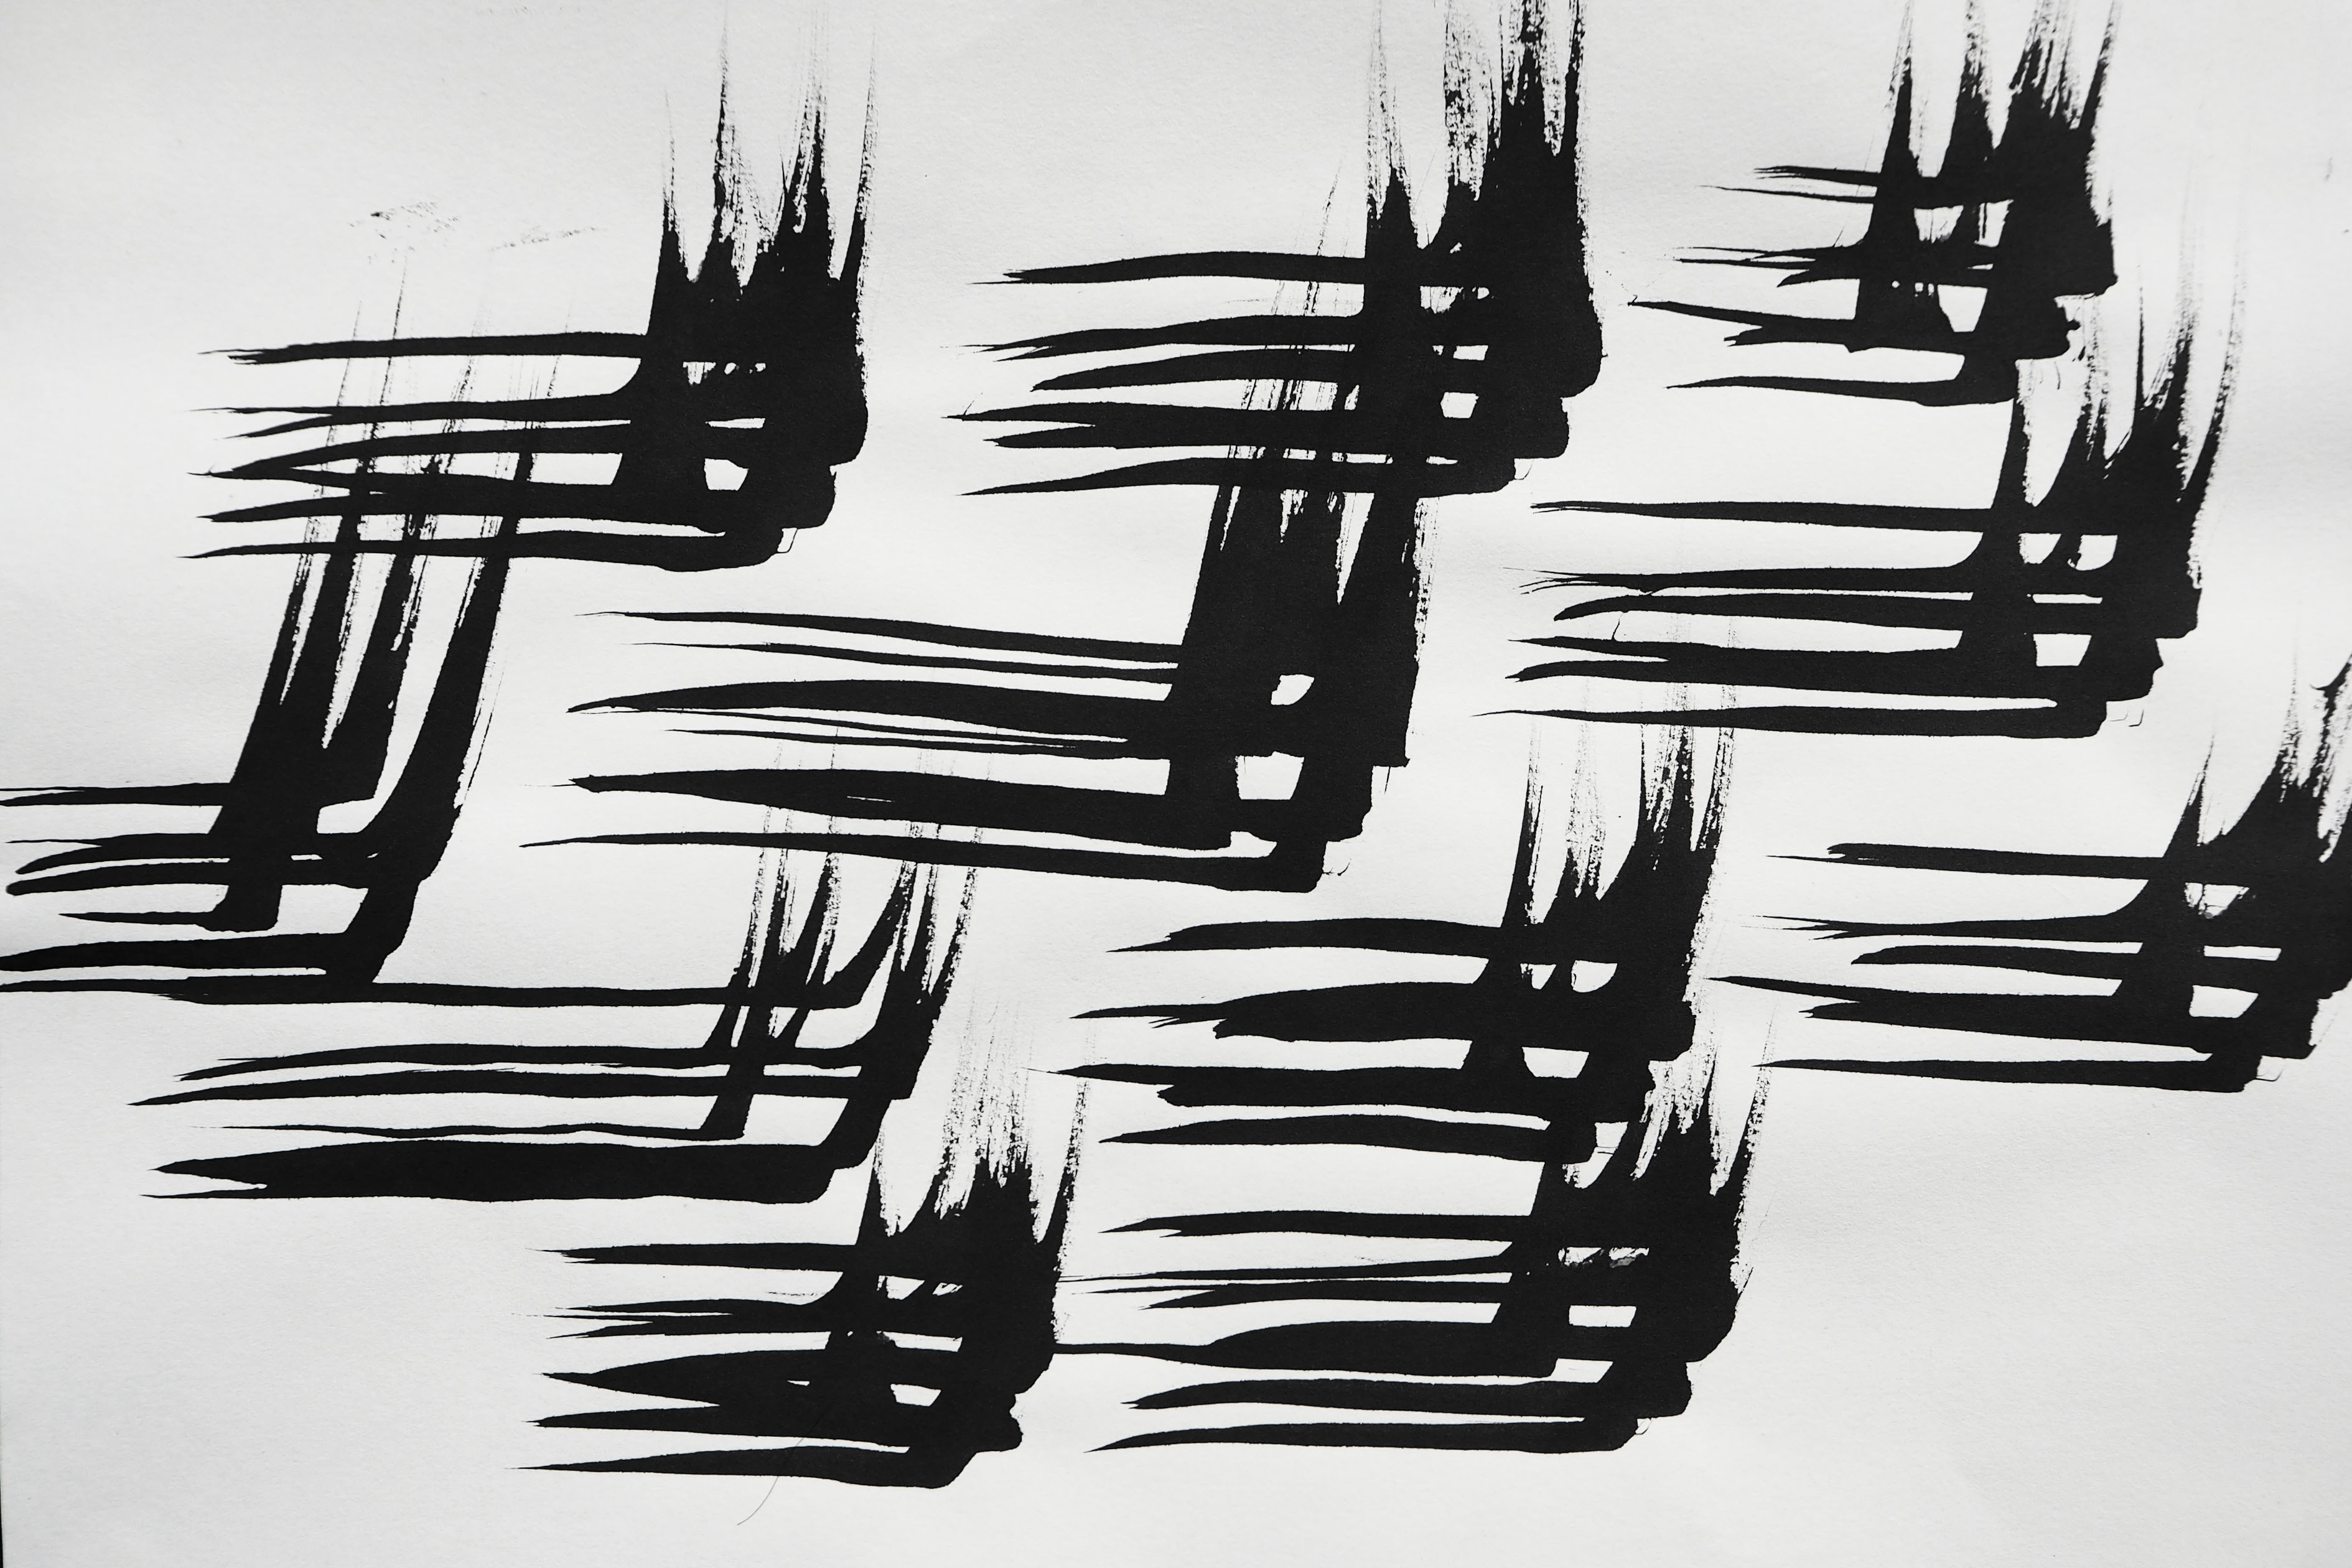
Jabbing the brush violently into the paper

OLYMPUS DIGITAL CAMERAAggressive and frantic swirls on paper

OLYMPUS DIGITAL CAMERATrying to “shake in anger” literally while drawing lines across the paper resulting in jagged lines

These were process-centric prints whereby the process in creating the mark displayed anger but the results on the paper did not. This was something I wanted to avoid.

Through this directed approach, I had another important takeaway: I prefer a result-centric approach instead of a process-centric approach as I wanted the viewer to be able to feel the emotions I was trying to portray in my mark.

Other than these two main takeaways, I had other smaller observations.

OLYMPUS DIGITAL CAMERA

OLYMPUS DIGITAL CAMERA

OLYMPUS DIGITAL CAMERA

By reducing the negative spaces of the mark in the first two photos, it will evoke a more sombre mood as it has an overall darker value. This is as compared to the piece in the last photo with a lot of negative space.

Also, I really like the effect of water with ink and salt in ink as it produced marks impossible to recreate using the brush, and I felt it could express emotions of anguish.

Water 1

OLYMPUS DIGITAL CAMERA

OLYMPUS DIGITAL CAMERA

However, as it was my first time working with salt in ink, the marks I produced was not very successful. I would definitely have to continue working and improving on it.

To sum up, my first experience with mark making was really eventful, and it was really a journey of learning for me. It forced me to start to observe qualities of the prints, like the thickness of lines or value of the mark, something I do not usually take into consideration. Furthermore, I realised that mark making, especially the ones made with more experimental methods, was actually really hard. It made me look at mark-making artists with ten times more respect now.

Continue reading more about my mark making journey in my second post. See you there!!

4D Project 1: Picture Story – Curating Self

TASK 1: ME1a
1b

1c

This task is supposed to creatively introduce myself to the viewer using three photographs. I was trying to express the main idea of façade and appearance. As I have always been a rather guarded person, I was trying to portray this quality in my three photographs.

IMG_8693

The photographs are meant to be viewed from left to right, they are placed side by side in a horizontal layout as I wanted the viewers to see the three photos as a whole singular narrative. I chose to mainly portray my face as I feel that it is the first thing that people see when they meet a person, a direct physical representation of one’s identity.

For the first photograph, I took it when I just woke up. My idea was at the moment one regains consciousness from slumber, there would not be a chance for one to put on a façade or mask one’s true self. Thus, I would be showing my most vulnerable and raw “face” with my guard down.

The second photograph was supposed to act as a transition between the first and last. The white veil I positioned in front of my face and eyes symbolises the masking of myself and putting my guard up.

Lastly, in the third photograph, is my daily guarded face. This is also the only photograph where my eyes are clearly looking straight at the viewer, to represent how this is the only appearance I choose to allow others to see. My face here is captured to be positioned and angled almost exactly like the one in the first photograph. This mirroring is to further highlight the contrast between my vulnerable self and my guarded self.

The few other methods I used in the photograph to convey the idea of facade would be through my facial appearance and colouration.

My facial appearance in the first photograph is deliberately made more dishevelled, as compared to the final photograph where I had some makeup on and looked distinctly more put together and groomed. This was significant to me as my groomed self was a mask in which I feel more confident in and less vulnerable, thus, well-guarded.

For colouration, the first photograph is in a warmer hue of yellow, which emphasizes the vulnerability of the subject. This hue eventually transitions into a cool hue of blue in the third photograph, which signifies a colder, more distant persona who has her guard up.

Process

img_4201Photo: http://www.sothebys.com/content/dam/stb/lots/N09/N09141/714N09141_7BFK5.jpgG04A01Untitled-85_1981_large-929x475Photo: https://www.moma.org/interactives/exhibitions/2012/cindysherman/lib/uploads/G04A01Untitled-85.1981_large-929×475.jpg

For this series, I was loosely inspired by Cindy Sherman’s Centerfold Series. I was mostly trying to observe how Sherman portrays vulnerability in her photographs through the appearance and the facial expression of the subjects. The influence of her work is mostly reflected in my first photograph.

Collage

Here are some other photographs that I took that did not make it to the final selection. I tried close ups and other angles of my face. However, I decided that I would prefer a similar angle between the first and last photograph to ensure coherence.

TASK 2: OBJECT AND REPRESENTATION OF SELF

2b

2a

2c

The task is to pick an object which has significance or symbolic value to you, the item I pick is my glasses. This item is extremely significant to me as I have been near-sighted since I was six years old. Thus, my glasses are the thing that gives me sight and allows me to lead a normal life.

IMG_8716

The layout of the photographs are in a triangular composition. This is to facilitate my expression of my concept.

My concept was to express by love-hate relationship with my glasses. The top-most photograph acted as a neutral one to express how my glasses give me a new clear perspective of the world, an improvement from a blurry one without it.

The lower left photograph portrays my dislike towards my glasses. This dislike is something of my pre-teen years, where my glasses kind of solidify my identity as a “nerd”. While the lower right photograph presents my appreciation and admiration for such a small object to have such a large positive impact in my life.

My dislike and appreciation is contrasted by the position of my glasses. In the photograph of dislike, I am looking down at my glasses, holding it far away from my body, almost to the point to dropping it. While to signify my love of the glasses, the photo is taken from a top-down perspective where I look up smiling towards my glasses. The perspective emphasises the feeling of admiration and how the object is one of importance.

Process

I did not really refer to a specific artist for this task but I was taking photos in the general style of advertisements, to somewhat “sell” the greatness of my glasses.

Post 1

I tried other shots as stated in the project brief. However, I felt like they do not portray my feelings with the object as obviously.

TASK 3:MY WORLD
3a

3c

3b

The last task, I am supposed to choose a place that is significant to me. However, I decided to interpret the task differently, as I strongly believe that the people makes the place, not the other way around. For me, a place would hold no significance if there were no memories with people associated to the place.

IMG_8717

Thus, I decided to portray the same group of people in three distinctly different settings to convey my idea. I decided to place the photos in this layout, as I would like the viewer to see each photo individually. Each shot is composed in a way so that the subjects are in close proximity to the viewers. This is so they can feel as though they are viewing the world through my eyes.

Another thing I would like to highlight is, unlike the previous two tasks that I took with a DSLR, I did this task with an iPhone, as that is usually the gadget we use when we are out with our friends, so I felt it would seem more natural that way.

Process

I truly believe that people makes the place, but I was further inspired by this question in the project brief, “Is it the people, the environment, or a combination?” It made me come to my final decision of using this as my main concept.

I did have some difficulty securing these shots though, as during the outing w my friends, I realised I did not have a wide-angled lens. Also, sometimes my friends were not sitting in an aesthetically pleasing composition, so for those shots, I had to ask if they could shift.

With this, my Project 1 for 4D draws to a close. I had fun doing this assignment and am looking forward to more photo shoots in the future.


Props As Signifier

Object as an Icon

IMG_8426

IMG_8429

IMG_8428

Object Connotes New Meaning
IMG_8452For this photograph, I was trying to make the pencil case take on the persona of a person who just committed suicide by jumping. The stationery spilling out haphazardly is supposed to symbolise the guts of the person splattered across the road.
IMG_8439While for this photograph, the pencil case is supposed to be some sort of road block the man is going to skateboard right into, and he is desperately trying to stop.
IMG_8449In this the photograph, the pencil case acts as a sort of plank the lady is walking across.