This interactive device makes use of 2 Infrared sensors to detect presence of obstacles from behind, particularly useful in places where you may potentially block someone’s path (narrow paths, etc). It can also be used as a defensive too for early warning of someone sneaking up on you.
How it works:
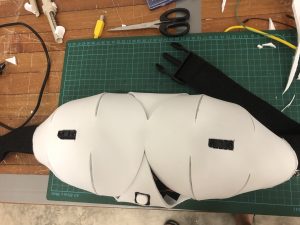
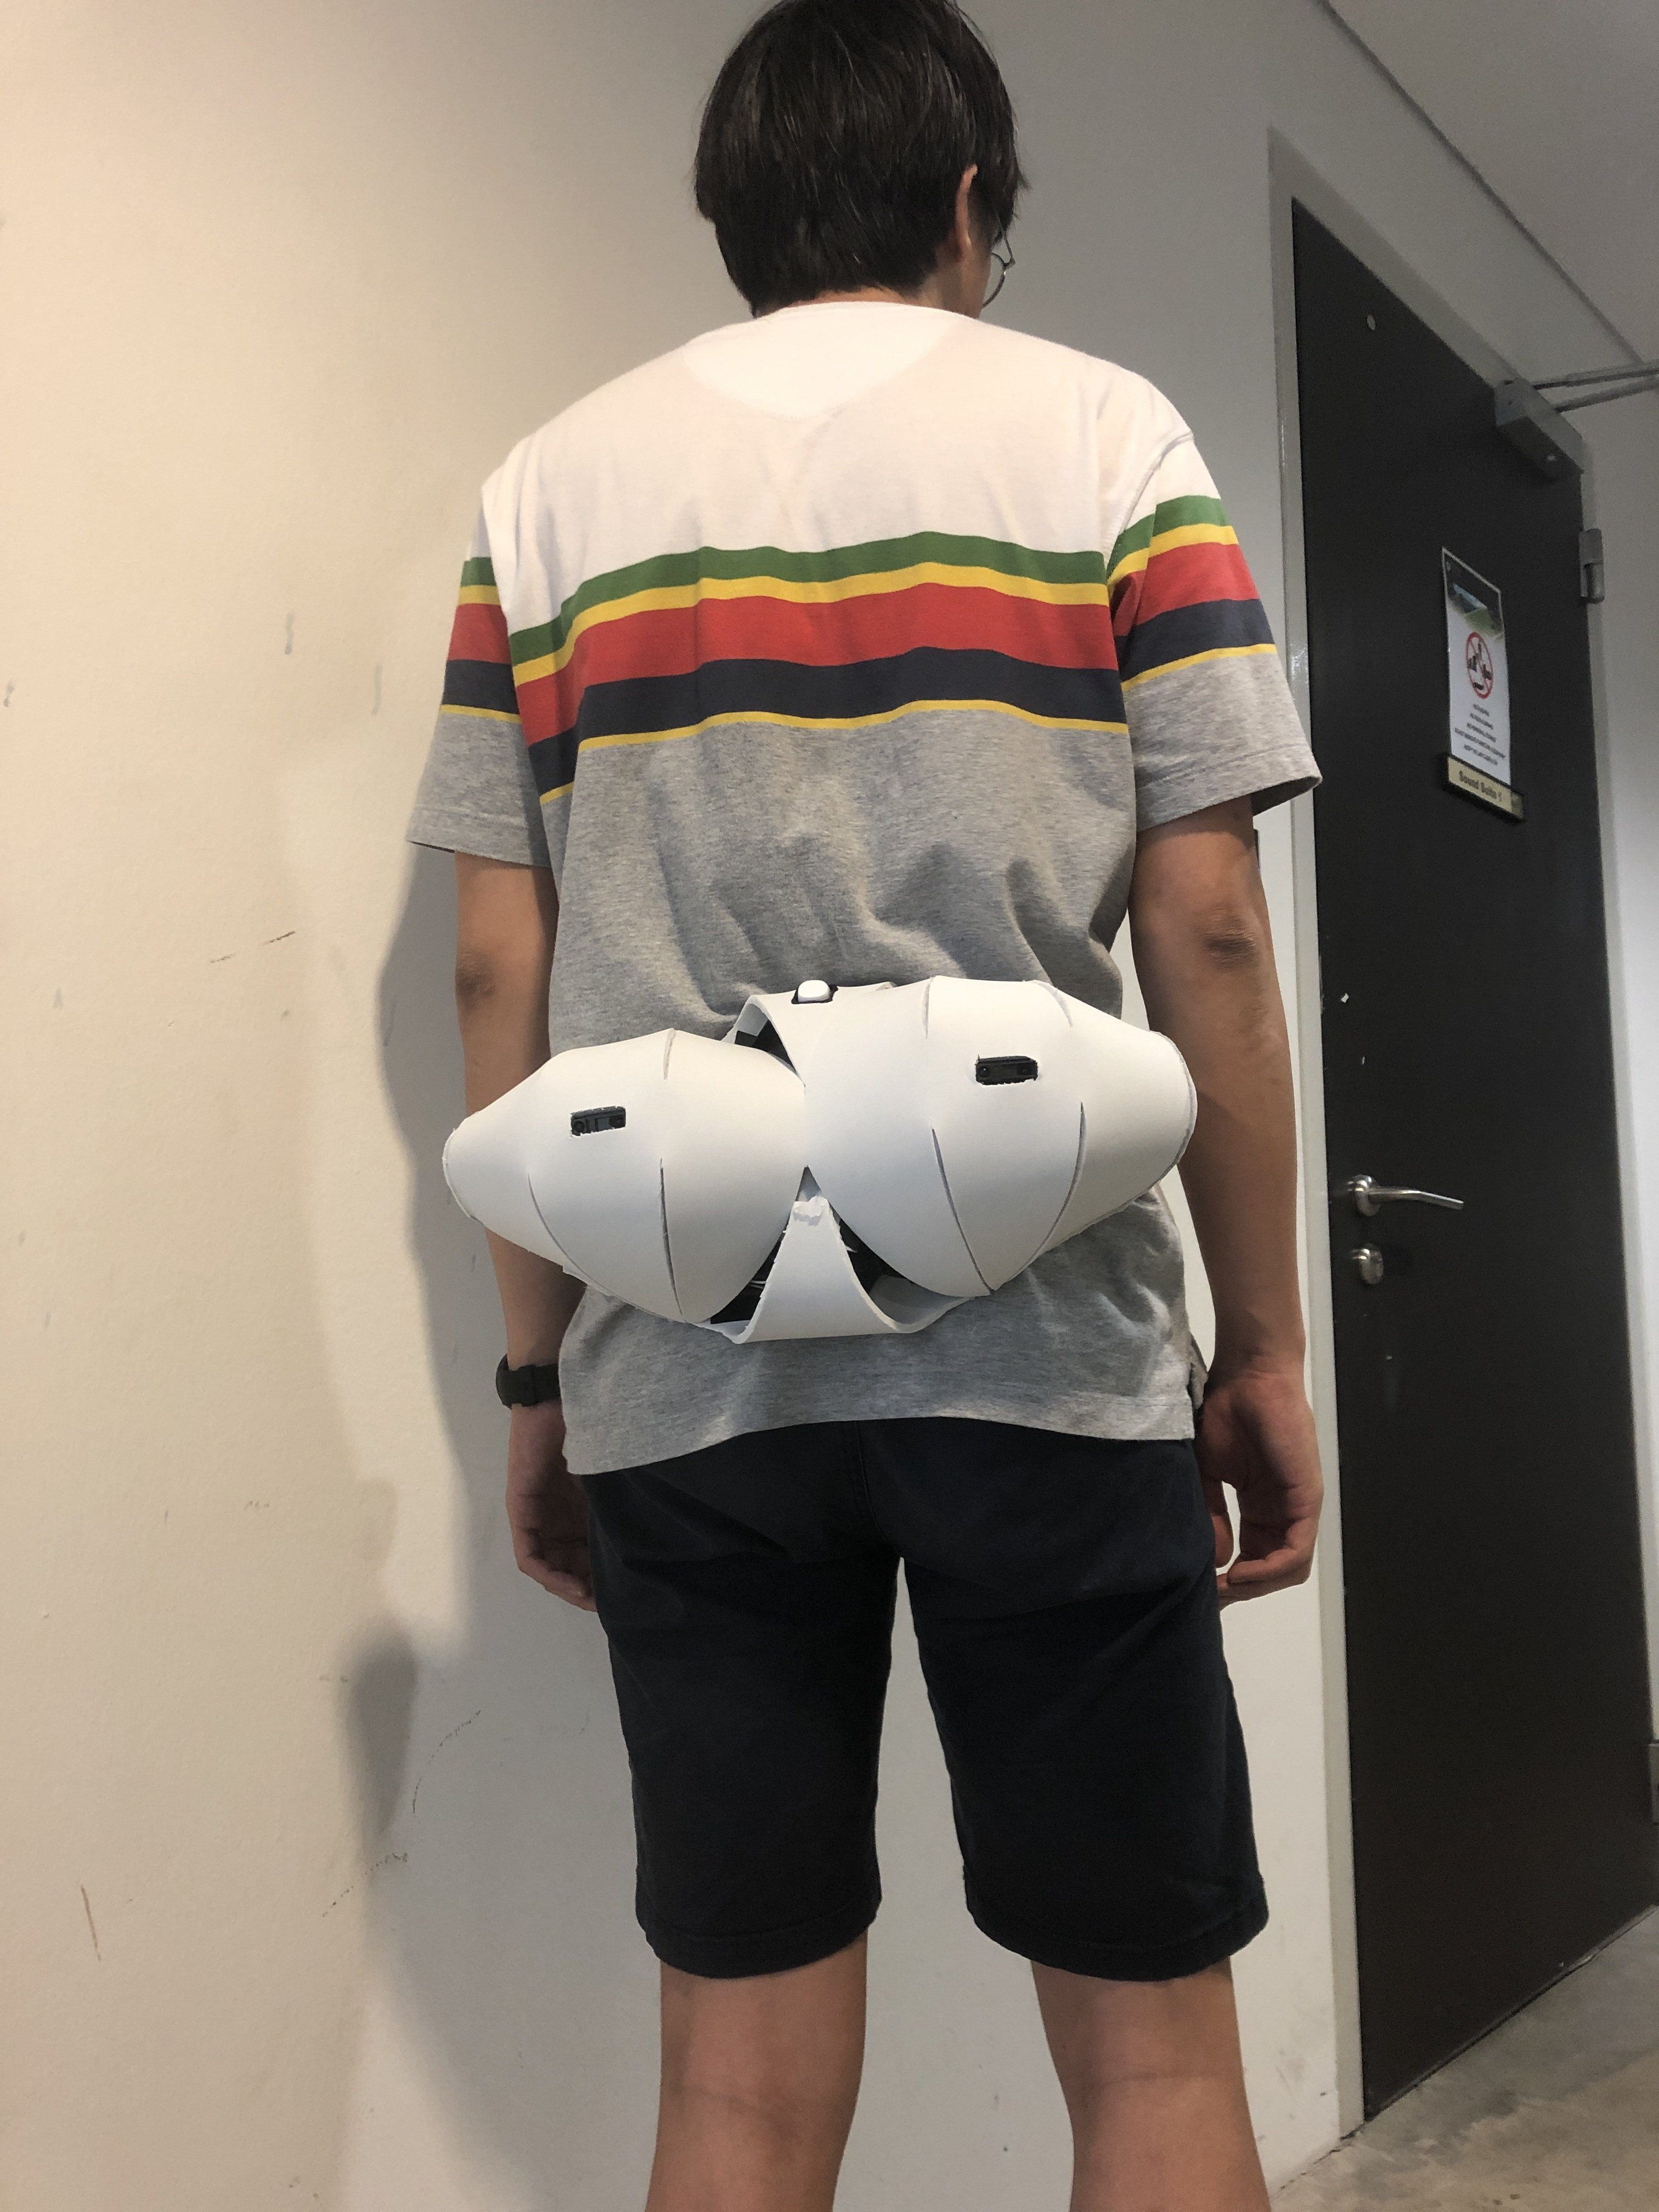
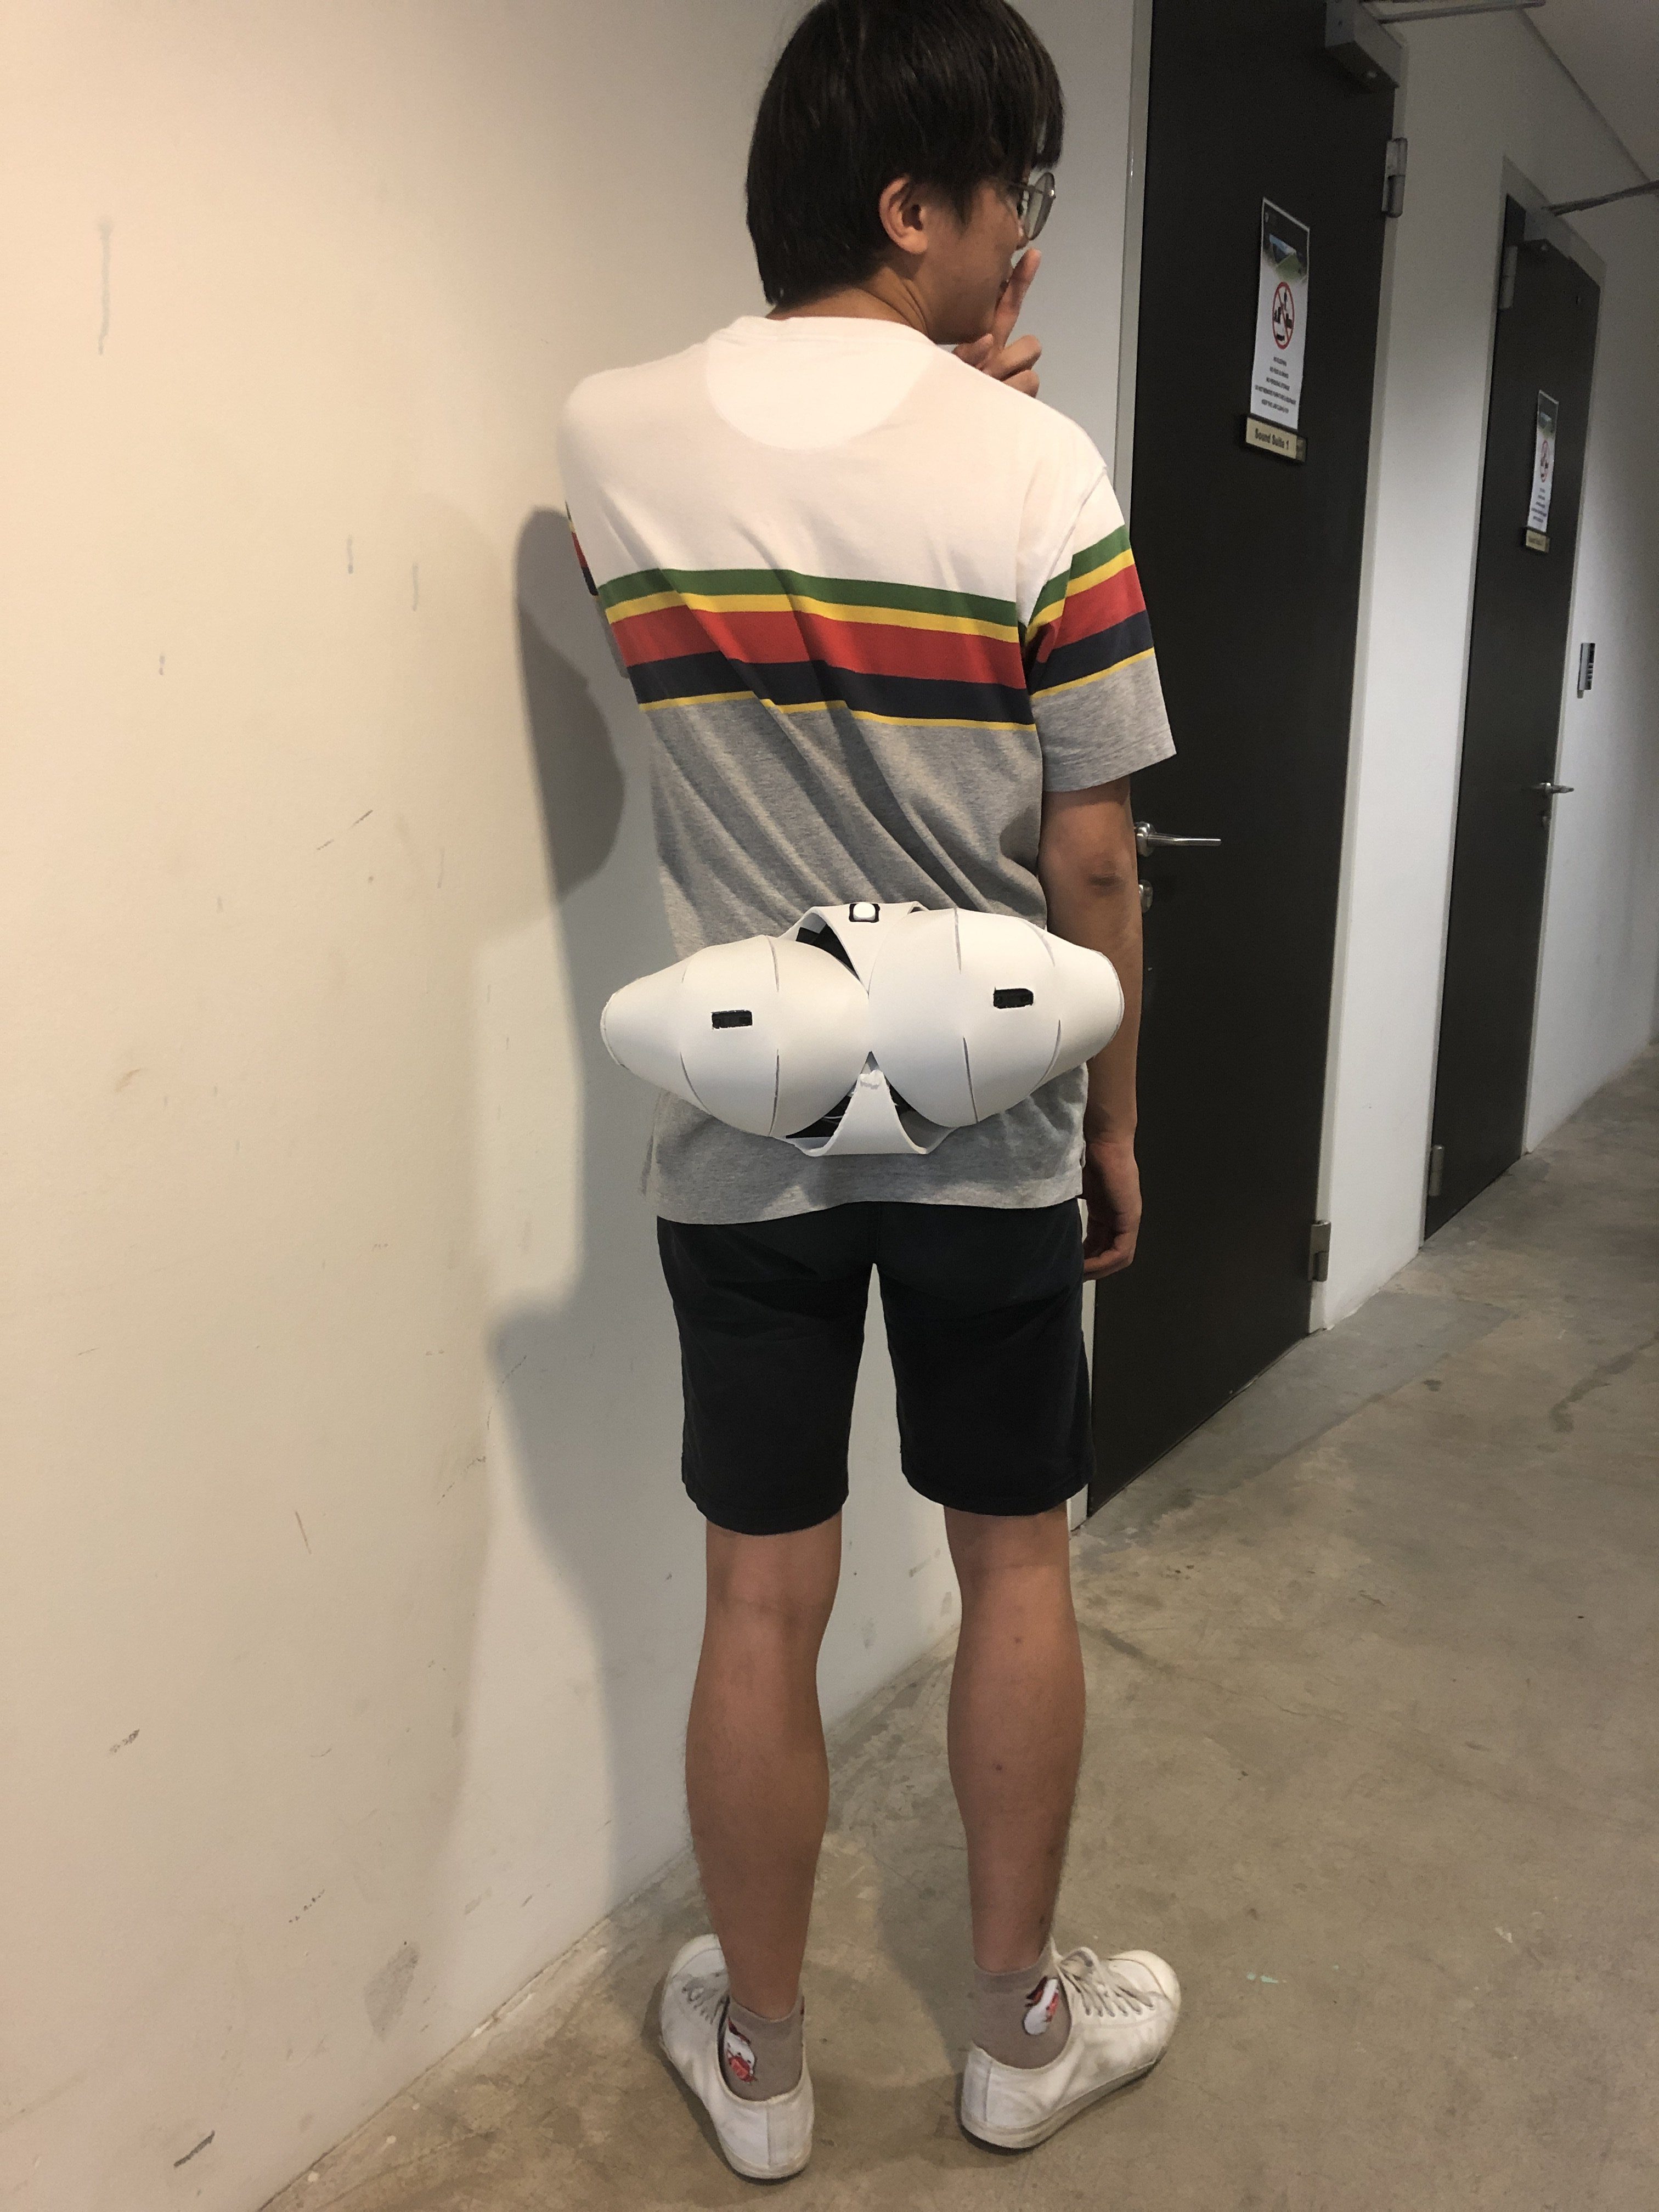
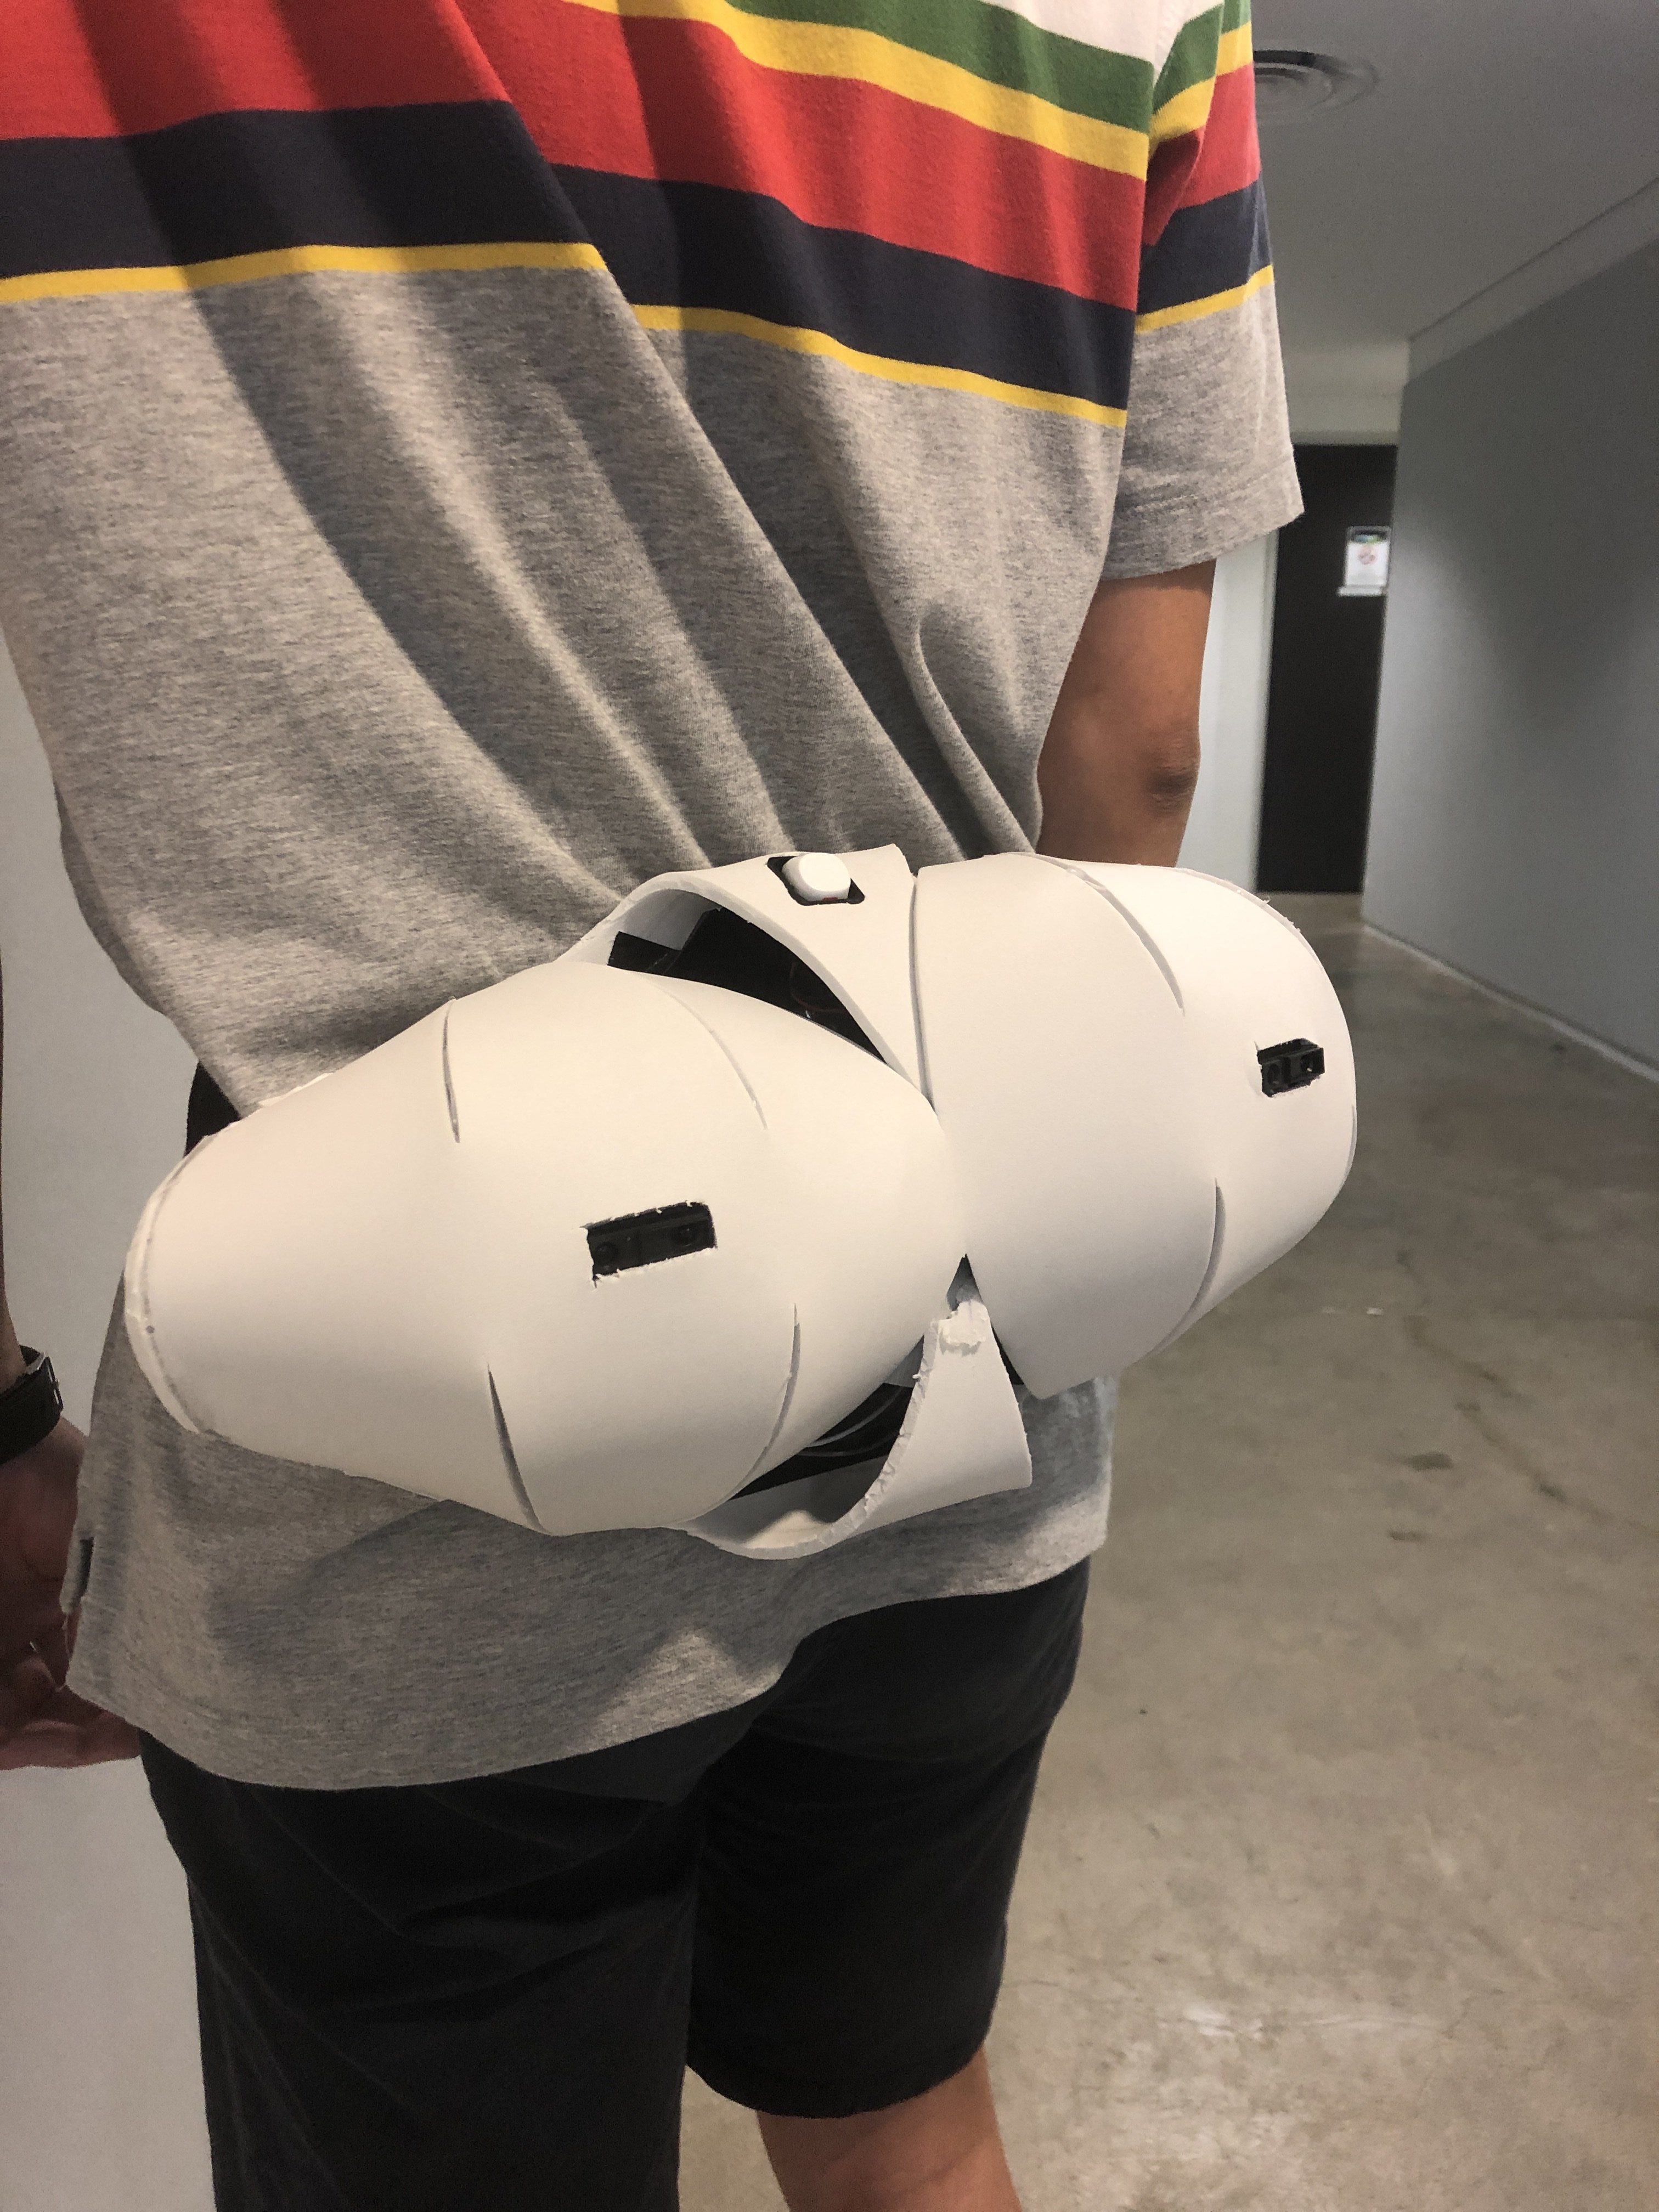
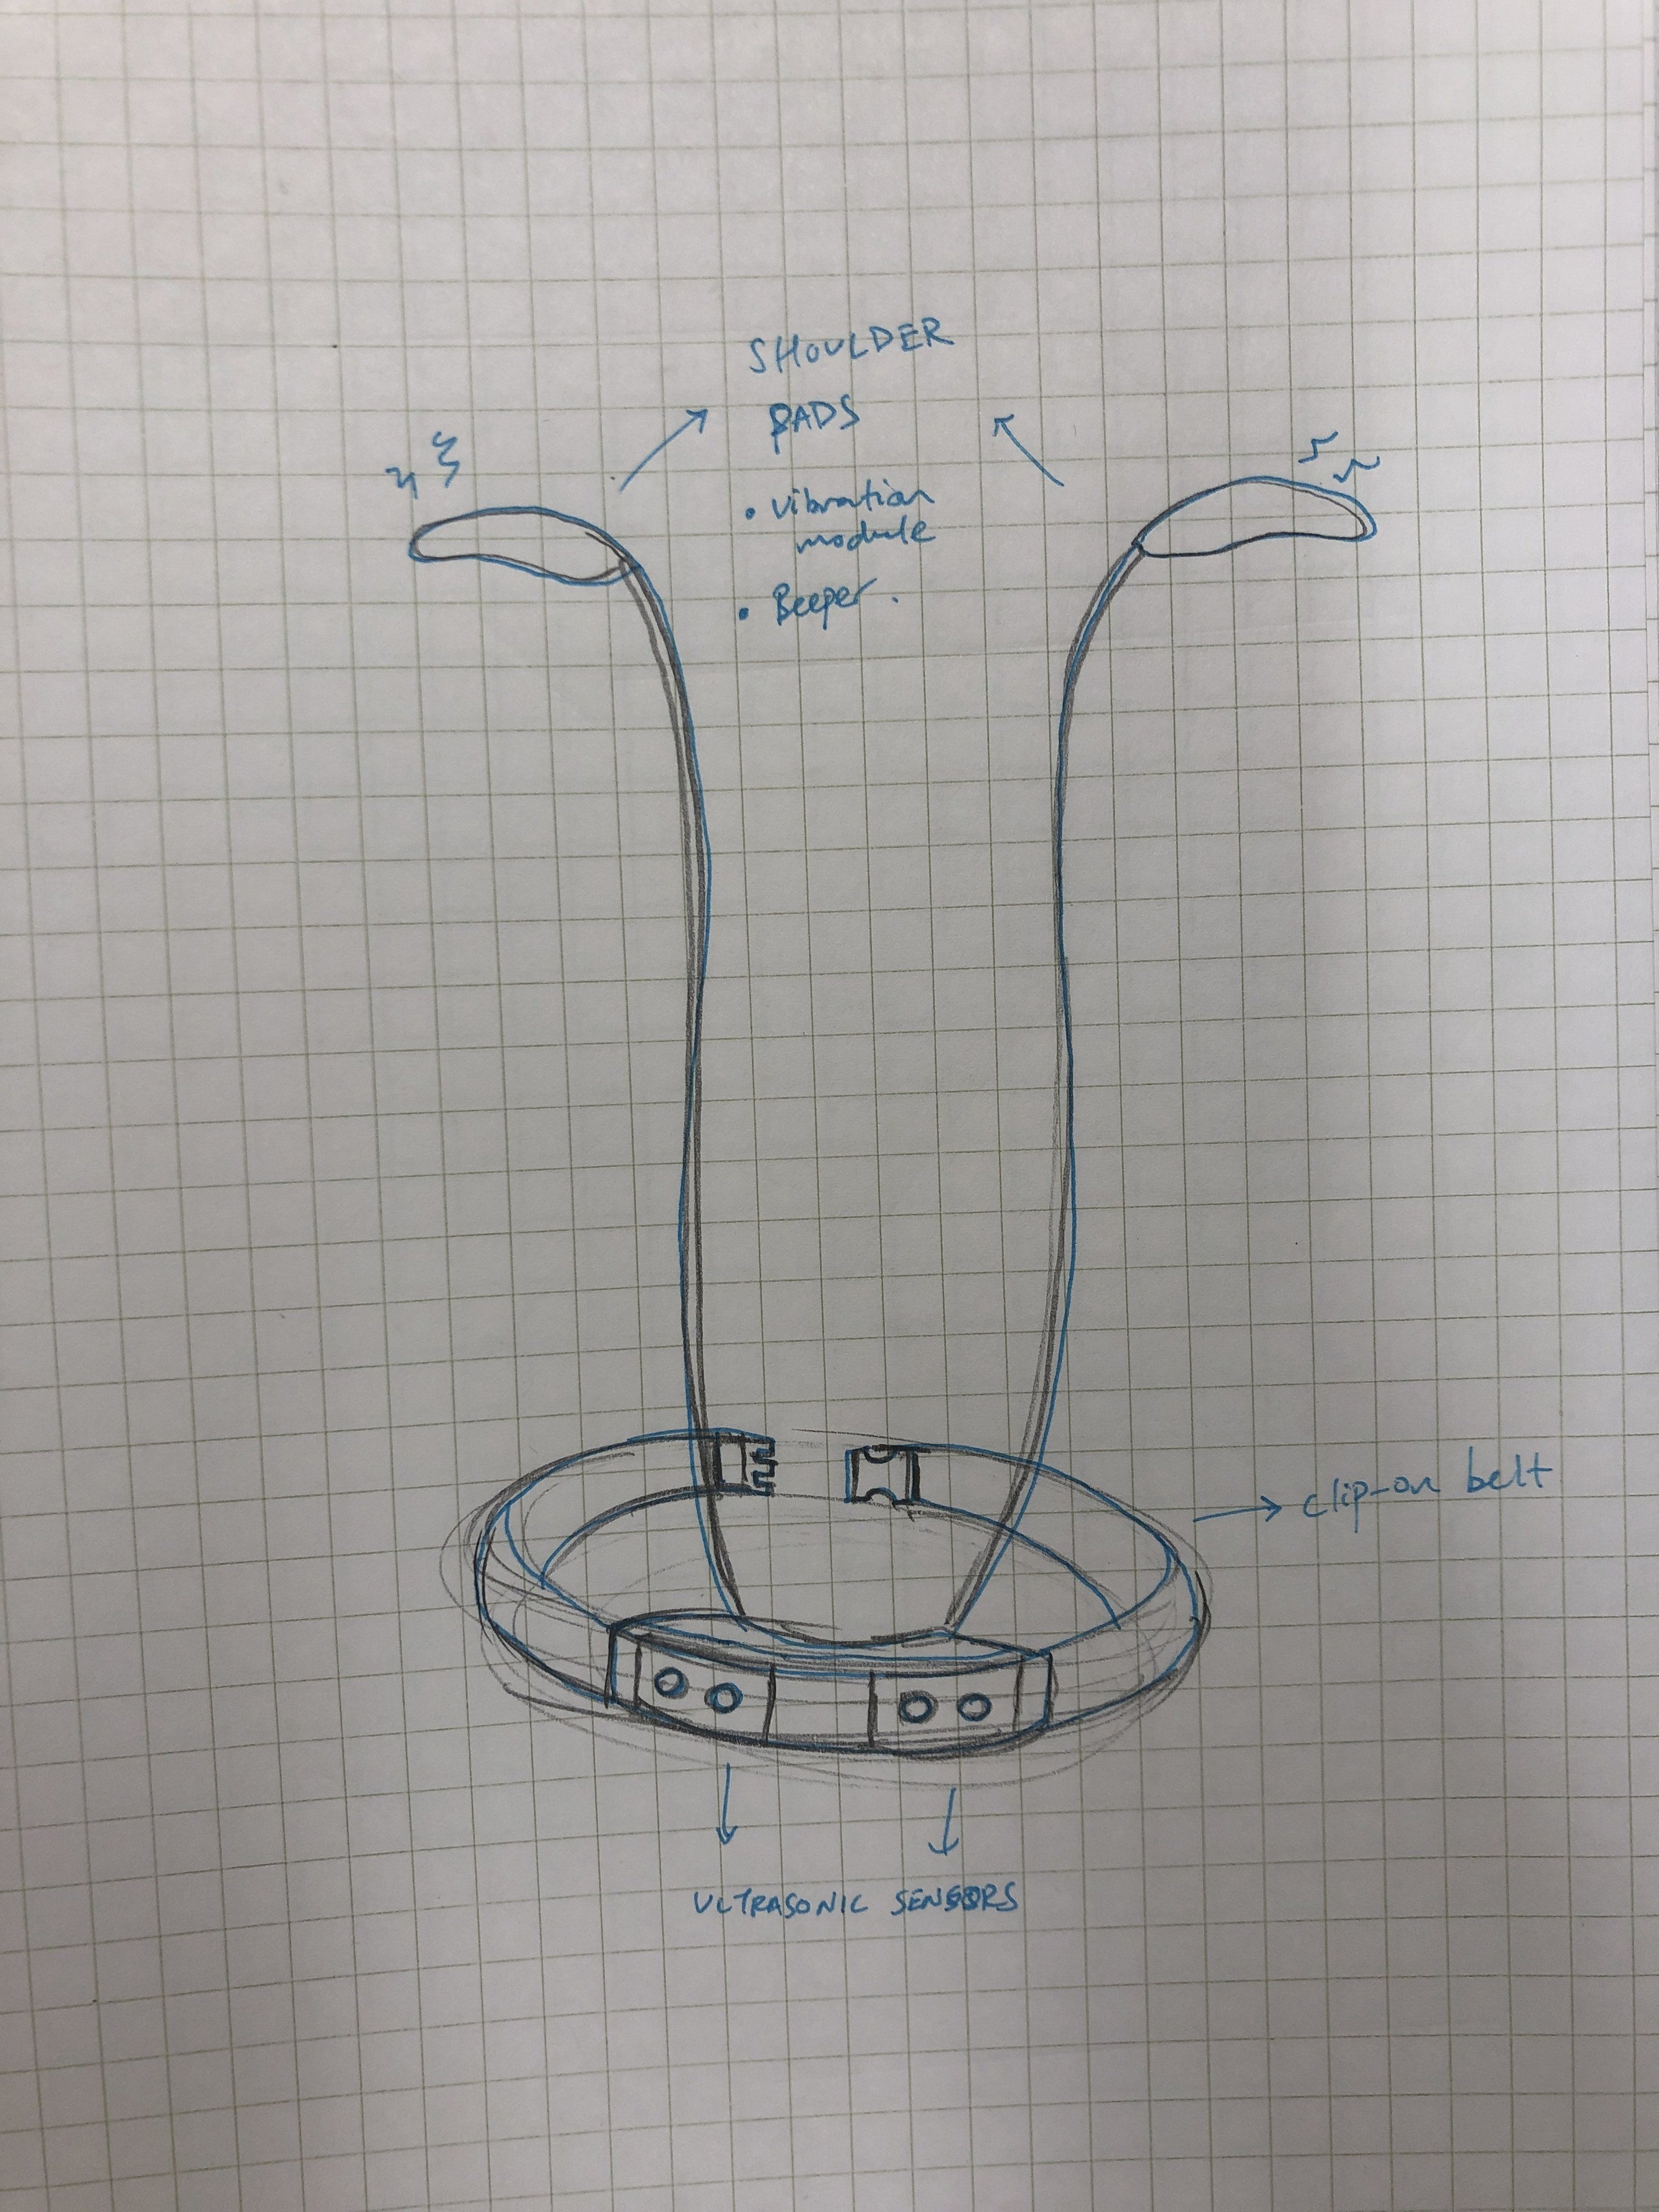
Wearer will wear this like a belt.
Switch to switch on
If something is in the proximity of 1 of the sensor (eg. the left side), the left vibration module will start to vibrate
Depending on the proximity, the vibration varies. As the strength of the vibration cannot be controlled, I only controlled the frequency of vibration in relation to the proximity. The closer something is, the more frequent it vibrates. This is similar to car reversing system.
If the obstacle is in between both sensors, and both sensors pick up the obstacle, both will vibrate indicating the obstacle being in the middle. But the threshold for this is too low (I think) and as such it isn’t very sensitive.
Problems:
the vibration is very strong so it can be uncomfortable, and that cannot be controlled.
if the wearer is leaning against the wall, it will keep vibrating. To solve this, one can simply switch it off
Form not fitting, could be more flexible and concave rather than convex
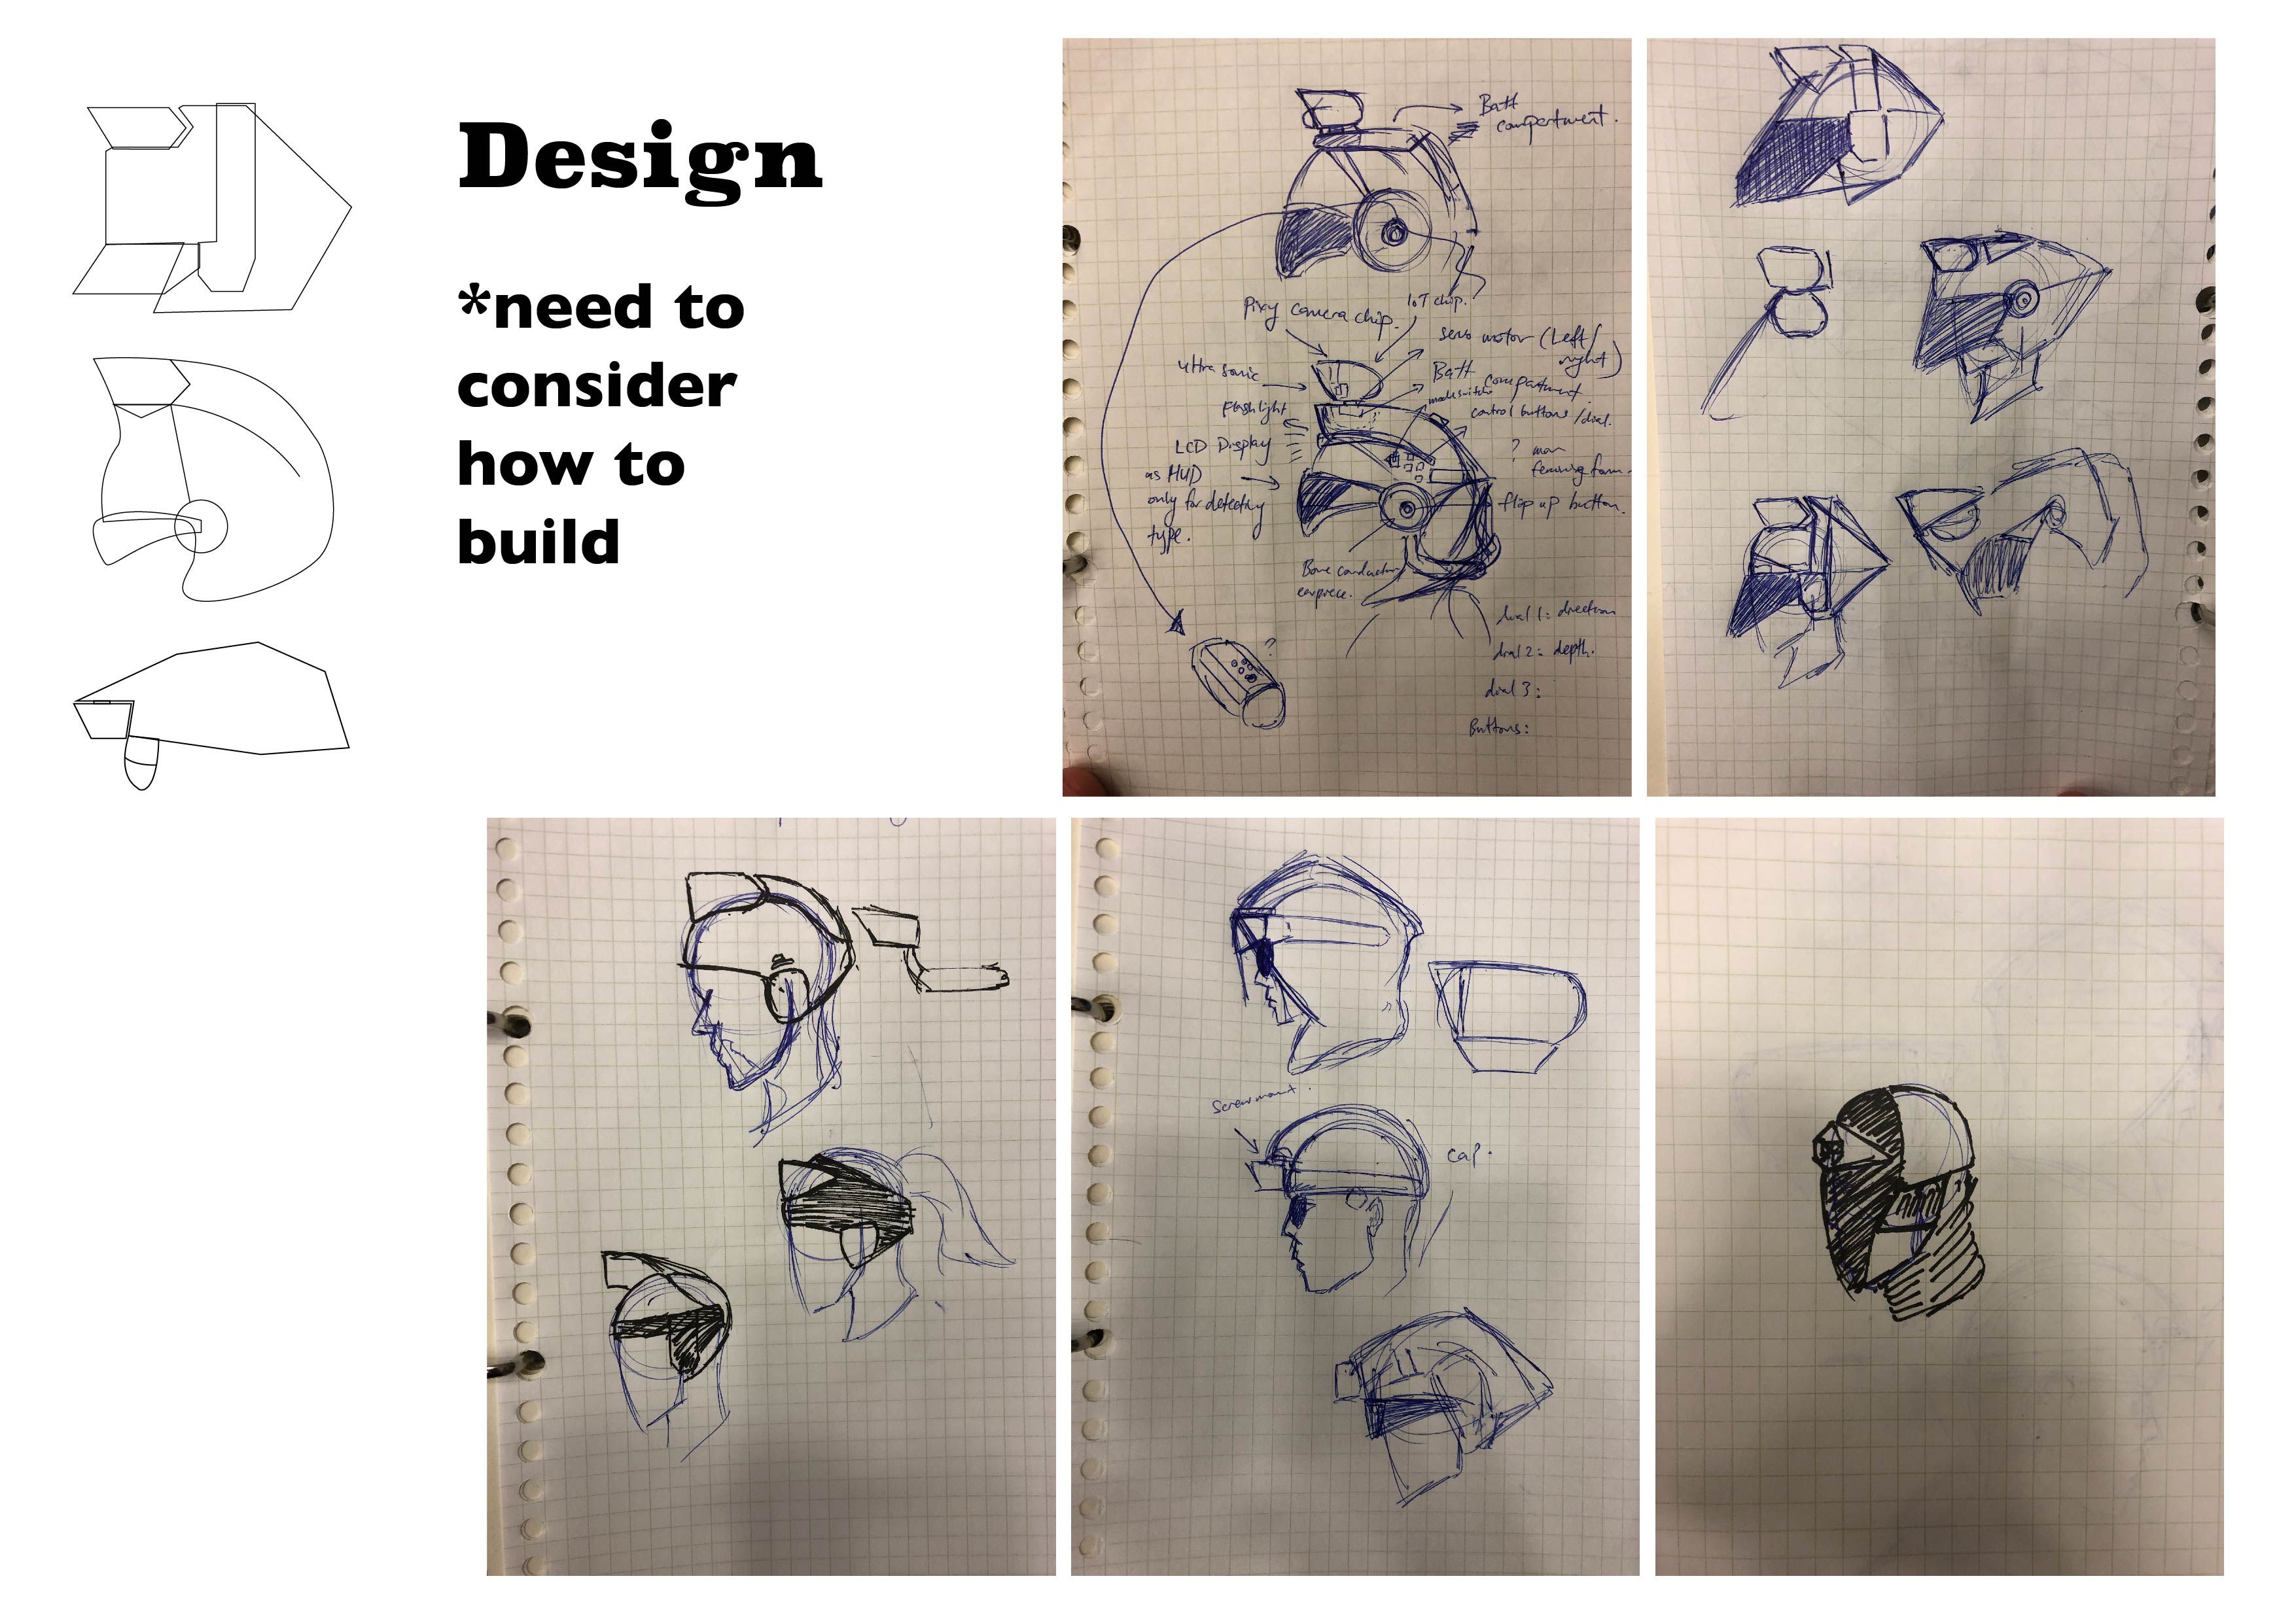
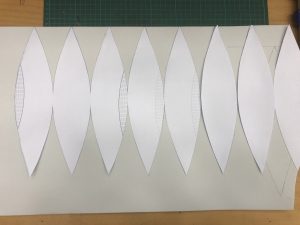
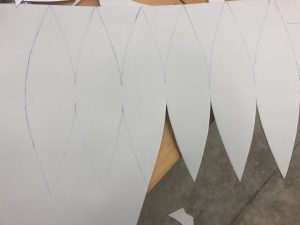
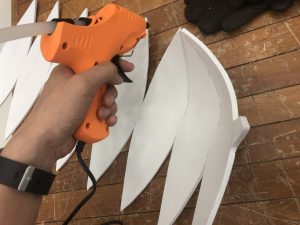
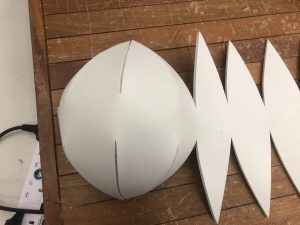
Process
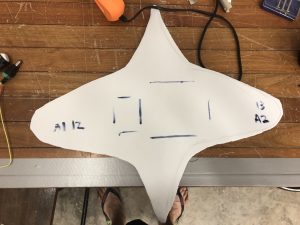
Template for the form
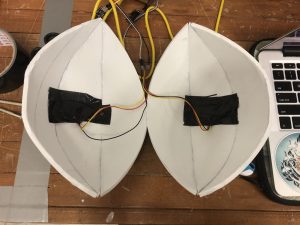
Putting it together into a half-sphere
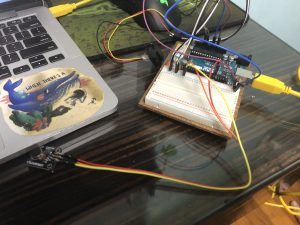
Trying out the sensors
Putting the IR sensors on
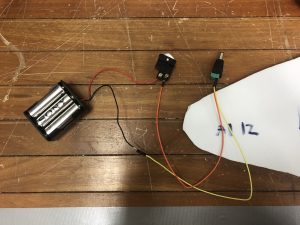
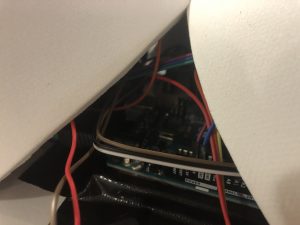
Putting the switch and the battery pack together
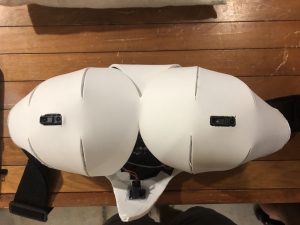
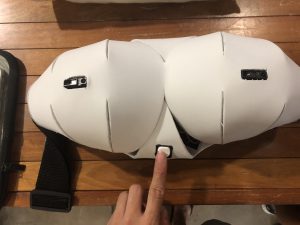
The final form!!!
Code
Base system:
How the vibration module and IR sensor working together
This is some extra stuff I did to make the vibration not repeat itself if its within the same range for at least 1 cycle of the code. Doesn’t work well so I didn’t use it.
I was burnt out after a series of try-harding at making everything good because #newsemnewme, but after 2 weeks of being uninspired, I’m feeling better now and I think I’m going to go with a less tedious project.
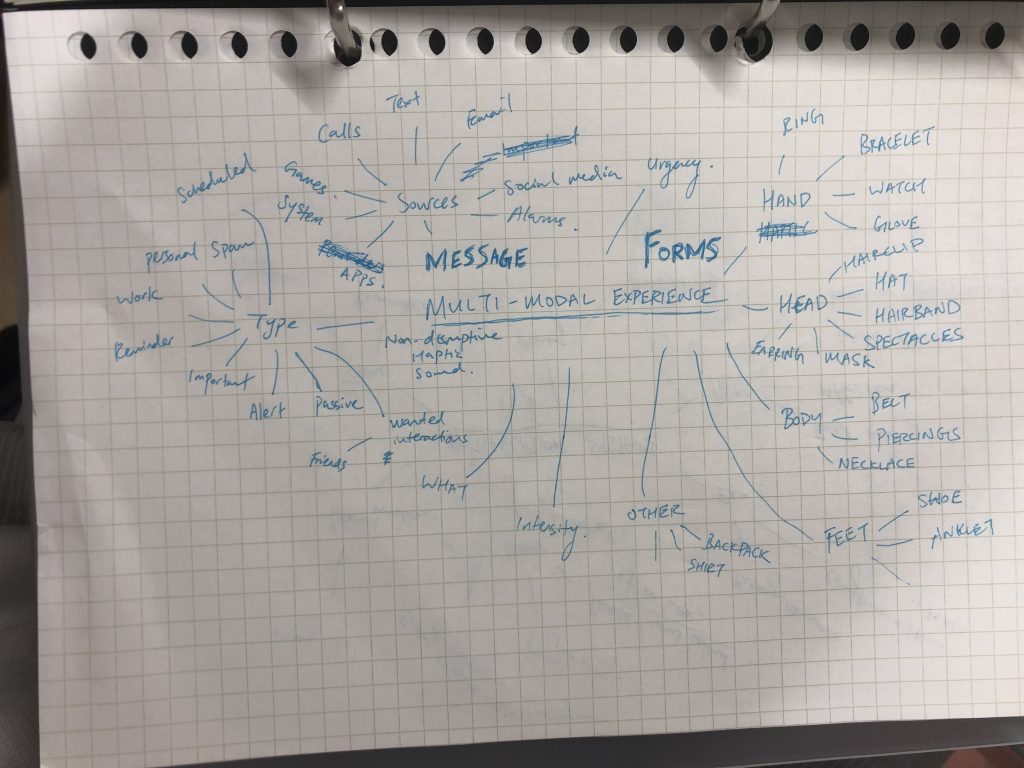
While in my burnt out phase I made this mindmap:
I kind of broken down the types of messages there can be, as well as what forms a wearable can take. I was stuck with the idea that a notification must be from a phone.
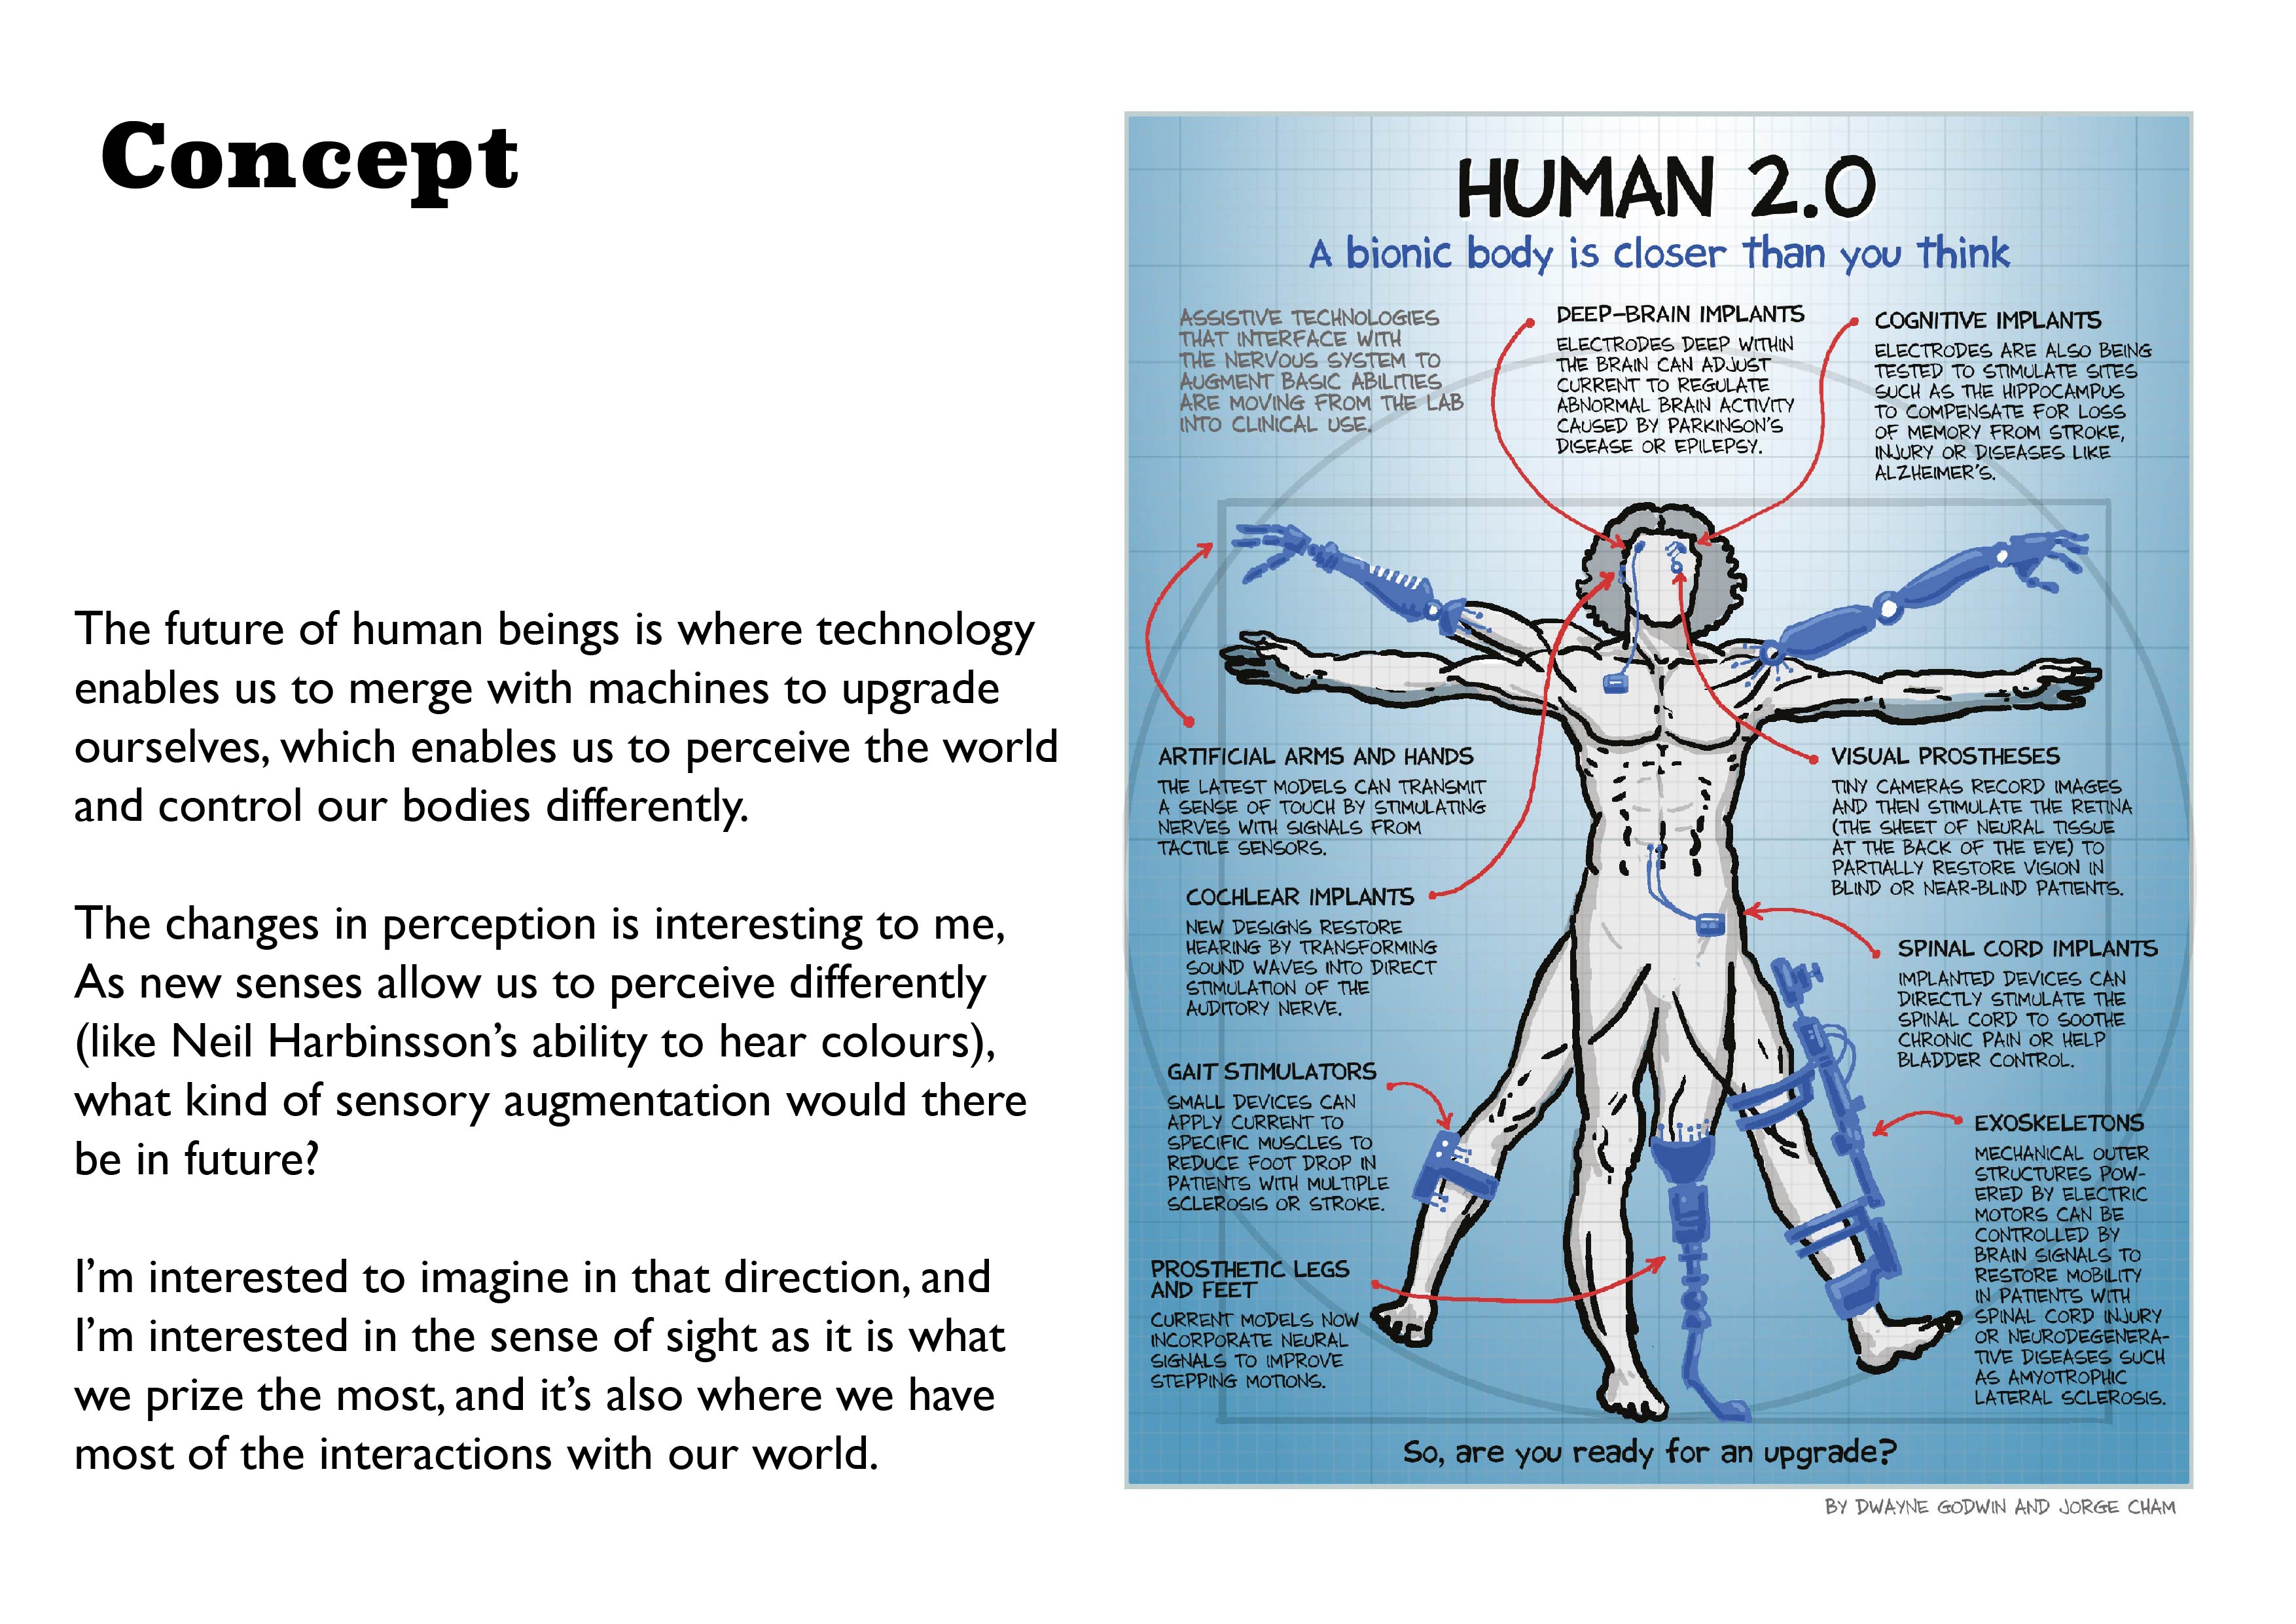
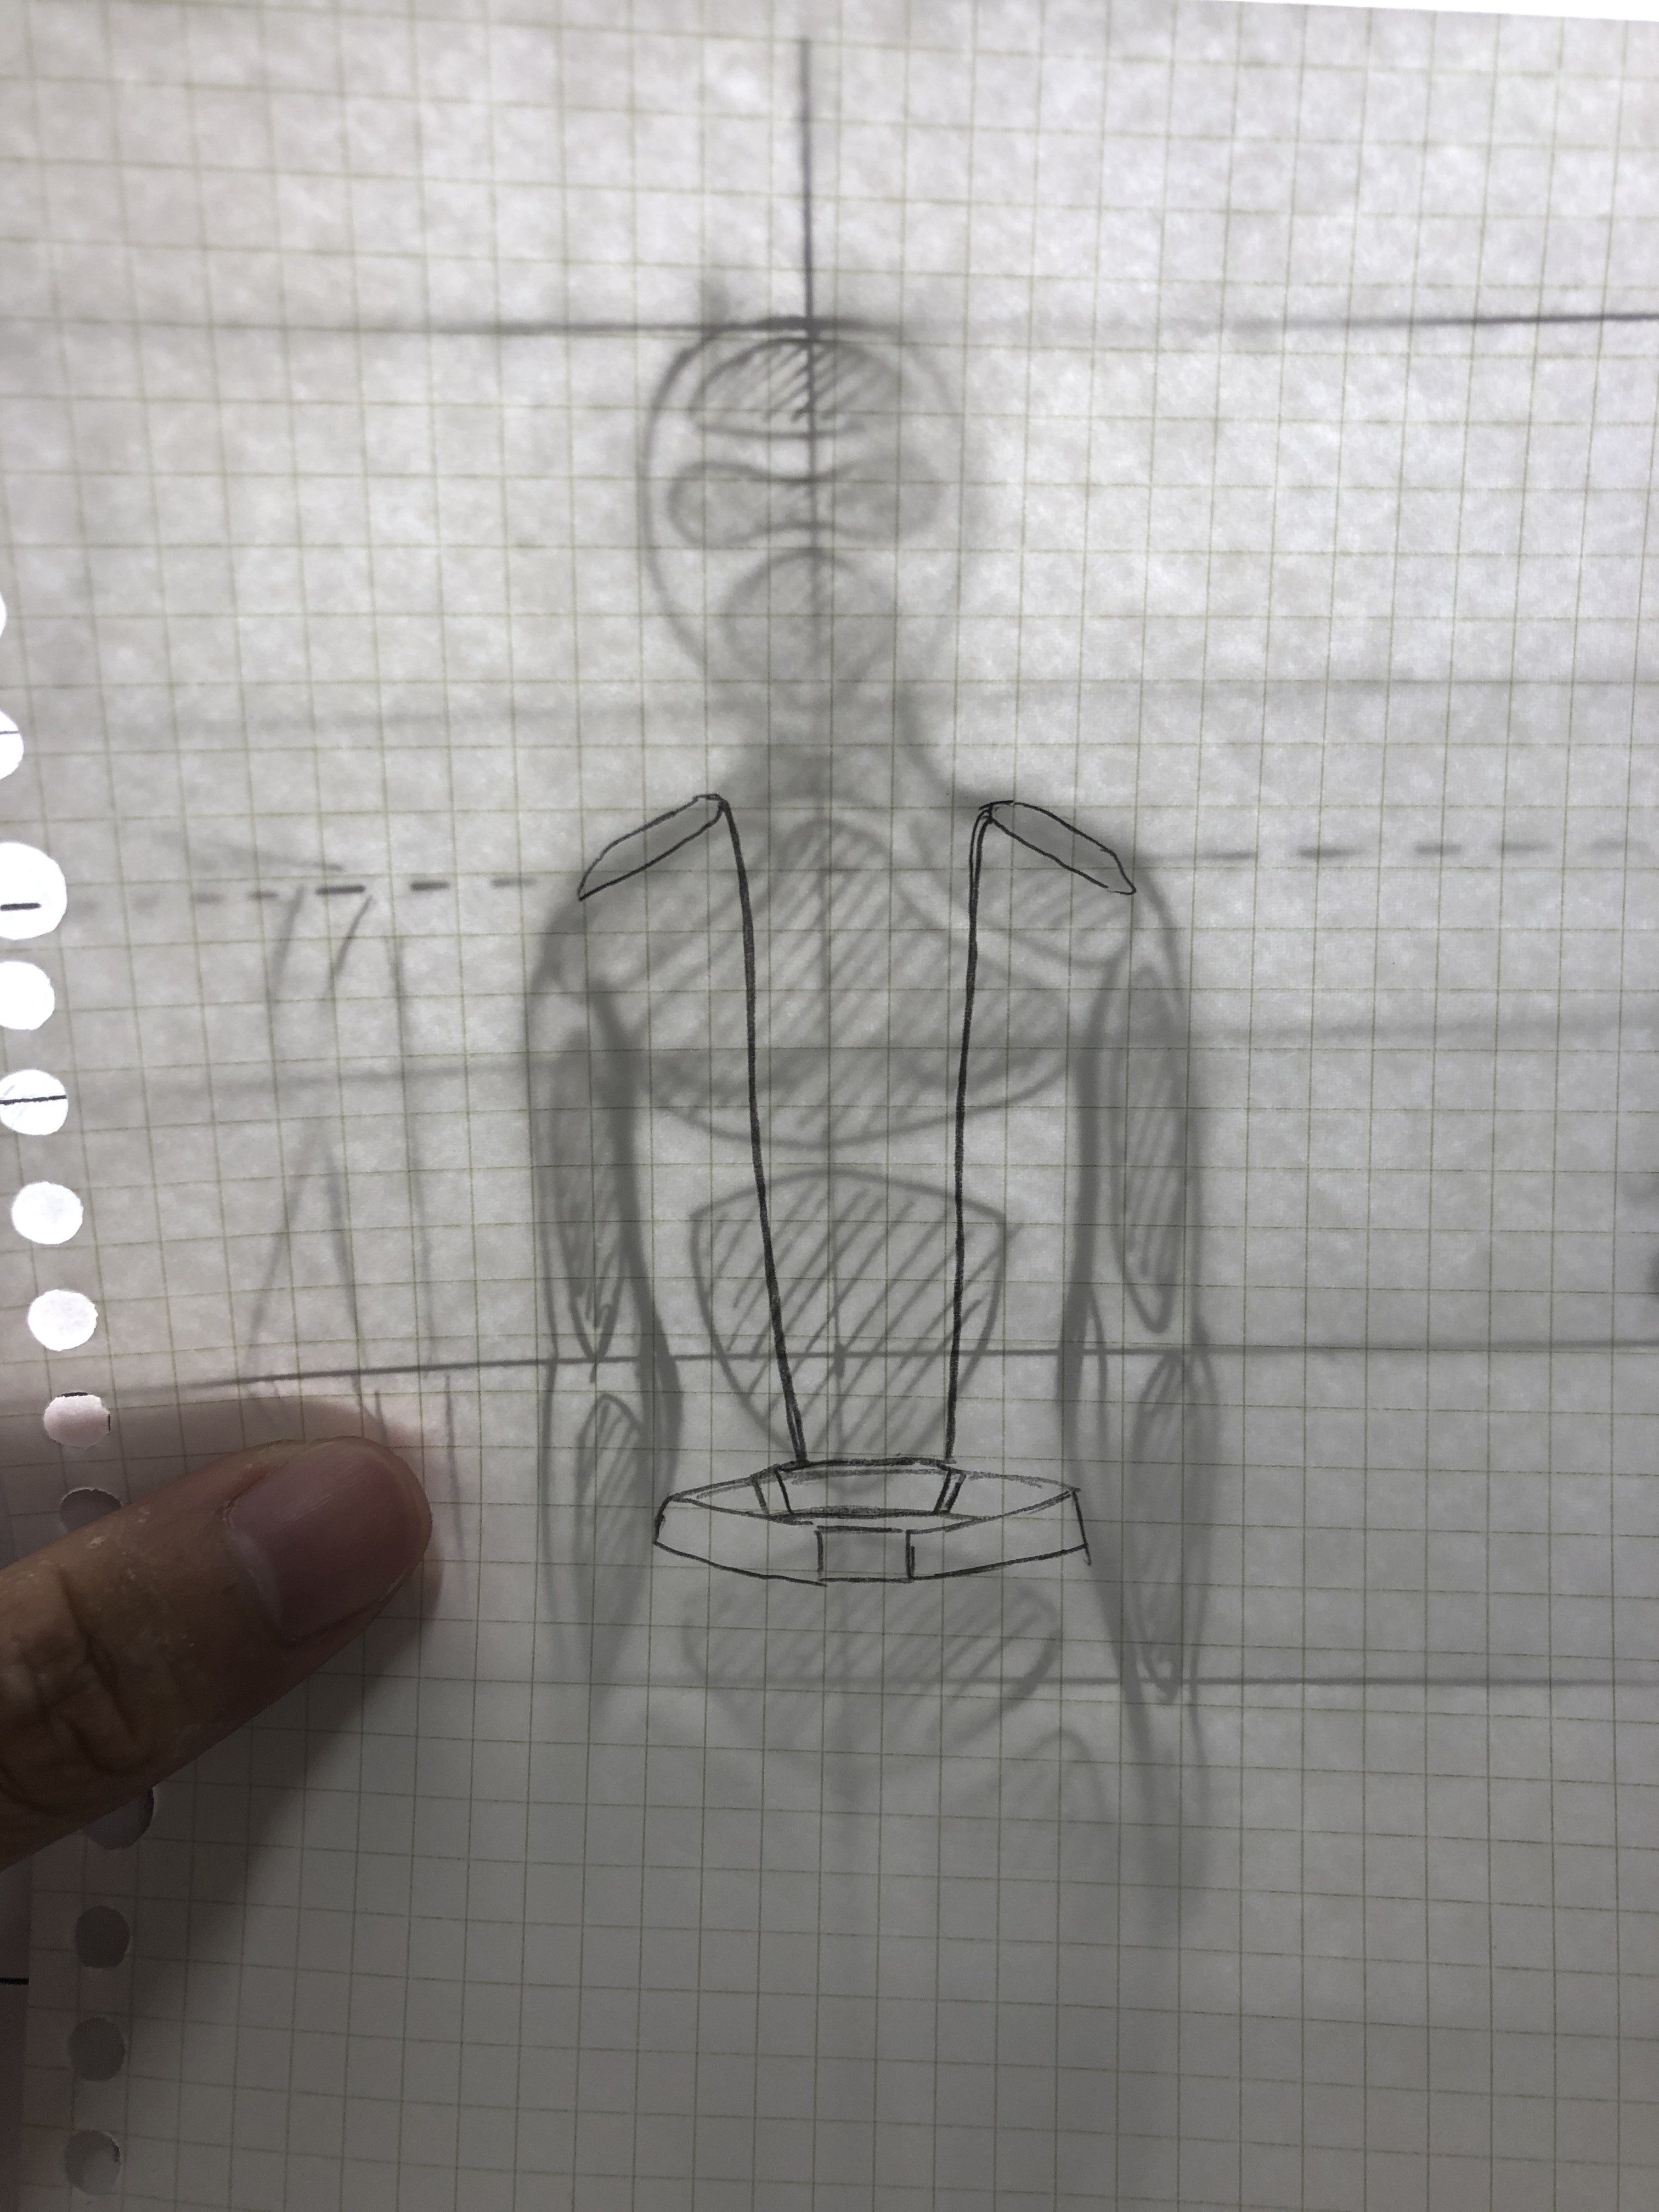
During the lesson last week, we were introduced to the 8.5 head human figure, which allows us to accurately depict our device on a human body.
Along with the lesson, I was also told that the notification can even be something that’s outside of the mobile phone. Things like a touch or press of an object that can be translated into a vibration on another person’s forearm.
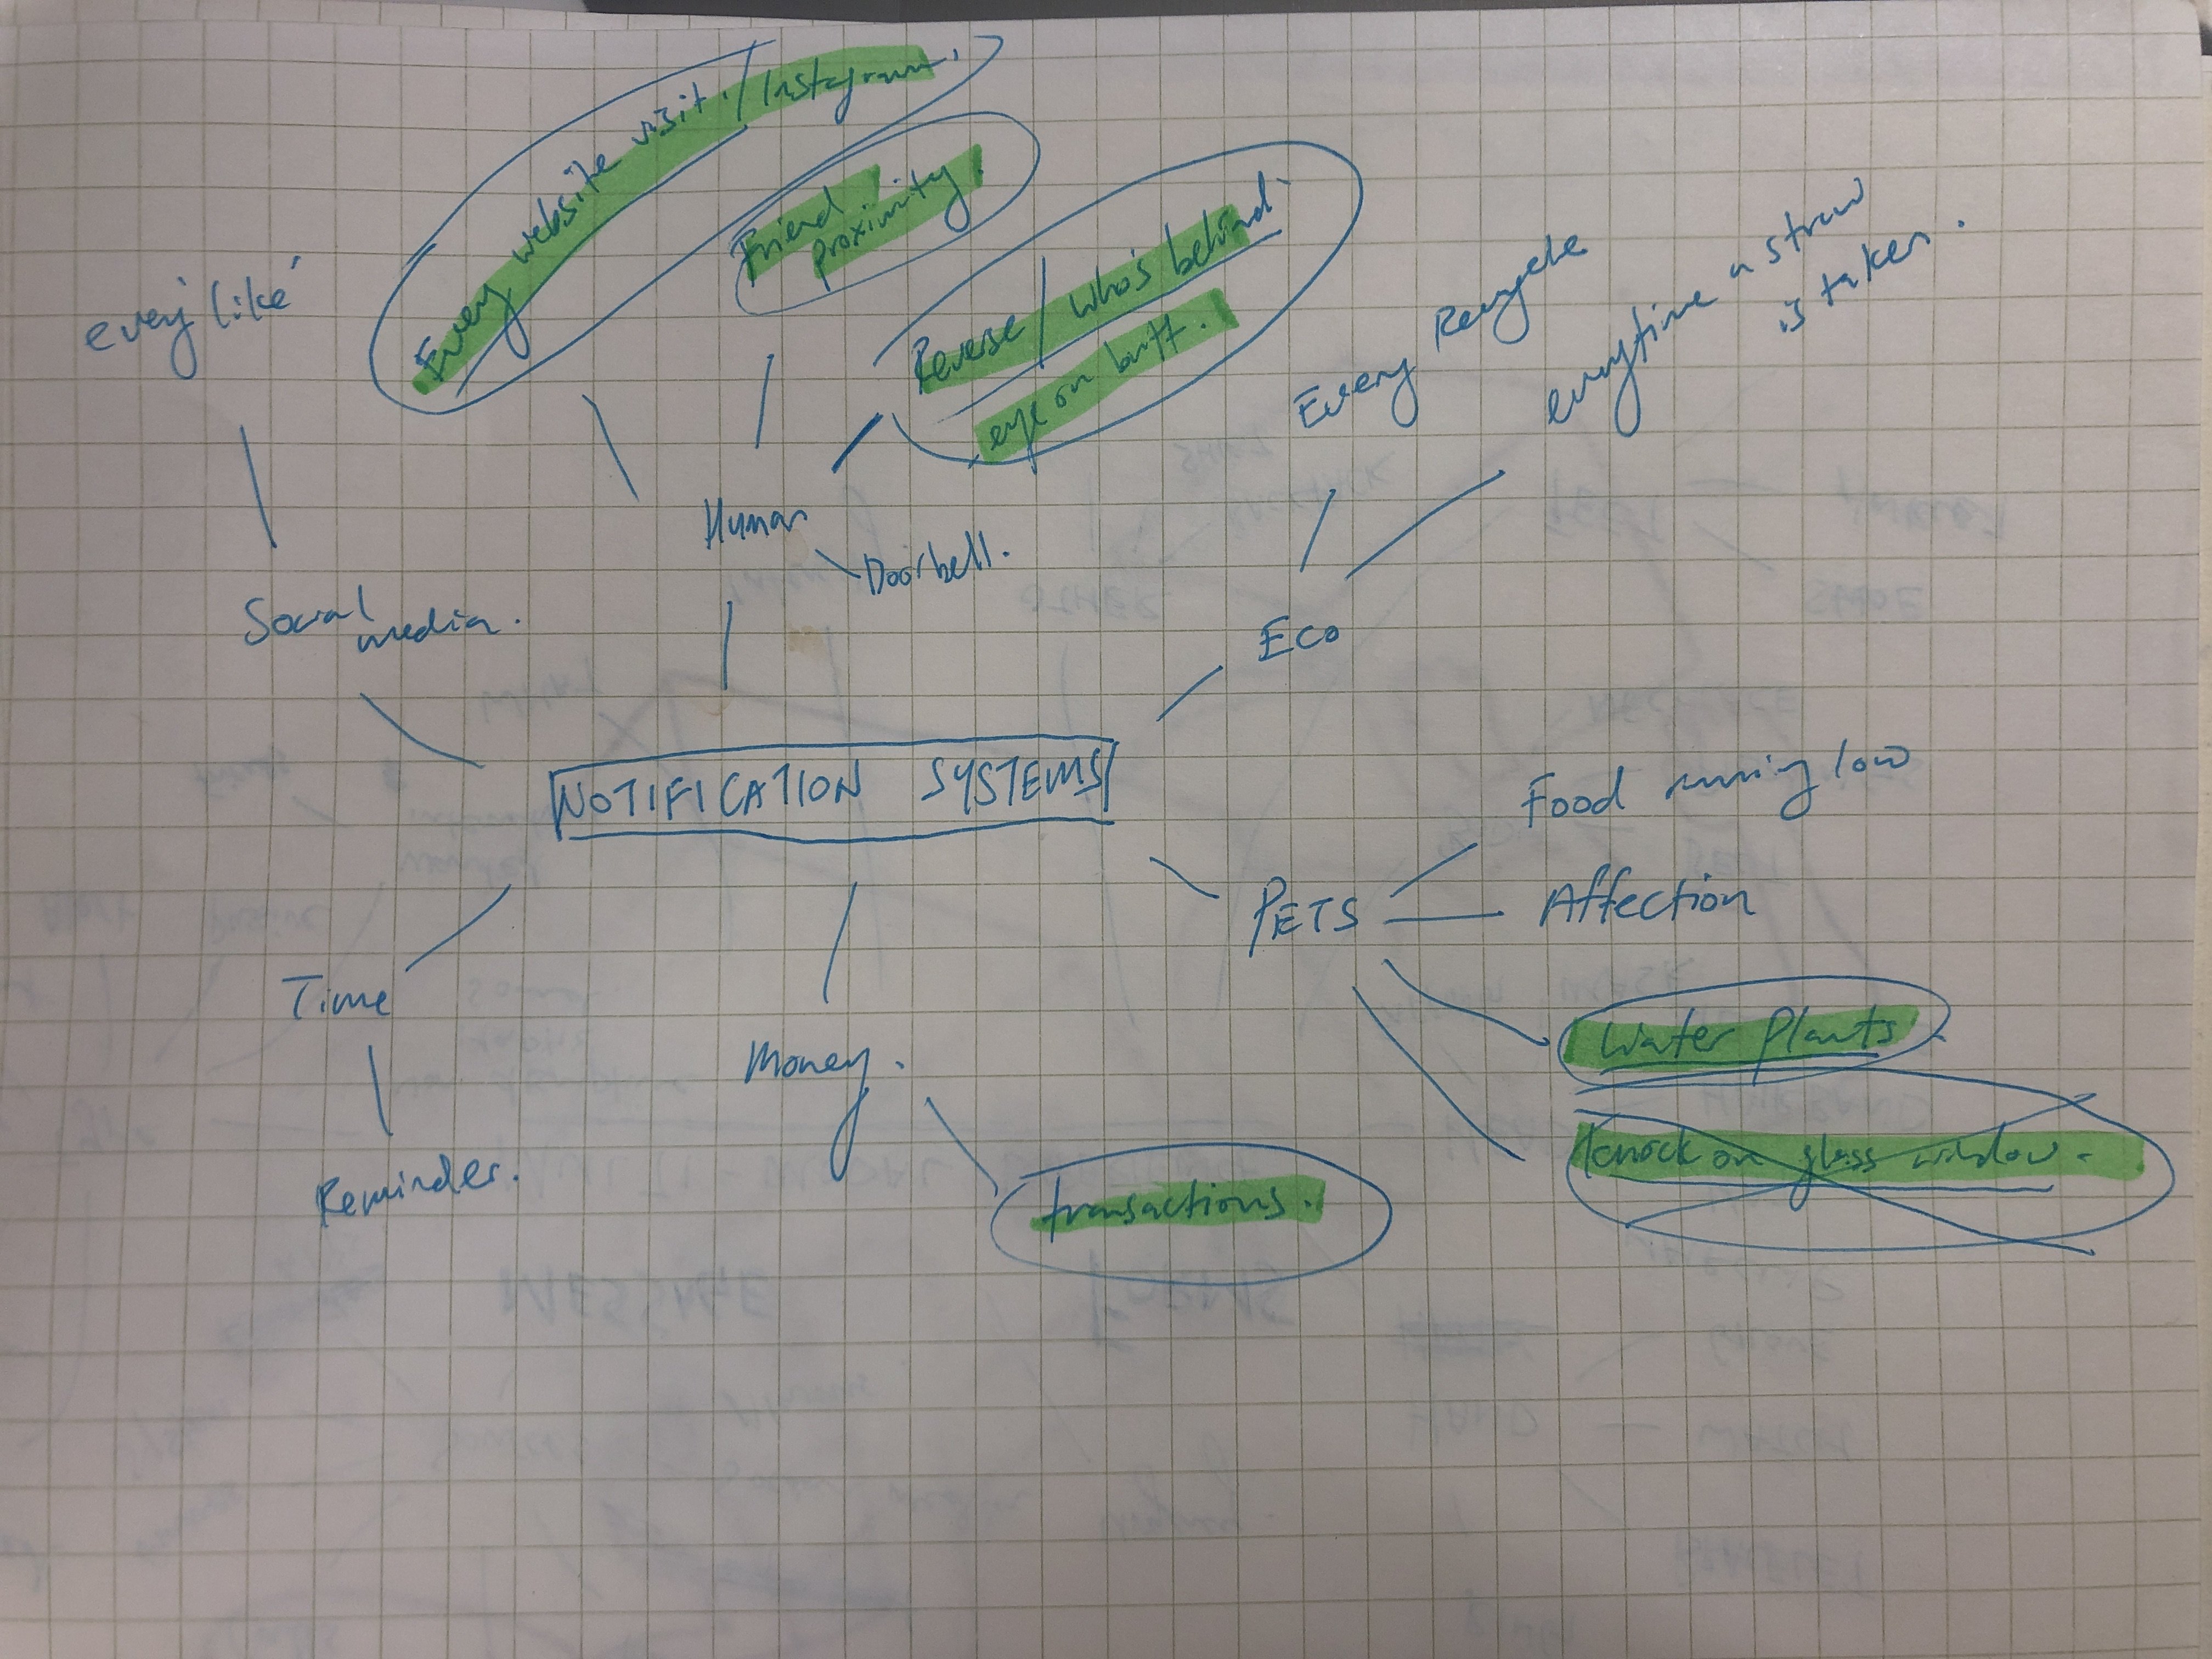
With that, I felt more at ease that there are more ideas to explore. So I started this new mindmap
Very unclear, what I highlighted are:
money transactions
water plants
knock on glass window
every website visit / instagram
friend proximity
reverse / who’s behind (eye on butt)
I found out that notifications should always be personally catered to an individual. The individual should care about the notification and not just something that is sent for a cause. As such, the ones that I highlighted are the more feasible ones (except for the one I striked out, which I included at first thinking it will be nice if it can work together with my Interactive Spaces project)
The Device
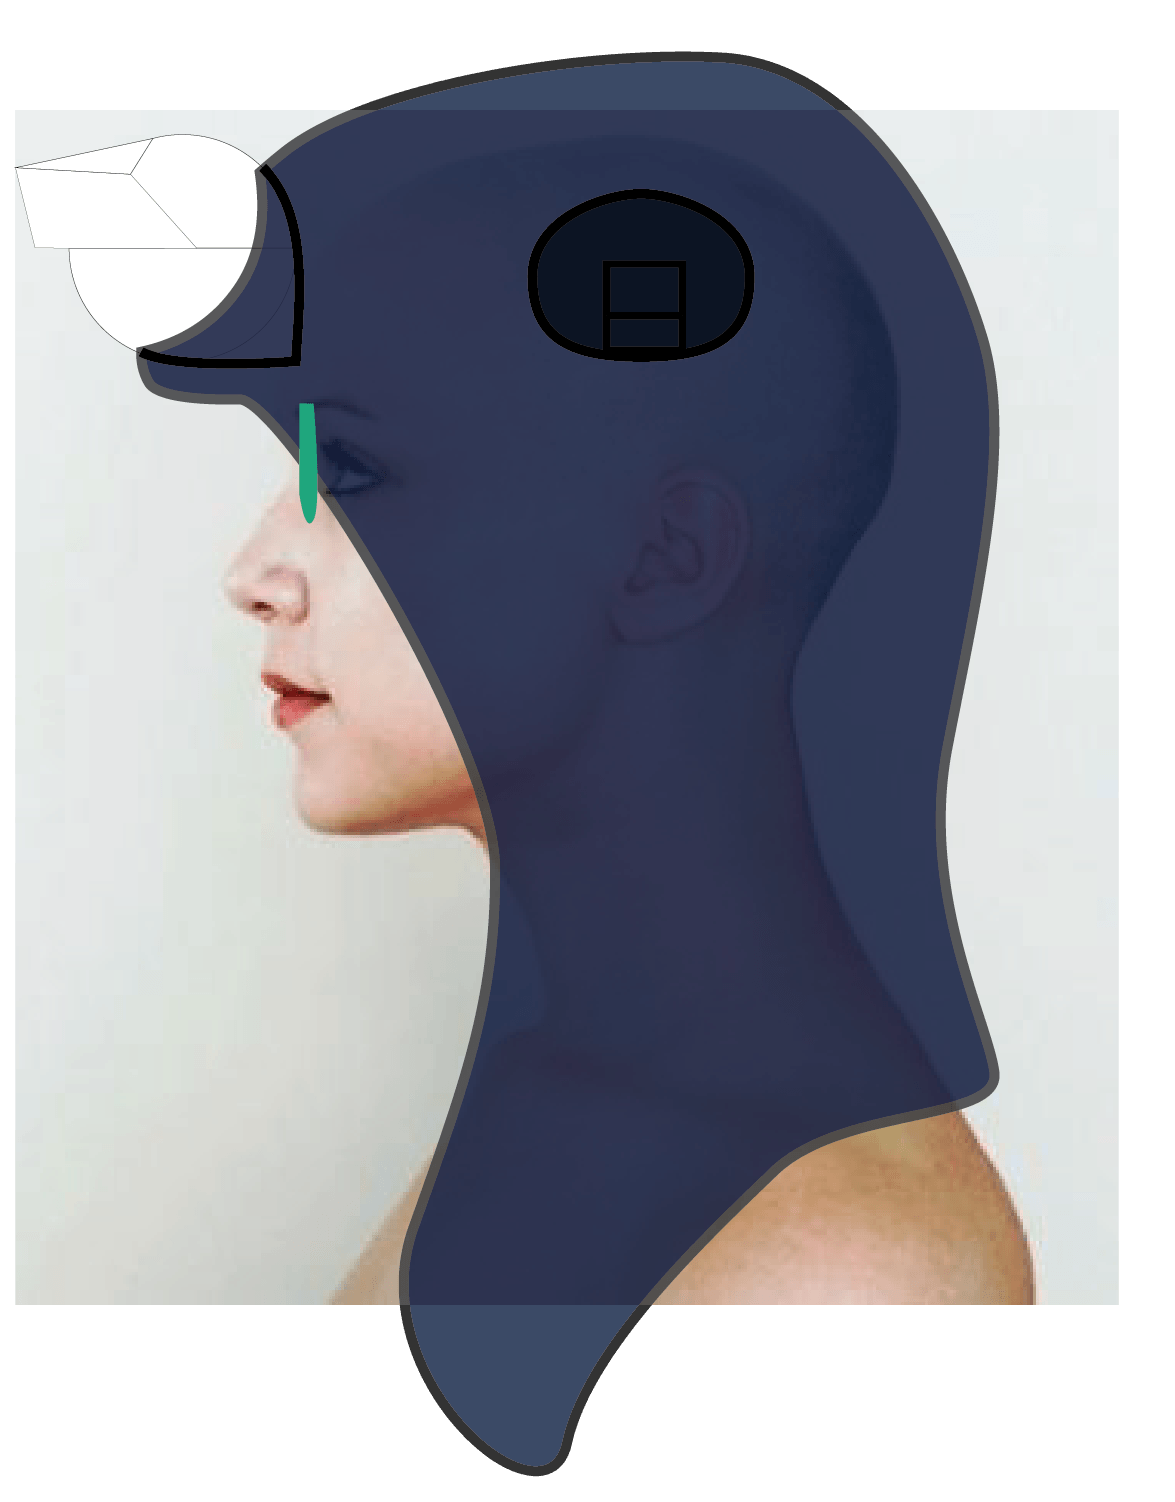
I was interested in the idea of having a sensor on the back that can detect people that are behind us. It works as some kind of rear mirror for people, a 6th sense for us to ‘see’ what’s behind us. I like it as I think it’s interesting to think of ways to enhance our senses, and wearables are perfect for that. Also, I found way too many times that I have to pull my friend when he/she is blocking someone from passing.
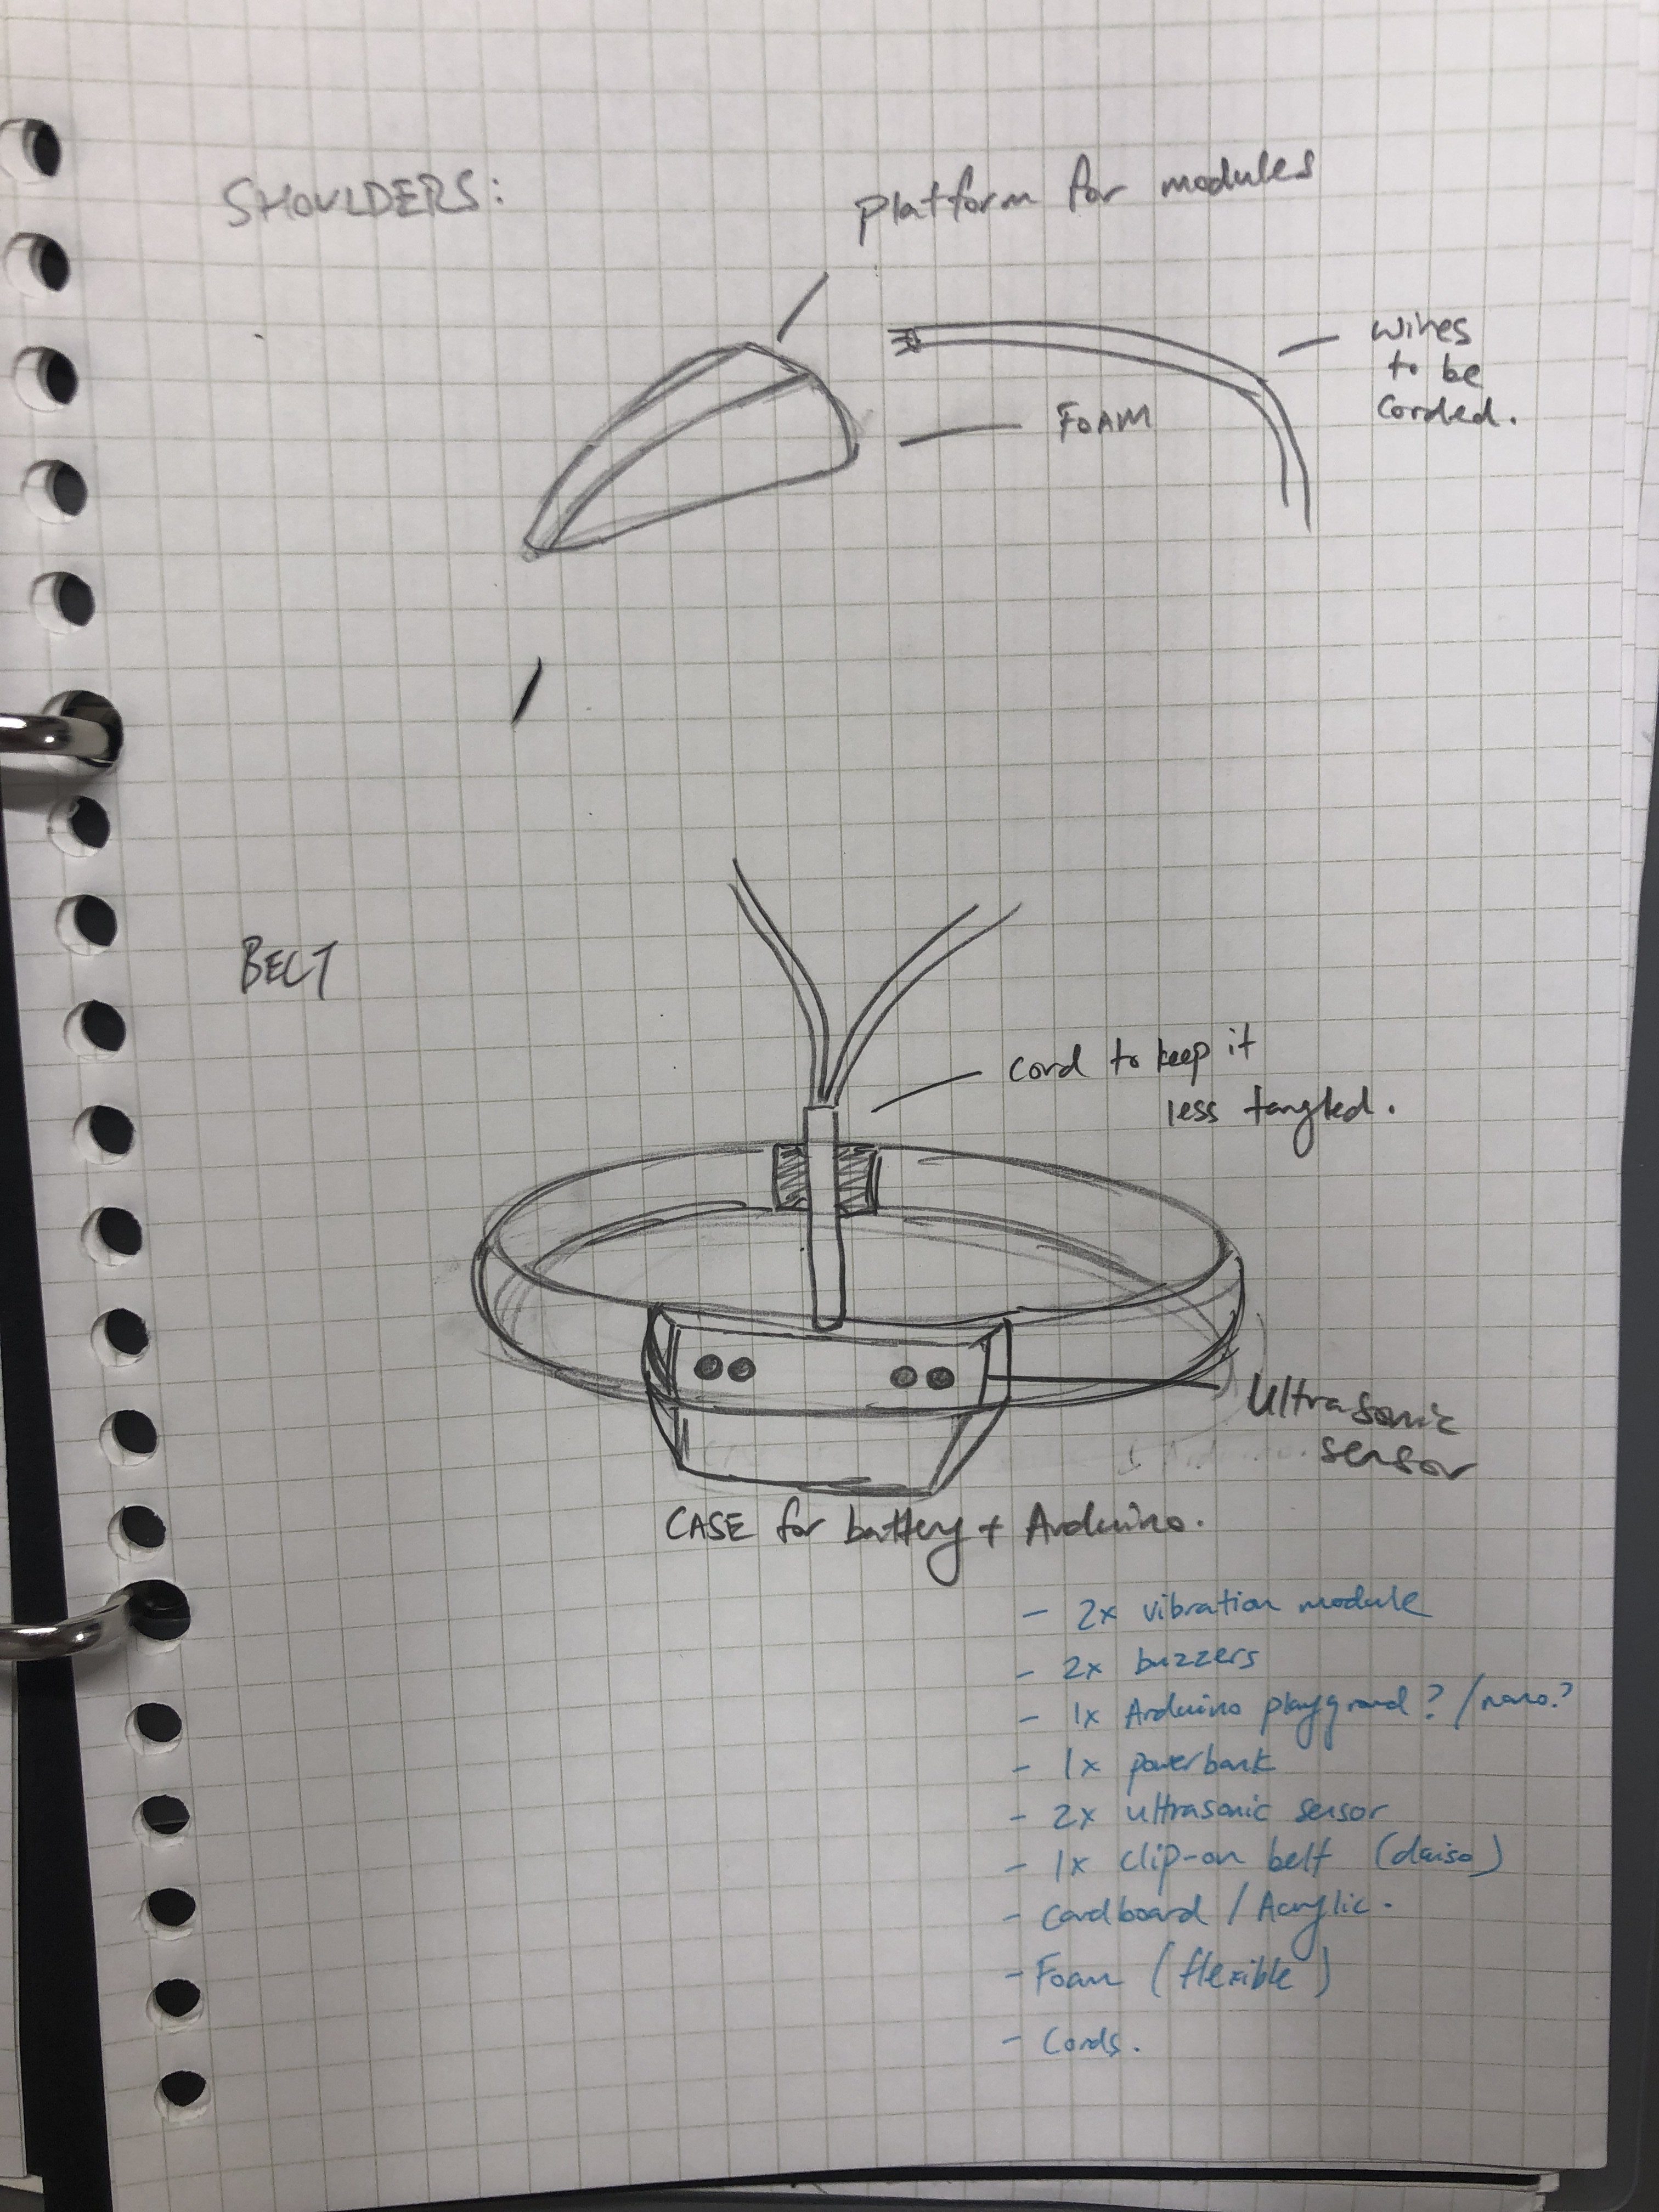
My idea of a wearable is going to be a belt which sends a signal to the shoulders. My rationale is that a belt will be stable and inconspicuous. The belt will also allow the sensor to always be facing the back of the person as that’s the only side of the body that it can face. The shoulder, as the vibration should feel like a tap on the shoulder to prompt the person to move away when there is something or someone behind him or her. The notification will also tell the user whether the incoming object or person is coming to the left or the right side.
A quick sketch of how this will look like in comparison to the 8.5 head model
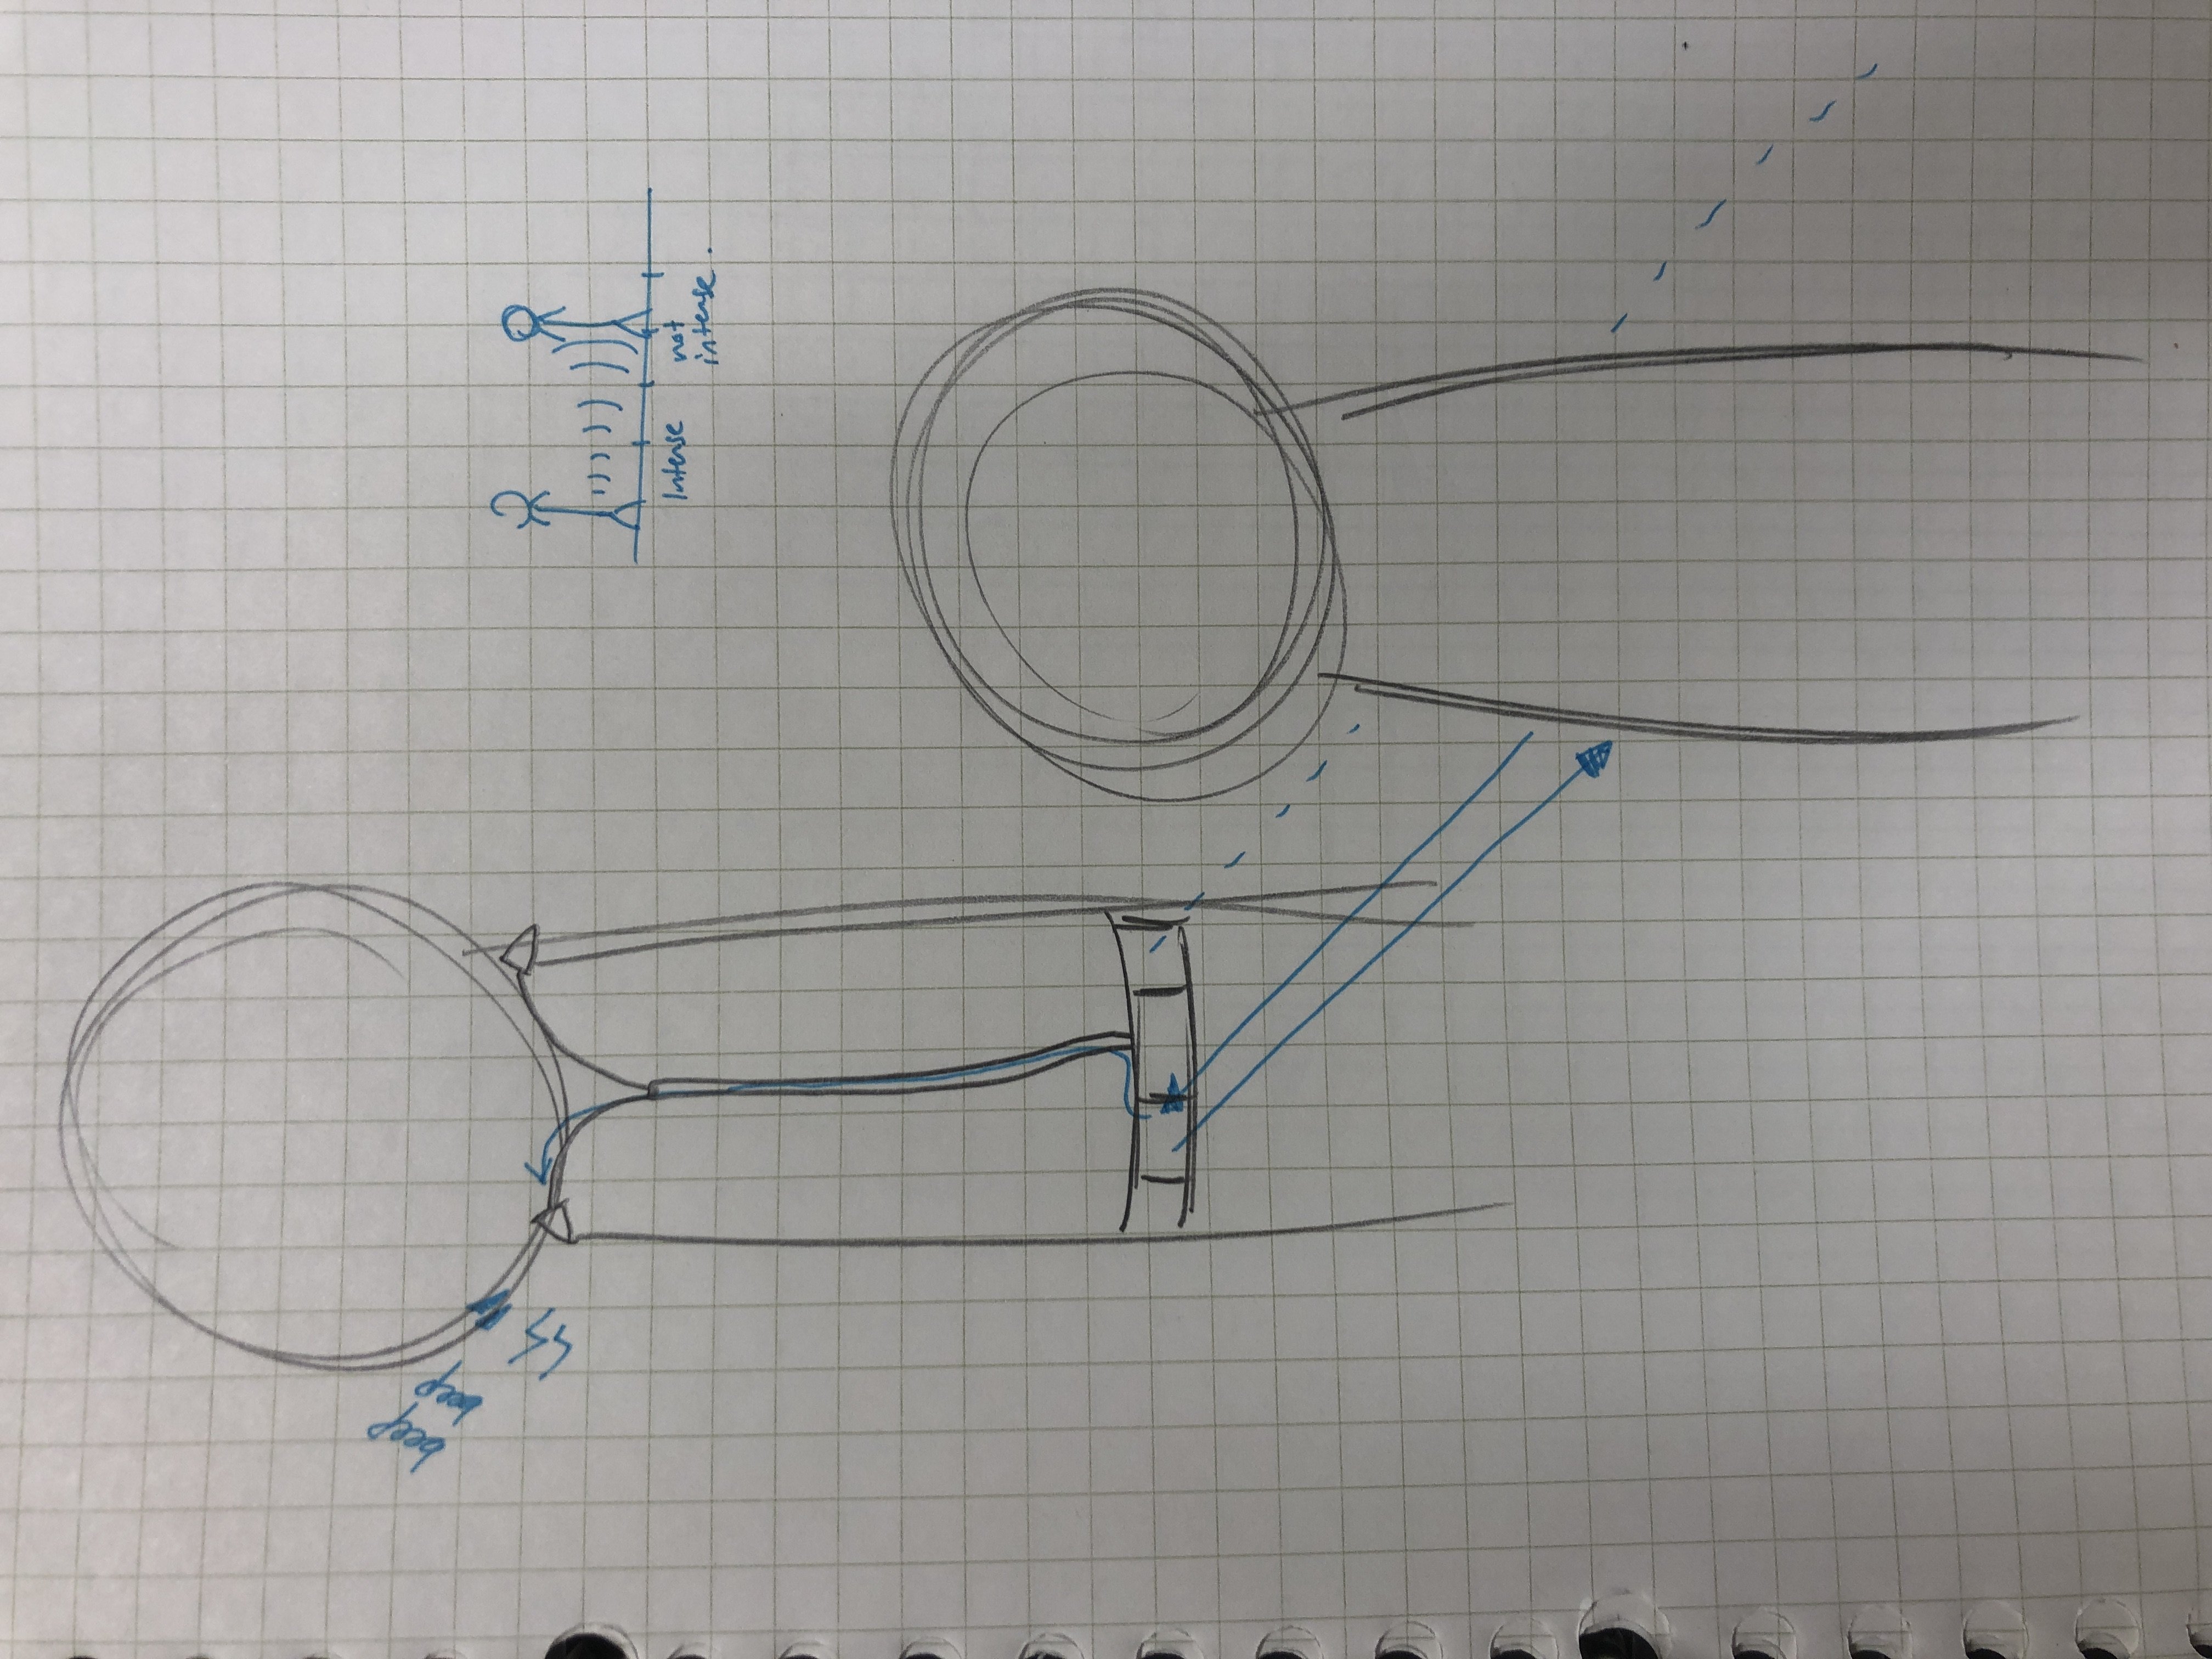
The Interaction
So how this device should work is, if something is in the vicinity, at least 1 sensor should pick it up. The arduino will then compare both ultrasonic sensors: if one side is higher than the other, it will notify the user on the correct side. If both side detects a similar output (maybe within a certain range), both shoulders will vibrate to alert that the object or person is directly behind. The intensity will be determined by the closeness. The sound will come in the form of short beeps with decreasing intervals as the gap gets smaller, just like a car when in reverse.
Problem: if the user is leaning onto something on purpose, the device will keep beeping and vibrating. To solve this, I would make it such that the user can switch the device off at anytime, so as to prevent disruption or disturbance.
Something more advanced… If I can do it
I wonder if I can change the idea to the arduino detecting change in speed (acceleration) of oncoming ‘entities’, basically detecting change in environment so static environment will not trigger the system. This will solve the problem mentioned above. We shall see.
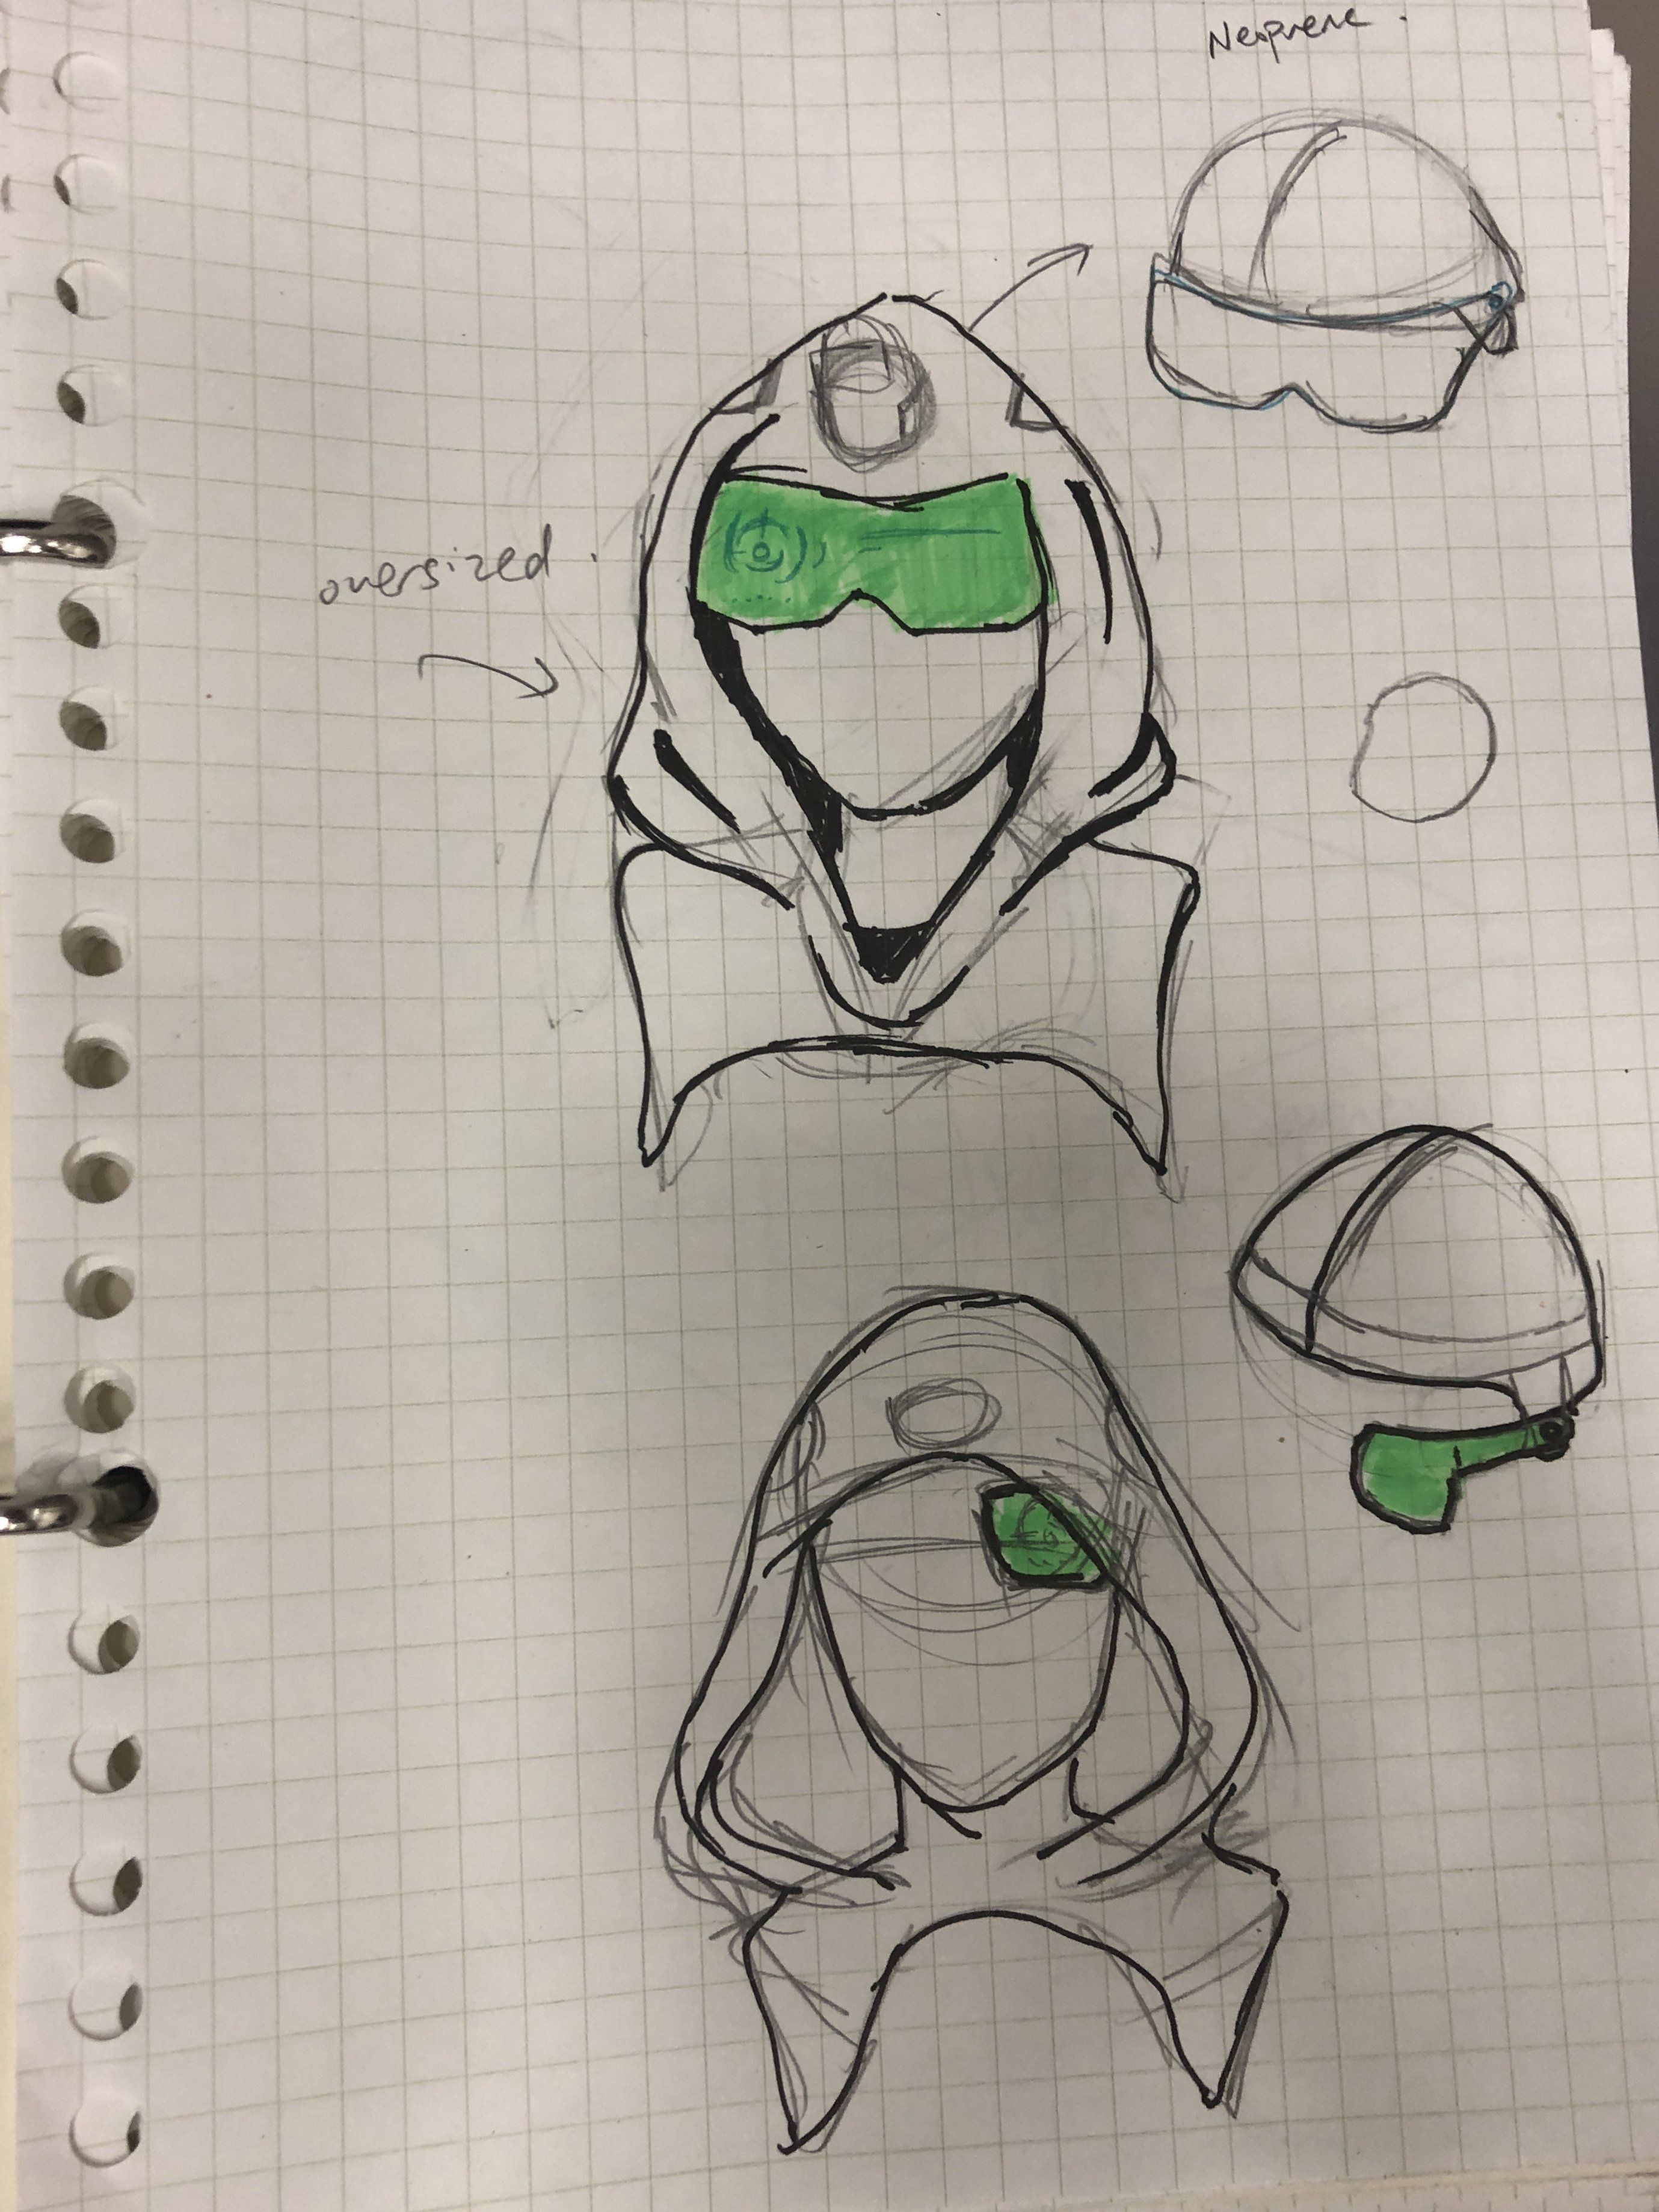
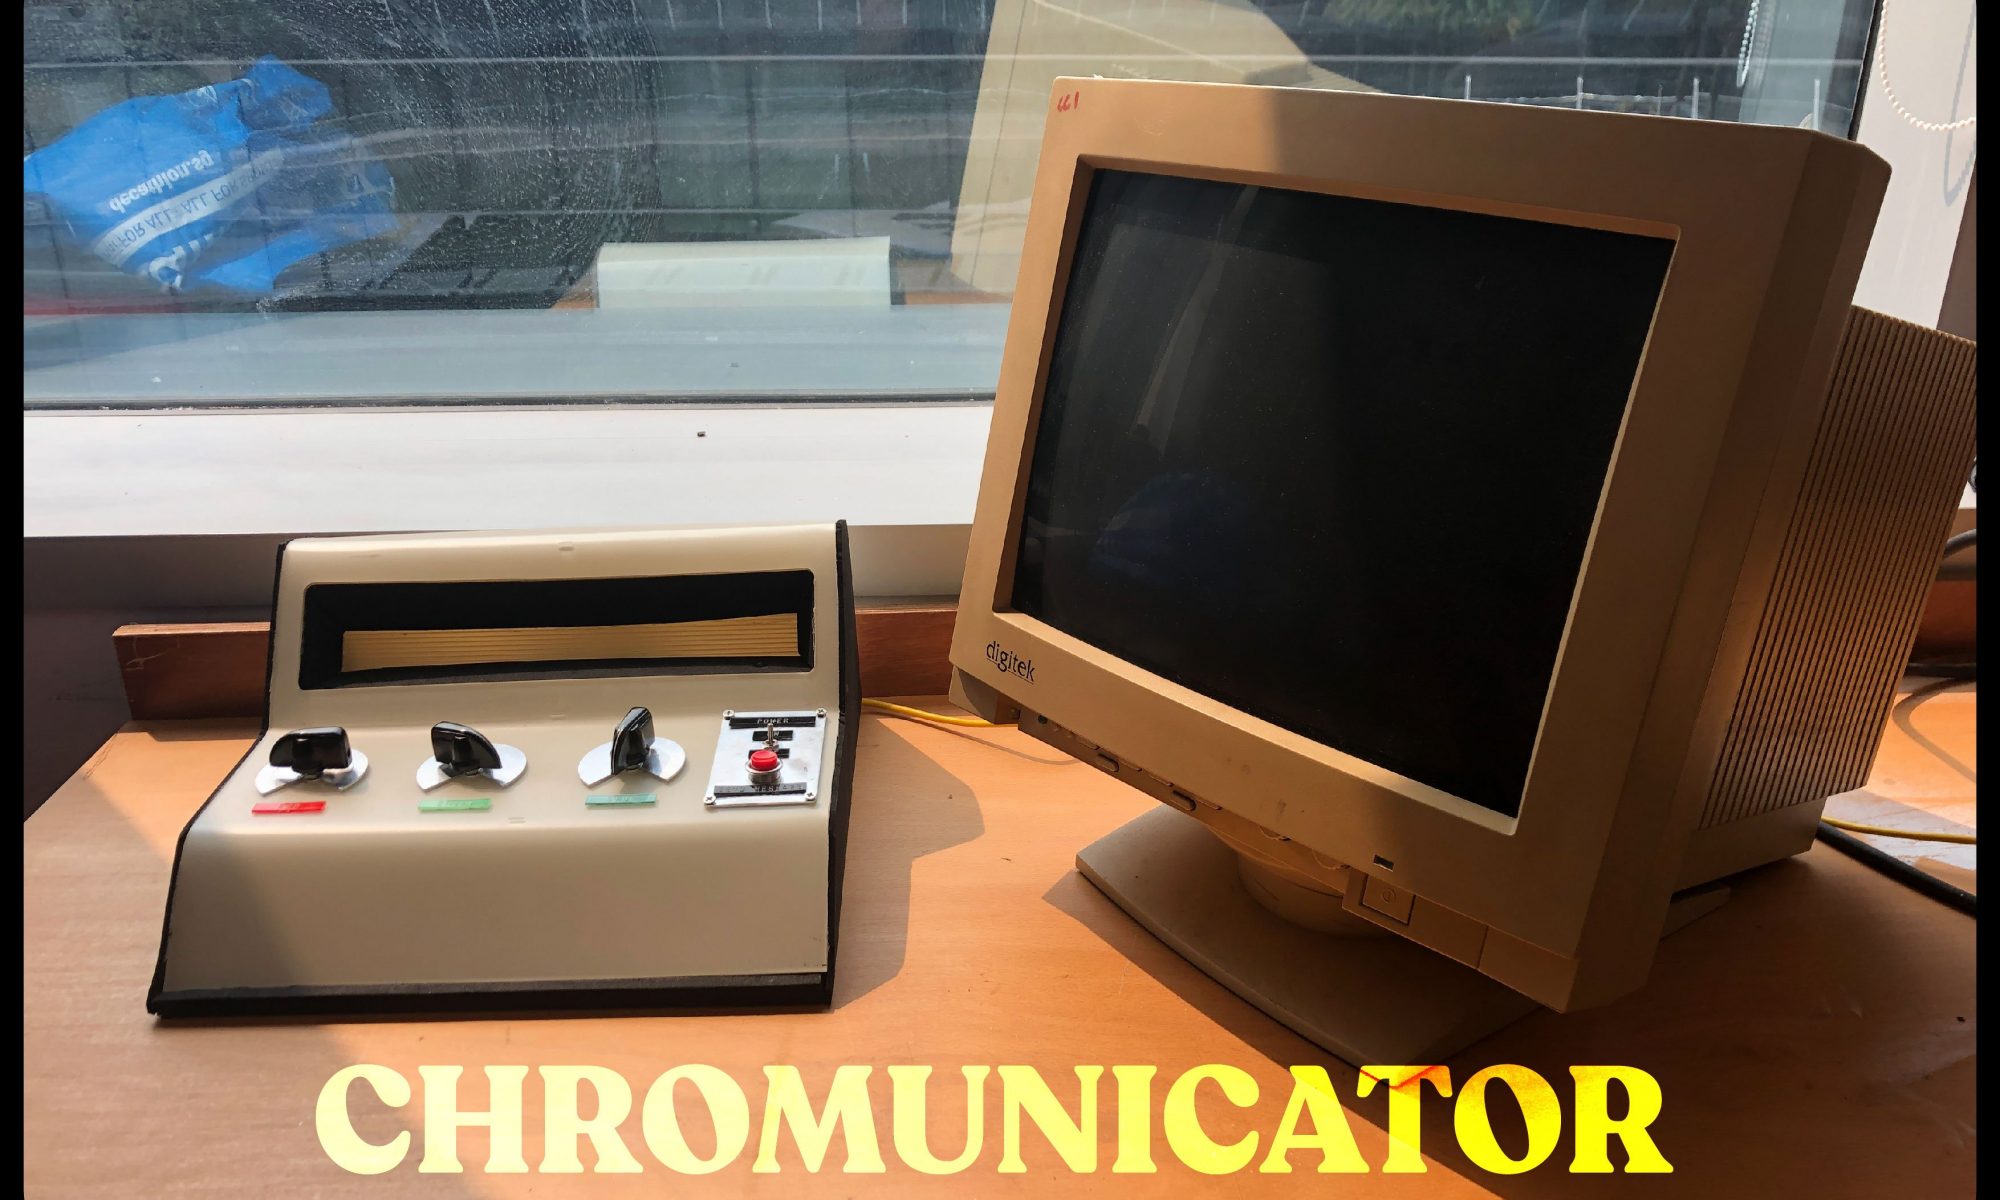
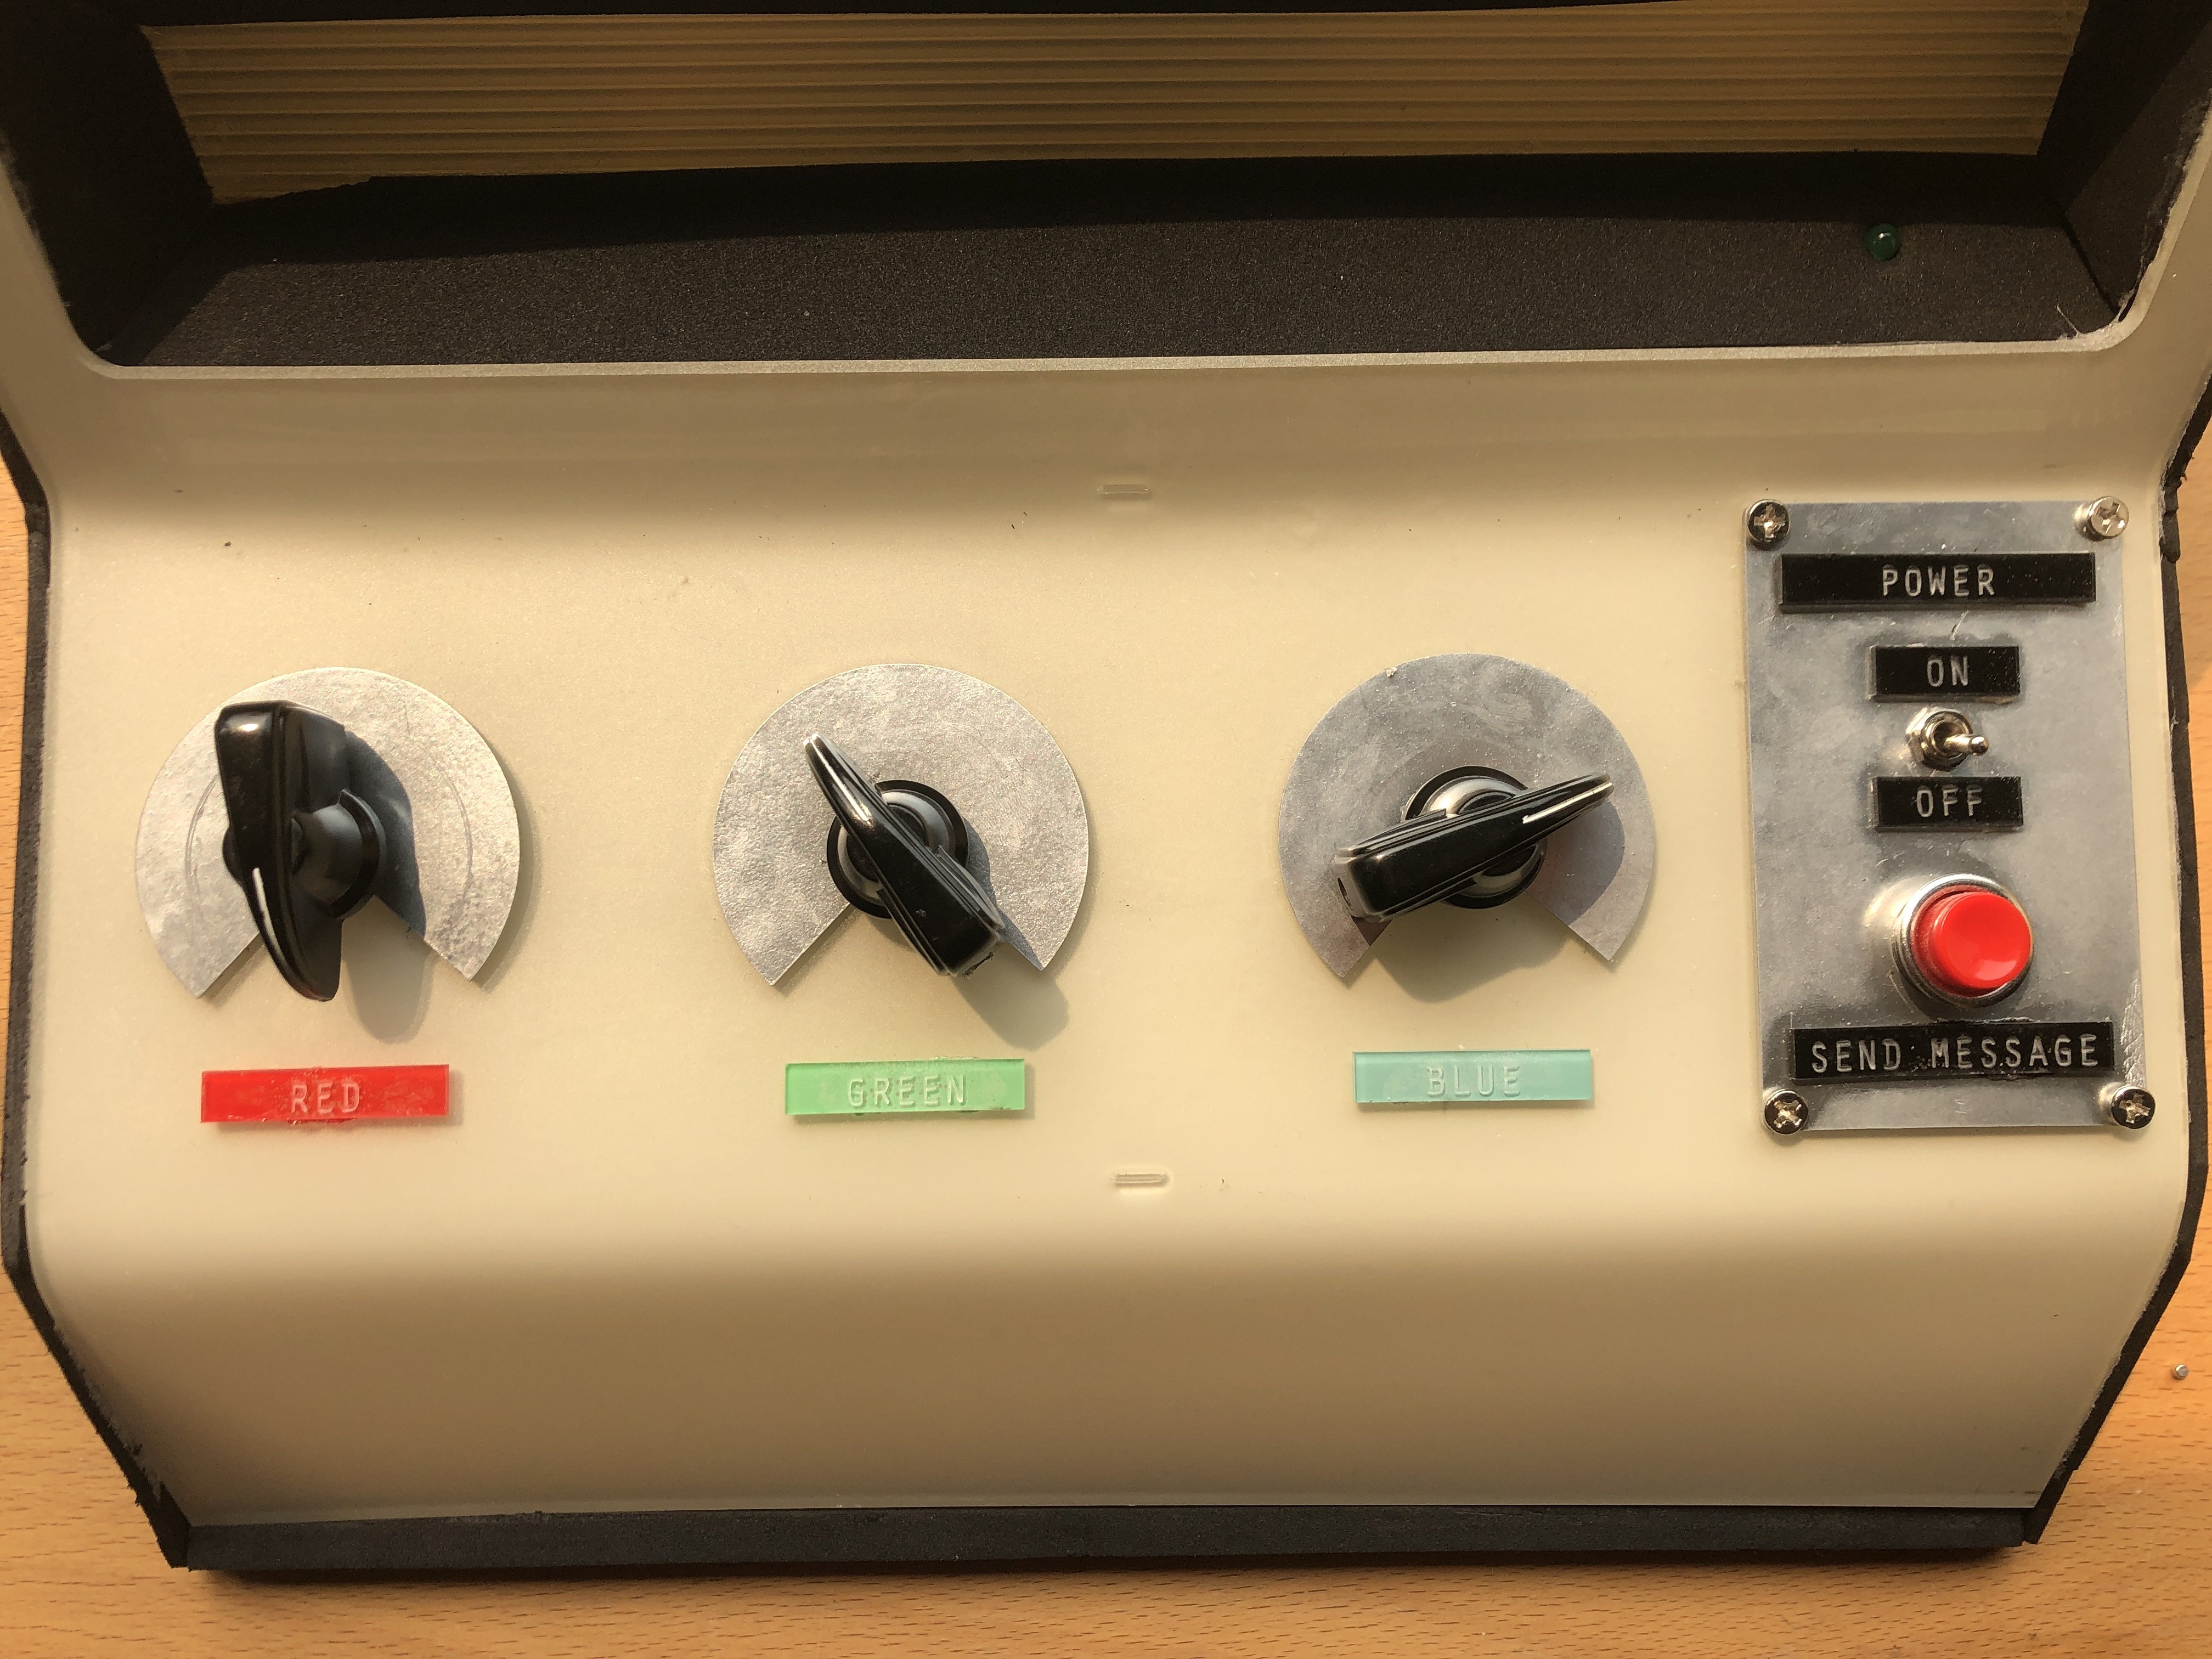
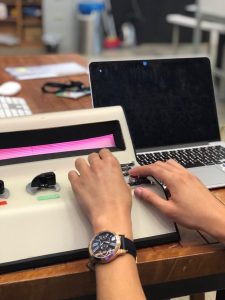
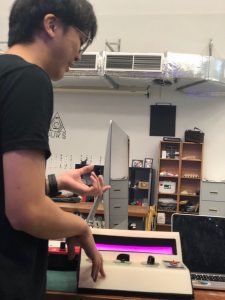
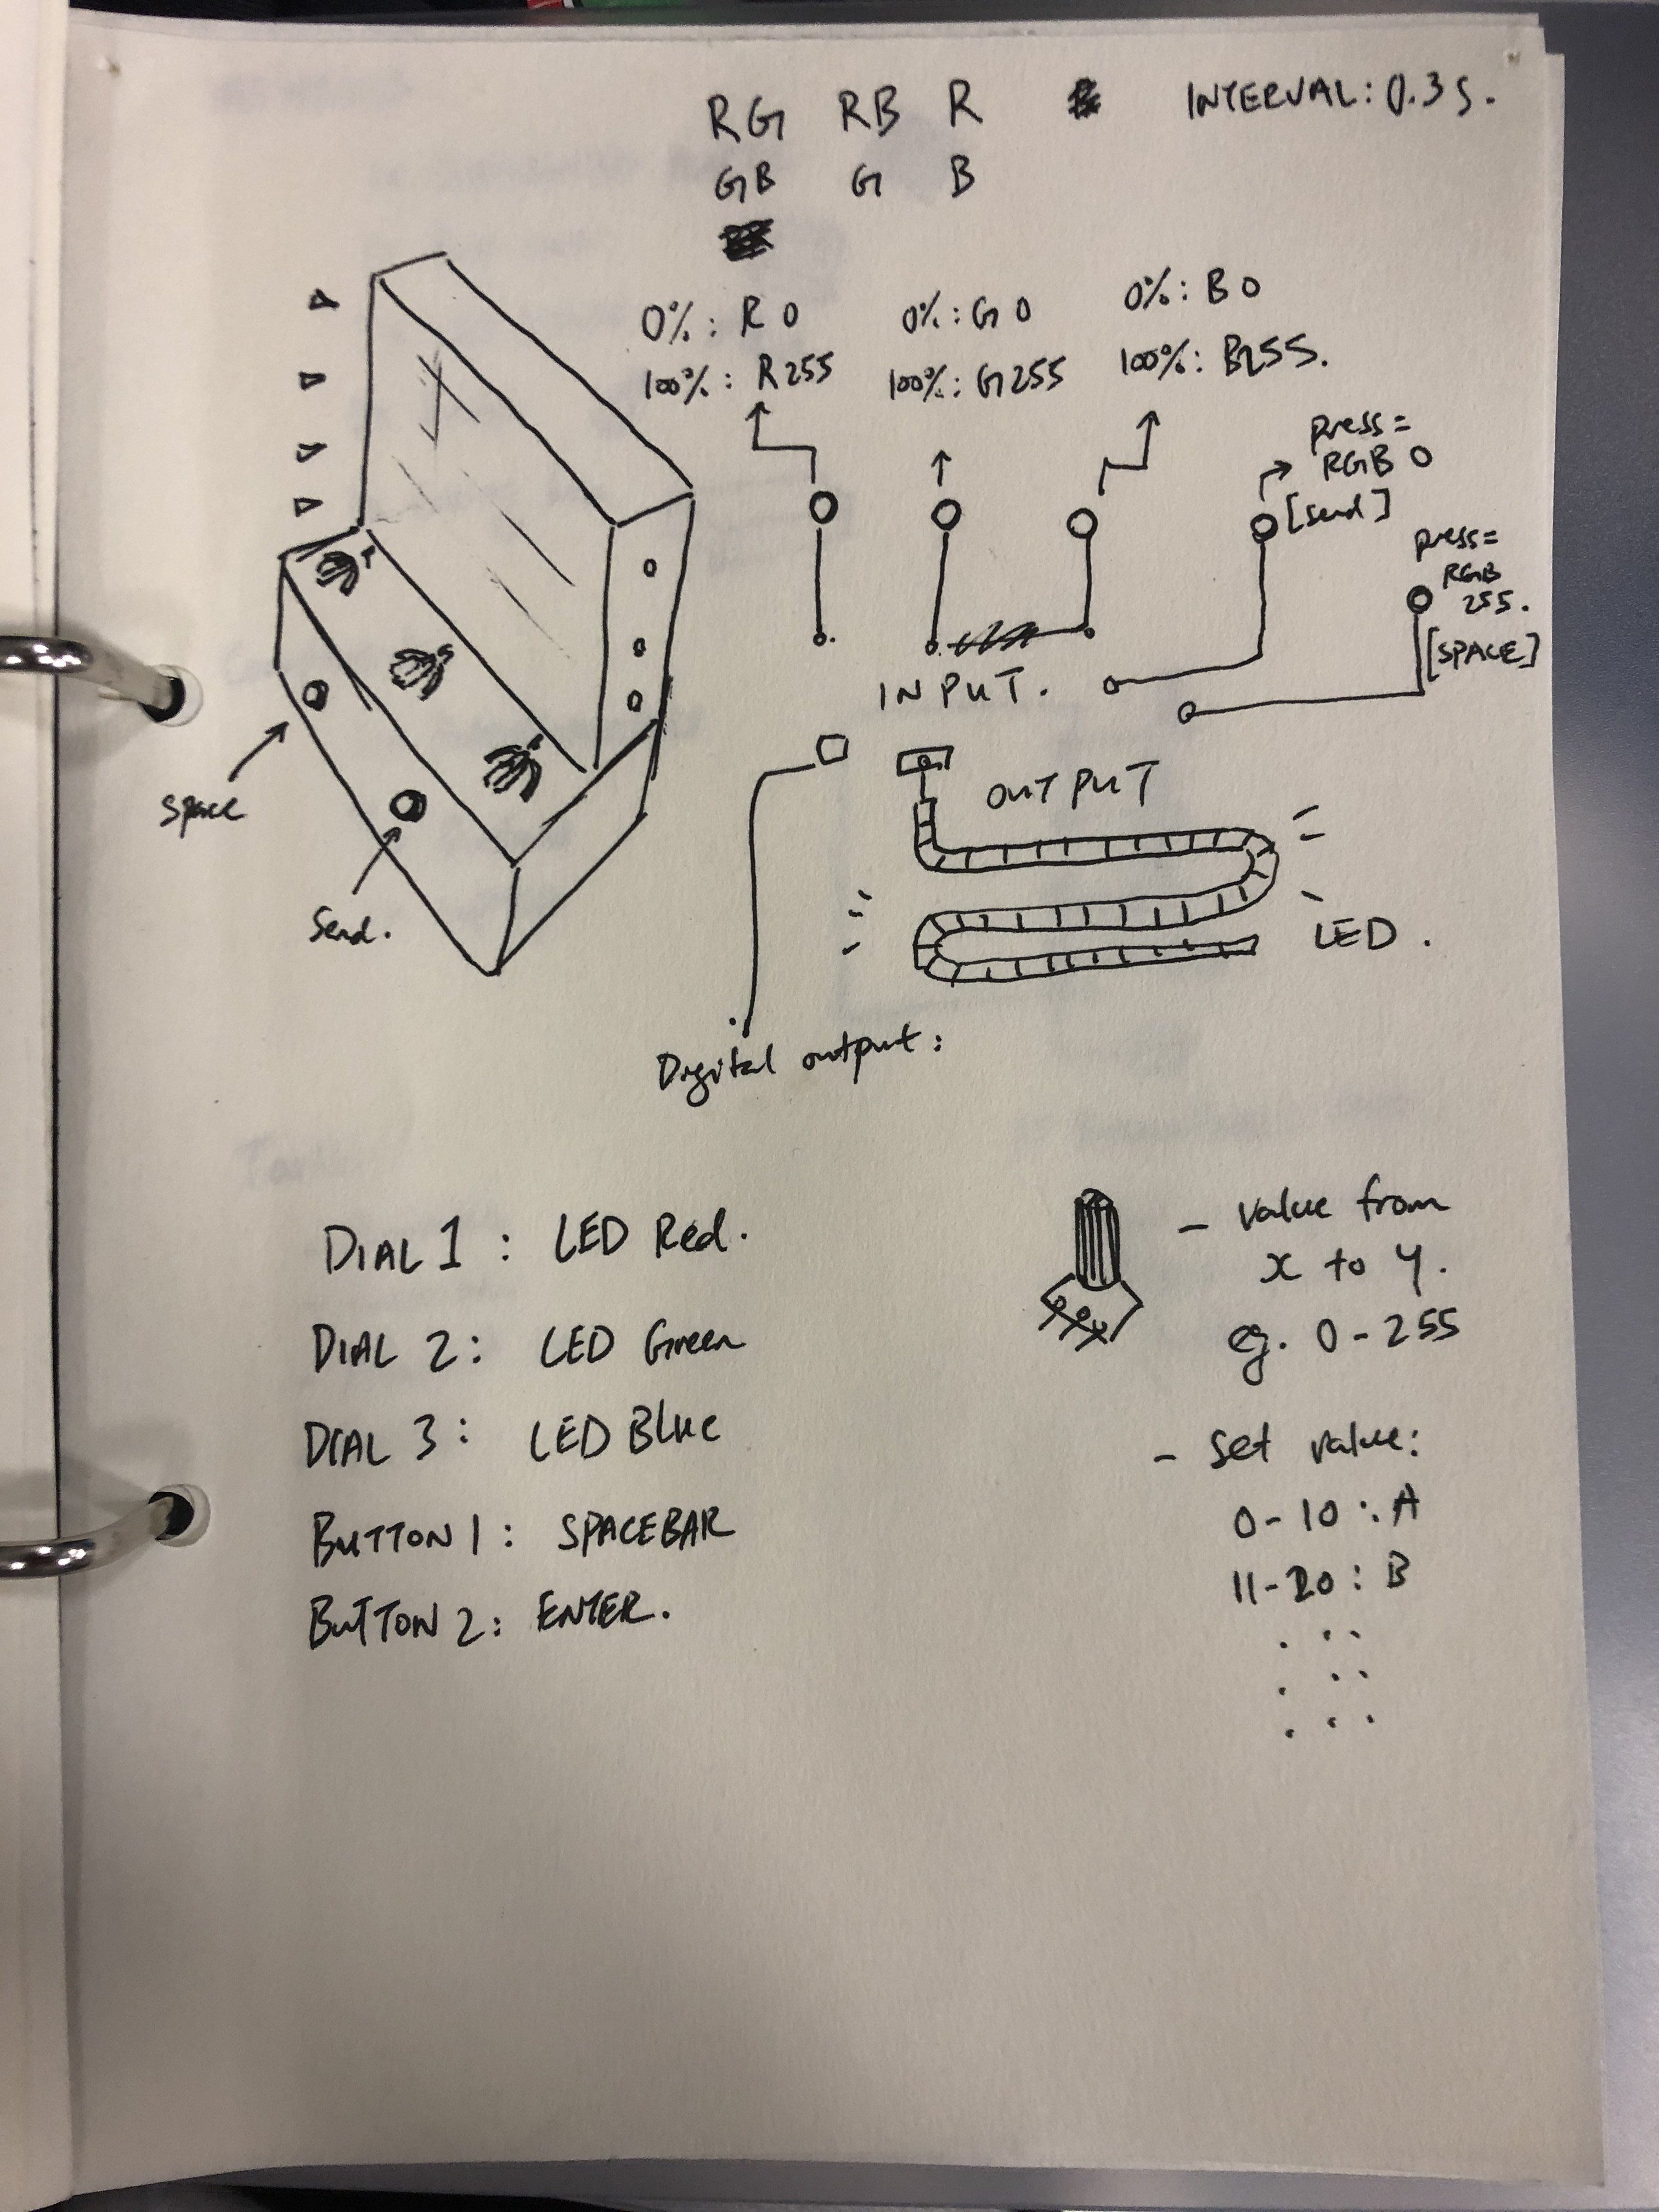
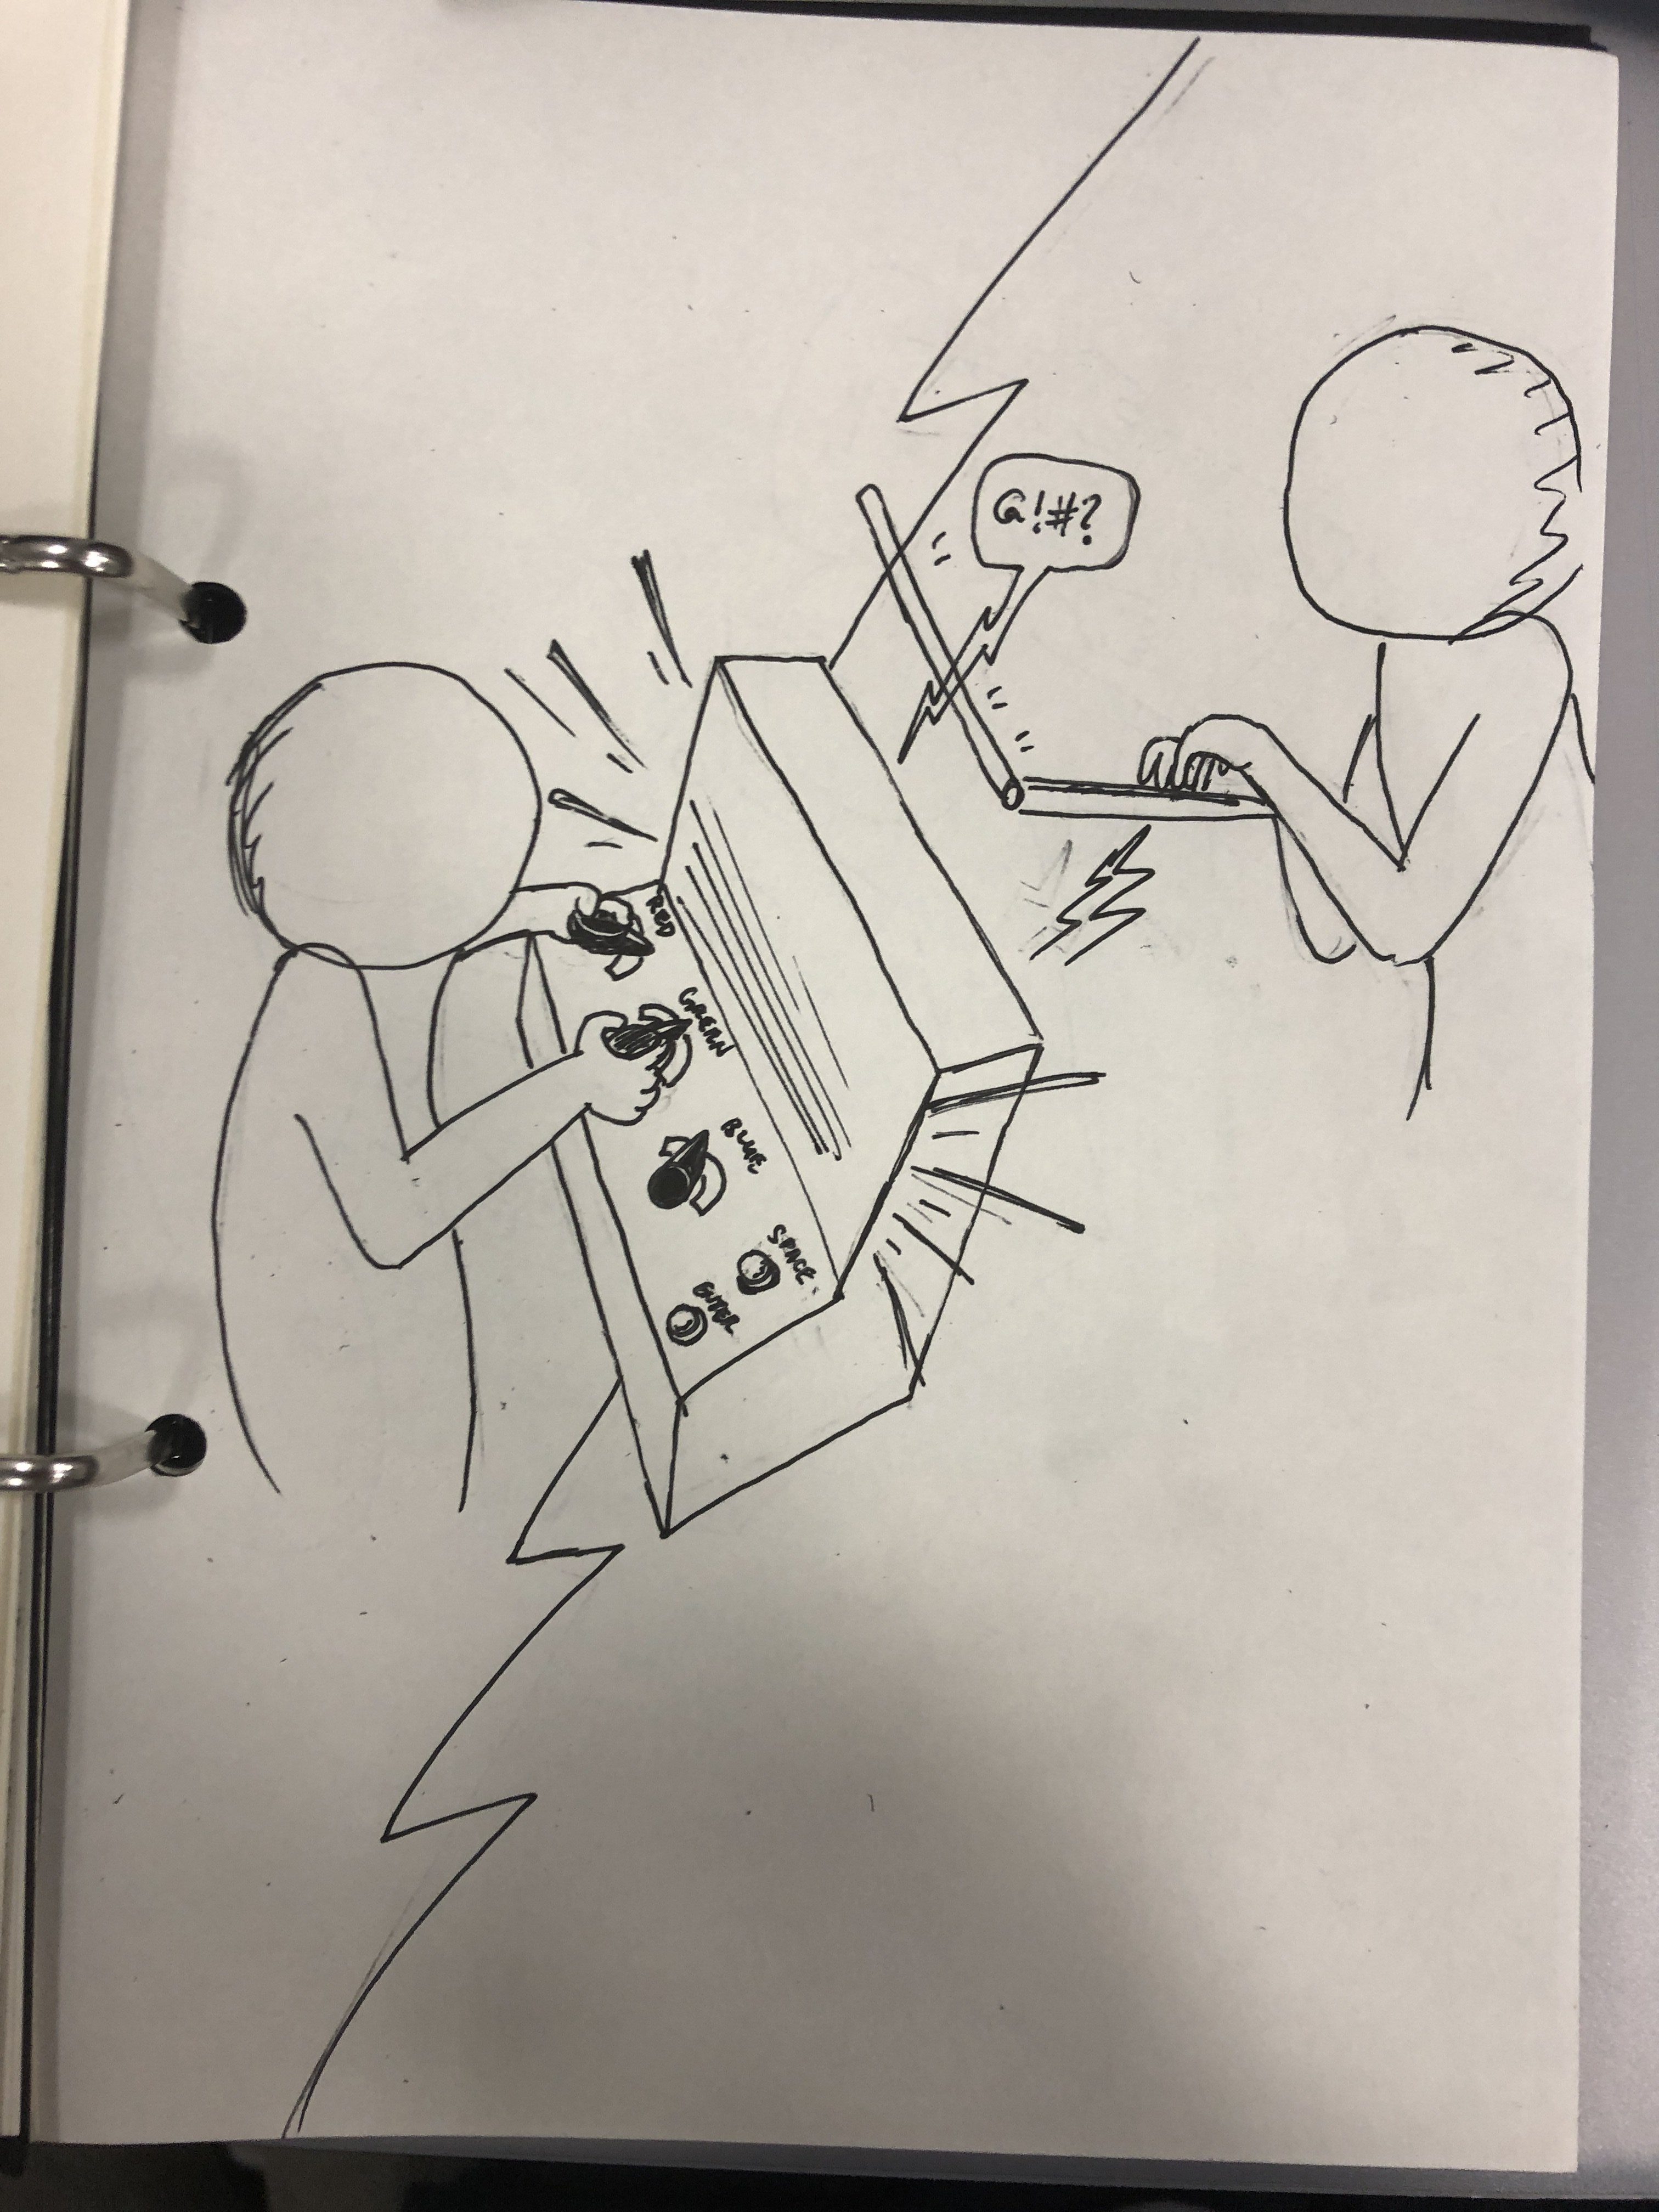
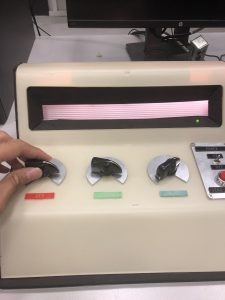
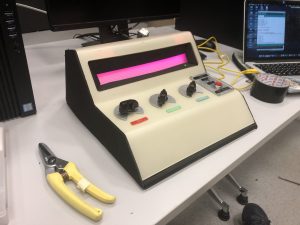
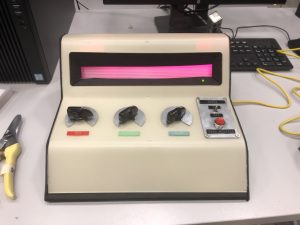
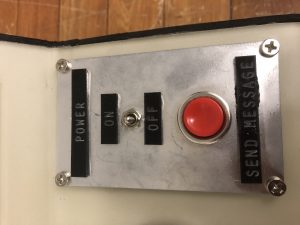
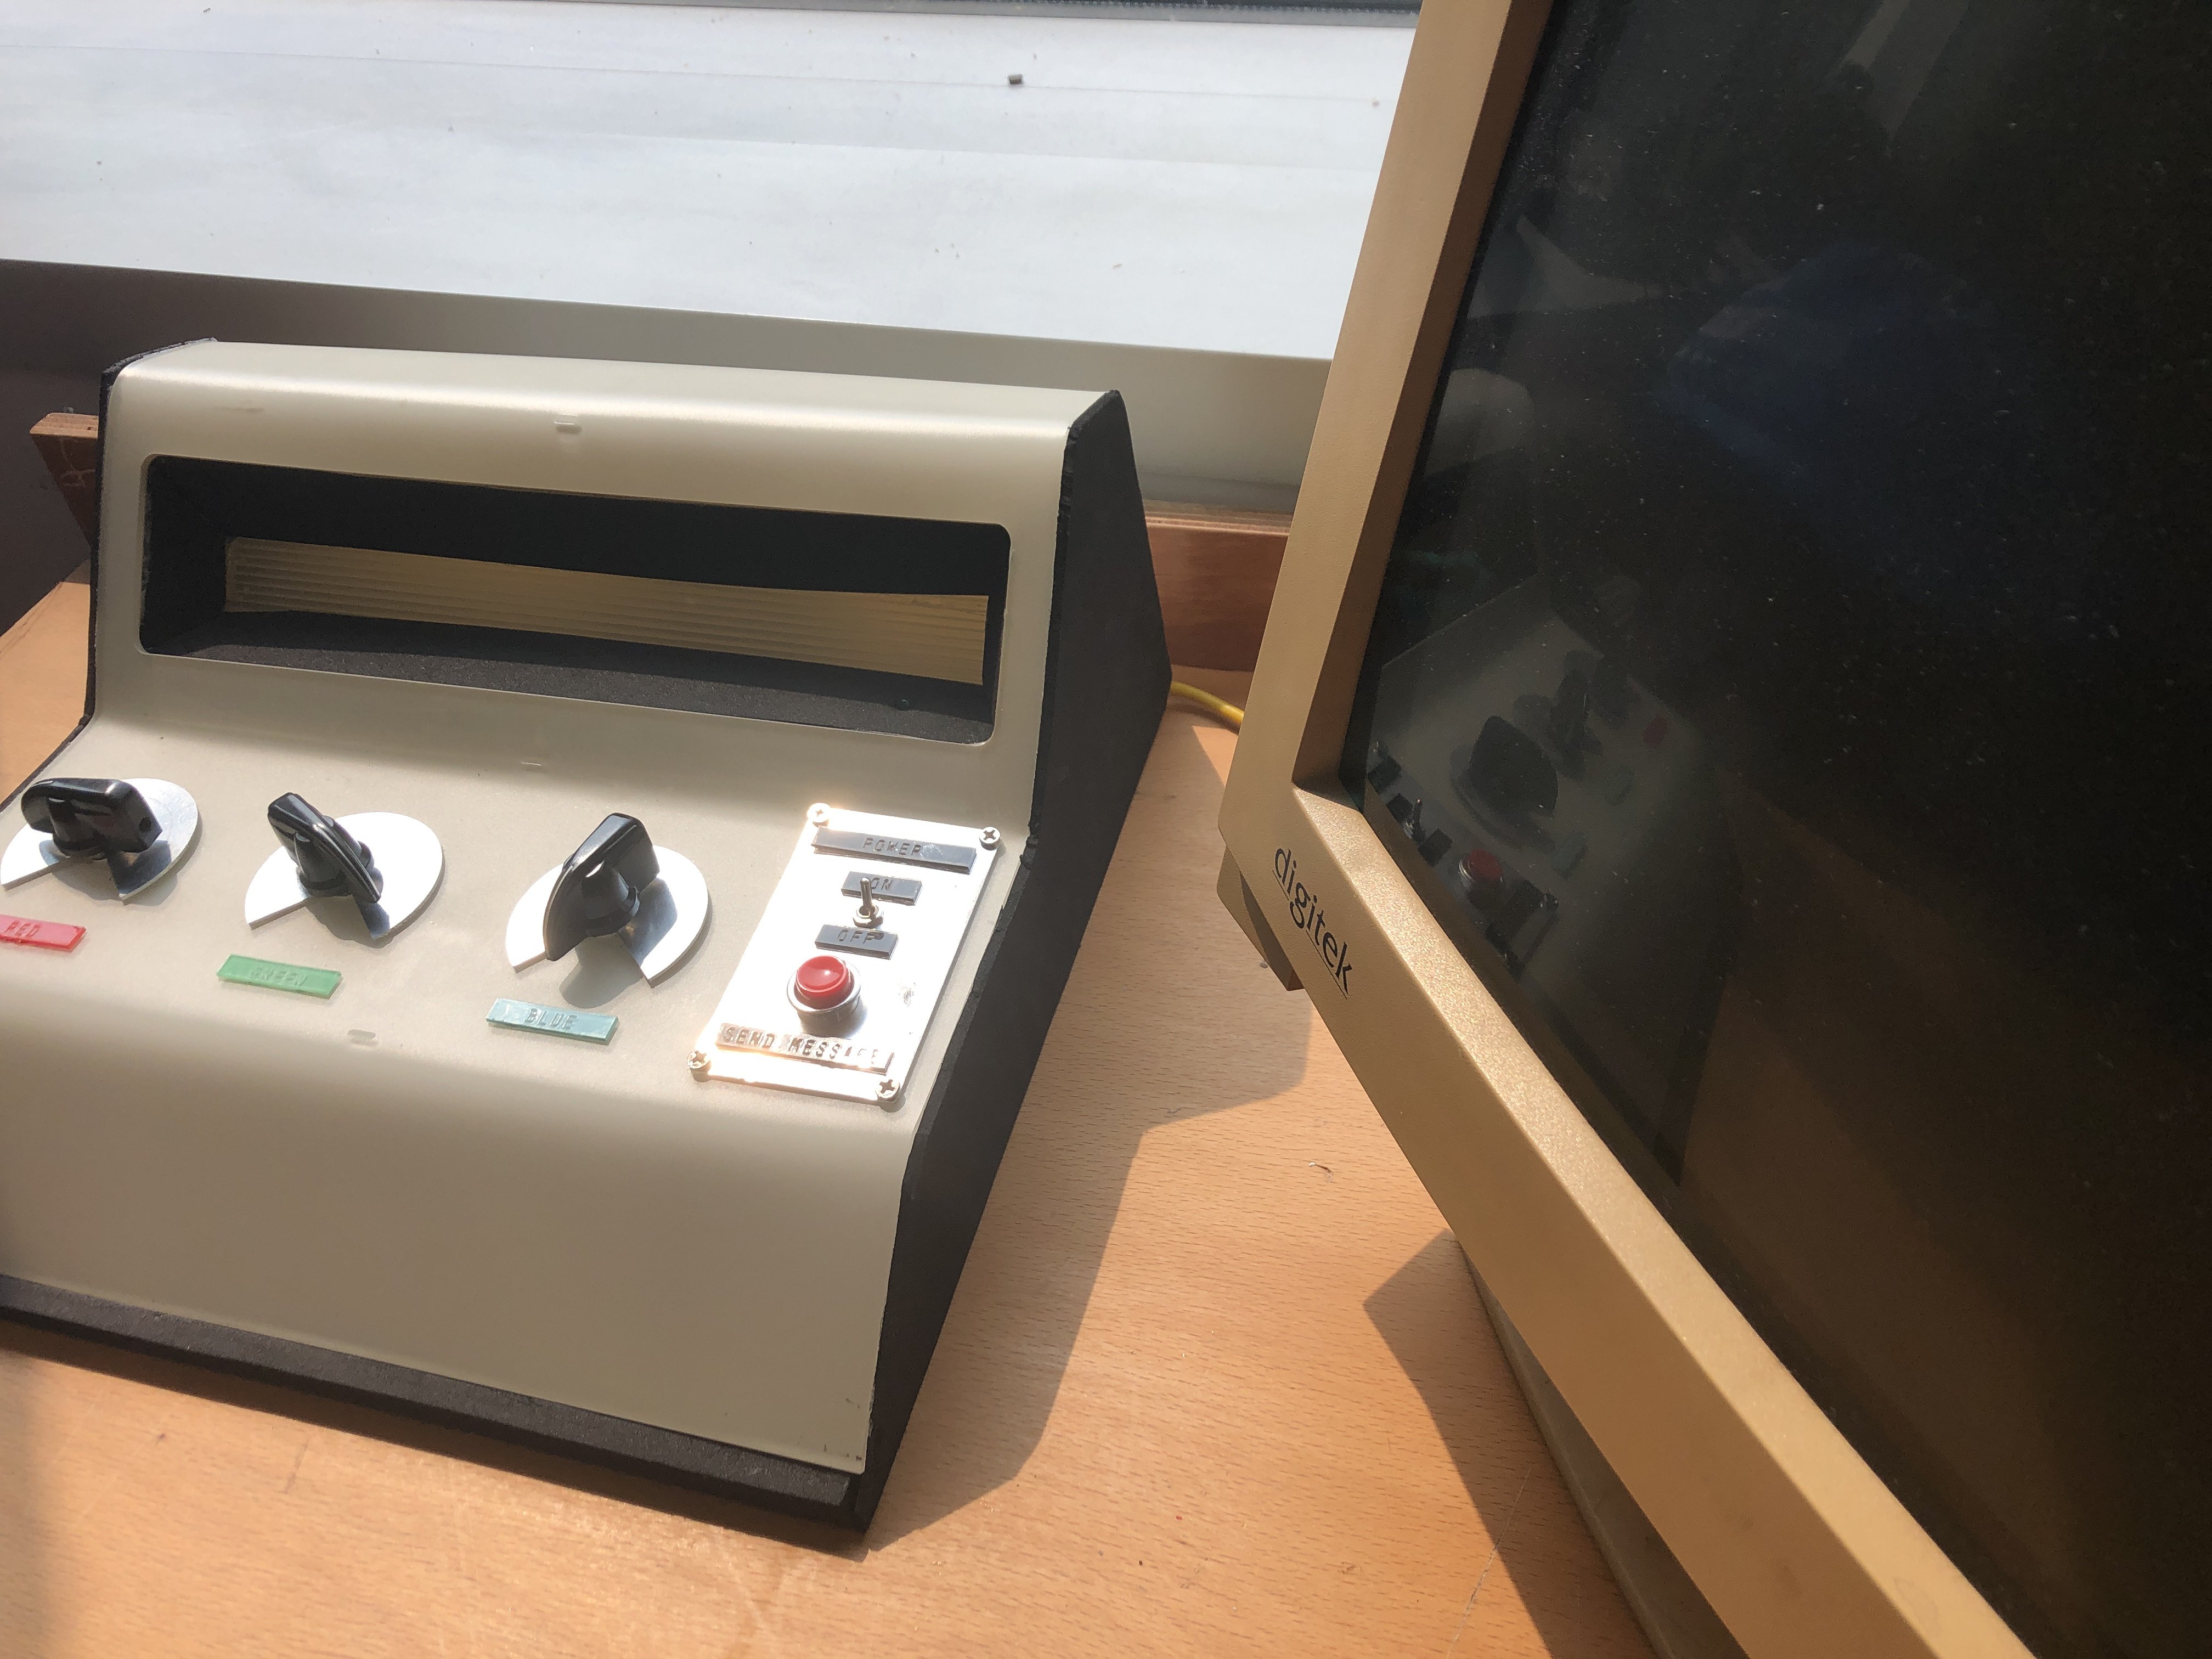
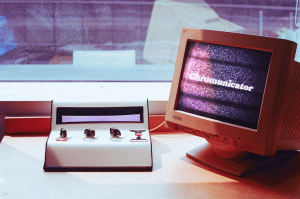
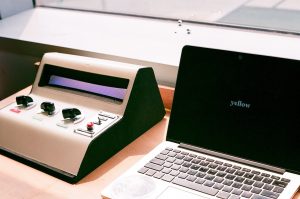
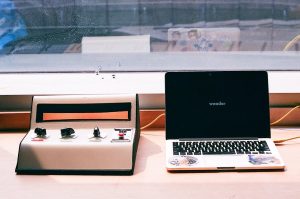
This device is an analog machine that provides full tactile and visual feedback through the use of dials, a button, a toggle switch, an LED strip, and computer screen. The device ‘converts’ coloured light into text. Users can turn the dial to alter the colours’ red, green, and blue values manually. After selecting a colour they like, they are to press the red button to ‘save’ the colour. The machine can save up to 10 colours. The users can then send the message to the computer by pushing the toggle switch down. This results in the machine entering ‘transmit’ mode, and promptly repeats the selected colours on its screen. Meanwhile, the ‘translation’ happens in real time, displaying the translated words on the computer screen. Users can then press the red button again to repeat the transmission. Users can then flick the switch back up to return to ‘record’ mode.
In a nutshell:
In record mode (toggle switch up)
dials: control RGB values on the LED
button: record (up to 10) colours
In transmit mode (toggle switch down)
dials: does nothing
button: repeat transmission
*Note: the words at the toggle switch and buttons do not mean what they mean now as the concept is changed. Switch ‘up’ should mean “input” and switch ‘down’ should mean “transmit”, and the red button should be “record”
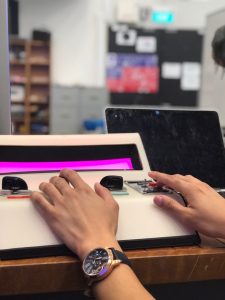
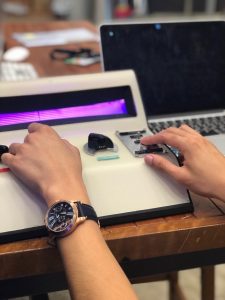
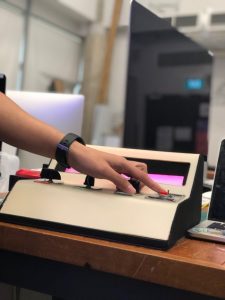
Presentation
Thanks Fizah for helping me take these SUPER HIGH RES PICS!!! And Shah for playing with the model!
Why this device?
In the context of a trade show, I would use this device as an attractive ‘toy’ to attract people to come to the stall. The manual control of LED allow visitors to test the strip’s potential while also having fun.
Personally…
I wanted to make this as I was really excited to do this when I had this idea. I also wanted to improve my workflow and the way I treat school projects. I was also deeply inspired by the group last year that did the Light Viola, and also Zi Feng in the way he document and work on his assignments. After this project, I found that I have a real interest in making physically active and immersive experiences, things people can play around and fiddle with.
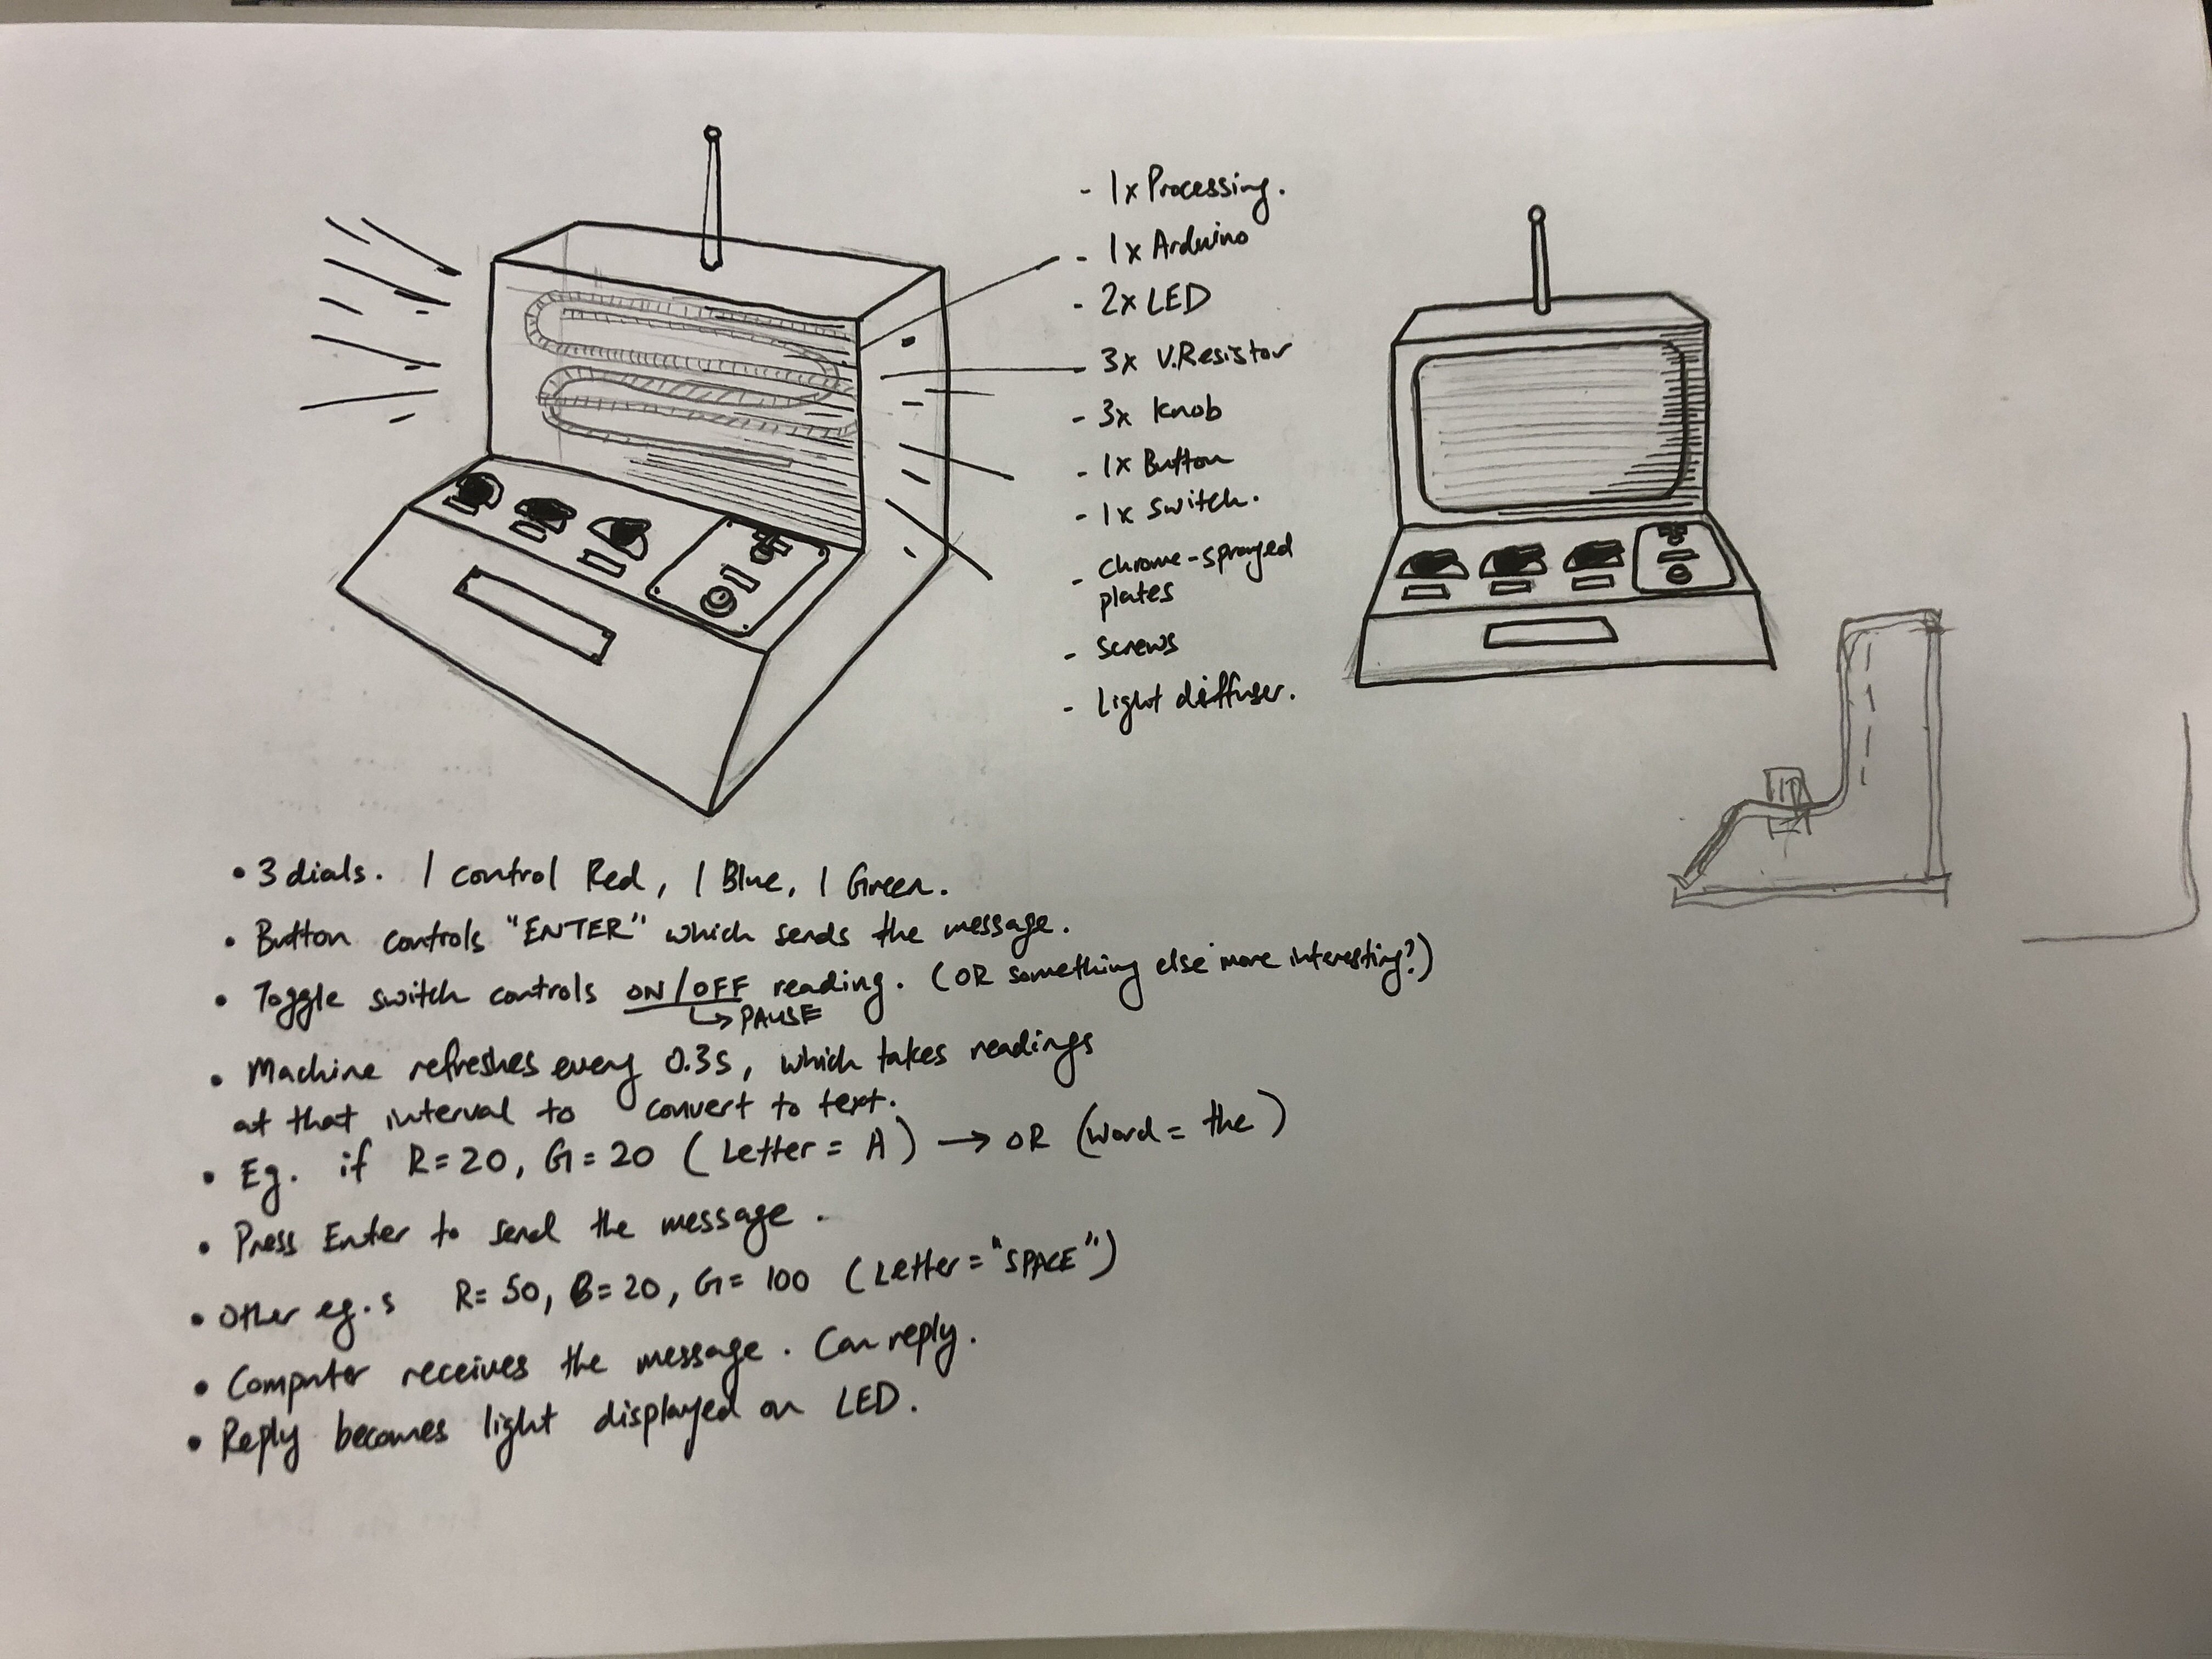
Process
I started with simple sketches to illustrate my idea. I had a few different ideas. The one that stuck with me was the current setup with a different rule: the device remembers an input every 0.3seconds, and the button sends all the words together in a string.
The sketch developed to this in class:
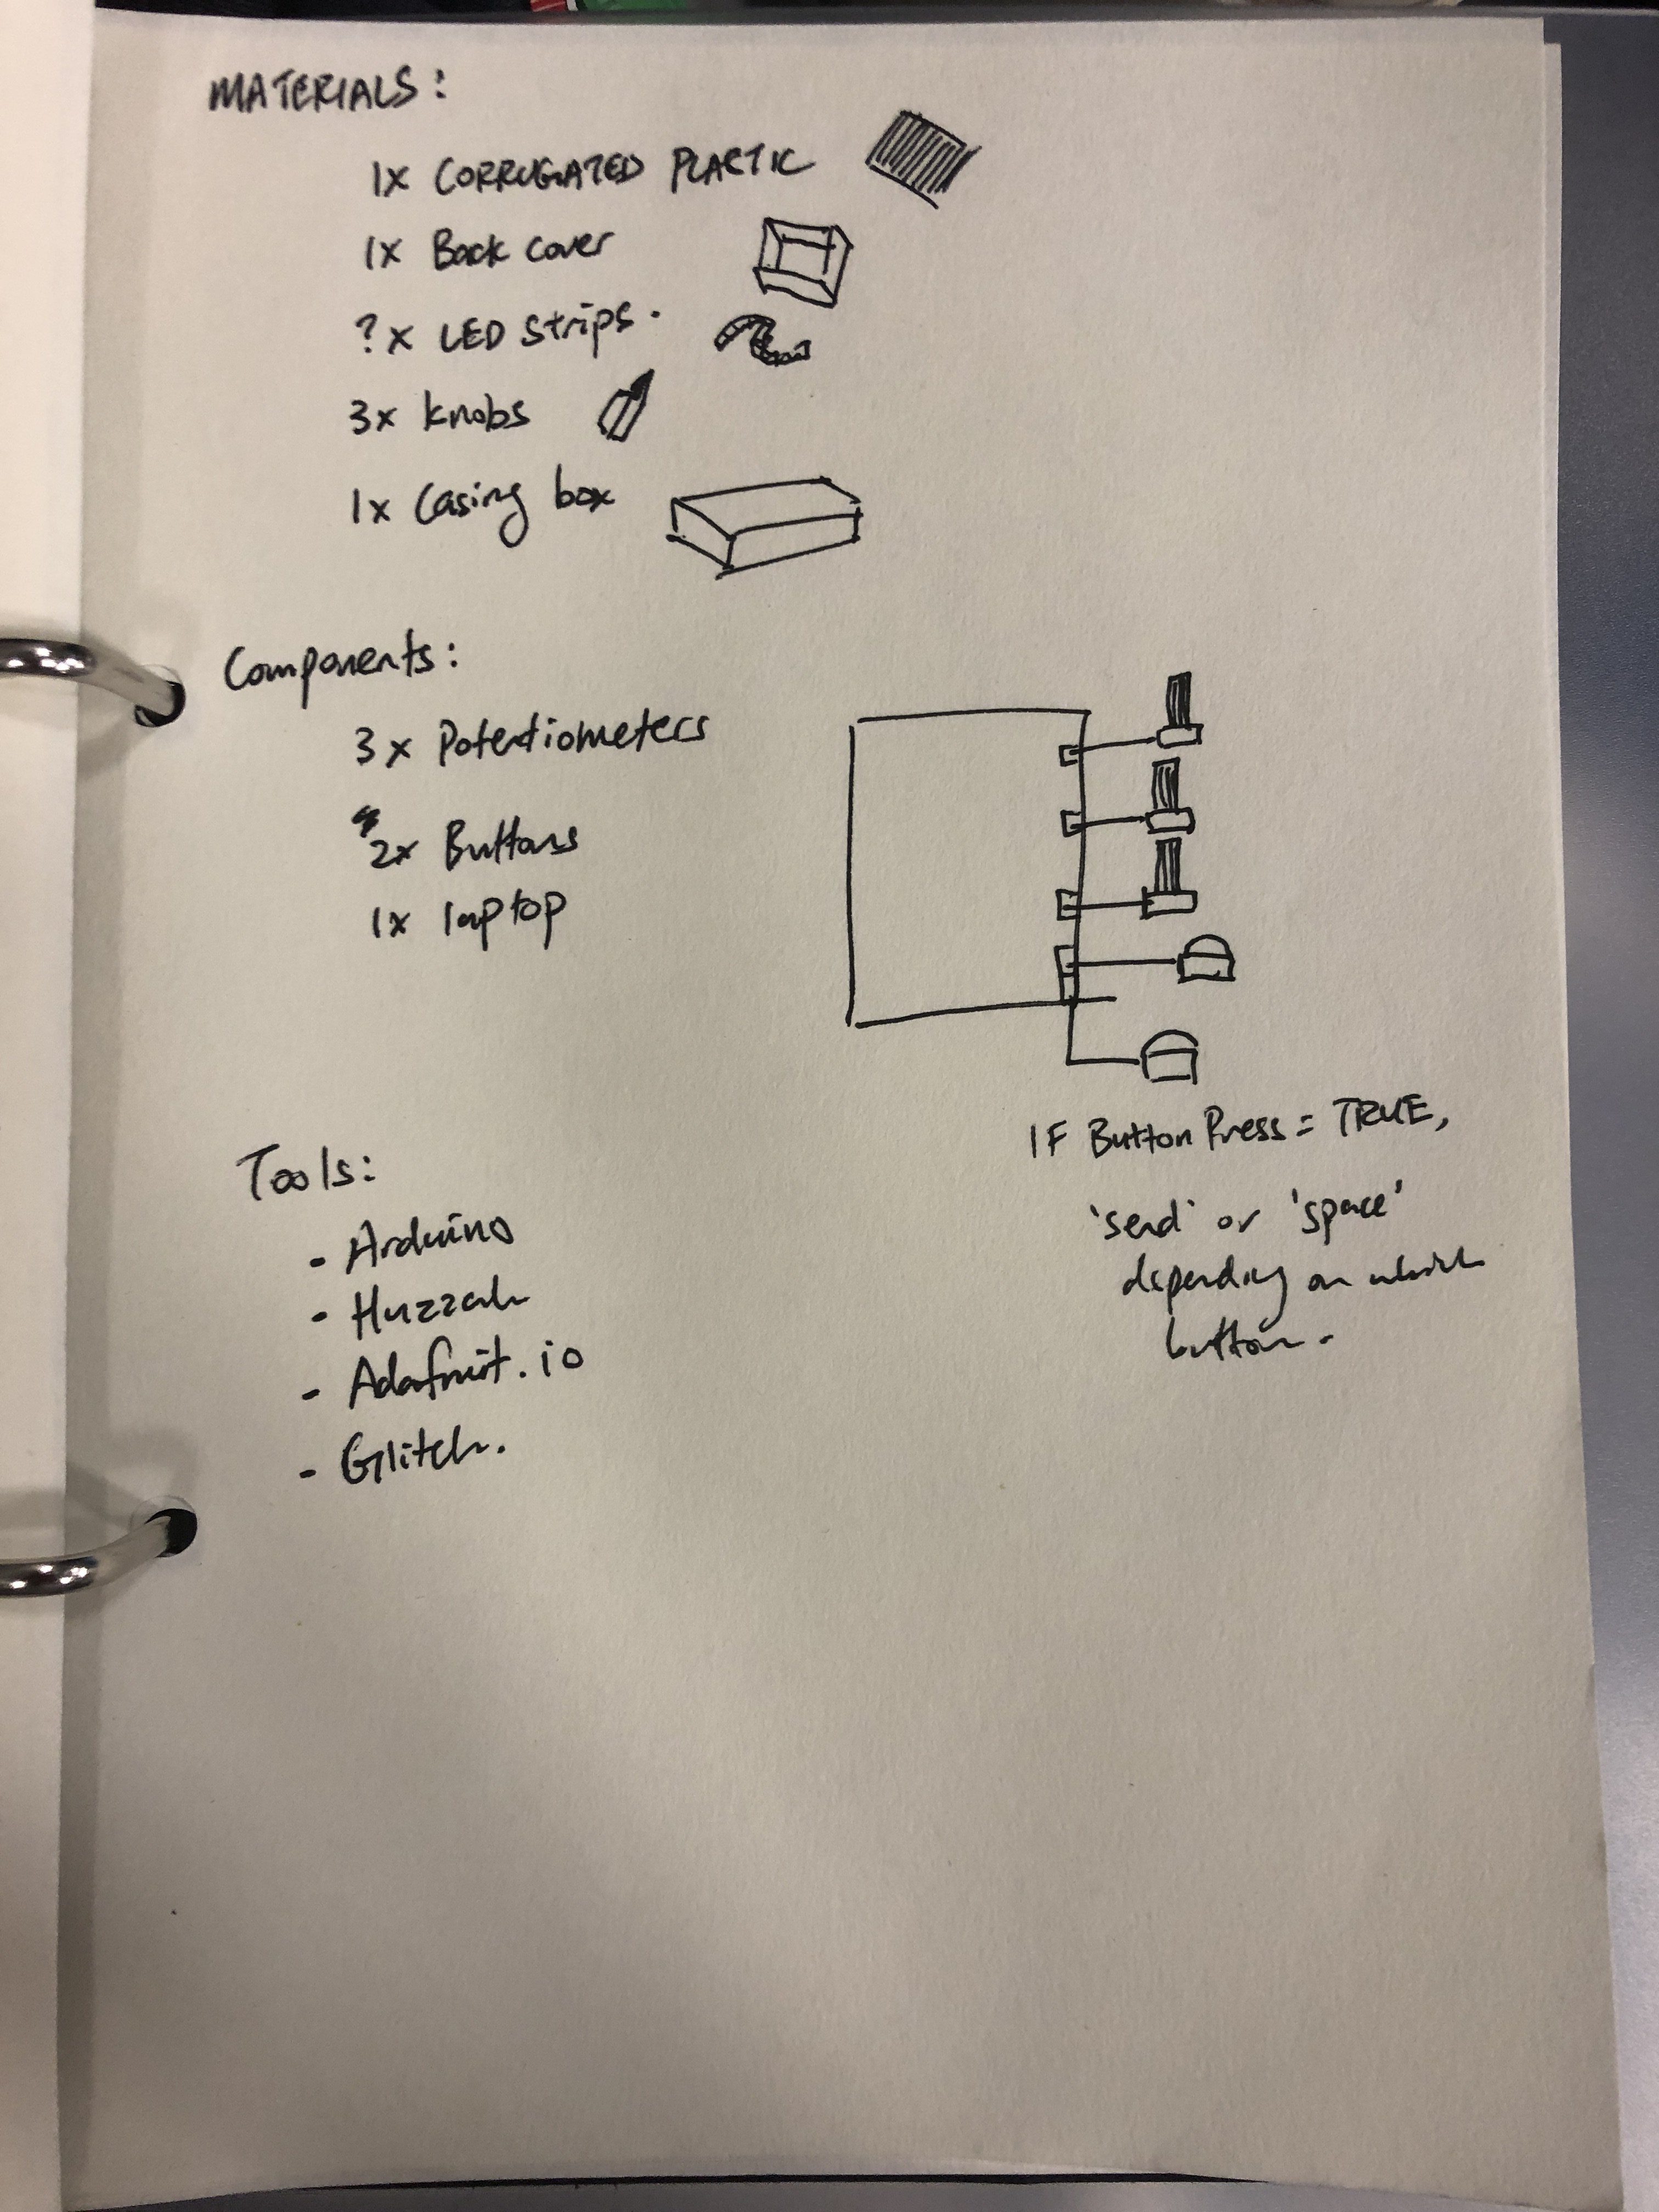
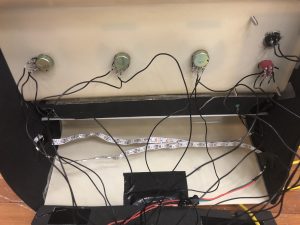
After the sketch and some consultation with Galina and Jeffrey, I went around finding scrap materials. Before this, I also went on a trip with Shah, Joey and Elizabeth to look for components and bought an LED strip (forgot what type it is), 3 knobs, 6 variable resistors, a button and a toggle switch. So with these, I pretty much knew what I wanted to do.
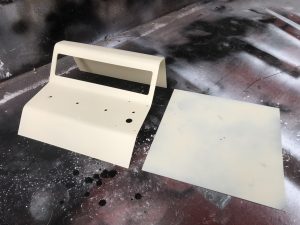
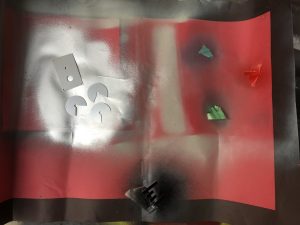
I went on to make the model. I found a large matt sheet of acrylic and decided that it was a good material for my casing. I lasercut it after making measurements to ensure that every component can be installed in. I then bent it using hot gun and a table (unfortunately there is no documentation of that). After that, I went to spray paint the case and the other parts using the left over spray paints I had last few sems when I was in Product Design.
For the case, I spray painted from the back side so the front remains matte and the paint won’t be scratched. The bottom piece was sprayed black in the end to fit the aesthetics better. The other parts are sprayed in their respective colours.
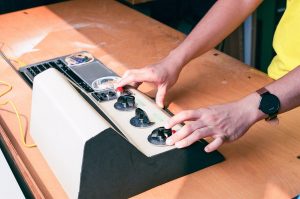
This is how it looked like after installation. YAY!
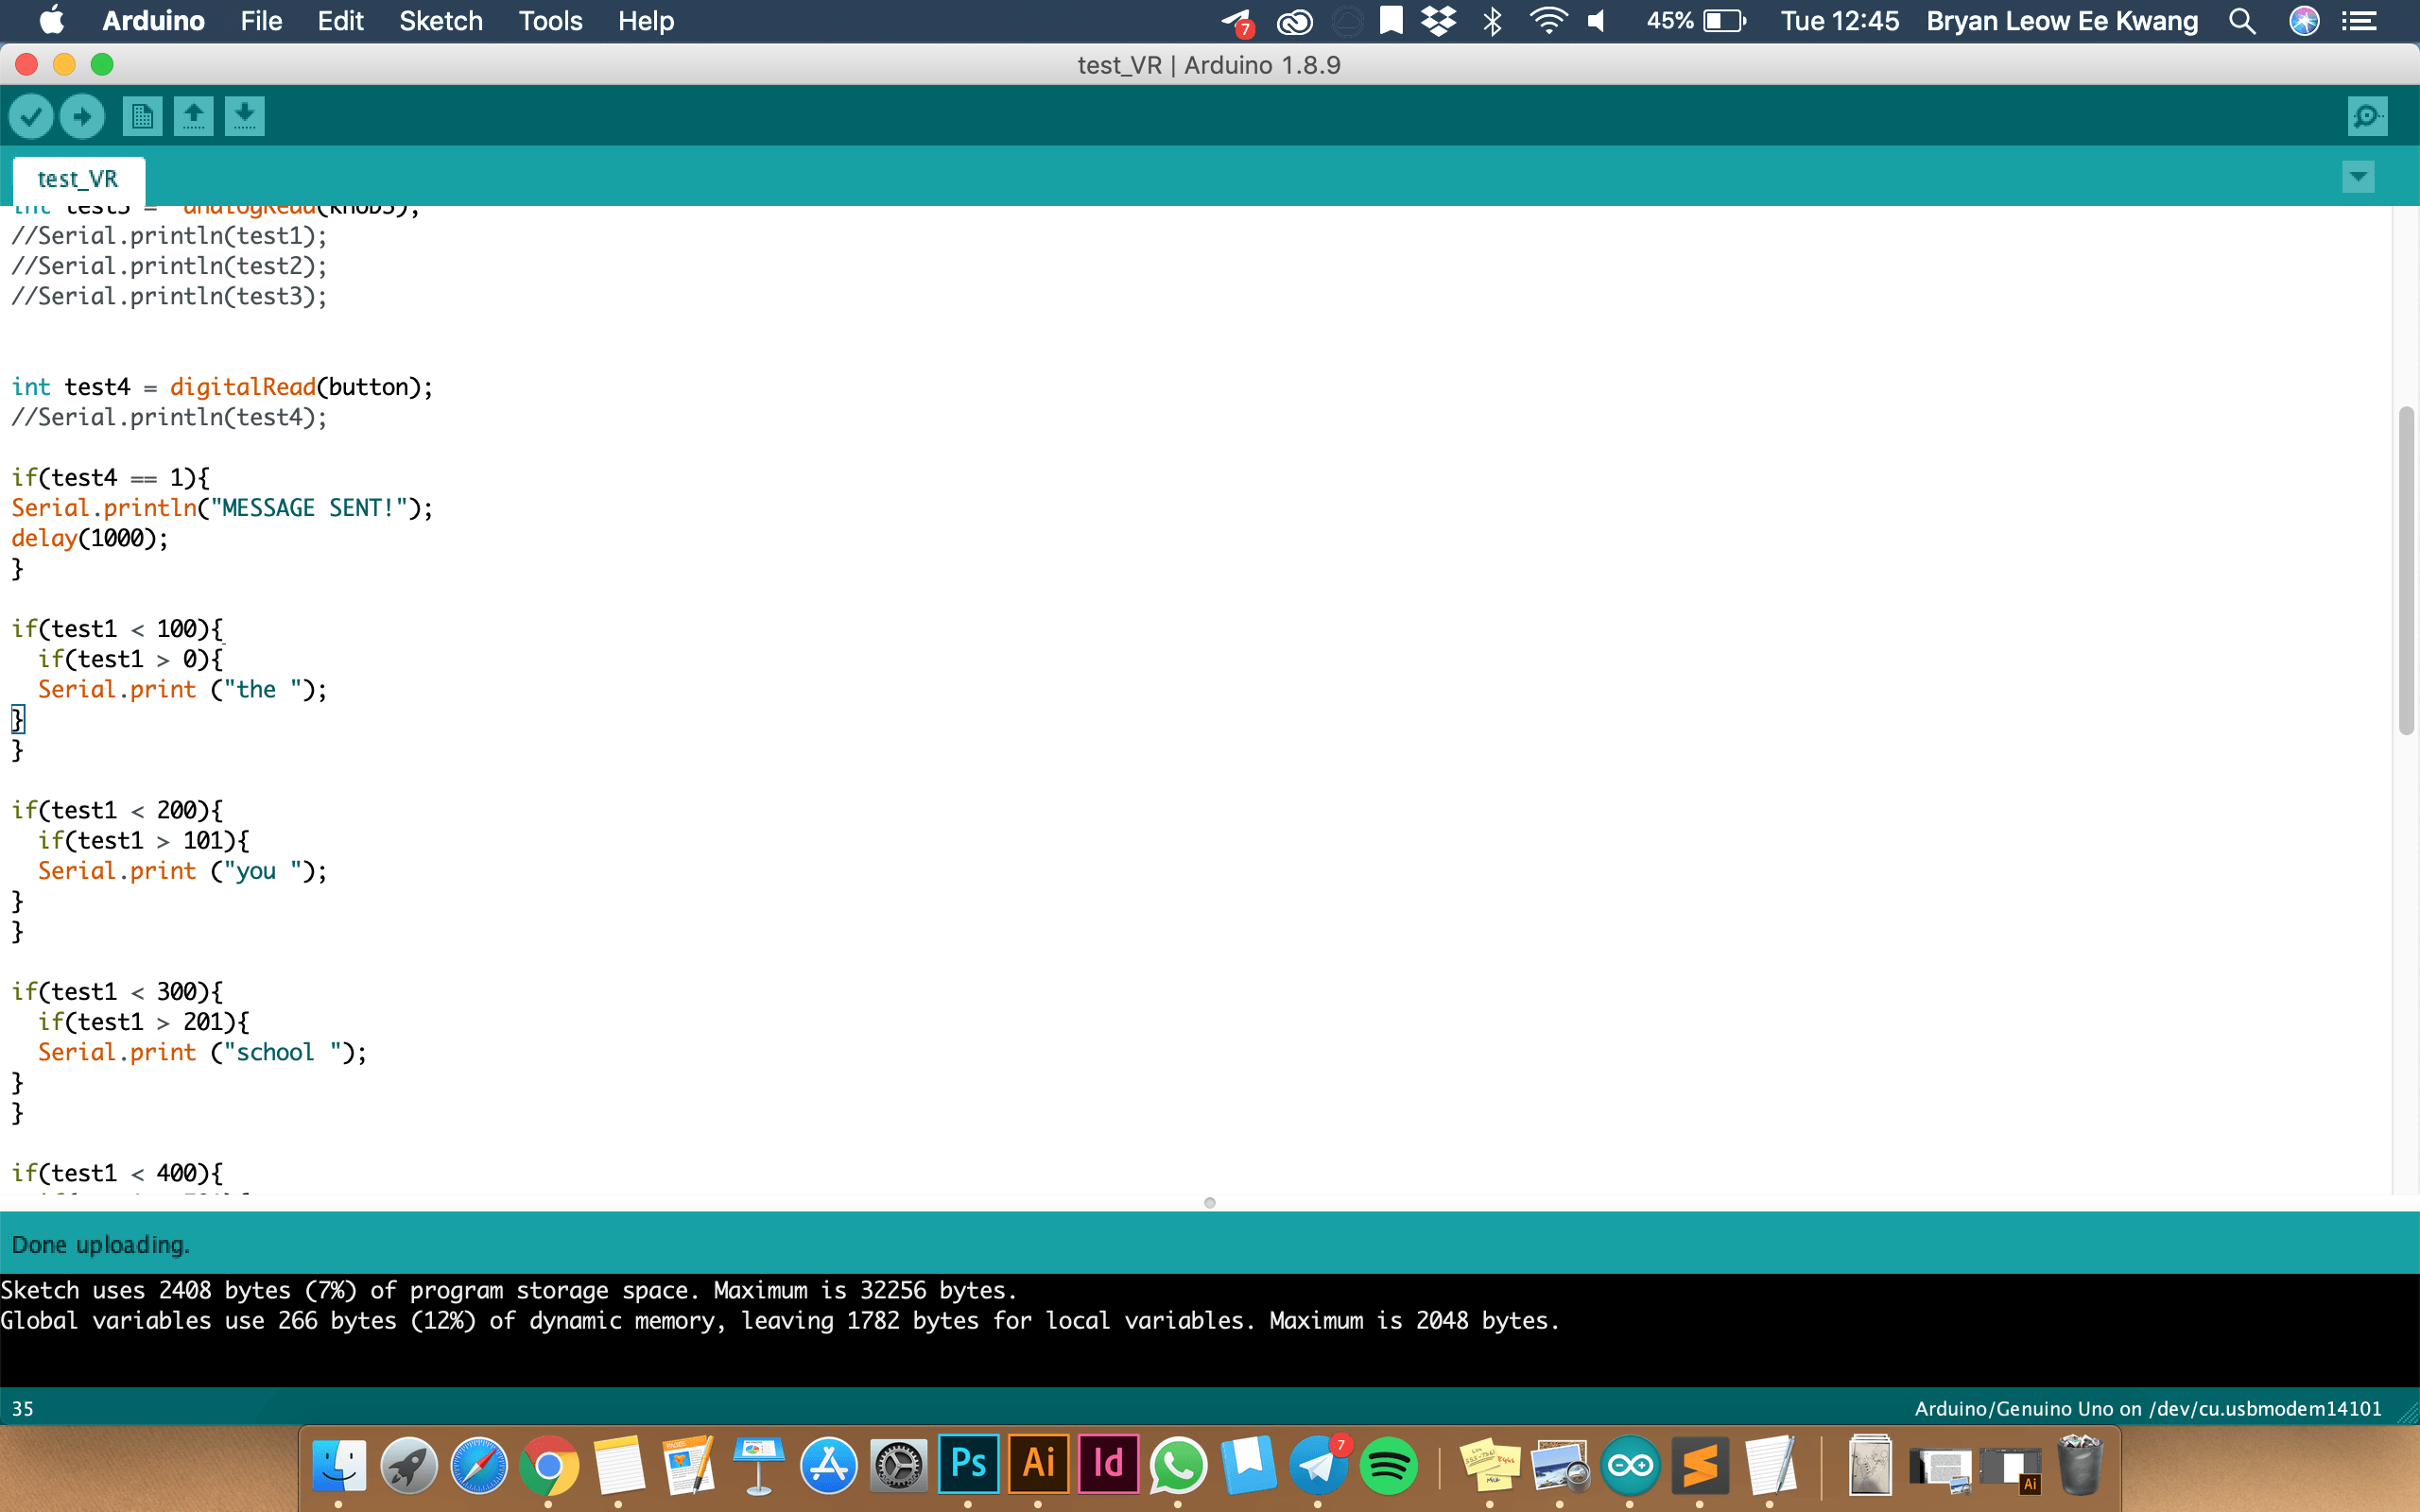
So after I was satisfied with the cover, I went on to work on the code. It was a long process of editing, adding, testing.
All my previous files. I save them separately with each big edit in case I needed to return to the previous one
The first variant of my code is like my original idea, which works like this:
switch is on
input from the dials are recorded every 0.3s
each individual inputs will form words
the words form a sentence
press button to send the message to the computer to be displayed
With this variant, I found that it keeps repeating the words, and that the user has to turn the knob quickly enough to create an interesting mix of words. It is too restricted in general and as such I changed to the new idea which allow users to take their time to select the colours they want and send the message as and when they wish.
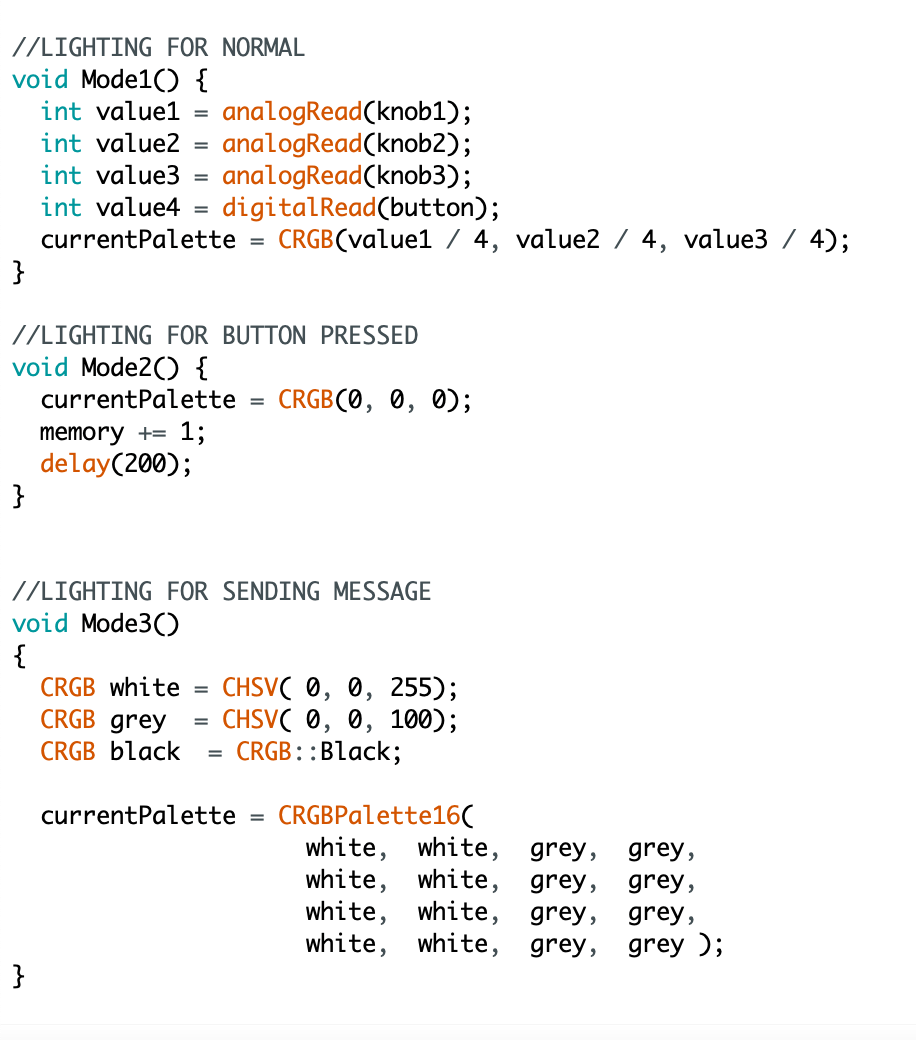
The basis of my final code is:
Fast LED libraries which runs the LED strip
Here are some examples of how fast LED works (CRGBPalette16, CRGB)
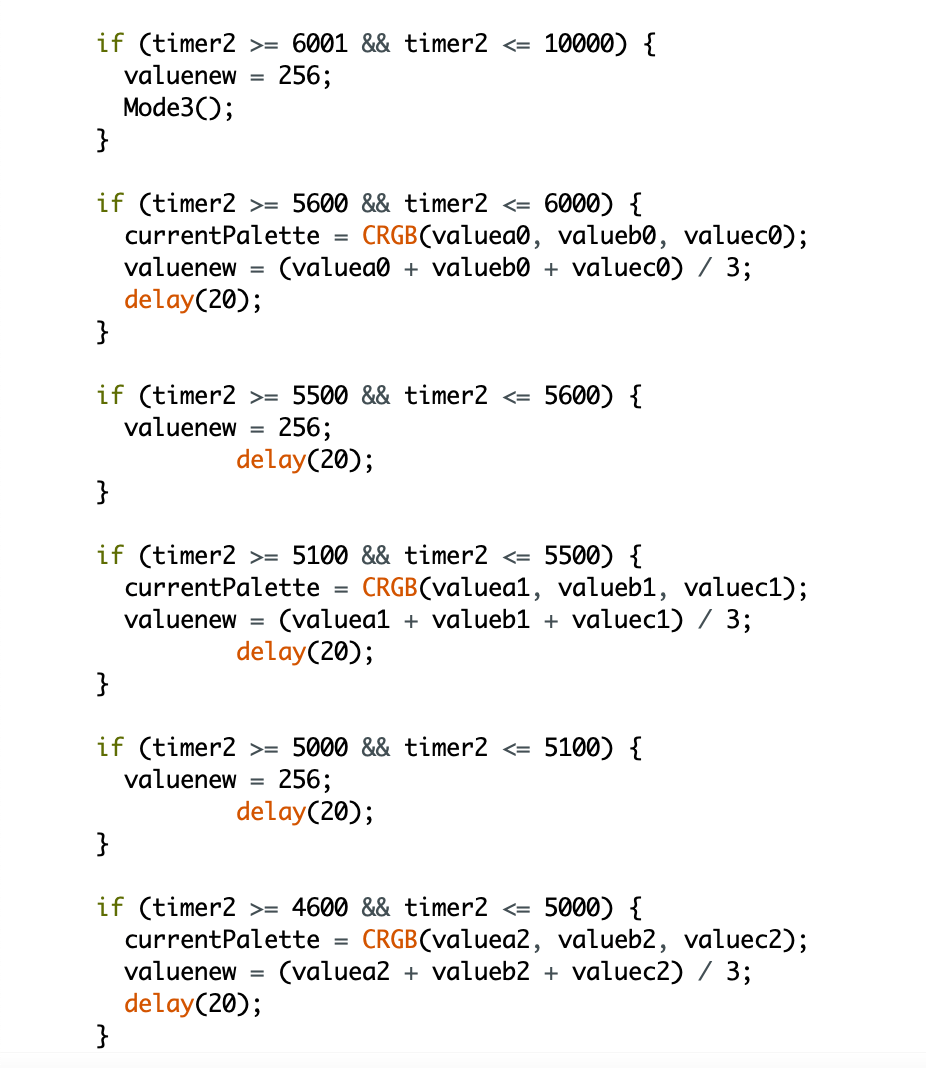
Timers
Timers helped me a lot in controlling the variables. The code above helps me constrain the variable ‘valuenew’ (which controls what word will be printed) during the ‘transmit’ stage. How my timers work is, for instance:
int timer 1000;
int t = 10;
timer -= t;
if(timer <= 0){
timer = 1000;
}
In this example, timer will minus 10 every tick, until it becomes 0, then it will reset to 1000 and repeat. If I want to control a variable, I can make something happen when timer <= 0.
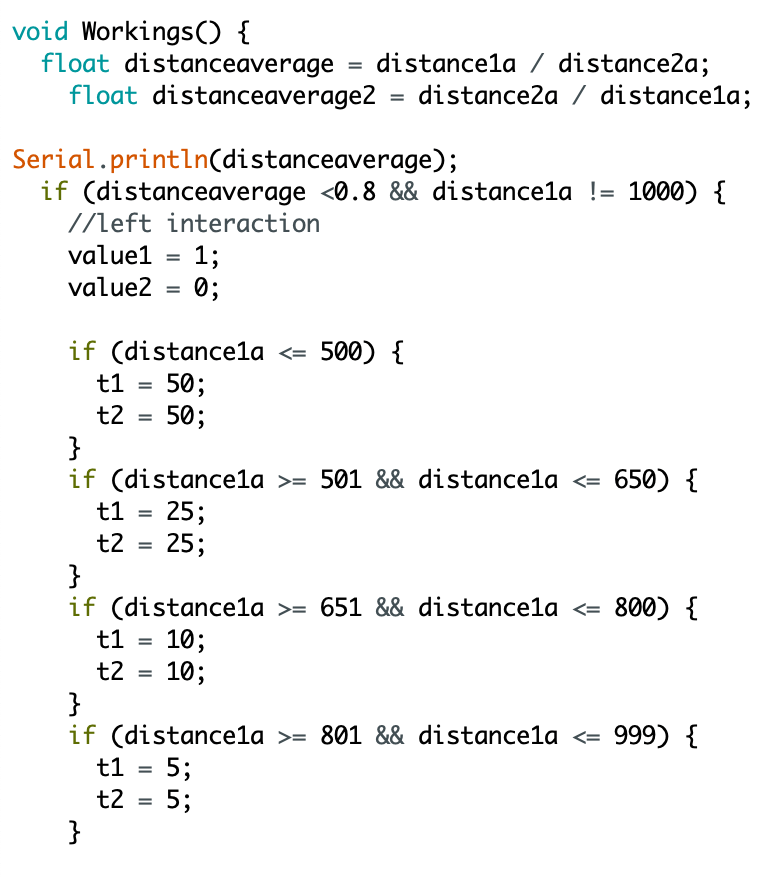
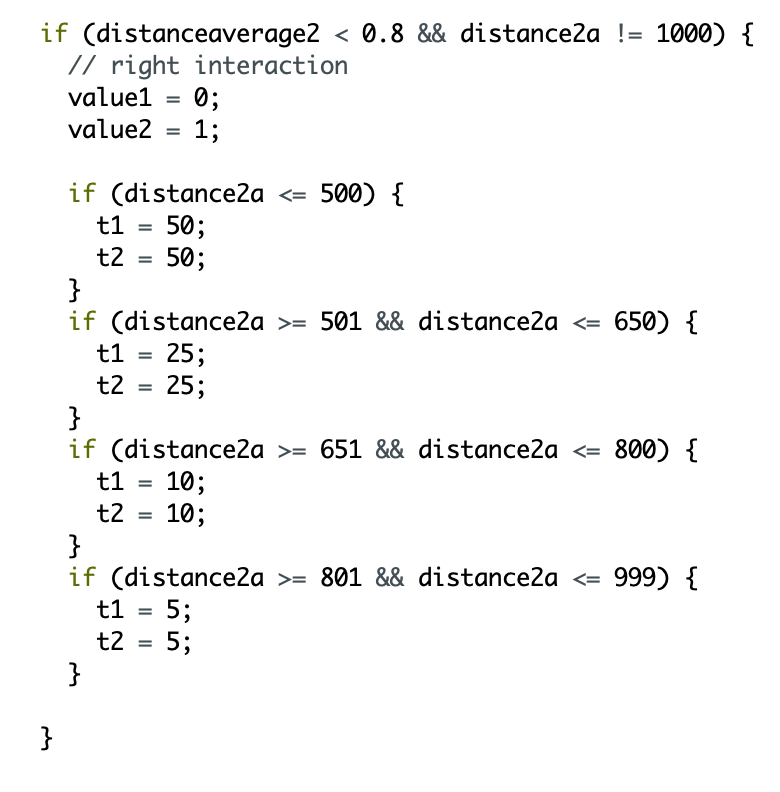
How ‘valuenew’ controls the words printed
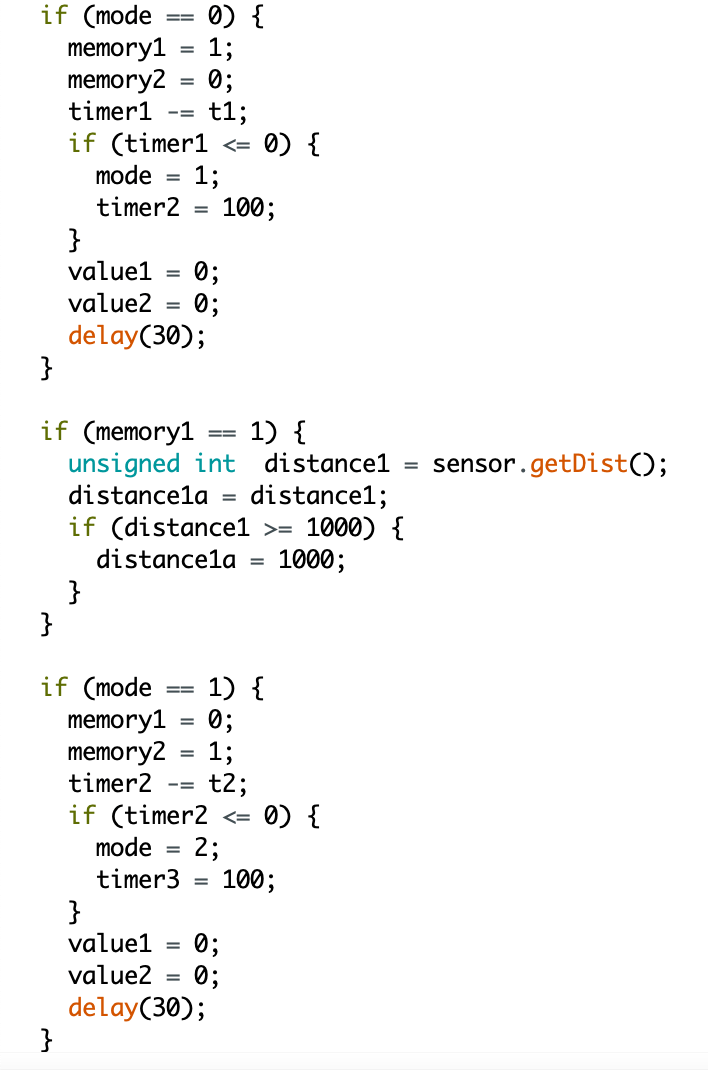
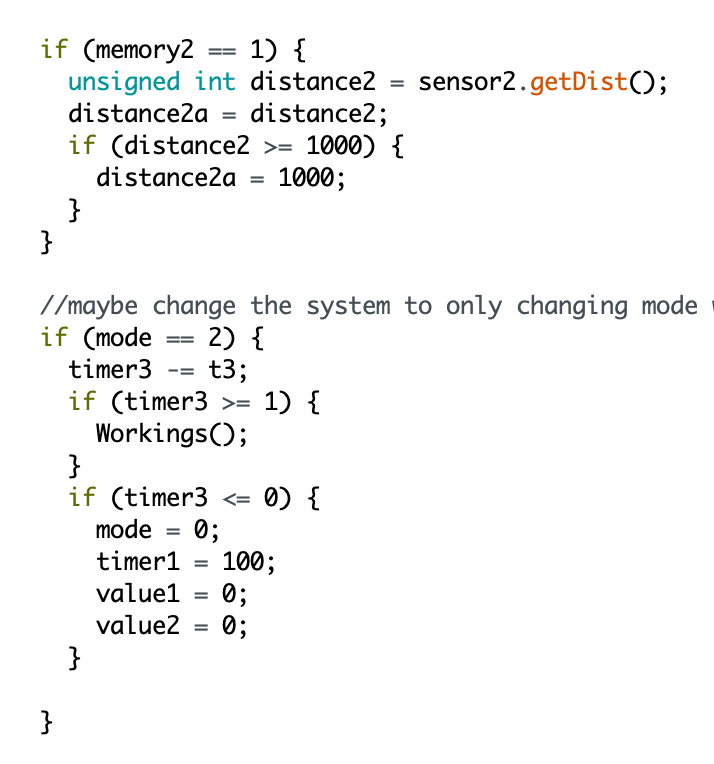
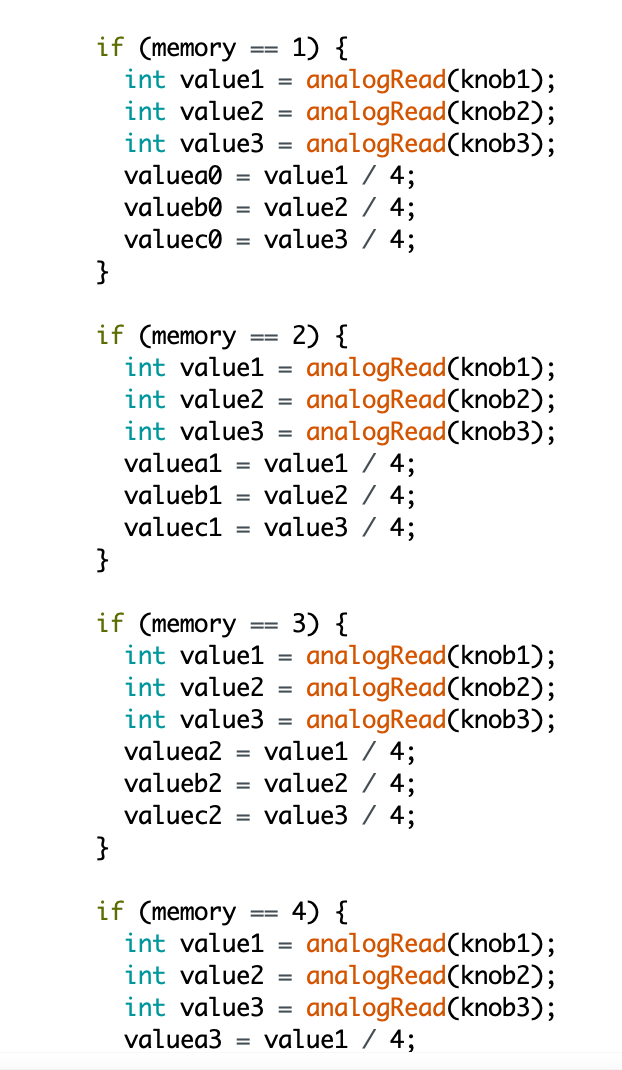
Modes
The above screenshot is an example of a mode. Each variant of ‘memory’ stores a set of instructions, and these set of instructions will play when the mode is changed.
Other ways I used mode is as such:
int buttonpress = digitalWrite(button,HIGH);
if(buttonpress = 1){
mode = 1
}
if (mode == 1){
Serial.println(“something should happen here”);
}
In this example, if button is pressed, the mode will switch to 1, which causes the serial monitor to print “something should happen here”. It’s a very versatile way of coding although it can be very clunky in a complex code.
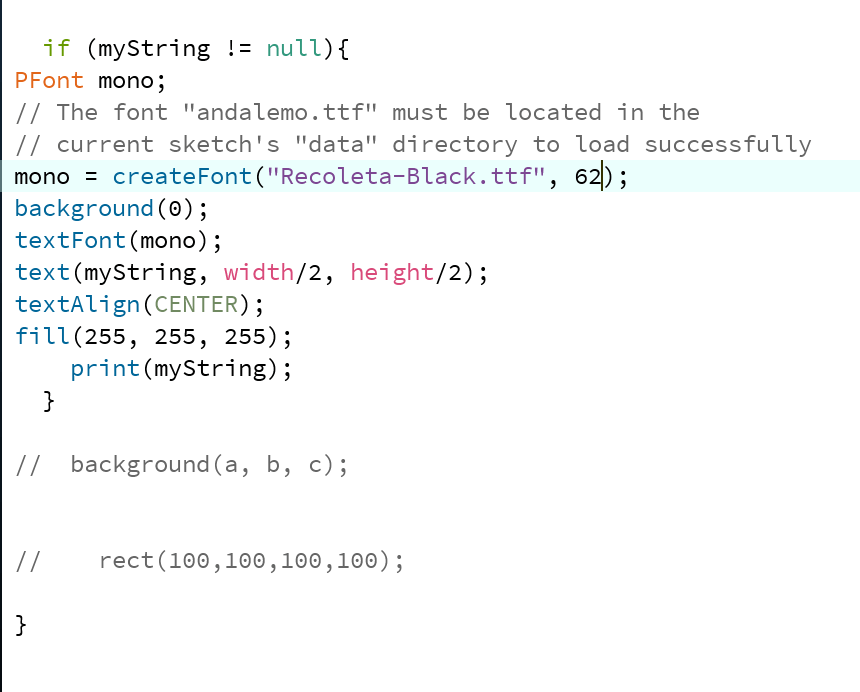
In Processing
The code in Processing is very simple. It’s basically receiving inputs from the serial monitor and displaying it on the screen as texts. There is only 1 problem: if there is nothing in the serial monitor, it will print ‘null’ which causes an error “null pointer exception” which crashes the program. What I did to counter it is to only run the program if there is no ‘null’s.
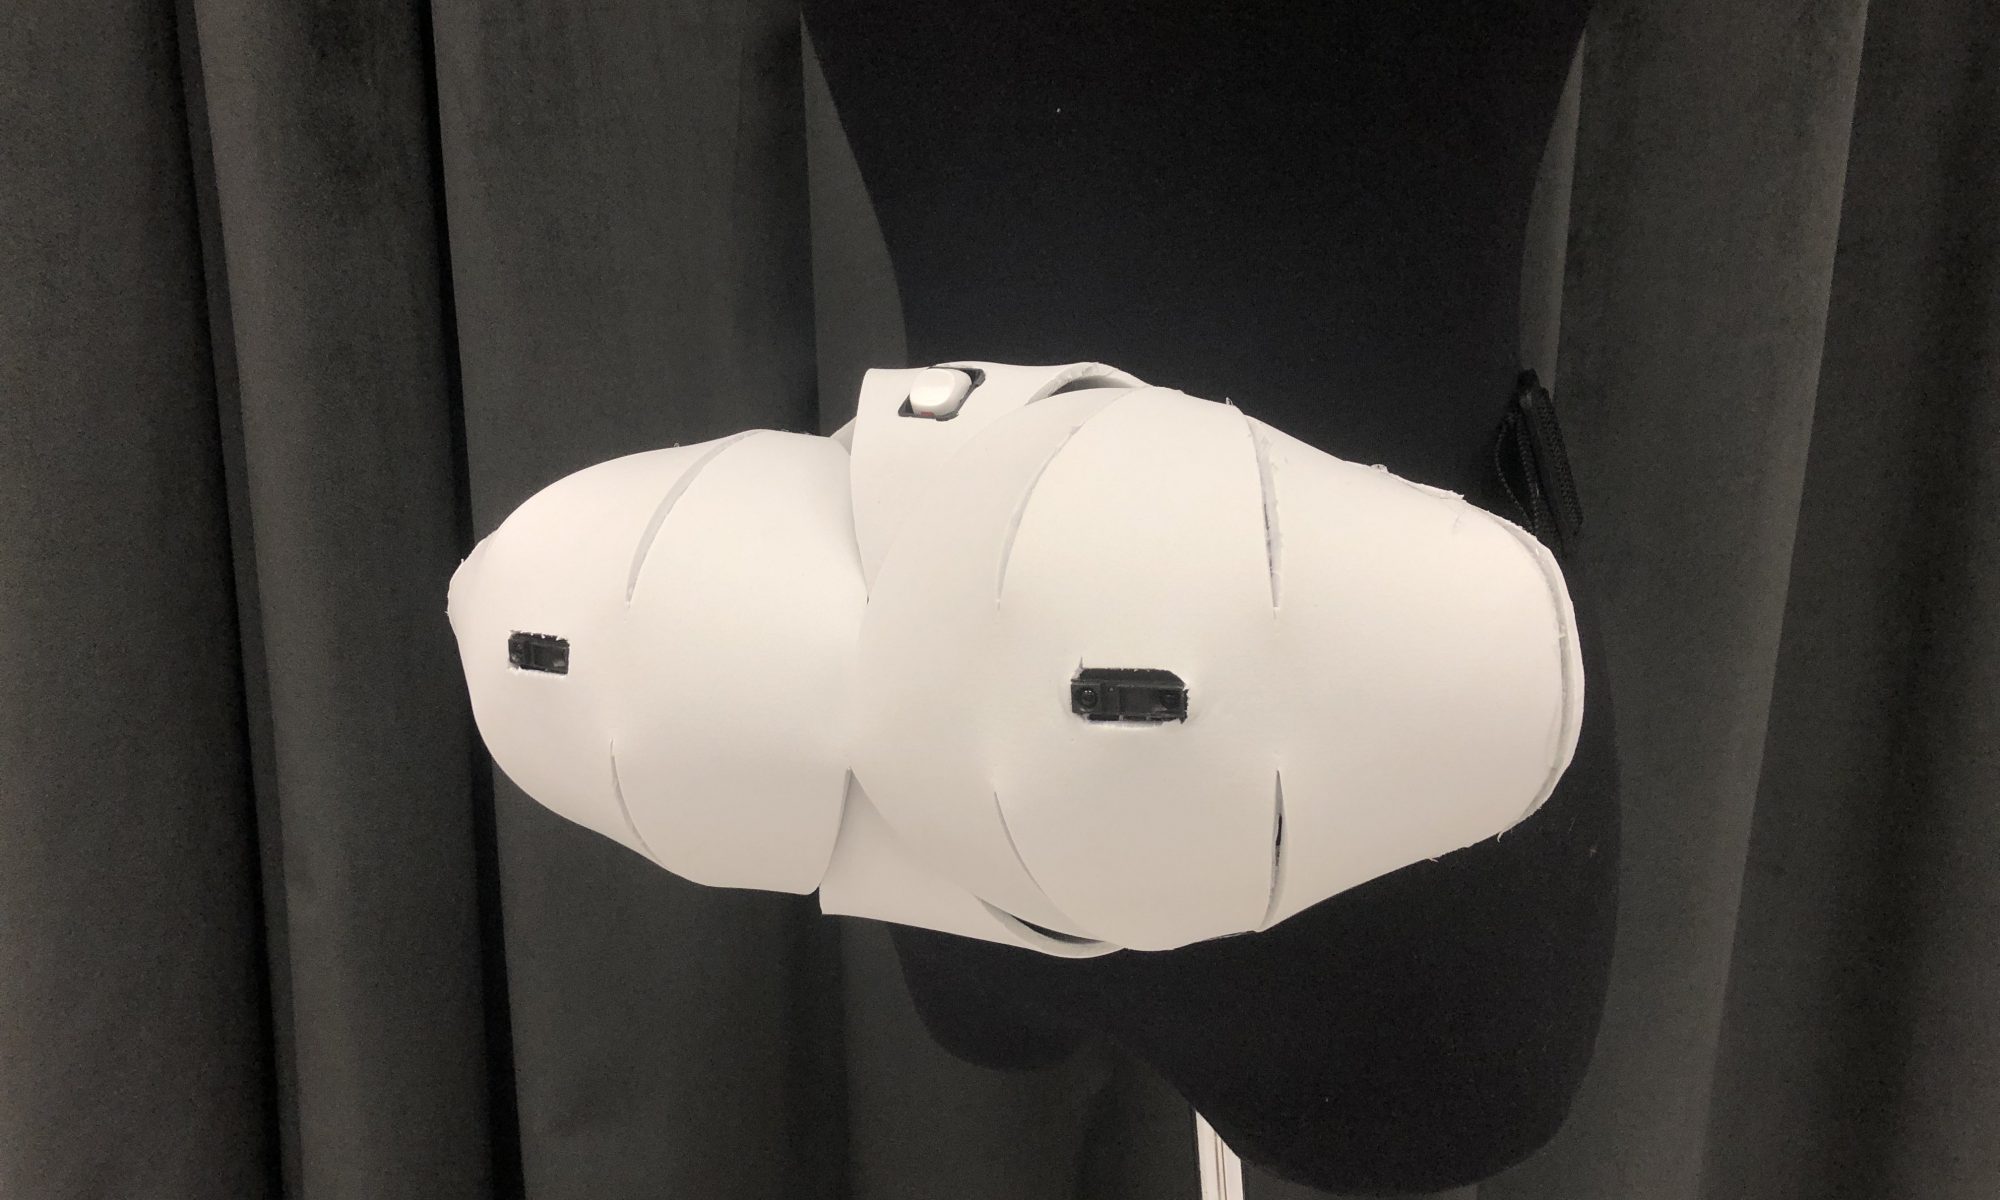
Physical Model Part 2
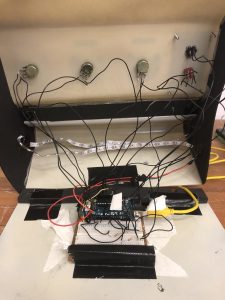
I continued with my model while working on the code, as a way of me taking a break from constantly pulling my hairs out with codes. I went on with using foam to cover up the rest of the form as it is a versatile material for my oddly-shaped case. It also fits the aesthetics. I also used a white corrugated plastic sheet as a screen as I wanted a diffused look.
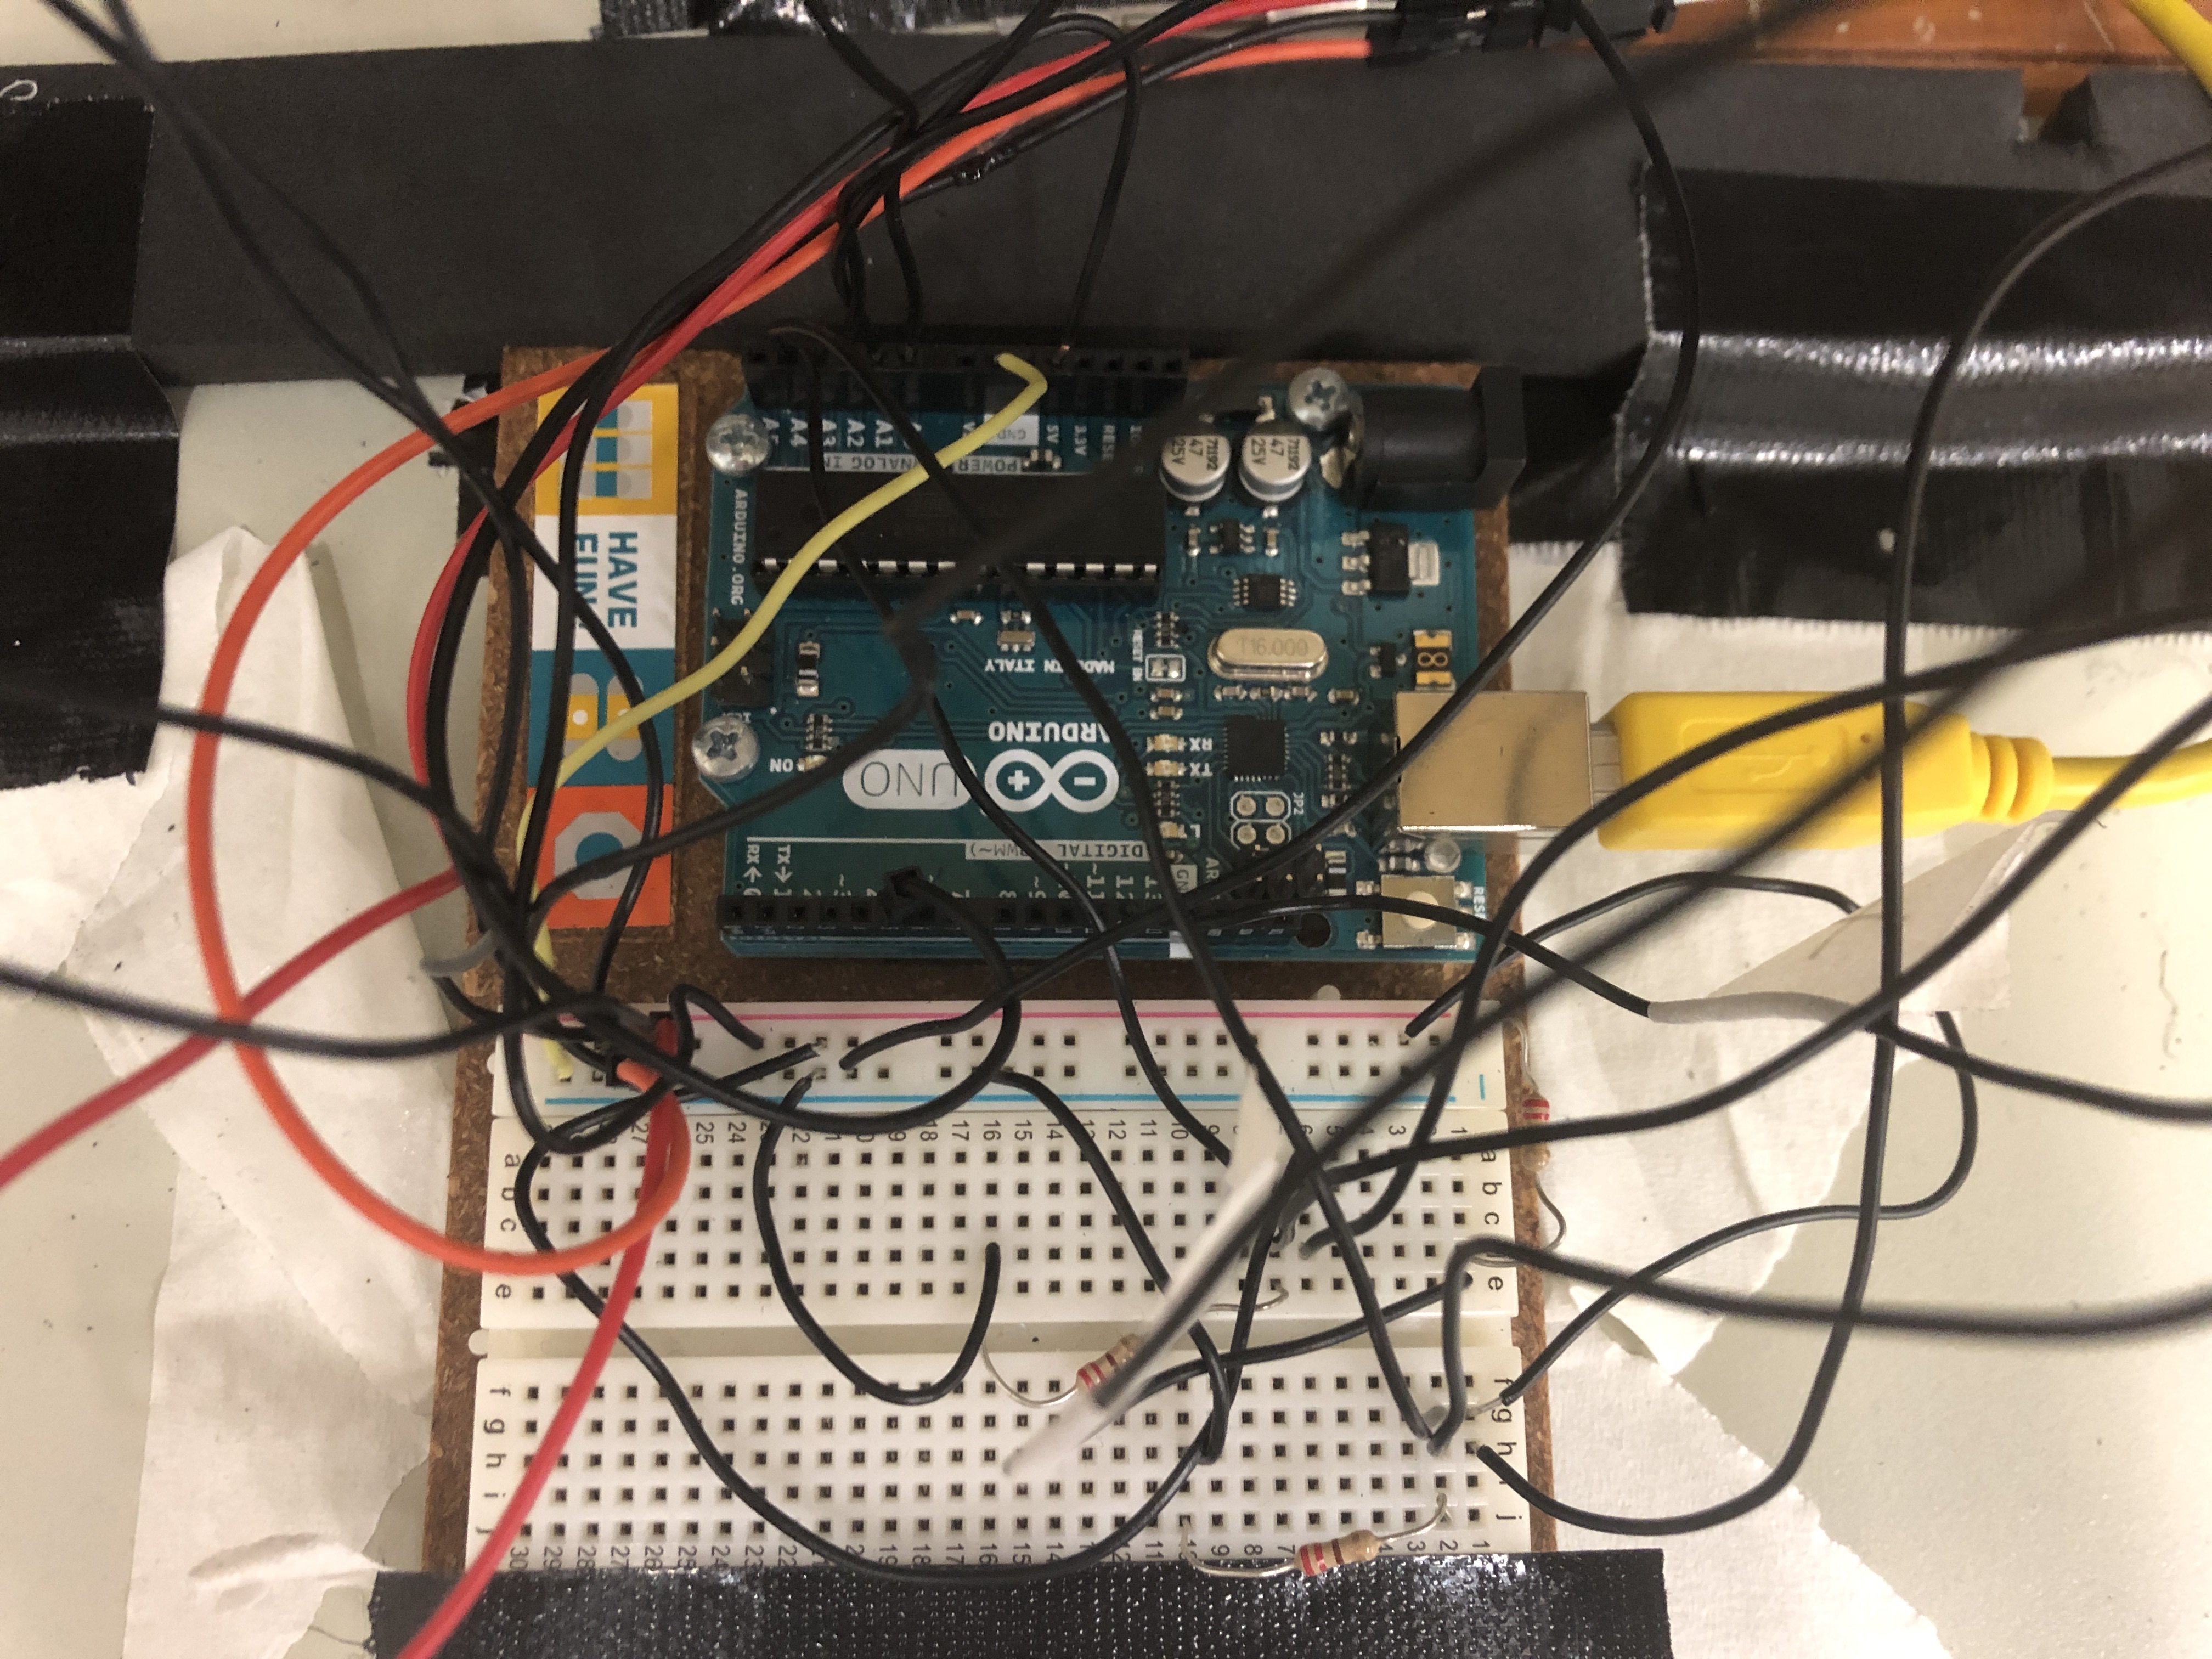
I forgot to mention wiring. So I soldered the wires onto the components and learnt the best way to solder through Zi Feng. It was amazingly easy after he shown us the magic!
Wiring isn’t that complicated as it looks. It’s just because I used the same wire for every component. The casing really helps a lot to keep things organised.
This video was recorded in my Instagram story last weekend, when it was pretty much finalised.