Week 11 Wearable Tech Updates

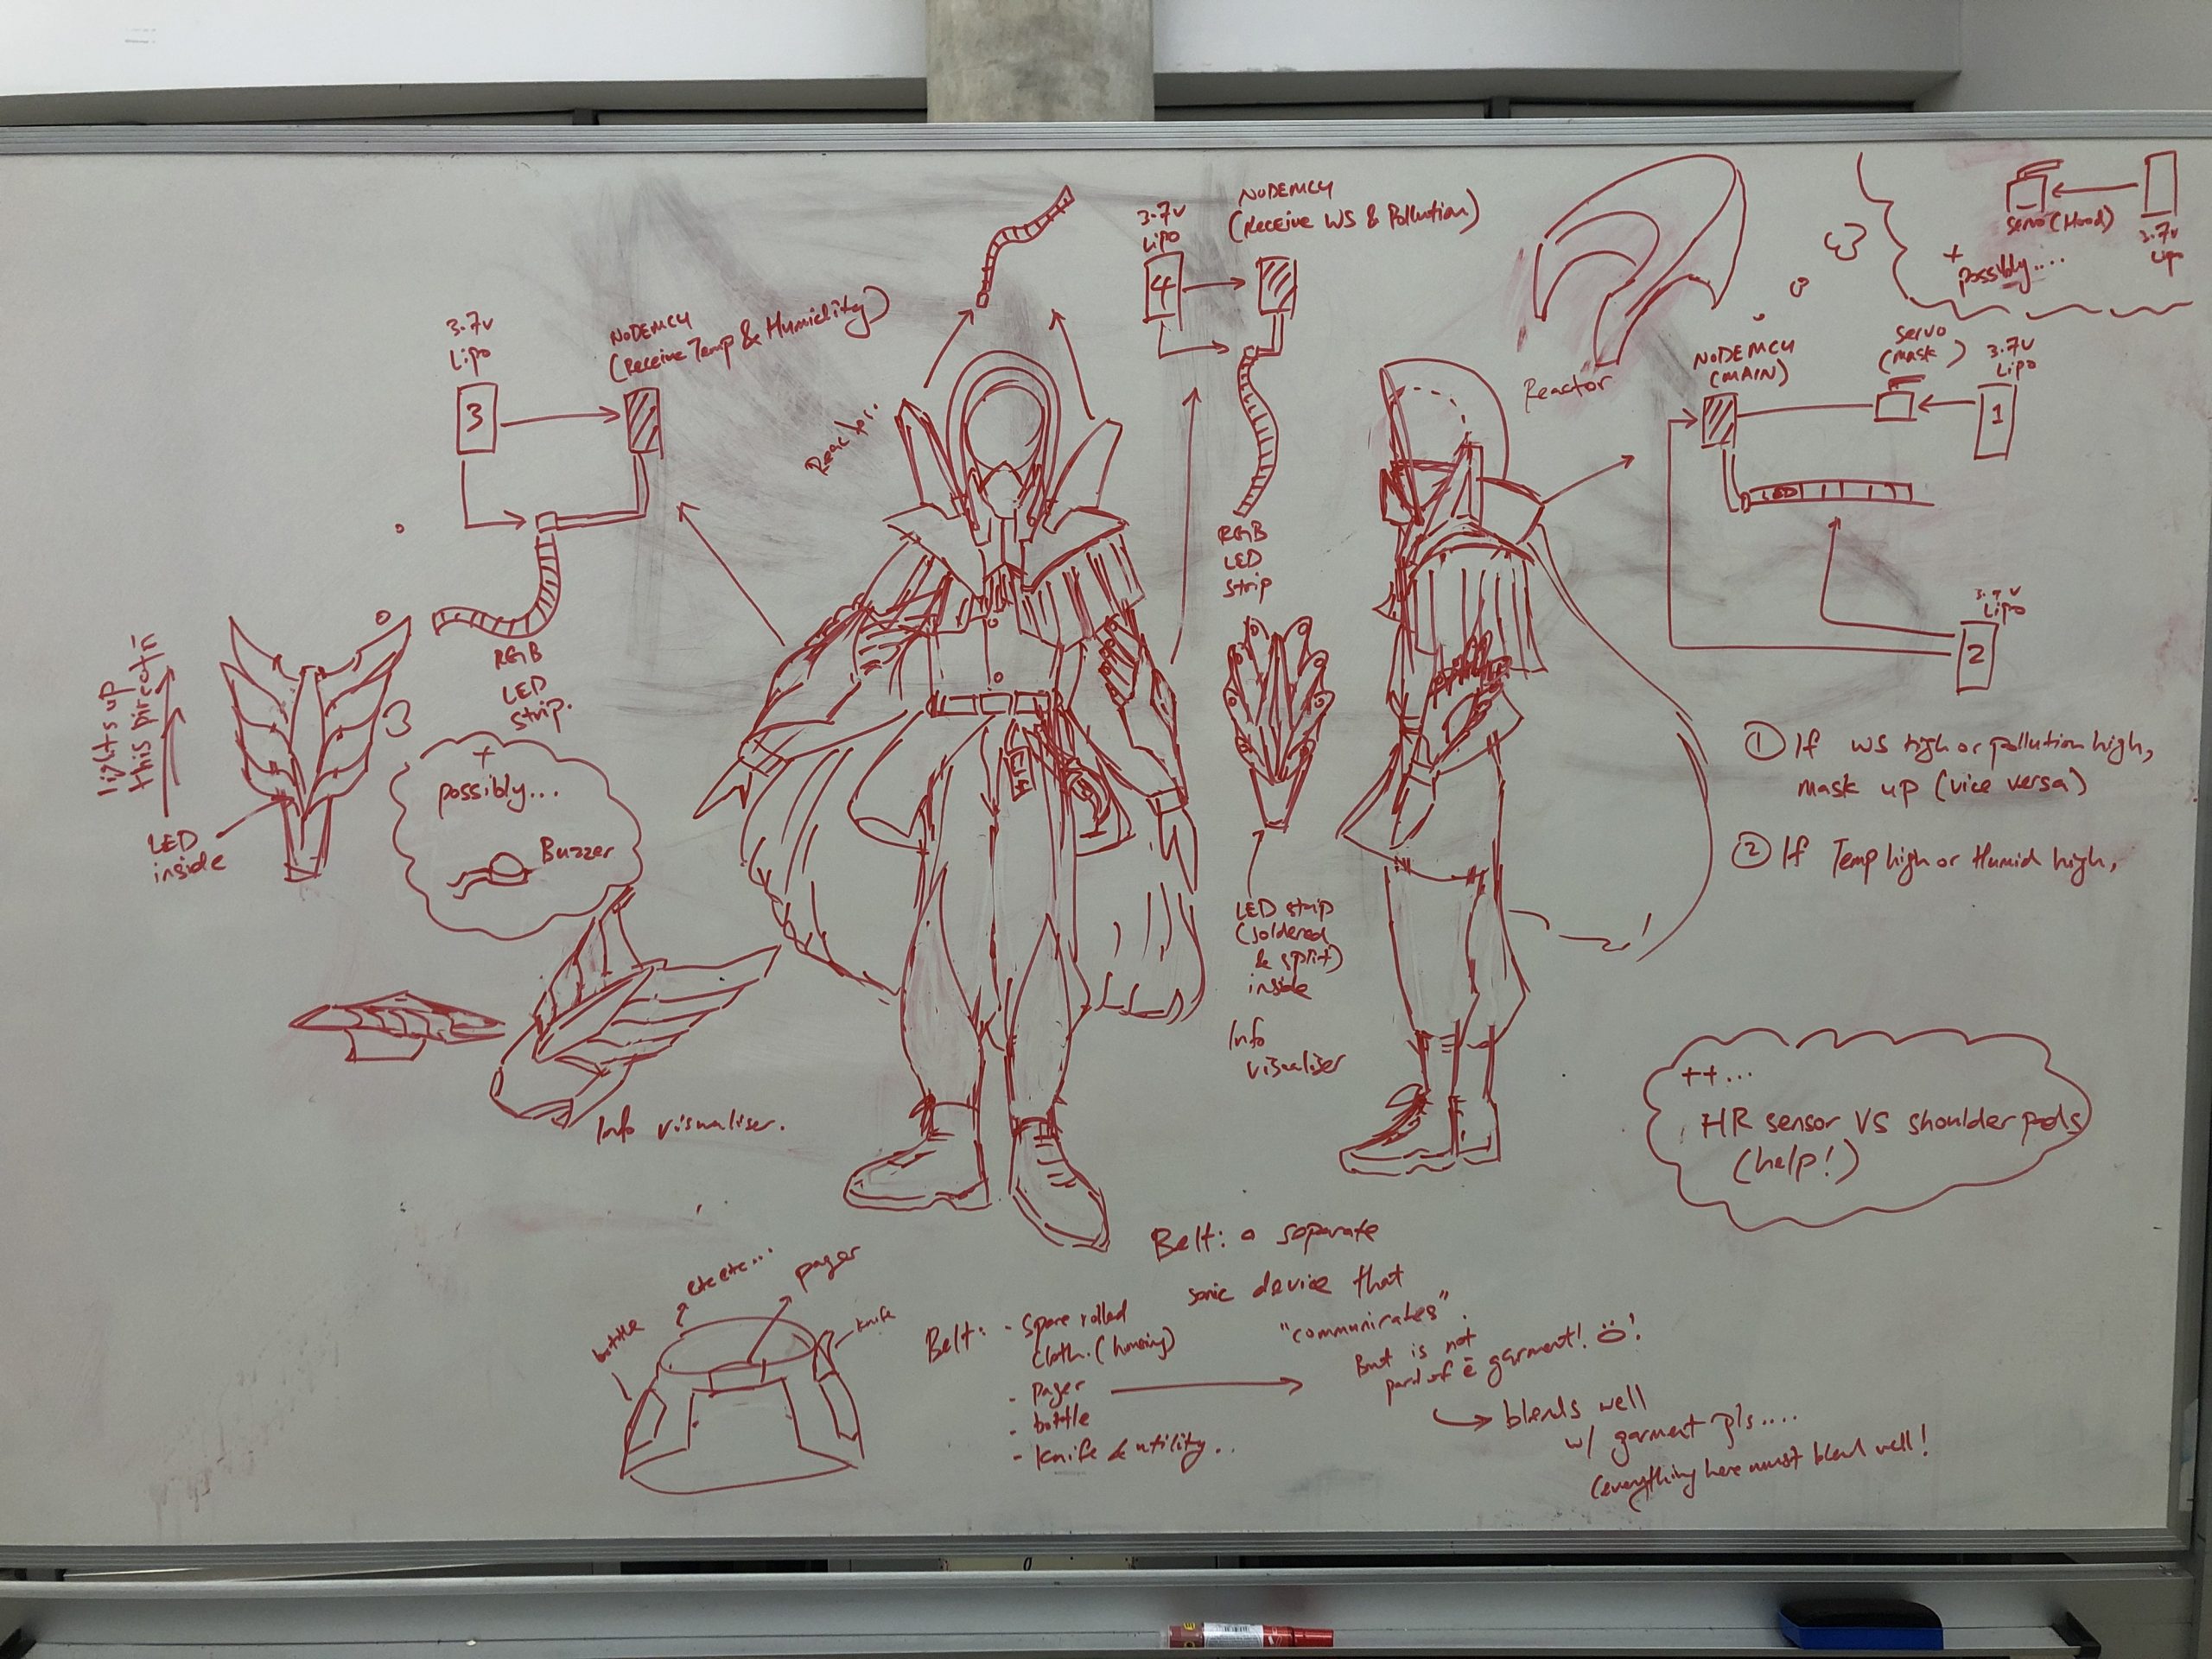
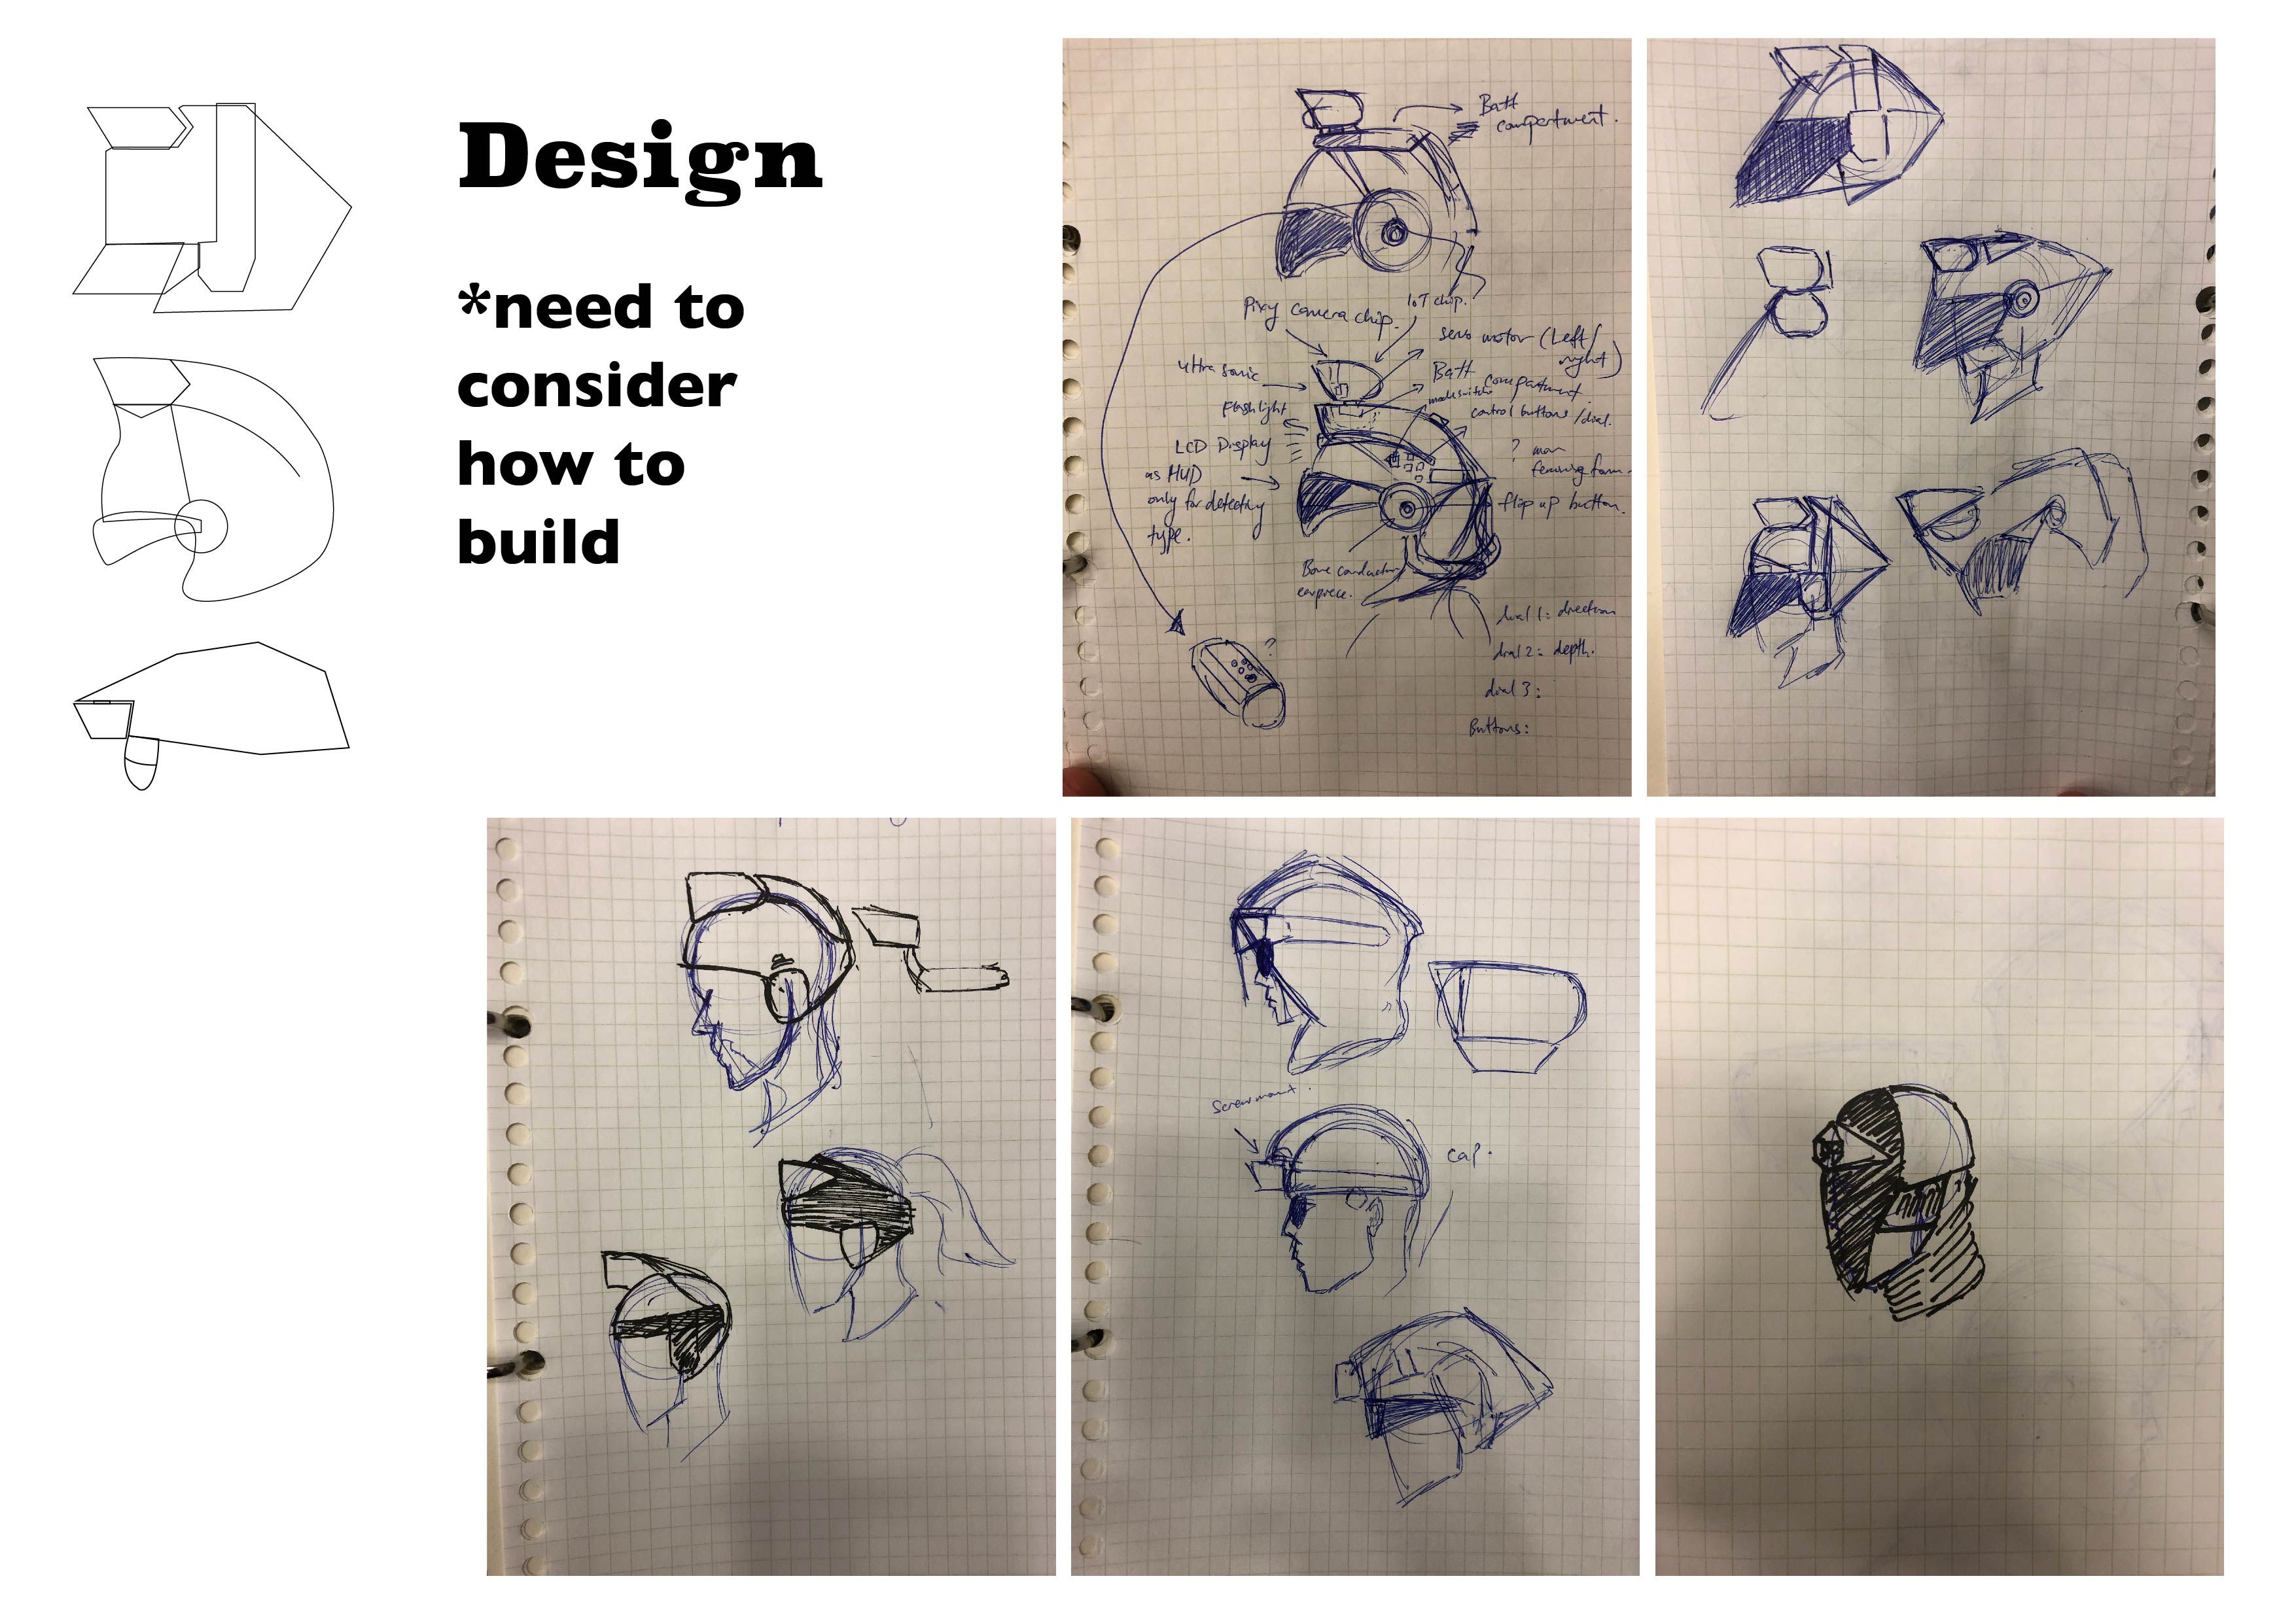
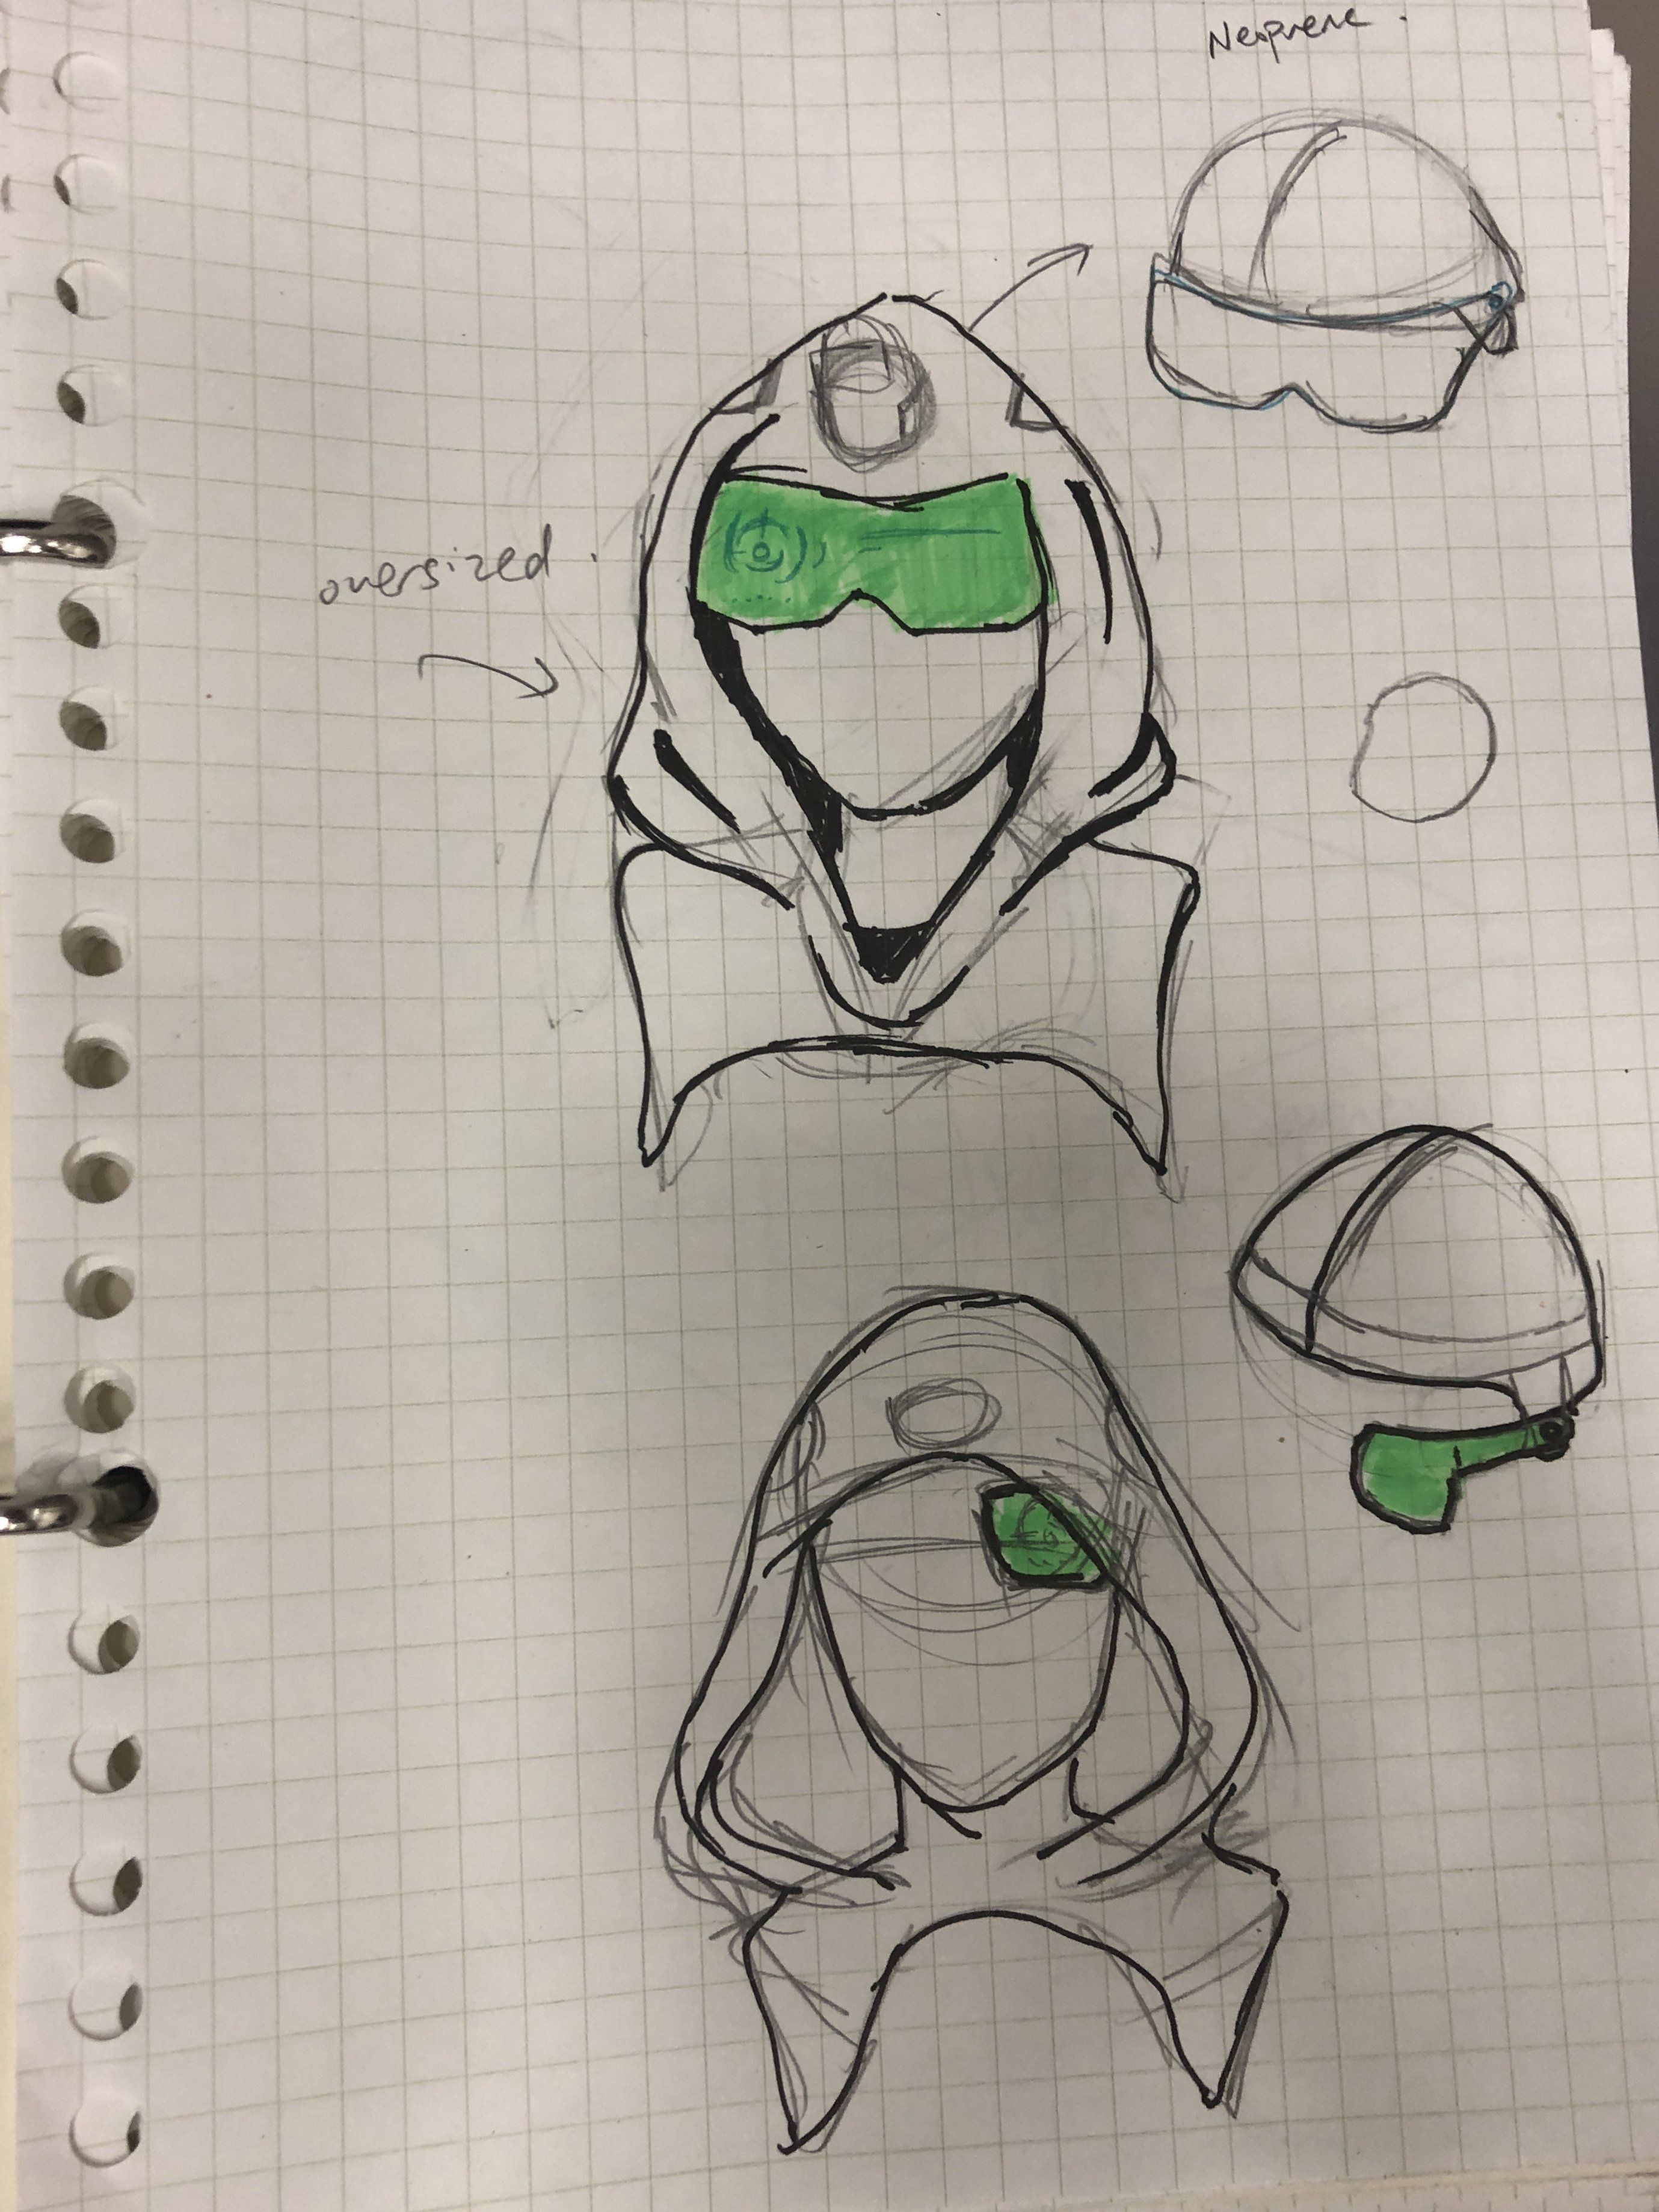
Last week, I was drawing this to collect my thoughts and it helped me figure out the logistics of my tech

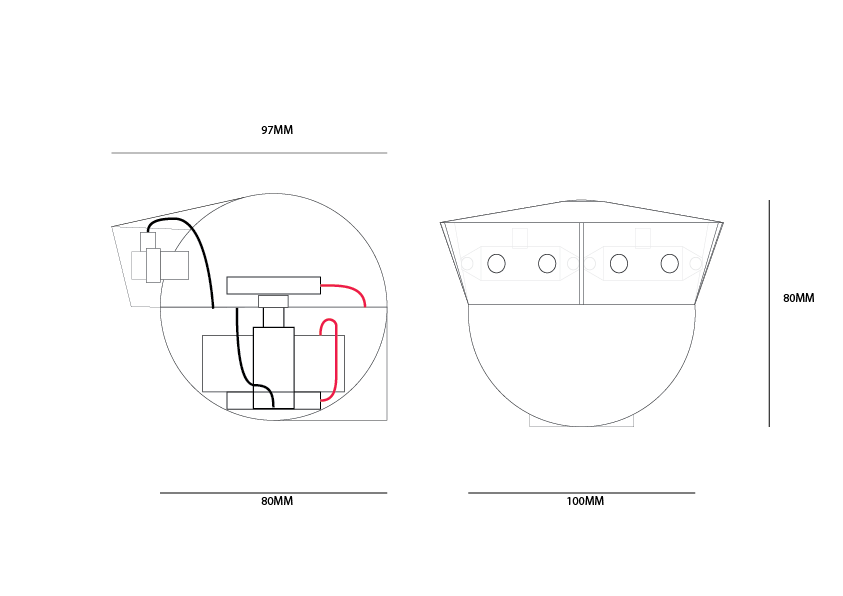
Last week’s electronics setup:

LED + wifi
Servo + wifi

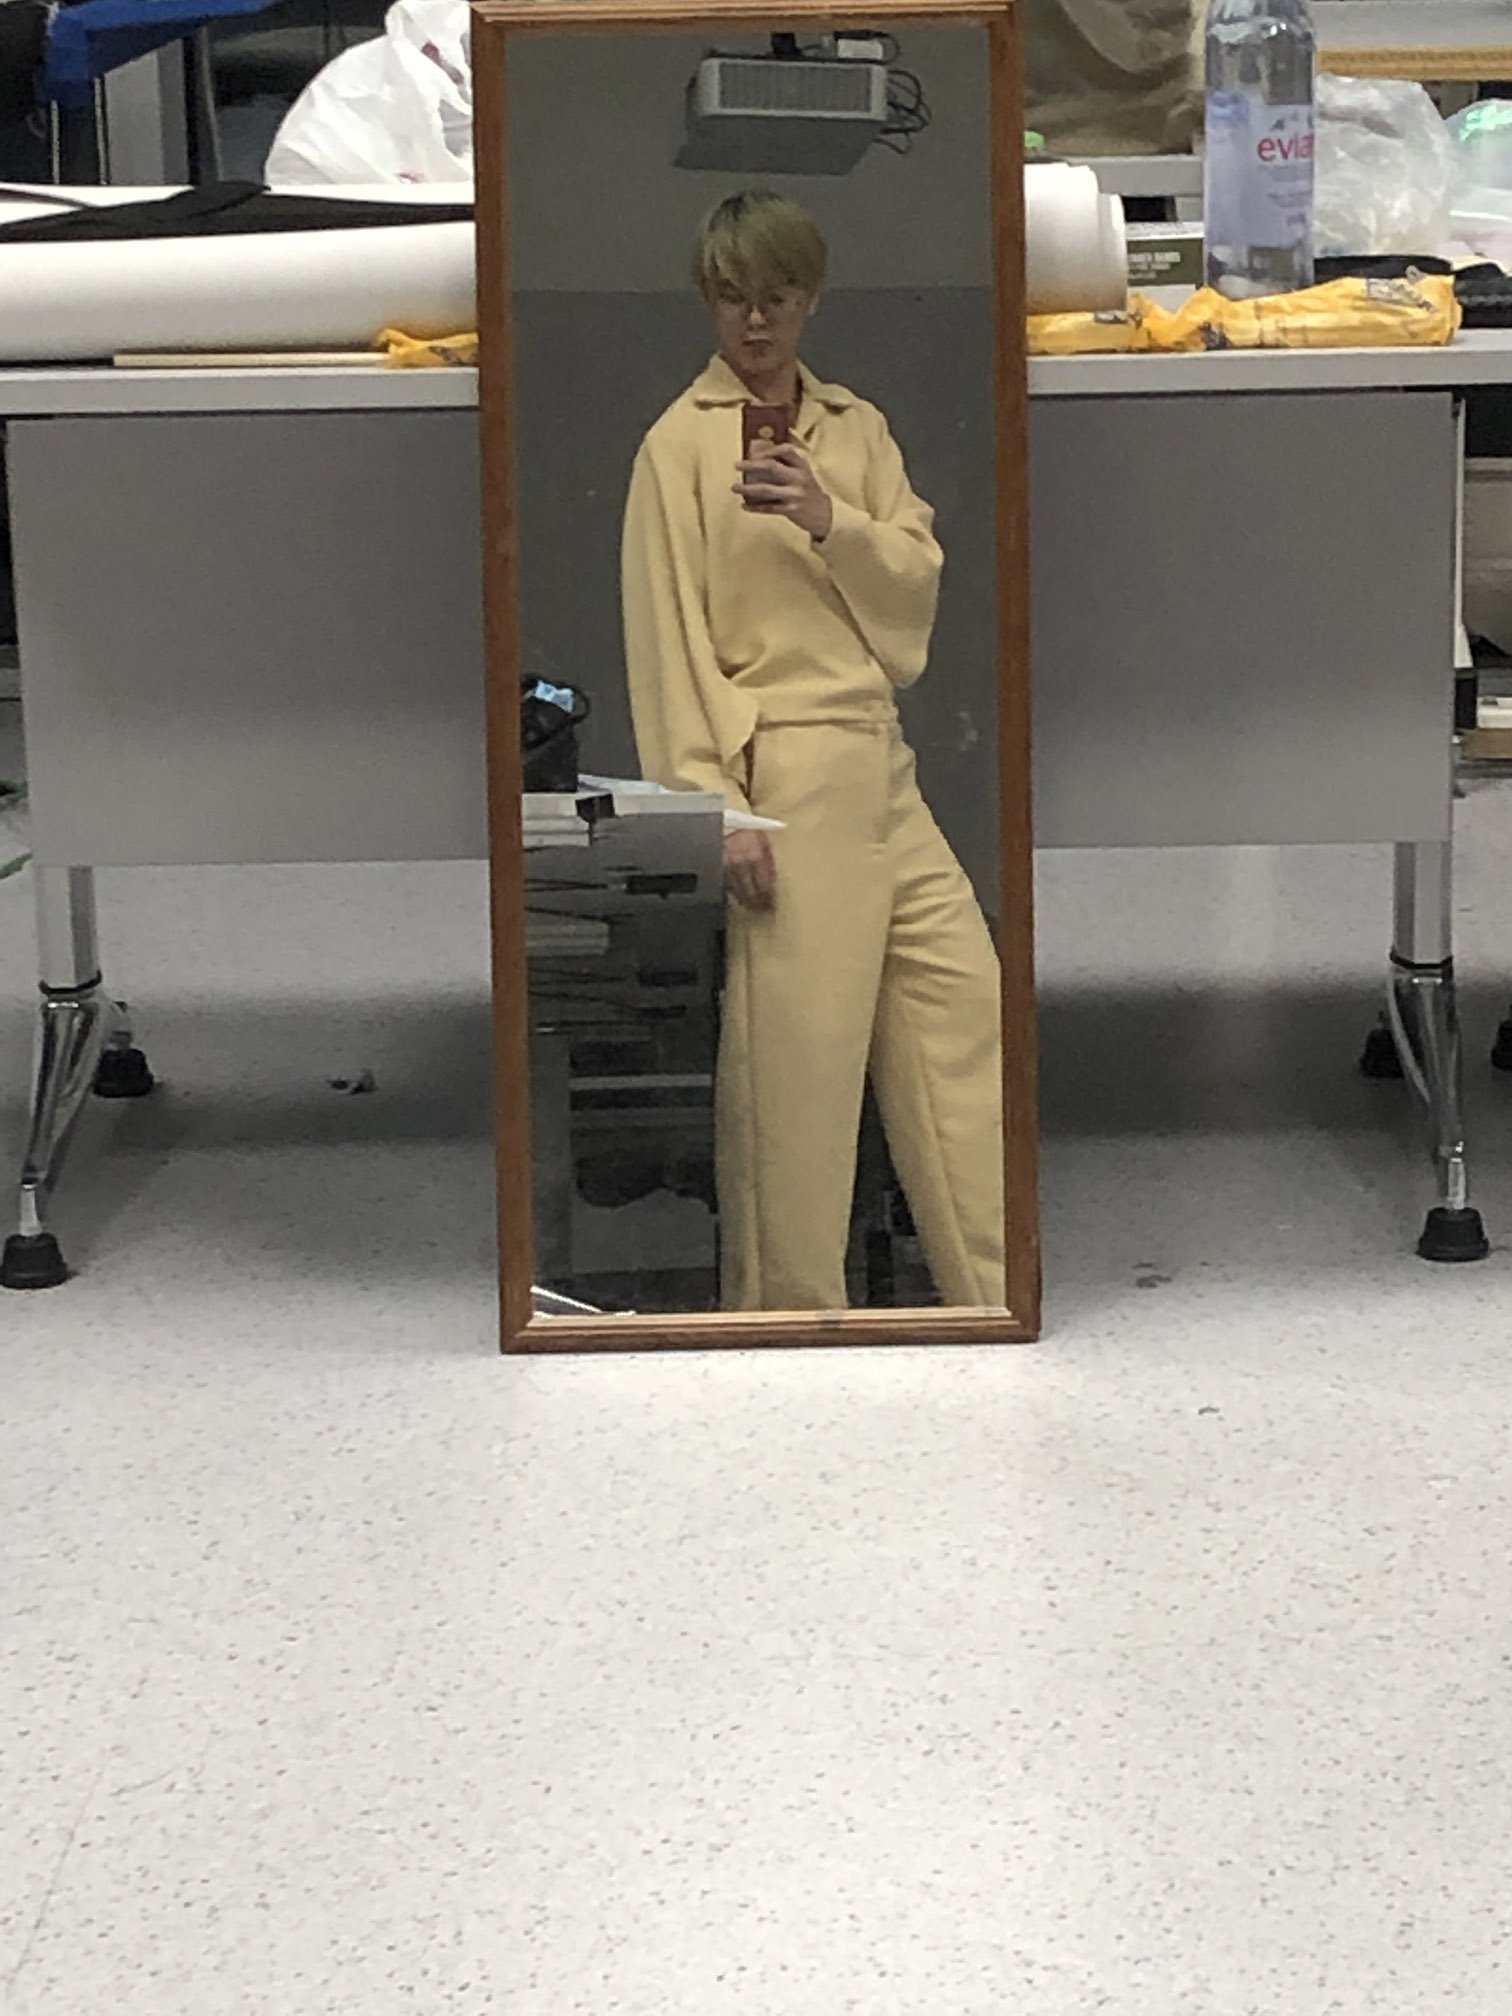
Last week’s progress:

I managed to complete the jumpsuit with help from Galina for the zippers and connecting the 2 pieces together!

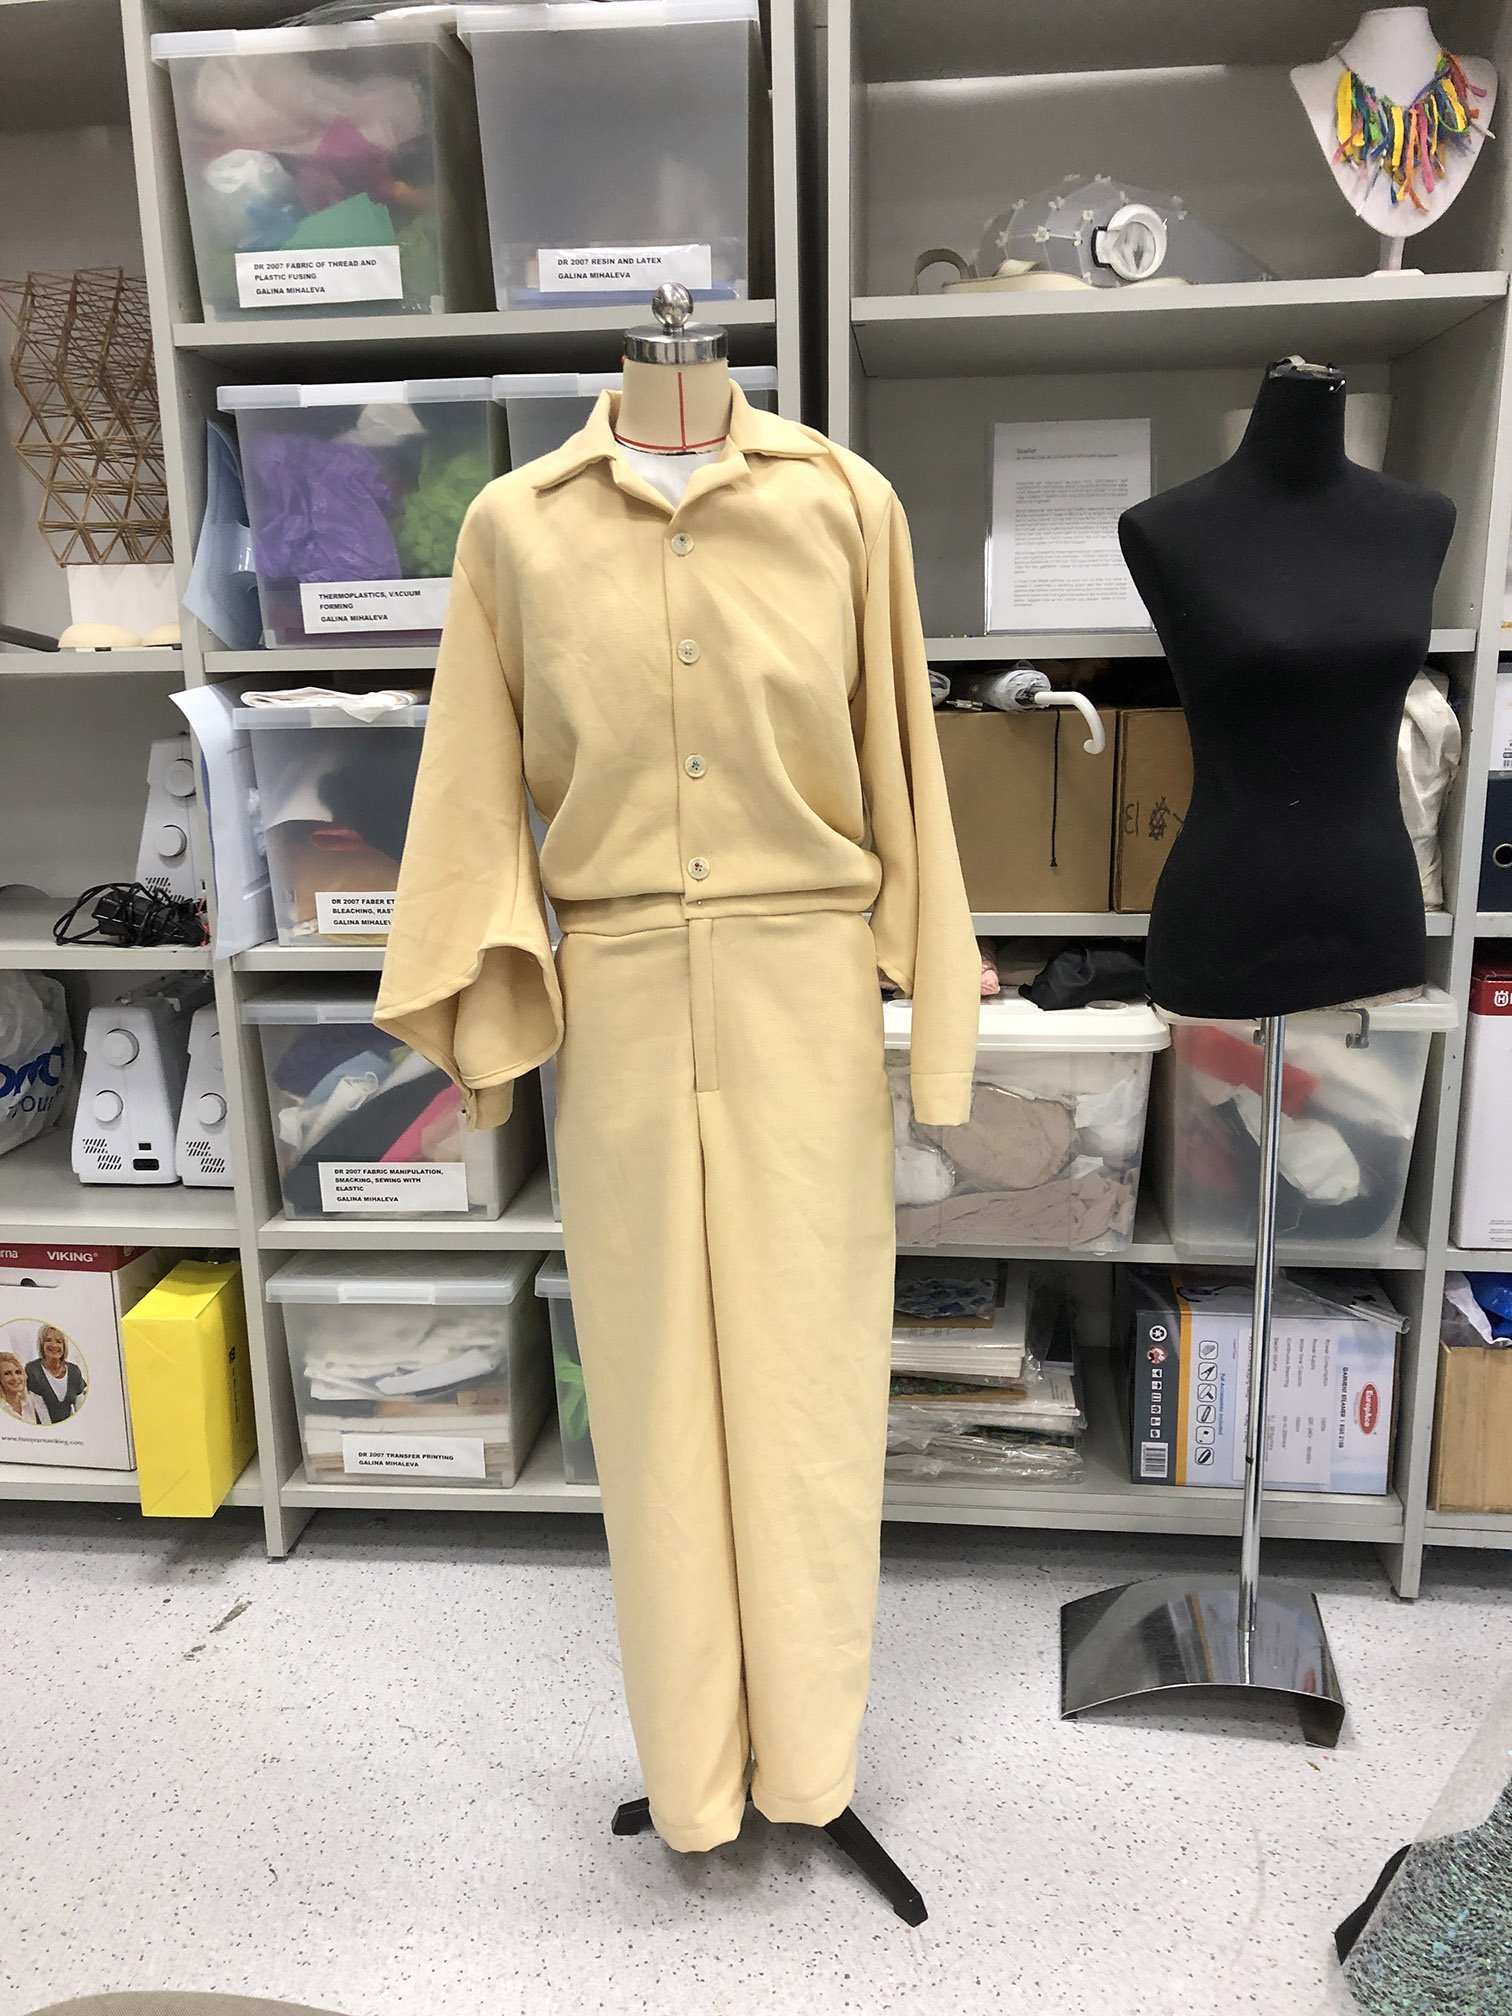
Galina also taught me how to sew button holes which was very fun!!

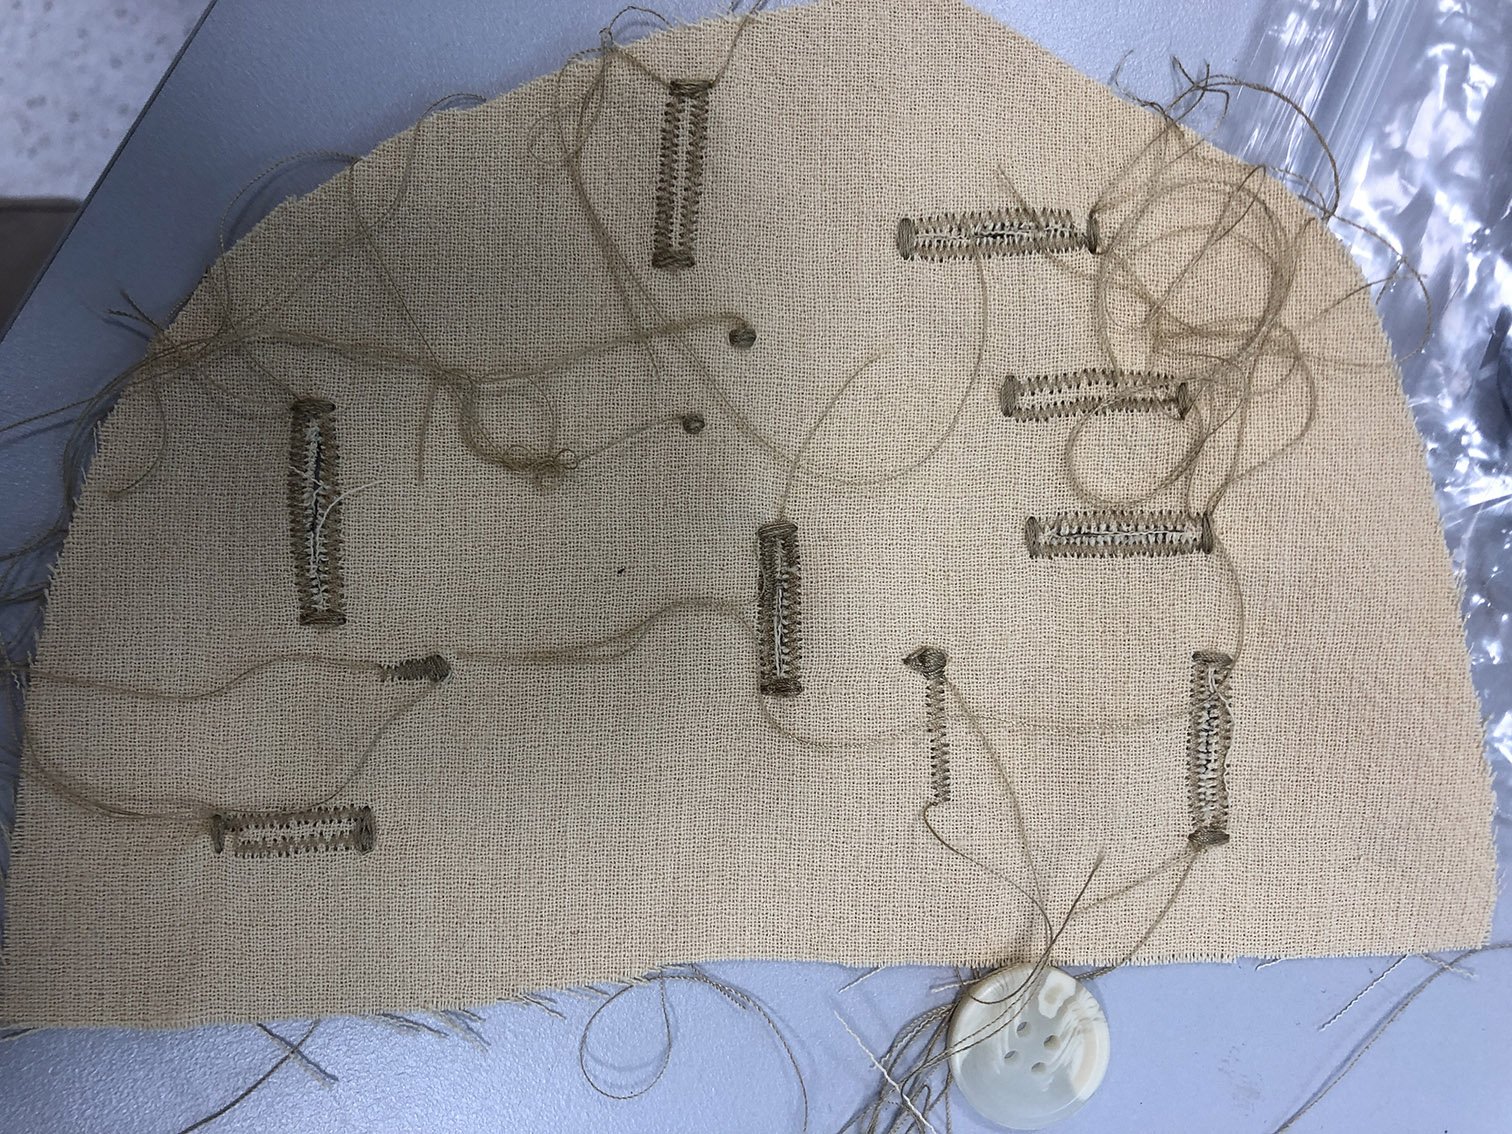
What’s left for the jump suit is for me to hand sew the buttons, to create button holes for the sleeves, to add front pockets, and belt holding thing. But that’s not my priority now.

This week, I’m working on the cape and armour pieces.

This Week’s Progress: (incomplete as theres more days this week to work on this!)

I was playing with the materials to create the look of desert beetles, but it failed so I will just stick to the pvc without material alterations.

putting pins before heating it to create round bumps but it ended up folding
only heating the PVC creates this effect

Cutting and putting things together: I was experimenting with the materials and turns out its more flimsy than I previously thought. It’s also much thinner than I thought so it doesn’t look as good if it’s single layered. Sewing 2 pieces together makes it look better, which means now I need 2x the amount of PVC ($$$$$$$!!!!!!) but at least I have 1m left of the pink piece which I’m not gonna use as pink contrasts too much with my garment. I’m switching to green instead.

What was previously the neck piece was tested on the shoulder to see how it looks like as a shoulder piece.

I was having a hard time trying to figure out which cloth to use. Using both cloth together with the armour will make the whole look very weird. Too much is going on. Using only 1 cloth and the armour works, but I need to decide which to remove. In the end, I removed the metallic mesh cloth.

The final decision (except the pink parts will now be green)\

I also started sewing the cape piece to make it more frilly / have pleats. So yeah. (no pics tho)

So in conclusion, this week was more of a start of the next phase, and I am more or less confirmed for the entire design and I’m happy with it. I’m gonna continue the cape till I’m happy with it then I’ll start with the armour which is gonna be a pain 🙁 and I need to go buy the PVC also. Hopefully finish this by week 12 end so I can finish the electronics and have time to finish up the small details. And also work with Shah with the fashion runway!!! AHHHH!!!

Oh and also Mayle was working on a PVC vest and I took a pic of the pattern so I can tweak it (thanks Mayle!!!)

it’s actually just a pants pattern but if you drape it over the shoulder it becomes some kind of vest which looks like my chest armour!

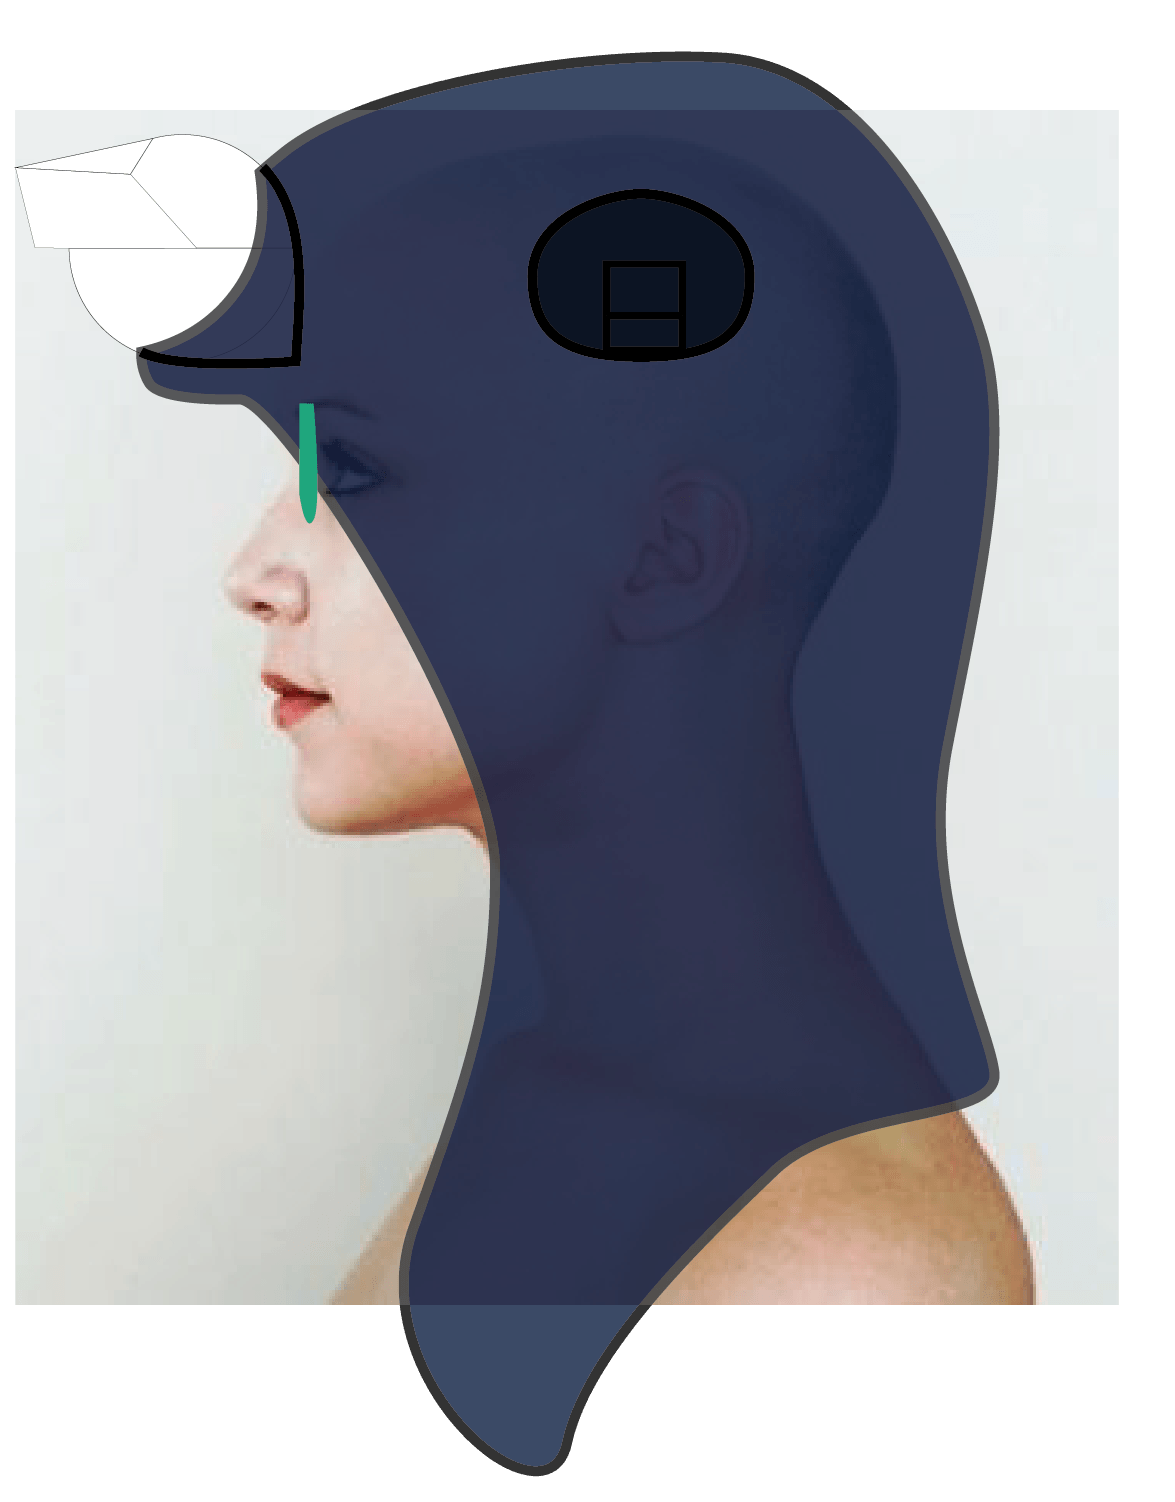
My sketch of how I think it will look like:

The perfect vision of my garment

Ok out of topic but I think what helped me a lot was to imagine my concept as an Overwatch character. Anyway, here’s an updated concept:

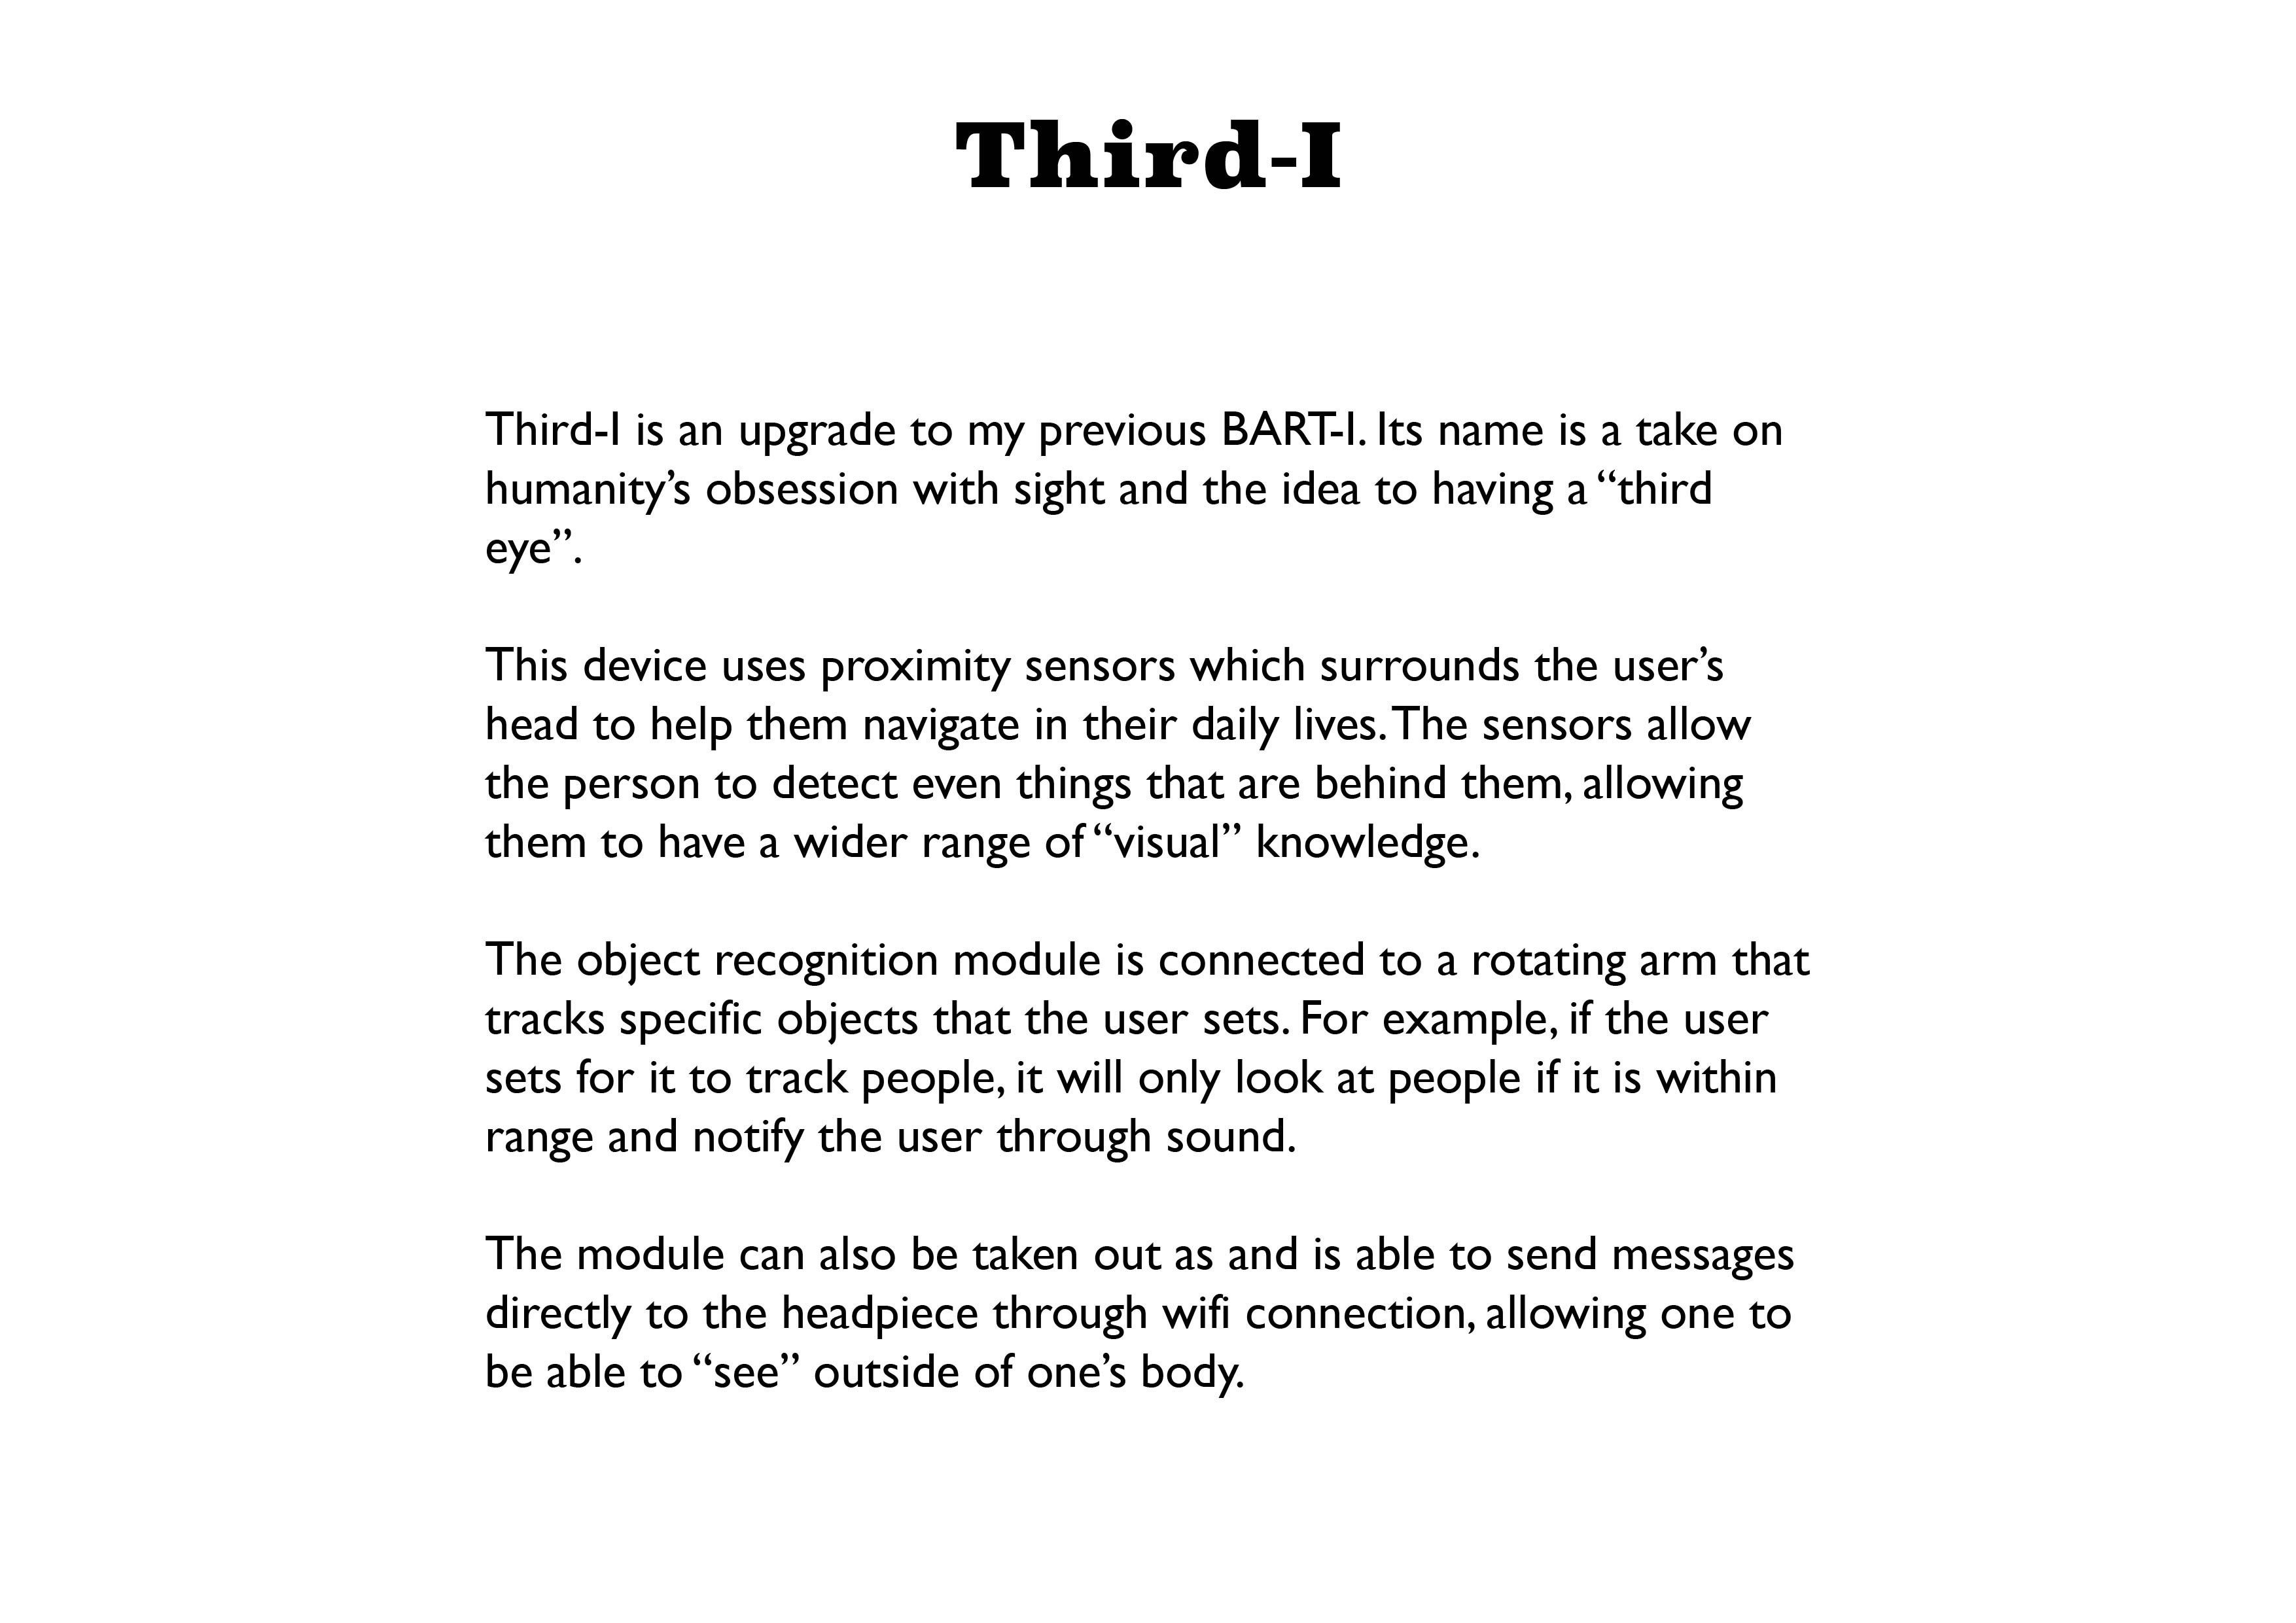
Concept: nomad from a future dystopia city which is covered in dust from sandstorm due to desertification and global warming. Cyberpunk elements (iridescent armour + tech) to create a sense of urban-ness (because he’s still from a city) and sandy garment to blend with the desert city. A bit of inspiration from beetles also (in terms of their colour and appearance)

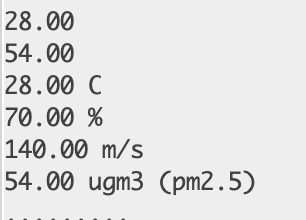
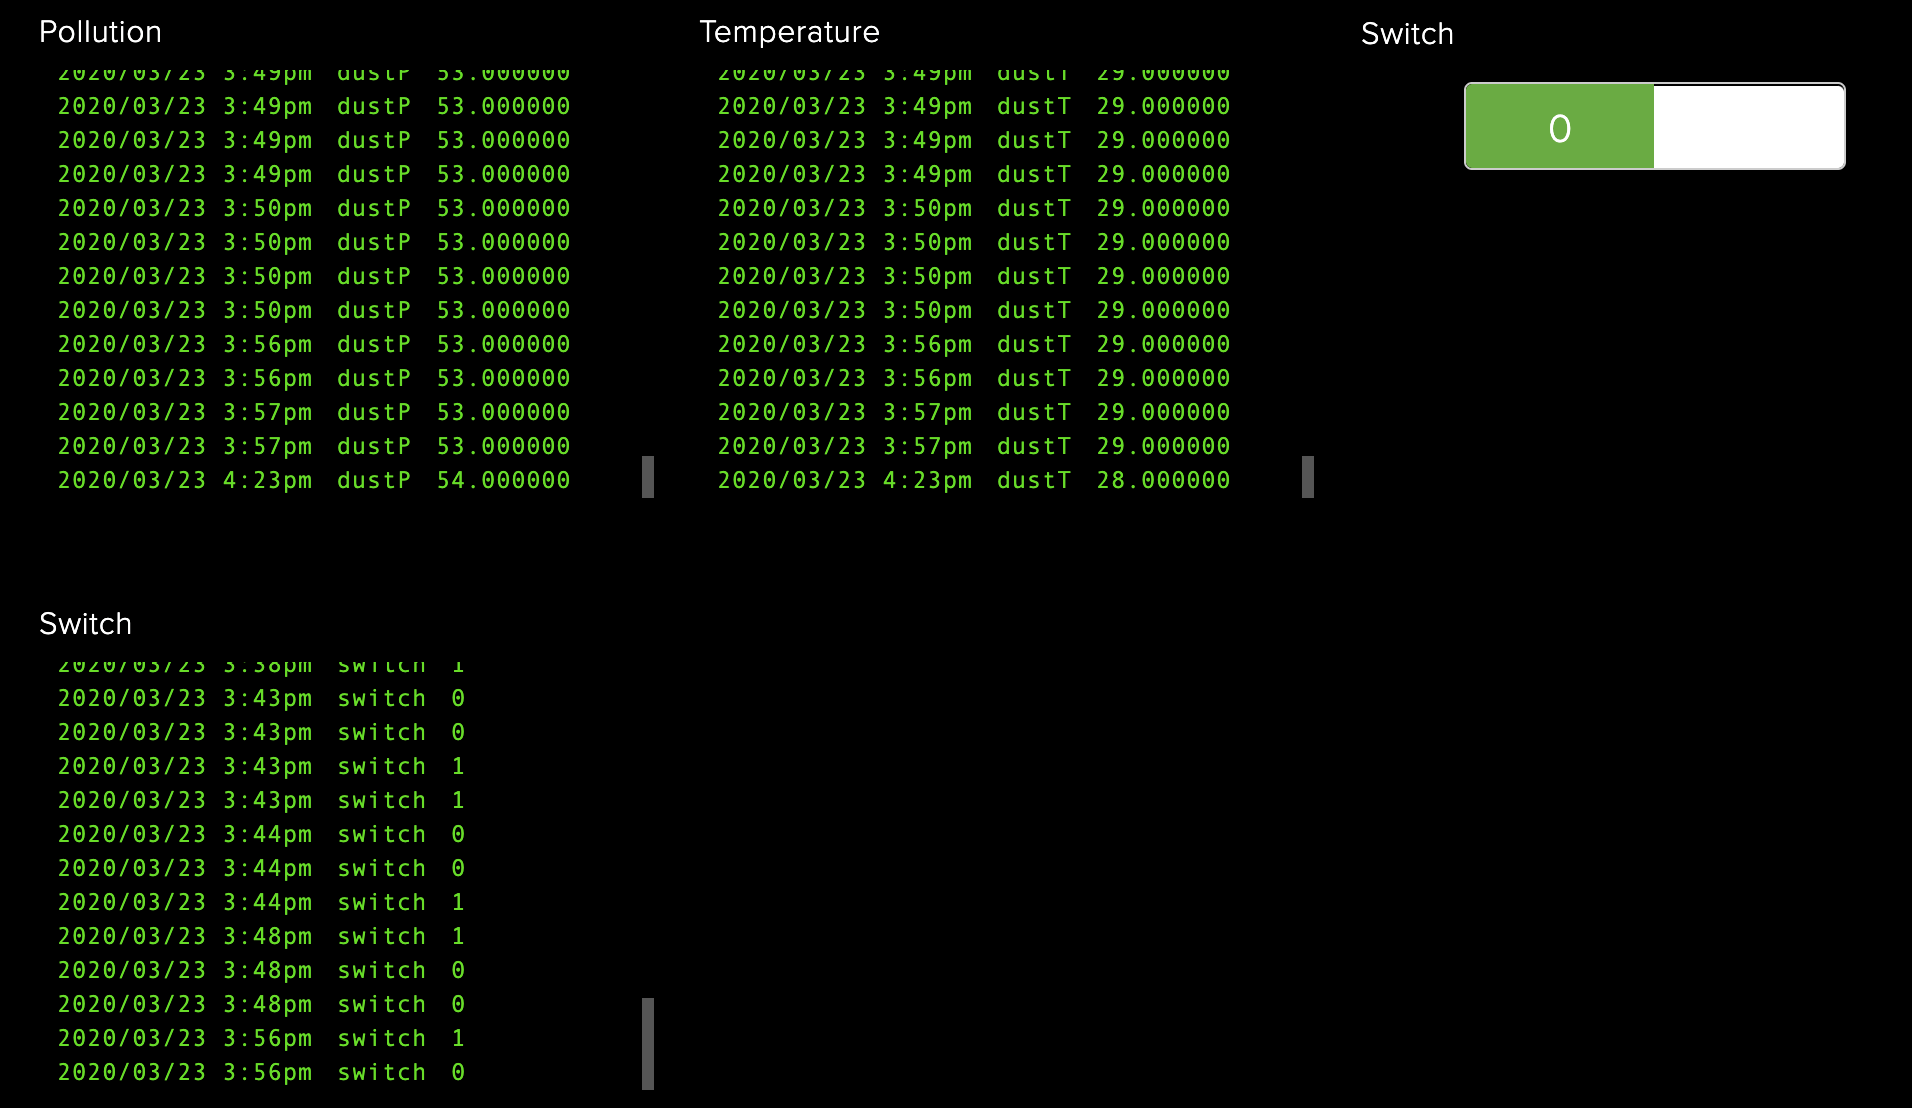
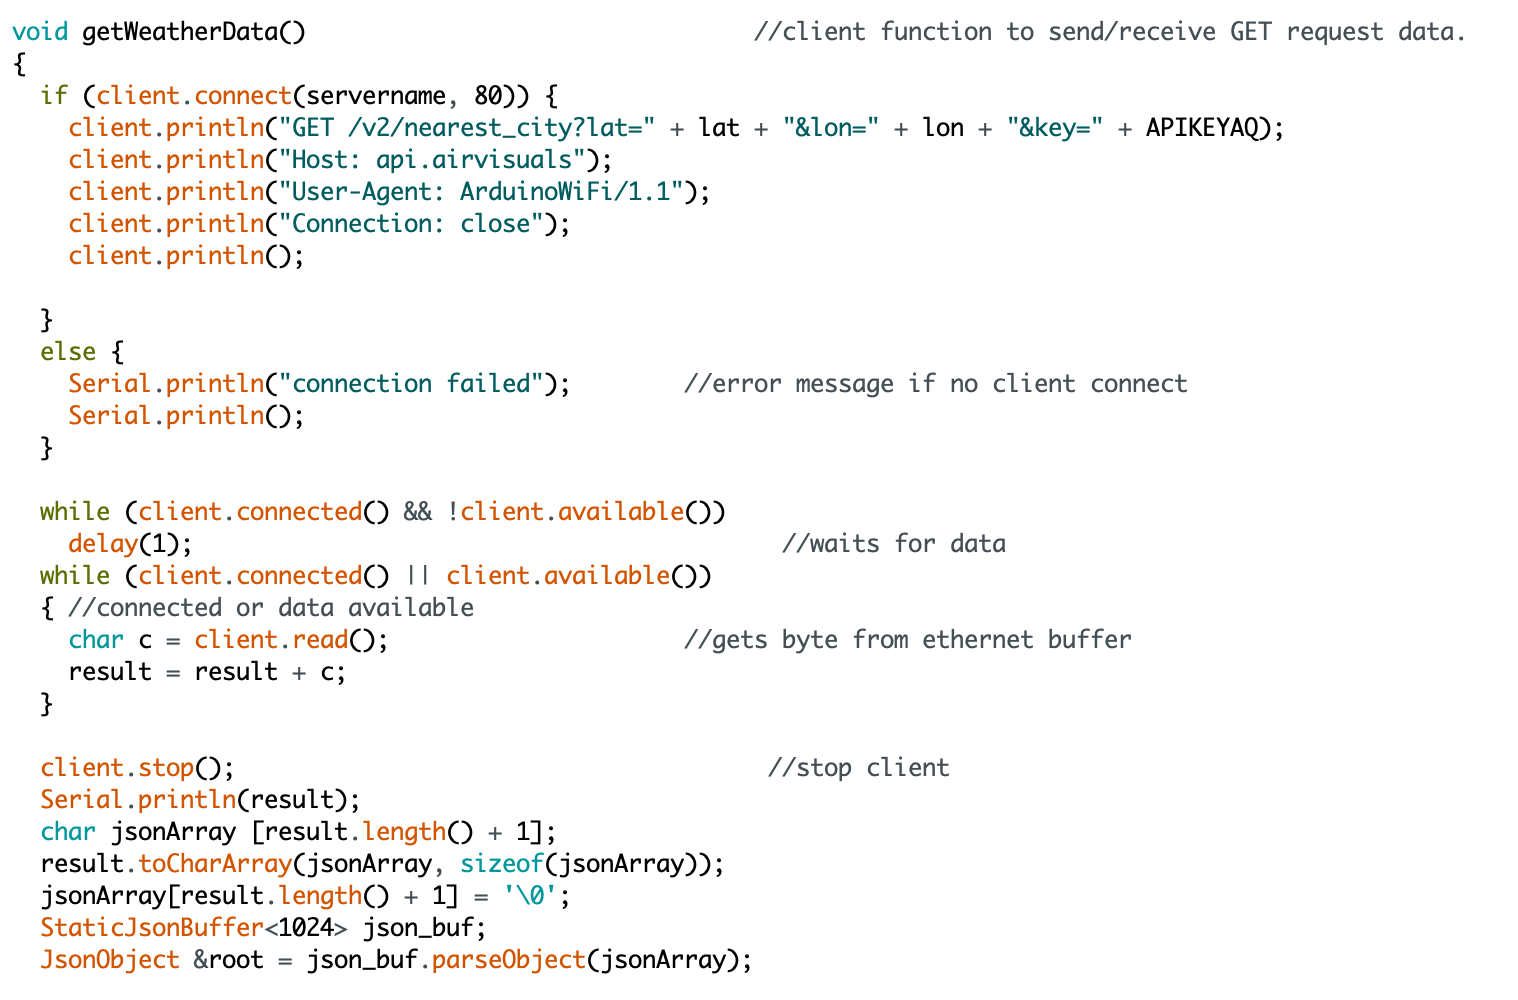
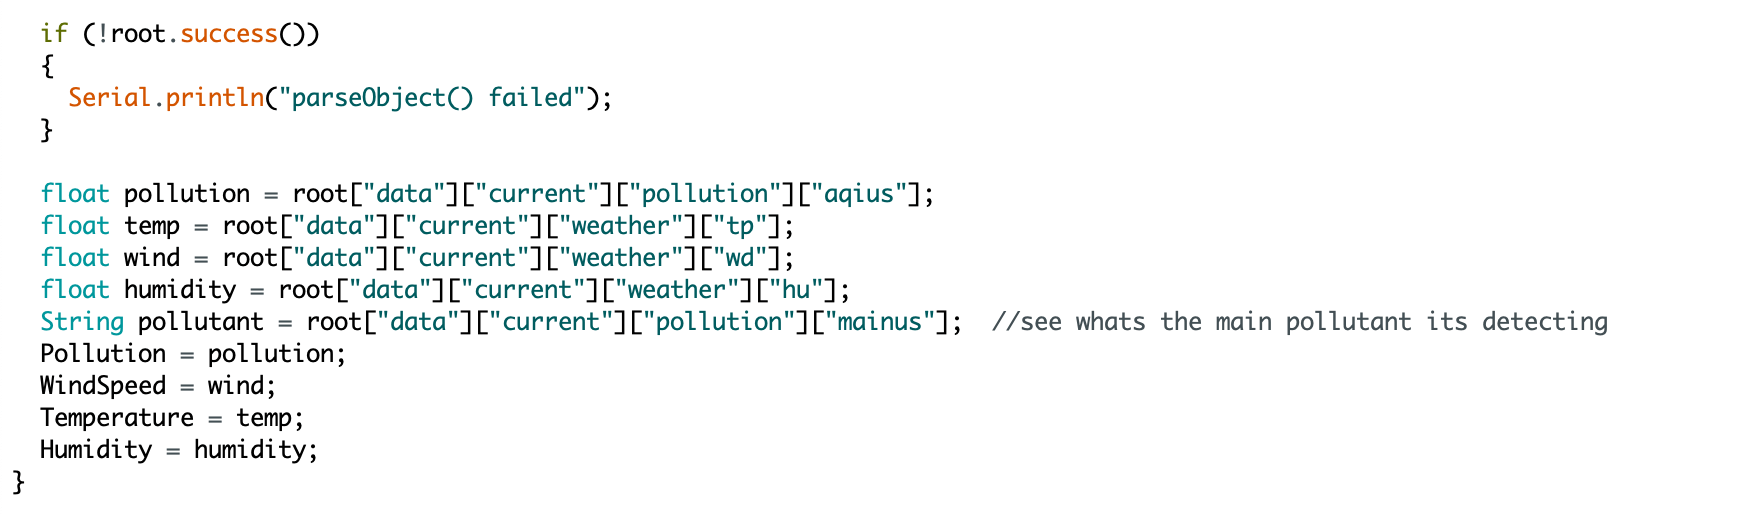
ALSO… I’m thinking what if the controller on my belt can control which city to look at. And because different cities have different temperatures and pollution levels, the values will cause the garment to react to it. Hmmm…

More Updates & Electronics

Presentation

https://docs.google.com/presentation/d/17-Pvo66K8ttybAE1qZW7n7R4OzupP-roymF4opGizro/edit?usp=sharing

Updates

I would really like to thank Galina for helping me with the sleeves, collars, and the fitting! Also… IT HAZ POCKETS NOW!!! The pockets are really useless for my concept but having them makes the garment looks really whole and useable after the show, AND I LOVE IT! THANK YOU MOTHER GALINA :’))) Without you my garment will be just a floppy beige thing that’ll be thrown to a corner after the show…

Anw, so here are images of the growth of my garment…

It starts from me working on my “final” on my own and….. turns out many things I’m doing is wrong.

Although I got some parts correct, the overall look is quite shabby. I’m ok with it, but turns out it can be much much better.

I went to buy more fabric as I ran out, but then I saw a nicer fabric and it costs $8/m at Gim Joo. I thought I can redo it and do better so I Bought 3m. Came back to school to cut. Lucky Galina spotted that I was cutting it in the wrong direction (not along the grain) so she flipped it for me. After cutting, I went to sew the back and front pieces together, then Galina started teaching everyone on how to work on the sleeves.

I then worked on the other sleeve of the shirt (note: this image may not be the sleeves part cos I didnt document the process :’) )

After finishing the sleeves, the garment looks like this:

So afterwards we worked on the lapels, then the collar. Again, not well documented process, but heres an image of Galina ironing the collar!

nice!

To finish the collar, I have to handstitch the collar and facing so it will be nice and invisible. Galina showed me how to do it and I brought it back to hall to finish it.

Here’s some photos of me looking at the mirror after sewing!

After being happy about the collar, I sew the pants and wore the pieces together:

I m the star in mario games — i forgot who said it

Galina helped me with the fitting afterwards to make sure that I can bend my body with it.

Can’t really see much here, but the fitting is better. The sides are tucked in cos they’re cut and restitched, while the front and back are slack to allow bending

Then, we begin with the pockets. There’s nothing much to see cos I didnt document this also :’)

Now, I’m just left with the zipper and buttons and then I’ll refine the sleeve ends and pants ends and I think I’m done with the garment. Then… the tech part. Which I’m working on right now.

Concept

Ok you see, although my concept have always been revolving around the futuristic cyberpunkish desert, I haven’t really gotten the hang of the exact things I want. So today I clarified it. I also tuned it to fit what I can do and what’s best for a wearable, while also noting that this is a 13 week school project.

Previously, I had an illuminator, respirator, a cape, and sensors on arm that are like armour. Now, I want to make use of the belt and tone down on the components on the garment itself, so I can still impact viewers with the show, make it easy for me, and also stick to the theme.

  • The illuminator now lights up all the time.
  • The temperature and pollution sensors now uses IoT so I dont need actual sensors anymore
  • The mask is the only part that has a motor. This is because motor costs a lot of electricity and very bulky to wear on
  • The belt will now be a piece of armour, and it conceals the utility items (knife, bottle, device)

Code & Electronics

I was playing with OpenWeatherMap API, after Naga recommended it to me. I tried many codes but it doesn’t work and was going to give up. But yesterday, I consulted Zi Feng and we figured out a bit of the code, and I think it was like those kind of moment where you dont look at code for a while and come back and you realised how things work… Yeah… So it worked for me.

So basically, I used the api with the api key and I ran it in arduino and the code will generate the information and pluck out what’s relevant (temperature, humidity, wind speed, etc)

http://api.openweathermap.org/data/2.5/weather?q=singapore,sg&appid=[insertAPIkeyhere]

Then I switched to this other API called Air Visual which has much more information (including pollution)

http://api.airvisual.com/v2/nearest_city?lat=1.3521&lon=103.8198&key=[insertAPIkeyhere]

So after figuring out how API works, I’m able to draw relevant information directly from the website to my NodeMCU wifi module. This means that I don’t even need an external program (eg. Python) to feed my program.

Here it’s taking temperature and humidity

So I’ve decided to use this instead of components so I can lessen the wires and energy. I worked long enough with wifi to have enough faith with it i guess…

So I tried using the data to control servos and LEDs, it worked. But after a while I think the servos burnt out (SORRY ZIFENG I WILL Buy BACK FOR U :((( ) so I needed to plan properly for the power and components.

Photo documentation of code:

Circuit

Prototype main component with servo and LED
Prototype arm component with LED

Electronics Logistics:

  • 3x NodeMCU (ESP8266 wifi modules)
    • Main controller
    • Temperature arm armour
    • Pollution arm armour
    • IF POSSIBLE: 1 more for Device controller
  • 4x 3.7V Lipo batteries (or higher but not more than 5V) 
    • Main NodeMCU + main LED
    • Mask servo motor
    • Temperature arm armour NodeMCU + temperature LED
    • Pollution arm armour NodeMCU + pollution LED
    • IF POSSIBLE: 1 more for Device controller
  • 4x LED strips
    • Main LED (10 bulbs)
    • Shoulders LED (50 bulbs)
    • Temperature LED (20 bulbs)
    • Pollution LED (20 bulbs)
    • IF POSSIBLE: a few bulbs for Device controller
  • 1x servo motor
    • Mask servo
    • IF NEED: another one for mask servo to make it more reliable. (if that’s so, need add 1 more Lipo)

What’s next?

After today’s breakthrough, I’m gonna start getting the necessary stuffs

  • Code for individual electronics
  • Buy whatever’s left that I need
  • Work on final armour pieces
  • Put electronic together
  • Refine garment
  • Test test test! and also charge my batteries.

So for today’s presentation, I’ll show my progress with electronics and my plans.

Pitch Proposal : THIRD-I

https://oss.adm.ntu.edu.sg/a150133/category/17s1-dm3005-tut-g01/

https://unnecessaryinventions.com


Updates:

Design:

Tests:

The Interaction

  • Tracking mode
    • IR sensors will detect difference in distance
    • Motor will turn to track the object, prioritising whatever’s closest that’s in field of view
    • The info of motor angle, IR distance will be sent wirelessly to Adafruit.io
    • These info will be received by the cowl, vibrating the corresponding vibrating motor to indicate sensor’s location
    • * A pitch will be heard on either side of the ear to determine proximity
  • * Sweep Mode
    • IR sensors will detect its surrounding like a radar
    • Motor will turn 180 degrees to and fro.
    • The info of motor angle, IR distance will be sent wirelessly to Adafruit.io
    • These info will be received by the cowl, vibrating the corresponding vibrating motor to indicate sensor’s location
    • * A pitch will be heard on either side of the ear to determine proximity
  • Eye movement Mode
    • Motor will turn in the direction of the eye, stopping when the eye is looking forward.
    • IR sensor detects proximity
    • The info of motor angle, IR distance will be sent wirelessly to Adafruit.io
    • These info will be received by the cowl, vibrating the corresponding vibrating motor to indicate sensor’s location
    • * A pitch will be heard on either side of the ear to determine proximity

Communication flow (1 cycle)

  • Cowl’s Arduino sends mode info to 8266
  • Cowl’s 8266 sends mode info to eye’s 8266
  • Eye ESP8266 subscribes mode info
  • ESP8266 sends the info to its slave lilypad which acts accordingly
  • Lilypad receives motor and IR distance info and sends to eye’s ESP8266
  • Eye ESP8266 publishes motor and IR distance info wirelessly
  • Cowl’s 8266 reads the info and sends to its slave Arduino
  • Arduino react its vibrating motor and pitch accordingly

What’s next?

  1. Receive ezbuy stuffs so can continue
  2. Settle ESP8266 communication
  3. Settle master-slave communication
  4. Get necessary materials for new eye that’s bigger in size
  5. BUILD THEM! And simplify the difficult parts