This is it, the last submission for Foundation 2D!
Halloween Horror Nights
Me
situation
outcome
Me
Situation
Outcome
October has recently passed and with that, Halloween Horror Nights as well. I’m not good with scary things at all. They totally break my calm composure that I always like to maintain.
Here I chose a jaguar to represent me at my peak, agile and capable. However, when I’m faced with a haunted house, I completely lose my sense of composure and become a blind log that my friends have to drag through the haunted house. I placed the haunted house in a space like setting because haunted houses are definitely not a part of what makes up my world. When I enter this house as a jaguar, I am so scared that my entire being disappears into a blackhole and my spots fall (or fly) off my body.
For this equation, I used two adjacent colour schemes and one triad complementary which is made up of the first two colour schemes. I used this to show the two separate emotions and atmospheres associated with the two panels, and how they react together in the last panel. I used warm orange/brown tones for my first panel to give a sense of ease and warmth, cool and dark purple/blue tones to create a sense of fear and mystery, and a mixture of the two at the end to show a clash between me and the situation.
My Broken Brick Wall
me
situation
outcome
I’m no open book and I’m not very talkative either but when someone comes along and showers me with enough love and affection I would start to open up.
Here, I am an egg but my shell is not the usual fragile one – it is made out of bricks. Note the broken nails and hammer. My walls are not easy to penetrate. Following the same colour pattern as the first equation, I chose to have the egg remain in its usual colour and have the shades of the background and surrounding elements match to the egg. This keeps the contrast minimal and gives the image an overall soothing, neutral look, which is also the atmosphere I am going for with the image. I then chose pastel pink hues to represent love and create a soft and welcoming atmosphere. For the last image, both colour schemes are combined and made more vibrant giving an overall bright look, representing the new found happiness in being able to be myself with somebody.
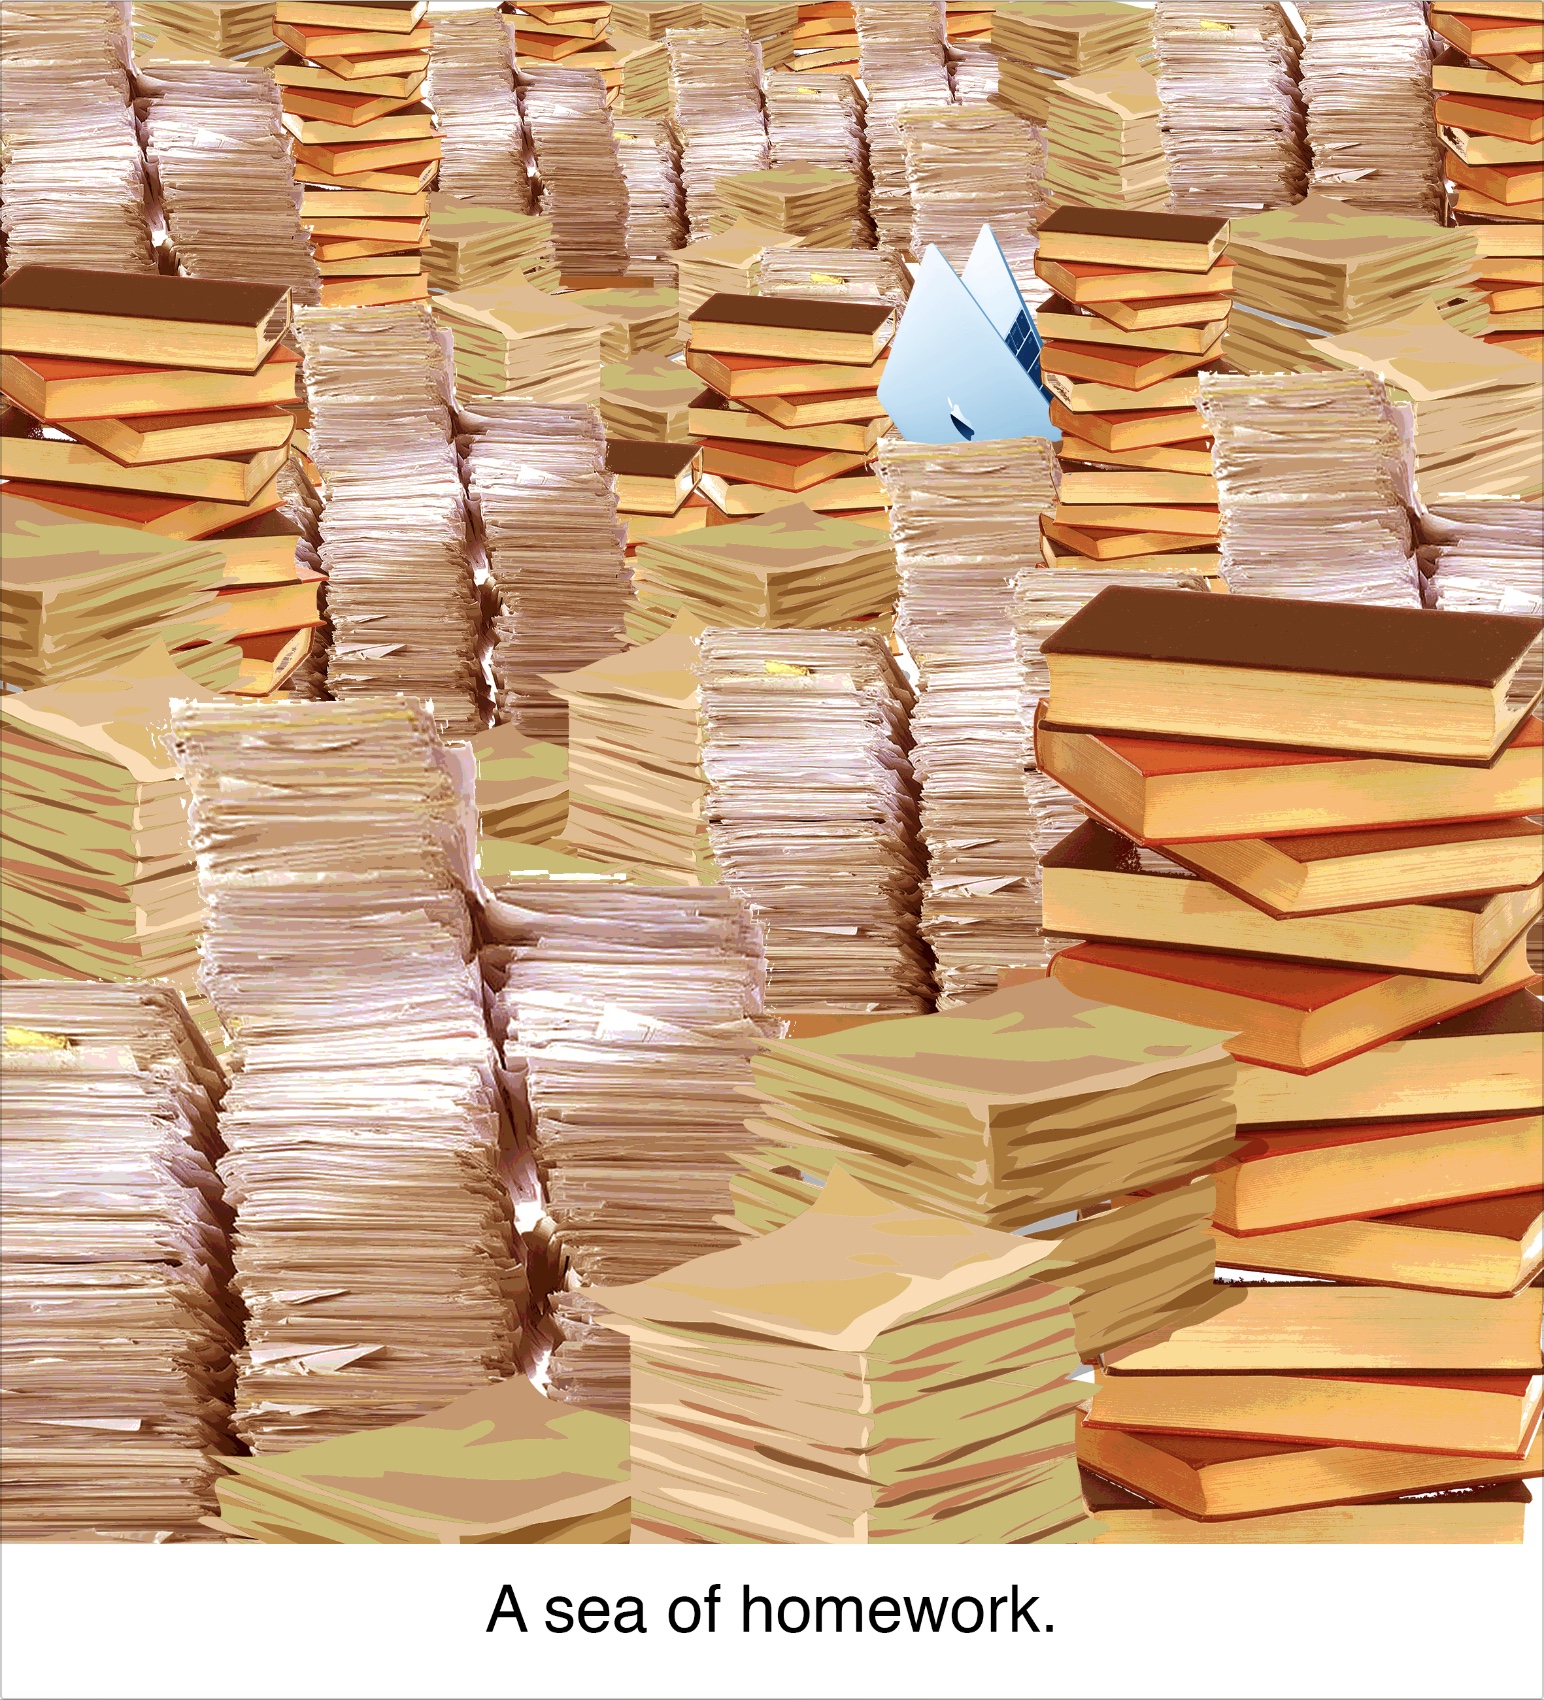
A Sea of Homework (and the Wheel of Death)
me
situation
outcome
As with many other people, even though we may be fully functional and ready to get out there and do things, when we are given too much of it we can burn out.
I used the same colour pattern for this equation as with the first one. Cool blue tones are used for the first panel which is often used for tech related design to show new, innovative, efficient technology. In this case, that would be me, a laptop. Using colours from the opposite end of the colour wheel, I contrasted the laptop with a sea of homework which completely consumes the laptop as it struggles to stay on top of things. The contrast shows how the two just don’t go. For the last panel, the same contrast is used but much more obviously and with deeper colours showing the chaos the situation brought me.
No Hoodies at Social Events
me
situation
outcome
Growing up, and even now, I was very quiet and never had much to say. I end up usually just listening to the conversations of the people I’m with and I enjoyed doing that; but because I didn’t talk much I often ended up being casted out sooner or later. So I just find my little corner in the space and people watch.
With the same colour pattern, I start out with cool and dull tones of blues and greens. These colours, to me, reflect my personality – chill, easy going, and calm. I then move to some brighter and more vibrant colours on the opposite side of the colour wheel in my next panel showing the happiness and liveliness of big social events. In the last panel, the two colour schemes are put together to form a triad complementary. The only difference is that I inverted the colours as I wanted to make my hoodie stand out more in this composition.
Final Thoughts
I really liked this project. It was definitely one of the hardest ones for me because it pushed me to think a lot about my compositions and also to push myself to think out of the box. I had a lot of fun finally being able to play with colour and make my images look more harmonious with them. For this project, I applied quite a few techniques I had learnt from our previous two projects and I’m happy to see that what I have learnt didn’t fly out of my brain and go to waste! Also I got to create some sick photo collages (not as sick as the real deals of course but it’s a start) like the ones I see on the internet and I think I might go on to create more of them in the future (-:
This is not goodbye! I will always be re-visiting all that I’ve learnt here and constantly apply them (consciously and unconsciously) in all the other work that I will be doing. Twas a good semester. Thanks Shirley!
2D is coming to a close with our final project, “Ego”. Time to get my brain cracking again!!
RESEARCH
For this project, we were free to decide on what medium and style we wanted to work with. For me, I want to use a style that is popular with my generation. I looked up online and here are some results.
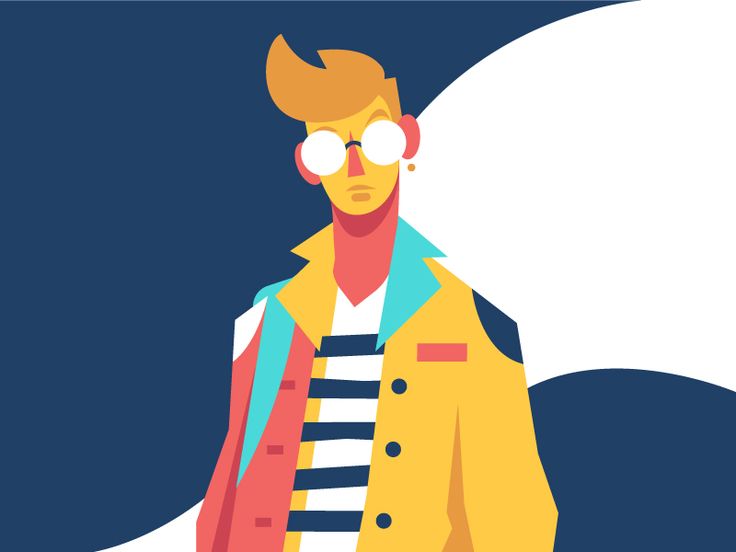
Flat illustration with pops of colour/minimal colour
Image from http://create.adobe.com/2017/3/17/illustration_trends_for_2017.html
Accessed on 20 Nov 2017
Image from https://dribbble.com/shots/2920138-Boy
Accessed on 20 Nov 2017
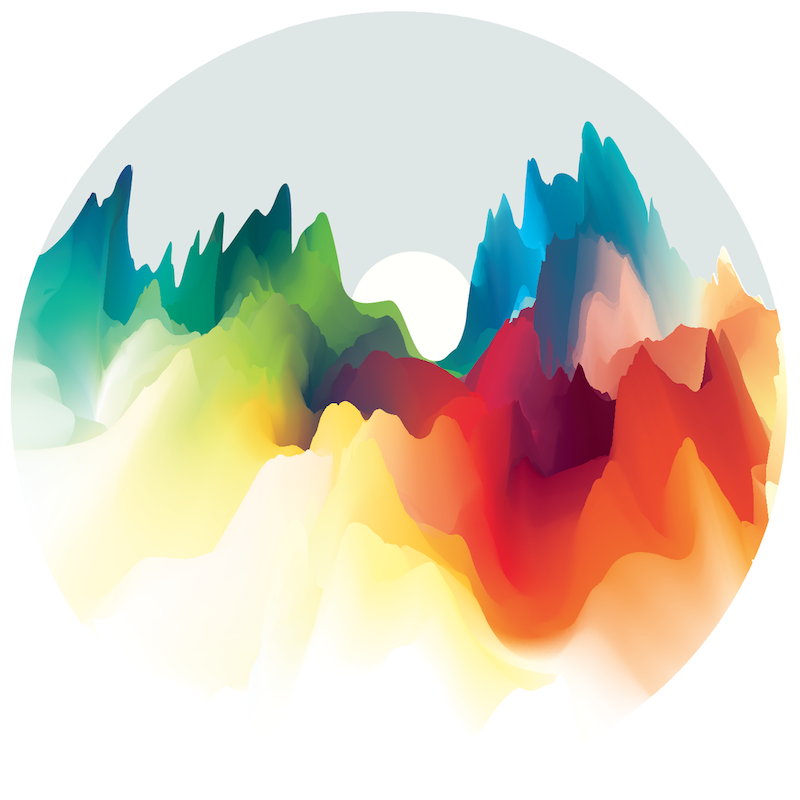
Vibrant, fluid colour
Image from http://create.adobe.com/2017/3/17/illustration_trends_for_2017.html
Accessed on 20 Nov 2017
Image from http://create.adobe.com/2017/3/17/illustration_trends_for_2017.html
Accessed on 20 Nov 2017
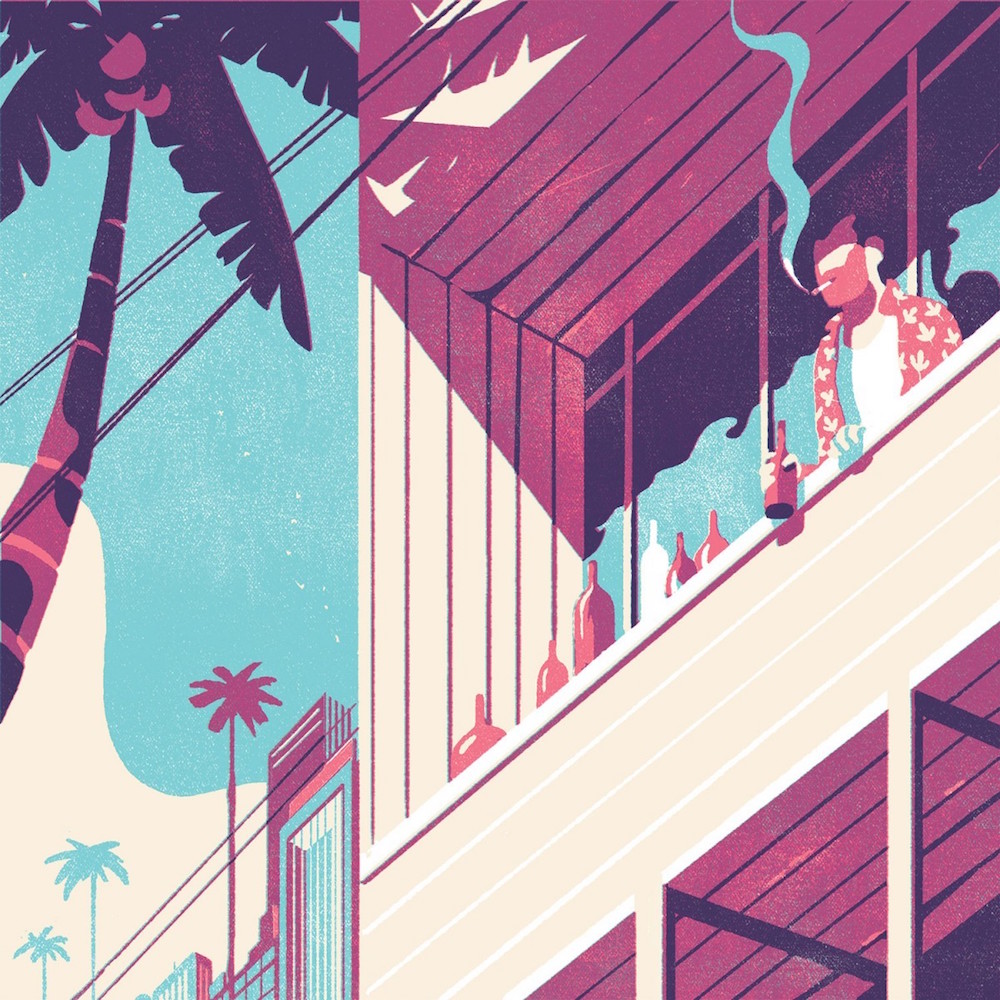
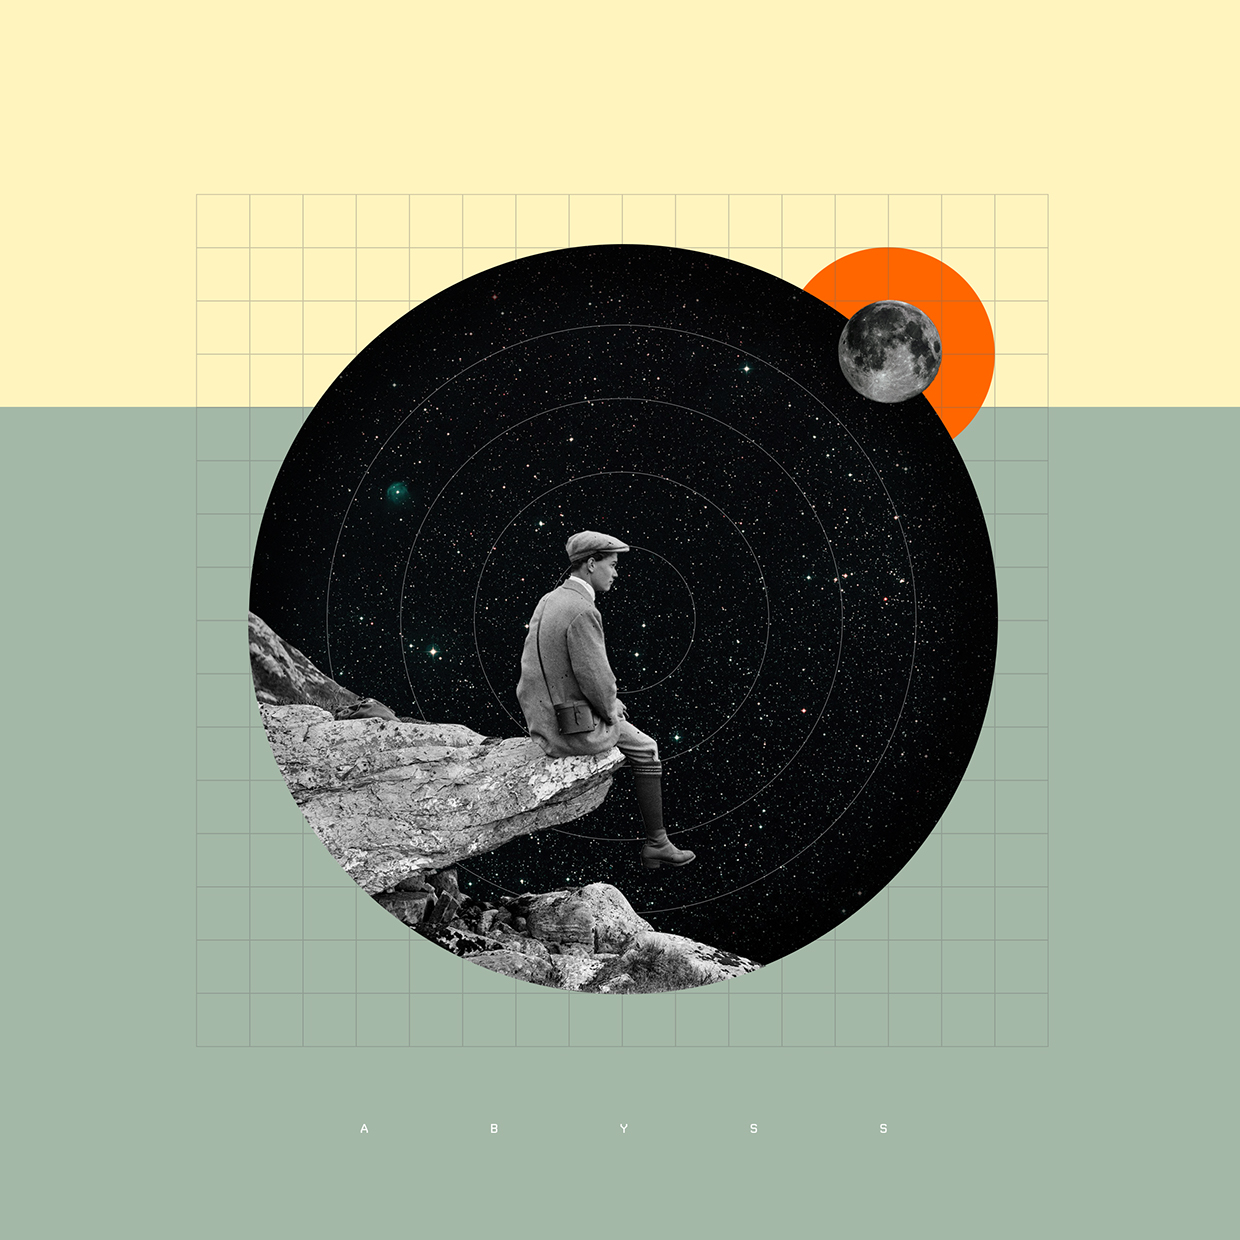
Photo collage
Image from http://abduzeedo.com/node/41225
Accessed on 20 Nov 2017
Image from https://society6.com/product/abyss-6xj_print?curator=paolotonon
Accessed on 20 Nov 2017
The first two styles are much more illustration based as compared to the last style. While the first two seem to depend heavily on colours, the last one depends more on the juxtaposition of images and colours come in as more of a secondary importance.
Although the other two cater to this project that focuses on colour, I have chosen to go with the photo collage style because I like how different it is from the rest. Making something new out of existing images has a somewhat fresh and eye-catching feel to me too!
ARTIST REFERENCE:
ADAM HALE
Image from: https://www.instagram.com/the.daily.splice/
Accessed on: 7 November 2017
Image from: https://www.instagram.com/the.daily.splice/
Accessed on: 7 November 2017
Image from: https://www.instagram.com/the.daily.splice/
Accessed on: 7 November 2017
Image from: https://www.instagram.com/the.daily.splice/
Accessed on: 7 November 2017
Image from: https://www.instagram.com/the.daily.splice/
Accessed on: 7 November 2017
Image from: https://www.instagram.com/the.daily.splice/
Accessed on: 7 November 2017
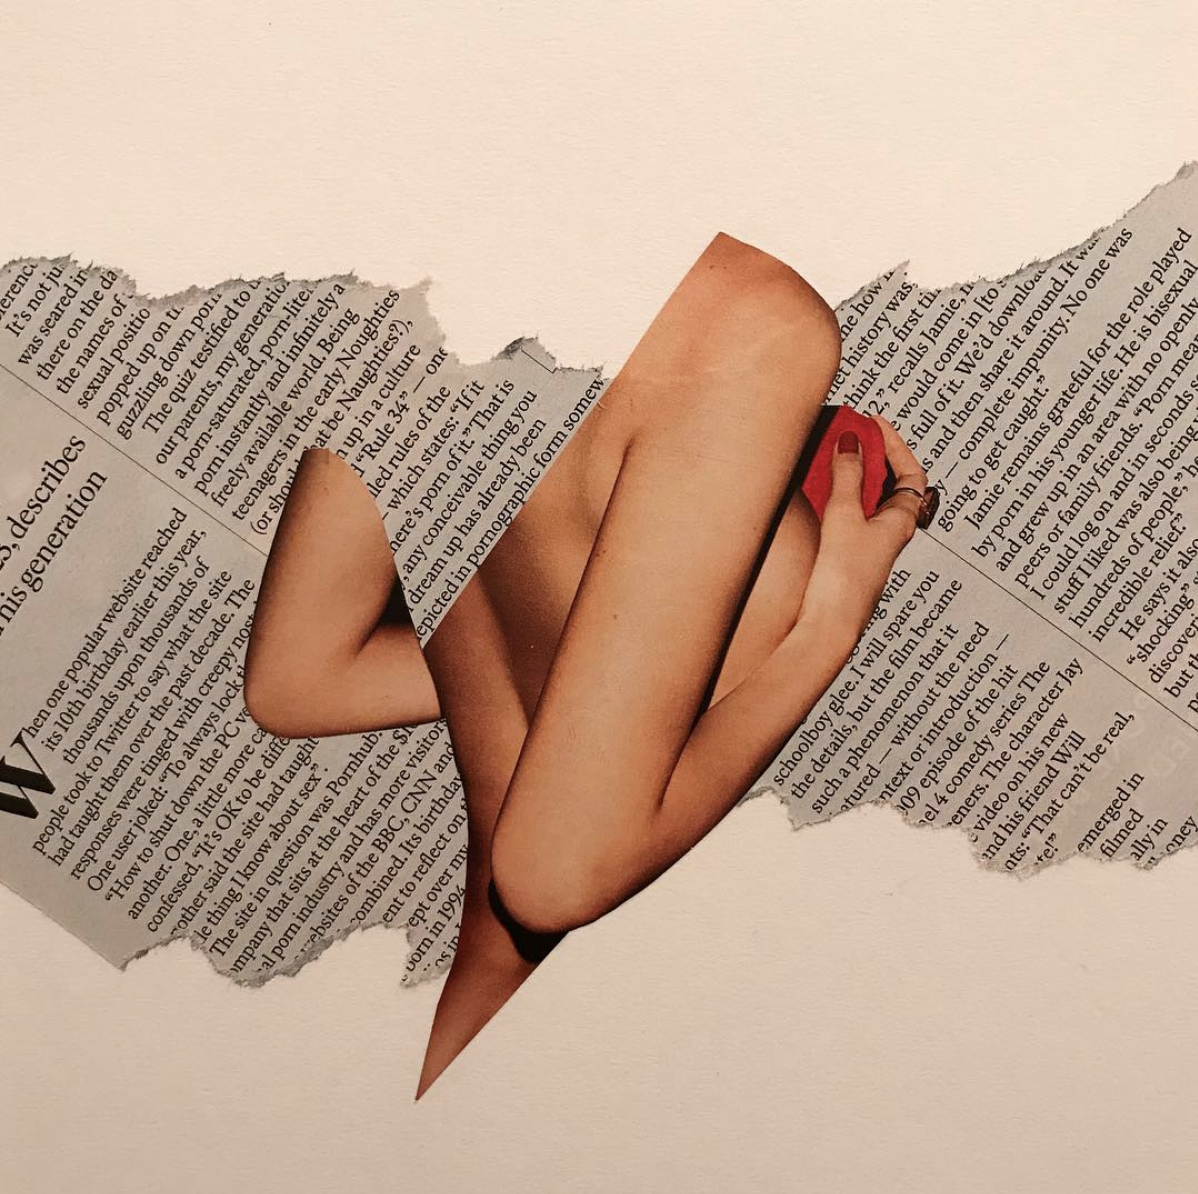
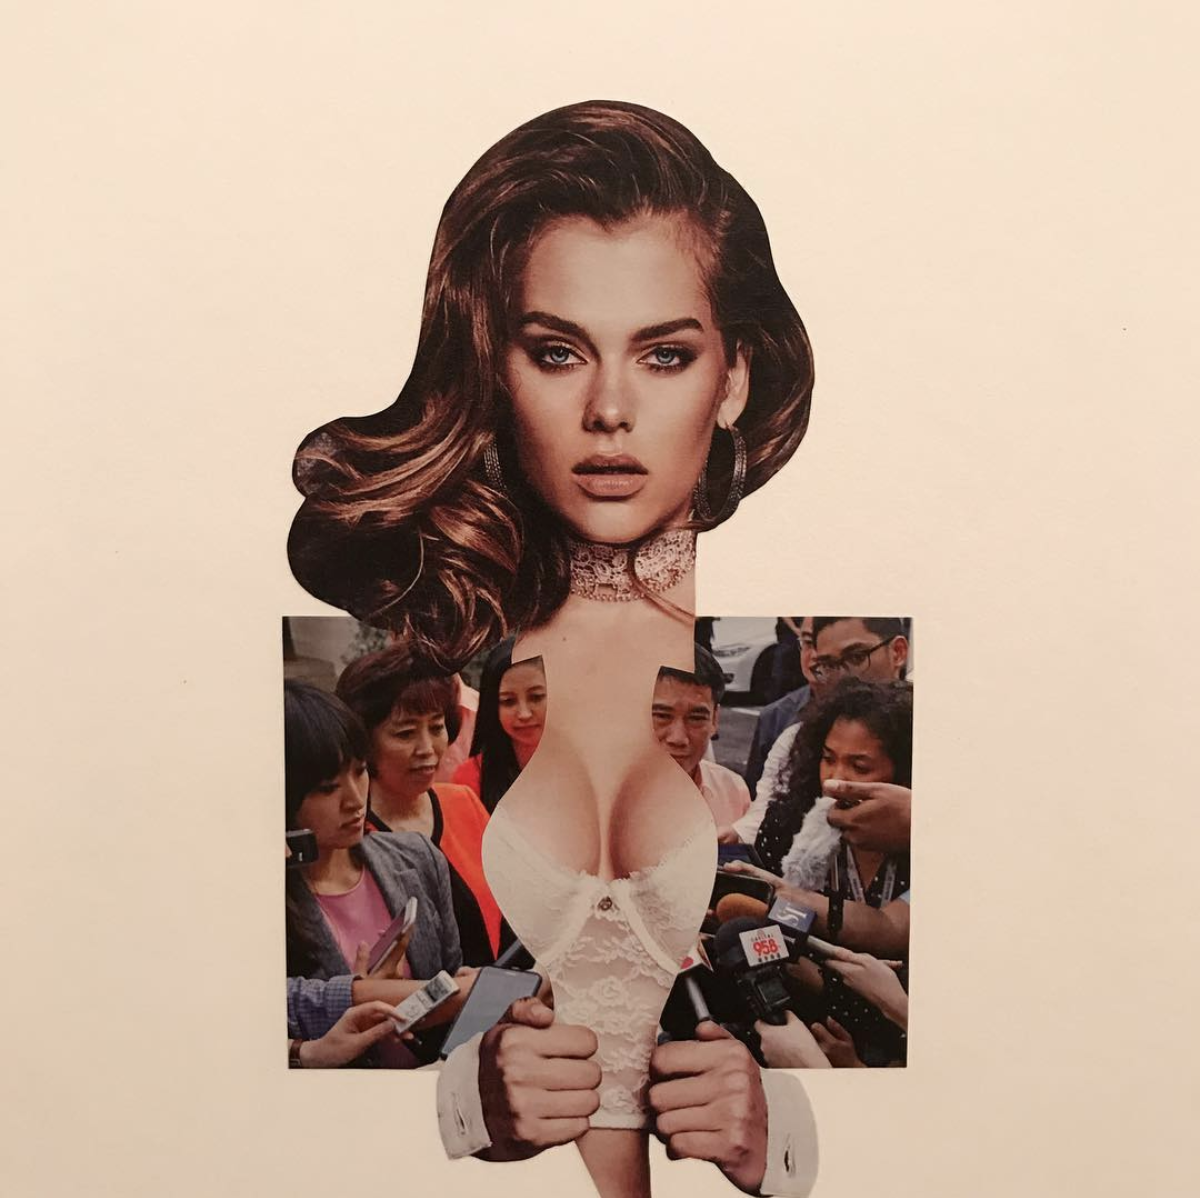
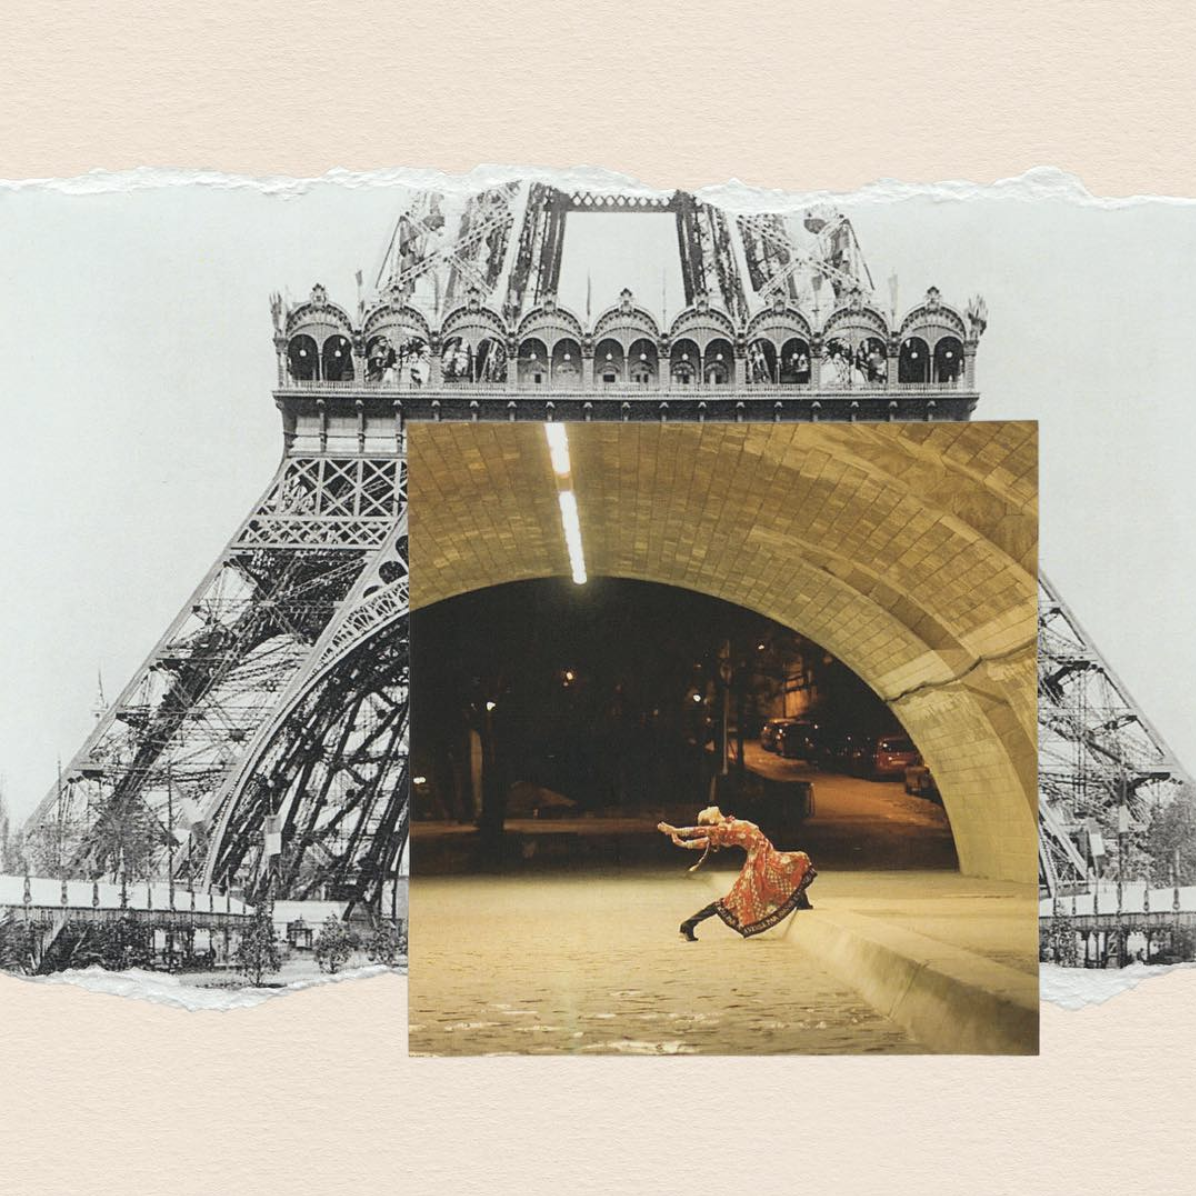
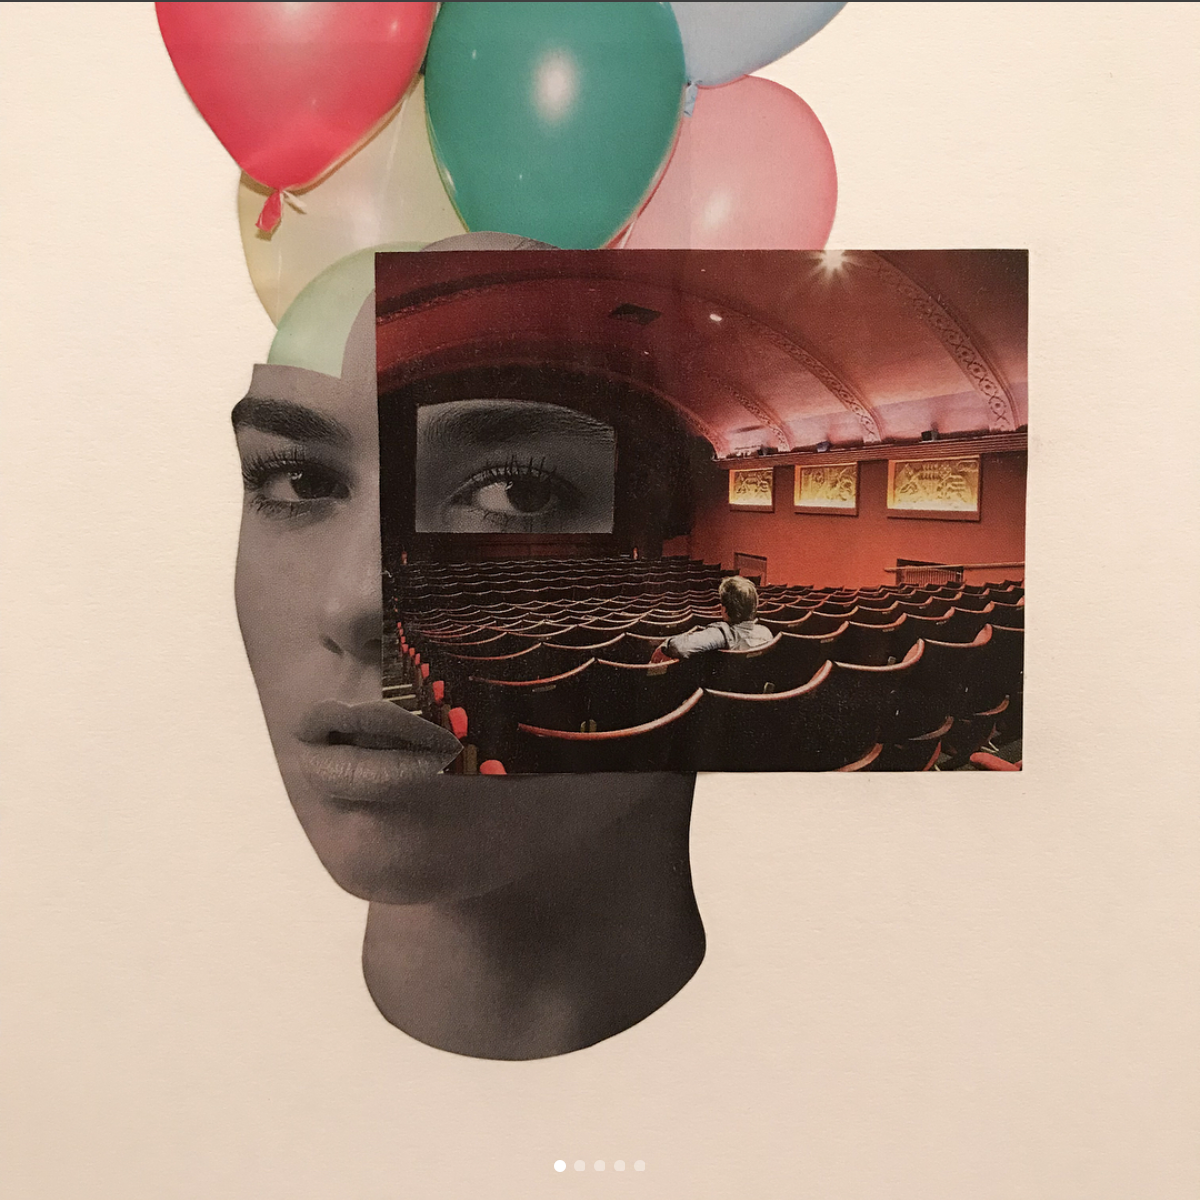
Adam Hale is a collage artist who shares his quick work on Instagram under the handle @the.daily.splice. One main thing I am taking away from his work is his focus on being unconventional, putting images that don’t seem to relate together and creating new meaning with it.
COLDPLAY – UP&UP
Another artist reference, not really, but this specific music video is filled with the style I am interested in recreating!
PROCESS
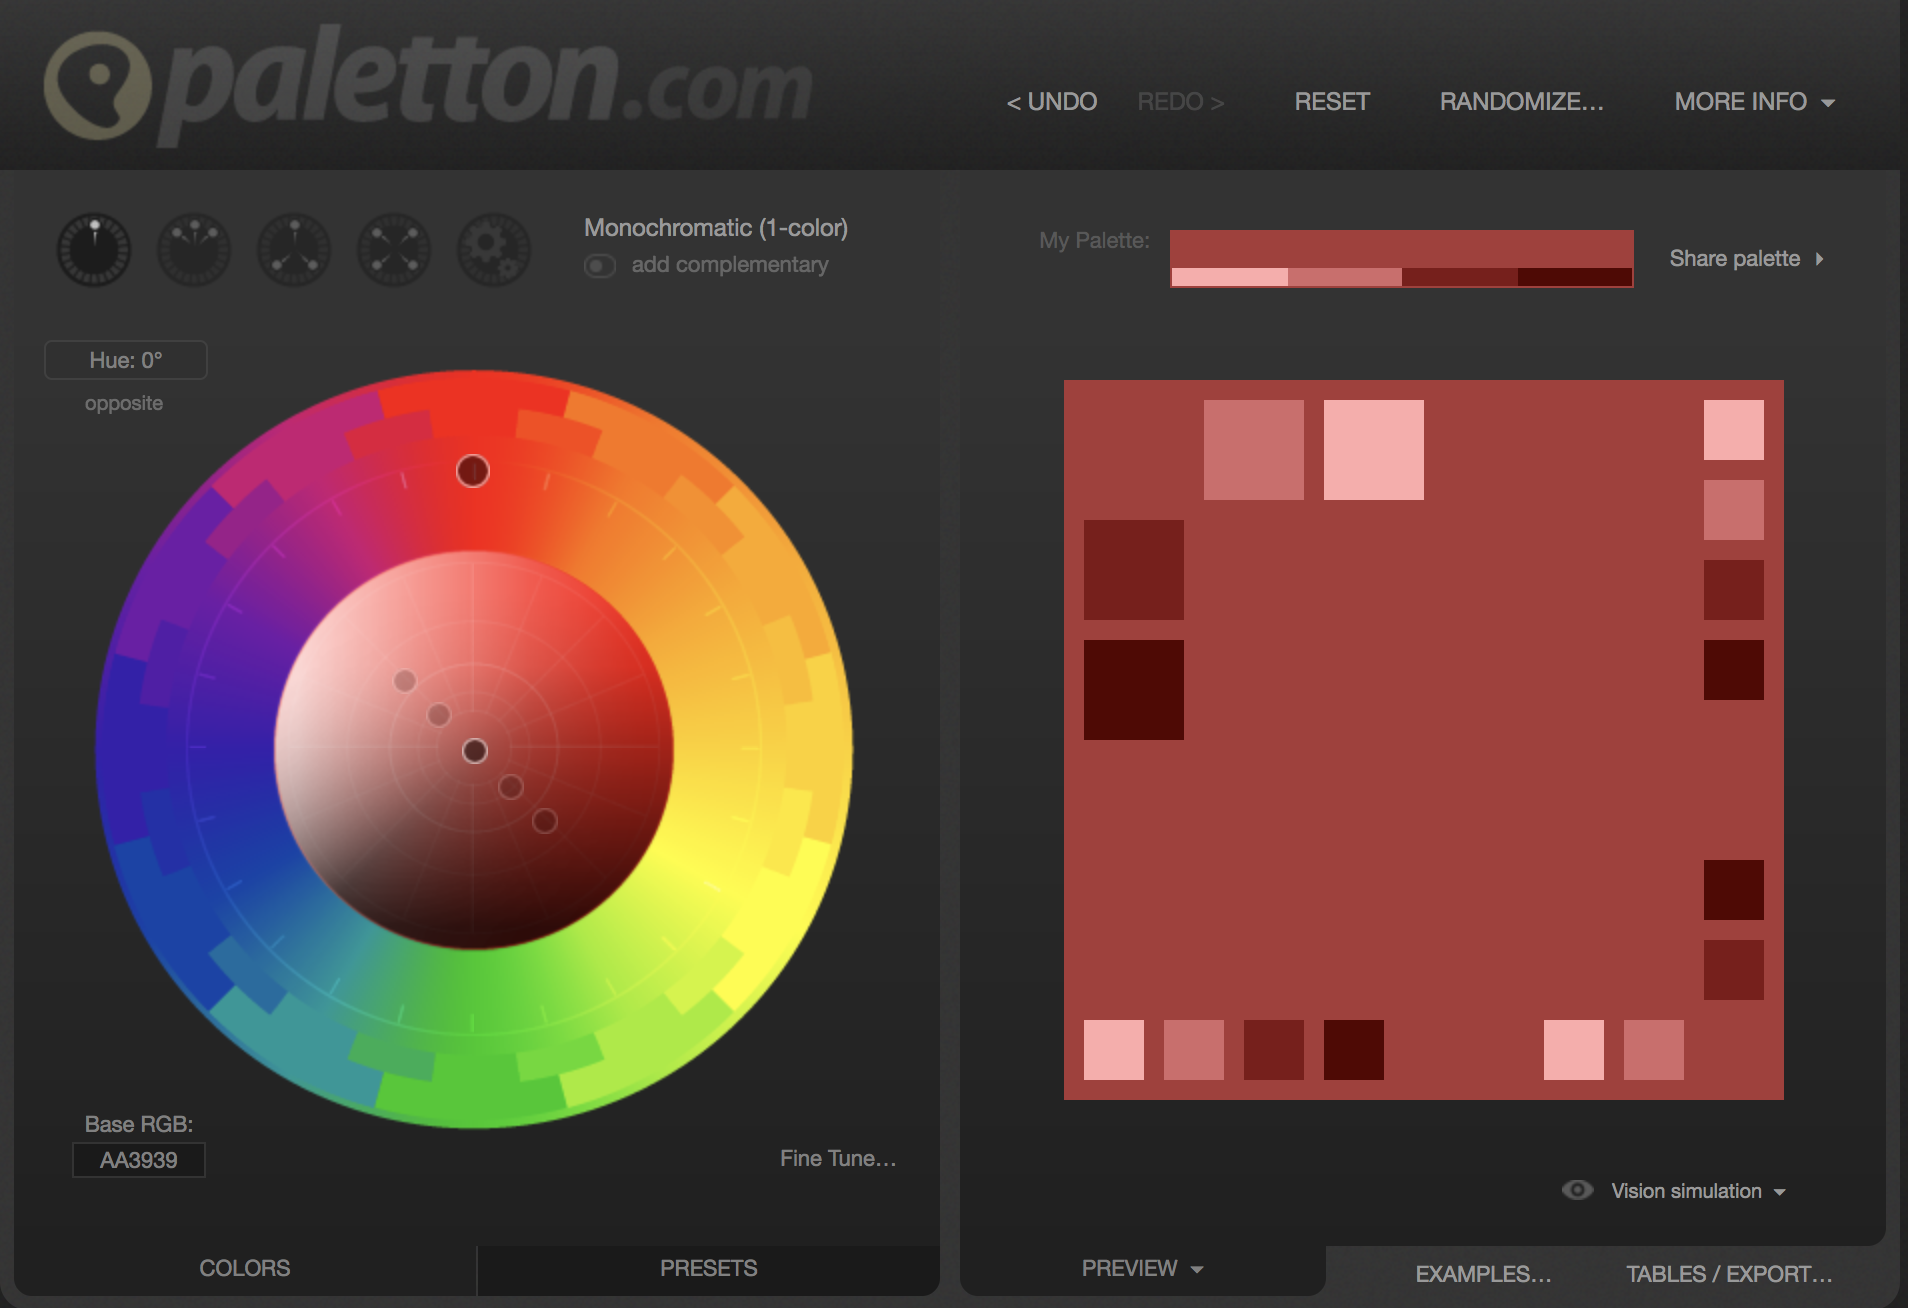
Looking at past year students’ works, I have decided to use this website called Paletton to help me choose my colours.
Image from http://paletton.com/#uid=1000u0kllllaFw0g0qFqFg0w0aF Accessed on 7 Nov 2017
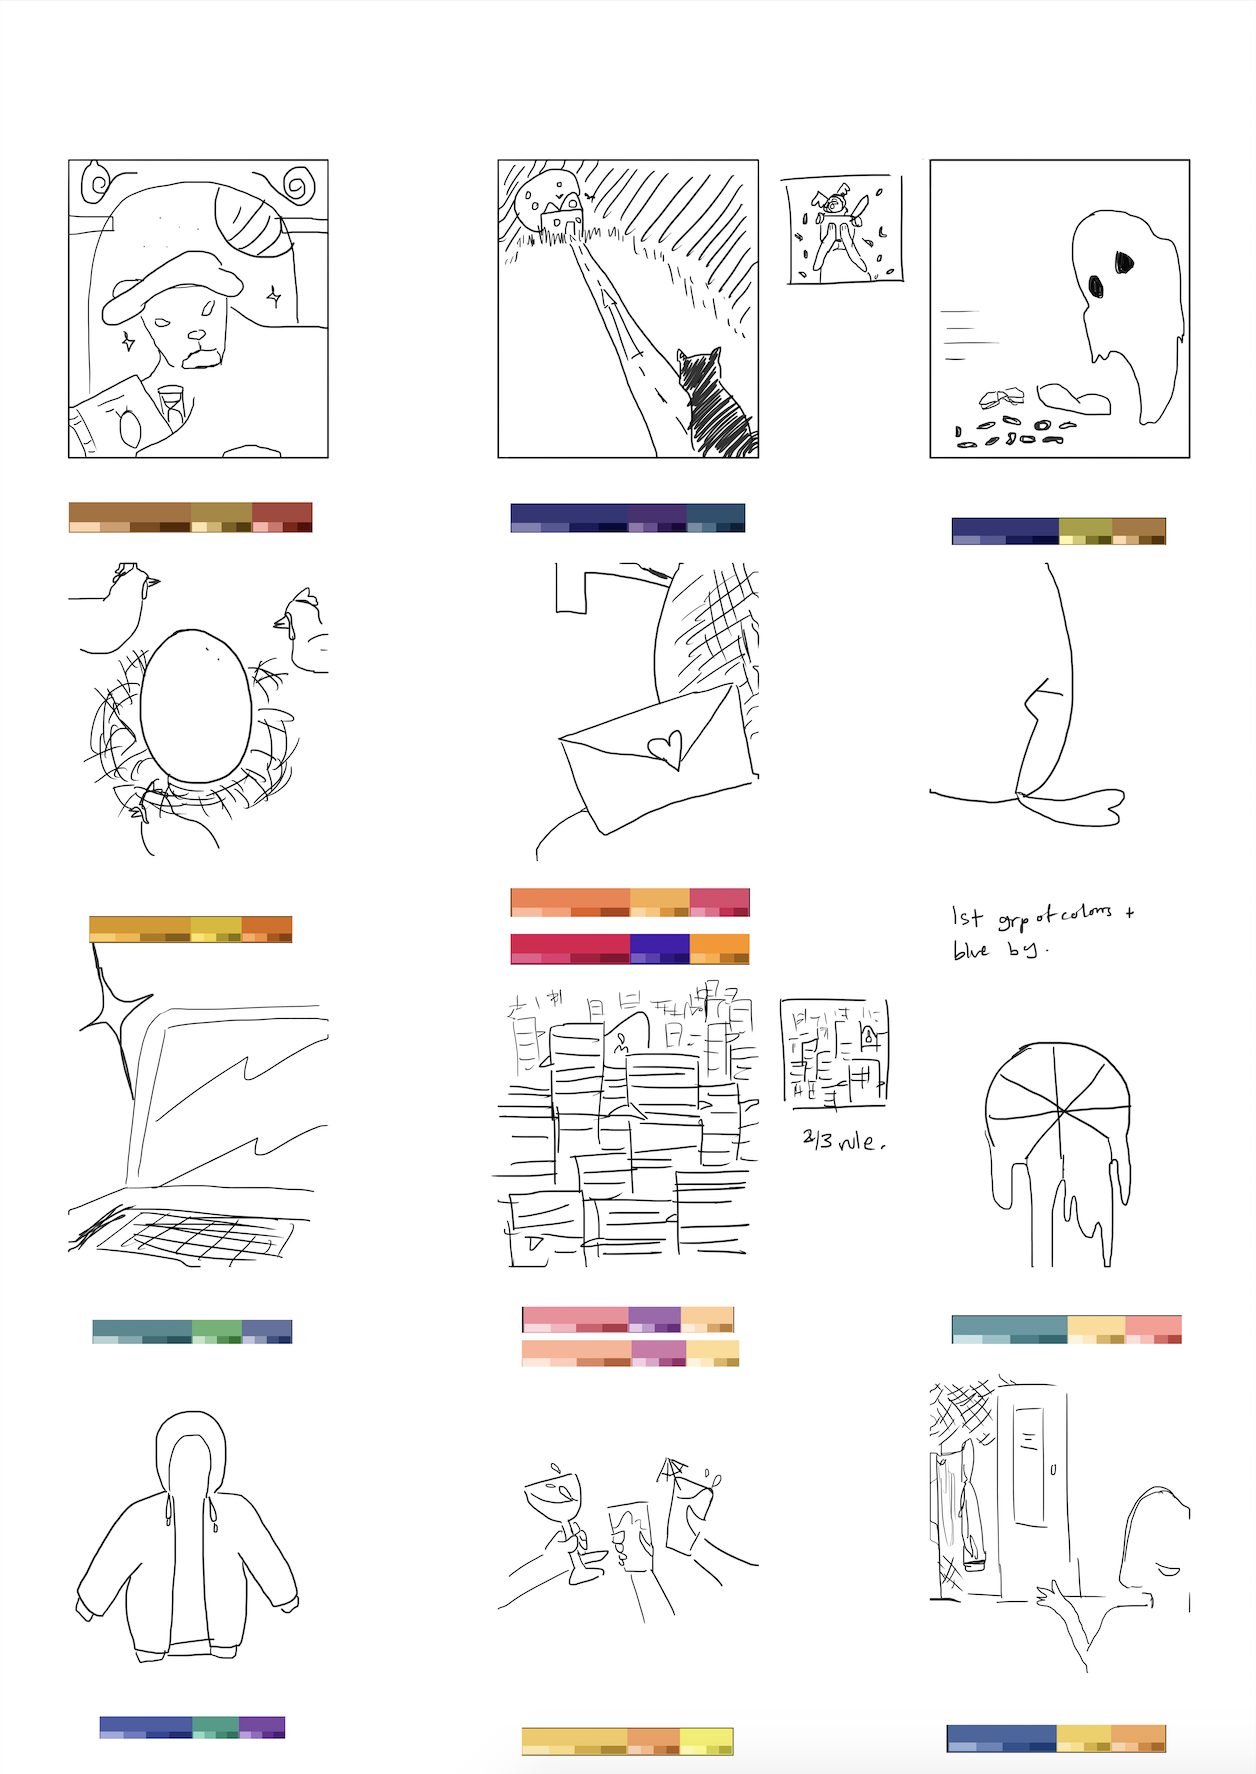
Here are some sketches of my ideas for the panels:
Planning
After consulting Shirley, I realised my outcomes were too straight forward. Again, I had to think of making these outcomes unconventional.
My second set of sketches, including colour choice:
Planning round 2
For my colours, I went with adjacent colours (3 colours) and triad colours. The adjacent colours would be used for my first and second panels, and the triad for my last panel, where both sets of adjacent colours mix, representing my ego mixing with the situation to give the outcome. I also want to stick to 3 colours as with photo collage work, lots of images have varying tones/colours so it’s not easy to stay at just 2 colours.
EQUATION 1: Jaguar
Me
Situation
Outcome
Me
Situation
Outcome
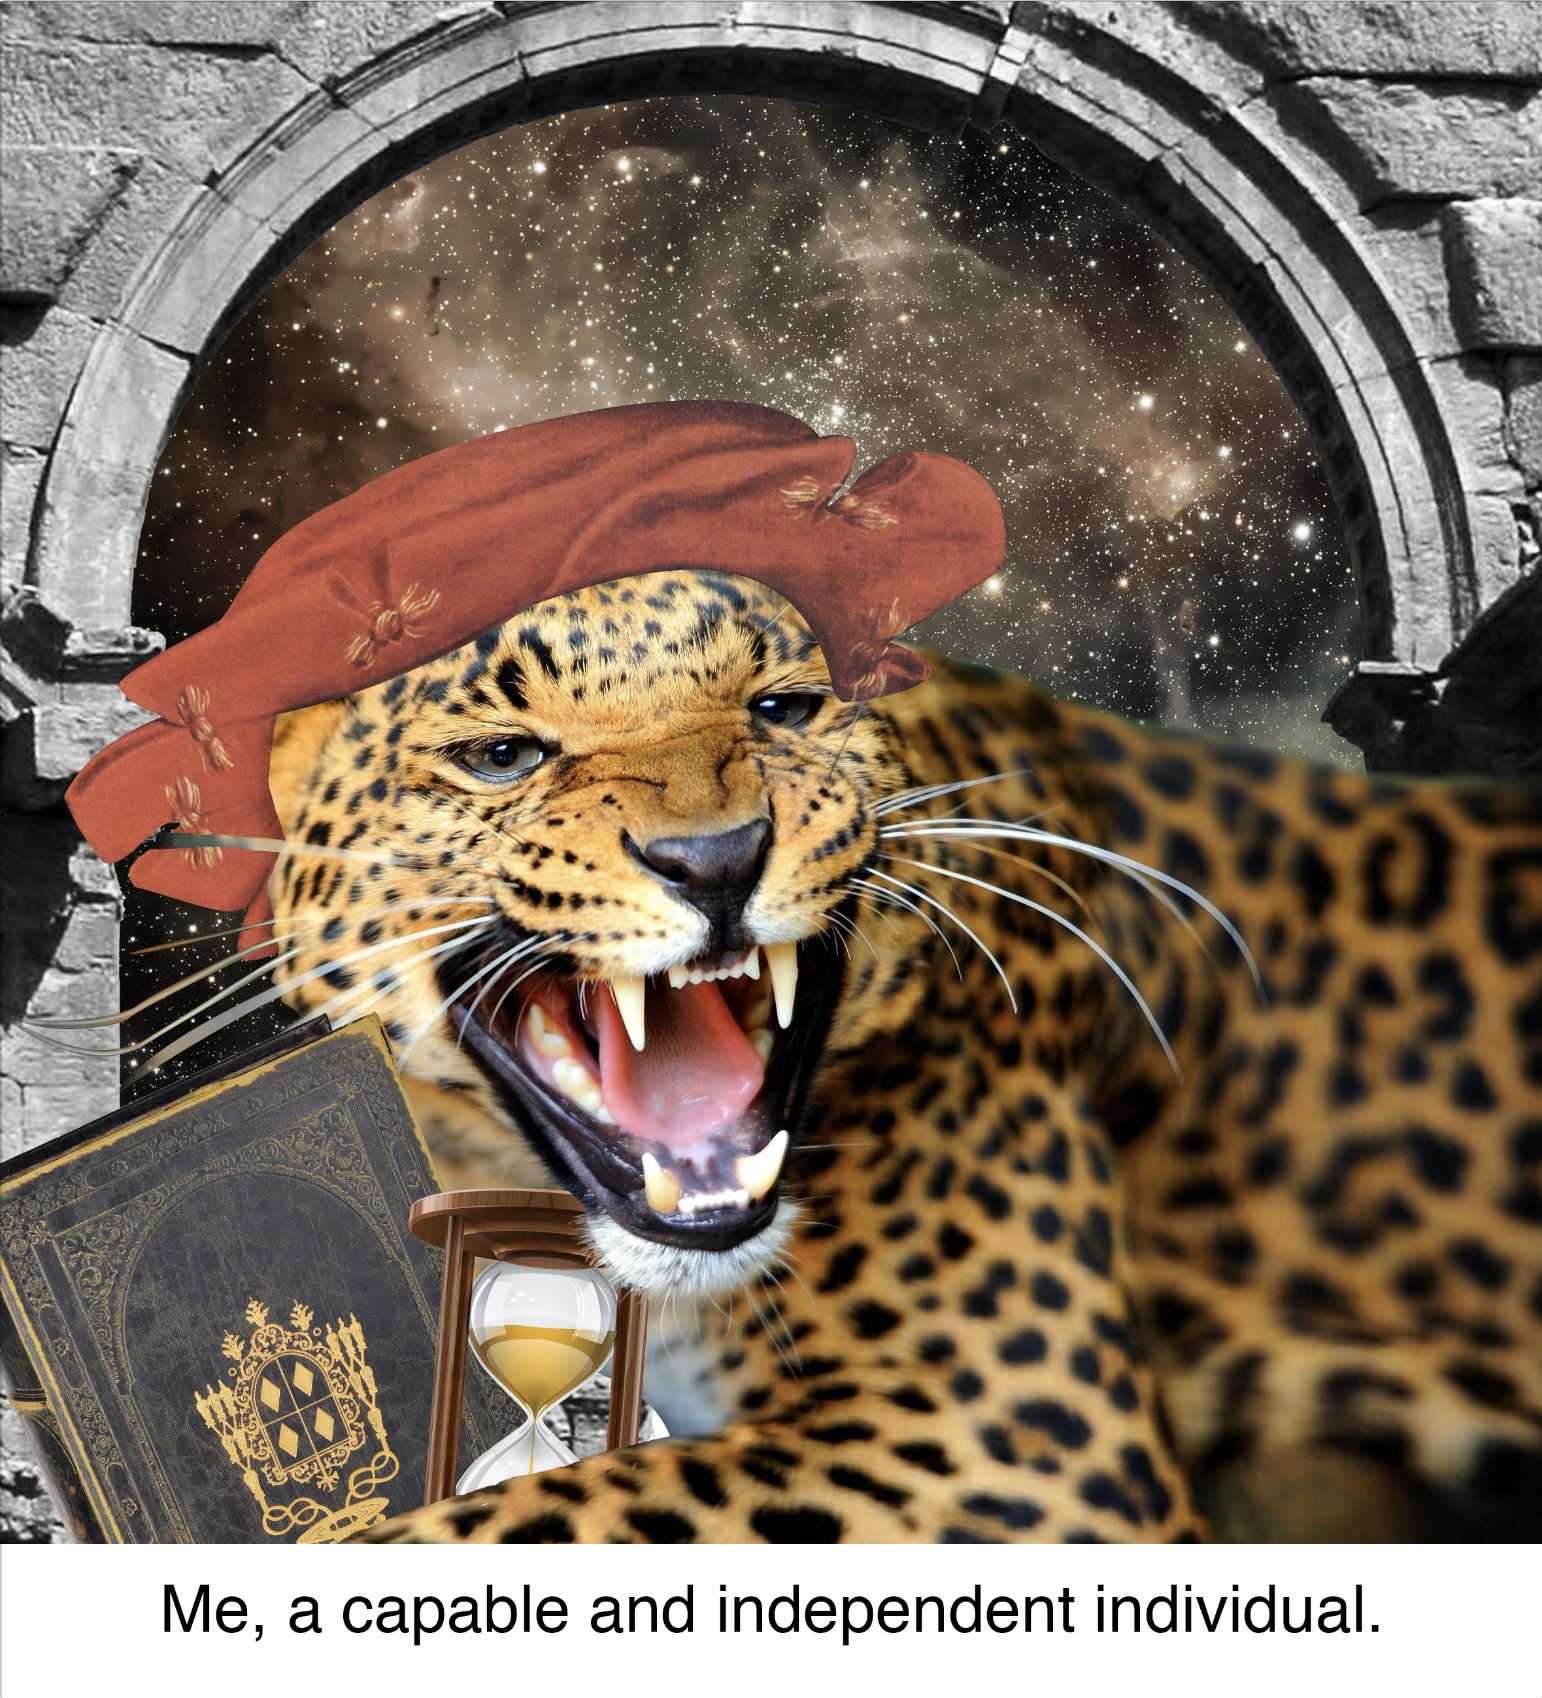
Image 1: Me, a capable and independent individual
I used a jaguar to represent me because it is one of the agilest animals in the animal kingdom. I donned it with Renaissance items as well as the Roman arch in the background to represent the idea of being forward thinking, as well as the image of space in the background to represent going beyond.
In this image, I used shades of brown (and red) because I wanted the image to feel safe and calm when juxtaposed to the second image.
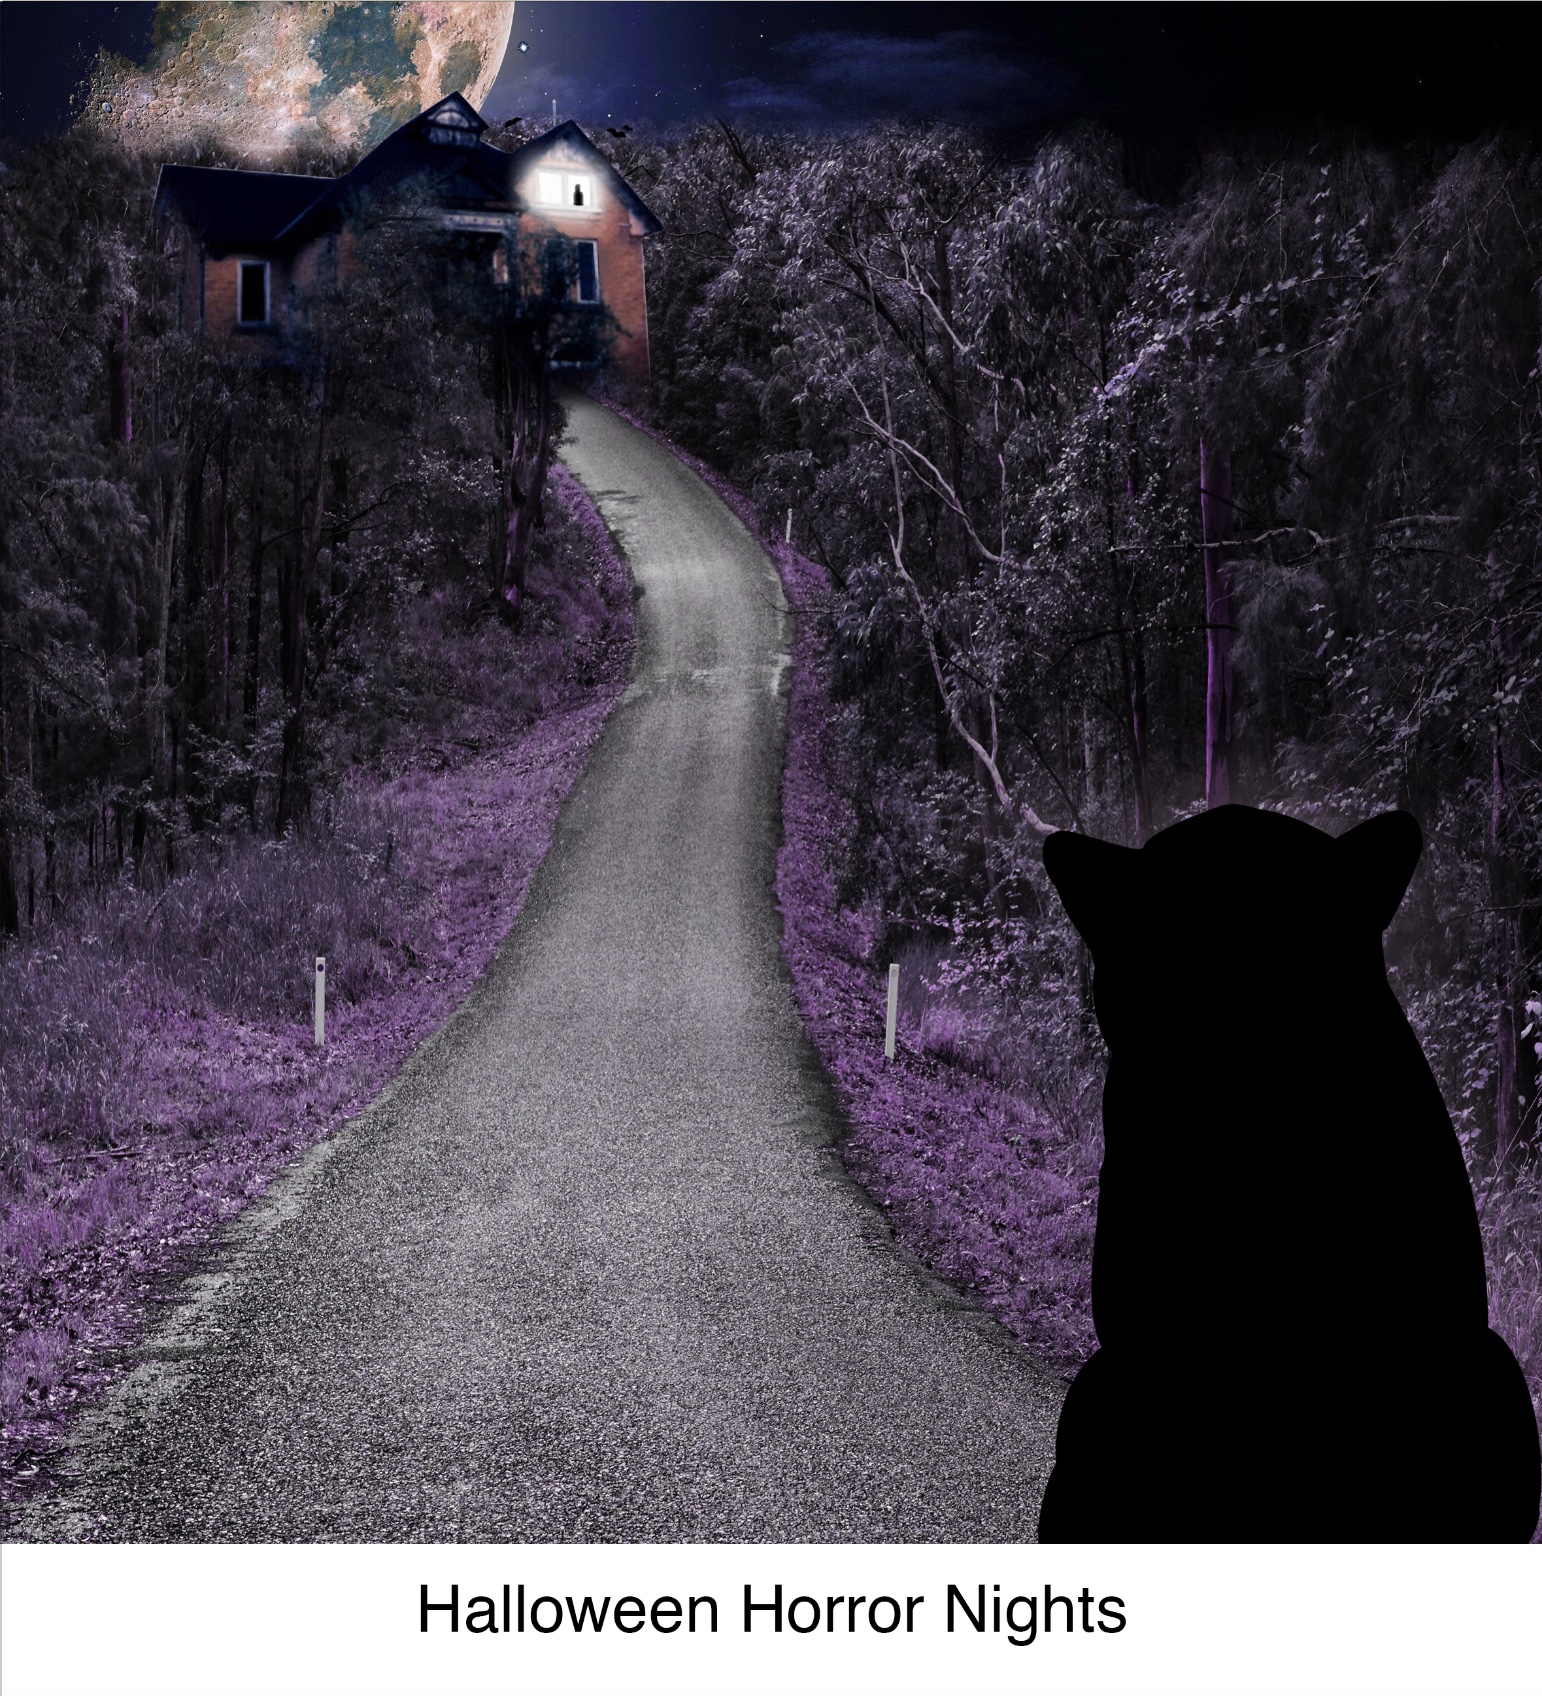
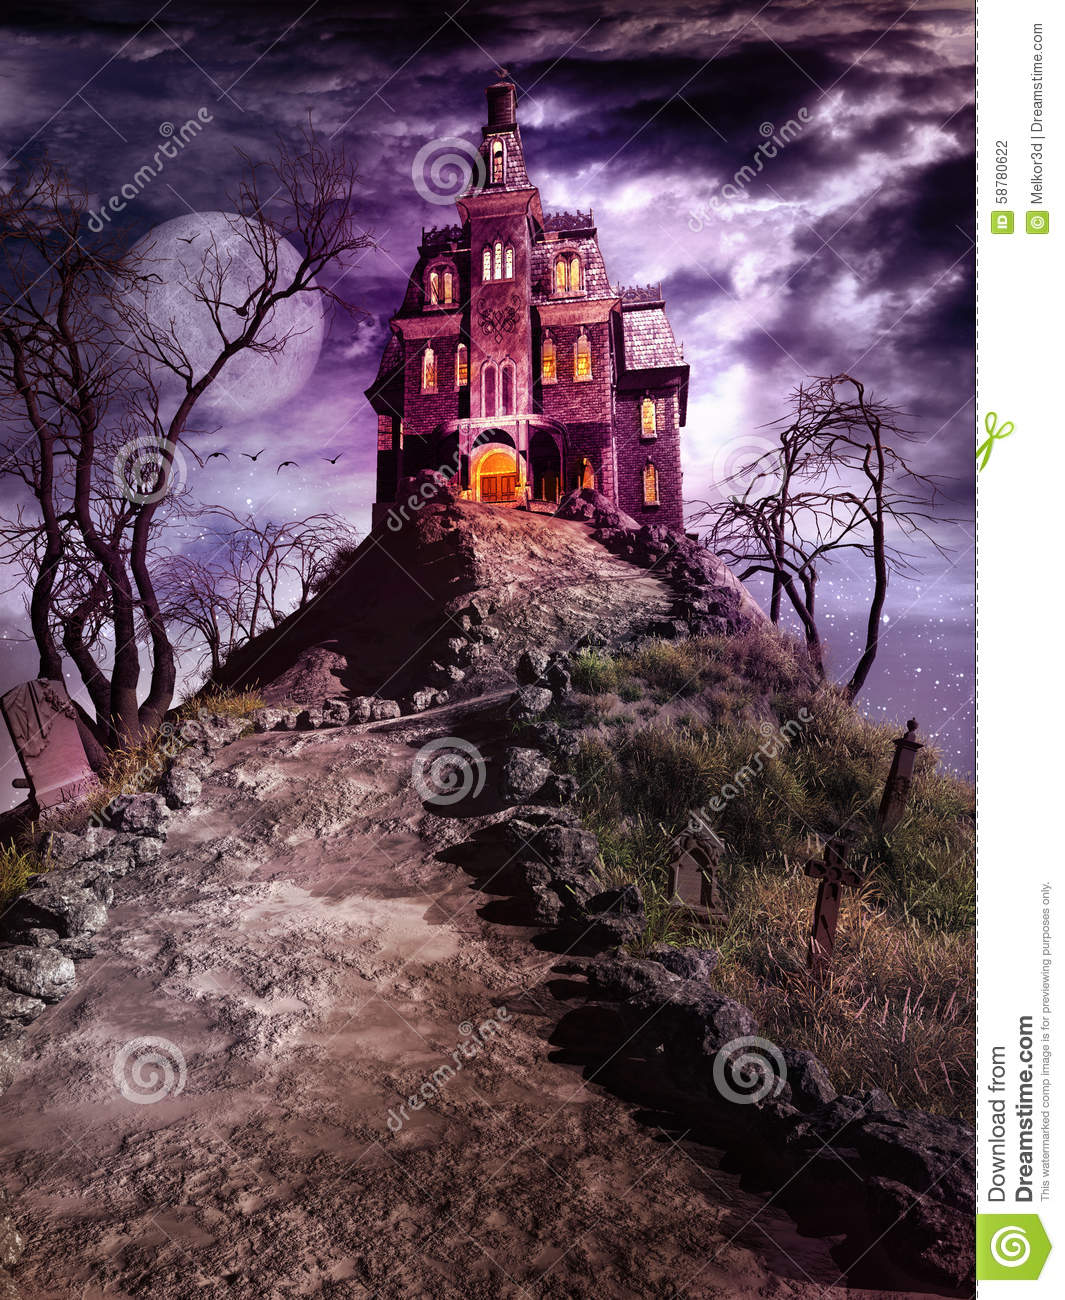
Image 2: Halloween Horror Nights
I’m seriously not a fan of haunted houses or anything scary. I went for Halloween Horror Nights only once and could only bring myself to go through one house (with my eyes closed).
Image from https://www.dreamstime.com/stock-illustration-haunted-house-top-hill-night-fantasy-scene-cemetery-image58780622 Accessed on 20 Nov 2017
I hence wanted to have the typical haunted-house-on-a-hill look with a huge moon and a long and winding path. I used shades of purple here to give the whole image an eerie feel. I do feel that the composition here can be pushed further though. Maybe I could add elements of space to make it seem as if Halloween Horror Nights is something out of my world, something I would not even give a second thought to.
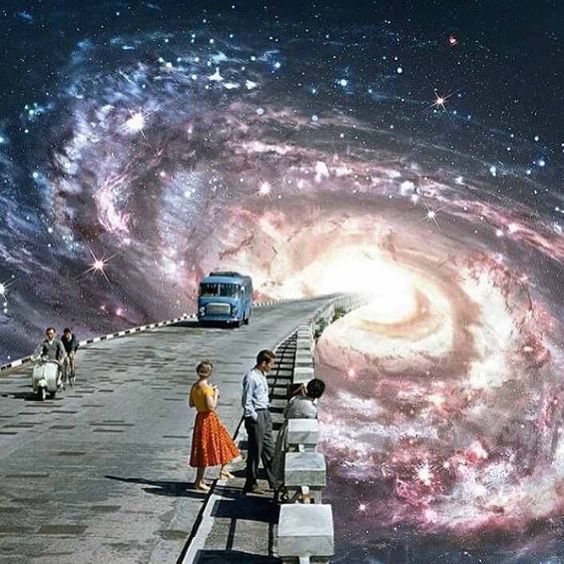
Image from: https://www.pinterest.com/pin/AbDSiQYMyQd4ndgoH_c1omRDUkao5oXH9UwE7ezZQ2zUe4uu34g7dFc/ Accessed on: 19 Nov 2017
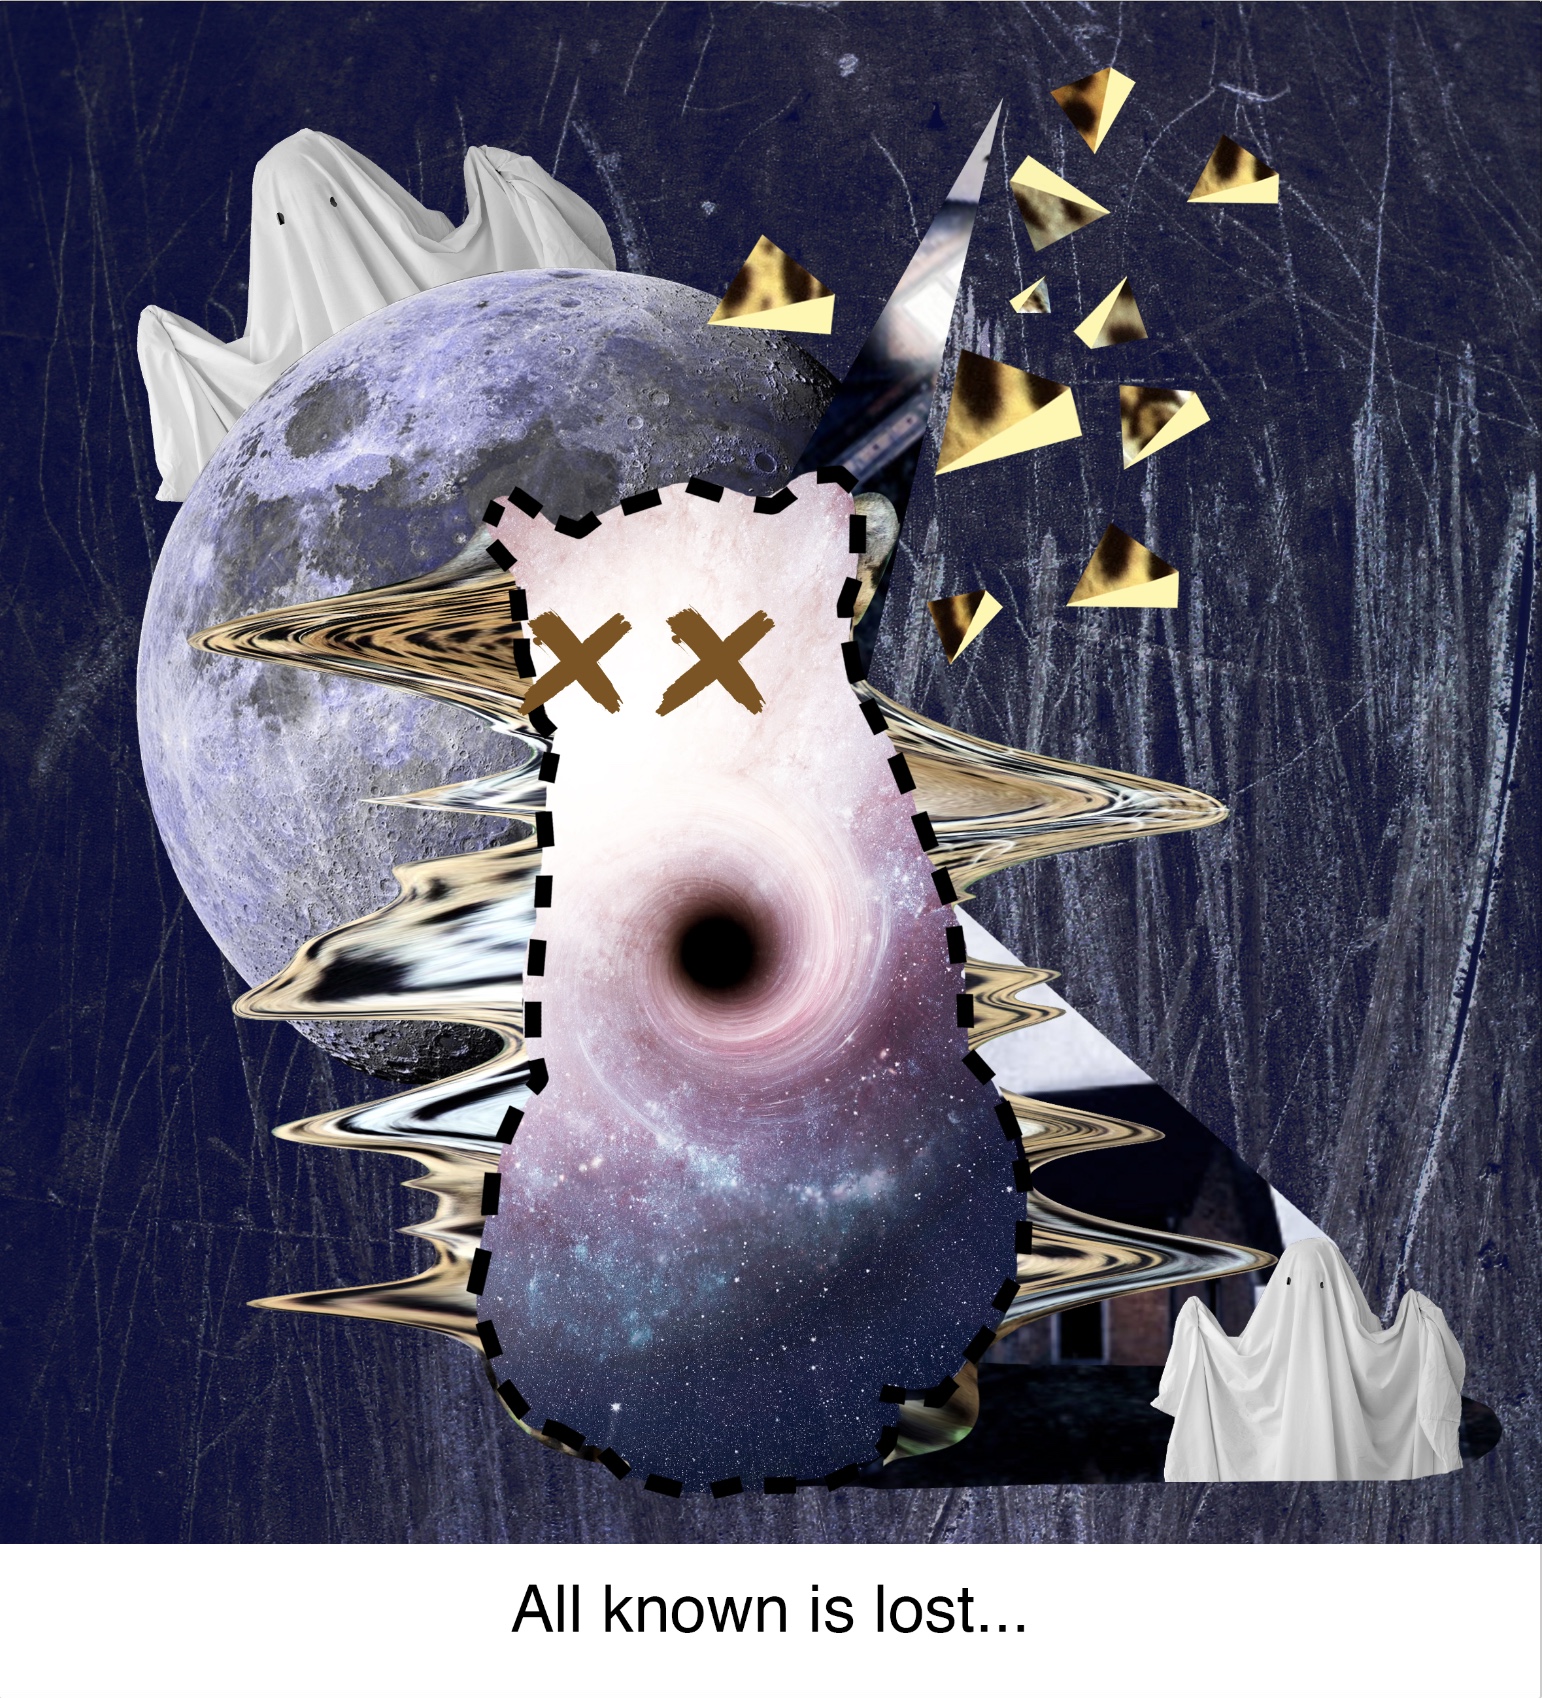
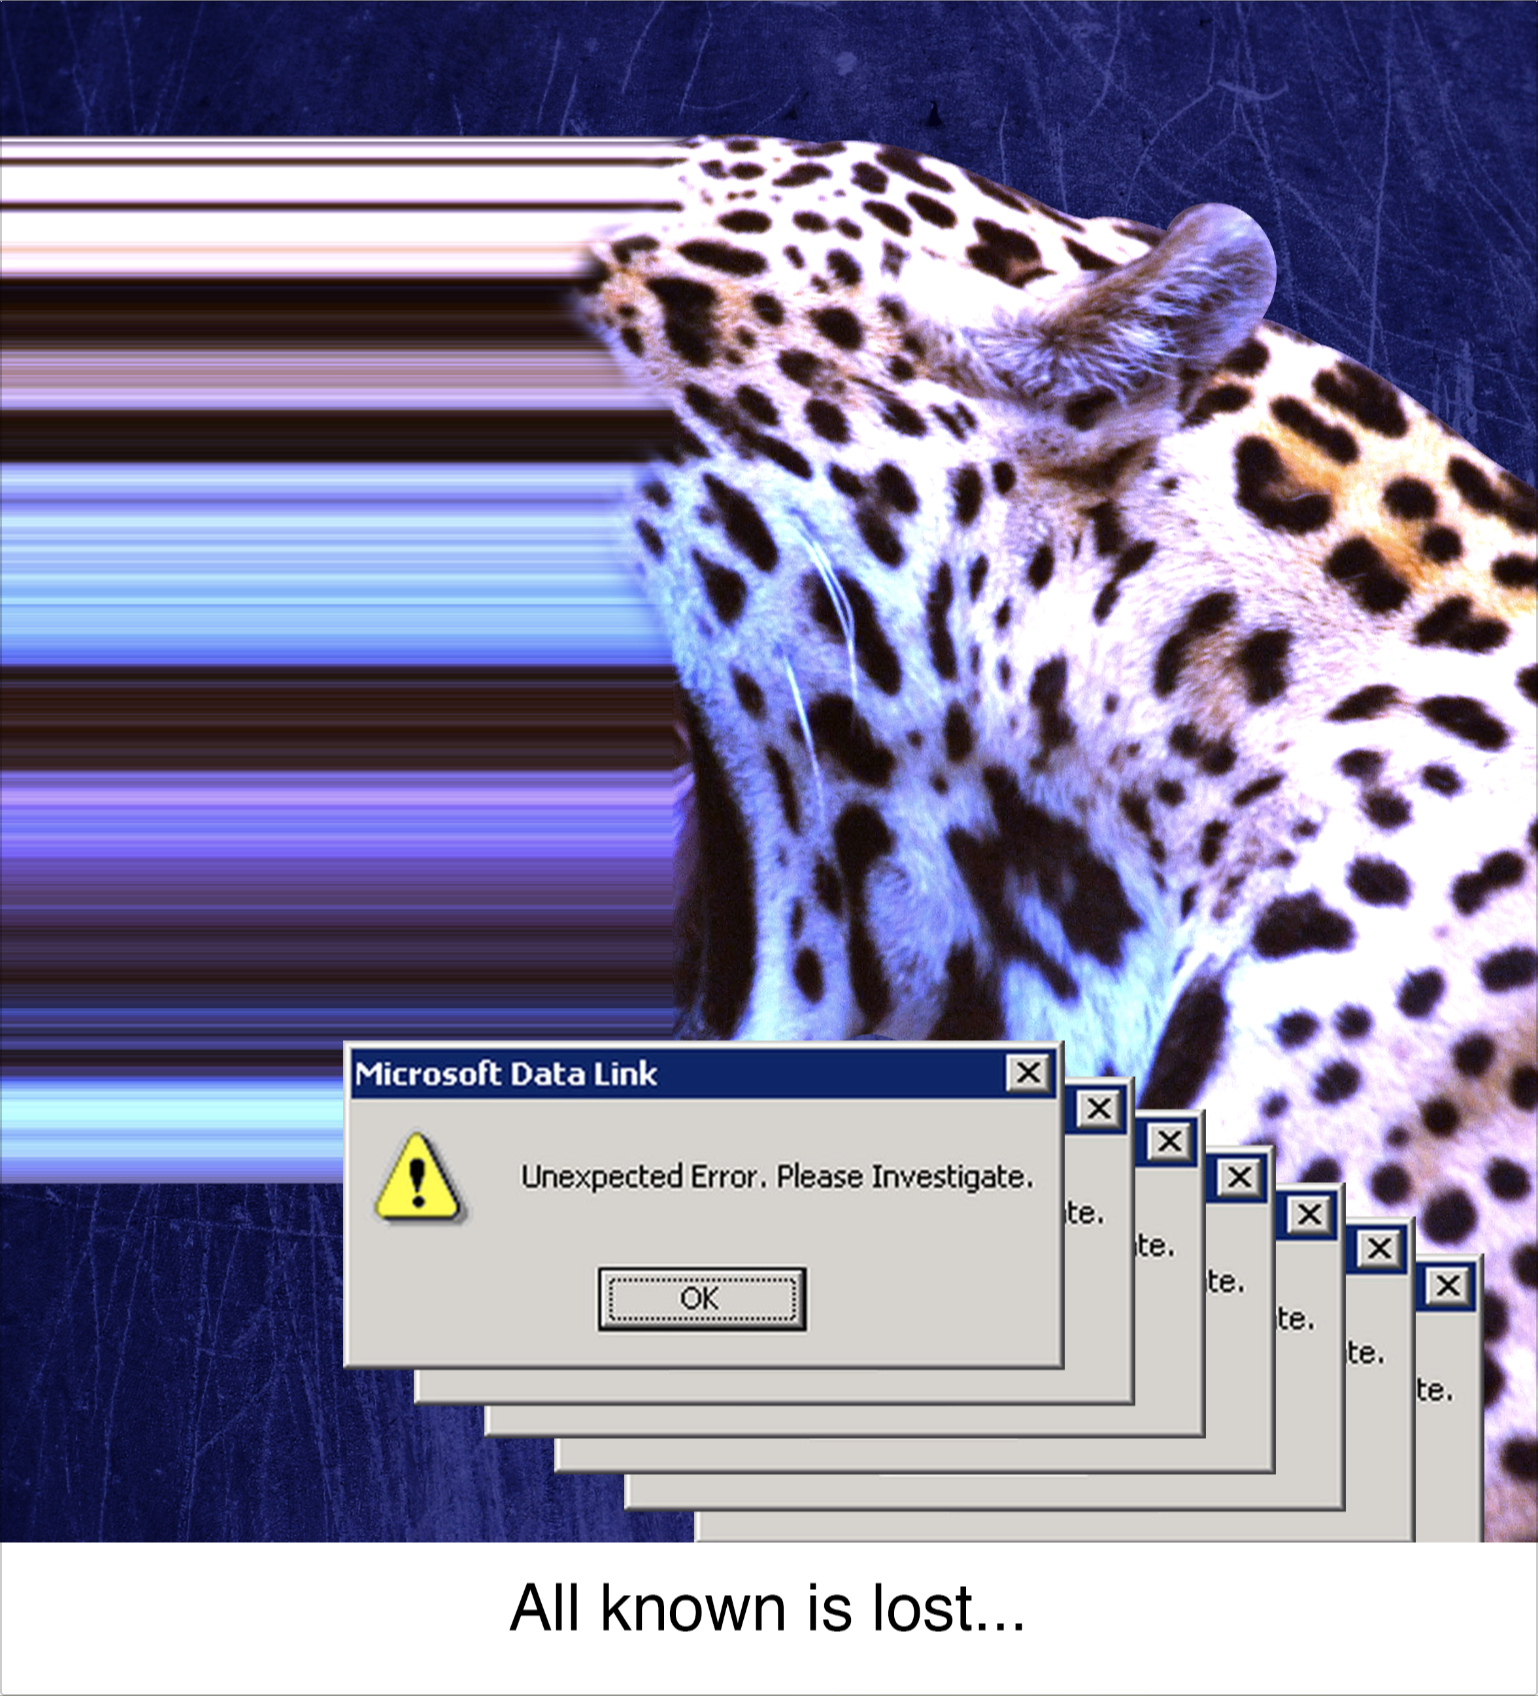
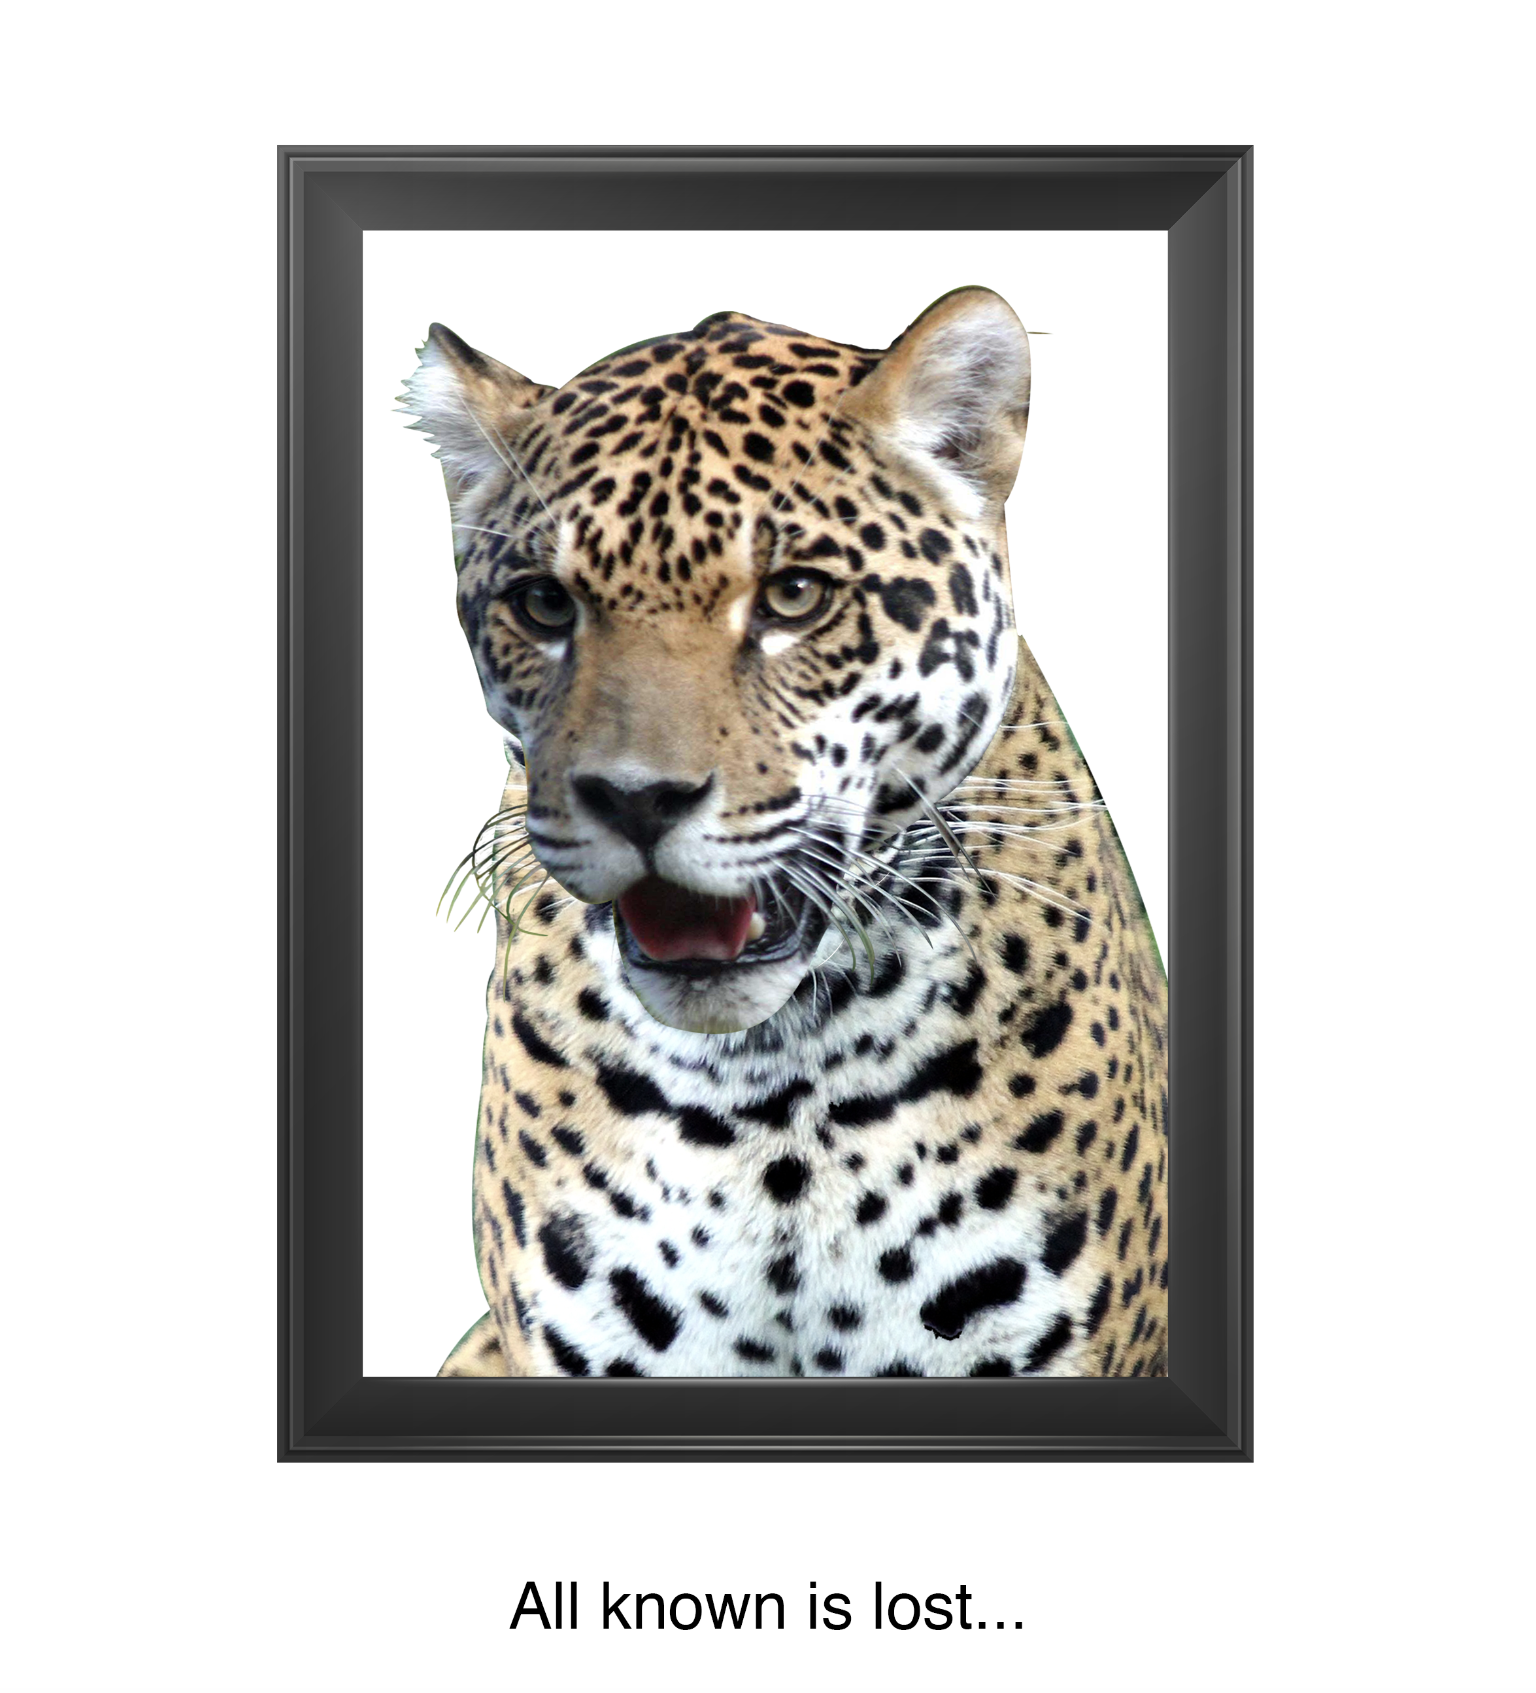
Image 3: All known is lost…
For this last image, I wanted to have the Jaguar lose its spots as if his soul were sucked out of him. I tried not to literally remove its spots but use a pixel stretch effect to represent the Jaguar’s skin’s movement away from all things scary. I also threw in a windows error window to further bring forward the idea that the jaguar is so scared that it cannot think and malfunctions.
There is a triad colour scheme here where I mix the colours from the first and second images. I used a dark blue for the background with a scratchy texture to create an eerie look. The Jaguar remains a colour of brown, with hints of blue, so that it can stand out from the background. This kind of colour juxtaposition is very common with movie posters to heighten the contrast, and also because while these colours are on the opposite ends of the colour wheel, they are complementary.
Poster example Image from http://abduzeedo.com/node/41225 Accessed on 20 Nov 2017
The colours for this image is okay but I feel the composition can be worked on a bit more as the feeling of being scared doesn’t seem to be conveyed quite well.
I thought maybe I could put the jaguar in a photo frame, like for his funeral after it dies from shock at the haunted house.
funny
That would be hilarious, but I was aiming for more abstract ways of representing this. I took to Pinterest to get my inspiration.
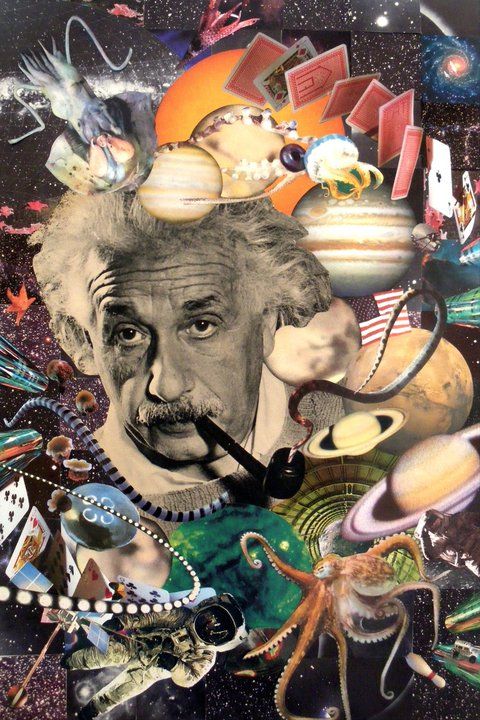
Image from https://www.flickr.com/photos/eugenia_loli/13987767009/
Accessed on 20 Nov 2017
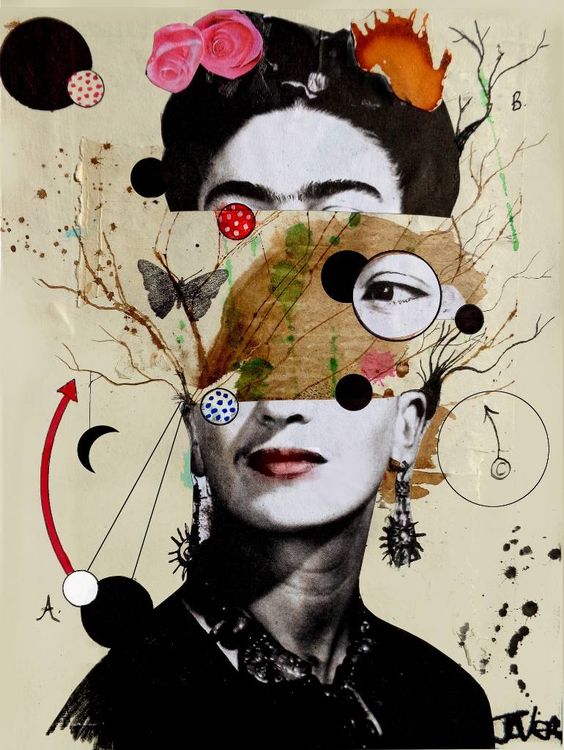
Image from https://www.saatchiart.com/art/Collage-deconstructing-frida/284005/3064412/view
Accessed on 20 Nov 2017
Image from http://www.leblogdukitsch.com/art/les-collages-de-marian-williams/
Accessed on 20 Nov 2017
I found that it was a common thing to have objects and patterns branching out from the head of the subject. Each image told a different story because of the objects that branched out from behind each subject. I decided to work with that to express the feeling of being scared. (work will be in final)
EQUATION 2: Egg
Me
Situation
Outcome
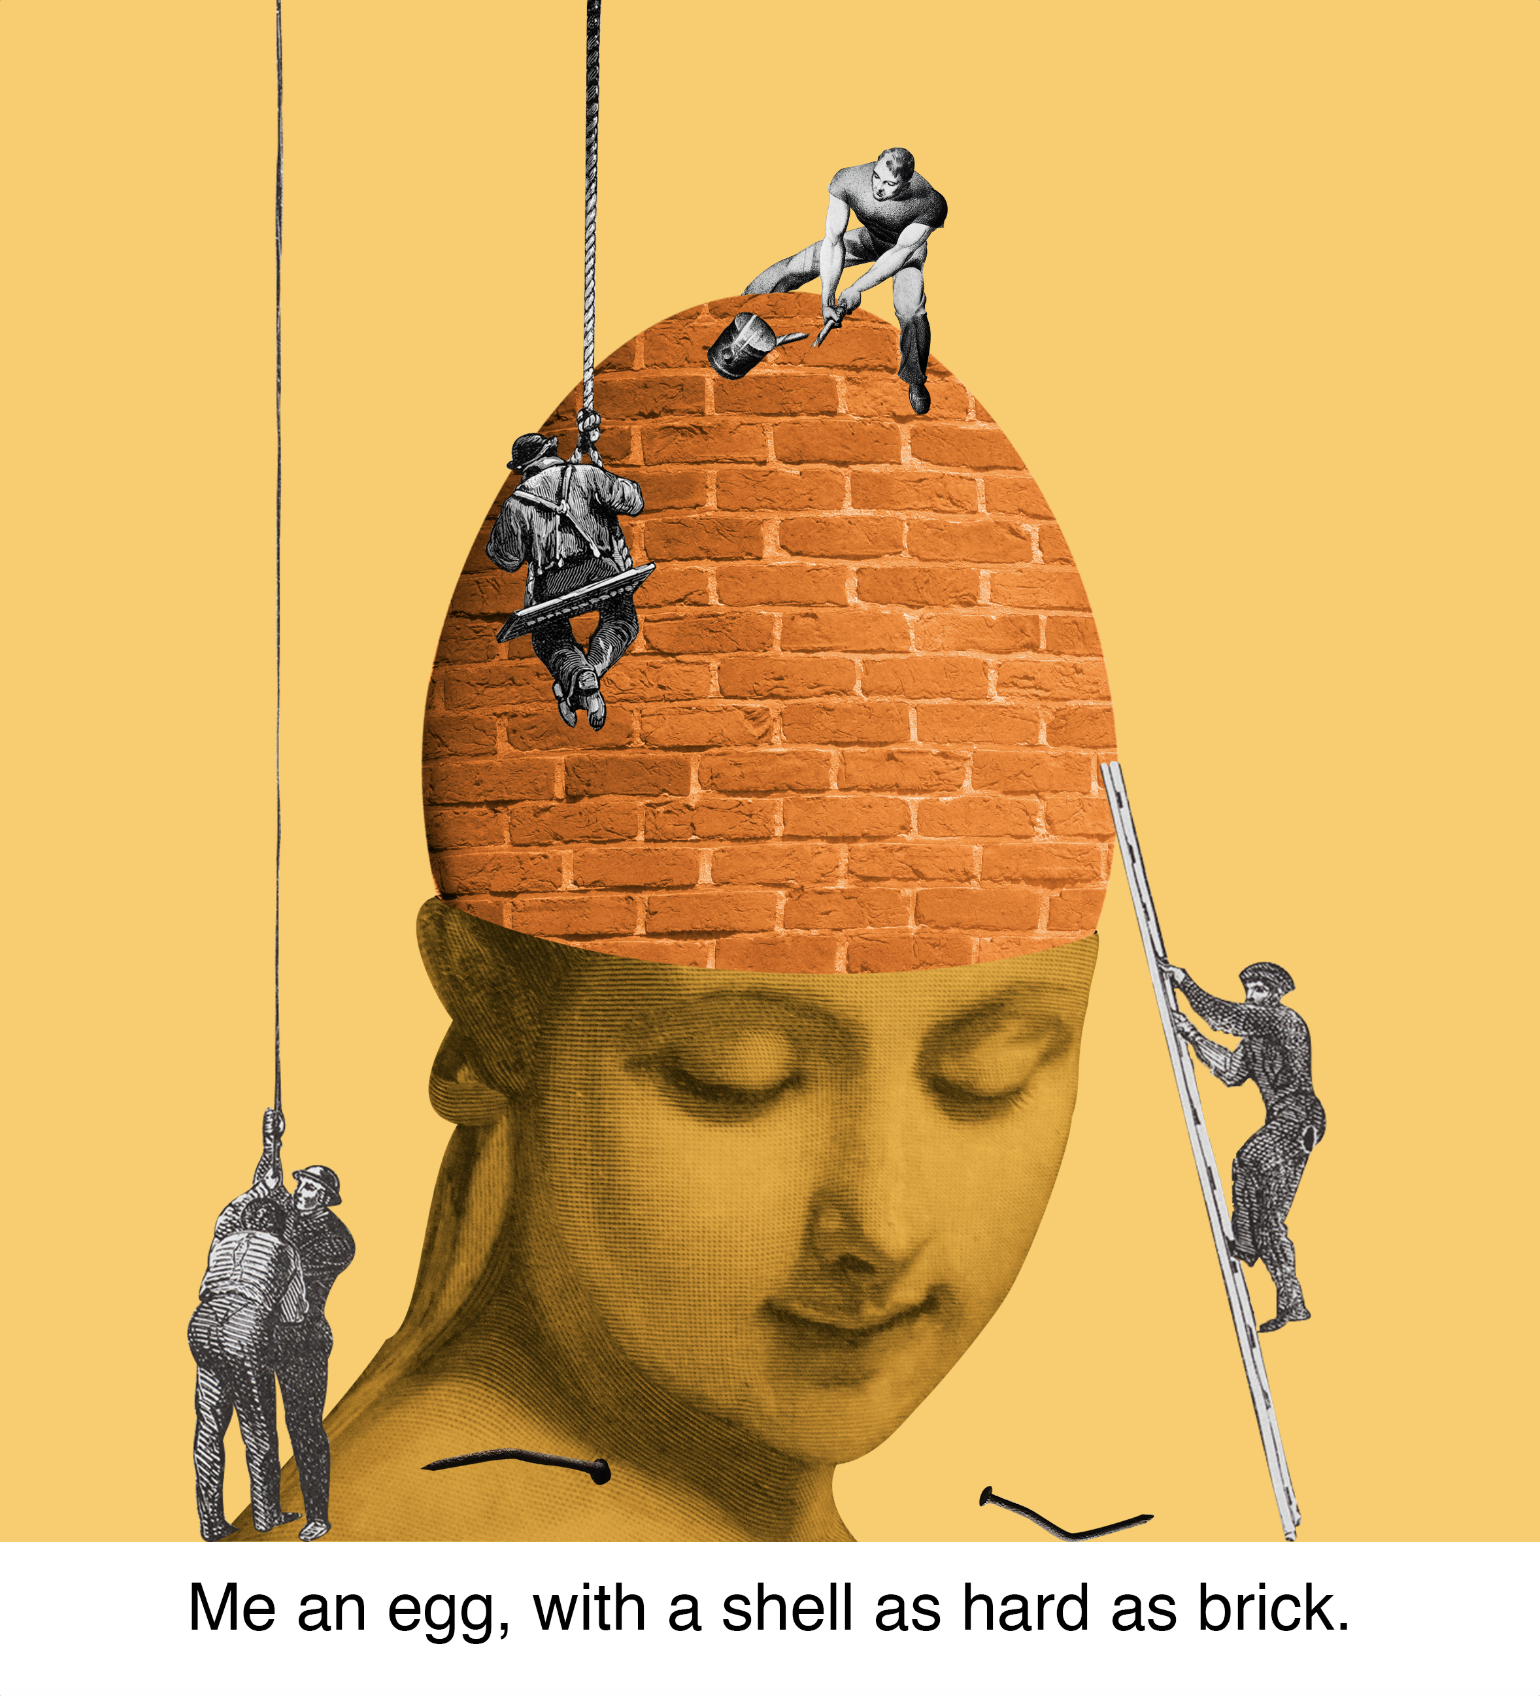
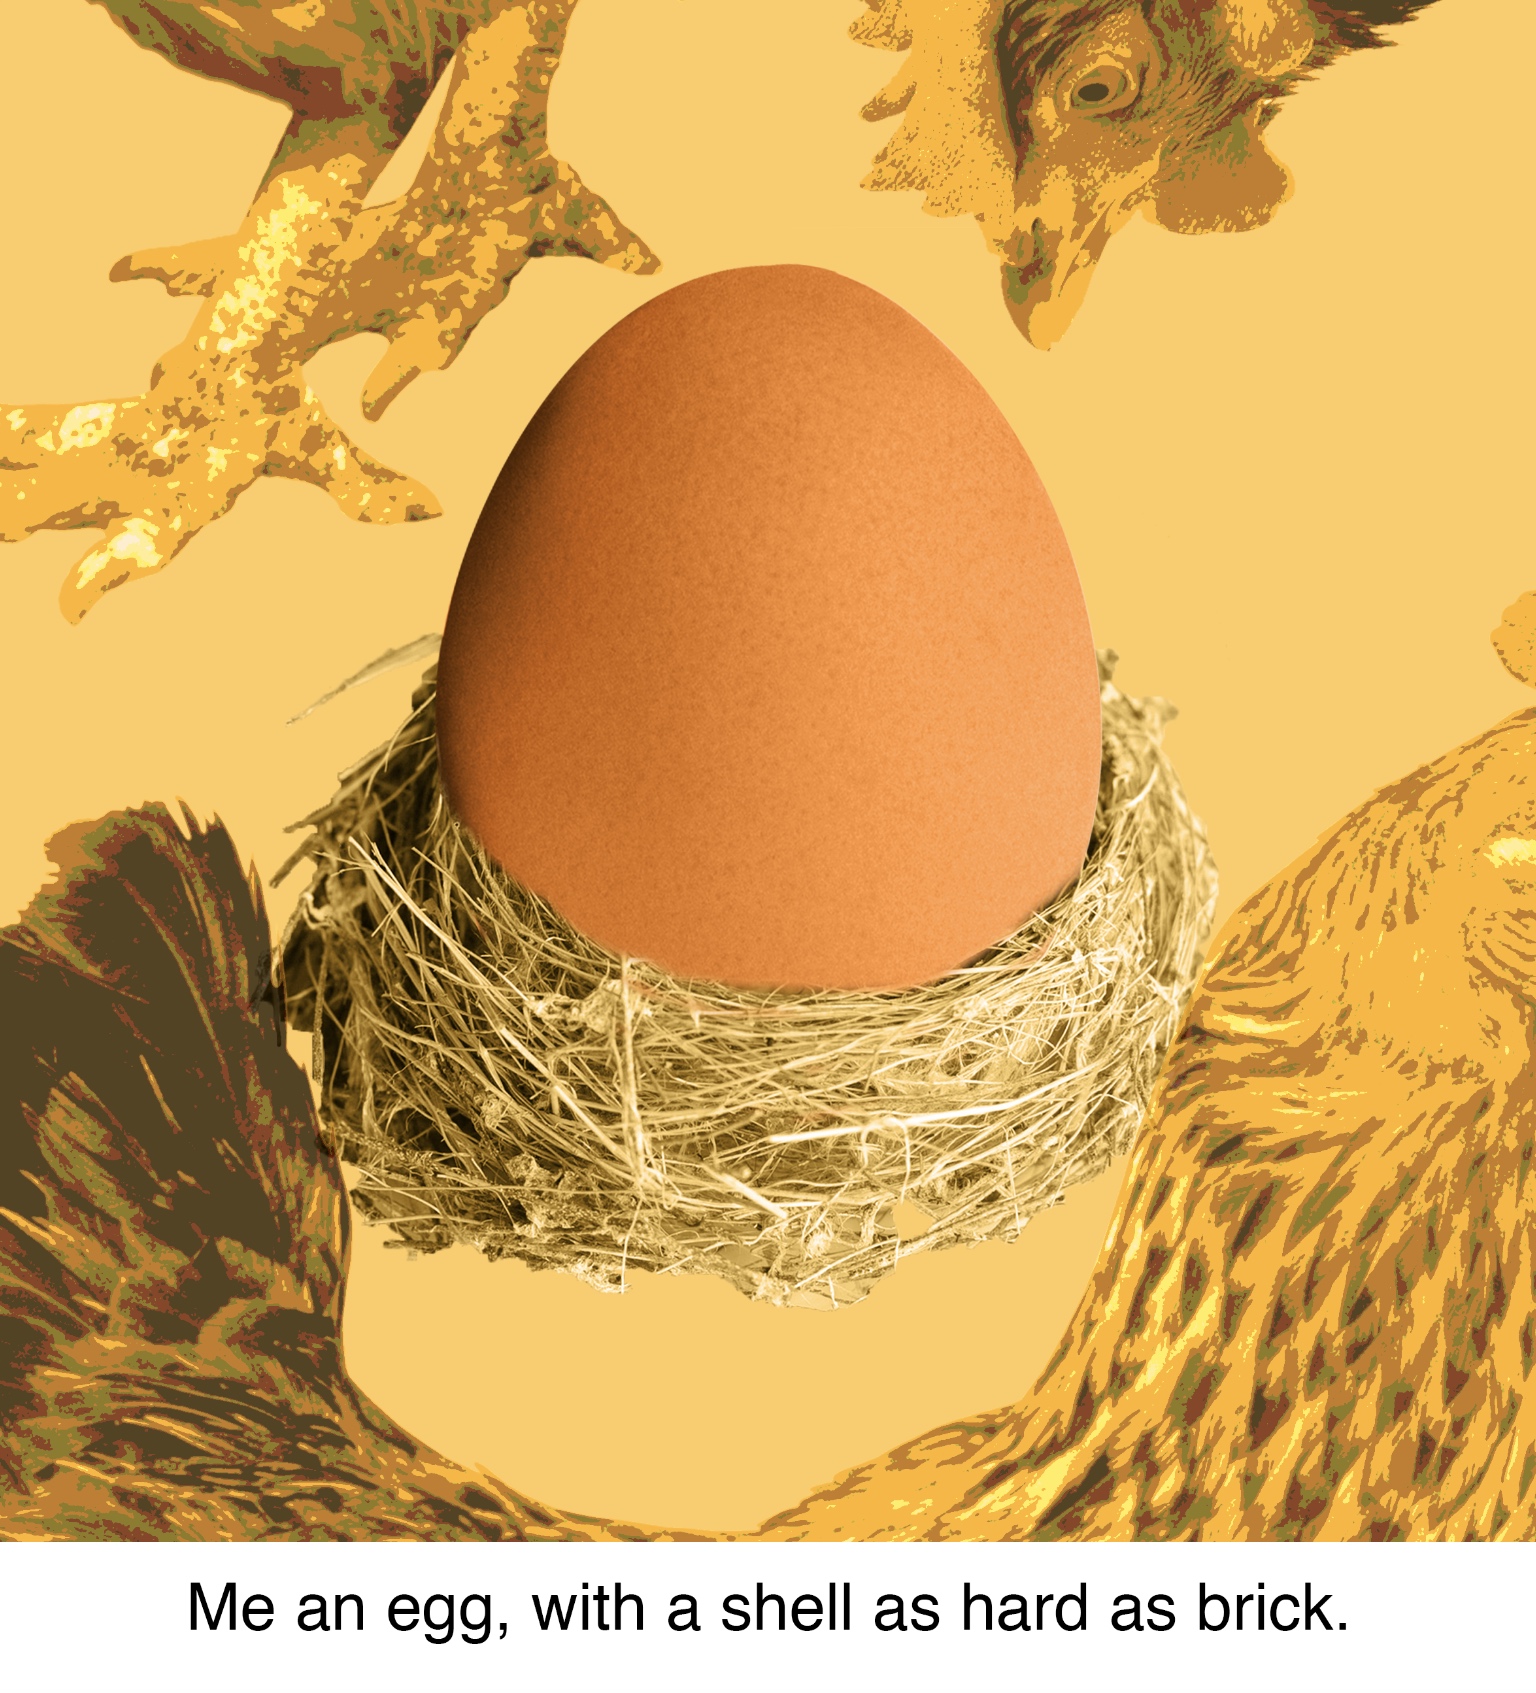
Image 1: Me, an egg, with a shell as hard as brick.
I initially intended for the hens to surround the egg like a pattern but I eventually placed it in such a way where the hens frame the egg. For me, this composition is fine but too straightforward. It is also difficult to tell that the egg is as hard as brick – it looks fragile as always.
Colour wise, I used a darker orange for the egg to make it stand out. I kept the colours adjacent as I want the egg to look comfortable with its surroundings instead of sticking out like a sore thumb.
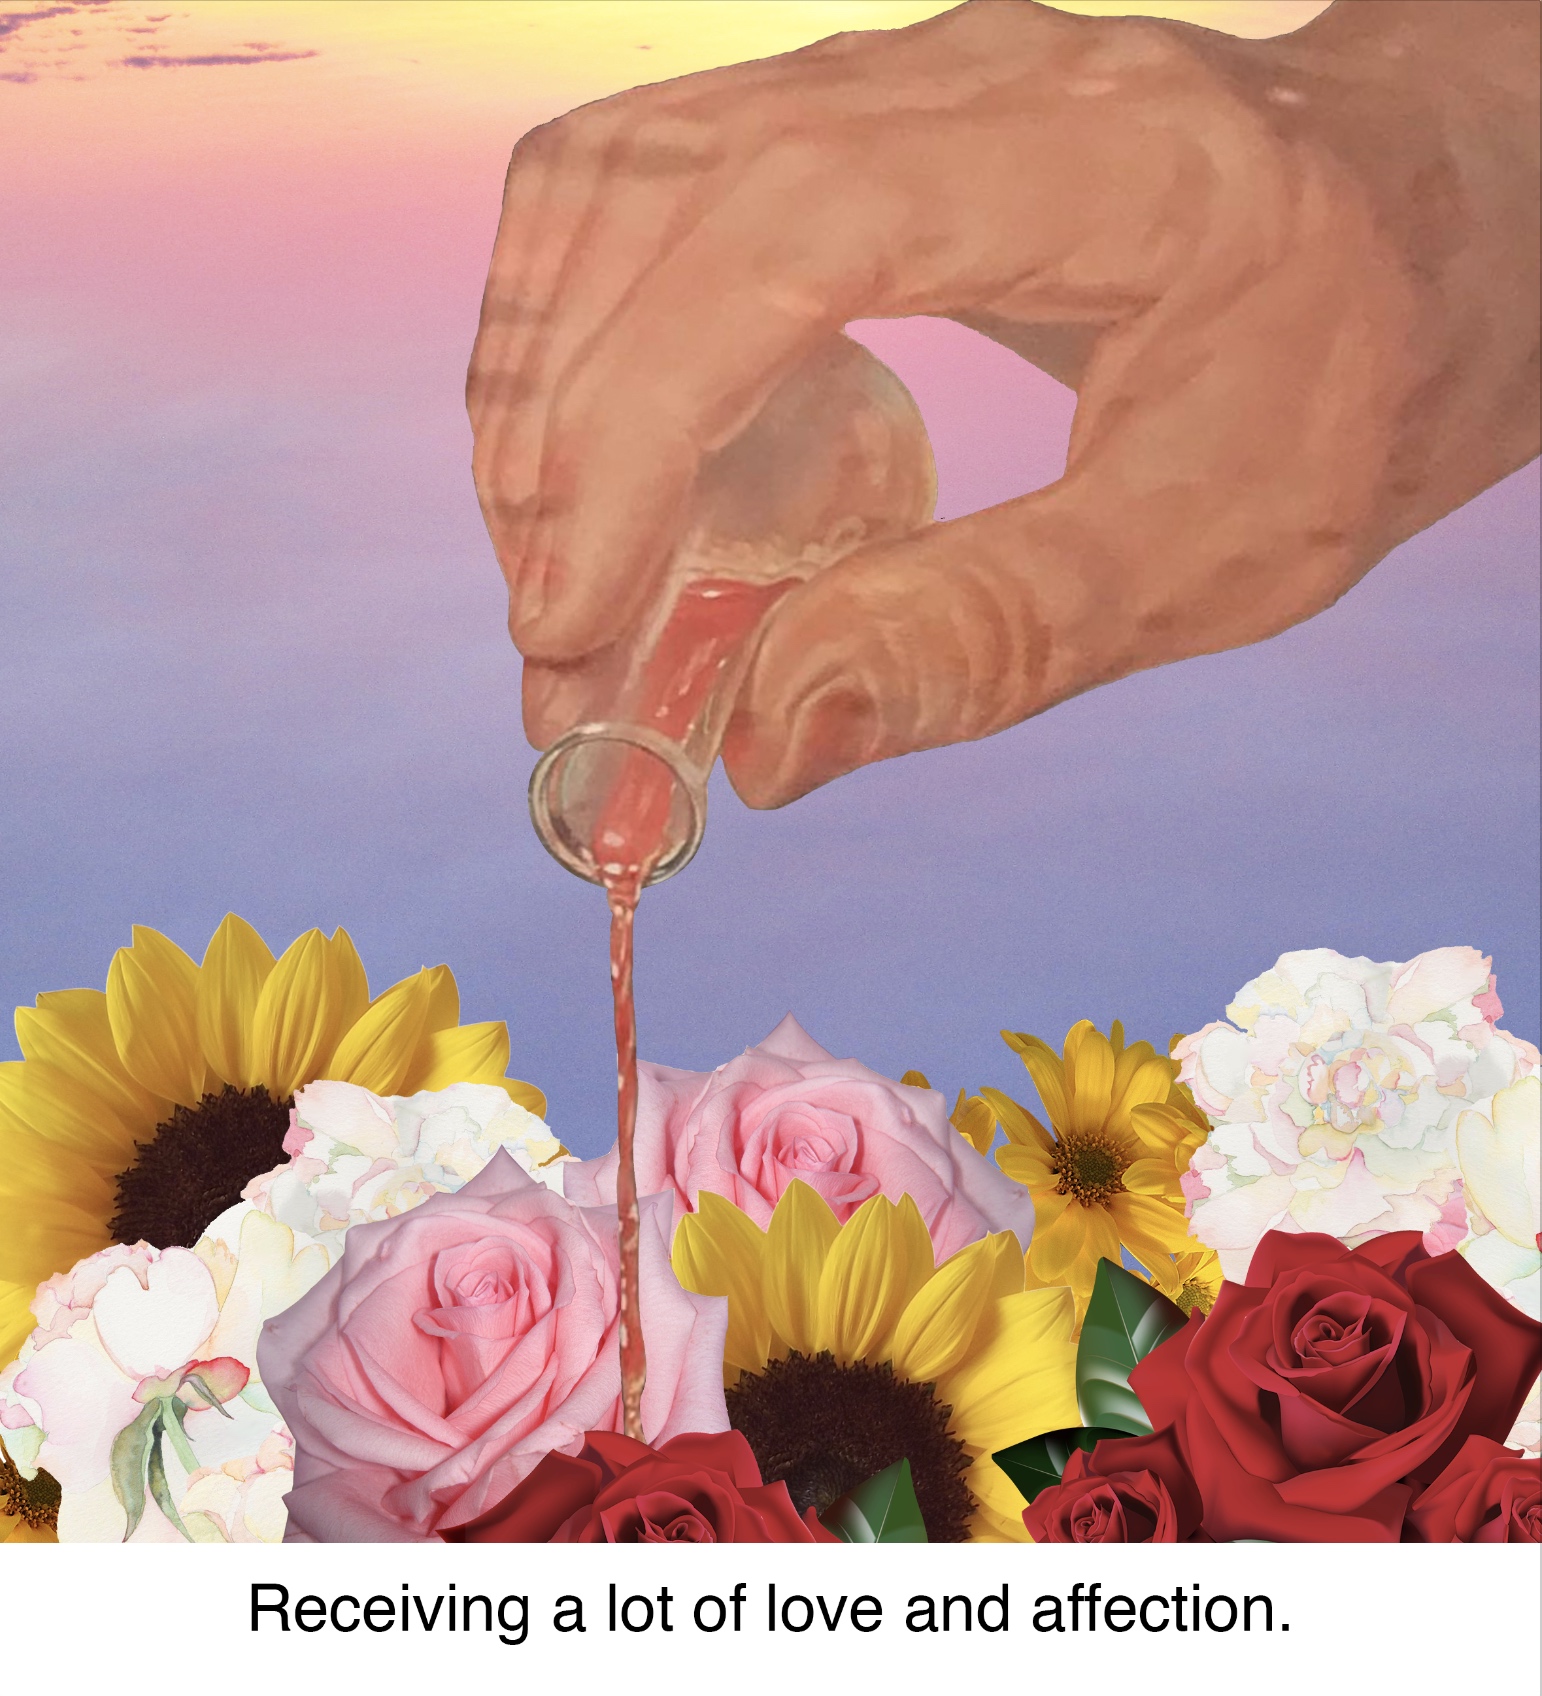
Image 2: Receiving a lot of love and affection.
For this image, I managed to lean towards the more unconventional side in which I represented the love and affection through the pinkish solution. With that, I also kept my colours close to pink, pastel hues to emulate love.
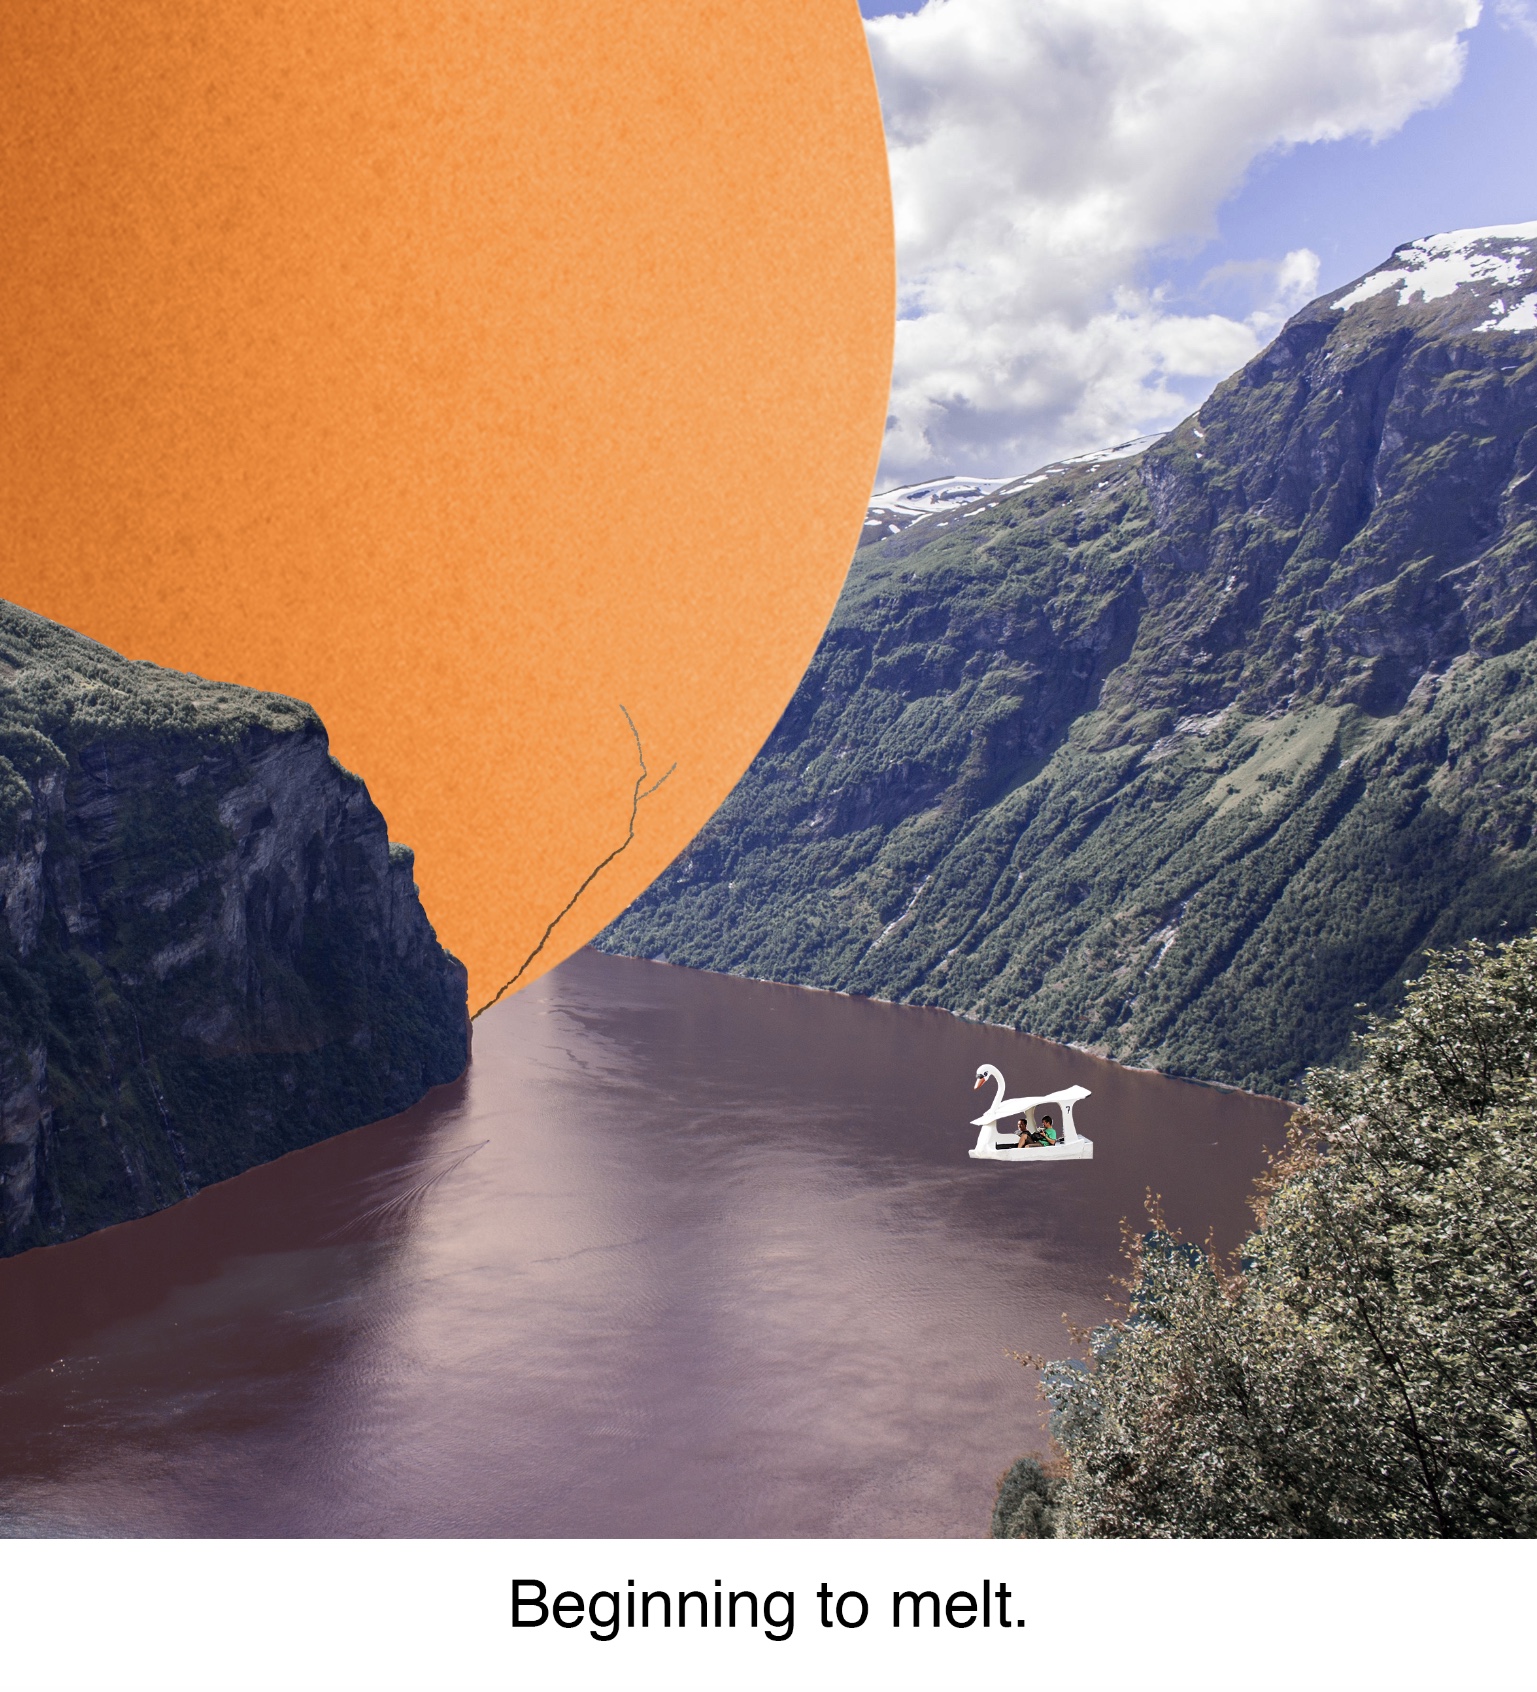
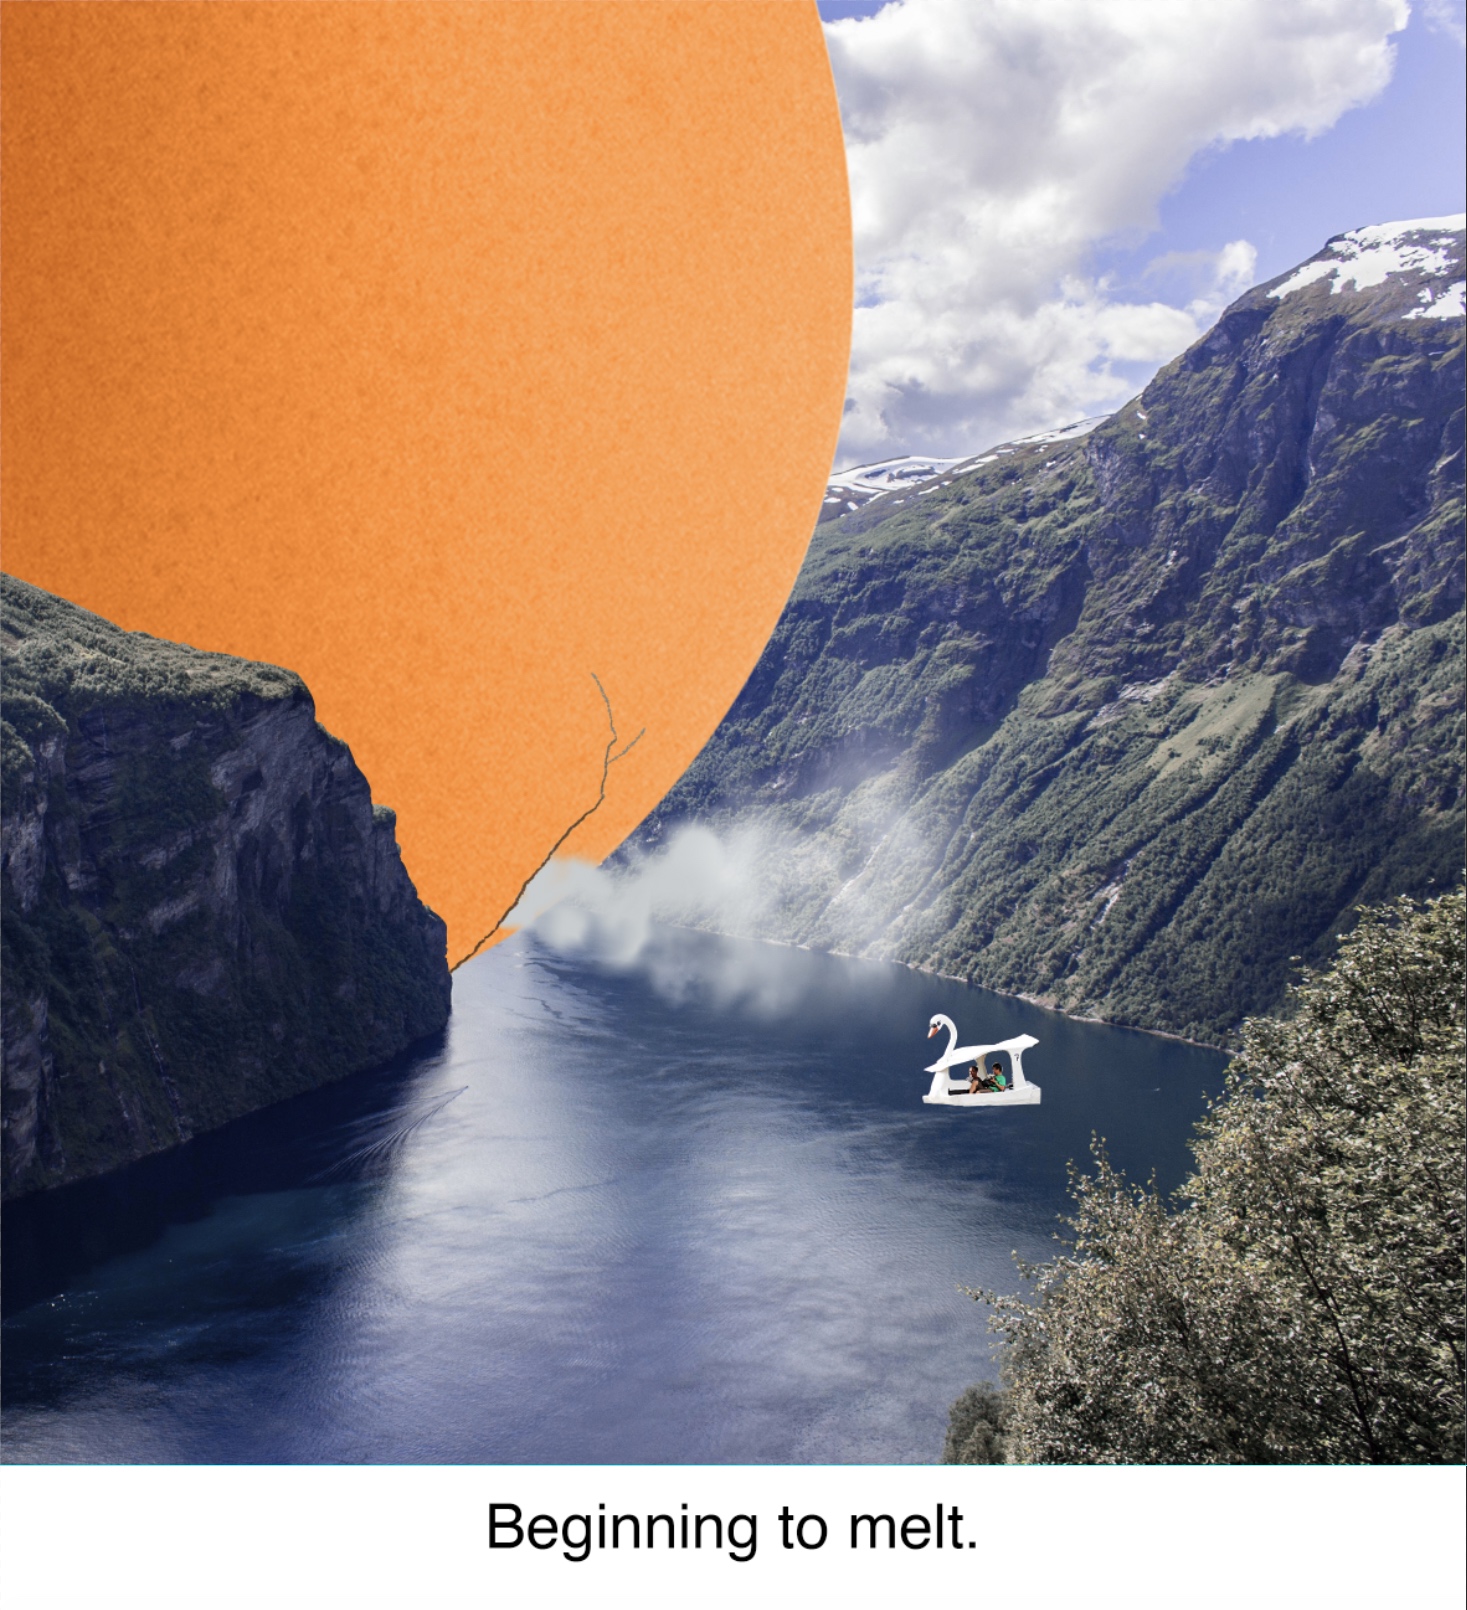
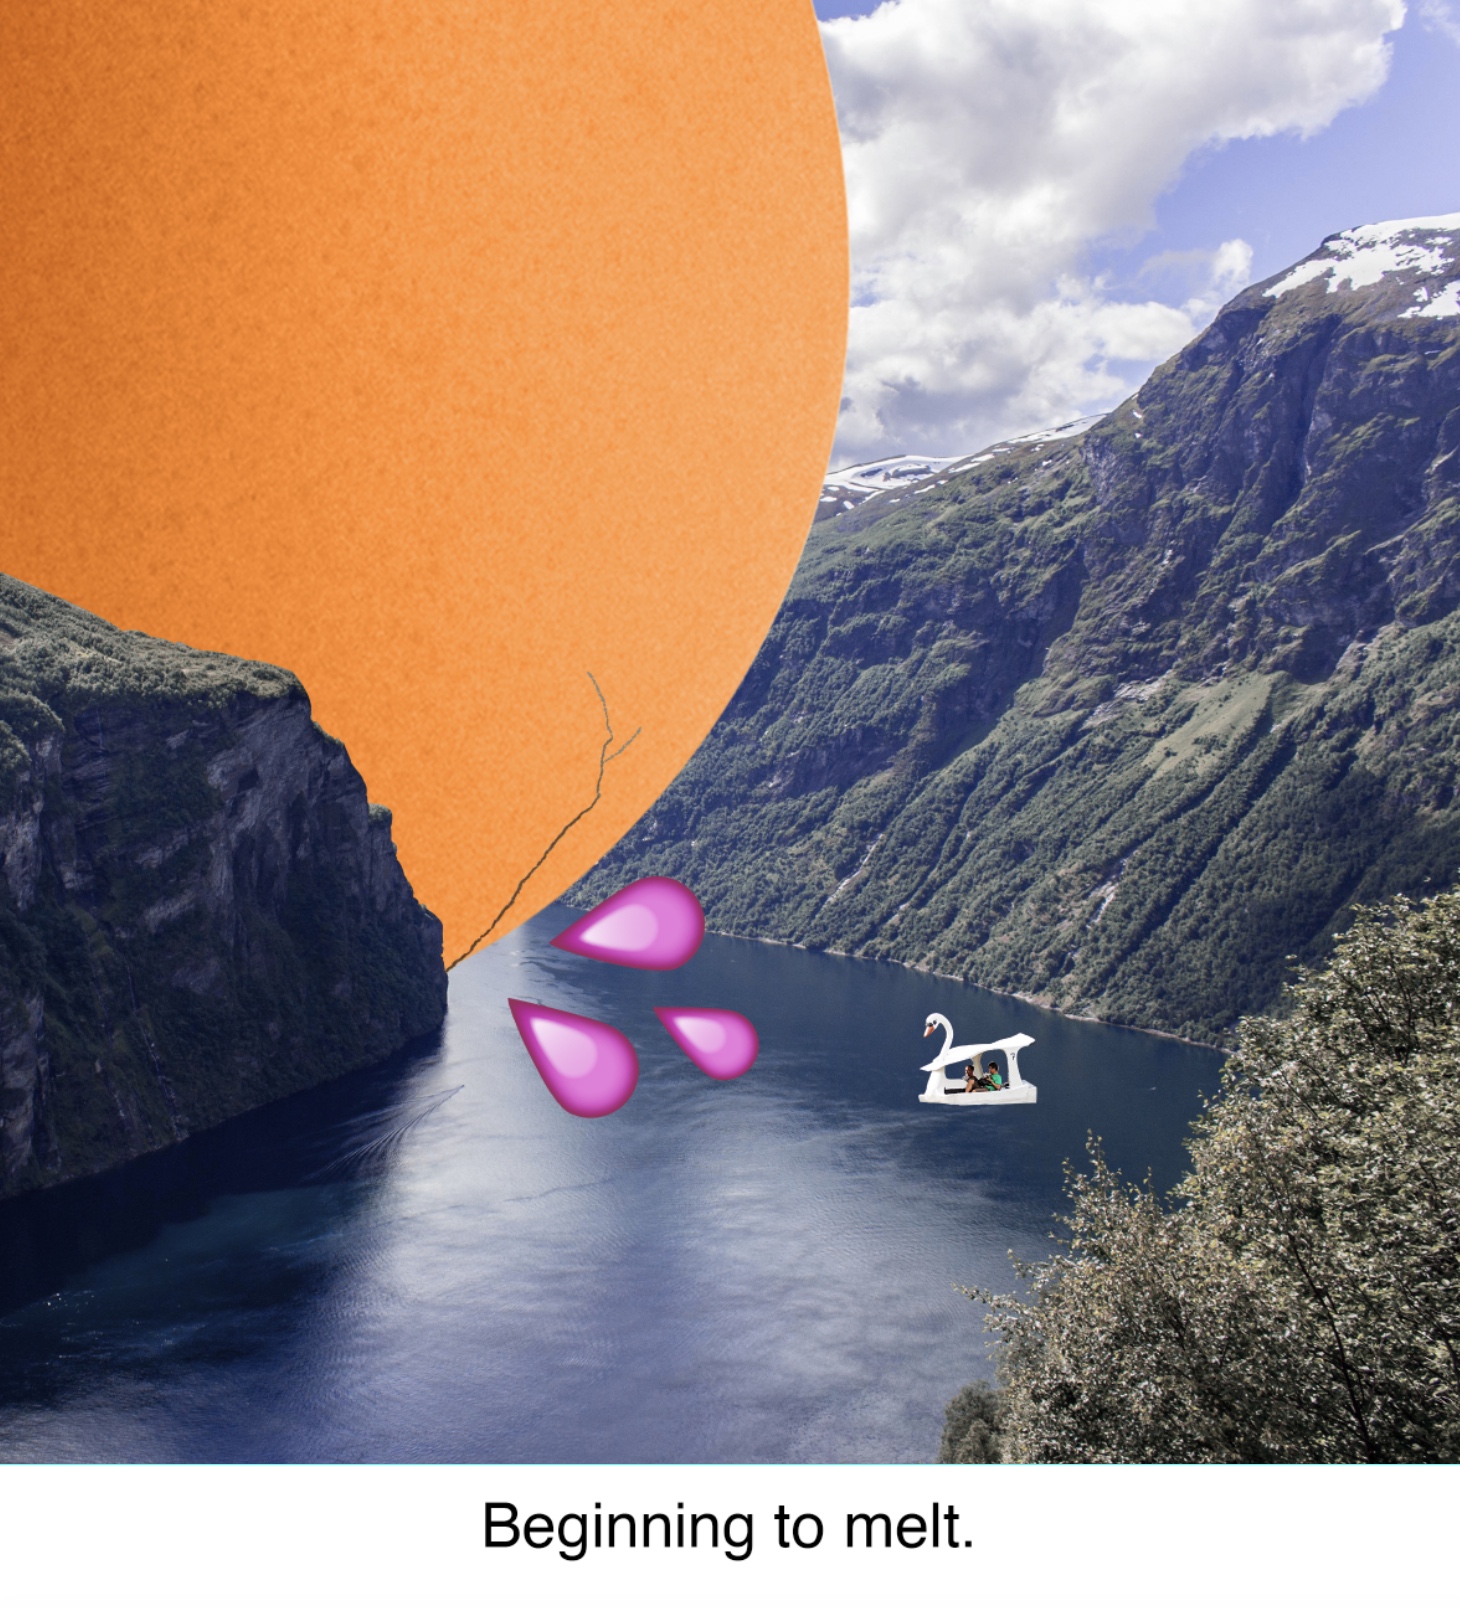
Image 3: Beginning to melt
Outcome
I think the hard part with a lot of the images is composition. There are so many interesting ways I can tell my story but it is hard to figure out which would be the best or even what other interesting ways I could share my story. I really had to crack my brain for this project.
For example, here, I initially wanted the egg to leak out a little bit of yolk (representing how its walls have been broken), but I thought of trying for something more whacky and went with it leaking a river. I tinted the river pink and it didn’t look good at all. I tried another idea where steam comes out of the crack as if the crack had just formed and the air is being released… but it just looks like the egg is farting… The pink rain emoji idea does not work as well because it stands out too much compared to its surroundings.
I realised the problem didn’t lie in what was coming out of the crack in the eggshell, but in where the crack was placed. Of course, placing it at the bottom would make a viewer instinctively think of a butt.
I also realised the image looked a bit plain compared to usual photo collage work. They usually have a lot going on but somehow they all blend together nicely to form a surreal, dreamy landscape. (work will be in final)
Colour wise, the image has a mixture of light pink/orange and blue tones, again as with the other equations, to show the reaction between the subject and the situation.
EQUATION 3: Laptop
me
situation
outcome
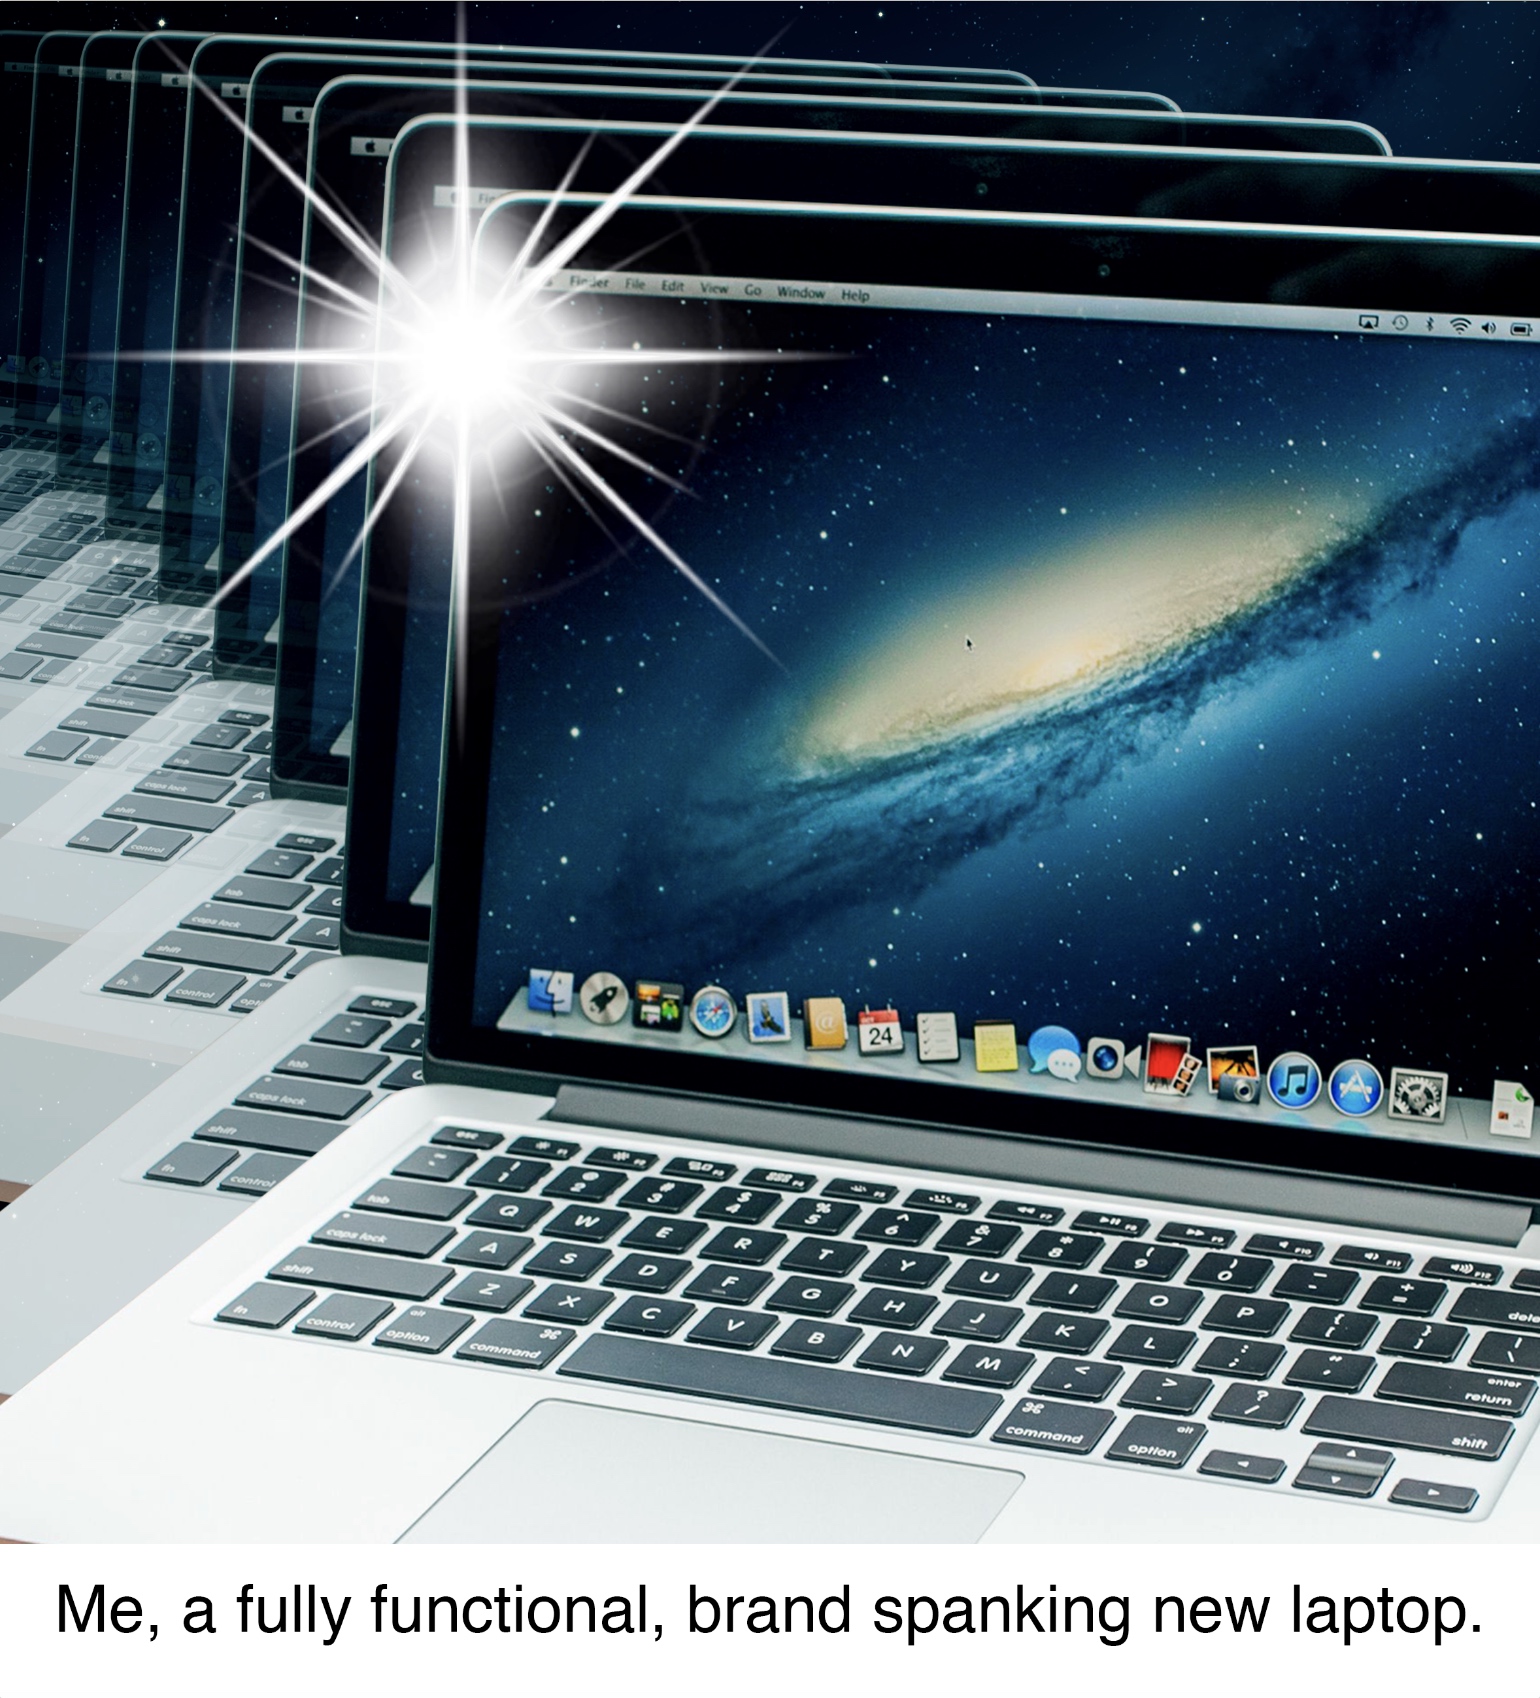
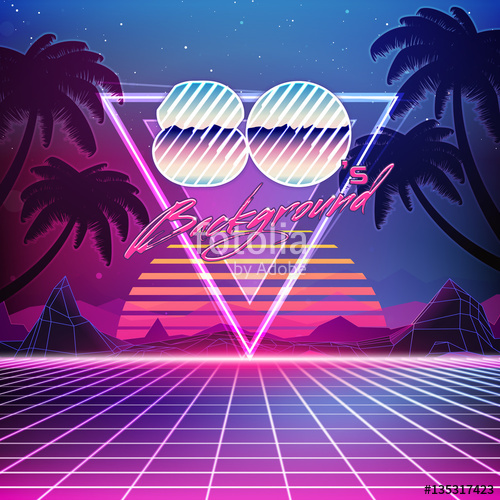
Image 1: Me, a fully functional, brand new laptop.
Image from https://us.fotolia.com/id/135317423#
Accessed on 20 Nov 2017
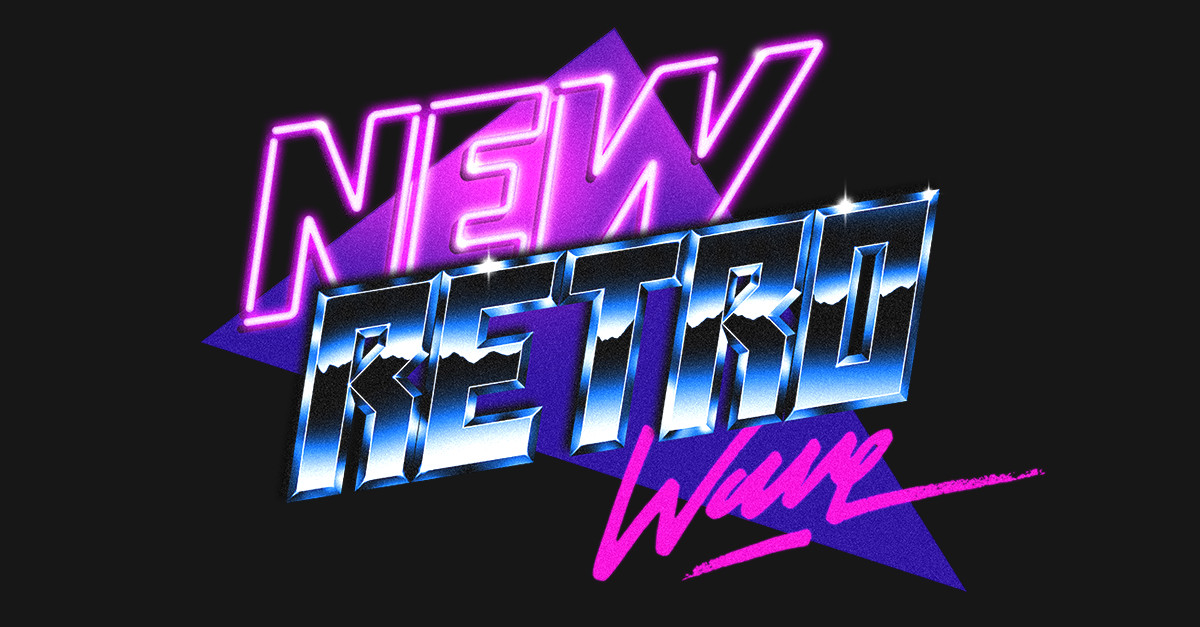
Image from https://newretrowave.com/
Accessed on 20 Nov 2017
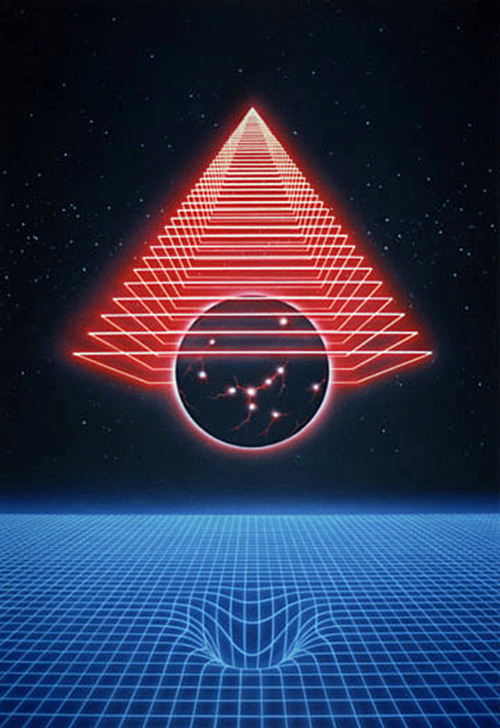
Image from http://uzicopter.tumblr.com/post/92005920799
Accessed on 20 Nov 2017
For this image, I was going for the 80s retro style, hence the repeated laptops slowly moving through space, towards you, and the sparkle at the corner. For colour choice, I chose cool blue with green hues to give that sense of a brand new, high tech laptop.
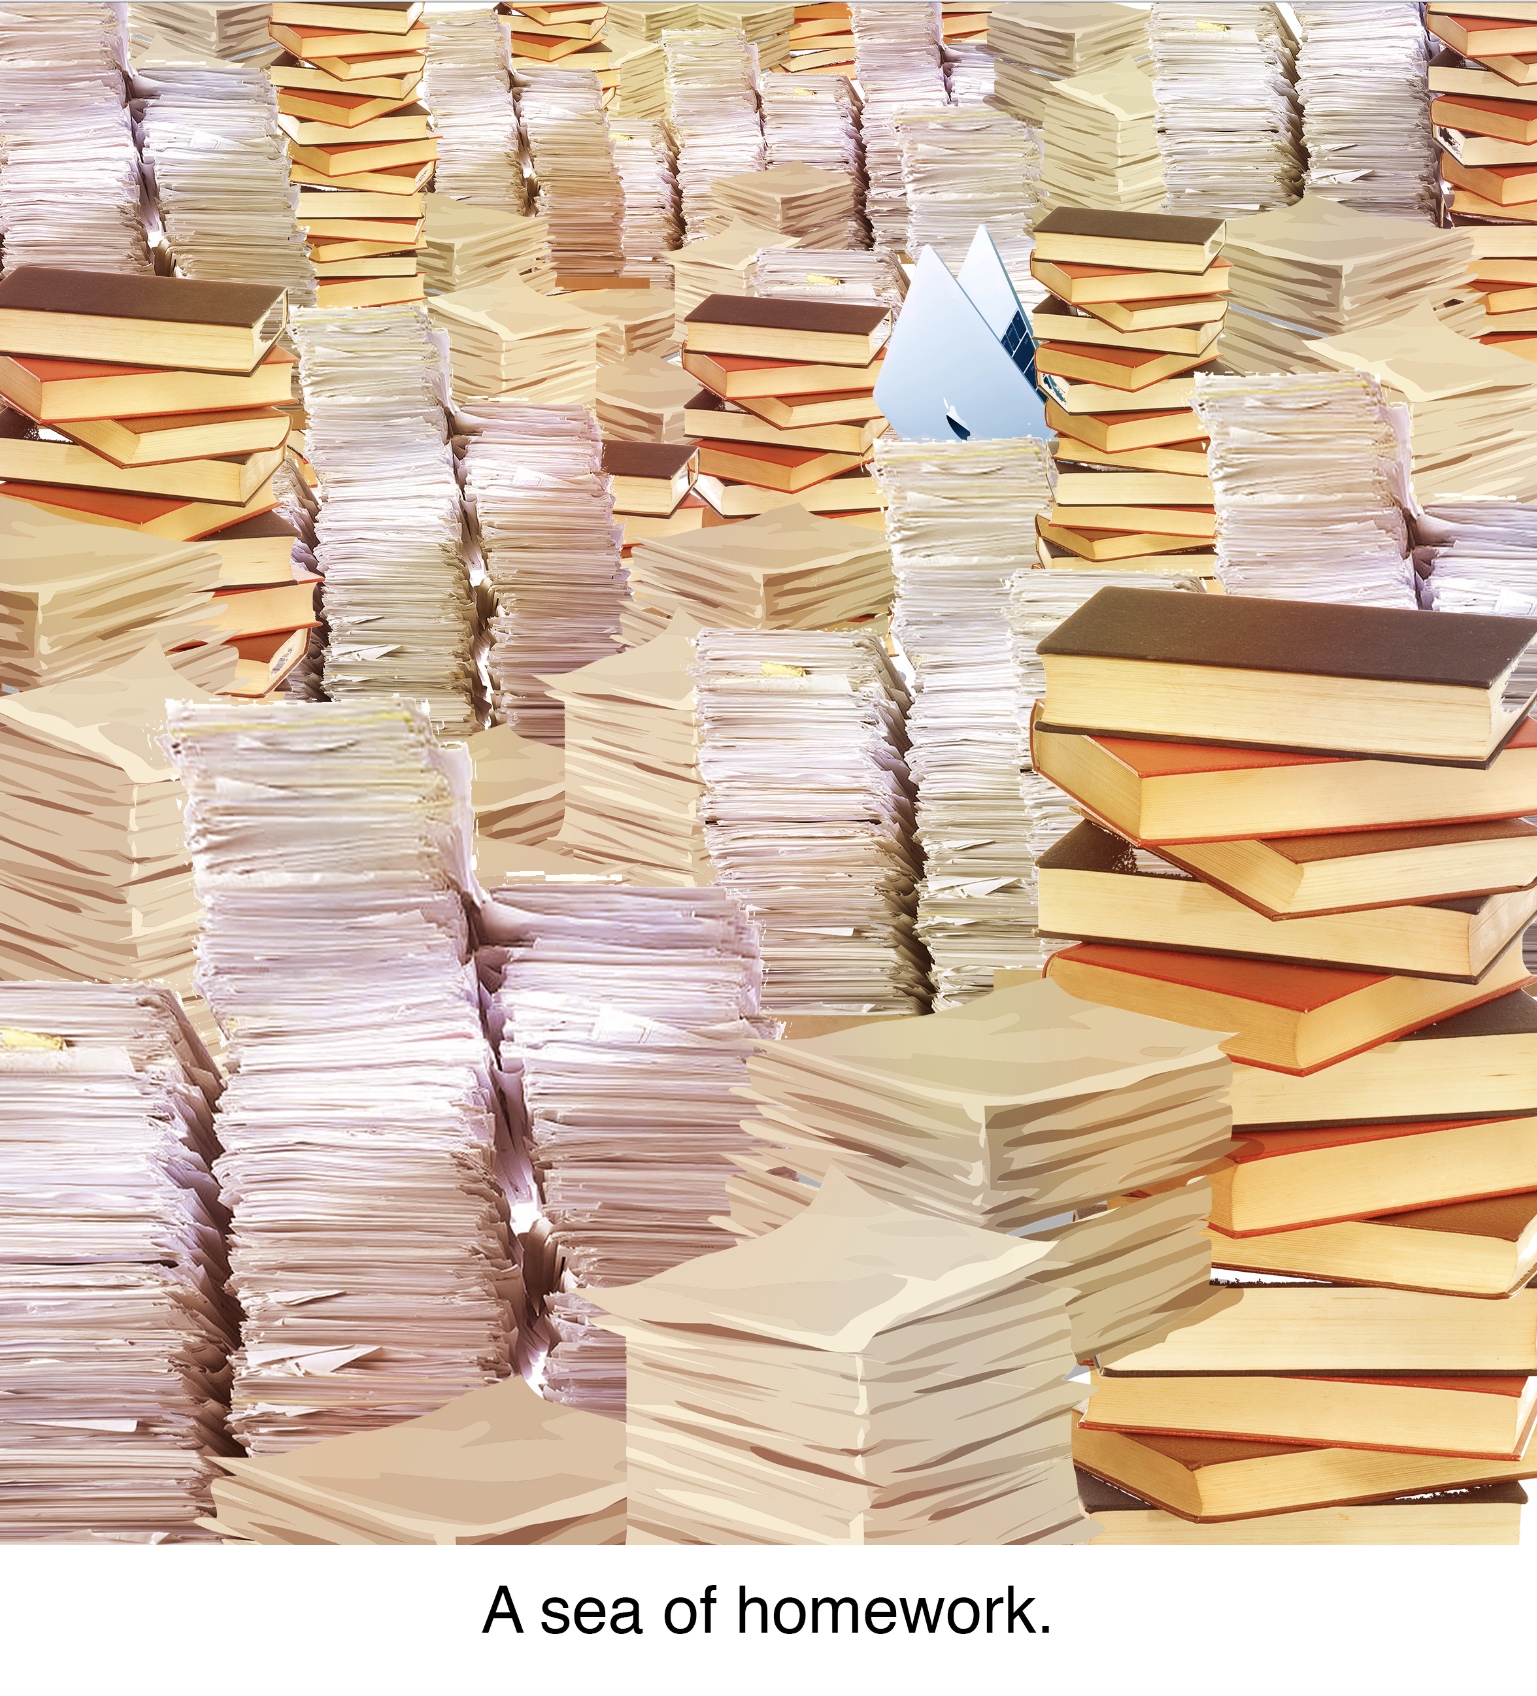
Image 2: A sea of homework
I used orange shades in this image to contrast the first. I put the laptop in at around a third in the image as well to create a juxtaposition of the colour and size, showing the laptop being flooded with work. I also chose the orange shades to give a subtle hint to heat which would relate to my last image where the computer is overheated.
Looking at this image again, I might bump up the intensity of the orange and reds to deepen the contrast. (Image in final)
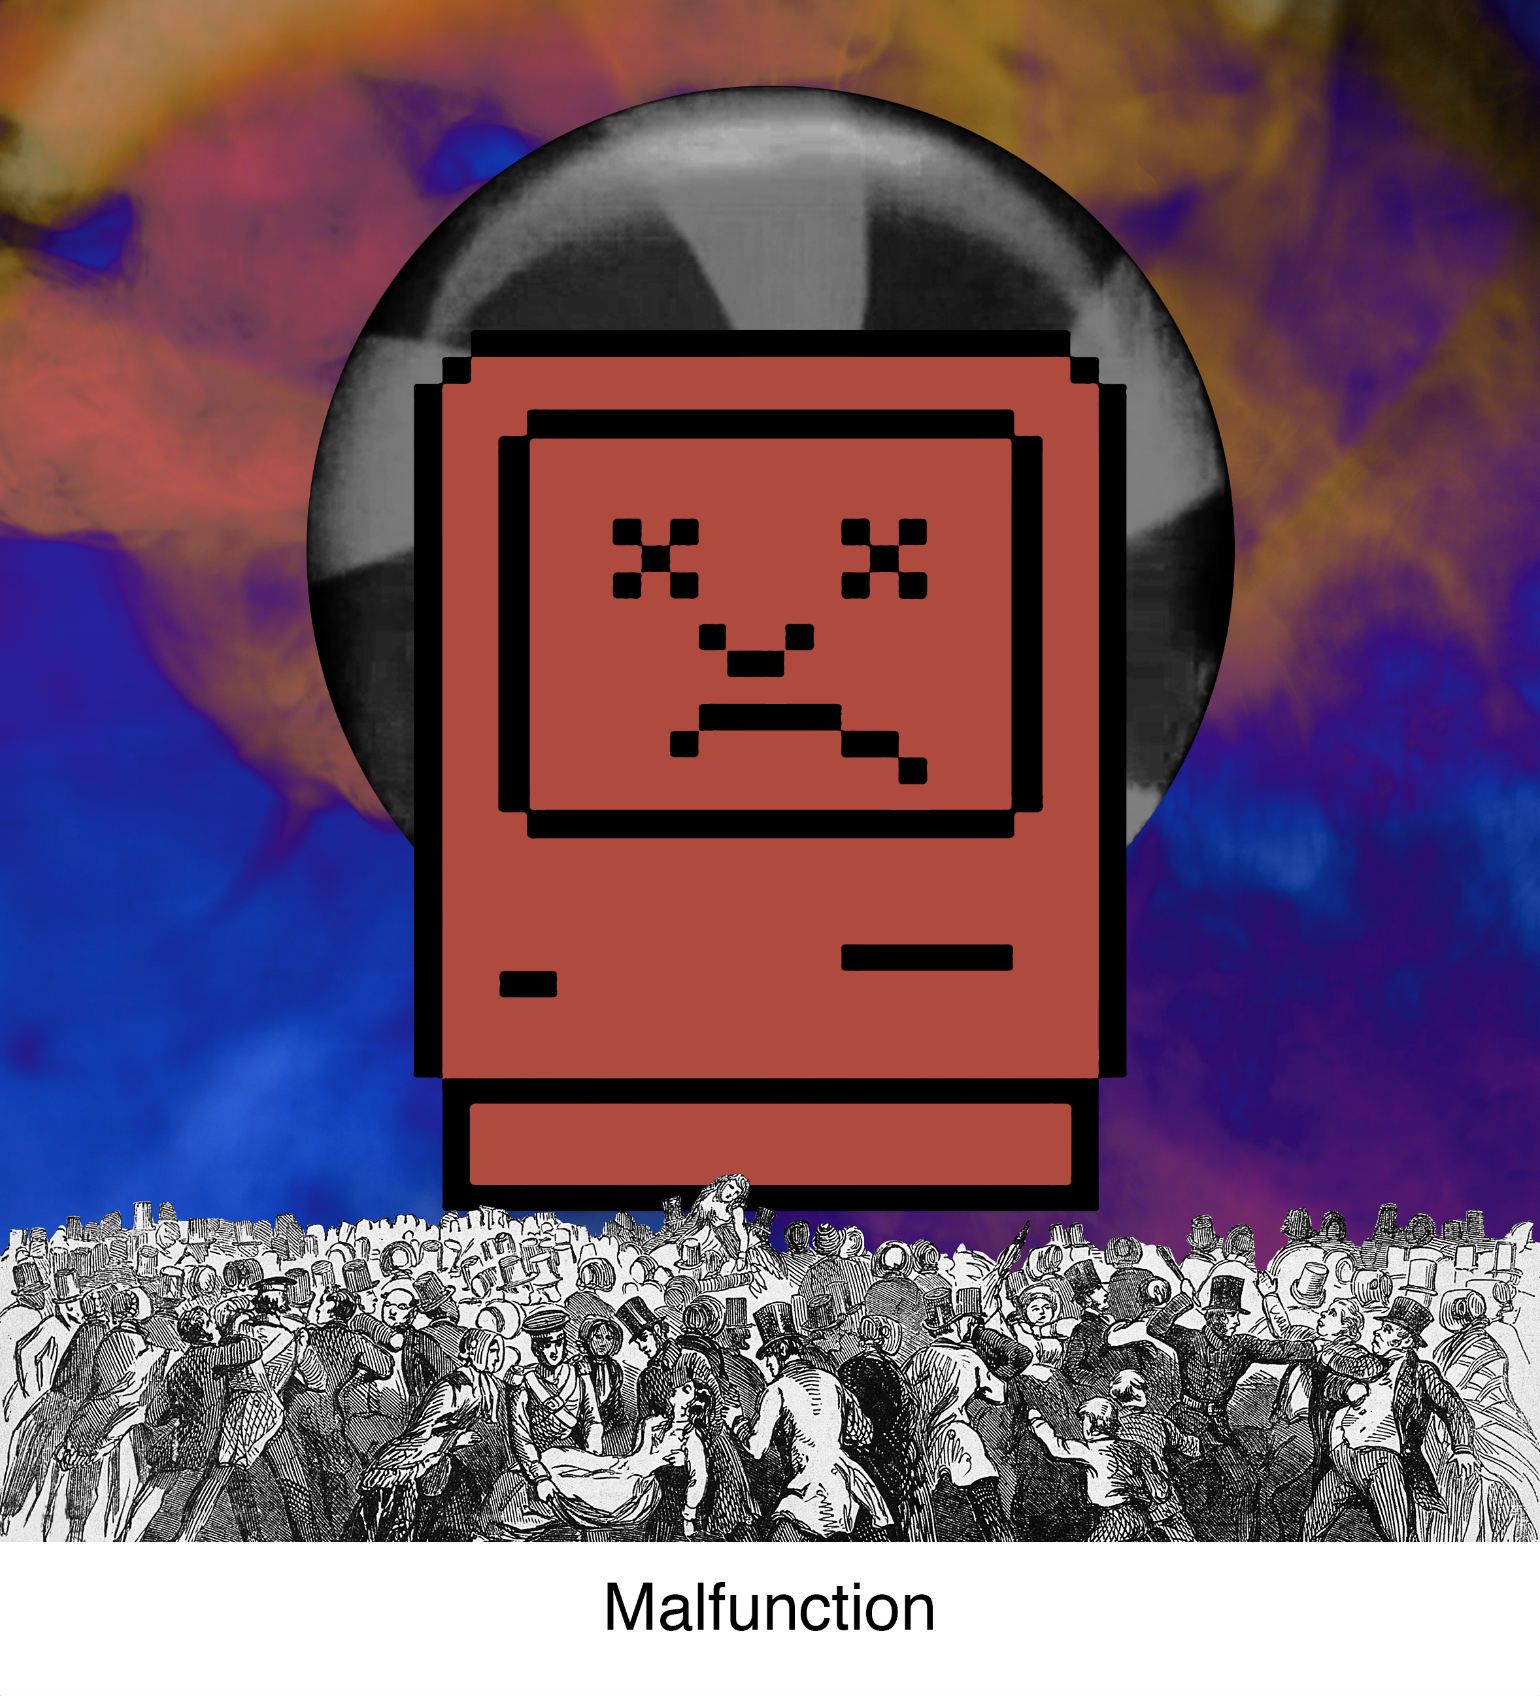
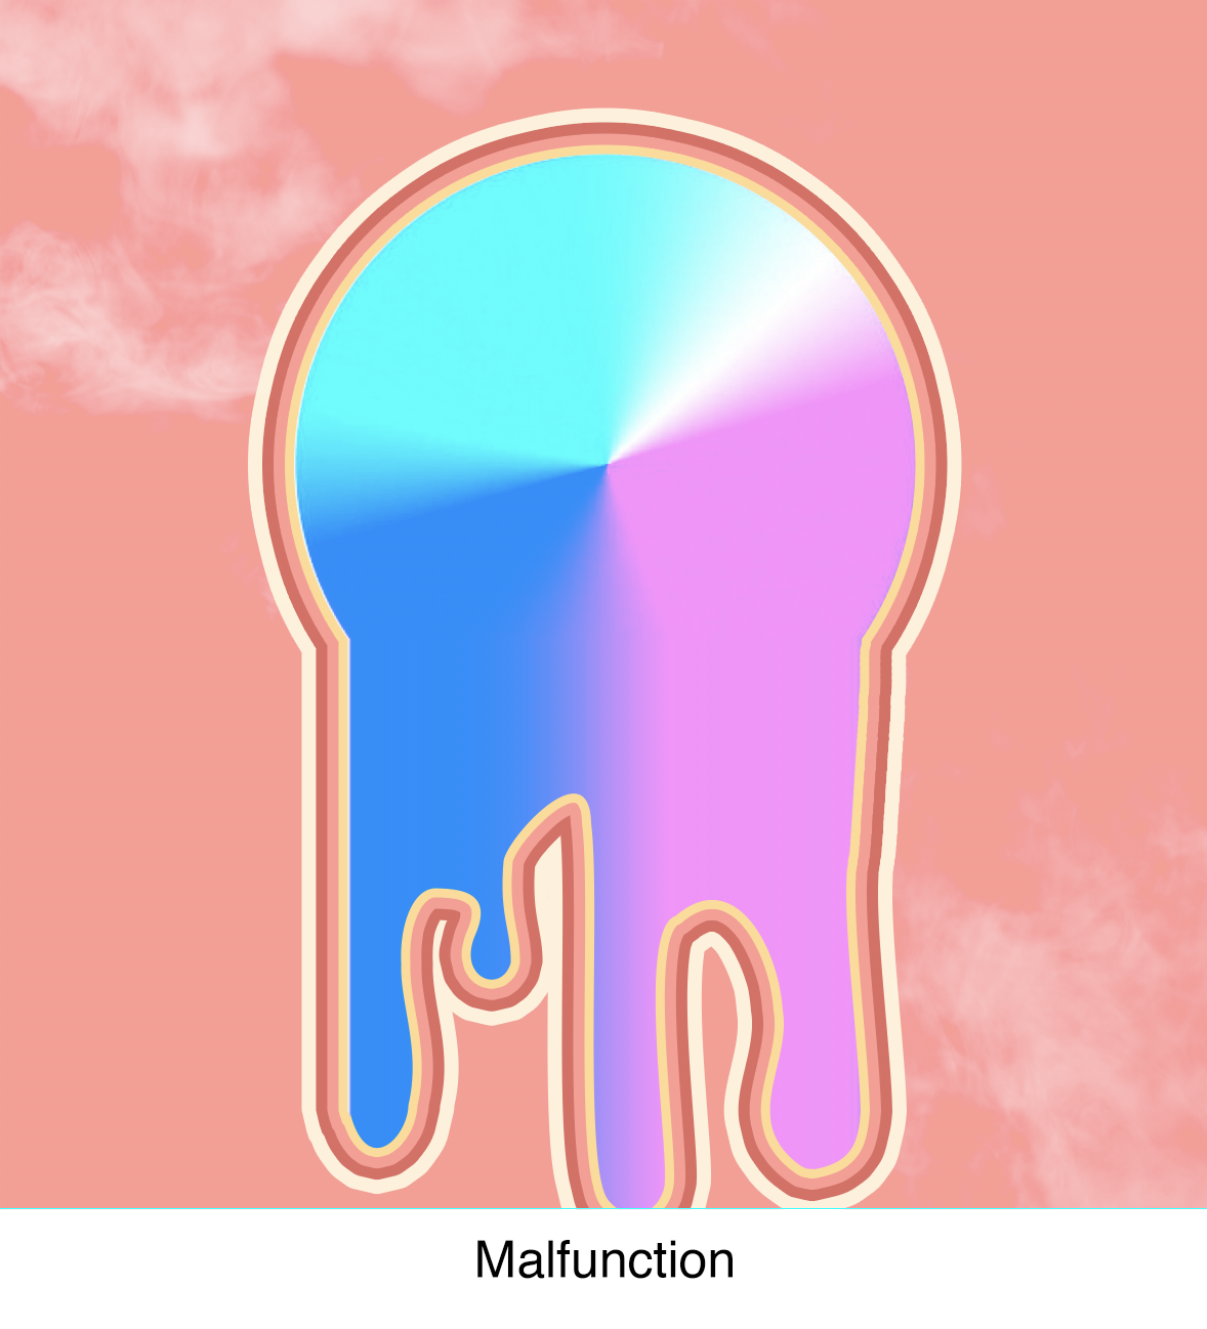
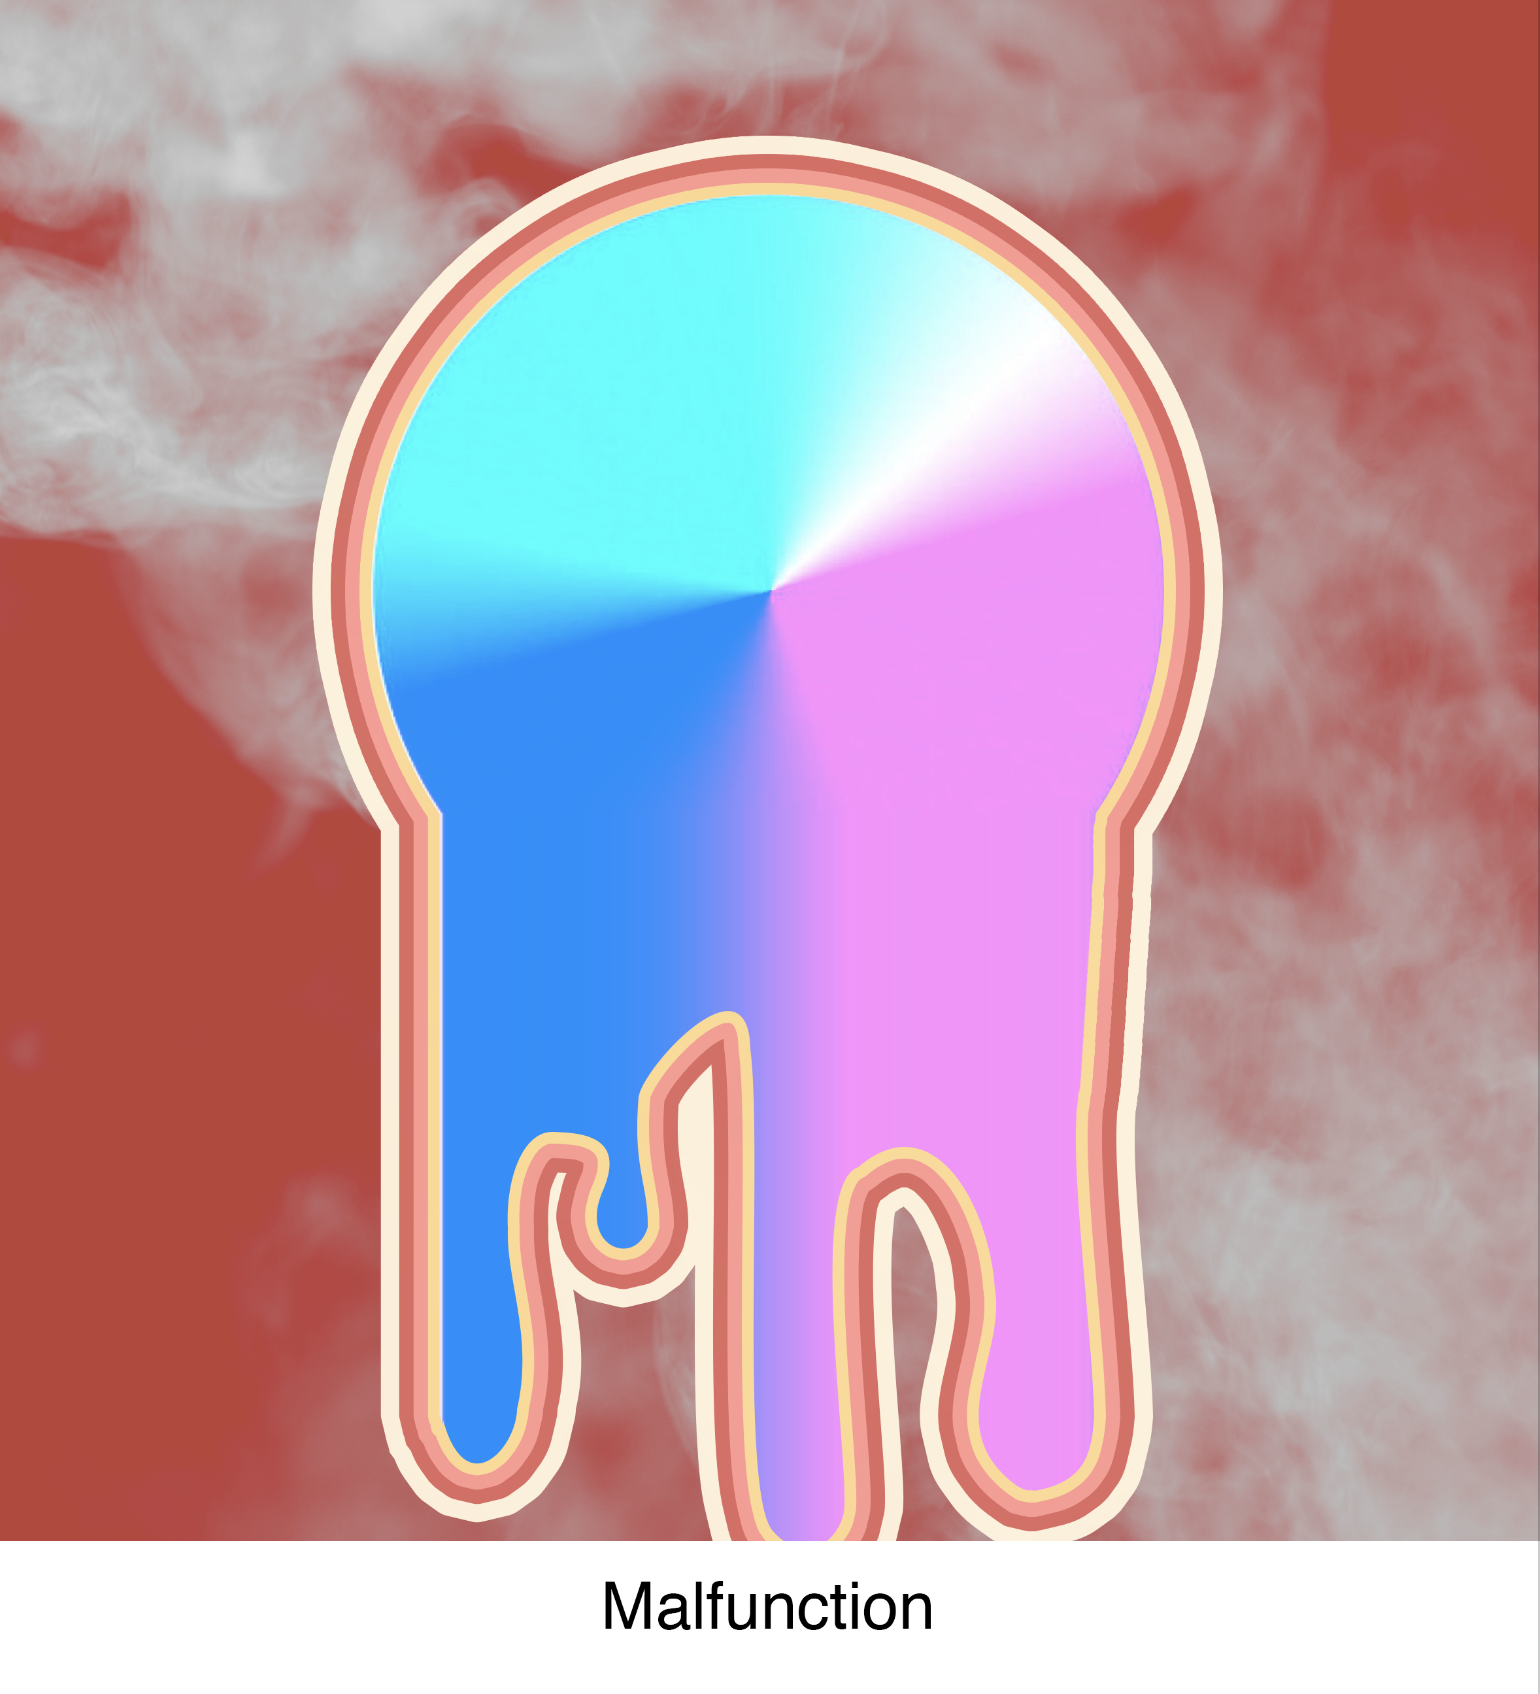
Image 3: Malfunction
Ah, yes, the rainbow wheel of death. I tried to simplify the colours in the wheel but it was still quite distracting. My choice in pastel colour does not really give the image the sense of something dire.
I tried making the background darker but the colours really clashed and did not work out at all.
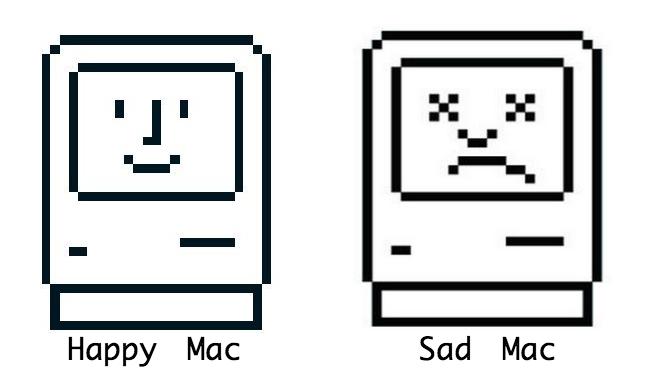
Shirley suggested I could use the old mac icon for a broken hard disk – it tells the same story without all the colours:
So cute, mac should still stick to these icons Image from: https://priceonomics.com/the-woman-behind-apples-first-icons/ Accessed on: 19 Nov 2017
On top of changing the icon, I probably had to change my approach to this as well, colour wise. I decided to stick to the darker shades of my already chosen palette (see final work)
EQUATION 4: Hoodie
me
situation
outcome
Image 1: Me, a hoodie with personality and character.
Following from the last image of the first equation, I had objects come out from the subject, this time from the head of the hoodie. For my colour choice, I chose cooler toned colours as I never saw myself as a cheery, bright-coloured individual. The hoodie, however, is given a brighter green colour to stand out from the muted background if not the composition as a whole would look too muted.
Image 2: A big social event
What do social events for young adults like me always without a doubt contain? Booze. It’s also filled with chatty and loud individuals and usually overall noisy and a little crowded. Although it sounds unappealing, the noise and crowd usually add to the bright atmosphere of these social events. Hence I chose the bright orange shades and the image of the sunbeams.
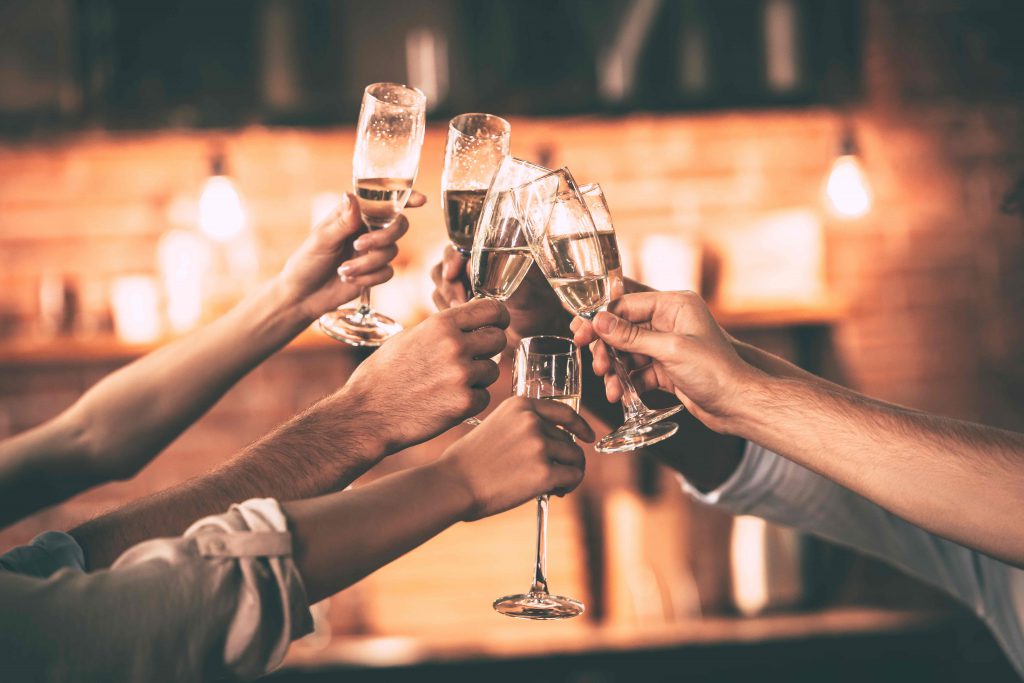
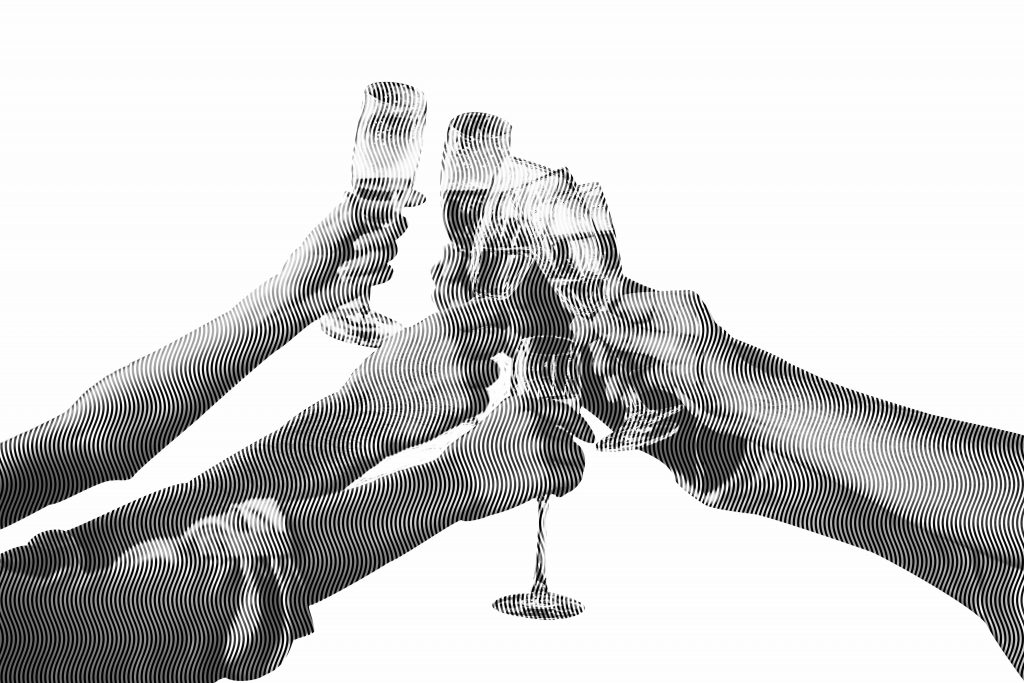
While creating this image, I tried looking for engraved images of people raising their glass but could not find one, so I got to doing it myself. Previously there was a senior that found an engraving preset that gives the engraving effect seen on money but it didn’t seem to work too well for me. I did a bit of researching and found this simple method to create the same engraving texture.
My try with the tutorial:
Original image: Image from: http://nvcbr.org/2017/05/11/cheers/Accessed on: 19 Nov 2017
My edit
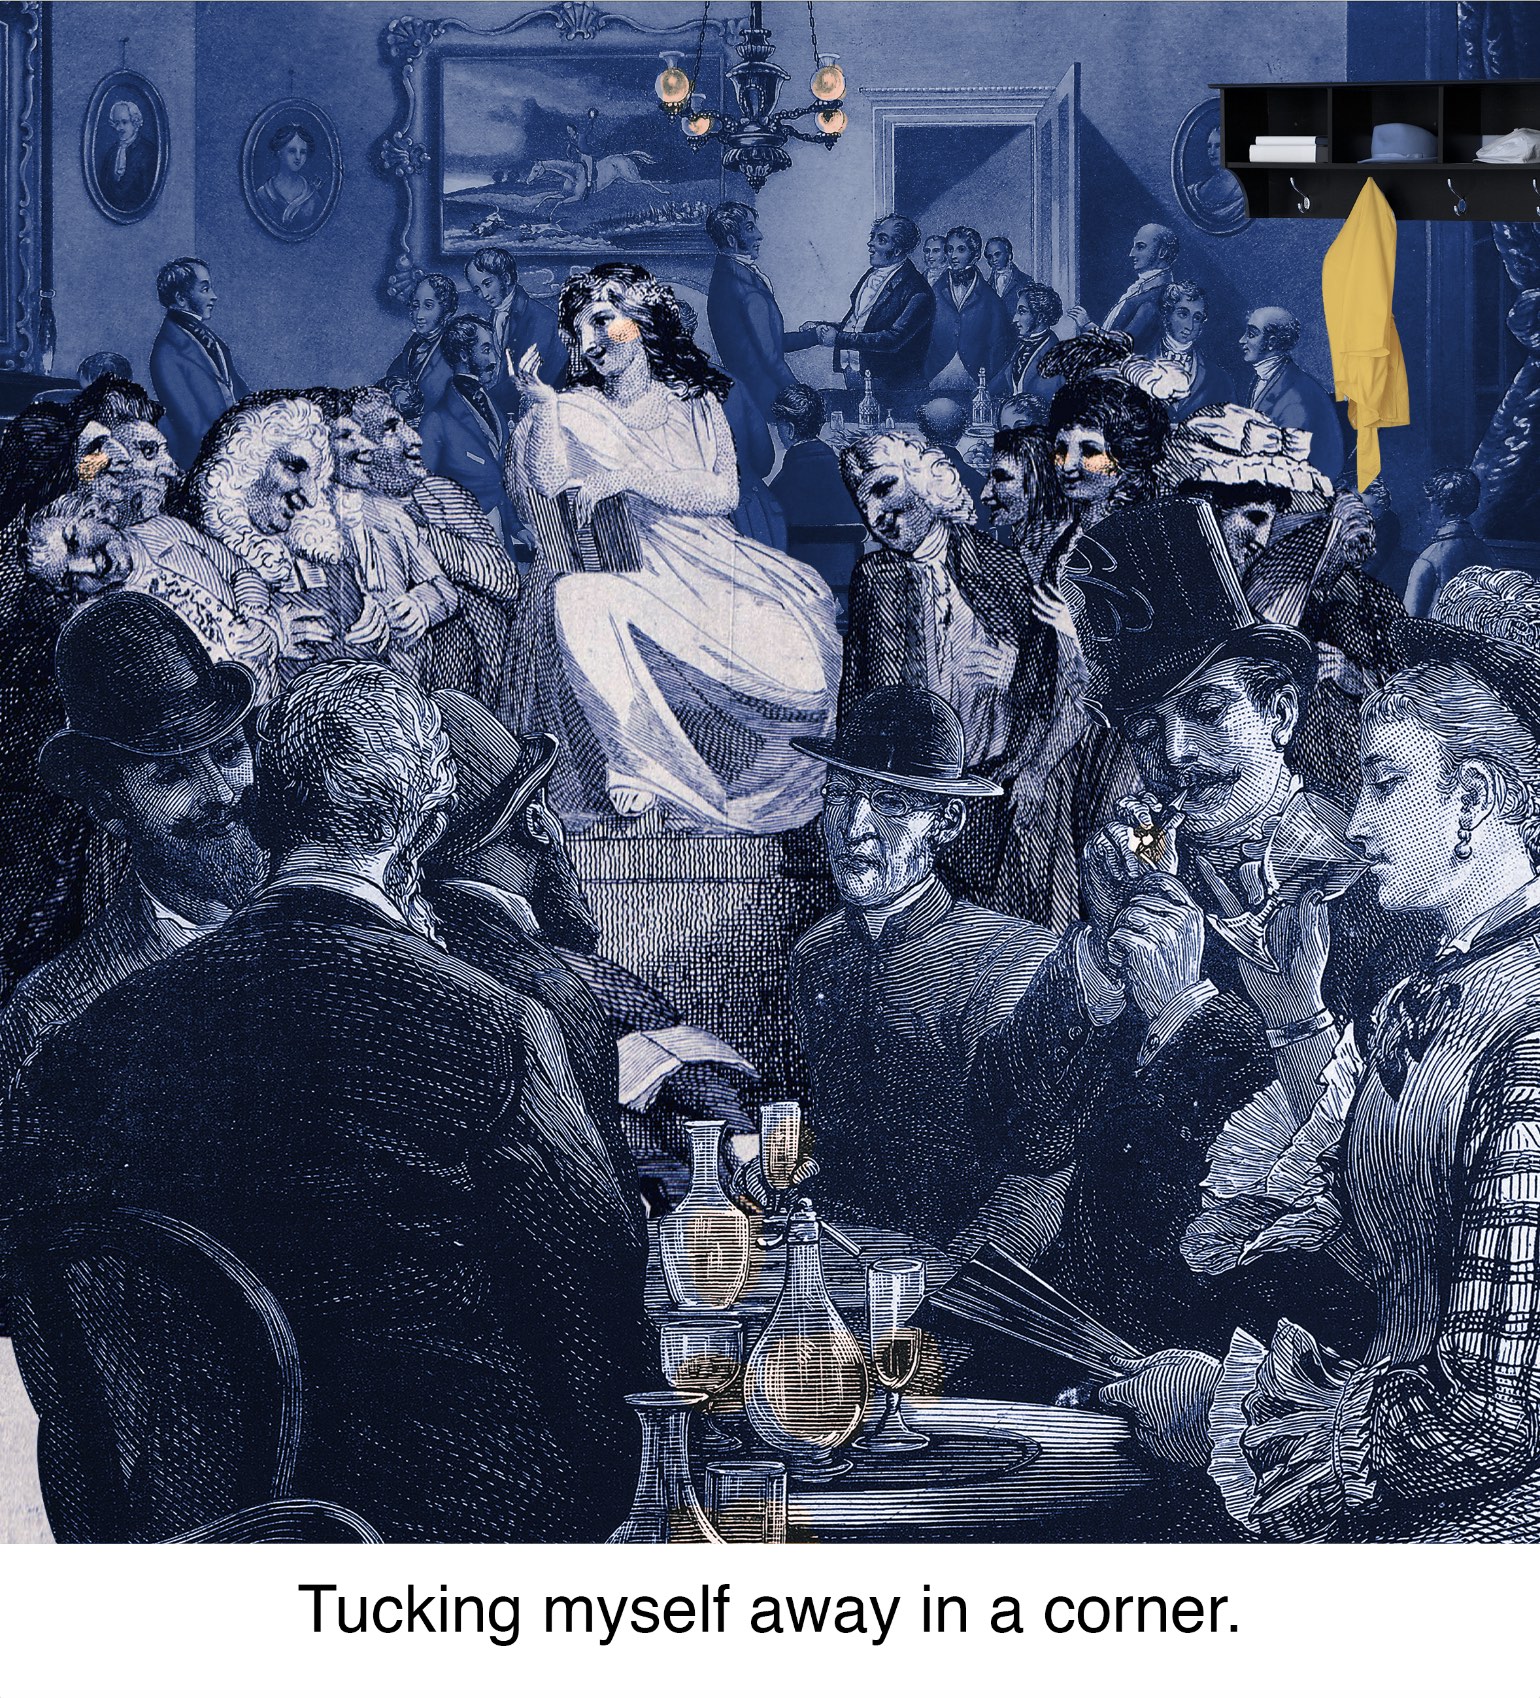
Image 3: Tucking myself away in a corner
For this image, I inverted the colours and used the cool, dark colours for those at the social event and the bright colours for myself to make the contrast more prominent, as well as to draw attention to the hoodie in the composition. I added small streaks of orange for the glasses of alcohol as with the previous image, and at the lights and cheeks of some of the figures. I did so to tone down the contrast between my hoodie and its surroundings, as well as create more dimension to my image.
A picture is worth a thousand words. Sometimes they’re only worth one, but if you put those pictures together, they may not tell you a thousand words but convey a quote from a movie instead!
Our second Foundation 2D project is Forest Gump. We have to pick 4 movie quotes, then piece together images – symbols, pictograms, dingbats (ornaments), icons and engravings as my visual vocabulary – to create my visual narrative.
QUOTES
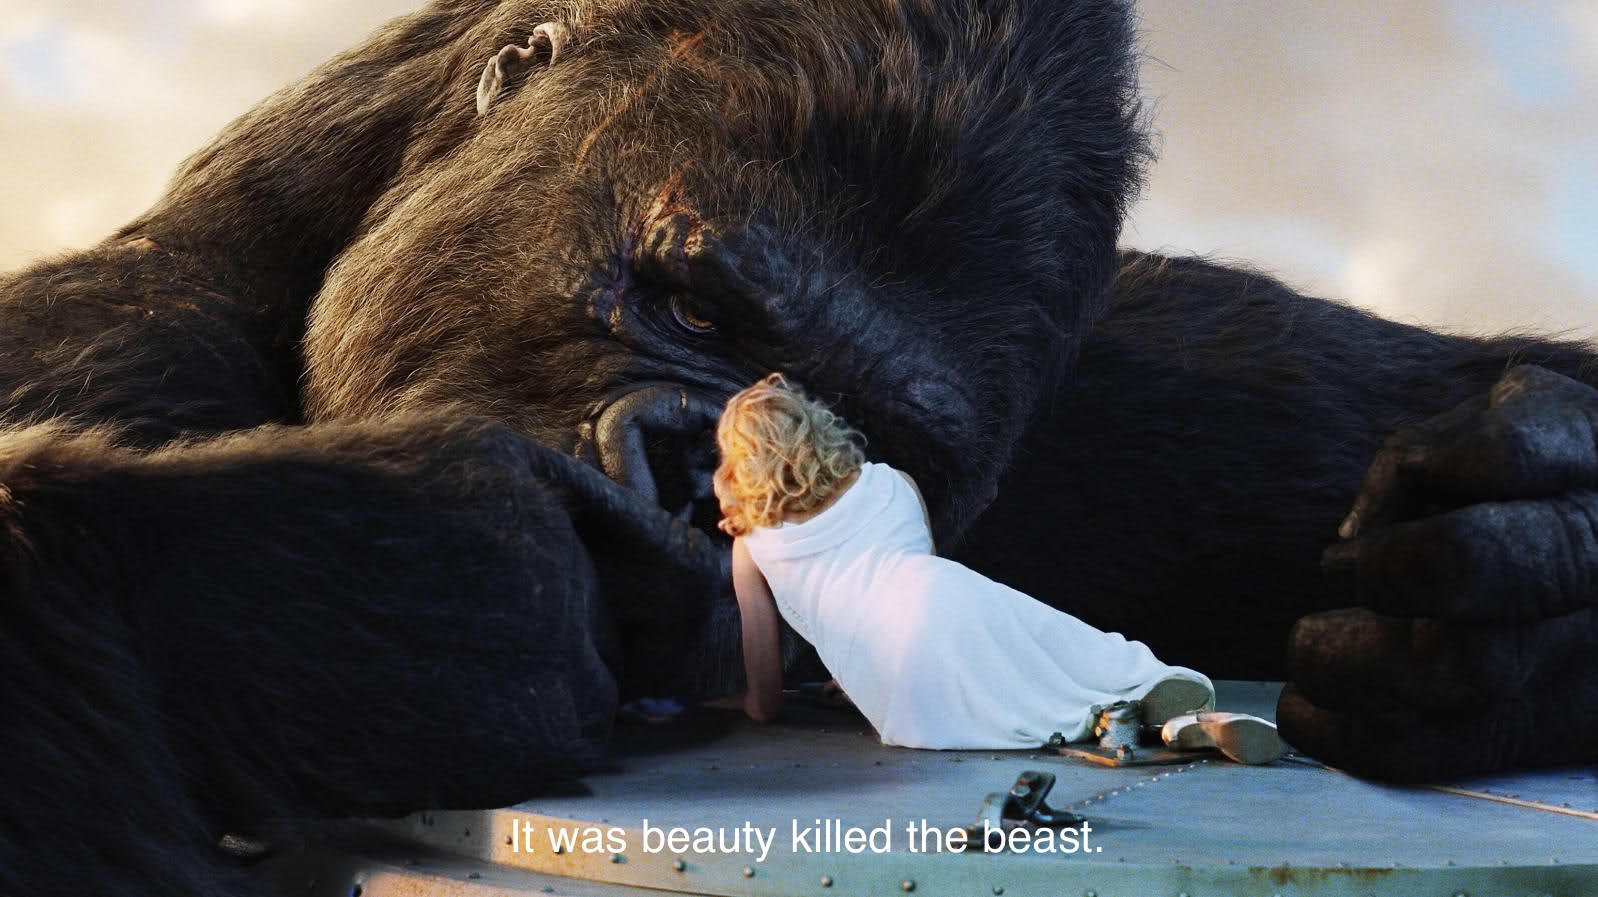
Quote 1: In the Mood for Love, 2000Quote 2: Blade Runner, 1982Quote 3: King Kong, 1933Quote 4: Pulp Fiction,1994
Quote 1: “You notice things if you pay attention.” – In the Mood for Love, 2000
Quote 2: “All these moments will be lost in time, like tears in the rain.” – Blade Runner, 1982
Quote 3: “It was beauty killed the beast” – King Kong, 1933
Quote 4: “They call it Royale with cheese” – Pulp Fiction, 1994
RESEARCH
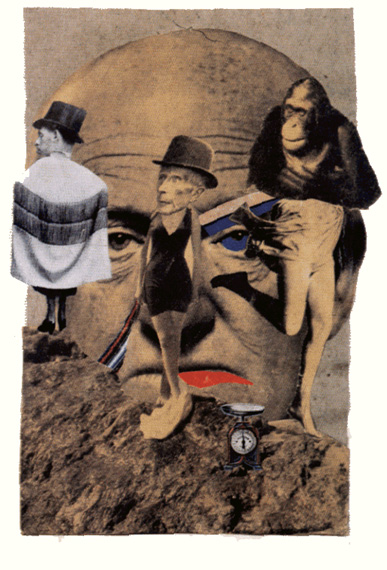
The Art Critic 1919-20 (31.8×25.4 cms) Image from: https://www.dadart.com/dadaism/dada/022-dada-berlin.html Accessed on: 9th October 2017Cut with the Dada Kitchen Knife through the Last Weimar Beer-Belly Cultural Epoch in Germany, 1919 90×144 cm, Image from: https://en.wikipedia.org/wiki/Dada Accessed on: 9th October 2015Hannah Höch: And When You Think the Moon is Setting – 1921 Image from: https://www.dadart.com/dadaism/dada/022-dada-berlin.html Accessed on: 9th October 2015
Before starting on this project, I researched on collage work during the Dada period and found the Berlin female artist Anna Therese Johanne Höch. Her works centre around the theme of women’s roles in the working world and convey this through collages made of cutouts from popular media such as newspaper and magazines.
What I like about her work and feel that I can take from her work is her ability to put two objects that can be very different together. For instance, with The Art Critic, the subjects head is too big for his body. Unusual objects like a shoe are also placed on the man’s forehead. All of this, of course, is intentional as Höch uses the uncanny to grab the viewers attention and bring forward what she wants to discuss or convey.
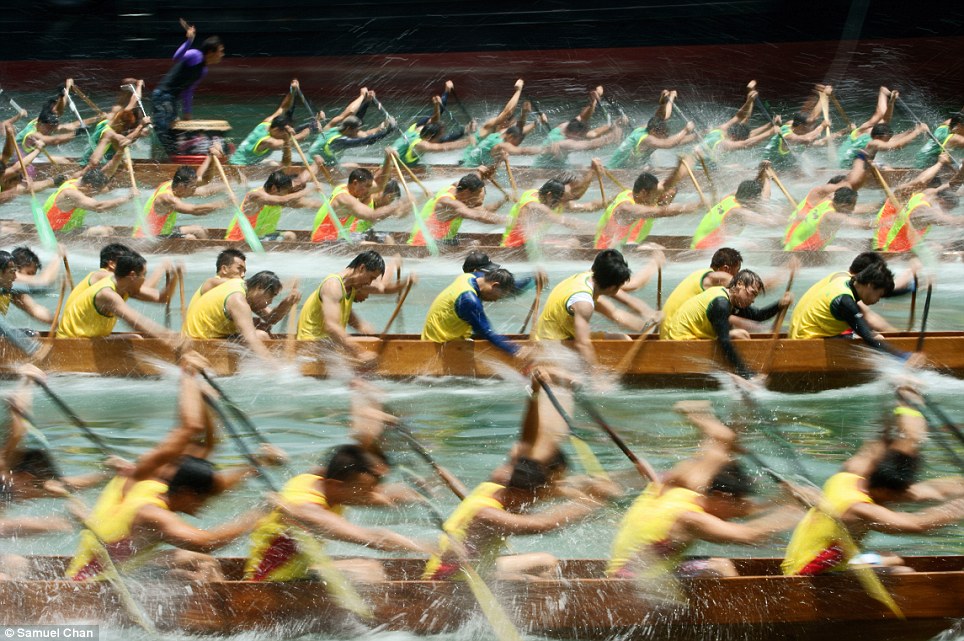
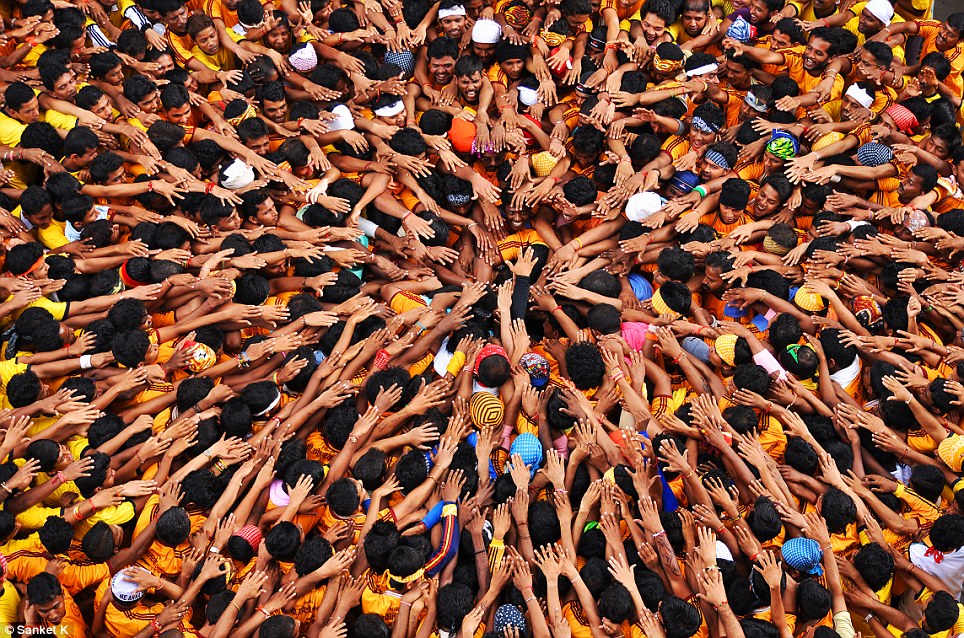
Image 1 Image from: http://www.dailymail.co.uk/news/article-2095791/Sony-World-Photography-awards-shortlist-2012-provides-real-challenge-eye.html Accessed on: 9th October 2017Image 2 Image from: http://www.dailymail.co.uk/news/article-2095791/Sony-World-Photography-awards-shortlist-2012-provides-real-challenge-eye.html Accessed on: 9th October 2017
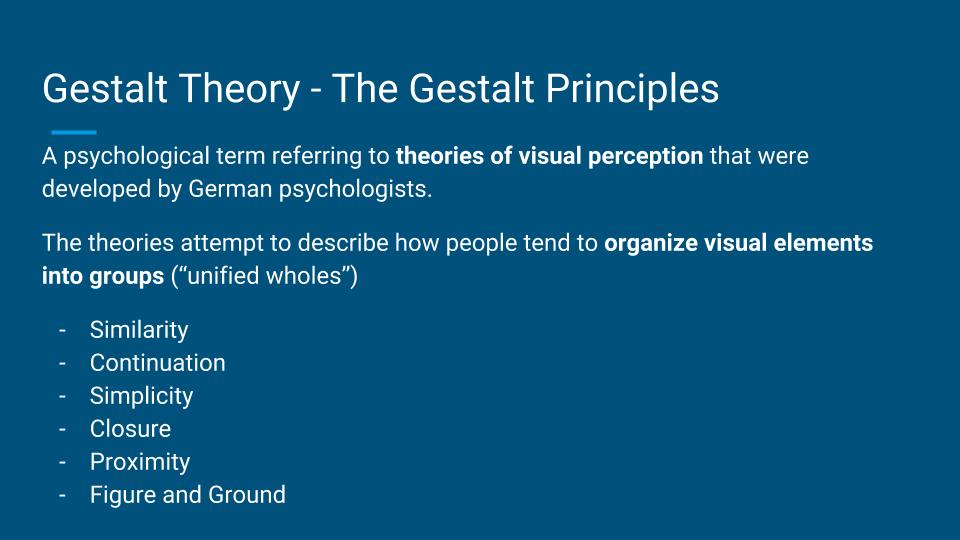
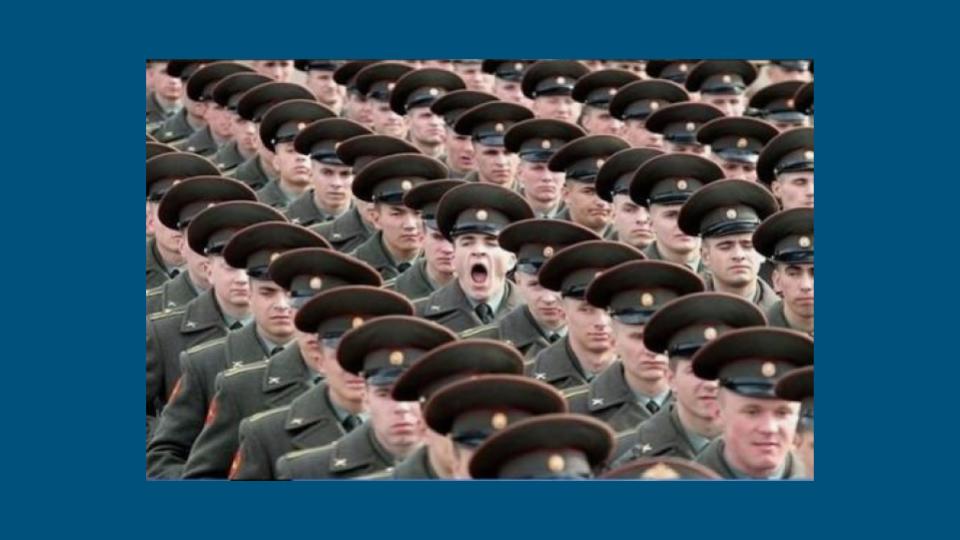
Compositional wise, I will be applying Gestalt principles to create interesting compositions. For example, like in image 1, I can repeat an image to create a pattern, and play with its size to create depth. I also want to have leading lines in my work like in image 2 above.
PROCESS and FINAL
Quote 1: “You notice things if you pay attention.” – In the Mood for Love, 2000
Of course, I had to pick a quote from my favourite movie!
For this specific quote, my work went through very dramatic changes.
Initially, when I thought” of paying attention”, I thought of open eyes and ears and keeping quiet. Noticing things to me would be about noticing people around me, including what they’re saying.
Taking inspiration from the movie itself, I created the piece below:
Composition 1
As shown, I included an eye and an ear for “paying attention”, as well as the warning or attention signs above the eyes. For “notice things”, I added a silhouette of people talking in the iris of the eye to show that the eye is watching and paying attention, and speech bubbles that slowly travel towards the ear. The splatters created was to add some texture to the work.
The feedback I received for this composition was that the image created was too literal and that while I wanted the eye to be the focus of the composition, the biggest speech bubble took away some of the focus as it was just as big or even bigger than the eye.
Redo!!
Taking more inspiration from Dada collages, I created the piece below:
composition 2
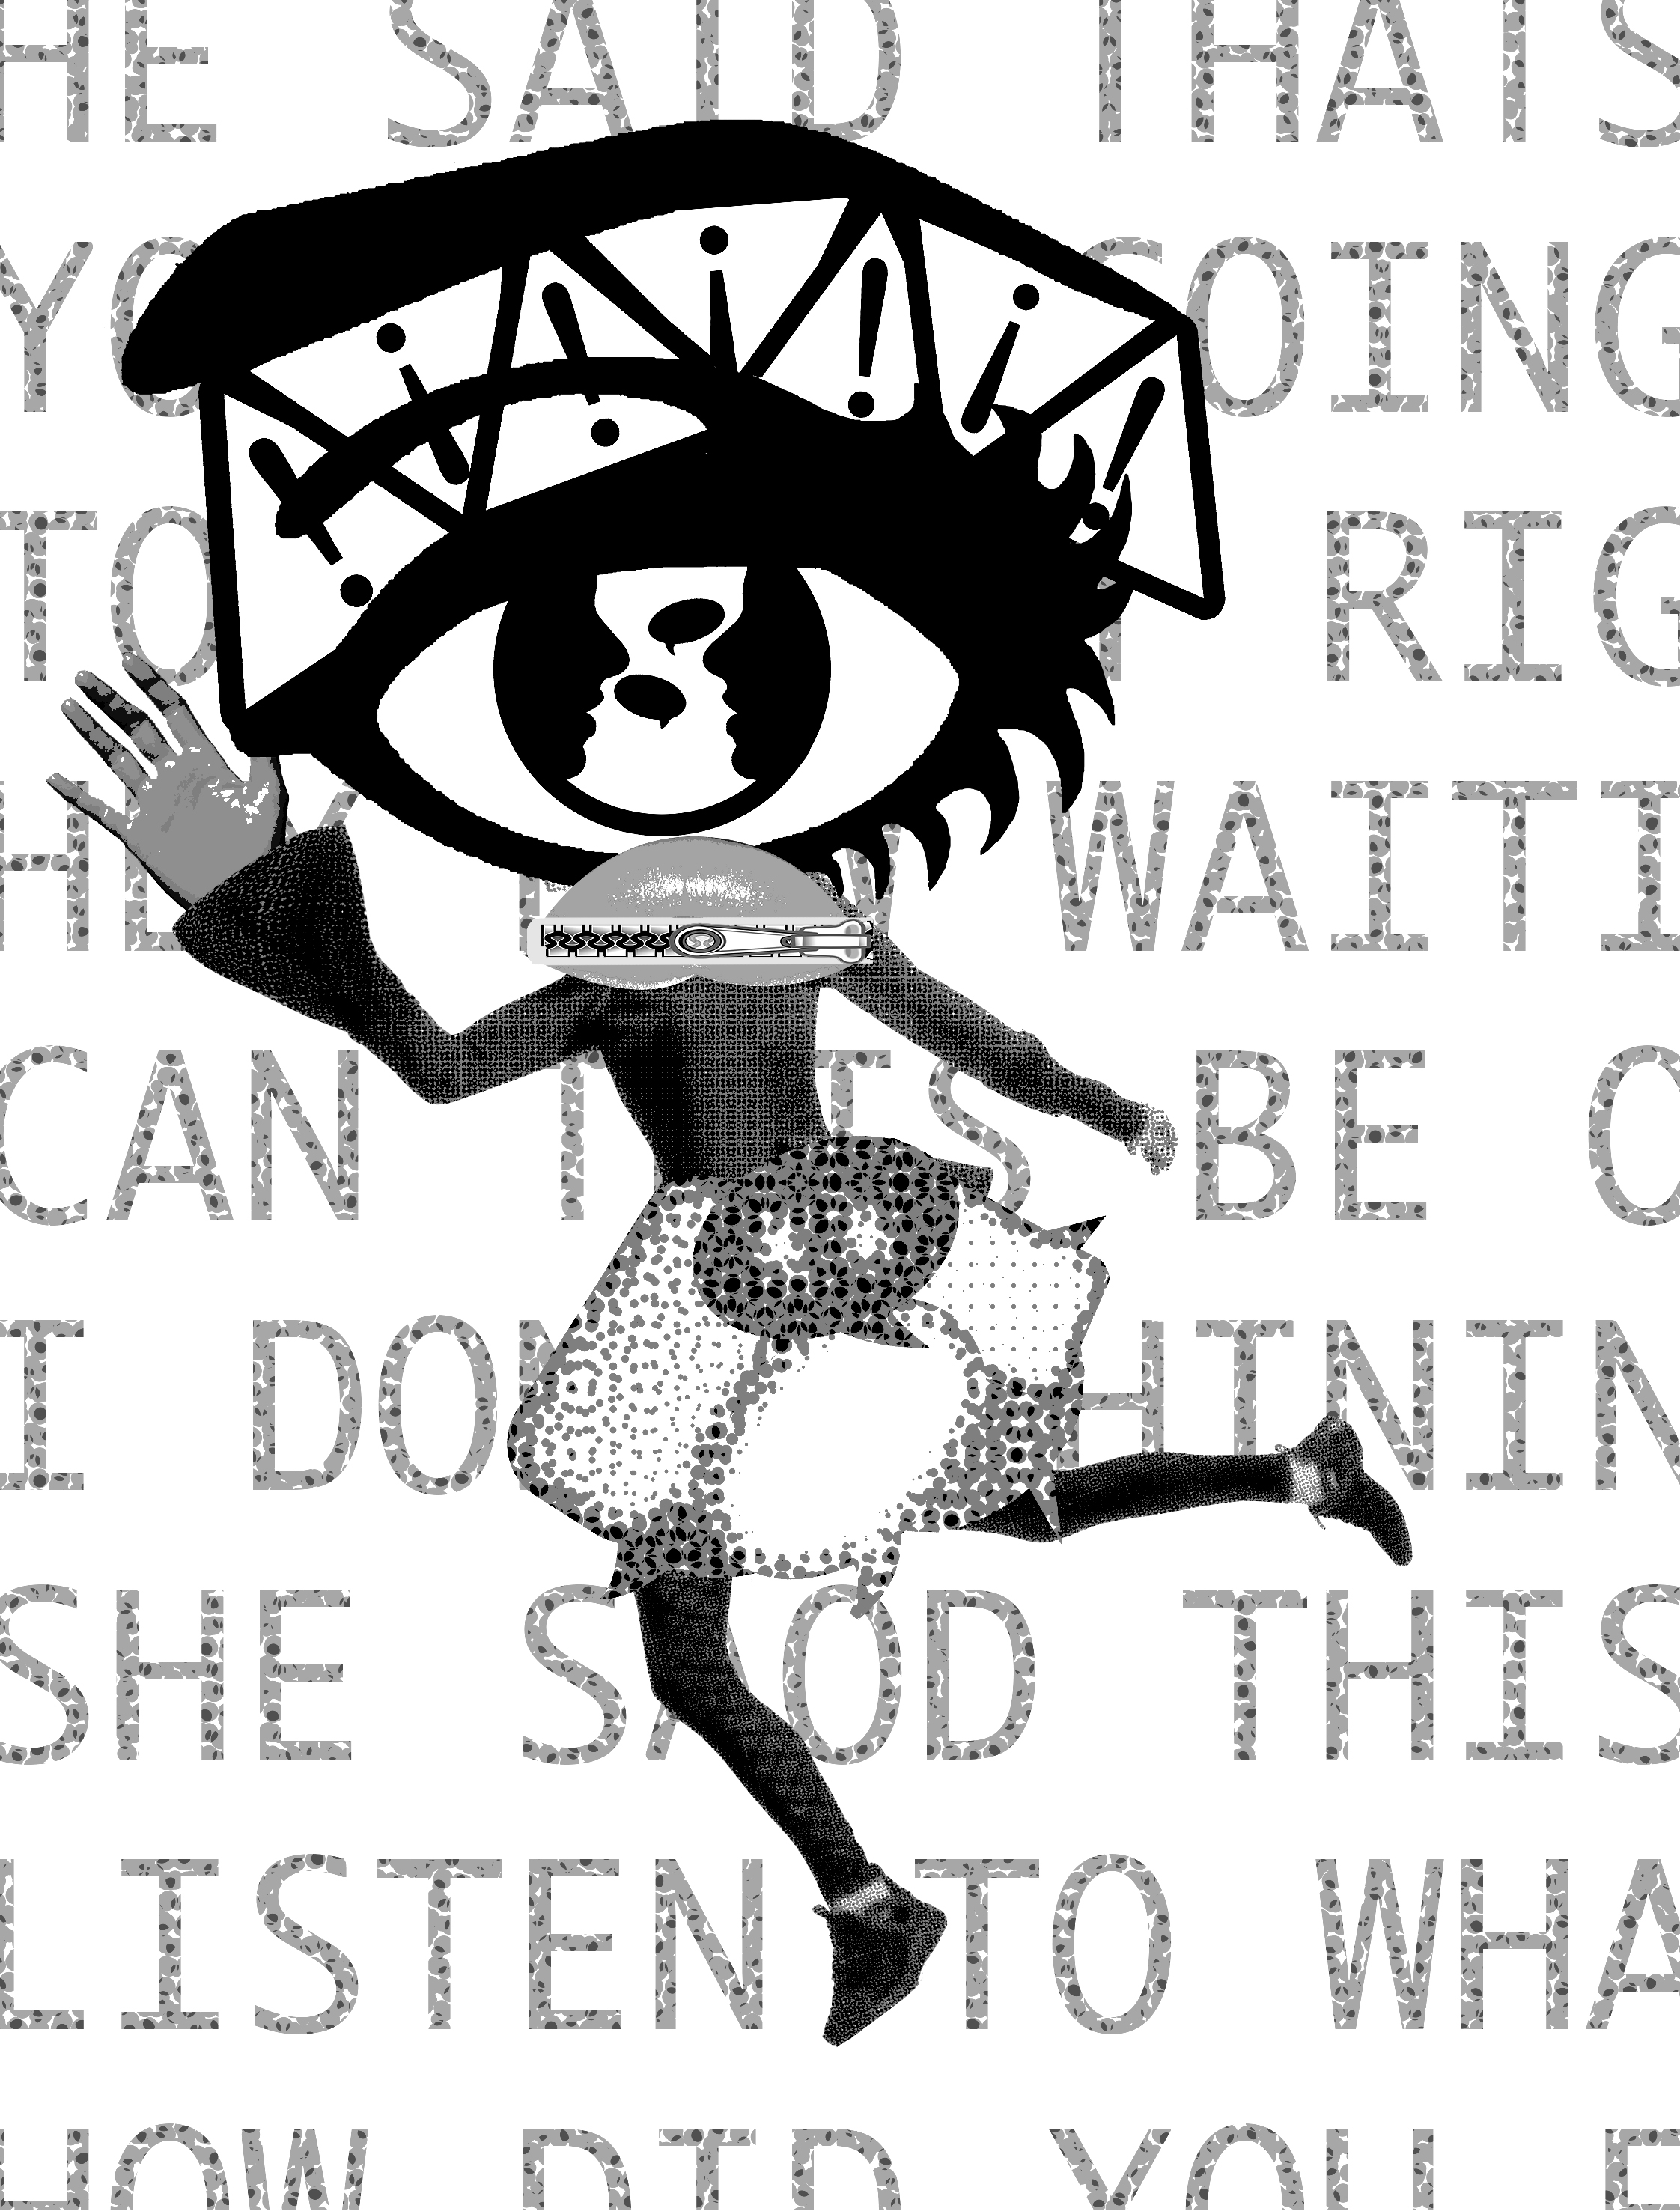
This time I tried to be a little more unconventional with the way I put my images together. I kept the eye with the notice signs above it as I really liked it. I added a mouth that was closed with a zipper and a skirt made of speech bubbles. I used a dynamic stance for the figure to make it more interesting but made the hand closest to the eyes big to make it look like the hand is being placed behind its ear and trying to listen to something. I added text in the background (thinking if it was cut off and made no sense it would be alright haha – it was not) to add texture.
While I picked up on putting images together in a more unconventional way, there was not many compositional techniques or Gestalt principles used and the image itself was not easy to decipher. SCRAPPED
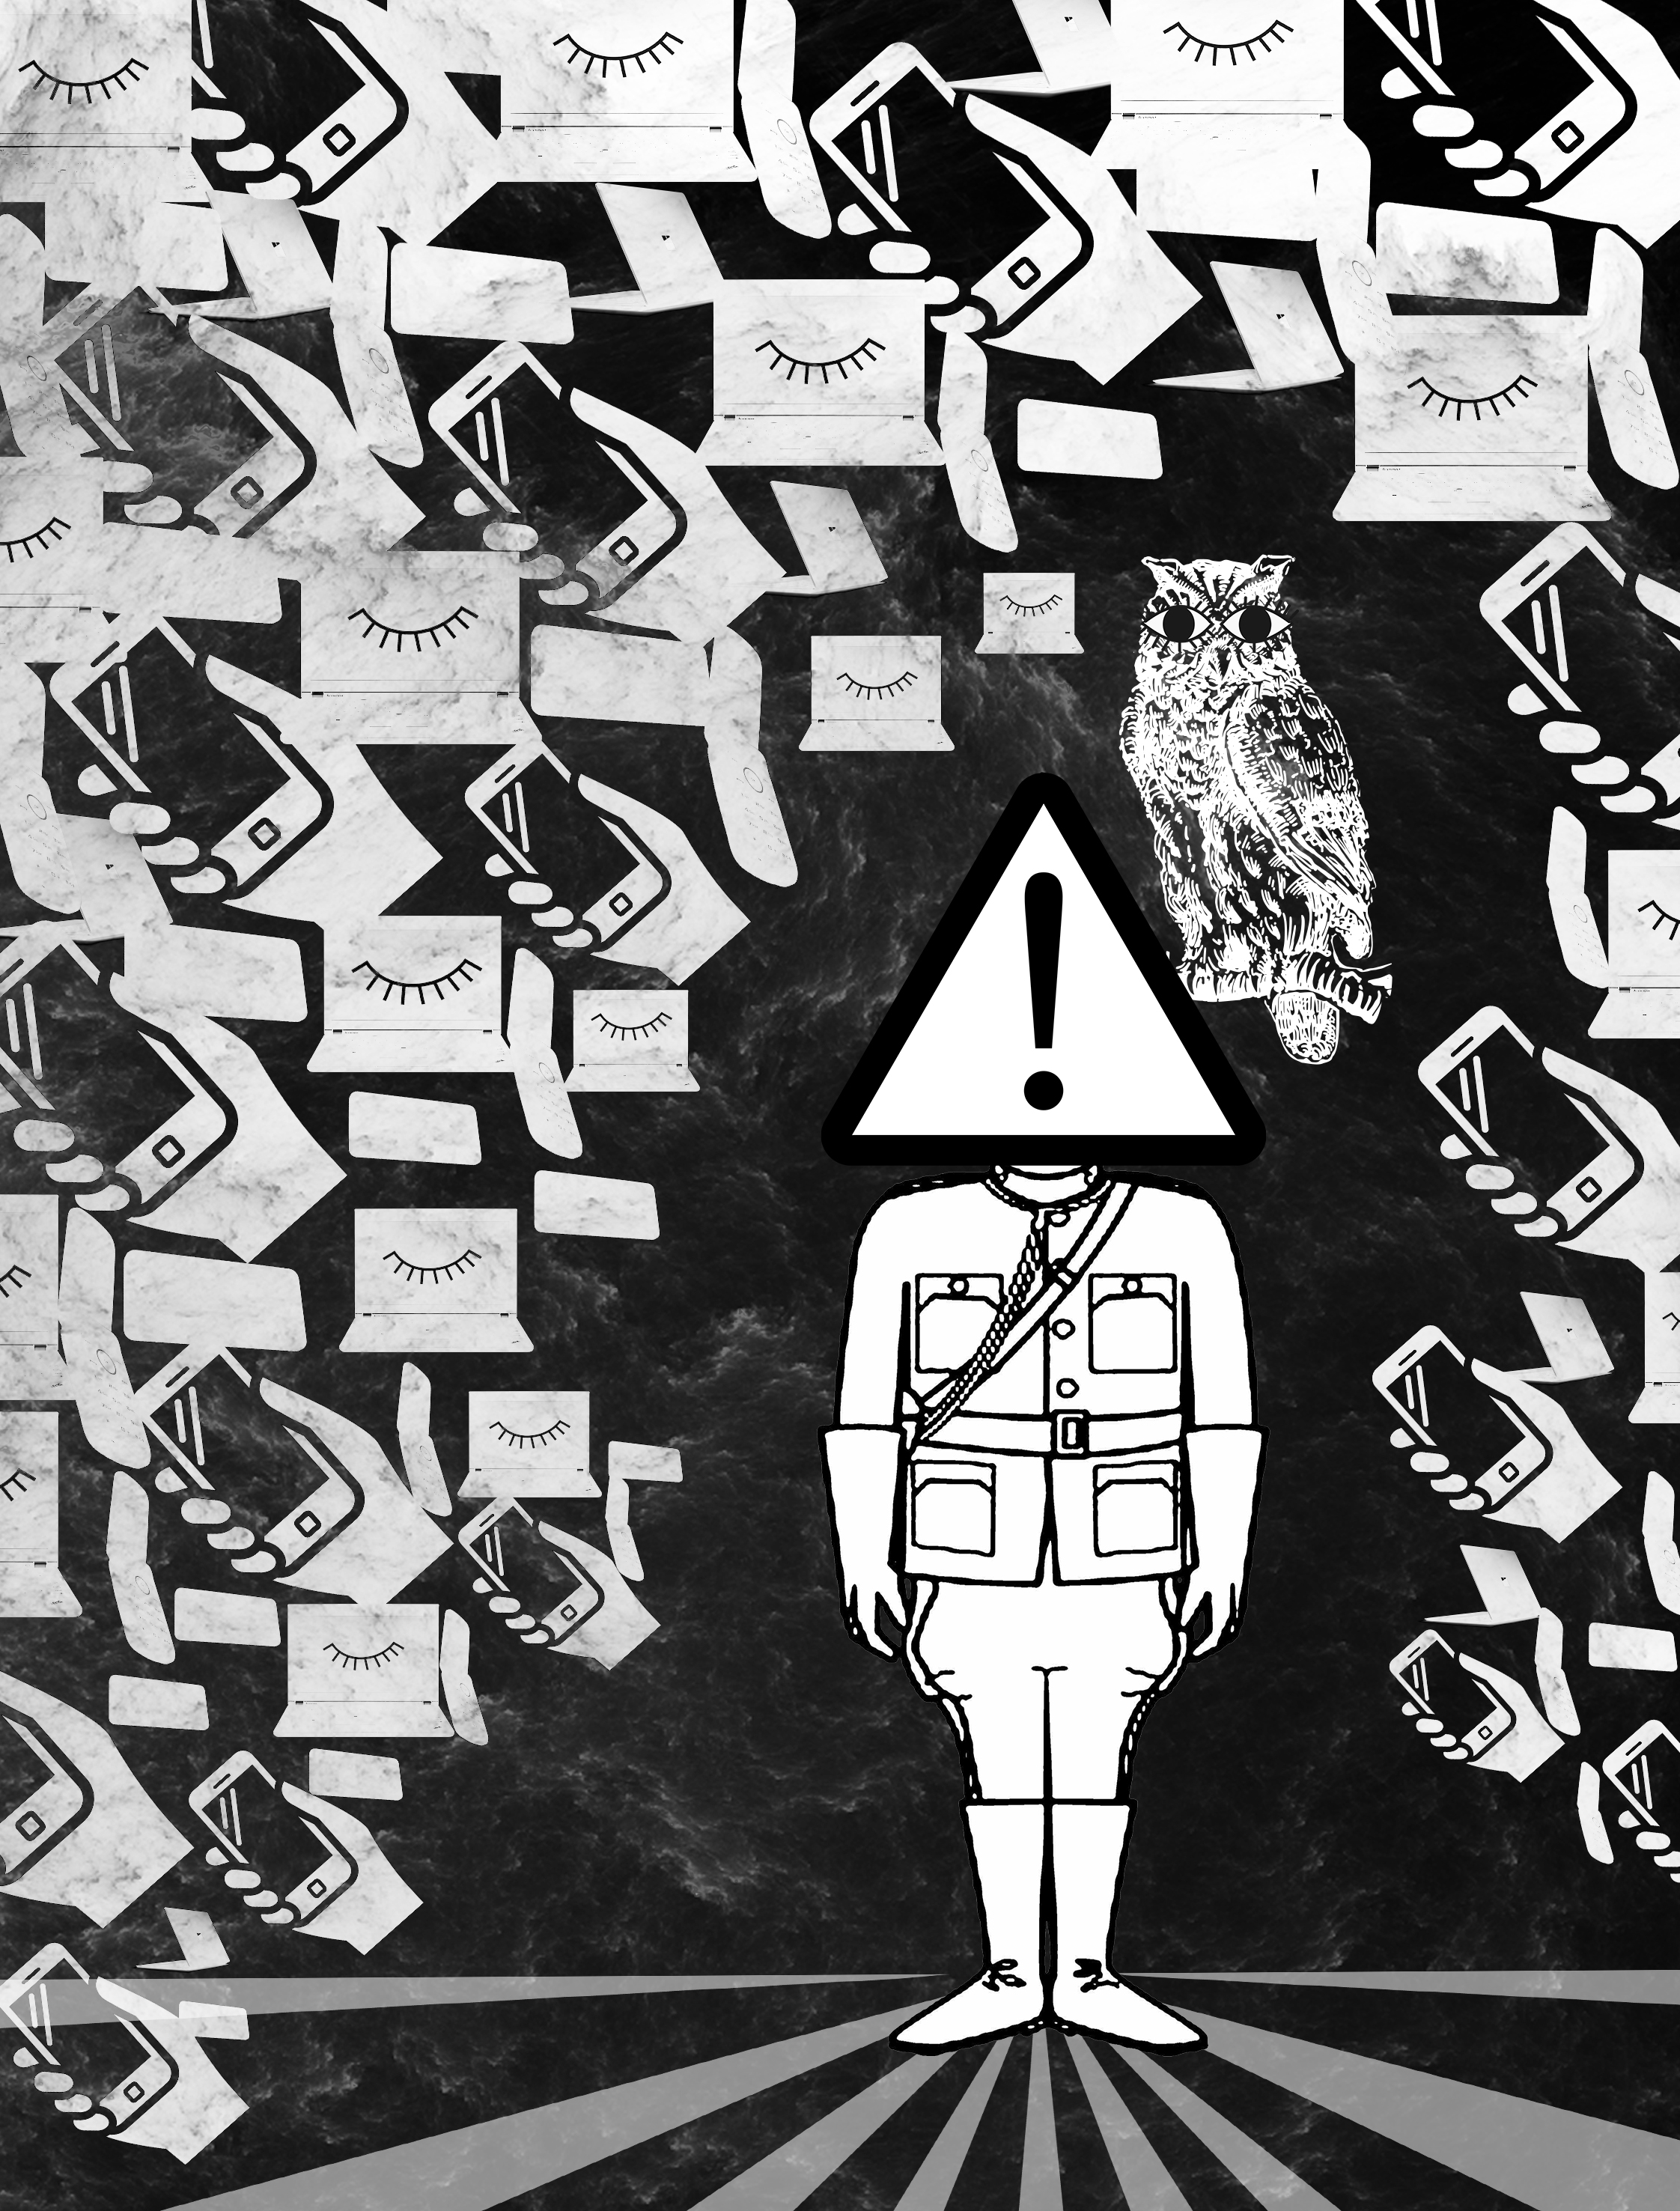
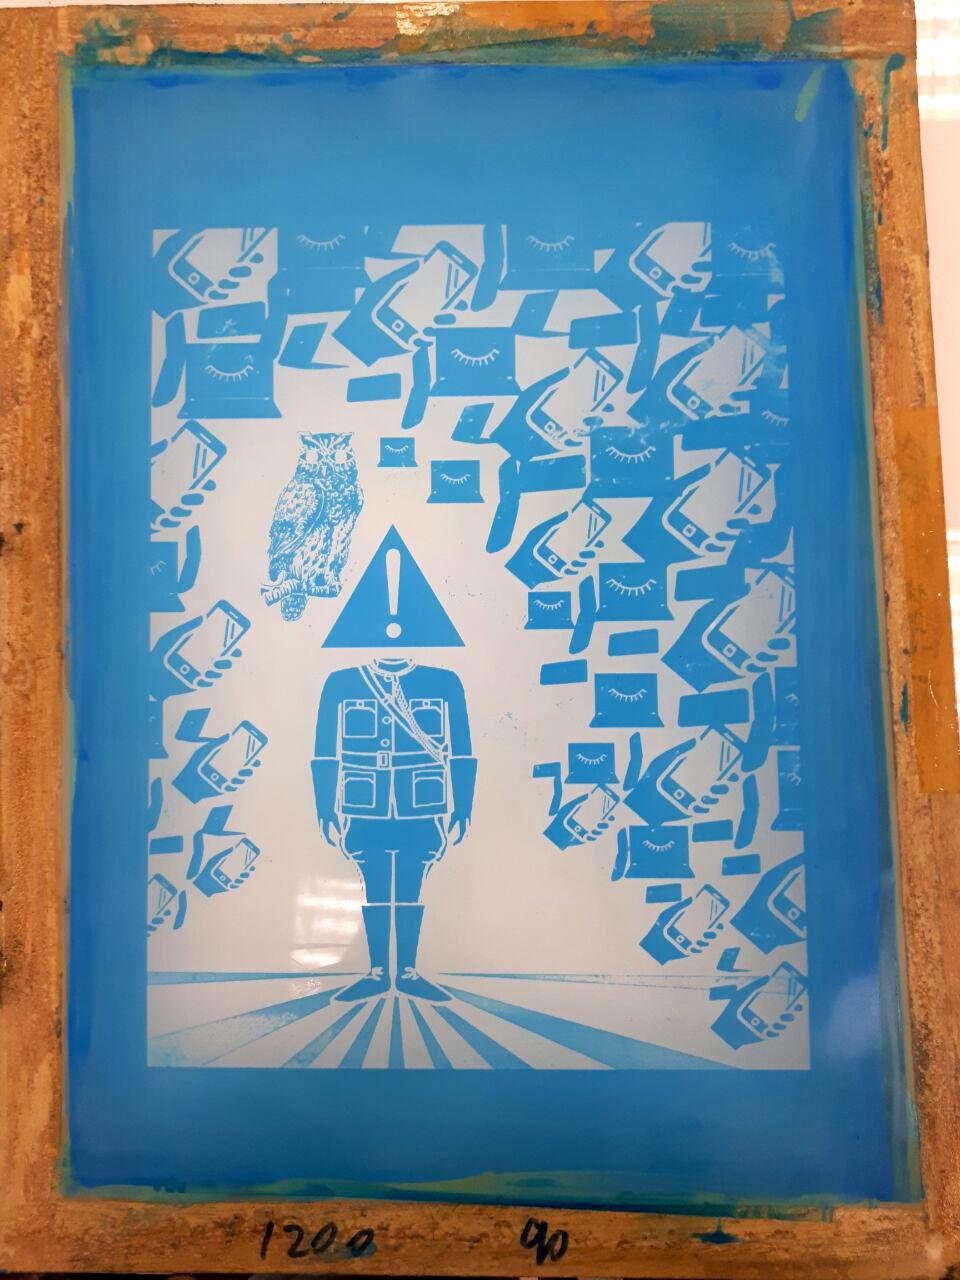
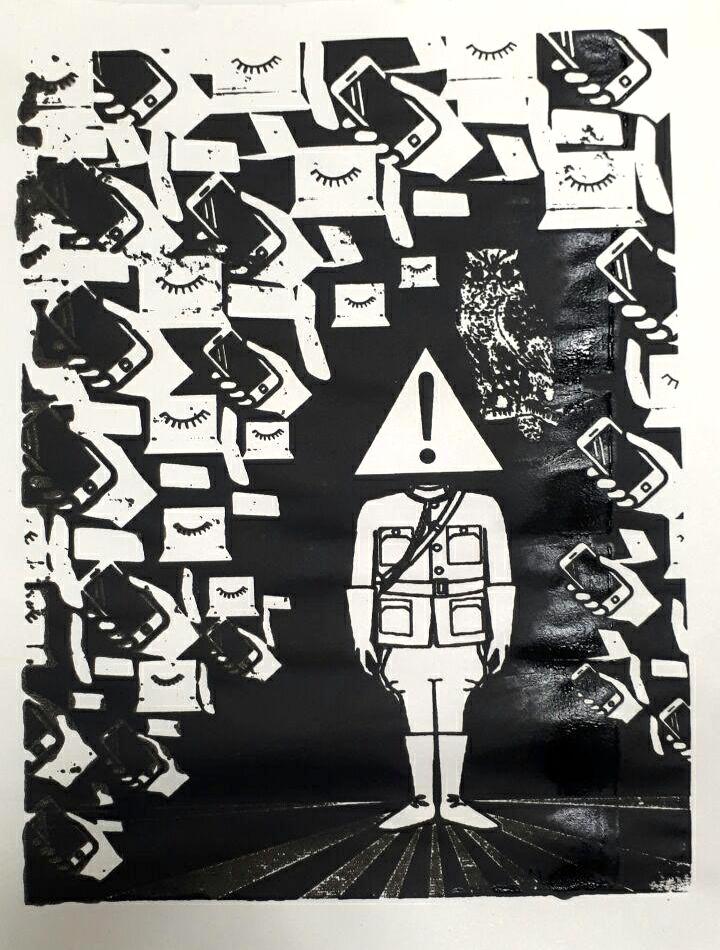
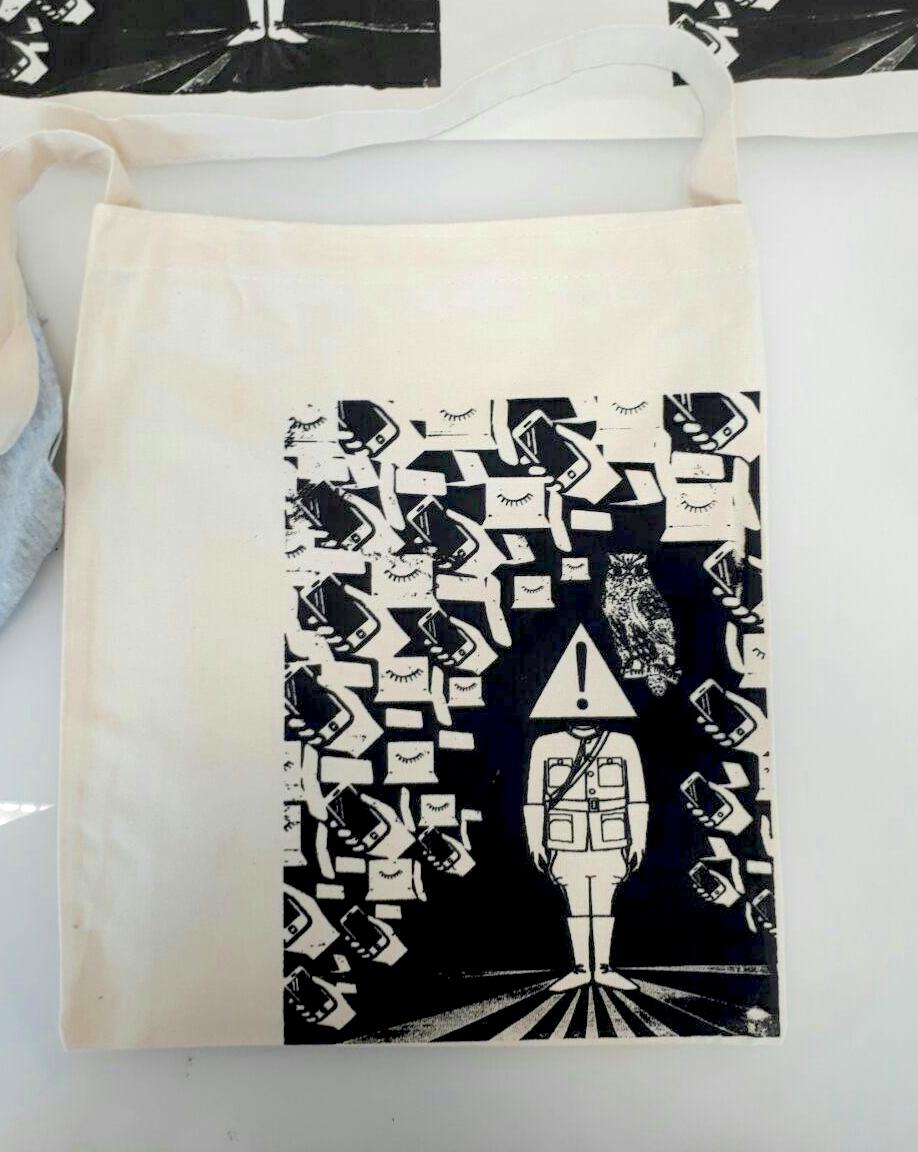
I then re-thought about the quote, what each word or phrase meant to me and how I can represent it through composition. When I thought of “paying attention”, I thought of it in a modern context, in our here and now. I thought of how people nowadays don’t pay attention and are always on their electronic devices. I wanted to then create a sea of objects not paying attention surrounding one object that is. This idea was based off comic book-style drawings that use black lines that surround a subject with some white space between the subject and the lines to make it look as if it is being surrounded.
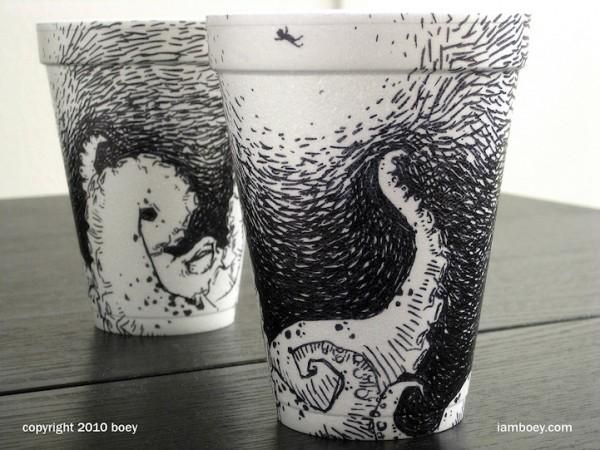
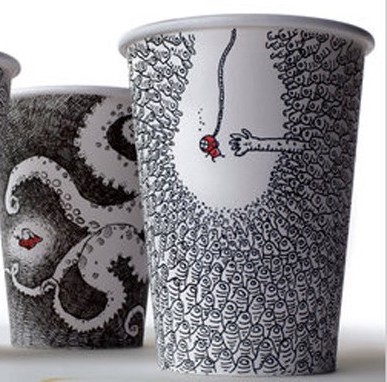
Reference 1 Image from: http://comicsalliance.com/styrofoam-cup-art-cheeming-boey/ Accessed on 9th October 2017Reference 2 Image from: http://comicsalliance.com/styrofoam-cup-art-cheeming-boey/ Accessed on: 9th October 2017Final composition, quote 1
In this image, I used repeated images and symbols of technological devices to surround the man, having the images diminish in size as they get closer to the subject. I also used some lines that fan out under his feet like sun rays as leading lines to bring the focus to the man. I also placed the subject off-centre to make the composition more visually appealing. The subject is standing at attention with a signboard as its head, symbolizing “pay attention”. There is an owl with human-like eyes attached to its head. I used an owl as an owl has very good vision, but I also gave it human-like eyes, too big for its face, to draw attention to its sight or the act of looking. Comparatively, there are closed eyes on the screens of computers to show that looking at these smart devices is equal to not paying attention to one’s surroundings. I made the background black so that the subject stands out, and changed the background textured layer mode to “difference” creating the above effect on the mobile gadgets. By darkening the surrounding images and decreasing their contrast with the background, the subject stands out much more.
Quote 2: “All these moments will be lost in time, like tears in the rain.” – Blade Runner, 1982
Another classic movie! Let’s break down the quote.
Moments: A very short period of time. Also an image/photo, hence the saying capturing moments.
Time: Life and death
Tears in the rain: being disguised or blending in.
Here is my initial composition:
Composition 1
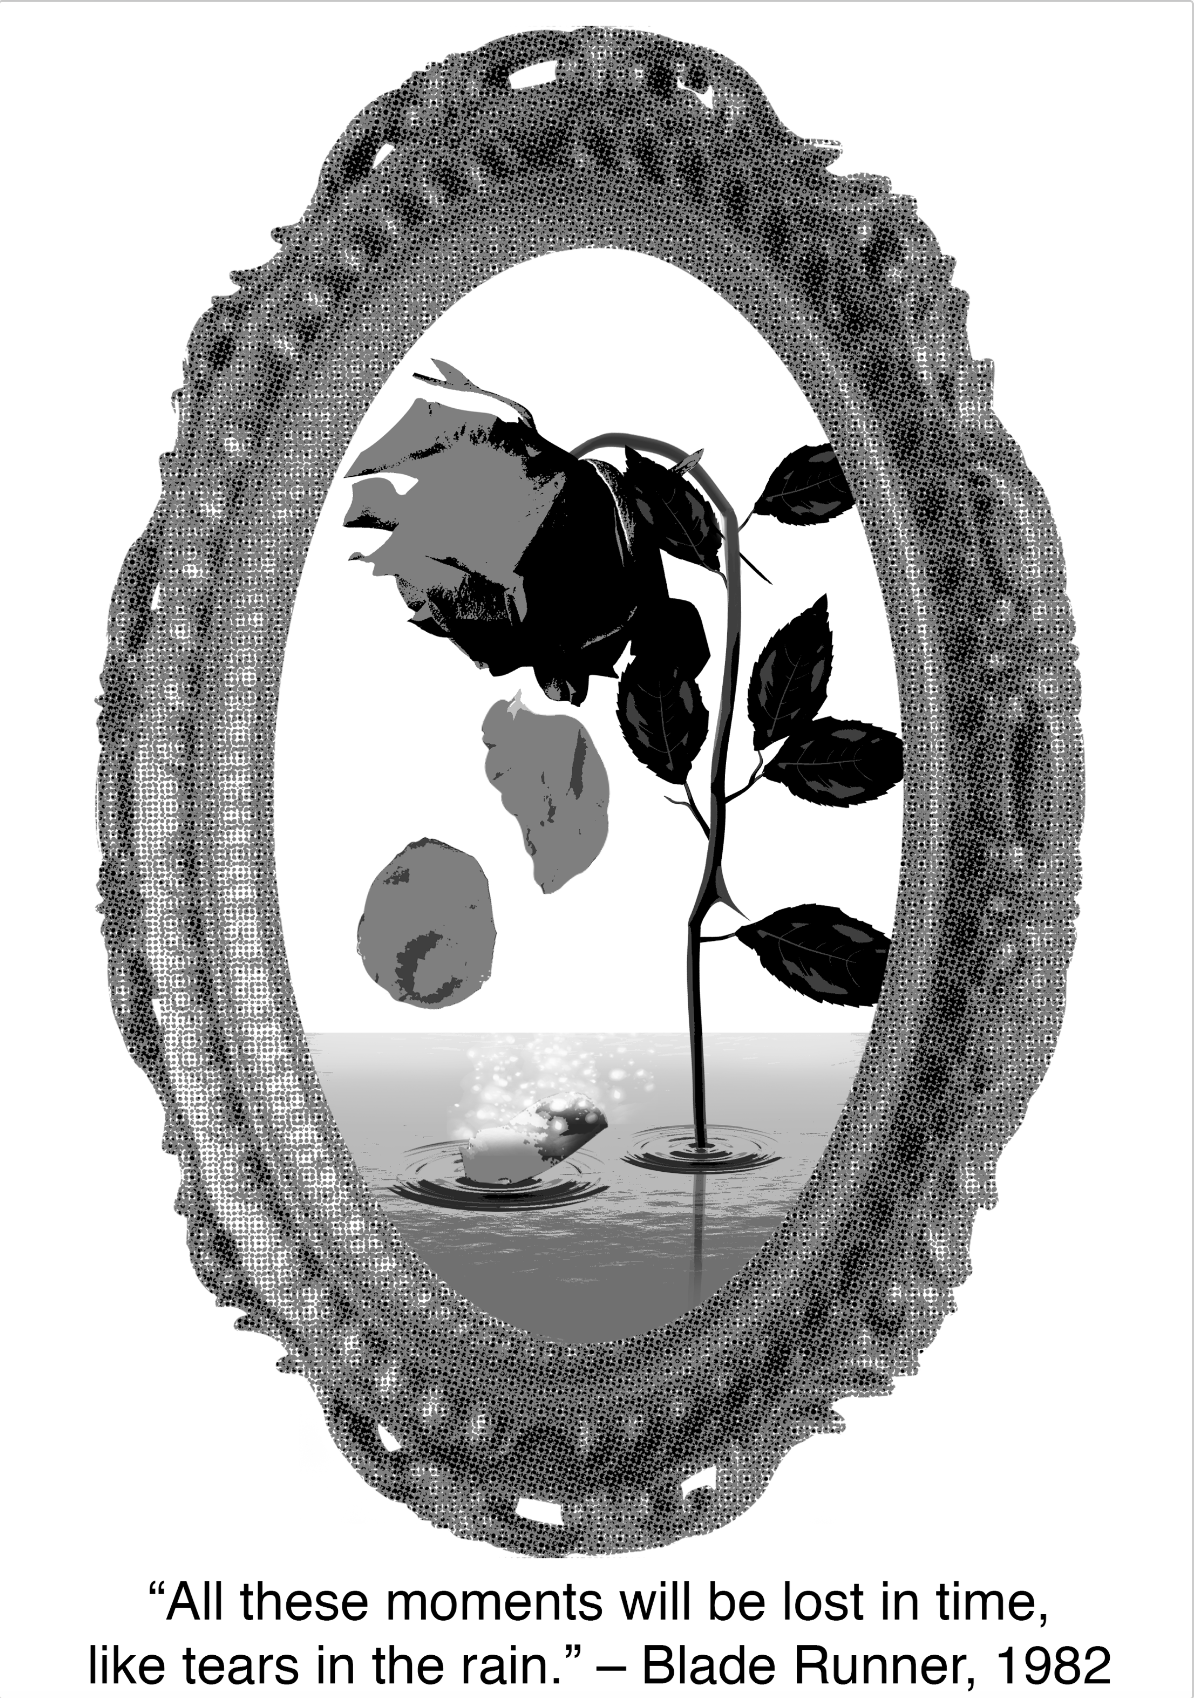
In this composition, I used a photo frame to represent “moments” as moments are like pictures to me. I used a rose to represent life and death, and the falling petals to mimic how rain falls. To represent “lost in time”, I made a petal disintegrate in a magical manner when it touches the water. Personally, I quite liked this composition. However, I found it too symmetrical and static, and I felt that the white space on the canvas was not being utilized.
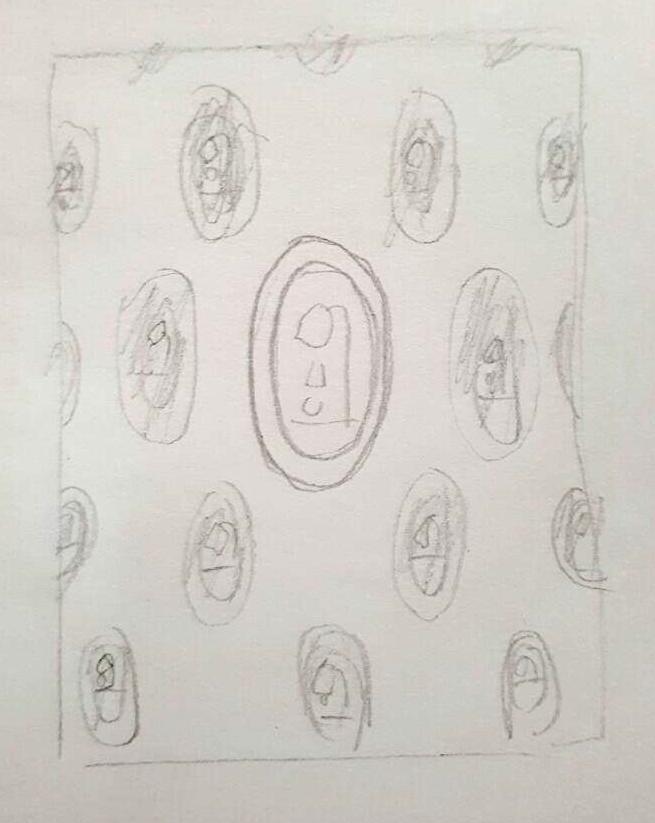
Composition sketch
I then thought about duplicating it to create a wall of “moments”, and instead of making the pattern uniform, I wanted to have the frames diminish in size as they moved away from the centre. I thought of making the centre frame the subject and posterizing the other frames to make it stand out more. After thinking it through, I didn’t really like this idea as it still felt static and too symmetrical.
Again, going with a more Dada-like style, I created my final composition:
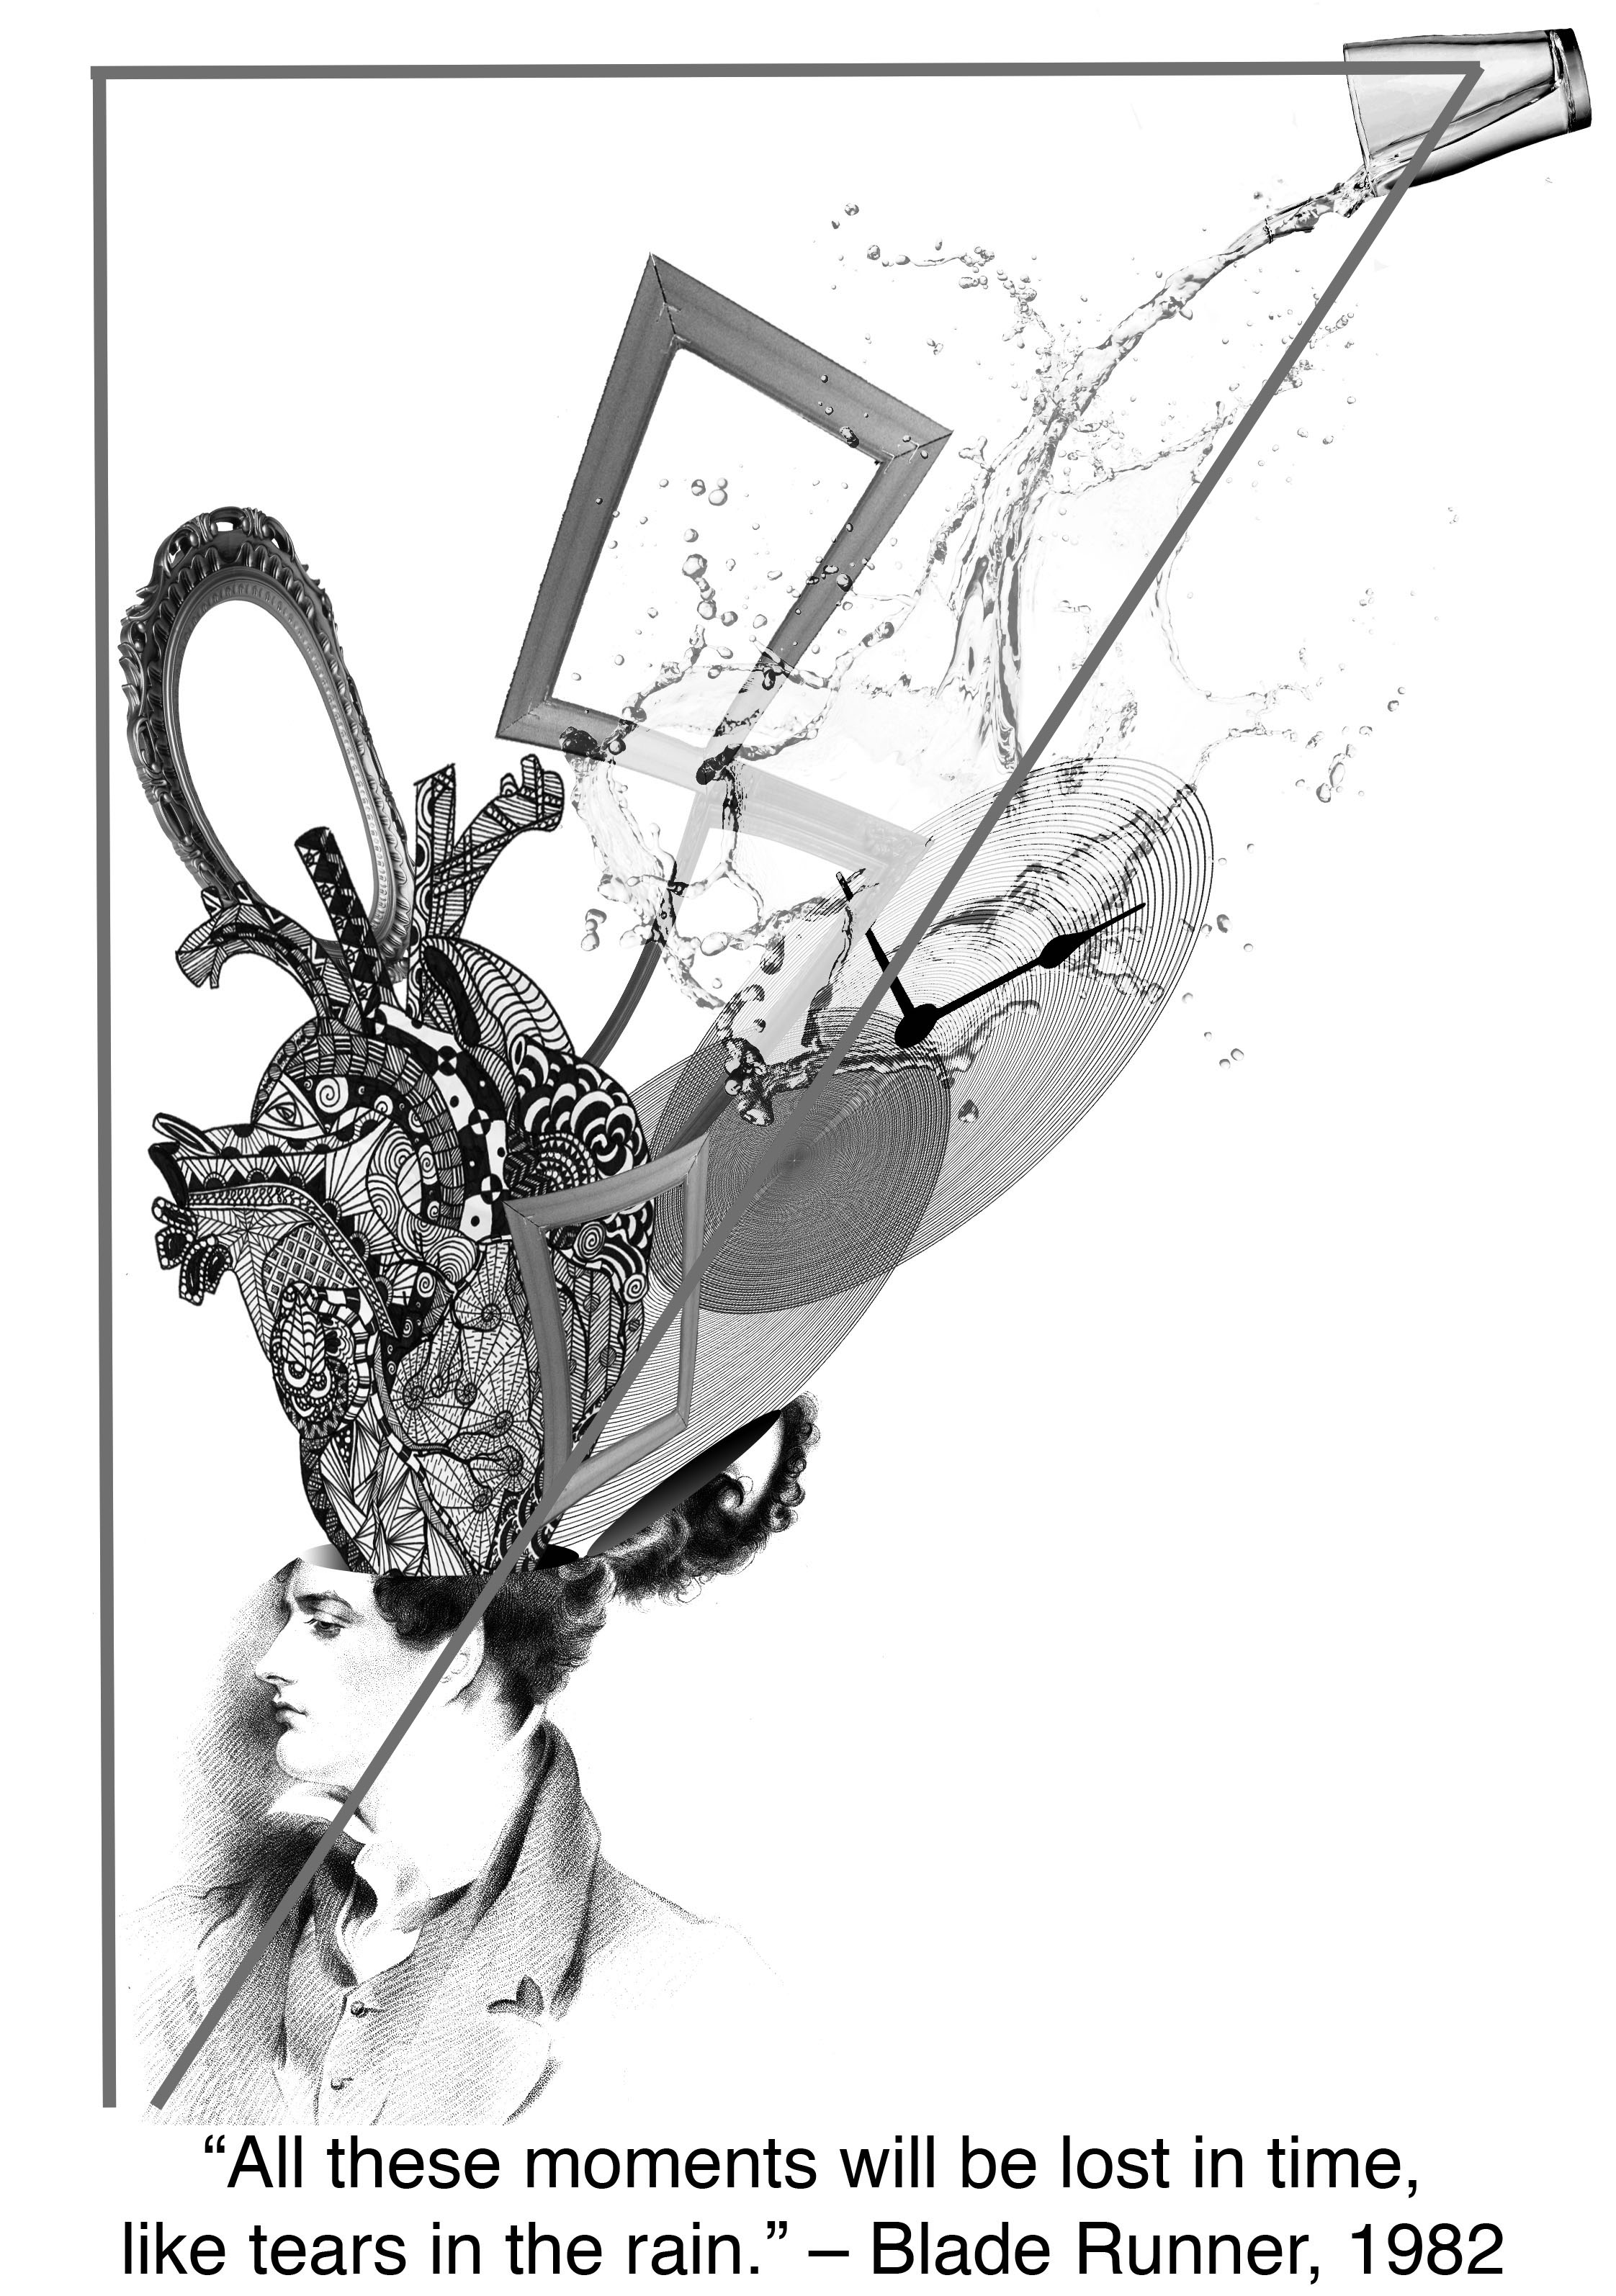
Final image, quote 2
For this image, I wanted to show moments in time floating out of the man’s head, showing him literally losing his memories of these moments. I also added a heart as memories tie in very much with emotion. The spilt water in my composition gives the image some movement. Here, I have the water spill over the moments, letting the moments be washed away.
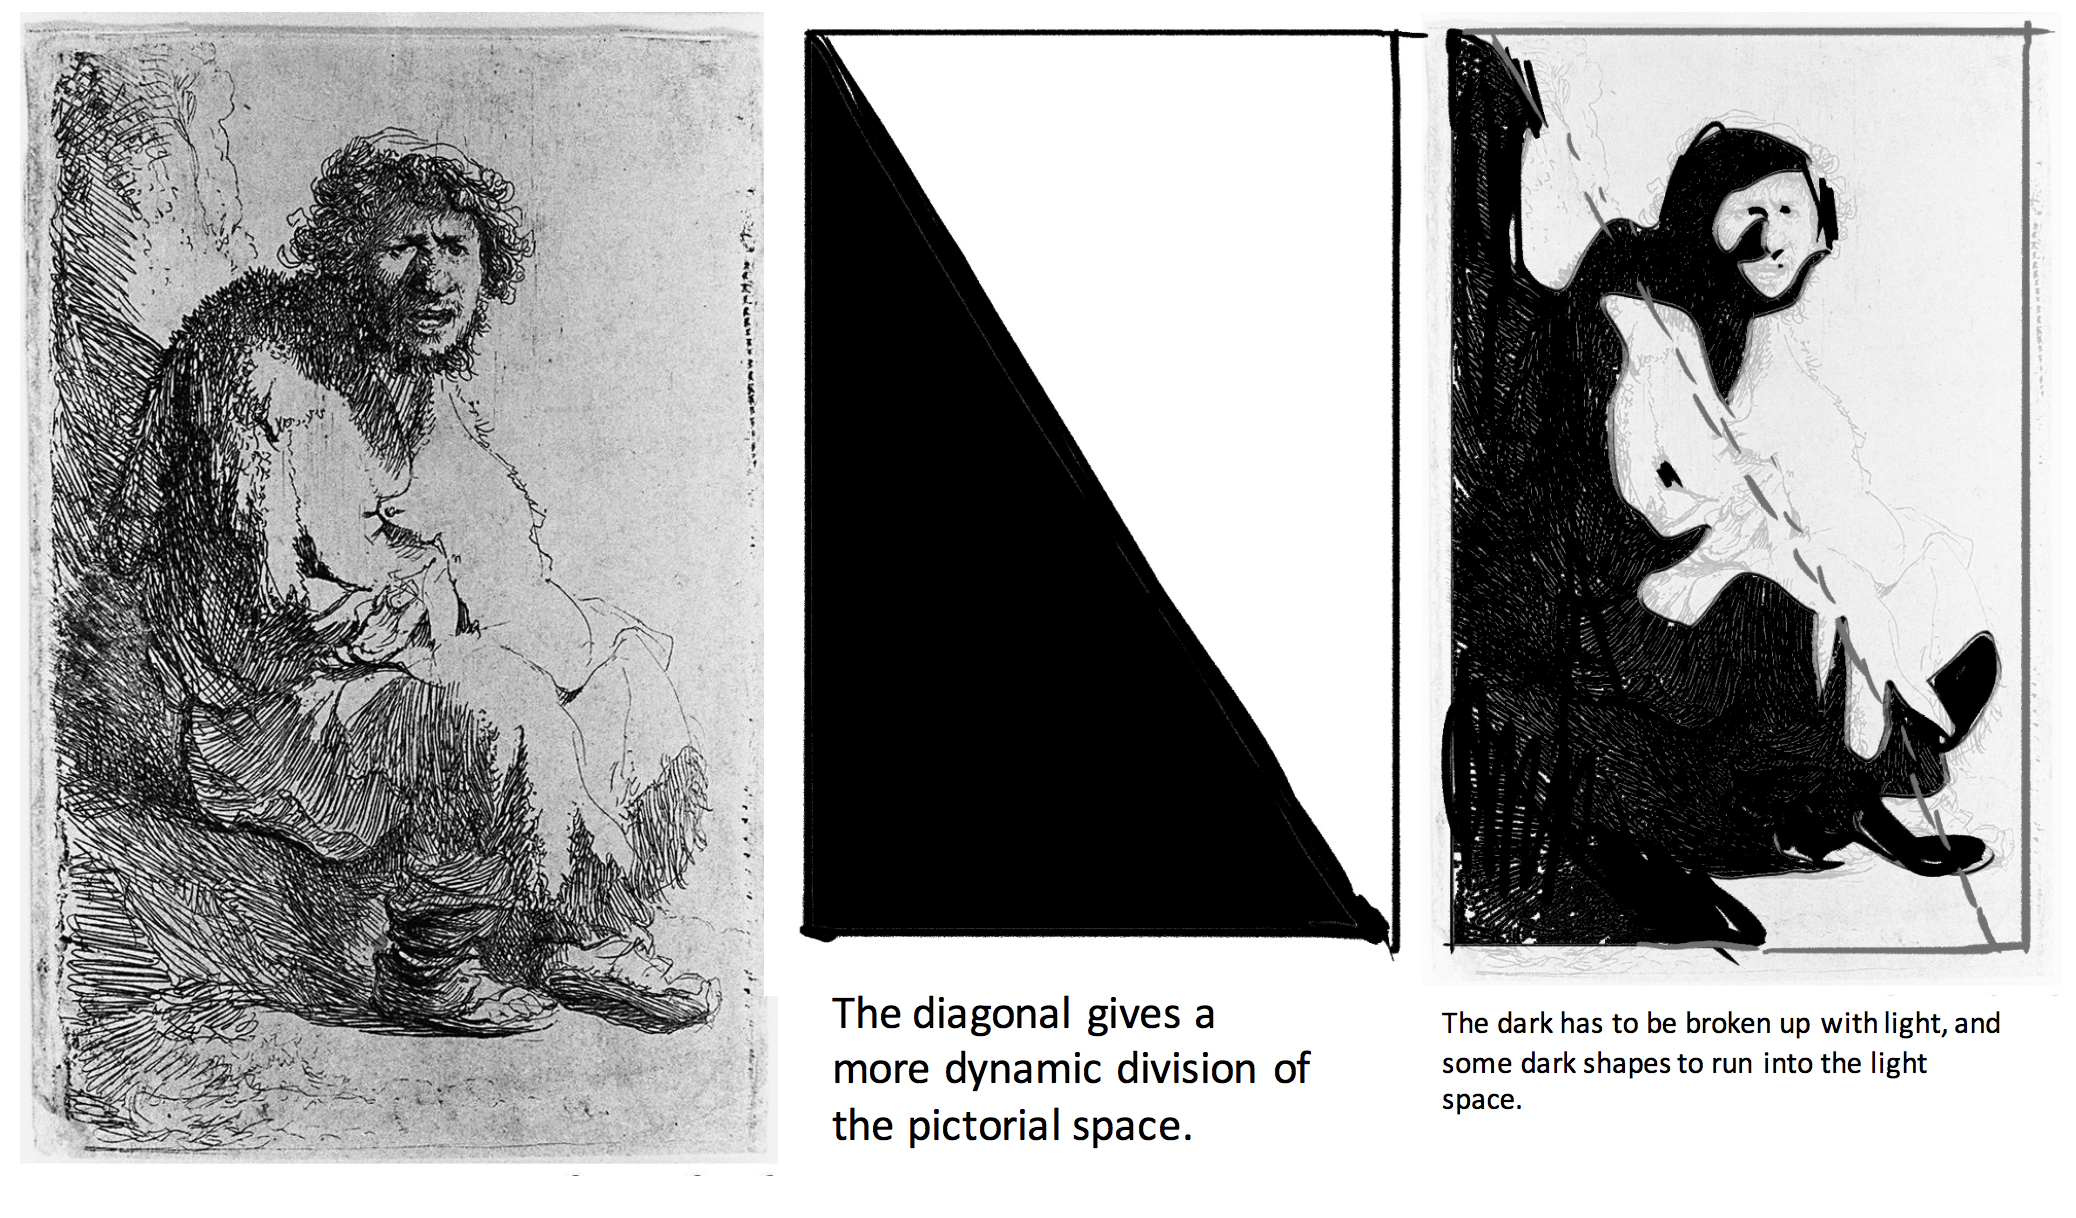
For this composition, I focused on the diagonal line composition which would make my image more visually interesting. I used the warped shapes of the frame and the spilt water as leading lines for the viewer towards the top half of the work.
Diagonal line/angular ruleDiagonal line/angular rule splits dark tones and light tones across a page diagonally.
The rule splits the canvas into two separate sections diagonally. One dark and one light. Following this, my darker tones in my composition are all placed more towards the upper diagonal of the canvas while the bottom diagonal remains mostly white.
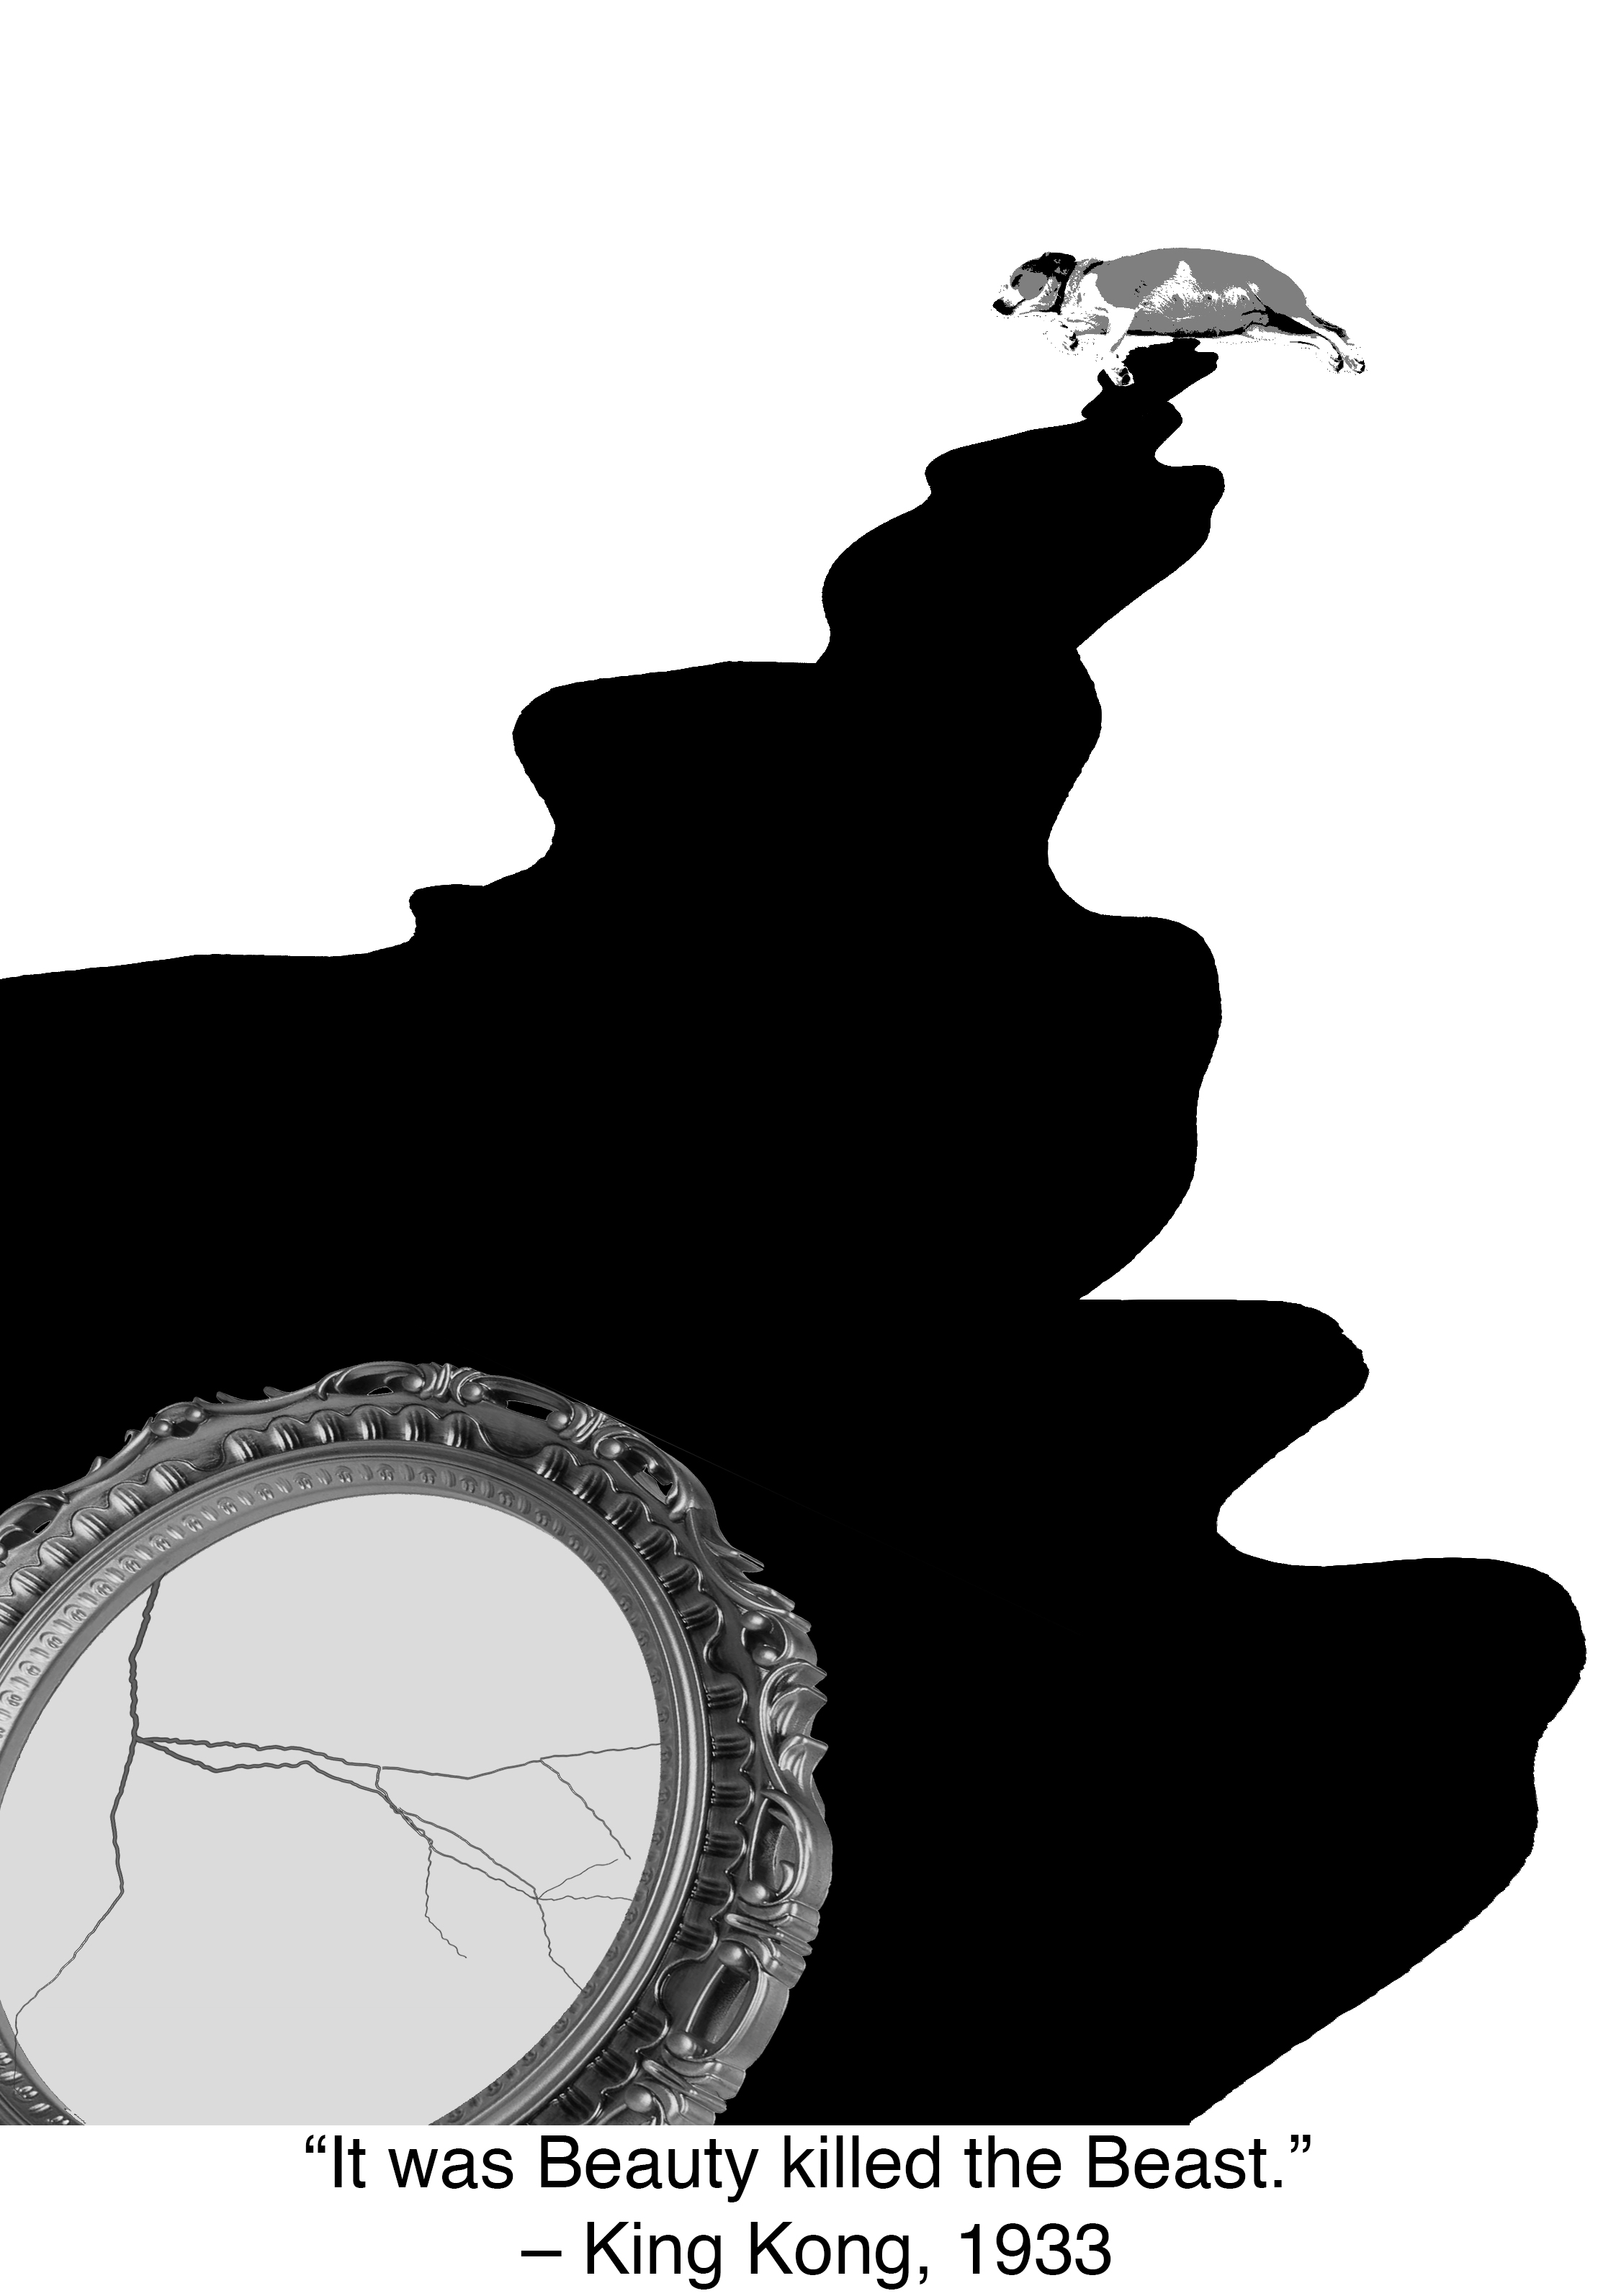
Quote 3 – “It was beauty killed the beast” – King Kong, 1933
Breaking down the quote:
Beauty: Luxury, fashion
Beast: Some sort of animal.
Killed: Murder, blood, grim reaper.
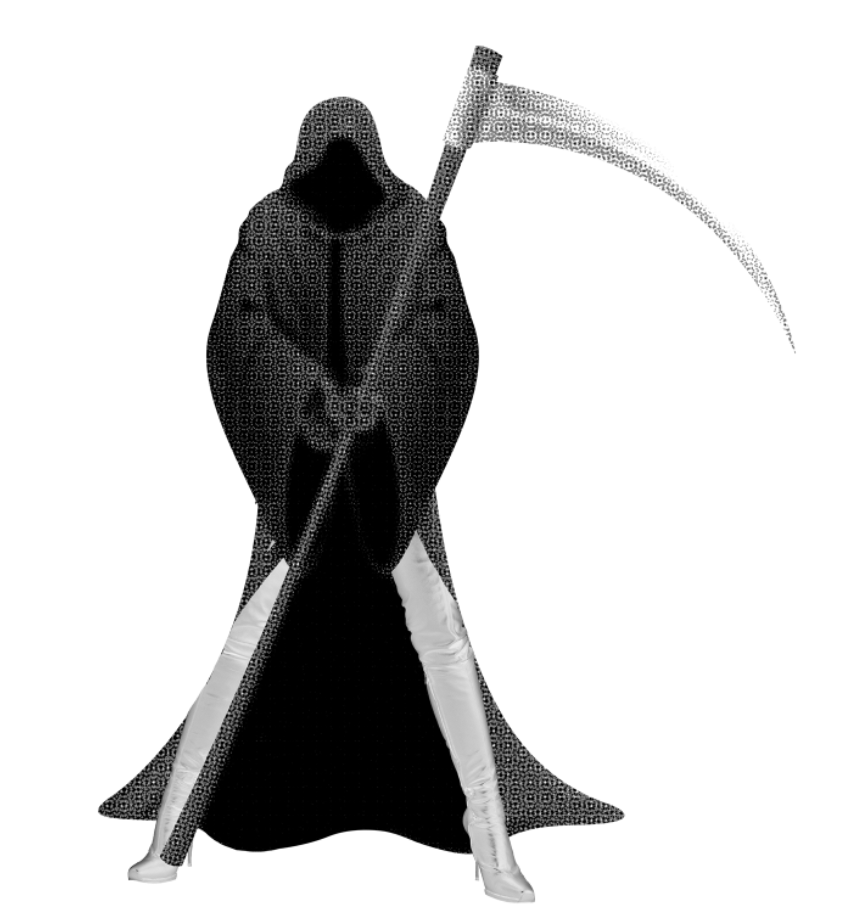
For my initial composition, I wanted to include an image of a grim reaper with female legs to literally show beauty killing the beast but again, I realised it might have been too literal of a portrayal of the quote.
Sexy Grim Reaper
I thought of wanting to create an image with more depth or perspective. I thought of referencing this poster:
Rocky movie poster Image from: http://collider.com/movie-poster-rolling-roadshow-2010-there-will-be-blood-dirty-harry-jackie-brown-robocop-olly-moss-movie-poster/ Accessed on 12th October 2017
Here is my composition:
Composition 1
I used a dog to represent beast, and a mirror to represent beauty, with the crack on the mirror to hint some sort of murder, and the blood to link the mirror and the dog together.
Talking with Shirley, she told me I could make my mirror bigger and add some sort of texture to my work as it was looking a little flat. I realized this made it quite hard to see the depth in the photo.
I thought about how to improve that. I thought of what beauty was to me and decided to use lipstick stains as an overlay layer over the blood. Here is my final composition:
Final image, quote 3
In this image, there is a much stronger sense of depth and perspective because of the relative size of the mirror to the dog, and the diminishing size of the lipstick stains. I decided to also leave the surrounding space white to add a sense of mystery to the image as there is no clue where the dog is.
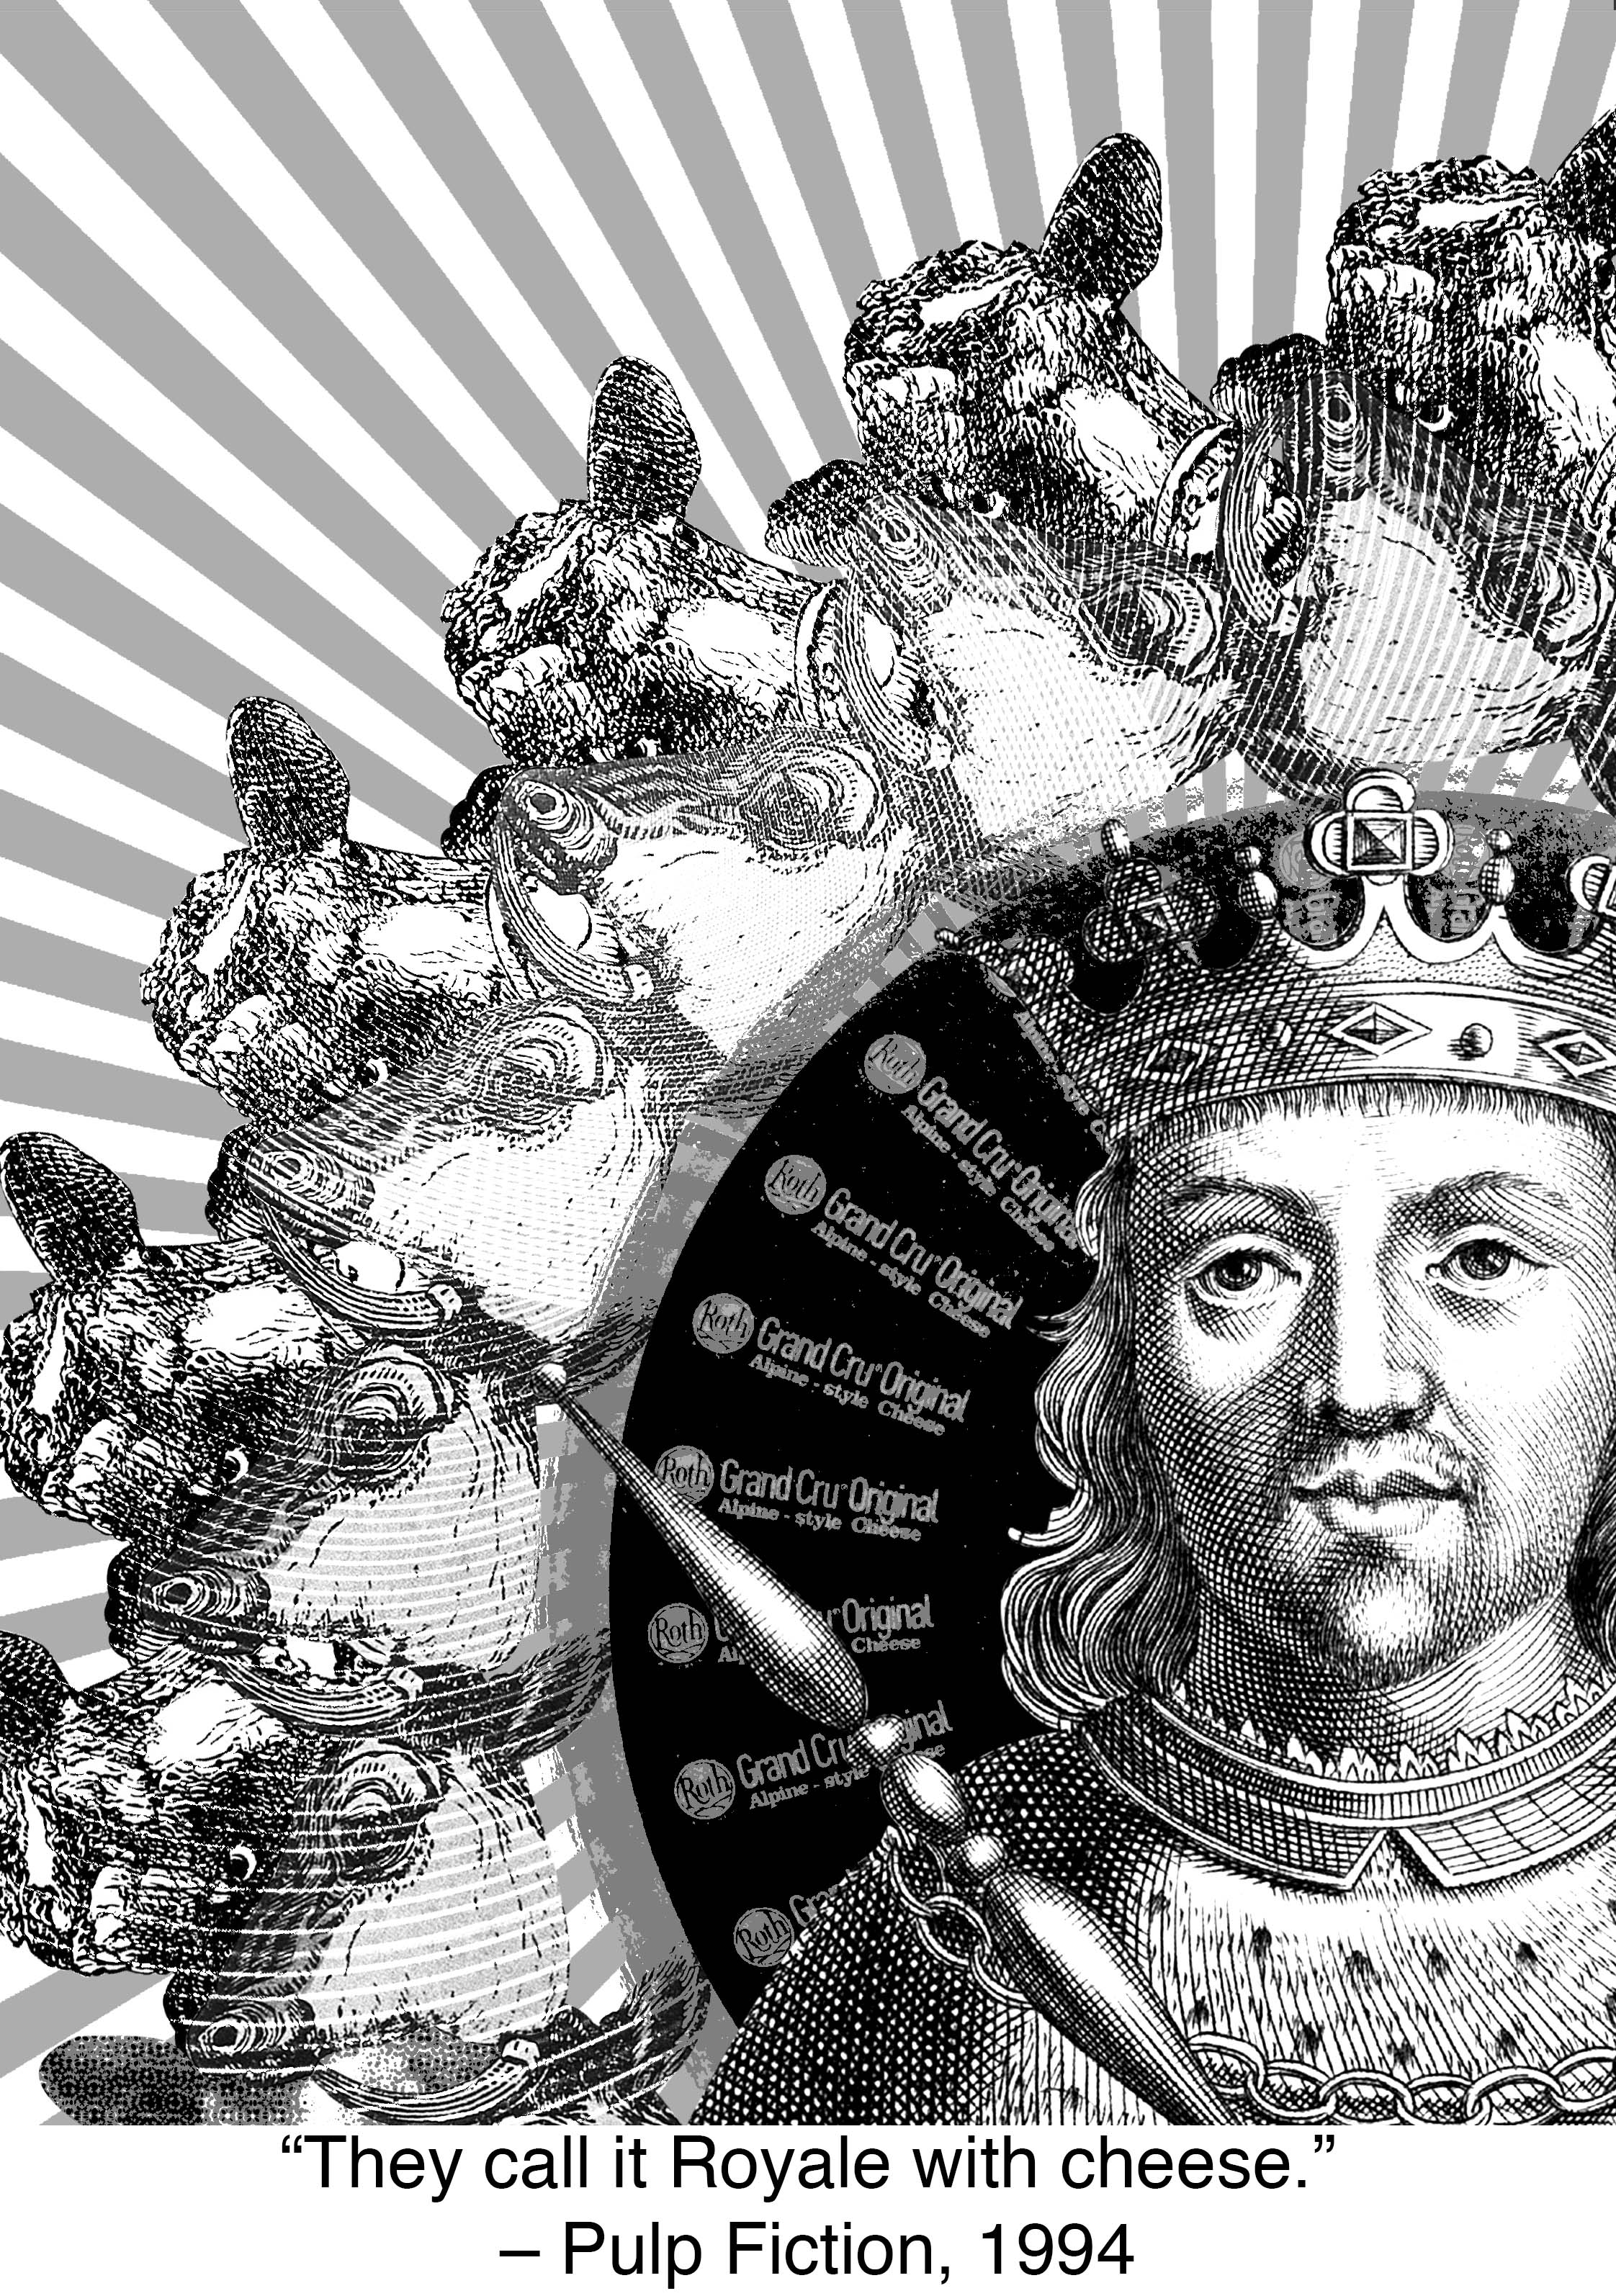
Quote 4: “They call it Royale with cheese.” – Pulp Fiction, 1994
Another great film with entertaining characters and funny lines, it was hard to decide which to pick but I was hungry and a Royale with cheese was hence the perfect choice.
Breaking the quote down:
Royale: Royalty and luxury
with: together, a couple (a boyfriend with a girlfriend).
Cheese: Cow, milk, cheese wheel
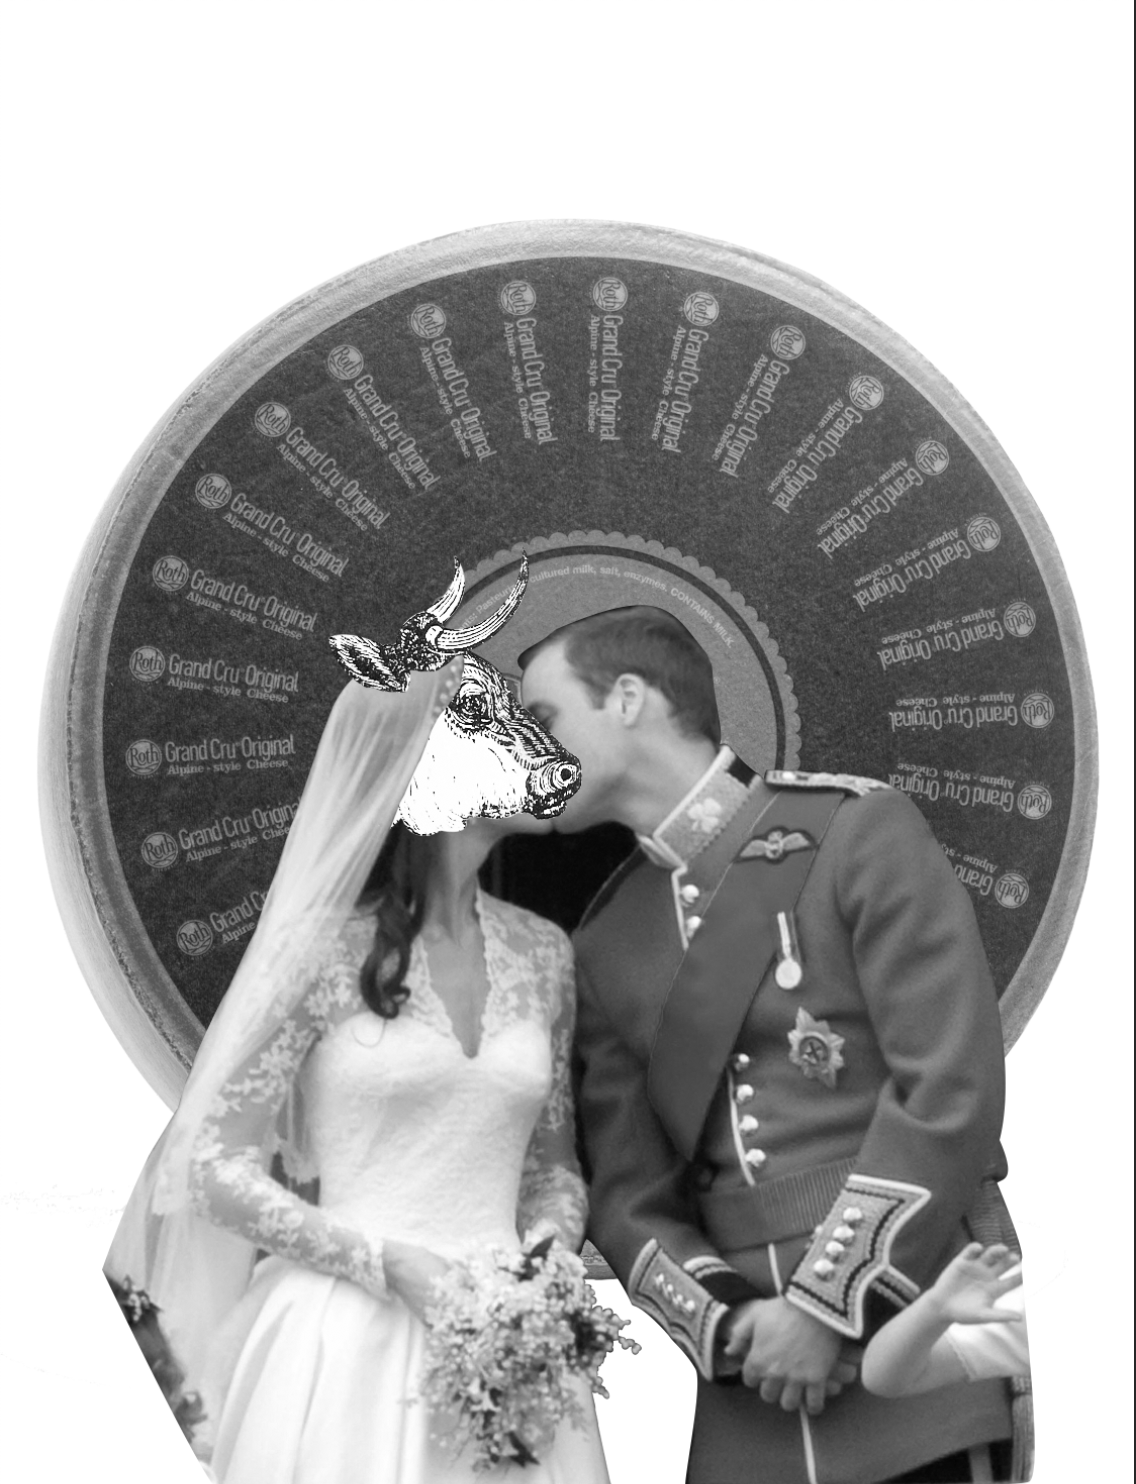
For this specific quote, I found it quite difficult to come up with an idea for the composition.I set myself an aim for this image and it was to create tiled or layered images. I first churned out a little bit of a symmetrical piece, just to get that out of my system:
Composition 0.5, an unfinished piece
Here, I chose wedding photos of Prince William and Kate Middleton, but have Kate’s head replaced with a cow, making it look like the prince was marrying the cow, hence “royale with cheese”! For this design, I wanted to play with the roundness of the cheese wheel and the nice pattern created by the text by layering it. Here is the result with a different composition:
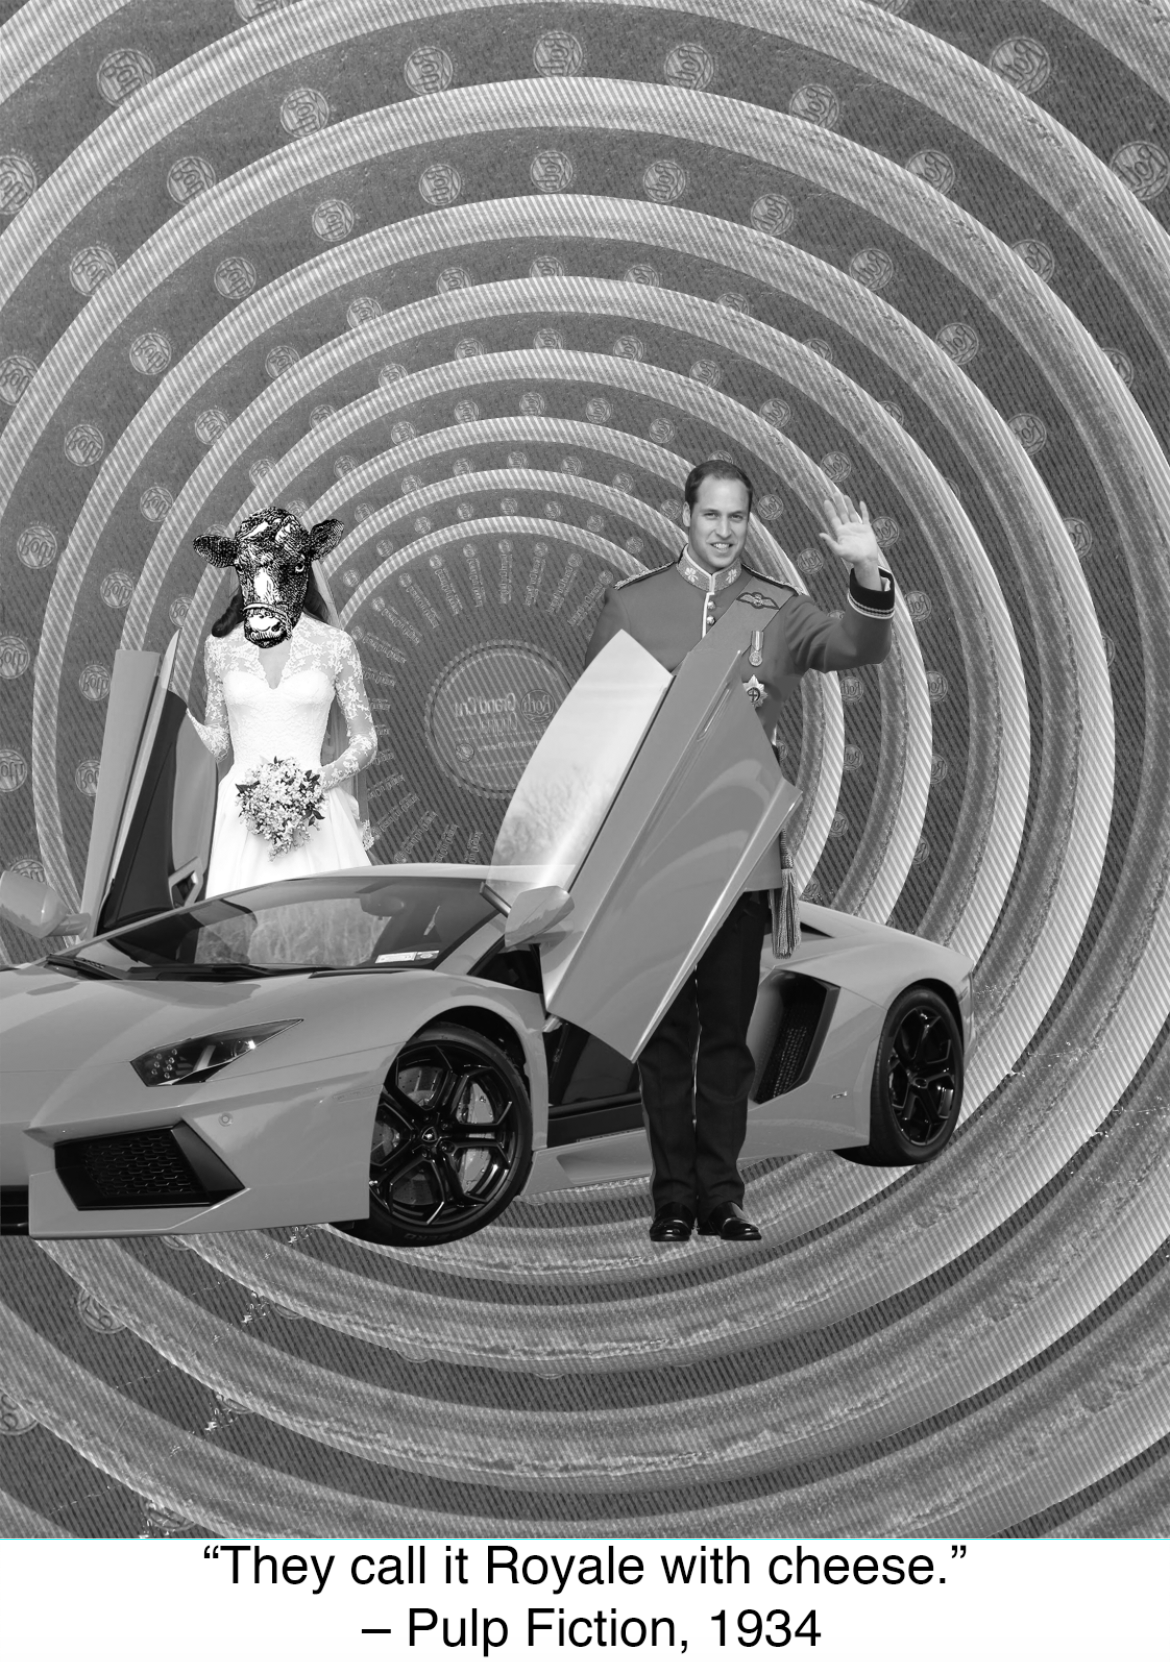
Composition 1
This time I had the royal couple look like they stepped out of a luxury car. This composition turned out a lot plainer than I expected. The background looked plain as it was just a repetition of the same image, and the royal couple and their car were floating in mid-air. There were no design principles applied to the subjects. I scrapped the royal couple idea but kept my layering idea and came up with this final result:
Final composition, quote 4
I switched up the royal couple for an engraving of a king instead but kept the cheese wheel background. I posterized the cheese wheel, creating a black colour that allowed the king to stand out more. I then made tessellations of two cow heads and overlayed them with a radial line pattern, using the divide layer mode to remove some detail, and hence emphasis from the cow, allowing the king to stand out. Following my design for my first quote, I used the sunray-like lines to lead the viewers’ eyes to the King.
Silkscreen Printing!
exposed and washed silkscreenTest print!
The ink on the test print bled a little because I went over the silk screen multiple times. The trick was to get it in one swipe and that’s what I did for my tote bag print.
Printing on the tote bag! Click on the image to reveal the gifFinished design!
My finished design! I decided to have it at the corner of the bag to make my tote bag a little more original and less conventional.
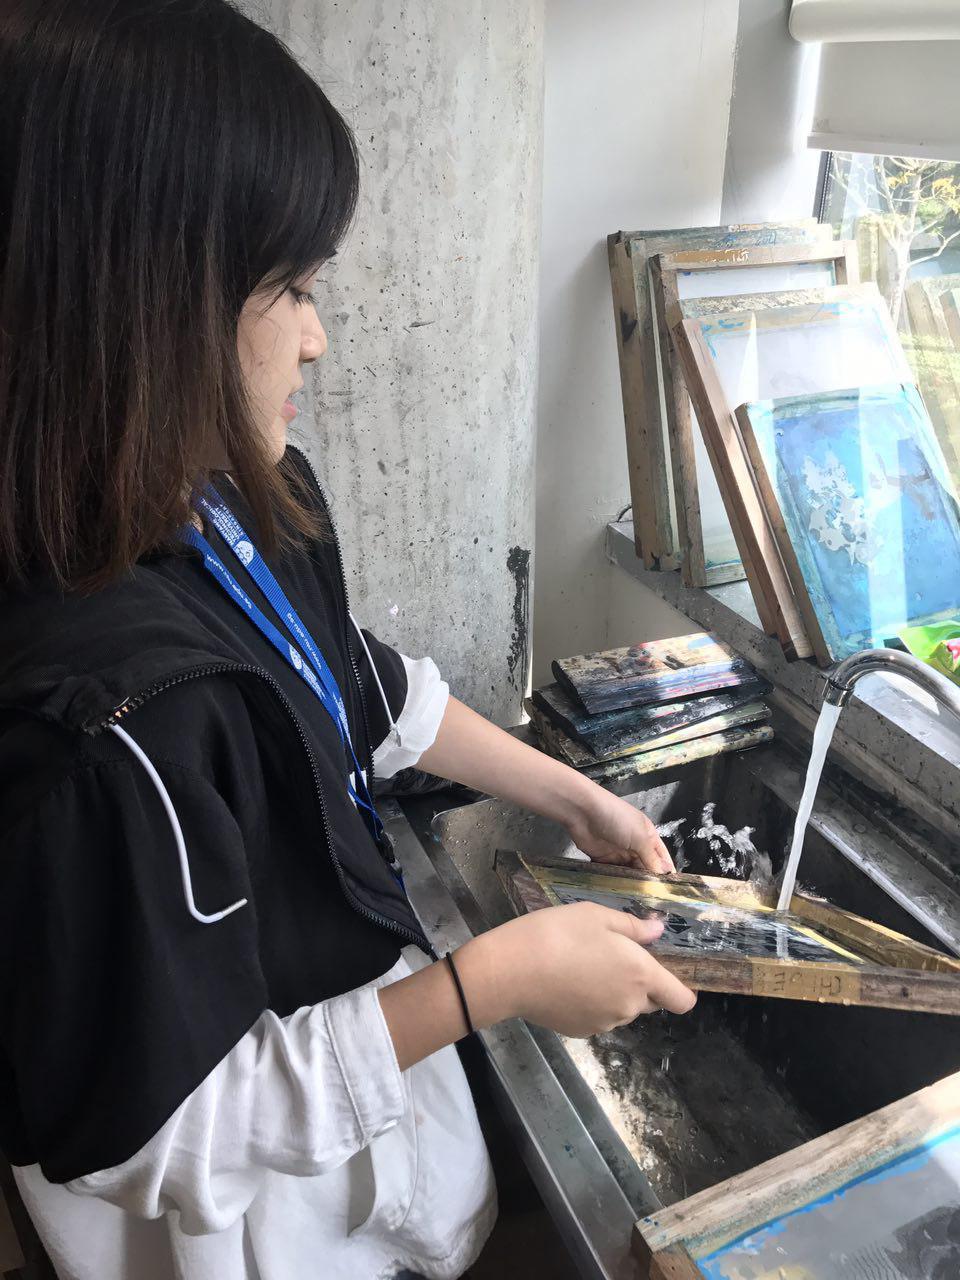
Washing the silkscreen
… And finally, saying goodbye to the silkscreen!
Post-project THOUGHTS
After this project, I’ve come to realise that I shouldn’t be scared or re-doing my designs and trashing my previous one completely, also that I shouldn’t “hoard” or try to keep an object in my composition just because I like it – if it doesn’t work with the composition, it doesn’t work and means it needs to be SCRAPPED! I’ve also learned how to see things in a more uncanny or unconventional manner as well as to see how to compose images, in other words, I think my seeing and composing abilities went up a notch. Although, I think I can improve on showing less to tell more, less is more.
I’ve also learnt so much about composition. I used to think it would be quite an easy thing to do and that it came naturally to a lot of people, but I’ve realised that composing an image can take a lot of thought. I’ve wrecked my brains quite a bit for this project but, overall, it was really fun and I finally got to try out silkscreen printing!
It’s 4 in the afternoon. I’m sitting in my Foundation 2D class at B2-20 and I’m currently working on how to create this OSS site. Here’s my first post:
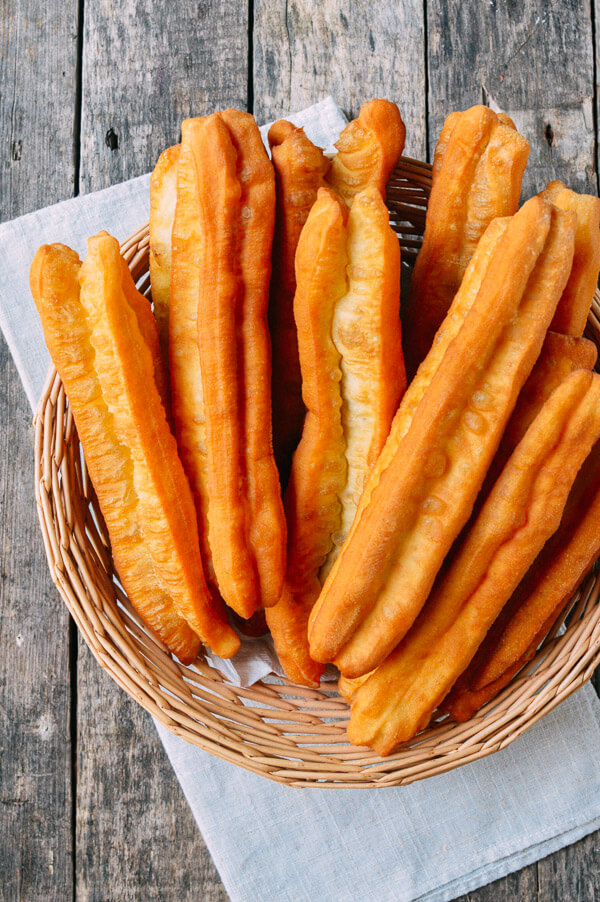
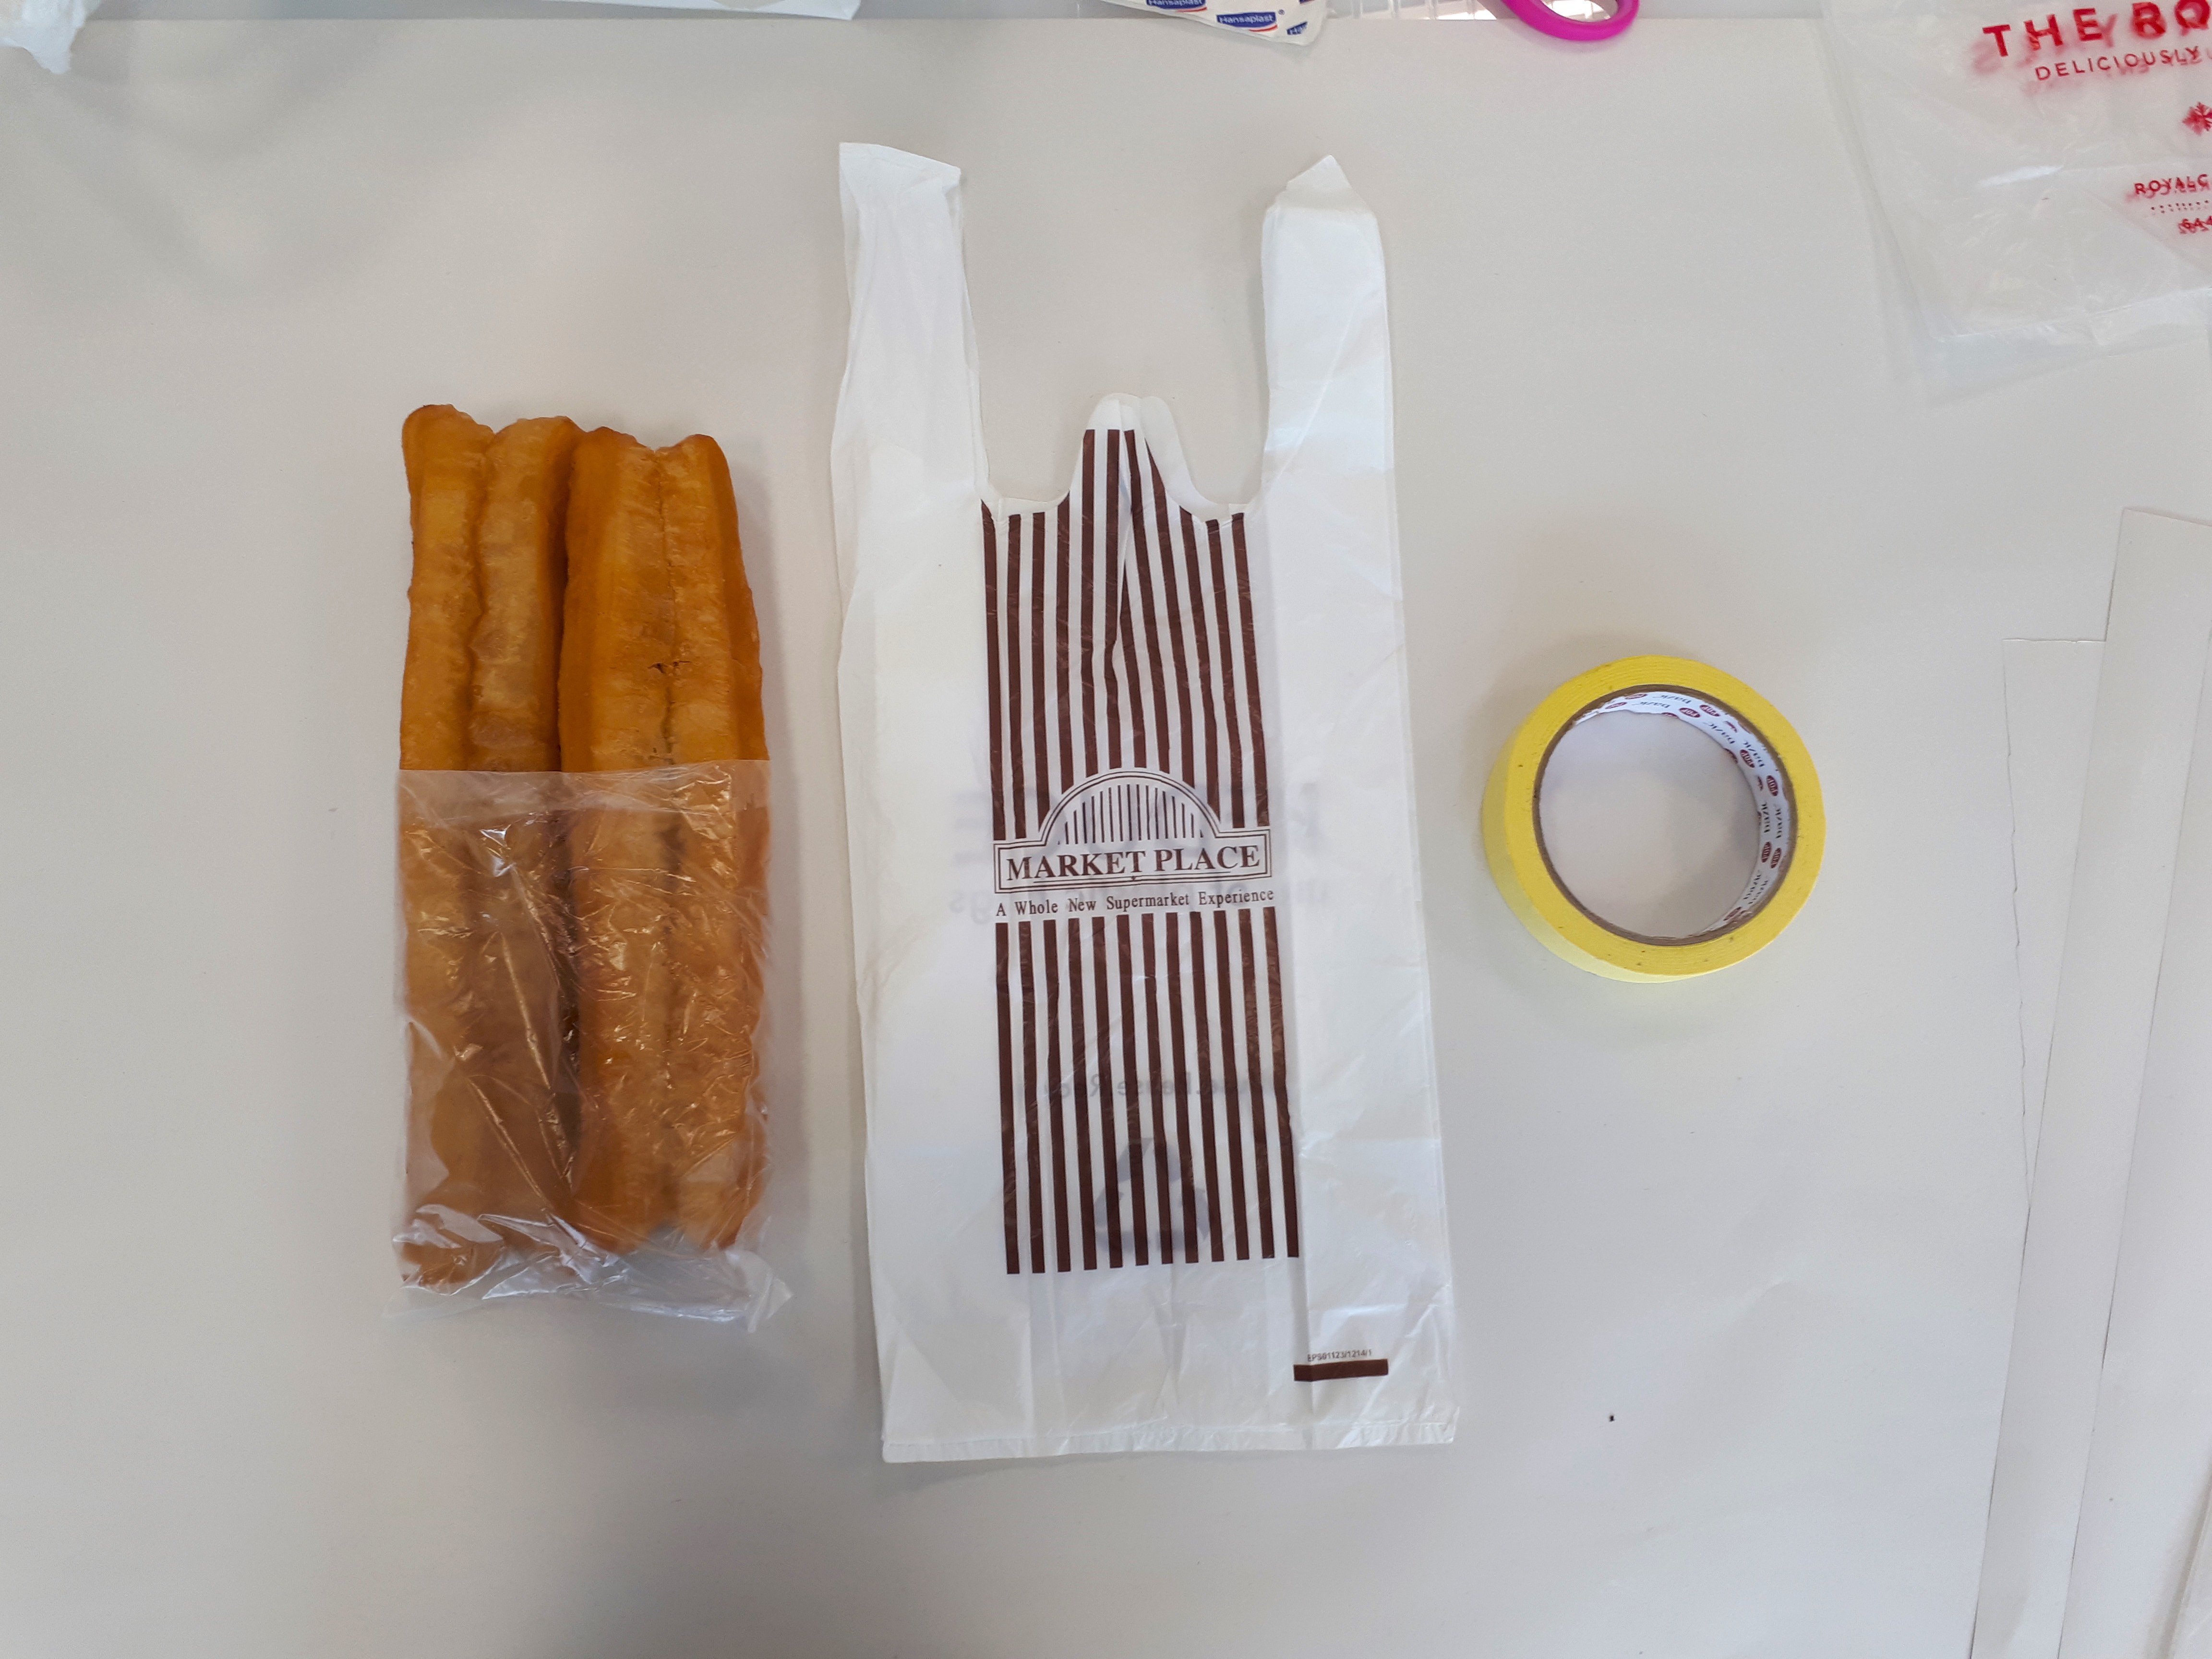
I’m bringing some youtiao (Chinese oil sticks) and a plastic bag as tools for next week’s mark making class.
The surface of the donut is smooth and there isn’t much texture to play around with. Image from https://en.wikipedia.org/wiki/Doughnut Accessed on 15th August 2017
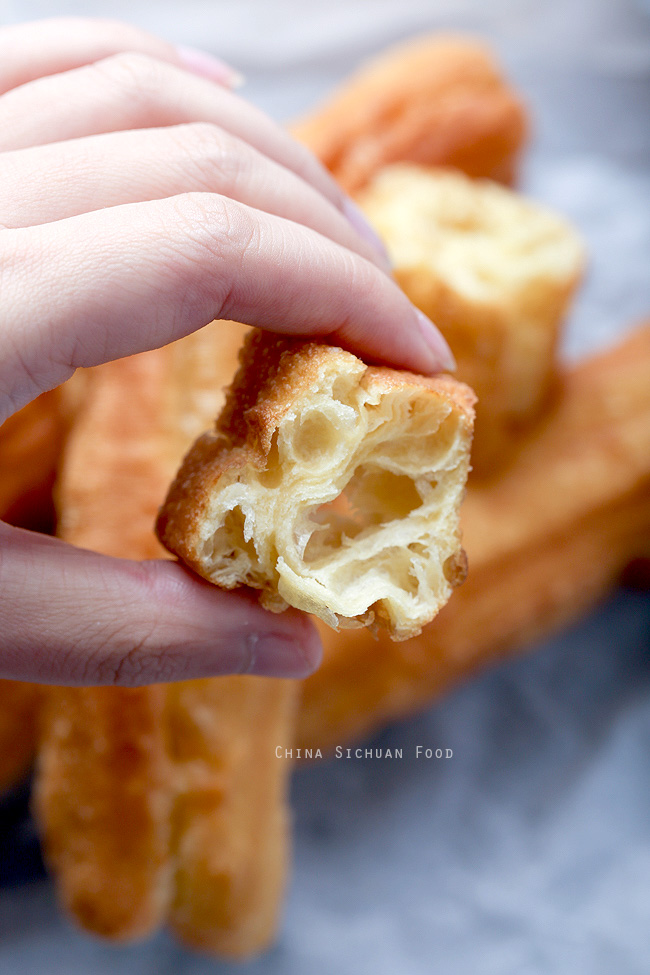
I initially thought of bringing donuts instead of youtiao, but I think youtiao have interesting uneven textures both inside and outside that I can experiment with as compared to a donut.
youtiao, otherwise known as Chinese oil sticks. Image from http://thewoksoflife.com/2015/08/youtiao-recipe/ Accessed on 20th August 2017Interesting organic shape in the youtiao. Image from http://www.chinasichuanfood.com/youtiao-chinese-oil-stick-chinese-cruller/ Accessed on 20th August 2017
Plastic bag Image from https://favim.com/image/3580977/ Accessed on 20th August 2017
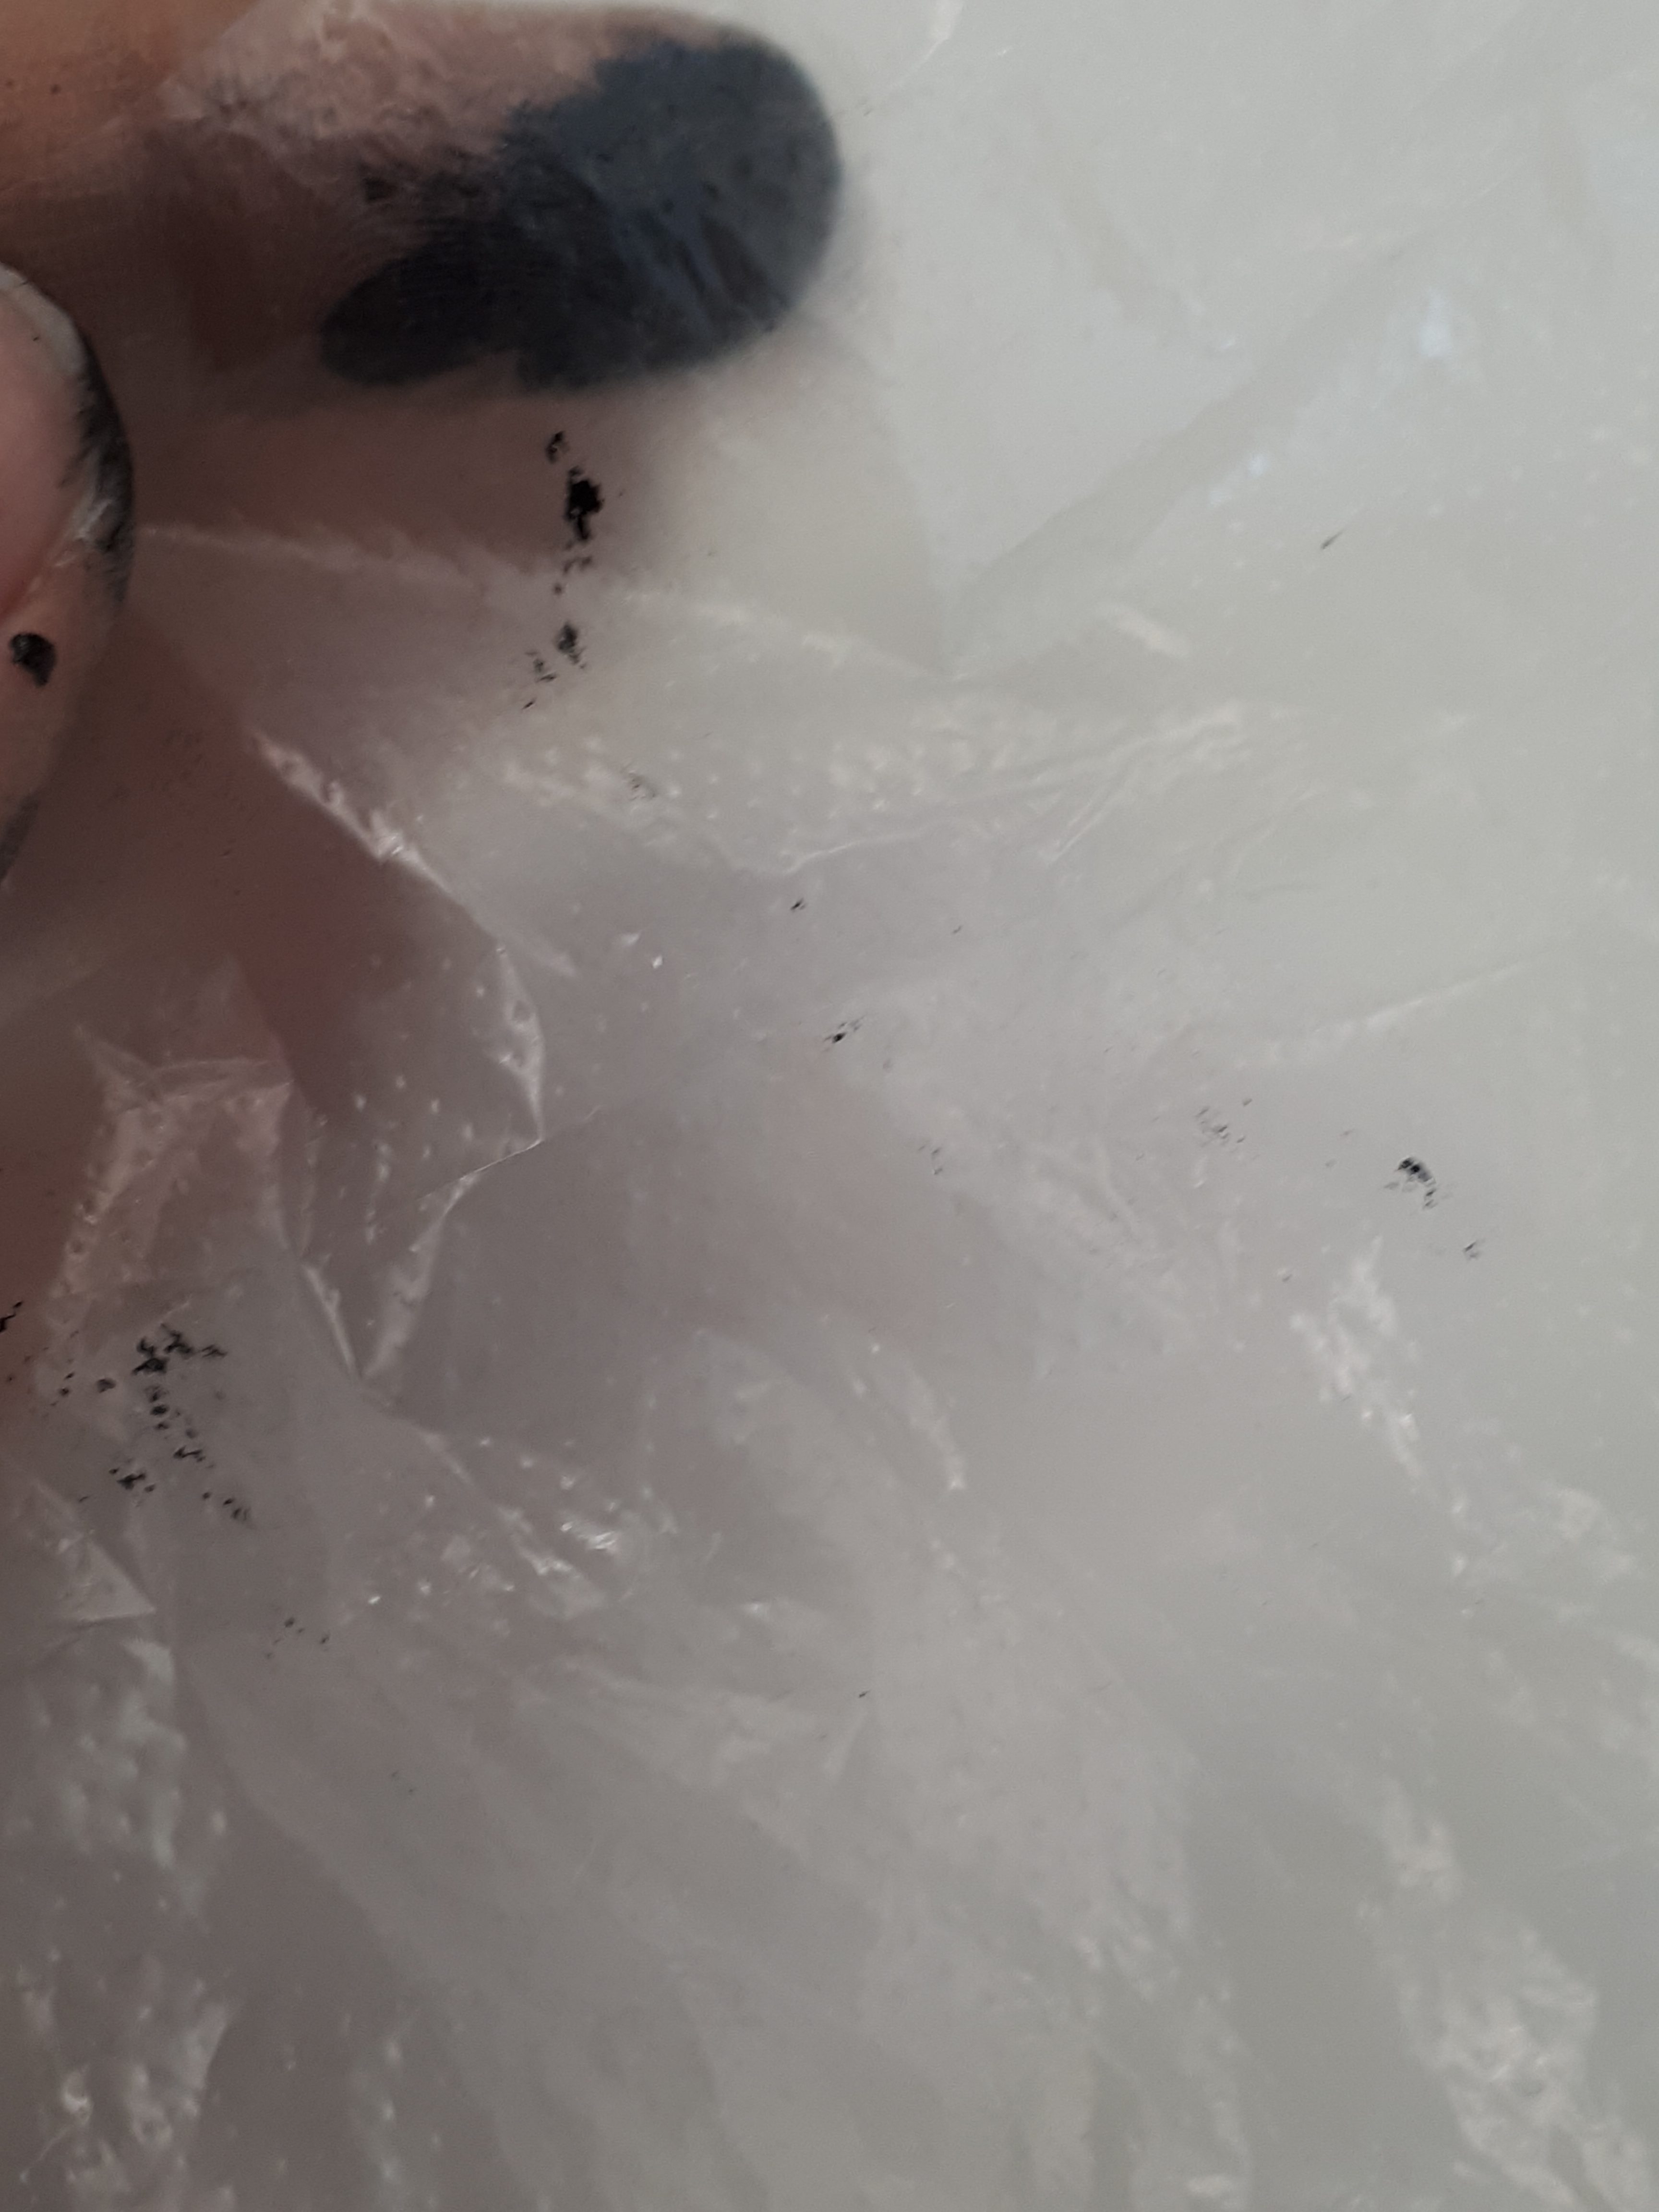
The next item I want to play with are plastic bags. Have you ever seen stains or water marks left by plastic bags? They capture the folds and texture of plastic bags quite well. I want to try recreating that with plastic bags as well as seeing if I can find new ways to print with the bags.
Looking forward to the next class (and possibly munching on some youtiaos)
RESEARCH
Some artist references whose styles I found interesting:
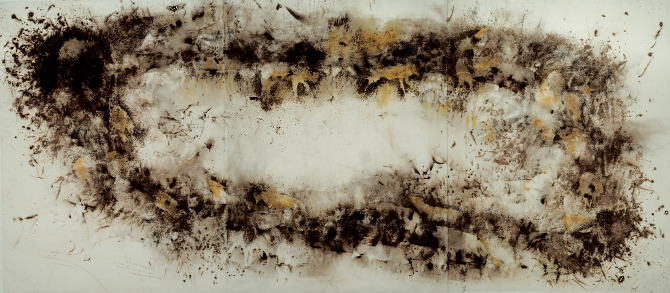
Cai Guo-Qiang: Gun powder art
Image from http://cargocollective.com/cladcreatures/CAI-GUO-QIANG-GUNPOWDER-ART Accessed on 27th August 2017
Image from http://cargocollective.com/cladcreatures/CAI-GUO-QIANG-GUNPOWDER-ART Accessed on 27th August 2017Image from http://cargocollective.com/cladcreatures/CAI-GUO-QIANG-GUNPOWDER-ART Accessed on 27th August 2017
I like how the directional lines created by the gunpowder flow in all directions, creating a sense of chaos in Cai Guo-Qiang’s work, yet the works seem to have a calming feeling to them as well, possibly because of the organic and round shapes that the artist himself created. Even the work where the gunpowder flows diagonally downwards (2nd picture) does not seem to show so much anger as the downwards lines aren’t completely straight or harsh, and vary in width.
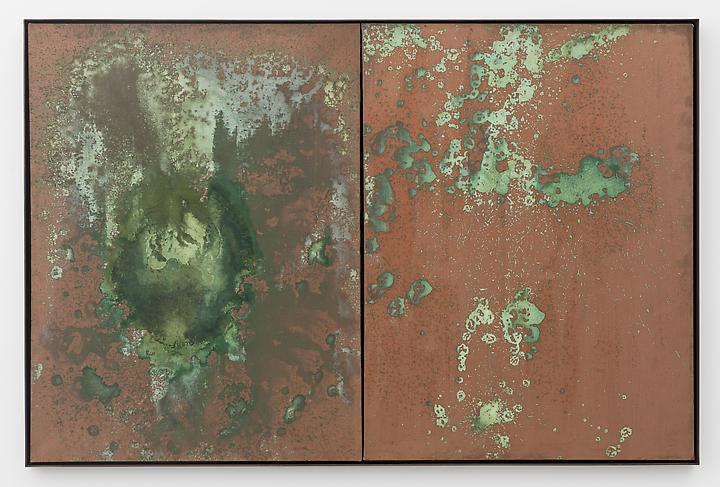
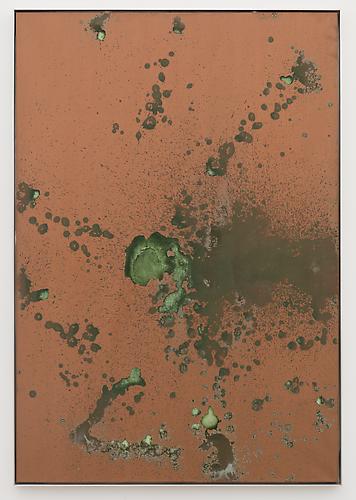
Andy Warhol: Oxidation works
Image from http://www.skarstedt.com/exhibitions/2014-05-08_yves-klein-and-andy-warhol/#/images/23/ Accessed on 27th August 2017Image from http://www.skarstedt.com/exhibitions/2014-05-08_yves-klein-and-andy-warhol/#/images/24/ Accessed on 27th August 2017
Similar to Andy Warhol’s oxidation works and Cai Guo-Qiang’s gunpowder art, I am aiming to create organic, round shapes with my mark making tools, specifically the youtiao.
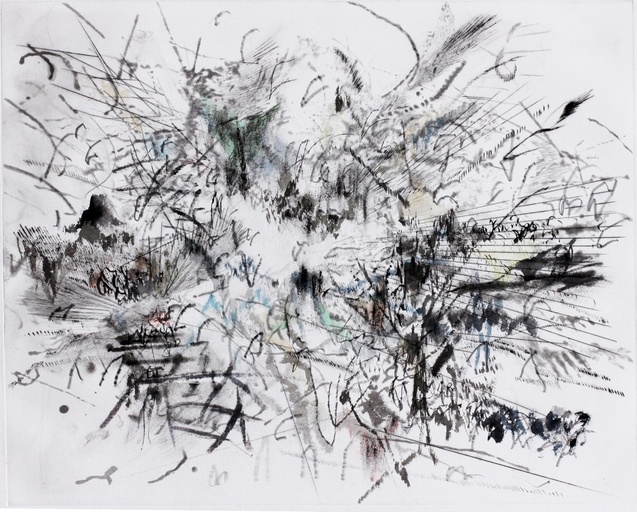
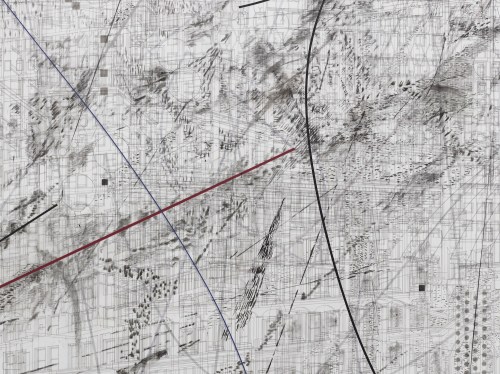
Julie Mehretu
Image from https://art21.org/read/julie-mehretu-to-be-felt-as-much-as-read/ Accessed on 27th August 2017Image from https://paddle8.com/work/julie-mehretu/20340-untitled Accessed on 27th August 2017Image from http://burnaway.org/feature/julie-mehretu-contemporary-sublime/ Accessed on 27th August 2017
I really like Julie Mehretu’s works as well as they tell their own story through these extremely expressive lines and patterns. Her directional lines can make her audience go through a series of emotions that then convey the story she wants to tell. I also like how her works have depth and is not just a flat image. I hope to be able to create some depth with my mark making tools as well!
PROCESS
Mark making day! I’ve brought my youtiao and plastic bags to class. I’ve also decided to throw in some masking tape into the mix. I’m interested in seeing what marks my masking tape can make!
My mark making tools
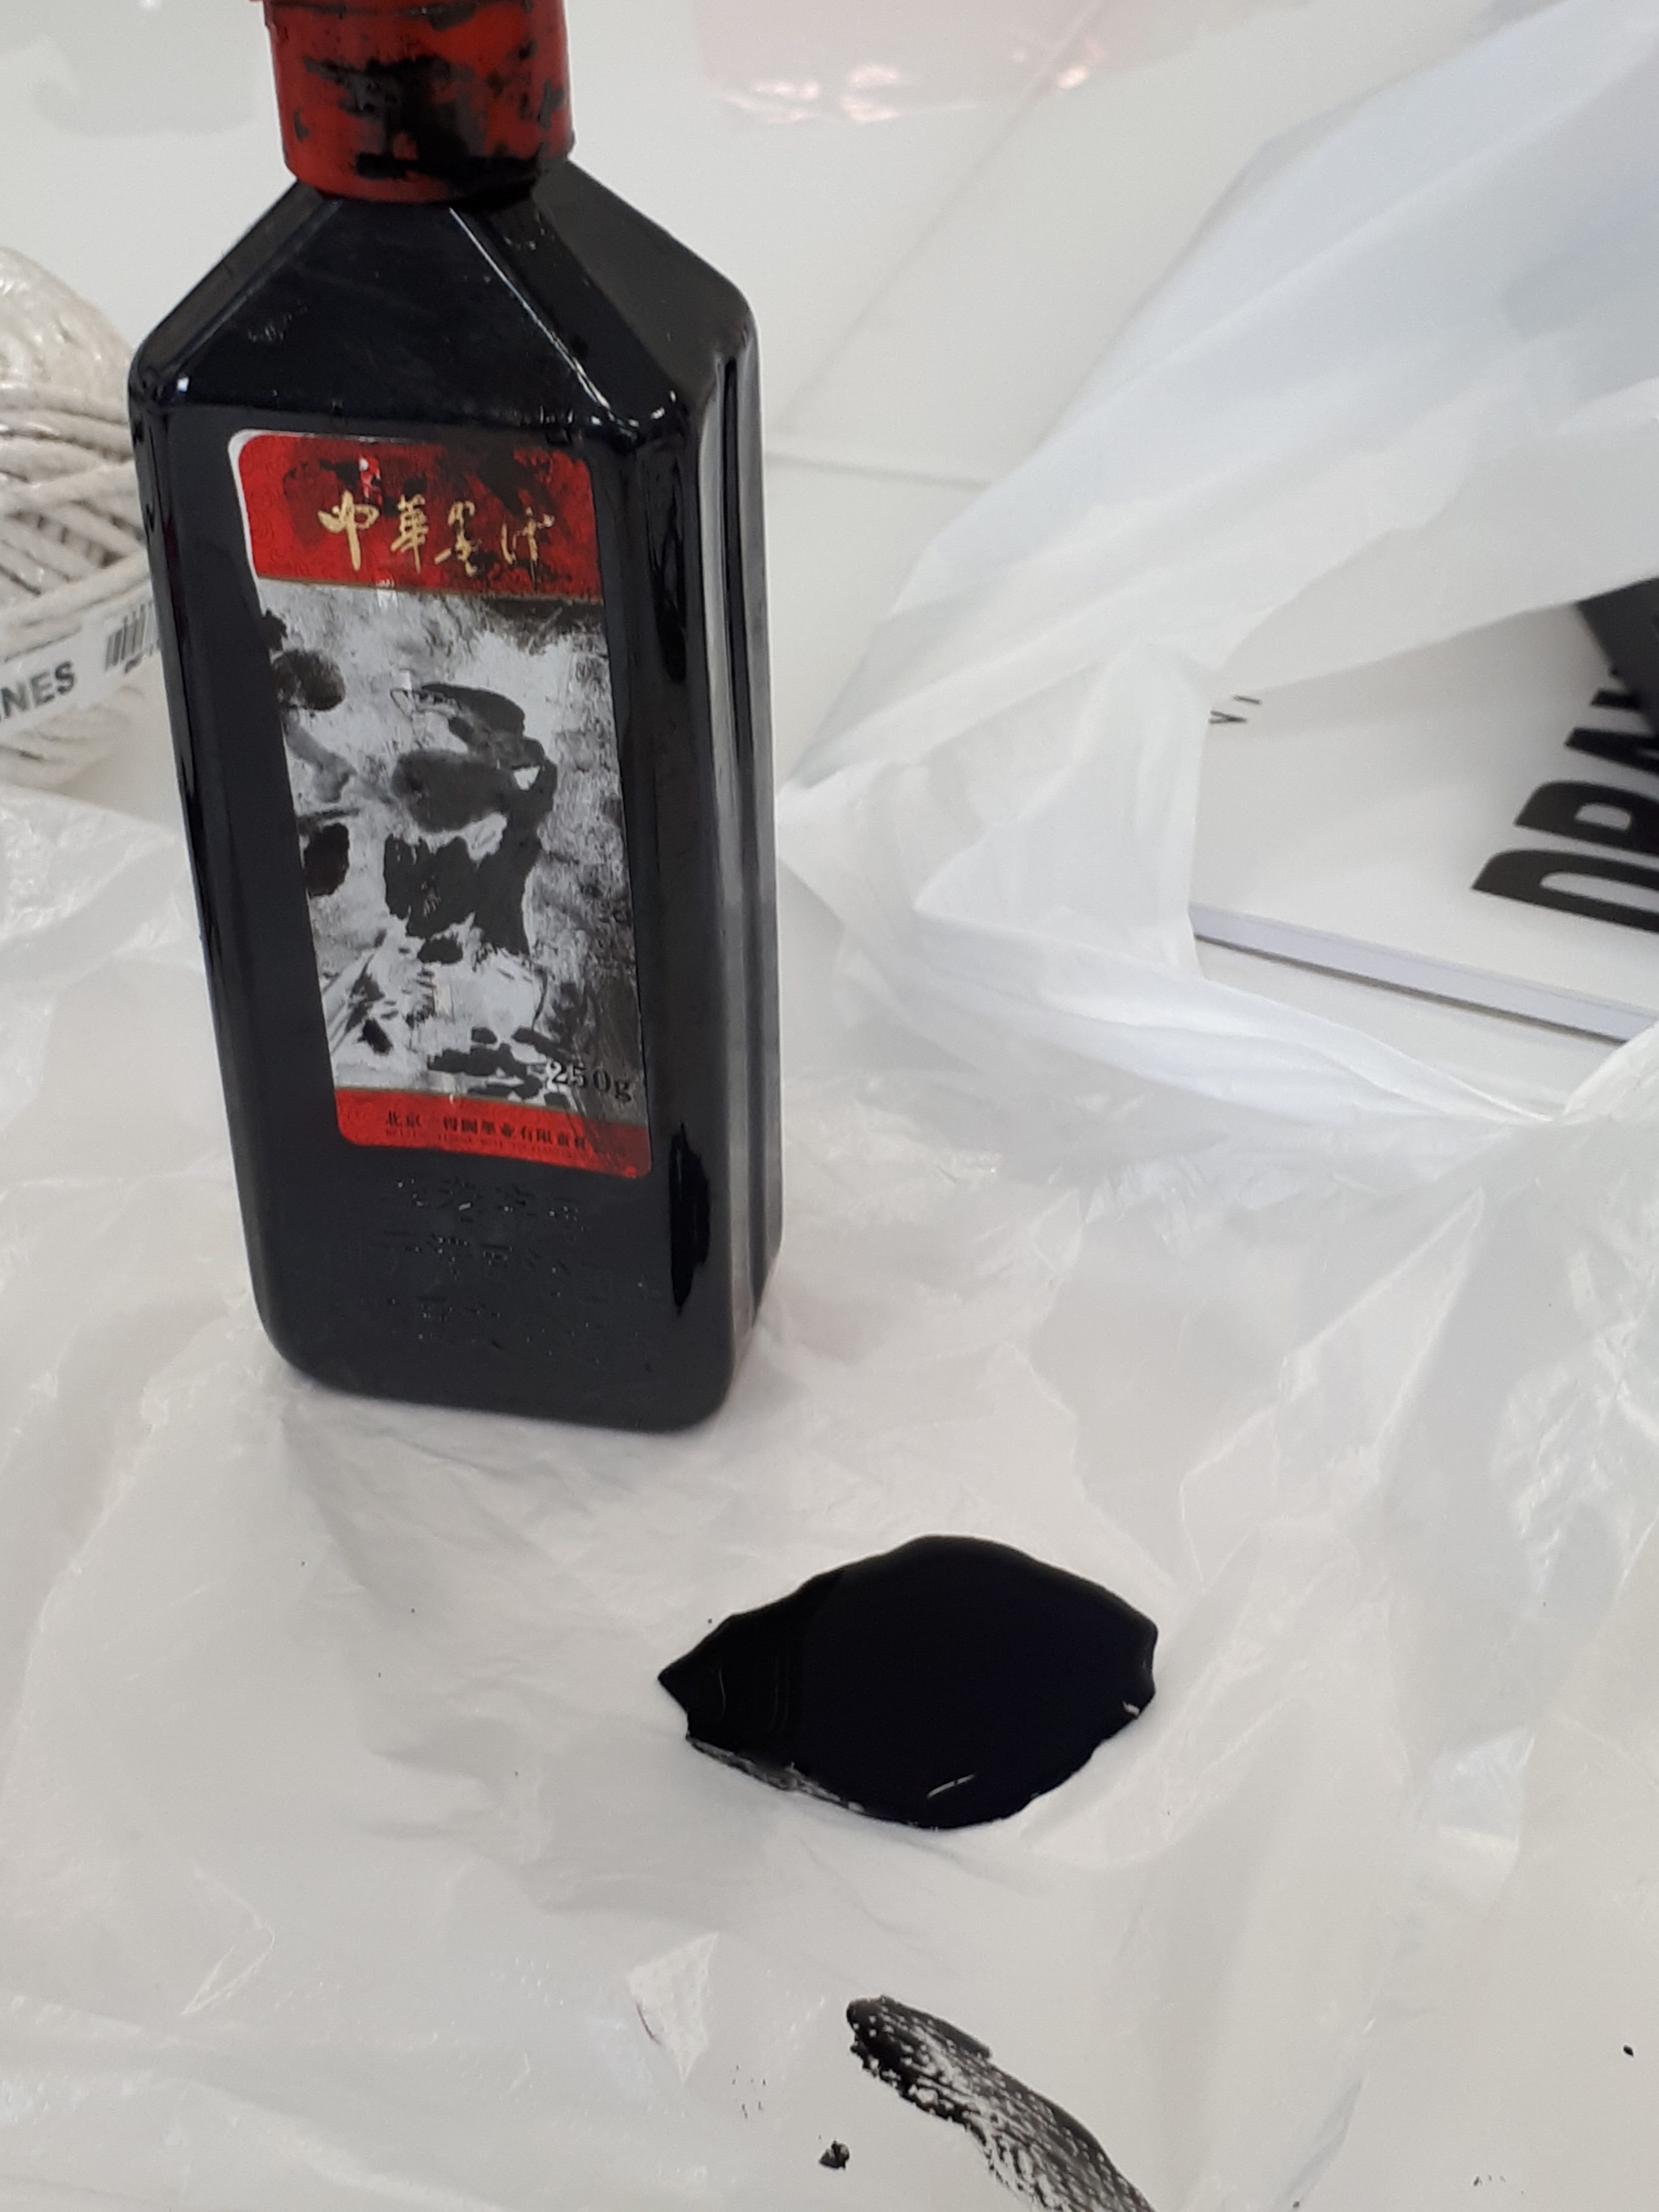
We were given both paint and Chinese ink to experiment with:
The paint gave a thicker consistency which could provide some texture while the Chinese ink was watery. I was excited to experiment and see how my marks would look with the varied mediums.
My approach
I plan to experiment with my materials and see what emotions my experiments will lead me to.
MASKING TAPE
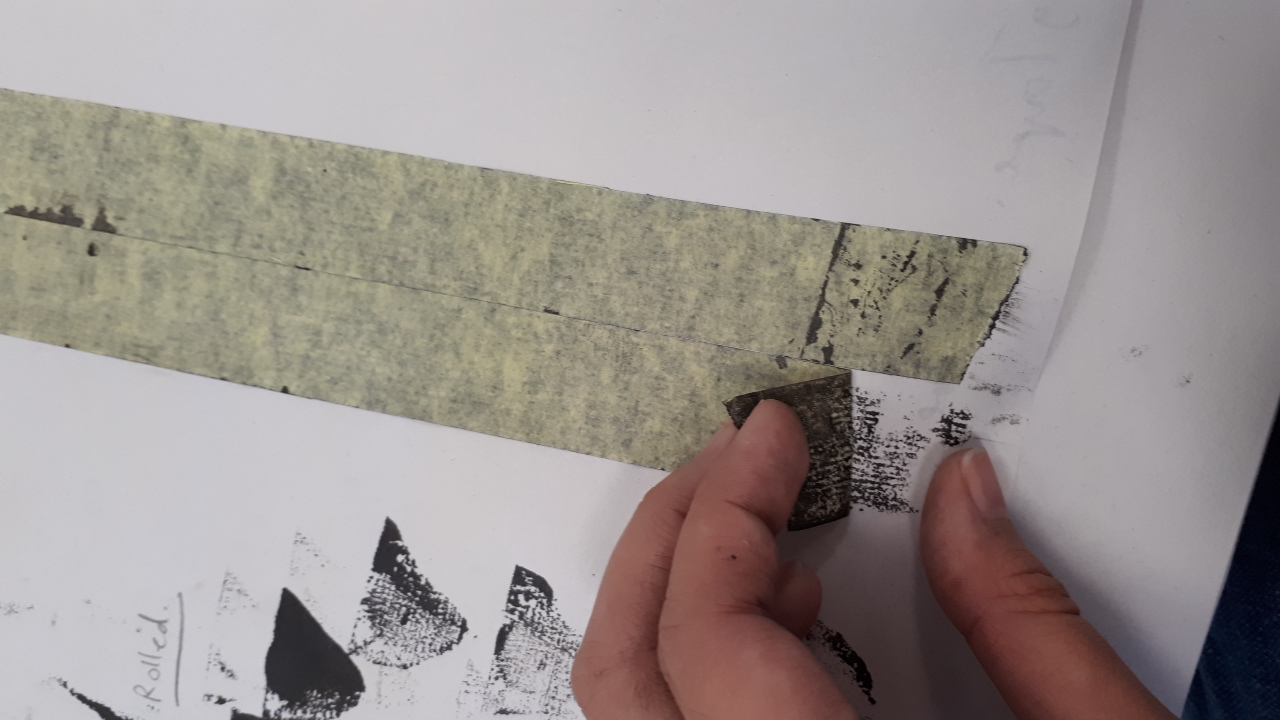
How i apply the paint or ink. Click on the image to reveal the gif
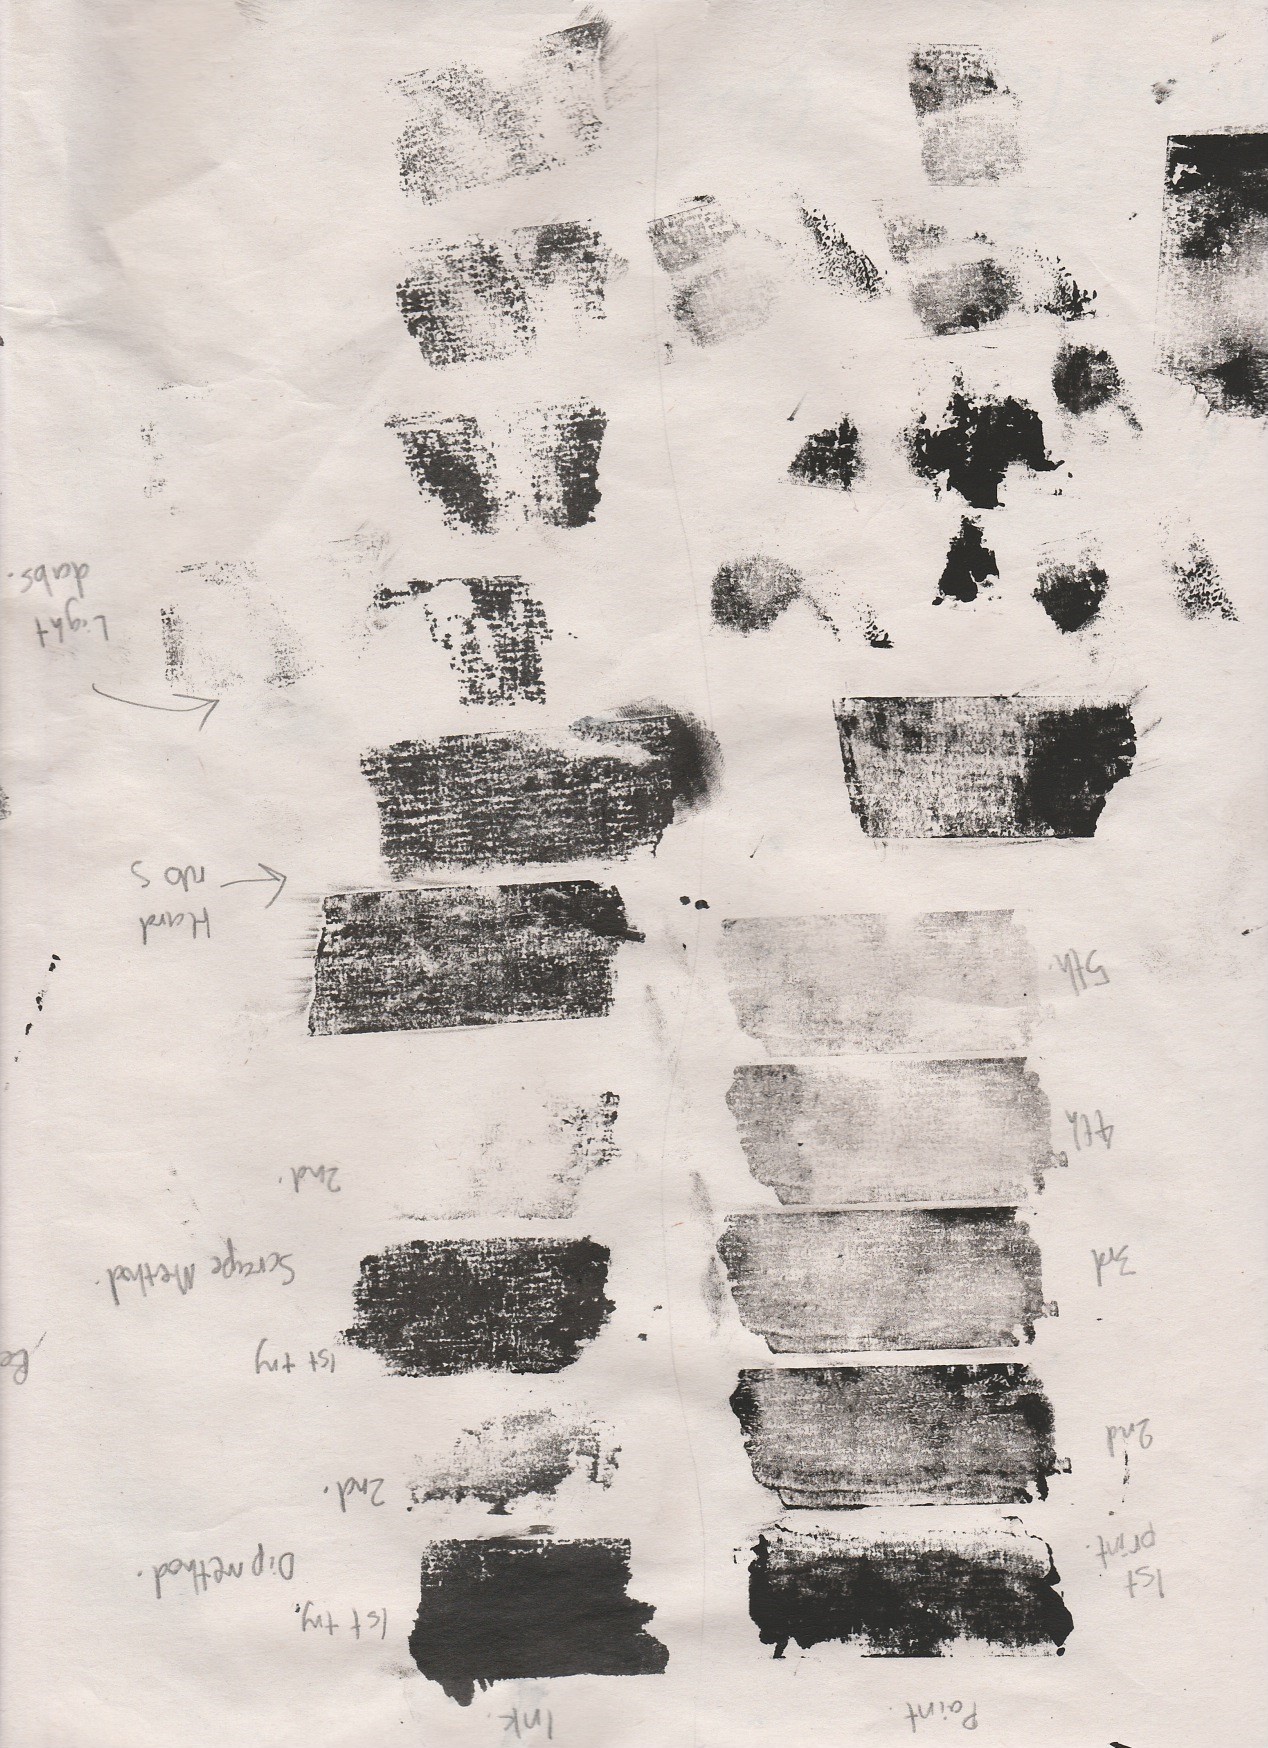
For the masking tape, I first dipped the adhesive side of a piece of masking tape in either paint or ink then scraped the excess paint/ink away with a paint knife so that the textures and grooves of the tape can be seen when printed onto the newsprint paper.
Here are my studies:
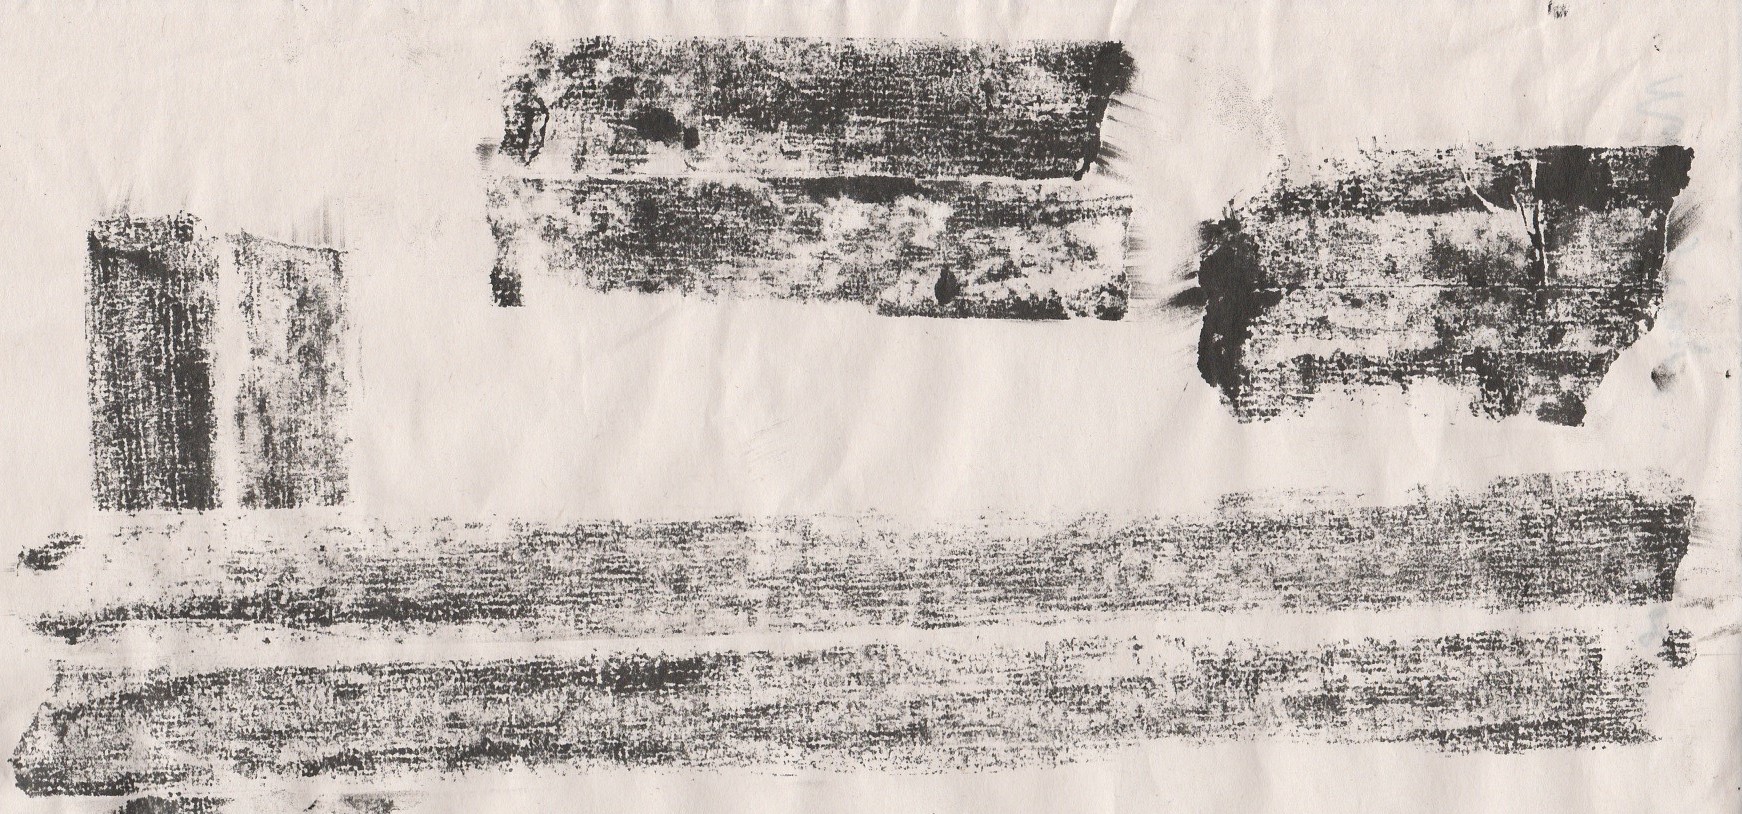
Masking tape print experimentation with both paint and ink
I tried transferring the ink onto paper by using both light dabs and also by rubbing the surface of the masking tape with force after i’ve stuck it onto the paper. I found that the texture is better shown when using Chinese ink and with the rubbing method.
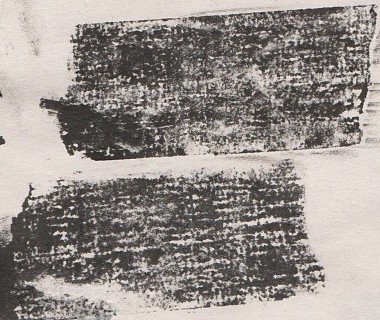
Zoom in on the texture created by the masking tape
The texture or marks created by the tape is scratchy and seem chaotic. I thought that perhaps I could use this texture for emotions like anxiety.
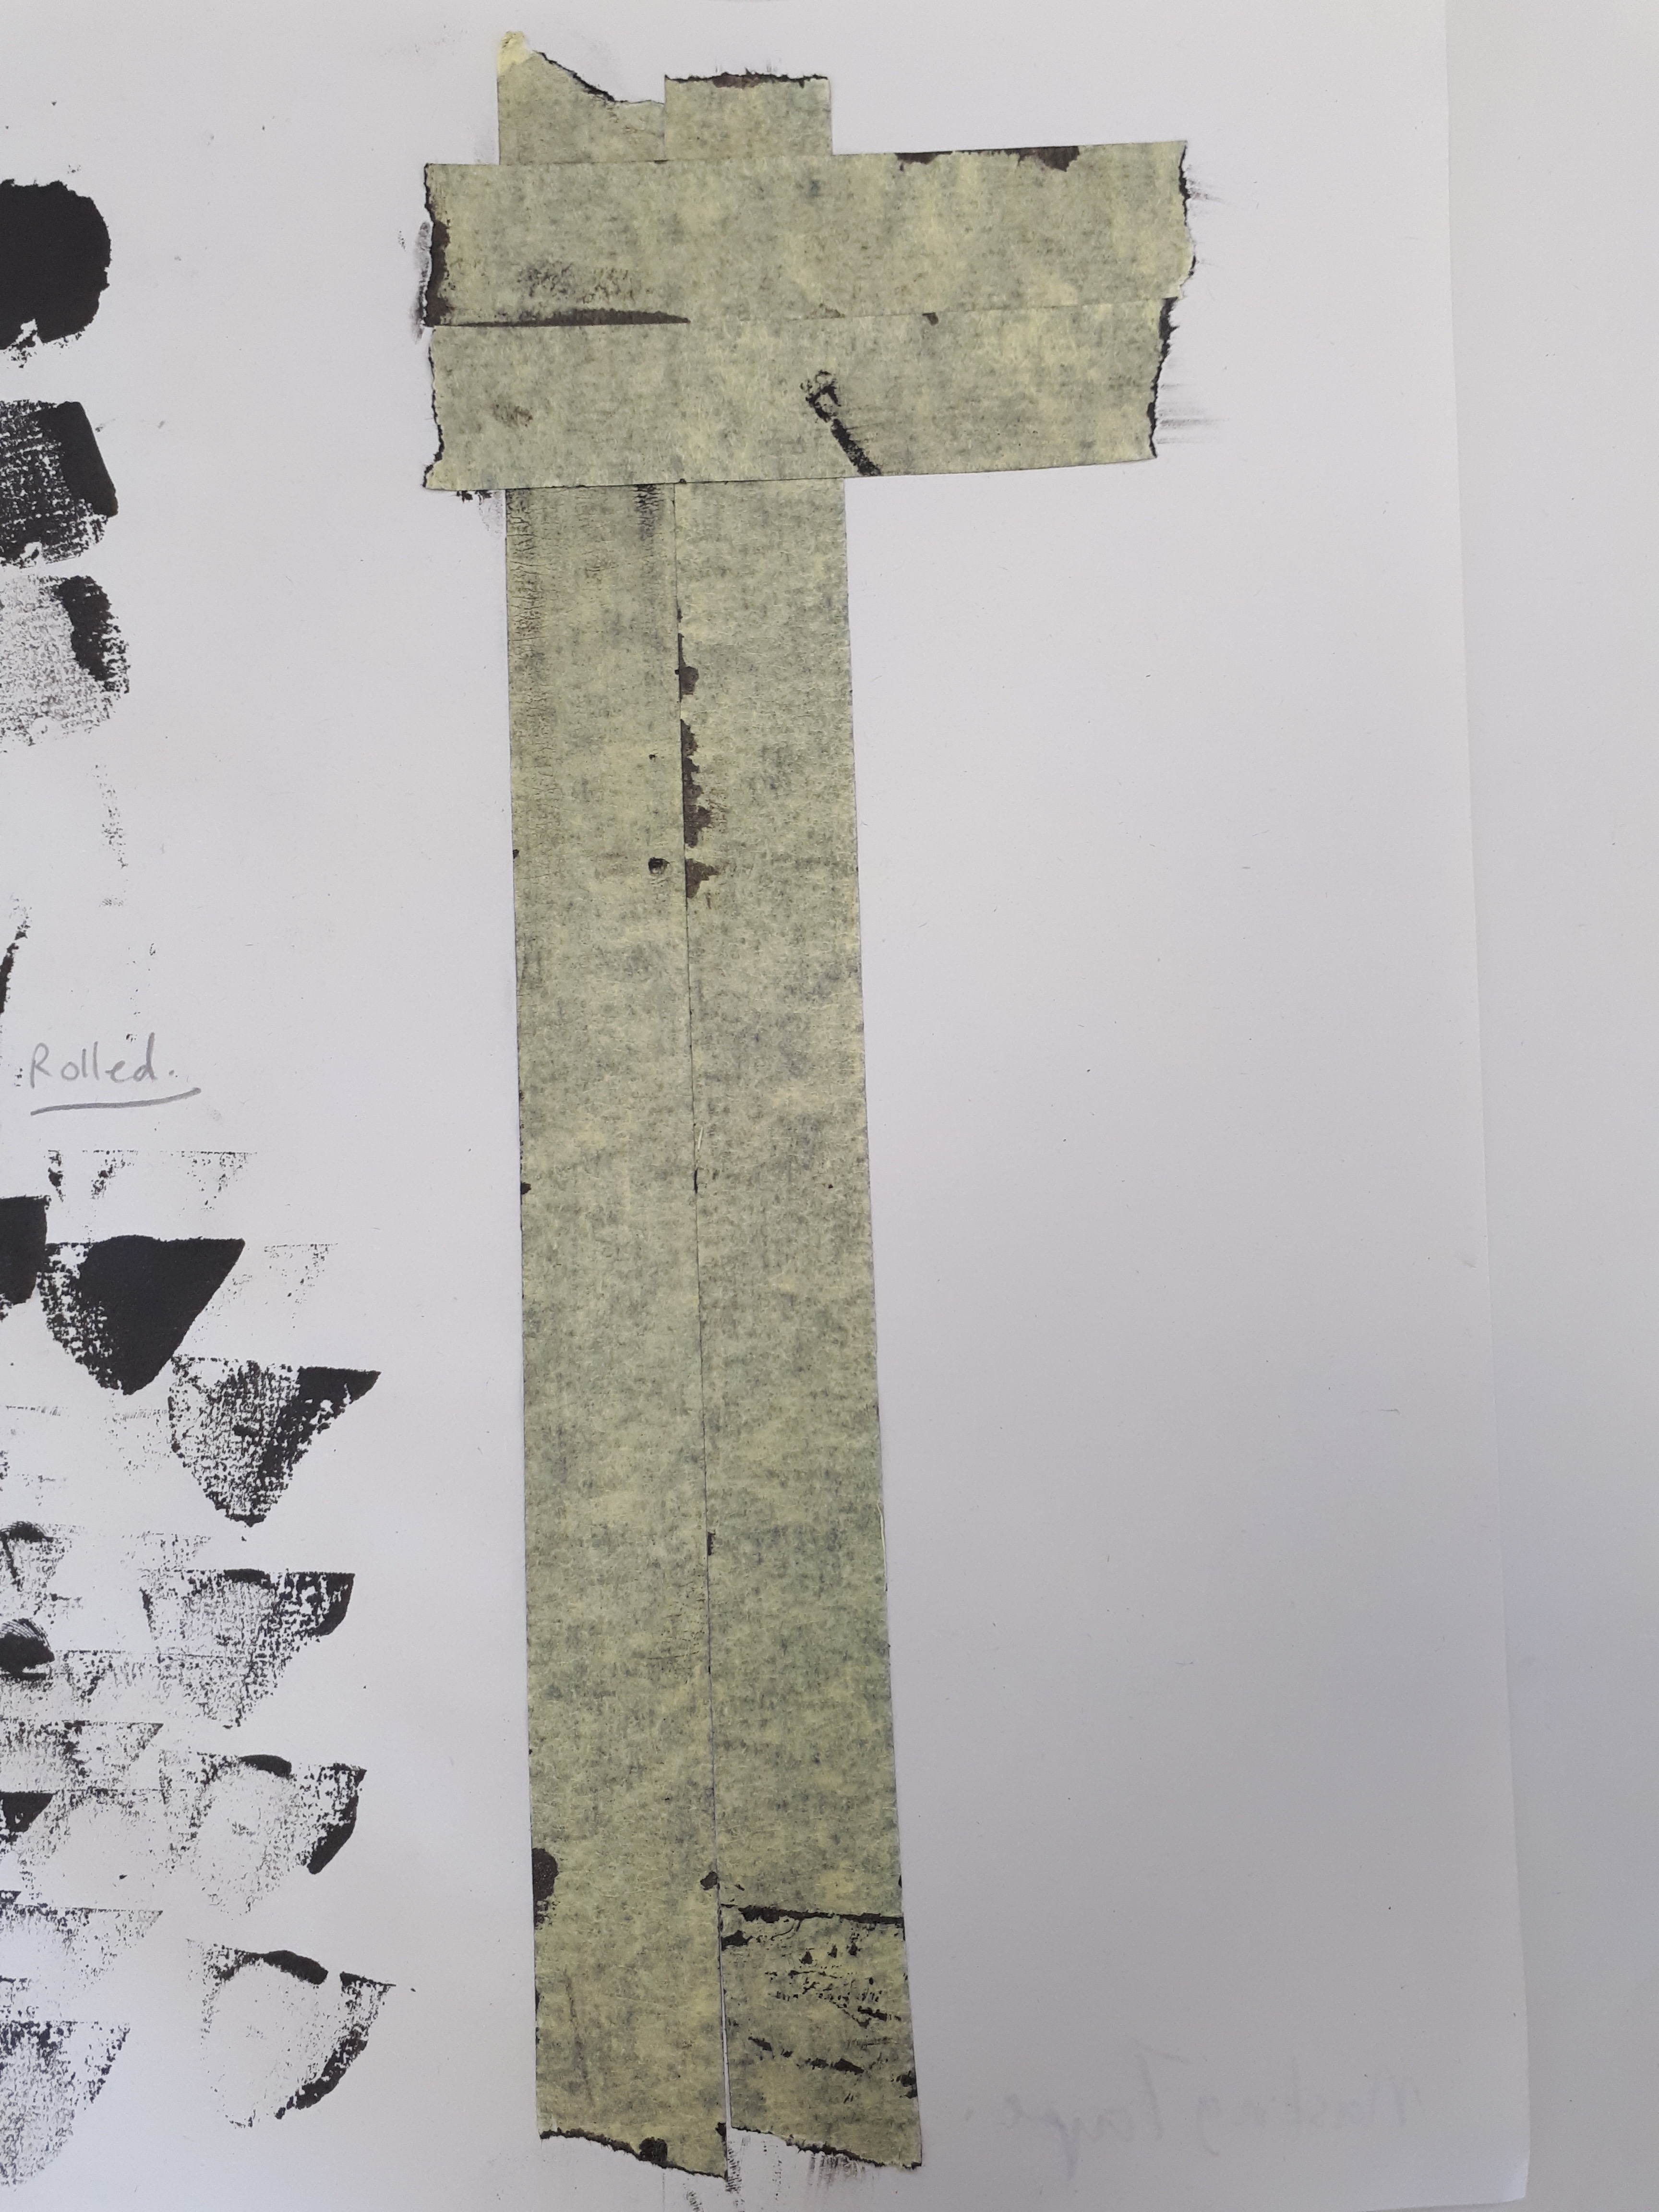
Sticking lengths of tape next to each other
Results
I first tried lining lengths of the tape next to each other to try and transfer the texture throughout the page. However, I found the marks rather flat and that it did not represent anxiety well. The marks were also too uniformed; I imagine anxiety to be more chaotic.
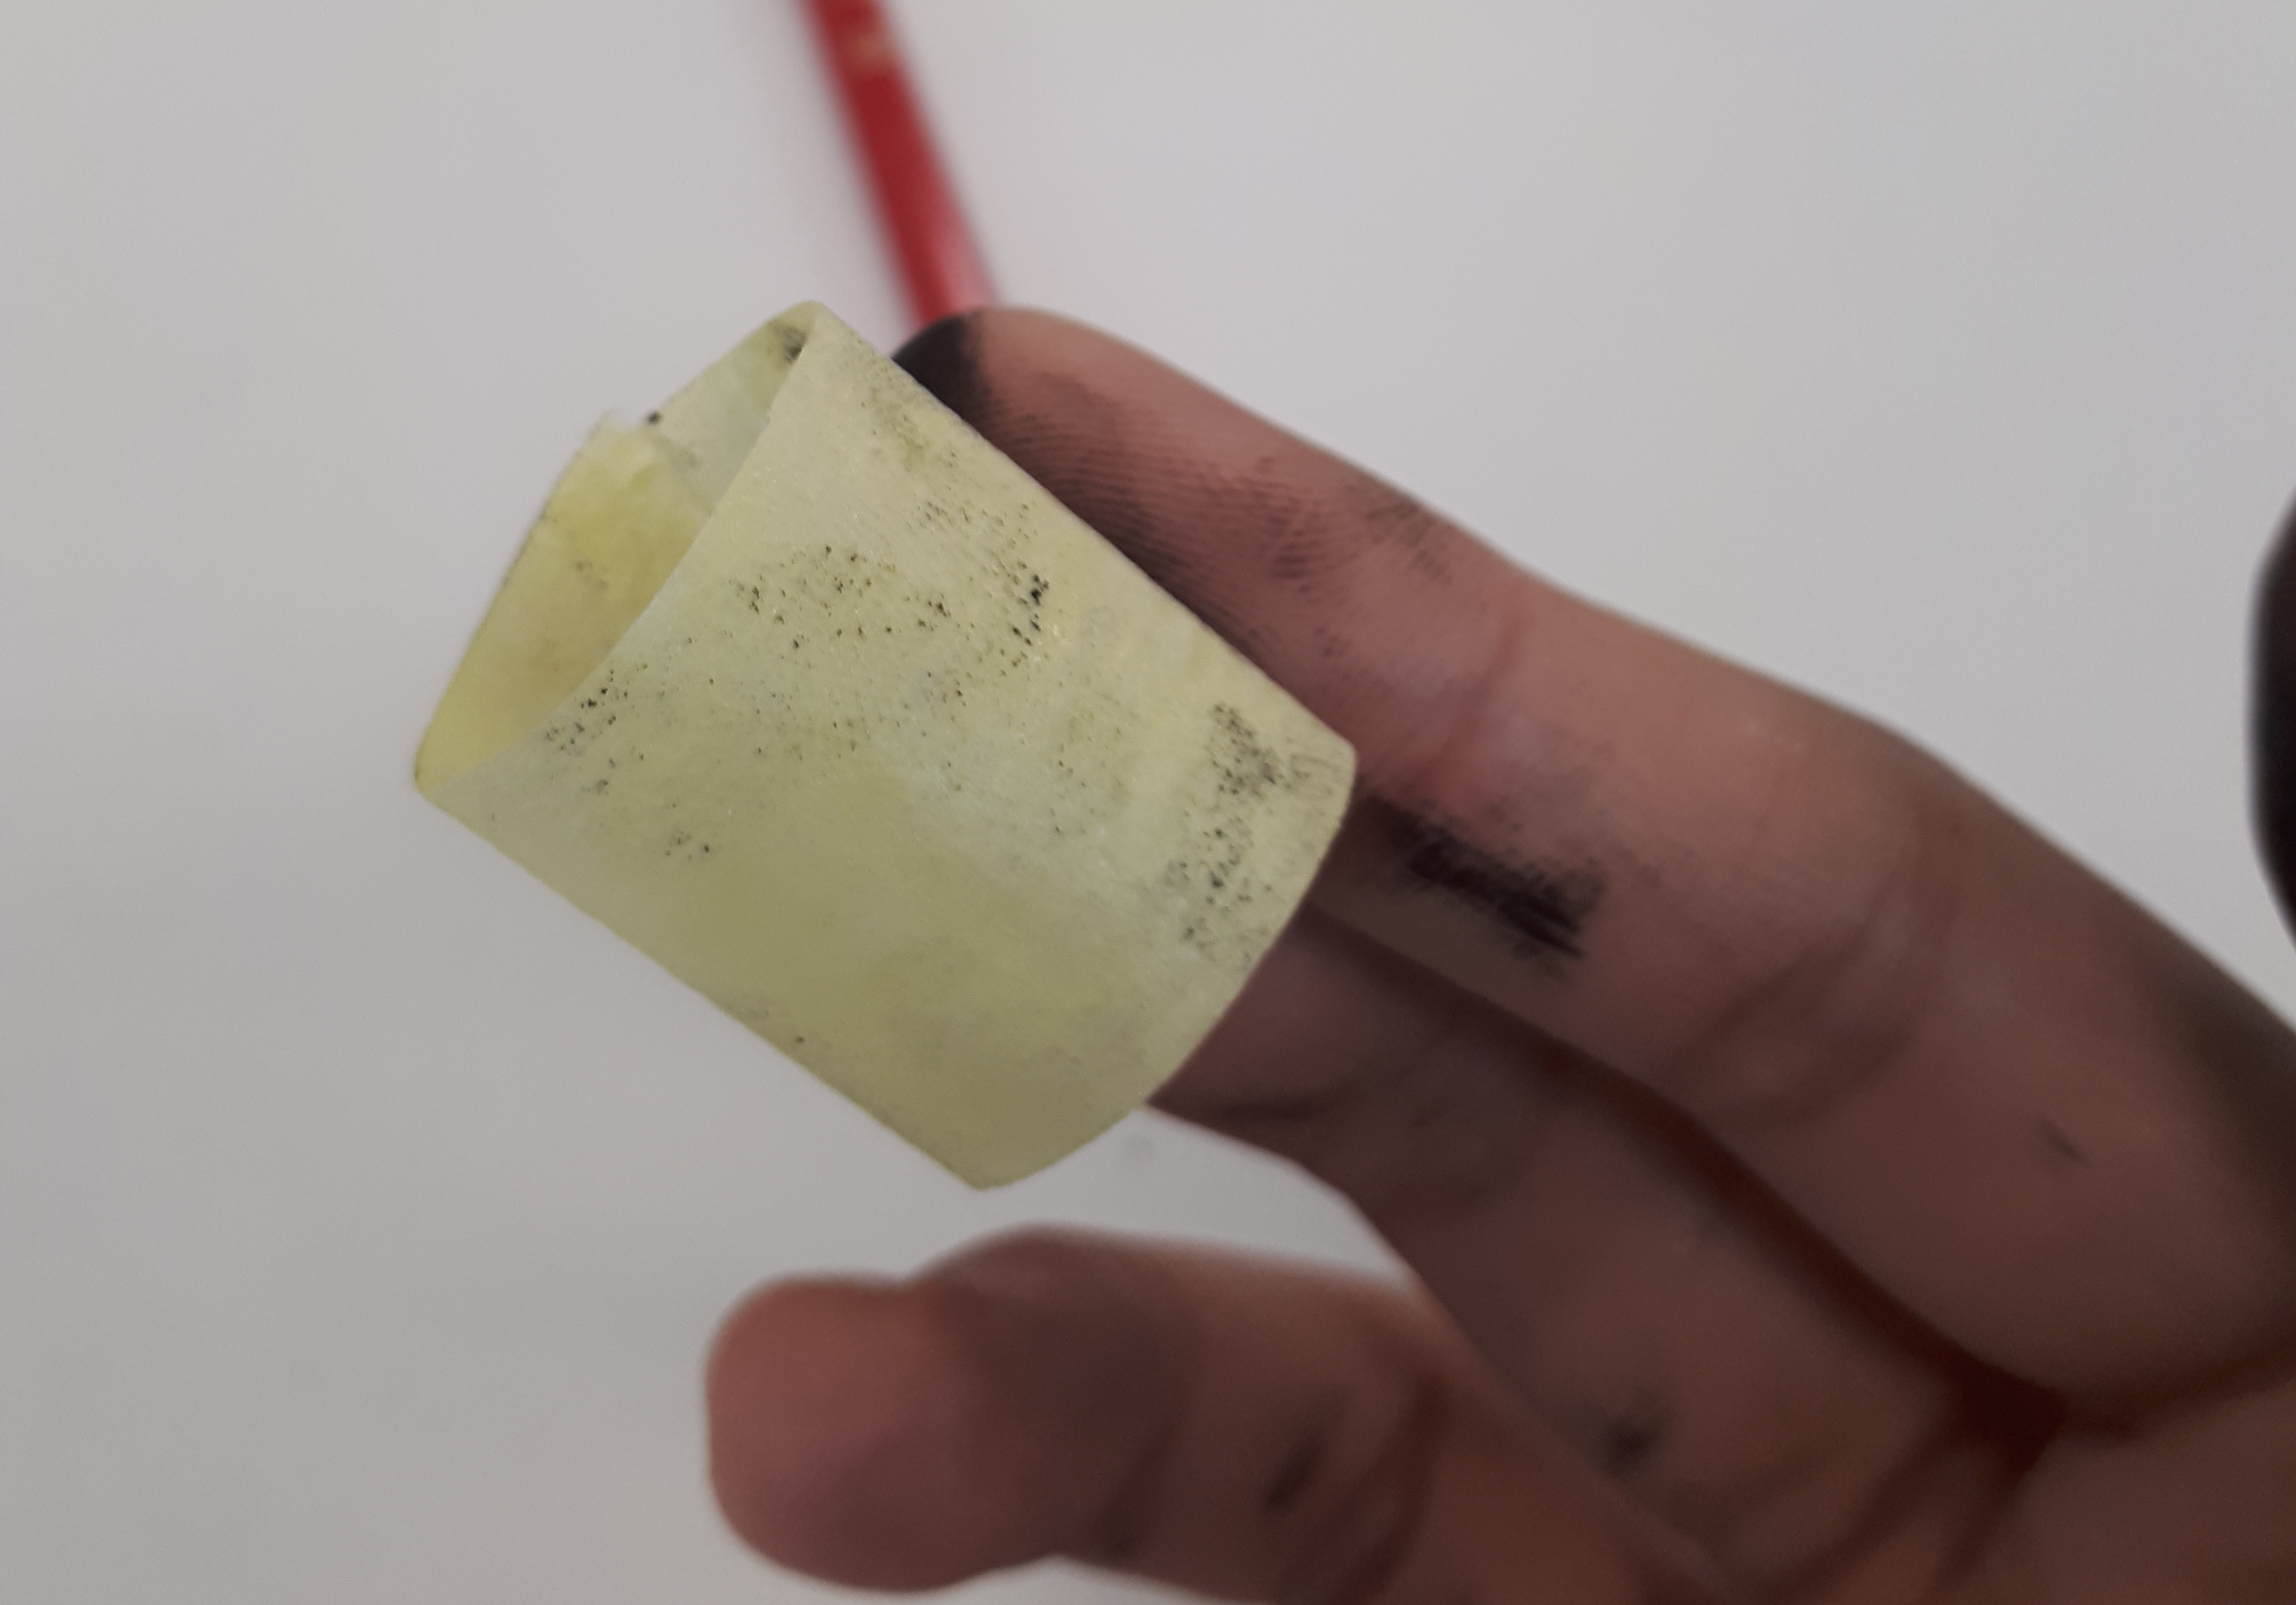
rolled up tapeApplication. Click image to see gif
Results
I then tried rolling up the tape and dabbing the tape onto the paper. The results created were tiny mountain-looking prints that did not seem to fit with my definition of anxiety. Each mark had a rounded tip that looked more joyful rather than nervous. The repeated mark created a pattern that was also too uniformed.
ProcessResult
I realised that the reason why the previous two methods were not working out for me was because the scratchy marks created from the masking tape print were too uniformed and had distinct direction — the scratchy lines seemed to be moving horizontally. I hence tried tearing off small, uneven pieces of masking tape and sticking them down in different directions. I felt that this particular method represented anxiety best for me. To me, anxiety is not only just worrying about one thing, but worrying about everything that could happen because of one situation — the mind runs free and endlessly conjures up consequences (no matter how improbable) to the preceding situation. Hence the mind is not moving in a singular direction but all over the place, in multiple directions. The results of the method here especially shows this. The arrangement of the tape pieces are not organised and the scratchy marks on each tape are moving in their own separate directions. Furthermore, the faint, uneven lines running between two pieces of tape create a separation between each piece of tape. This to me represents the different problems one thinks of and how scattered the mind is when it is anxious, as compared to my first method where the lines flow in one general direction. What I can work on next is to experiment with torn pieces of tape in varying sizes and how they would work well with each other.
PLASTIC BAGS
Close up of the textured plastic bag
For this material, I had two different textures. One had the usual smooth texture of a plastic bag while one felt a little bumpy as it had small perforations on it.
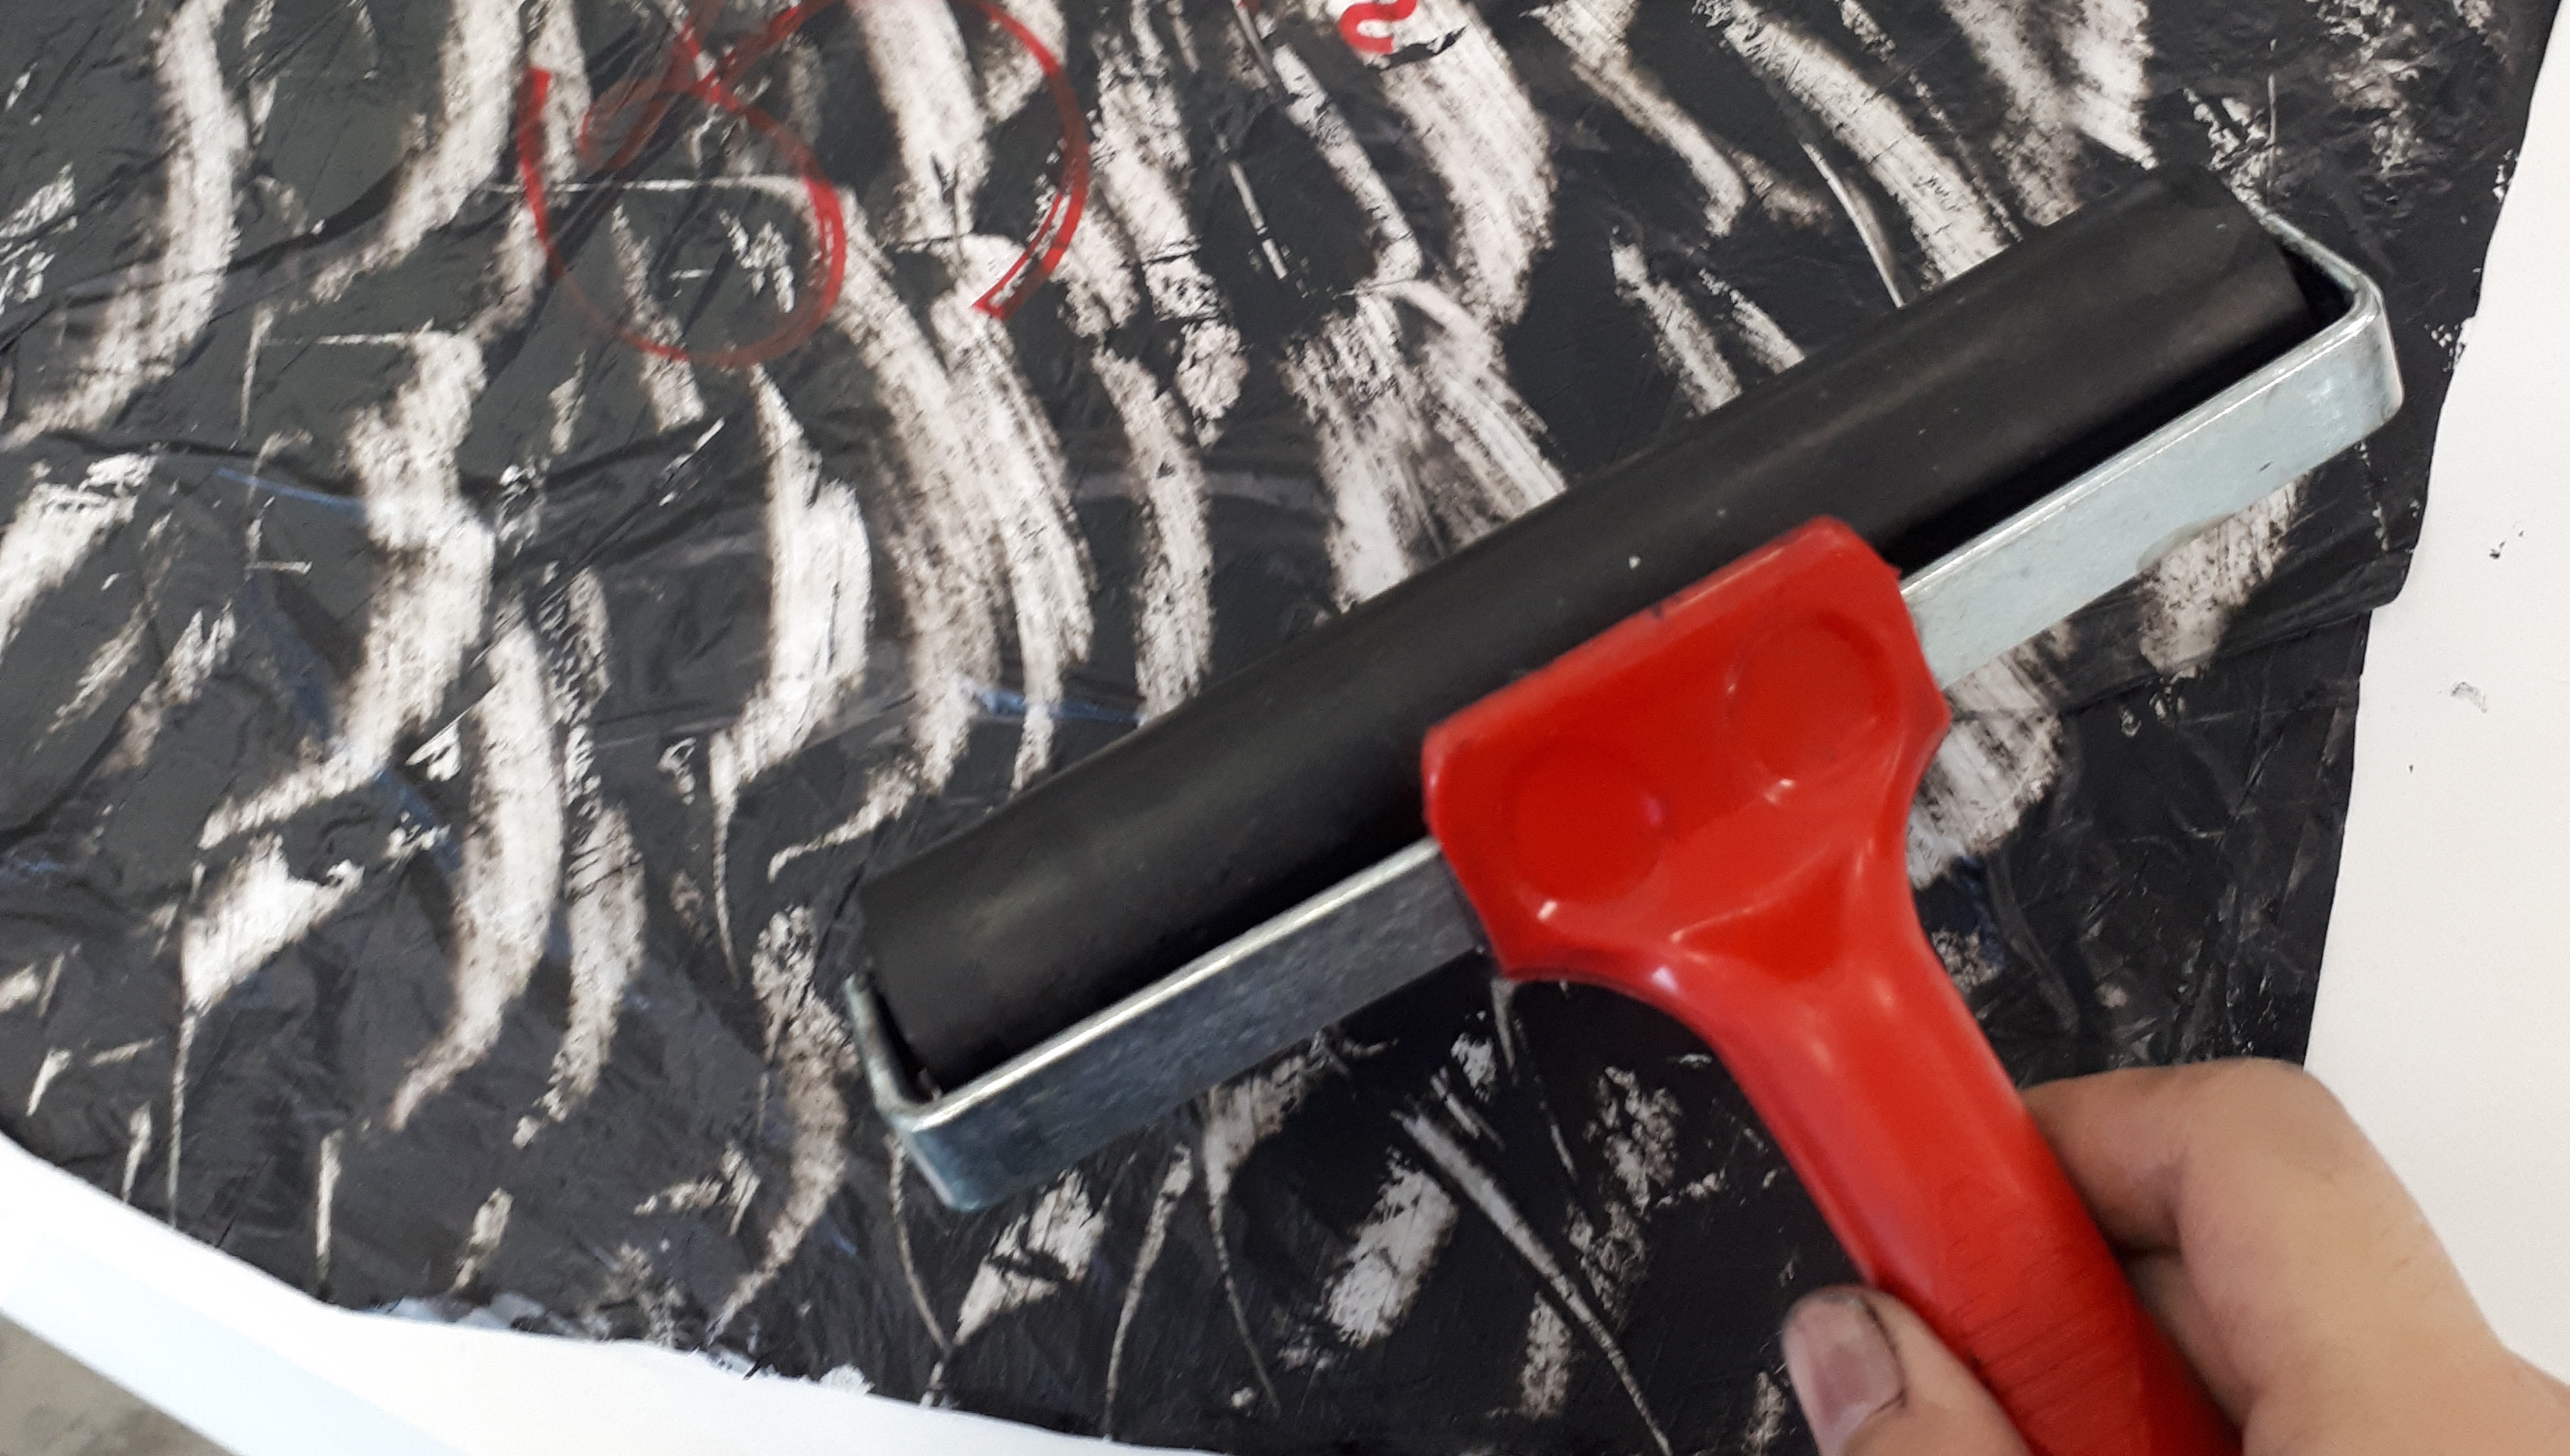
Adding ink to the plastic. Click on the image to play gifAdding paint to the plastic. Click on the image to play gifApplication methodResults for paint with plasticResults for ink with plastic
To create the marks, I first used the paint knife to apply either the ink or the paint on one side of the plastic bag. I then placed the painted side face down on my newsprint and transferred the print by using a roller to roll and flatten the plastic bag.
I found that using paint on plastic was much better as paint is slightly sticky and can latch unto the surface of the plastic creating a nice print and hence I proceeded experimenting with paint.
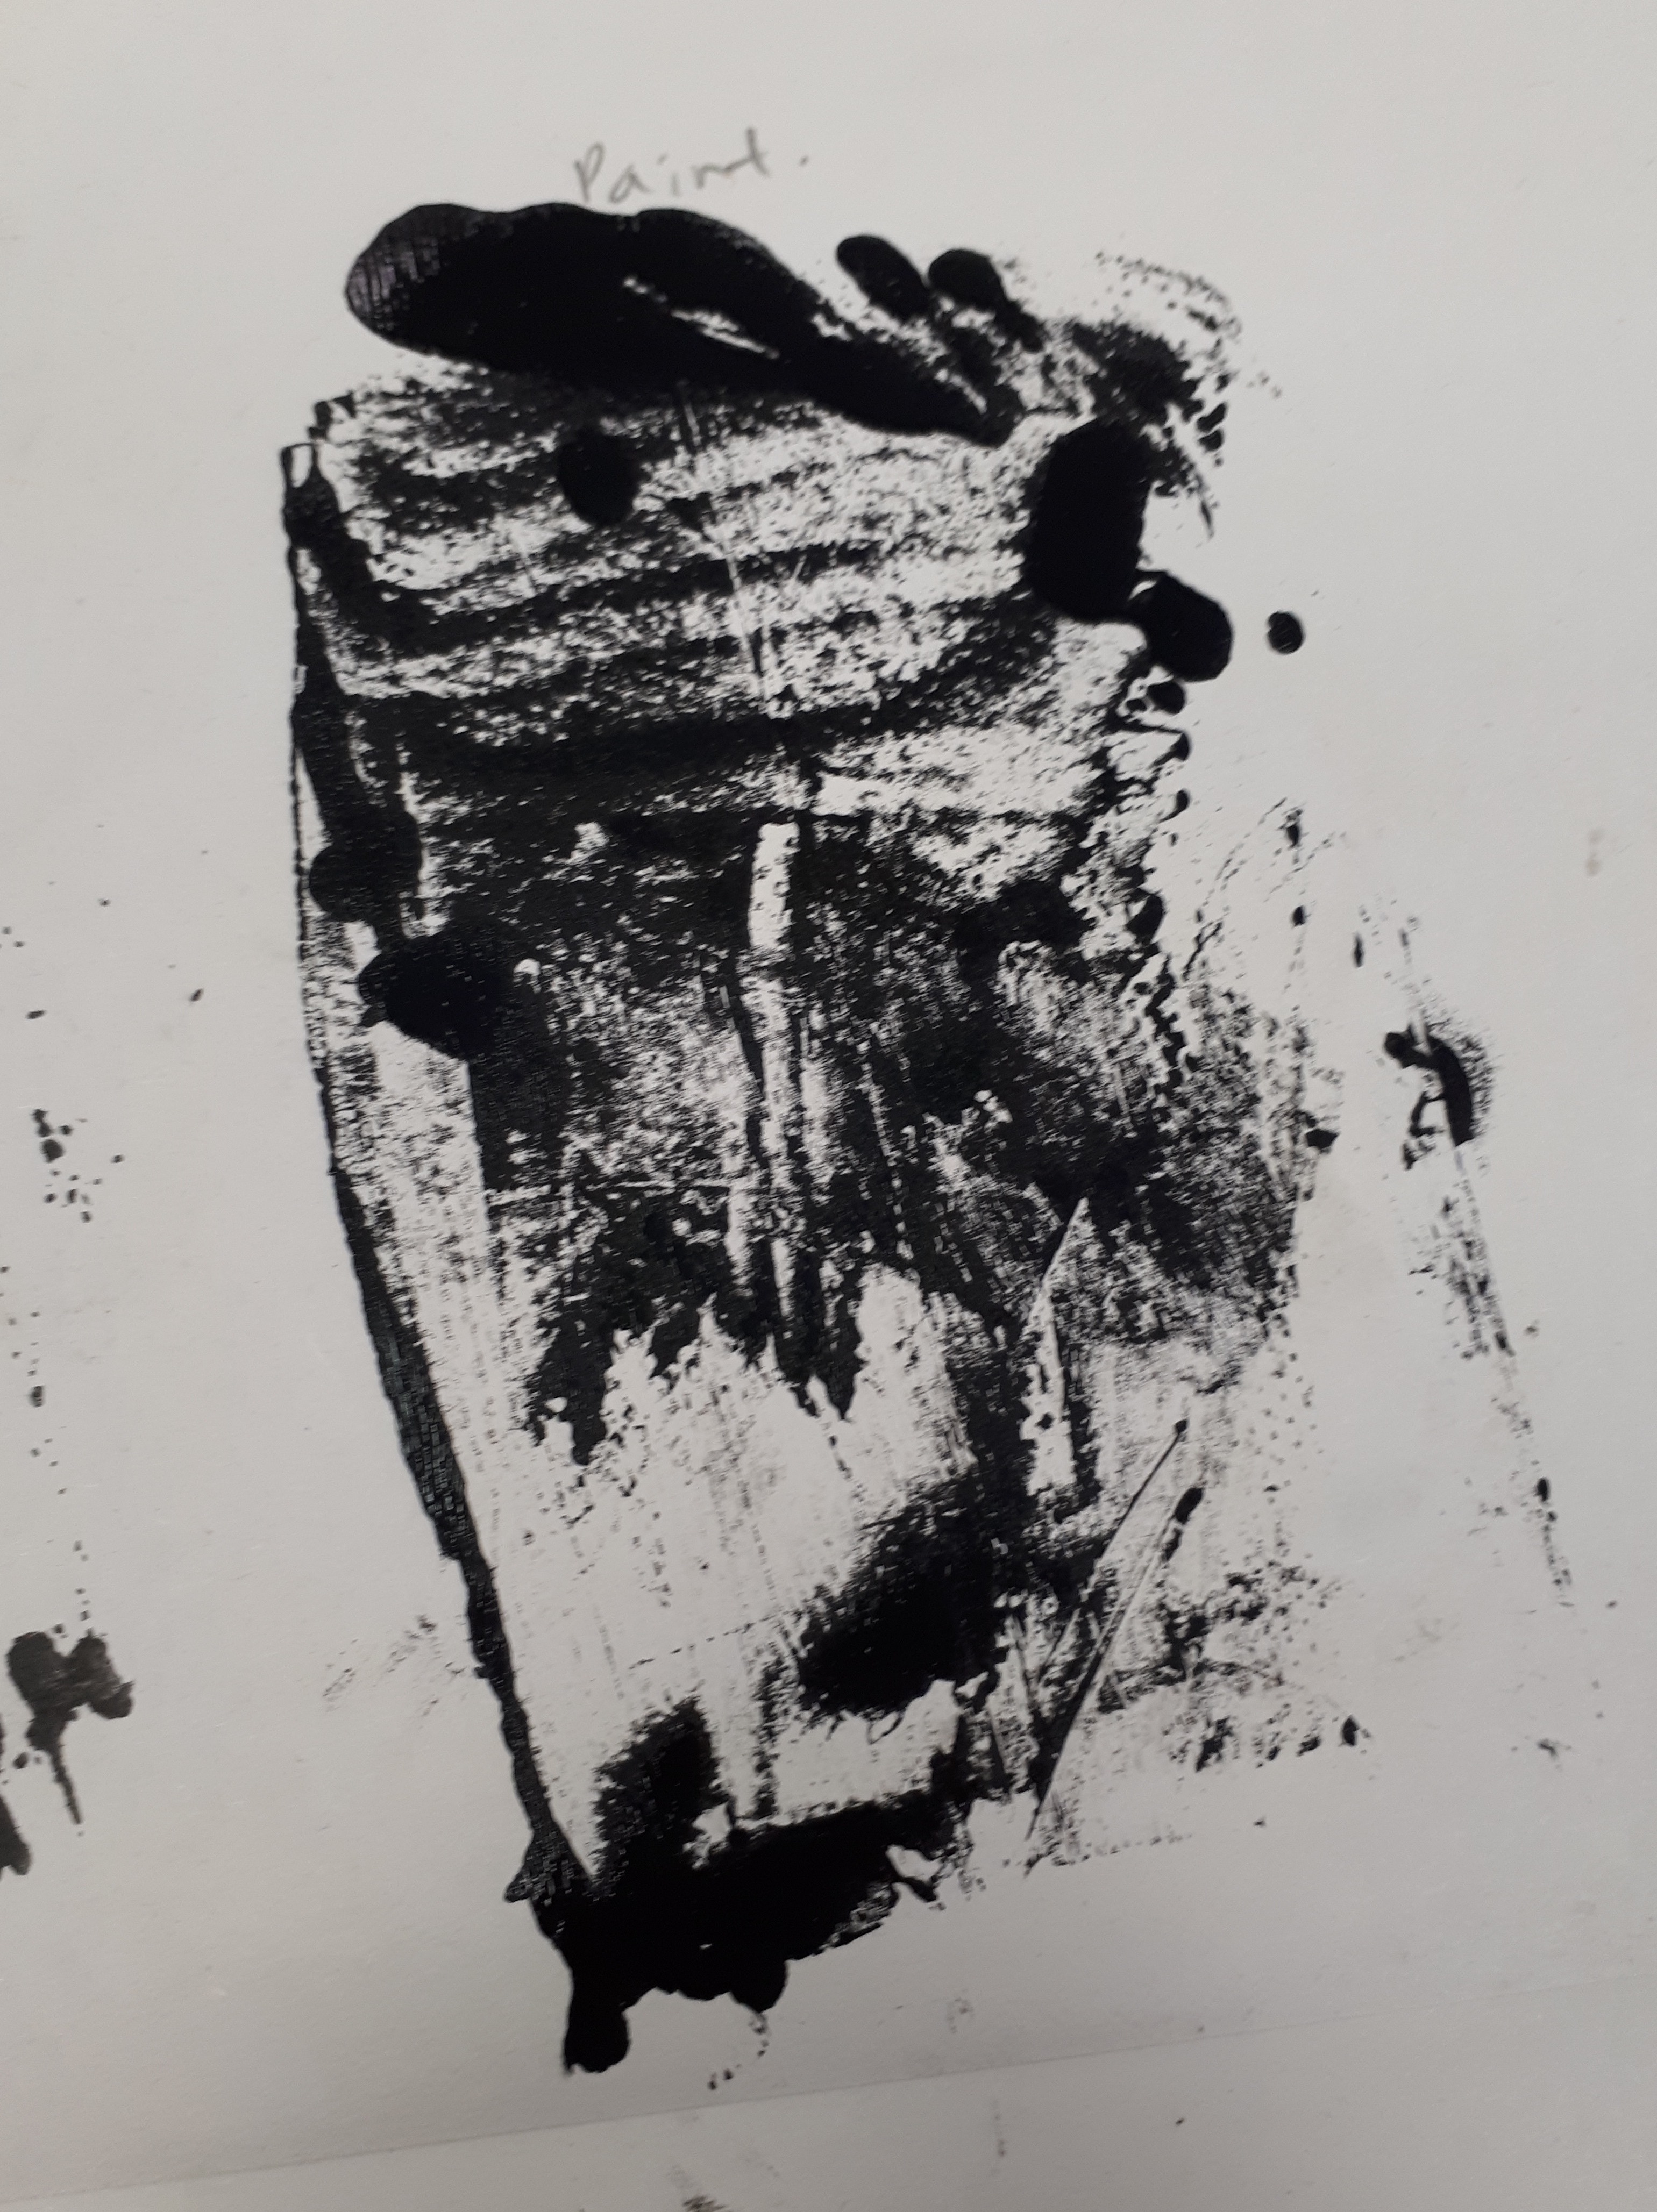
Creating more texture with my paint knifeResults with perforated plastic bag (with thick paint knife stokes)Results with perforated plastic bag (with thin paint knife strokes)
As I applied more paint to my plastic bag, I realised that i could create lines by pushing paint away with my paint knife. I quite liked how the prints turned out with the extra scratches created by the paint knife, as well as the extra texture given by the perforated plastic bag.
Results with regular textured plastic bag (with both thin and thick paint knife strokes)
From my experimentations, I found that I prefer the perforated plastic bag prints more as it adds a rustic texture to the overall print. I also prefer the thicker strokes created with the paint knife as compared to the thin strokes. I found that thickness and bluntness of the strokes, along with their curved shapes, conveyed a certain kind of sadness to them. The thin strokes on the other hand seemed too harsh. I felt that the thick, curved strokes that I created could be used to represent sorrow. To me, the strokes looked like waves that could represent the waves of sadness one feels when they are sorrowful. The perforated bag adds some texture to the strokes as well which I find decreases the contrast between the background and the strokes. This makes the strokes softer as compared to the harsher ones made with the smooth plastic bag. The softer strokes represent sorrow better as the waves of sadness, to me, are not forceful or hard but are soft, lingering and continuous.
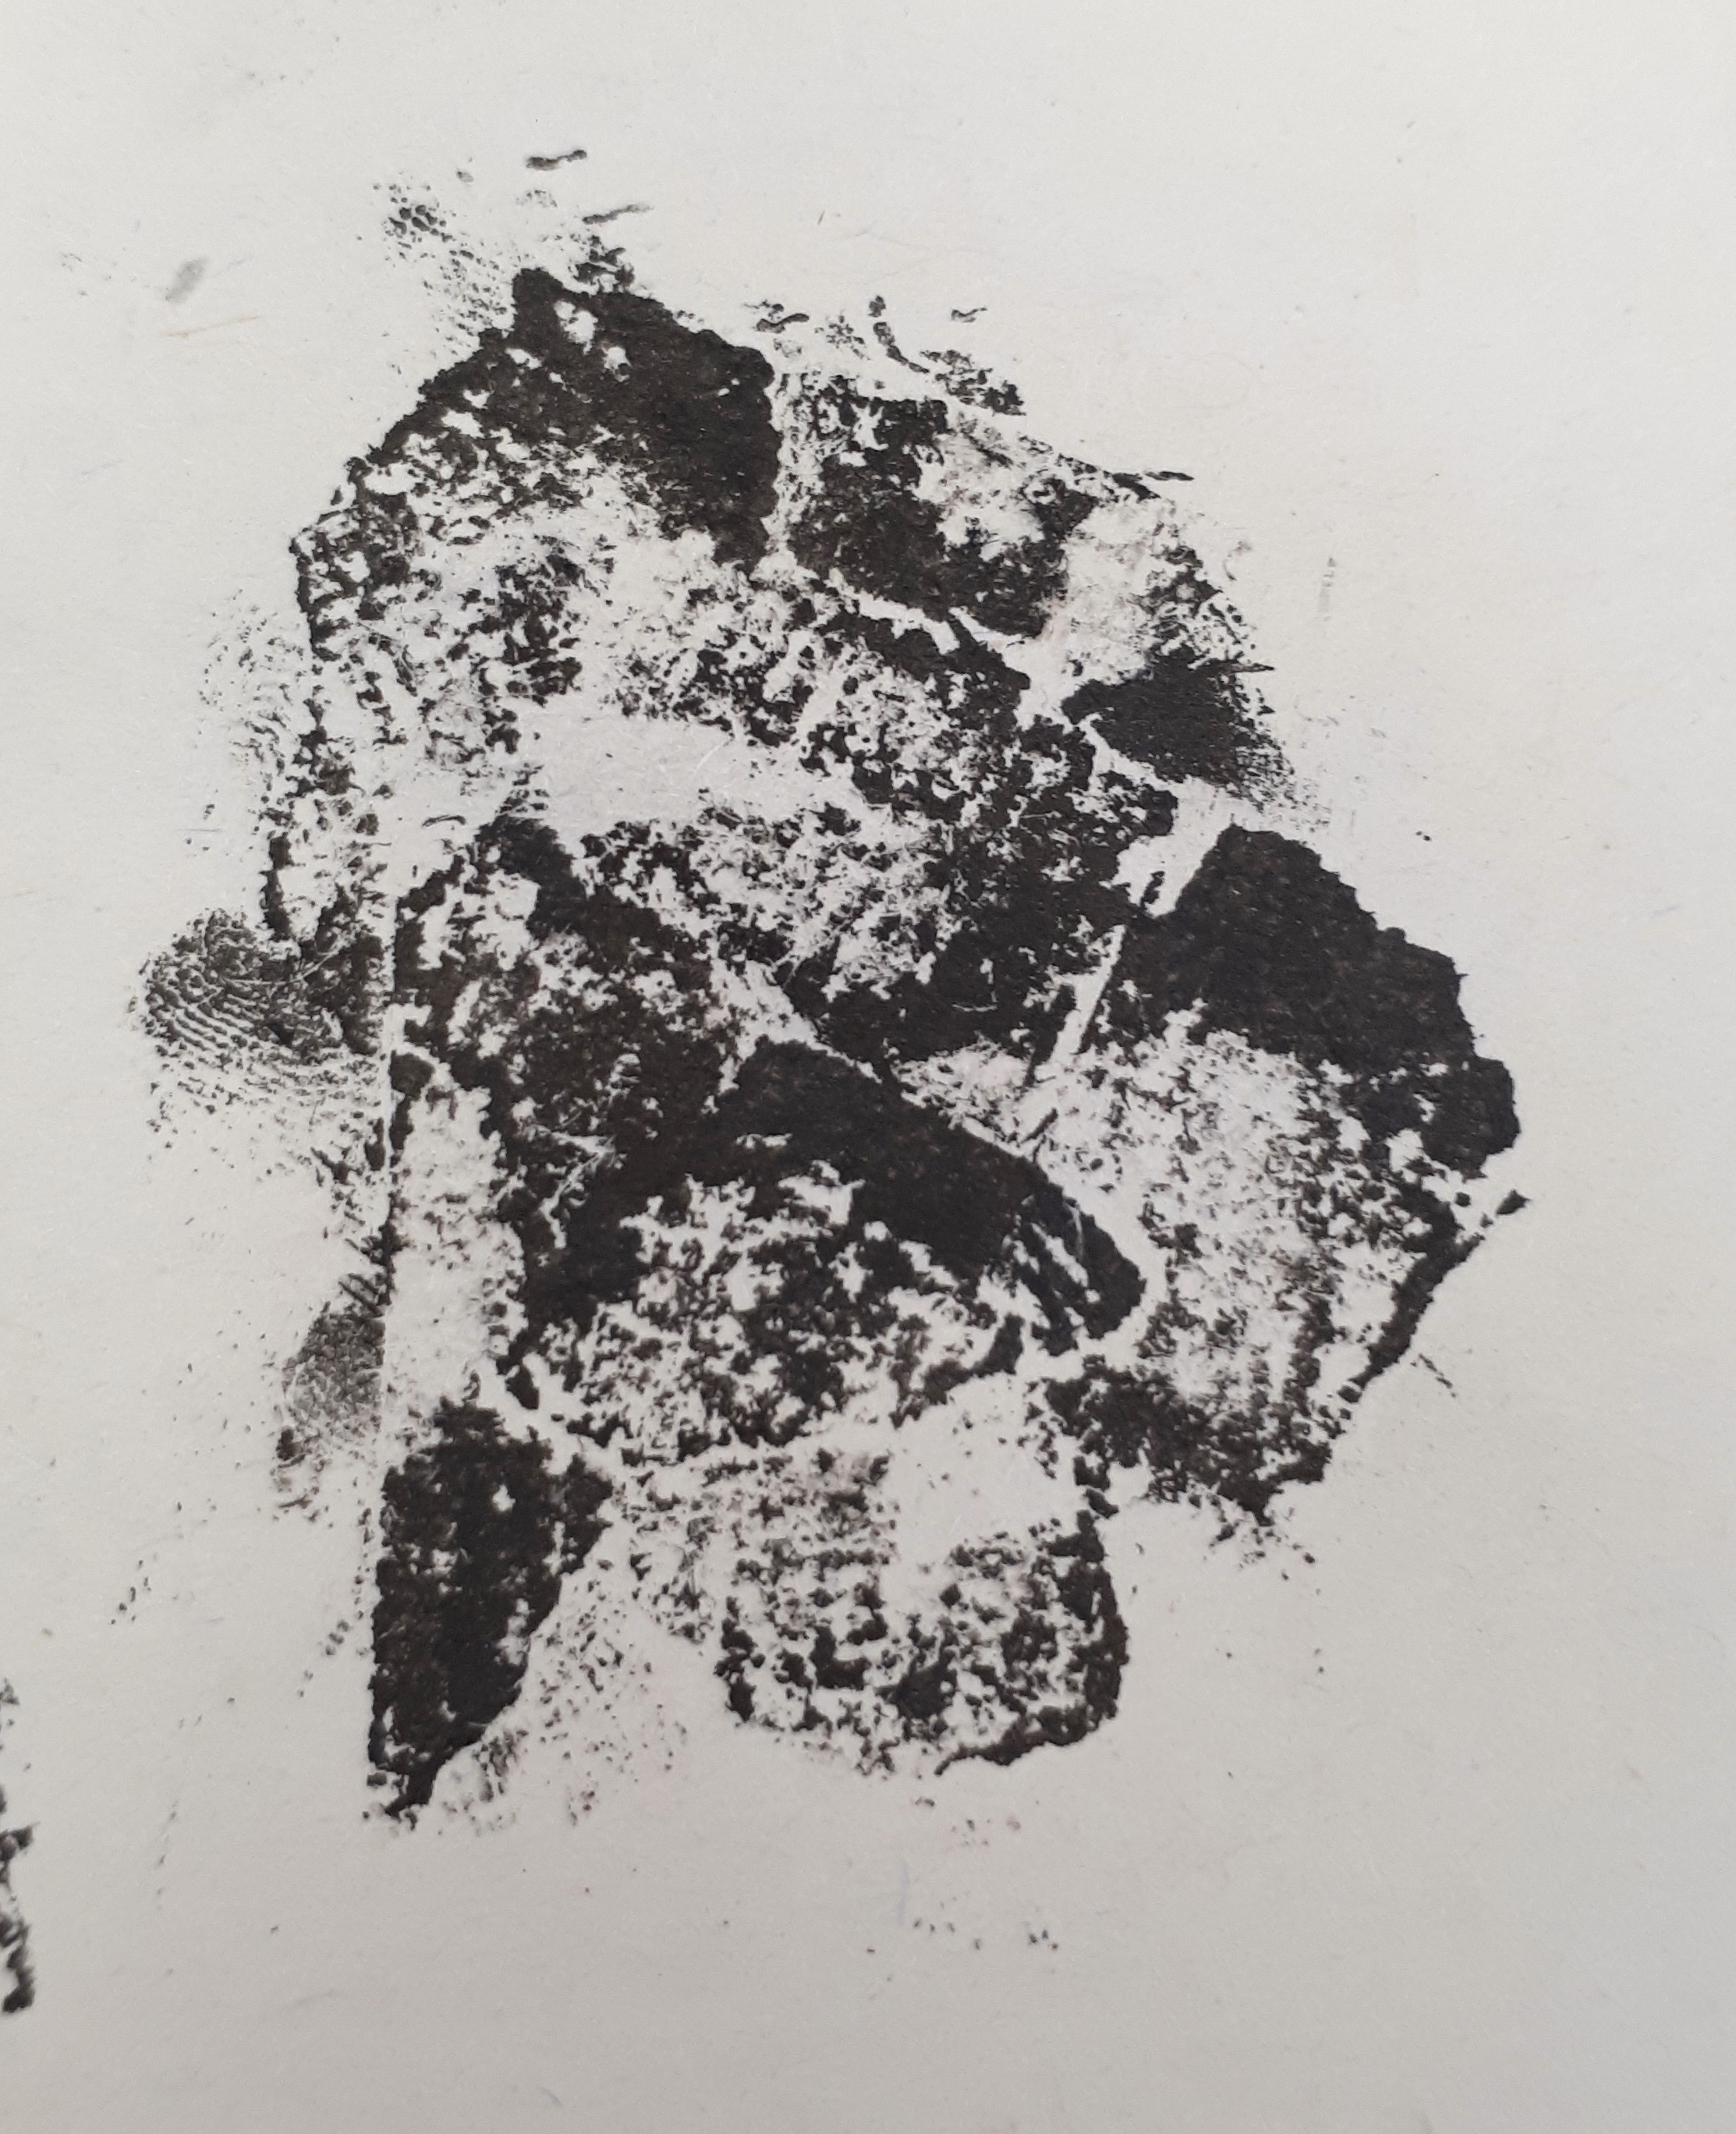
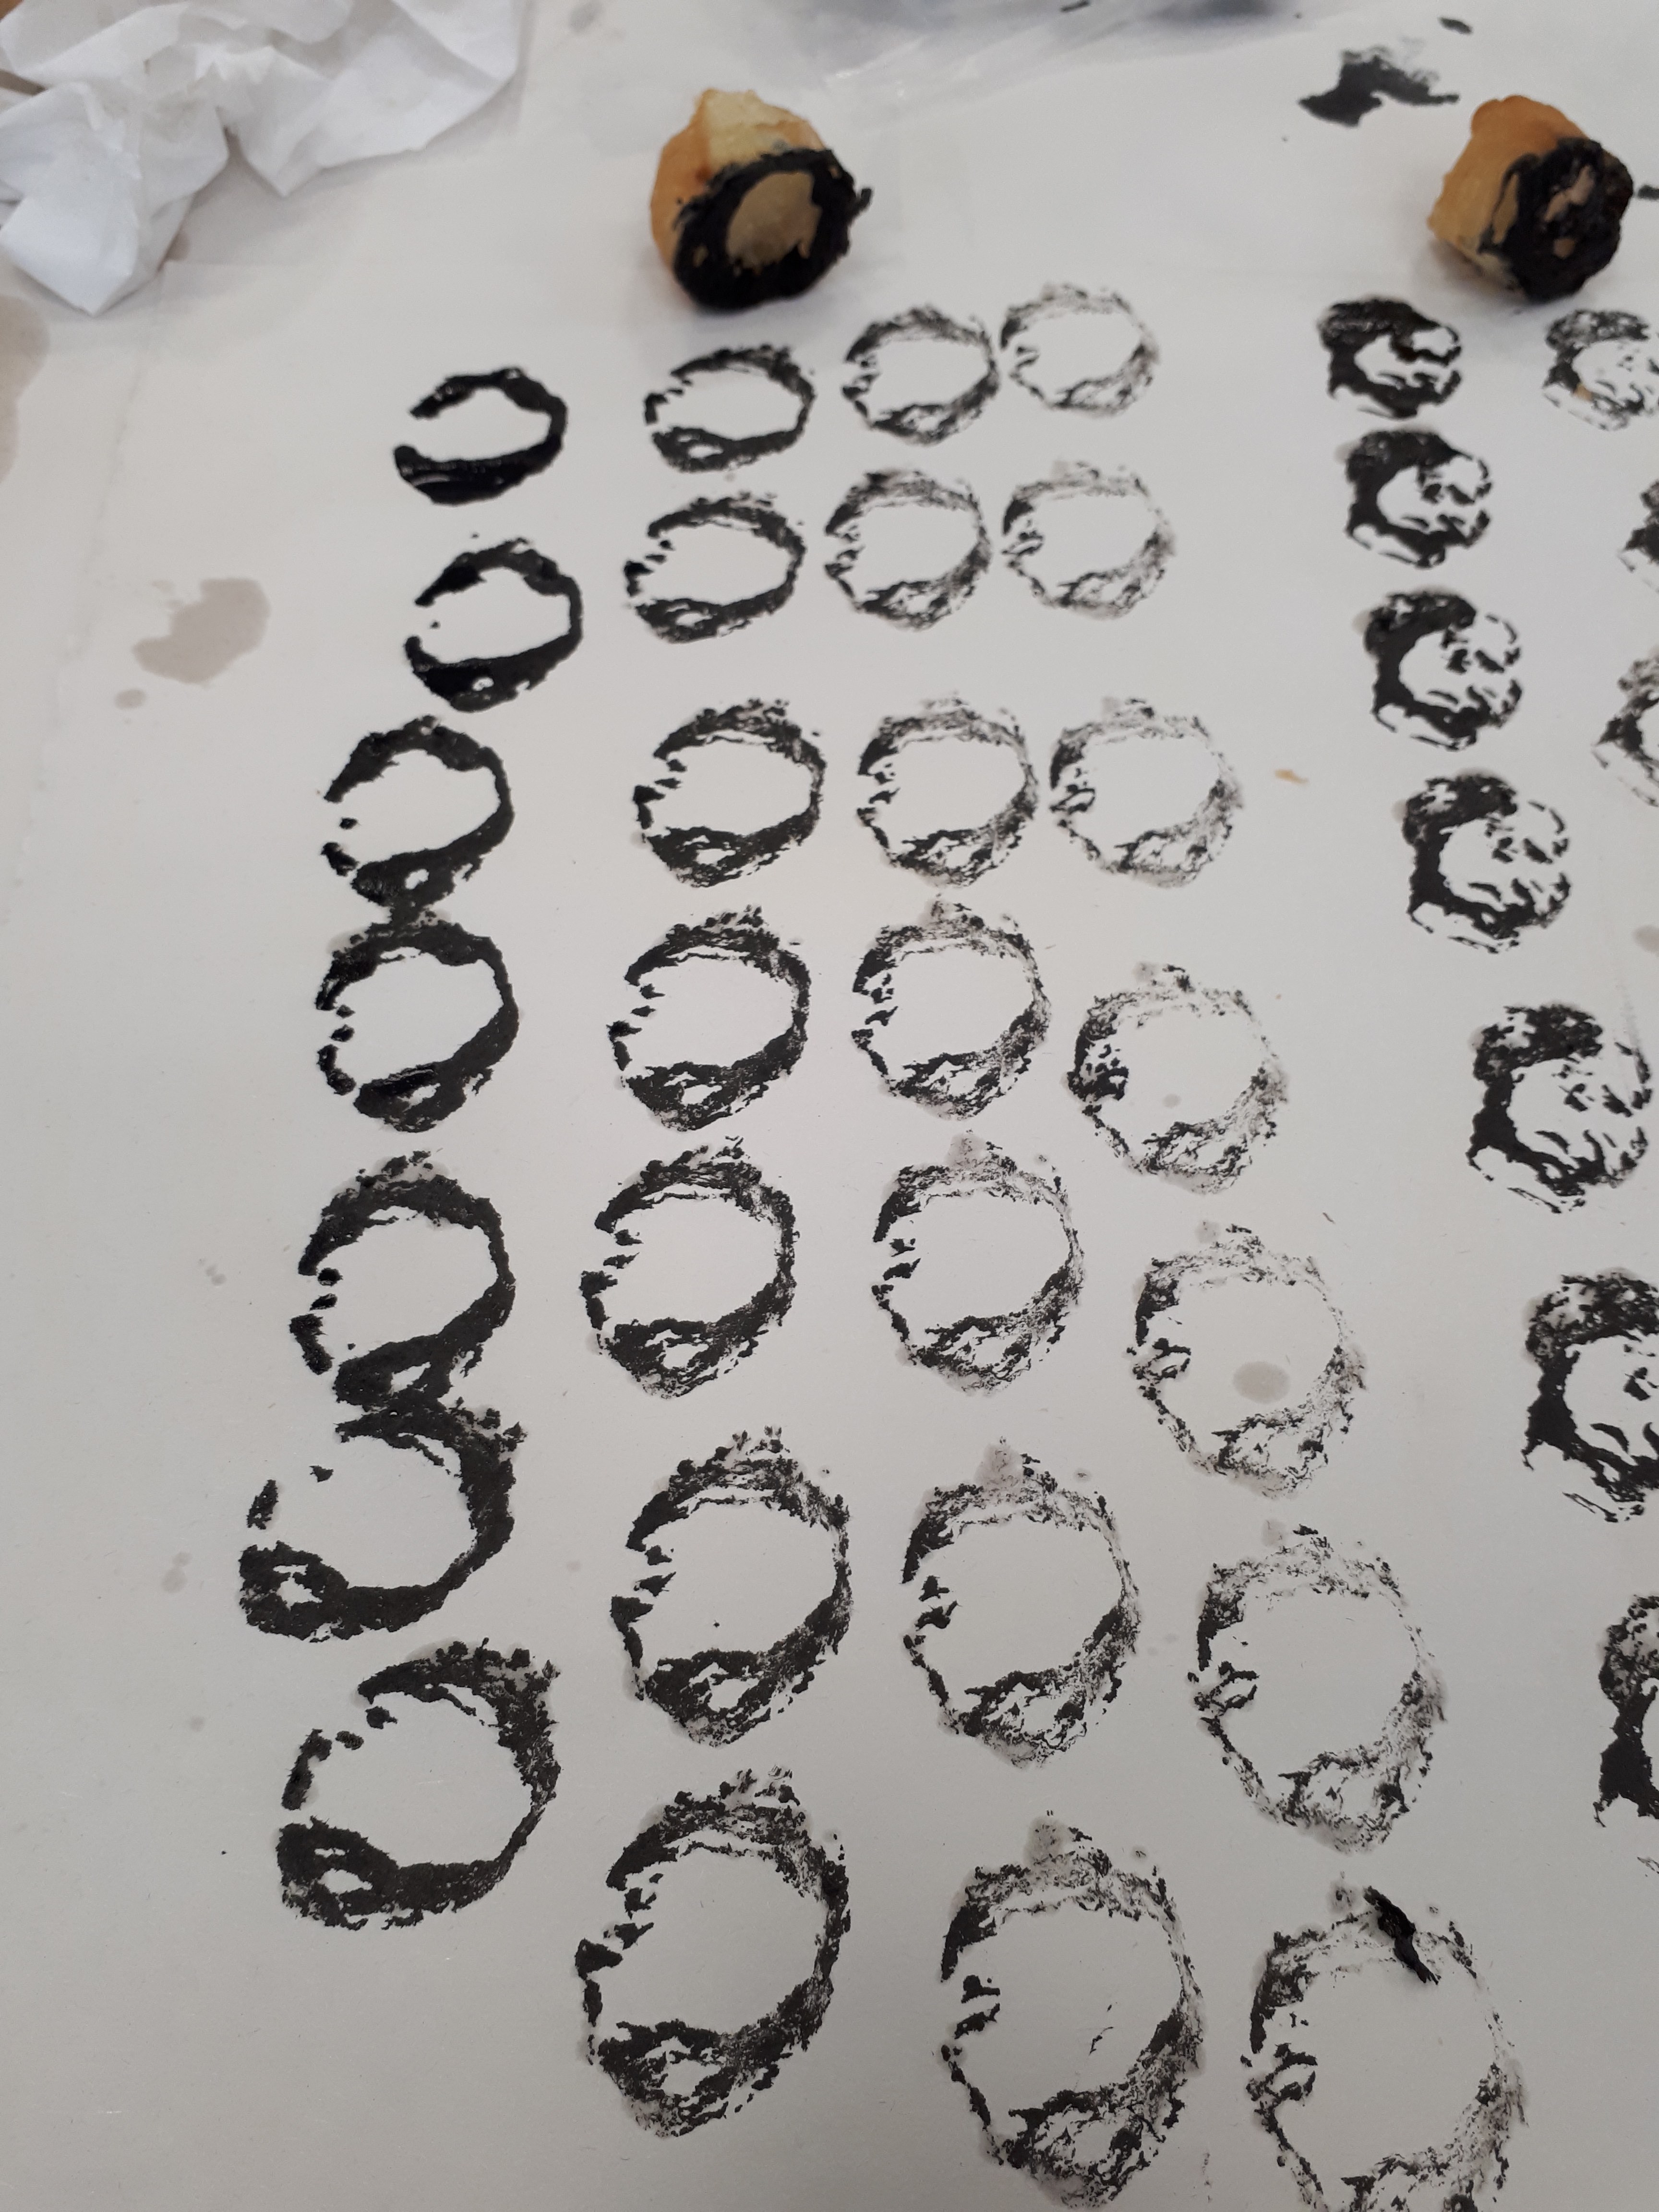
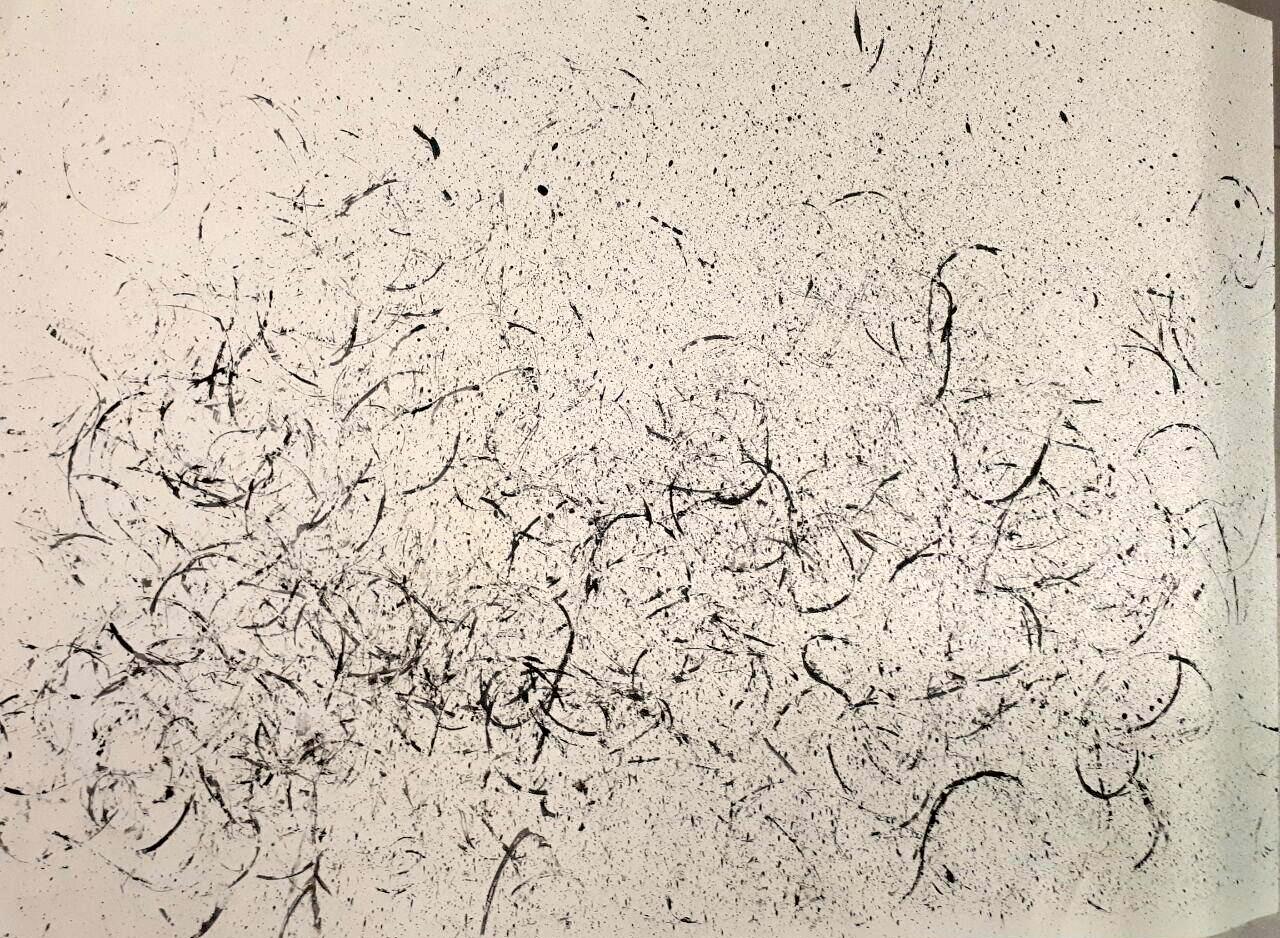
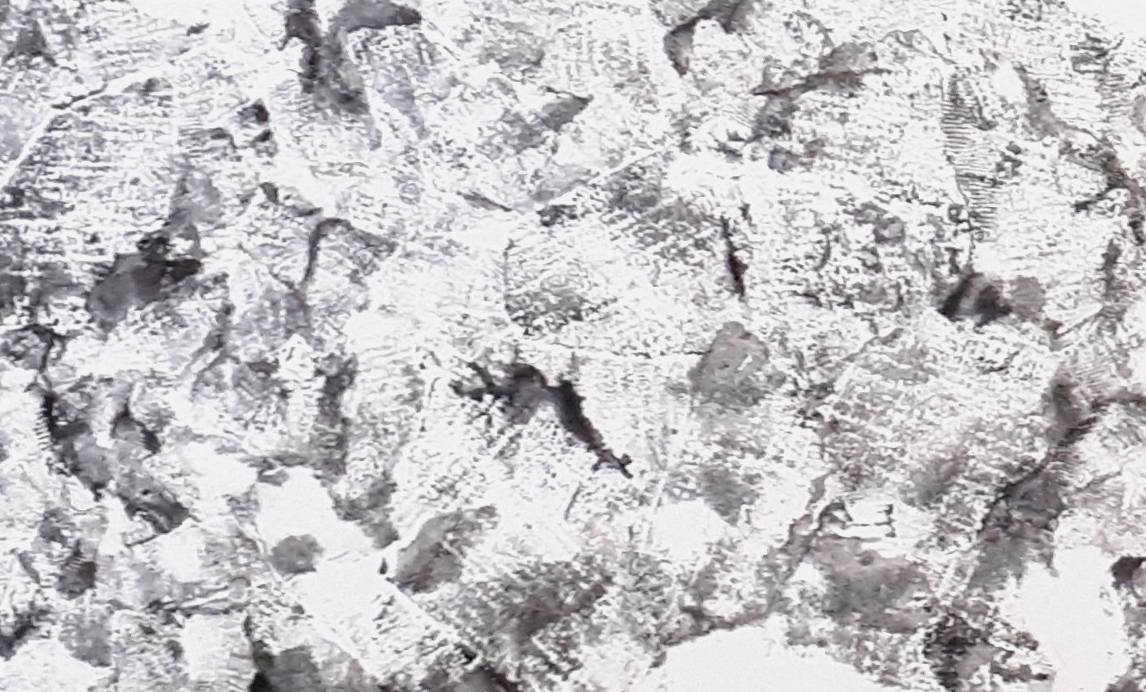
YOUTIAO
2134
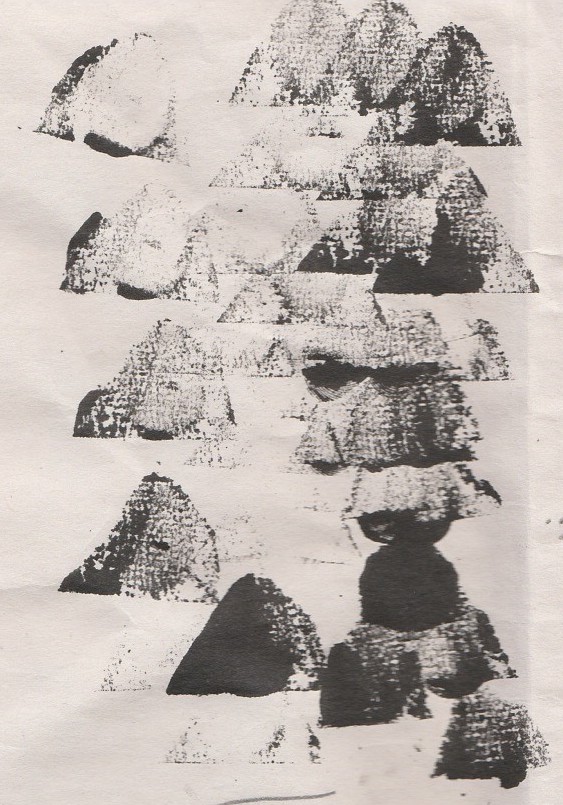
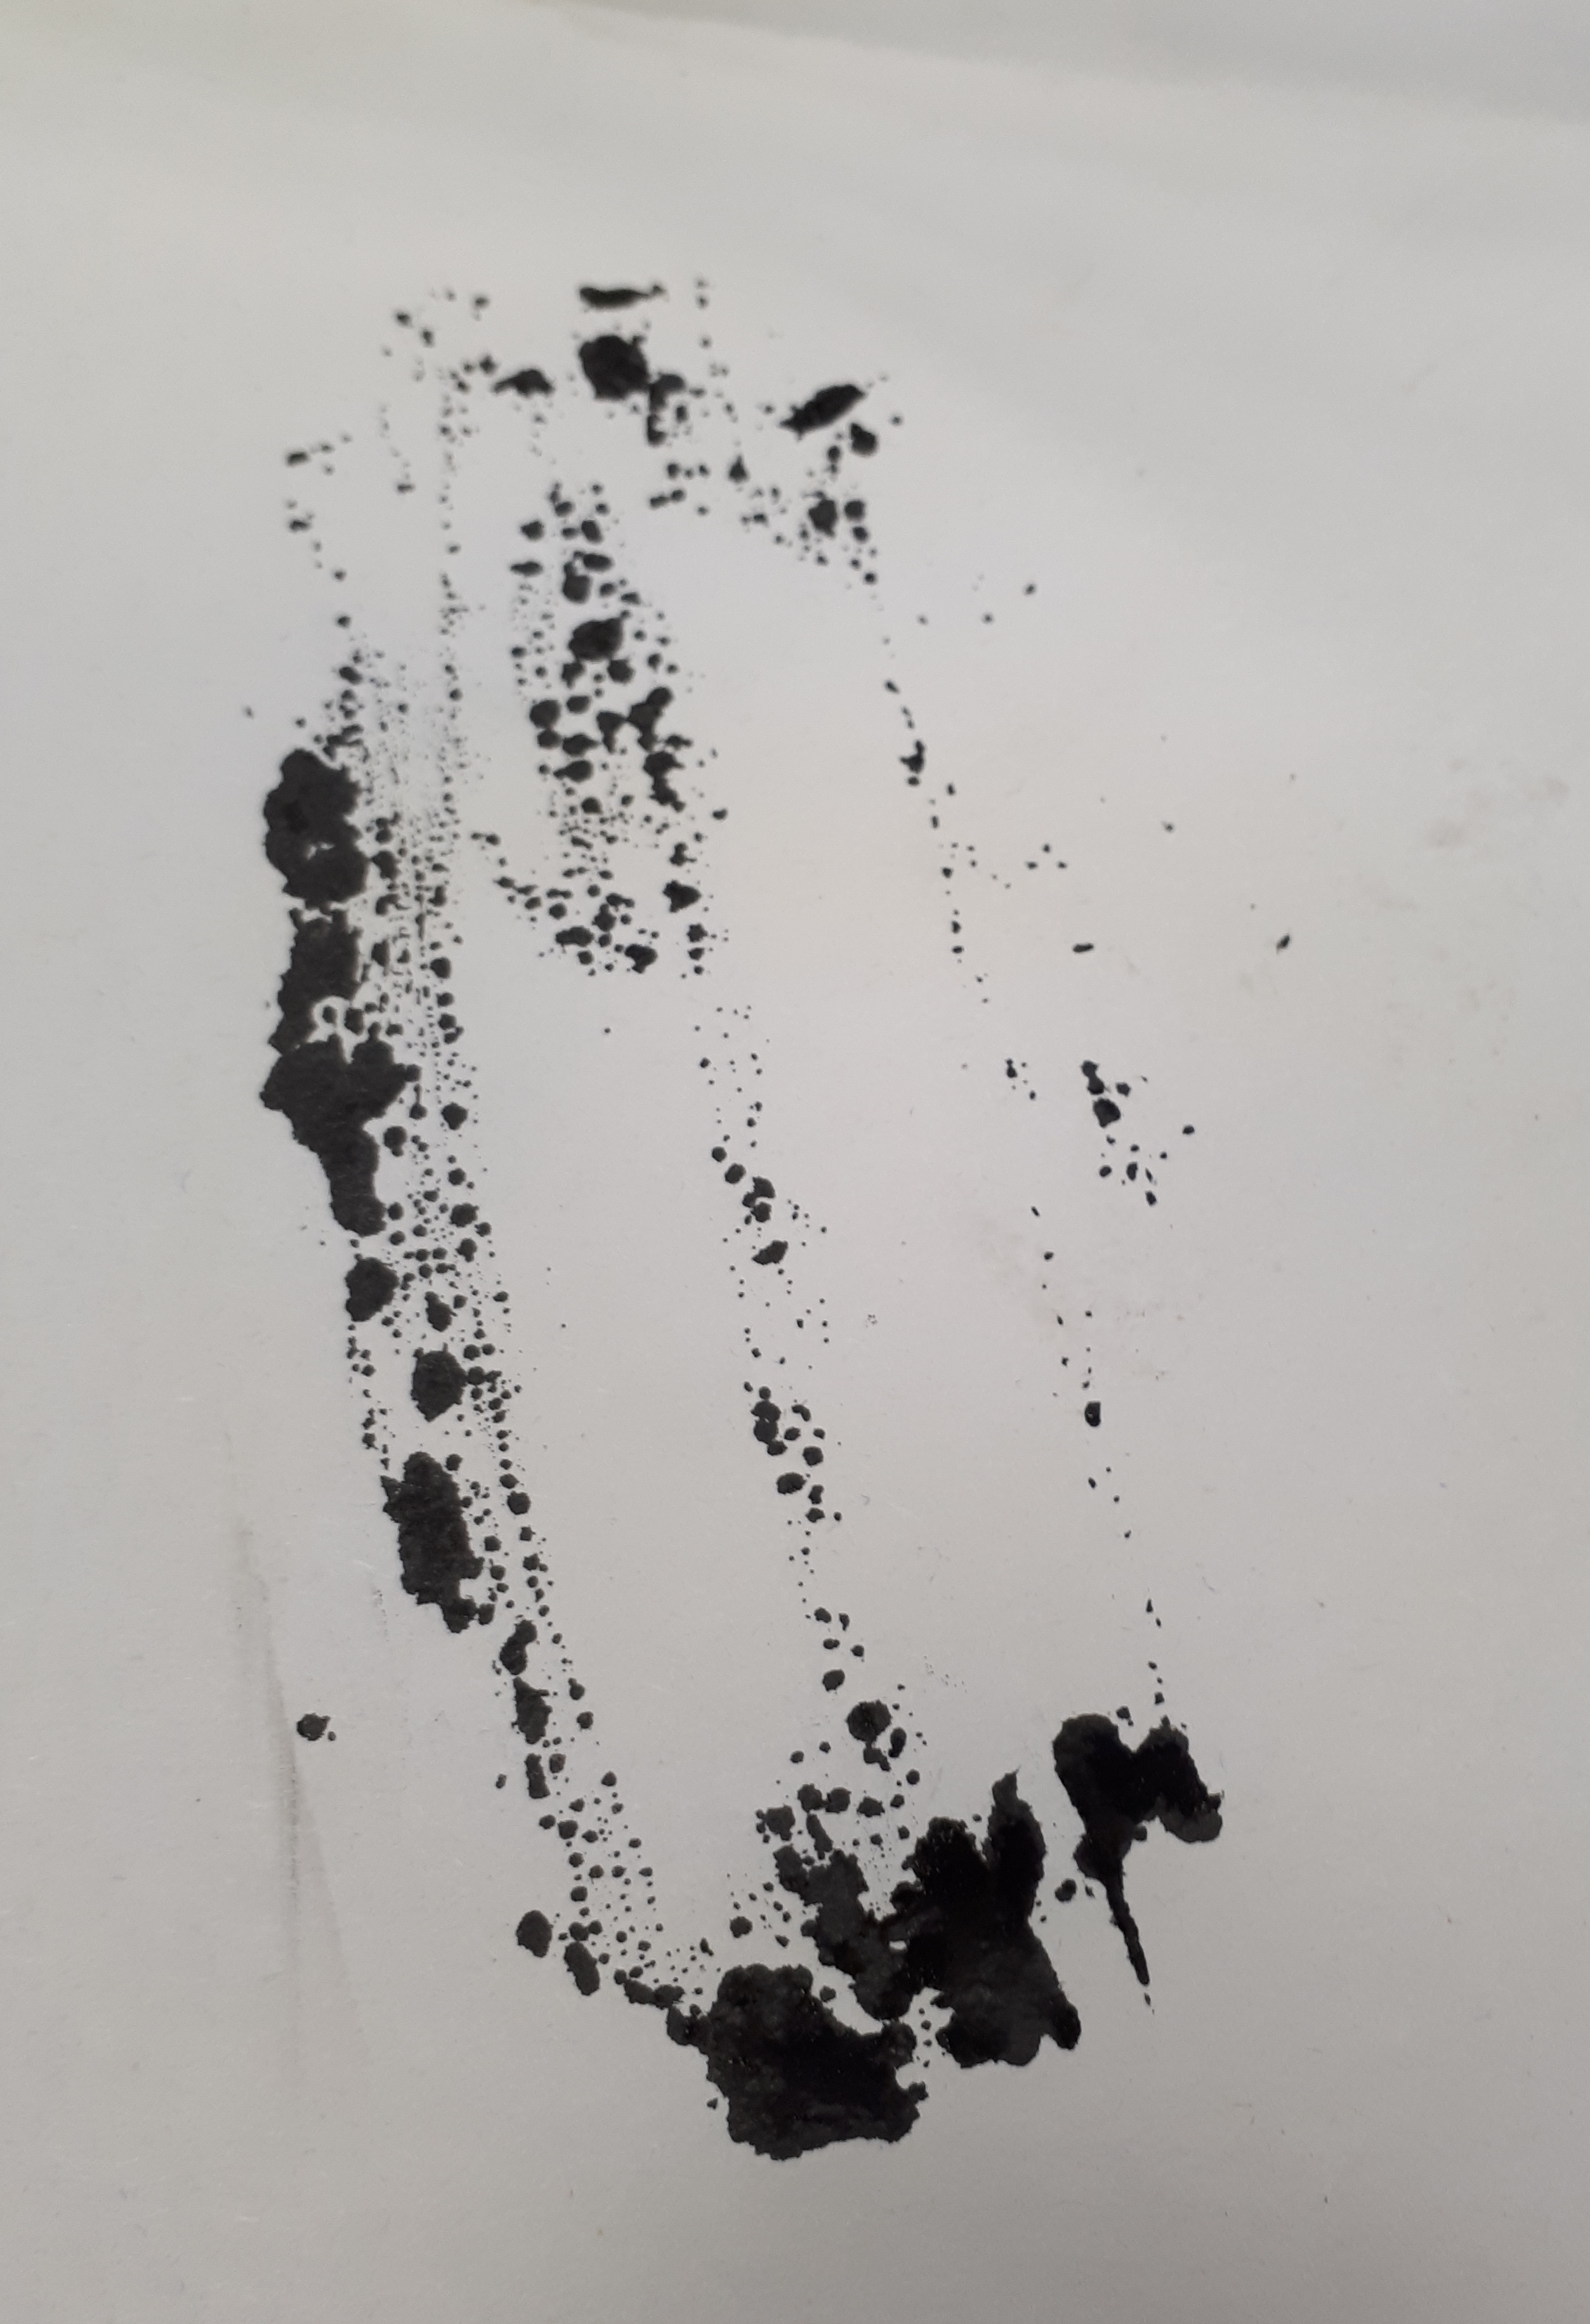
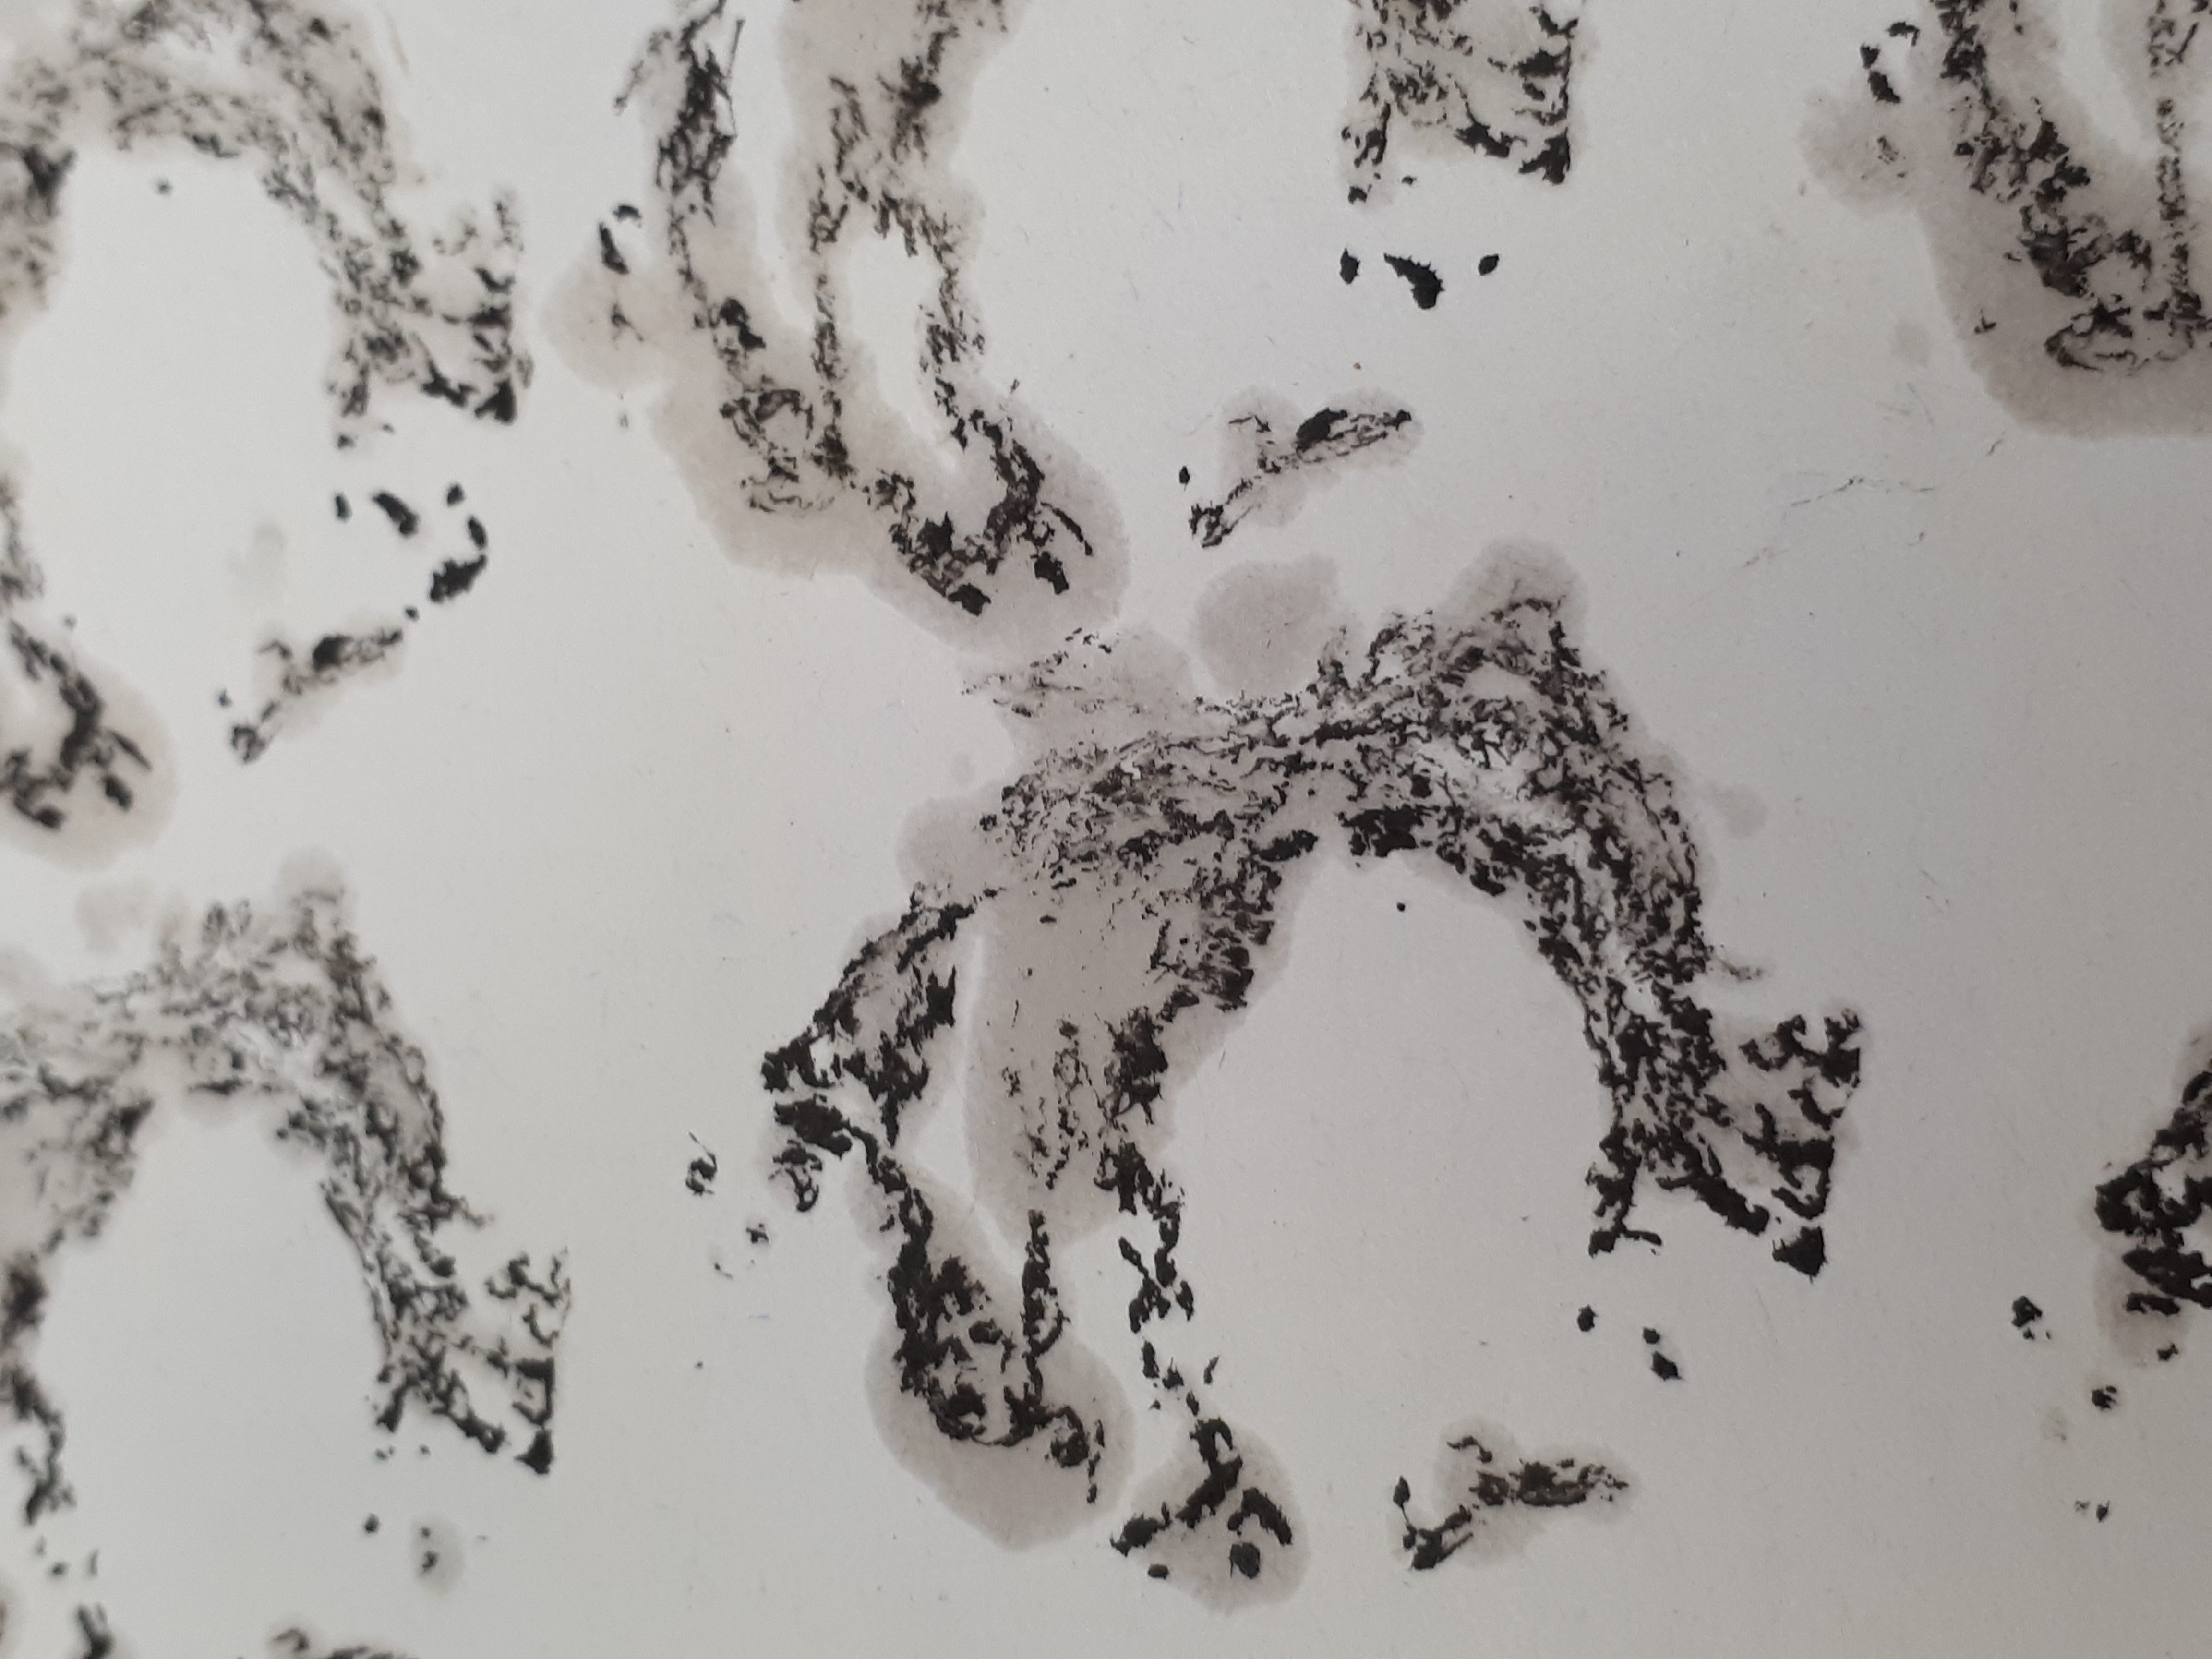
Close up of results created using ink with oil from the youtiao
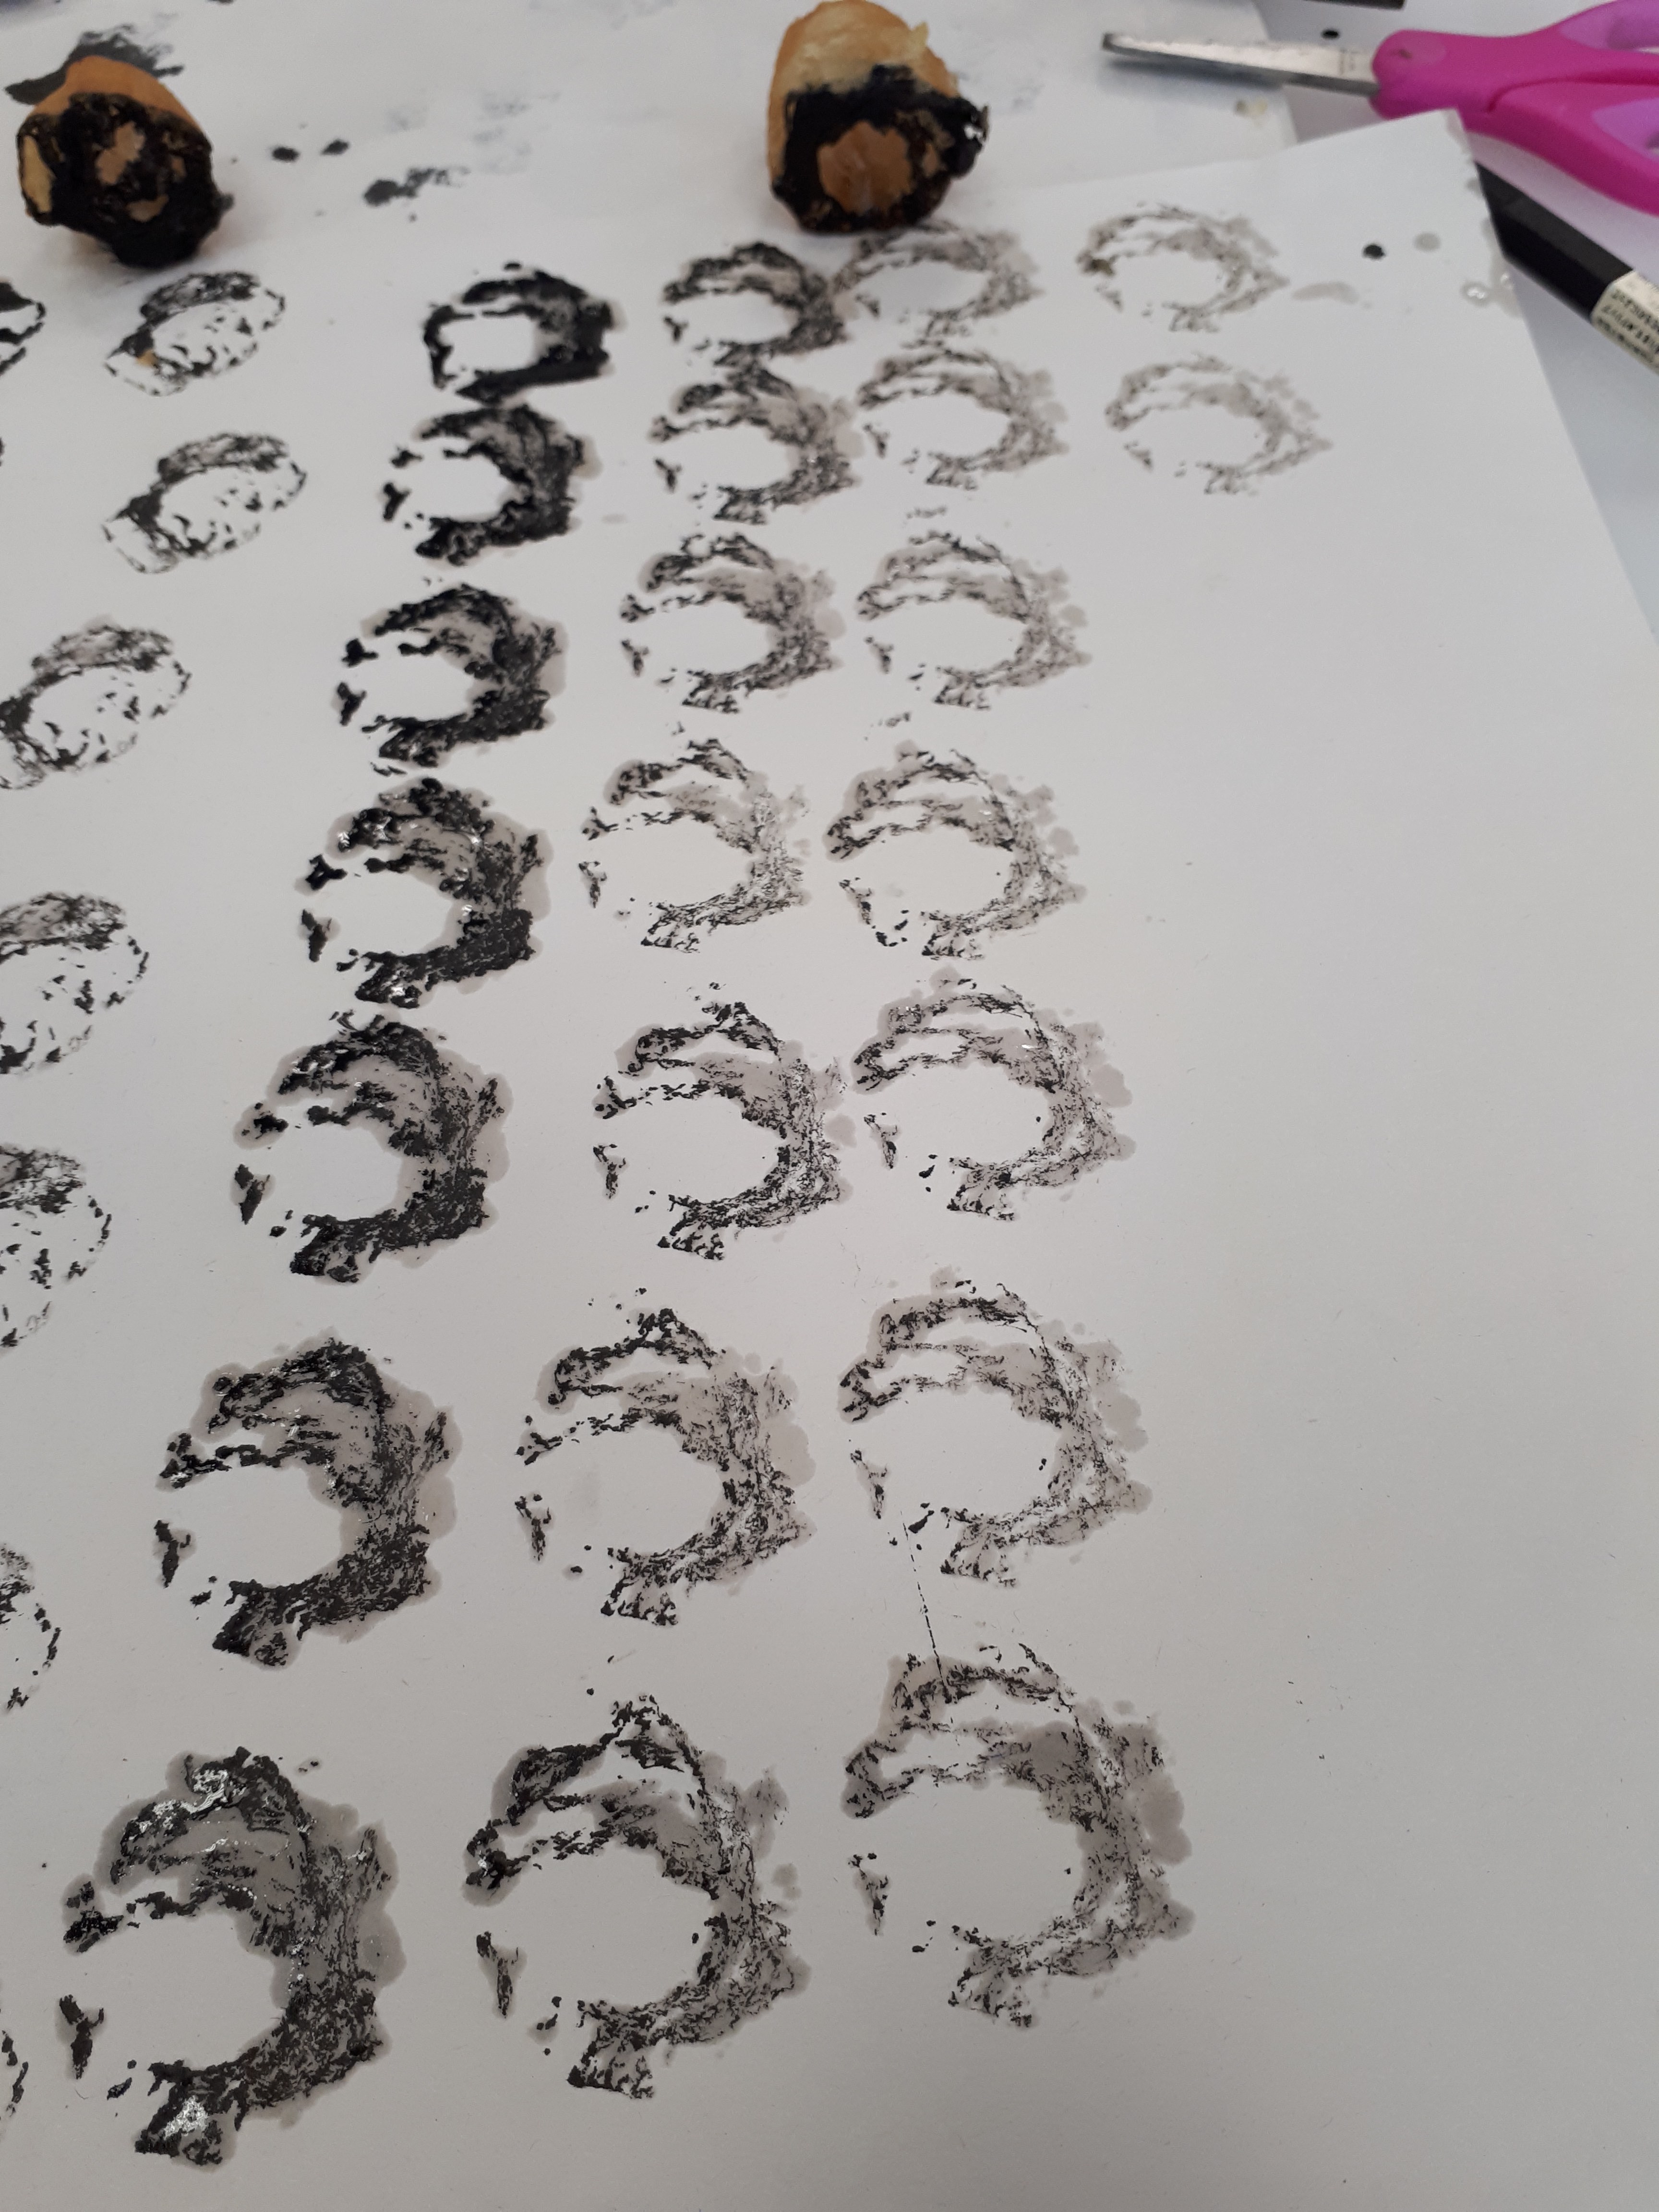
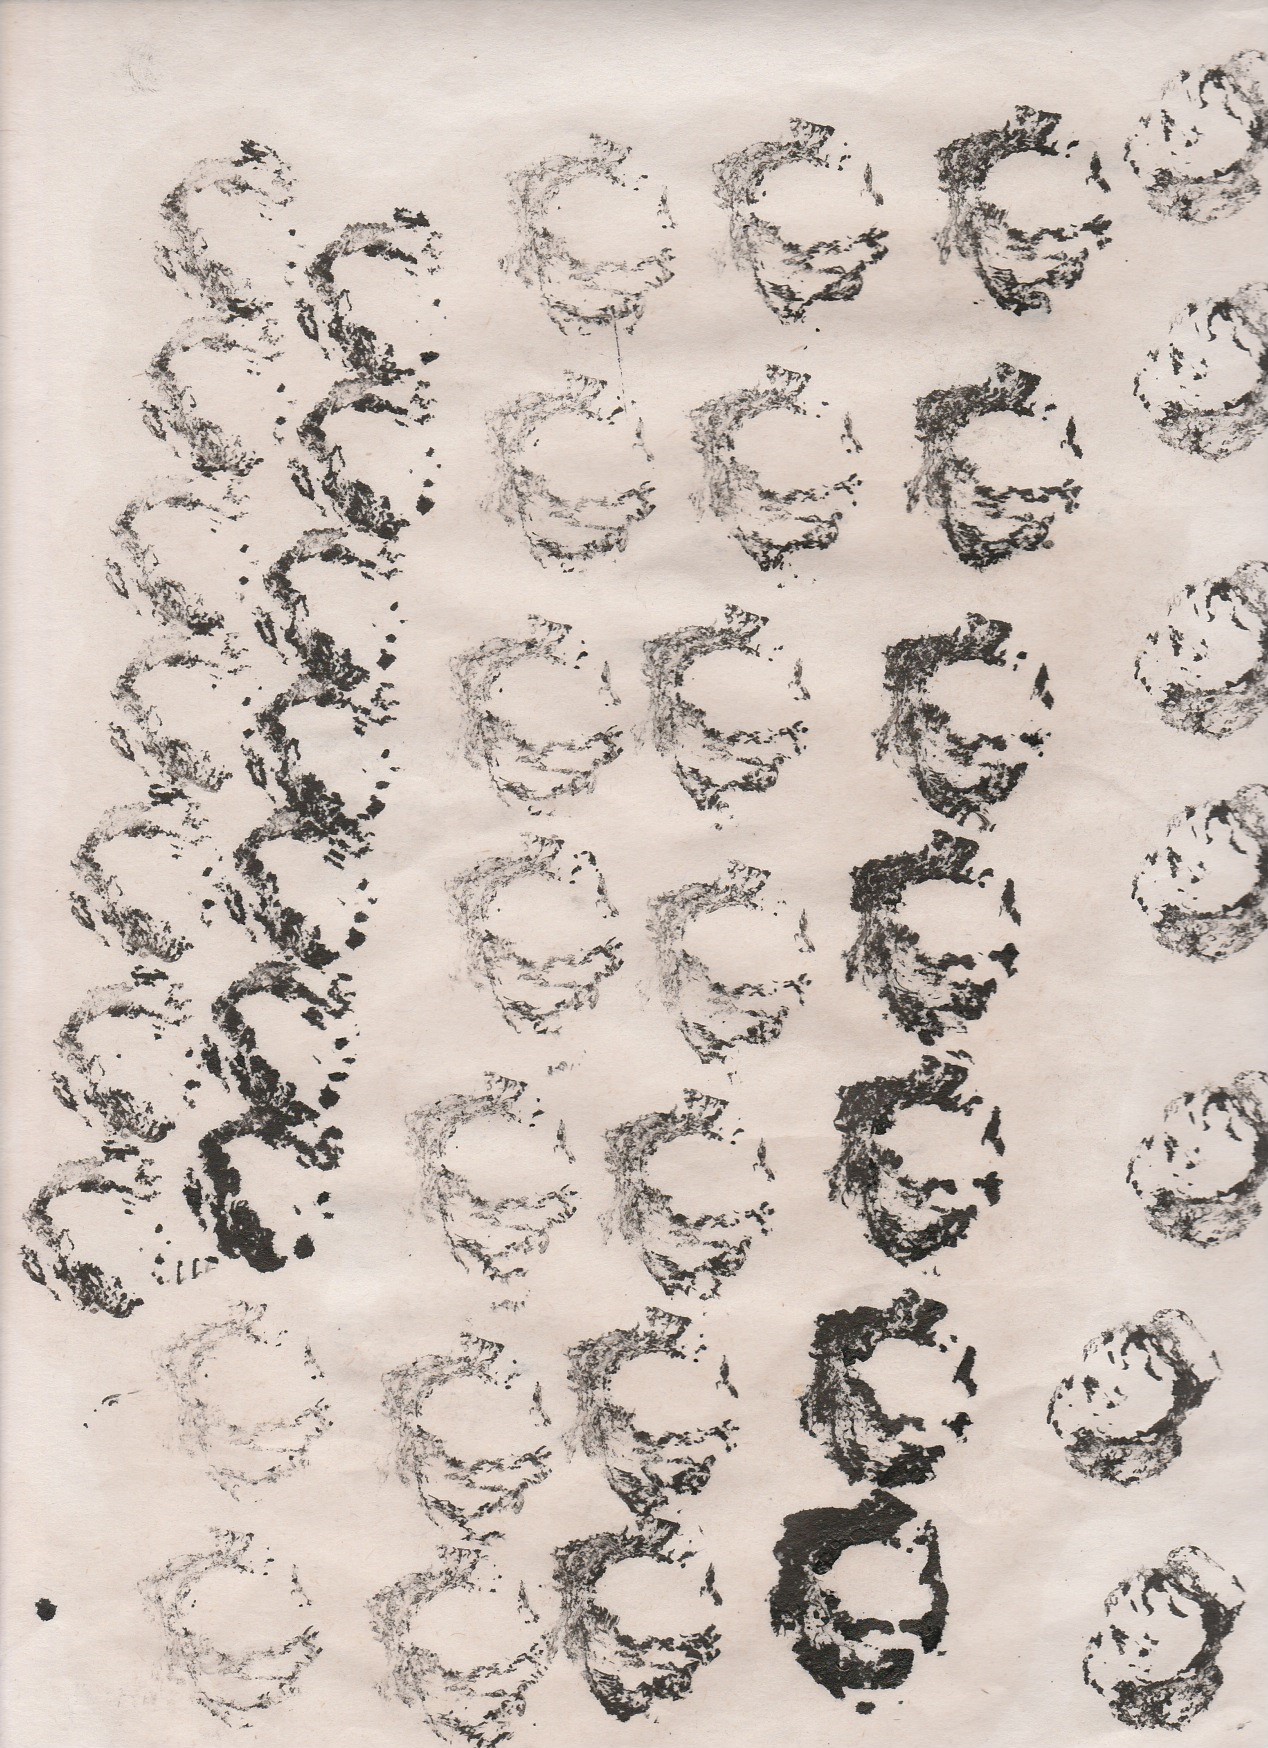
For the youtiao, I cut different small pieces off, dipped them in Chinese ink, and stamped the youtiao pieces onto the newsprint. I chose to use Chinese ink as it is water based and can be easily absorbed by the youtiao. From the experimentation. I liked the rounded, organic shapes the “youtiao stamps” created, as well as the interesting marks created by the interaction of the ink with the oil from the youtiao.
Stamping the youtiao in straight lines with equal amount of space between each print.Stamping the youtiao in straight lines with equal amount of space between each print.
The results created from this first experimentation convey a positive kind of emotion because of its uniformity and roundness. However I felt that the uniformity created was rather dull and that there was too much unused space on the paper. I decided to close up the space between each stamp and see what that would give me.
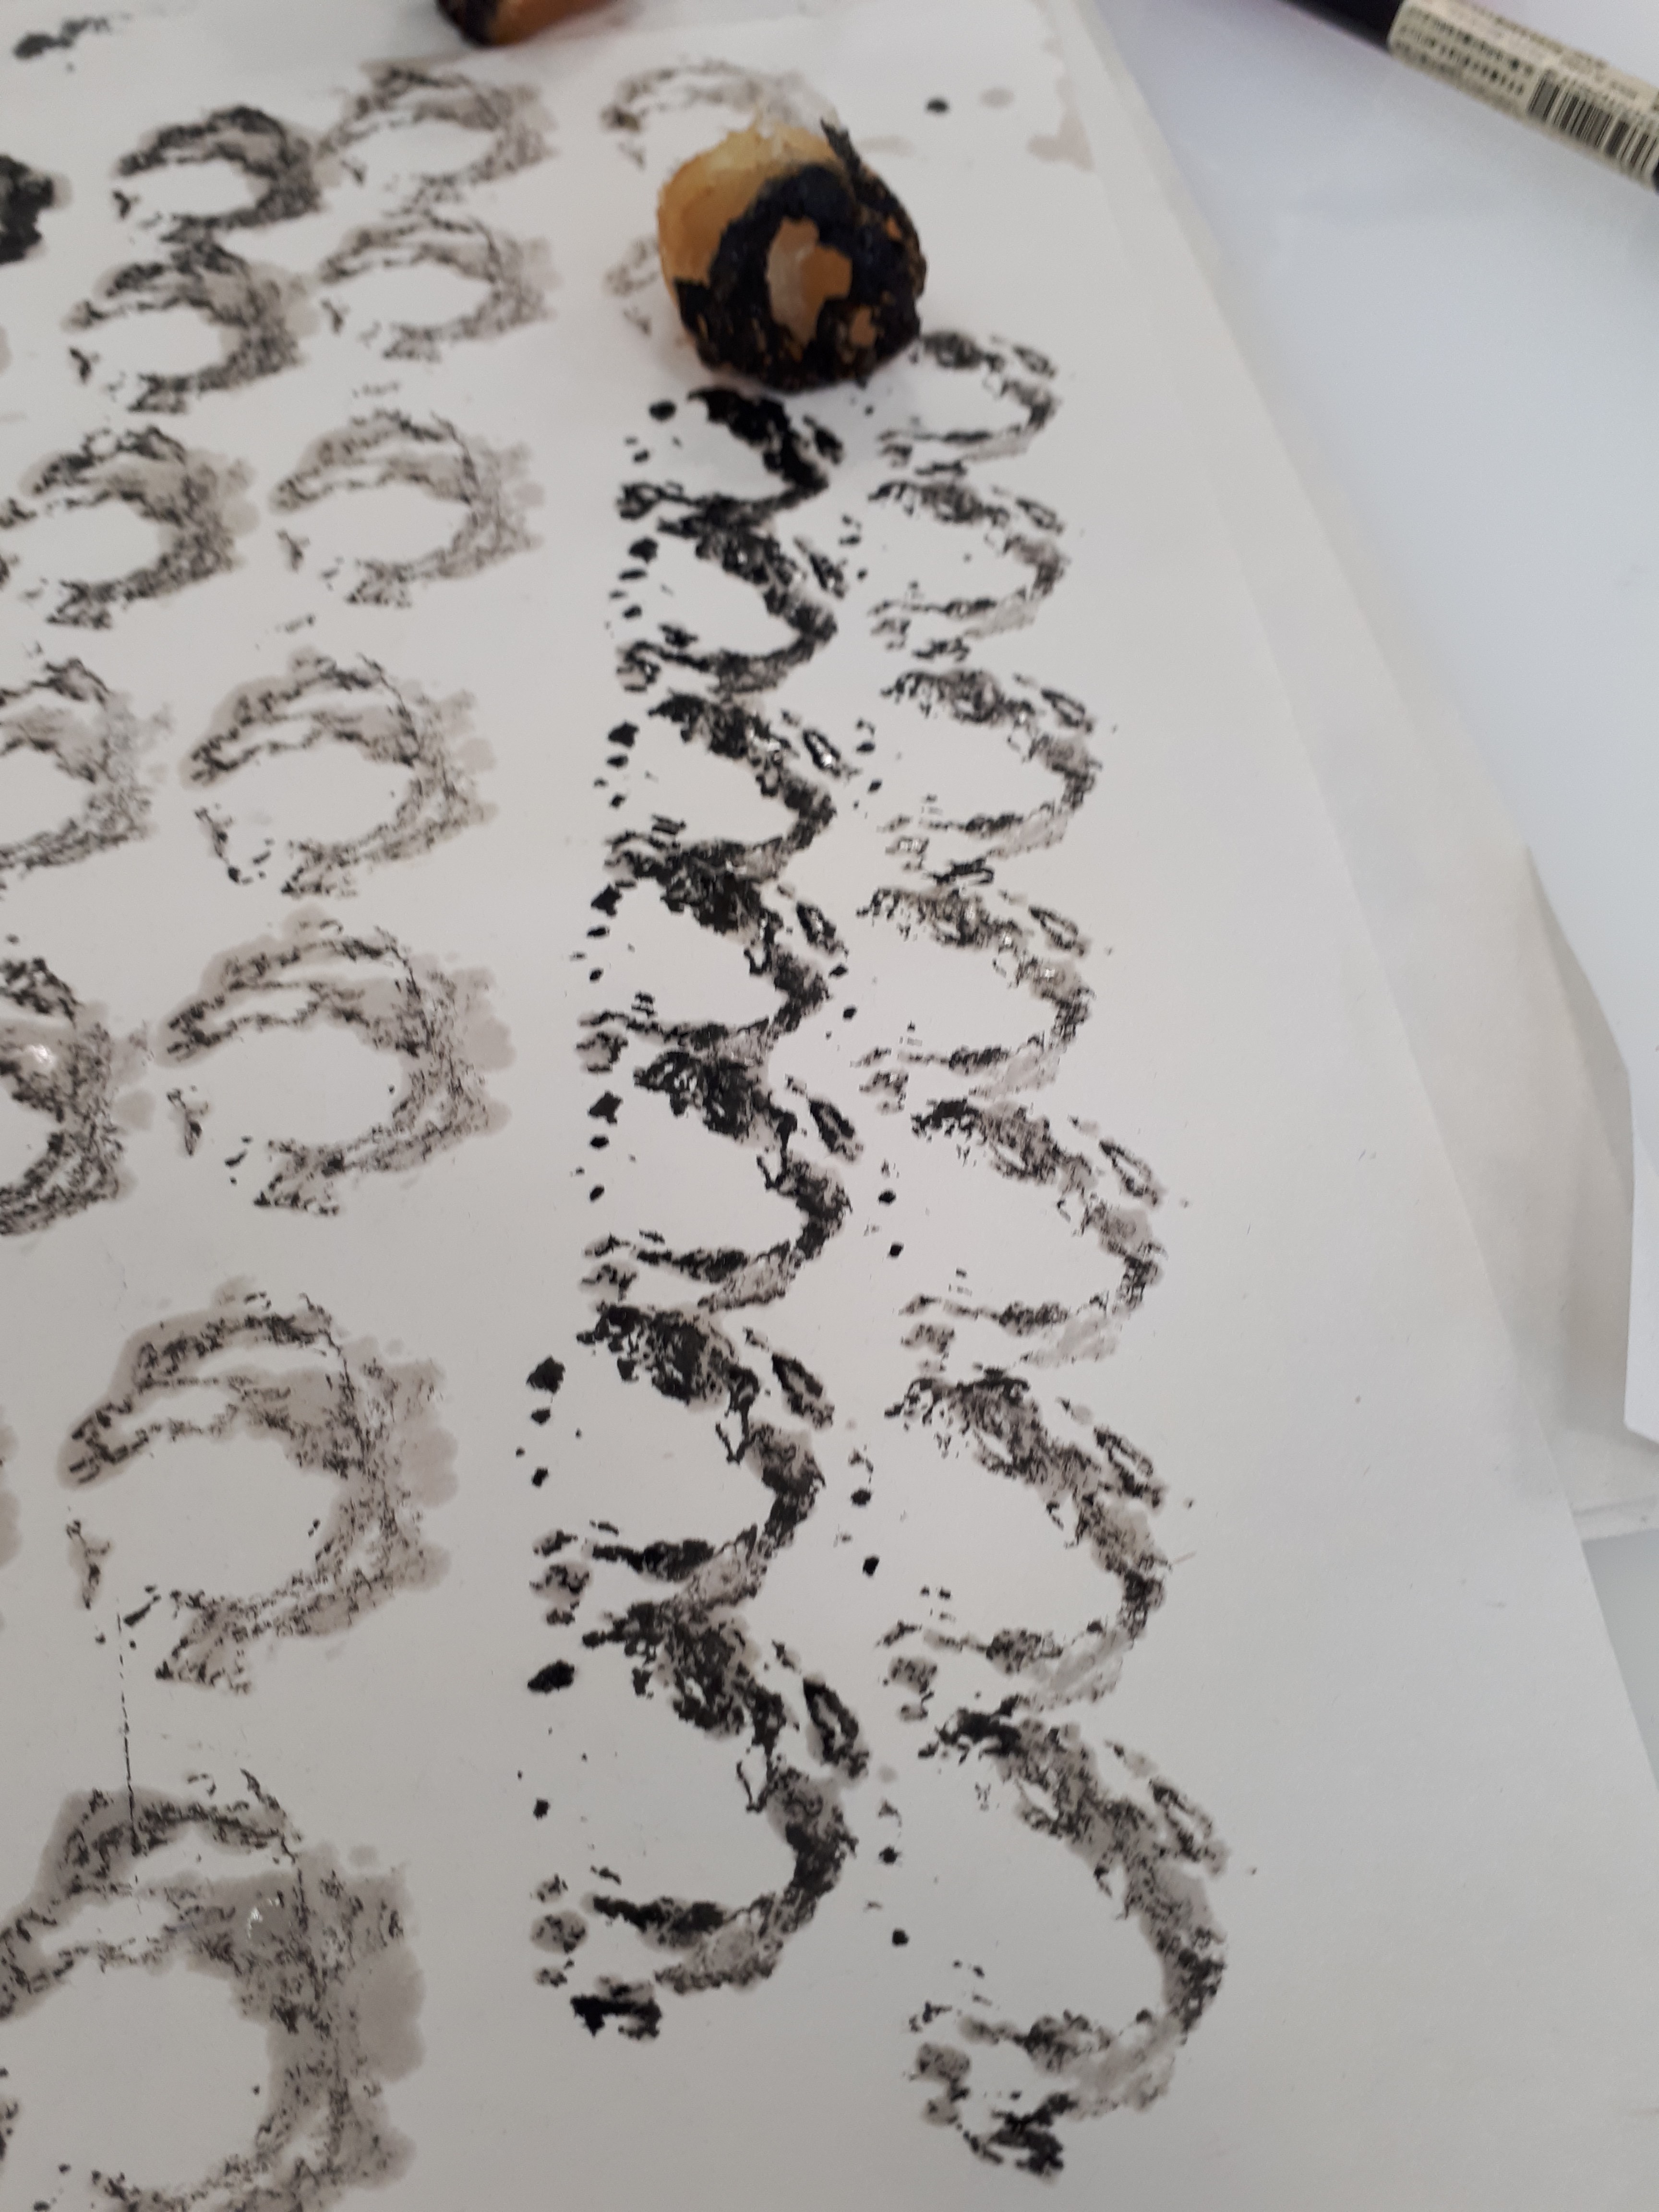
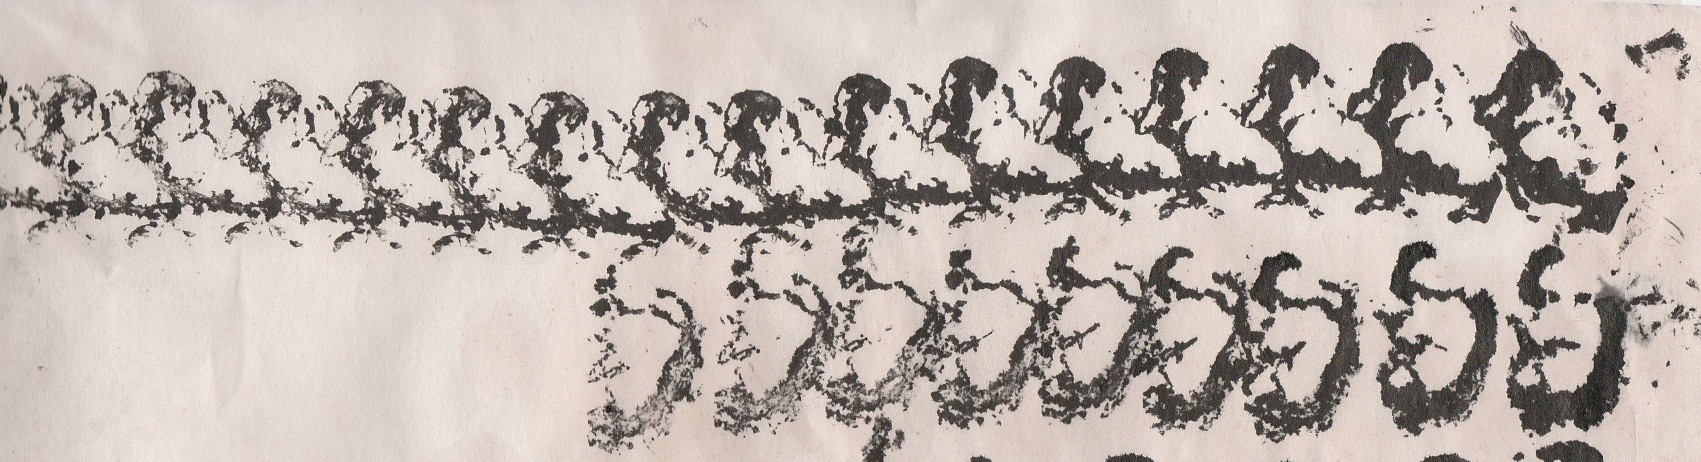
closing up the gaps between each print.
I found that this second attempt was more interesting than the first and would be even more interesting if each row had a different pattern. However, I felt that there was still something lacking in the work. It still seemed a little boring and flat. I decided to try mixing up the stamps instead of using one single one throughout.
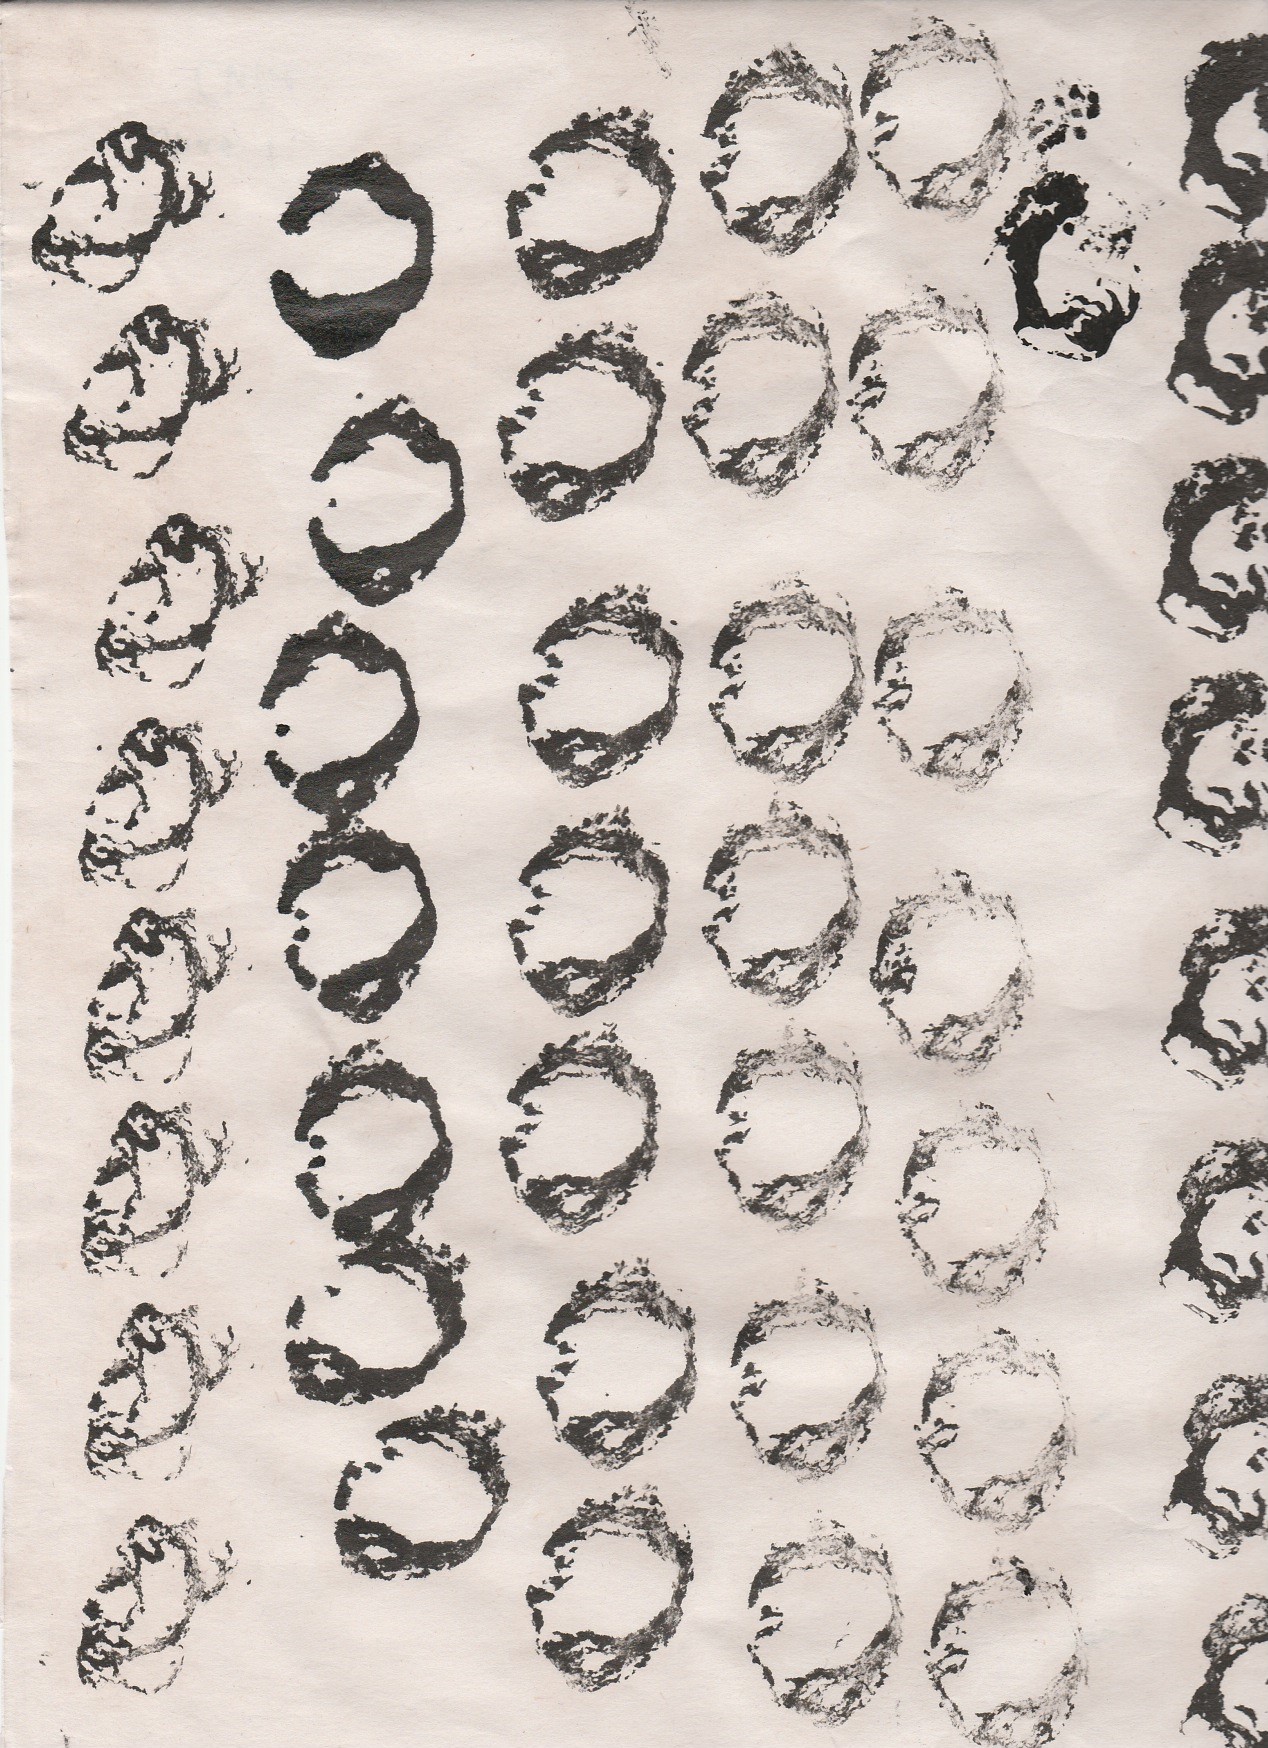
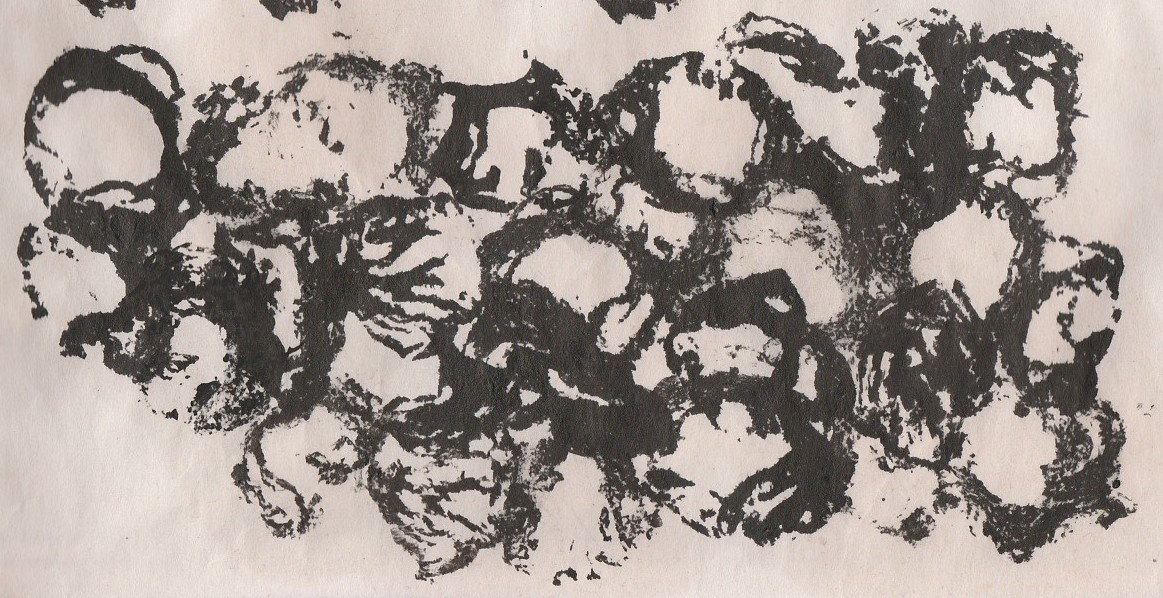
Results from using a mixture of stamps and having no gaps between each stamp.
I found this end result much better than the rest. It was rather eerie looking as compared to the previous experimentations because of the organic forms created from the youtiao and how they were oddly put together. The pattern created almost seemed to look like internal organs, and the lack of gaps and slight overlapping made the image look cramped/crowded and claustrophobic. I felt that this image represented torment. The roundness of each stamp gave the impression that the problem causing this torment has yet to be solved as it is trapped within the circles created by the stamps. The overwhelming amount of circles in such close proximity also gave the feeling of one being surrounded or even constantly haunted by the problem. Although the shapes are round, they do not give off the same sense of positivity like the previous experimentations as there is a lack of repetition and uniformity. Repetition and uniformity gives a sense of safety, as I feel a viewer will be able to predict what they will be looking at next. However, for this image, each turn/point of the image reveals a different shape. This creates a sense of unease for the viewer because they are not able to predict the image that they will see next, and because there is no singular image/stamp that they are able to identify (as compared to the previous experimentations where one can easily make out the repeated image/stamp).
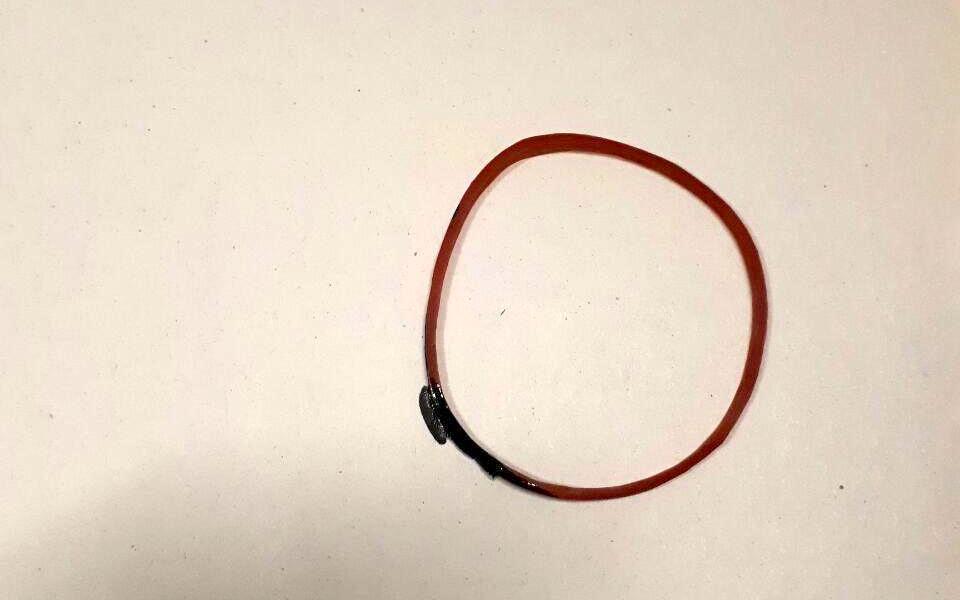
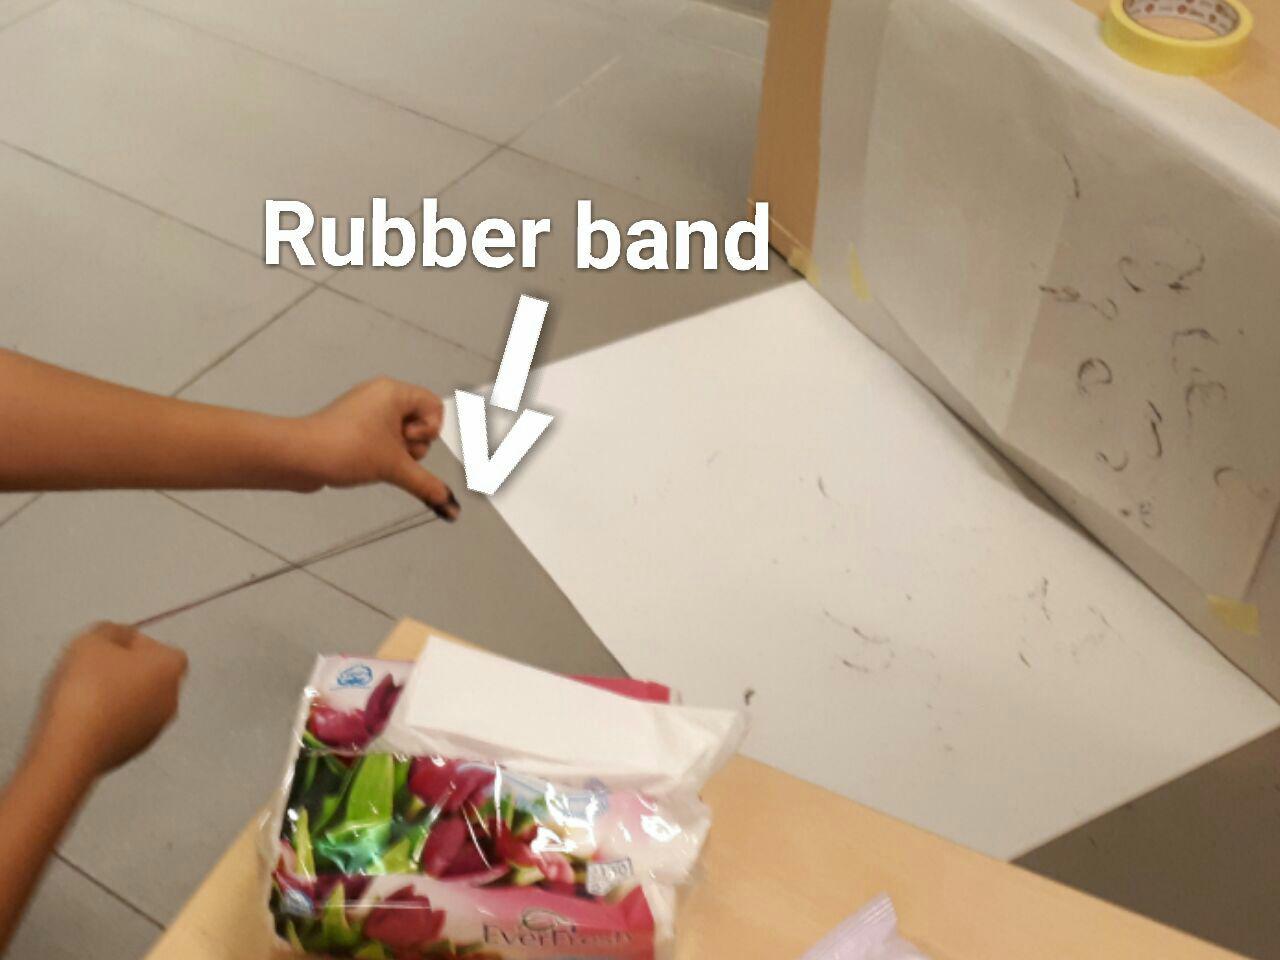
RUBBER BAND
My new mark making tool
As I was experimenting with my different mark making tools, I thought of trying to experiment with rubber bands as well. I got my hands on a few rubber bands and started to make marks!
Dipping one end of the rubber band in paint.Stretching and aiming the rubber band before releasing it and letting it hit my canvas.
mark making!!ResultsClose upAdditional marks created when the rubber bands fall after hitting the canvas
I first dipped one end of the rubber band in a mixture of poster colour and water, then stretched and aimed it at my canvas. I then released the rubber band and let it fly and hit my canvas, creating the marks above. I quite like how the marks turned out and I also like the mixture of lines and dots created. Each individual line had varying thickness which i thought was interesting. There was another set of marks created below the canvas where the rubber bands fell after hitting the first canvas.
Same process but on a crumpled sheet of paper
I then repeated the same process but on a crumpled sheet of paper. I thought that perhaps the crumpled paper might create a different set of marks when the rubber bands hit it. Unfortunately, there wasn’t much of a difference, but I thought the crumpled paper added more depth to the overall image. I felt this image represented triumph as the curved lines looked like they were dancing for joy and the splatters that accompanied the lines added a sense of excitement. Also, there is no triumph if there is nothing to overcome. I felt that the crumpled sheet of paper represented the obstacle, which was then easily overpowered by the marks created by the rubber bands.
MULTIPLE MEDIUMS
Rubber bandClose up from rubber bandMasking tapeYoutiao
Gathering some mark makings from my previous experimentations, I find that these three drawings give off positive feelings. Mostly because of the roundness and repetitiveness of the shapes. I found that being able to see a pattern or identify a shape made my mind feel at ease, as compared to the marks I made with my youtiaos to represent torment. I hence wanted to use these to express happiness.
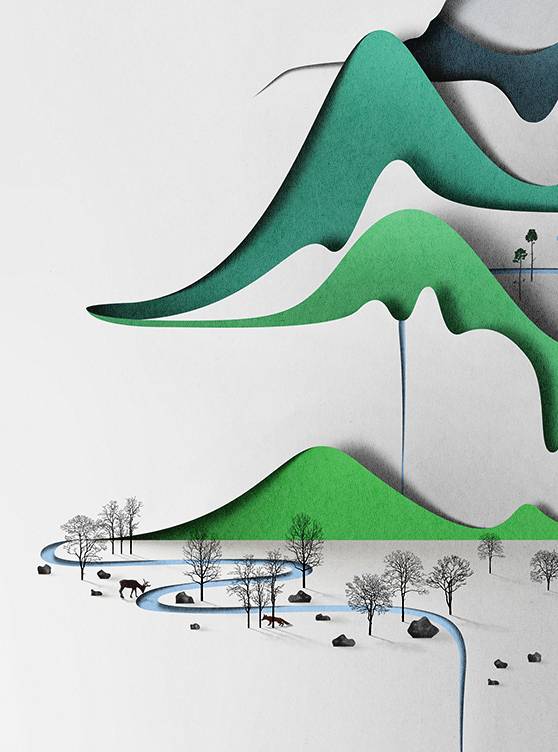
However, I found that the patterns were too overwhelming or complex and that my mind would rest a lot easier with a pattern that is simpler. I decided to create arc like shapes, following the mountain-like prints made from my masking tape, and instead of having many of it spread all around my canvas, I wanted to have a very small number of them placed in a nice systematic order.
Reference Image from http://www.huffingtonpost.com/2014/05/18/eiko-ojala_n_5326627.html Accessed on 28th August 2017Reference Image from https://www.treehugger.com/culture/eiko-ojala-paper-craft-art.html Accessed on 28th August 2017
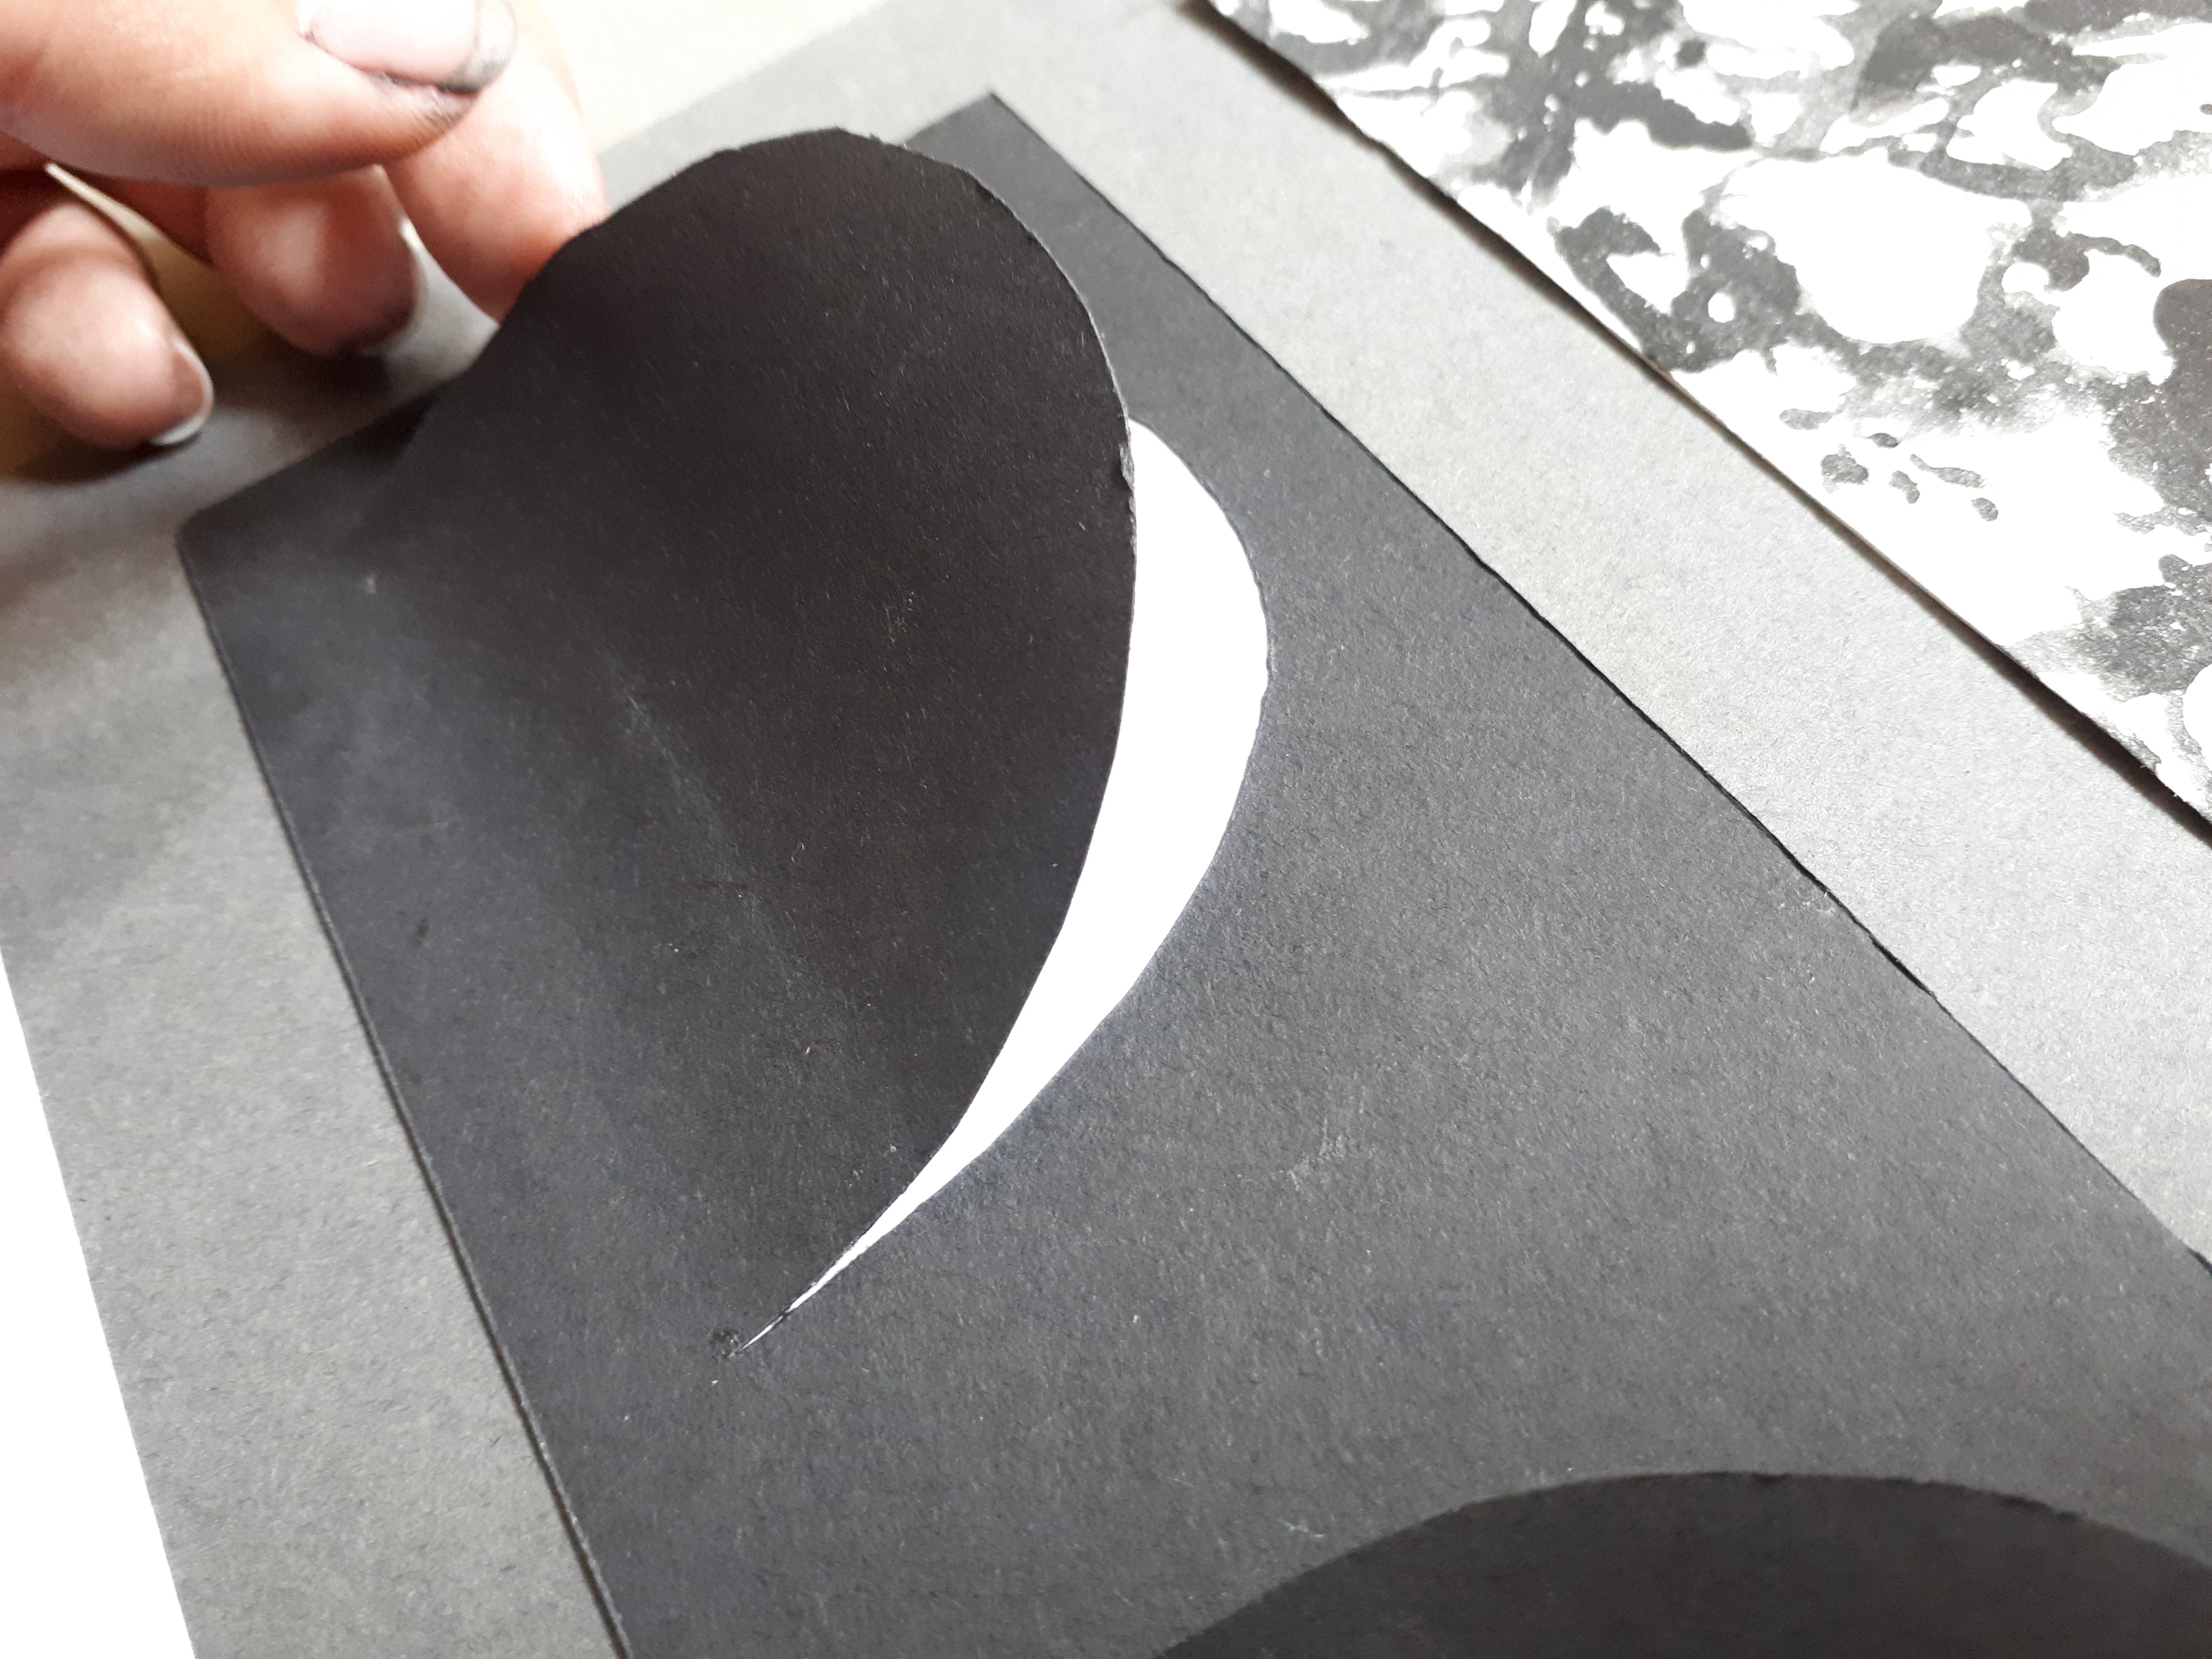
I wanted to challenge myself and attempt to convey the emotion without using any paint or mark making tools. I decided to go for cuts.
4 simple arcs placed neatly across the canvas3 dimensional look
I decided to cut 4 arcs across a black piece of paper in a neat row, and have it pasted on top of a white sheet of paper so that the definition of the arcs can be seen. (Explanation on work in FINAL)
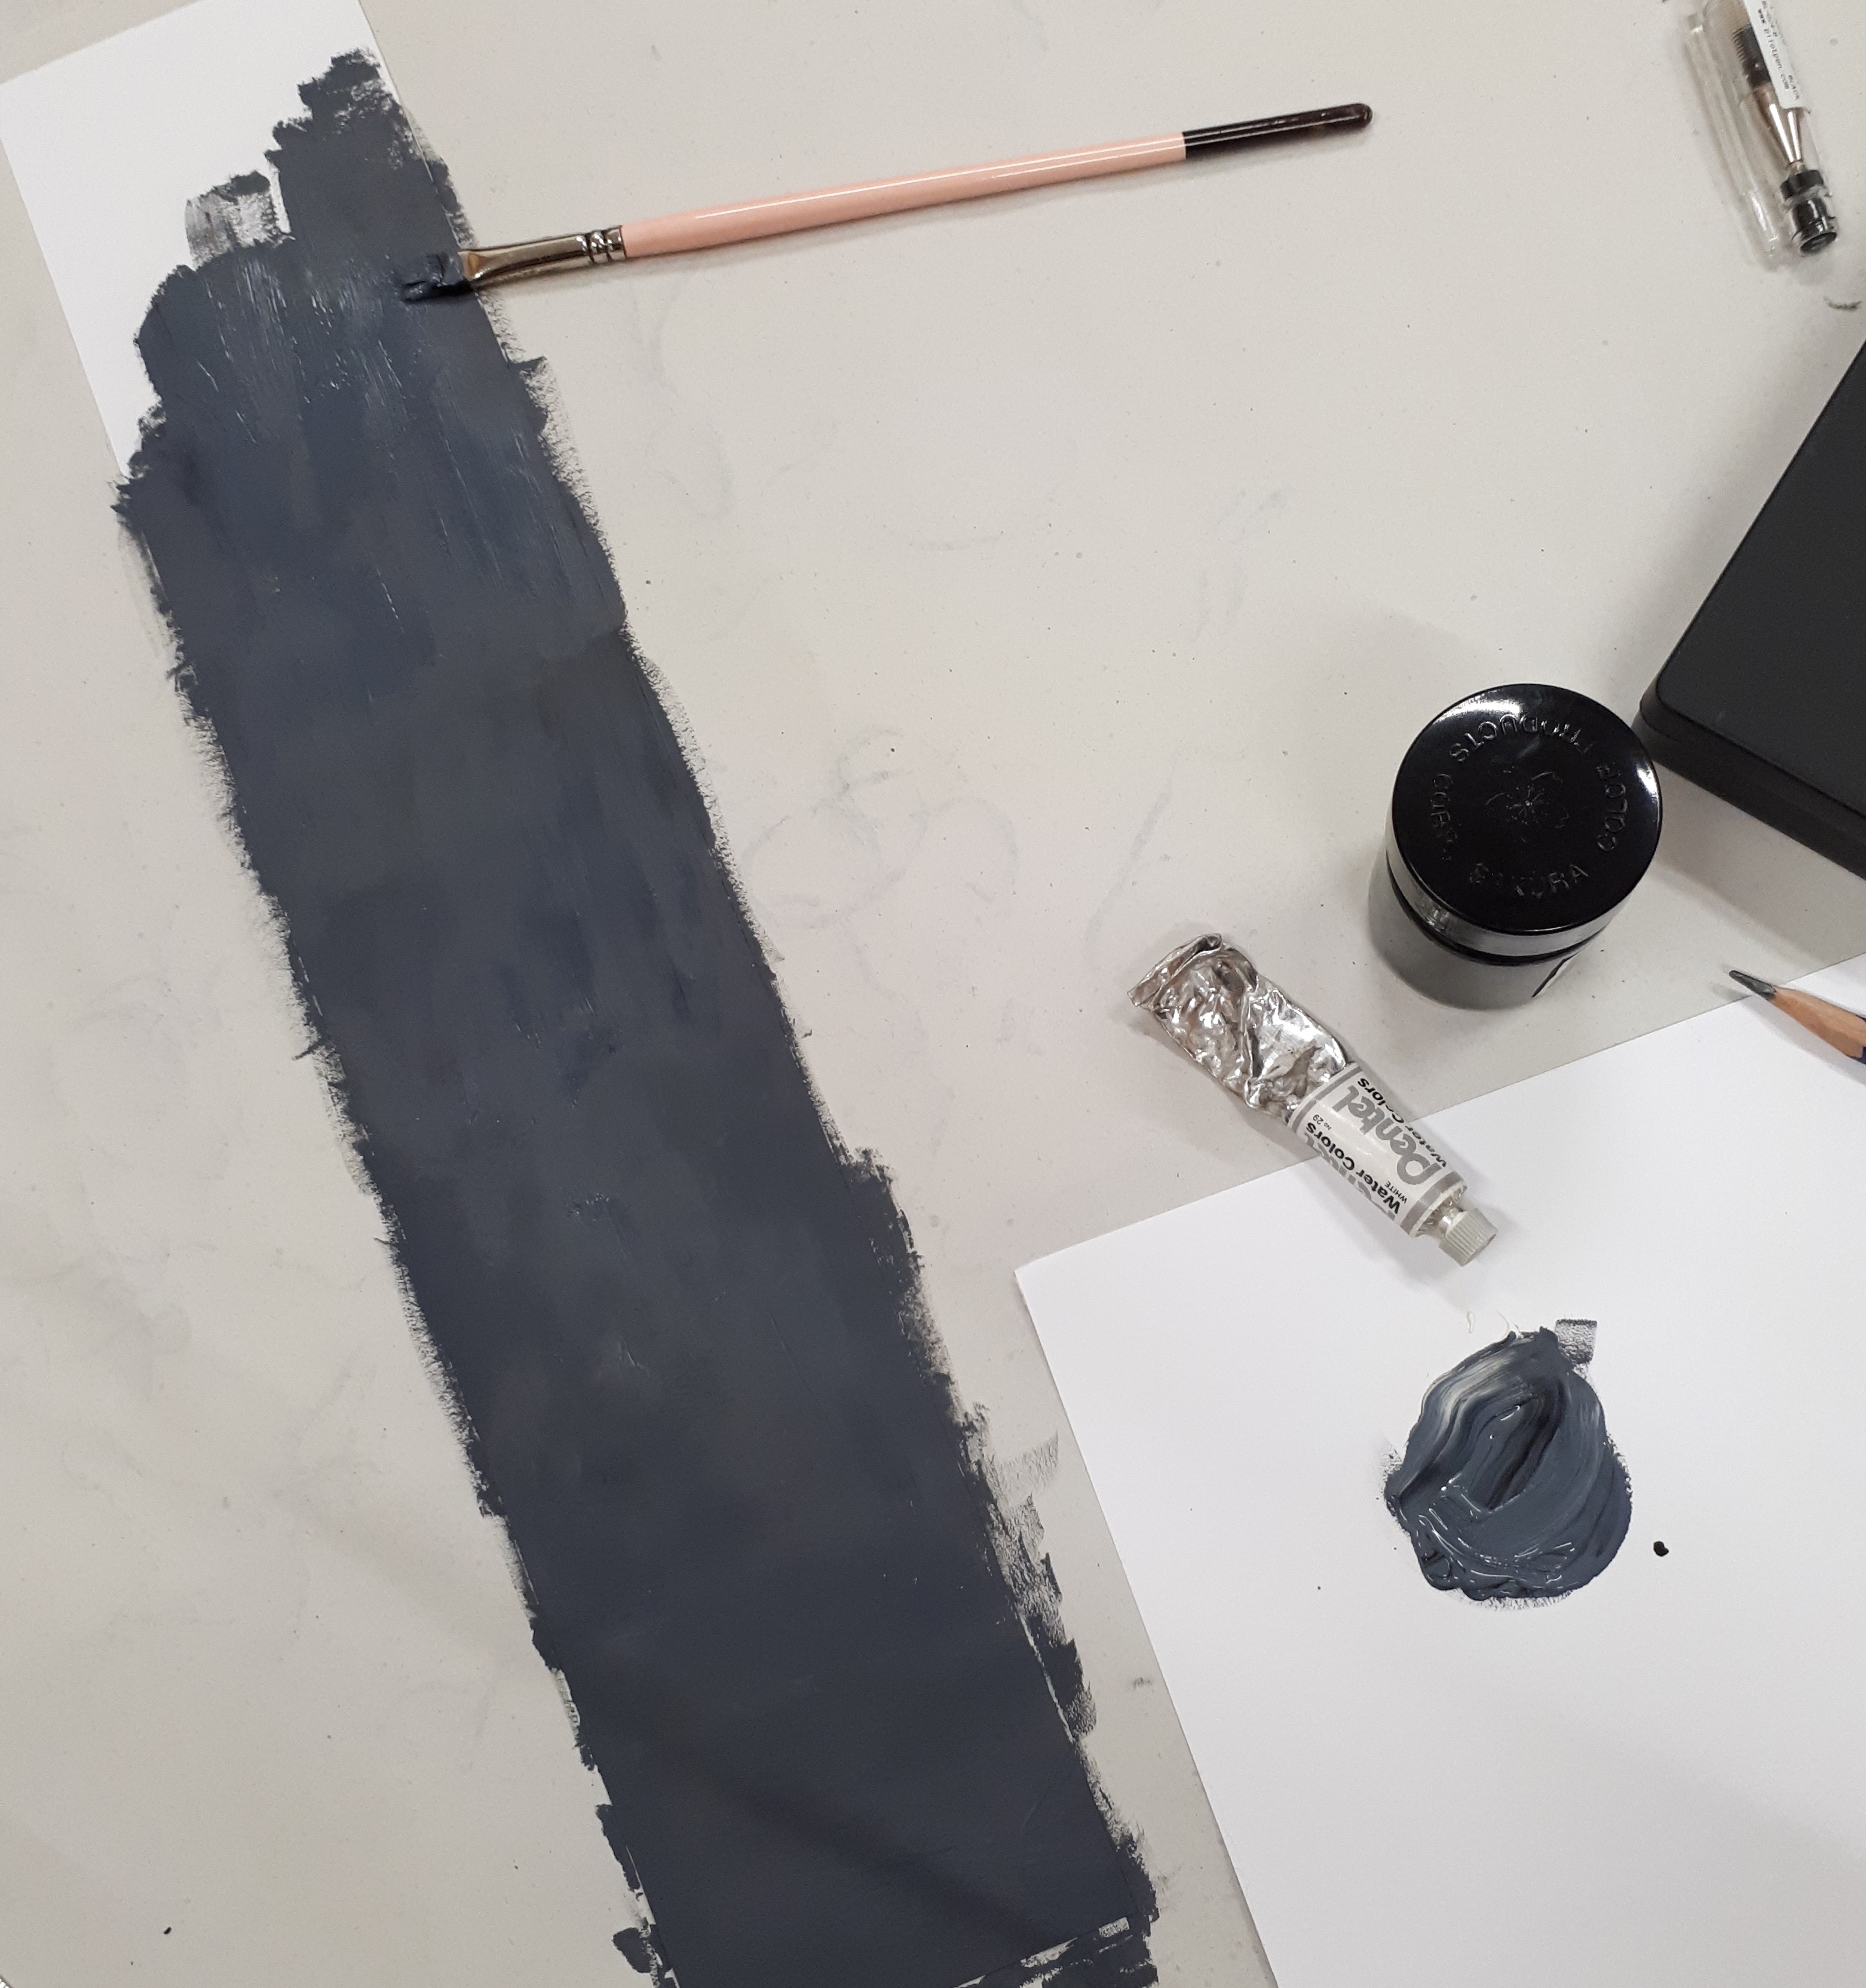
PAINT
Placing my canvas against a vertical surface/wall
For my last emotion, I had already decided the emotion prior to my experimentation:
I wanted to express attraction using paint and water which would flow towards a specific direction, imitating how one would turn and direct their attention to something he/she is attracted to. I hence placed my canvas vertically up right so that I can have my paint flow downwards.
paint flowing downwards
I diluted my paint with water and starting dripping away. However, I did not like how the paint was just flowing down in one generic direction. I wanted it to flow towards a point rather than just a direction because I want to create the feeling of being pulled towards something.
New methodPaint gathering back to the main path Open image to view gif
I decided to tilt/rotate my canvas left and right so that my paint droplets will flow towards a point. I found that some of the droplets at the corners will merge and follow the paths of the droplets nearer to the centre of the canvas and ultimately flow down one main path which is directly cutting across the centre of the canvas. I preferred the results from this experimentation more as the sense of attraction was more clearly shown as the droplets literally gathered to one main path and ultimately end at a point, at the bottom of the canvas.
FINAL
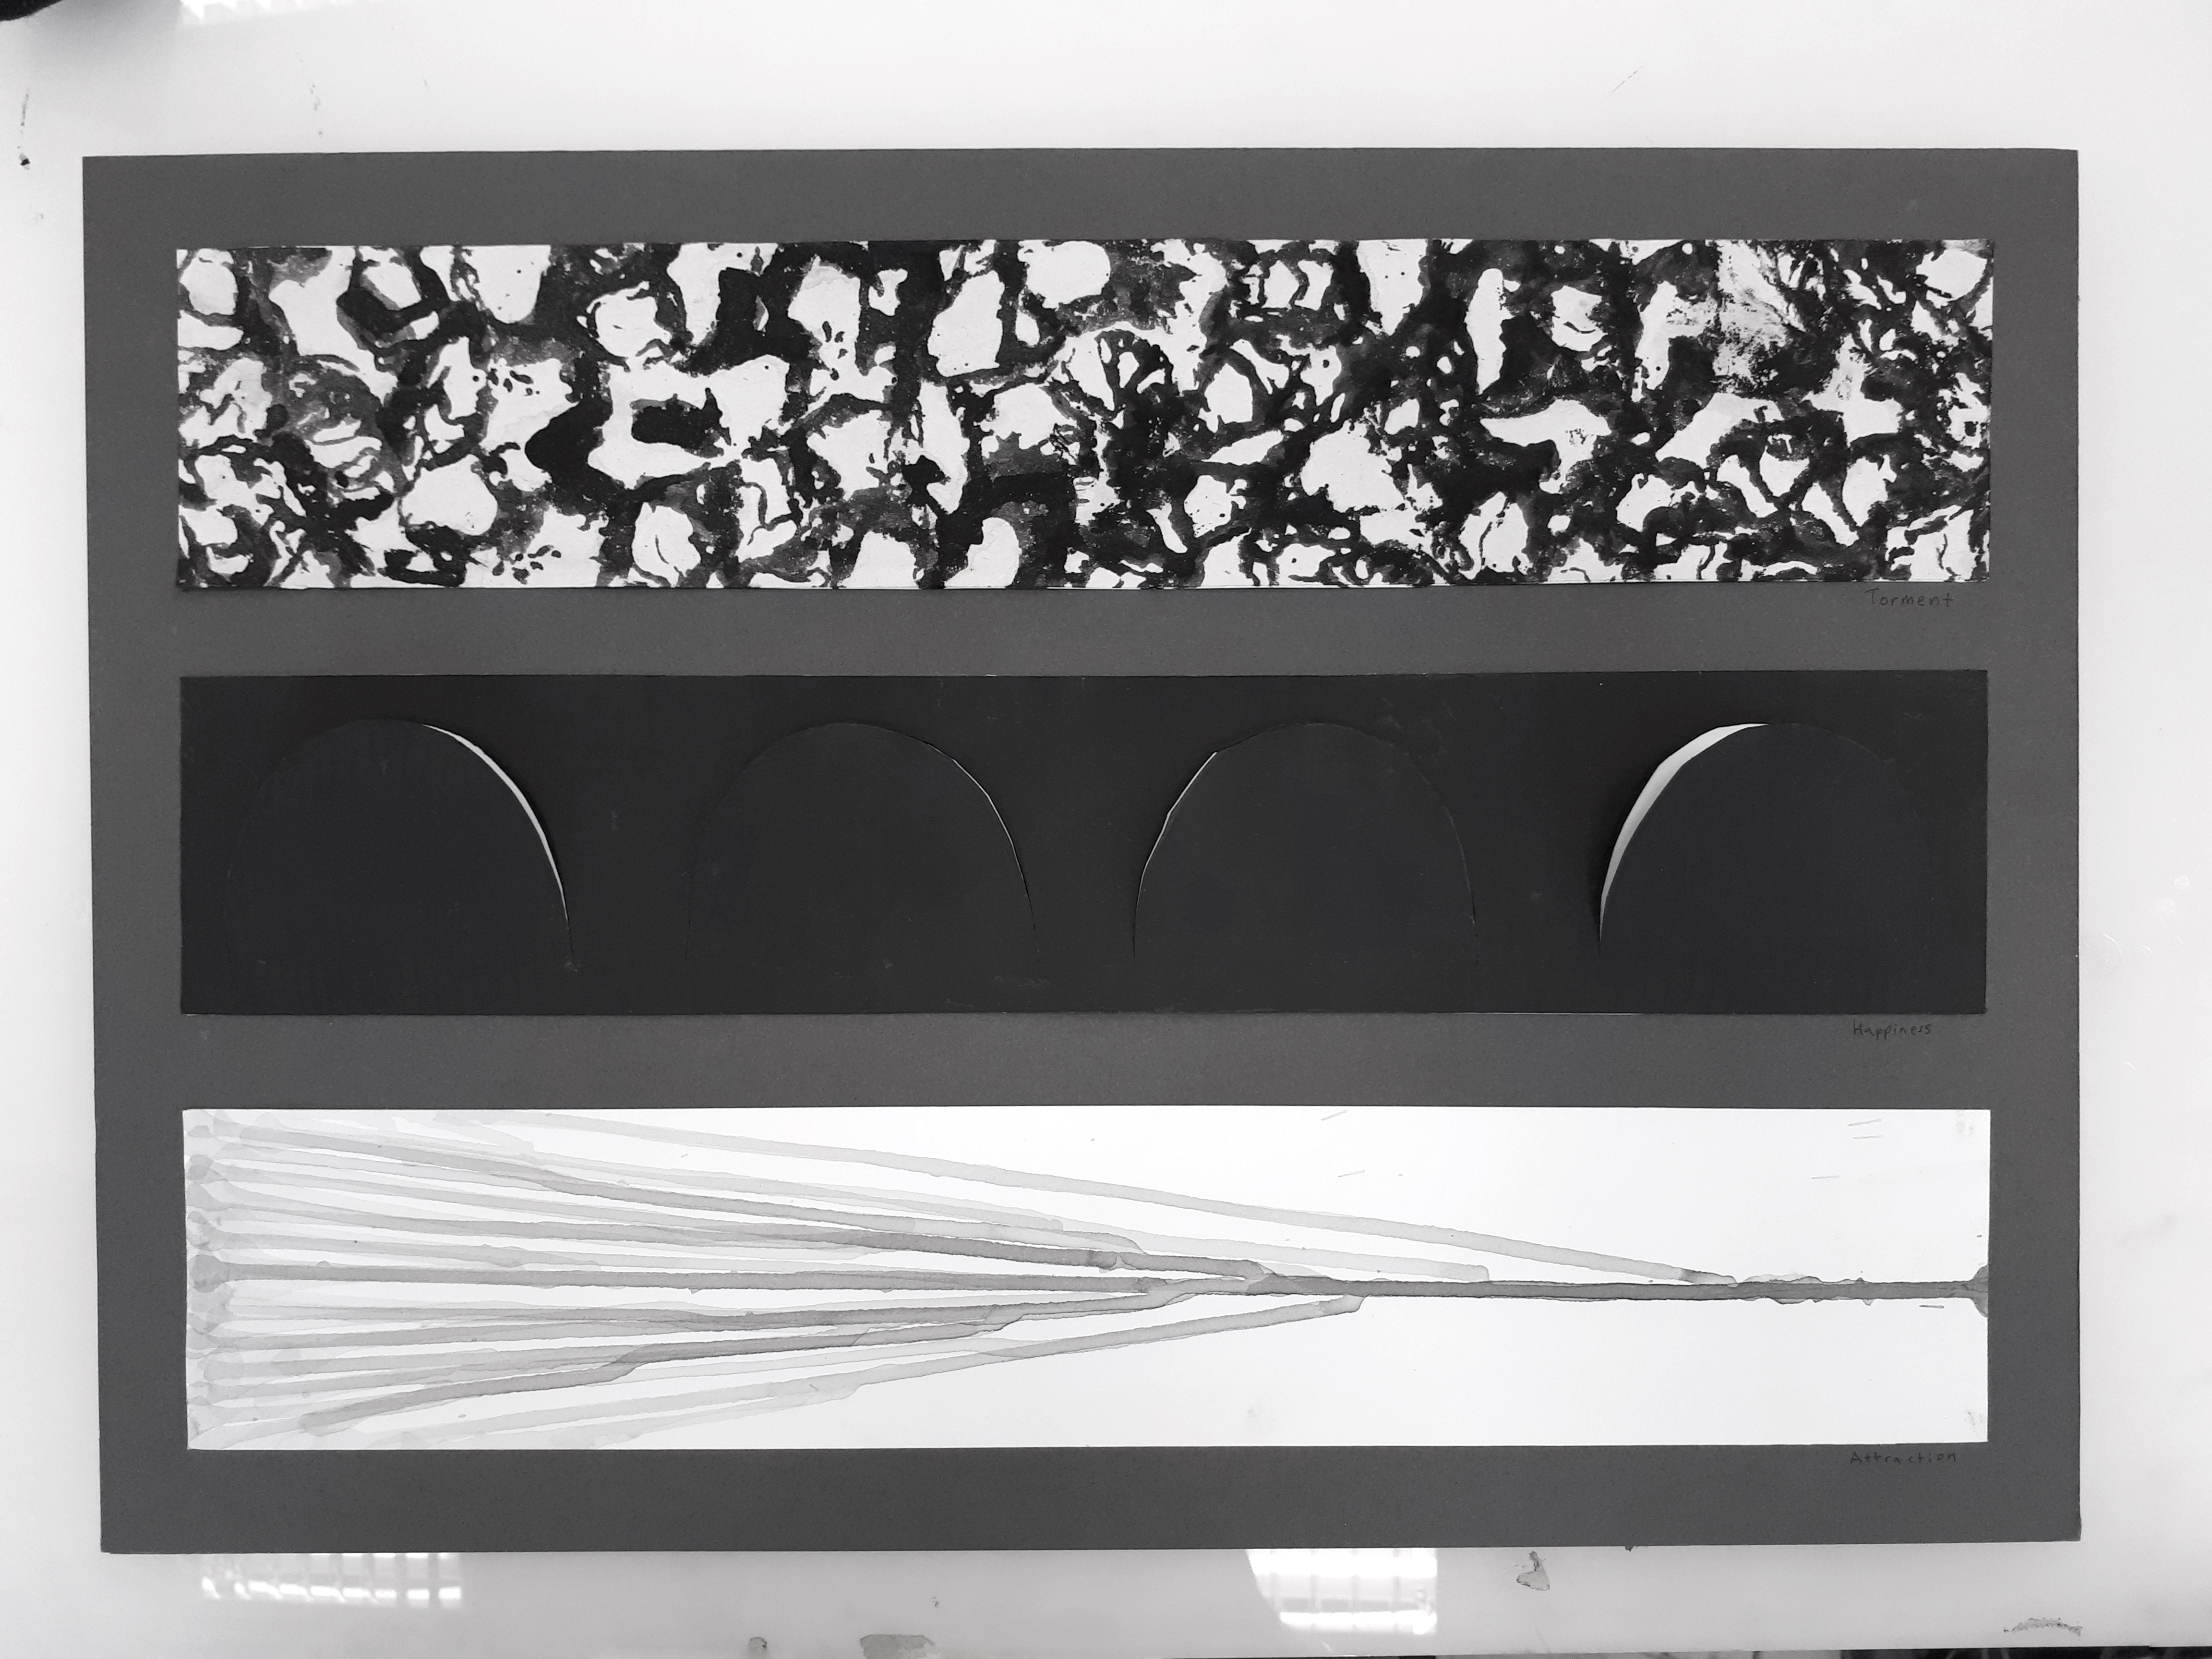
Finalised Emotions
The 6 emotions I’ve chosen (including their definitions – from the Cambridge dictionary – and my personal interpretations) are:
Emotion
Defintion
My interpretation
Torment
Great mental suffering and unhappiness, or great physical pain
Prolonged suffering or pain that haunts one’s self. A person who is tormented is constantly surrounded by the problem that is causing him/her pain.
Happiness
Feeling, showing, or causing pleasure or satisfaction
A feeling that can only be felt when one knows hardships. It is a calm, stable and pleasant state. A feeling that is derived from getting the simple pleasures in life.
Sorrow
a feeling of great sadness
Waves of sadness that are seemingly never ending.
Anxiety
An uncomfortable feeling of nervousness or worry about something that is happening or might happen in the future
Constant worrying that can lead to slippery slopes in thinking
Triumph
A feeling of great satisfaction or pleasure caused by a very great success, achievement, or victory.
The ecstatic and proud feeling one gets or is overcome by when they succeed in doing something.
Attraction
the feeling of liking someone, especially sexually, because of the way they look or behave
When someone is attracted to someone or something, both their body and mind are pulled towards the person or object of liking.
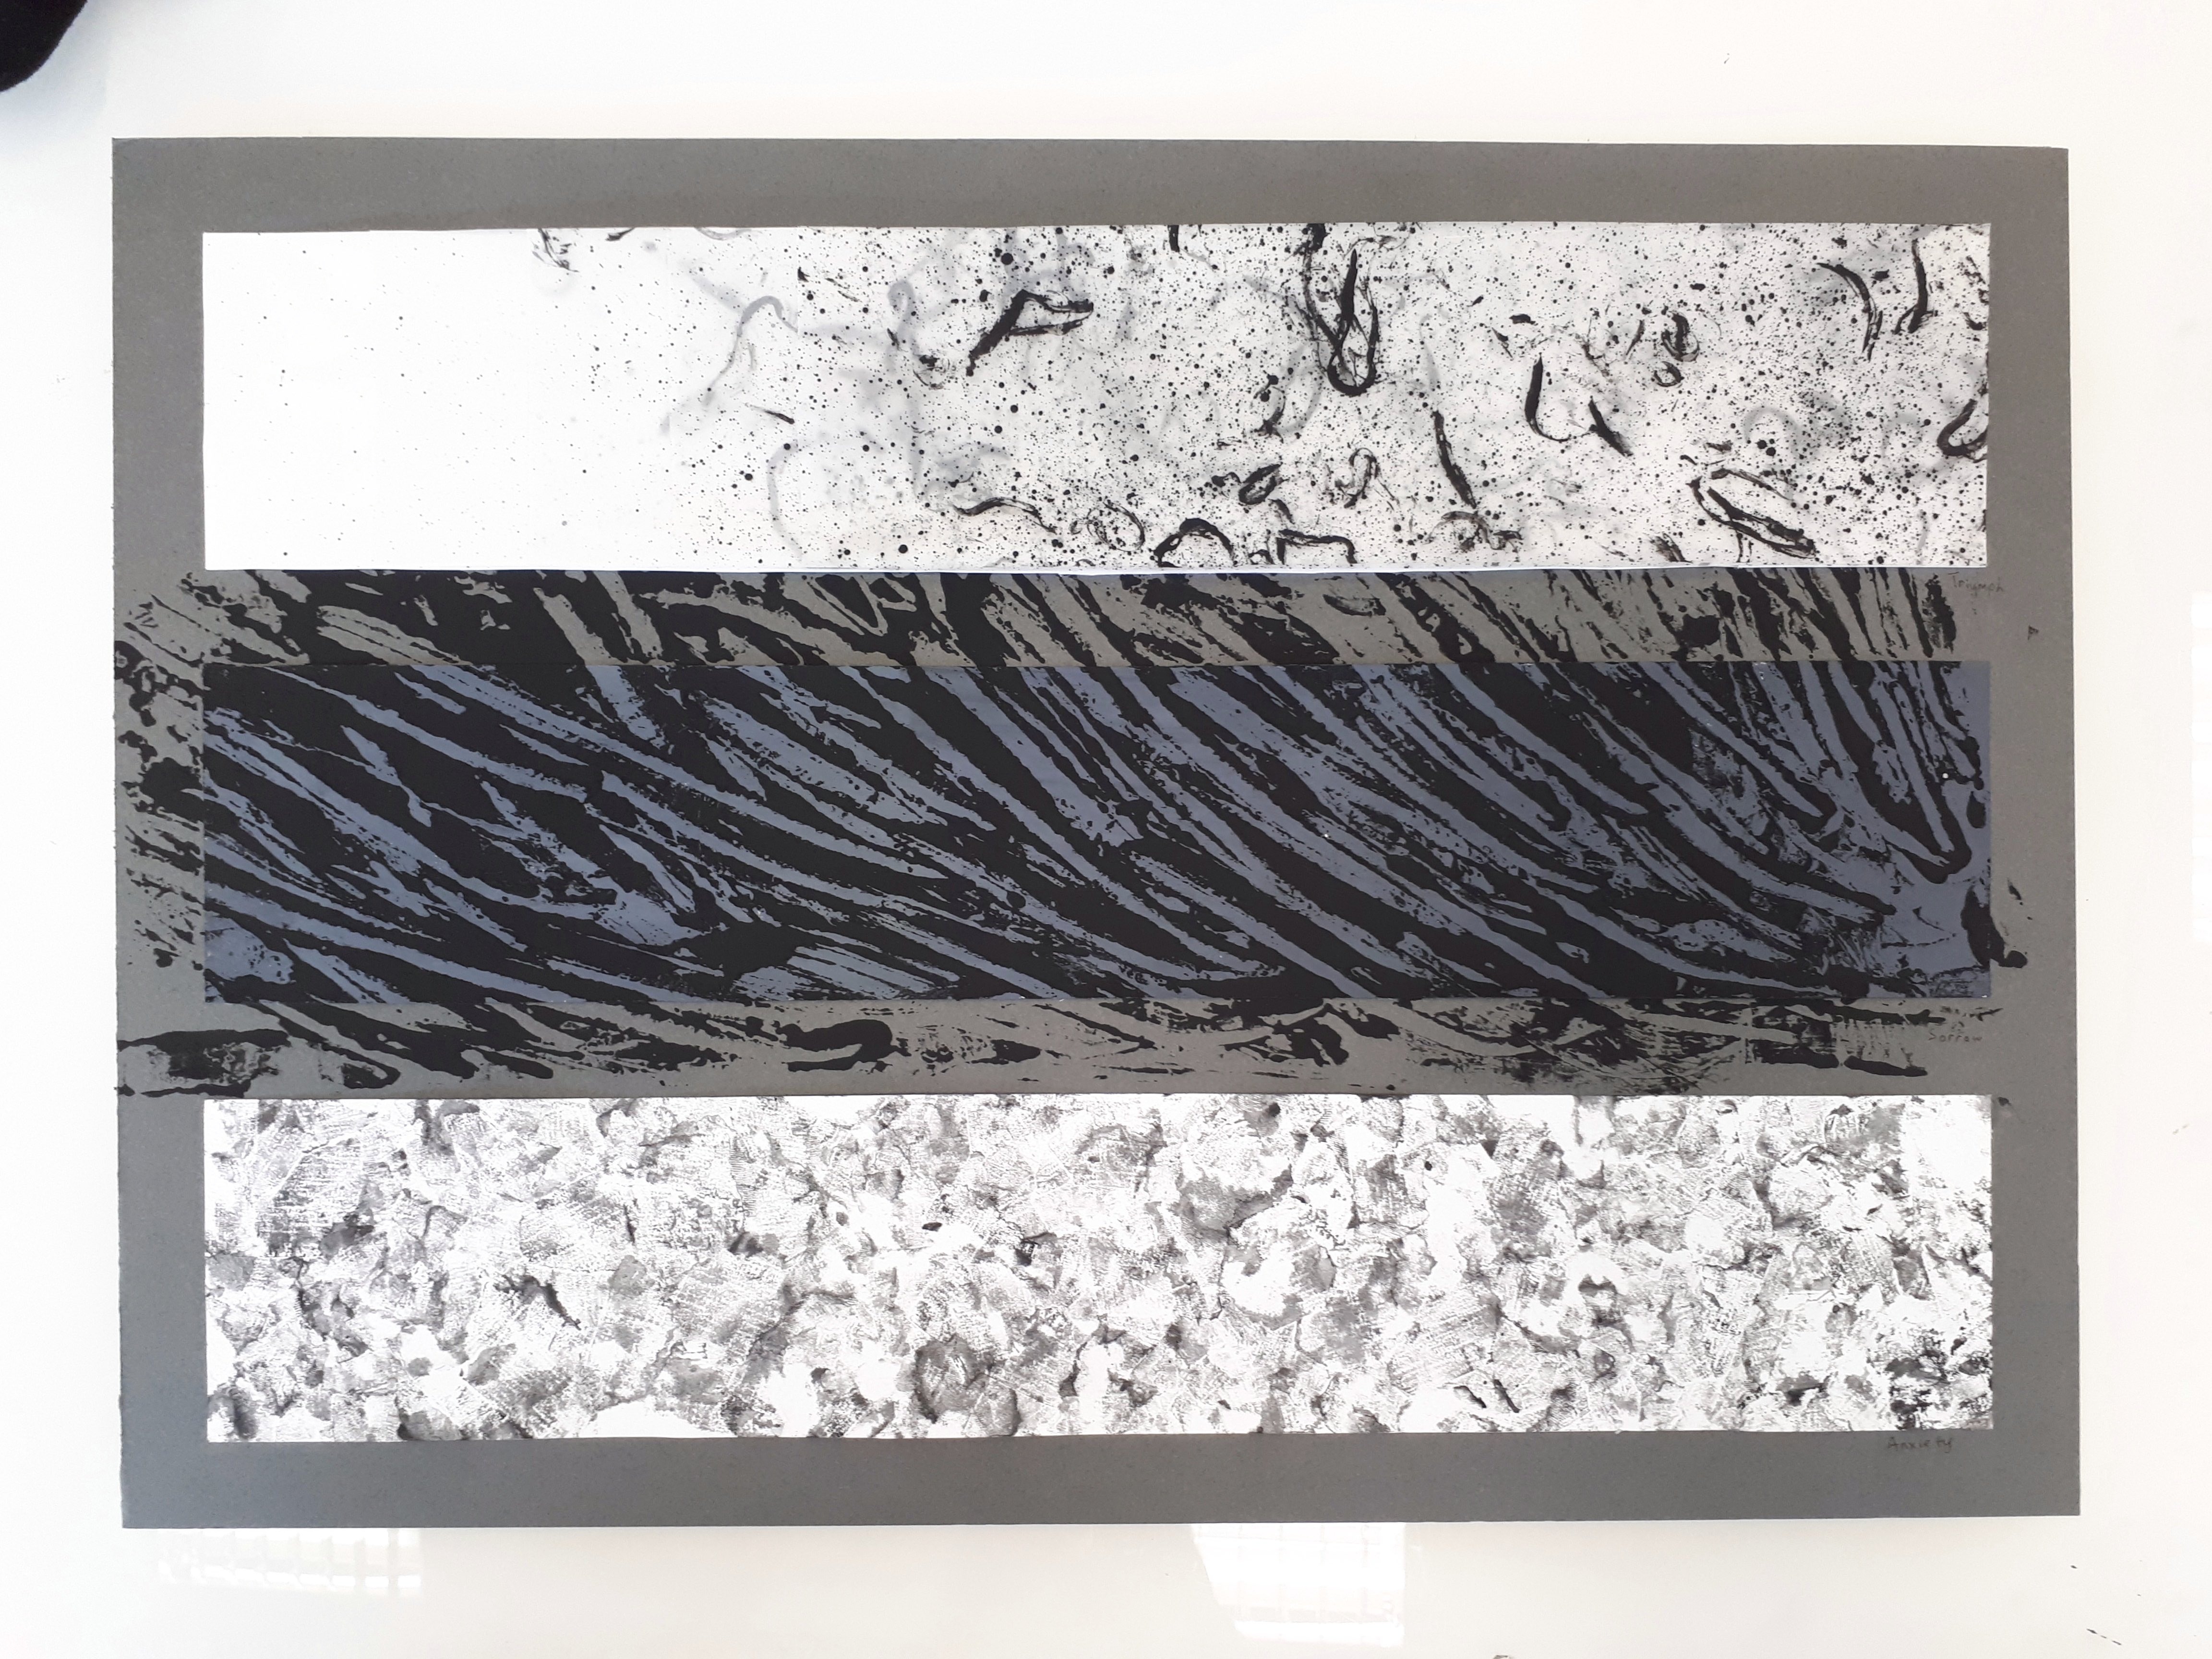
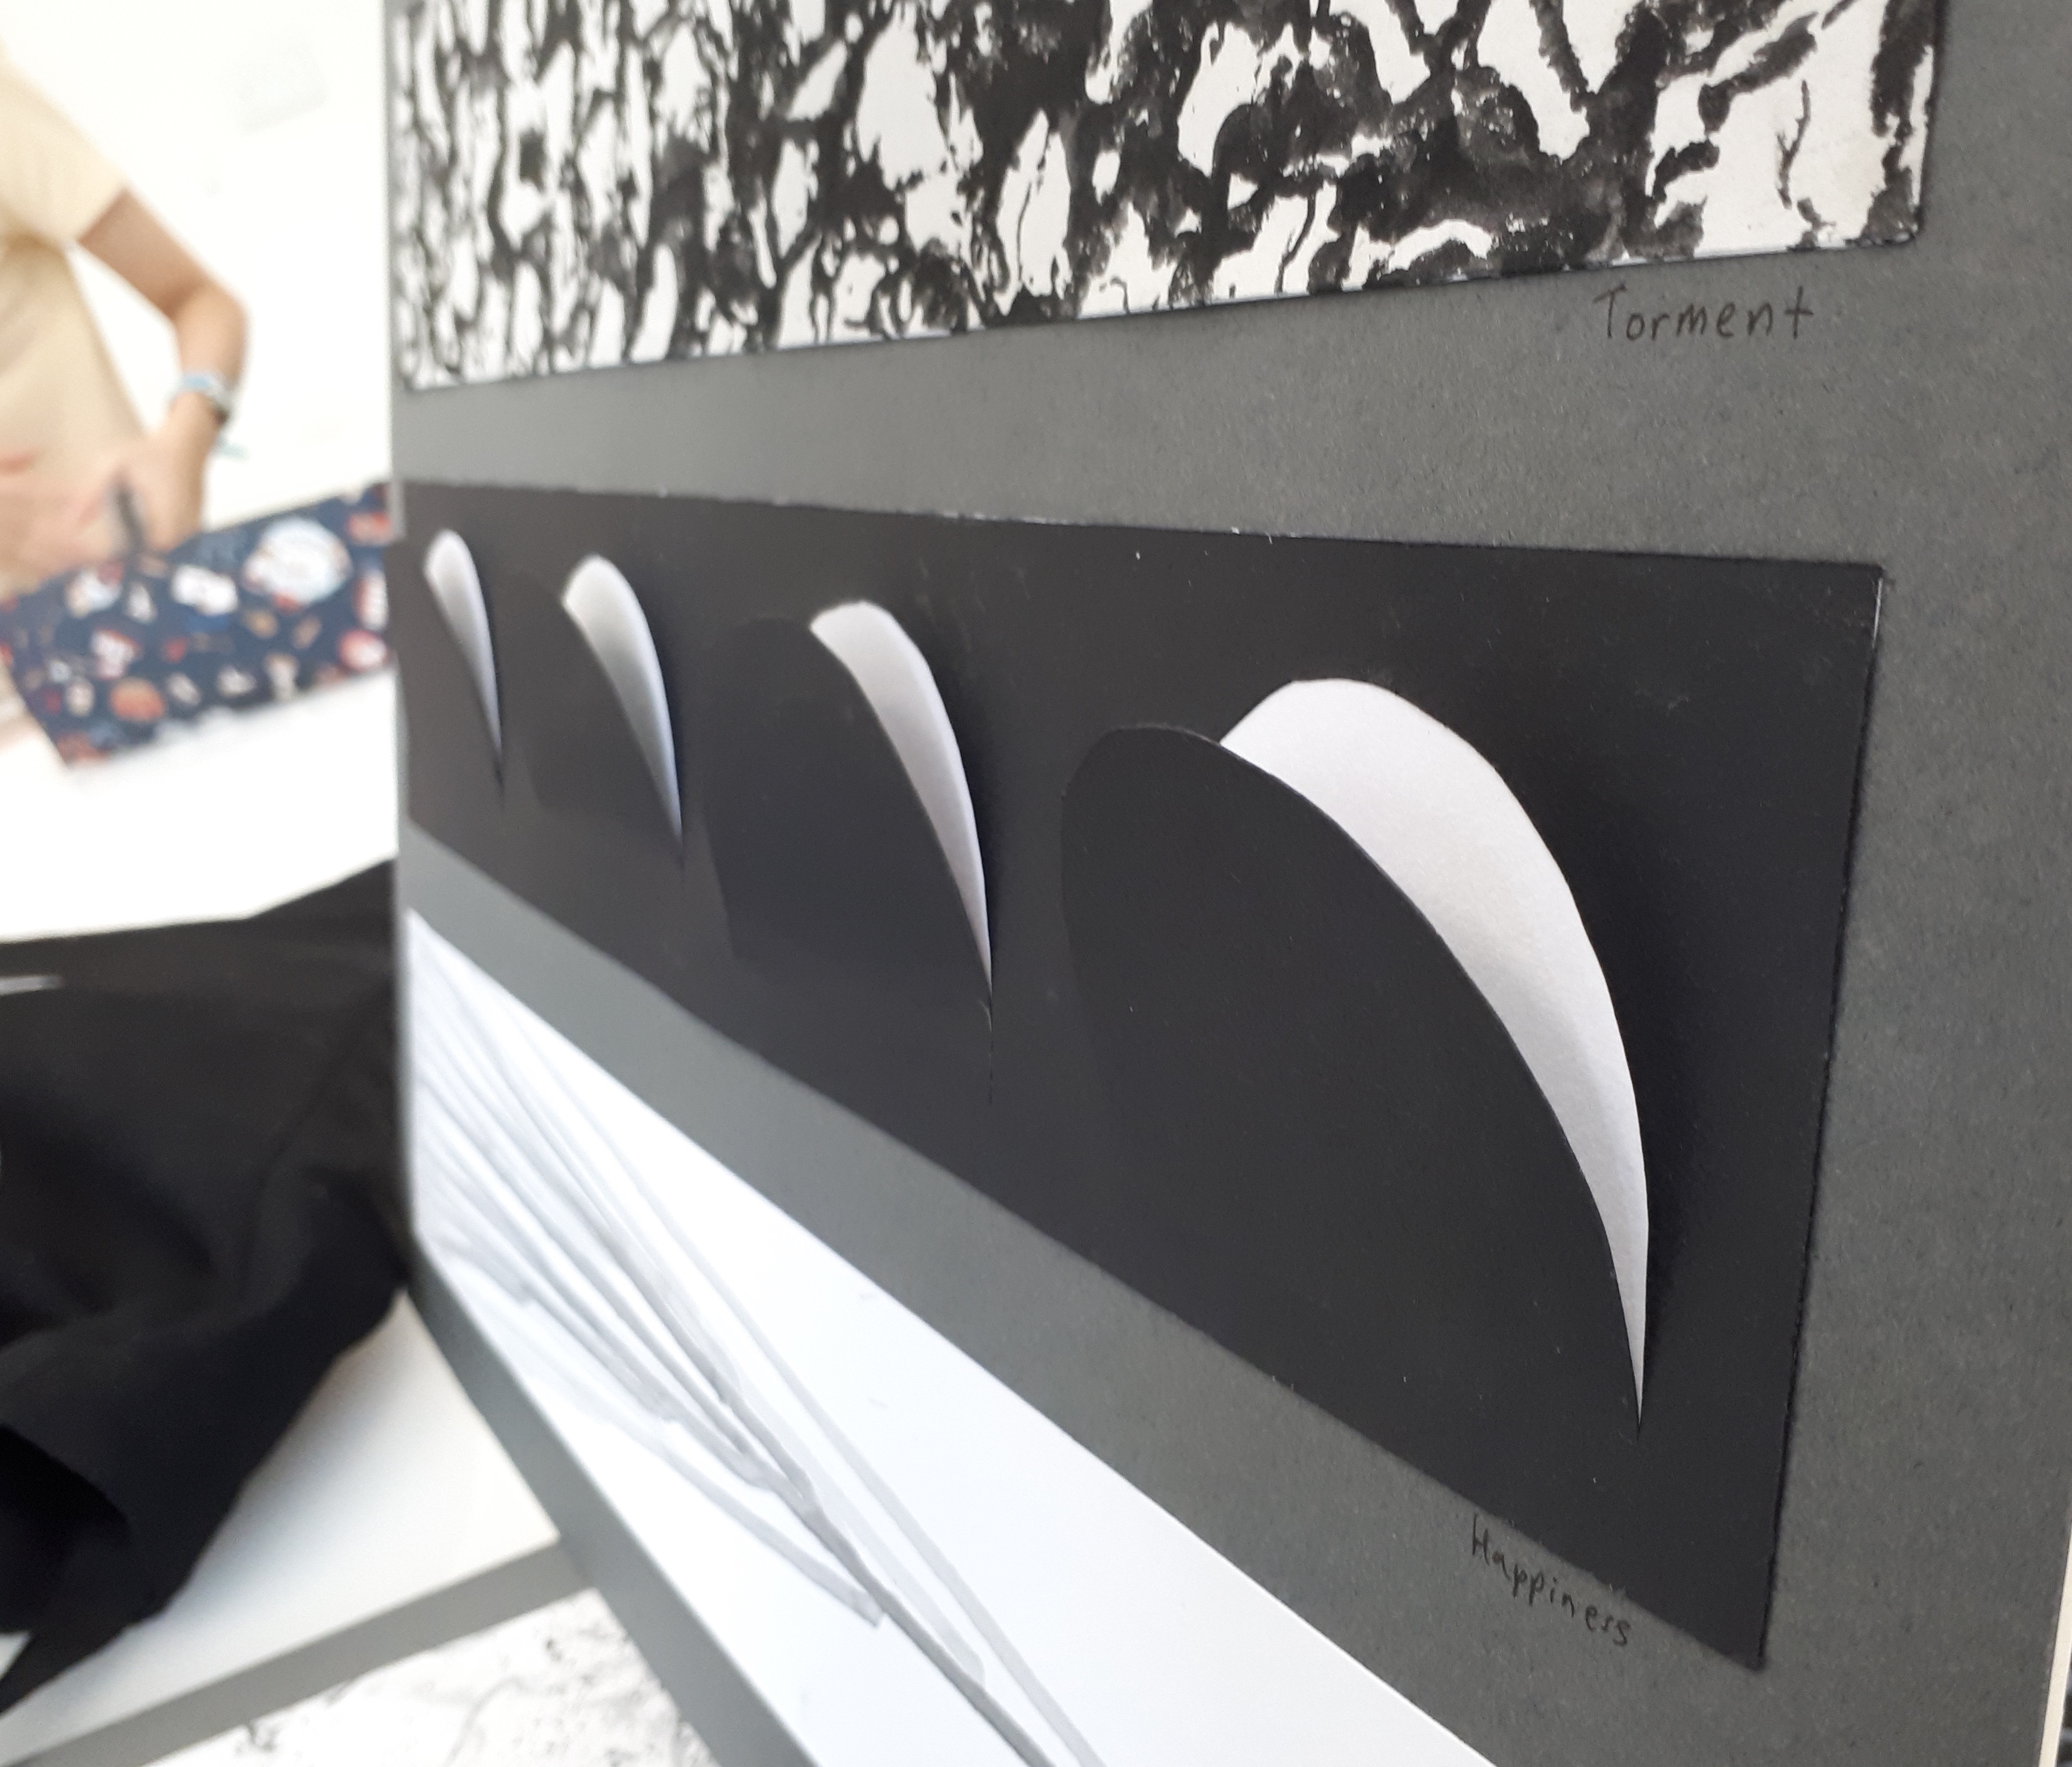
Final work and set up part 1Final work and set up part 2
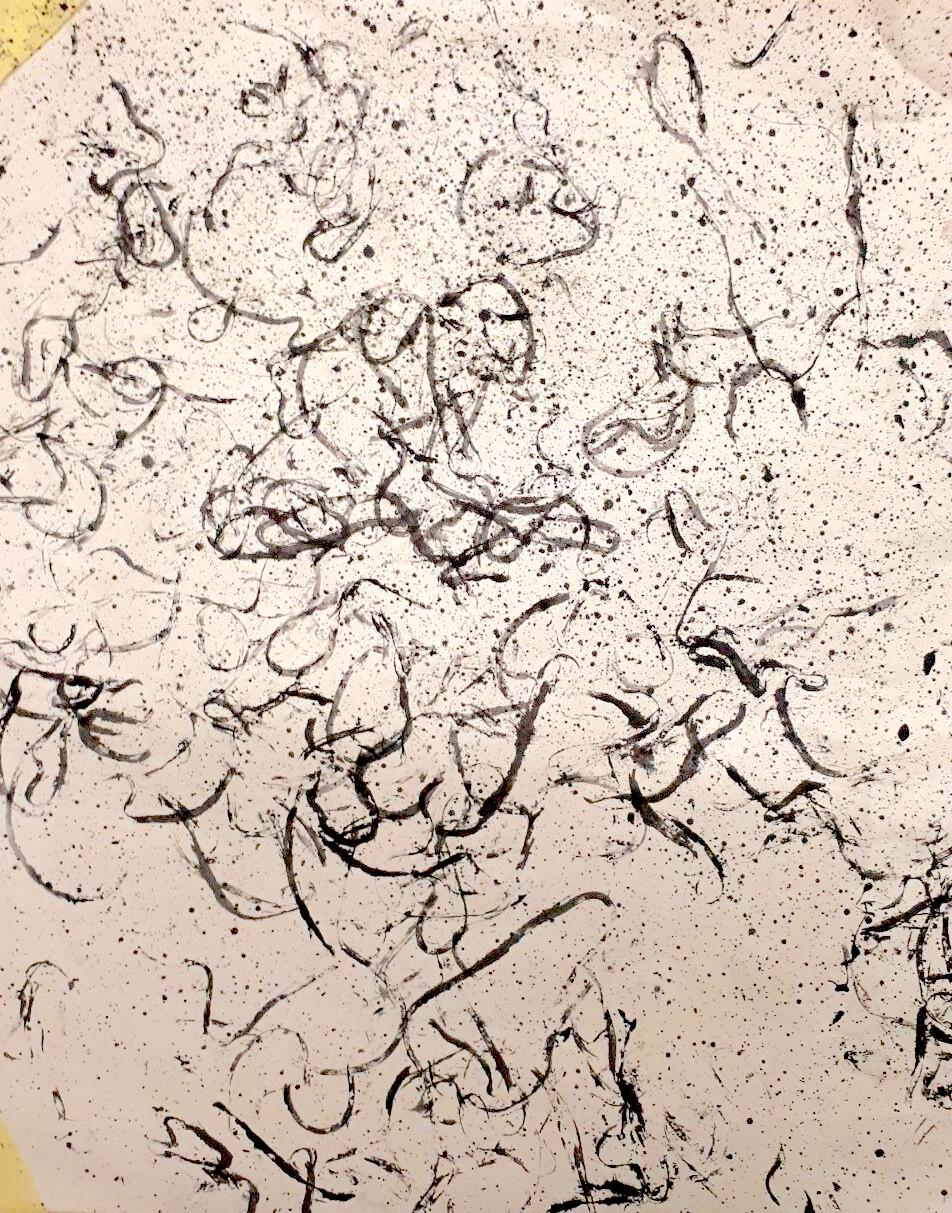
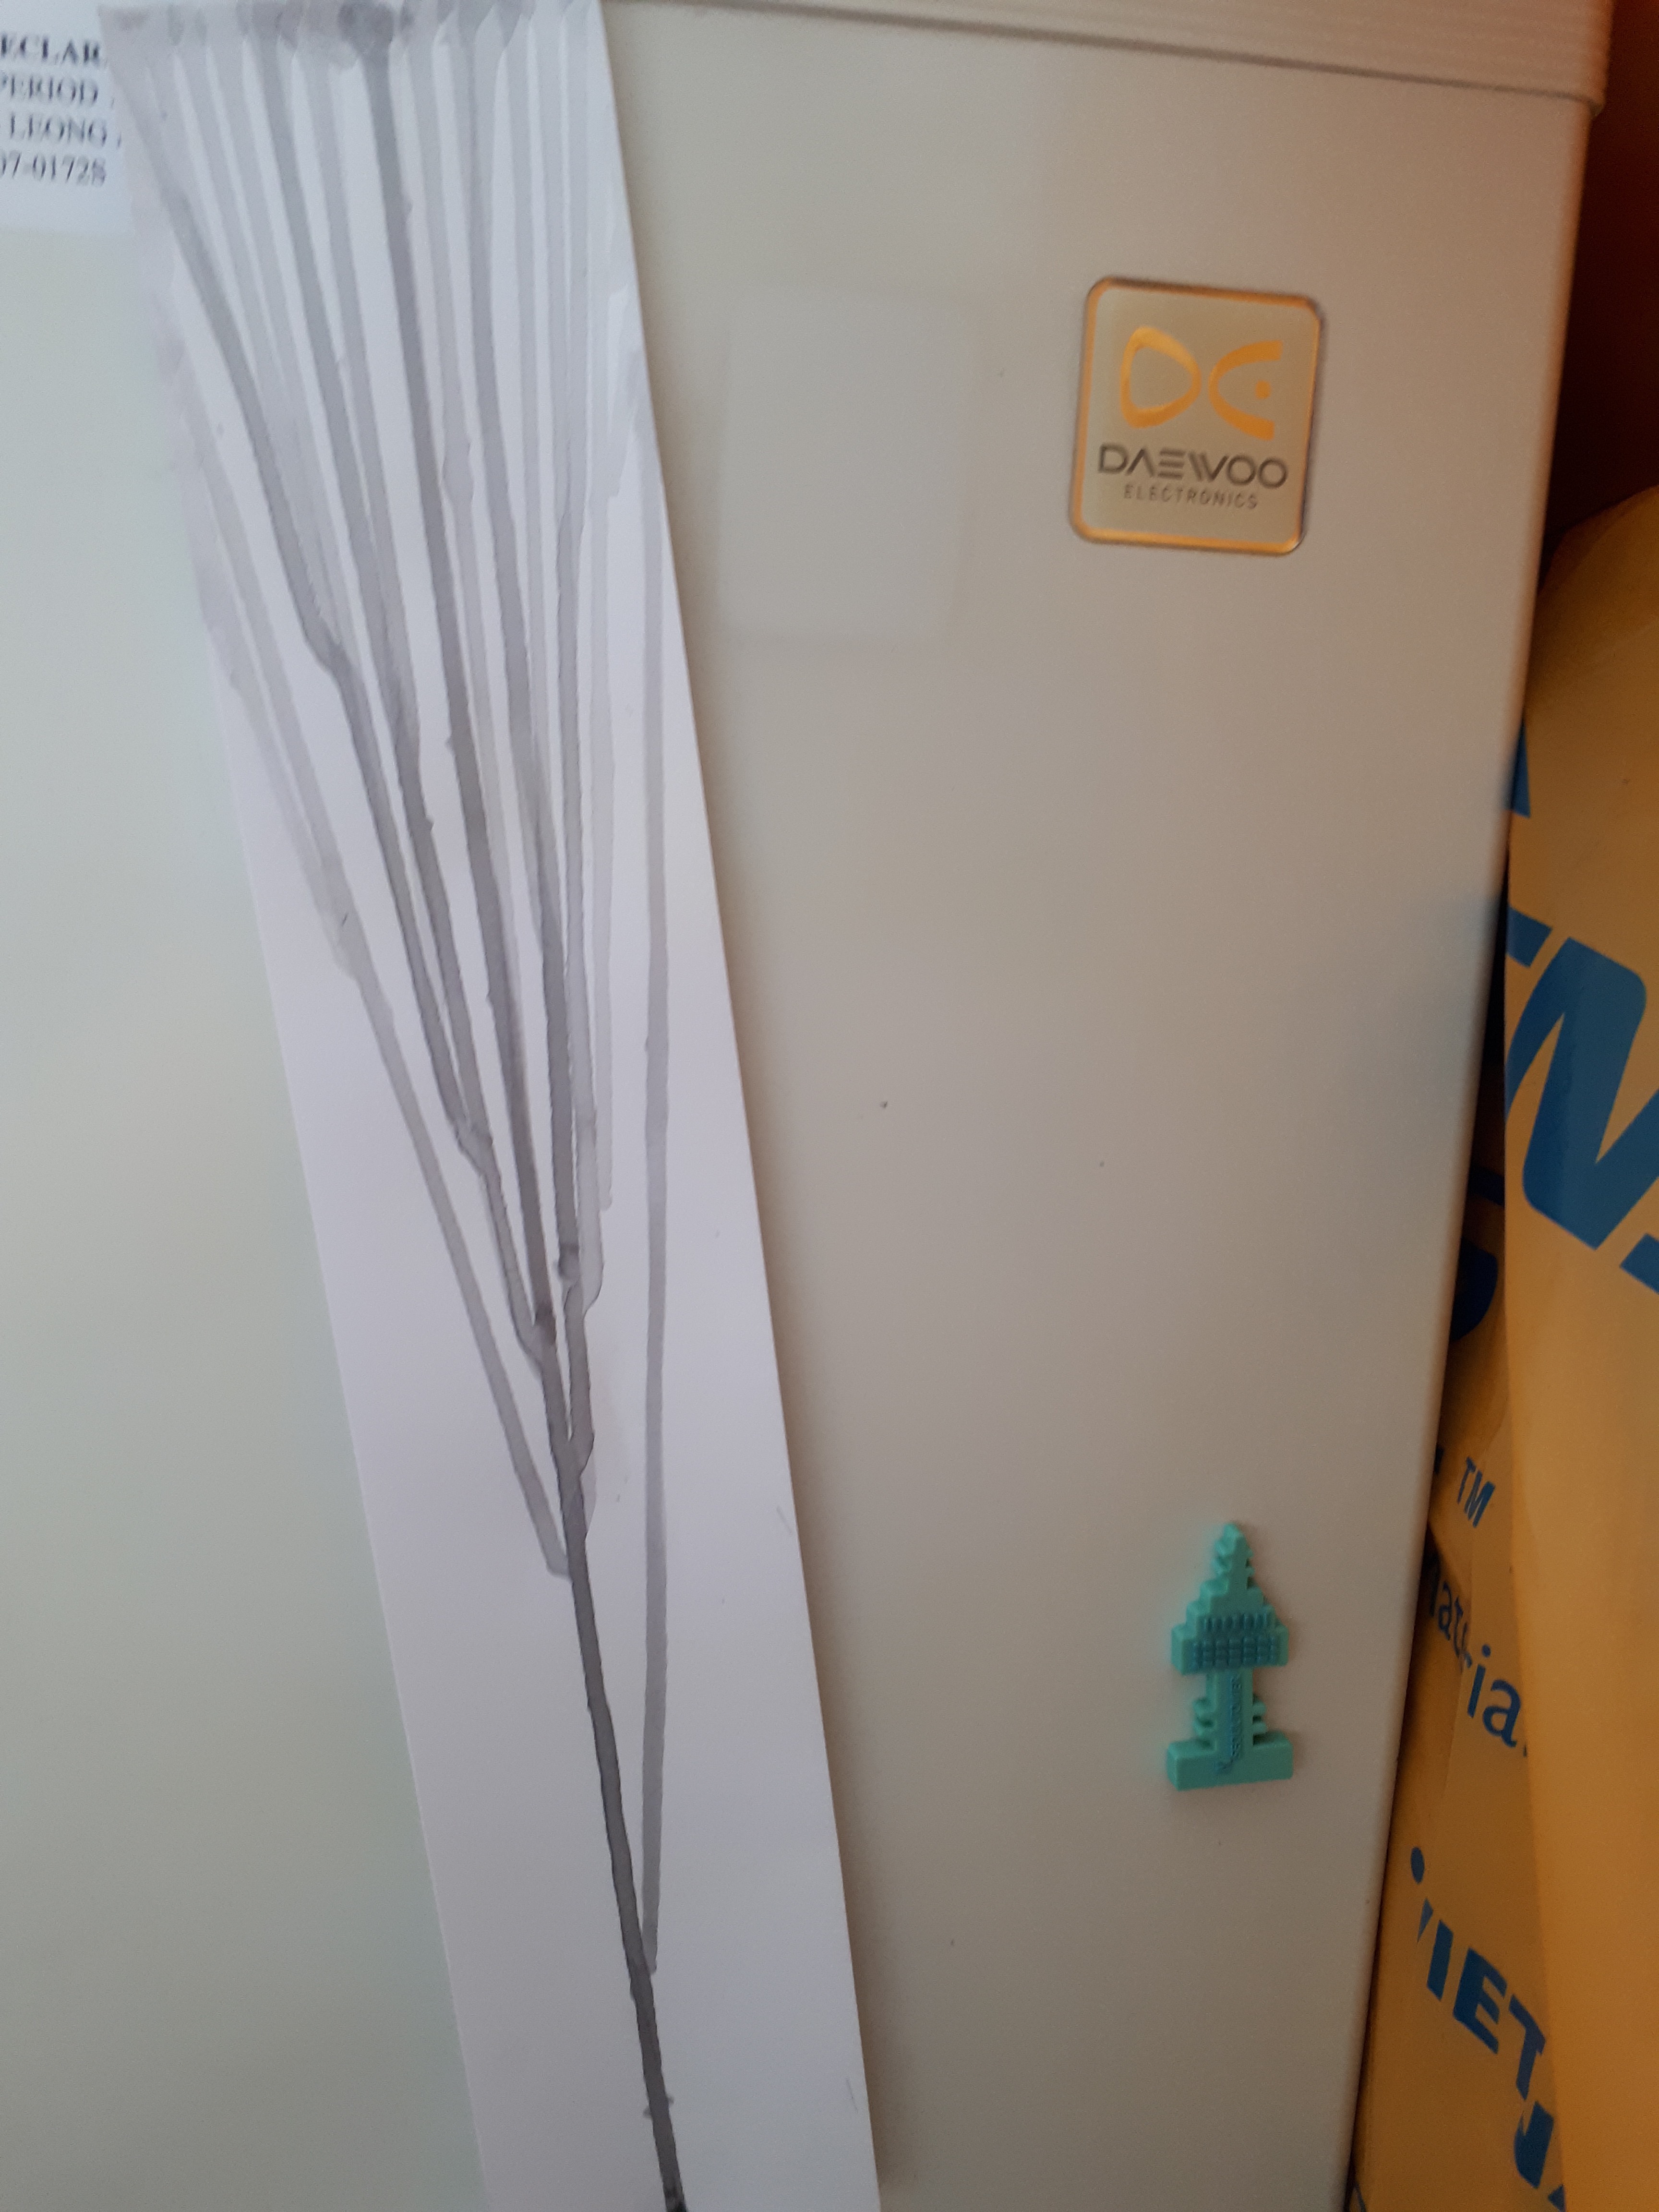
TRIUMPH
Final work for triumph
Mediums: Rubber band, paint, tracing paper
For this piece, my main aim was to show that triumph is an emotion that cannot be felt on a whim but can only felt after one goes through a process of trails to finally reach their goal — which by then, they can feel triumphant.
To do so, I used multiple layers of tracing paper with varying lengths, from long to short, and flung rubber bands coated in paint on to them. I chose to use the marks created with the rubber band for this piece because of how the lines were twisting and turning in all angles, as if to express celebration. The splatters created when the rubber band hit the canvas also add to the ecstatic feeling felt from the lines. This is the accompanied feeling I would get when I achieve something and feel triumphant, I simply feel like celebrating! The progression of the density of the marks was such that the longest piece had the least marks and the shortest piece had the most. I then arranged and layered the slips of paper in such a way where the longest piece was at the bottom and the subsequent ones were arranged on top, aligned to the left, till the shortest piece was on the top, to achieve the outcome in the picture above.
As seen, the density of the marks increases towards the left as the papers are layered on top of one another and the amount of marks multiply. I did this to show one’s progression through their journey to success. At the beginning, one might be overcome with failures and their goal seems unattainable, but as they progress, they began to achieve small successes and reaching their goal seems more probable. Hence, as we move towards the centre of the work, there is an increase in marks and layers. Finally, at the right side of the work, when the goal is achieved and one feels triumphant, the marks cover the entire space.
Besides using the marks as an indication of progress and the eventual feeling of triumph, I also made use of the translucency of the tracing paper. The translucency allows for the marks on the previous slips of paper to be still visible when a new one is placed over it, though not as visible as the marks on the very top layer. The reason behind this is that, as I have mentioned, triumph is only felt after the arduous process of trial and error. Hence, I aimed to express triumph as the layer on the very top, backed by the other layers below it which represent the process towards triumph.
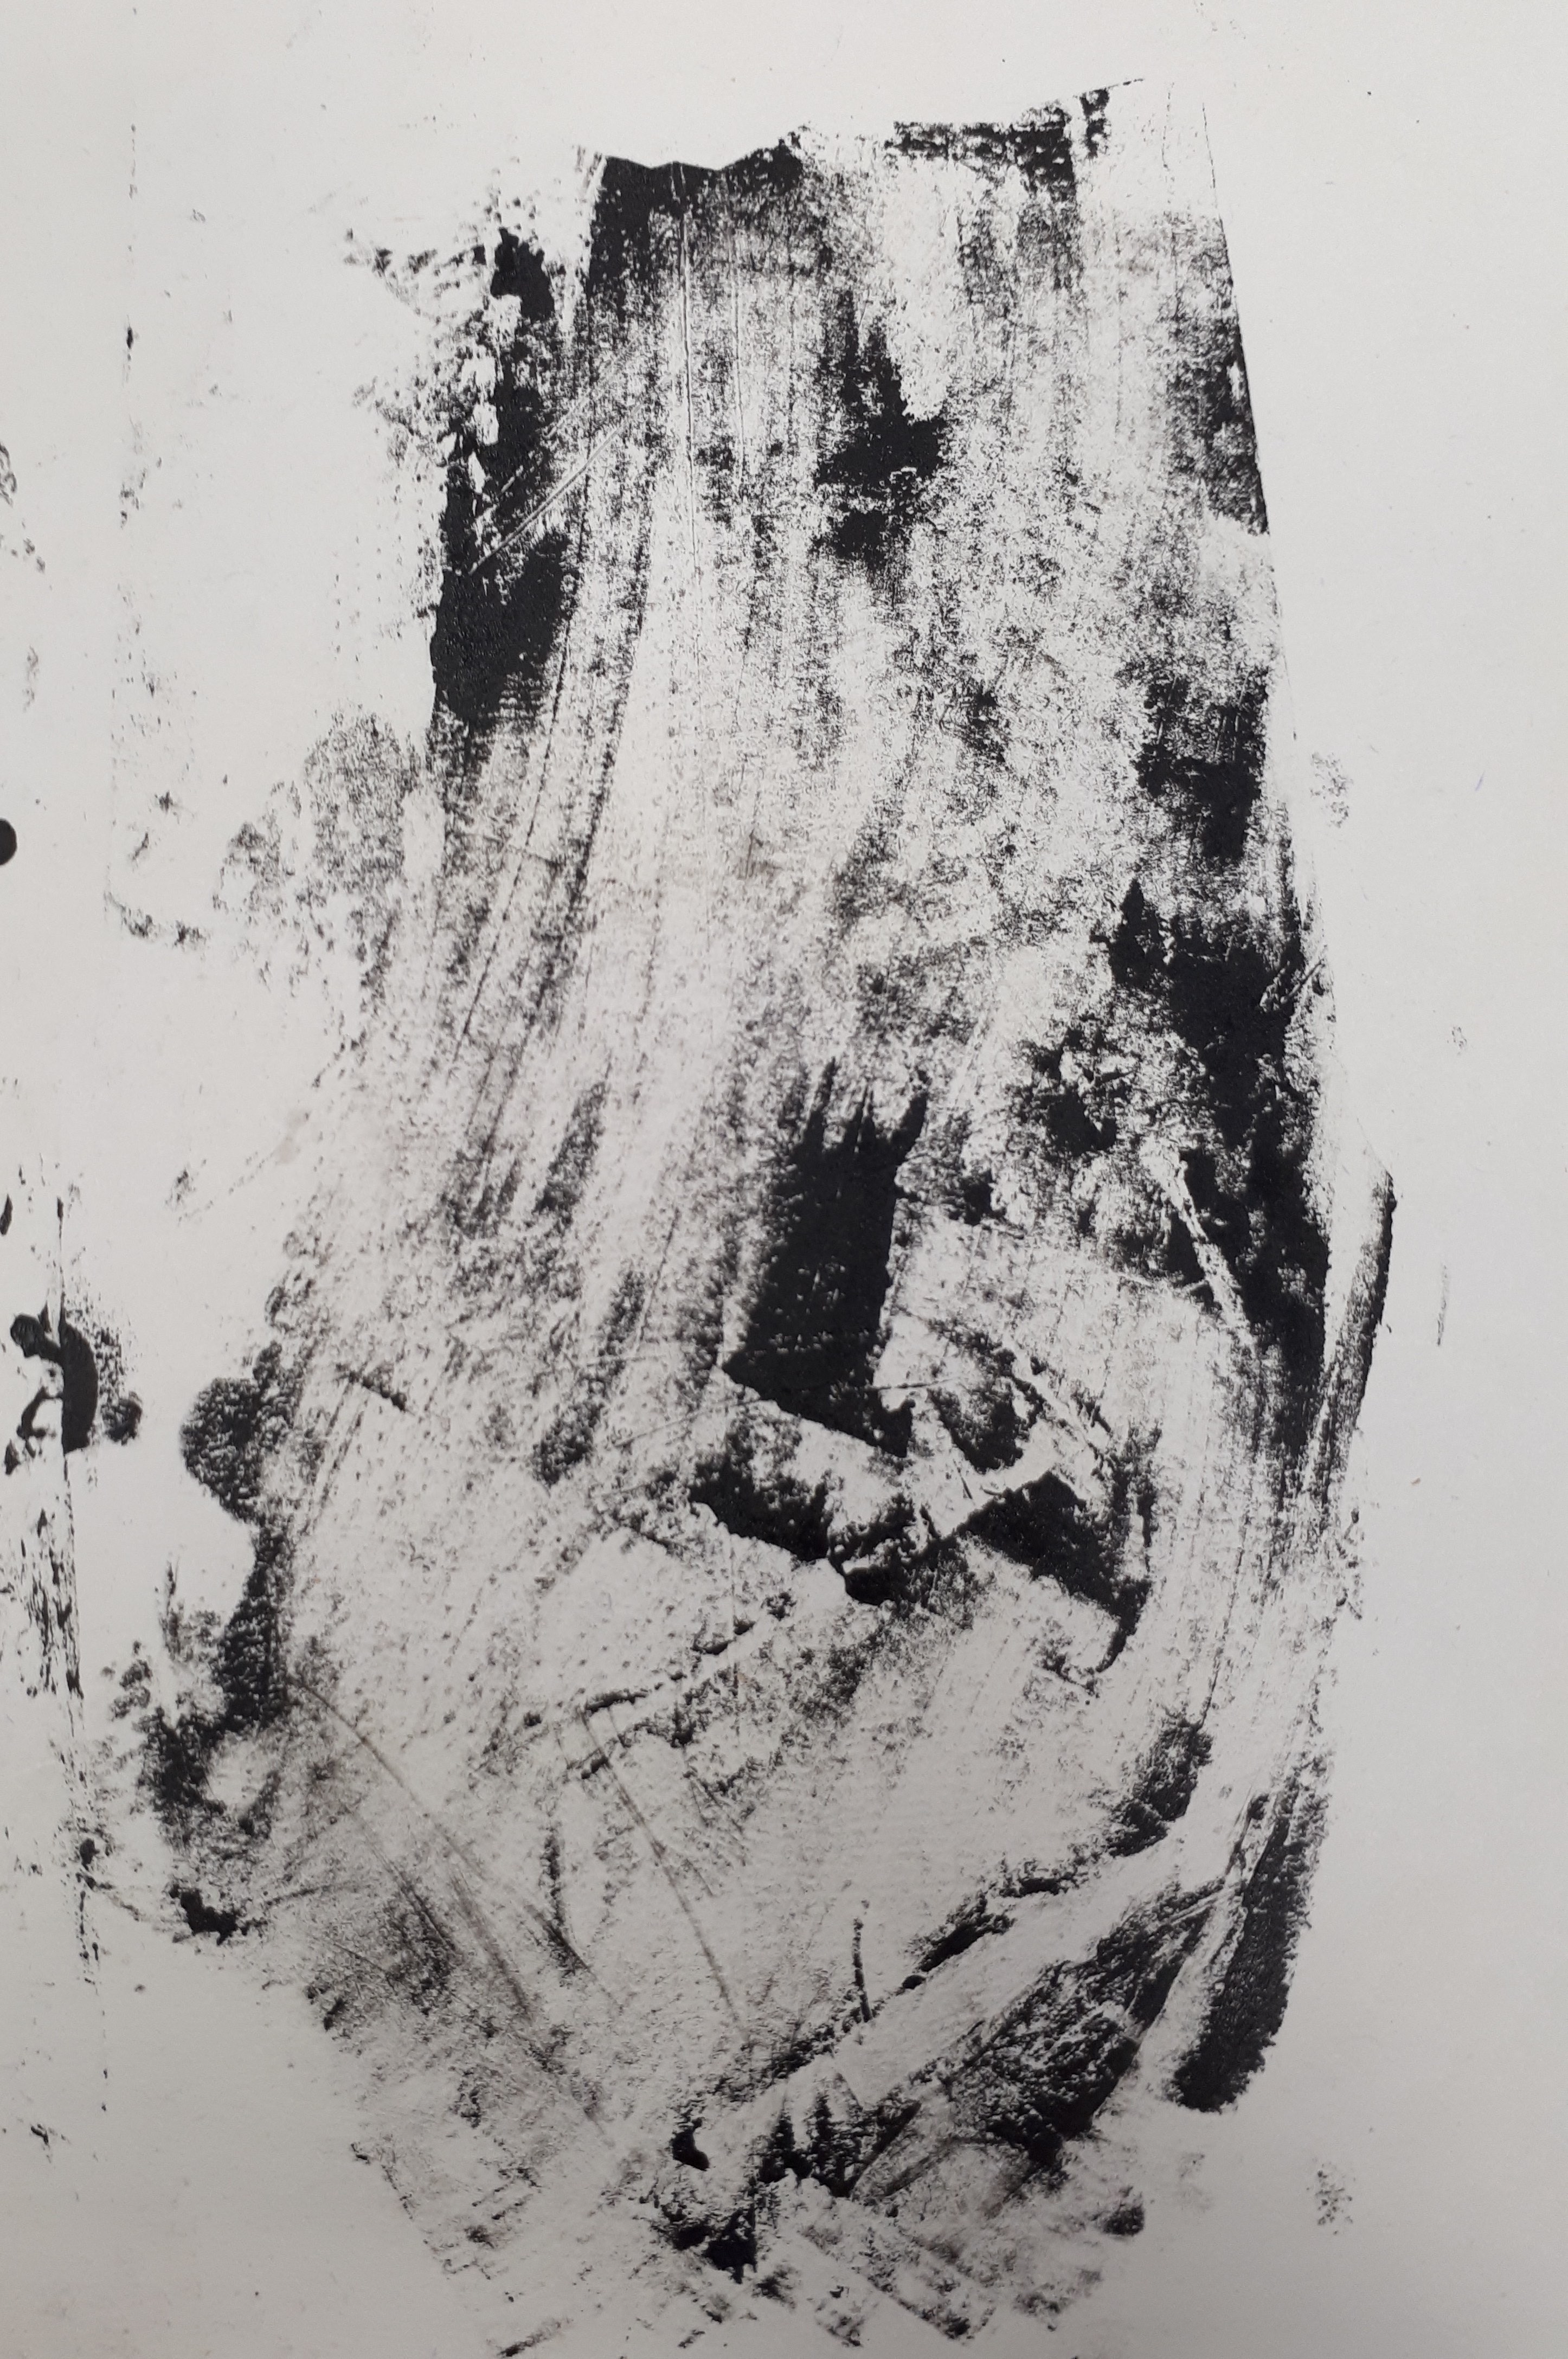
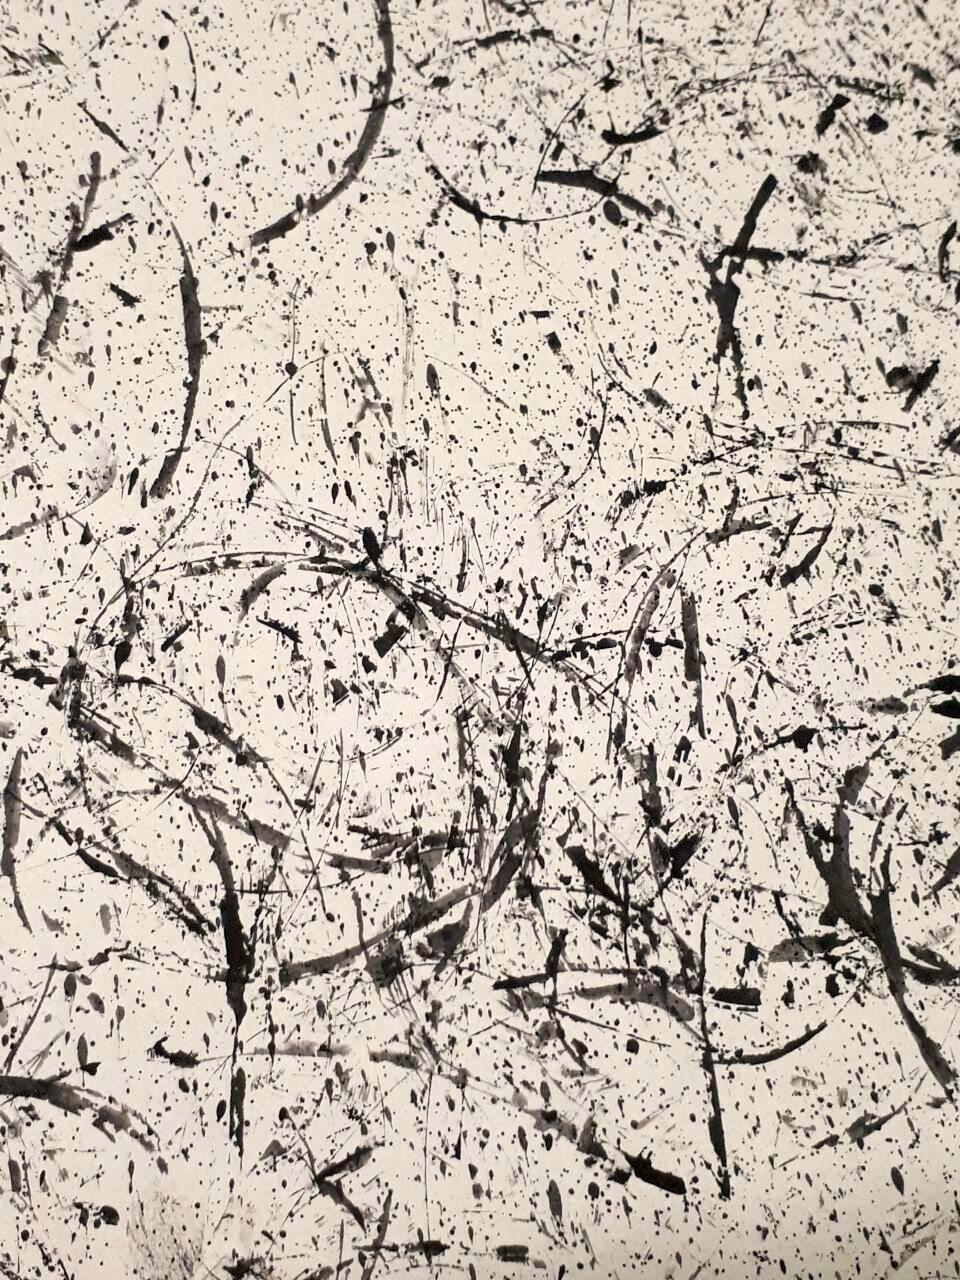
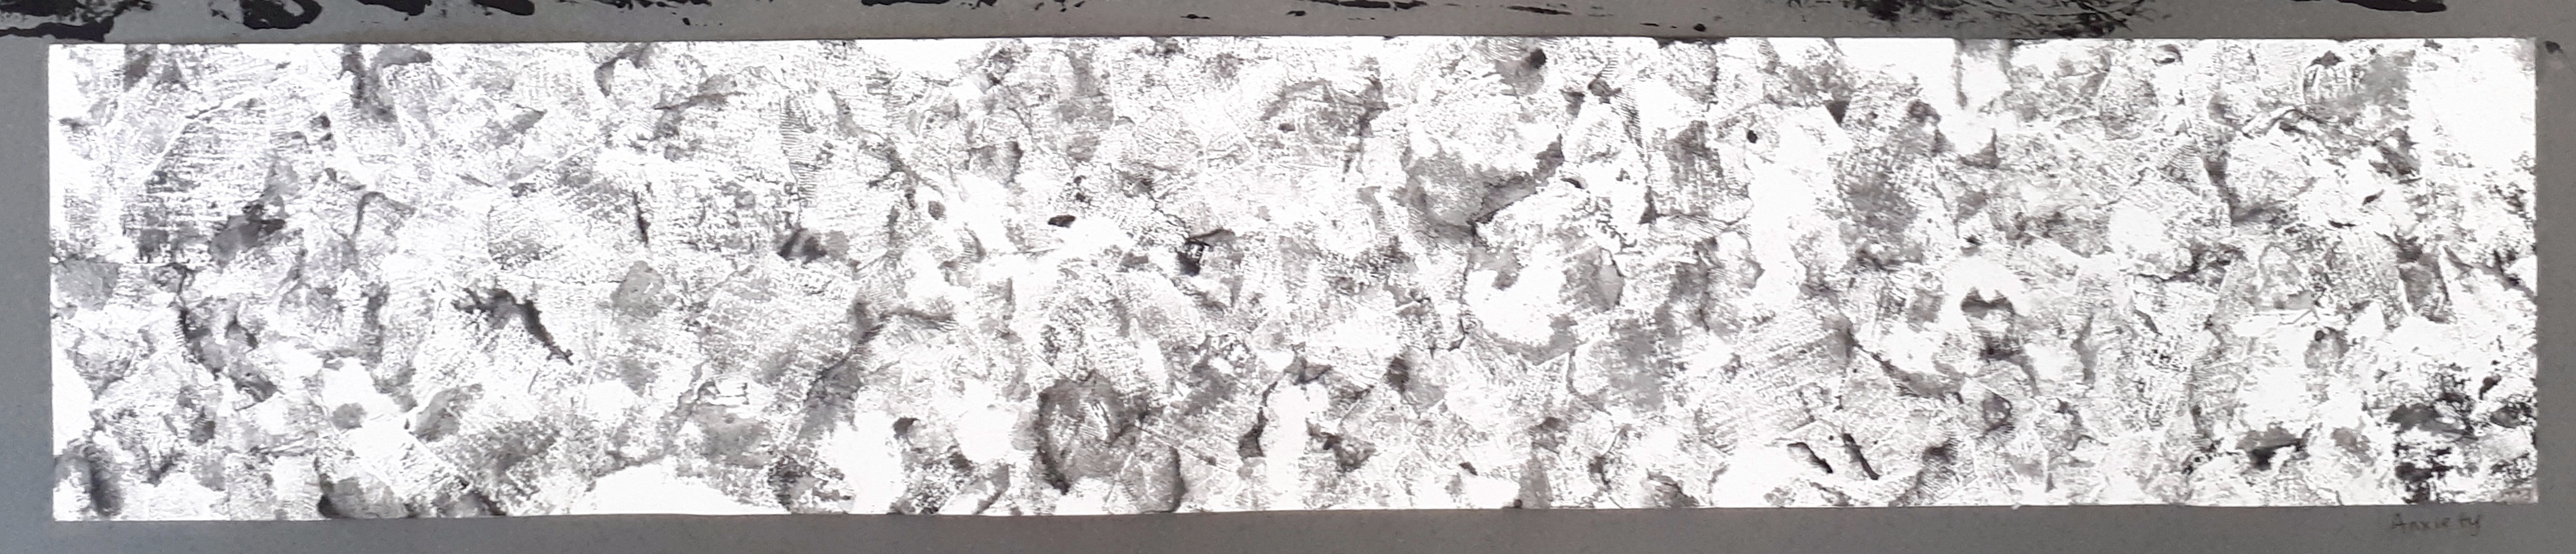
My focus for this piece was to show how sorrow is felt in waves, following the saying “waves of sorrow”.
I executed this by using the method done with the perforated plastic bag during my experimentation, which was to spread paint onto the bag then scrape it with a paint knife, creating directional curved lines that imitated the movement of waves.
Painting the baseFinal product for base
Besides using that transferring method, I also painted my base grey. As said above in the process part of this post, I did not want the waves to have too much contrast. I felt that the contrast made the waves look harsher, warping my sorrow into a deep sadness or even anger. I find sorrow to be a heavy yet mellow kind of feeling. While it can completely take over a person, it is not the kind of emotion to make one feel like venting. It is rather a feeling that makes one depressed and lack motivation to carry out simple, everyday activities.
I chose to use waves to express sorrow as, besides it relating to the saying “waves of sorrow”, I do feel that the feeling of sorrow is constantly coming in waves. It is a feeling that is constantly there. It may die down at times but it would easily build back up again and crash into you just like an oncoming wave. With my work, I wanted to express the first wave of sorrow. I did so by creating a big violent strokes as seen on the left side of the piece, and let it slowly subside as it moved towards the left. I also chose to have the waves flow out of the canvas as sorrow to me is overwhelming, especially when it first hits you.
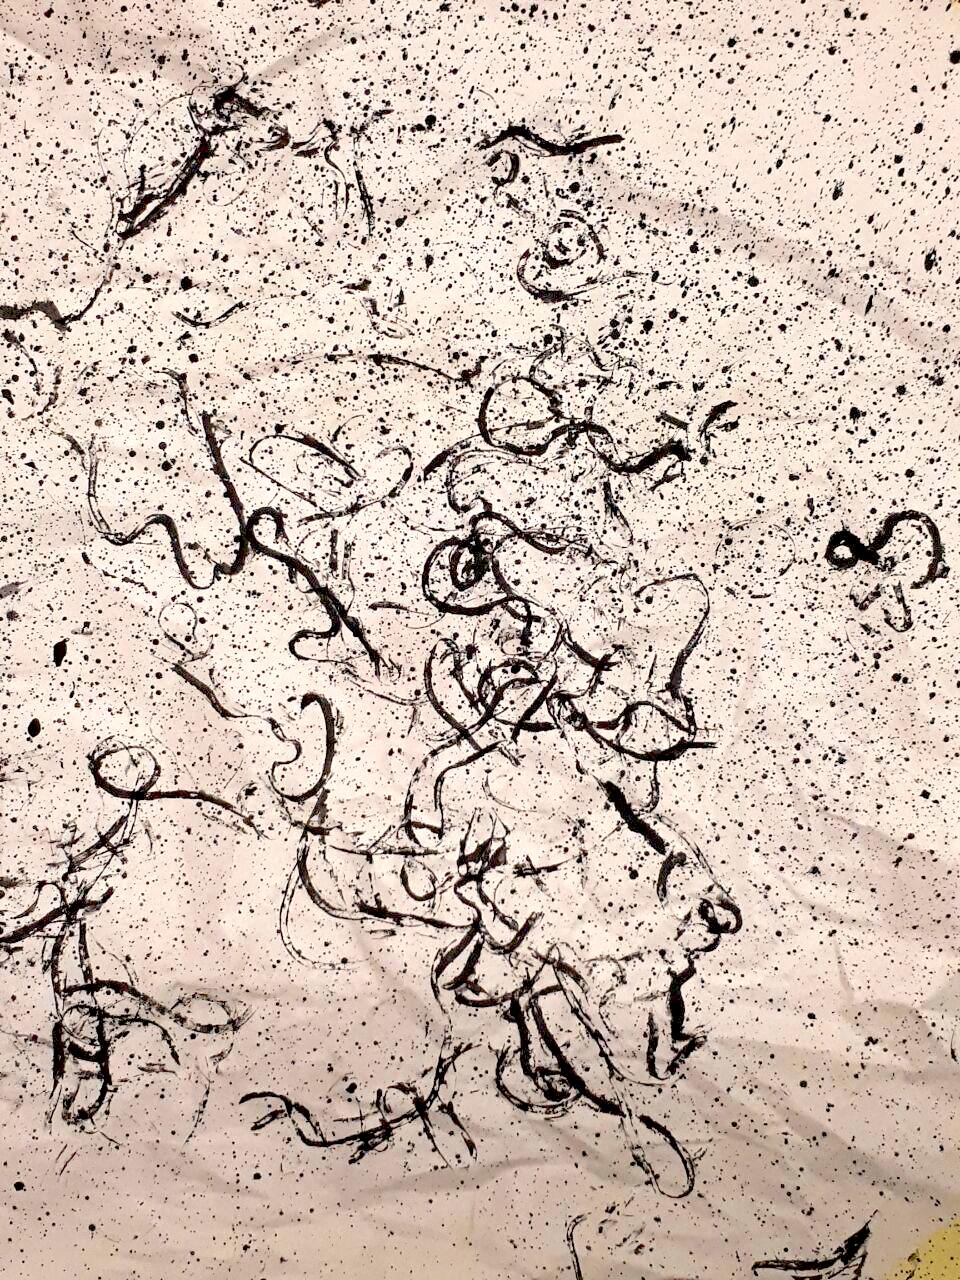
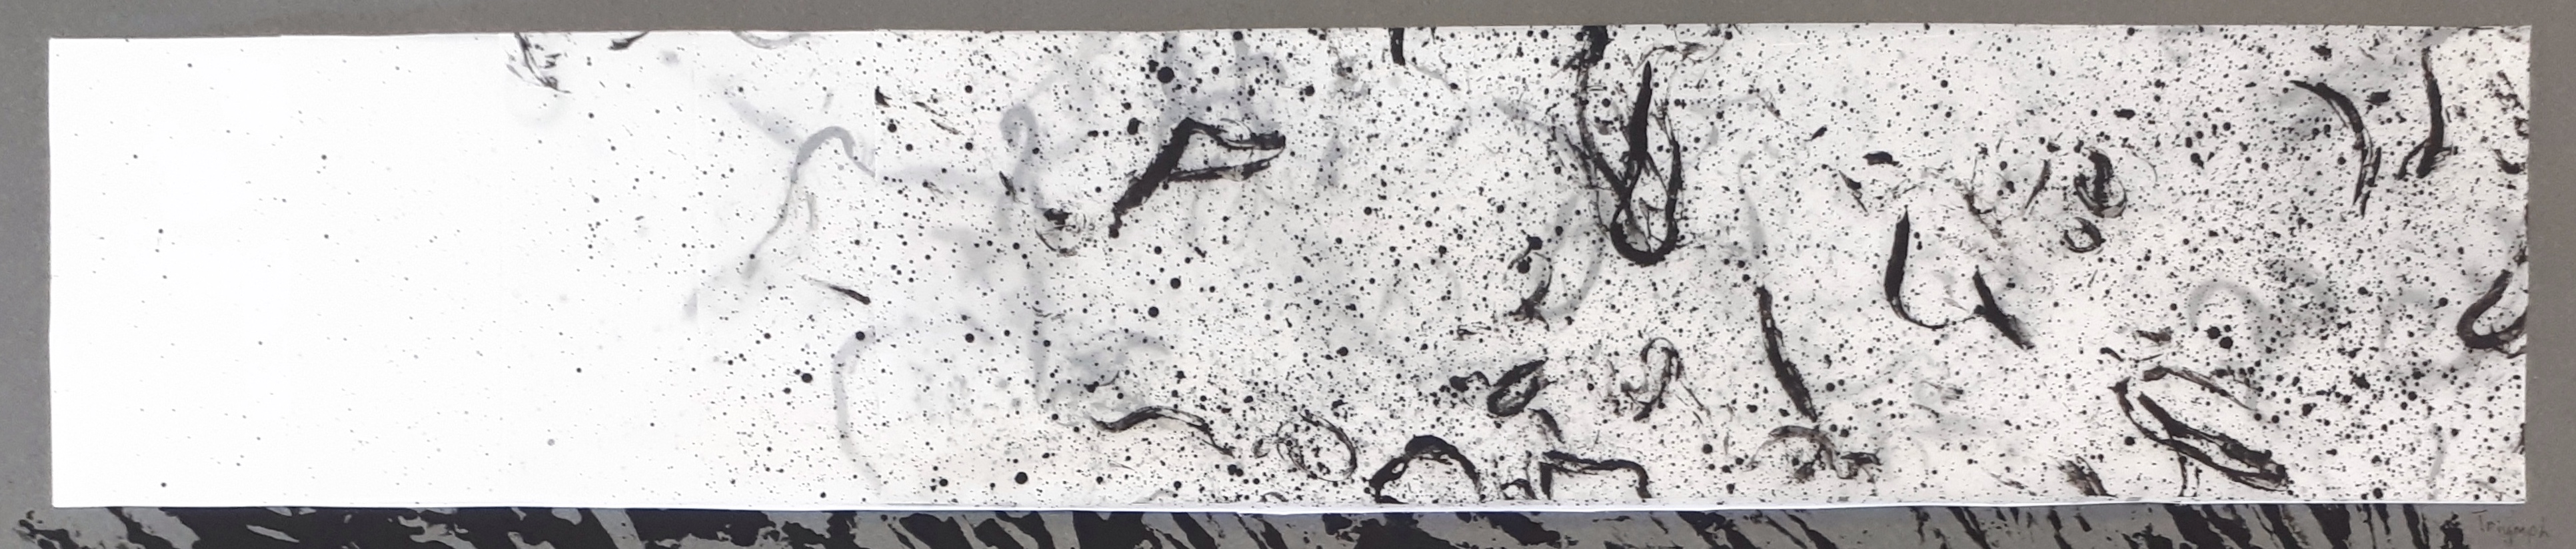
ANXIETY
Final work for Anxiety
Mediums used: Ink, masking tape, drawing block
A close up of the work
My aim for this piece was to express how overwhelming and disruptive anxiety is.
I did this by tearing varying sizes of masking tape and sticking the adhesive side unto the paper after i have dipped it in ink, as shown in my process. I used different sized masking tape to create tighter and also larger patches across the canvas. I did so as anxiety to me is being constantly worried about something even when you are not really thinking about it. Those moments when you are not thinking much about it are represented through the smaller, distant patches, while the big patches represent anxiety at its peak.
I chose to use masking tape as I liked the texture it gave me, as well as how there was some form of direction created with the tape marks, which is something I could play around with. I pasted the tape in multiple directions and multiple sizes across the canvas to create this uneven piece. It’s uneven-ness and chaotic nature represent what it feels like to be anxious to me. One’s mind is constantly running all over the place (hence the multiple directions), thinking about all the possible turn of events or outcomes for the problem that is making him/her anxious, and can sometimes also conjure up exaggerated situations that would probably never happen. Also, besides the multiple directions created, the chaotic nature of this work is used to express how the feeling is constantly in one’s mind and cannot fully be shaken off until the supposed situation is settled.
Close up of a torn out area
A happy accident created during the process of this final piece was how some bits of the paper would tear off as I peeled the masking tape away. This added effect where the white, blank patches interfere with the work create the sense of patchiness or scratchiness which can be irritating, much like how one’s anxiety over something can be constantly bothering them or scratching at them, as well as constantly popping up into one’s mind.
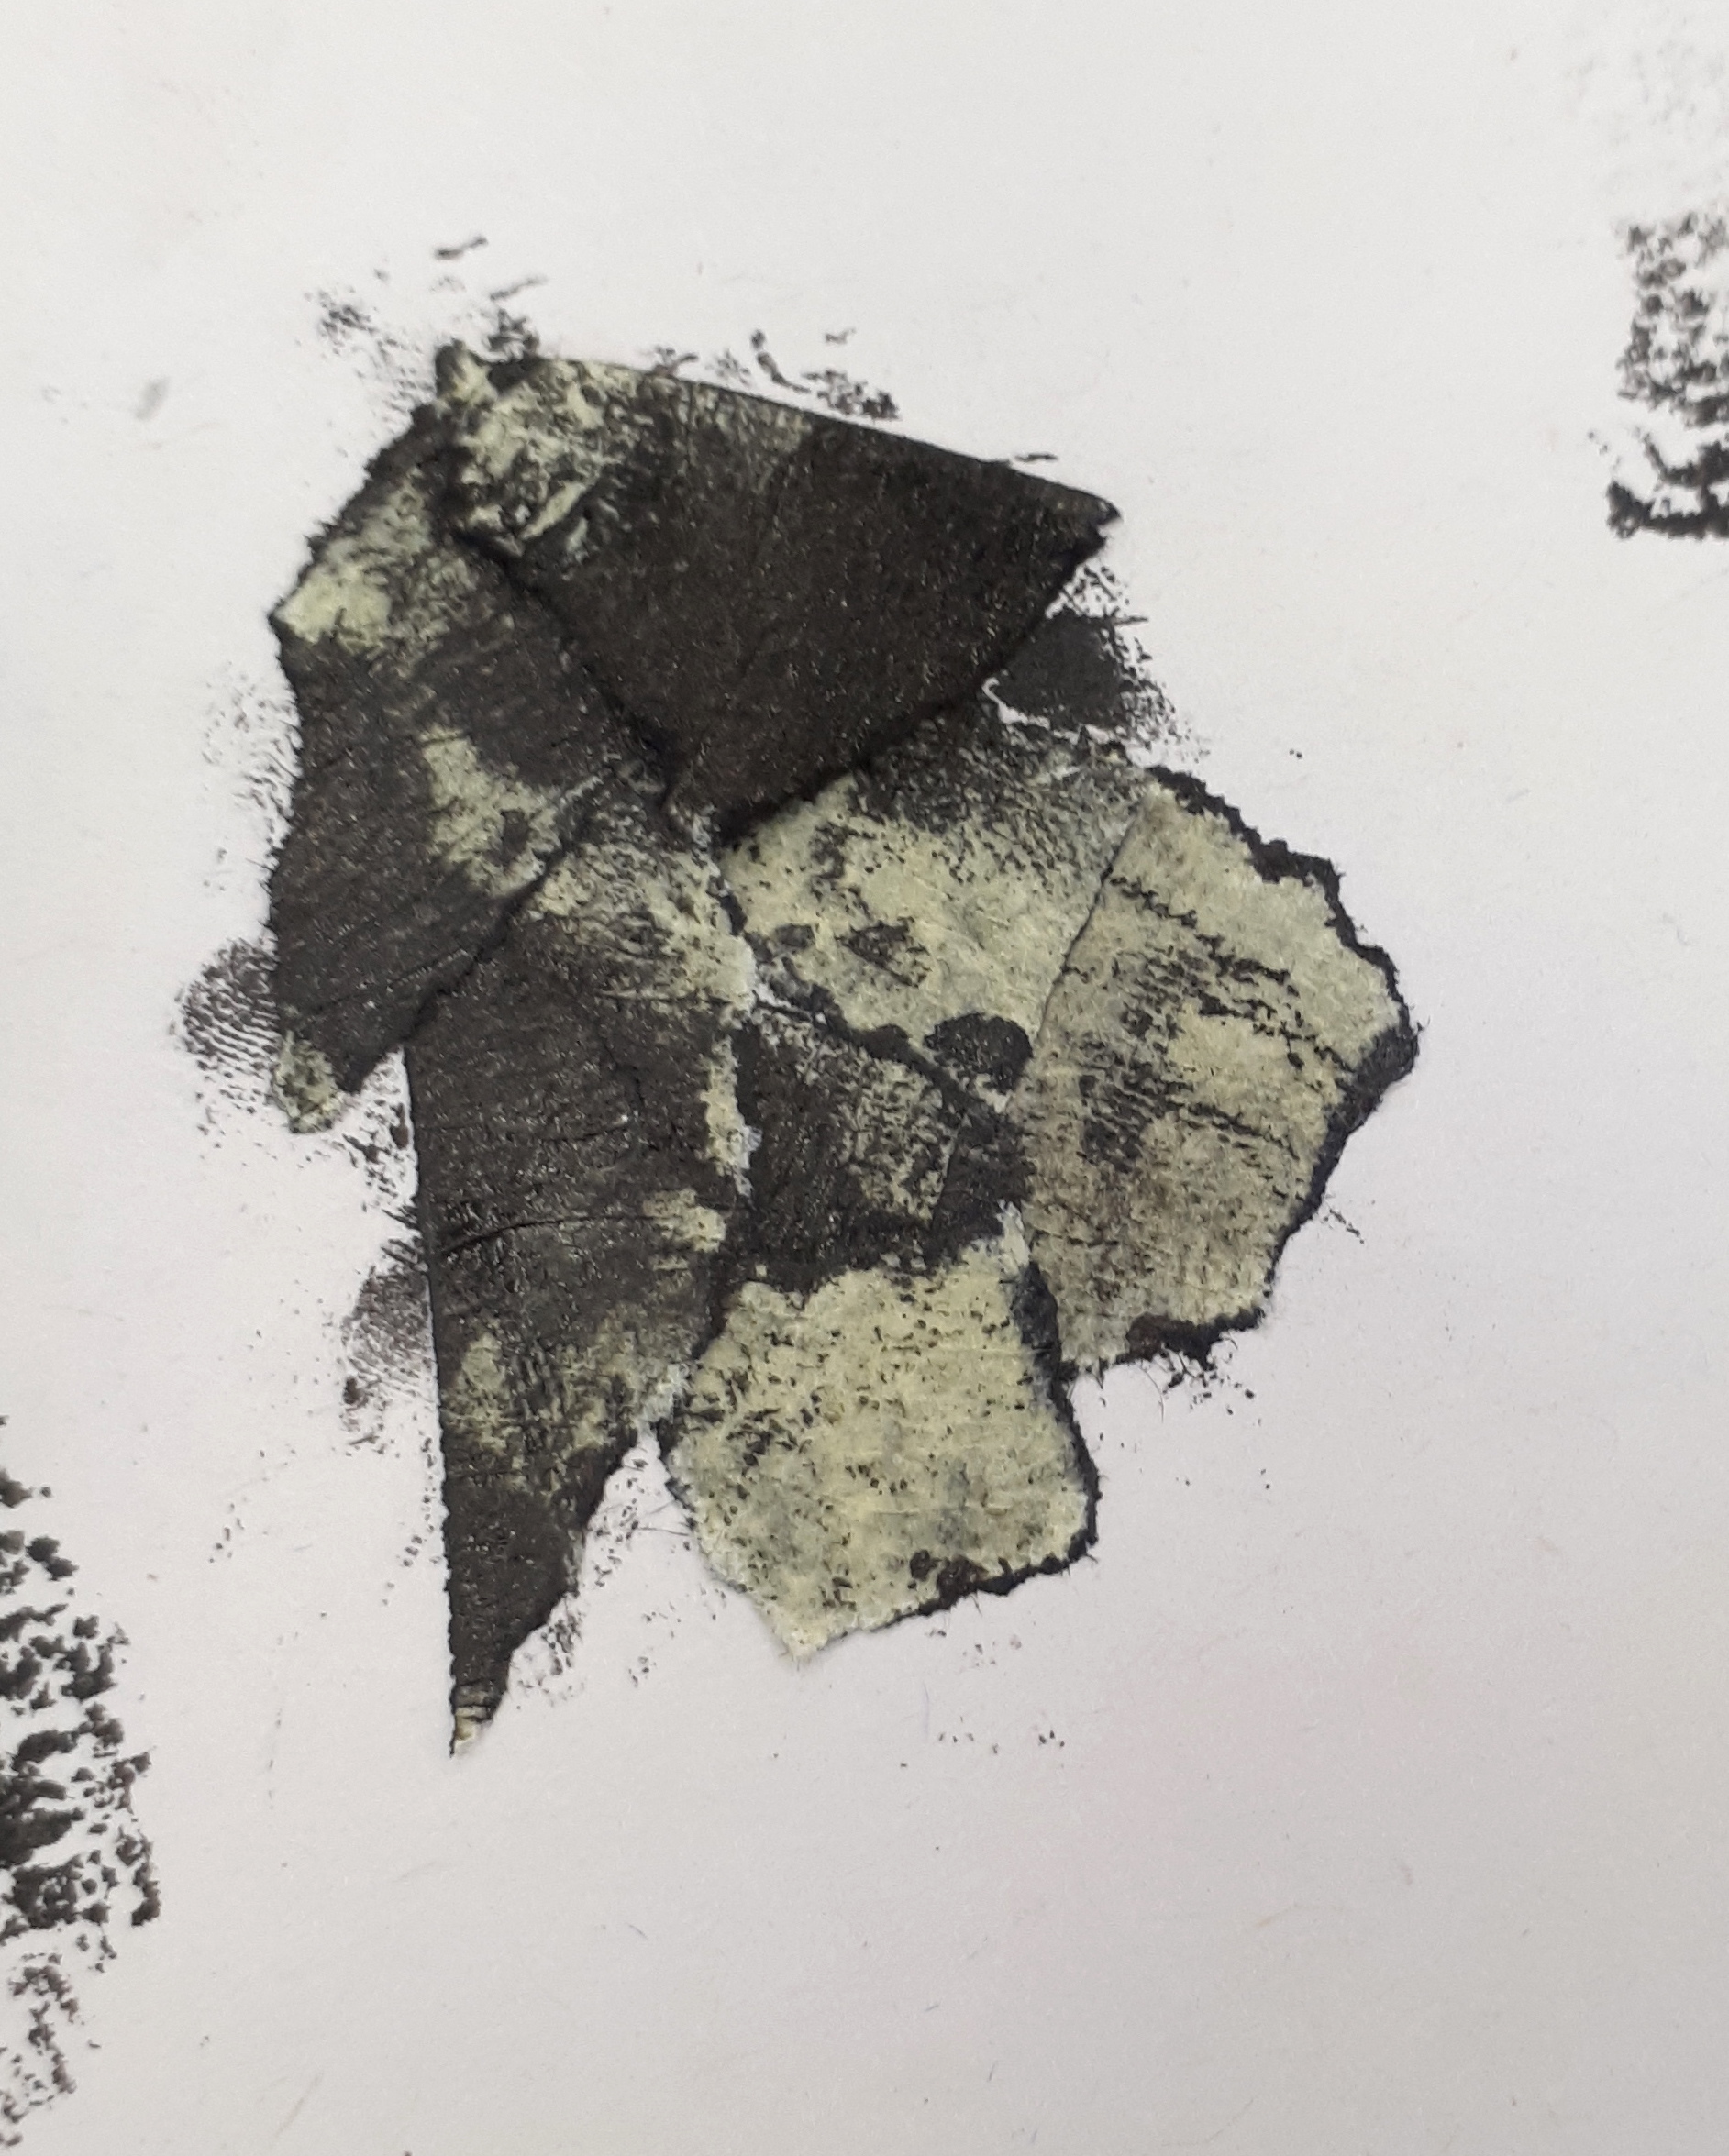
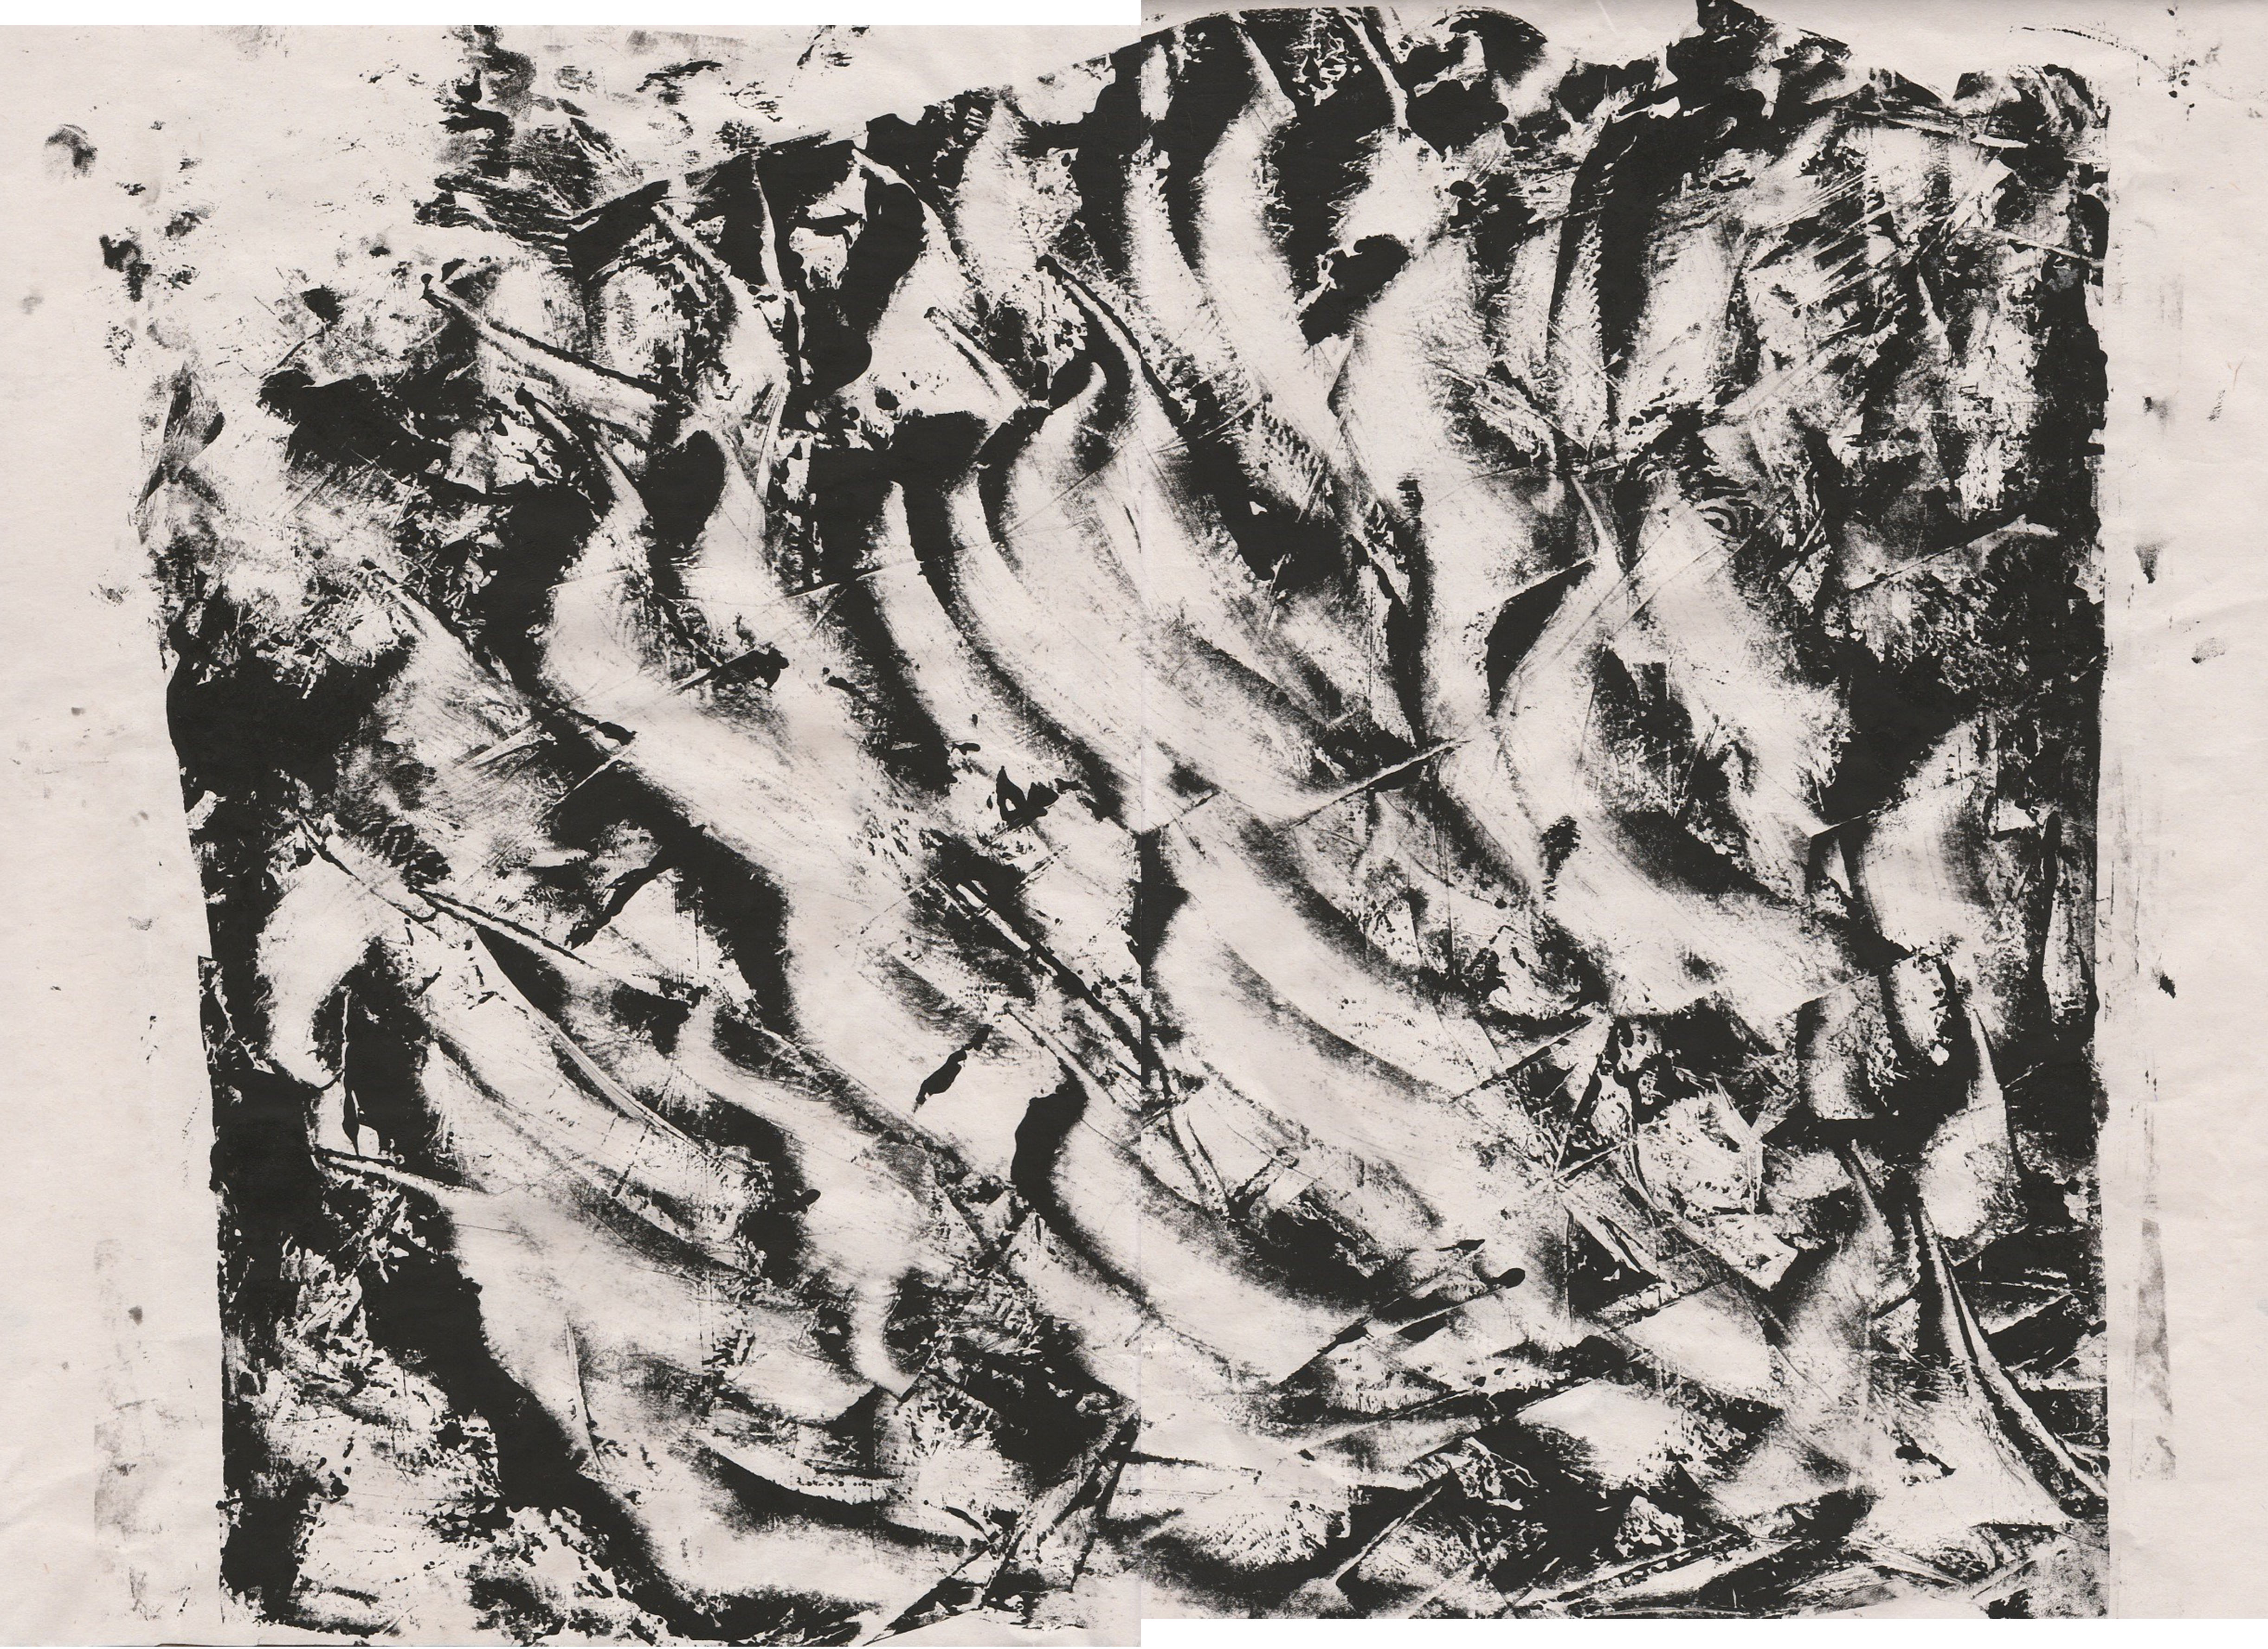
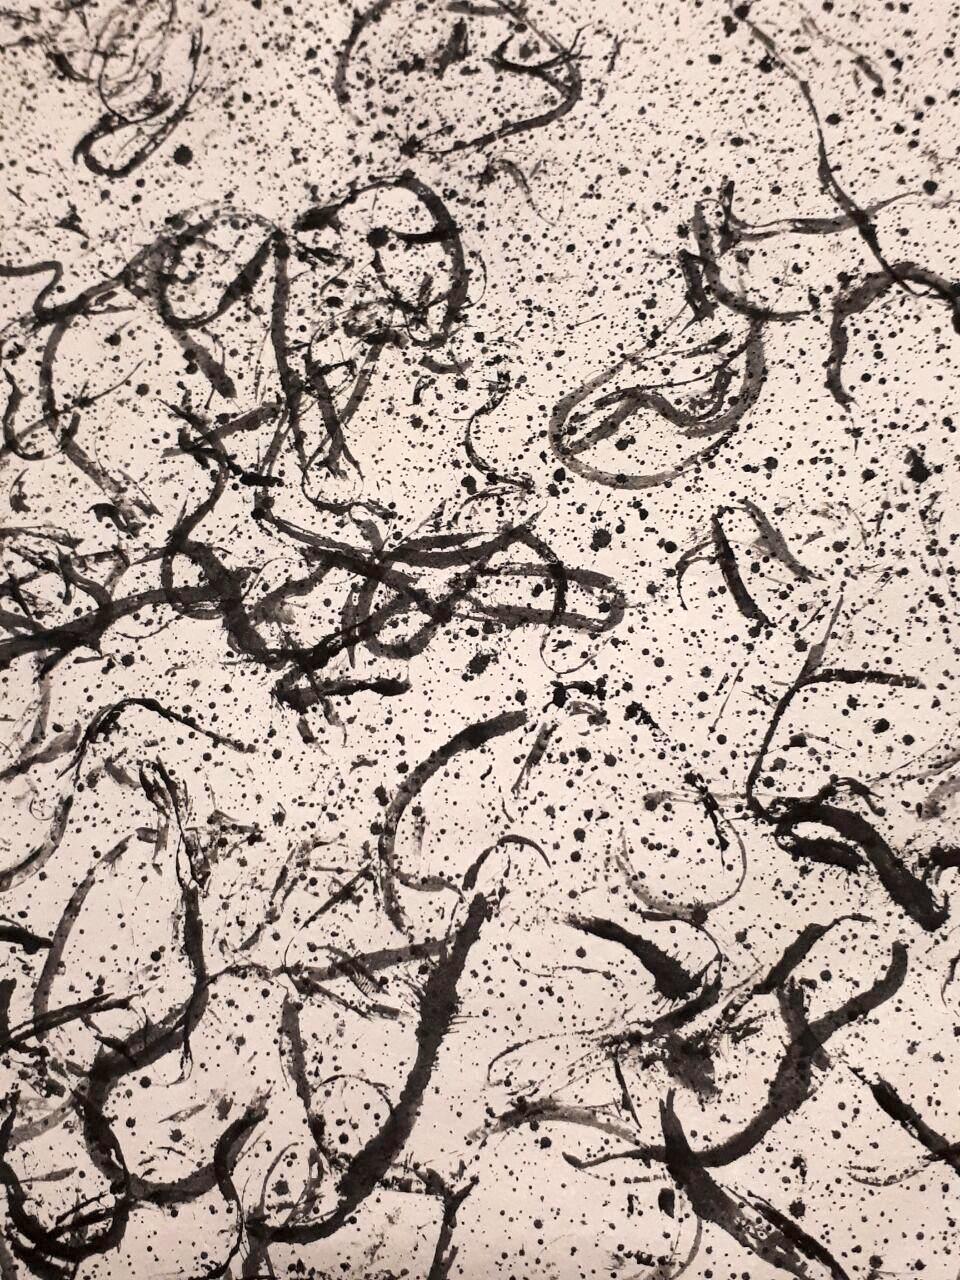
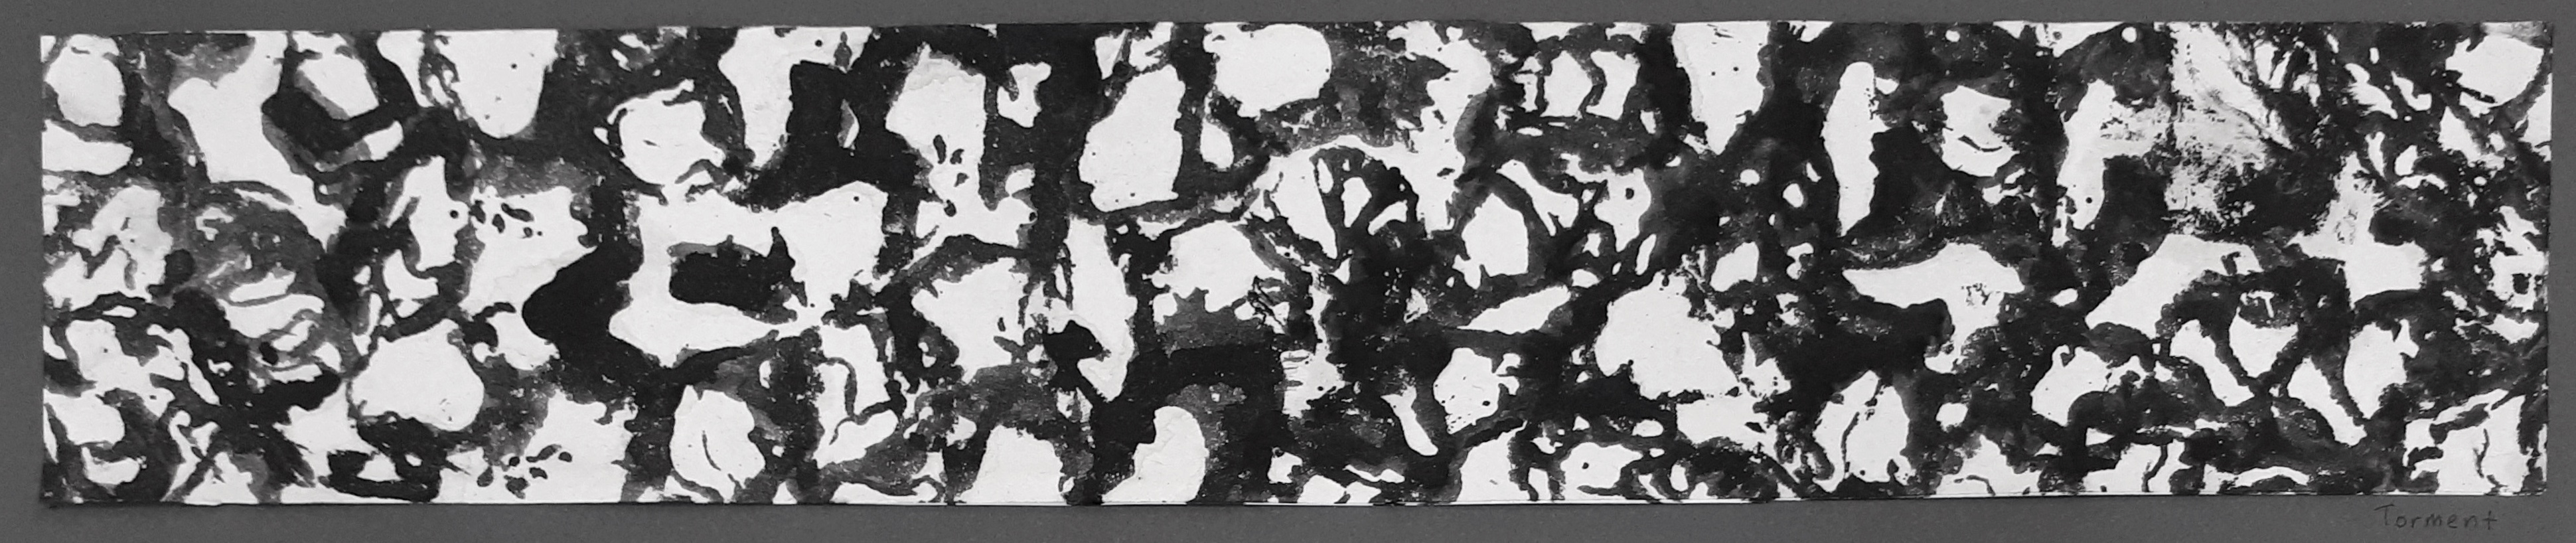
TORMENT
Final work for Torment
Mediums used: Chinese oil sticks (youtiao), ink, newsprint paper
The aim for this piece was to create a disturbing image that makes viewers feel uneasy when they see it.
For this piece, through my experimentation, I used the centres of the youtiao as stamps to create this work.
To express torment, I wanted to create a haunting image as I felt that when one is tormented, they are constantly being reminded of or thinking about the situation that they are unable to overcome or get over. Rather than nagging, torment is haunting to me as nagging creates a sense of irritation but haunting creates a sense of despair, it makes me want to close up and hide or desperately run away from the problem. To create this sensation, I used the roundness of the youtiao as a metaphor for the problem. It is stuck within the circle or space created by the youtiao and is unable to be released because it has not been solved. To have these spaces containing the problem appear all over the canvas creates an overwhelming sensation where the problem is constantly asking for once attention and won’t leave one alone, hence tormenting the individual.
The organic shapes created by the different youtiaos also create a sense of unease due to how eerie they look. They can resemble a cluster of organisms or innards. Both these images are unsettling and would make one feel uneasy when looking at the work, just like how being tormented can make one feel disturbed. The lack in a pattern and the minor overlapping would also make the viewer feel disturbed as he/she would not be able to identify a singular shape nor will they be able to predict what they would see next as there is no clear pattern to follow. There is no sense of certainty when looking at the painting and hence the viewers are at the mercy of the work. One could say that this would make them feel quite lost, much like how one would feel if they are being tormented as they may be at a lost at how to solve the situation that torments them, similar to how the viewer cannot locate or identify a subject or pattern in the work.
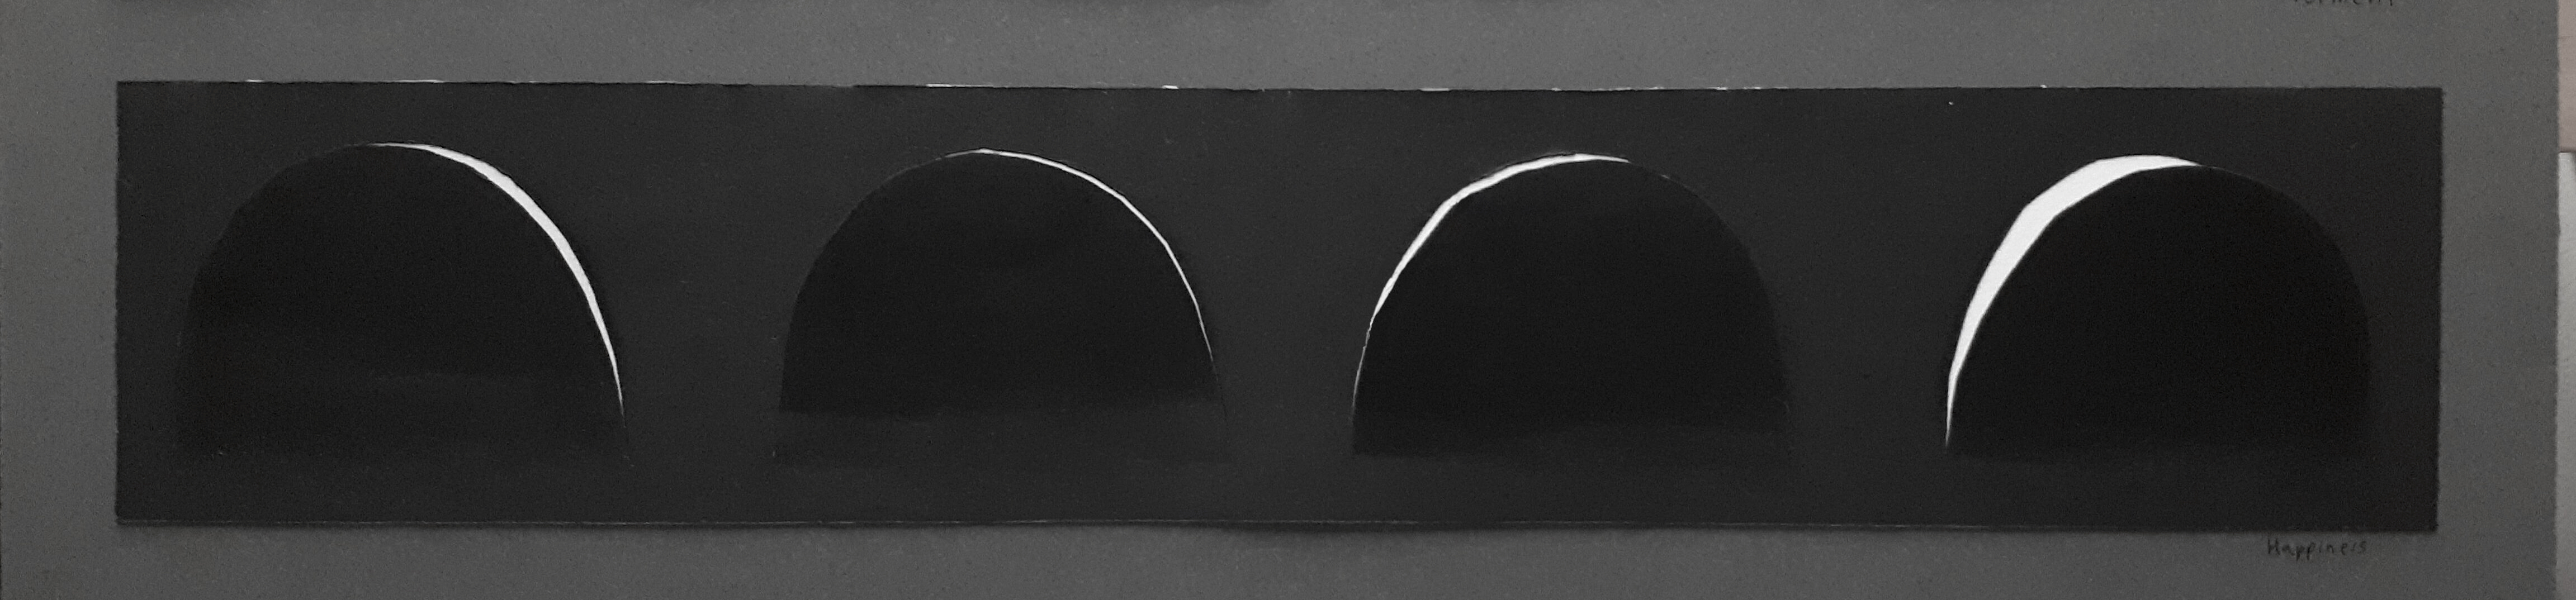
HAPPINESS
Final work for Happiness
Mediums used: Drawing block, Black paper
For happiness, I wanted to create something that was simple and easy on the eyes as I wanted my viewers to feel the comfort and contentment looking at my work, as well as because happiness to me is being able to enjoy the simple pleasures in life.
I chose to create four arc-like cuts in a symmetrical and orderly manner because it gives the work uniformity rather than chaos. The symmetry of the work can also make viewers feel at ease because patterns or neatly arranged things tend to make people feel a sense of joy and peace. The roundness and uniformity of the cuts also portray positivity as it gives a sense of wholeness and ease, unlike straight lines which would better represent hard and explosive emotions. I also chose to create cuts that reveal the white paper underneath as I wanted to create a eclipse like outcome when one looks at the work from the front. I used this to create something similar to a silver lining.
View of Happiness from an angle
I wanted to use the silver lining as a portrayal of happiness as it represents hope and optimism. Hence the black paper chosen was used to represent hardships and trials, as I feel that one cannot fully enjoy happiness or the simple pleasures in life if they have not gone through hardships before that.
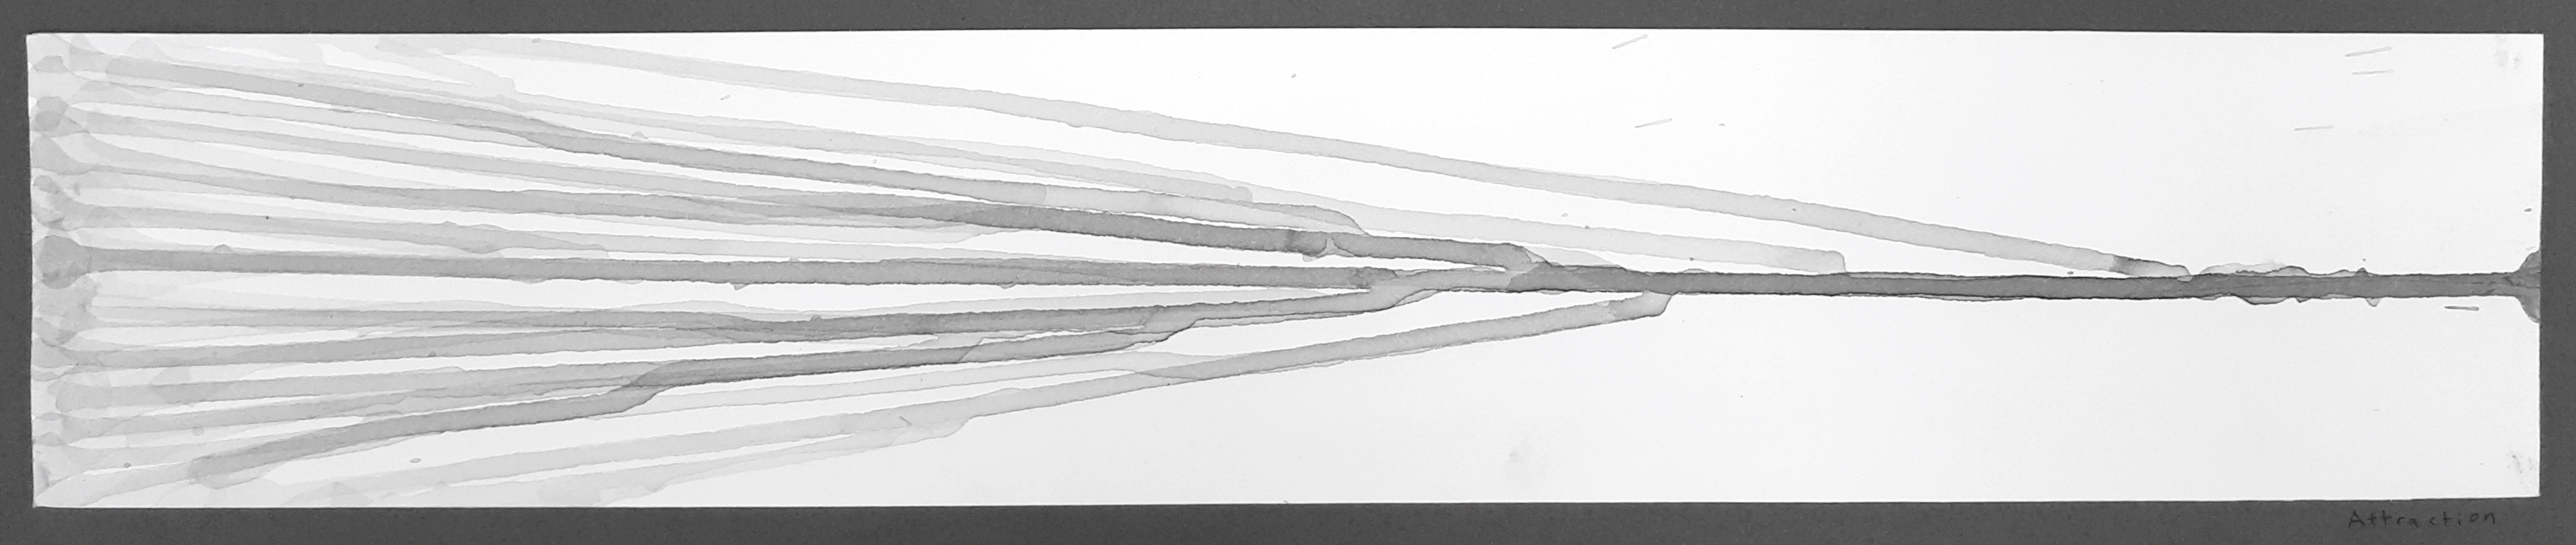
ATTRACTION
Final work for Attraction
Mediums used: Drawing block, paint
For this piece, I simply wanted to express the feeling of having all of one’s attention being drawn in by something or someone, hence I used the lines created by the diluted paint and paint drops to all flow towards one point of the page. By having the paint drops at the very corners connect to the main path midway presents how one’s attention will be forcefully (but willingly) grabbed and drawn in, into the item or person of interest. As seen, the intensity of the ink gets darker at the very end as all the attention is channeled towards that one point, while the beginning of the piece on the left is much more diluted or faint.
Also, I used multiple lines at the beginning to all end in one main path as regularly, our minds will be engaged in doing a few things at once, such as eating, talking, observing, all at the same time. However, when we see something we are attracted to, all these different activities happening in the brain stop and immediately shift their focus onto that one item or person, hence the multiple channels all stream down into one main path, some normally while some very abruptly.
FINAL THOUGHTS
After completing this project, I have come to truly understand the importance of research and experimentation and the benefits they give you, such as finding out about a new or interesting method of doing things and helping me to build ideas. I also learnt how to think more visually. I learnt to be sensitive about how I create my works, Such as why I would put a stroke on my paper at this certain point and what kind of stroke am I using or creating.
I must say, I really enjoyed this project as it has pretty much warmed me up for my next few projects and I am feeling more encouraged to experiment and explore more, and to push my boundaries.