Instructions: move your mouse throughout the image, find the links that are there. One image may have more than one option.
Click here to play
Instructions: move your mouse throughout the image, find the links that are there. One image may have more than one option.
Click here to play
For our upcoming assignment, we were tasked to create a mood board.
To get things started, the fictional film will be about a designer on a quest to make it big in the design industry but through his/her journey to success, he/she loses loved ones and friendships along the way – the journey to success is a lonely one.

Personally, I want to keep things simple and clean and what better way to do that then to delve into minimalism.
For my title sequence, I want to focus on having a lighter background like white or light grey, unlike most title sequences where they are all on a black background.


For my opening sequence, I also wanna focus on using more simple shapes and lines and showing a contrast between organic and structured shapes.
The assigned roles for my film were:
DOP: Fendi
Sound: Simin
AP: Alena
CA: Hannah
Director/Producer: Chloe
In preparation for the shoot, I did up a call sheet, and with Fendi, created a shot-list.:


And my script:


LOOK OF FILM (LOCATION SCOUTING)
I want the film to be set in an HDB flat kind of setting to give that rustic Singaporean/local kinda feel.
Some inspiration or visuals to understand what I mean:
4:30 by Royston Tan


Ilo Ilo by Anthony Chen


The decided location was a room in hall 11 of NTU that had the black windows grill I wanted.
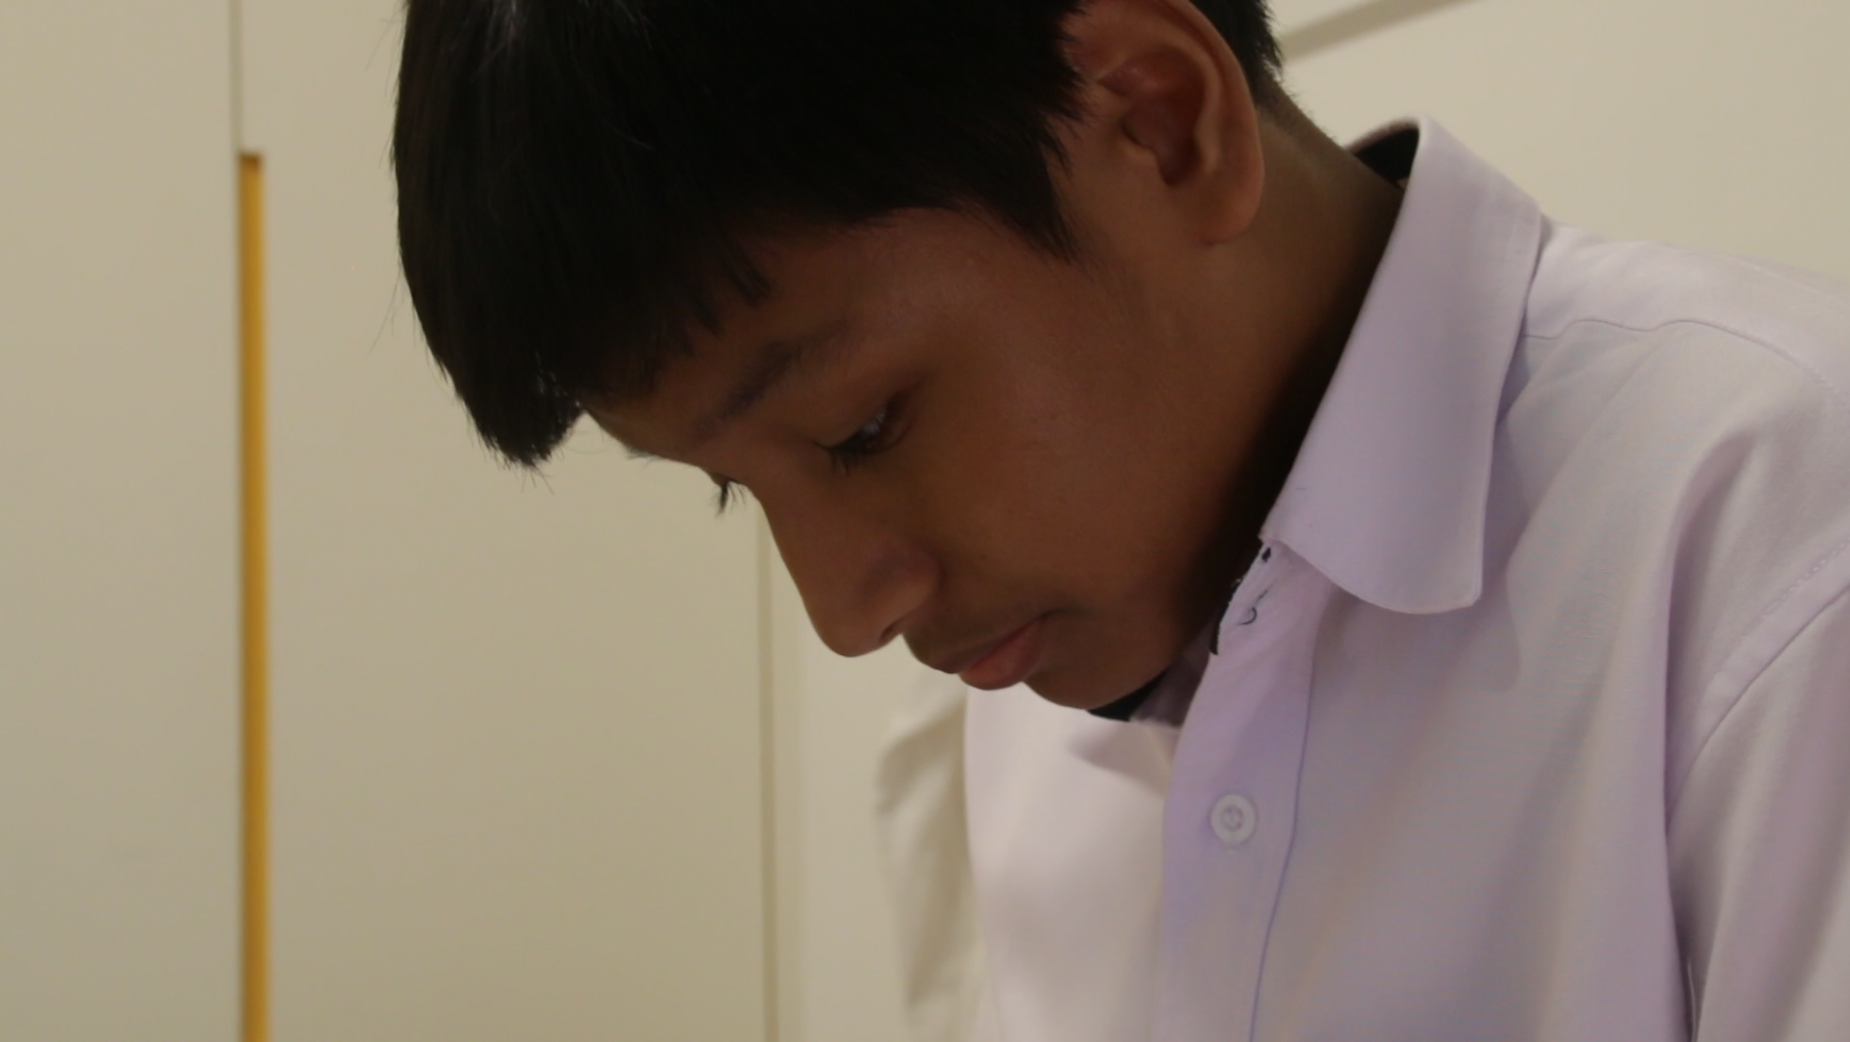
Overall, on the day of production, my shoot went smoothly and we were running on schedule. My actor was also easy to work with! However, there were instances on set where after production was over, I looked back and realized I made some mistakes and then I regretted not being more mindful and aware on set. Before getting into that, I want to break down my 7 shots for Kueh.

Audio: Mother scolding child, child sobbing.
For this shot, I showed the main subject of the argument, the exam paper, instead of the mother and son. I wanted to both show more yet reveal less – let the audience experience the scene through sound instead of sight. I also wanted to capture this tranquil like scene of the paper bathing under the light seeping through the window grills in contrast to the argument going on off-screen. I think an additional touch that would make this shot look a little nicer would be if the dust in the room could be seen floating through the sunlight. Ultimately, this shot lets the viewer focus more on the argument rather than the characters themselves, and hopefully draws them in to want to find out more about this boy and his mother.

Audio: Child sobbing
For this shot, we again focus on the exam paper, but this time we see the boy alone (we know that the mother has left in the previous shot). This time, I went for a much more intimate shot (aka ECU/CU) – a subjective shot that would bring the viewer into the perspective of the boy.

Shot 3 is a continuation of Shot 2 and reveals the boy to the audience. I went for a close-up, low angle shot to again bring the viewer closer to the boy and allow them to empathise with him.

Still in the same scene, we this time bring the viewer into the perspective of the mother with an over the shoulder shot, showing the viewer what she sees/what she is looking at. I chose to switch perspectives because I wanted to show the beats the mother goes through in this shot. She peers at her son crying in his room, is saddened, feels guilty for giving him such a harsh scolding, then decides to leave to do something to make up for it.

In shot 5, we have another close up shot of the boy waking up from his sleep, again to create an intimate relationship between the audience and boy, as well as allow them to empathize with him.

Shot 6 cuts on action as the boy gets up from bed and walks out of his room. I used this shot more to help with the continuation from here to the last shot where the boy moves to the dining table, but I also wanted to use this wide angle shot to show the boy alone in his room. and just to capture the moment of him waking up, sitting on the bed, still drowsy.


For the last shot, we have the exact same setting and framing as the first one, this time there is a packet of kueh on the table that the boy opens and eats. The mother then comes into frame and asks him if he likes the kueh to which he says yes. I wanted to convey the mom buying him the kueh as a sort of apology for the harsh scolding she gave to her son earlier. The kueh is also supposed to be the boy’s favourite food but I’m not sure if it can be easily inferred (thoughts?).
With the use of the same setting and framing, the film comes full circle. It contrasts the beginning with the end and shows the change in the relationship between the mother and son or simply the way their relationship has always worked (meaning how the son understands his mother’s way of apologising to him and how they forgive each other and move on as they would always do).
After the shoot, I sat down with the actor to record his voice, getting variations of his sniffles and lines.

Some thoughts on the production of Kueh: I generally did not like how my shots were taken. The shots were only taken this way because I neglected to check the shotlist for details on what lenses I wanted to use to create what kind of depth of field, etc. For instance, for shot 5, I wanted it to be a much tighter shot with a very shallow depth of field to create the blurry, dreamy like atmosphere surrounding the boy. I think that would have better complemented the emotions of the boy in that scene or his immediate feelings (the sleepiness/drowsiness)
I shot a lot of my film without audio. Everything heard besides the boy’s and mother’s voice is foley! I also used some sounds from this website freesound.org to get sounds that I didn’t manage to get.

As seen above, I used a simple atmosphere sound clip for the base of the entire film (bottom track), then used other sounds like footsteps, door slams, etc, to create the entire atmosphere of the scene. A lot of my time was spent on the audio of the film which I am pretty happy with. I learnt how to make sounds sound far away or in another room as well which was pretty fun and really helped to build my scenes’ soundscapes.
For my visuals, I did not do much besides stabilising some clips and also colour grading the entire film. I have yet to master colour grading and hope that I will be able to colour grade better as the semester progresses!


As you can see, the colour grading I did was very suttle. I washed out the colours a little to create a more rustic/vintage and dreamy effect, much like the films I had referenced earlier – ilo ilo and 4:30. Hopefully, I can do some significant and good colour grading in the near future.
The class came together to watch everyone’s works. Here is my take on the screening:
I was really blown away and inspired by all my classmates. All their stories were really creative and made me think “damn I should have done that”. Those who said they were not good in film had, I found, the most creative stories that were also, technically speaking, well executed. I couldn’t tell that they hadn’t had much experience with film. The screening made me feel inspired to really push my creativity beyond my limits for the following project and to do something out of my comfort zone (which will probably be humour/comedy).
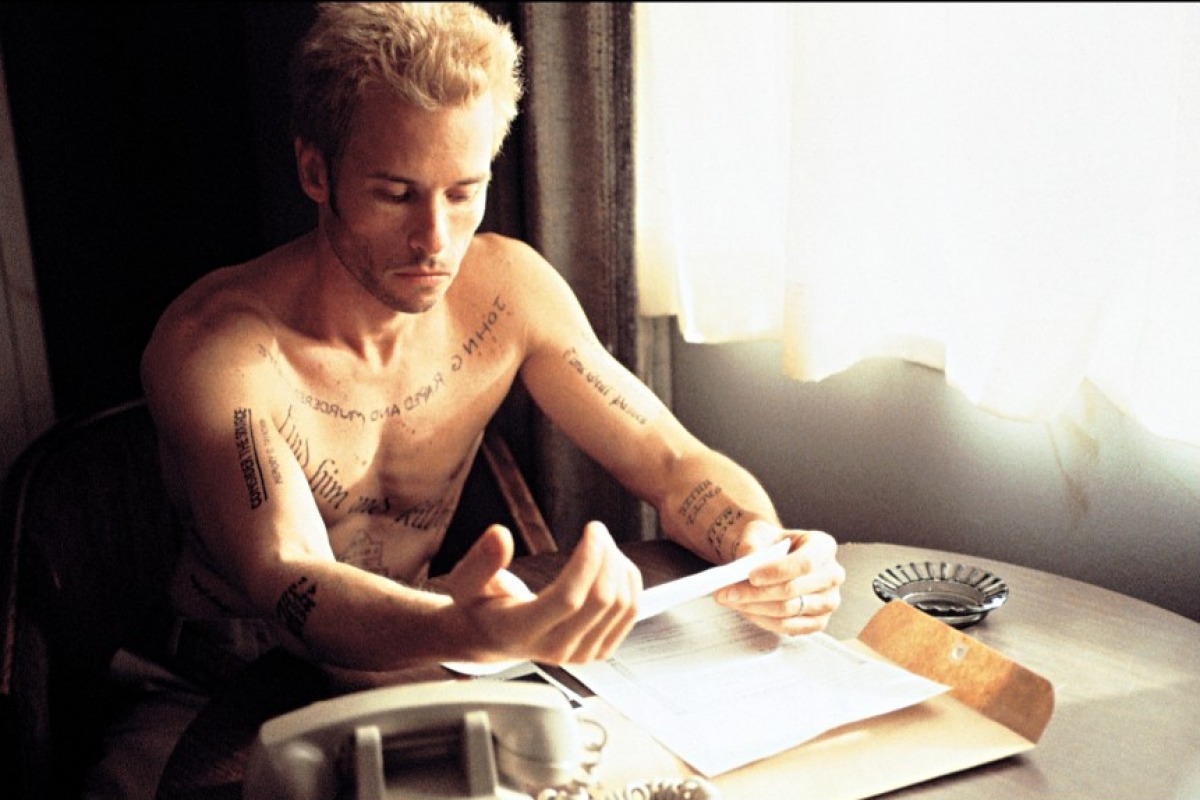
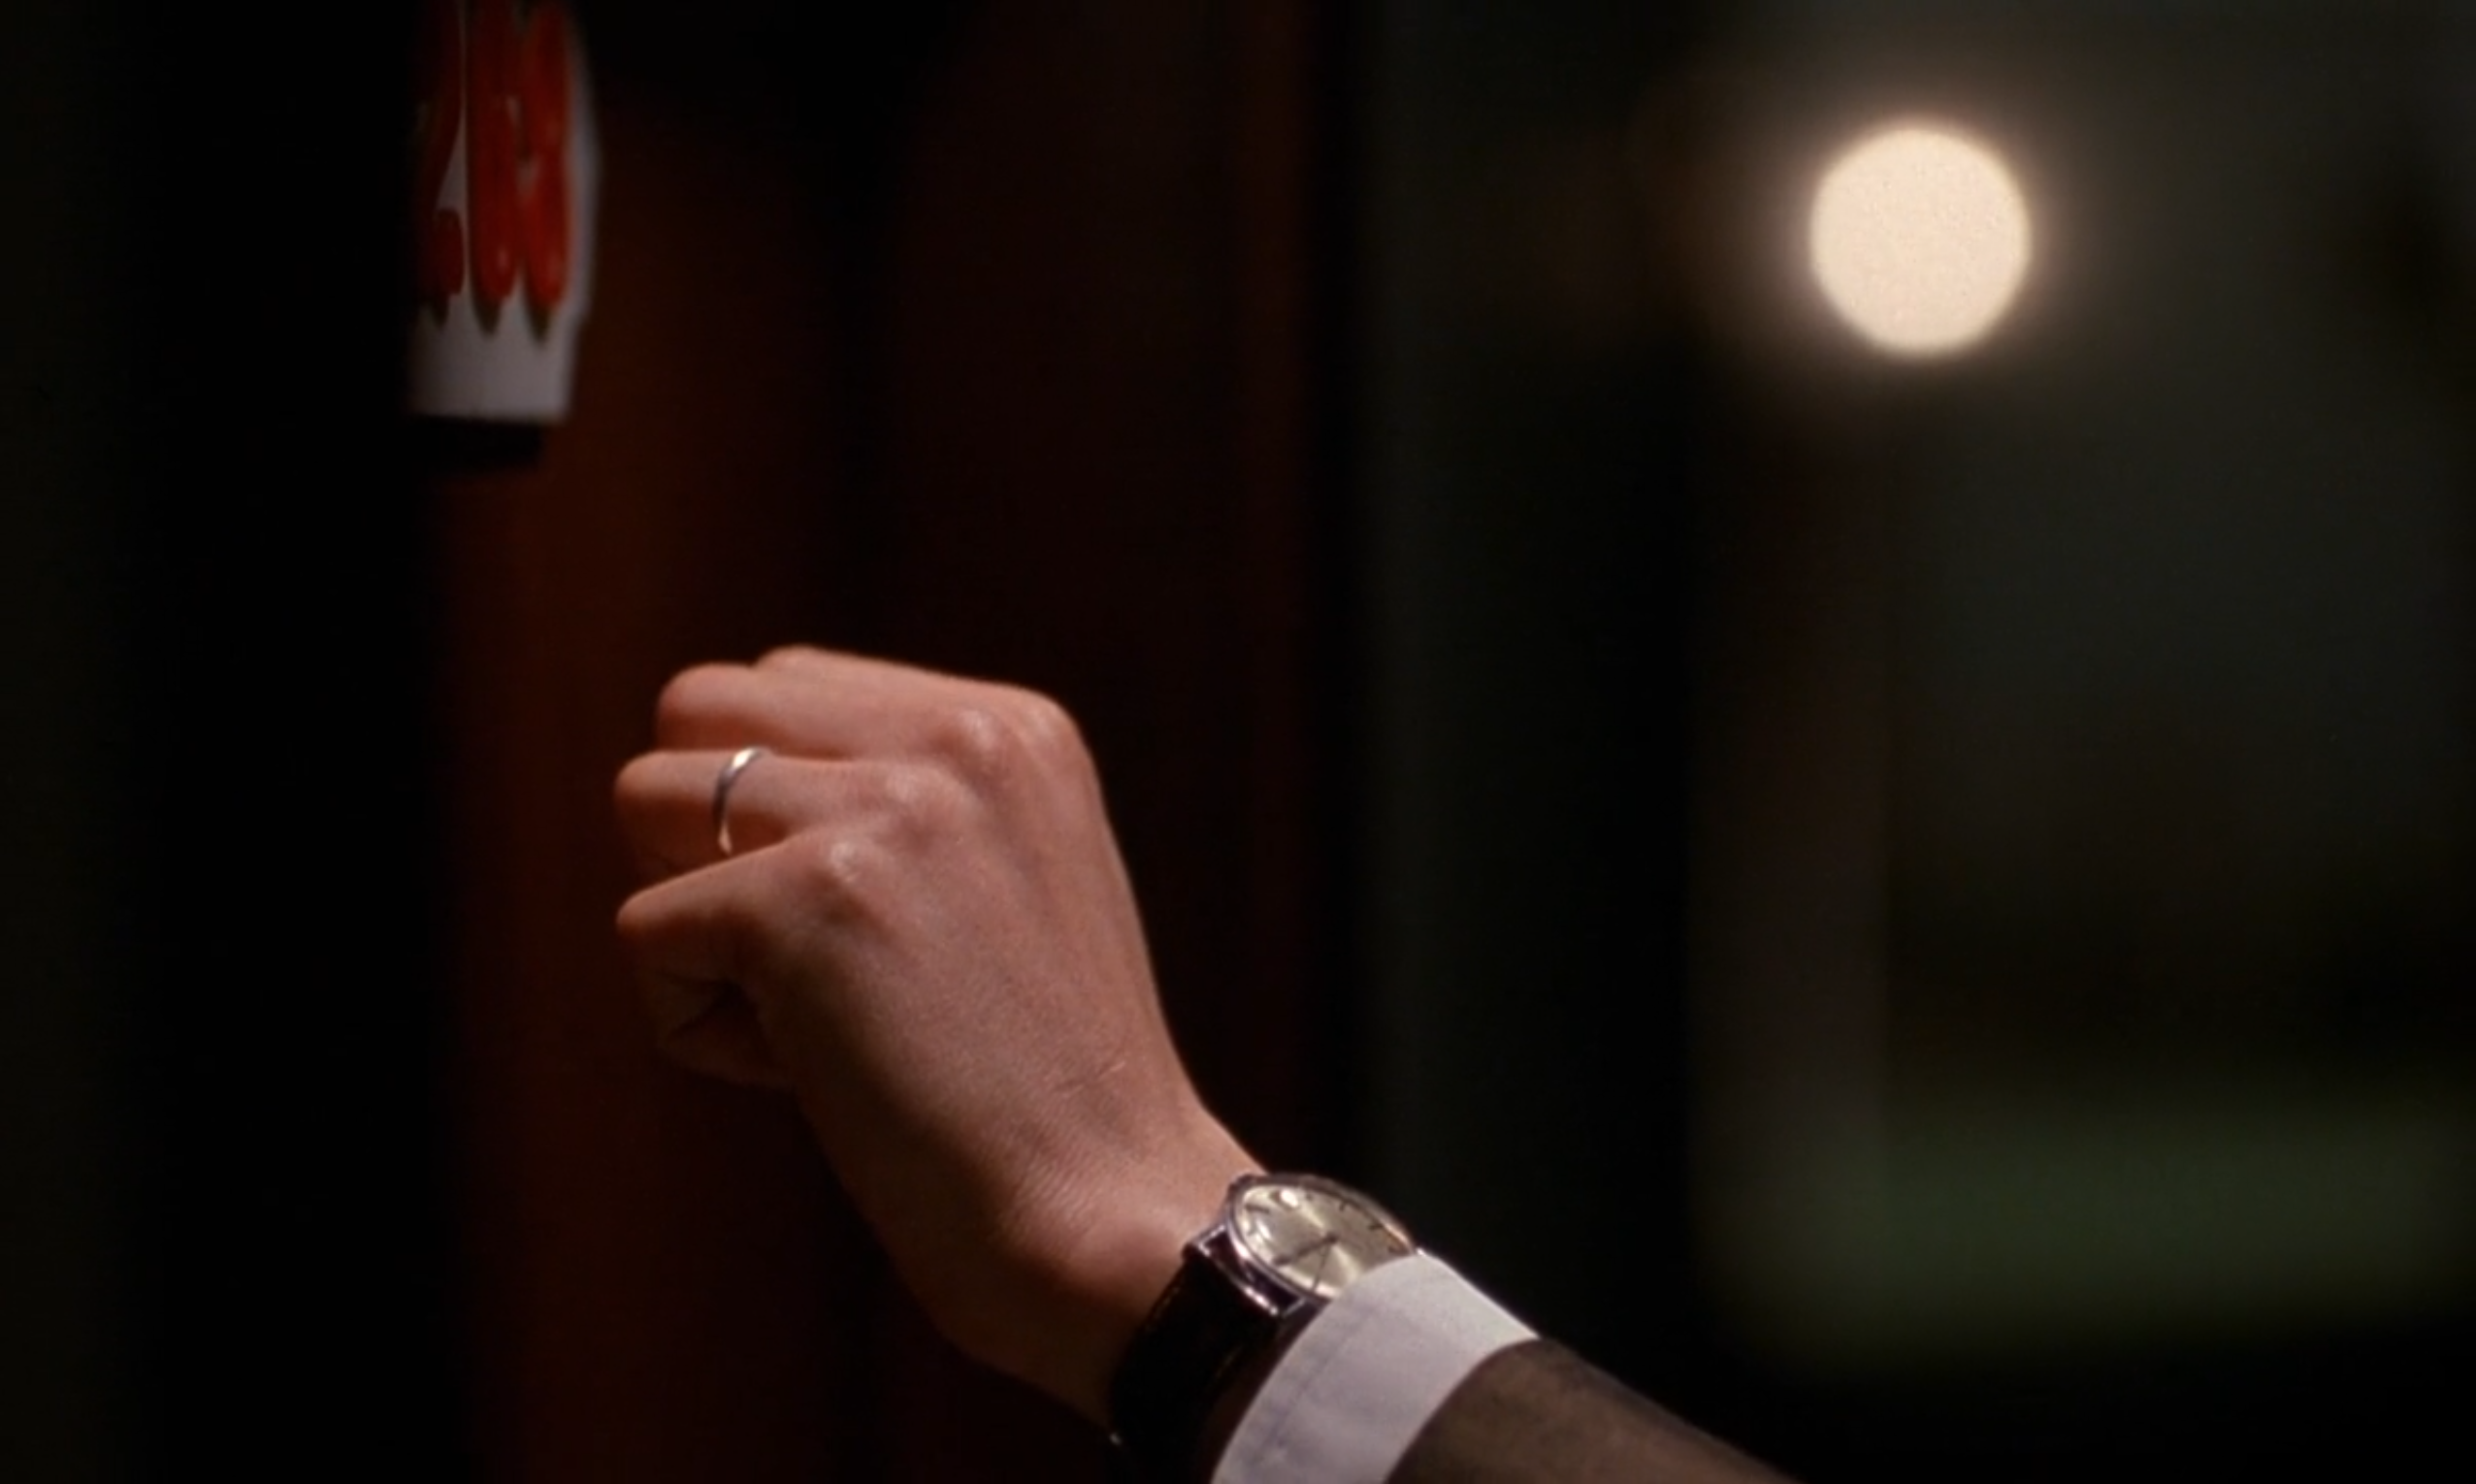
For this project, I decided to go for an existing character from a film I like:
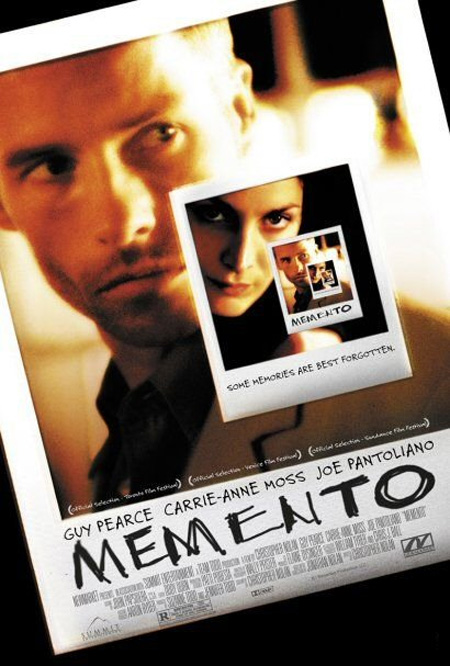
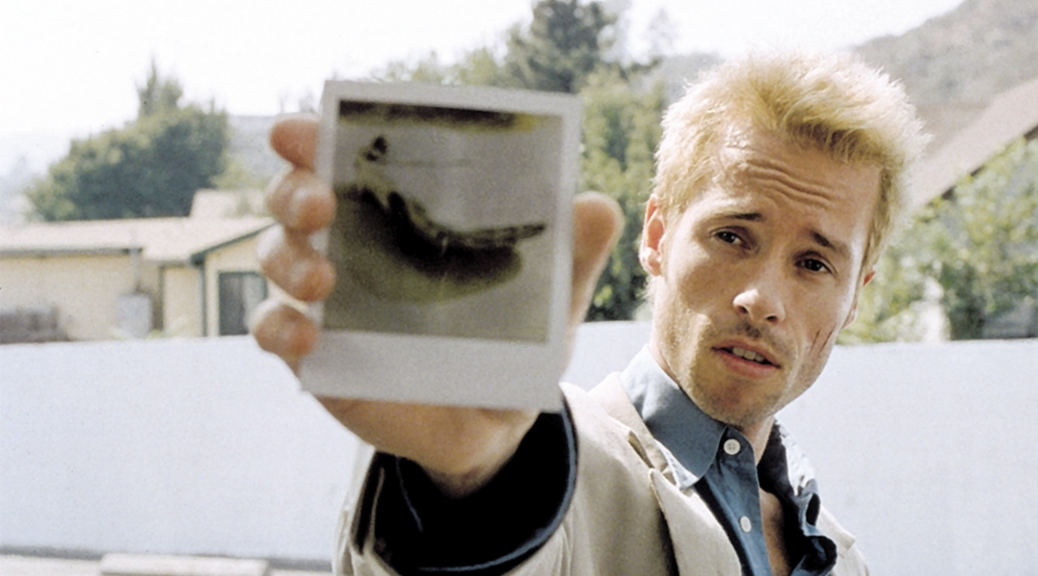
Leonard from Memento.
I decided to use his habit of tattooing his facts that as a way to portray him and his character in this assignment.
Here is my work in black and white:

and in colour:
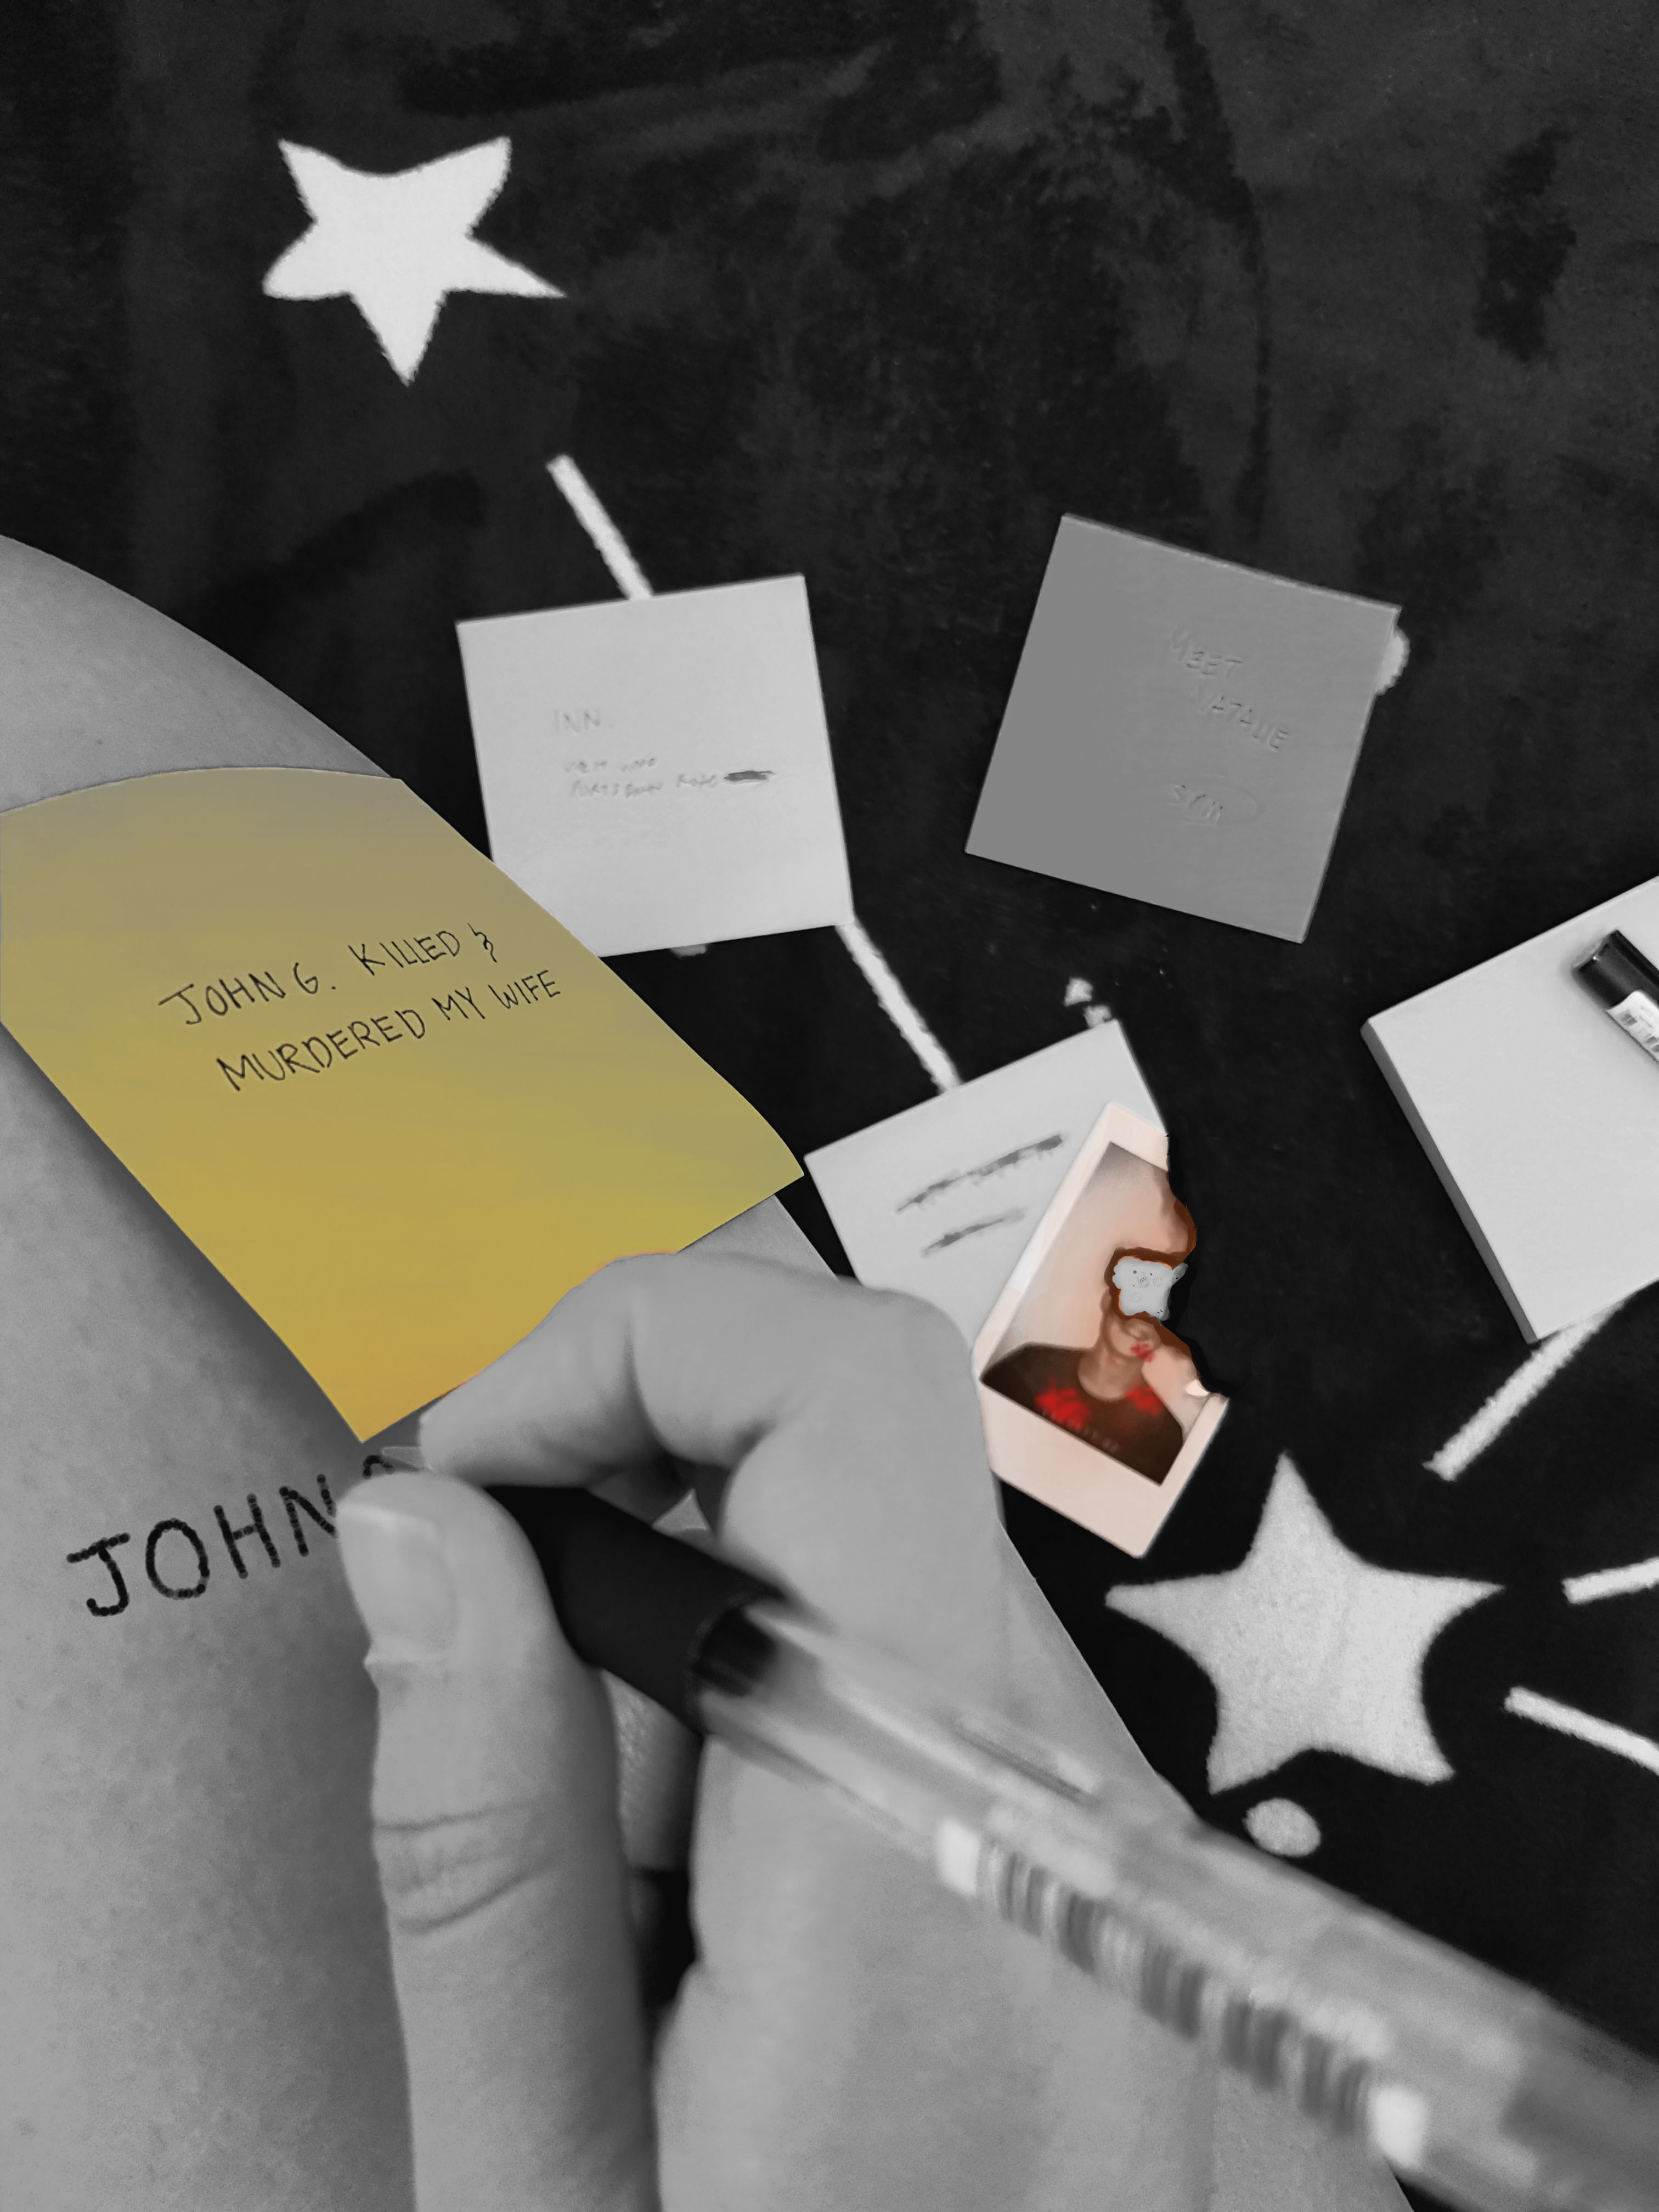
I wanted people to be able to tell who I’m trying to represent right off the bat, hence using the tattooing, notes, and a burnt polaroid to represent Leonard.
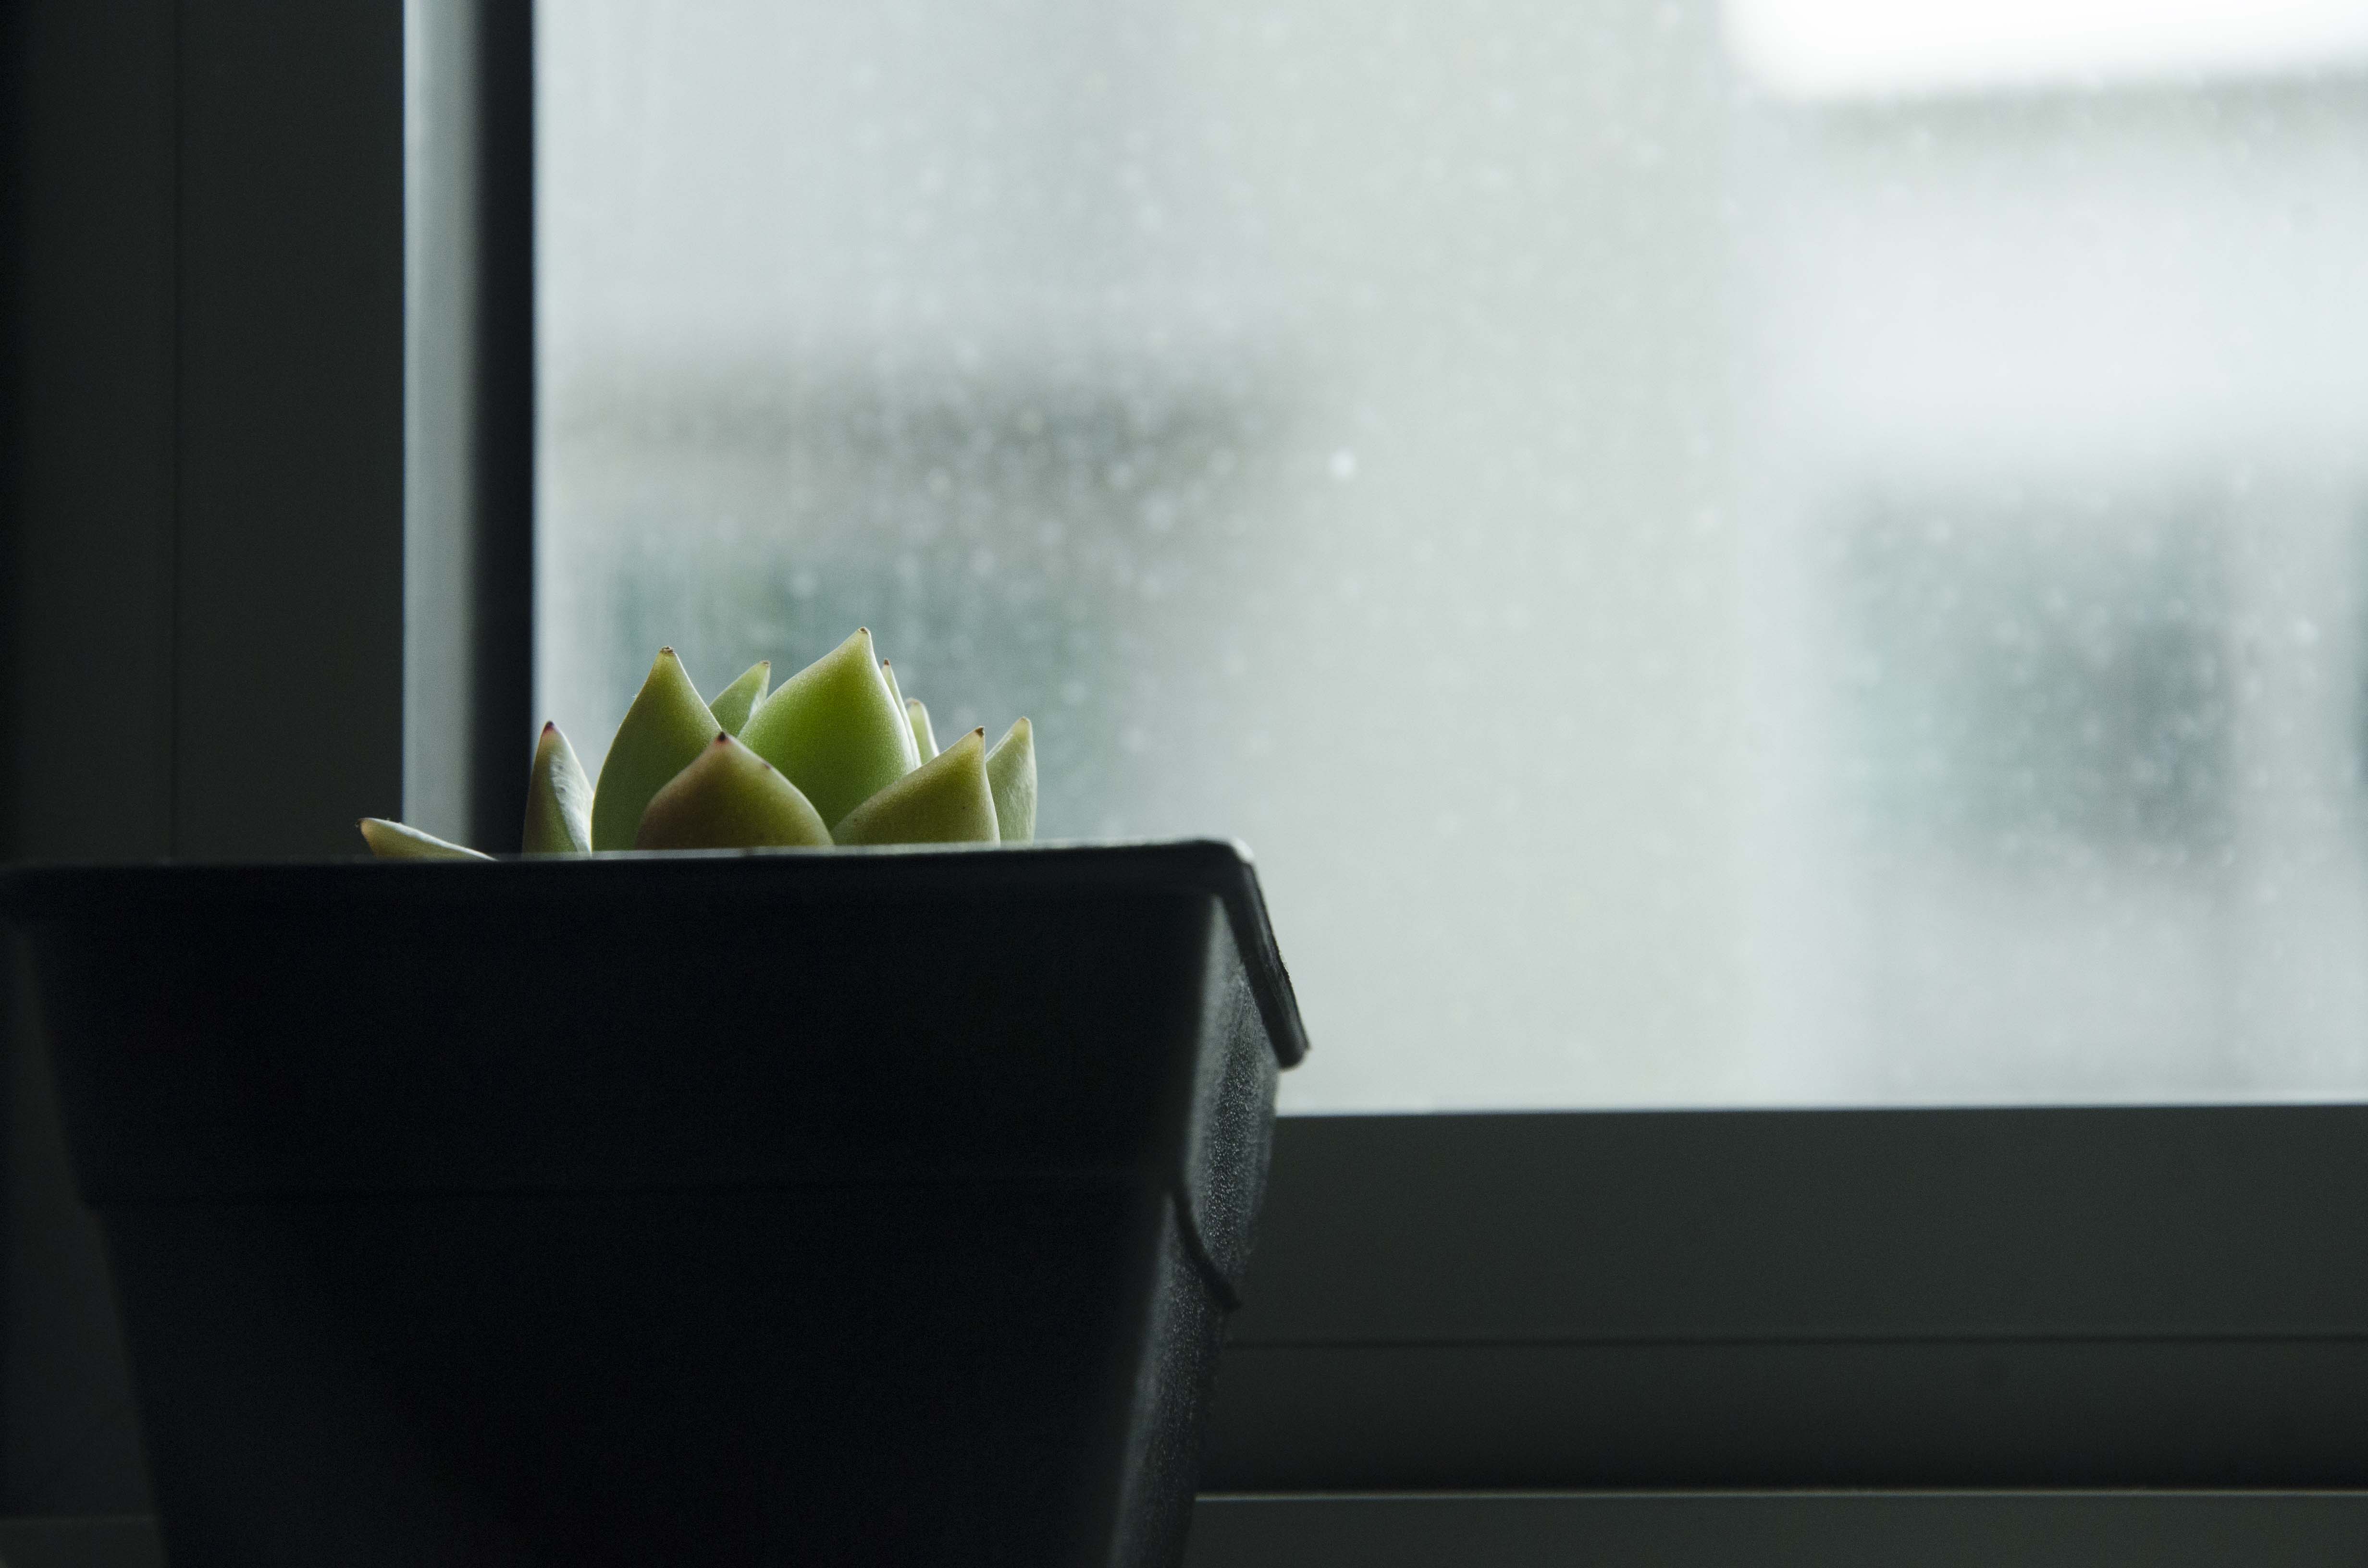
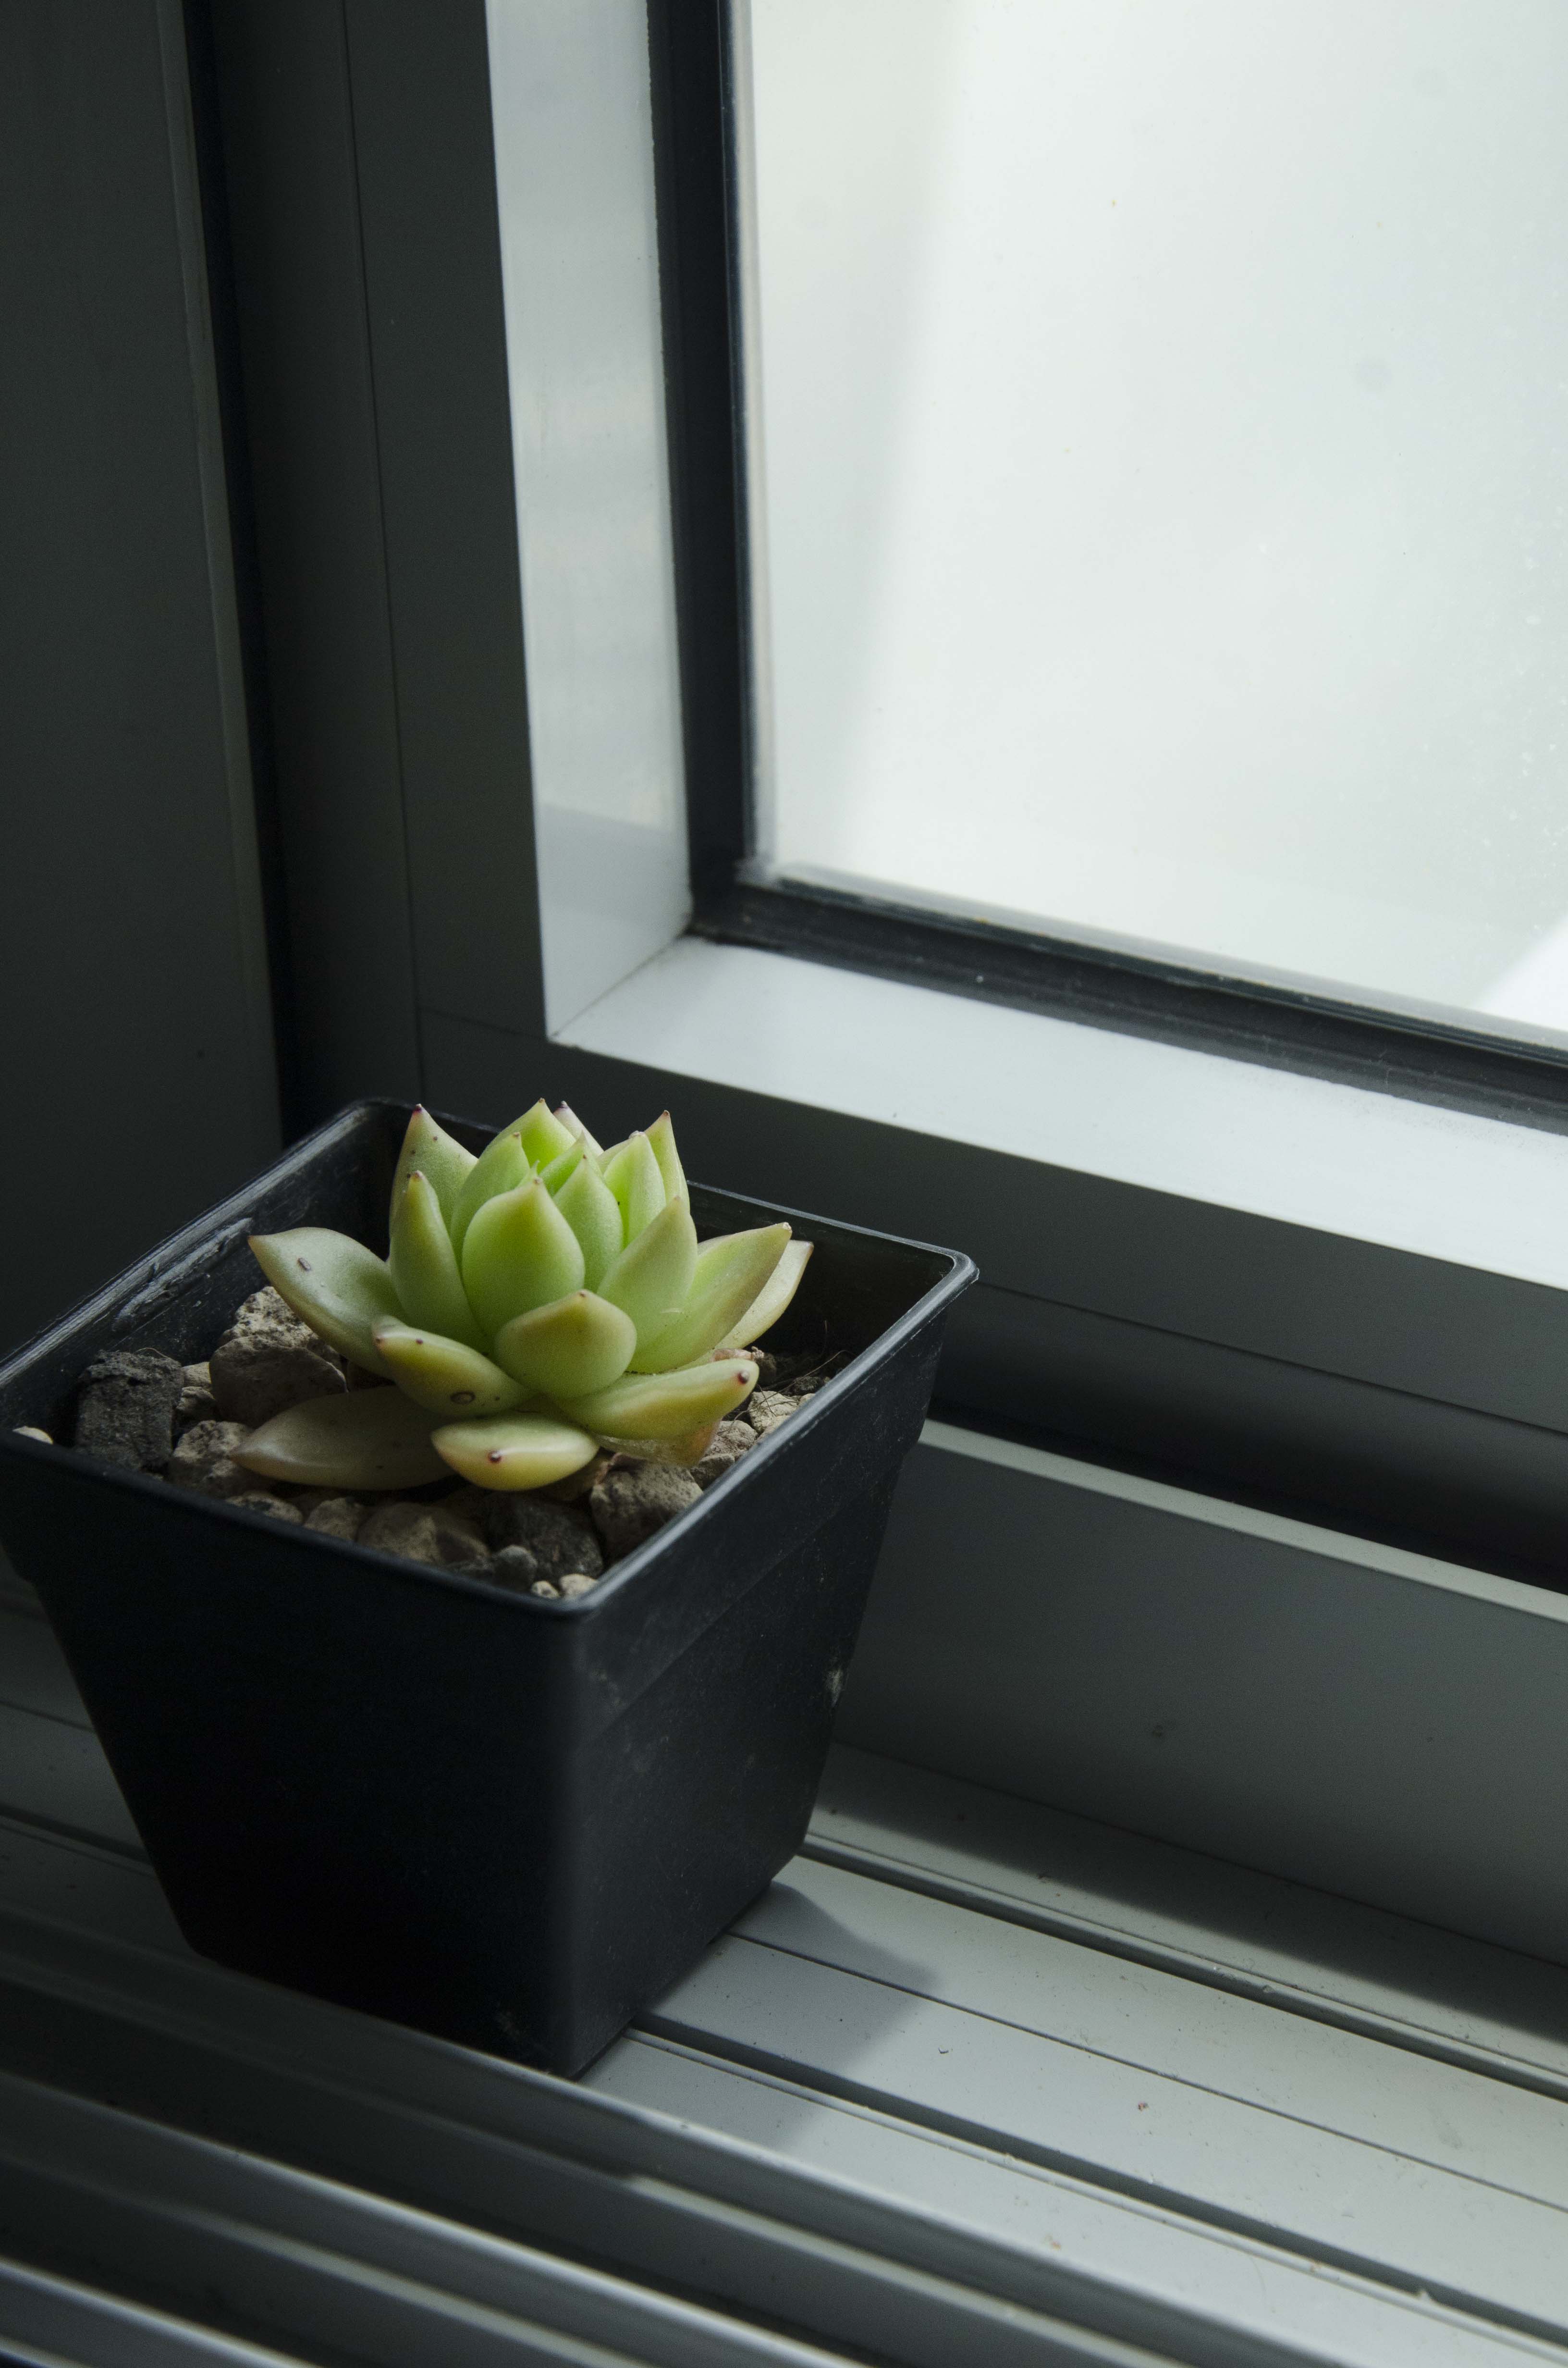
Exploration with camera settings and camera angles to represent my relationship with my subject.
Here are my selected 5 shots:
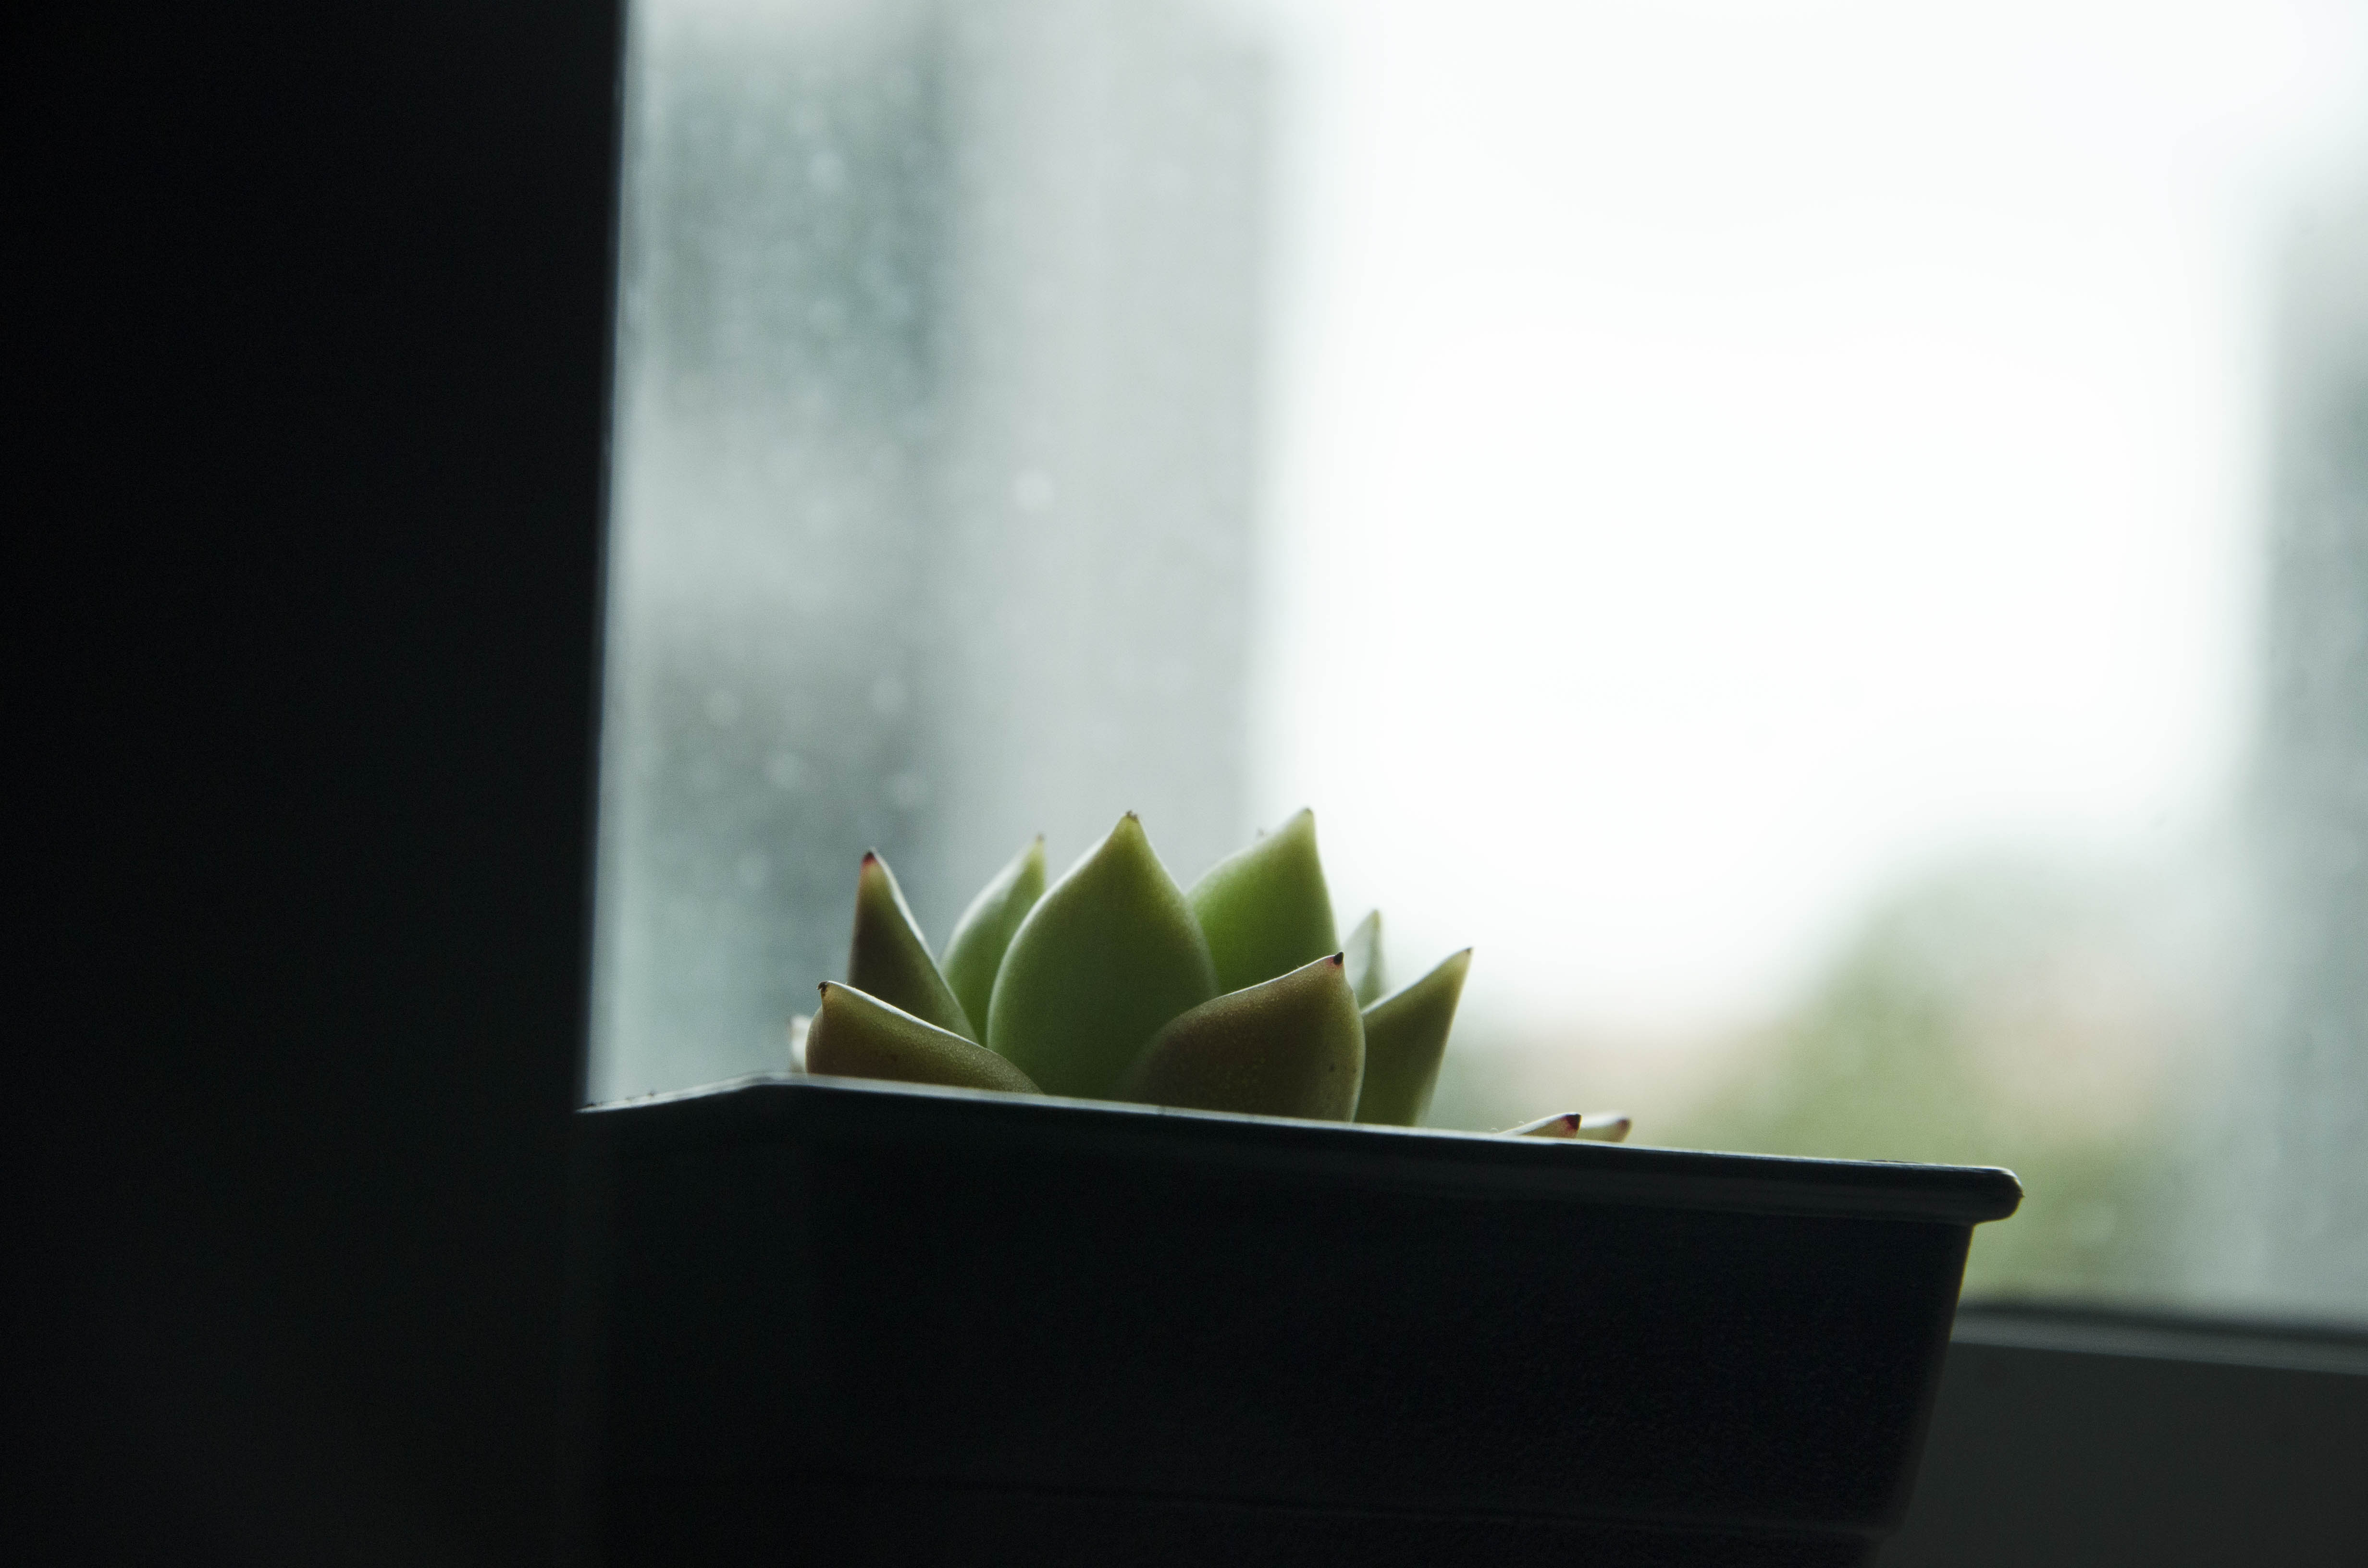
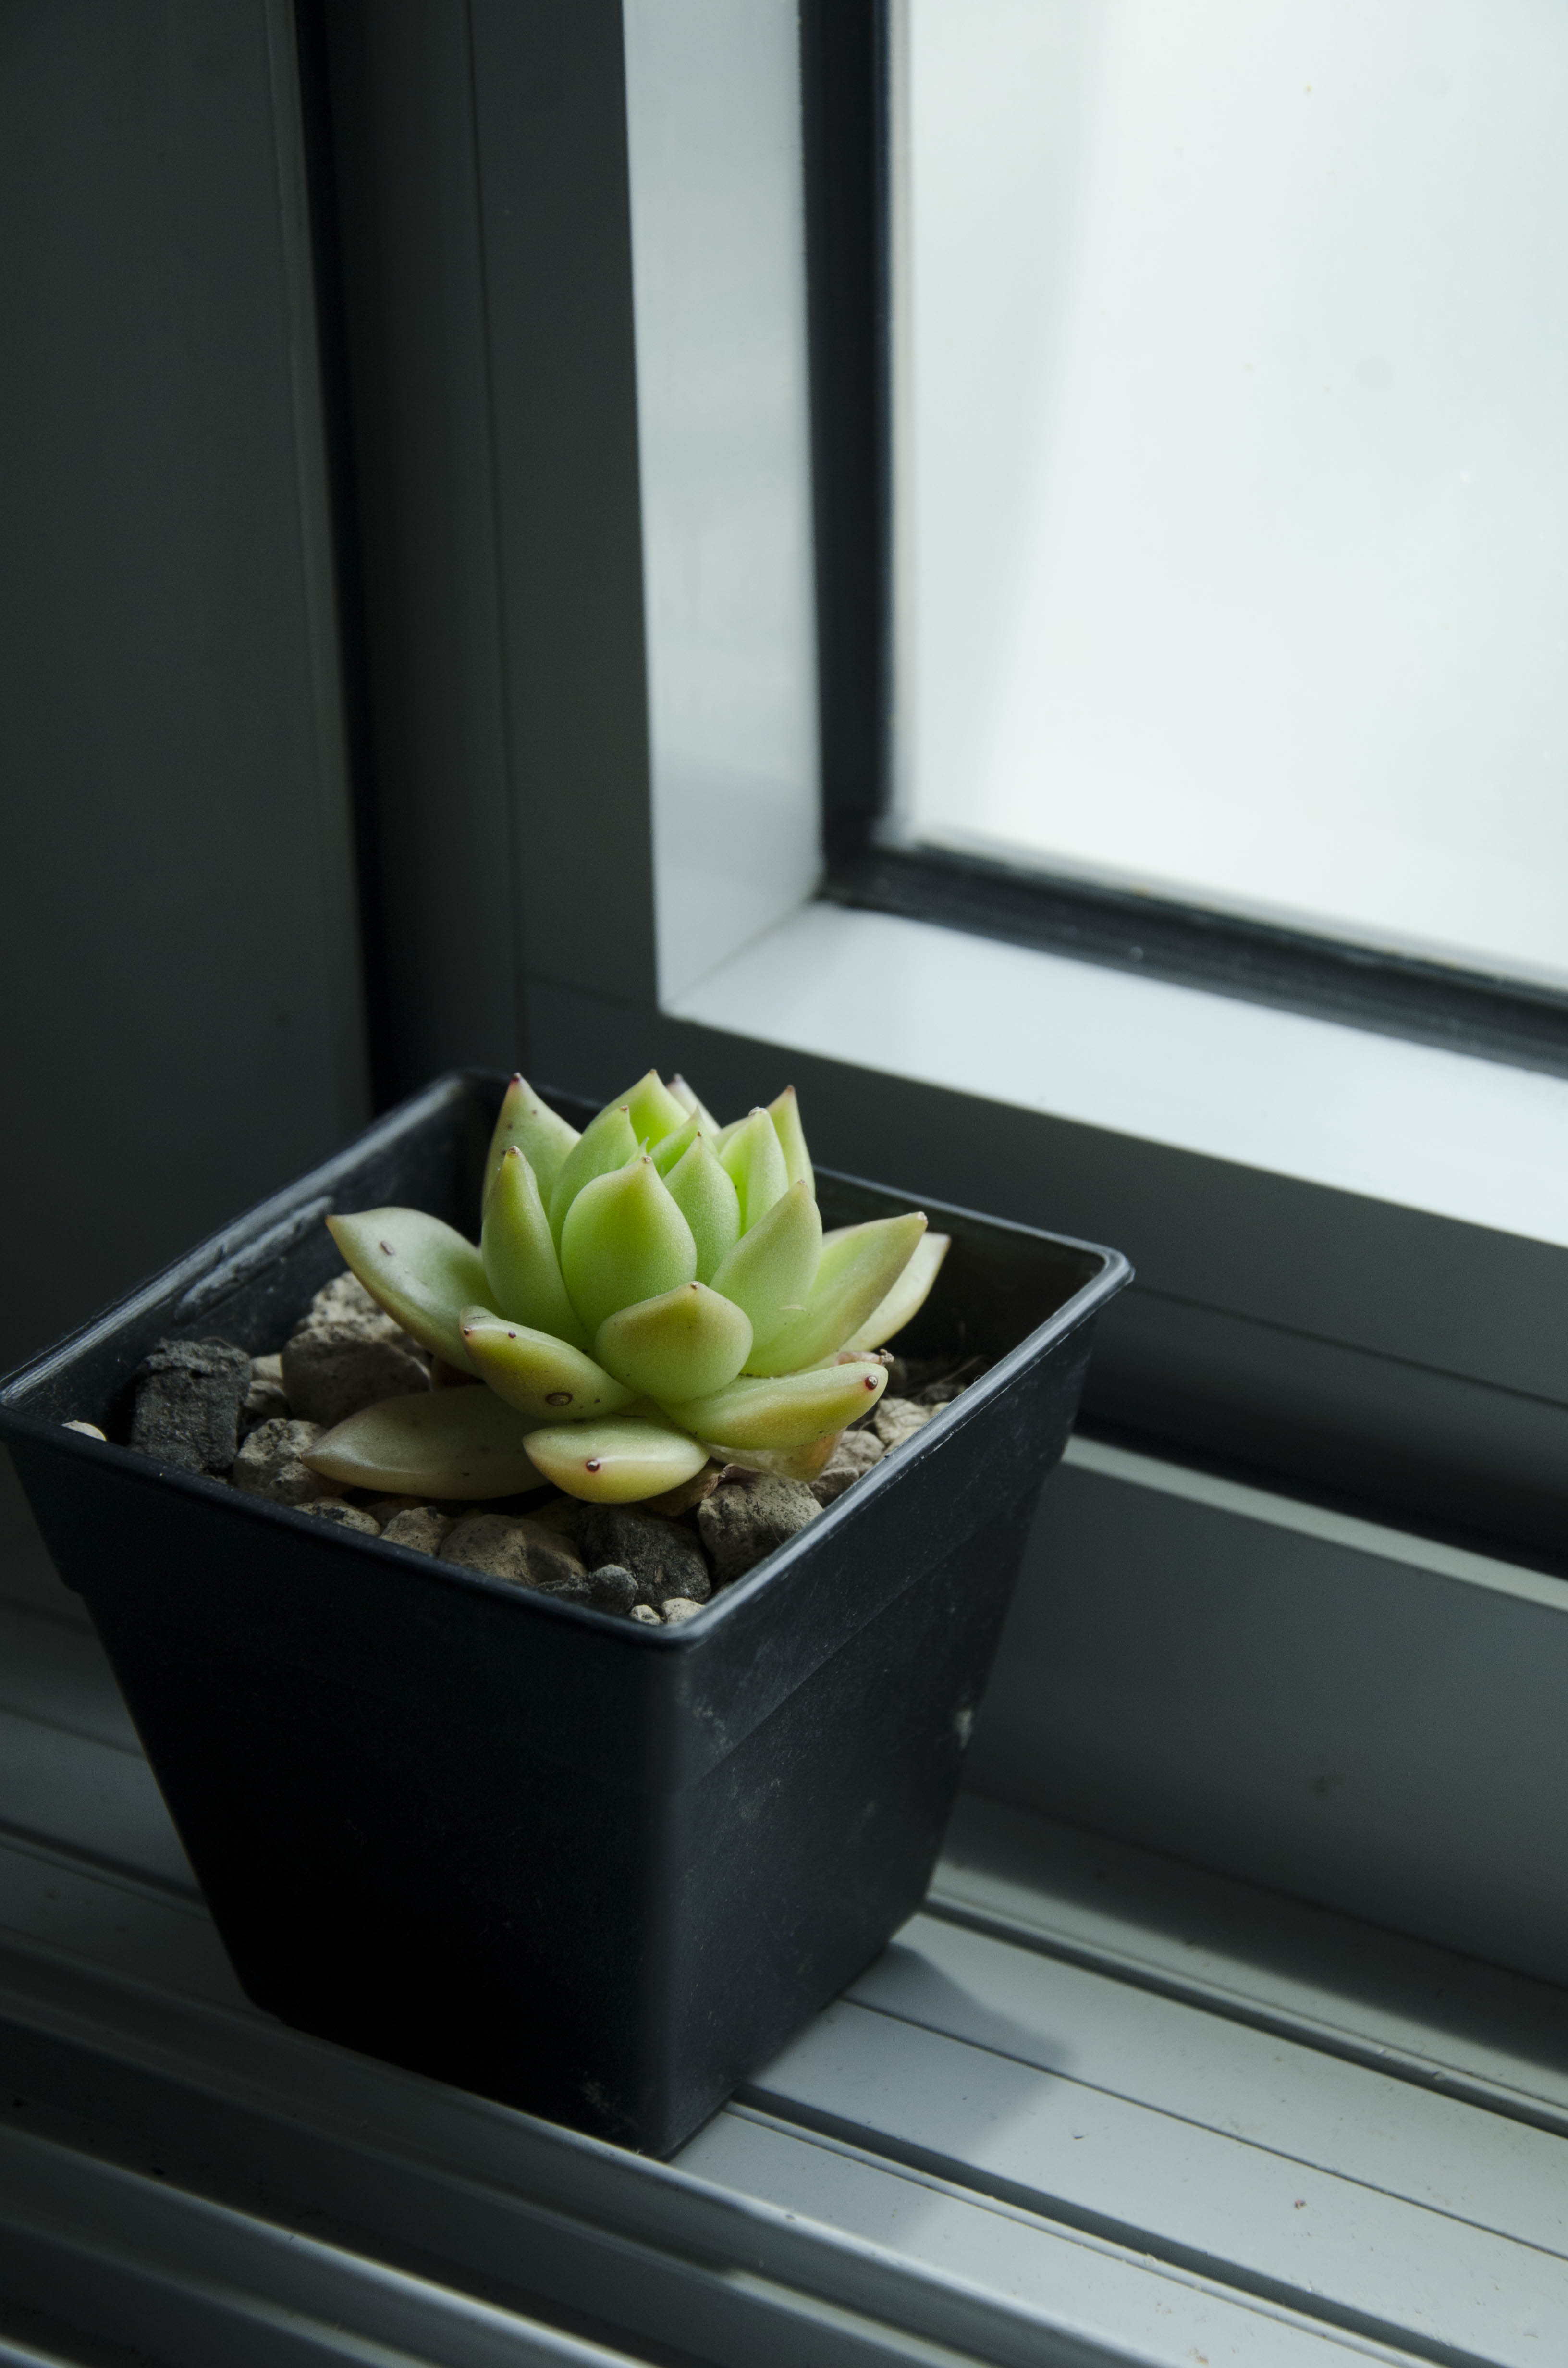
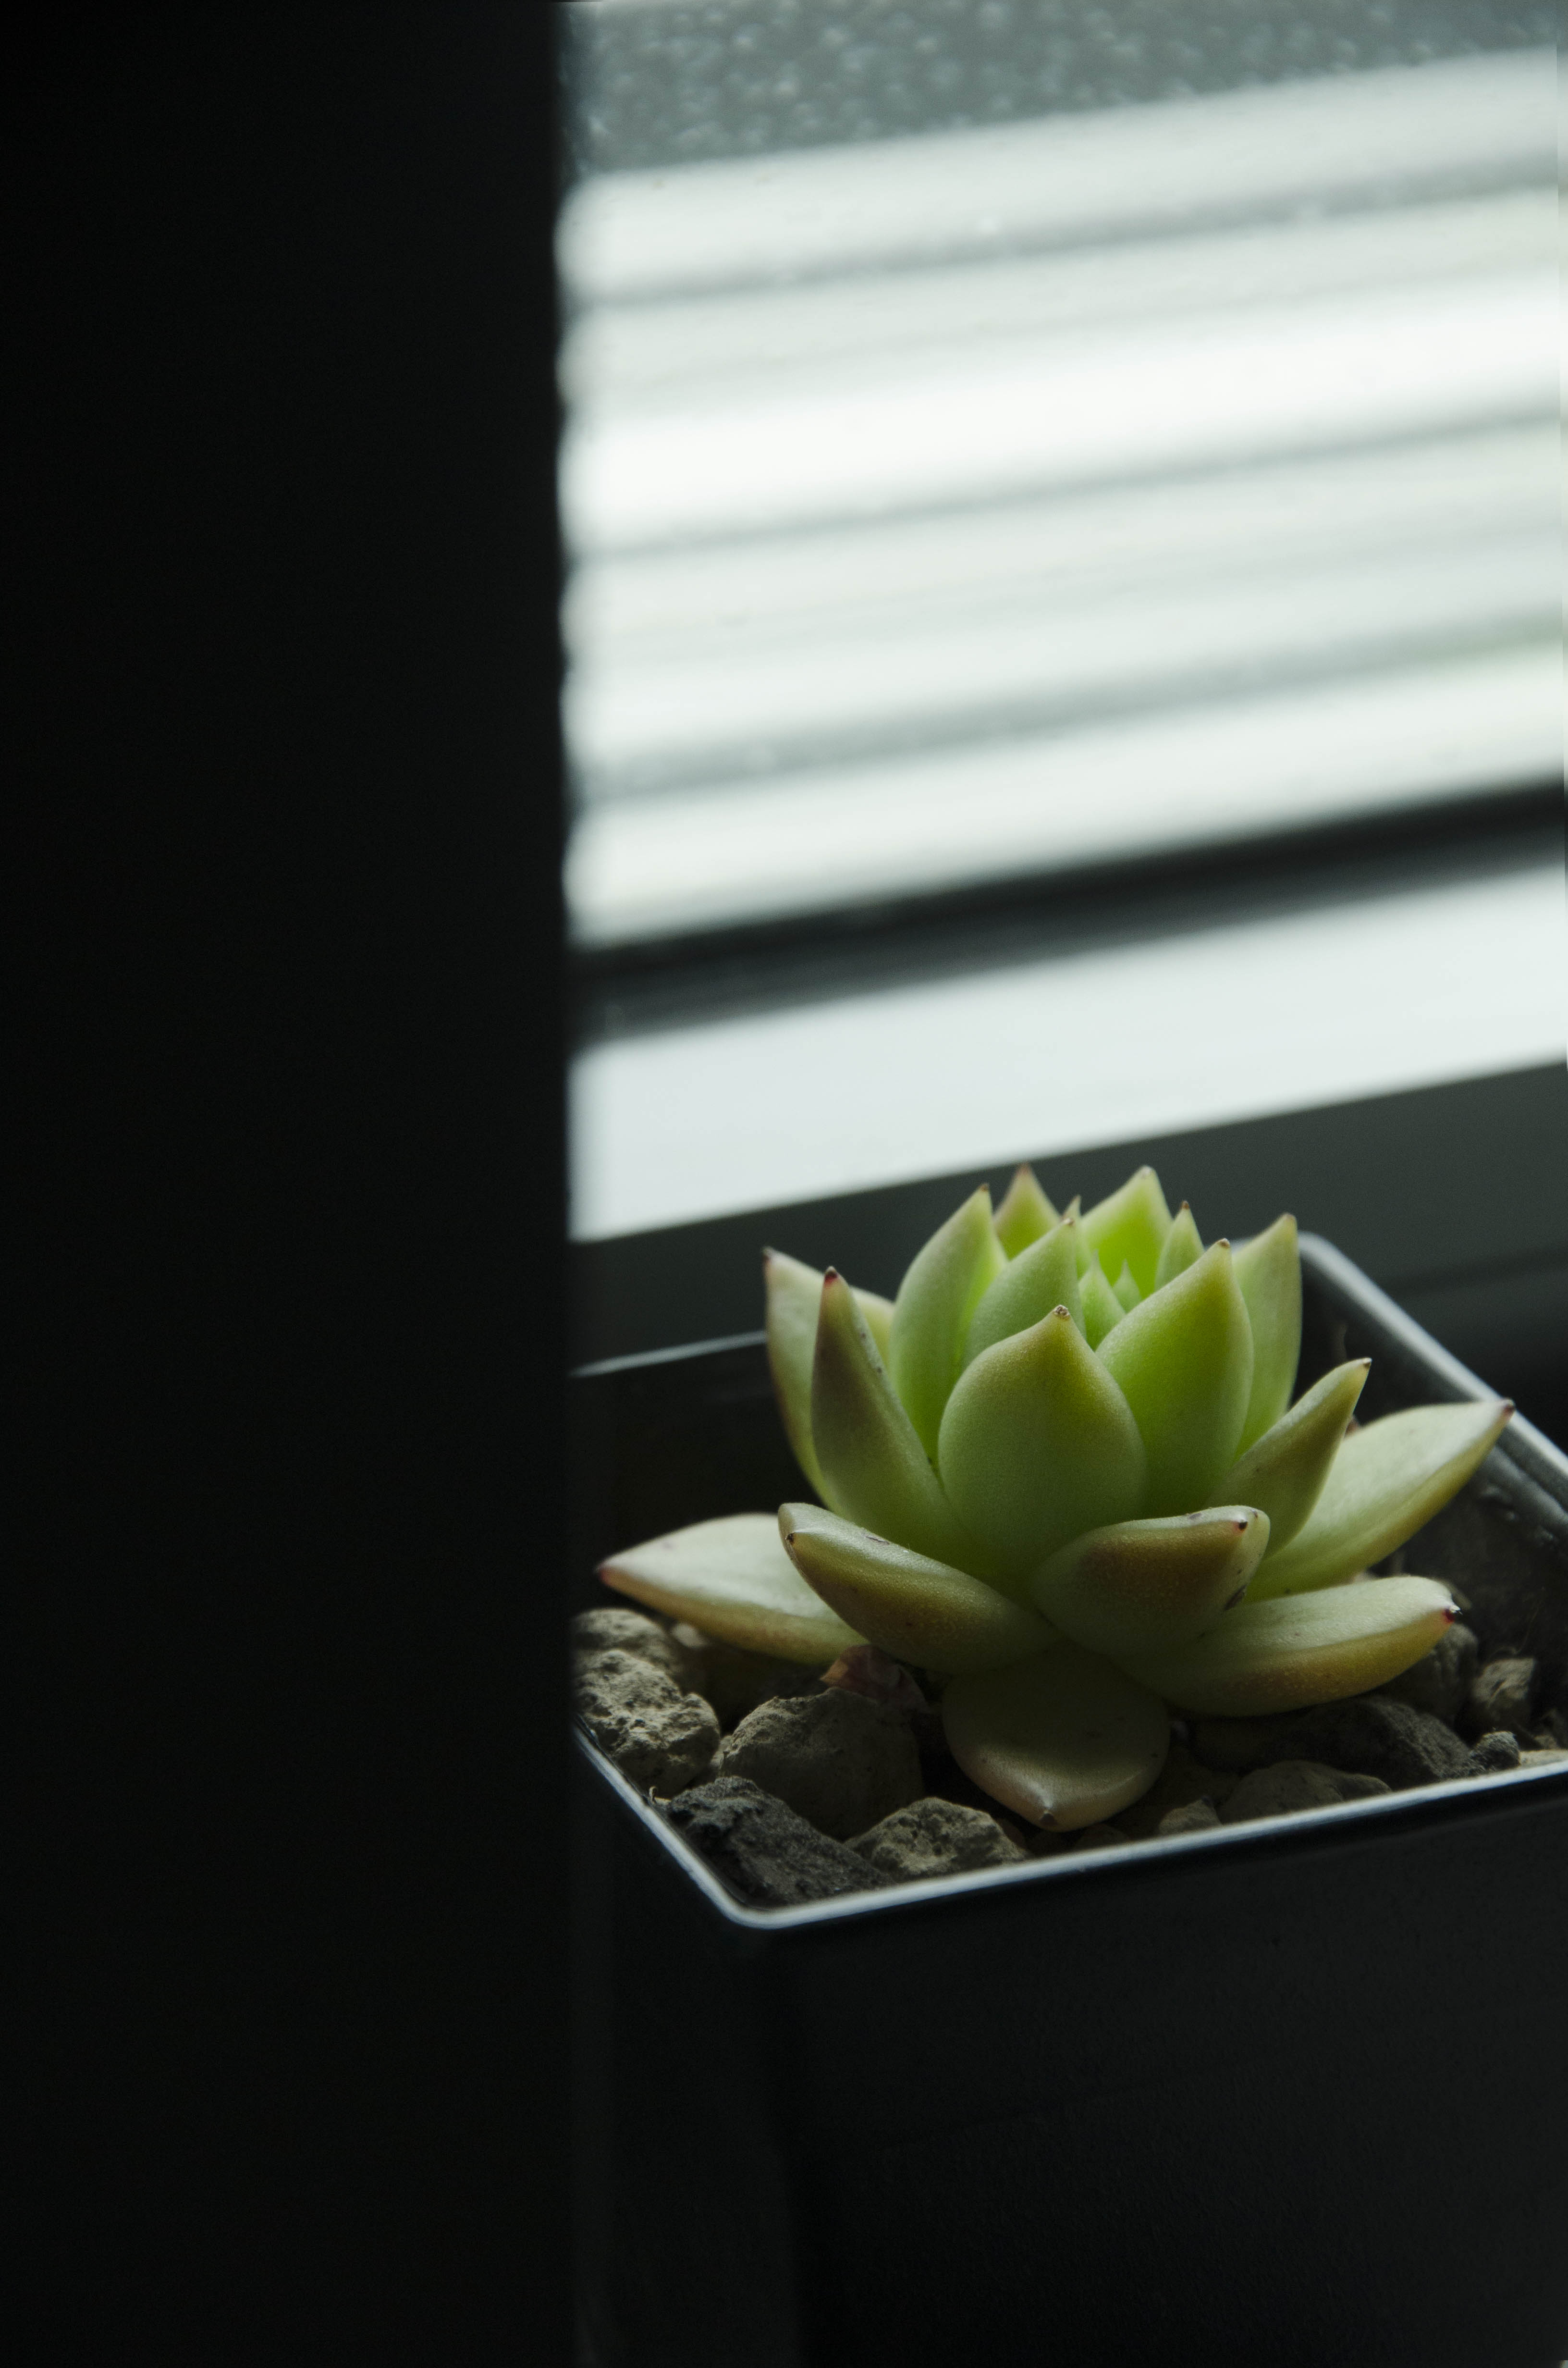
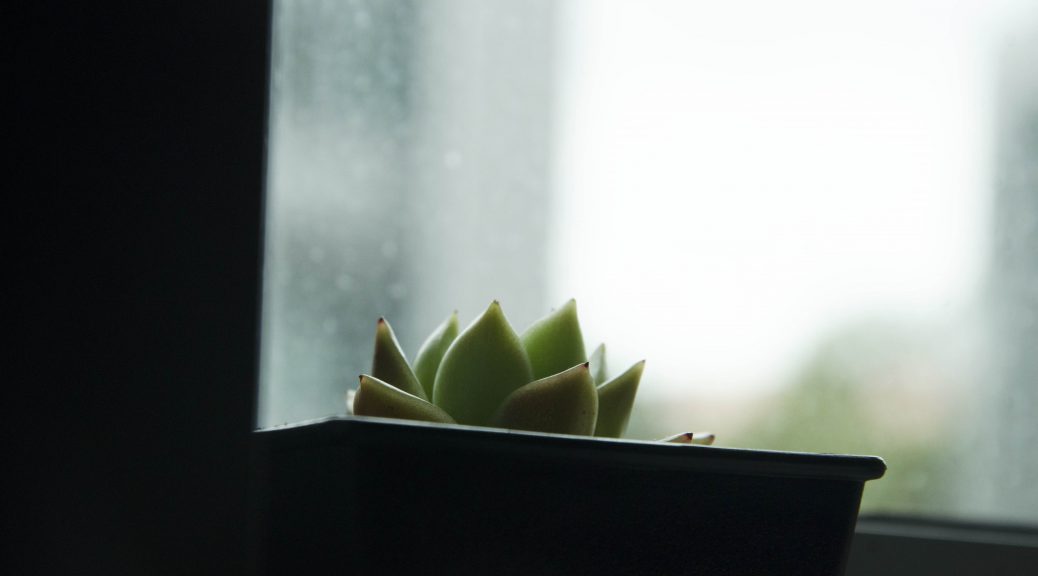
And my favourite:
I chose this image because I felt the angle best represented my relationship with the plant. For instance how I’m always looking down to make sure that it is okay, and how this angle makes the plant look fragile. I also used the surroundings to frame the plant. The overall mood and framing also make the plant look lonely which is one of my aims because I do feel that it is a lonely plant, sitting by itself on my window sill.
Feedback: Image could be cropped further as the black is dominating the image but if it is to show the environment surrounding the plant then it’s okay.
For this project that we were given – creating a 7 shot sequence/film using the theme ‘seen and unseen’ – I want to work with the nuances of a relationship, or rather how true feelings between two people or sometimes or often kept hidden. What is shown on the exterior is not what is really felt in the interior.
My inspiration for this concept comes from the film In the Mood for Love by Wong Kar Wai (one of my favourite films). The two main characters both know that their spouses are cheating on them with one another. They try to figure out how they should resolve this but end up having feelings for one another in the process. These feelings are not said by the characters but can be seen through their actions and hidden meanings in their speech.
Some shots and scenes that inspired me:


All scenes above have an element of seen and unseen (along with most of the other shots in the film, really) where the audience has to keep an eye out for details in other to infer what is being shown or rather not shown to them.
This is it, the last submission for Foundation 2D!


October has recently passed and with that, Halloween Horror Nights as well. I’m not good with scary things at all. They totally break my calm composure that I always like to maintain.
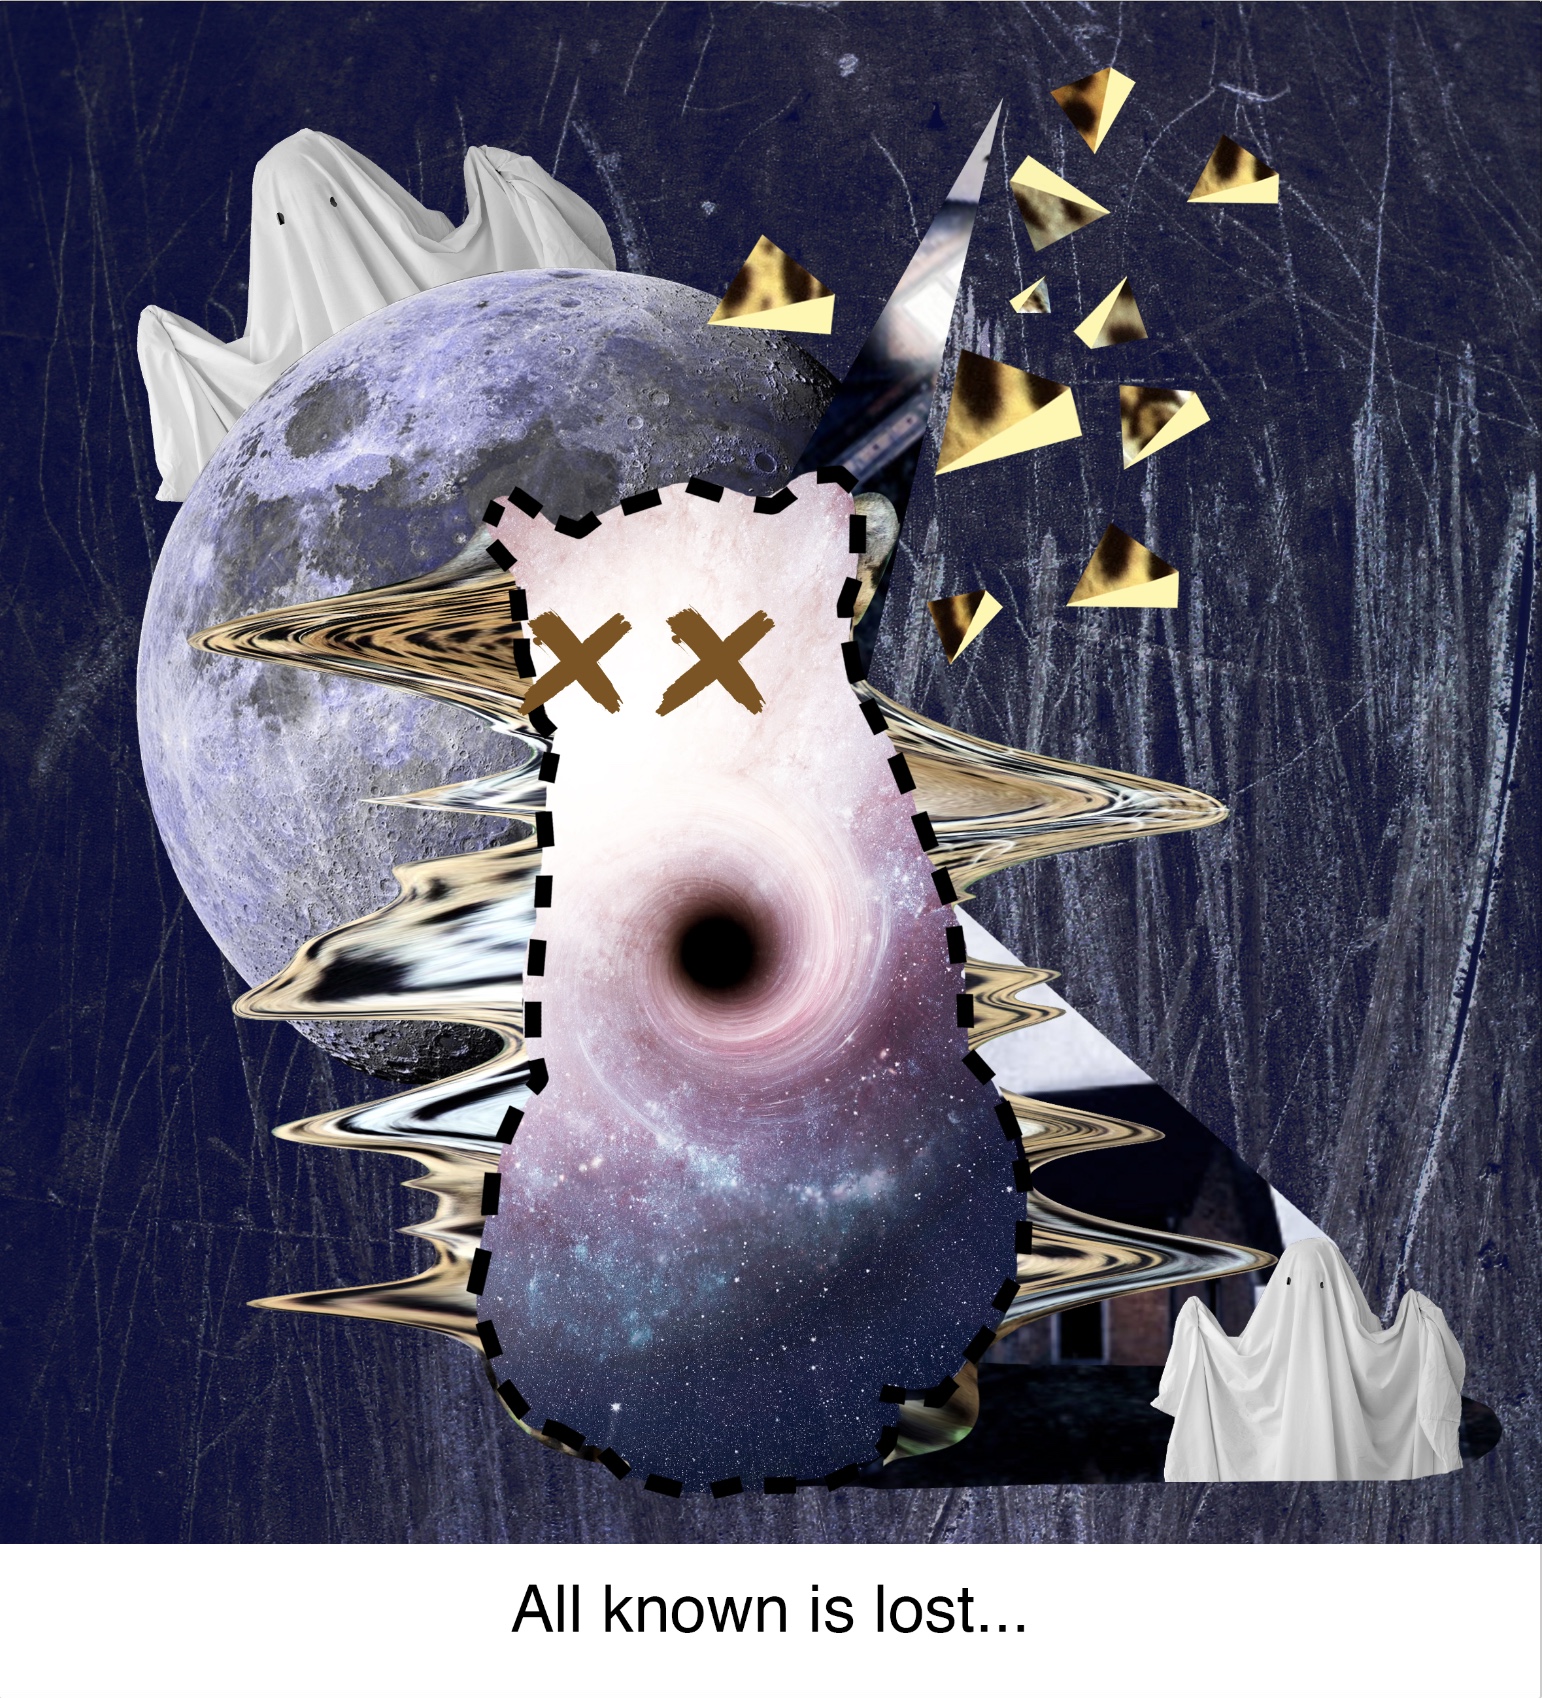
Here I chose a jaguar to represent me at my peak, agile and capable. However, when I’m faced with a haunted house, I completely lose my sense of composure and become a blind log that my friends have to drag through the haunted house. I placed the haunted house in a space like setting because haunted houses are definitely not a part of what makes up my world. When I enter this house as a jaguar, I am so scared that my entire being disappears into a blackhole and my spots fall (or fly) off my body.
For this equation, I used two adjacent colour schemes and one triad complementary which is made up of the first two colour schemes. I used this to show the two separate emotions and atmospheres associated with the two panels, and how they react together in the last panel. I used warm orange/brown tones for my first panel to give a sense of ease and warmth, cool and dark purple/blue tones to create a sense of fear and mystery, and a mixture of the two at the end to show a clash between me and the situation.
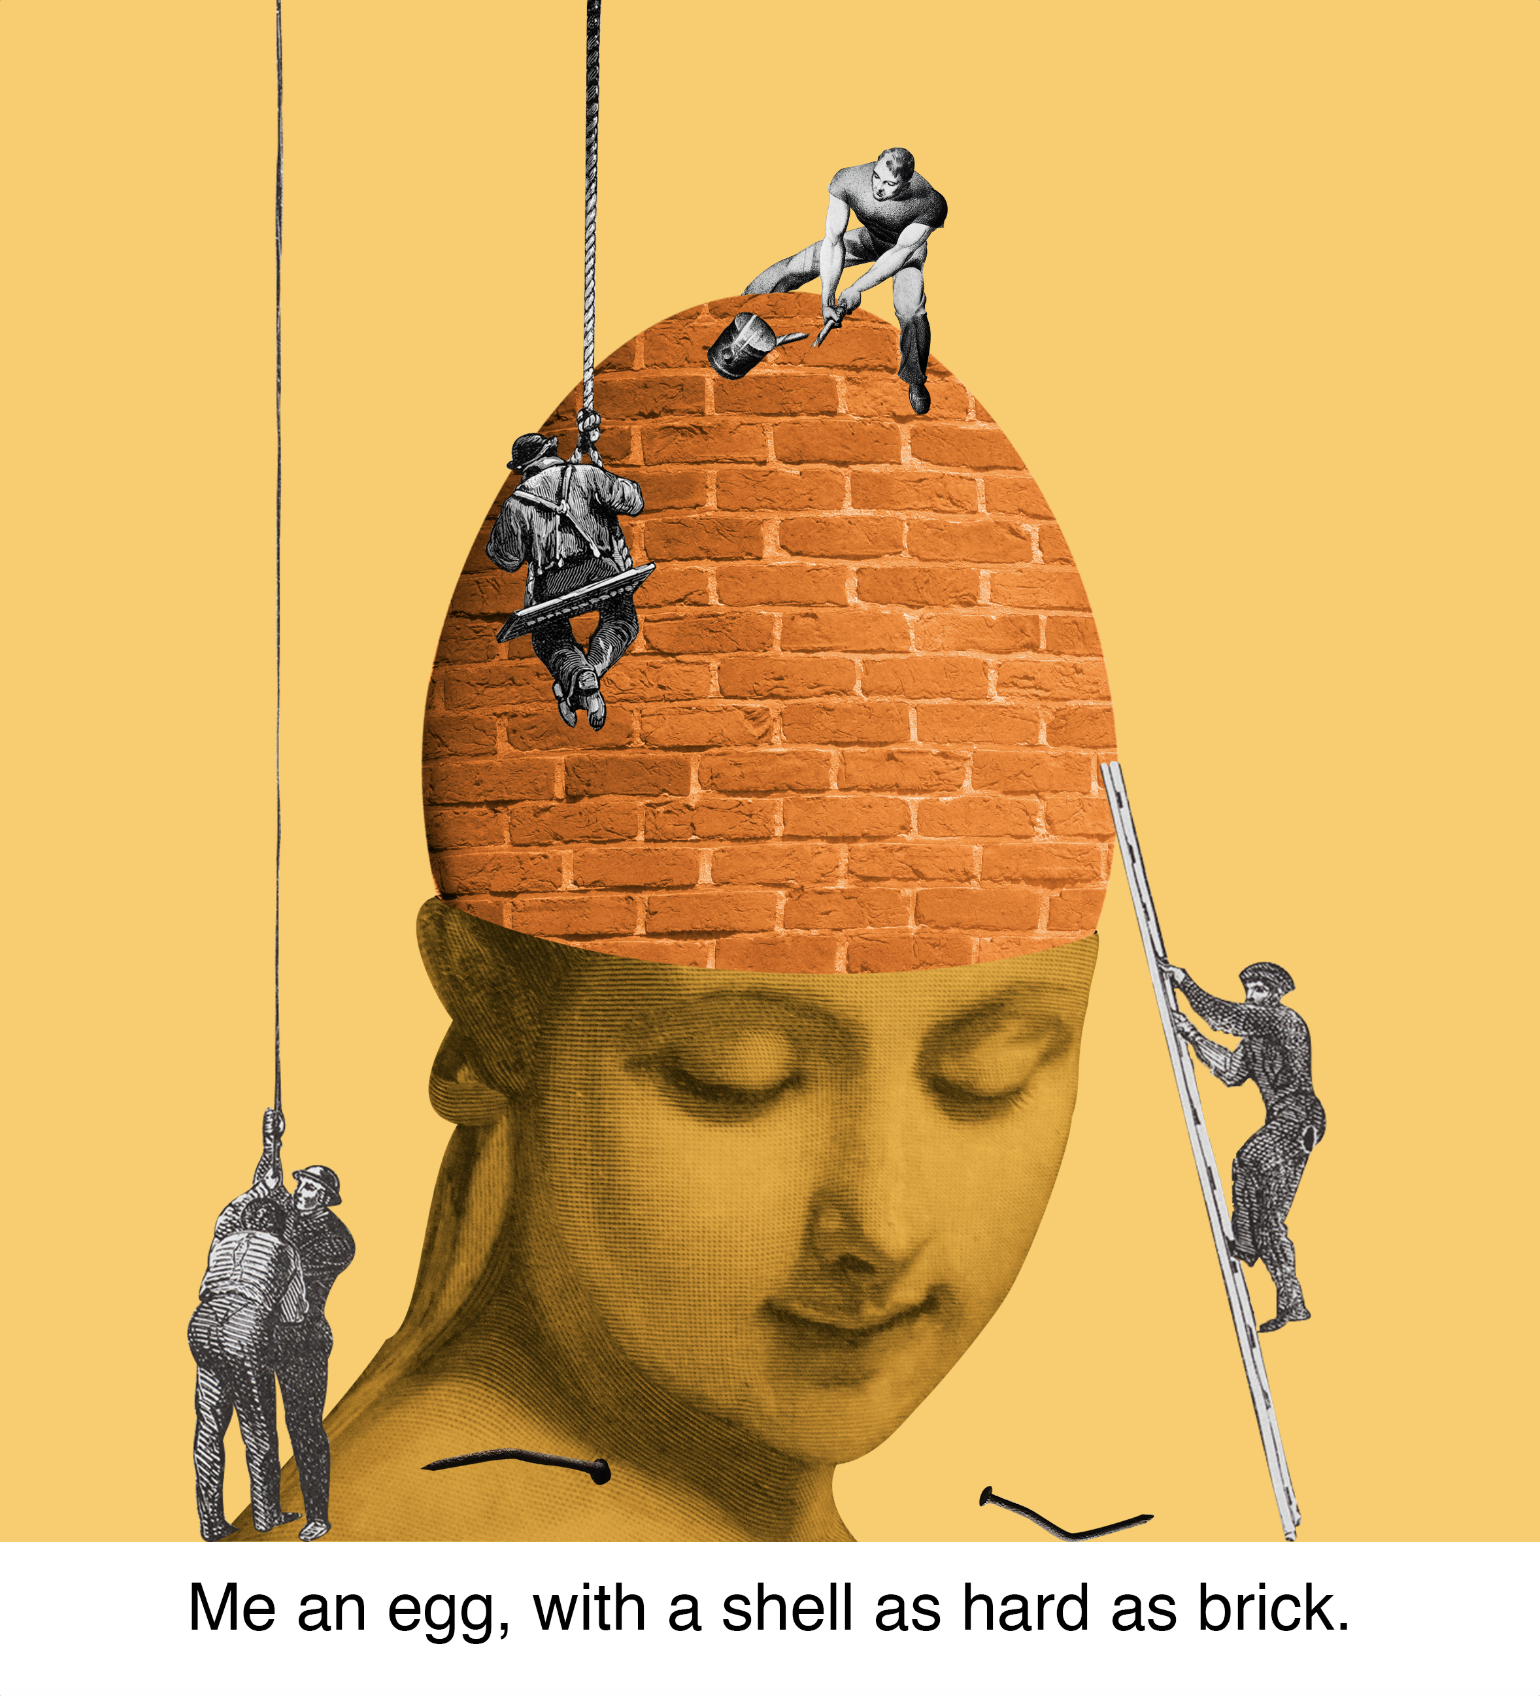


I’m no open book and I’m not very talkative either but when someone comes along and showers me with enough love and affection I would start to open up.
Here, I am an egg but my shell is not the usual fragile one – it is made out of bricks. Note the broken nails and hammer. My walls are not easy to penetrate. Following the same colour pattern as the first equation, I chose to have the egg remain in its usual colour and have the shades of the background and surrounding elements match to the egg. This keeps the contrast minimal and gives the image an overall soothing, neutral look, which is also the atmosphere I am going for with the image. I then chose pastel pink hues to represent love and create a soft and welcoming atmosphere. For the last image, both colour schemes are combined and made more vibrant giving an overall bright look, representing the new found happiness in being able to be myself with somebody.
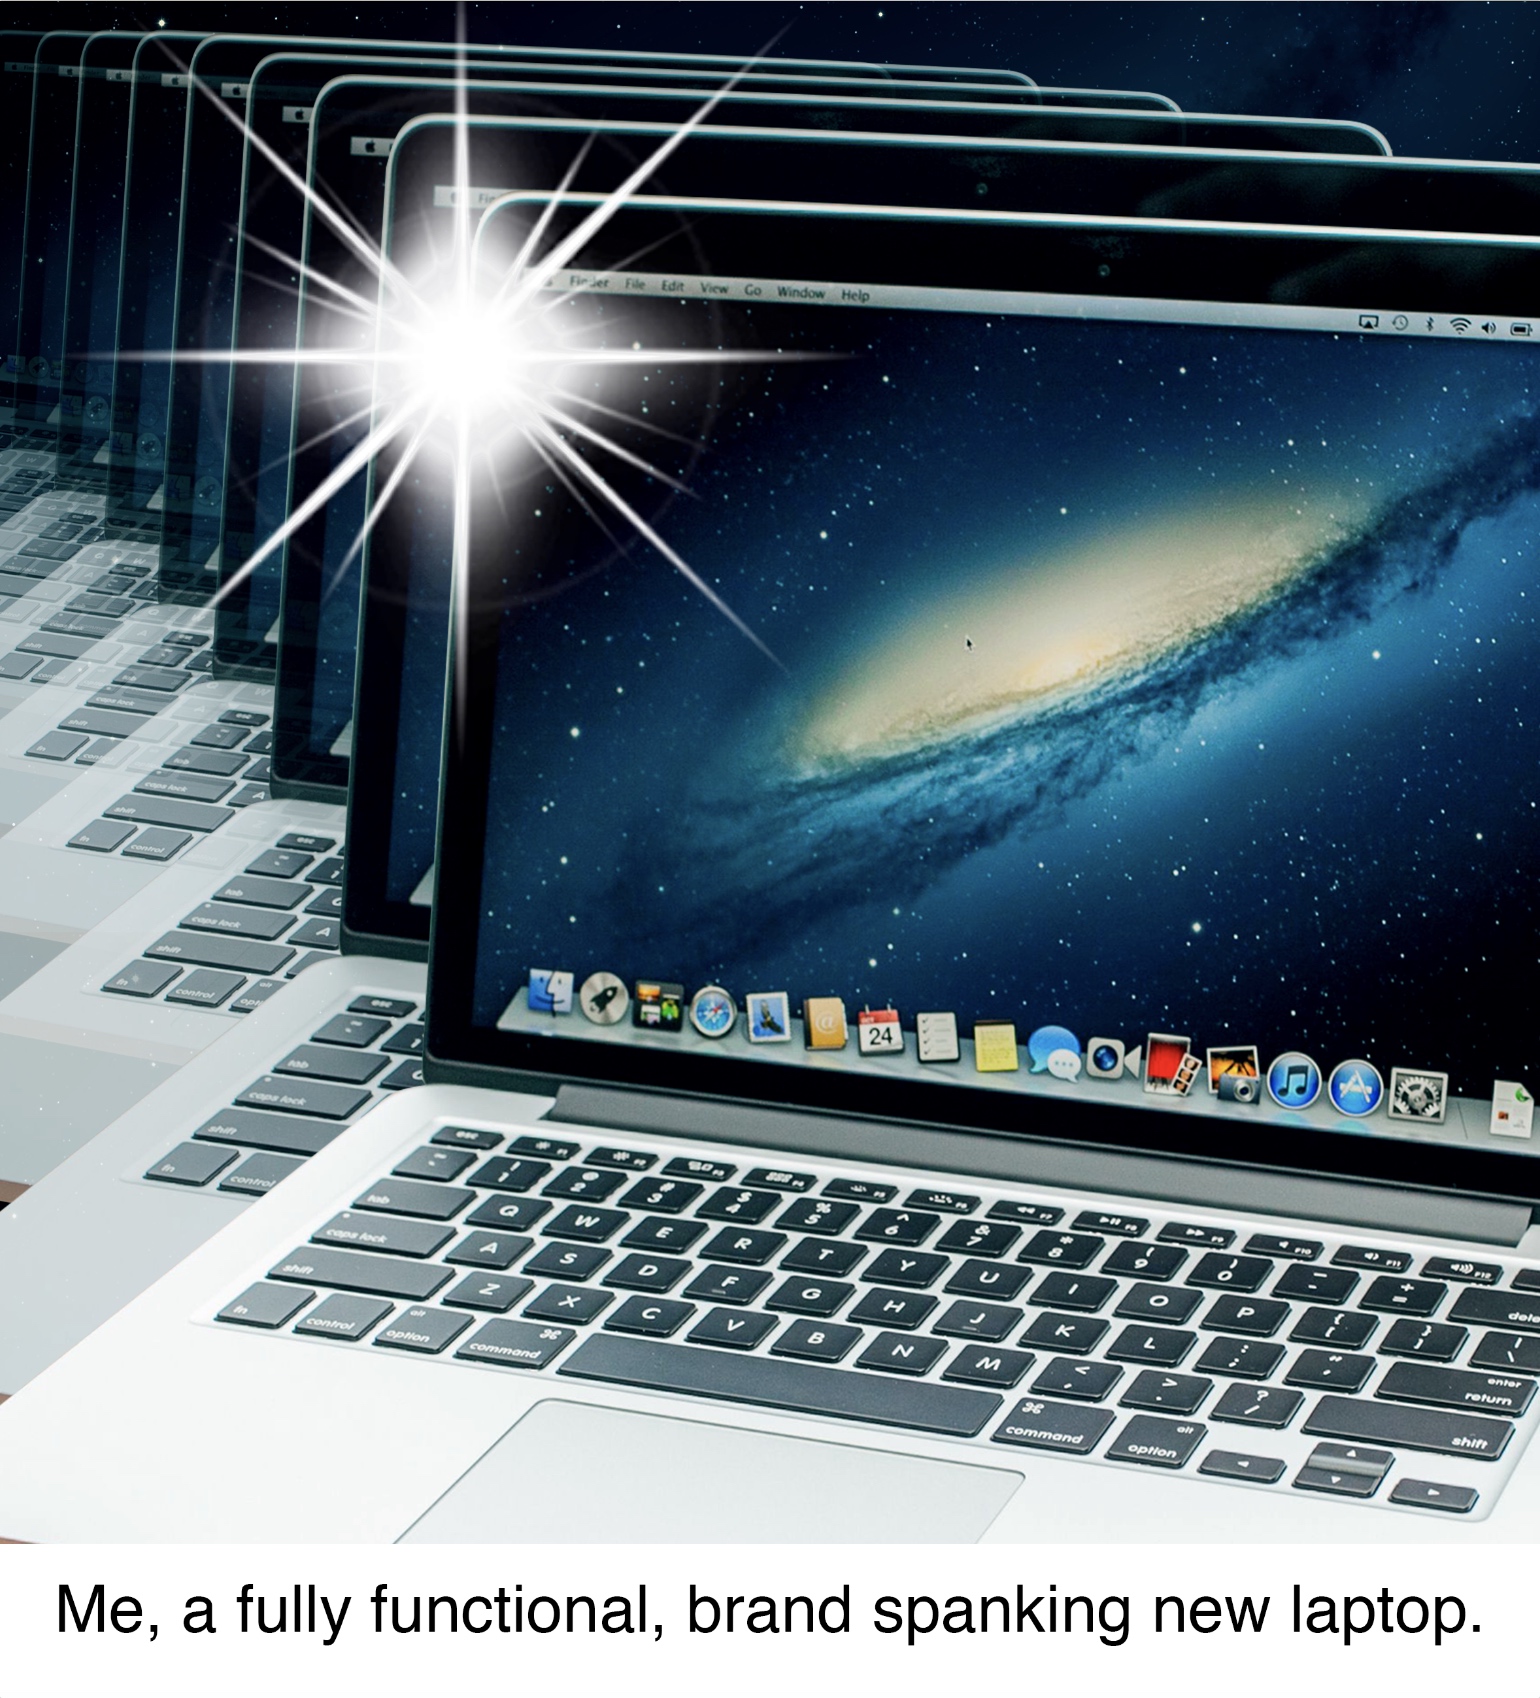


As with many other people, even though we may be fully functional and ready to get out there and do things, when we are given too much of it we can burn out.
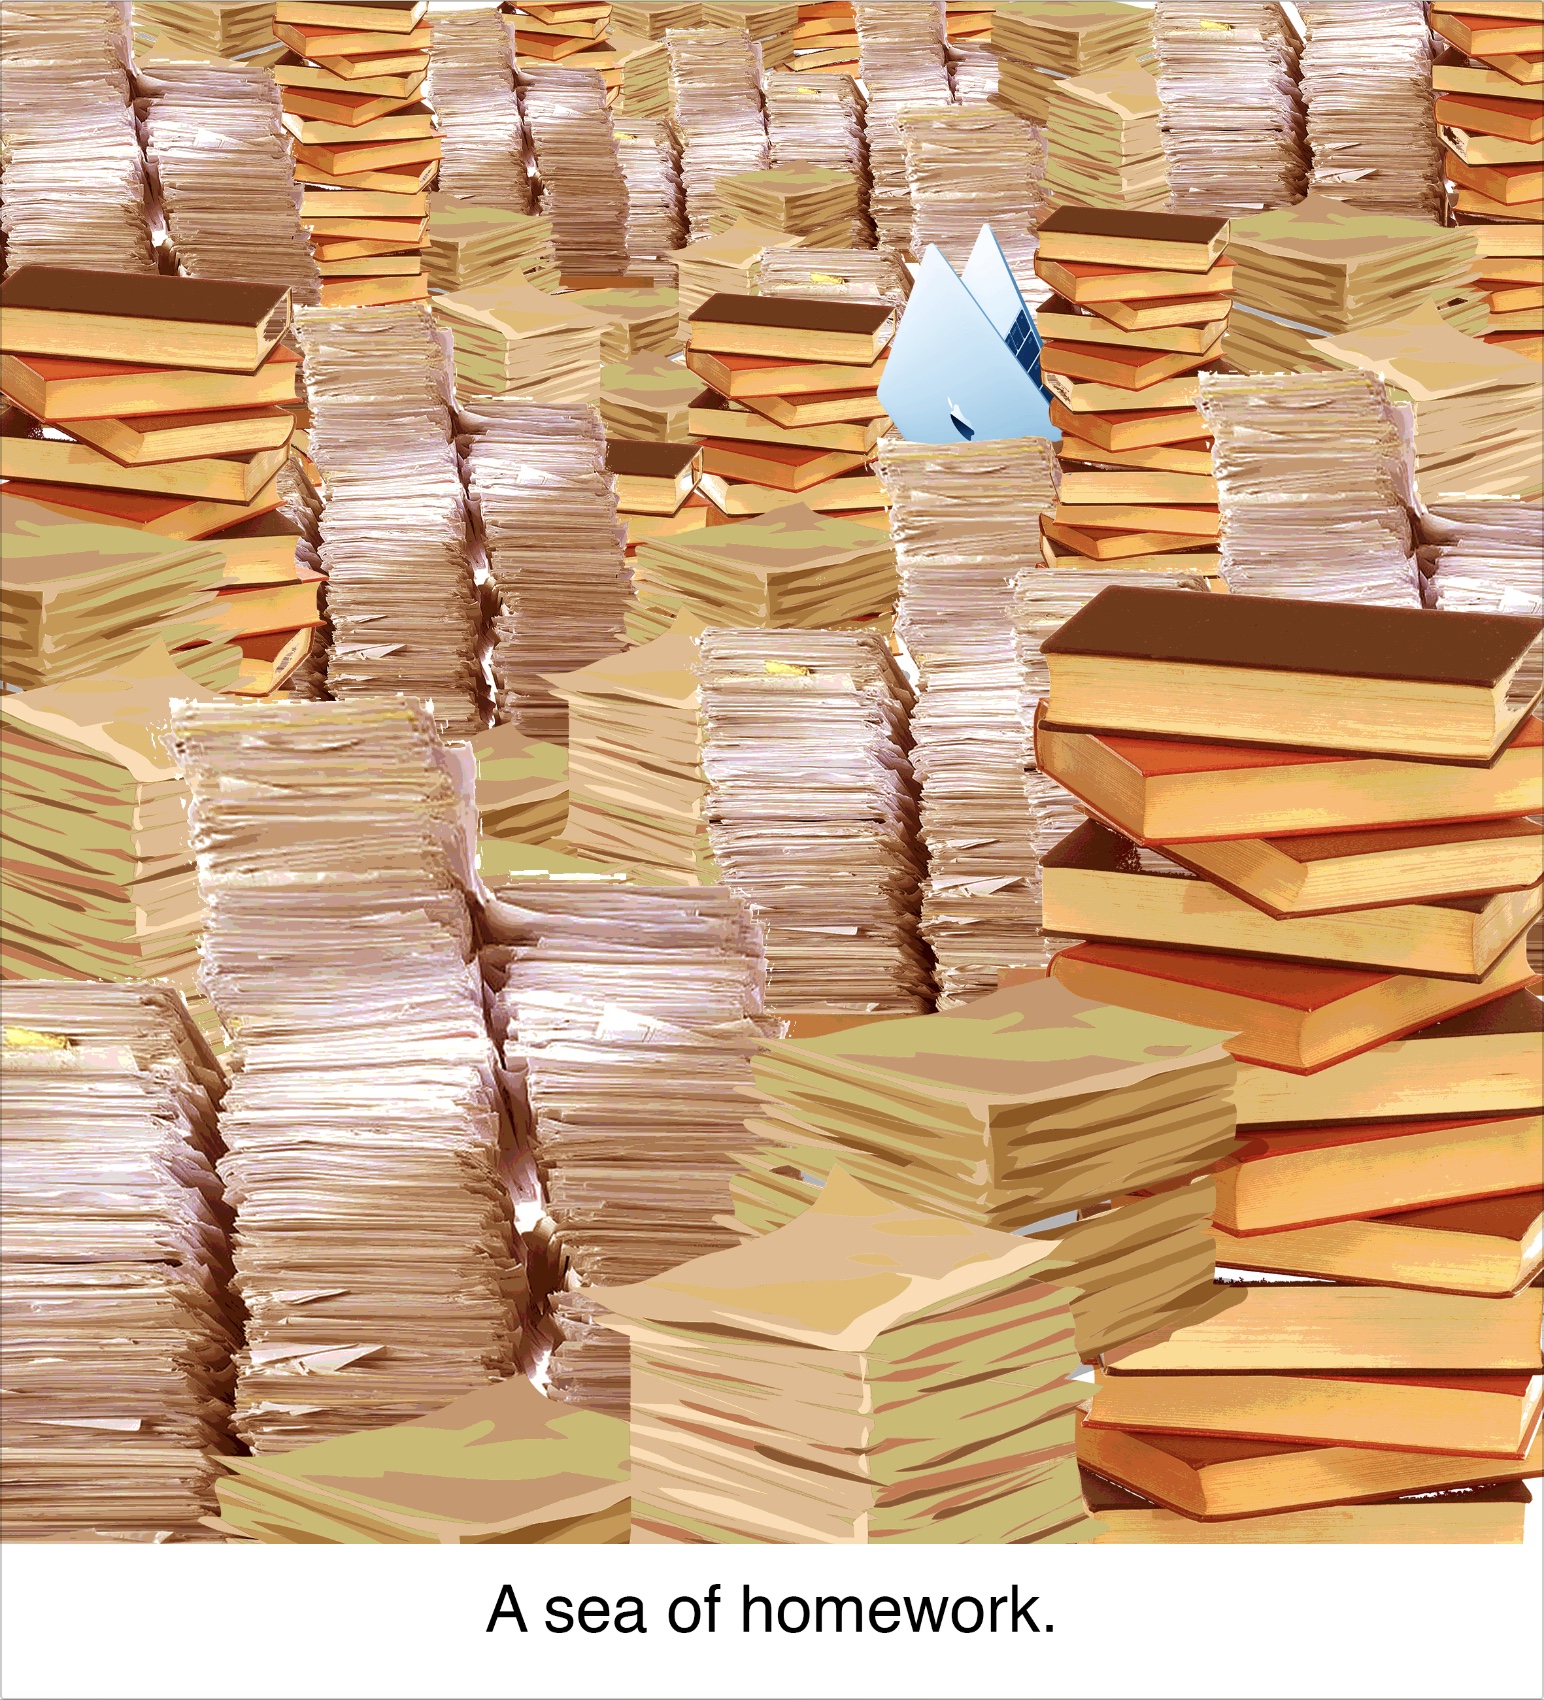
I used the same colour pattern for this equation as with the first one. Cool blue tones are used for the first panel which is often used for tech related design to show new, innovative, efficient technology. In this case, that would be me, a laptop. Using colours from the opposite end of the colour wheel, I contrasted the laptop with a sea of homework which completely consumes the laptop as it struggles to stay on top of things. The contrast shows how the two just don’t go. For the last panel, the same contrast is used but much more obviously and with deeper colours showing the chaos the situation brought me.


Growing up, and even now, I was very quiet and never had much to say. I end up usually just listening to the conversations of the people I’m with and I enjoyed doing that; but because I didn’t talk much I often ended up being casted out sooner or later. So I just find my little corner in the space and people watch.
With the same colour pattern, I start out with cool and dull tones of blues and greens. These colours, to me, reflect my personality – chill, easy going, and calm. I then move to some brighter and more vibrant colours on the opposite side of the colour wheel in my next panel showing the happiness and liveliness of big social events. In the last panel, the two colour schemes are put together to form a triad complementary. The only difference is that I inverted the colours as I wanted to make my hoodie stand out more in this composition.
I really liked this project. It was definitely one of the hardest ones for me because it pushed me to think a lot about my compositions and also to push myself to think out of the box. I had a lot of fun finally being able to play with colour and make my images look more harmonious with them. For this project, I applied quite a few techniques I had learnt from our previous two projects and I’m happy to see that what I have learnt didn’t fly out of my brain and go to waste! Also I got to create some sick photo collages (not as sick as the real deals of course but it’s a start) like the ones I see on the internet and I think I might go on to create more of them in the future (-:
This is not goodbye! I will always be re-visiting all that I’ve learnt here and constantly apply them (consciously and unconsciously) in all the other work that I will be doing. Twas a good semester. Thanks Shirley!
2D is coming to a close with our final project, “Ego”. Time to get my brain cracking again!!
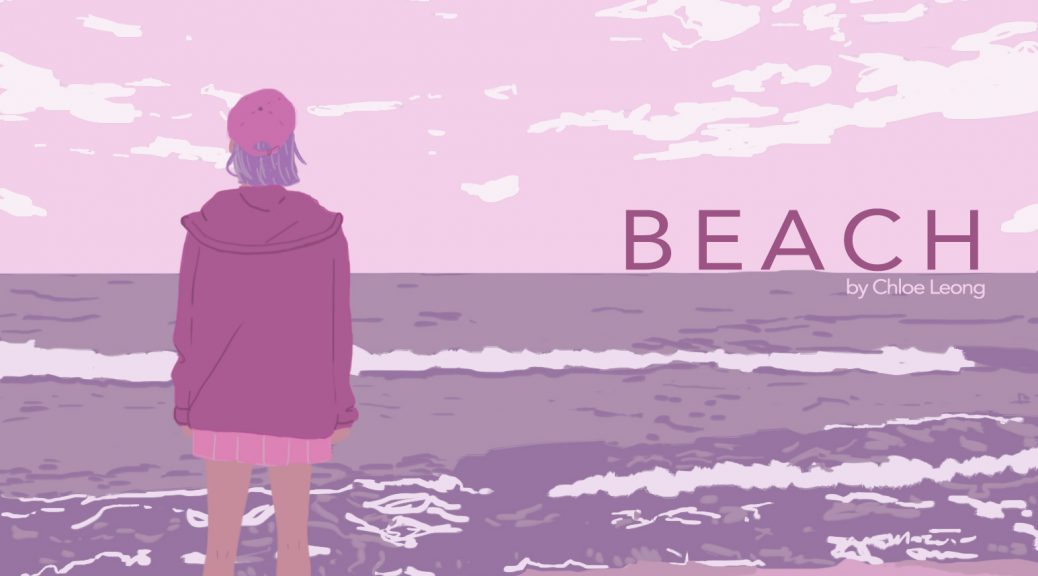
For this project, we were free to decide on what medium and style we wanted to work with. For me, I want to use a style that is popular with my generation. I looked up online and here are some results.
Flat illustration with pops of colour/minimal colour
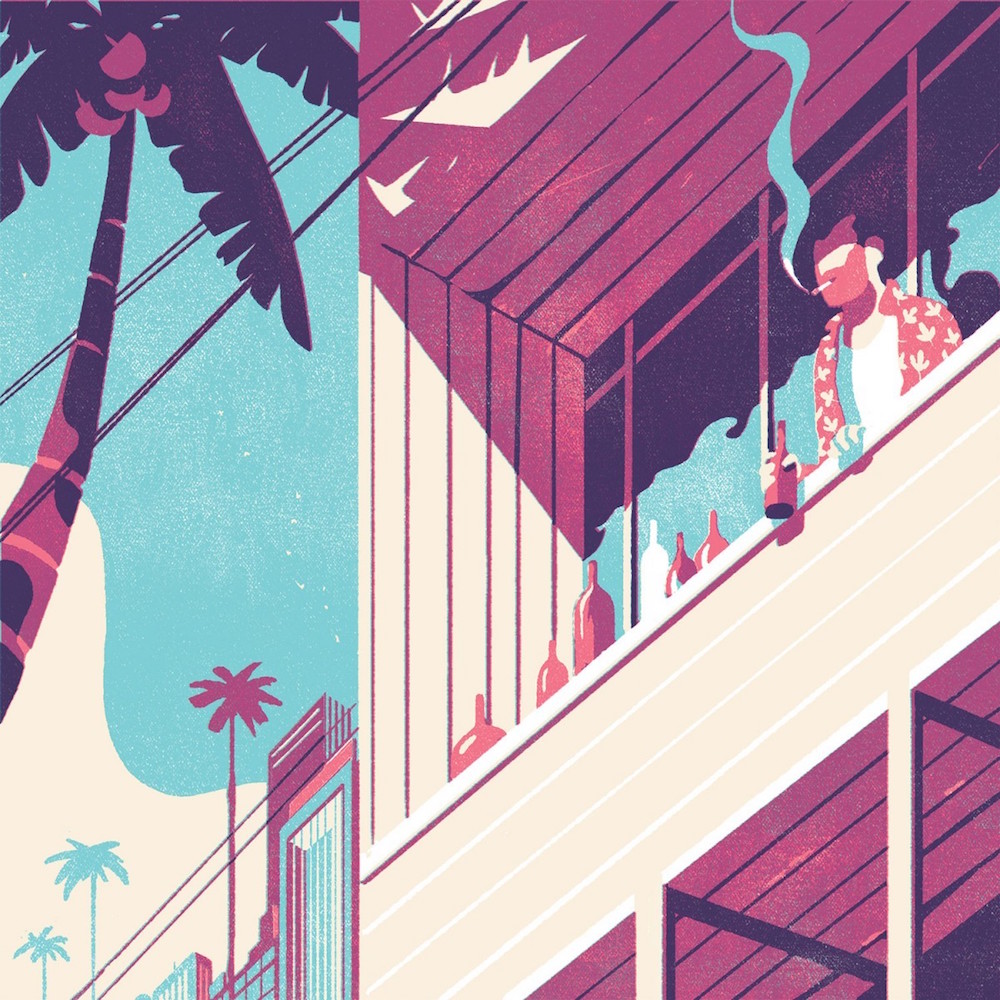

Vibrant, fluid colour
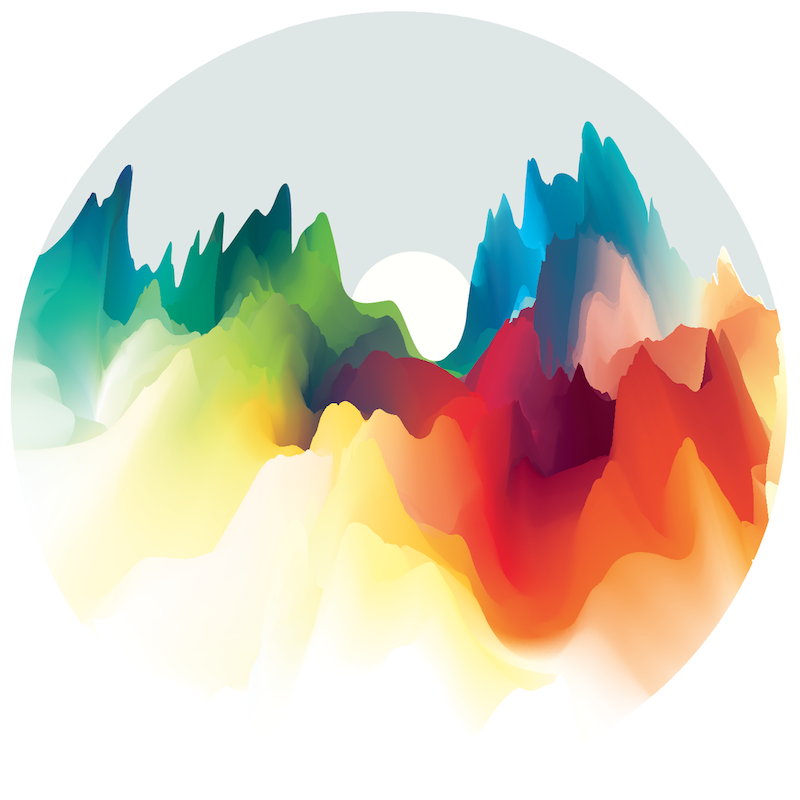

Photo collage
The first two styles are much more illustration based as compared to the last style. While the first two seem to depend heavily on colours, the last one depends more on the juxtaposition of images and colours come in as more of a secondary importance.
Although the other two cater to this project that focuses on colour, I have chosen to go with the photo collage style because I like how different it is from the rest. Making something new out of existing images has a somewhat fresh and eye-catching feel to me too!
ARTIST REFERENCE:
ADAM HALE

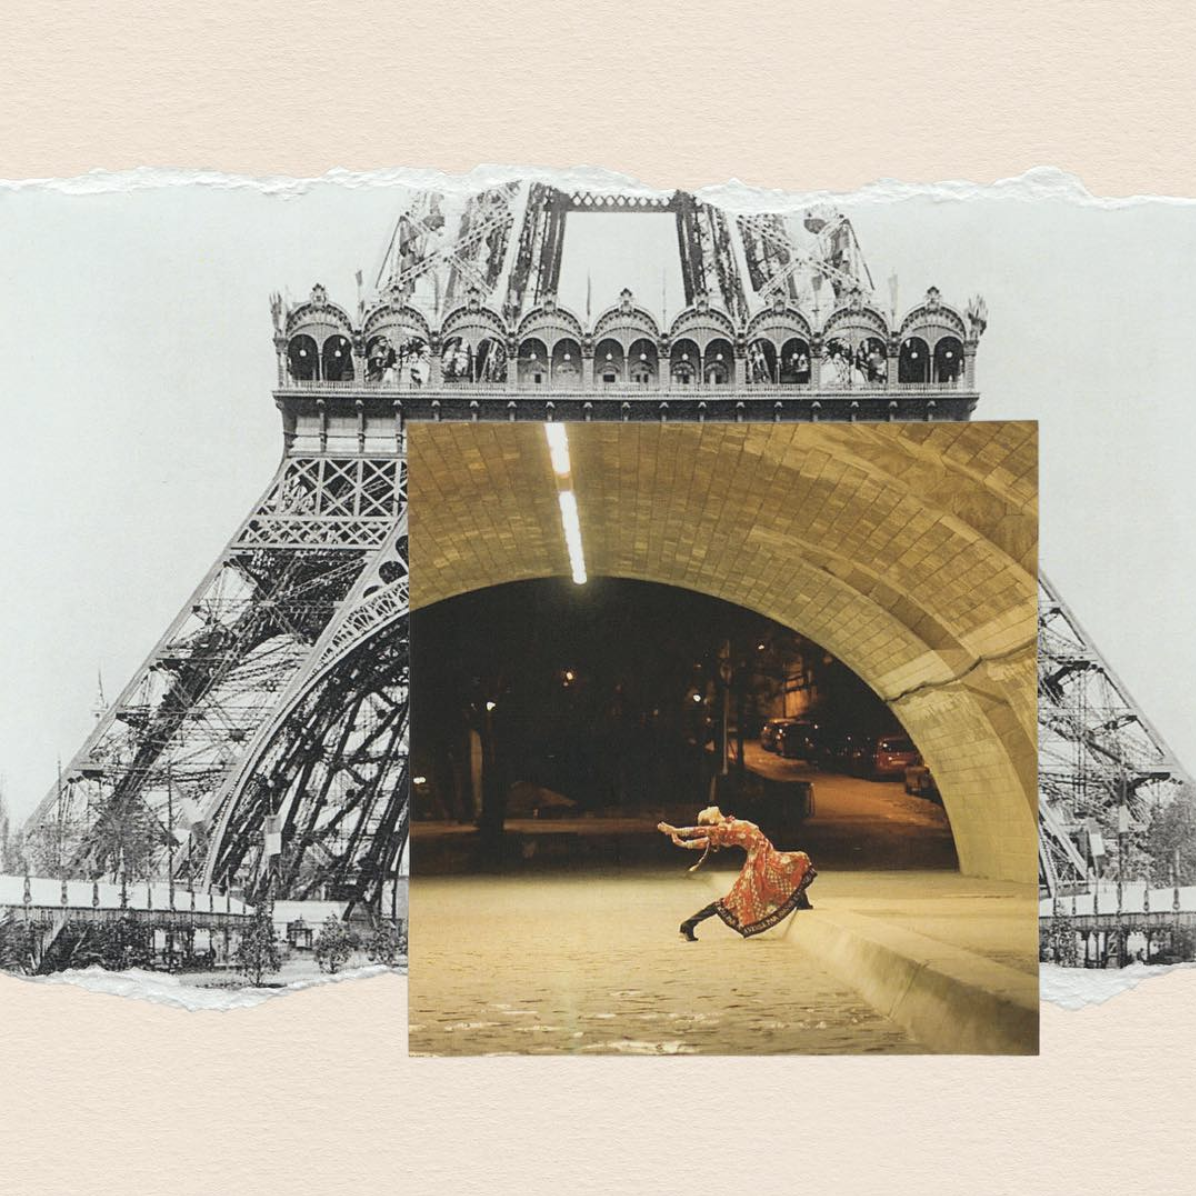

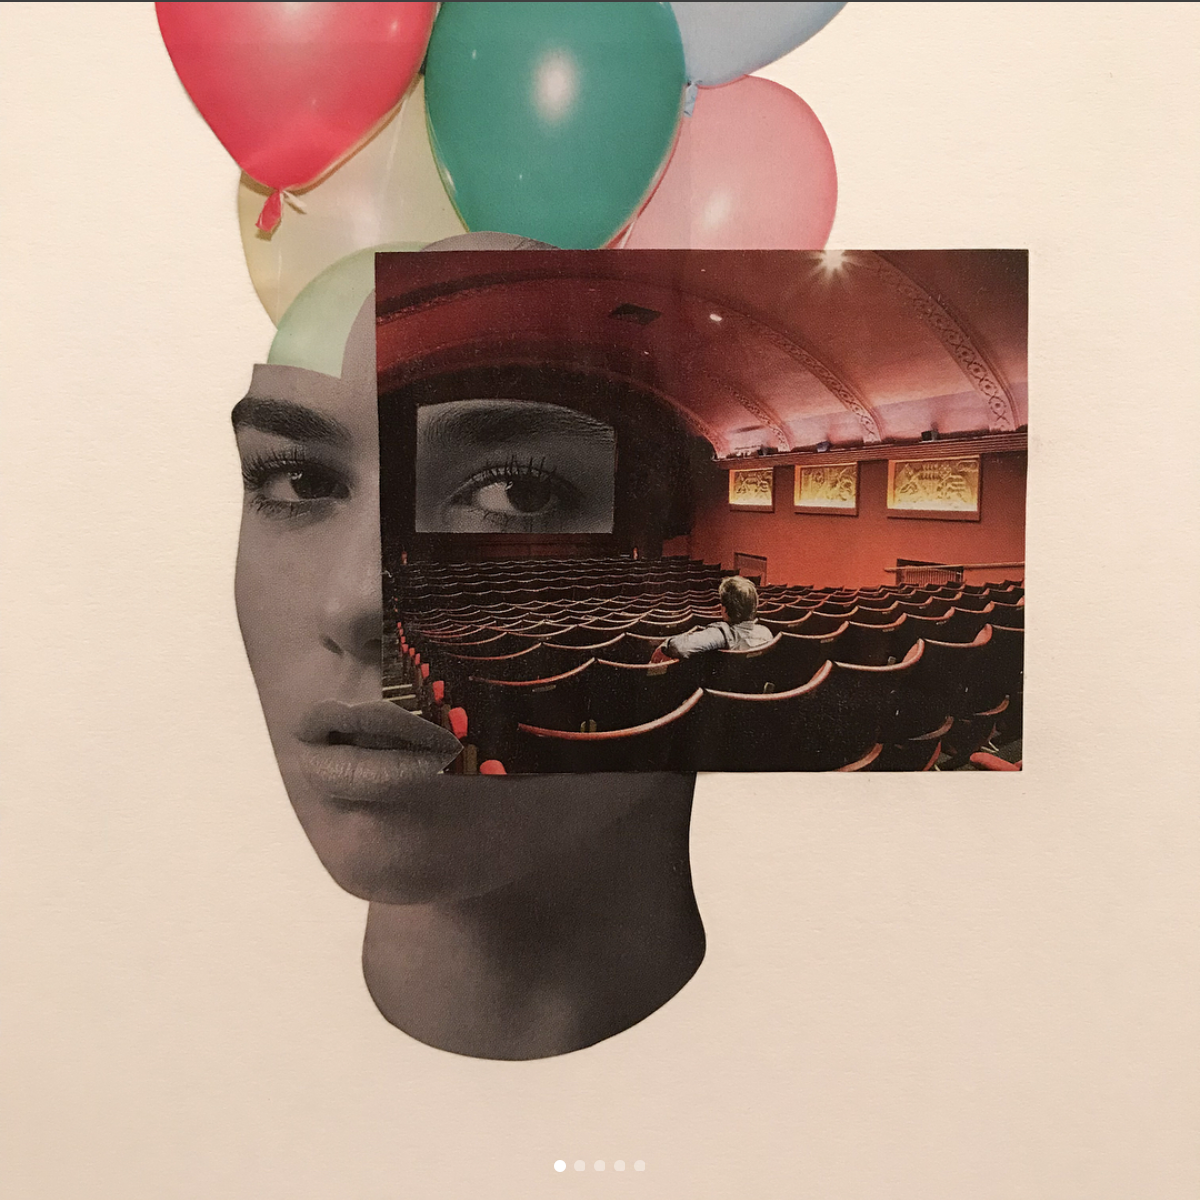
Adam Hale is a collage artist who shares his quick work on Instagram under the handle @the.daily.splice. One main thing I am taking away from his work is his focus on being unconventional, putting images that don’t seem to relate together and creating new meaning with it.
COLDPLAY – UP&UP
Another artist reference, not really, but this specific music video is filled with the style I am interested in recreating!
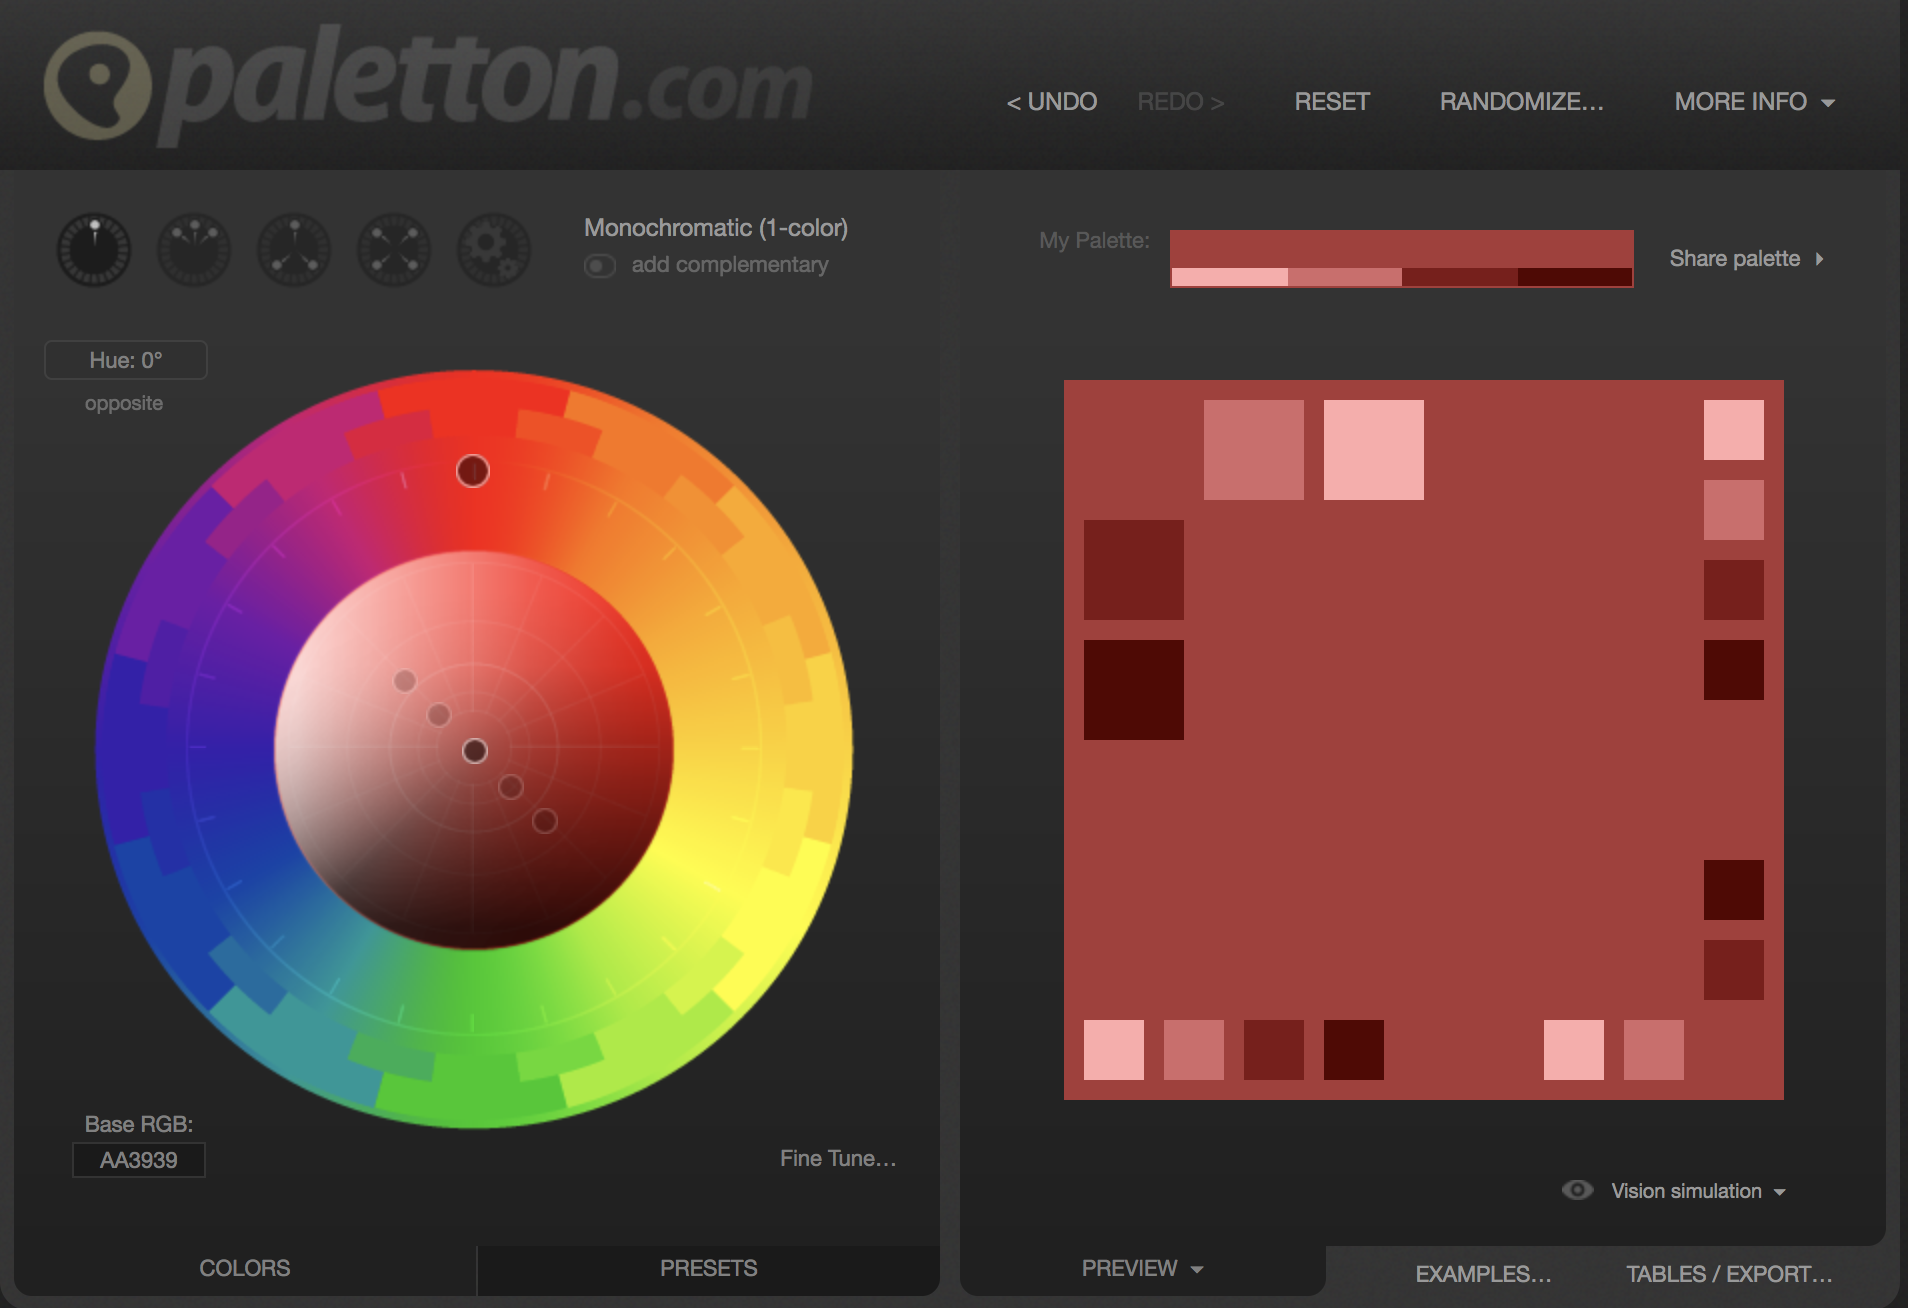
Looking at past year students’ works, I have decided to use this website called Paletton to help me choose my colours.
Here are some sketches of my ideas for the panels:

After consulting Shirley, I realised my outcomes were too straight forward. Again, I had to think of making these outcomes unconventional.
My second set of sketches, including colour choice:
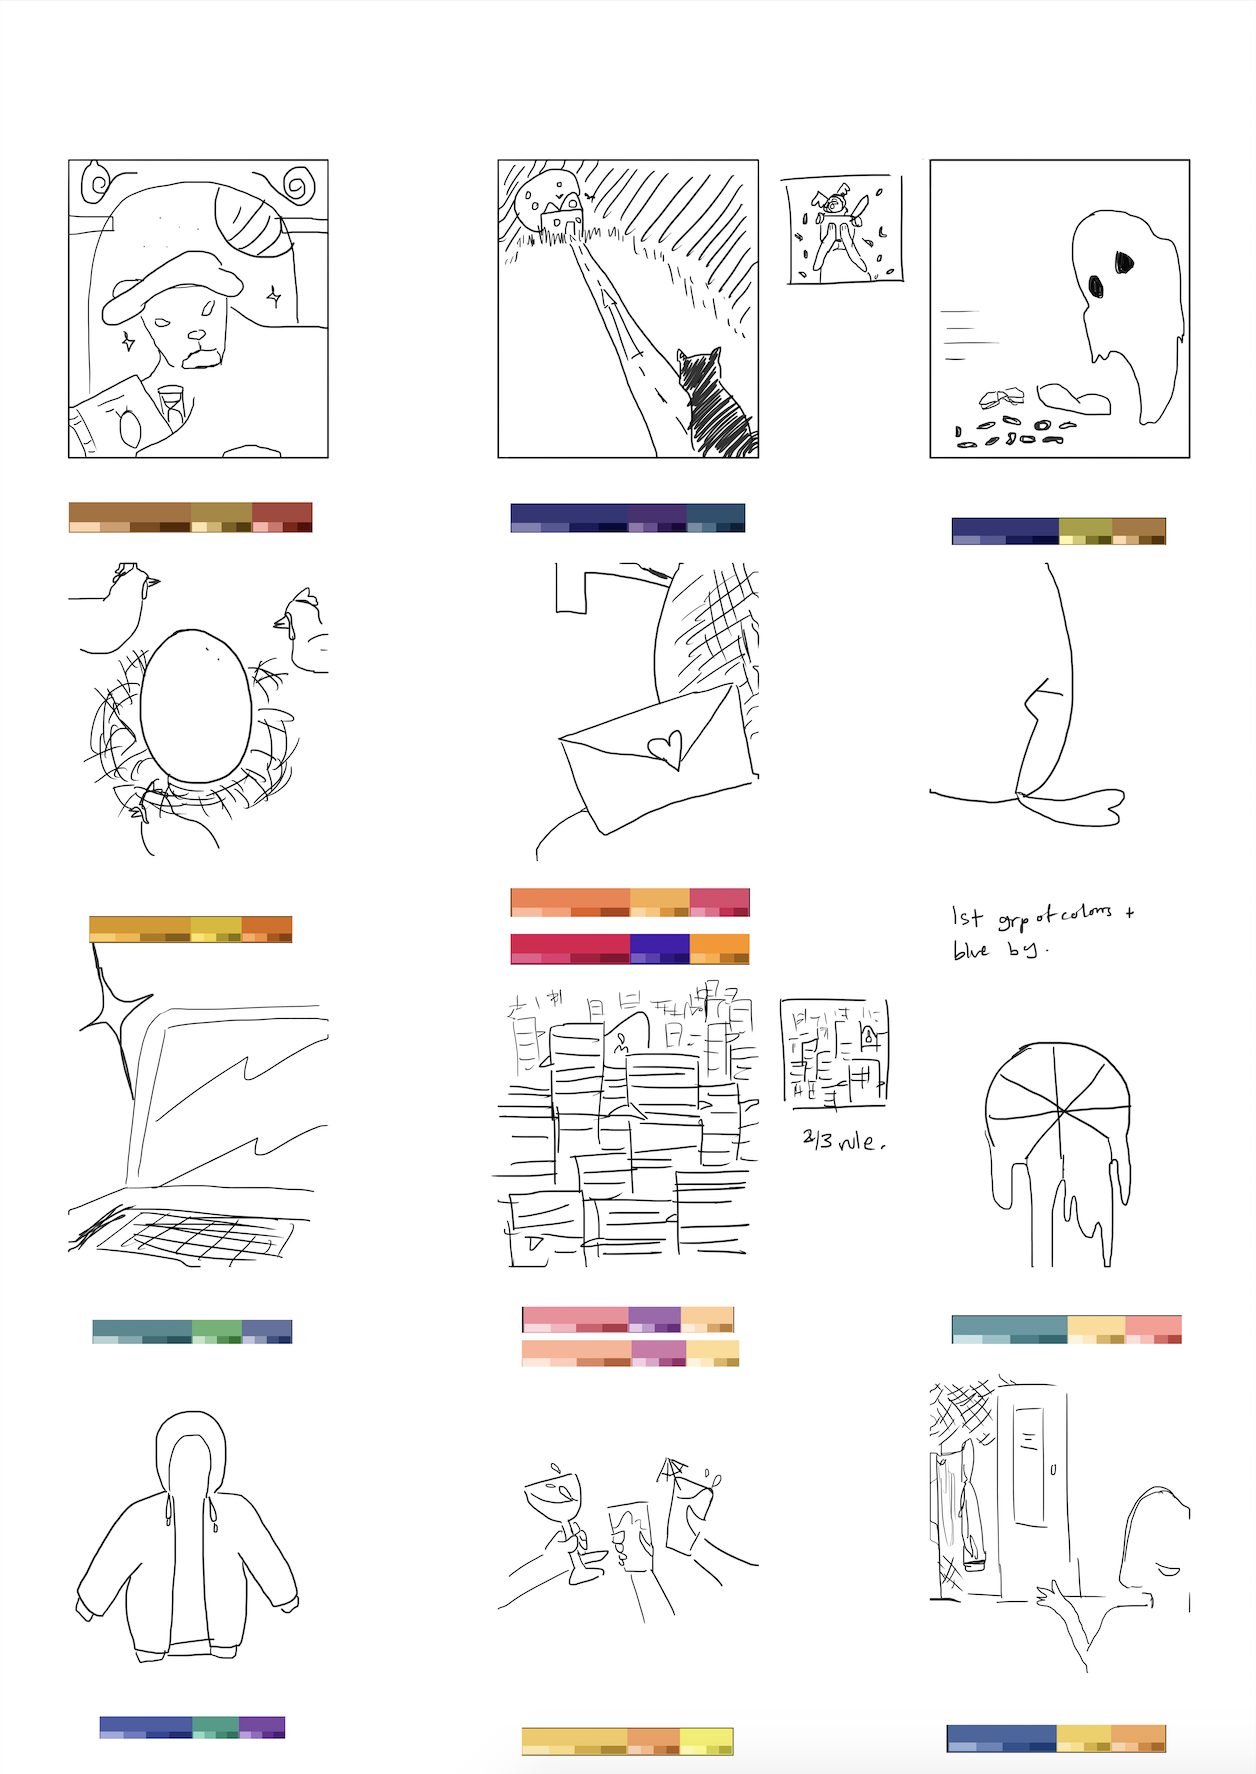
For my colours, I went with adjacent colours (3 colours) and triad colours. The adjacent colours would be used for my first and second panels, and the triad for my last panel, where both sets of adjacent colours mix, representing my ego mixing with the situation to give the outcome. I also want to stick to 3 colours as with photo collage work, lots of images have varying tones/colours so it’s not easy to stay at just 2 colours.
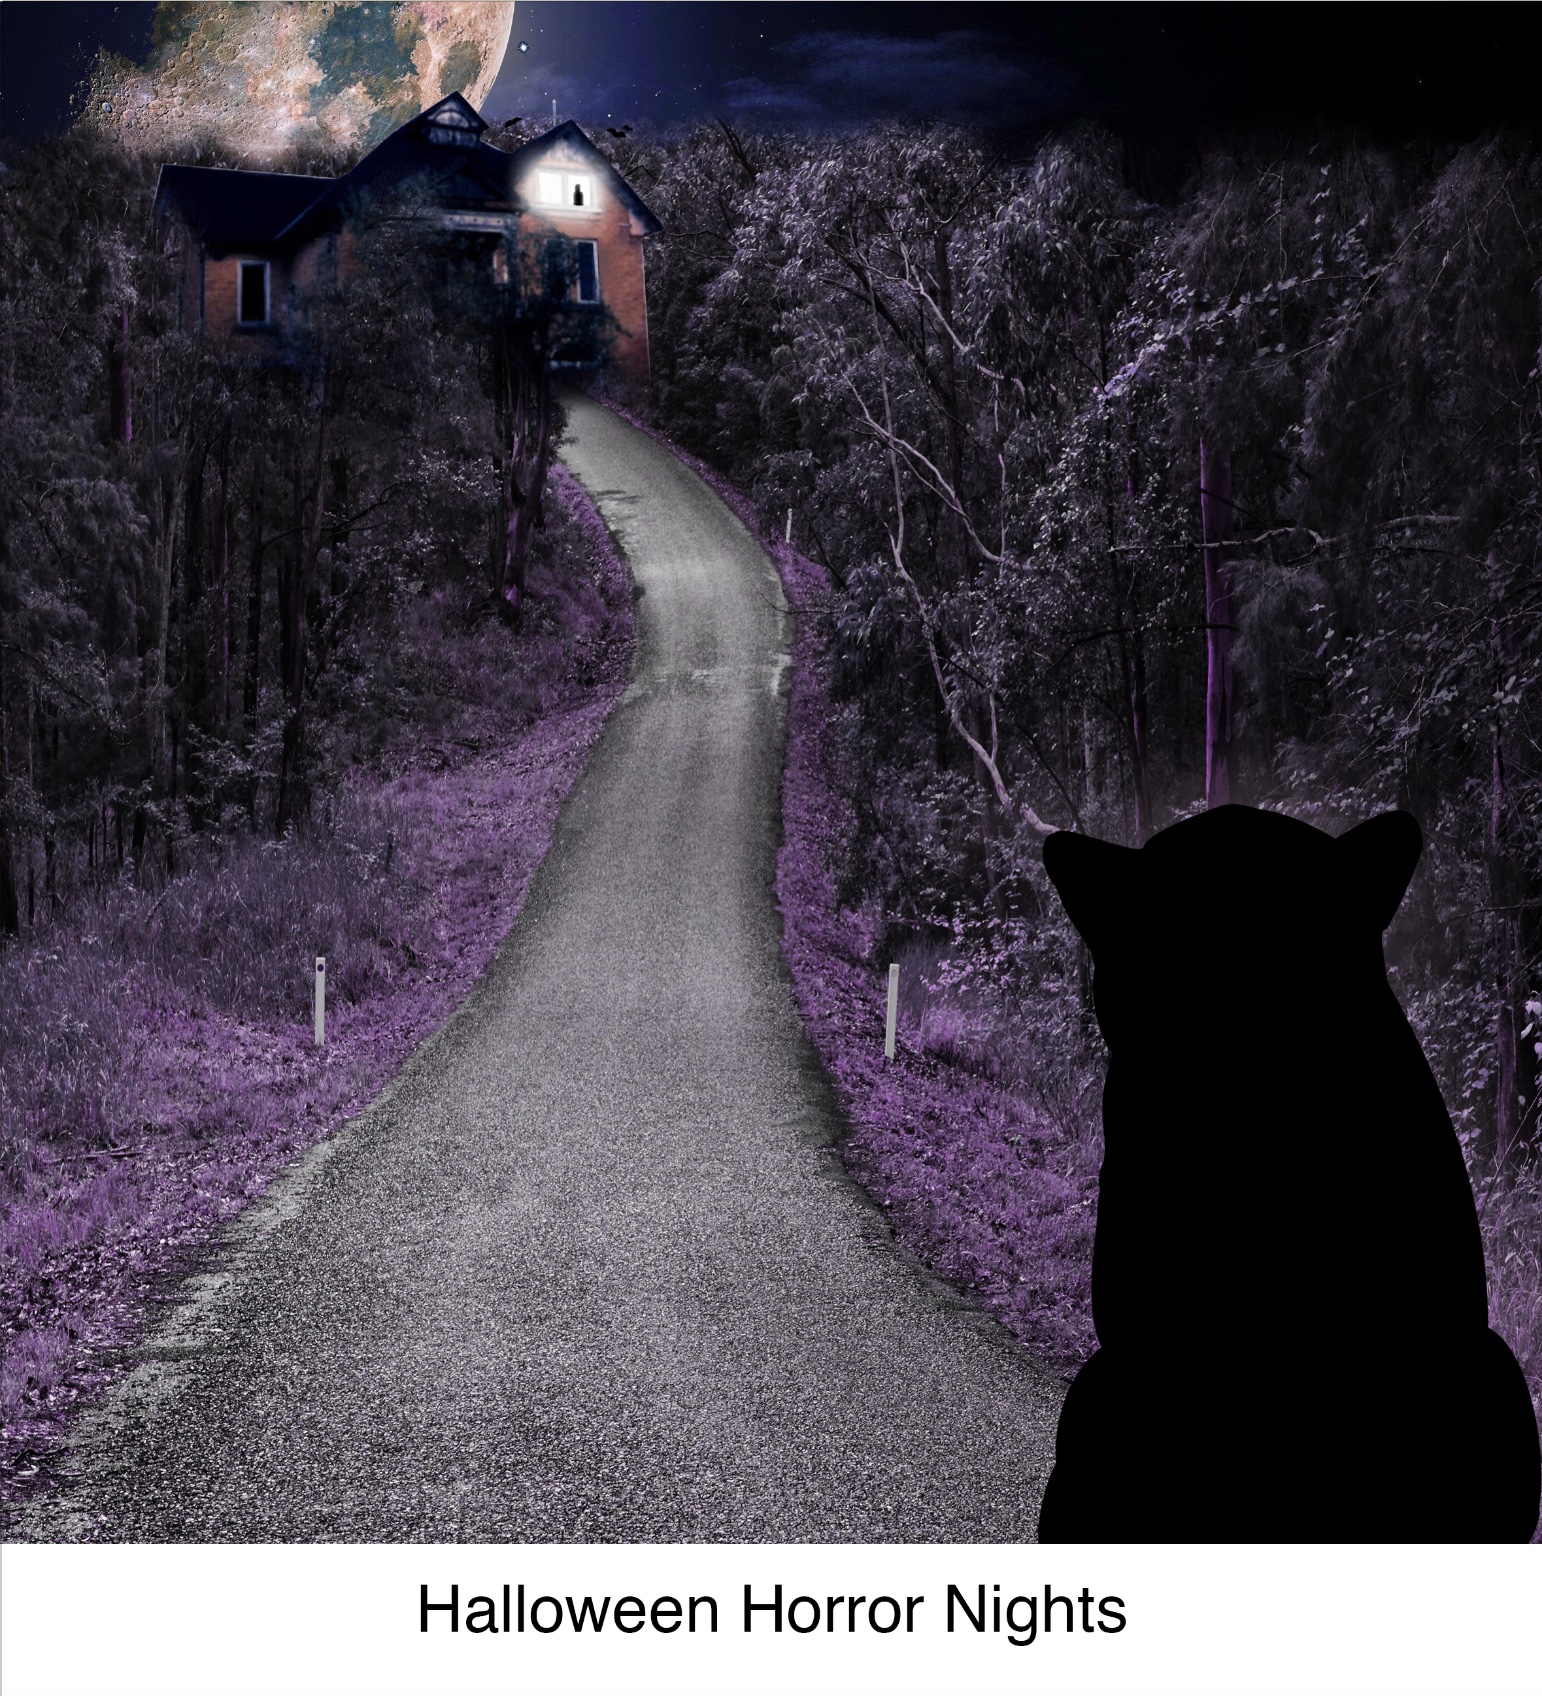
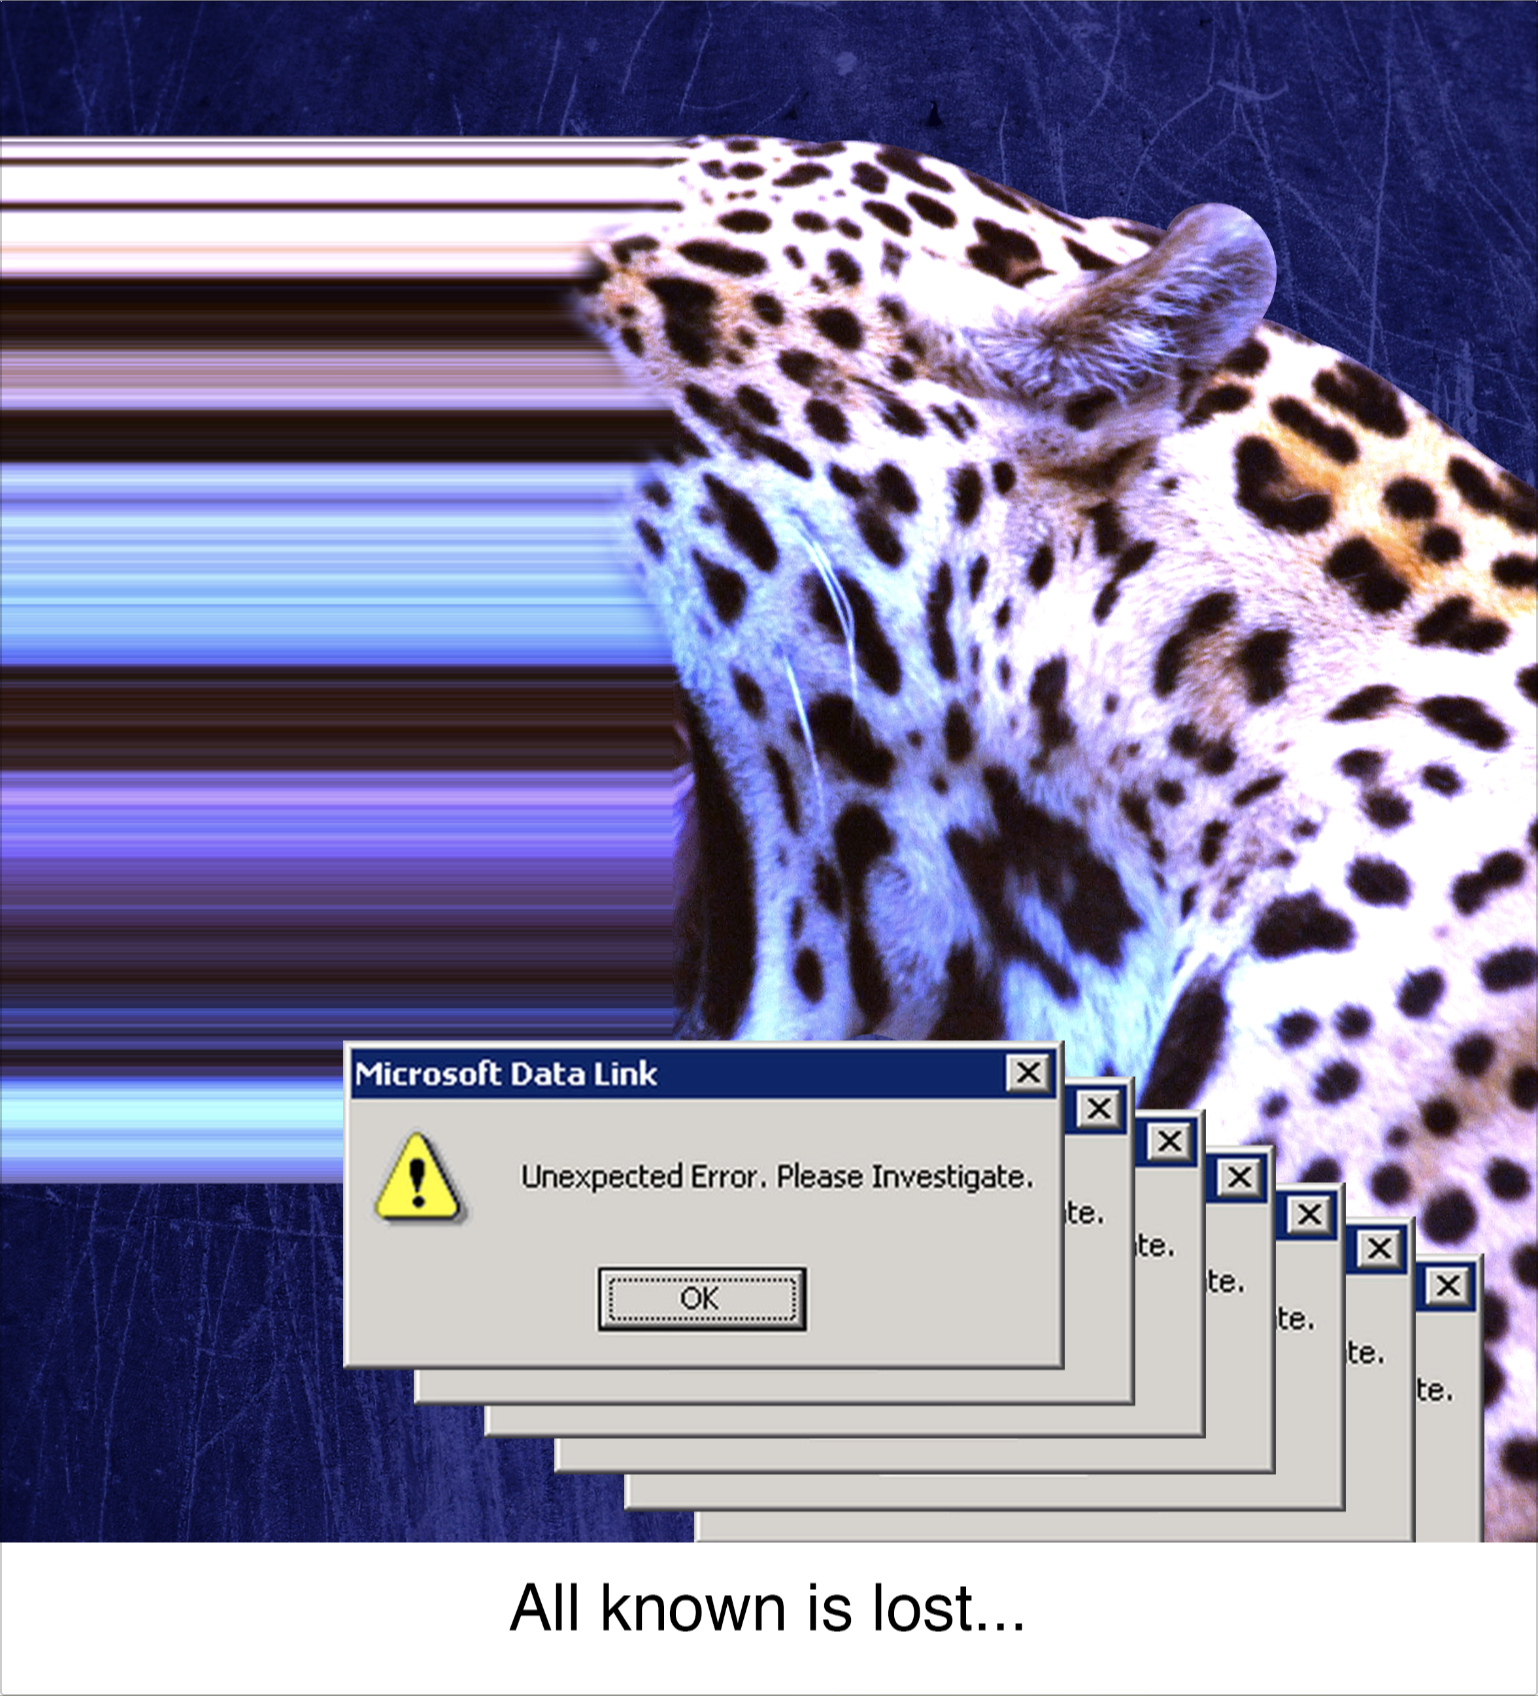
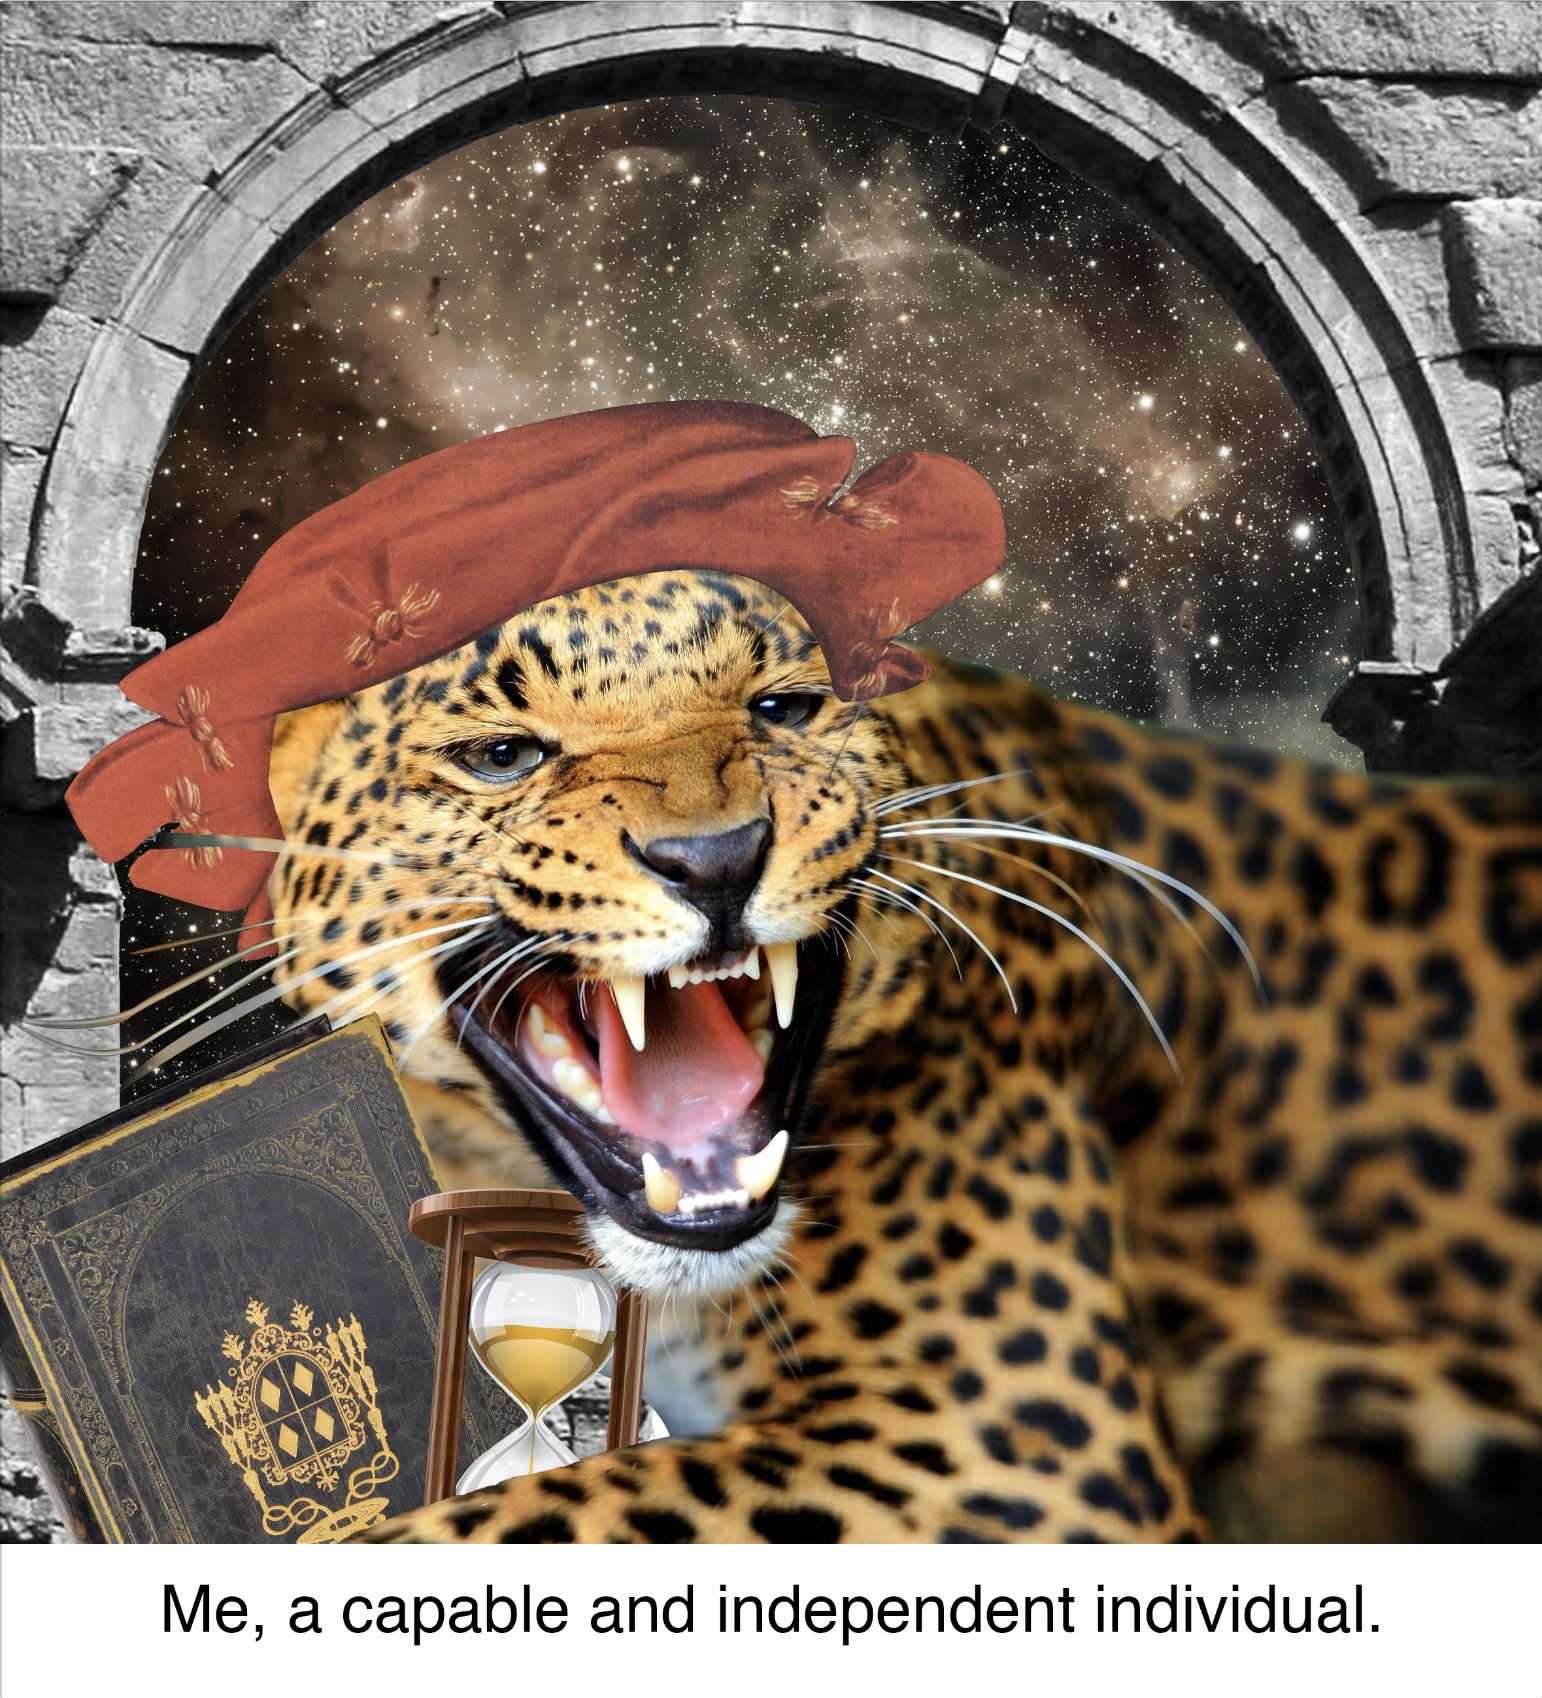
Image 1: Me, a capable and independent individual
I used a jaguar to represent me because it is one of the agilest animals in the animal kingdom. I donned it with Renaissance items as well as the Roman arch in the background to represent the idea of being forward thinking, as well as the image of space in the background to represent going beyond.
In this image, I used shades of brown (and red) because I wanted the image to feel safe and calm when juxtaposed to the second image.
Image 2: Halloween Horror Nights
I’m seriously not a fan of haunted houses or anything scary. I went for Halloween Horror Nights only once and could only bring myself to go through one house (with my eyes closed).
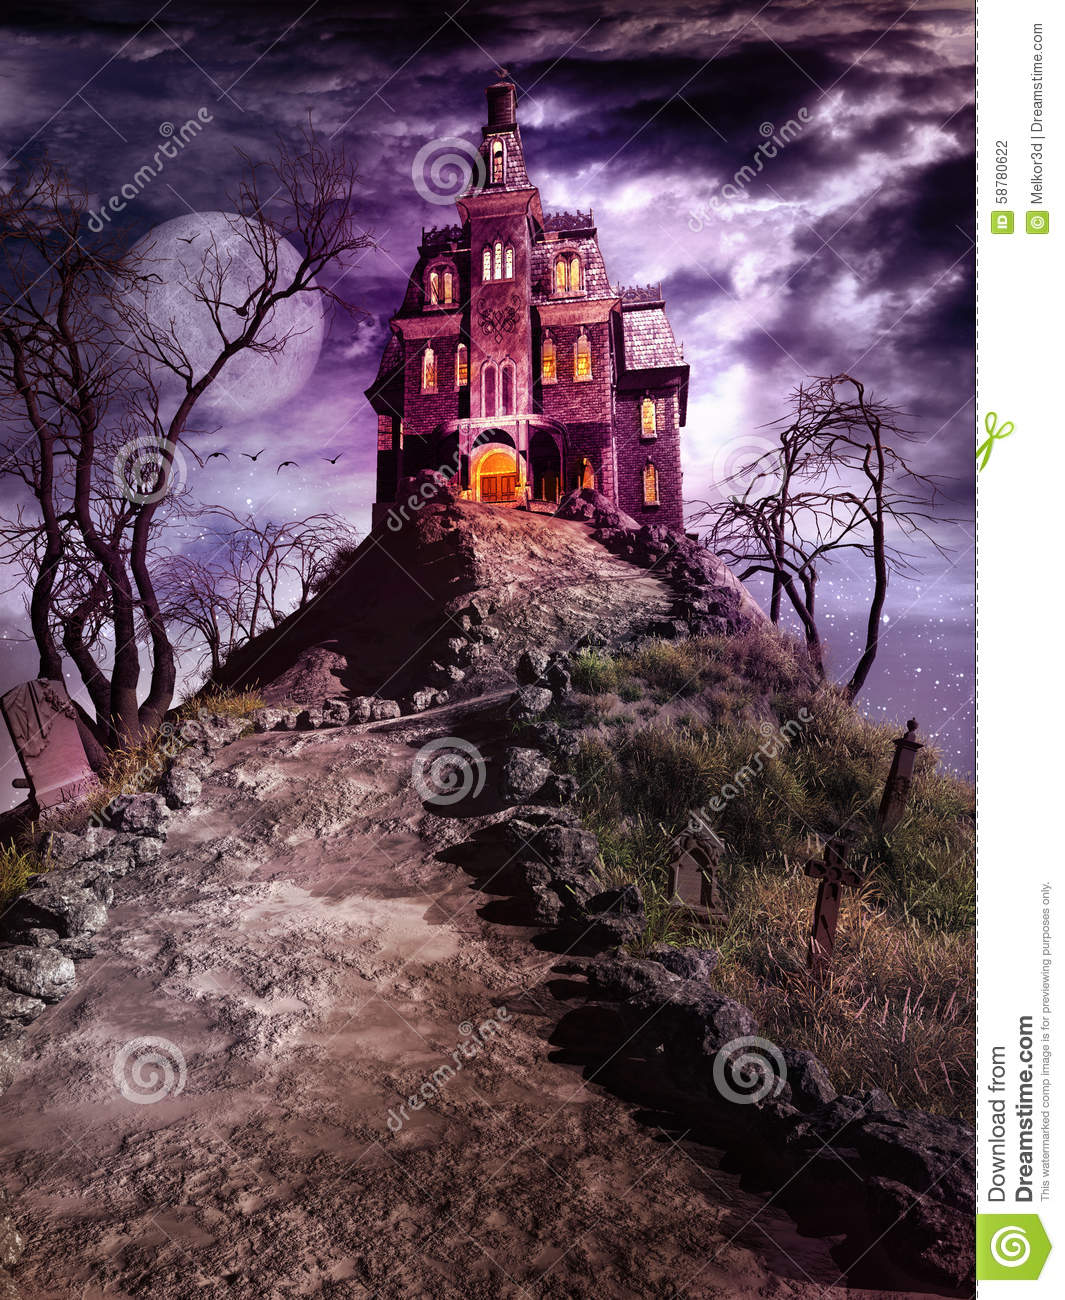
I hence wanted to have the typical haunted-house-on-a-hill look with a huge moon and a long and winding path. I used shades of purple here to give the whole image an eerie feel. I do feel that the composition here can be pushed further though. Maybe I could add elements of space to make it seem as if Halloween Horror Nights is something out of my world, something I would not even give a second thought to.
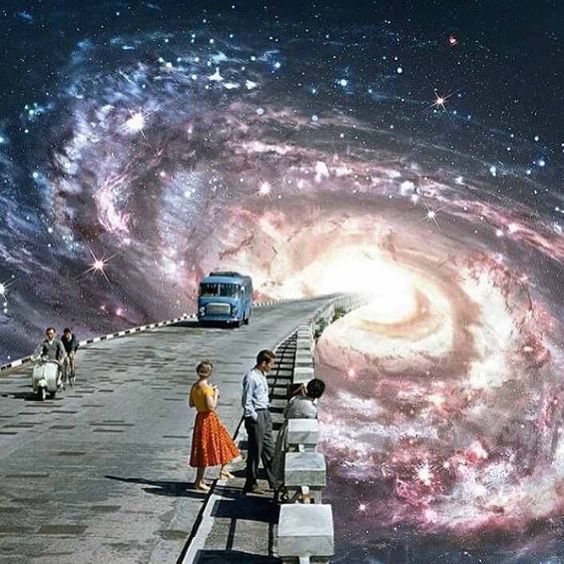
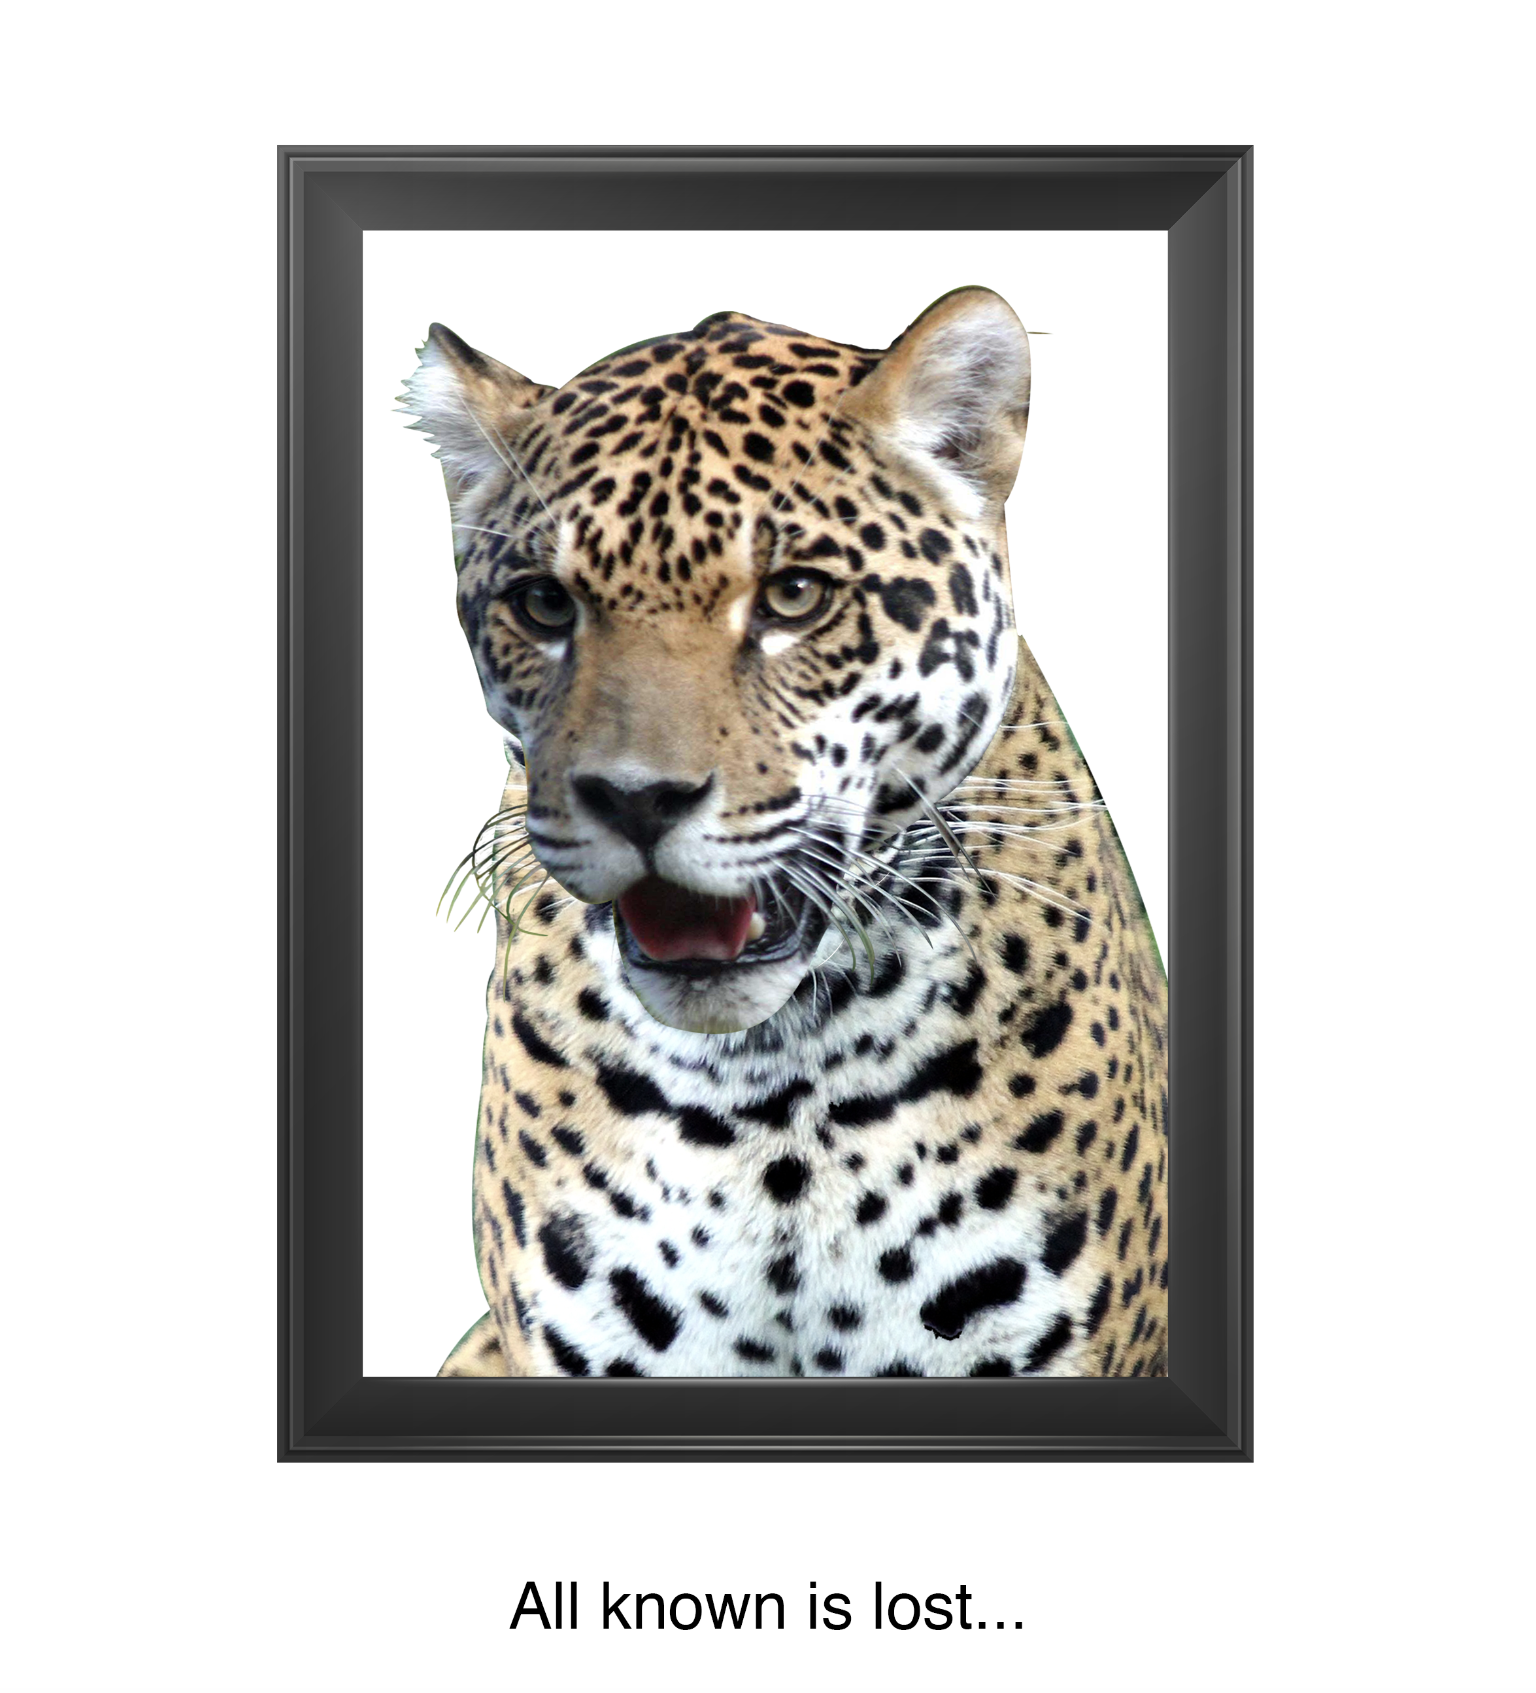
Image 3: All known is lost…
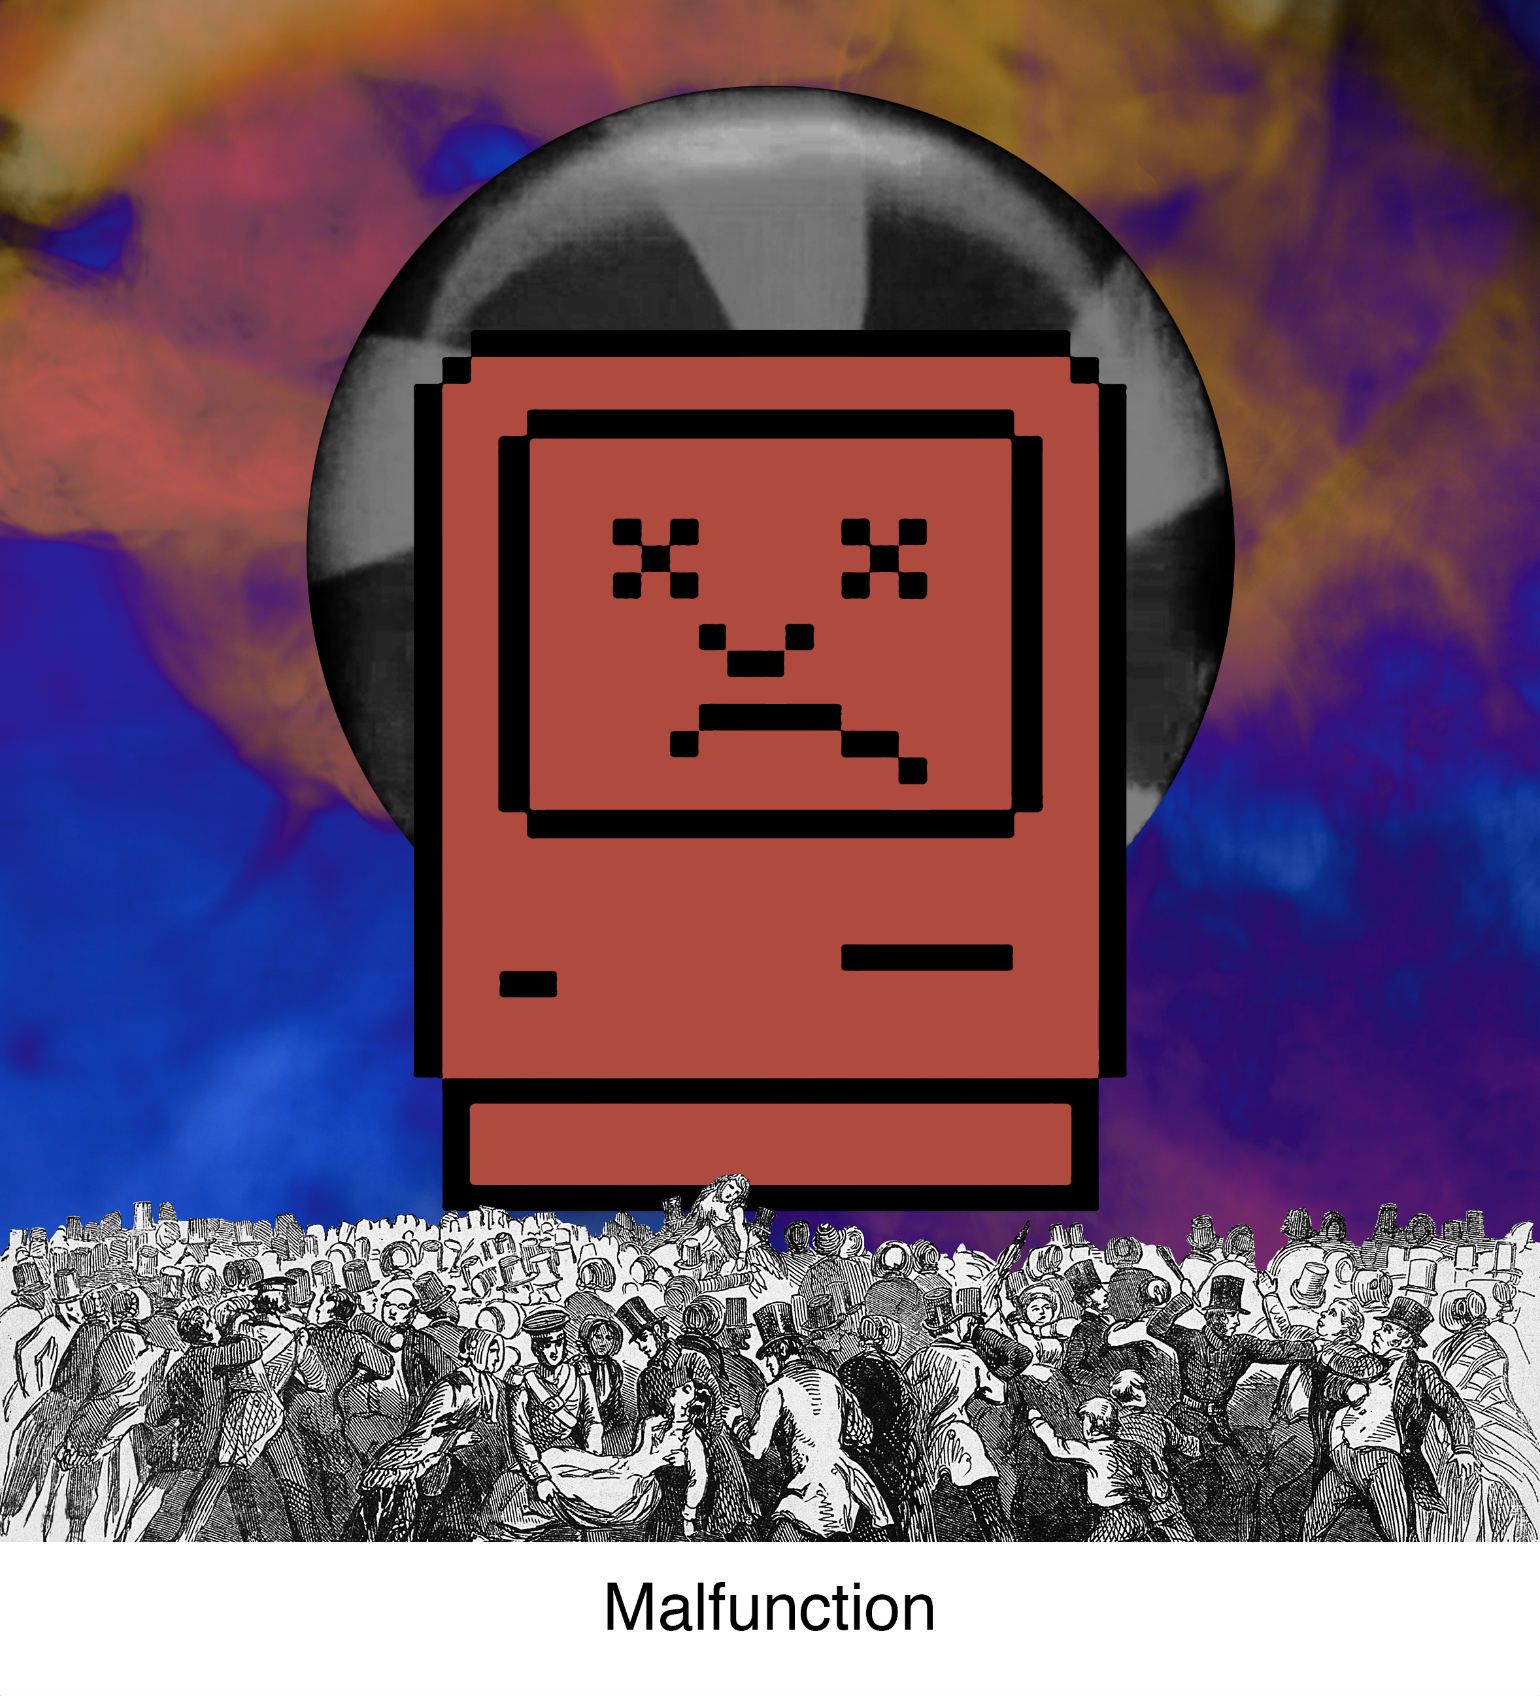
For this last image, I wanted to have the Jaguar lose its spots as if his soul were sucked out of him. I tried not to literally remove its spots but use a pixel stretch effect to represent the Jaguar’s skin’s movement away from all things scary. I also threw in a windows error window to further bring forward the idea that the jaguar is so scared that it cannot think and malfunctions.
There is a triad colour scheme here where I mix the colours from the first and second images. I used a dark blue for the background with a scratchy texture to create an eerie look. The Jaguar remains a colour of brown, with hints of blue, so that it can stand out from the background. This kind of colour juxtaposition is very common with movie posters to heighten the contrast, and also because while these colours are on the opposite ends of the colour wheel, they are complementary.
The colours for this image is okay but I feel the composition can be worked on a bit more as the feeling of being scared doesn’t seem to be conveyed quite well.
I thought maybe I could put the jaguar in a photo frame, like for his funeral after it dies from shock at the haunted house.
That would be hilarious, but I was aiming for more abstract ways of representing this. I took to Pinterest to get my inspiration.

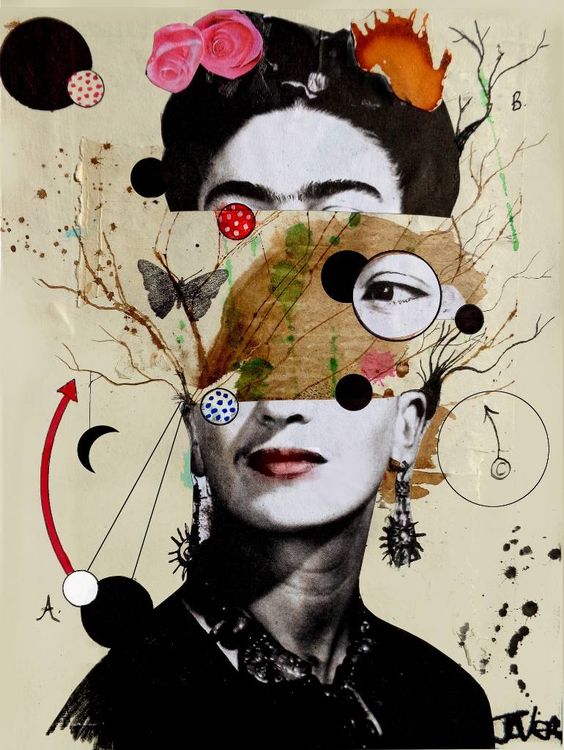
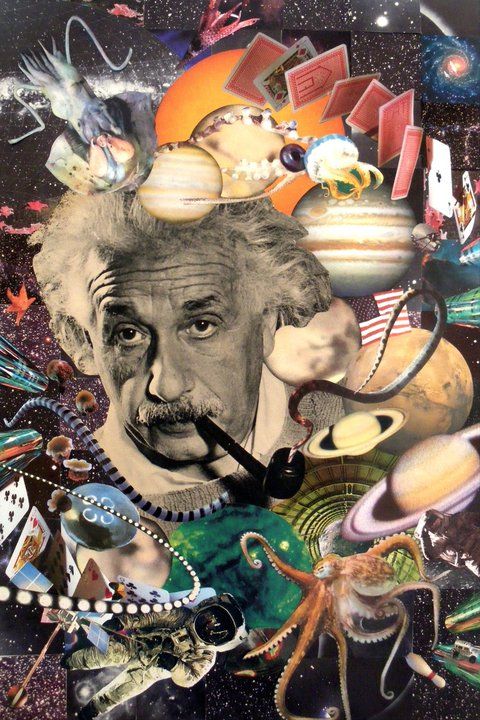
I found that it was a common thing to have objects and patterns branching out from the head of the subject. Each image told a different story because of the objects that branched out from behind each subject. I decided to work with that to express the feeling of being scared. (work will be in final)
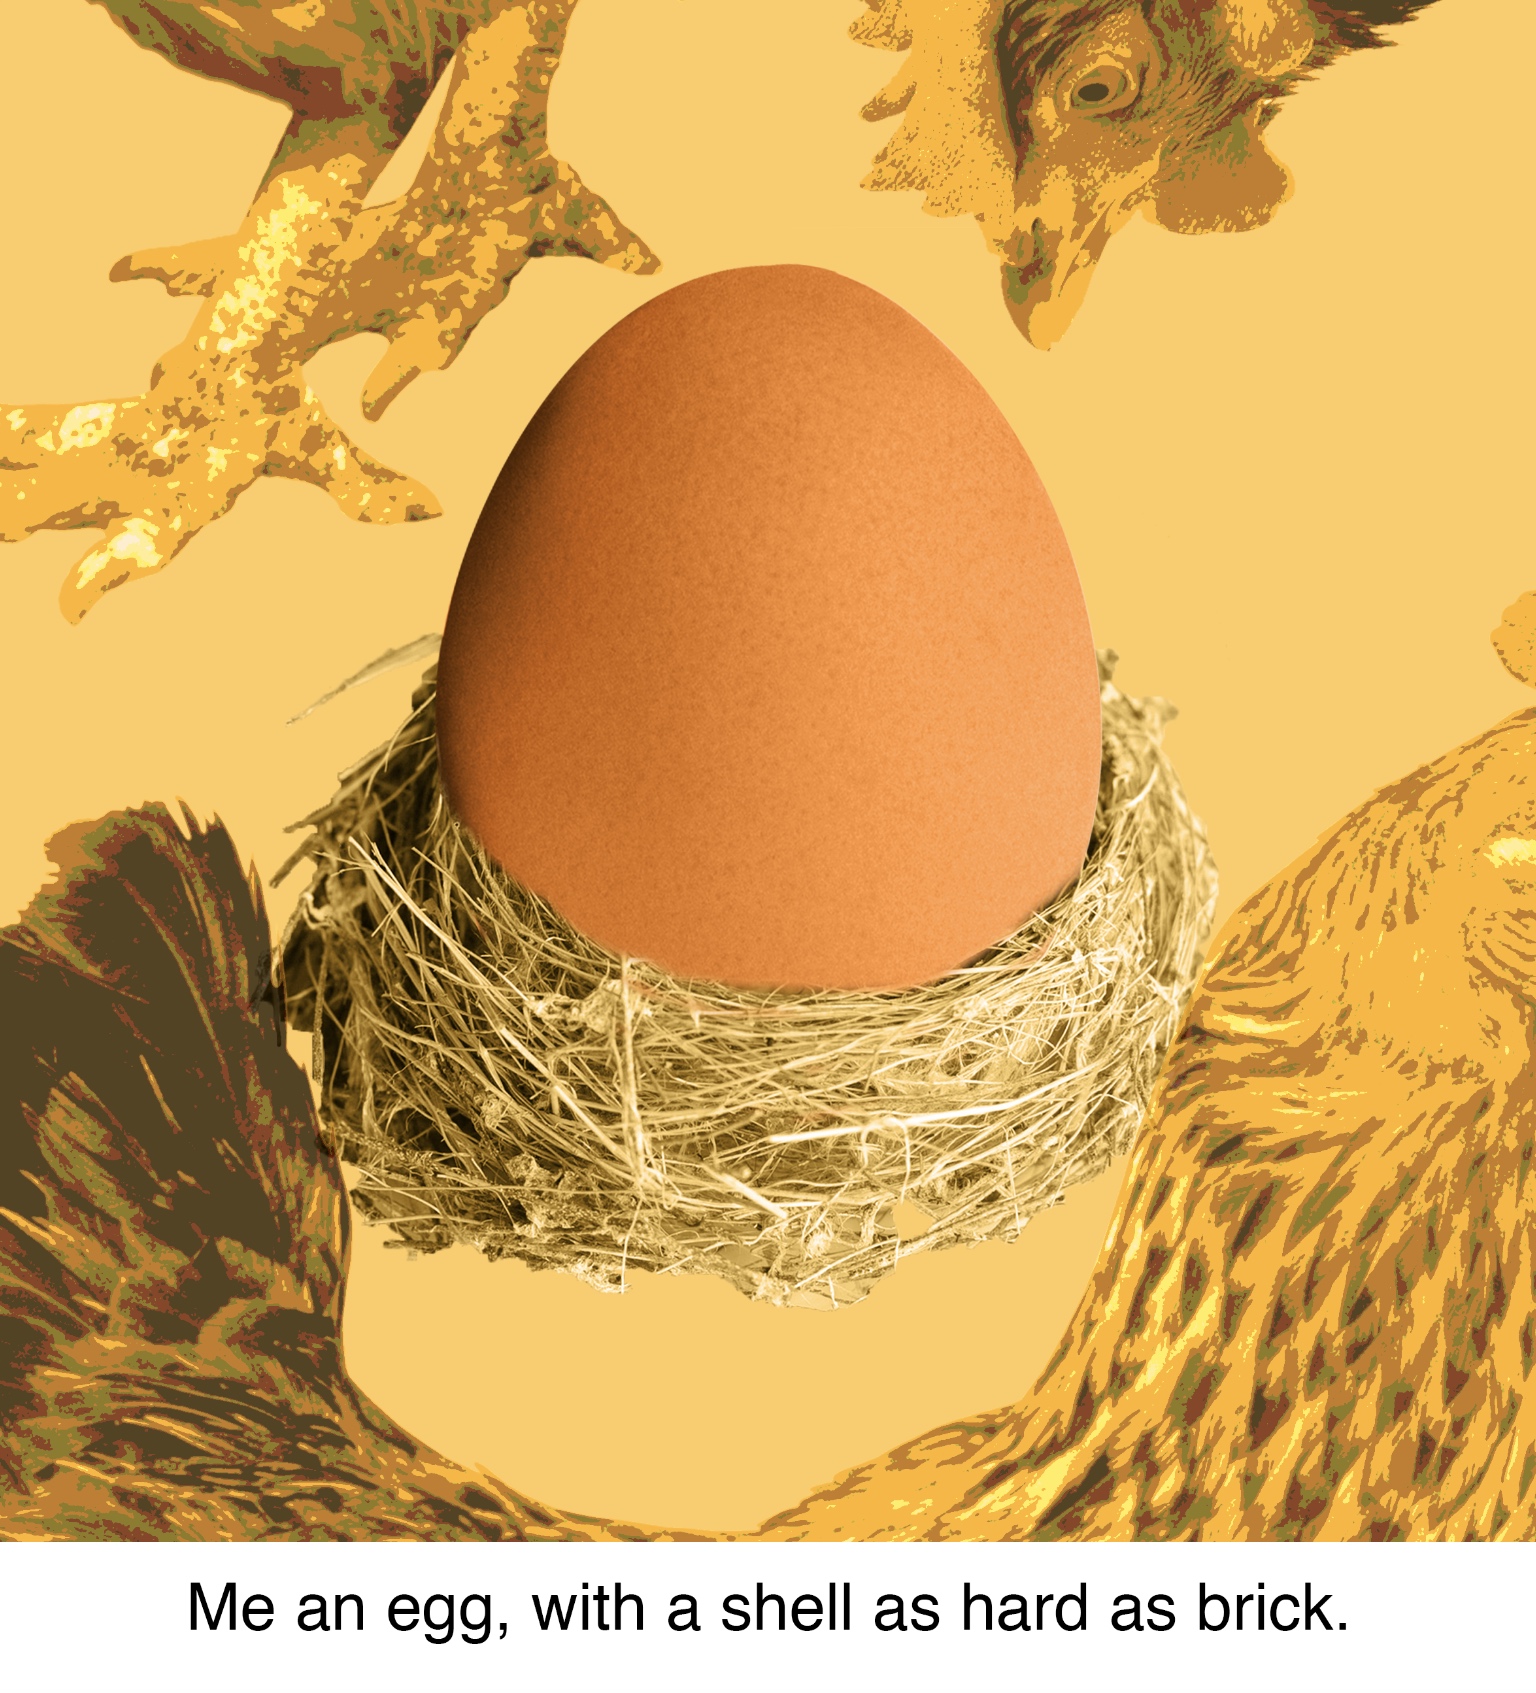
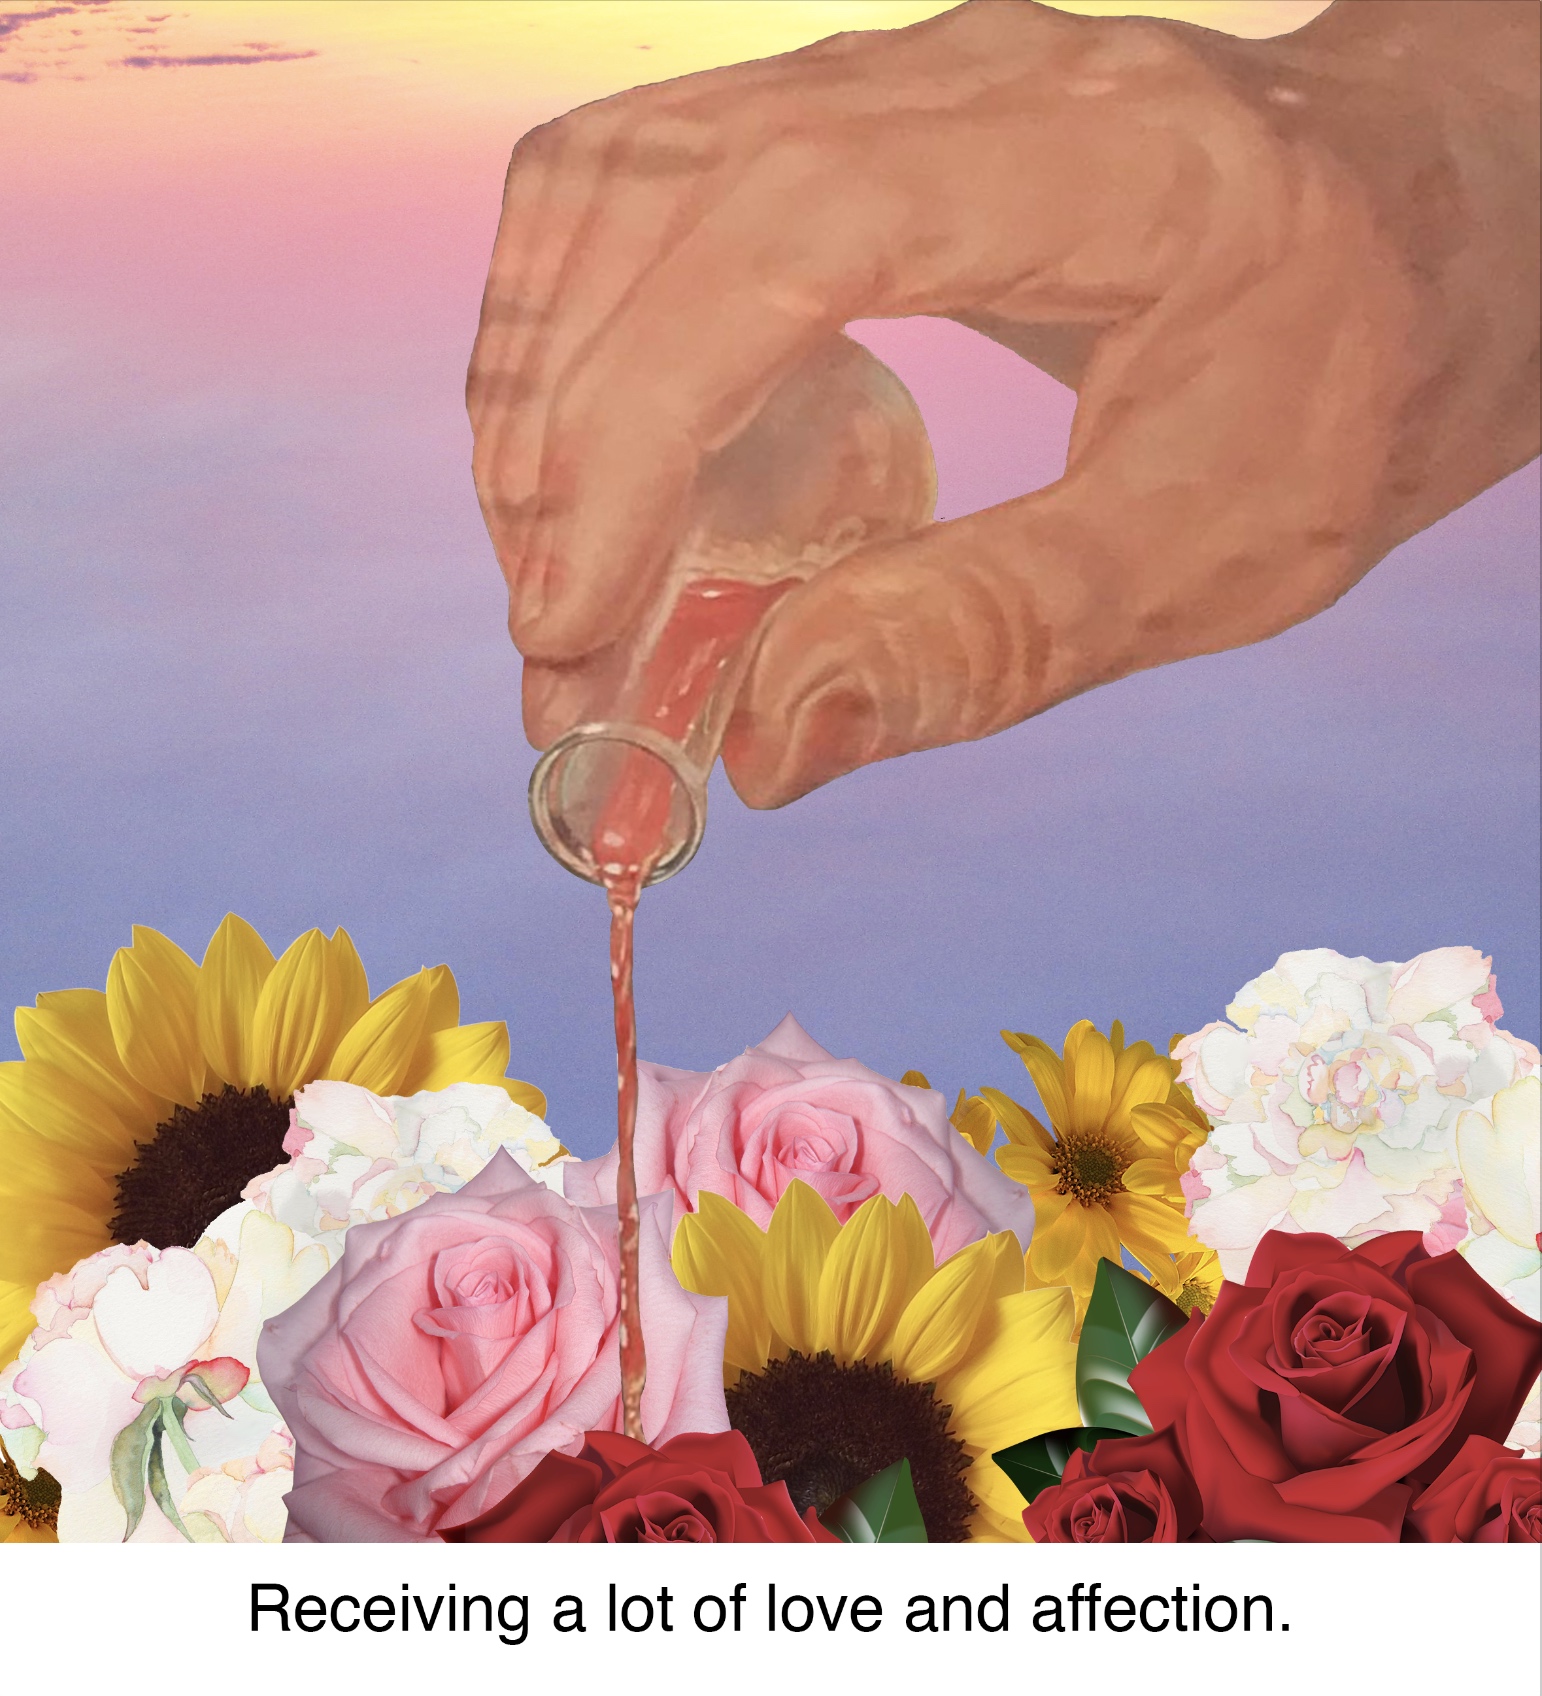
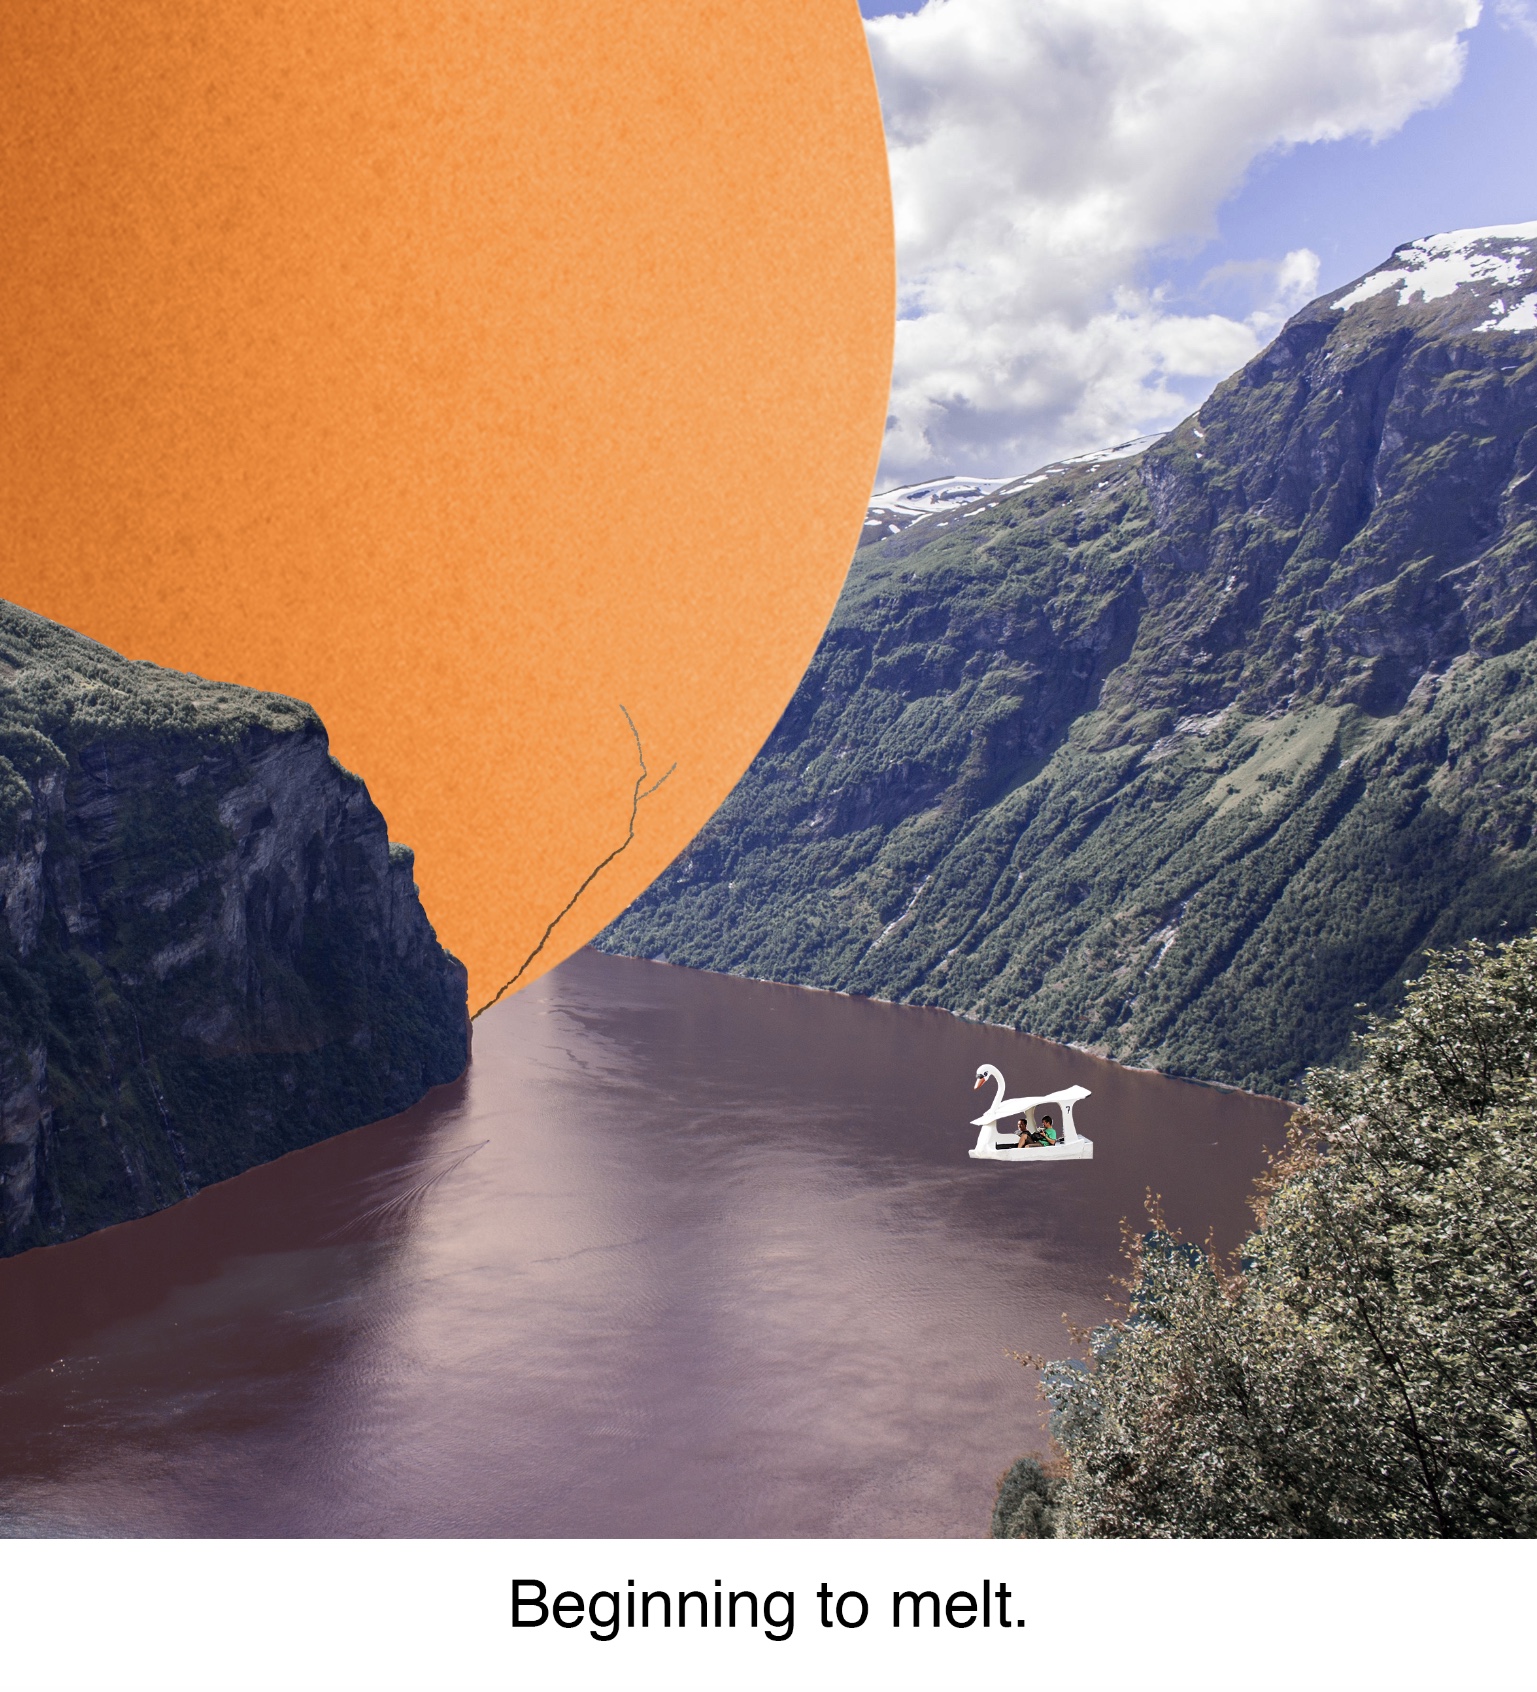
Image 1: Me, an egg, with a shell as hard as brick.
I initially intended for the hens to surround the egg like a pattern but I eventually placed it in such a way where the hens frame the egg. For me, this composition is fine but too straightforward. It is also difficult to tell that the egg is as hard as brick – it looks fragile as always.
Colour wise, I used a darker orange for the egg to make it stand out. I kept the colours adjacent as I want the egg to look comfortable with its surroundings instead of sticking out like a sore thumb.
Image 2: Receiving a lot of love and affection.
For this image, I managed to lean towards the more unconventional side in which I represented the love and affection through the pinkish solution. With that, I also kept my colours close to pink, pastel hues to emulate love.
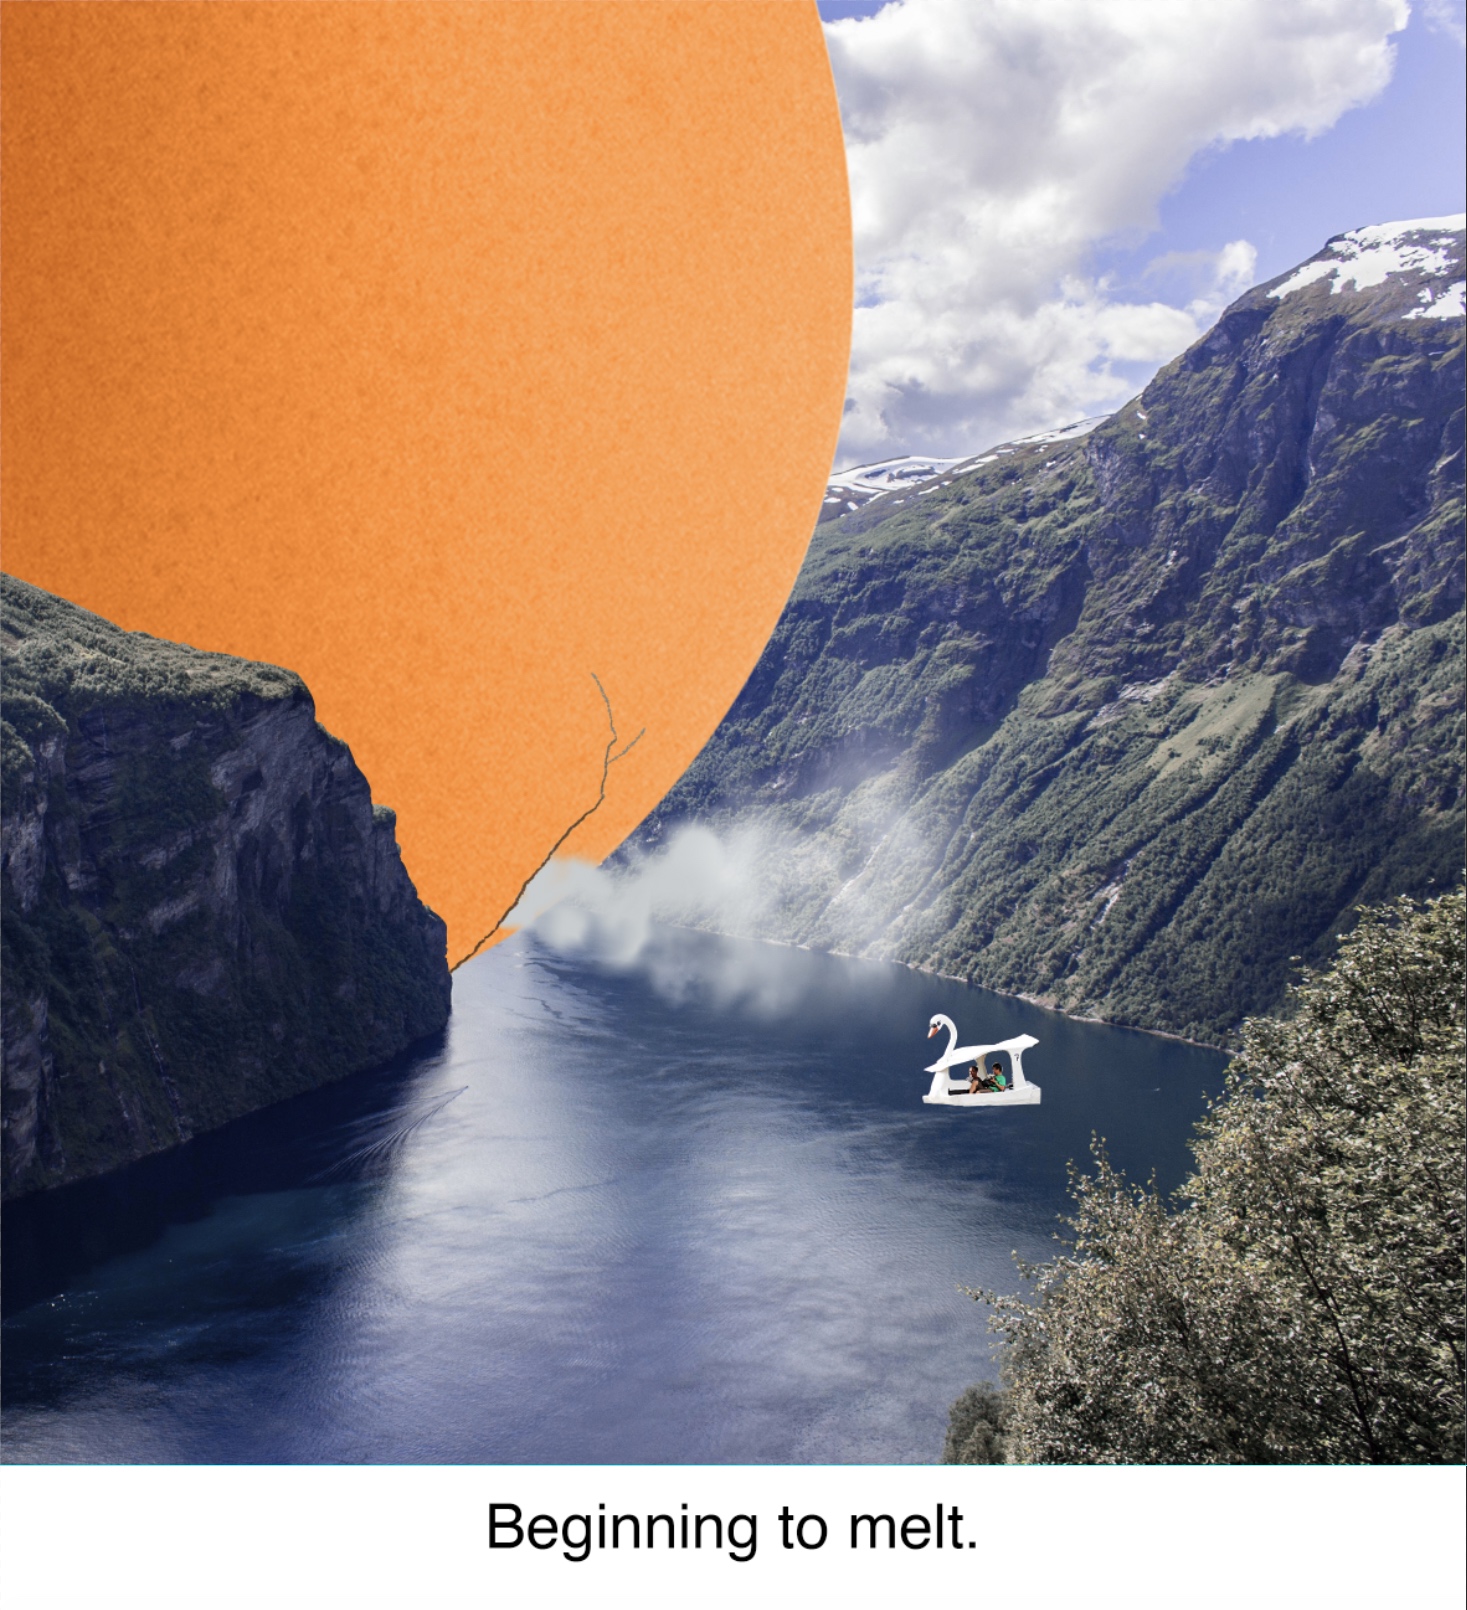
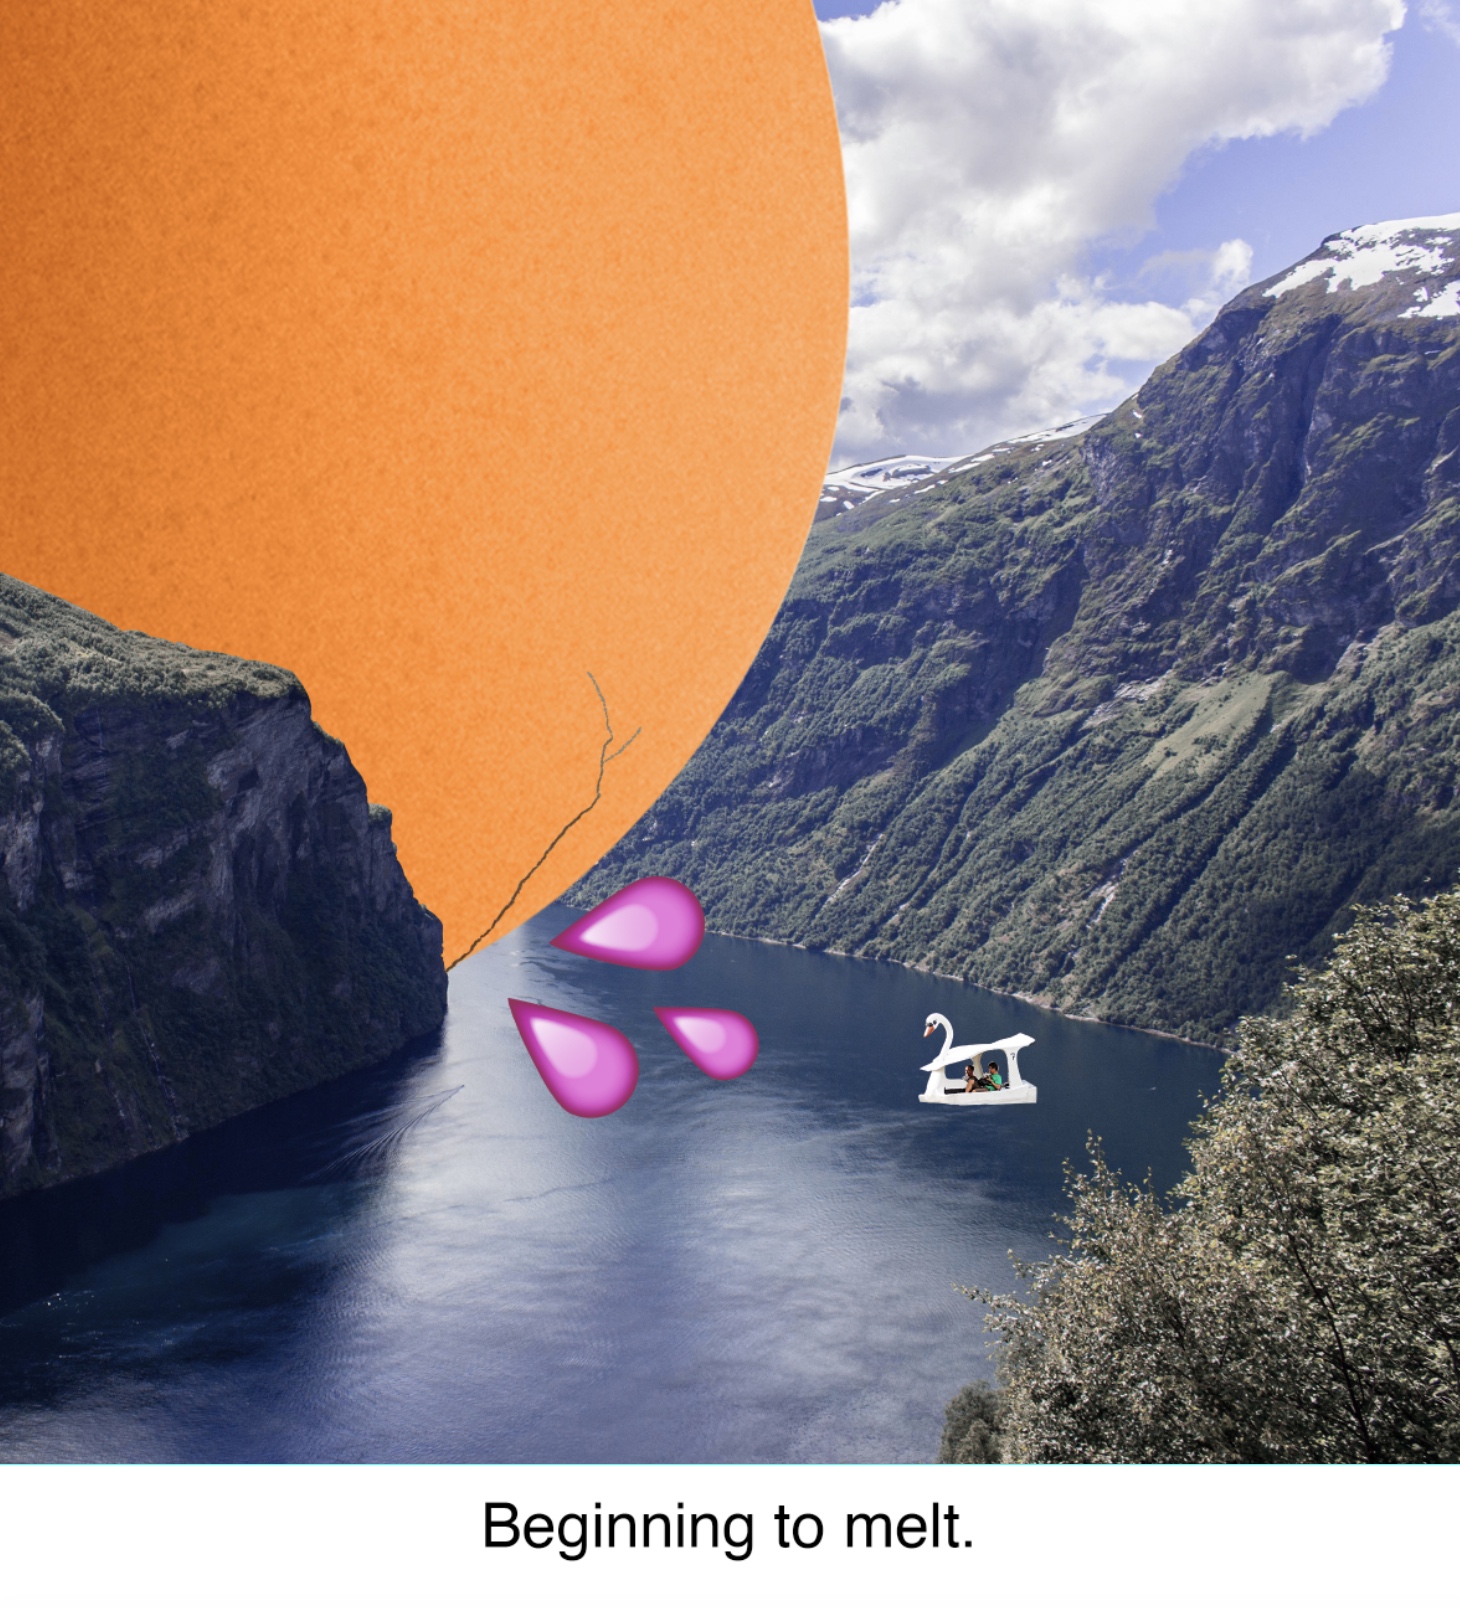
Image 3: Beginning to melt
I think the hard part with a lot of the images is composition. There are so many interesting ways I can tell my story but it is hard to figure out which would be the best or even what other interesting ways I could share my story. I really had to crack my brain for this project.
For example, here, I initially wanted the egg to leak out a little bit of yolk (representing how its walls have been broken), but I thought of trying for something more whacky and went with it leaking a river. I tinted the river pink and it didn’t look good at all. I tried another idea where steam comes out of the crack as if the crack had just formed and the air is being released… but it just looks like the egg is farting… The pink rain emoji idea does not work as well because it stands out too much compared to its surroundings.
I realised the problem didn’t lie in what was coming out of the crack in the eggshell, but in where the crack was placed. Of course, placing it at the bottom would make a viewer instinctively think of a butt.
I also realised the image looked a bit plain compared to usual photo collage work. They usually have a lot going on but somehow they all blend together nicely to form a surreal, dreamy landscape. (work will be in final)
Colour wise, the image has a mixture of light pink/orange and blue tones, again as with the other equations, to show the reaction between the subject and the situation.
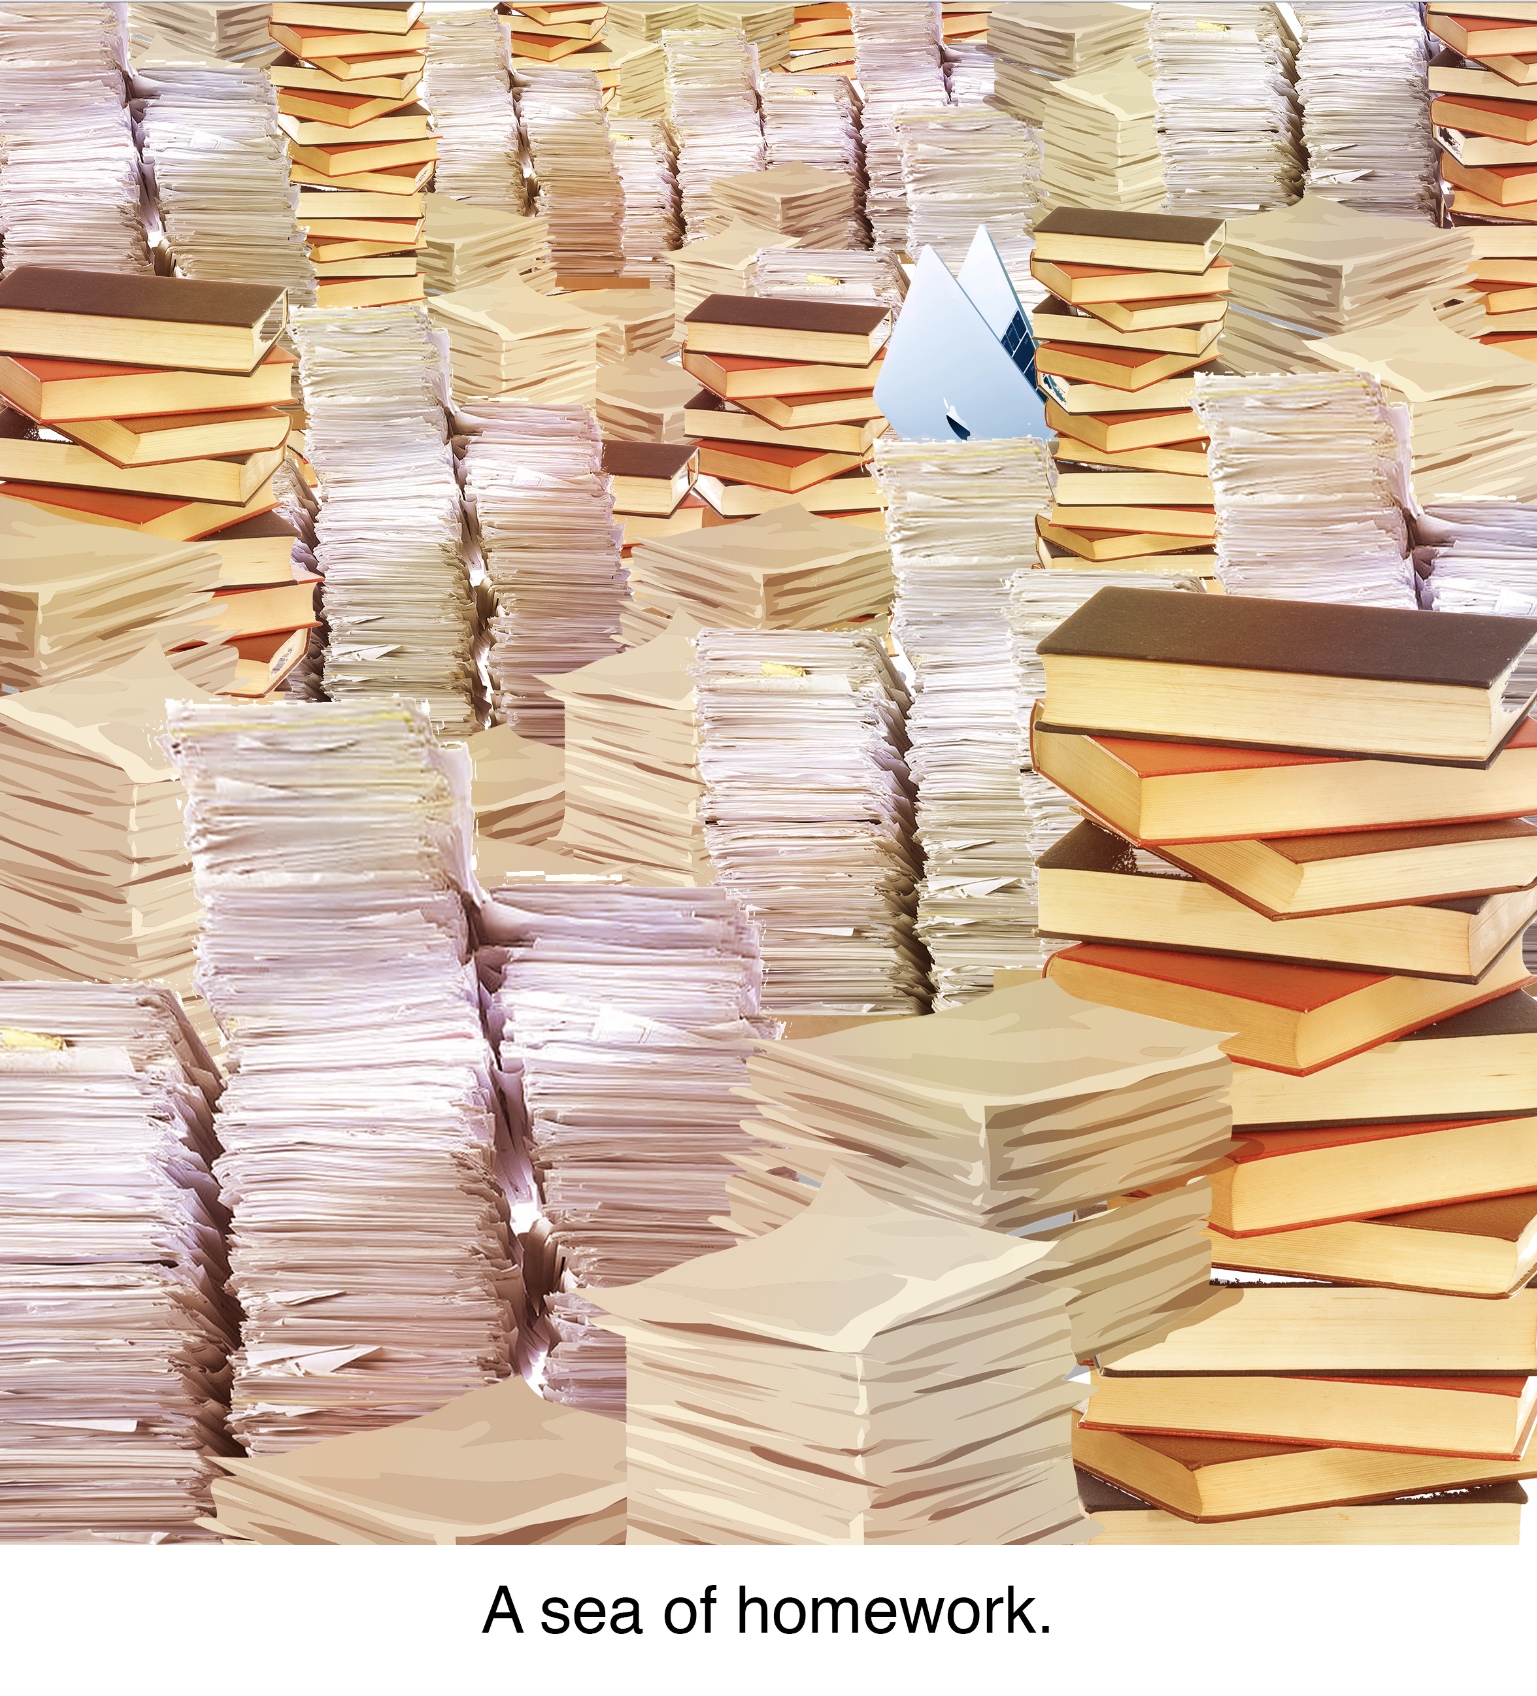
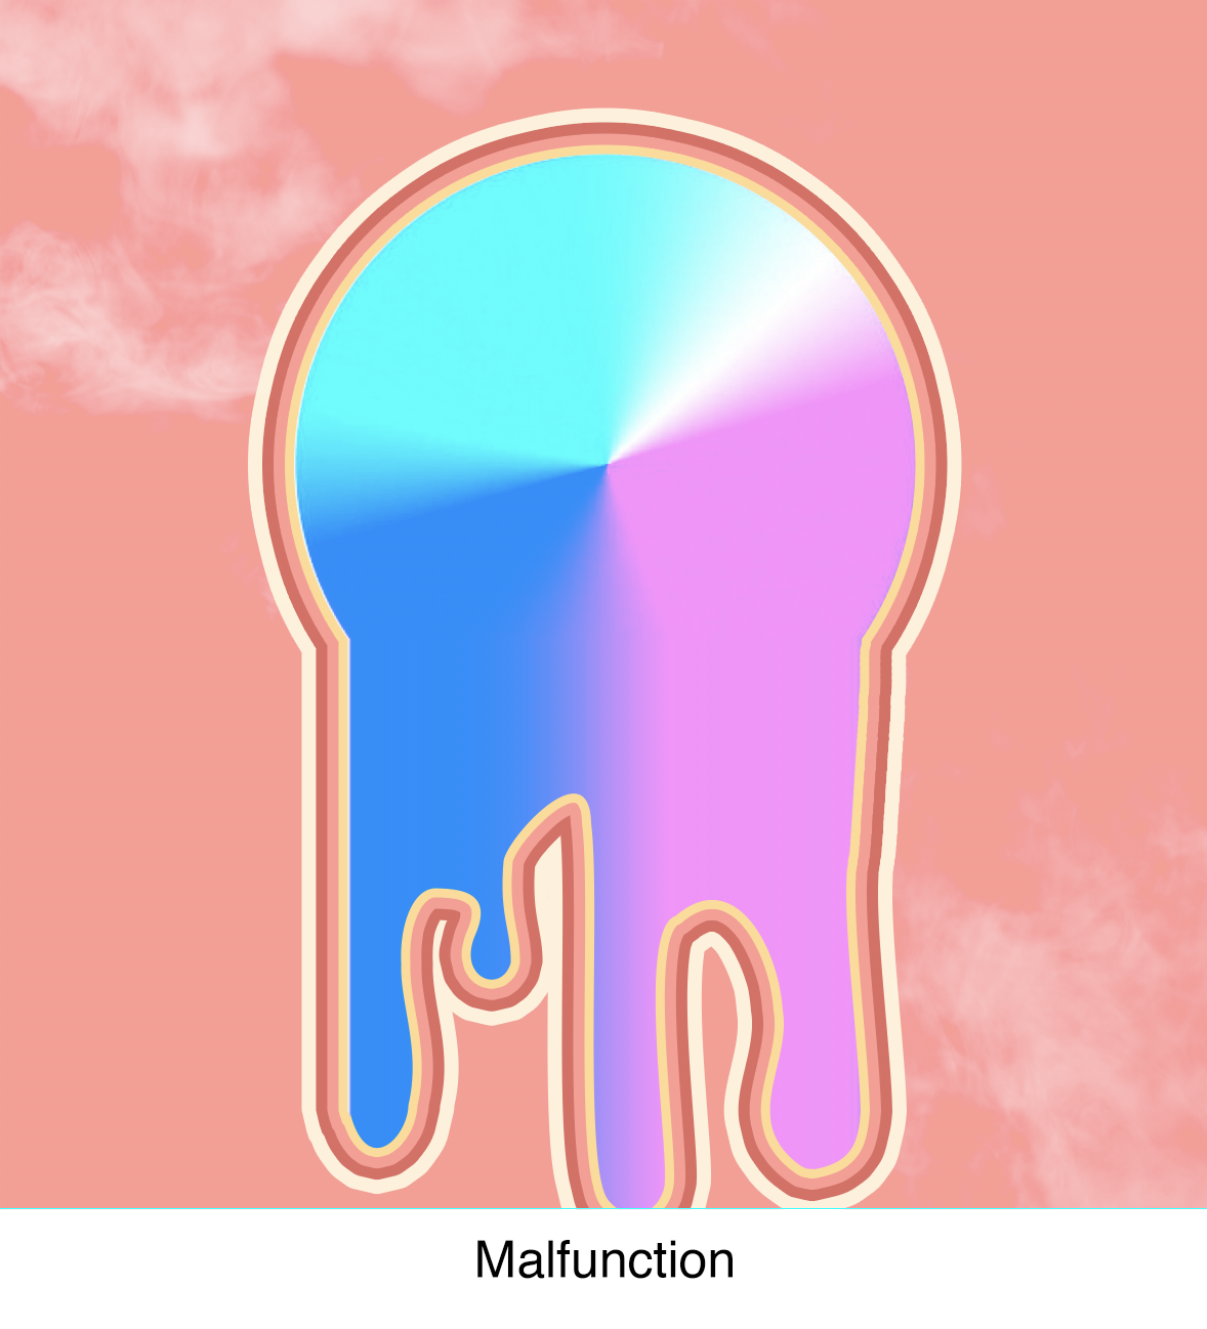
Image 1: Me, a fully functional, brand new laptop.
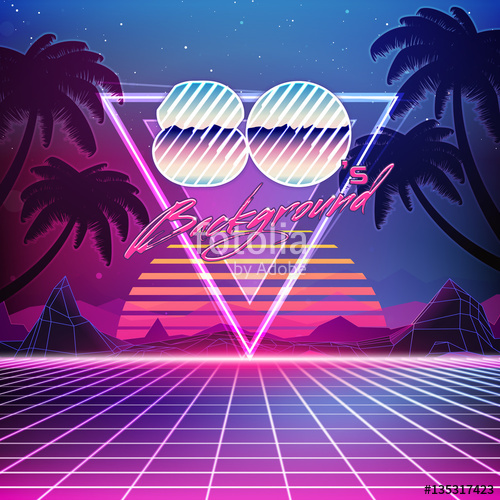
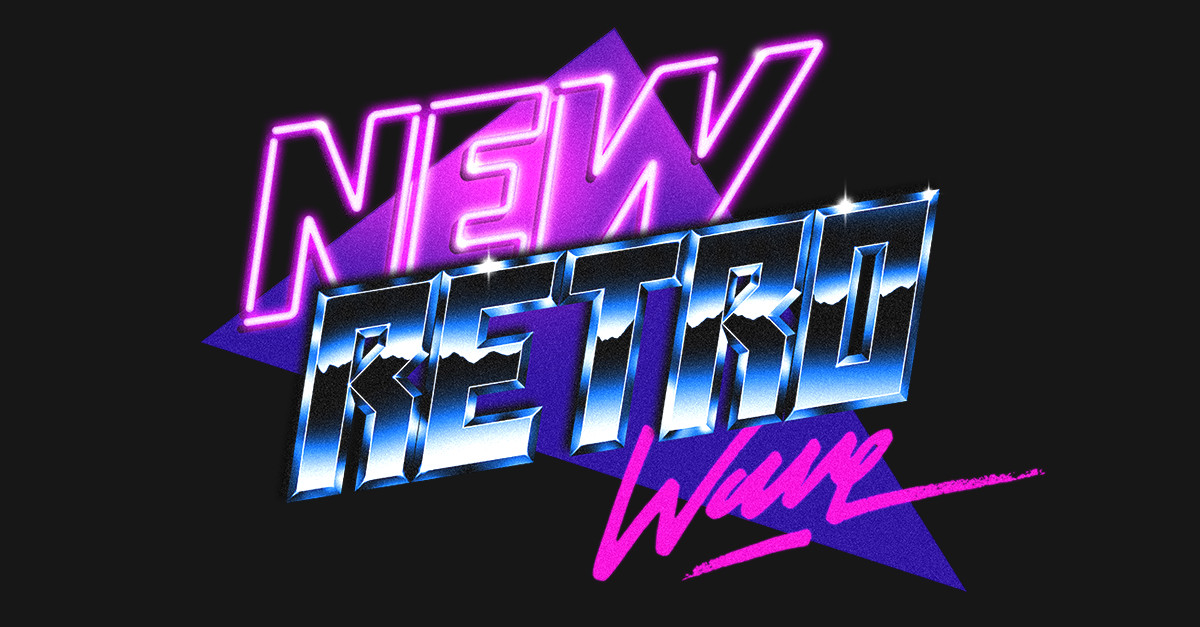
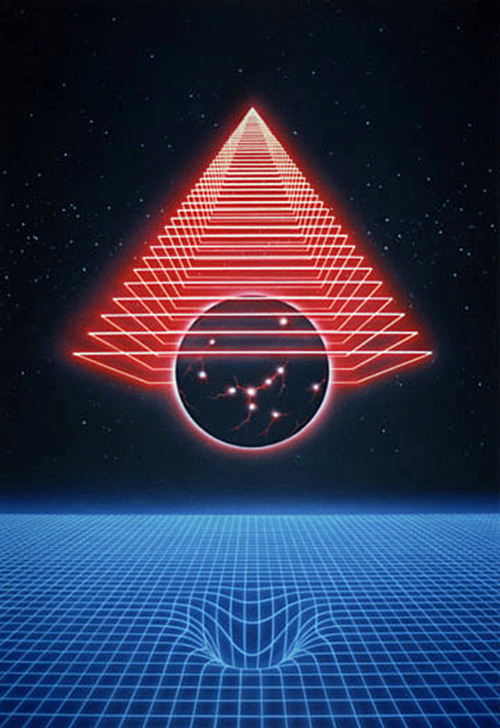
For this image, I was going for the 80s retro style, hence the repeated laptops slowly moving through space, towards you, and the sparkle at the corner. For colour choice, I chose cool blue with green hues to give that sense of a brand new, high tech laptop.
Image 2: A sea of homework
I used orange shades in this image to contrast the first. I put the laptop in at around a third in the image as well to create a juxtaposition of the colour and size, showing the laptop being flooded with work. I also chose the orange shades to give a subtle hint to heat which would relate to my last image where the computer is overheated.
Looking at this image again, I might bump up the intensity of the orange and reds to deepen the contrast. (Image in final)
Image 3: Malfunction
Ah, yes, the rainbow wheel of death. I tried to simplify the colours in the wheel but it was still quite distracting. My choice in pastel colour does not really give the image the sense of something dire.
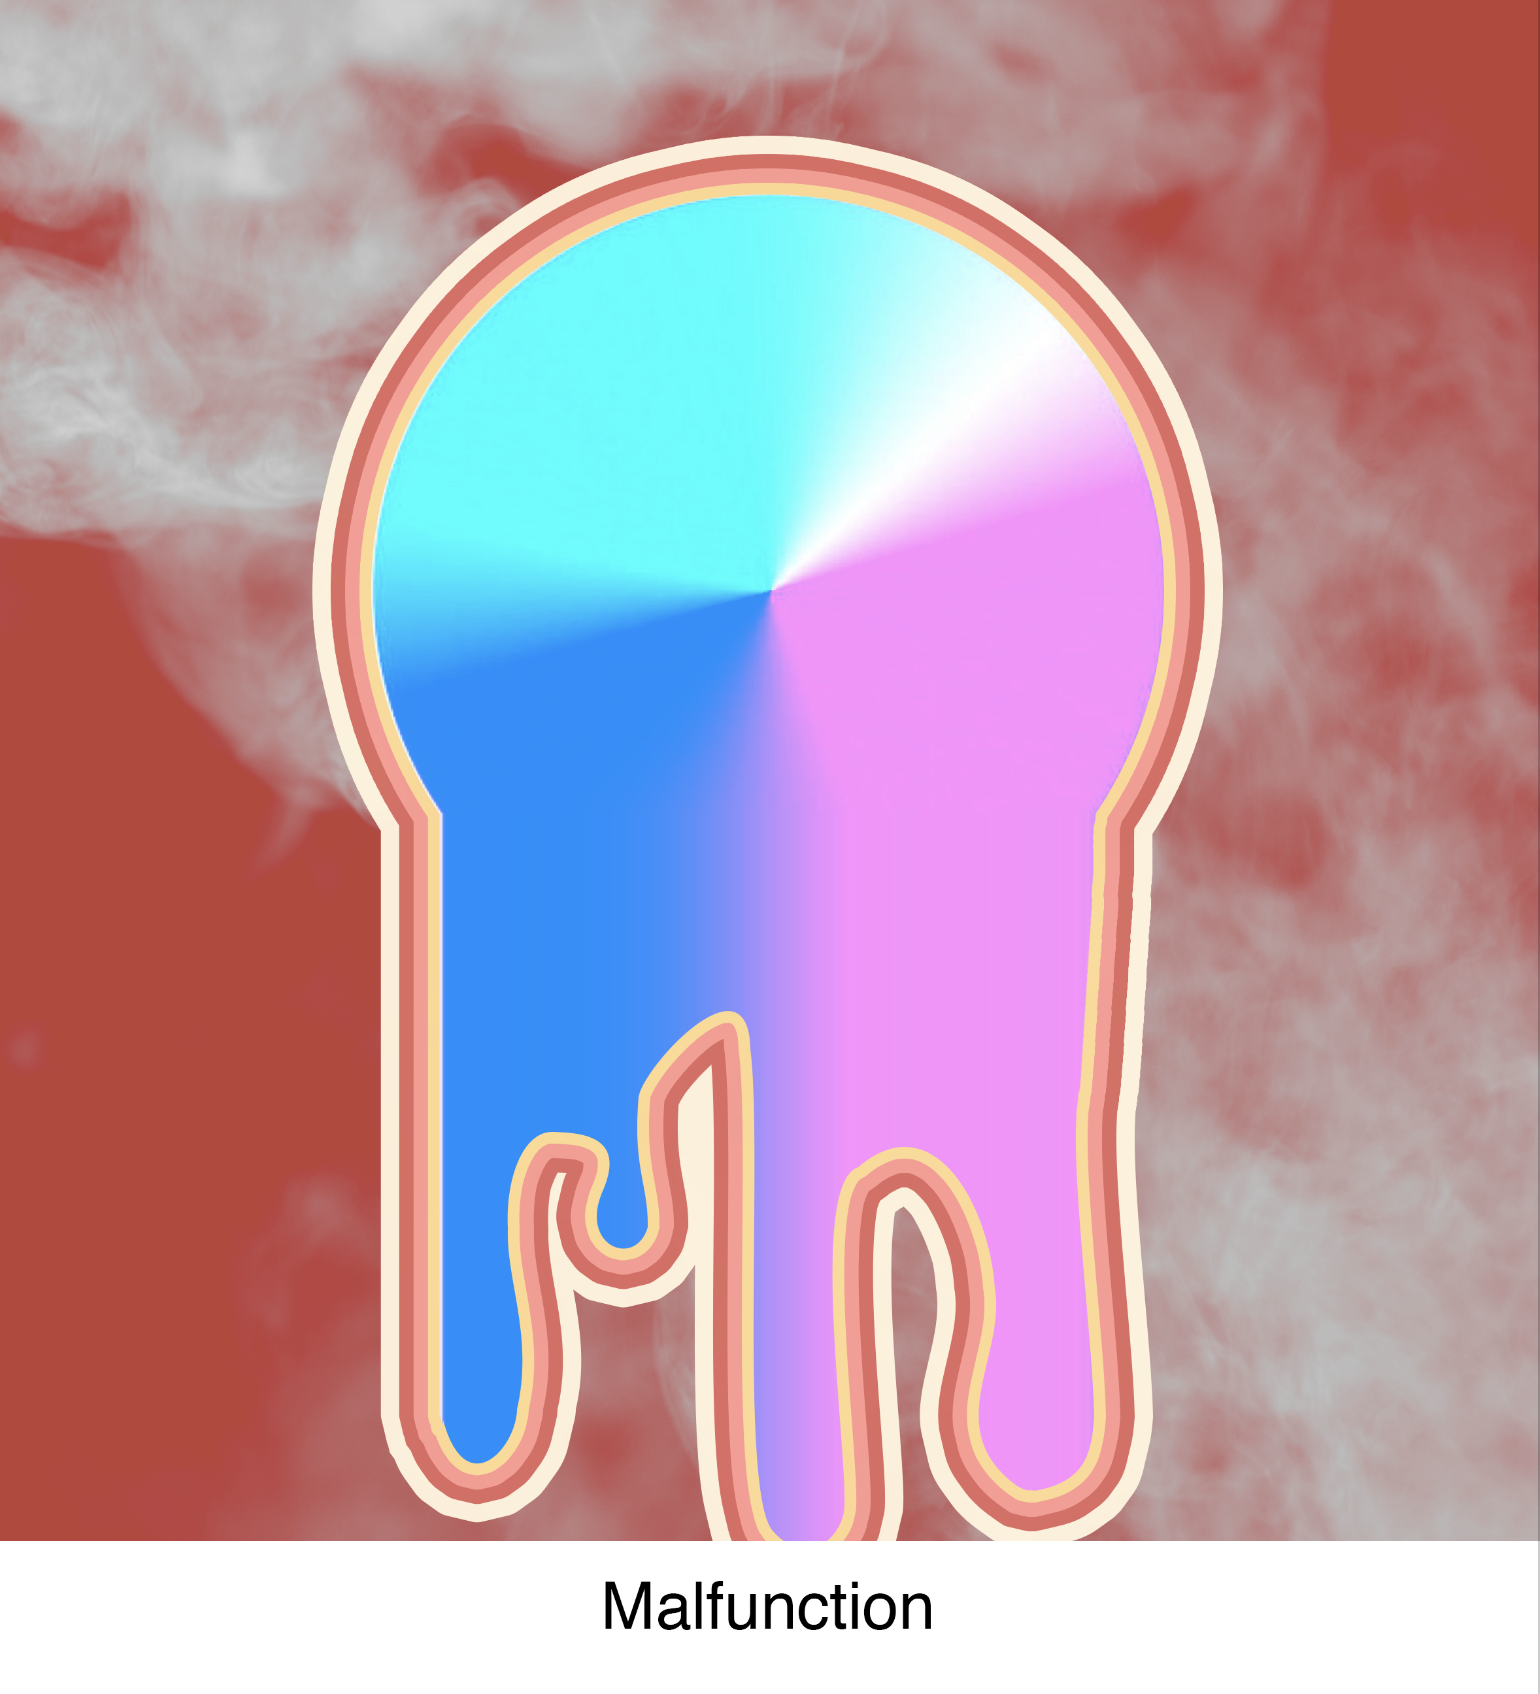
I tried making the background darker but the colours really clashed and did not work out at all.
Shirley suggested I could use the old mac icon for a broken hard disk – it tells the same story without all the colours:
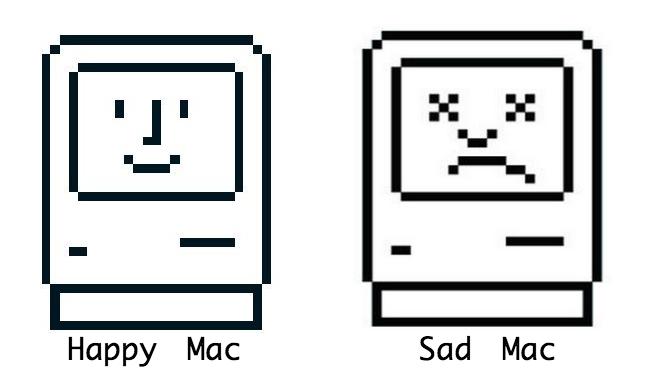
On top of changing the icon, I probably had to change my approach to this as well, colour wise. I decided to stick to the darker shades of my already chosen palette (see final work)
Image 1: Me, a hoodie with personality and character.
Following from the last image of the first equation, I had objects come out from the subject, this time from the head of the hoodie. For my colour choice, I chose cooler toned colours as I never saw myself as a cheery, bright-coloured individual. The hoodie, however, is given a brighter green colour to stand out from the muted background if not the composition as a whole would look too muted.
Image 2: A big social event
What do social events for young adults like me always without a doubt contain? Booze. It’s also filled with chatty and loud individuals and usually overall noisy and a little crowded. Although it sounds unappealing, the noise and crowd usually add to the bright atmosphere of these social events. Hence I chose the bright orange shades and the image of the sunbeams.
While creating this image, I tried looking for engraved images of people raising their glass but could not find one, so I got to doing it myself. Previously there was a senior that found an engraving preset that gives the engraving effect seen on money but it didn’t seem to work too well for me. I did a bit of researching and found this simple method to create the same engraving texture.
My try with the tutorial:
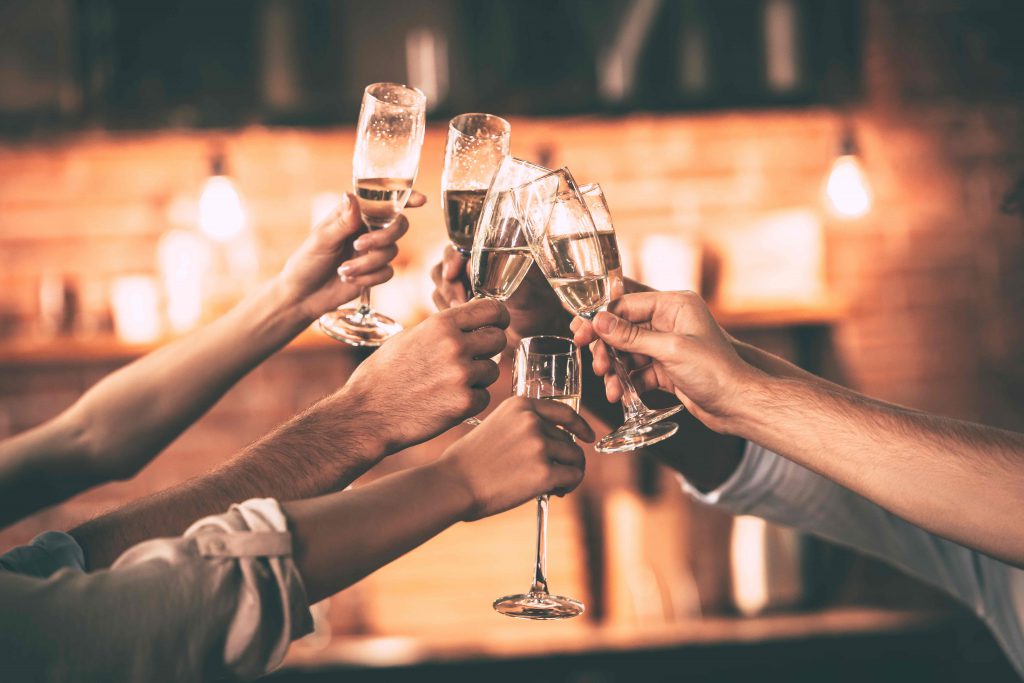
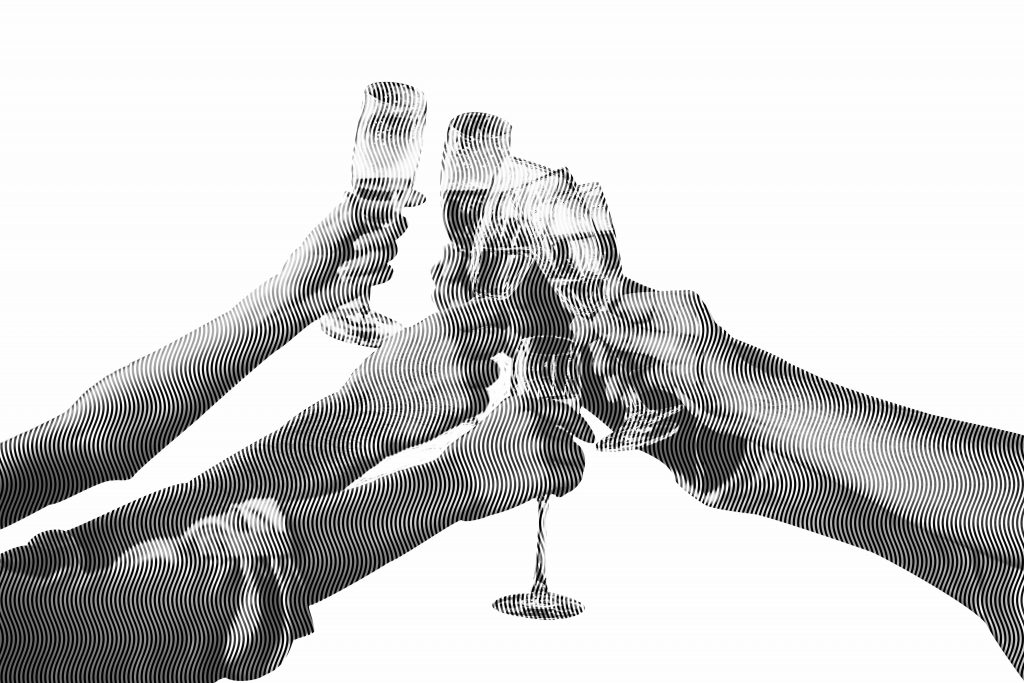
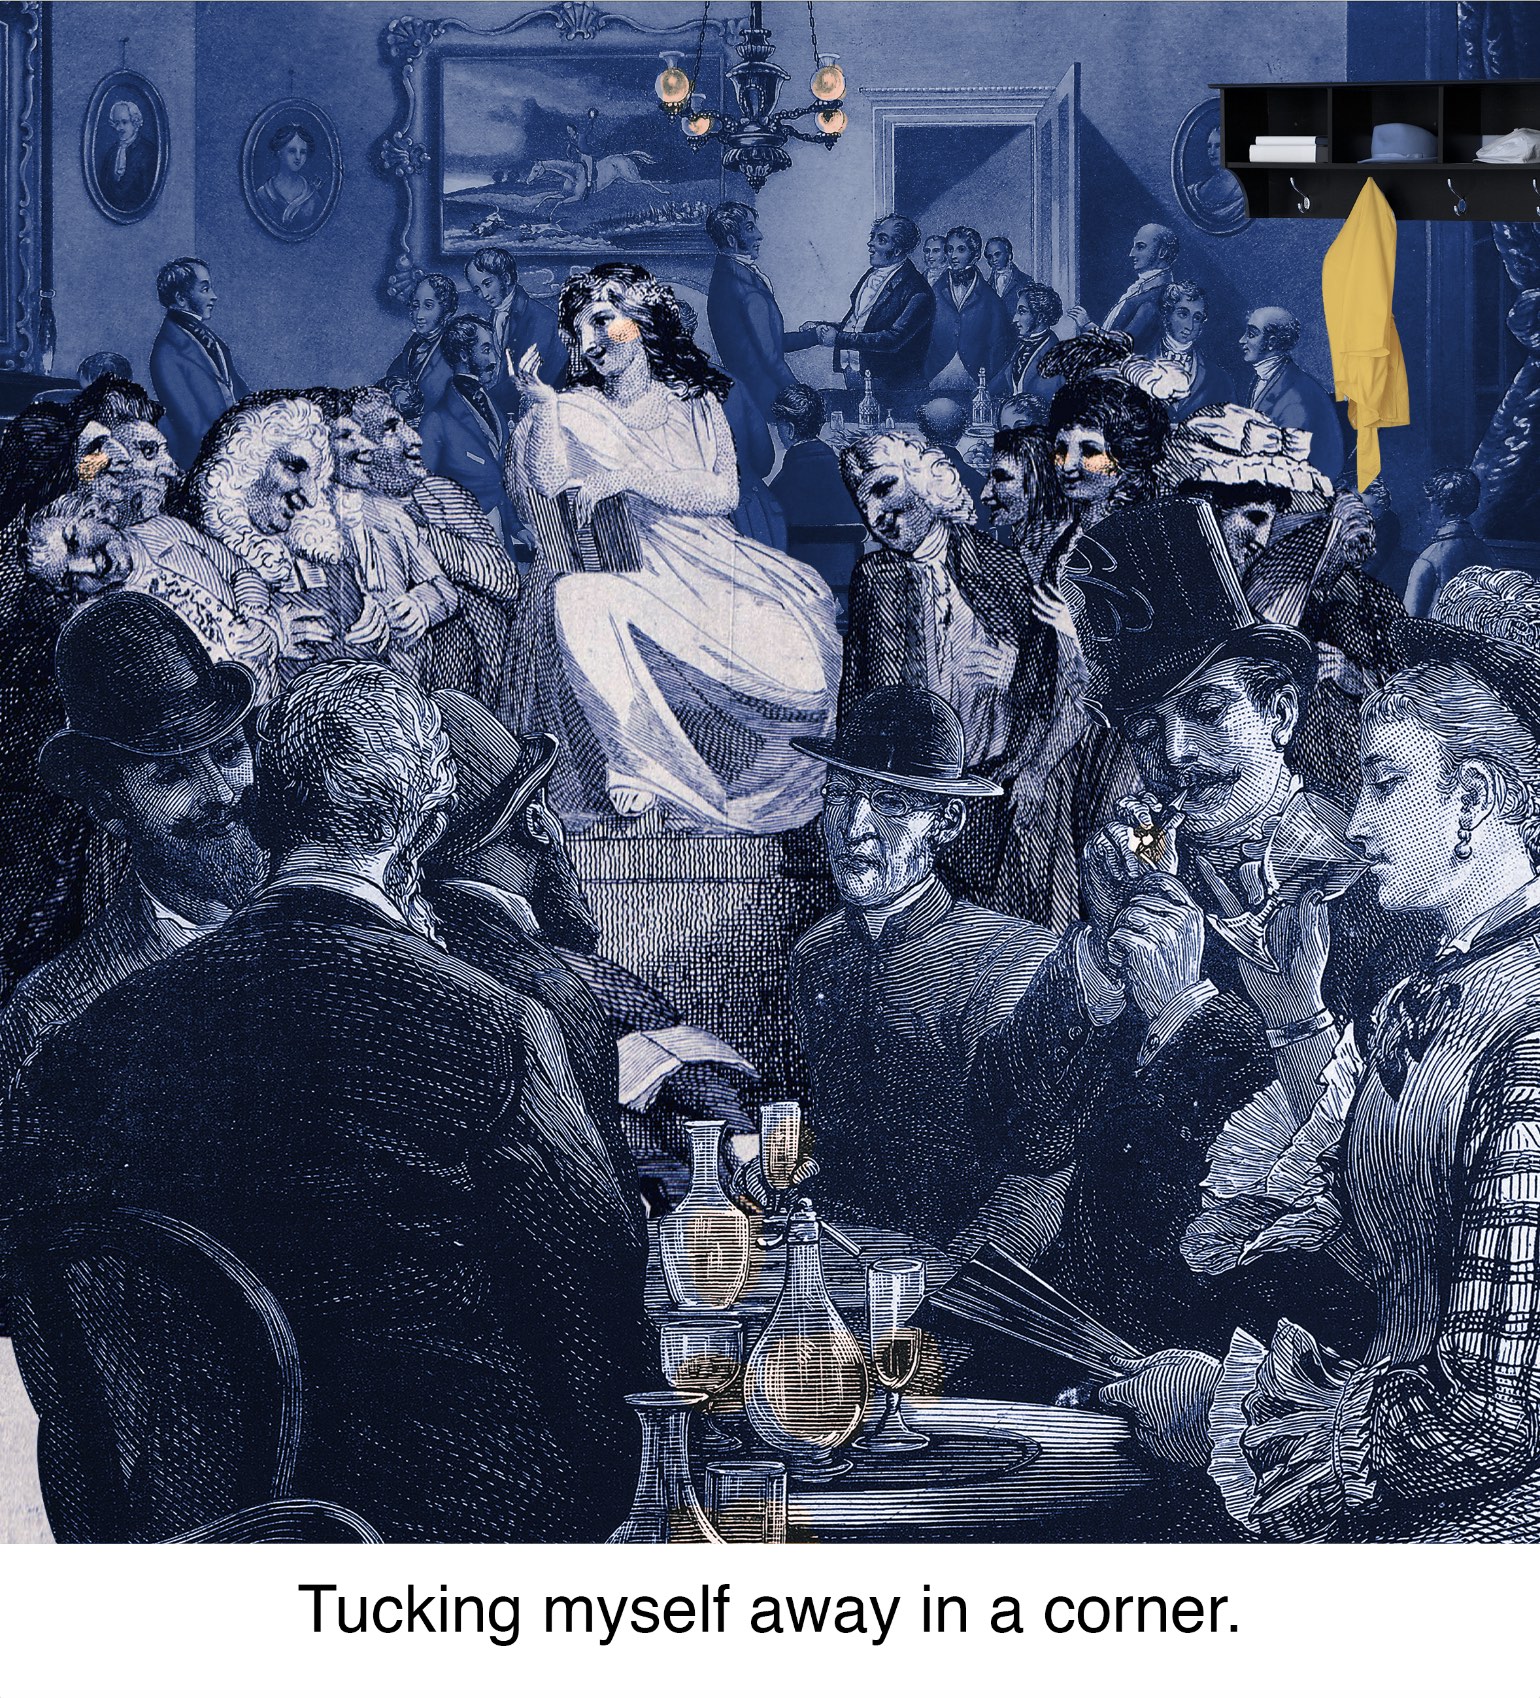
Image 3: Tucking myself away in a corner
For this image, I inverted the colours and used the cool, dark colours for those at the social event and the bright colours for myself to make the contrast more prominent, as well as to draw attention to the hoodie in the composition. I added small streaks of orange for the glasses of alcohol as with the previous image, and at the lights and cheeks of some of the figures. I did so to tone down the contrast between my hoodie and its surroundings, as well as create more dimension to my image.

On to my final pieces (-:
A picture is worth a thousand words. Sometimes they’re only worth one, but if you put those pictures together, they may not tell you a thousand words but convey a quote from a movie instead!
Our second Foundation 2D project is Forest Gump. We have to pick 4 movie quotes, then piece together images – symbols, pictograms, dingbats (ornaments), icons and engravings as my visual vocabulary – to create my visual narrative.


Quote 1: “You notice things if you pay attention.” – In the Mood for Love, 2000
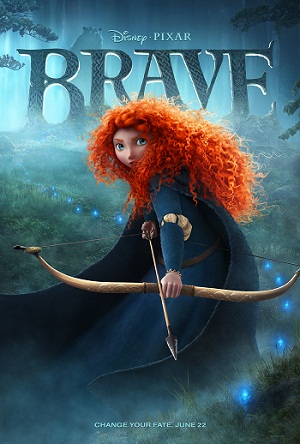
Quote 2: “All these moments will be lost in time, like tears in the rain.” – Blade Runner, 1982
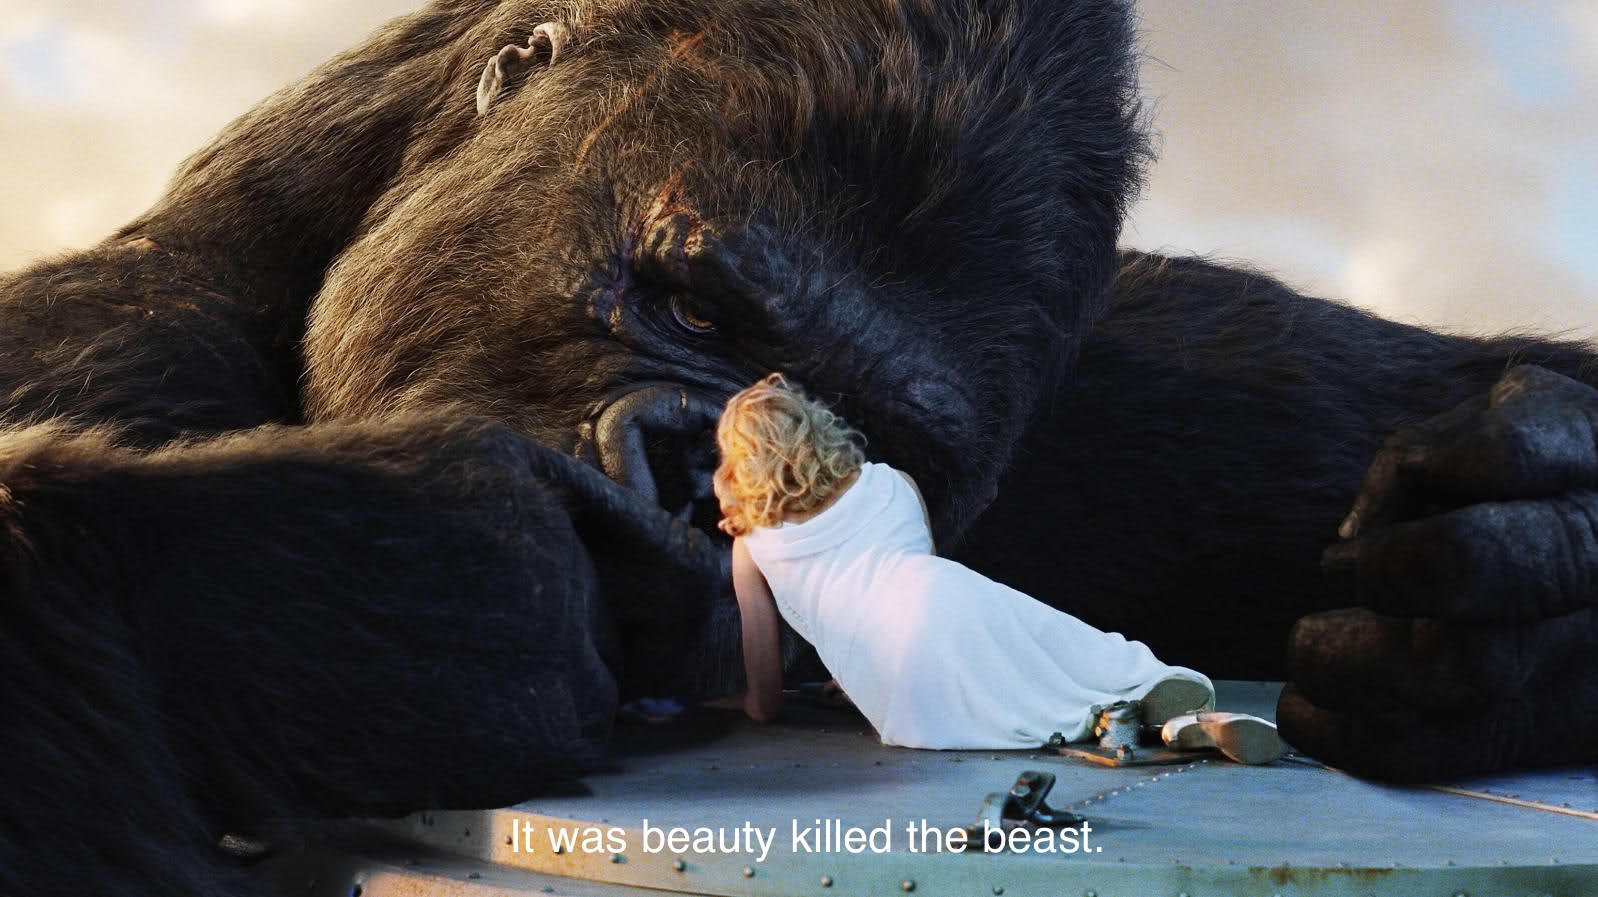
Quote 3: “It was beauty killed the beast” – King Kong, 1933
Quote 4: “They call it Royale with cheese” – Pulp Fiction, 1994


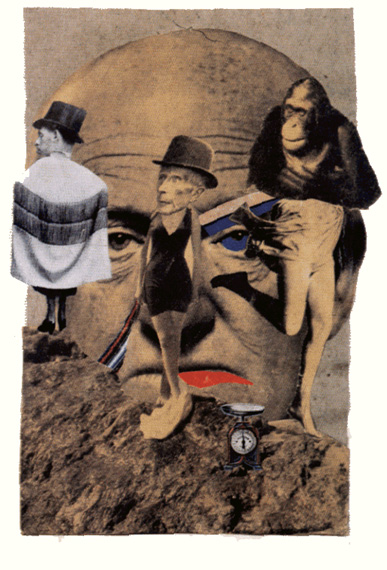
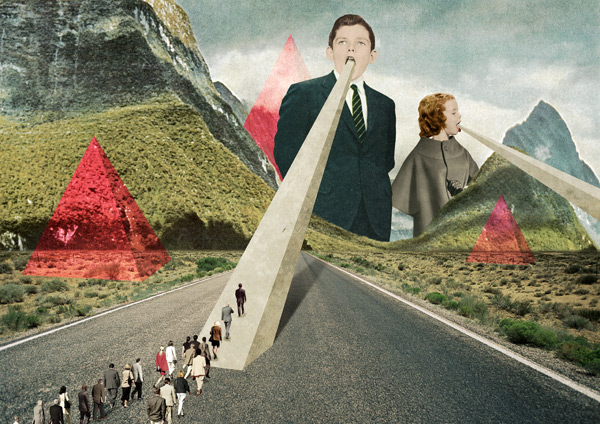
Before starting on this project, I researched on collage work during the Dada period and found the Berlin female artist Anna Therese Johanne Höch. Her works centre around the theme of women’s roles in the working world and convey this through collages made of cutouts from popular media such as newspaper and magazines.
What I like about her work and feel that I can take from her work is her ability to put two objects that can be very different together. For instance, with The Art Critic, the subjects head is too big for his body. Unusual objects like a shoe are also placed on the man’s forehead. All of this, of course, is intentional as Höch uses the uncanny to grab the viewers attention and bring forward what she wants to discuss or convey.
Compositional wise, I will be applying Gestalt principles to create interesting compositions. For example, like in image 1, I can repeat an image to create a pattern, and play with its size to create depth. I also want to have leading lines in my work like in image 2 above.
Of course, I had to pick a quote from my favourite movie!
For this specific quote, my work went through very dramatic changes.
Initially, when I thought” of paying attention”, I thought of open eyes and ears and keeping quiet. Noticing things to me would be about noticing people around me, including what they’re saying.
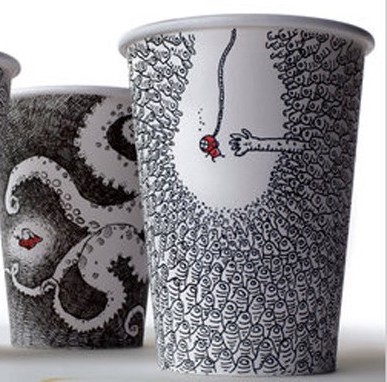
Taking inspiration from the movie itself, I created the piece below:

As shown, I included an eye and an ear for “paying attention”, as well as the warning or attention signs above the eyes. For “notice things”, I added a silhouette of people talking in the iris of the eye to show that the eye is watching and paying attention, and speech bubbles that slowly travel towards the ear. The splatters created was to add some texture to the work.
The feedback I received for this composition was that the image created was too literal and that while I wanted the eye to be the focus of the composition, the biggest speech bubble took away some of the focus as it was just as big or even bigger than the eye.
Redo!!
Taking more inspiration from Dada collages, I created the piece below:
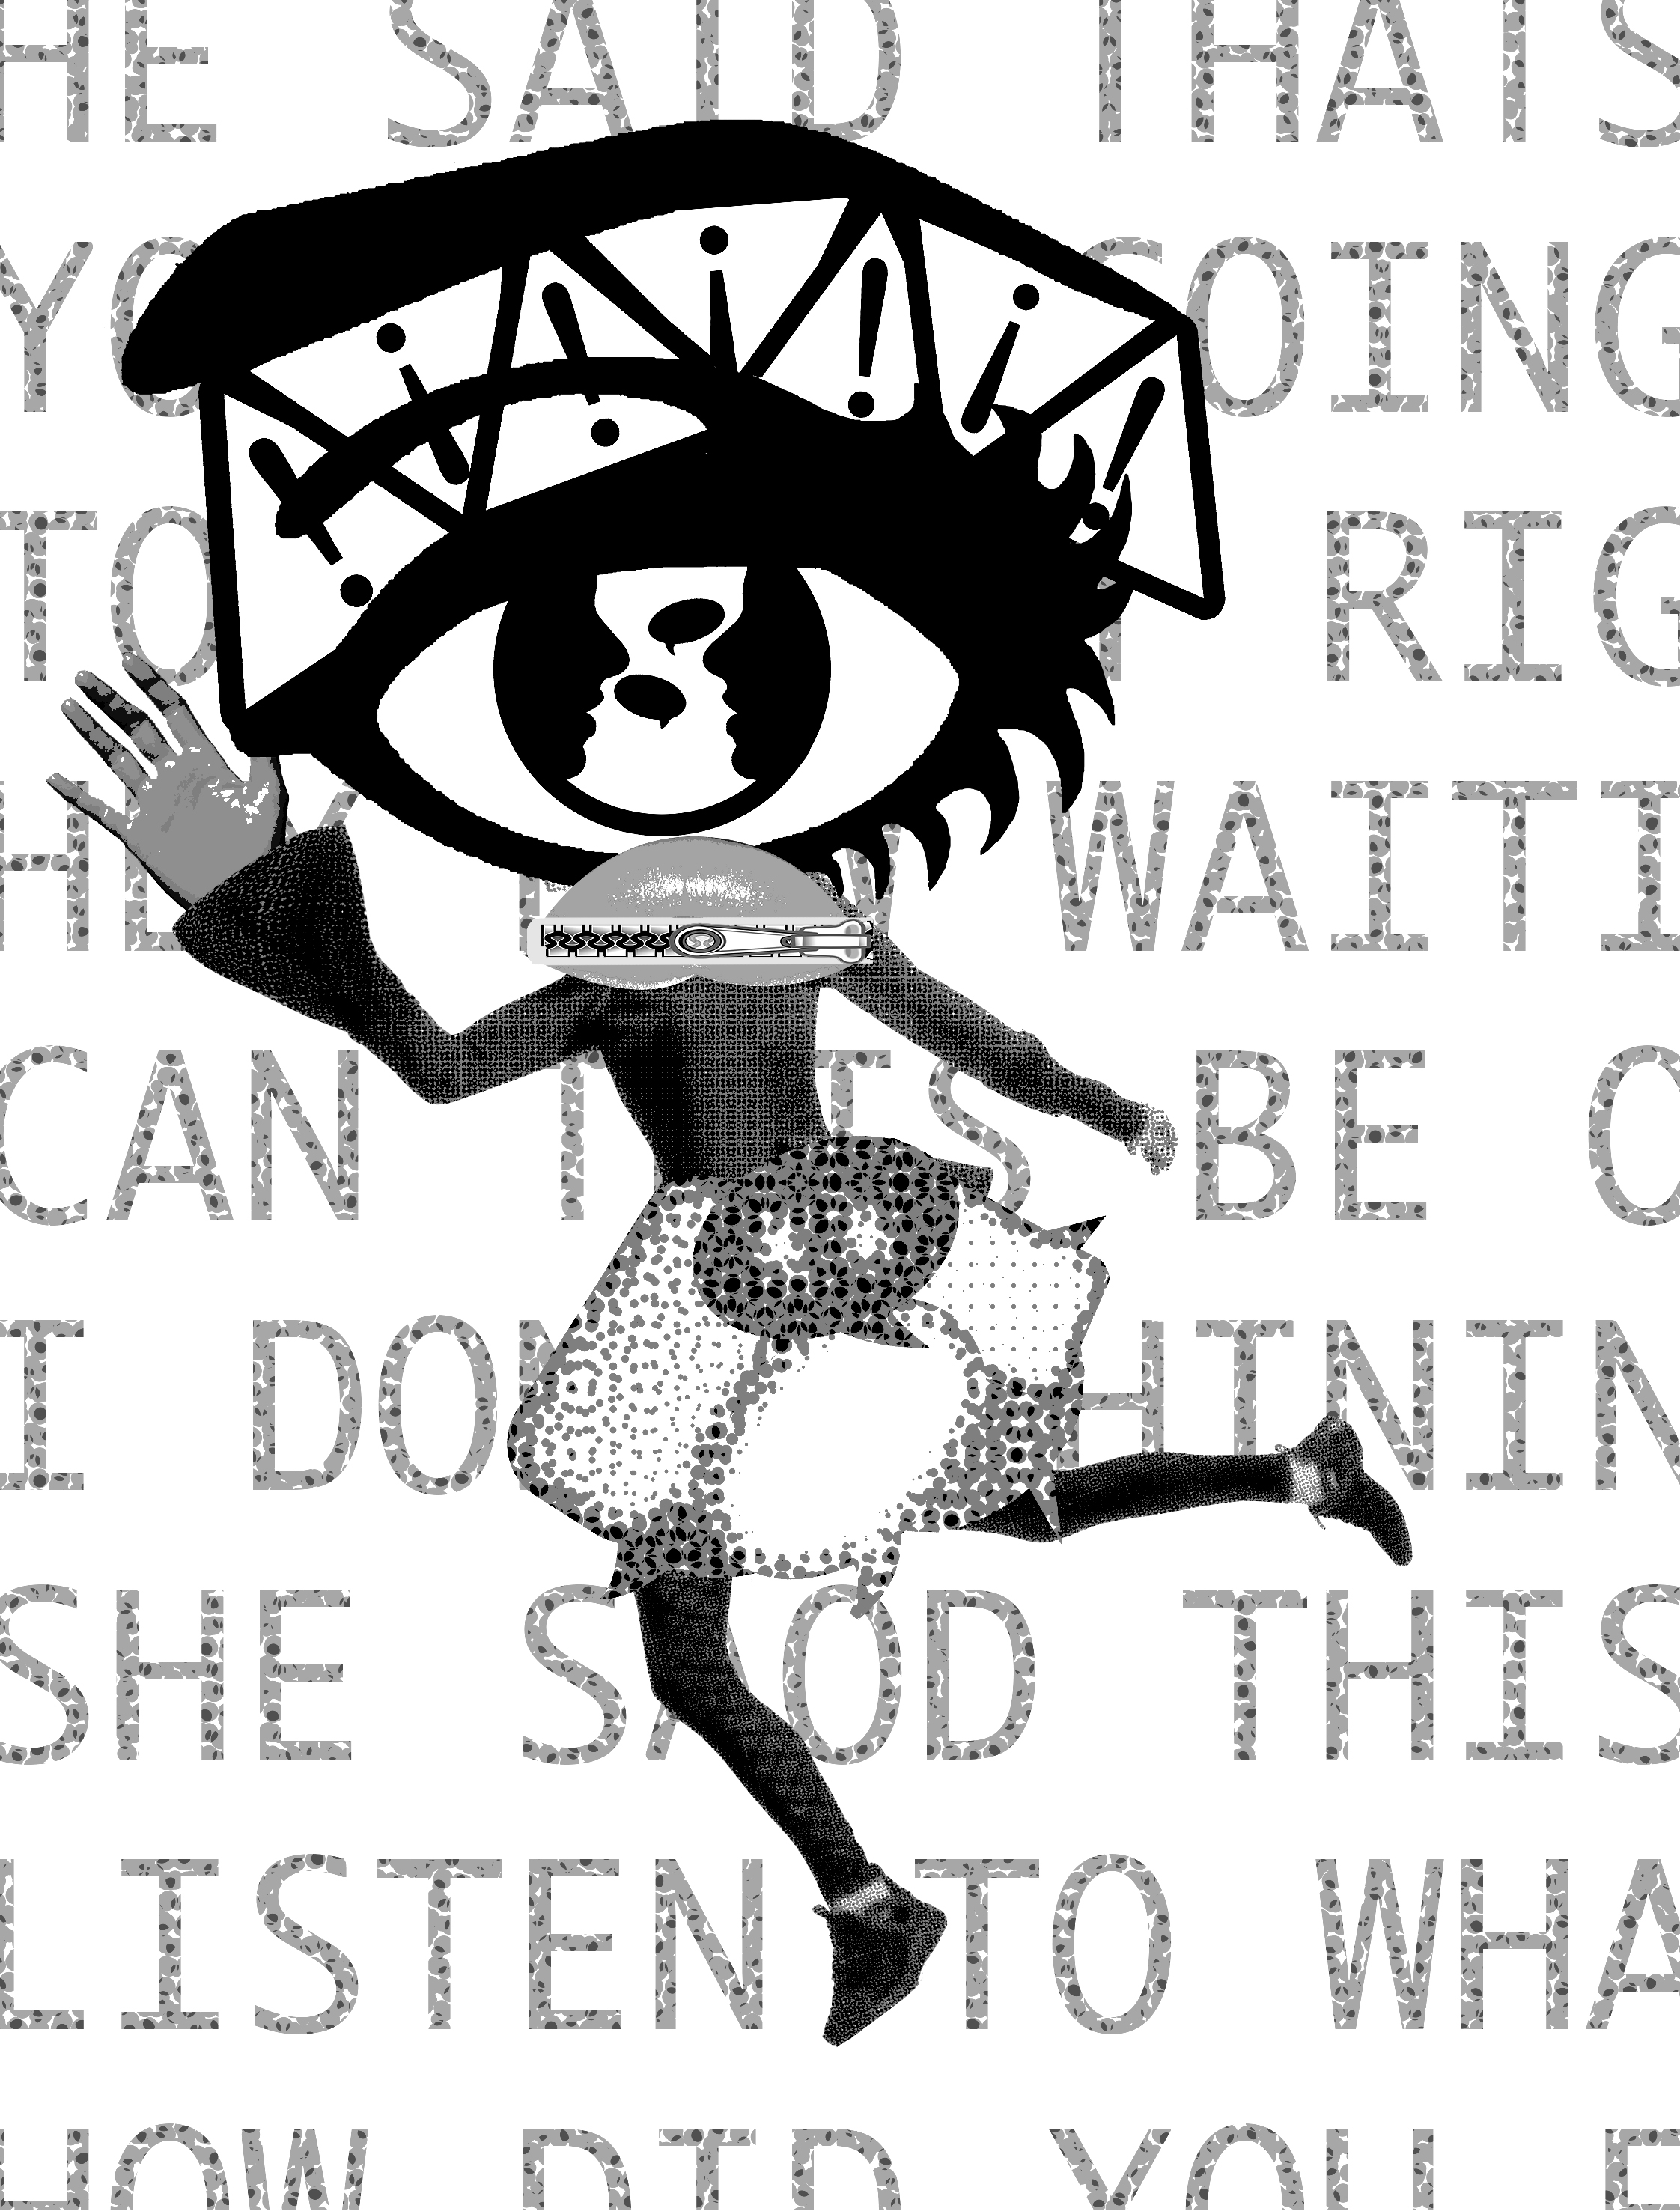
This time I tried to be a little more unconventional with the way I put my images together. I kept the eye with the notice signs above it as I really liked it. I added a mouth that was closed with a zipper and a skirt made of speech bubbles. I used a dynamic stance for the figure to make it more interesting but made the hand closest to the eyes big to make it look like the hand is being placed behind its ear and trying to listen to something. I added text in the background (thinking if it was cut off and made no sense it would be alright haha – it was not) to add texture.
While I picked up on putting images together in a more unconventional way, there was not many compositional techniques or Gestalt principles used and the image itself was not easy to decipher. SCRAPPED
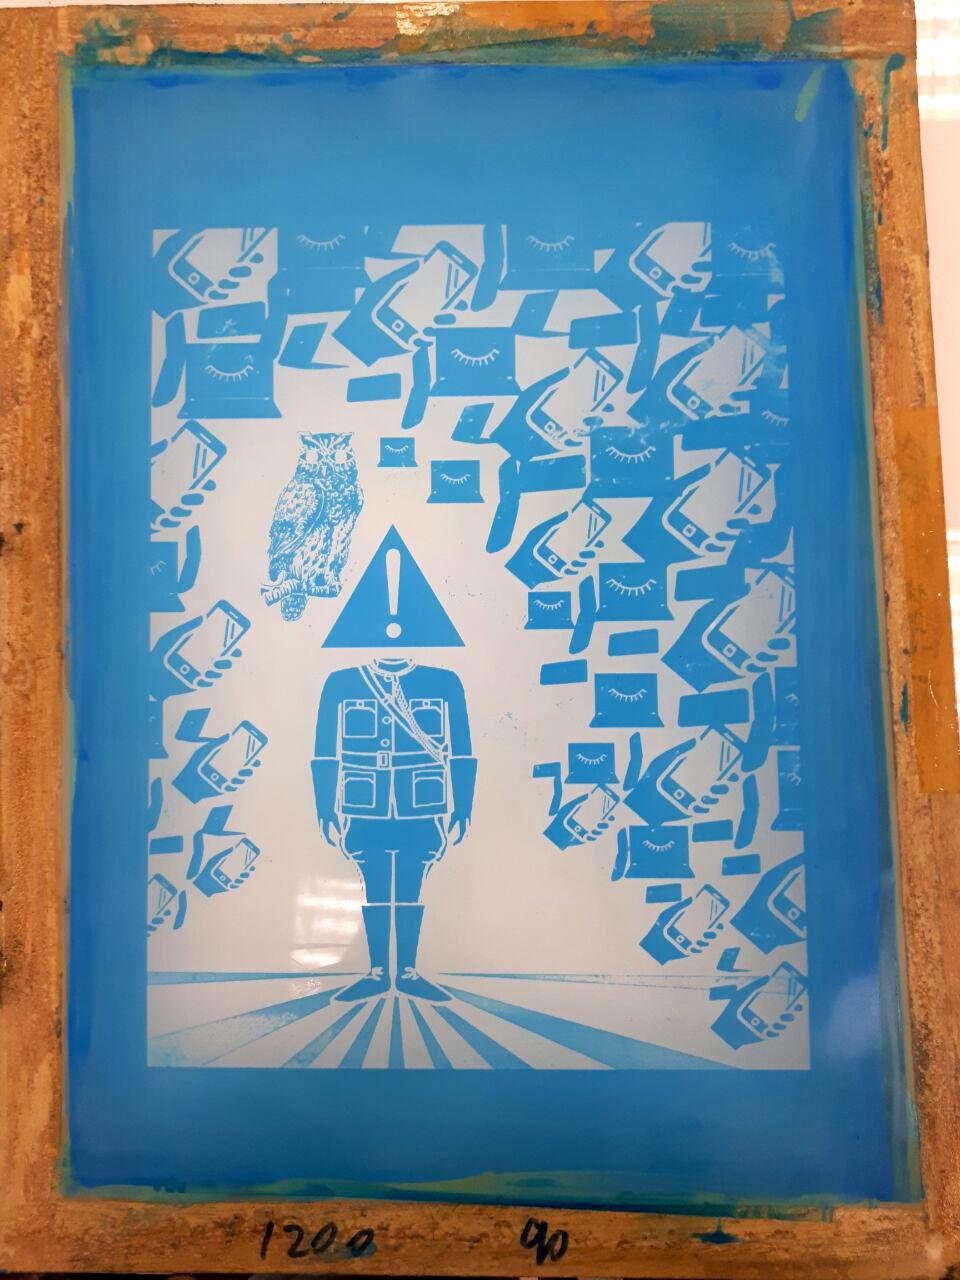
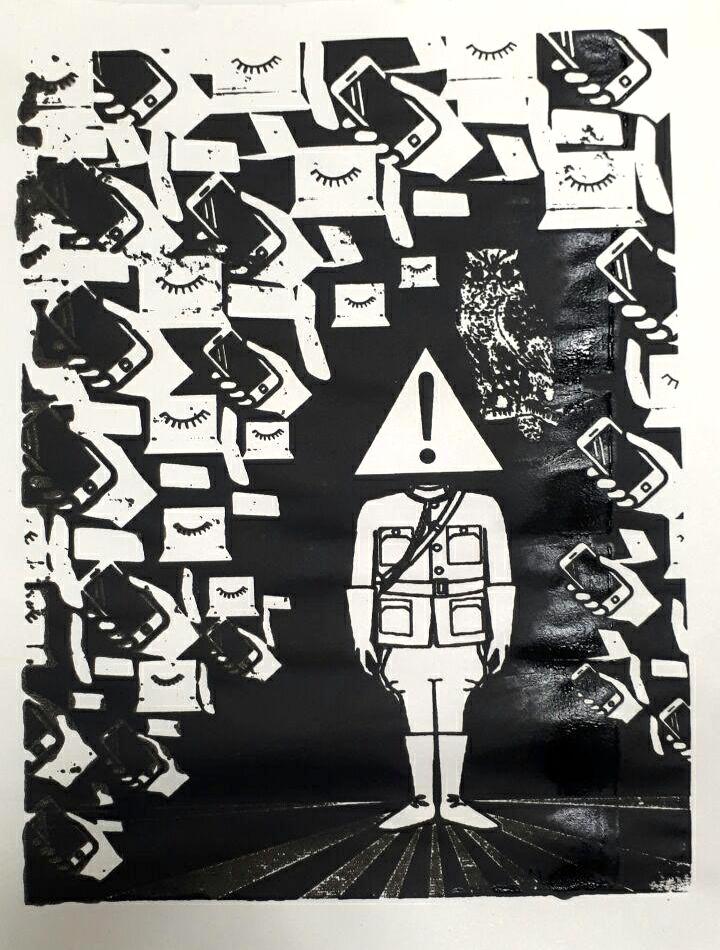
I then re-thought about the quote, what each word or phrase meant to me and how I can represent it through composition. When I thought of “paying attention”, I thought of it in a modern context, in our here and now. I thought of how people nowadays don’t pay attention and are always on their electronic devices. I wanted to then create a sea of objects not paying attention surrounding one object that is. This idea was based off comic book-style drawings that use black lines that surround a subject with some white space between the subject and the lines to make it look as if it is being surrounded.
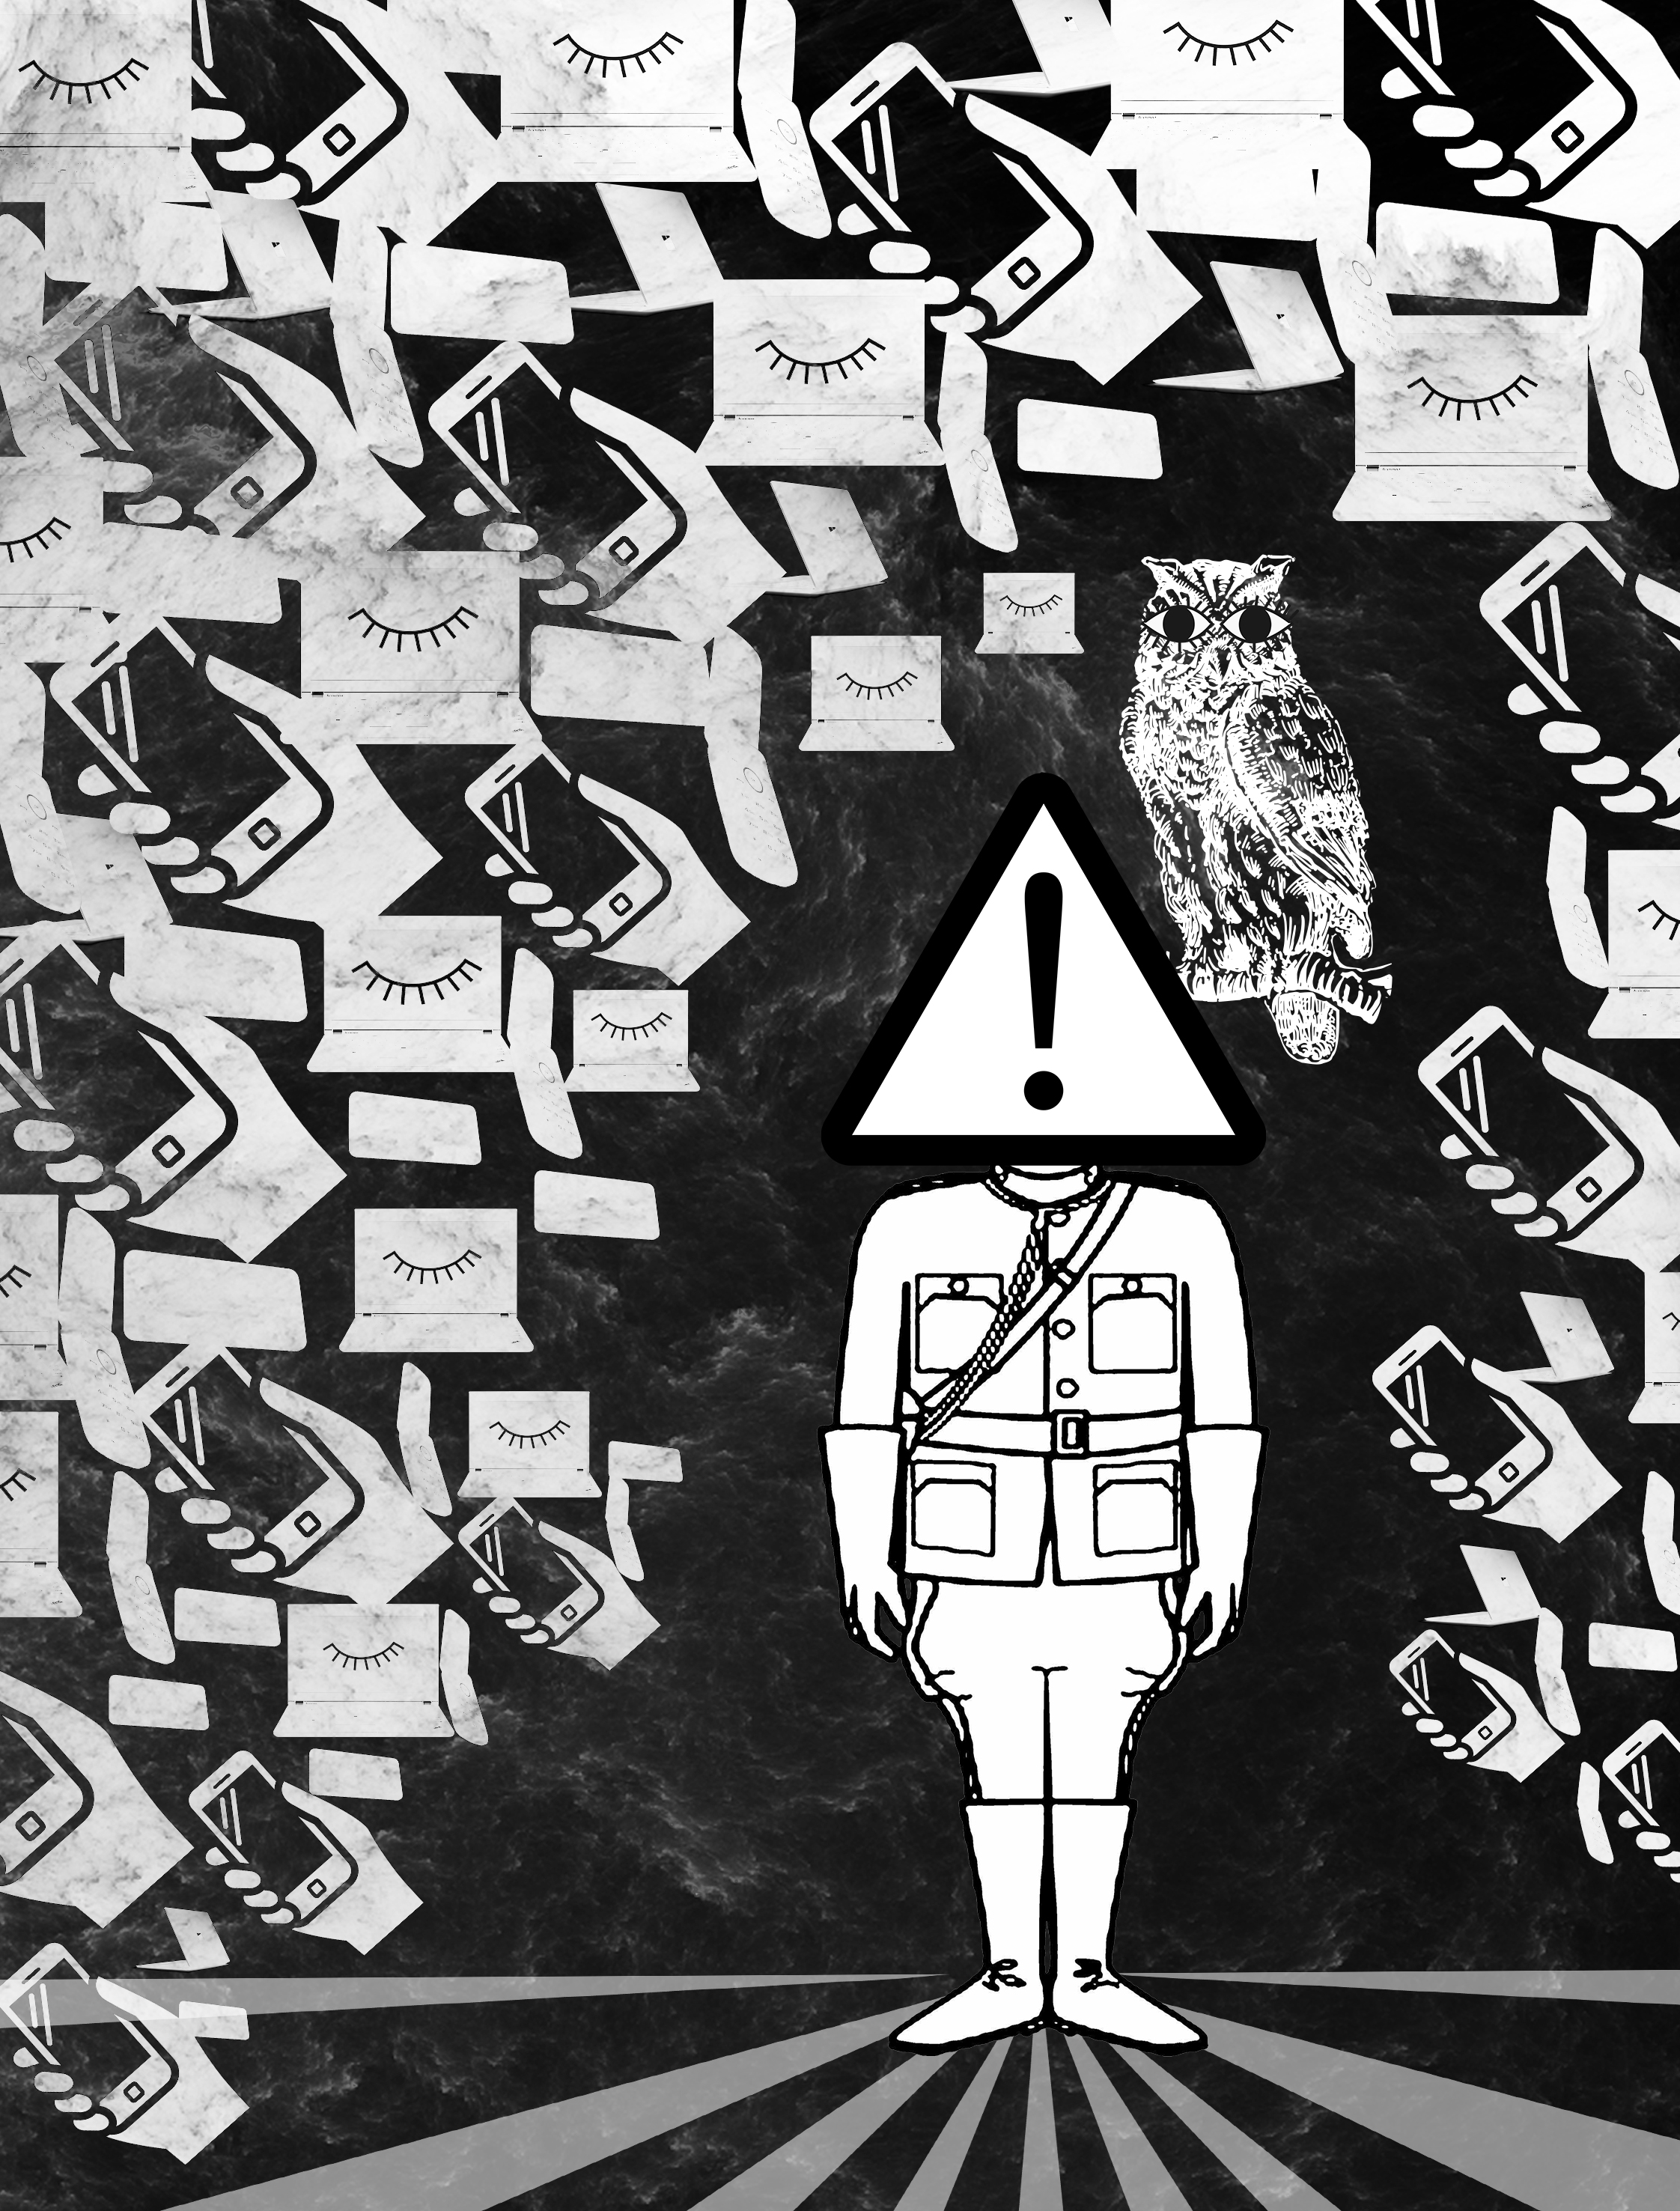
In this image, I used repeated images and symbols of technological devices to surround the man, having the images diminish in size as they get closer to the subject. I also used some lines that fan out under his feet like sun rays as leading lines to bring the focus to the man. I also placed the subject off-centre to make the composition more visually appealing. The subject is standing at attention with a signboard as its head, symbolizing “pay attention”. There is an owl with human-like eyes attached to its head. I used an owl as an owl has very good vision, but I also gave it human-like eyes, too big for its face, to draw attention to its sight or the act of looking. Comparatively, there are closed eyes on the screens of computers to show that looking at these smart devices is equal to not paying attention to one’s surroundings. I made the background black so that the subject stands out, and changed the background textured layer mode to “difference” creating the above effect on the mobile gadgets. By darkening the surrounding images and decreasing their contrast with the background, the subject stands out much more.
Another classic movie! Let’s break down the quote.
Moments: A very short period of time. Also an image/photo, hence the saying capturing moments.
Time: Life and death
Tears in the rain: being disguised or blending in.
Here is my initial composition:
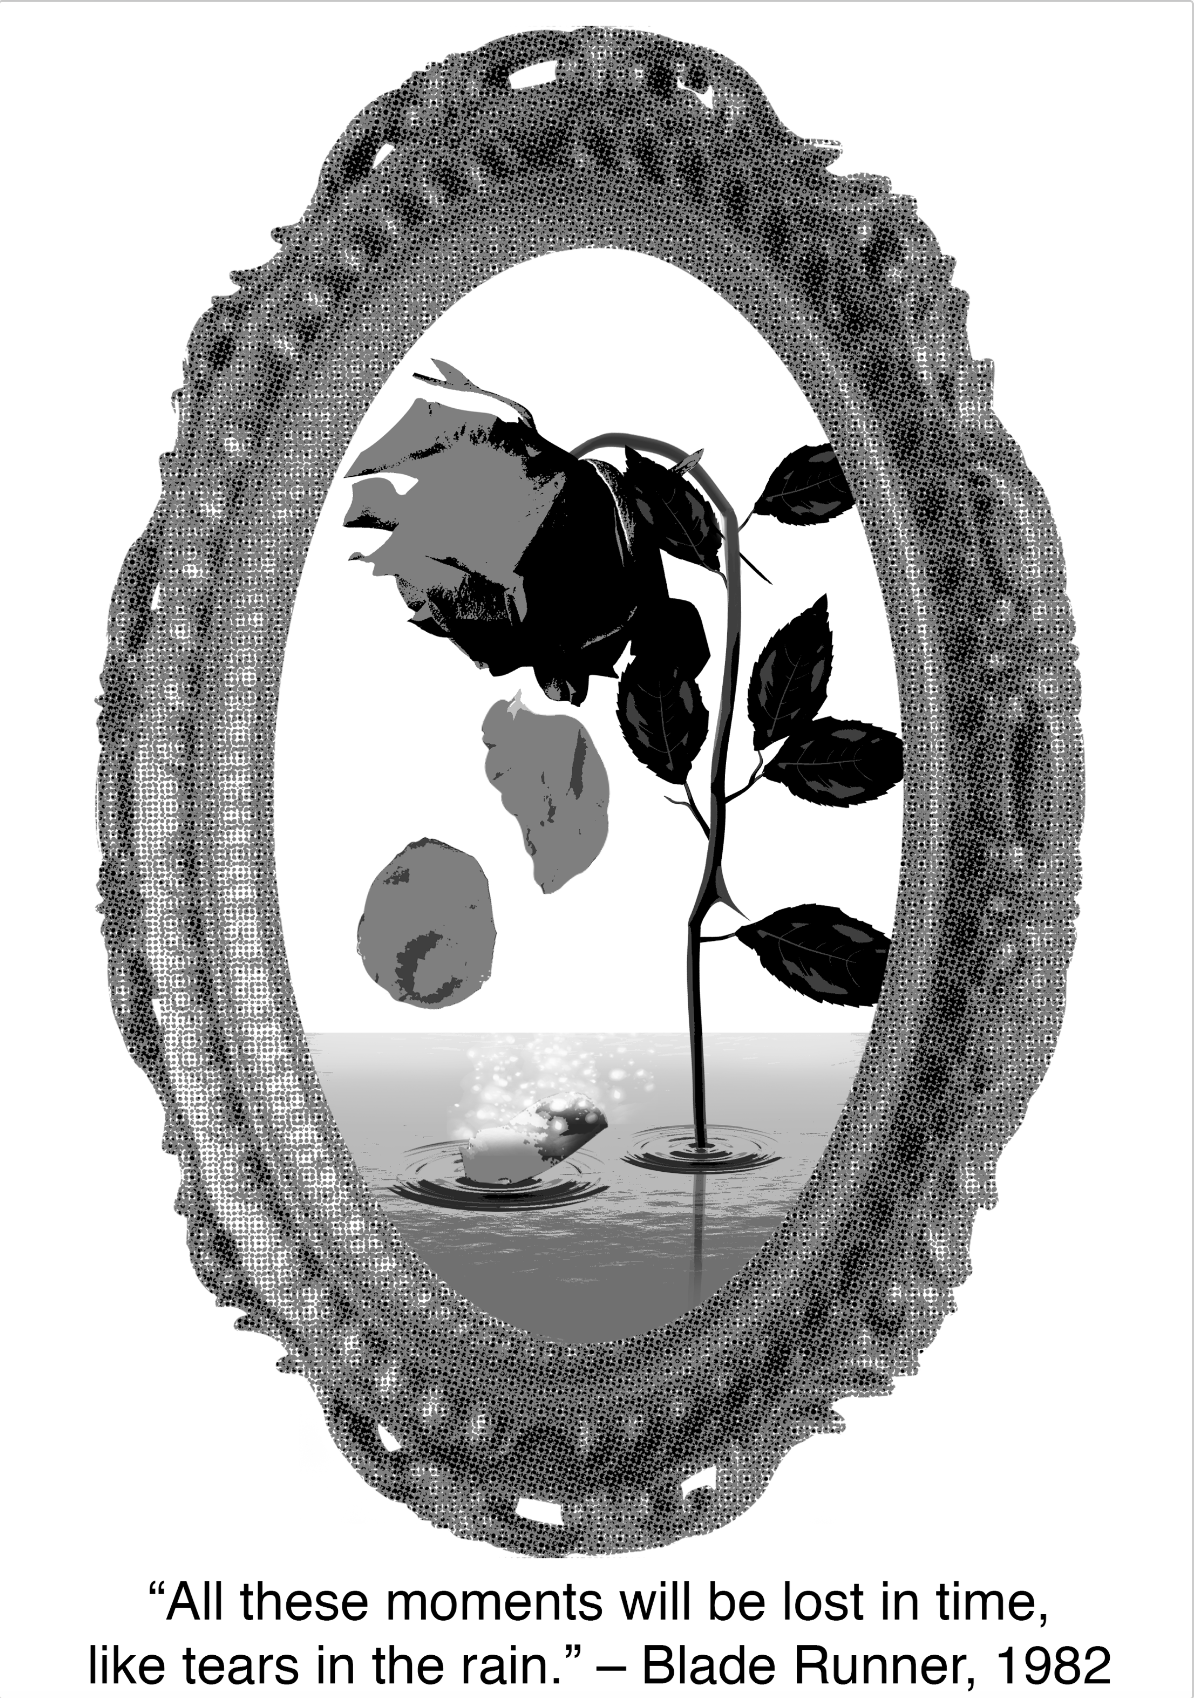
In this composition, I used a photo frame to represent “moments” as moments are like pictures to me. I used a rose to represent life and death, and the falling petals to mimic how rain falls. To represent “lost in time”, I made a petal disintegrate in a magical manner when it touches the water. Personally, I quite liked this composition. However, I found it too symmetrical and static, and I felt that the white space on the canvas was not being utilized.
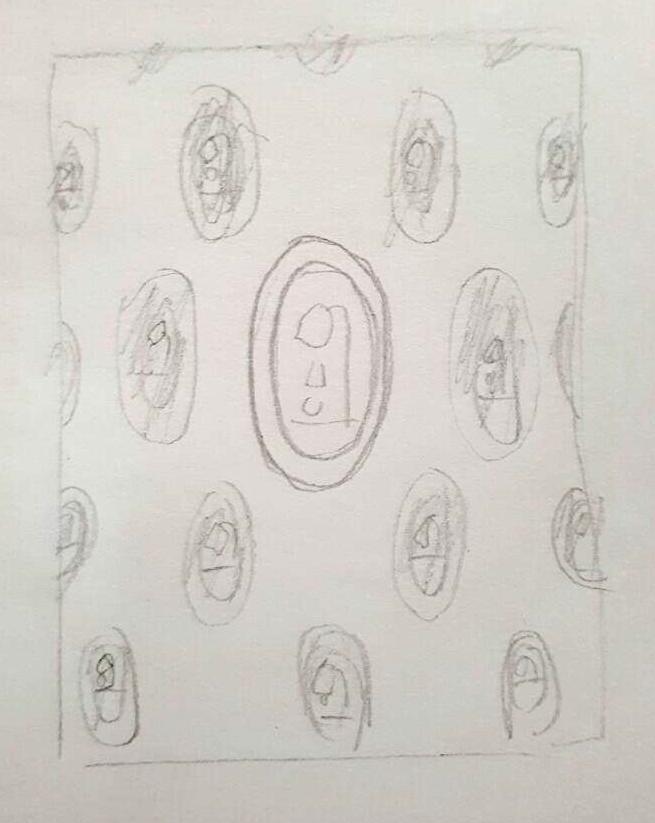
I then thought about duplicating it to create a wall of “moments”, and instead of making the pattern uniform, I wanted to have the frames diminish in size as they moved away from the centre. I thought of making the centre frame the subject and posterizing the other frames to make it stand out more. After thinking it through, I didn’t really like this idea as it still felt static and too symmetrical.
Again, going with a more Dada-like style, I created my final composition:

For this image, I wanted to show moments in time floating out of the man’s head, showing him literally losing his memories of these moments. I also added a heart as memories tie in very much with emotion. The spilt water in my composition gives the image some movement. Here, I have the water spill over the moments, letting the moments be washed away.
For this composition, I focused on the diagonal line composition which would make my image more visually interesting. I used the warped shapes of the frame and the spilt water as leading lines for the viewer towards the top half of the work.
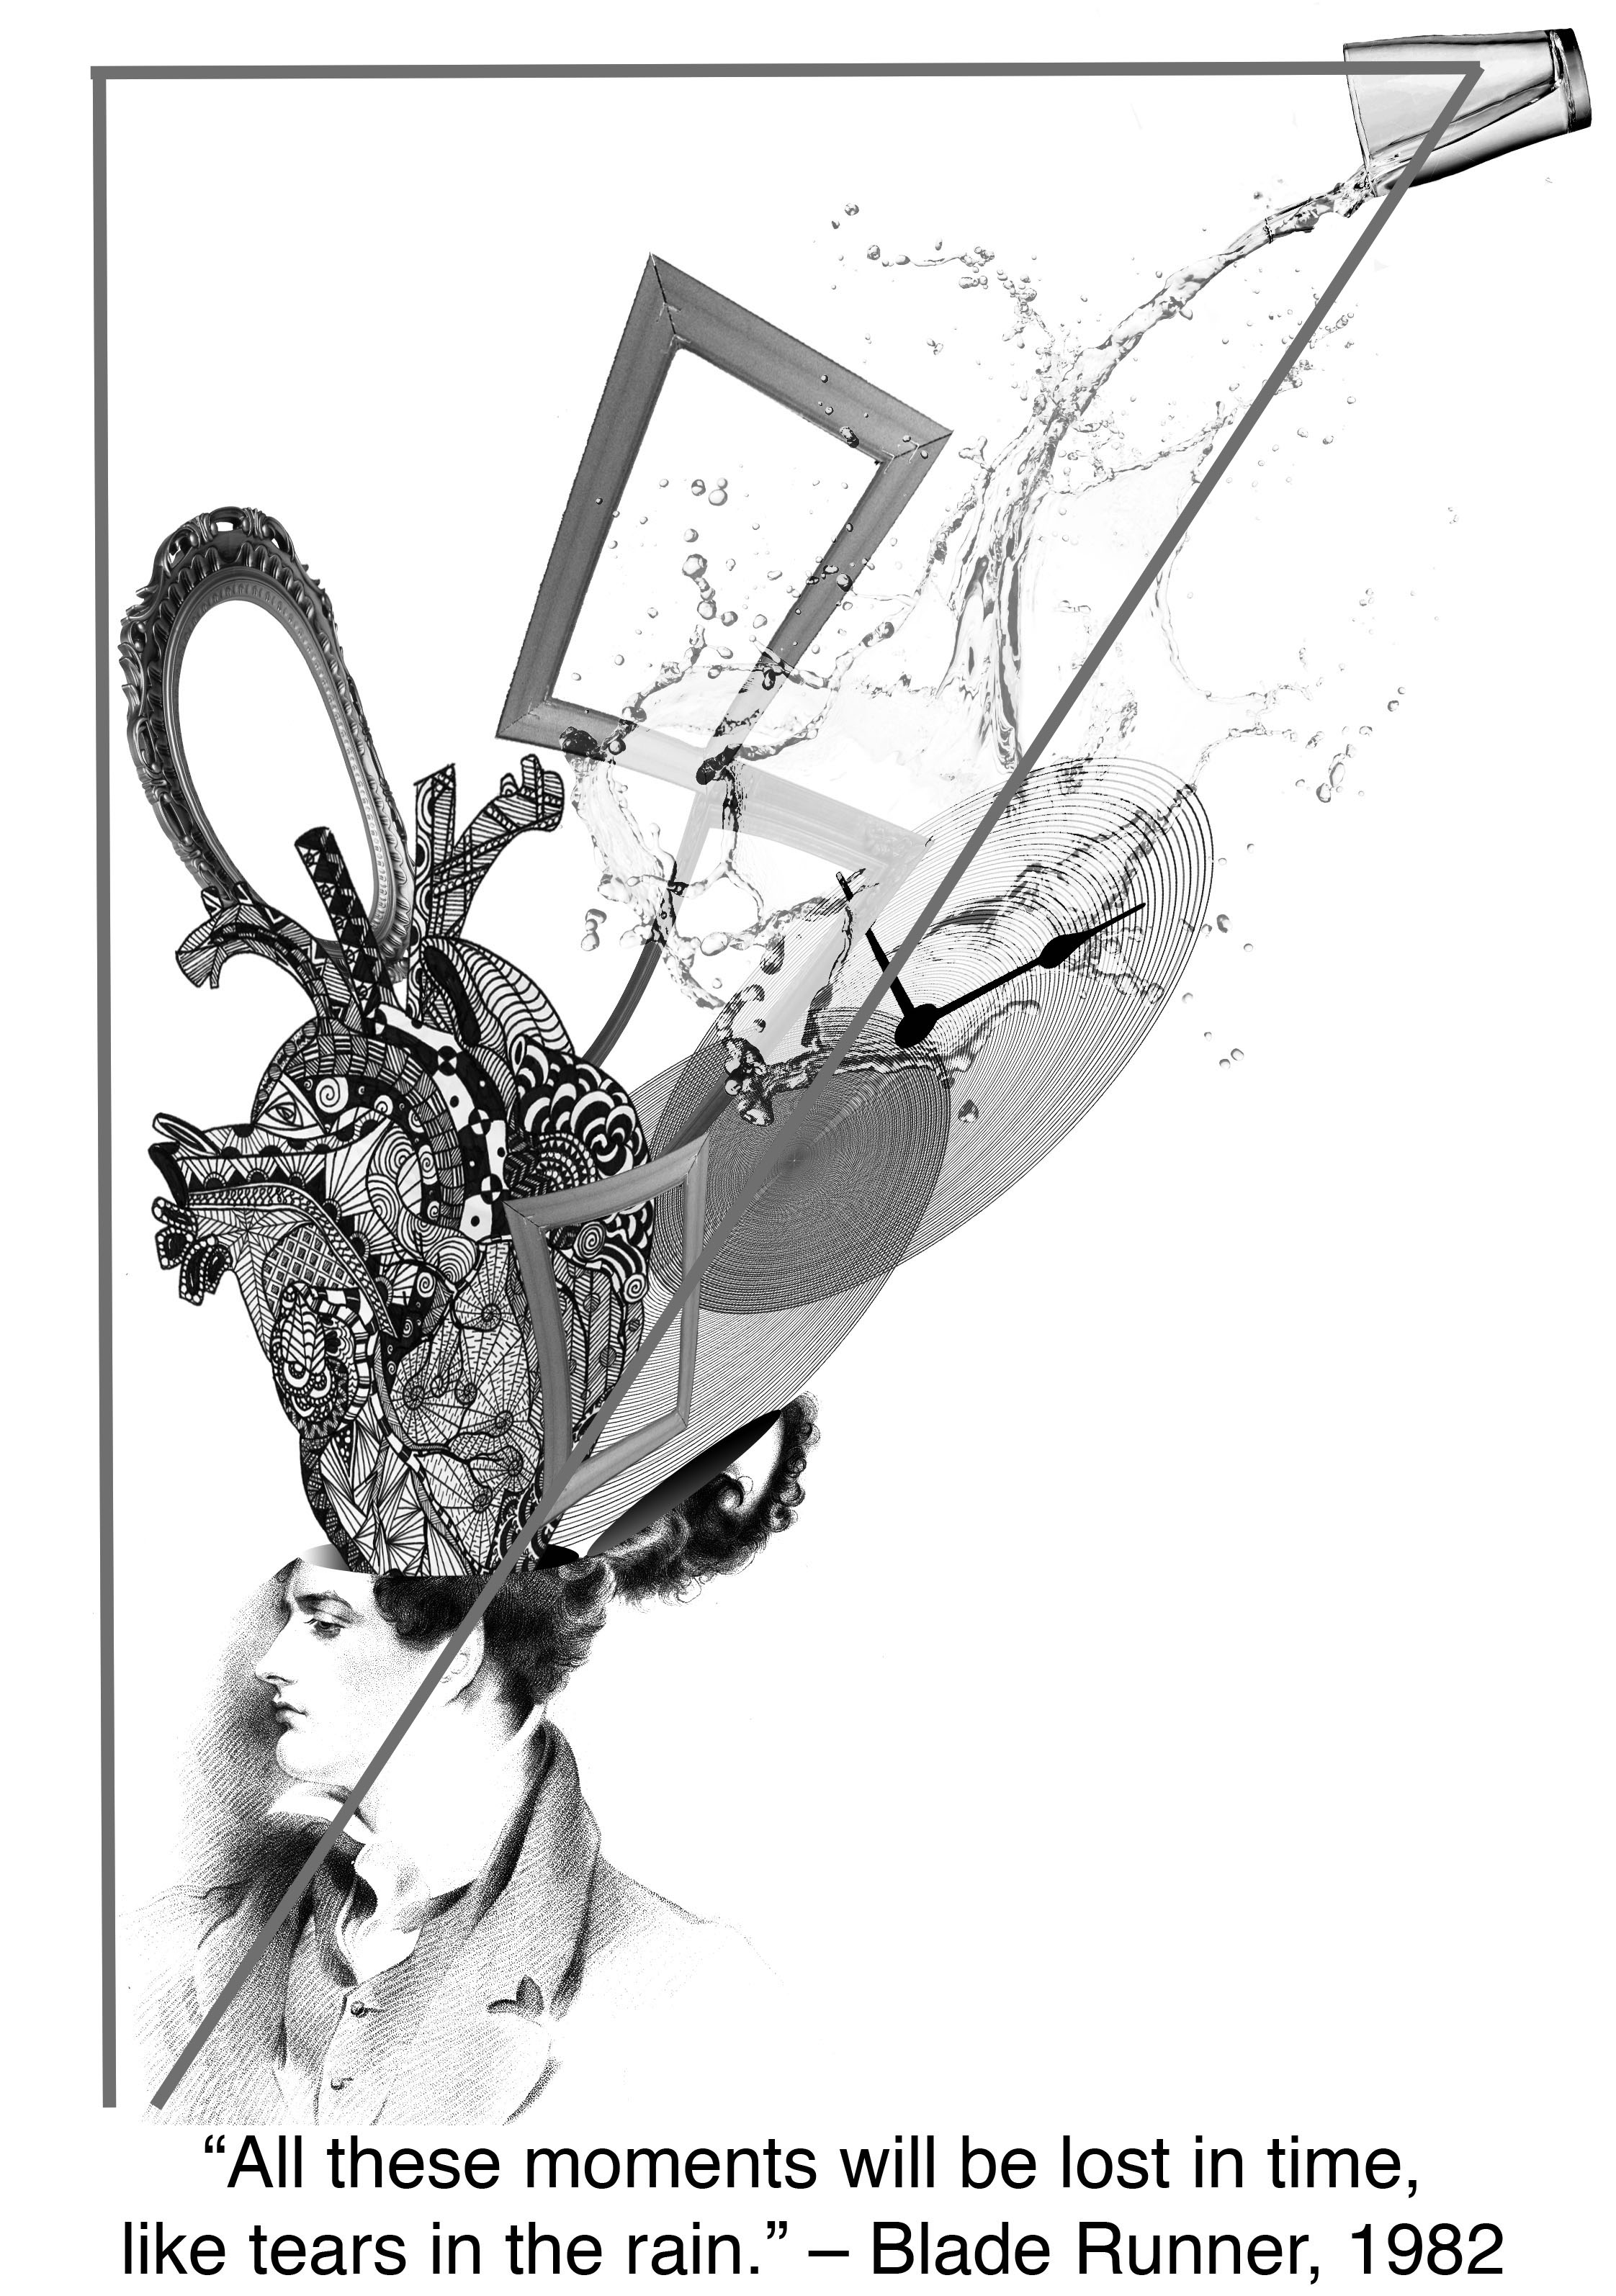
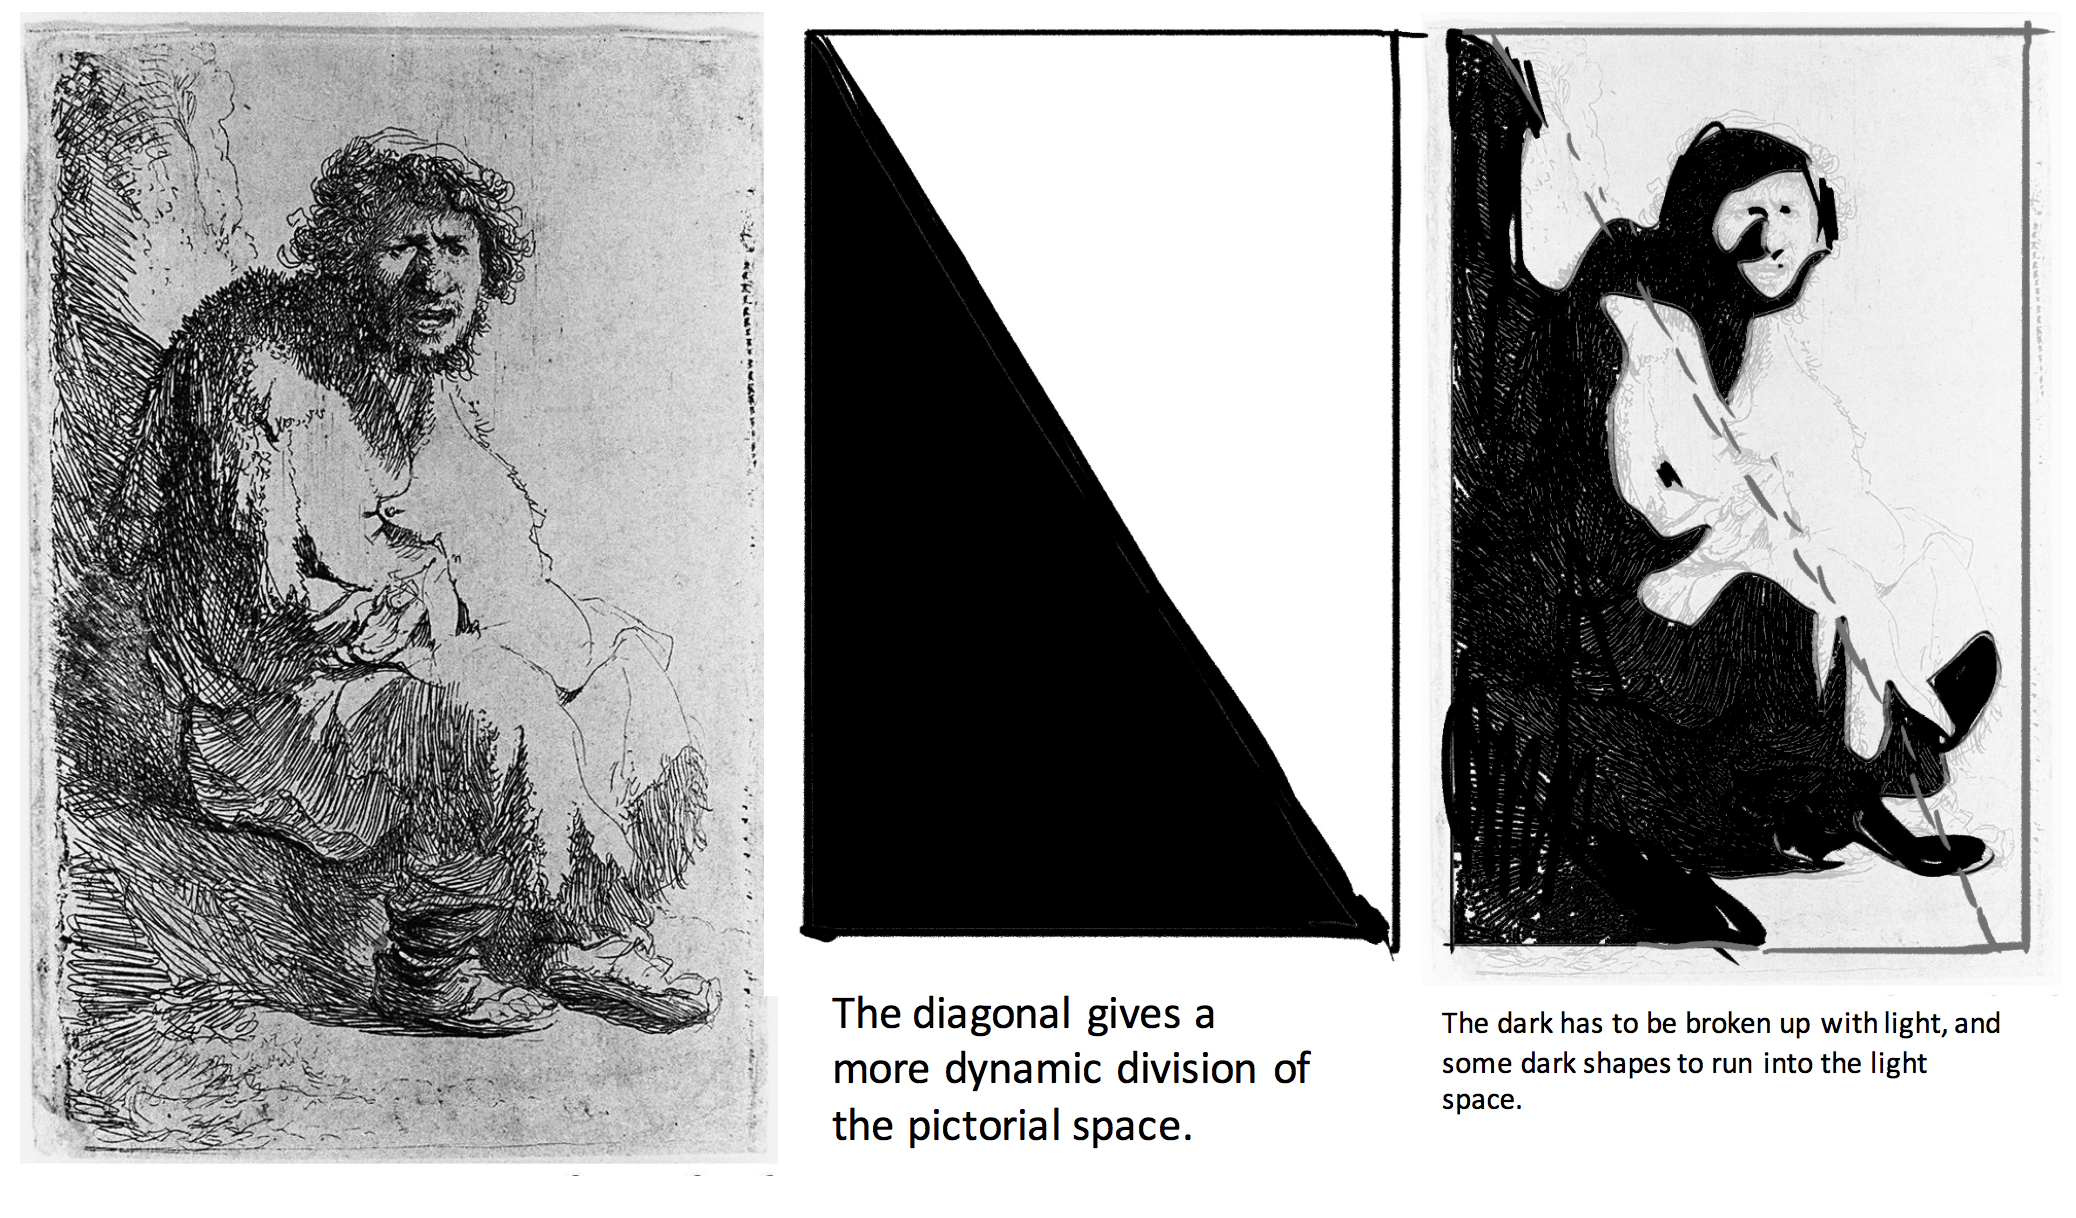
The rule splits the canvas into two separate sections diagonally. One dark and one light. Following this, my darker tones in my composition are all placed more towards the upper diagonal of the canvas while the bottom diagonal remains mostly white.
Breaking down the quote:
Beauty: Luxury, fashion
Beast: Some sort of animal.
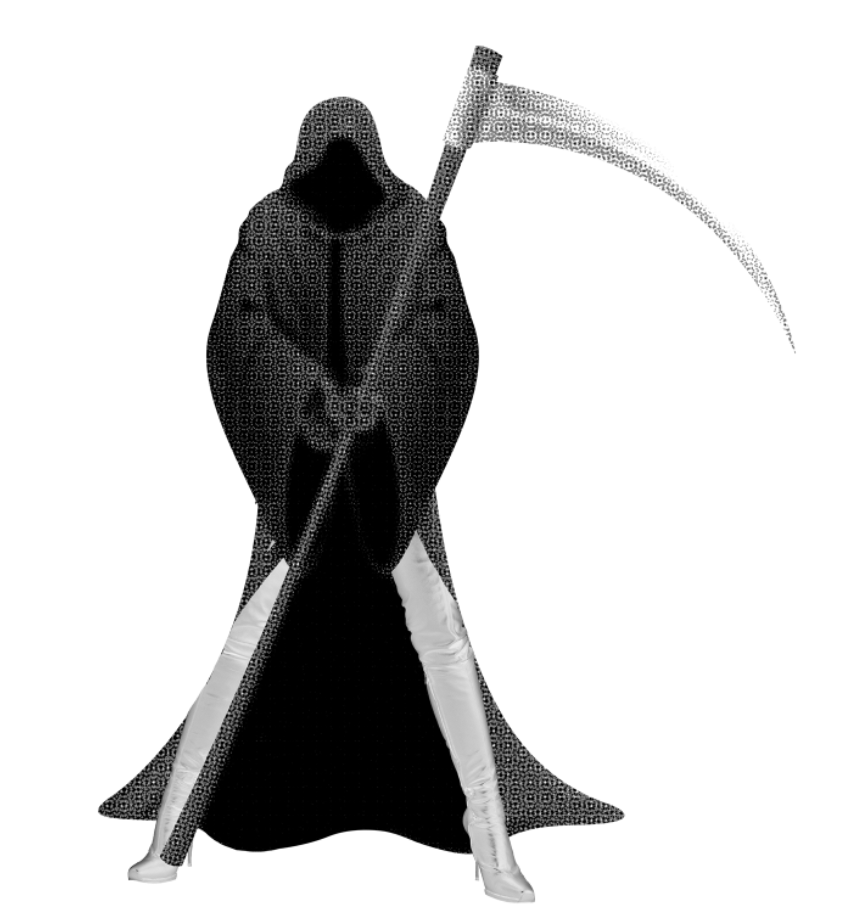
Killed: Murder, blood, grim reaper.
For my initial composition, I wanted to include an image of a grim reaper with female legs to literally show beauty killing the beast but again, I realised it might have been too literal of a portrayal of the quote.
I thought of wanting to create an image with more depth or perspective. I thought of referencing this poster:

Here is my composition:
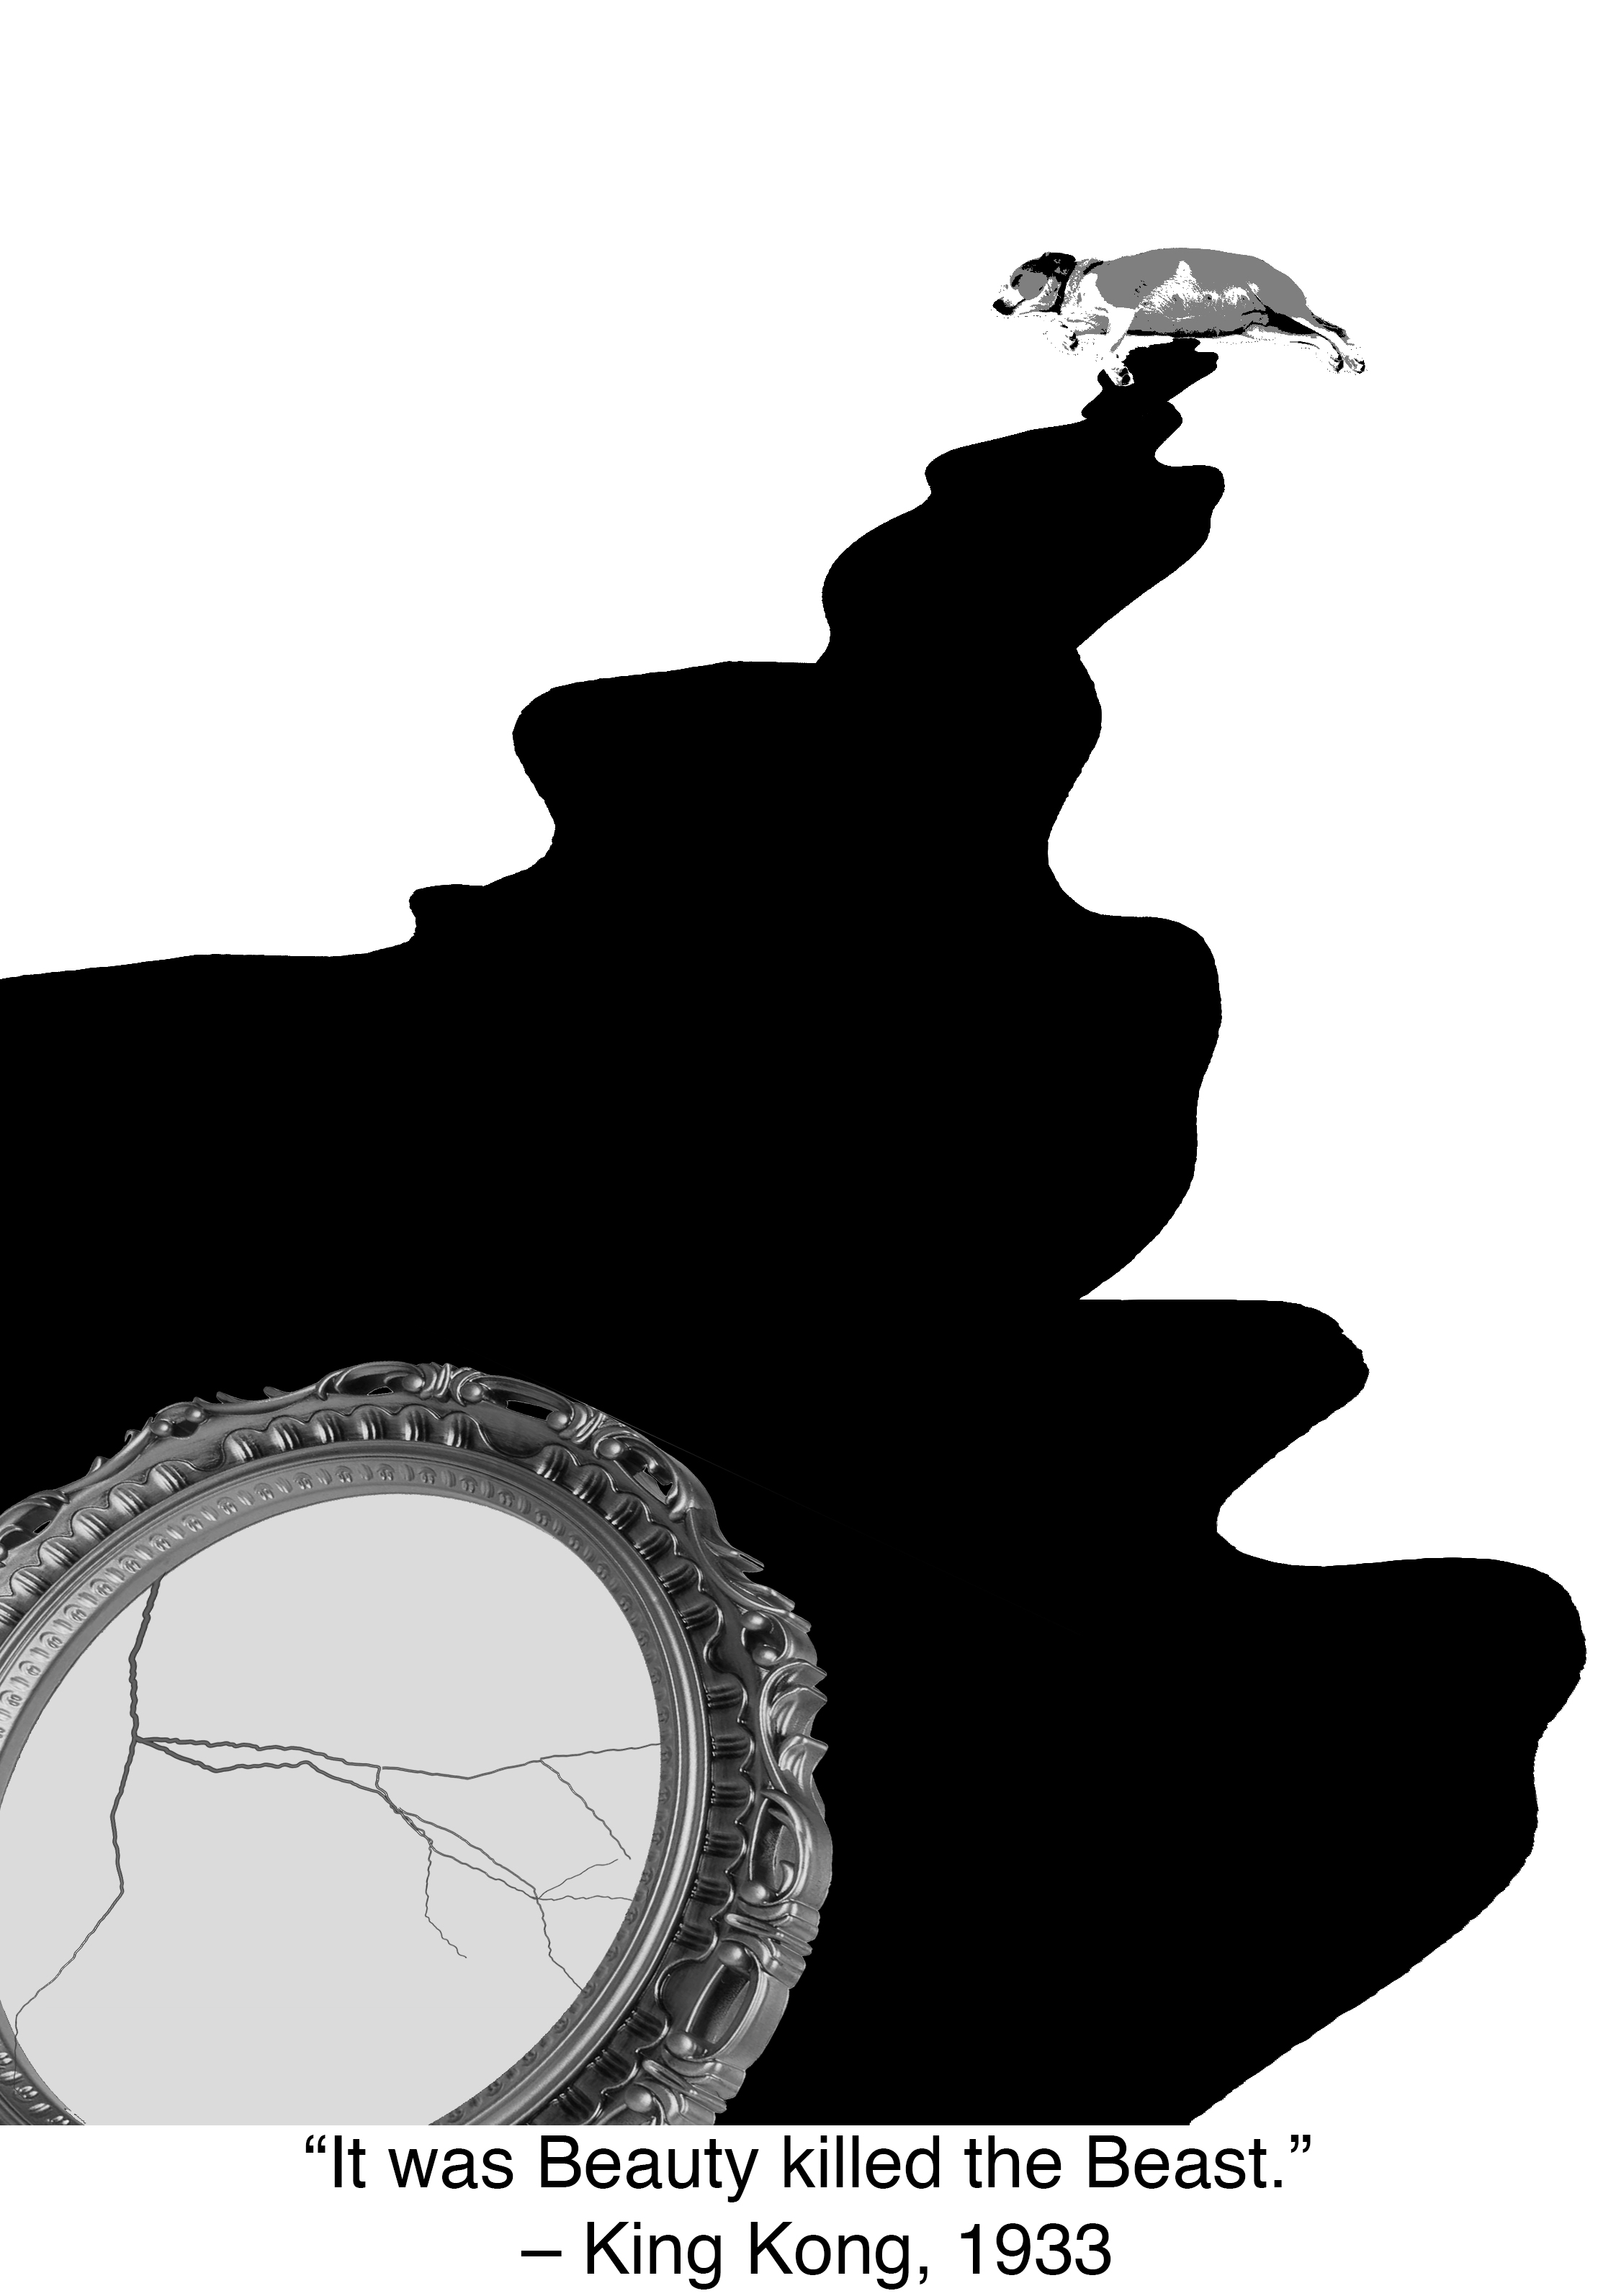
I used a dog to represent beast, and a mirror to represent beauty, with the crack on the mirror to hint some sort of murder, and the blood to link the mirror and the dog together.
Talking with Shirley, she told me I could make my mirror bigger and add some sort of texture to my work as it was looking a little flat. I realized this made it quite hard to see the depth in the photo.
I thought about how to improve that. I thought of what beauty was to me and decided to use lipstick stains as an overlay layer over the blood. Here is my final composition:

In this image, there is a much stronger sense of depth and perspective because of the relative size of the mirror to the dog, and the diminishing size of the lipstick stains. I decided to also leave the surrounding space white to add a sense of mystery to the image as there is no clue where the dog is.
Another great film with entertaining characters and funny lines, it was hard to decide which to pick but I was hungry and a Royale with cheese was hence the perfect choice.
Breaking the quote down:
Royale: Royalty and luxury
with: together, a couple (a boyfriend with a girlfriend).
Cheese: Cow, milk, cheese wheel
For this specific quote, I found it quite difficult to come up with an idea for the composition.I set myself an aim for this image and it was to create tiled or layered images. I first churned out a little bit of a symmetrical piece, just to get that out of my system:
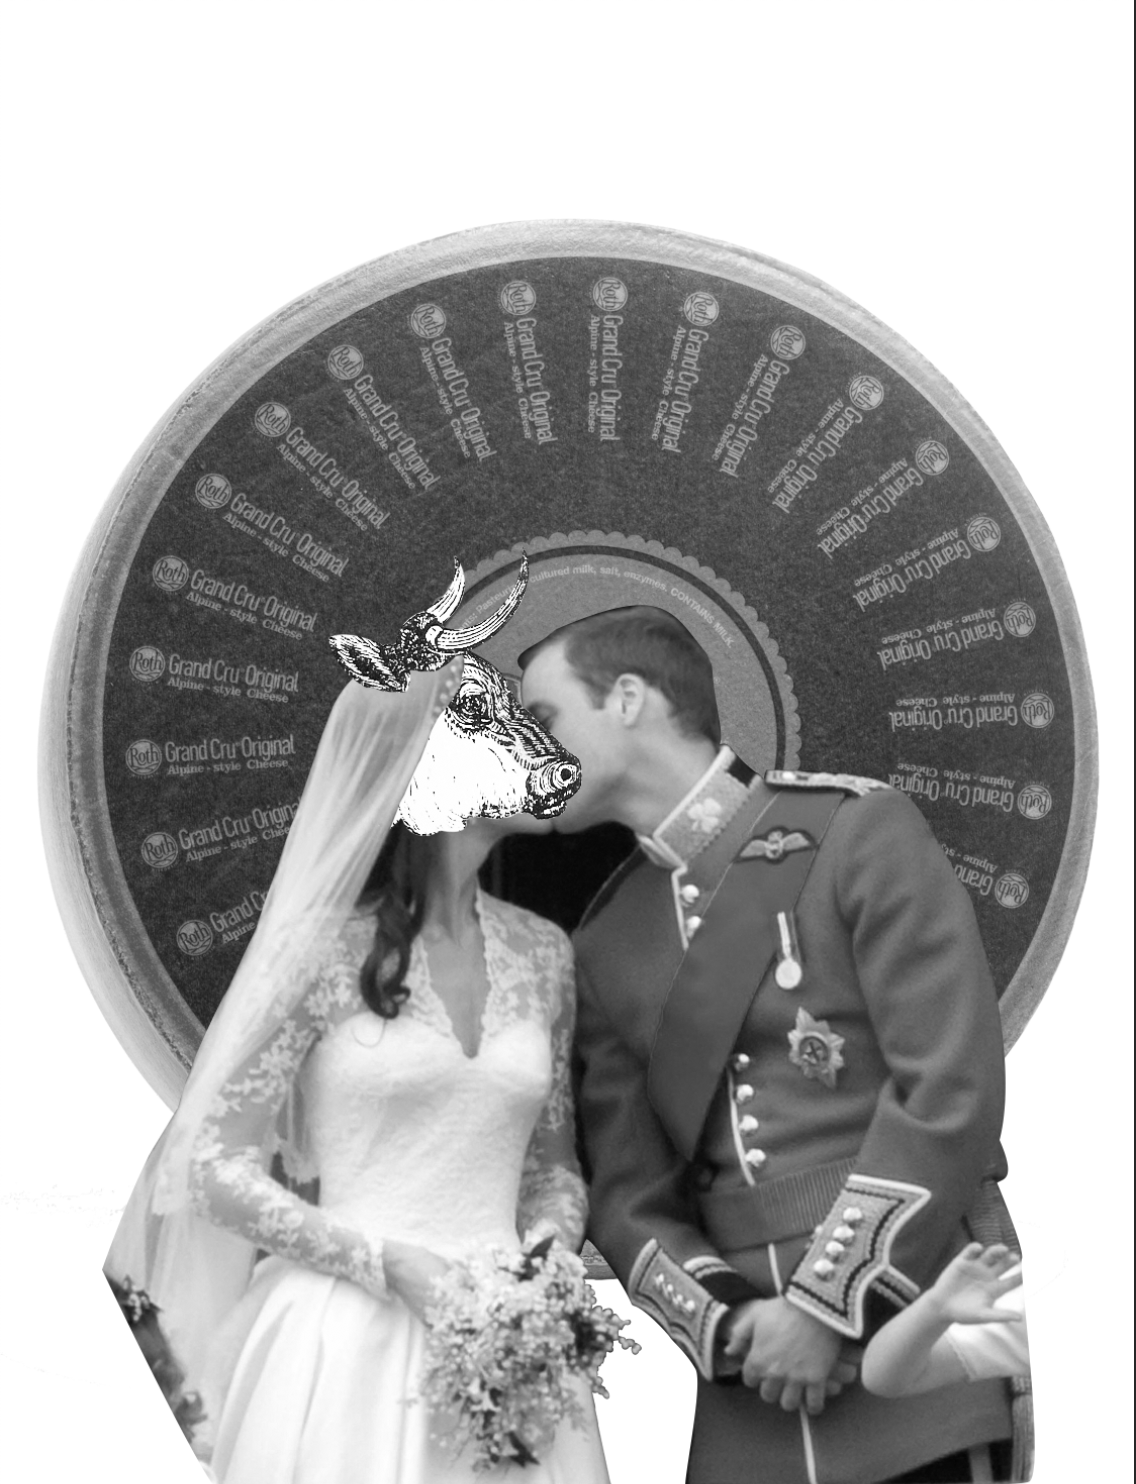
Here, I chose wedding photos of Prince William and Kate Middleton, but have Kate’s head replaced with a cow, making it look like the prince was marrying the cow, hence “royale with cheese”! For this design, I wanted to play with the roundness of the cheese wheel and the nice pattern created by the text by layering it. Here is the result with a different composition:
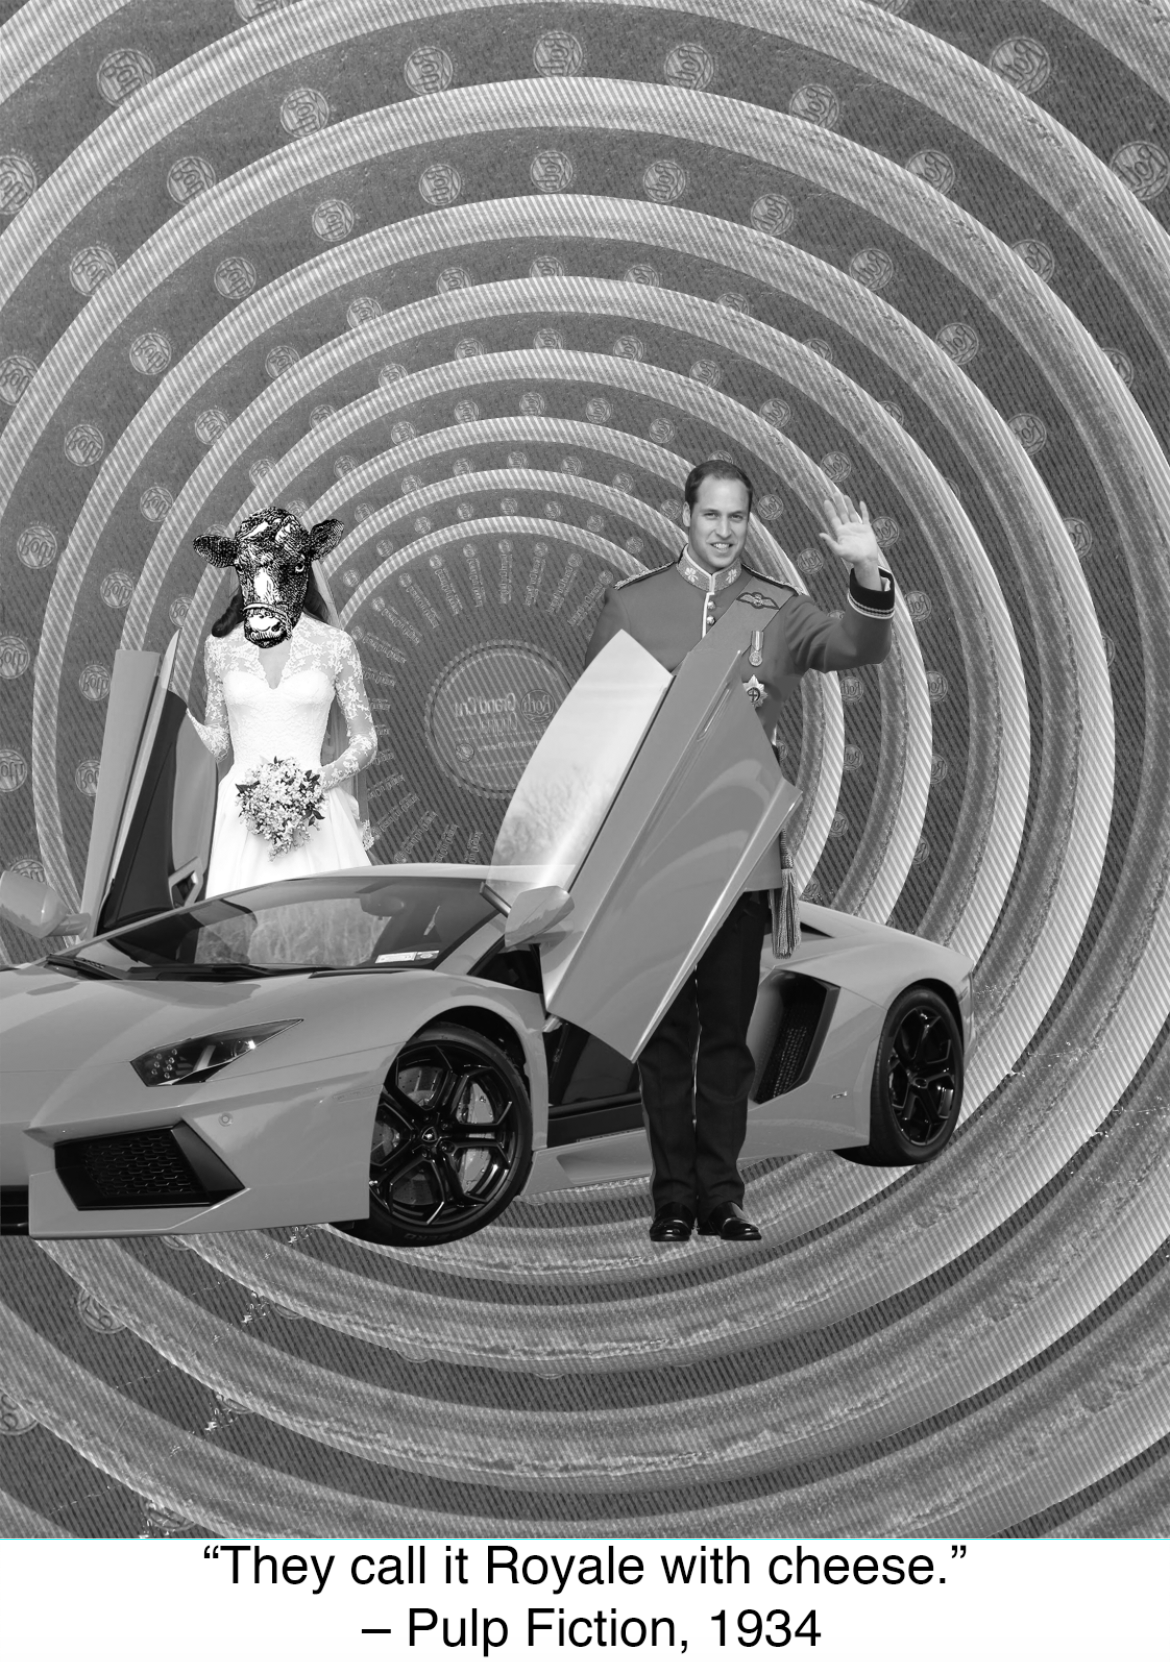
This time I had the royal couple look like they stepped out of a luxury car. This composition turned out a lot plainer than I expected. The background looked plain as it was just a repetition of the same image, and the royal couple and their car were floating in mid-air. There were no design principles applied to the subjects. I scrapped the royal couple idea but kept my layering idea and came up with this final result:
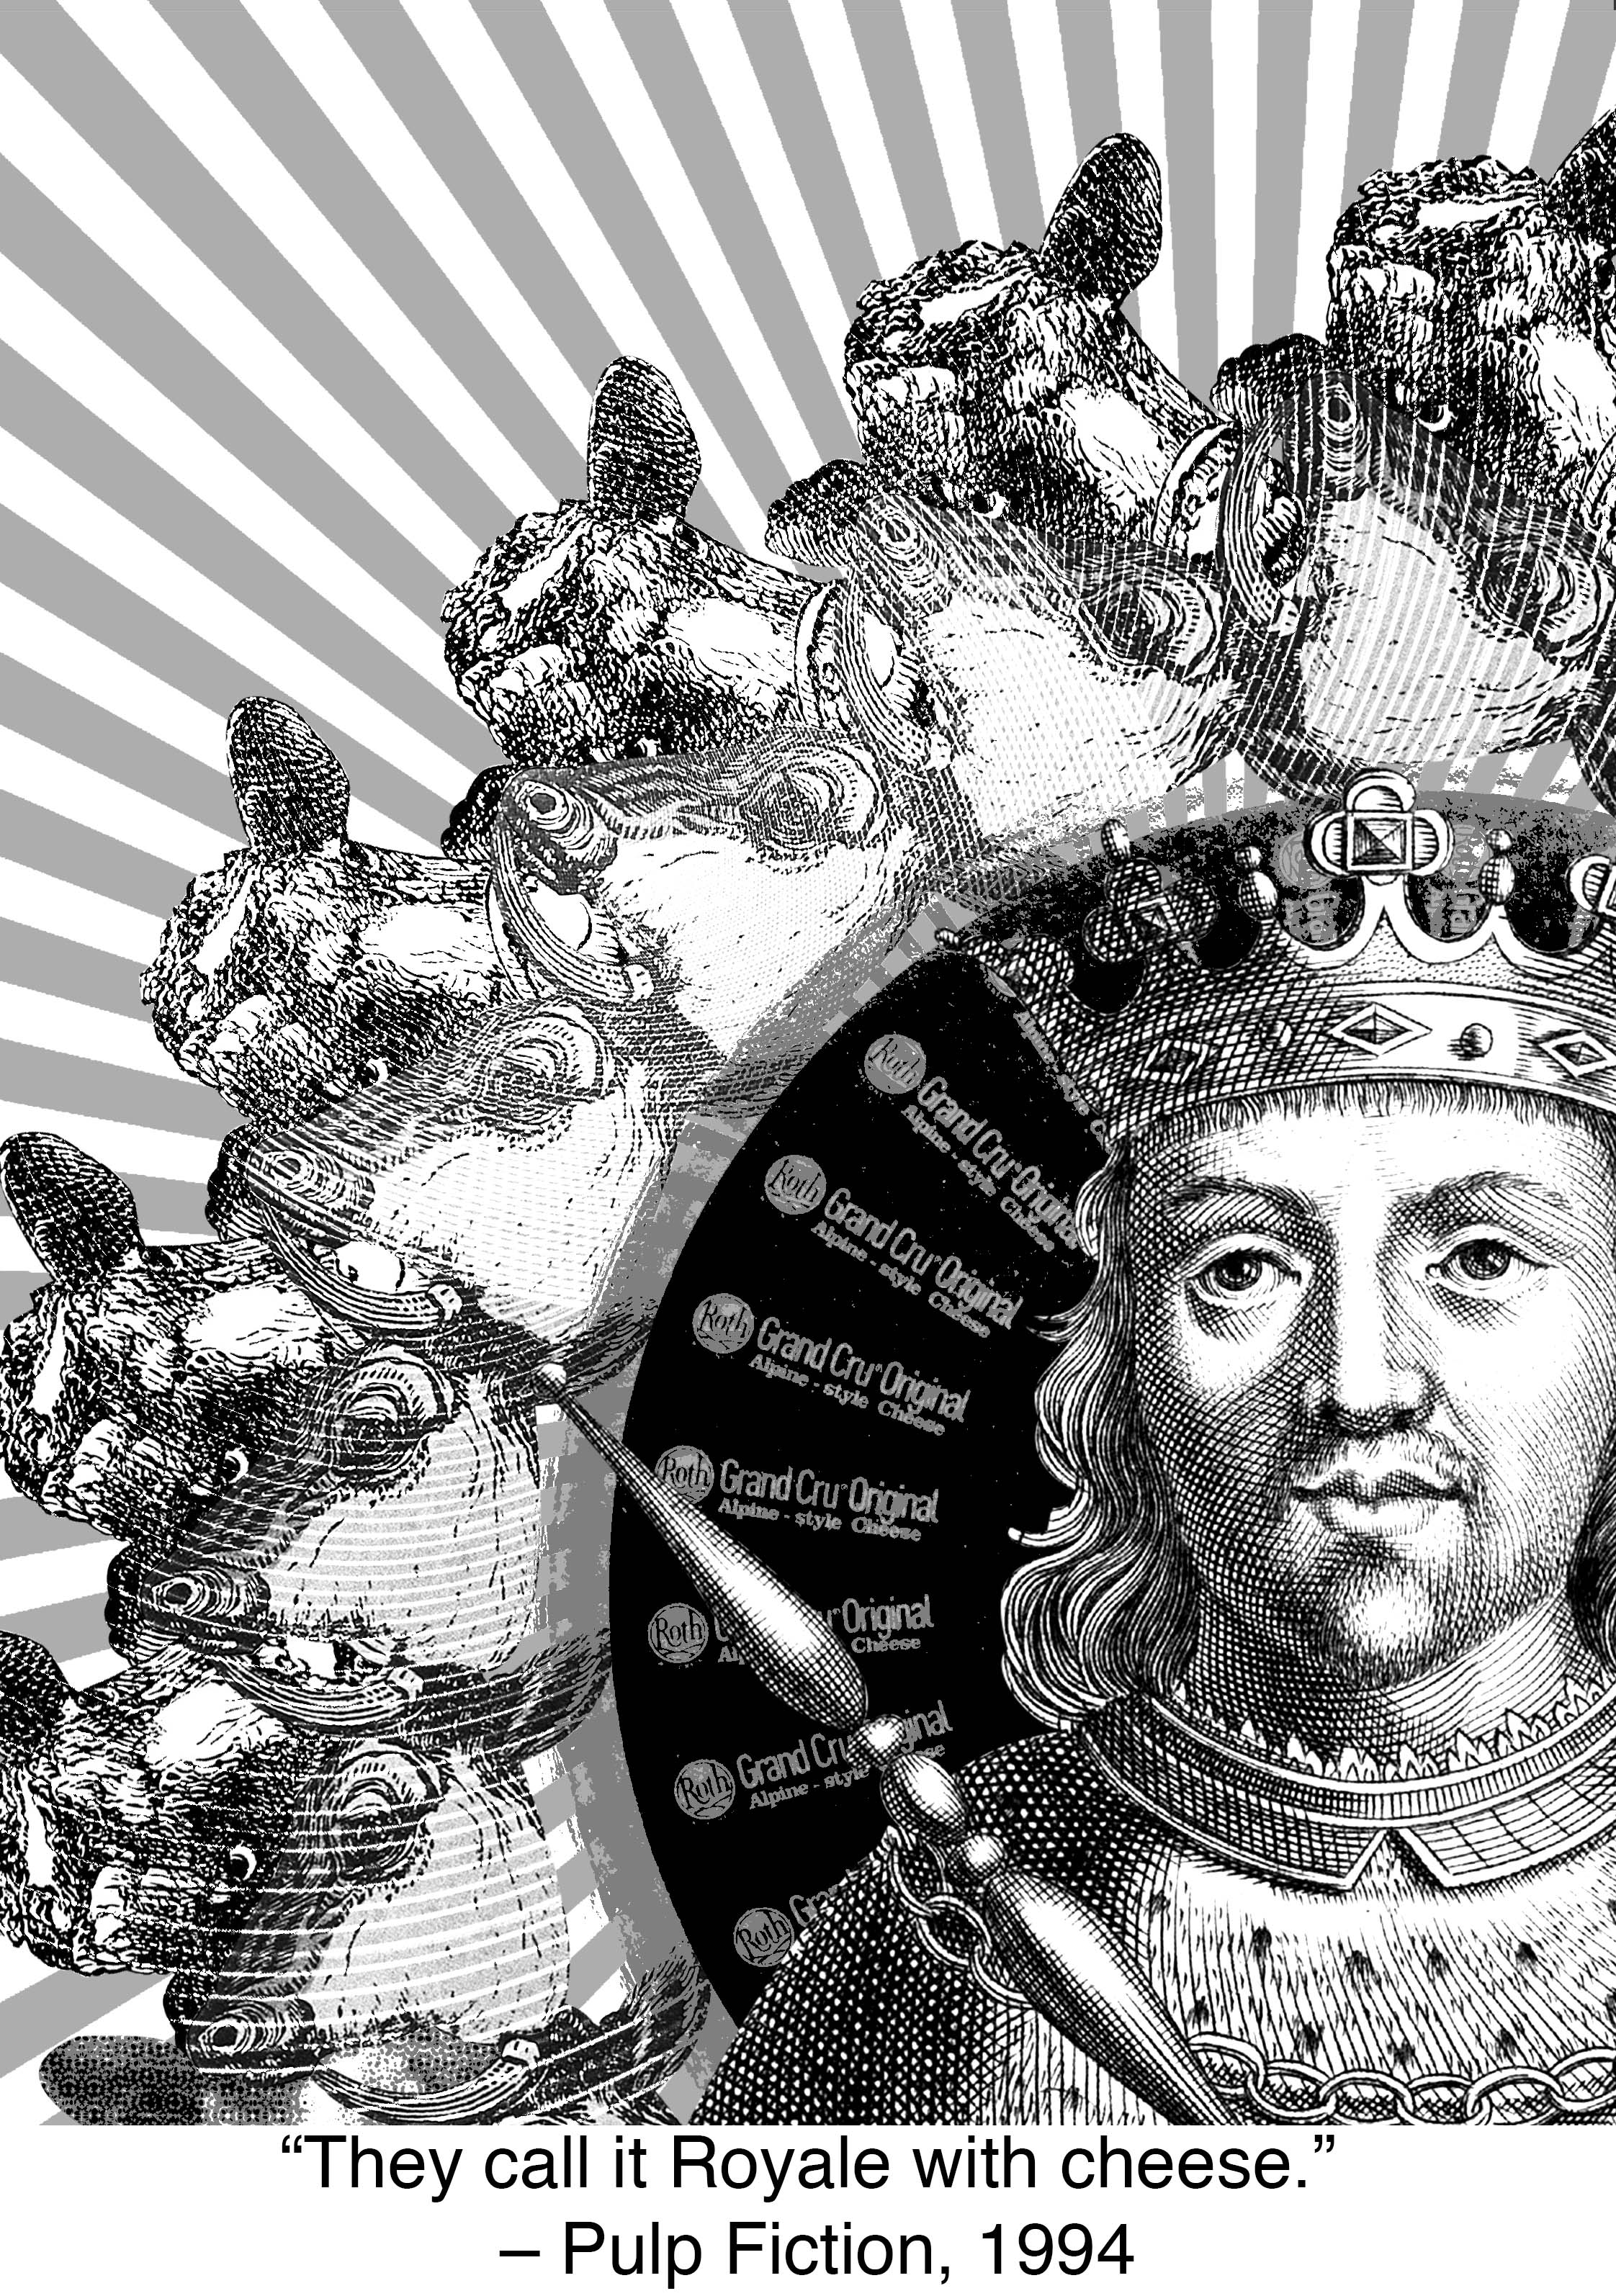
I switched up the royal couple for an engraving of a king instead but kept the cheese wheel background. I posterized the cheese wheel, creating a black colour that allowed the king to stand out more. I then made tessellations of two cow heads and overlayed them with a radial line pattern, using the divide layer mode to remove some detail, and hence emphasis from the cow, allowing the king to stand out. Following my design for my first quote, I used the sunray-like lines to lead the viewers’ eyes to the King.
The ink on the test print bled a little because I went over the silk screen multiple times. The trick was to get it in one swipe and that’s what I did for my tote bag print.
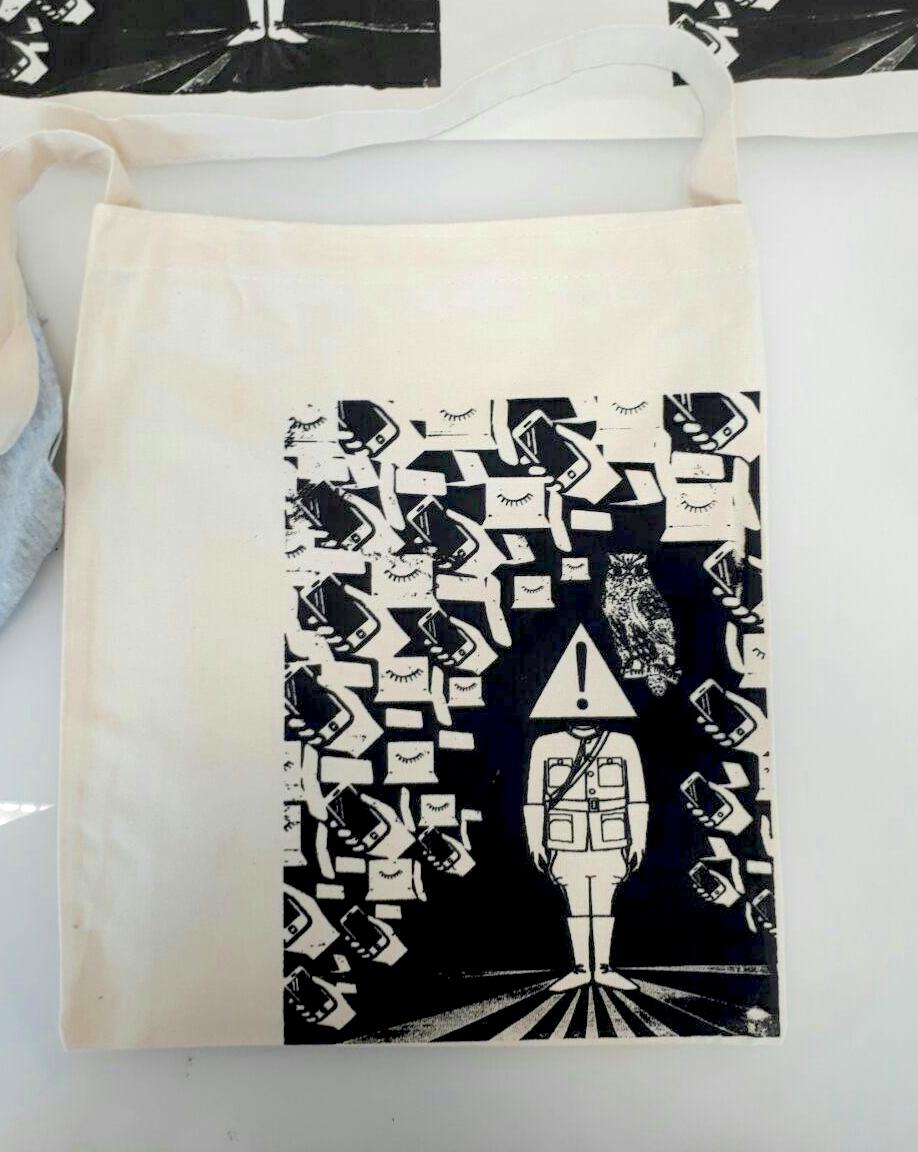
My finished design! I decided to have it at the corner of the bag to make my tote bag a little more original and less conventional.
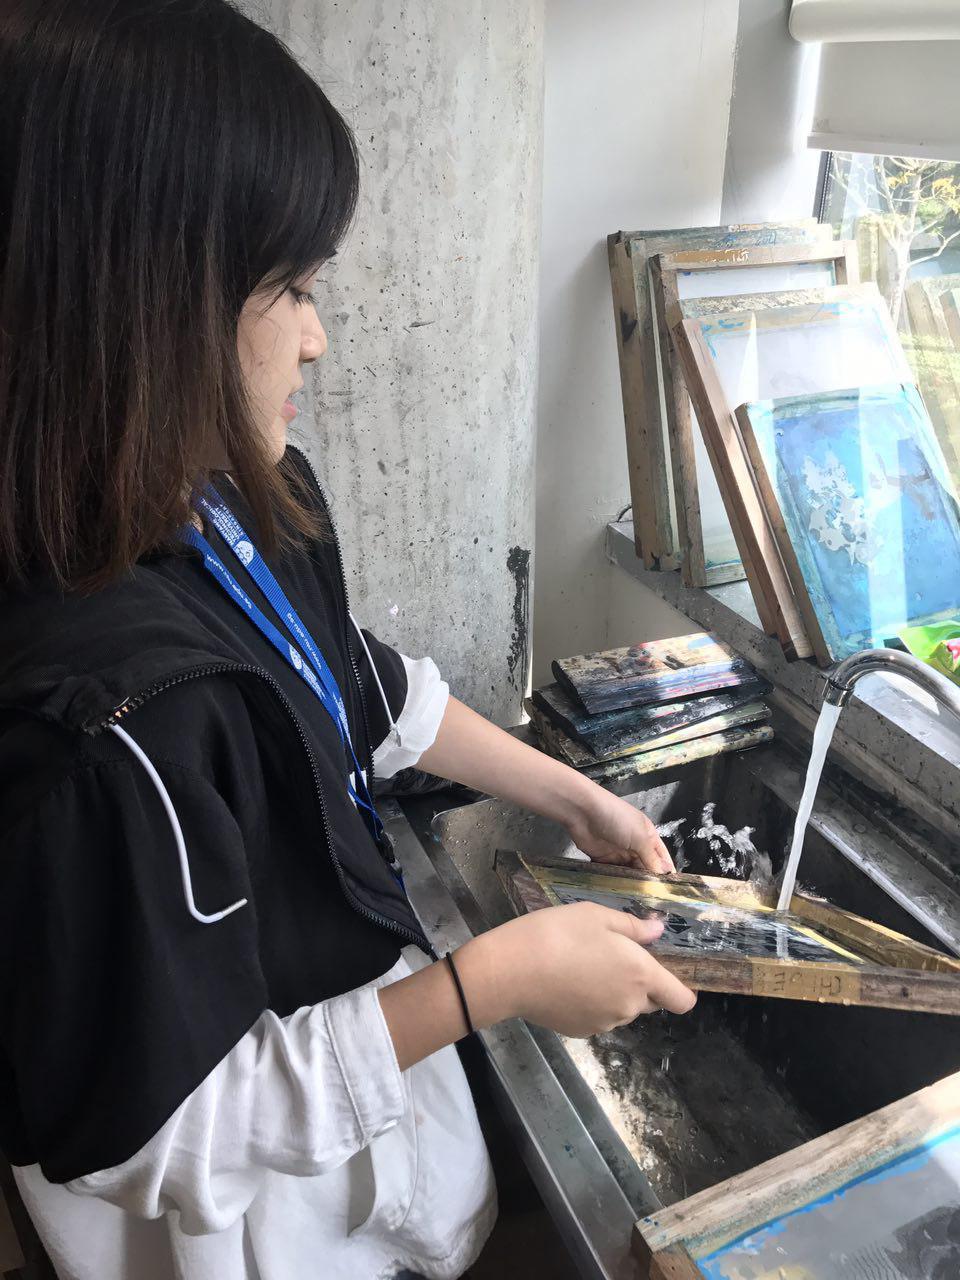
… And finally, saying goodbye to the silkscreen!
After this project, I’ve come to realise that I shouldn’t be scared or re-doing my designs and trashing my previous one completely, also that I shouldn’t “hoard” or try to keep an object in my composition just because I like it – if it doesn’t work with the composition, it doesn’t work and means it needs to be SCRAPPED! I’ve also learned how to see things in a more uncanny or unconventional manner as well as to see how to compose images, in other words, I think my seeing and composing abilities went up a notch. Although, I think I can improve on showing less to tell more, less is more.
I’ve also learnt so much about composition. I used to think it would be quite an easy thing to do and that it came naturally to a lot of people, but I’ve realised that composing an image can take a lot of thought. I’ve wrecked my brains quite a bit for this project but, overall, it was really fun and I finally got to try out silkscreen printing!