This project was one hell of a ride. Many firsts. Having to manage my time with studies while doing an internship was really a challenge. Nonetheless, this is definitely one of my favourite class of 2 and half years. I chose Interactive Media to learn about mechanics and interactivity, be it organic or the use of digital scripts.
Ideation.
I decided that form and mechanics was more important in creating a physical and interactive device. The study of how things work and the organic nature of an interactive physical product allows for a more intuitive and relatable user experience. I wanted to explore the process of making a product instead of coding out something. I felt it was more important that I explore a physical interactive device before I incorporate digital technology into my devices. And I am glad I did.
THE FLUTE.
I decided to take something ordinary that no one has tried to redesign and give it a refreshed take. Based of the 4-hole Native American Flute, I wanted to redesign the flute such that it will produce a refreshed sound through modifications to the internal structure of it.
This was where I took reference from for the modelling of my flute.
Modelling
For the first time, I was introduced to 3D modelling. I intended to do a rapid prototyping for the flute and the best tool for this given the short span of time available was Tinkercad. It was a stripped down version of autocad and you create shapes based on existing shapes (triangle, rectangular boxes etc.) Even then, it wasn’t easy especially for someone new to this. You have to take into consideration how every part fits and works together, printing issues and the measurements.
This was the first prototype model I designed. 
At this point, I wasn’t sure if this would work and the interactivity is actually very limiting. I’ve changed the mouth-piece of the flute to make it sound like a recorder, while keeping the body similar to a recorder/flute.
Still, I wasn’t at all pleased with it. So I continued to research on 3D printing and making of flutes. These are the other videos that I took references from,
Keys to a good flute.
AIRFLOW.
I realised that a smooth inner surface and the correct incision of the air hole and sound hole helped with achieving the sound we want. There should not be any frays as it will disrupt airflow, affecting the sound made by the flute.
Since sound waves has crest and troughs, I wanted to experiment if I could cause a distortion in the airflow which in turns creates a new sound. I did so by adding humps to the inner lower part of the flute.
I have also added two modular parts to the flute.
First is a spinning fidget that spins when high pressure air passes through. This, ideally, will cause some sort of vibrato.
Second is a flap that minimises the space where air passes through the flute.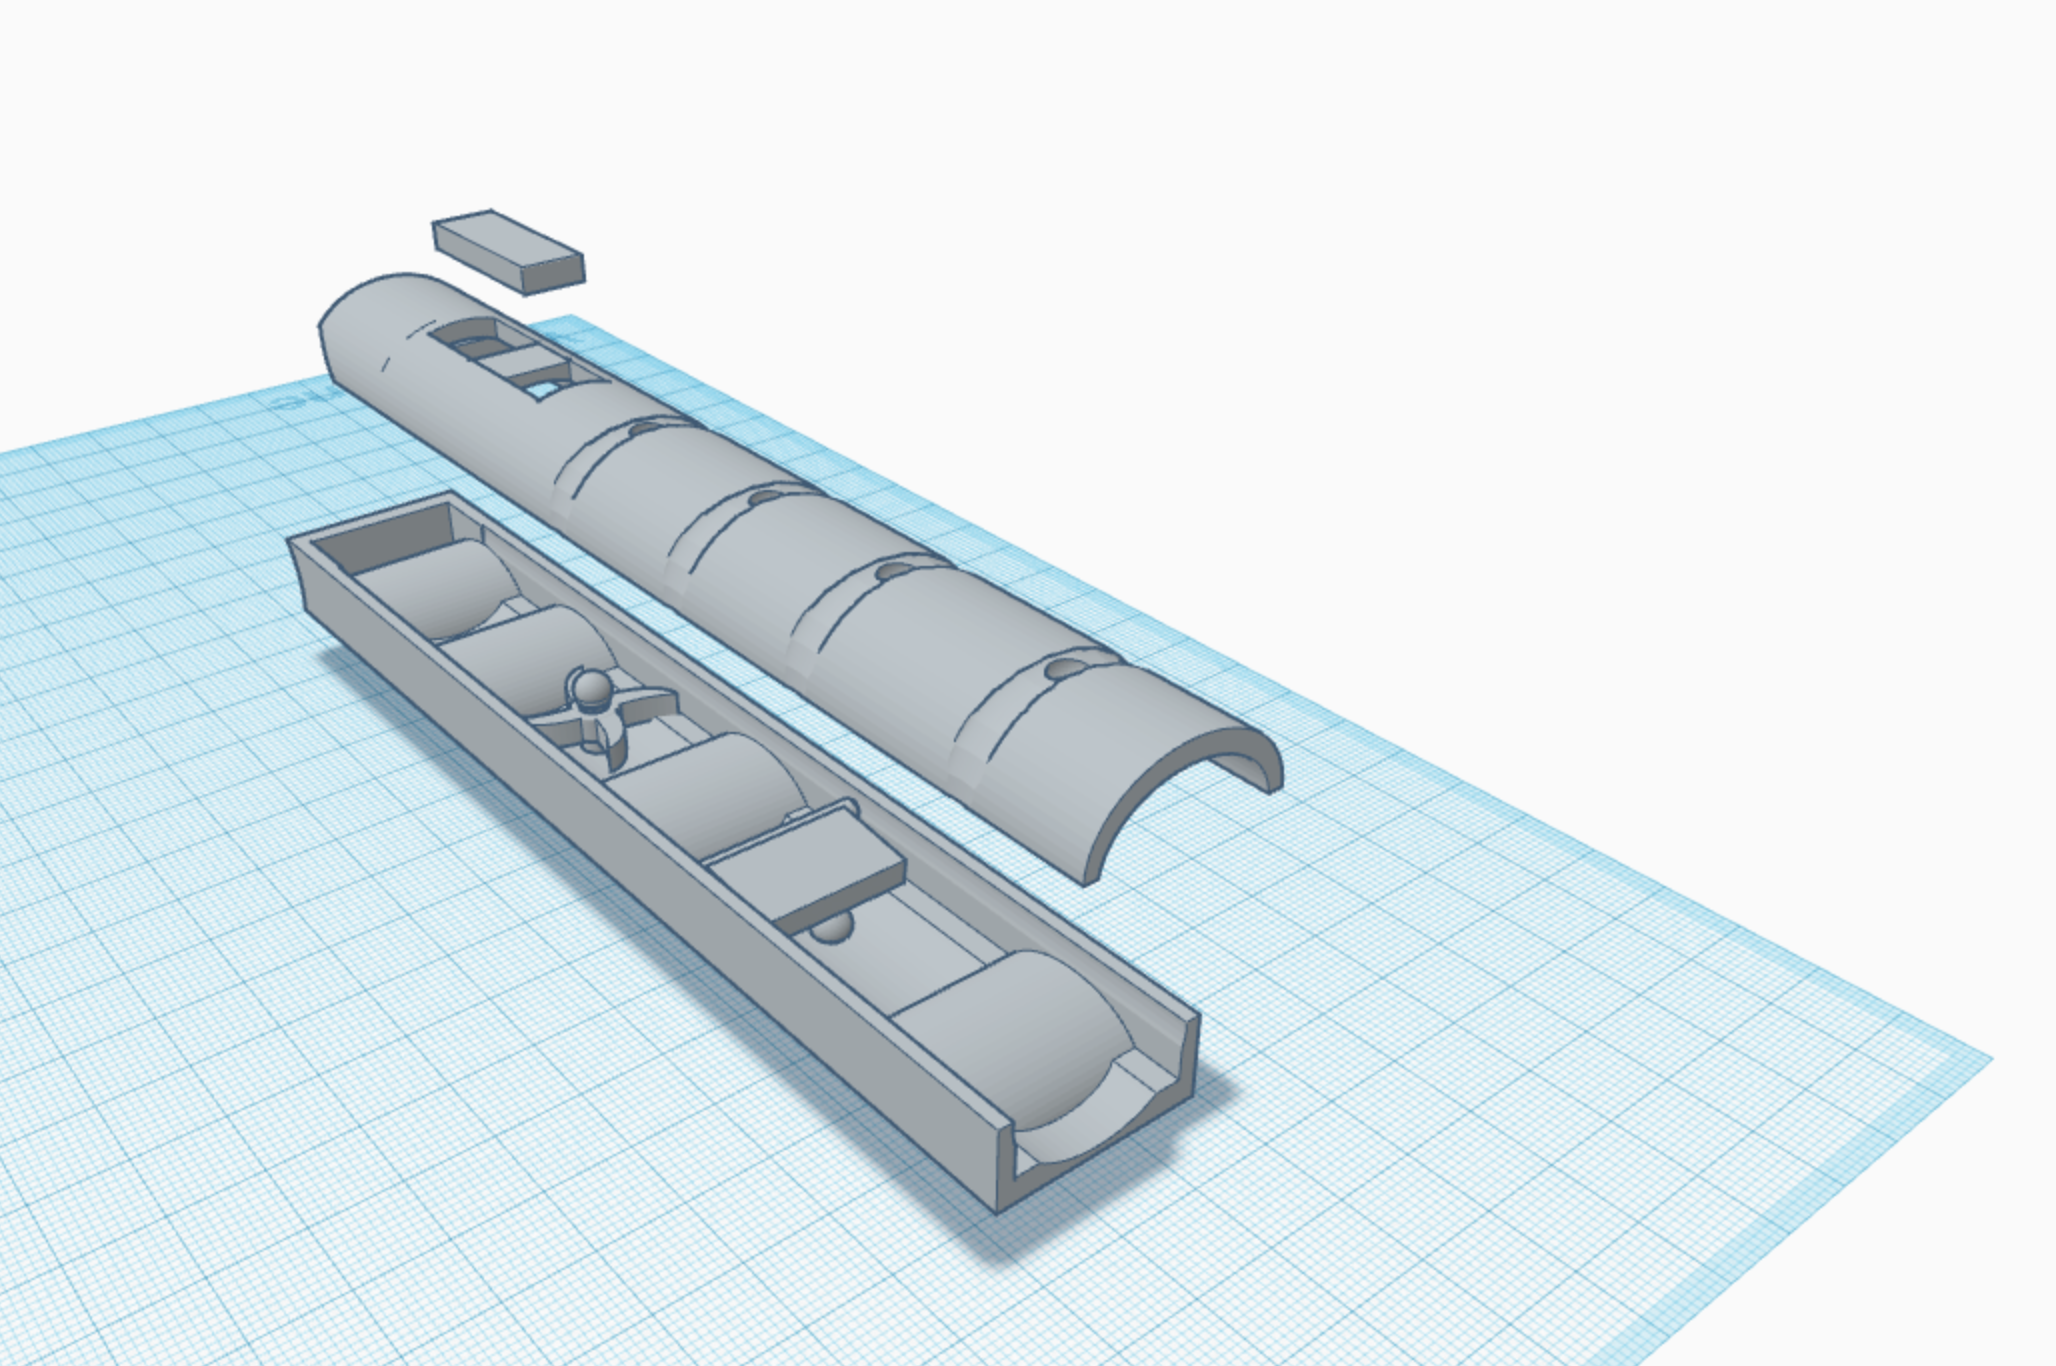
Because of the limiting capabilities of the 3D printer, I have to make a boxed bottom and widen the overall width of the flute to prevent it from deforming.
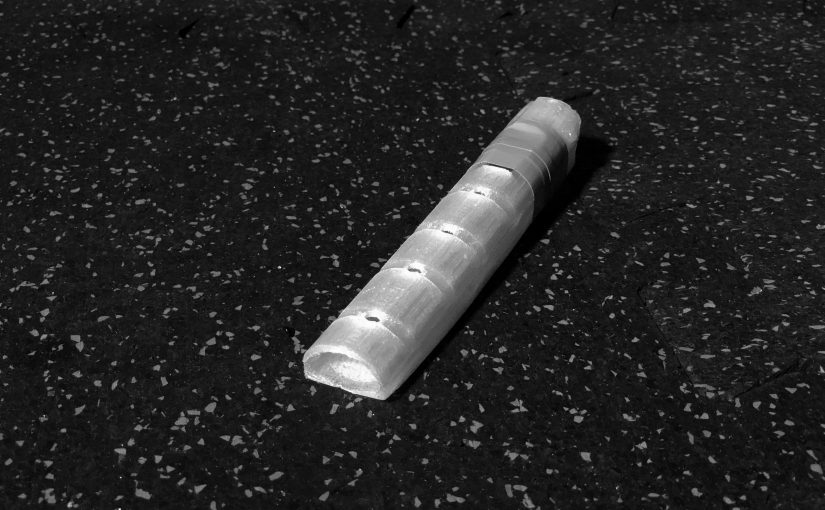
Viola! The final product.

I printed it in halves and used epoxy to fit them together. Also filed the inner bits and the holes but the finish was not as smooth as I hoped it would. The whole process was extremely time consuming but worth it when I put it all together:)
DOES IT WORK? WHAT COULD HAVE BEEN DONE BETTER?
Sadly, it doesn’t. There are several factors.
The number of humps are probably too many and sound waves just didn’t flow well enough through the chamber. The mouthpiece was not big enough and airflow was restricted. The air hole and sound hole could have been covered better and I believe there was an error in my design of the flat piece that goes on the top. There should be a small chamber that allows the flow of air from the air hole to the sound hole.