So basically, I have combined what I have learnt over the course of this semester with this pixel patch. So you are able to view your pixelated face on the screen and as you move around the screen, 4 different sounds will play. And the trick is to get the photo taken. When you finally do, you will get the pixelated image taken instead of a clear image:)
Category: Interactive 2
Snapchat-ish filter (brad pitt assignment)
For this patch, alpha blending as it is is already quite a big thing to grasp. I played around with setting params whereby if we move around, the images on my face would change according to the x and y values.
Sharing
Here’s a series of add ons for interactivity ideas:
- AXIS – Anatomy of space
“kaleidoscopic journey full of movement with AXIS“

This experiments with the concept of space and human interactivity with gravity and sound.
“The visualisation of sound for AXIS arrived through a music notation system synchronised to the generation of pure light – expanded points and lines.”
How do they do it?
“Optical devices, along with mapping and sound technologies alter how the human body is perceived in space and in time. Sequenced code renders breathing geometry that is traversed by the dancer in motion during this 35-minute digital transmission. The dancers are conductors travelling through a space tensioned with the happening of projected light.”
2. Robotic Arm
This man built a working robotic arm from scratch. Best part: He made his designs available to all to inspire others who do not have a limb to make their own. This is very motivating because as we move forward into the near future, it involves crowd sourcing and a lot of open source collaborations and I think for what we are studying in IM, we can explore and perhaps push the boundaries with what we do in the class to tackle real world situations and maybe change the direction we are taking with classroom activities and learning.
3. “Ocarina Switch”
In this project, a short musical verse played through an ocarina acts as a switch to a smart home, triggering lights and fans etc. But all that effort to just switch on something, is it really worth it? hahaha

The play of narrative on life unto the technology used to create this art piece is phenomenal. With state of the art projectors and sensors used to create real time projection, it made the projection seem as though it was part of the skin. The narrative also explores “‘death’, ‘suffering’, and ‘sadness’. And then, the ‘opportunity’ to overcome those things.”. Check it out now!
5. Moonlite

Telling stories through what we used to know as the viewmaster. This is an adaptation of it, only now, it’s digitally projected with the use of a smartphone LED flash light. And, more interestingly, used to tell stories with animations and sounds. Still prefer actually reading a book and I think the viewmaster is still better.

Photobooth
In this exercise, we learn how to use expr (and how to set parameters for x and y values), clocker and importing of sound files amongst other things.
Virtual switch (explore the possibilities with Max 7 face tracking)
This was tough…
[UPDATE]
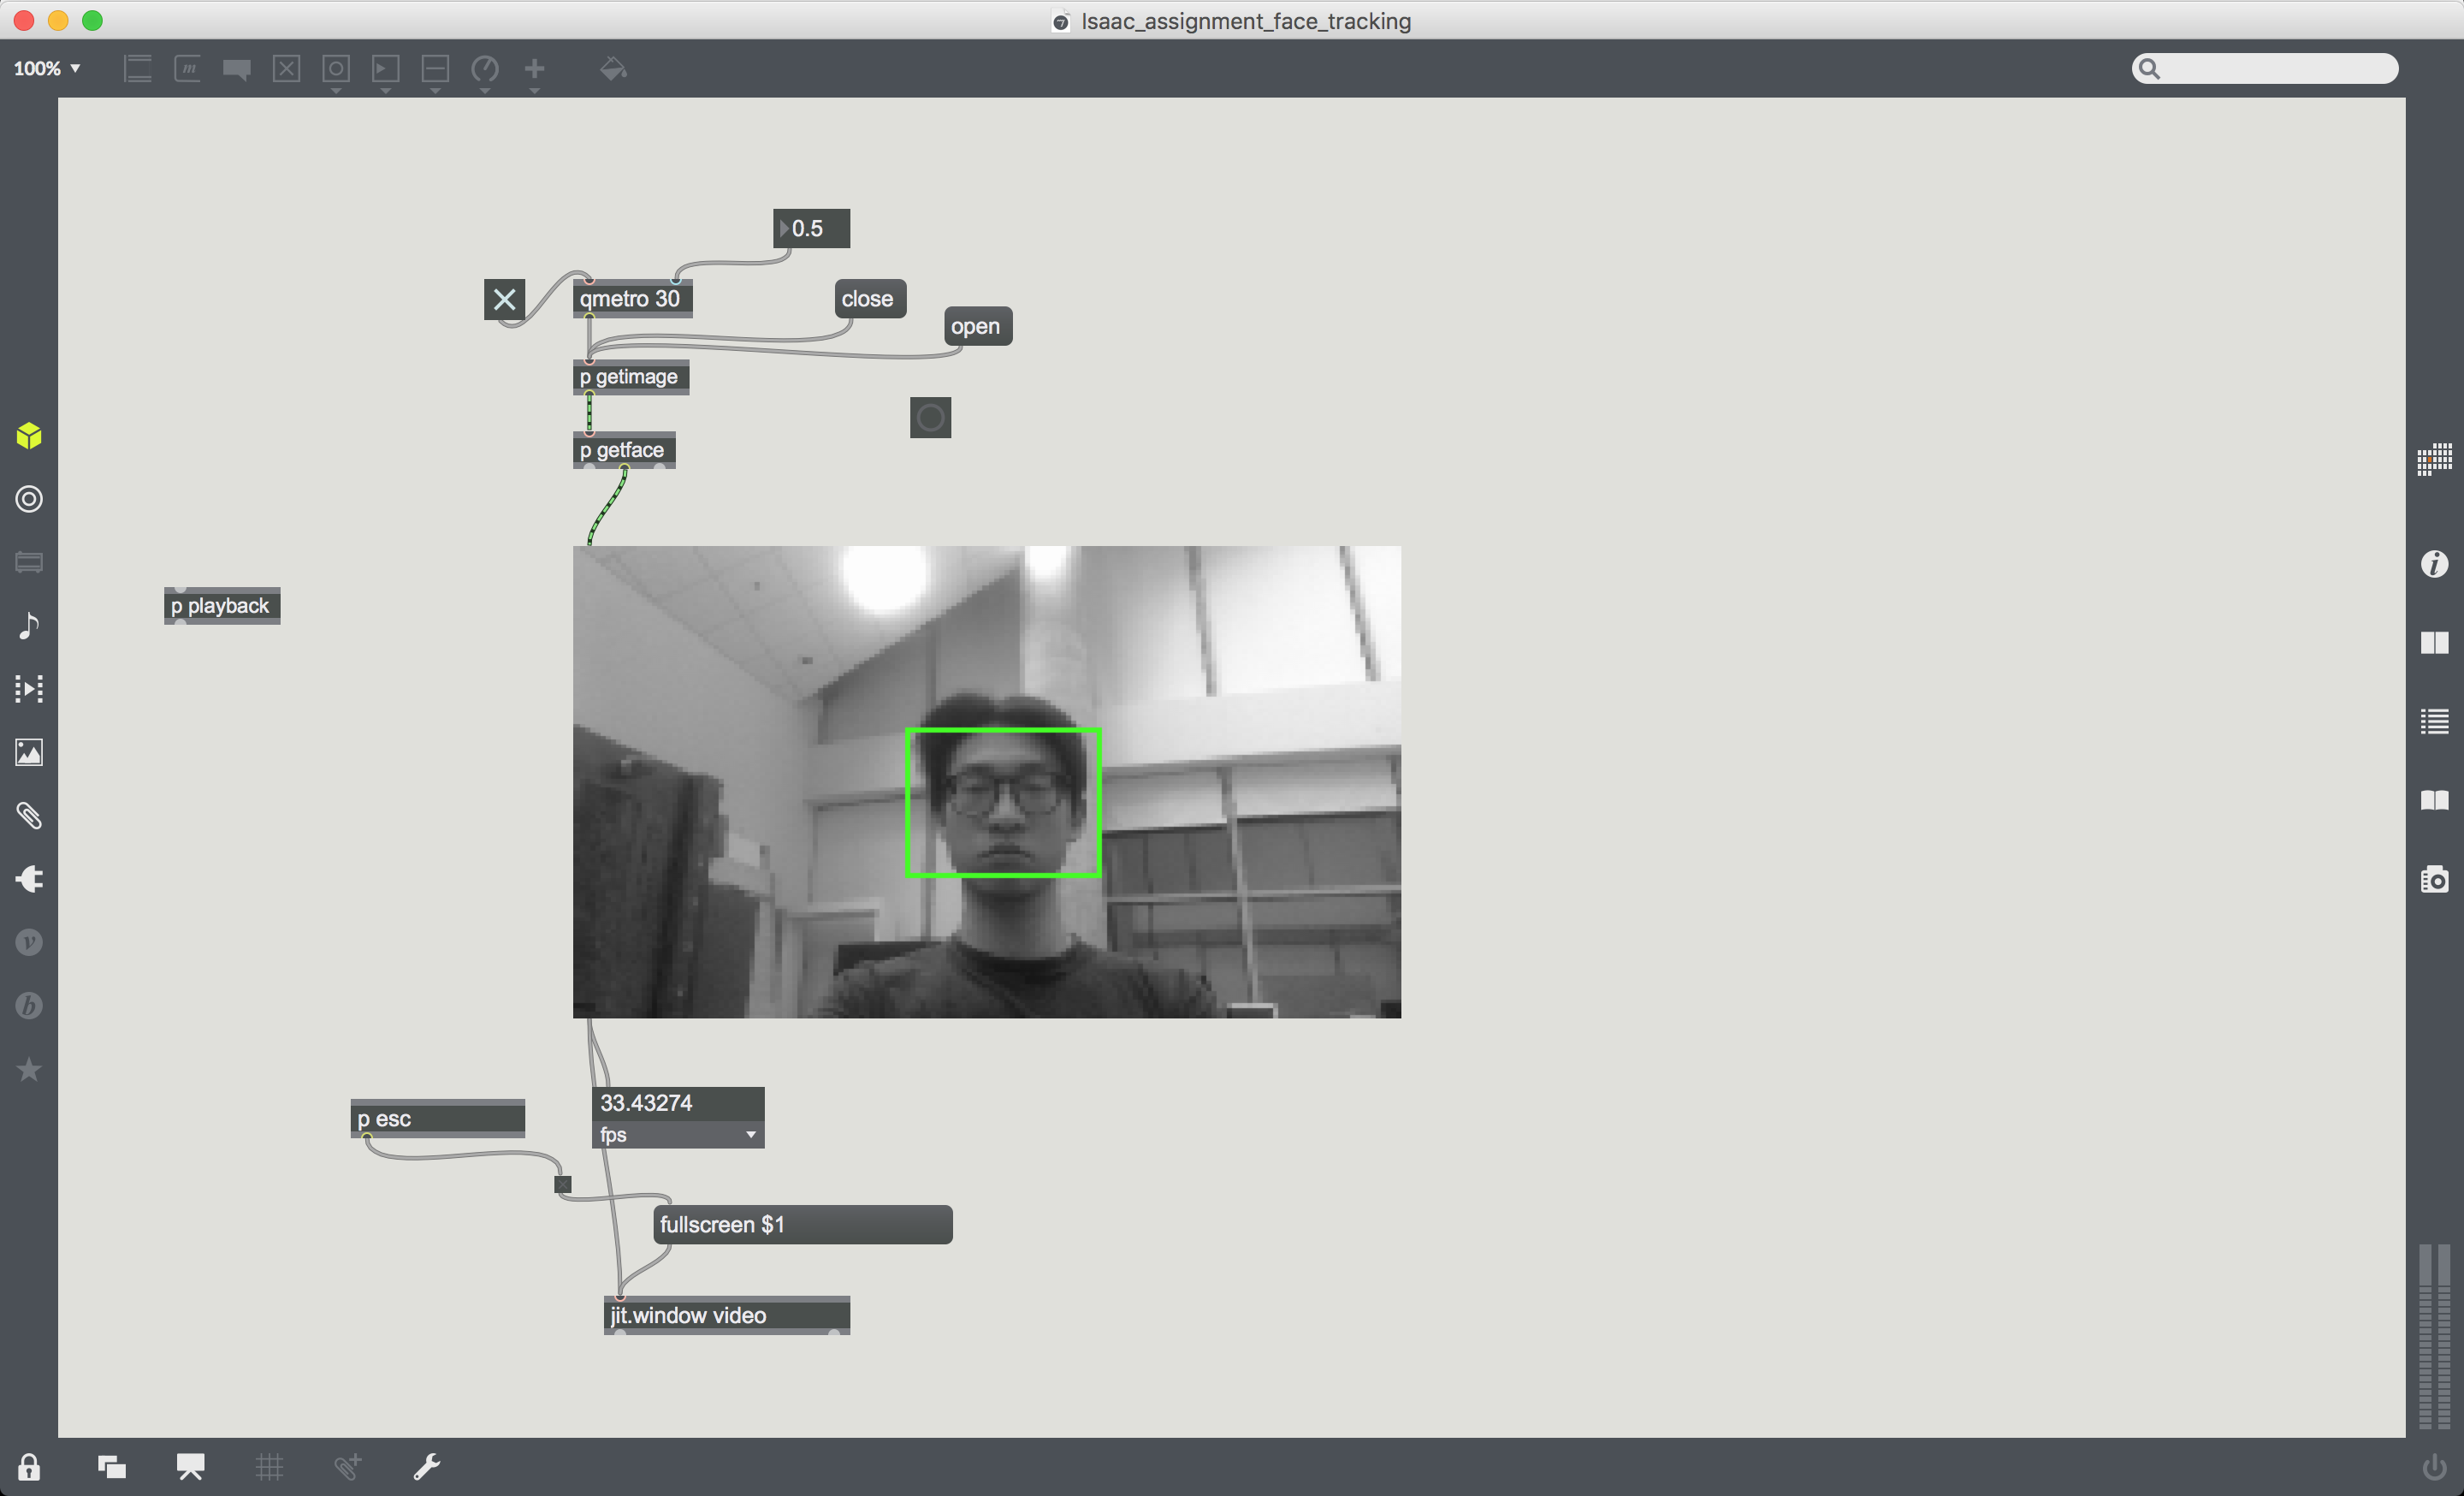
Here’s the breakdown for the Mirror project.
Take a look at the overall lineup:
[p getimage]
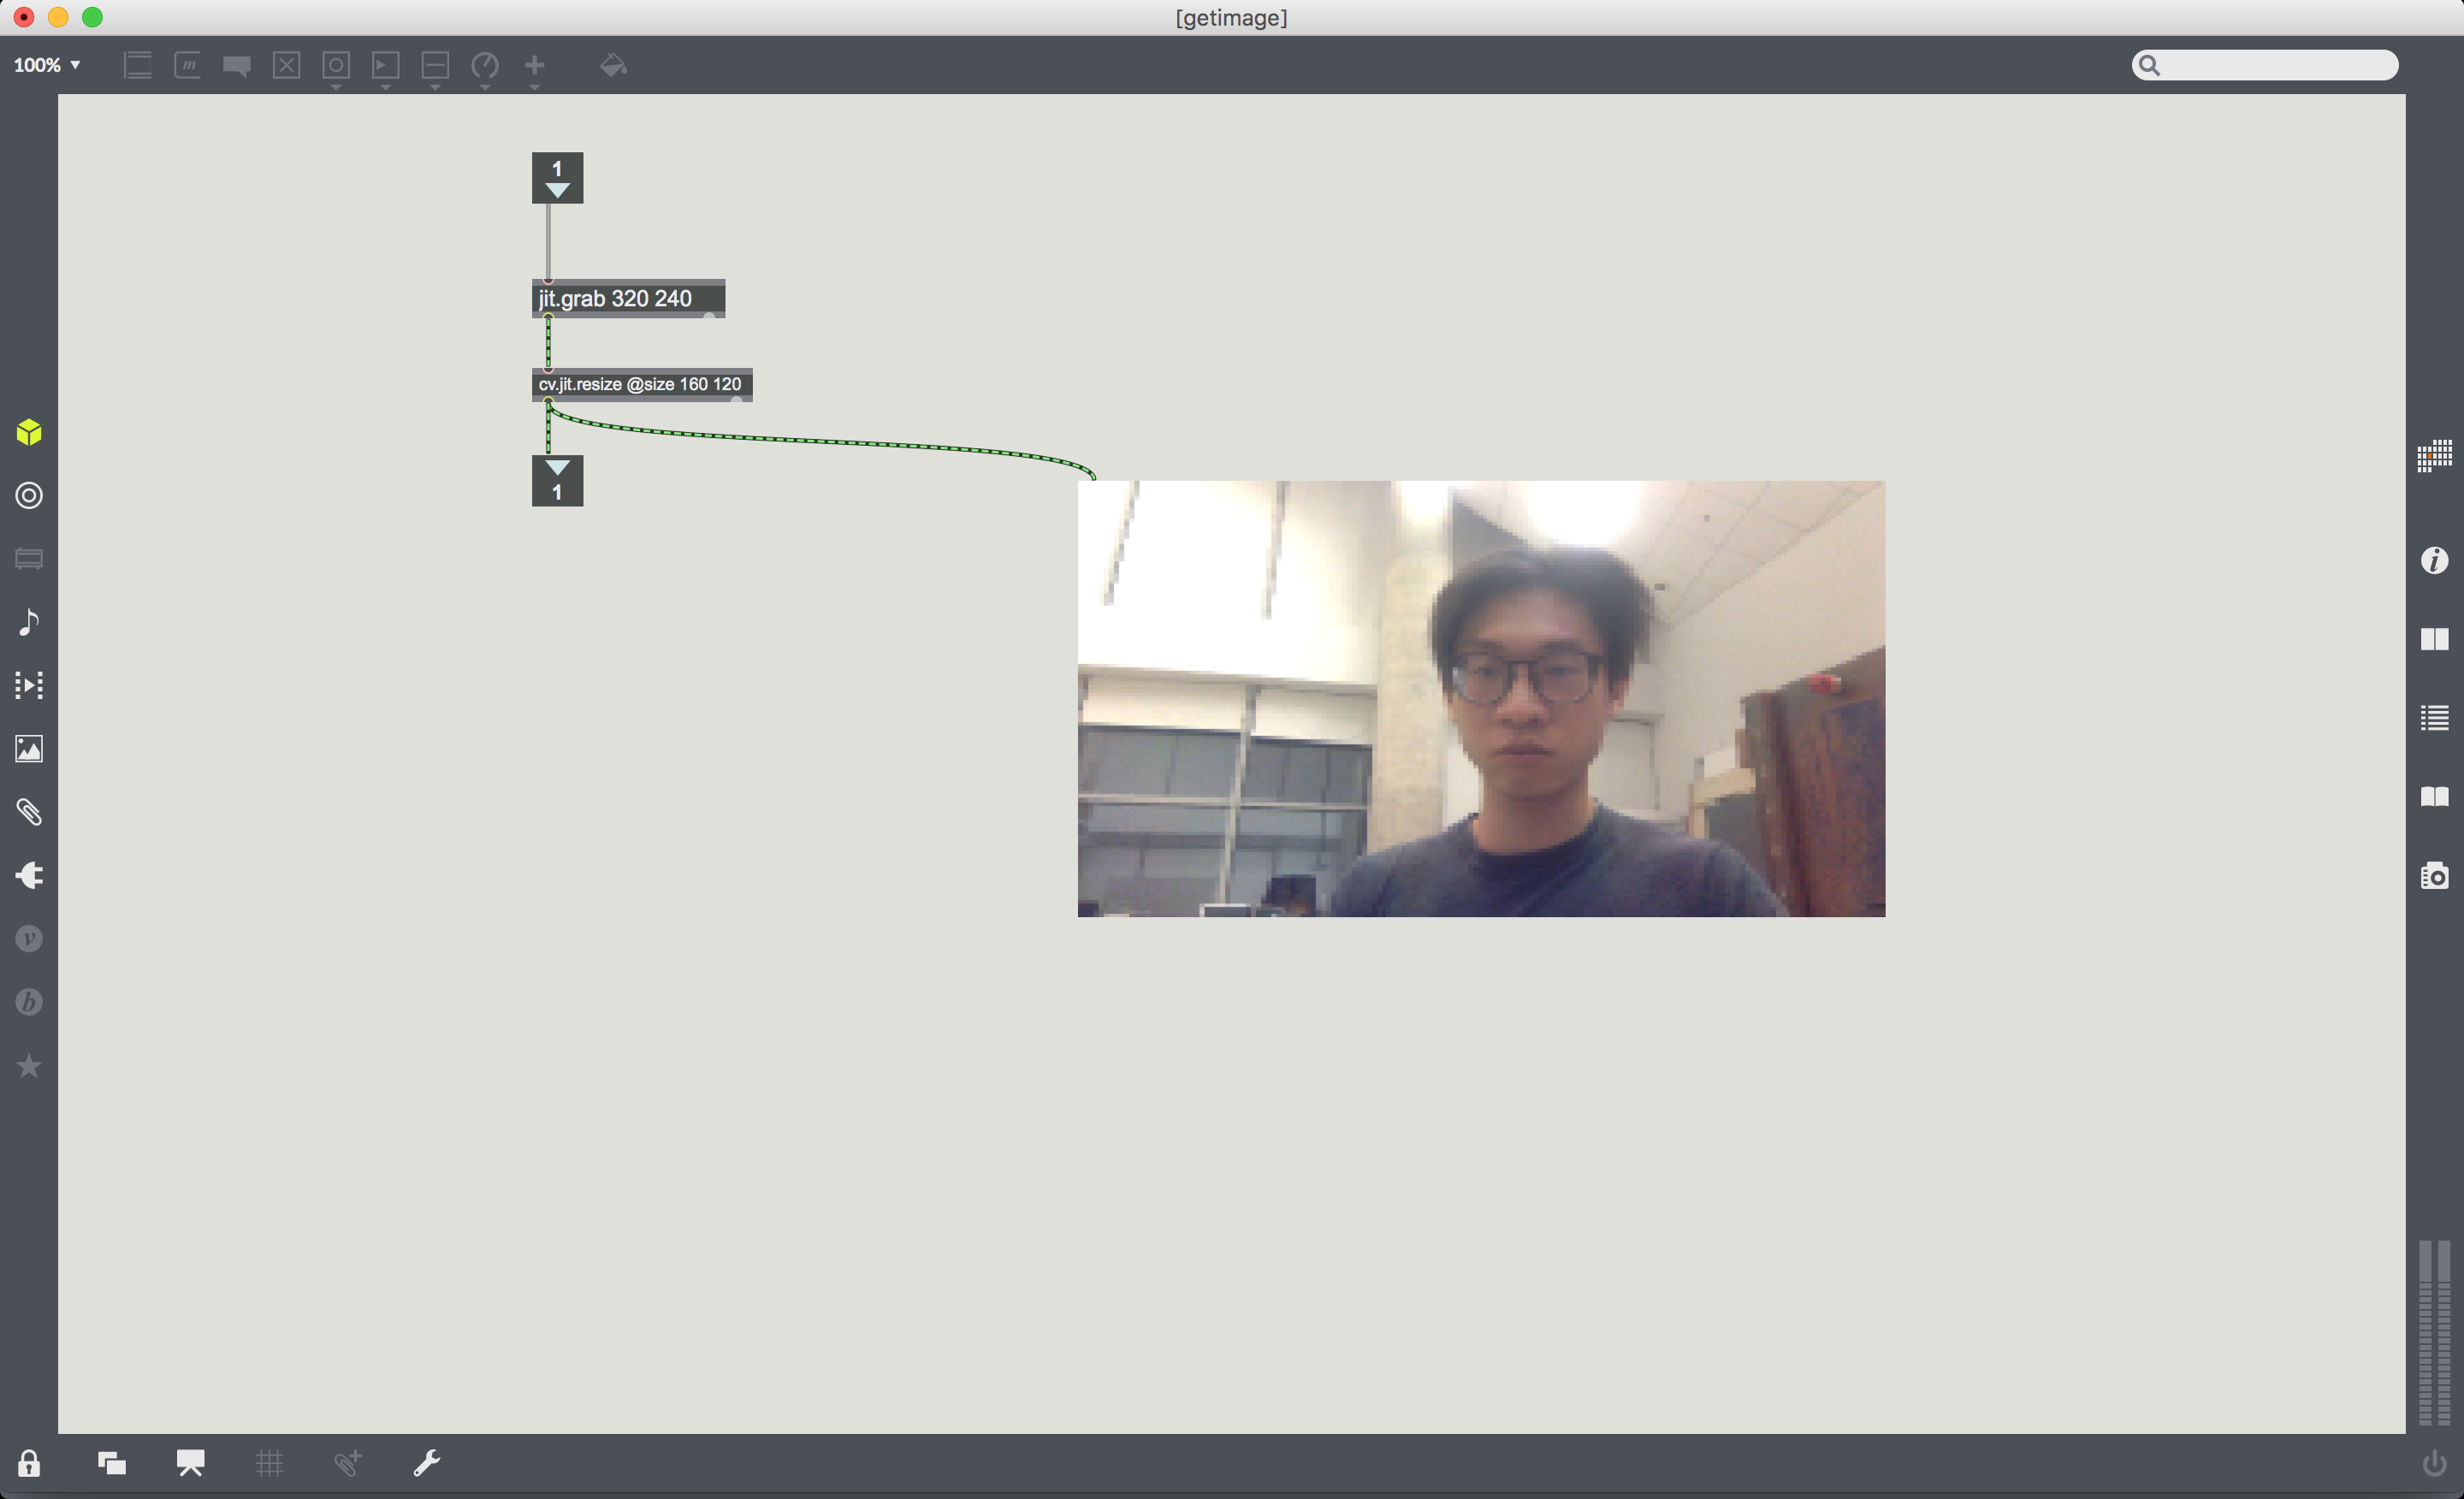
So this works…
[p getface]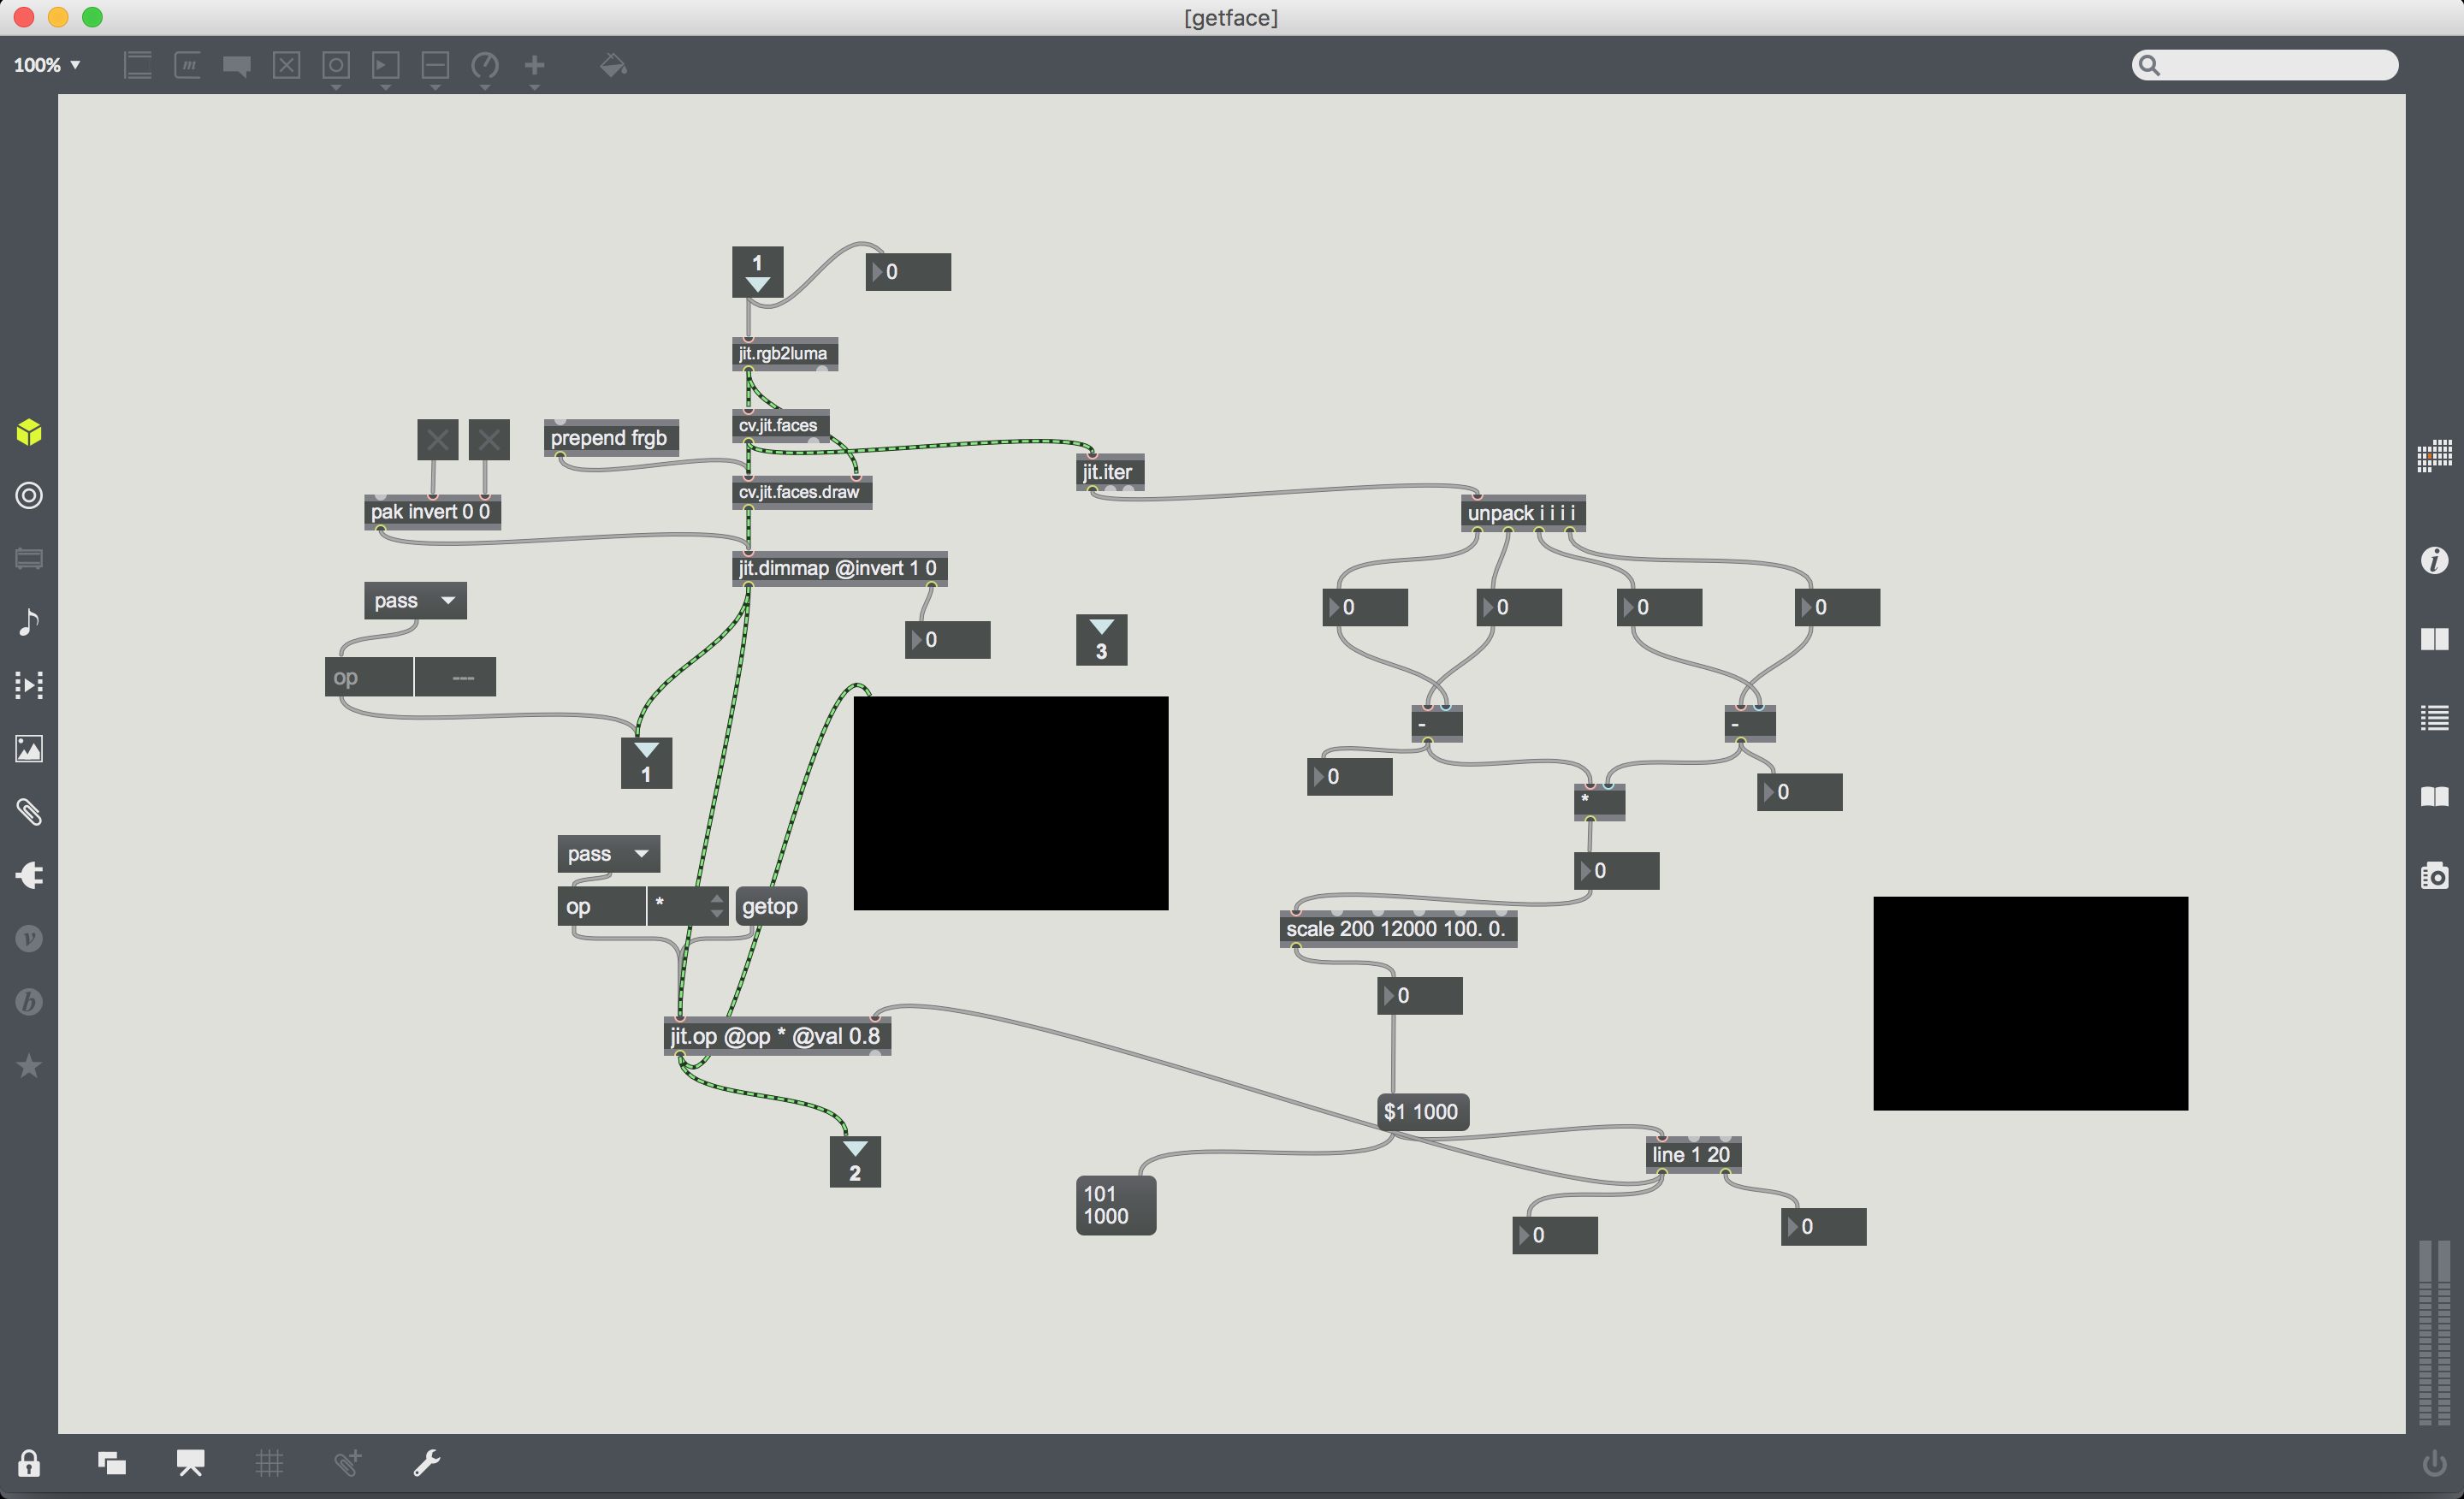
…But, I couldn’t get the dimming to work well. perhaps it could be my laptop’s webcam. I tried playing with the scale dimensions but it doesn’t seem to work:(
Mirror: [pak invert] works well. But I think there is an issue in the unpack area.
Ok I finally found out what was the issue. I didn’t understand the concept of scale. Cleaned up the patch a little. Take a look. I added the correct value for input and output low/high. Line definitely helped to allow for a smooth transition.
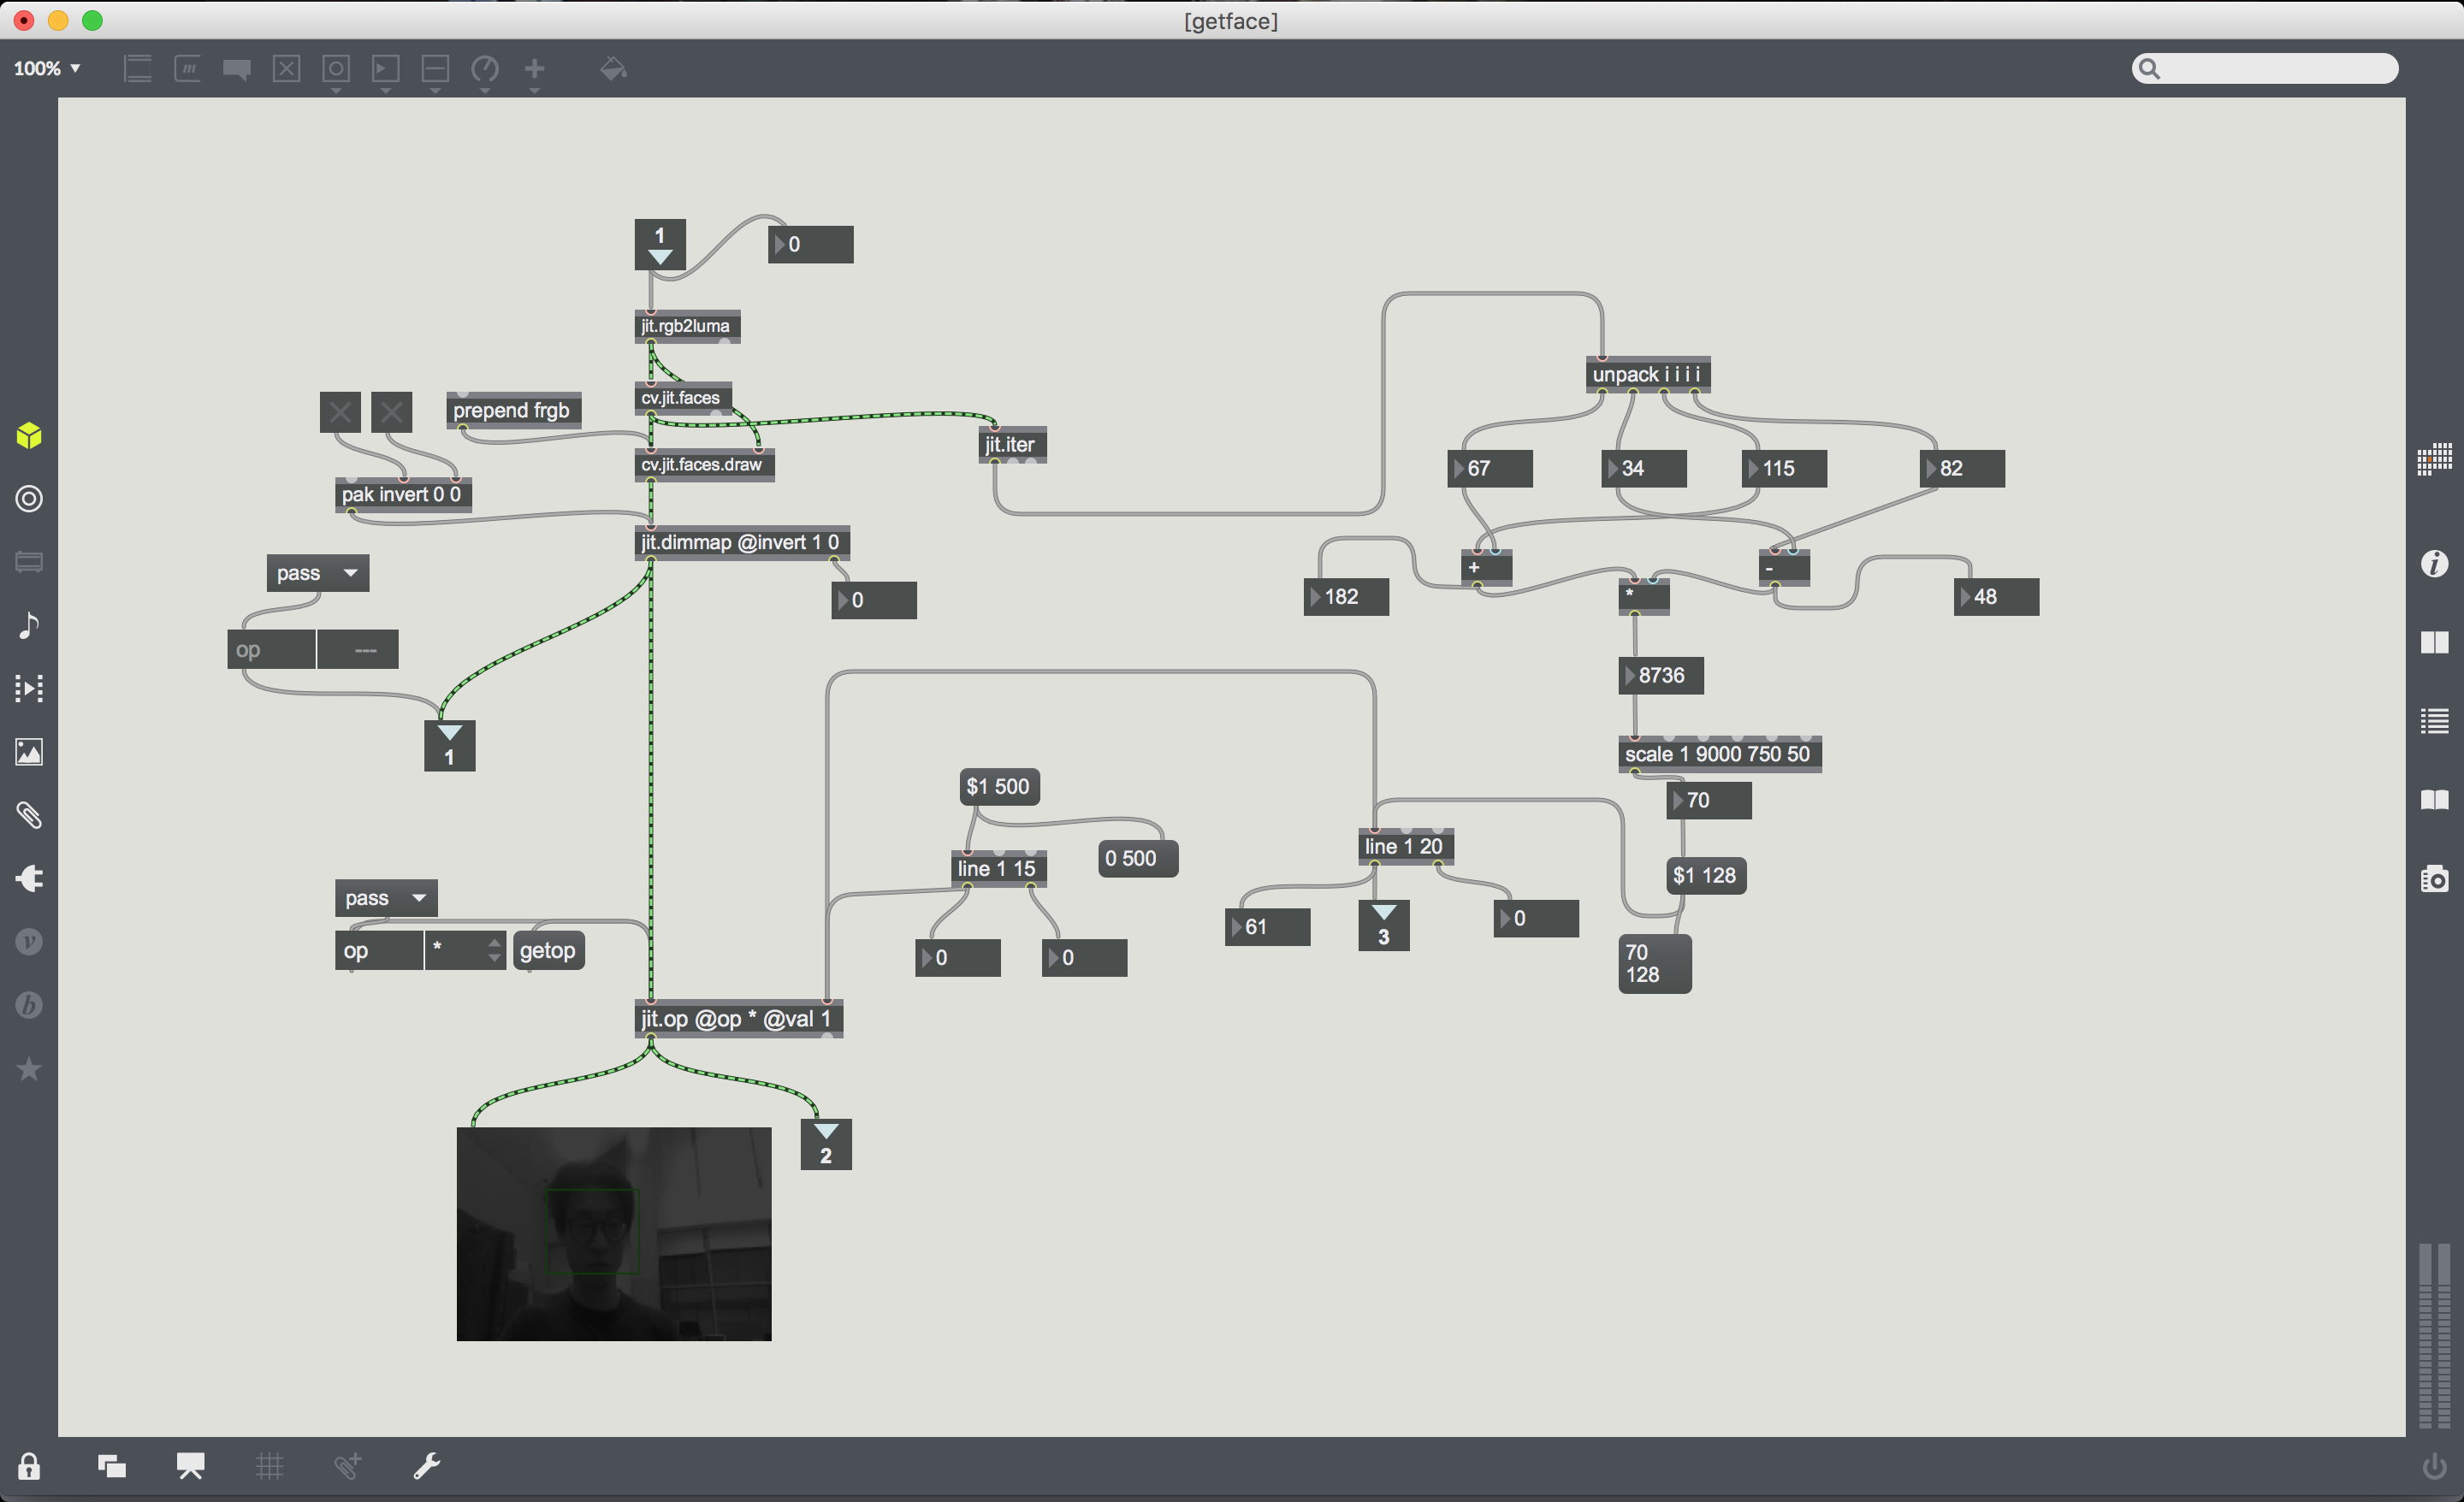
The final product, ta-da!
https://drive.google.com/open?id=0B85eB-v1c8SXa1BtRm5VSkVGU2s
Part 2:
Tracking
https://drive.google.com/open?id=0B85eB-v1c8SXOXpZSlpOQmJhT0U
I started out with what has been gone through in class and tried to make sense of everything. Without a doubt, I had to ask around for help to understand all the commands I needed to insert into Max. I’ve progressed further but there’s so much more to learn and many questions to ask. But for now, here’s what I’ve got.
This was skeleton of the project:
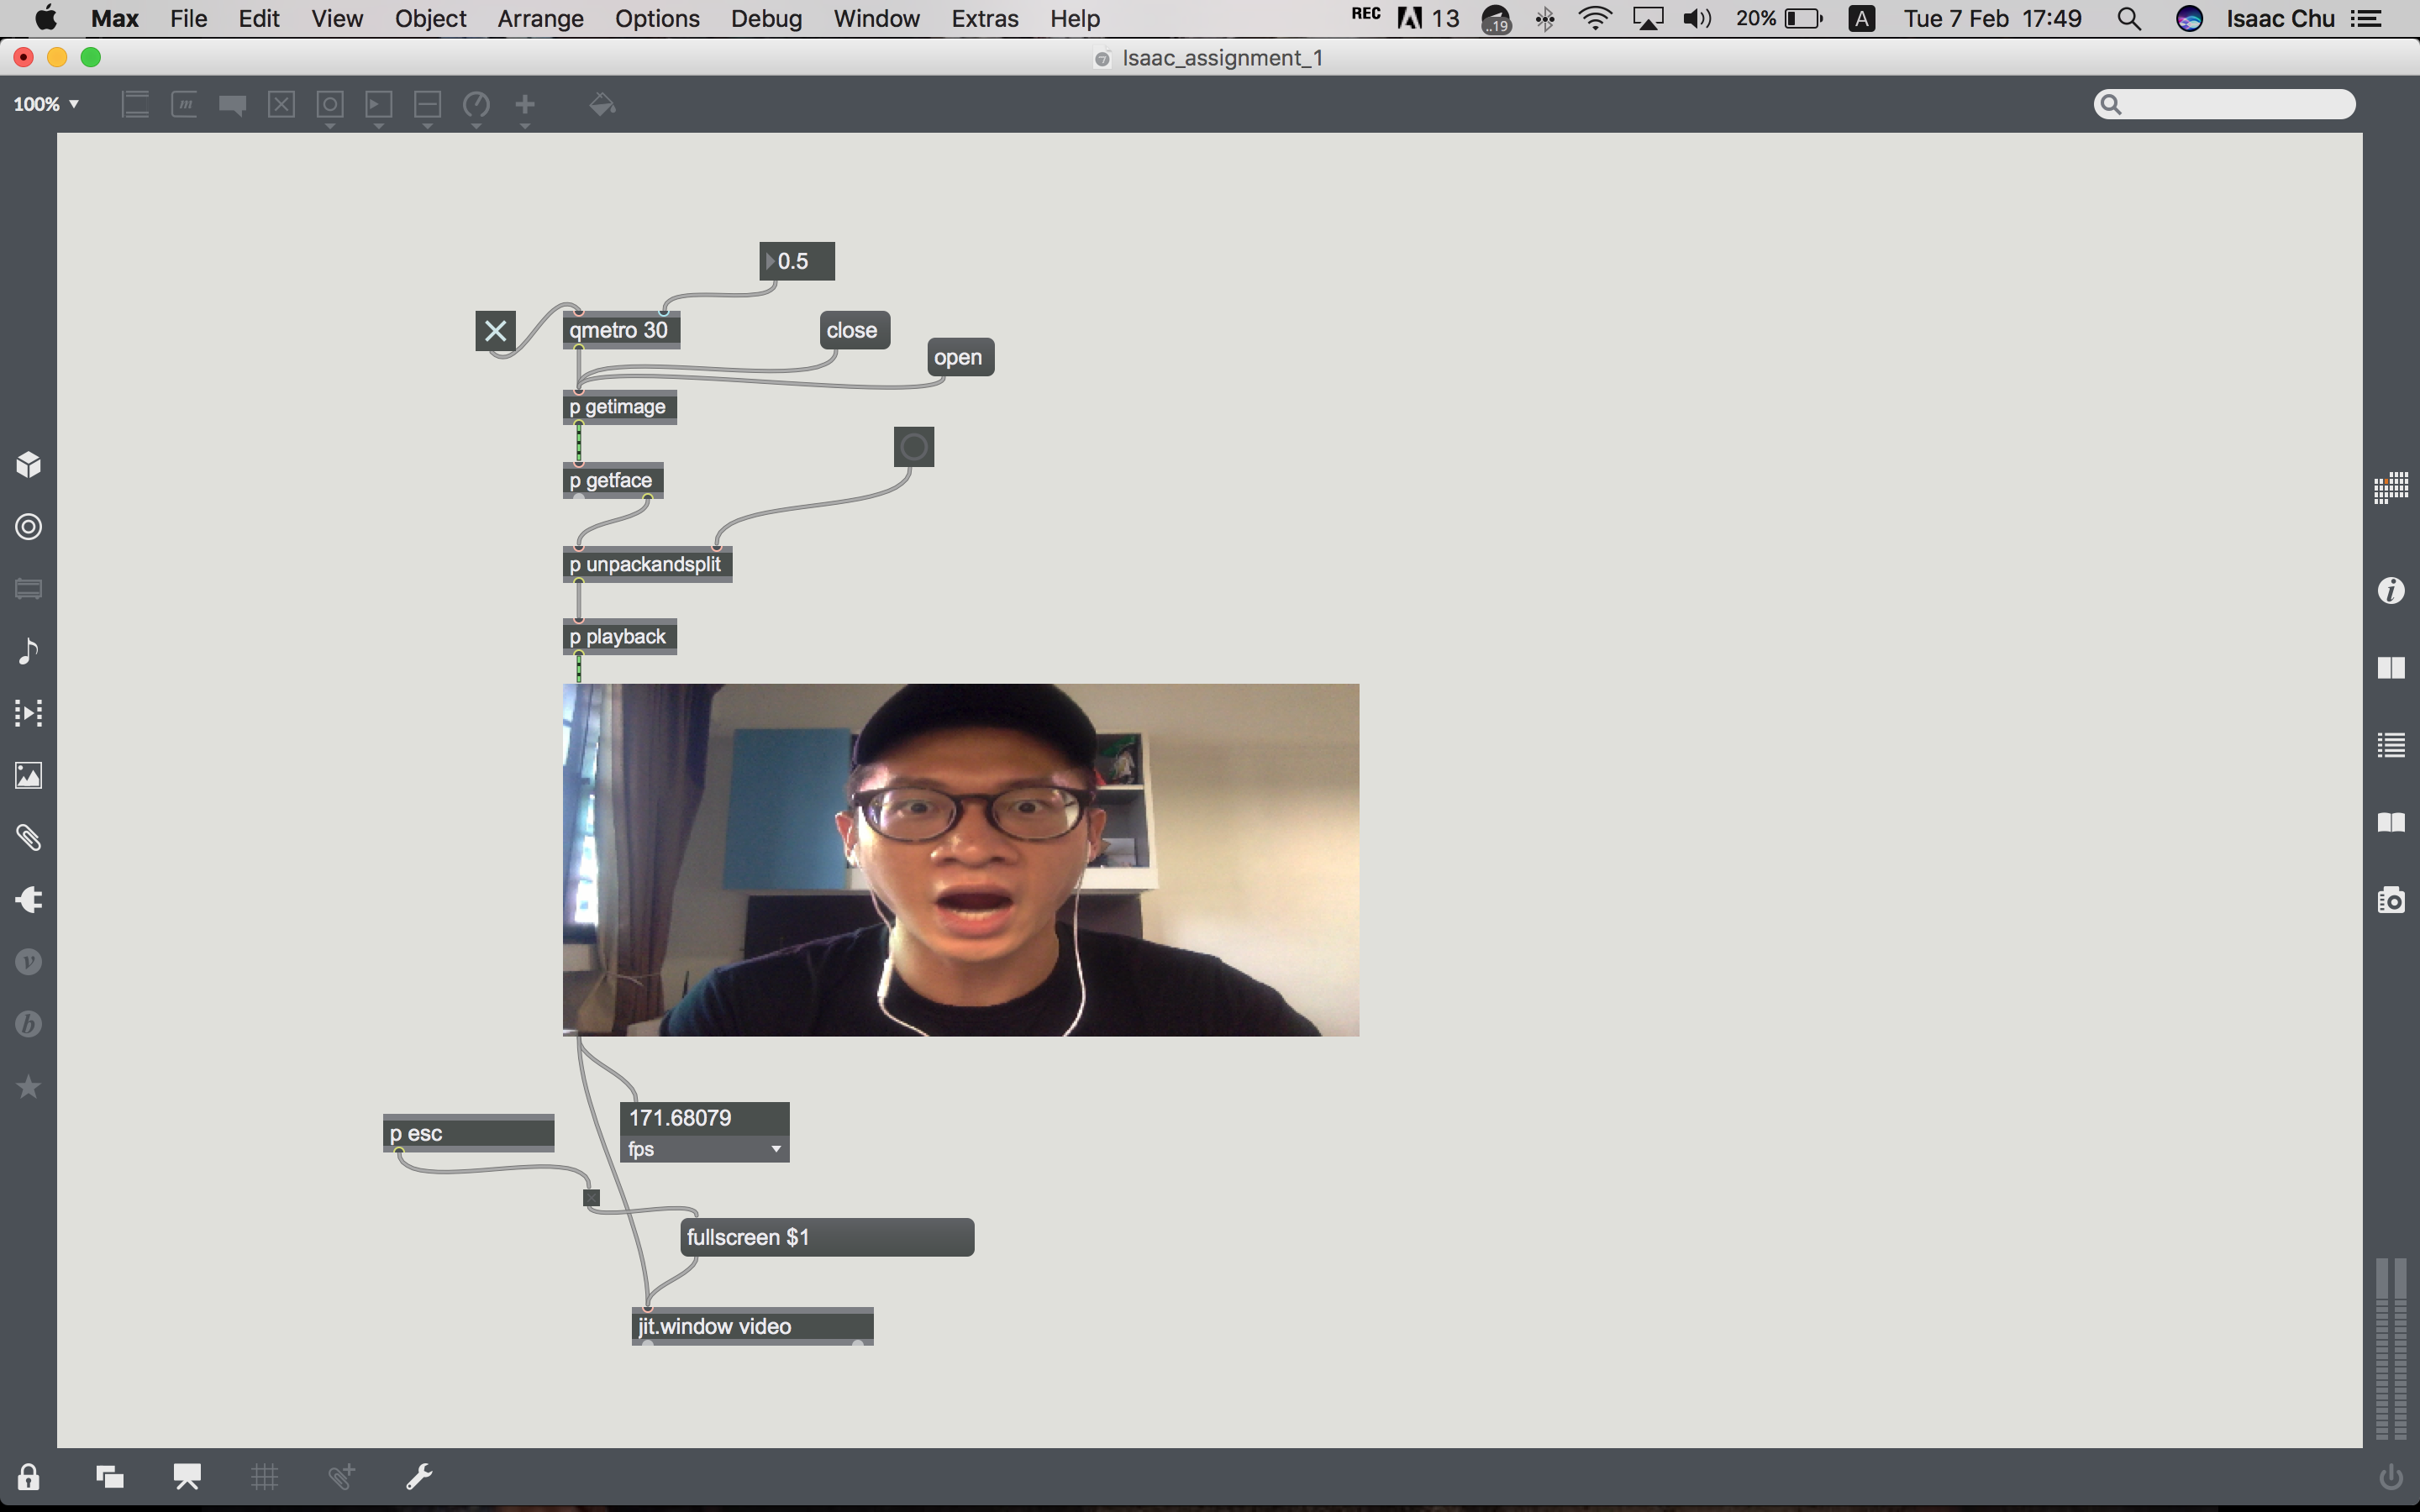
So I was stuck with the the entire thing for a very long time because I linked “open” to “qmetro” and thus there was no video feed (web camera didn’t turn on).
Learnt that qmetro acts like a refresher and and there was no logic in linking the “open” switch to it. Instead, it should be linked to “p getimage”.
[p getimage]
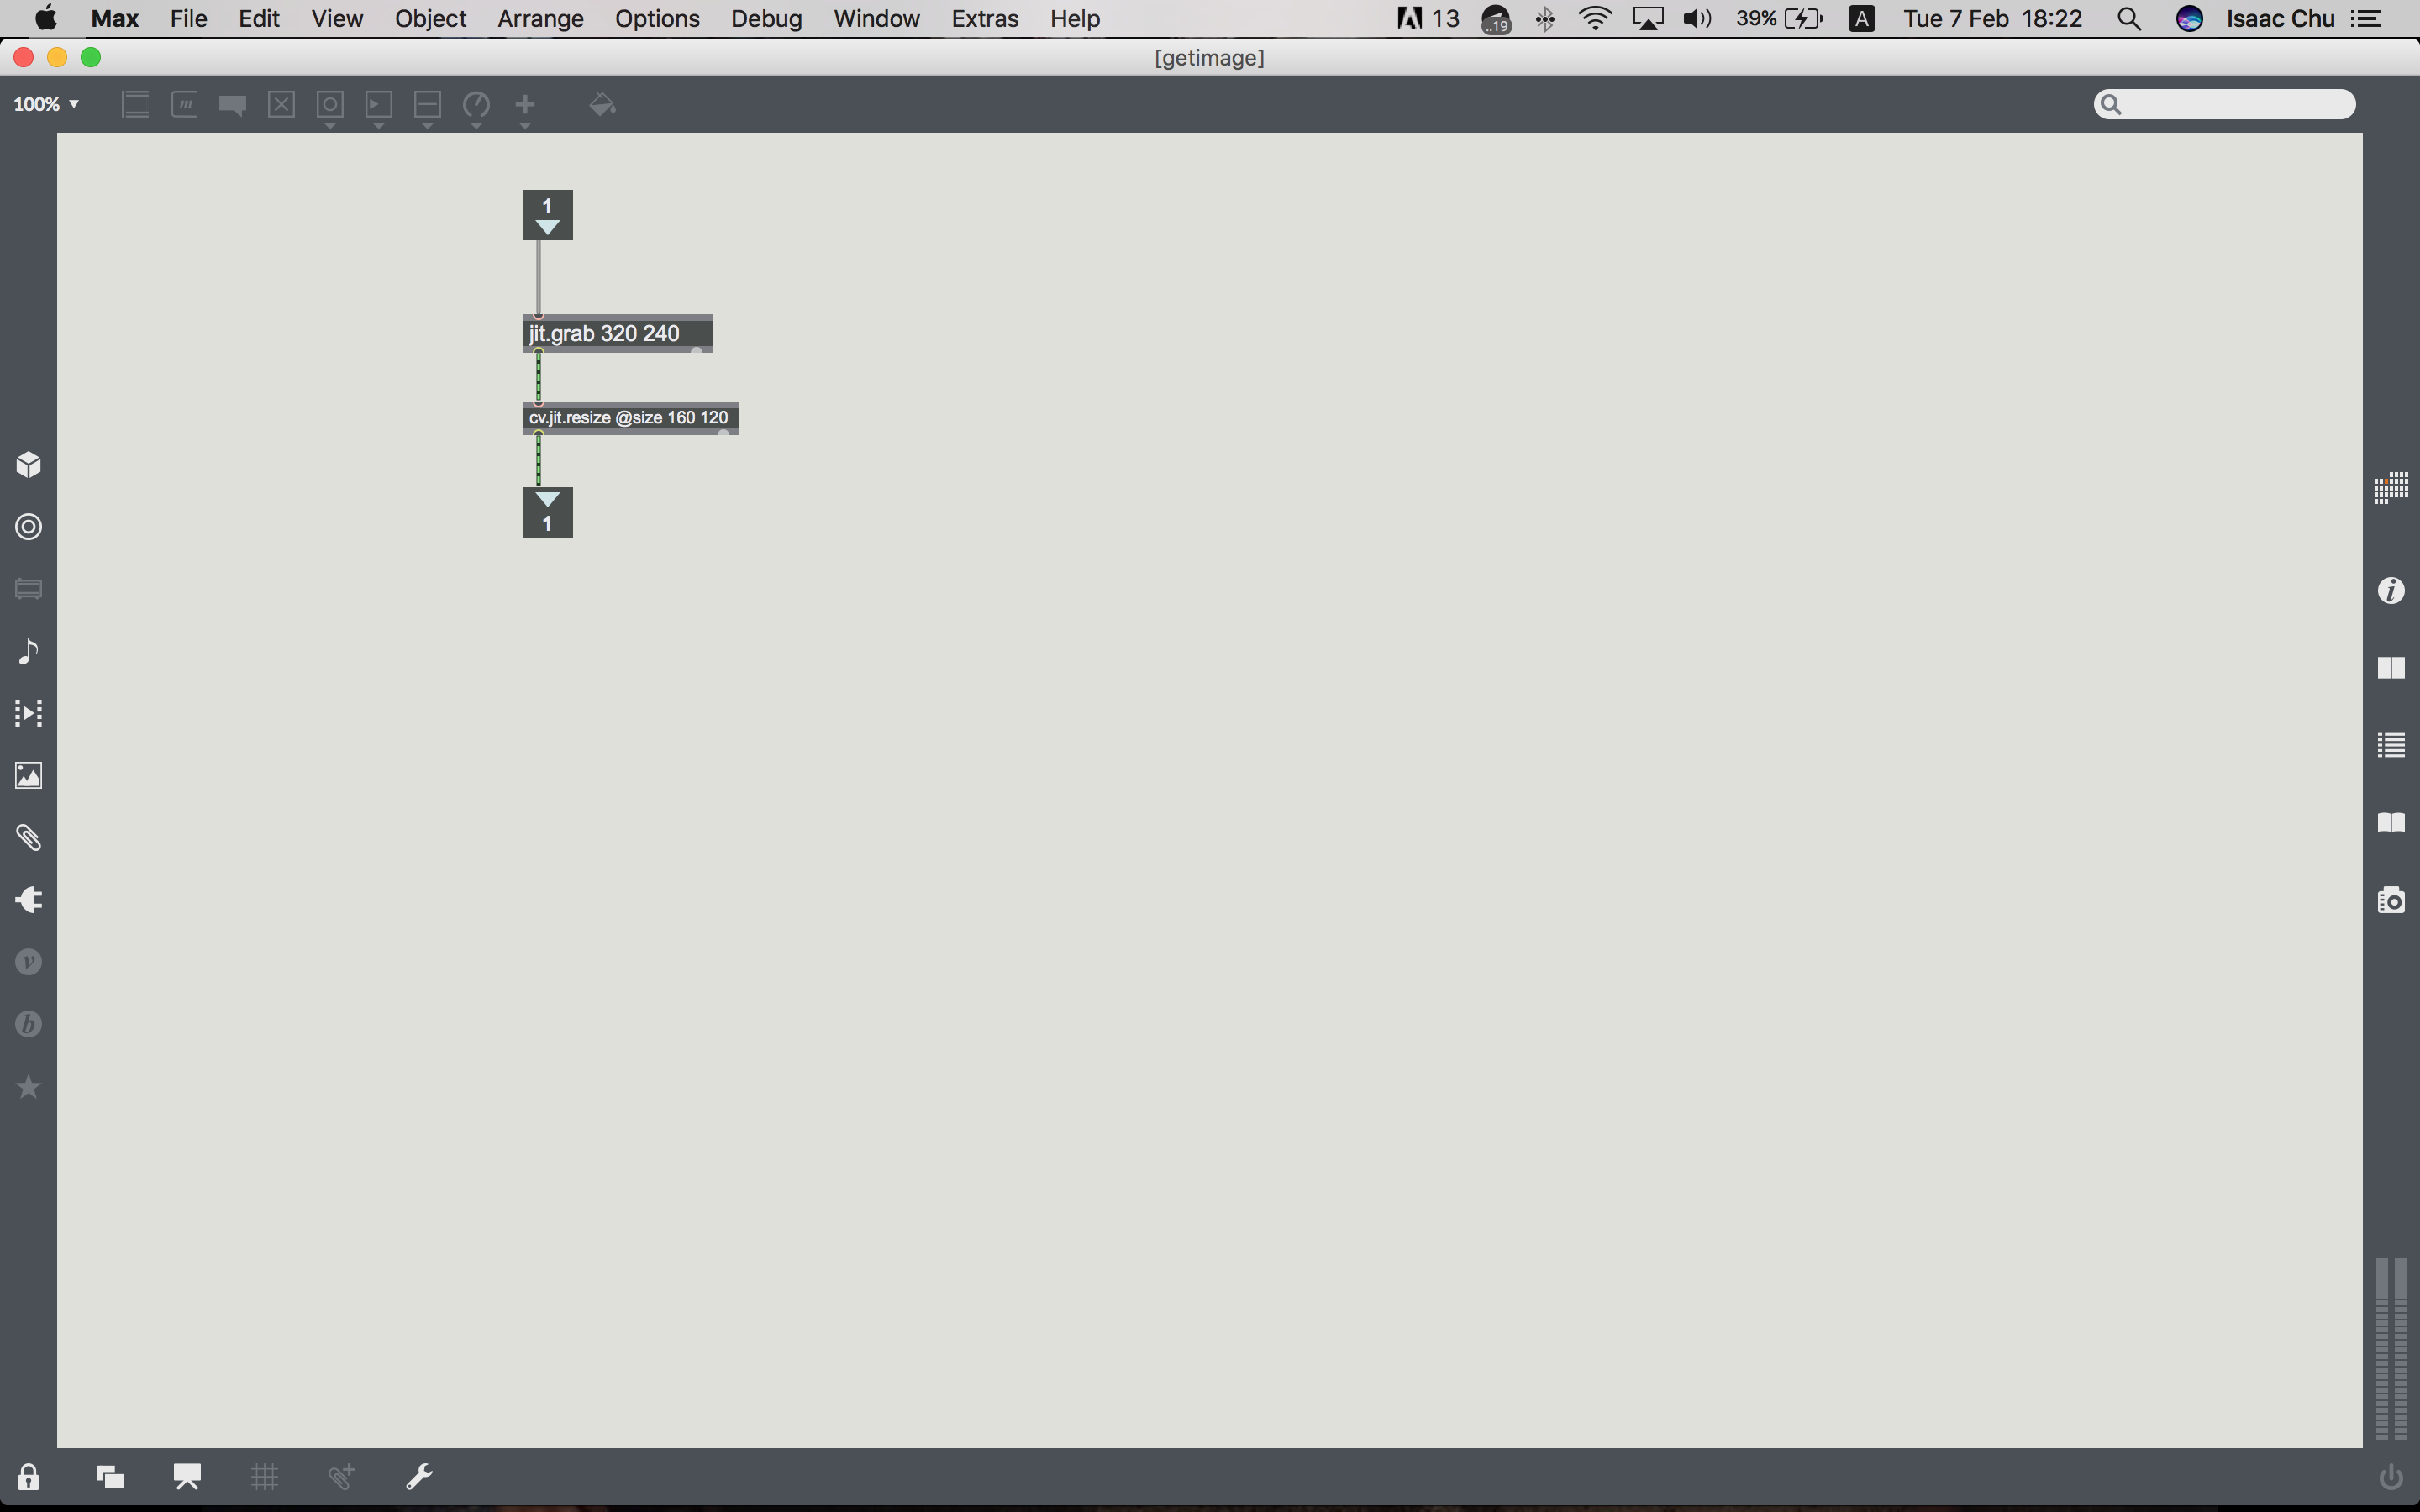
So what this does it that it’ll grab the feed from the web camera along with the defined scale.
[p getface]
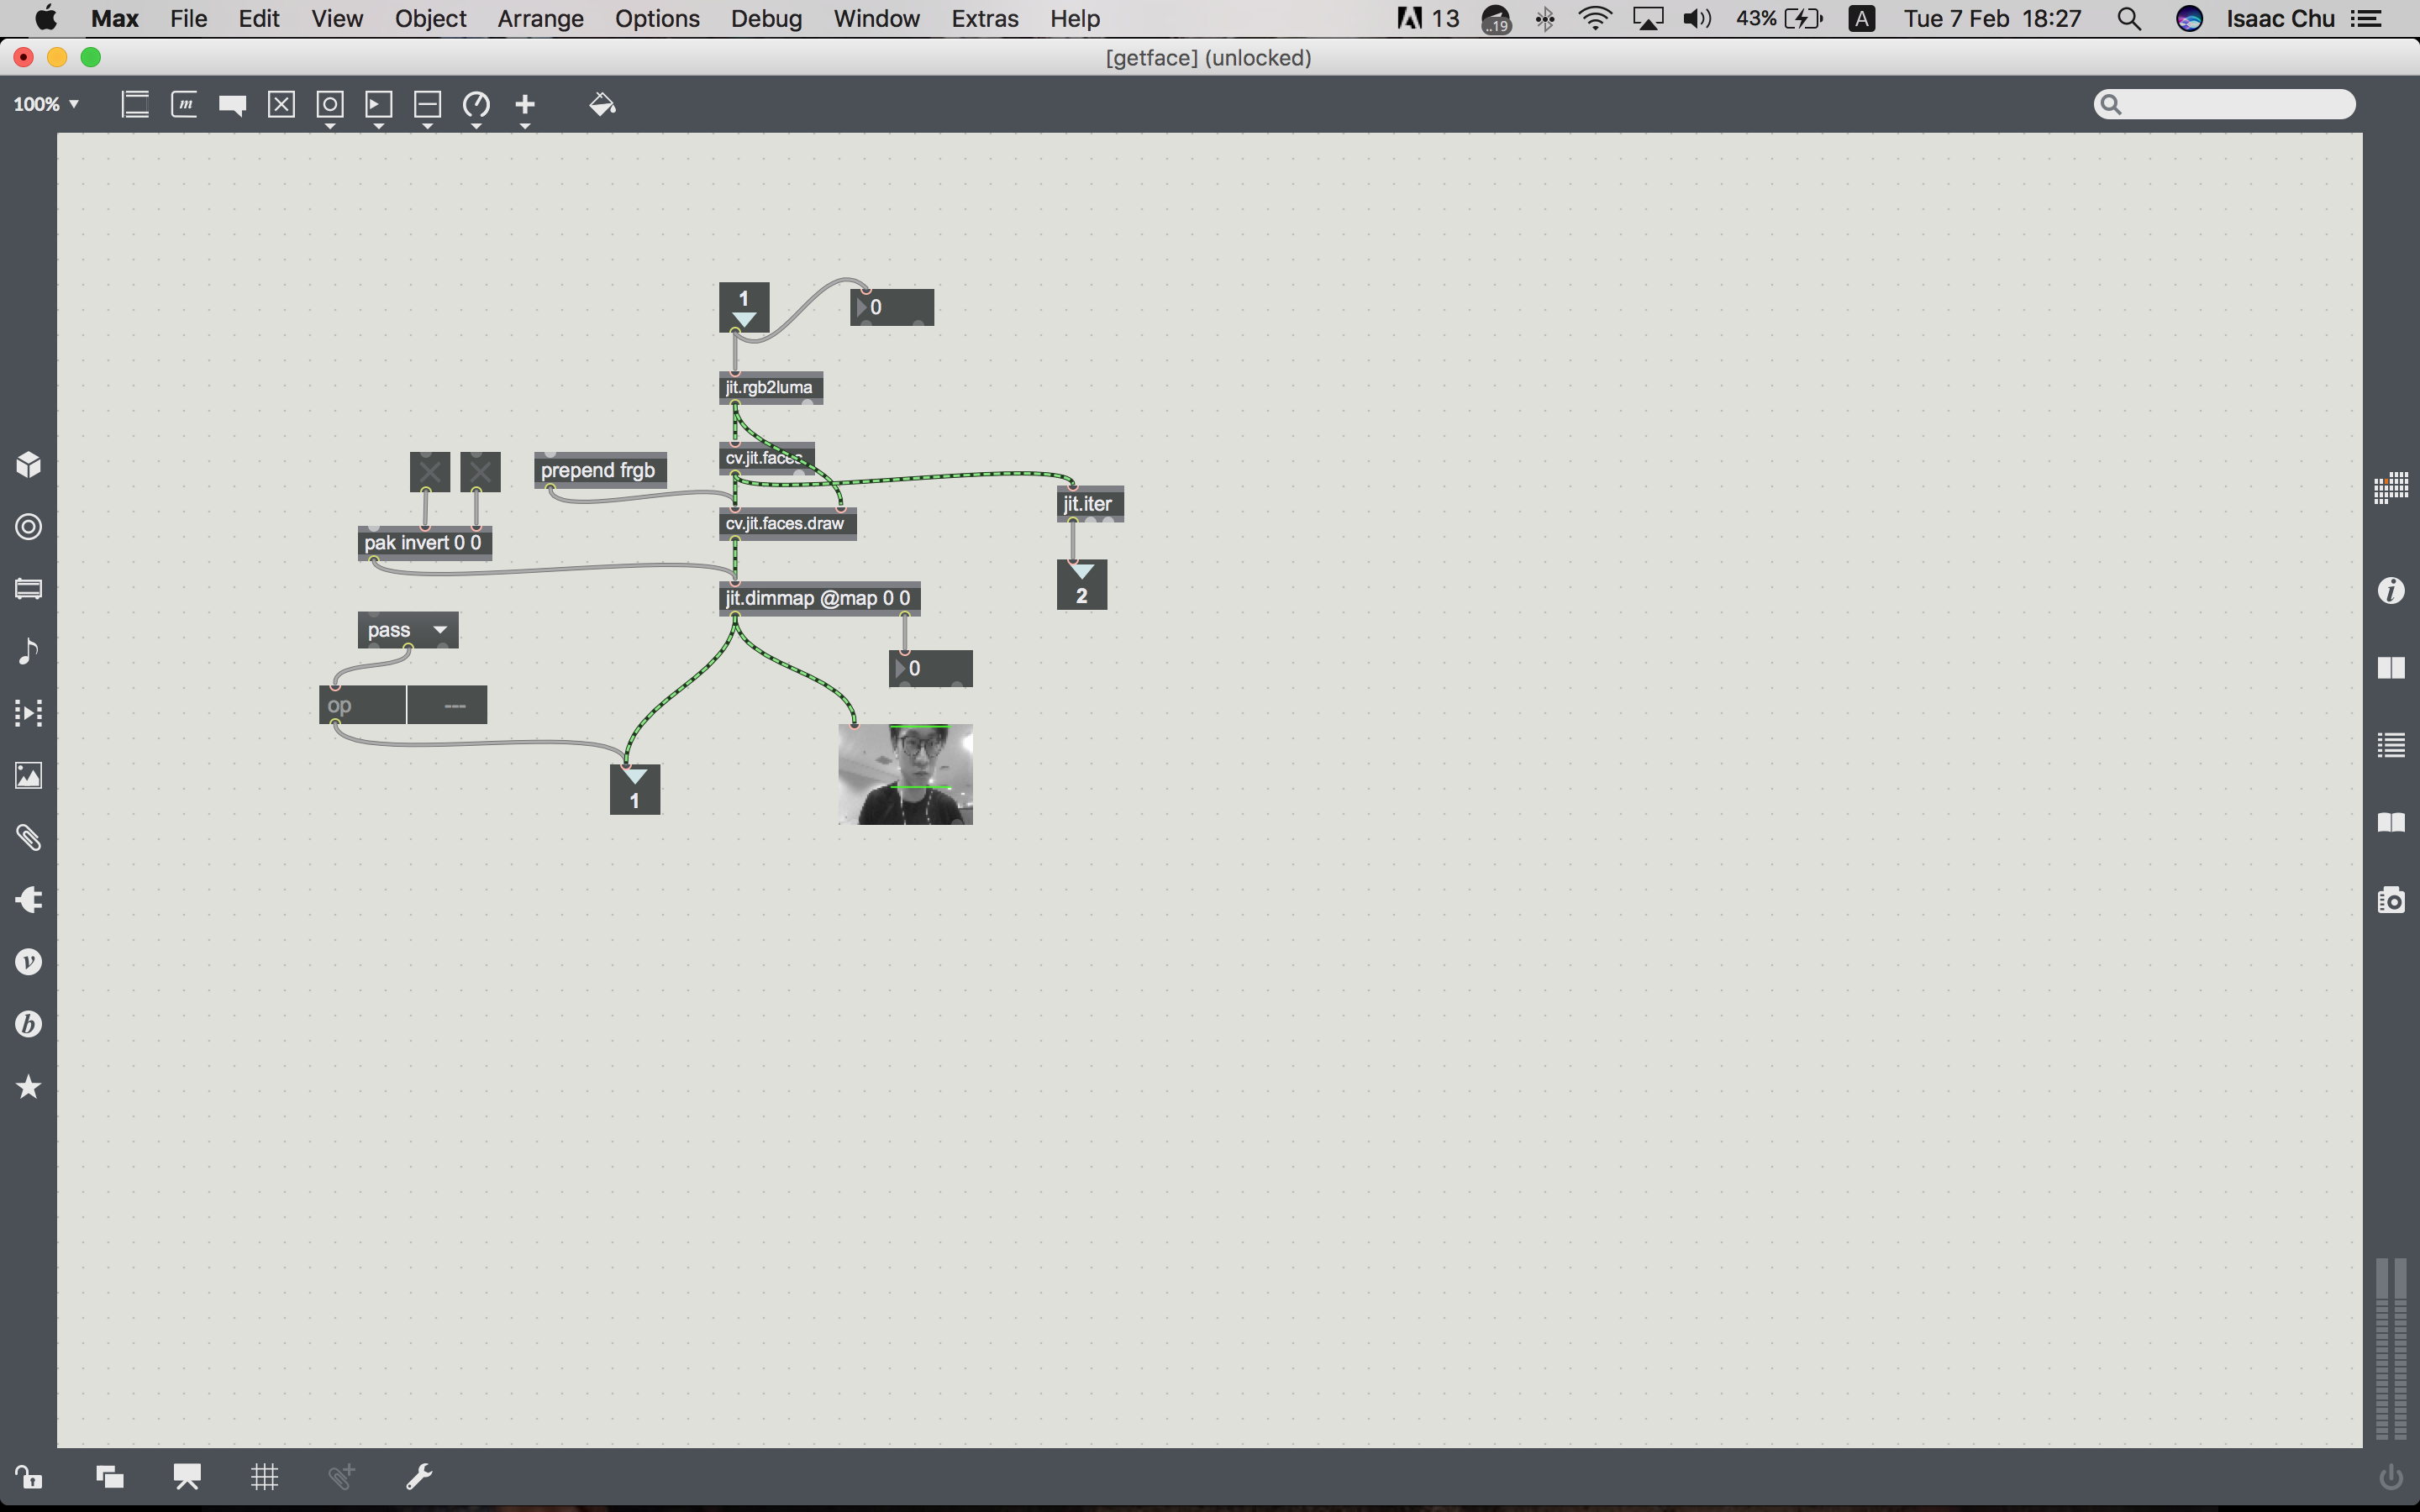
This was one of the more complicated one for me because there were many components involved like jit.ter, prepend frgb, pak invert and opacity. Of course, these were all gone through in class but connecting them together in a logical way was the challenge. So prepend converts the video feed into monochrome so it’s easier to identify the facial contours and pak invert inverts the video frame so it becomes a mirror. Everything was easy to grasp up till here. What goes on next is the real challenge.
[p unpackandsplit]
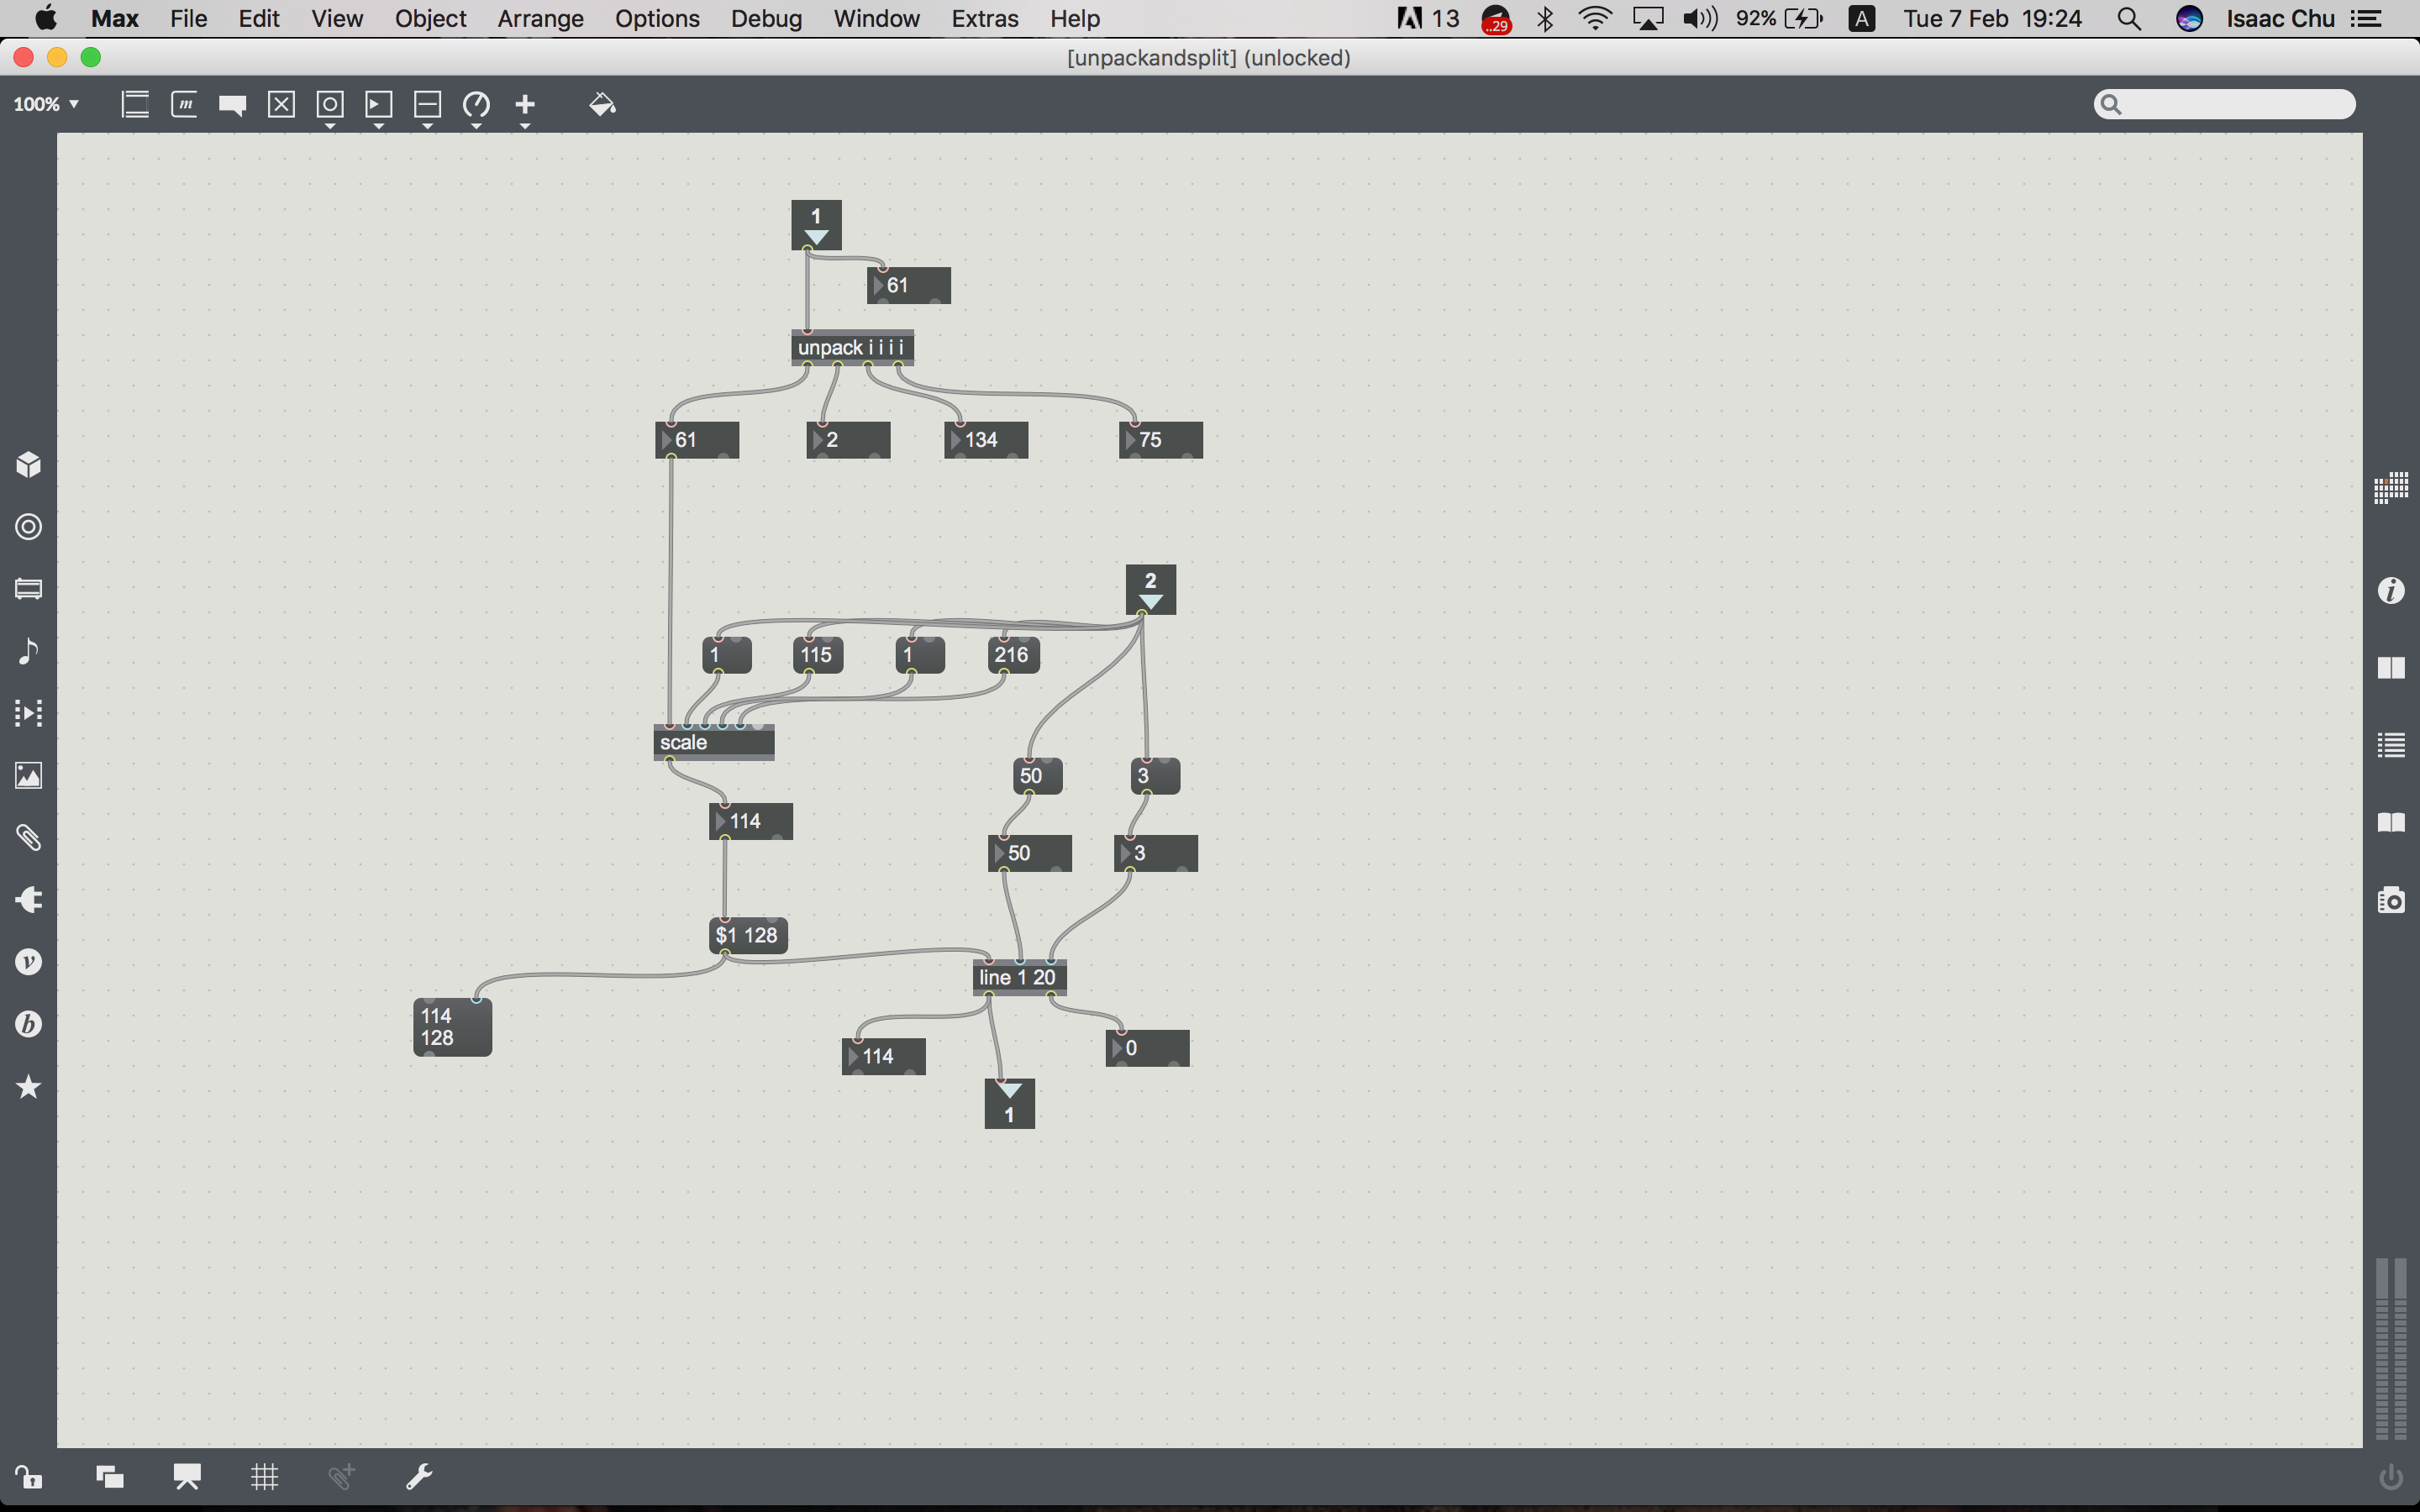
This was the toughest to get but I’m so happy I managed to understand it with the help of Zi Feng. (I think peer-to-peer teaching is so useful, since it reinforces learning and queries can be answered at student level haha)
[p playback]
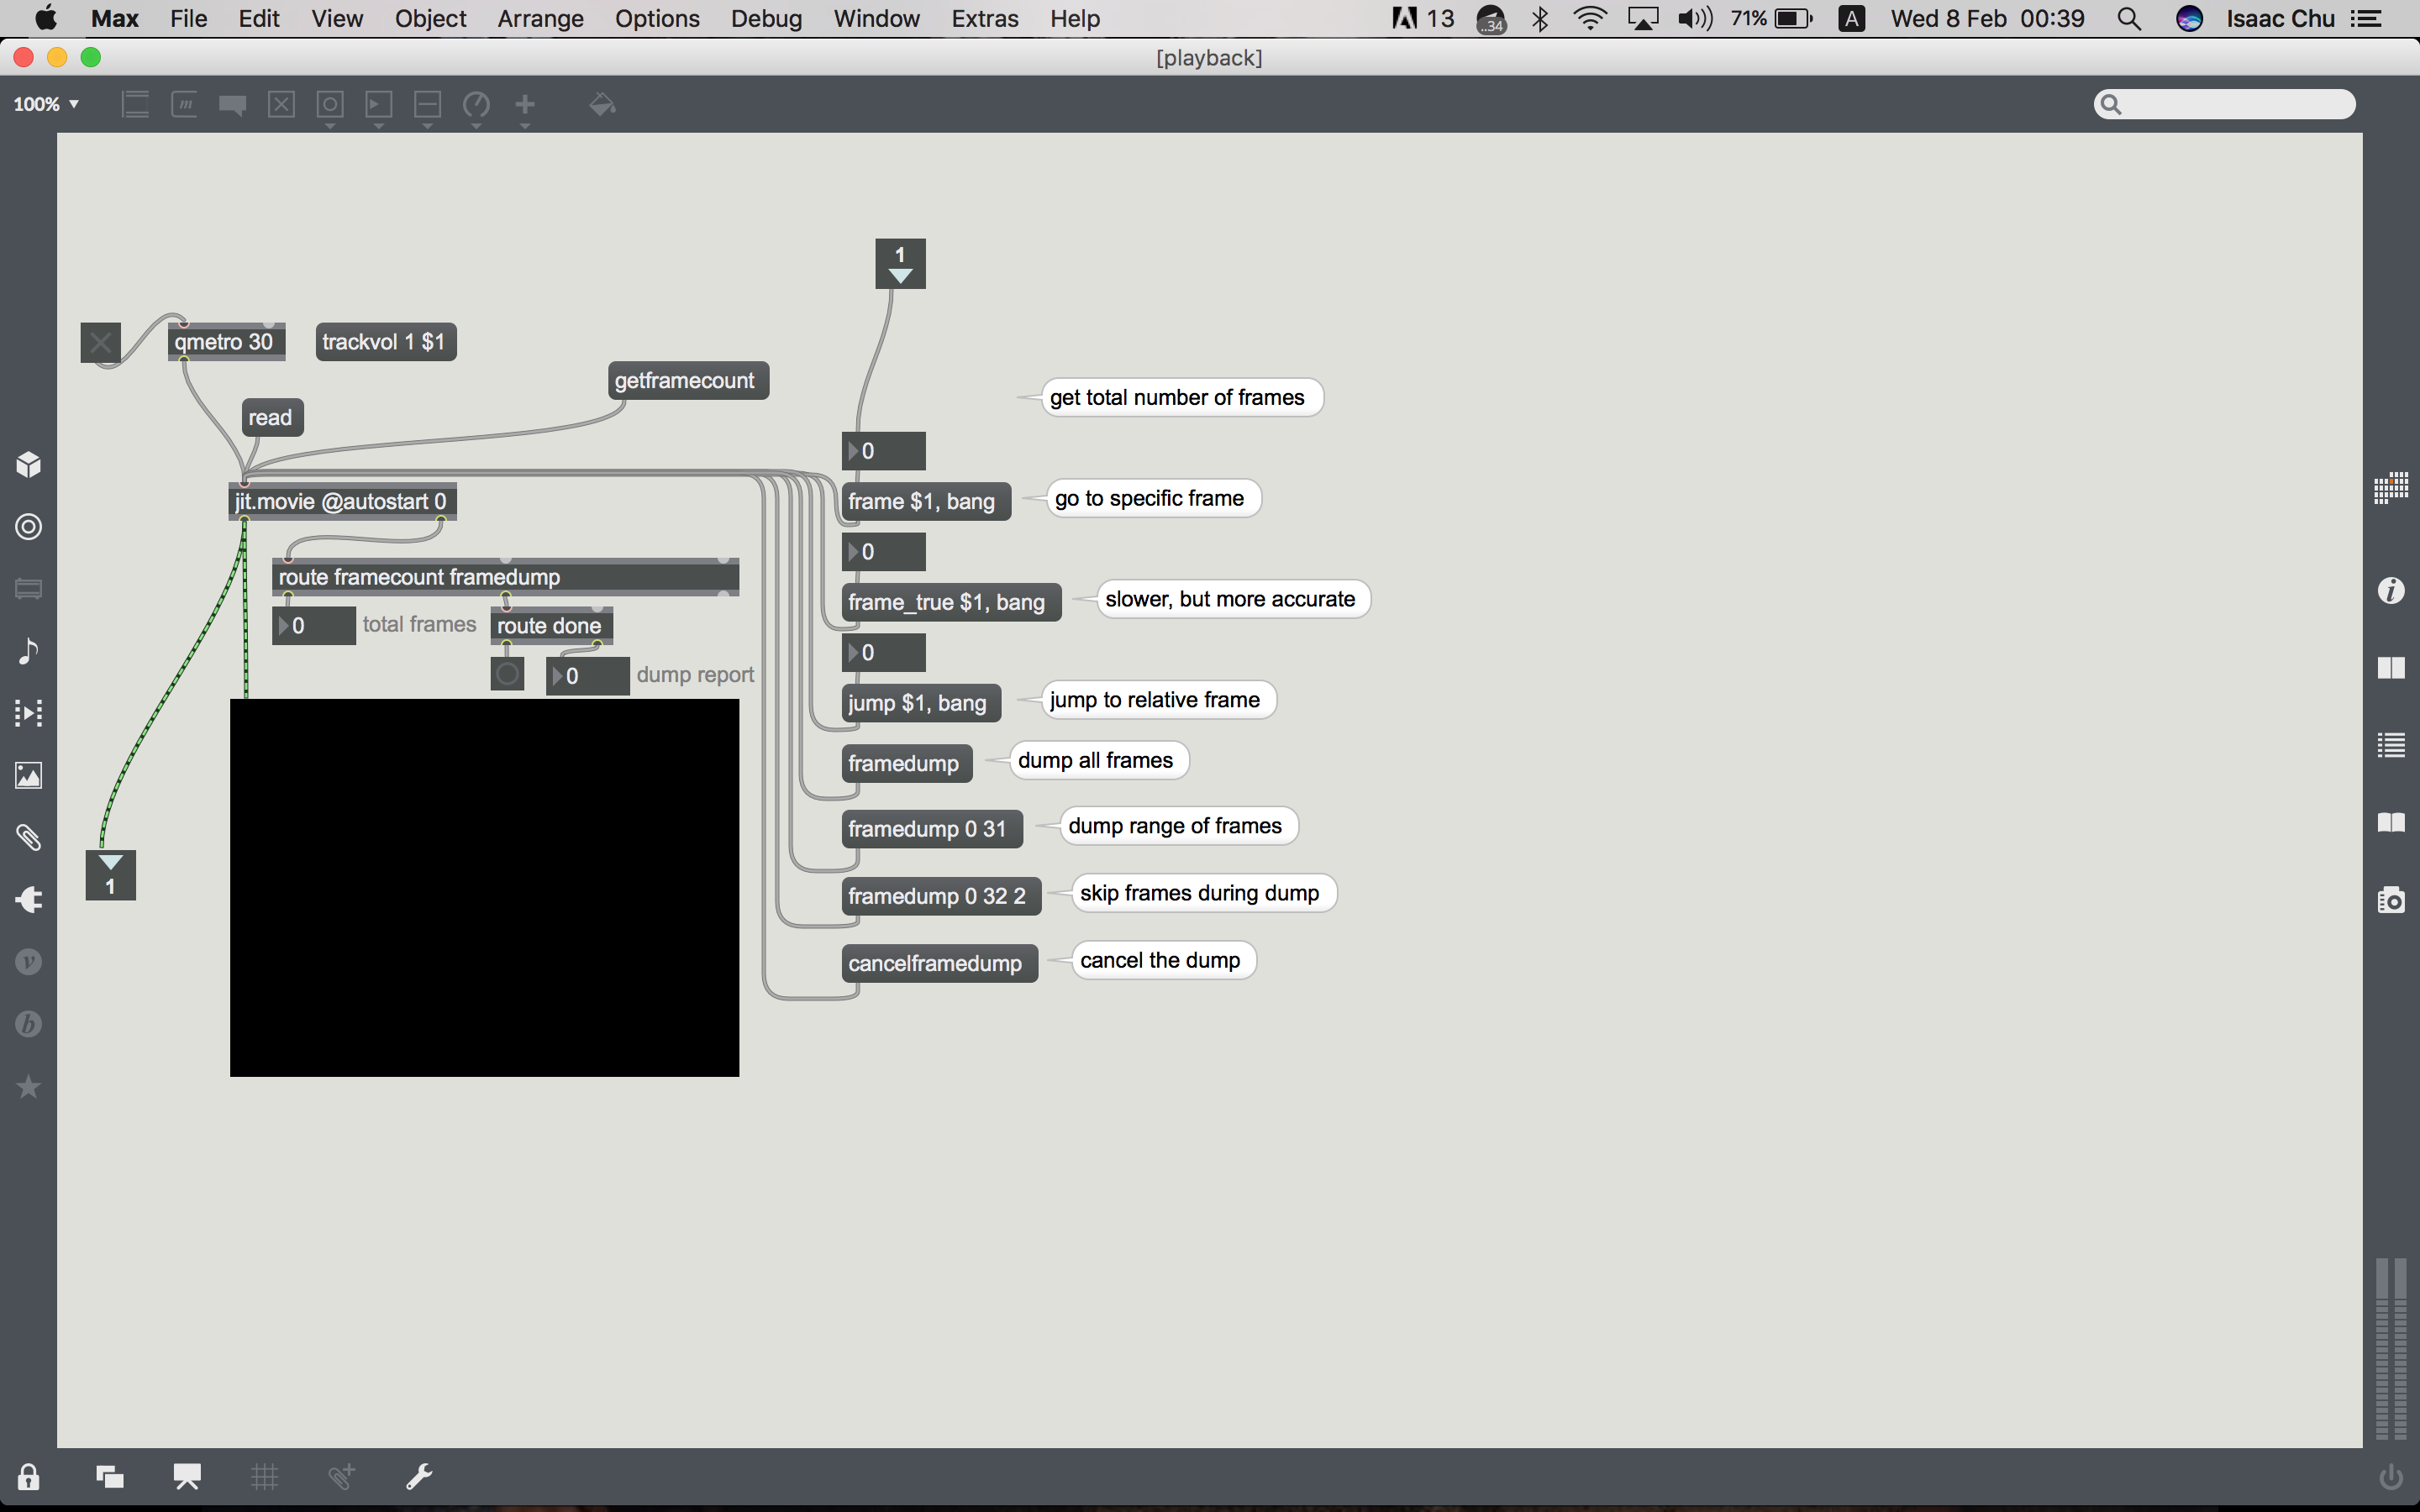
Everything here is pretty much understandable and easy to grasp. Mainly, the use of jit.movie and adding in the inlets/outlets.
Conclusion
In all, I think I have learnt a lot doing this assignment. I would have definitely not been able to understand everything properly if not for the peer-to-peer teaching and I’m really thankful for asking question. Have a great one!