This was tough…
[UPDATE]
Here’s the breakdown for the Mirror project.
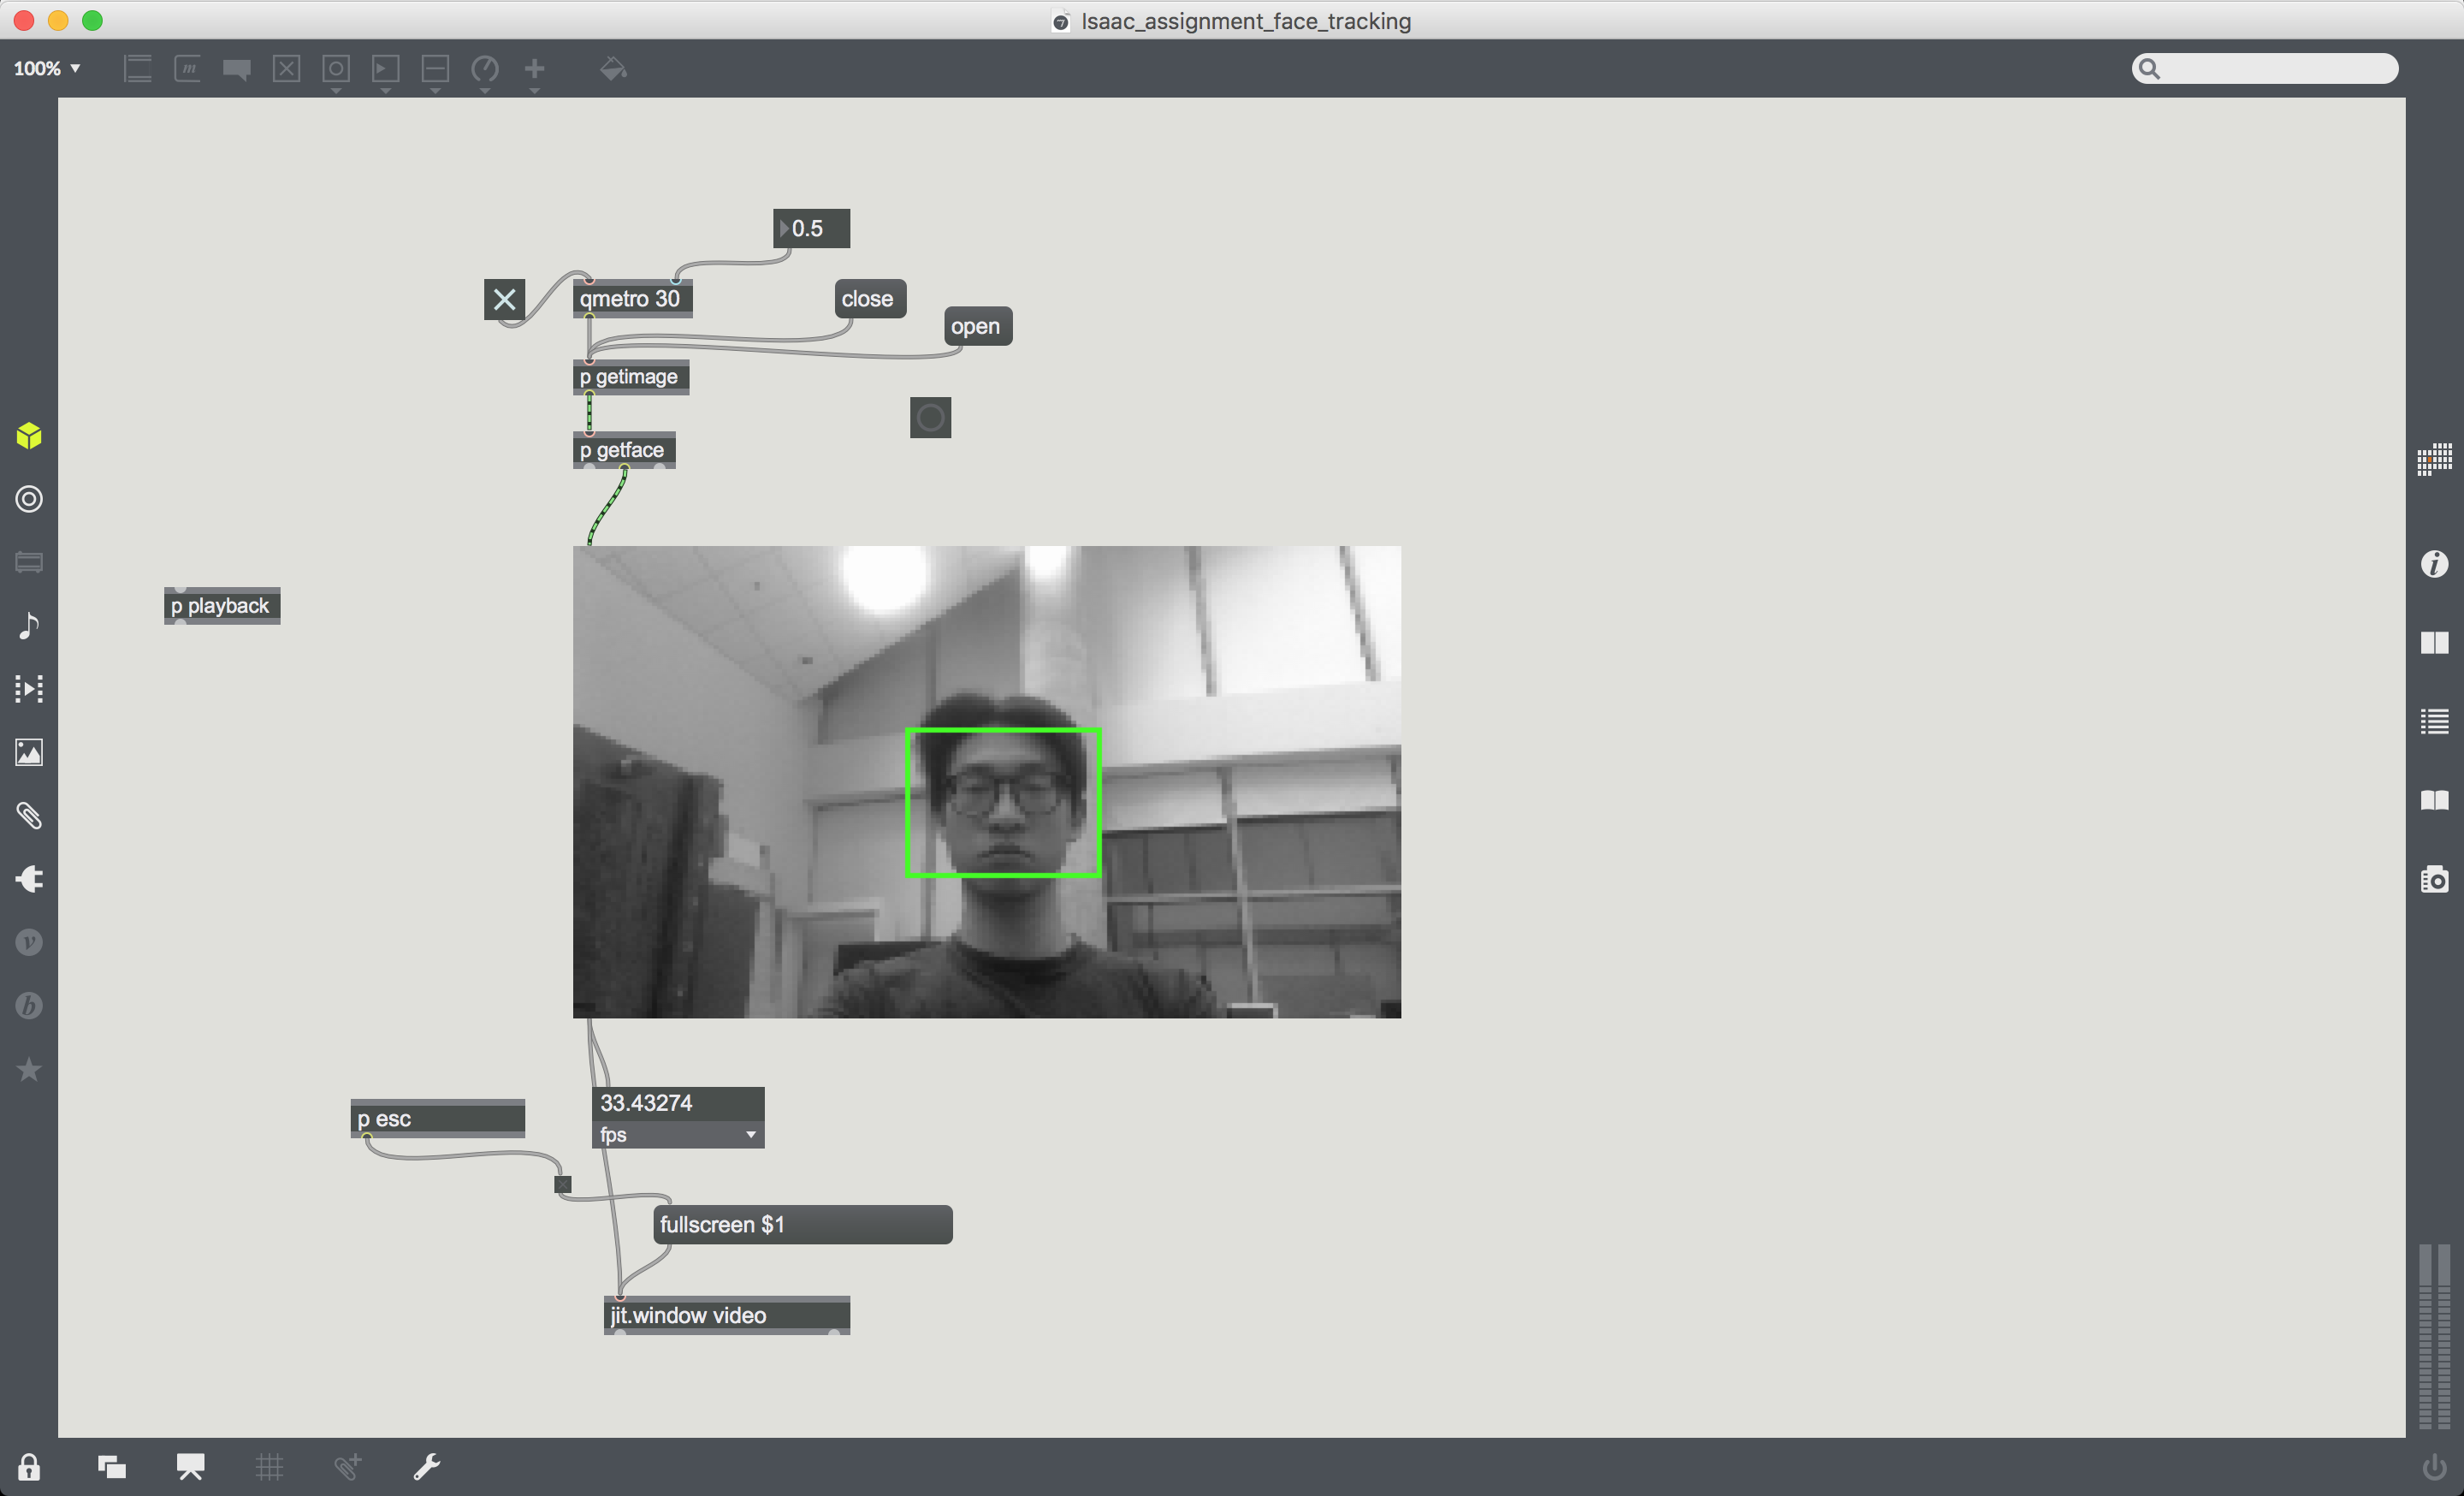
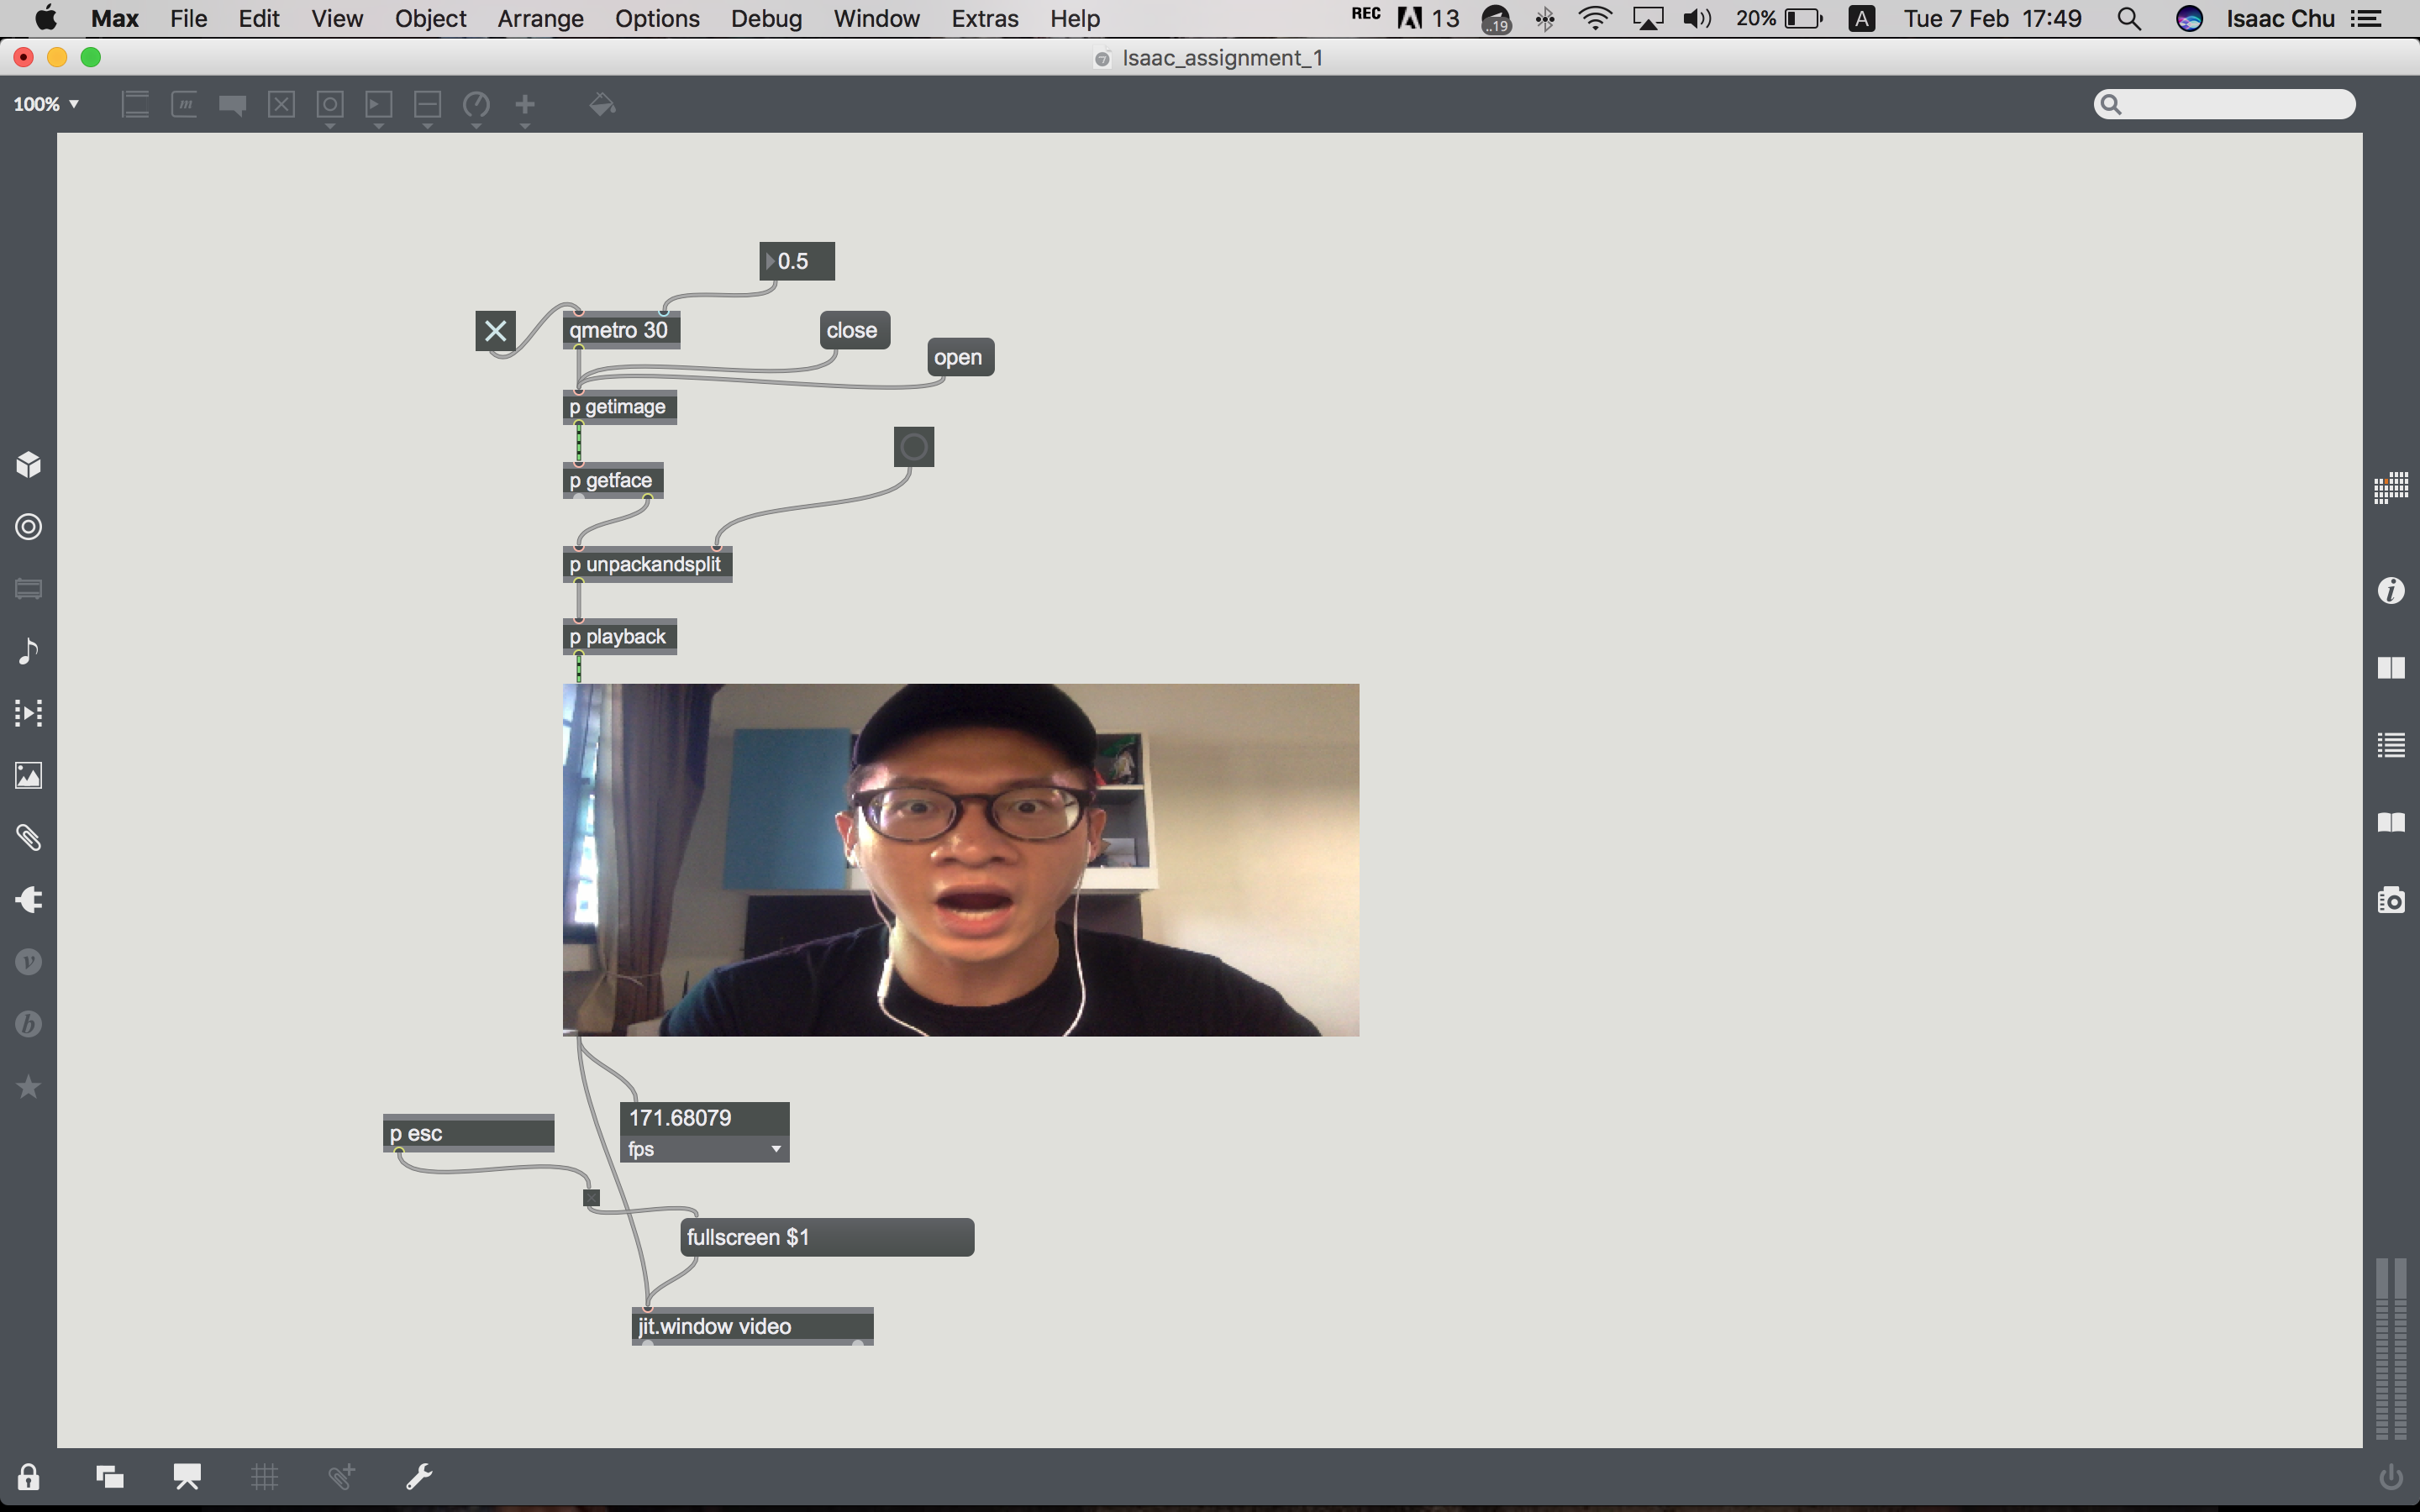
Take a look at the overall lineup:
[p getimage]
So this works…
[p getface]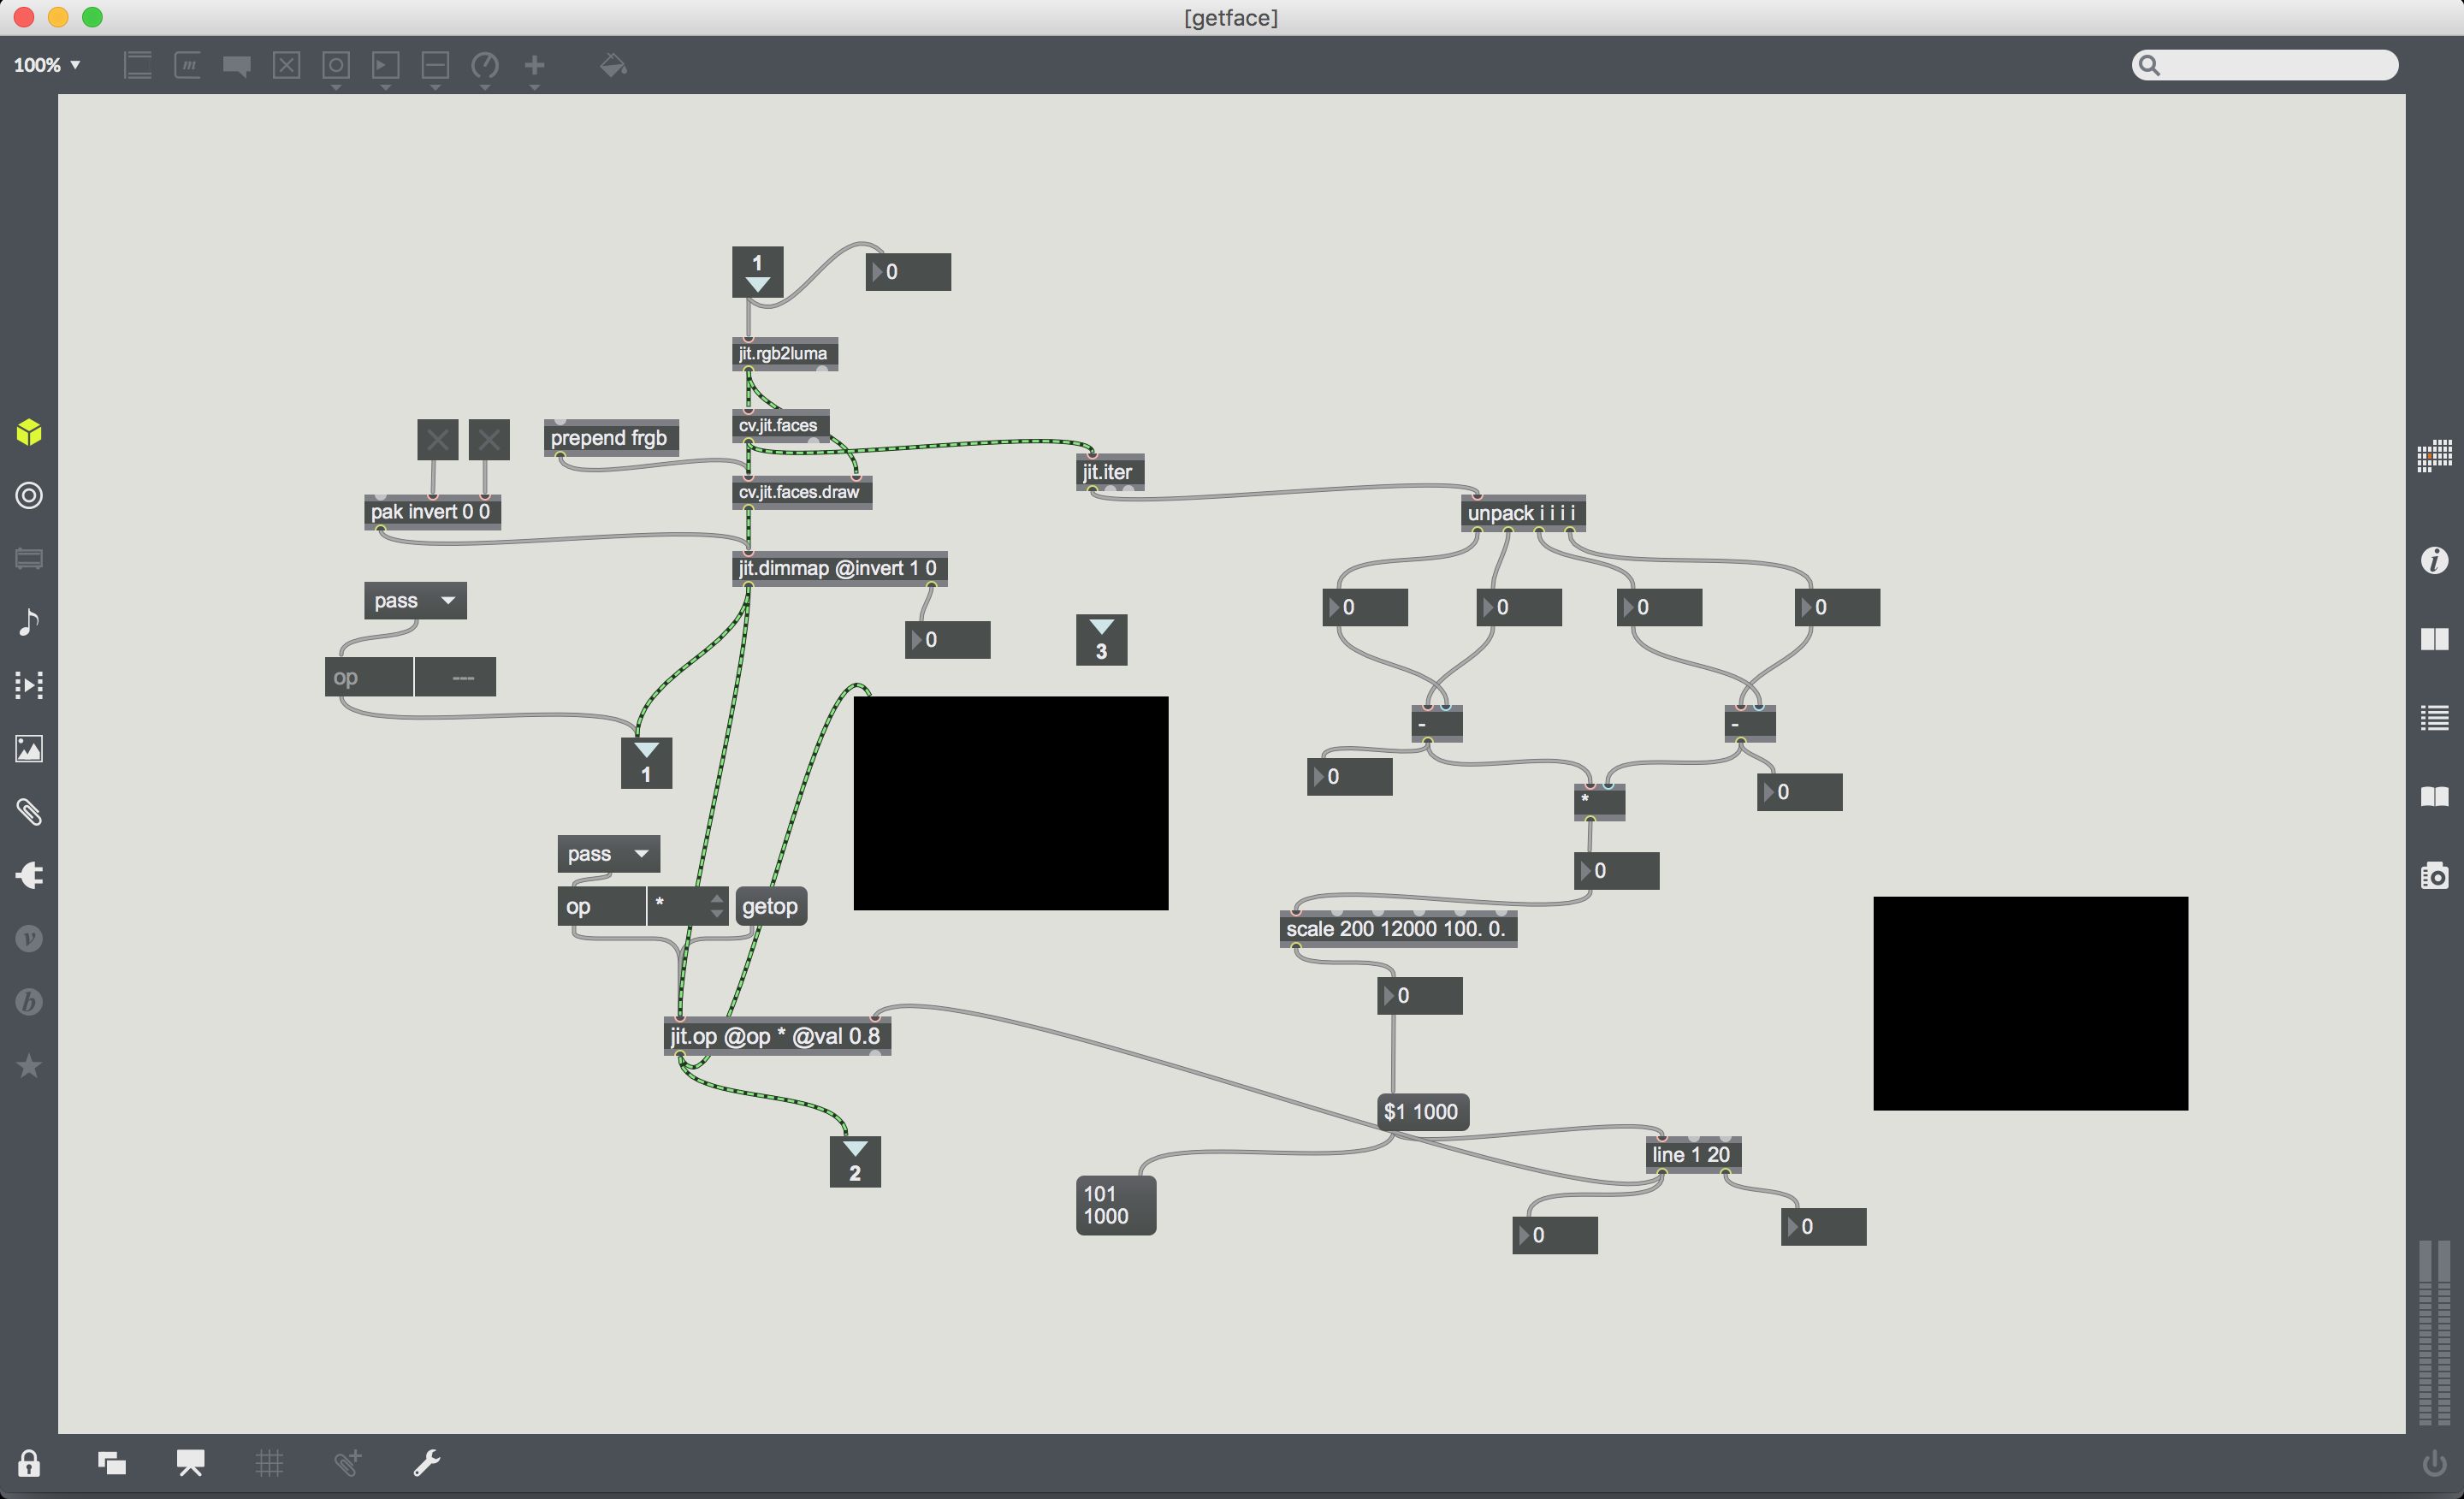
…But, I couldn’t get the dimming to work well. perhaps it could be my laptop’s webcam. I tried playing with the scale dimensions but it doesn’t seem to work:(
Mirror: [pak invert] works well. But I think there is an issue in the unpack area.
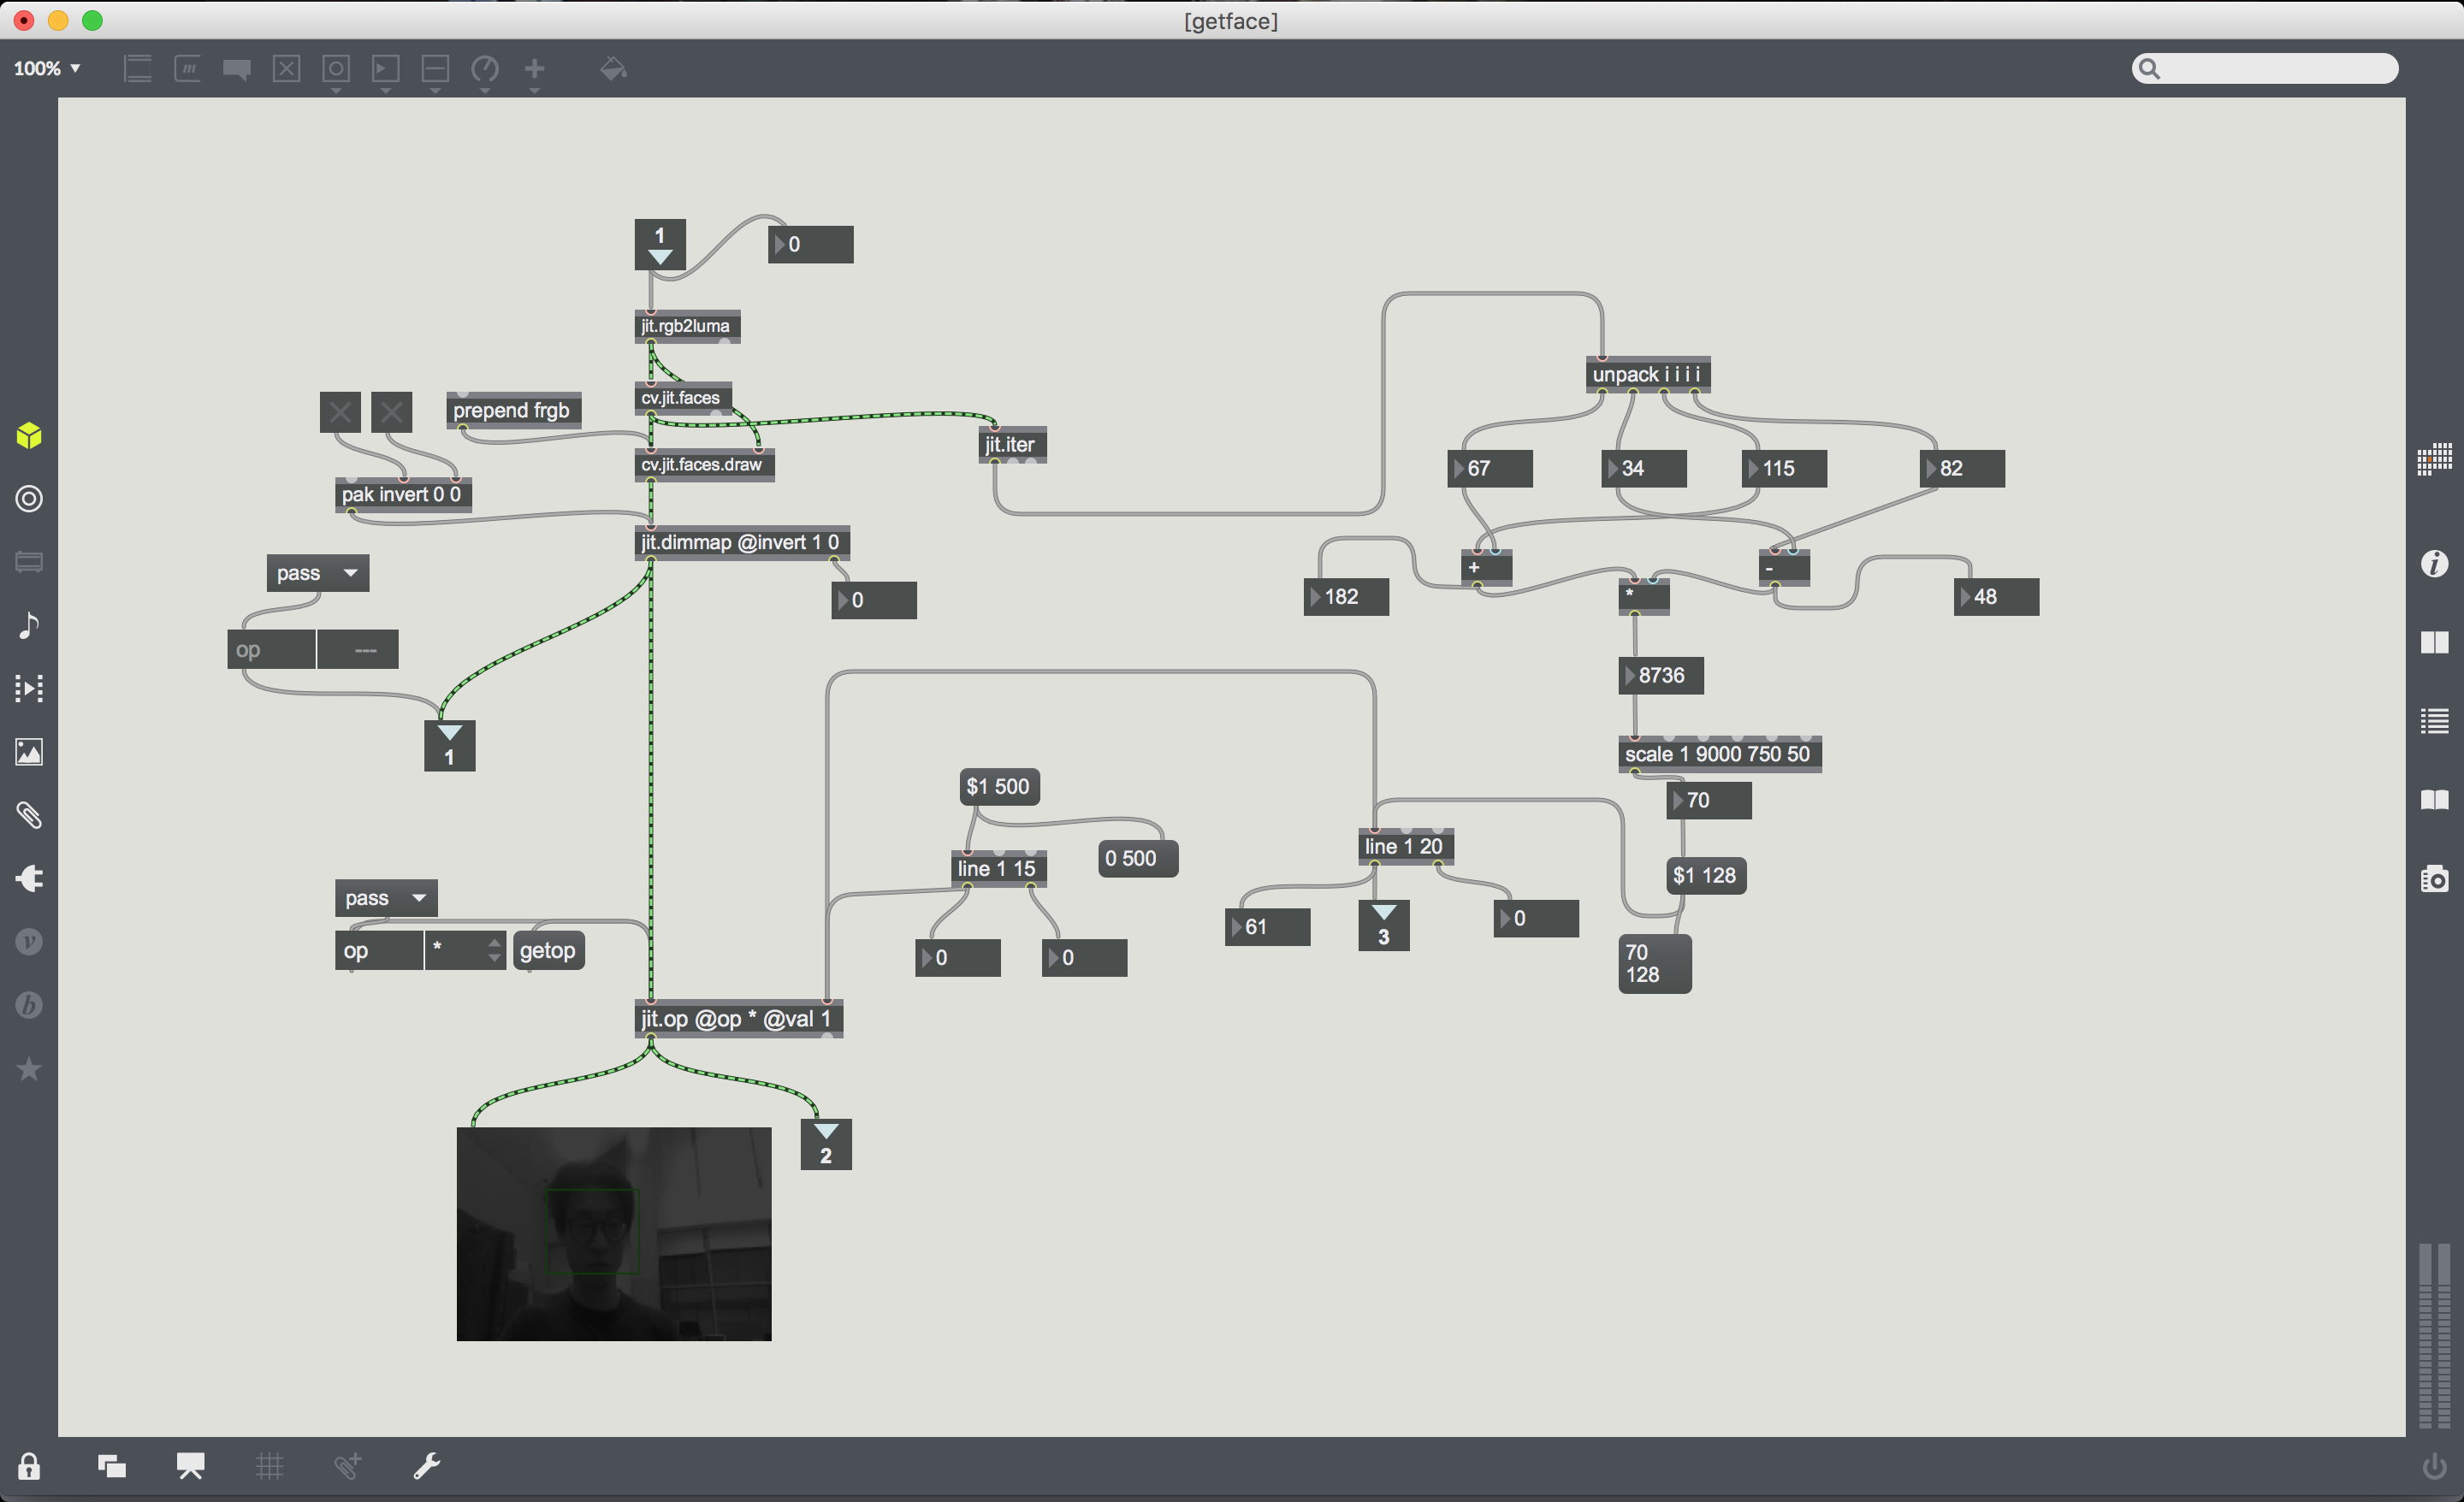
Ok I finally found out what was the issue. I didn’t understand the concept of scale. Cleaned up the patch a little. Take a look. I added the correct value for input and output low/high. Line definitely helped to allow for a smooth transition.
The final product, ta-da!
https://drive.google.com/open?id=0B85eB-v1c8SXa1BtRm5VSkVGU2s
Part 2:
Tracking
https://drive.google.com/open?id=0B85eB-v1c8SXOXpZSlpOQmJhT0U
I started out with what has been gone through in class and tried to make sense of everything. Without a doubt, I had to ask around for help to understand all the commands I needed to insert into Max. I’ve progressed further but there’s so much more to learn and many questions to ask. But for now, here’s what I’ve got.
This was skeleton of the project:
So I was stuck with the the entire thing for a very long time because I linked “open” to “qmetro” and thus there was no video feed (web camera didn’t turn on).
Learnt that qmetro acts like a refresher and and there was no logic in linking the “open” switch to it. Instead, it should be linked to “p getimage”.
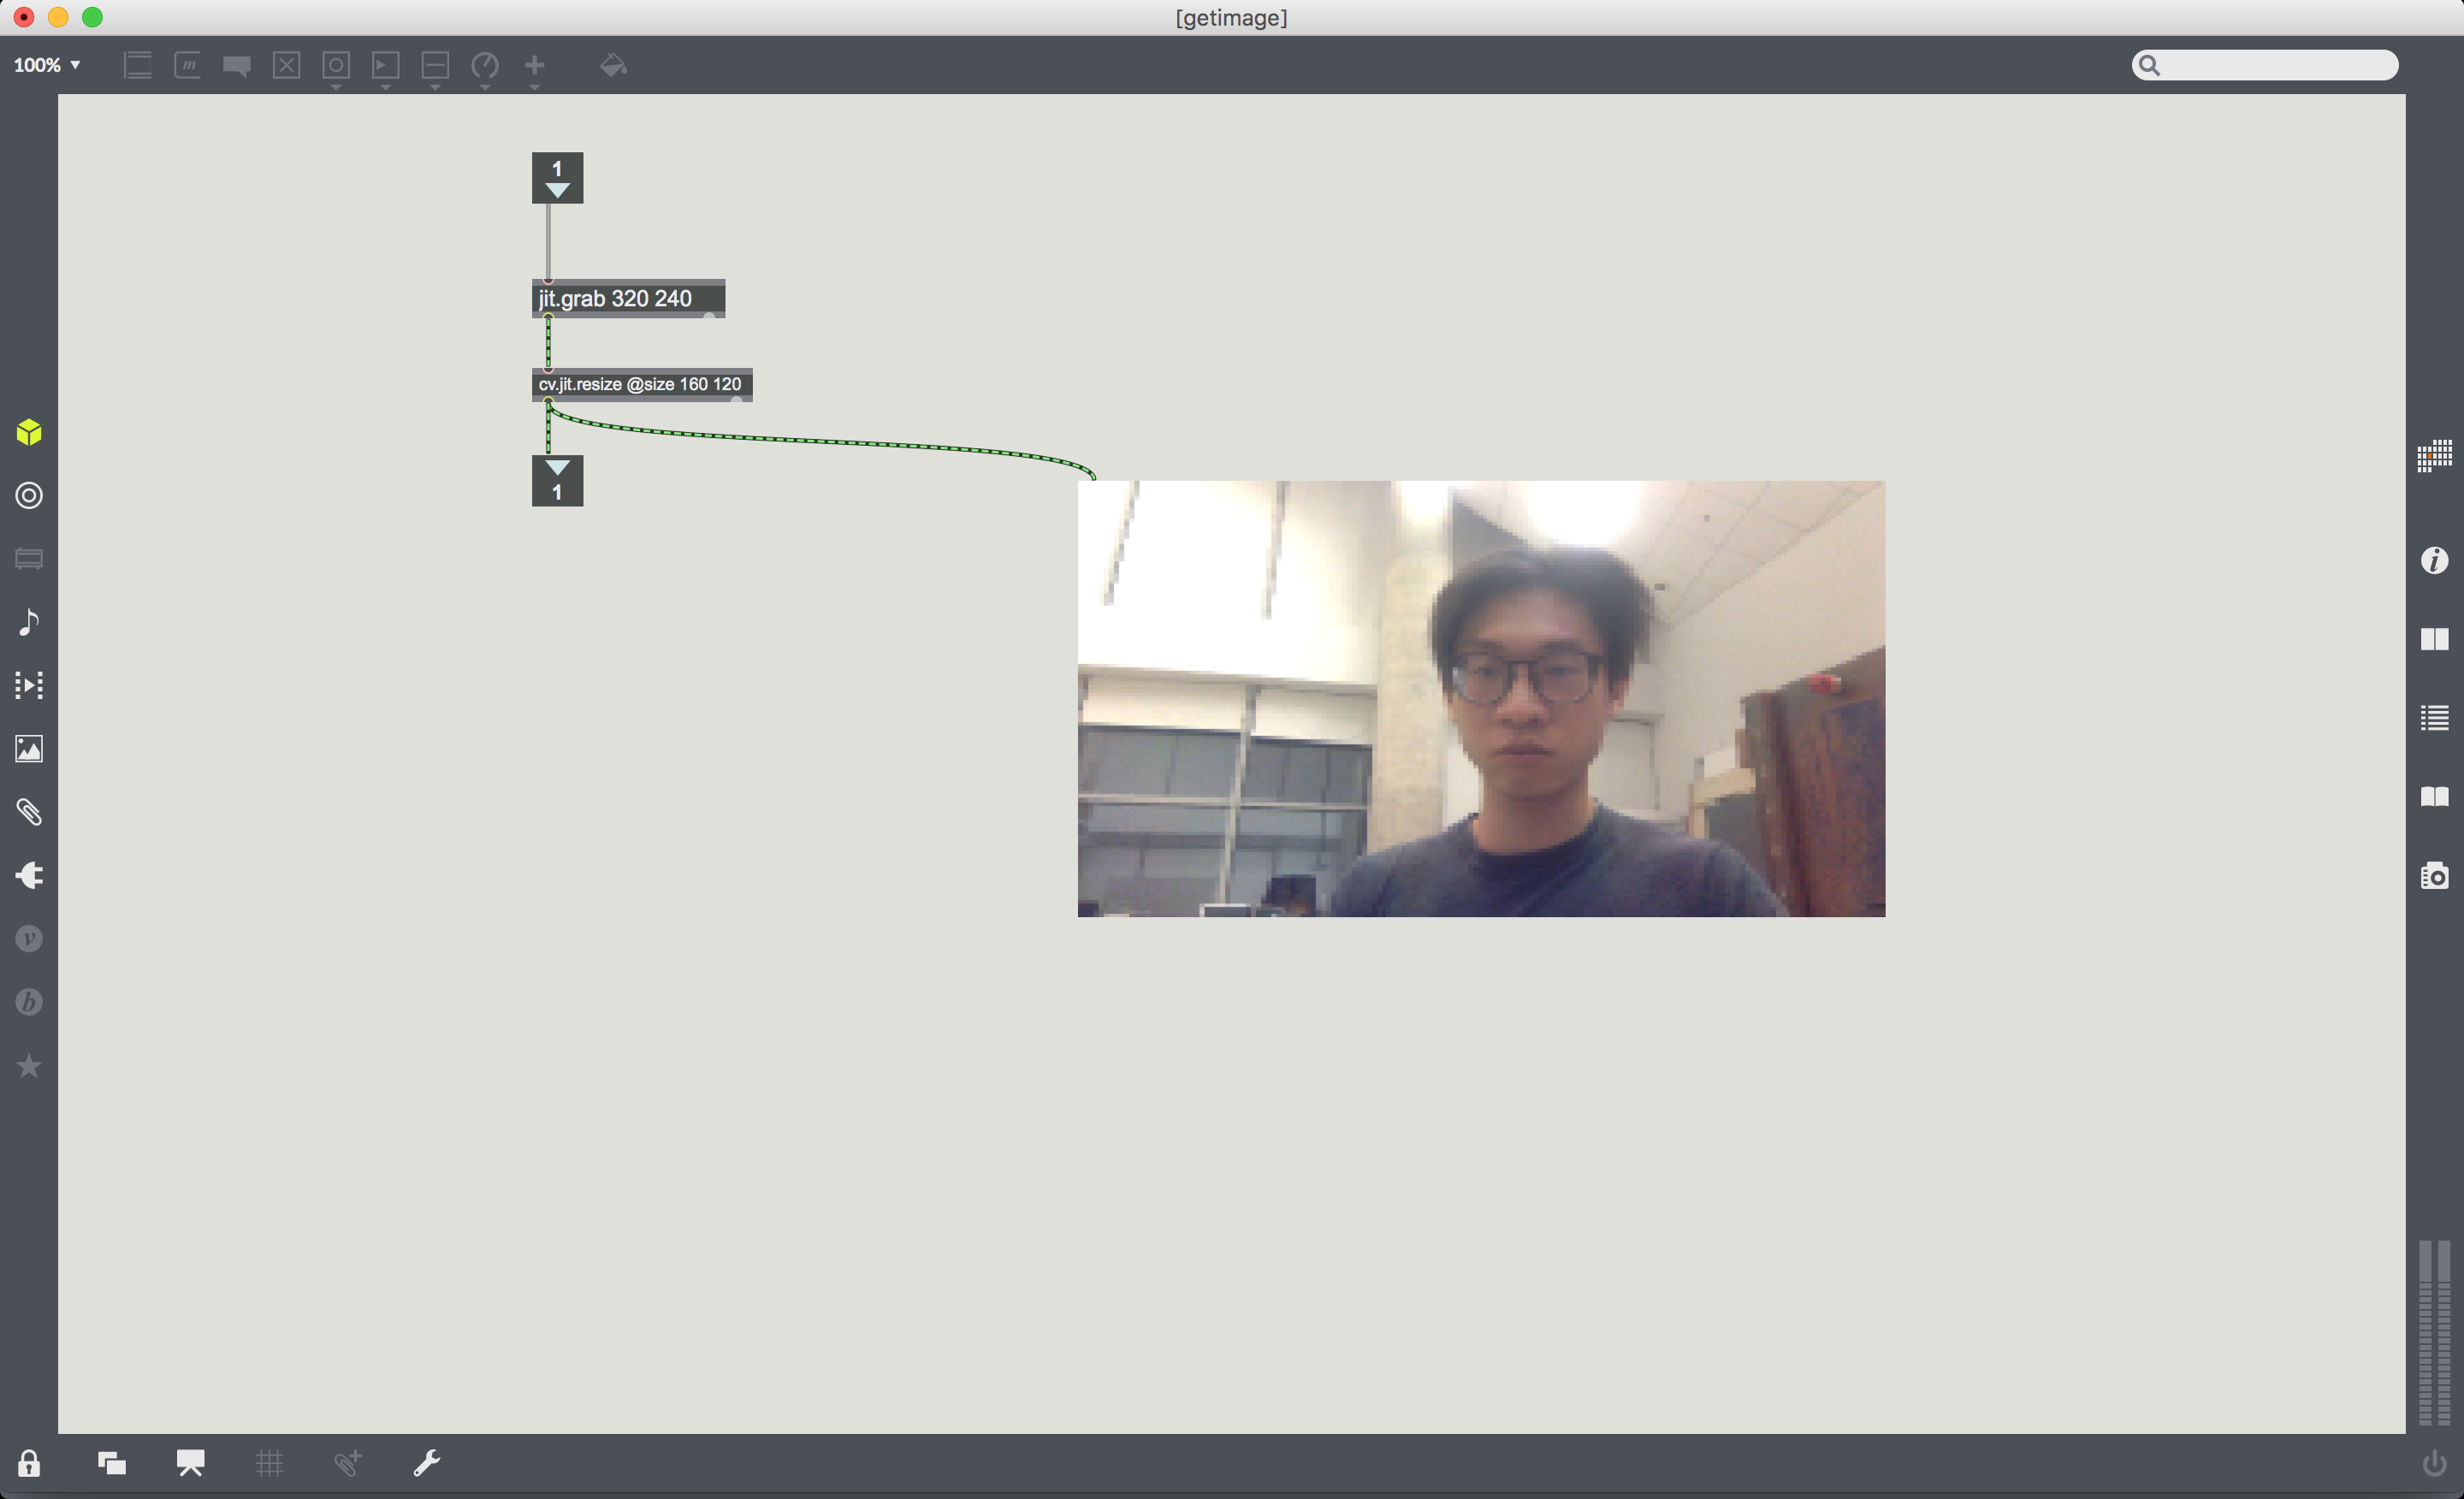
[p getimage]
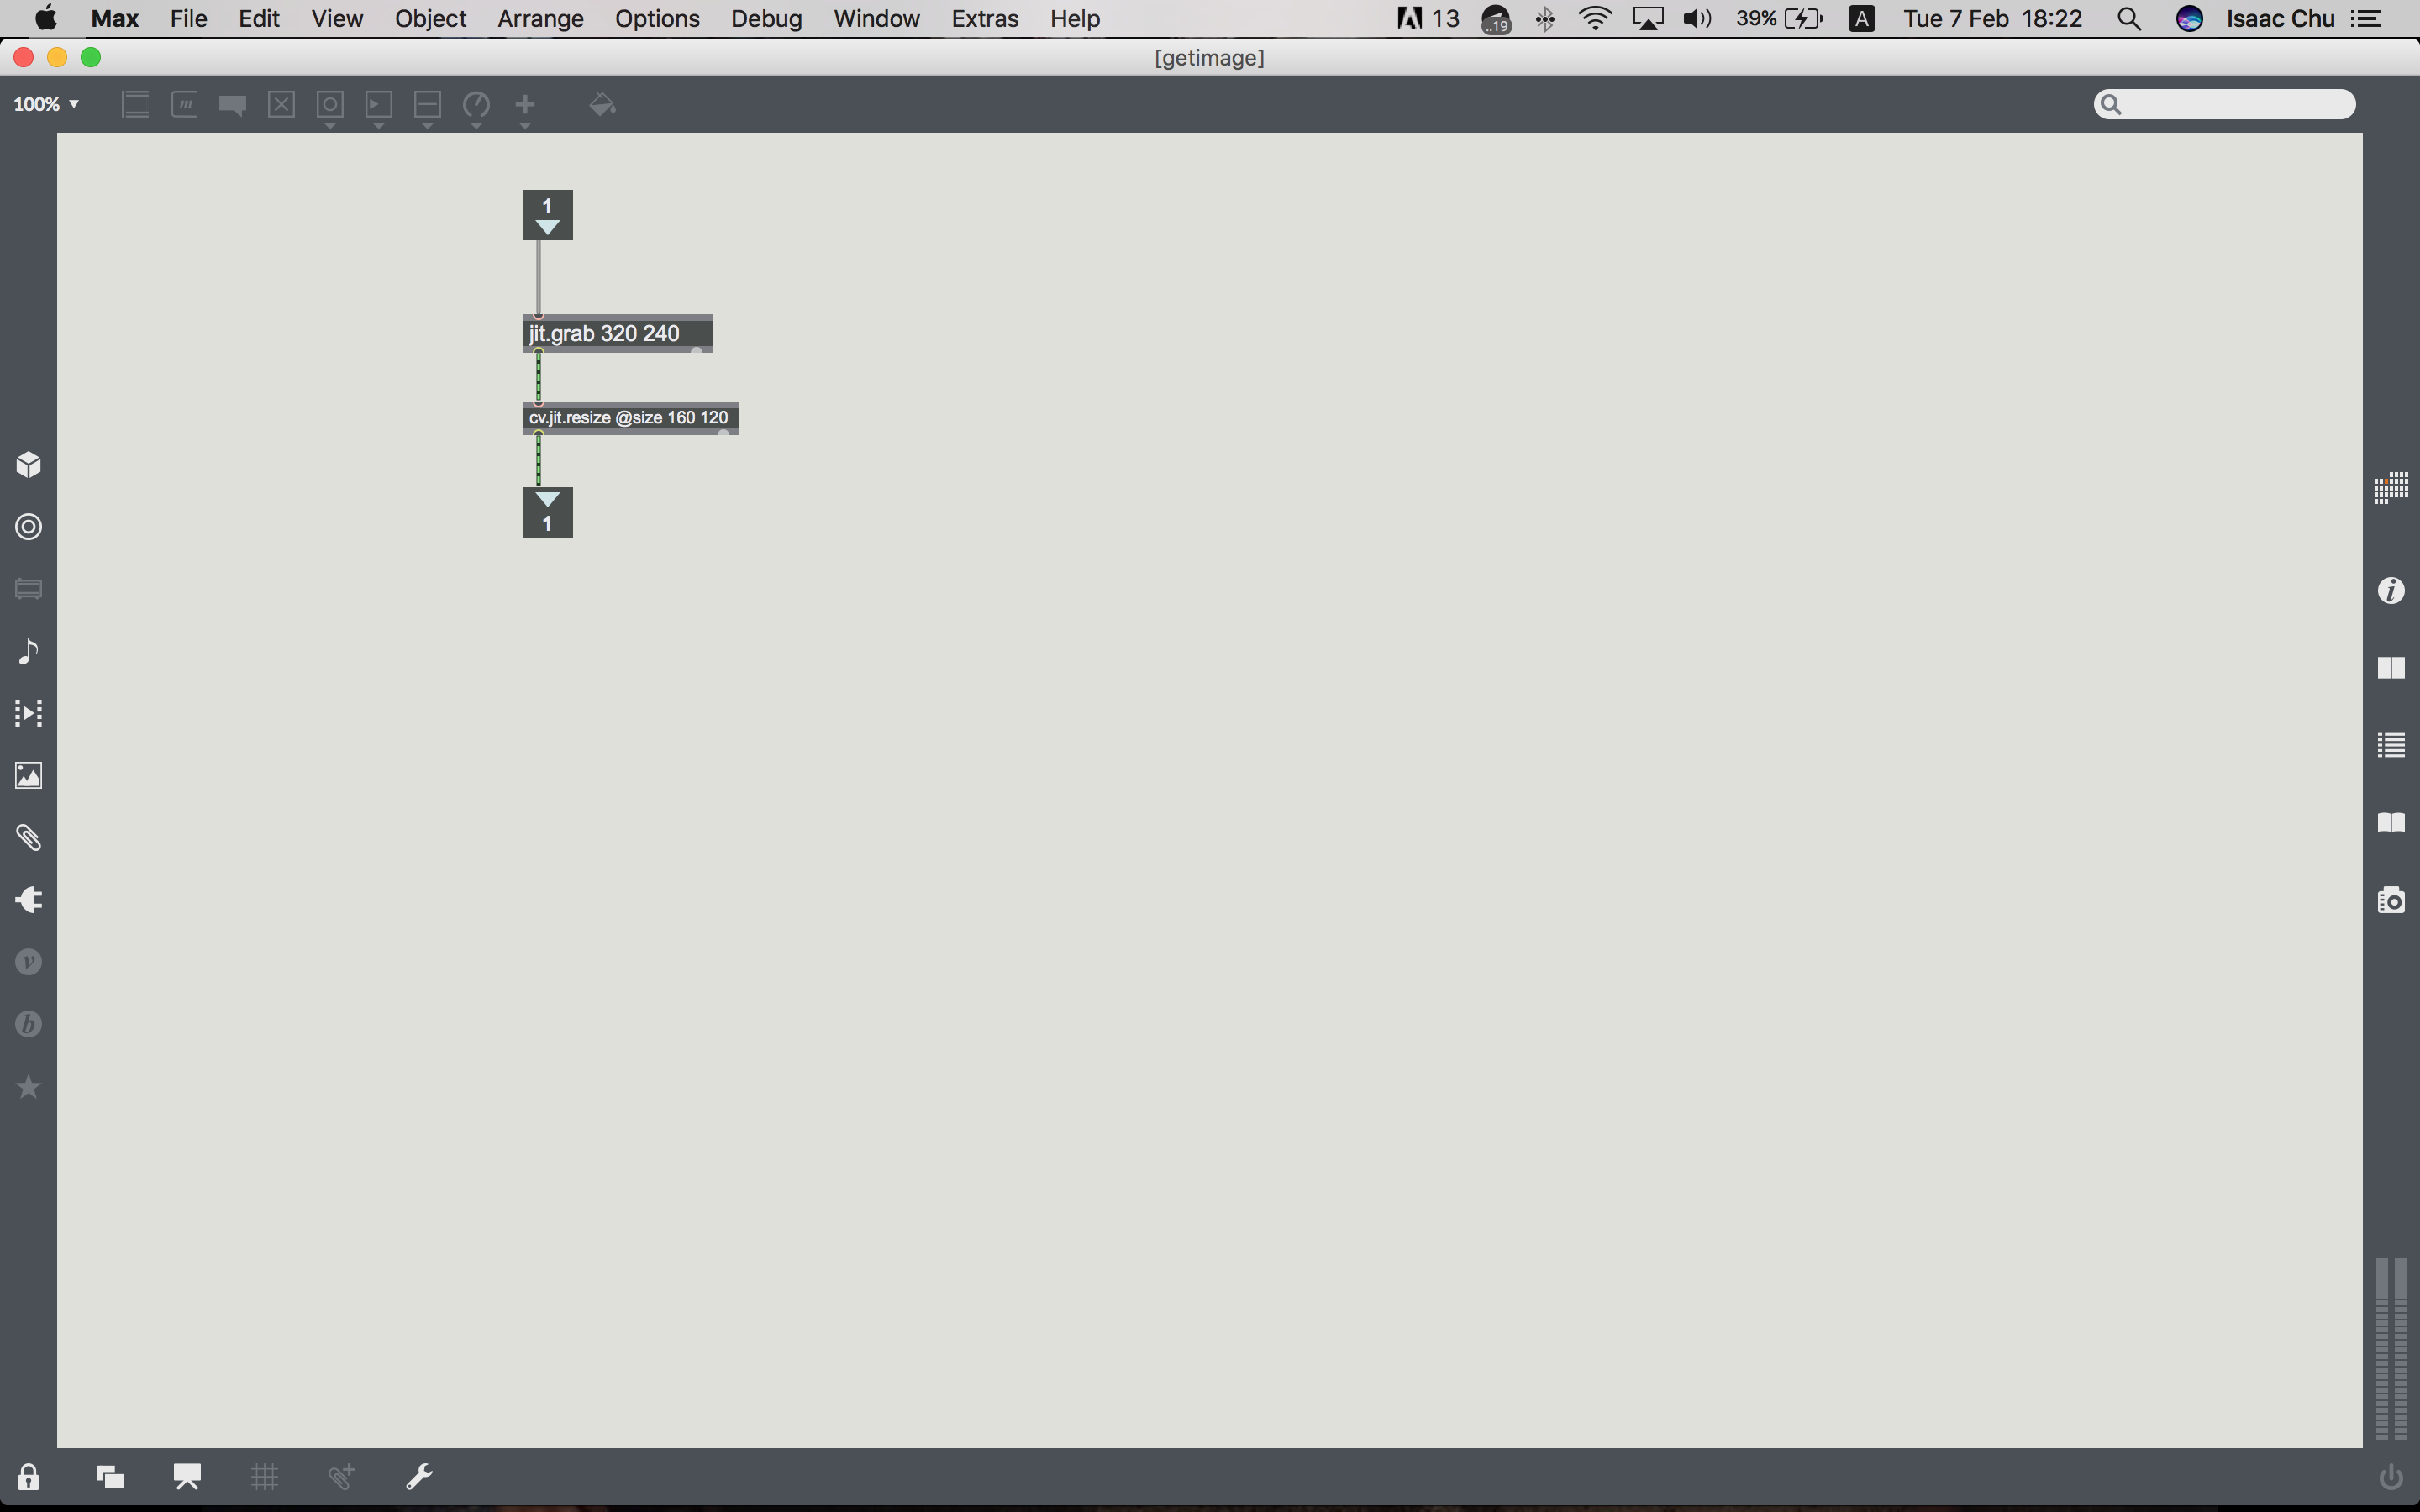
So what this does it that it’ll grab the feed from the web camera along with the defined scale.
[p getface]
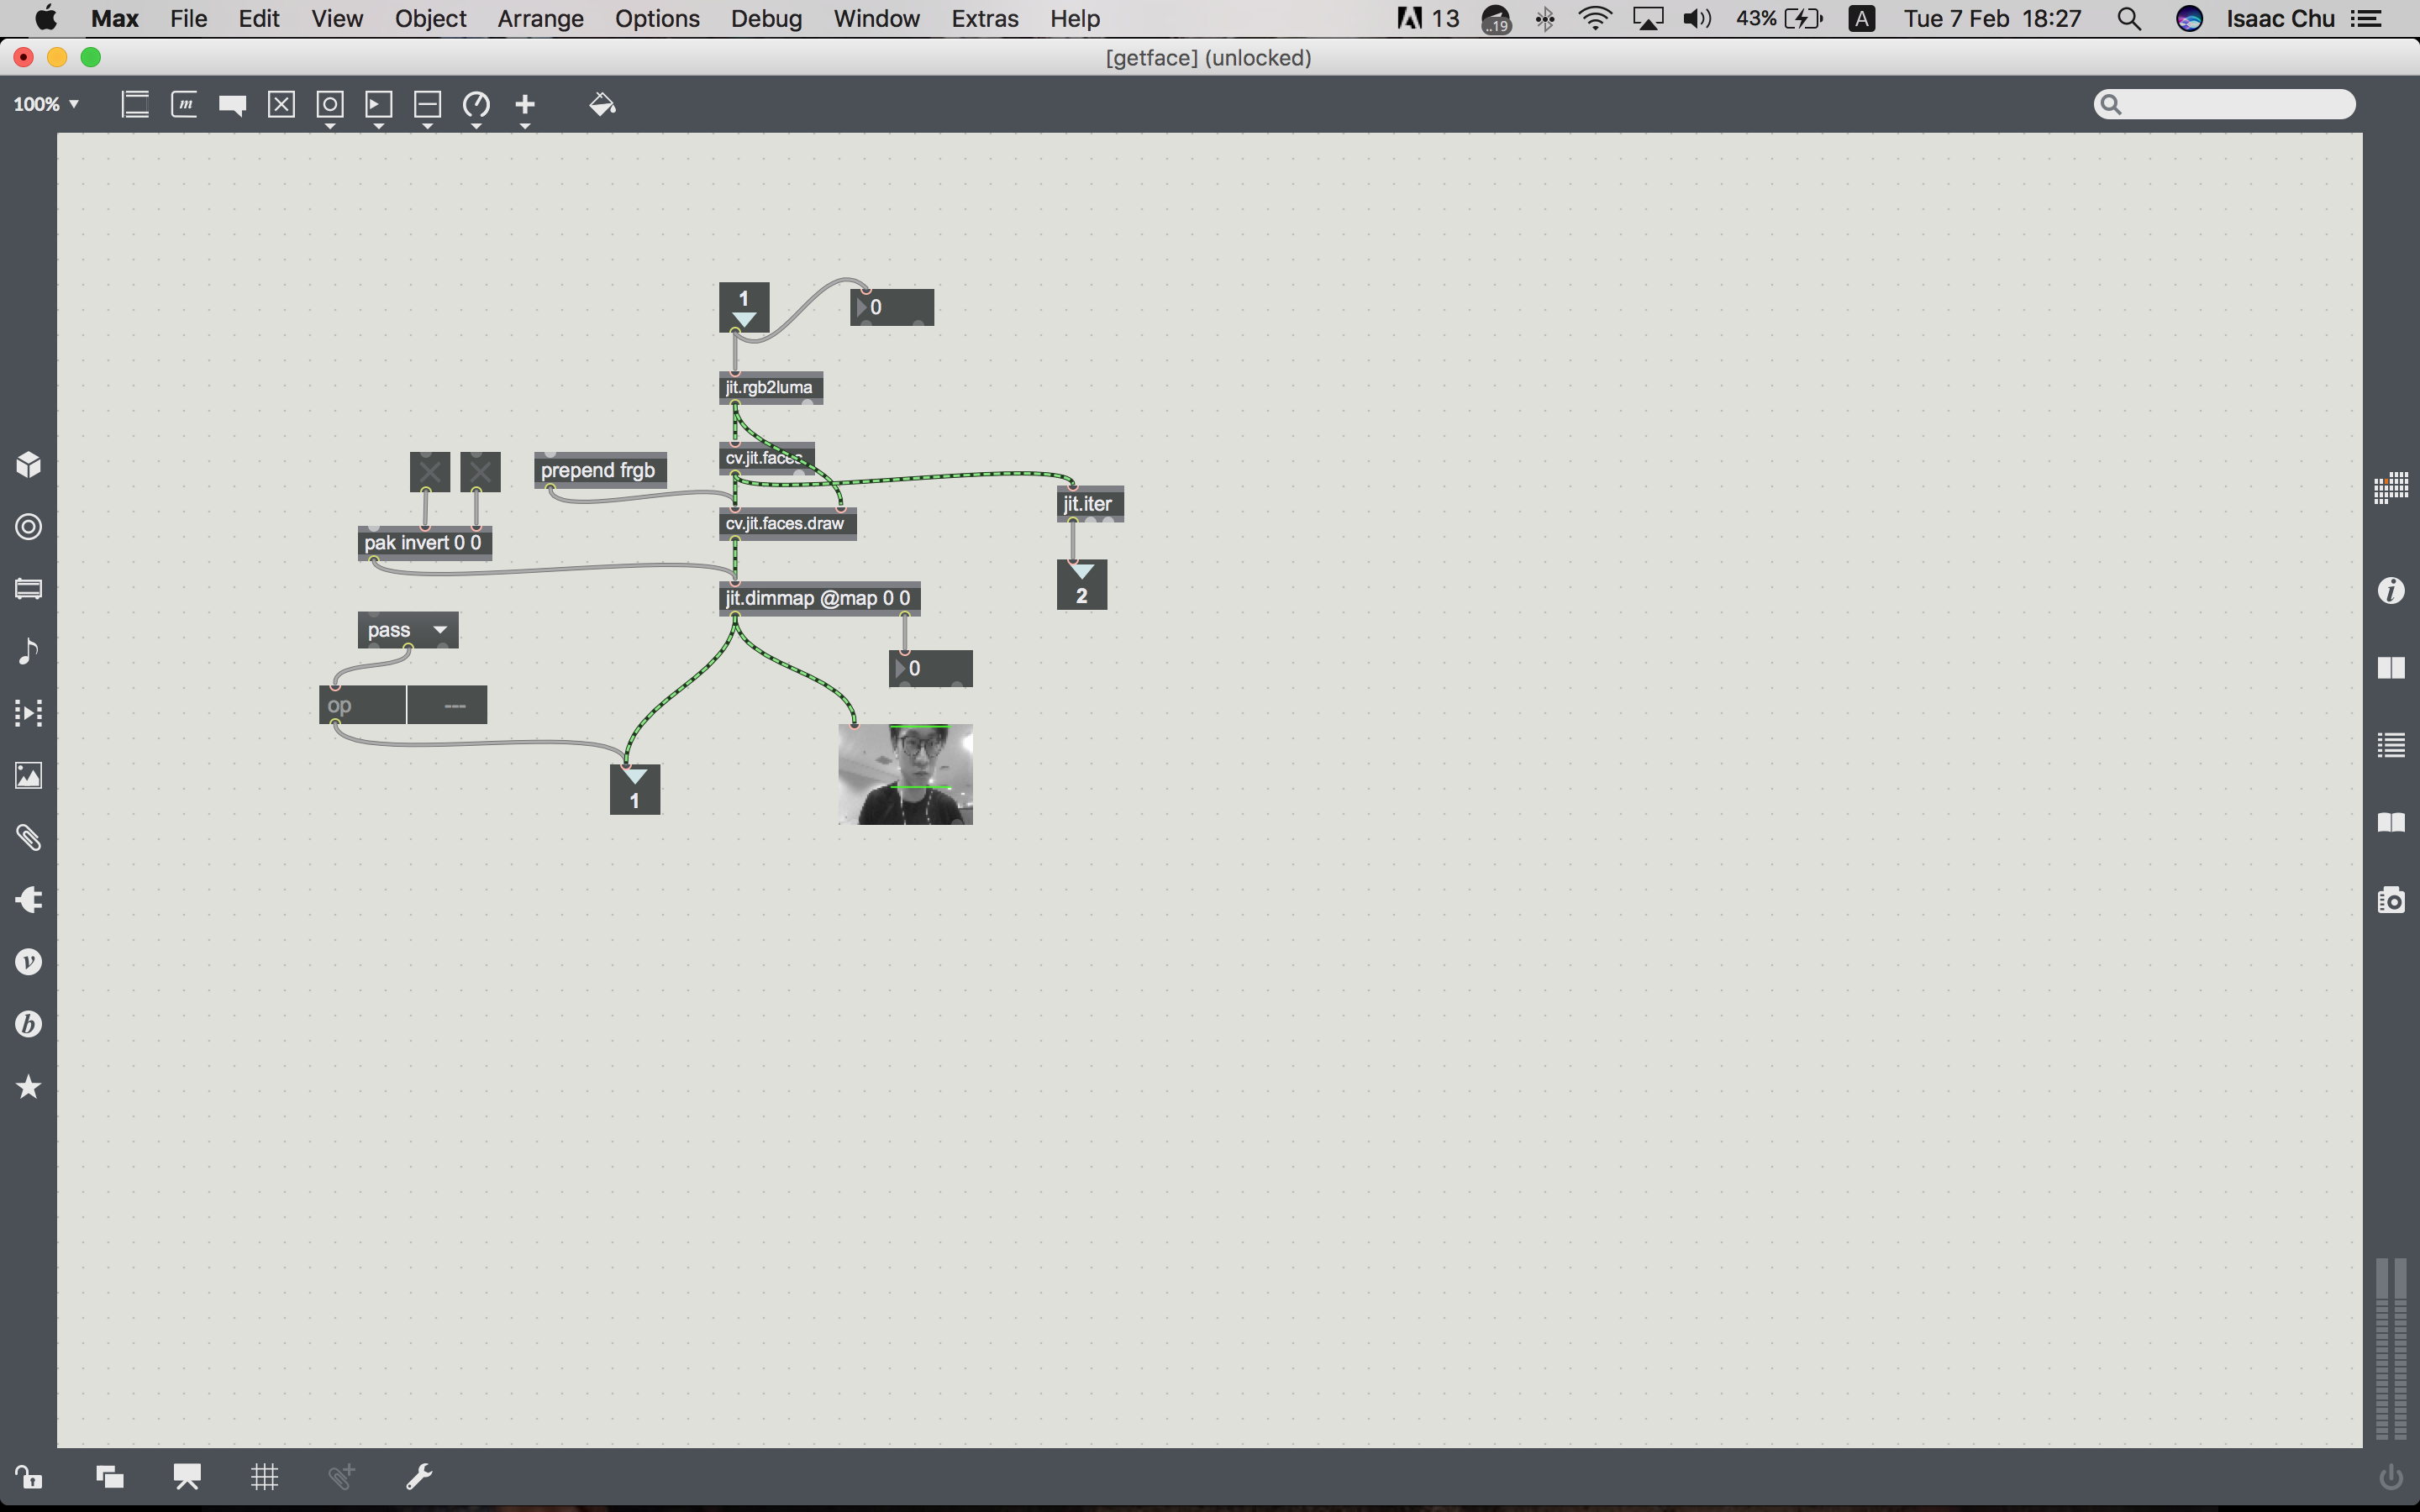
This was one of the more complicated one for me because there were many components involved like jit.ter, prepend frgb, pak invert and opacity. Of course, these were all gone through in class but connecting them together in a logical way was the challenge. So prepend converts the video feed into monochrome so it’s easier to identify the facial contours and pak invert inverts the video frame so it becomes a mirror. Everything was easy to grasp up till here. What goes on next is the real challenge.
[p unpackandsplit]
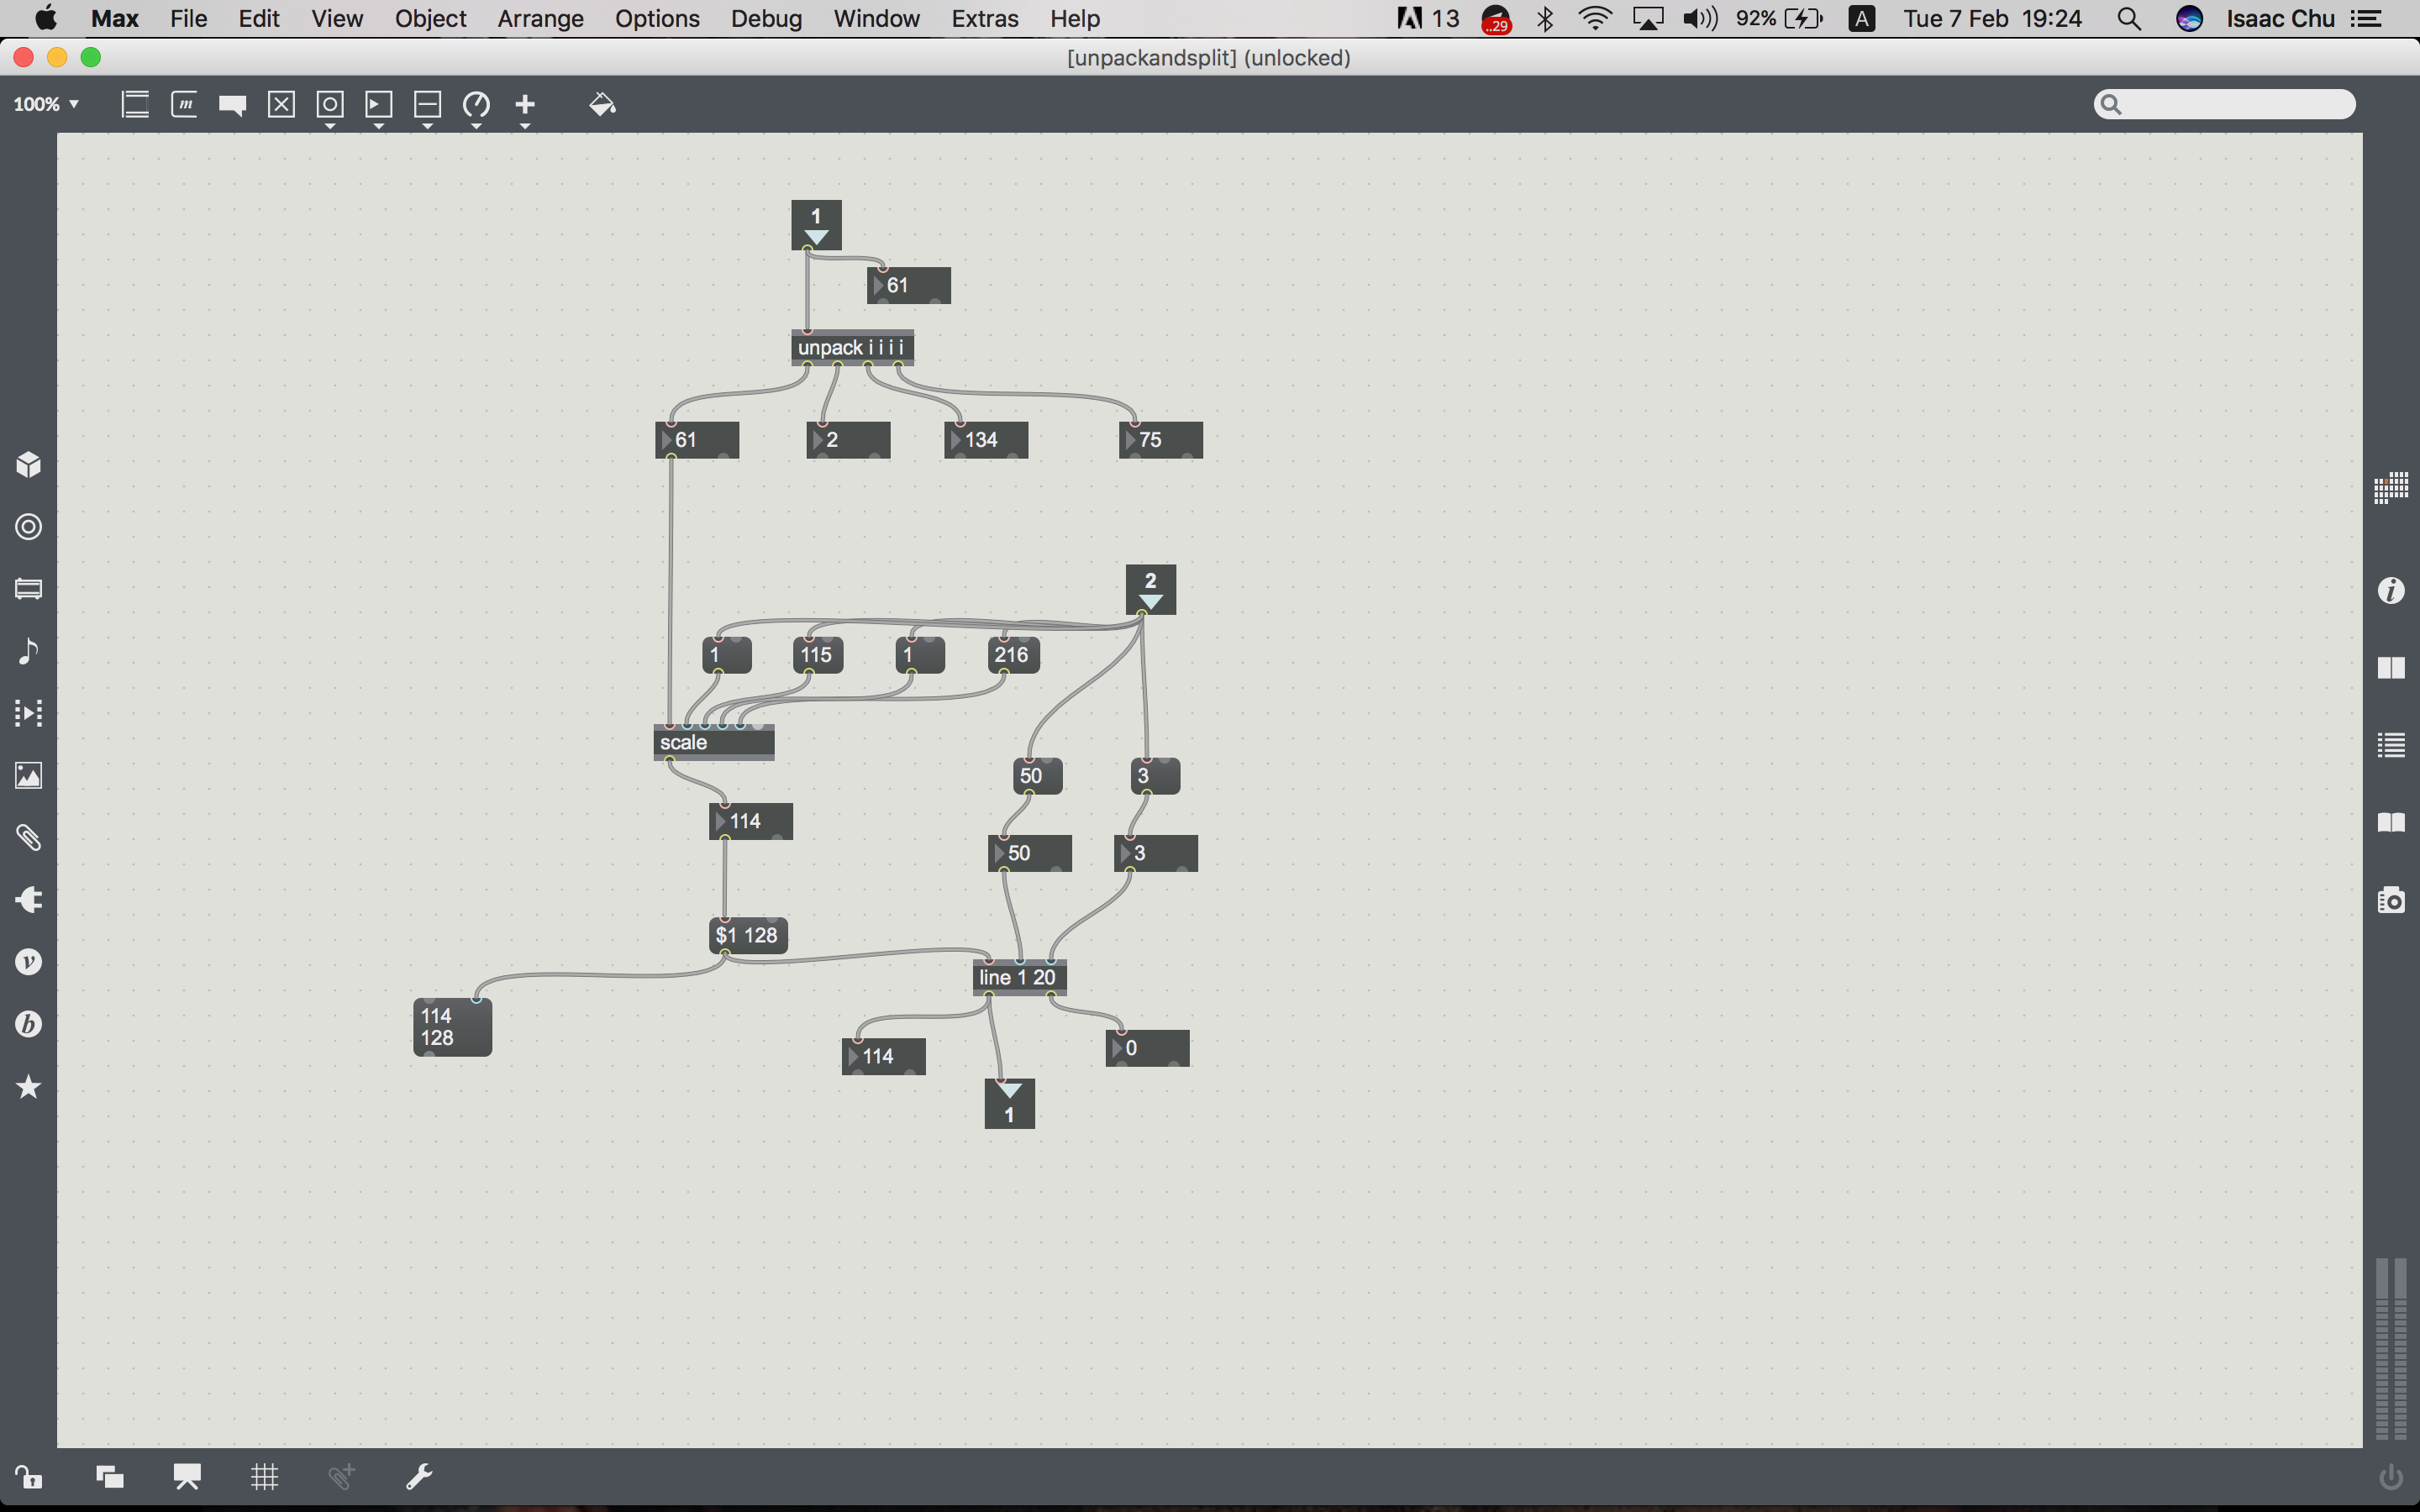
This was the toughest to get but I’m so happy I managed to understand it with the help of Zi Feng. (I think peer-to-peer teaching is so useful, since it reinforces learning and queries can be answered at student level haha)
[p playback]
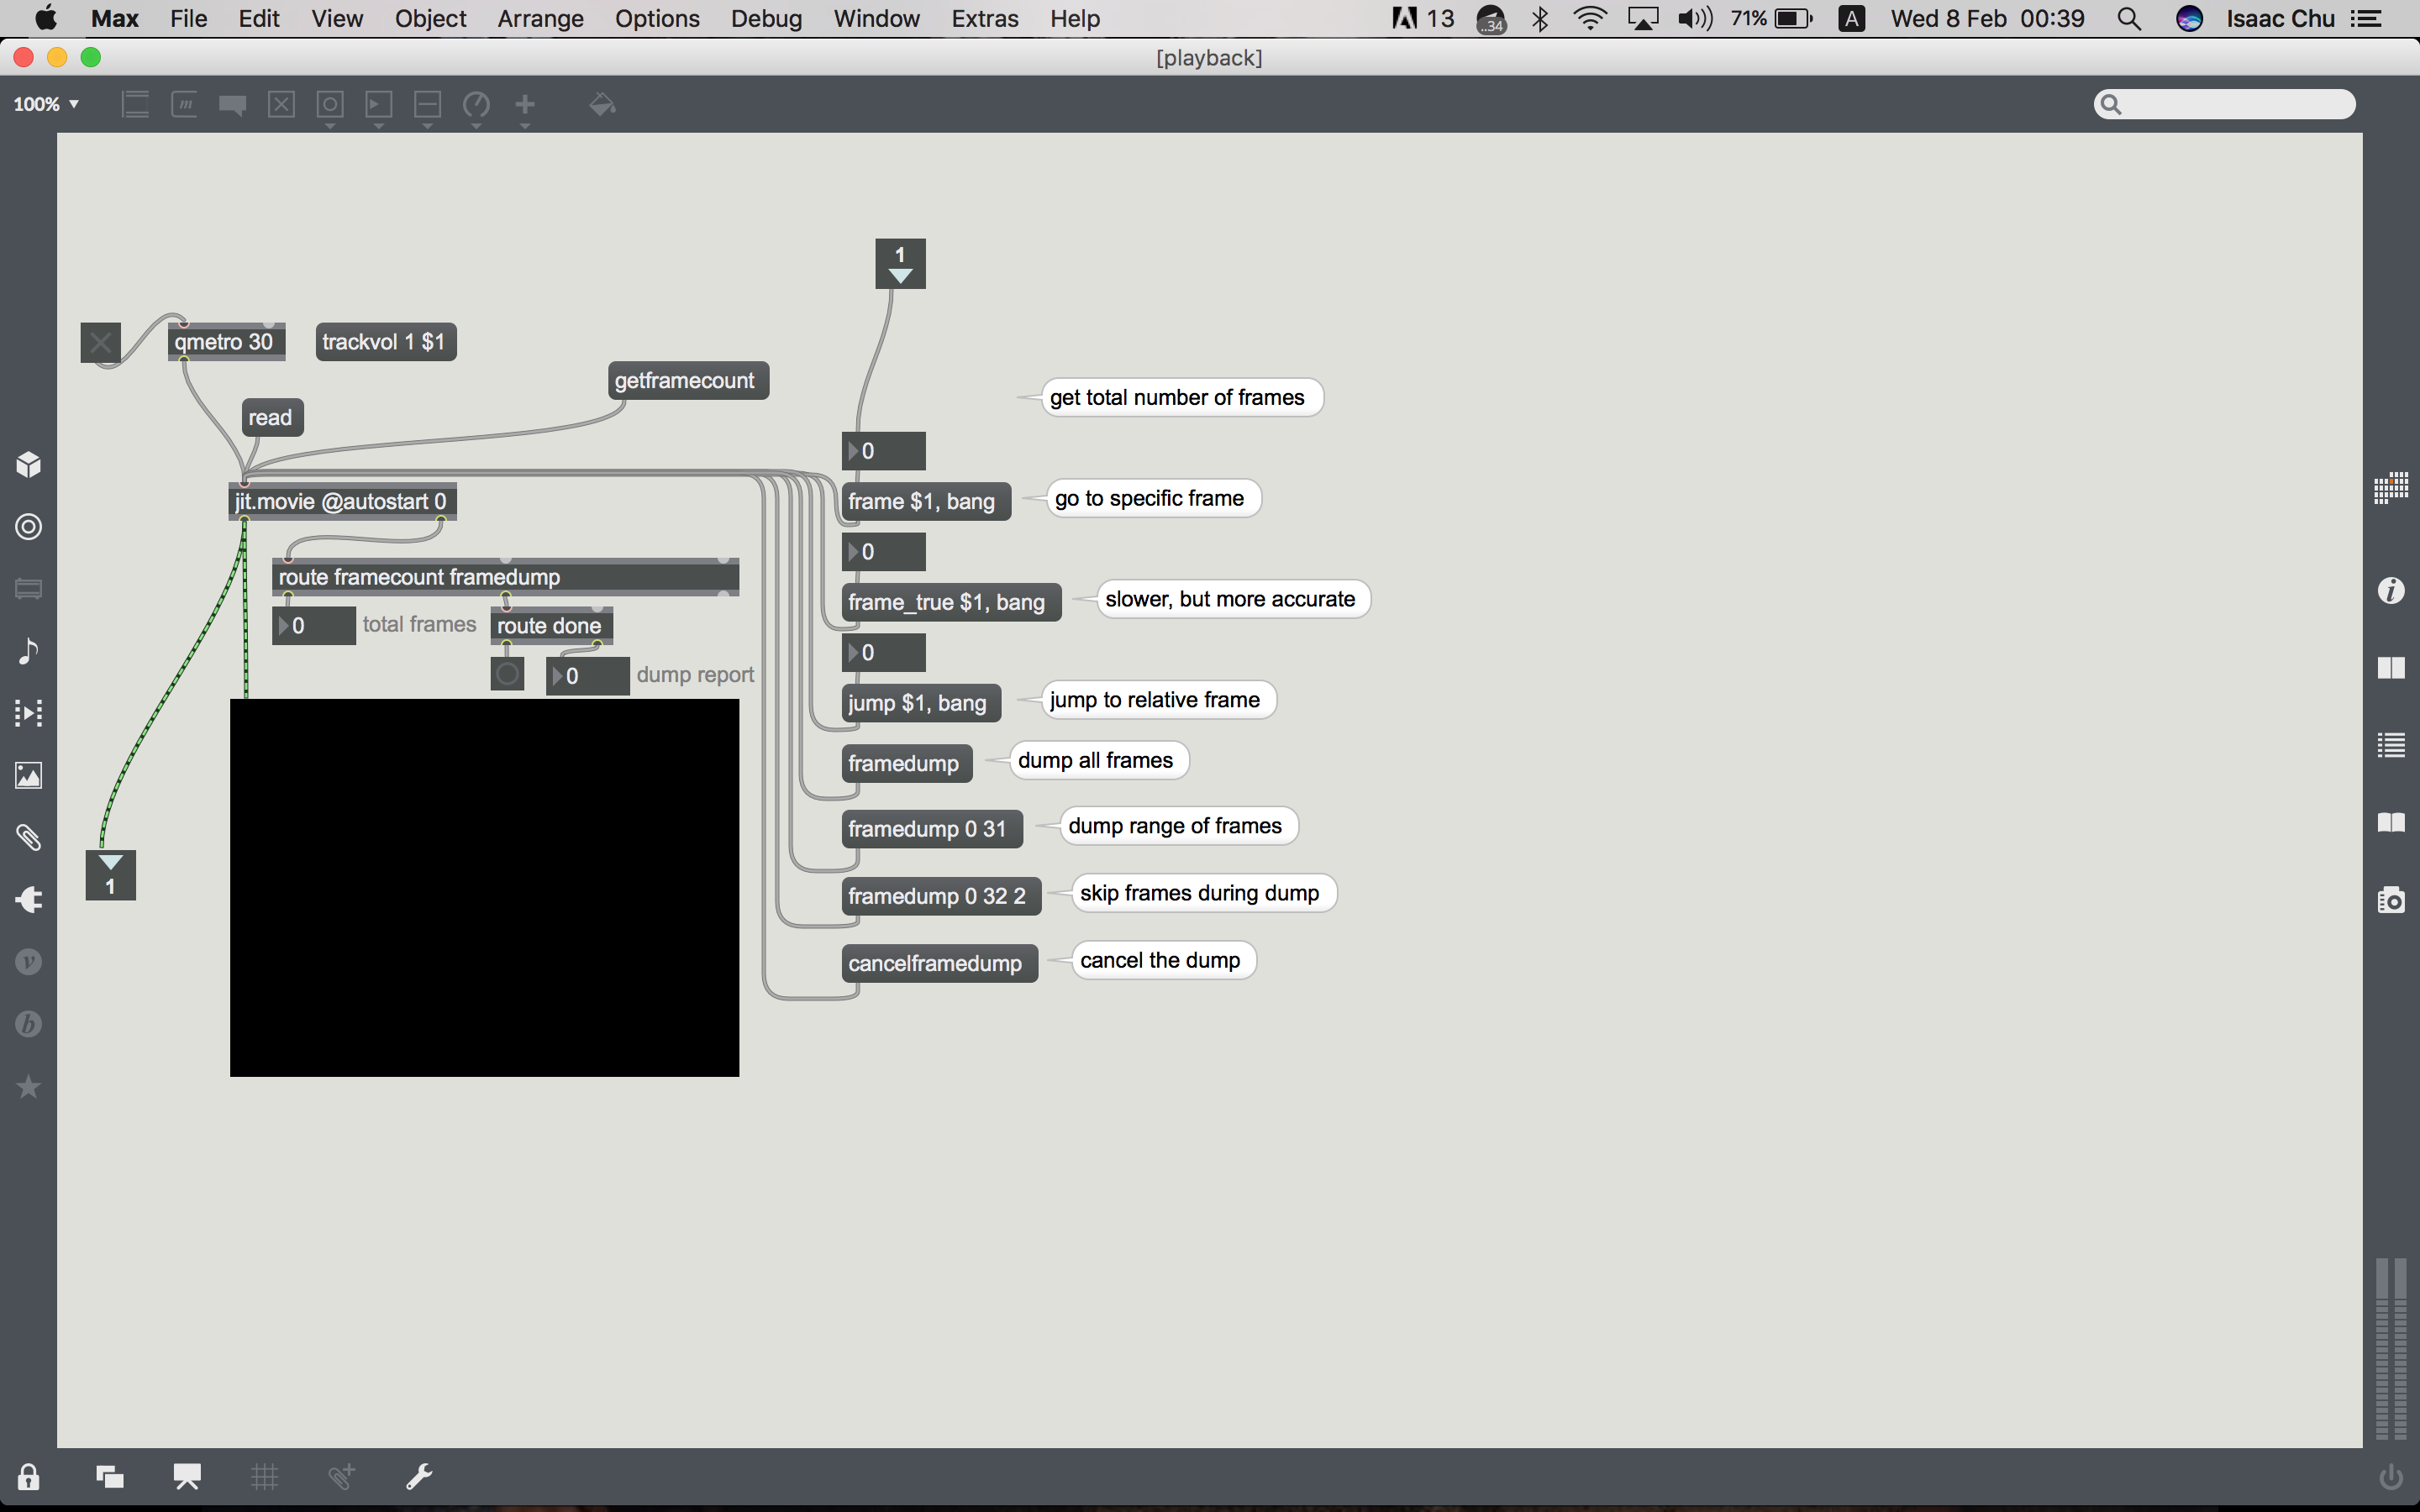
Everything here is pretty much understandable and easy to grasp. Mainly, the use of jit.movie and adding in the inlets/outlets.
Conclusion
In all, I think I have learnt a lot doing this assignment. I would have definitely not been able to understand everything properly if not for the peer-to-peer teaching and I’m really thankful for asking question. Have a great one!