Month: September 2016
Food for Thought
Haha! Witty title because we’re talking about food. Is the title in any other way relevant? No.
Let’s dig in!
I spent the weekend thinking about what kinds of food would work in my model for Atlas.
The first thing that came to mind was prata. Indian food is amazing. I thought about letting the crispy prata wedge into a skewer of tender tandoori chicken with a ball of spices that just break open to titillate your senses when the curry is poured over.
Then of course, I realised that I wanted to make something that didn’t require so much work considering the fact that I have Critical Writing class before 3D.
Desserts. Dry desserts tend to be easier to work with right? Maybe teatime snacks?
I thought about slicing a croissant in half to be used as the cone, with a disc of solidified chocolate. As for the subordinate flavour? A single coffee bean to provide that special kick to the entire dish. Again- all well and good, but how well I would be able to work with chocolate? I really don’t know – especially with time constraints
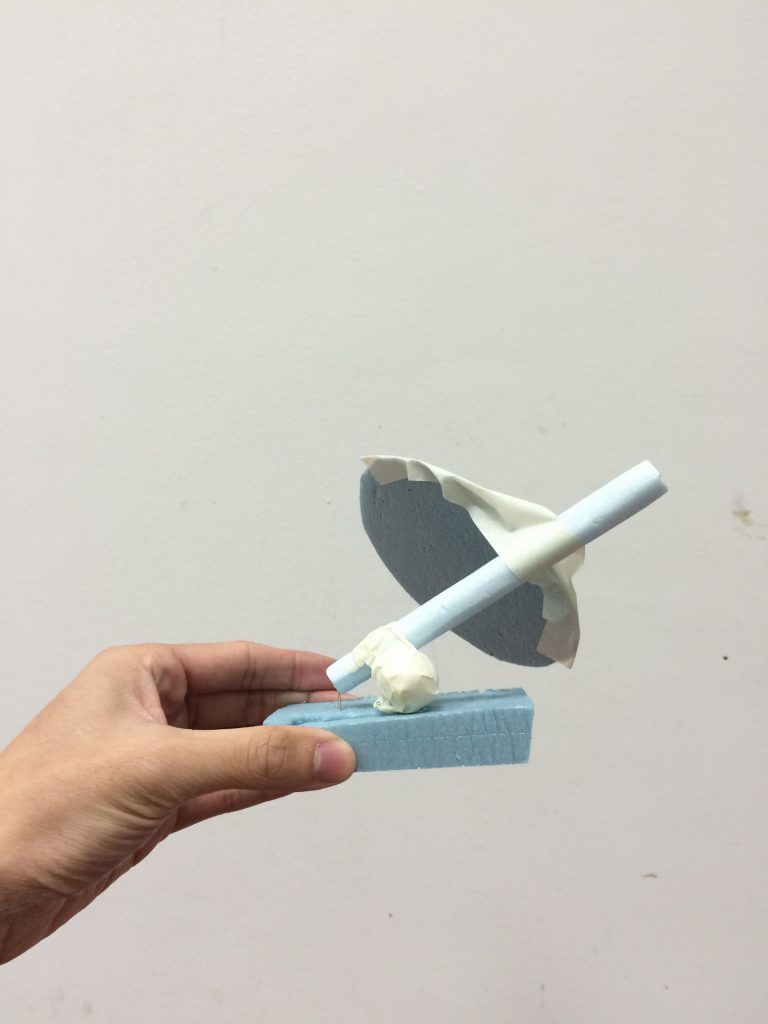
So down to my final idea, which will probably stay that way: a very local take on the tea time snack of cheese and crackers.
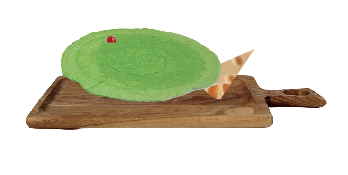
Tada!
Okay it’s not going to win any Michelin stars but the effort was there.
Now I have to explain what exactly you are looking at. The disc, for non-locals or if you are just too young, is a Biscuit Piring Wafer – a snack that most Singaporean are all too familiar with. The cone is the cheese of choice and that little reddish dot is a single grape to cut through the creamy richness of the cheese.
Now, I just have to hope that this will stay assembled on Friday.
Curves and Endurance
In which the featured image was not shamelessly taken from the internet.
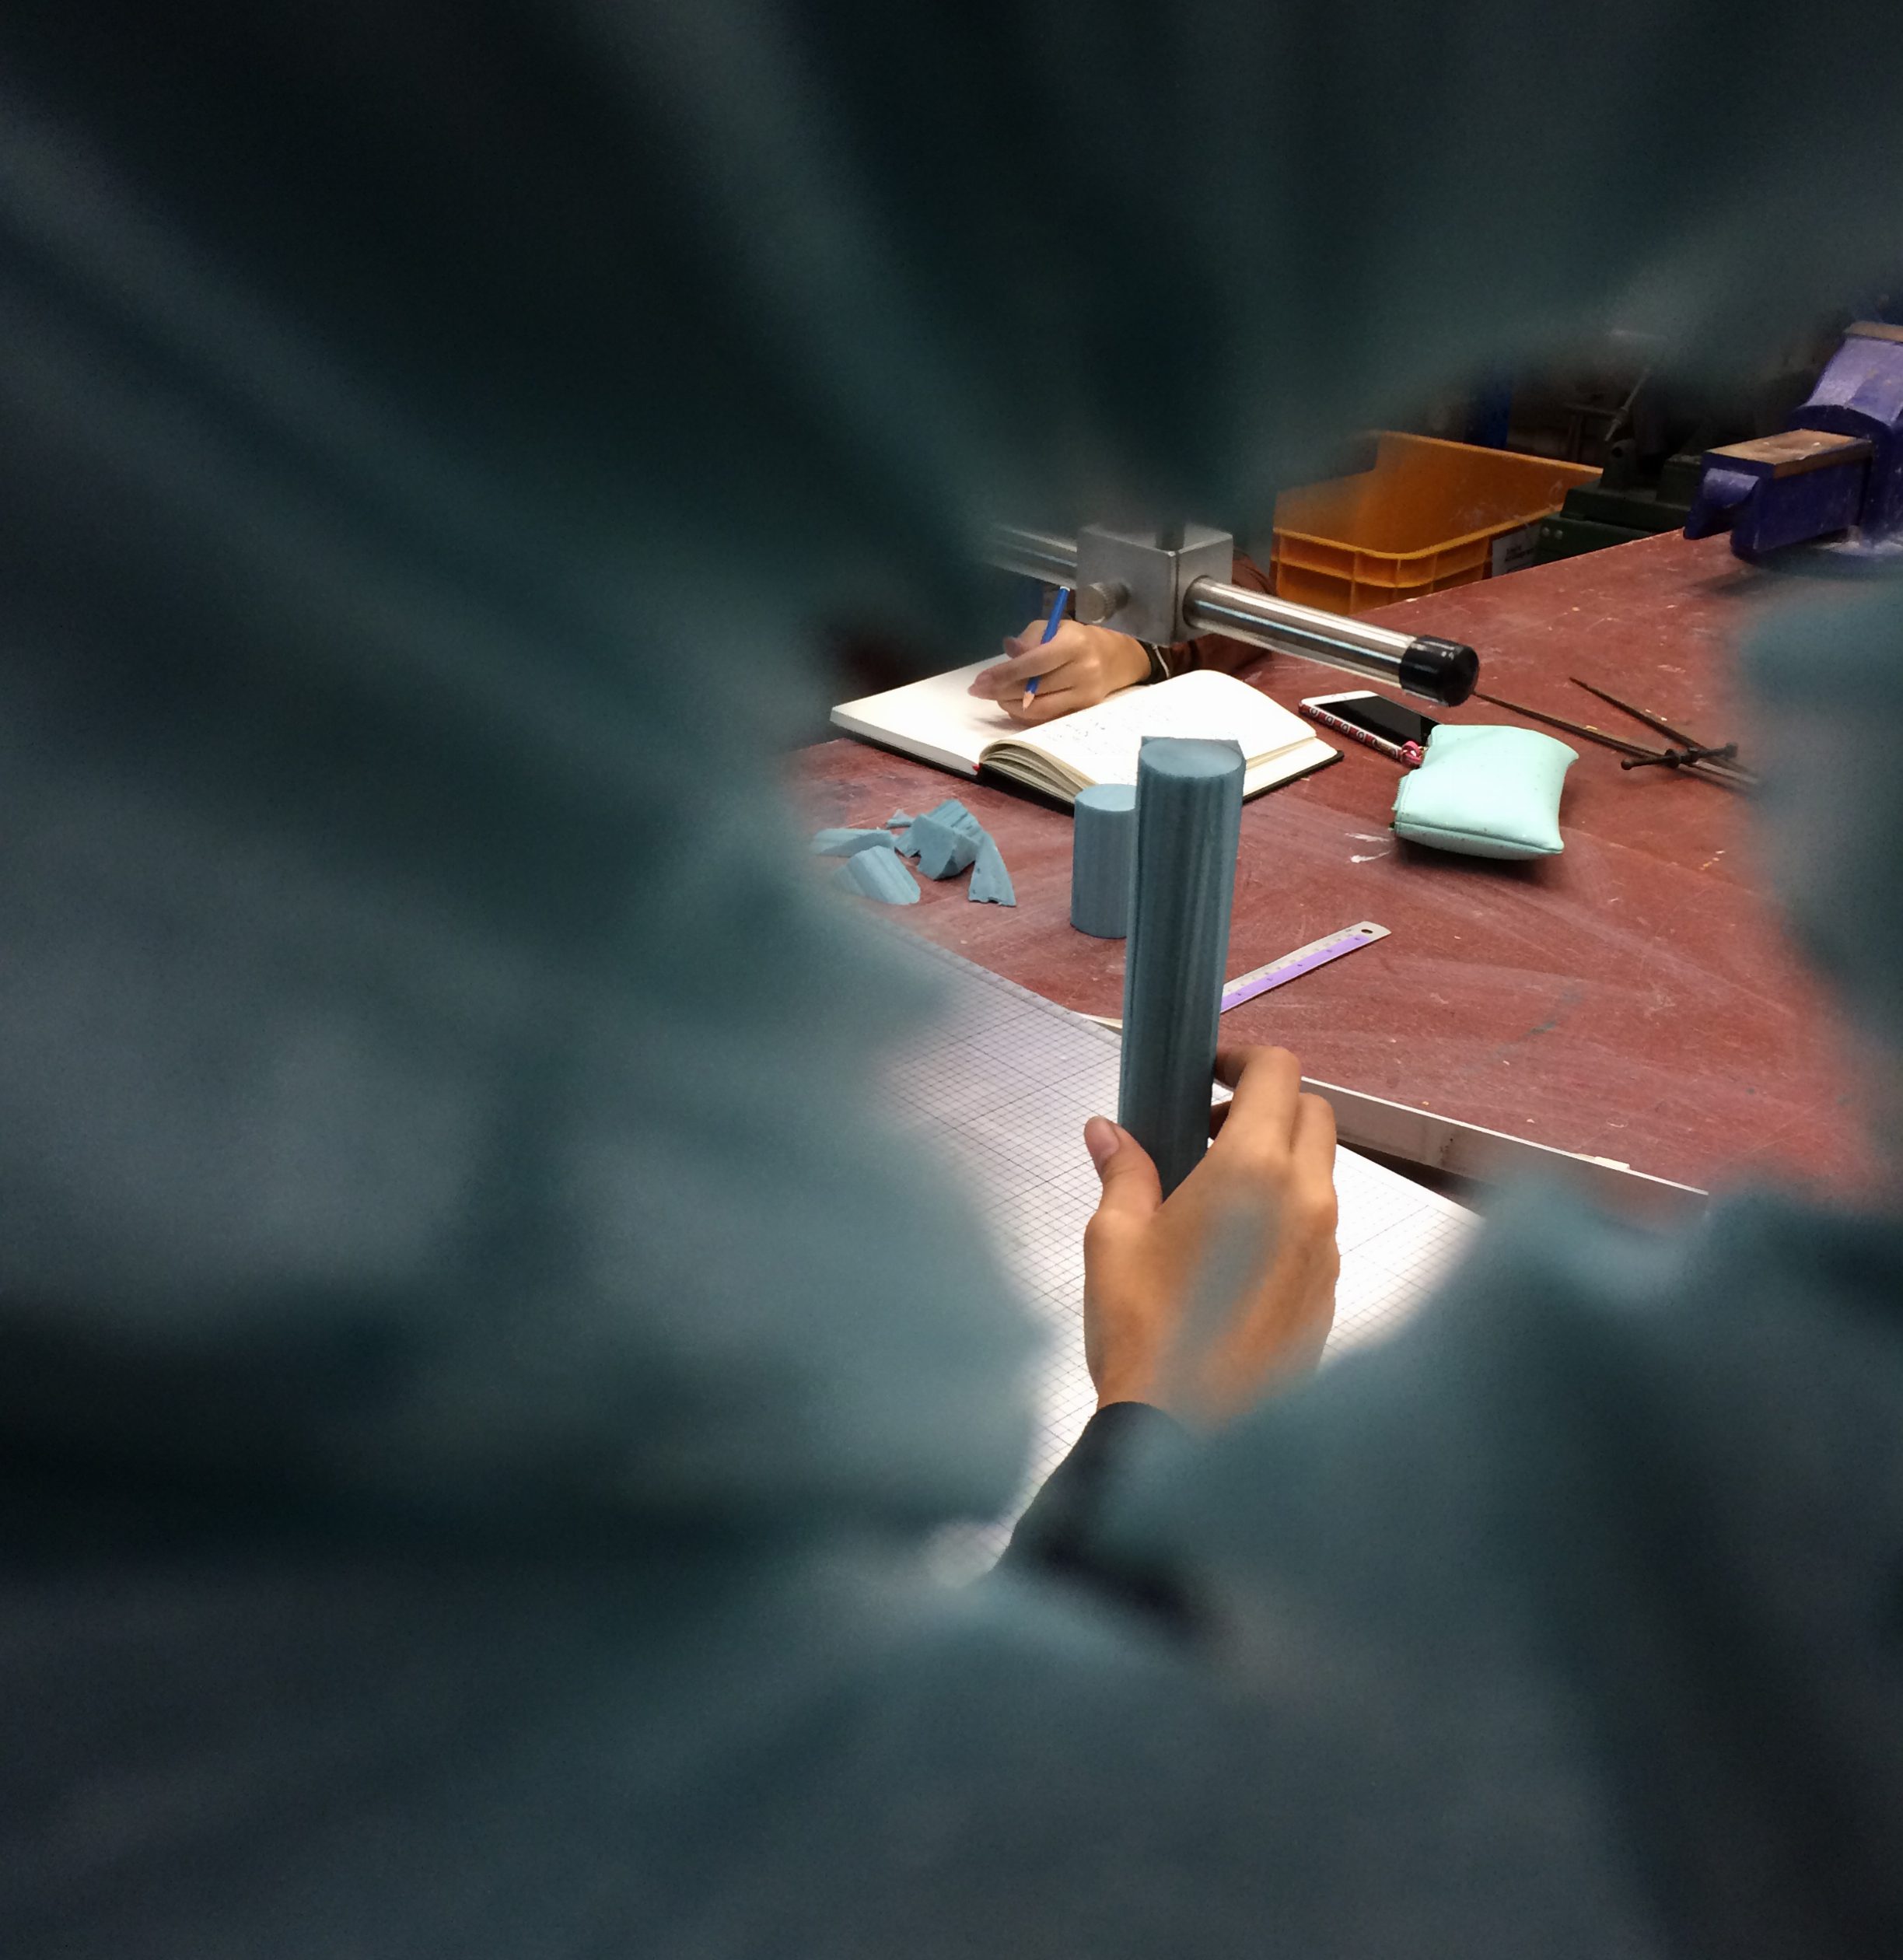
Curvilinear Volumes has been challenging for me so far. Simply for the fact that I am not that great with the foam cutter. It has been frustrating trying to make the foam models that I envision. I don’t mean to complain, but that’s just how it has been. Understanding visual hierarchy is only a tiny fraction of the troubles in the transition from rectilinear to curvilinear volumes.
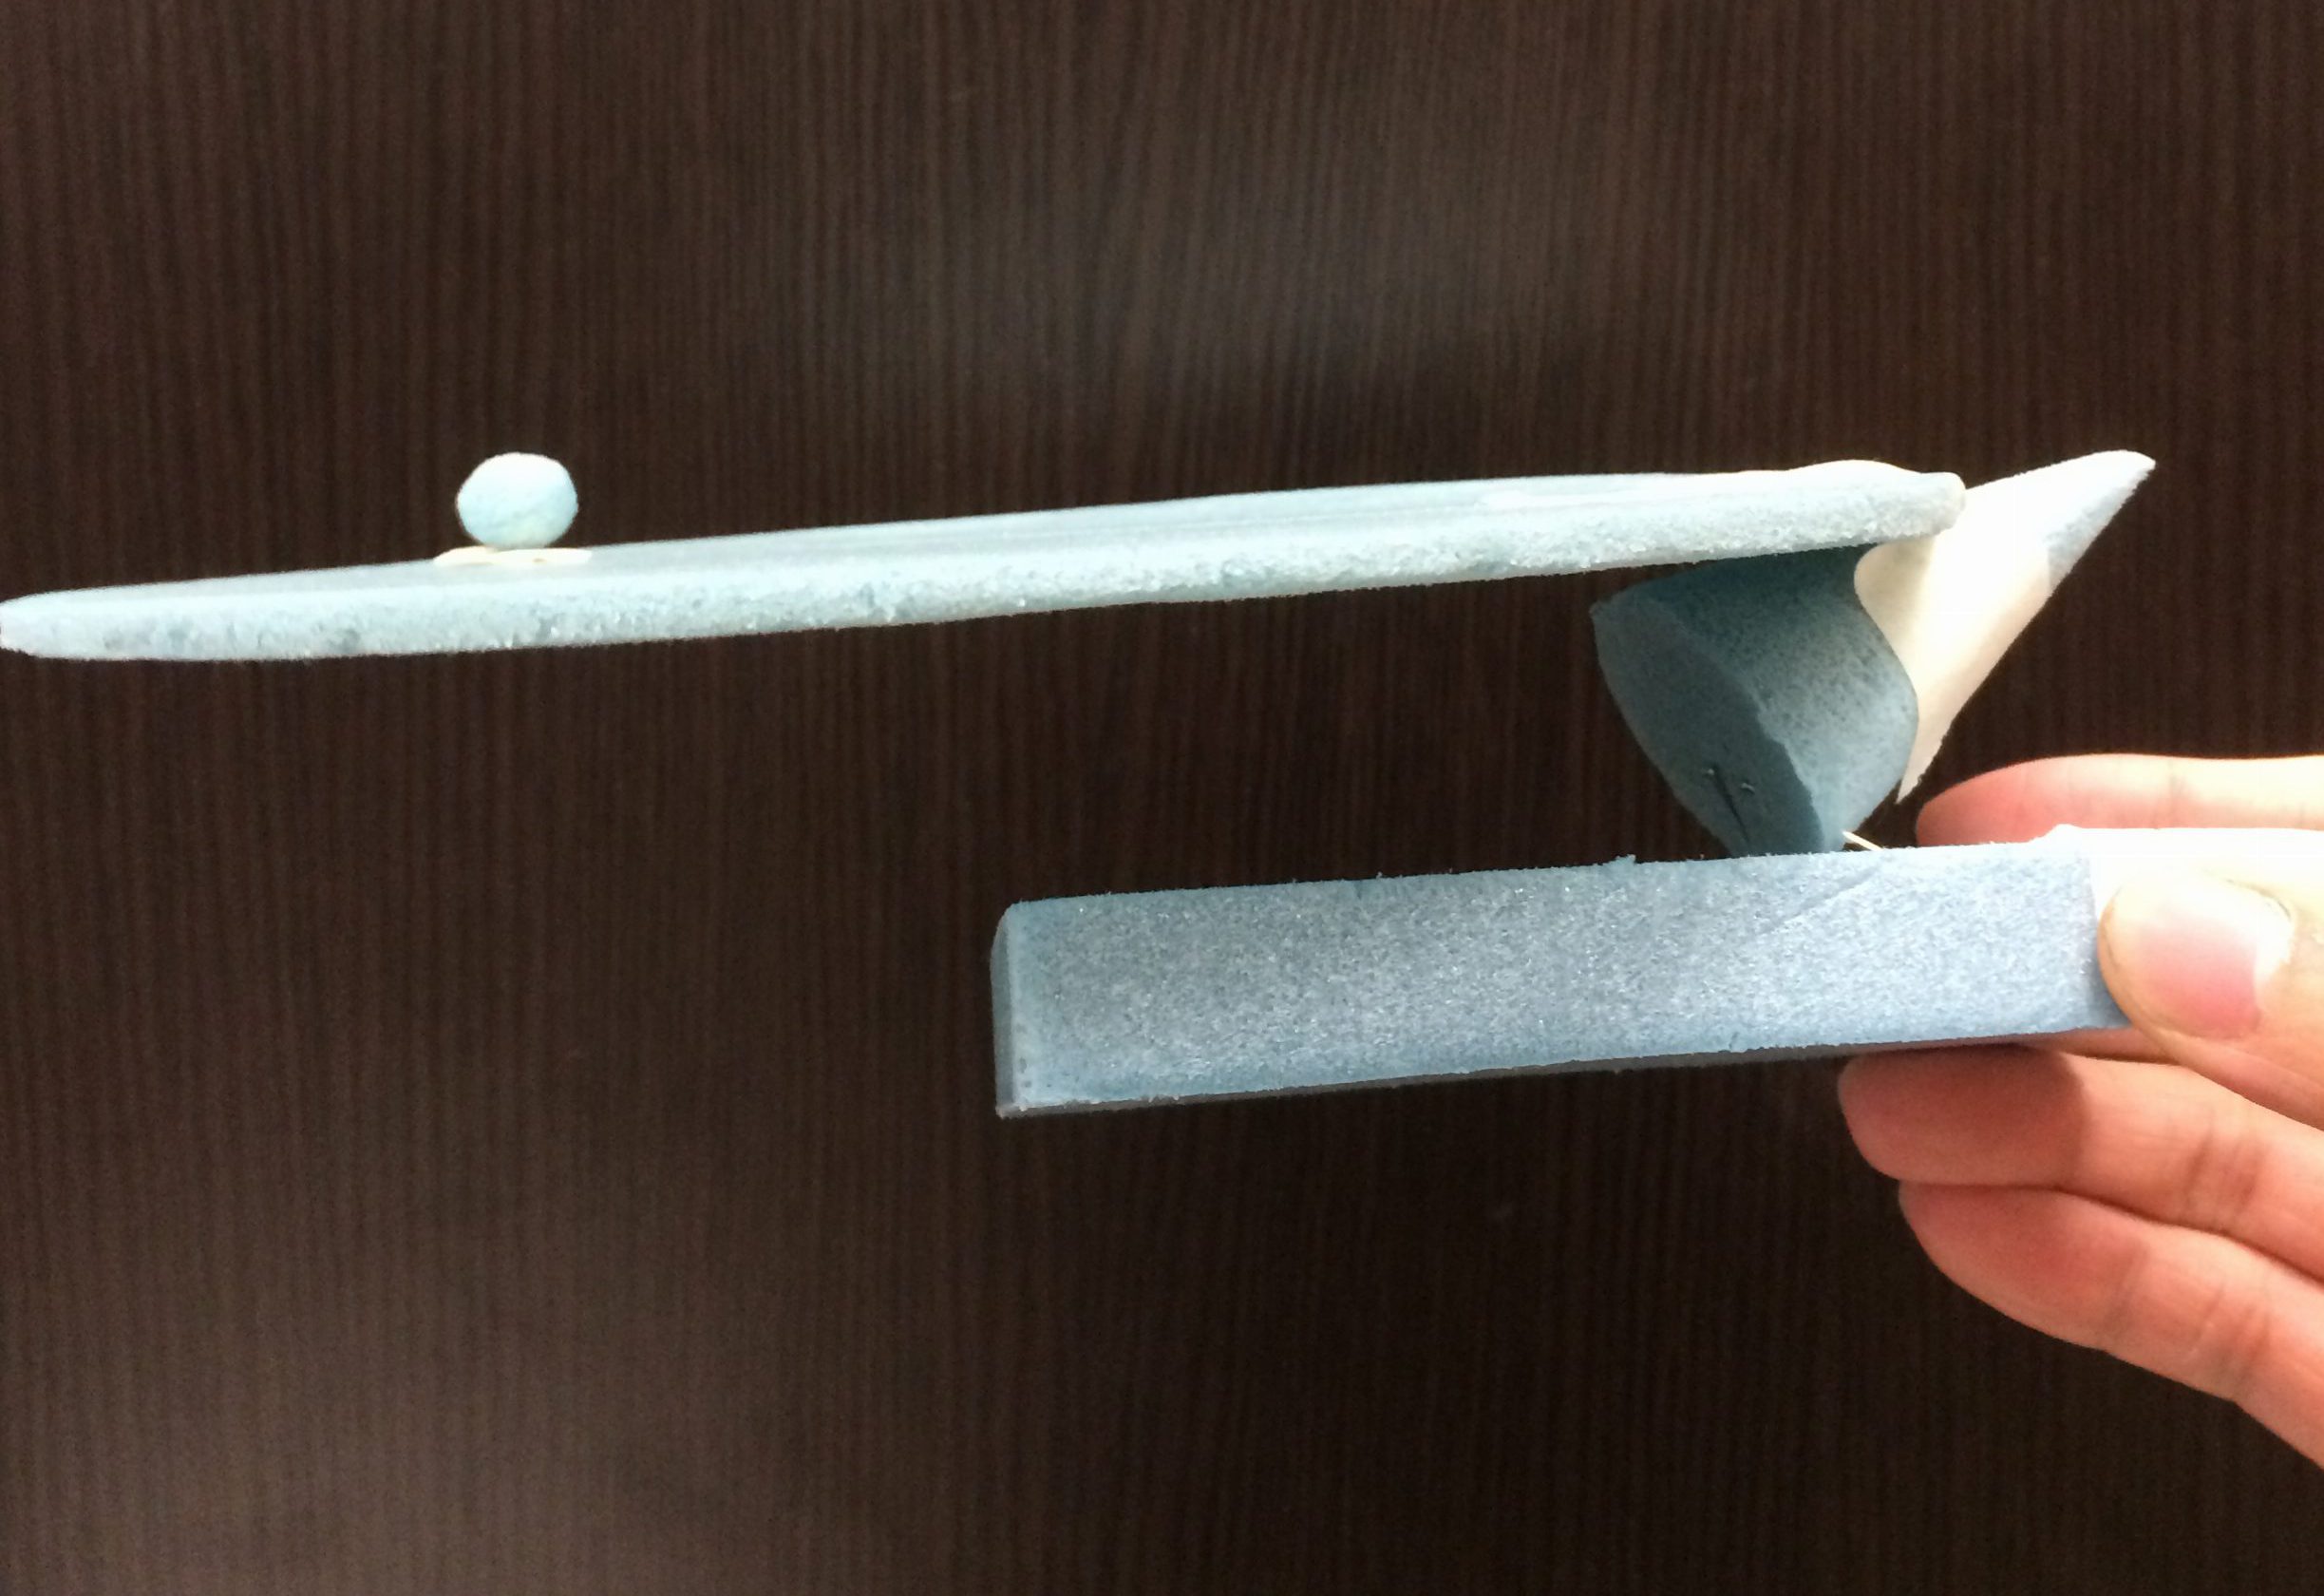
Nevertheless, the foam models emerged.
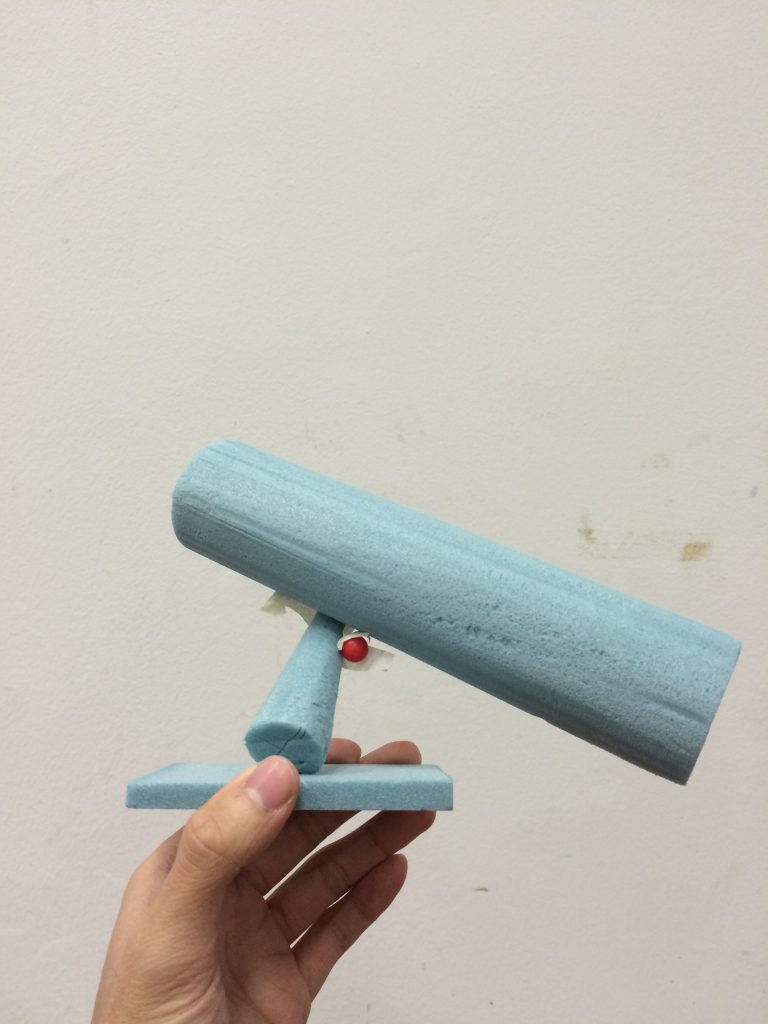
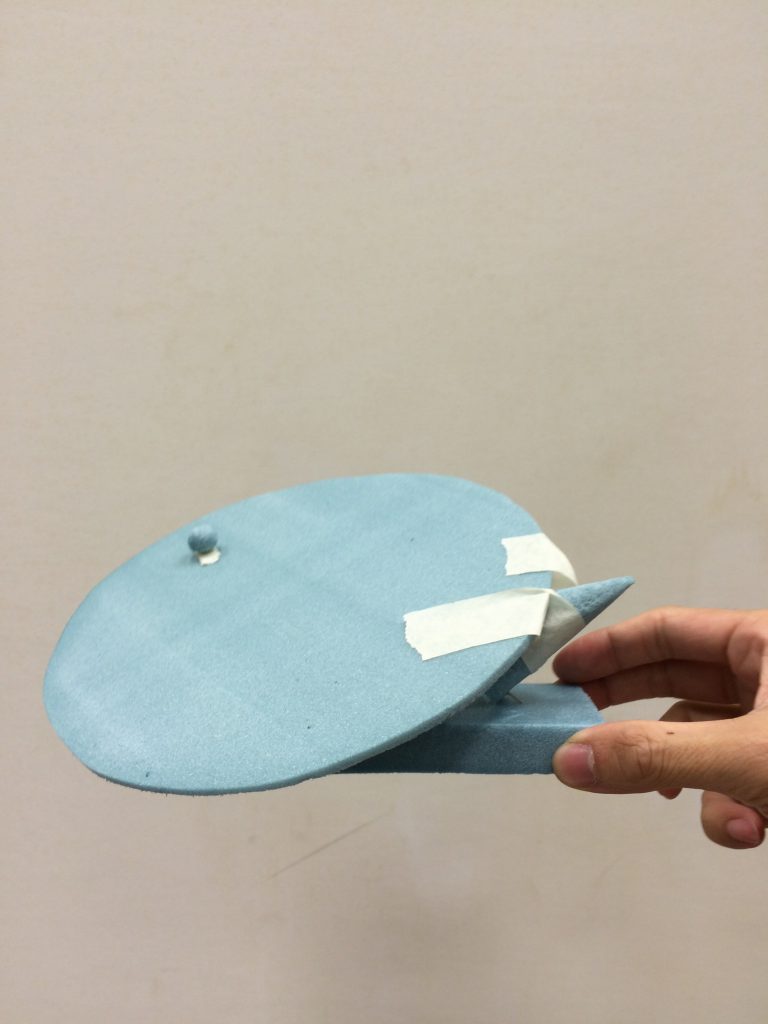
Of the three, I liked the Atlas: The Titan and My Neighbour. I decided to work with Atlas as my final model. In my opinion, it has the most potential.
Atlas: The Titan was eternally condemned to stand on the Western side of Gaea (Earth) holding the heavens on his shoulders. Atlas was also the Titan god of Endurance – A characteristic that I need so much more of.
I am strong. I can do this. I am become Atlas.
I will work on the 2D sketch analyses on The Light Cannon and My Neighbour, and fix up a proper final model for Atlas.

House Setup
So I thought that it would be a nice to show the ghetto setup in my room for day two of the shoot.
I thought about doing this in the same post as the main photoshoot, but that just disrupted the flow of everything so here it is, two posts later.
I had a couple of crafts given to my from my grandfather as well so I just had to shoot them as well
Knowing that the sunlight shining through my window would be strongest around 0900, I woke up at about 0800 to set everything up, making most effective use of natural light.
In hindsight, I should have waited until about 1030 to start my shoot because the light just too harsh earlier in the day.

Of course, I adjusted everything and it turned out looking much better. In a perfect world, I would have all the time in the world in a studio with proper lighting, but sometimes all you can do is make lemonade.

After the shoot: Swimming with fishes
While looking through the photos, I tried thinking about the narrative I wanted to convey.
At this point, the only information I had was the rough time period of each item and the materials used. I wanted to know the man who made the items. I called up my grandfather and had a long conversation. When he gets started, it’s hard to stop him.
I might not include this in the actual submission so I thought I’d add this in here. (Paraphrased for easy reading)
“Where did you find the seahorse and crab?”
“Back in the 1970s, I would spend my free time going to Changi beach in the evening to catch fishes. We used carbide lamps to help us see in the dark. You had to wait for the tide to go down before you went out look for the fishes. There were even sea snakes, sawsharks and catfishes. You don’t really see them nowadays with all the reclaimed land.

One time, I waded in the water and felt a sharp pain on the leg. At first I thought that it was a sea snake but once a sea snake bites you, it doesn’t let go. This sharp pain was short so it can’t have been that. I looked down and saw this huge catfish swimming away. What’s worse, the pain made me stumble. The lamp touched the water and stopped working. I couldn’t see the shore because the street lamps were blocked by trees. Thankfully, the wind came and blew the trees aside for me to see the shore. During the drive back, my leg was still numb from the pain. I had so much difficulty working the pedals. When I reached home, my roommate gave me some Chinese medicine and I felt much better.
During the 15th day of the lunar month, the king crab (horseshoe crab) would come to the shore in pairs. You can eat the eggs but you need to know how to remove them because if the bile gets onto the eggs then you’ll get mabok.”

The photoshoot
I went over to my grandparents’ house over the weekend t0 take pictures of the crafts that he has done. I arrived at Lengkong tiga to some famous beach road nasi briyani; which my grandparents queued 1/2 hour for.
It was the best.
Looking around his house, you could see all sorts of ornaments. Mostly figurines and a whole array of tea sets. I have fond memories as a kid of playing with all the different things that my grandfather had made- and also watching Space Jam on LaserDisc. It’s been a long time since I’d been at his house alone. It seemed much smaller now. Strangely though, there are still crafts in his house that I had never seen before; like the cobra in the featured image above.
When I was young boy, I had always assumed that the things that he owned were bought, but only when he started making coconut zodiac animals for us did I realise that his home was quite homemade.
Back when my parents were living with my grandparents, they owned a coat rack. My grandmother wanted one for their room so my grandfather made a similar one out of wood. Guava tree wood, specifically; his wood of choice for its strength.
He talked about how he collects coconuts whenever he finds them, much to the displeasure of my grandmother.
We proceeded with the set up of the shoot area, which was near his balcony. Natural light, best light. Also, Natural light, only light. And also, Natural light, time-sensitive light. So therefore I needed to work fast.
I taped white cloth on the ceiling and let it drape down. With a table on one side of the cloth and the objects on the other side, I created the following:

Getting the light to be consistent was a challenge. I had to use the camera flash (I know, I cringe too) with tissue as a diffuser.
When it got darker, I had to use a light and because I did not have a proper light stand, I became the light stand.

Timers are also great for reducing the shake when pressing the shutter button (because I had a subpar tripod).
Because the shoot was by the balcony, wind was inevitable so getting the photos without too many creases was a challenge. I had to wait for the right moment to snap each photo.
He sat on the sofa behind the white cloth, occasionally coming over to see how I’m doing and also to tell me more about the things he made.
After we were done, my grandmother heated up some pastries, peeled a bunch of rambutans and offered them to with along with mooncake and ginseng water.
I am loved.
I wished that I had taken a photo of them then and there, instead, here’s a photo of them dancing at my grandfather’s 80th birthday.


3D Model Making
Failure. Lots of Failure. It started off trying to find the right kind of wood that could balance the SD. I settled for Basswood. Getting wood of the right size also proved equally challenging. I settled for ones with a similar surface area but shorter height. I would have to glue 2 pieces of wood together.

I sawed one piece of wood and glued the two together.
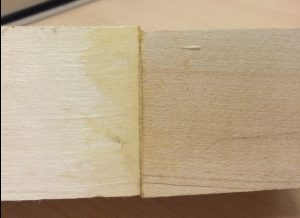
The quality was far from desirable. I had to file it down.


With that, the D was done.
Moving on to the SO. I bought a whole bunch of wire in hopes that I could fashion it into a spring- Don’t use wire to make springs. The material is just wrong for that purpose.
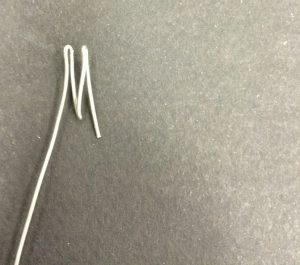
As a compromise, I bought pens so that I could use the springs to form the SO.

I foolishly tried using one piece as the SO, completely disregarding the fact that SD would be heavier. I soon realised my mistake.

I used multiple springs to create the above. This would have to embedded into the SD.
SD was supposed to be easy but proved to be the most challenging.

I used silicone putty to make a mould for epoxy to be the SD. After that, I had to fit the springs into the epoxy, but since the epoxy was still liquid, I needed to levitate the springs.
All was good until Wednesday when I realised that I had to start fitting all the pieces together on Thursday. The Epoxy was still liquid so I had to come up with a back-up. I used some resin that was recommended to me by the storeowner at the Hobby Shop (where I got Balsa wood for David). It would prove to be my saving grace. I made another putty mould for the resin to be fit in. Because the resin could only turn more malleable when put in hot water, I had to work fast to fit the springs inside before it hardened. It worked.


The epoxy did not dry in time so I used the resin instead. I might have messed up the proportions. I had to create a small hold in the basswood to fit the springs inside. I picked out the wood filing and carving tools for the first time.


It might have looked a little rough but I thought it was good enough. I jammed the springs in and used hot glue to bind it all together. The final product:

The resin could definitely look neater but I think that this was an enlightening experience overall.
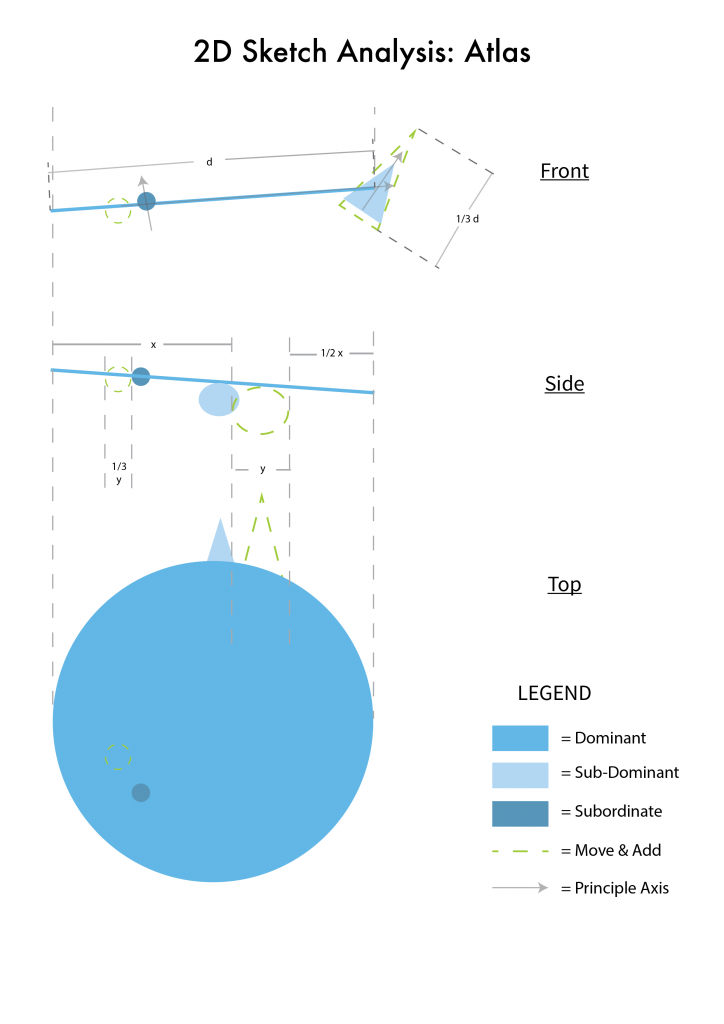
2D Sketch Analyses


