EXPERIMENTAL INTERACTION // DN1010 // FINAL PROJECT
In collaboration with Shariffah.
The Family Portrait aims to create an immersive experience to empathise with individuals who have lost their loved ones. By creating an intimate Dark Object we wanted to differ from conventional design’s focus on consumerism and capitalism. Rather, we aimed to tap on the multi-faceted feeling of loneliness and abandonment through a narrative and physical interaction.
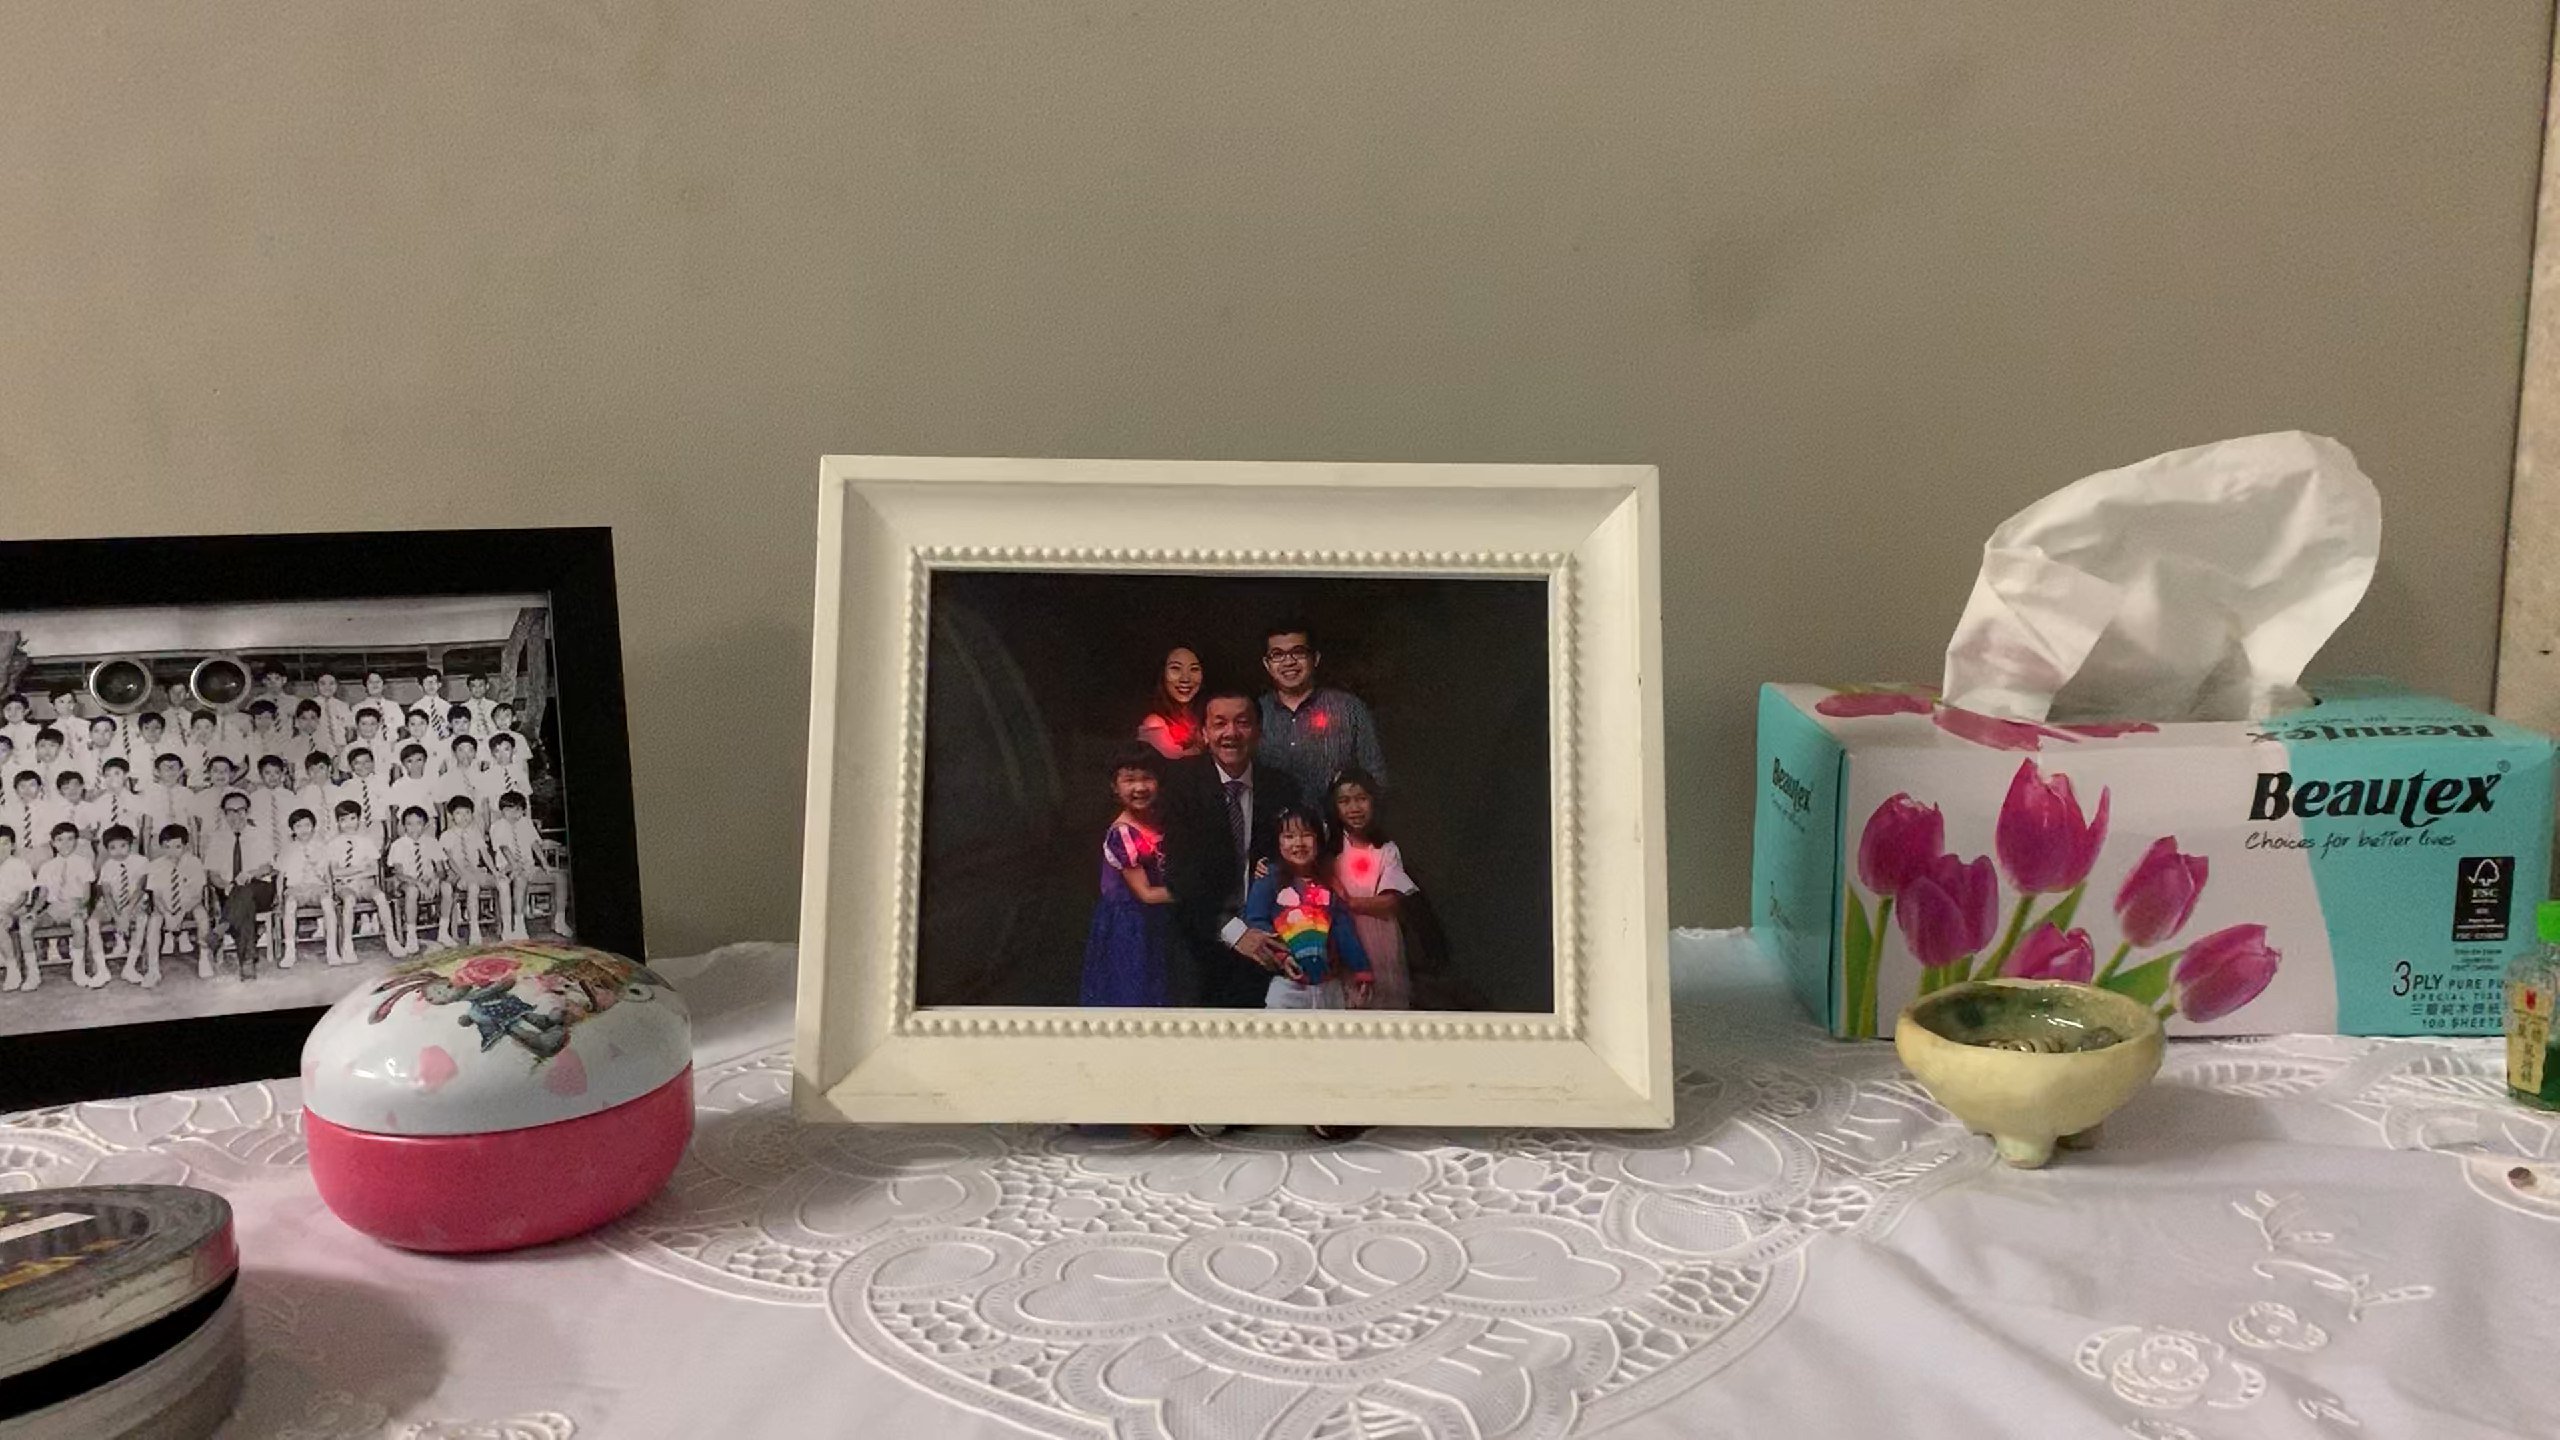
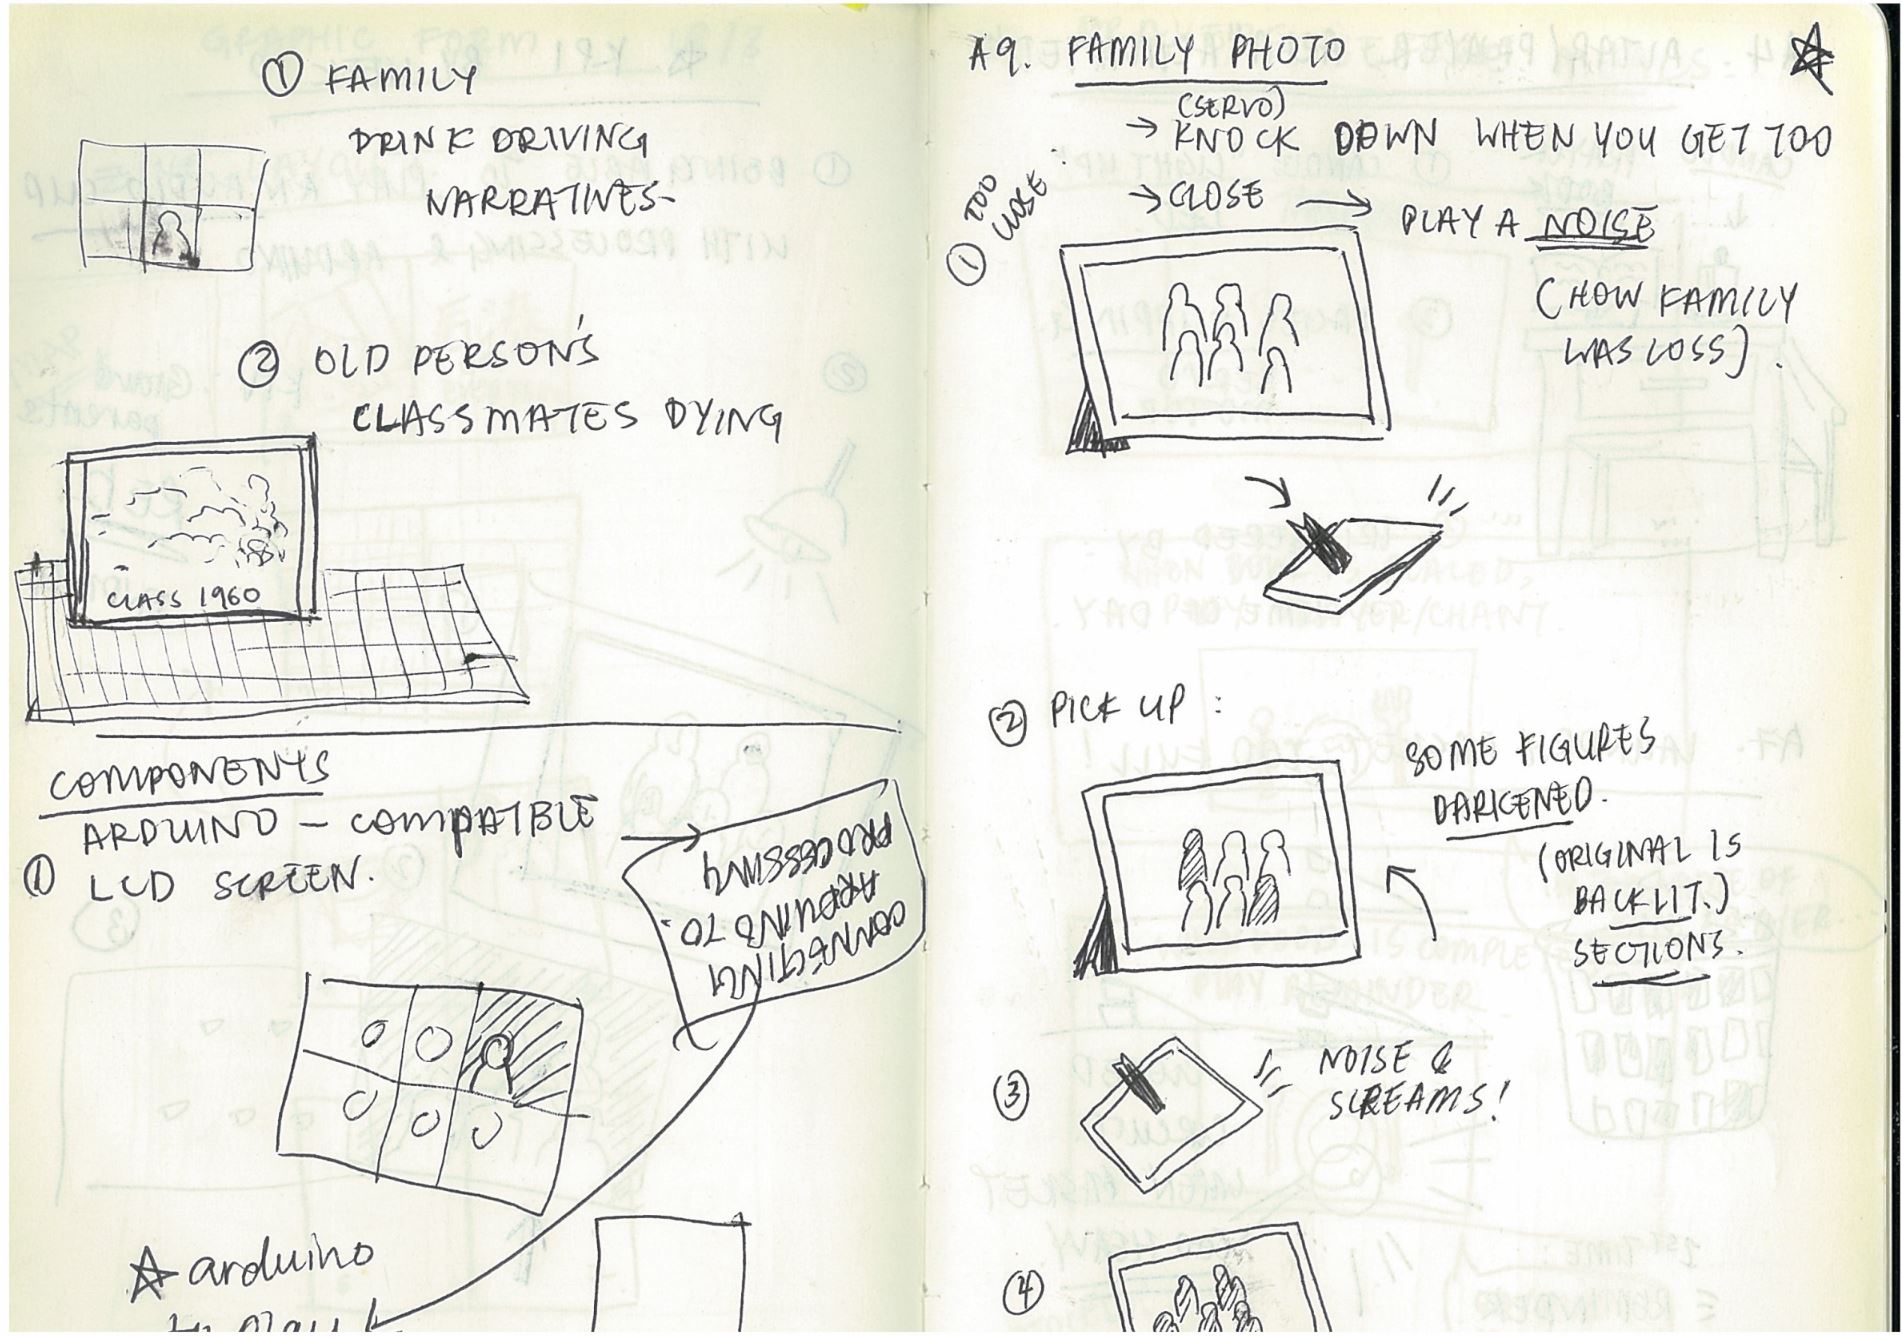
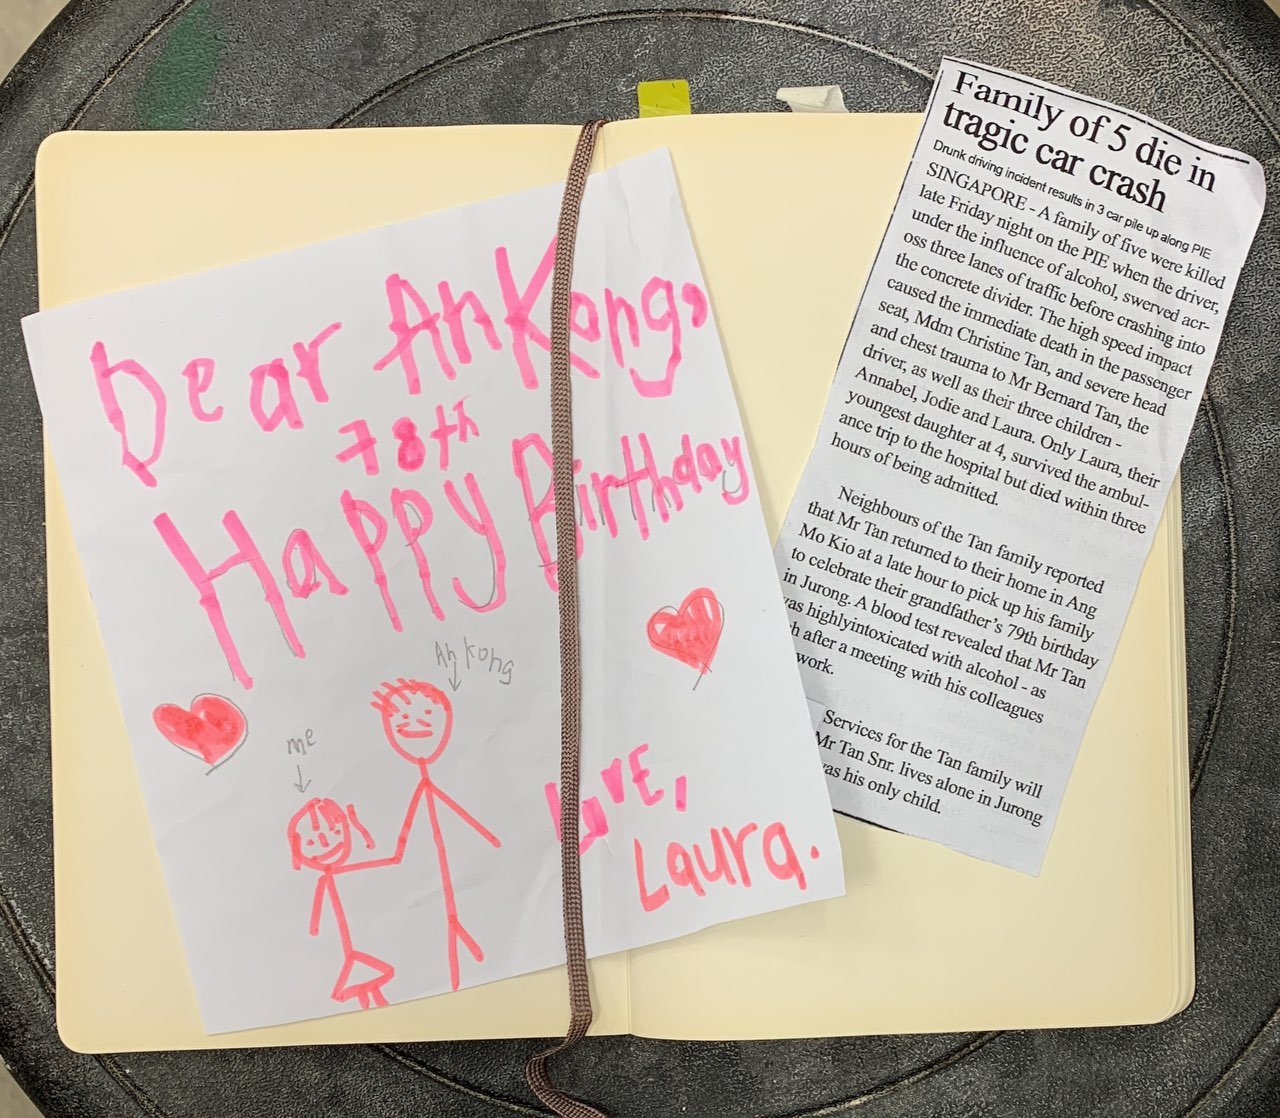
This particular Family Portrait focuses on an old man’s memory of losing his family in a tragic car crash on his birthday.
Observations from First User Tests:
Initially, users seemed hesitant to interact with the object until they connect “Ah gong! I got something to tell you!” with the out-of-place headphones. After placing the headphones on, I noticed two different reactions:
- Pensieve and anticipatory listening – slowly growing more uncomfortable
- Touching the different props on the table in an attempt to trigger another response from the object
I think the second response is due to the promise of an interactive experience via objects and more props would suggest more interactivity. I would like to believe this is only so because the multiple play-tests our class went through – which encouraged any form of interaction possible.
When the photo frame slammed down the first time, users were shocked and in being surprised, they would make an effort to listen to the audio for prompts. After picking up the frame, some would watch the frame more intently and others would start reading the journal provided.
At the second falling of the frame, users were quicker to pick it up and were less shocked. Upon hearing the audio of the baby crying, they expressed discomfort in their facial expressions.
By the end of the experience, users would take off their headphones looking relieved it was over.
Some notable reactions from other users:
- “I feel like crying for some reason.”
- “I feel like, super weird like I’m supposed to be somebody else but not.”
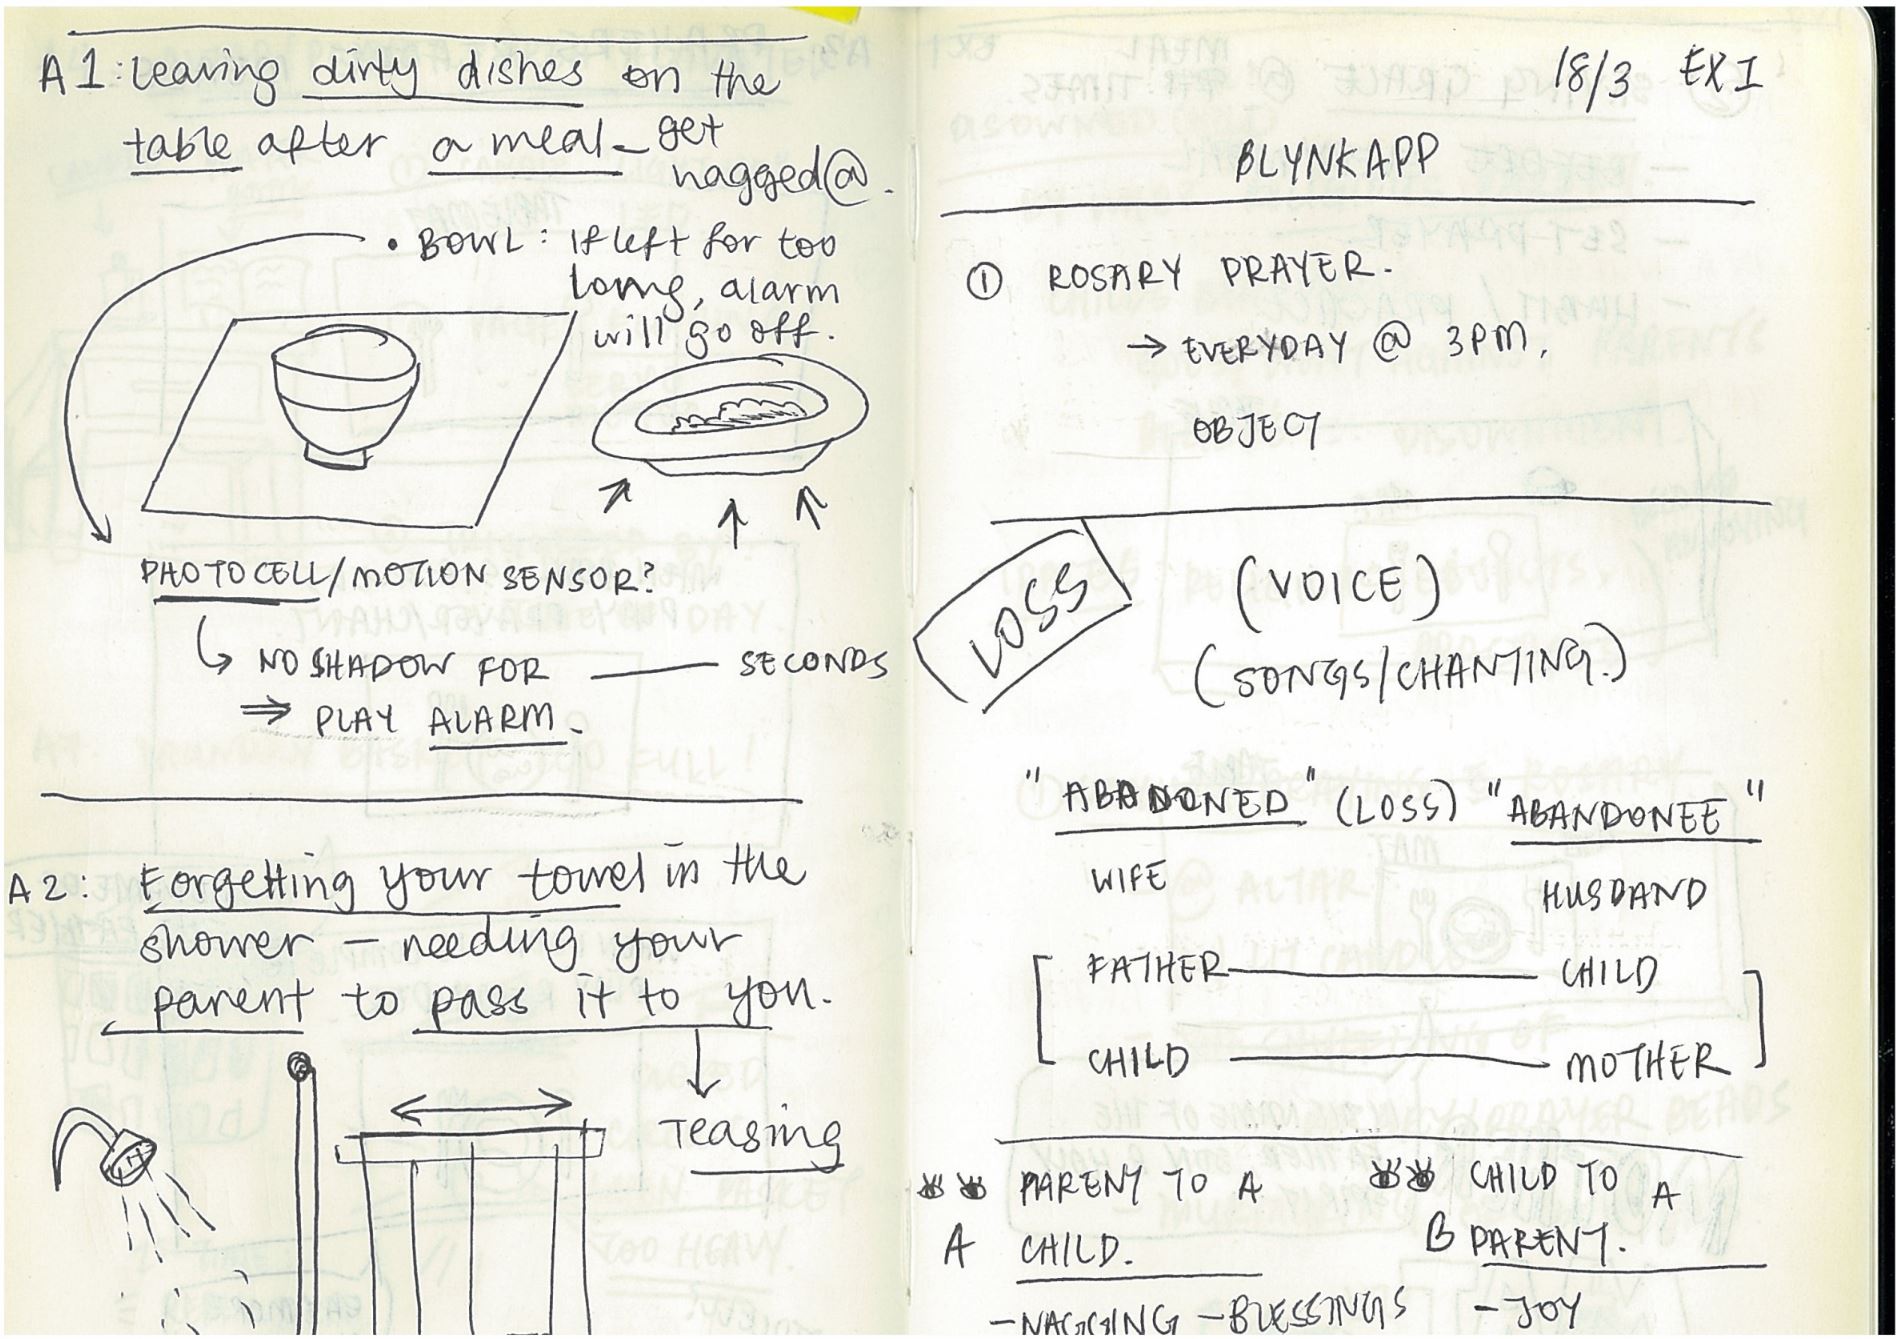
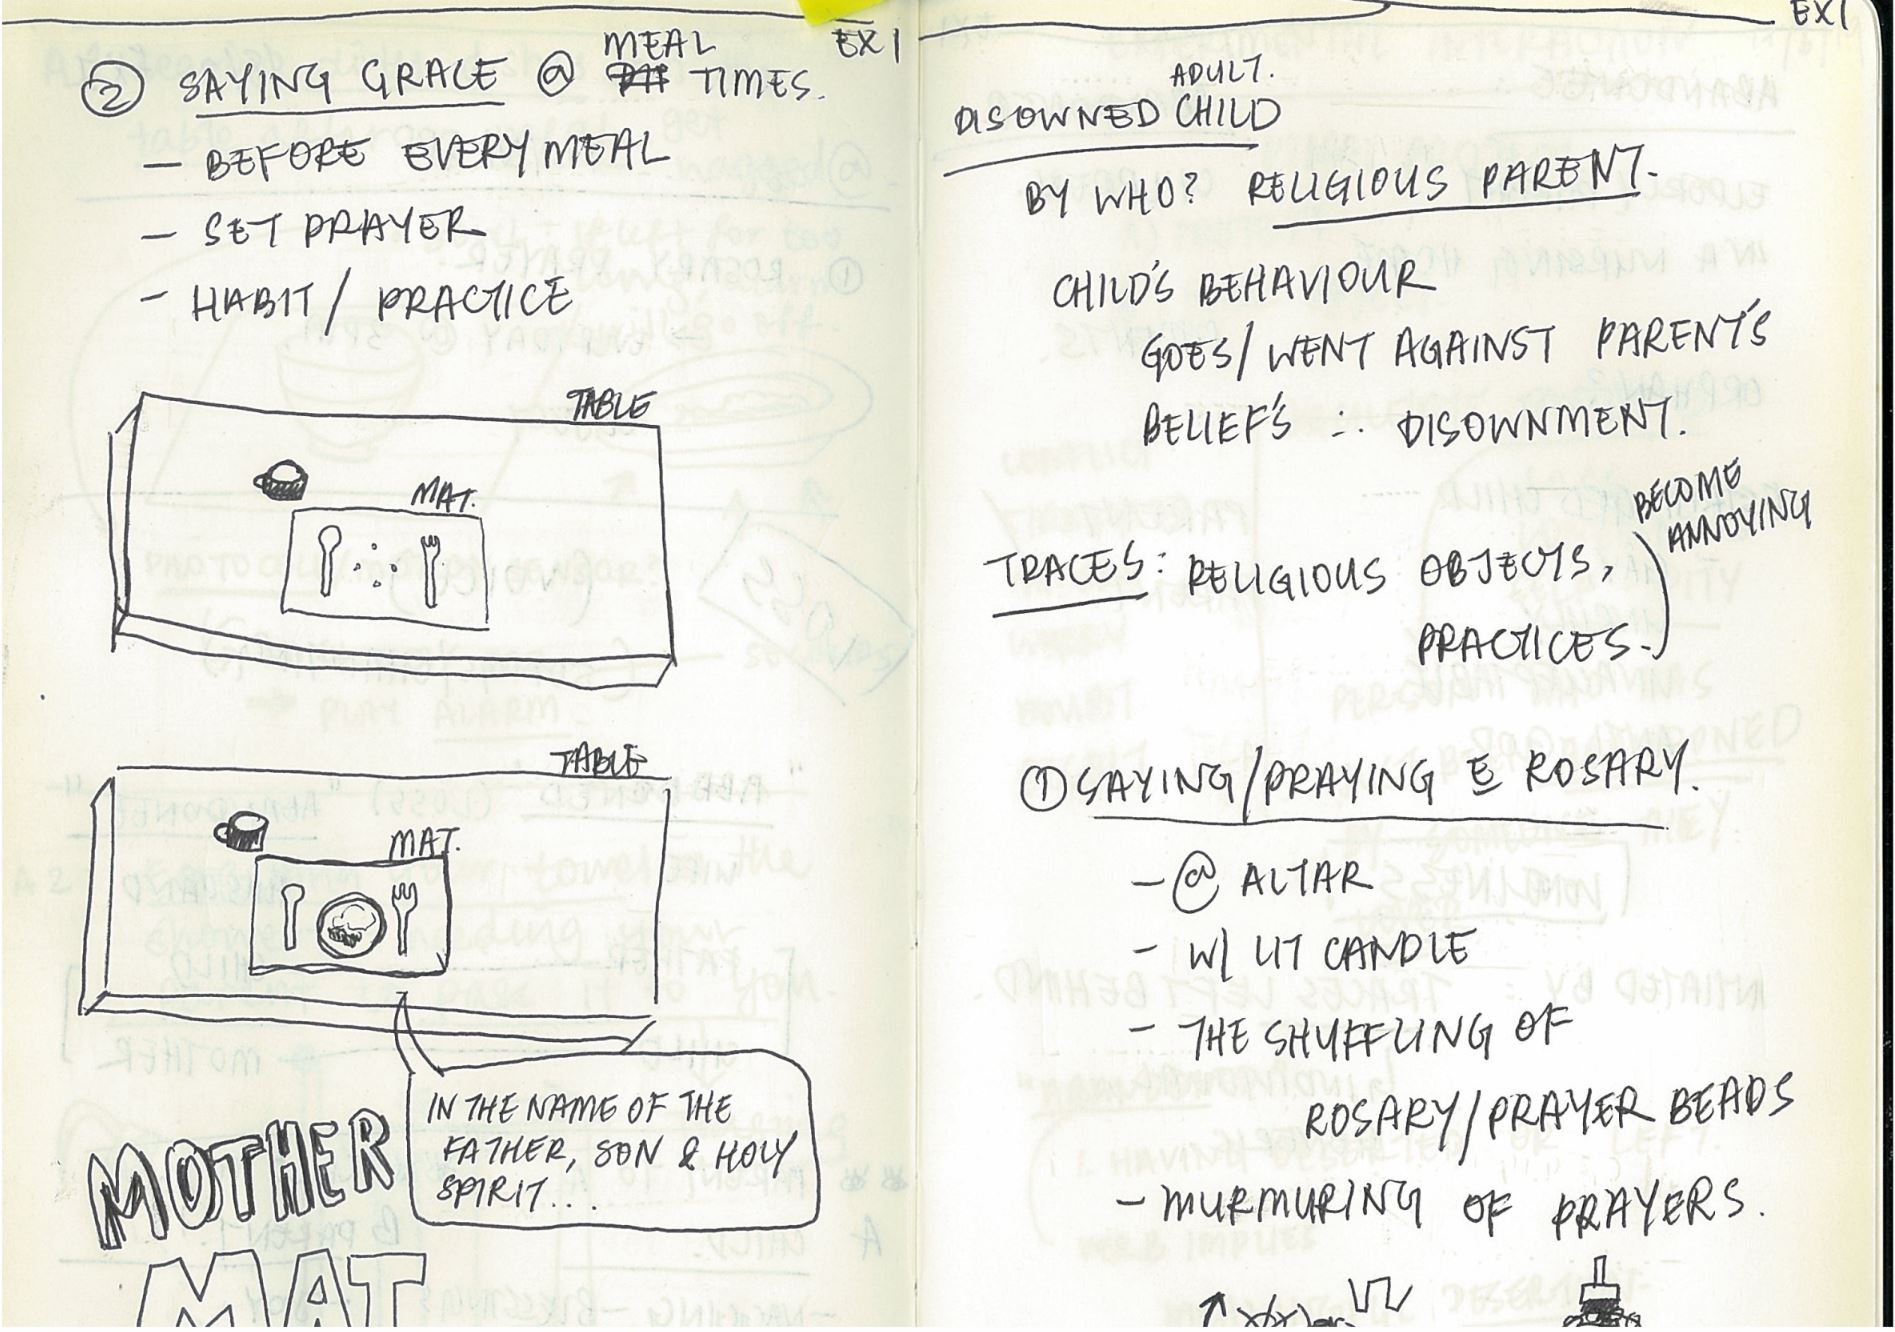
Initial ideation:
See our body-storming session here and our initial sketches here!


How it’s made!
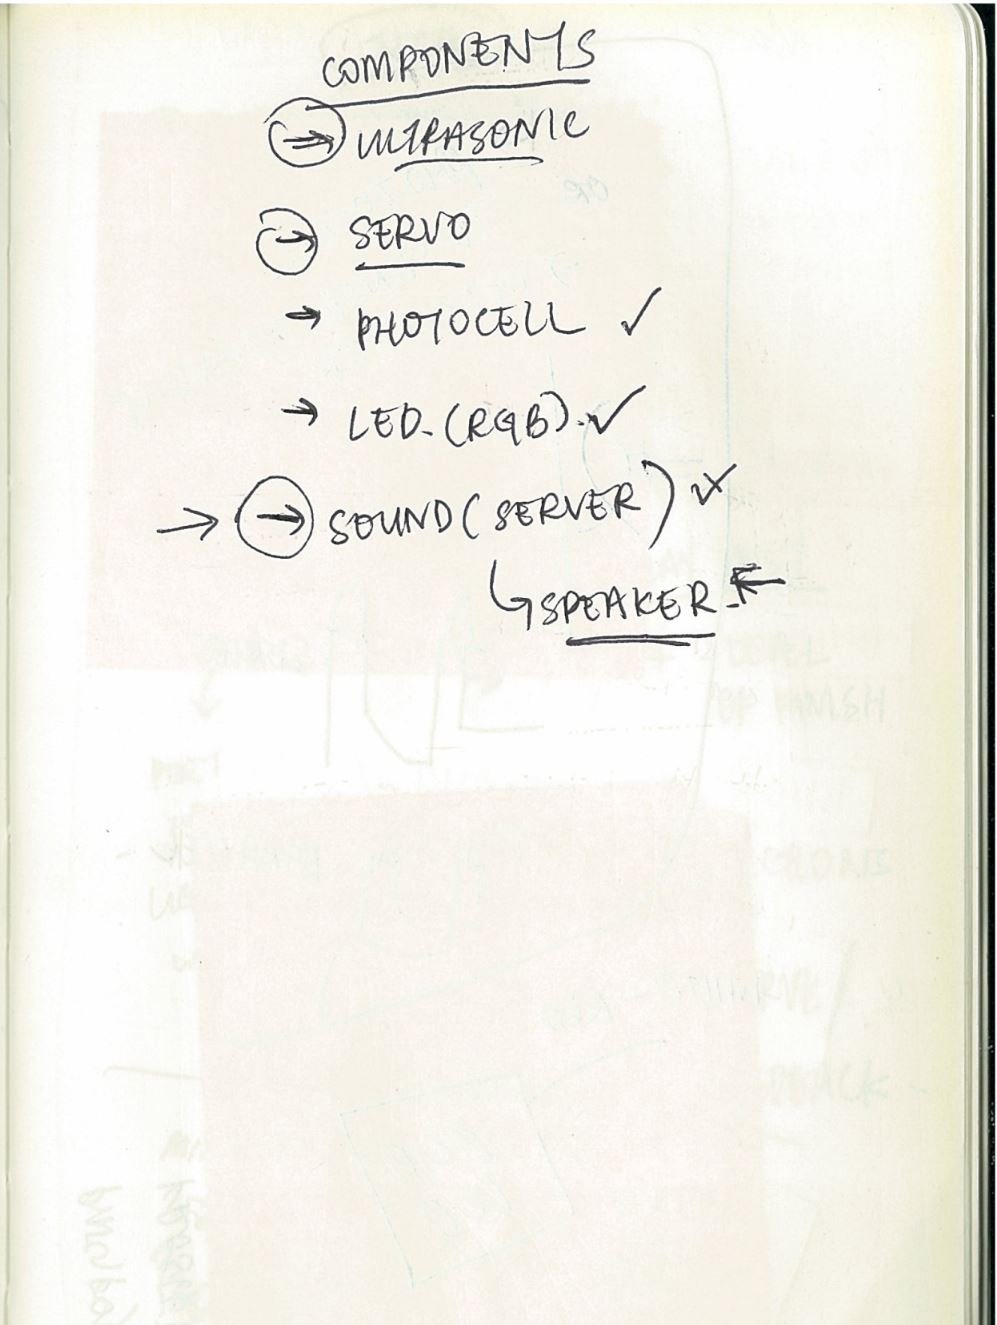
Step 1: Electronic Components
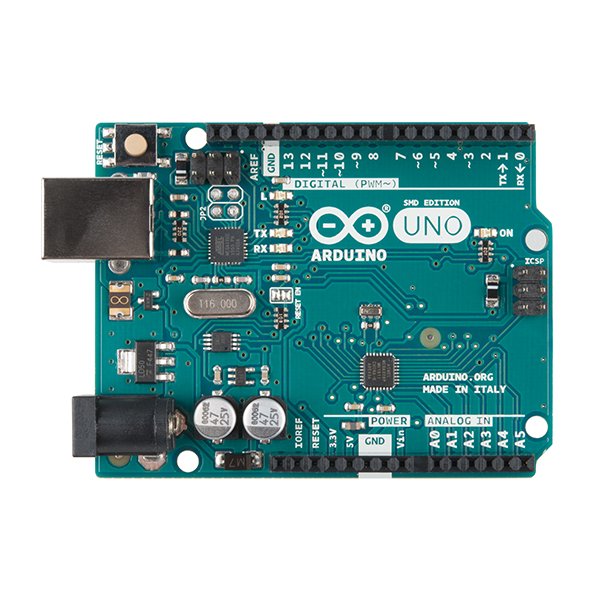
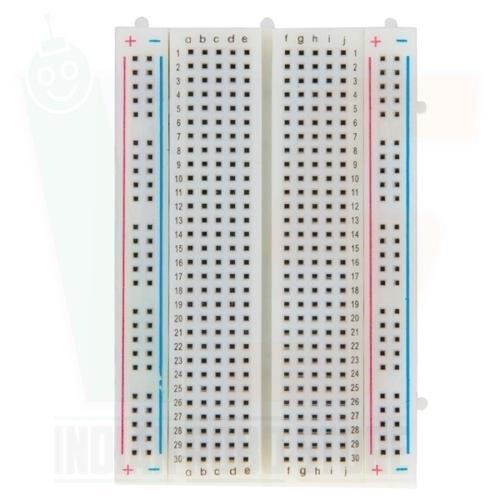

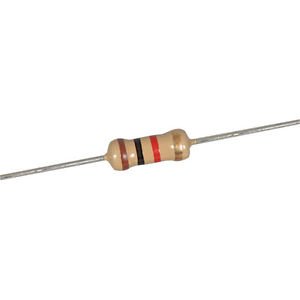
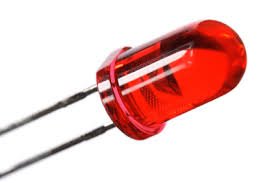
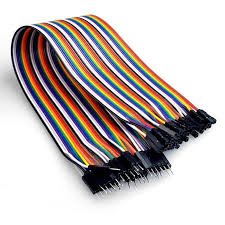
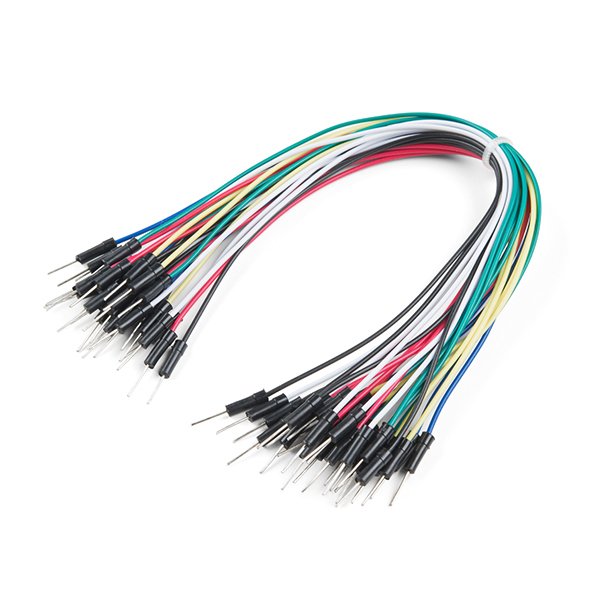


You will need to purchase all of these components in order to build your own Family Portrait. You can find all these items at Simlim Tower.
Step 2: Family Portrait

You will also need a family portrait and frame of your choice! Maybe find/make some “fake families”… touch wood right?


Step 3: Building your Family Portrait

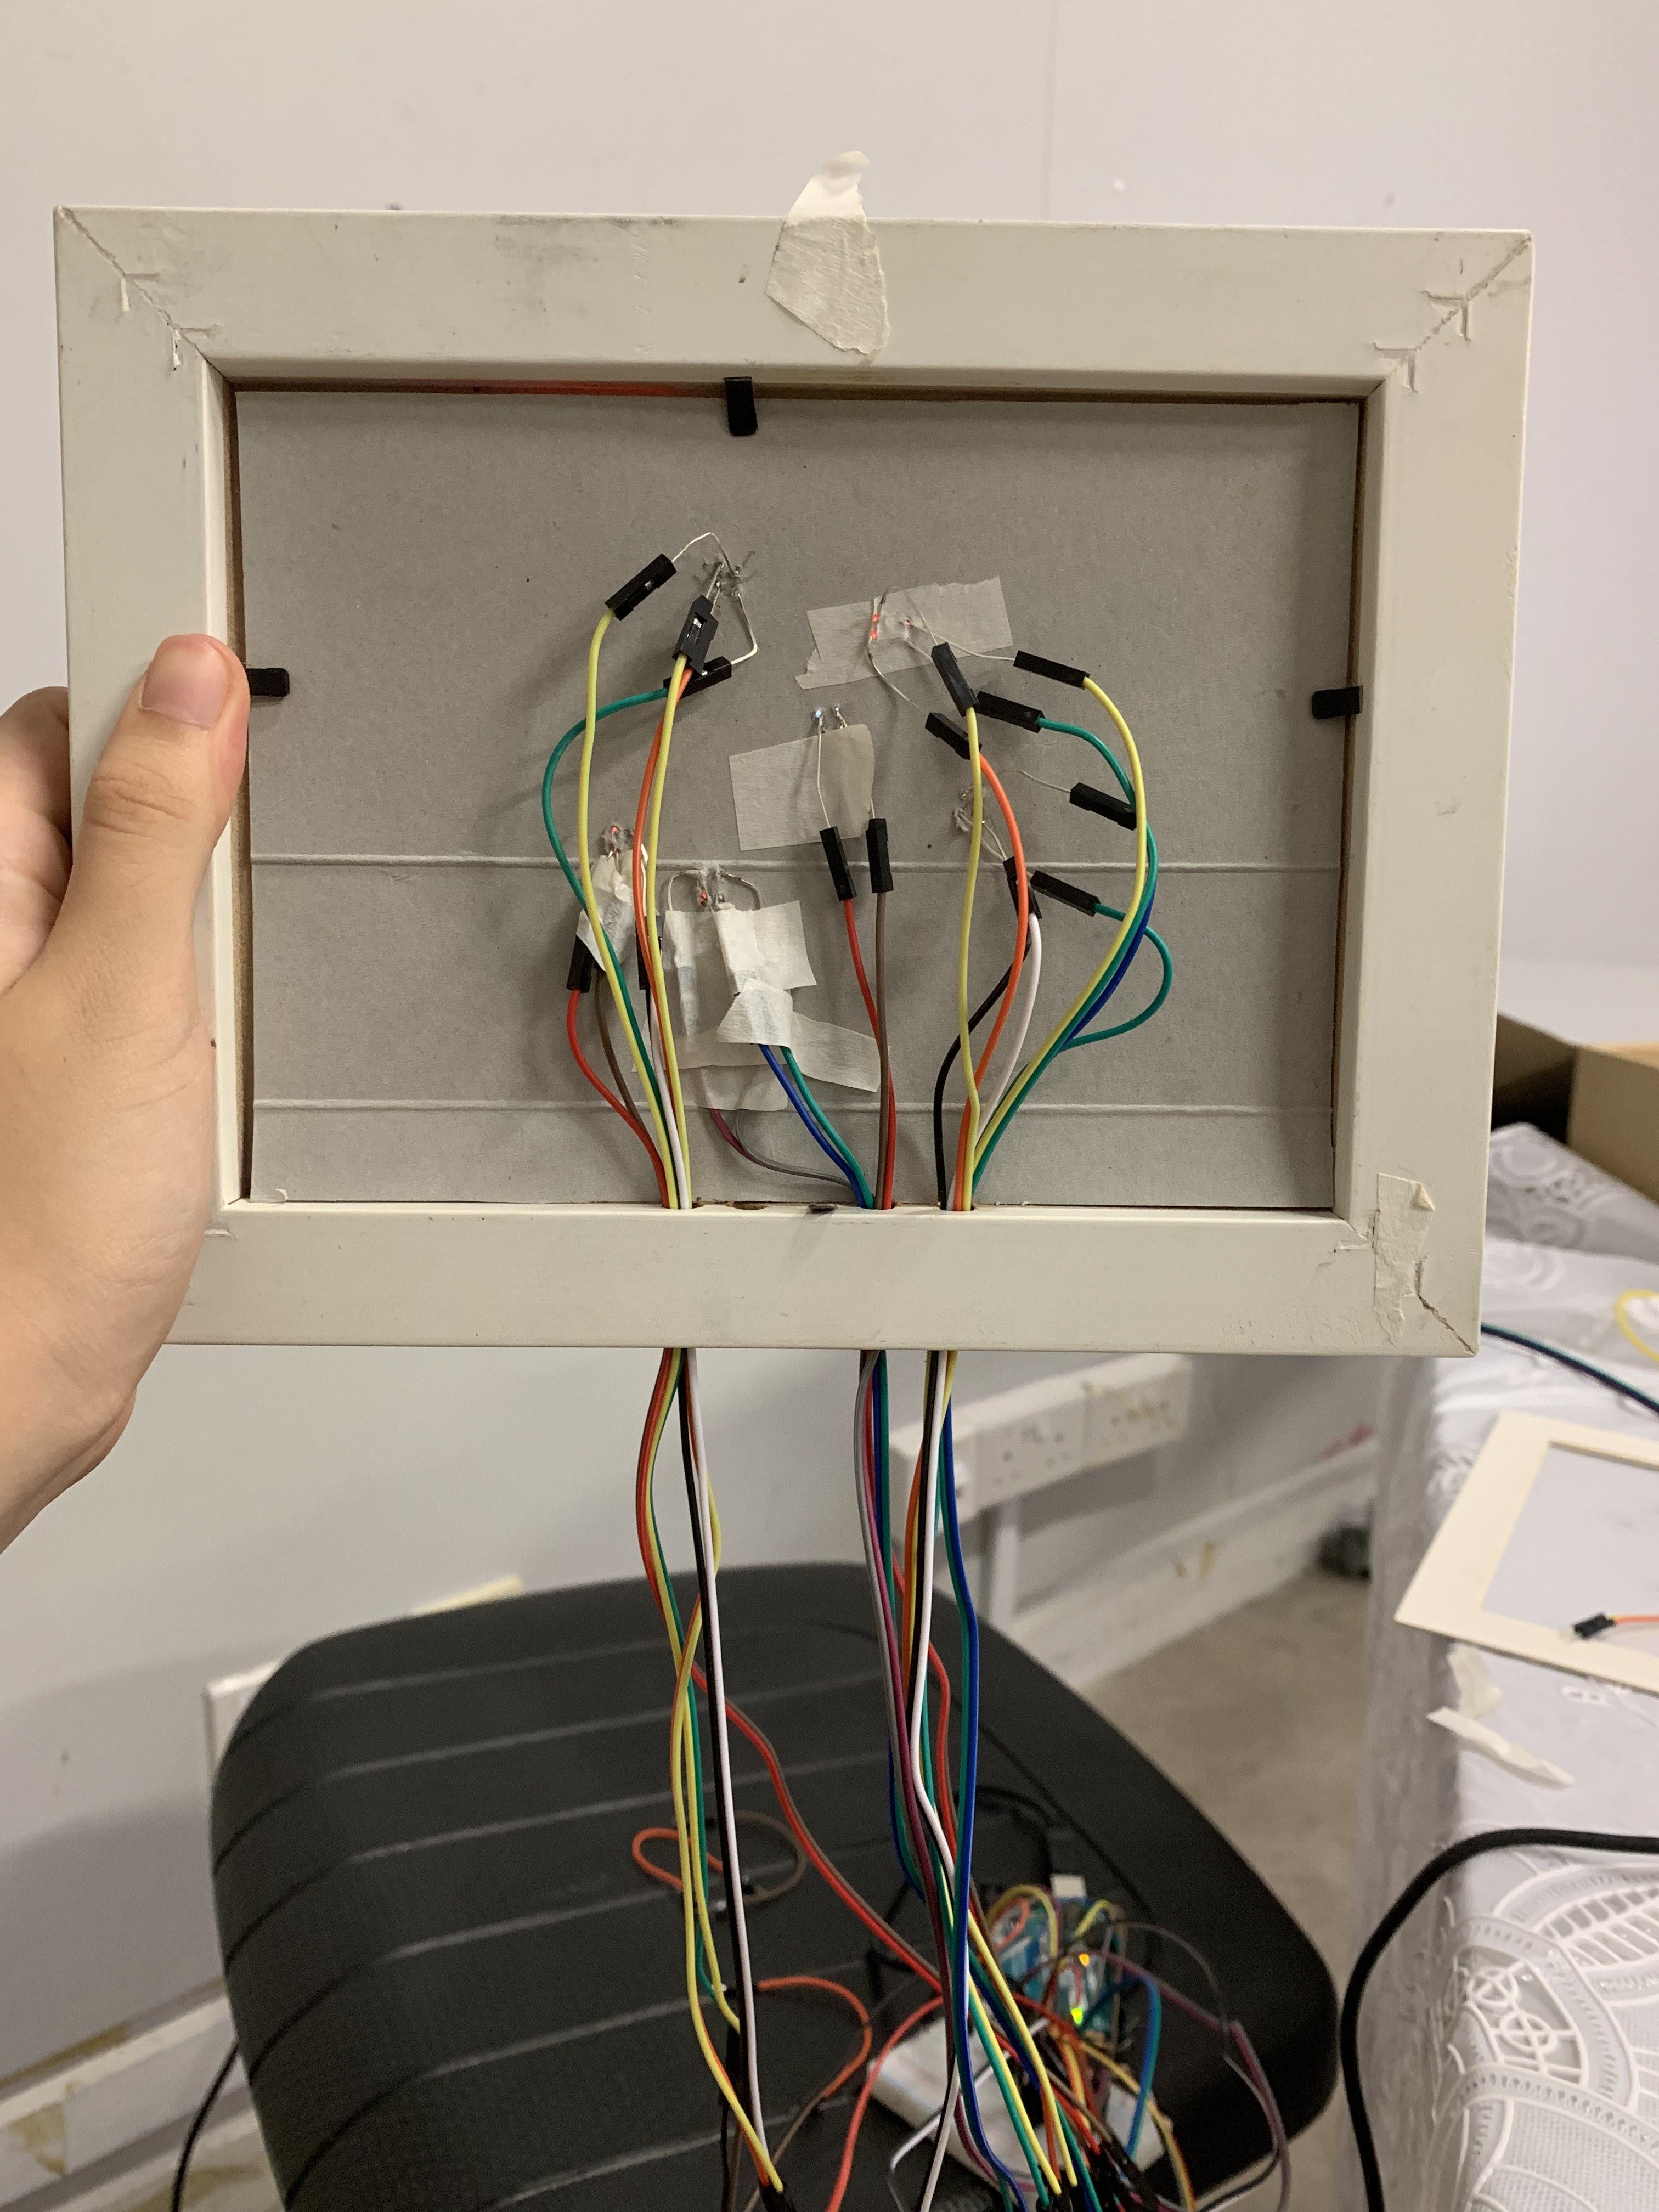
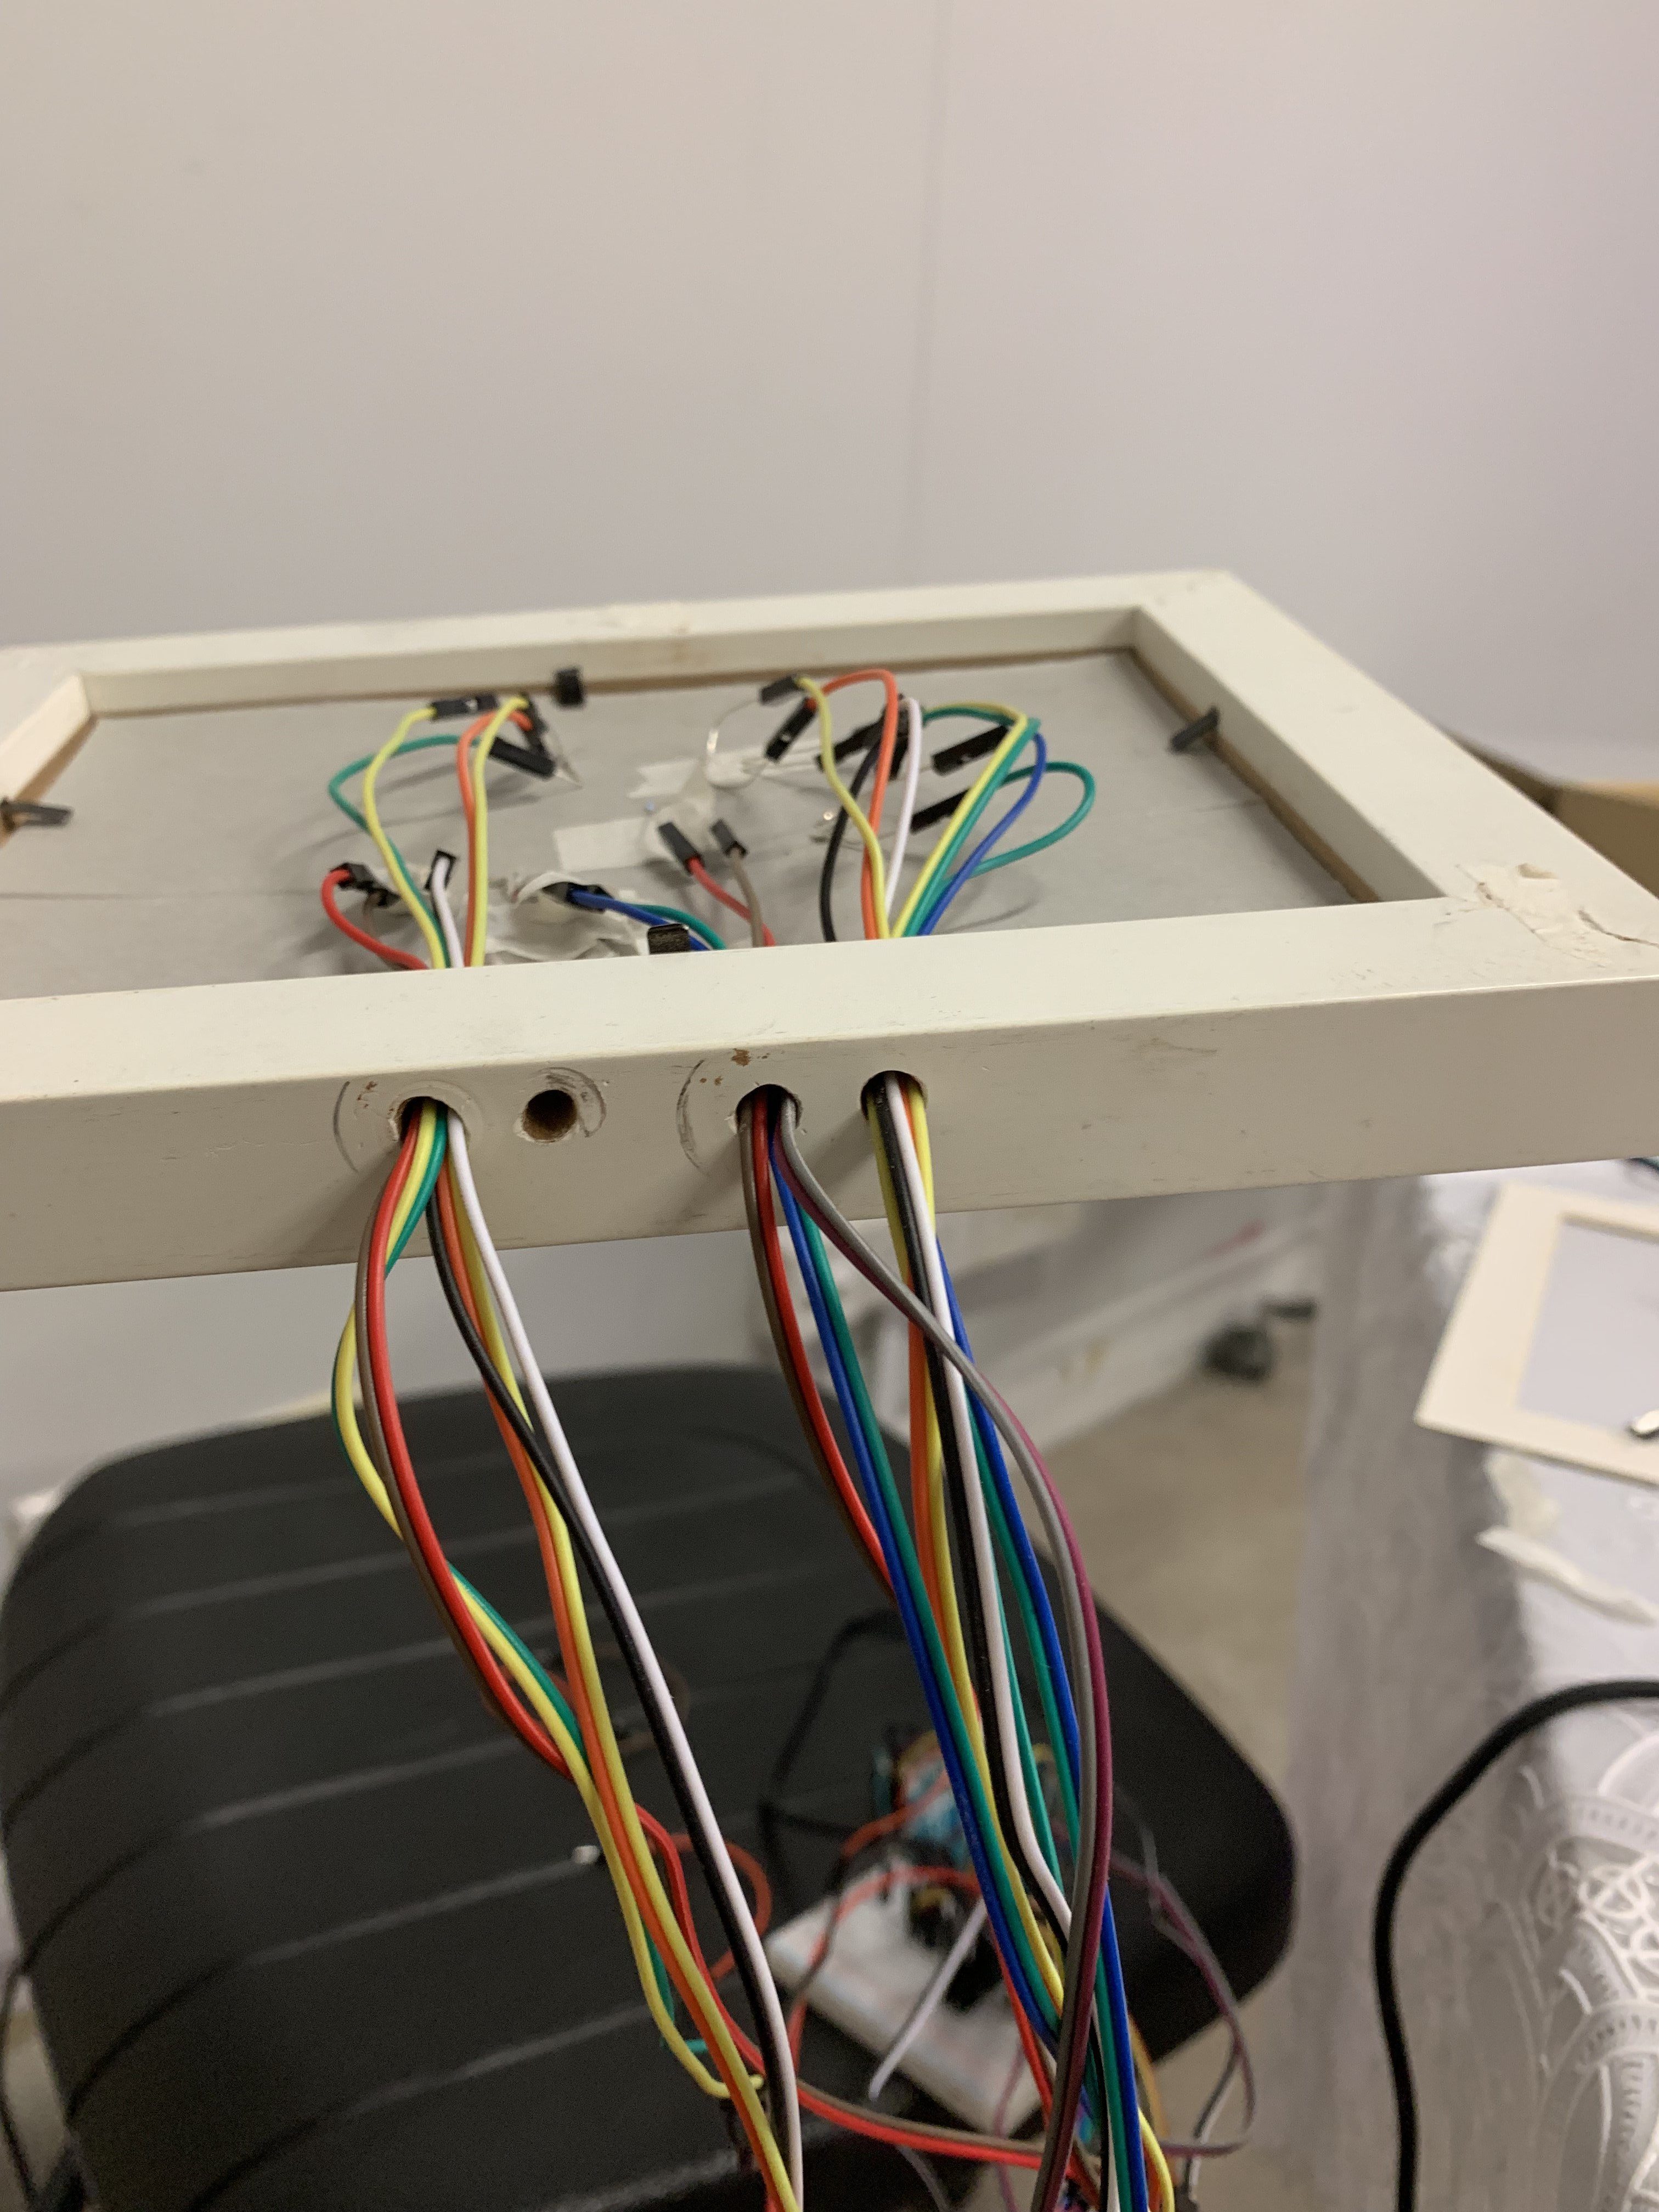
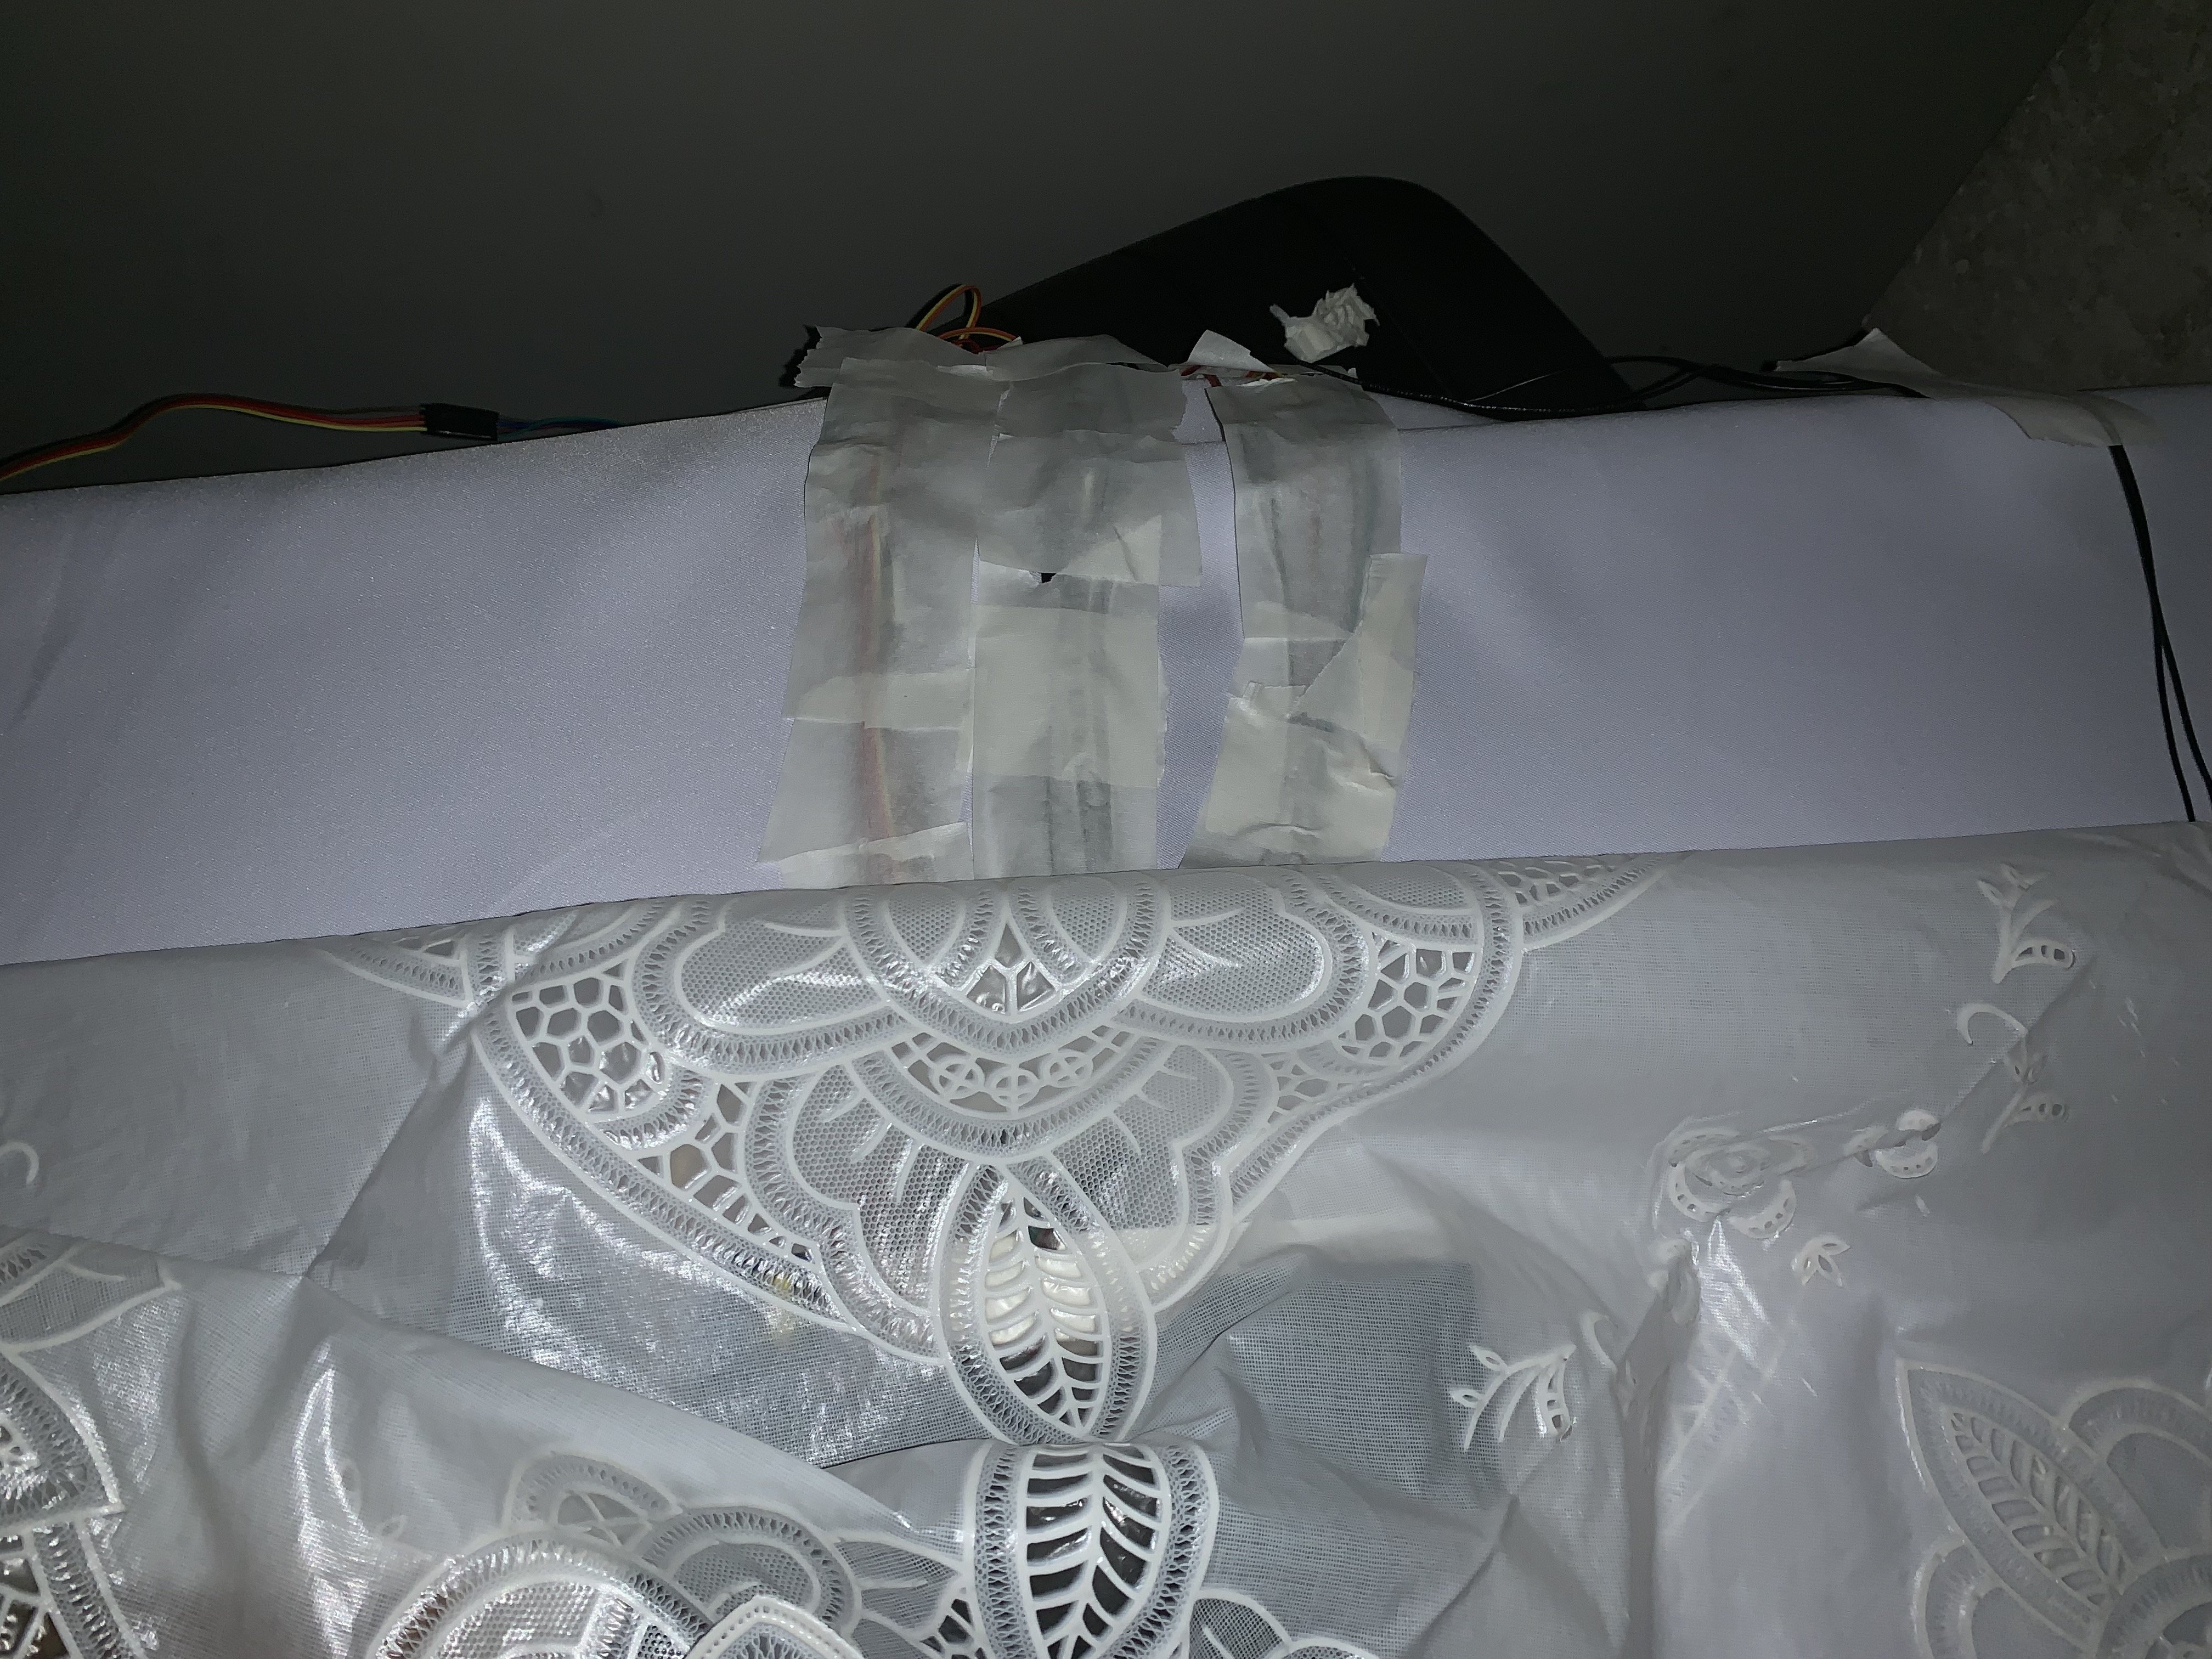
You will need to have a cardboard backing to place behind the photo to hold your LEDs and hide the wiring. Poke two small holes for each LED: one for each pin. The white LEDs will be placed behind the faces of your Family and red LEDs behind their hearts.
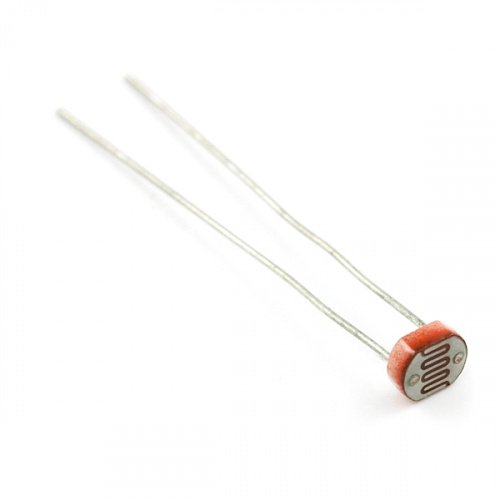
Use male to female jumper cables to connect your LEDs to your Arduino and breadboard. Drill four holes into the bottom of your frame to accomodate for wiring and inset a photocell into one hole. Secure everything with (electrical) tape.
Attach a servo motor with a chopstick attachment to the back of the frame.
Step 4: Building your circuit

Step 5: Writing your code
You will need to combine codes for an Ultrasonic sensor, photocell, servo motor and multiple LEDs.
Ultrasonic:
const int pingPin = 12; // Trigger Pin of Ultrasonic Sensor
const int echoPin = 13; // Echo Pin of Ultrasonic Sensor

void setup() {
Serial.begin(9600); // Starting Serial Terminal
}

void loop() {
long duration, inches, cm;
pinMode(pingPin, OUTPUT);
digitalWrite(pingPin, LOW);
delayMicroseconds(2);
digitalWrite(pingPin, HIGH);
delayMicroseconds(10);
digitalWrite(pingPin, LOW);
pinMode(echoPin, INPUT);
duration = pulseIn(echoPin, HIGH);
inches = microsecondsToInches(duration);
cm = microsecondsToCentimeters(duration);
Serial.print(inches);
Serial.print("in, ");
Serial.print(cm);
Serial.print("cm");
Serial.println();
delay(100);
}

long microsecondsToInches(long microseconds) {
return microseconds / 74 / 2;
}

long microsecondsToCentimeters(long microseconds) {
return microseconds / 29 / 2;
}
Servo motor:
#include <Servo.h>
Servo servoMain; // Define our Servo

void setup() {
// put your setup code here, to run once:
servoMain.attach(9);
servoMain.write(0);
}

void loop() {
// put your main code here, to run repeatedly:
servoMain.write(180); // Turn Servo Left to 180 degrees
delay(1000); // Wait
servoMain.write(0); //Turn Servo Left to 0 degrees
}
Photocell:
const int analogPin = A1;

const int threshold = 500;
//const means the content of the bucket does not change

void setup() {
// put your setup code here, to run once:
Serial.begin(9600);
//serial port is the USB cable - so information is received from the aurduino into com
//9600 is the speed - how often do i send PER SECOND

}

void loop() {
// put your main code here, to run repeatedly:
int analogValue = analogRead(analogPin);
//whatever the sensor reads, it will be put into the bucket int analogPin

Serial.println(analogValue);
delay(1);

}
LEDs:
//code to test if all the LEDs work
const int ahgongPin = 5;
const int dadPin = 6;
const int familyPin = 11;
const int redPin = 10;
const int babyPin = 3;
int glow = 0;

void setup() {
pinMode(ahgongPin, OUTPUT);
pinMode(dadPin, OUTPUT);
pinMode(familyPin, OUTPUT);
pinMode(redPin, OUTPUT);
analogWrite(ahgongPin, 0);
analogWrite(dadPin, 0);
analogWrite(familyPin, 0);
analogWrite(redPin, 0);
}

void loop() {
analogWrite(dadPin, 100);
delay(400);
analogWrite(dadPin, 0);
delay(400);
analogWrite(ahgongPin, 100);
delay(400);
analogWrite(familyPin, 100);
delay(400);
analogWrite(familyPin, 0);
delay(400);
analogWrite(redPin, 100);
delay(400);
analogWrite(redPin, 0);
delay(400);
analogWrite(babyPin, 100);
delay(400);
analogWrite(babyPin, 0);
delay(400);

//red LEDs to glow:
for (int glow = 0; glow <= 100; glow++) {
analogWrite(redPin, glow);
delay(300);
}
analogWrite(redPin, 0);

}
Pseudo code:
default:
play 'happy birthday'
all LEDs off

if User approaches {
play 'ah gong I got something to tell you!"
all white LEDs turn on

if User picks up headphones {
play 'dad's conversation and car screech'
slam Photo Frame down
White LED for father turns off

play 'ah gong can you carry me?'

if User sets Photo Frame up {
play 'family in the car and crash'
slam Photo Frame down
all white LEDs turn off except grandpa's and baby's

play 'ah gong, my leg very pain, can you pick me up?'

if User sets Photo frame up {
play 'baby sobbing'
baby's LED flickers with sobbing sounds
baby's LED turns off
All red LEDs flicker on brightly
Grandpa's white LED remains on

}
}
}
}
Final code:
const int ahgongPin = 5;
const int dadPin = 6;
const int familyPin = 11;
const int babyPin = 3;
const int redPin = 10;
const int headphonePin = A2;
const int framePin = A1;
const int threshold1 = 600;
const int threshold2 = 600;


int glow = 0;

const int pingPin = 12; // Trigger Pin of Ultrasonic Sensor
const int echoPin = 13;

#include <Servo.h>
Servo servoMain; // Define our Servo


void setup() {
// put your setup code here, to run once:
Serial.begin(9600); // Starting Serial Terminal
servoMain.attach(9);
servoMain.write(0);
// servo on digital pin 10
//lights are off
analogWrite(ahgongPin, 0);
analogWrite(dadPin, 0);
analogWrite(familyPin, 0);
pinMode(redPin, OUTPUT);

//happy birthday to you in speakers
Serial.write(1);

}

void loop() {
// ultrasonic sensor
long duration, inches, cm;
pinMode(pingPin, OUTPUT);
digitalWrite(pingPin, LOW);
delayMicroseconds(2);
digitalWrite(pingPin, HIGH);
delayMicroseconds(10);
digitalWrite(pingPin, LOW);
pinMode(echoPin, INPUT);
duration = pulseIn(echoPin, HIGH);
inches = microsecondsToInches(duration);
cm = microsecondsToCentimeters(duration);
/*Serial.print(inches);
Serial.print("in, ");
Serial.print(cm);
Serial.print("cm");
Serial.println();
delay(100); */
delay(100);

//read for approaching
if (cm < 150) {
analogWrite(ahgongPin, 100);
analogWrite(dadPin, 100);
analogWrite(familyPin, 100);
analogWrite(babyPin, 100);
Serial.write(2); //ah gong! i got smth to tell you! come listen!

delay(10);

//read for when headphones are picked up
int analogValue1 = analogRead(headphonePin);
if (analogValue1 > threshold1) {
Serial.write(3); //pa, we cant make it for dinner, but we'll come later for the cake -- drinking and car HORN
delay(77000);
servoMain.attach(9);
servoMain.write(180); // Turn Servo Left to 45 degrees
delay(1000); // Wait
servoMain.write(0); // Turn Servo Left to 0 degrees
analogWrite(dadPin, 0);
delay(1200); // Wait 12 second


Serial.write(4); //calling out for grandpa to pick them up
delay(12000);

int analogValue2 = analogRead(framePin);
Serial.println (analogValue2);

if (analogValue2 < threshold2) {
delay(500);
Serial.write(5); //in the car and mum kids screech crAsh
delay(24000);

servoMain.write(180); // Turn Servo Left to 45 degrees
delay(1000); // Wait 1 second
servoMain.write(0); // Turn Servo Left to 0 degrees
delay(1000); // Wait 1 second


//mum and two kids turn off
analogWrite(familyPin, 0);

Serial.write(6); //ahgong my leg is stuck, pick me up!
delay(10000);

Serial.write(7); //baby crying and blinking out 10sec

flickerSeq();

// for (int glow = 0; glow <= 100; glow++) {
// analogWrite(redPin, glow);
// delay(300);
// }
// analogWrite(redPin, 100);
digitalWrite(redPin, 1);
delay(100);
digitalWrite(redPin, 0);
delay(100);
digitalWrite(redPin, 1);
delay(100);
digitalWrite(redPin, 0);
delay(100);
digitalWrite(redPin, 1);
delay(200000);
}

}

}
}


void flickerSeq() {
analogWrite(babyPin, 0);
delay(100);
analogWrite(babyPin, 80);
delay(100);
analogWrite(babyPin, 40);
delay(100);
analogWrite(babyPin, 80);
delay(100);
analogWrite(babyPin, 40);
delay(100);
analogWrite(babyPin, 80);
delay(100);
analogWrite(babyPin, 40);
delay(100);
analogWrite(babyPin, 40);
delay(100);
analogWrite(babyPin, 10);
delay(100);
analogWrite(babyPin, 40);
delay(100);
analogWrite(babyPin, 10);
delay(100);
analogWrite(babyPin, 40);
delay(100);
analogWrite(babyPin, 10);
delay(100);
analogWrite(babyPin, 20);
delay(100);
analogWrite(babyPin, 5);
delay(100);
analogWrite(babyPin, 20);
delay(100);
analogWrite(babyPin, 5);
delay(100);
analogWrite(babyPin, 10);
delay(100);
analogWrite(babyPin, 5);
delay(100);
analogWrite(babyPin, 10);
delay(100);
analogWrite(babyPin, 5);
delay(100);
analogWrite(babyPin, 10);
delay(100);
analogWrite(babyPin, 0);
delay(100);
analogWrite(babyPin, 0);
delay(100);
analogWrite(babyPin, 80);
delay(100);
analogWrite(babyPin, 40);
delay(100);
analogWrite(babyPin, 80);
delay(100);
analogWrite(babyPin, 40);
delay(100);
analogWrite(babyPin, 80);
delay(100);
analogWrite(babyPin, 40);
delay(200);
analogWrite(babyPin, 40);
delay(200);
analogWrite(babyPin, 10);
delay(100);
analogWrite(babyPin, 40);
delay(100);
analogWrite(babyPin, 10);
delay(100);
analogWrite(babyPin, 40);
delay(100);
analogWrite(babyPin, 10);
delay(100);
analogWrite(babyPin, 20);
delay(100);
analogWrite(babyPin, 5);
delay(100);
analogWrite(babyPin, 20);
delay(100);
analogWrite(babyPin, 5);
delay(100);
analogWrite(babyPin, 10);
delay(200);
analogWrite(babyPin, 5);
delay(200);
analogWrite(babyPin, 10);
delay(200);
analogWrite(babyPin, 5);
delay(200);
analogWrite(babyPin, 10);
delay(200);
analogWrite(babyPin, 0);
delay(200);
analogWrite(babyPin, 20);
delay(100);
analogWrite(babyPin, 5);
delay(100);
analogWrite(babyPin, 10);
delay(200);
analogWrite(babyPin, 5);
delay(200);
analogWrite(babyPin, 10);
delay(200);
analogWrite(babyPin, 5);
delay(200);
analogWrite(babyPin, 10);
delay(200);
analogWrite(babyPin, 0);
delay(200);
analogWrite(babyPin, 10);
delay(200);
analogWrite(babyPin, 5);
delay(200);
analogWrite(babyPin, 10);
delay(200);
analogWrite(babyPin, 5);
delay(200);
analogWrite(babyPin, 10);
delay(200);
analogWrite(babyPin, 0);
delay(200);
}

long microsecondsToInches(long microseconds) {
return microseconds / 74 / 2;
}

long microsecondsToCentimeters(long microseconds) {
return microseconds / 29 / 2;
}
Processing Code and Audio
Sound engineering by Shariffah
Voice actors: my siblings

/**
* http://code.compartmental.net/minim/audioplayer_class_audioplayer.html
* you will need to import Minim audio player library
*
*/

import processing.serial.*;
import ddf.minim.*;

Minim minim1;
Minim minim2;
Minim minim3;
Minim minim4;
Minim minim5;
Minim minim6;
Minim minim7;

AudioPlayer player1;
AudioPlayer player2;
AudioPlayer player3;
AudioPlayer player4;
AudioPlayer player5;
AudioPlayer player6;
AudioPlayer player7;


Serial myPort; // Create object from Serial class
int val; // Data received from the serial port

void setup()
{
size(200, 200);
// I know that the first port in the serial list on my mac
// is always my FTDI adaptor, so I open Serial.list()[0].
// On Windows machines, this generally opens COM1.
// Open whatever port is the one you're using.
// String portName = Serial.list()[2];
//print(portName);

myPort = new Serial(this, "COM3", 9600);

minim1 = new Minim(this);
minim2 = new Minim(this);
minim3 = new Minim(this);
minim4 = new Minim(this);
minim5 = new Minim(this);
minim6 = new Minim(this);
minim7 = new Minim(this);

player1 = minim1.loadFile("Audio 1 - Happy Birthday.wav");
player2 = minim1.loadFile("Audio 2 - Kids calling out to user.wav");
player3 = minim1.loadFile("Audio 3 - Son talking to dad + Son Drinking + Car Horn.wav");
player4 = minim1.loadFile("Audio 4 - Can you carry me.wav");
player5 = minim1.loadFile("Audio 5 - Mum screaming + Car Screeching.wav");
player6 = minim1.loadFile("Audio 6 - My leg very pain.wav");
player7 = minim1.loadFile("Audio 7 - Baby Crying.wav");
}

void draw()
{
if ( myPort.available() > 0) { // If data is available,
val = myPort.read(); // read it and store it in val
println(val);
}

background(255); // Set background to white


if (val == 1) {
fill(0);
// play 1
player1.play();
player2.pause();
player3.pause();
player4.pause();
player5.pause();
player6.pause();
player7.pause();

} else if
(val == 2){
fill(0);
// play 2
player1.pause();
player2.play();
player3.pause();
player4.pause();
player5.pause();
player6.pause();
player7.pause();

} else if
(val == 3) {
fill(0);
// pllay 3
player1.pause();
player2.pause();
player3.play();
player4.pause();
player5.pause();
player6.pause();
player7.pause();

} else if
(val == 4) {
fill(0);
// play 4
player1.pause();
player2.pause();
player3.pause();
player4.play();
player5.pause();
player6.pause();
player7.pause();

} else if
(val == 5) {
fill(0);
// play 5
player1.pause();
player2.pause();
player3.pause();
player4.pause();
player5.play();
player6.pause();
player7.pause();

} else if
(val == 6) {
fill(0);
// play 6
player1.pause();
player2.pause();
player3.pause();
player4.pause();
player5.pause();
player6.play();
player7.pause();

} else if
(val == 7) {
fill(0);
// play 6
player1.pause();
player2.pause();
player3.pause();
player4.pause();
player5.pause();
player6.pause();
player7.play();

}

rect(50, 50, 100, 100);
}
Step 6: Creating the Installation
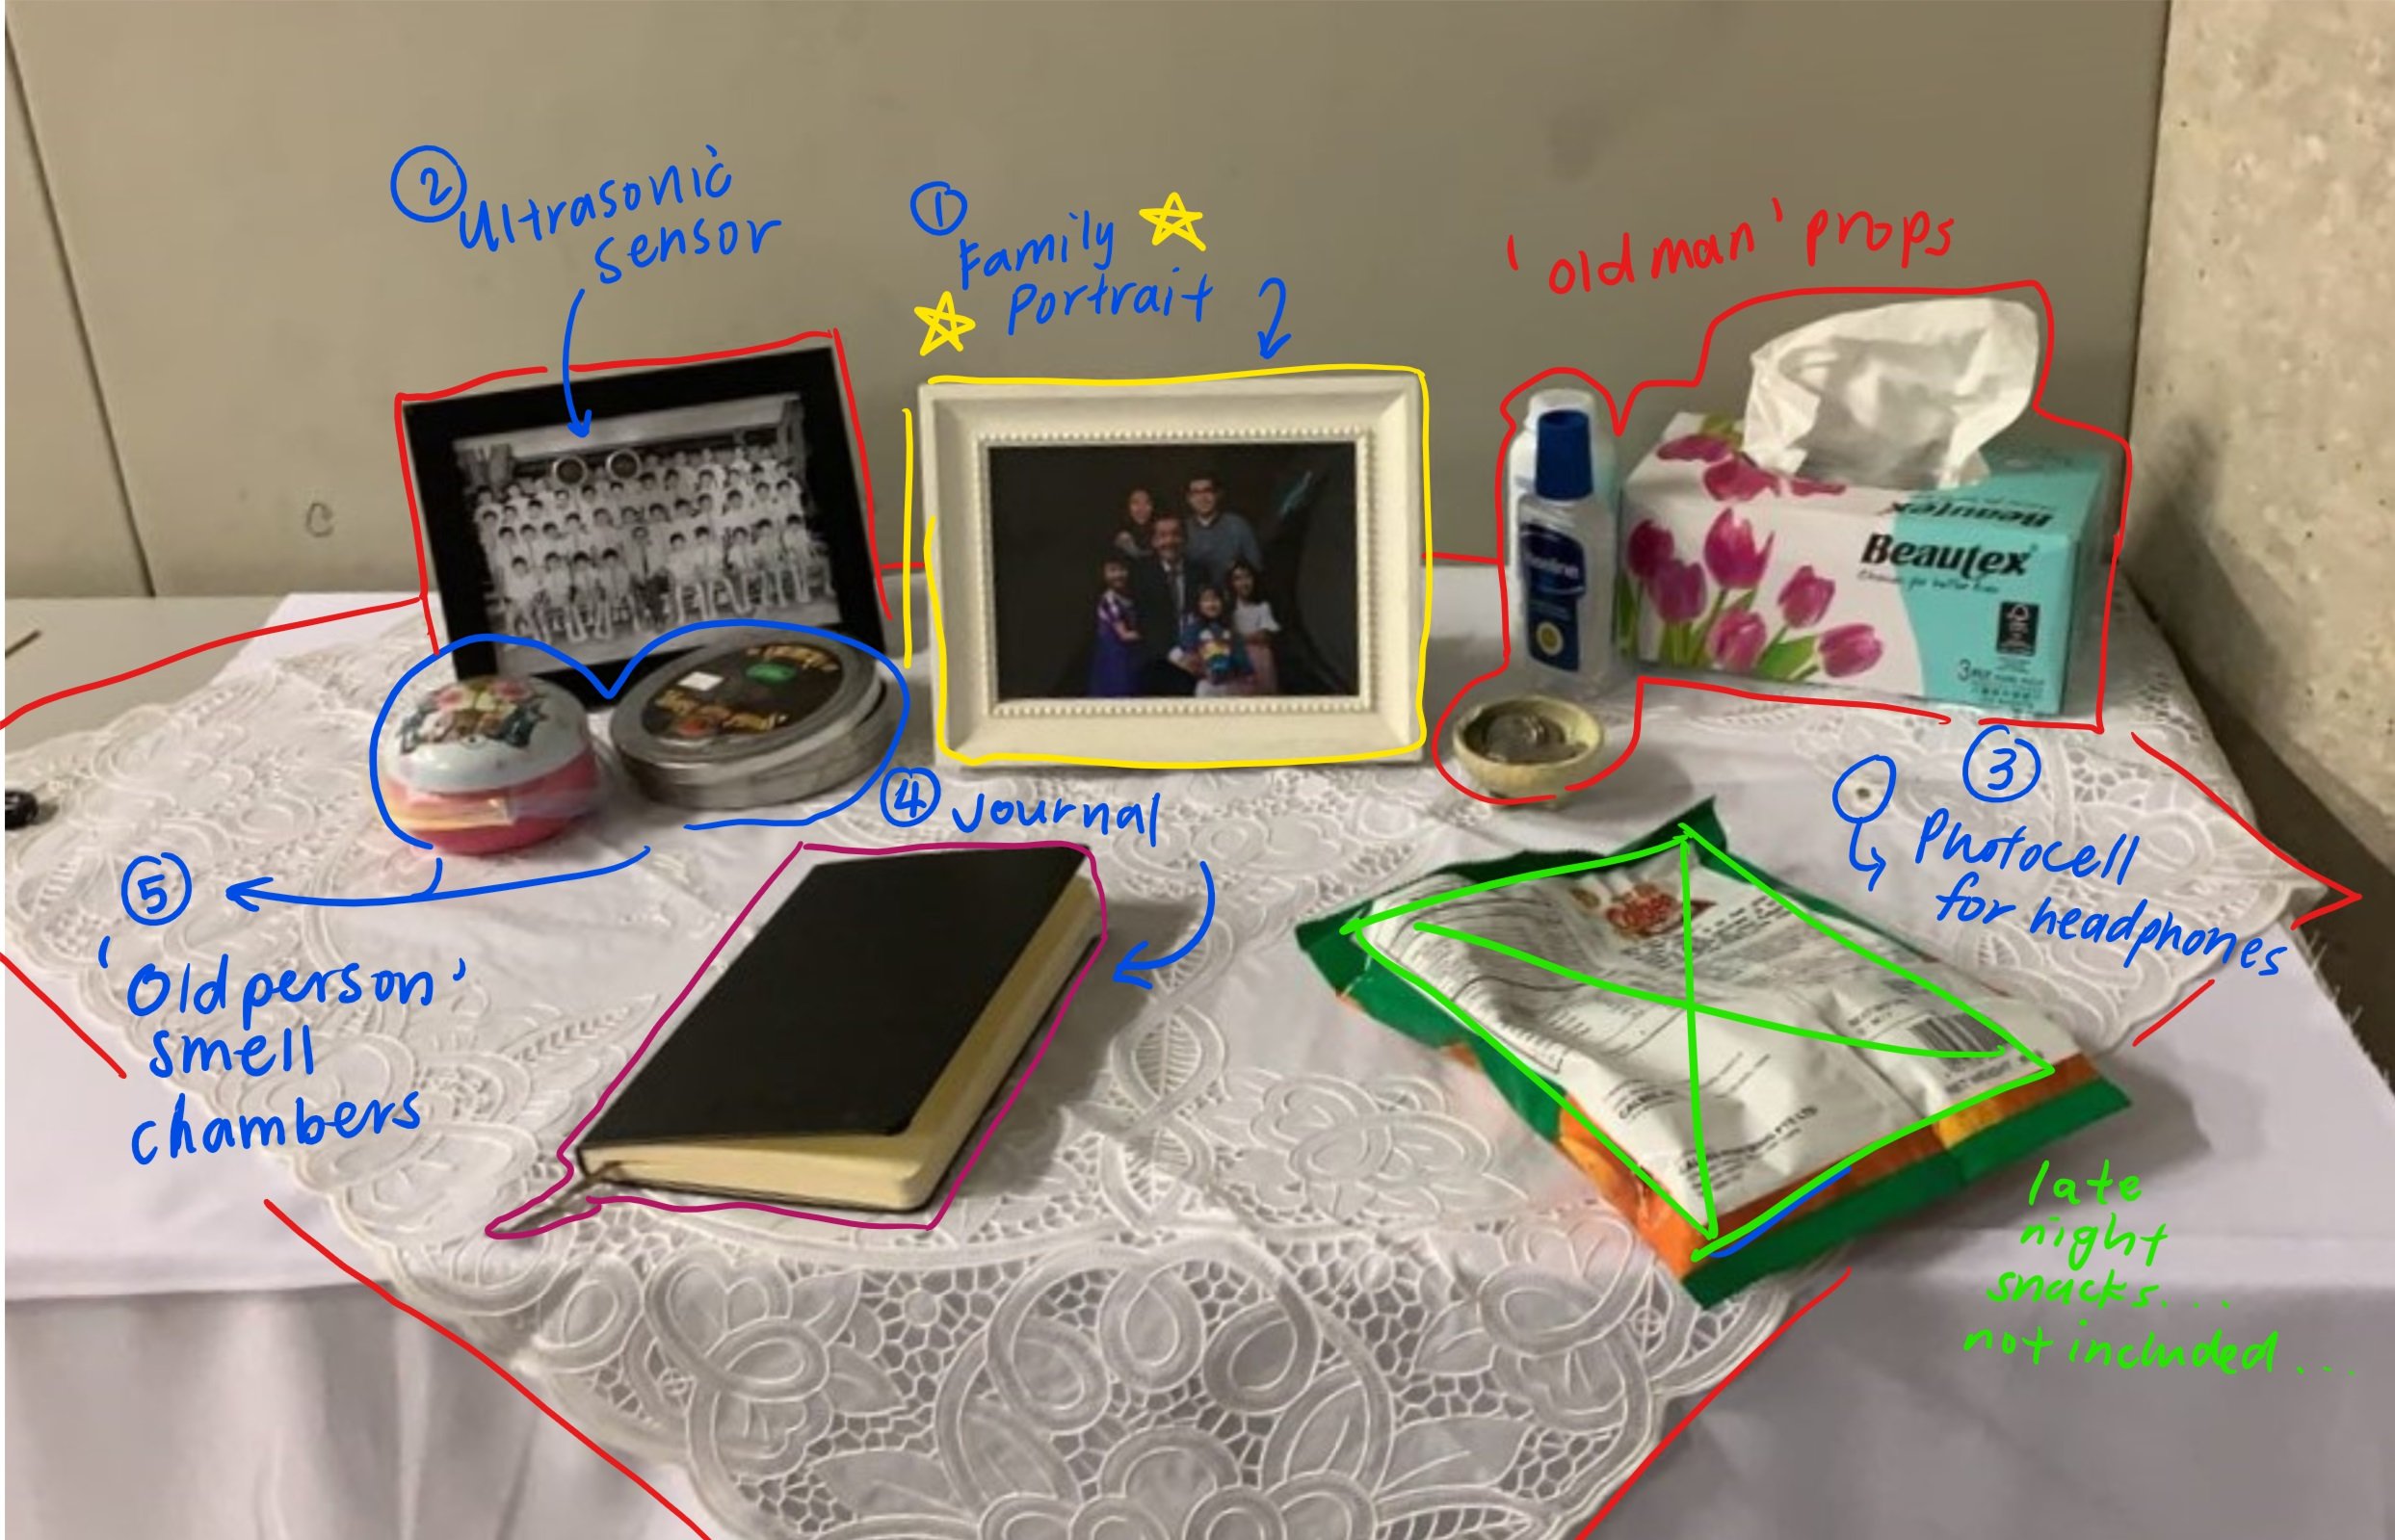
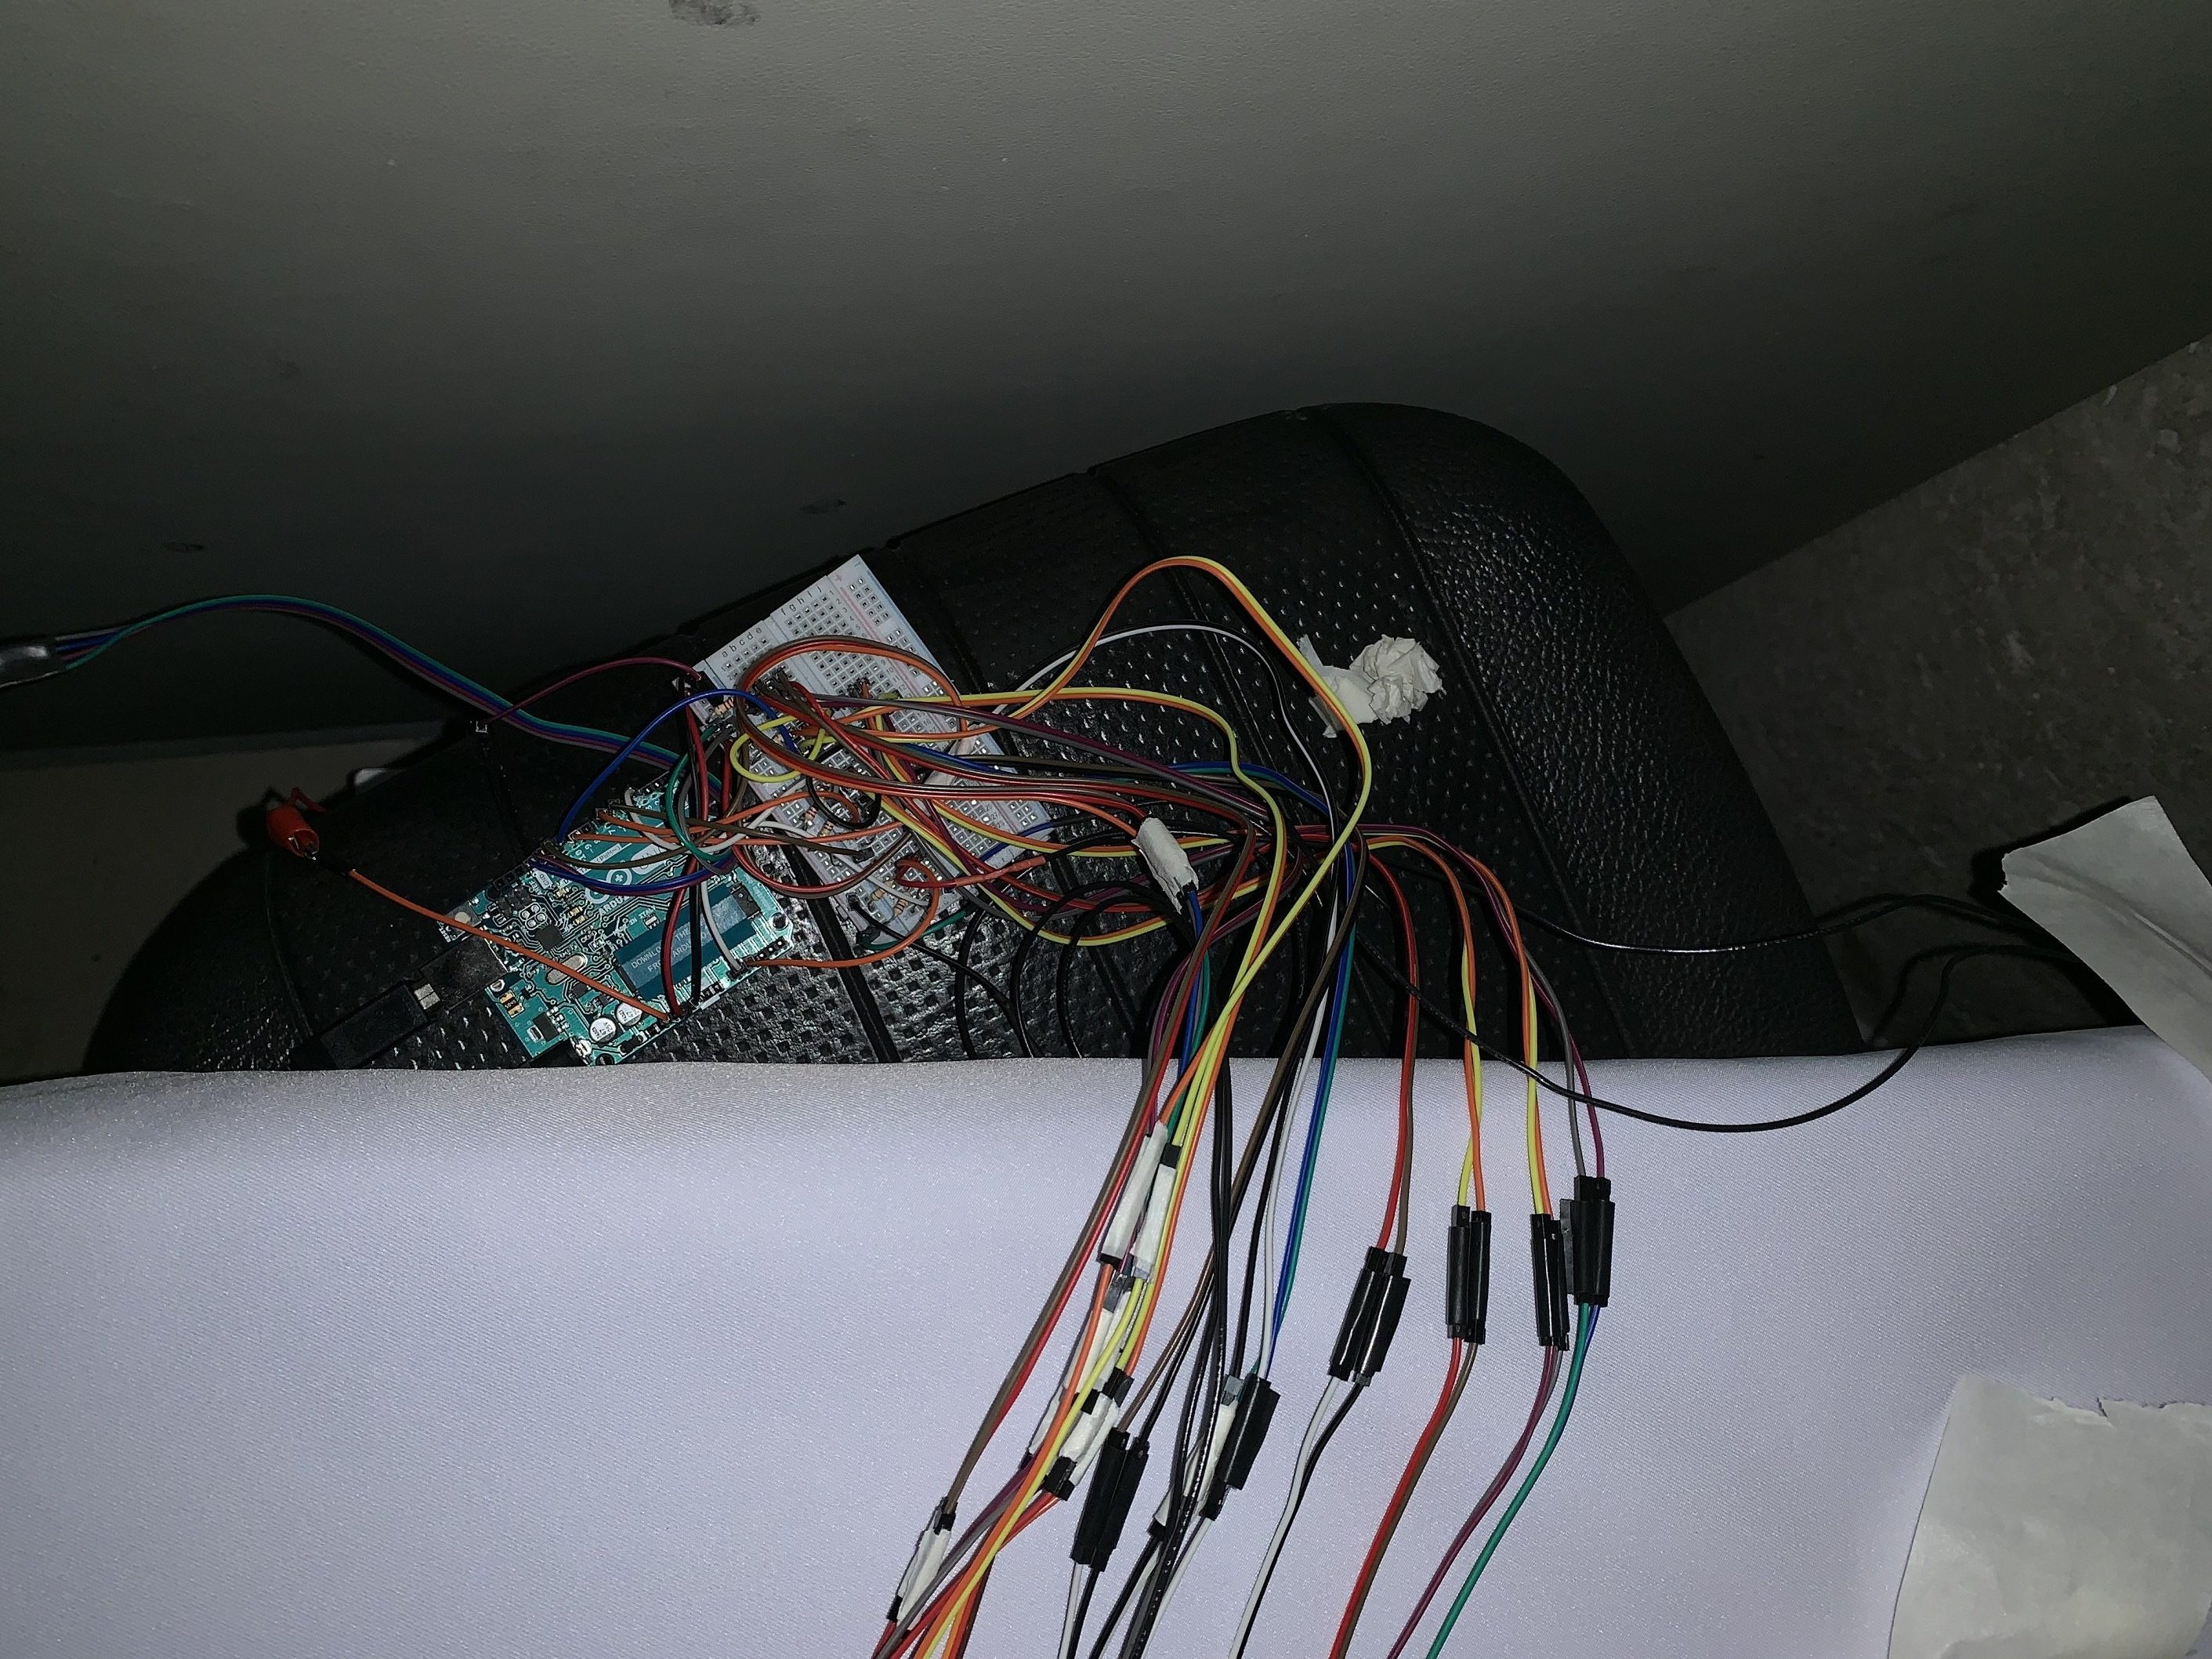
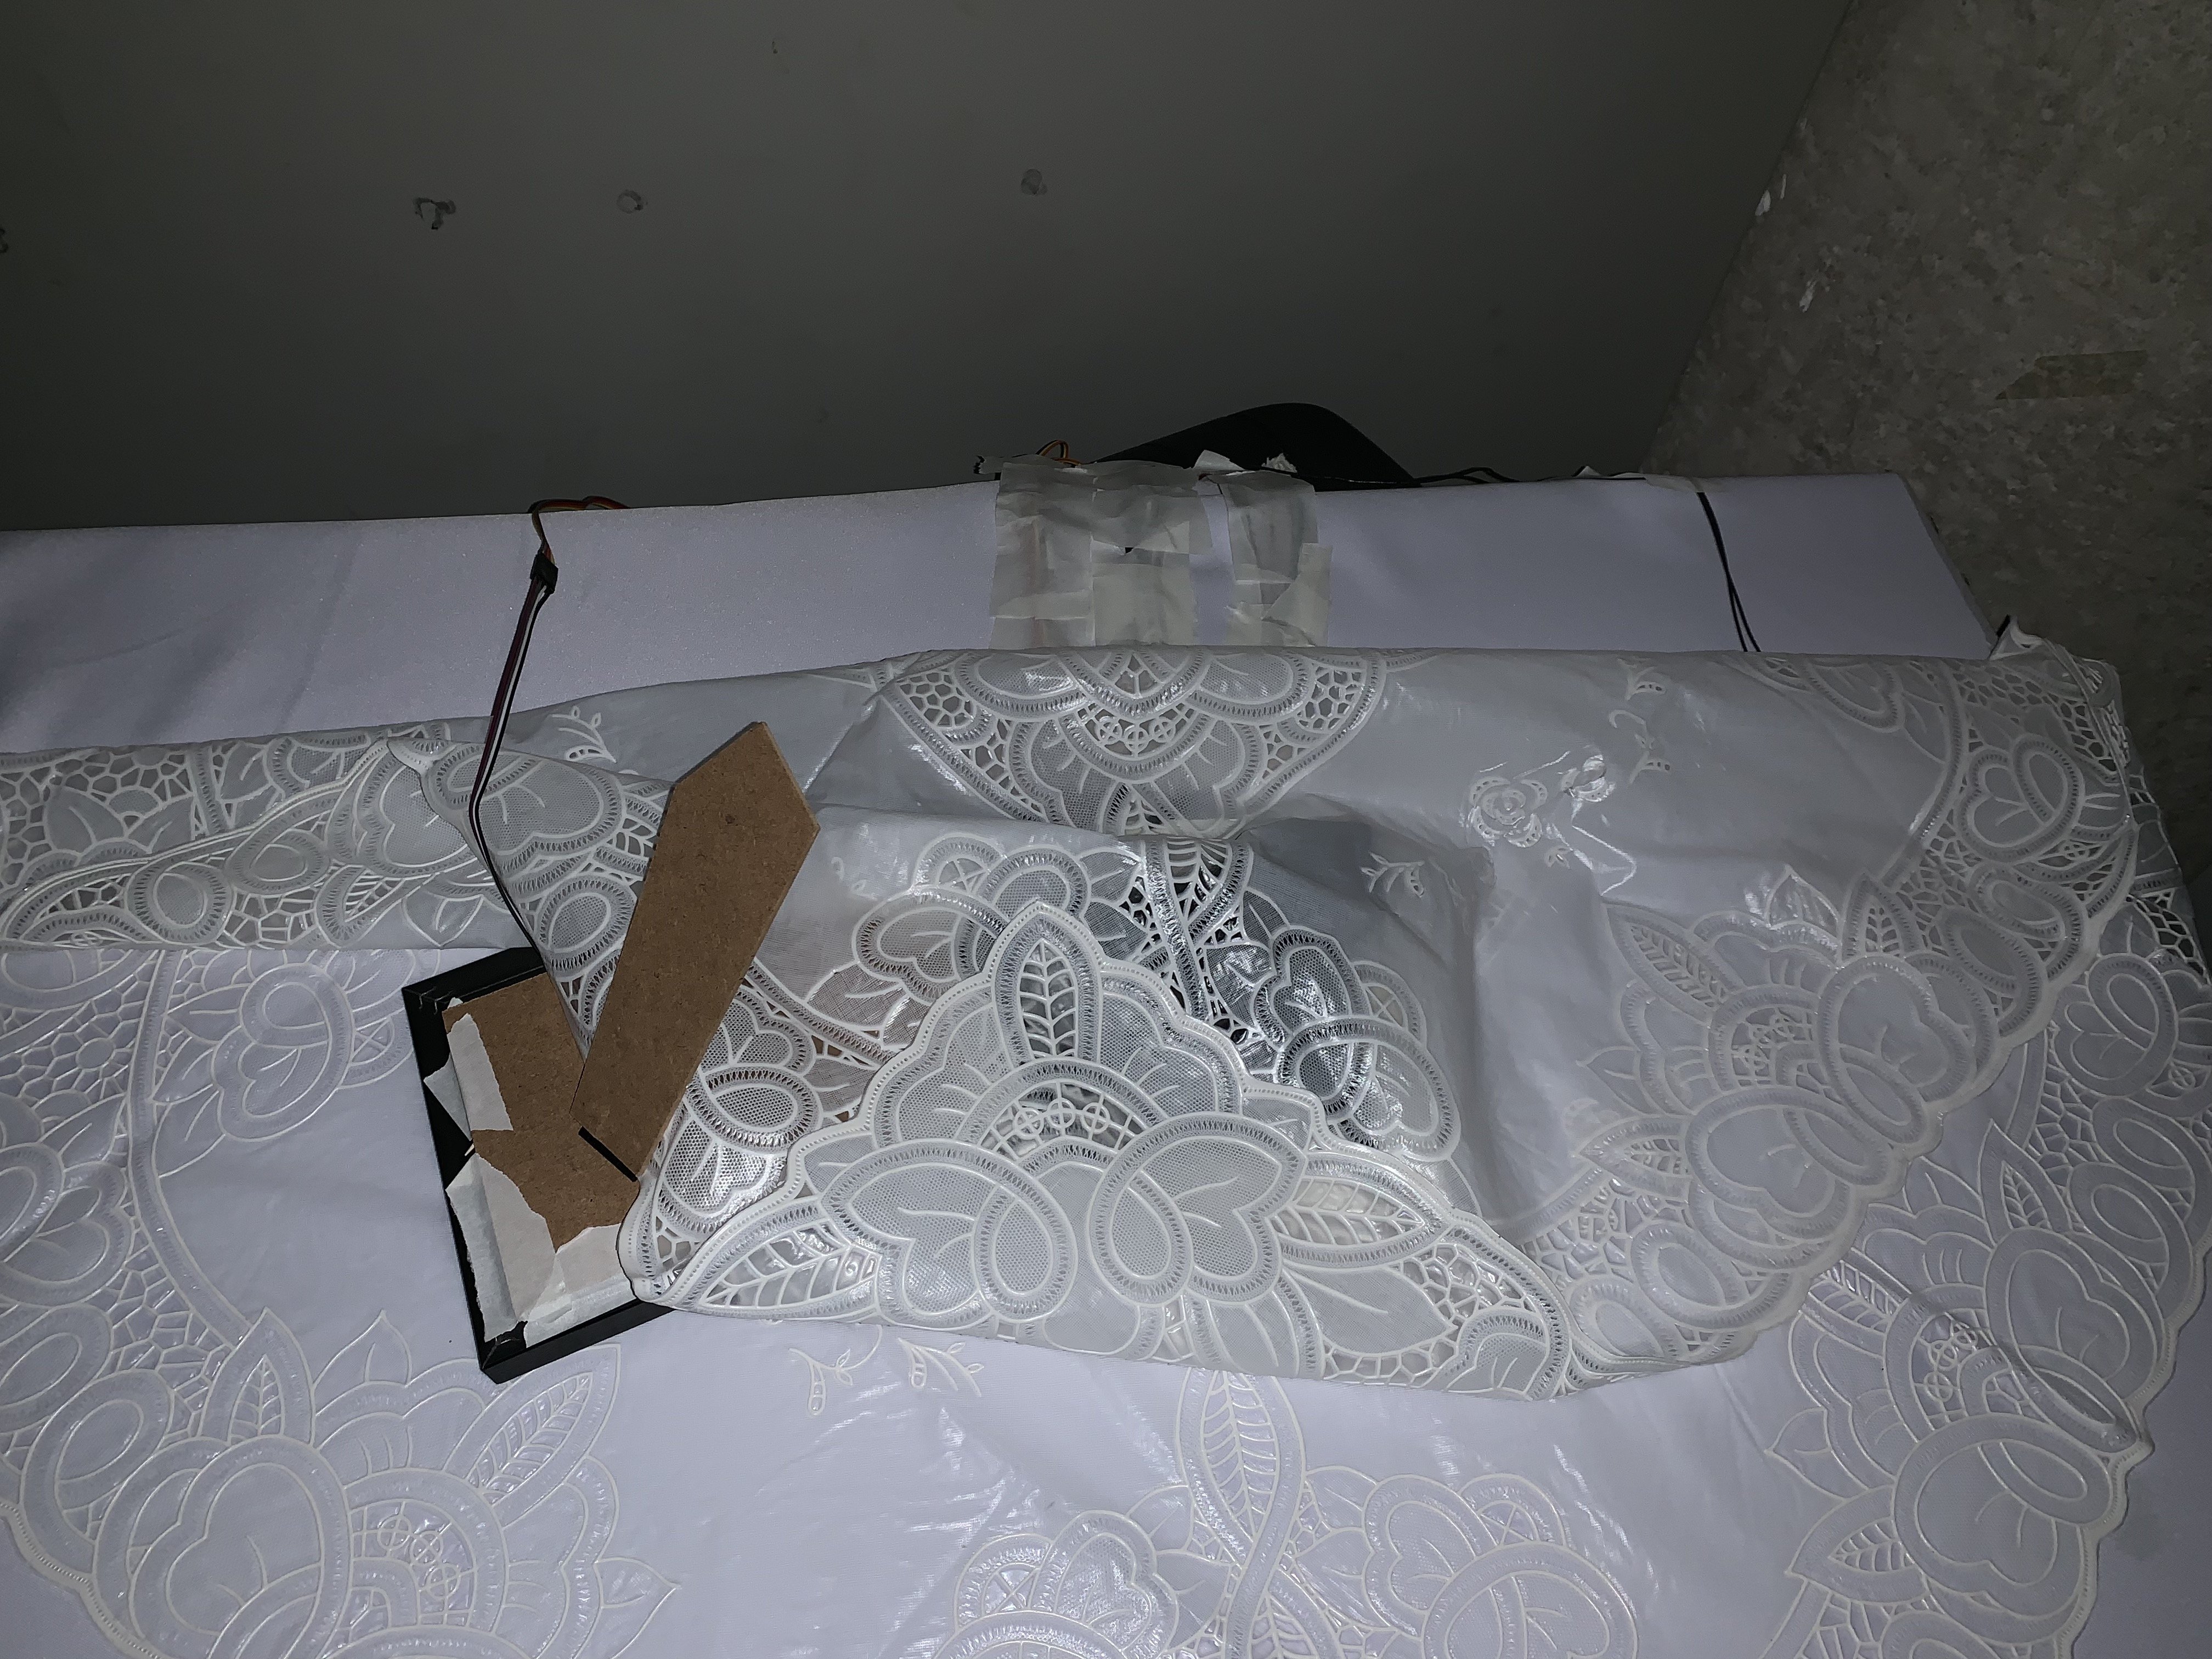
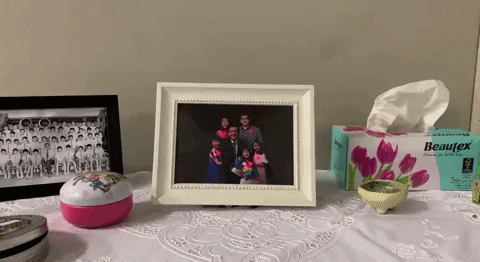
- Place your Family Portrait on a table and run all the wiring underneath the table cloth and set up your Arduino, breadboard and laptop below.
- Hide your Ultrasonic sensor somewhere in your set up. (I recommend in an antique class photograph!)
- Add a second photocell inset to the table cloth. Place a pair of wireless headphones here!
- Add a journal with a newspaper article and birthday card to add context to the incident.
5. To immerse viewers even more, add scents like:
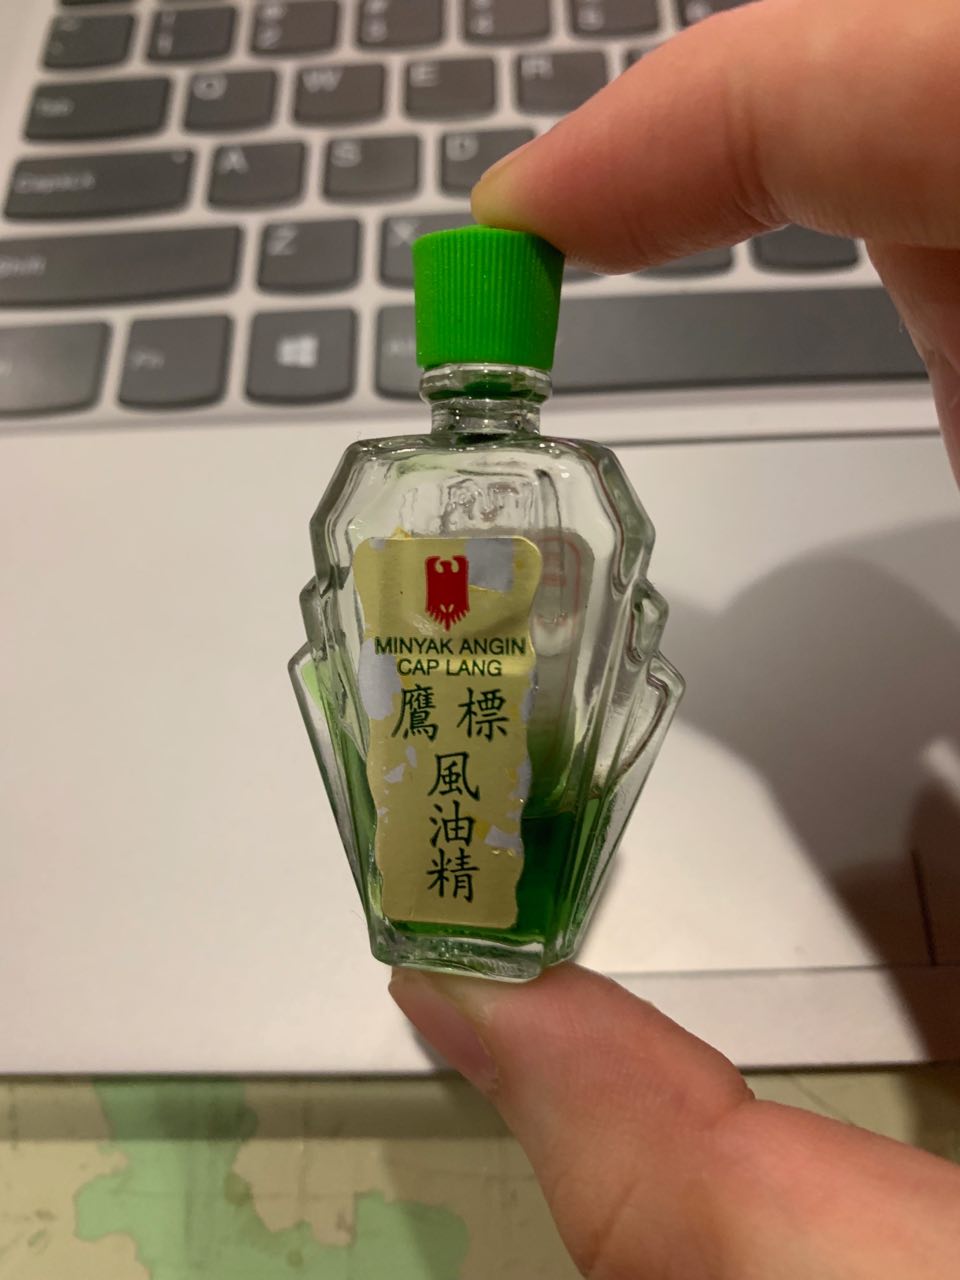
I borrowed this Eagle Brand oil from my Dad. It really smells like old people.
‘Old man props’: add various paraphernalia that reminds you of an old man or your ah gong. Turns out, this stuff is almost universal!
Hiding the wiring and Arduino:
Reflections
I really enjoyed the brief of either Dark Object or one of protest. When working with Shariffah, we came to a compromise to create an object about the death of loved ones. We also feel very deeply for the loneliness of the elderly and wanted to create something that would evoke empathy for this particular group.
Coding for this project was relatively simple in parts, but combining everything became confusing at first. Once I blocked out the code into chunks and followed my pseudo code closely, it was easier to arrange everything. To truly check if the code worked properly, I had to assemble everything into the build first, so I had to make sure that the components and everything I coded for made sense before wiring the whole mess together.
The build was a process that took quite a while. With Lei’s godsent suggestion, we avoided soldering by purchasing many, long m/f jumper cables and I was able to daisy chain them to connect components to the Arduino. Packing everything into the photo frame was a challenge and wires kept disconnecting (we used a lot of tape!) but the almost seamless end result was worth it.
Adding the props and hiding components with the set up provided the appropriate context for viewers and it was nice to hear compliments on the “Ah gong smell” because I ended up smelling like one for the whole day.
Creating an audio narrative really pushed the project further in pairing Sha’s sound engineering with the Processing and Arduino code. I am glad that I took the time to make sure every component reacting timely to the audio with delay()s creating pauses everywhere.
I was very assured (and amused) by the reactions and the feedback from my classmates and especially from my friends who did not take this class. I think this project was a success and achieved our goal very effectively.
This project and the brief of the “Dark Object” really pushed me to understand Critical Making and how intimate and emotional experiences can and should be created through objects and electronics. I thoroughly enjoyed the reactions and feedback that users gave as it also revealed more notes about the project that I did not even anticipate. This project also taught me patience in working in teams but also revealed how working in pairs brings out the strengths in both of us. Hopefully, I will get the time and opportunity to create something as Dark as the Family Portrait again.