

EXPERIMENTAL INTERACTION // DN1010 // MICRO-PROJECT 4 – DISOBEDIENT OBJECTS
This project was done in collaboration with Shariffah!
Click here for the link to our presentation slides!
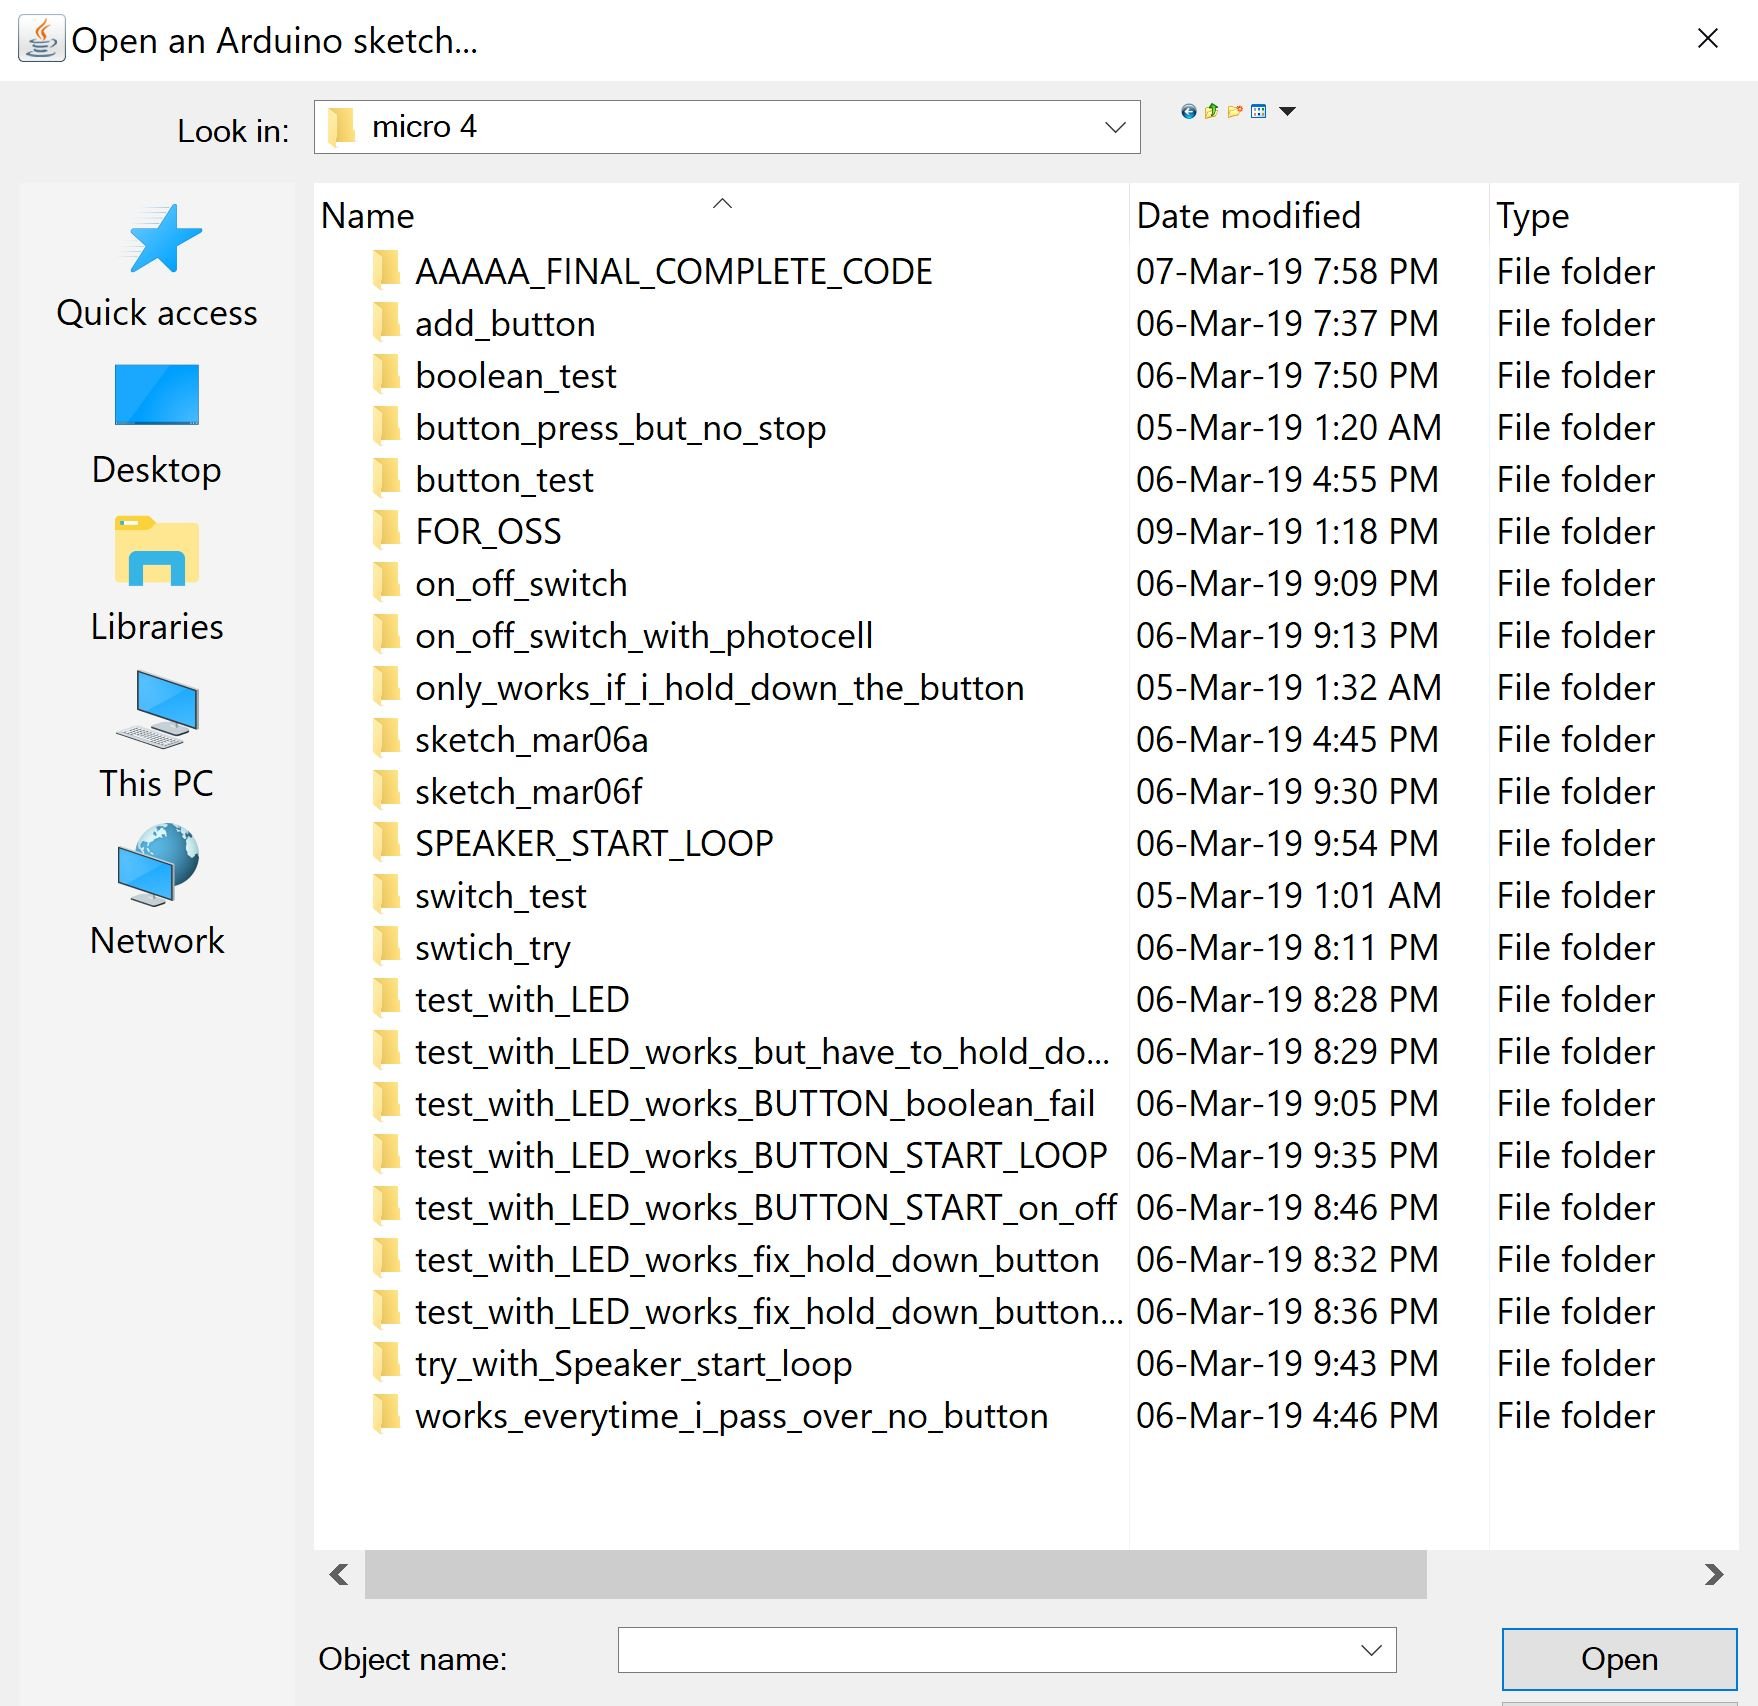
Click below for a compiled list of the codes used for this project!
(Open for side-by-side reading.)
RESEARCH & PROCESS
In this project, Shariffah and I worked together to “hack an everyday household object so that it behaves in a way you least expect. It is an object that disobeys.”
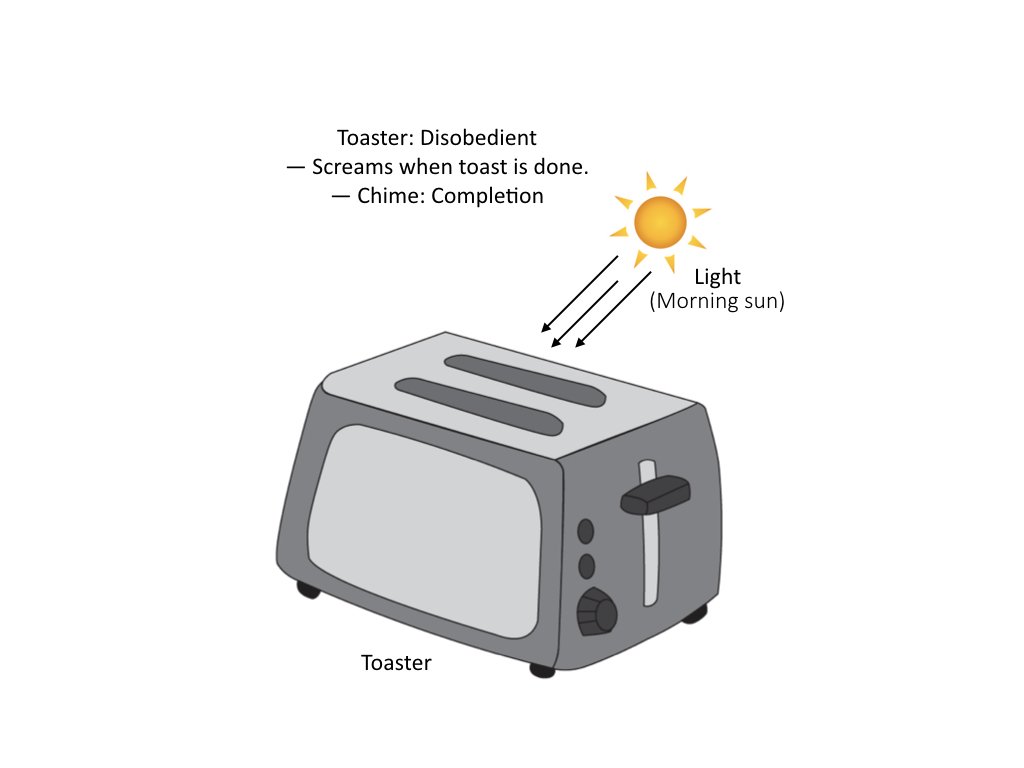
Initial Idea: A toaster that screams when your toast is done.
Comments: Why is it screaming? Is it to annoy the user?
Edited Idea: A toaster that has a completion chime when your toast is done.
- Sensors: Photocell
- Actuators: Piezo Buzzer
Rough idea:
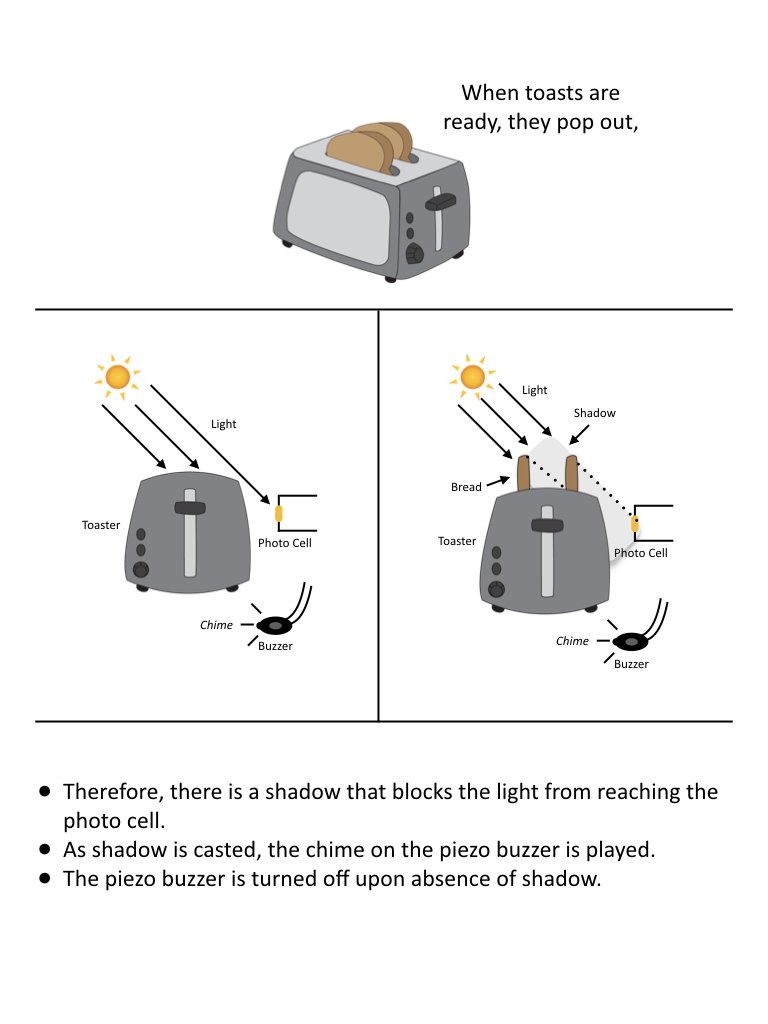
- when toast pops up, it casts a shadow
- shadow can be detected by photocell
- photocell will trigger the piezo buzzer into playing a chime
Requirements: a direct light source
Hypothesis: When one makes toast, its usually in the morning, when the sun shines into one’s room and is the only light source.
CHIME
We sourced for a familiar completion chime online and one that came to mind was the Level Complete music from Super Mario Bros. This is an ideal chime as it is familiar and already in 8-bit which is playable by a piezo buzzer.
Here is the code for the chime by Arduino Forum user Linkaan: https://forum.arduino.cc/index.php?topic=393731.0 [CODE 1]
This code plays the chime once as it is not meant to loop, so we would have to input it into our major code later on.
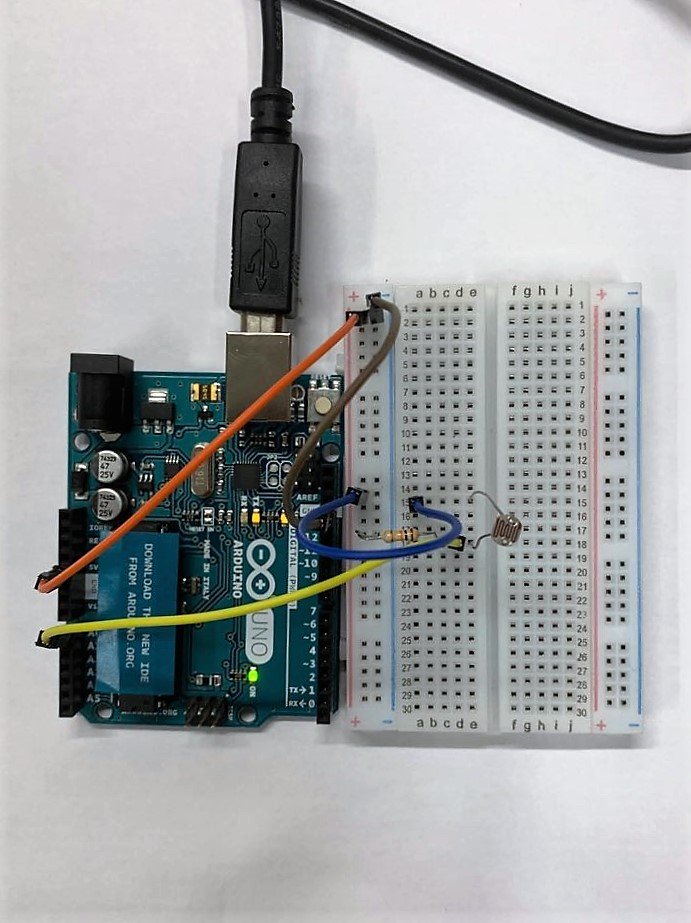
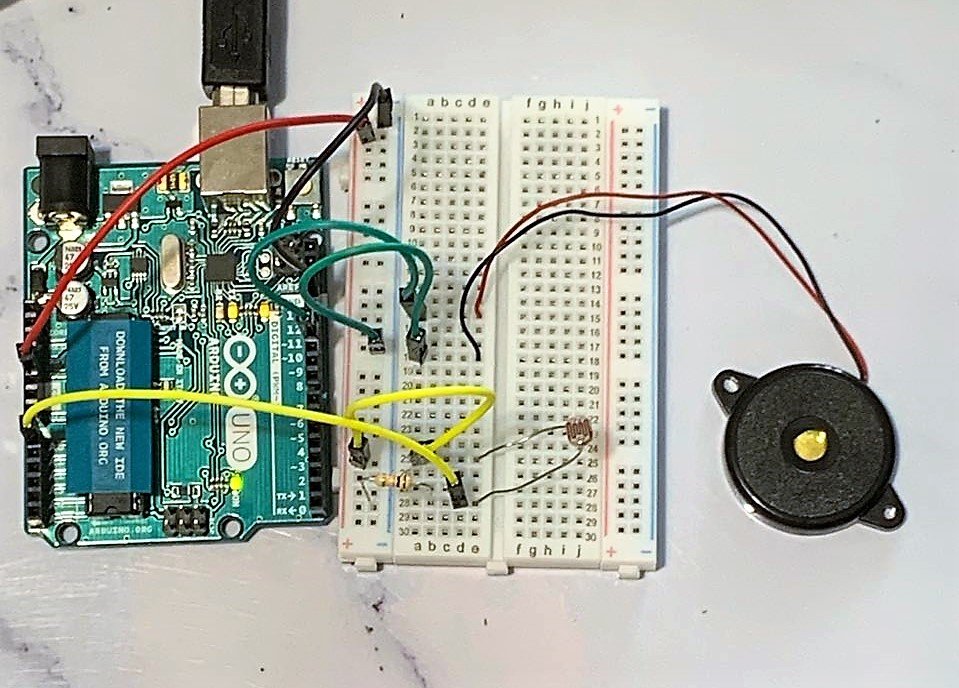
PHOTOCELL
Adding a photocell (sensor) to detect the light change to trigger the piezo buzzer (actuator).
I followed the schematic and code provided in the syllabus, and used the Serial.println function to determine the level of threshold I wanted to set.
This was an important step as the lighting would change based on the location this object was going to be set up.
const int analogPin = A0;
void setup() {
Serial.begin(9600);
}
void loop() {
int analogValue = analogRead(analogPin);
Serial.println(analogValue);
delay(1);
}
 With this, we wrote a pseudo code to understand how we wanted the sensor to activate the actuator:
if analogValue is less than threshold
  play chime
else
  do nothing
To achieve the code, I modelled the new code based off of this code from the syllabus (p.32):
const int analogPin = A0;
const int ledPin = 13;
const int threshold = 400;

void setup() {
 pinMode(ledPin, OUTPUT);
 Serial.begin(9600);
}
void loop() {
 int analogValue = analogRead(analogPin);
 if (analogValue < threshold) {
  digitalWrite(ledPin, HIGH);
 } else {
  digitalWrite(ledPin, LOW);
 }
 Serial.println(analogValue);
 delay(1);
}
And changed out the ledPin code for the Mario Chime on the piezo buzzer. See [CODE 2]
ON/OFF SWITCH
After compiling the base code, I realised that there needed to be an option to turn ON/OFF the loop. Otherwise, any shadow that passes over the photocell will activate the buzzer.
This would not make sense as we only wanted the chime to play when the toast was popped up, so I researched and did multiple trials to create an ON/OFF switch.
I did the button tests by replacing the buzzer with an LED as I started going stir crazy hearing the chime so many times.

int buttonPin1 = 2; //Start button
int buttonPin2 = 3; //Stop button
int ledPin = 8;
int buttonStatus1 = 0;
int buttonStatus2 = 0;
void setup() {
pinMode(ledPin, OUTPUT);
pinMode(buttonPin1, INPUT);
pinMode(buttonPin2, INPUT);
}

void loop() {
buttonStatus1 = digitalRead(buttonPin1);
buttonStatus2 = digitalRead(buttonPin2);

//Check(==) if the first button(START) is HIGH, AND(&&) the second button (STOP) is LOW, if yes turn the LED on.

if (buttonStatus1 == HIGH && buttonStatus2 == LOW)
{ int analogValue = analogRead(analogPin);
    if (analogValue < 700) {
      digitalWrite(ledPin, HIGH);
      delay(200);
      digitalWrite(ledPin, LOW);
      delay(200); }}

//Check(==) if the first button (START) is LOW, AND(&&) the second button (STOP is HIGH, if yes turn the LED off.

if (buttonStatus1 == LOW && buttonStatus2 == HIGH)
{digitalWrite (ledPin, LOW); } }
int buttonPin = 12; // the number of the pushbutton pin
int ledPin = 3; // the number of the LED pin
boolean on=false;
int buttonState = 0;

void setup() {
pinMode(ledPin, OUTPUT);
pinMode(buttonPin, INPUT);
}

void loop(){
buttonState = digitalRead(buttonPin);
if (buttonState == HIGH) {
if(on==true){
on=false;
} else{
on=true;
}
}


if (on == true) {
digitalWrite(ledPin, HIGH);
}
else {
digitalWrite(ledPin, LOW);
}

delay(500);

}
These tests worked perfectly fine with the LED but when I added the rest of my code I realised that it would not be able to apply the same way to the photocell+buzzer loop.
The codes worked as if the ON button was pressed, it would start the code (light up the LED). This would then continue to run until the OFF button was pressed.
With the photocell+buzzer loop, it was a more complex code that was not simply an on/off led as it had conditional ‘if’ statements.
For example, this code only started the photocell+buzzer loop if the switch was continuously held down. See [CODE 3].
Thus, I had to do more research.
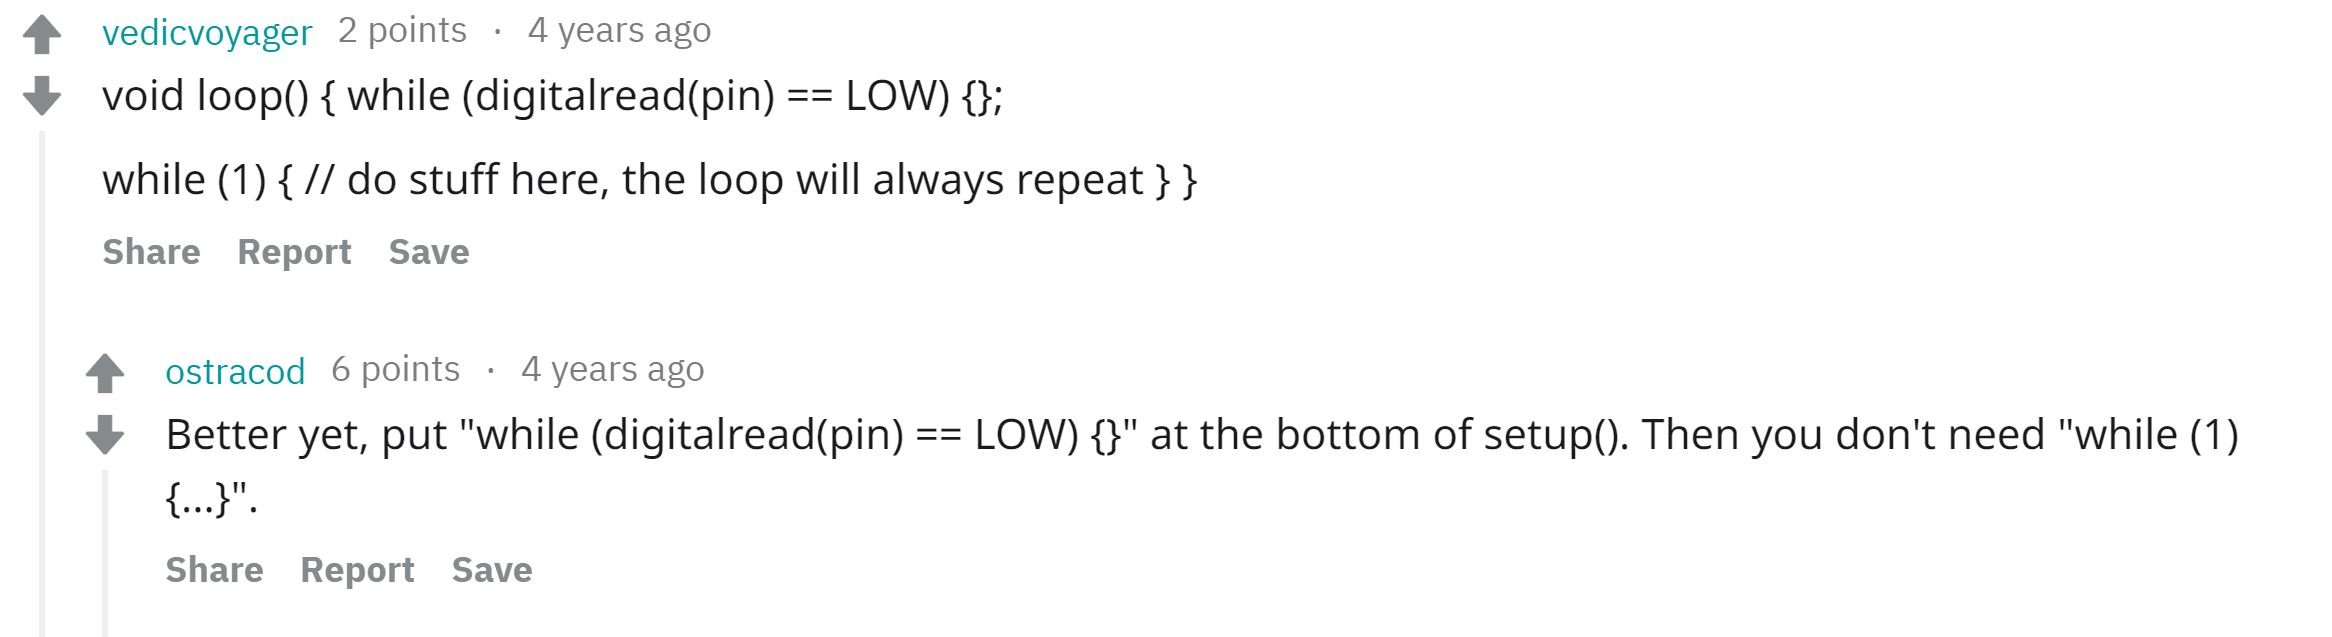
I catered my search input a bit more and instead of “on/off switches”, I searched for “switch to start and stop void loop()”. I found this Reddit post that had this suggestion:
Adding buttonPin:
const int analogPin = A0;
int switchState = 0;
int buttonPin = 12;
int speakerPin = 5;
int threshold = 600;
Adding the suggested code into setup()
void setup() {
 pinMode(buttonPin, INPUT_PULLUP);
 pinMode(speakerPin, OUTPUT);
 while (digitalRead(buttonPin) == LOW) {} //initially, while the button is not pressed, nothing will happem.
// This also suggests that the loop starts when this is changed = when the button is pressed
}
This solution worked as an ON button for the code: the photocell would only activate the buzzer after the button was pressed the first time.
However, after the first press, the code would keep looping and there was no way to stop it besides the reset button on the Arduino or unplugging the whole Arduino.
I kept trying to implement a start/stop button with the code from test #1 and #2 but kept running into the same problems.
I even tried to implement some boolean states and not! functions:
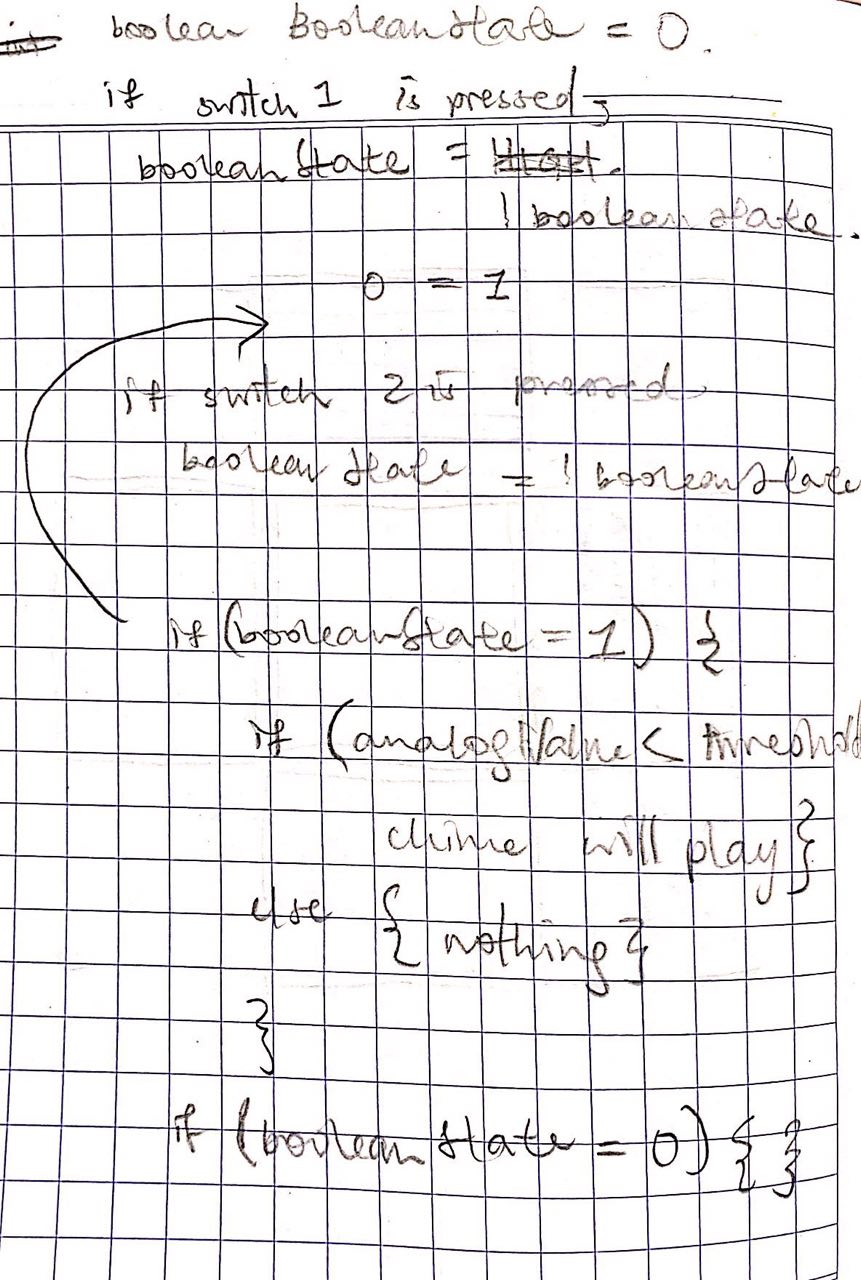 but was continuously unable to apply the code with so many conditions.
Epiphany: Create an external reset button!
Since the only way to restart the loop to ” while (digitalRead(buttonPin) == LOW) {} ” was to press the inbuilt reset button on the Arduino, I looked online to see if there was a possible external reset button:

This was the perfect solution as the RESET pin does not require any coding.
FINAL DRAFT
After this success, both Shariffah and I felt that this “Disobedient Object” was not as disobedient as we wanted it to be. Though useful in alerting a person that their toast is done, it lacked that prank aspect.
I decided to have a “time limit” to reaching your completed toast before the happy, completion chime turns into an annoying siren to aggressively alert the user and continues until the toast is taken out.
void loop() {
  int i = 200; // The starting pitch
  while(i < 800) {
    i++;
    tone(buzzer, i); // Emit the noise
    delay(5);
  }
  delay(100); // A short break in between each whoop
}
ADDED Code: SEE [CODE 5]
FINAL DRAFT #2?
Pseudo code:
if the start button is not pressed

nothing happens

else

start loop:

if analogValue is less than threshold

play Super Mario Bros. Level Complete

//if reset button is not pressed,

play Super Mario Bros. Level Complete again

//if reset button is not pressed,

start siren loop four times //unless reset button is pressed

//if reset button is not pressed,

play 2 minute long high pitched noise until reset button is pressed!
Basically: Users have one minute after their toast is done to reset the machine before it starts the sirens and then 20 seconds before the seemingly endless screech!
see [code 6]
Problem: After photocell reads a shadow, the chime does not stop until the reset button is pressed. This is especially problematic now that the chime loops and plays a siren.
Solution: Create an array for the chime!
With the help of the syllabus (p.80) and my little brother finding
TomS240’s suggested code on the Arduino Forum: see [CODE 7]
We formulated a code that reads:
if the start button is not pressed
nothing happens

else

start loop:
if analogValue is less than threshold
buzzer play Super Mario Bros. Level Complete

if analogValue is still less than threshold
buzzer play Super Mario Bros. Level Complete again

if analogValue is still less than threshold
buzzer start siren loop

if analogValue is more than threshold //at any given point
buzzer will play nothing //immediately
int chime[60][3] =
{ {speakerPin, G3, 166},
{speakerPin, C4, 166},
{speakerPin, E4, 166},
{speakerPin, G4, 166},
{speakerPin, C5, 166},
{speakerPin, E5, 166},
{speakerPin, G5, 500},
{speakerPin, E5, 500},
{speakerPin, E3, 166},
{speakerPin, C4, 166},
{speakerPin, Eb4, 166},
{speakerPin, Ab4, 166},
{speakerPin, C5, 166},
{speakerPin, Eb5, 166},
{speakerPin, Ab5, 500},
{speakerPin, Eb5, 500},
{speakerPin, Bb3, 166},
{speakerPin, D4, 166},
{speakerPin, F4, 166},
{speakerPin, Bb4, 166},
{speakerPin, D5, 166},
{speakerPin, F5, 166},
{speakerPin, Bb5, 500},
{speakerPin, 0, 50},
{speakerPin, Bb5, 166},
{speakerPin, 0, 50},
{speakerPin, Bb5, 166},
{speakerPin, 0, 50},
{speakerPin, Bb5, 166},
{speakerPin, C6, 2000},
{speakerPin, G3, 166},
{speakerPin, C4, 166},
{speakerPin, E4, 166},
{speakerPin, G4, 166},
{speakerPin, C5, 166},
{speakerPin, E5, 166},
{speakerPin, G5, 500},
{speakerPin, E5, 500},
{speakerPin, E3, 166},
{speakerPin, C4, 166},
{speakerPin, Eb4, 166},
{speakerPin, Ab4, 166},
{speakerPin, C5, 166},
{speakerPin, Eb5, 166},
{speakerPin, Ab5, 500},
{speakerPin, Eb5, 500},
{speakerPin, Bb3, 166},
{speakerPin, D4, 166},
{speakerPin, F4, 166},
{speakerPin, Bb4, 166},
{speakerPin, D5, 166},
{speakerPin, F5, 166},
{speakerPin, Bb5, 500},
{speakerPin, 0, 50},
{speakerPin, Bb5, 166},
{speakerPin, 0, 50},
{speakerPin, Bb5, 166},
{speakerPin, 0, 50},
{speakerPin, Bb5, 166},
{speakerPin, C6, 2000},

};
and incorporated for loops that can be interrupted by conditional statements.
Final Code: SEE [CODE 8]
Casing: White Box
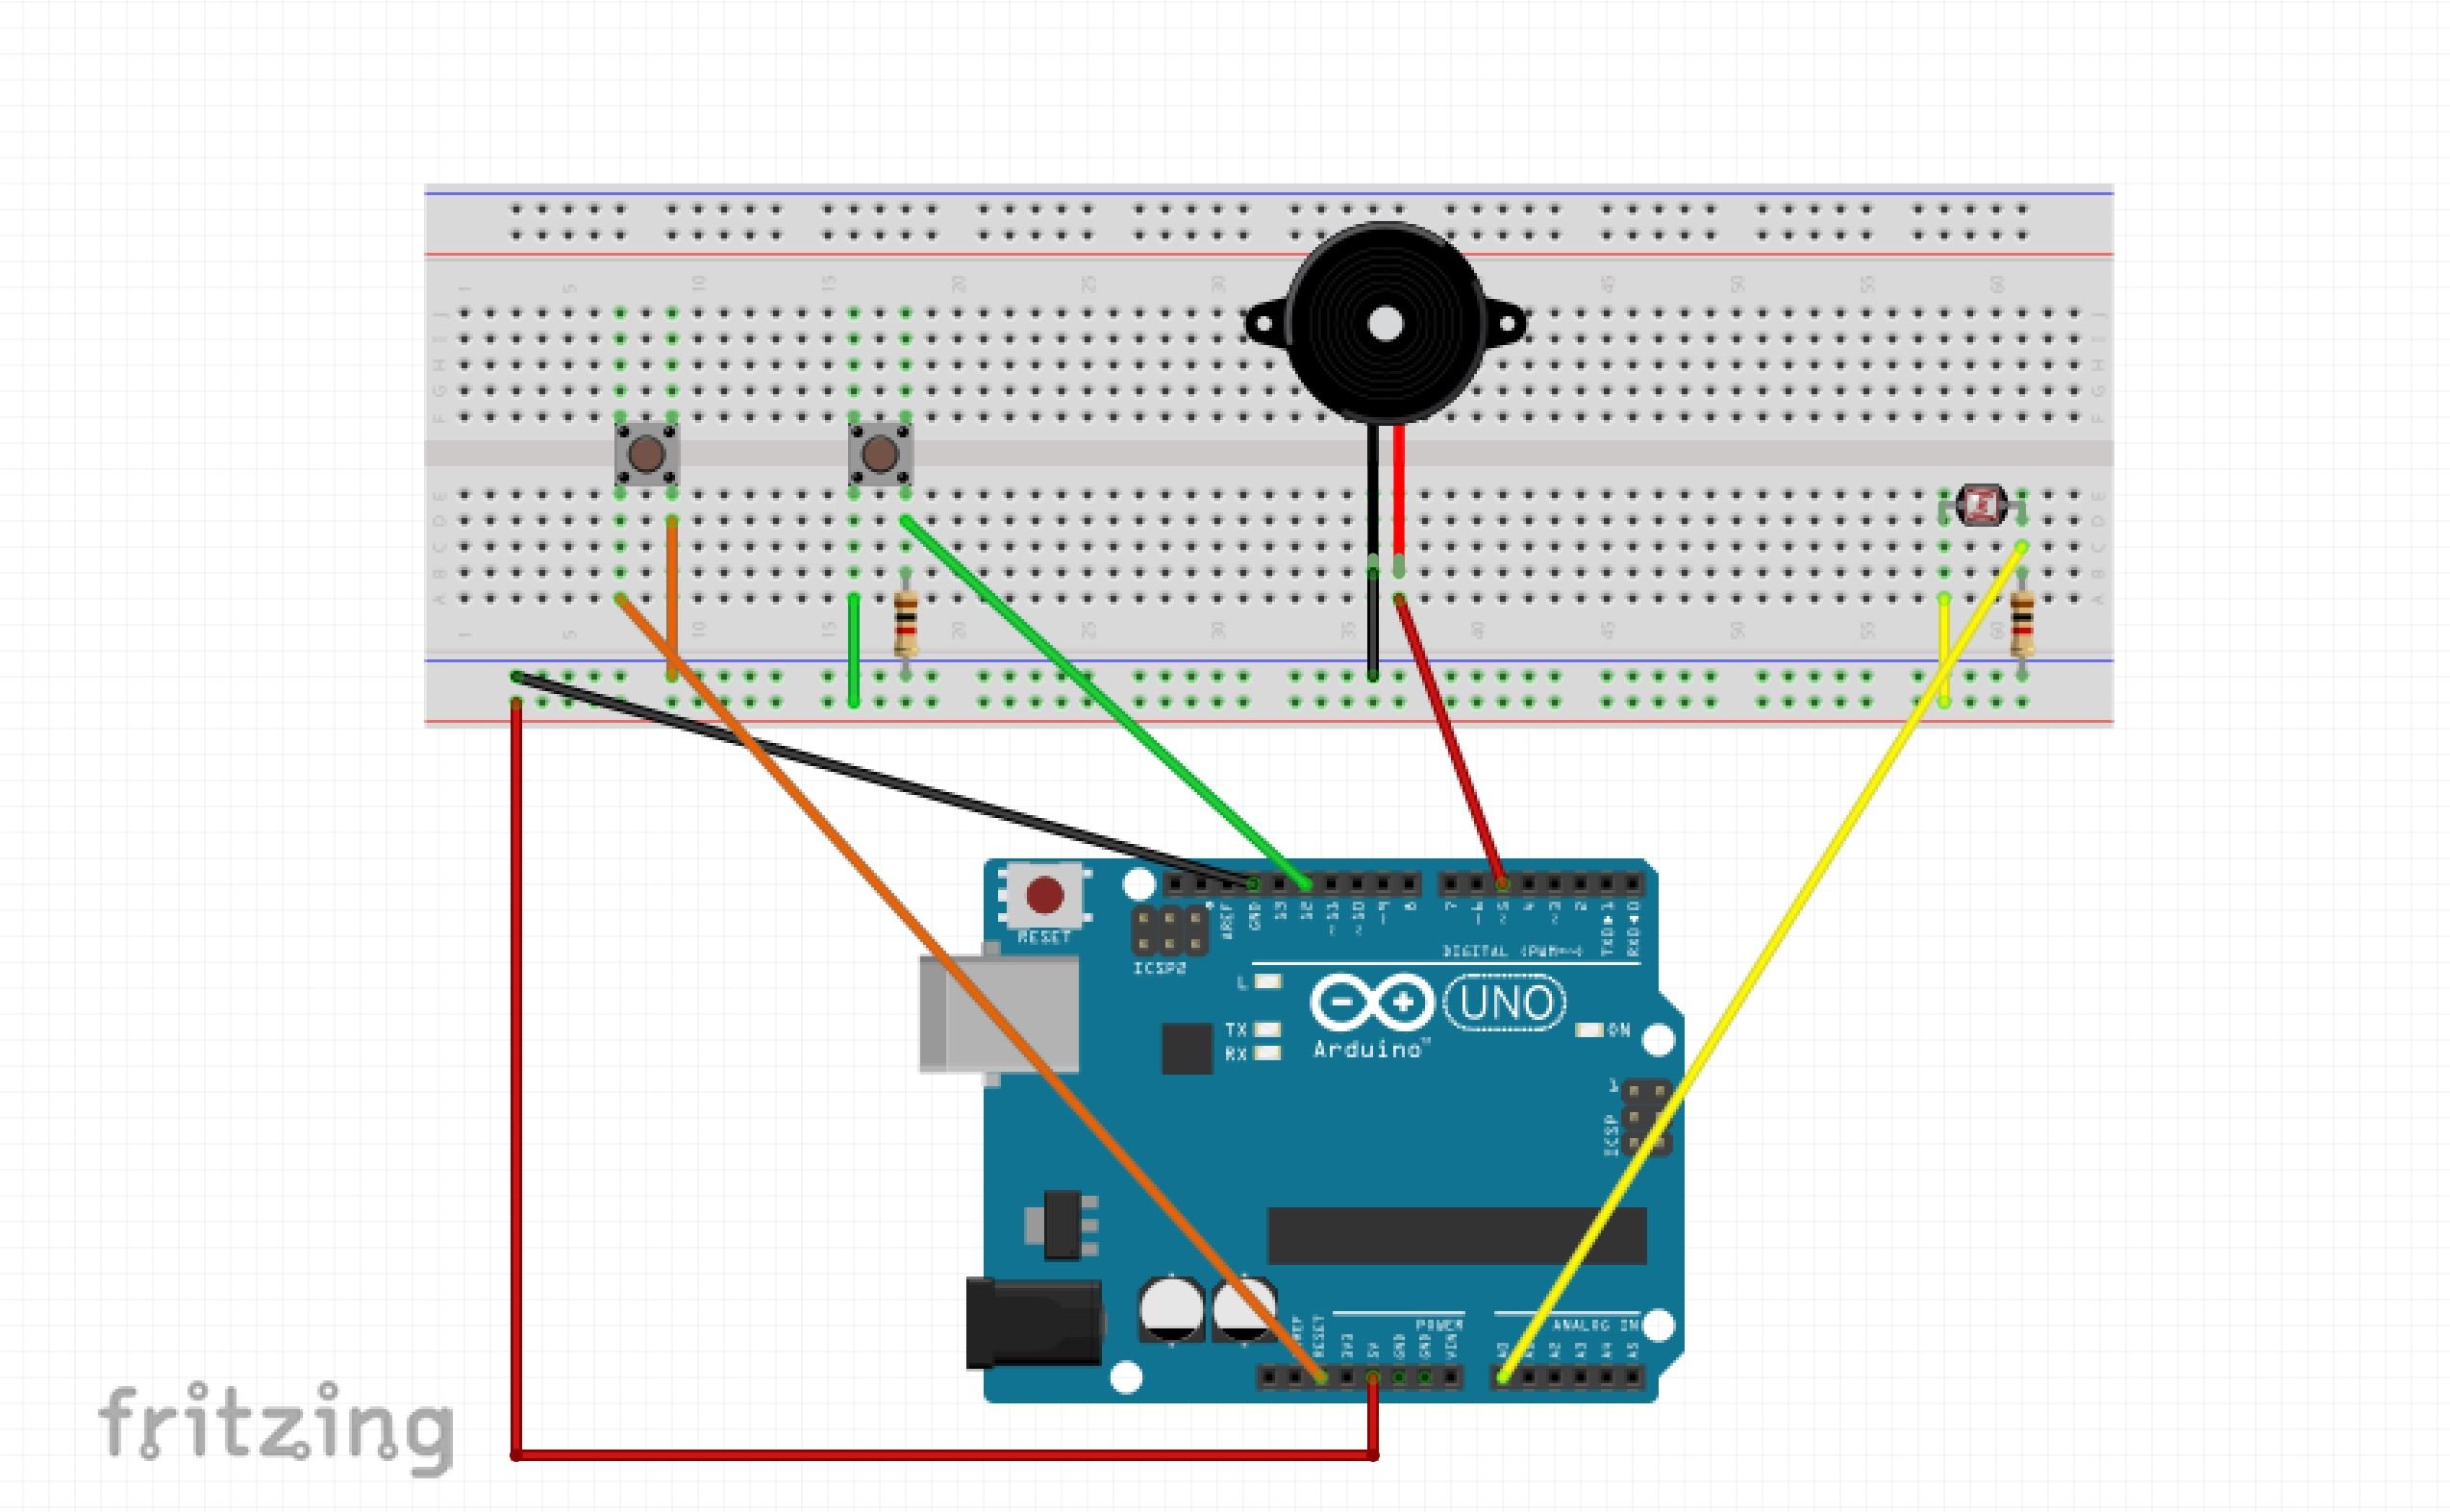
Knowing how messy the Arduino set-up would be, we decided to add a WHITE BOX, to store all the wires, board and Arduino neatly away from sight.
We punctured holes for the photocell, buzzer (for better sound emittance) and switches to mount them on to the box.
This was our sketched plan:

Final outcome for White Box:

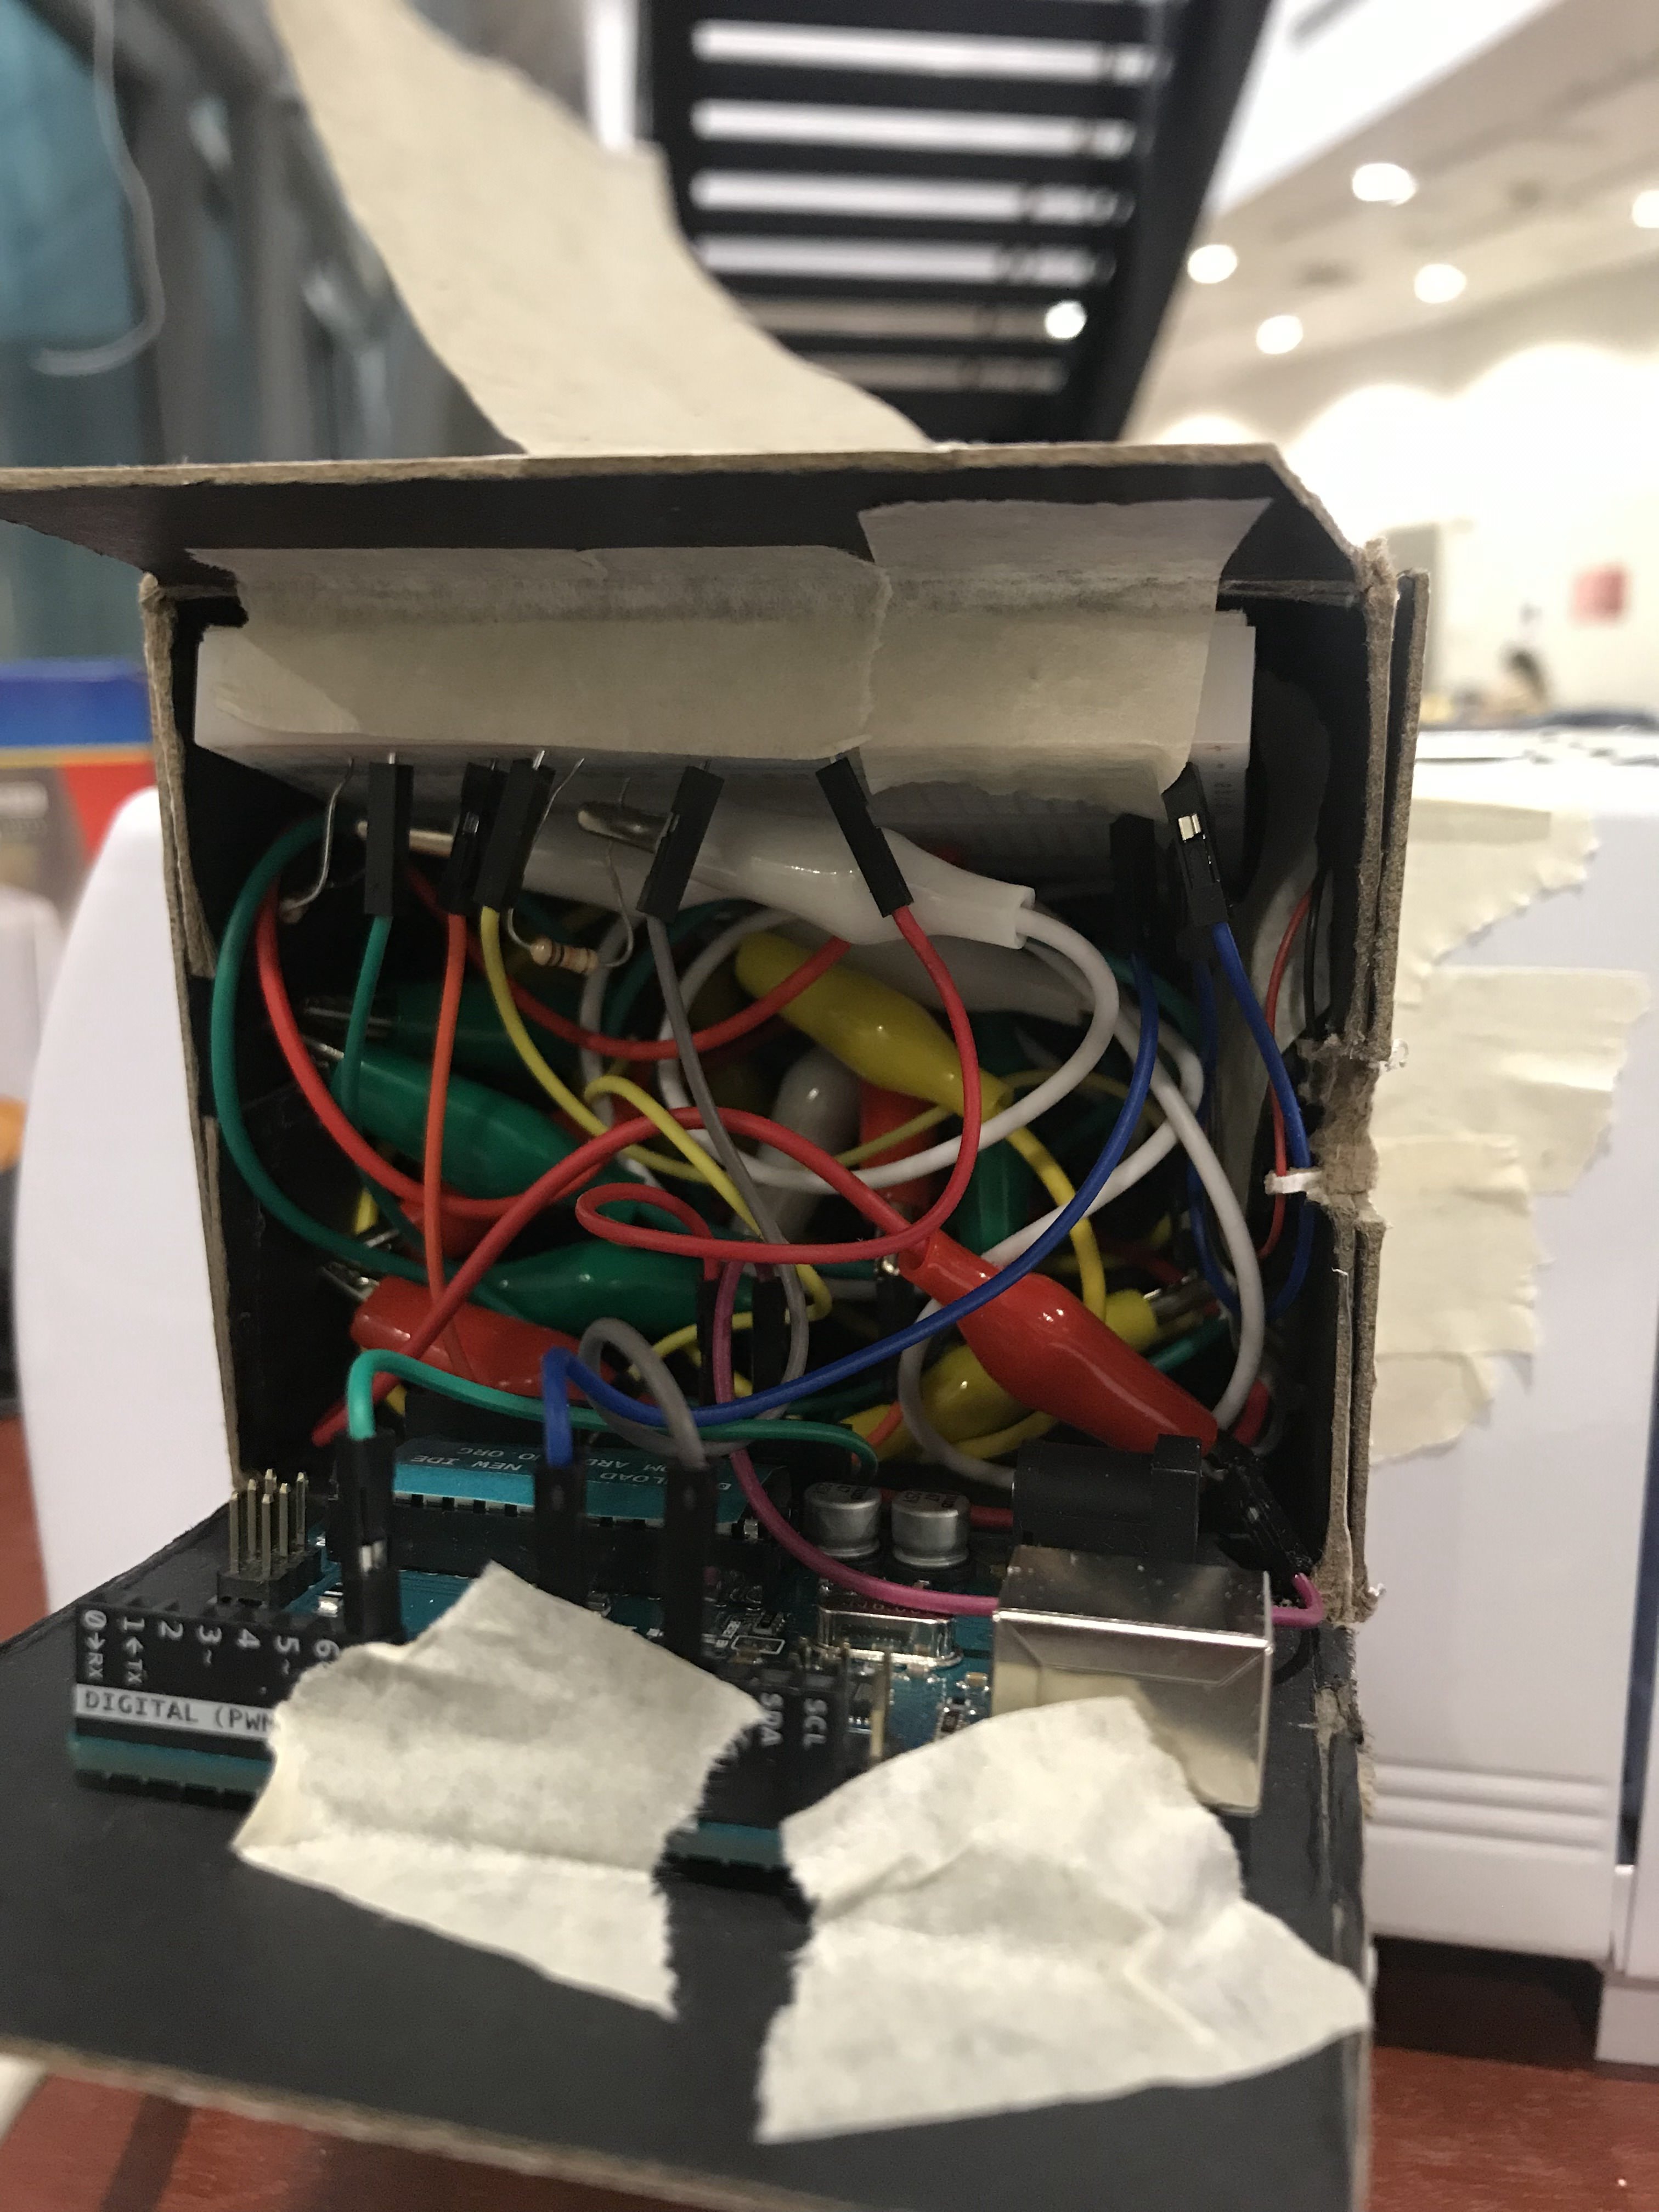
Fitting all the components in proved to be a lot more challenging than we anticipated. It took a lot of rewiring and delicate finger work to get all of the parts in and for the set up to work.
In-Class Trials
Questions
How does your hacked object behave in a way you least expect it to?

The hacked object is called Rig-a-Toaster. It plays a chime upon the completion of the toast. The part where it is disobedient is when the alarm plays when the toast is not collected after sounding 2 cycles of the chime. The alarm will continue to go on until the user picks up the toast from the toaster. In addition to that, the user has to switch off the Rig to ensure that no other shadows casted on photocell would trigger the buzzer to play the chime and alarm.
What are some reactions you observed from your participants when they interacted with the object?

Some of the participants got nervous while interacting with Rig-a-Toaster because they weren’t sure as to how it was going to react. Most of them were amused as to how it works.

Whilst figuring out how to switch off the chime, they realised that removing the toast would do so, as intended. However, it took them a while to know that they had to switch off the Rig’s OFF button.

The alarm that was played when the toast wasn’t collected and that made them realise how annoying the alarm was if the toast wasn’t removed as it continued to go on before both of the toasts were removed. The participants found the hacked object to be useful as a lot of them do deal with the problem of having toast that has already cooled down, simply because they forgot to collect it or just misjudged the timing.
What are the challenges involved and how did you overcome them? What problems still exist? How might you overcome them eventually?

The challenges faced popped up from the start to the end.
Initially, our "Hacked" object seemed very regular and not "disobedient". Thus, we added the element of the siren to annoy the user.

Another challenge was figuring out what was the appropriate code for all the components to actuate what we wanted. We knew we wanted a photocell that triggered a piezo buzzer to play a chime, so we utilised the provided syllabus presentations as well as online forums and crowdsourcing.

We had a big problem fitting all wires in the box. We wanted the rig to be compact but this resulted in us having to use alligator clips which are  bulky and we bought male to male and needed another wire to connect to the Arduino ports. This was overcome with an hour of rewiring and experimenting. While it works at the moment, the only way for this set up to be long-lasting is to solder (but we wanted to be able to reuse our components!).

An interesting challenge we anticipated was how to present our toaster rig to the class as we bread needs at least a minute to get toasted. This resulted in an awkward pause but in a situational setting, it is more appropriate.

We also felt that finding the ideal lighting was necessary for our object to work. There is a specific angle range where when the toast pops out, it covers the photocell. This problem still exists and is really subjective to the light source. That is why we forced a controlled light set up for presentation. Given more research and experimentation, we might be able to find an ideal spot for the photocell to lay on the toaster without it melting and breaking (which was another concern), for a more efficient toaster.