Watermedia Landscape Painting: Studies and Drafts for Final Assignment (Week 11)

Topics Selected

Out of the 4 topics, I’ve chosen to work on Interior Space and Weather Condition.

If time permits, I definitely want to try out the other topics too! (Or at least study them)

As of now, I only have in mind what I might want to do for Interior Space.

Process: Research, Studies and Drafting

On week 10, prof. Woon Lam mentioned a Russian painter called Abram Arkhipov and I went to check him out. I love the color control in some of his works – the recurring use of reds in his works and how the colors transit from red to greens/blues.

Abram Arkhipov Excerpt

My Abram Arkhipov Study #1

My Abram Arkhipov Study #2

I want to try studying and implementing his color schemes on an interior! Maybe find a way to play with it too. 🙂

Thumbnails

I did 4 quick thumbnails so far that are a combination of photos/live doodles.

No. 1 is a living room space with a glass door/window shining in.

No. 2 is a dining moment with lots of food on the table.

No. 3 is a quick thumbnail based on Jurong East bus station waiting lines.

No. 4 is a combination of windows, chairs and people to make a party-like interior situation. Abit messy here.

Looking to do more thumbnails and try the cutout filter method too. So far I’m more keen on No. 3 because I want to look into painting shadows, or No. 4 because I want to paint more food.

Links to previous work

Week 2 to 10 works (In-class practices and self-studies): https://oss.adm.ntu.edu.sg/laum0005/watermedia-landscape-painting-week-2-10-exercises/

Week 5 tonal practice: https://oss.adm.ntu.edu.sg/laum0005/watermedia-landscape-painting-week-5-tonal-exercises/

Illustration for Designers: Assignment 2 Final + Process (Varoom)

— FINAL —

(1) ILLUSTRATION ON VAROOM COVER

(2) ILLUSTRATION ONLY

(3) MAGAZINE MOCK-UP


(4) CONCEPT: POLARITY

I chose to expand on the thumbnail that featured a composition of a girl in a bed, with monsters swimming under her bed. The composition was first inspired by the state of dreaming and the idea of having ‘monsters under your bed’.

I chose to integrate water as an essential element as to me, water is a symbol of great change and polarity (life and death, benevolence and ferocity). This reflects my take on fantasy where alot of elements and ideas are taken to the extreme (good and evil, poor and rich, colorful and colorless).

Towards the end of the illustration, I also decided to leave out the mouth of the girl to convey restraint when staying on the side of reality – since the image is split into dual halves: orange half symbolizing reality and purple half symbolizing fantasy.

For references, I looked into Hokusai, Zaodao and a few other Asian artists because they were great influences in my artistic journey.

I took this chance to review some of the text in their art books to check out their working processes. An interesting tidbit I found:

An excerpt from Hokusai’s sketchbooks: The Wonders of Nature

I found out that Hokusai wasn’t a very well-traveled man. His lack of travel and getting information from sources around him (picture books, etc), however, contributed to the bizarre nature of his creatures and fantasies.

Other than artist research, I also drew inspiration for the creatures from the animals at my house right now like:

My sister’s pug, Pepper

My budgie friend, Ginko

Pepper had alot of folds and wrinkles in her face and was the major source of inspiration for the brush pen in my drawing to achieve texture and volume in the creatures! Ginko (and Hokusai) was good reference for the fierce look and textures of the creatures.

(5) MEDIUM

The tools I used were: Micron pens (0.03mm – 0.1mm), Brush pens, Adobe Photoshop (with natural brush textures) and Adobe In-Design (compilation)

— WORKING PROCESS —

(1) USER PERSONA & MOOD BOARDS

(2) THUMBNAILS

My 16 Thumbnails

Thumbnail #1: Hero and dragons

Thumbnail #2:Wearing fantasy


Thumbnail #3: Traveler and a twisting dragon


Thumbnail #4: Sleep

Thumbnail #5: Witch, her Cat and the City 

Thumbnail #6: Traveler and her sea


Thumbnail #7: Thinking

Thumbnail #8: Spirit Parade

Thumbnail #9: Bubbles

Thumbnail #10: Day and Night

Thumbnail #11: Dreaming with friends

Thumbnail #12: Things around You


Thumbnail #13: Cat and Twisting Dragon


Thumbnail #14: Loch Ness and Cat

Thumbnail #15: Swords

Thumbnail #16: Sea of Monsters

Concept behind the thumbnails:

My thumbnails were generally based off on my experience with the fantasy genre (in games and novels). During the thumbnailing process, I focused alot more on creating visually interesting compositions and not so much about the individual concepts. When I think of fantasy, I think of fantastical creatures in my childhood. I loved monster-taming games like Pokemon, Rhapsody: A Musical Adventure and Azure Dream.

Rhapsody: A Musical Adventure

Rhapsody: A Musical Adventure (Gameplay Screenshot)

Azure Dreams

Azure Dreams (Gameplay Screenshot) 

My thumbnails generally revolve around animals as friends and companions, or creatures as an anthropomorphized aspect of myself or a journey to overcome. As a kid and teen who never traveled much last time, these creatures were simultaneously my best friends and worst fears at the same time because I could relate to them in stories but they also confronted things and concepts I didn’t have much exposure or access to – such as responsibility, power, loss, and more.

This was also why I related to the passage in Hokusai’s sketchbook since he lived in a time where the world was not so accessible yet and had to rely on his imagination to fill in the rest – which made things alot more polar and led to the creation of extremes, absurd creatures and concepts.

(3) PENCIL COMPS

The three chosen pencil comps after the thumbnail feedback session are as follows:

Pencil Comp #1: Spirit Parade


Pencil Comp #2: Traveler and a twisting dragon


Pencil Comp #3: Sleep

(4) WORK-IN-PROGRESS

My materials

I worked directly on the pencil comp with black brushes and microns, before scanning in the drawing, increasing the contrast to extract the black lines.

From thumbnail to pencil comp

The pencil and ink scan


Initial draft for Week 9 review

I filled in the rest of the rest of the image digitally on Adobe Photoshop and also filled in the purples and orange/yellows to work out the composition!

Adobe Photoshop: continued work-in-progress

Final – overlay with paper texture

Link to Varoom Research: https://oss.adm.ntu.edu.sg/laum0005/illustration-for-designers-varoom-artist-research-week-5/

Typography I: Assignment 3 – Archetypes and Typography (Part 1/2)

CONTENTS

  • Chosen Archetypes
  • Ideation
  • Write-ups
  • Experimentation and Process
  • Decisions
  • Link to Part 2 (Final Outcome)
CHOSEN ARCHETYPES

Assignment 3’s mission is to disseminate information on 6 (out of 12) archetypes used for brands!

On 24/10 (Week 10), I’ve chosen the following archetypes for my project:

  • Hero [Defending the underdog]
  • Magician [Supernatural and wondrous]
  • Explorer [Travel and experience]
  • Outlaw [Revolutionary]
  • Lover [Idealist aspiring for love and pleasure]
  • Jester [Enjoyment, fulfillment and instant gratification]
IDEATION

During my walking exercise in class, I’ve managed to come up with a couple of ideas for the format of the project:

  • Archetype texture book
  • Archetypes as moving lines zine / optical movements or illusions made with type (twisted lines, speed lines, curvy lines)
  • Archetypes on holiday: a travel log with type (could be digital/social)
    (what about a survival book)
  • Fashionable type (archetypes in a fashion magazine)
  • A board game on archetypes (a game adventure) (could be a digital game as well)
  • Archetype diorama (made with typography; archetypes in their enviro)
  • Archetype tarot/lenormand cards
  • Play cards

The bolded ones were the ones I thought about and expanded on after the first consultation! In the end, I decided to go with the concept “Archetypes on a Holiday” and use the diorama/landscape idea to approach the concept.


Some sketches!

WRITE-UPS

Since we learn about the gist of the archetypes through the lessons and our personal research, I kind of wanted to have a situation where they could interact with each other – a little bit like the ABO blood-type comics where they’re all doing their own unique and cute thing.

ABO comics!

My concept developed in the slice-of-life direction:

  • What would be the role of each archetype when they traveled together?
  • What would they do together?
  • What would be their individual agendas?
  • What would they want to eat?
  • Would they get along?

Thus for each of them, I gave them a situation and did a short write-up of their reaction!

Explorer: The wild child can’t sit still. This time, he took it upon himself to ensure that no one chickens out on the trip. He was the first to ring up the rest. With great enthusiasm, he persuaded the others to spend some quality time together. He brought his handy dandy bagpack along for the trip and can’t wait for the journey to start!

Hero: The brave friend who scored a free meal. Right before departure, Hero noticed a highly suspicious type at the terminal dressed in black and tailed the fellow. He later assisted the staff in effectively disarming and arresting the suspicious type, before regrouping with everyone before the flight to enjoy a good burger on the house.

Outlaw: The defiant rogue. Nauseated by how hopelessly clingly the rest of them are, he immediately left the group after the flight to enjoy some time on his own. He wandered around and found a quaint little shophouse full of little trinkets and took a nap there with the resident cat, Mr. Pica.

Jester: The free spirit brought nothing with him. He never properly prepares for any trip and this time he forgot to bring a change of clothes. Thankfully, everyone decided to pool some money for him to buy some essentials. He is very appreciative but ended up squandering everything on an armful of trinkets.

Magician: The old soul spaced out and got lost. Penniless, he started performing and attracted a lively crowd in the streets. He was almost arrested for illegally performing on a streets but pulled a vanishing act at the very last second and snuck away. Eventually, he found his way back to the group but had to be persuaded to let the seven rabbits under his coat go.

Lover: The charmer struck lucky on this trip. Lover received a proposal at the airport, right before they went back home. The proposal caused a huge commotion. Due to the commotion, the flight was delayed and everyone decided to take an extended vacation.

EXPERIMENTATION AND PROCESS

I collected some images for a moodboard

While I wanted to do a diorama initially, the experimentation stage didn’t work out too well for me. I was reminded countless times about my poster grid as well. The poster grid is definitely the biggest struggle I had during this project. 🙁

I purchased a book on grids because I was stumped and it definitely saved me (kind of). Both the consultations and the book gave me a little bit of foothold and pulled me back from doing the wrong kinds of crazy.

I promise to study grids 🙁

Different drafts that I experimented with

I definitely started out with alot more illustrative elements, before deciding to go with a more structural layout and do my best to play with existing fonts instead of wanting to illustrate everything. I also picked to use a modular grid.

The set at the bottom was initially intended for me to make an accordion book – I wanted to connect it in a “ARCHETYPE -> LOCATION -> ARCHETYPE -> LOCATION -> …” sort of manner, but it didn’t work out too well because I needed to find a way to make it more structured and more poster grid-ded. I scrapped it, but kept the same concept and elements, instead of depict moments instead of actual location.

DECISIONS

Around 15/16th Nov (Thurs/Fri), I arrived at these drafts:

I can’t say I’m completely satisfied with the outcome, but it’s a start!

More images of experimentation with fonts and layouts for the rest of the archetypes:

LINKS

Final Outcome (Part 2/2): https://oss.adm.ntu.edu.sg/laum0005/typography-i-assignment-3-archetypes-and-typography-part-2-2/


Graphic Form Project 2 Part 2: Zine (´・ᴗ・ ` ) (Research & Process)

Early Concept Ideas

This was the first two pages I created for this concept – based on how I could tell the information in the signs at the wetland reserve. I wanted to tell the information of the nature reserve through containers at the reserve. (Or was it the information of the signages of the nature reserve through marks at the nature reserve?)

Anyway, I think I overcomplicated the criteria for myself and got myself so confused with the zine criteria. I had a difficult time working with this, so I decided to take a step back and review what I could do with a zine and with my location.

Early drafts

start over with my concept based on my 7 senses – which I felt was closer to heart.

Research for 7 Senses

I decided to think about the fundamental elements of a zine (8 pages, etc) so that I could tap on the elements of this zine’s criteria and go on to  personifying the 7 senses.

I decided to draw inspiration from the moon gates that you can find in China or Japan. These doors are found in gardens and I think it’s interesting because of how it controls what you can see of the garden and how it creates a very curated scenic view!

Image of a moon gate (Japanischer Garten).

Image of a moon gate by Alec Finlay.

I also did some research on parts of the eye and how the eye worked:


There was an interesting article I read about ‘forbidden colors’: red-green and yellow-blue. This was an excerpt:

“While most colors induce a mixture of effects in both sets of neurons, which our brains can decode to identify the component parts, red light exactly cancels the effect of green light (and yellow exactly cancels blue), so we can never perceive those colors coming from the same place.”

I decided to experiment with these basic colors for my concept later on.

Zine-Making Process

Conceptualizing

As mentioned, I had alot of difficulties working with my initial concept and decided to revise and start the conceptualizing stage over. I decided to piece the format and each piece together a little by a little, standardizing that the ‘focus’ would depict the physical sight I saw/experience I felt, while the ‘peripheral’ would express my emotions towards that impression, emotions and the location.

Early revised concept:


Motion blur for movement!

Creating Focus: Photo Manipulation

Started off with making trippy images out of the photos that I had of the most impressionable parts of the wetland reserve!

From this:

To this:

Lily Pond (Hear):

After that, I used Audacity to play an MP3 of the video of the lily pond sounds, and screenshotted the soundwaves of the place to impose it and create a pattern for ‘Hear’!

Golden Orb Spider Silhouette (Touch):

I made a spider wallpaper. 🙂

And the aquarium image I used for ‘Smell’:

Warping the image of berries (Taste):

Proprioception (Spatial):

All:

I was really surprised when I placed all the layers together and they looked like a painterly Sungei Buloh! (‘o’) I did receive feedback during consultation that it looked too green – like it was too much slanted towards the pages ‘Balance’ and ‘Hearing’ because it was very green and yellow.

However, I do want to slightly draw it back to my visual experience at the location, so I wound up trying to work around the proportion of green instead.

During the early consultations, I also made the choice of including words because I was worried about how the zine has to be a ‘show-don’t-tell’ book – but I was informed that we’ll be explaining our zines, so I decided to just take out the explanatory content completely.

Early draft with caption

Creating Peripherals: Mark-Making

I couldn’t take anything from the site for mark-making, so I decided to take more photos and recreate them instead!

Honestly they look nothing alike HAHAHA.

The wings that took the most effort but also looked the most hideous.

This one’s based on the shadows of leaves!

My hand is my mood – icky.

I THINK IT’S READY???

Also – other marks that I tried with gouache and rope but didn’t work out so well.

Ripple marks didn’t end up being very suitable either. :’)

Intended to draw a structure to impose for every piece but it didn’t work out very well aesthetically, so I just extracted the flower in the middle to use as a mark instead.

It was pretty challenging working with the concept and timeline, but I had alot of fun. To view the outcome of this project, go to ‘Project 2 Part 2 Final Design’! 🙂

Links

Project 2 Part 2 Final Design: https://oss.adm.ntu.edu.sg/laum0005/graphic-form-project-2-part-2-zine-2/

(Previous) Project 2 Part 1 Process & Final Infographics: https://oss.adm.ntu.edu.sg/laum0005/graphic-form-project-2-locale-2/

References

Moon Gates: https://insteading.com/blog/moon-gate/

Image of moon gate: https://upload.wikimedia.org/wikipedia/commons/d/d6/Japanischer_Garten_IGA_Rostock.jpg

Parts of the Eye: https://lookafteryoureyes.org/how-your-eyes-work/parts-of-the-eye/

Graphic Form Project 1: My Name ( ` ω ´ ) (Research and Process)

ART DIRECTION & Research

This was a personal project and I naturally swung towards Japanese comics and game art upon starting on the research for this project! Japanese RPGs are my life and I really want to let my love for games decide where to swing for this project!

Seeing as I was assigned to the first week for the weekly presentations as well, I decided to incorporate extensive research of Russian Constructivism, Suprematism and De Stijl into my works as well.


I did some research on brushwork and practiced some calligraphy too to practice discerning line work and improving my line expression for this project.

I decided to base my Project 1 on interpreting real life jobs as a utopian fantasy much like fantasy jobs such as Mages, Swordsmen, Bards, and more!

PROCESS

Sketches:

Deciding the occupations was definitely the toughest part of this project – but I didn’t expect sketching and composition to take so much time! It took me the entire Chinese New Year break (at the rate of approximately 1 drawing a day, at least) to complete the pencil work and line art.

I proceeded to scan in the drawings and repurpose them into digital portraits for printing through Photoshop.

I initially planned for it to be monochromatic, but it didn’t turn out so well. After consultation, I decided to have larger percentages of color and…

It worked out decently – I think! 🙂

… now just need to repeat consistently for 3 more.

After finishing up the four portraits, I went down with Nic to Sunshine Plaza for printing!

Introduction Activity: https://oss.adm.ntu.edu.sg/laum0005/graphic-form-introduction/

Other Research: https://oss.adm.ntu.edu.sg/laum0005/research-artist-and-unconventional-art-material/

Final Designs: https://oss.adm.ntu.edu.sg/laum0005/graphicform-project-1-part-2/

2D Project 2: Silkscreen Printing \(・∀・)/ (Part 2)

Pre-Session 2 (9/10/16)

I went to Muji on a Sunday to buy a couple of blank totebags for myself and my friends, so I figured I should put this down here as well so that I can refer to it if I ever need more totes in the future!

img_20161015_142545_lq

img_20161015_142639

Nicole previously went to Art Friend as well to look at the totebags over there, but in terms of both pricing and fitting length – Muji is cheaper and also more aesthetically pleasing.

(I later found out on Tuesday that it was better for printing on (material-wise) as well)

Also on an unrelated note, while shopping for the totes in Muji, I realised that Muji named it “MyBag”. A friend from WKW and I had a conversation over lunch about Japanese slang as well – I learnt more about their tendency to use “my —” in their slang.

Like when a Japanese asks you what is your “my boom”, it sounds ridiculous to us. What’s a “my boom”? Is it some sound? Some audio fad thing?

Apparently “my boom” refers to what’s your current obsession – like what do you have strong interest in – is it Kpop? Basketball? Fandoms?

There’s also “my glove”, which would mean personal gloves in japanese (which could be used when you have a personal bowling glove, etc)

So I guess Muji naming their product “MyBag” is their way of showing that they want to make this bag personal for the customer, in their own way.

It’s rather unrelated to the silkscreen process, but I feel like I understand more about Japanese product-naming senses and fads through shopping as well, so I just wanted to put this down. It’s kinda nice to learn! (‘u’)

Silkscreen Session Part 2 (The important bit!)
I’ve been dying to come back and finish up the silkscreen process!

img_20161015_132531

Today’s session continued off from last week, and we got into pairs. I teamed up with Andree (thanks for being so patient and also for your help, Andree ;u;)

We started off with putting coins at the corners of the screen and putting brown low noise, packing tape over them. Putting coin at the corners helped to give a small distance between the screen and the canvas we were inking, and the packing tape on the sides was to prevent ink from seeping through the borders of the design.

img_20161015_134351

img_20161015_132008With the taping done, there was a demonstration for printing!

The concept of it was easy, but doing it myself kinda destroyed my nerves.
I should have bought more totebags from Muji. 🙁

img_20161015_132340

My tries on paper kept turning out too dark and I was extremely worried for a sec. Each time I tried, I needed to wash and dry the screen as well so I learnt to be careful to make sure the front part of the screen was dry before I attempted another shot at printing – else the print would come out with grey splotches and stains of ink mixed with water. (;u;)

img_20161015_142446

One of the attempts on newsprint; bottom-left is grey because of water.

I finally dared to try printing on the blank tote given by the school. I stuffed a piece of cardboard into the tote and started on it, but I crapped up on my first attempt, so I had to flip it over and do it on the other side. I was so sad, but it was…. okay. It turned out alright… I guess…

But the one I printed on the Muji tote!!!

The one I printed on my own tote turned out better than my attempts on newsprint and on the school tote though!

ALL THE STARS CAME OUT.

img_20161011_172225_lq

IT’S FINALLY DONE.

I shouldn’t scare myself so much next time – but it was really scary to try to print when all my newsprint attempts turned out so dark, and the Art Friend bag turned out either too dark or light.

It turned out alright in the end though! I guess what I picked up from this is that different material would take differently to printing. I have a feeling that since Muji made their bags for stamps and chops, it was probably why it printed better – the surface was smoother and took well to printing. //slaps newsprint to mars

It’s kinda sad to be applying betastrip to clean the emulsion off after working so hard to get the design out on the screen.

In the previous session, I saw Shirley applying emulsion on the front and back of Amelia’s screen to get the design off, so I did the same for mine after removing the tape and coins when I felt like I done.

The blue slowly comes off after the betastrip is applied, so I just left it on the screen as I went to clean up the other stuff – like the newsprints, the table and the screen printing squeegees (the smooth rubber blades we were using to pull the ink down).

I was super curious about the word ‘squeegee’ because it sounds super cute; apparently it comes from the word “squeege”, which meant to press or squeeze – which was in use around 1783. THIS IS SO COOL.

But anyway…

img_20161015_132142RIP my first screen >—>(c’:)

After waiting for awhile, I just dunked it in the sink and started scrubbing until all the blue came off, dried it in The Dark Room and returned the screen.

20161011_160109

It was a blank screen graveyard.  ~~~ଘ(੭*ˊᵕˋ)੭*

I was initially intimidated by the silkscreen process but I’m really glad to have been able to do it for this assignment! I really enjoyed the process, and I have newfound appreciation for people who are doing printing – they must be super patient and meticulous!

img_20161015_140627

I’m not sure what I’m going to use the totebag for since I only printed one for myself, but I think I’ll eventually find a use for it!

I’ll just let my hamster sit on it for now. (;u;)

2D Project 2: Silkscreen Printing 口\(・∀・ ) (Part 1)

Silkscreen Session Part 1
The class started on silkscreen printing today!

After the weekly presentation, we all took a screen. I went with Nicole into the dark room first to coat my screen in blue ink with Jia Hui’s (our super kind student assistant’s) help, and placed it to dry for the next 20 minutes.

img_20161015_162037

I’m sorry for being a public nuisance (u-u);;

While waiting for it to dry, I realised that we had to actually print our quotes together with the image on the transparency. I printed only the image, so I had to go reprint the transparency at One Stop.

img_20161015_155504

After returning with the transparencies, our screens were dried! We grouped up in fours and went in to put the transparency on it so that we can do exposure! I went with Andree, Rochele and Amelia.

I forgot to take my phone into the room so I took some images with Shirley’s phone during the vacuuming process! (‘u’) (And for the dark room parts, we mostly used Andree and Rochele’s phones to take pictures. Thanks guys! ♡)

fullsizerender-6

Jia Hui opening the vacuum machine and putting our four screens for vacuuming!

fullsizerender

Zwoop!

(Thanks for the pictures, Shirley! ♡)

After that, we went to spray our designs with a hose-gun thing and wow, it was sure loud.

Hosing the screen generally got the big parts to come off, but we still parked by the sink so that we can scratch off the leftover emulsion bits that wasn’t supposed to be there.

img_20161015_161933

-pew pew pew-

img_20161015_133014

-scratch scratch dab dab-

img_20161015_133226

WHY WON’T YOU COME OFF.
*scratching intensifies*

The emulsion was surprisingly strong! I scratched it with all my strength and it was still somewhat okay. I’m surprised that some of the thinner details made it as well – like the lace lines and the stars!

img_20161015_162158

And also… BUDDY ROCHELE…!

If I’m not wrong, some of the other classmates had more intricate spots, and the hosing + scratching made those spots come off completely – what a nightmare. (Guys, you’re super amazing for redoing this. (;u;) )

After the hosing + scratching, I dried off the screen abit and just stored it in class – that was the end of today’s session!

Consultation
Other than the process, I also got a couple of feedbacks and notes:

– My designs were very central and safe; I will try to be more adventurous next time!
– I almost printed the designs with the wrong dash (an em dash instead of en dash. These dashes are evil.)
-Also, I got to talk to Shirley more about my other designs as well, other than the main design – like the crow and bacon design.

…And that was all! (‘u’)✿

2D Project 2: Photoshop Session and Recess Week ヾ(・ω・)メ(・ω・)ノ

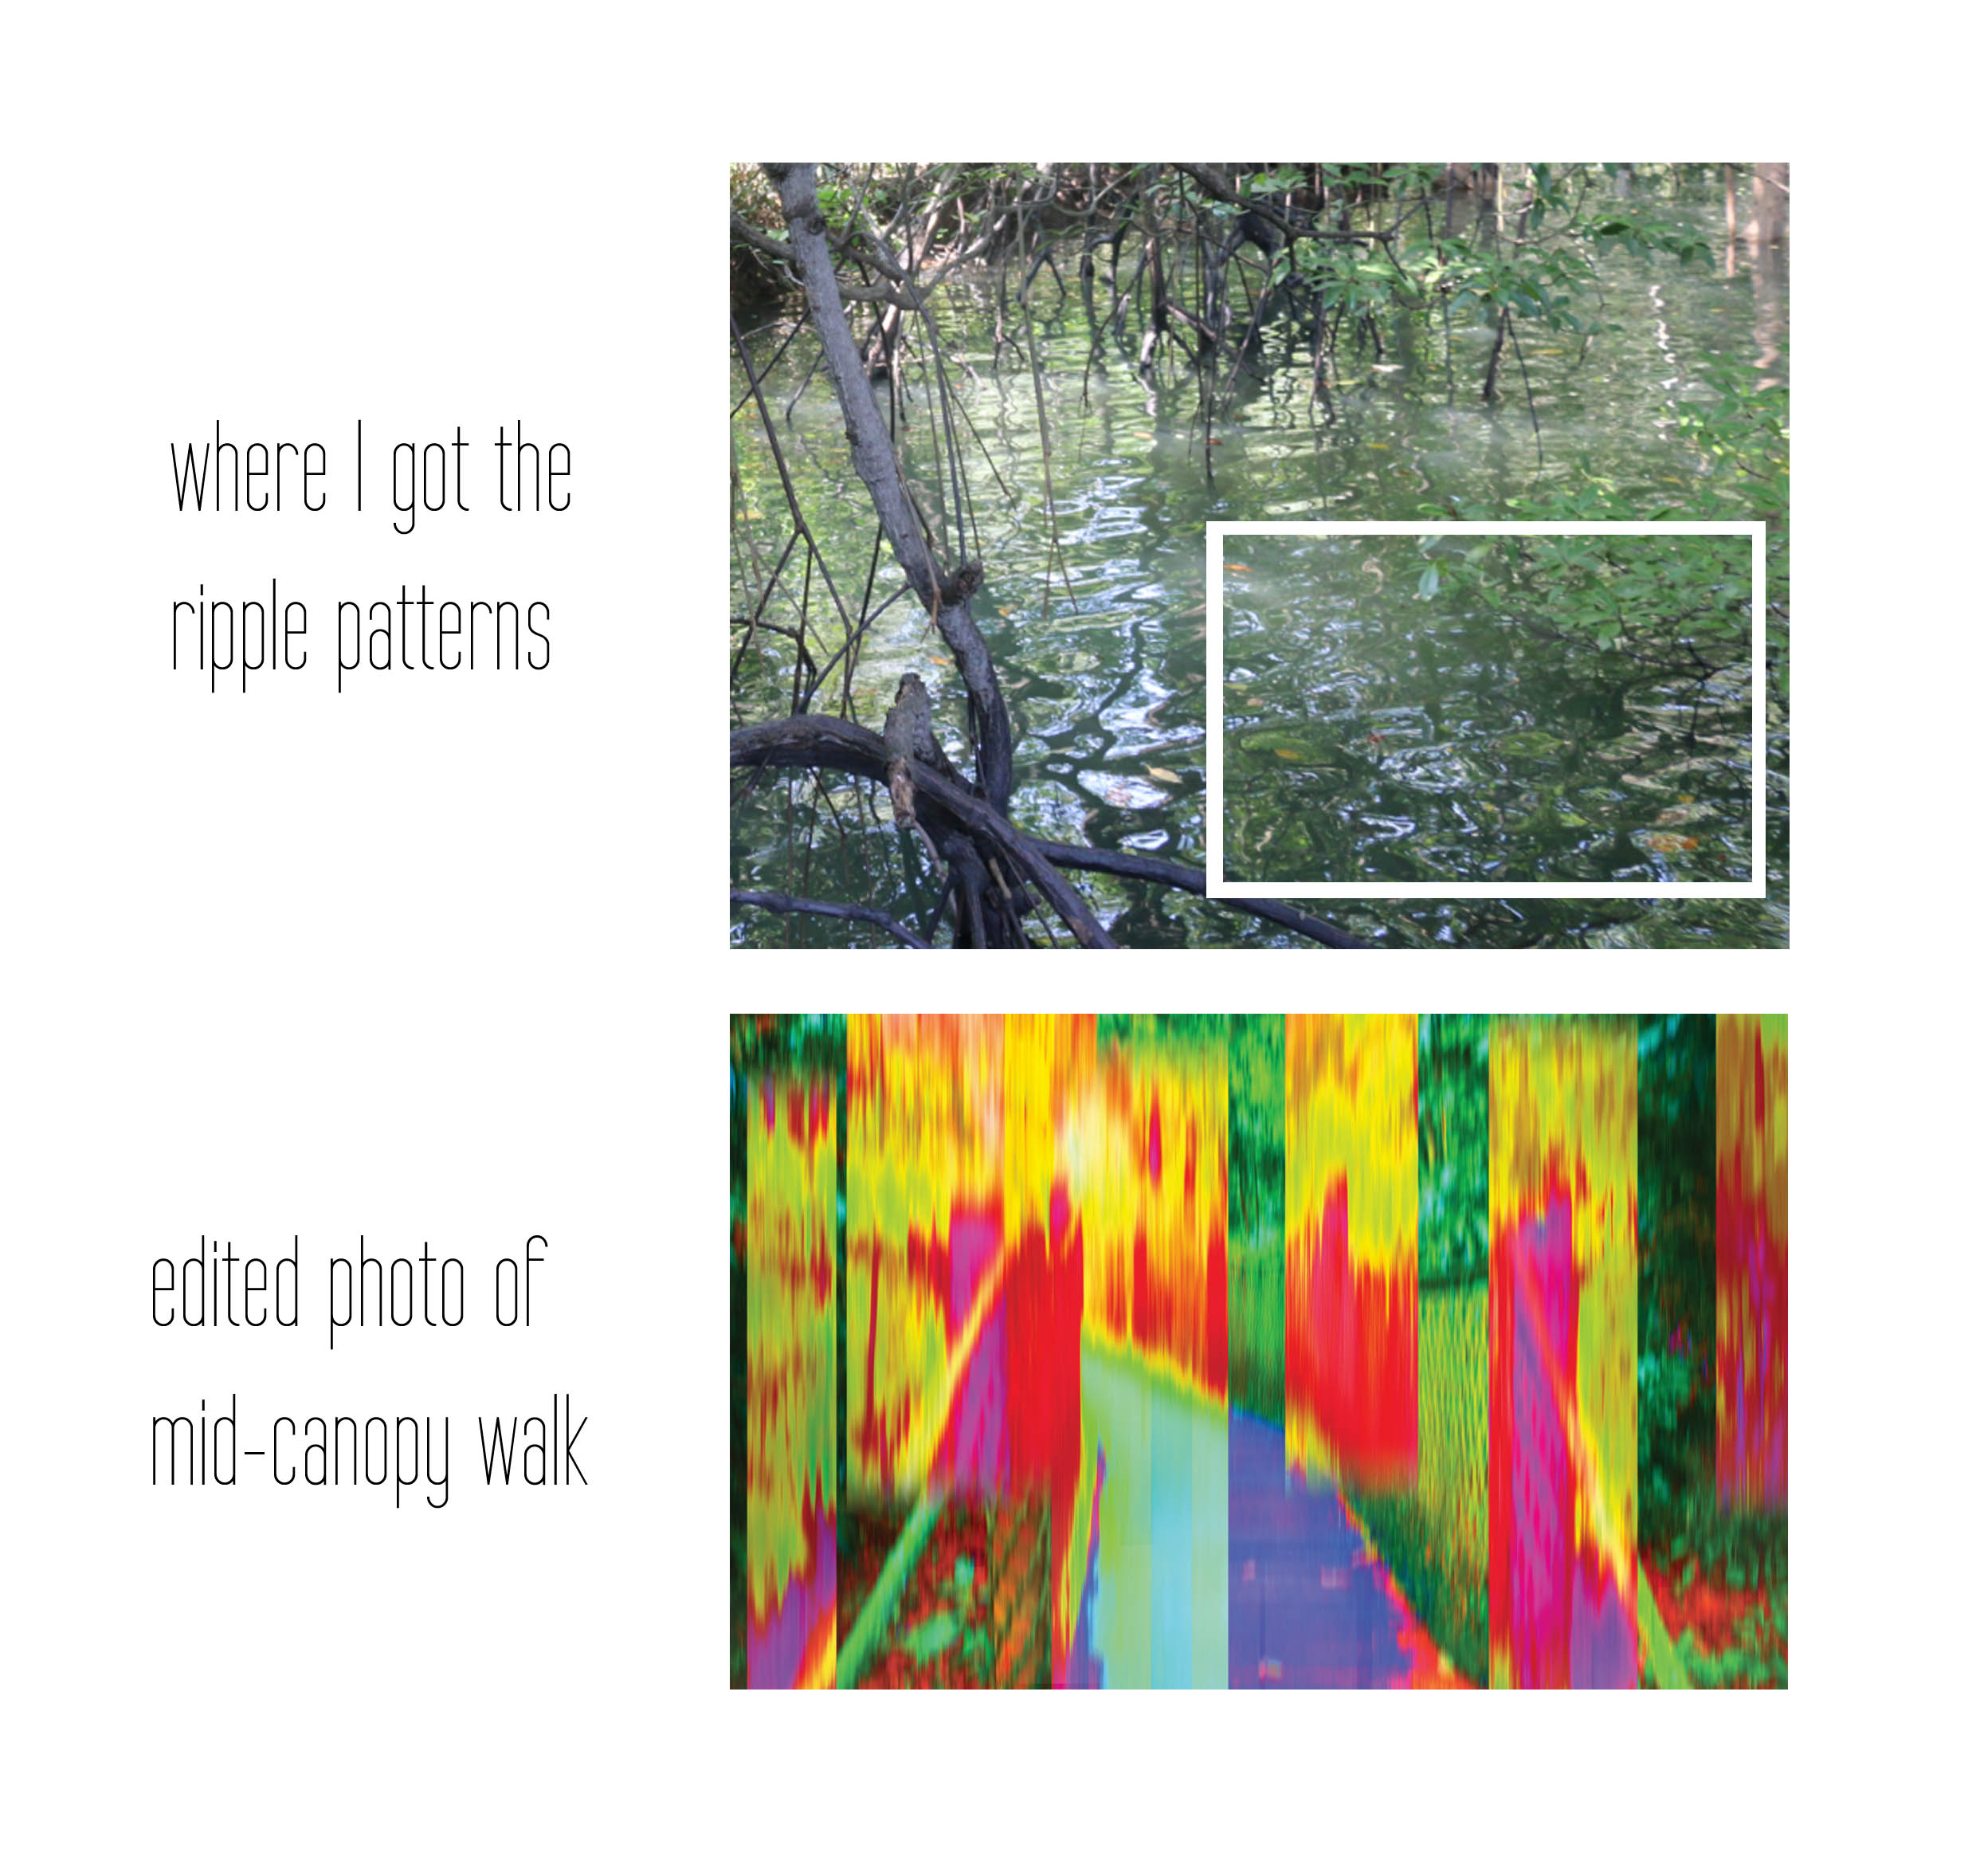
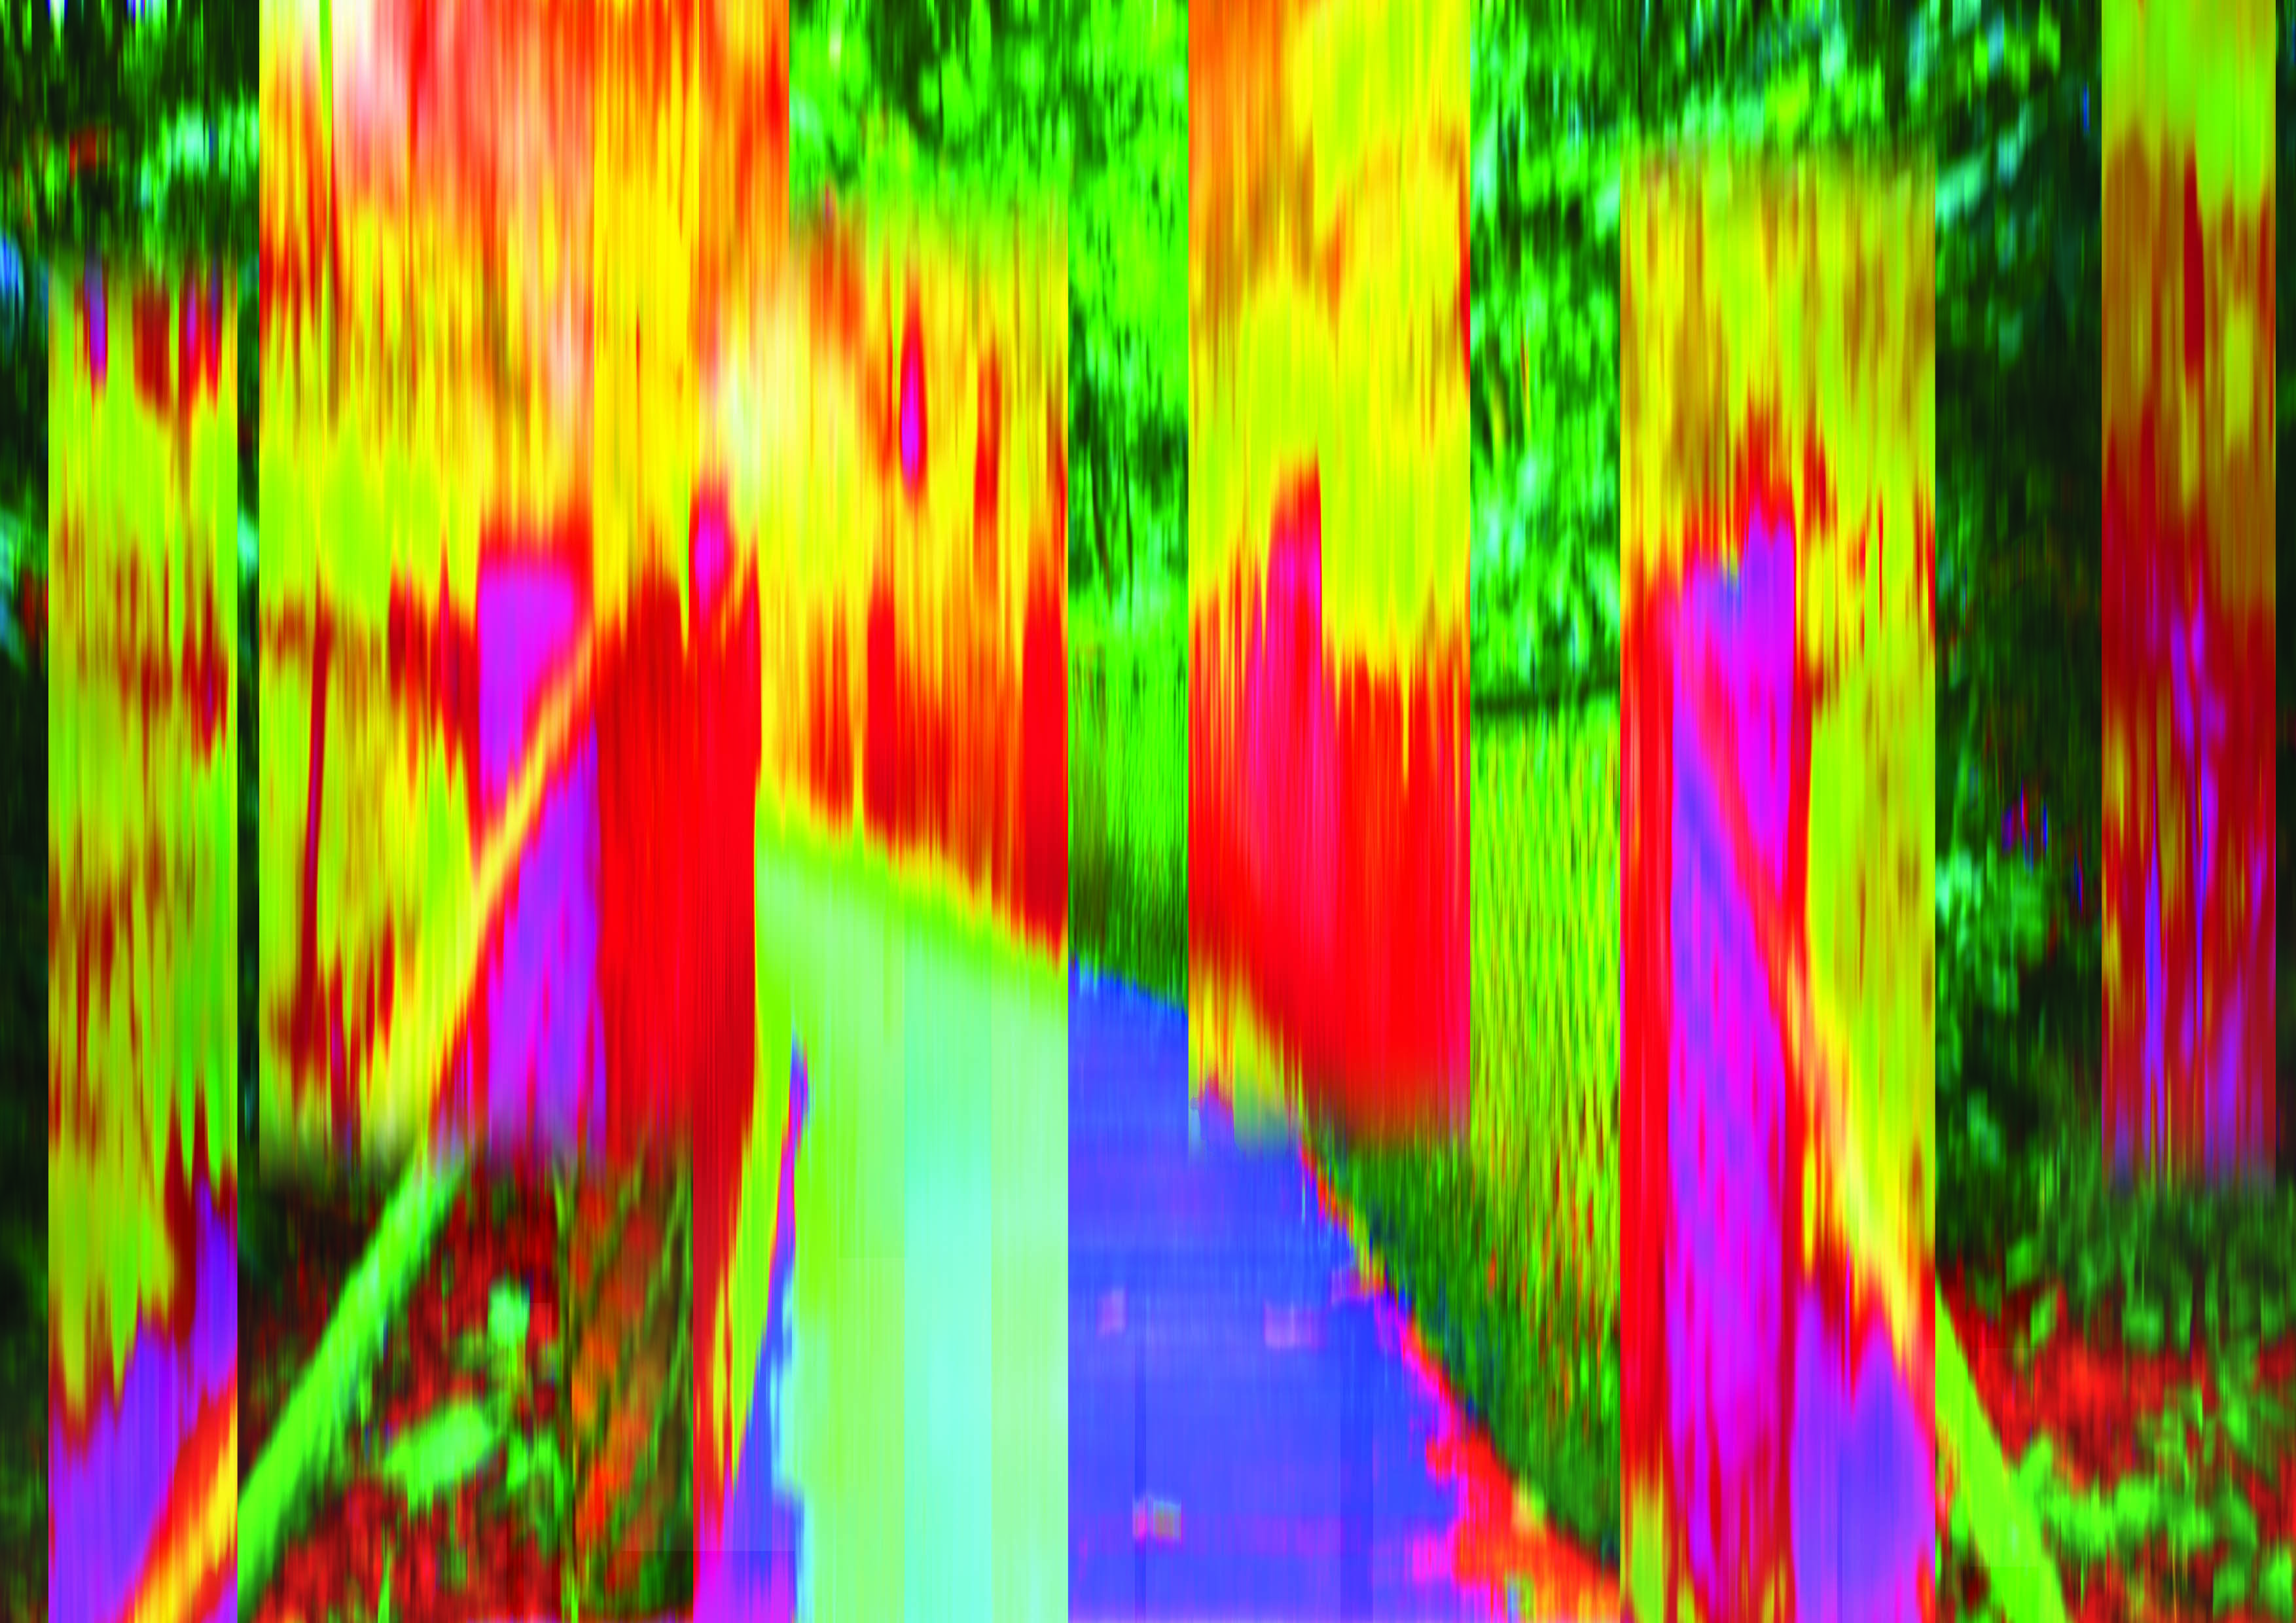
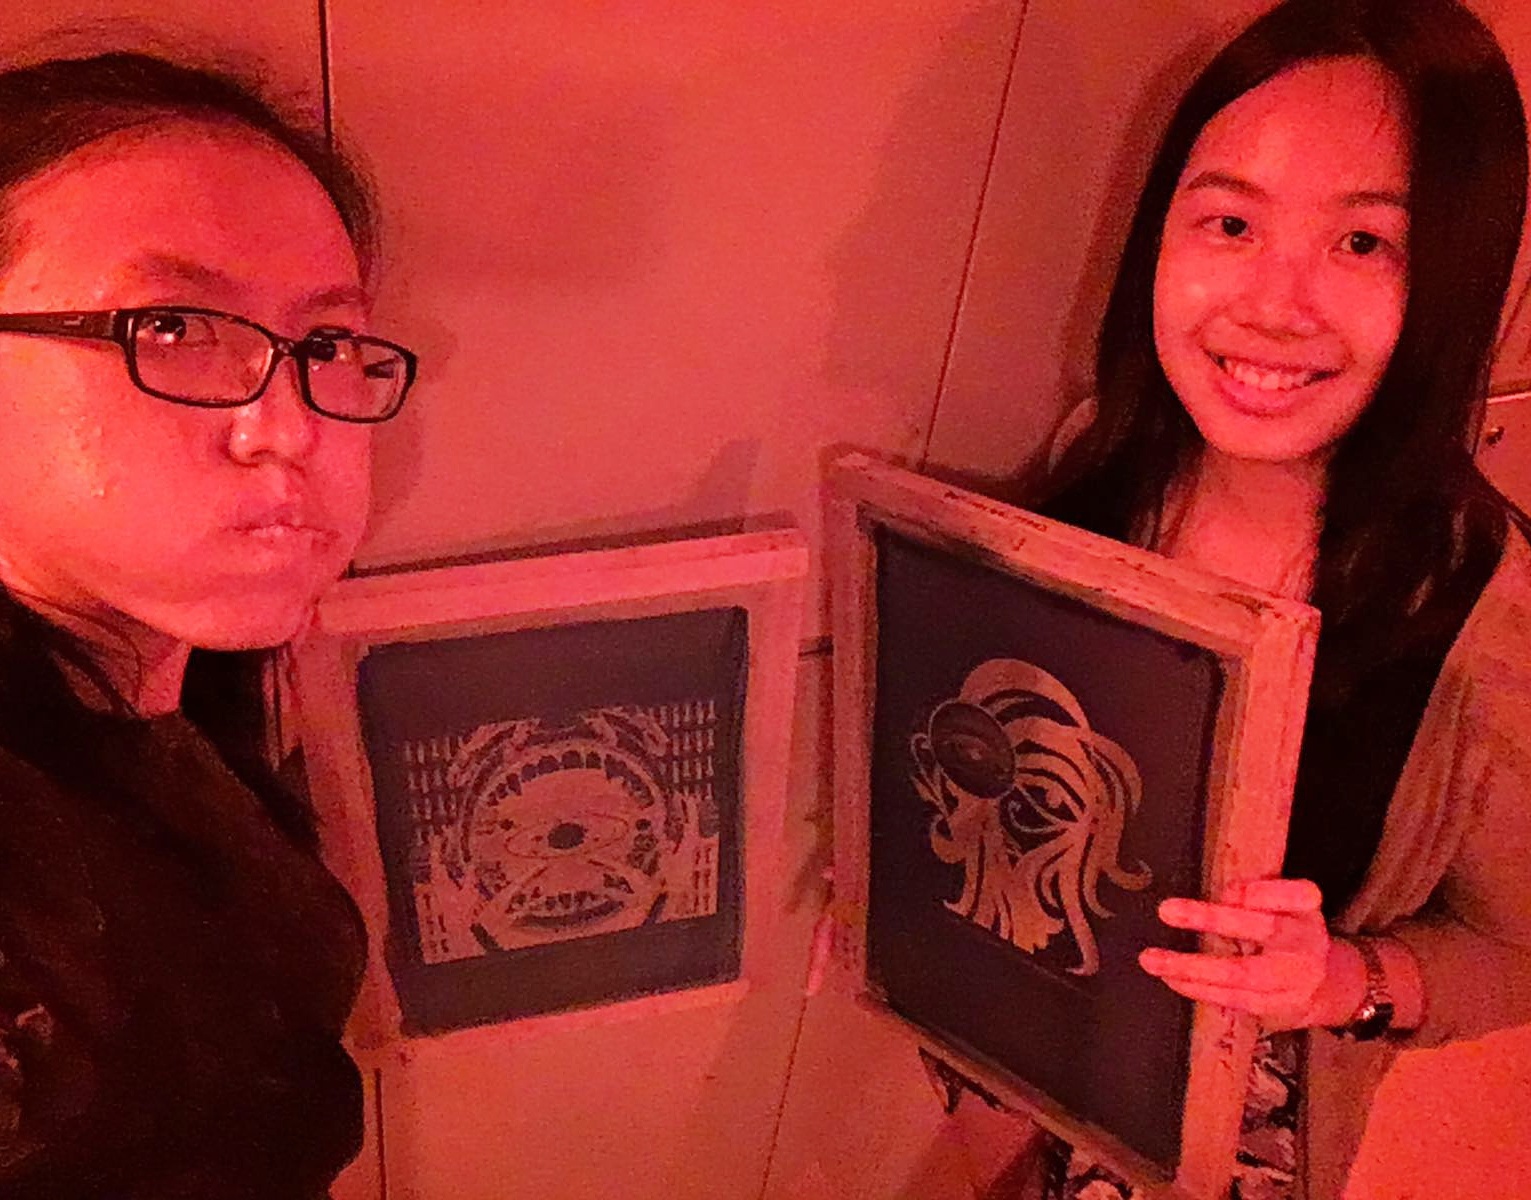
27th September 2016: Photoshop Tutorial in PC Lab (‘u’)
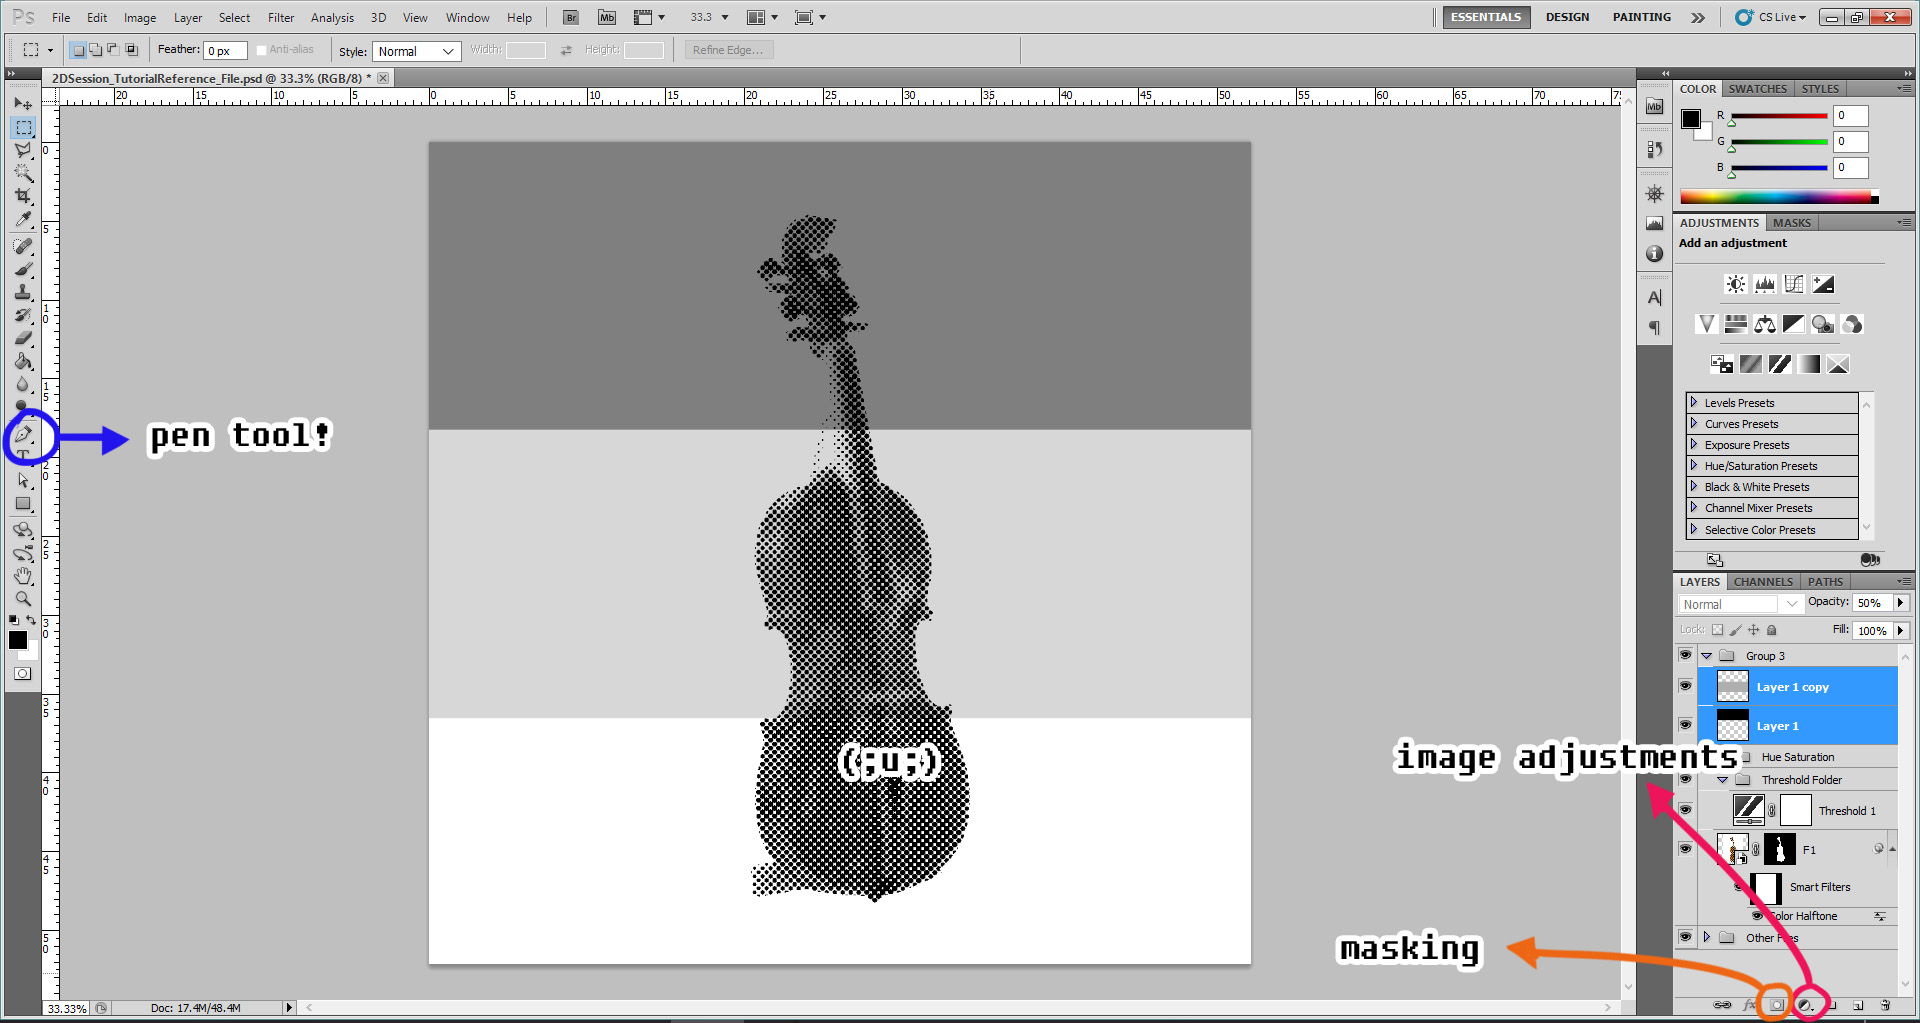
The session today started off with a quick tutorial by Shirley on pen tool, path, masking, half-tones, etc!

Before this, I’ve never used the pen tool, path and converted my images to smart objects. I abused the polygonal lasso tool and the transform tool to make images, and I end up having to lasso the same areas over and over again. (;u;)

I feel this this session has taught me alot about retaining my image information and quality – I’m super stoked!

file1

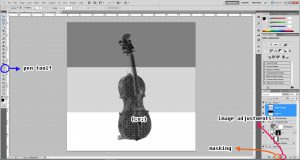
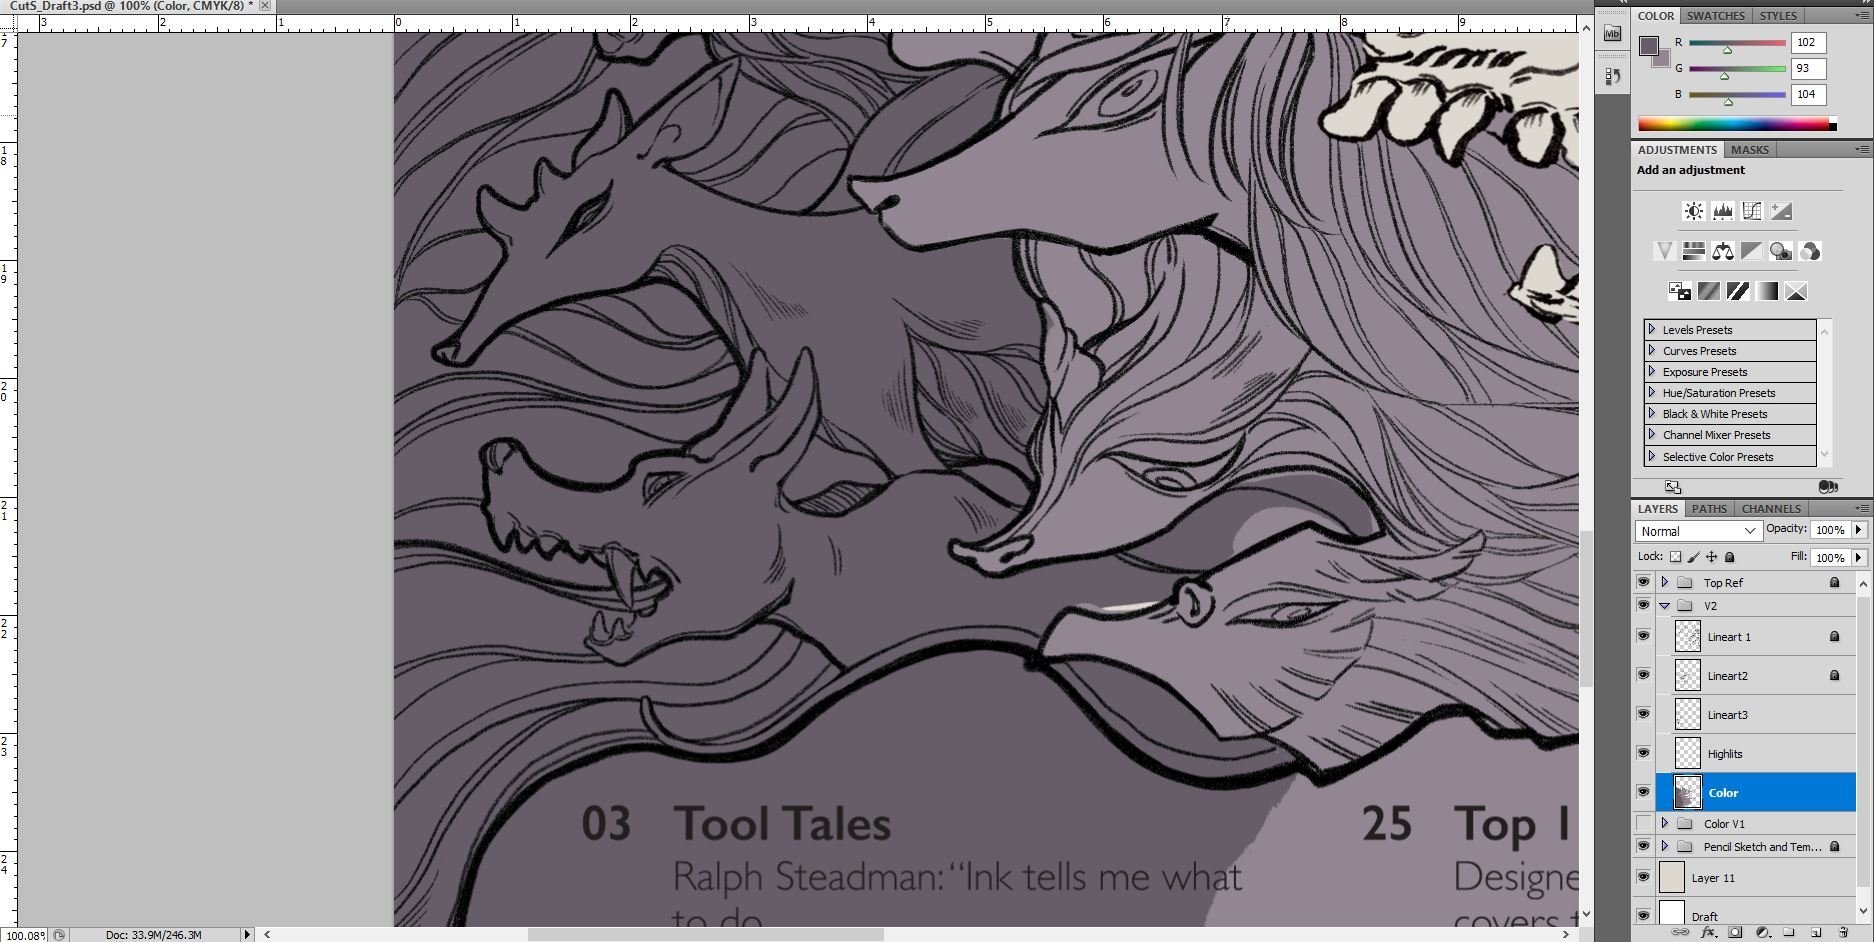
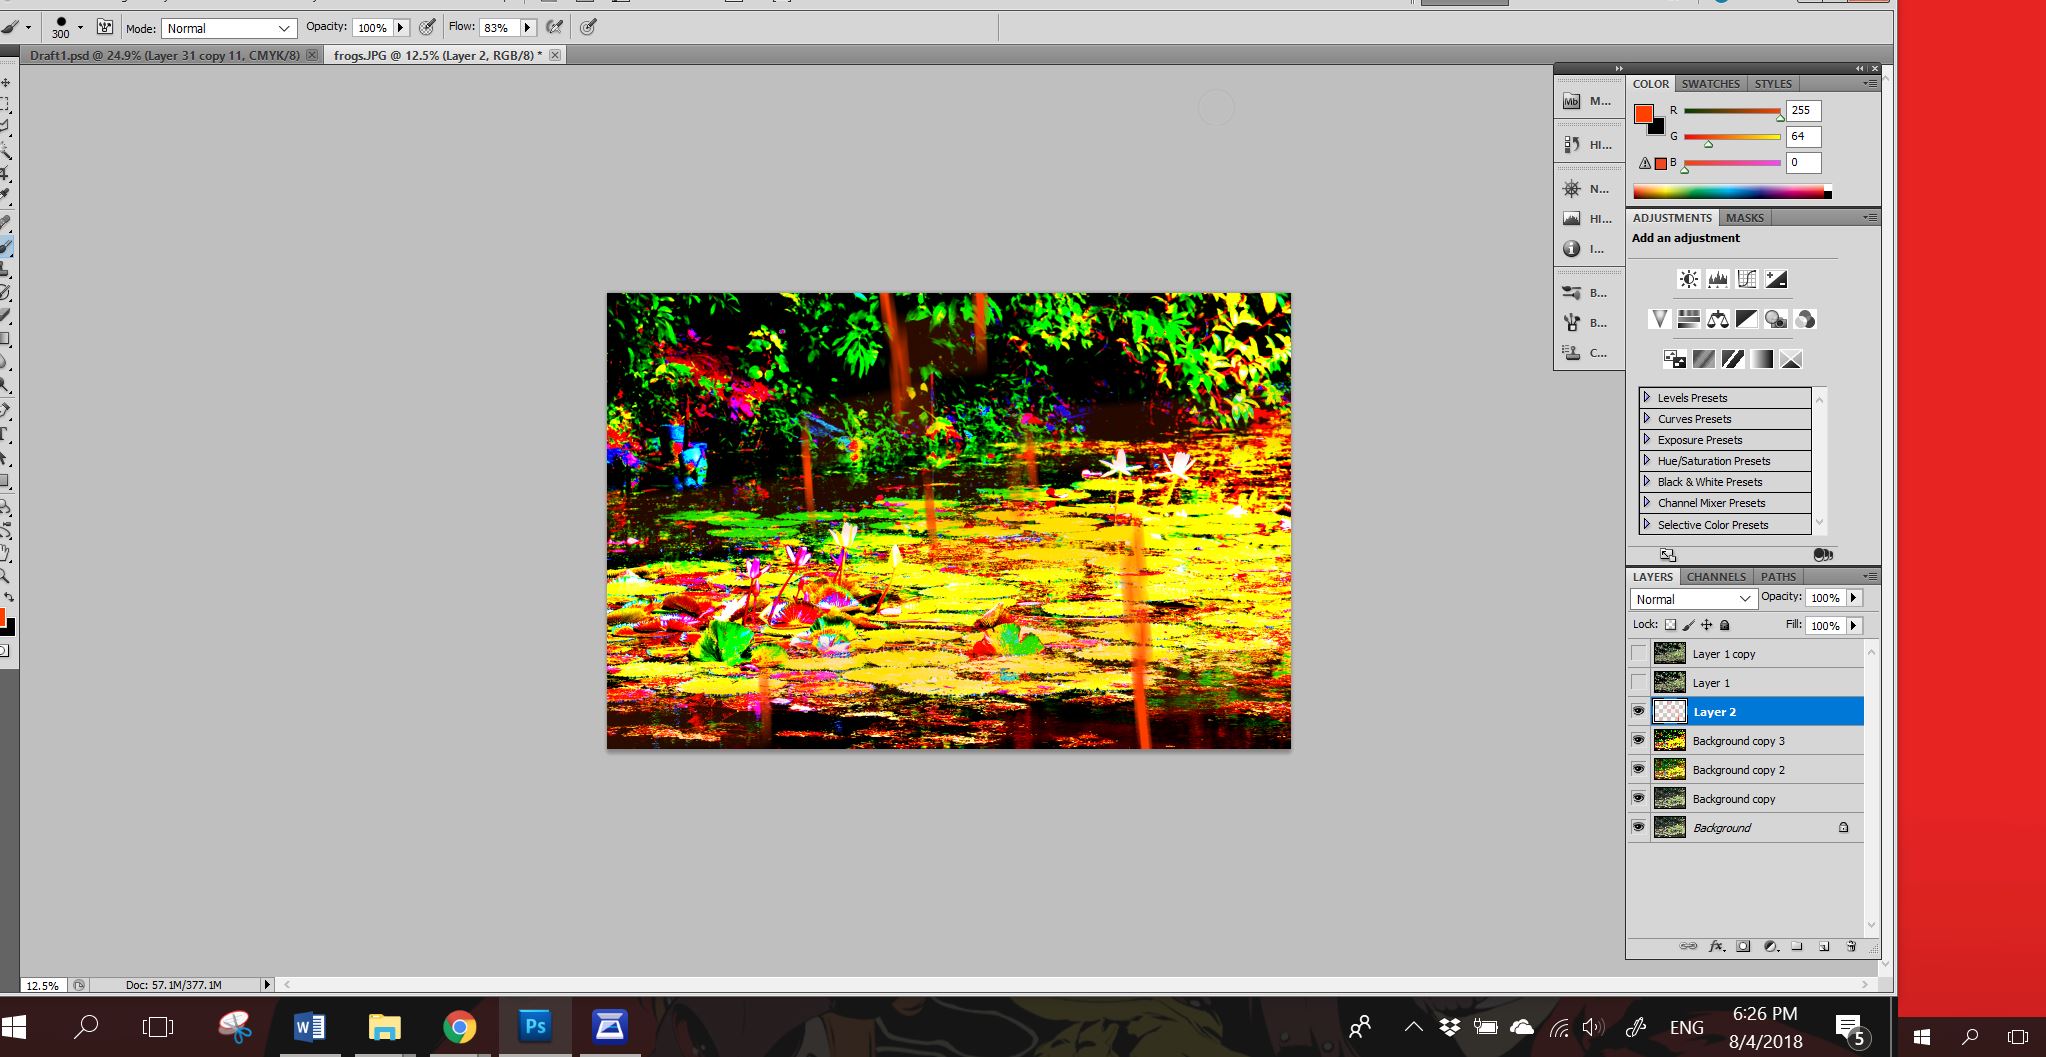
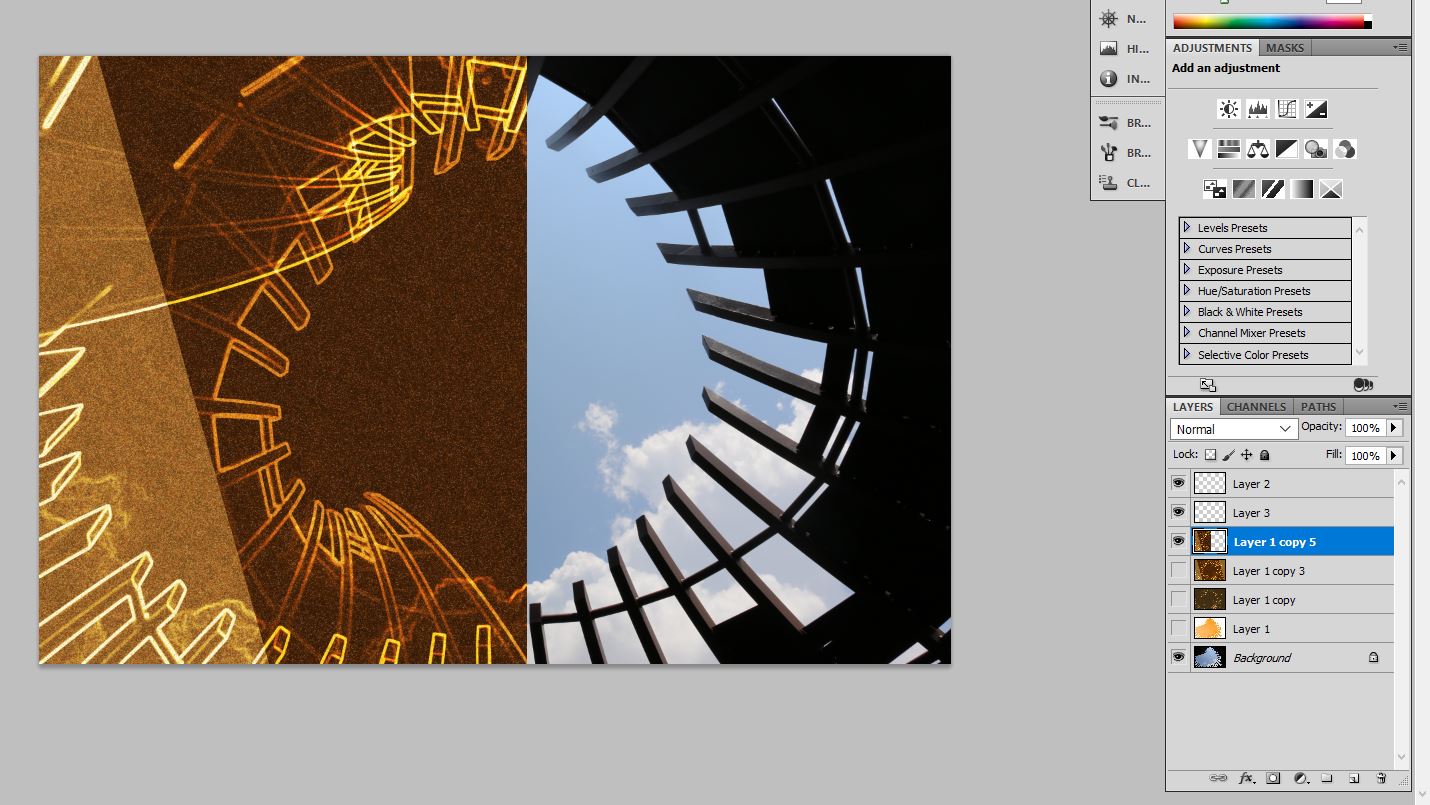
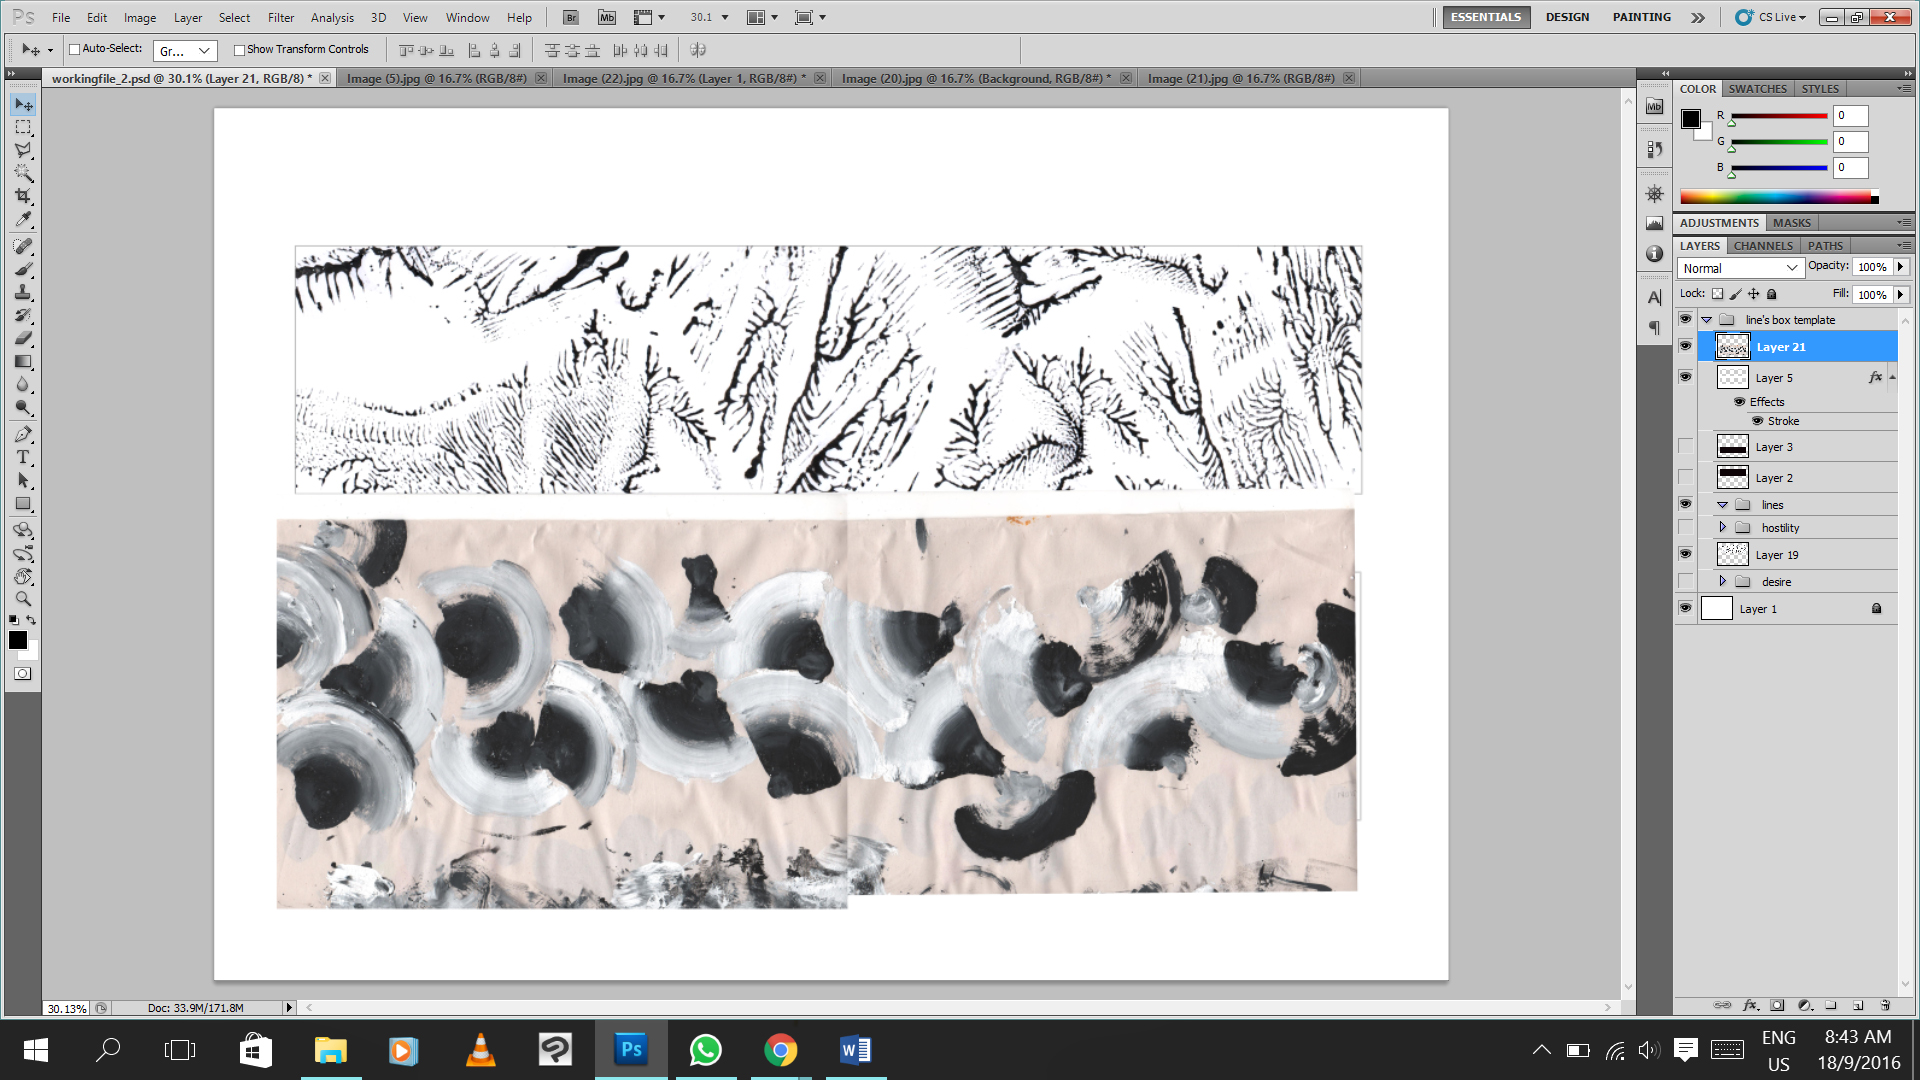
Screenshot of my first practice with the pen tool and paths/masking.

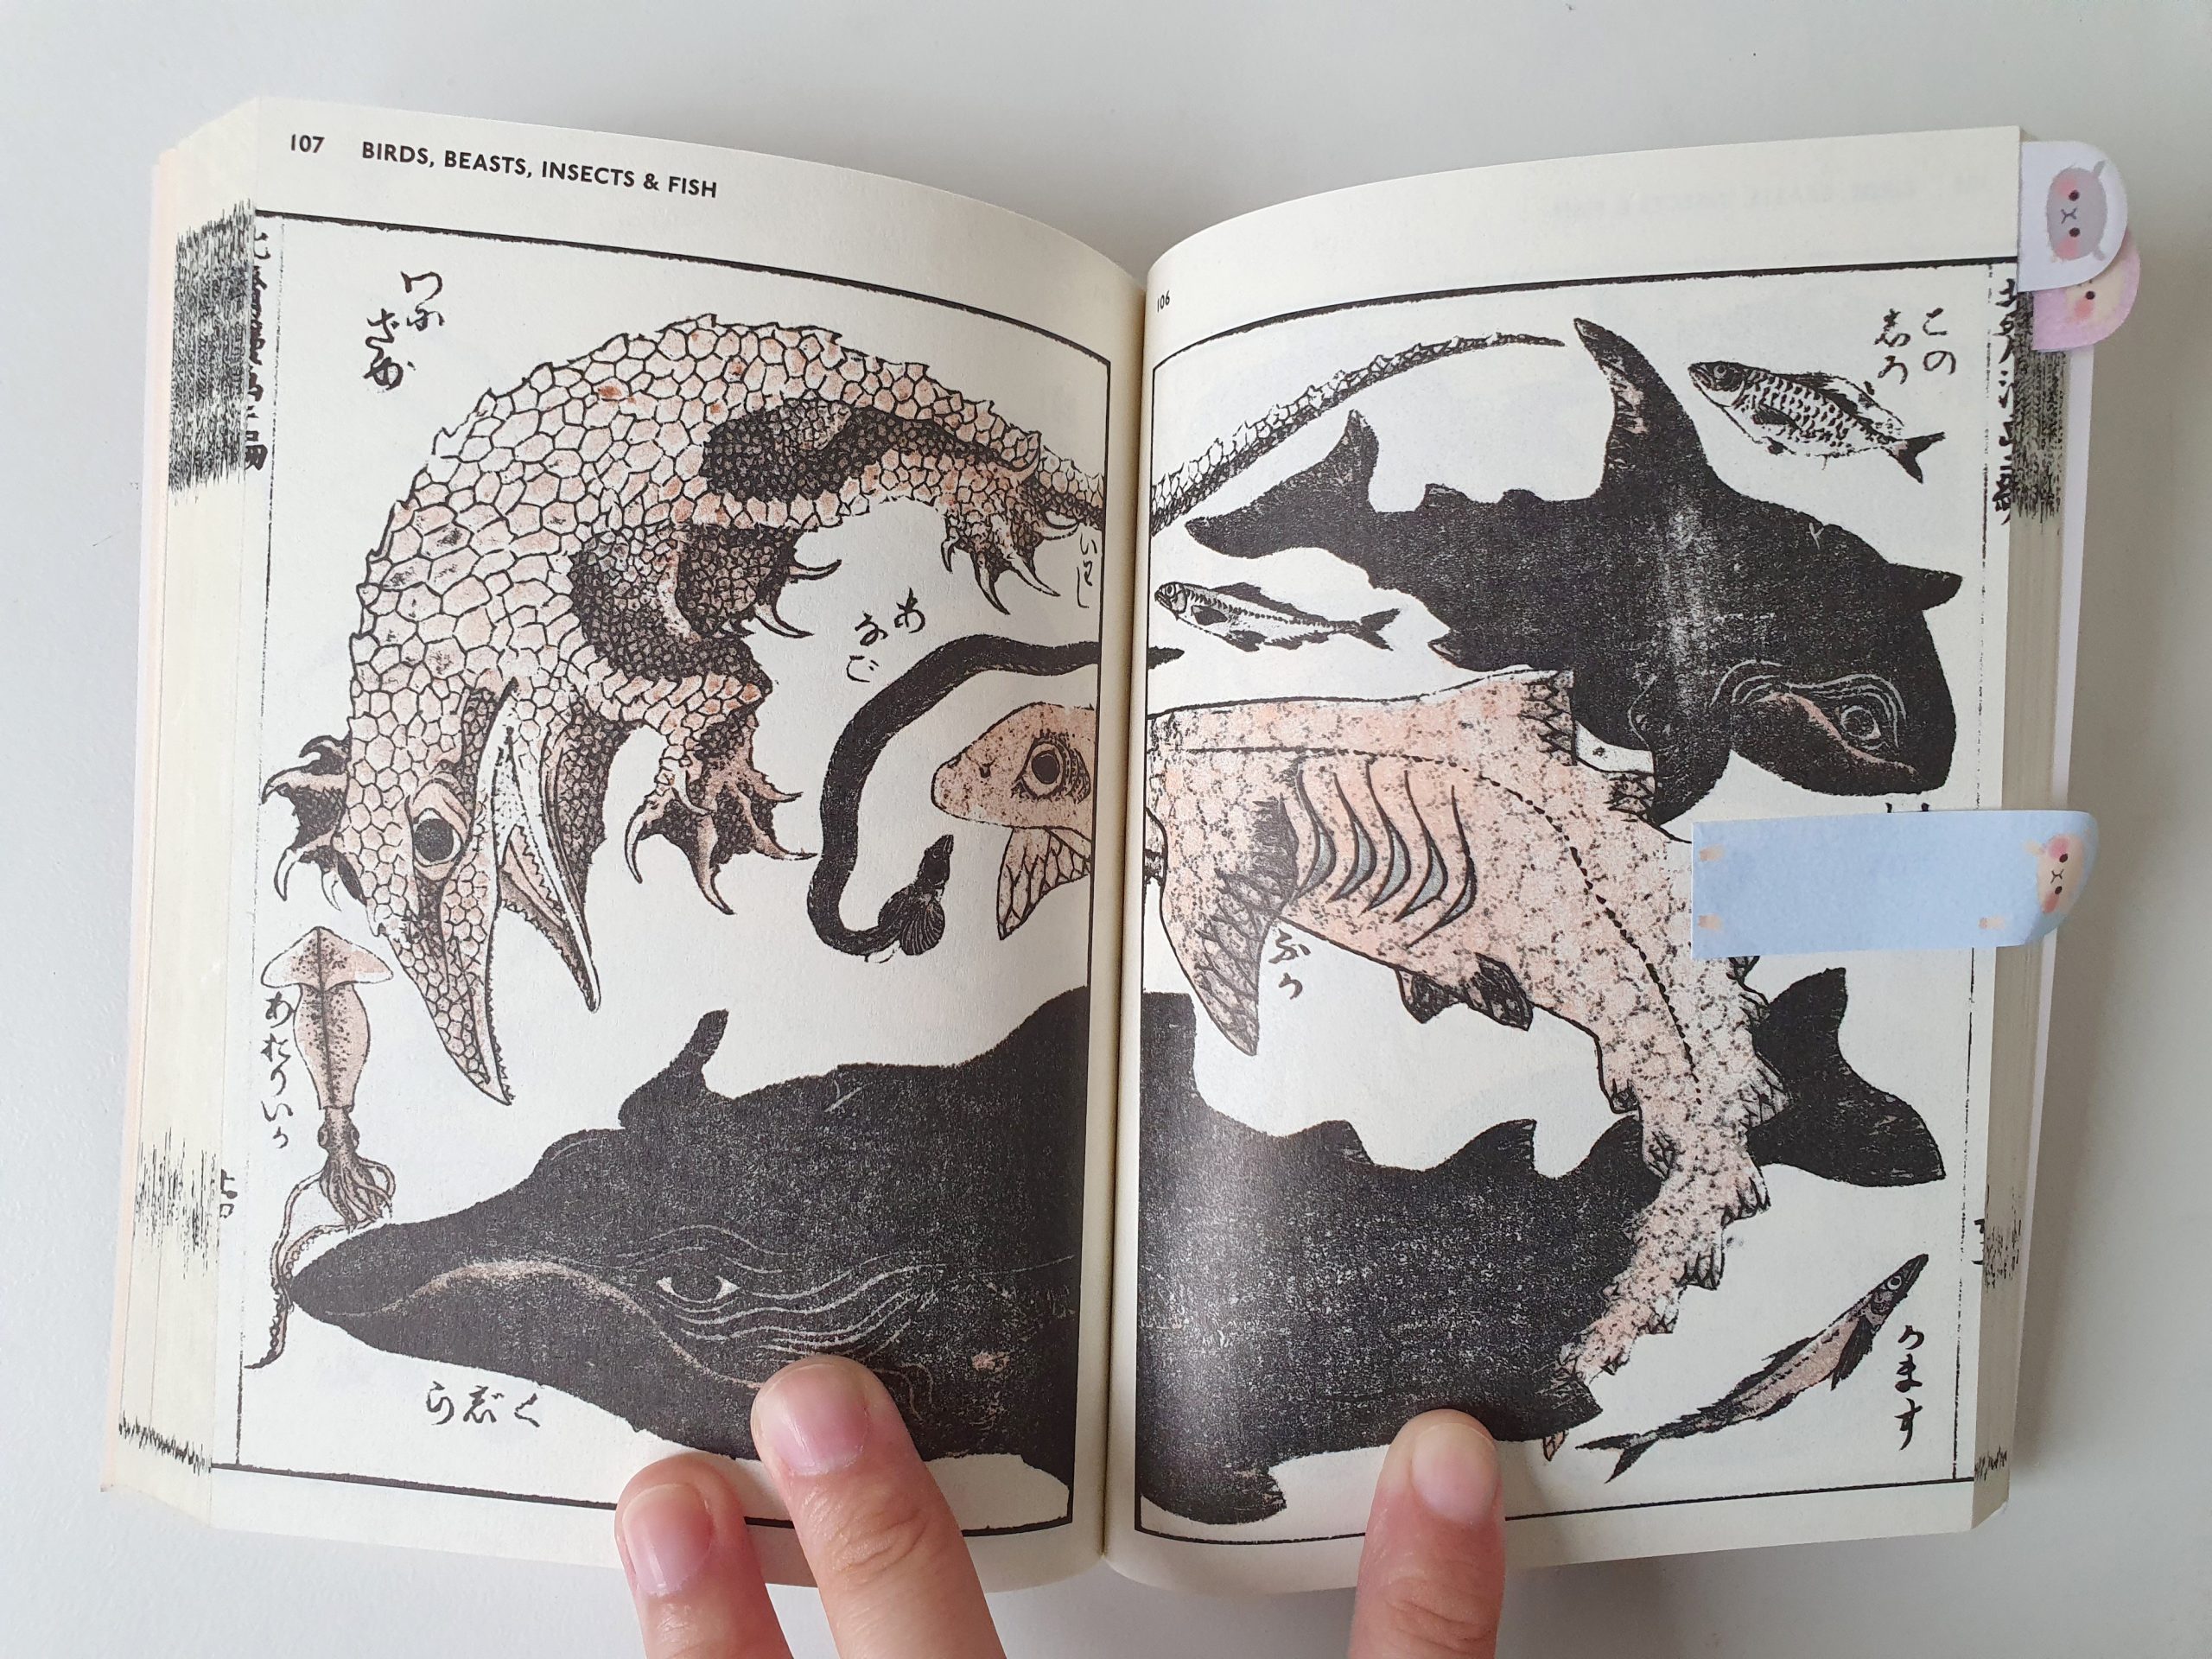
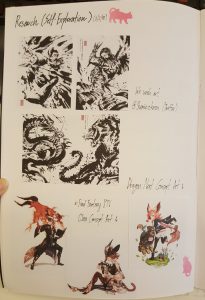
I tried it out on a few more objects as well like skulls, and proceeded to try out the different filters on them – half-tone, posterize, threshold, etc.

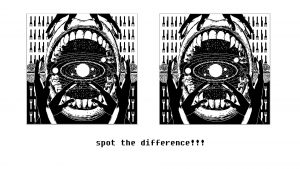
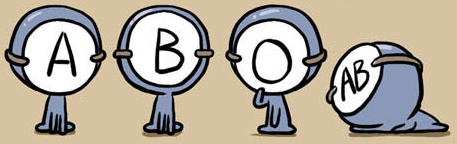
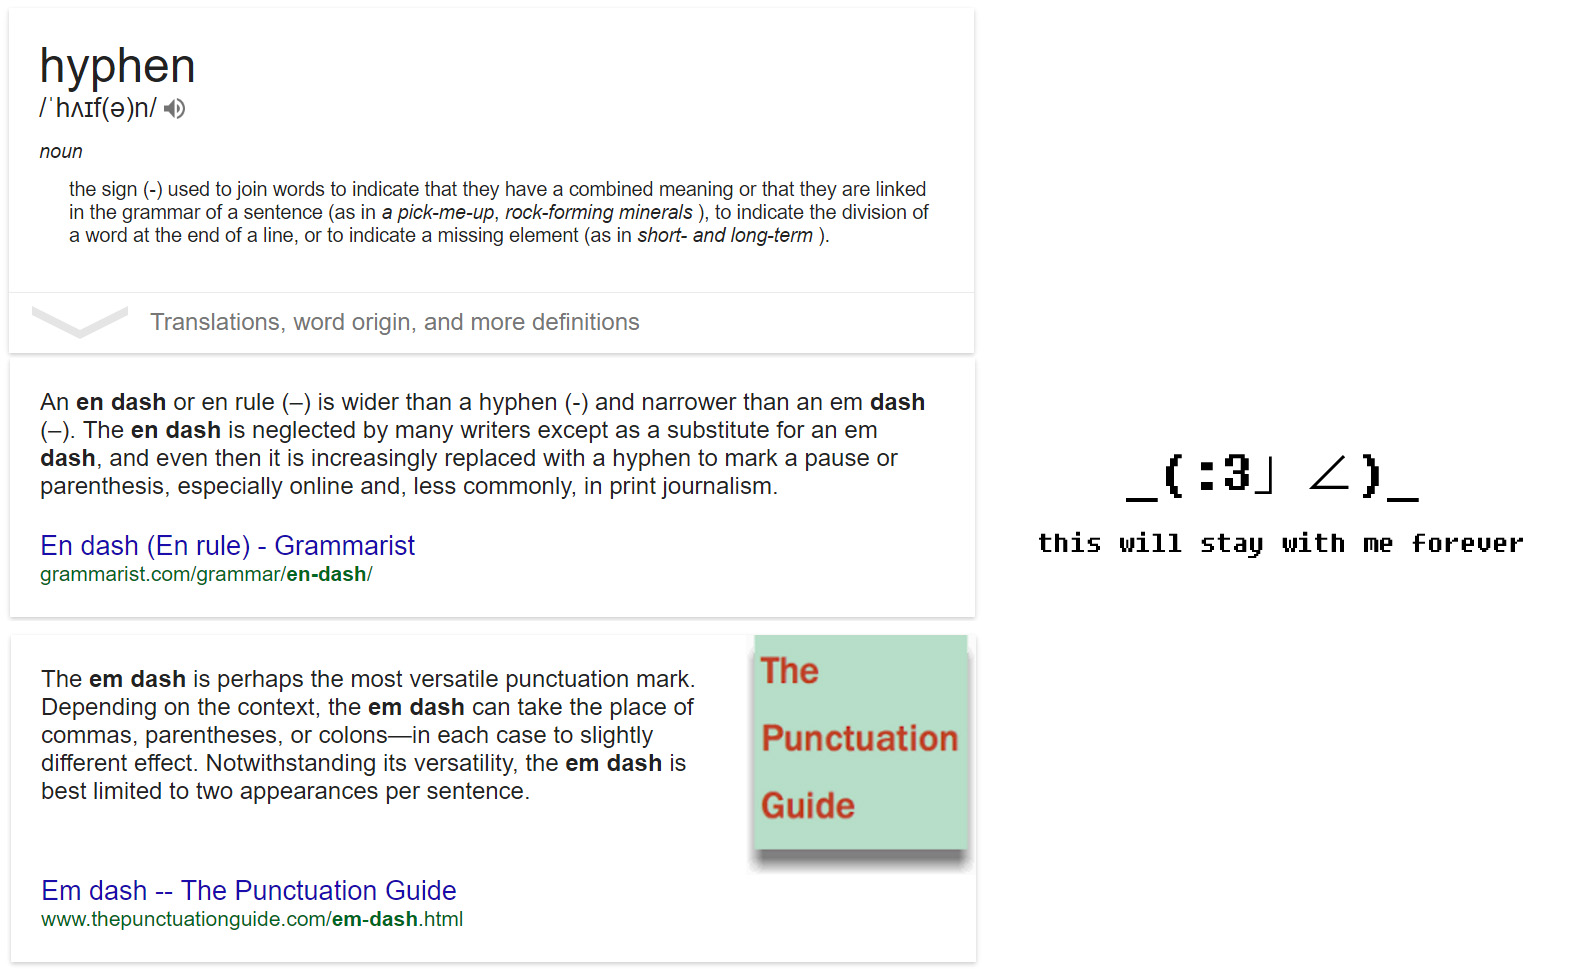
On another note, I’ve also learned something pretty incredible.

file2

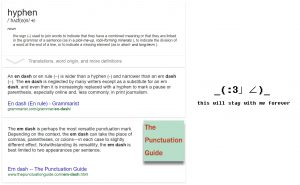
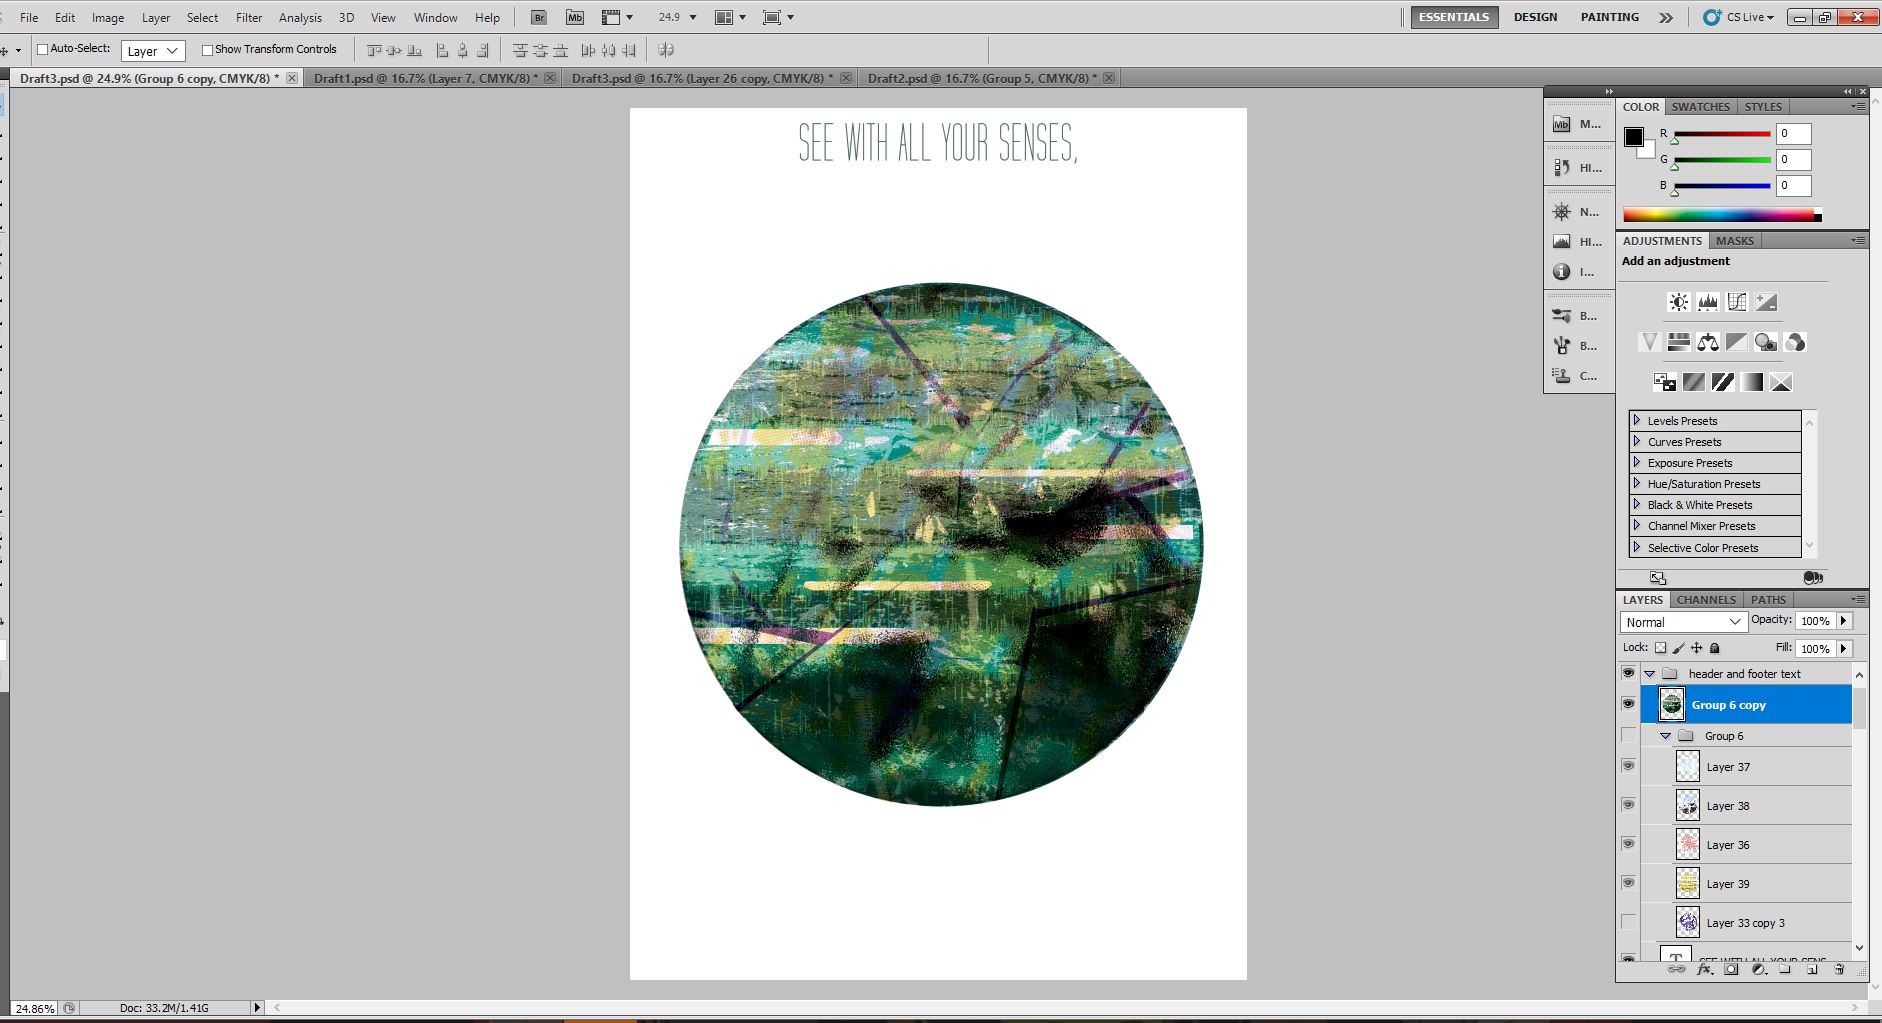
I’m pretty sure that I still can’t tell the difference between these three even if they were shown to me right now. I’ll have to go take another look at them. To people who can see the difference: YOU ARE INCREDIBLE.

ALSO I WOULD REALLY LIKE TO THANK JOYCE FOR BEING INCREDIBLY PATIENT AND SUPER COOL DURING THE SESSION.

THANK YOU JOYCE!!!

1st October 2016: Drafts for Consultation

I dedicated my Saturday completely to working on the four drafts for Sunday’s consultation!

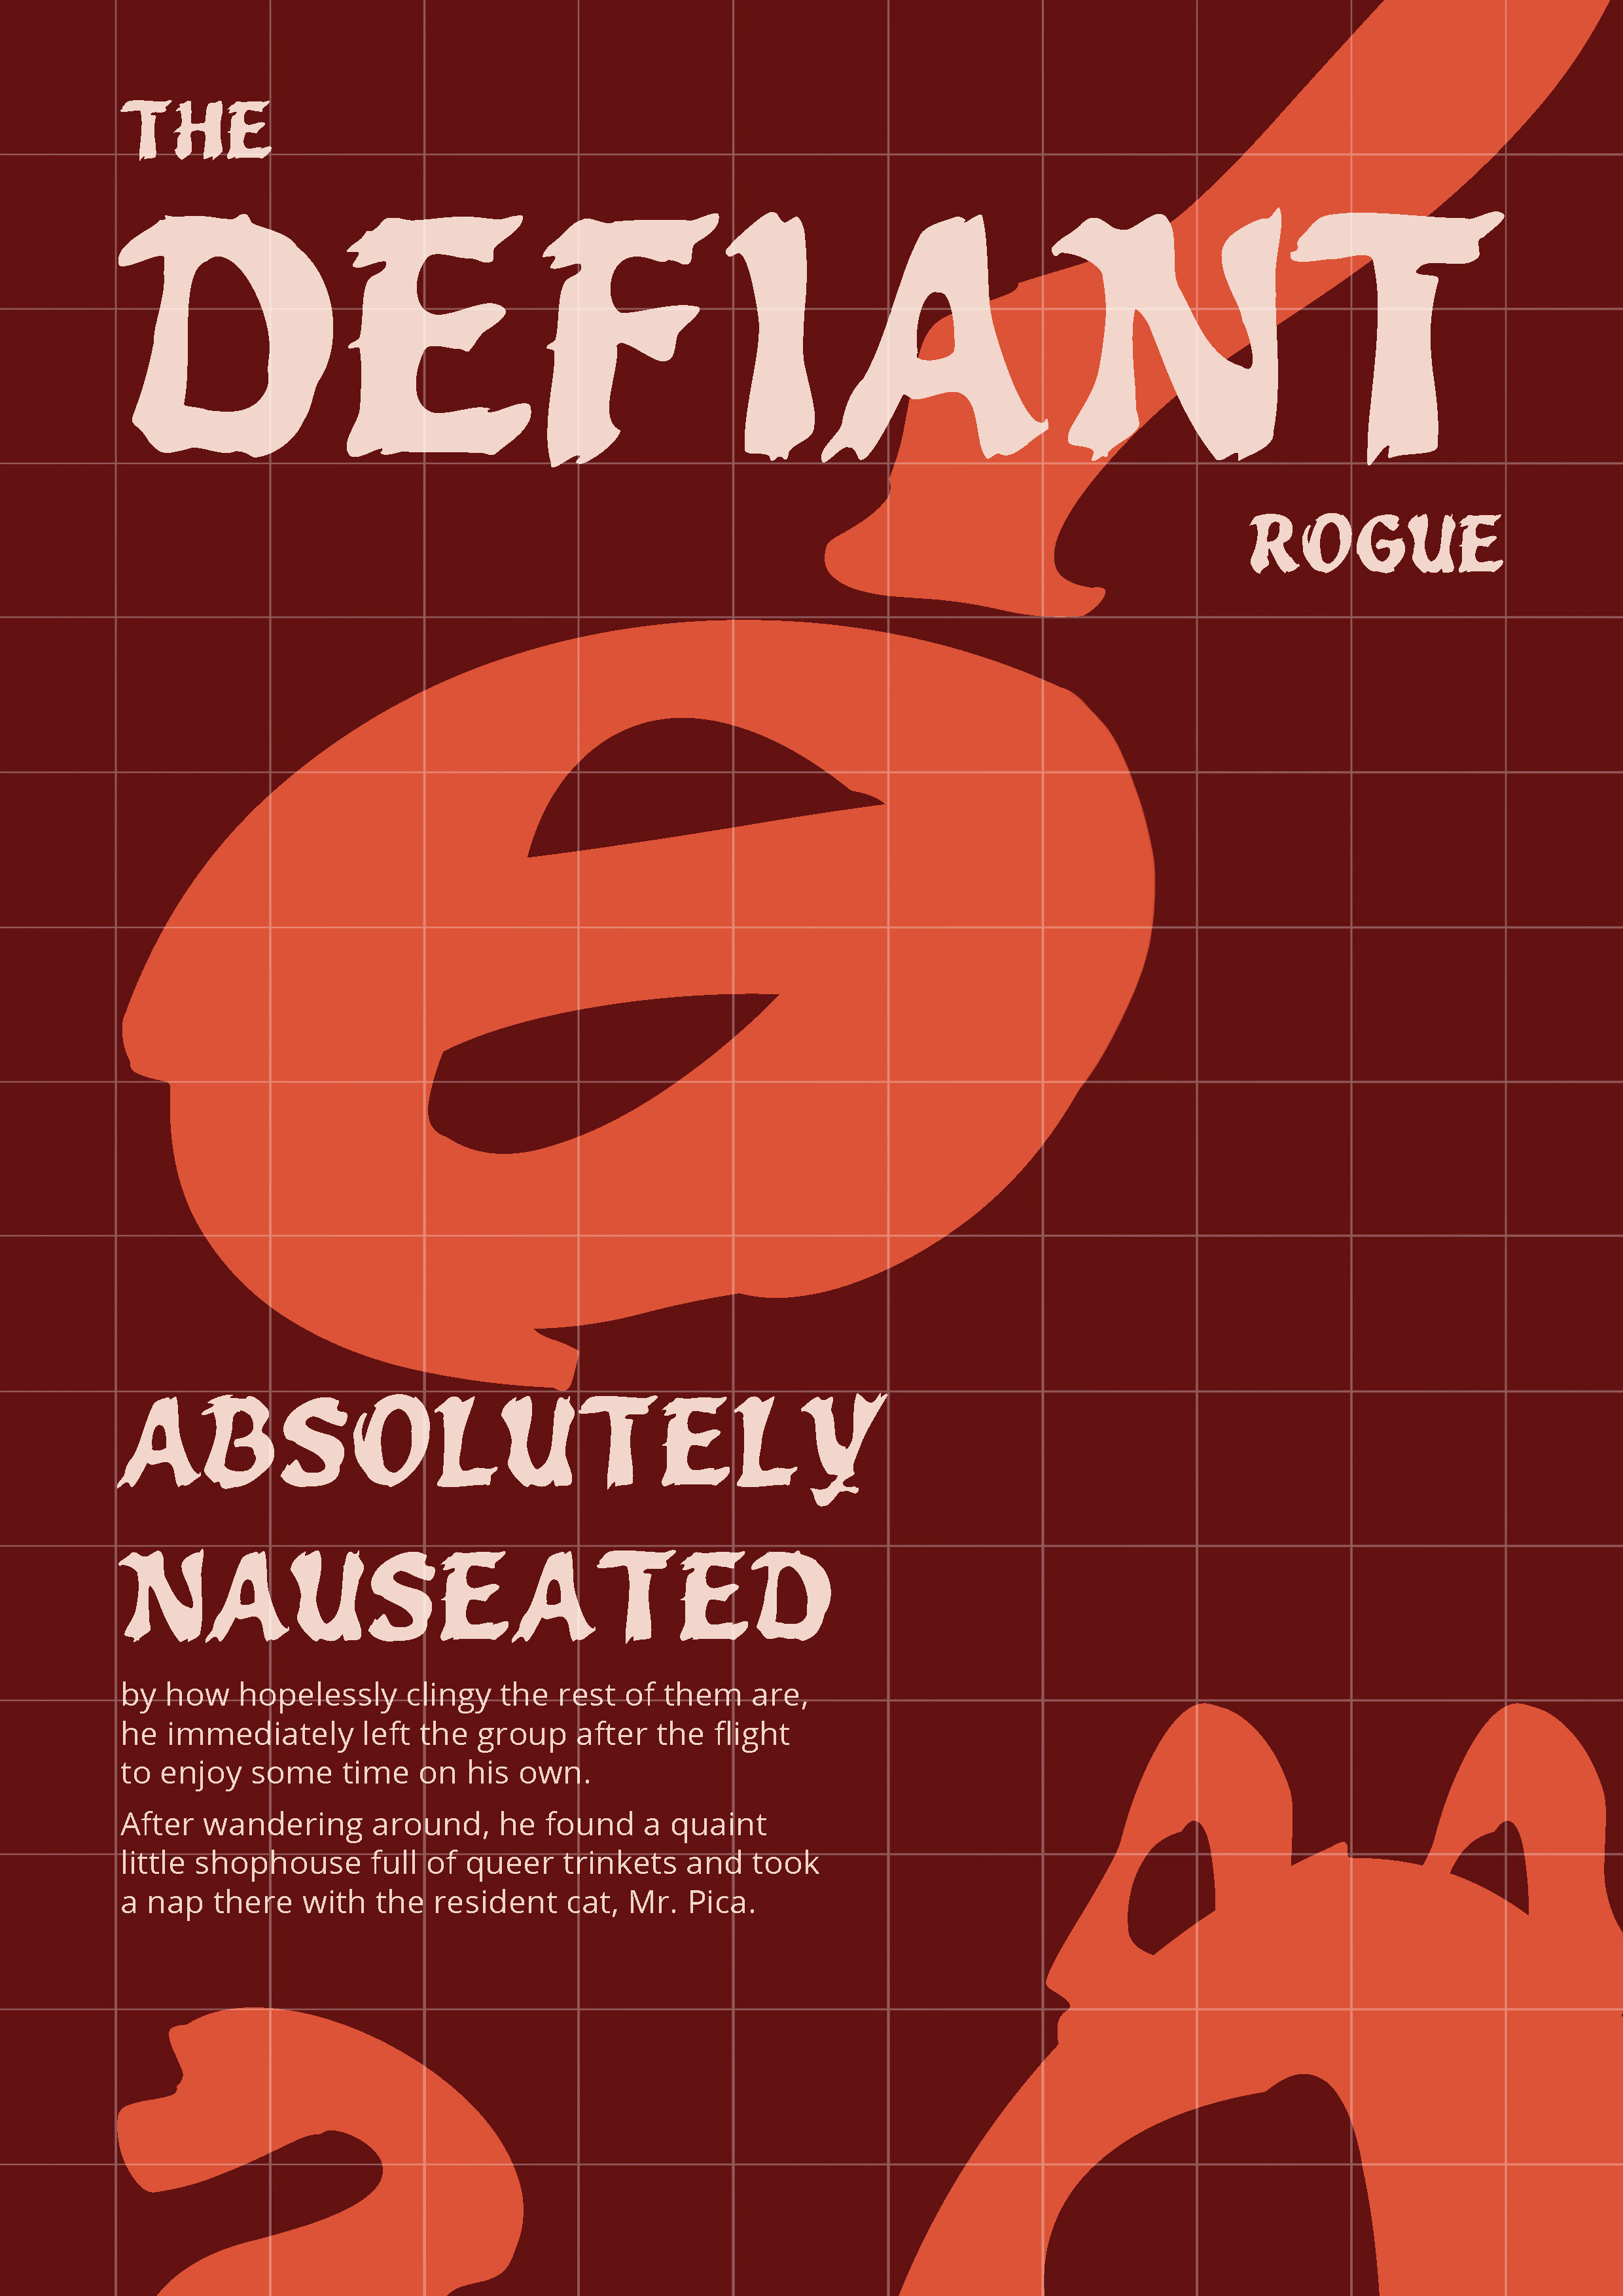
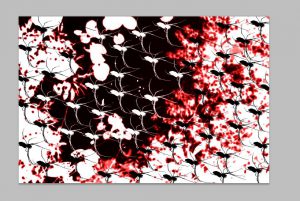
The prototype for the first draft turned out absolutely terrifying.

file4

Abandoned working file for “No music!”
this is terrifyingggg noooooo :'(

I felt like by trying to make too much sense and trying to forcibly use a quote that I already set my heart on, I wound up spending hours on something that didn’t work at all.

I previously had quotes (from Rise of the Guardians, How to Train Your Dragon and Mad Max) from different movies, but I changed them to look for quotes that I could interpret better, instead of something that was a little bit too open-ended, such as “No Music!”.

I was trying to work out posterize as well, and it retained some greys – not good!

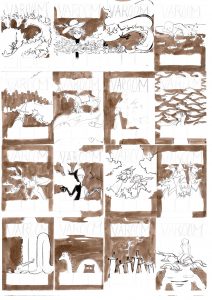
So I tried working the other way instead – finding objects that I liked, and finding quotes and looking at how to arranging the elements instead. I quickly wound up with 4 designs!
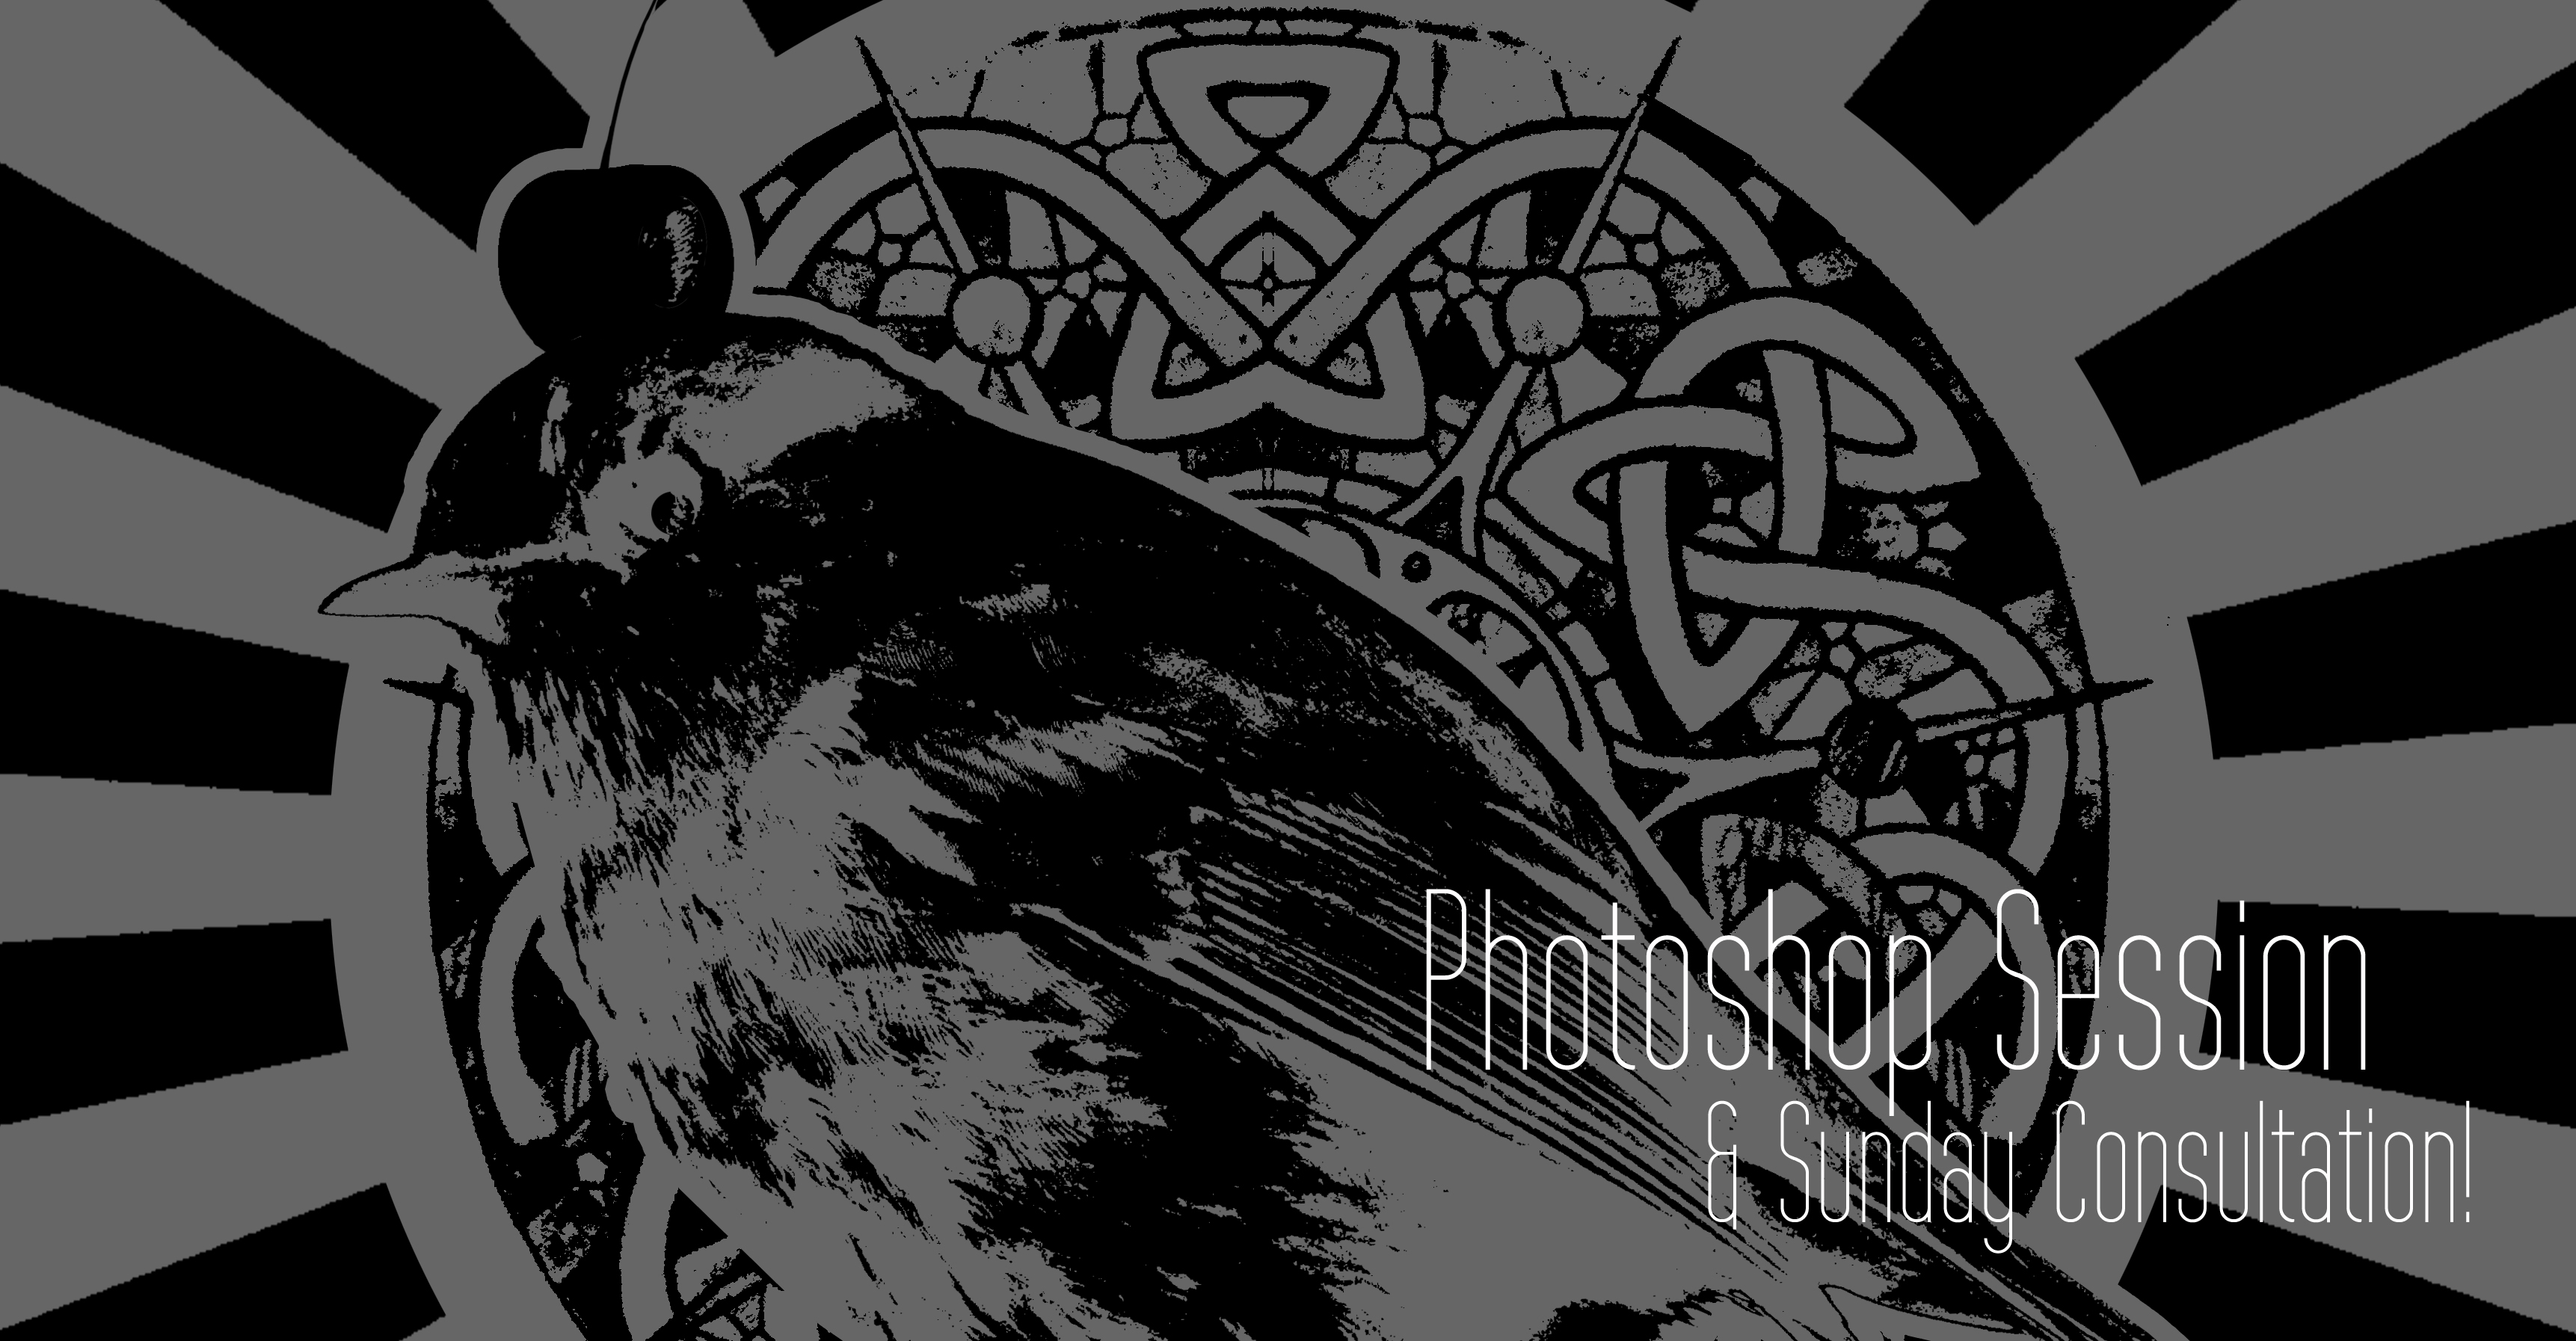
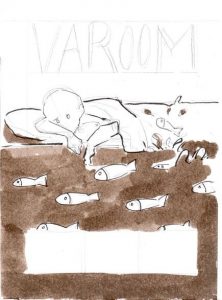
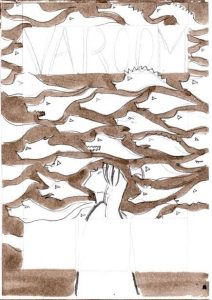
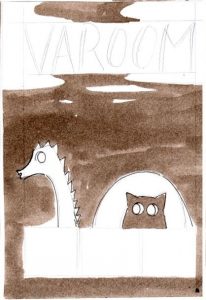
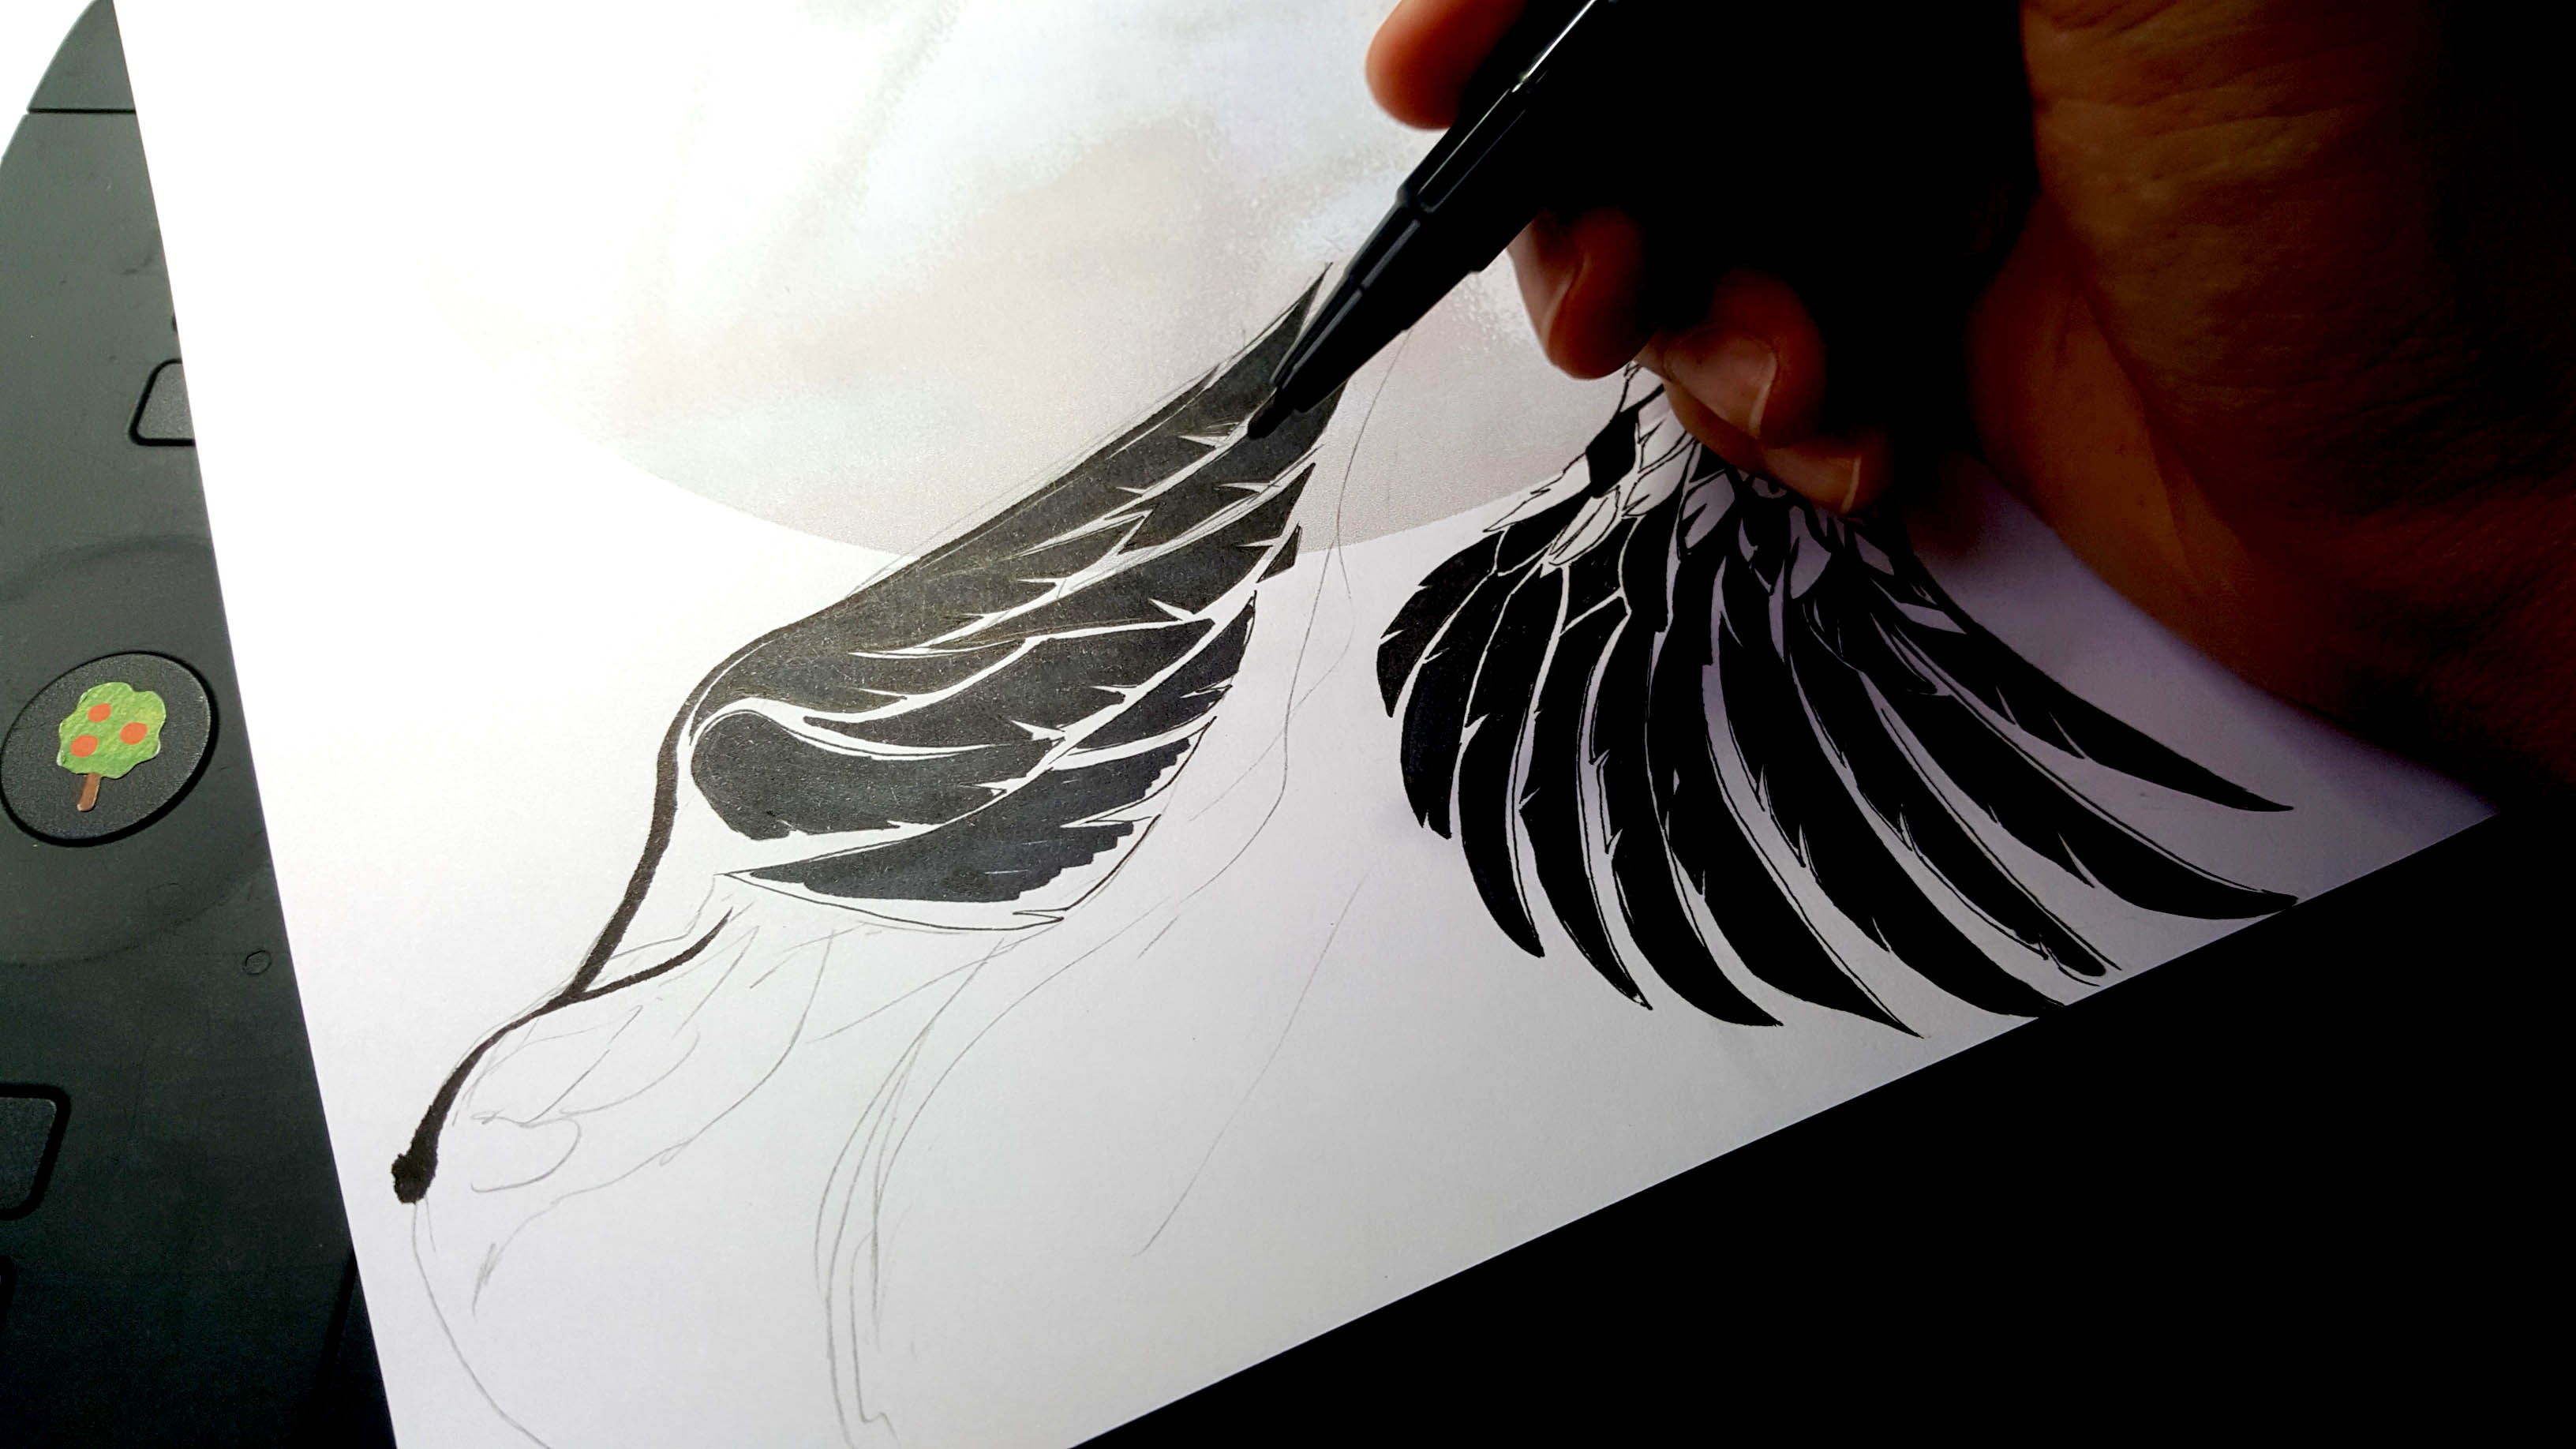
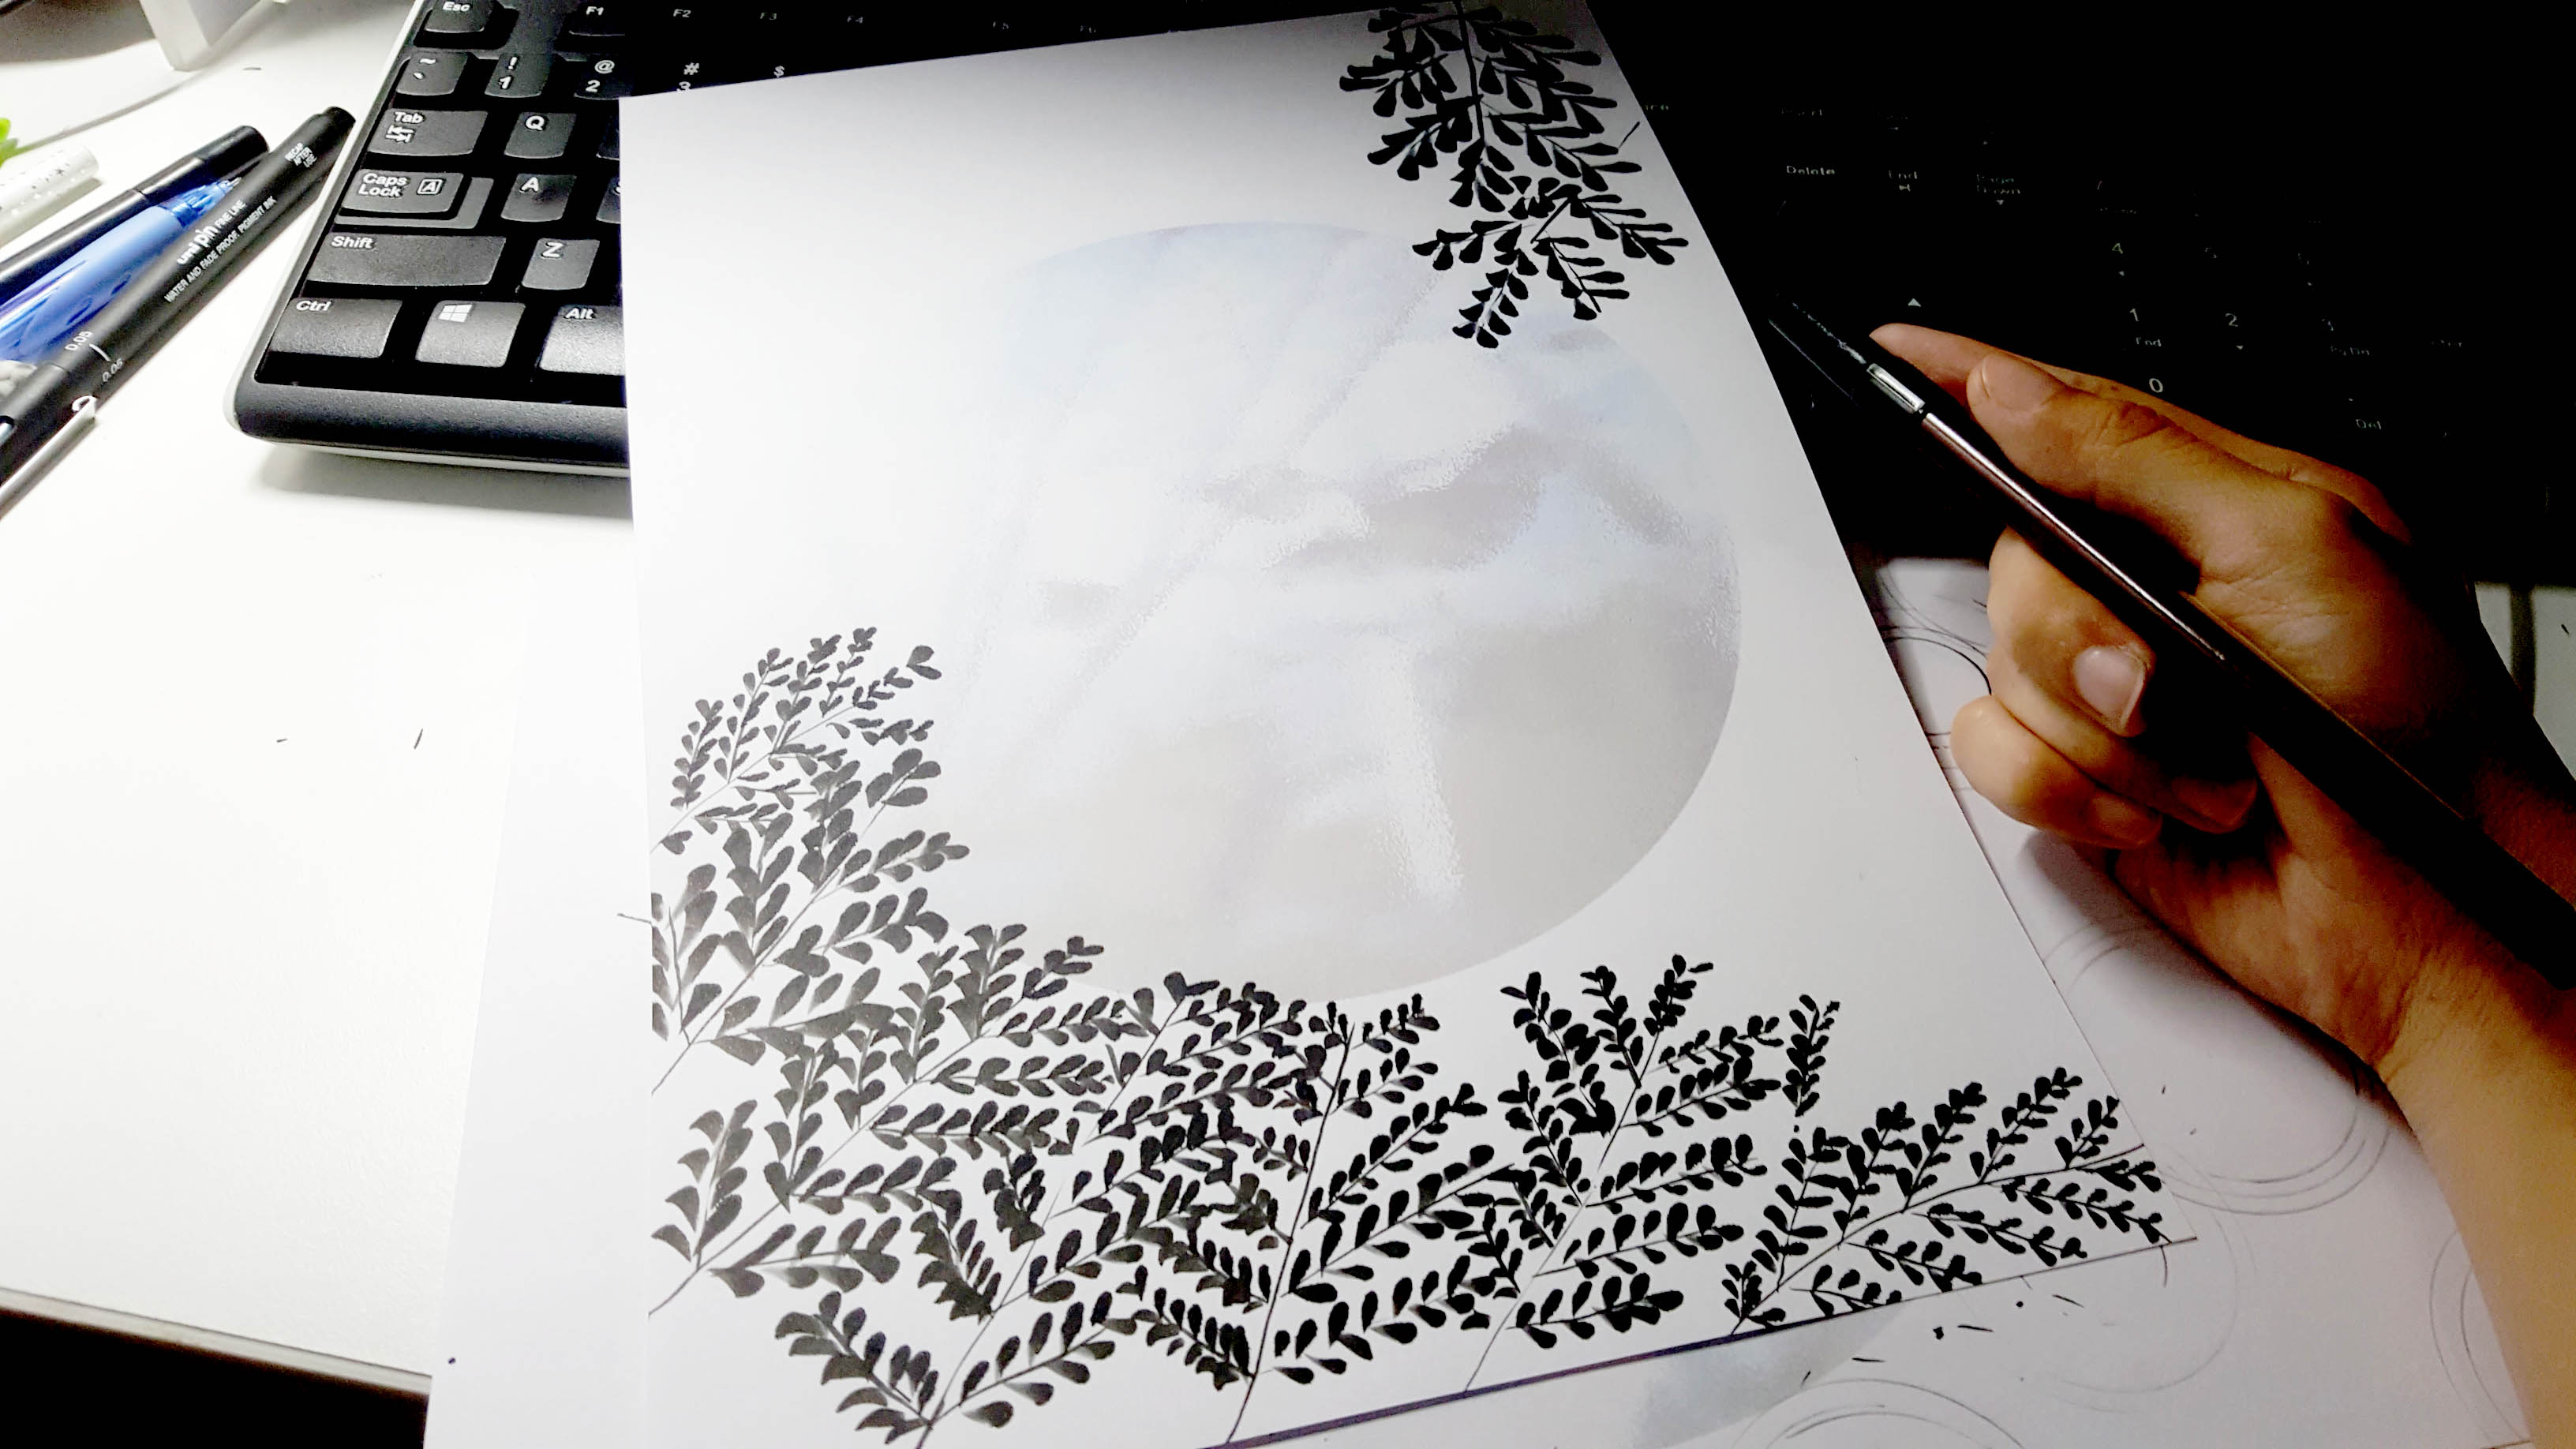
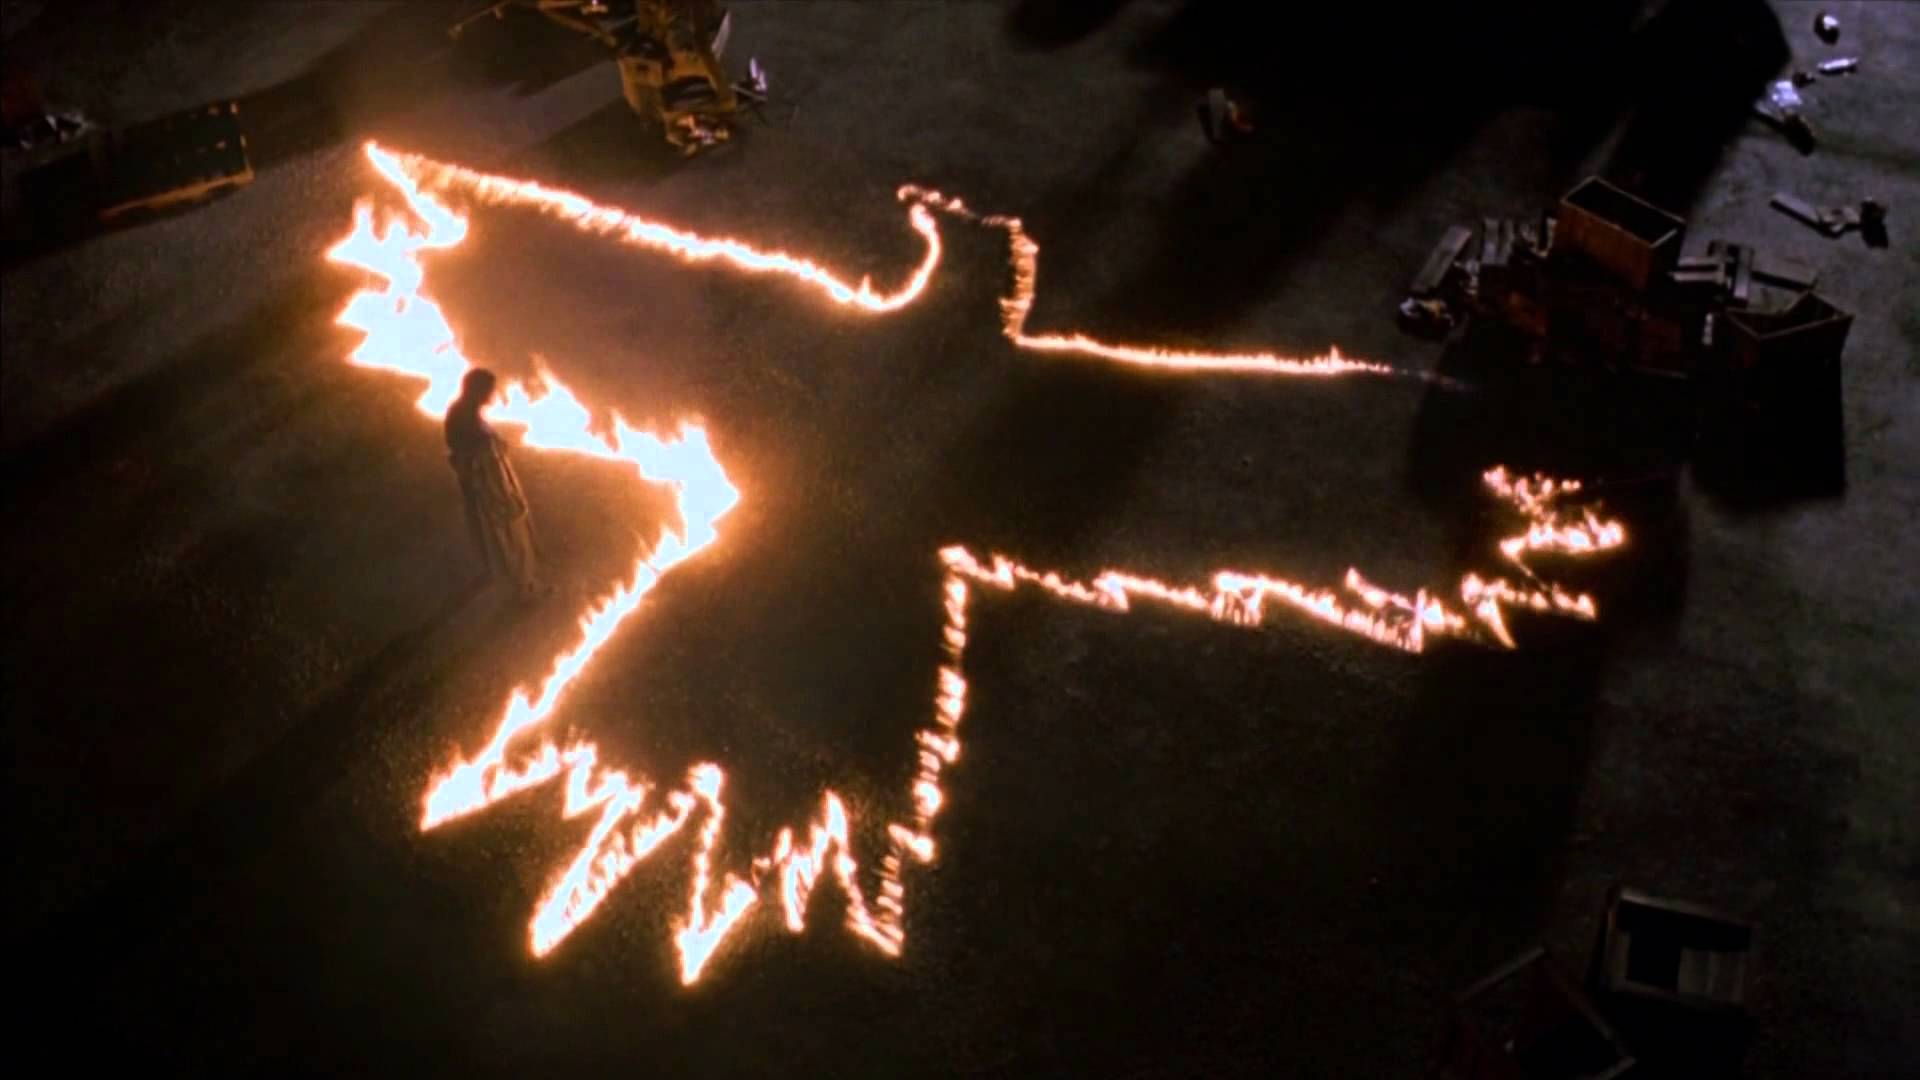
1. Crow

crow_draft1

Draft that was sent in on Sunday.

file3

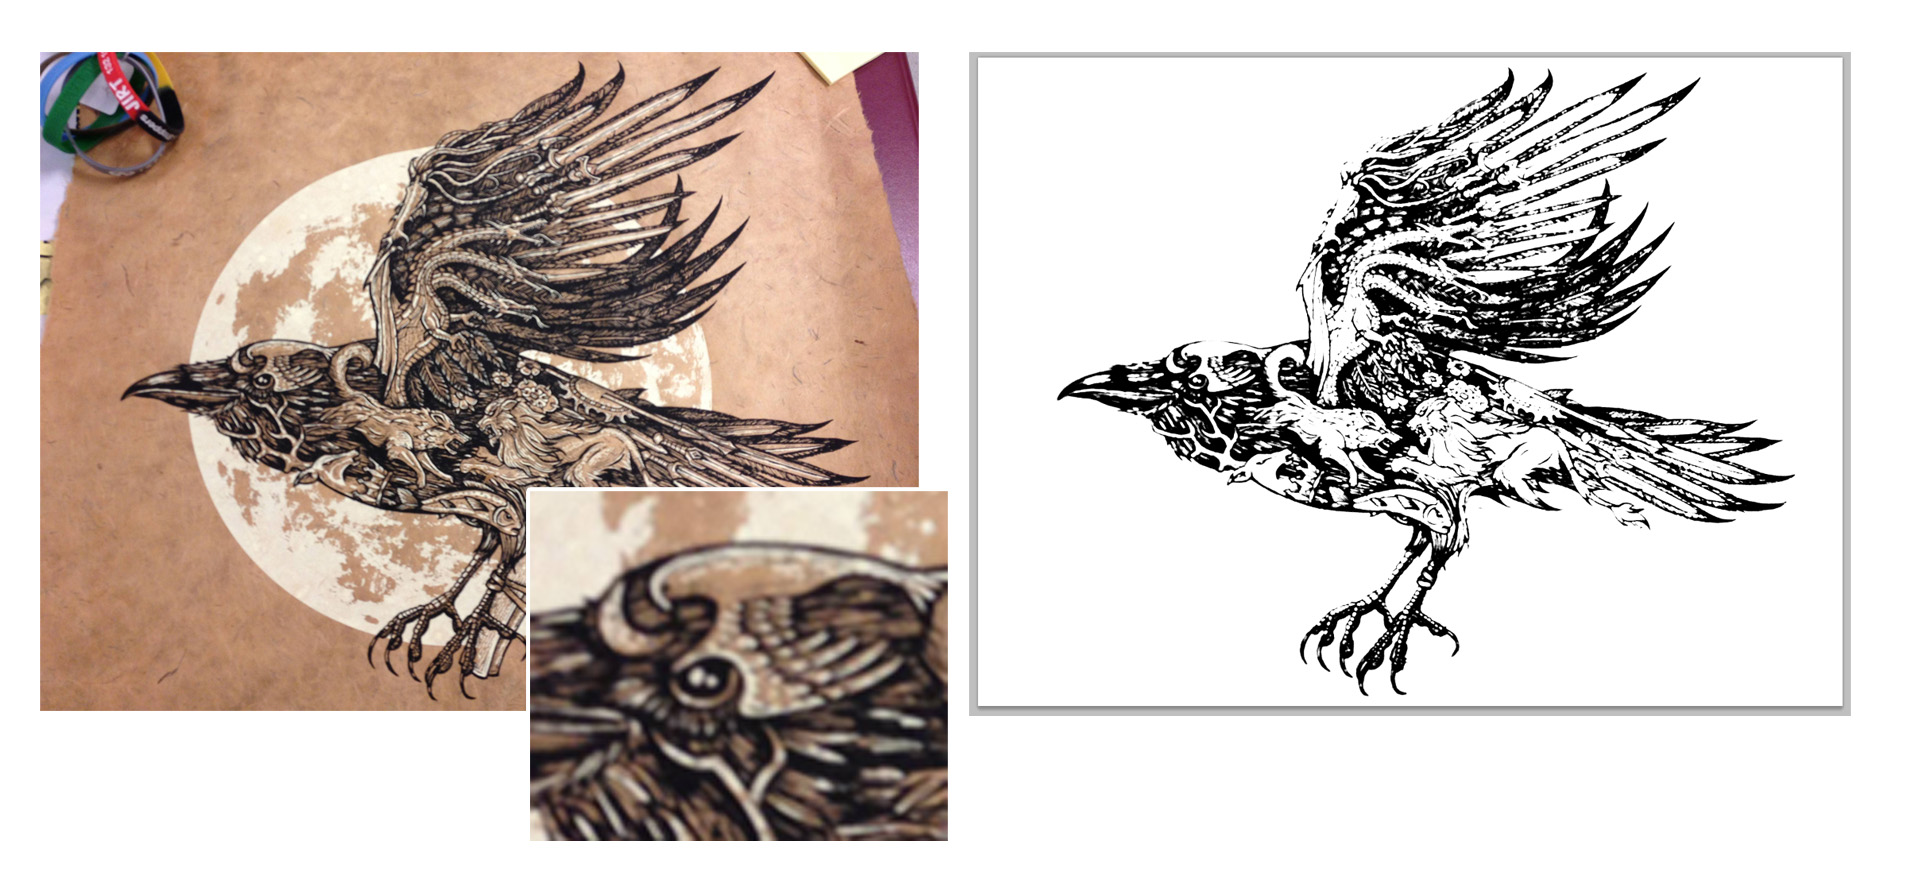
From a blurry image of someone’s crow artwork!
Thank you so much for the beautiful work >—>(c’:)

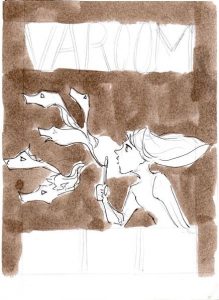
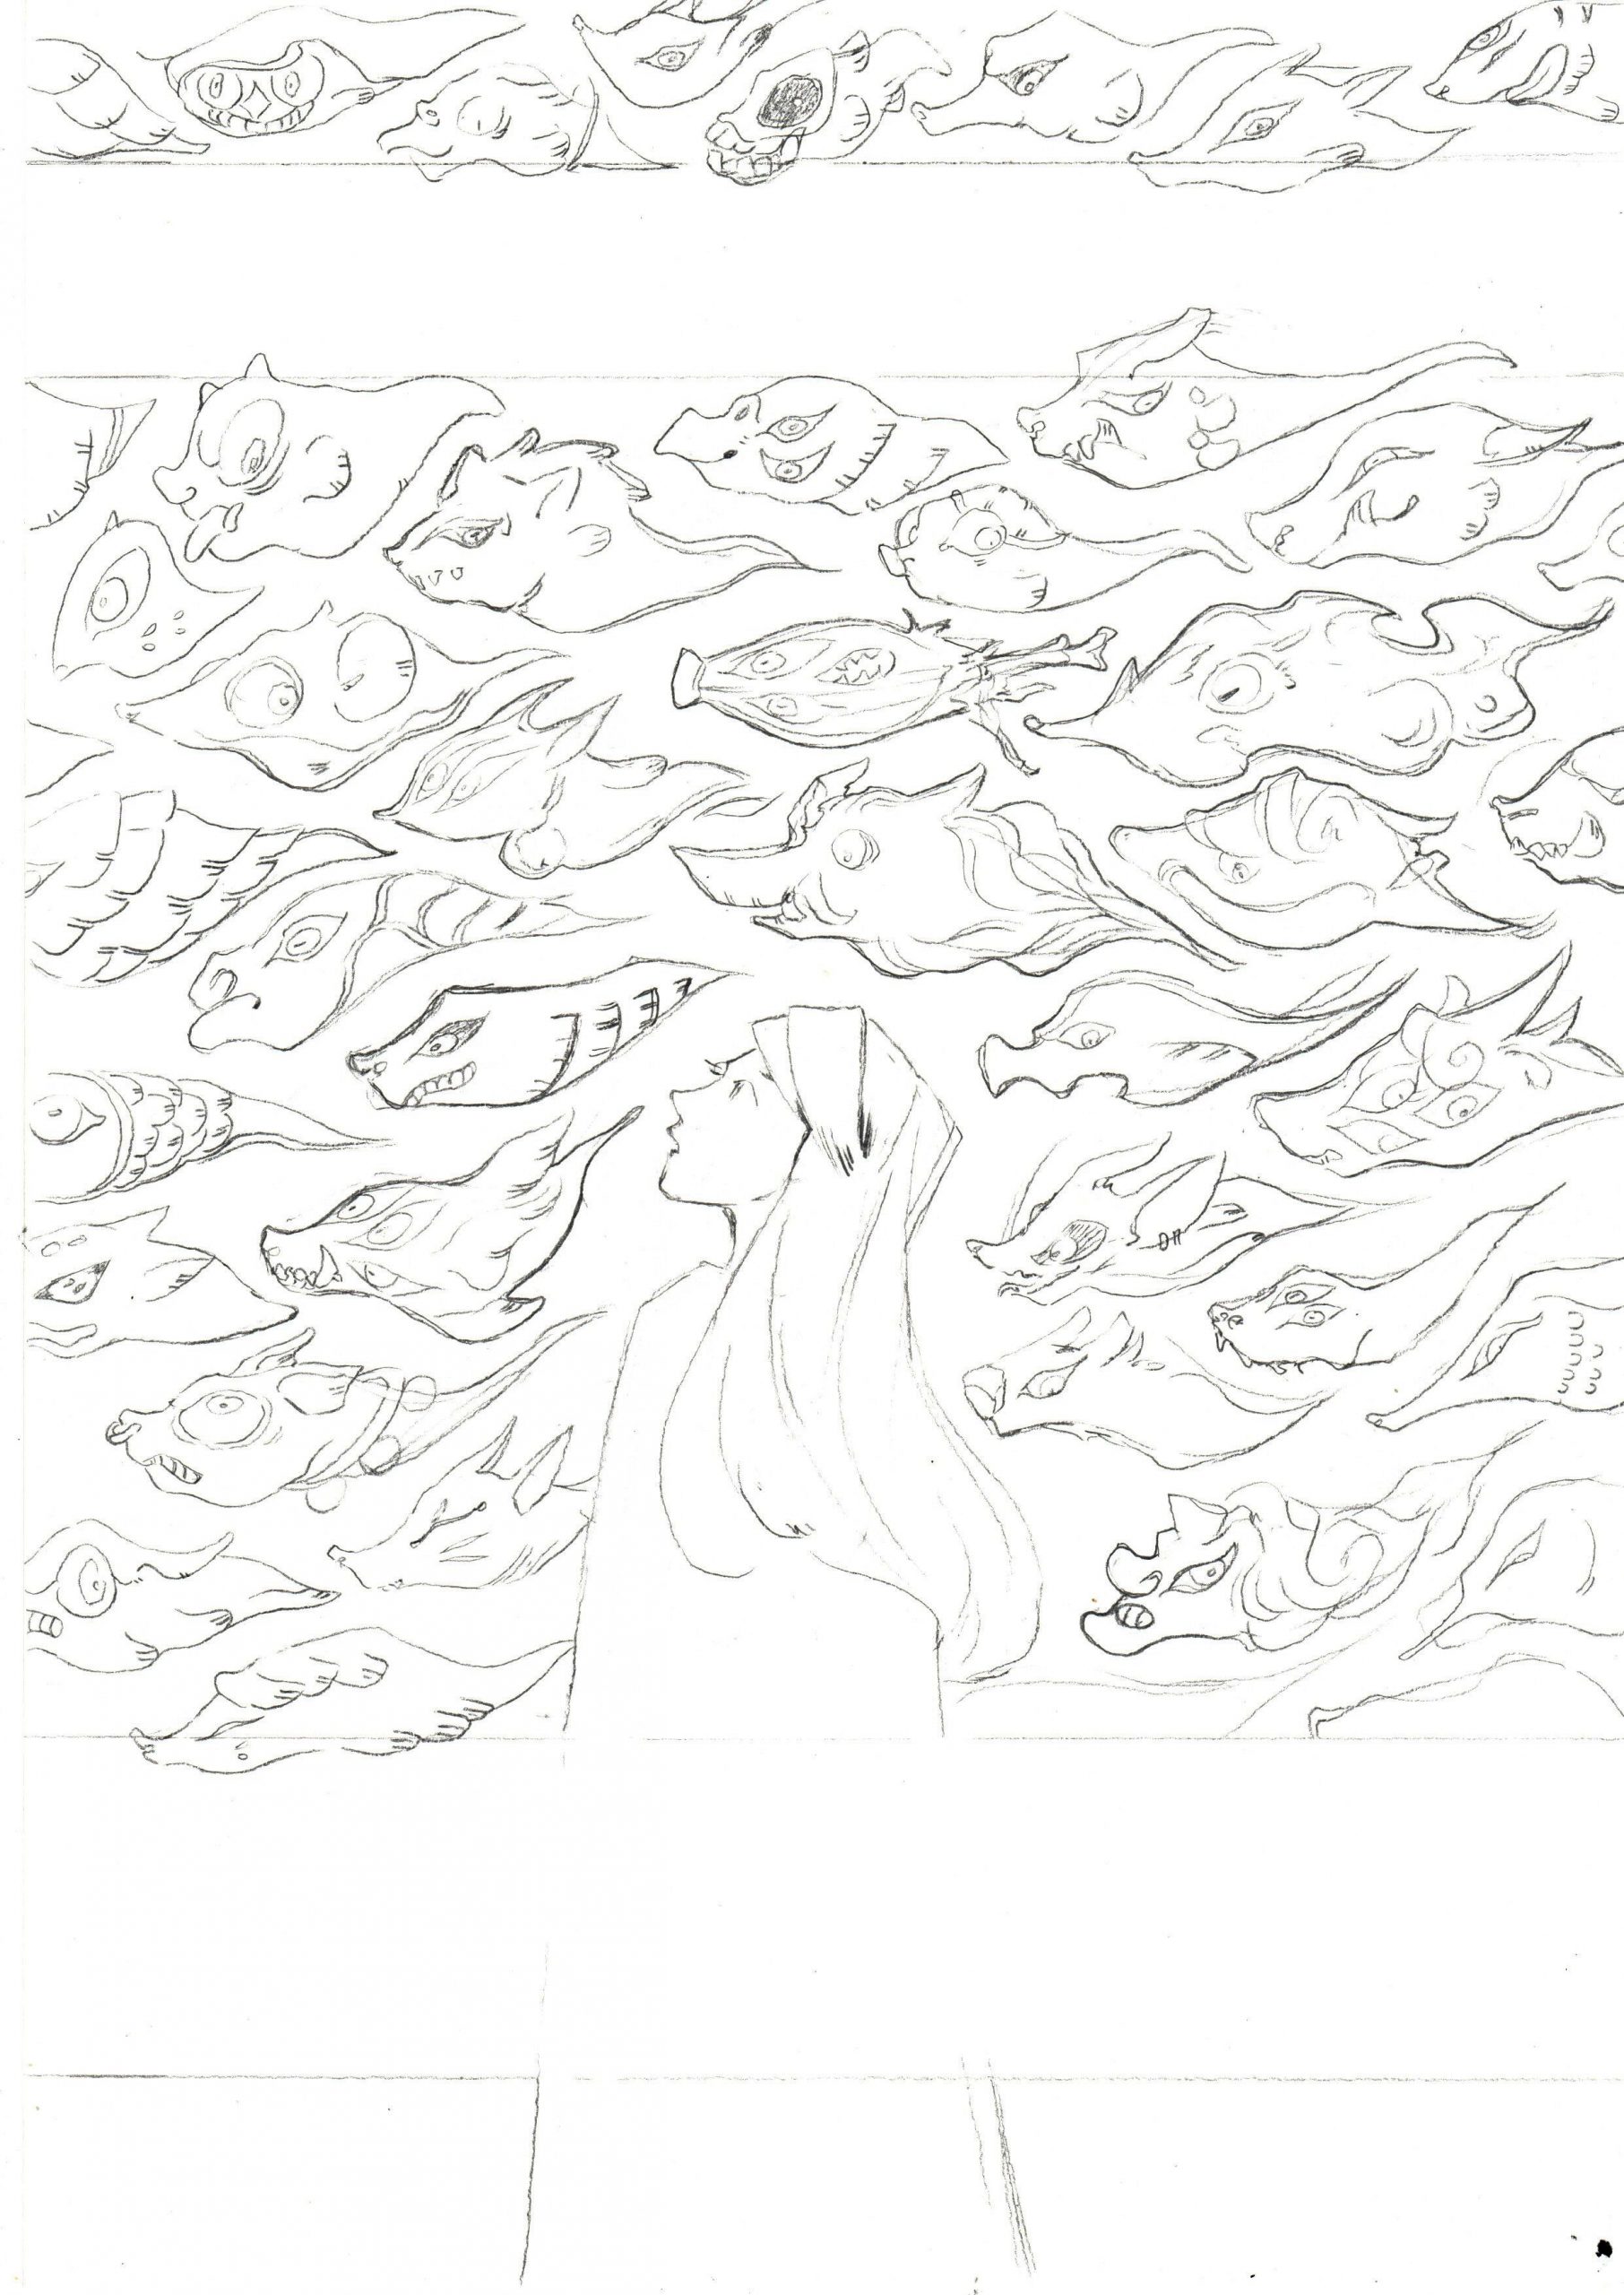
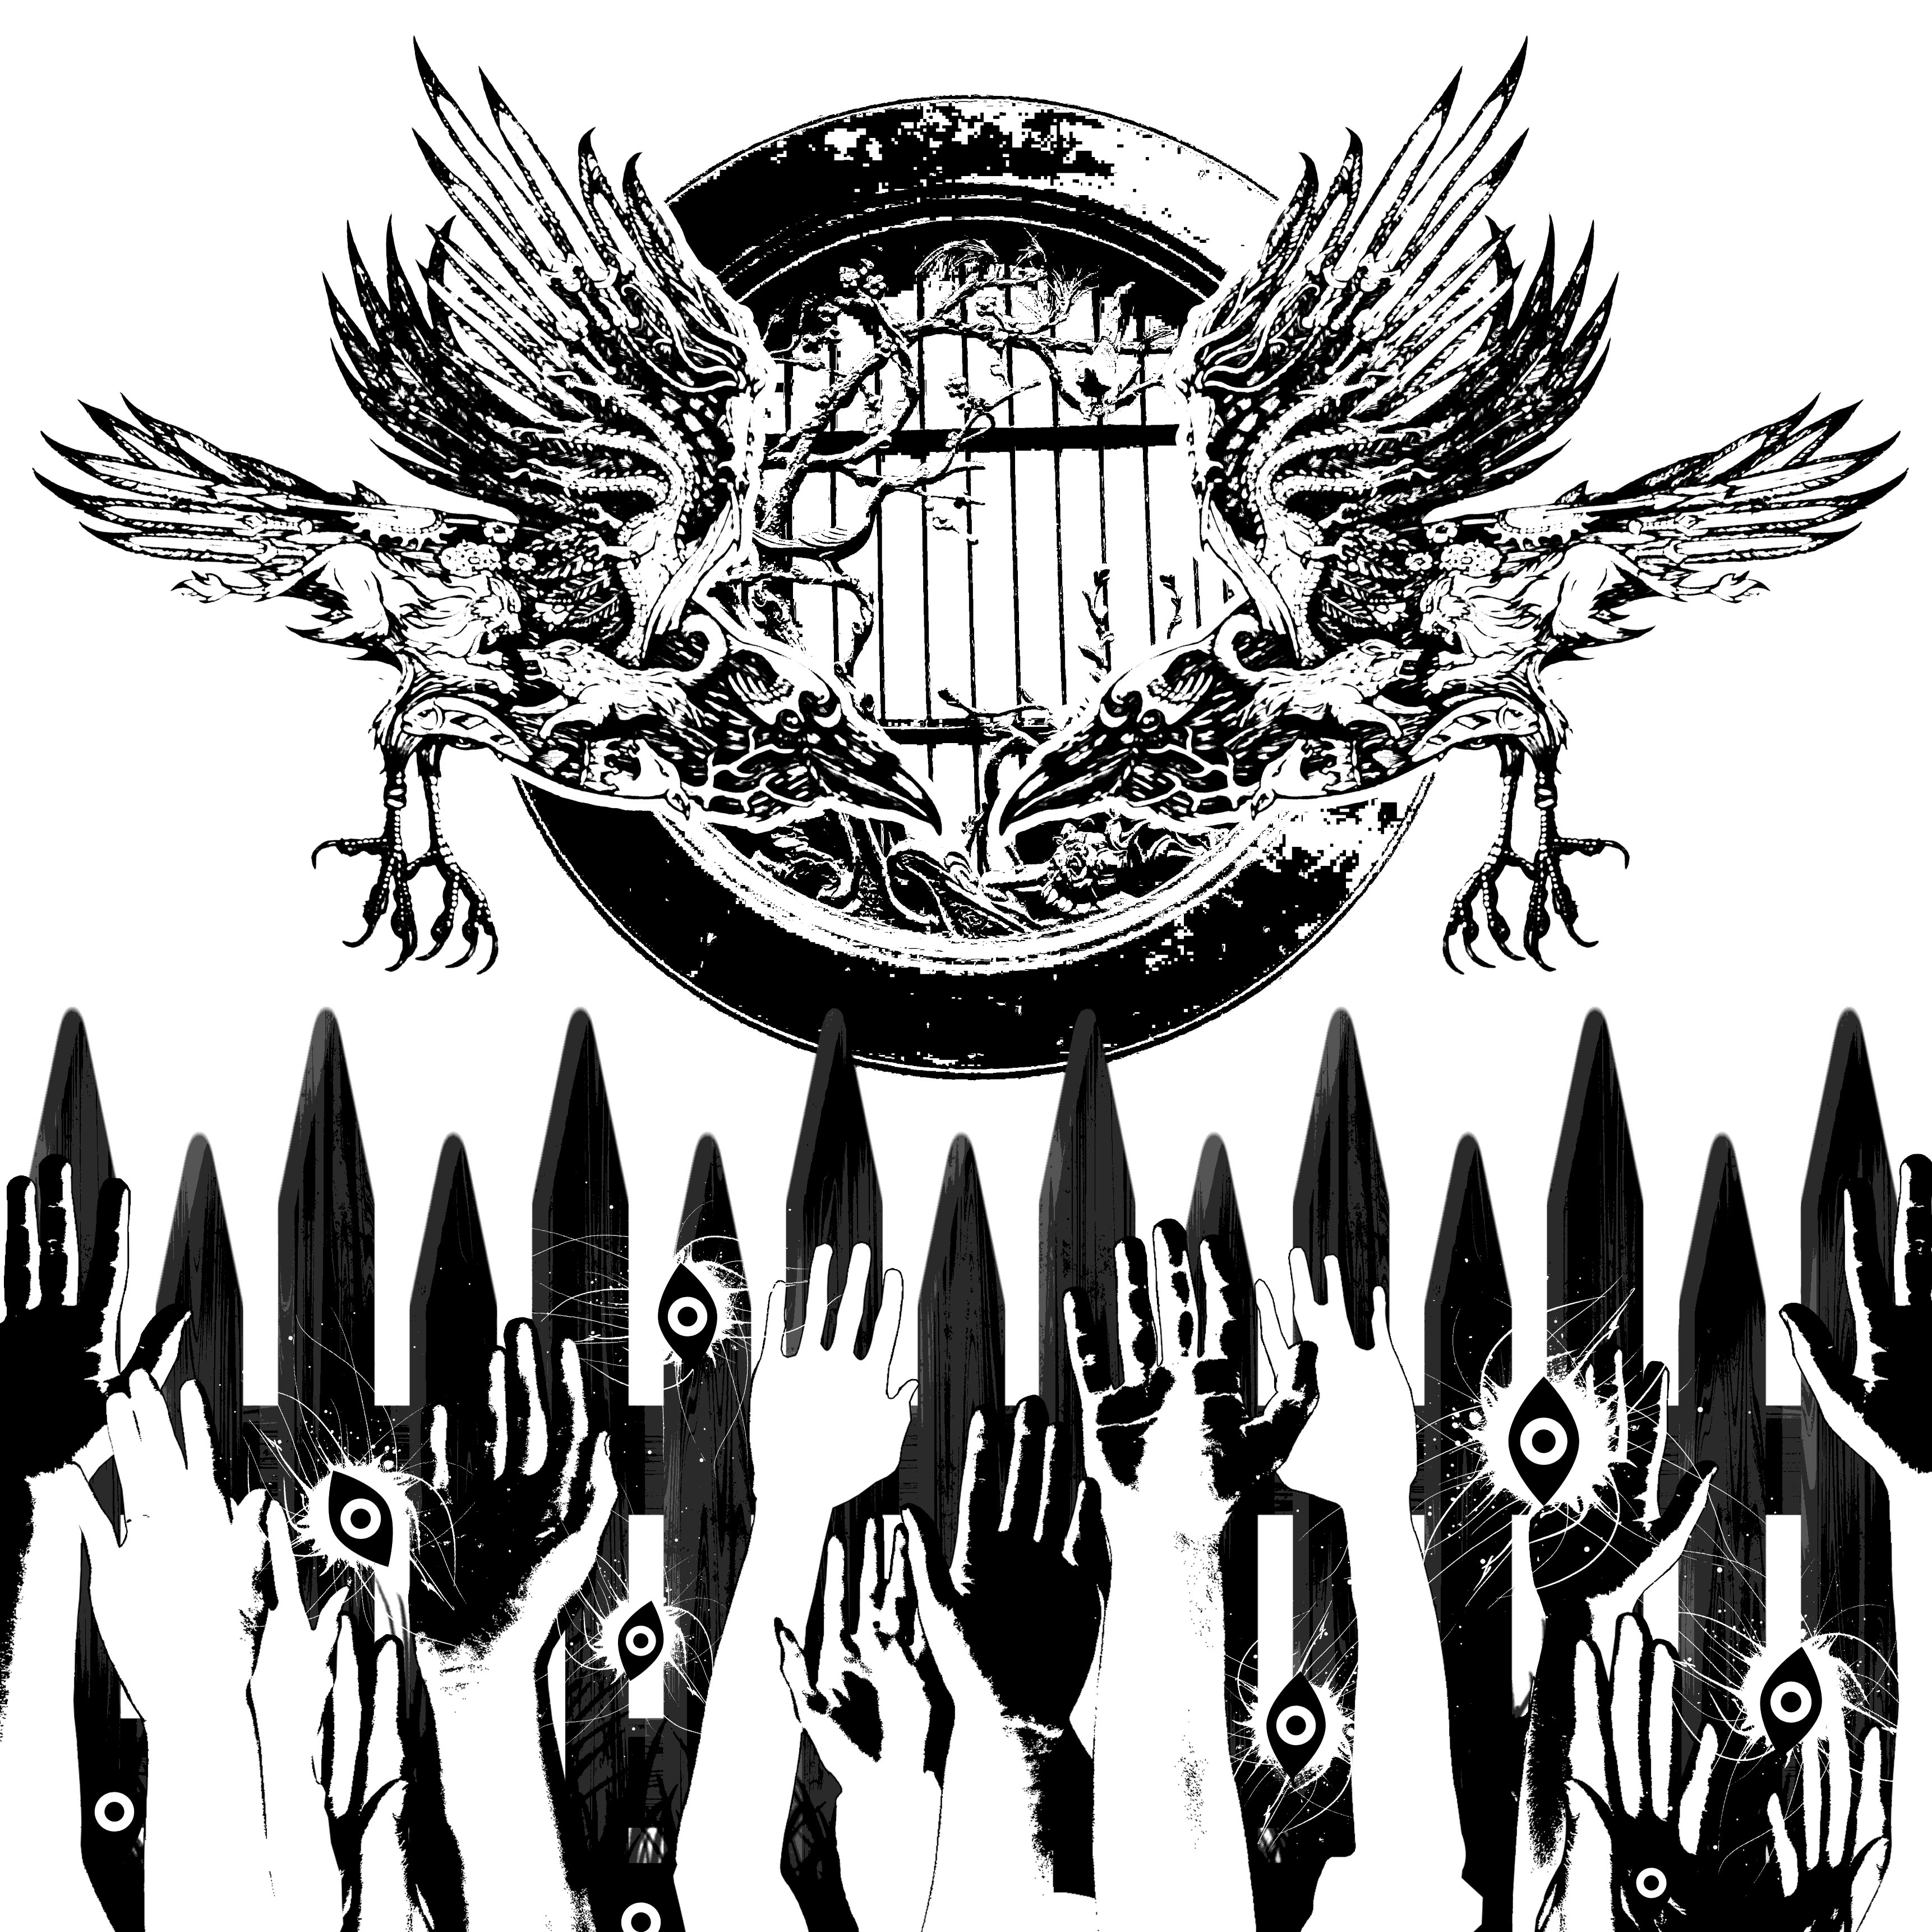
The first one, I worked on it from a tattoo of a crow I liked – then I found a movie quote pertaining to crows, and remembered an old movie that had a really nice quote about them: “People once believed that when someone dies, a crow carries their soul to the land of the dead.”

I chose to interpret:
-people as ‘hands’
-souls as ‘eyes’
-picket fences as ‘mortality’ or ‘burden’
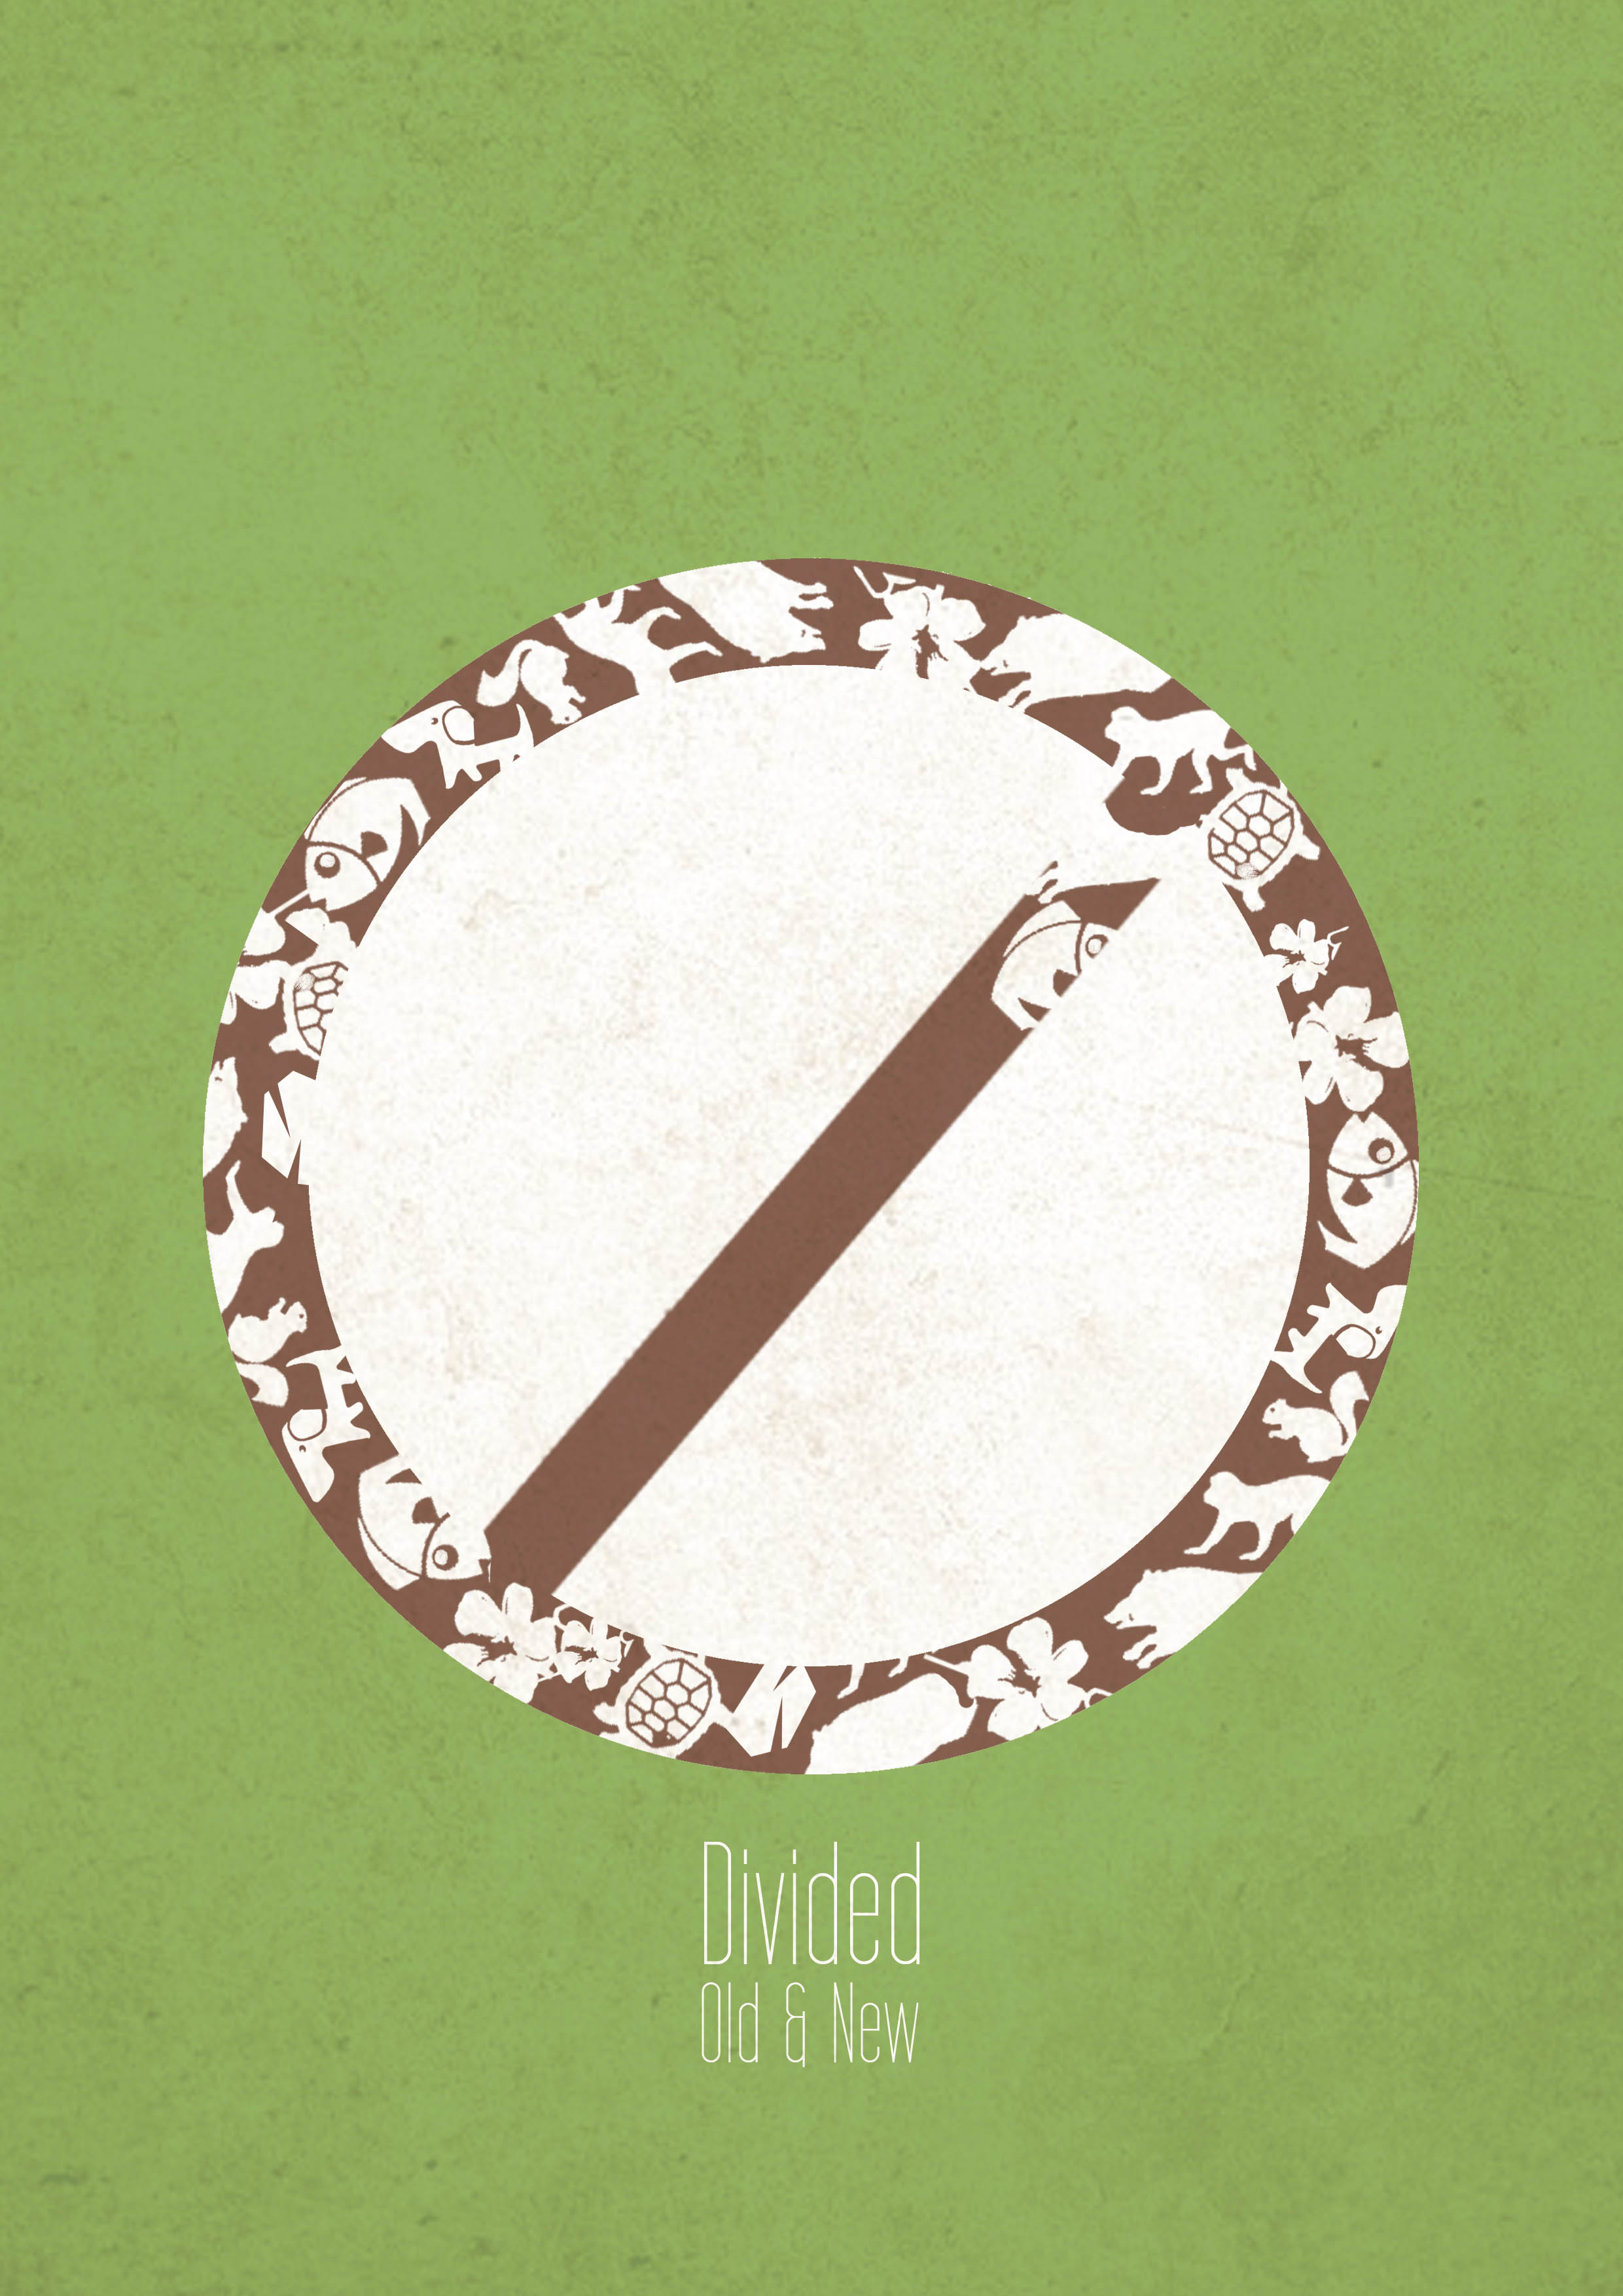
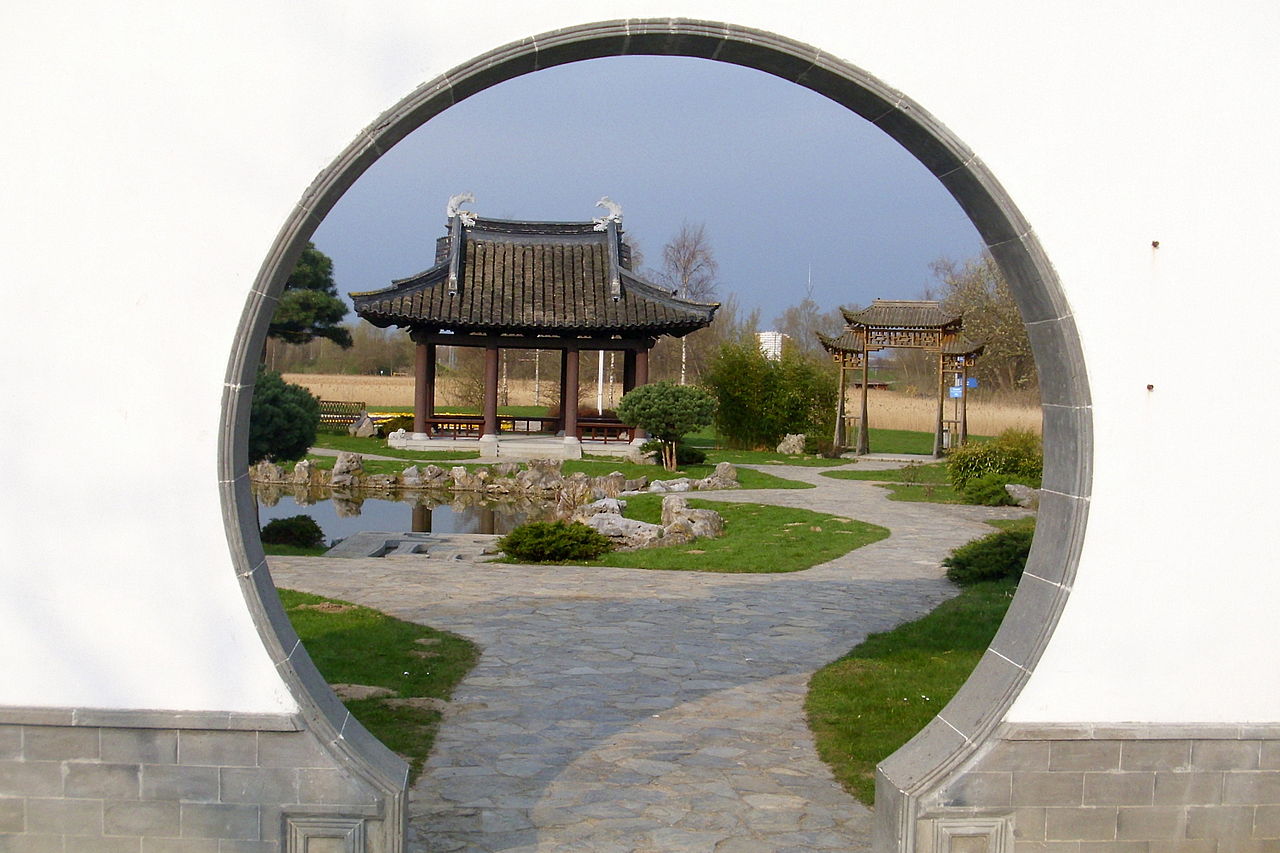
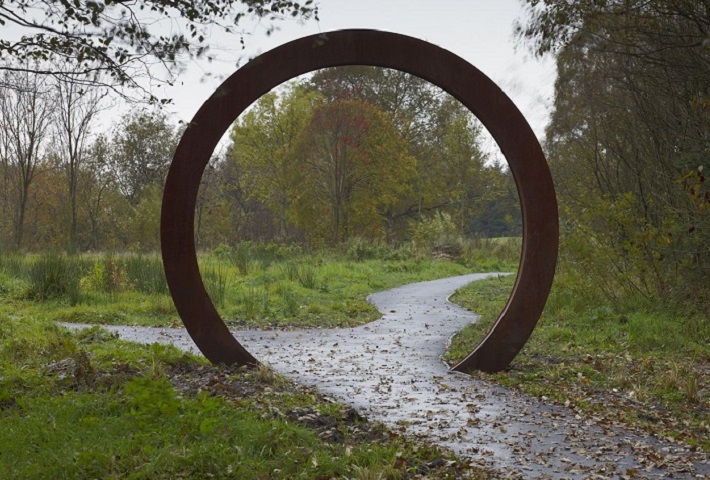
-a circular door as a ‘portal’ or ‘border’
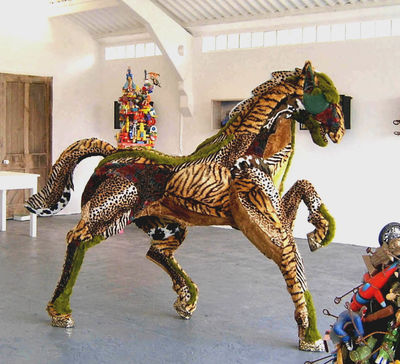
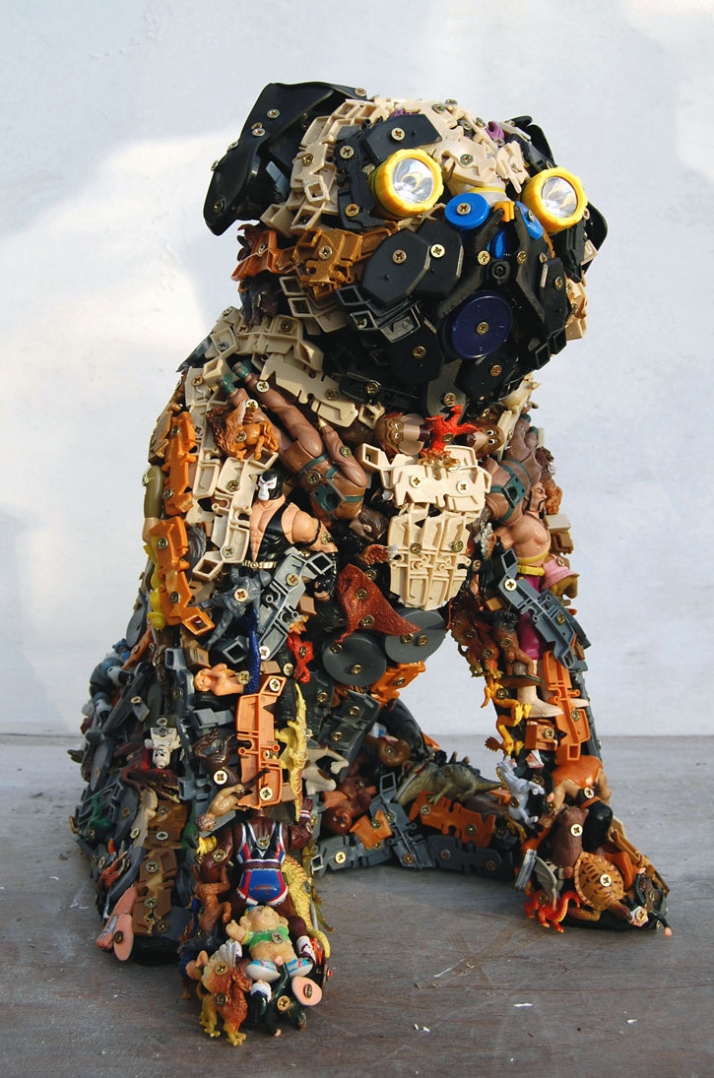
-an image of a crow made of other different animals as the ‘crow’ and the meaning of human/animal ‘actions’
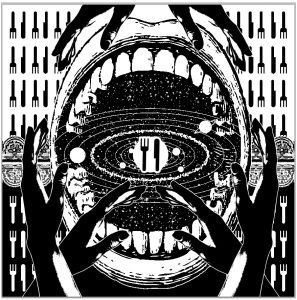
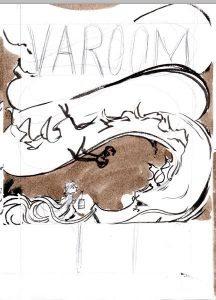
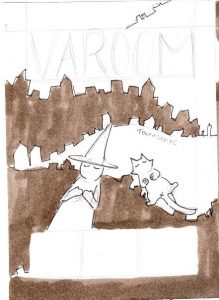
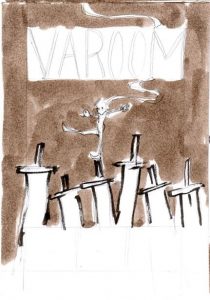
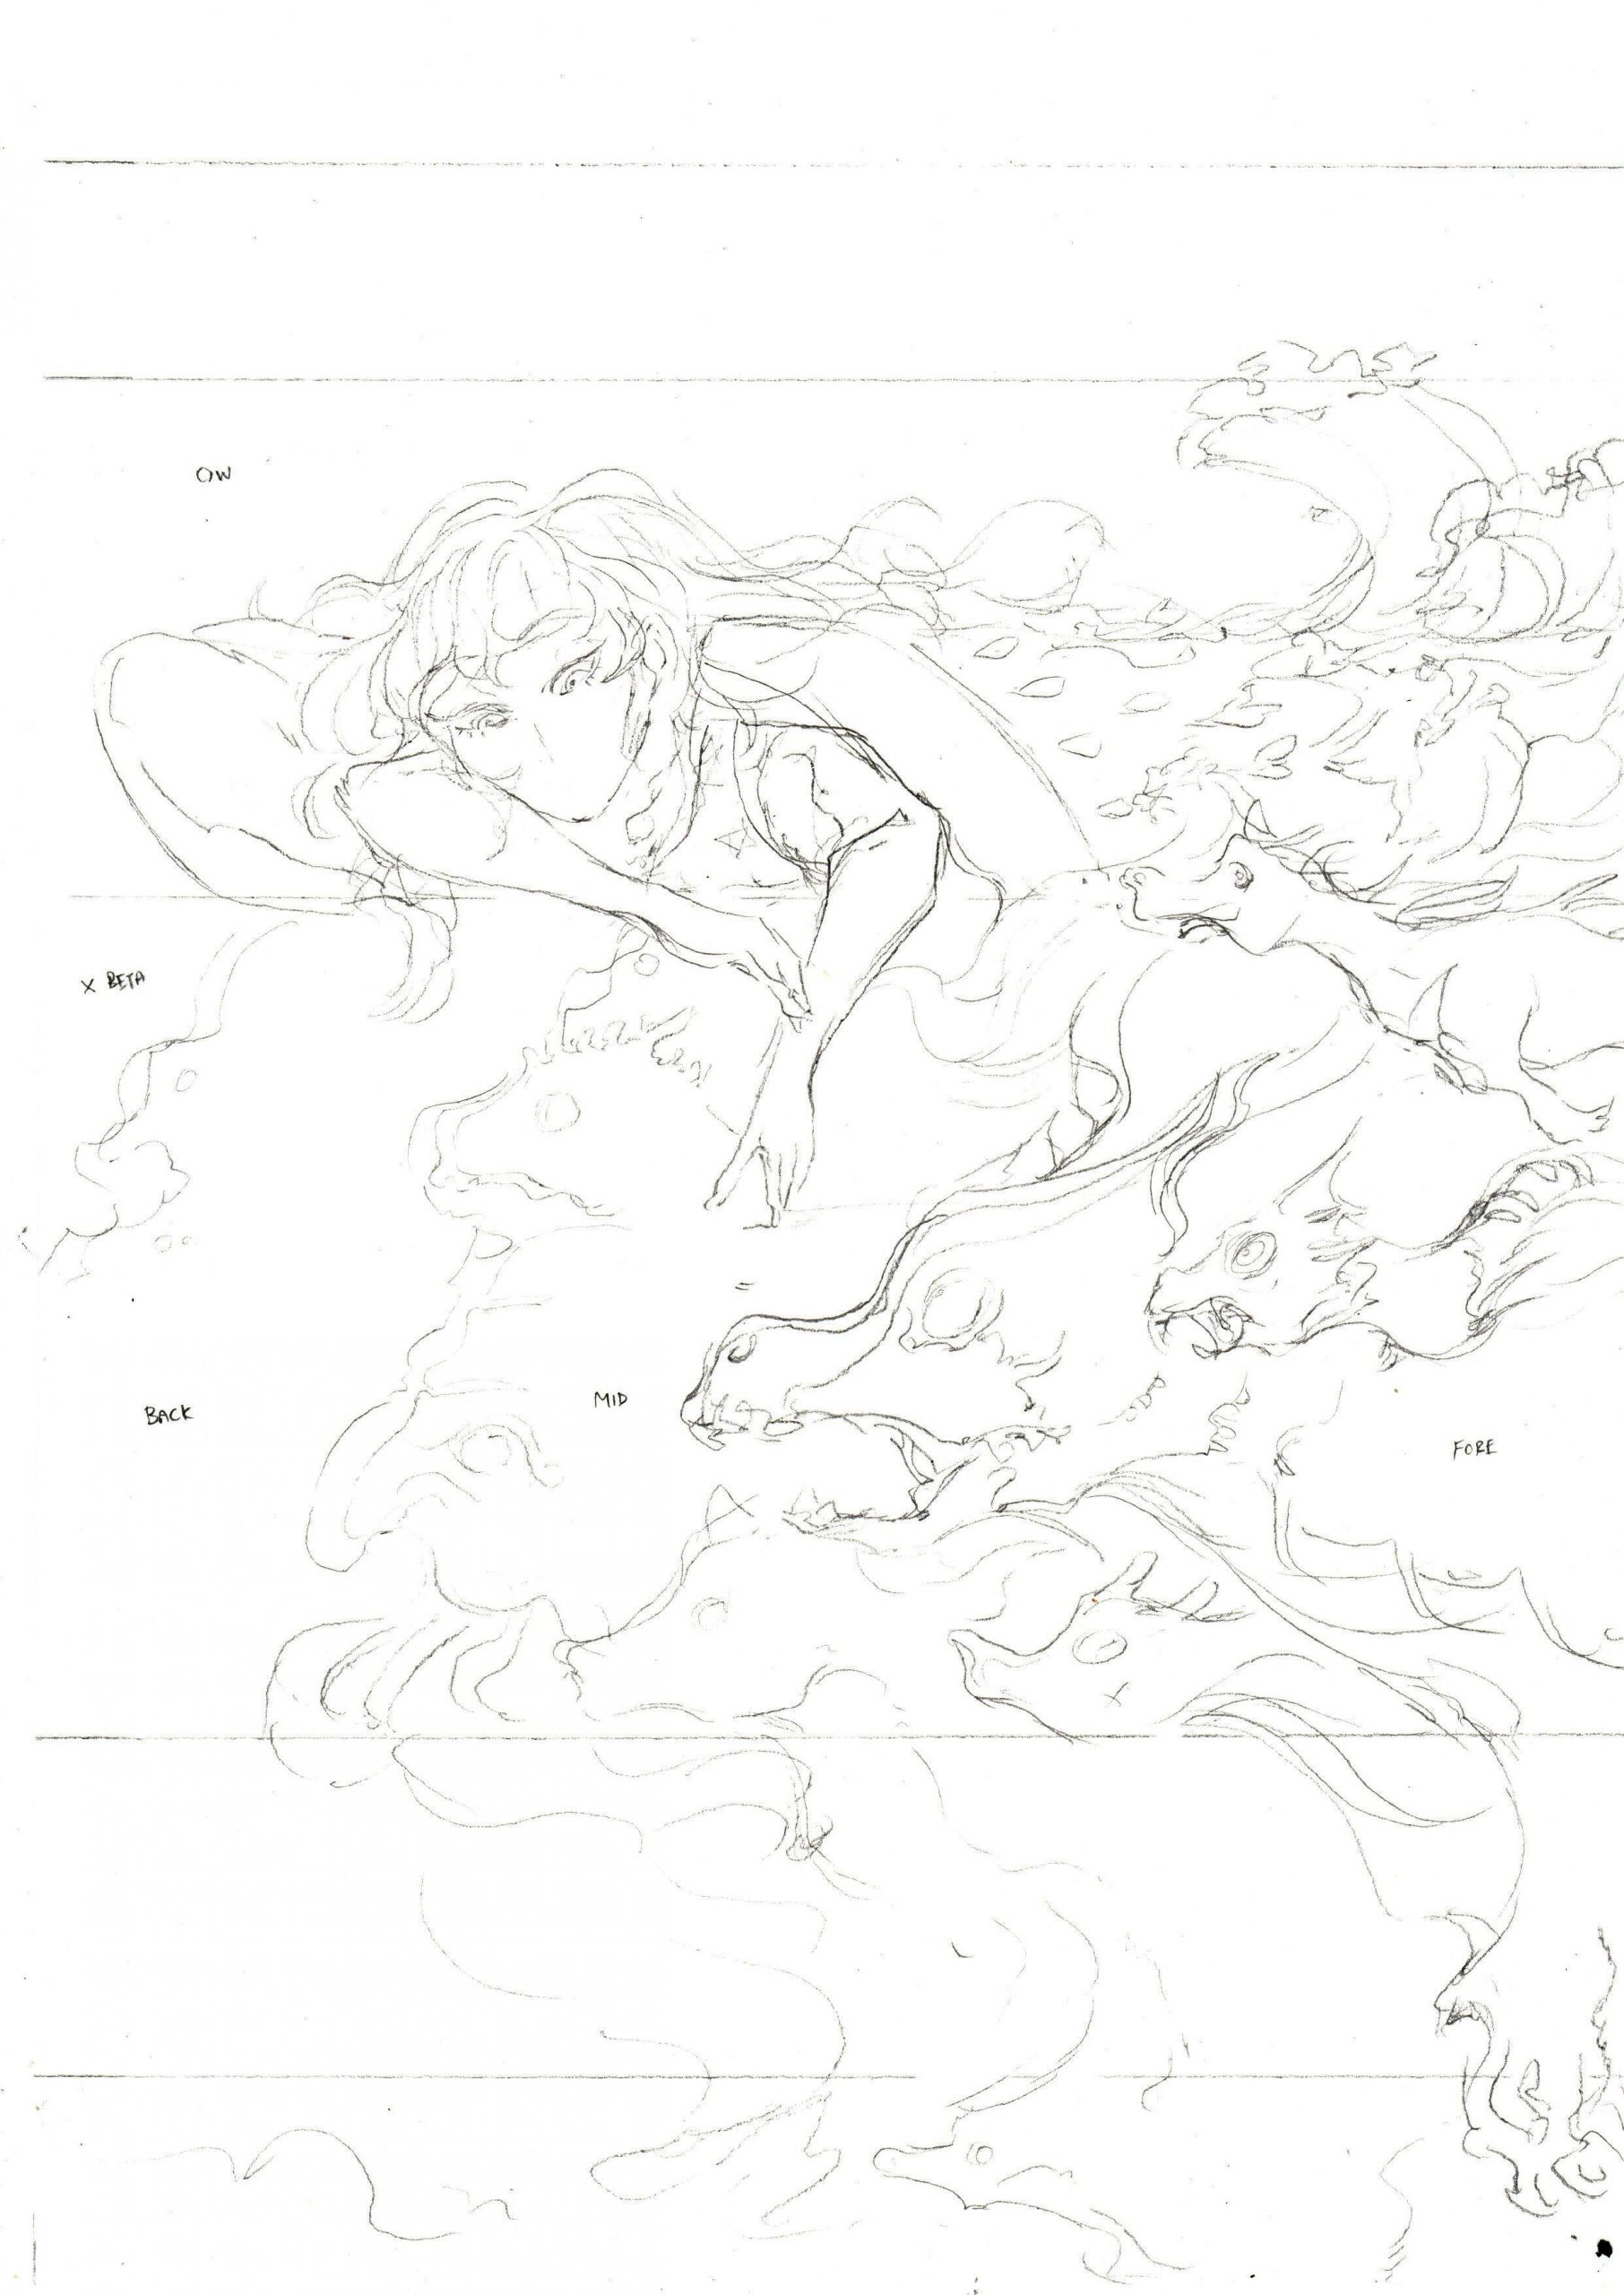
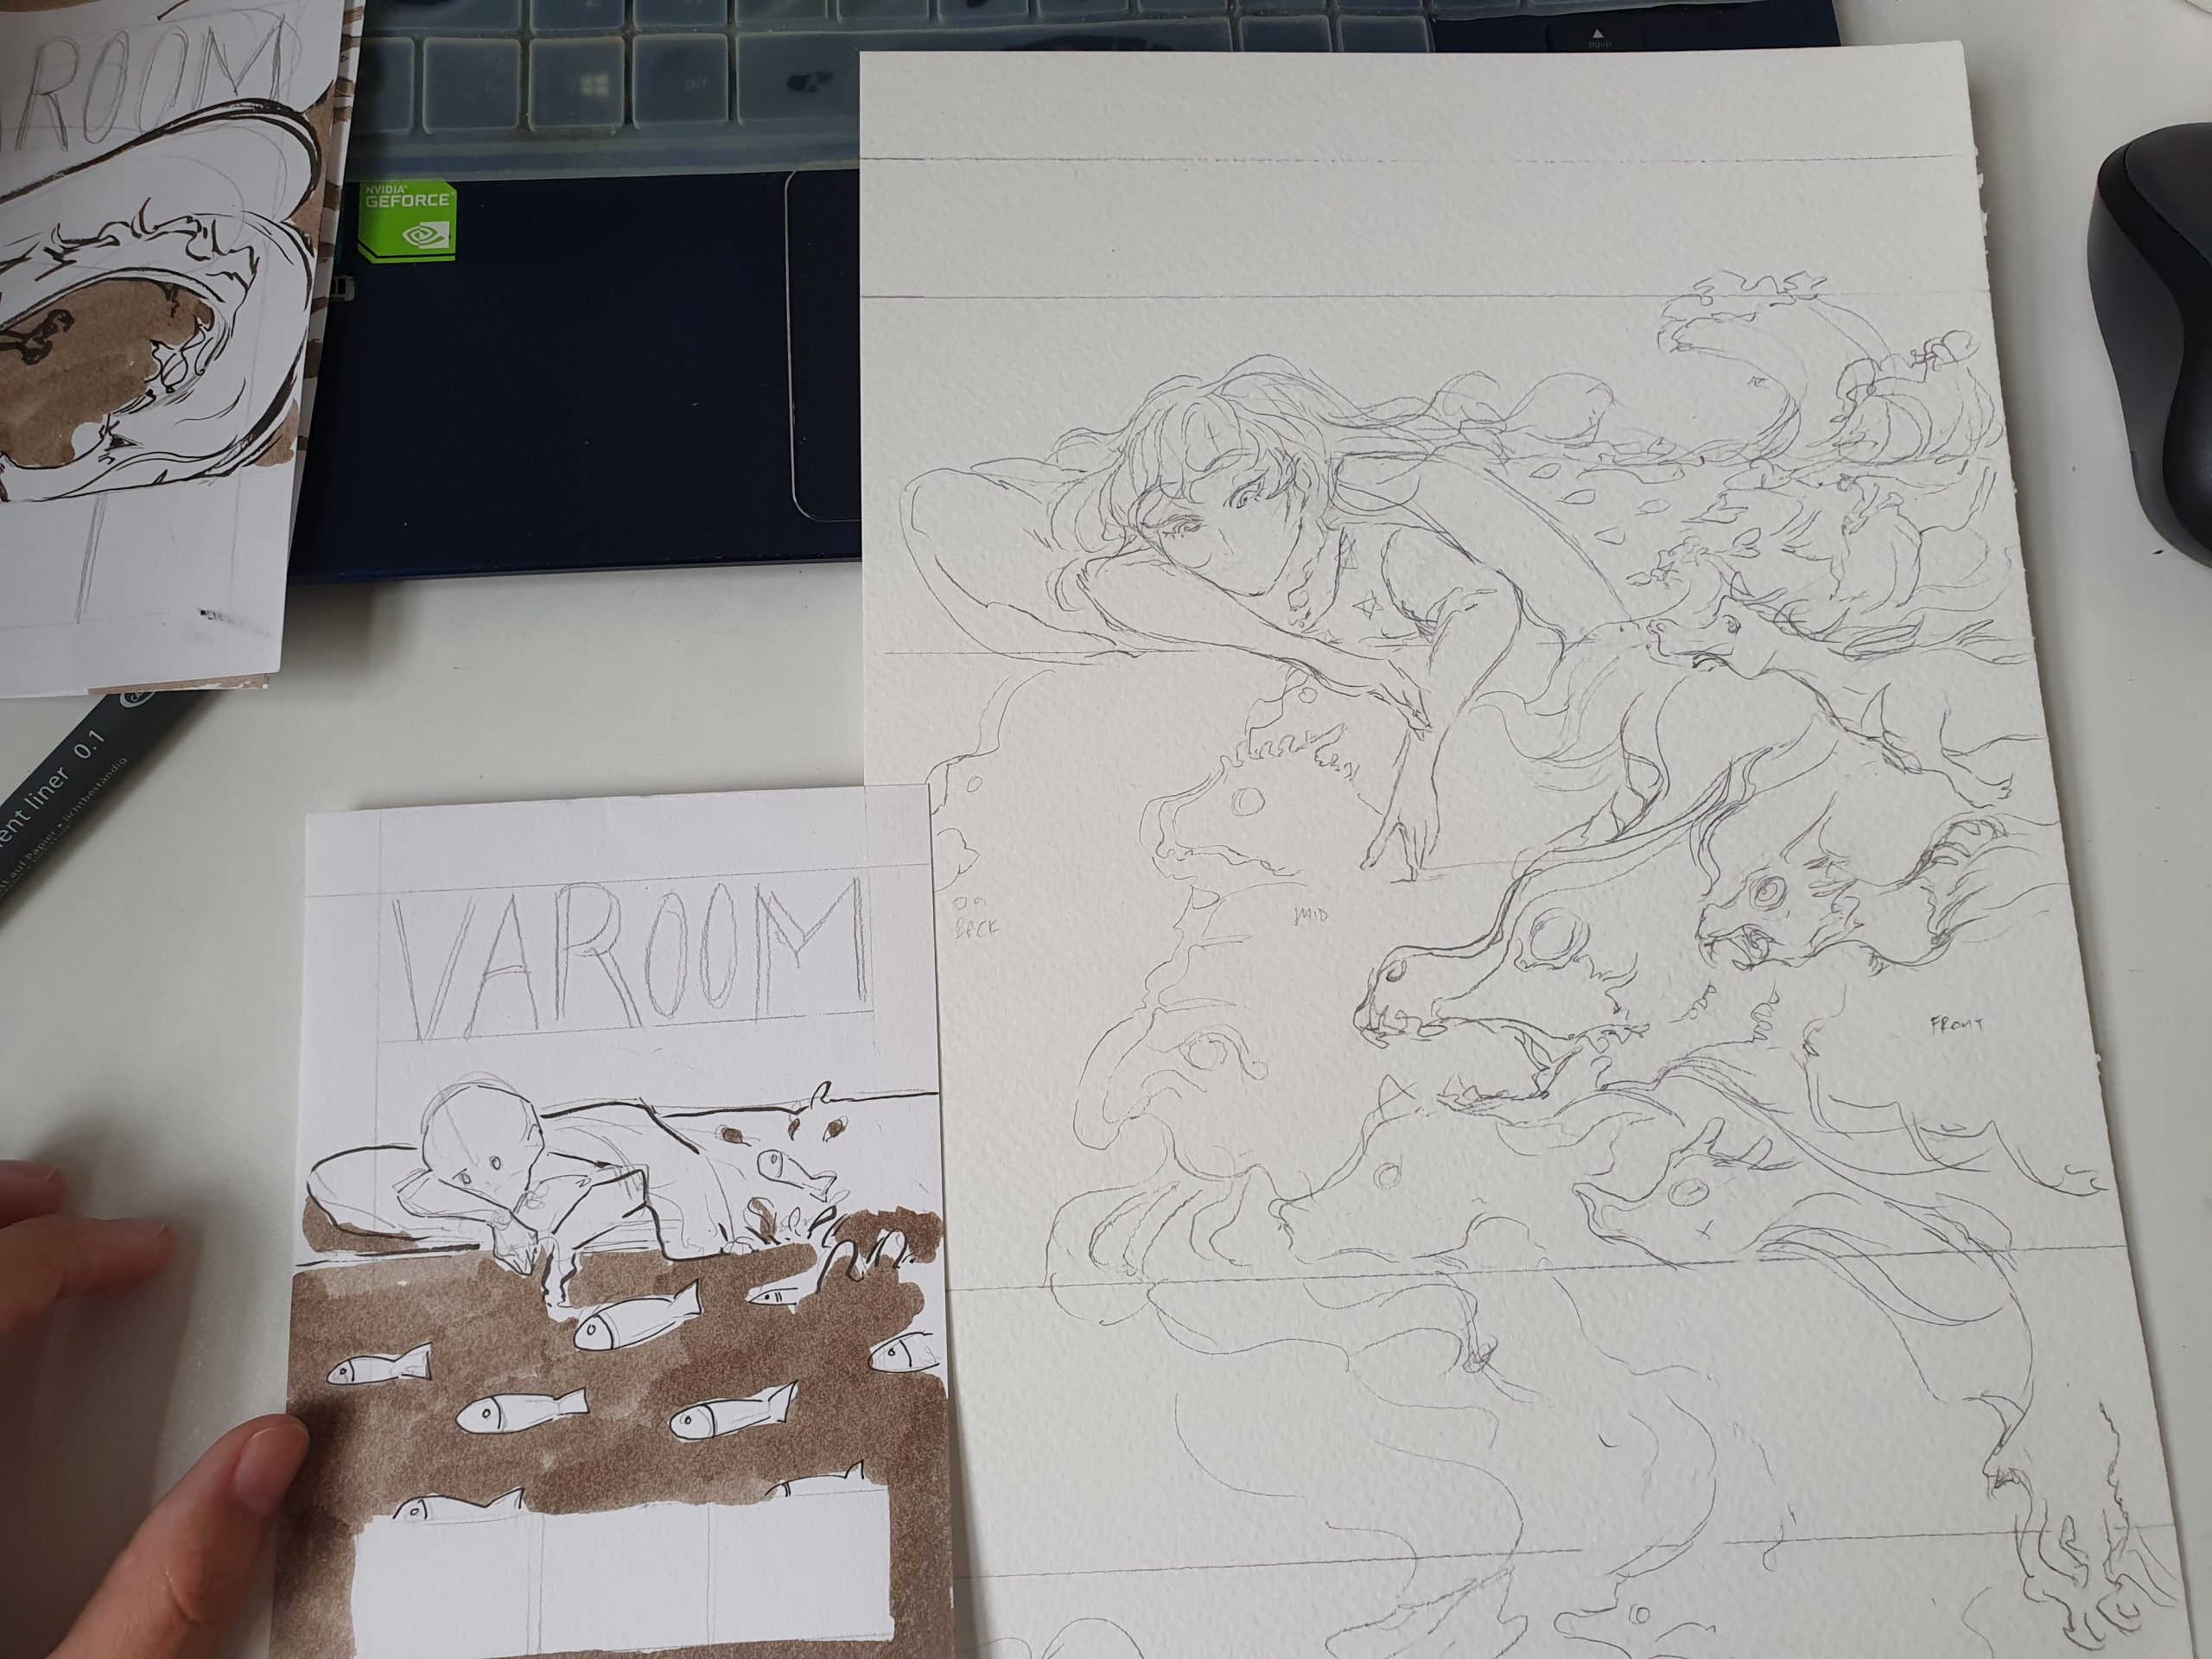
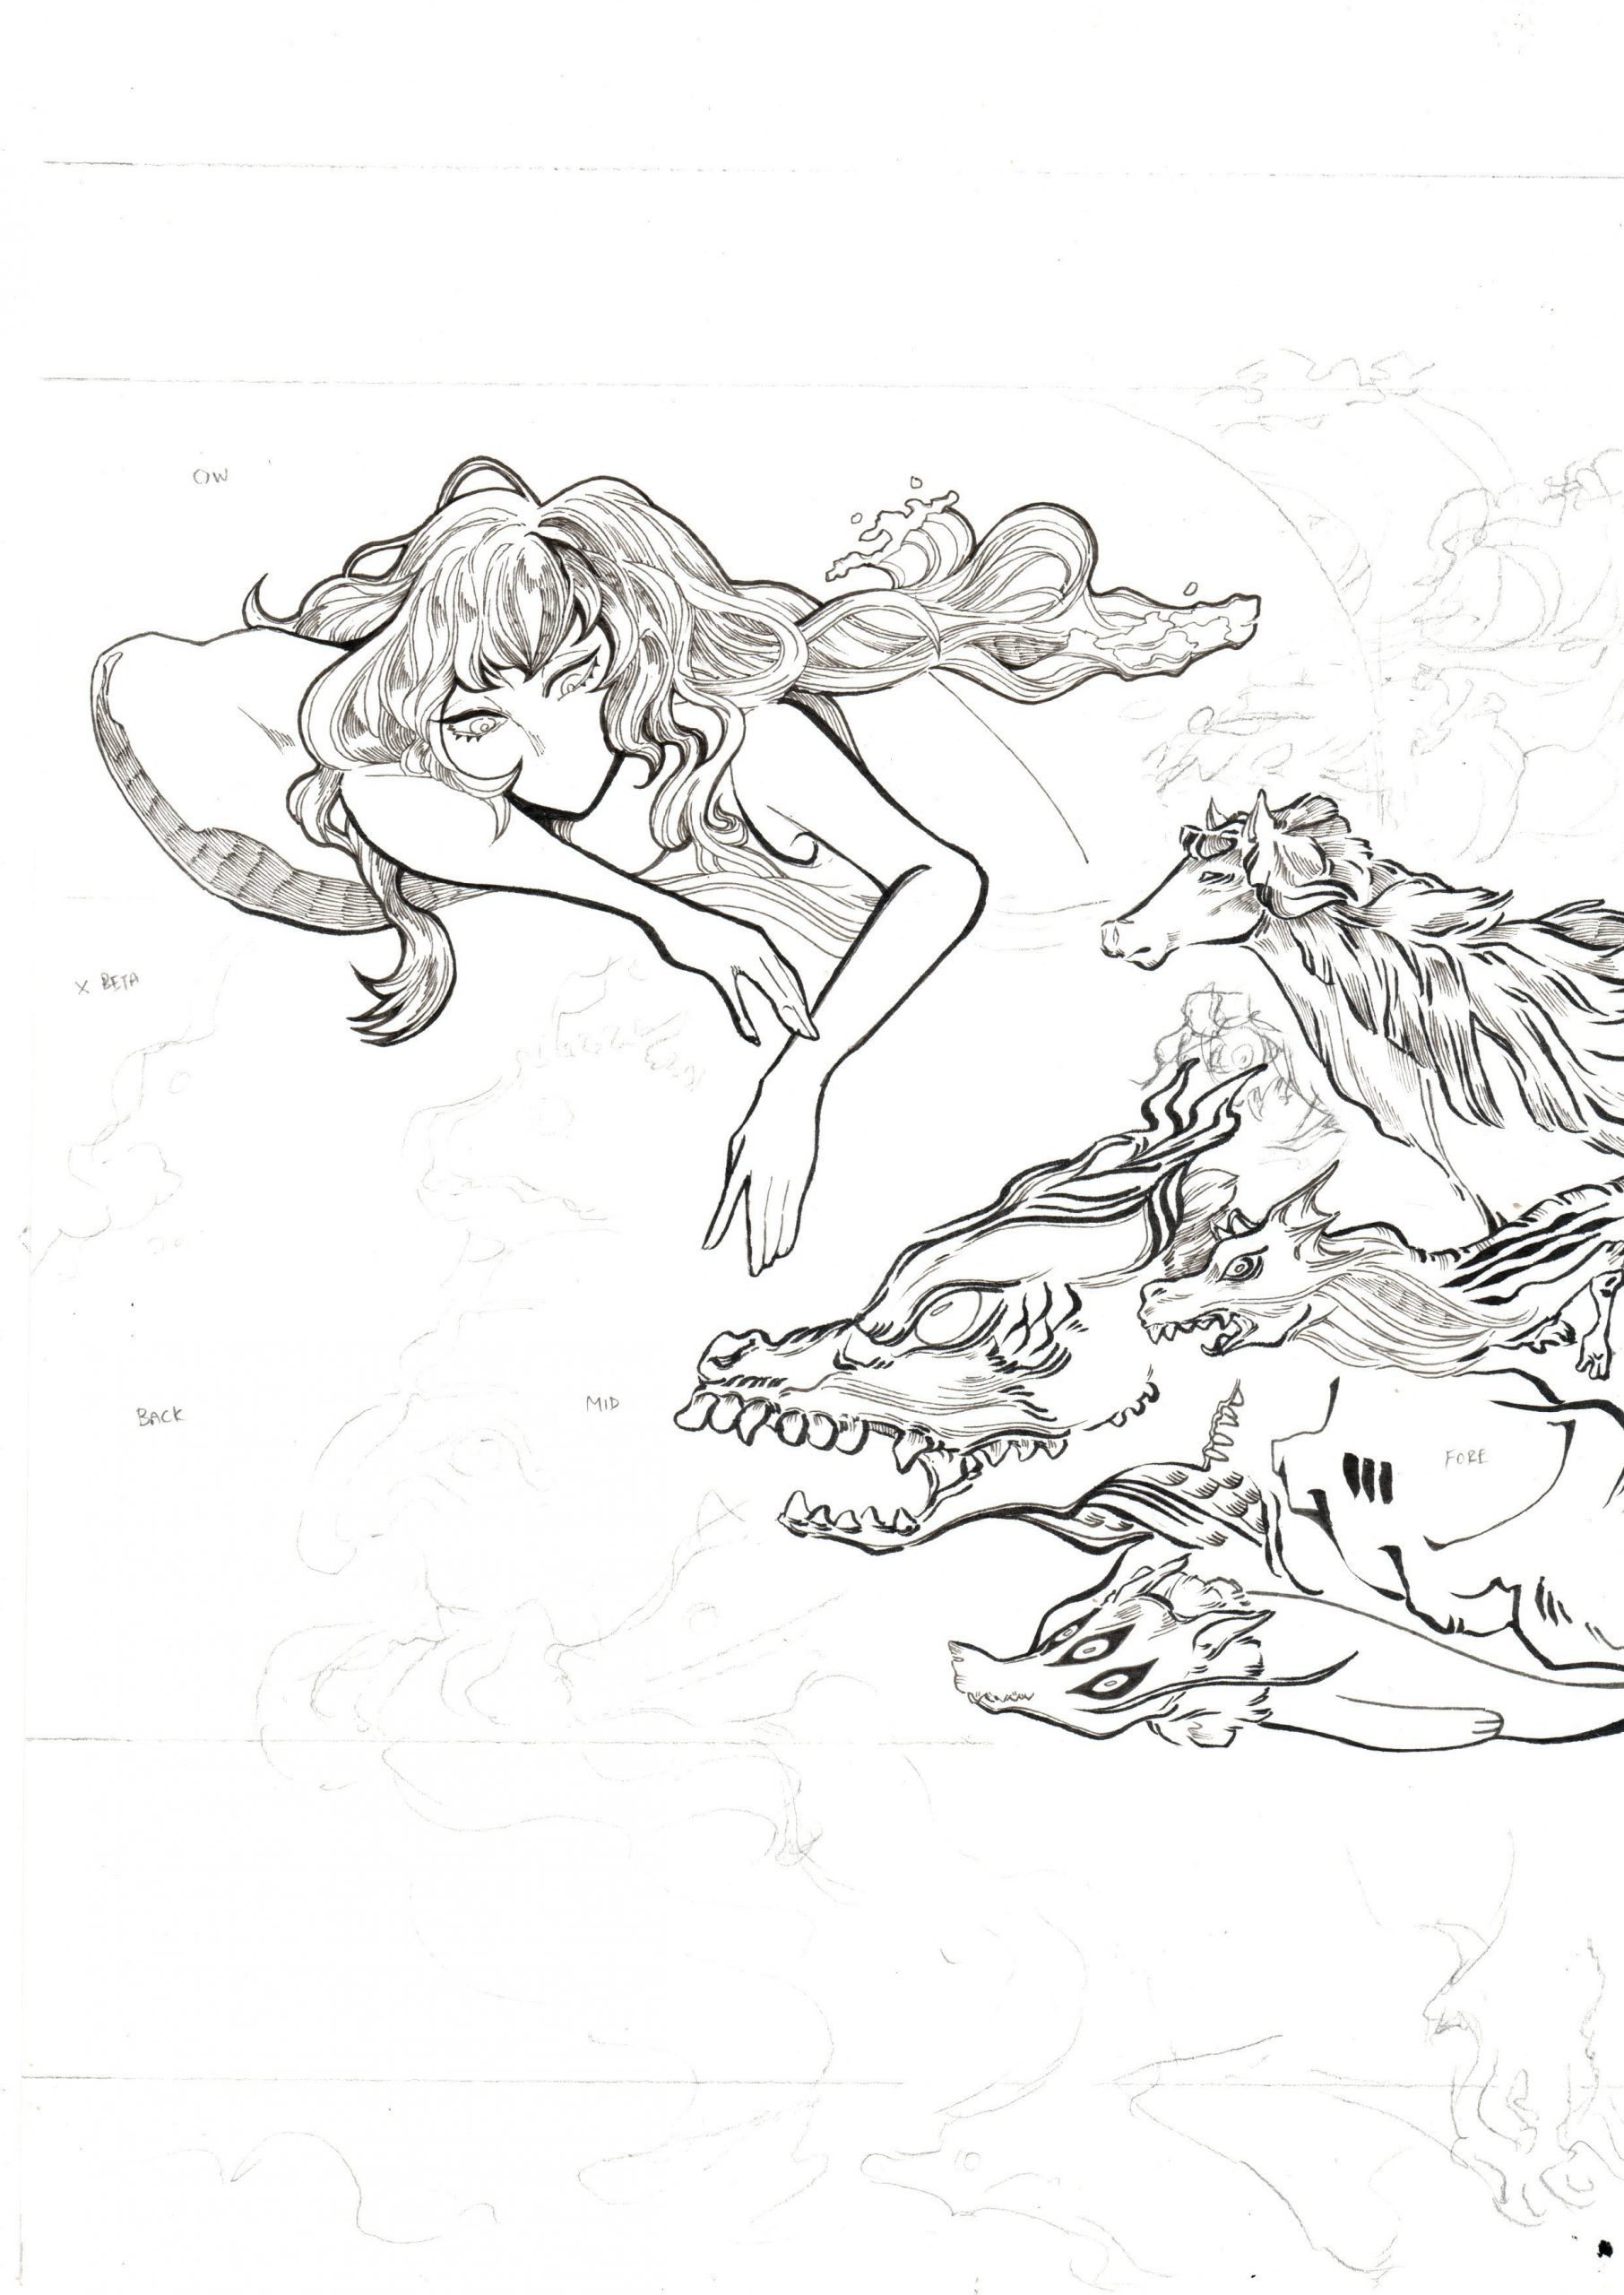
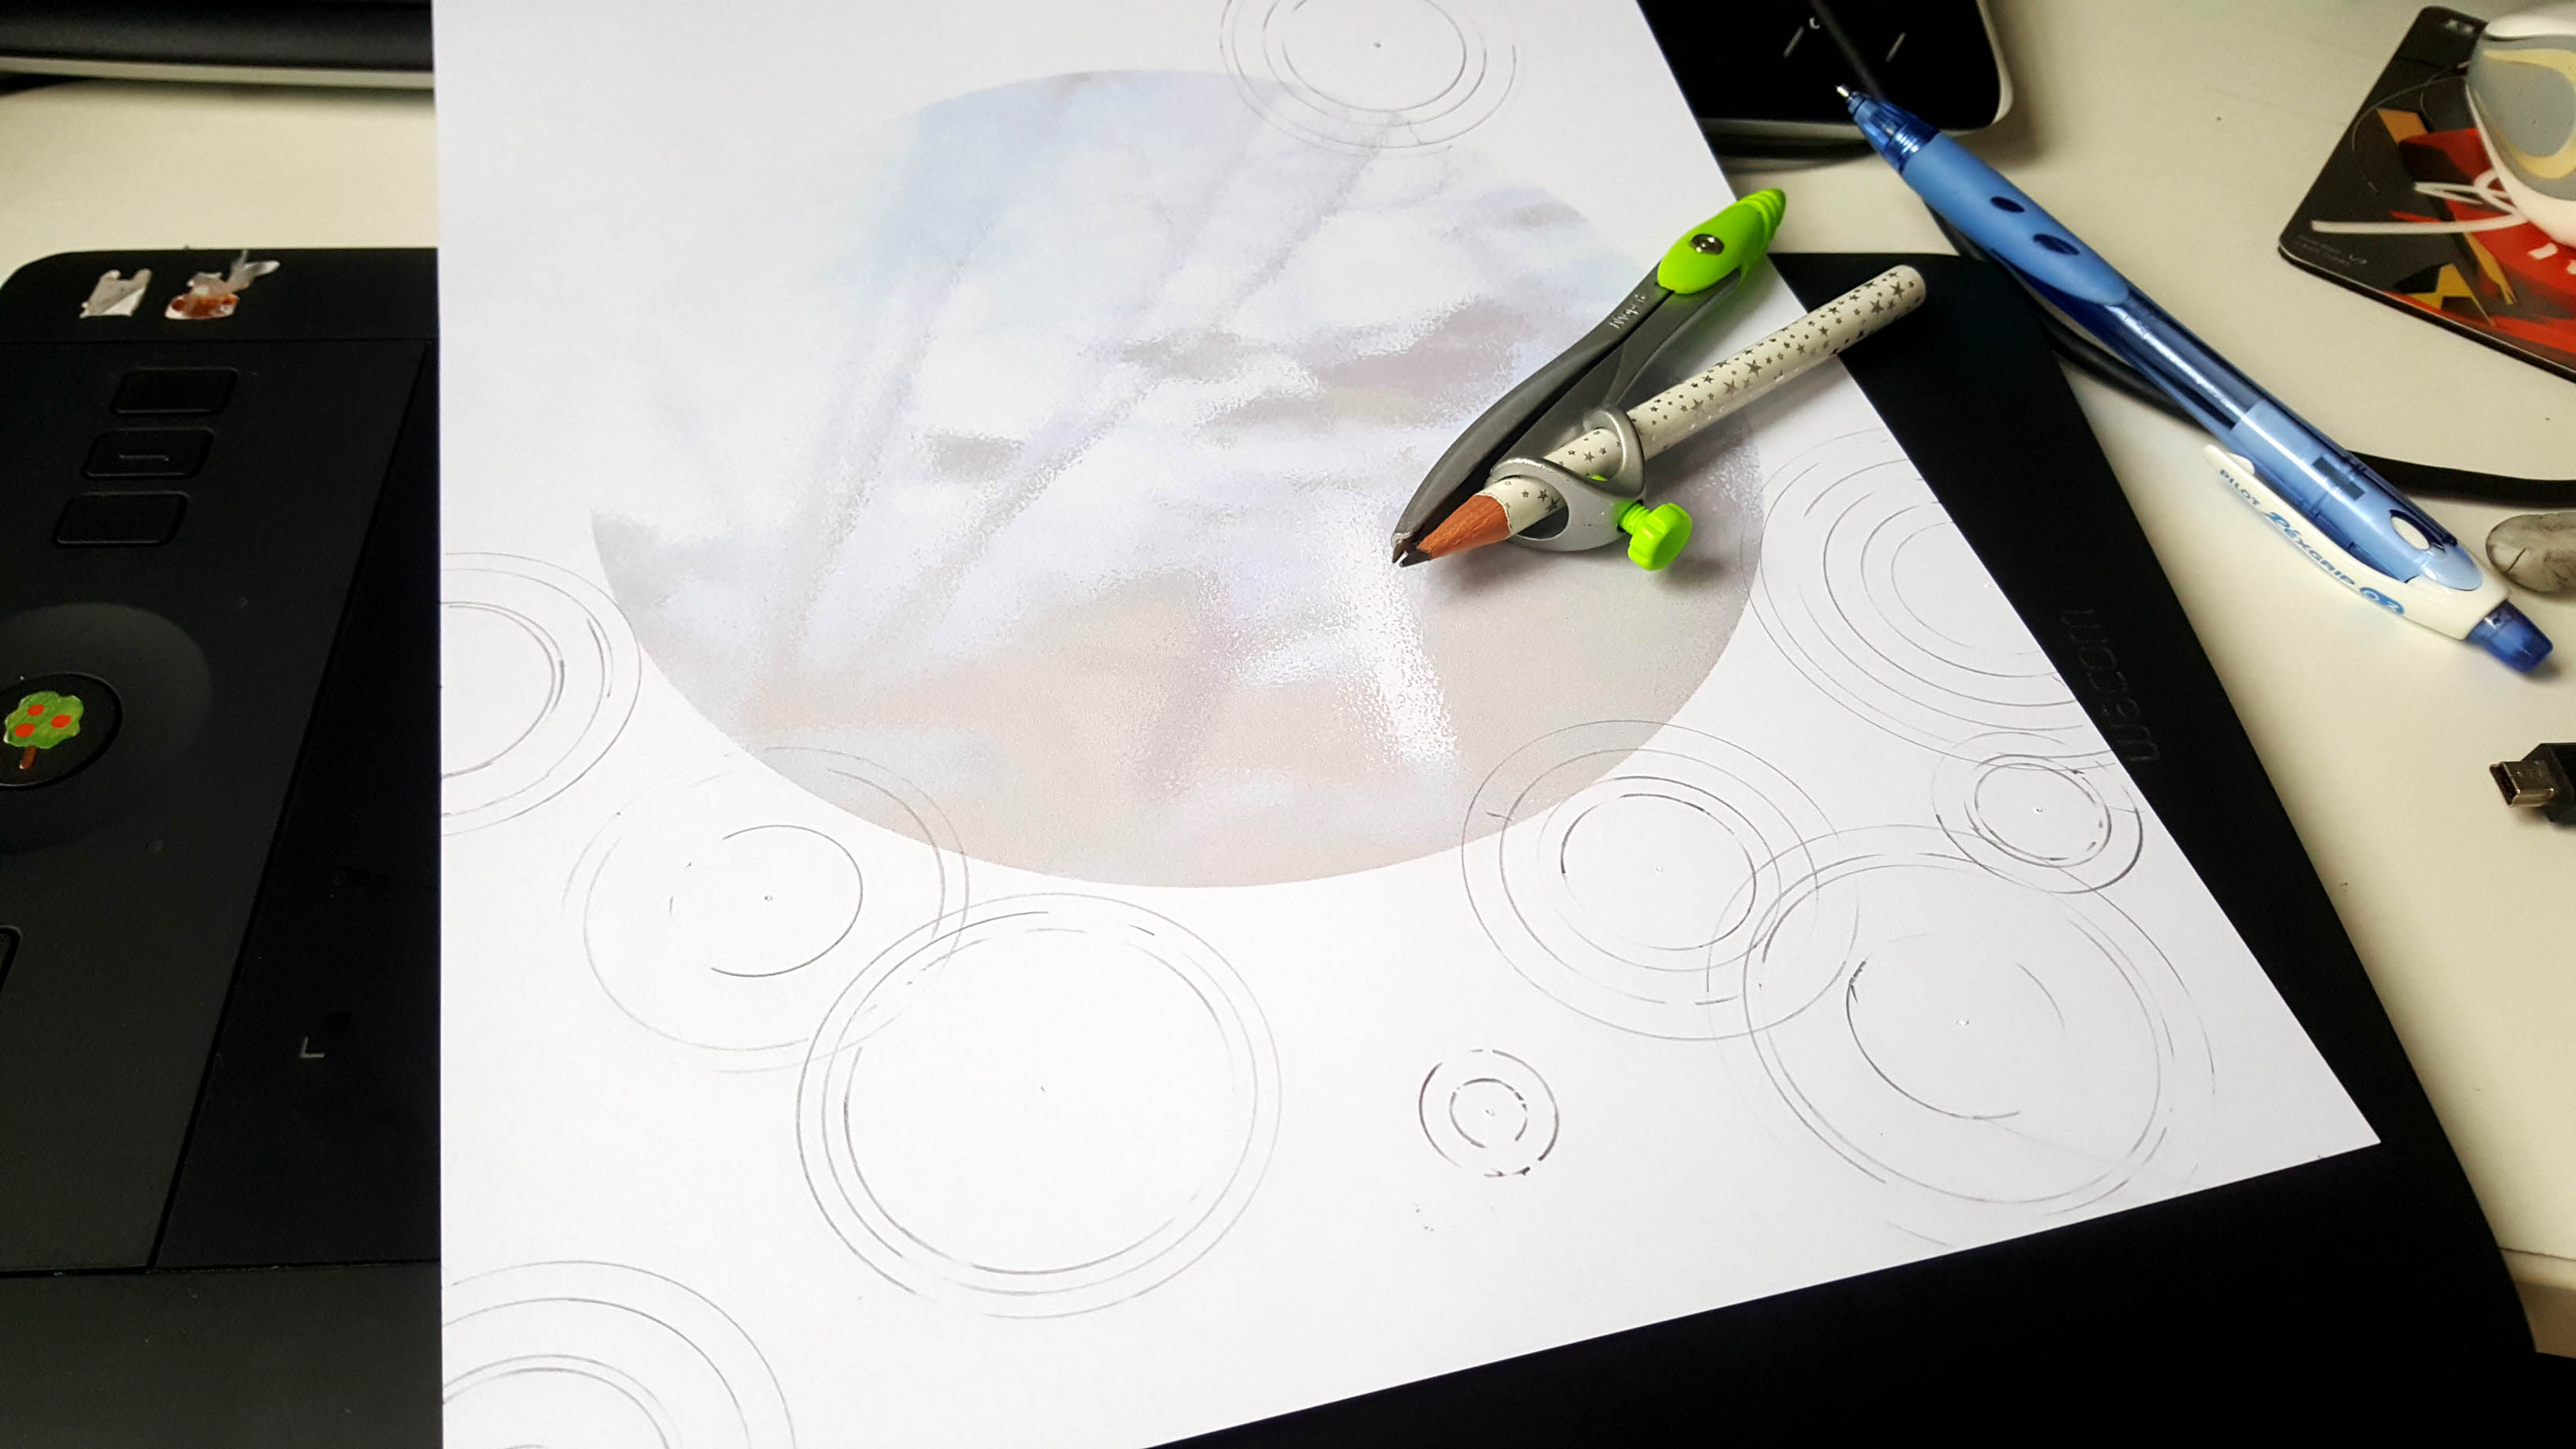
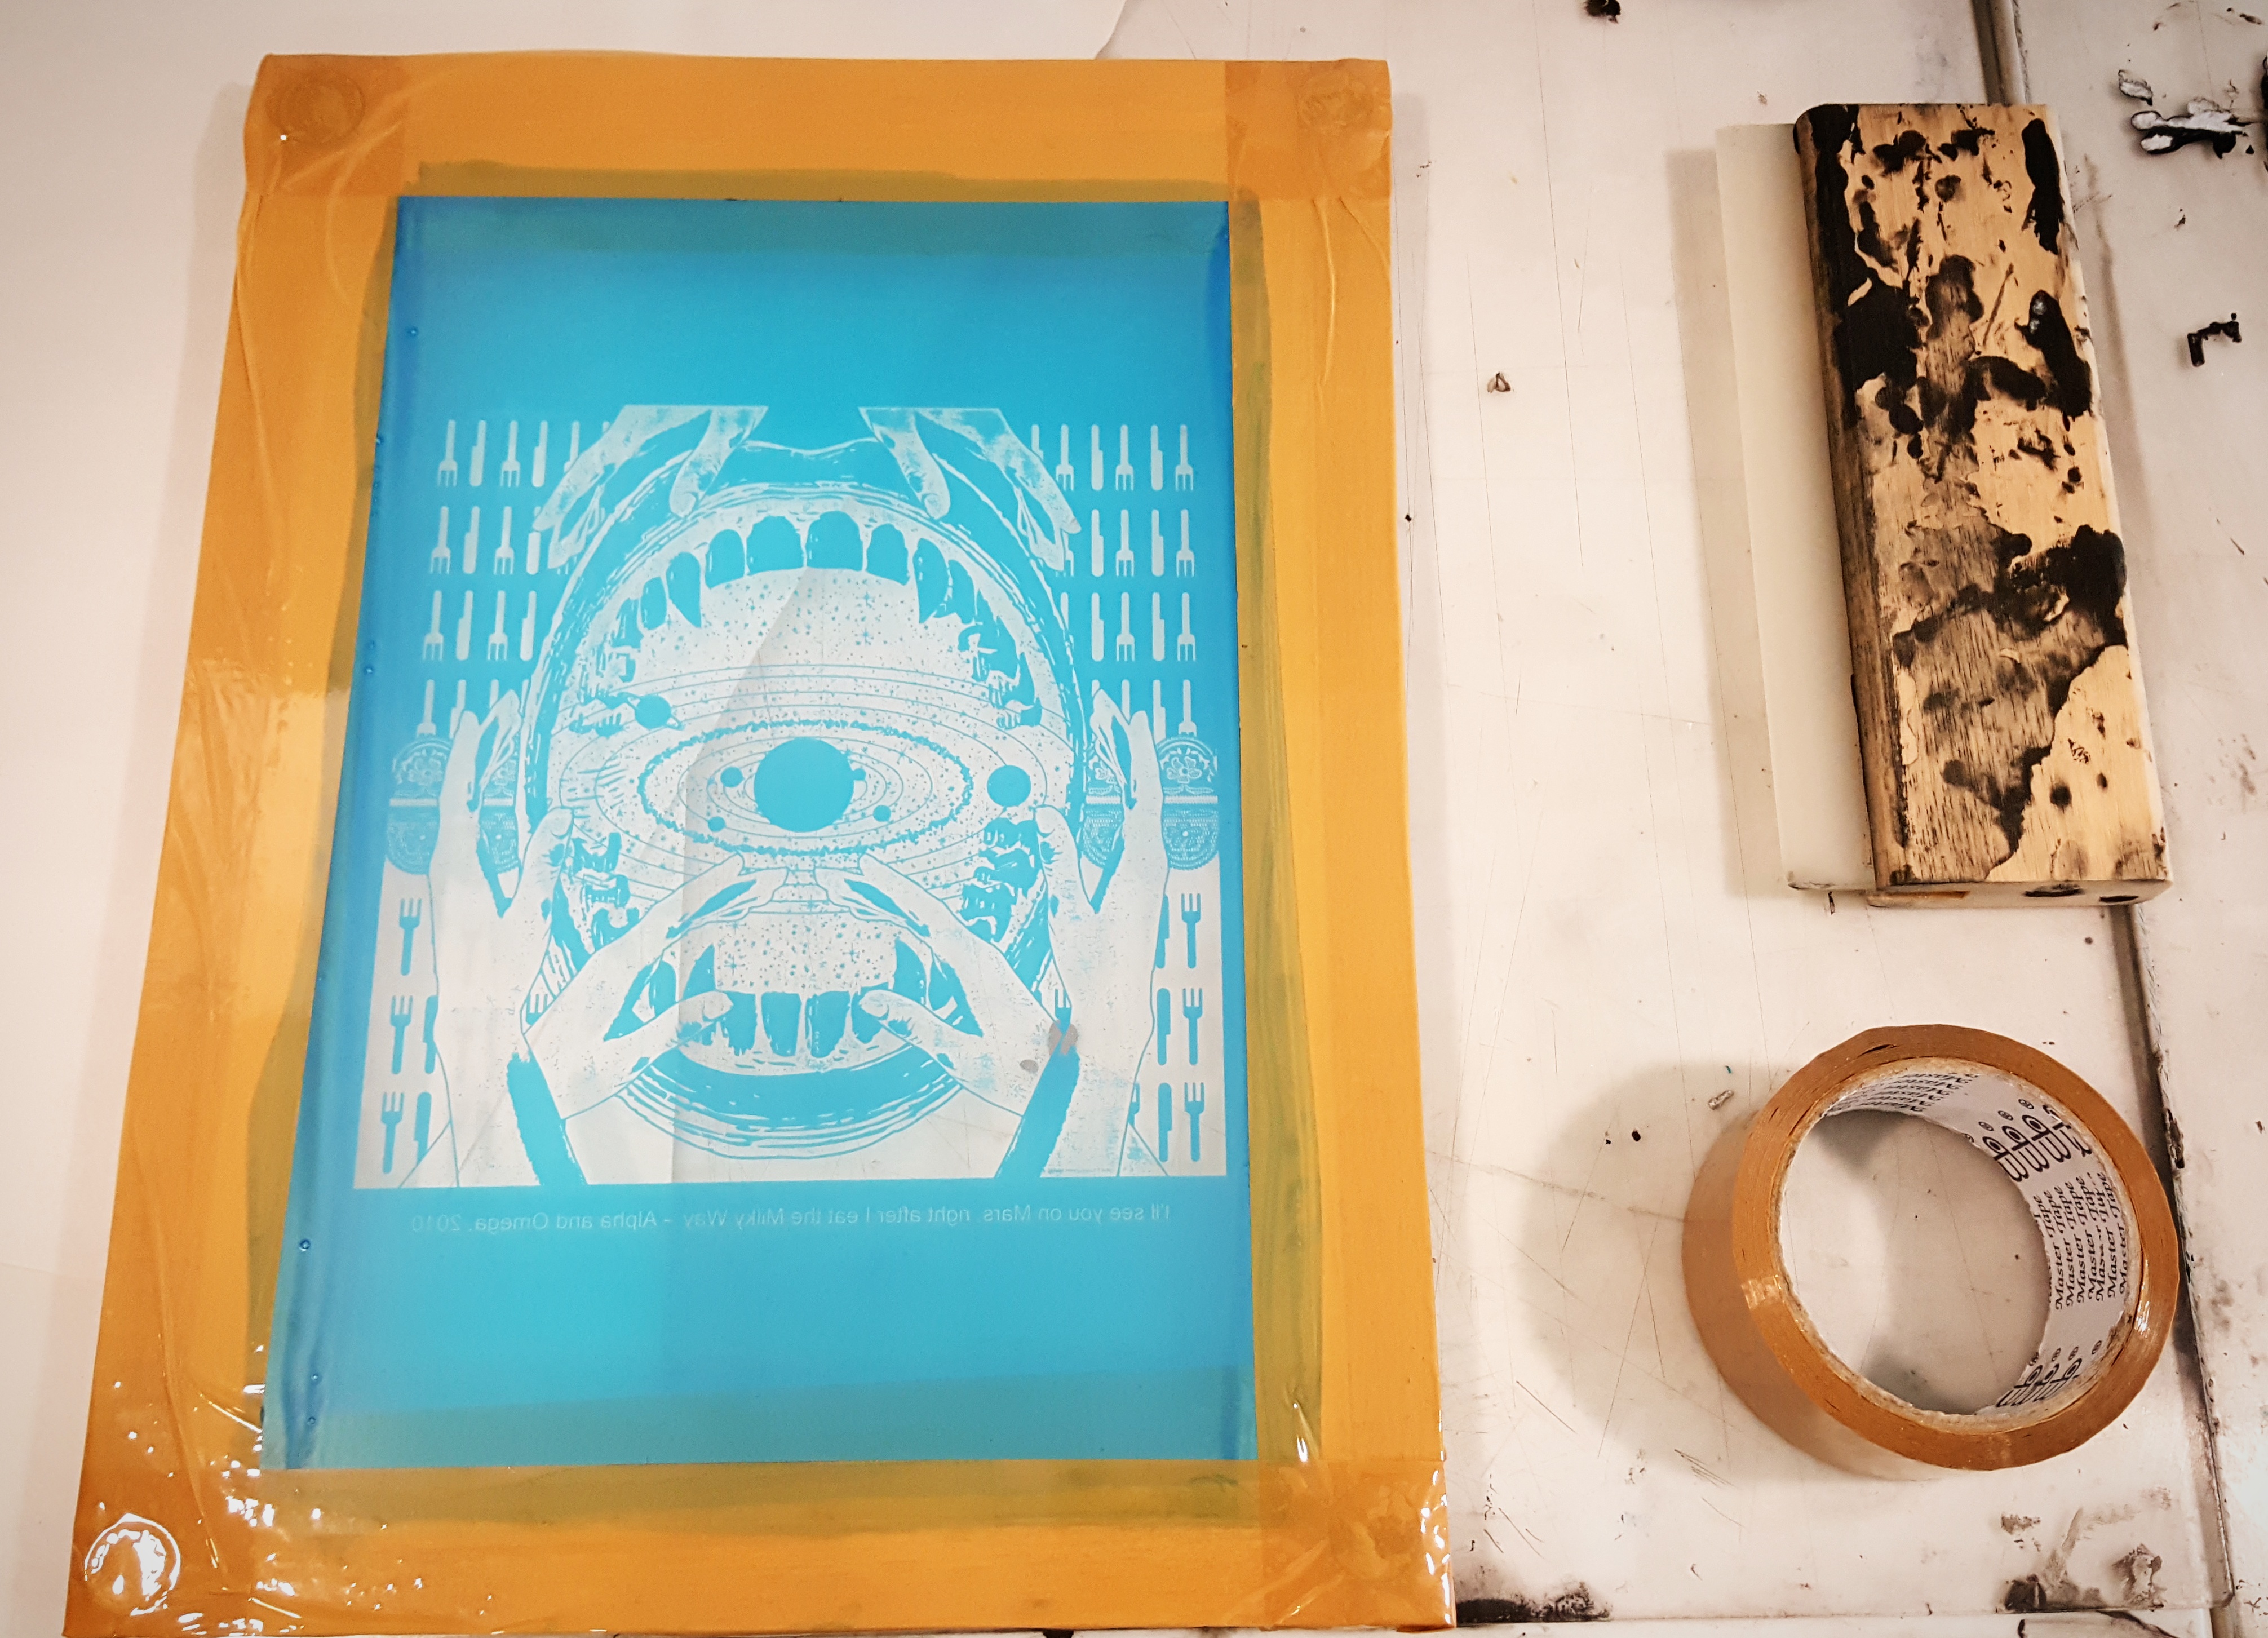
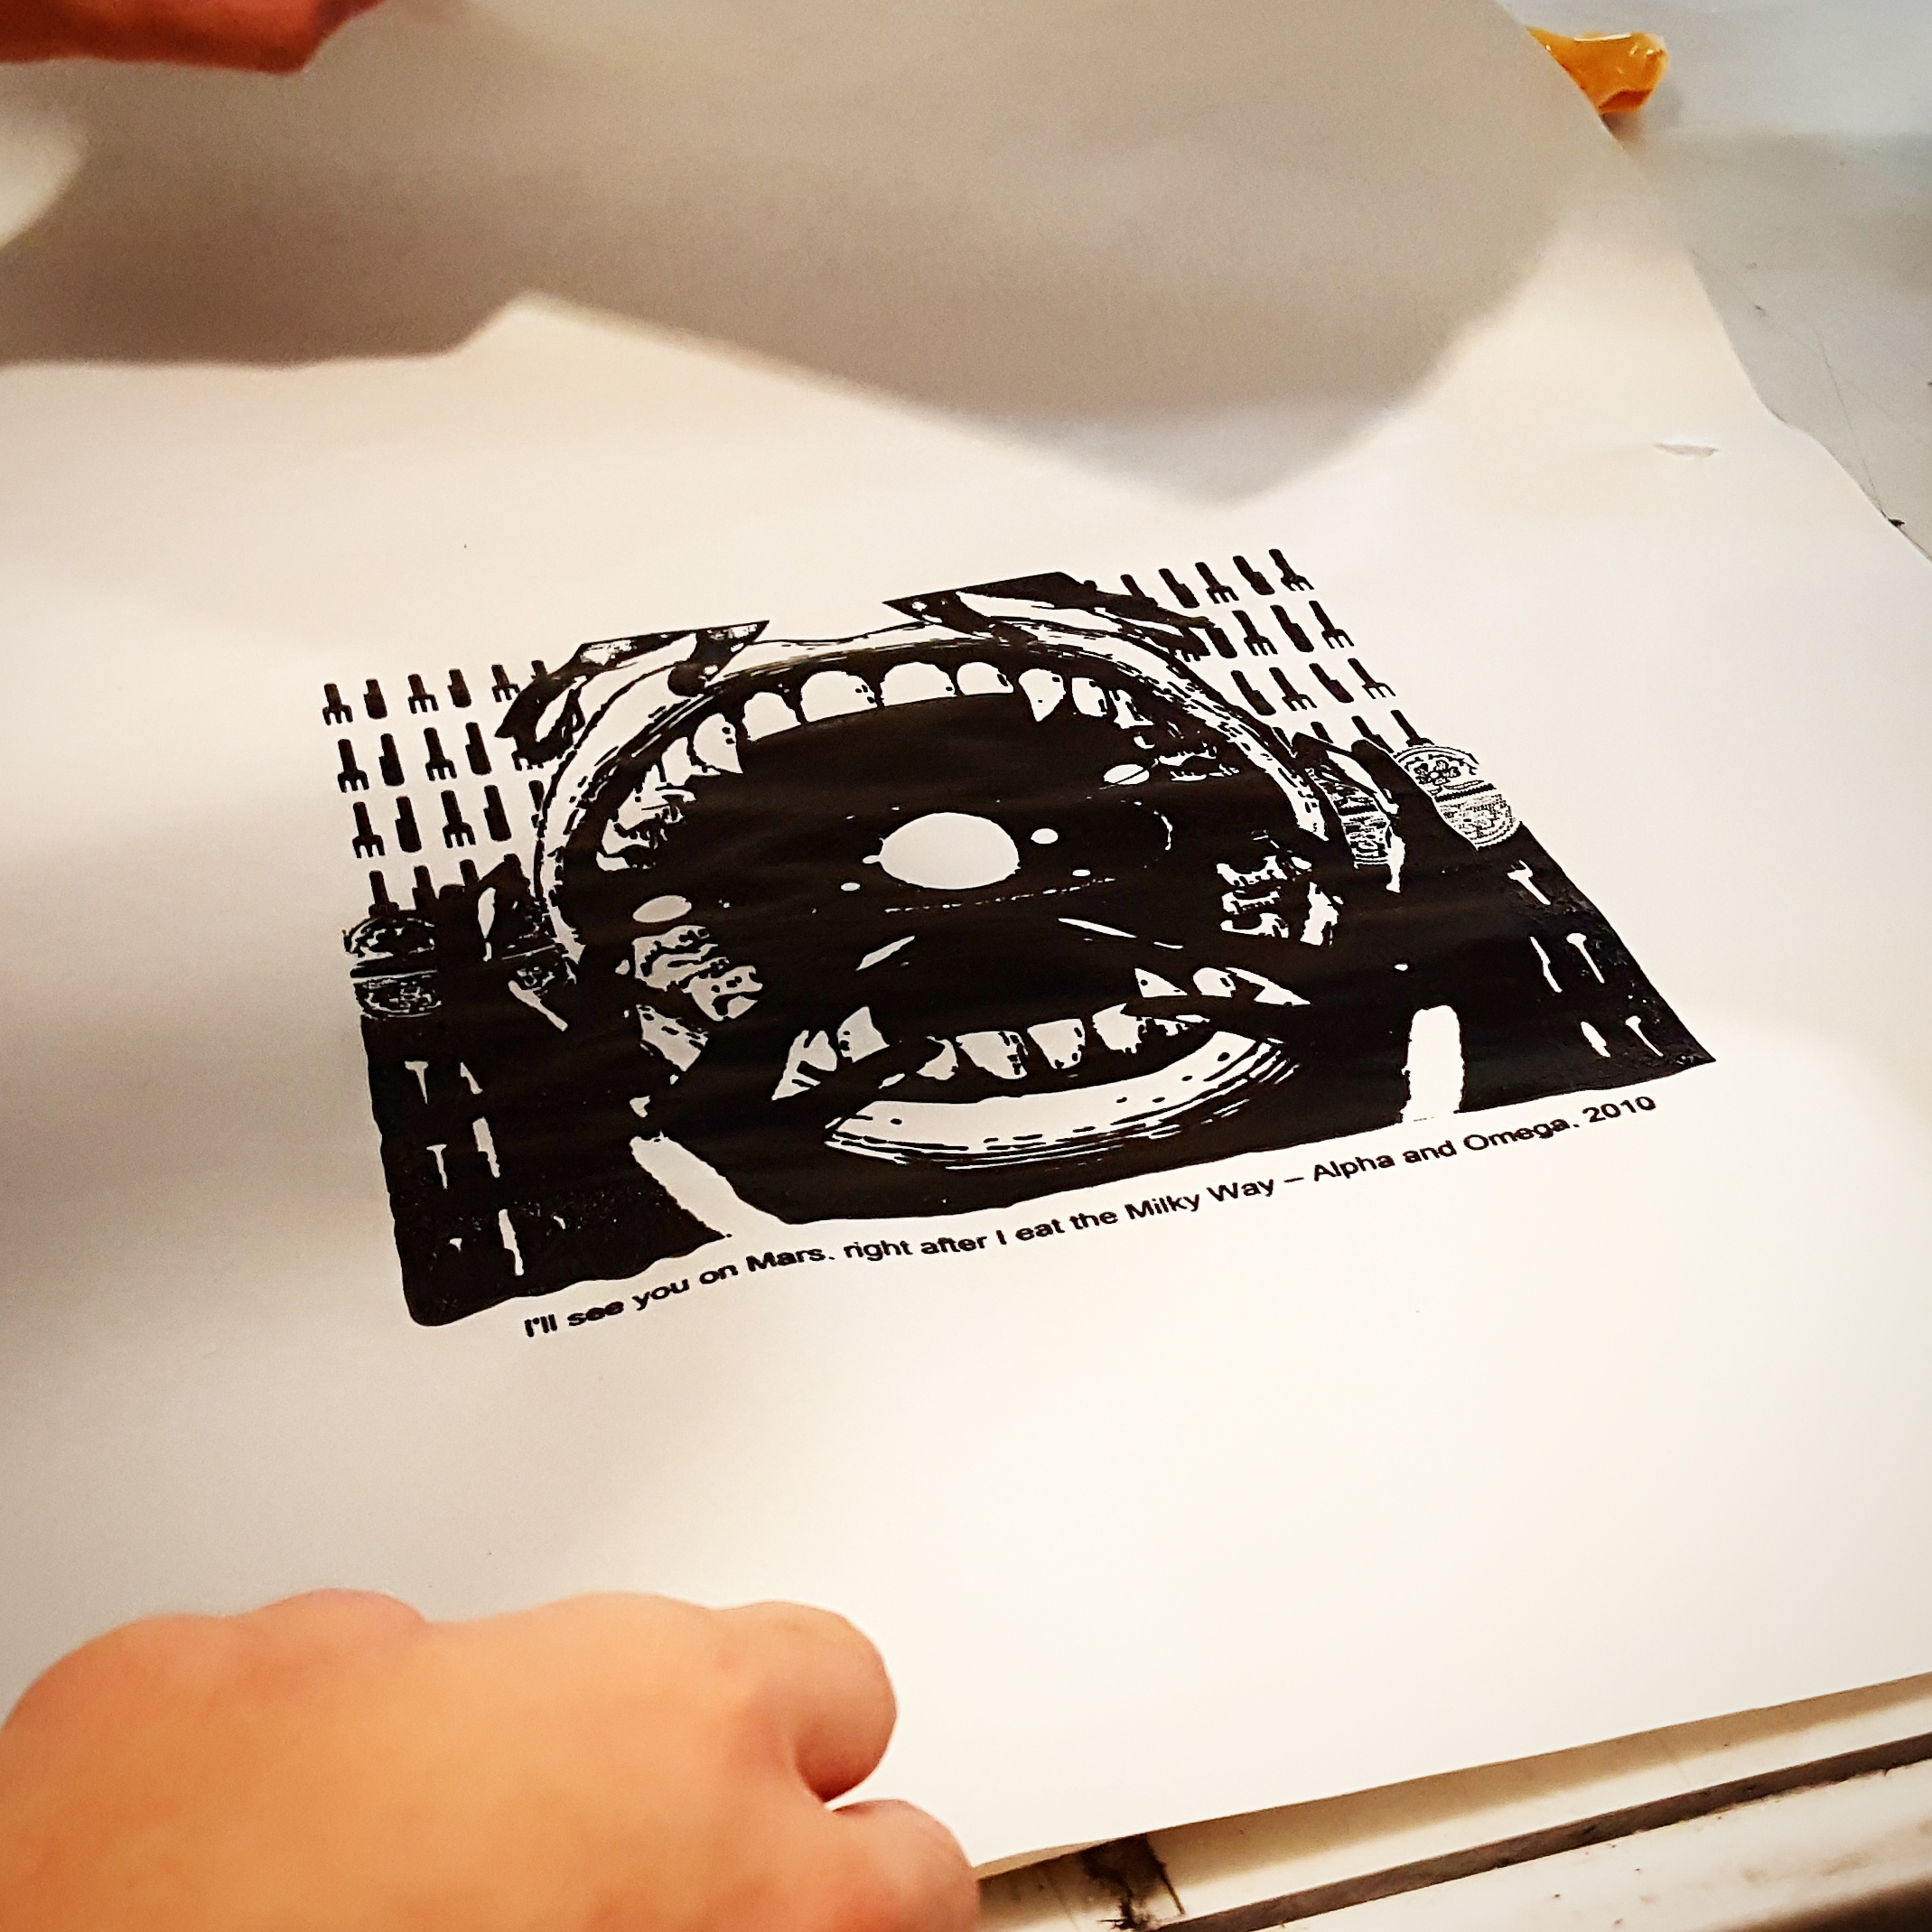
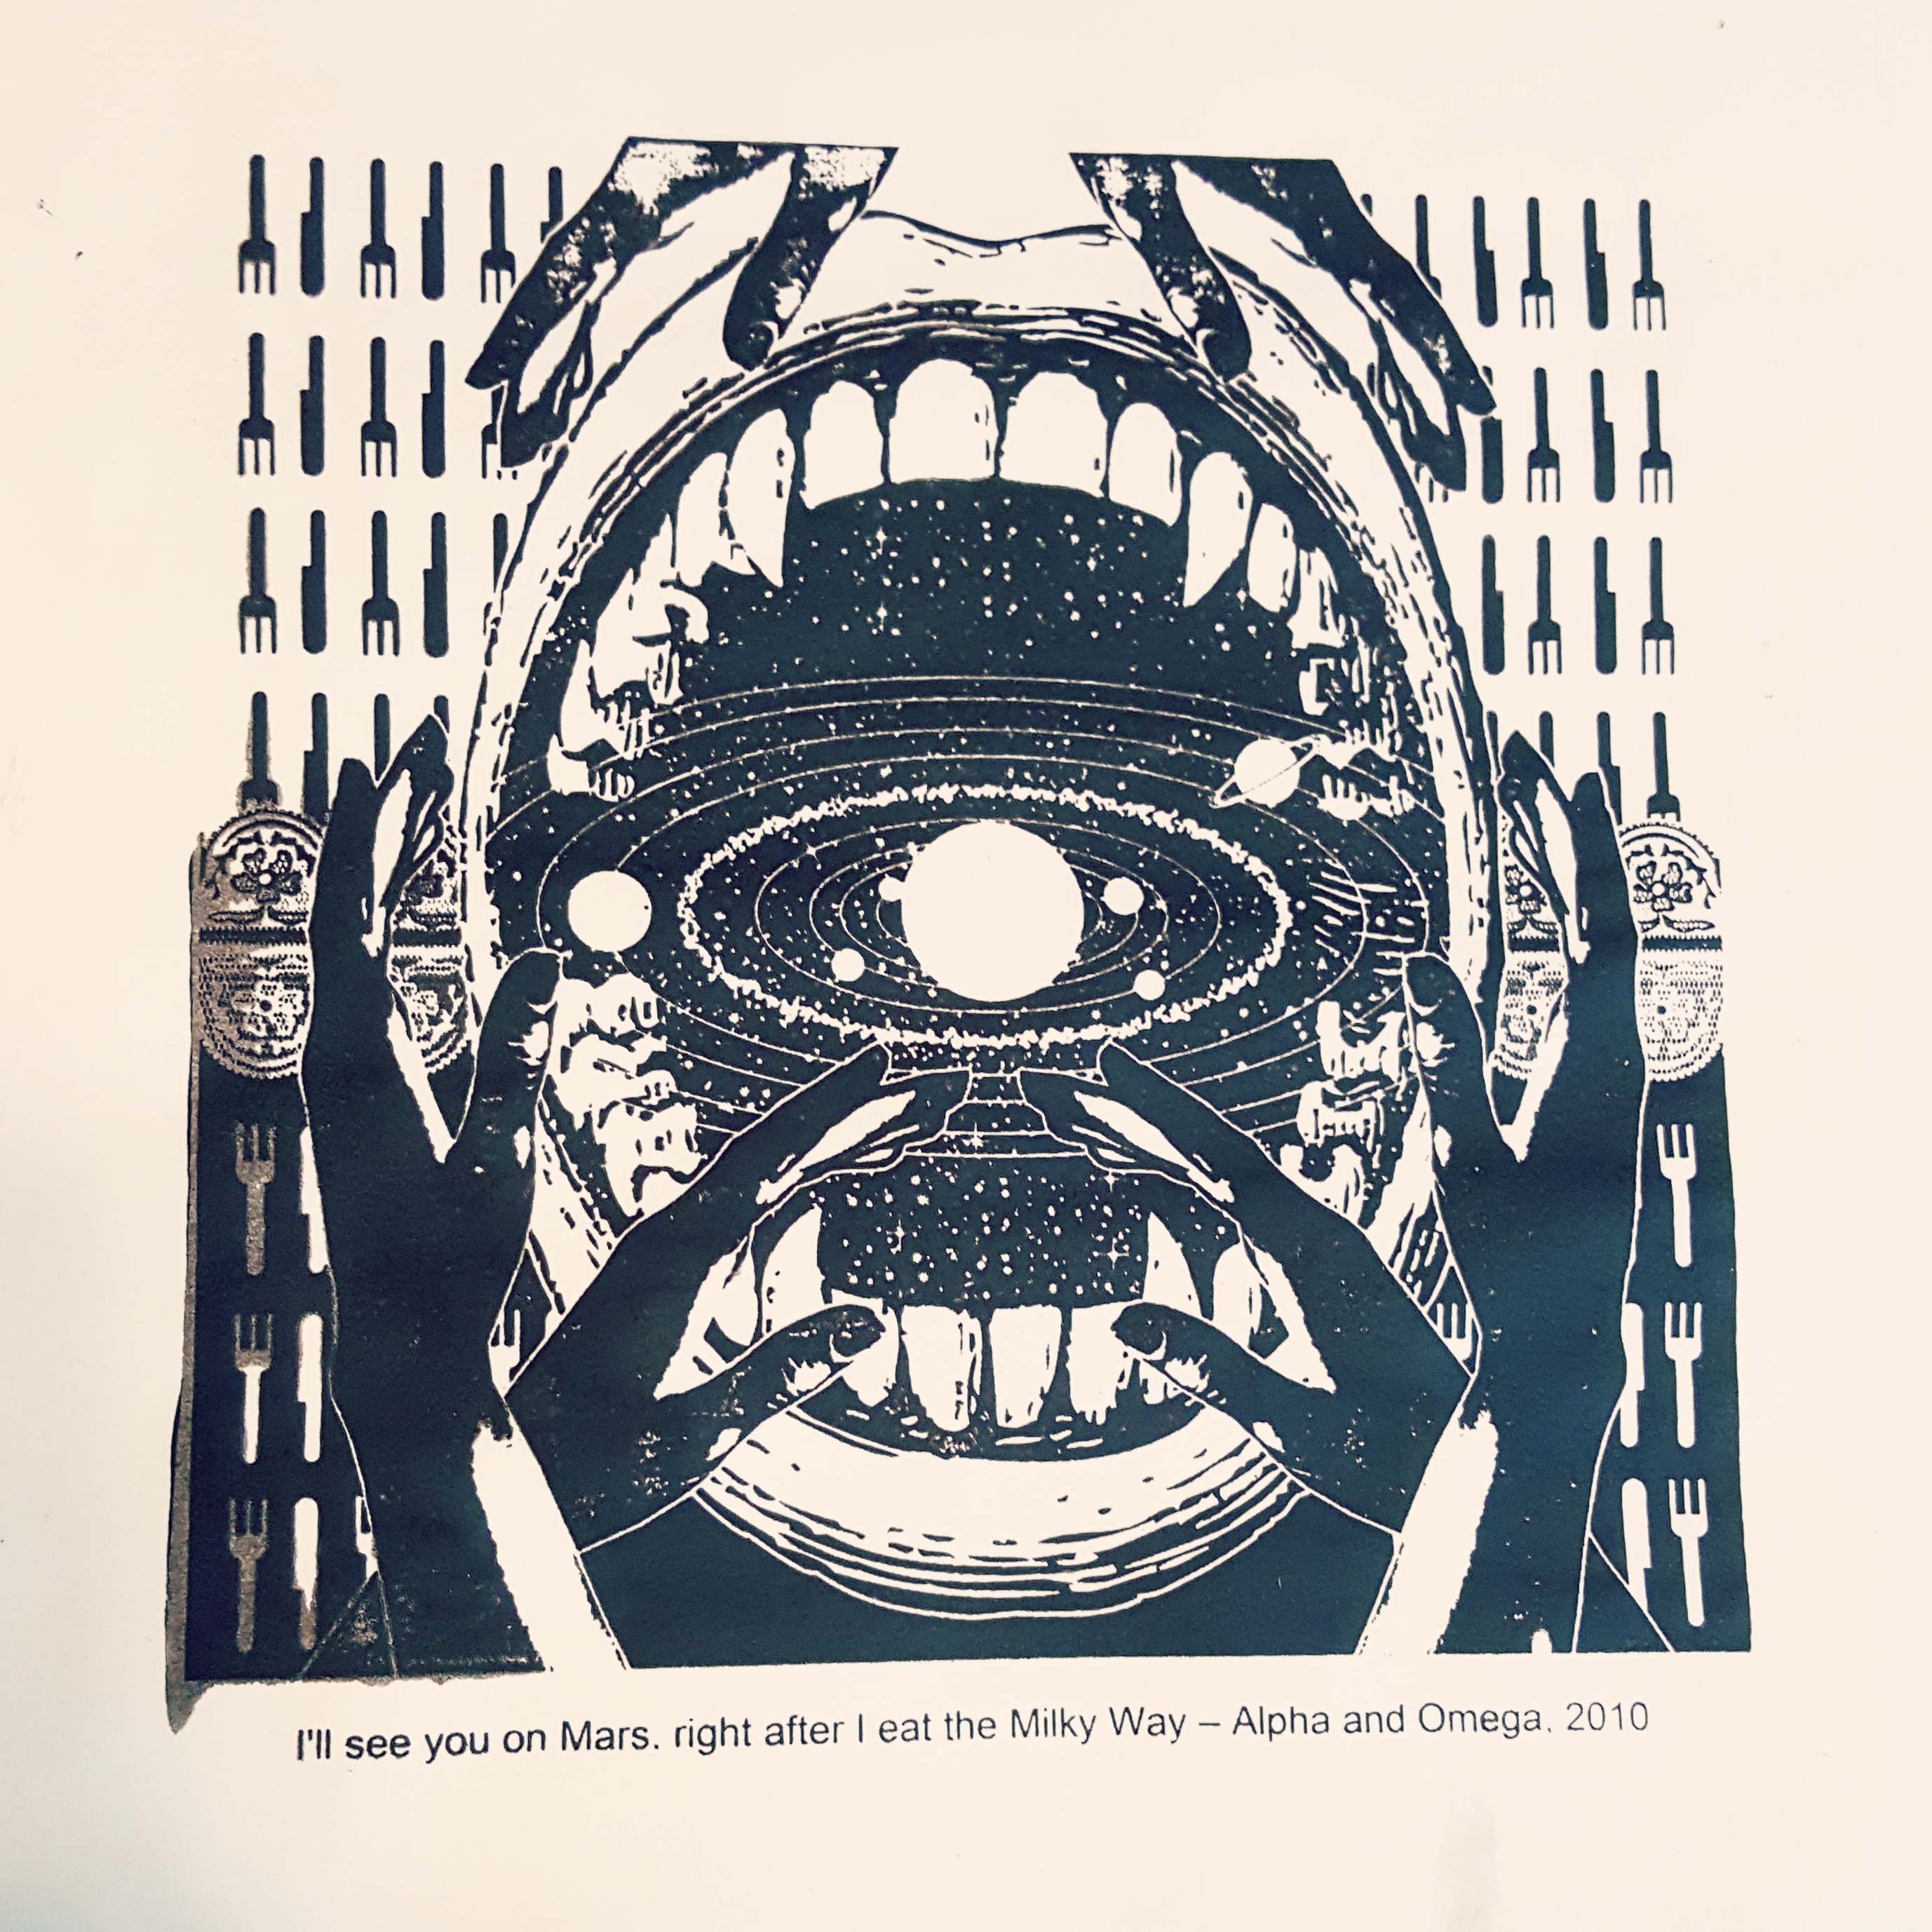
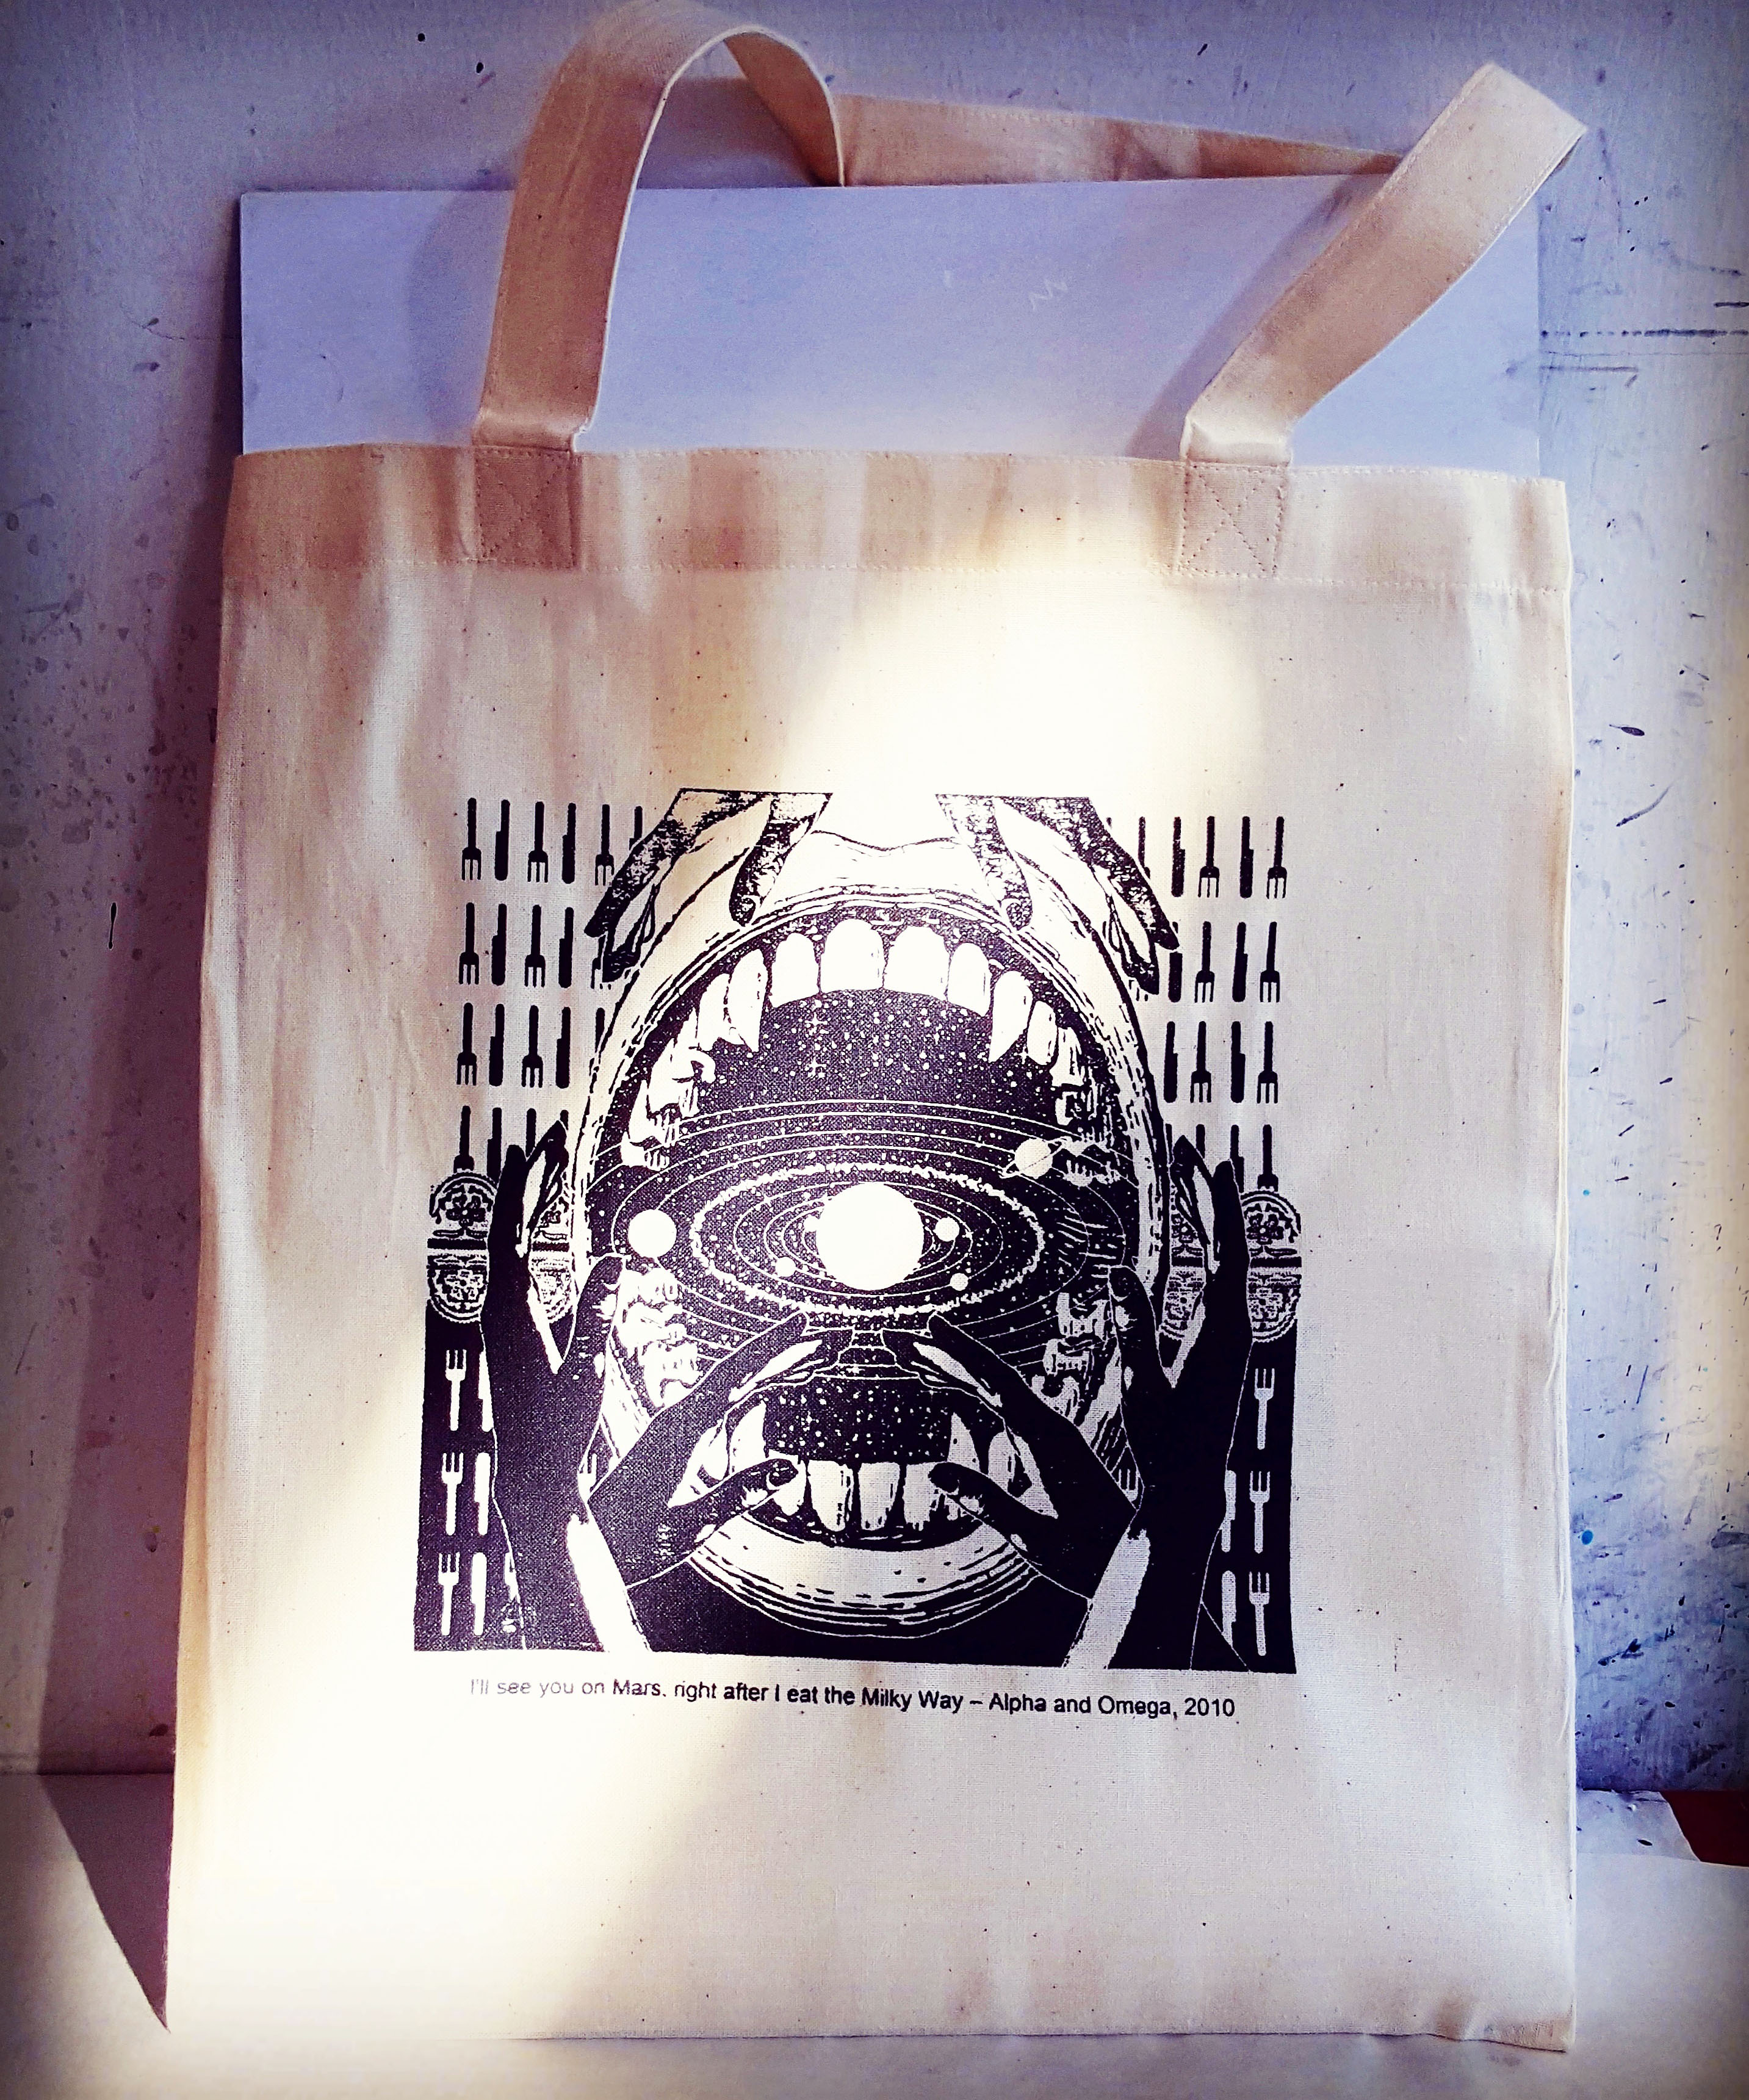
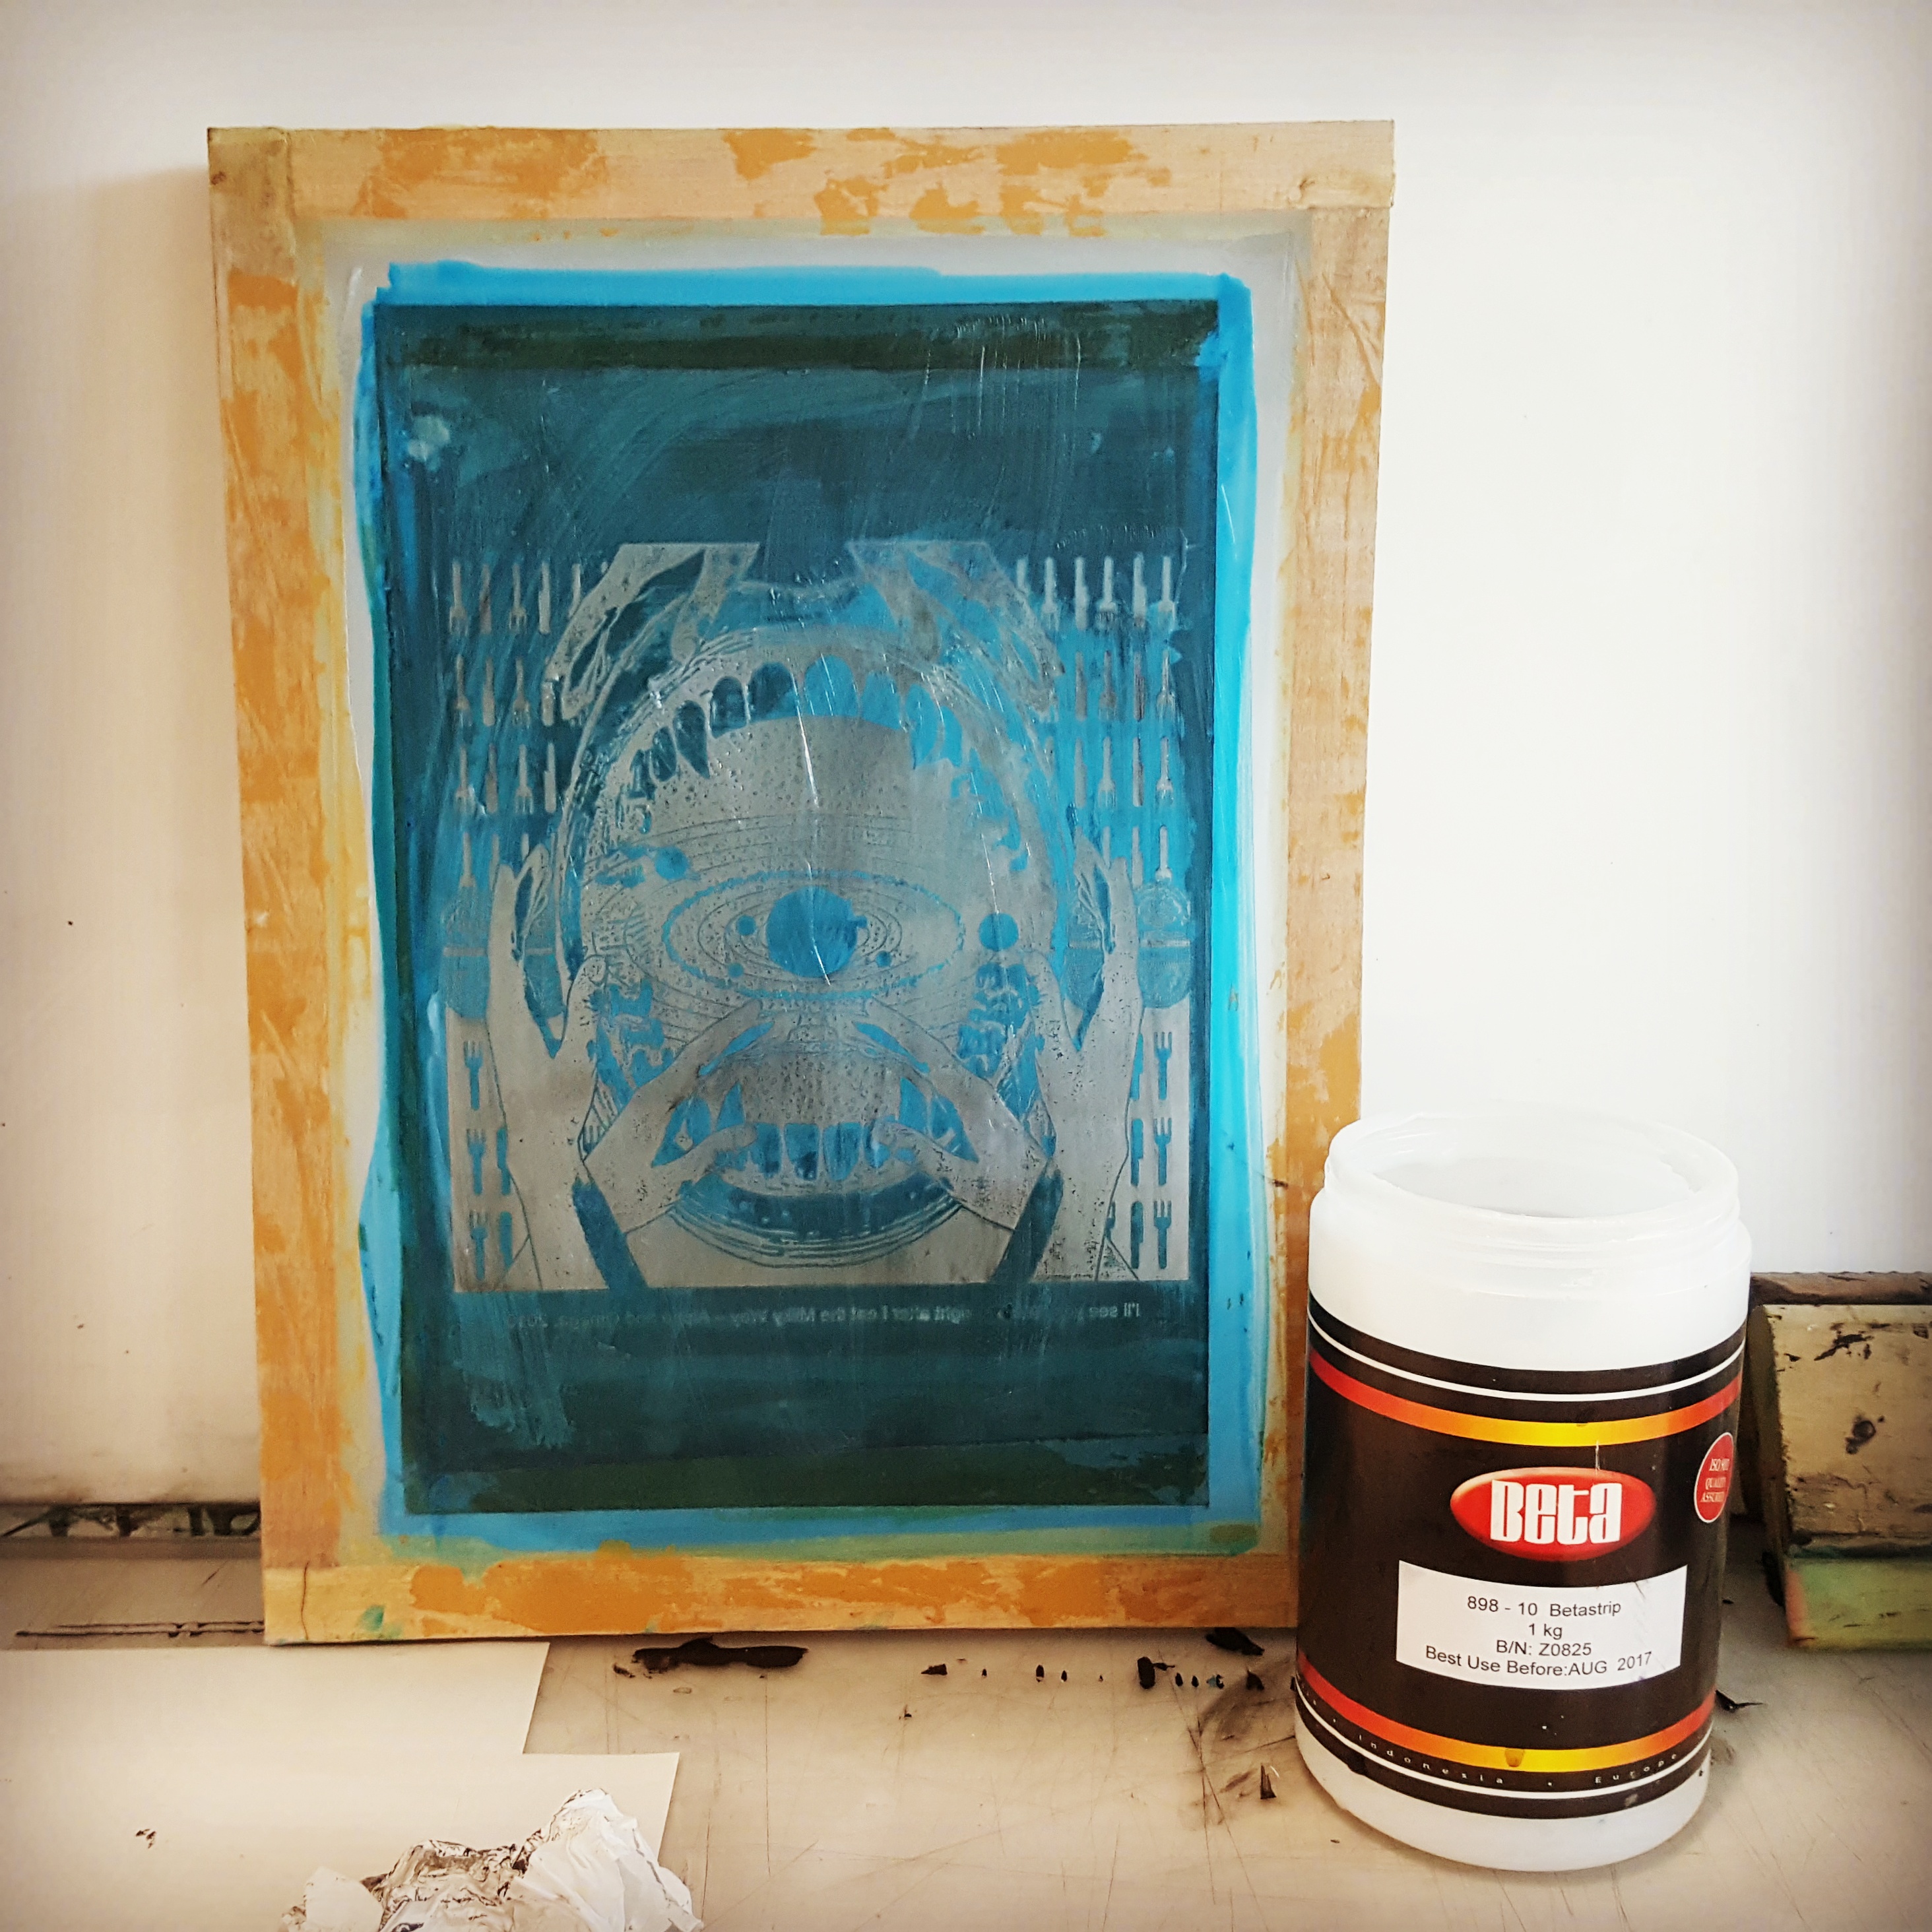
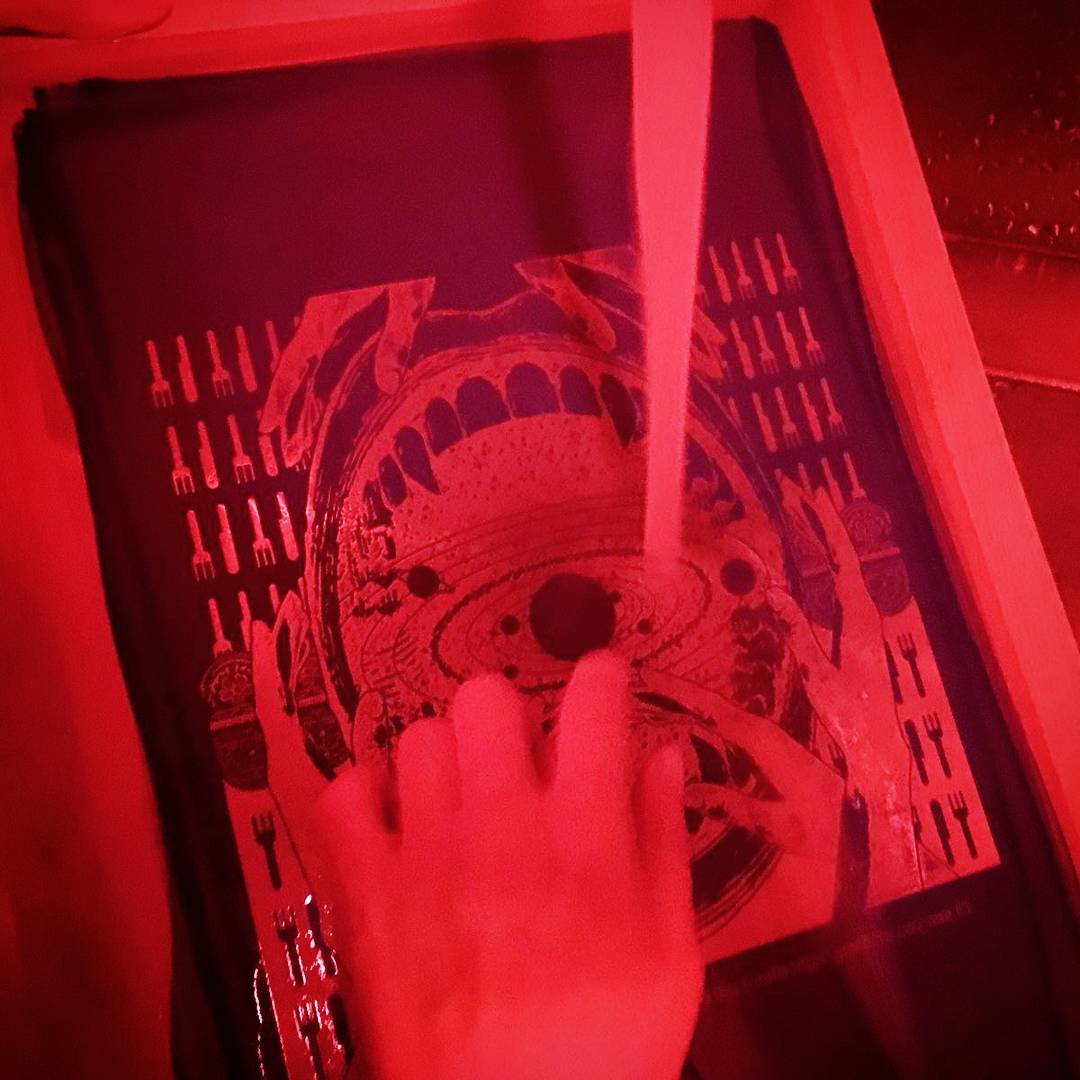
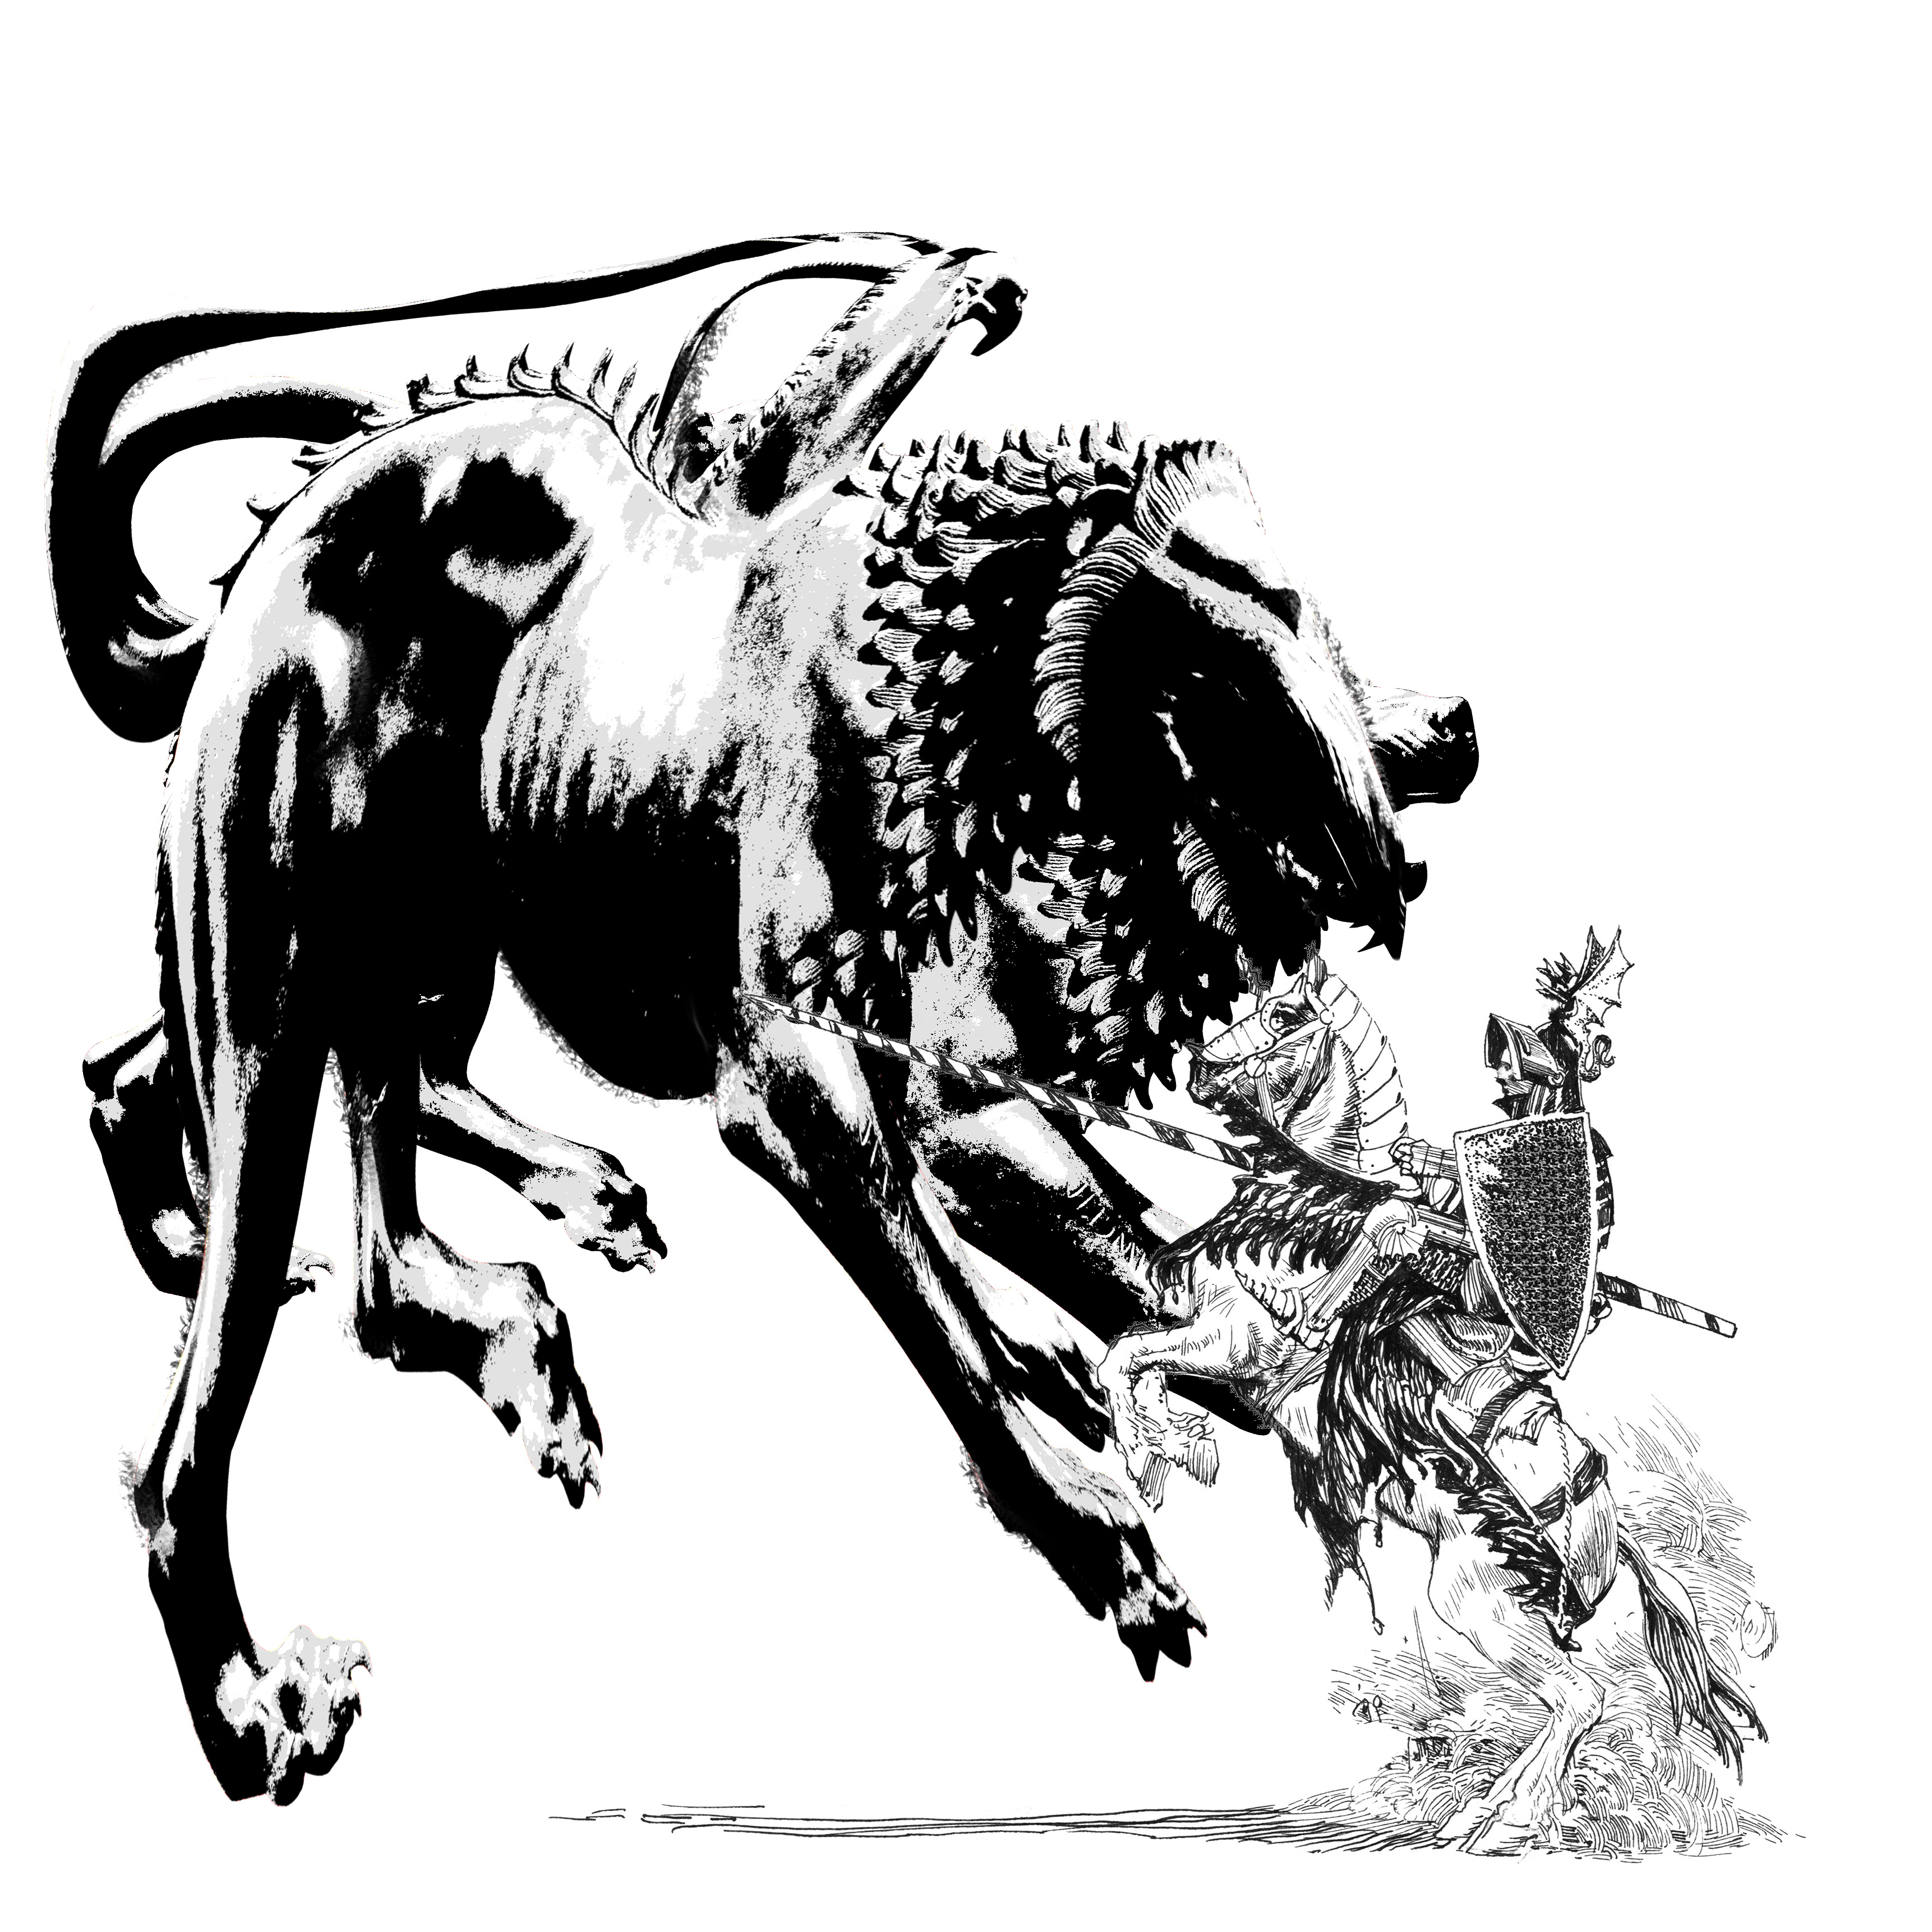
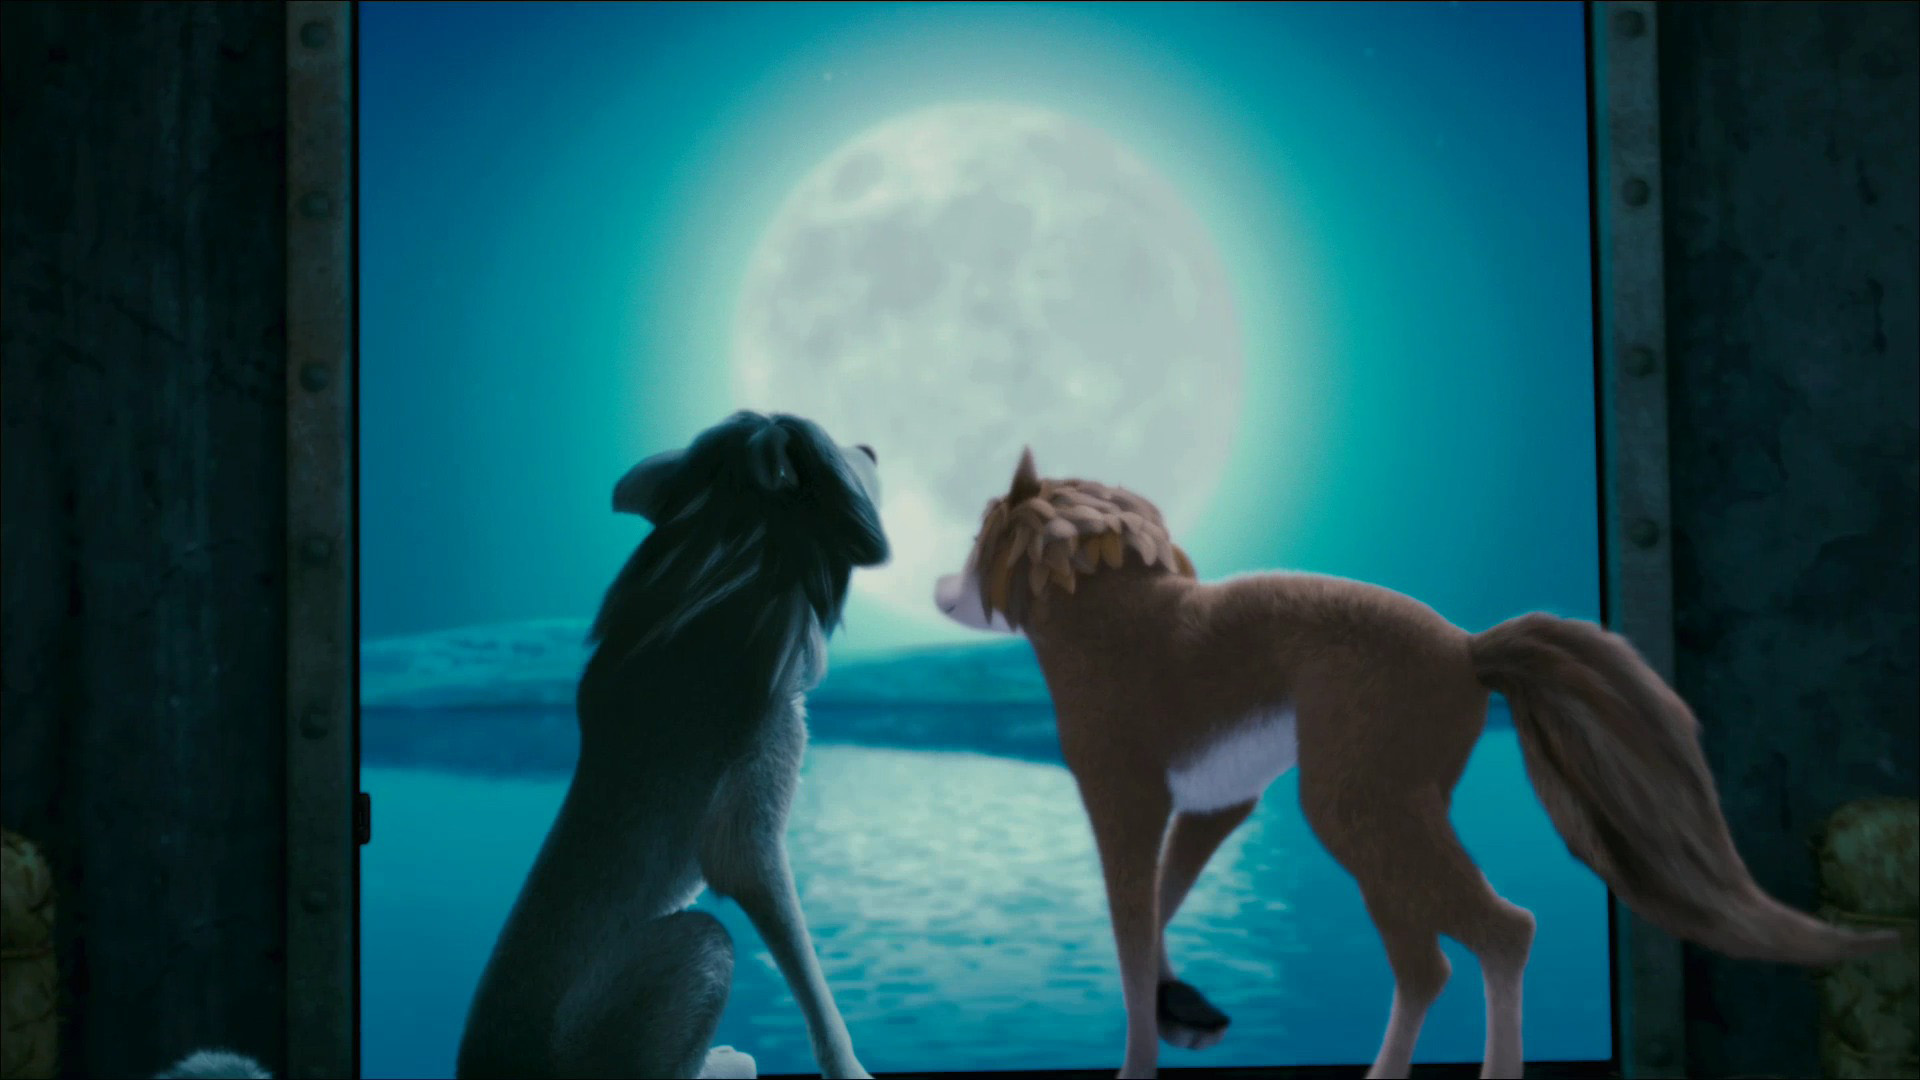
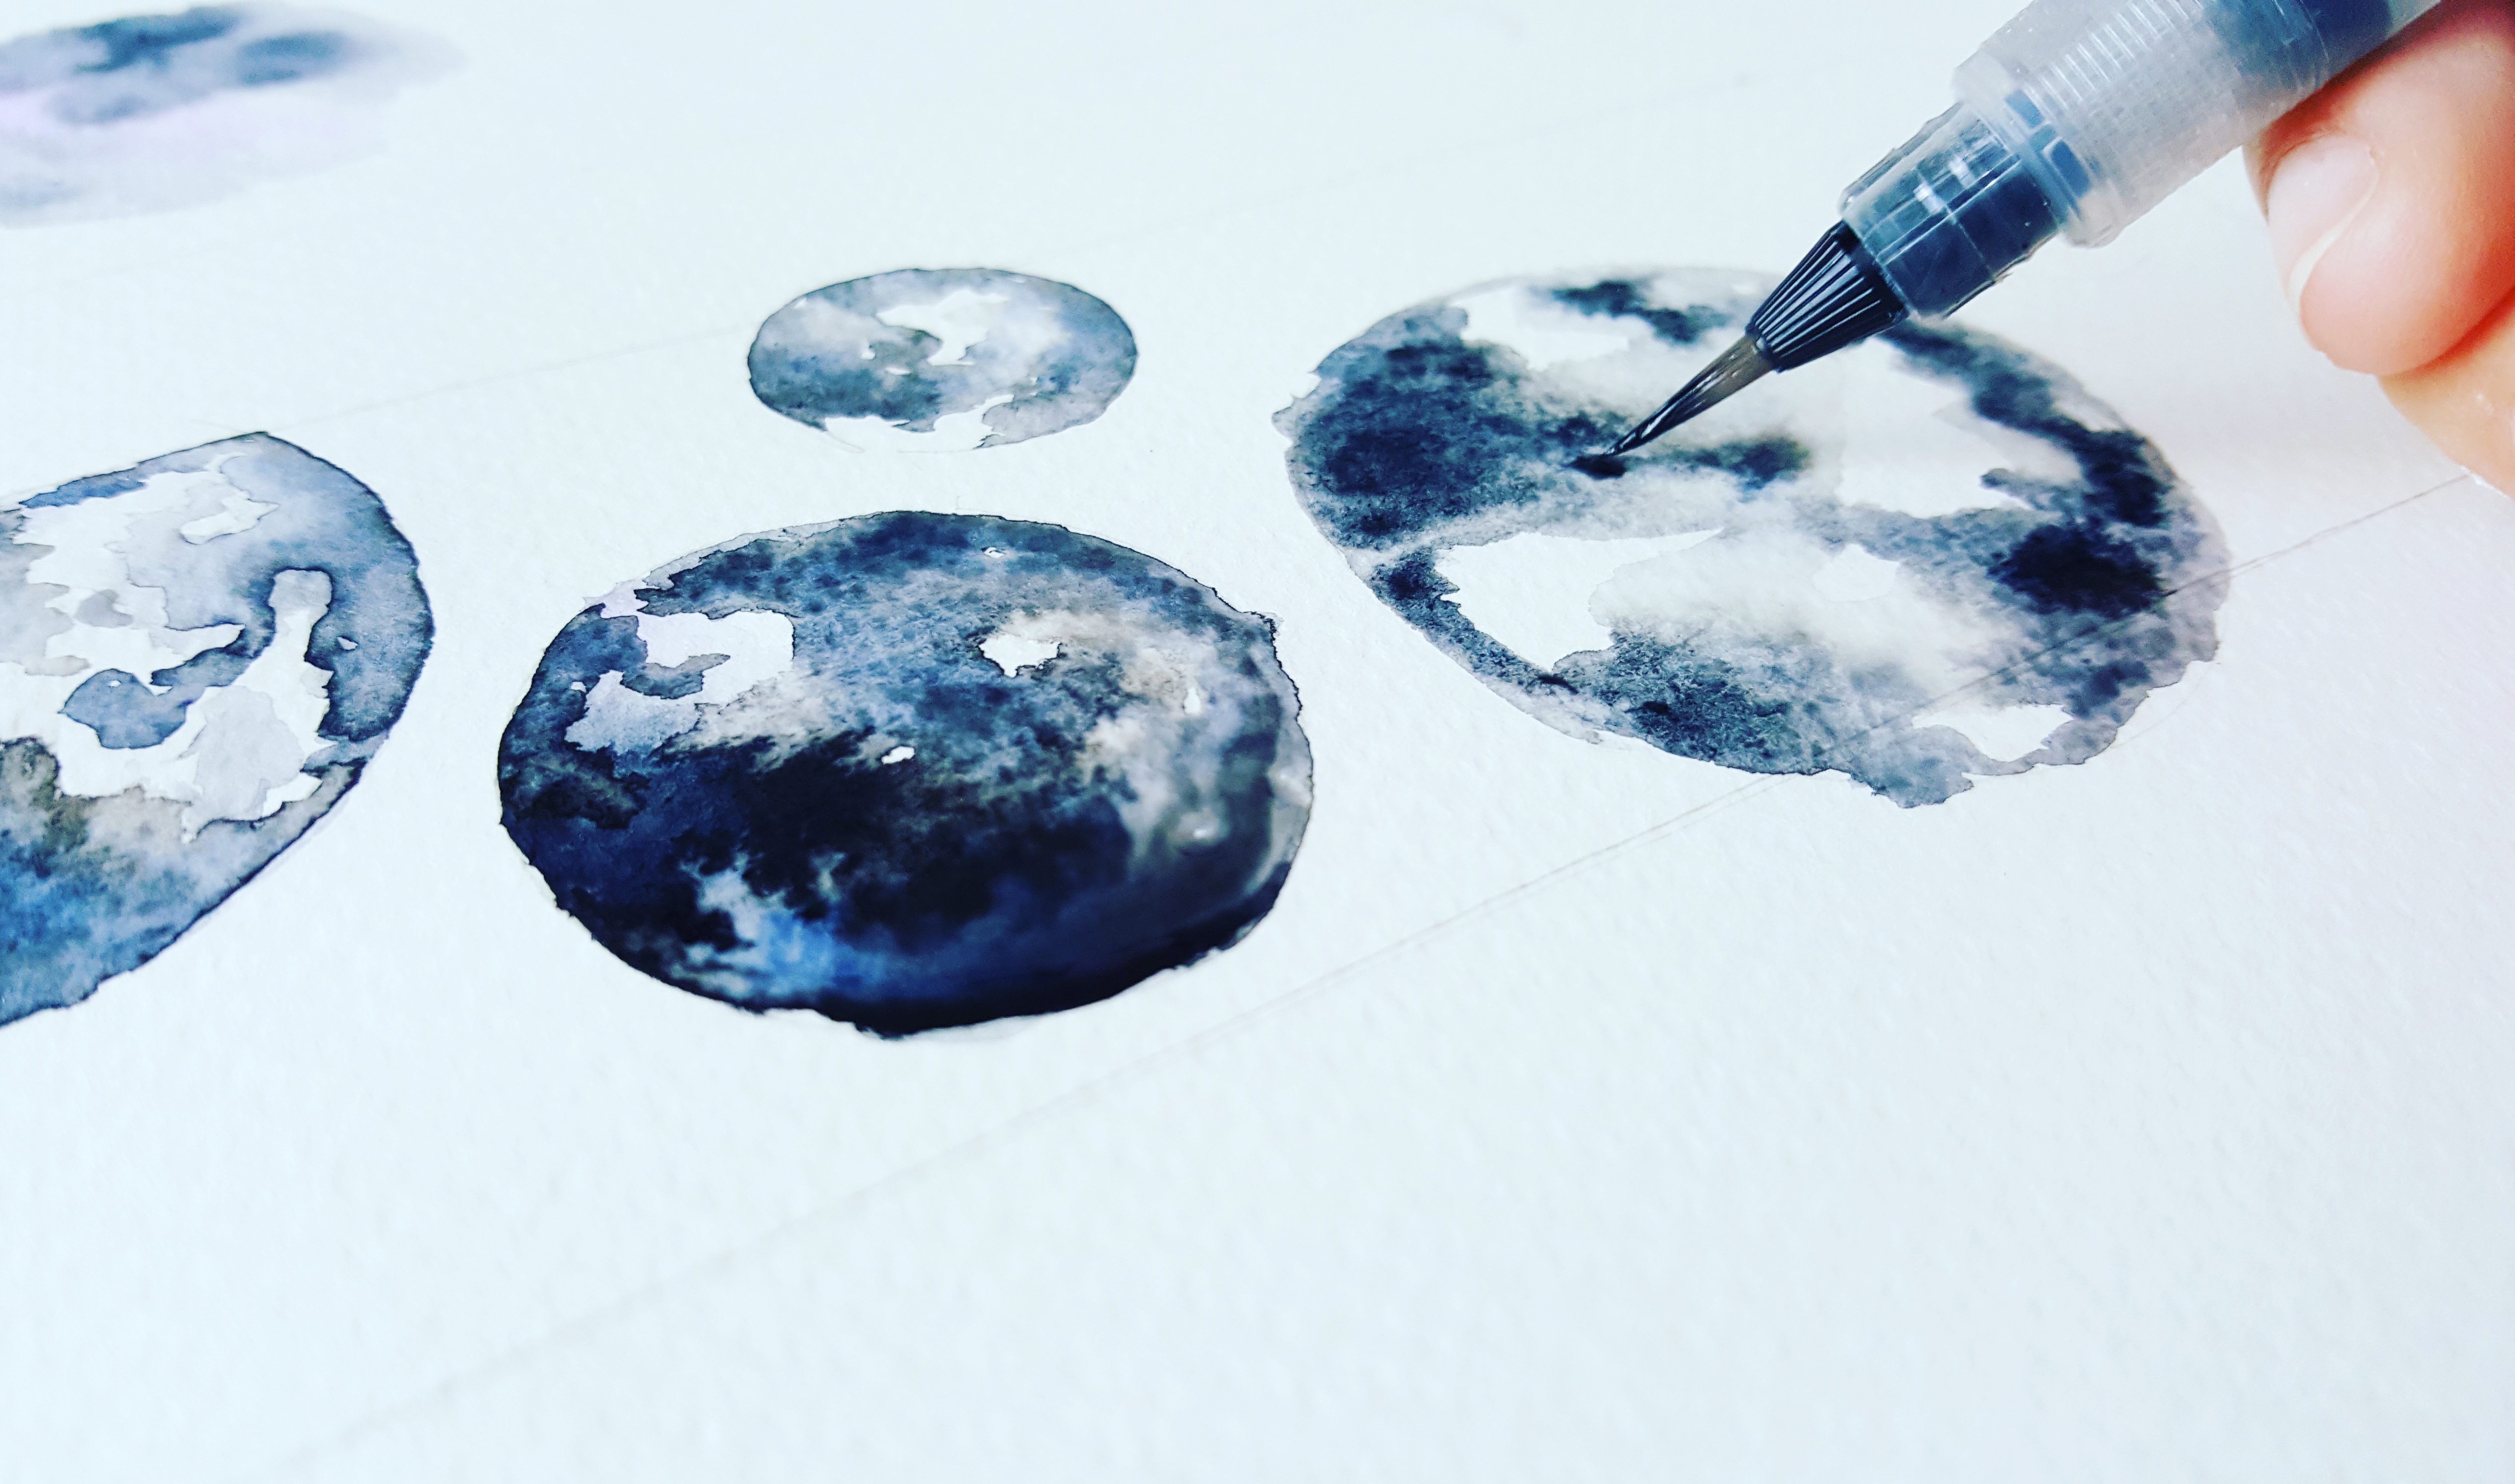
2. Milky Way

milkyway_draft1

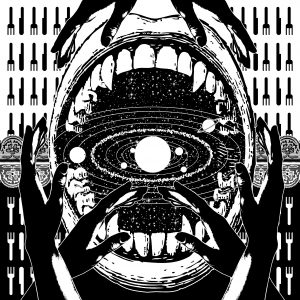
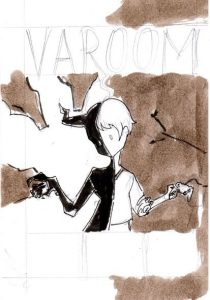
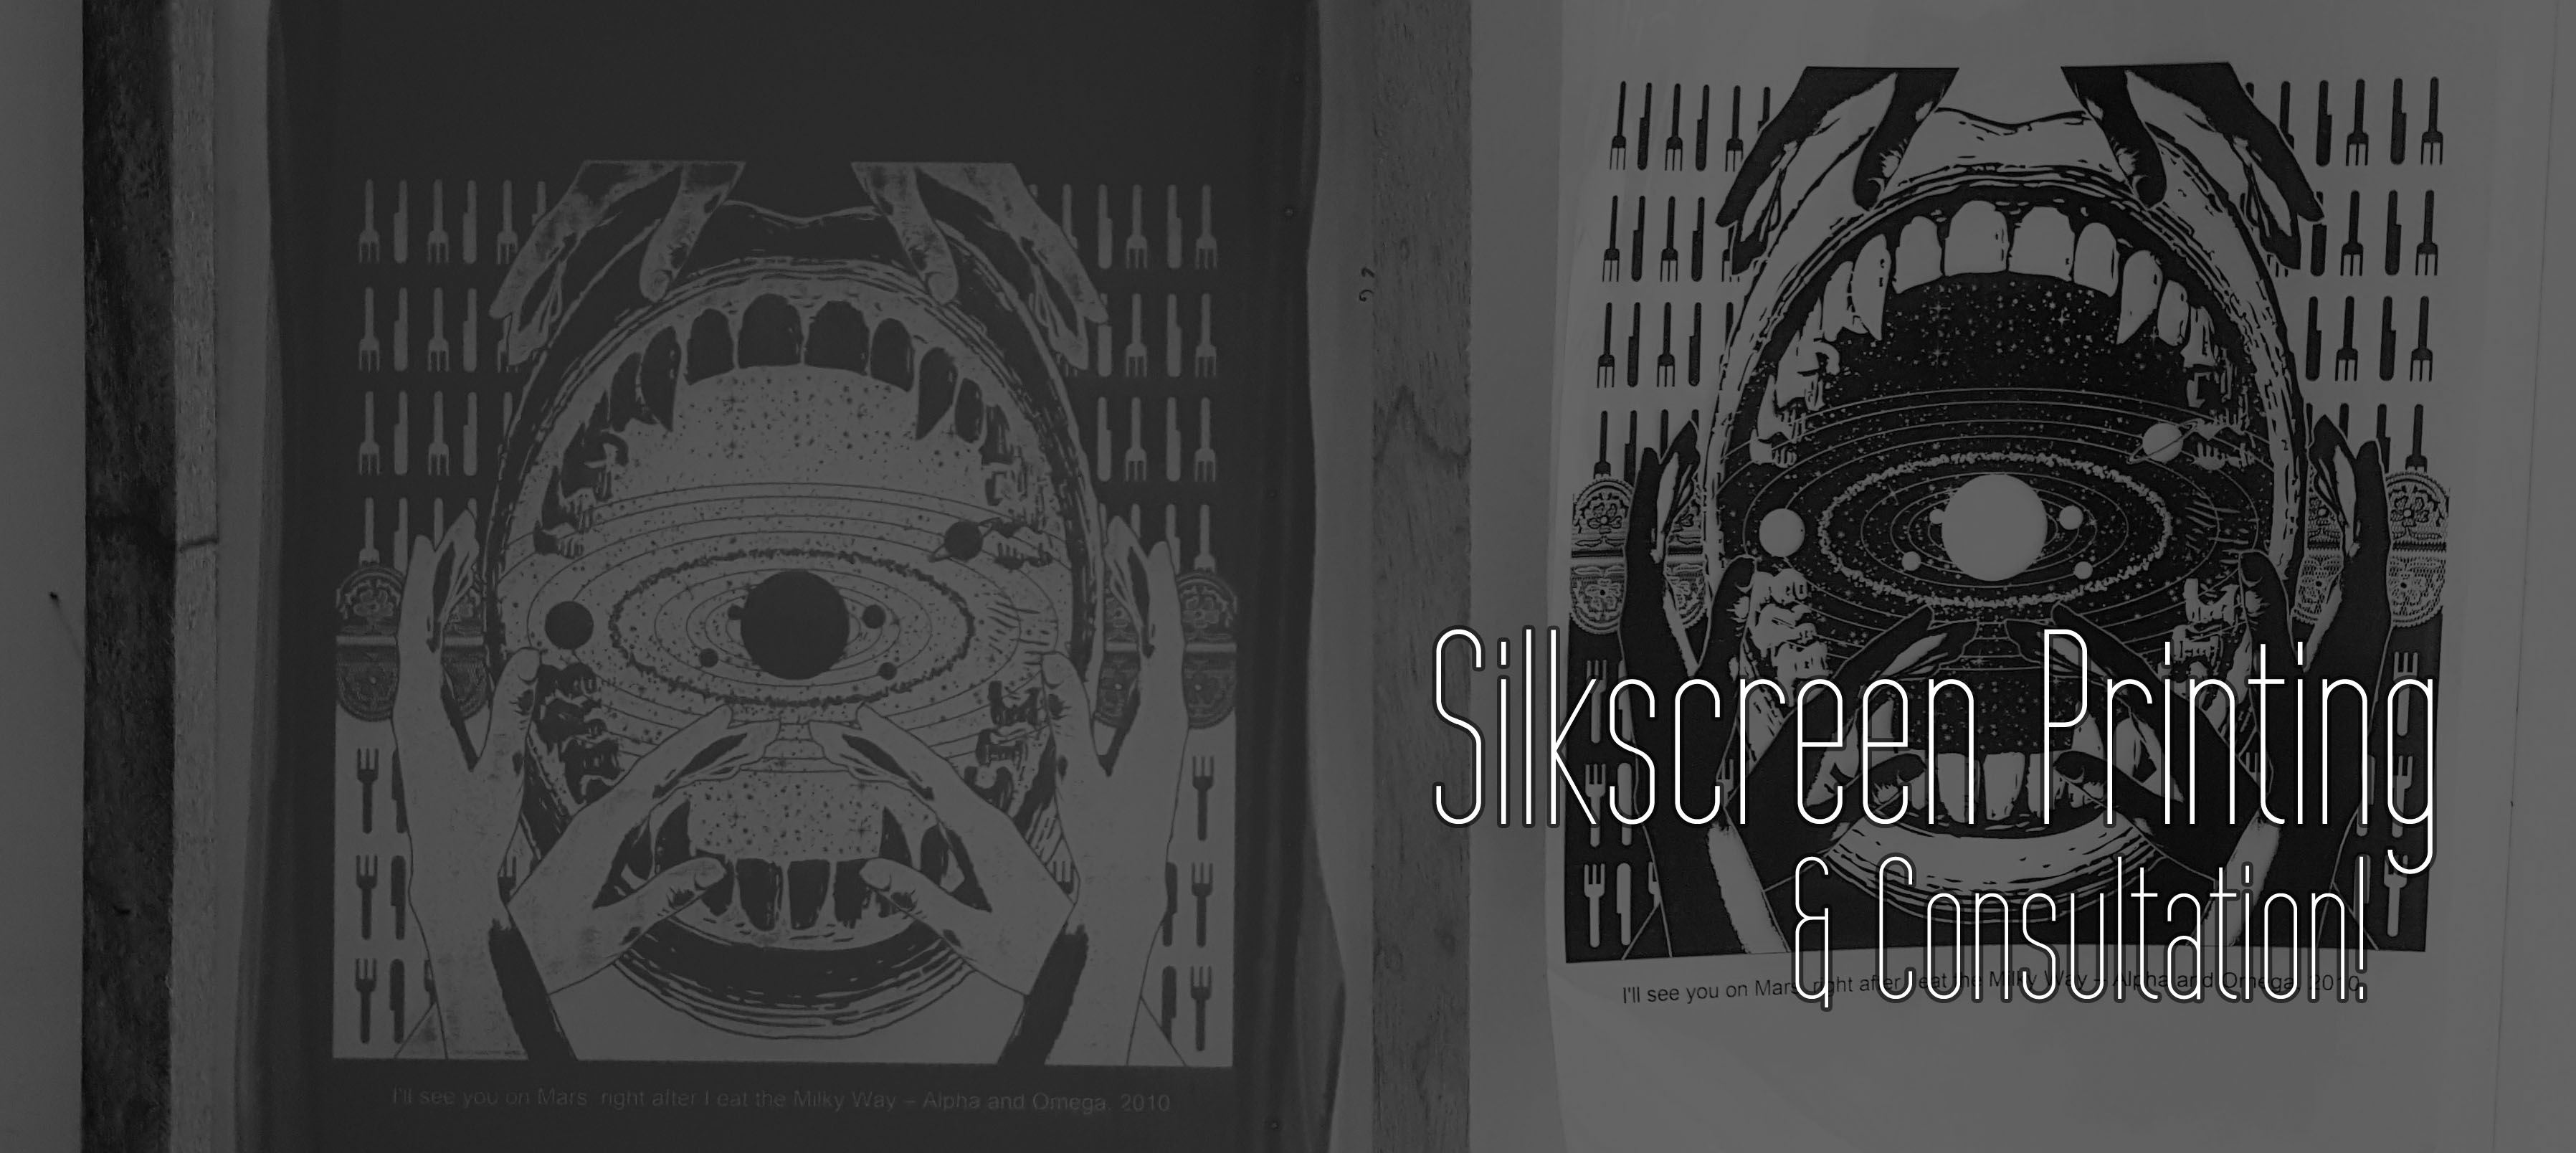
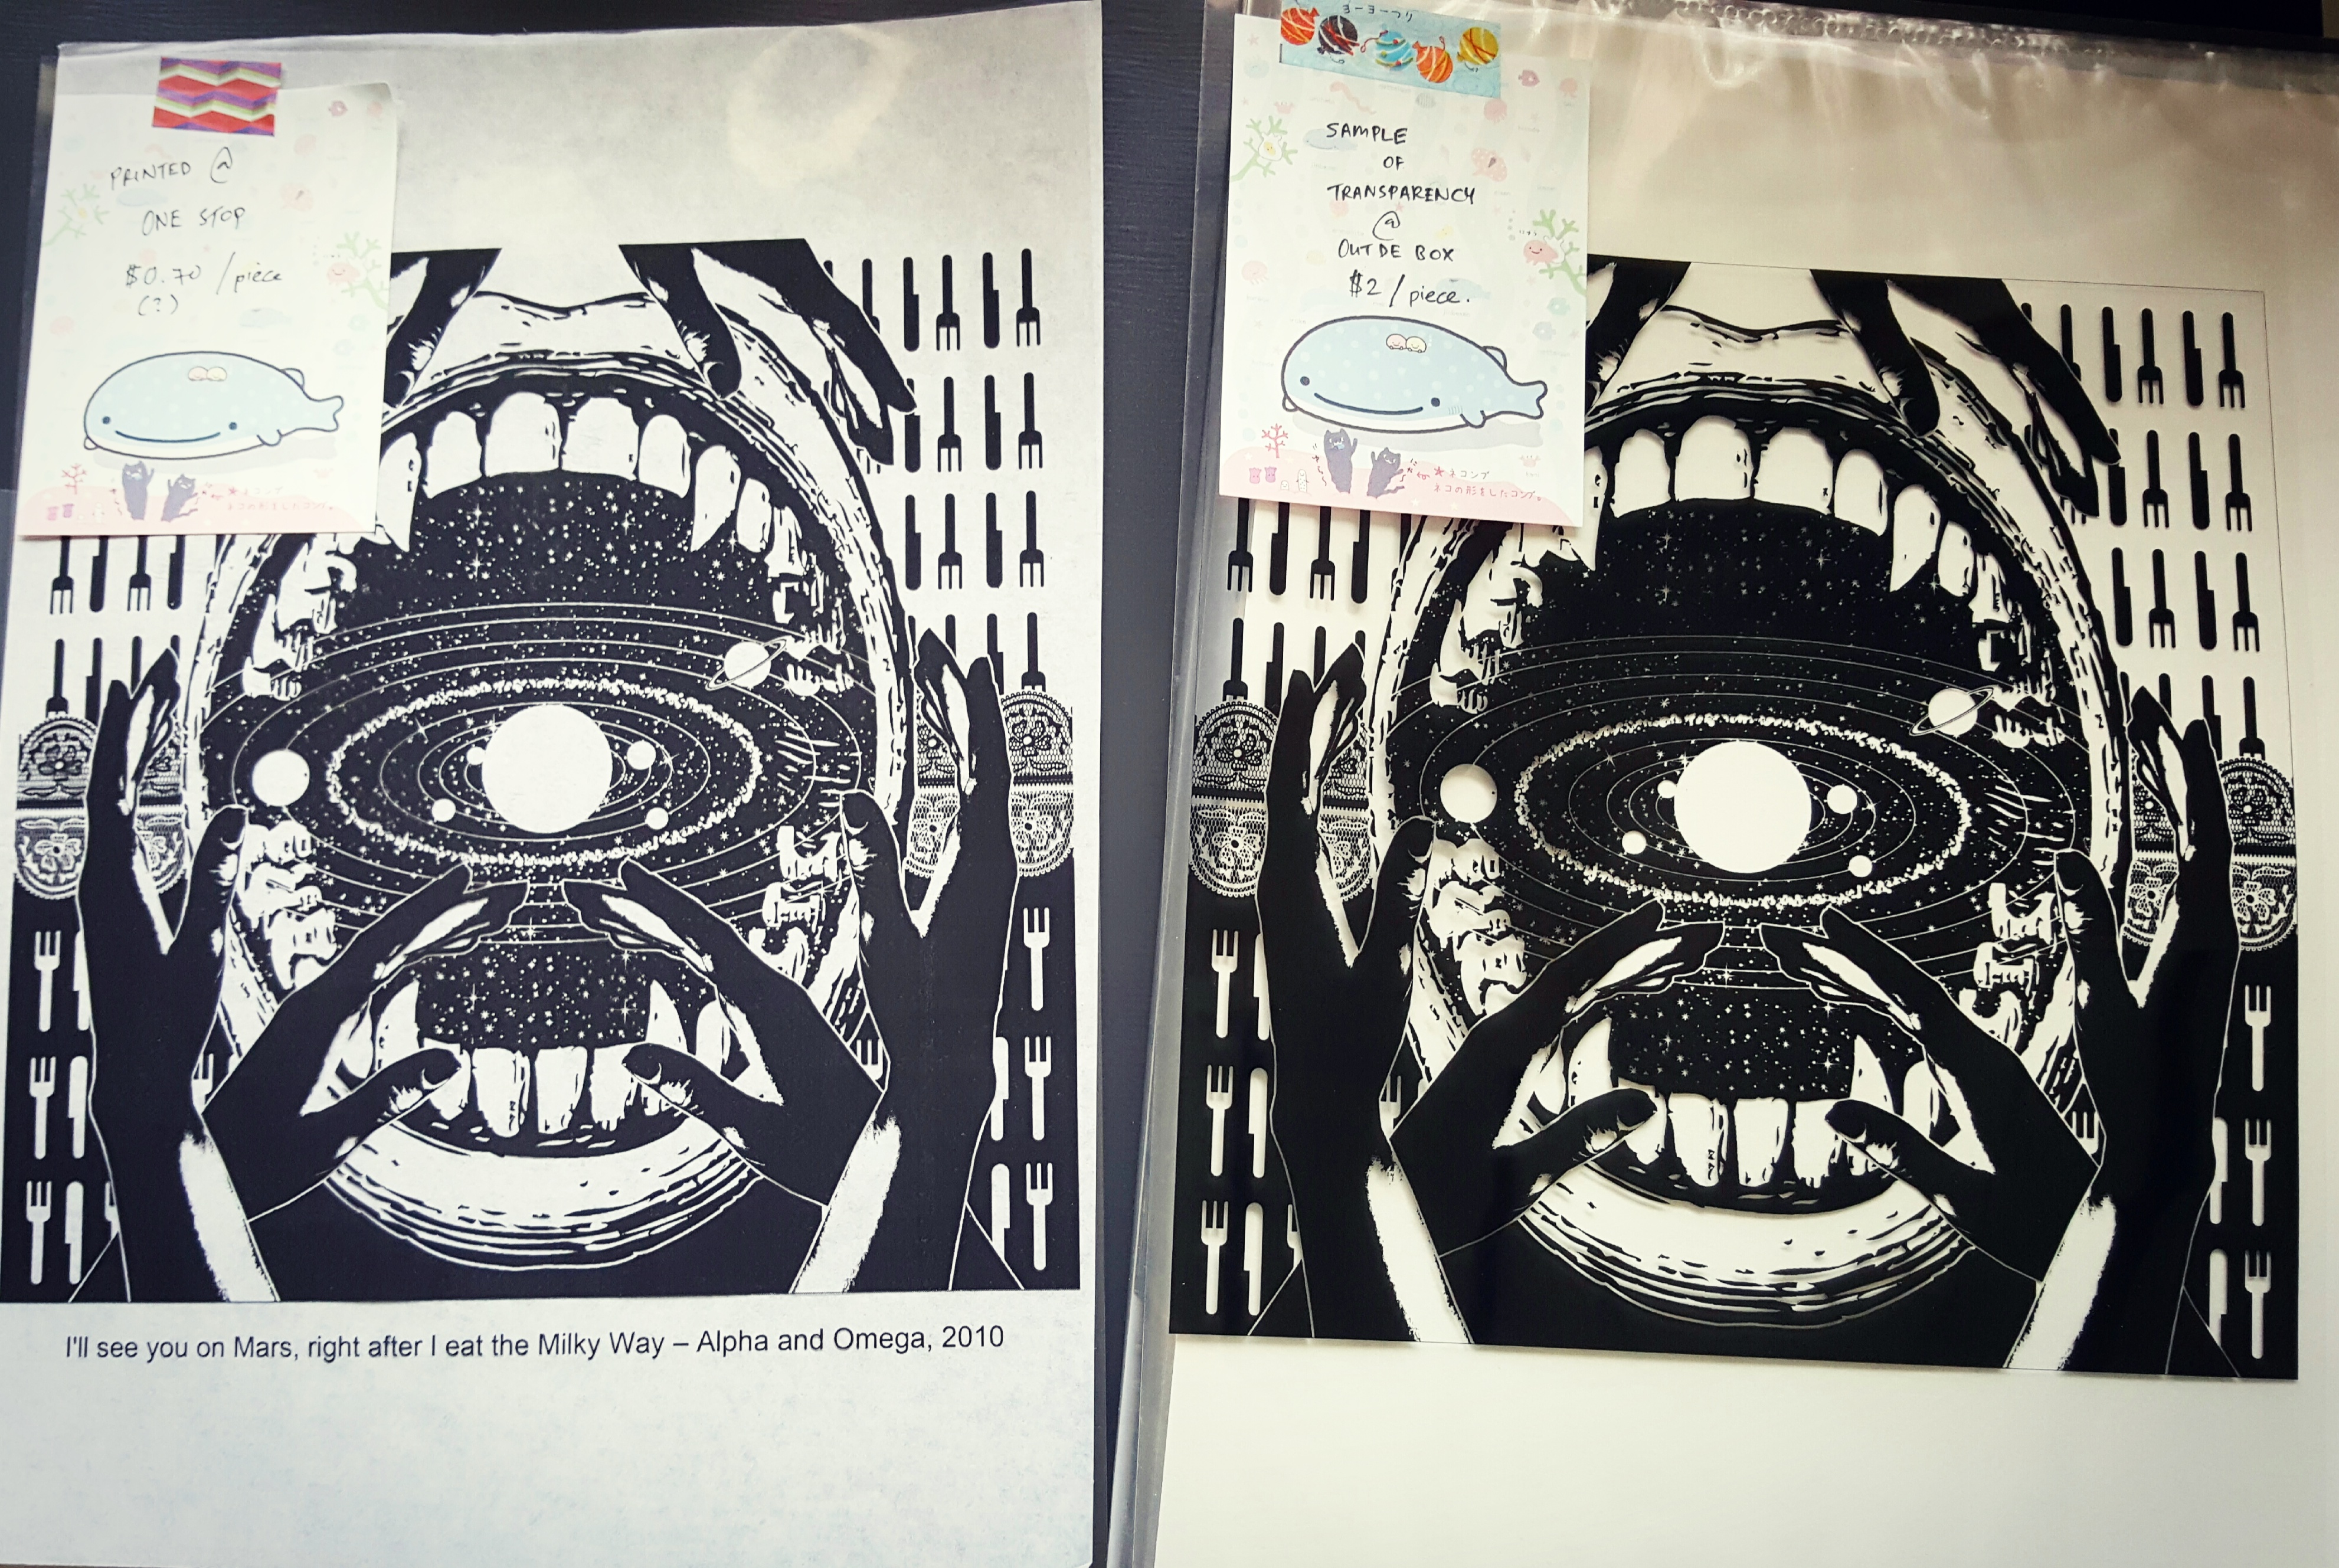
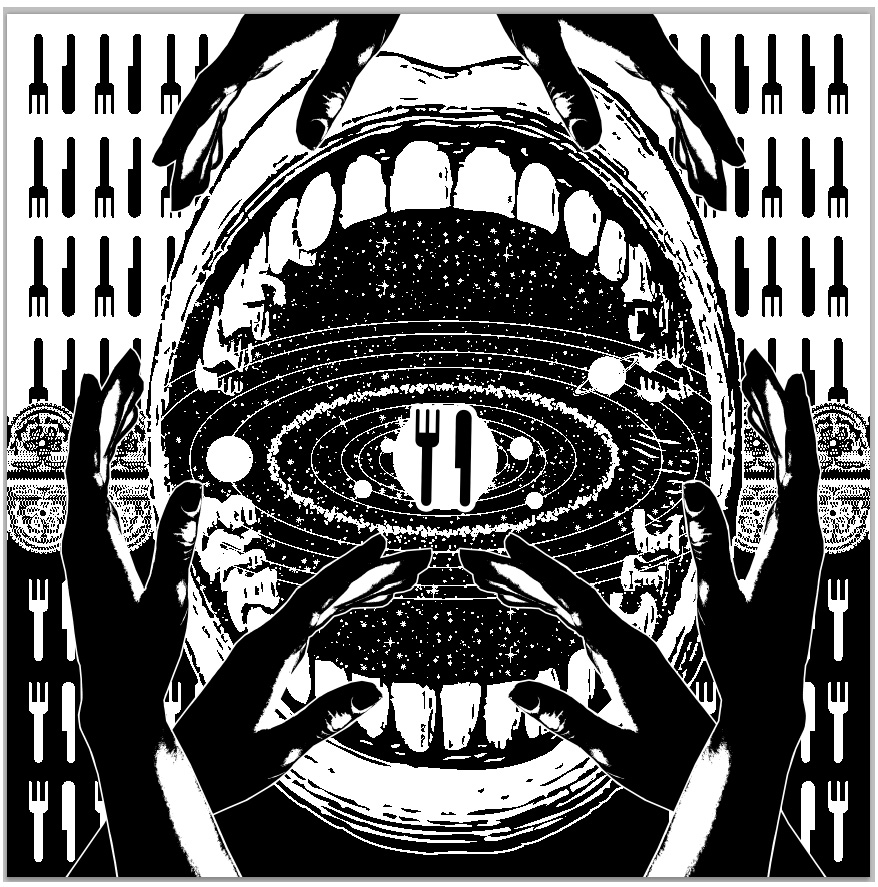
I worked on a quote from Alpha and Omega right after this one: “I’ll see you on Mars, right after I eat the Milky Way”.

It’s pretty hard to break down this one in my head since I started running away with my gut/instincts with this one, but it went along the lines of:

-mouth and the solar system in mouth, as quite literally “eat the Milky Way”
-fork and knife pictogram and lace as the idea of feasting, or eating
-hands as the idea of “meeting”

file5

For this one, I only had a couple of minor decisions – like the conscious decision to give the mouth fangs instead of normal teeth so that it looks more aggressive, and also I didn’t give in to temptation do this ridiculous thing and end up overusing/abusing the fork and knife pictogram:

file5_1

…well things could have turned out much south aaahahahaha-
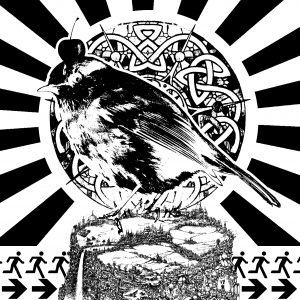
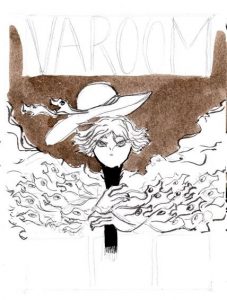
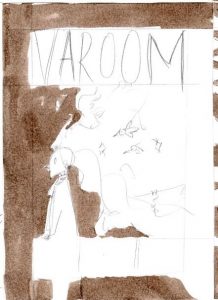
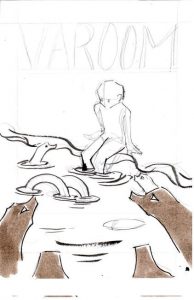
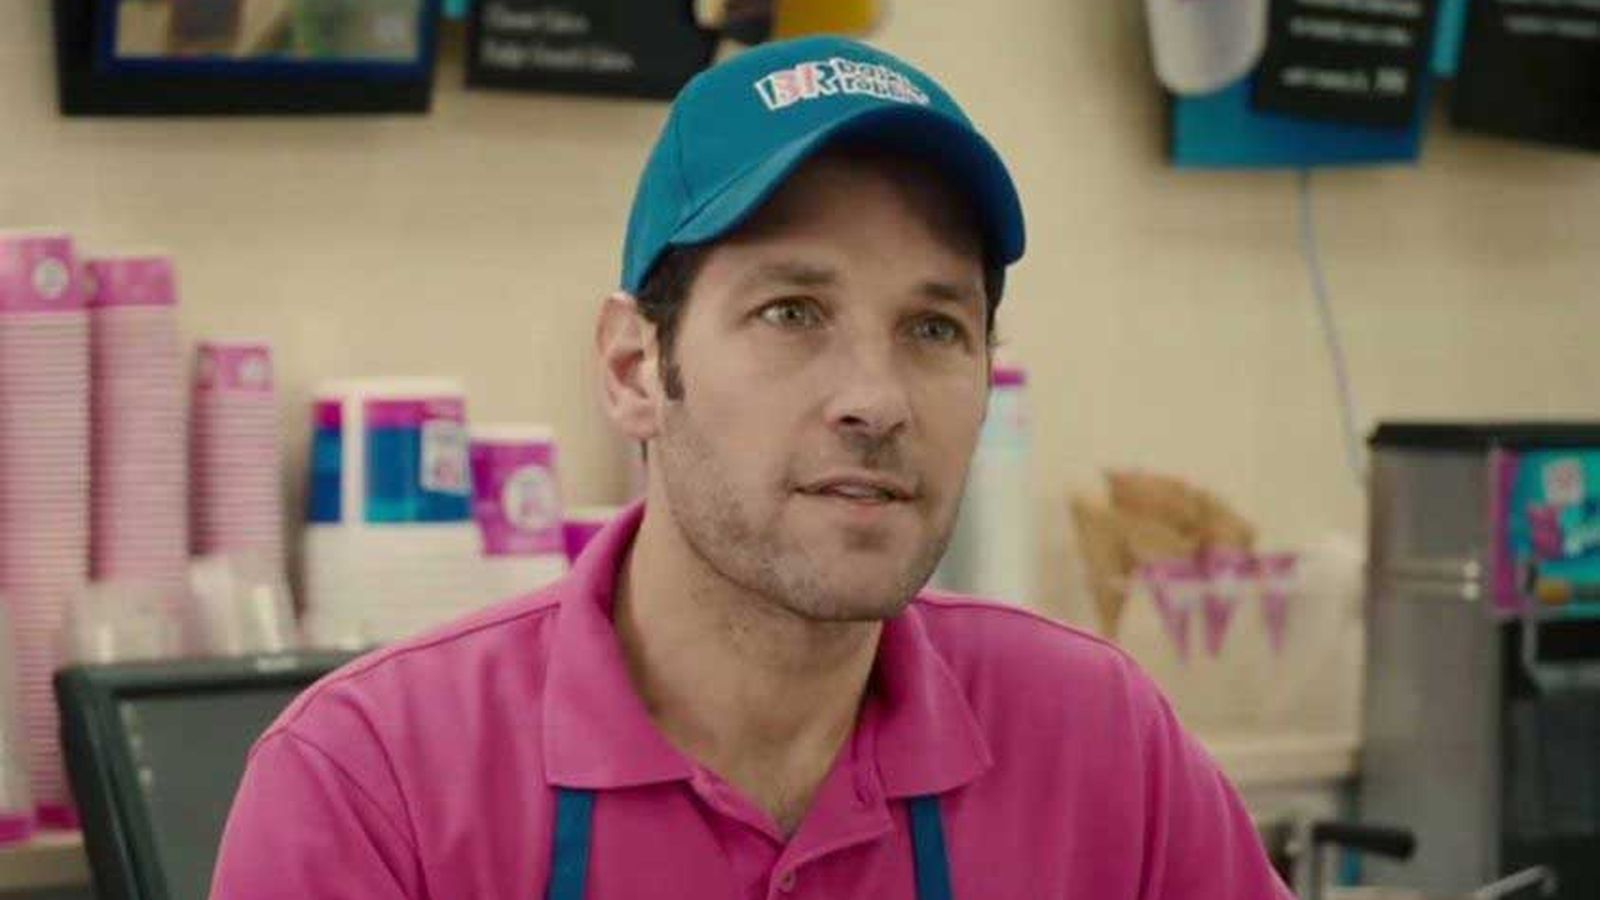
3. Baskin Robbins

baskinrobbins_draft1

I SHOULD HAVE DONE “BASKING ROBINS”.

I really should have…!

But anyway, this design wound up kinda circular as well. I showed it to my dad and he said it looked like some kind of design with political agenda. (thanks dad)

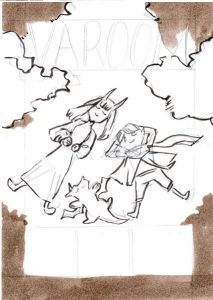
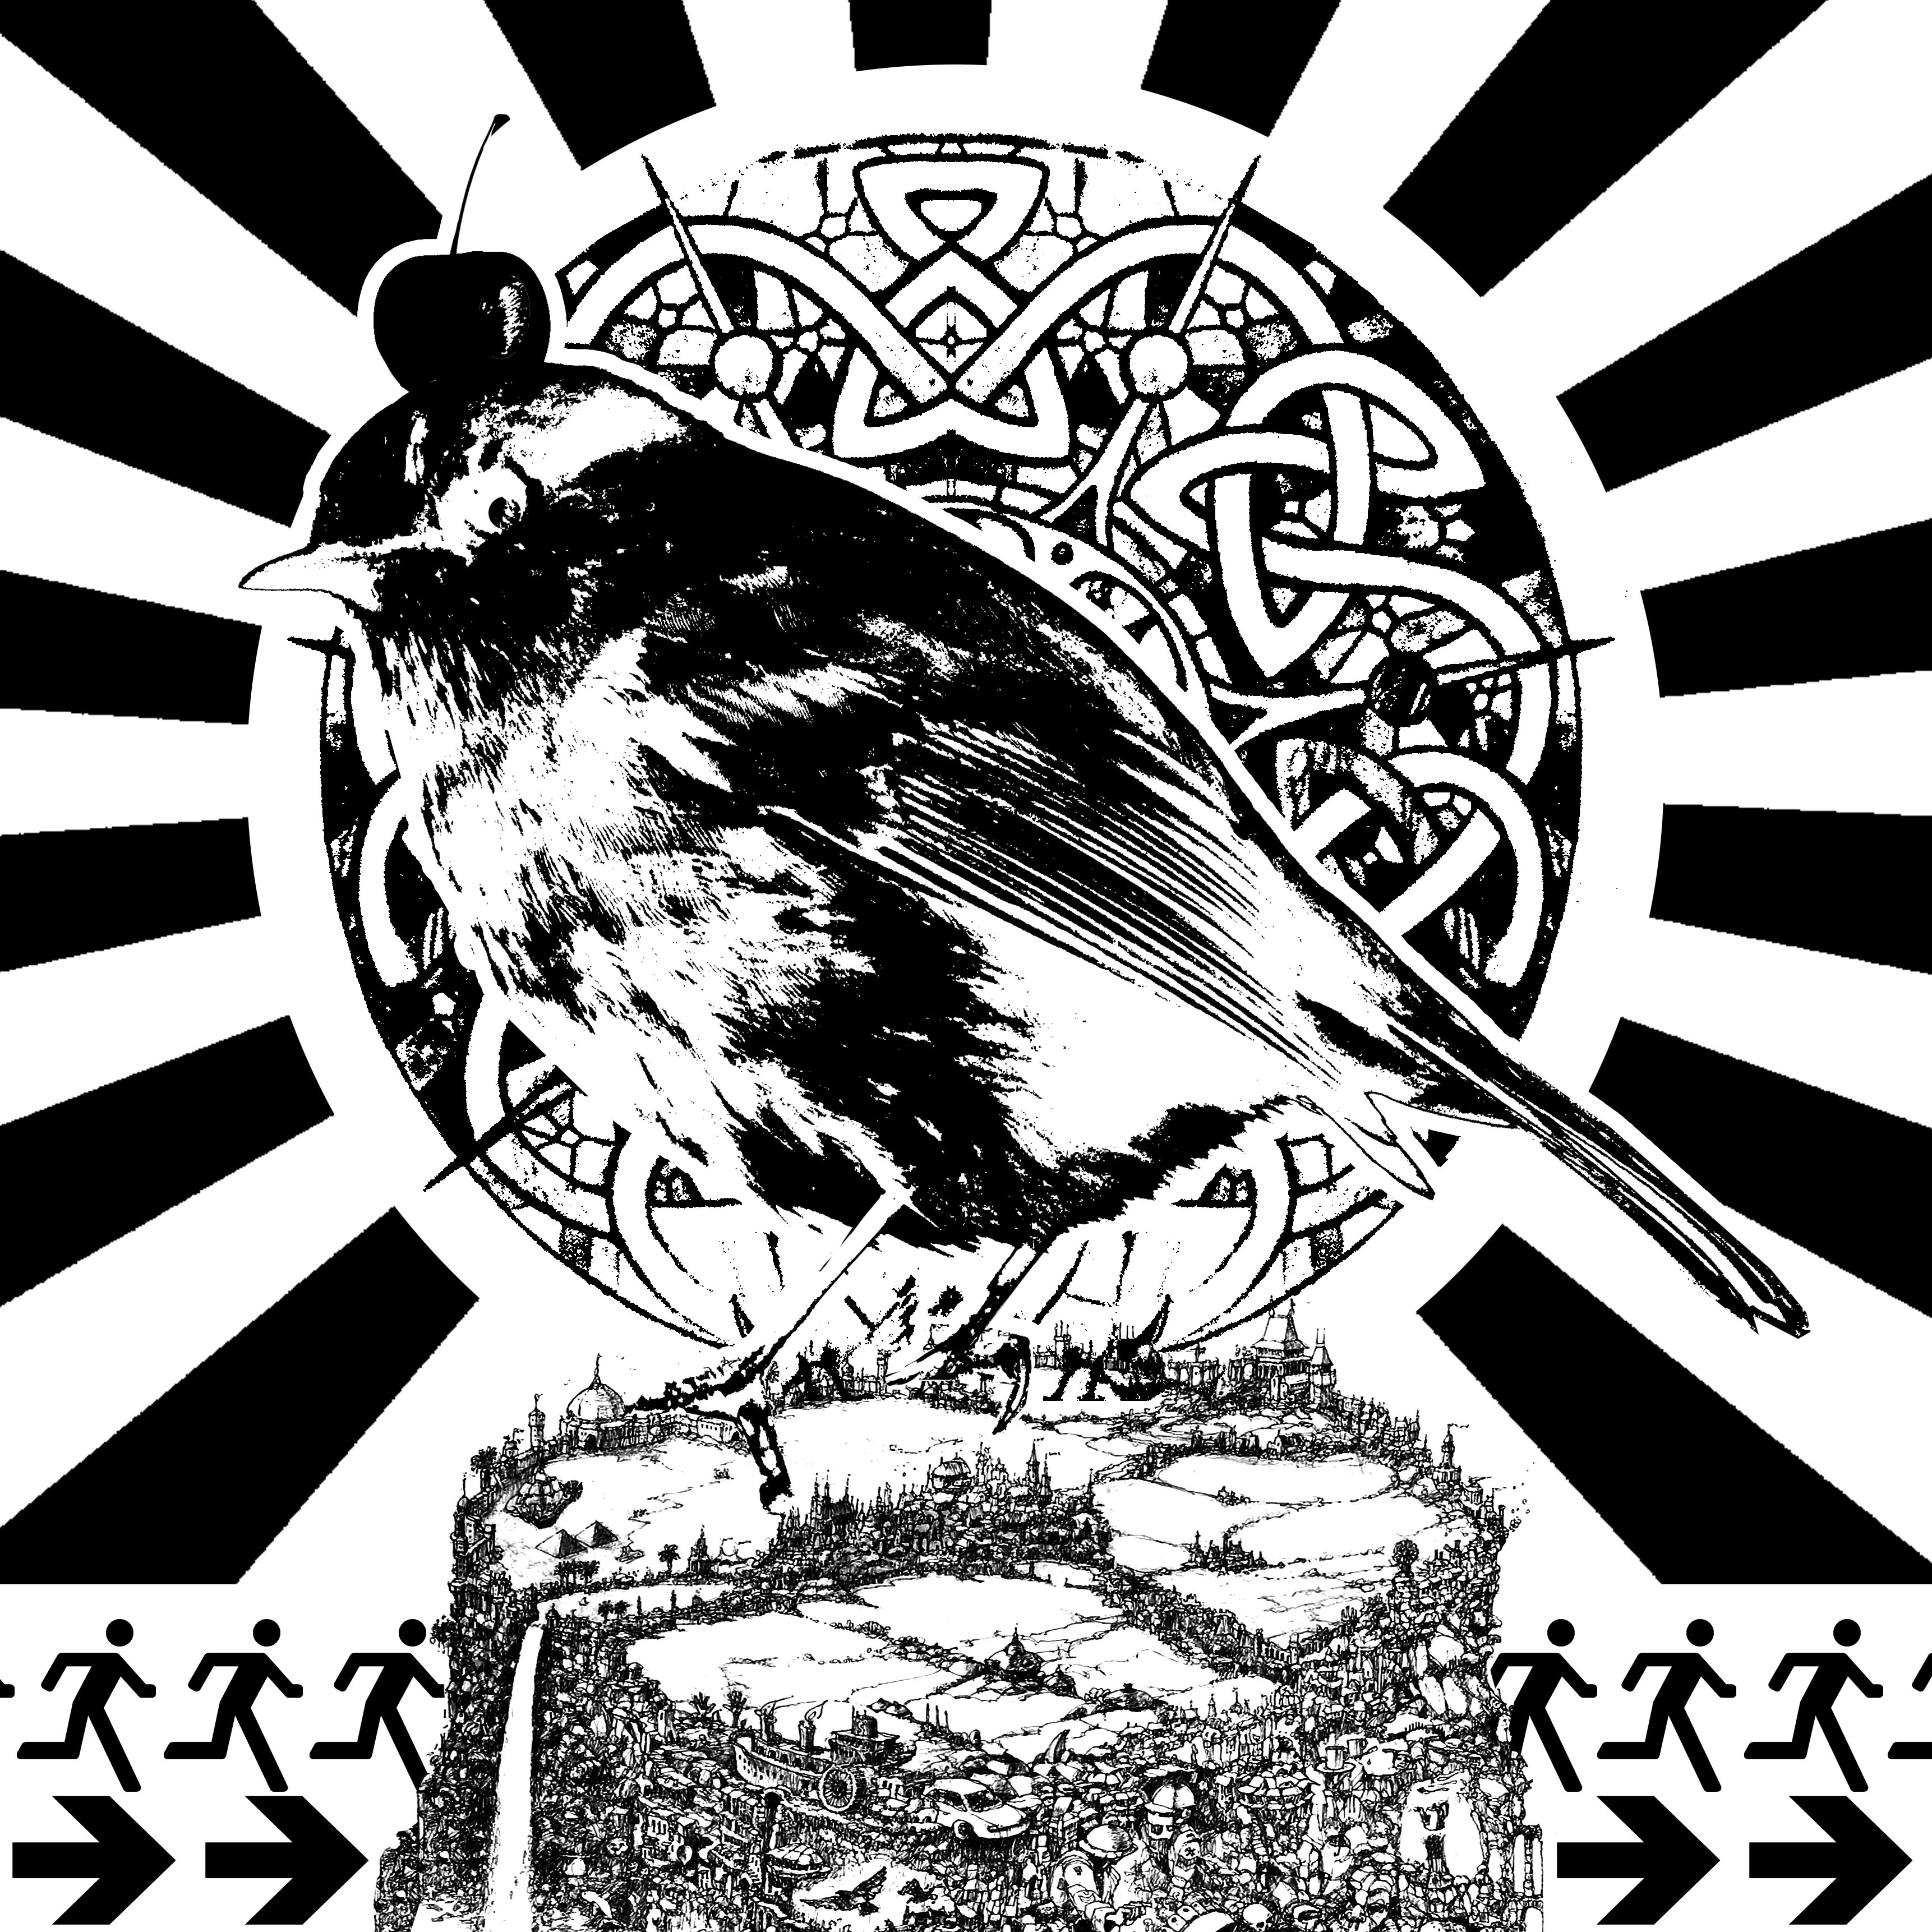
This one was based on the quote “Baskin-Robbins always finds out”.

I wanted to make a nod to Baskin Robbins by placing a cherry on top of the robin’s head as a hat. I also made the robin look extremely judgmental to give off the feeling of being far superior – along with a halo and light rays, and also that the robin is constantly watching everything you do.

The little humans and vectors are to show a ‘checkpoint’ – the feeling like you can run, but you can never hide from the robin.
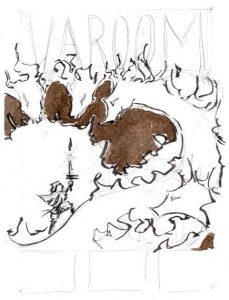
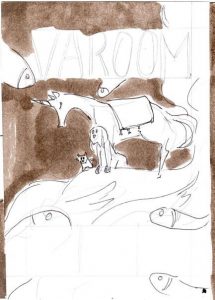
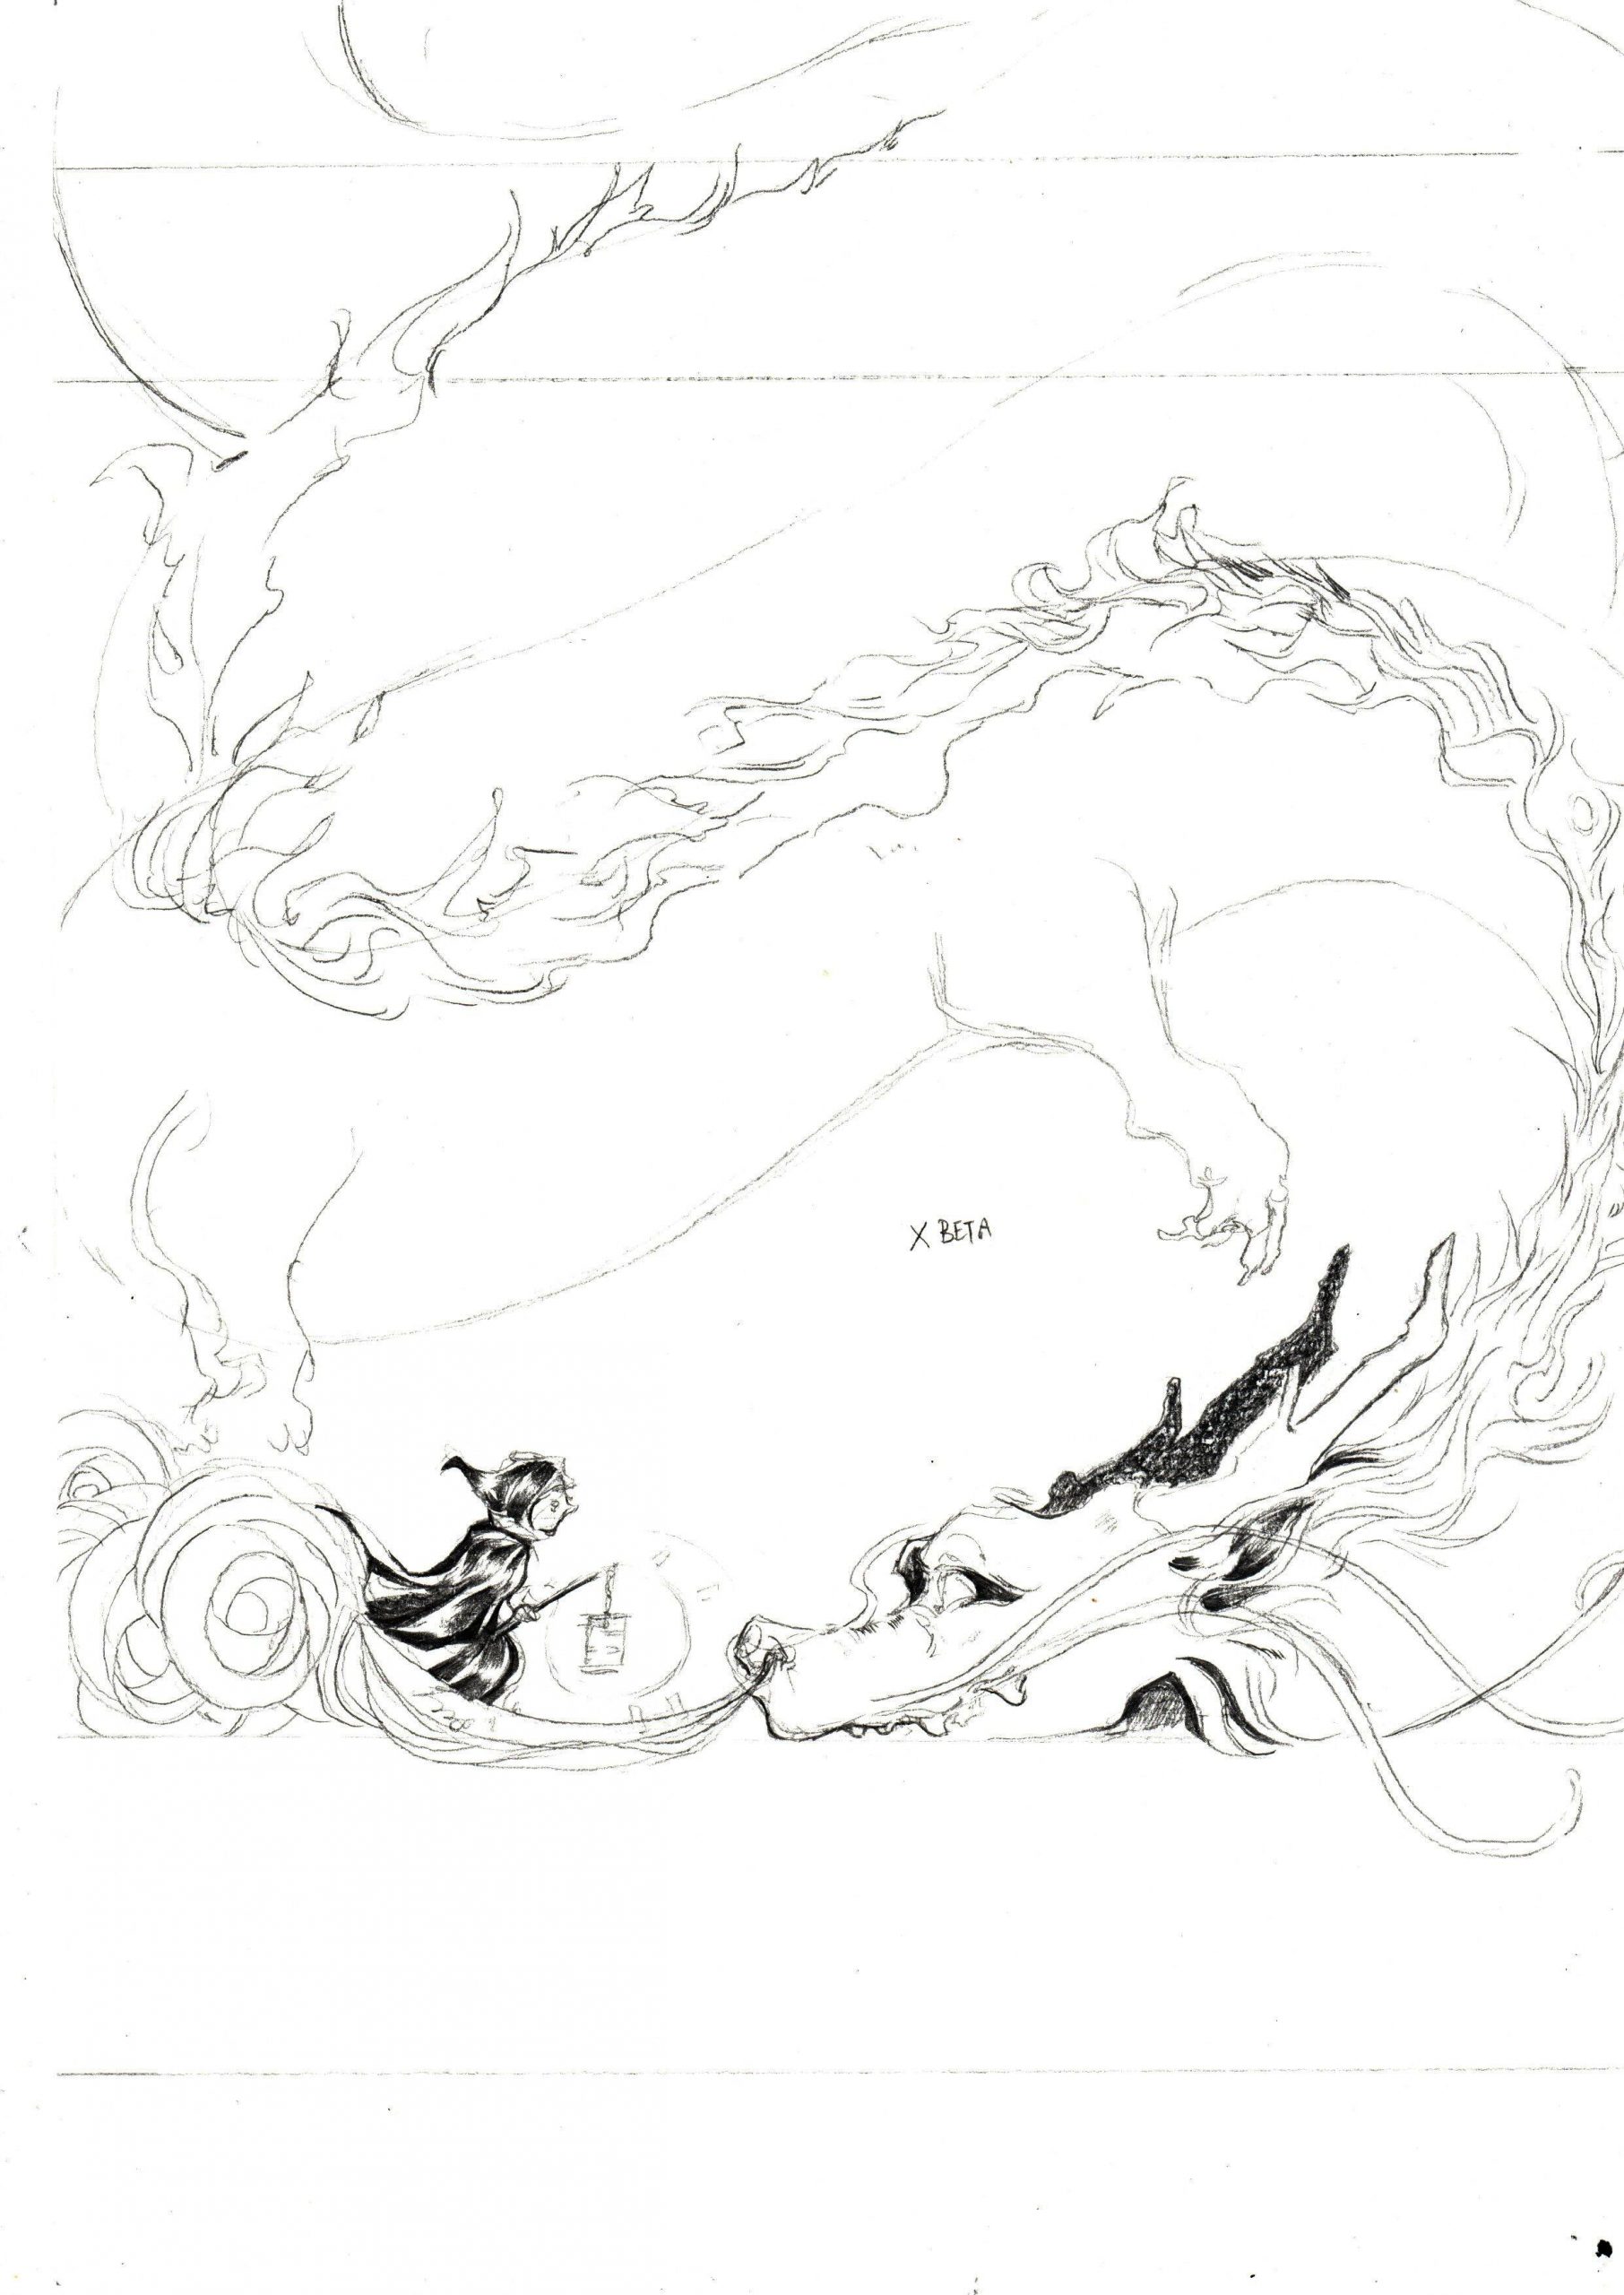
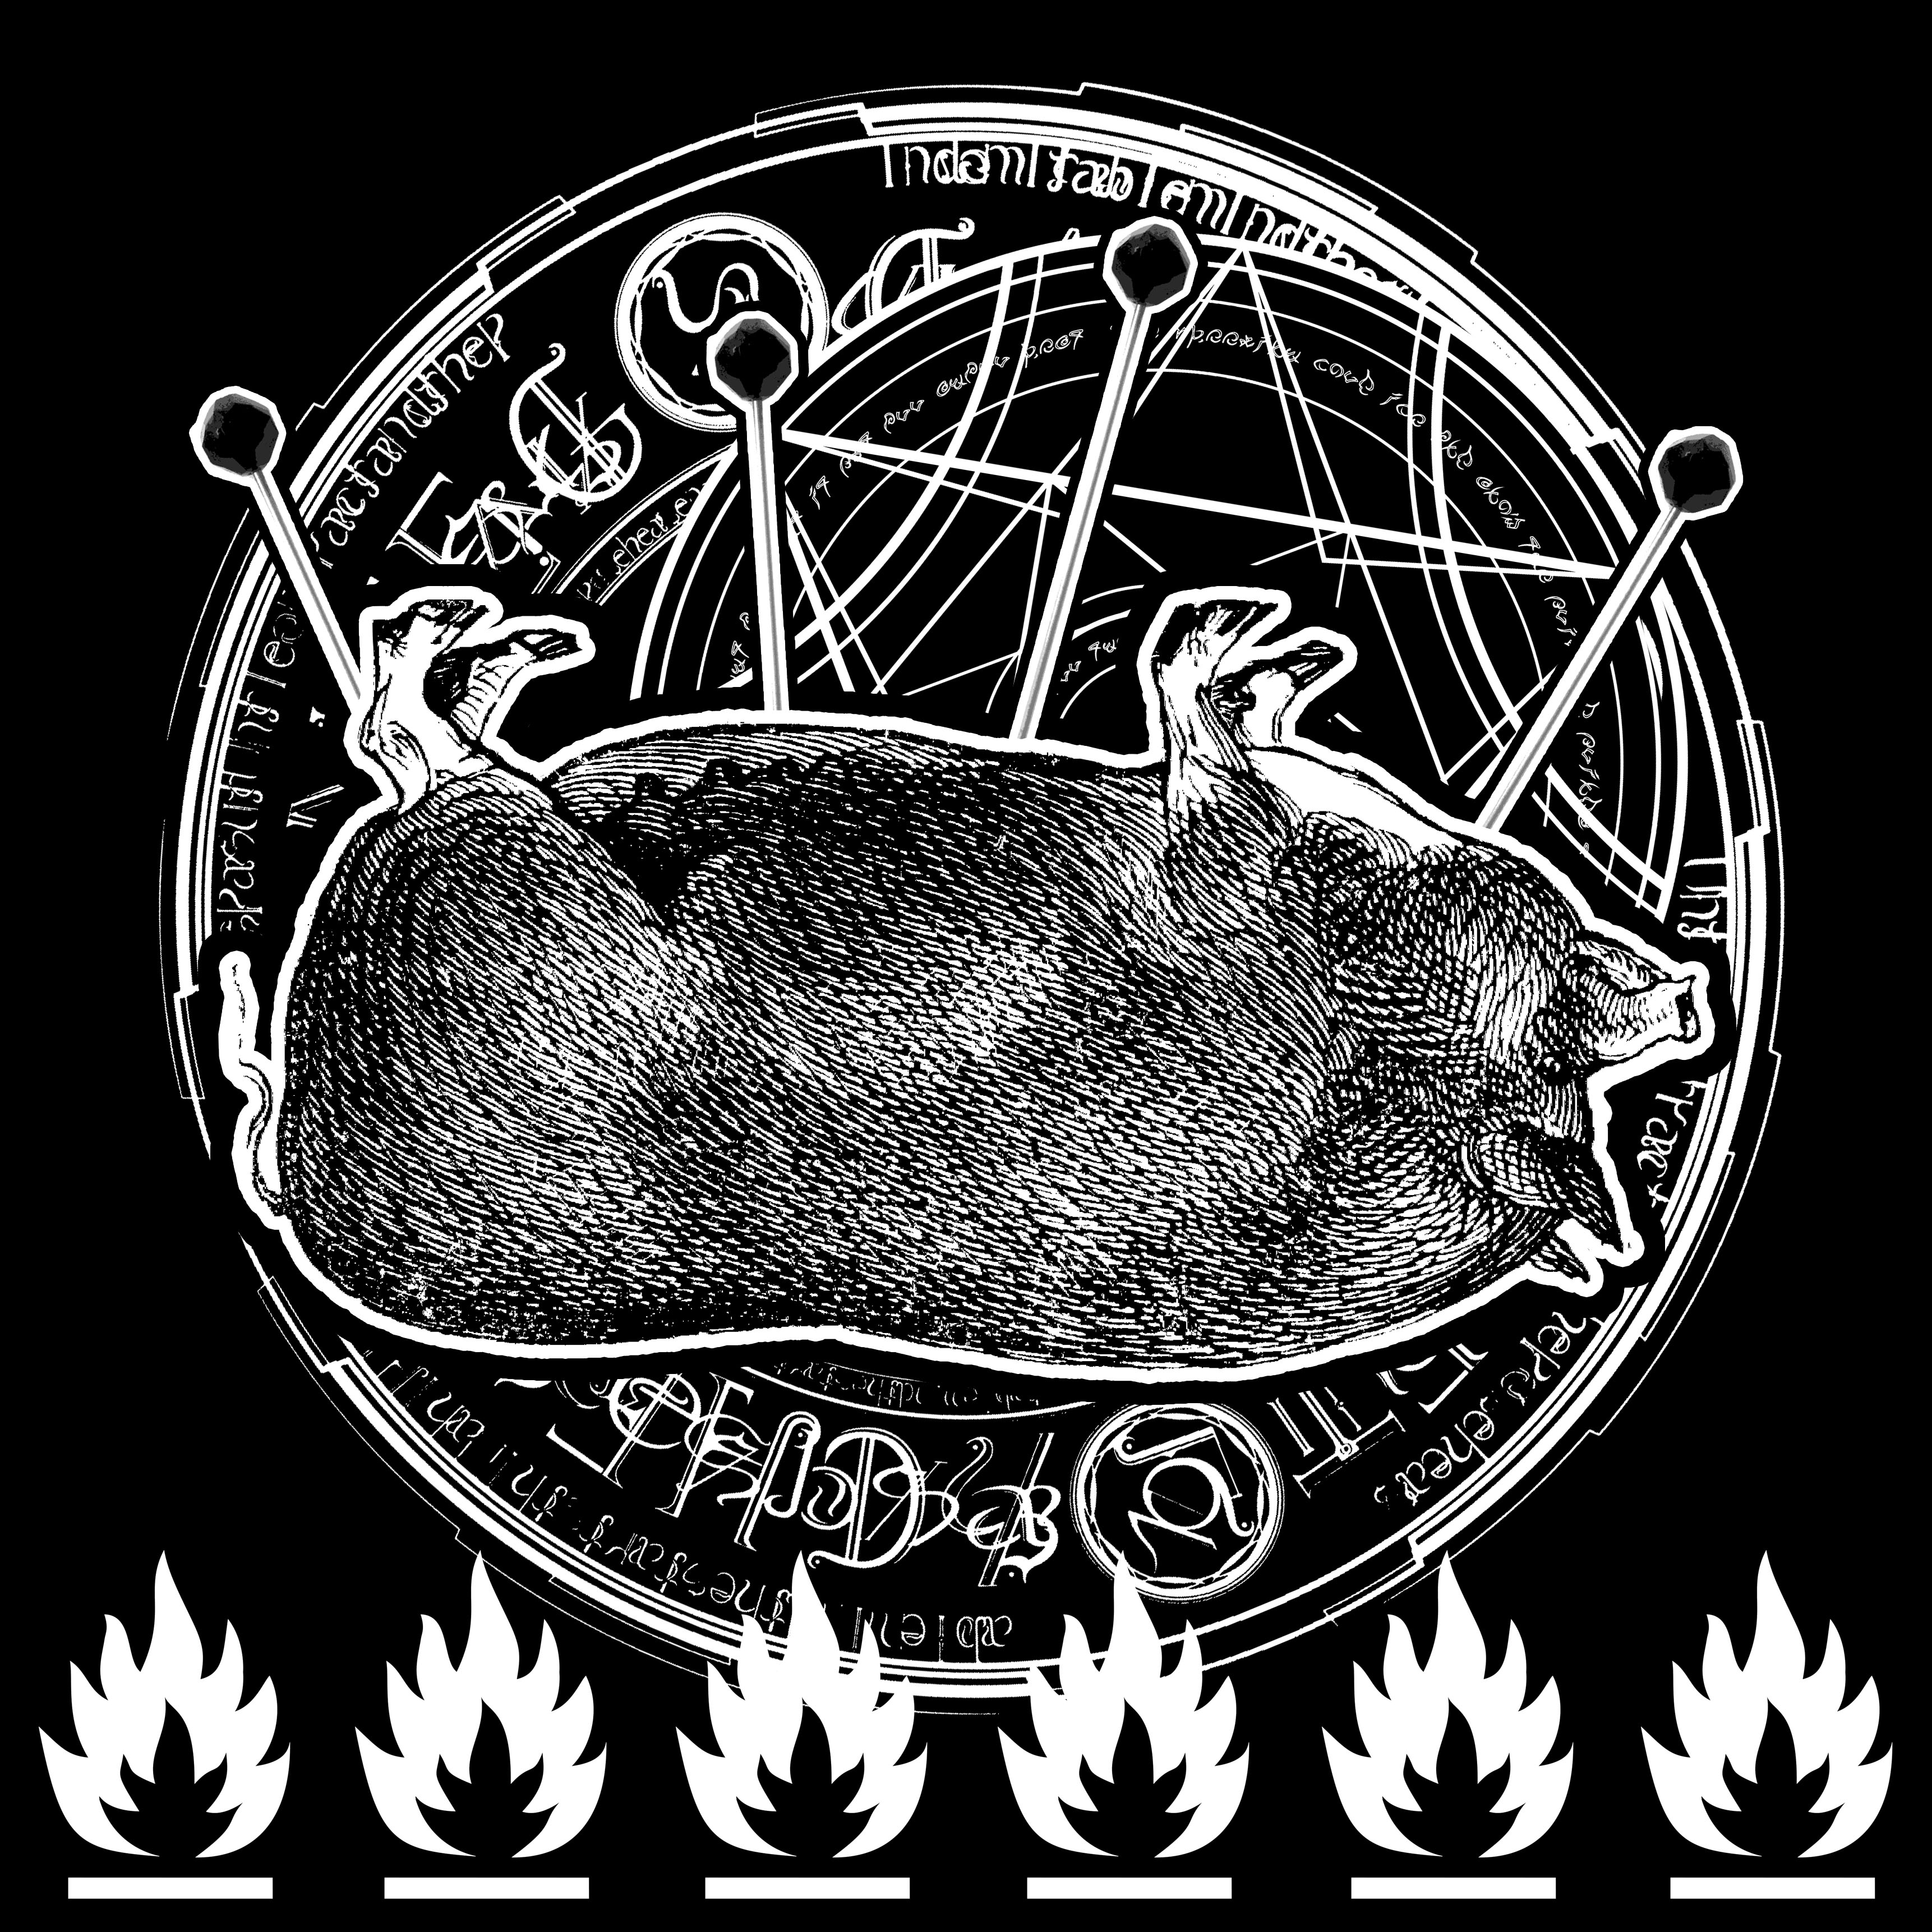
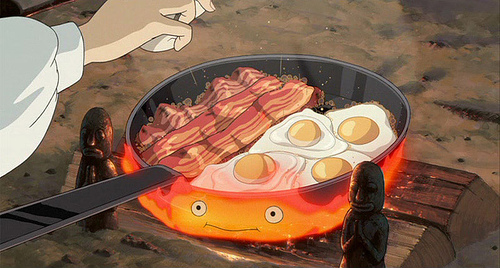
4. Burn Bacon!

burnbacon_draft1

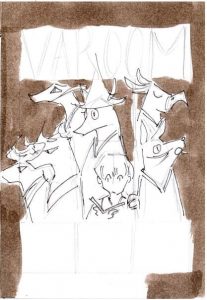
I had a ton of fun with this one! I was exploring how satanic I could push it.

I’m kinda terrified of googling for satanic magic circles and will probably never print this.

I found a great quality engraving image of a pig, and decided to get some image of yarn pins and combine it with the magic circle element to imply the “curse”. I kinda wound up combining two magic circles to create the image of having something intricate behind the pig as well – it was strangely empty and it wasn’t complimenting the pork well previously. 🙁

Also to show burn, I had used fire pictograms!

2nd October 2016: Sunday Consultation – Compilation of first drafts

baskinrobbins_draft1

Baskin-Robbins always finds out – Dale, Ant-Man, 2015

burnbacon_draft1

Here’s another curse for you – may all your bacon burn – Calcifer, Howl’s Moving Castle, 2004

crow_draft1

People once believed that when someone dies, a crow carries their soul to the land of the dead – Sarah, The Crow, 1994

milkyway_draft1

I’ll see you on Mars, right after I eat the Milky Way – Kate, Alpha and Omega, 2010

2D Project 2: Movie Quotes and Artist Research (╮’-‘)╮

Quotes selected for Project 2

paul-rudd-ant-man-0-0

Baskin-Robbins always finds out – Dale, Ant-Man, 2015

maxresdefault

People once believed that when someone dies, a crow carries their soul to the land of the dead – Sarah, The Crow, 1994

alpha-and-omega-088I’ll see you on Mars, right after I eat the Milky Way – Kate, Alpha and Omega, 2010

910152091_06621933faHere’s another curse for you – may all your bacon burn – Calcifer, Howl’s Moving Castle, 2004

Art/Artist Research

This project is strongly related to dada – an art movement where the artists focuses on not creating and crafting aesthetically pleasing objects, but instead on making works that challenged controversies, social issues, and the purpose of art, amongst many other thing.

Dada artists generally use ready-made objects, and in this project, we are encouraged to use ready-made images available on the Internet as well, and to alter and distort them to fit our purpose – which is to send a message or to provoke certain thoughts and emotions.

One of the most popular examples of the use of ready-mades was Duchamp’s “Fountain” in 1917, which was just a urinal. It apparently was a reference to Baroque and Renaissance artists, and he was the first to use a ready-made.

I would like to just focus more on the aspect of ‘found object’ (‘objet trouvé’ in French), and more specifically – Robert Bradford’s trash art.

514995_rocking-horse

Rocking Horse by Robert Bradford

robert-bradford-interview-yatzer_2

Pug One by Robert Bradford

I’m extremely intrigued by ‘chimera’ art that steals many different parts to form a wholesome piece of art that delivers a clear message and image.

Bradford’s work uses recycled and utilitarian materials, and he prefers materials with a history of weathering – which I find interesting. I find that his use of materials gives some texture and personality to the different parts of the art. It’s interesting to look at his choice of materials for the different parts of the toy – the hooves, the bones, grooves, muscles and more.

His most popular works, in my opinion, are probably the plastic and soft toy sculpture series. It tries to bring across a message about recycling, as well as consumerism waste (with the use of toy parts). Apparently, they are also monuments to uncredited artists who produced the toys used in the works. Other than that, he uses his art to explore psychotherapeutic concepts – art practiced for therapeutic purposes.

I feel that Bradford uses his art for an incredibly gentle, yet strong, purpose and I would probably like to explore art as a wholesome entity for this project with elements that would co-exist well as a body in terms of texture, variety and more.

Hopefully in doing so, my movie quote and purpose would come strongly through the quote and look aesthetically pleasing at the same time!

2D Project 1: Extra ╮(︶▽︶)╭ (Part 4)

Between the last lesson on 13th, til 19th today, I had been reworking most of my strips – and even the emotions I have selected underwent massive changes. I’m going to have to edit my research on the emotions, but here’re the original list and the edited list!


Original List


1) Zest
2) Exhilaration (Removed)
3) Zeal
4) Adoration
5) Compassion (Removed)
6) Tenderness
7) Euphoria (Removed)
8) Elation
9) Delight
10) Hope (Removed)
11) Optimism
12) Eagerness (Removed)
13) Passion
14) Desire (Removed)
15) Infatuation (Removed)
16) Loathing
17) Hostility
18) Resentment


New List


1) Passion
2) Tenderness
3) Adoration
4) Zest
5) Zeal
6) Optimism
7) Delight
8) Elation
9) Surprise (NEW!)
10) Loathing
11) Hostility
12) Resentment
13) Heartache (NEW!)
14) Abandonment (NEW!)
15) Gloom (NEW!)
16) Trapped (NEW!)
17) Fright (NEW!)
18) Perturbation (NEW!)

I had previously selected 9 emotions from ‘Joy’ and 6 from ‘Love’, but after some careful thought while working on the final strips, I’ve decided to reshuffle the emotions into the 6 categories in the brief, and explore a little more!

img_20160919_214706Reworking ‘Adoration’

16th to 19th were busy days – reworking emotions onto a 257mm x 50mm strips, trying to recreate emotions on different canvases and failing a million times because certain paints just wouldn’t achieve the harmony I wanted – like wood and gouache for ‘Passion’.
failed-attempt Failed attempt to re-create Passion

The gouache paint wouldn’t spread smoothly on the wood and in turn making the strokes extremely dry and not great to work with. I’ve decided to stick to the original piece I had in the end – to scan it in and print it instead.Another thing I experimented with during this period of time was the backing. I managed to dig up some transparency films and tone papers, and used them for the following emotions: Compassion (Grey texture paper), Loathing (transparency film) and Abandonment (transparency film).

img3img5

I felt like a scientist! (*v*)
Doing these strips traditionally gave me a huge sense of satisfaction since I’m weak to gimmicky stuff; I sure hope they’re working out well! (;u;)
 20160921_103724
wweep
Make-shift charts I made for my experiments!

Next are the 6 strips that have mostly retained their original form from the previous mark making sessions in the 2D studio – Hostility, Gloom (previously Desire), Resentment, Passion, Zeal and Eagerness (Fright).

screenshotsossupdate1For these 6 strips, I’d scanned a part of them, pieced them together, digitally edited them so that they’ll look like a proper strip and took them down for a little trip to Sunshine Plaza at Bugis!

img_20160919_215328On my way to Sunshine Plaza; it was so very hot on the way there. I’ll remember to bring an umbrella next time.

img_20160919_214441… After printing, it was time to cut all the strips! Hurrah! (;u;)!!!

And that was pretty much it! The strips will probably be ready for submission soon – and I’m a little sad because I really want to work with more mediums. Hope everyone’s really enjoying the process too! (=’u’=)