Weekly Syllabus
In order to post a weekly syllabus that allows you to upload more material like media and lecture notes you need to do a few extra steps.
- New Syllabus Item: You can create new syllabus items for every week of your course by going into your “Dashboard” and under the “Syllabus” section click “Add New”. You need to follow the steps listed below to gather all these weekly syllabus items into a continuous feed on the main menu of your class site.
This can be done in the following manner:
- Setting up the Main Menu: On your Dashboard go to “Appearance” then click on “Menus”

- Aggregating Syllabus Items: Now on the left you will notice a drop down menu called “Syllabus.” Inside this menu you should go under the “View All” section and check the box that says “All Syllabus Items.” Then Click “Add to Menu” and this aggregates all the posts you make under syllabus into a page that appears on the top main menu of your class site – therefore creating a collection of all the weekly syllabi you post for that course.

12. The Main Menu
The Main Menu is the top header of your class site. It looks something like this:

Assigning New Pages to The Main Menu on The Class Site
So even though you have created and published the “Project References” page, you will notice that it doesn’t automatically appear on your class site, this is because it hasn’t been assigned to the Main Menu of your class site yet. In order for this to happen you need to do the following.
On your Dashboard go to “Appearance” then click on “Menus”
On the left side you will notice a drop down menu called “Pages.” In the “Most Recent” section of this drop down you must check the “Project References” which is the page we just created. Then you click “Add to Menu” and voila! The page has now been added to the Main Menu of your class site.
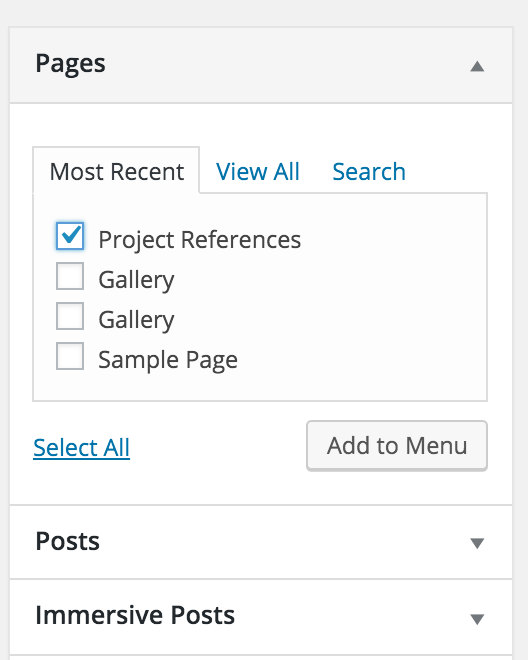
To view the Page just go to your class site and it should be on the right side of the Main Menu which is on the top of the page.

Reordering and Deleting Menu Items
Now that you know how to add an aggregated Weekly Syllabus and other Pages to your class site you must also know how to reorder and delete pages you no longer want displayed on the Main Menu of your class site. For example if your class is an FYP class and doesn’t have a Syllabus then you won’t need the default syllabus item already present in the template of the class site. In order to do this you must go back into the “Menus” which is under “Appearances” in the Dashboard.
- Reorder Menu Items: Simple go to the Menu Structure and drag and drop the Individual Menu Items like “Syllabus”, “Gallery” and “Project References” to rearrange the order in which they appear on the class site.
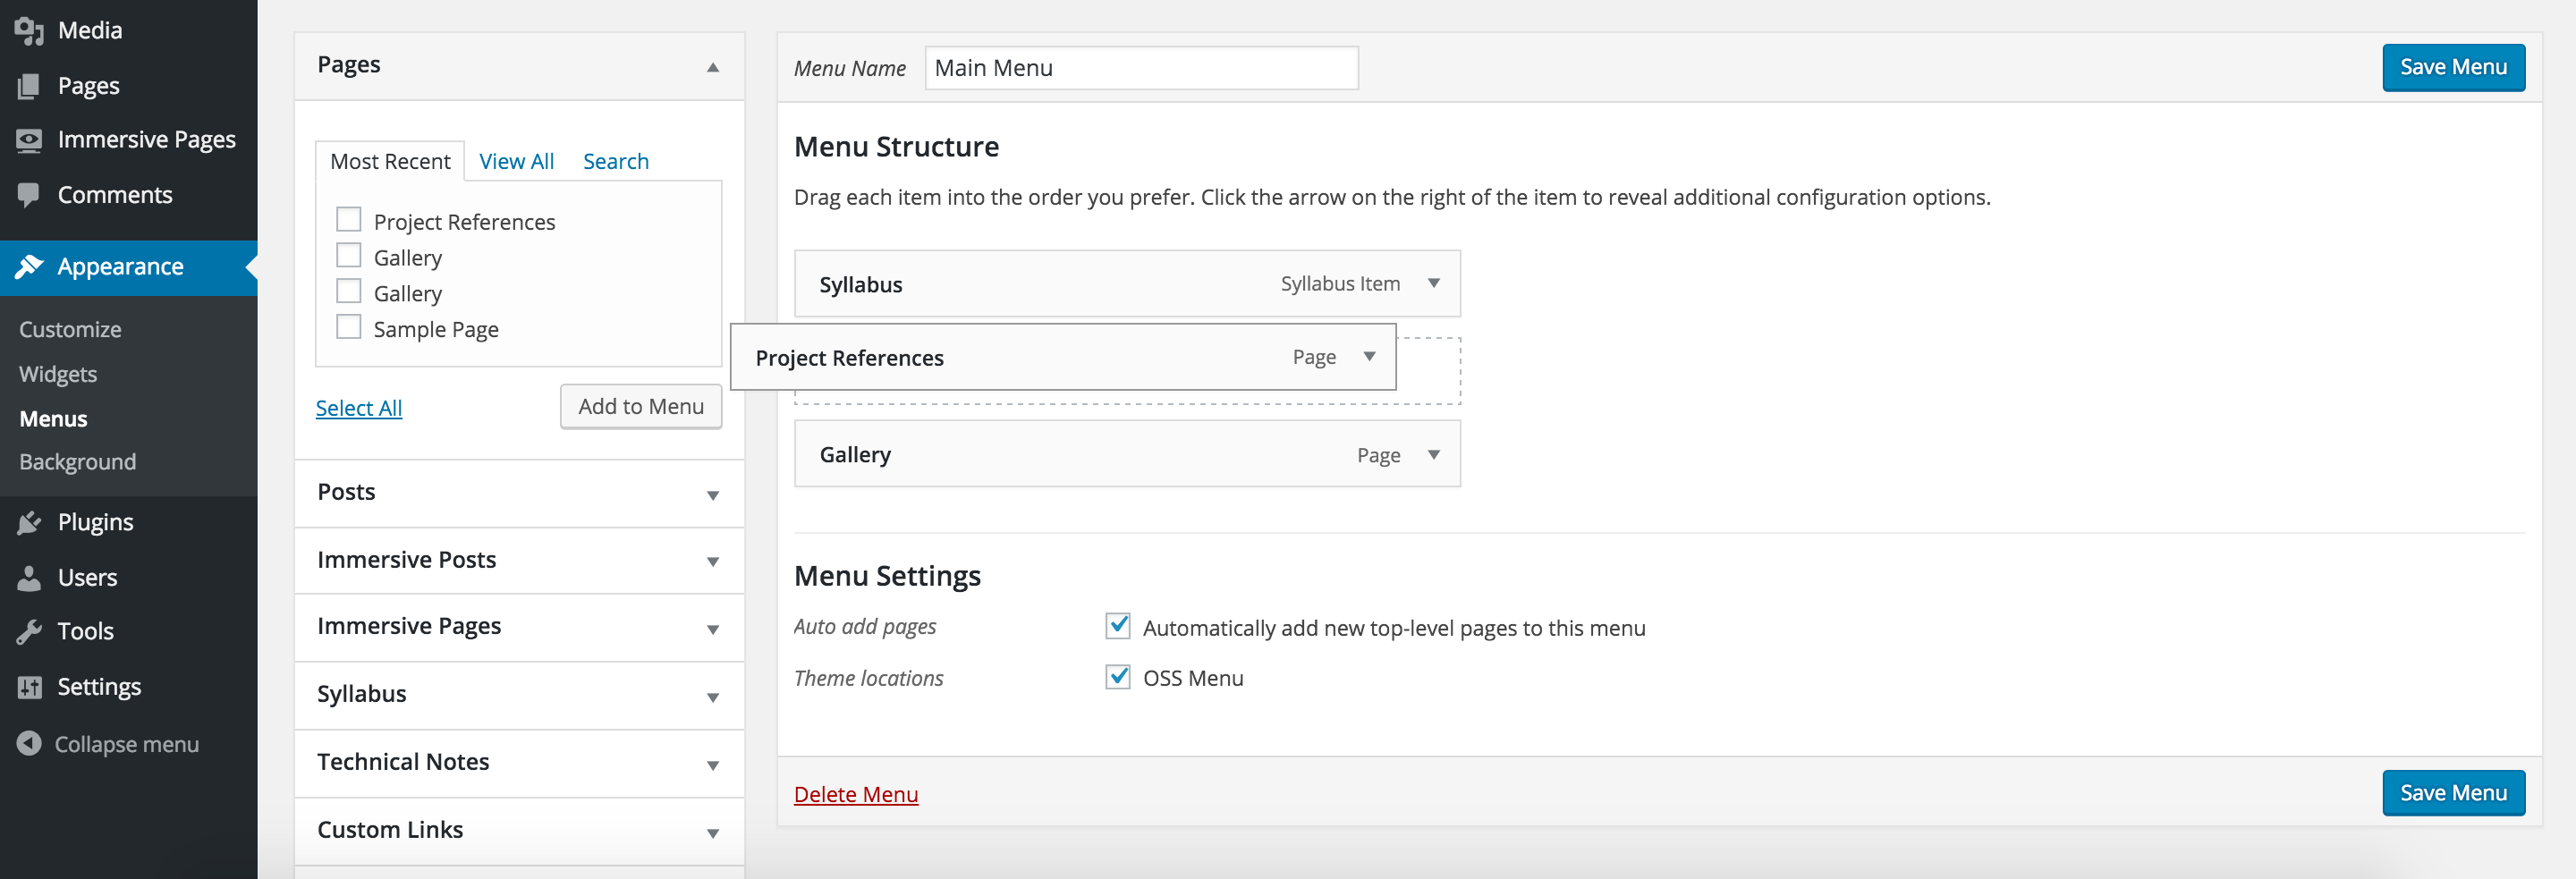
- Delete A Menu Item: You must go under “Menu Structure” where you will find the Menu item that you want to delete. So lets remove the page we just created from the Main Menu by opening the dropdown under “Project References” and clicking the red coloured “Remove” in the bottom left corner of the drop down. Click on Save Menu on the top right corner to finalise your action.

