


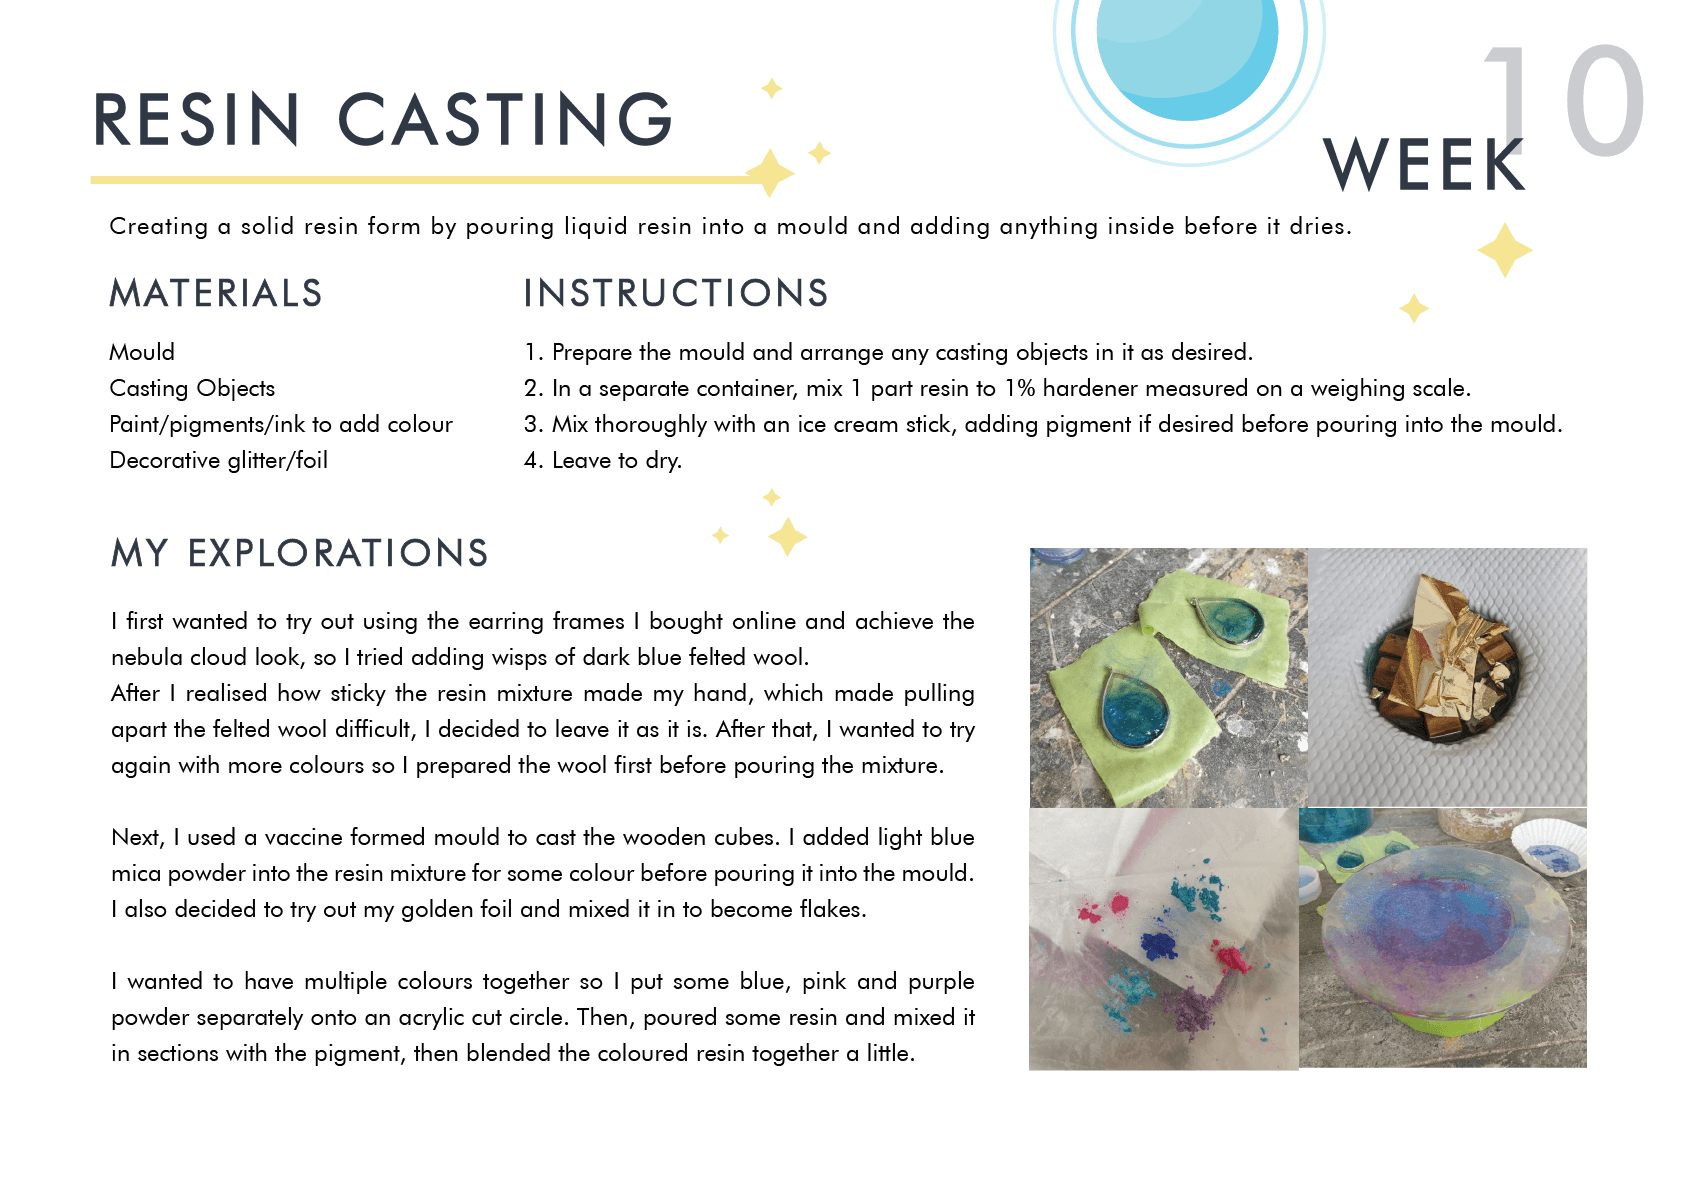
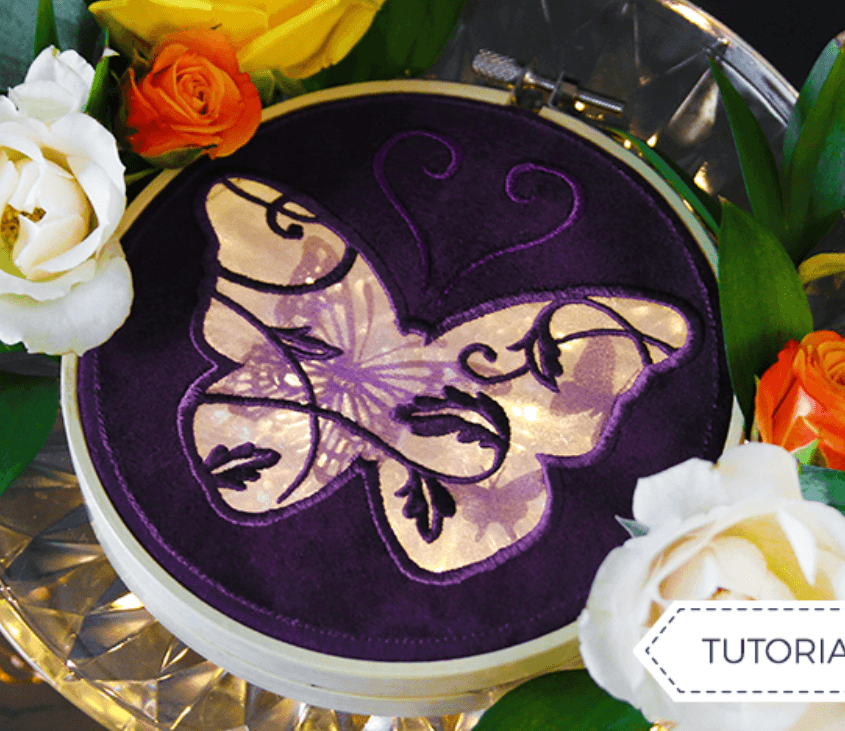
Escape to Design
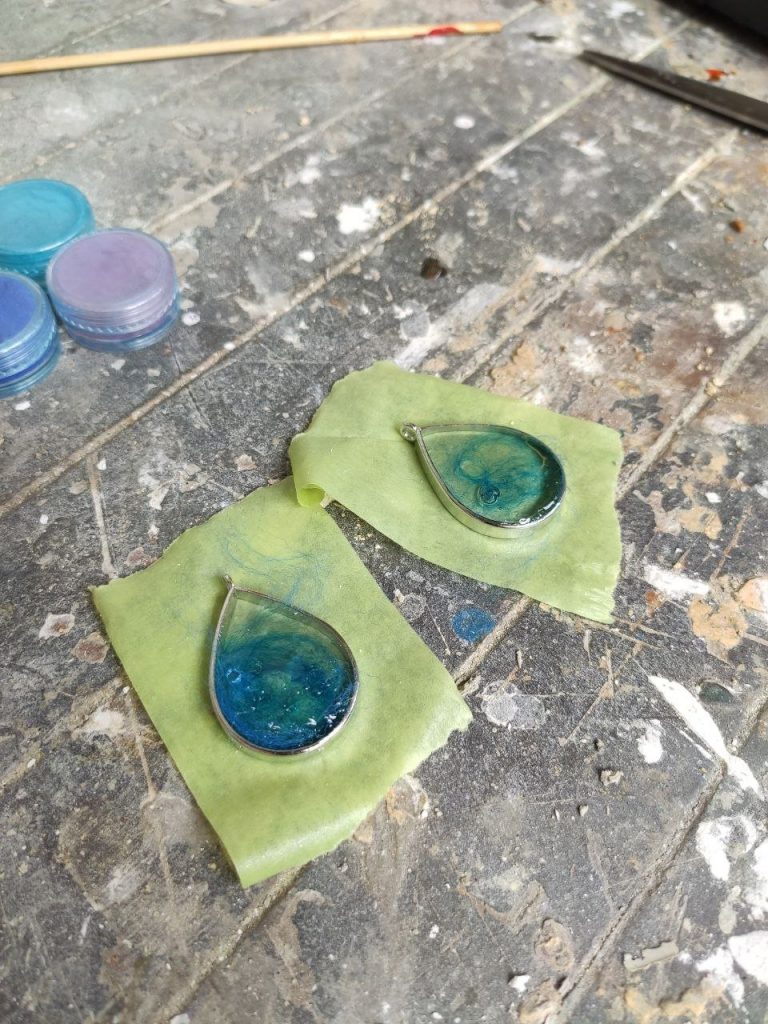
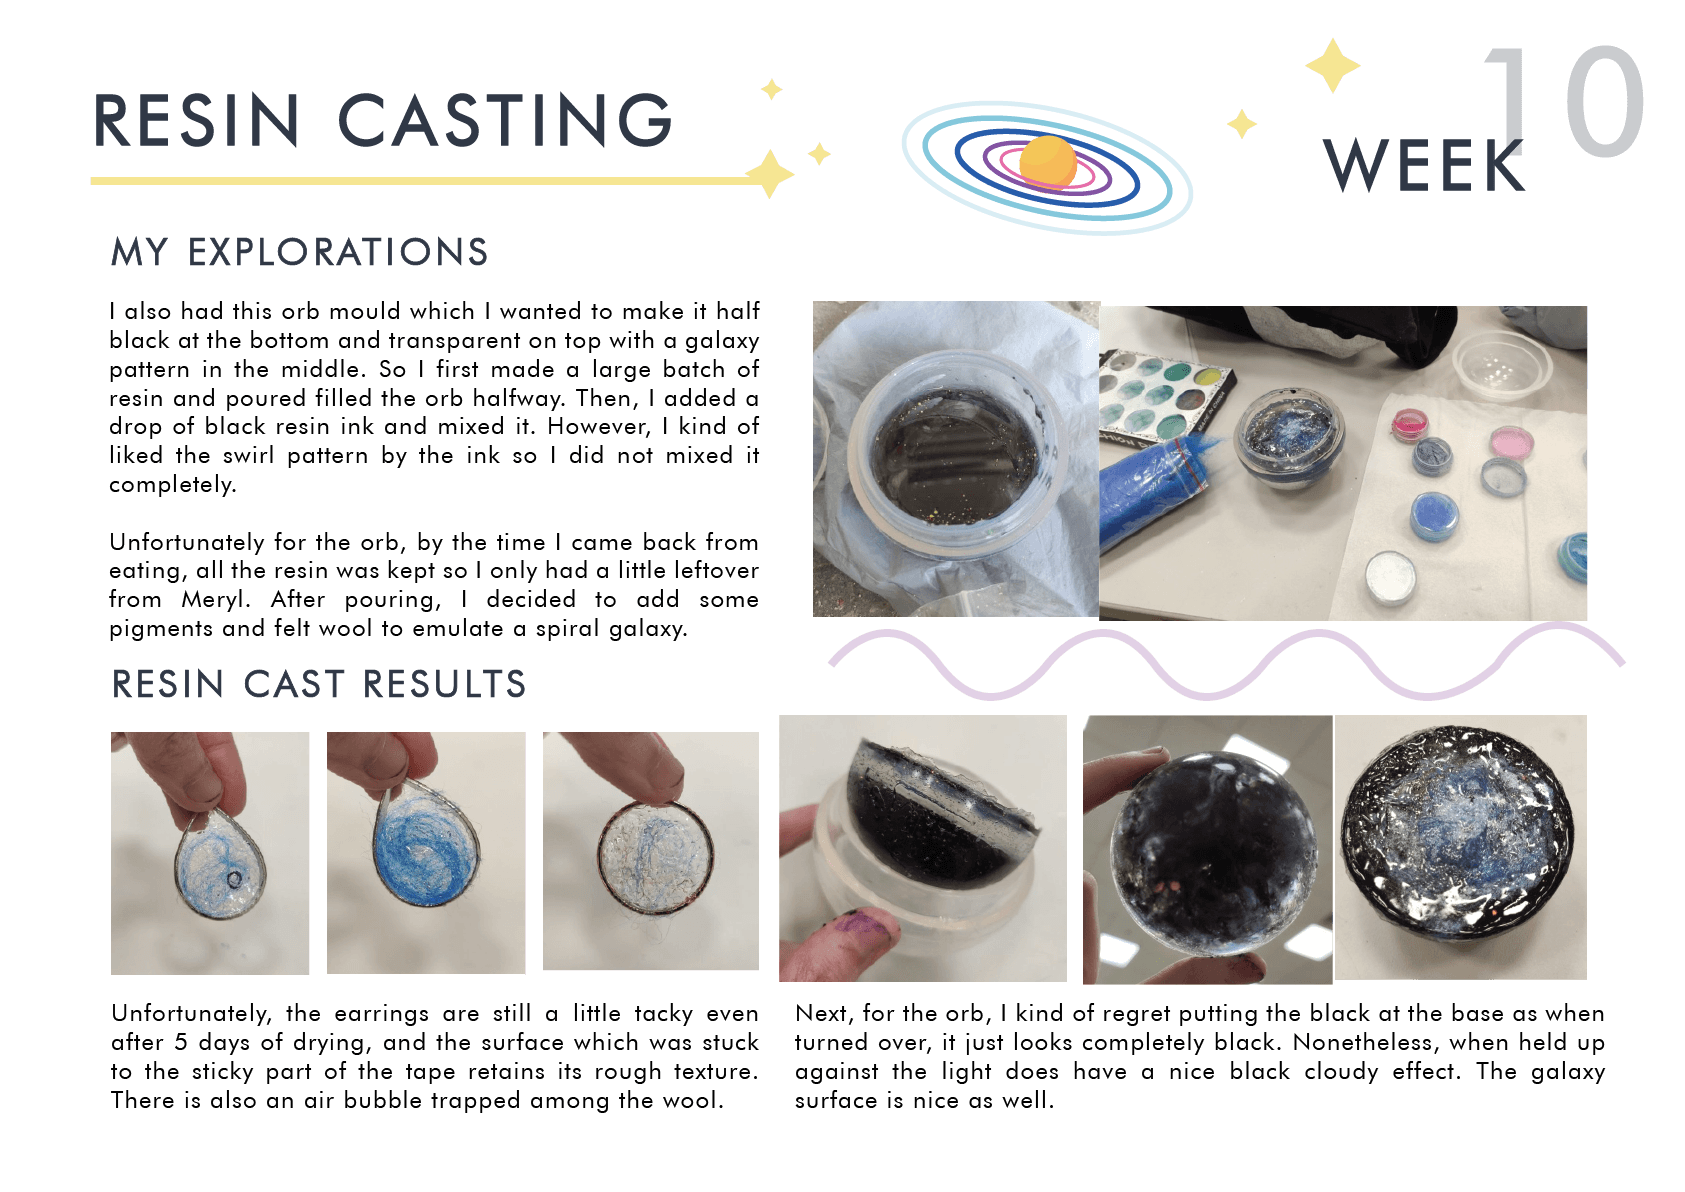
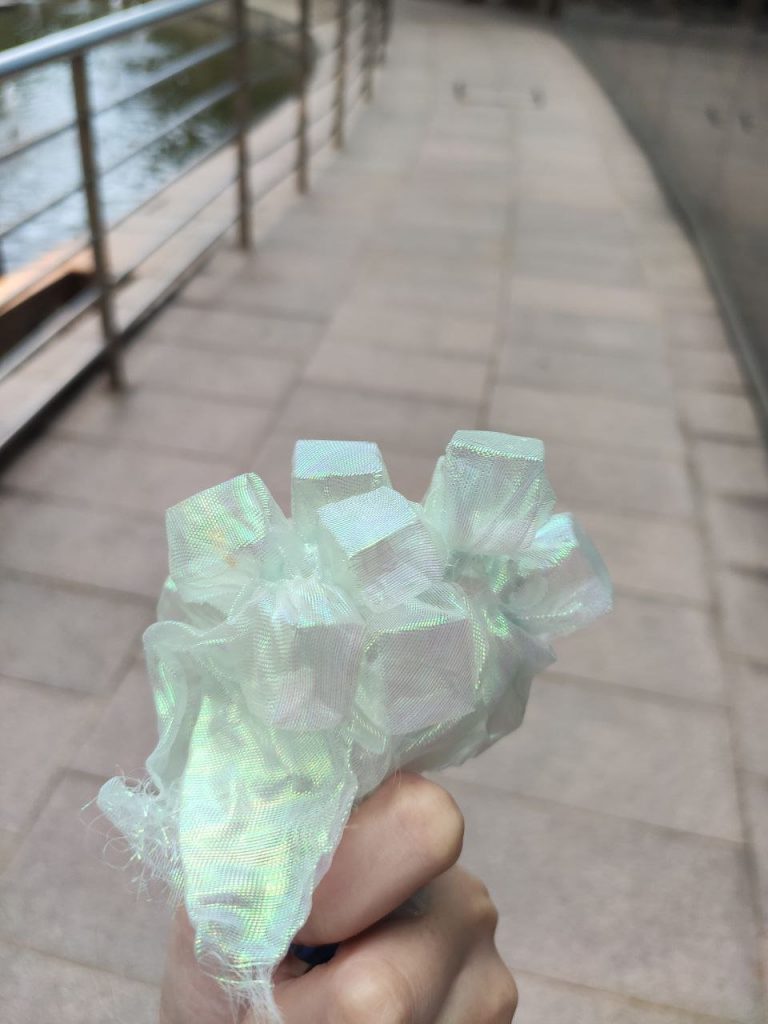
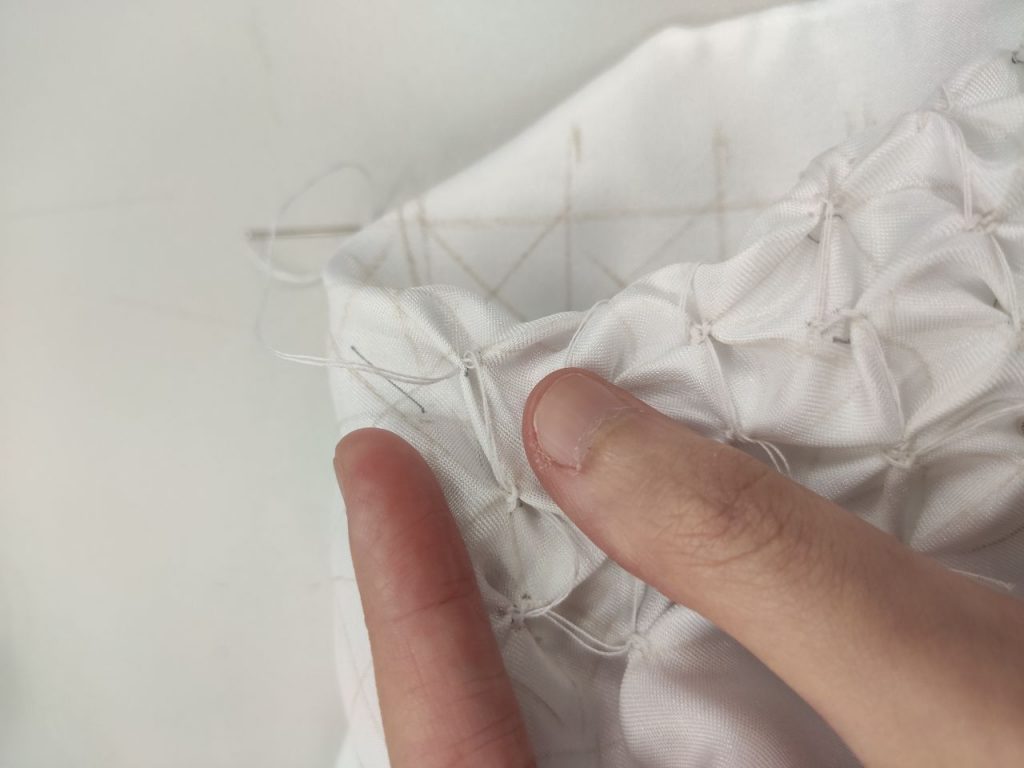
Unfortunately, the earrings are still a little tacky even after 5 days of drying, and the surface which was stuck to the sticky part of the tape retains its rough texture.
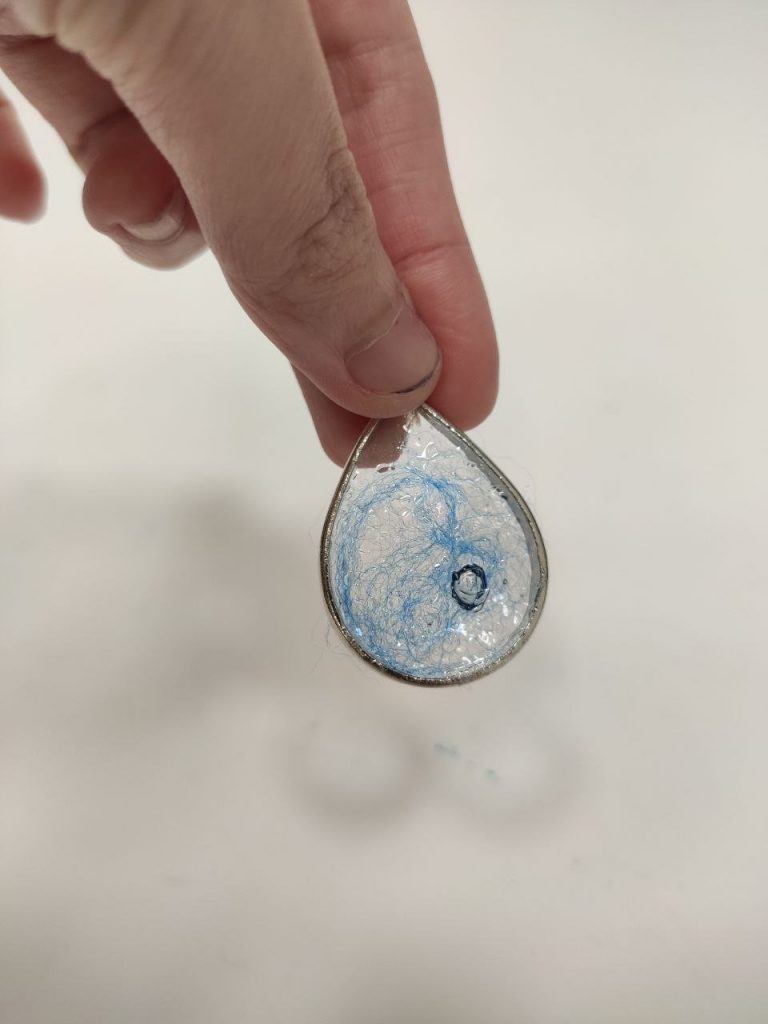
There is also an air bubble trapped among the wool.
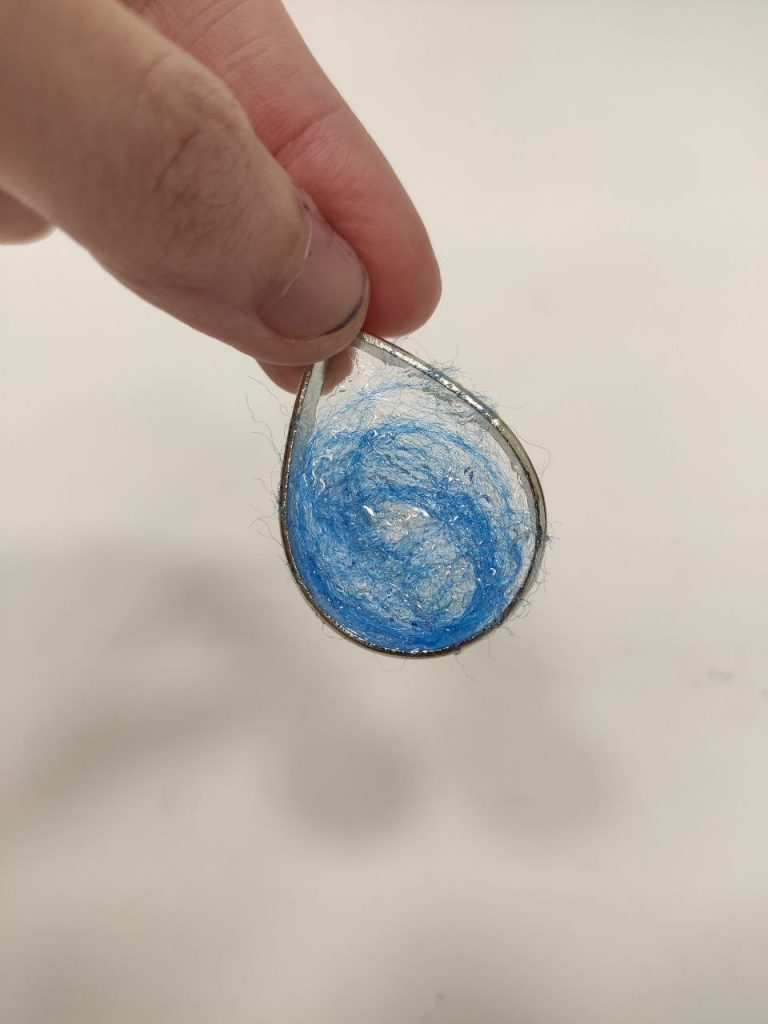

I think if not for the rough texture and sticky surface, it would be better!
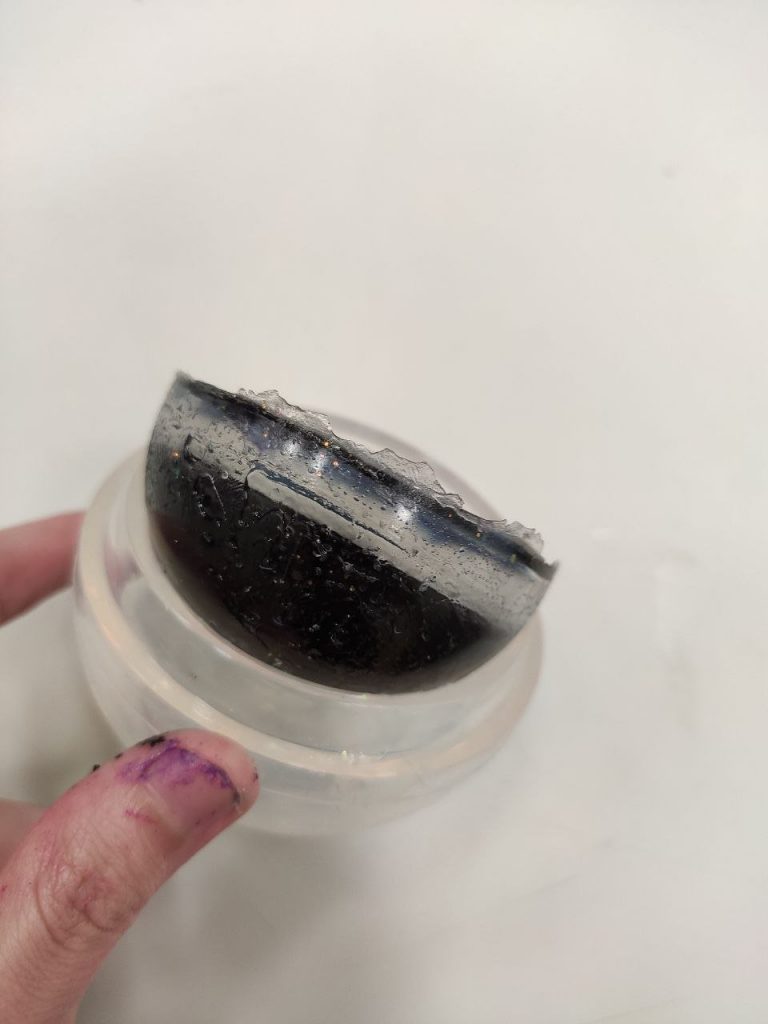
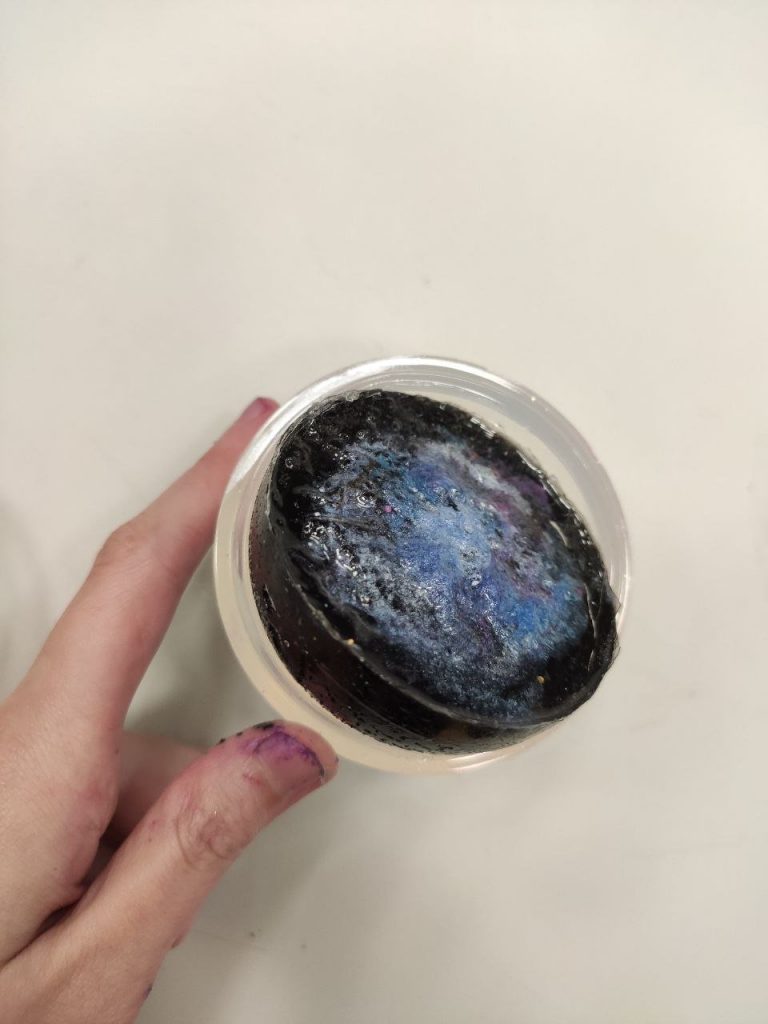
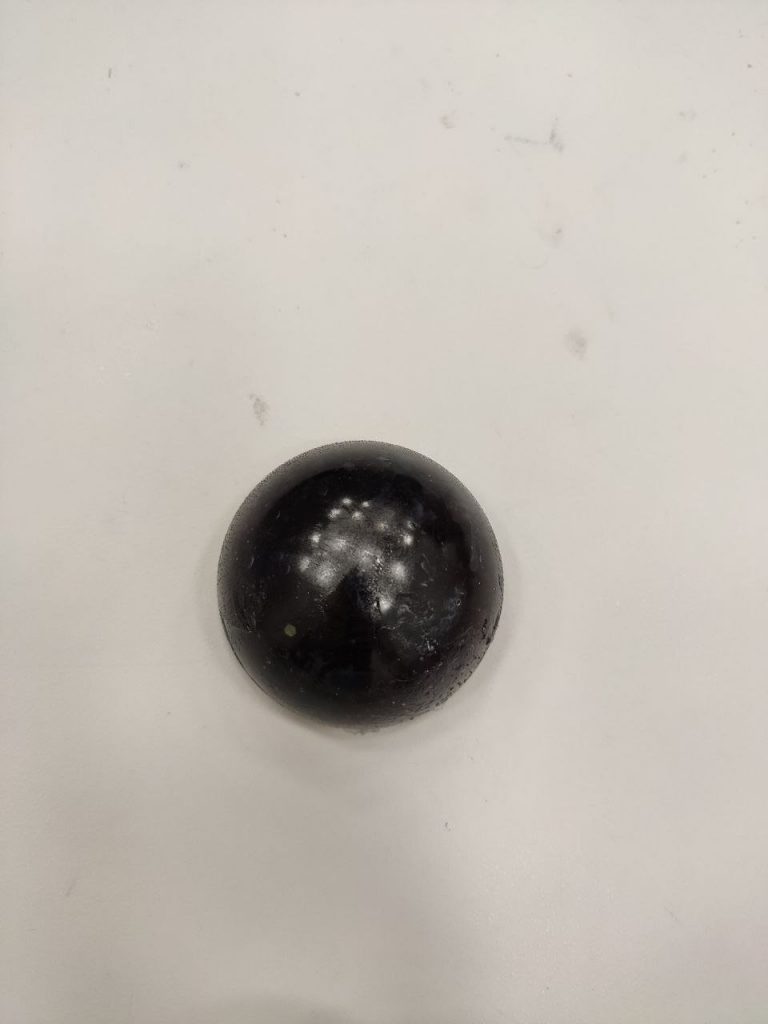
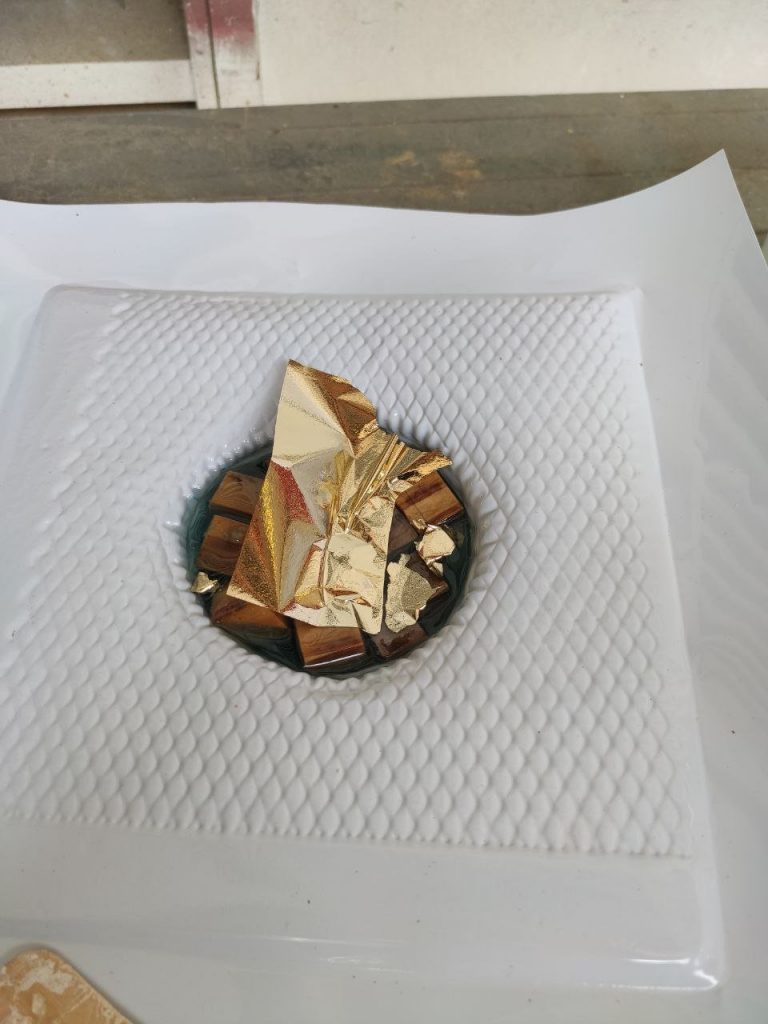
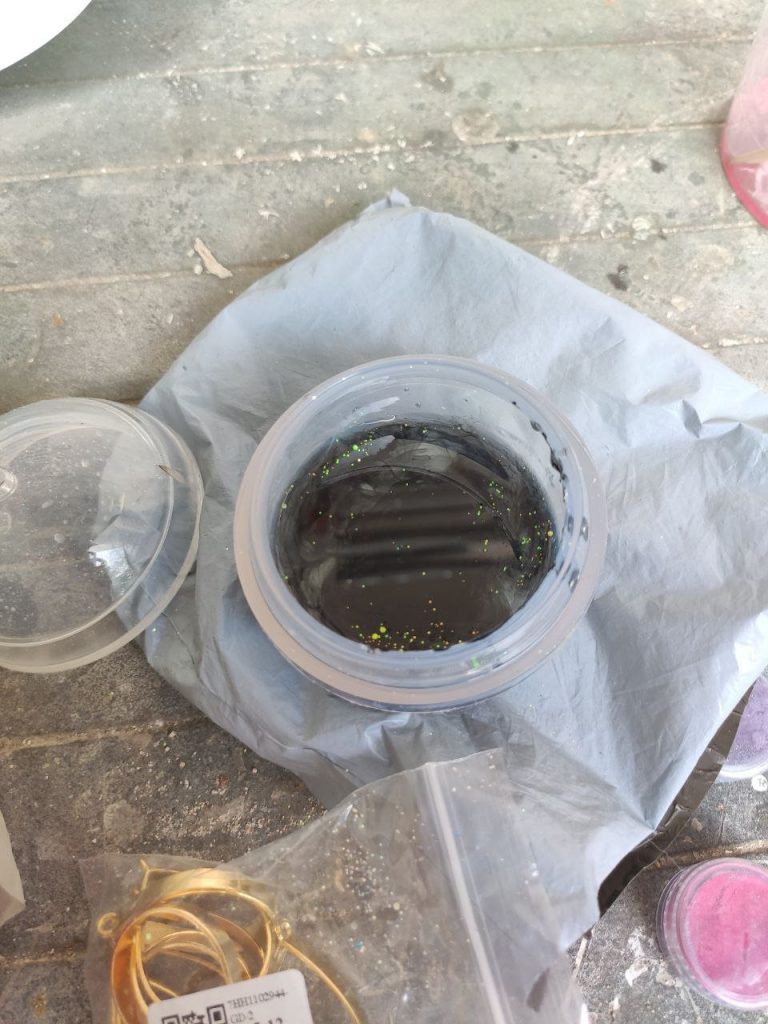
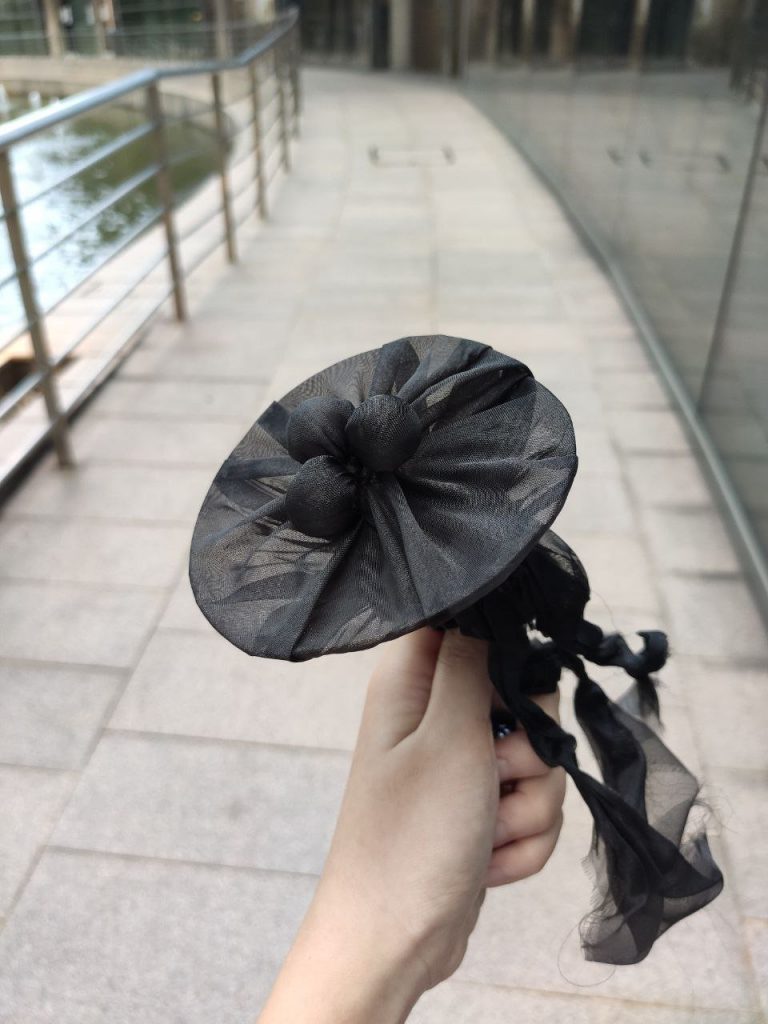
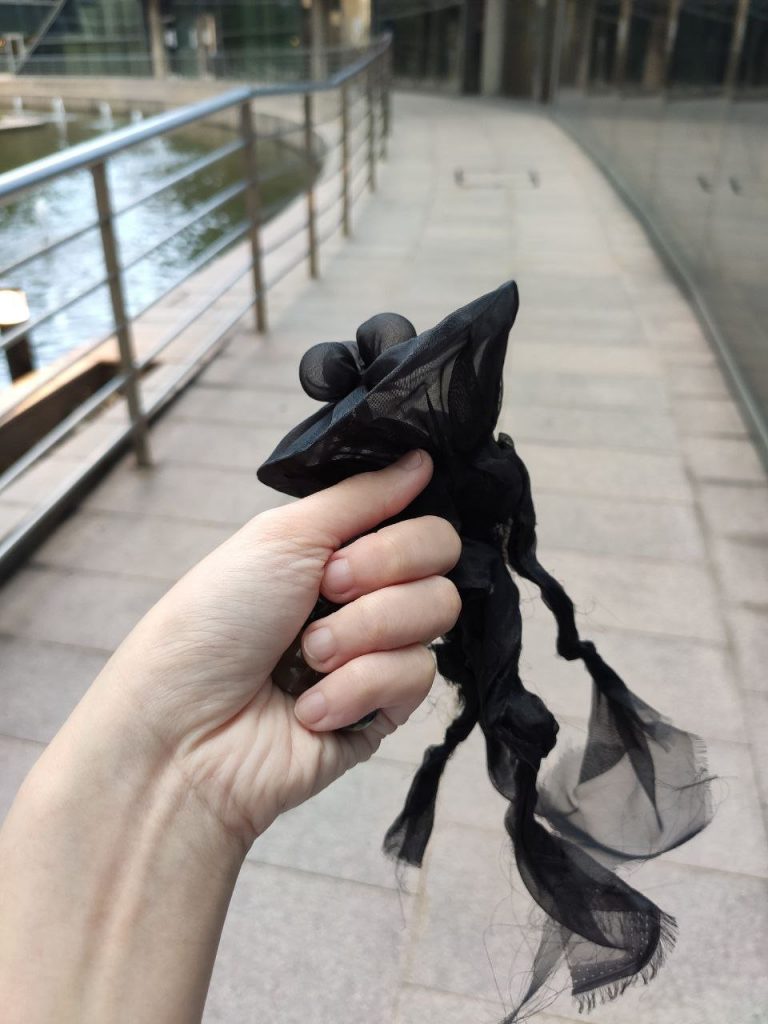
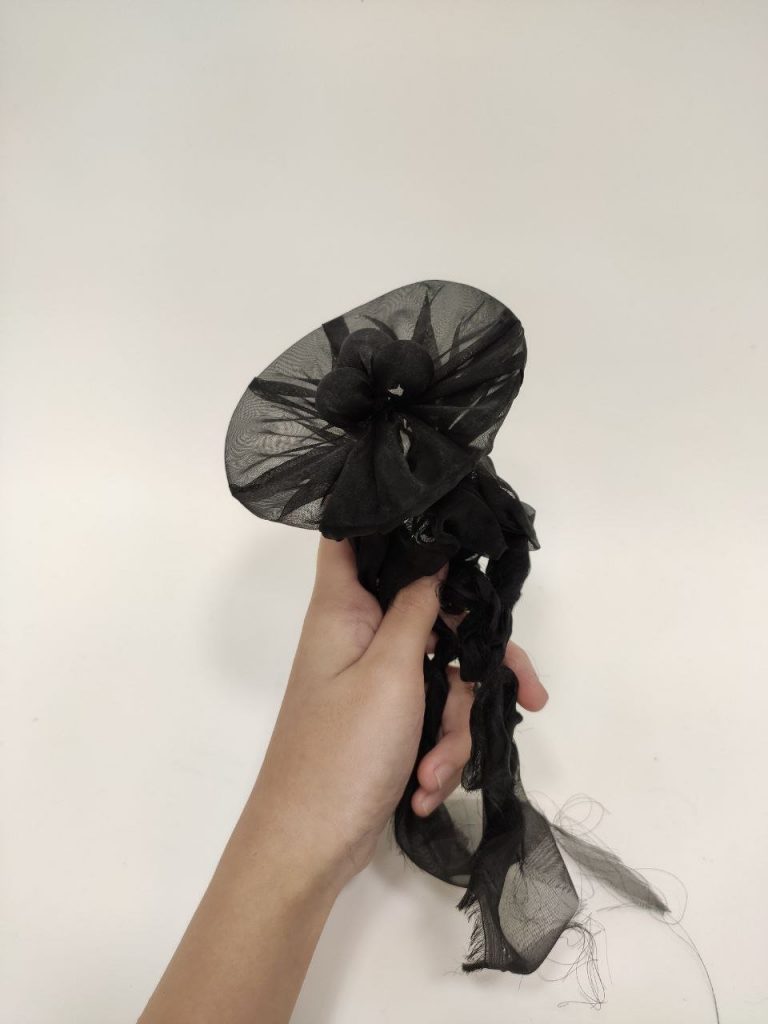
Next, for the orb, I kind of regret putting the black at the base as when turned over, it just looks completely black. Perhaps I should have poured transparent resin first, add the galaxy and then add the black resin as the backdrop.
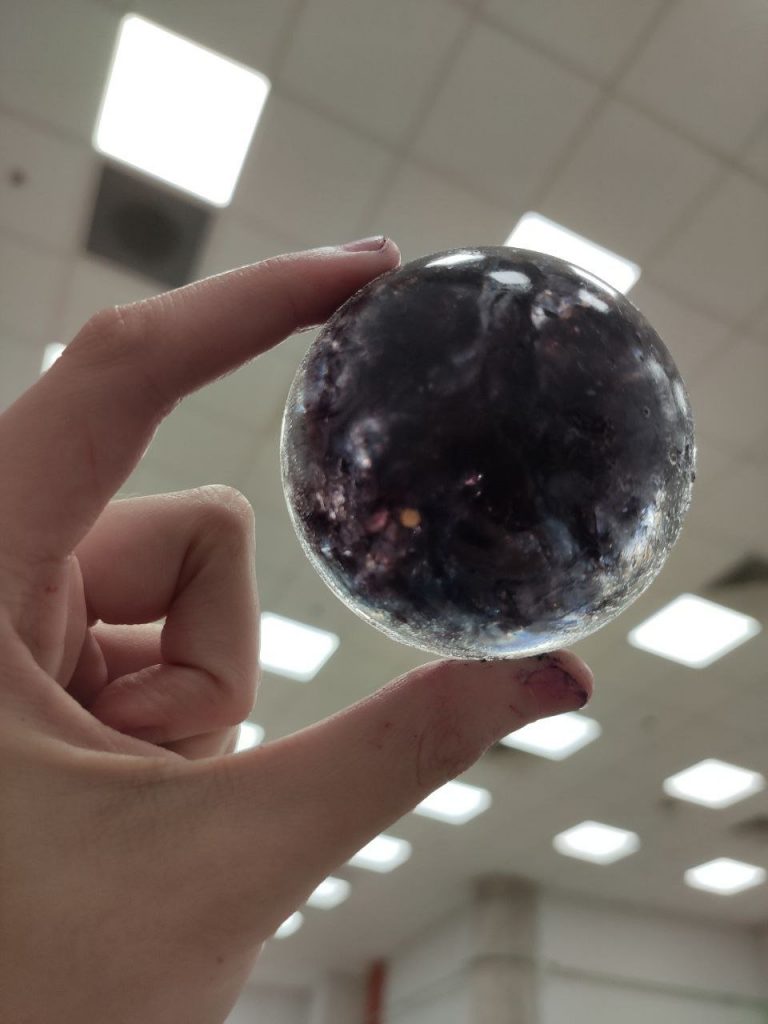
Nonetheless, when held up against the light does have a nice black cloudy effect.

The galaxy surface is nice as well.
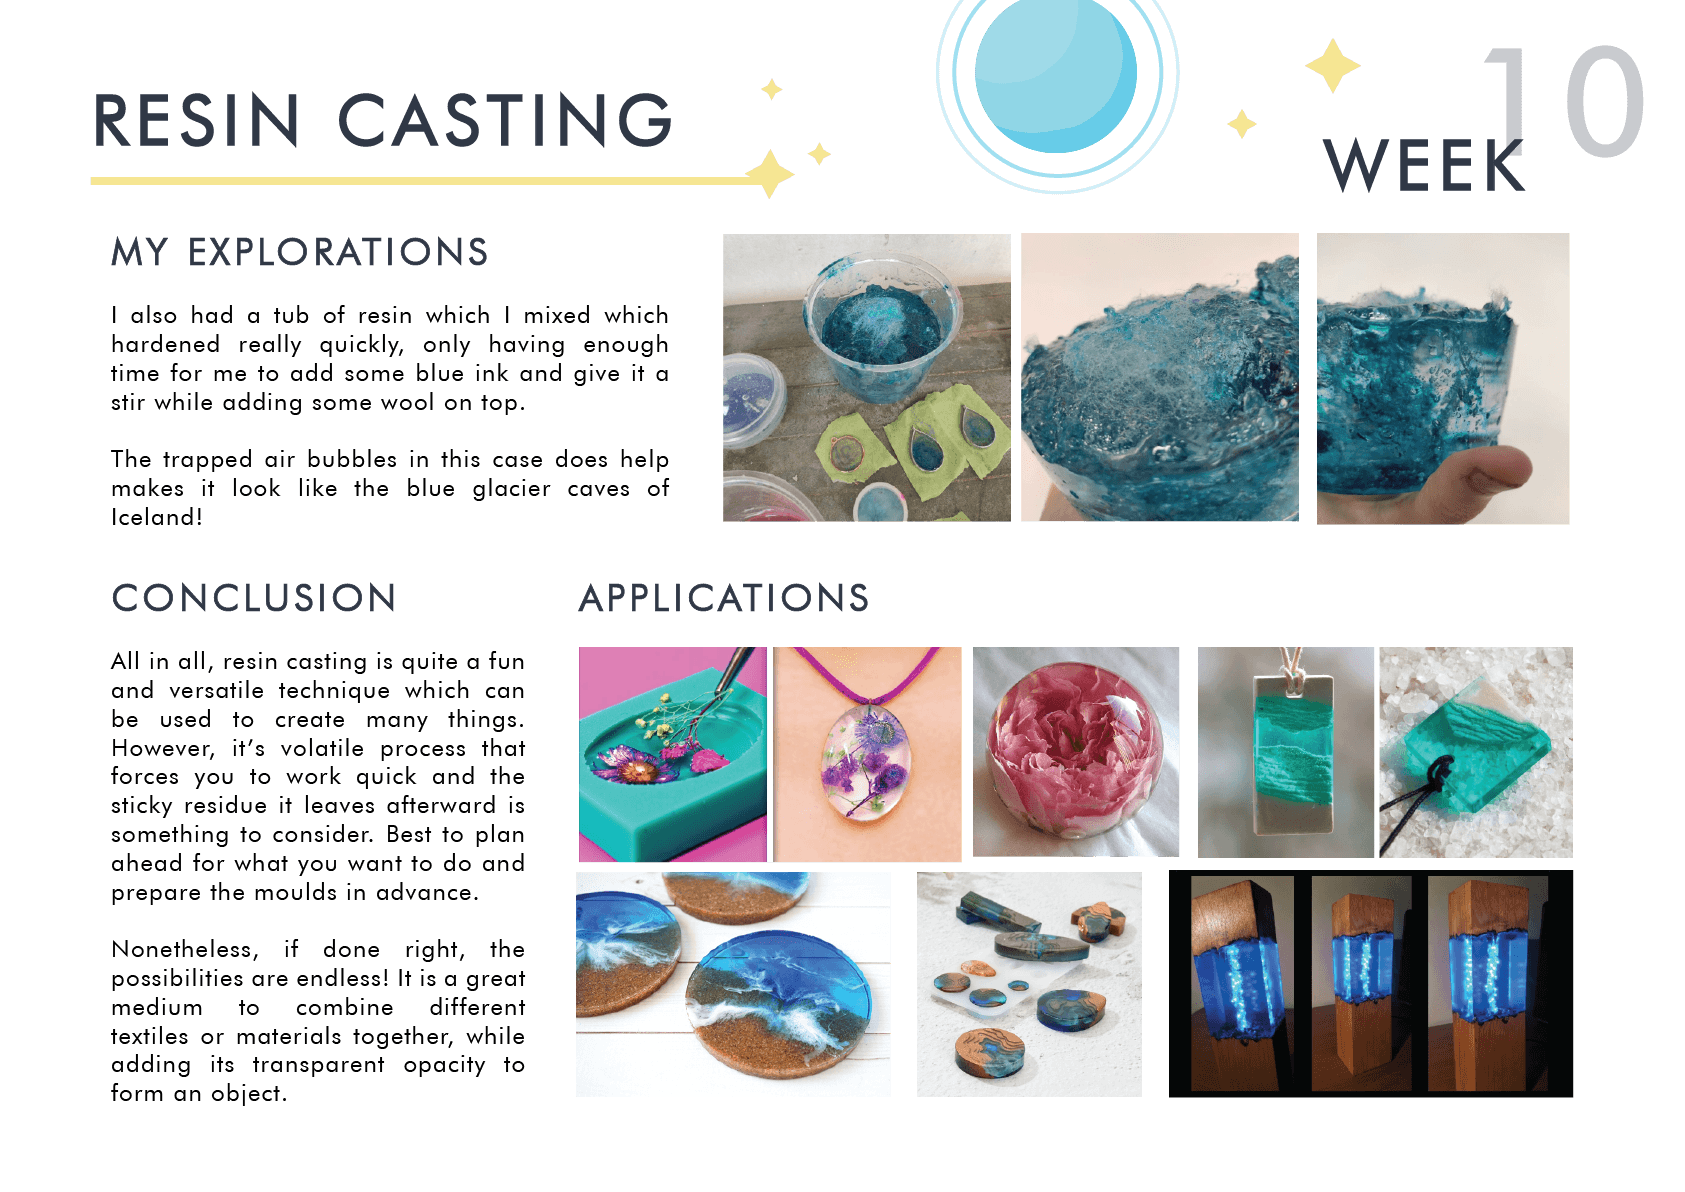
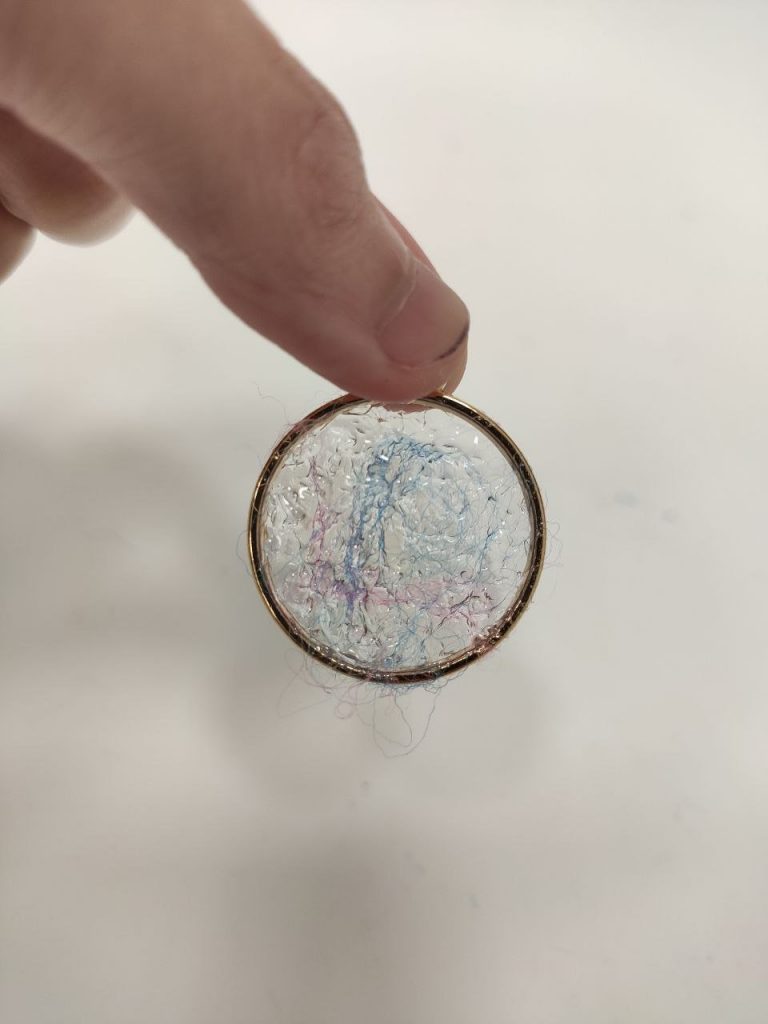
Lastly, for the unplanned resin which dried faster than expected, has a nice texture that goes with the blue dye I mixed in before it dried.
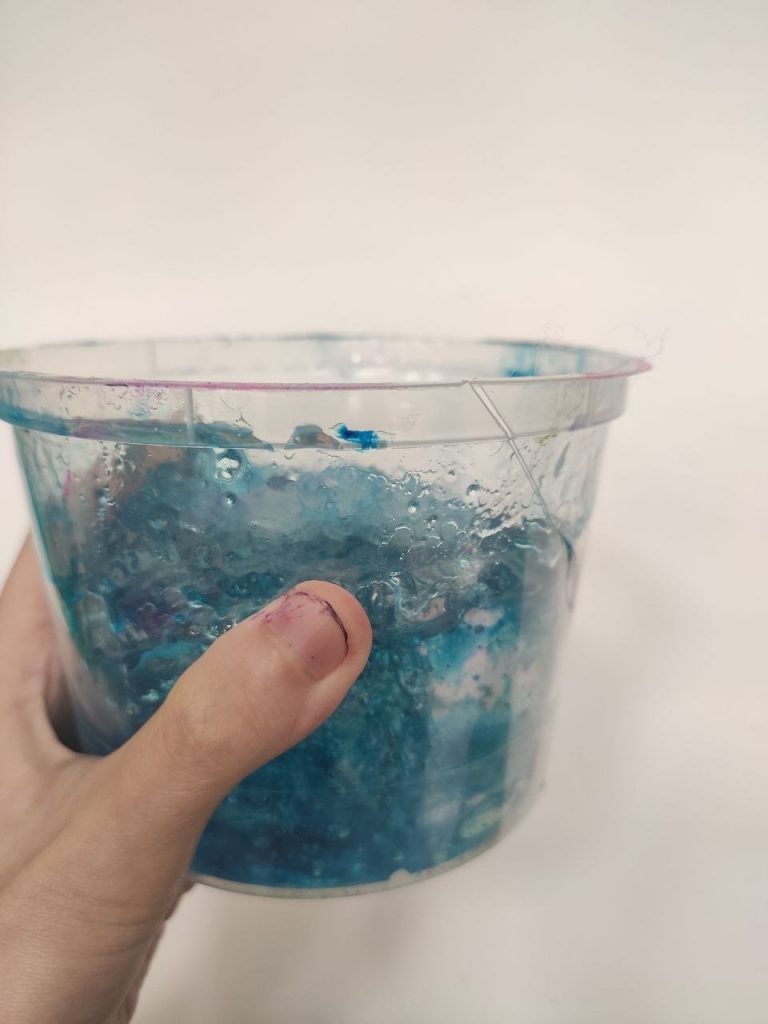
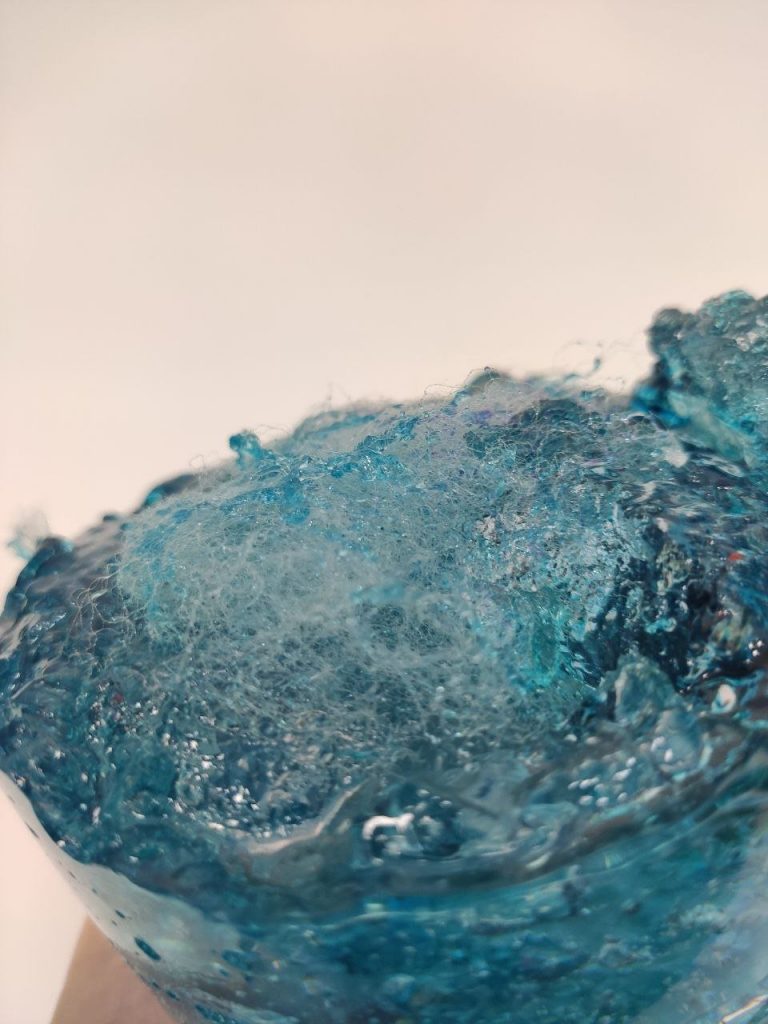
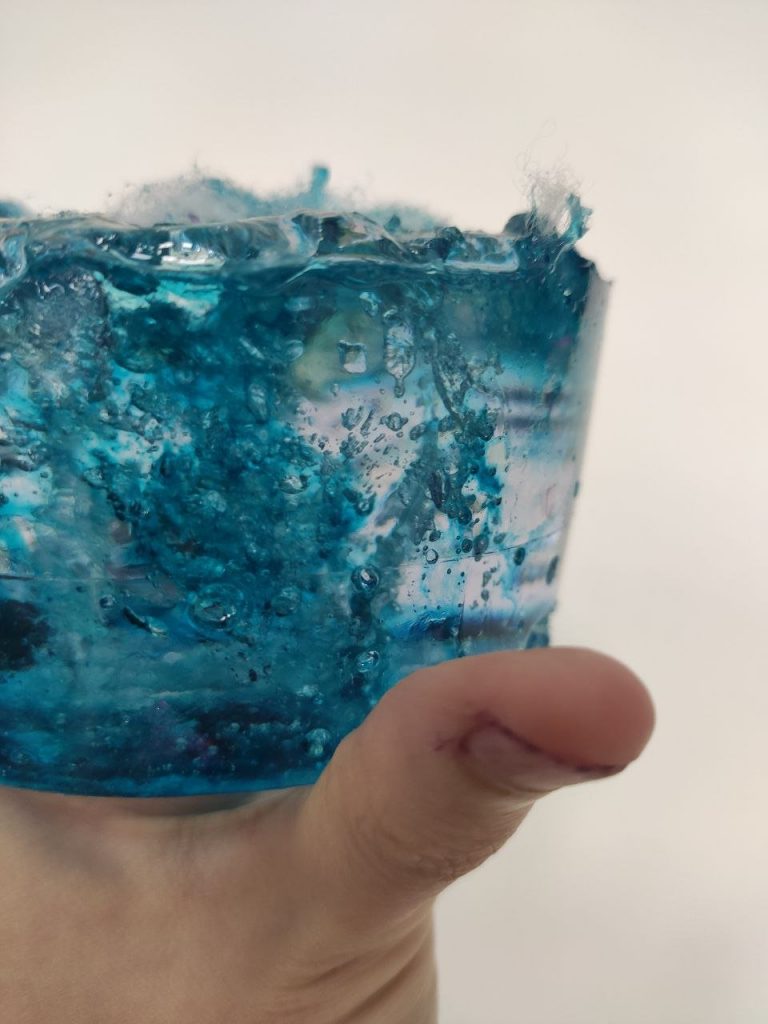
The trapped air bubbles in this case does help makes it look like the blue glacier caves of Iceland!

A P P L I C A T I O N S

Dried flower casting

Flower preservation

Beautiful Sea simulation
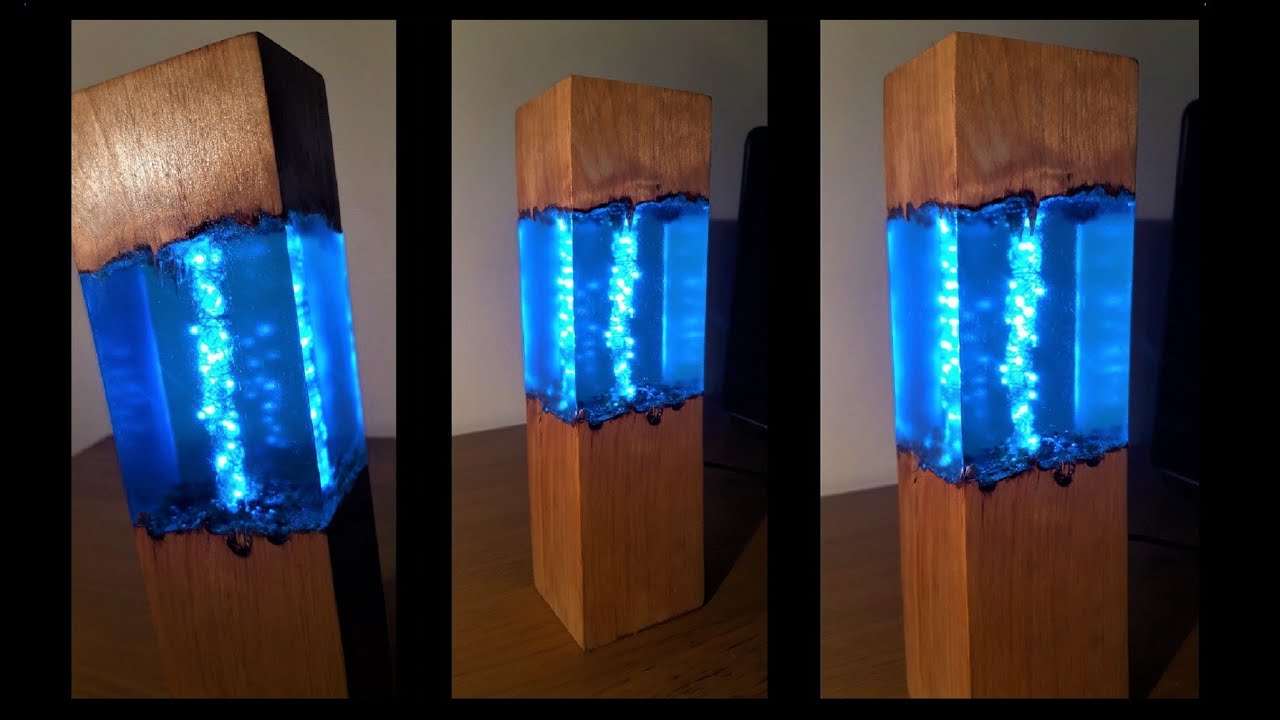
Its transparency makes it great for making lamps!
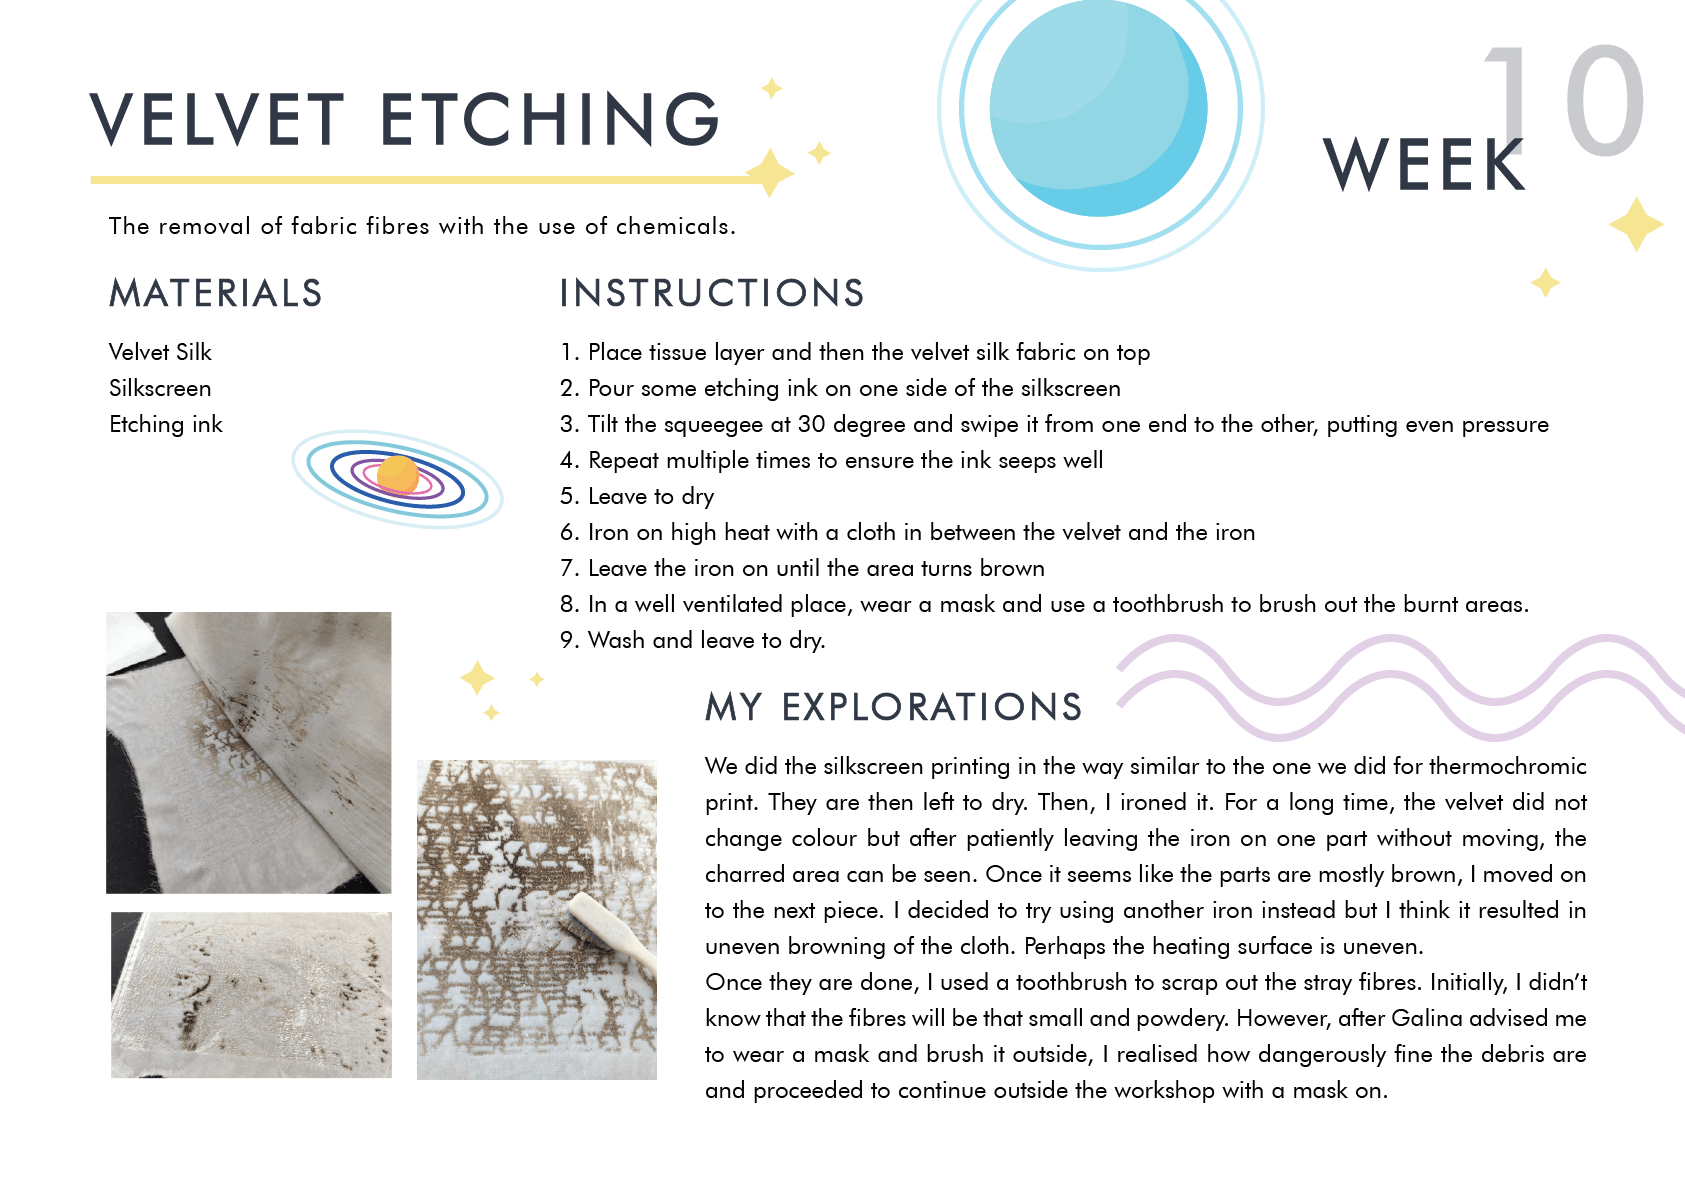
Removal of colour from fabrics through chemical means.
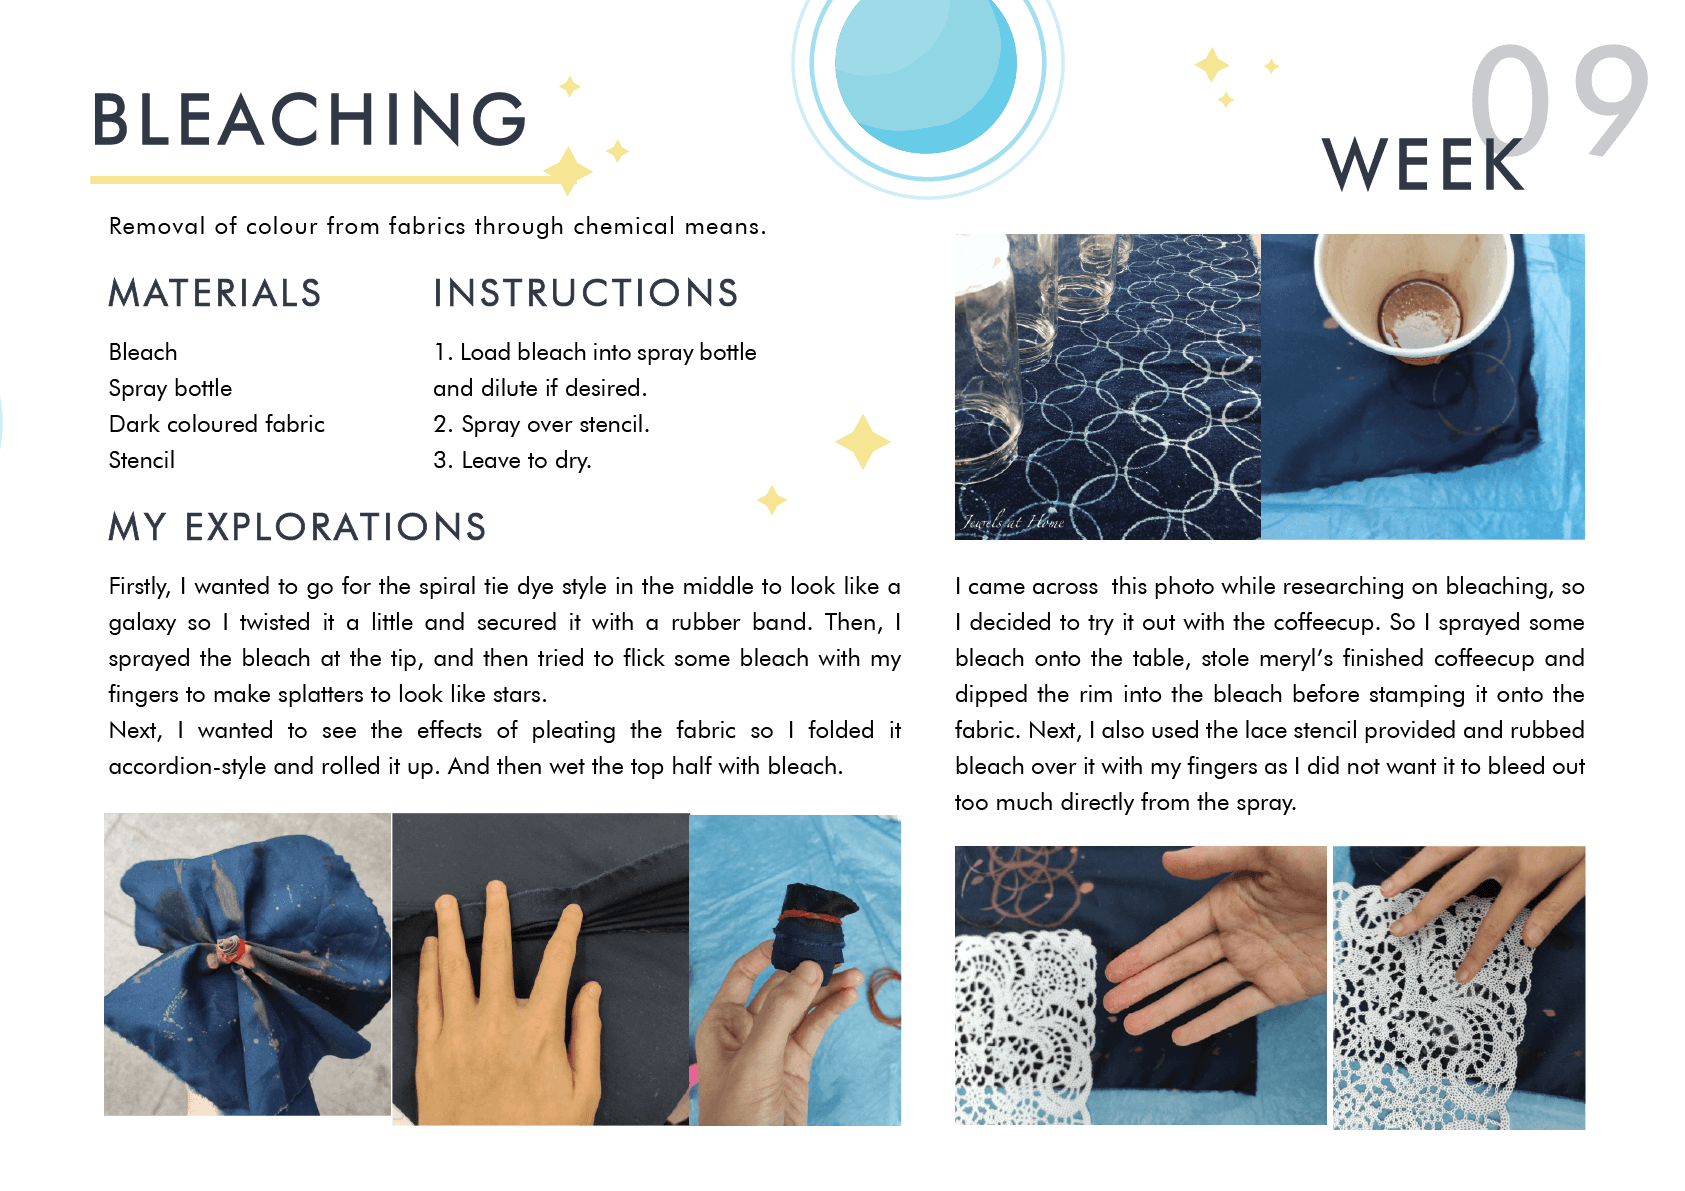
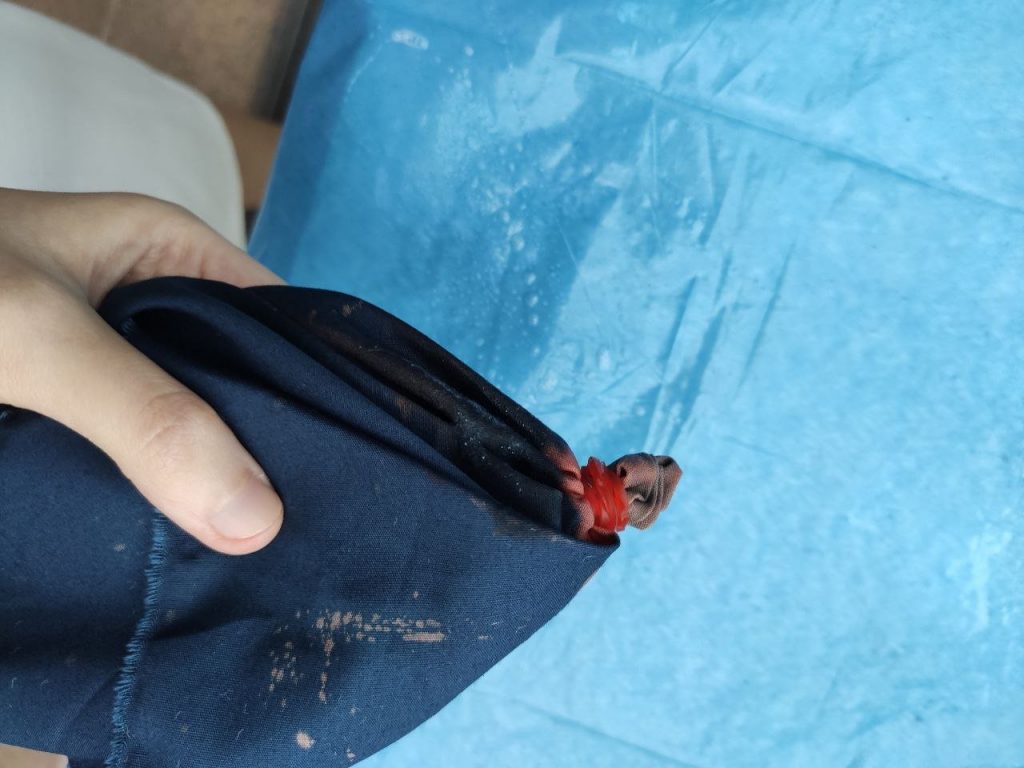
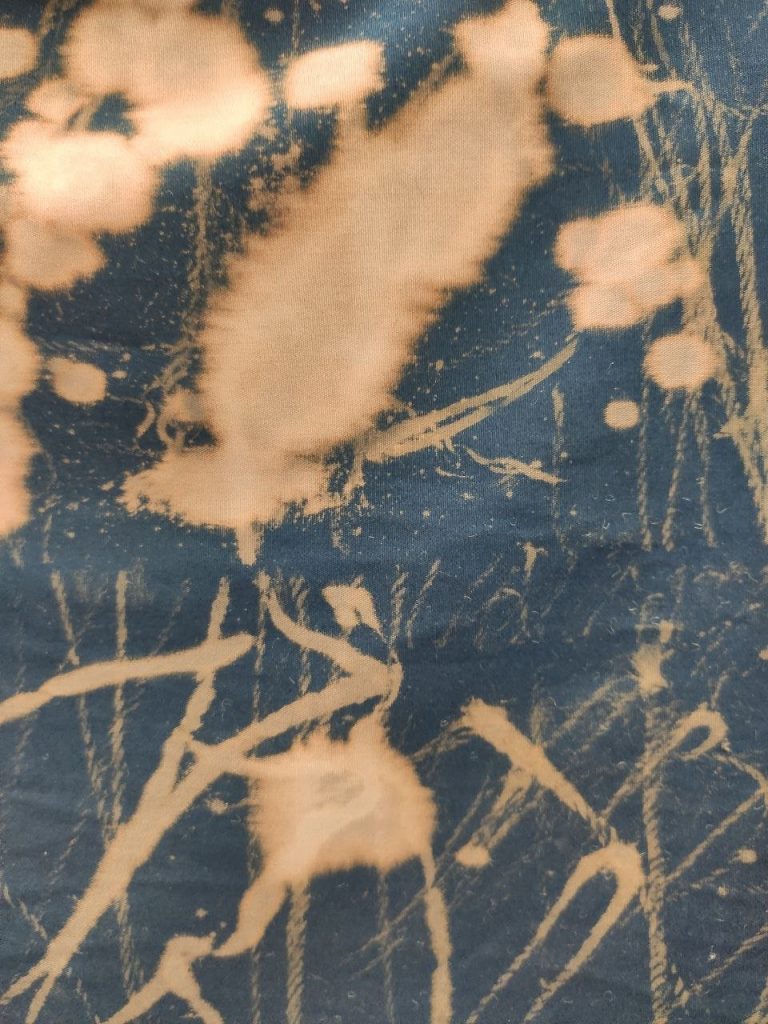
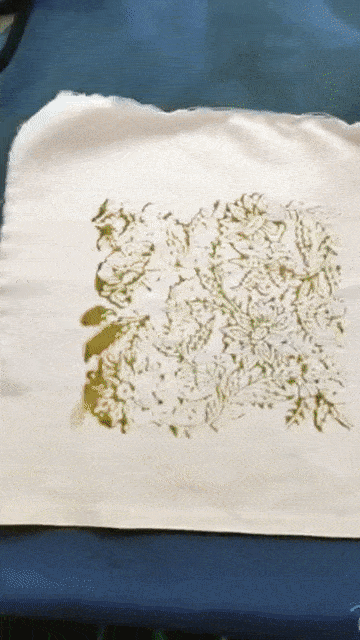
Firstly, I wanted to go for the spiral tie dye style in the middle to look like a galaxy so I twisted it a little and secured it with a rubber band.
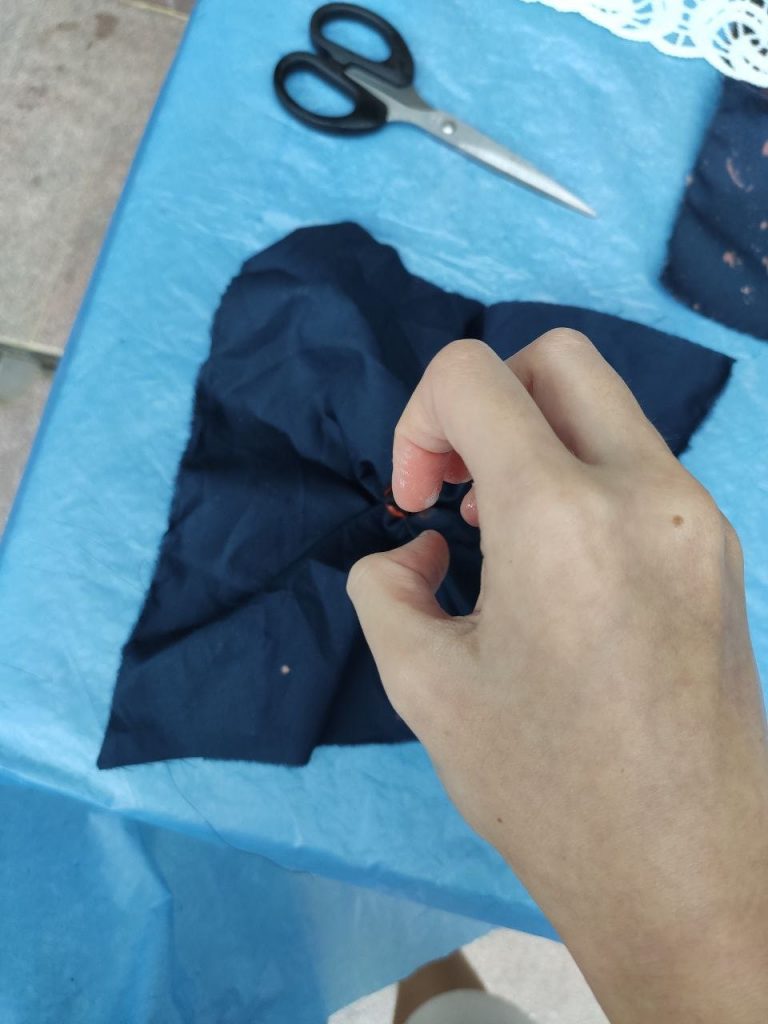
Then, I sprayed the bleach at the tip, and then tried to flick some bleach with my fingers to make splatters to look like stars.
Next, I wanted to see the effects of pleating the fabric so I folded it accordion-style and rolled it up.

And then wet the top half with bleach.
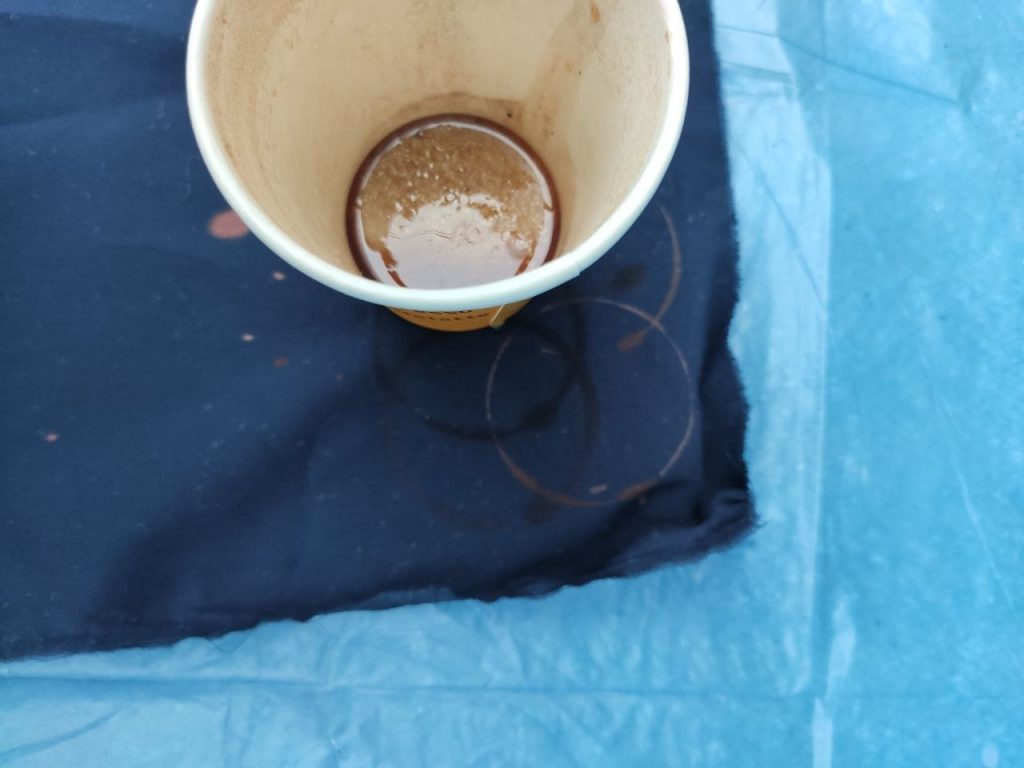
I came across this photo while researching on bleaching, so I decided to try it out with the coffeecup.

So I sprayed some bleach onto the table, stole meryl’s finished coffeecup and dipped the rim into the bleach before stamping it onto the fabric.


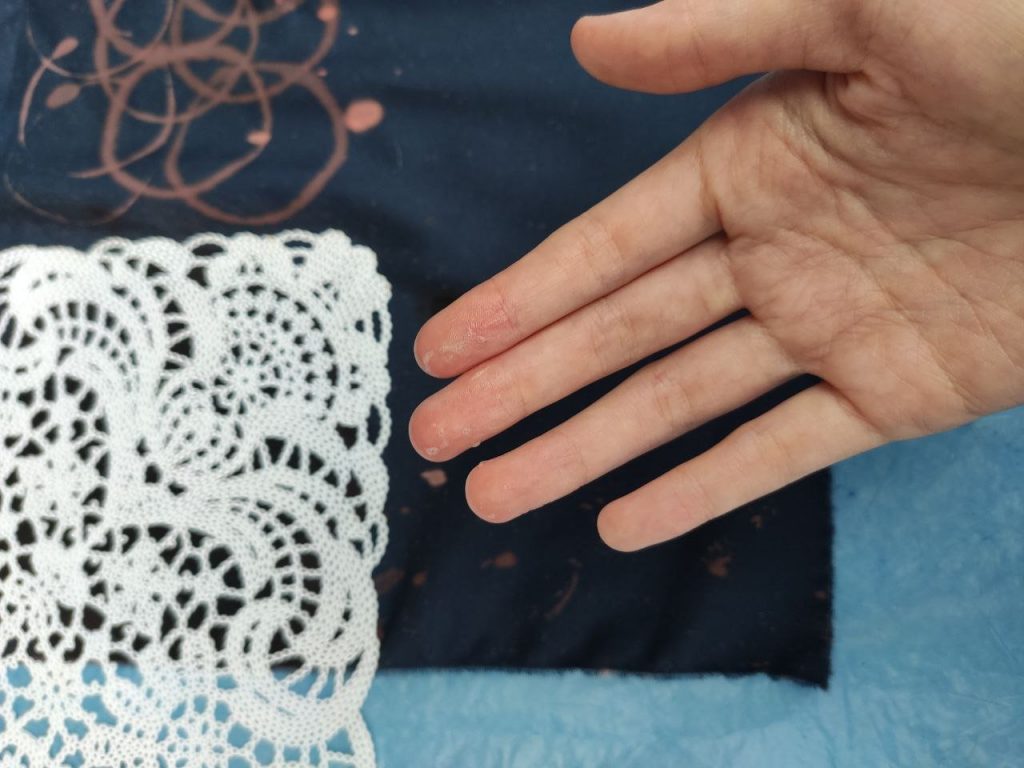
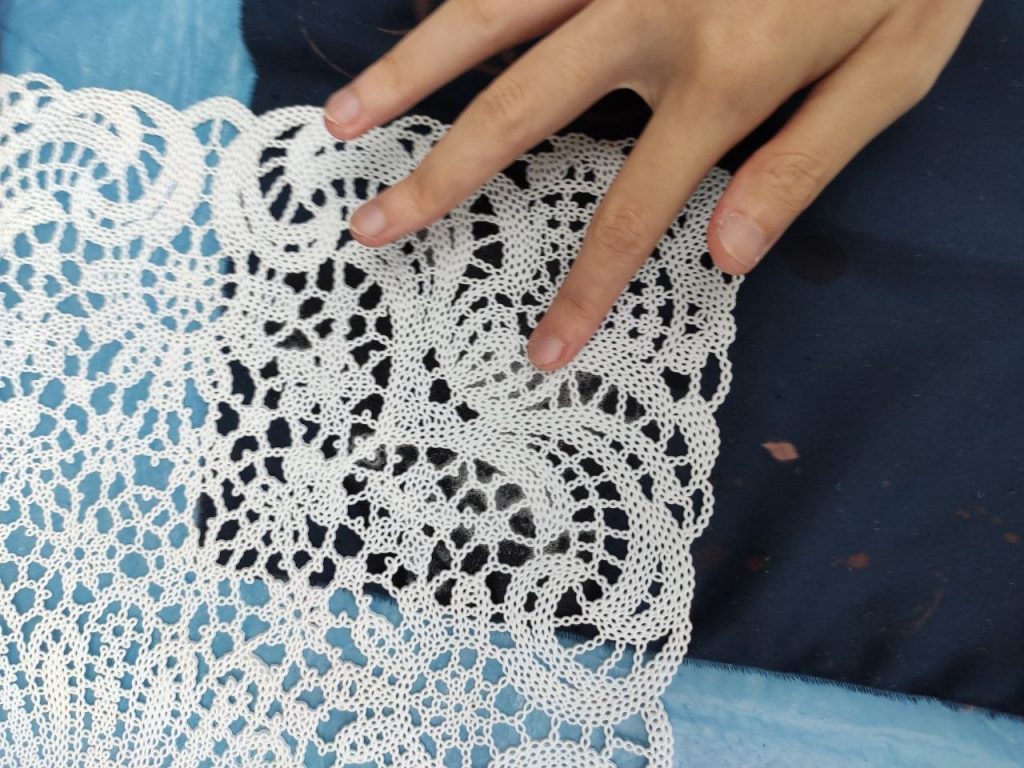
Next, I also used the lace stencil provided and rubbed bleach over it with my fingers as I did not want it to bleed out too much directly from the spray.
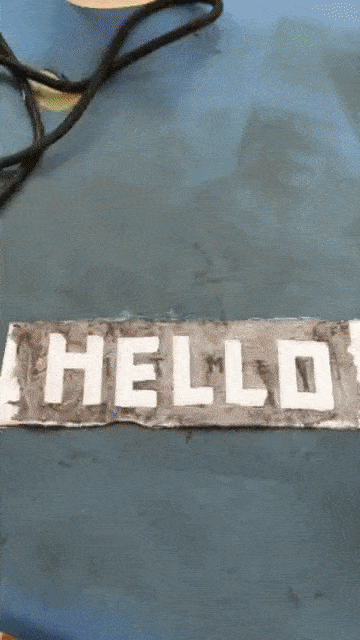
The last method is inspired from a module I took in year 1 where we got to play with black ink on white paper.
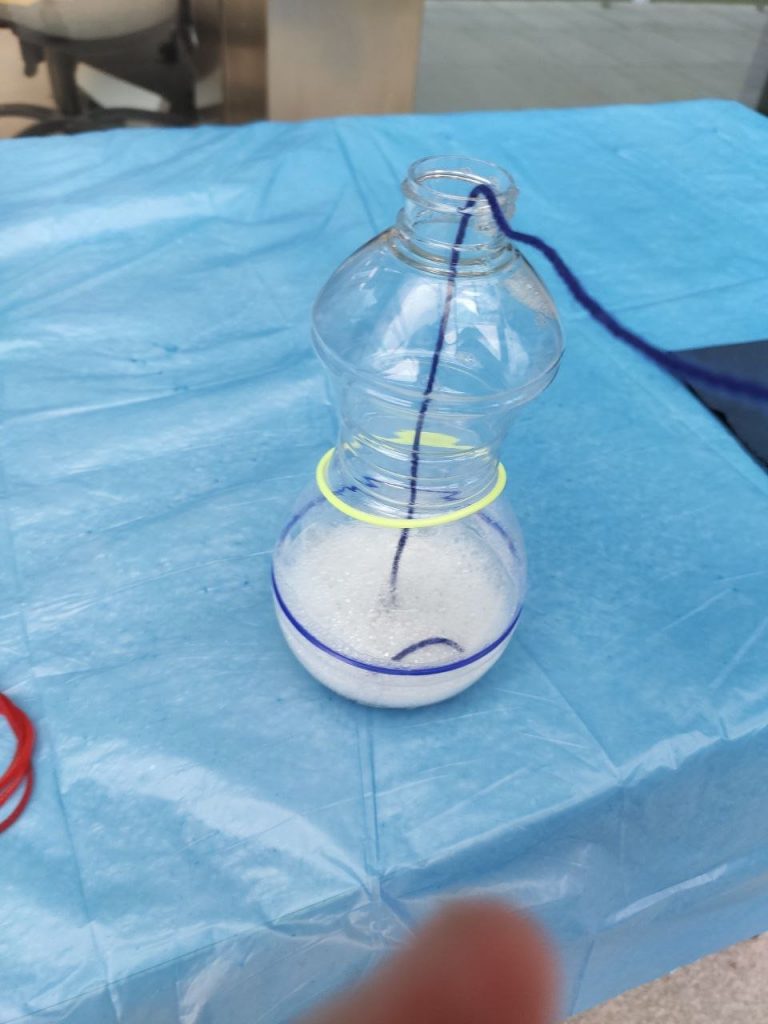
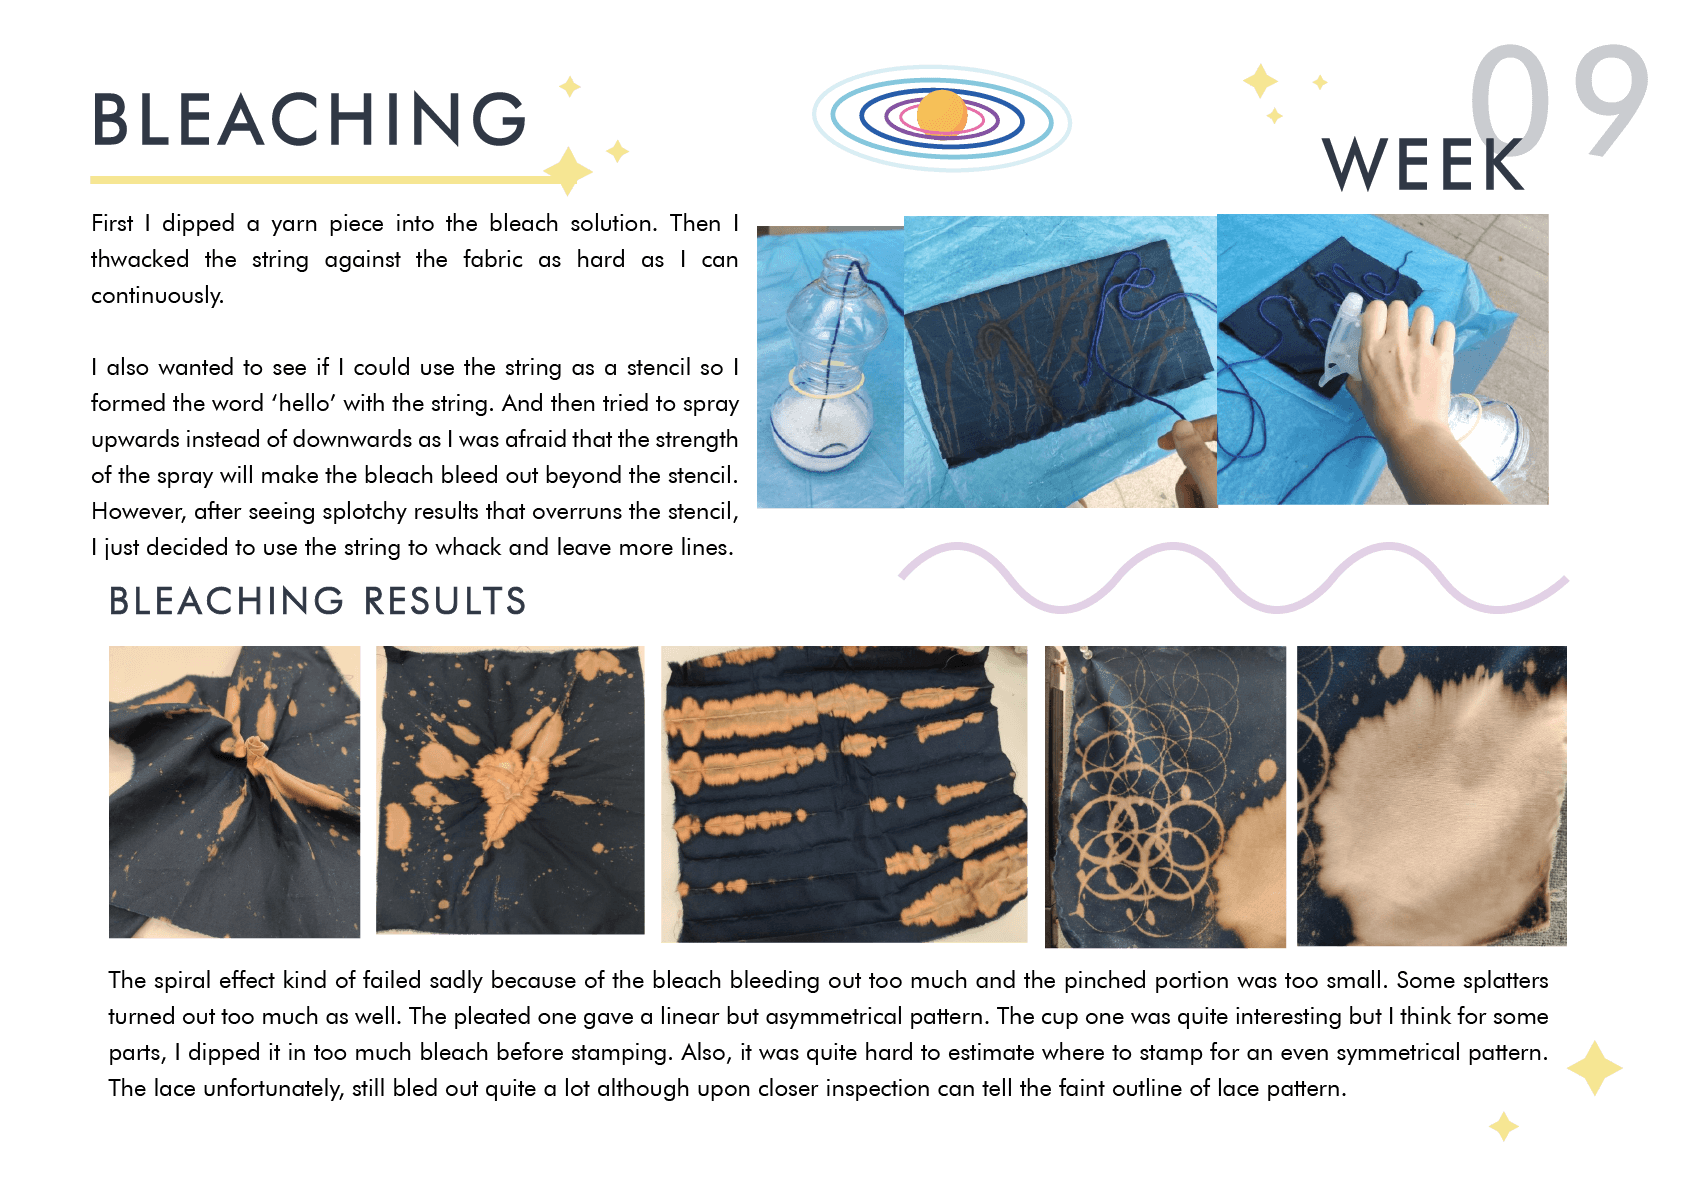
So first I dipped a yarn piece into the bleach solution.
Then I thwacked the string against the fabric as hard as I can continuously.
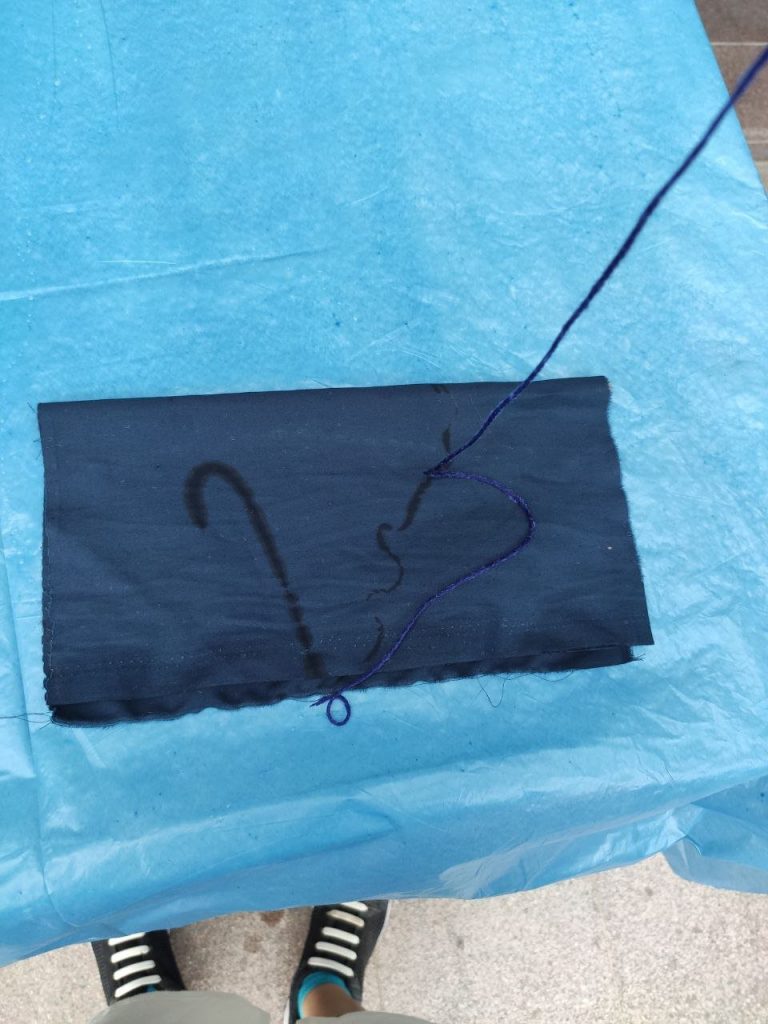
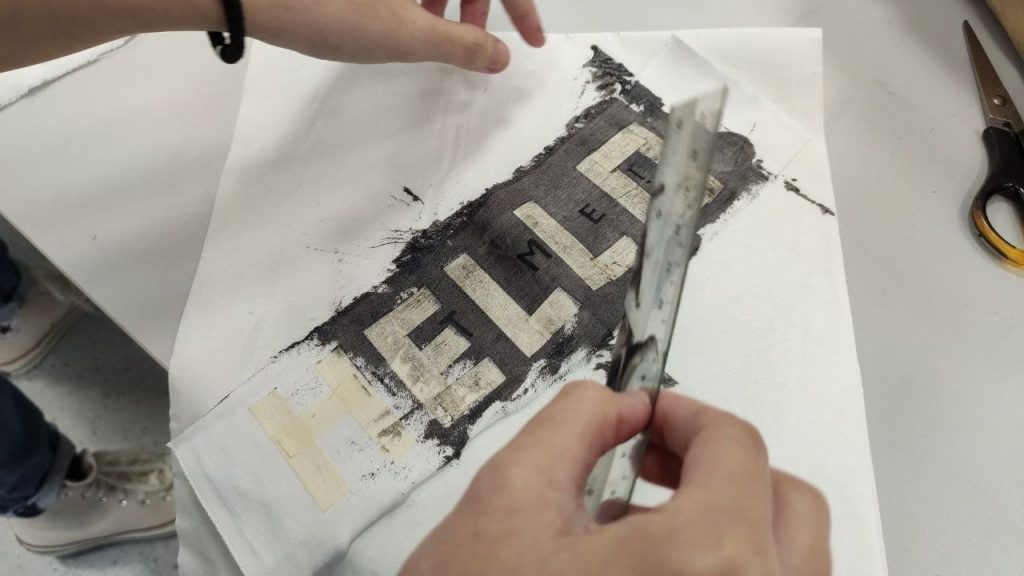
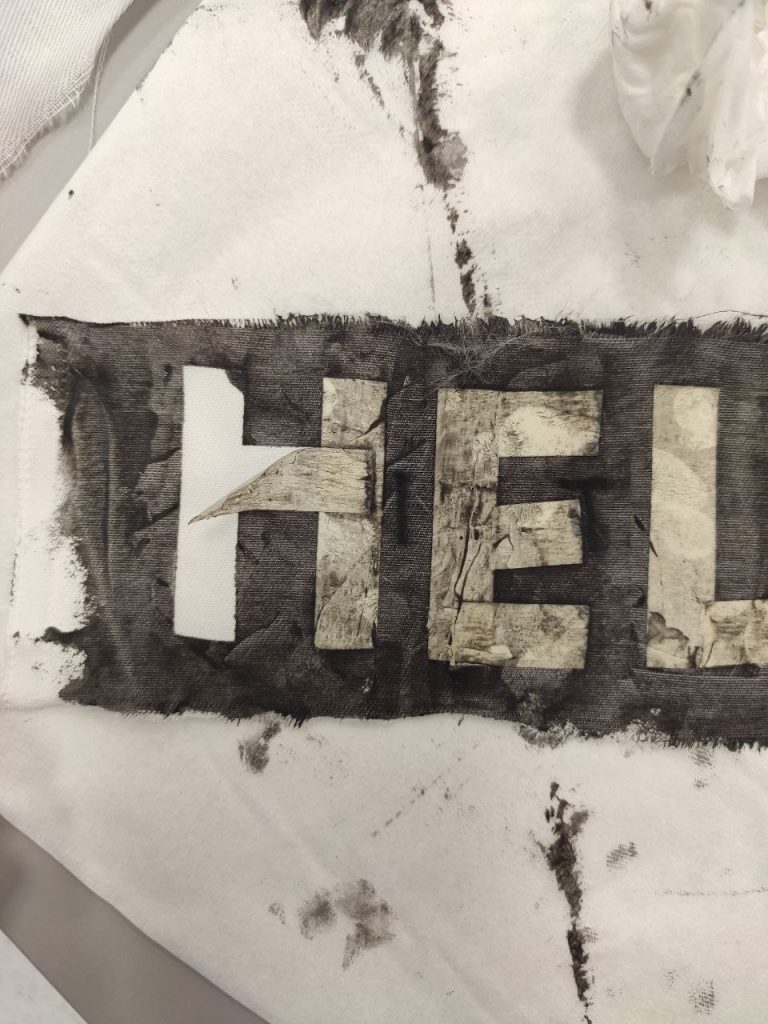
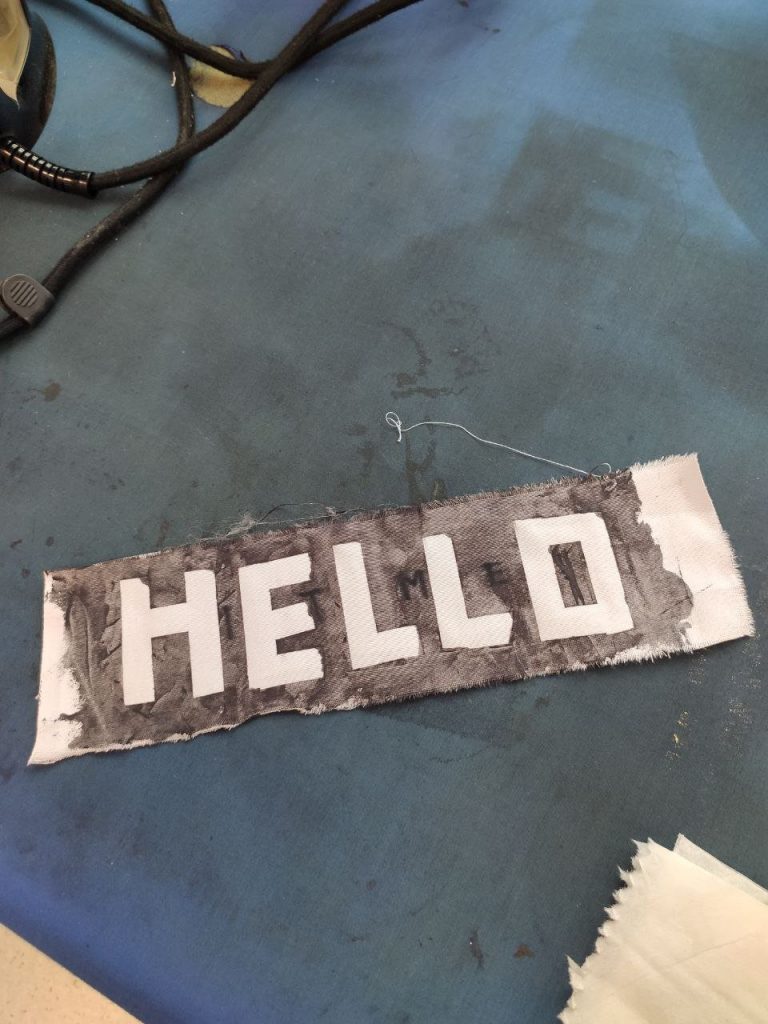
I also wanted to see if I could use the string as a stencil so I formed the word ‘hello’ with the string.
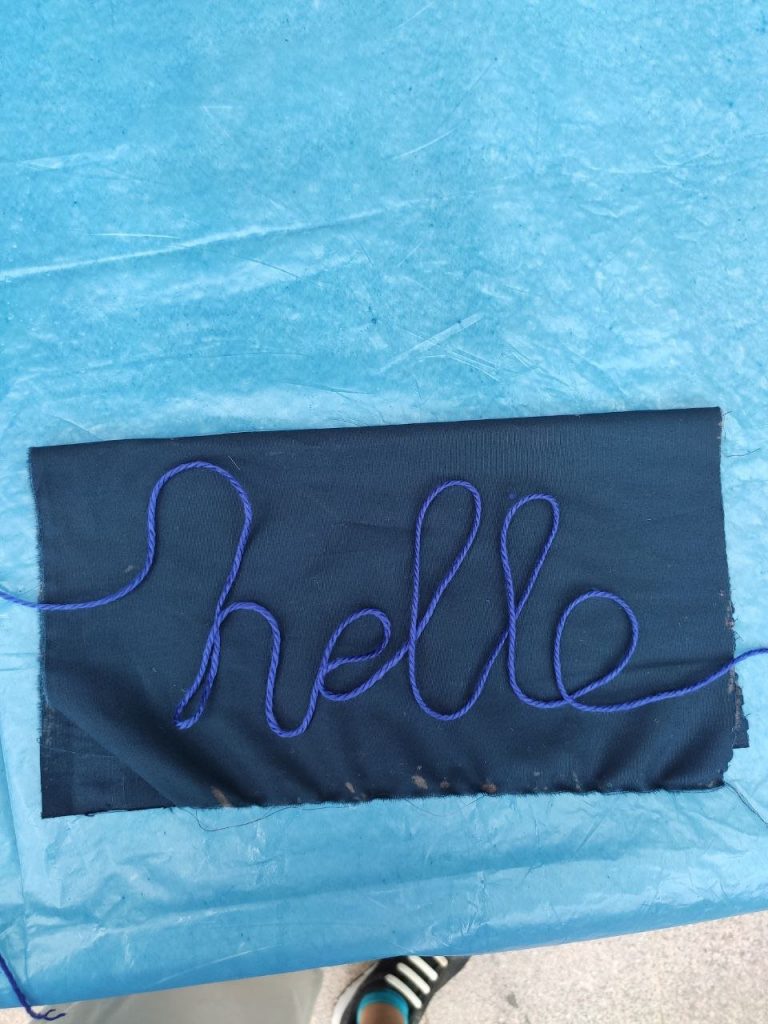
And then tried to spray upwards instead of downwards as I was afraid that the strength of the spray will make the bleach bleed out beyond the stencil.
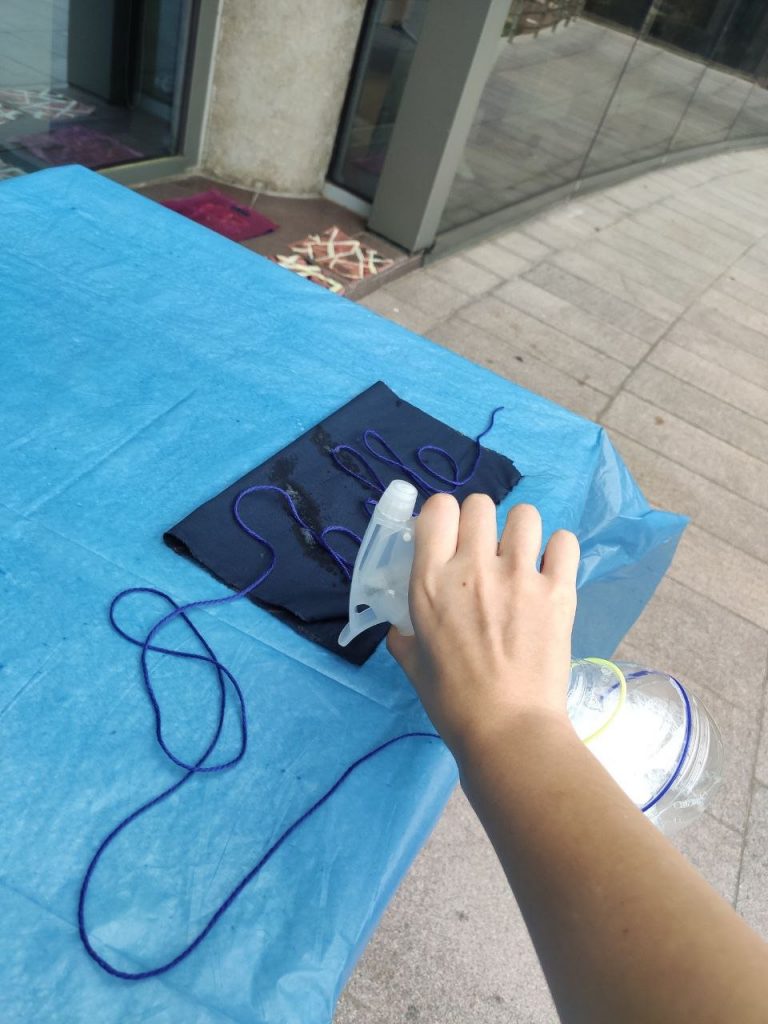
However, after seeing splotchy results that overruns the stencil, I just decided to use the string to whack and leave more lines.
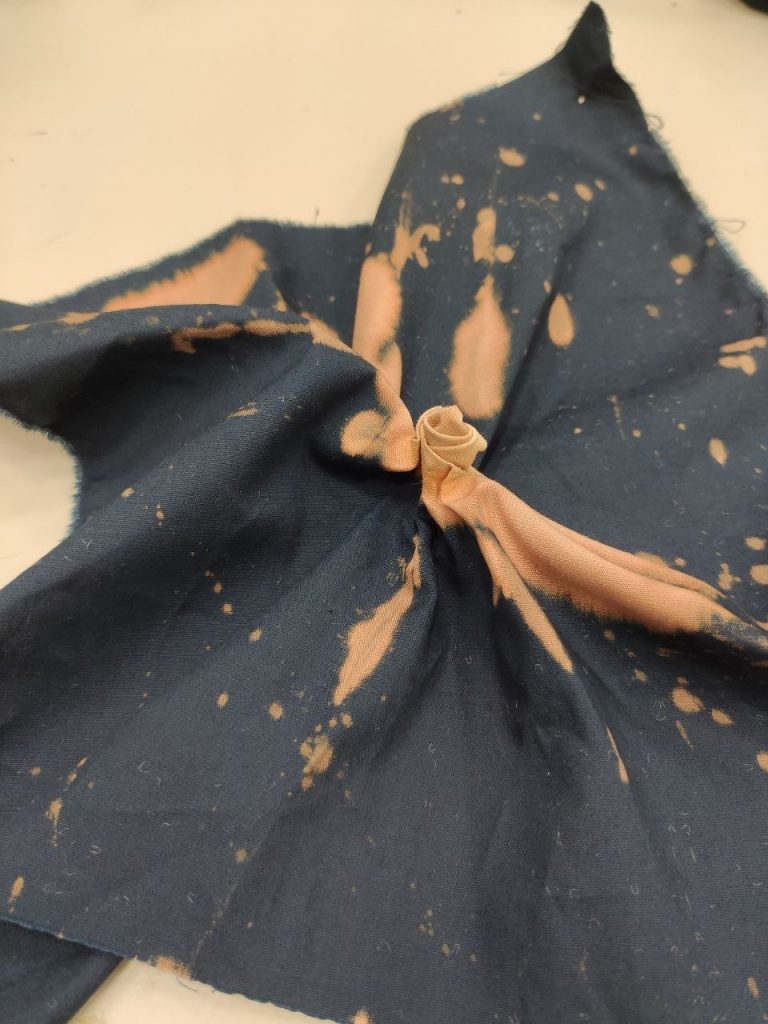
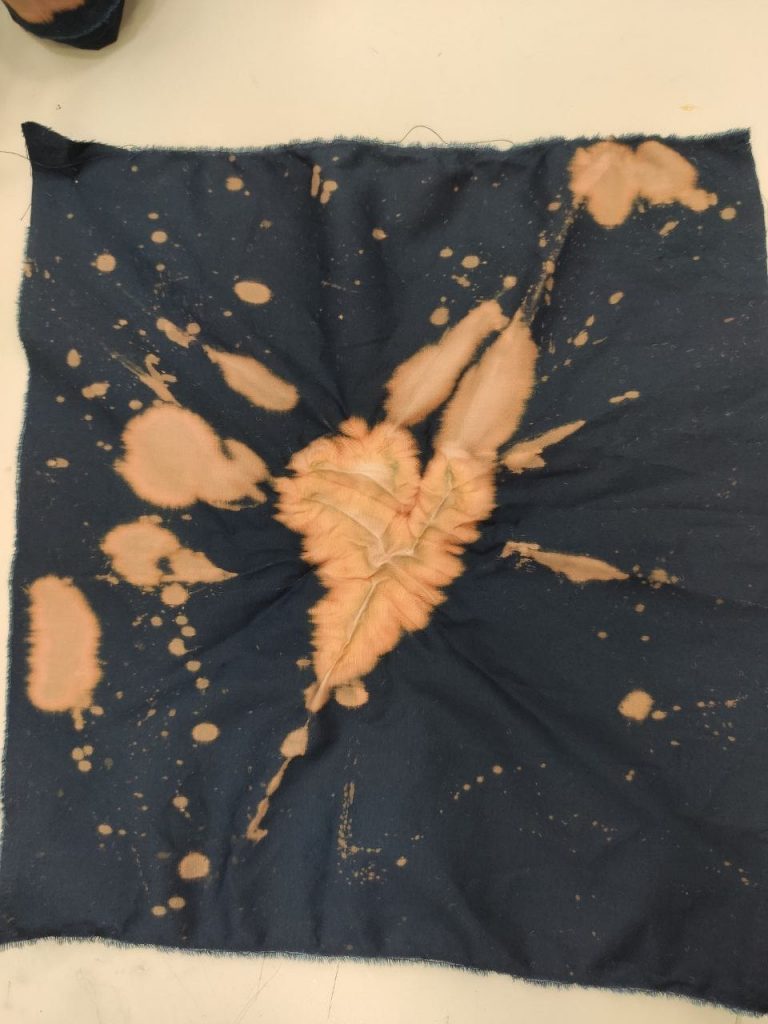
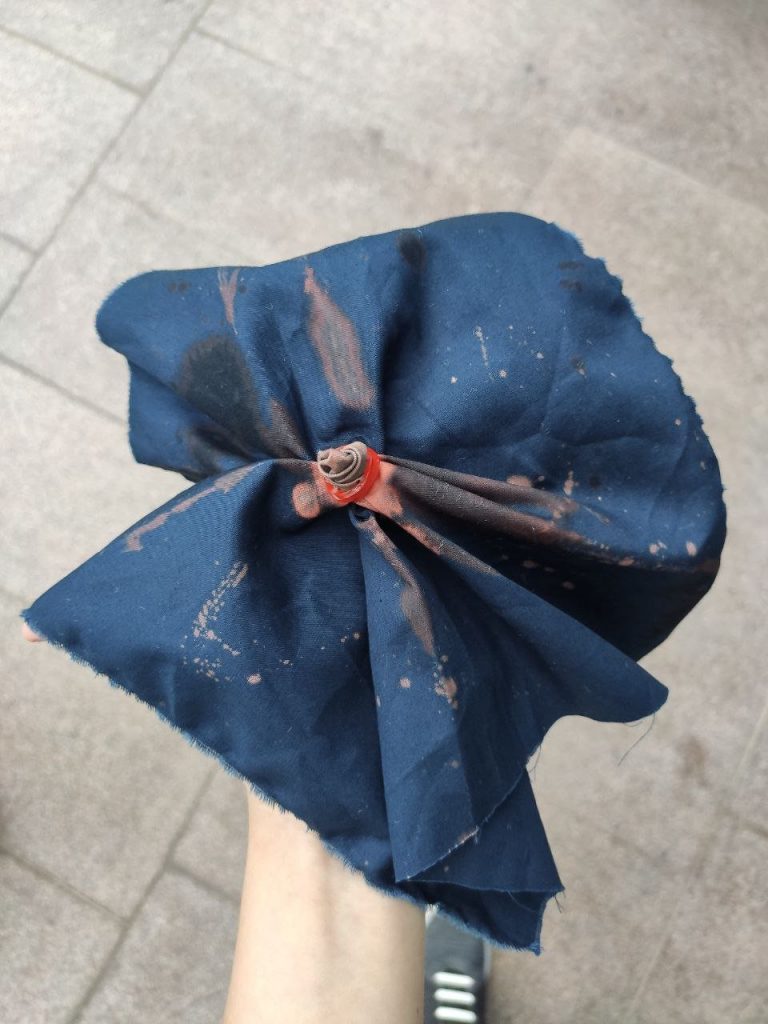
So the spiral effect kind of failed sadly, I think perhaps because of the bleach bleeding out too much as well as the pinched portion was too small. Some splatters turned out too much as well.
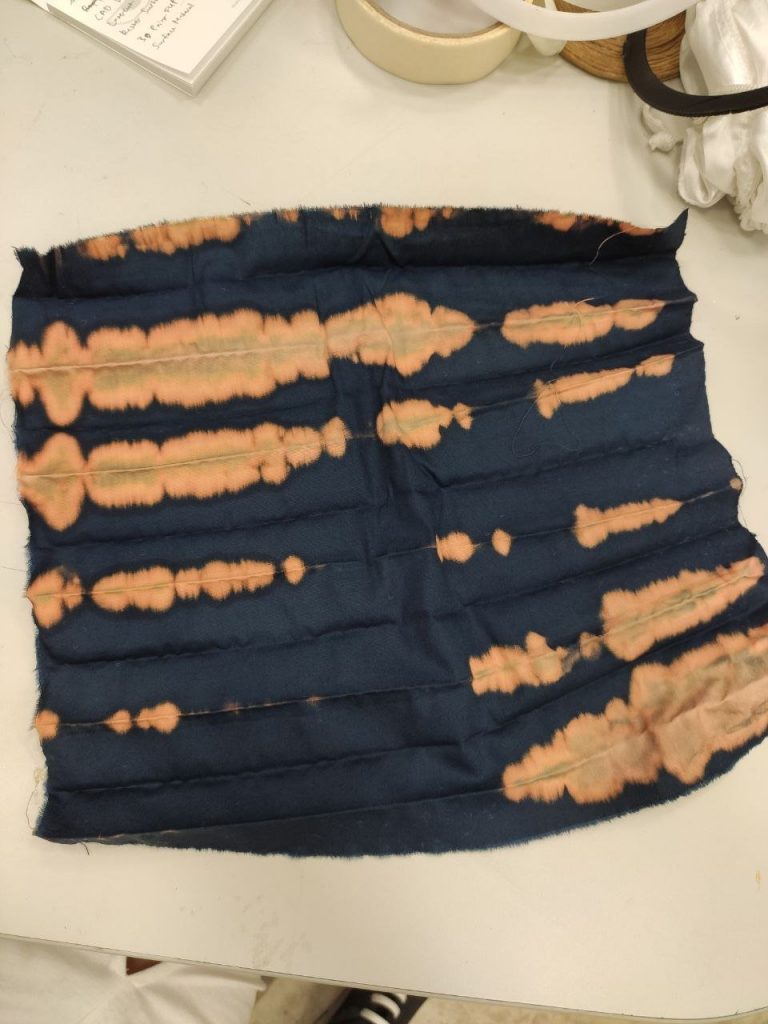
The pleated one gave a linear but asymmetrical pattern.
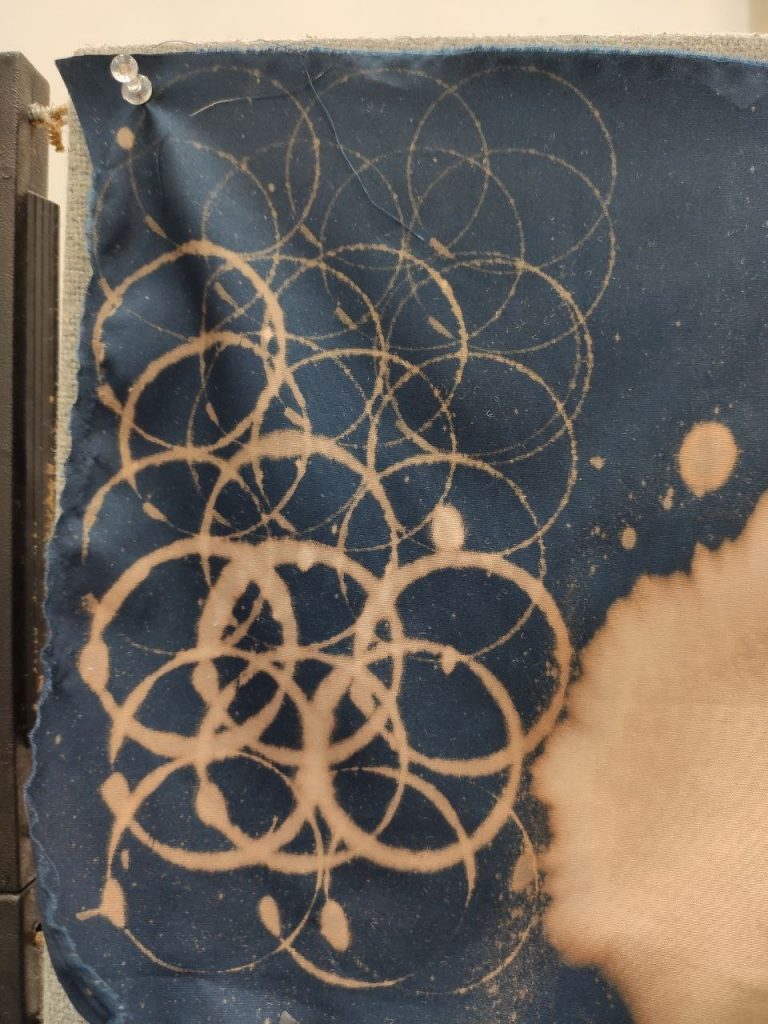
The cup one was quite interesting but I think for some parts, I dipped it in too much bleach before stamping. Also, it was quite hard to estimate where to stamp for an even symmetrical pattern.
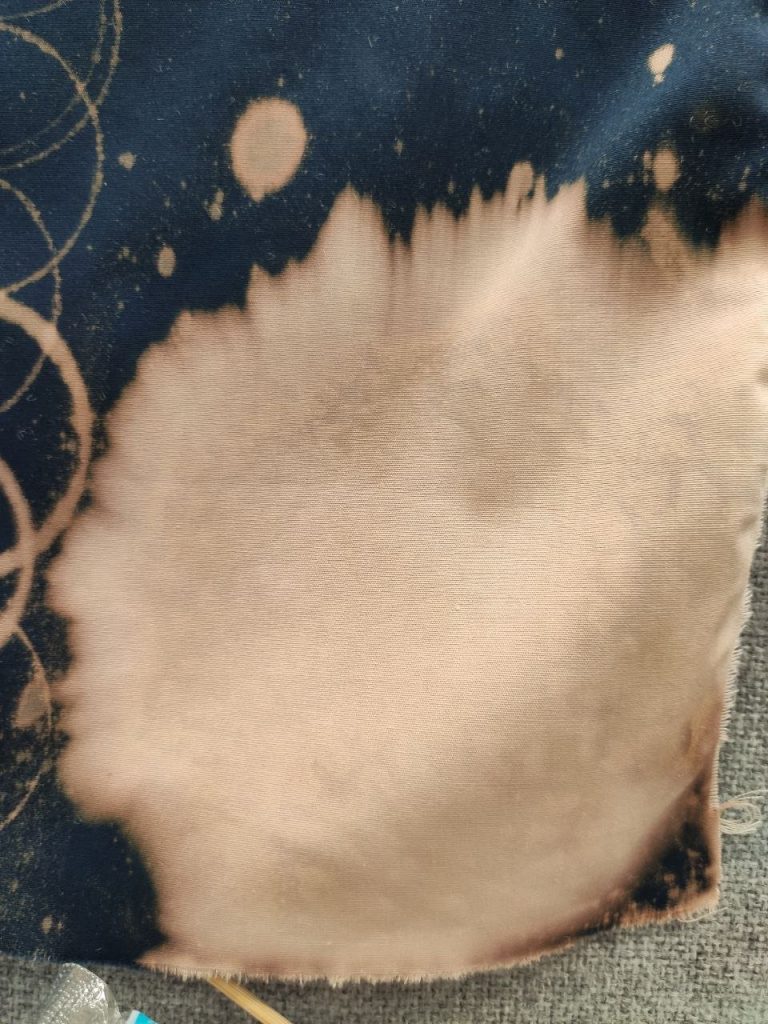
The lace unfortunately, still bled out quite a lot although upon closer inspection can tell the faint outline of lace pattern.
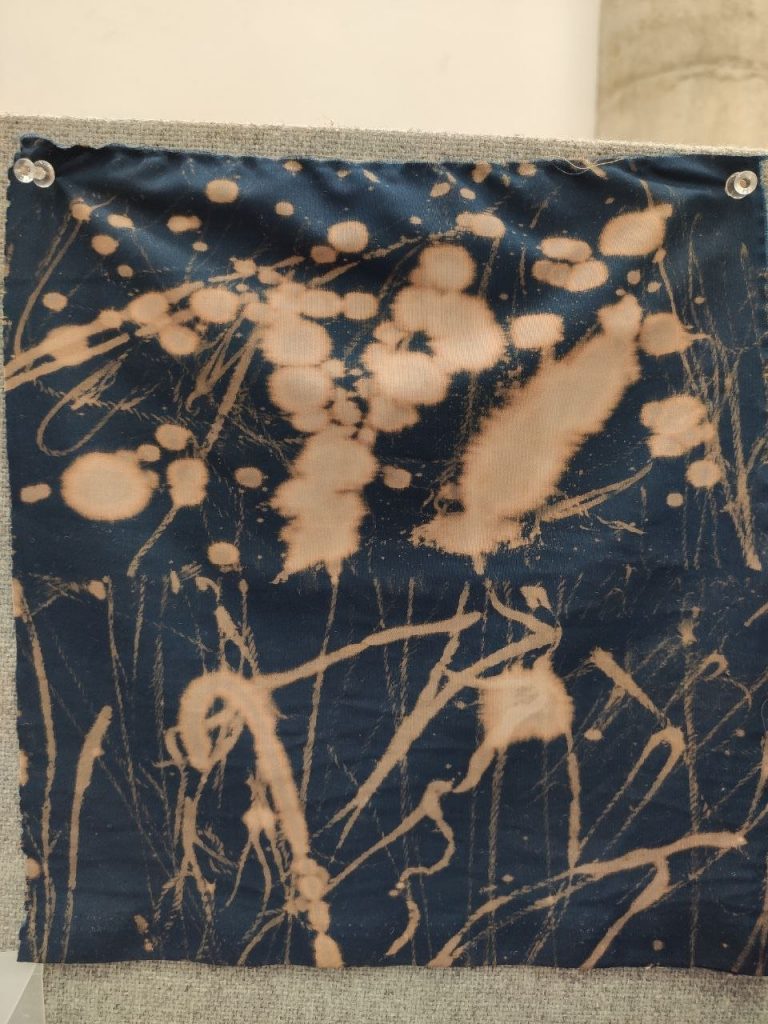
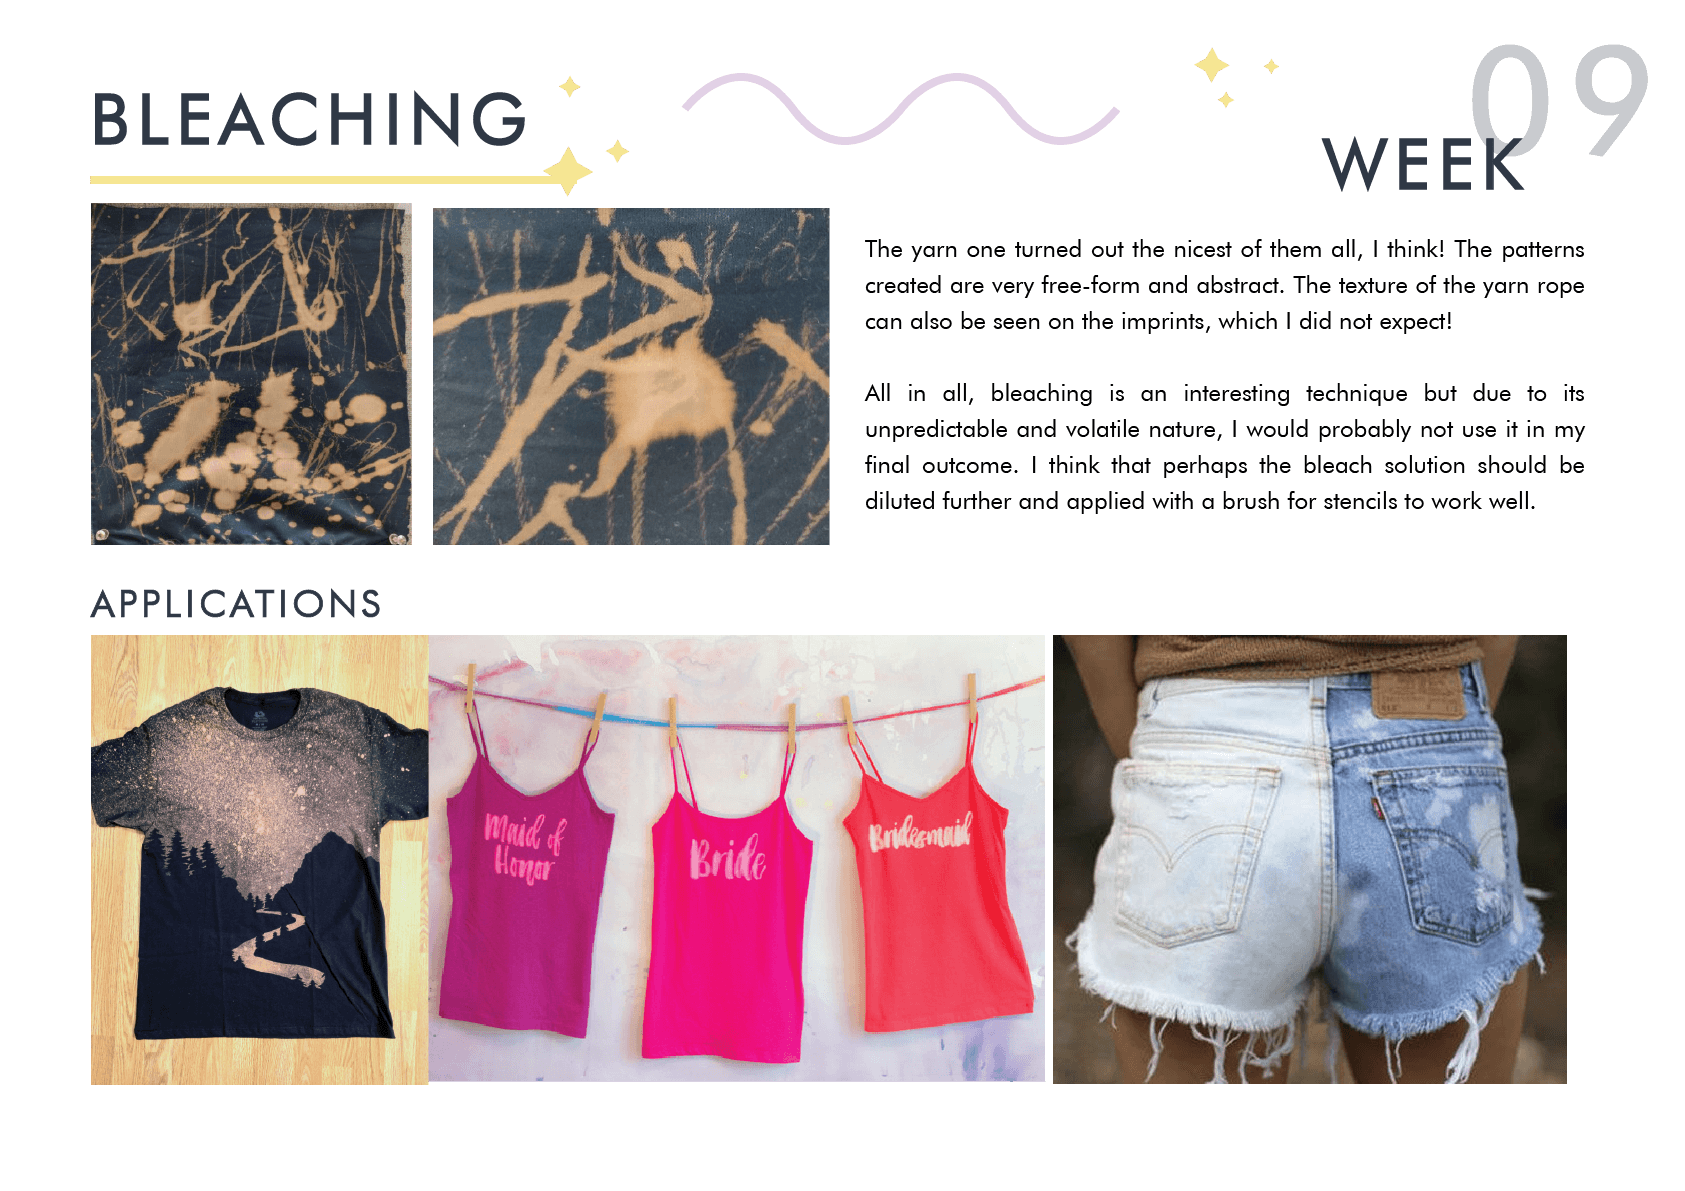
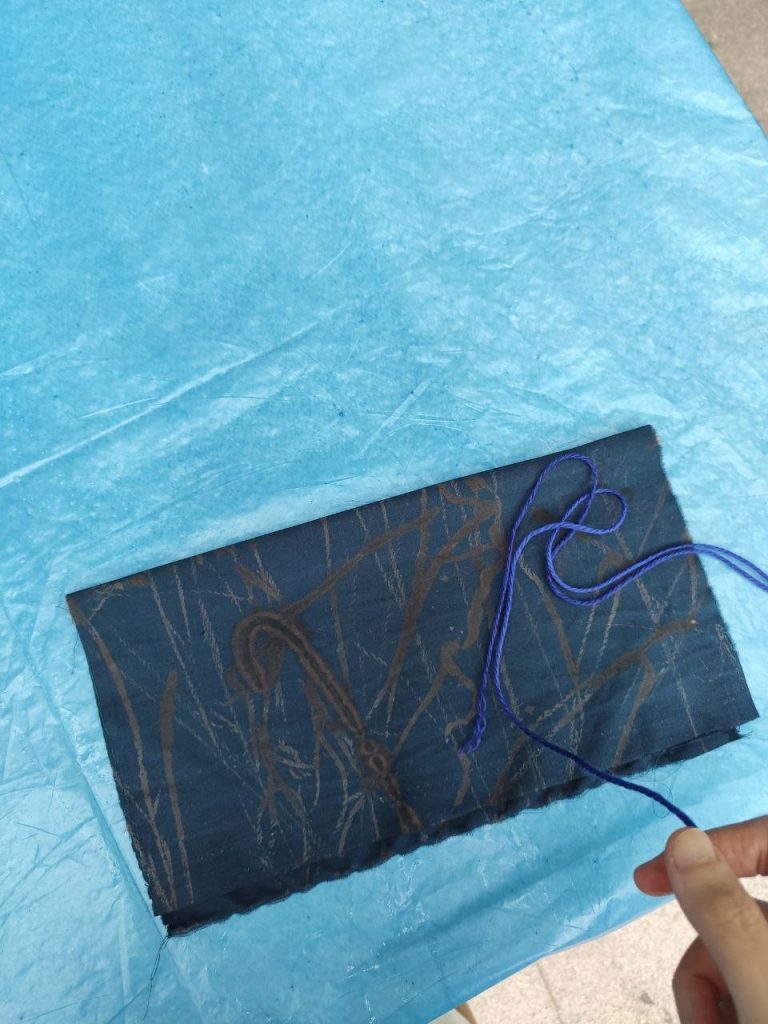
The yarn one turned out the nicest of them all, I think! The patterns created are very free-form and abstract.
The texture of the yarn rope can also be seen on the imprints, which I did not expect!
All in all, bleaching is an interesting technique but due to its unpredictable and volatile nature, I would probably not use it in my final outcome.
I think that perhaps the bleach solution should be diluted further and applied with a brush for stencils to work well.
A P P L I C A T I O N S
T-shirt customisation


Writing words using a precise brush dipped in bleach

Can be used on denim as well!
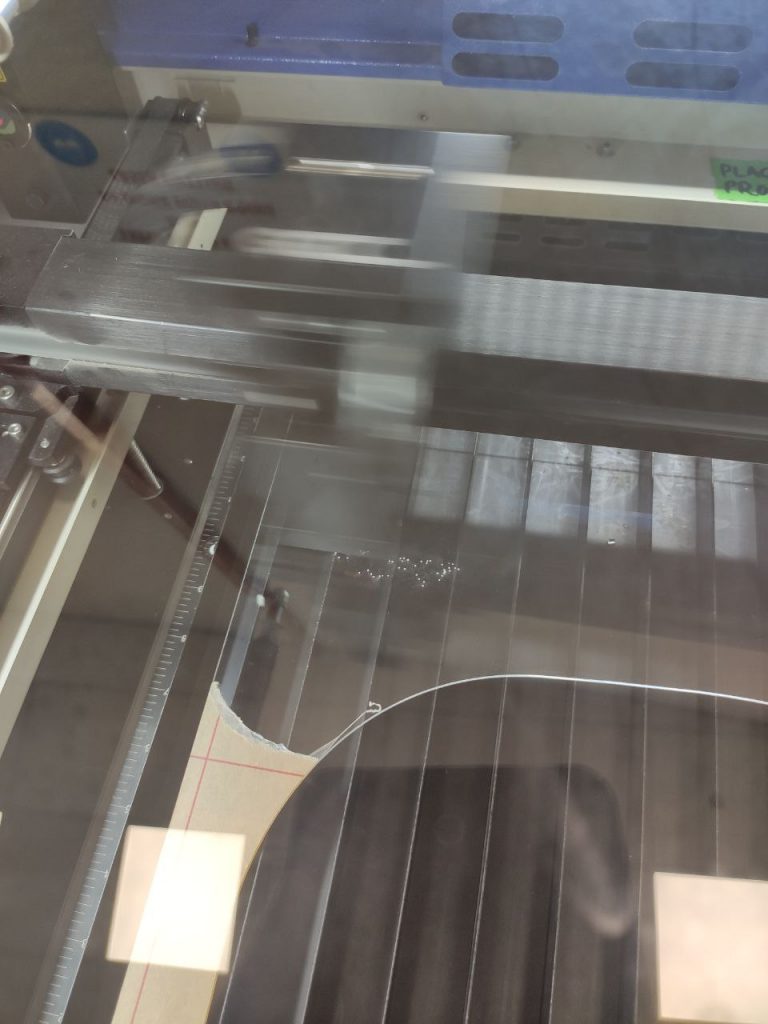
Partial removal of material from the surface by a machine to form an engraved image.
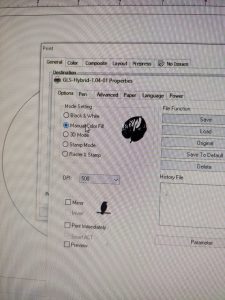
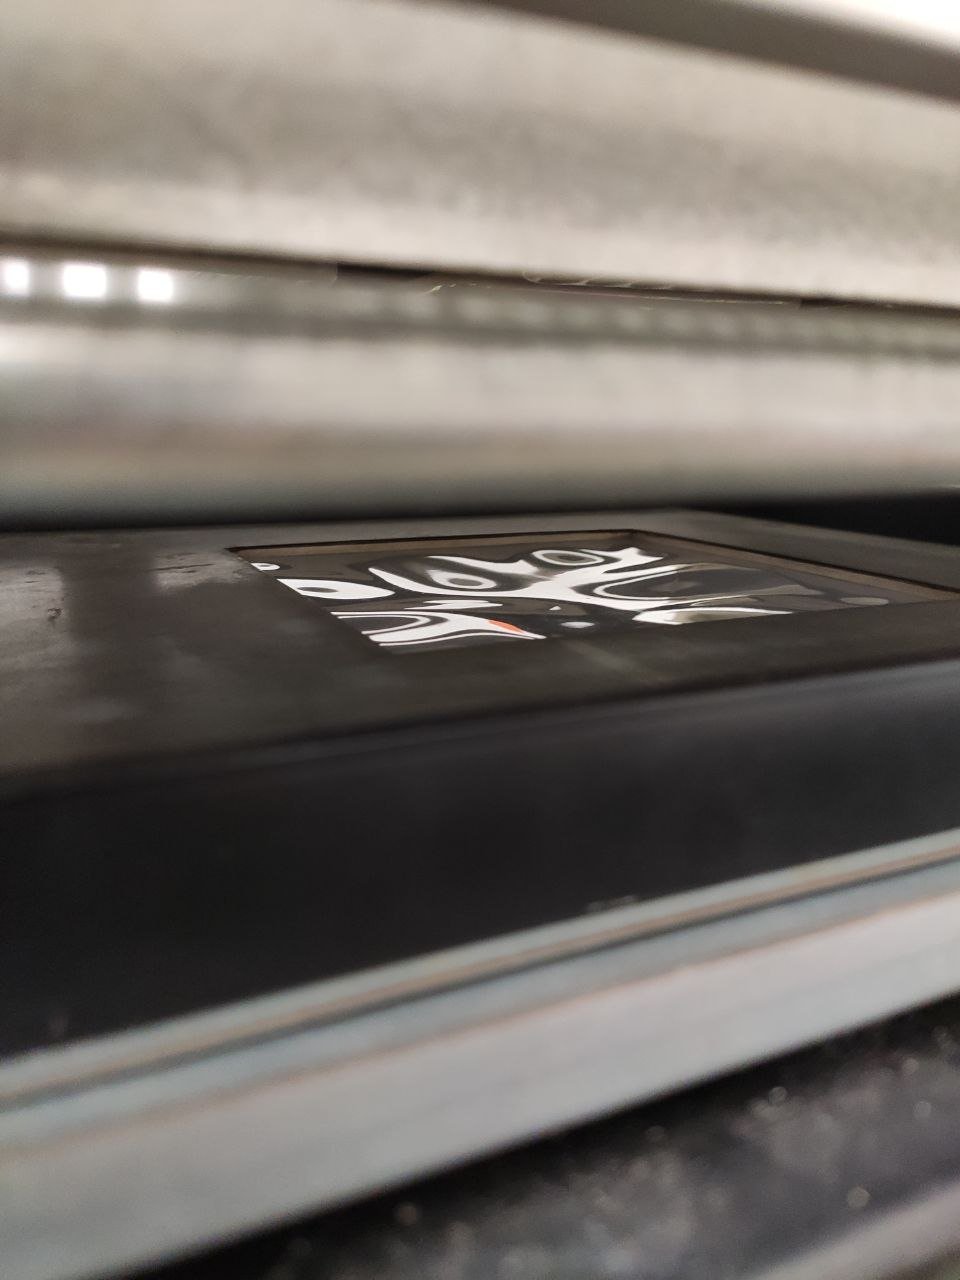
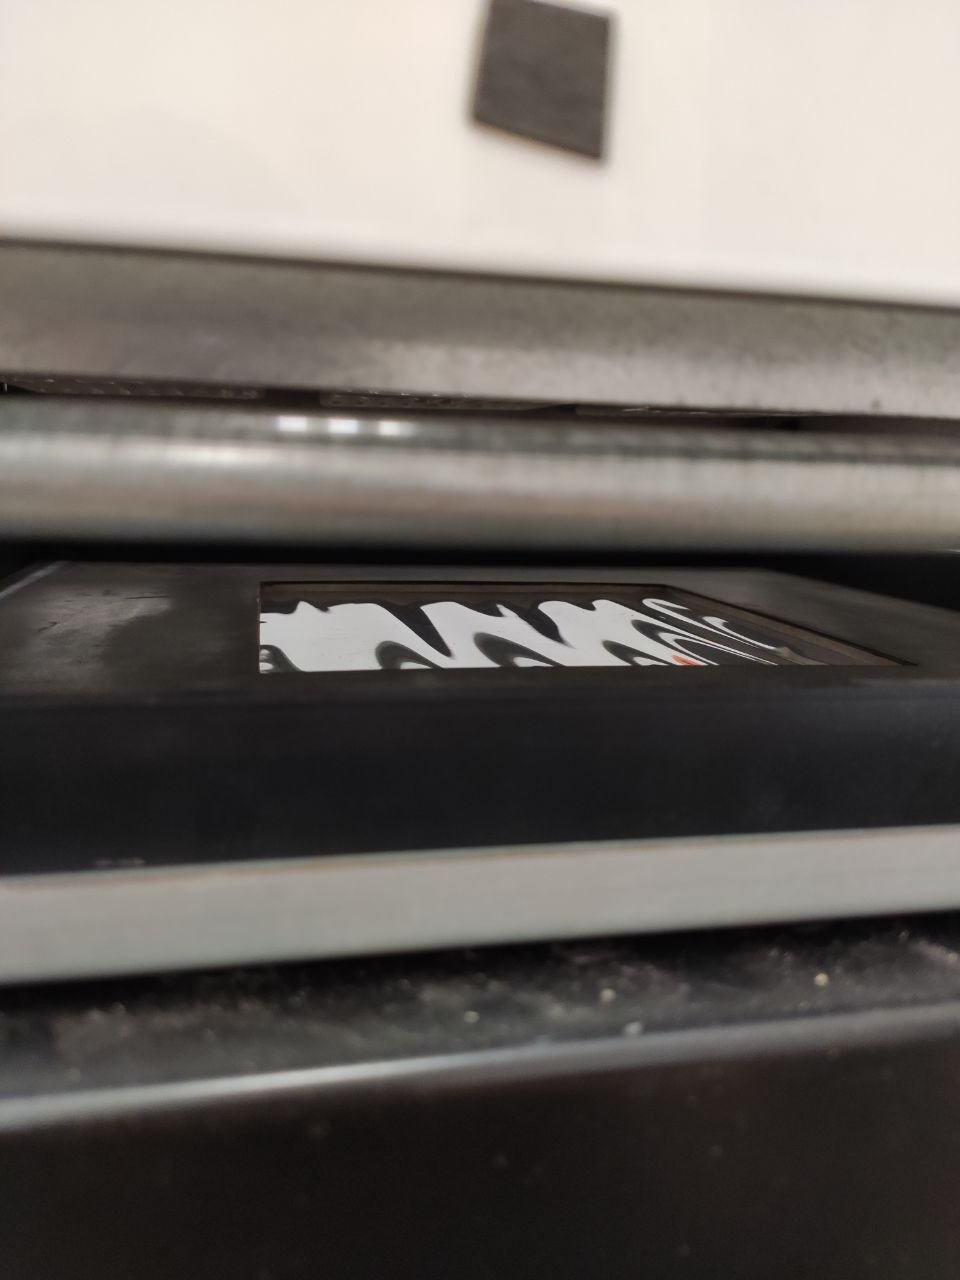
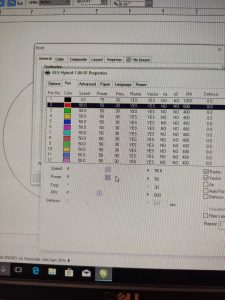 Position the print as desired. Then, click print and set preferences. Ensure that the mode setting is switched from Black & White to Manual Color Fill. Then, set the pen colour setting accordingly: For black cut outline, Speed – 3 for 2 mm(depends on sheet thickness), Power – 75, PPI – 1000. For red raster, Speed – 50, Power – 50, PPI – 600. Then, hit save, apply and print.
Did the auto-focusing with the focus probe.
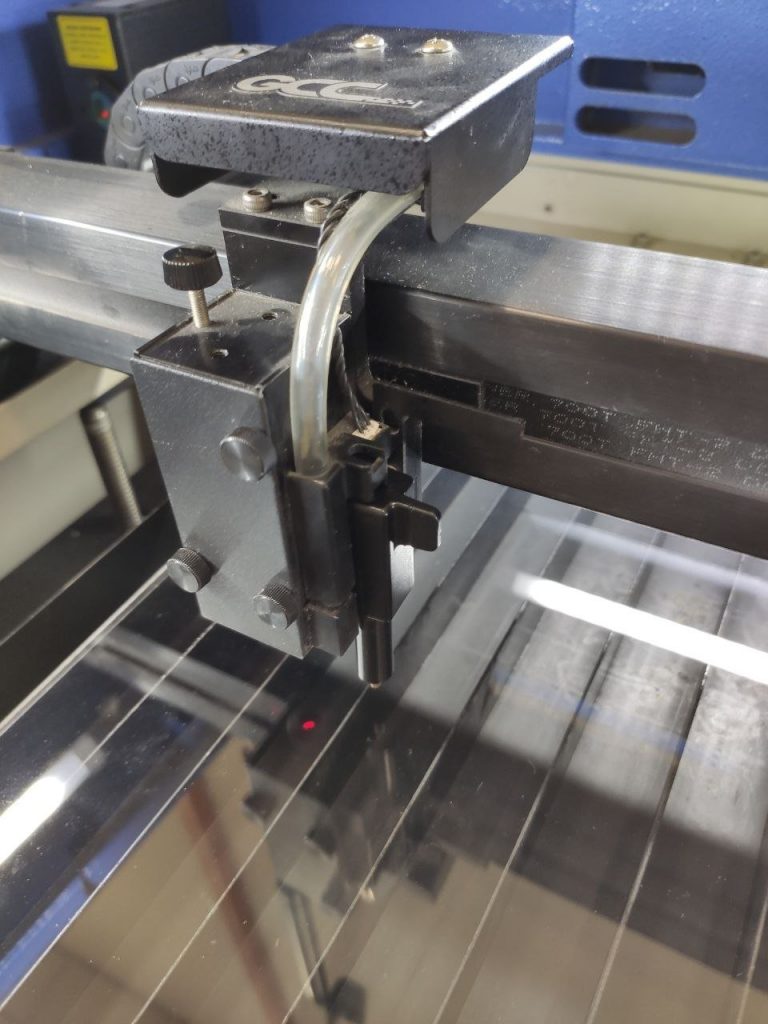
After everything is adjusted, start the cut!
My first attempt was for an image I found online and converted it into a vector shape.
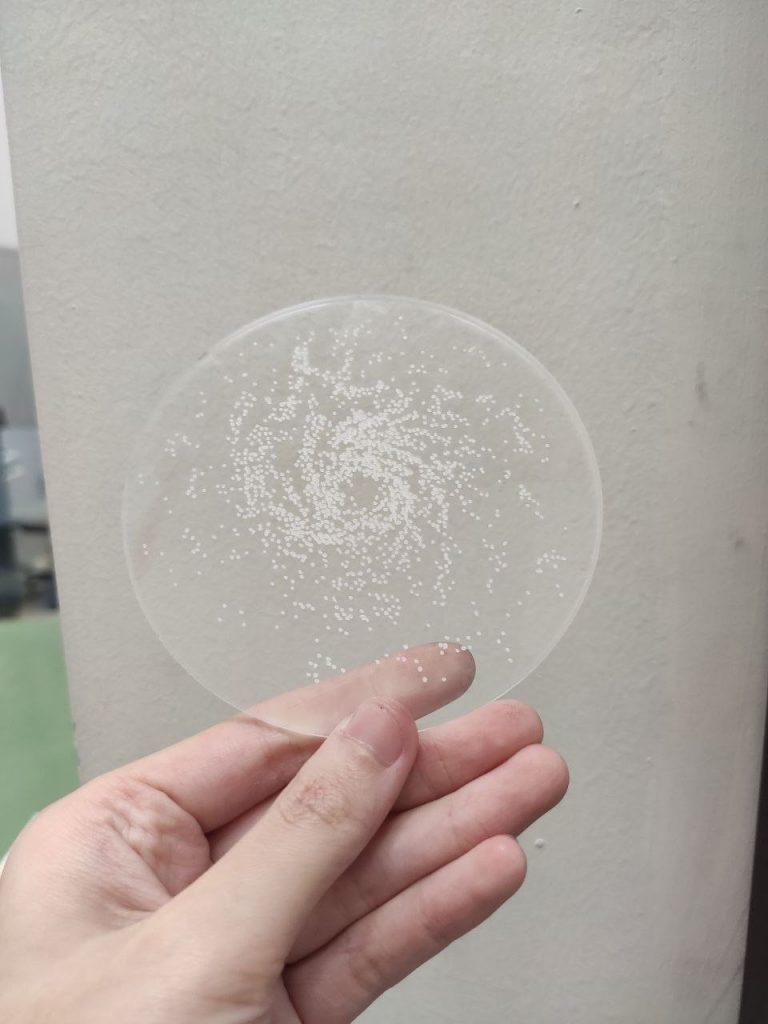

Not too bad! I think making multiple pieces of these will give it a cool layered look.

Tried it again on black acrylic instead! Thinks it looks more like a galaxy in space.
Next up is a planet orbit image I drew out on Illustrator.
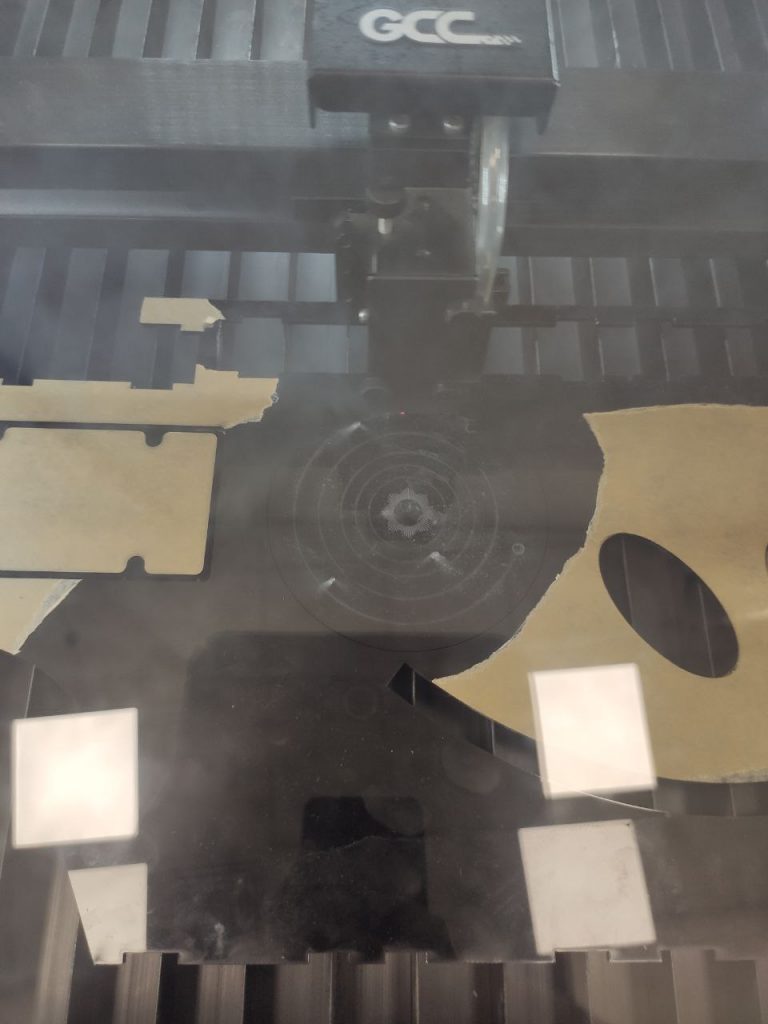
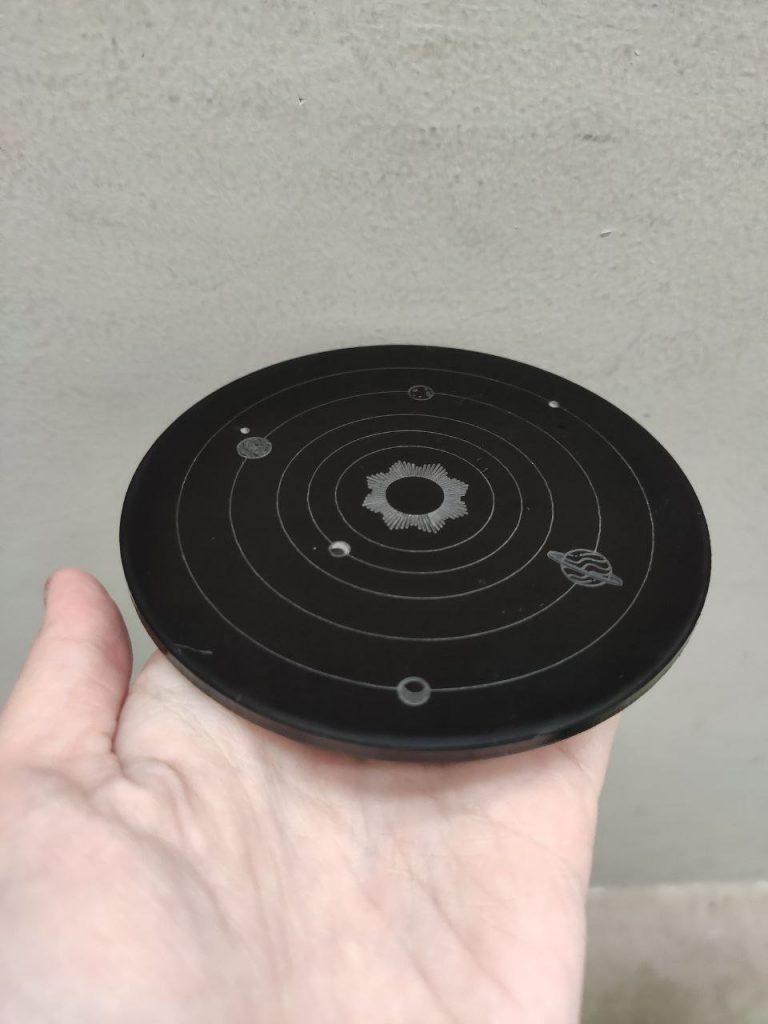
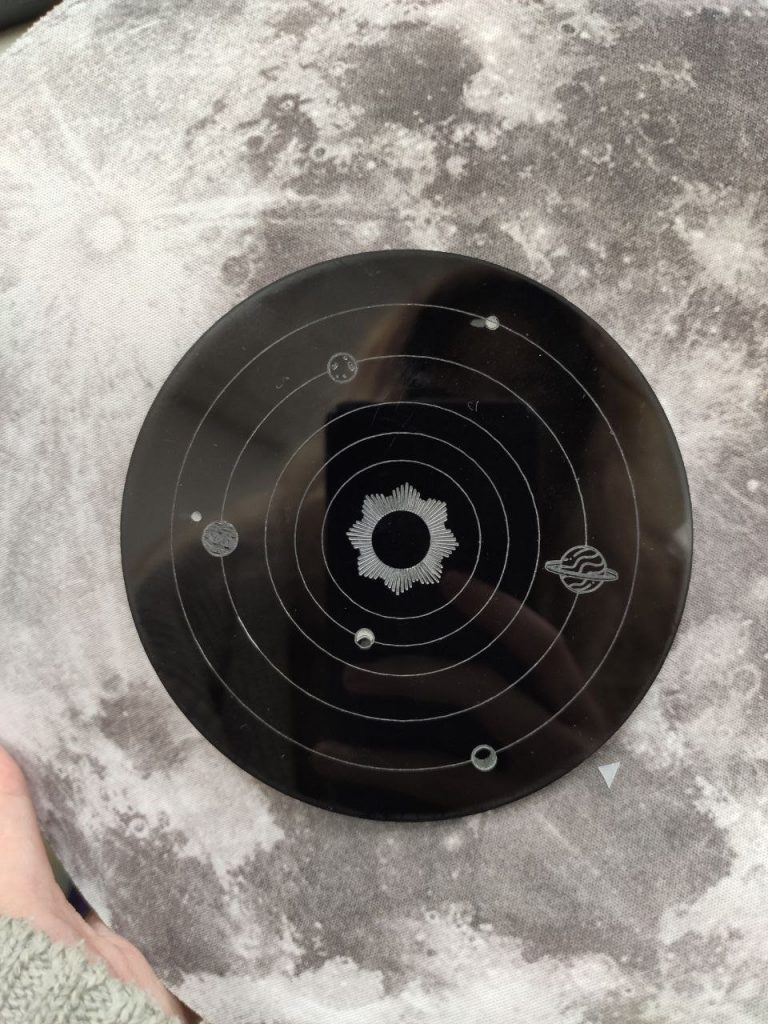
I realised some details of the planet surface are lost as the lines are too closely placed. Nonetheless, I still like the clean look of it!
Lastly, I wanted to try rastering the logo I created for my entire theme!
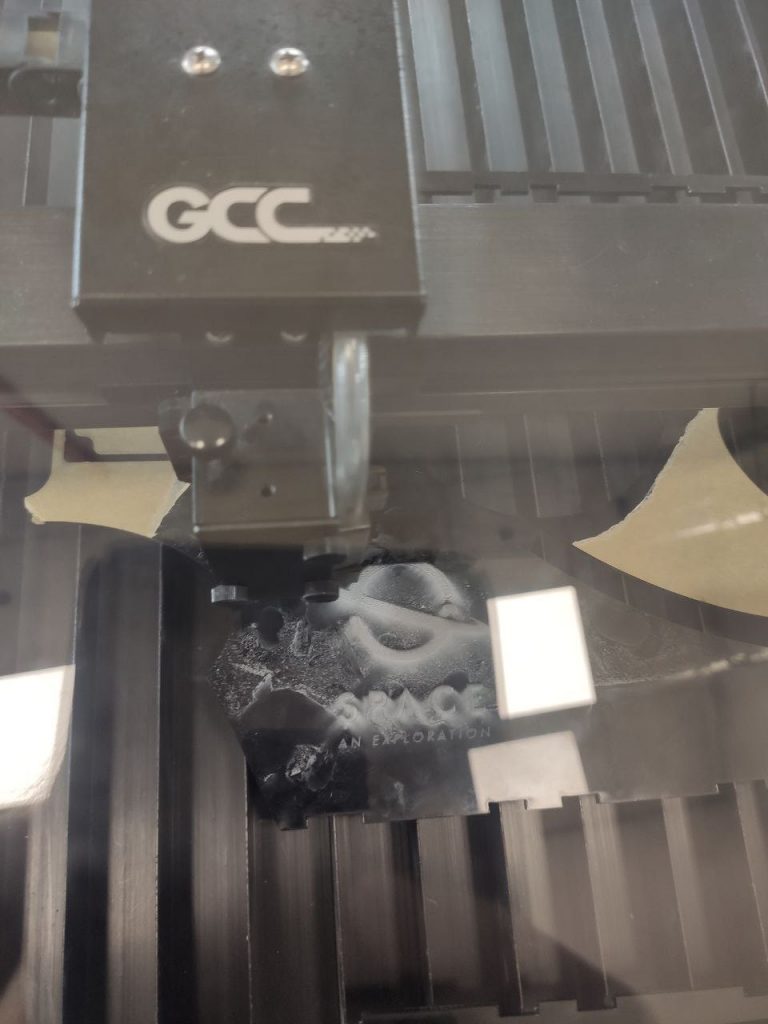
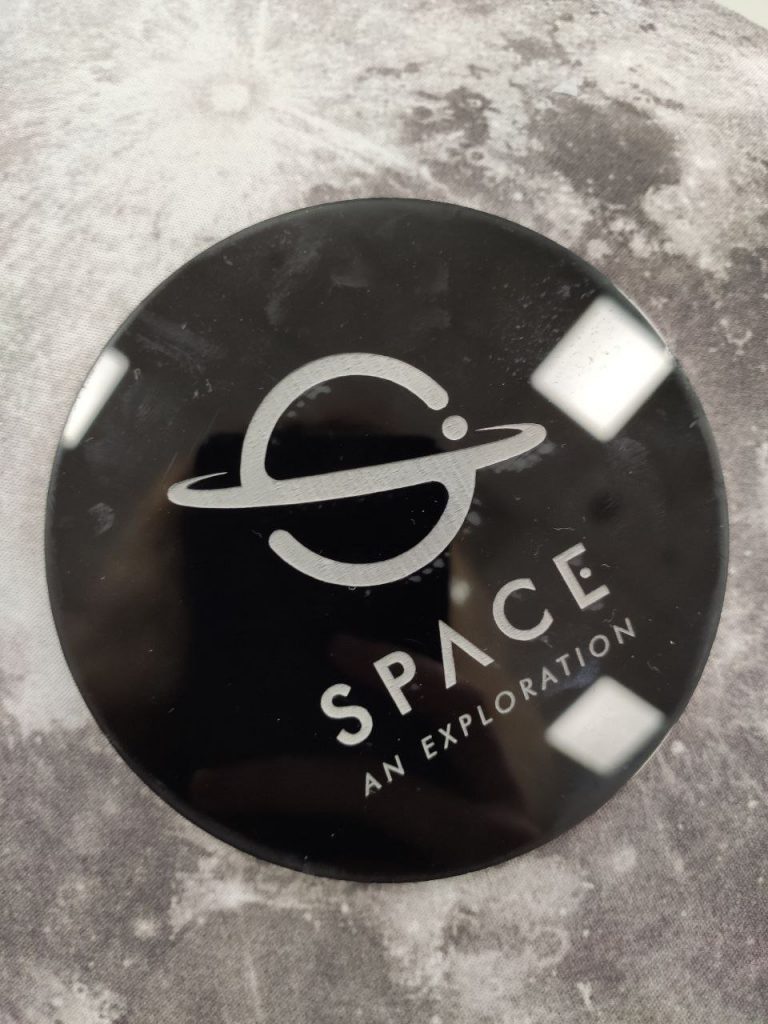
I think this image made the best use of the rastering as it is very big and clear!
All in all, laser engraving is a smart way of using the laser cutter to raster images to achieve quite a professional finish! However, it did took quite long as there was a lot of tweaking needed to change the colour of the lines accordingly, especially when you have to do it in CorelDraw manually one by one.
One problem I faced is that for certain shapes, when I set the fill colour, it filled the entire thing instead of just the outline. For instance, the ‘P’ in the SPACE logo initially had no hole as it was filled up. However, I am able to overcome this by setting the outline of the ‘P’ hole to white infill instead, creating a false gap. Nonetheless, it is not the most efficient method and I hope there is a better way to counter this problem in Illustrator itself.
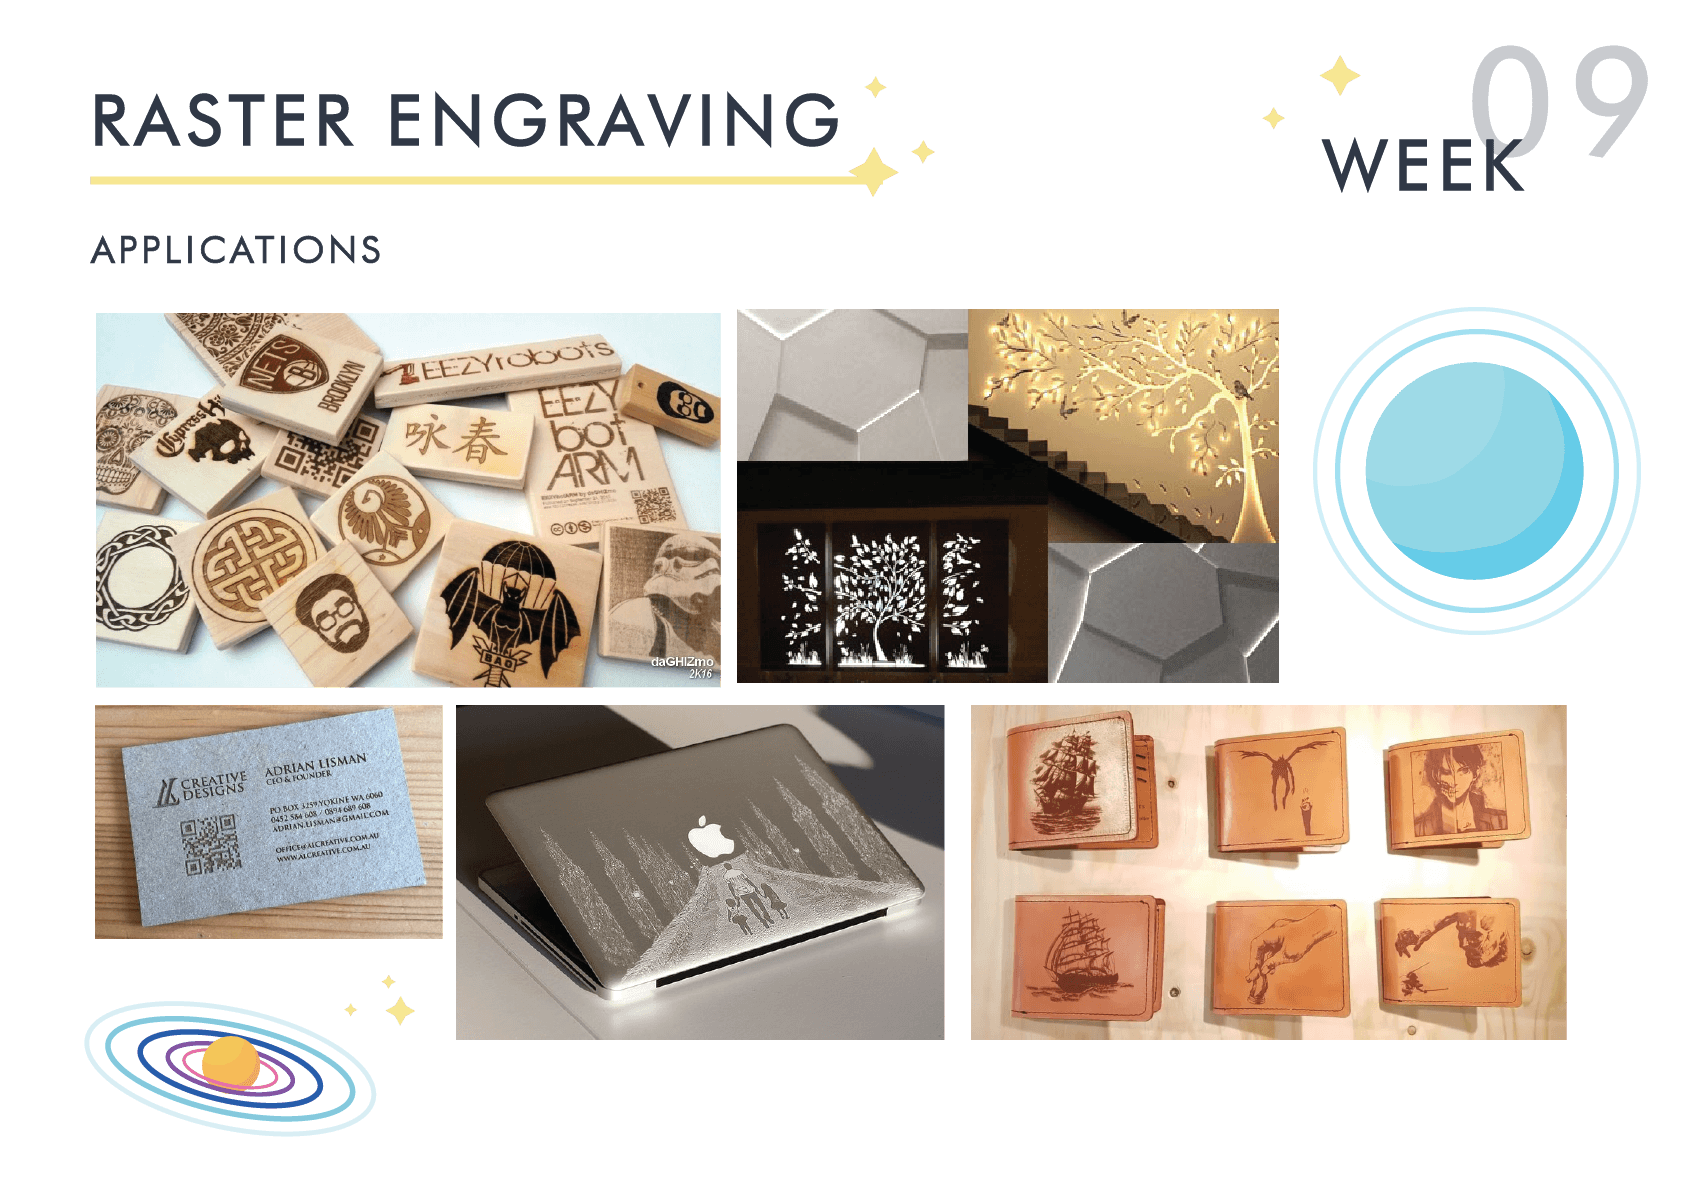
A P P L I C A T I O N S

I would imagine they can be used as stamps too!

Lamps

For a more professional name card look!
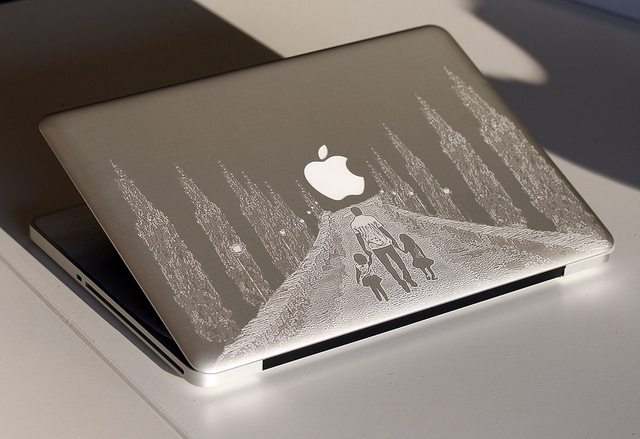
Macbook engraving

Even on leather!
Printing with thermochromic ink that colours changes with temperature.
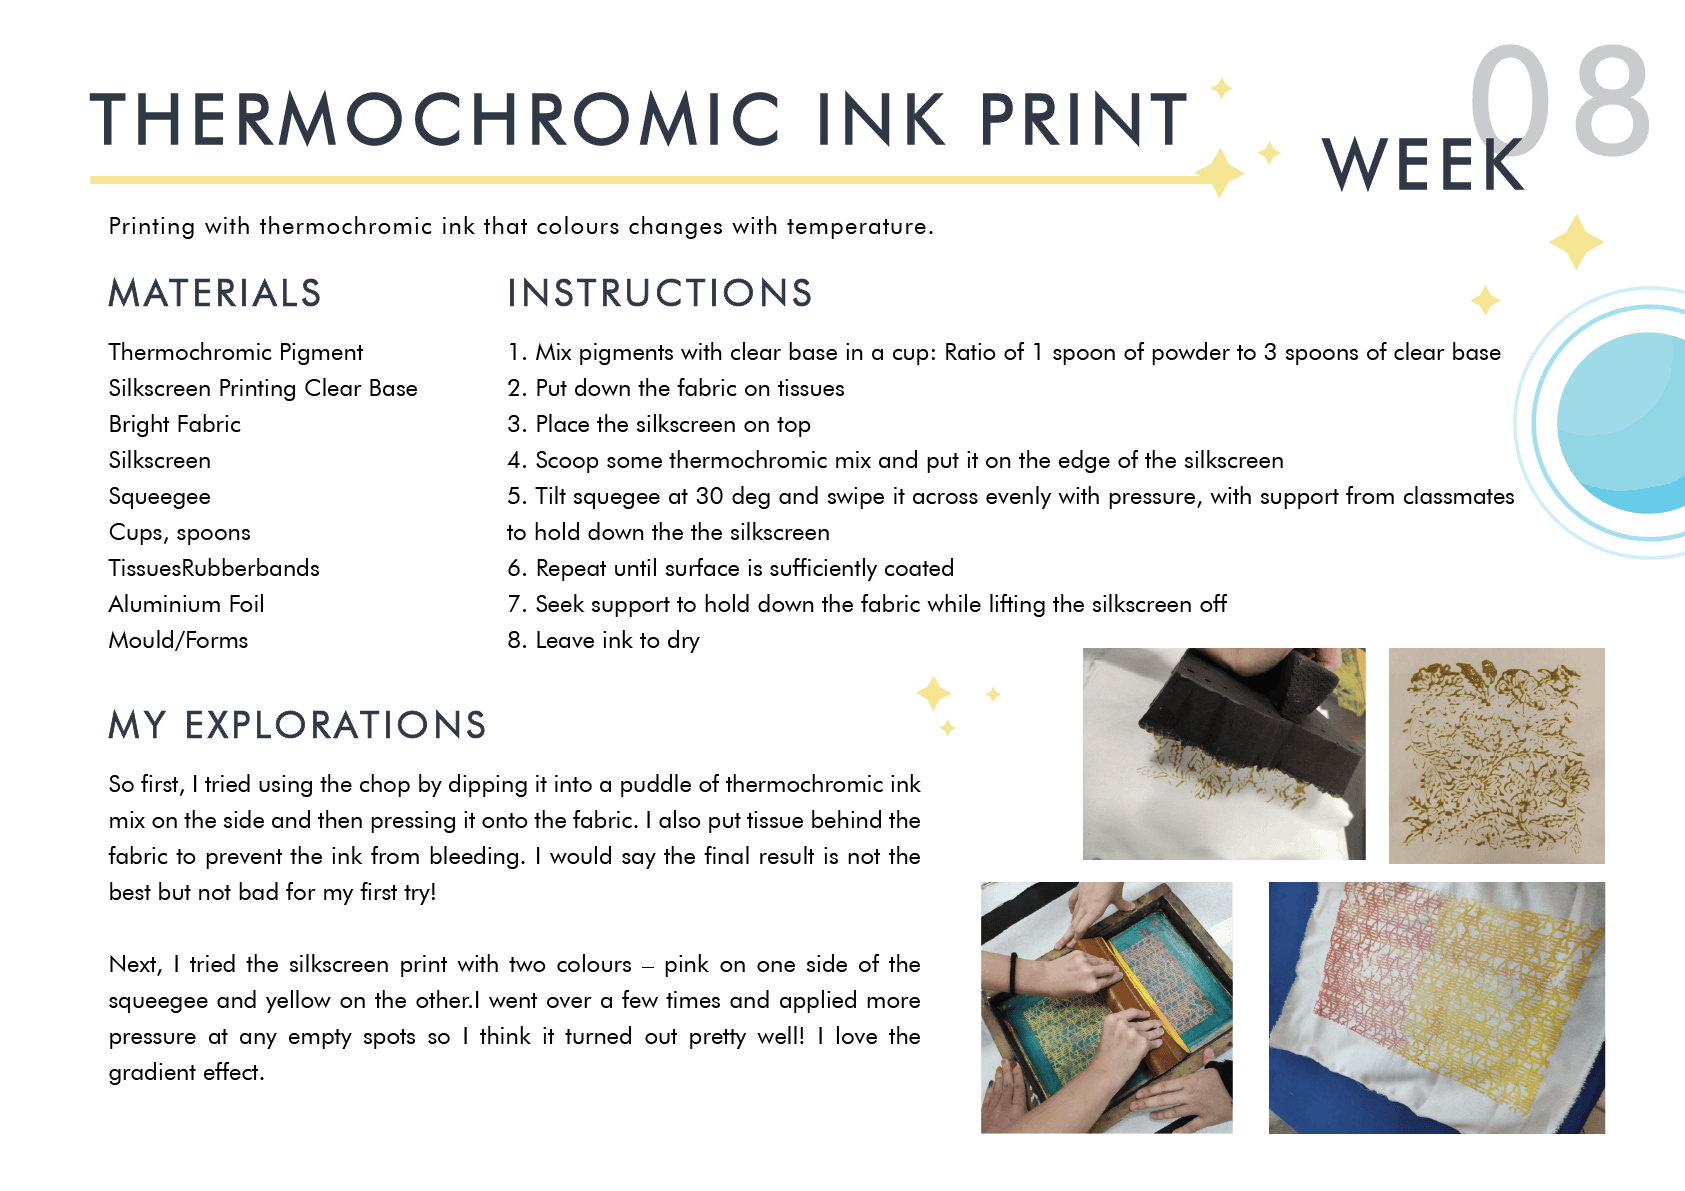
So first, I tried using the chop by dipping it into a puddle of thermochromic ink mix on the side and then pressing it onto the fabric.
I also put tissue behind the fabric to prevent the ink from bleeding.
I would say the final result is not the best but not bad for my first try!
Next, I tried the silkscreen print with two colours – pink on one side of the squeegee and yellow on the other.

I went over a few times and applied more pressure at any empty spots so I think it turned out pretty well! I love the gradient effect.
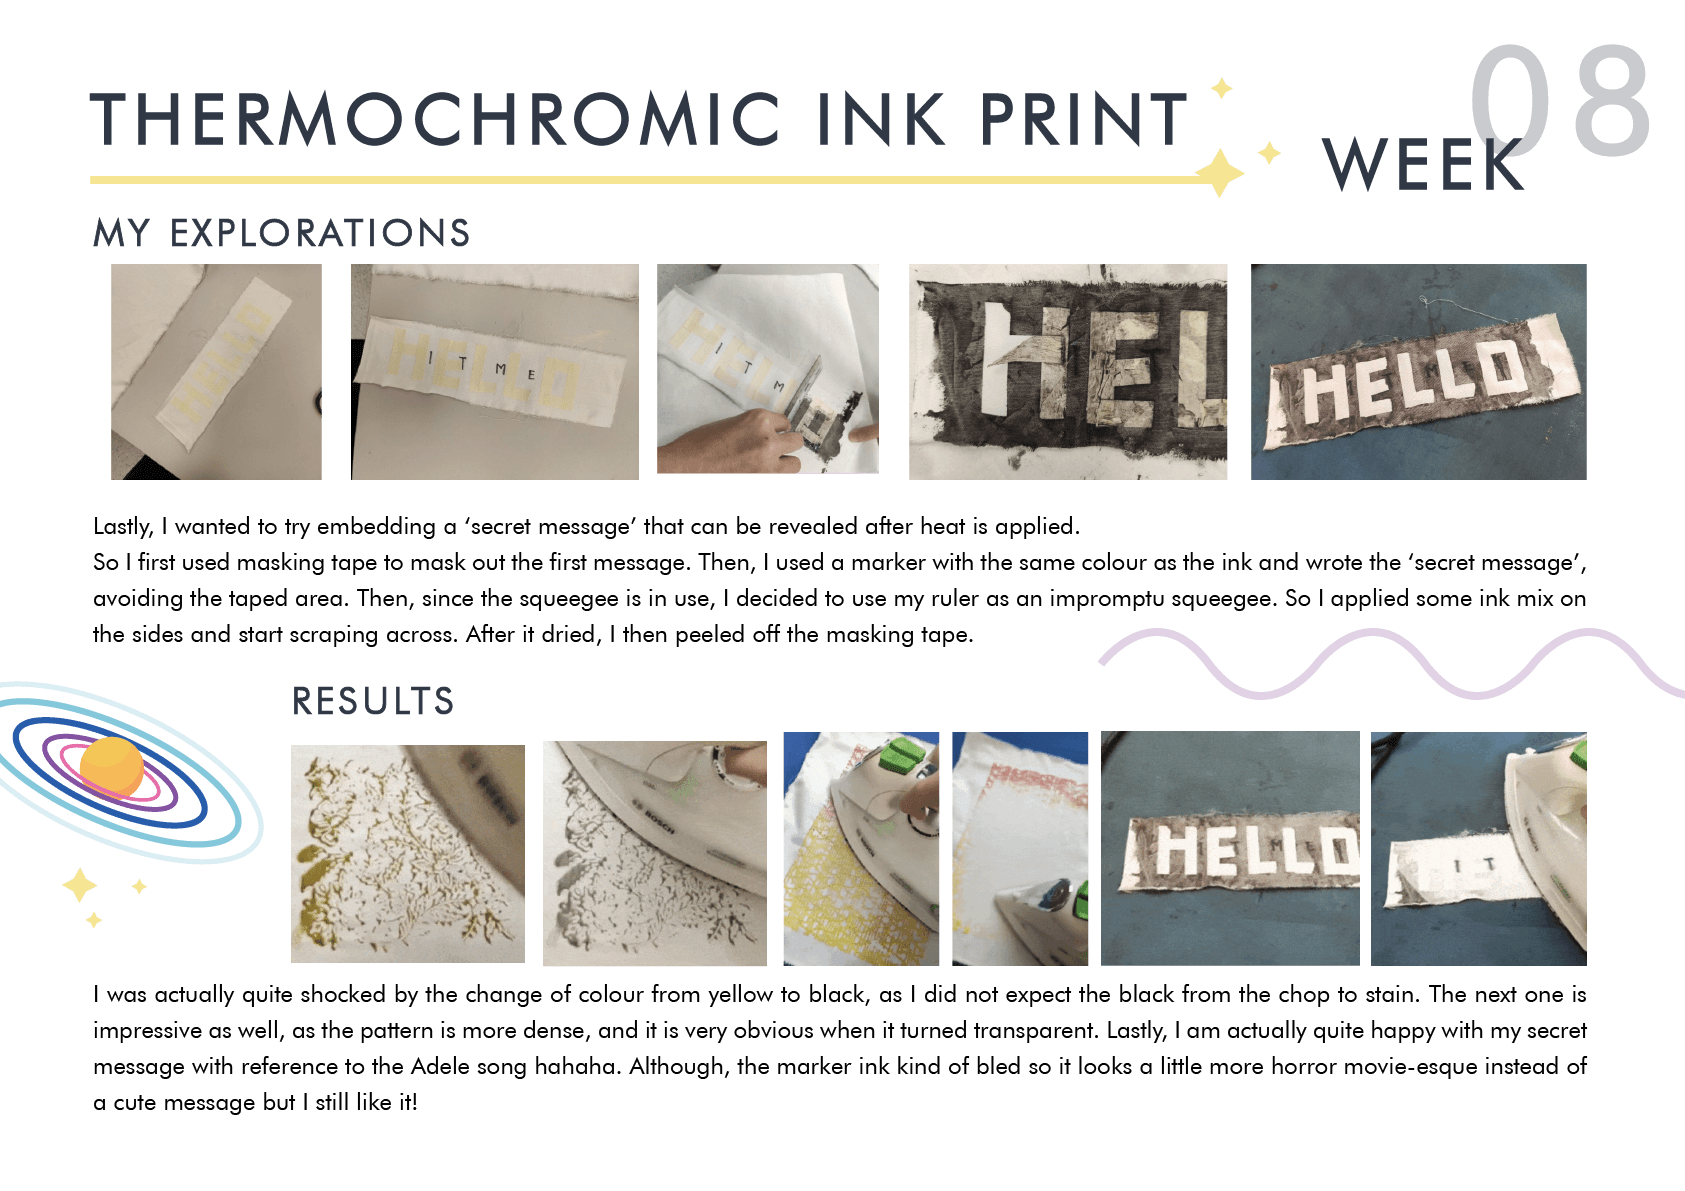
Lastly, I wanted to try embedding a ‘secret message’ that can be revealed after heat is applied.
So I first used masking tape to mask out the first message.
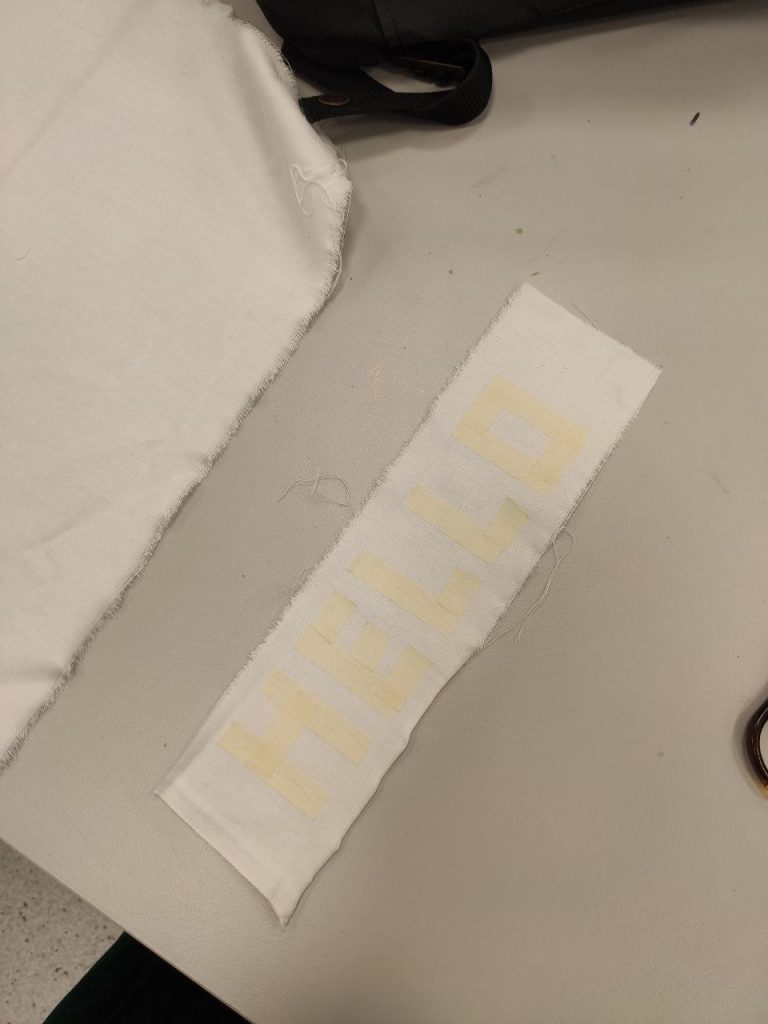
Then, I used a marker with the same colour as the ink and wrote the ‘secret message’, avoiding the taped area.

Then, since the squeegee is in use, I decided to use my ruler as an impromptu squeegee. So I applied some ink mix on the sides and start scraping across.
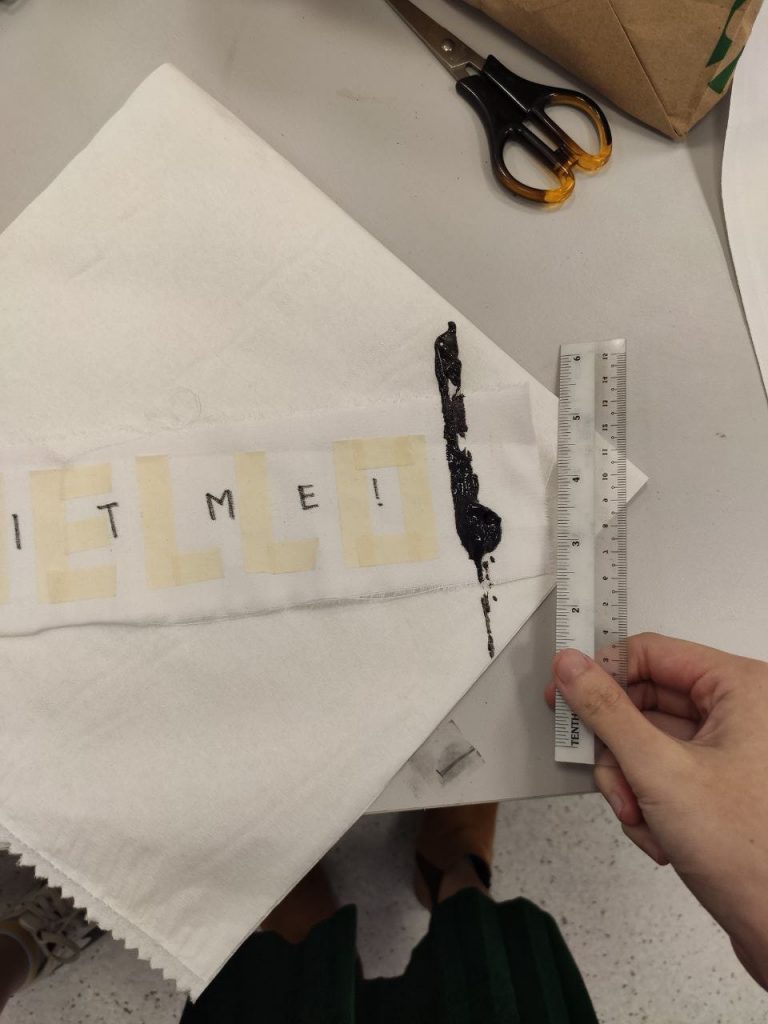
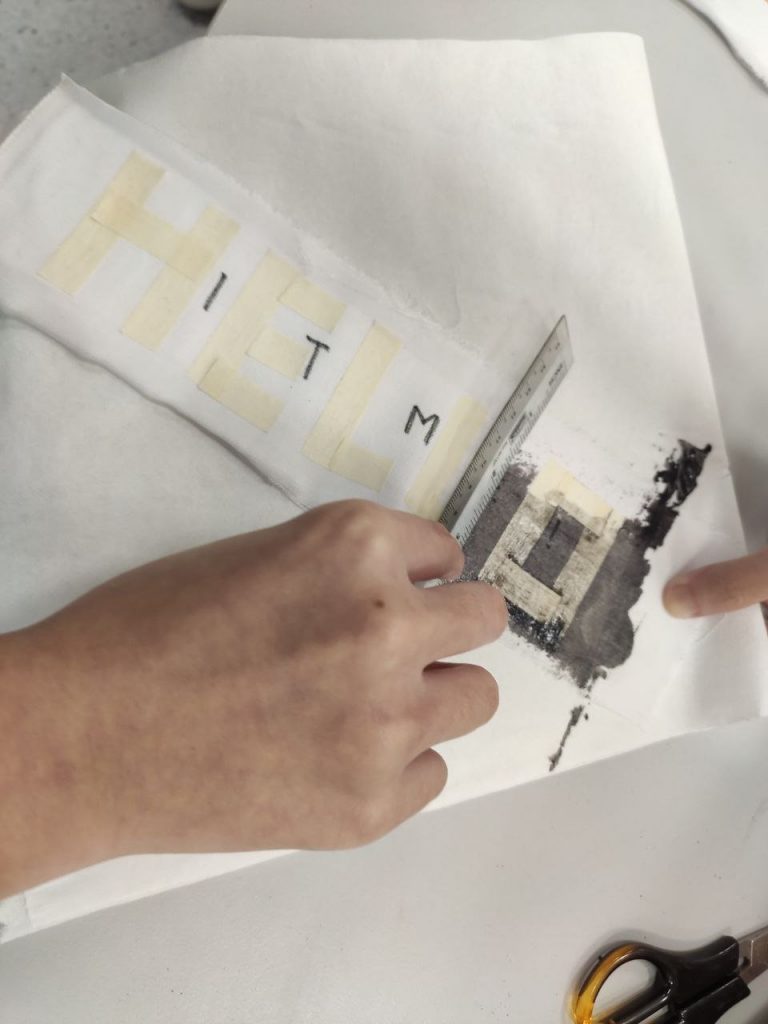
After it dried, I then peeled off the masking tape.
Tada! Although the ink did not cover the ‘secret message’ as well as I wanted it to be.
I was actually quite shocked by the change of colour from yellow to black, as I did not expect the black from the chop to stain.
This was really impressive as well, as the pattern is more dense, and it is very obvious when it turned transparent.
Lastly, I am actually quite happy with my secret message with reference to the Adele song hahaha. Although, the marker ink kind of bled so it looks a little more horror movie-esque instead of a cute message but I still like it!
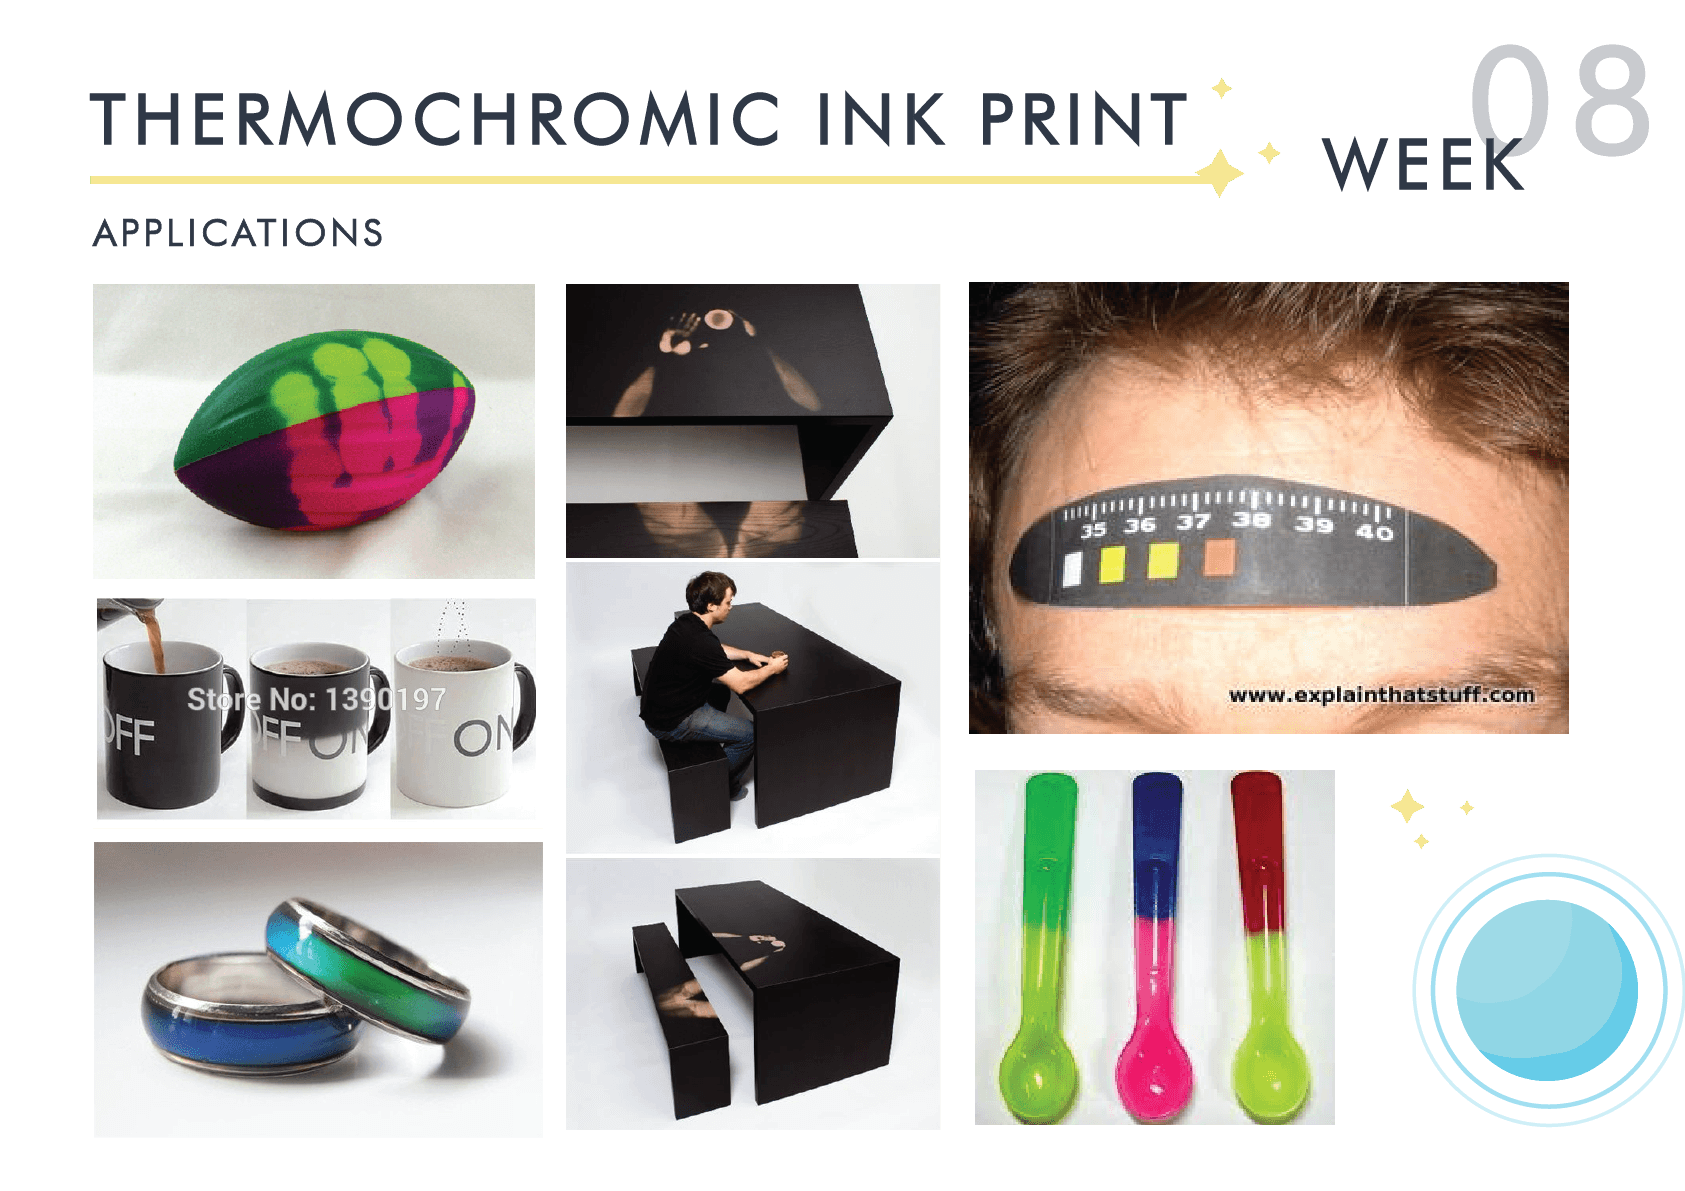
A P P L I C A T I O N S


Forming of a heated thermoplastic sheet by pressing it against a mould through the use of vacuum.
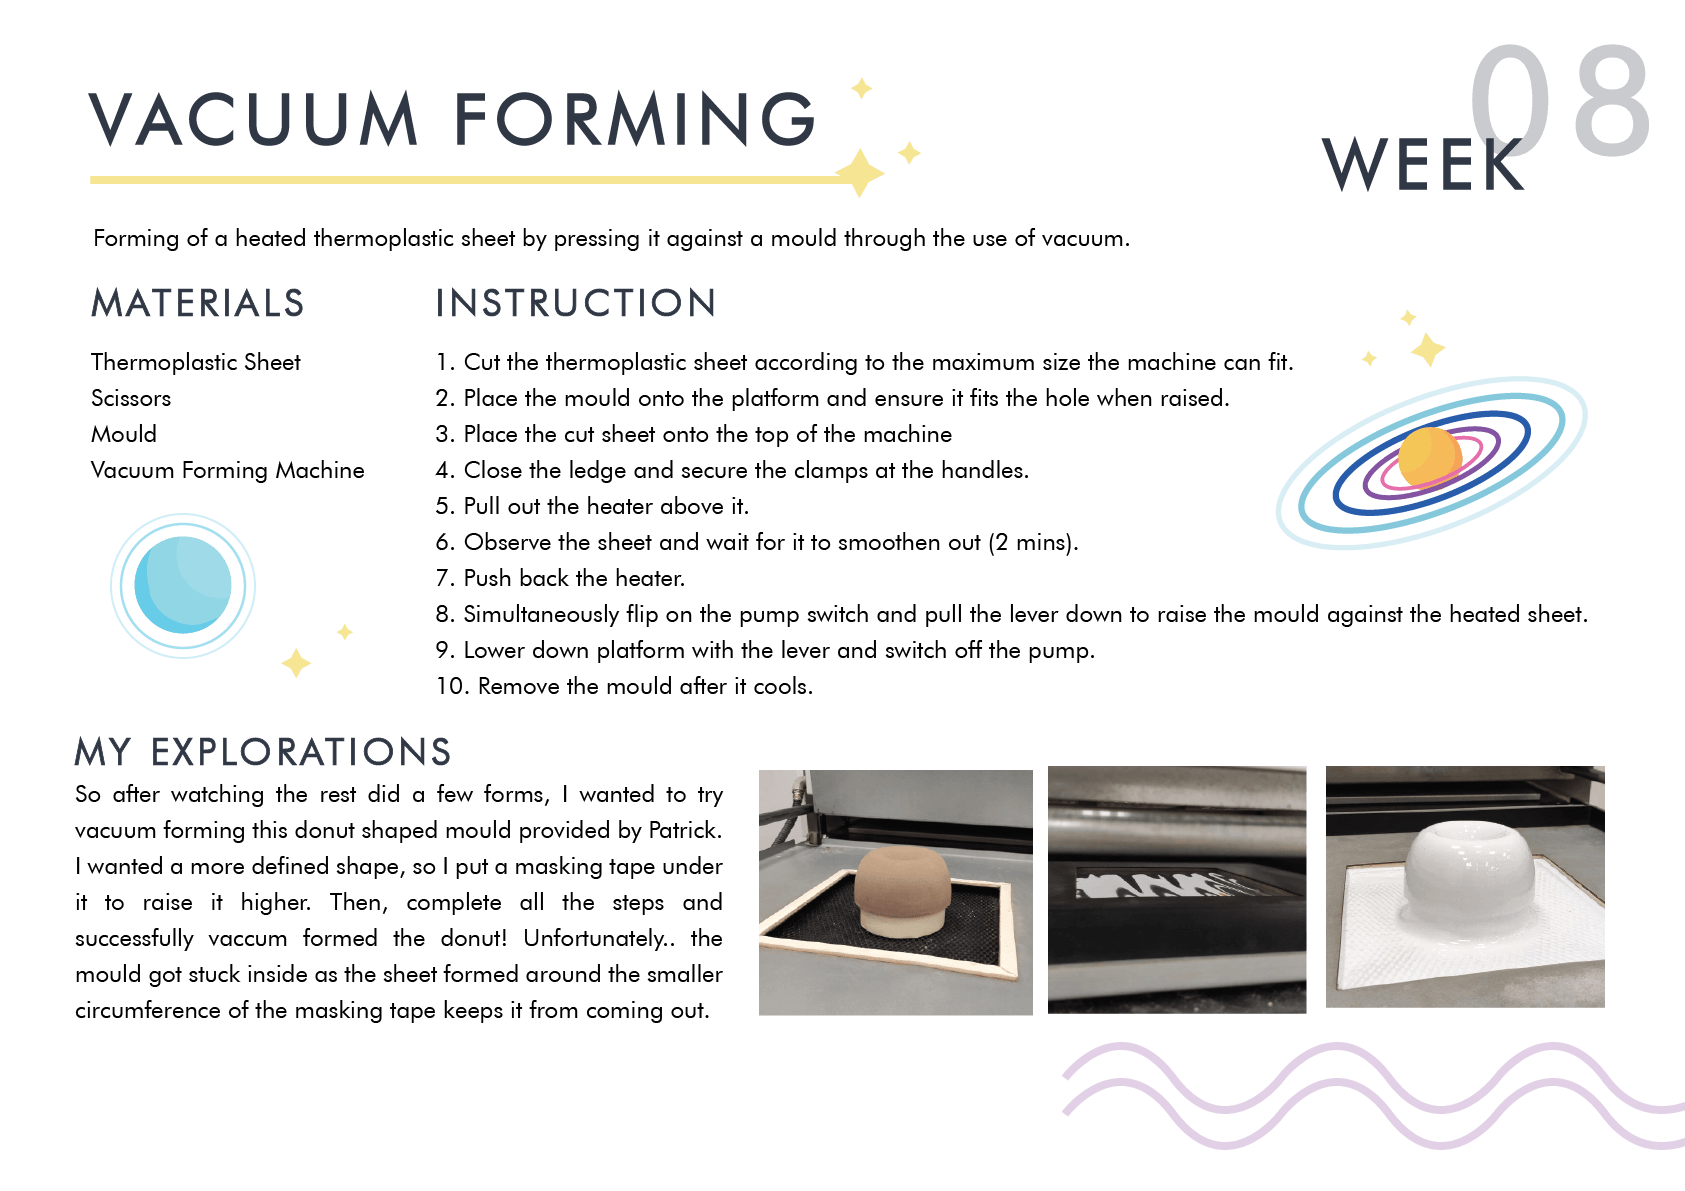
So after watching the rest did a few forms, I wanted to try vacuum forming this donut shaped mould provided by Patrick. I wanted a more defined shape, so I put a masking tape under it to raise it higher.
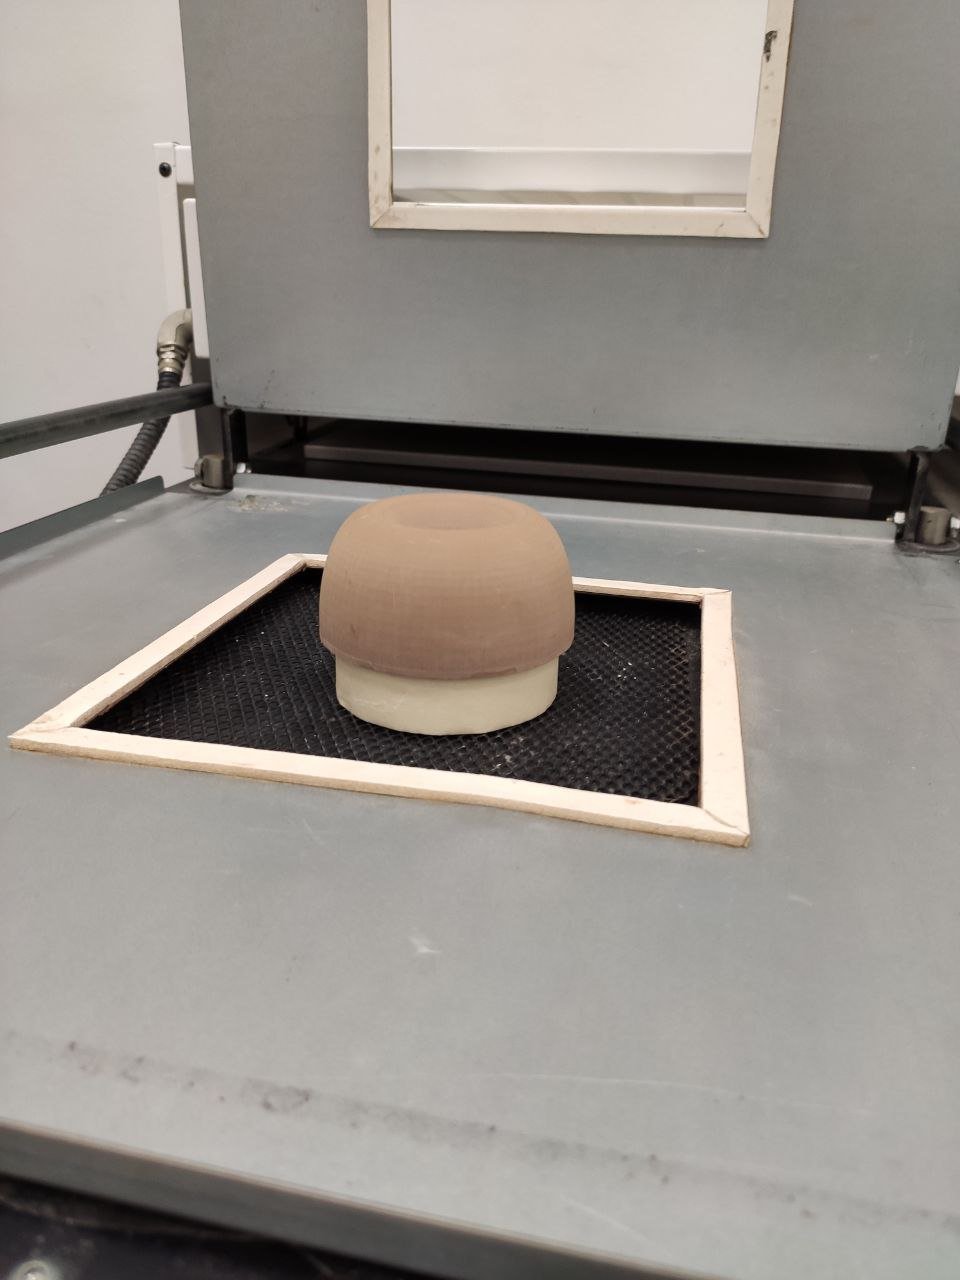
Then, I placed the sheet and closed the ledge…

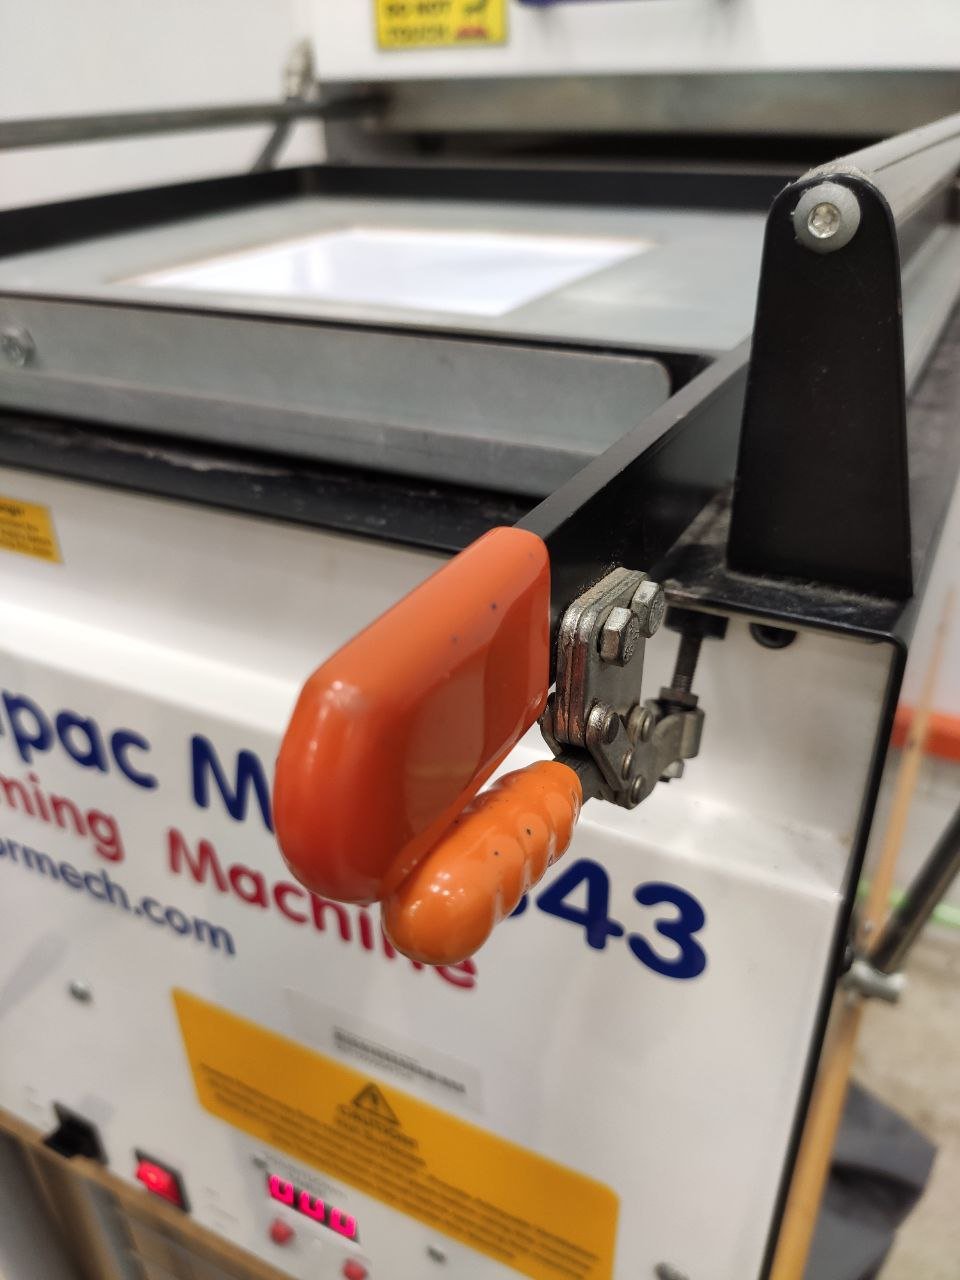
One side of the clamp was surprisingly hard to close.
Waiting for the sheet to smoothen..
…And we are ready to mould! So I pushed away the heater(it must be completely pushed to the back for the lever to be able to move) and raised the platform while switching on the pump.
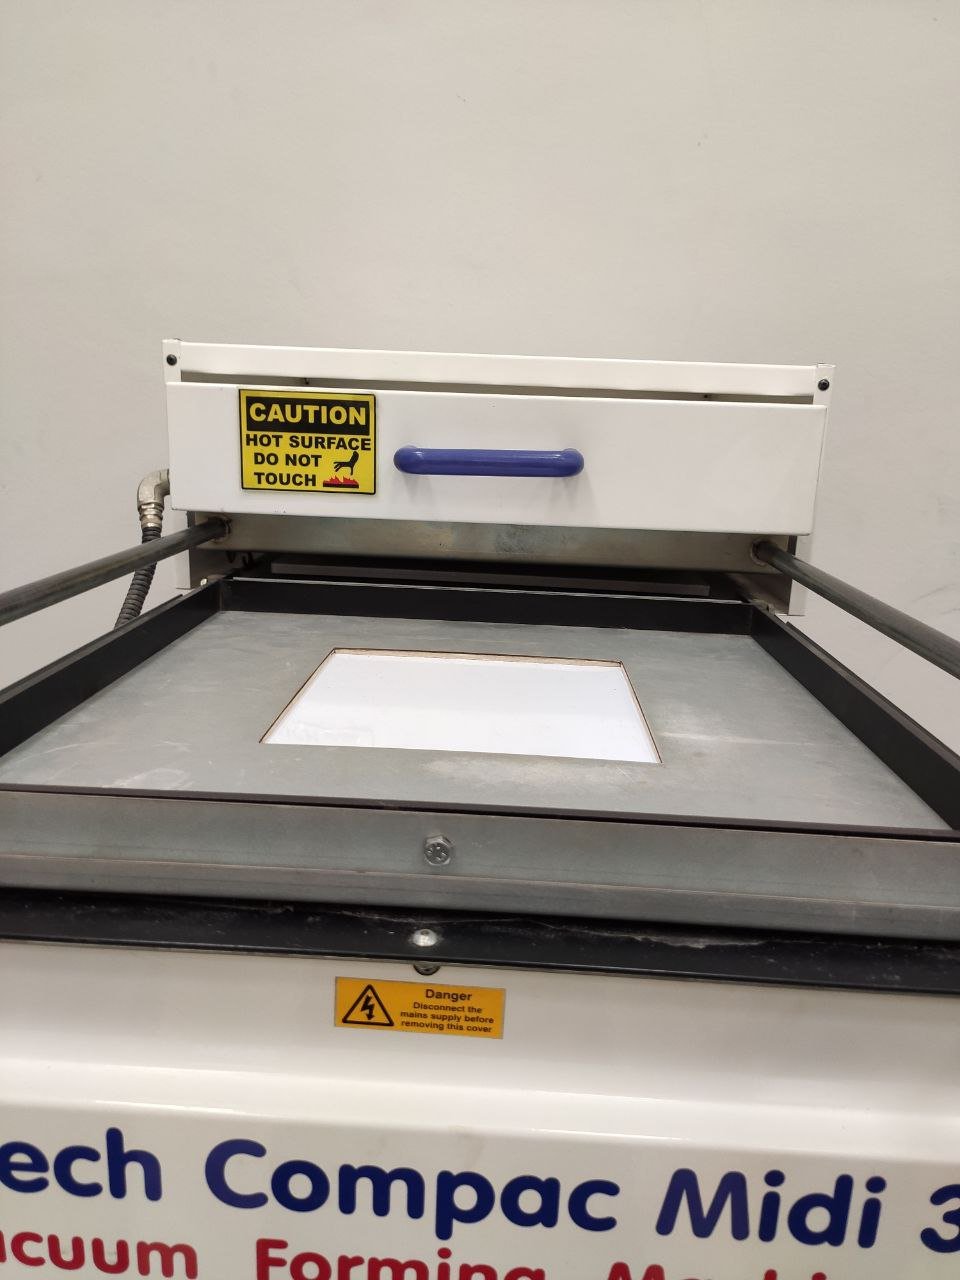

Success!
Unfortunately.. the mould got stuck inside as the sheet formed around the smaller circumference of the masking tape keeps it from coming out.
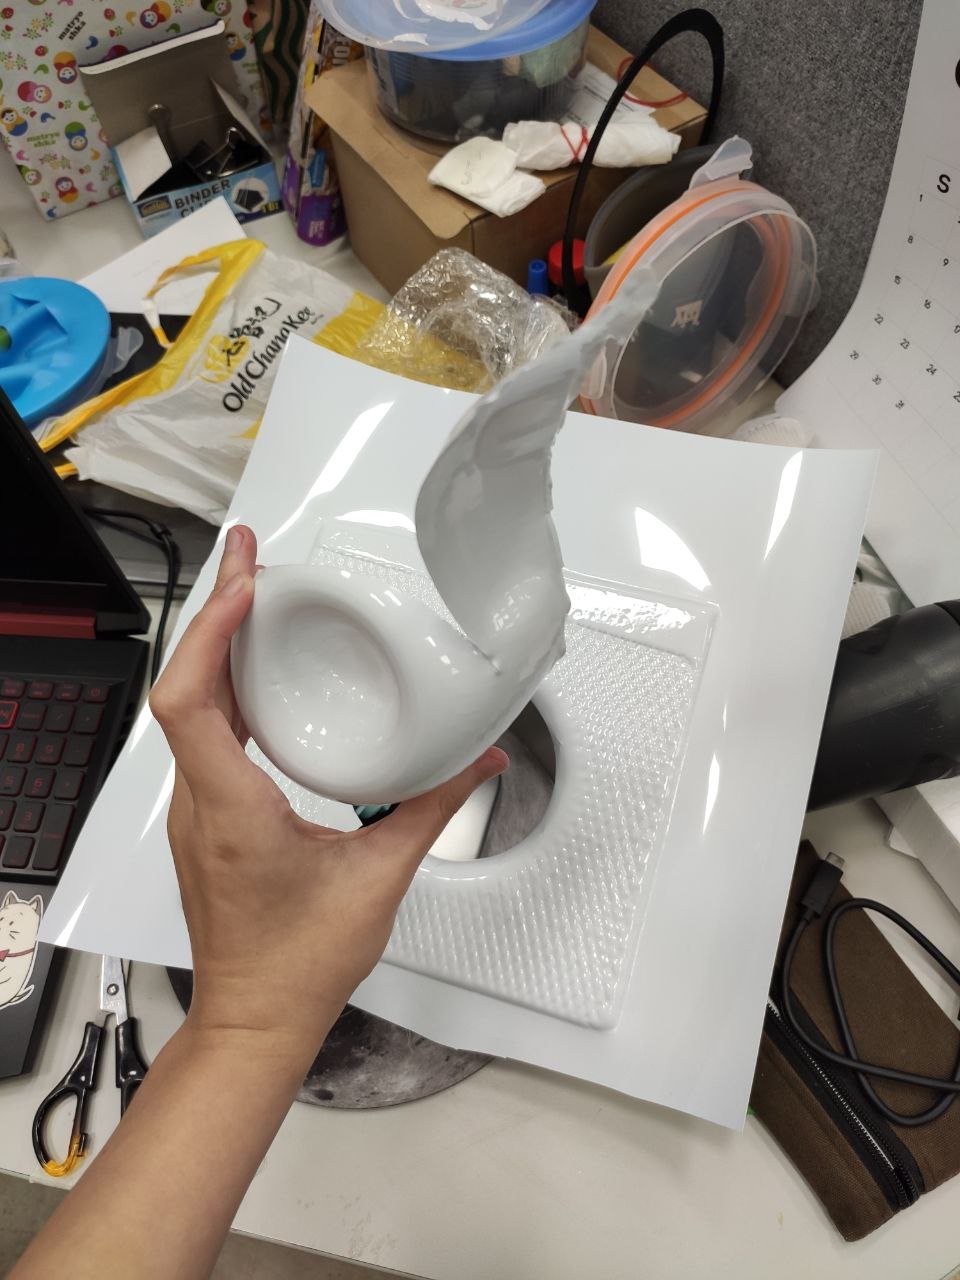
After many tries, including using the air gun in the workshop to ‘blow’ it out failed, I had to cut the sheet to release the mould. 🙁
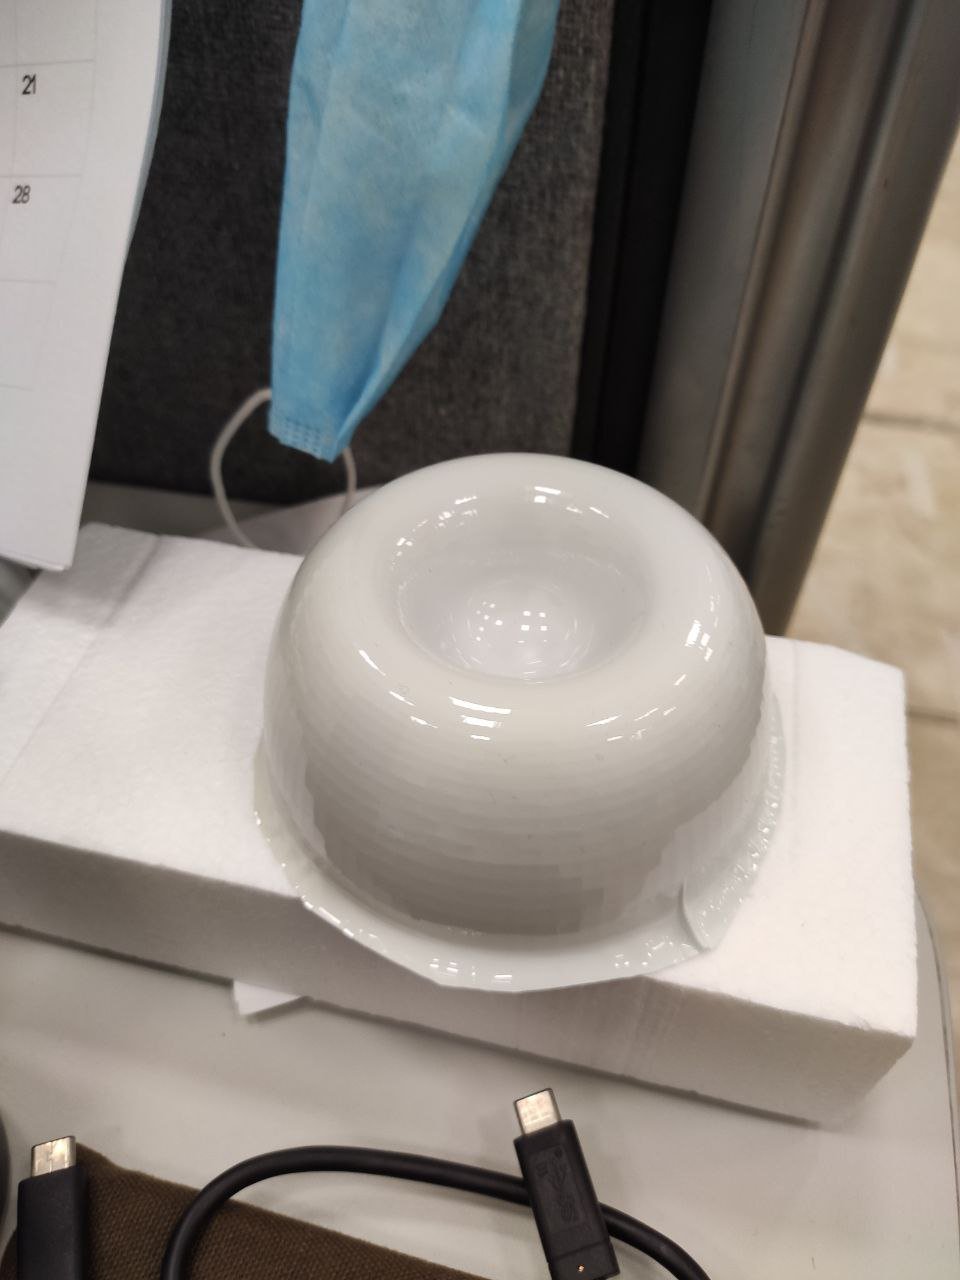
But no worries as I did another one without the masking tape this time and it came out perfect!
Overall, I think vacuum forming has many potentials to be used in the packaging and mould making industry. However, the mould used has to have many requirements mainly:
These factors kind of limit its use, especially for student work. Personally, I tried to make a mould of a plastic tupperware container but first I had to drill holes in the middle but eventually the plastic warped together with the sheet. Also, If I wanted to use a metal or glass tupperware instead, I will be unable to drill the required holes into them.
Nonetheless, with the right equipments and materials, vaccum forming can definitely go a long way as they can imitate a surface layer easily without using too much material.
I wonder if polyester fabrics can be used instead?
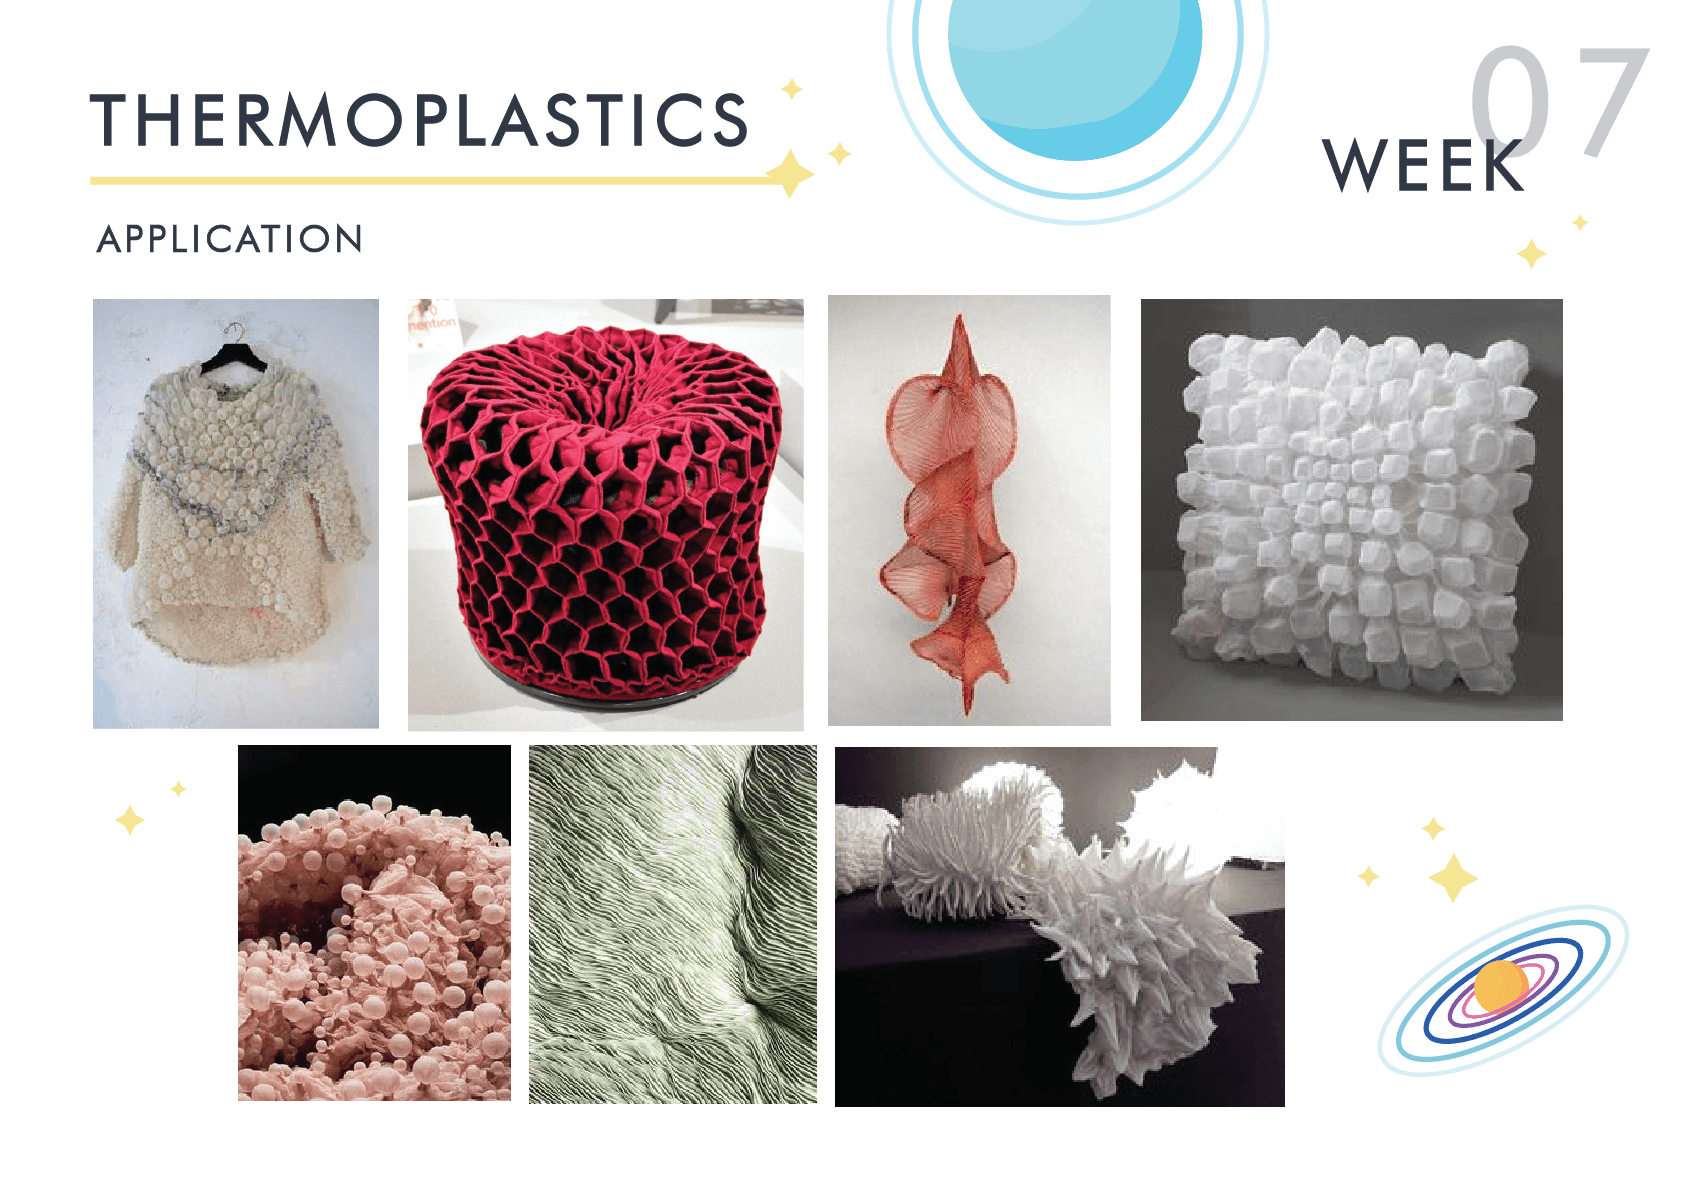
A P P L I C A T I O N S
Packaging

Furniture
Wall panelling

Fun 2D designs

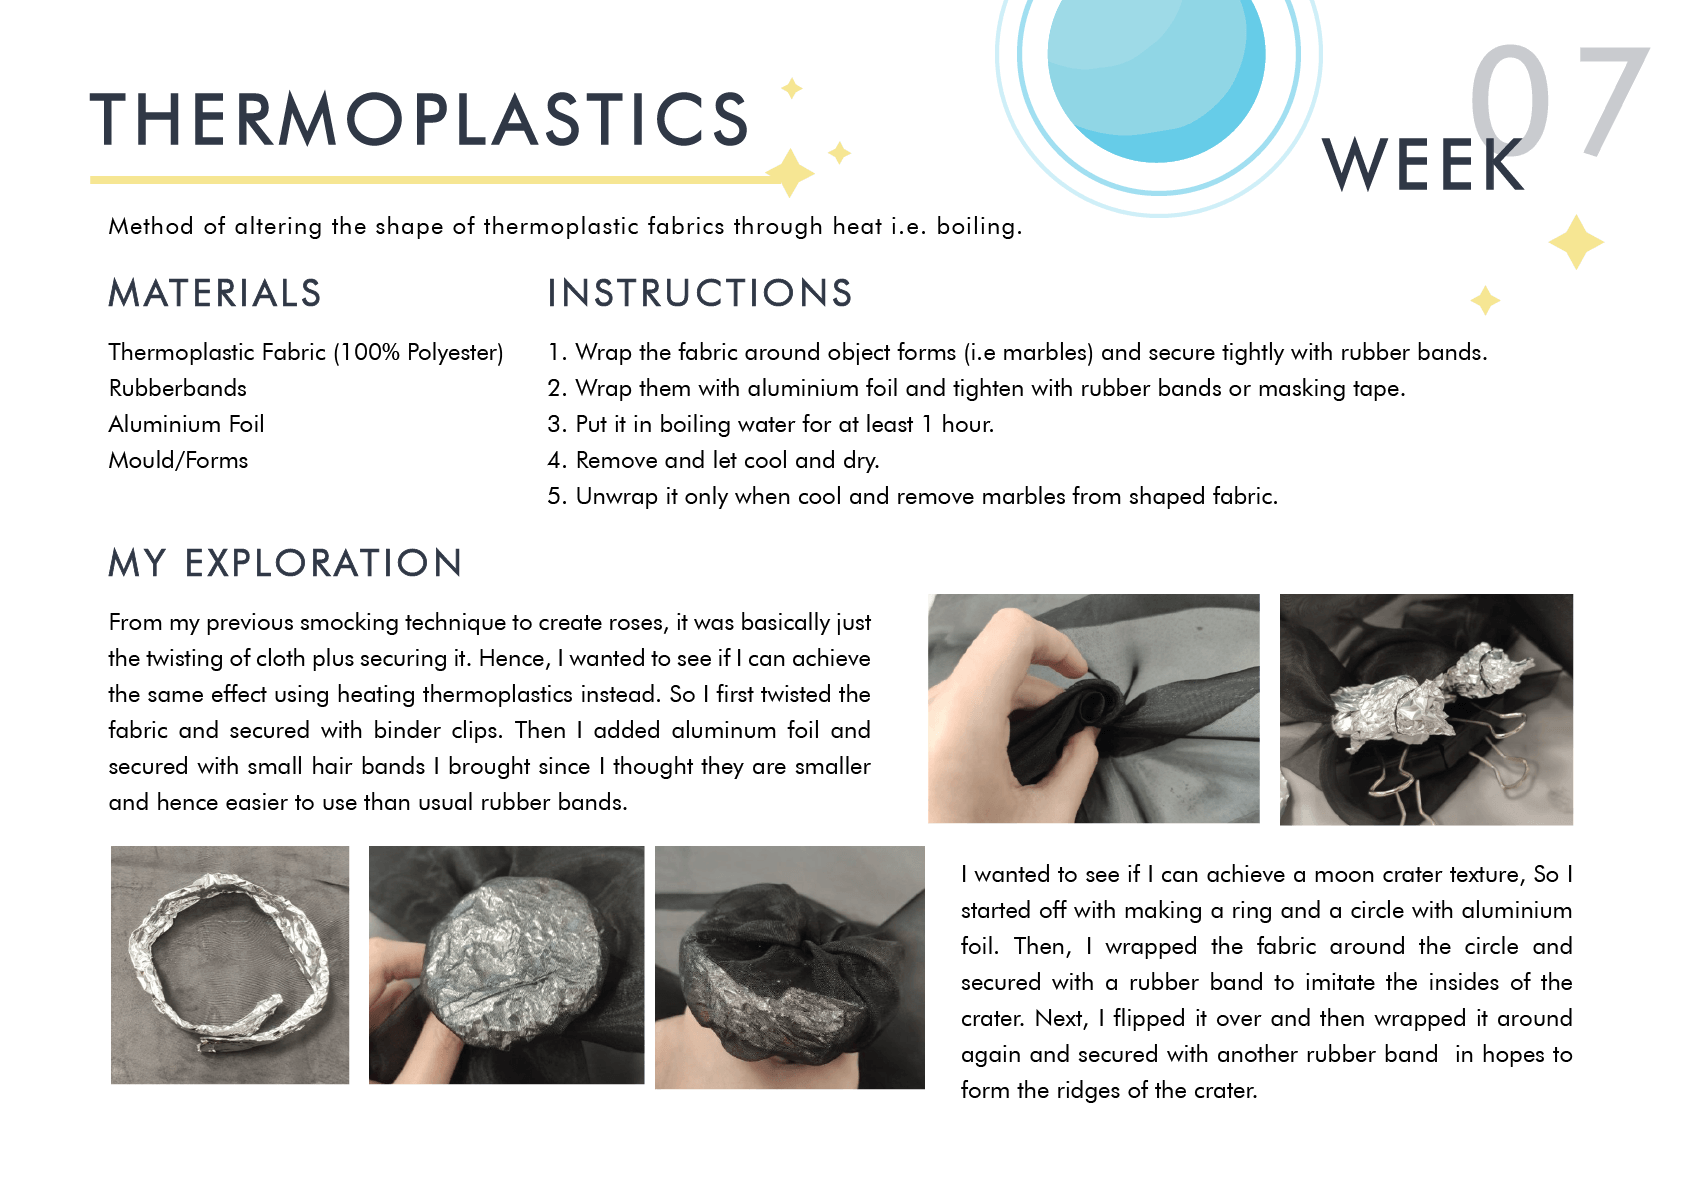
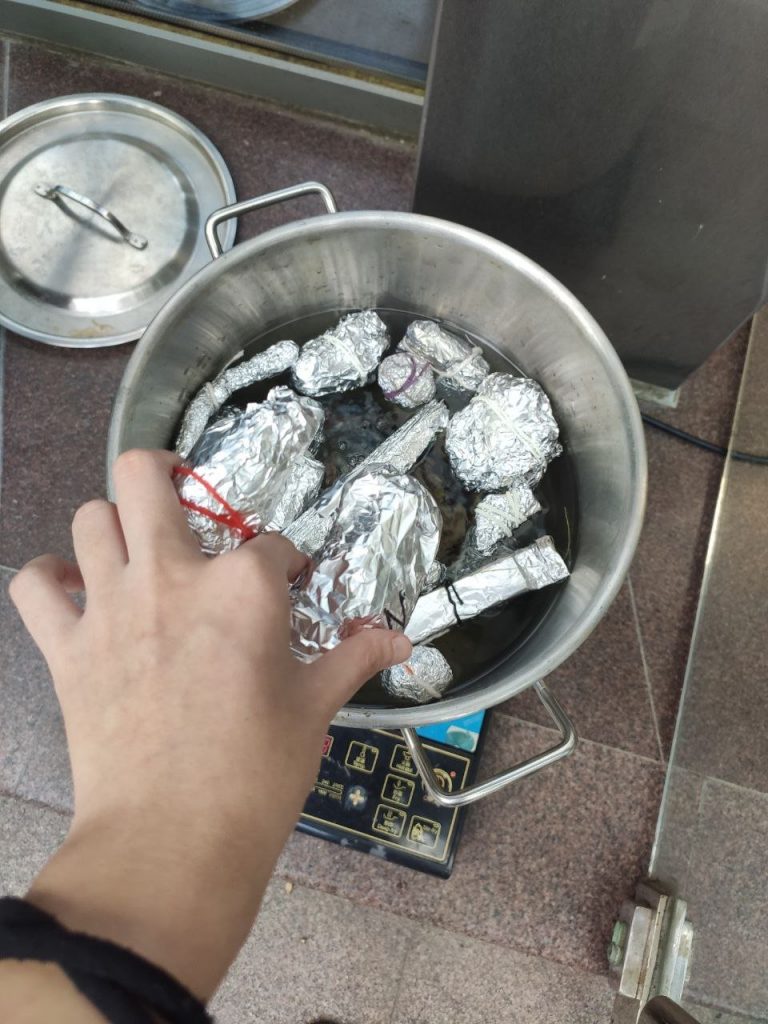
Method of altering the shape of thermoplastic fabrics through heat i.e. boiling.
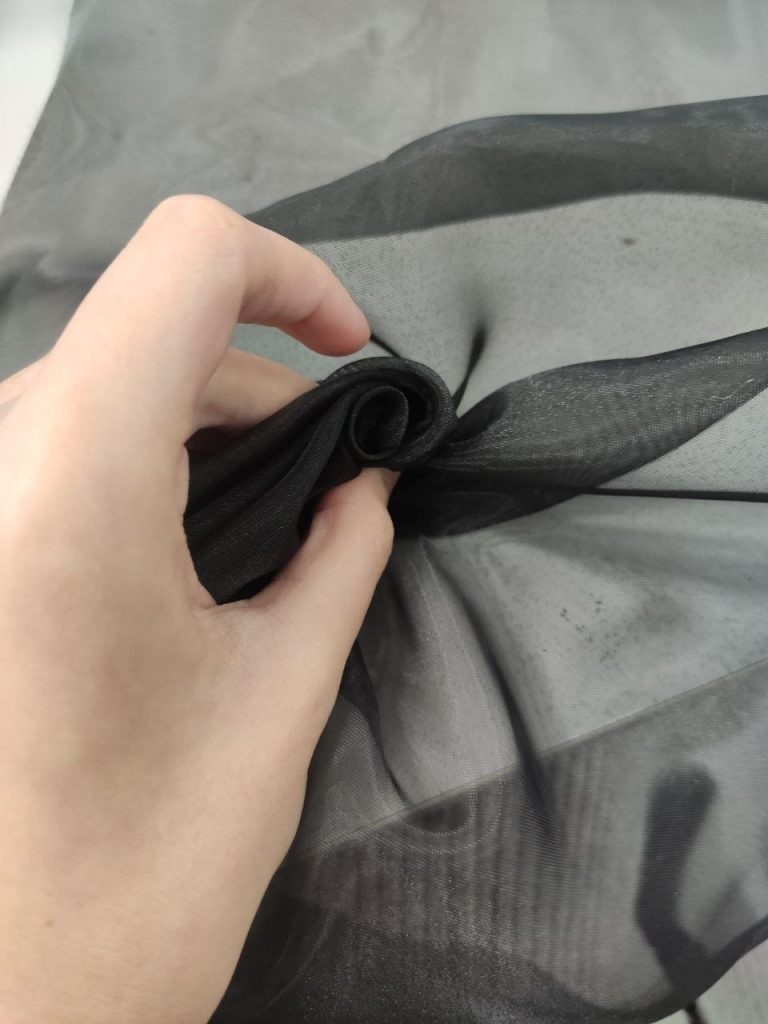
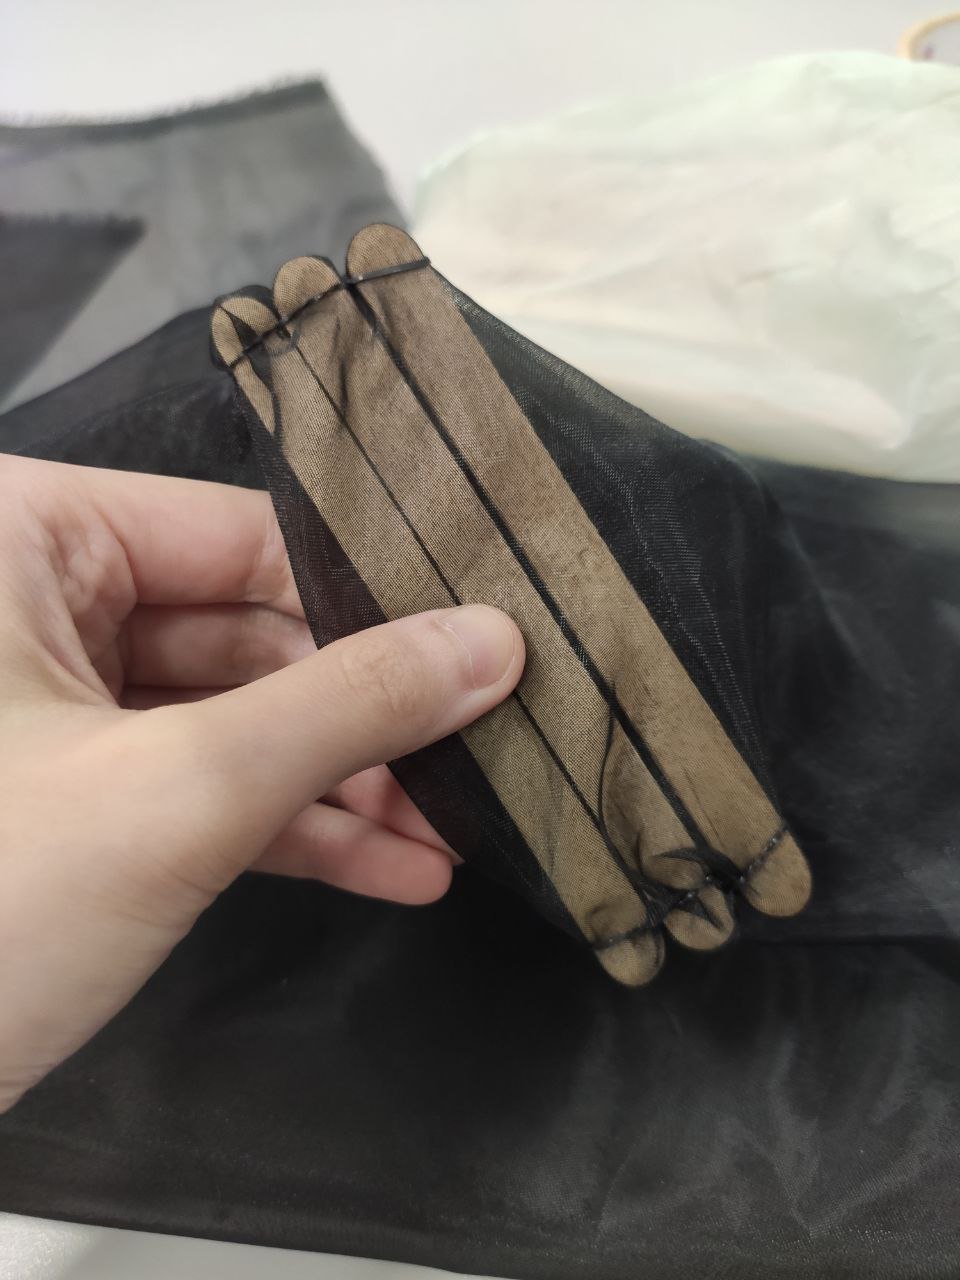
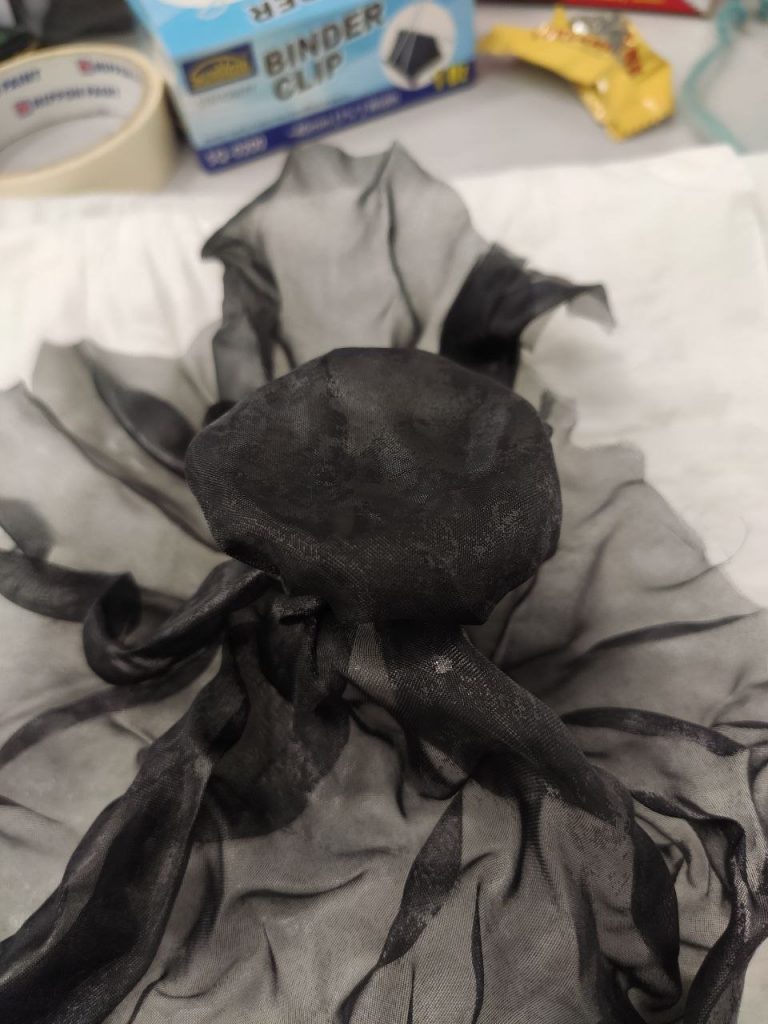
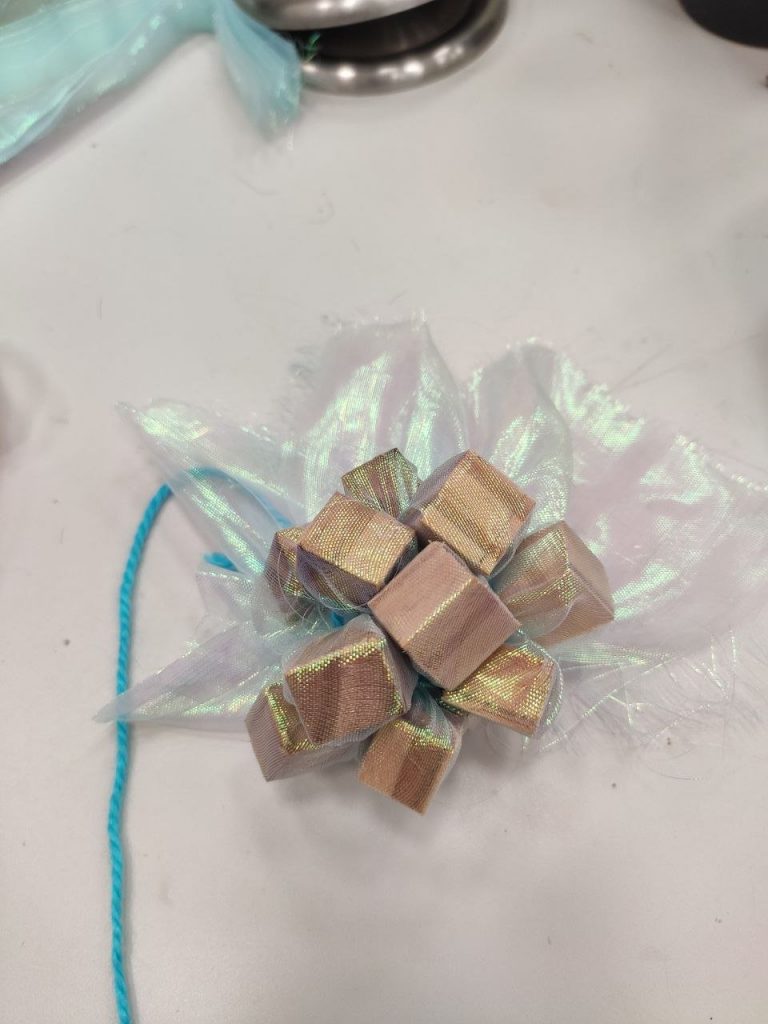
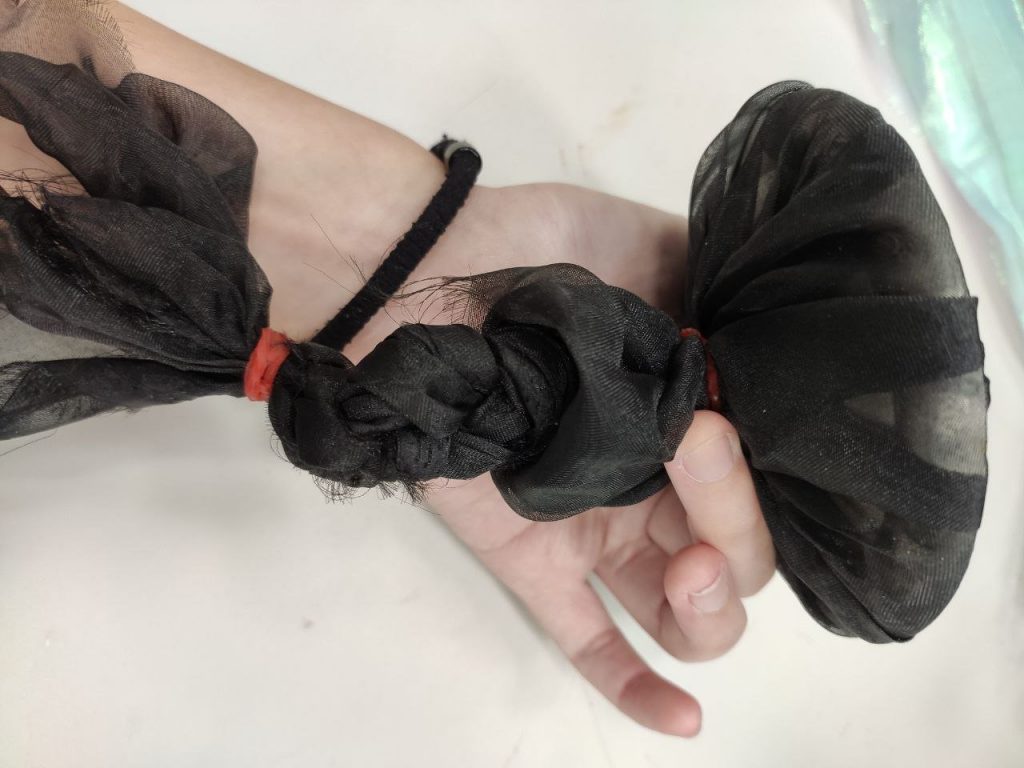
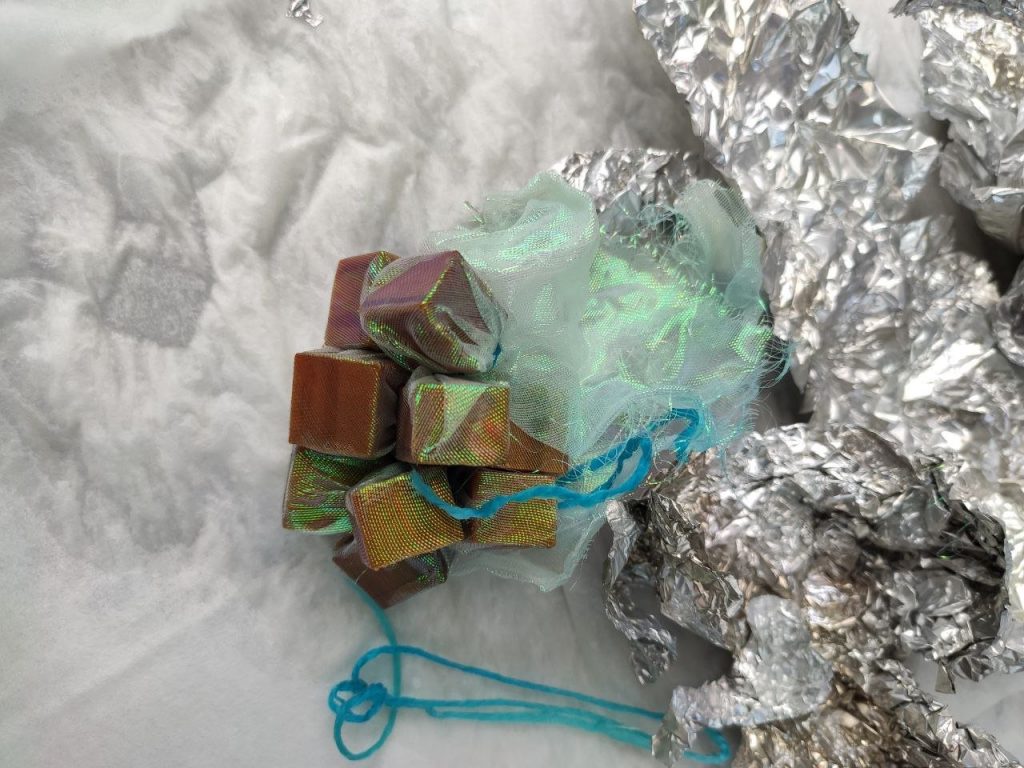
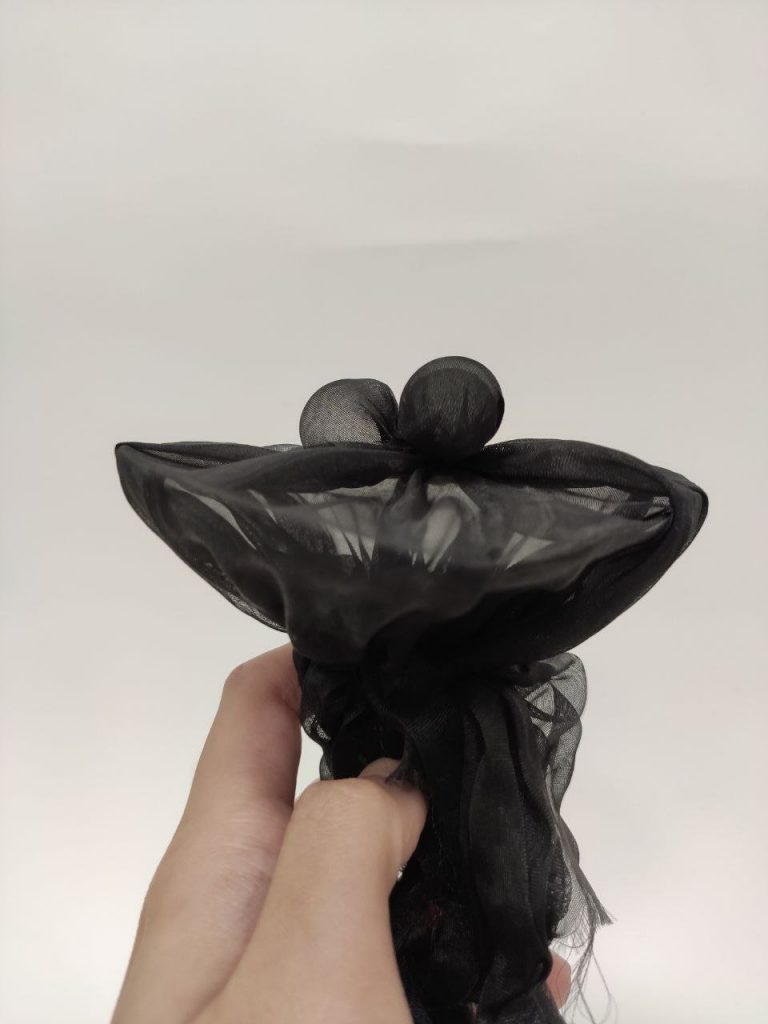
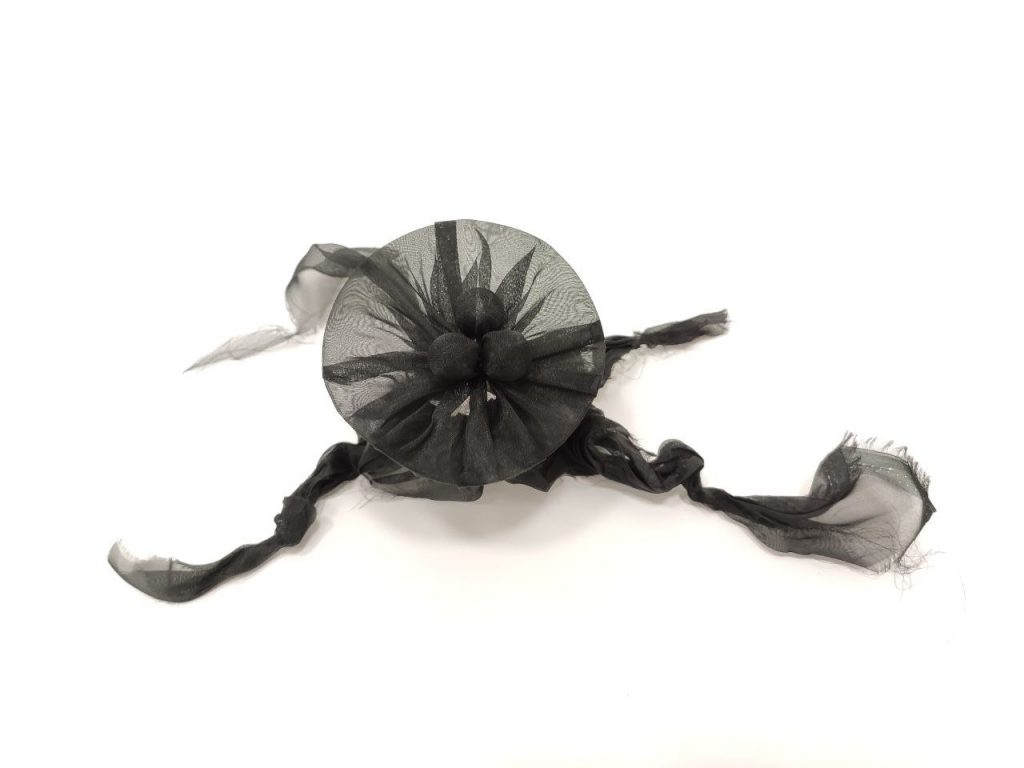
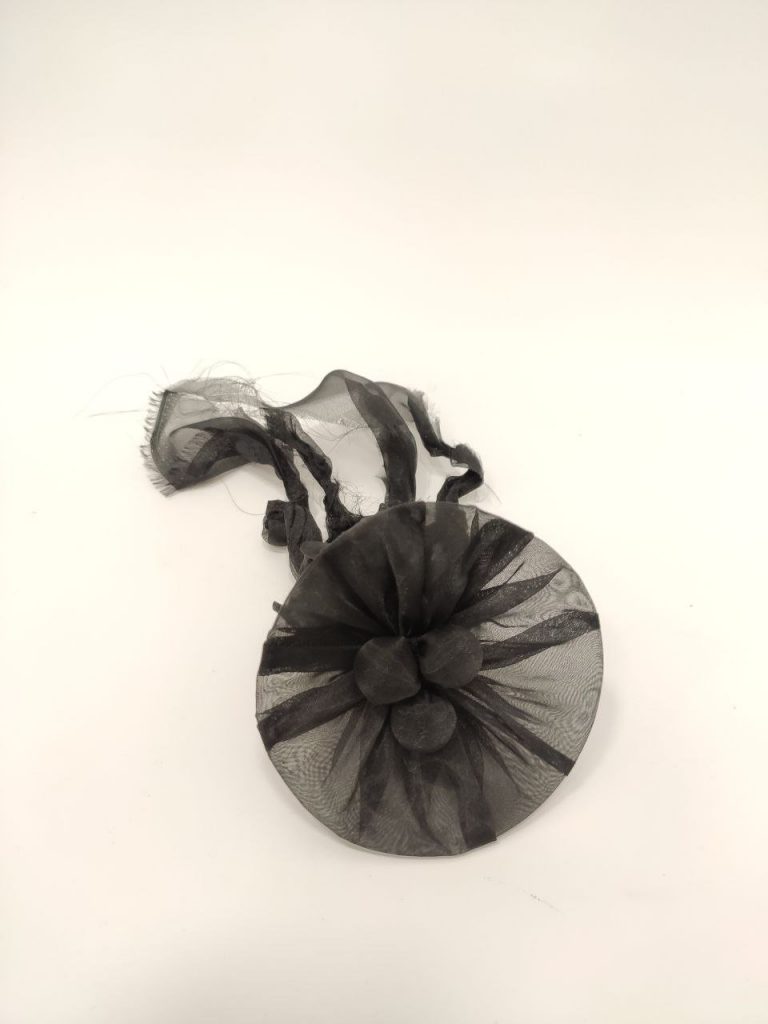
From my previous smocking technique to create roses, it was basically just the twisting of cloth plus securing it. Hence, I wanted to see if I can achieve the same effect using heating thermoplastics instead.
So I first twisted the fabric and secured with binder clips.
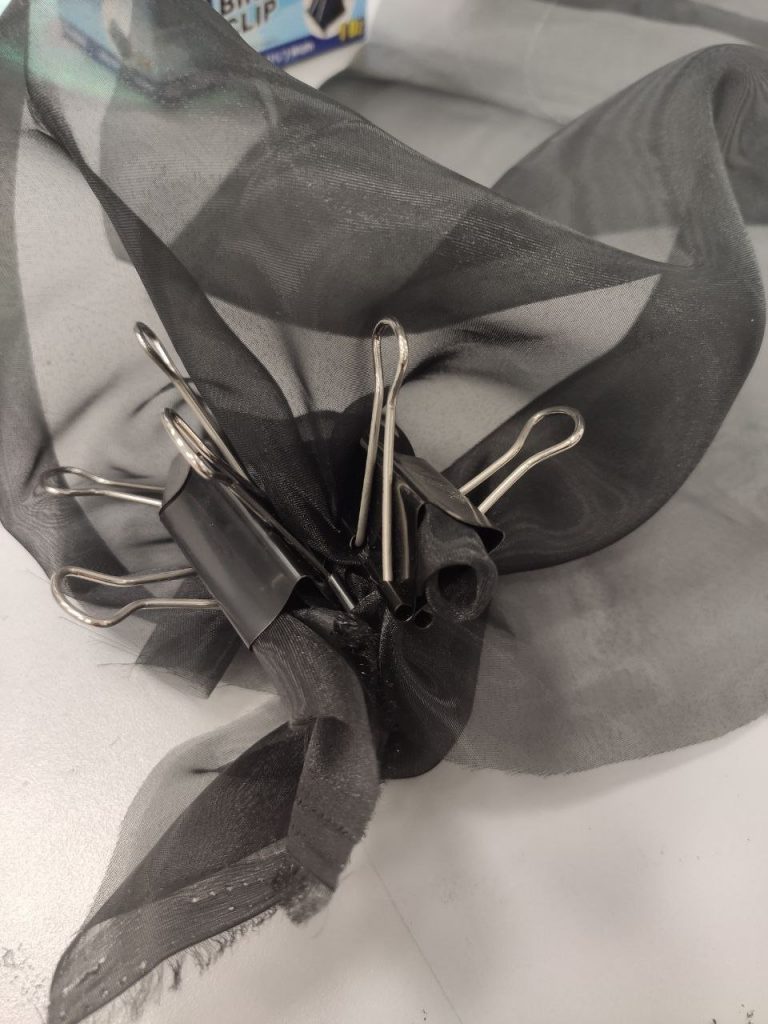
Then I added aluminum foil and secured with small hair bands I brought since I thought they are smaller and hence easier to use than usual rubber bands.

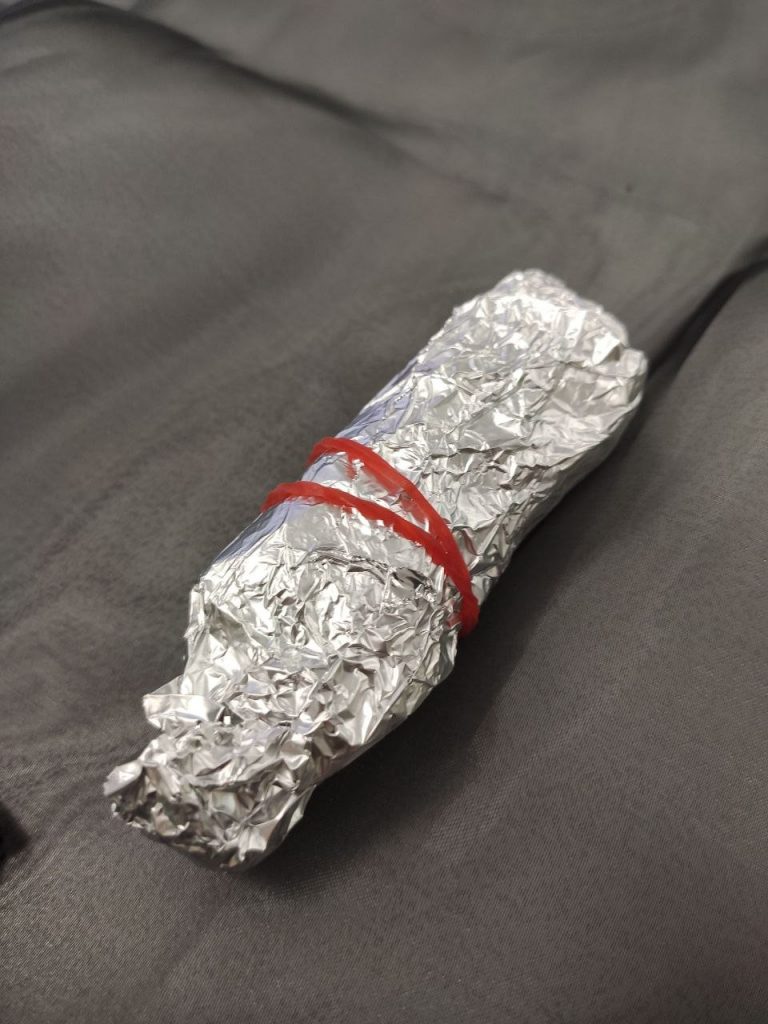
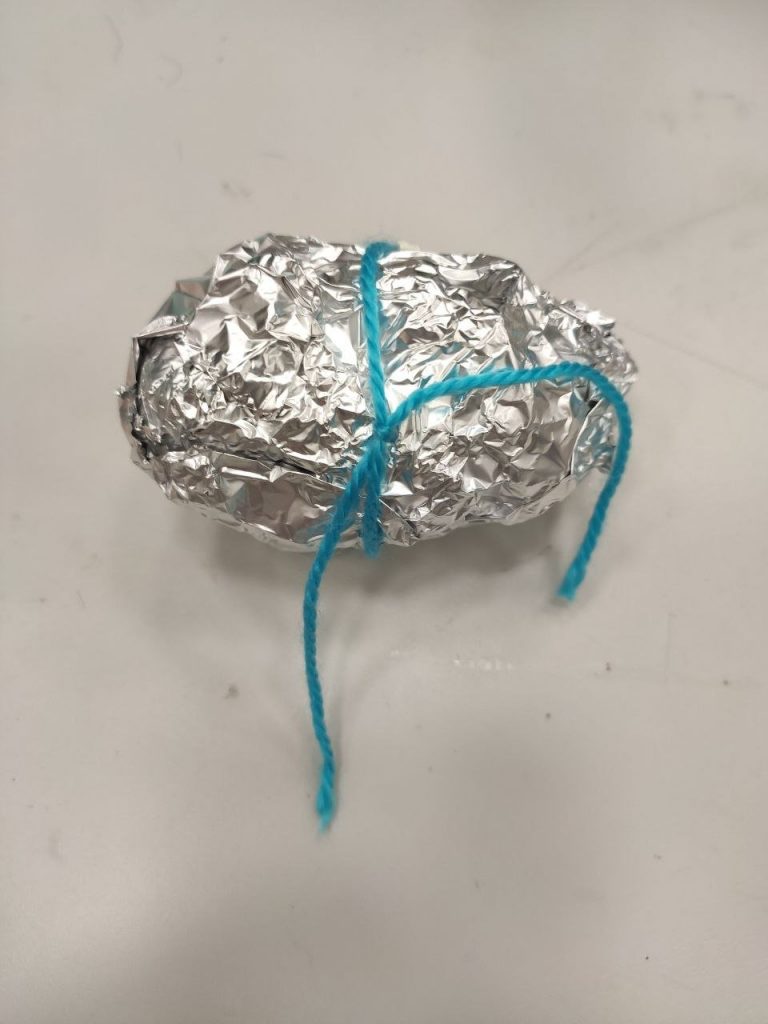
Finally, I rolled it all up and wrap it in aluminium foil.
Next, I also brought some ice cream sticks. and was exploring what I can do with them.
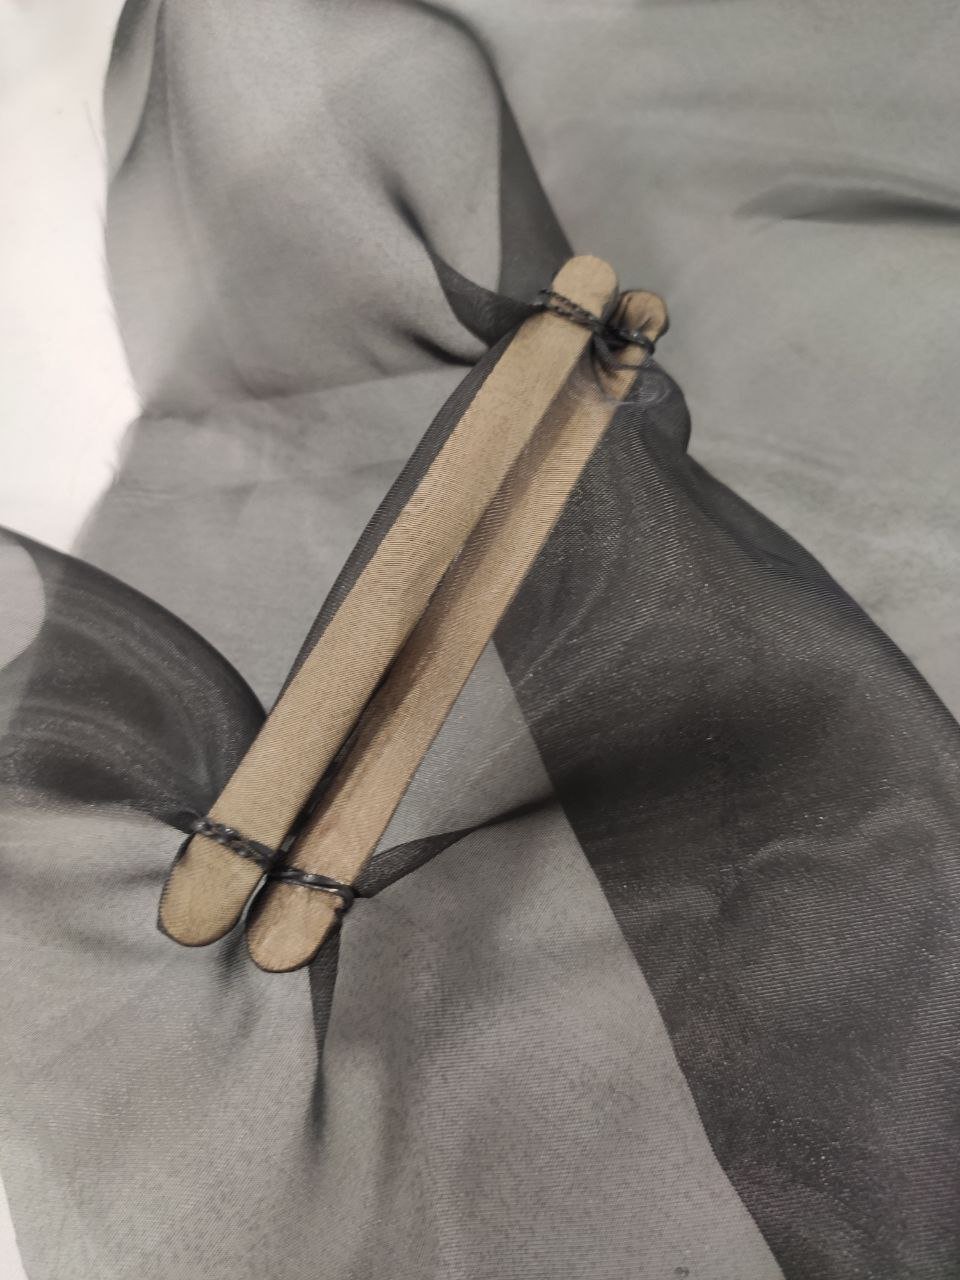
However, for the above picture, I realised since the middle is loose, the only part which the shape will hold are the ends of the ice cream stick. Hence, I removed them all.
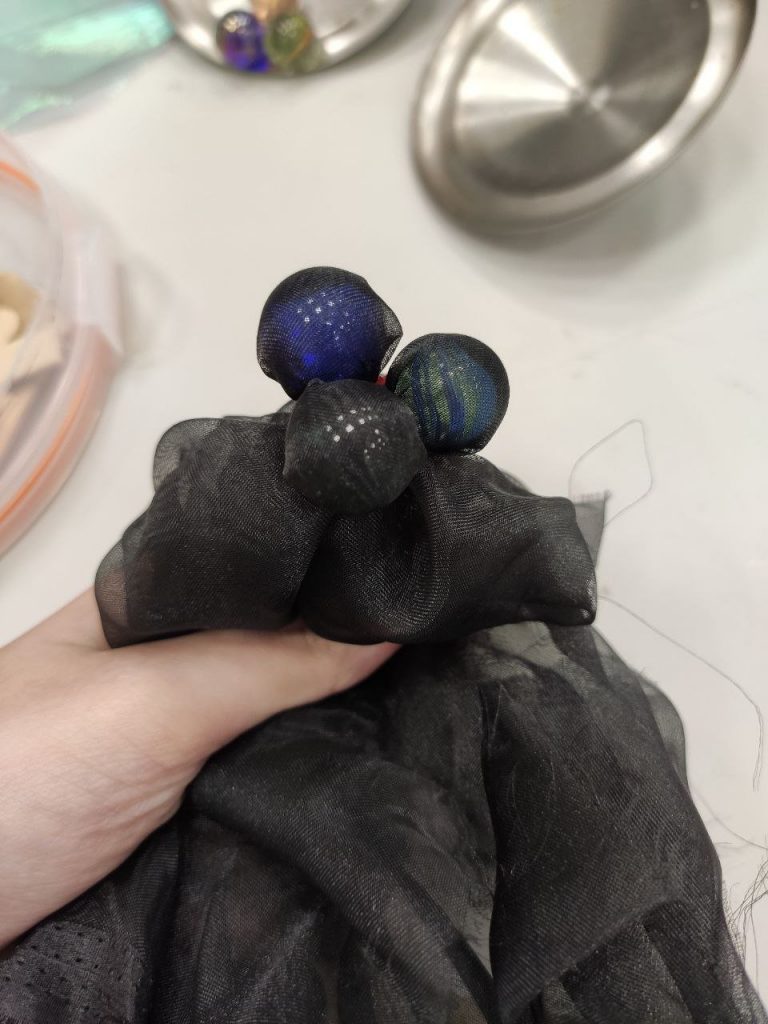
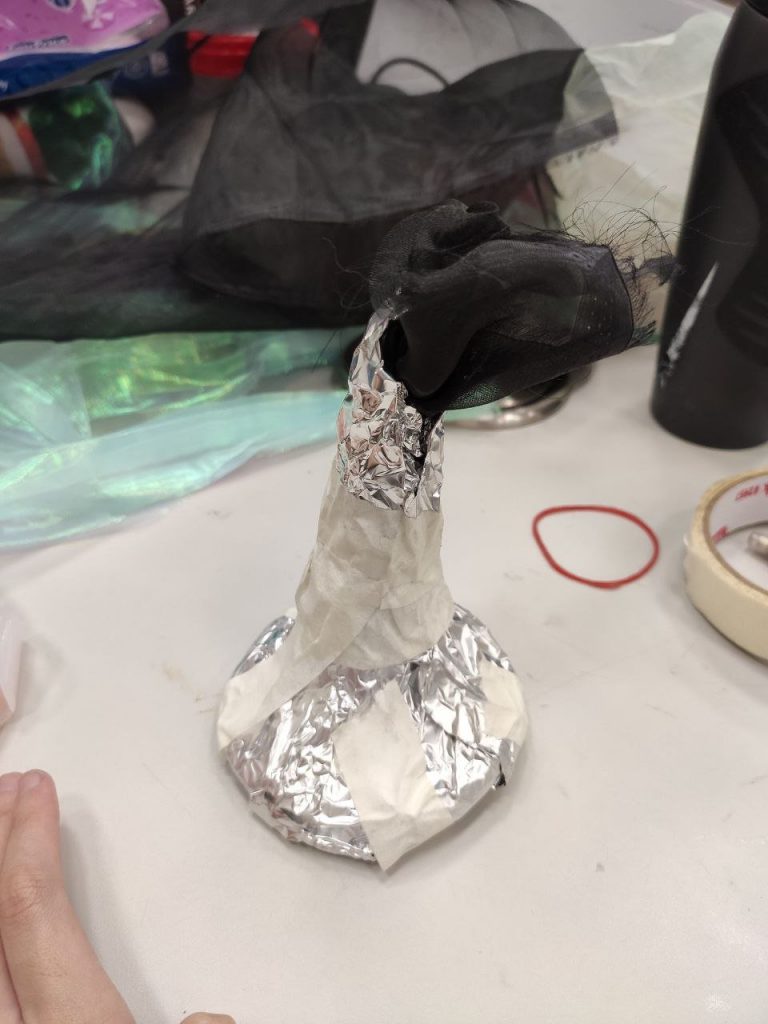
Lastly, I wanted to see if I can achieve a moon crater texture.

So I started off with making a ring and a circle with aluminium foil.
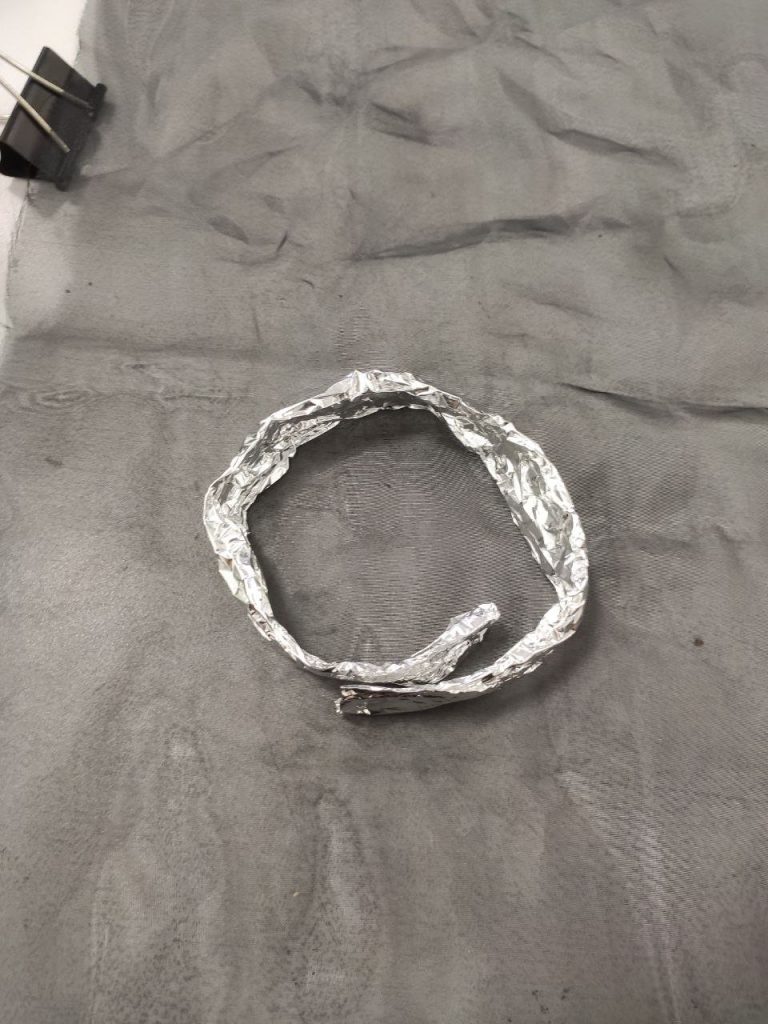
Then, I wrapped the fabric around the circle and secured with a rubber band to imitate the insides of the crater.
Next, I flipped it over and then wrapped it around again and secured with another rubber band in hopes to form the ridges of the crater.
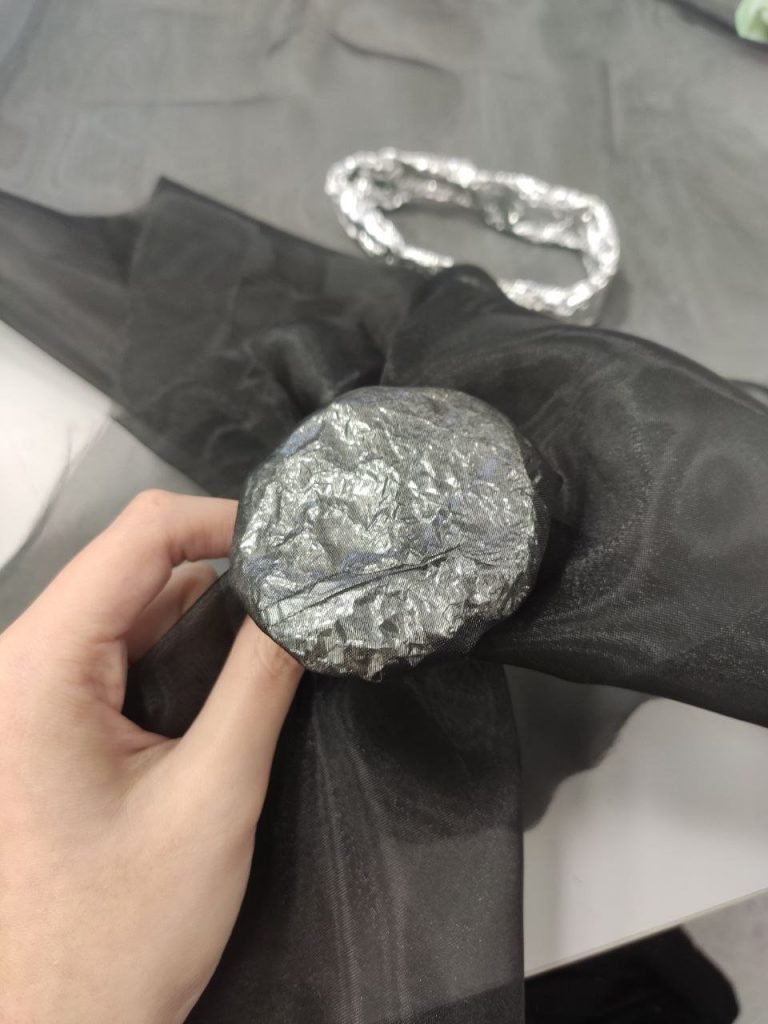
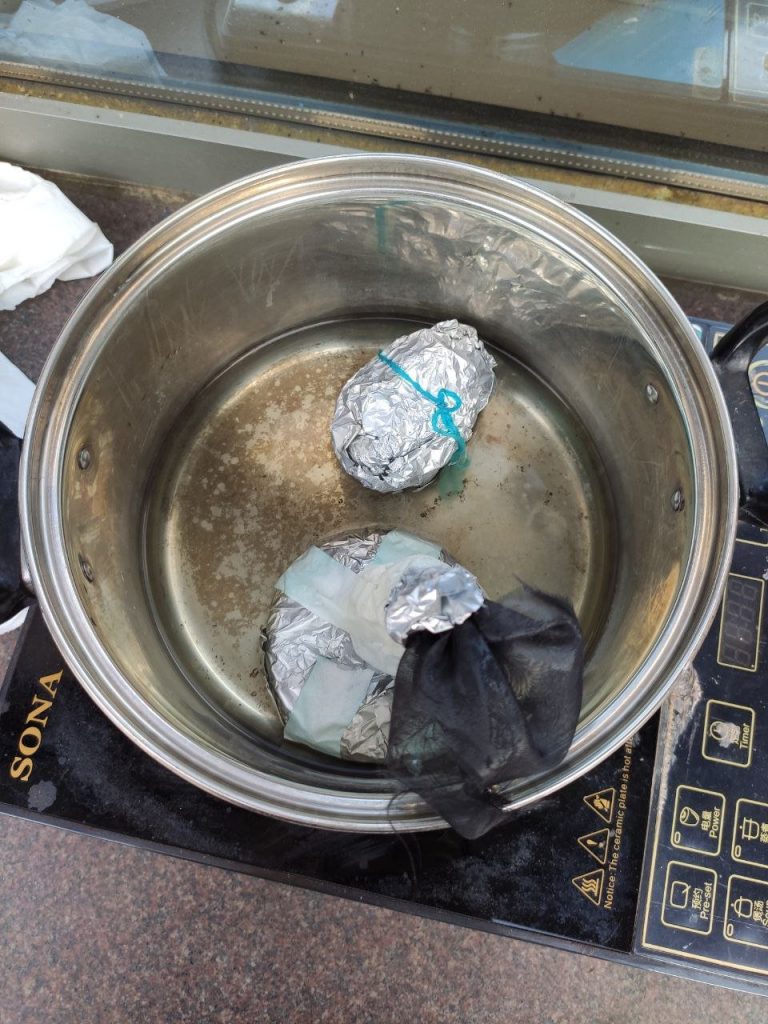
Then, its boiling time!
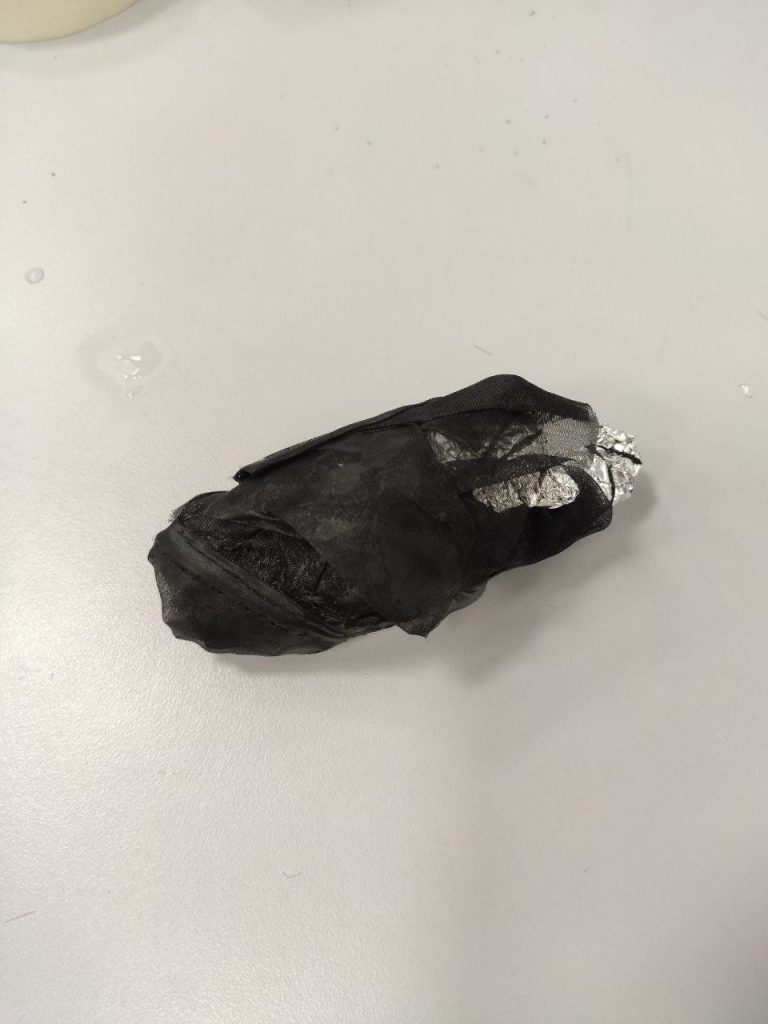
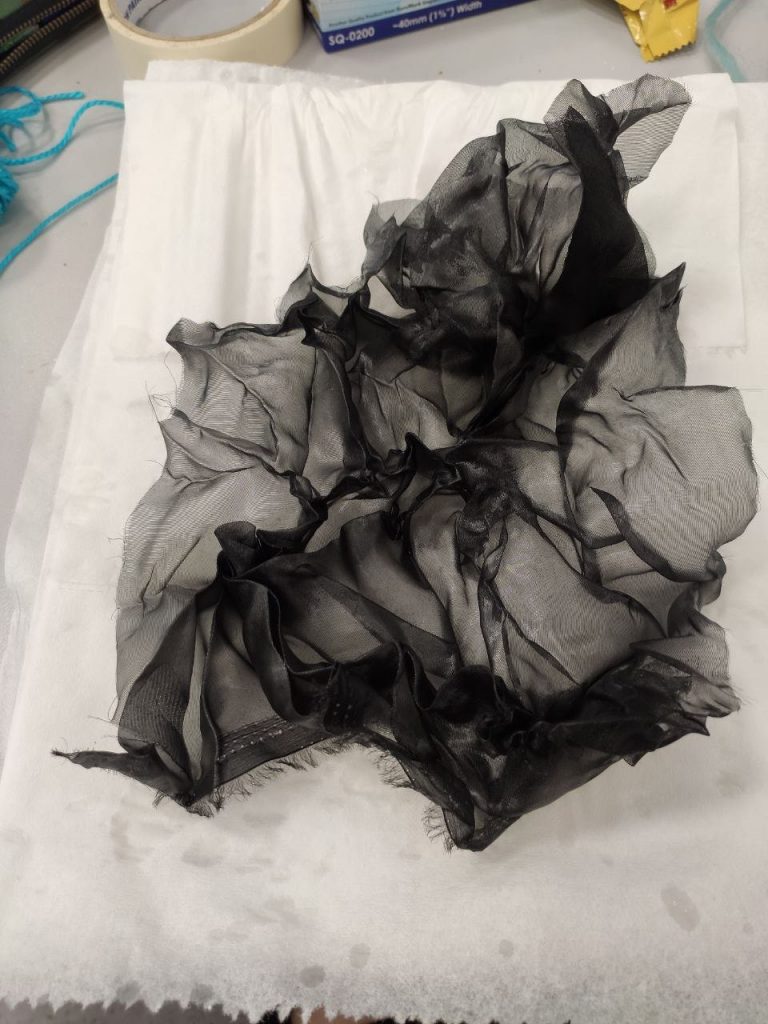
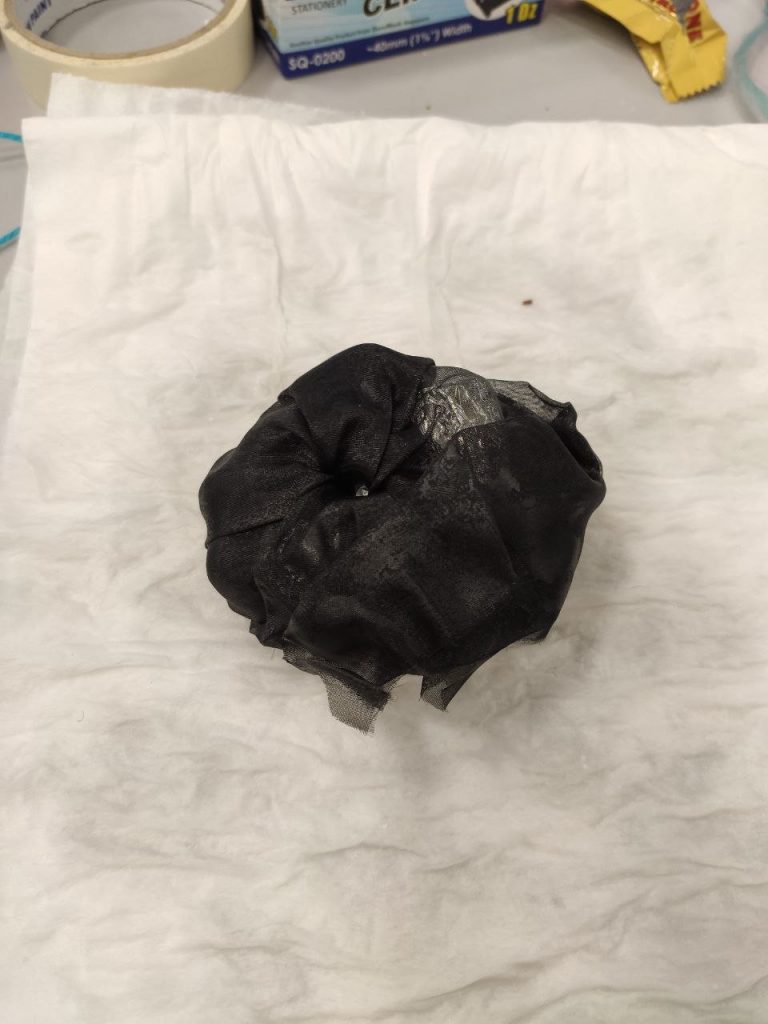
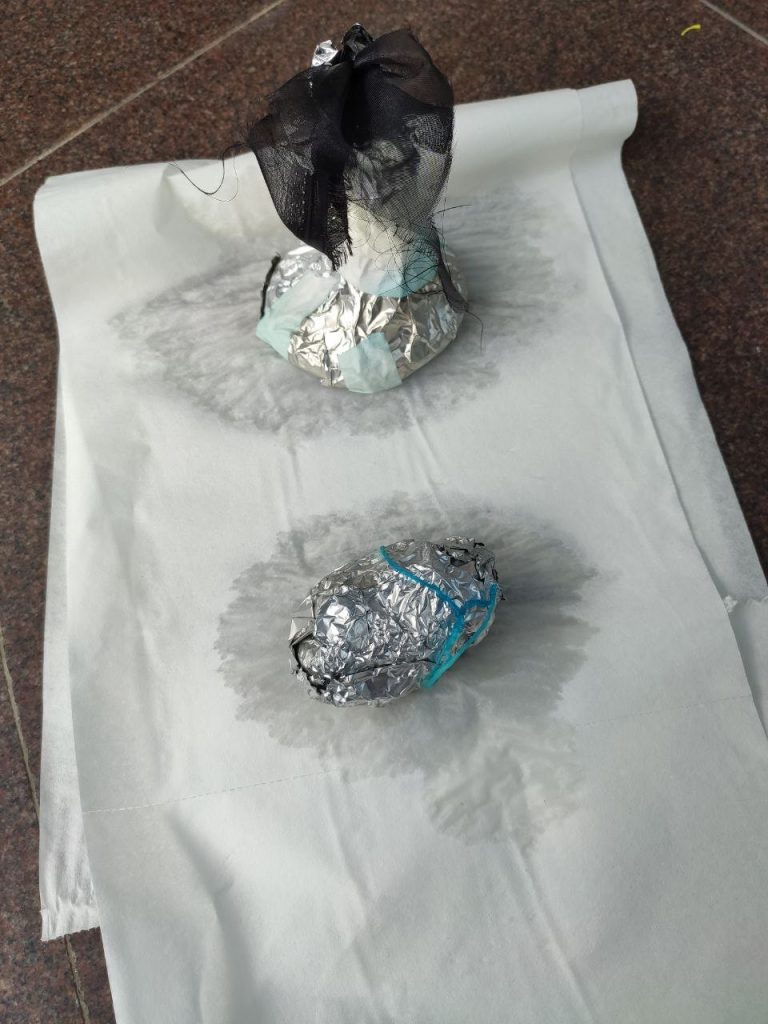
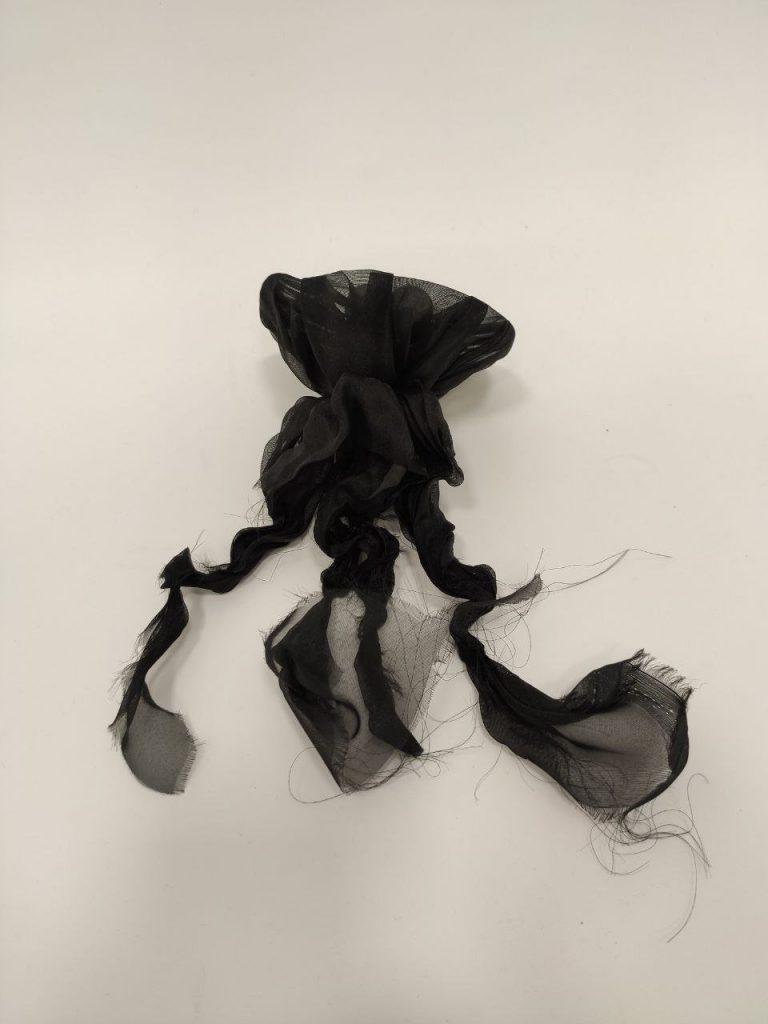
Unfortunately, it looks nothing like roses, but at least there was still some spiral form that can unravel and spring back.
I feel like the stiffness of organza might be causing the straight edges which makes it looks like mountains instead of round rose petals. Perhaps a softer polyester fabric like chiffon will have better results.
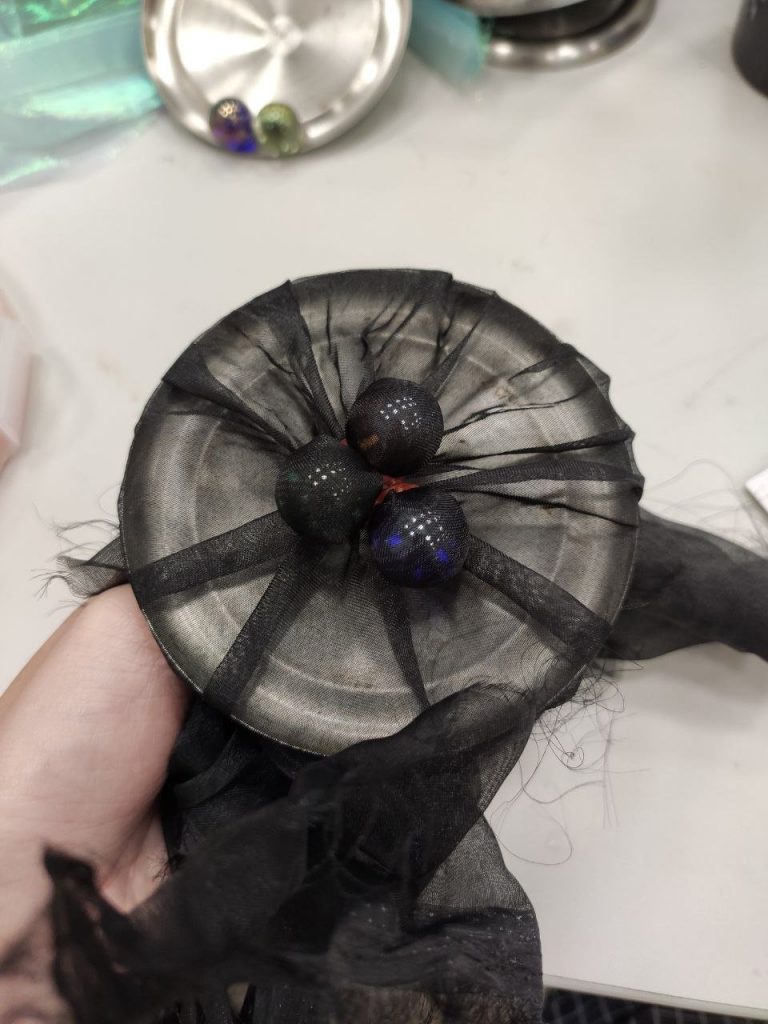
Next, for the crater:


Is also a failure! :((
I guess the tightness of the rubber band kind of makes it shape like a pouch instead.
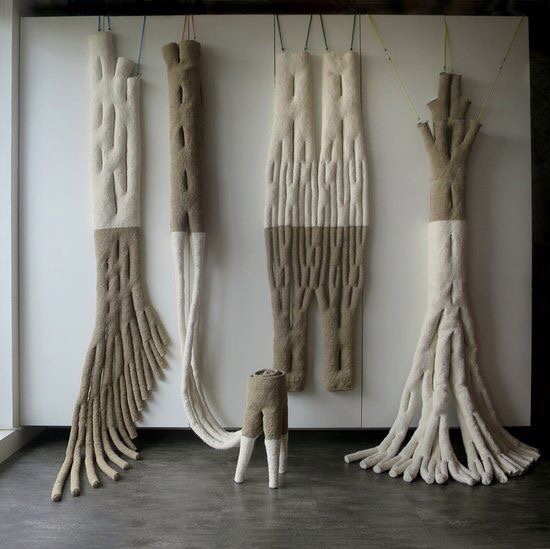
However, it does remind me of this knit sculpture that plays with opacity, and hence does have the potential to create an interesting lamp.

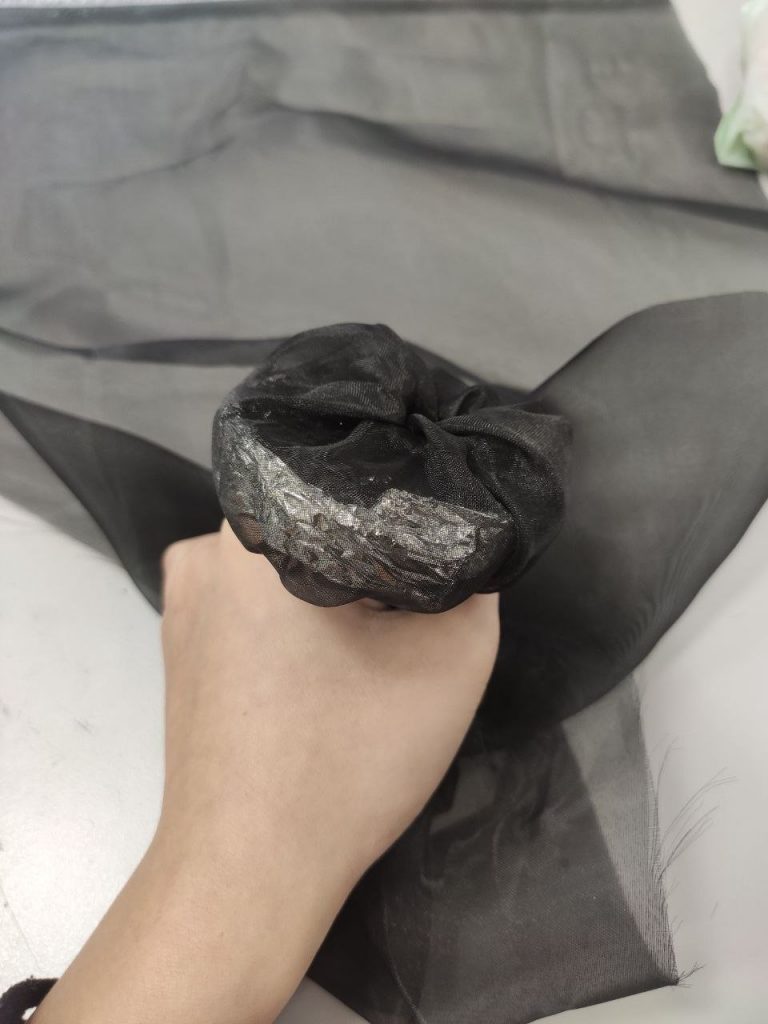
Overall, I am quite sad that there is a gap between expectations and reality with my forms but I’m glad I can learn from my mistakes and do better next time!
I will try again, next time with a few points in mind:
UPDATED: Round 2!
So this time I decided to use something smaller and borrowed some wooden cubes that Meryl had cut!
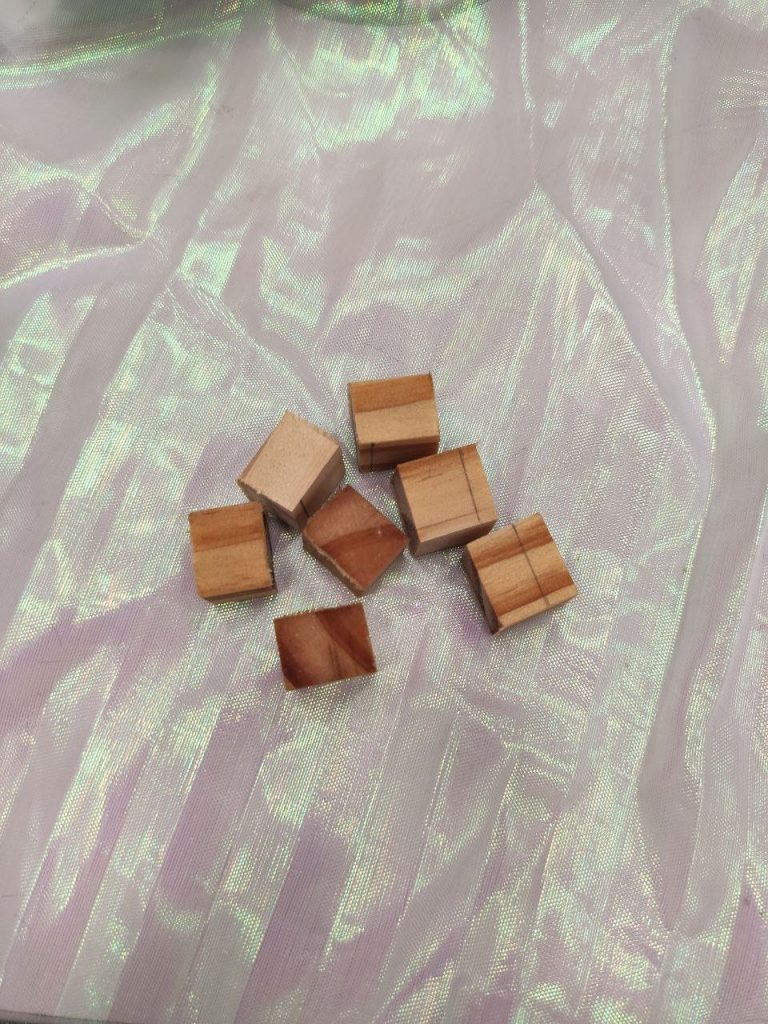
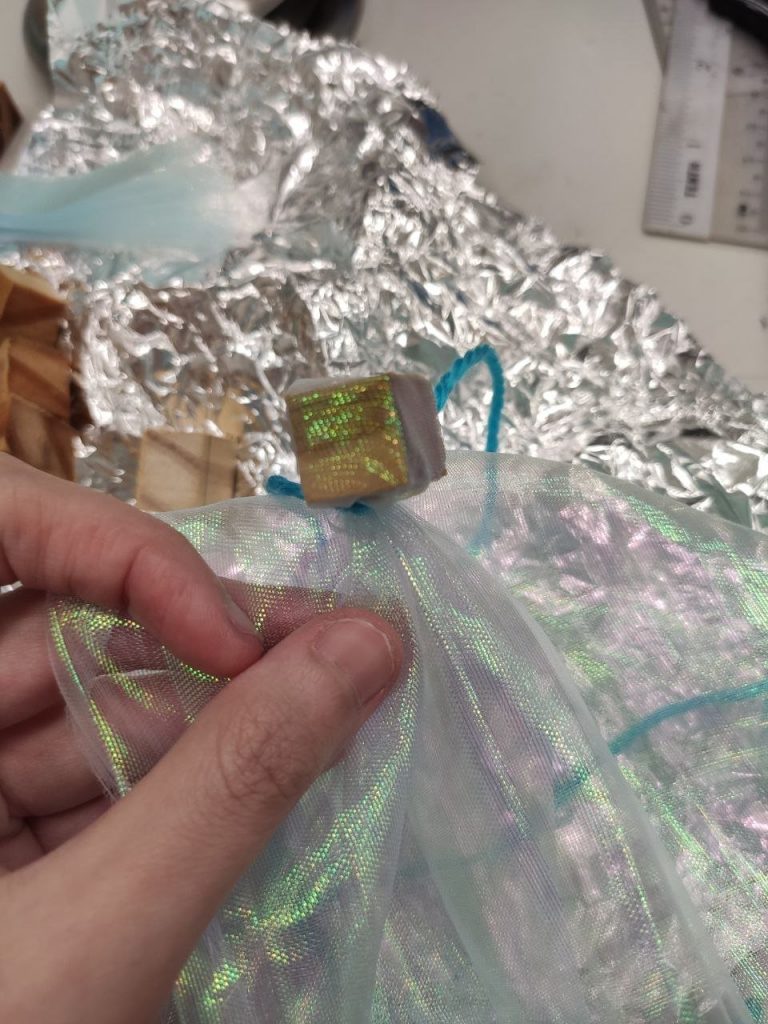
This time fastening using yarn instead of the fragile hair ties.
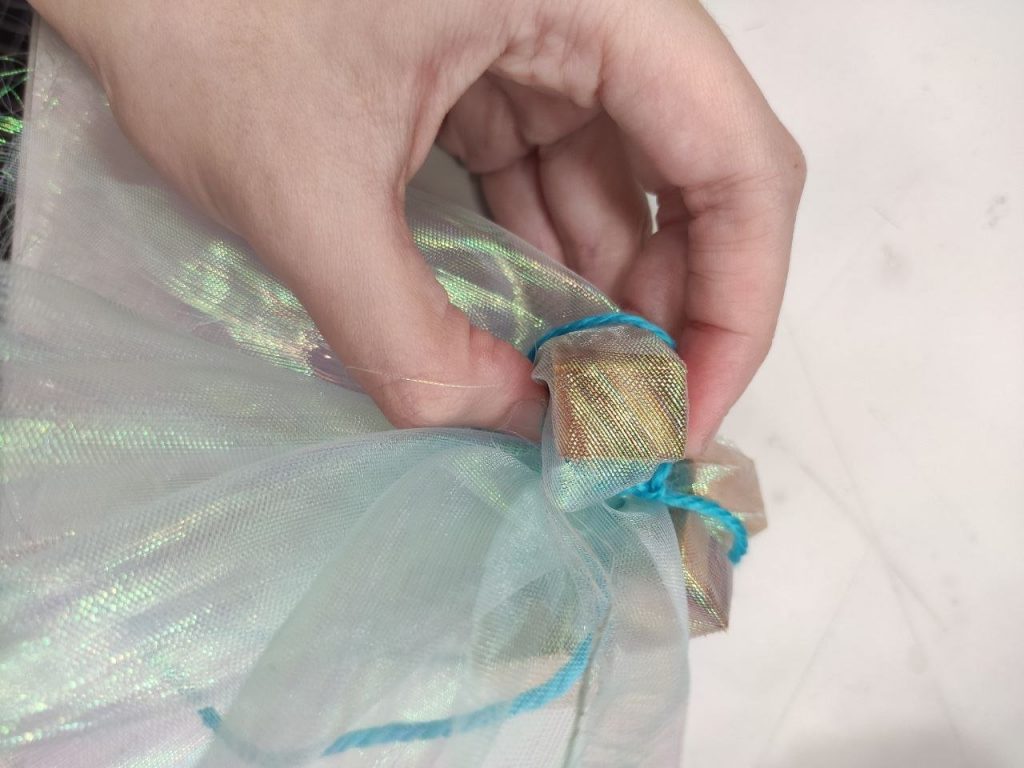
Then wrapped in aluminium foil and ready to boil!
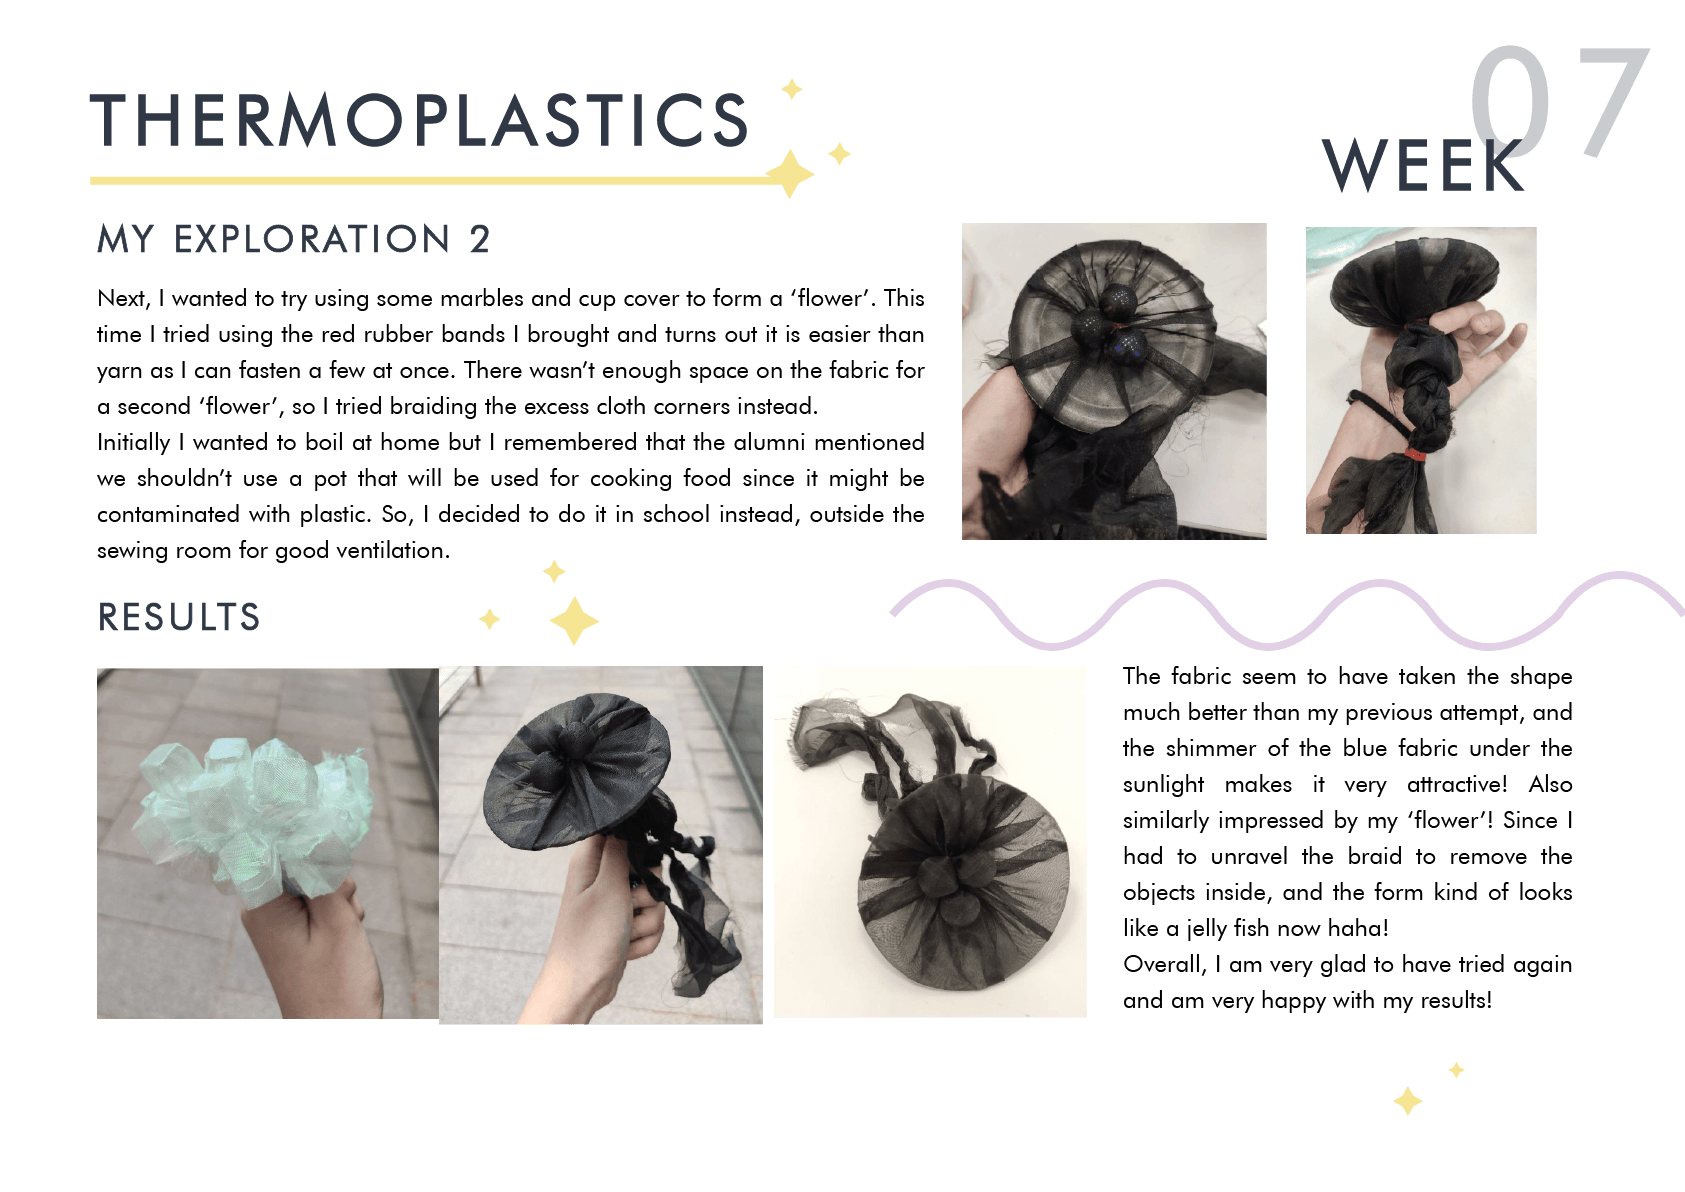
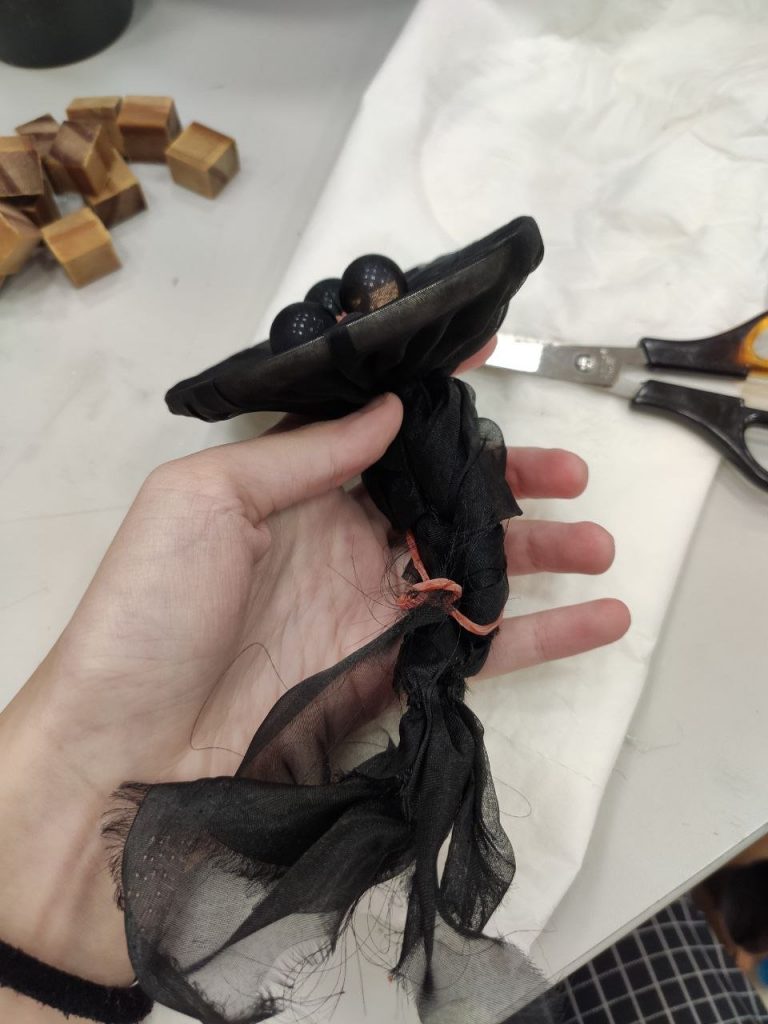
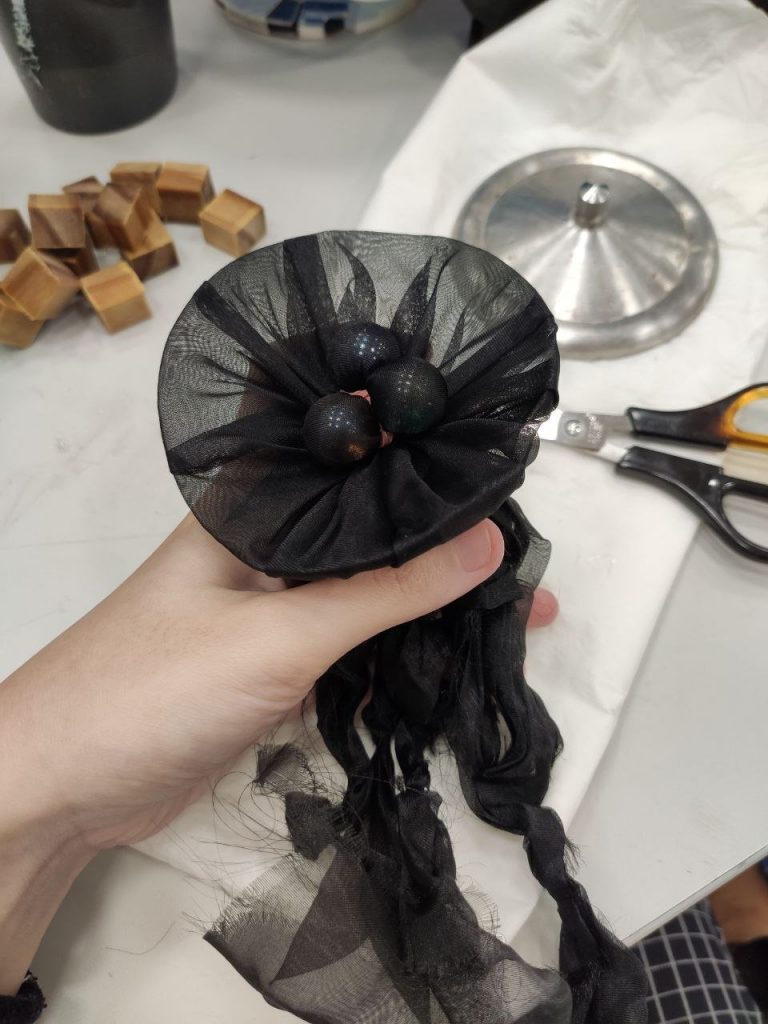
Next, I wanted to try using some marbles and cup cover.
This time I tried using the red rubber bands I brought and turns out it is easier than yarn as I can fasten a few at once.
There wasn’t enough space on the fabric for a second ‘flower’, so I tried braiding the excess cloth corners instead.
Once again wrapped in foil and ready to boil!
Initially I wanted to boil at home but I remembered that the alumni mentioned we shouldn’t use a pot that will be used for cooking food since it might be contaminated with plastic.
So, I decided to do it in school instead, outside the sewing room for good ventilation.
After 1 and a half hours of boiling…
The water level seemed really low by the end, and I was worried this might affect the results.
Nonetheless, I decided to see the end products first.
Removing the foil after it has cooled..

Tada!
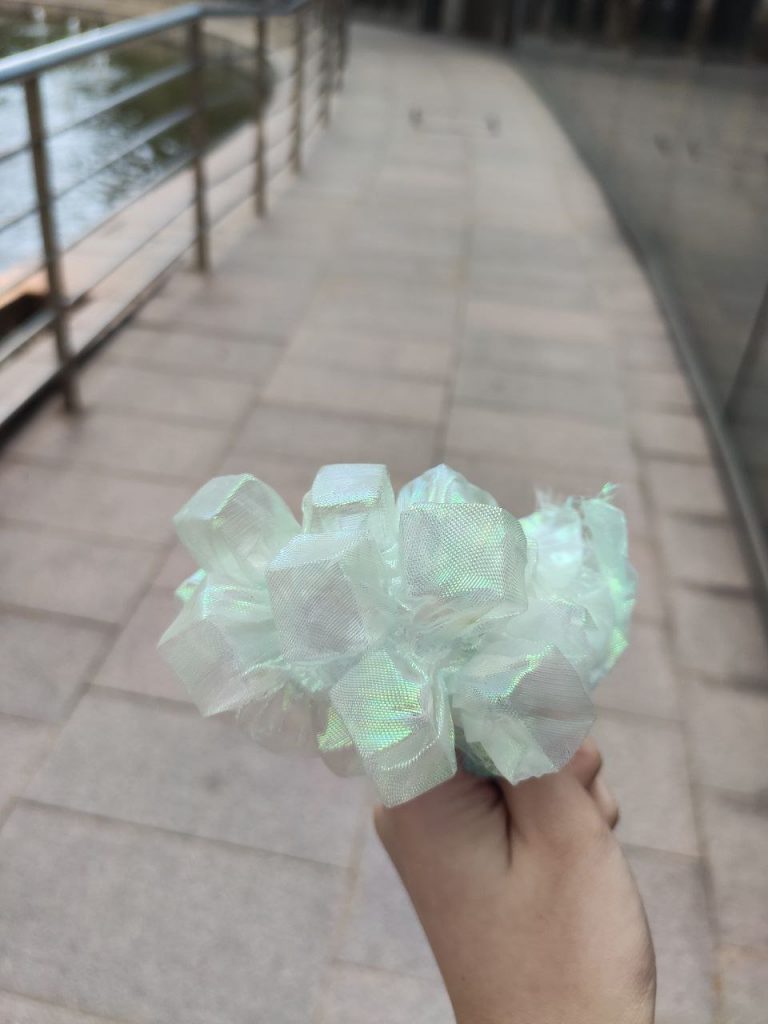
The fabric seem to have taken the shape much better than my previous attempt, and the shimmer of the blue fabric under the sunlight makes it very attractive!
Also similarly impressed by my ‘flower’!

Since I had to unravel the braid to remove the objects inside, and the form kind of looks like a jelly fish now haha!
Overall, I am very glad to have tried again and am very happy with my results! In fact, I liked the cubes one so much I have an idea to turn it into a hair tie! Stay tuned! 😀
A P P L I C A T I O N S


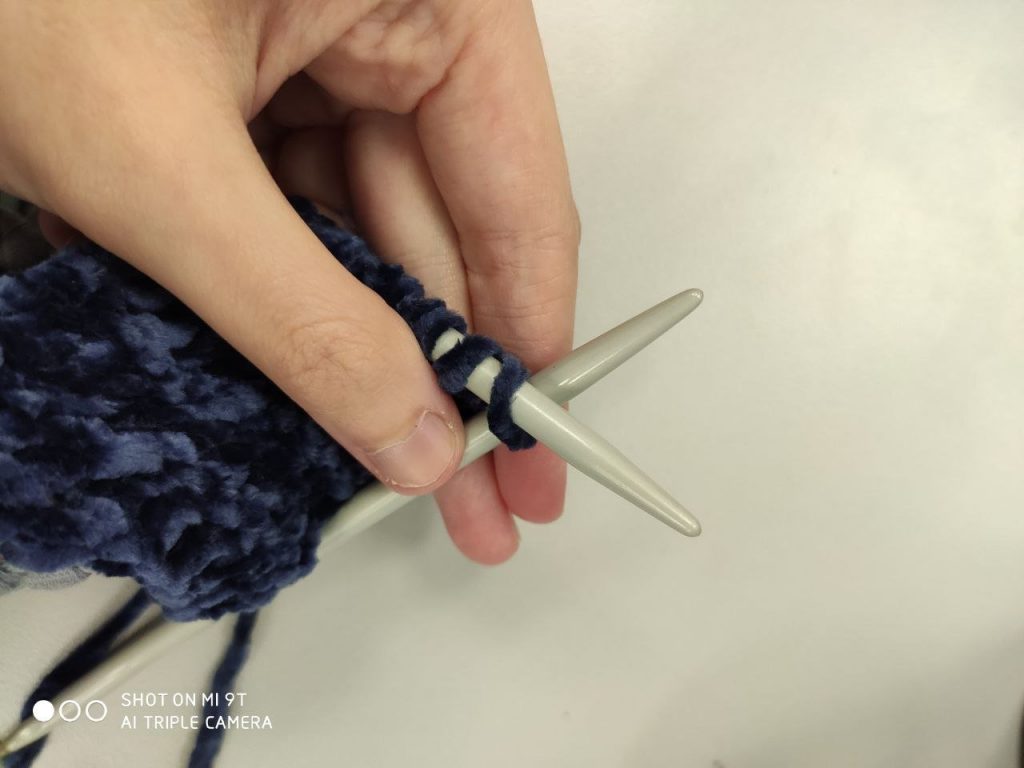
Method of creating garment by interlocking loops of thread-like material using needles.
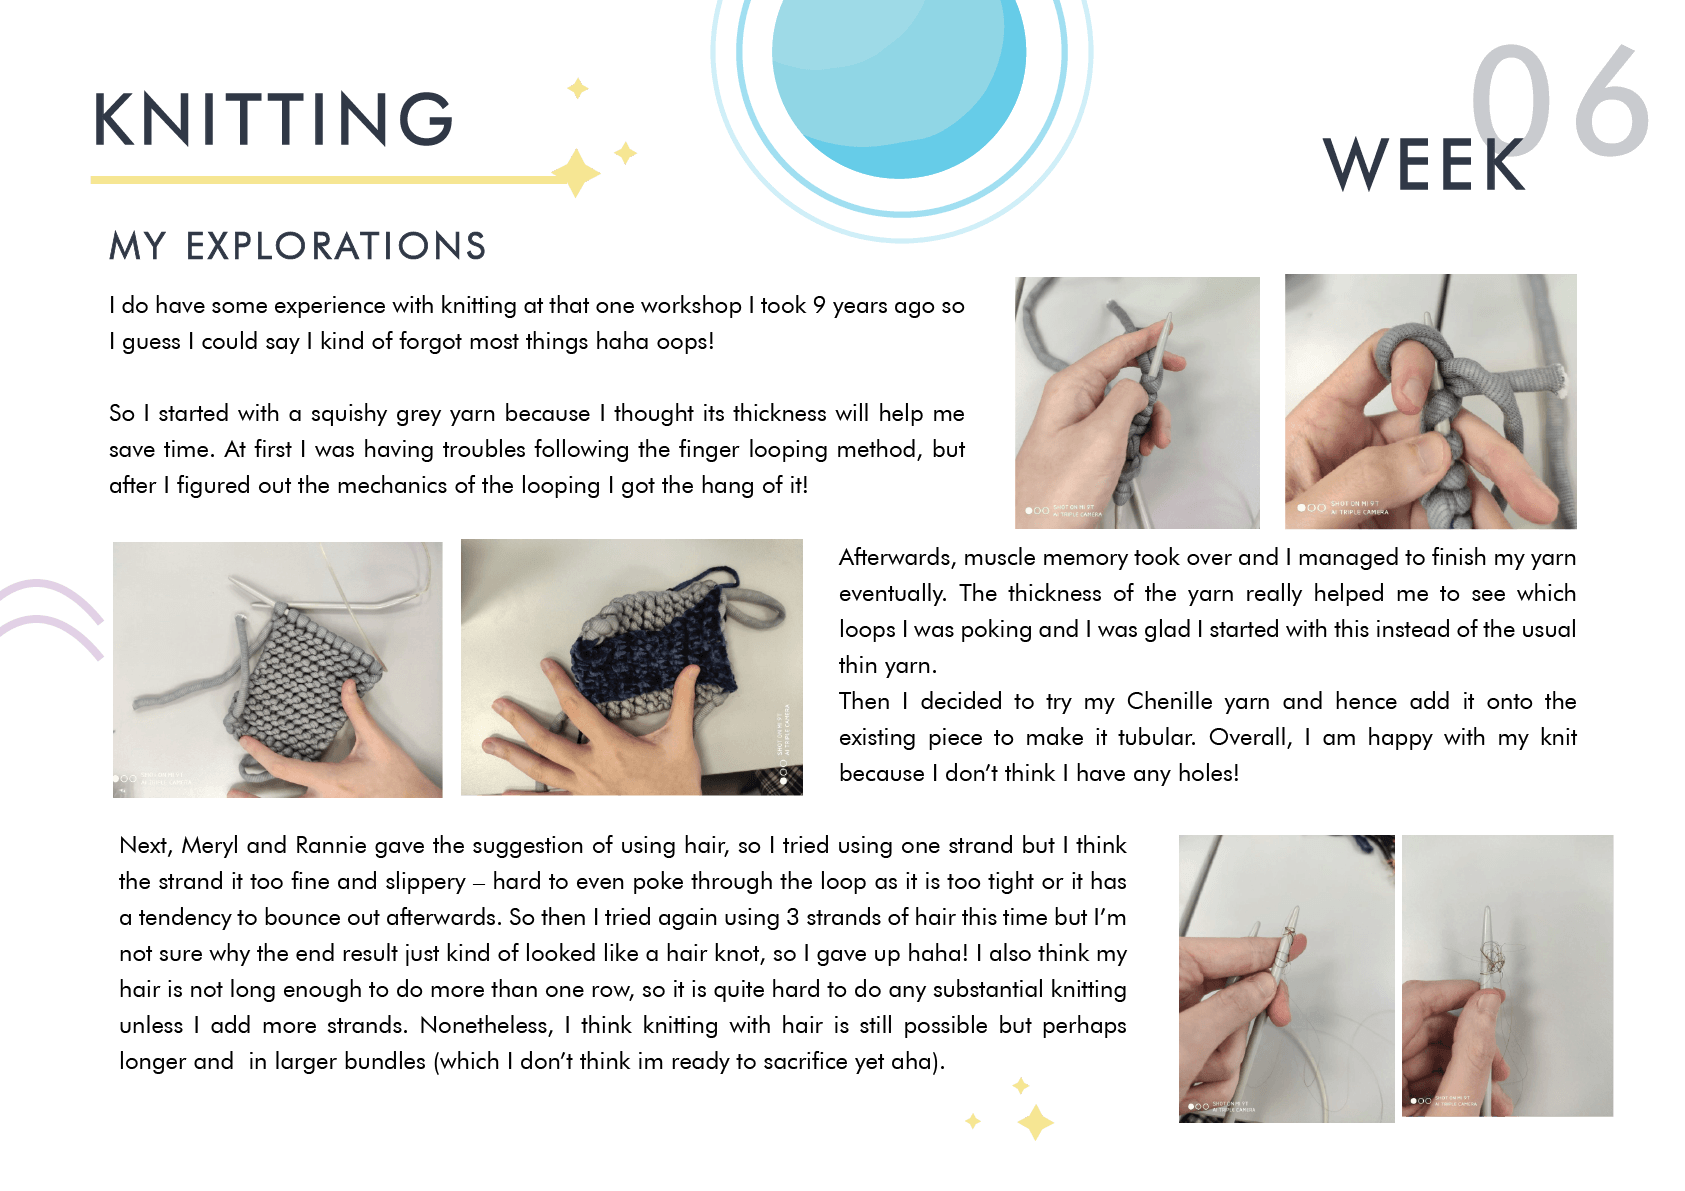
I do have some experience with knitting at that one workshop I took 9 years ago so I guess I could say I kind of forgot most things haha oops!
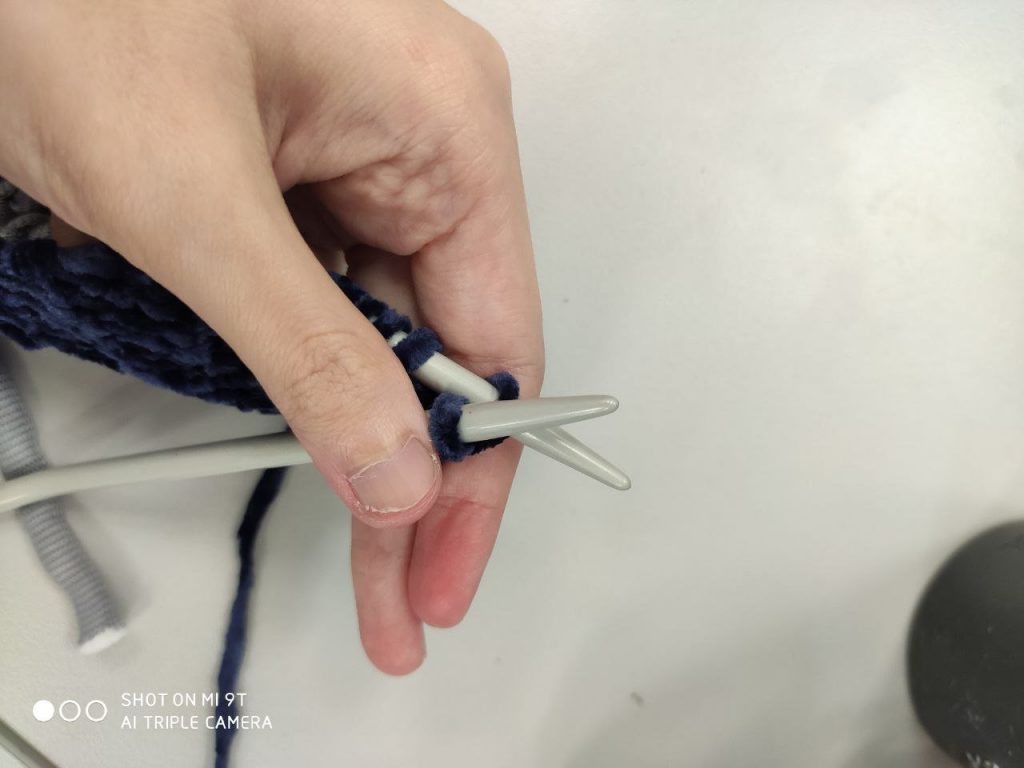
So I started with a squishy grey yarn because I thought its thickness will help me save time. At first I was having troubles following the finger looping method, but after I figured out the mechanics of the looping I got the hang of it!
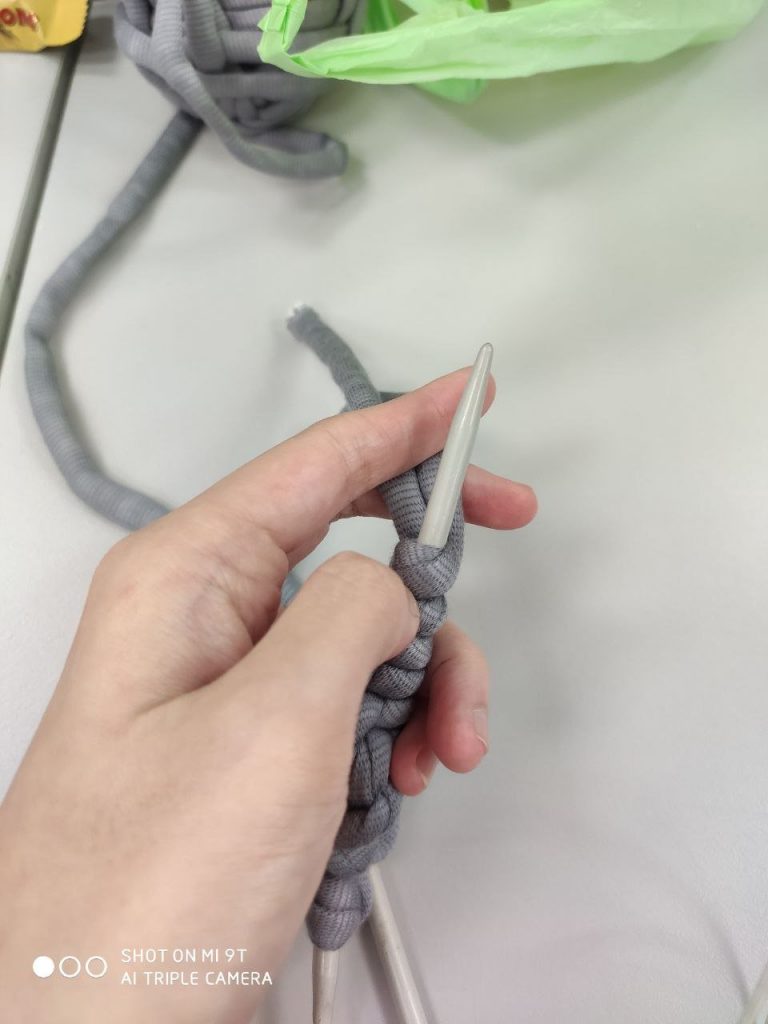
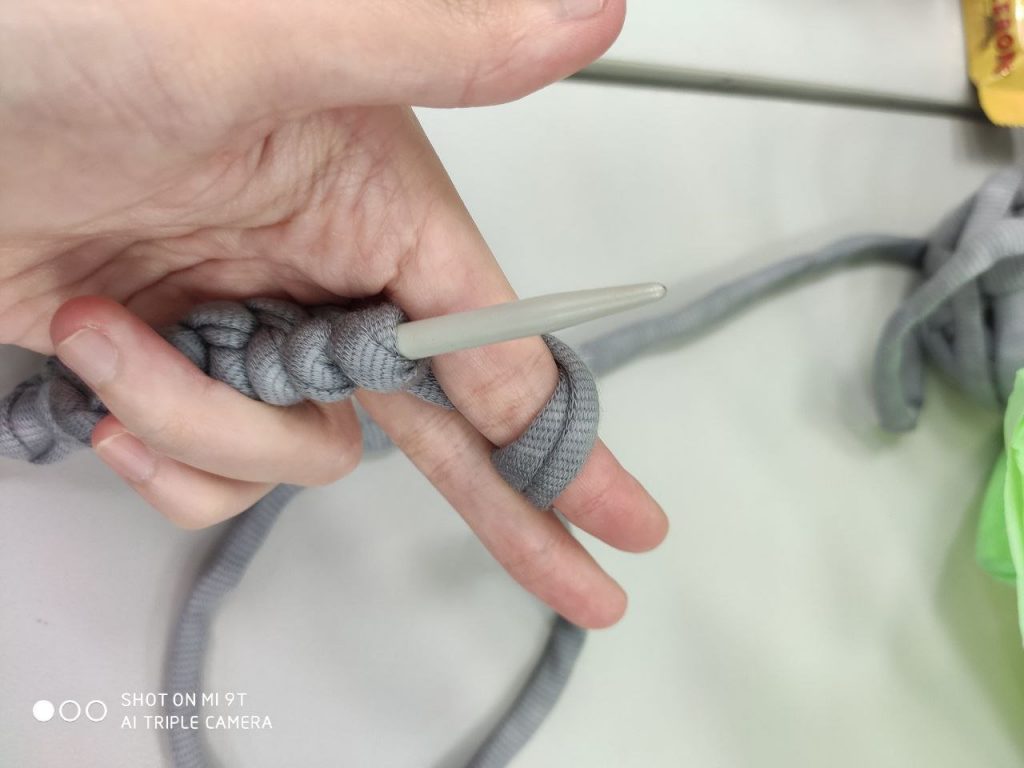
Afterwards, muscle memory took over and I managed to finish my yarn eventually. I would say that the thickness of the yarn really helped me to see which loops I was poking and I was glad I started with this instead of the usual thin yarn.
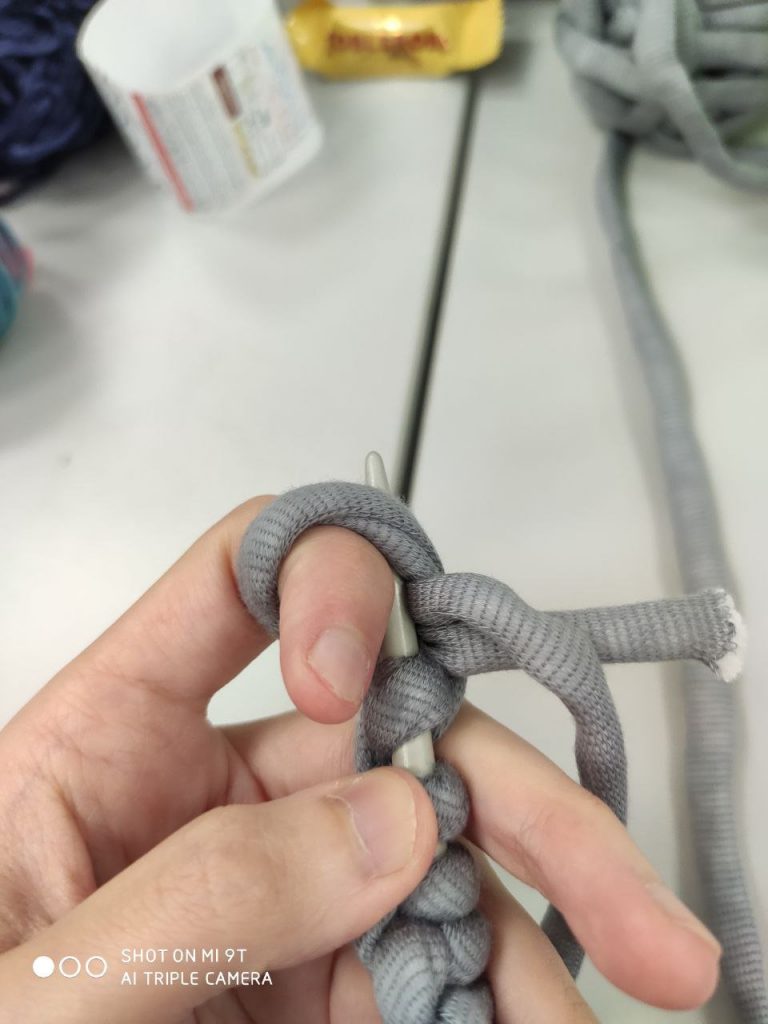
Then I decided to try my Chenille yarn and hence add it onto the existing piece. I love its soft and fluffy texture!
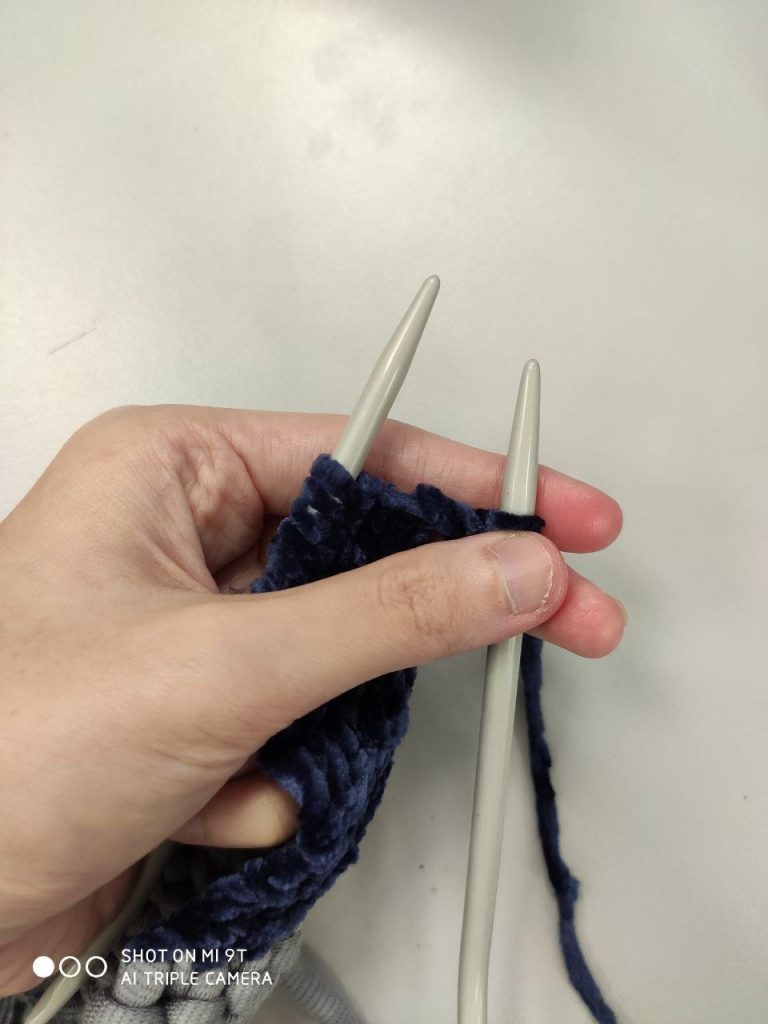
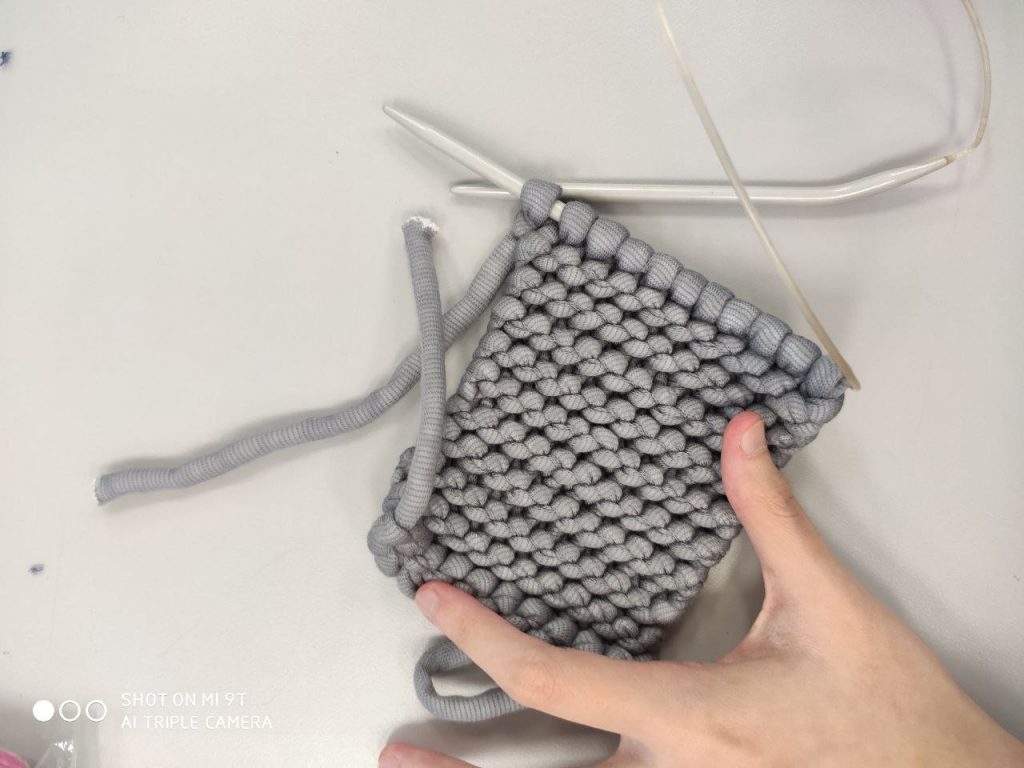
Eventually, I looped it to the other end to create a tube so it can be used as a cup cosy!
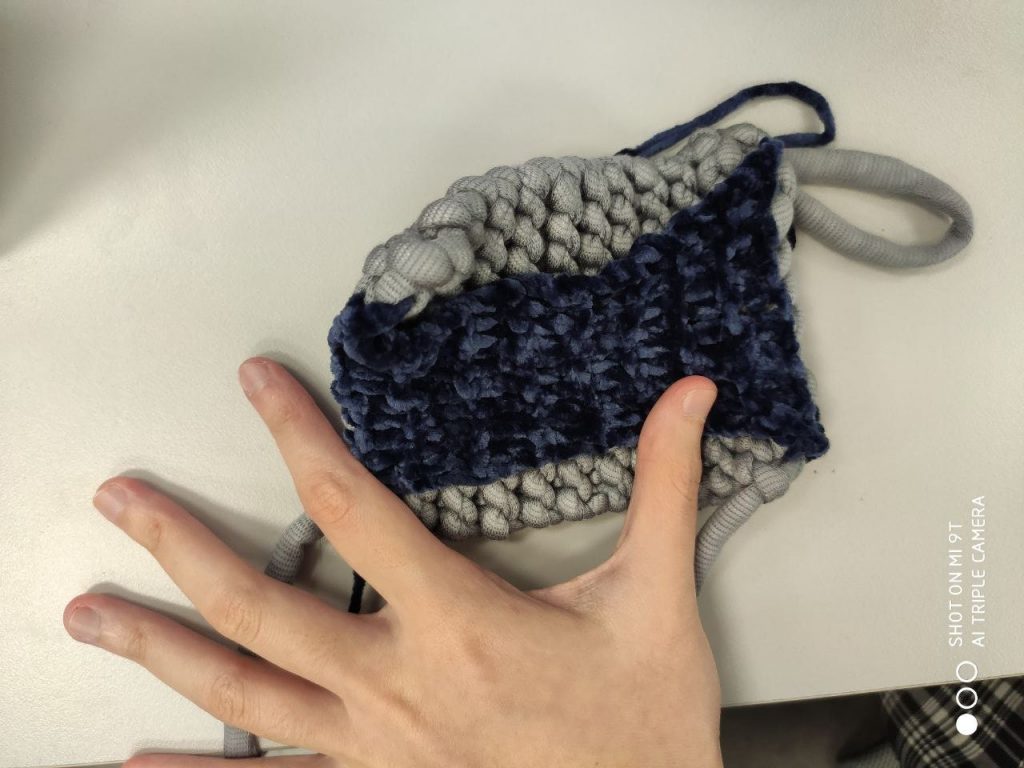
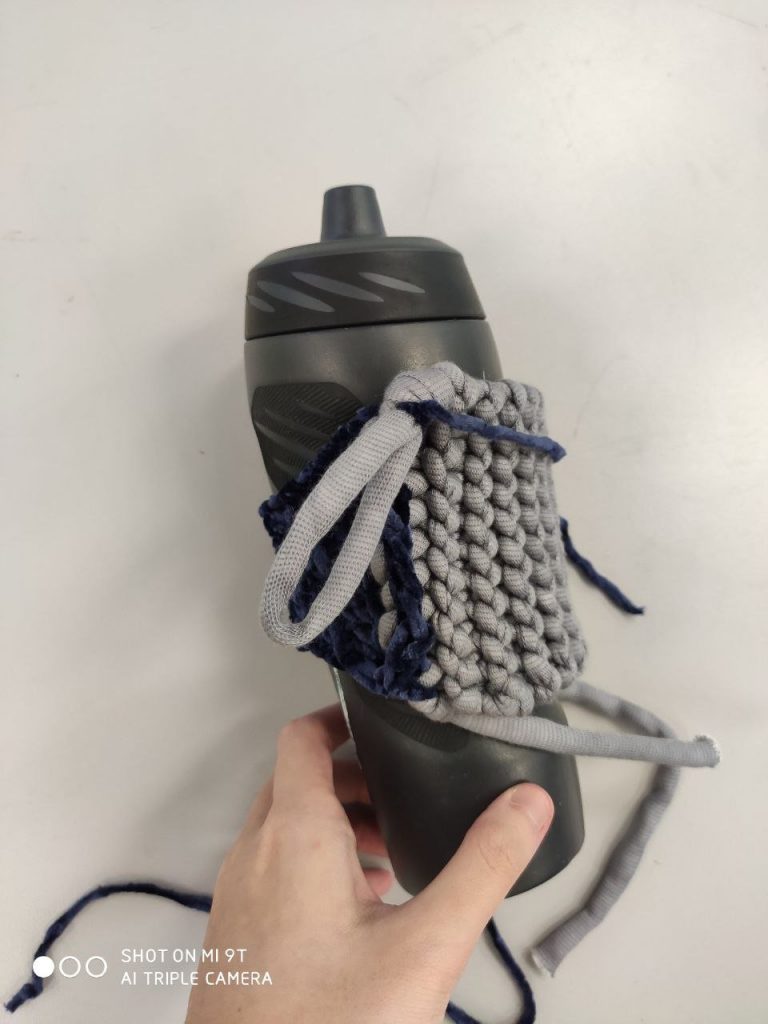
The knit modelled by my water bottle! Overall, I am happy with my knit because I don’t think I have any holes (although I remembered making a mistake every 5 minutes 9 years ago) so I’m glad I improved since then! I think the visibility of the yarn and being able to tell apart the loops help a lot in identifying mistakes.
Next, Meryl and Rannie gave the suggestion of using hair, so I tried plucking one strand..

But I think the strand it too fine and slippery – hard to even poke through the loop as it is too tight or it has a tendency to bounce out afterwards.
So then I tried again using 3 strands of hair this time…
But I’m not sure why the end result just kind of looked like a hair knot, so I gave up haha! I also think my hair is not long enough to do more than one row, so it is quite hard to do any substantial knitting unless I add more strands.
Nonetheless, I think knitting with hair is still possible but perhaps longer and in larger bundles(which I don’t think im ready to sacrifice yet aha).
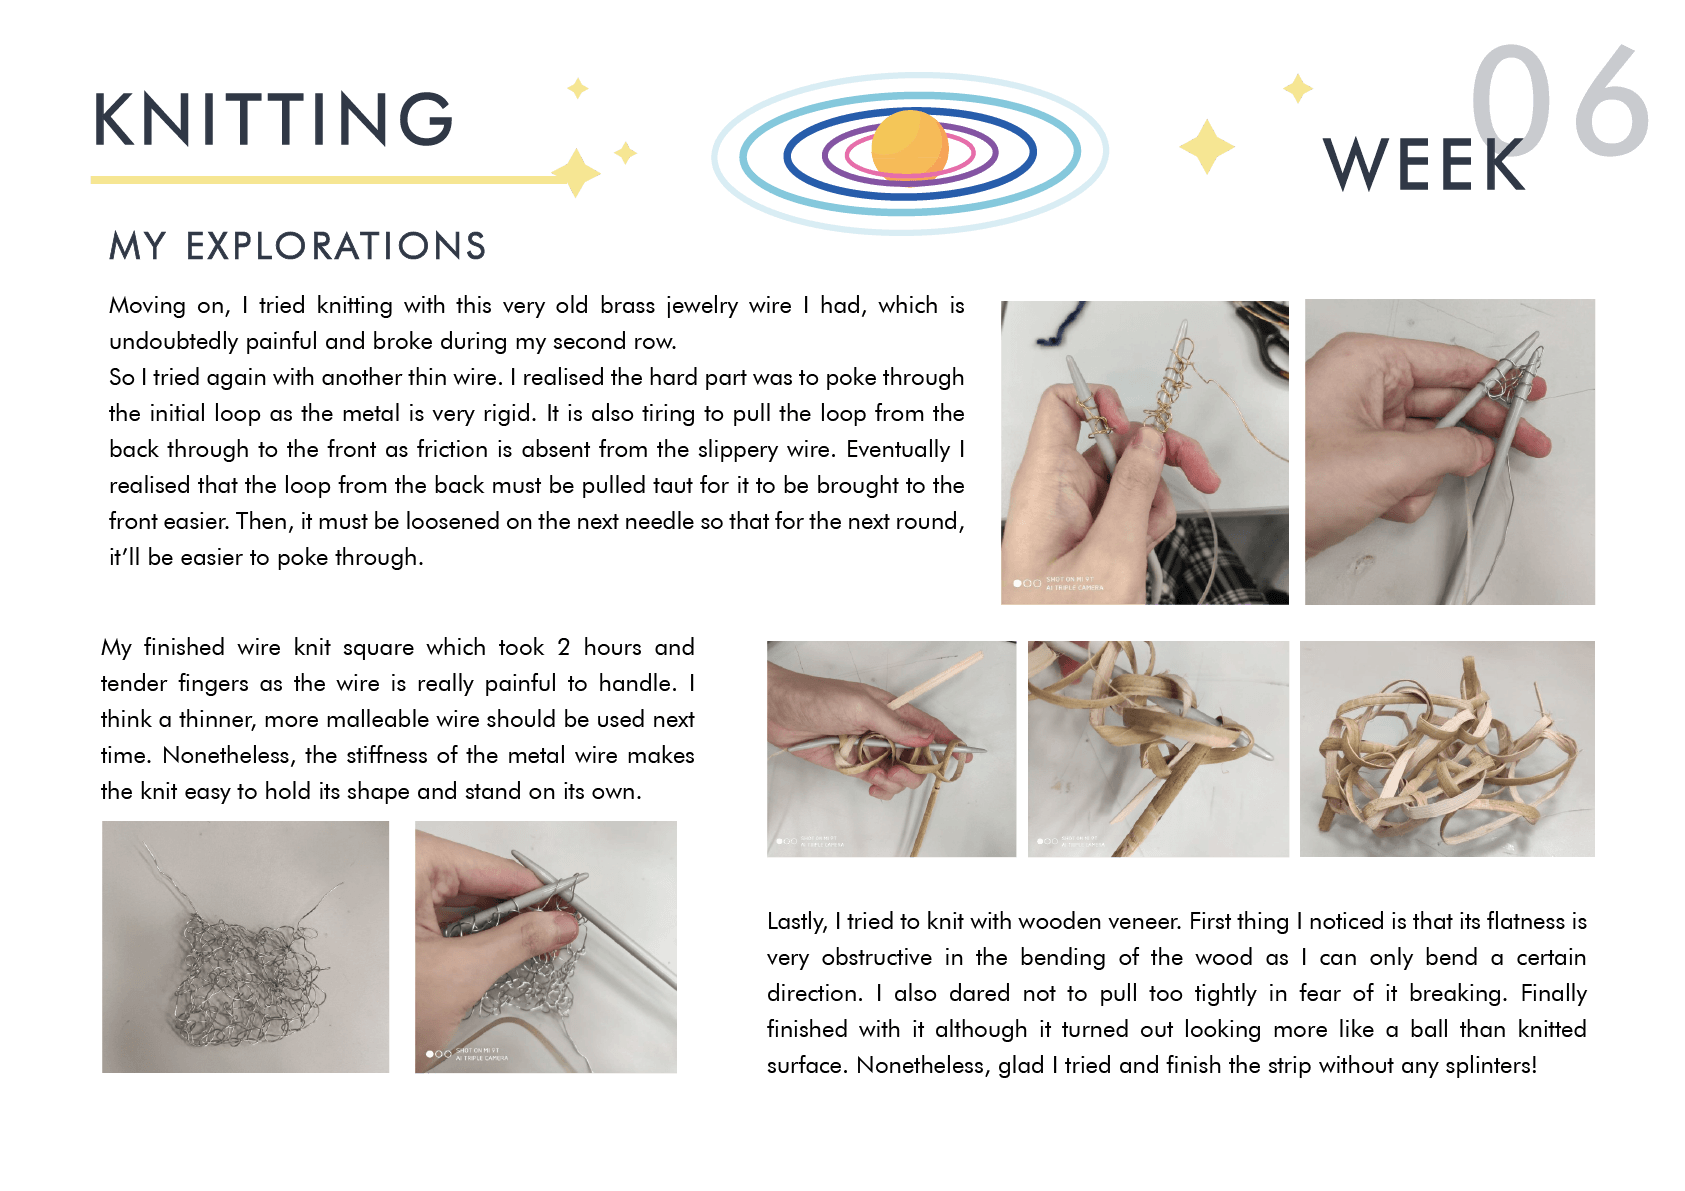
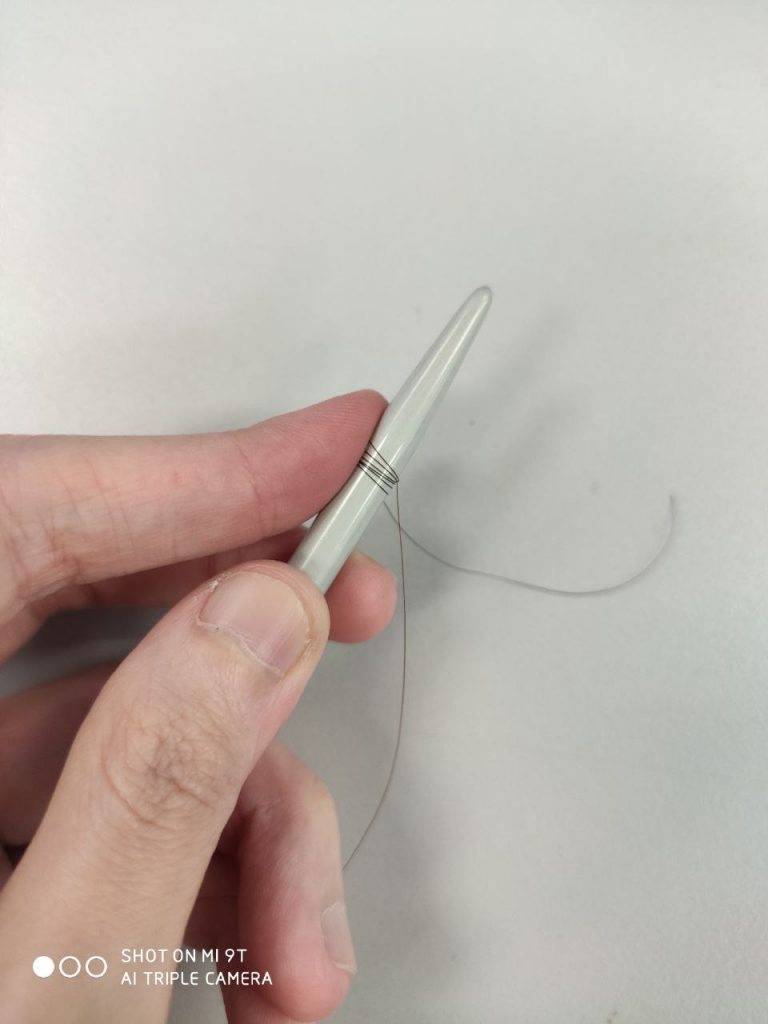
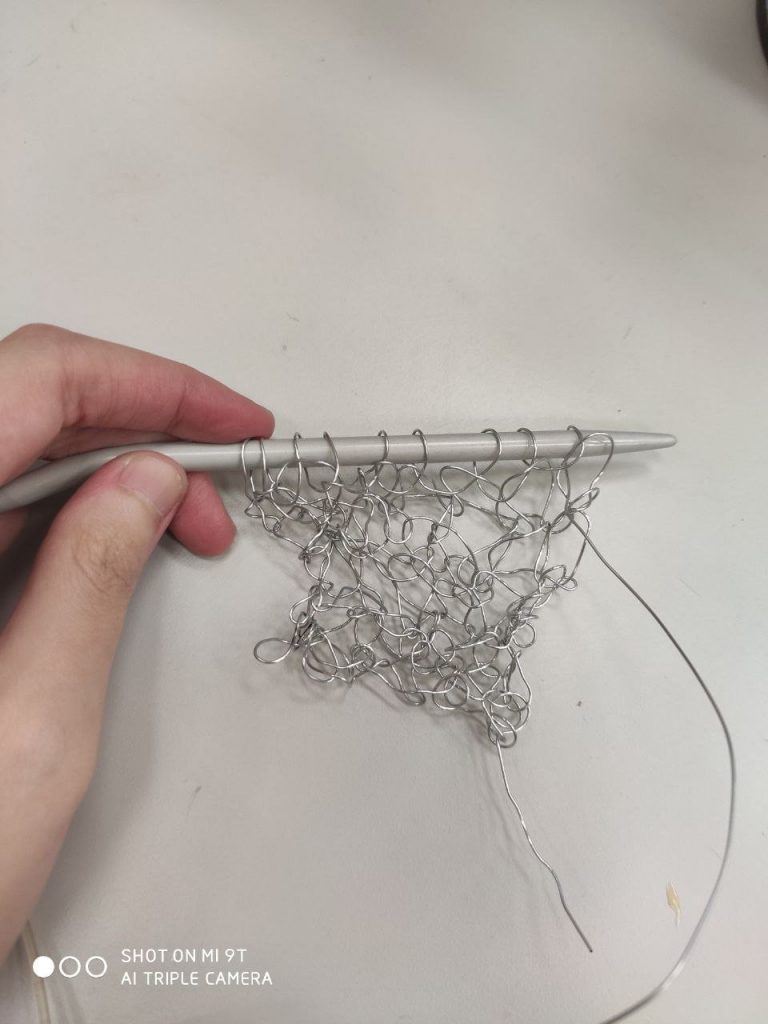
Moving on, I tried knitting with this very old brass jewelry wire I had, which is undoubtedly painful and broke 🙁 during my second row.
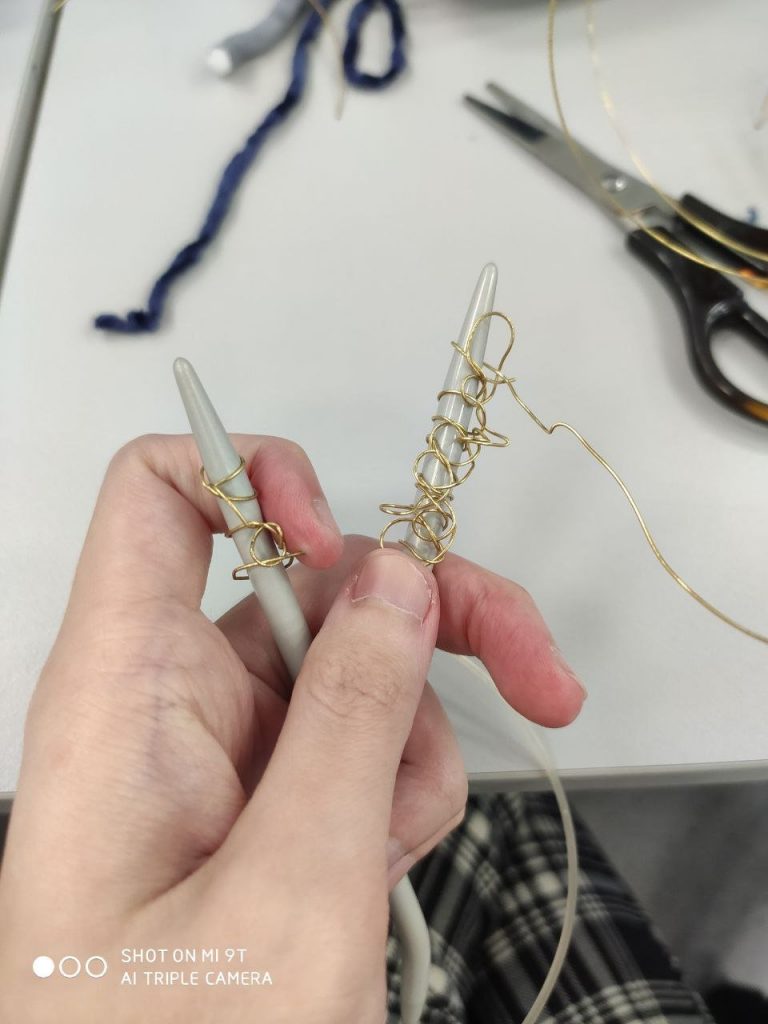
So I went back to the FYP Room and found another bundle of thin wire and I tried again.
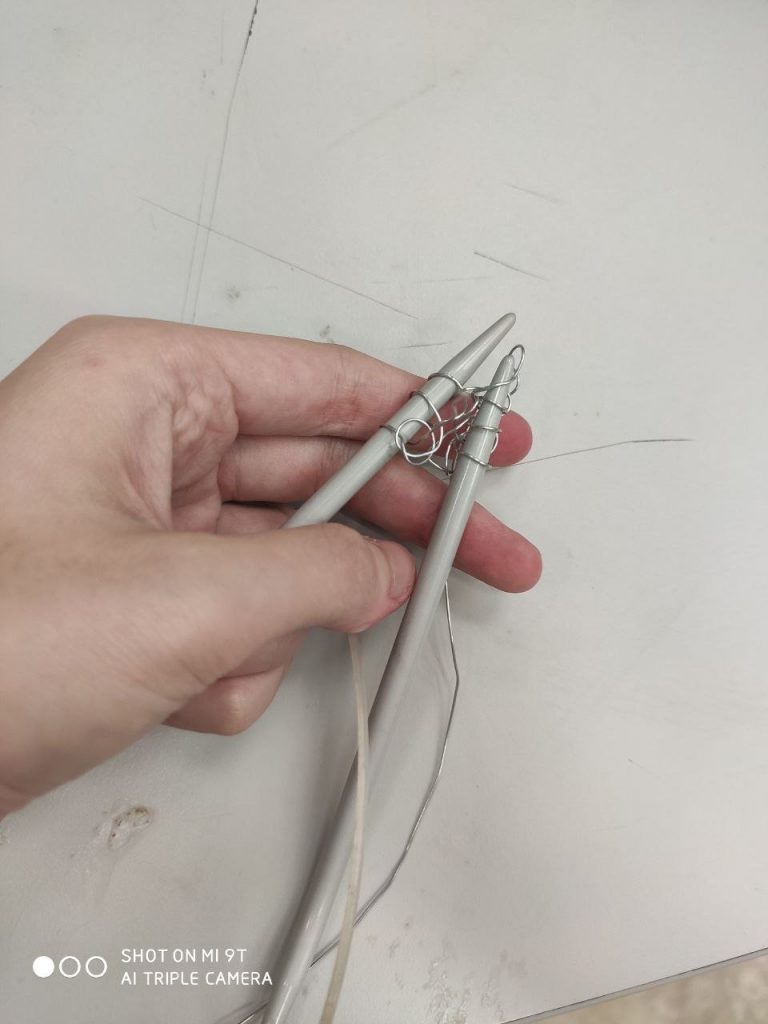
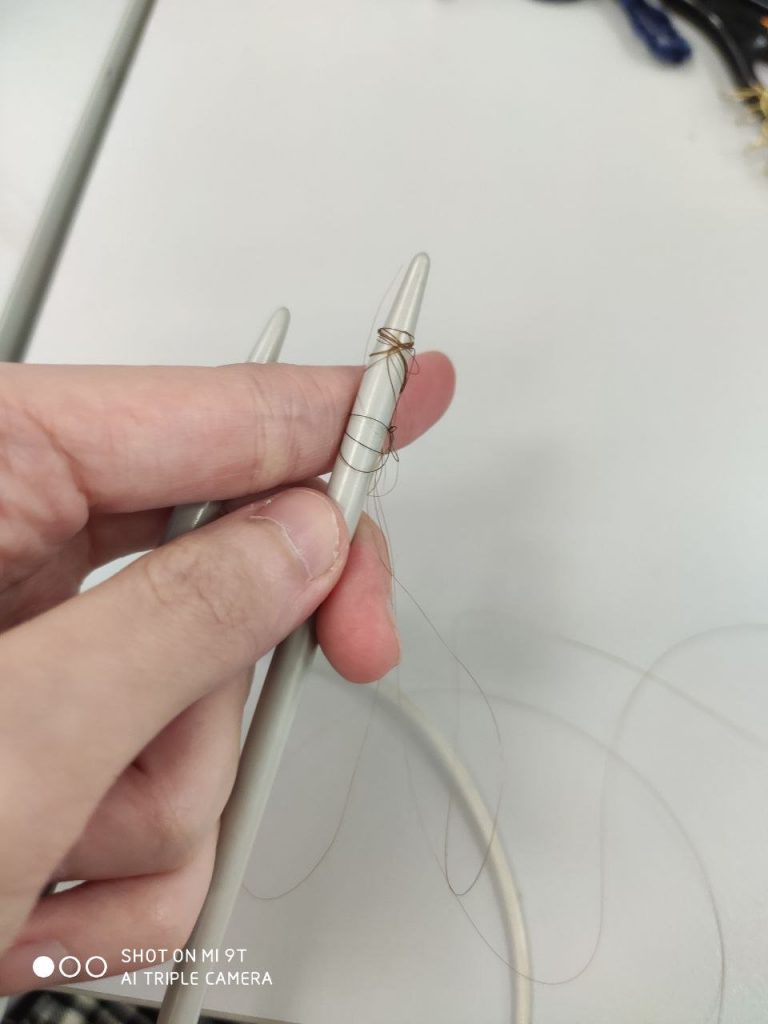
I realised the hard part was to poke through the initial loop as the metal is very rigid. It is also tiring to pull the loop from the back through to the front as friction is absent from the slippery wire.
Eventually I realised that the loop from the back must be pulled taut in order for it to be brought to the front easier. Then, it must be loosened on the next needle so that for the next round, it’ll be easier to poke through.
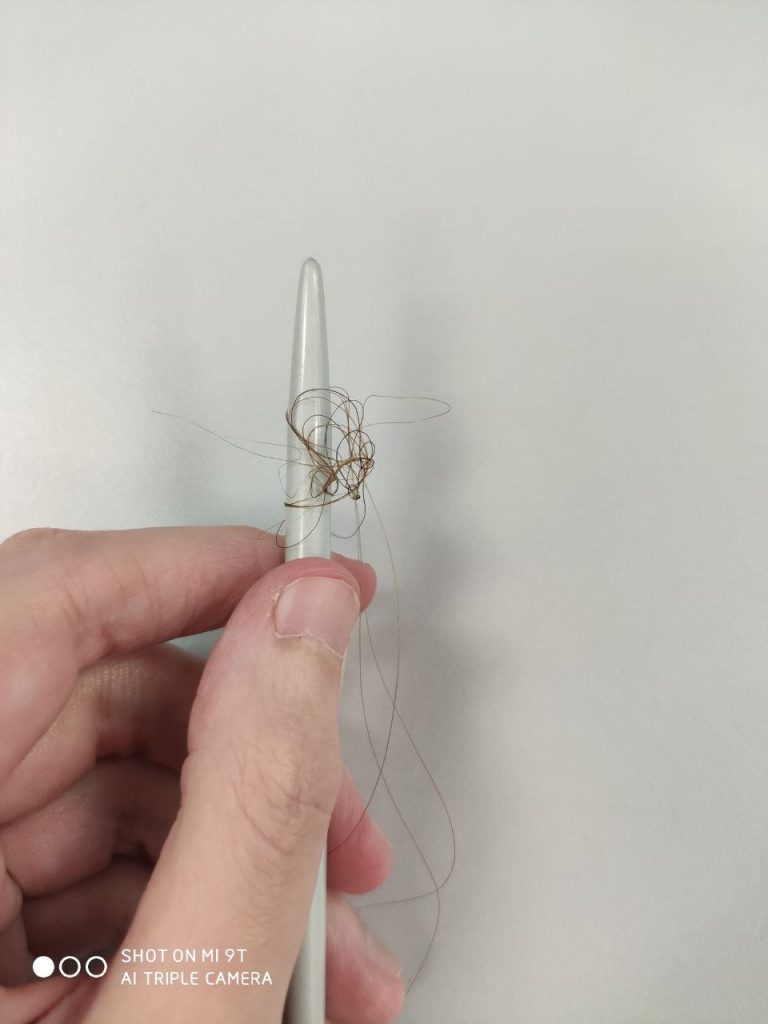
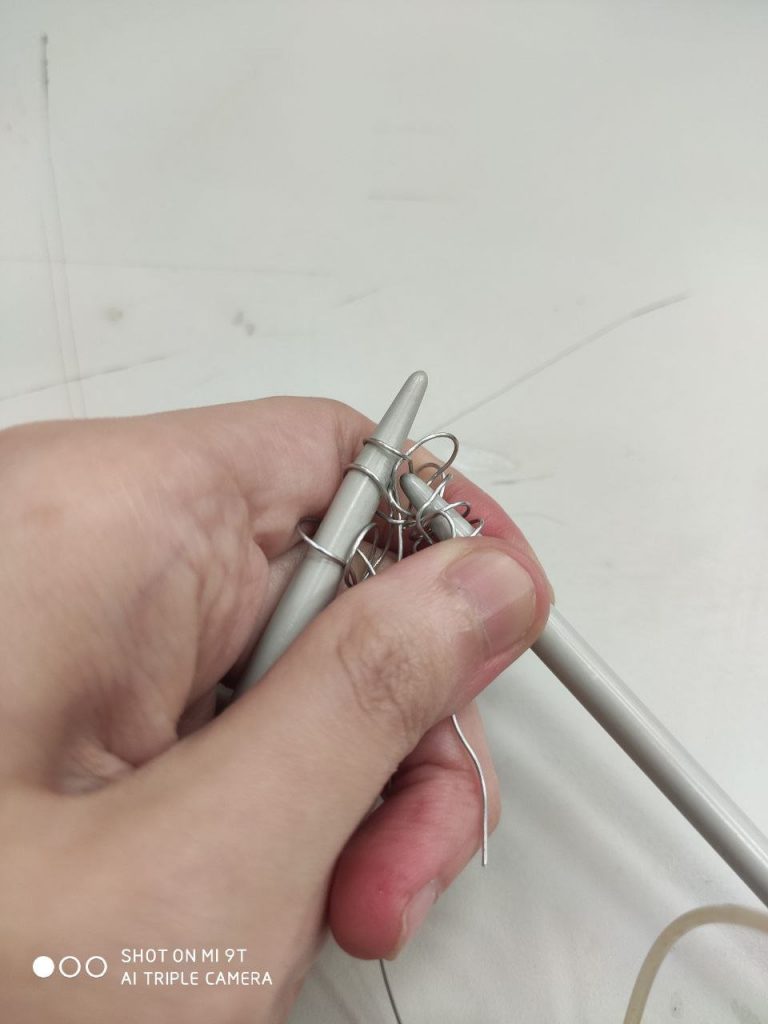
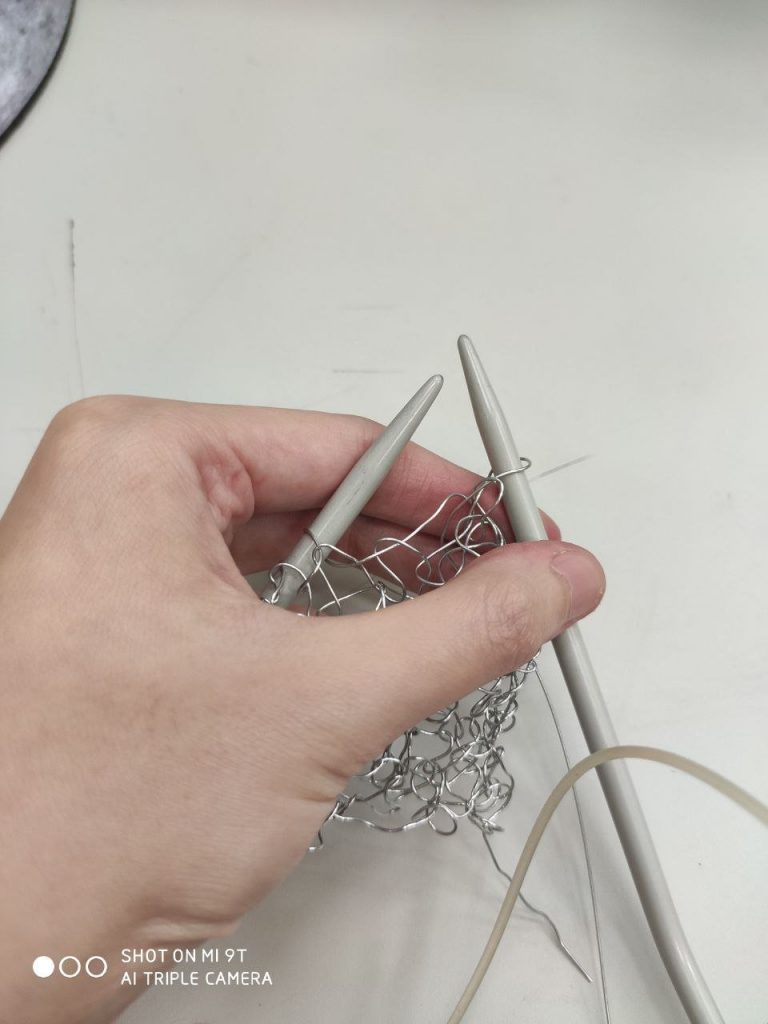
Then, I ended the knit by poking through 2 loops at once and bringing the wire through both of them.
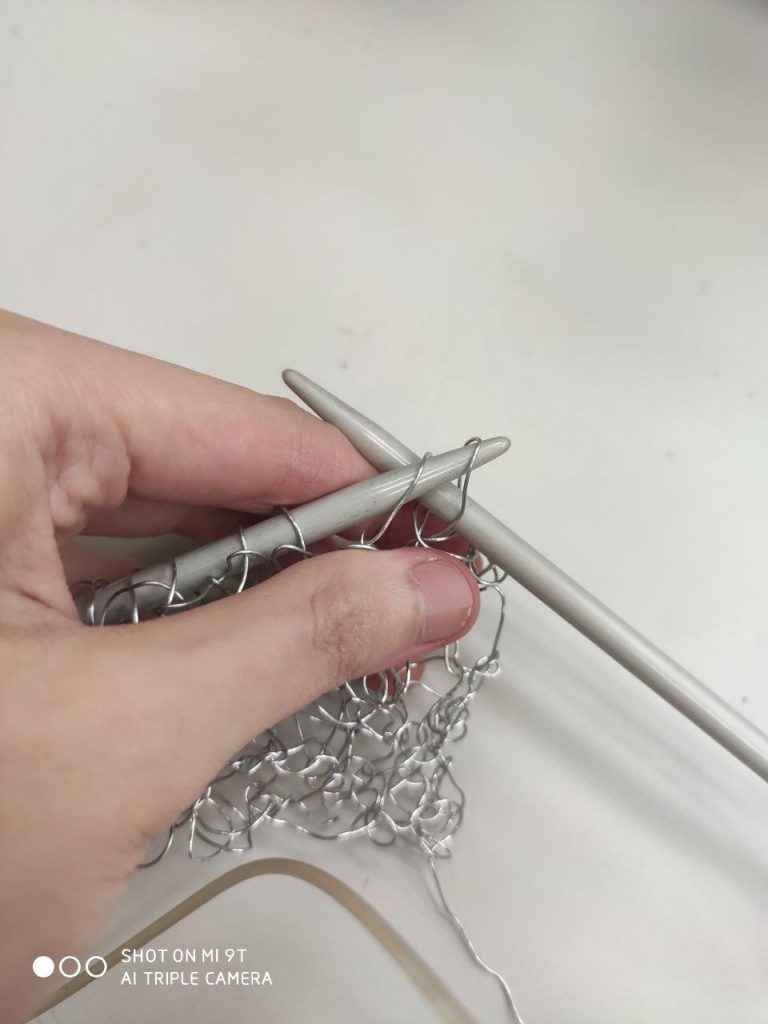
Then, release the 2 loops and then bring back the loop on the right needle to the left and repeat.
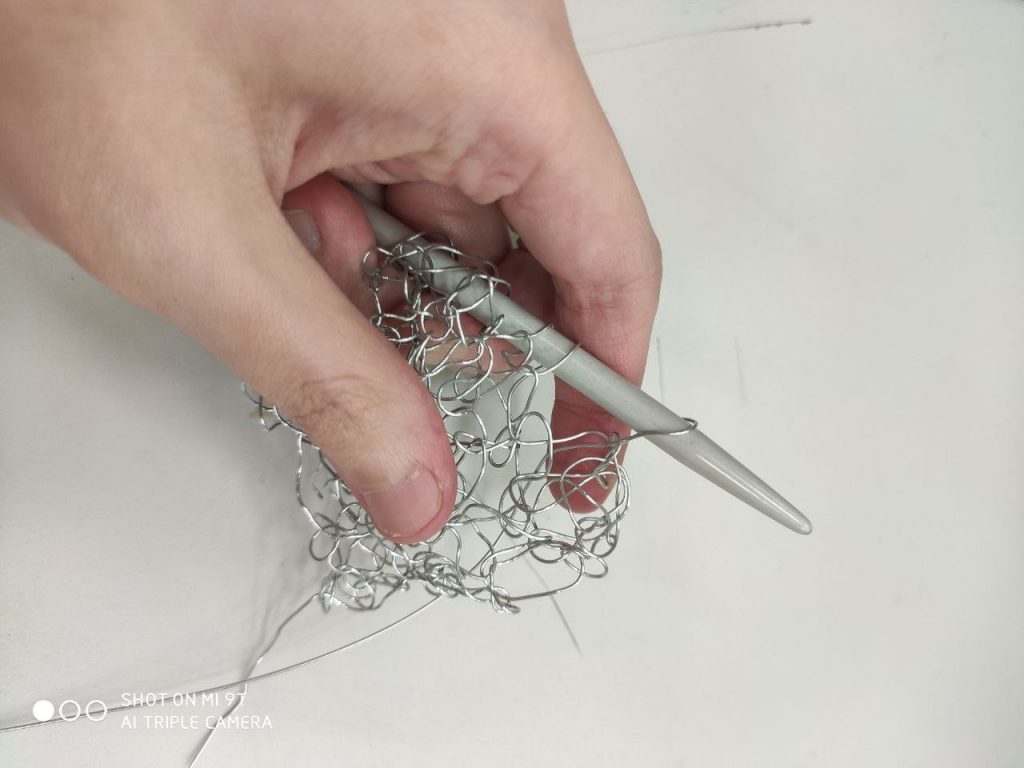
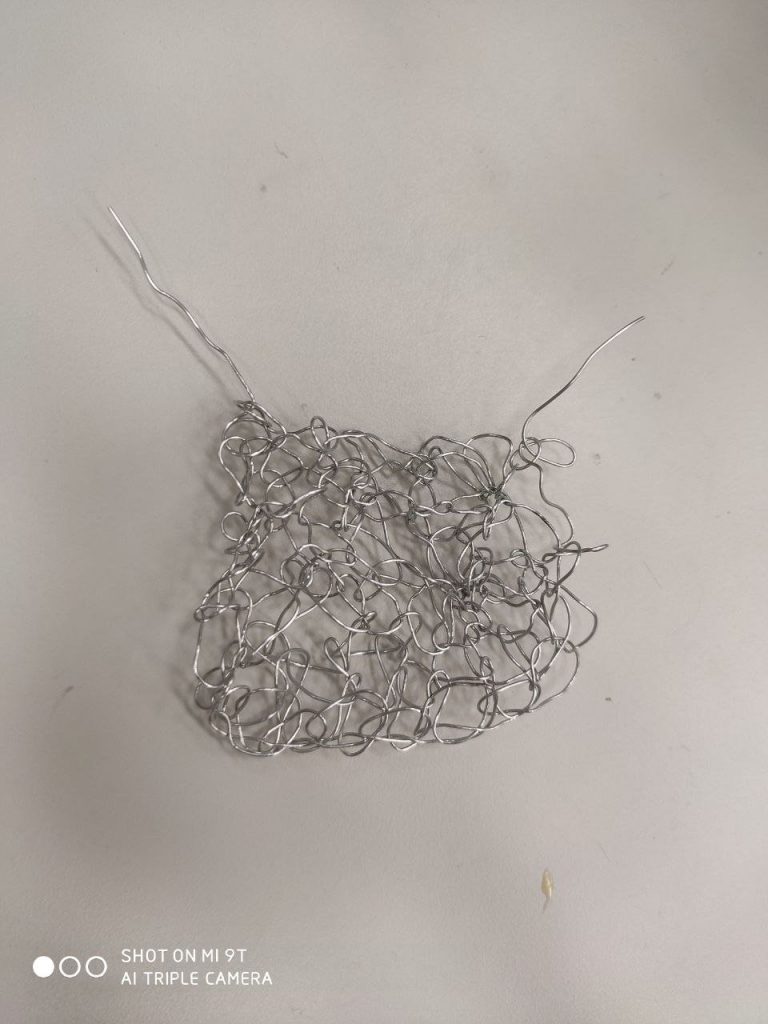
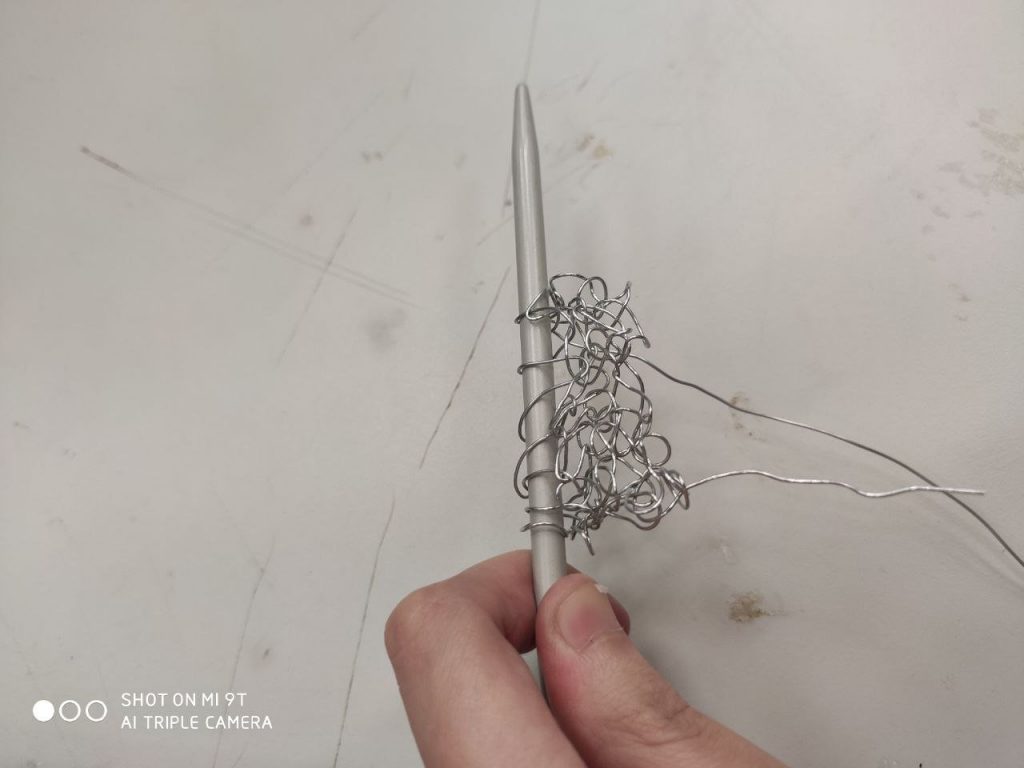
My finished wire knit square which took 2 hours and tender fingers as the wire is really painful to handle. I think a thinner, more malleable wire should be used next time.
Nonetheless, the stiffness of the metal wire makes the knit easy to hold its shape and stand on its own, which is useful in sculptures.
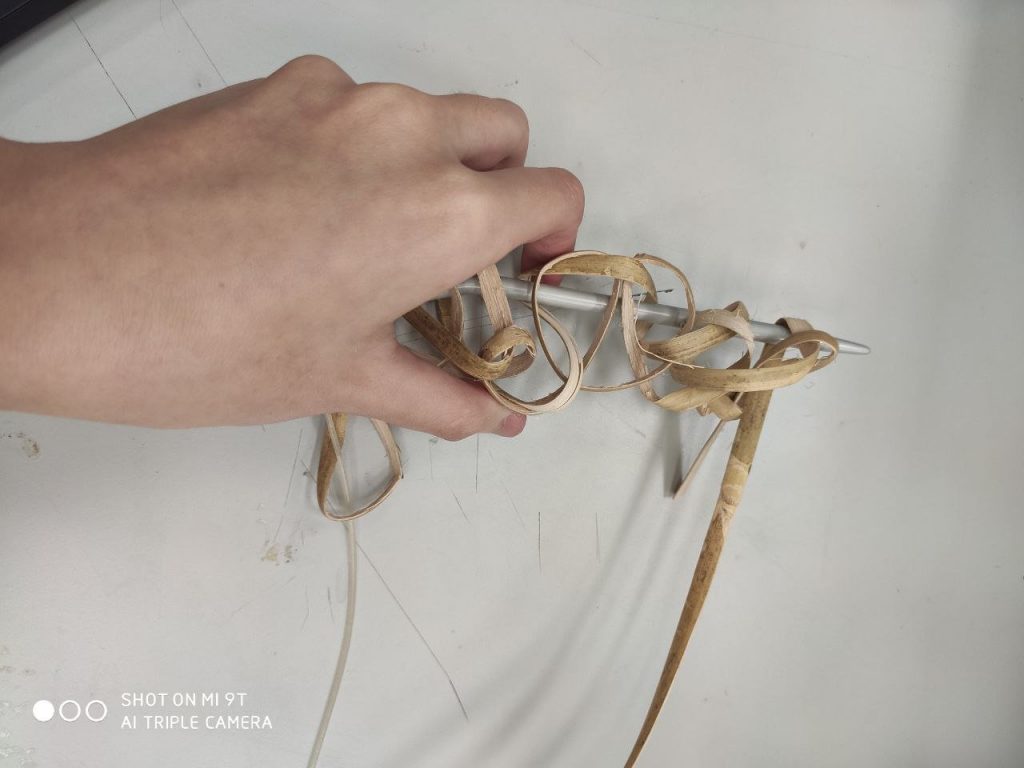
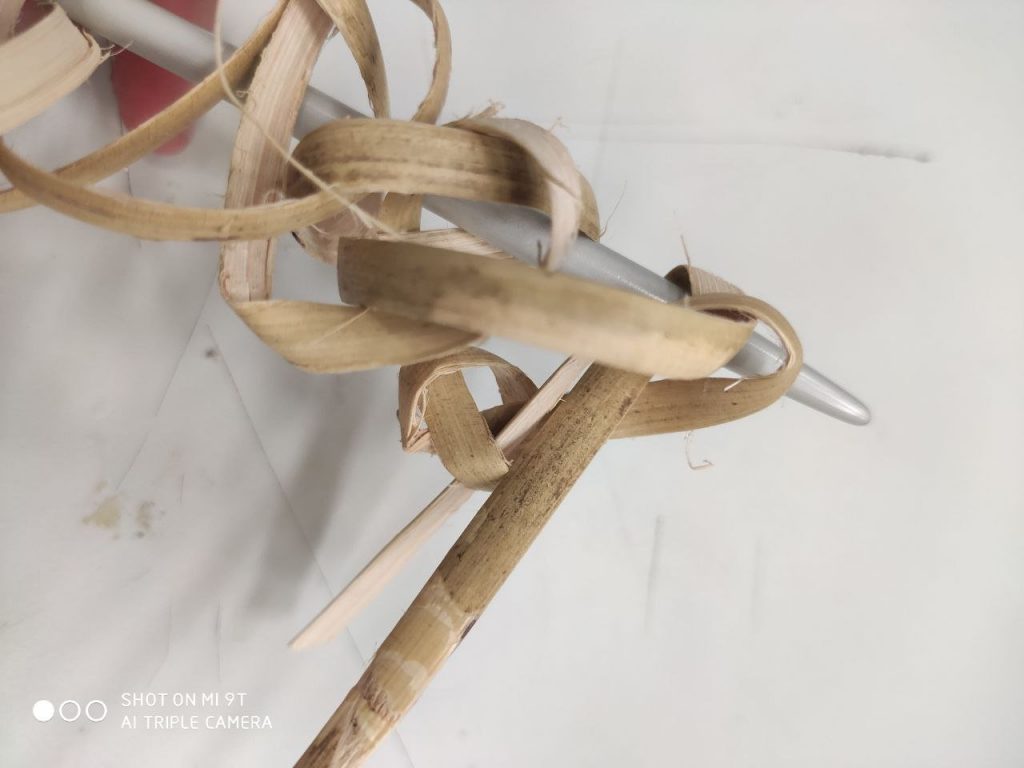
Lastly, just out of curiousity, I managed to find a long, flat strip of wood veneer(?) on the FYP shelf so I decided to try knitting with it.

First thing I noticed is that its flatness is very obstructive in the bending of the wood as I can only bend a certain direction. I also dared not to pull too tightly in fear of it breaking.
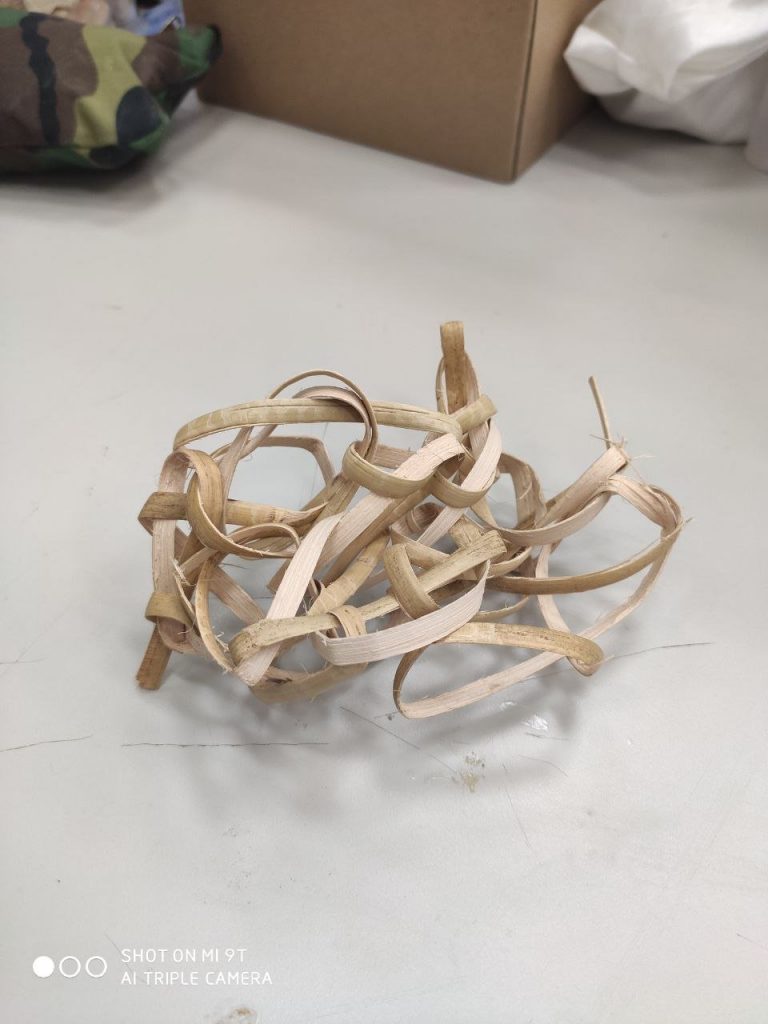
Finally finished with it although it turned out looking more like a ball than knitted surface. Nonetheless, glad I tried and managed to finish the strip without any splinters!
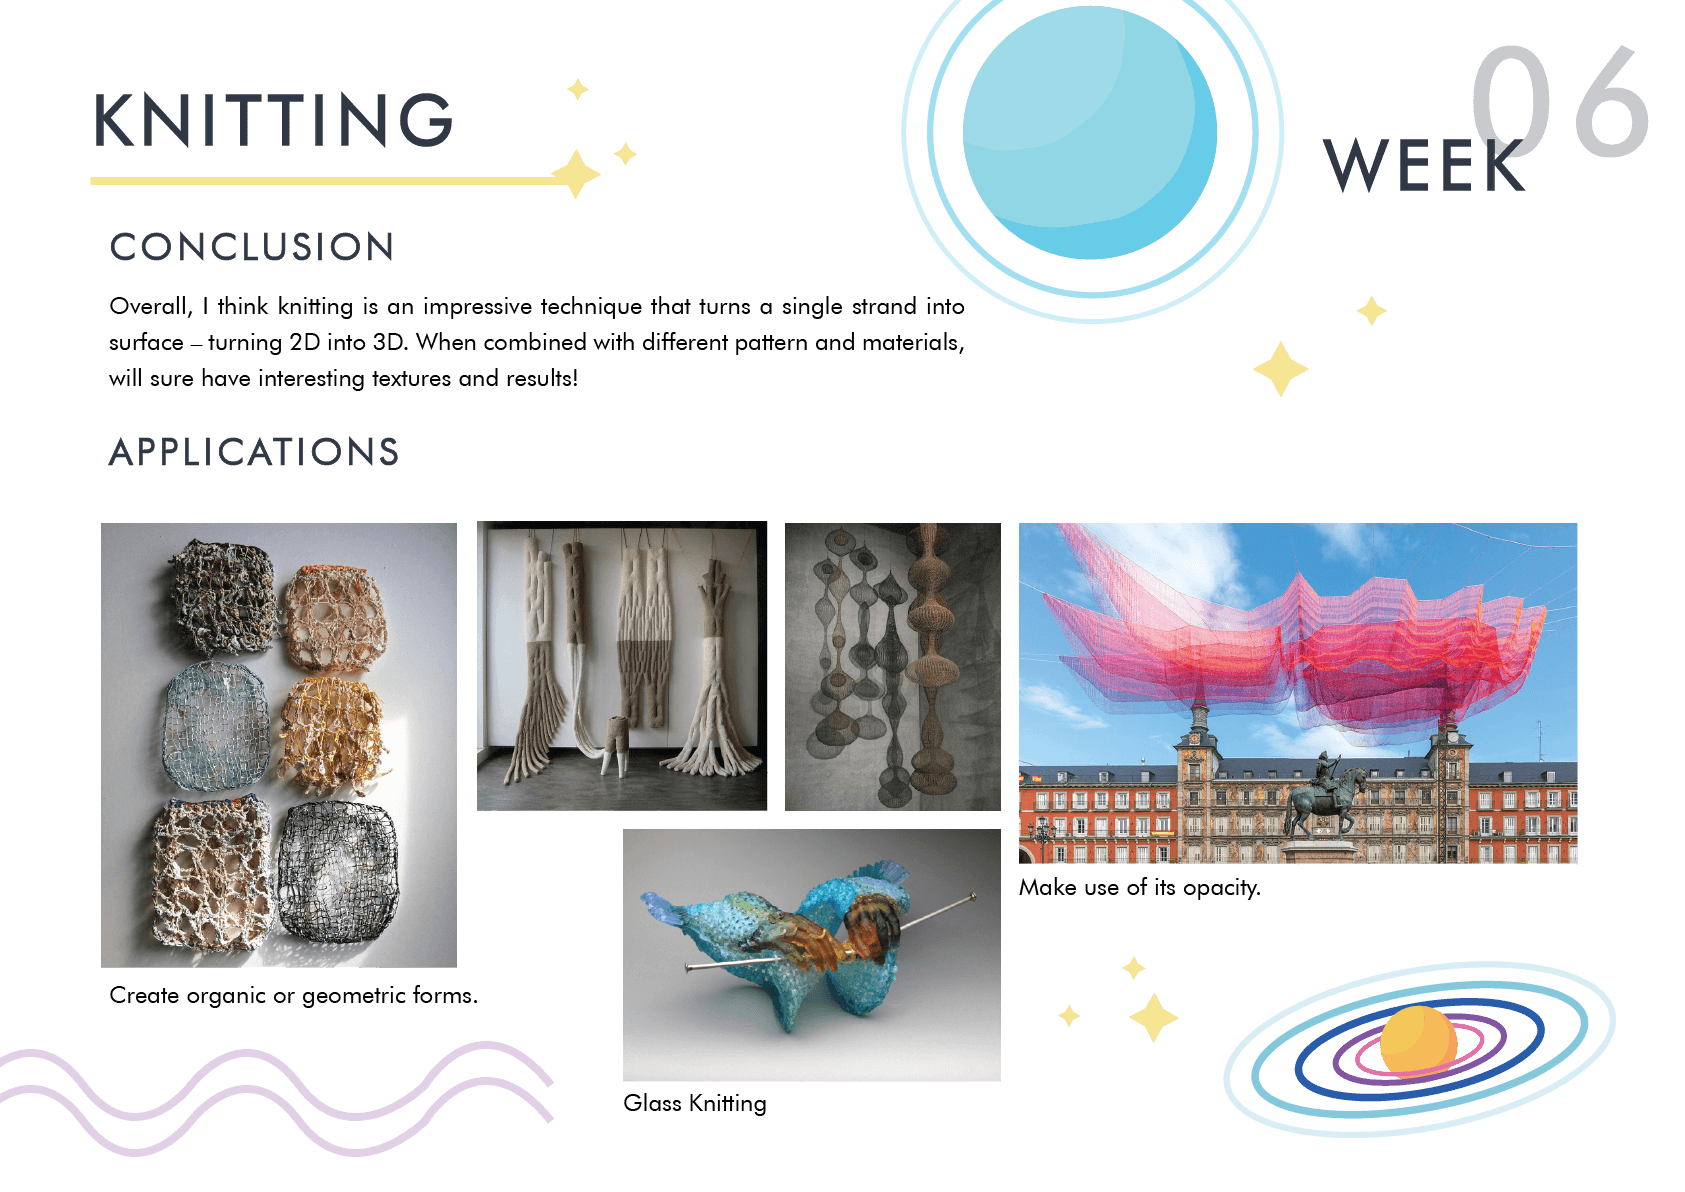
Overall, I think knitting is an impressive technique that turns a single strand into surface – turning 2D into 3D. When combined with different pattern and materials, will sure have interesting textures and results!
A P P L I C A T I O N S

Create organic or geometric forms.

Make use of its opacity.

Even glass knitting!
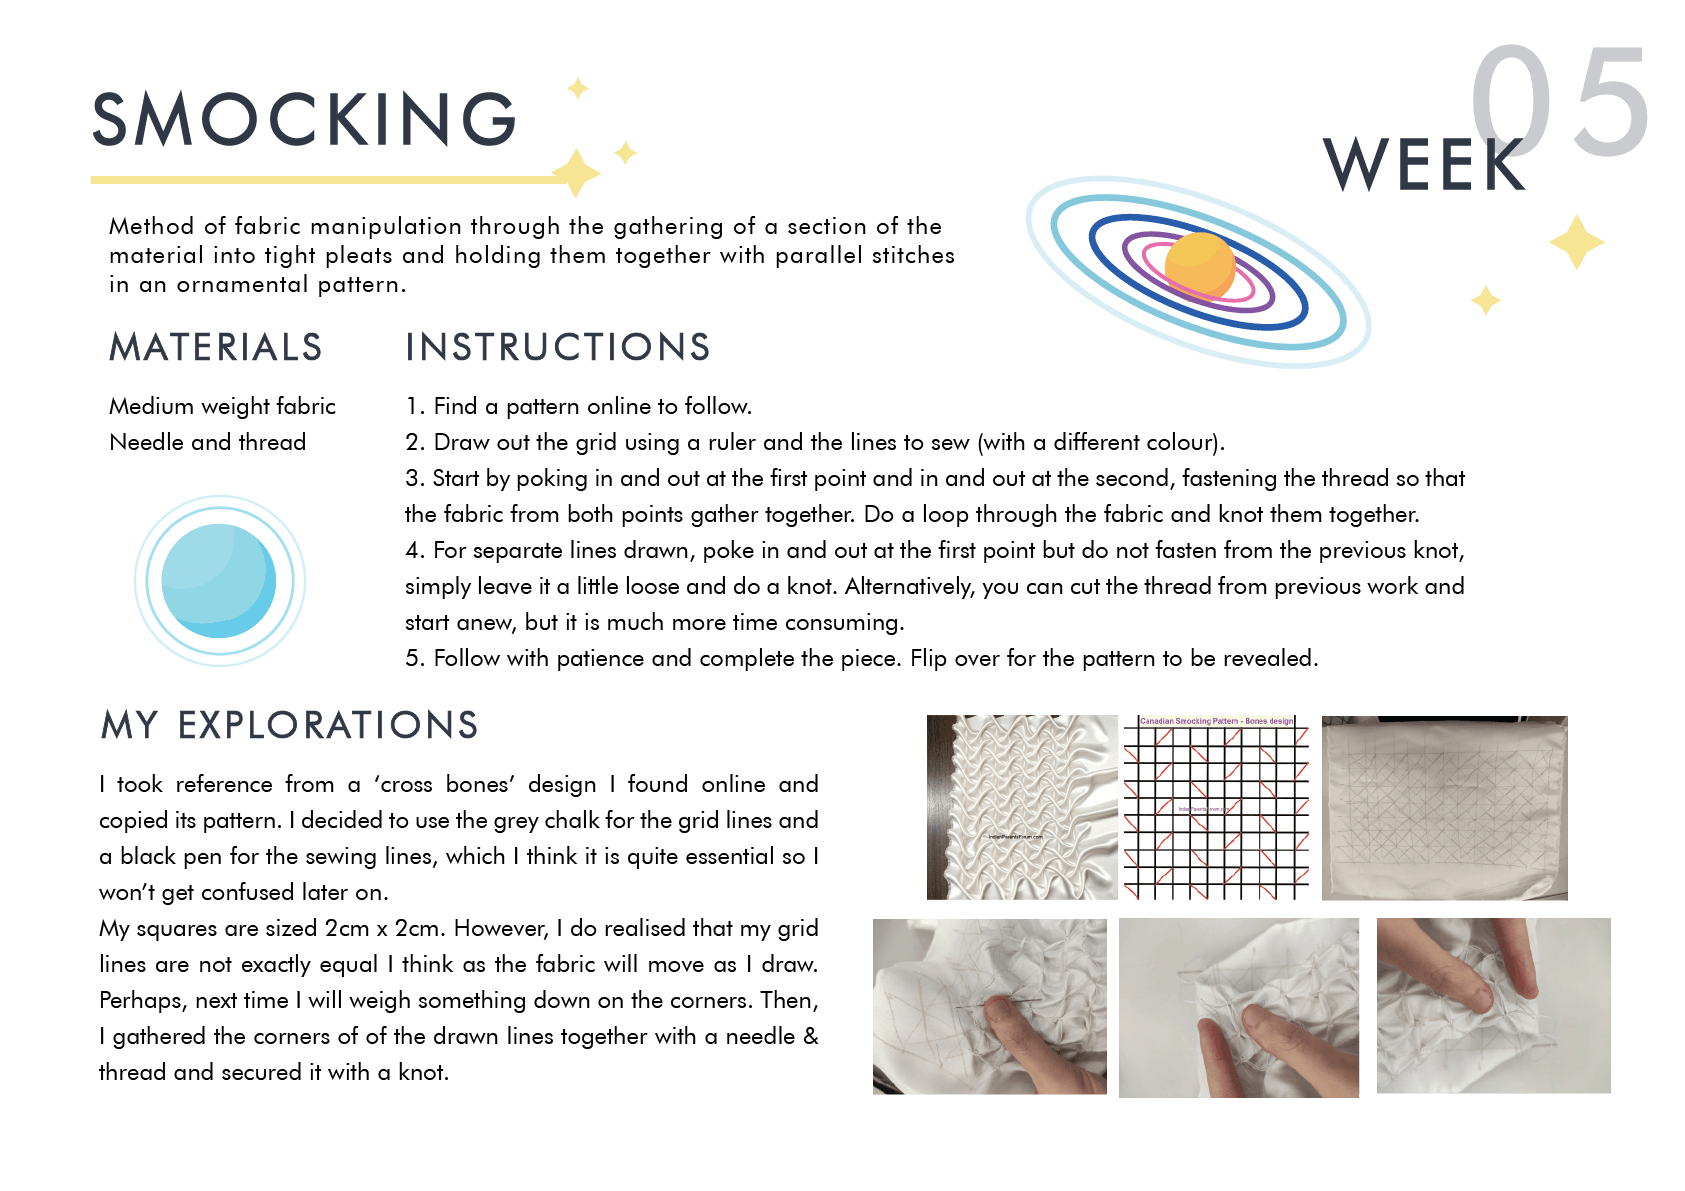
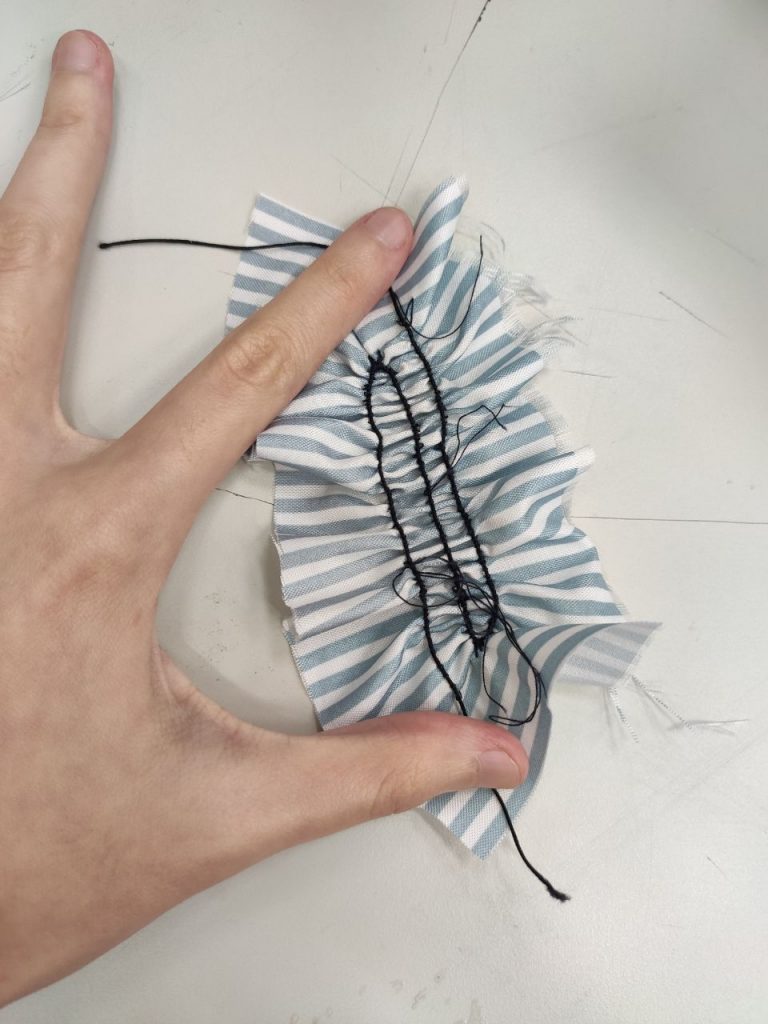
Method of fabric manipulation through the gathering of a section of the material into tight pleats and holding them together with parallel stitches in an ornamental pattern.
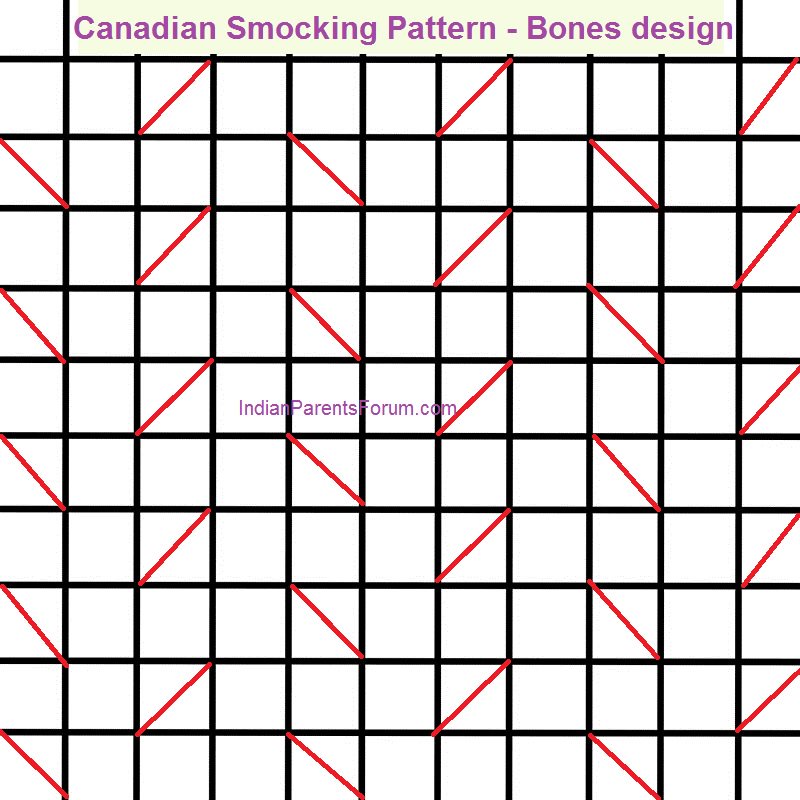
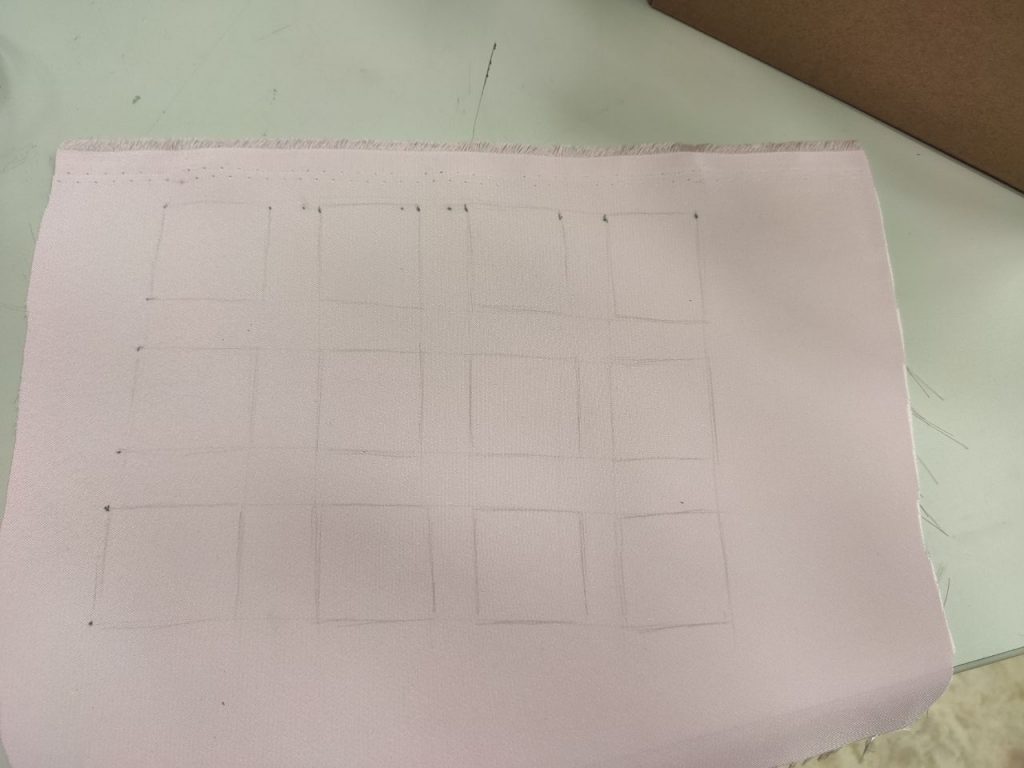
So I found online this ‘cross bones’ design with a pattern that seems pretty simple to follow.
So I drew out the grid, erm looking back I realised for some reason I saw the grids in a diagonal manner instead of the square grid hahaha but I think the end result is similar.

I decided to use the grey chalk for the grid lines and a black erasable pen for the sewing lines, which I think it is quite essential so I won’t get confused later on.
My squares are sized 2cm x 2cm.
However, I do realised that my grid lines are not exactly equal I think as the fabric will move as I draw. Perhaps, next time I will weigh something down on the corners.
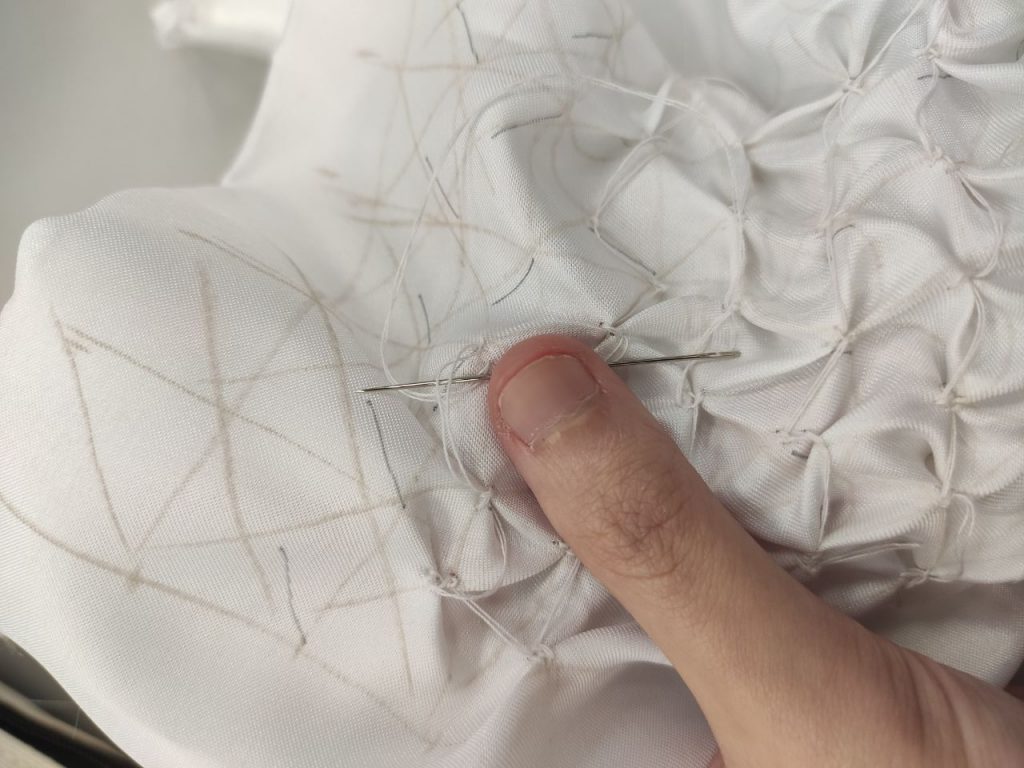

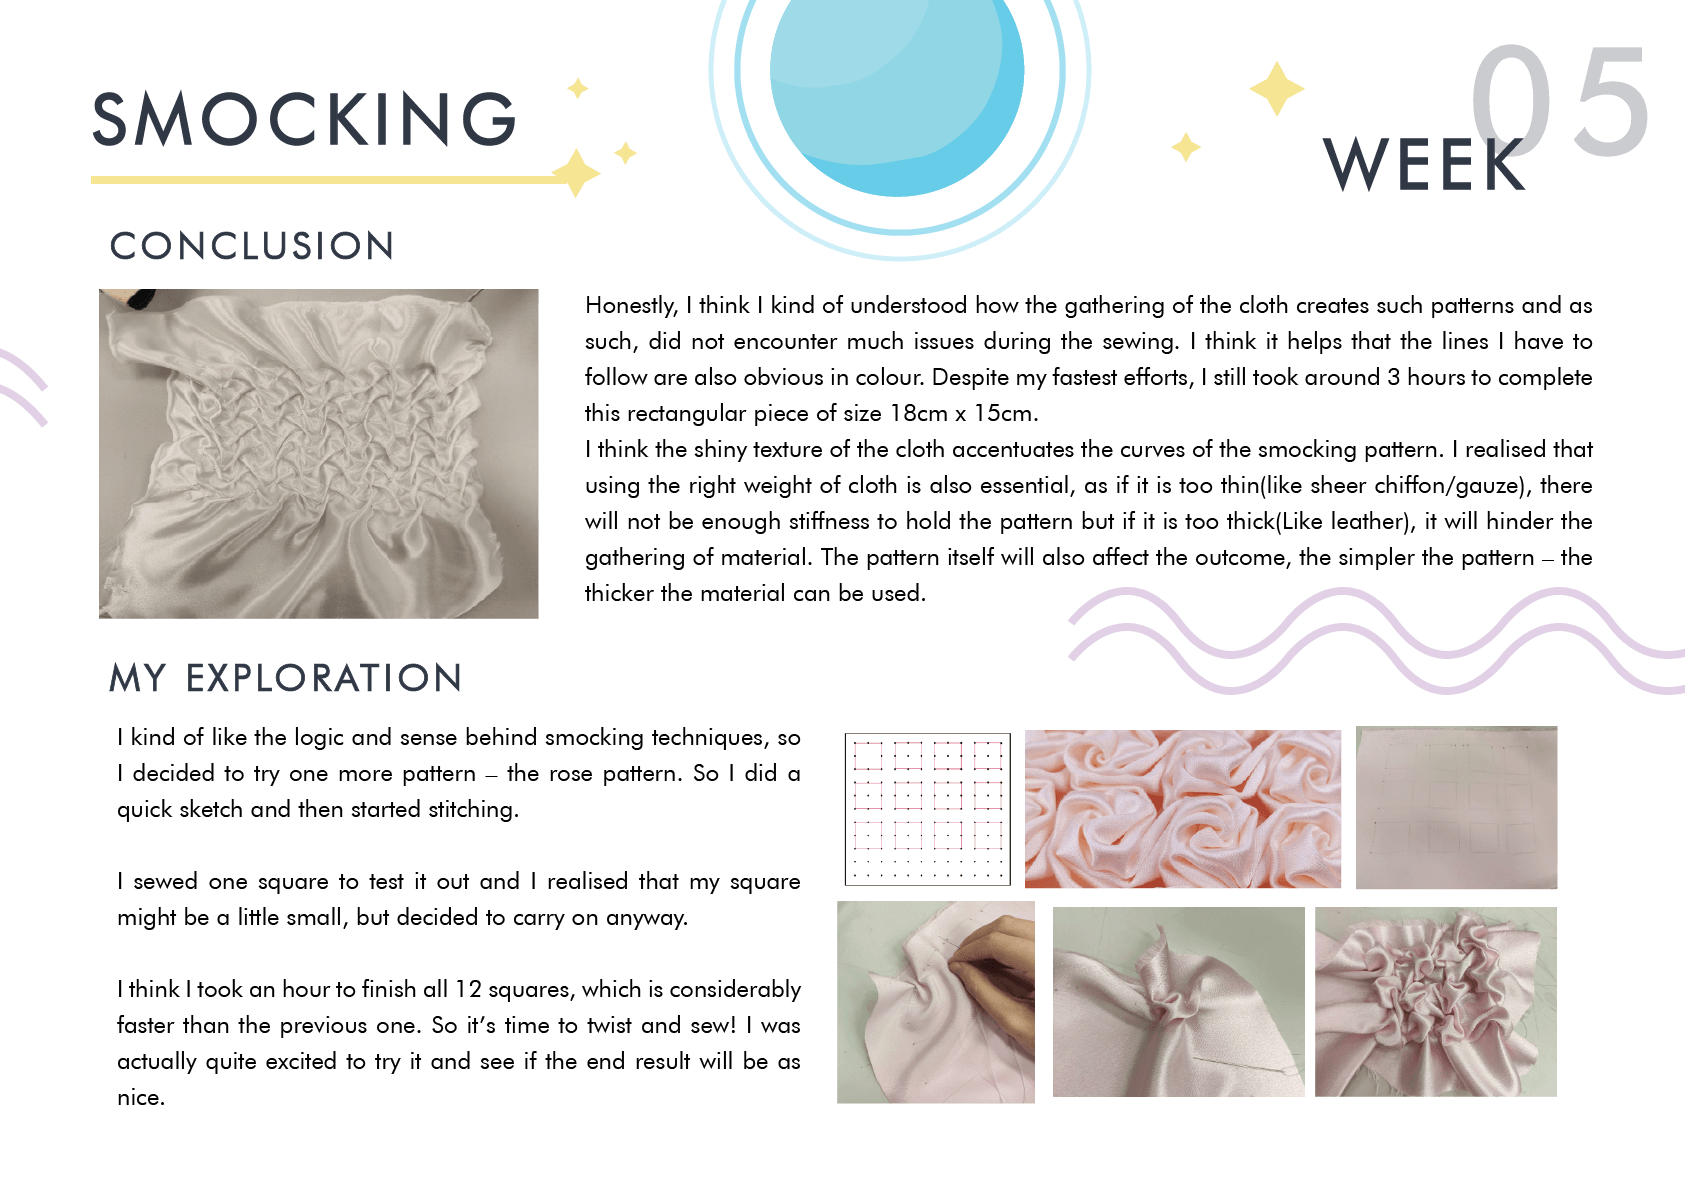
Honestly, I think I kind of understood how the gathering of the cloth creates such patterns and as such, did not encounter much issues during the sewing. I think it helps that the lines I have to follow are also obvious in colour.
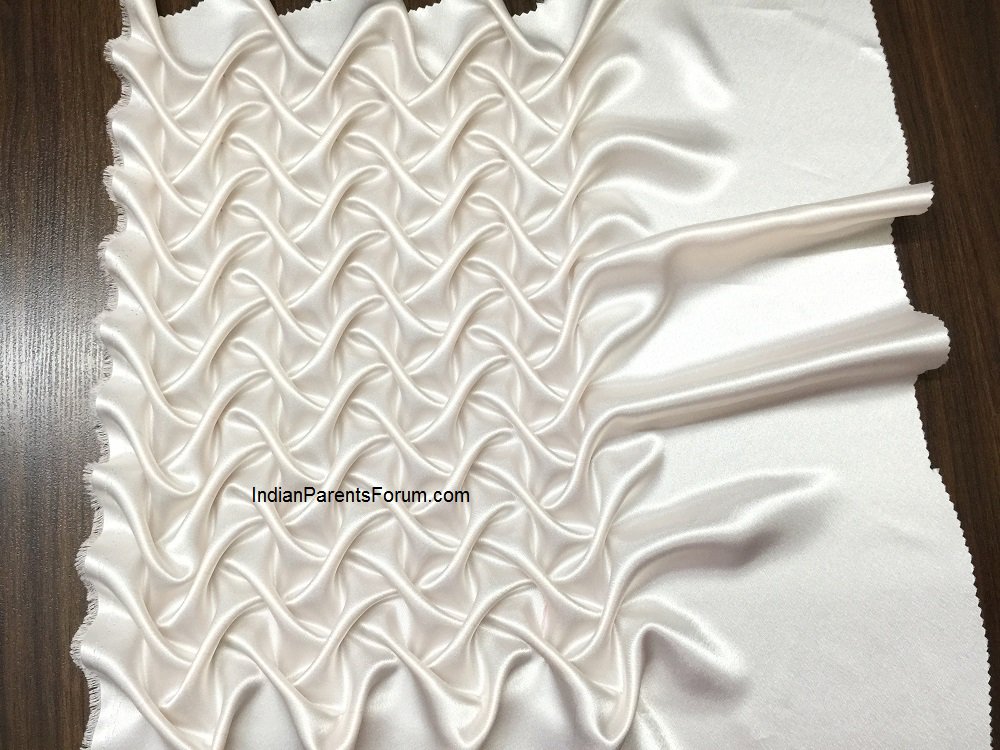
Despite my fastest efforts, I still took around 3 hours to complete this rectangular piece of size 18cm x 15cm.
I think the shiny texture of the cloth accentuates the curves of the smocking pattern. I realised that using the right weight of cloth is also essential, as if it is too thin(like sheer chiffon/gauze), there will not be enough stiffness to hold the pattern but if it is too thick(Like leather), it will hinder the gathering of material.
The pattern itself will also affect the outcome, the simpler the pattern – the thicker the material can be used.
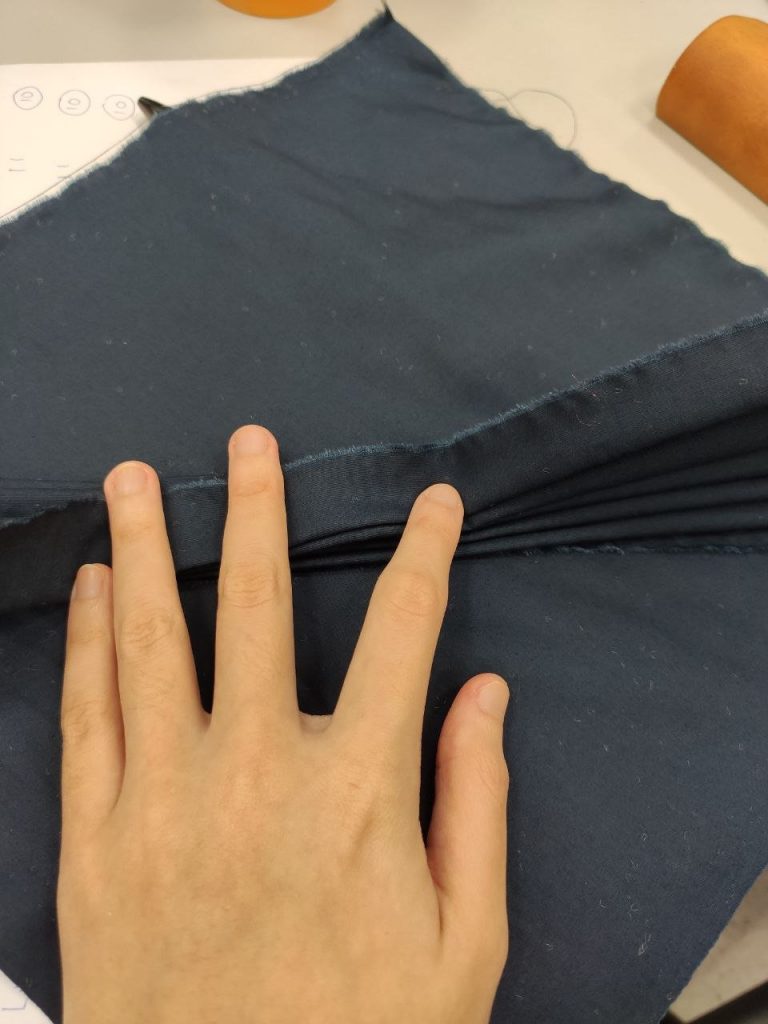
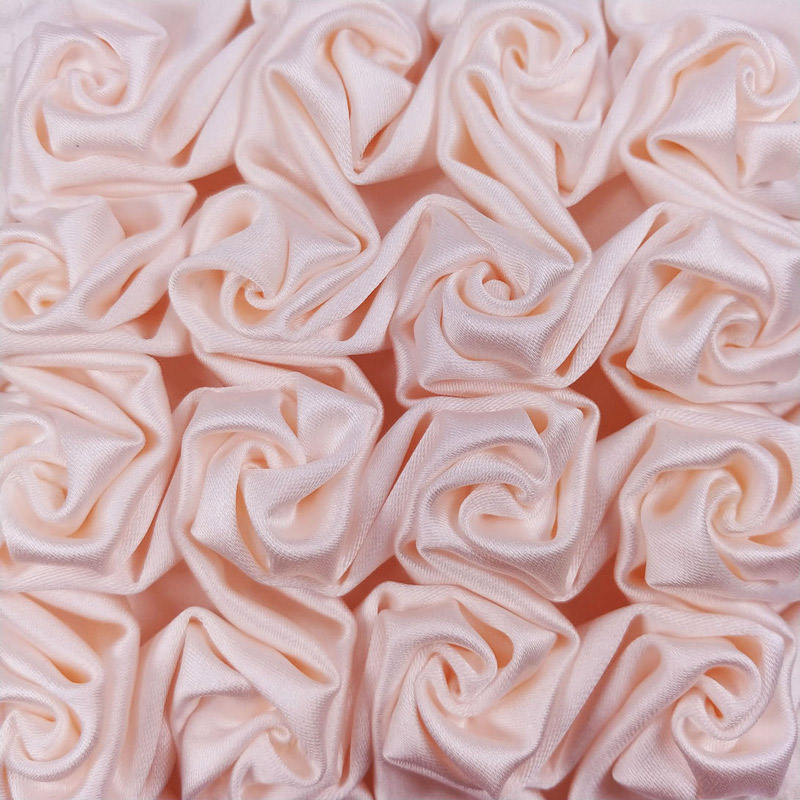
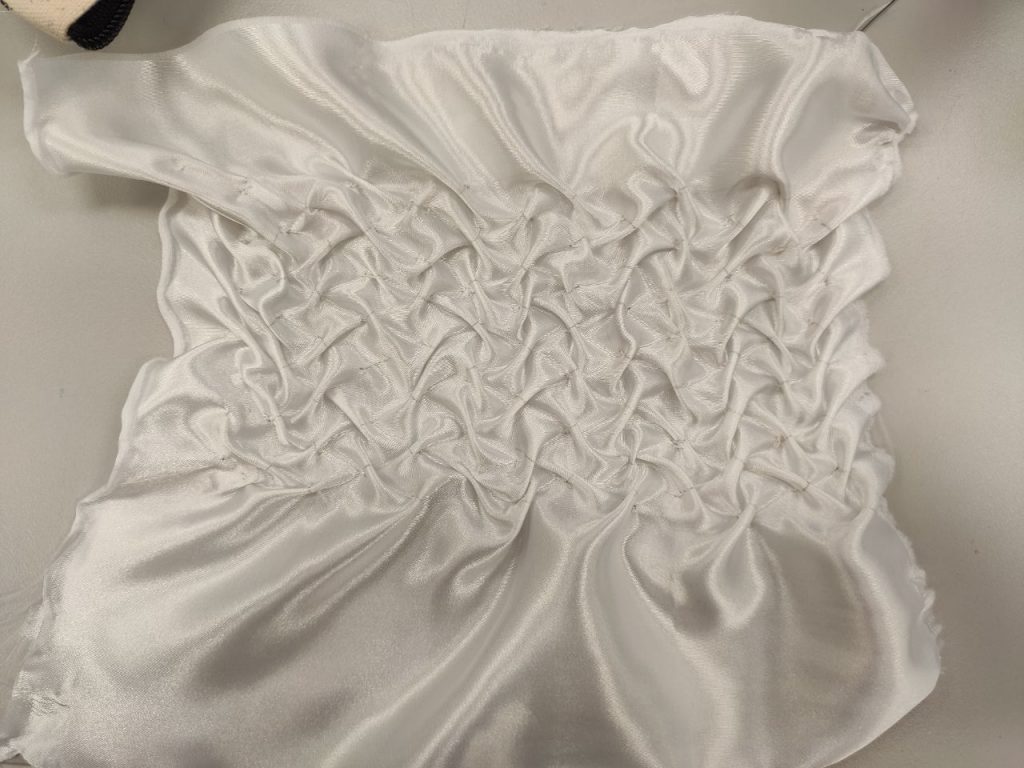
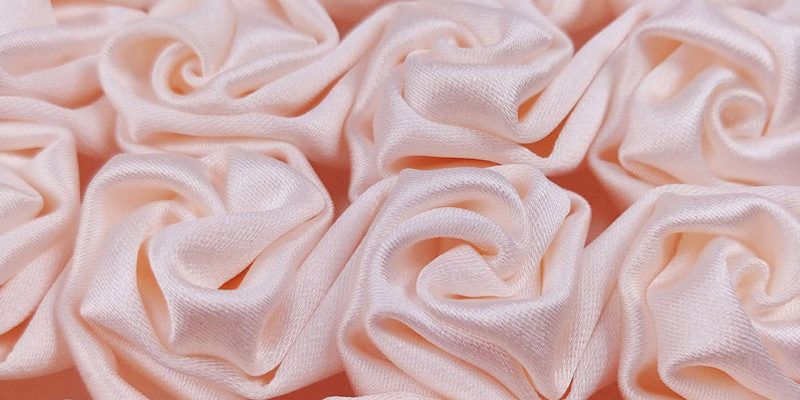
I kind of like the logic and sense behind smocking techniques, so I decided to try one more pattern – the rose pattern.
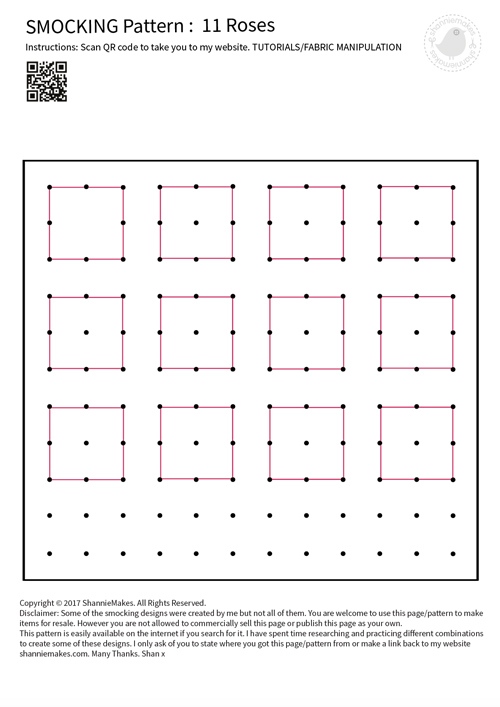
The pattern, once again seems simple enough, although the website did mention that afterwards the fabric have to be twisted with tweezers from the front and sewn in place once again.
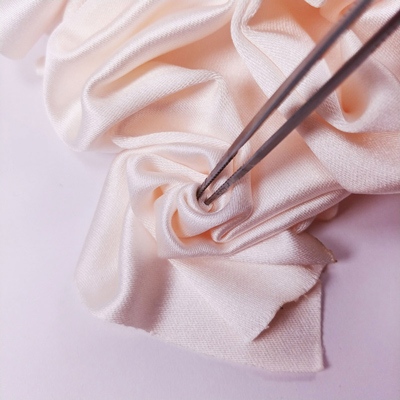
So I did a quick sketch (kind of impatient oops) and figured out that I just need to poke the middle of each line so I don’t really have to draw them.
And I just started with the squares.
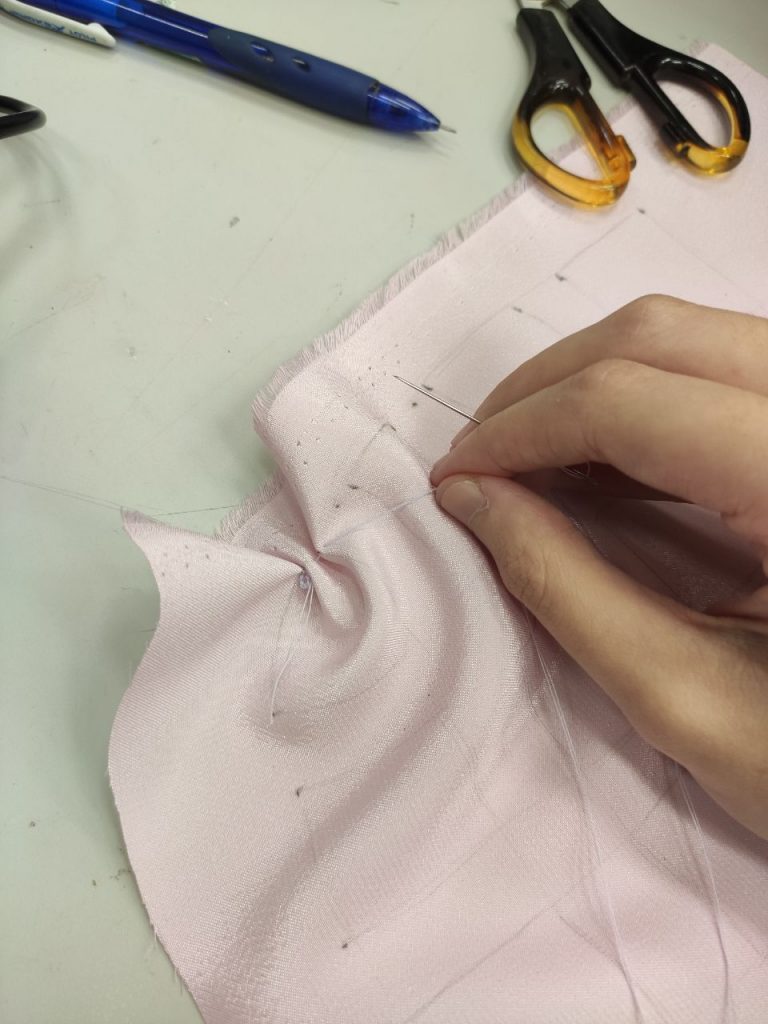
I sewed one square to test it out and I realised that my square might be a little small, but decided to carry on anyway.
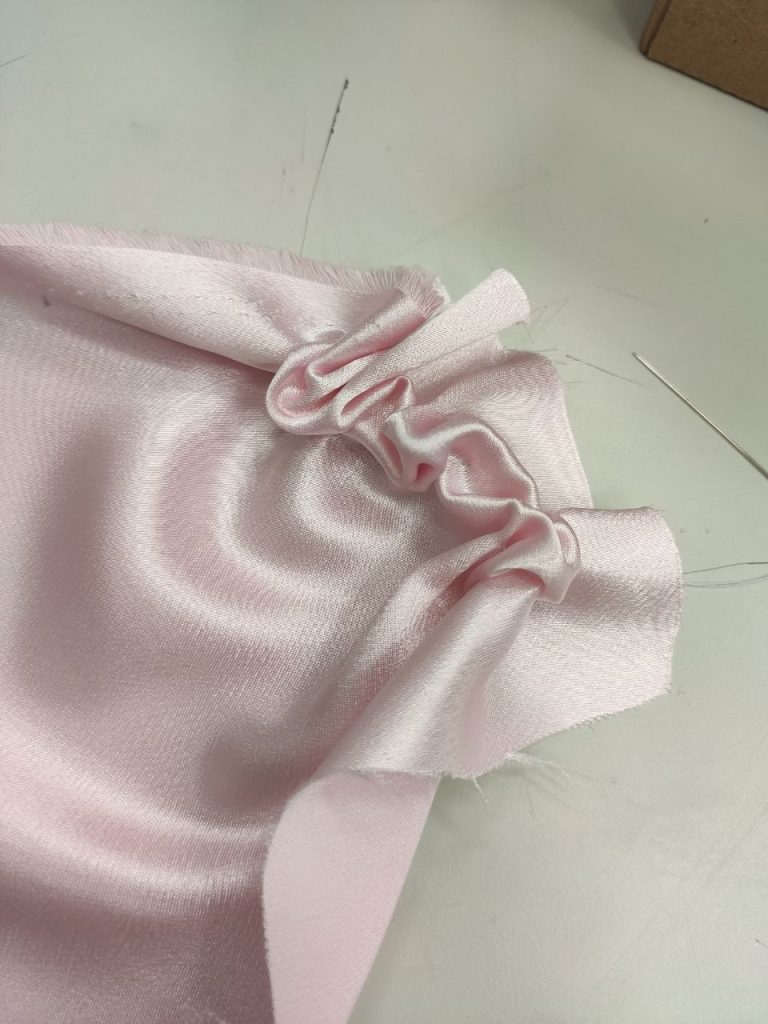
I think I took an hour to finish all 12 squares, which is considerably faster than the previous one. So it’s time to twist and sew! I was actually quite excited to try it and see if the end result will be as nice.

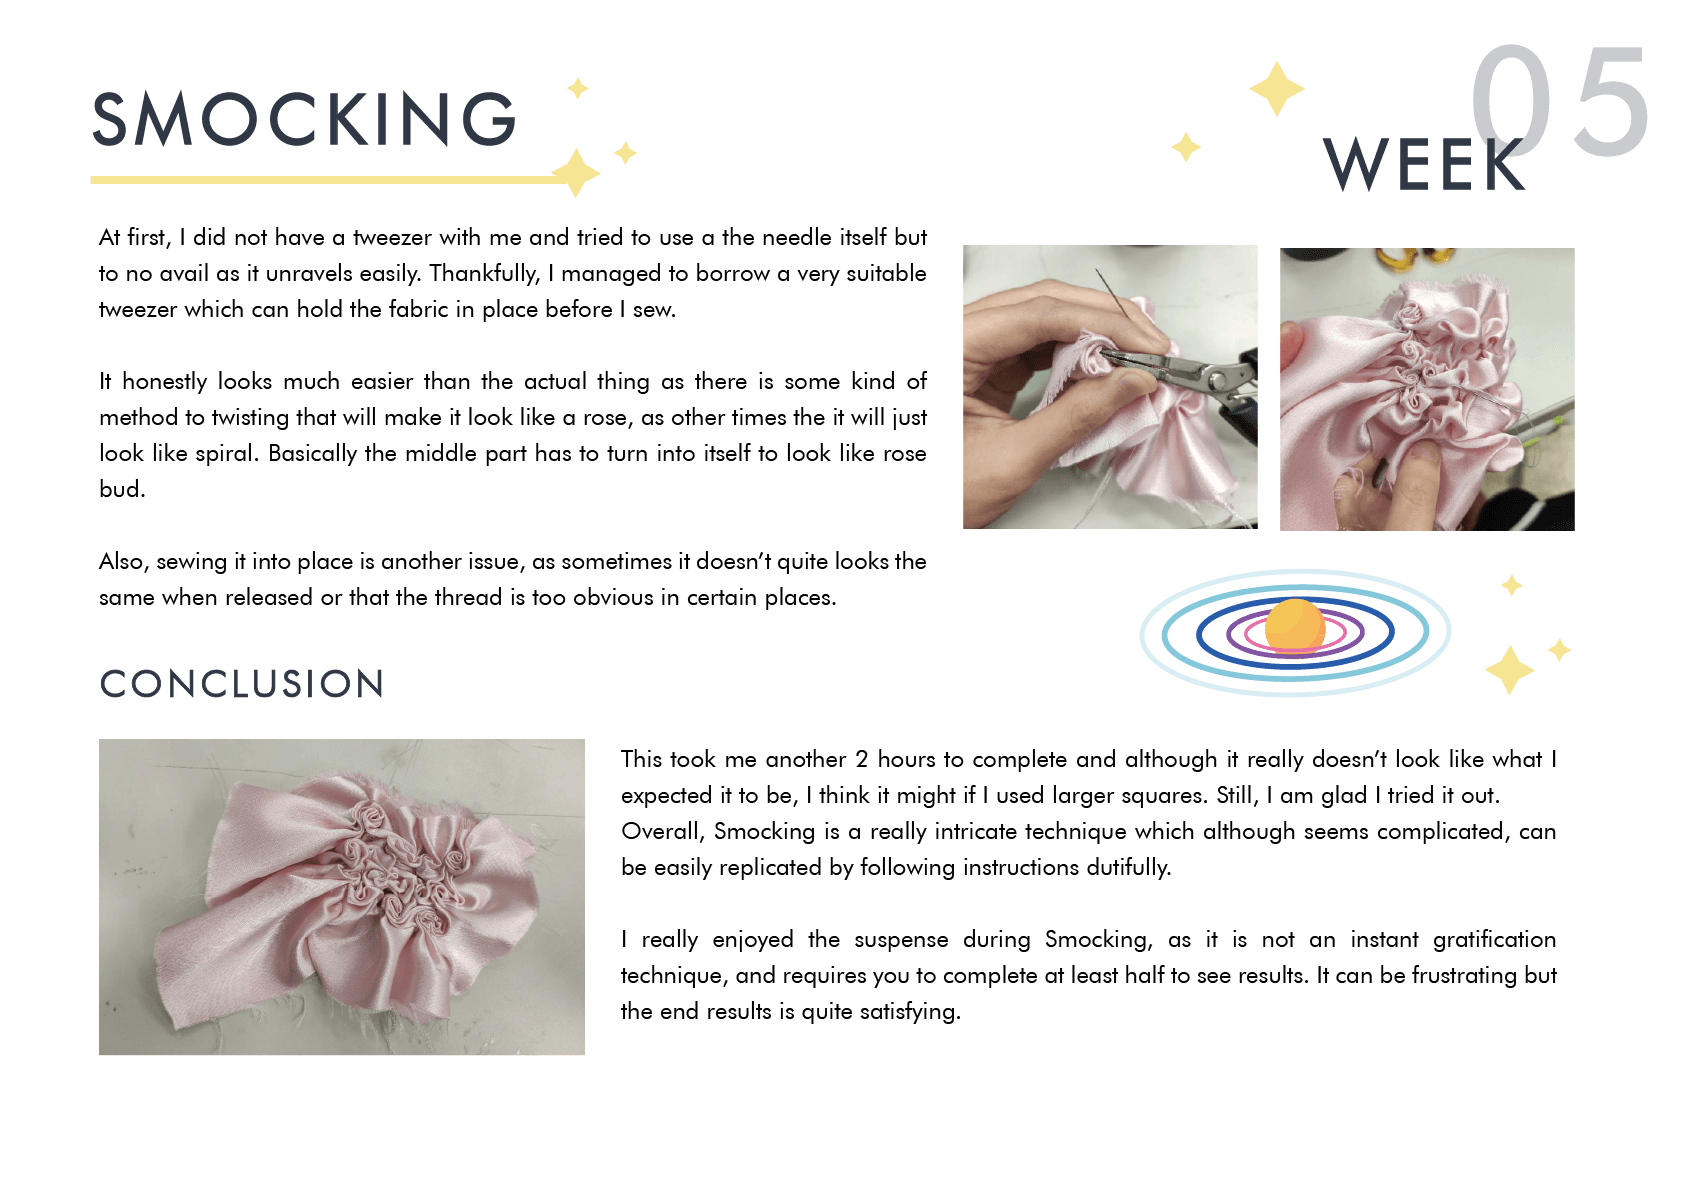
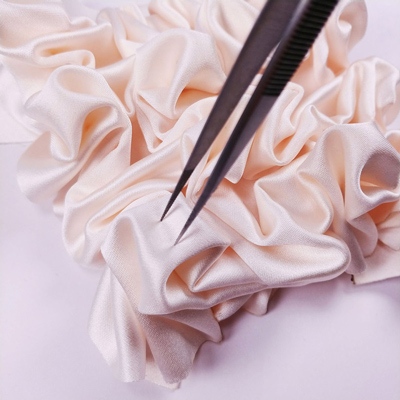
At first, I did not have a tweezer with me and tried to use a the needle itself but to no avail as it unravels easily. Thankfully, I managed to borrow a very suitable tweezer which can hold the fabric in place before I sew.

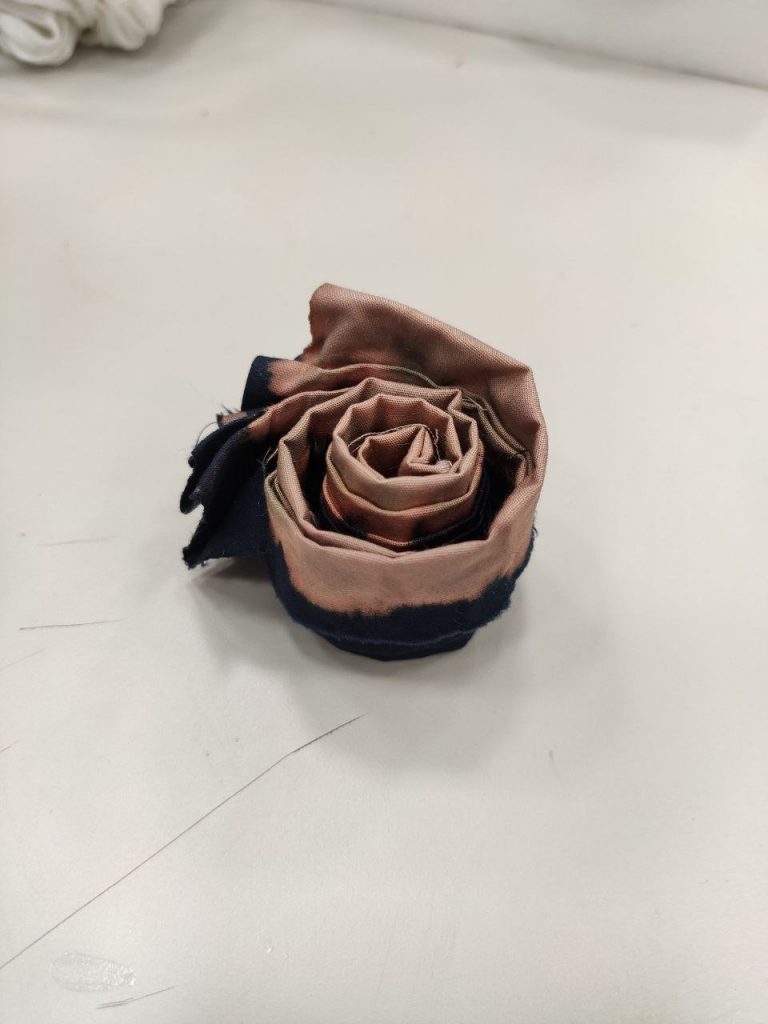
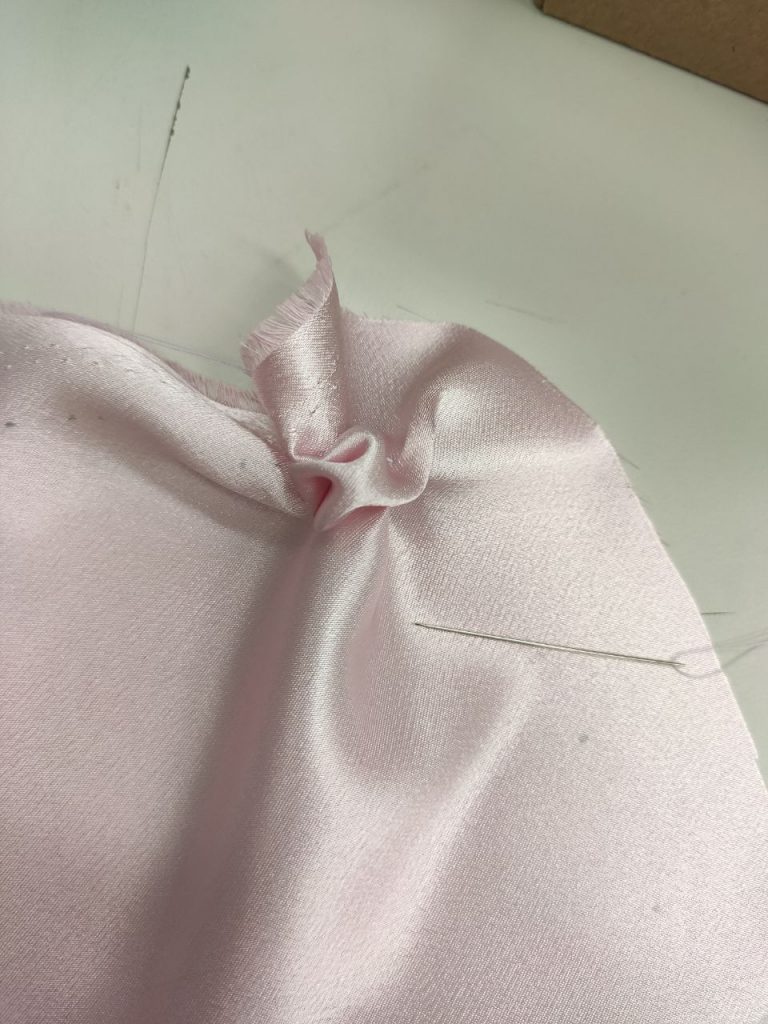
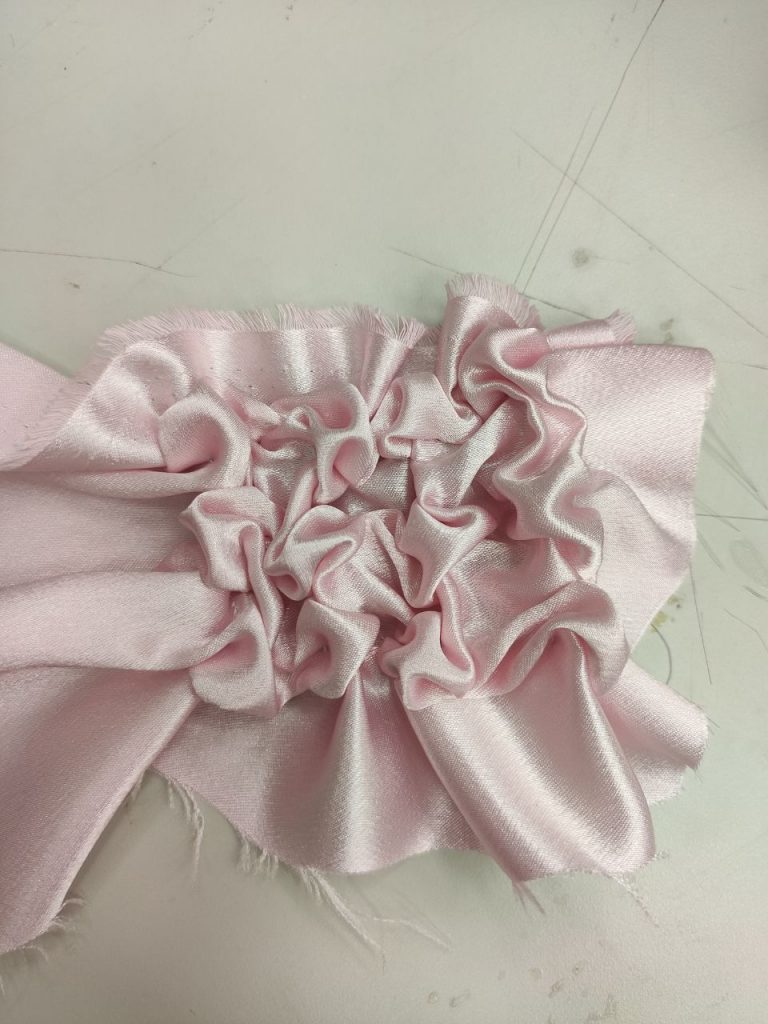
I would say it honestly looks much easier than the actual thing as there is some kind of method to twisting that will make it look like a rose, as other times the it will just look like spiral. Basically the middle part has to turn into itself to look like rose bud.
Also, sewing it into place is another issue, as sometimes it doesn’t quite looks the same when released or that the thread is too obvious in certain places. There was a lot of removing and trying involved.
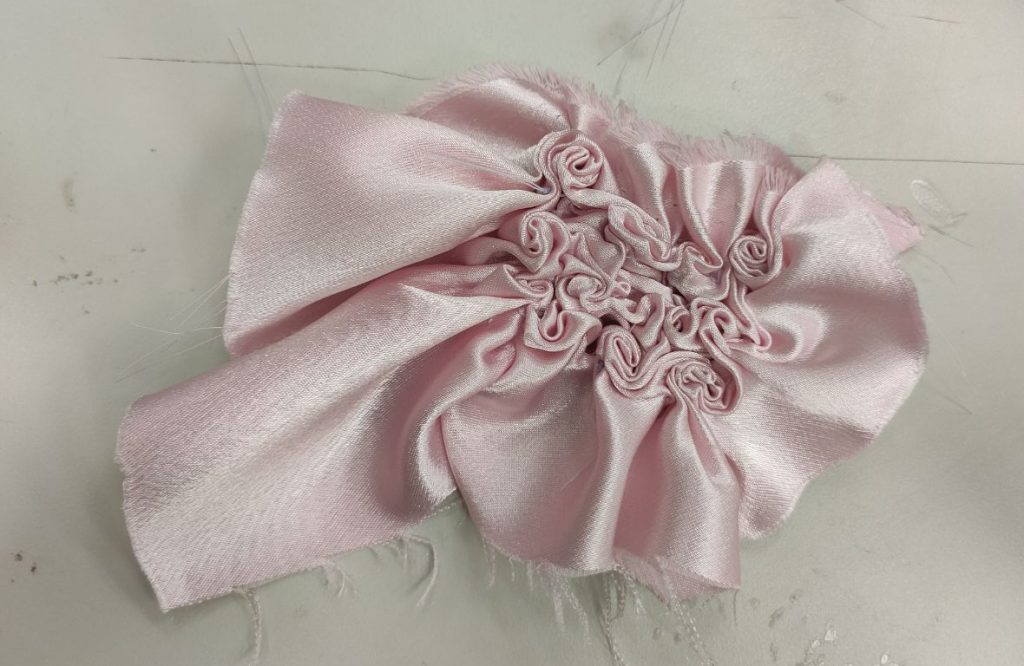
This took me another 2 hours to complete and although it really doesn’t look like what I expected it to be, I think it actually might if i used larger squares.
Still, I am glad I tried it out.
Overall, Smocking is a really intricate technique which although seems complicated, can be easily replicated by following instructions dutifully.
I really enjoyed the suspense during Smocking, as it is not an instant gratification technique, and requires you to complete at least half to see results. It can be frustrating but the end results is quite satisfying.
A P P L I C A T I O N S
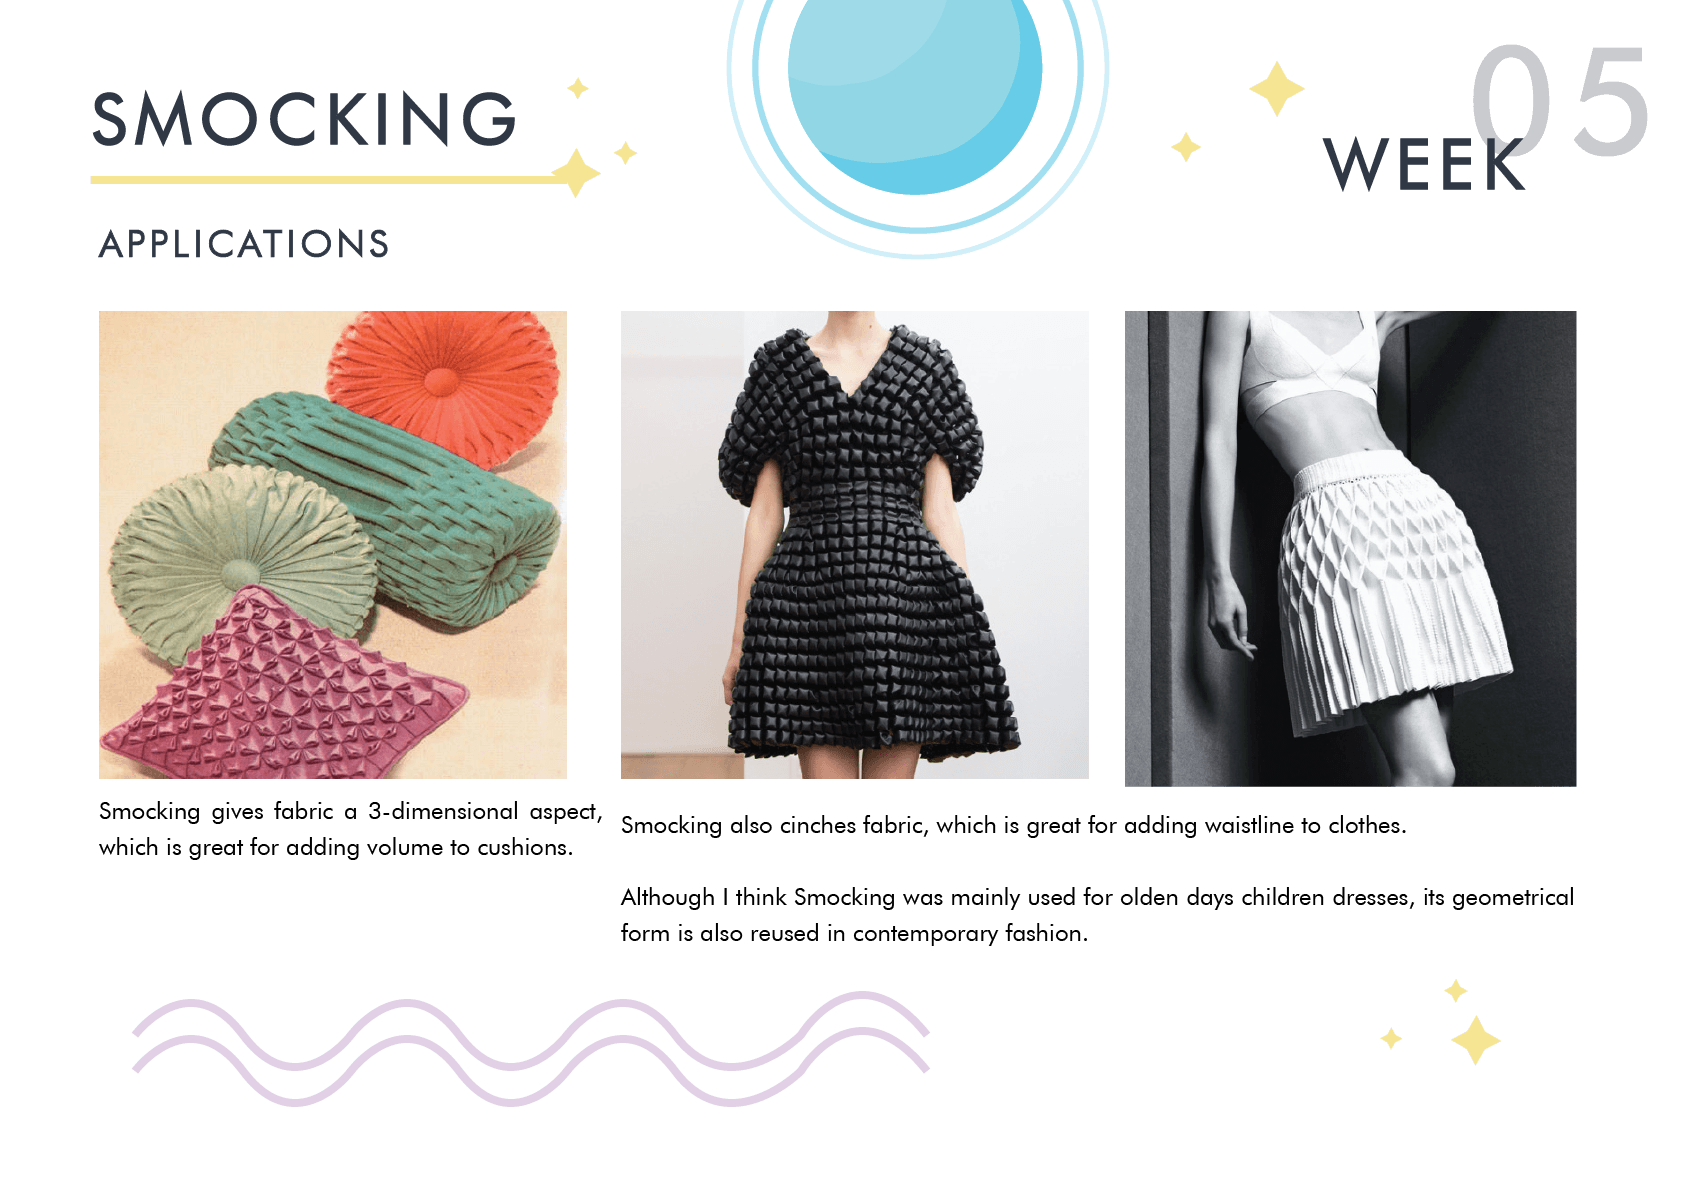
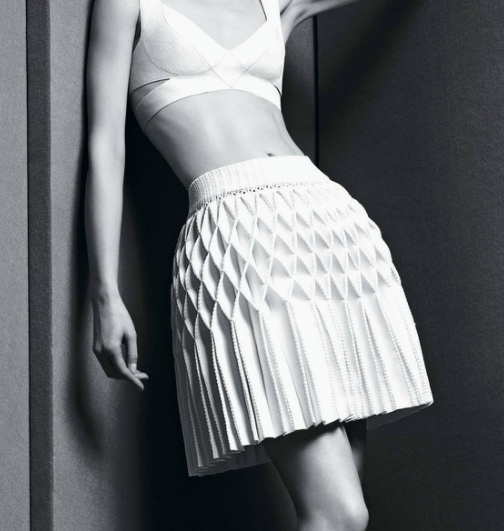
Smocking gives fabric a 3-dimensional aspect, which is great for adding volume to cushions.

Smocking also cinches fabric, which is great for adding waistline to clothes.
Although I think Smocking was mainly used for olden days children dresses, its geometrical form is also reused in contemporary fashion.

Method of fabric manipulation through the gathering of a section of the material into tight pleats and holding them together with parallel stitches in an ornamental pattern.
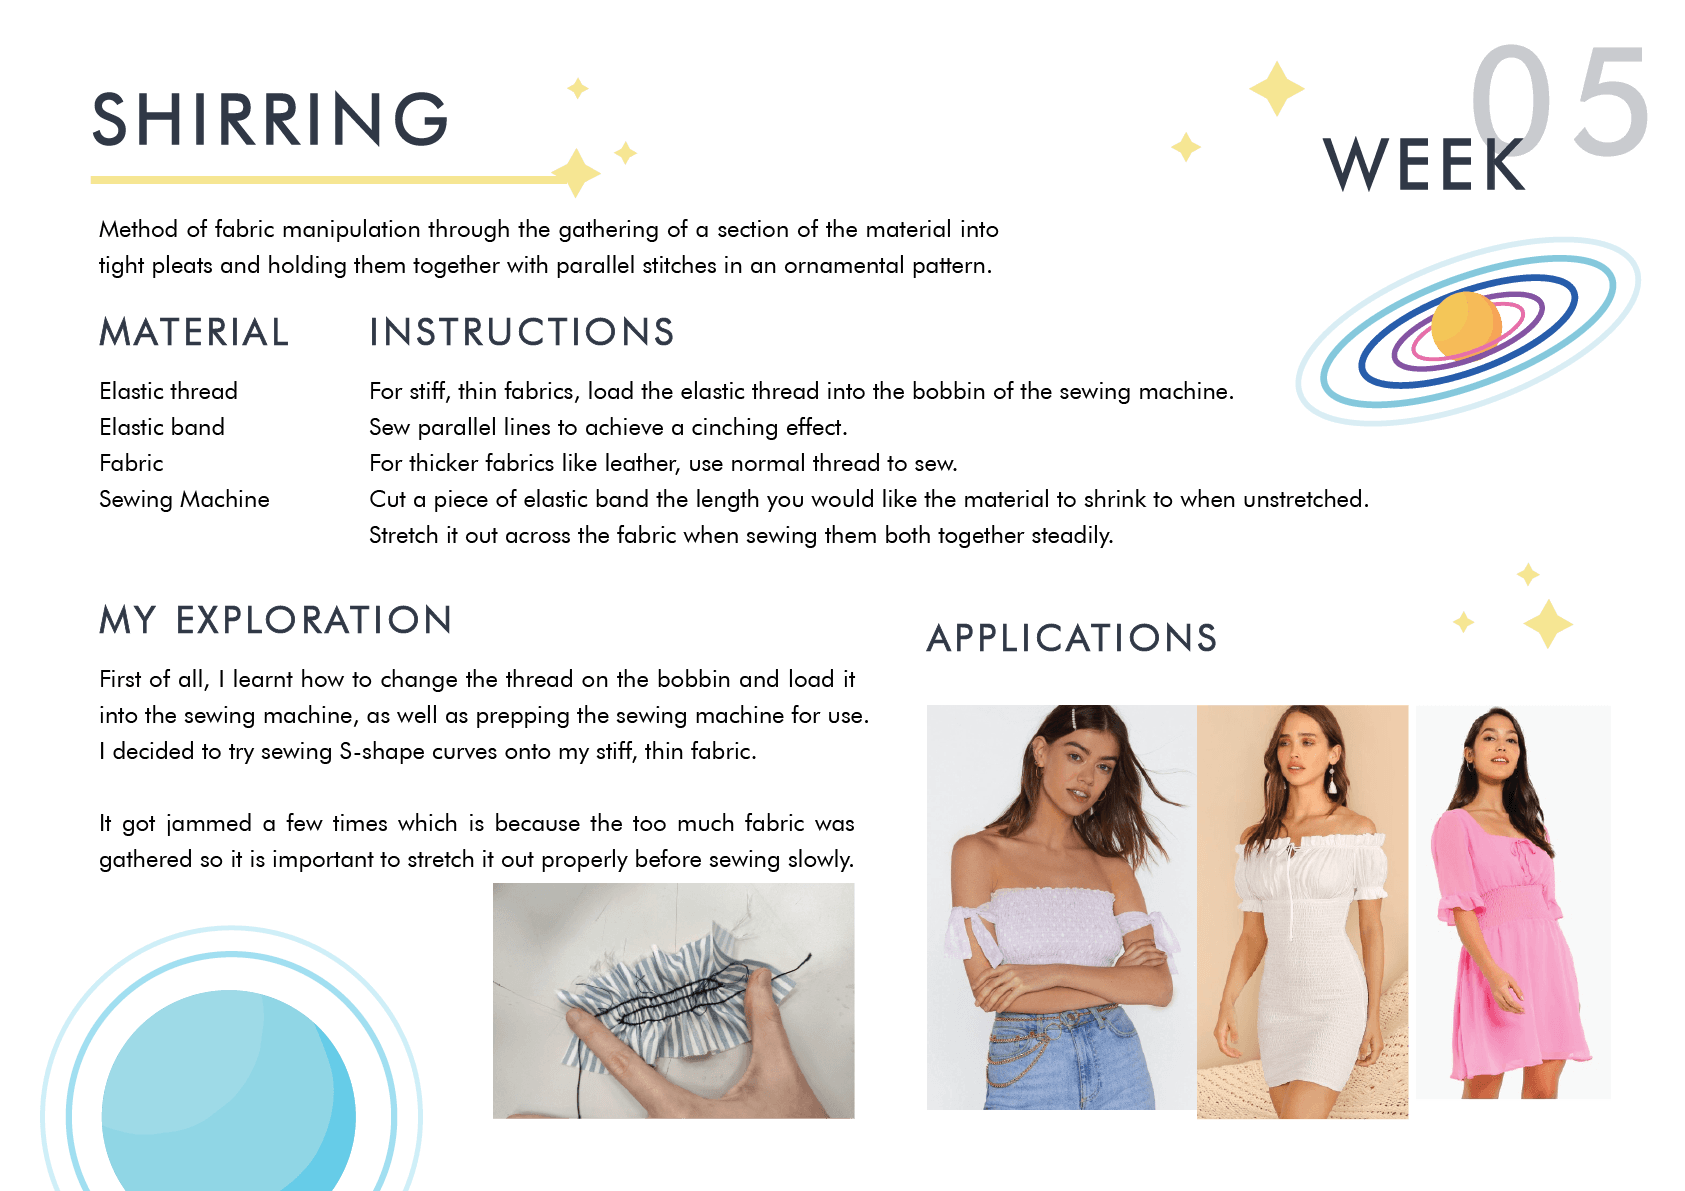
First of all, I learnt how to change the thread on the bobbin and load it into the sewing machine, as well as prepping the sewing machine for use.
I decided to try sewing S-shape curves onto my stiff, thin fabric.
I would say it got jammed a few times which is because the too much fabric was gathered so it is important to stretch it out properly before sewing slowly.
A P P L I C A T I O N S
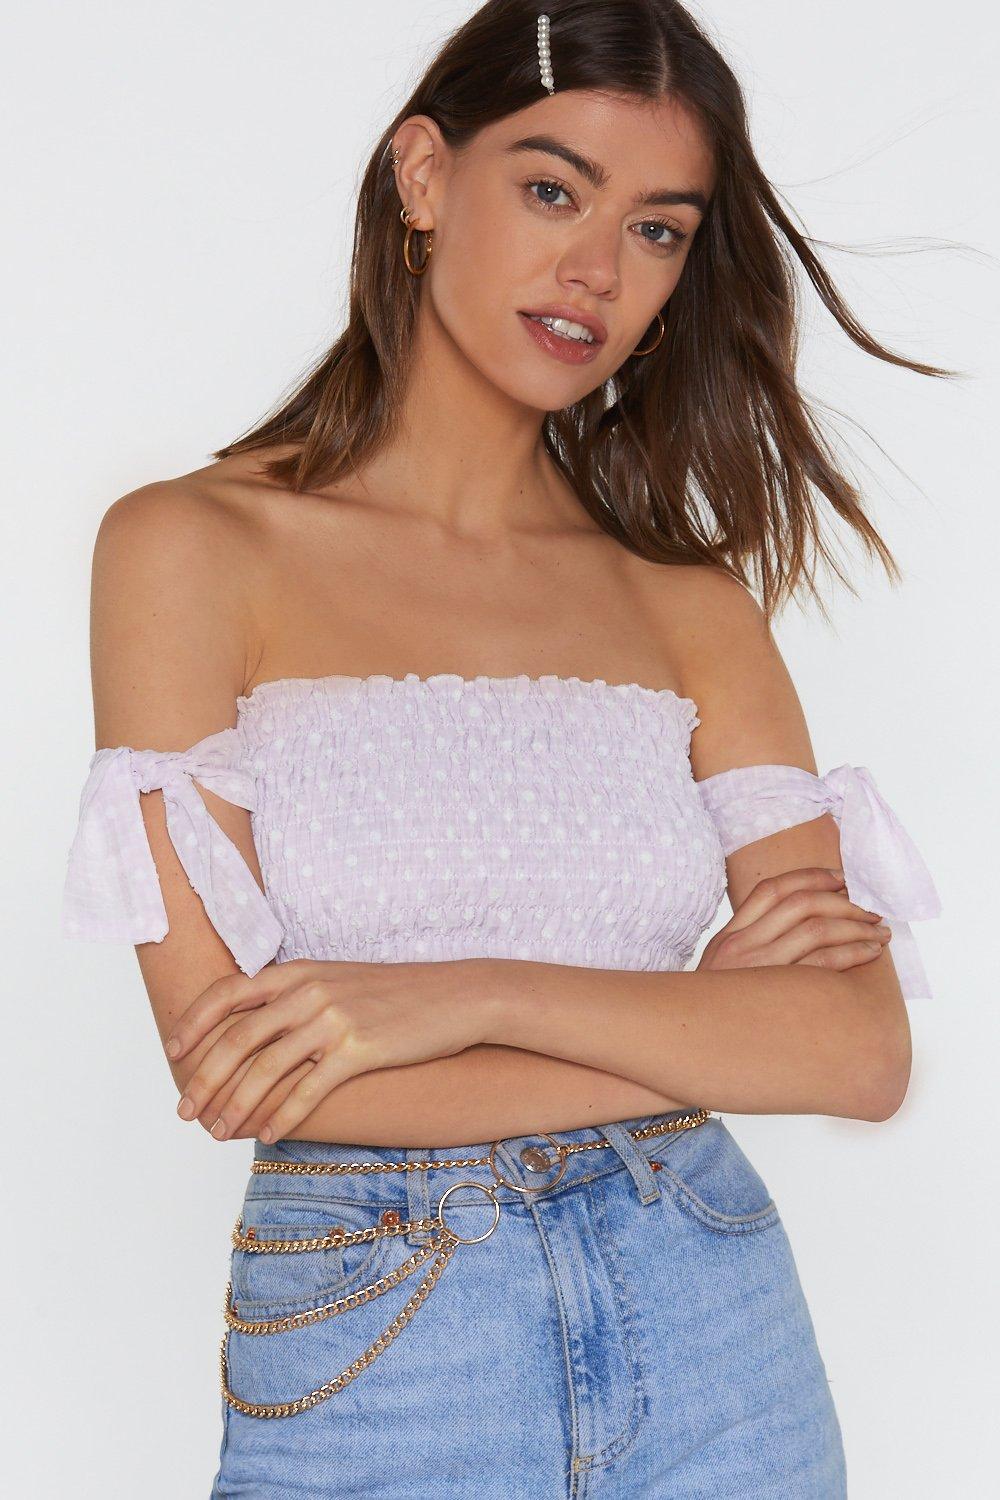
Shirring is commonly seen in fashion – myself owning one of these shirred tops! Due to their elasticity, they can show off your body shape when worn. They are also commonly used to cinch the waistlines of dresses to give it shape.
:fill(ffffff)/http://static.sg.zalora.net/p/glamorous-1379-6352701-1.jpg)

I think shirring is a great way to vary the form of the dress (i.e. tight at the top, flowy at the bottom) even though it is made out of only one fabric.
The raised/gathered texture of shirred fabric also gives it a bit of volume.
Consolidation of fibrous materials by the application of heat, moisture, and mechanical action, causing the interlocking, or matting, of fibres to form one uniform and complete piece.
Materials:
W E T F E L T I N G
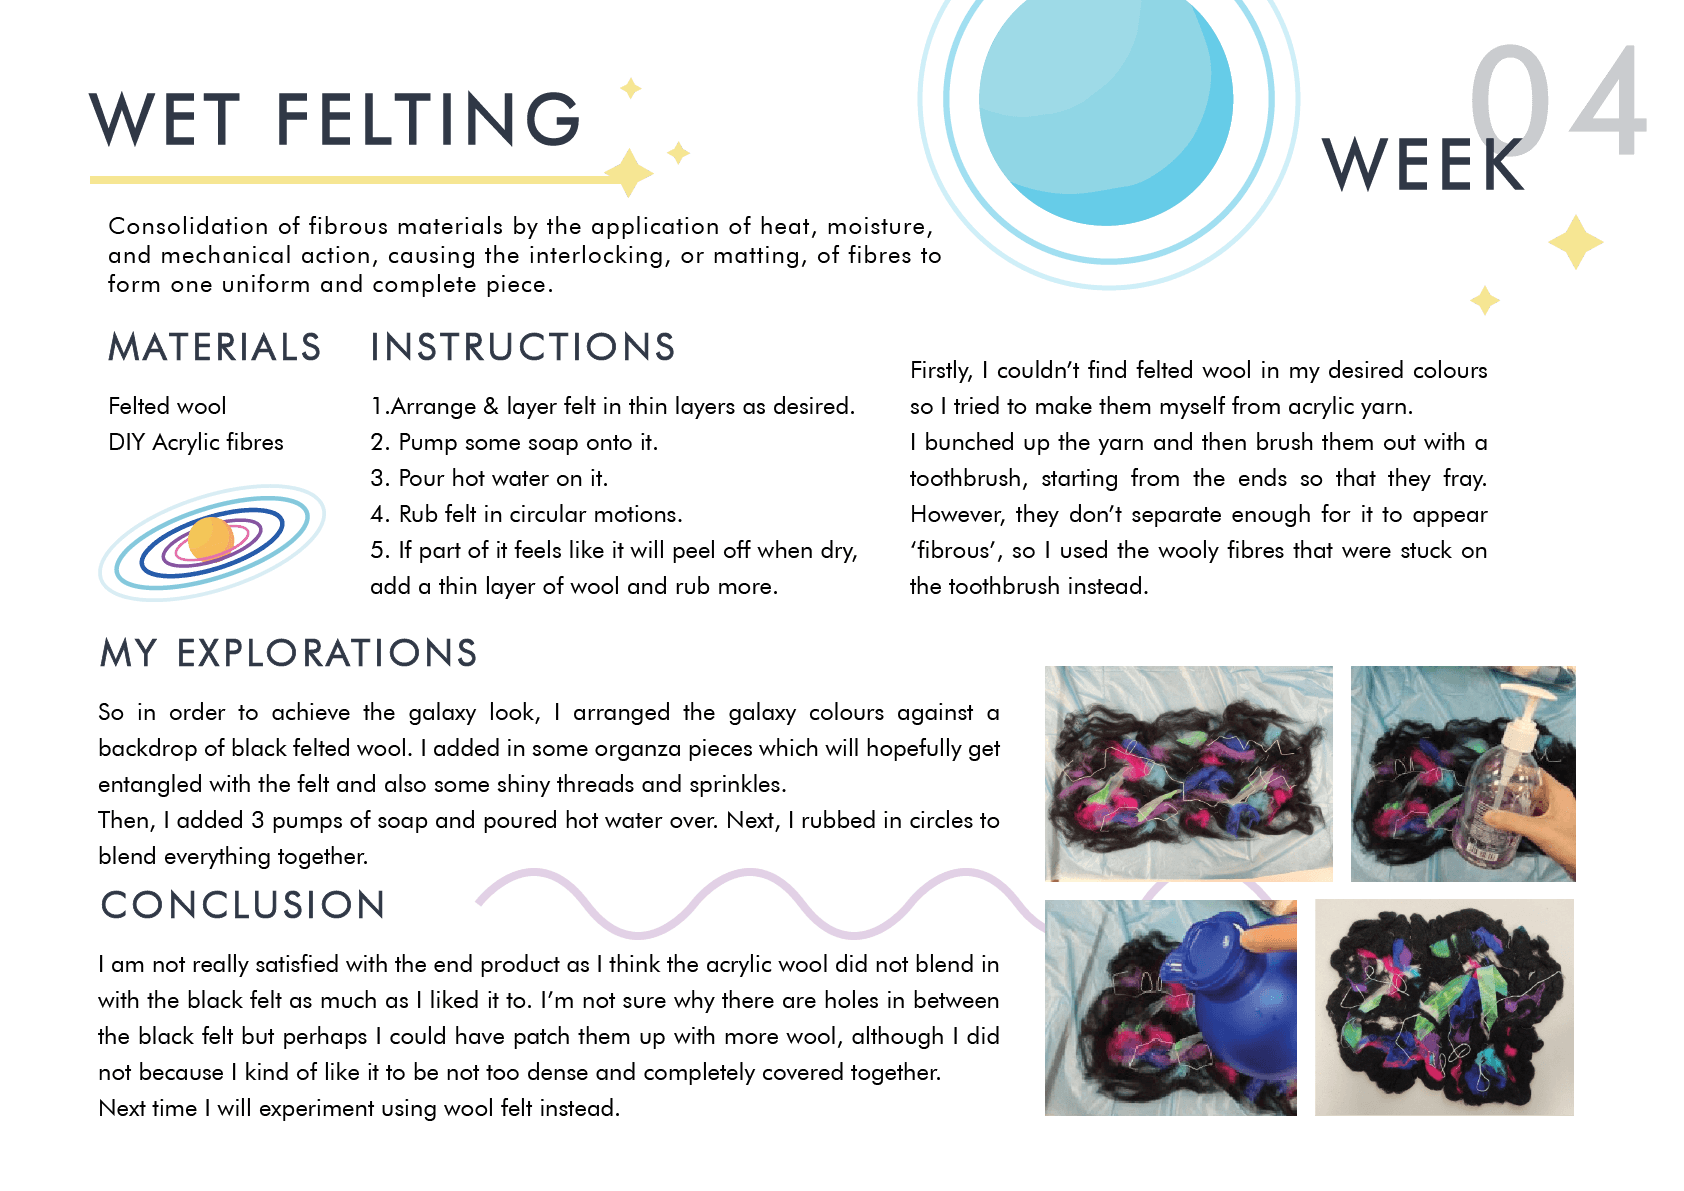
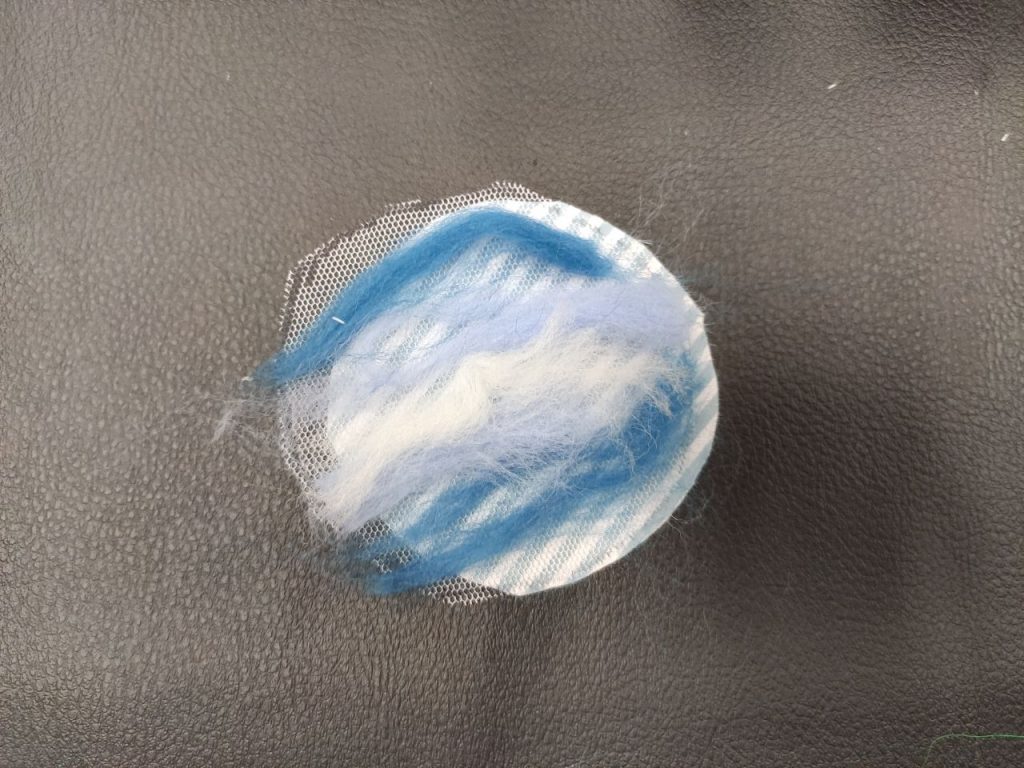
Firstly, I couldn’t find felted wool in my desired colours so I tried to make them myself from acrylic yarn.
I bunched up the yarn and then brush them out with a toothbrush, starting from the ends so that they fray. However, they don’t separate enough for it to appear ‘fibrous’, so I used the wooly fibres that were stuck on the toothbrush instead.
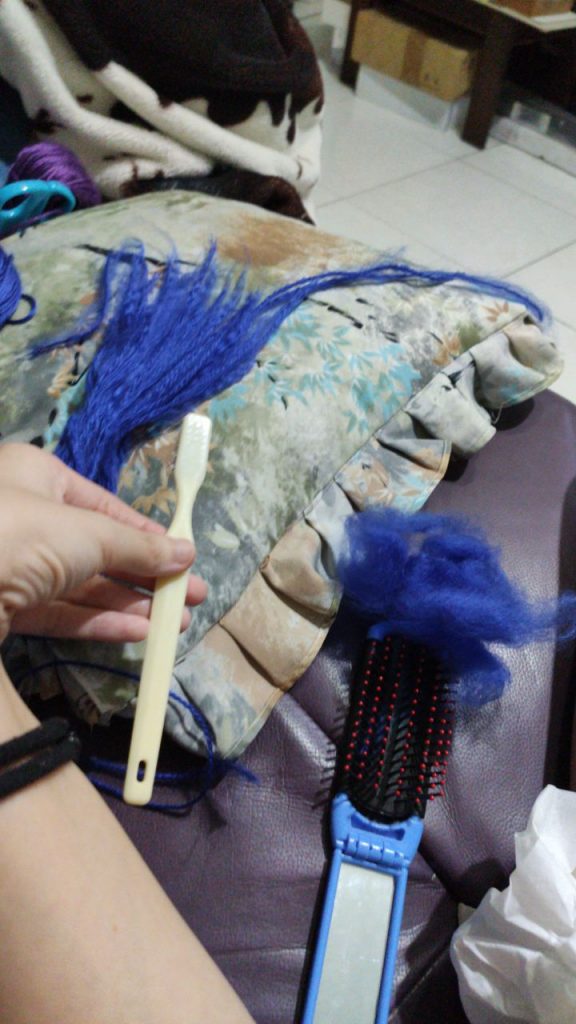
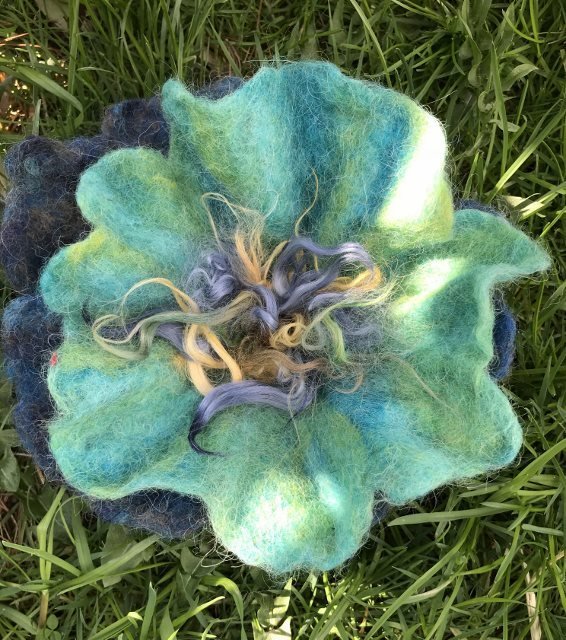
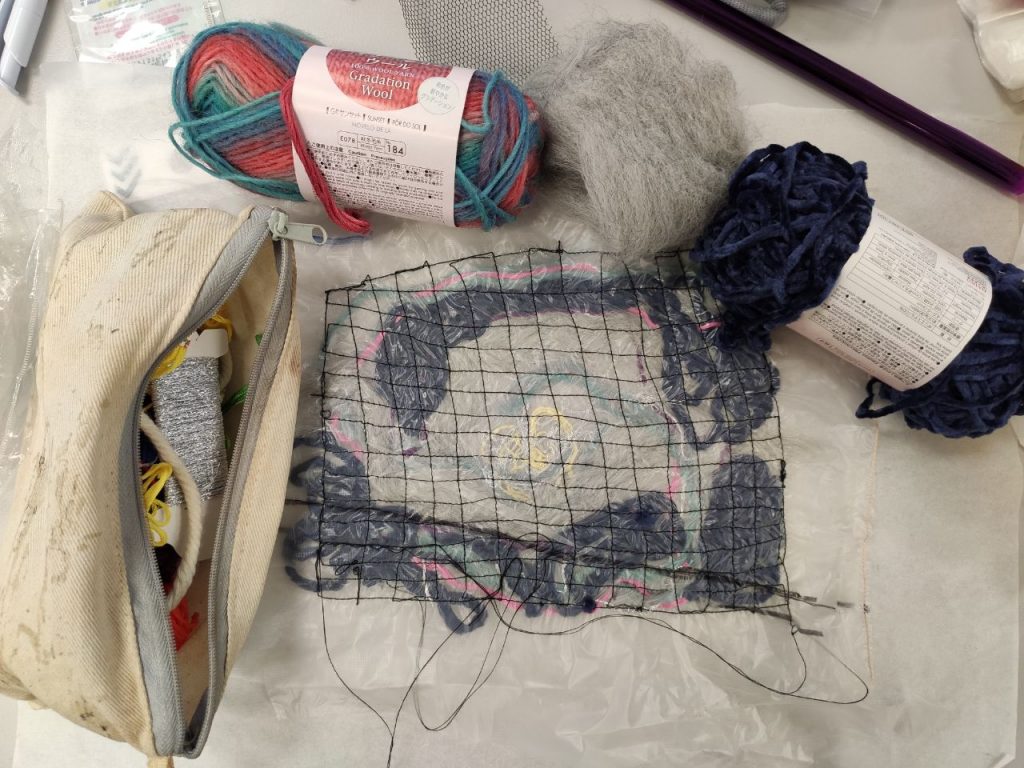
So in order to achieve the galaxy look, I arranged the galaxy colours against a backdrop of black felted wool. I added in some organza pieces which will hopefully get entangled with the felt and also some shiny threads and sprinkles.
Then, I added 3 pumps of soap and poured hot water over.
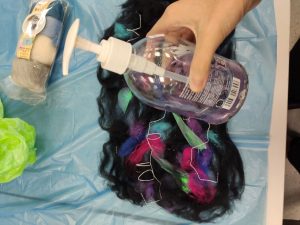
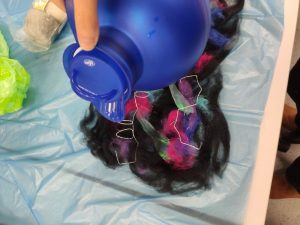
Then, I rubbed in circles to blend everything together.
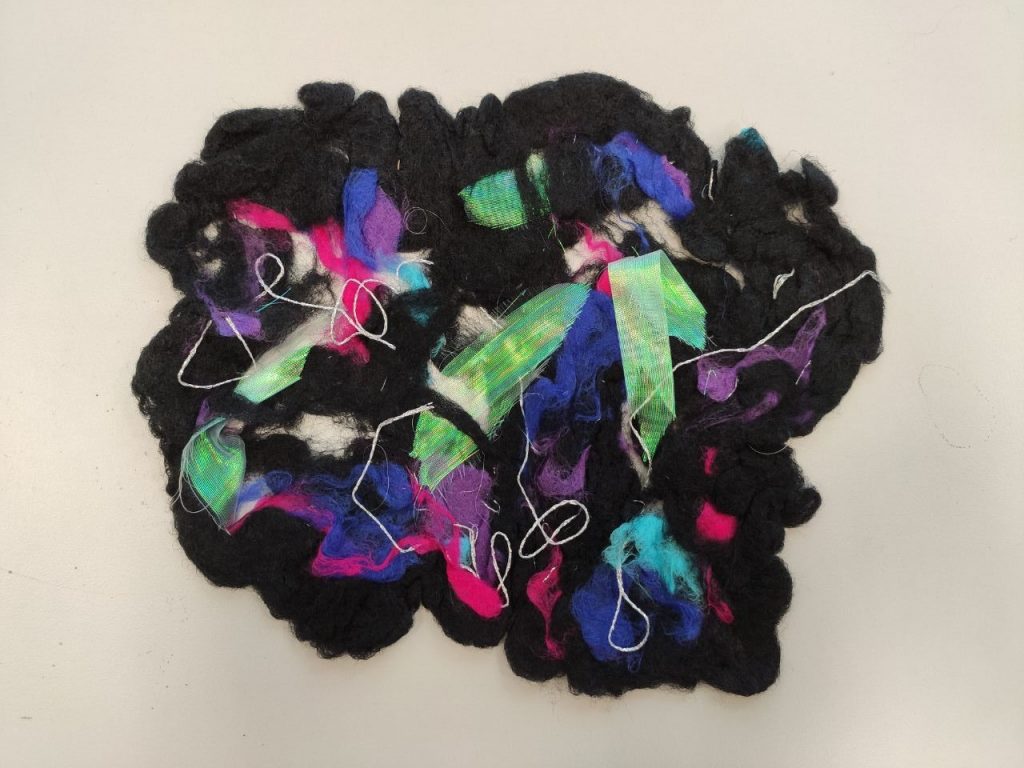
I am not really satisfied with the end product as I think the acrylic wool did not blend in with the black felt as much as I liked it to. The organza pieces not melding in between like they did in the plastic fusion technique. I’m not sure why there are holes in between the black felt but perhaps I could have patch them up with more wool, although I did not because I kind of like it to be not too dense and completely covered together.
Next time I will experiment using wool felt instead.
N E E D L E F E L T I N G
Materials:
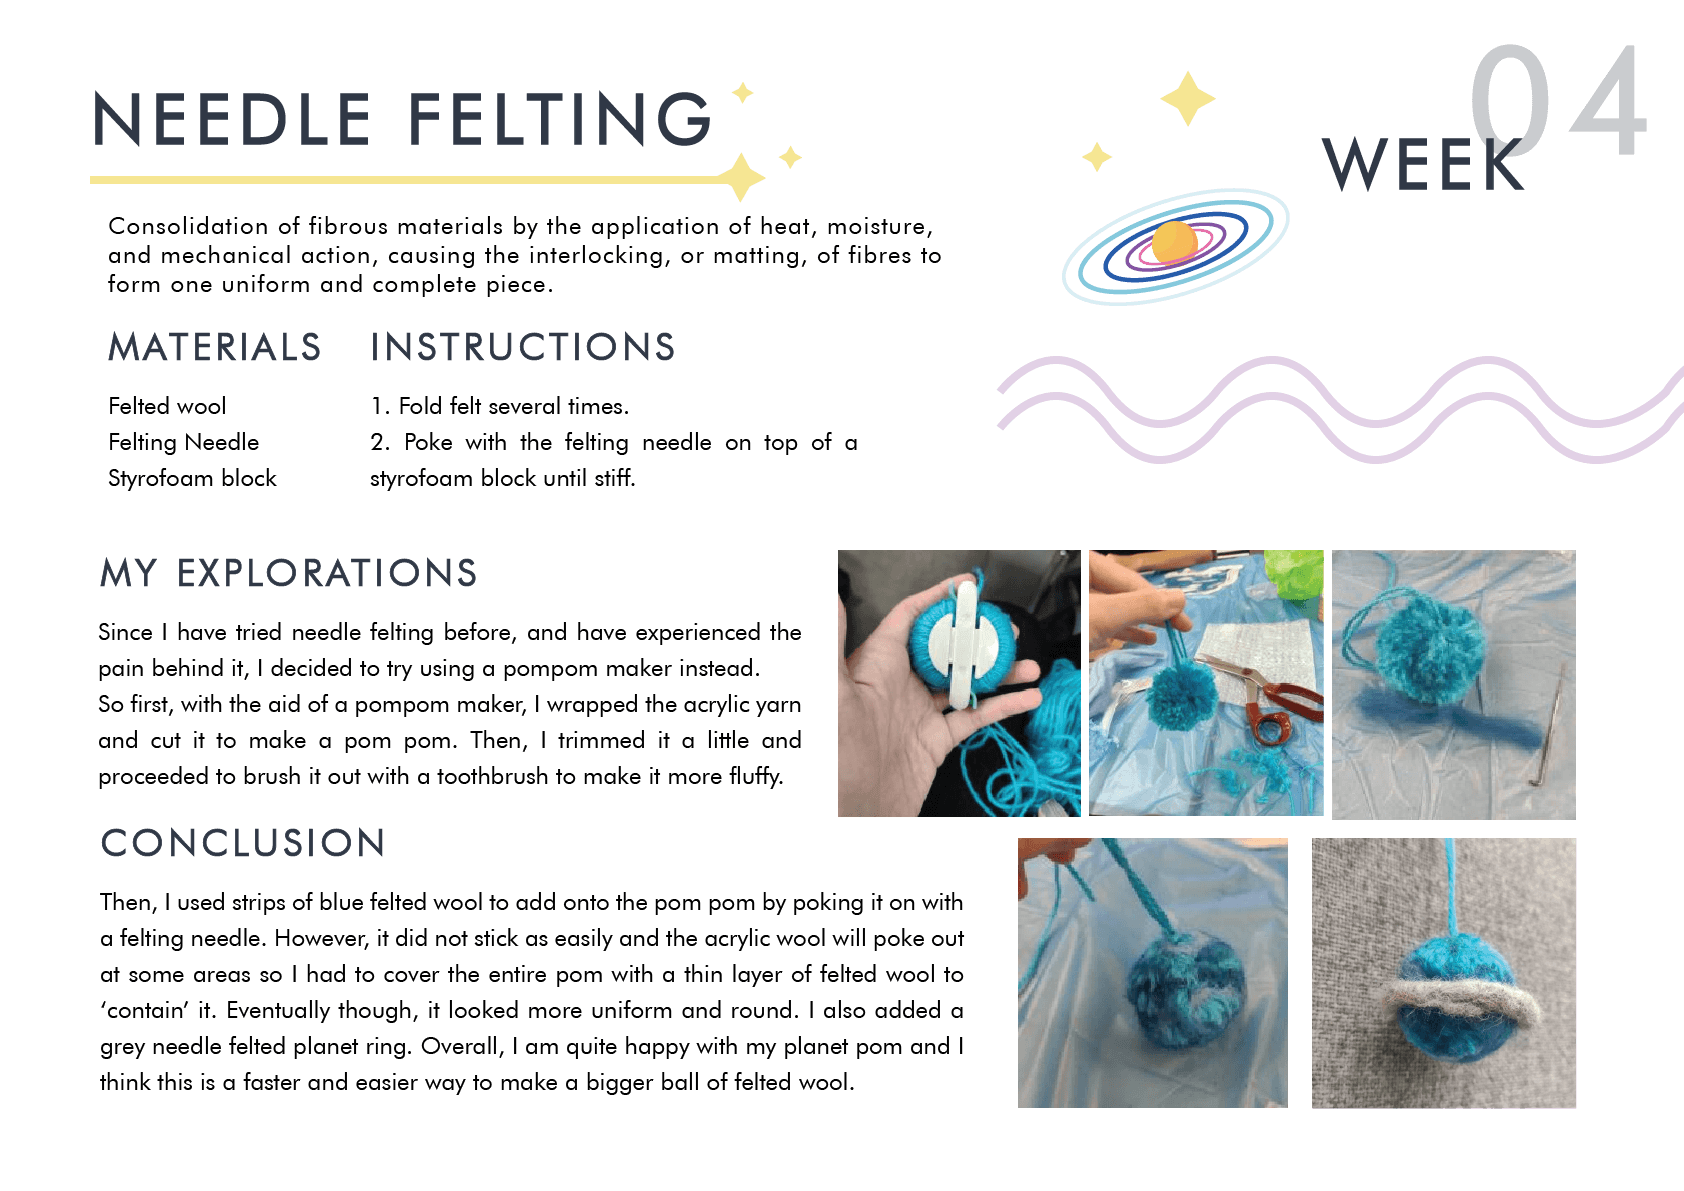
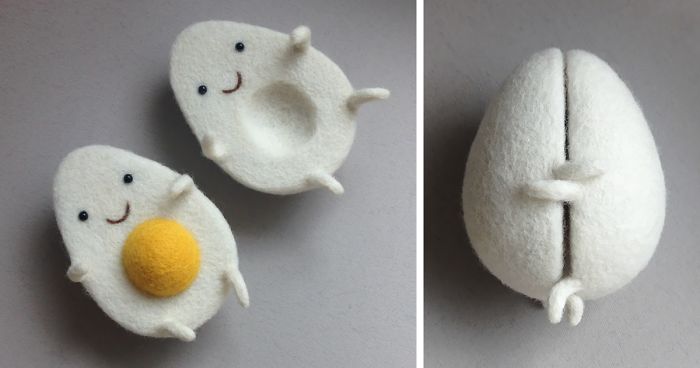
Since I have tried needle felting before, and have experienced the pain behind it, I decided to try another way of creating felted planets.
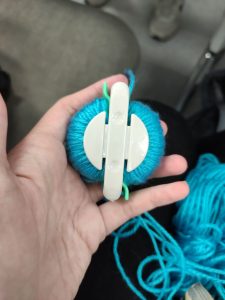
So first, with the aid of a pompom maker, I wrapped the acrylic yarn and cut it to make a pom pom.
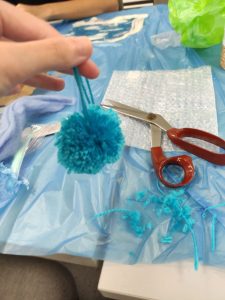
Then, I trimmed it a little and proceeded to brush it out with a toothbrush to make it more fluffy.
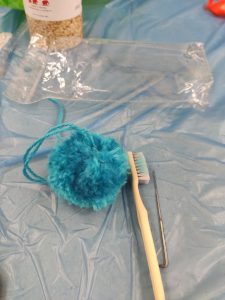
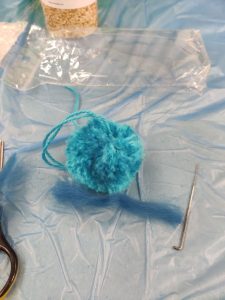
Then, I used strips of blue felted wool to add onto the pom pom by poking it on with a felting needle. However, it did not stick as easily and the acrylic wool will poke out at some areas so I had to cover the entire pom with a thin layer of felted wool to ‘contain’ it. Eventually though, it looked more uniform and round.
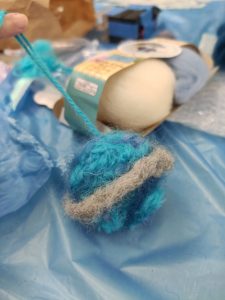
I also added a grey needle felted planet ring, which took longer than expected to make.
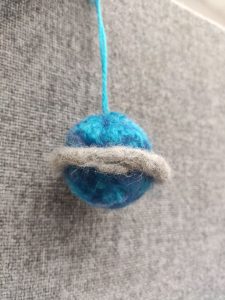
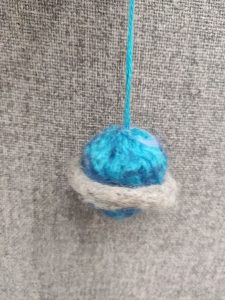
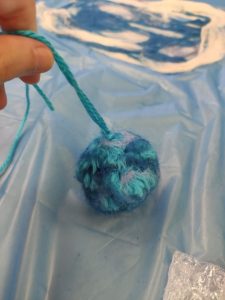
Overall, I am quite happy with my planet pom and I think I will make a few variations, perhaps with wool yarn instead. I think this is a faster and easier way to make a bigger ball of felted wool.
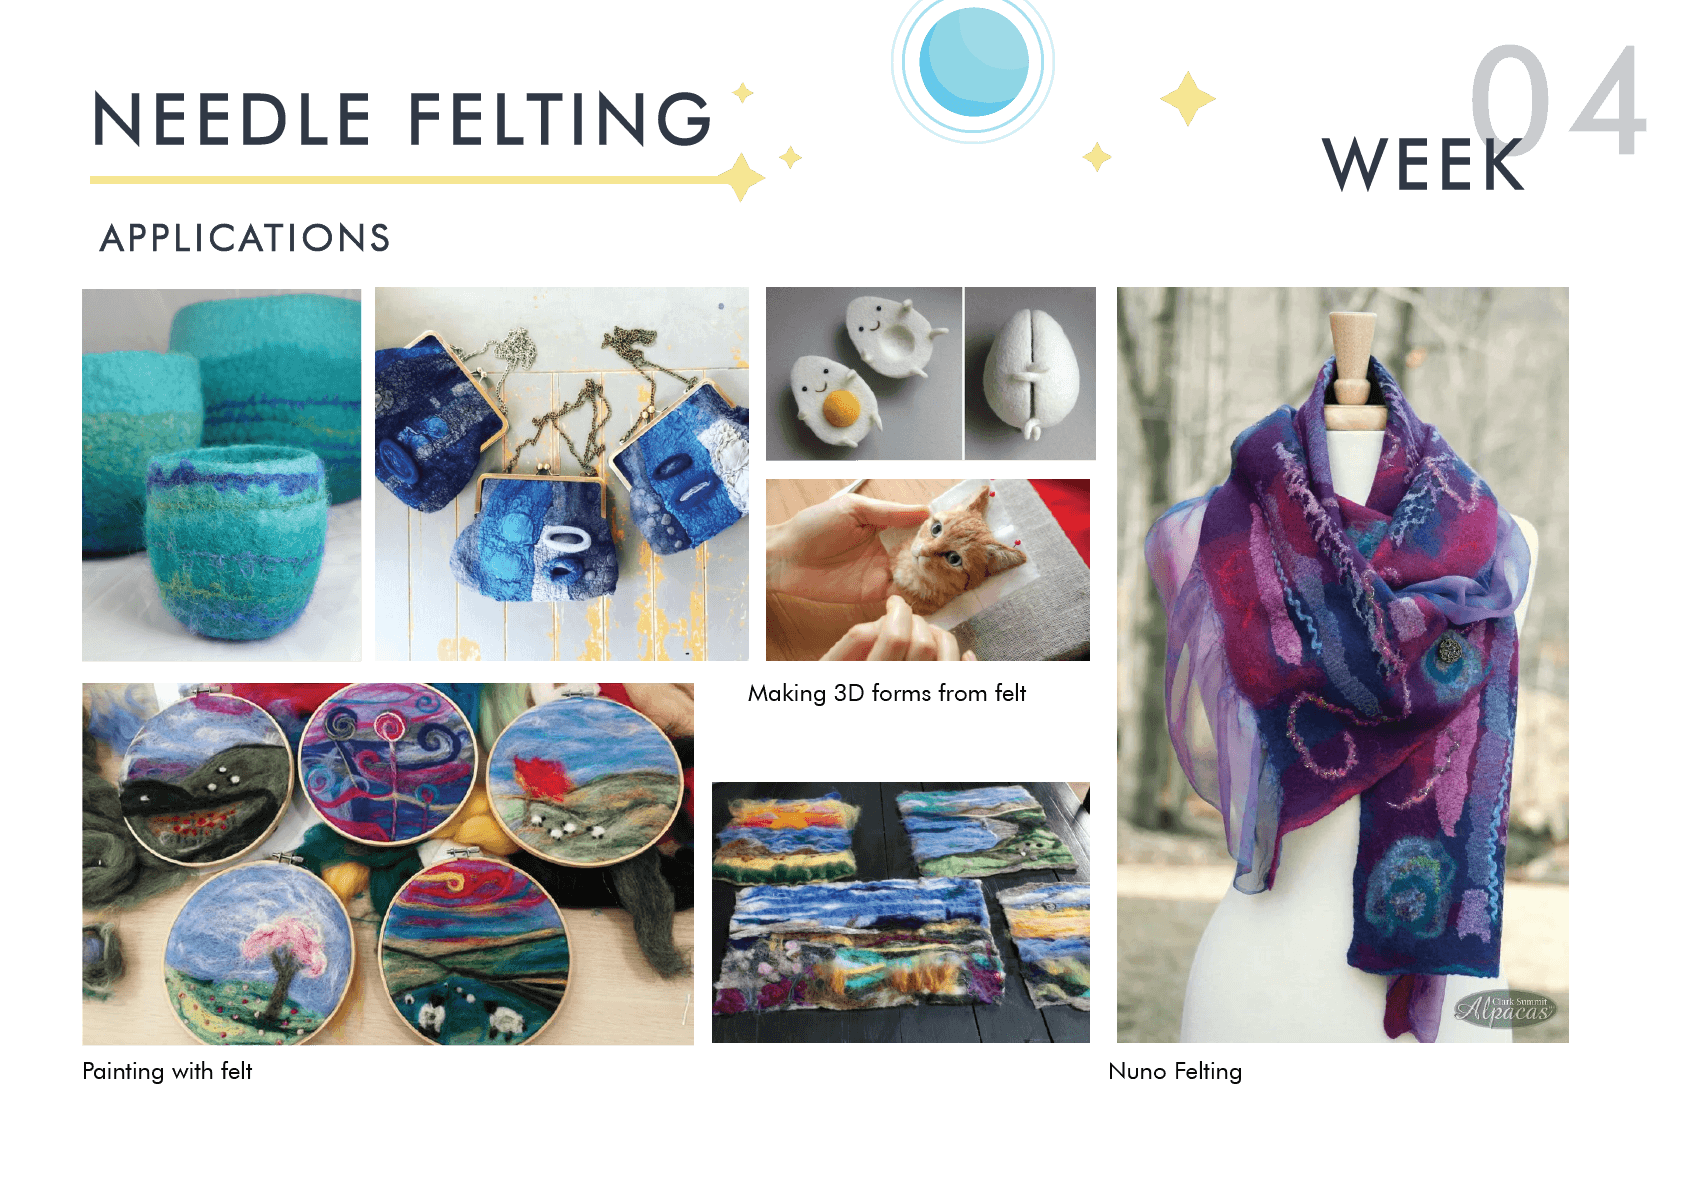
A P P L I C A T I O N S
 Painting with felt


Making 3D forms with felt
 Novelty gifts
 Nuno felting
Ornamental needlework in which pieces of fabric are sewn or stuck on to a larger piece to form a picture or pattern.
Materials:
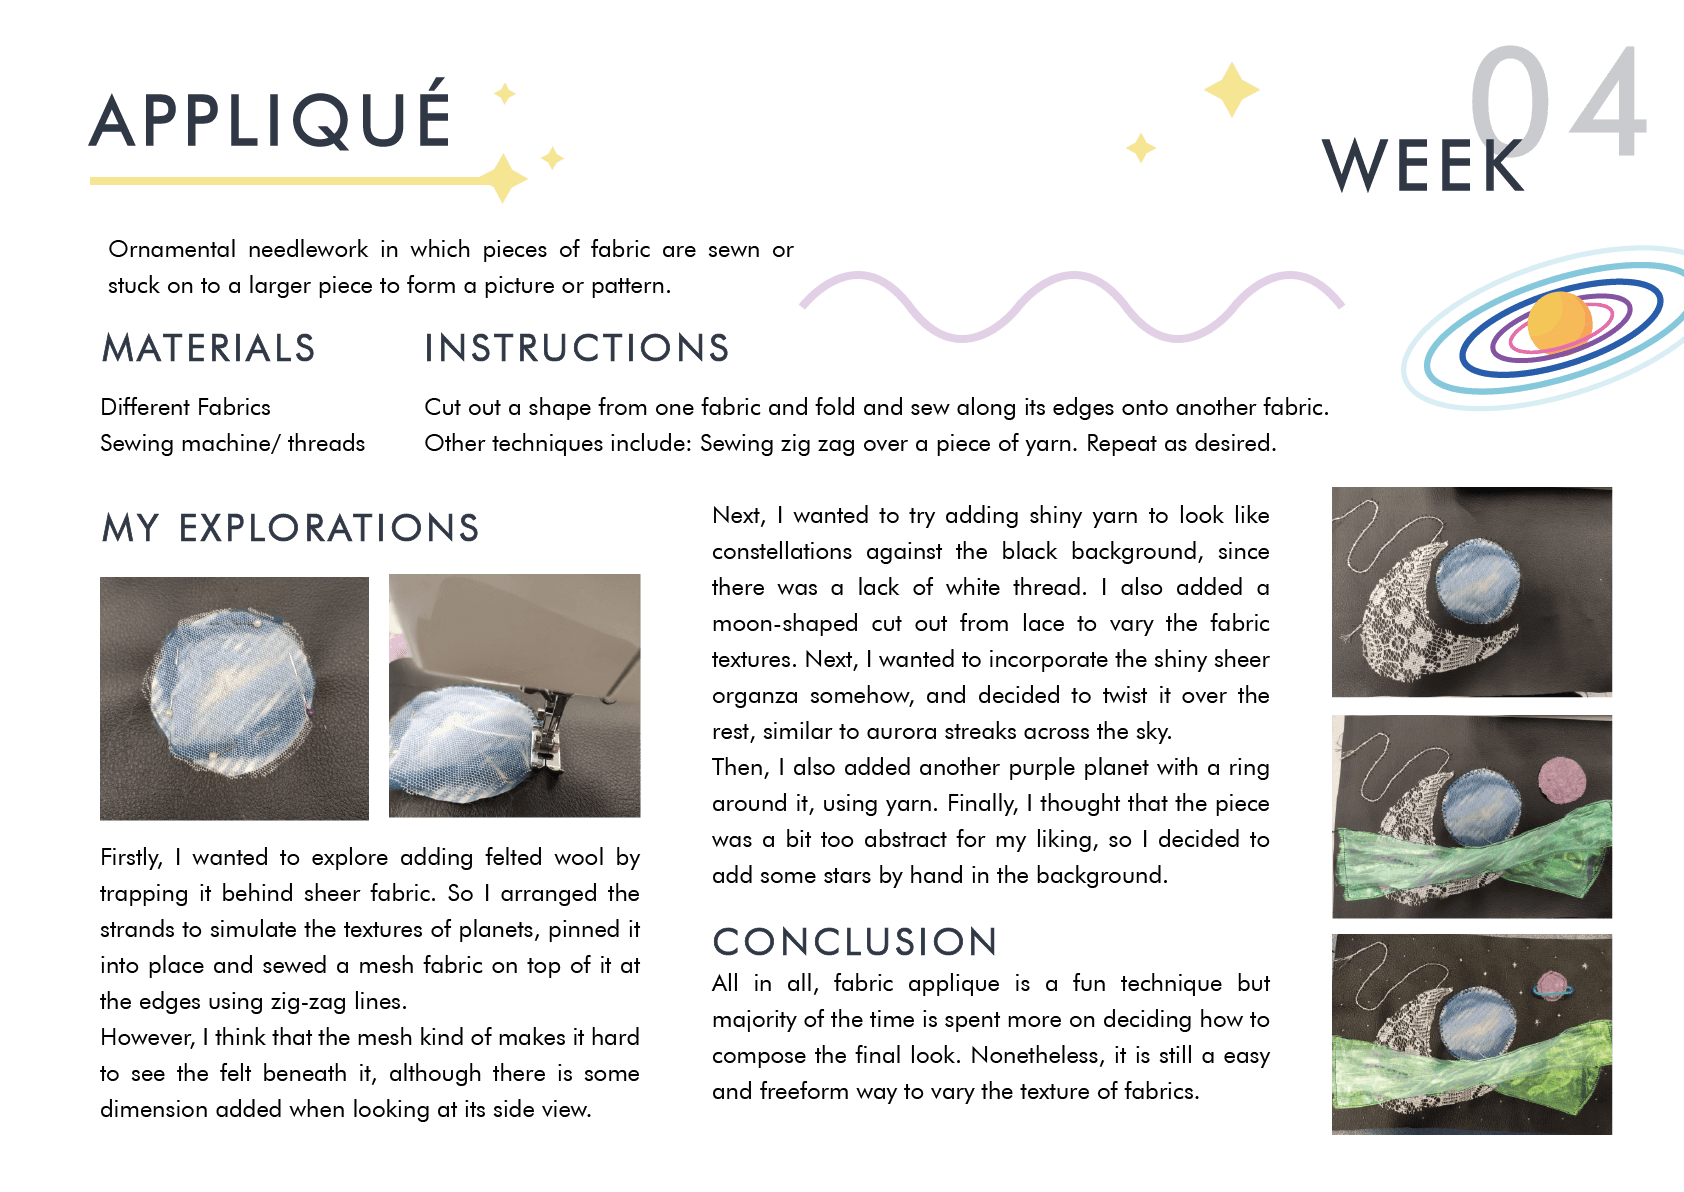
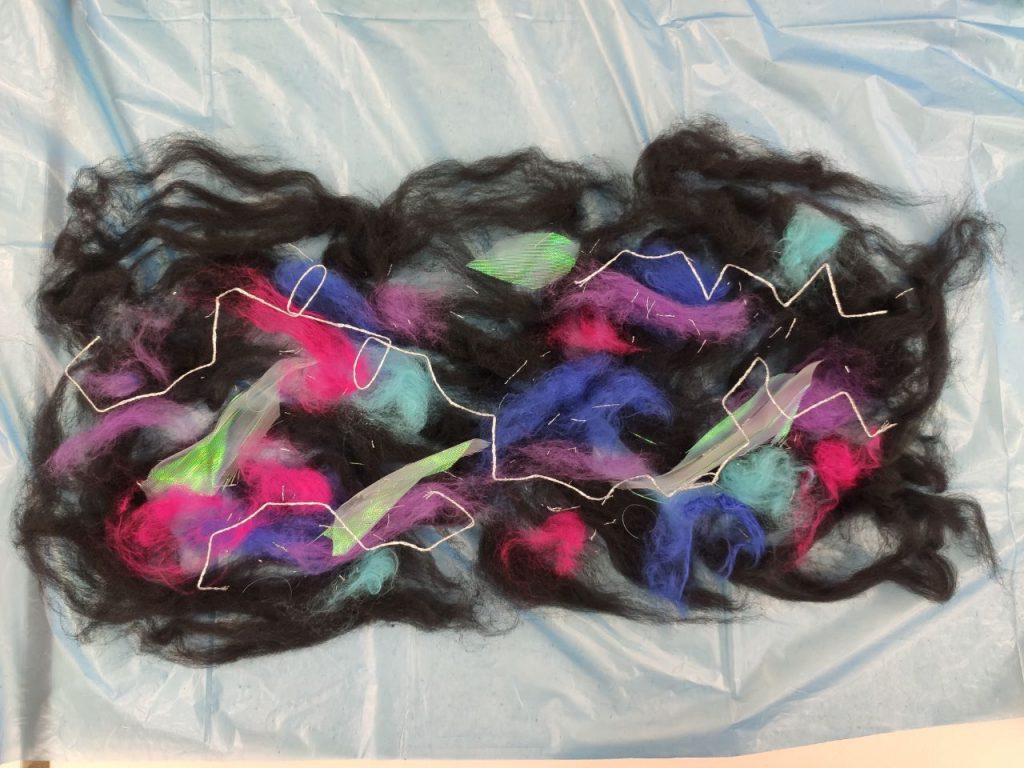
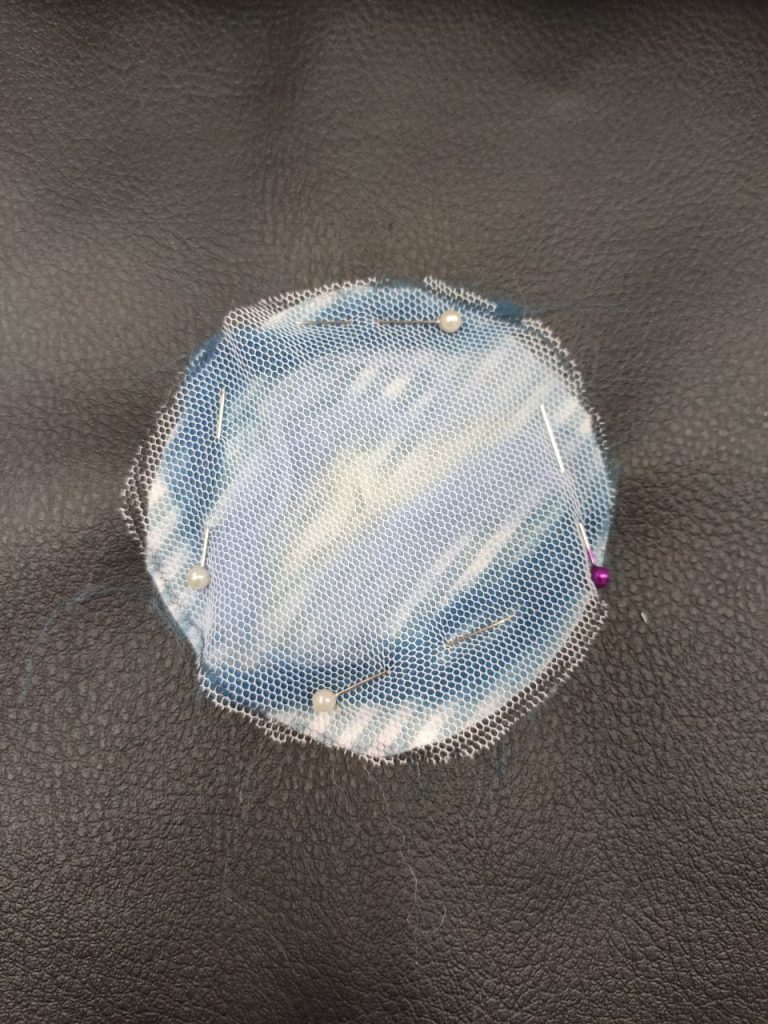
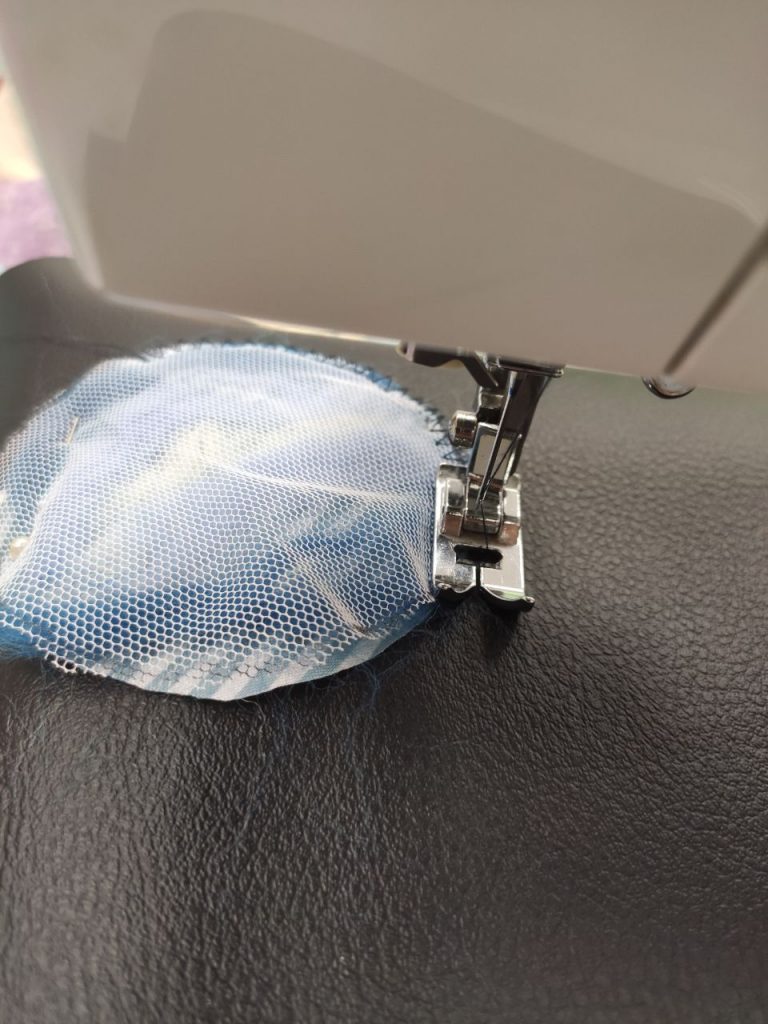
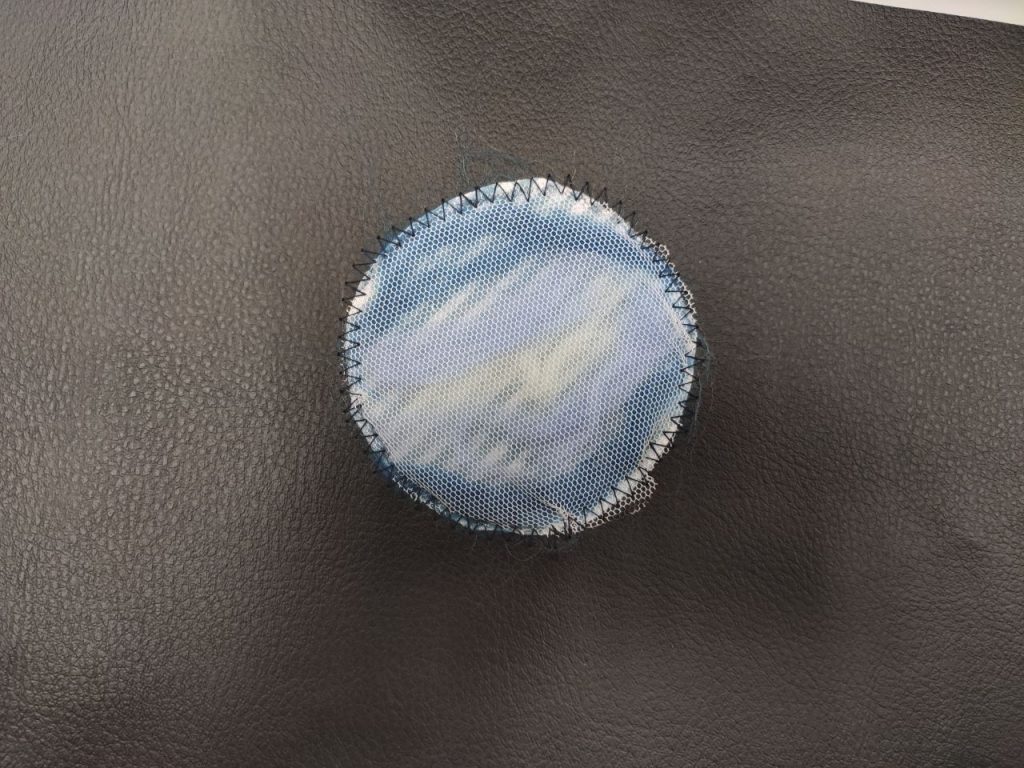
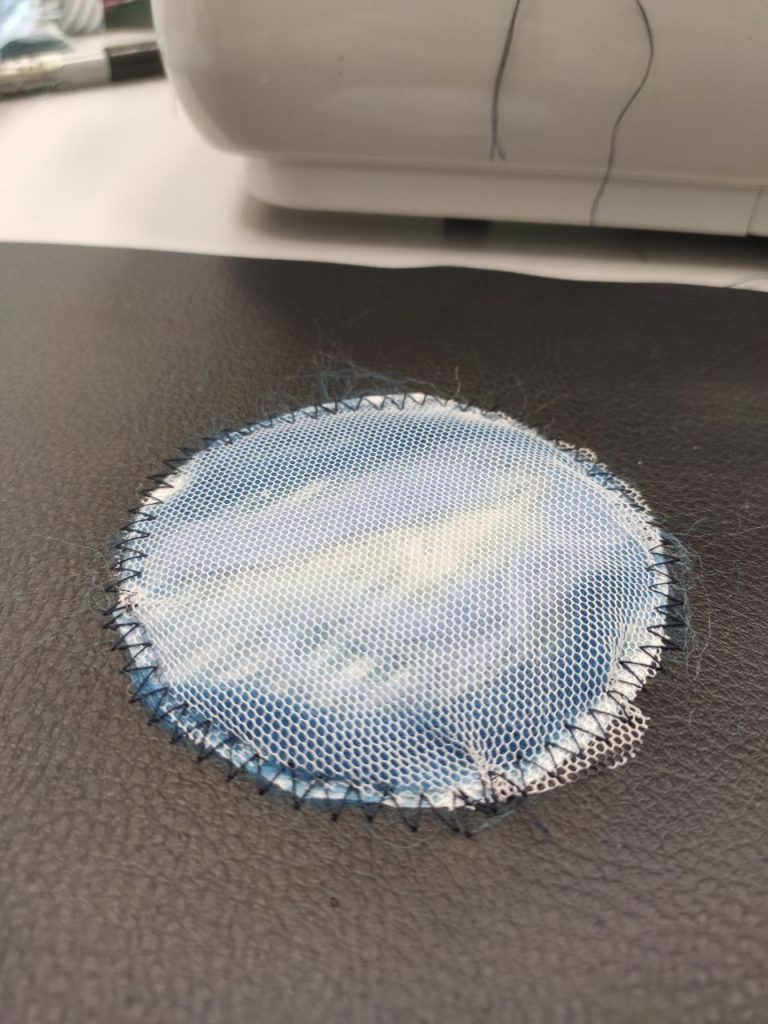
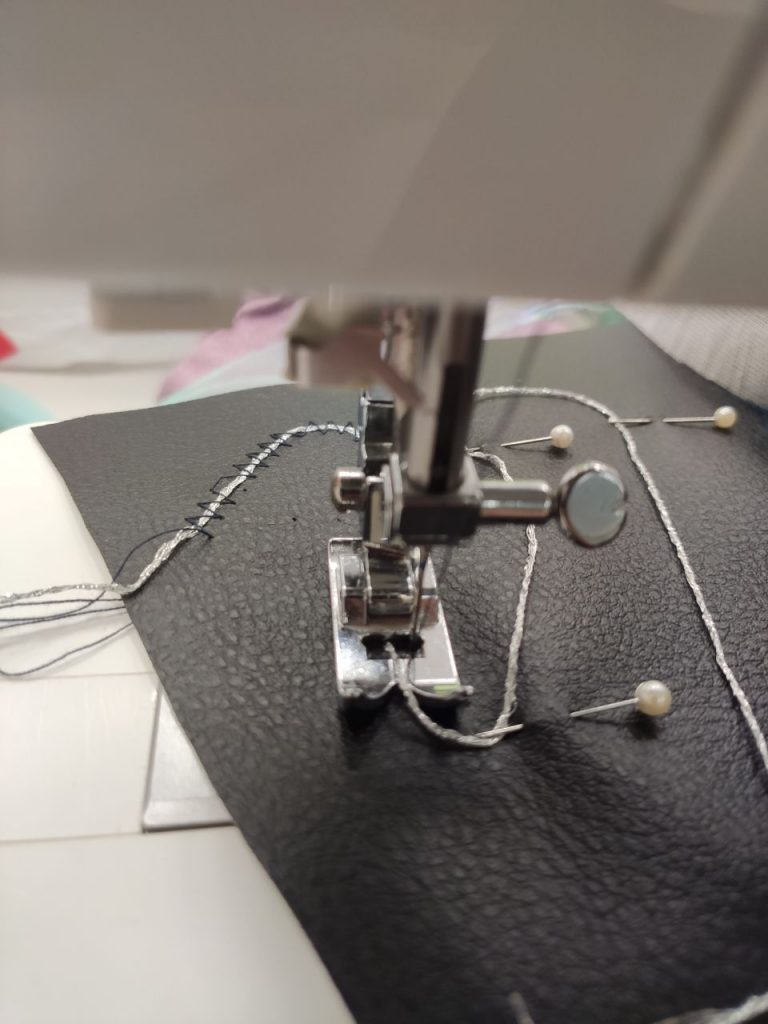
Firstly, I wanted to explore adding felted wool by trapping it behind sheer fabric. So I arranged the strands to simulate the textures of planets, pinned it into place and sewed a mesh fabric on top of it at the edges using zig-zag lines.
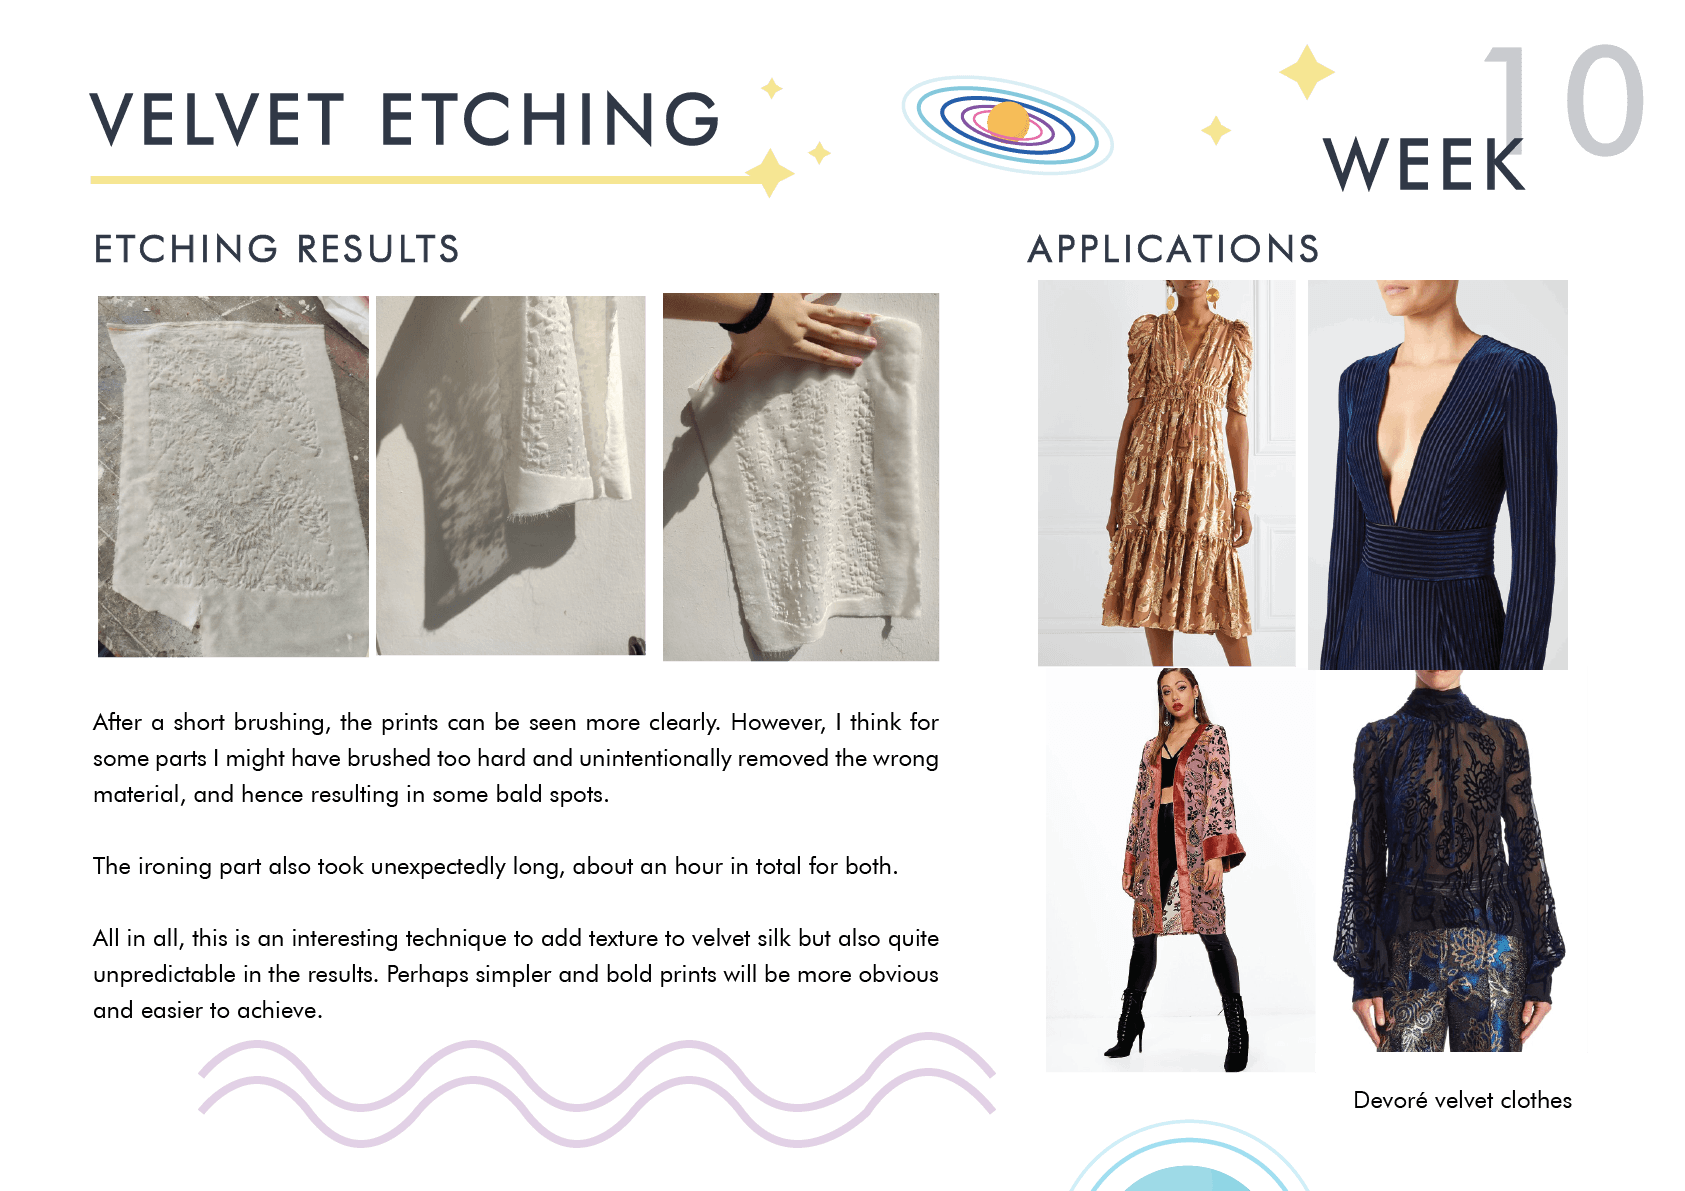
However, I think that the mesh kind of makes it hard to see the felt beneath it, although there is some dimension added when looking at its side view.
Next, I wanted to try adding shiny yarn to look like constellations against the black background, since there was a lack of white thread.
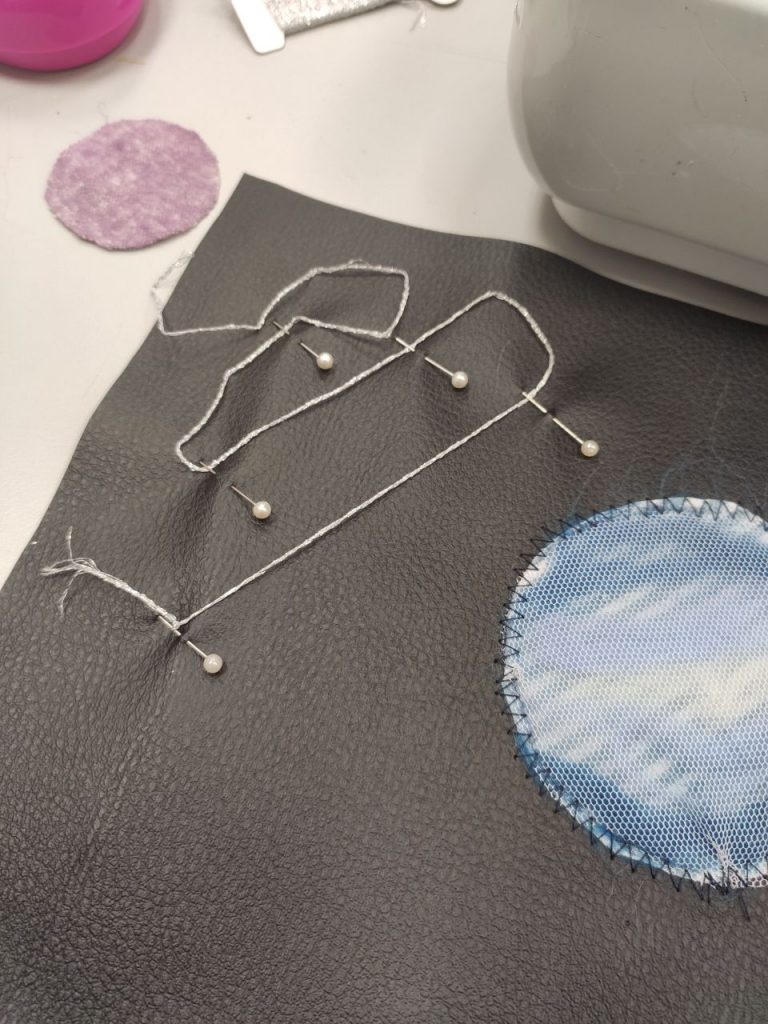
I also added a moon-shaped cut out from lace to vary the fabric textures.
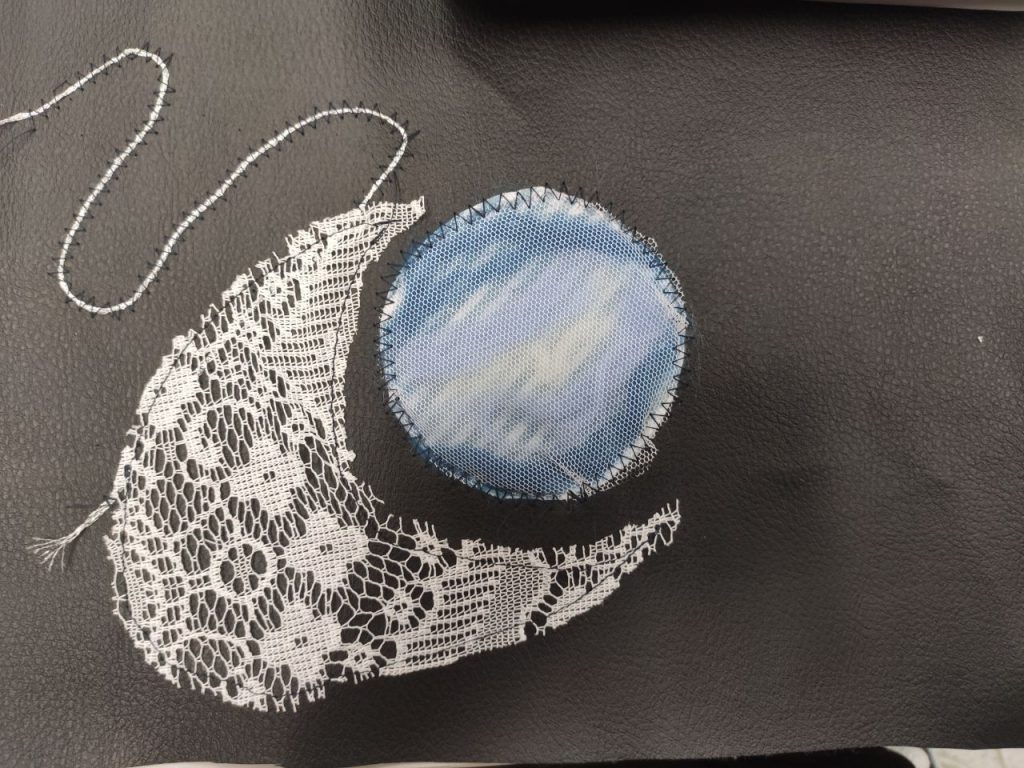
Next, I wanted to incorporate the shiny sheer organza somehow, and decided to twist it over the rest, similar to aurora streaks across the sky.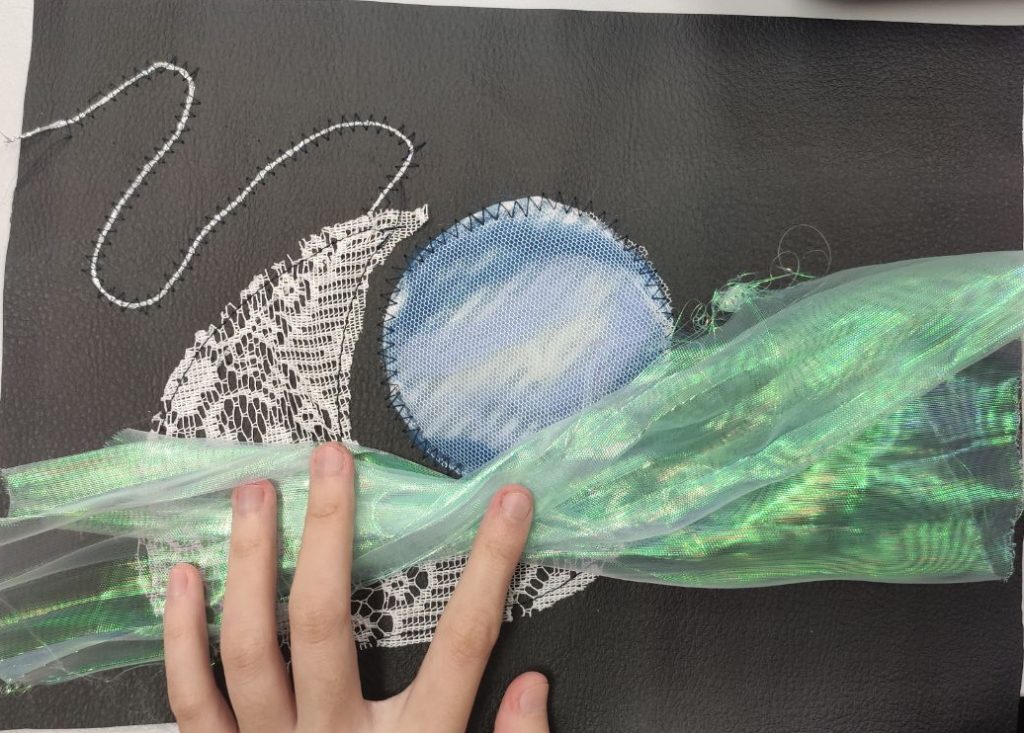
Next, I wanted to add another purple planet with a ring around it, using yarn.
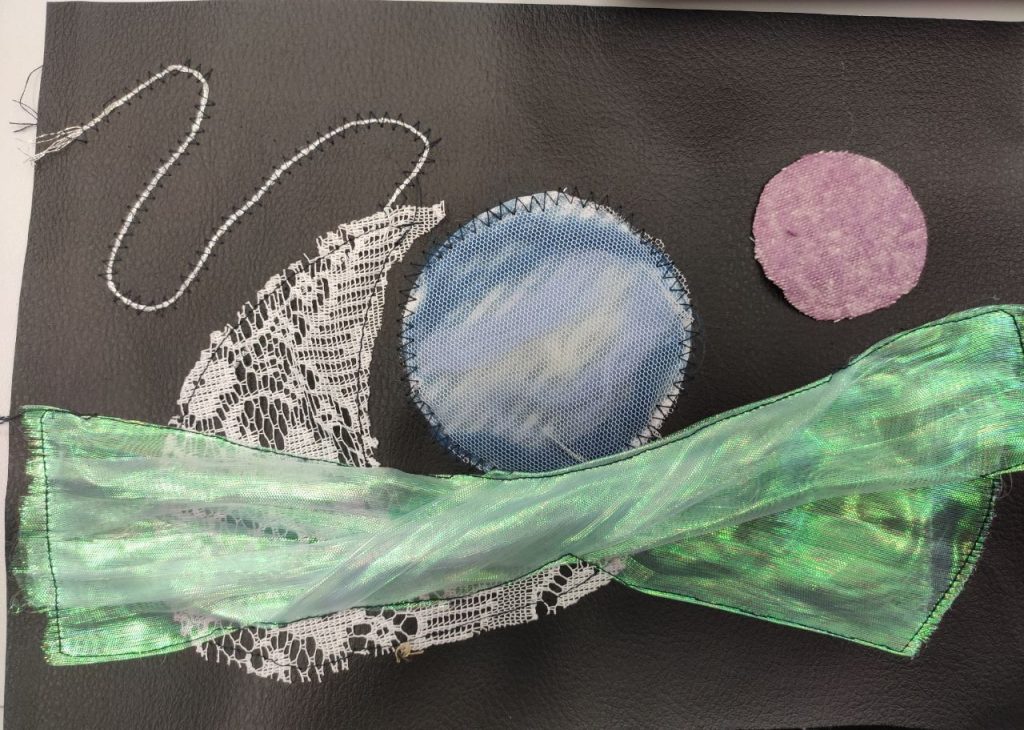
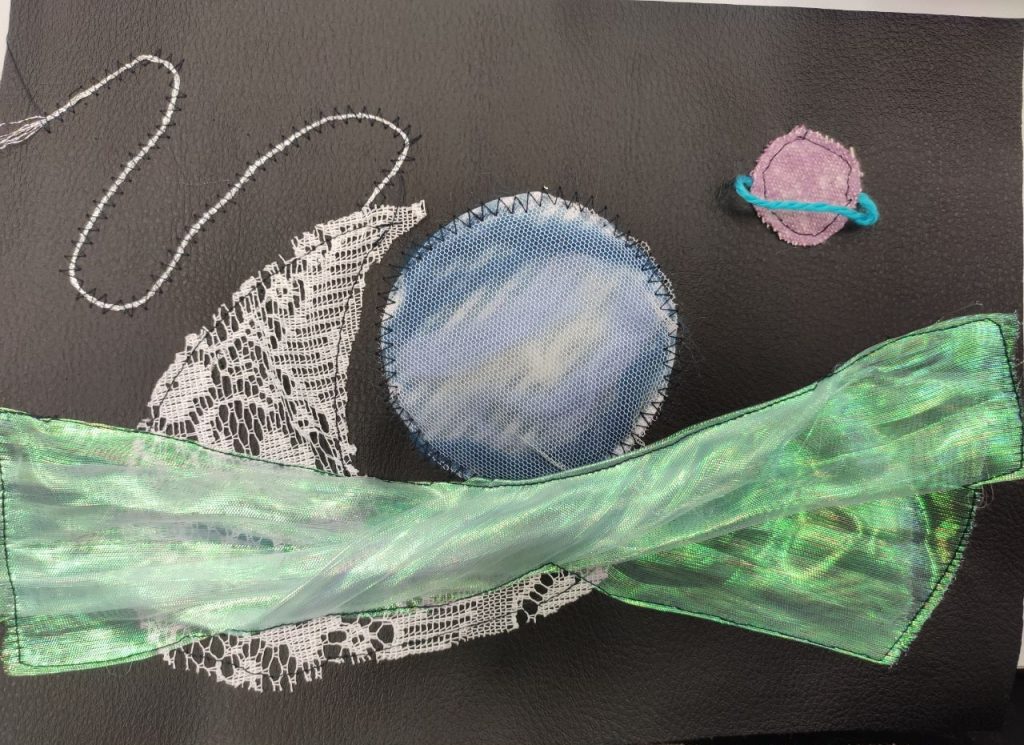
Finally, I thought that the piece was a bit too abstract for my liking, so I decided to add some stars by hand in the background.
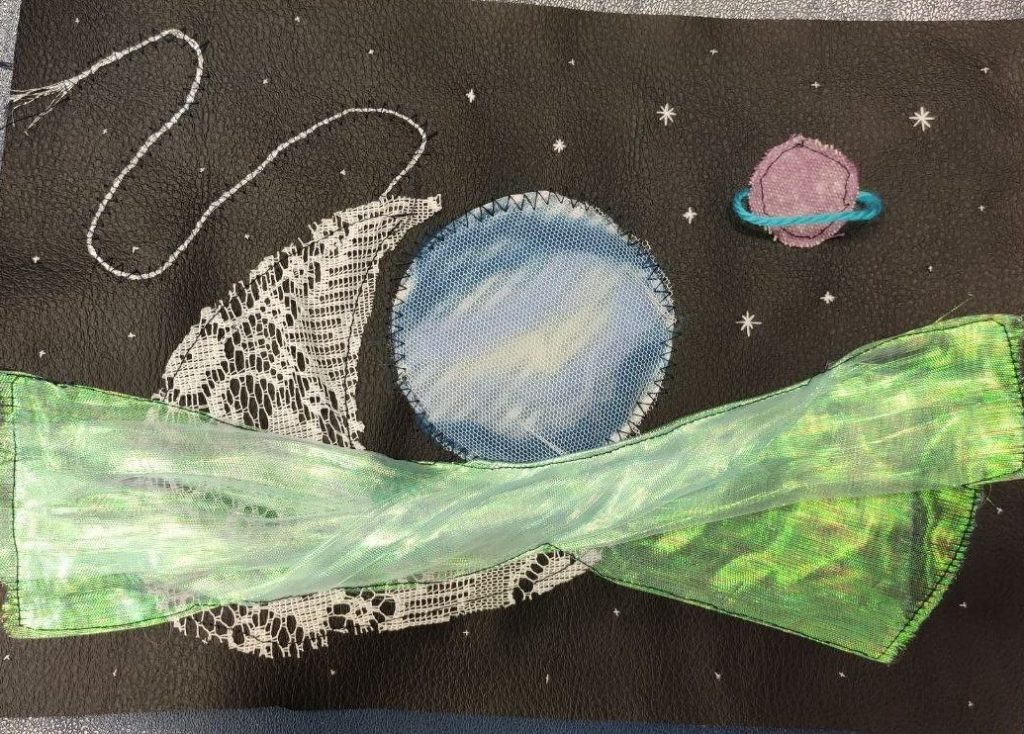
Ta-da! I think the textures of the different fabrics makes it very dynamic and more interesting for the viewer! I am quite happy with my final piece as it looks a little like a painting depicting space!
All in all, fabric applique is actually quite a fun technique, but I would say majority of the time is spent more on deciding how to compose the final look, i.e what shapes and where to arrange them. Nonetheless, it is still a easy and freeform way to vary the texture of fabrics.
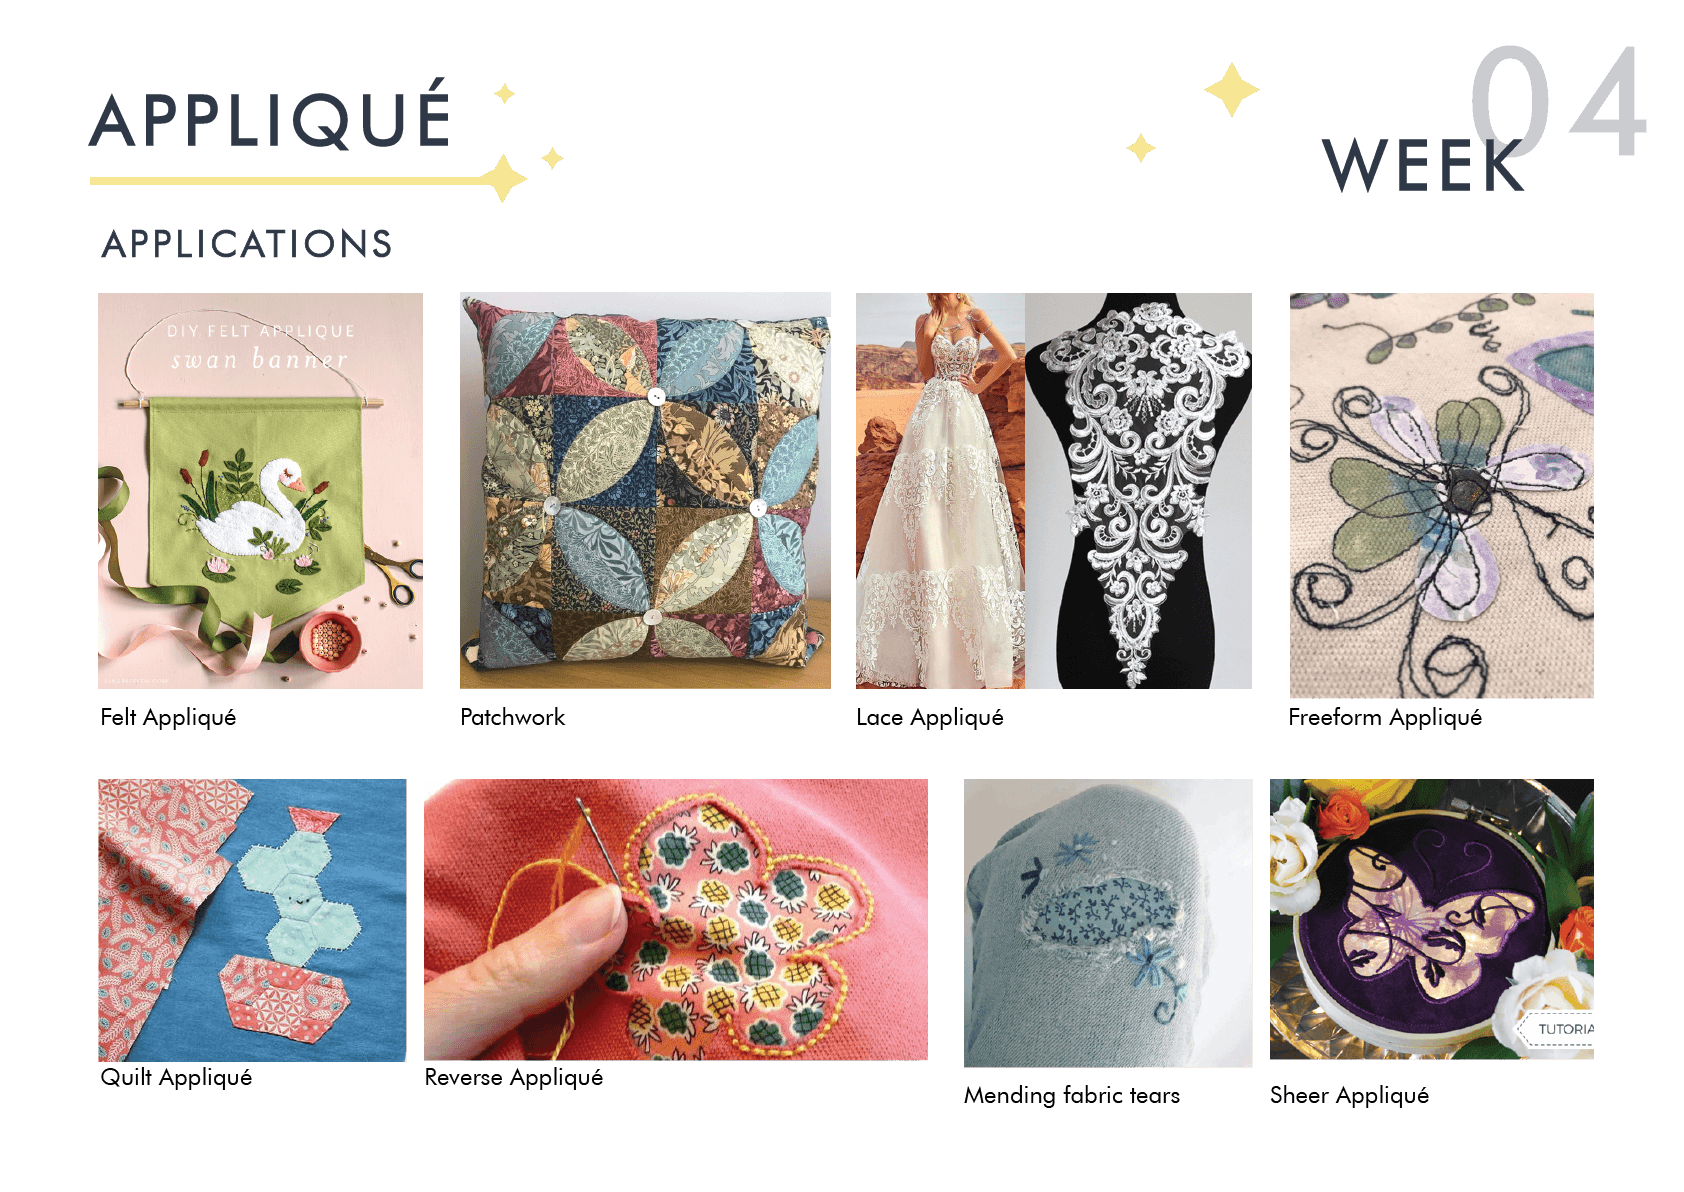
A P P L I C A T I O N S
Embroidery Appliques
Layered appliques

Lace appliques
The fusion of plastics through melting from the heat of an iron.
Materials:
P L A S T I C F U S I O N
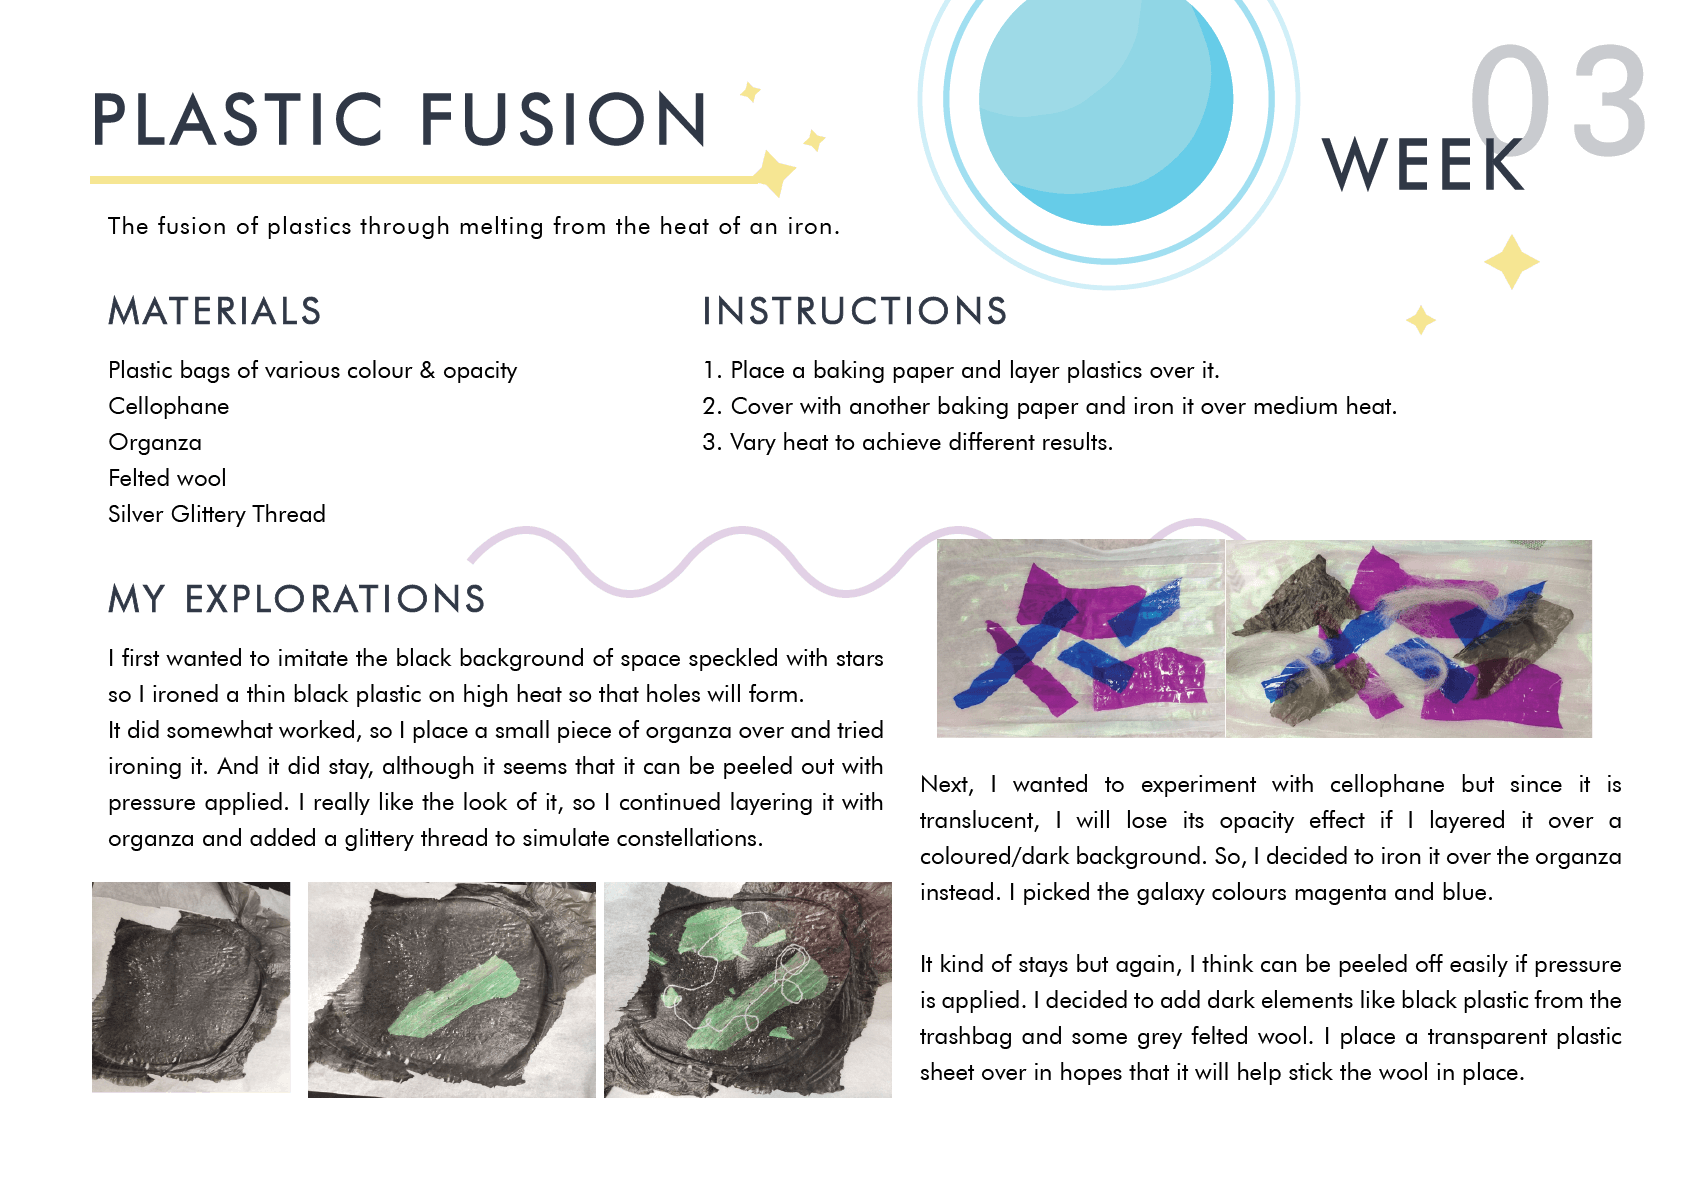
I first wanted to imitate the black background of space speckled with stars so I ironed a thin black plastic on high heat so that holes will form.
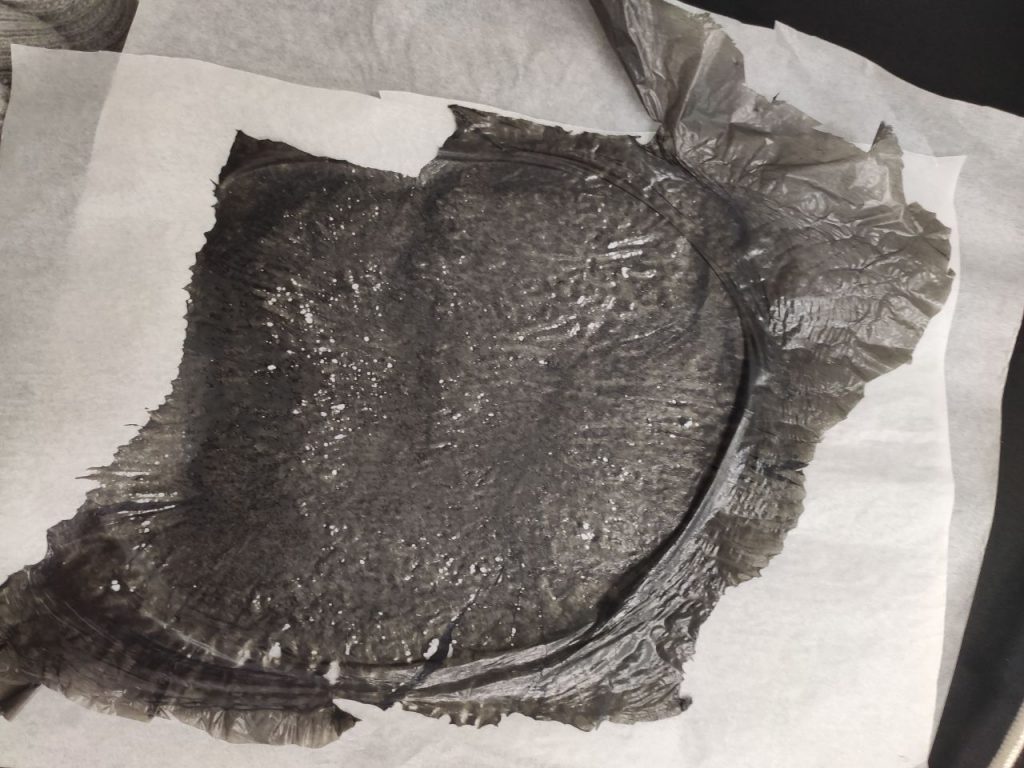
It did somewhat worked, so I place a small piece of organza over and tried ironing it.
And it did stay, although it seems that it can be peeled out with pressure applied. I really like the look of it, so I continued layering it with organza and added a glittery thread to simulate constellations.

Tada! A starry view with aurora coloured nebulas.
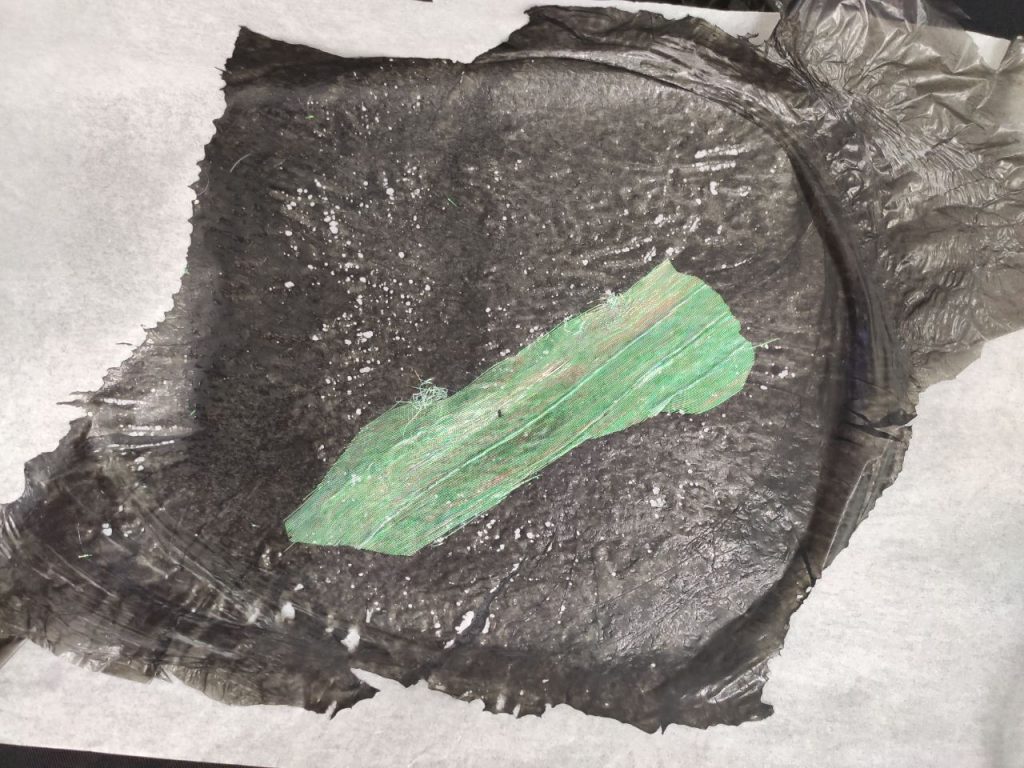
Next, I wanted to experiment with cellophane but since it is translucent, I will lose its opacity effect if I layered it over a coloured/dark background. So, I decided to iron it over the organza instead. I picked the galaxy colours magenta and blue.
It kind of stays but again, I think can be peeled off easily if pressure is applied. I decided to add dark elements like black plastic from the trashbag and some grey felted wool. I place a transparent plastic sheet over in hopes that it will help stick the wool in place.
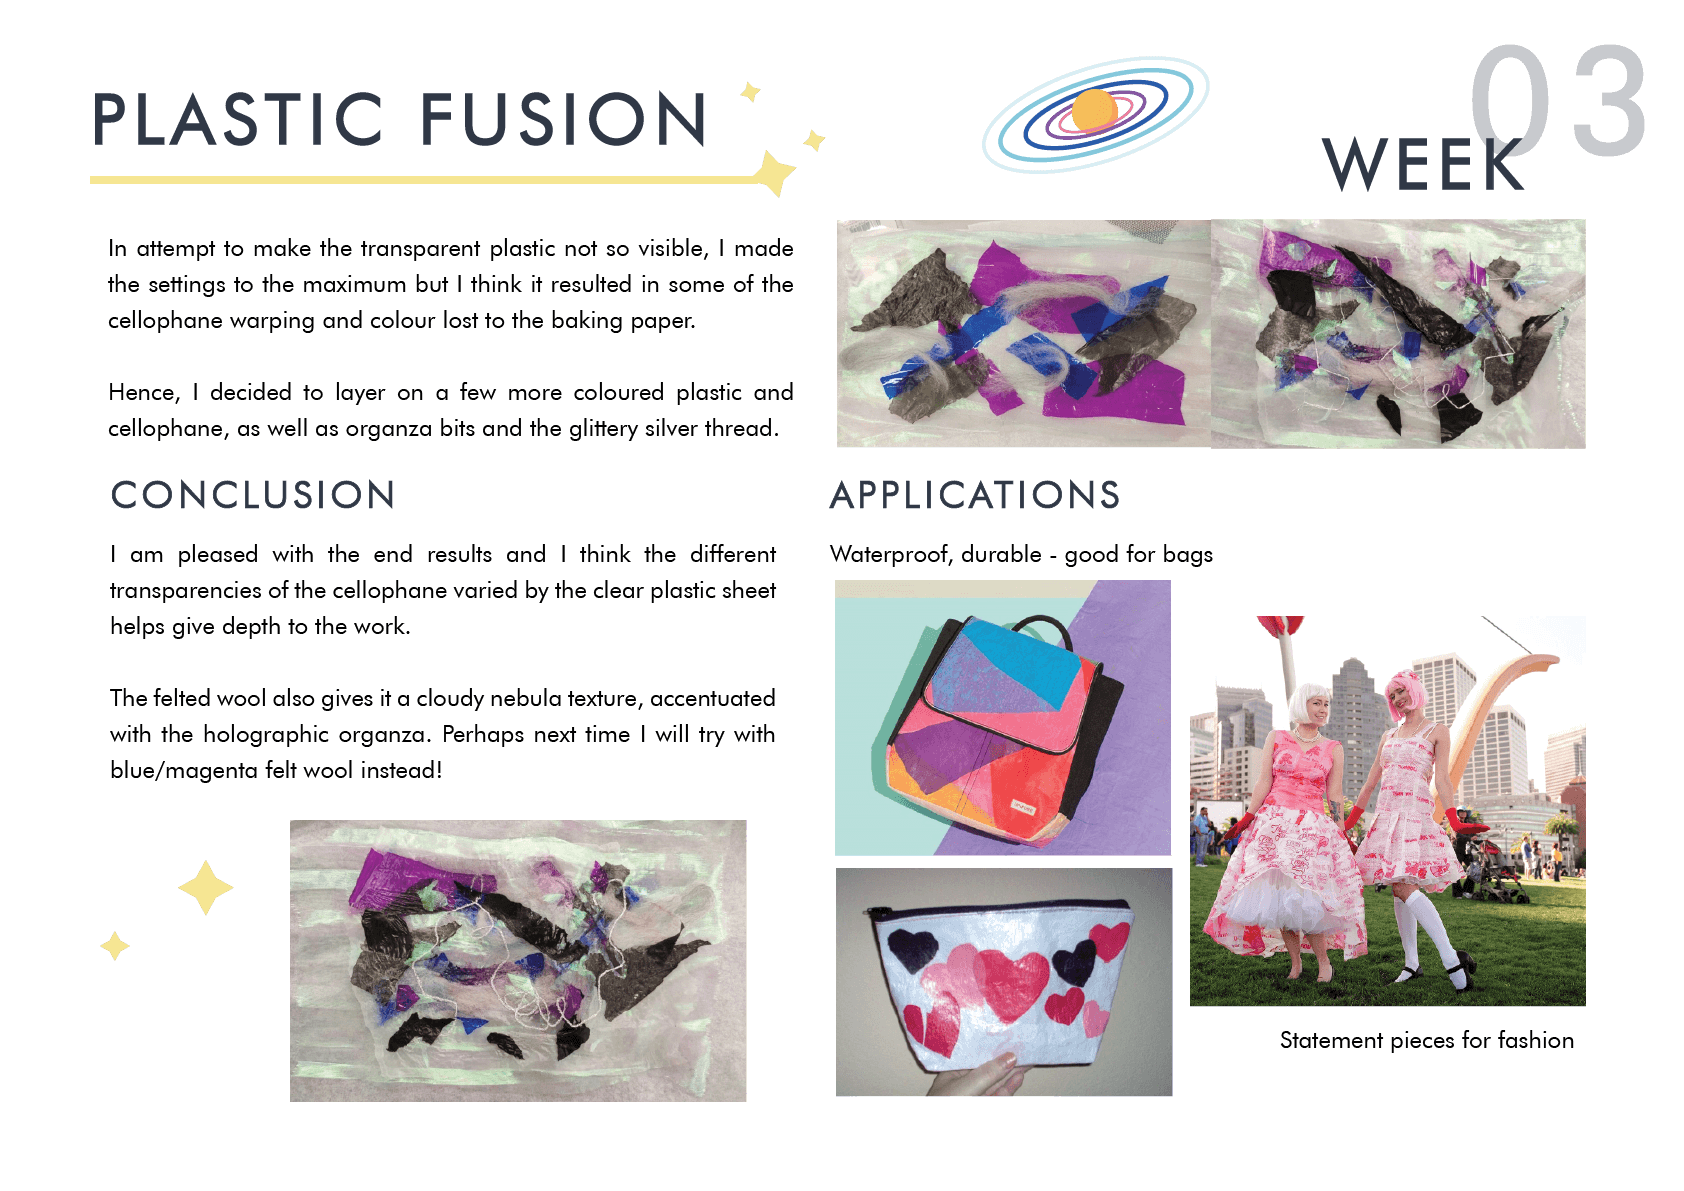
In attempt to make the transparent plastic not so visible, I made the settings to the maximum but I think it resulted in some of the cellophane warping and colour lost to the baking paper.
Hence, I decided to layer on a few more coloured plastic and cellophane, as well as organza bits and the glittery silver thread.
I am pleased with the end results and I think the different transparencies of the cellophane varied by the clear plastic sheet helps give depth to the work. The felted wool also gives it a cloudy nebula texture, accentuated with the holographic organza. Perhaps next time I will try with blue/magenta felt wool instead!
A P P L I C A T I O N S
Plastic fusing can make use of existing designs (i.e. on the plastic bag) to create more interesting patterns. The waterproof, flexibility and durability of plastic is also retained, making it suitable for bags.


Since it also acts as a fabric, it can also be used for fashion.

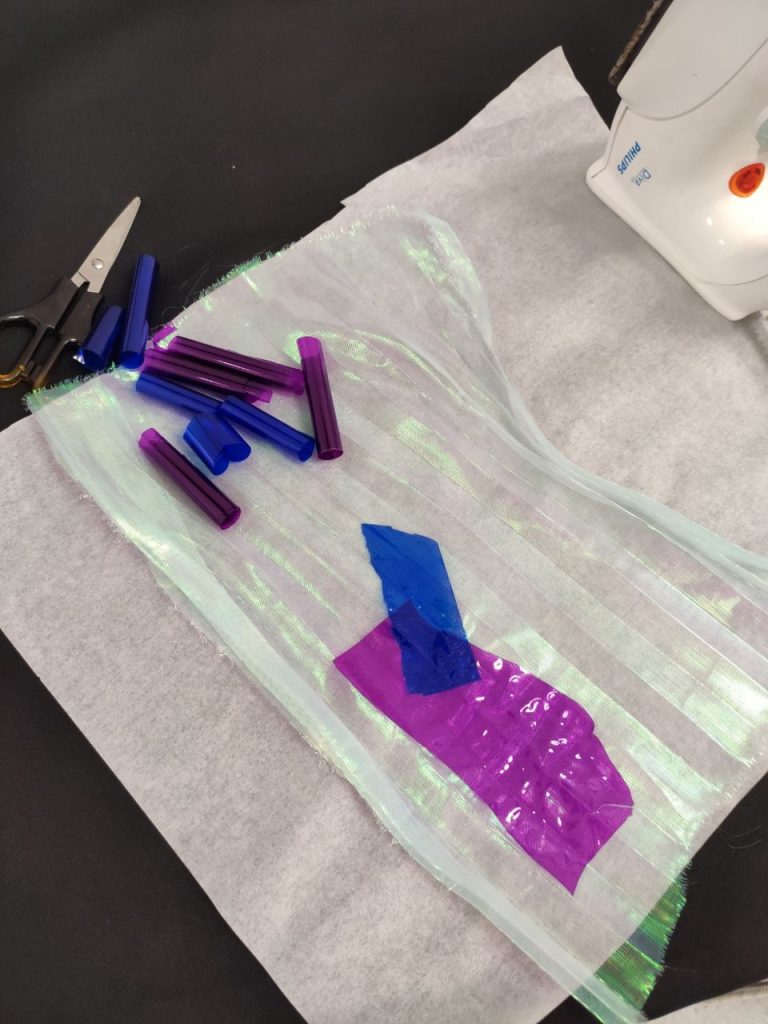
Materials:
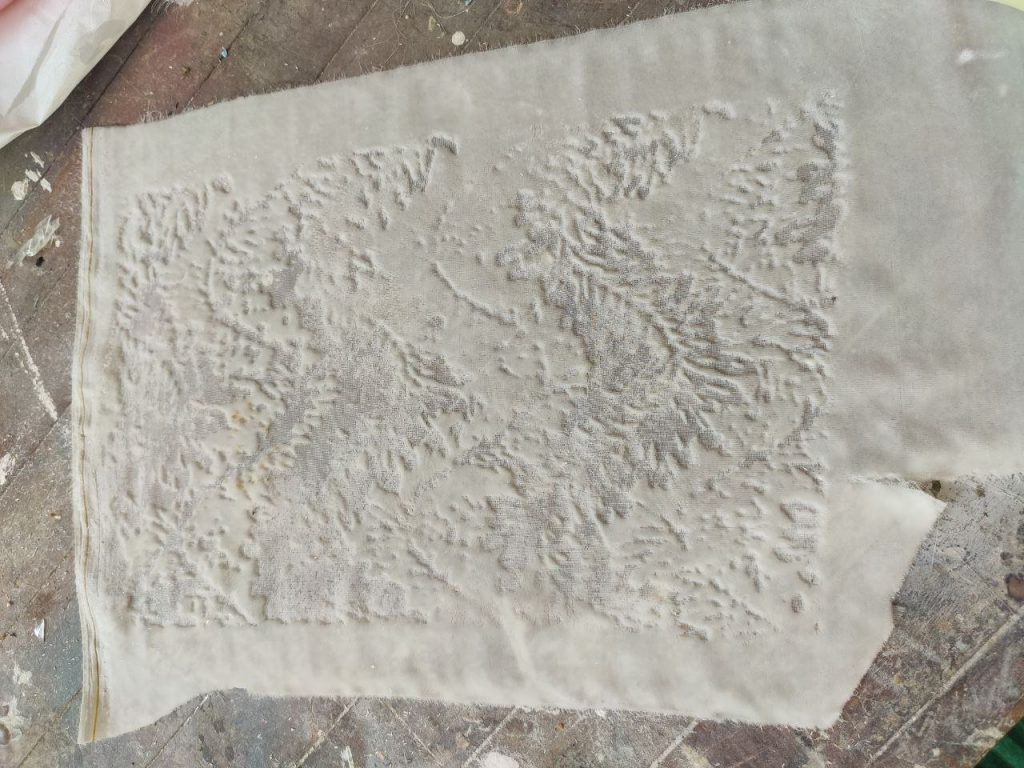
W A T E R S O L U B L E M E L D I N G
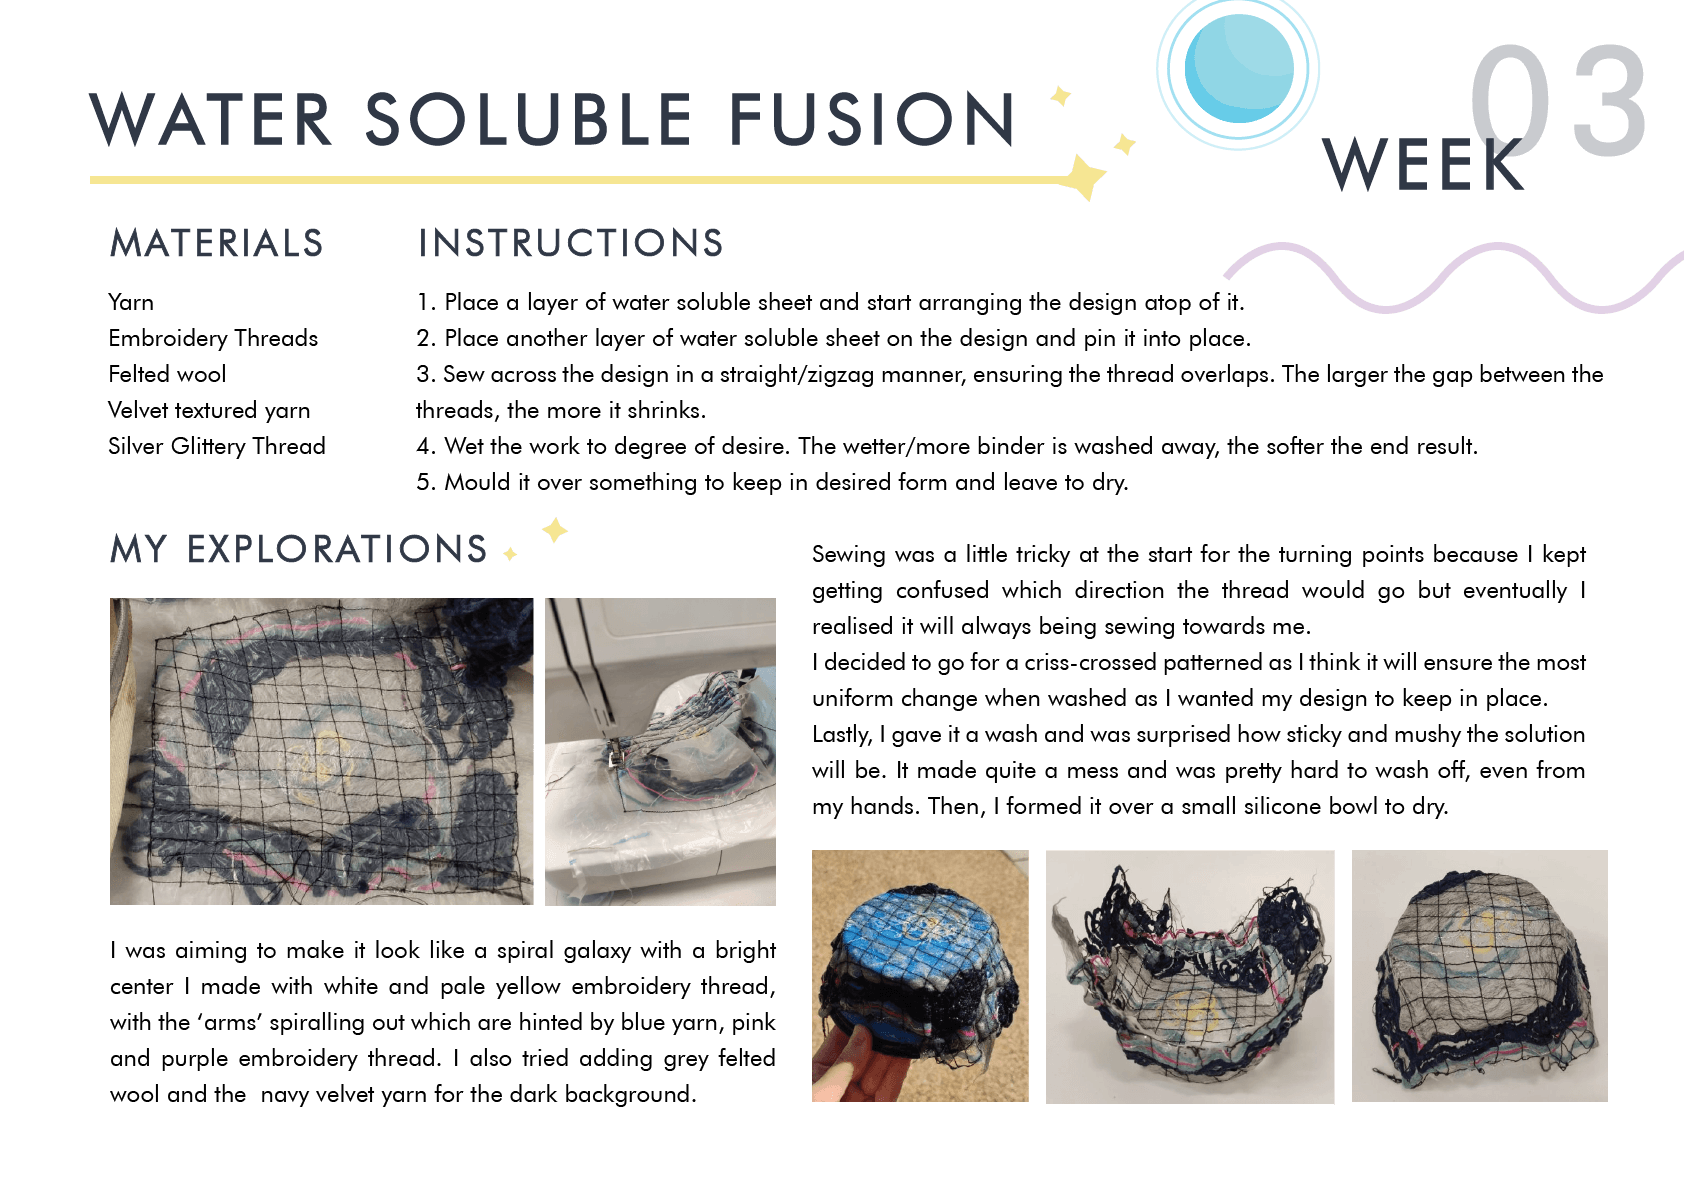
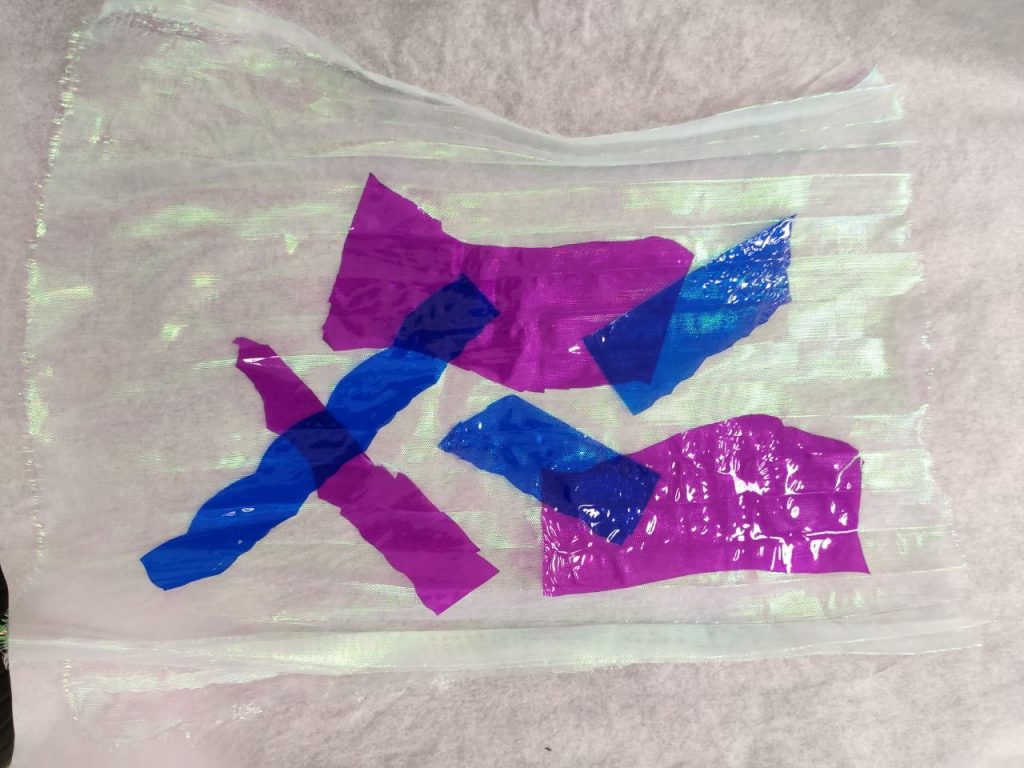
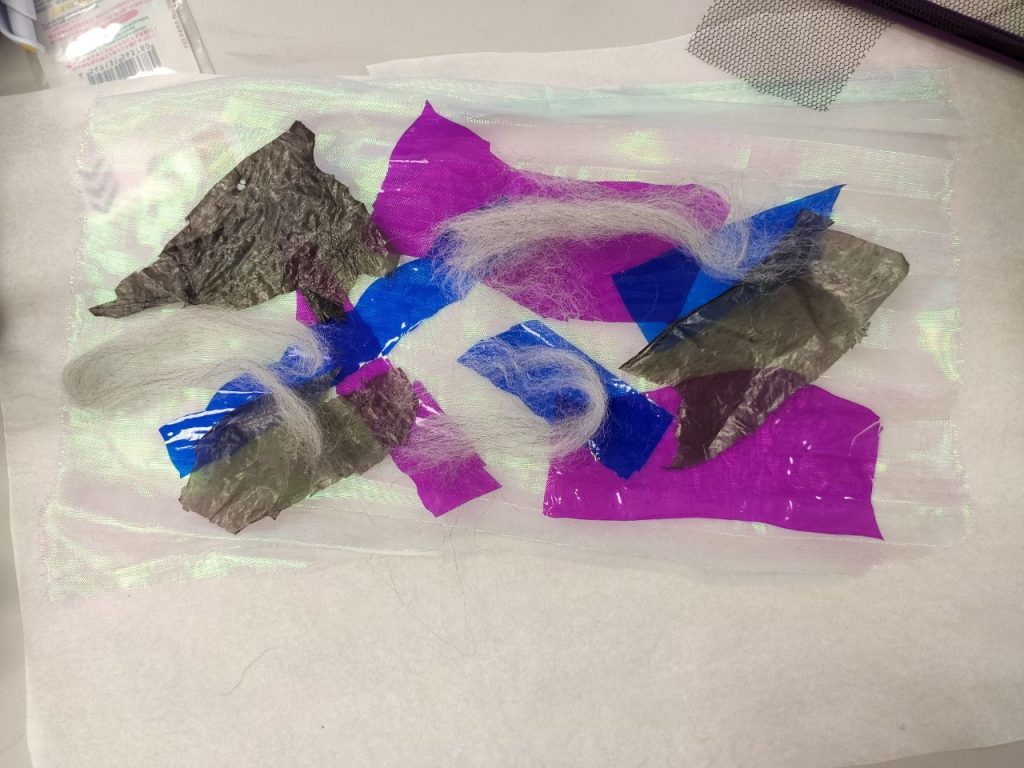
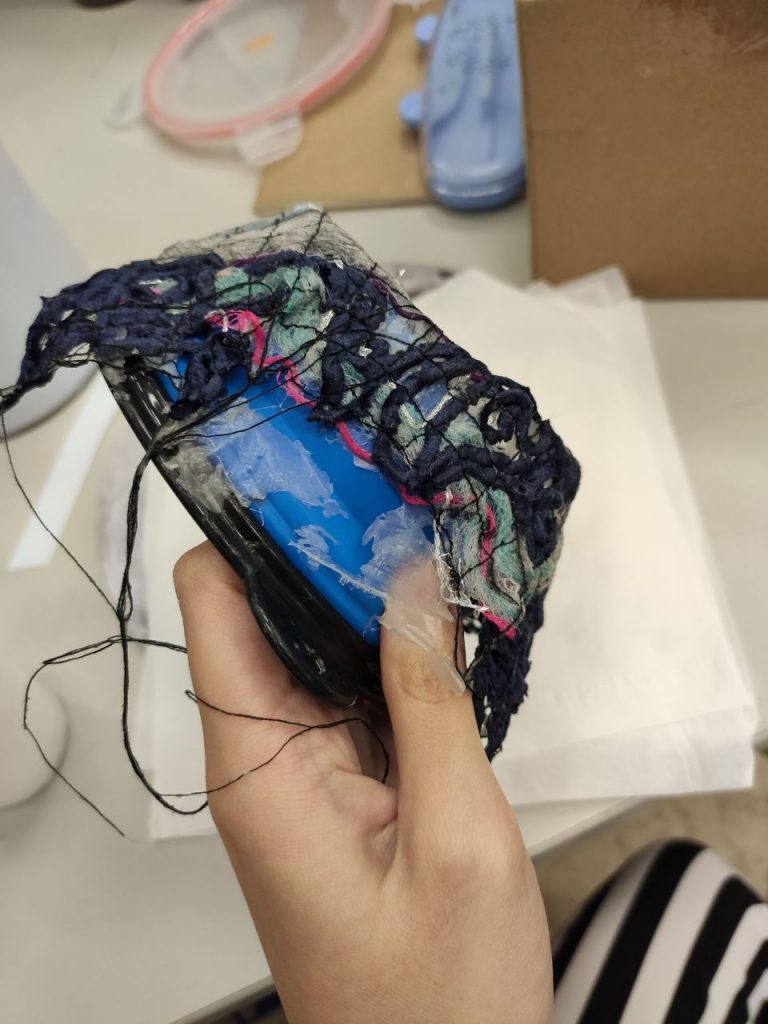
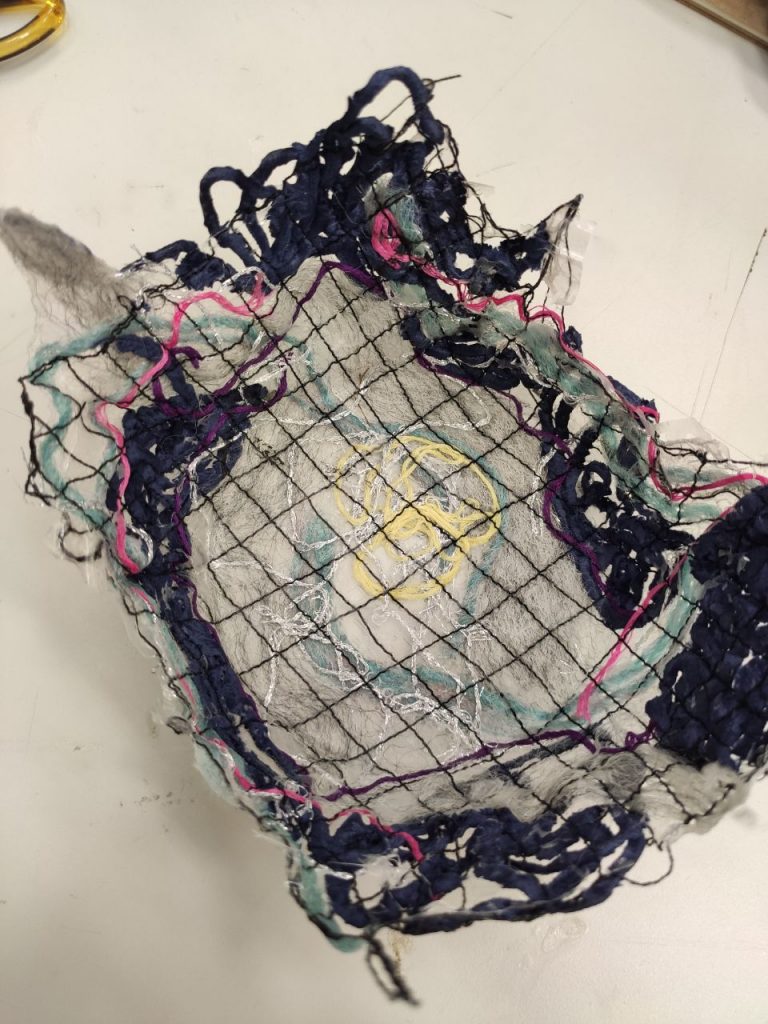
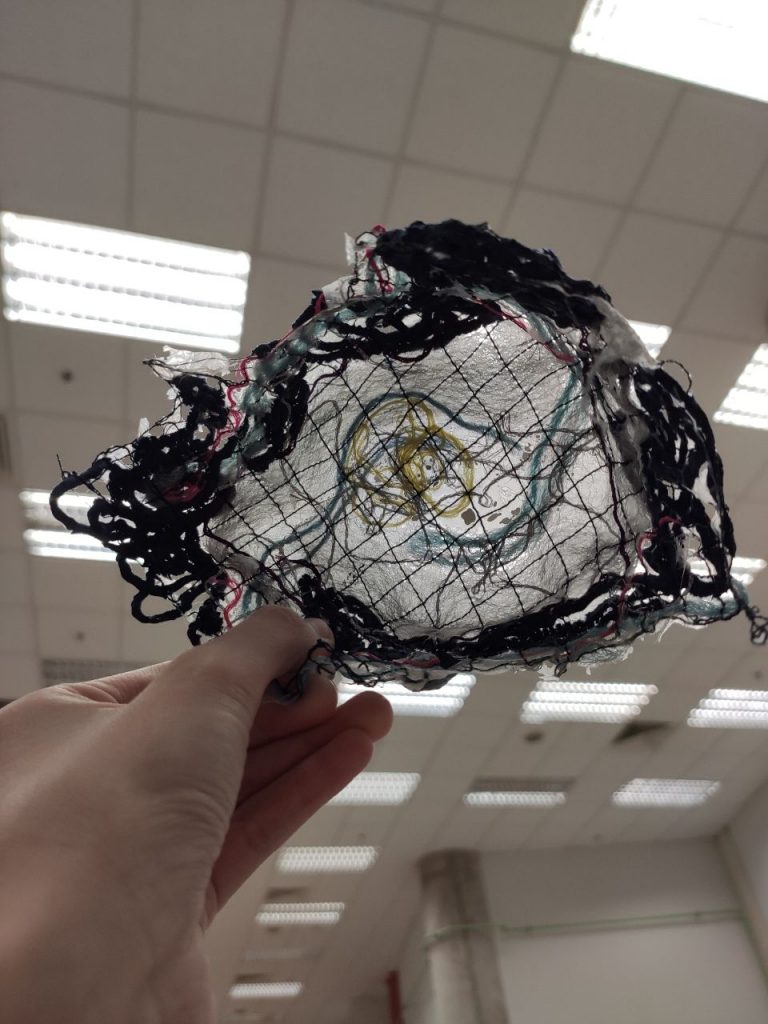
I forgot to take a picture before sewing oops but here is one after with all the materials I used. Basically I was aiming to make it look like a spiral galaxy with a bright center I made with white and pale yellow embroidery thread, with the ‘arms’ spiralling out which are hinted by blue yarn, pink and purple embroidery thread. I also tried adding grey felted wool and the navy velvet yarn for the dark background.

Next, onto sewing!
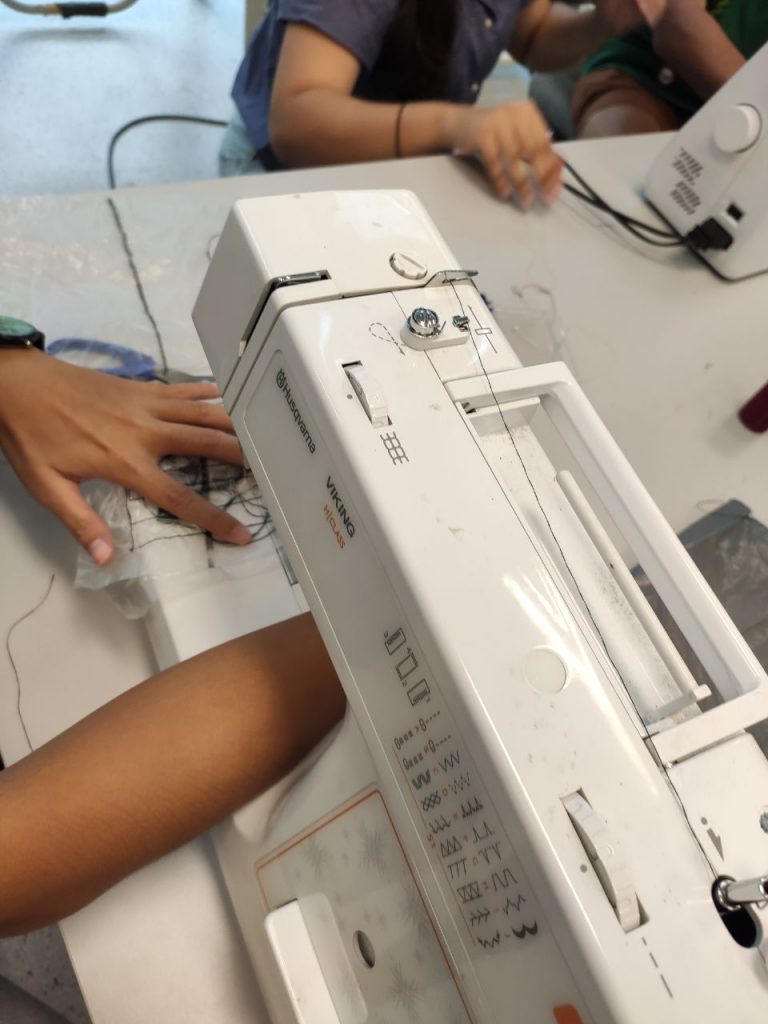
The setup for the sewing machine is quite different from the one at home.
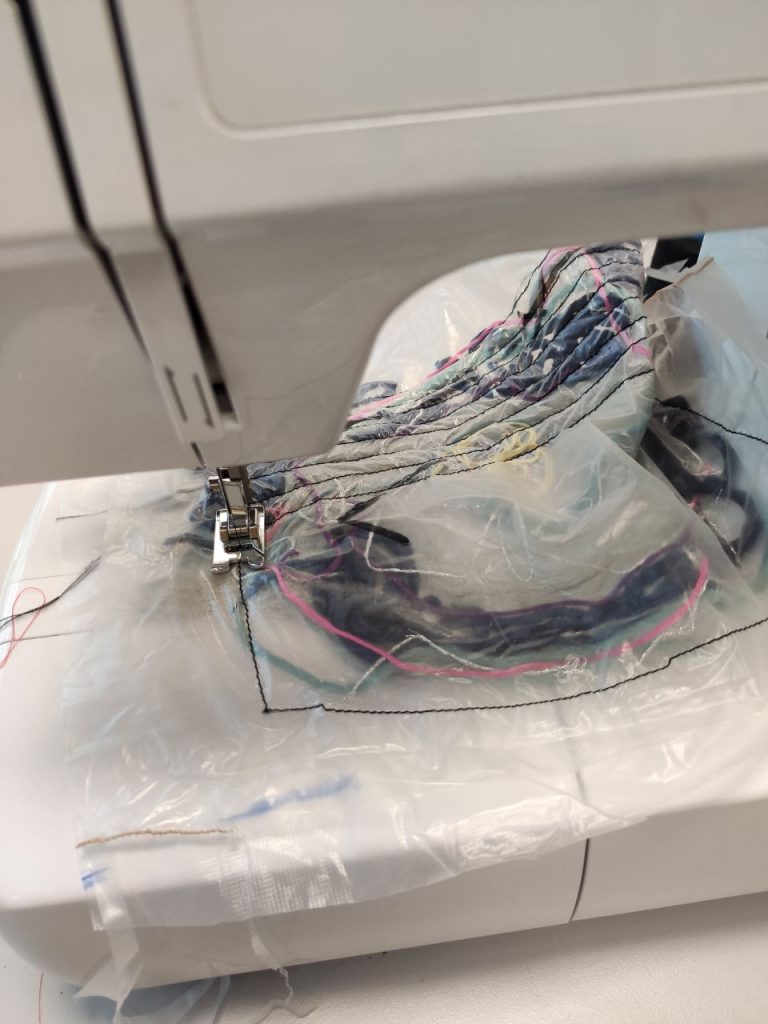
Sewing was a little tricky at the start for the turning points because I kept getting confused which direction the thread would go but eventually I realised it will always being sewing towards me.
I decided to go for a criss-crossed patterned as I think it will ensure the most uniform change when washed as I wanted my design to keep in place.
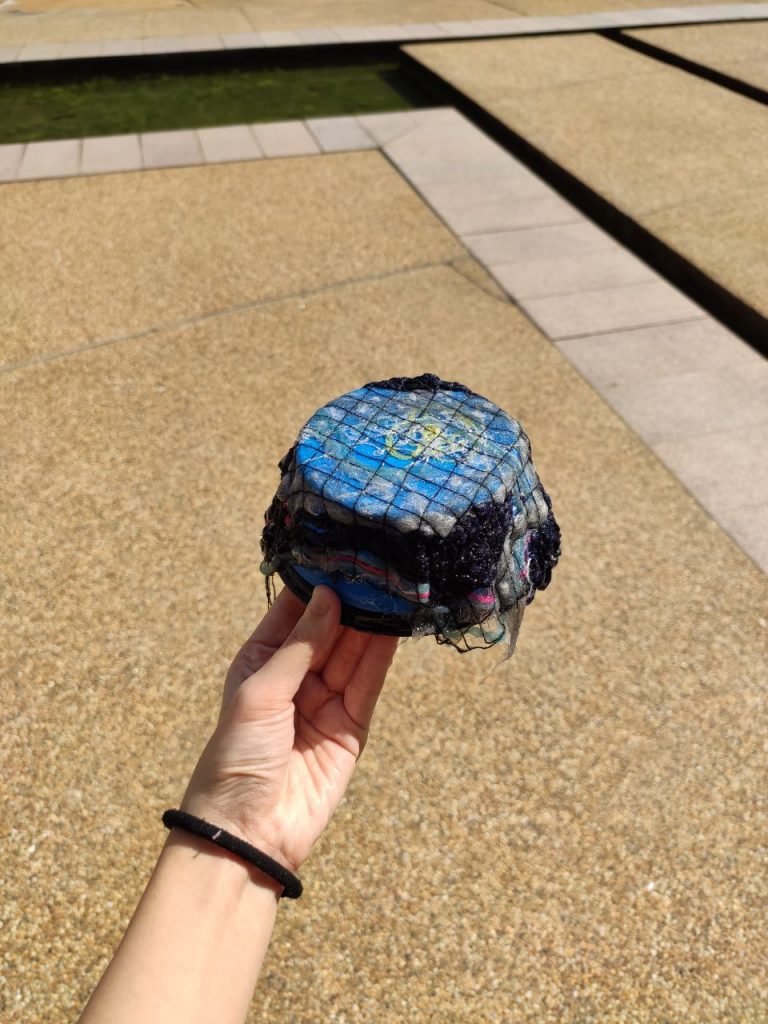
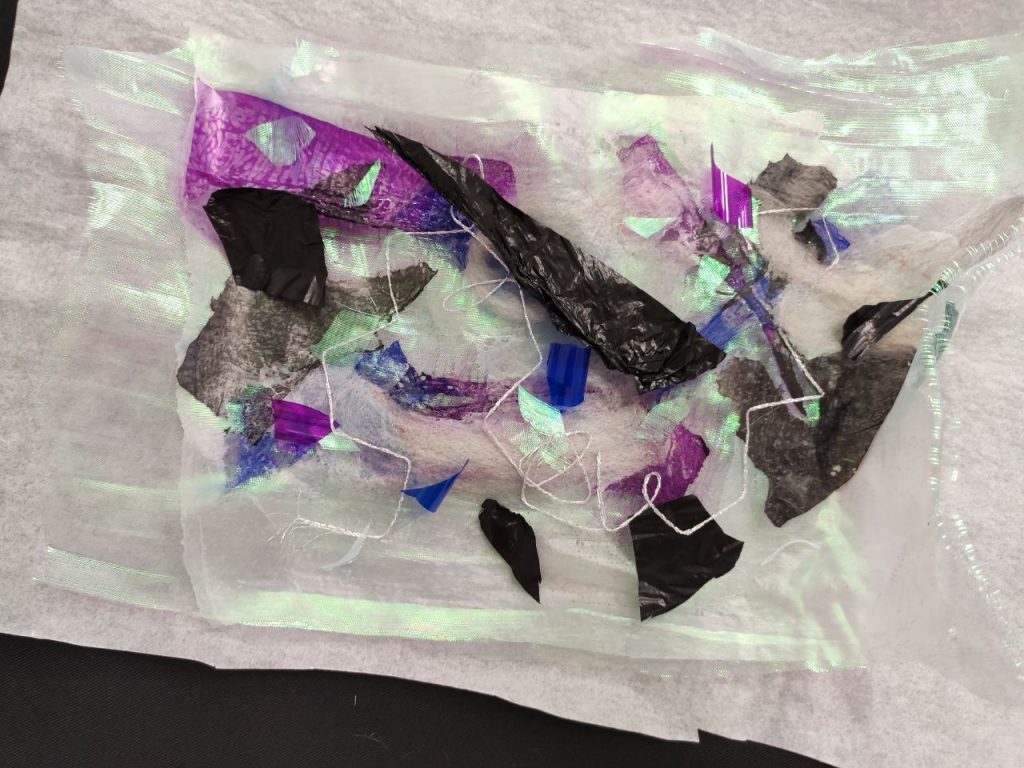
Lastly, I gave it a wash and was surprised how sticky and mushy the solution will be. It made quite a mess and was pretty hard to wash off, even from my hands. Nevertheless, I formed it over a small silicone bowl and I hope it will turn out as expected!
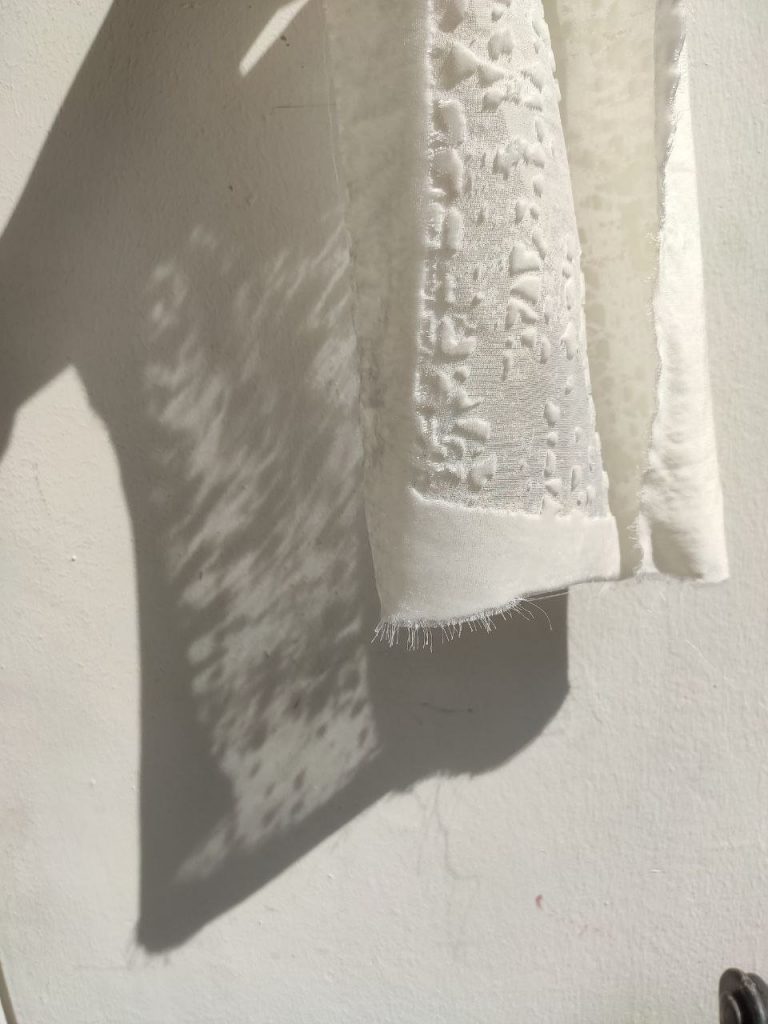
Update: It has dried in 3 days!
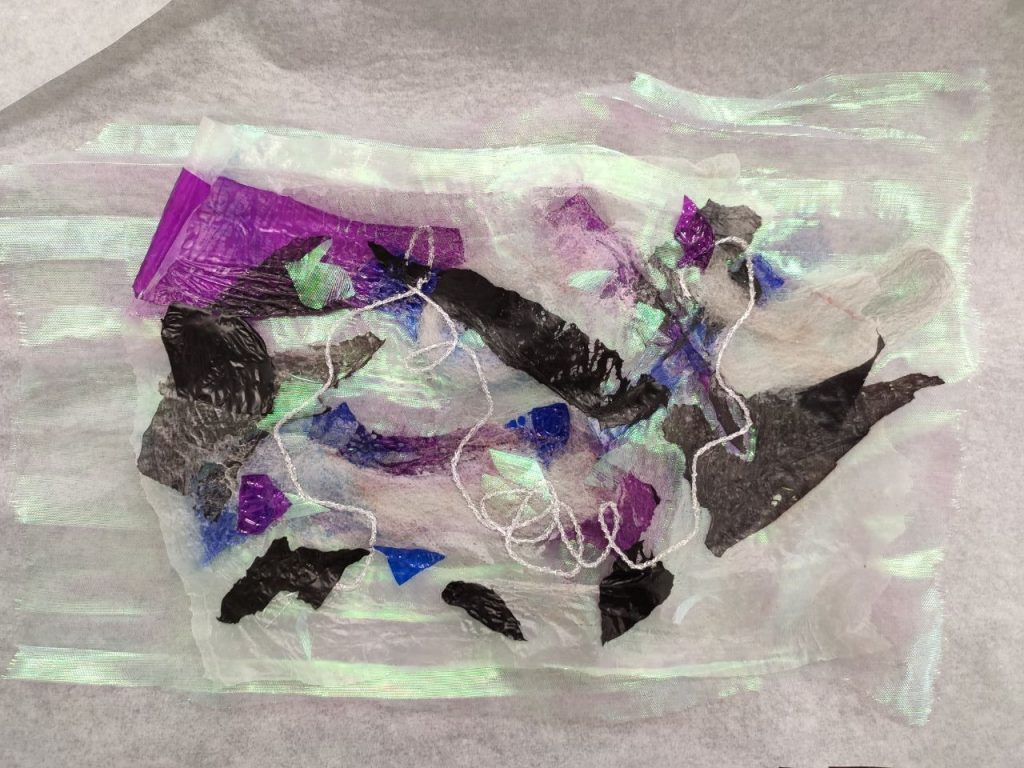
Removing the mould… I’m glad to see that the end product has not shrunk much.
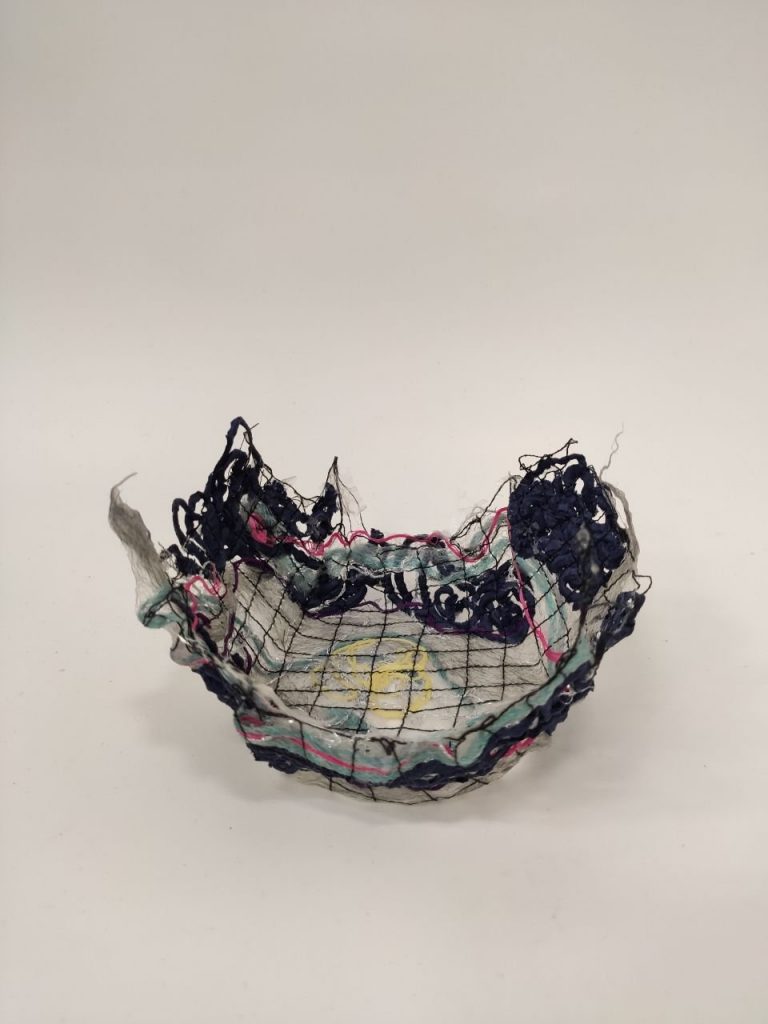
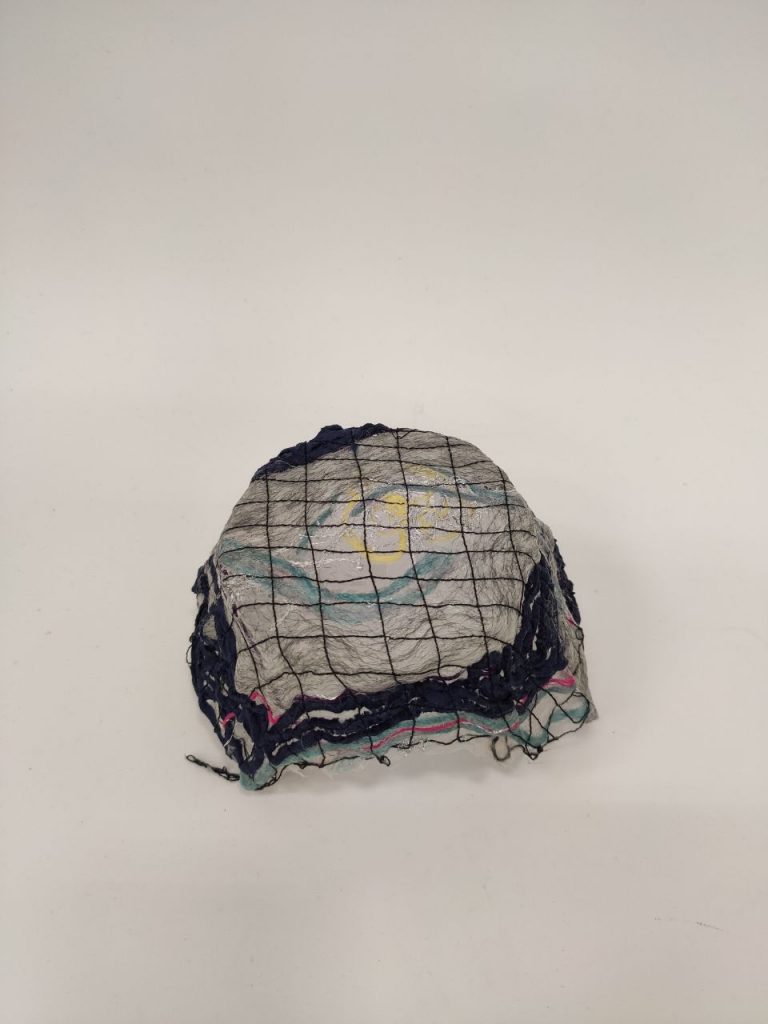
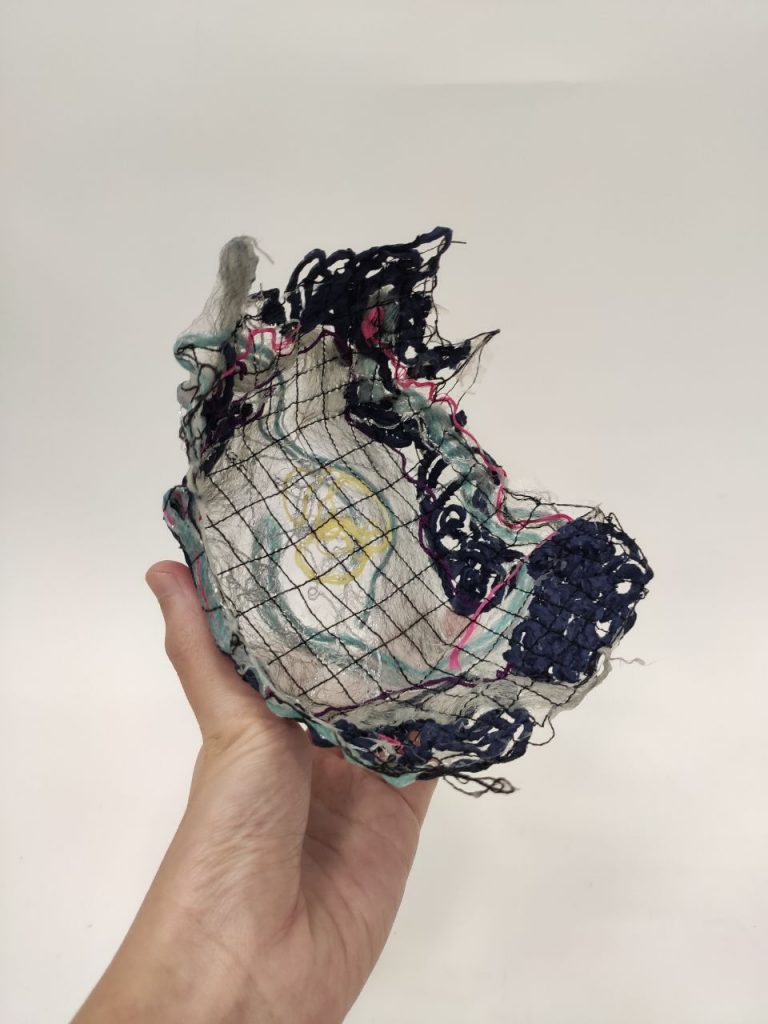
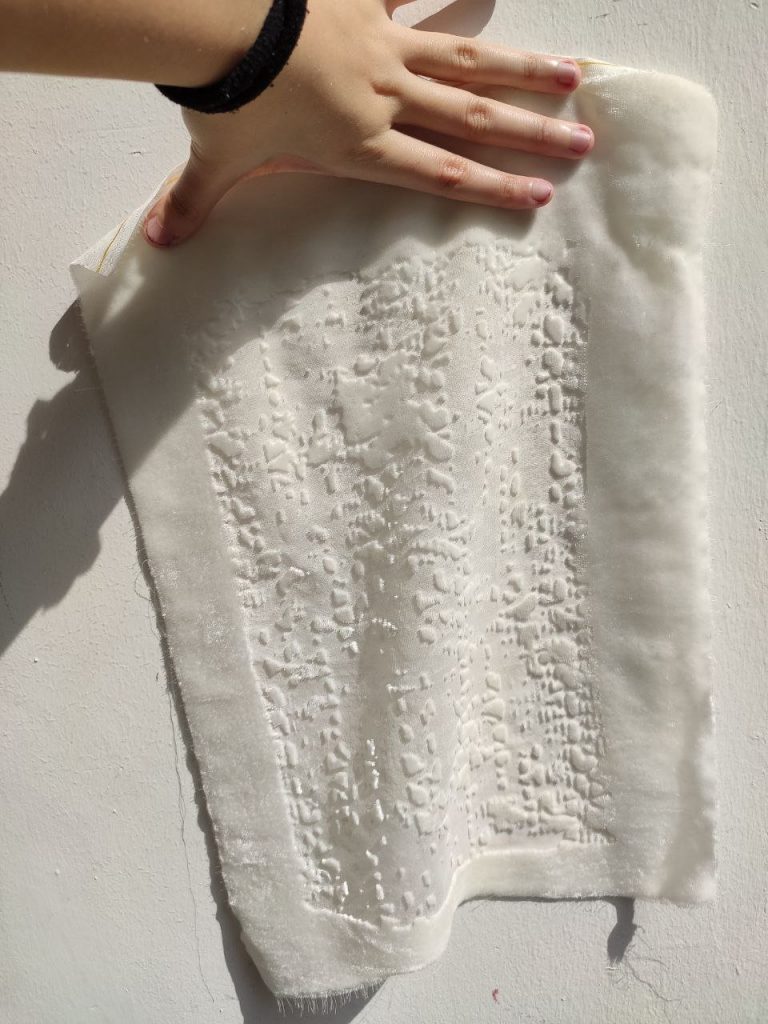
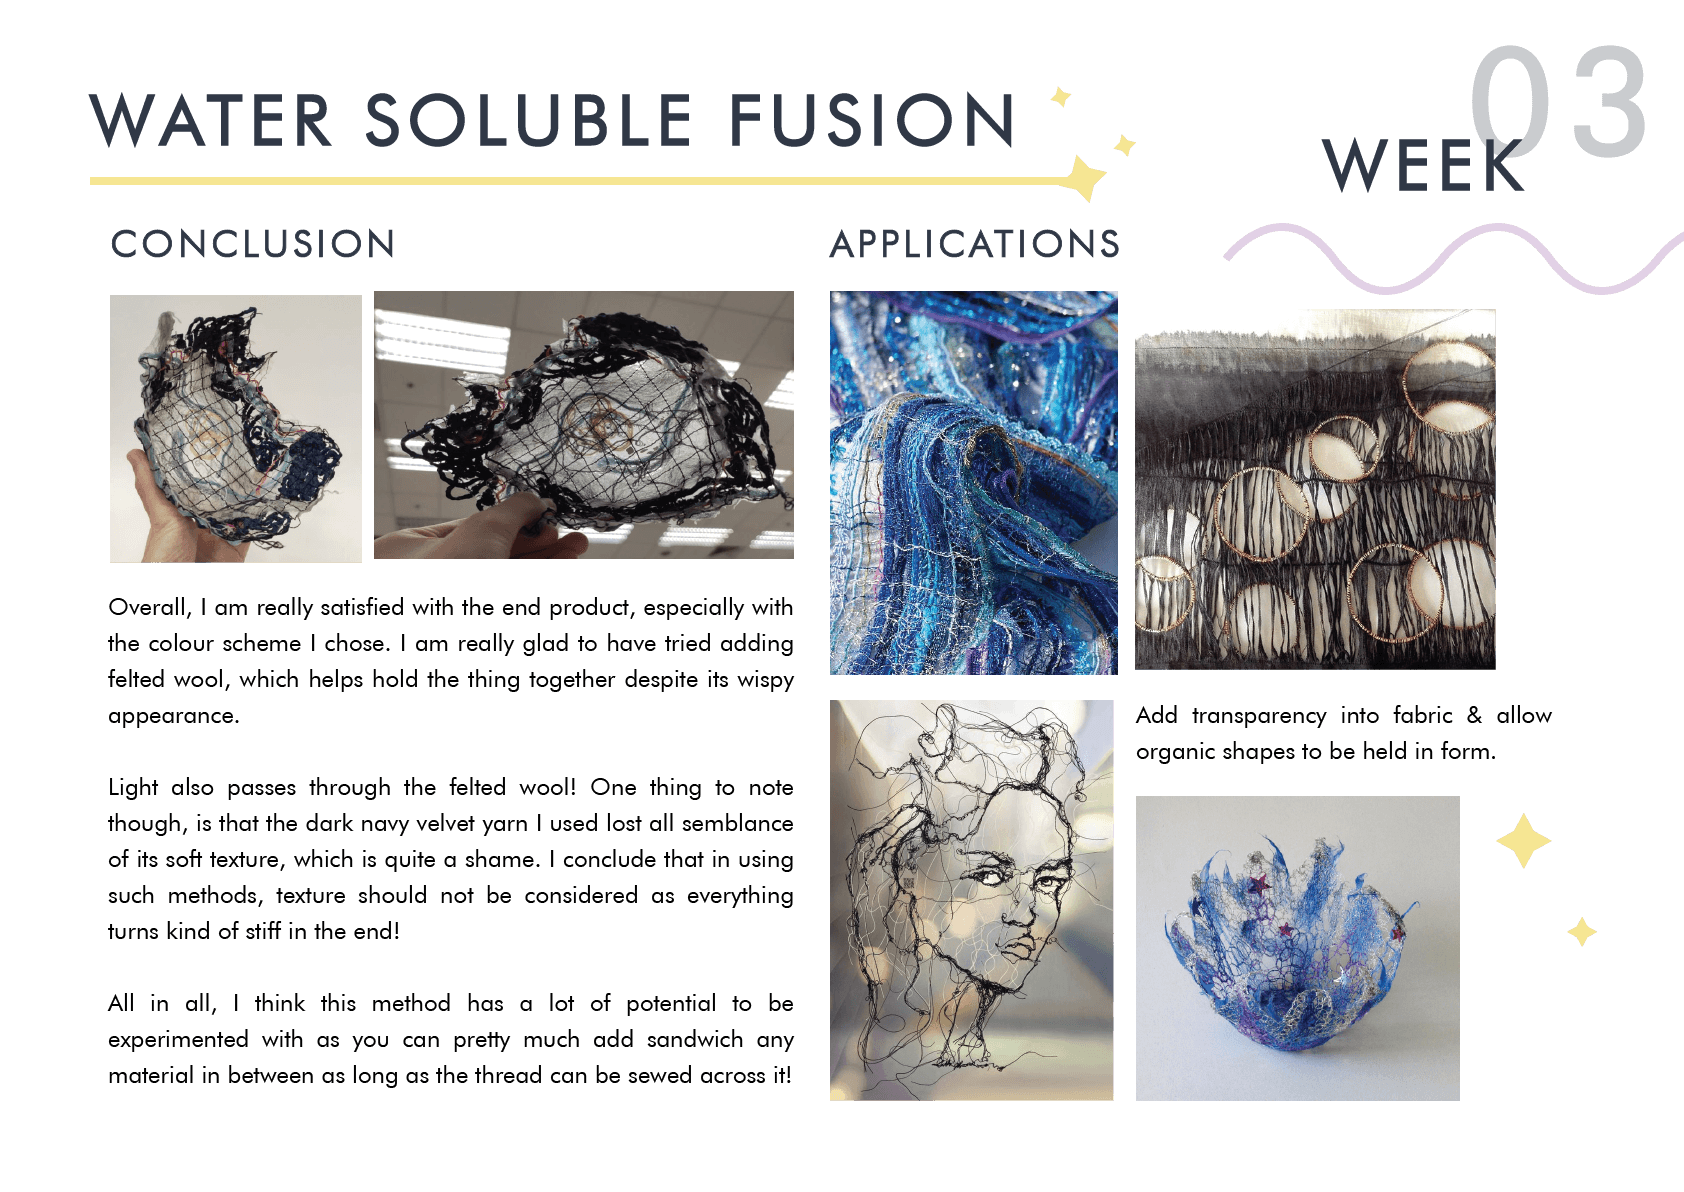
Overall, I am really satisfied with the end product, especially with the colour scheme I chose. I am really glad to have tried adding felted wool, which helps hold the thing together despite its wispy appearance.
Light also passes through the felted wool! One thing to note though, is that the dark navy velvet yarn I used lost all semblance of its soft texture, which is quite a shame. I conclude that in using such methods, texture should not be considered as everything turns kind of stiff in the end!
All in all, I think this method has a lot of potential to be experimented with as you can pretty much add sandwich any material in between as long as the thread can be sewed across it!
A P P L I C A T I O N S
I think the beauty of this method is in its ability to add transparency into fabric.


It also allows the nature of threads to be held in place, resulting in organic 3D works.


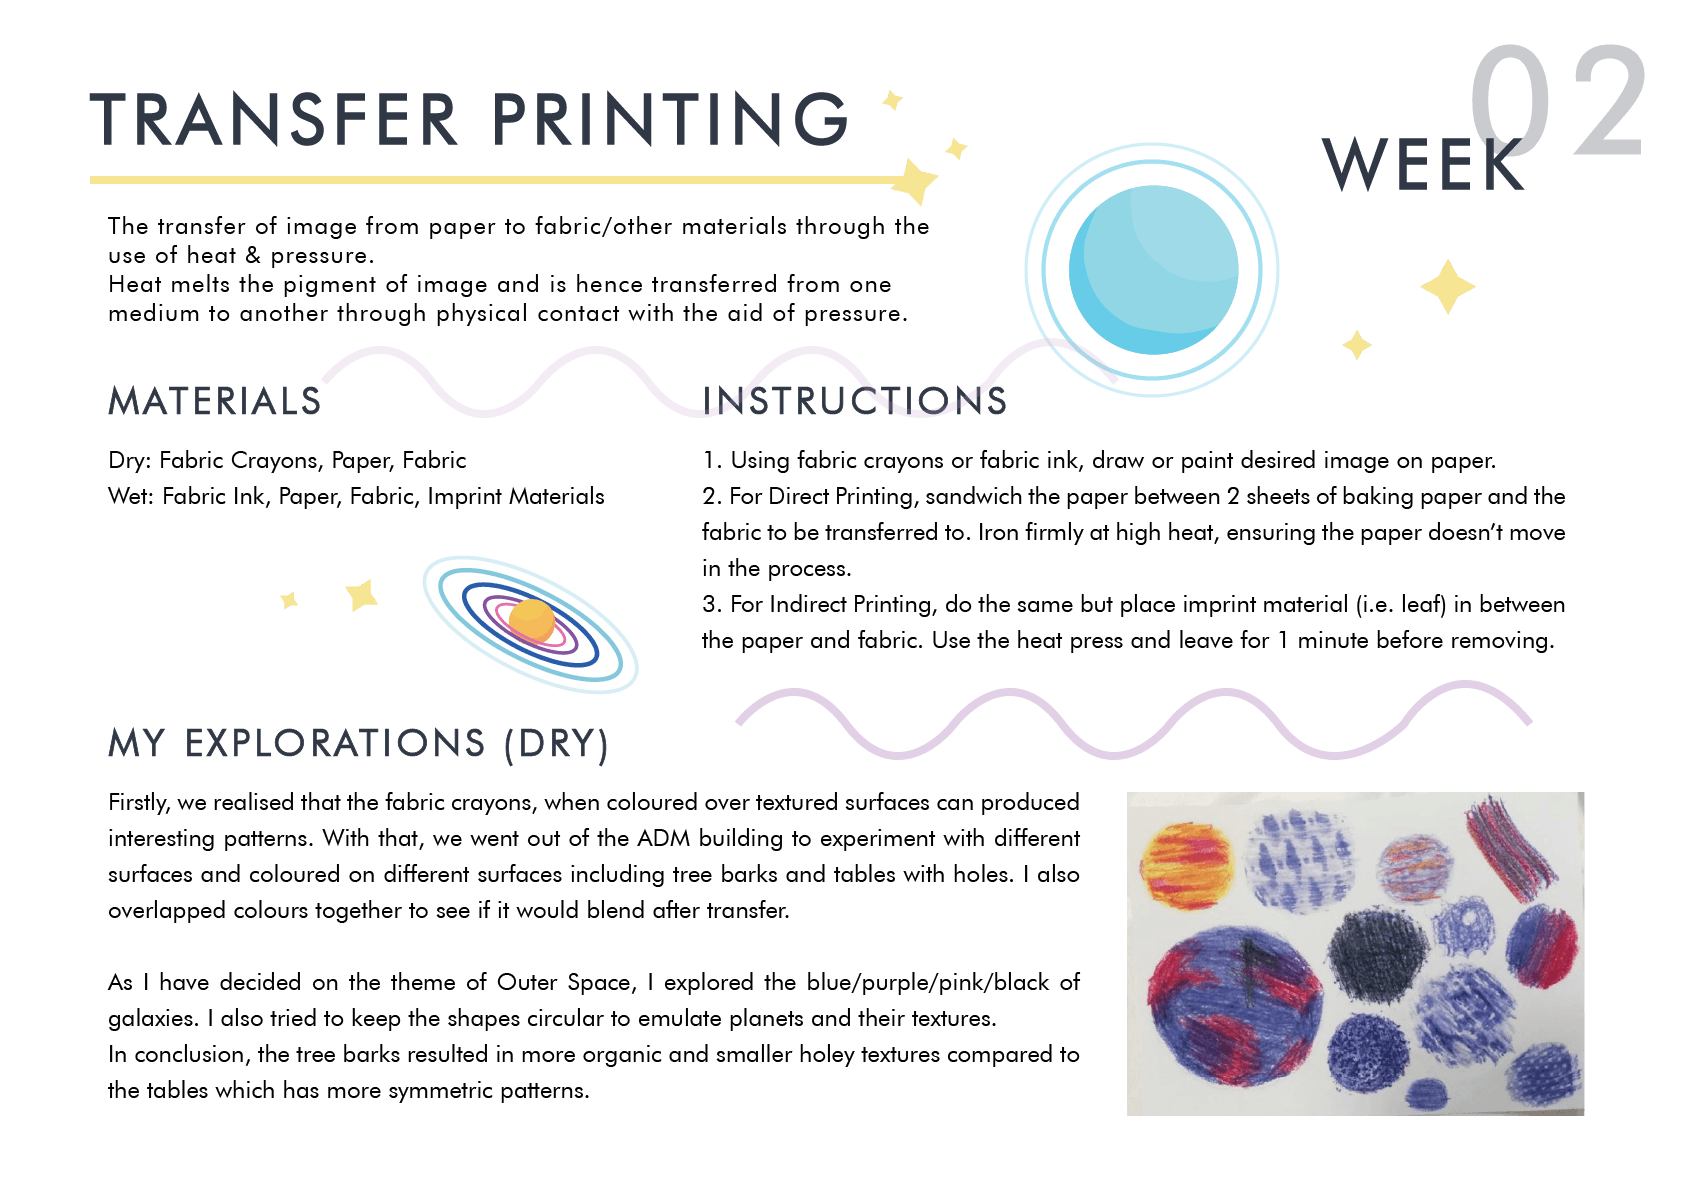
The transfer of image from paper to fabric/other materials through the use of heat & pressure.
Heat melts the pigment of image and is hence transferred from one medium to another through physical contact with the aid of pressure.
TYPES:
P R E P A R A T I O N ( D R Y T R A N S F E R )
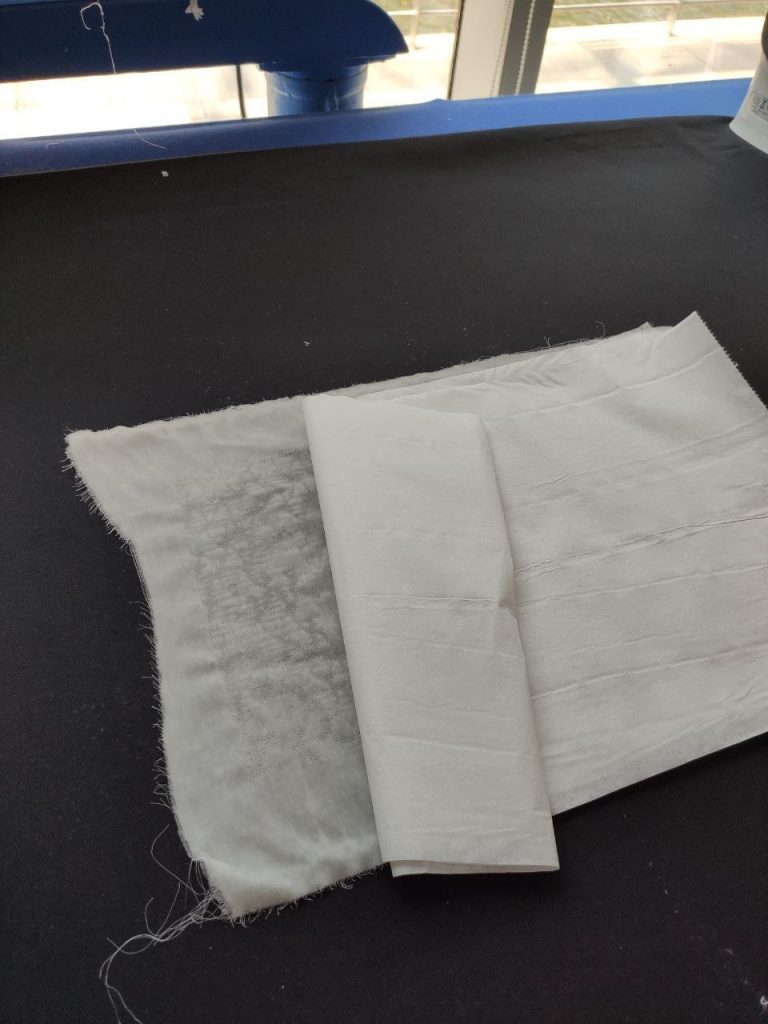
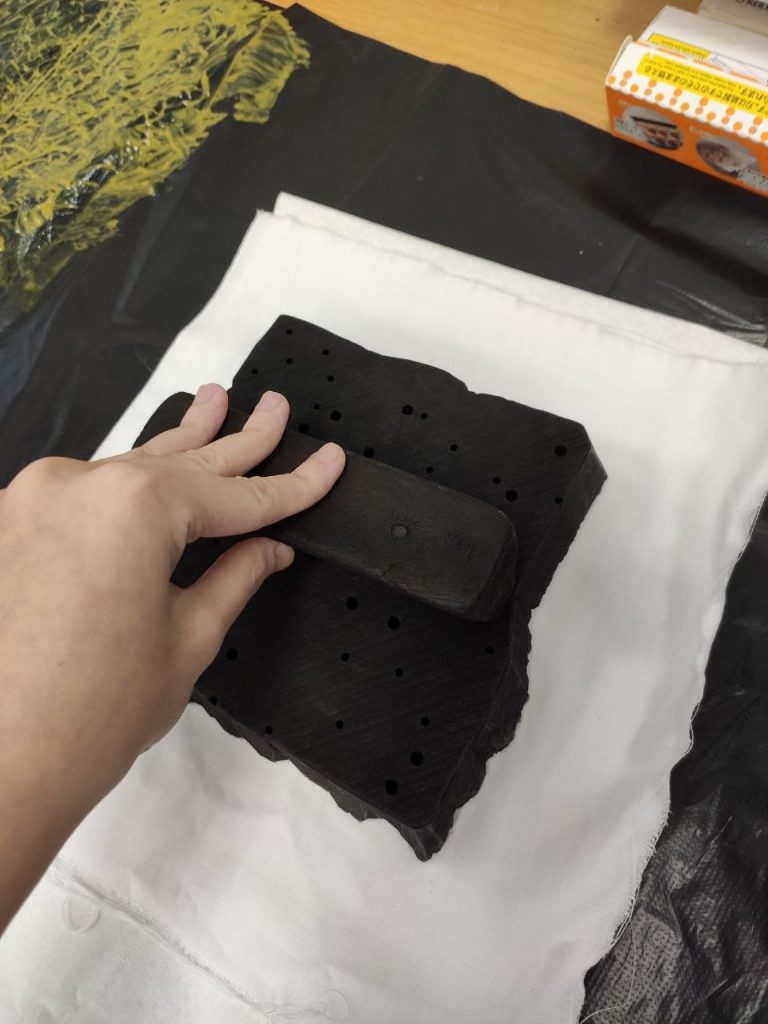
Firstly, we realised that the fabric crayons, when coloured over textured surfaces can produced interesting patterns. With that, we went out of the ADM building to experiment with different surfaces.
As I have decided on the theme of Outer Space, I explored the blue/purple/pink/black of galaxies.
I also tried to keep the shapes circular to emulate planets and their textures.

And so we coloured on different surfaces including tree barks and tables with holes.
In conclusion, the tree barks resulted in more organic and smaller holey textures compared to the tables which has more symmetric patterns.
I also overlapped colours together to see if it would blend after transfer.
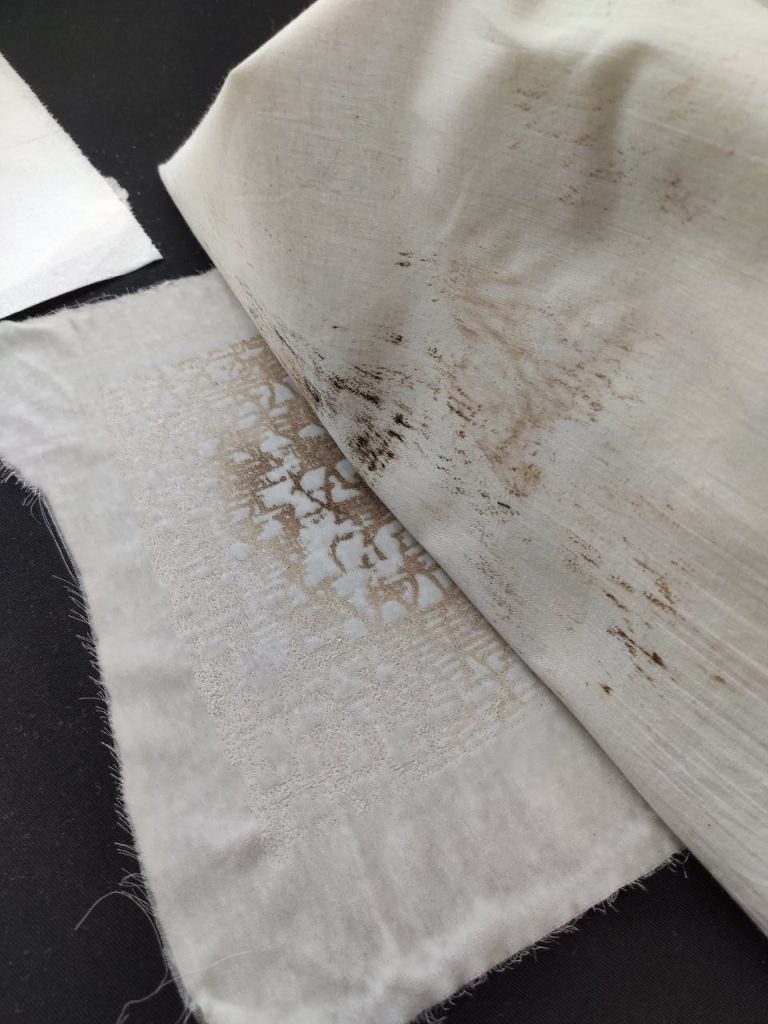
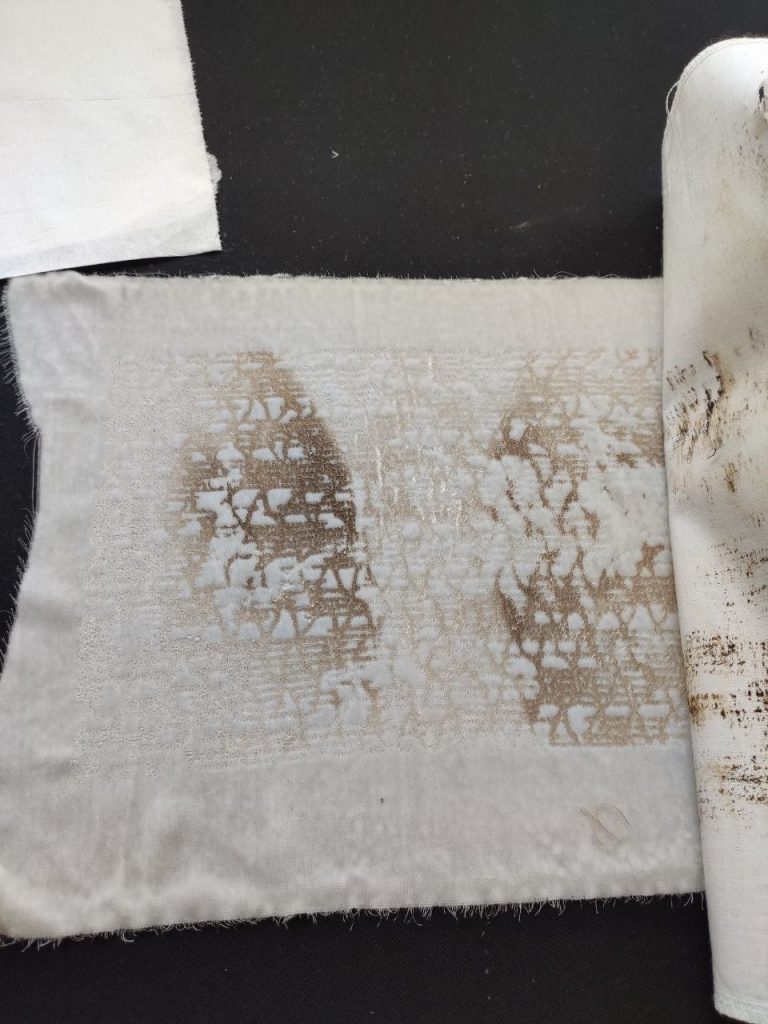
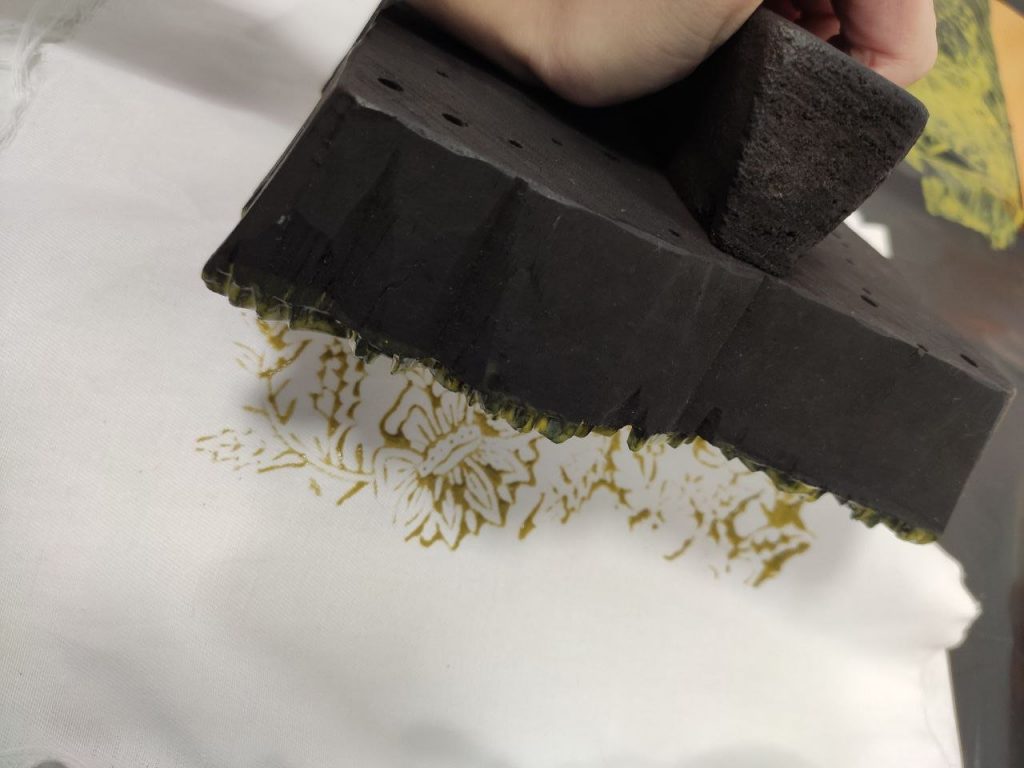
T R A N S F E R P R O C C E S S


For the iron, I realised that the heat must be sufficiently high (close to the max) for the process to work, or else it seems to require a long wait. However, putting the iron at max kinds of brown/burn the baking paper so it should be moderated.
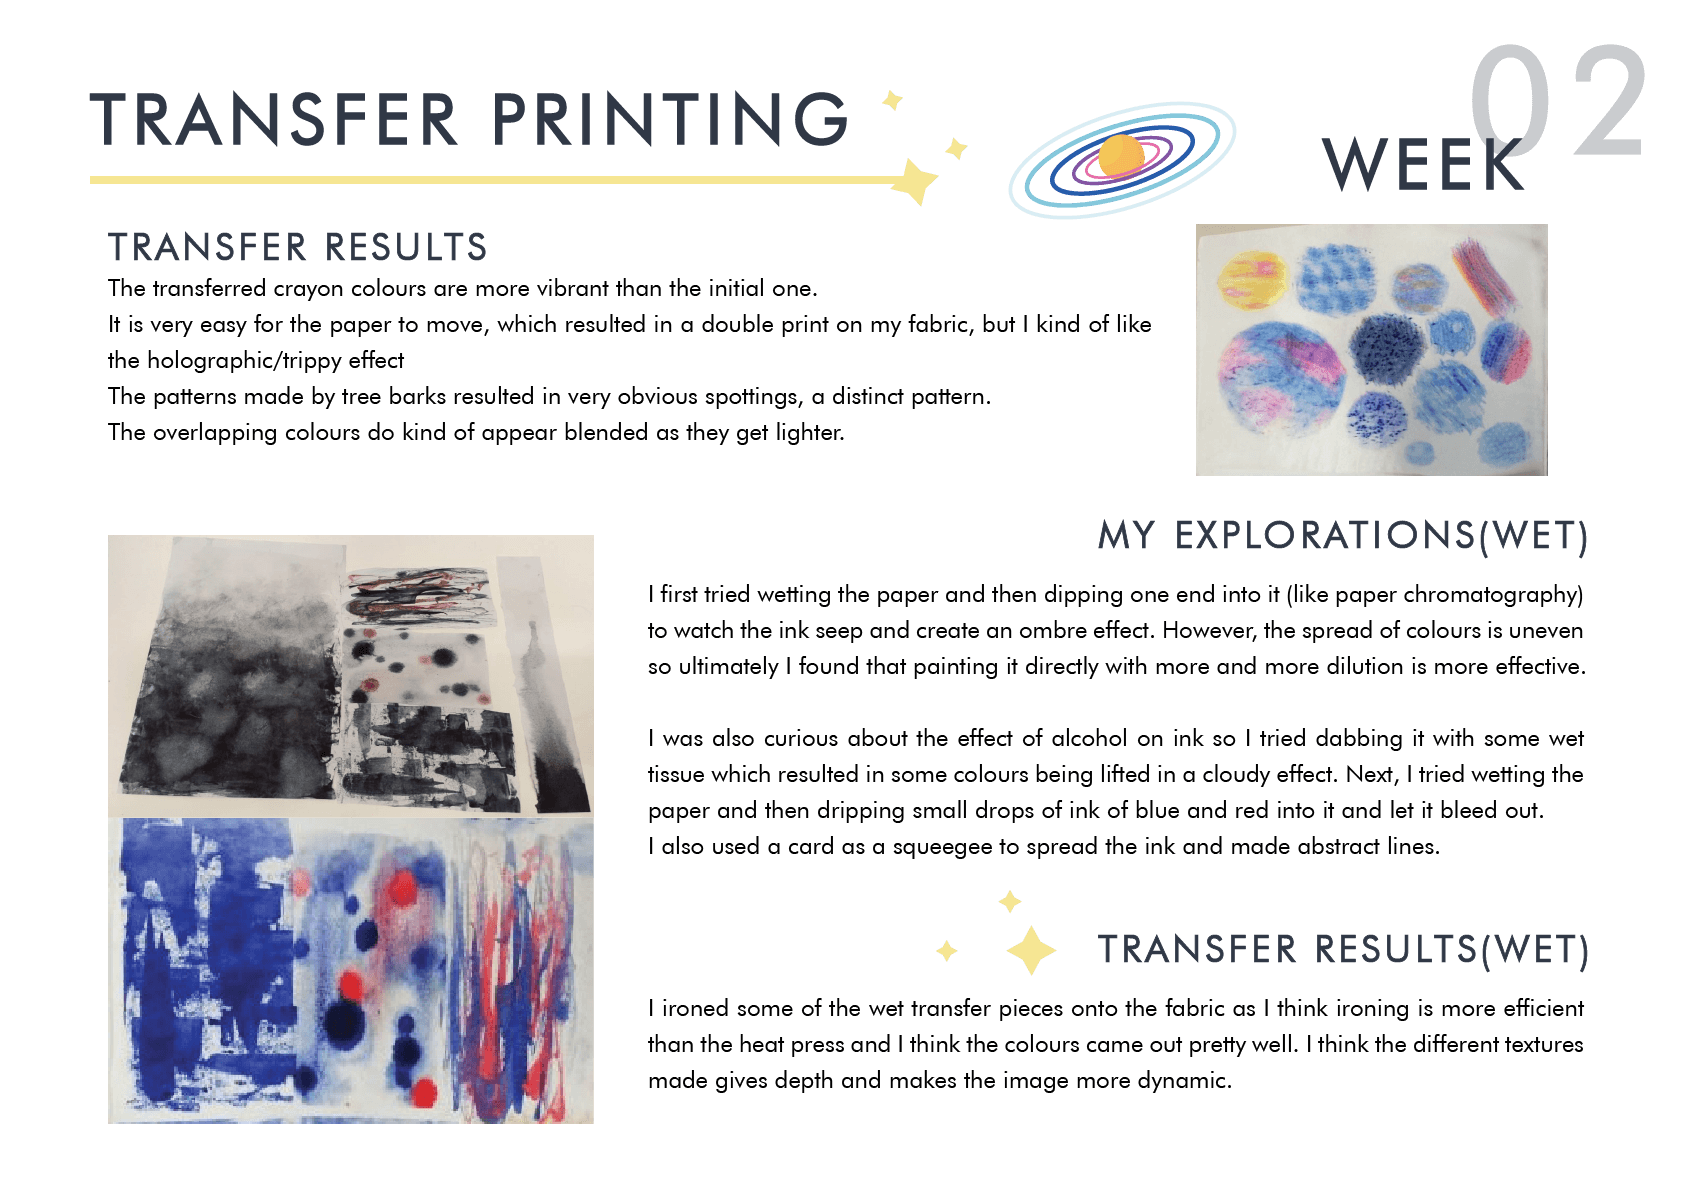
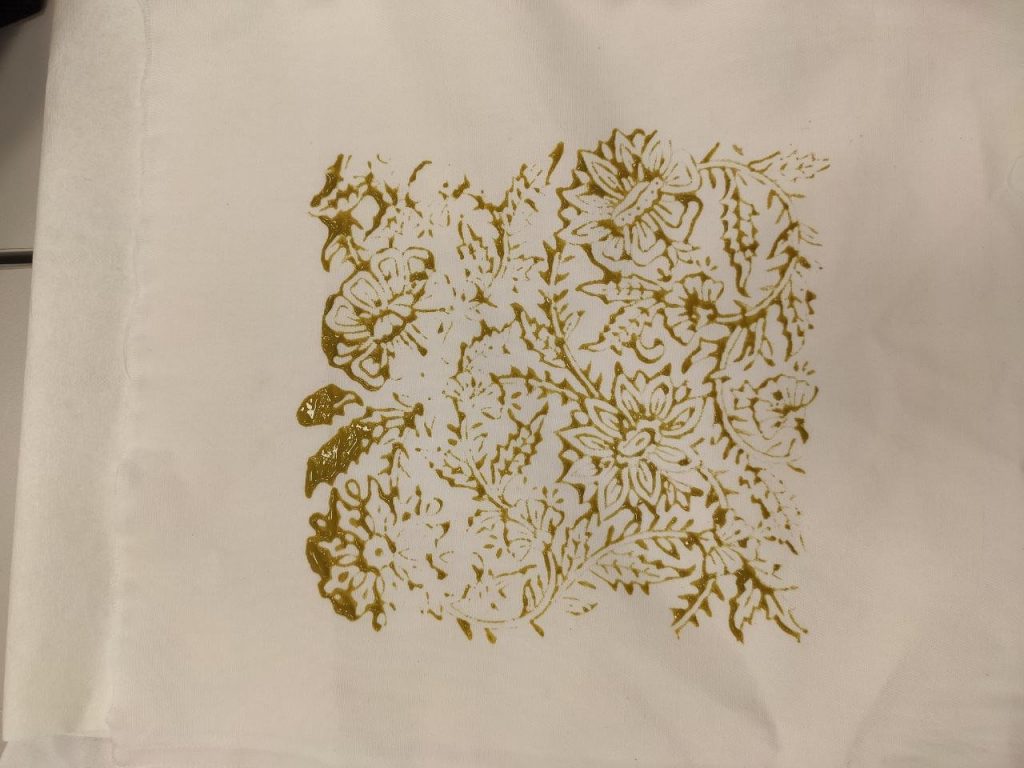
T R A N S F E R R E S U L T S

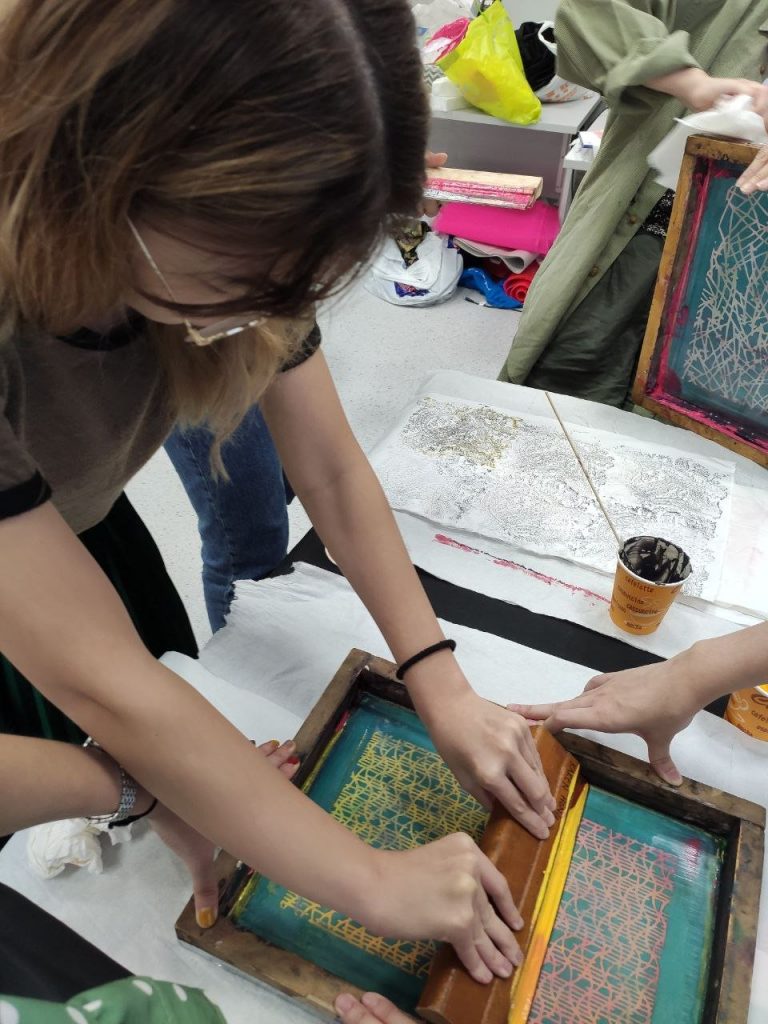
P R E P A R A T I O N ( W E T T R A N S F E R )
Next, I explored different ways of using the fabric ink.

I first tried wetting the paper and then dipping one end into it (like paper chromatography) to watch the ink seep and create an ombre effect. However, the spread of colours is uneven so ultimately I found that painting it directly with more and more dilution is more effective.
I was also curious about the effect of alcohol on ink so I tried dabbing it with some wet tissue which resulted in some colours being lifted in a cloudy effect.
Next, I tried wetting the paper and then dripping small drops of ink of blue and red into it and let it bleed out.
I also used a card as a squeegee to spread the ink and made abstract lines.
T R A N S F E R P R O C C E S S & R E S U L T S

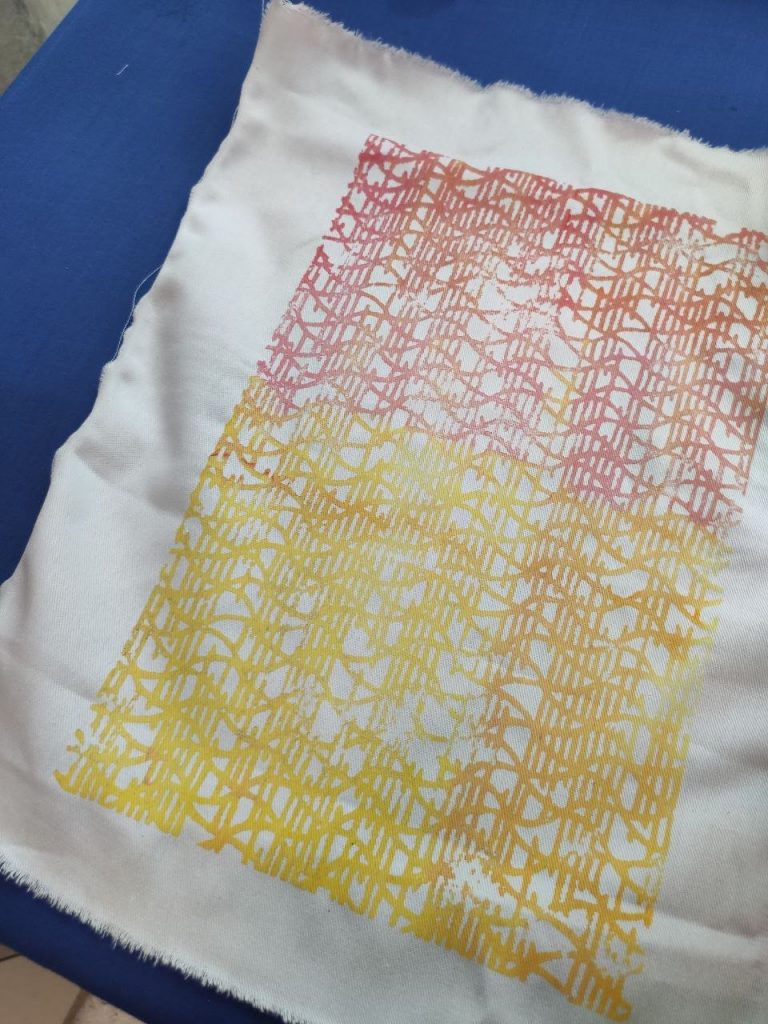
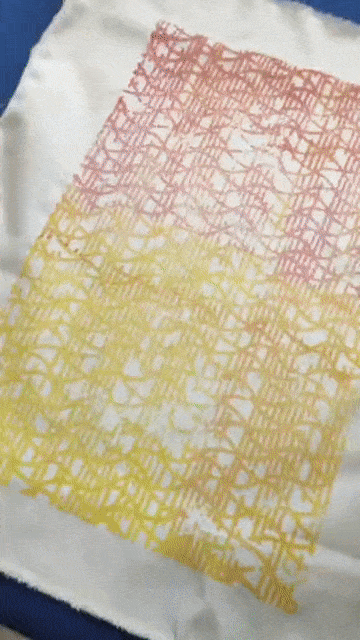
I ironed some of the wet transfer pieces onto the fabric as I think ironing is more efficient than the heat press and I think the colours came out pretty well. I think the different textures made gives depth and makes the image more dynamic.
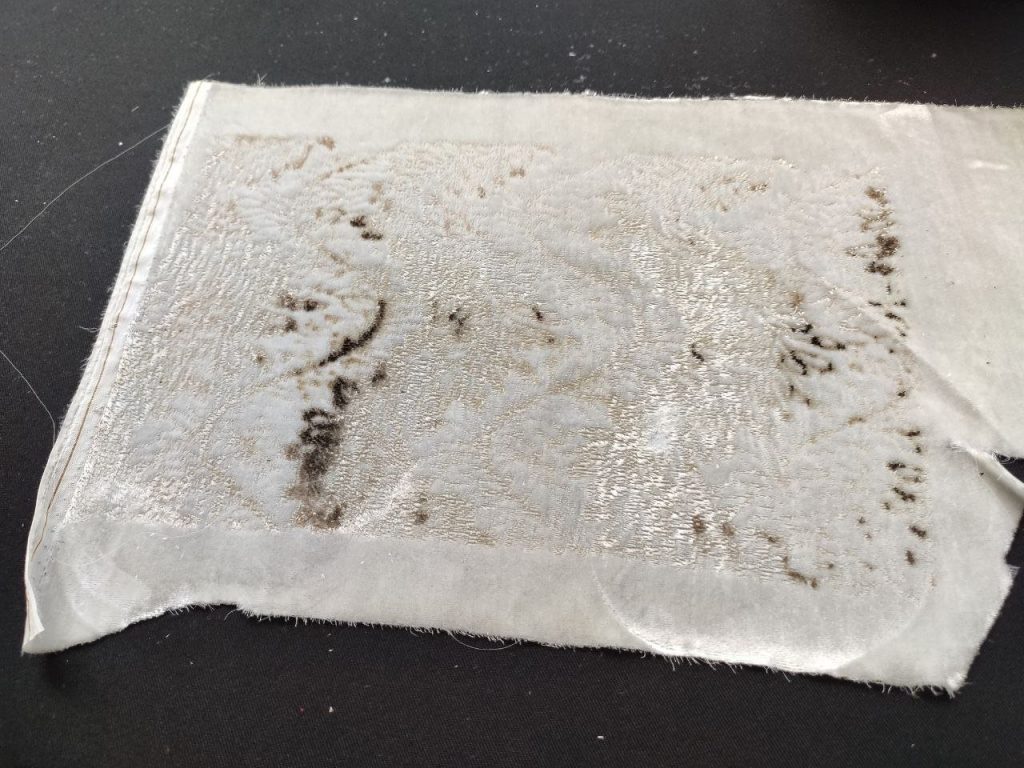
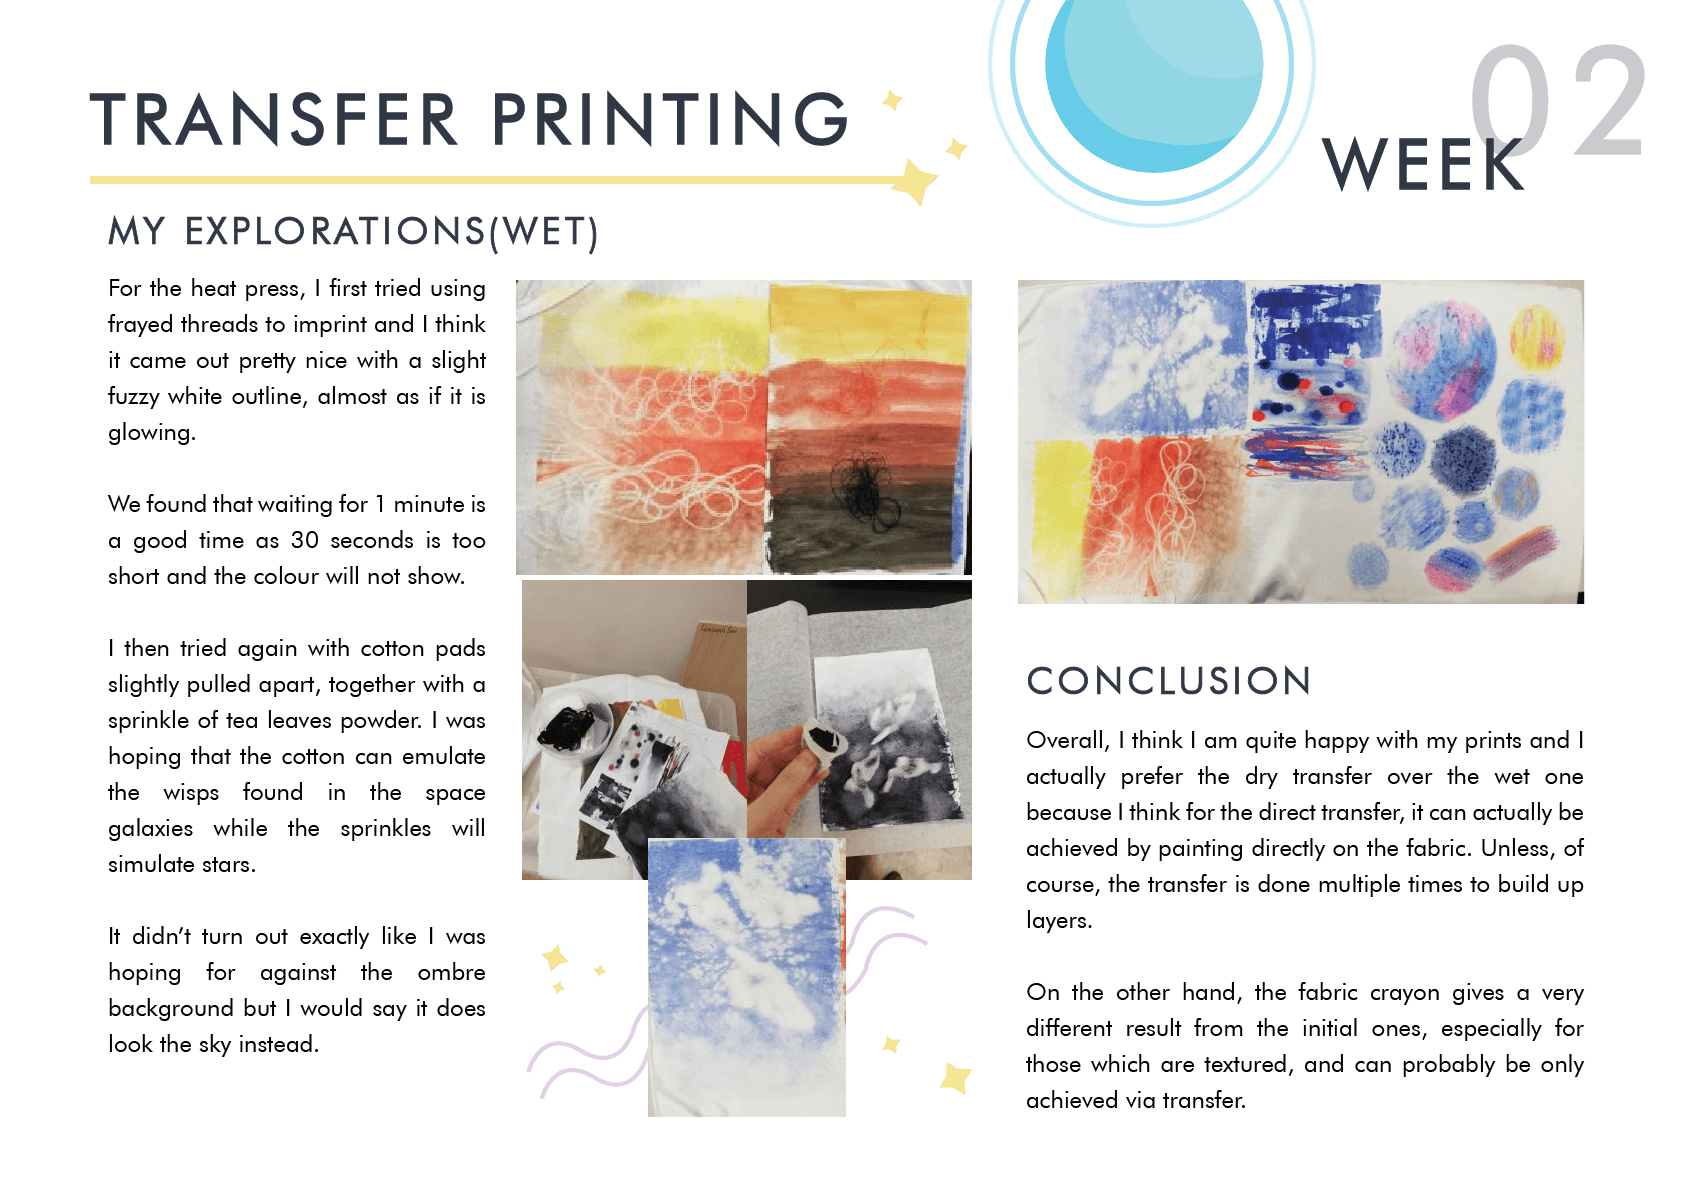
For the heat press, I first tried using frayed threads to imprint and I think it came out pretty nice with a slight fuzzy white outline, almost as if it is glowing.

We found that waiting for 1 minute is a good time as 30 seconds is too short and the colour will not show.


I then tried again with cotton pads slightly pulled apart, together with a sprinkle of tea leaves powder. I was hoping that the cotton can emulate the wisps found in the space galaxies while the sprinkles will simulate stars.

It didn’t turn out exactly like I was hoping for against the ombre background but I would say it does look the sky instead.
C O N C L U S I O N

Overall, I think I am quite happy with my prints and I actually prefer the dry transfer over the wet one because I think for the direct transfer, it can actually be achieved by painting directly on the fabric. Unless, of course, the transfer is done multiple times to build up layers.
On the other hand, the fabric crayon gives a very different result from the initial ones, especially for those which are textured, and can probably be only achieved via transfer.
Nonetheless, the indirect printing is a very novel concept but I think overlapping several times of indirect print will then make it more dynamic than just a a single one.
A P P L I C A T I O N S
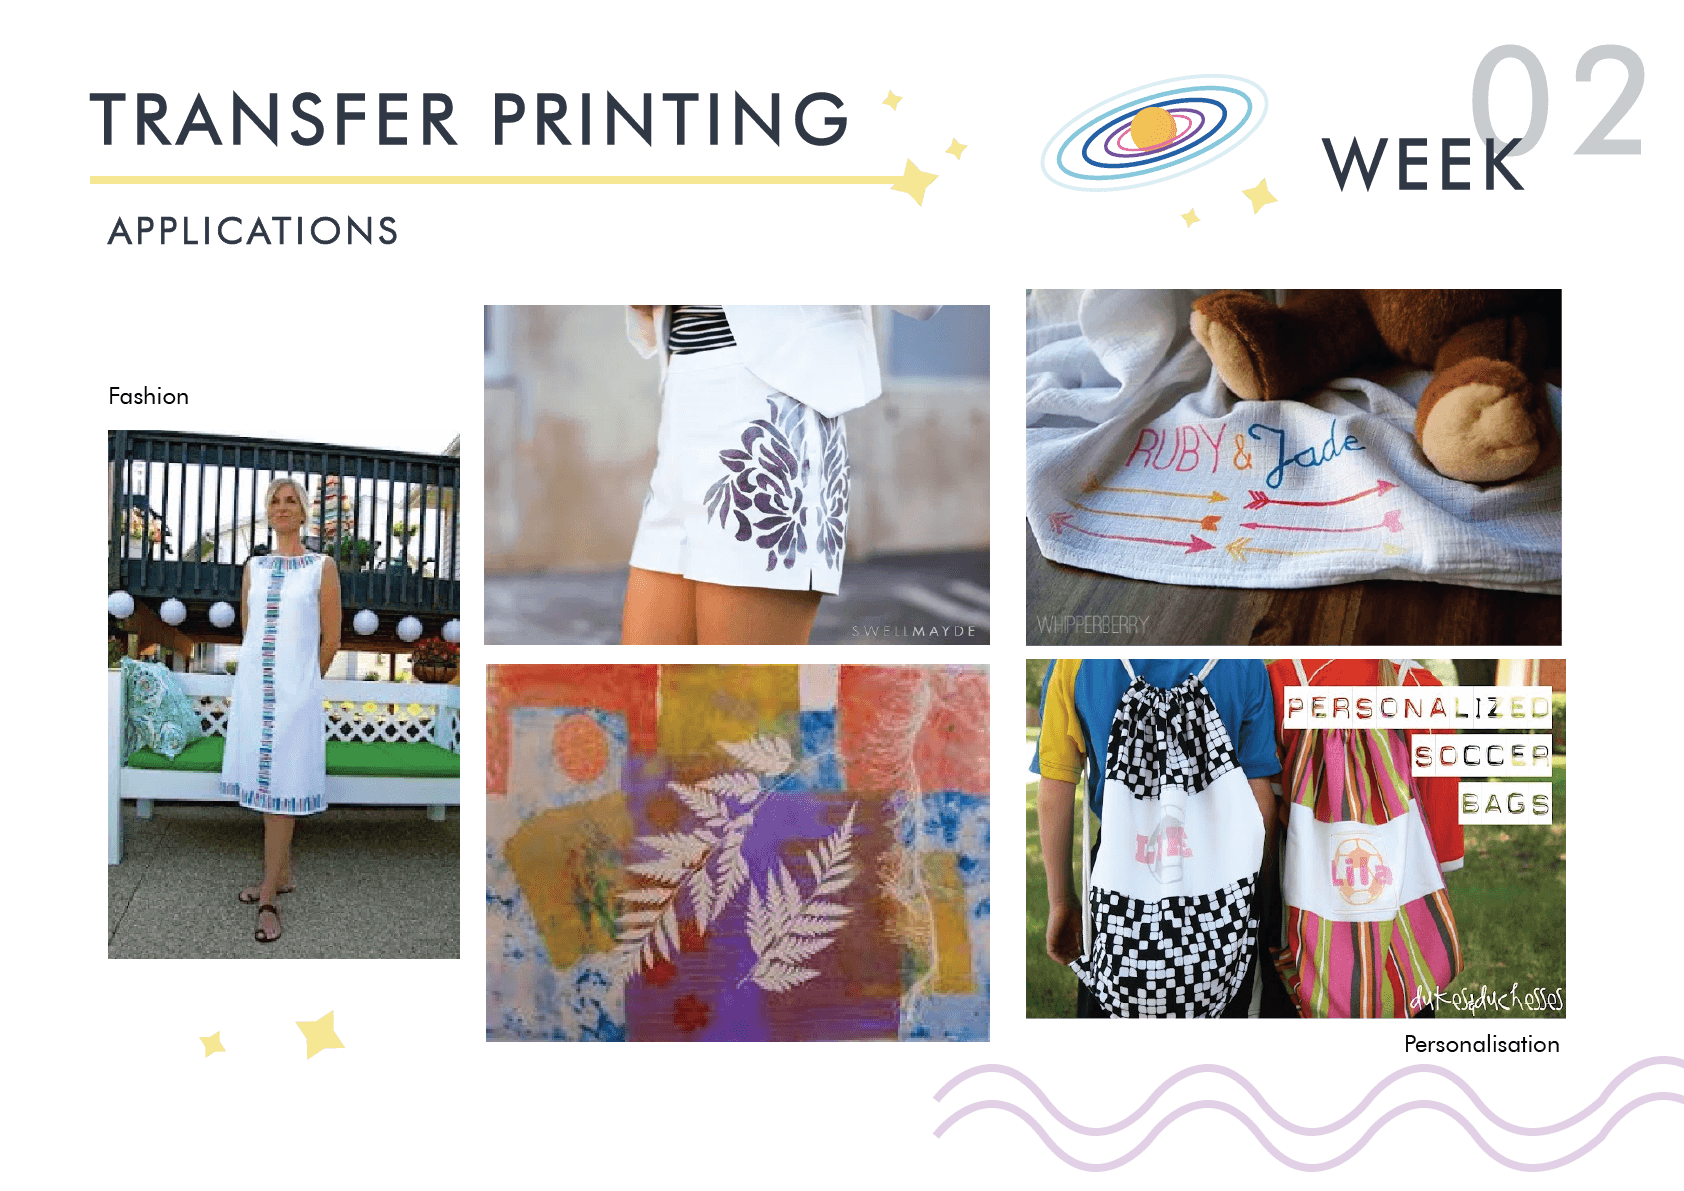
Pretty much anything made out of fabric can be decorated with these prints.
![]()


Would also be useful to personalise belongings or gifts.


It’s a great way for kid to wear their own creations as well!