Mnemosyne’s Scent: ★★★ PON PON PON ☆☆☆ (Part 2)

Hey guise! This is the second part of the write up for the final project of Mnemosyne’s Scent, which I did with the freshest salmon in the bowl, Sihui!!

The first part, done by Sihui, can be found here, with the analysis of the final piece and it’s properties plus the connection to the previous part of the projects:

Project III: Mnemosyne’s Scent

[ RESEARCH ]

Sihui and I were particularly intrigued by the concept of folding and bending of planar forms that took place in origami and thus wanted to incorporate such forms into our piece. We found some inspiration on Pinterest, many of which were modern forms of origami as well as paper sculptures.

Image taken from www.howwebuiltatimemachine.tumblr.com
Image taken from www.mchsapart.weebly.com
By Matt Schlian, taken from www.theinspirationgrid.com

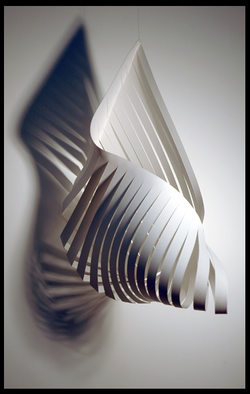
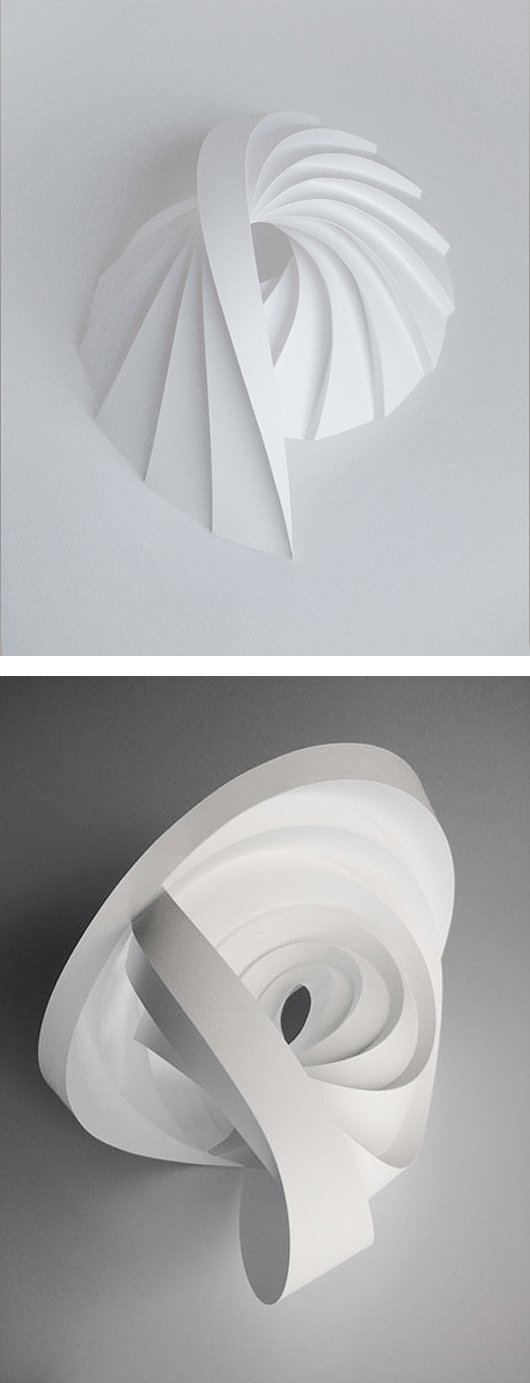
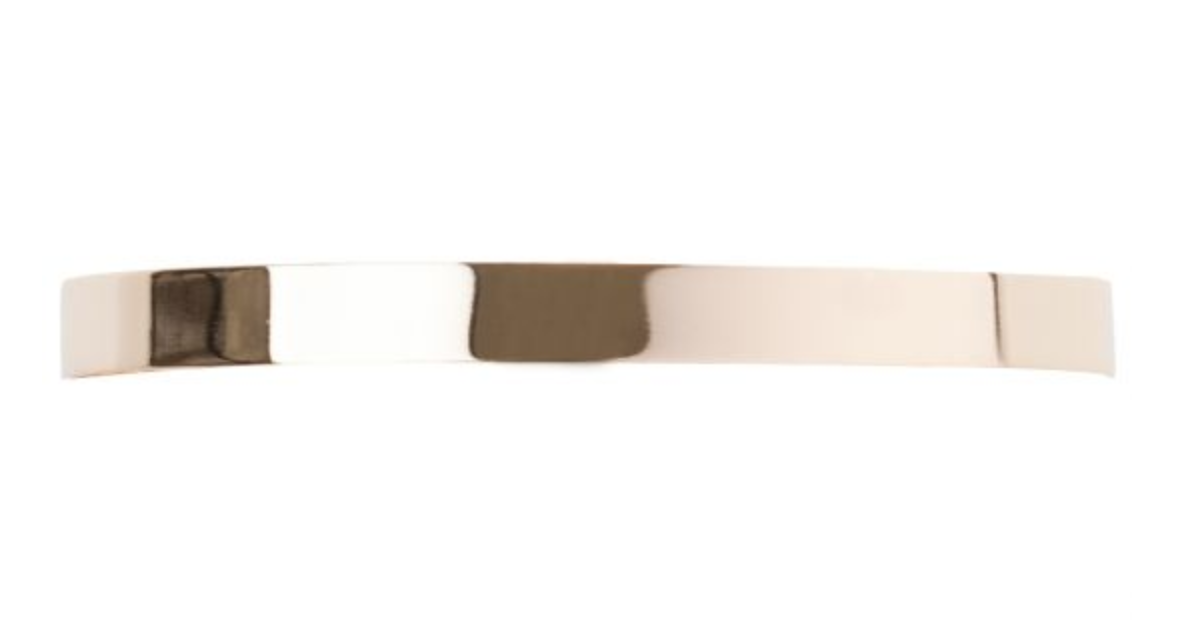
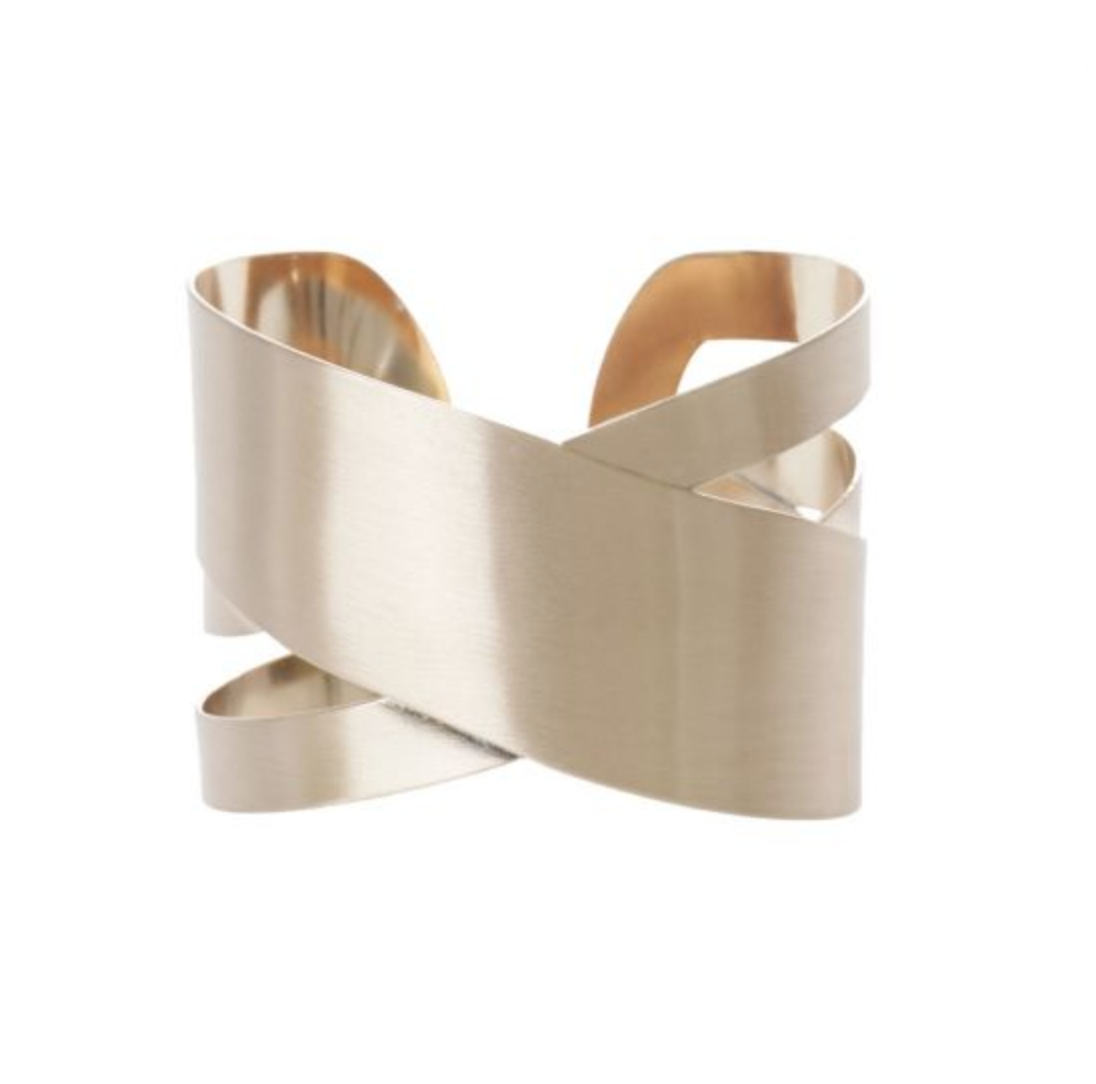
We thought about incorporating paper bending and folding into our final necklace, but we also wanted to have a metallic element in our necklace, so we also visited the websites of popular jewellery stores to look for trends in planar jewellery! The choker was a particularly apt form of using planar forms.

www.global.accessorize.com
80s Glam Choker Necklace – Accessorize
www.lovisa.com
Gold Choker – Lovisa
www.lovisa.com
Brushed Gold Cuff – Lovisa
www.global.accessorize.com
Infinity Drop Earrings – Accessorize


[ PROCESS ]

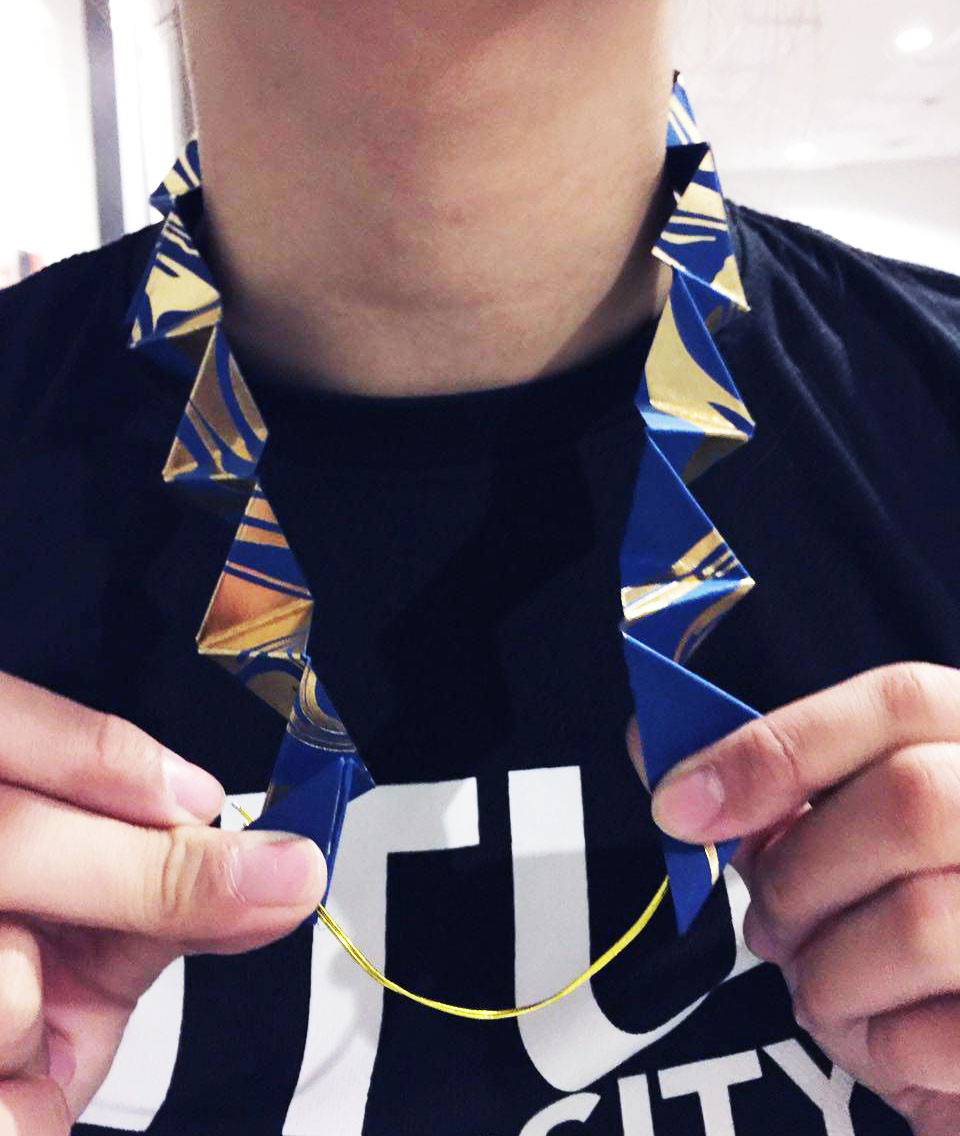
The first piece that we made out of the entire necklace was the origami strap! It was made by folding alternating triangles, and we made a few of such strips before attaching them together:

Choker style: 2 of the origami straps attached together

However, as we intended for the strap to be the dominant piece in the necklace, we felt that having the necklace as a choker would look too small when we would start adding other elements in the necklace. Thus, we started to expand into the idea of attaching another origami strap to make a longer necklace. Here are some of the design ideas that we came up with for both the choker and long necklace:

Brainstorming for designs of the necklace based off the origami strap

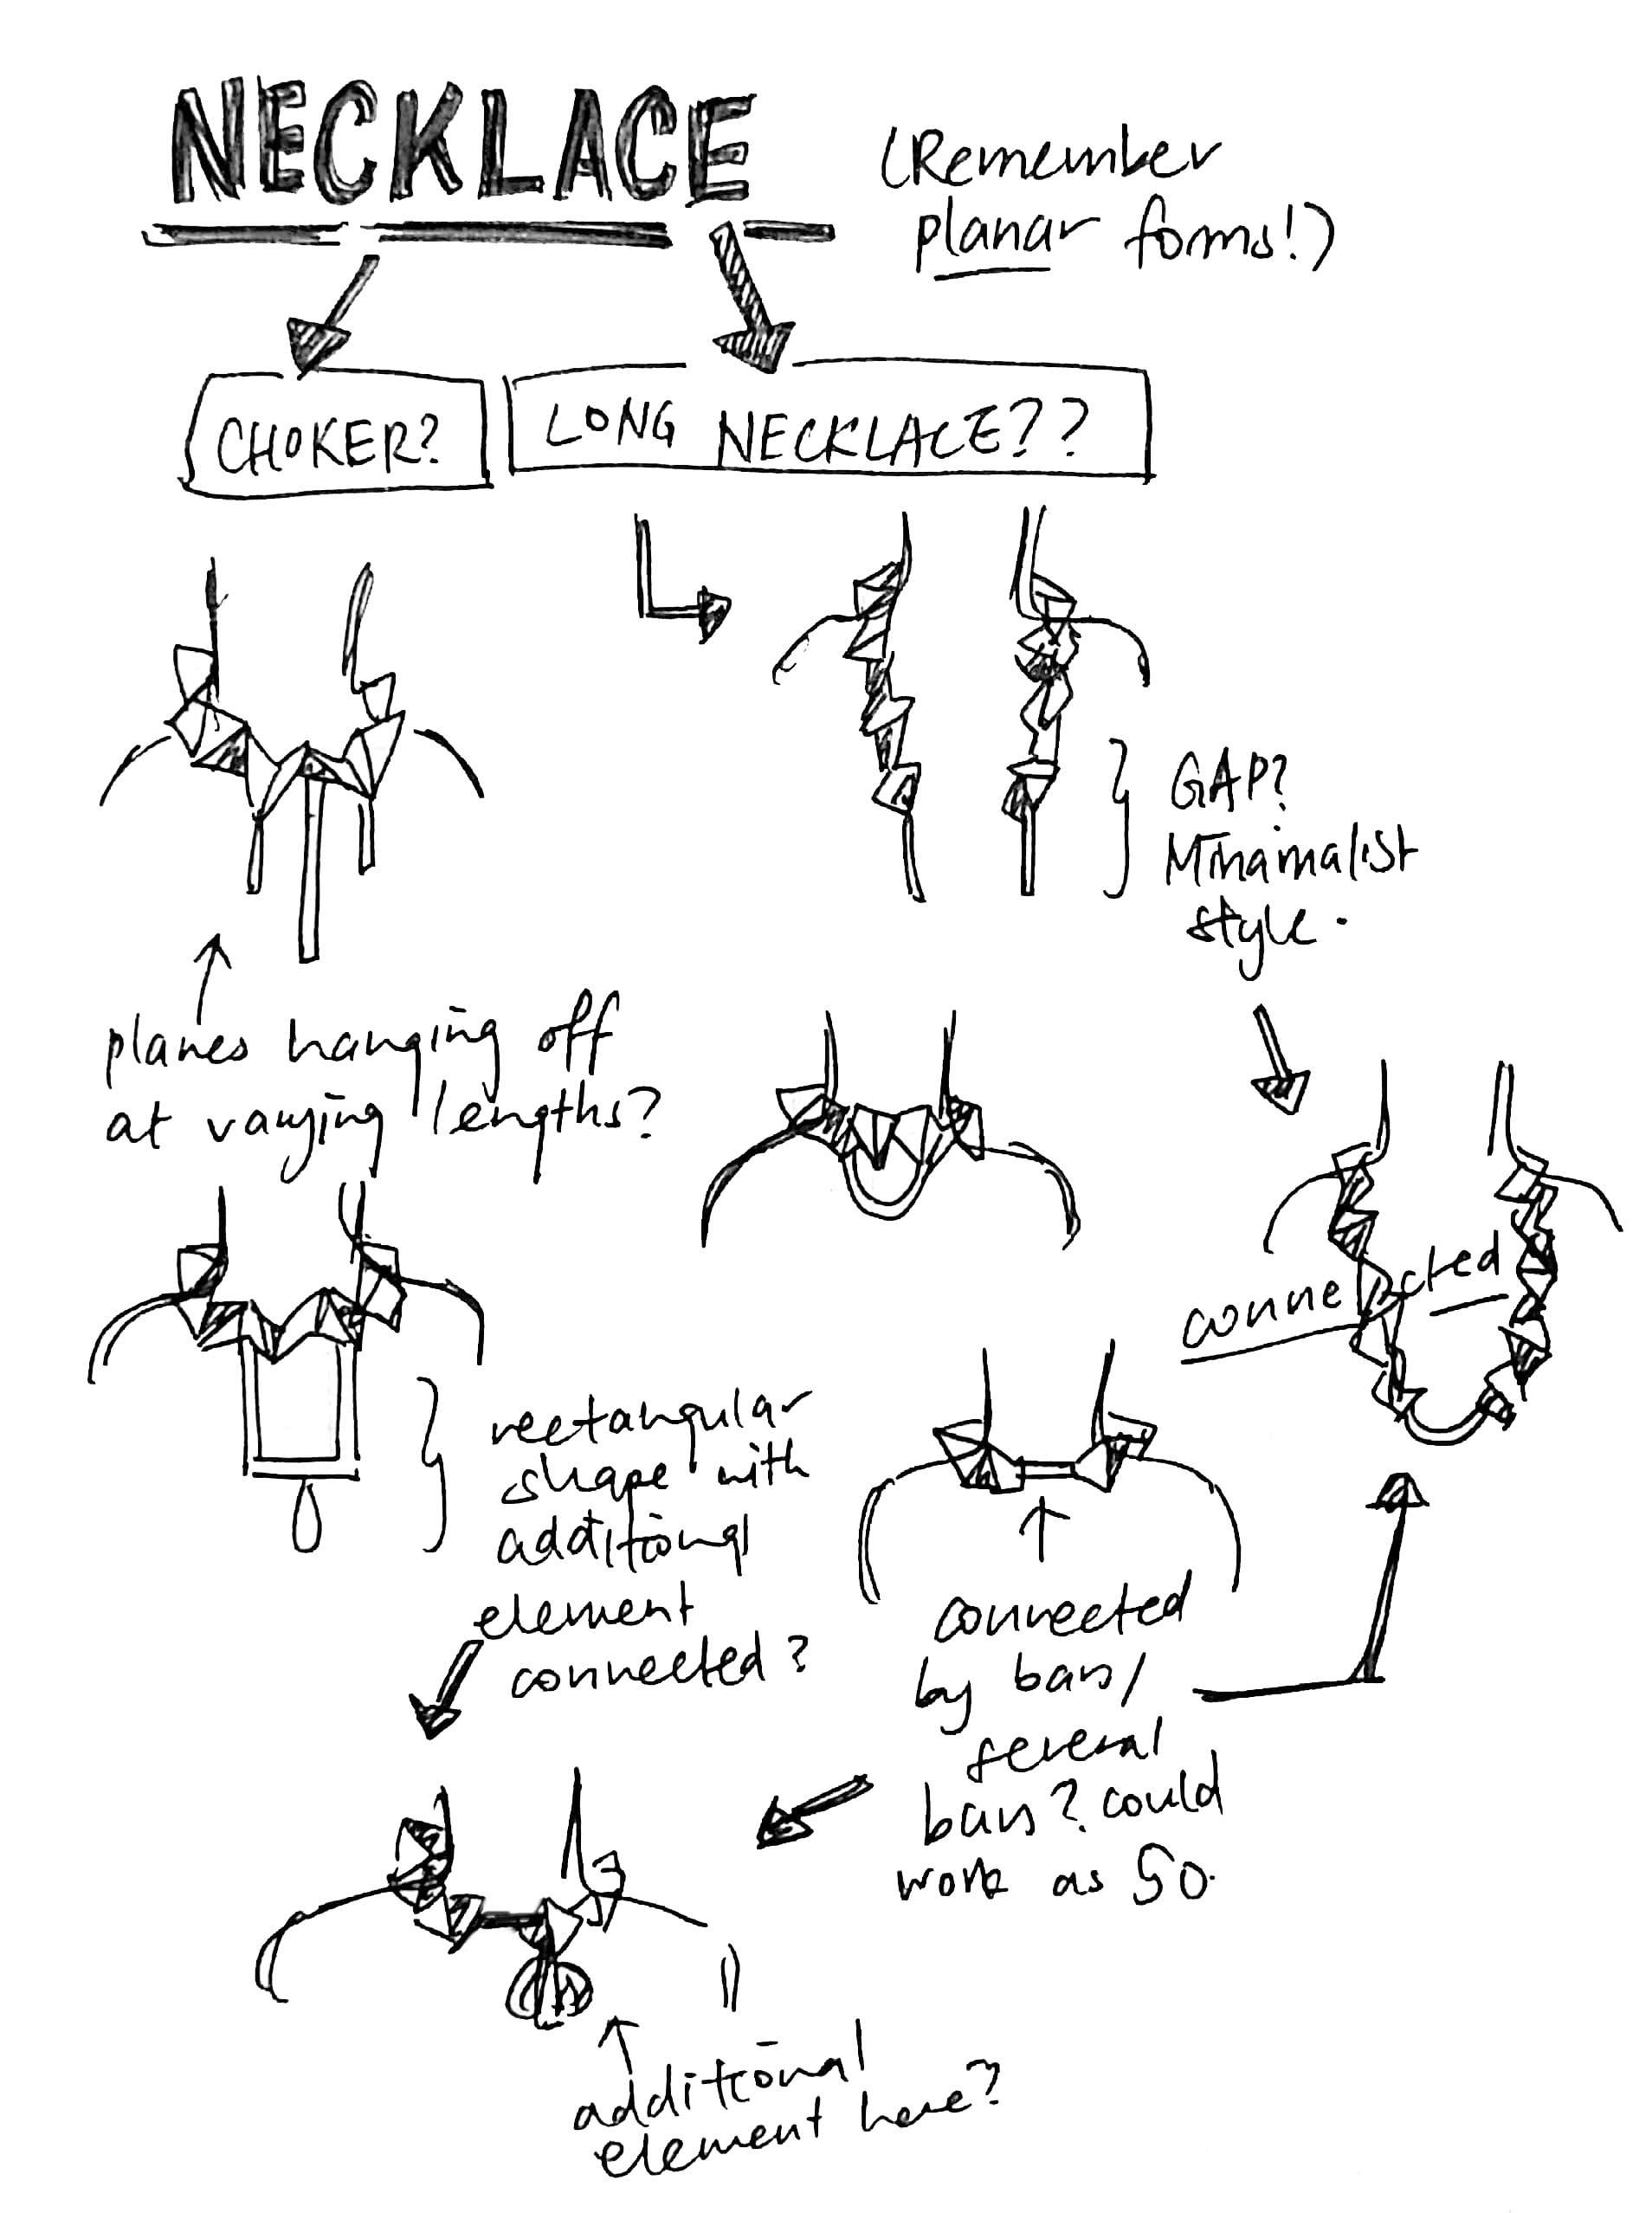
We felt that the wire that connected the straps would be the most effective as it would interact well with the strap through piercing, but we also had the shape and amount of wire to think about. Using too much wire could potentially overpower the strap, whereas using too little would make it almost unnoticeable. Furthermore, we still had to think about how we could make a plane using the wire.

Long necklace – 3 origami straps attached together with gold wire as a middle piece

Eventually, we settled on a design similar to the one above, but with two parallel lengths of straight gold wire attached across.

However, funny enough, when we tried to place the necklace over Sihui’s head to get it around her neck, it got stuck around her head and we looked at it and realised it worked better, aesthetically, as a headpiece rather than a necklace!!

However, even after settling that, we had the final element of our headpiece we still had to think about!! We went to our Pinterest board to search for inspiration for the final element.

‘Wave’ by Yaroslav Mischenko, Image taken from https://www.flickr.com/photos/origami_ua/5495573162/in/album-72157631683124740/

We decided to emulate the almost piercing-like structure of the model here, and used a piece of gold wire as the middle strip connecting all the parts together. Piercing strips of gold paper on the wire, we then overlapped and curved the paper to create a series of small planes, and then added blue ribbon as another form of plane that complemented the gold-blue colour scheme of our headpiece.

Close up on the subordinate element of the headpiece

With that, our piece was done!!!

As you can see there were quite a number of challenges in our process, including lack of clarity. Furthermore, we didn’t have a lot of time and so we couldn’t focus on making two pieces or pieces that were large scale in nature. 🙁 But luckily our research process and experimentation helped us to find our footing and we managed to come up with a good final piece!

Mnemosyne’s Scent: Front view of piece

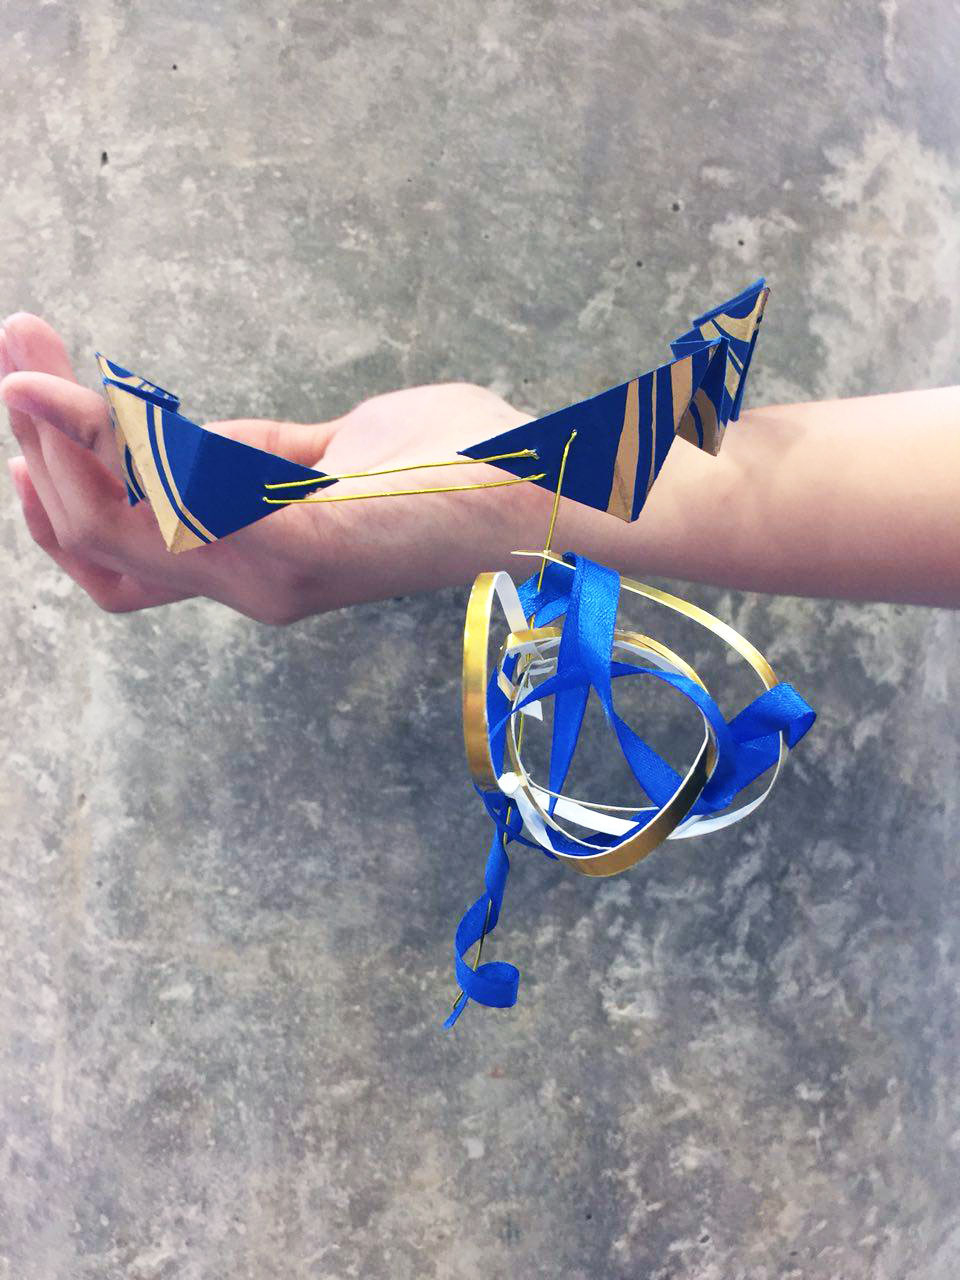
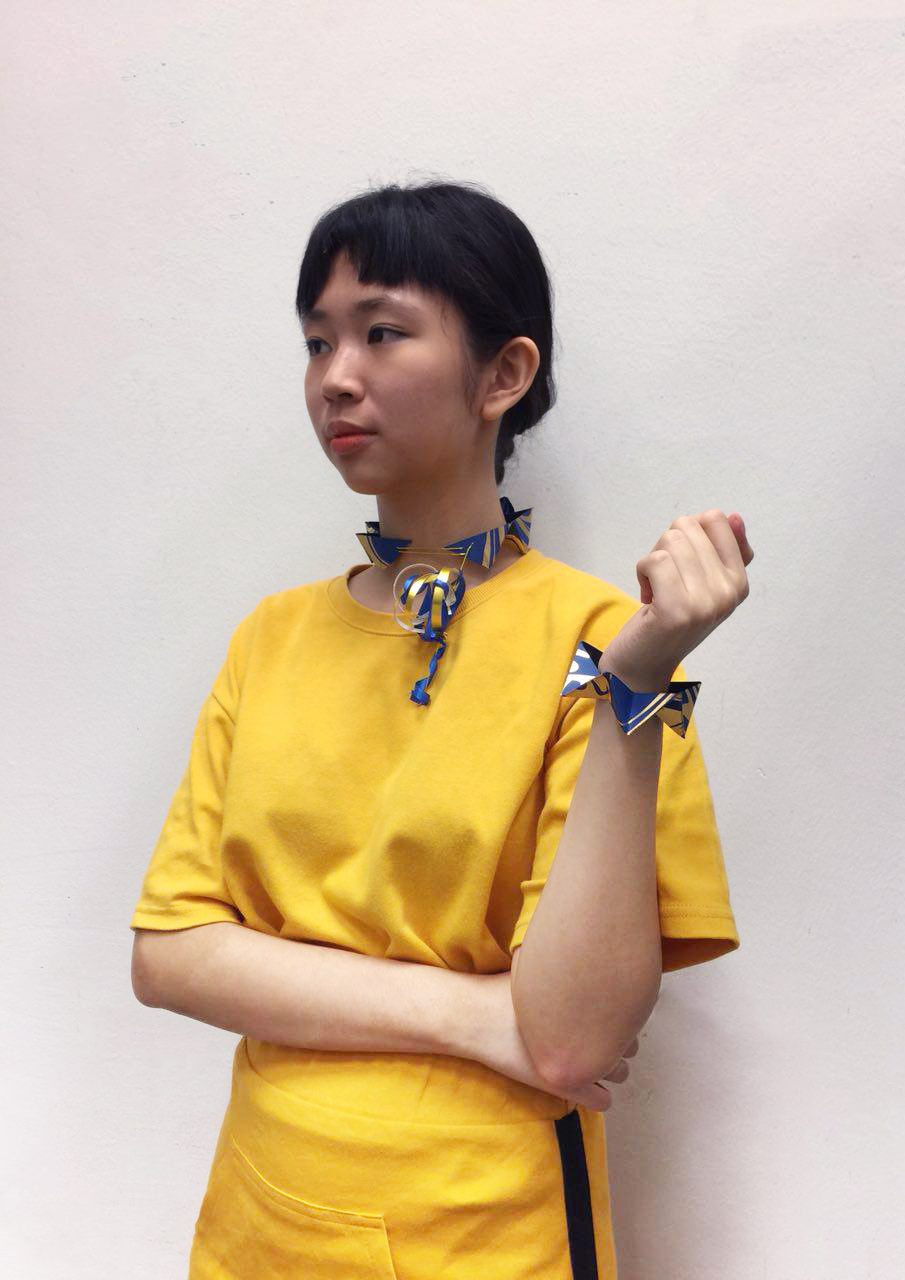
Here’s some alternative configurations of the piece that we did with comments from Cheryl. By removing a component of the necklace and turning that into a bracelet, we created a necklace and bracelet set.

Alternate Configuration: Bracelet
Sihui-sama with the choker and bracelet

Big BIG shoutout to Sihui for being such a kawaii bumblebee model and for being able to work with my horrible schedule haha <333

See yall next post!!!

  • Niki

The Subverted Object

[[[ F O R K ]]]

Weird title but that was my object for this project! So basically Lei’s assignment was for us to received an object and take photos of the object displaying its physical attributes or practical uses. After that, we had to take the object and subvert its meaning by changing or celebrating or critiquing the object’s meaning, or showing it’s cultural significance. Finally, we had to pick a picture and include text that would anchor or relay the message of the photo. I think everyone was stumped when they got their object and yah that included me too. :’)

The first task was okay, but the second task was killer. Subverting a fork?? At first I kept thinking along the lines of Poseidon’s trident, the Devil’s pitchfork, a fork in the road, blablabla. I even thought about how Ariel used a fork to comb her hair in The Little Mermaid??

But my previous project about me suffered from a lack of a cohesive theme, and I really really wanted to avoid that dissatisfaction in this project.

My initial idea was to have the fork as a murder weapon throughout all three subverted images. The non-subverted images would be the ‘before the murder’ photos whereas the subverted images would be the aftermath of the crime, with a fork sticking out from their heads or backs or whatever. It sounded super ambitious tbh. And I had other clearer ideas that didn’t fit into the murder plan. And the first week I was just so swamped with work that I didn’t manage to take even a single test shot and I just became uber stressed ohmygad.

So the second lesson where we had consultations with Lei, she let us do this exercise thing where we would practice subverting our objects by drawing them in different scenarios which was super fun hehe! I would show my drawings but they’re back in hall and I’m at home. :’) Upload later! Anyway, when I proposed my murder idea to Lei, as well as the other ideas, she proposed that I could just do matching sets of pictures with a theme for each set, like ‘eating’ or ‘killing’. The idea was SOLID MAN so I went ahead and did it.

Continue reading “The Subverted Object”

Gaia’s Ikebana: 3D Project 2

Hello friends! In this new post I will be giving an overview on the 2nd 3D project: Gaia’s Ikebana! Now I wasn’t at the 2nd lesson where most of the guidelines were given but I did know that I had to combine the shapes of a cone, sphere and a cylinder while incorporating the themes of food, a particular season, and ikebana, Japanese traditional flower arrangement. The season I got was spring!

SPRINGTIME RESEARCH

I needed to be able to find food that fit the theme of spring while fulfilling the shapes of a cone, cylinder and a sphere. I thought narrowing down the food to Japanese themed spring food would be more suitable since we were also bringing ikebana into the mix!

Japanese Spring Cabbage

Image taken from The Spruce. Image by Brett Stevens/Getty Images

Japanese Spring Potato

Taken from The Spruce. By Adam Gault/Getty Images

Sakura Mochi

Taken from Japan Info. Source: www. jp.fotolia.com/

Japanese seaweed

Picture taken from Hello Glow.

Japanese seaweed seems to be more of a staple food rather than a spring food, but I thought it would tie in nicely with my idea for a cone, as cone shaped food is really hard to find, so I thought of making a cone out of something flat and flexible instead.