
Indonesian/Malay-themed front page.

So many buildings called “Bugis”. Who are they?

Buginese lived by the Kallang River.

The came to Singapore through the Java Sea.

Let’s thank them too, shall we?

Indonesian/Malay-themed front page.
So many buildings called “Bugis”. Who are they?
Buginese lived by the Kallang River.
The came to Singapore through the Java Sea.
Let’s thank them too, shall we?
ICE SCULPTOR (80%)

I managed to find the proper ice texture. The object was made with a blinn (shiny and reflective) material. I changed the attributes of it, playing around with the refractive index so that the ice will be transparent but at the same time, refracting the background and lights. I added in bump map, which sole purpose is to create realistic texture but it is actually a flat image pasted on top of the blinn material.
I changed the background to something with more detail so that the refraction can be seen clearly in the ice.
PRESCHOOL TEACHER (80%)
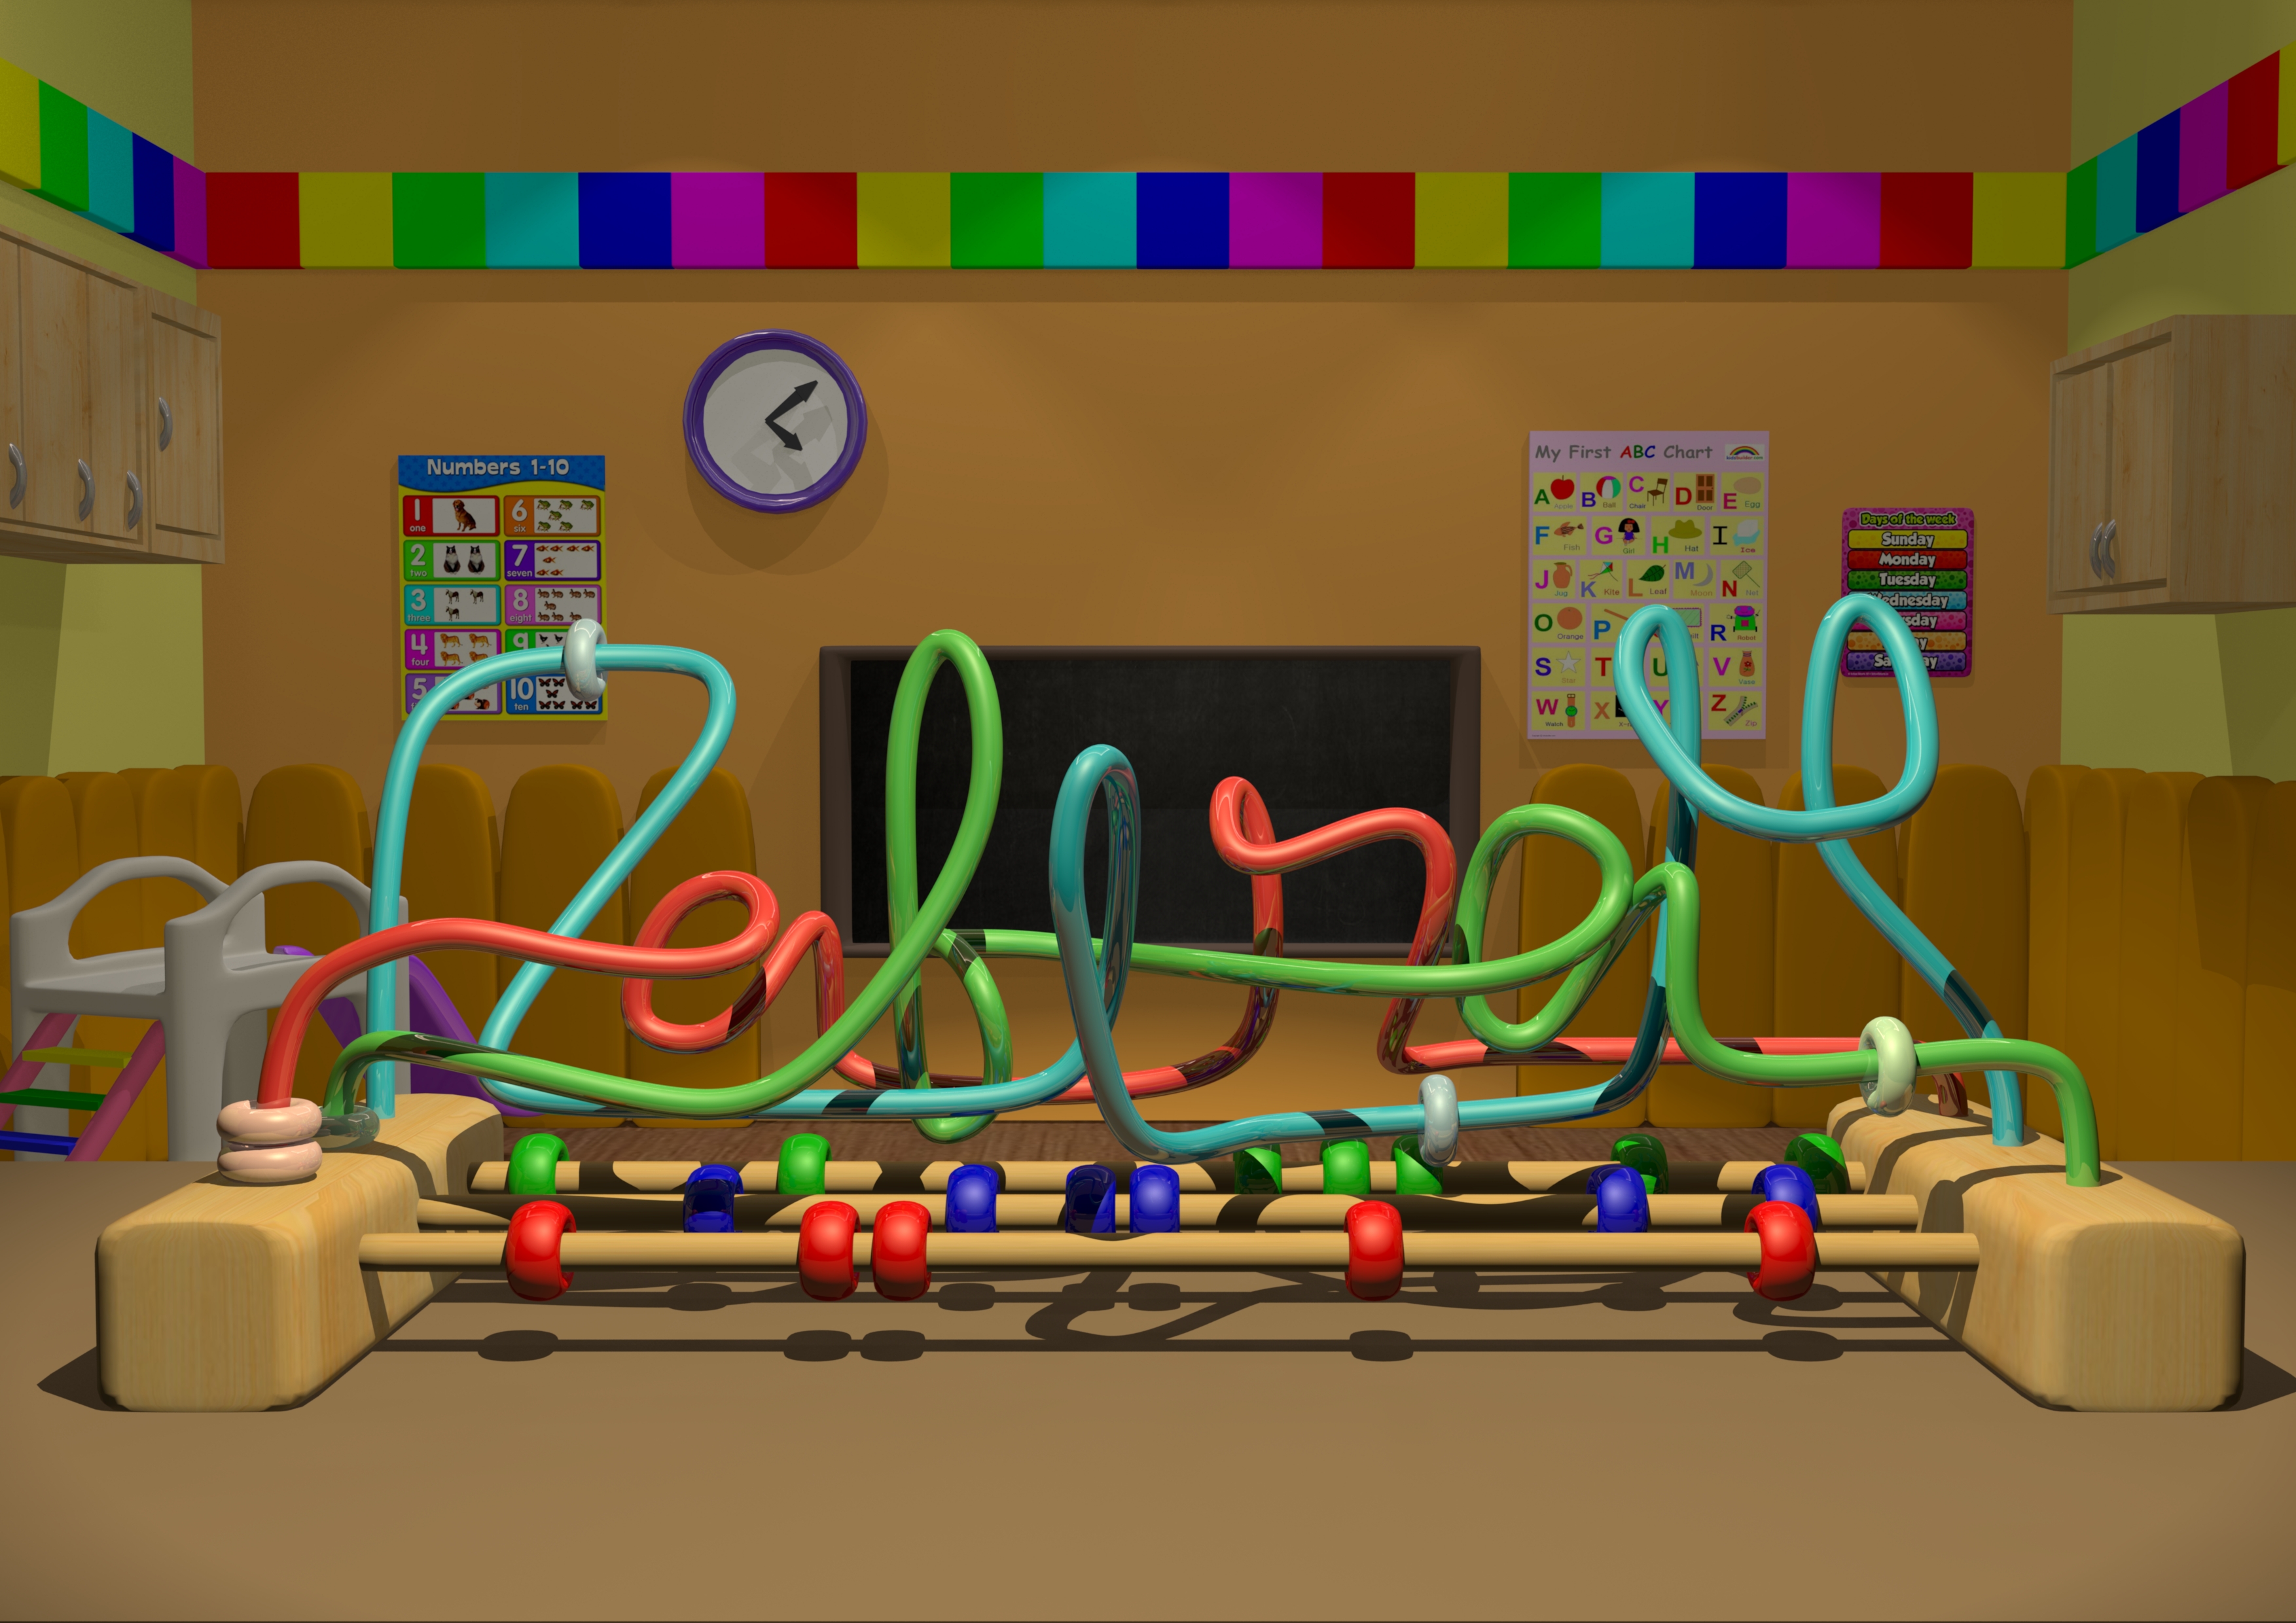
I’ve decided to submit this 80% piece and then focus on improving the typography later on. I made use of the colourful scheme to make it look like a preschool classroom. Preschool are mostly filled with babies and toddlers. Their toys are mostly for educational purposes. I’ve decided to use this particular toy as there’s more freedom to create free-form shapes using the metal rods.
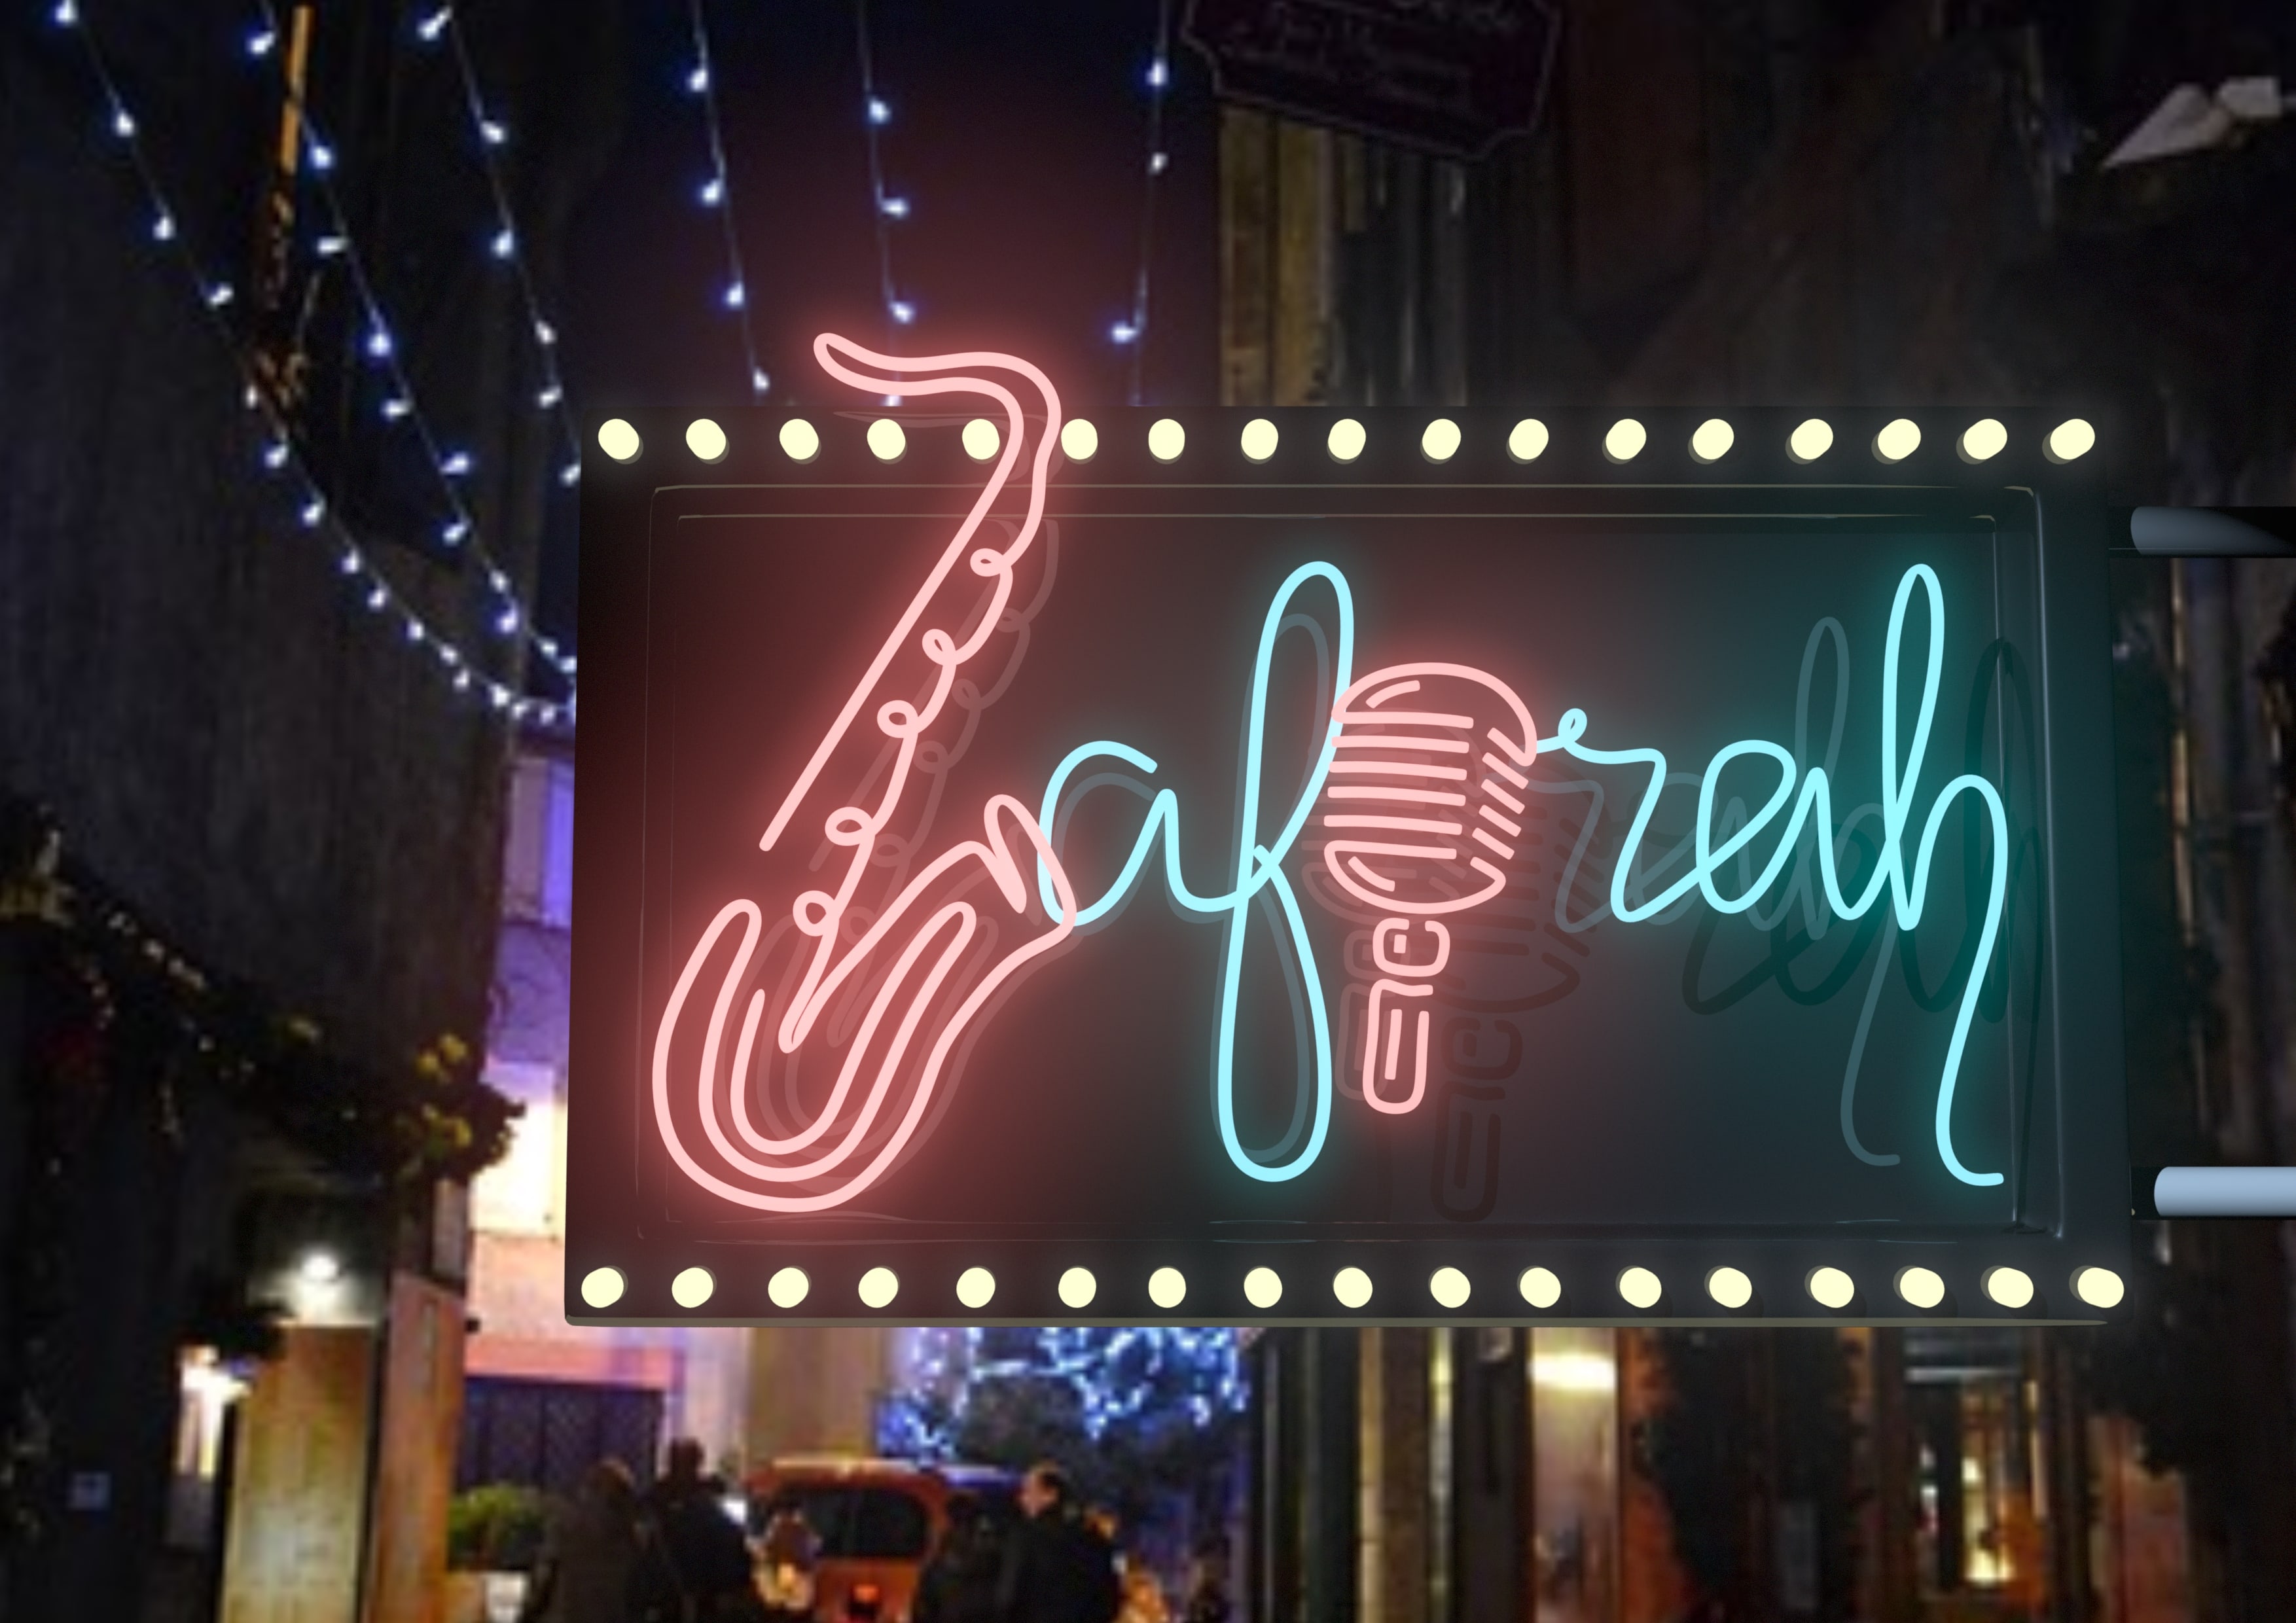
JAZZ MUSICIAN
I’ve decided to go with the outdoor scene as it looks more realistic. People would see this outside the club before proceeding inside. I changed the letter “Z” to a saxophone and the letter “I” to a microphone. I made the rest of the letters cursive to give it an informal and casual feeling. I feel that it’s quite easy to see that I am a jazz musician/singer due to the saxophone and microphone. And also the mini light bulbs surrounding the signboard.
ENGINEER (CIRCUIT BOARD)
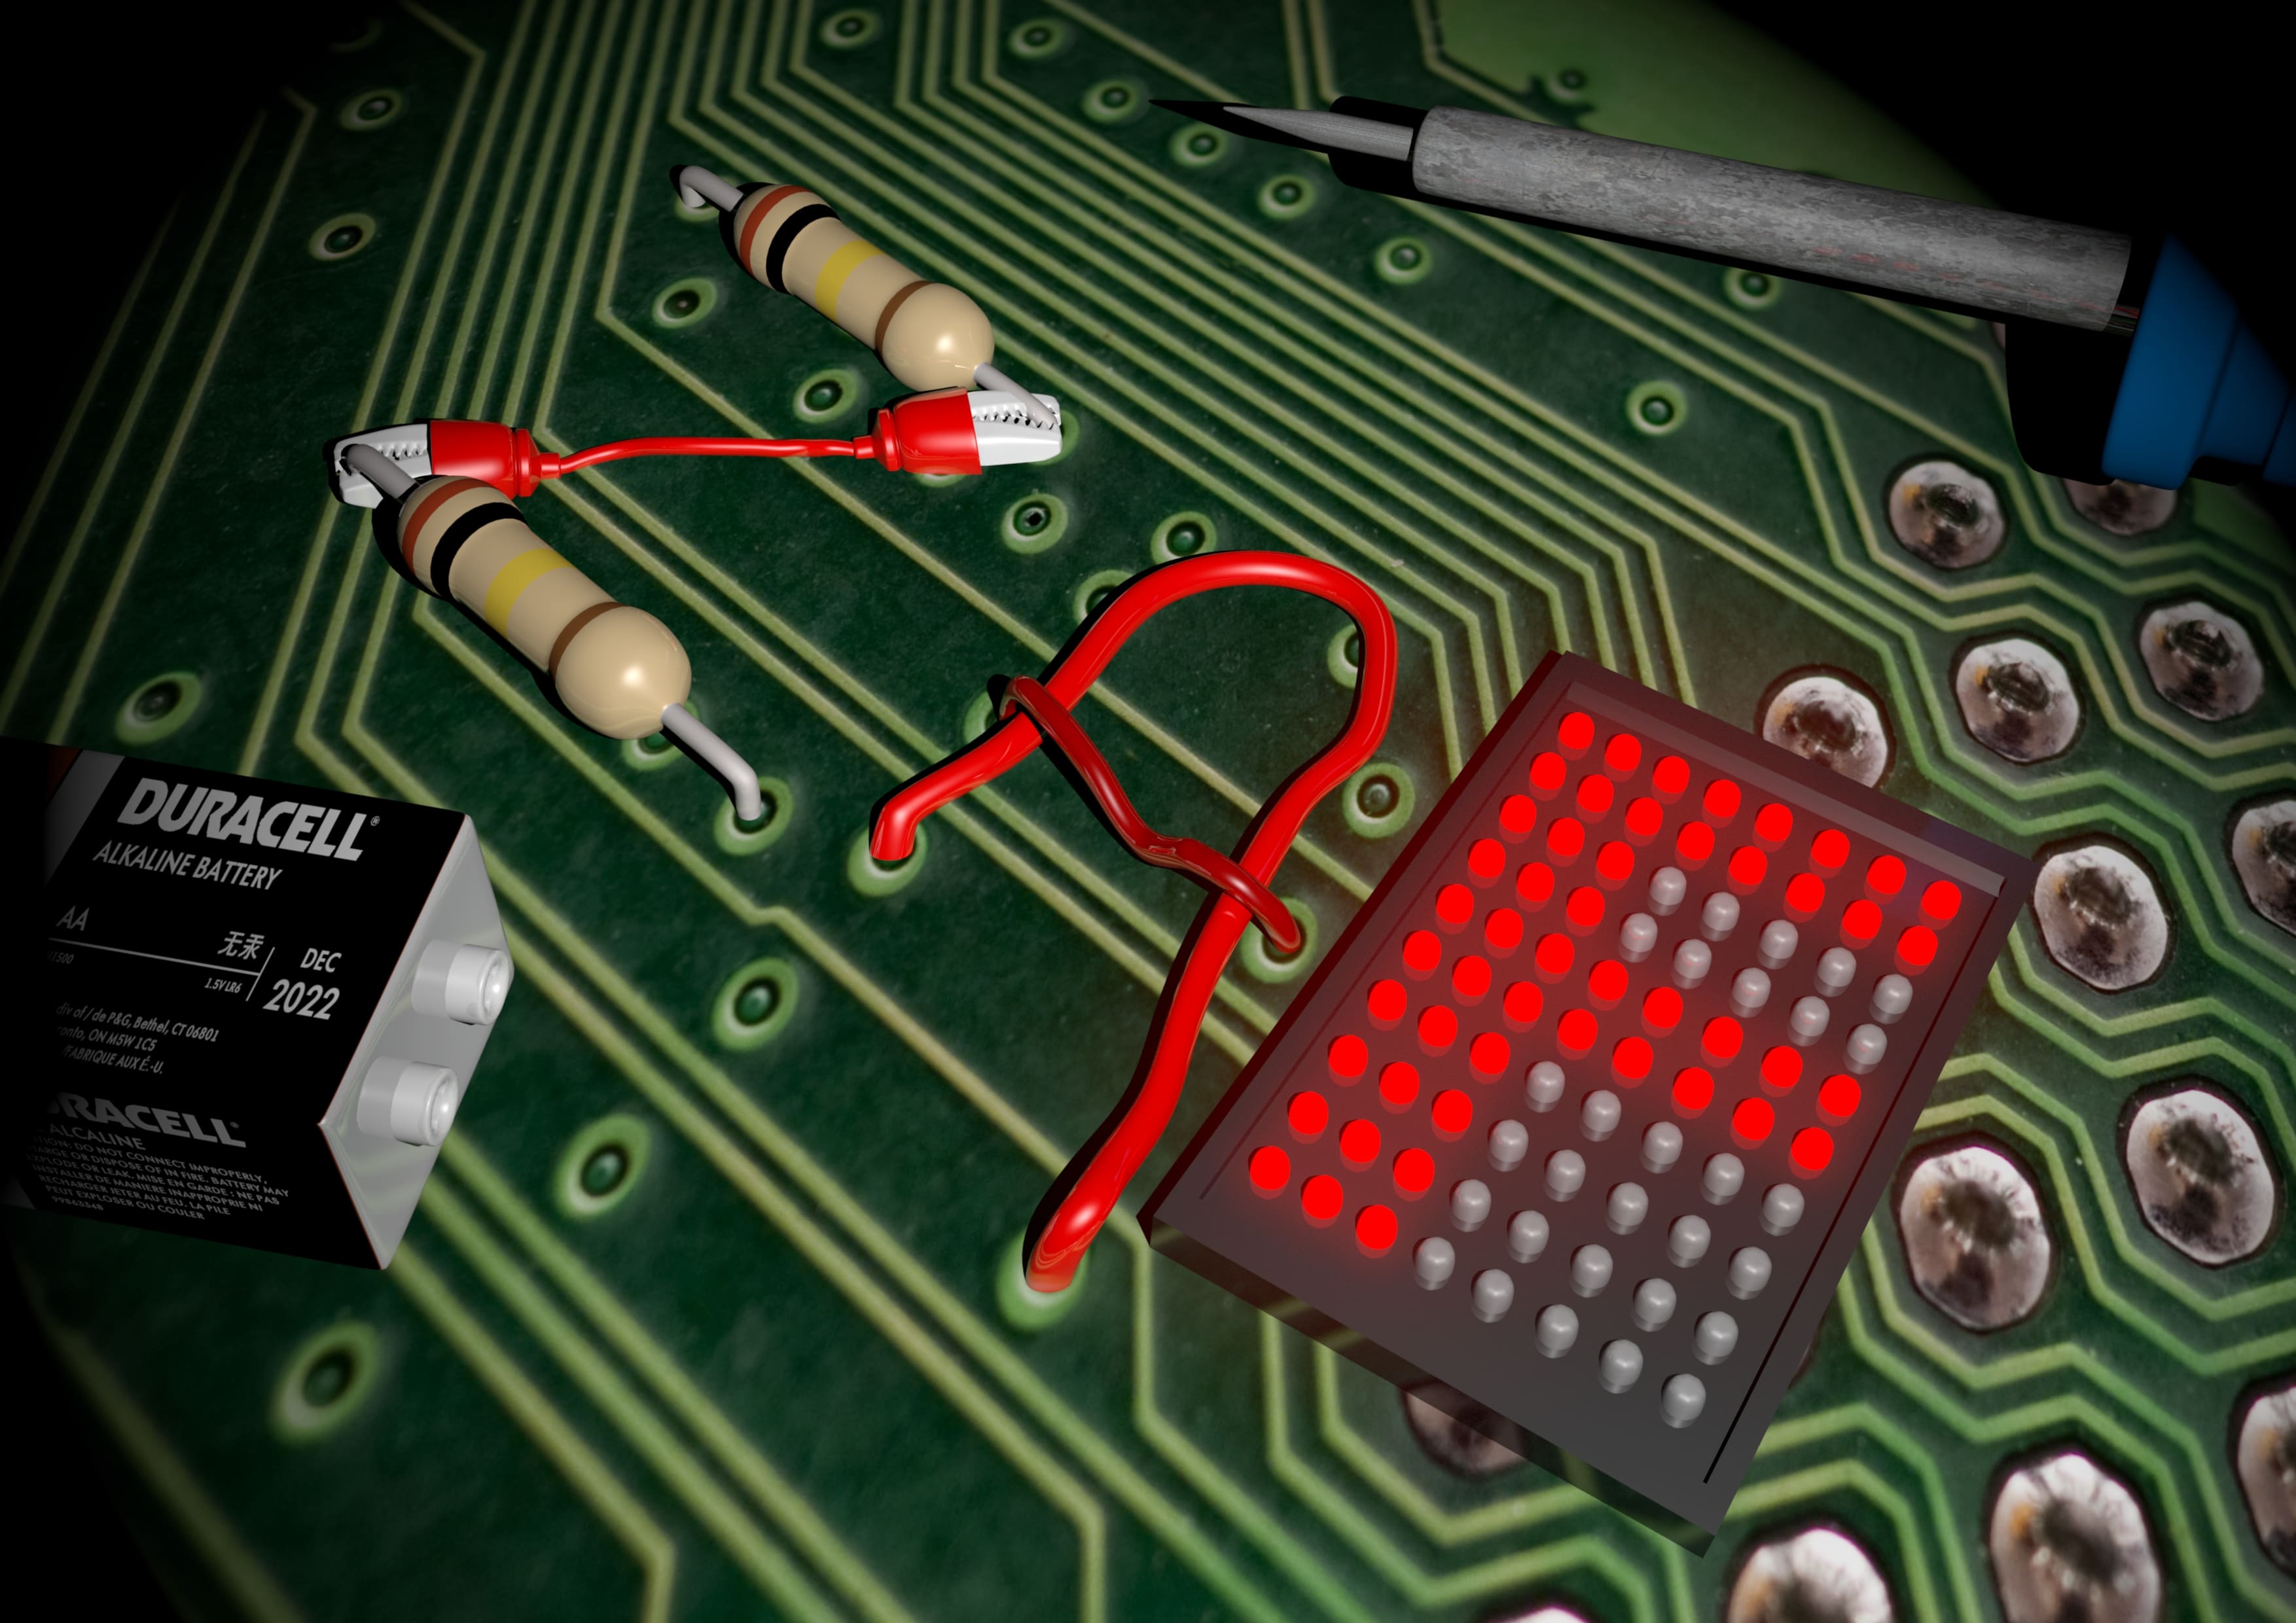
This is the final outcome. I’ve combined various electrical components to create my name. I’ve used resistors and a crocodile-teeth wire for the letter “Z”, wires for the letter “A” and finally, an LED light board for “F”. I’ve decided to use my nickname “Zaf” instead of my full name. I thought of changing the wires for the letter “A” to a blue-coloured wire but decided it didn’t compliment the colours of the other 2 components as both of them are red in colour. I decided to use 2 different tones of red for the letter “A” to create a contrast. Props such as soldering iron and battery are placed around the name to show that I was working on the circuit board.
This project has allowed me to explore various ways of creating names in a unique manner. I have to say that I really enjoyed myself doing this project. Totally worth staying up till 5am everyday to complete this work *smiley face* I’ve decided to use Maya 2016 as the main medium for this particular project. I am still finding ways to improve myself. I have a feeling I’ll be more of a 3D graphic designer rather than a 2D for most of my work but I will try to explore different mediums more and step out from my comfort zone.
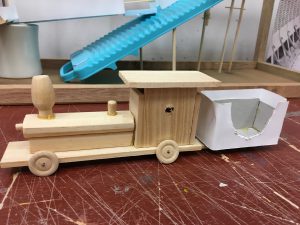
For our final project, we were challenged to make a Goldberg Machine. What is it you may ask? It’s the kinetic machine that starts with one object that triggers a chain of action and reaction using different objects.
The scene that I chose for this project was from Harry Potter and Sorcerer’s stone, the scene were the trios (Harry, Ron and Hermione) met for the ever first time on the train towards Hogwarts. Link to the clip can be found below!
Harry Potter and Friends first meeting
We didn’t know what our project was when we first chose our specific scenes. But when Peter told us the project brief, the only words that came to my mind was “die lah”.
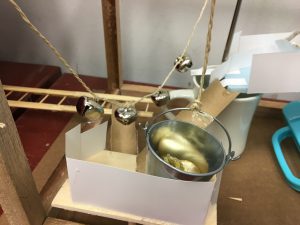
My scene was all talk and no actions! How do I put that in a machine that was suppose to show movements, actions and reactions? After having a discussion with Peter, he suggested using sounds instead of sight. He made a point and I proceeded on with that idea and added in parts of mine.
I separated the scene I chose into 2 parts; Harry and Ron’s first meeting and then their meeting with Hermione.
I specifically took 3 different actions from each part to include in my machine.
For the first part, I added in the following scene with the following sound/objects.
First scene:
Second scene:
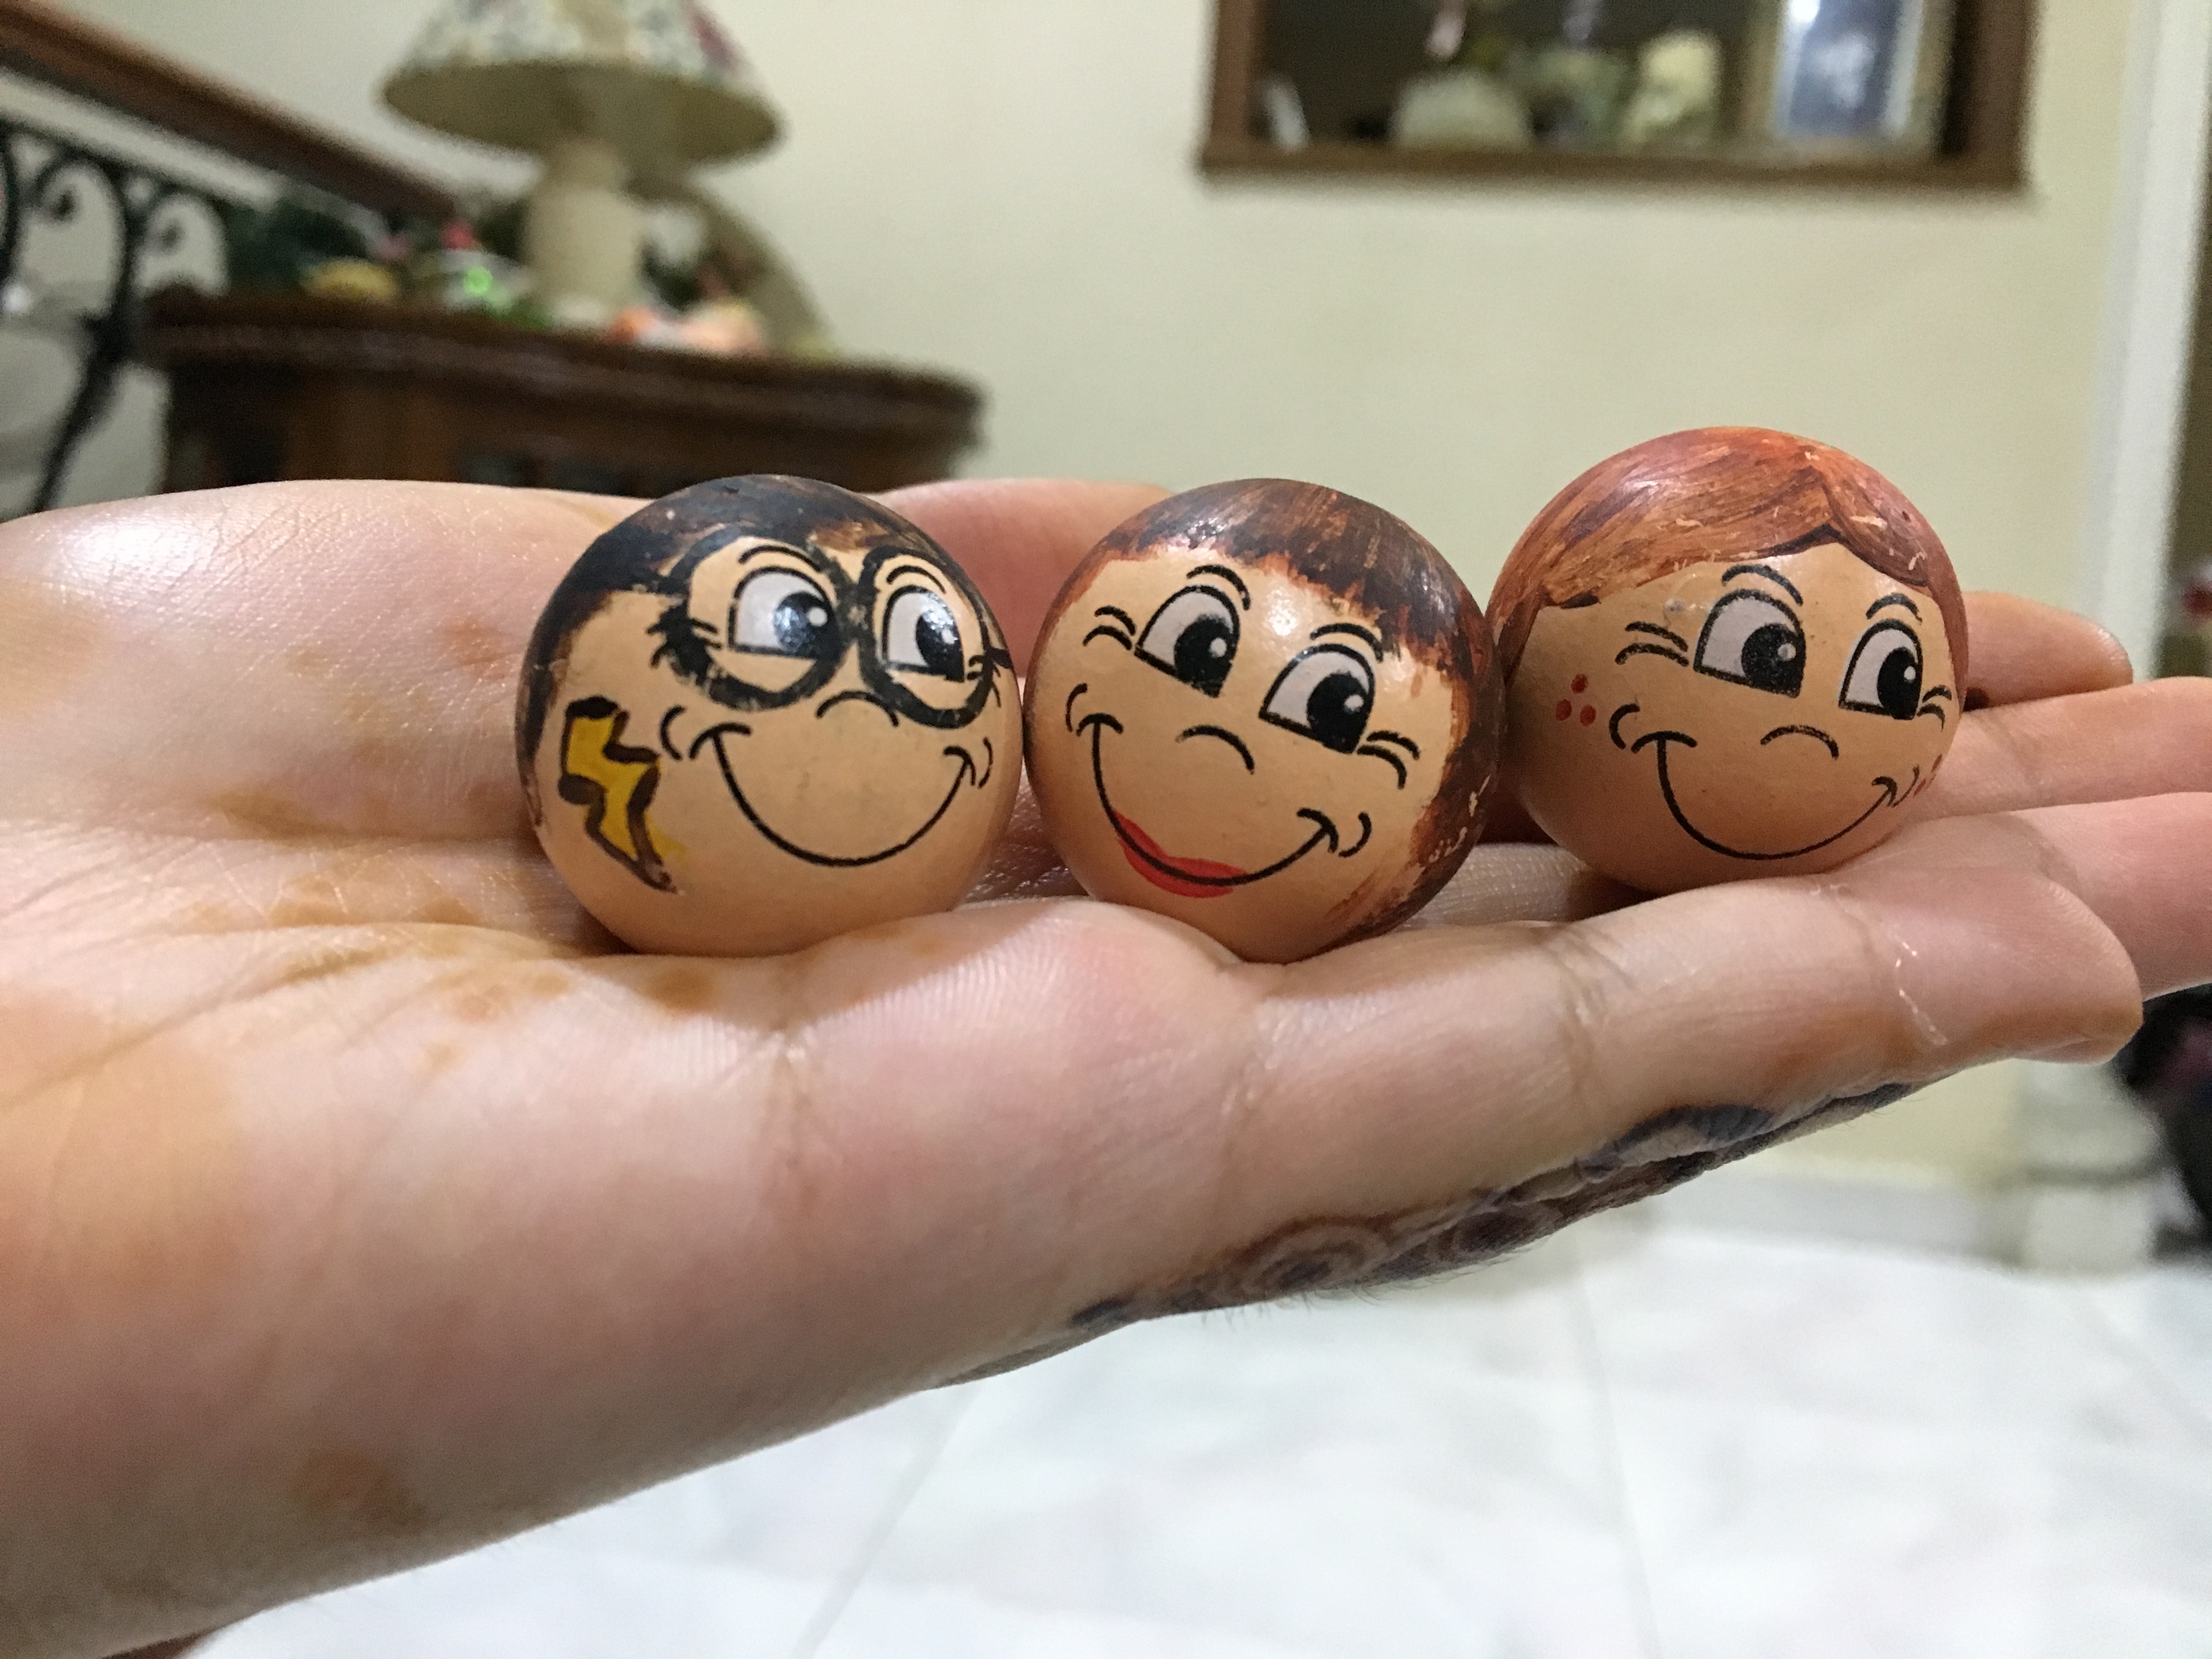
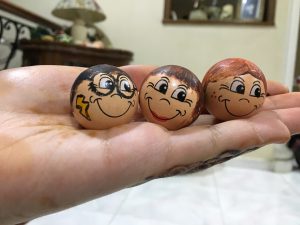
I used 3 different balls to represent 3 different characters. I’ve painted the faces of each characters onto the wooden balls. I placed Ron and Hermione on different parts of the machine to represent their meetings during the clip. They knocked into each other and moved on together.
Peter commented that some of the sounds were very subtle like the wrappers/plastic bag. Maybe that was one part I could improve on and also the visual of it. I didn’t think they would want to see my product as I would want them to hear instead of seeing but oh wells.
Below is the video of my final project. It seemed quite rushed but I hope you can see the 3 different characters meeting one another.
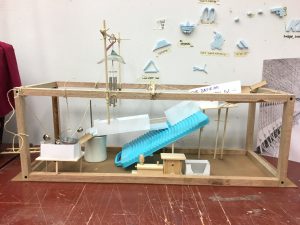
MY GOLDBERG MACHINE 3D FINAL PROJECT
Reflection:
Honestly, this final project challenged us to the very max. It was very stressful as we’re working with both “engineering” and design. It’s like I’m back to DNT during my secondary school days. I really feel I could’ve done better despite the amount of time given. Even Peter was worried when he looked at our progress. If we didn’t have other modules to focus on, I would’ve definitely given my all for this project.
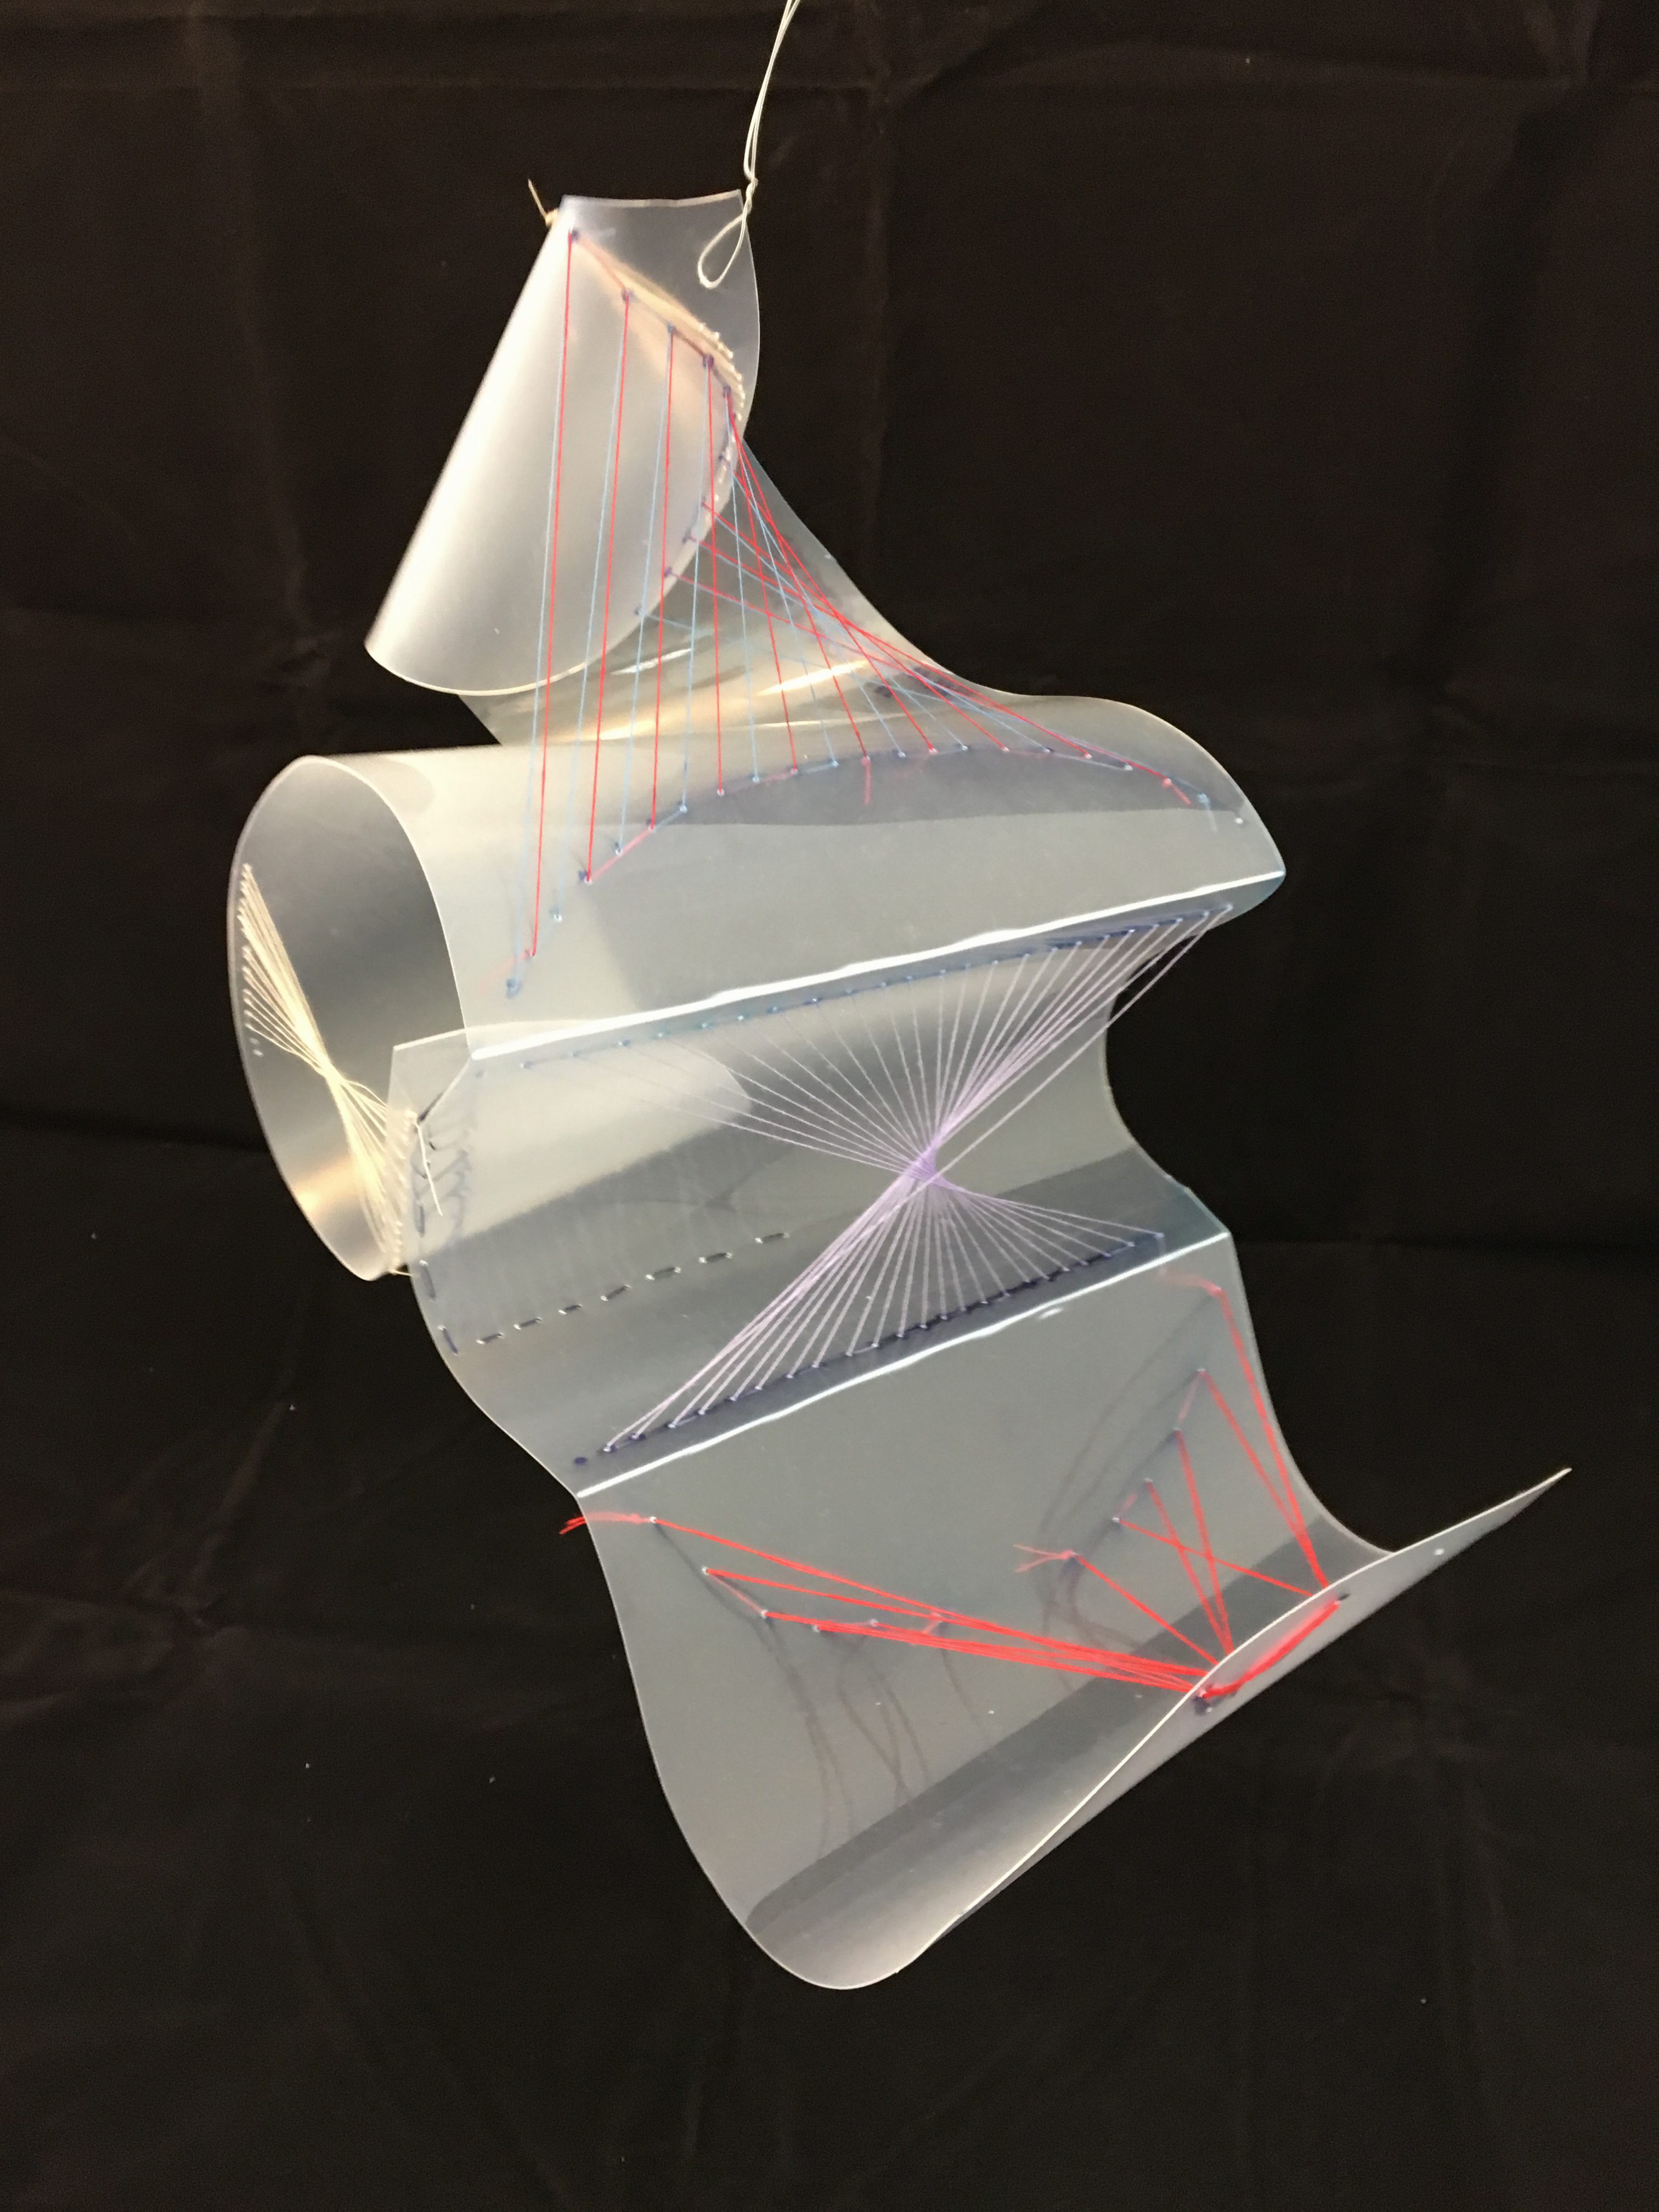
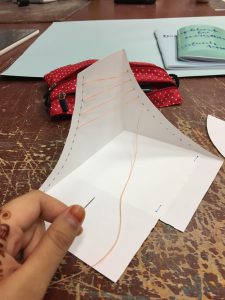
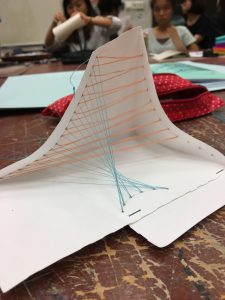
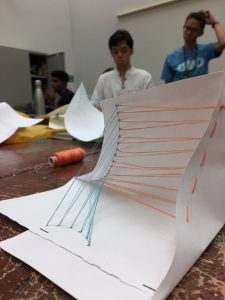
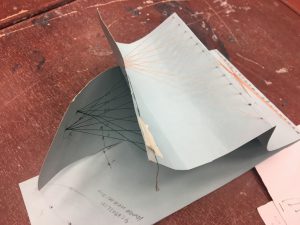
The main scope of our first project was to create a plan using threads. We were tasked to make holes on our plane (paper and then hard plastic) and then sewing in and out with needle and thread to create that plane. I’ve tried to use different color threads so that it won’t be confusing.
Ideation & Process:
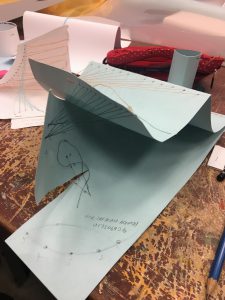
Initially, I had this design in mind. I’ve decided to create a squarish plane and combine each side together. I would’ve gone with this design but there were 2 problems as to why I didn’t. Firstly, the plane was forcefully folded and it wasn’t the threads that gave its shape. Secondly, only the inner part of the plane was aesthetically nice. There were no threads found on the back or bottom part of the plane.
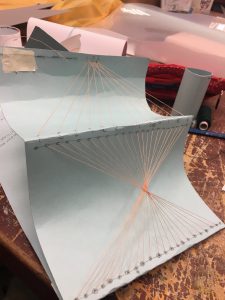
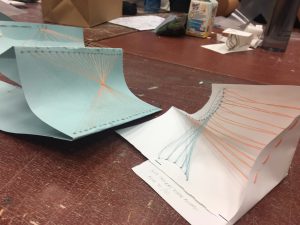
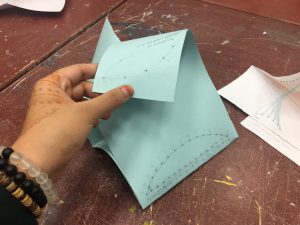
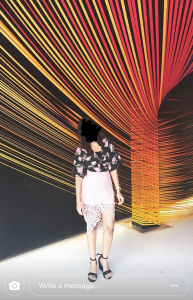
This was the finalized design for my final project. I’ve decided to fold some parts of the plane and also using the pull and strength of the thread to create a fold. Initially I wanted to put a “pole” in the middle of the artifact for support and wrap the thread around it (as shown in the image below) but realized that it was not encouraged when Peter checked my work and gave me feedback. I saw this idea from my friend’s instagram and decided to give it a go but failed miserably. Very very miserably.
The process was hard as I had to crack my head and find which angle and folds work best for my artifact. I used a long rectangular plane and the cut it up and fold to make it into a smaller one. I had to make use of both sides to get a balanced look but as I added more threads to my artifact, it became messy, small and overly-tightened.
FINAL OUTCOME:
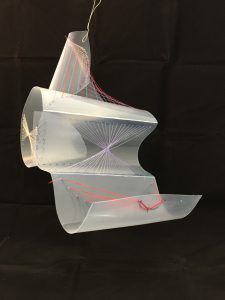
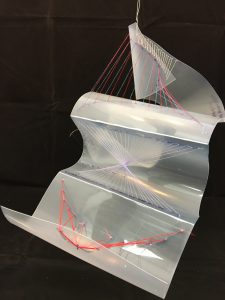
This was my final artifact for the project. I’ve used different colors. I’ve added some plane by the sides too. However, I’ve come to realize that using threads of many colors has caused the whole thing to look messy. I should’ve used at most 3 different colors to make it look nicer. And some of the thread color I’ve used seemed too bright to be seen from far, especially in the pictures above. All in all, I’m proud of how I was able to tighten the threads to make it look neat and presentable.
In conclusion, this project has greatly taught me the importance of these 3 basic elements: Dots, Lines and Plane. Without even 1 of the element stated, I would’ve not been able to complete the project smoothly. By combining these 3 together, it has created a aesthetically pleasant visual form of art and may create something else if used differently with different amount of emphasis on each element. I this particular project, we mainly focused on lines and planes. All in all, I’ve enjoyed completing this project as it enhances and opens my creativity to different mediums.