Be Nice – A Speech Recognition Device
Timeline:
[101017] – Proposal & First Prototype
[181017] – Initial Wiring (this post)
[201017] – Input Speech & Output LED
[231017] – Speaker Test & Output Synthesizer
[061117] – Soldering & Final Paper Prototype
[141117] – Laser Cutting & Assembling
[161117] – Finalizing
[171117] – Final Project Documentation
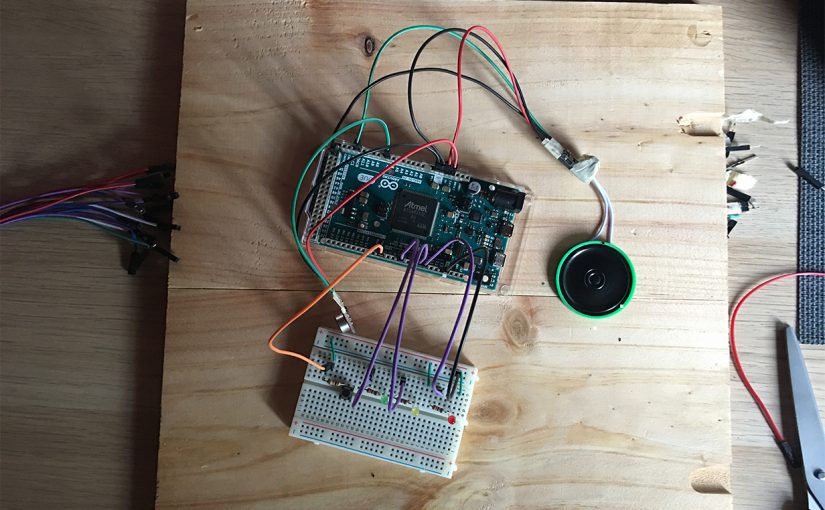
< Process – Wiring >
For this project, I decided to use an Arduino Due instead which I bought from SGBotic (the last piece, thank goodness). DUE has a digital-to-analog converter (DAC) so I can experiment with getting some synthesized speech if I wanted to.

While DUE runs at 3.3V, the microphone also works better with 3.3V. So I am killing two birds with one stone. Audio will be captured via the analog-to-digital converter (ADC) so I plugged the Mic to an analog pin.

To amplify the output sound, I connected the input section of a Mono Audio Amp to a DAC pin so it can propel the 8 ohm speaker. From reviews made by other users, I should keep the amplifier as close to the speaker as possible to minimize possible interference.
Obviously I do not dare to solder my wires yet, in case I could not get any of the components to work.

Lastly, I connected some 3mm LEDs and a push button for the ‘words accumulation’ part of the device at a later time. I think in the end I might not even need to use the breadboard so I can make my device as compact as possible.