Be Nice – A Speech Recognition Device
Timeline:
[101017] – Proposal & First Prototype
[181017] – Initial Wiring
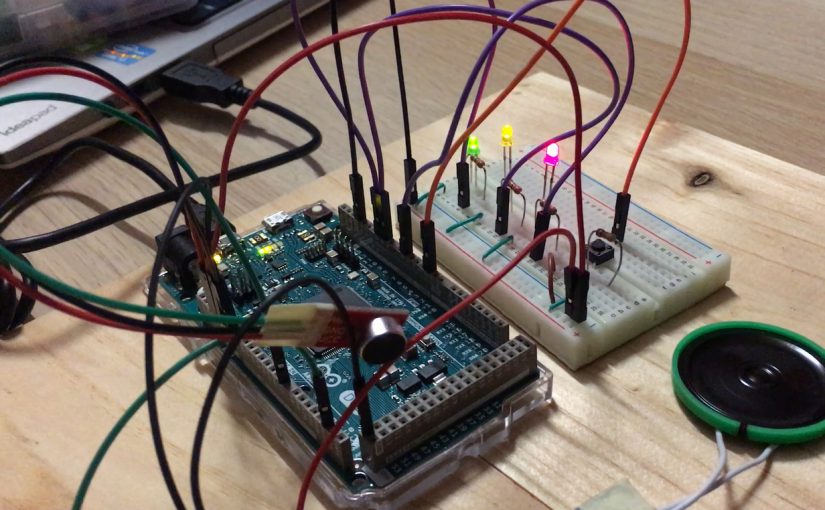
[201017] – Input Speech & Output LED (this post)
[231017] – Speaker Test & Output Synthesizer
[061117] – Soldering & Final Paper Prototype
[141117] – Laser Cutting & Assembling
[161117] – Finalizing
[171117] – Final Project Documentation
< Process – Input Speech + Output LED >
For this test, I wanted to make sure that I got the wiring correct and the initial coding to work. So for now, I would like to get some feedback from the LEDs from my speech.
BitVoicer Server : Setting up Device
I first purchased the BitVoicer Server and read through the manual to explore the software. BitVoicer Server is able to have a serial communication with Arduino and there are even examples in the library. However, the example they provided uses a TCP/IP connection instead (IP address) which might complicate things further. So I used the Serial communication instead and tweaked the Arduino code.

When I plugged in my DUE using the programming port, I received information on my Port Name (which was COM3) so I created a new Device on the BitVoicer side.

The type of my Device should be ‘Mixed’ as I am using DUE as both the input and output. I put the minimum audio level (input via Mic) as 30 for now and will adjust it accordingly later.

BitVoicer Server : Setting Up Voice Schemas
Here comes the best part, creating the Commands. Minimum Confidence Level represents the relative minimum probability for the SRE to accept a recognized speech. For a recognition to be valid, the confidence level must be equal to or greater than the value that I have set. The greater the value in this field, the better must be the pronunciation and the quality of the audio. I also have to set an activation word and period for the BitVoicer to be activated.

Next is what I would call a ‘Word Tree’. These are the words that will be recognized by BitVoicer to activate certain commands.

If BitVoicer recognized a speech from the audio captured, it will push a command that I have set. The only outputs that I will explore are PlayAudio (either synthesizer or a WAV file) an SendData (through Binary to light up LED).

BitVoicer Server + Arduino Test : Output LED
It was frustrating at first when I told the device to do a certain thing but it did something else. I had to use trial and error and adjust the Minimum Confidence Level and Minimum Audio Level accordingly.
Listen to my annoyance here:
I was also able to view the successful and failed speech recognition through the Server Monitor.


For some unknown reason, nothing came out of the 8ohm speaker and I was thinking whether it was a wiring problem or Arduino coding error. UNTIL, at one point, I suddenly heard some static.
Final LED Feedback
Moving Forward :
– Getting sound output (check whether I made an error in the wiring or Arduino coding)
– Once that is solved, output a synthesizer or play a WAV file