Be Nice – A Speech Recognition Device
Timeline:
[101017] – Proposal & First Prototype
[181017] – Initial Wiring
[201017] – Input Speech & Output LED
[231017] – Speaker Test & Output Synthesizer
[061117] – Soldering & Final Paper Prototype (this post)
[141117] – Laser Cutting & Assembling
[161117] – Finalizing
[171117] – Final Project Documentation
< Process – Soldering & Final Paper Prototype >
Soldering
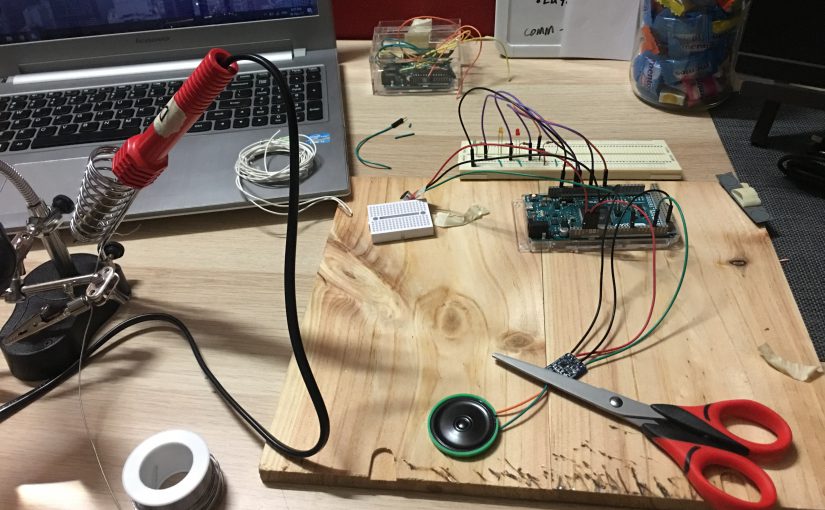
First of all, I decided to just use a synthesizer output for my device as it would create a dynamic response in comparison to a simple ‘Bleep’. At this stage, I decided to solder all the wires together to ensure that my device works well after that. I had to be extra careful when soldering wires to the Mono Amp because Zi Feng had told me earlier that I might burn it. So I aimed my soldering iron as quickly as possible to avoid doing so.

Since this was a solo project, obviously I had no extra hands to help me hold the wires. This little helper was a great investment indeed!

I also decided to attach the resistor directly to the LEDs so no breadboard will be used for the device.

Final Paper Prototype
Since the technical side was tested perfectly (other than the voice recognition itself not recognizing my voice at first try), I moved on to created the final paper prototype so I was able to get the exact measurements for my final acrylic prototype.

I had to also take into consideration the position of the speakers, LEDs and lipstick.

I used a hard mounting board for this test but later on, I realized that my acrylic was 3mm thick. There would be some extra space due to that thickness, which was a mistake that I did not think of.

Moving Forward :
– Lasercut the acrylic pieces
– Assemble the electronics inside
– Finalize the final words to be used for the device