Product Design IV // Week 5


Purpose
Fiona x Shanelle

Moving forward, from our previous progress. We decided that we need to be more specific as to:

  • How can we improve the well-being of people in the campus? What do we mean by well-being? How can we improve well-being as defined? What is the current situation in a particular context that is lacking that reduces or add on as barriers?  — Purpose
  • How can the function of the characteristics of pangolin be related to the space and environment of NTU? Purpose
  • Explore the construction of the modules in the sculpture from the basics
  • Look into available sustainable materials that can be sustained in given context.

Purpose
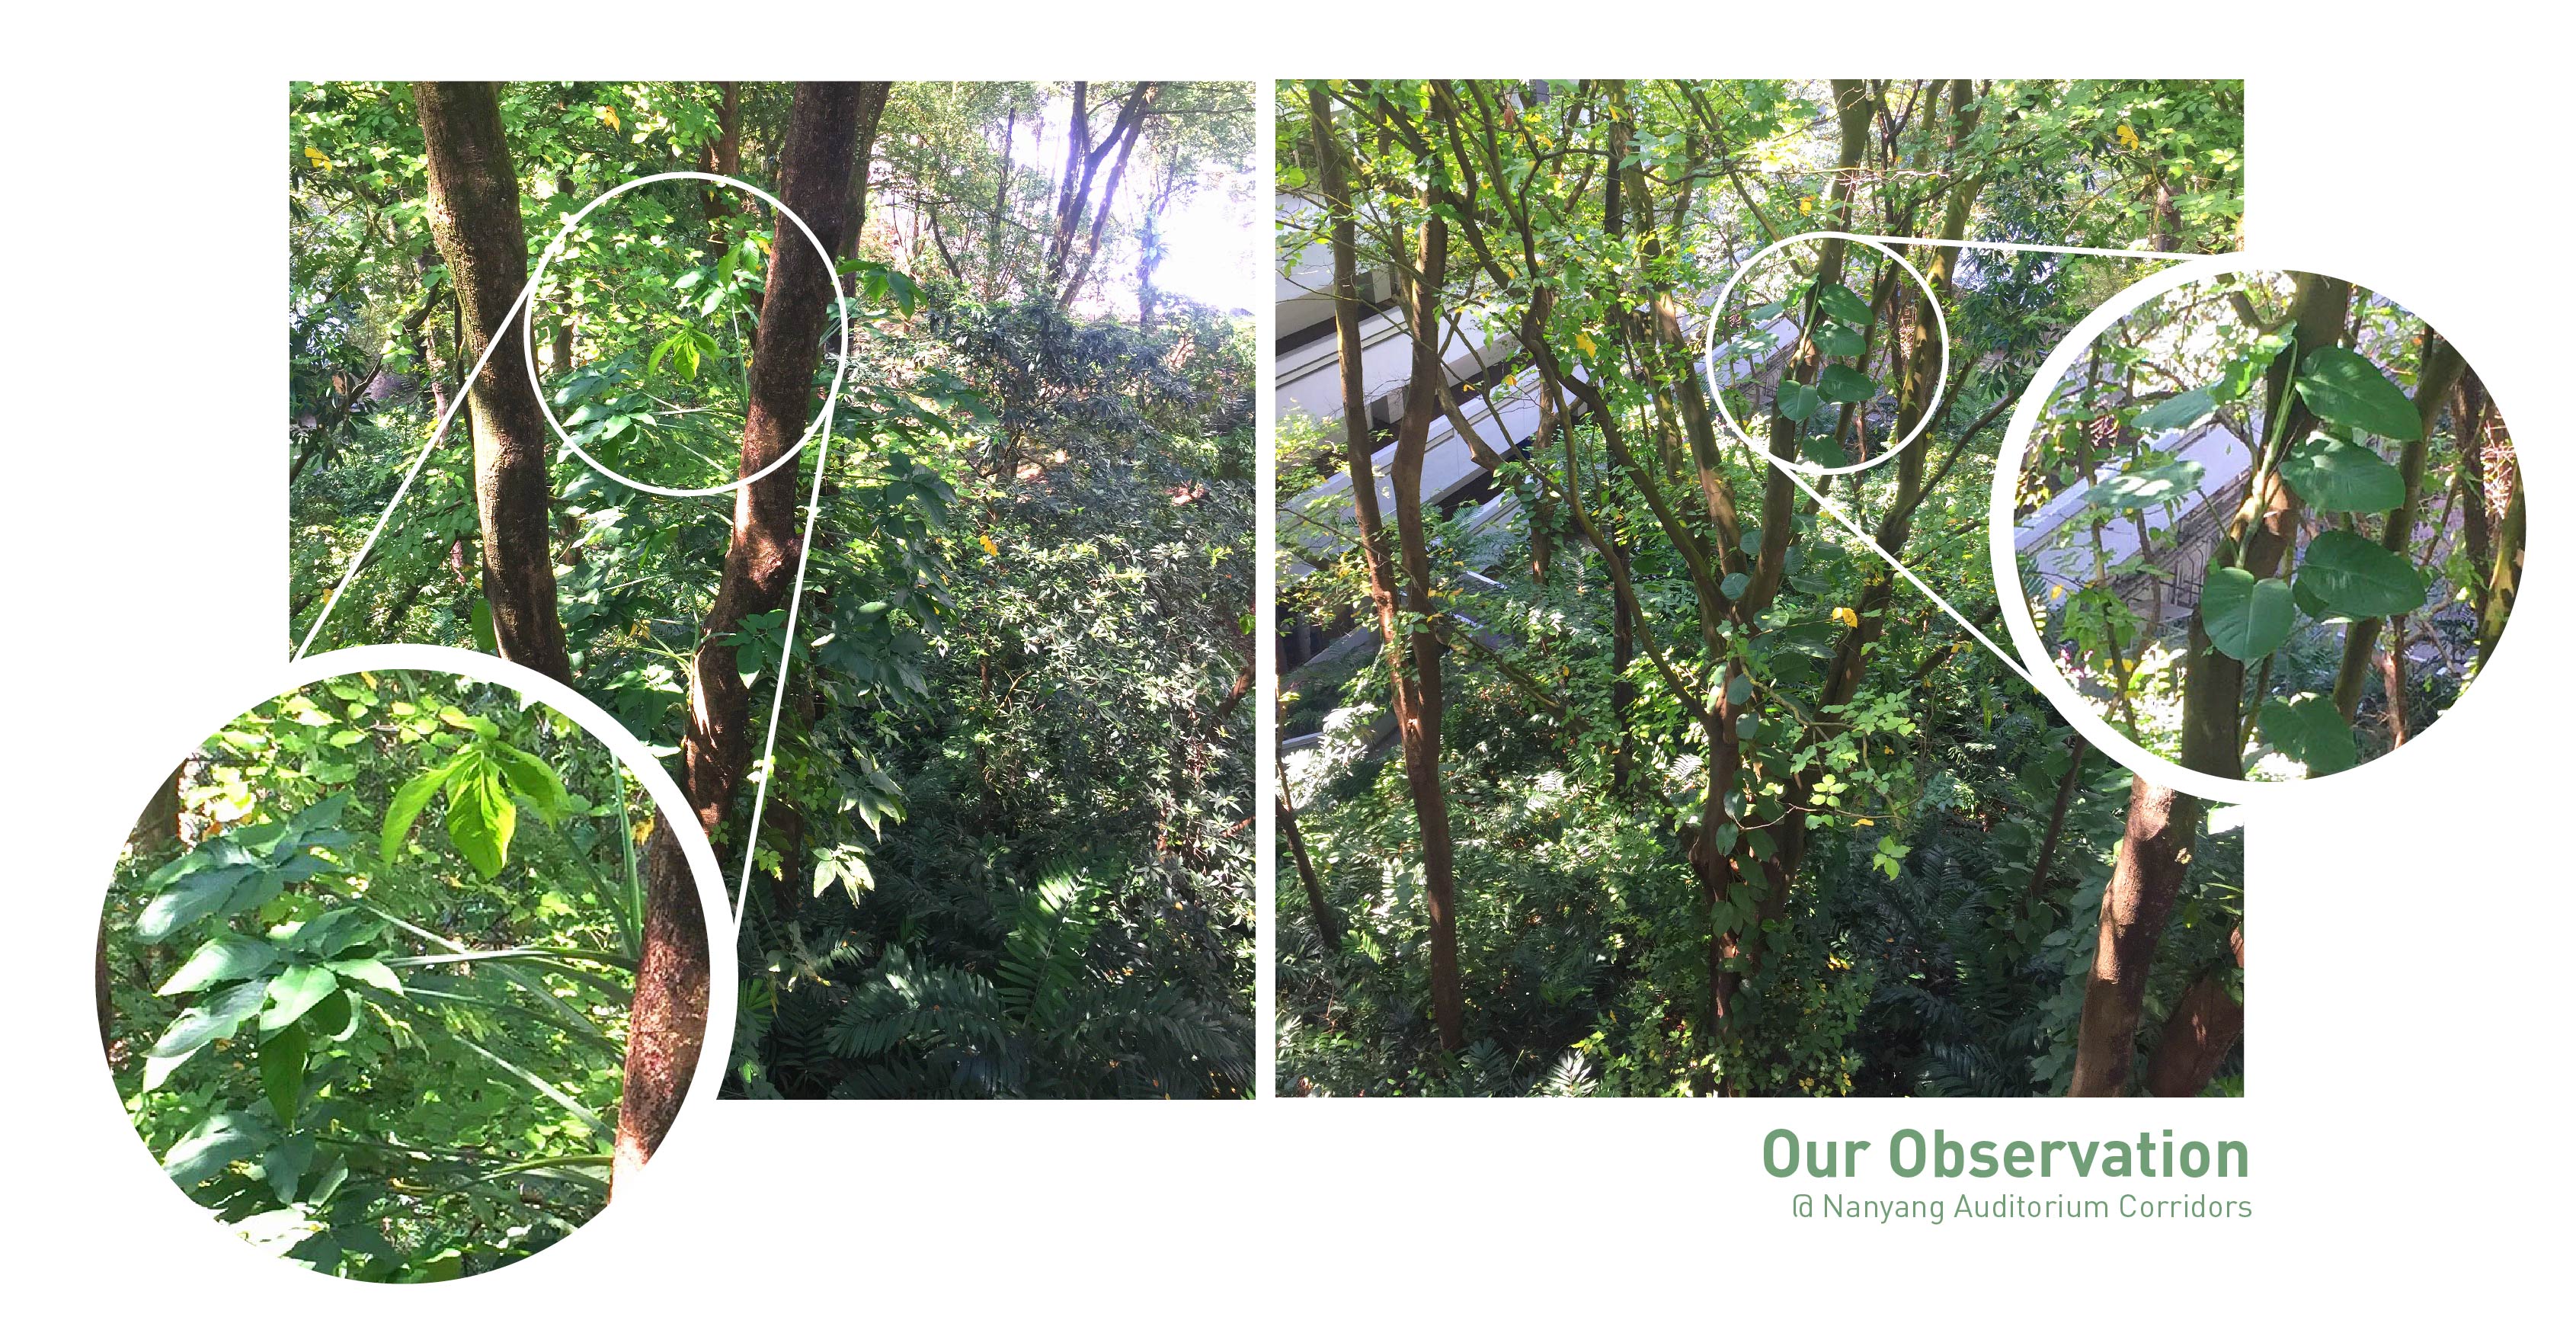
With the main objective to create a bond between nature and us, we went for a walk around the school to identify design opportunities. One of the interesting thing that we observe at North Spine is that the bigger tree serves as a support for the climber plants to grow upright as shown in the photo below.

From there we thought “How can we ensure that climbing plants can flourish without the support of trees? How do we combine design and plants such that the design itself can serve as a support to cultivate and nurture the plants?”

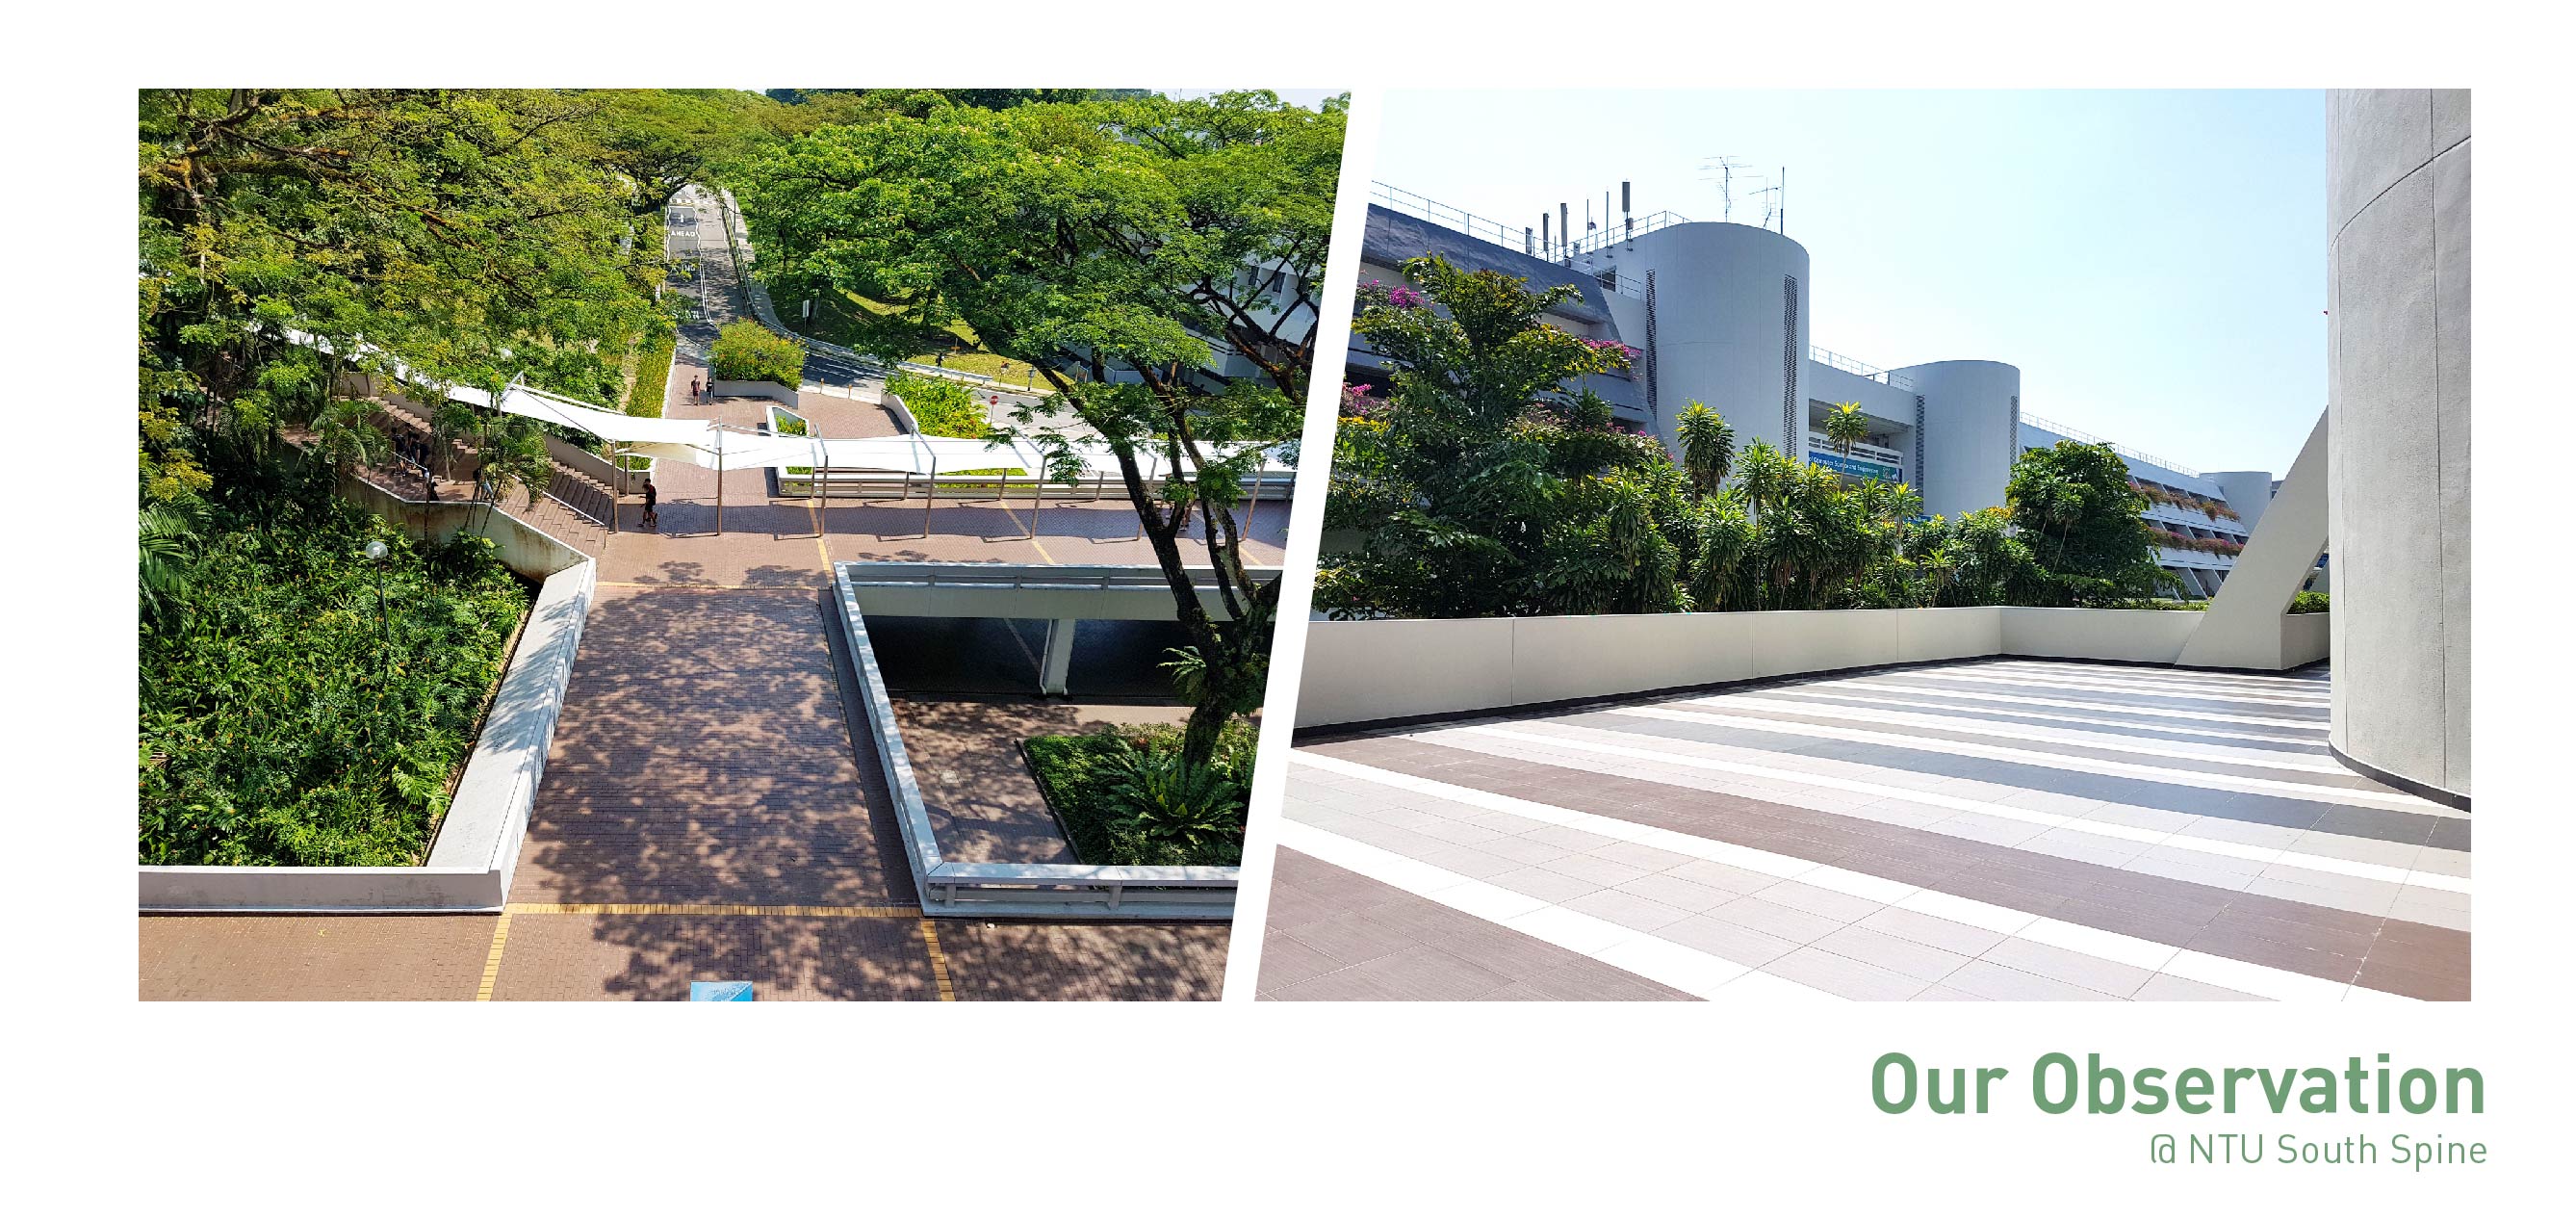
Furthermore, we were looking at a particular tree at South Spine and how the shadows cast down by the sun serves as a shade. At a different point of the day, the sun casts the shadow differently which led to the changing patterns and position of the shade. Inspired by these unintentional fluid patterns of nature, we thought that our sculpture could not just serve as an art piece, the shadows of the sculpture could have a purpose as well.

Thereafter we looked out for locations in school where we could incorporate this idea. By adopting natural living organism to make up the design, we want our sculpture to not just beautify the space, but serves a function of a shade as well. Instead of taking years to grow a tree, a simple design that supports the growth of climbing plants could be an alternative.

Design reference 1

Designed by Architect Jean-Jaques Hubert, this plant trellis system is a living work of art whereby the climber plants interact with space. The plants grip the surfaces, crawl along the wall and invade the ceiling horizontally. Designed to withstand and aid the growth of plants, the designer had in mind to create a volume in space that takes a life of its own.

Inspiration

A quick recap of our design inspiration from last week, we chose the Pangolin firstly because it is one of the endangered wildlife in NTU. Secondly, what is so special about Pangolin is that it is the only mammal with a modular overlapping scales that curves like a pavilion covering the body that we can study and possibly adopt. The overlapping pattern of pangolin scales provides effective body coverage, allows air to circulate, and regulates temperature. This mechanism provides design possibilities that could be implemented in exposed pathways in NTU aforementioned earlier.

Design reference 2

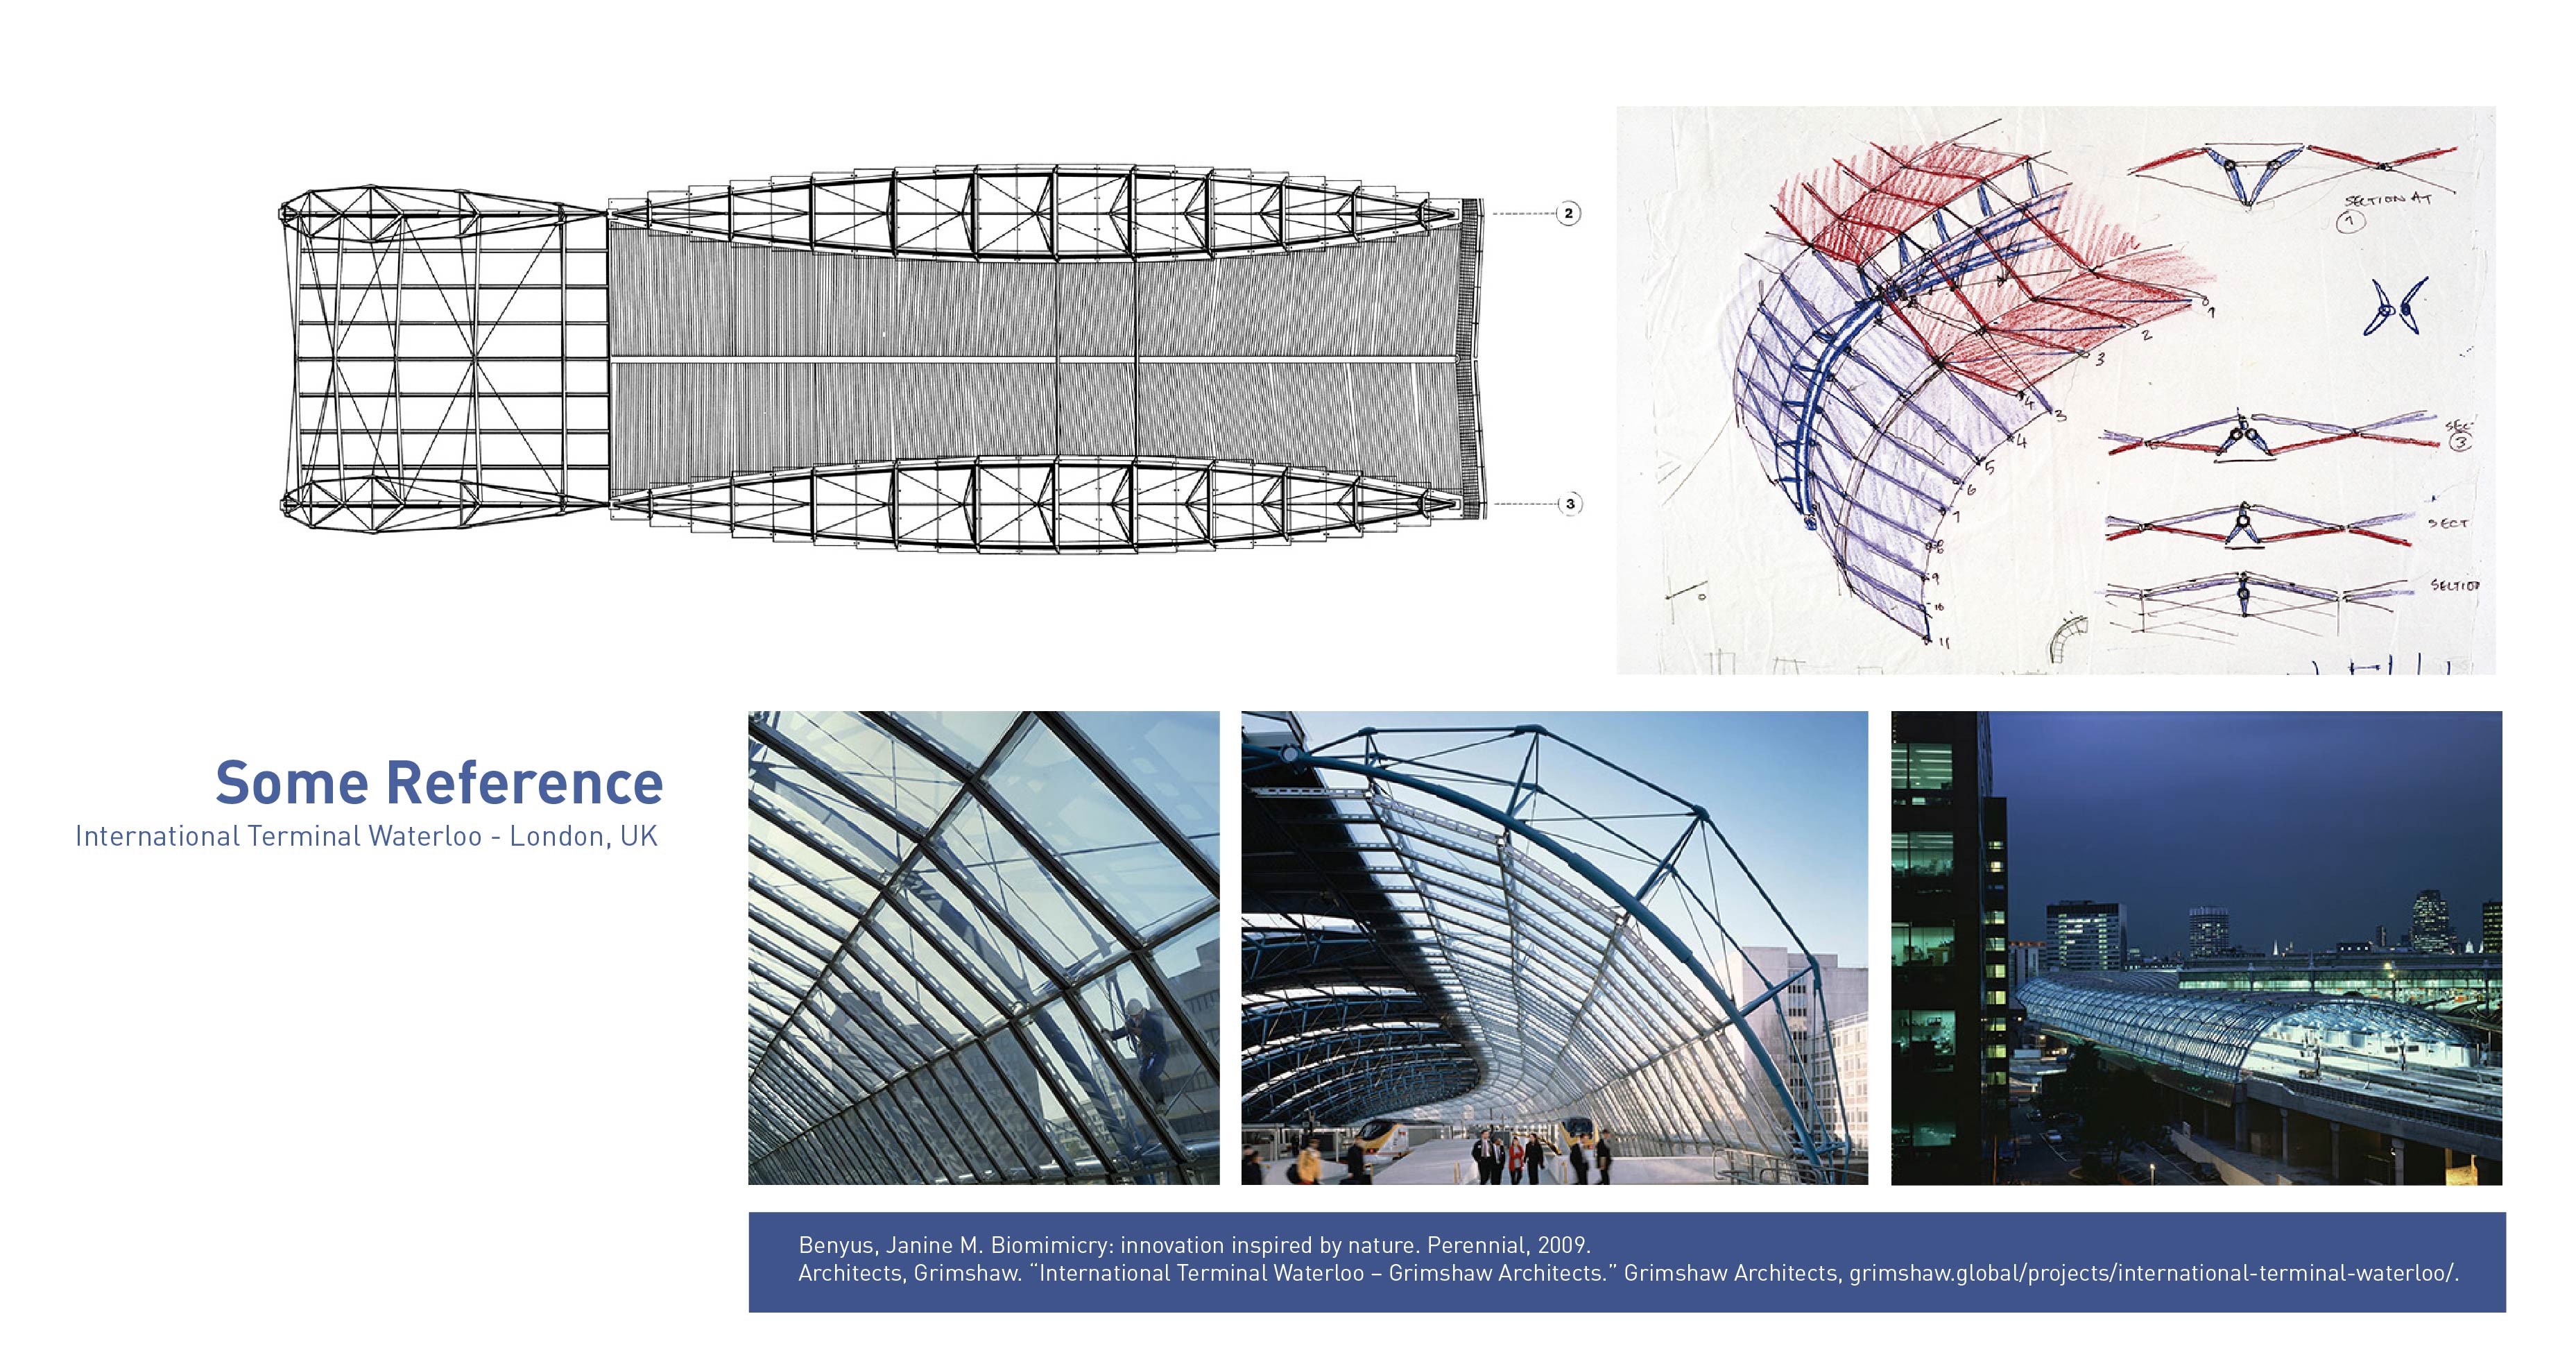
The roof of the Waterloo international terminal is inspired by the scales of Pangolin. The curvature of the design took shape in the early stage of the design process, in order to create a structure that adapts to the existing roof, the team mimics the overlapping modular arrangement of a Pangolin scale. The modular glass panels are overlapped and joined together to make up the organic form. The repetition and modularity make assembly much easier, cheaper and stronger.

You may click here for more insights. (But do take note that  it may not be what we are going for)

Keywords dictionary – updated

Flexibility

– Adapts to surrounding architecture

Repeating modules

– Multiplying and repeating one module, using a joint to form the overall shape

Layered

– By overlapping the different modules to create a space for plants to invade through.

Concealed vs exposed

– The play between positive space and negative space.

Possible design and construction of modules

This time instead of jumping straight into the ultimate design, we decided to start from designing the basic shape of the module that will make up the overall sculpture.

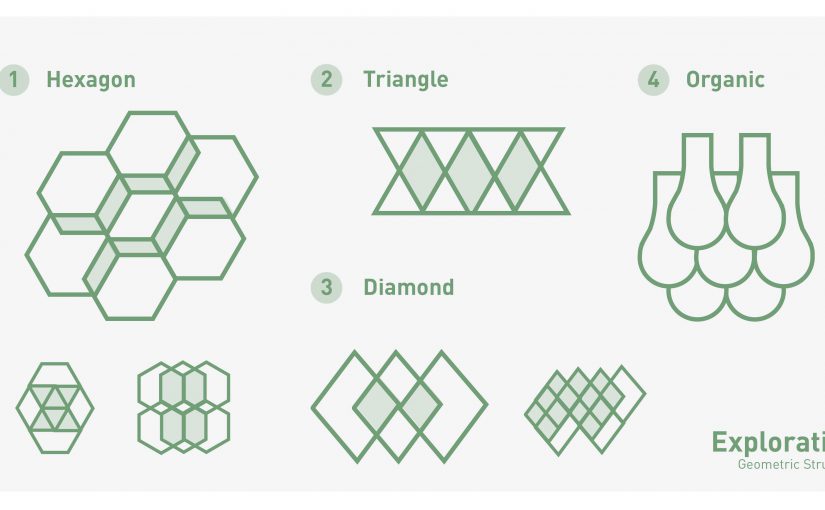
Hexagons are scientifically proven to be the most efficient packing shape. Triangles are part of the hexagonal family. Apart from looking into geometric shapes, we explored organic ones as well and how they could possibly overlap as shown in the diagram below.

As we want our sculpture to function as both a trellis and a shade, we want to look into balancing the use of positive and negative space.  

Sustainability – Material choice

Timber
As a fantastic insulator, wood has excellent thermal properties. Buildings made up from sustainable timber are more efficient to heat and cool and reduces the carbon footprint overtime in the long run

Benefits of Mass Engineered Timber?

Construction Productivity

  • Reduces construction time
  • High strength-to-weight ratio makes it easier to handle than steel and concrete

Environmental Sustainability

  • Highly renewable
  • Reduces up to 70% of concrete use in buildings
  • Highly durable, long life cycle
  • Superior noise control, better acoustics
  • Reduces need for finishing materials
  • Fewer disamenities due to dry method of construction

Bamboo
Technically a grass, bamboo has been used in decorations and a number of other assortments. As a sustainable resource, bamboo is also a cost-effective one. It is not only water resistant but also an extremely durable piece of material.

Benefits of Bamboo?

Construction Productivity

  • Can be used in combination with other types of construction materials – like reinforcing materials for foundations.
  • Light building material
  • Maintains strength and allows bending

Environmental Sustainability

  • Highly renewable
  • Highly durable, long life cycle
  • Reduces need for finishing materials

References

http://meyersgroup.ucsd.edu/research_posters/2013/2013%20-%20STRUCTURE%20AND%20MECHANICAL%20PROPERTIES%20OF%20PANGOLIN%20SCALES%20AS%20FLEXIBLE%20DERMAL%20ARMOR.pdf

https://www.researchgate.net/publication/303499715_Pangolin_armor_Overlapping_structure_and_mechanical_properties_of_the_keratinous_scales

https://ibois.epfl.ch/page-105527-en.html

http://biomimicryarch.blogspot.sg/

https://grimshaw.global/projects/international-terminal-waterloo/

http://themindunleashed.com/2014/03/collapsible-woven-refugee-shelters-powered-sun.html

https://www.bloomberg.com/news/photo-essays/2015-02-23/14-smart-inventions-inspired-by-nature-biomimicry

http://www.urbangardensweb.com/2013/03/06/plant-trellis-system-as-modular-living-sculpture/

http://www.sustainablematerials.org.uk/resource/
 

Week 8./ Thermochromic ink transfer

Thermochromic ink transfer
Thermochromic ink can change from colourless to colourful or colourful to colourless very quickly with temperature

” Thermochromic inks or dyes are temperature sensitive compounds, developed in the 1970s, that temporarily change color with exposure to heat. They come in two forms, liquid crystals and leuco dyes.”

Material needed:
Thermochromic Pigment Powder
– Container
– Paintbrush
– Acrylic Paint
Acrylic transparent gloss medium
– Fabric (Light coloured)
– Silkscreen set

Steps:
– Mix equal amount of acrylic transparent gloss medium and thermochromic pigment powder in a container
– Apply the mixture onto the fabric with silkscreen or brush
– Wait for the paint to naturally dry
– Apply heat on fabric to see results

Process photos

Challenges, learning points and application

I find thermochromic ink transfer one of the most cool and fascinating technique. It is also one of the simpler techniques. If there were one thing difficult, that would be applying the paint evenly with the silkscreen set. Overall, thermochromatic ink transfer can produce captivating results and I am glad that I am able to try it out in class!

Week 5. /Felting

Felting
Relying on wool’s ability to mat and tangle to create a stable fabric.

“Felt is one of the oldest known textiles because it is the least reliant on technology: moisture, heat, friction and wool fibers are the only materials required to create it.”

Dimensional Felting

Material needed:
– Felting needles
– Foam Pad
– Wool Fabric / Wool Yarns

Steps:
Layer the wool pieces on your palm and wet them with warm water
– Start in the center of the project and work towards the edges, rub the wool gently with hand soap and must sure it is thoroughly saturated
– Squeeze the wool dry and place them on a foam board
– Using a felting needle, poke through the felt and repeat
– Continue poking, adding more wool to fill in the gaps along the way.
– Stop when you are satisfied with the result.

Class photos

Process 

THE BIRTH OF MISS TEDDY

It took me 5 hours to make this. For a few times, I felt guilty for poking such a cute teddy with needle. I felt like I was slowing killing it. Ironically speaking, I was actually creating it and making it stronger~
” What doesn’t kill you makes you stronger~”

THE COMPANIONS OF MISS TEDDY

Challenges

I feel that dimensional felting is one of the most time-consuming and patience testing techniques I’ve learned. The continuous motion of poking the felt, this painstakingly slow process is one of the challenges I think everyone faces when felting. Nevertheless, I really love this felting technique and the beautiful result it gives. Excited to try out more different felting techniques!

Final outcome

Other felting techniques I have yet to try
– Nuno felting
– Wet felting
(Excited to try and upload more~ Stay tuned!)

Learning points and application

Felt’s durability makes it ideal for almost any application, its ability to blend with other natural fabrics makes it versatile and light. Felt ranges from pieces of commercially manufactured felt that are made from manmade fibers, to handmade felt that uses the finest animal fibers. I would say that felting, although is a painstakingly slow process, it is a therapeutic activity. It might also be life-saving as well. I mean if I ever get stranded on an island, I can apply this technique to make clothes and keep myself warm. 😀


Week 2. /My (Failed) Heat Printing Experiment

Here’s my story of me trying to use the heat printing machine~

It all started with the idea of printing a new shirt for my baby nephew for Chinese New year. It was a day filled with lots of mistakes made and I would like to document it down so that I hopefully will not make the same mistakes ever again. 

The design (Shirt front and back):

royce-page-001P.S. The design itself might be a mistake which I will talk about later…

20170126_174008

Mistake no. 1:
Firstly, I printed the design on a ttc 3.1 transfer paper using an inkjet printer instead of a lazer printer. (I think I somehow mixed up and thought we were supposed to use inkjet printer instead) It resulted in smudged ink and a sheet of wasted ttc 3.1 transfer paper…

20170126_001539
Result of the inkjet printer printed design

There goes my $1 paper…

img-20170130-wa0031In the end, I went to North spine to print a new sheet of design wishing that everything else will go on smoothly afterward. However, things happened…


Mistake no. 2:

20170126_180507

20170126_174807

20170126_182847

To be honest, I’m not quite sure what mistake I made though. I followed exactly what the instruction said on the paper…

Digital print TTC 3.1 on T-shirt fabric 
400 Fahrenheit @30 Secs Hot peel

However, the result wasn’t satisfactory as the ink was not transferred fully at all. I went to reflect awhile and came up with 3 things that may have went wrong.

1. I mentioned from the start that the design itself may be a mistake. Maybe the font was not solid enough, or the color of the words was not dark enough, resulting in insufficient ink on the transfer paper. 

2. Another possibility is that maybe I did not peel fast enough after lifting up the heat printing machine. I tried many times though, leaving a longer timer each time and working faster on peeling the paper, it still failed in the end. 

3. The last possibility I could think of is the material of the baby shirt. I am not exactly sure what material it is though, (probably cotton), however the ink came off once the shirt was washed.

All in all, I have learnt a very important lesson. Which is to never assume that your first try will be perfect and to always have a backup plan. Never leave things to the last minute to do and always start early just in case things does not go how you expected it to. Looking forward to learning new things and starting on the final project. Hopefully, I would be able to find some time to practice using the heat printer again. 

Point of view stage 5: Adding in the illustrations

Ok, so here’s how the process sounds like. First, I took plenty of photos (as shown in the previous post). Then, I chose the ideal ones, edited and cropped them to the ideal frame and size. Following that I drew the little characters on paper, scanned them and then refined the lines and colour digitally.

The following series are photos to show the evolution of each composition~

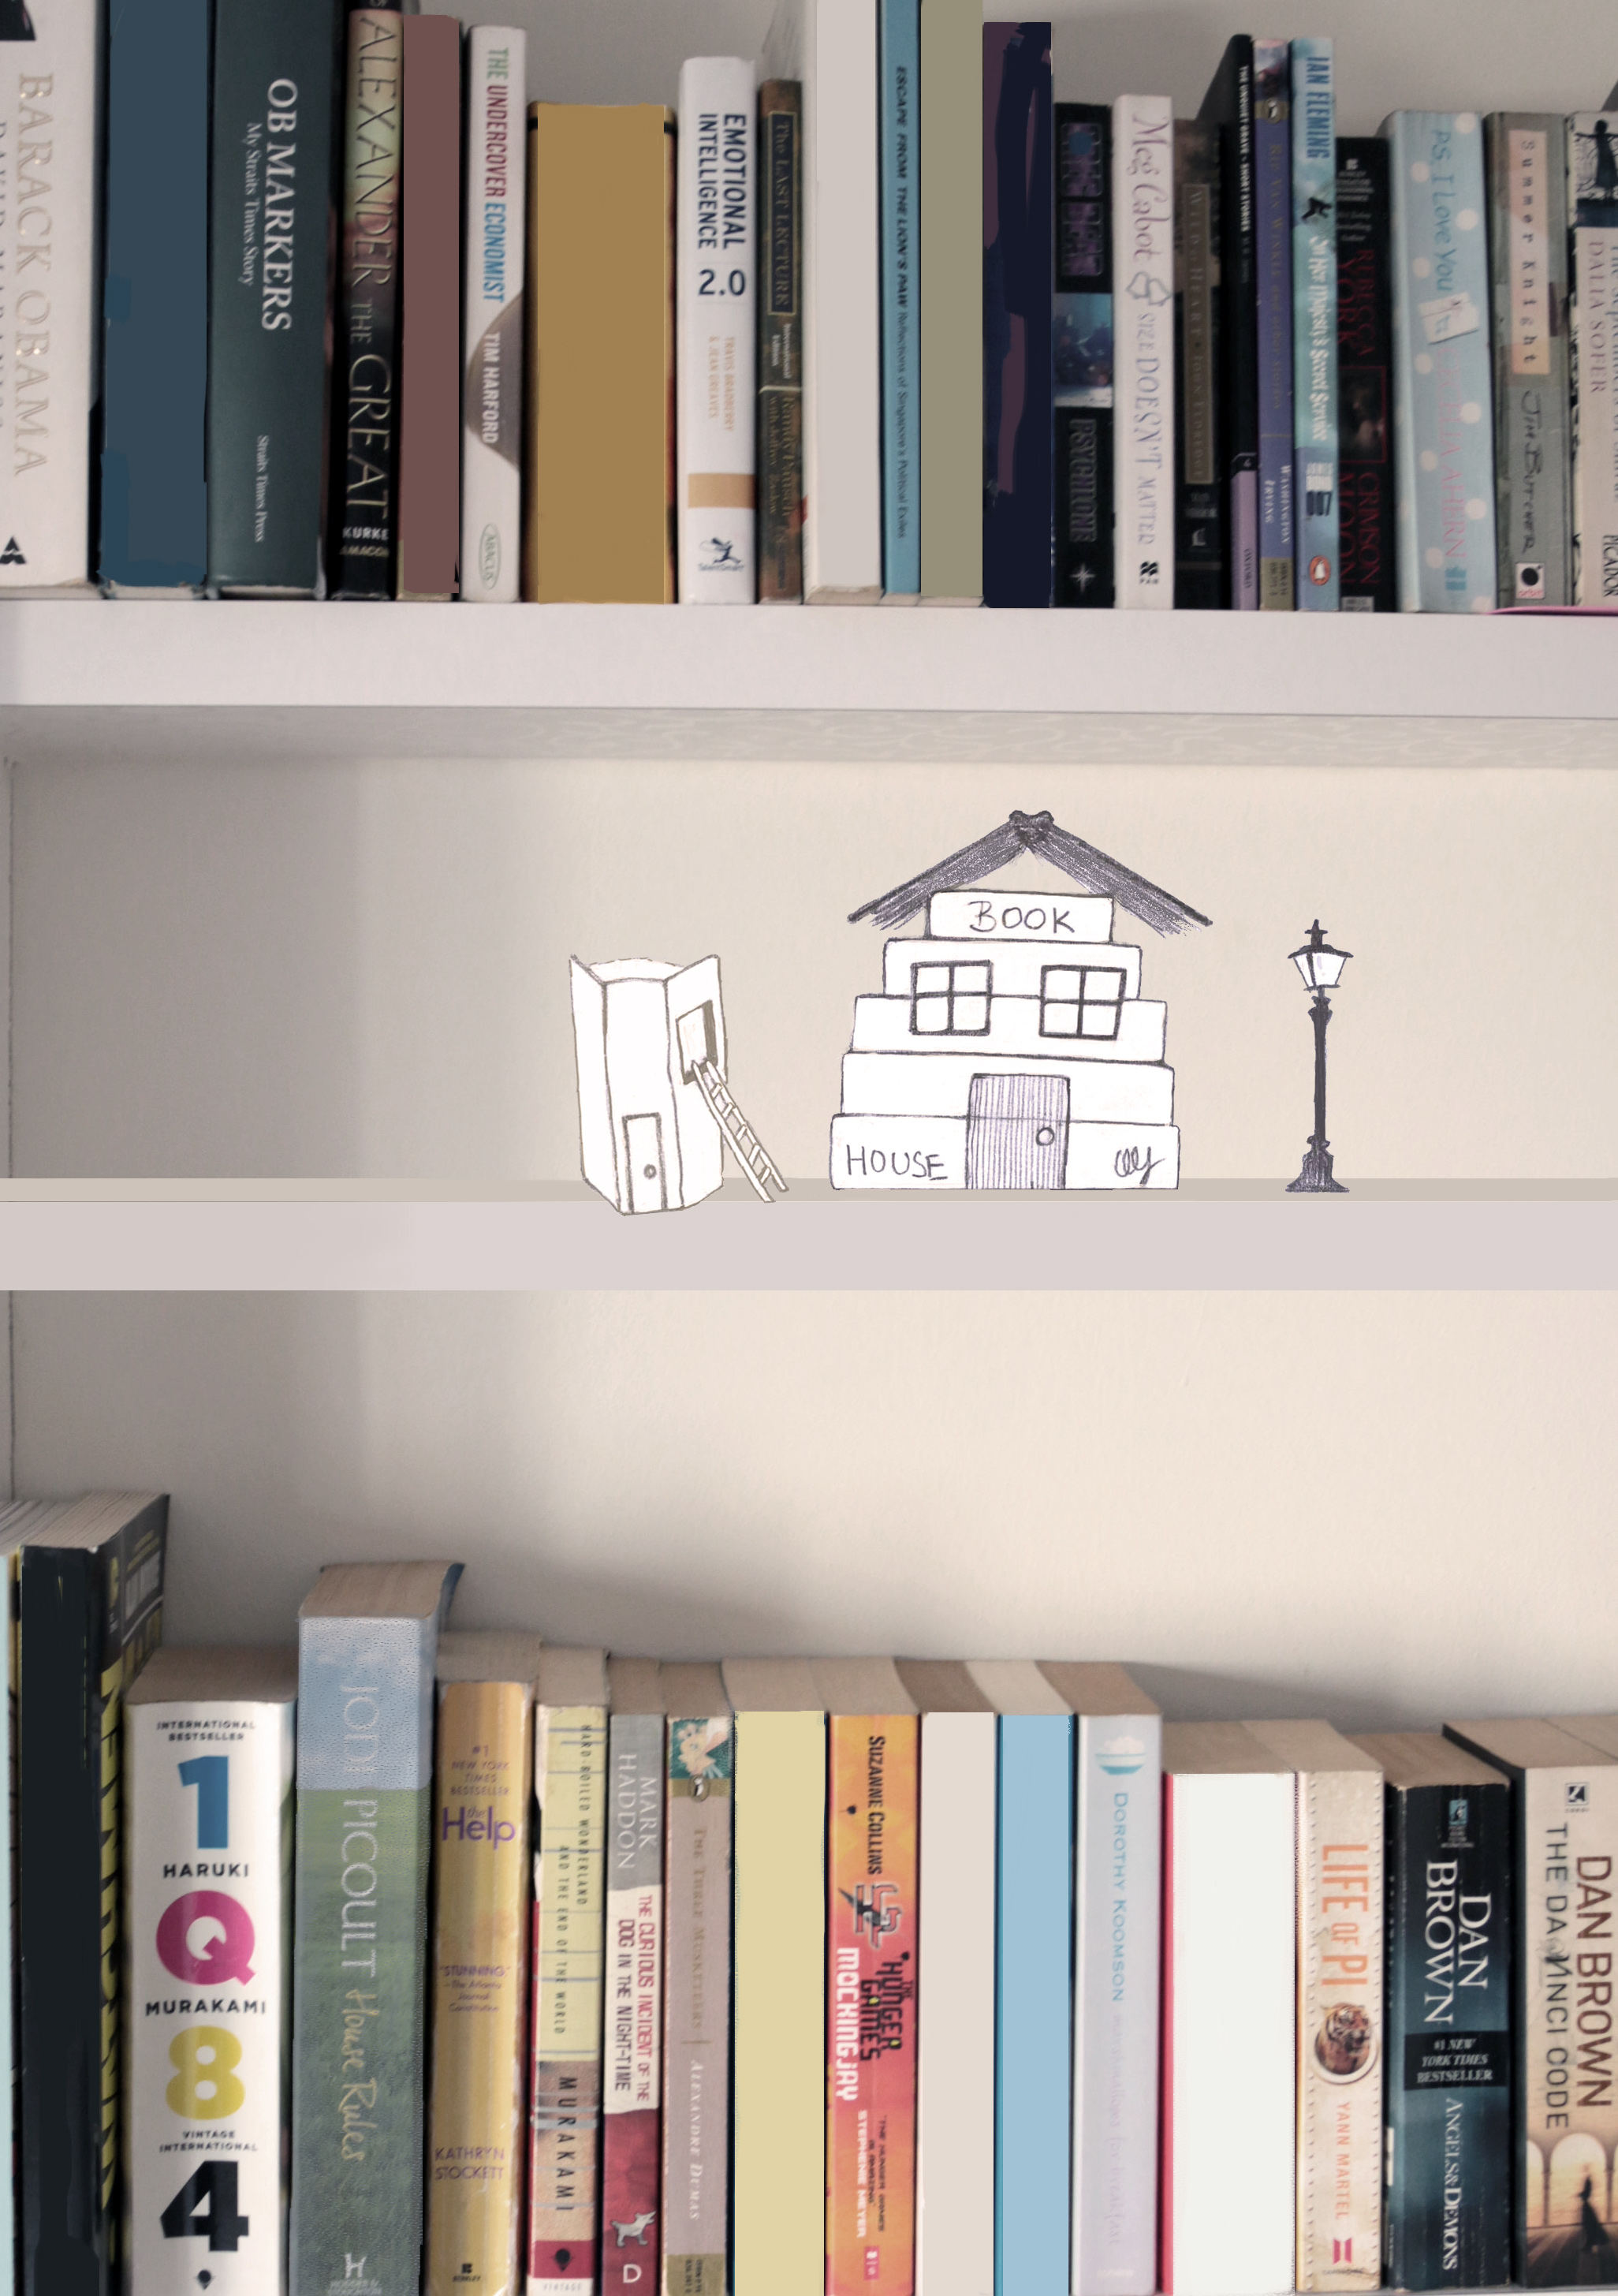
1. Books from the Point of View of a bookshelf are residents.

5
original
illustration
illustration

Refining the lines and adjusting the colours:


documenting process 2
documenting the progress
5.2
covering the titles, adding an extra shelf
shelf stuff
shelf stuff
correcting perspective, adding in more windows
adding in the shadows

2. A Book from the Point of View of a toddler (little Morrid) is a world of fantasy.

original
original

doodles
doodles
more doodles
more doodles

Refining the lines and adjusting the colours:

documenting process 5
documenting the progress

42.3

42.1
adding the shadows

3. A book from the Point of View of a student is a nightmare.

29
original
doodles
doodles

Refining the lines…

documenting process 1
documenting the process

nightmare 29.1

adding in the shadows

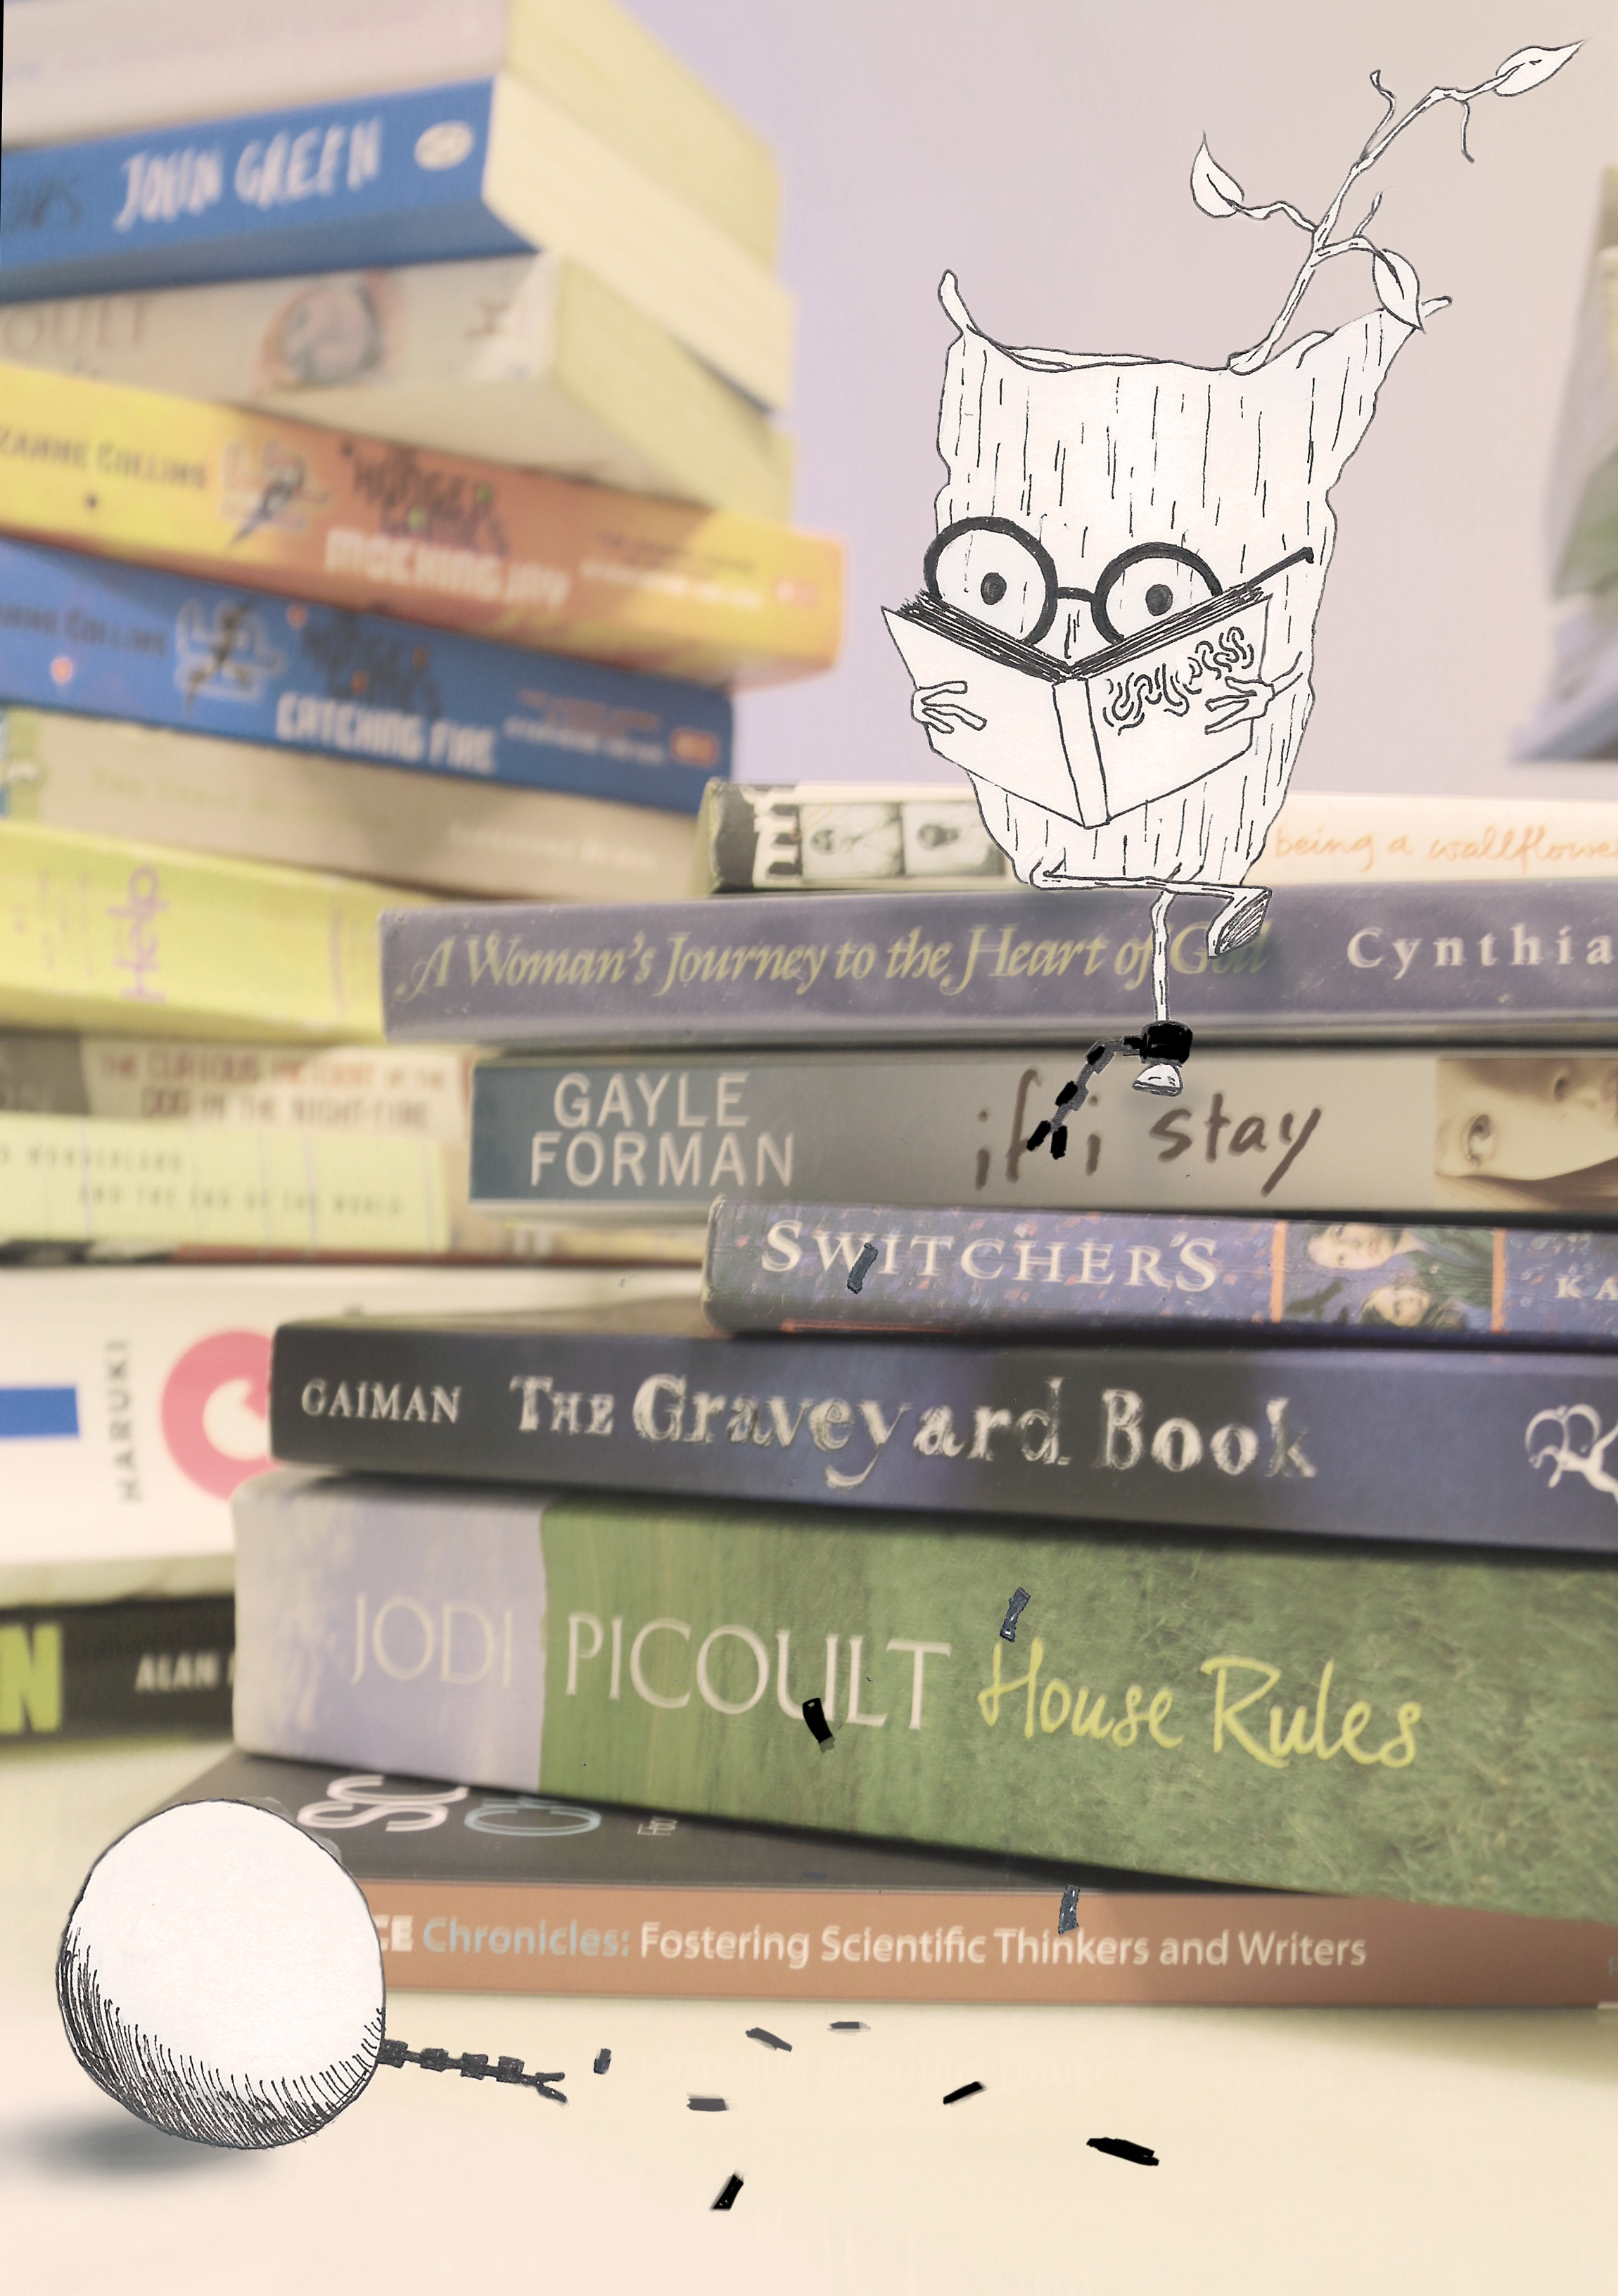
4. A Book from the Point of View of a bookworm is an escape.

original
original
SCAN0069
doodle


documenting process 4
documenting the progress

34.1

34.2

5. Books from the Point of View of a mother are dust collectors.

6

SCAN0068
doodles

mummy

documenting process 3
documentng the progress

6.2

6.3

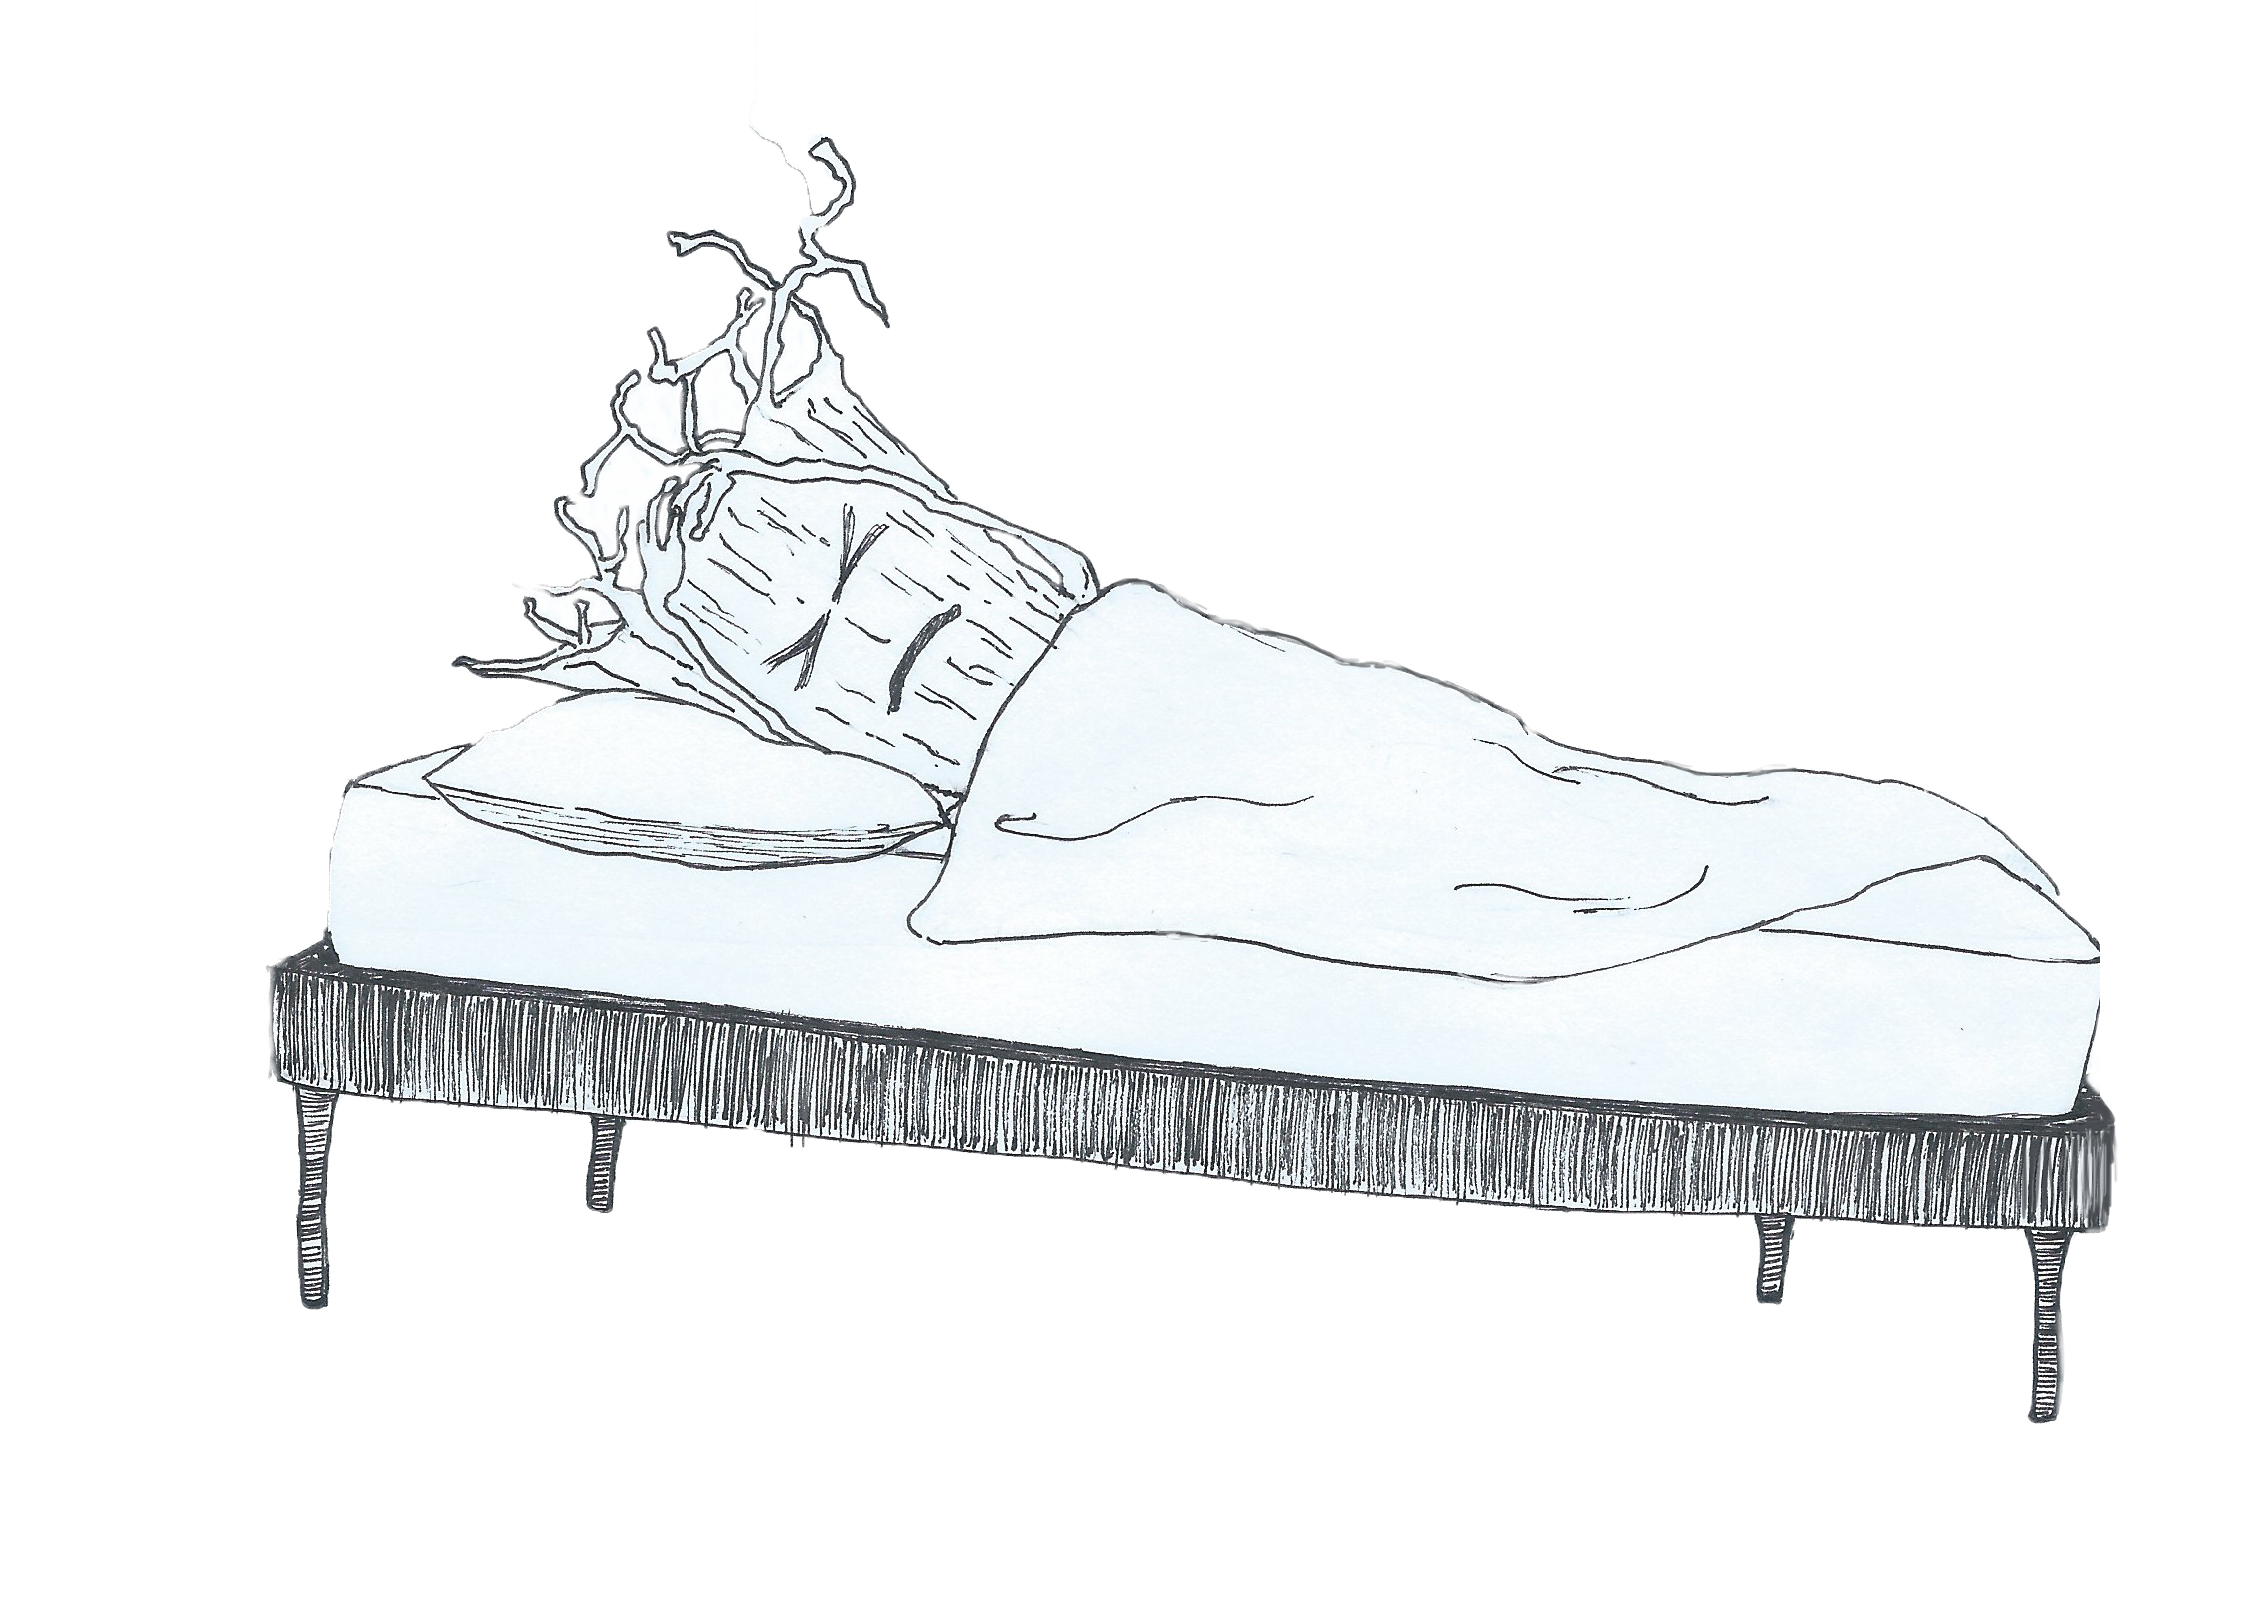
6. A Book from the Point of View of a tree is an offspring.

1

tree

roots

documenting process 6
documenting the progress

1.3

1.4

1.5

Typography chapter 3: More artist research.

Jee Young Lee.

Transforms Her Small Studio Into Dreamlike Worlds Without Photoshop

Artist JeeYoung Lee‘s work Stage of Mind is a series of images constructed in her tiny, room-sized studio in Seoul, South Korea. Since 2007, she has been transforming the space into wildly colorful and ephemeral dreamscapes, each scene painstakingly created by hand and without digital manipulation.

Some examples of her work:

Nightmare.

Lee used paper clips for this image. They bear no threat in real life, but she wanted to highlight how small worries can compile into a burden we carry through life. The clips stick to the woman as she walks away just like troubles do.

Black Birds.

“For me large birds are threatening, and the image of their feathers, beak, and curved talons is frightful,” says Lee. The scene is fraught with turmoil, and the doors represent future changes and challenges that the artist will have to go through.


Reaching for the stars.

lifebuzz-e6fe51741efc0ac3152ca1af873cb2d1-limit_2000
It is made of over 2,000 paper cups that were stacked together as bricks of a fragile castle, which represents the human need for betterment. Lee explains: “I wanted to express the process of heading toward your desire, along with the effort it takes to achieve your dream, which is represented by the star.”


I feel that Jee young’s work is very inspiring. Handicraft and skill aside, Lee’s work is permeated with complex layers imbued with personal meaning and symbolism. A mixture of childhood hopes and adult fears, Lee navigates her constructed landscapes as a wondering and apprehensive protagonist.