
Plane
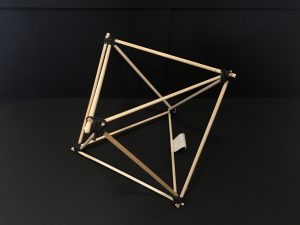
The plane solid I chose was an Octahedron.
When I was told to make a plane model, I was pretty much clueless on how that should work. So I just went and experimented.
Research & Development
Plane Model
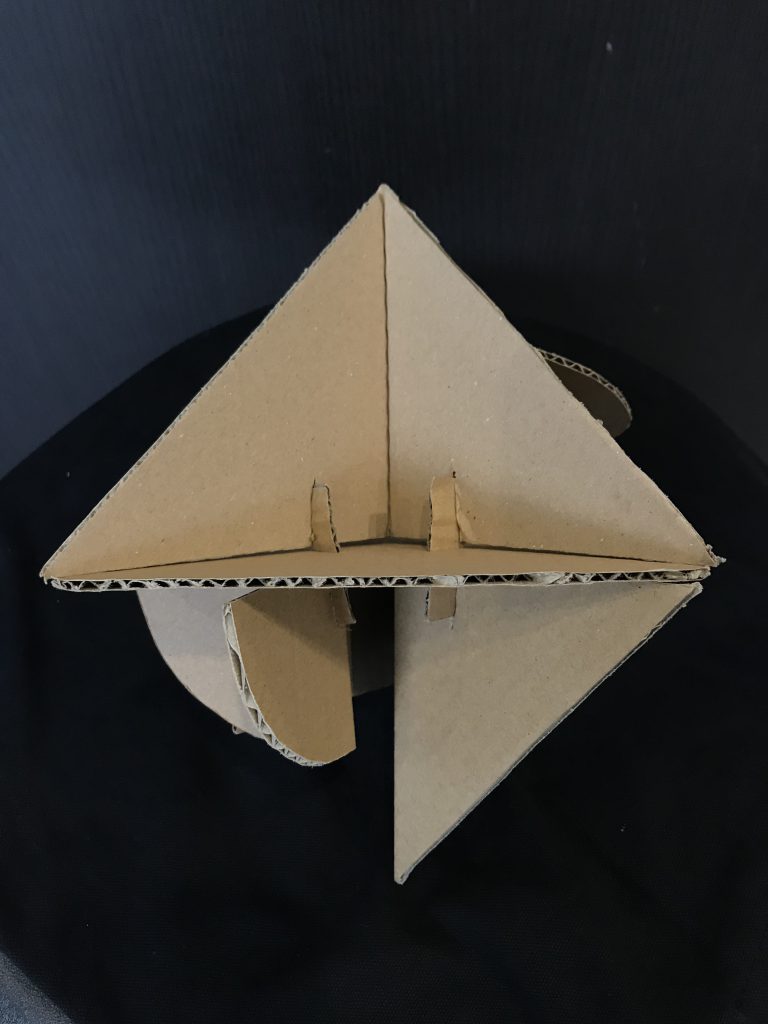
[1st Attempt] – Complete failure in terms of execution in expressing volume and did not look like an octahedron.
[2nd Attempt] – Did not manage to express the volume either.
It expressed lines of the Octahedron rather than implied lines.

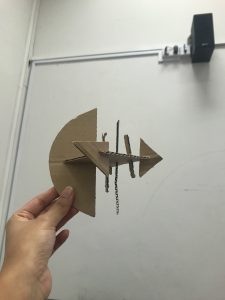
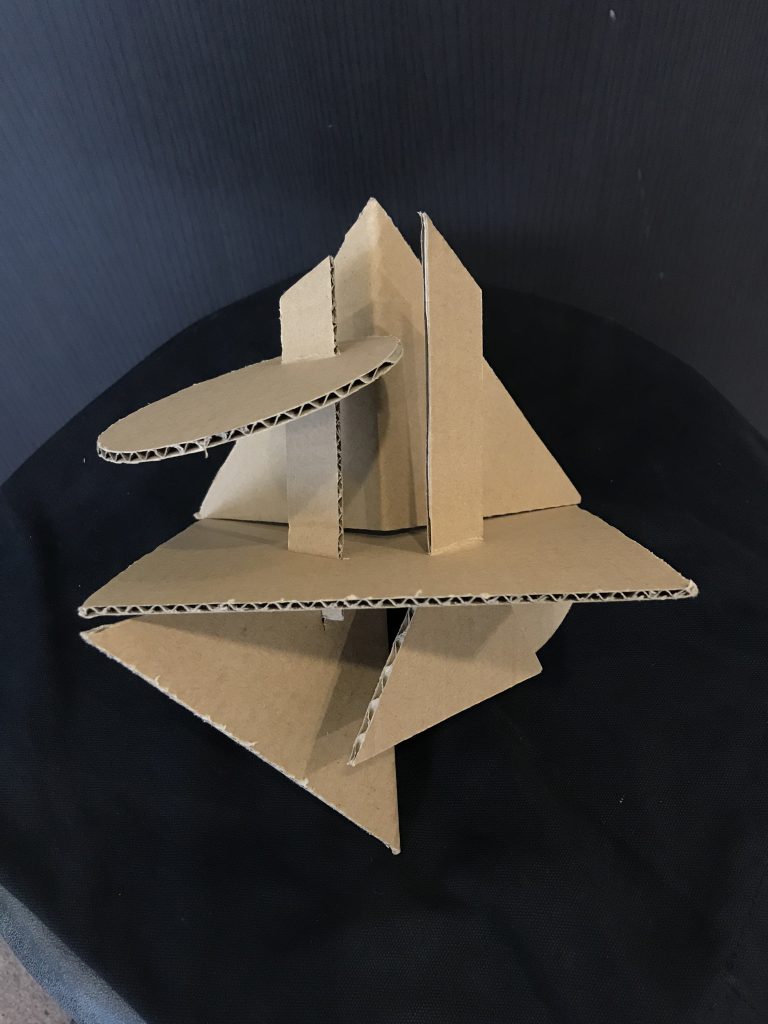
[3rd Attempt] – Way too symmetrical and I wanted to attempt to approach it in such a way that does not rely on glue to attach the planes together.
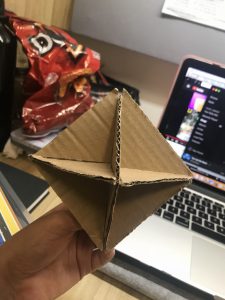
[4th Attempt] – Tested out slots and slits to attach the planes together and form this symmetrical shape. I wanted to take it step by step to be able to imagine how I could develop it. This was too symmetrical and did not look interesting from different angles. It was not as imaginative as I would have liked it to be. Basically, it looked more literal.
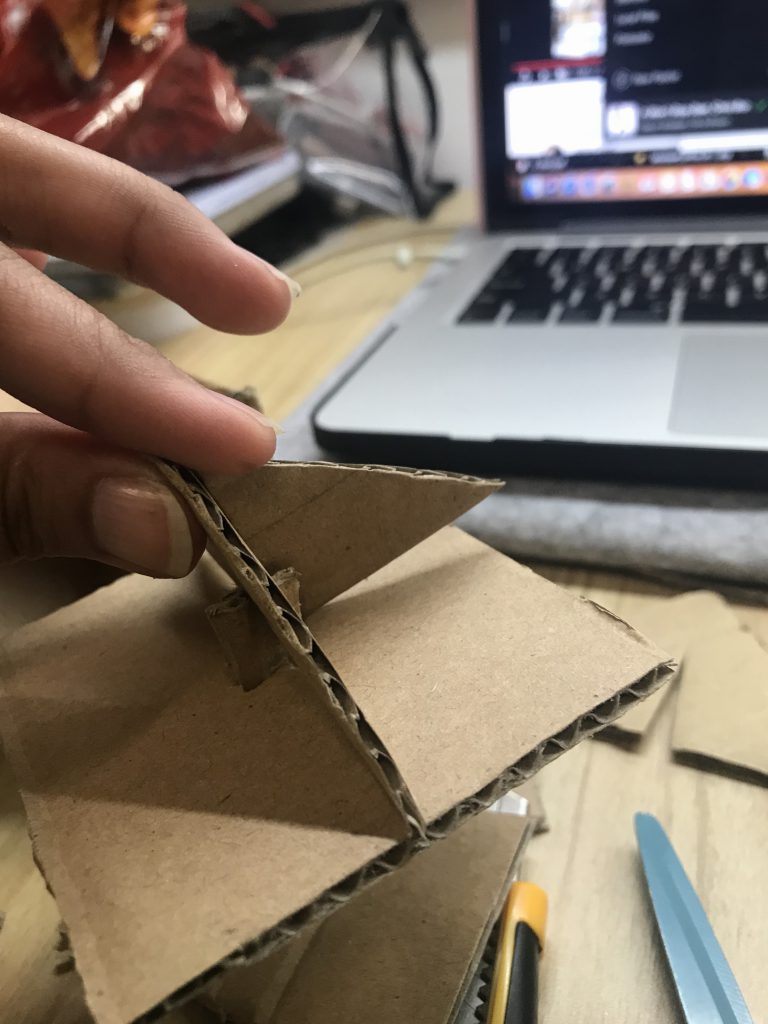
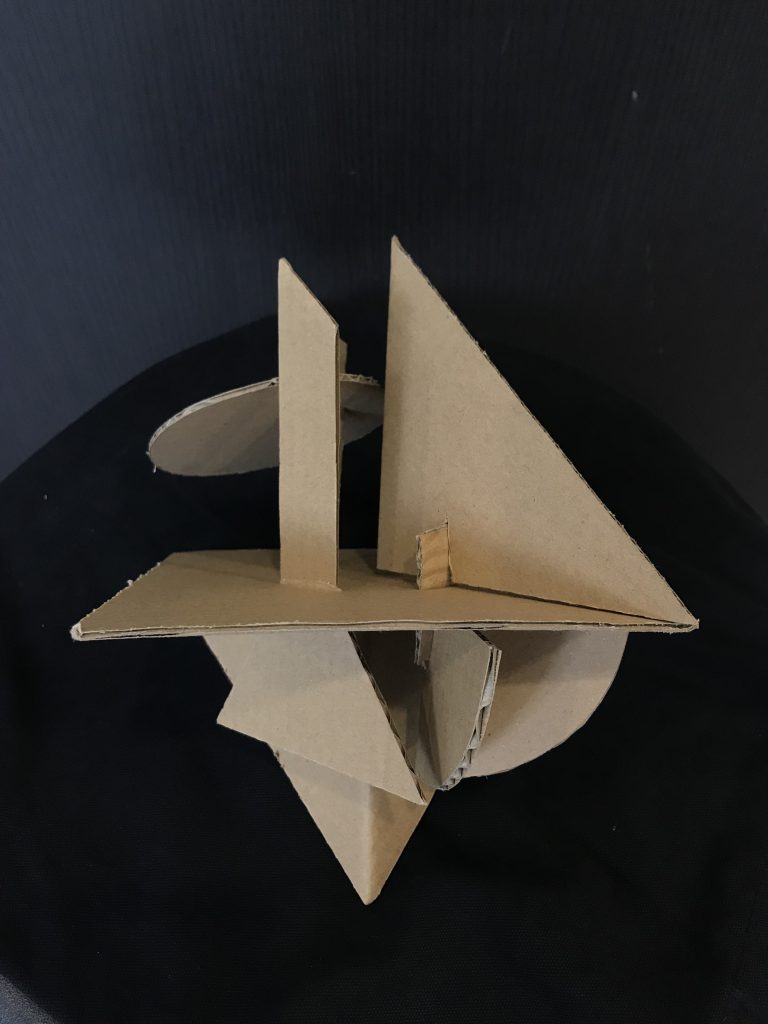
[5th Attempt] – To come up with this plane model, it was trial and error. I experimented with using different shapes, sizes and played with the floating illusion. I liked what I came up with much better than the symmetrical shapes before. Therefore, since this was a testing model, I refined it better in the 6th Attempt.
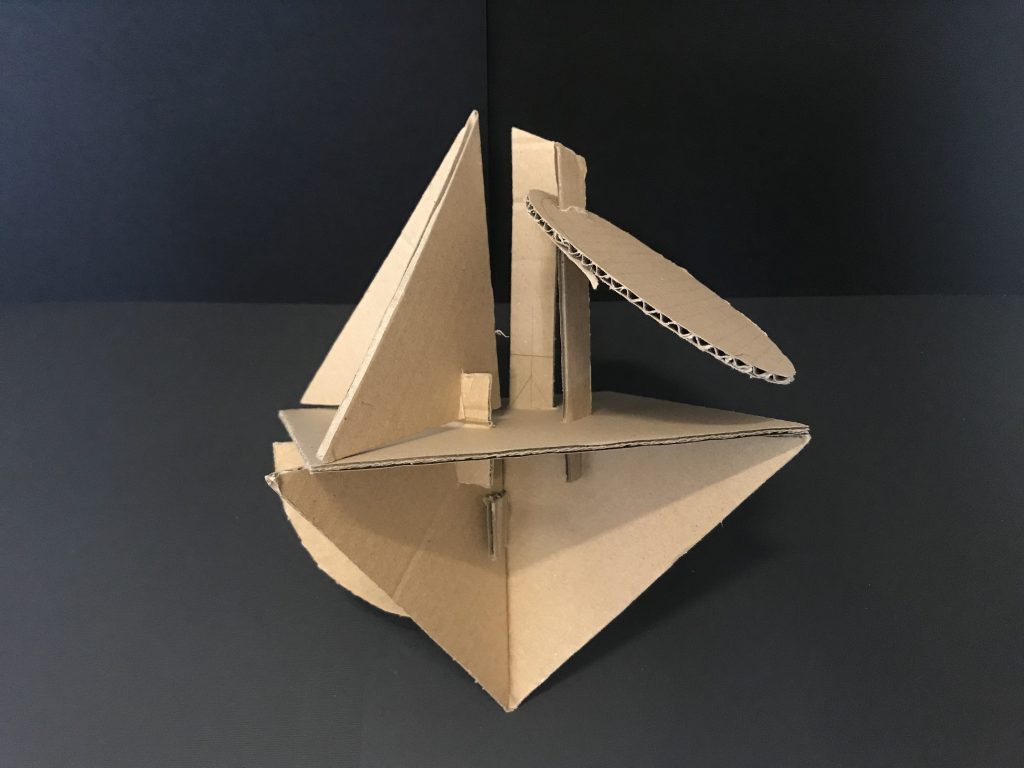
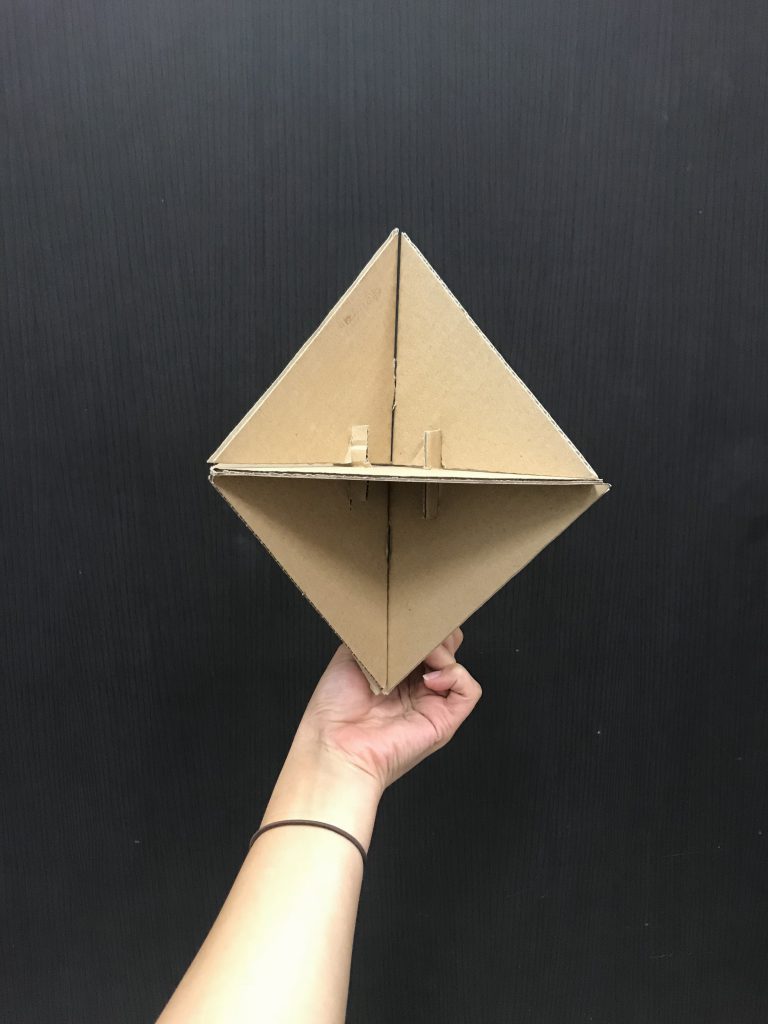
[6th Attempt] – Refinement was done where I had thicker slots to make it more stable and had proper measurements to have implied lines as well.
Lines + Planes
Upon research, I was very much inspired by minimal and clean-looking design. Slightly futuristic and modern in genre. I found that I love the play of strings to portray the hollowing element of the octahedron.
References:
-
- 1
-
- 2
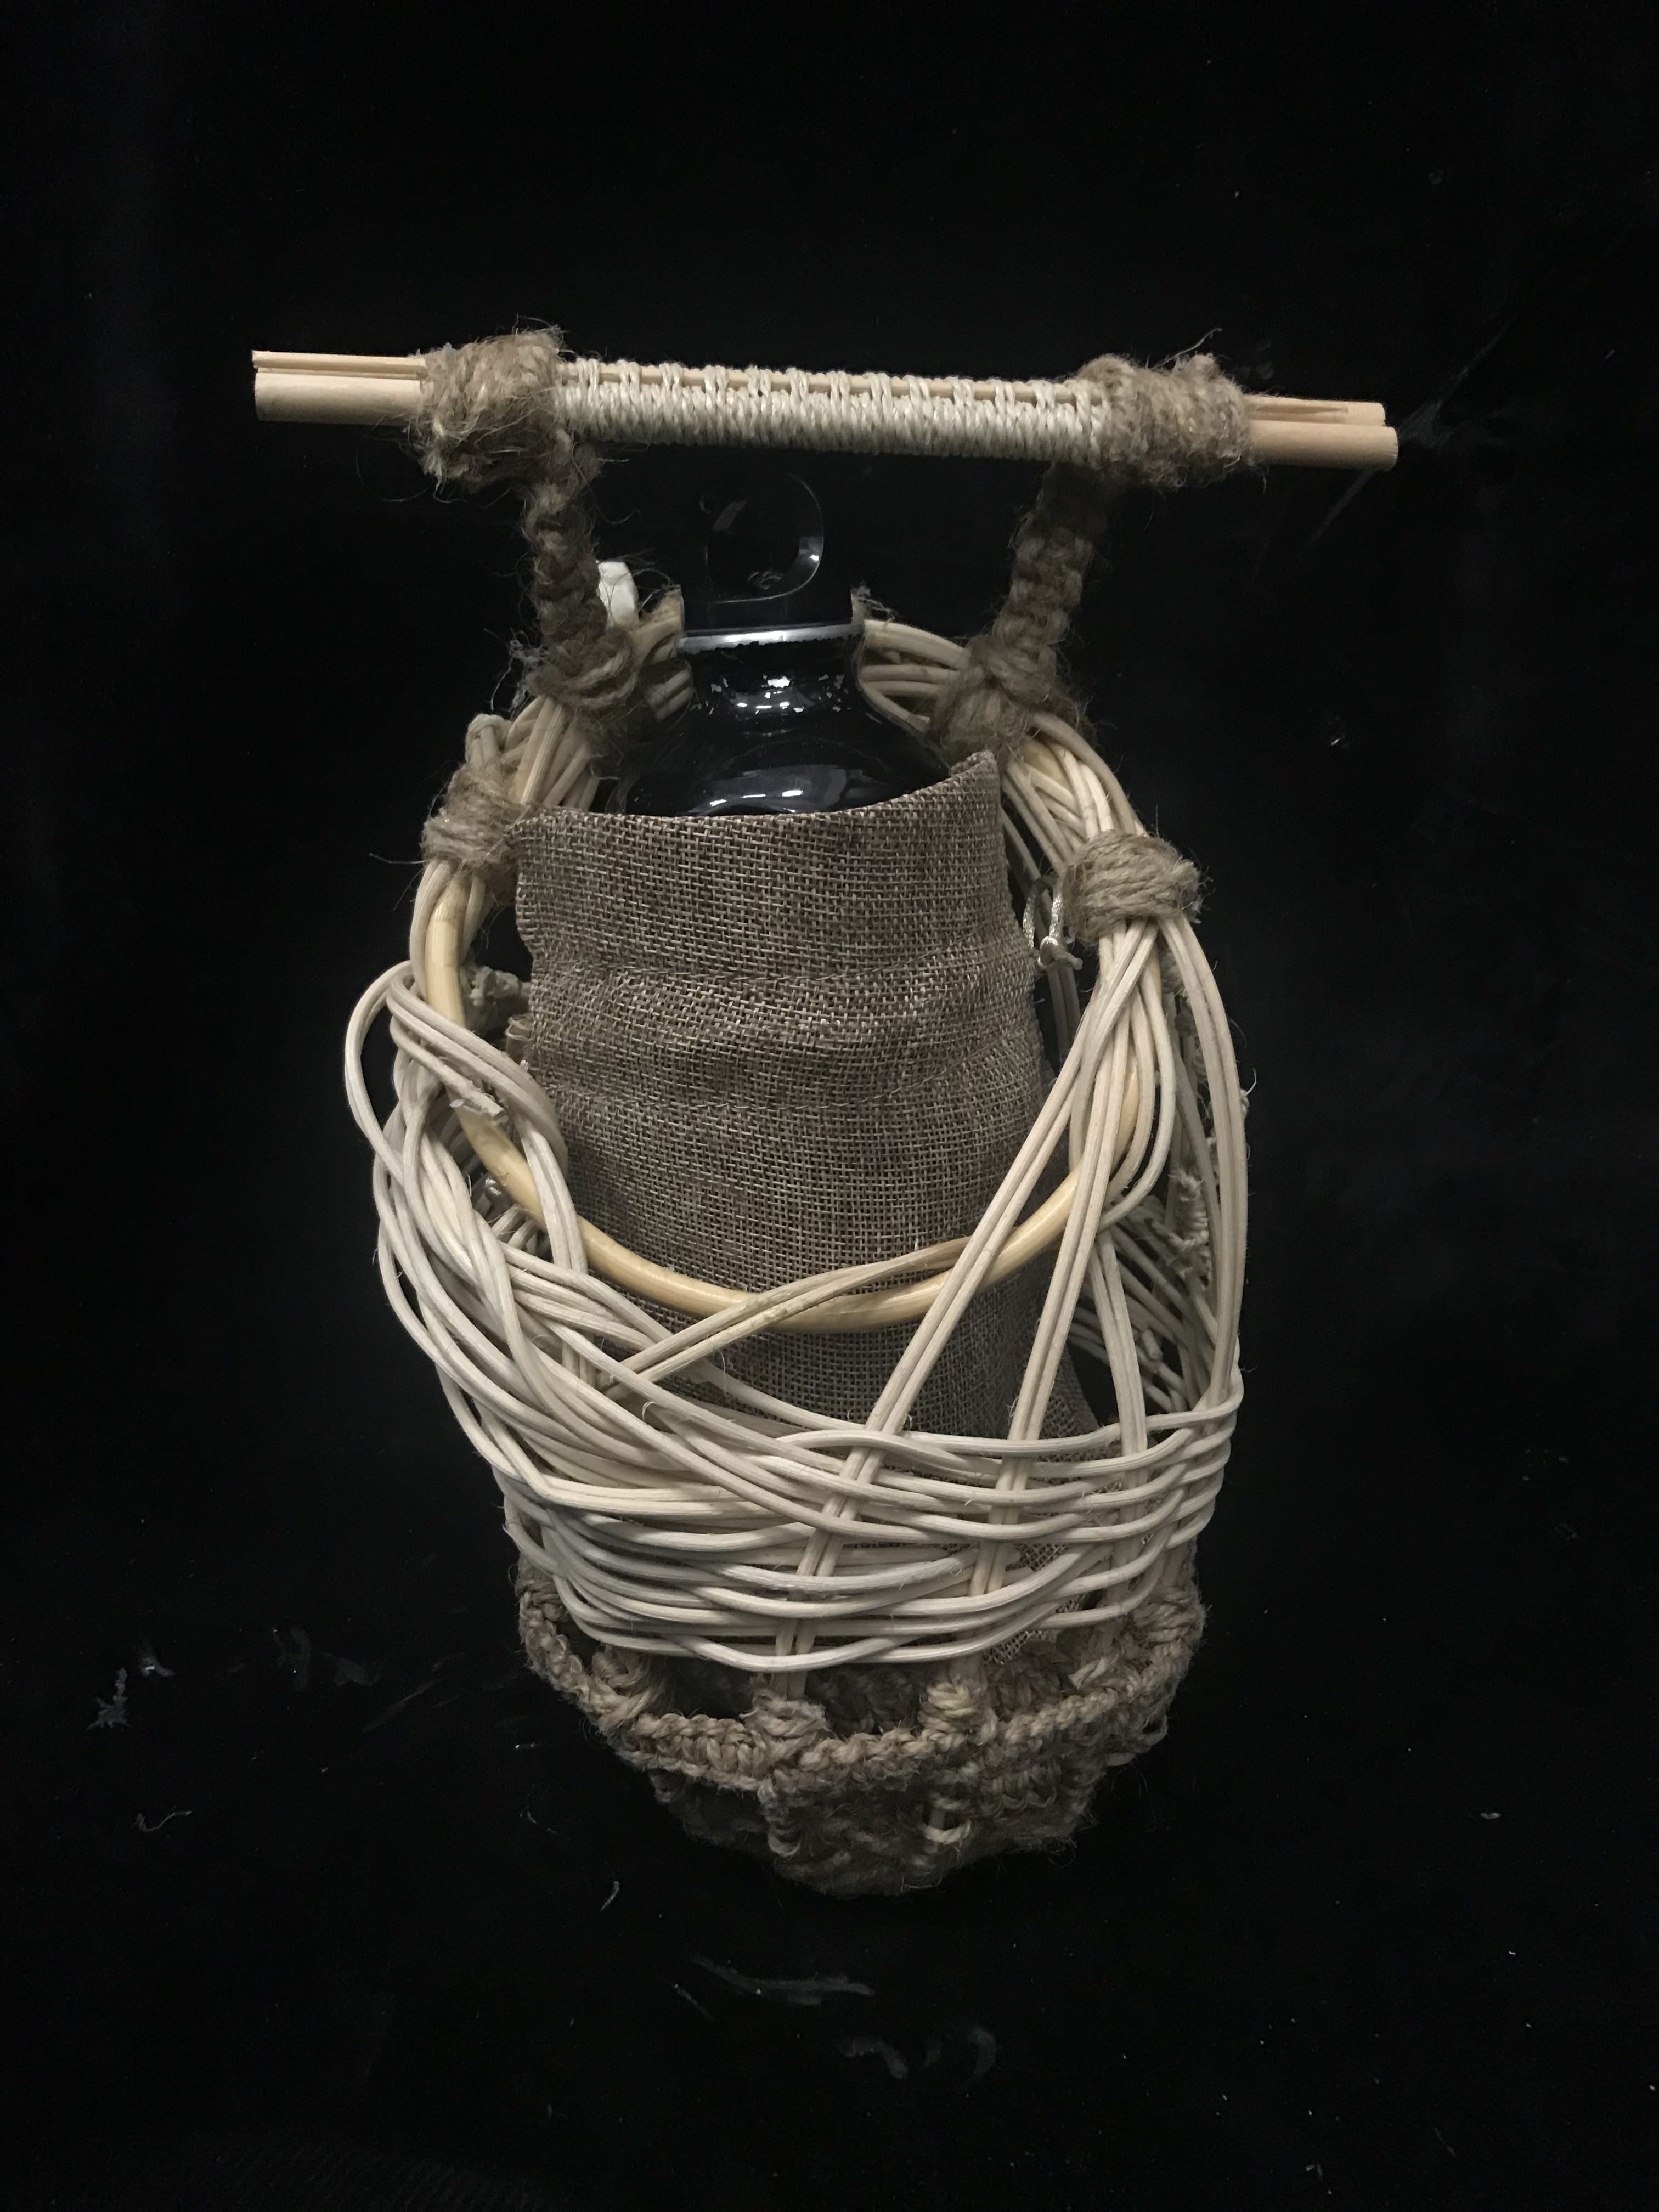
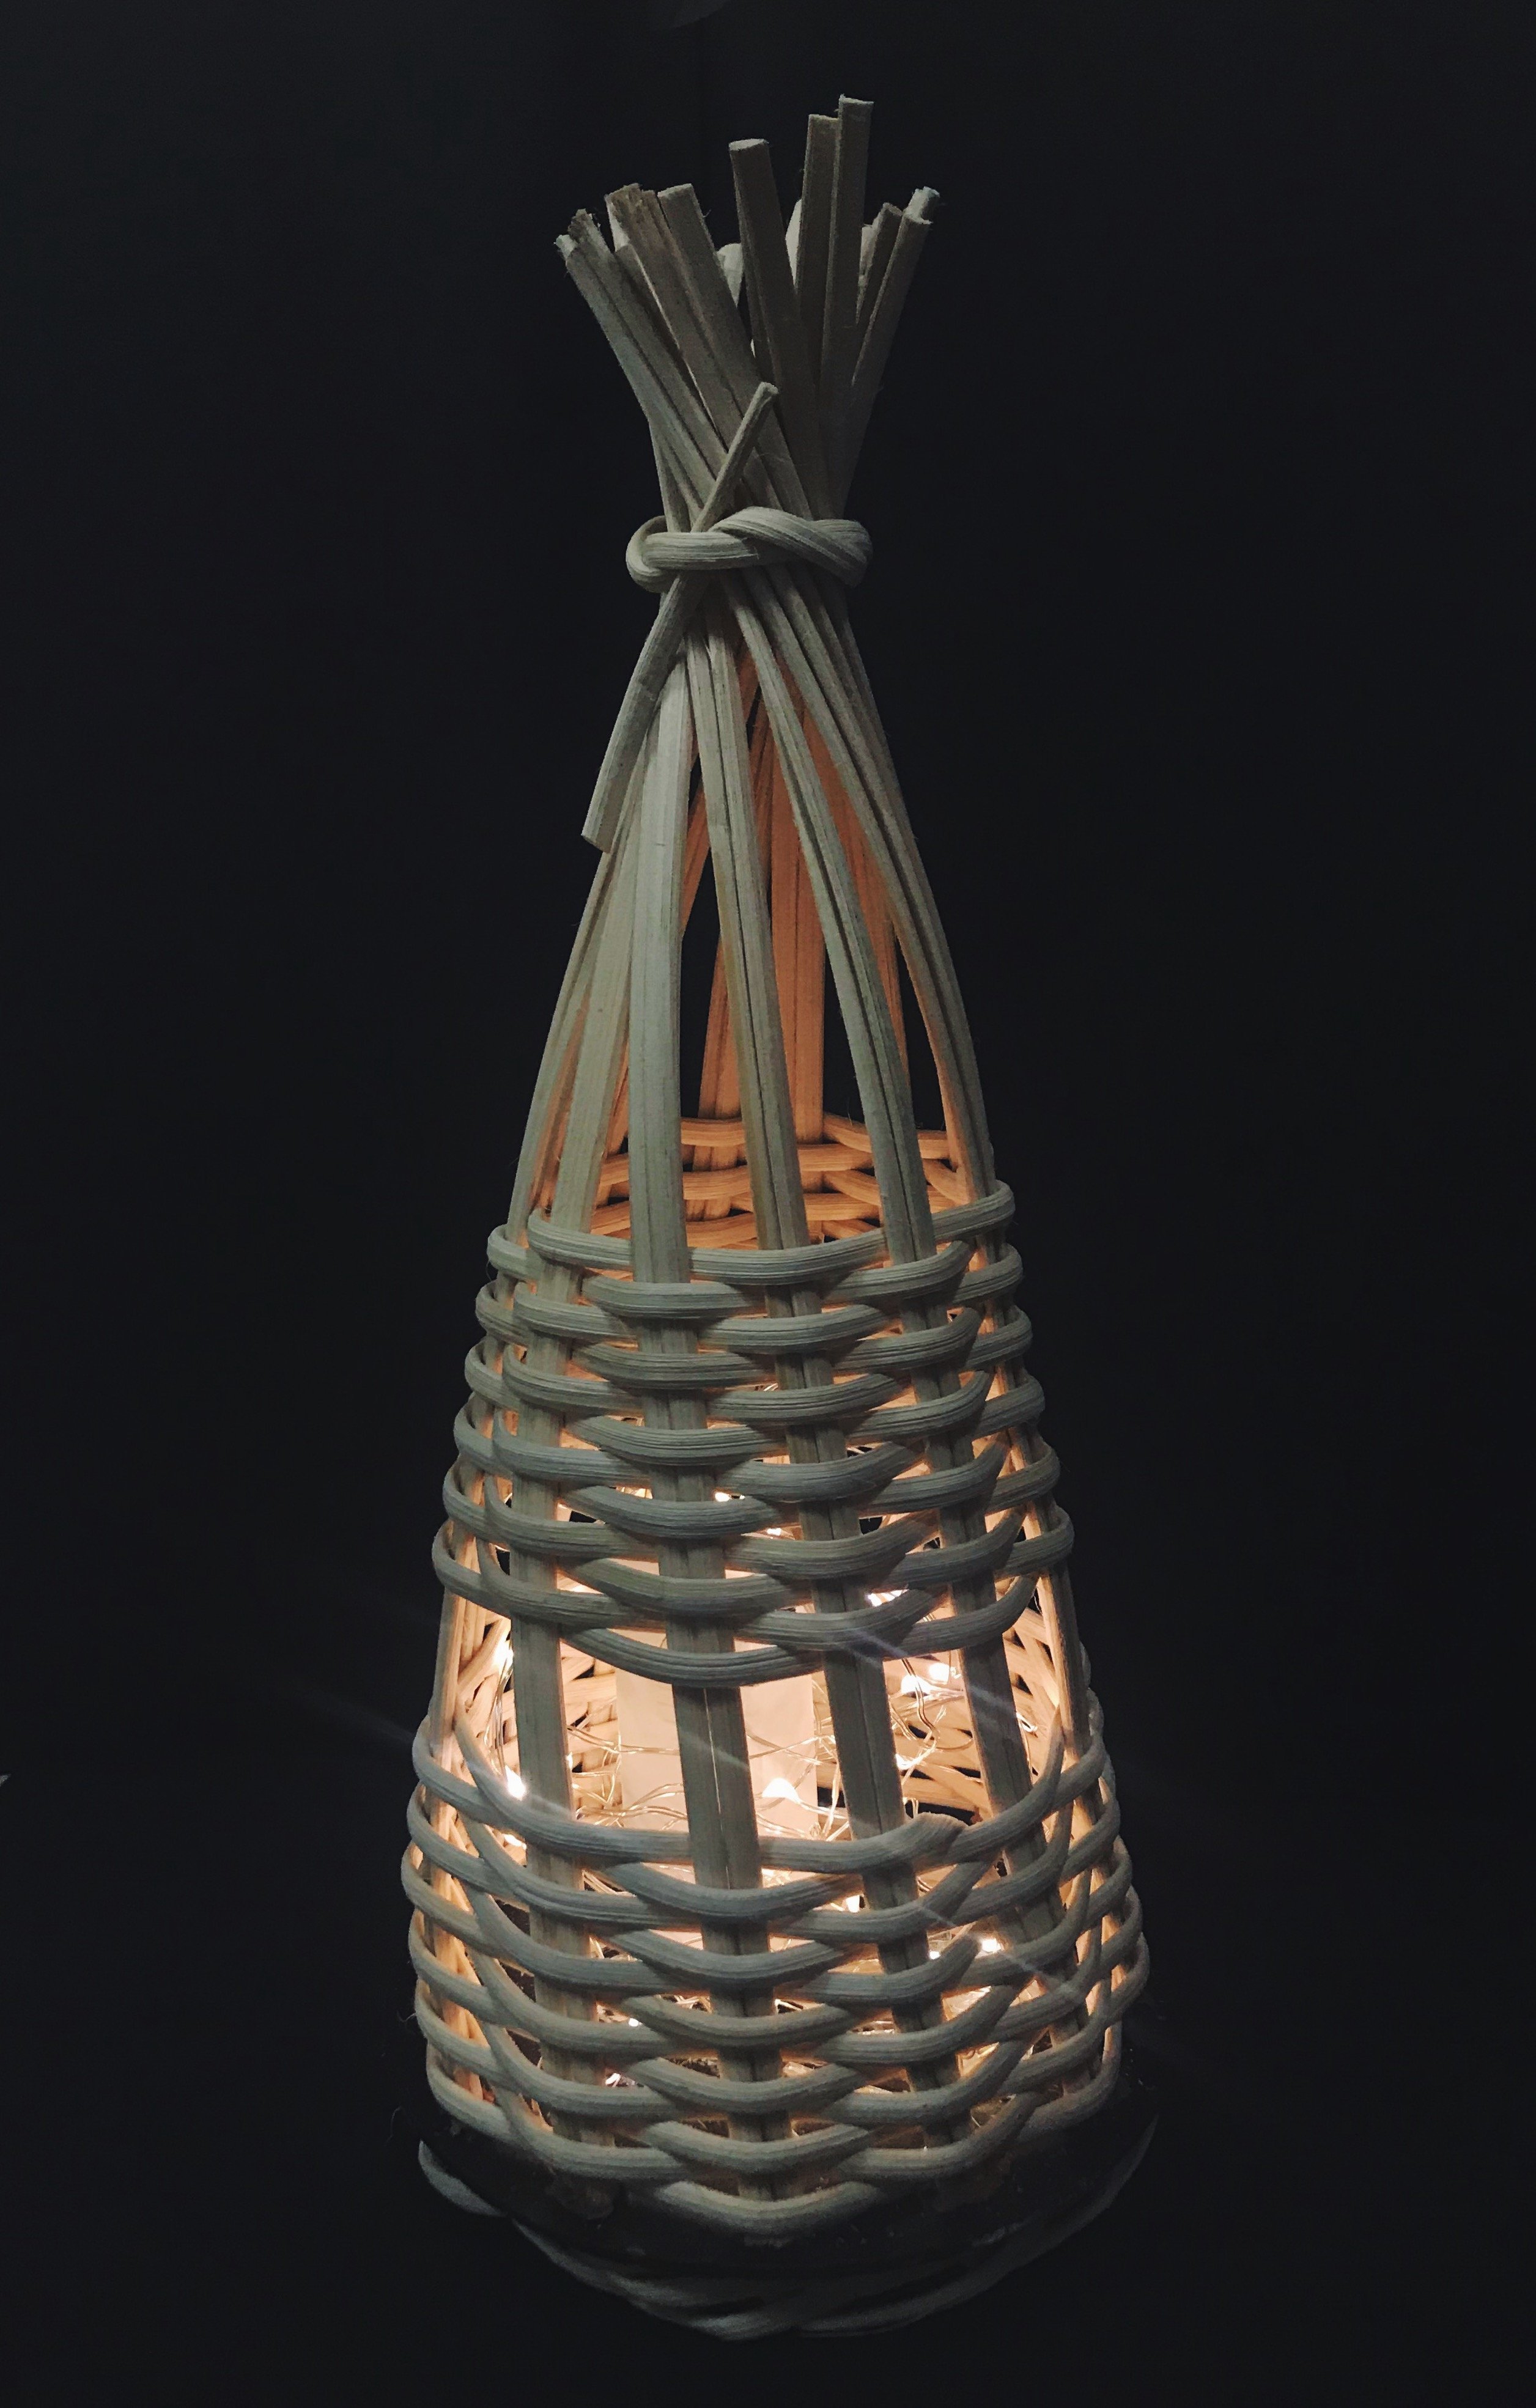
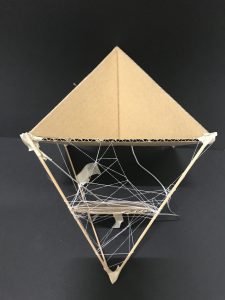
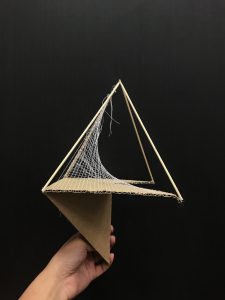
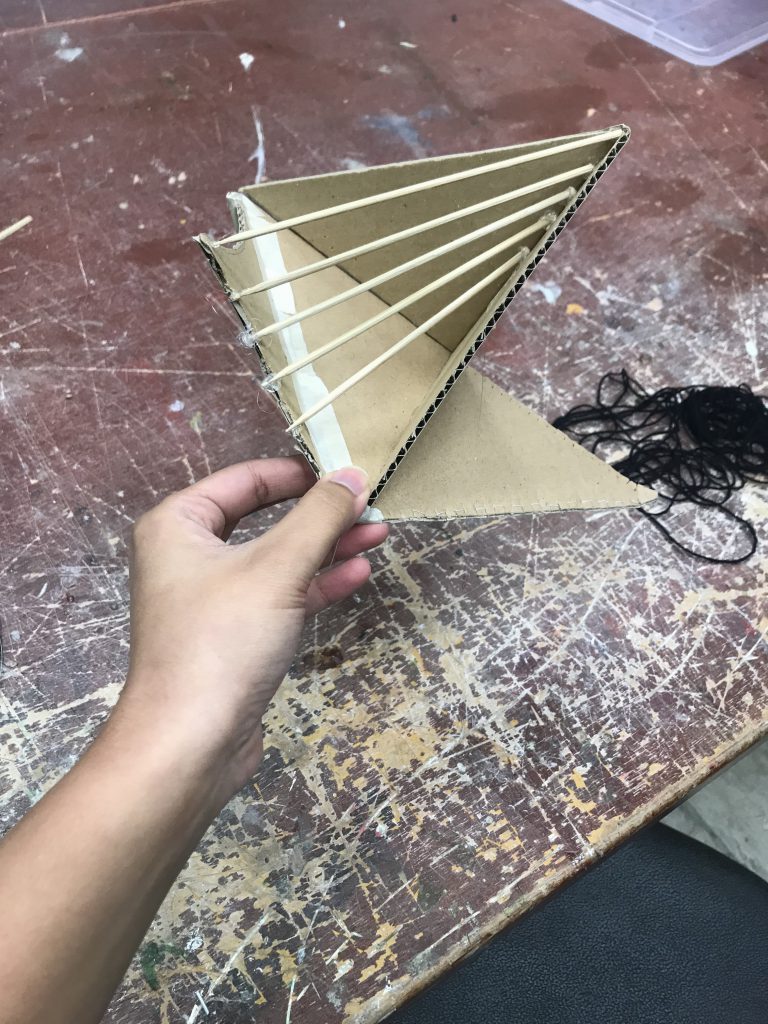
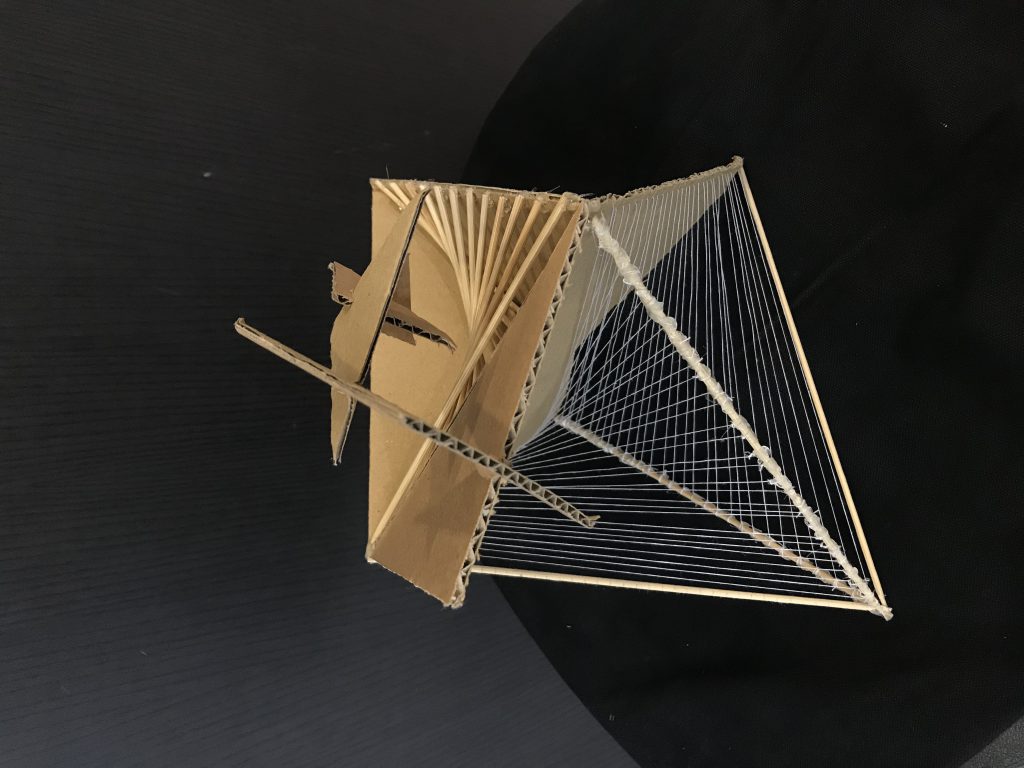
[1st Attempt] – I chose to stuck with cardboard as the planes because I wanted that to be the main structure to hold the sculpture down since I was familiar with it and wanted to develop from my current Plane Model. In addition to that, for contrast, I chose a white thread that are thinner in nature because I felt like that would create a more intricate and industrial look.
Therefore, to execute my idea, I had the different shapes of the original planes removed because I felt like angular shapes will work better for what I was going for.
Afterwards, I stuck satay sticks onto the sculpture to make up the bottom of the sculpture to show ‘hollowing’. I then tied the strings in random directions across the bottom part of the sculpture.
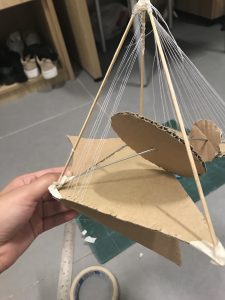
However, the problem I had with that was that the strings would not stay in place and kept sliding down the sticks. Therefore, I had to find a way to make it stay in place to provide a cleaner look to the model.
Also, I realised that tying the strings randomly did not provide a sophisticated look but instead, made it look more abstract.
I also added a metal wire at the bottom of the sculpture along with 2 other circular shapes to provide a more relaxed look but figured that I did not like how it looked.
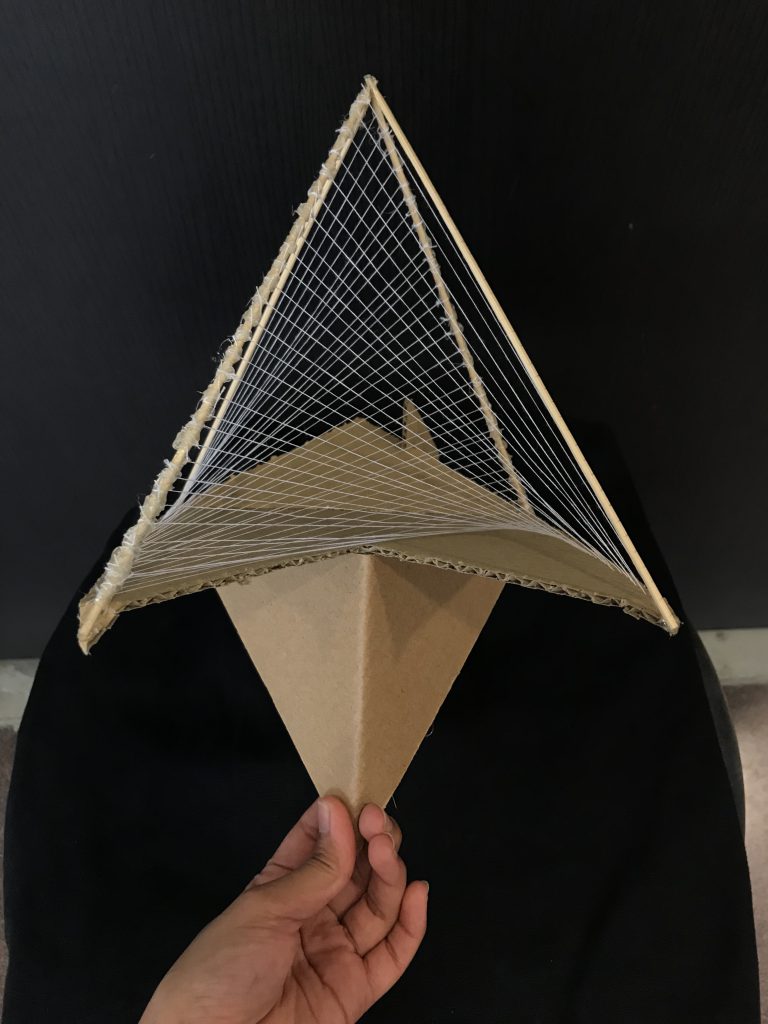
[2nd Attempt]
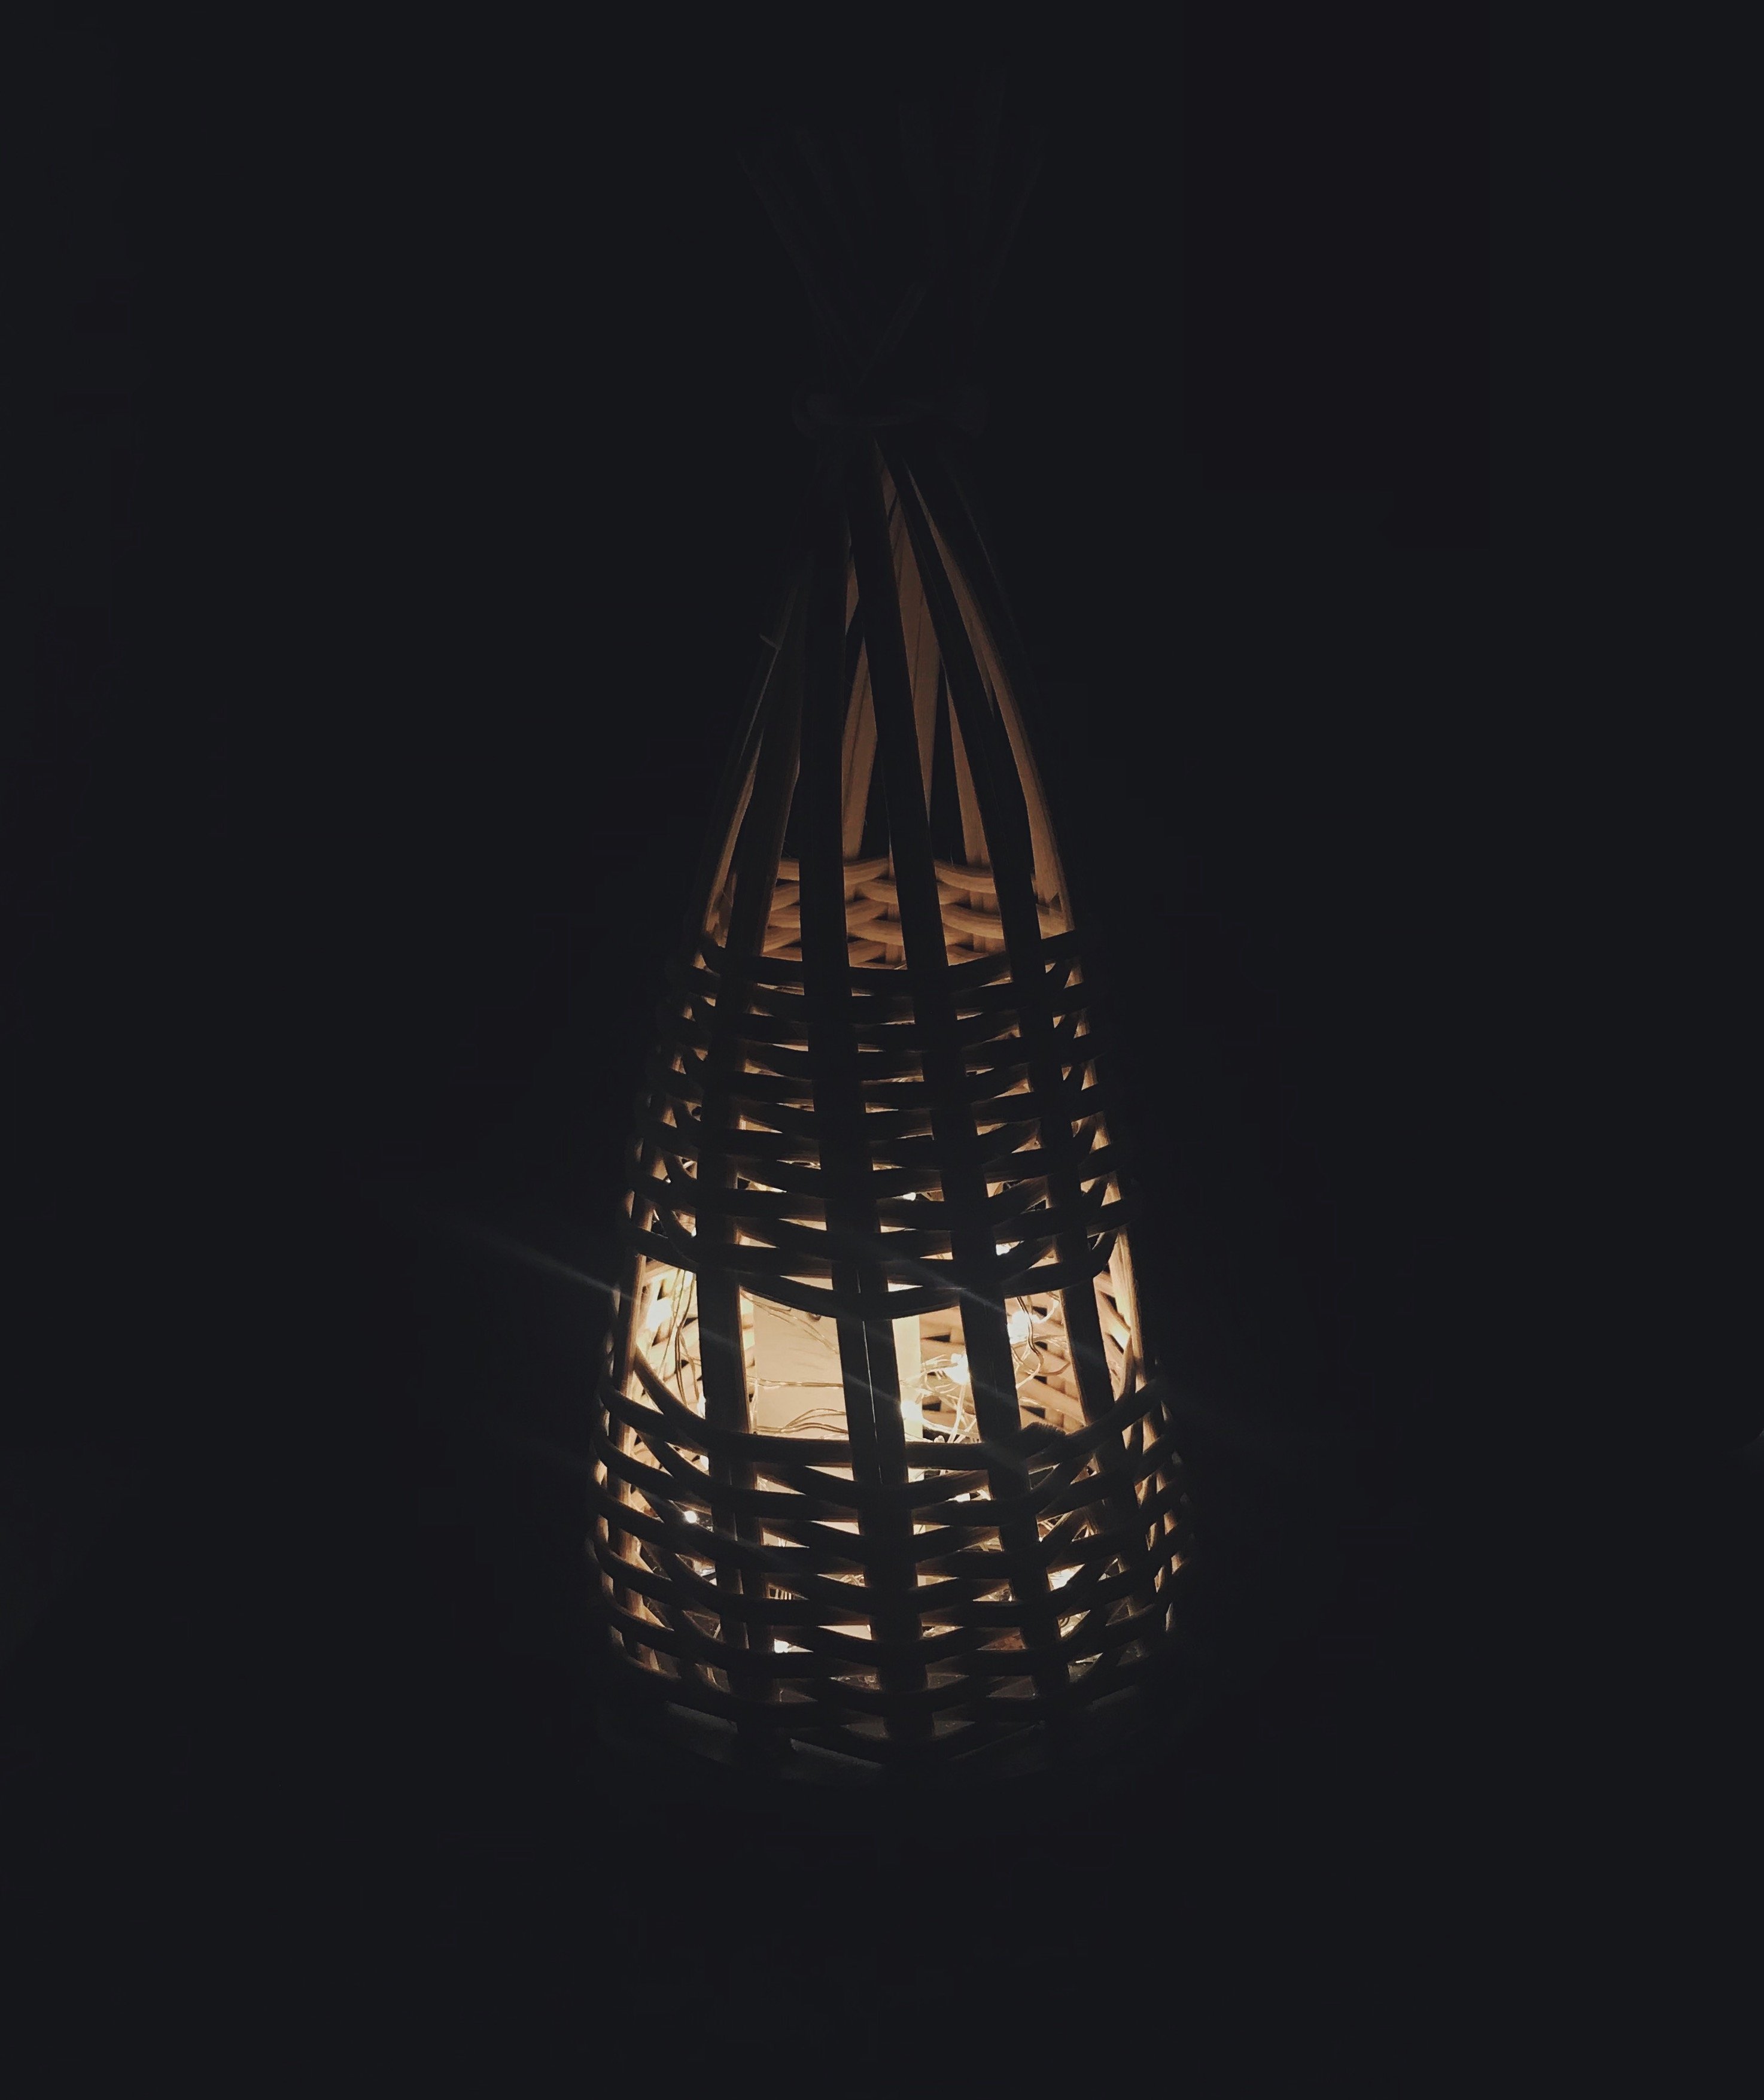
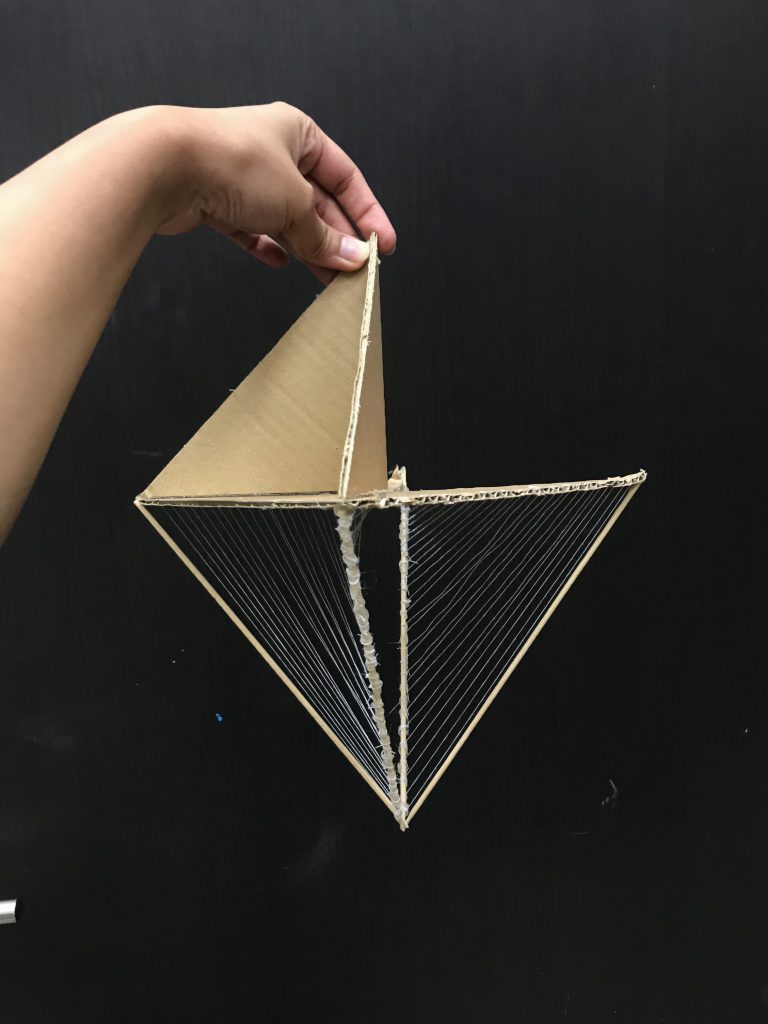
Hence, I redid the base model and added carefully measured slits along the base for the strings to go through, each with equal distance of 0.5cm. I also measure followed the same measurements for the sticks. This method was adapted and refined from the previous attempt.
To solve the problem of having the strings to stay in place, I tied it down, glued it into place and tied it once more.
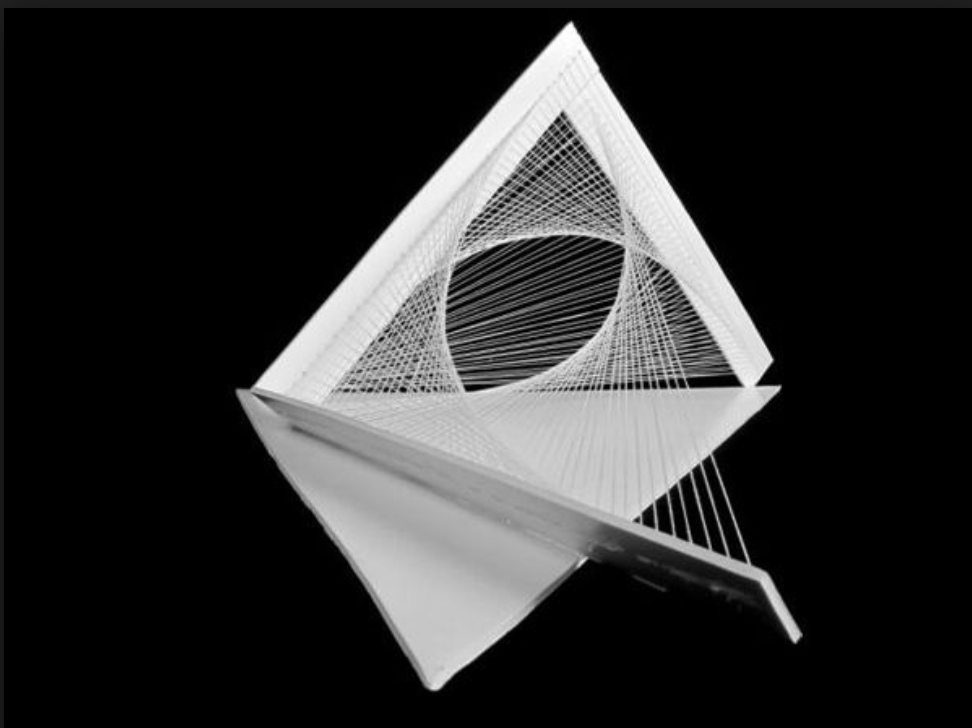
I was particularly drawn to this inspiration photo I found while doing my research. Hence, I learnt the curve stitching method to provide a bow-like curve stitching to my model by applying the technique on opposite sections of the model. This also created a hollowing effect.
Reference:
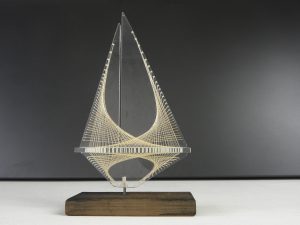
3
Photo Credit: 3
Further development:
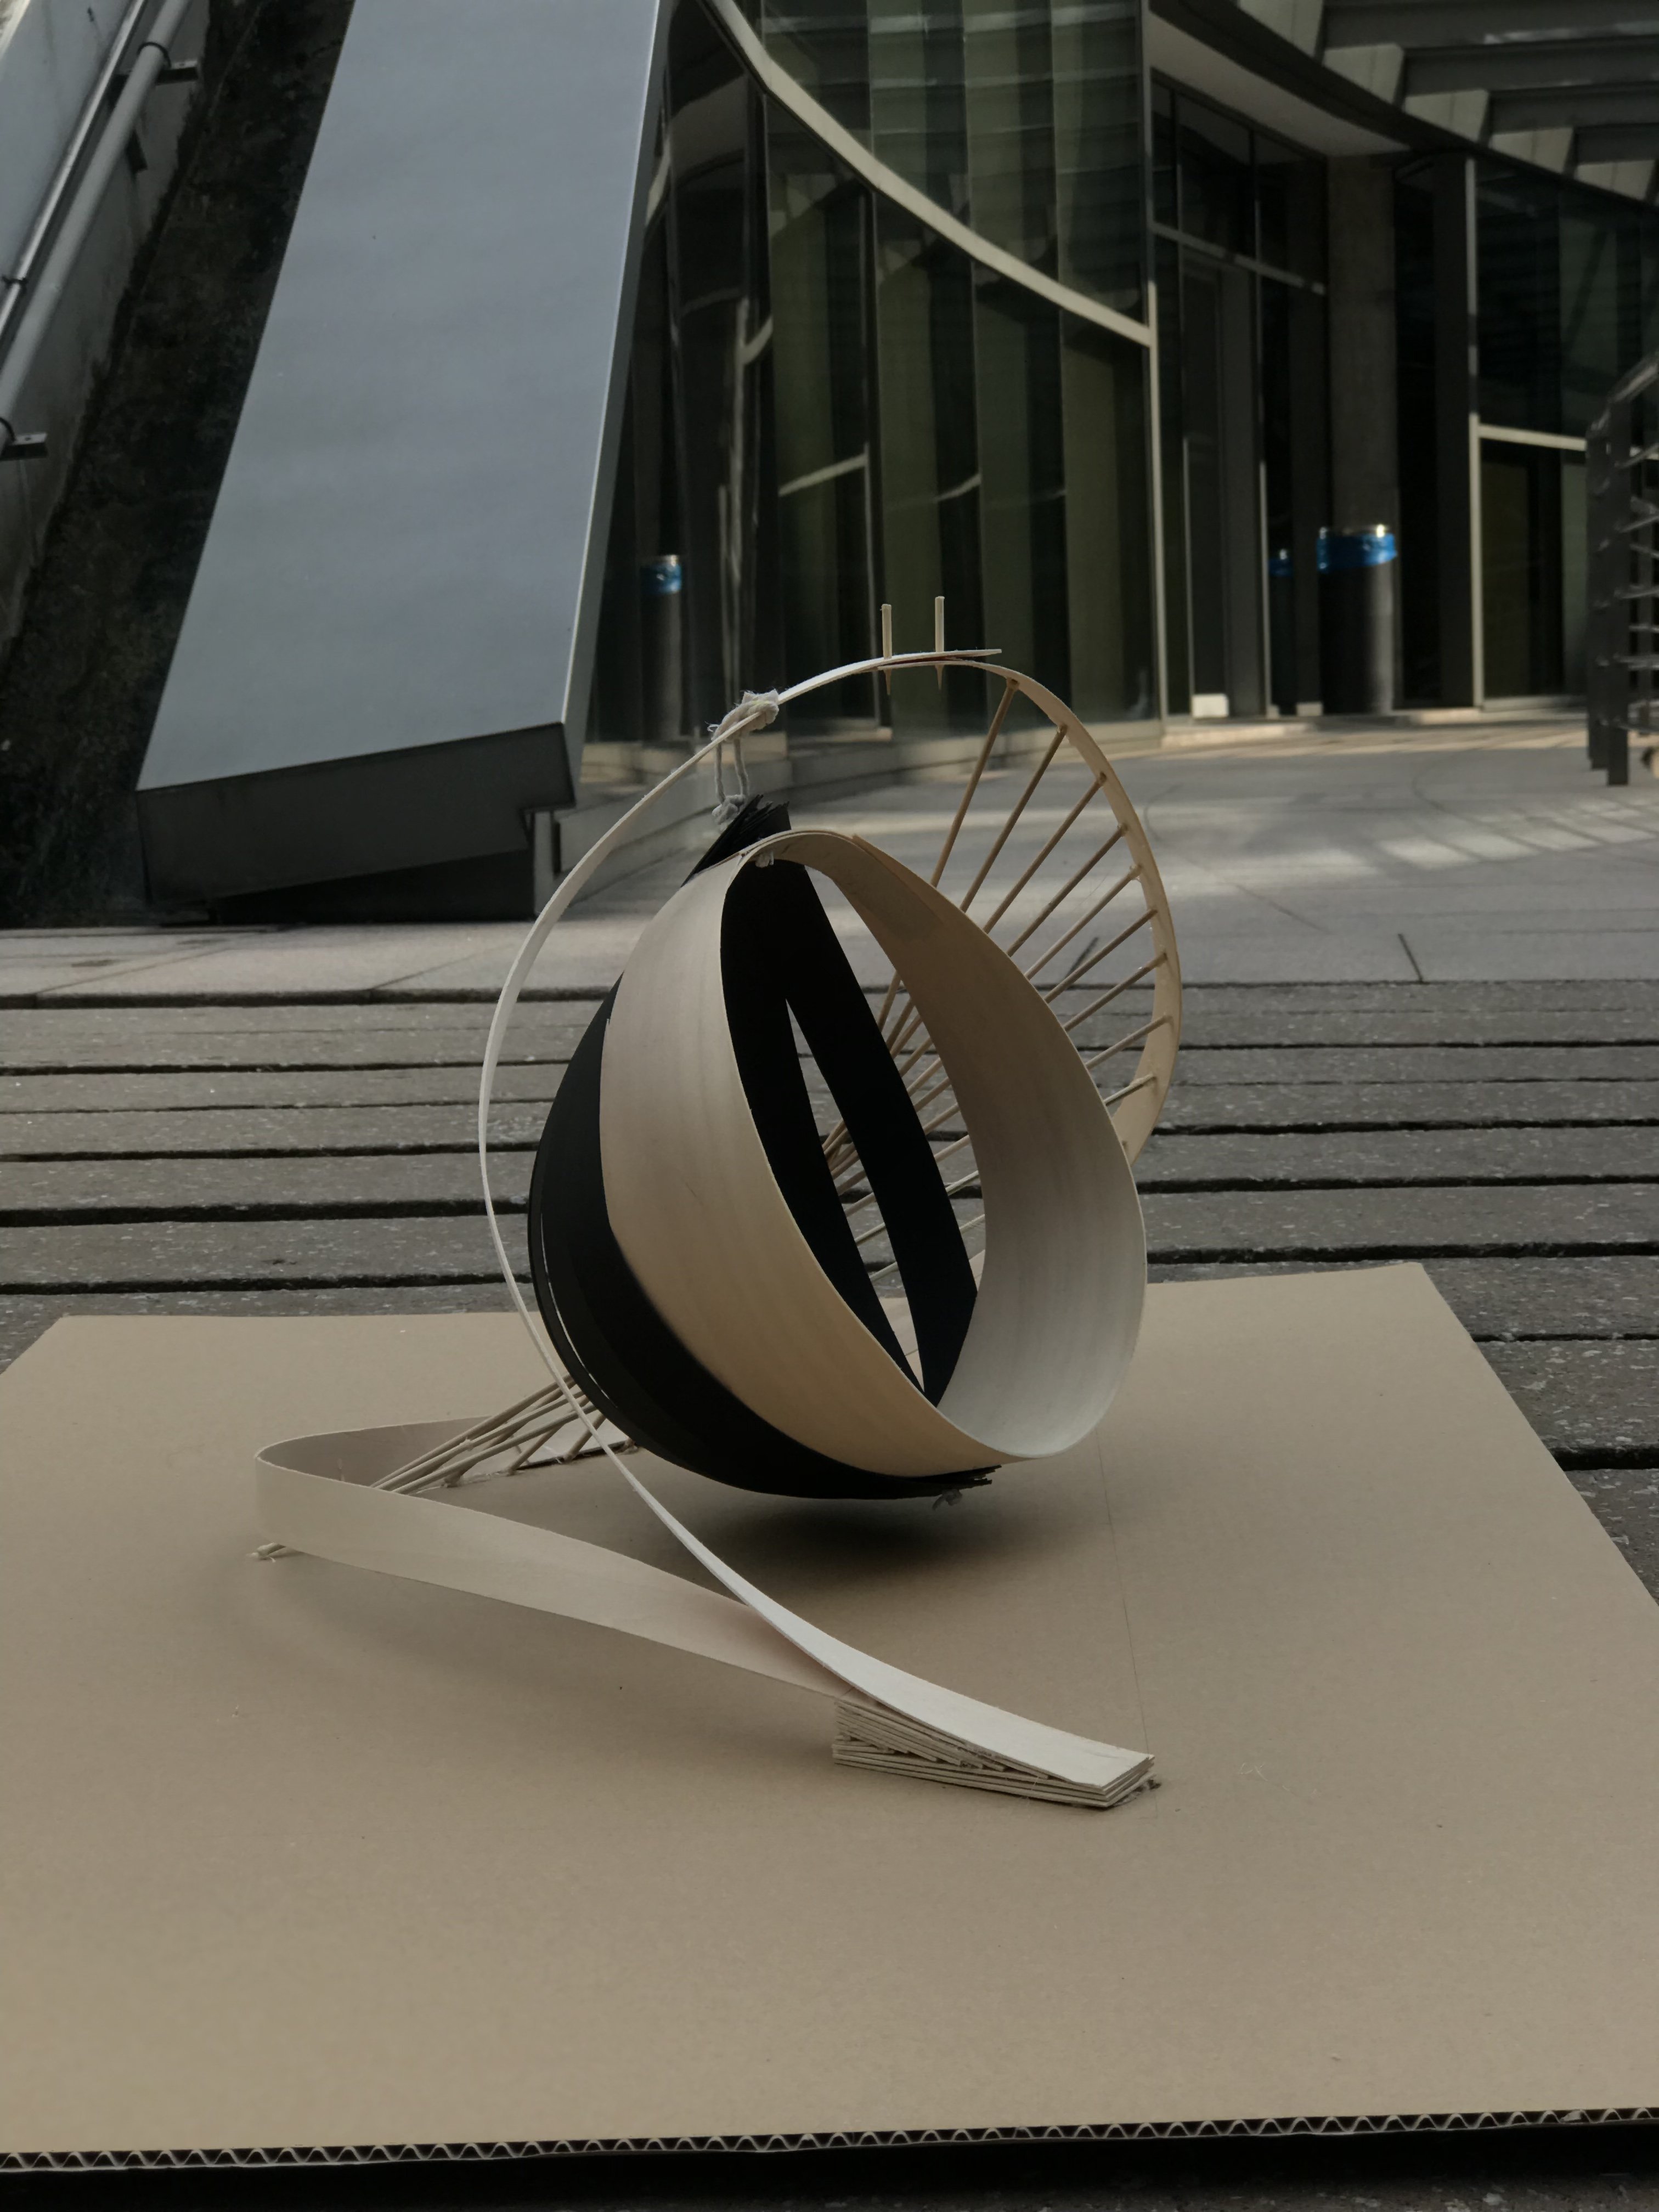
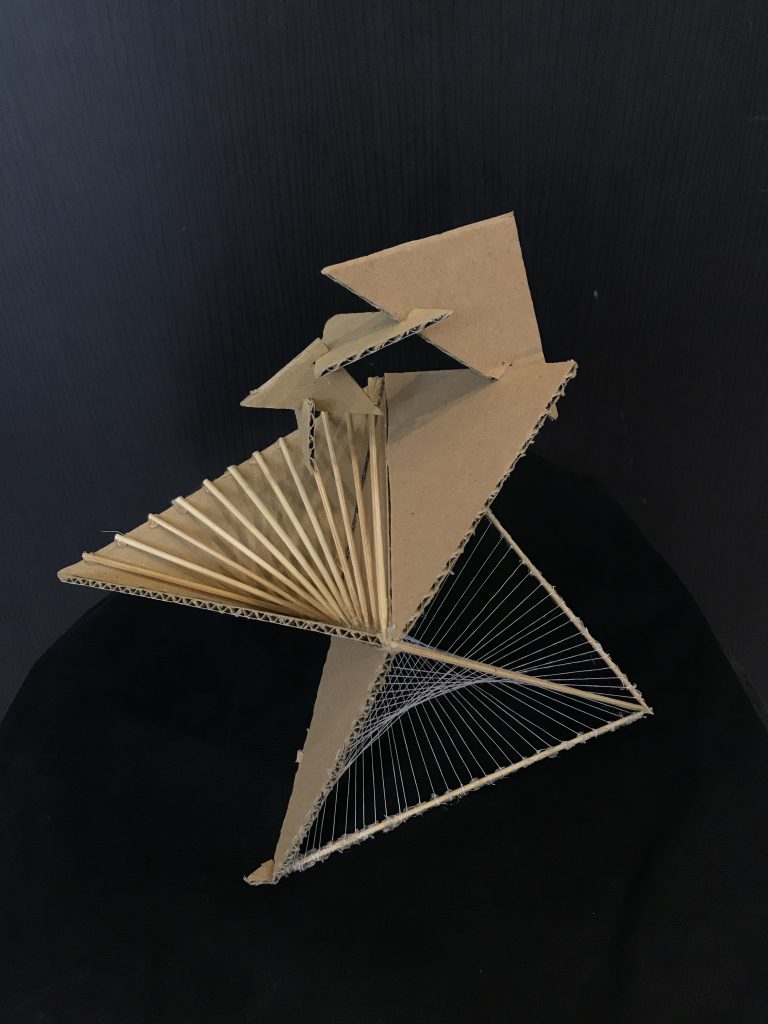
[3rd Attempt]
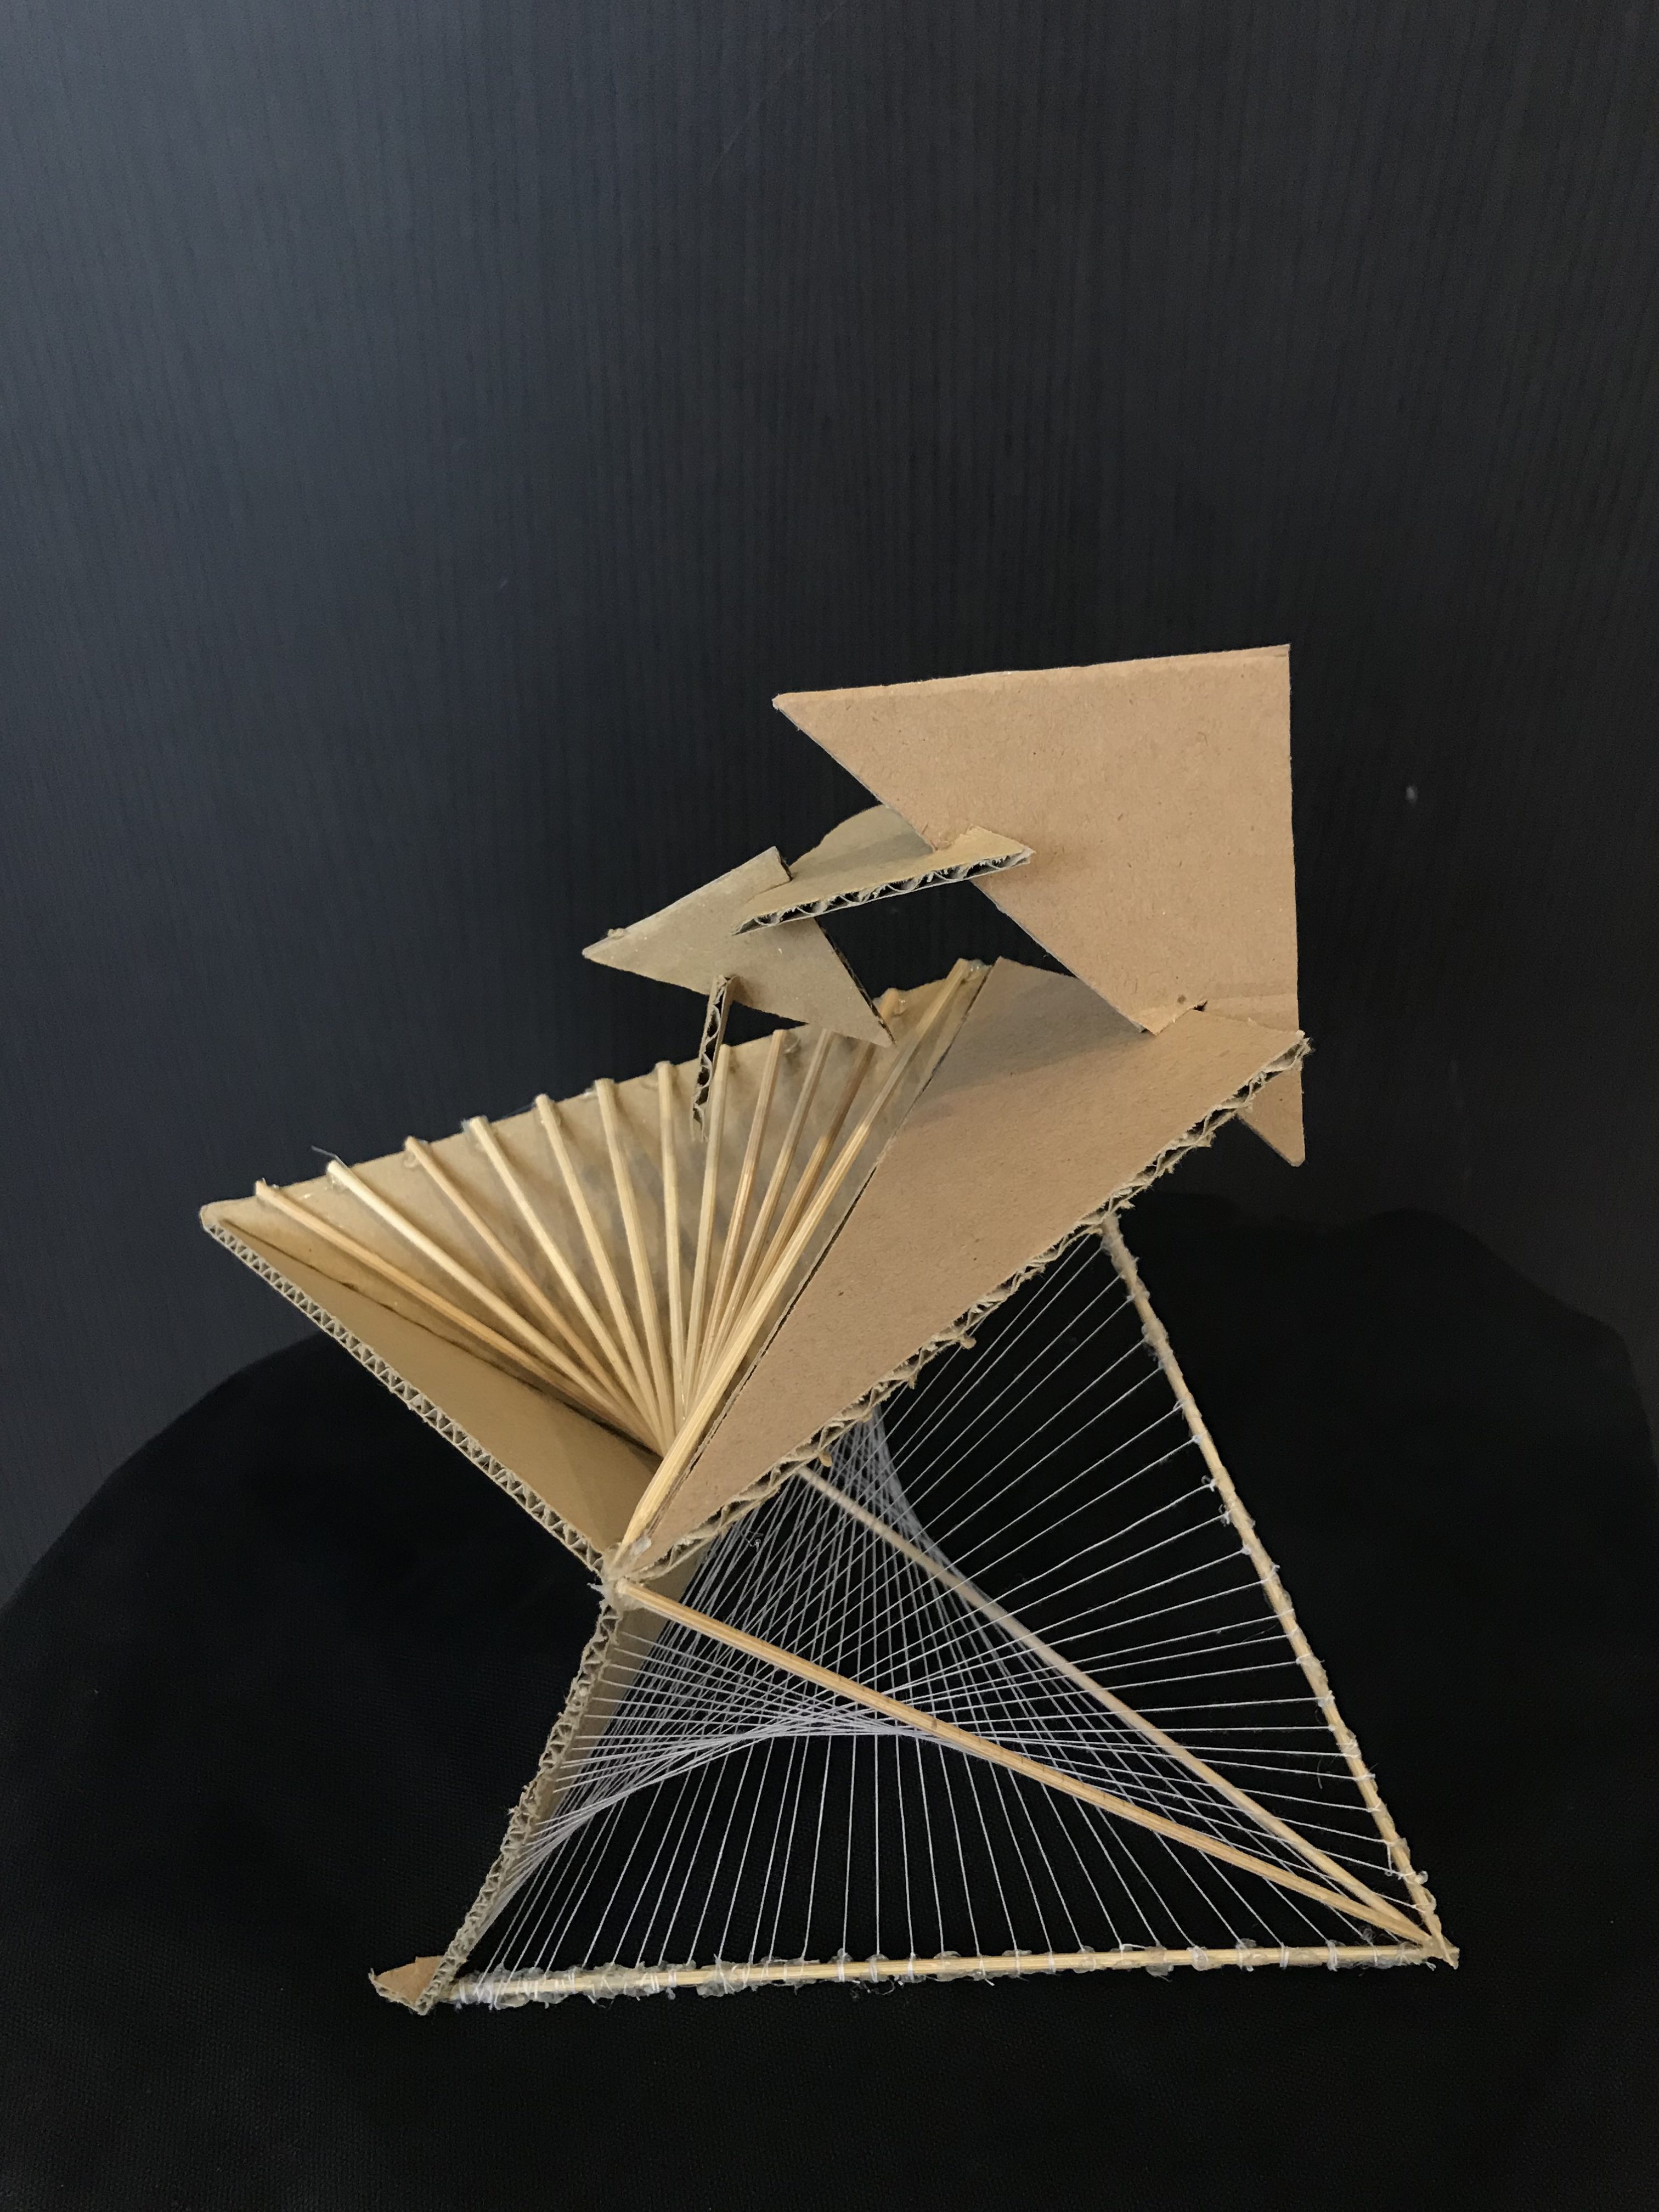
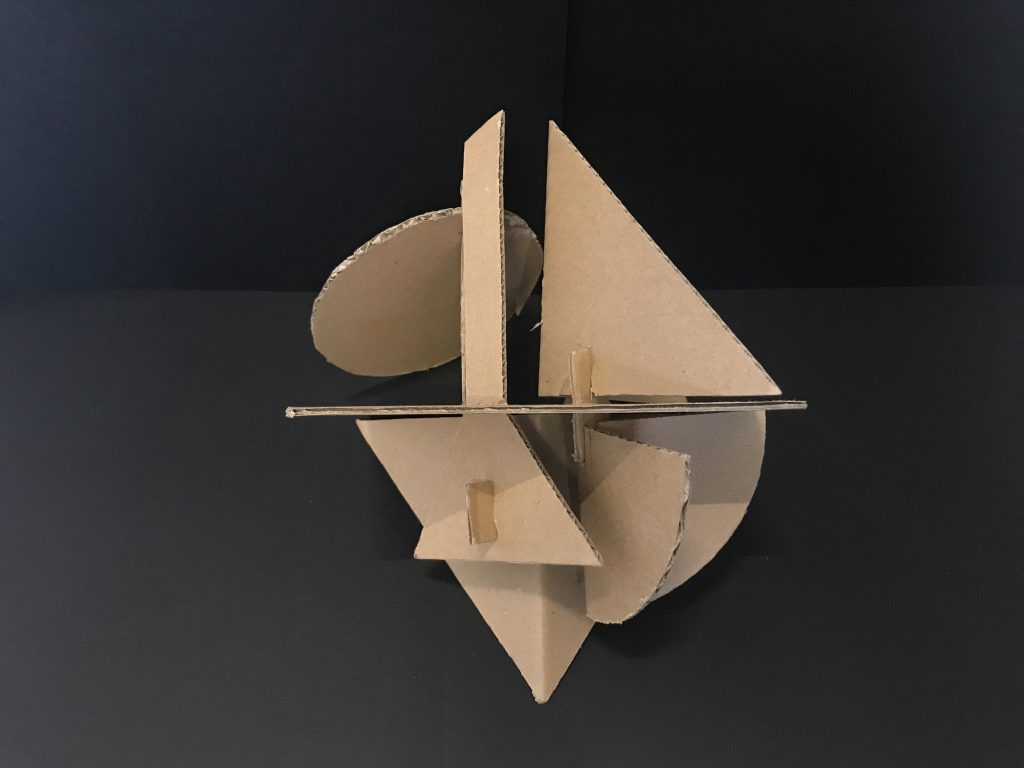
Upon completing the below, I realised that the model looked a little plain for my liking. Hence, I added a triangular plane on one side of the model.

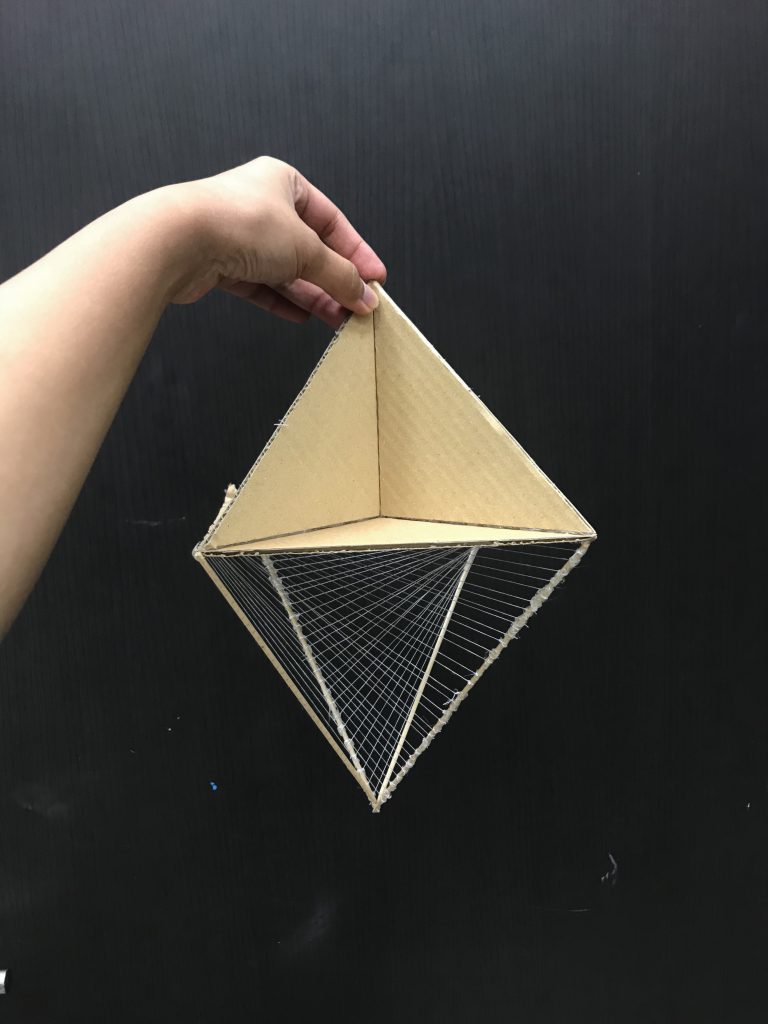
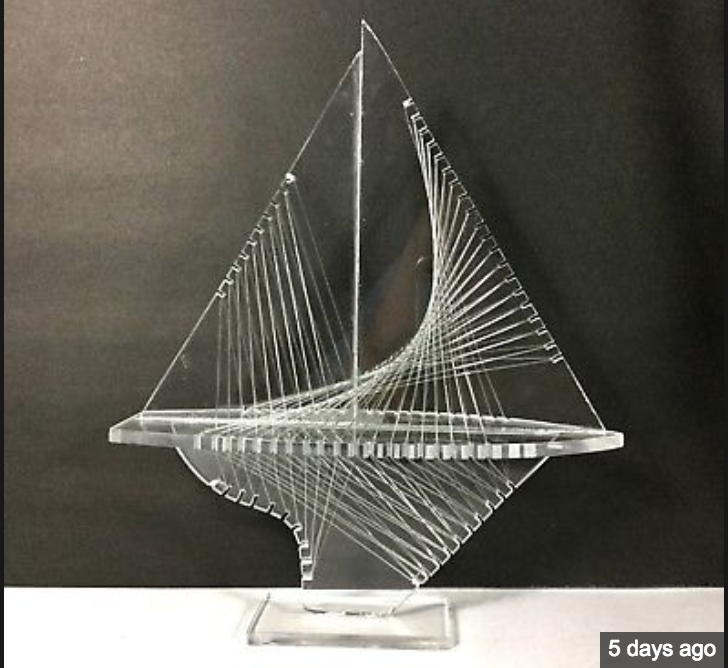
When I saw this reference photo, I realised how I could manipulate the use of sticks to create the same cross-stitching effect as the strings. I measured it accordingly and glue it down to the other side of the model that looked plain.
Reference:

4
Photo Credit: 4
I also decided to add the triangles that were cut into half each time it descends. I adapted the use of the slit and slot method from the previous attempts. This provided a disintegrating effect.
-
- Testing Phase
-

- Final Product
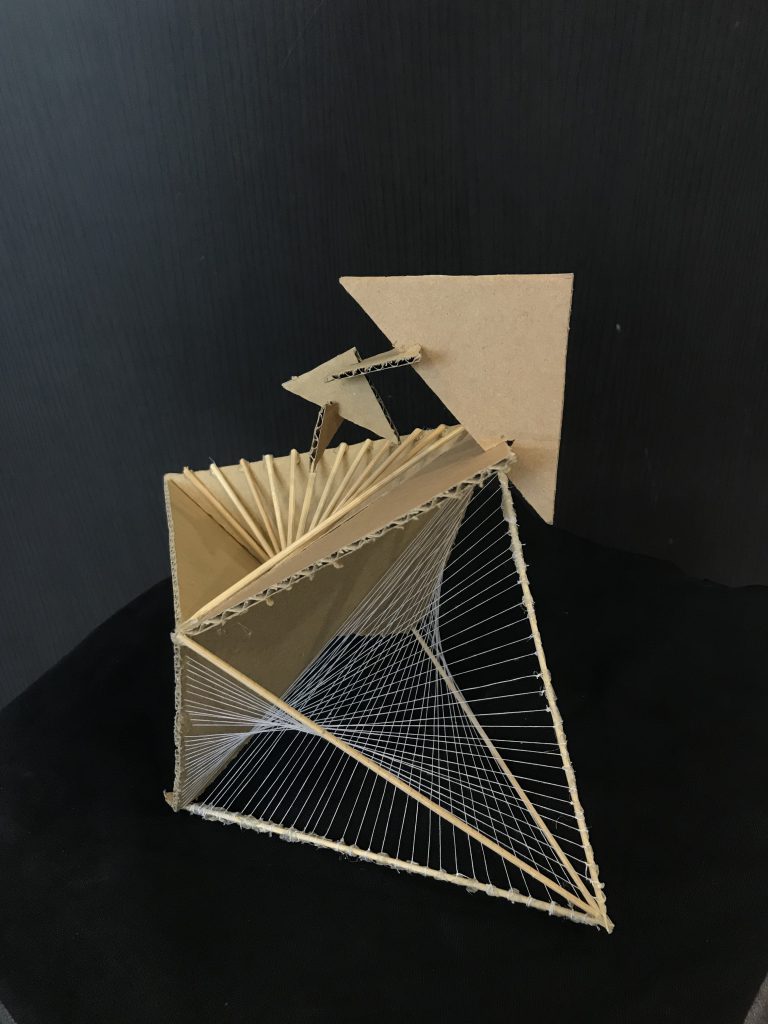
Final
Overall, the usage of thin white strings against the cardboard created an industrial look with modern and minimal feel. I also tried to keep the colour palette harmonious and neutral so that one does not overpower another. I wanted it to look cohesive. The cardboard and satay sticks gave it a raw edge.

Recent Comments