

After being introduced to ‘Critical Making’; a combination of Critical Thinking and Hands-On Making, we were tasked to create a disobedient object by hacking an everyday household object. The objective of this micro-project is to incorporate Arduino, sensors, and actuators with our chosen object so that it behaves in the least expected way.
Group Members: Siti Khadijah & Tong Tong
IDEATION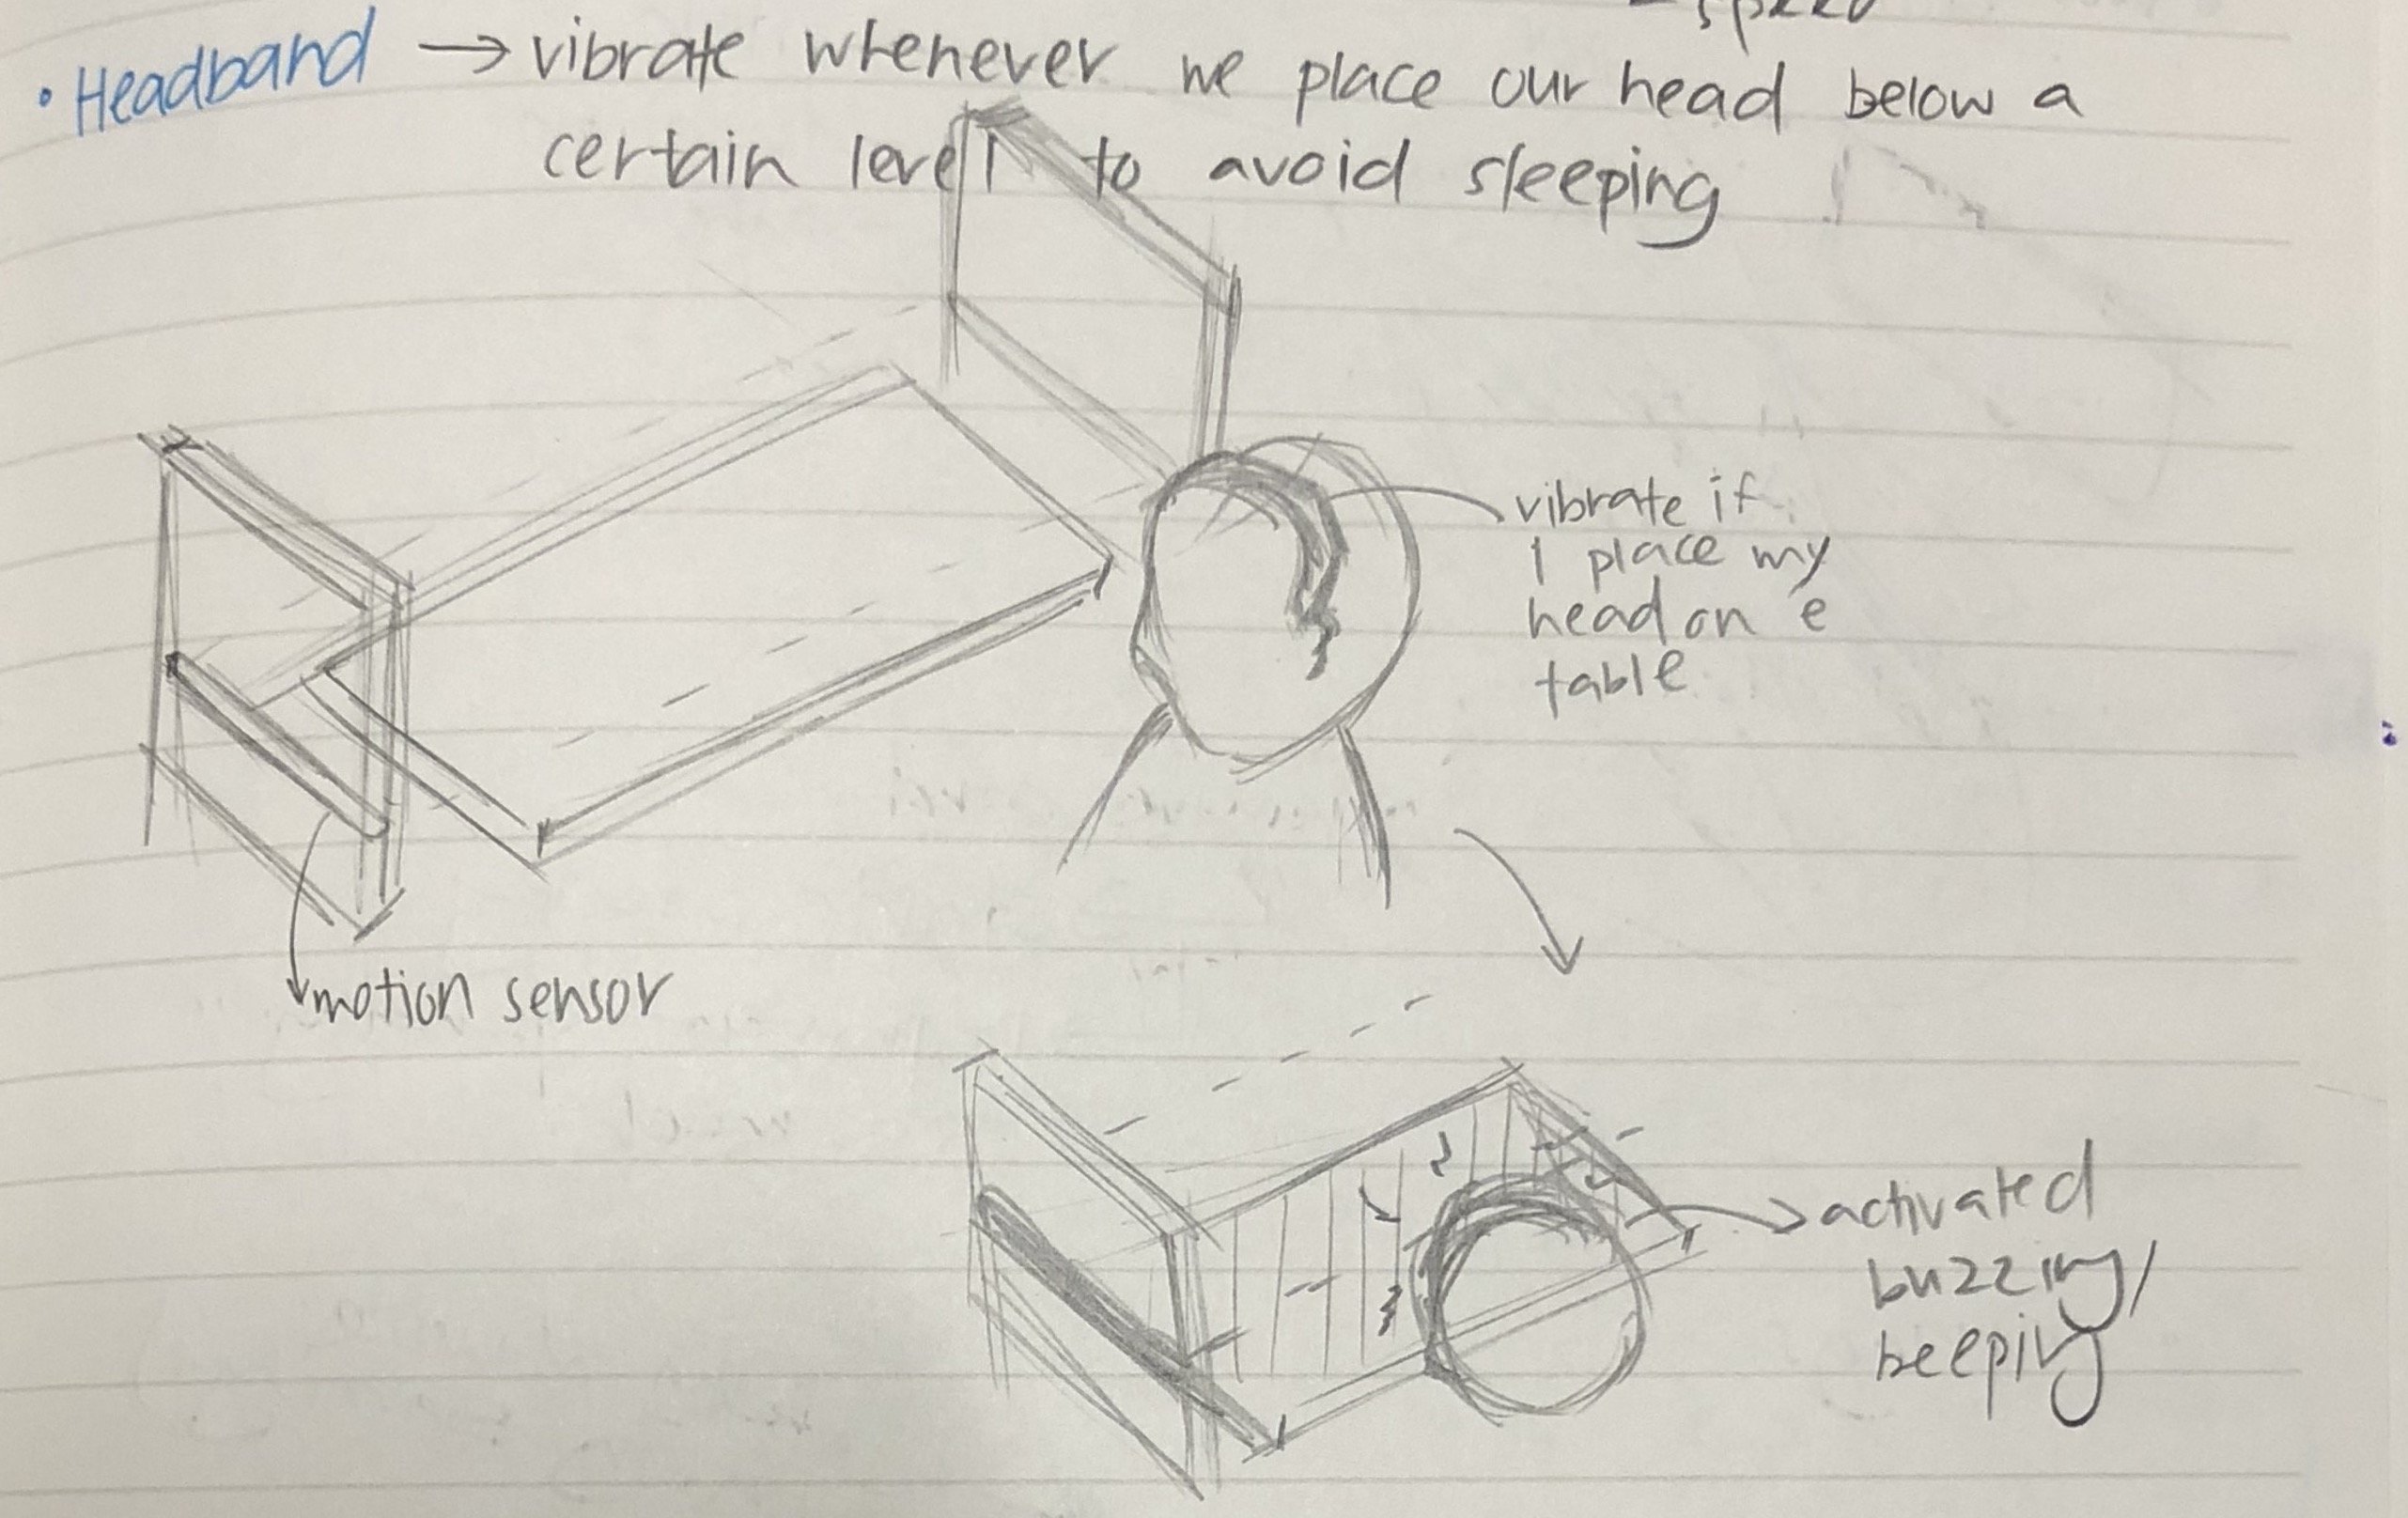
1. Screaming Headband
Hacking a headband so when we place our head below a certain level, it will start to beep, the objective of the hacked object is to increase productivity, avoid sleeping while when we are doing work.

2. Screaming Shoes
Hacking a pair of shoes so when the user enters a room with the shoes on, it will start to beep, the objective of the hacked object is to prevent the worn shoes into the room.

3. Warning Wallet
Hacking a wallet so when the user opens the wallet and take out a card from the cardholder, the wallet will produce an alarming noise to alert the user to control spending, give a second thought before spending.
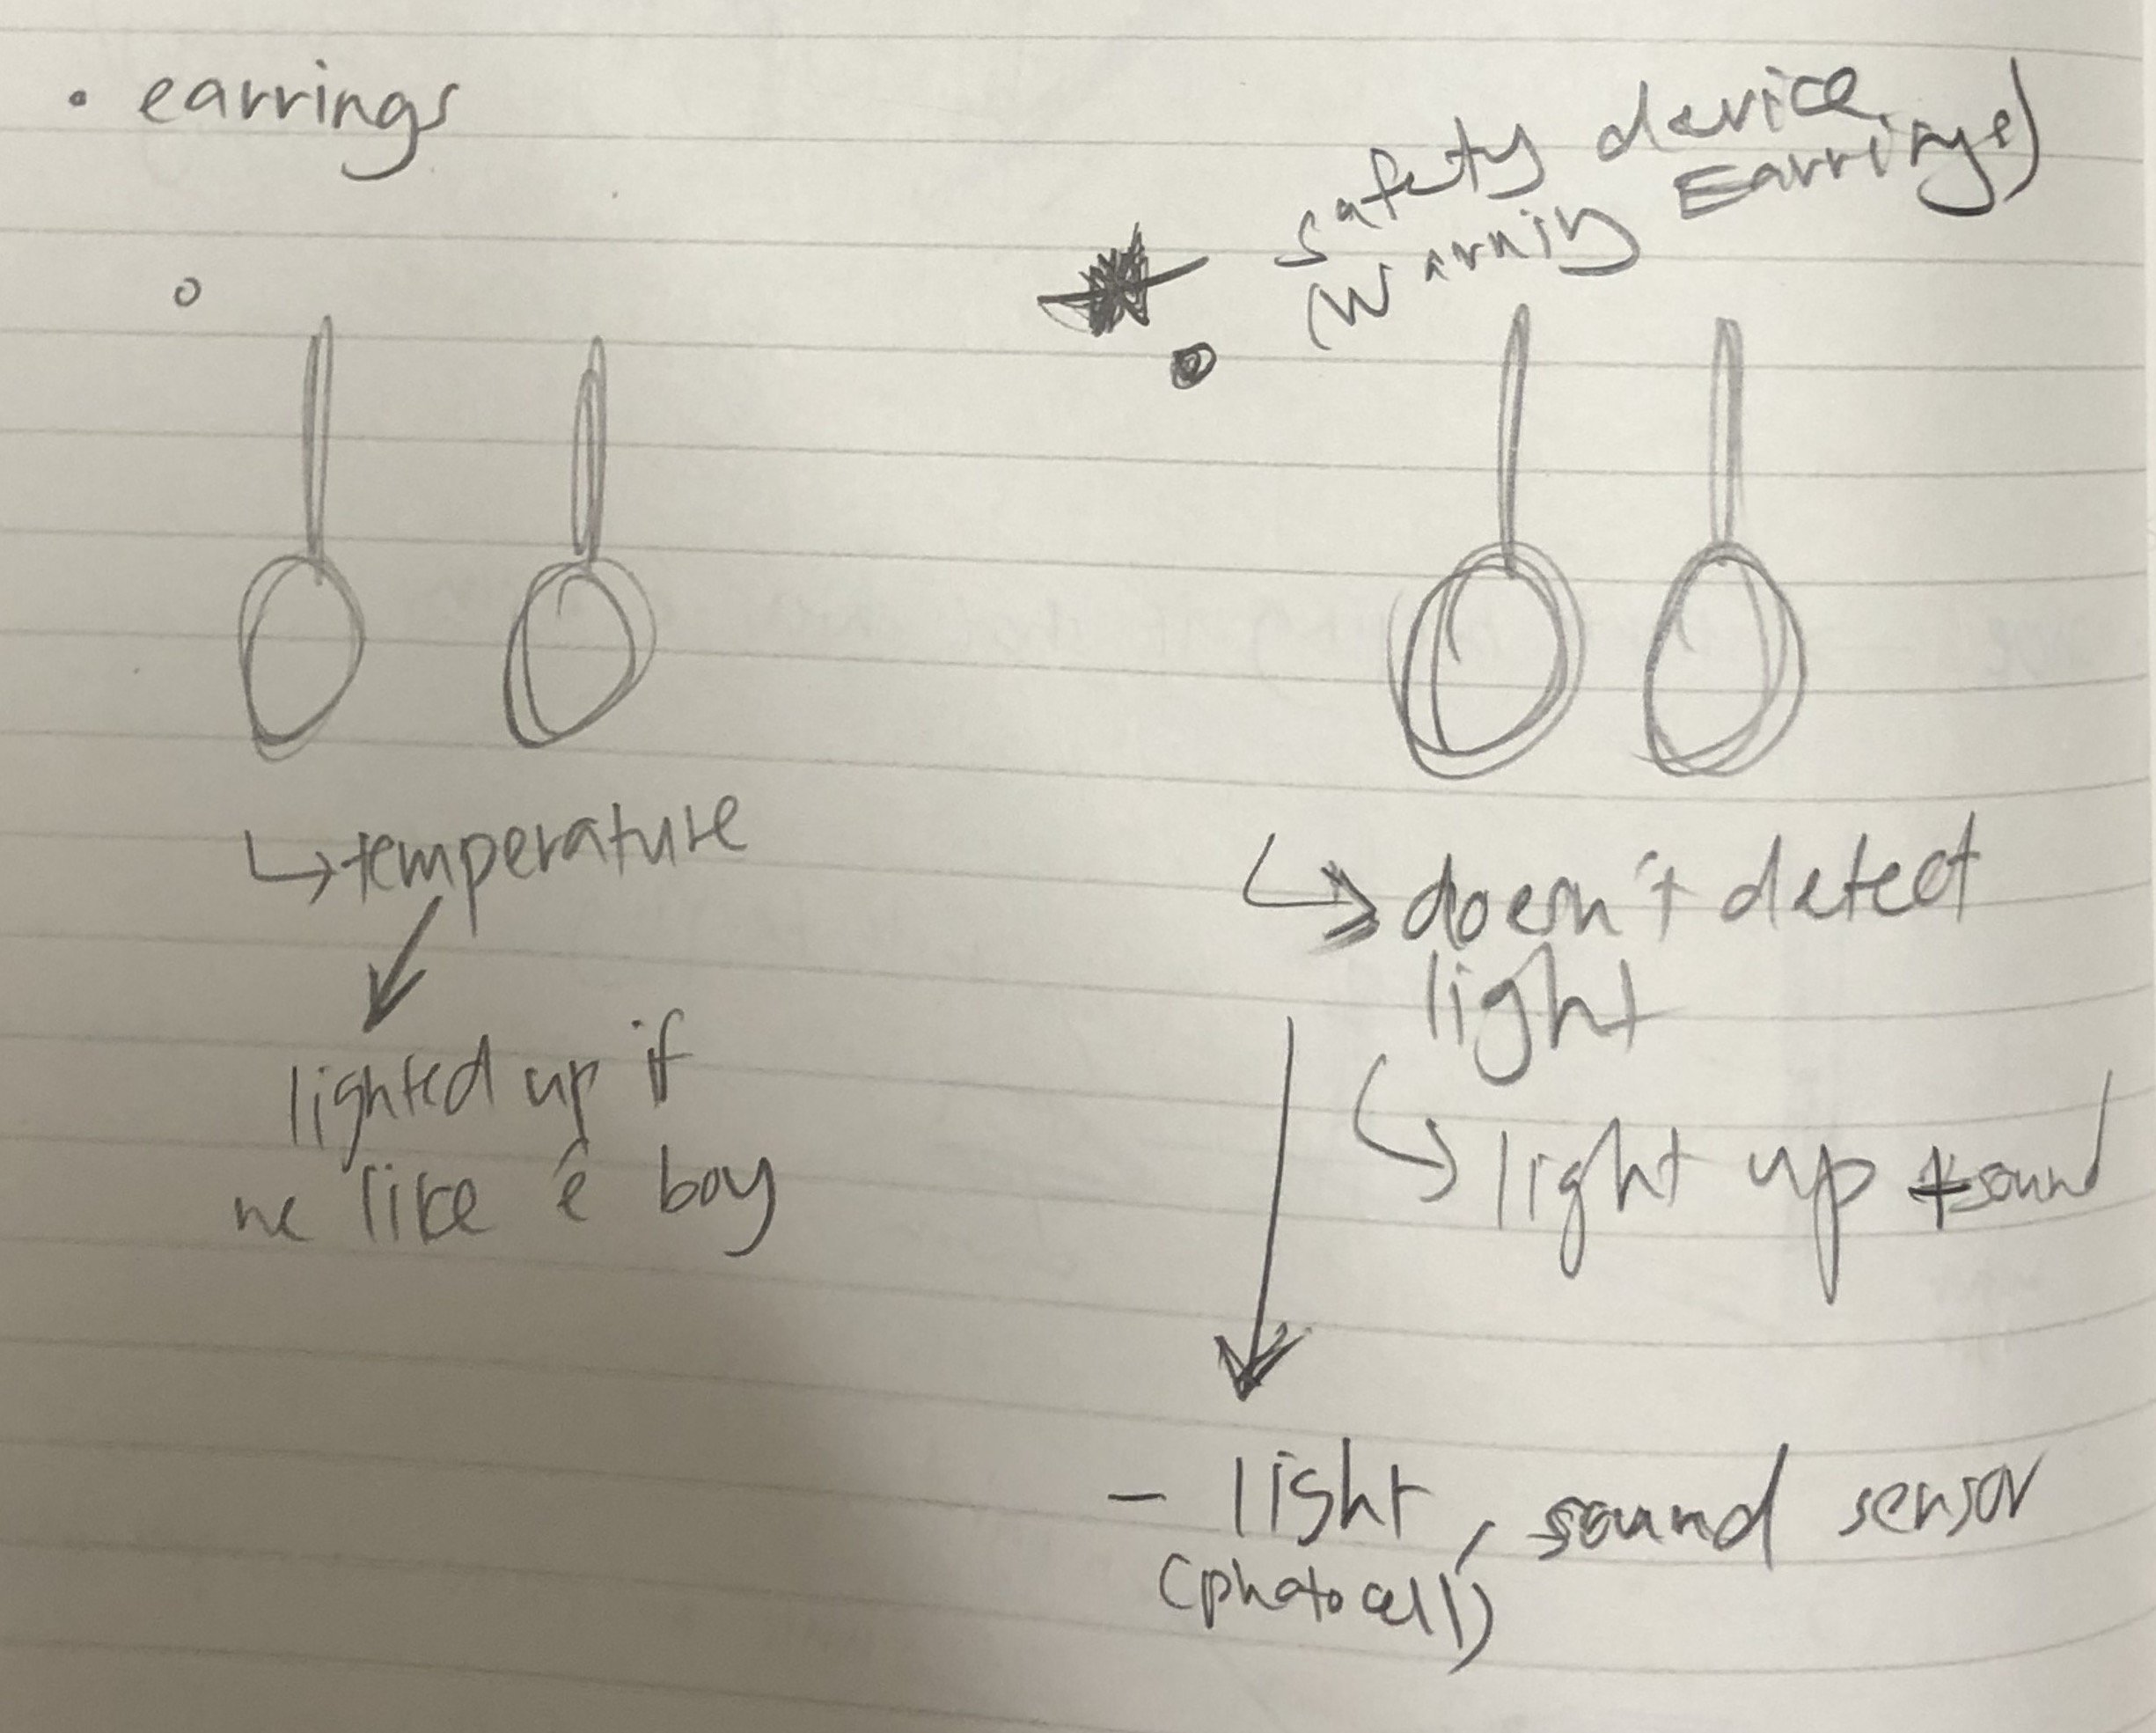
4. “True love” Earrings
Hacking an earring so when the user’s body temperature goes up, the earring will light up, the earning is helping the user to detect the love of his/her life.
CHOSEN IDEA: WARNING WALLET

After the presentation of ideas and discussing with one another, we decided to go with the third idea, we felt that the Warning Wallet is conceptually stronger and it’s a legit problem that we face everyday-impulsive spending. So we did a research on “How to avoid impulsive spending?” The first step to making a change in behavior is to recognize the problem. Once you acknowledge that uncontrolled spending is an issue, your awareness of the problem will help you follow through with a plan to stop. The alarming noise produced by “Warning Wallet” helps the user to acknowledge that uncontrolled spending issue thus, it helps reduce impulsive spending. In addition, creating an uncomfortable situation will embed discomfort and awkwardness into their experience hence, they won’t repeat the same action and it will serve as a reminder before they spend their money.
PROCESS – ‘WARNING WALLET‘
- Figuring out the code
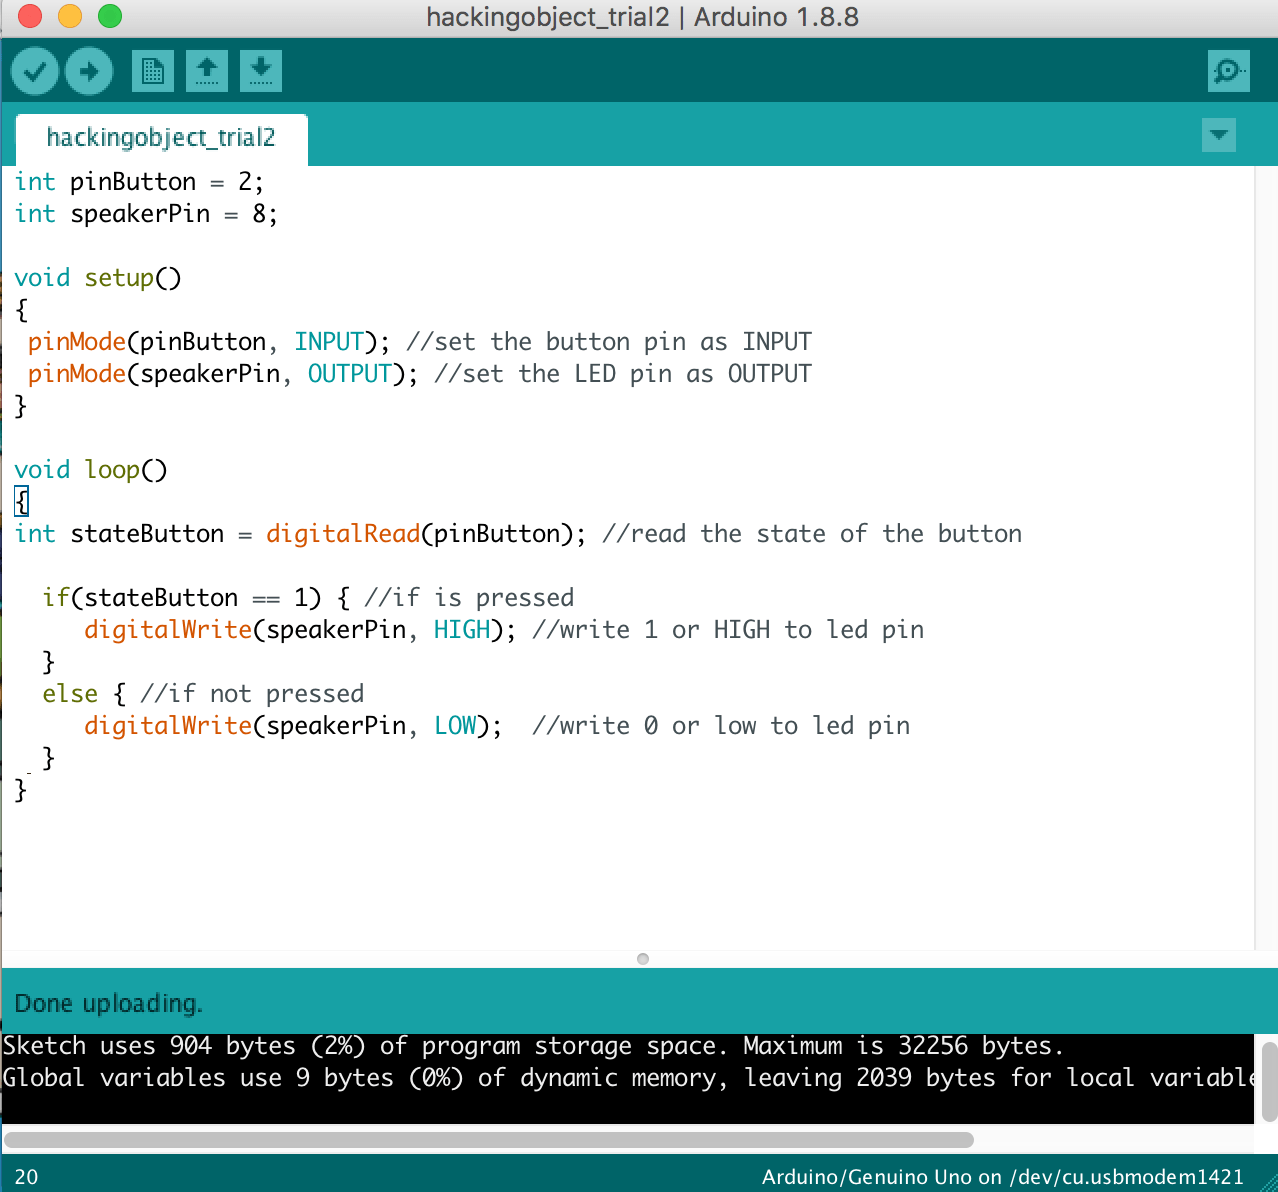

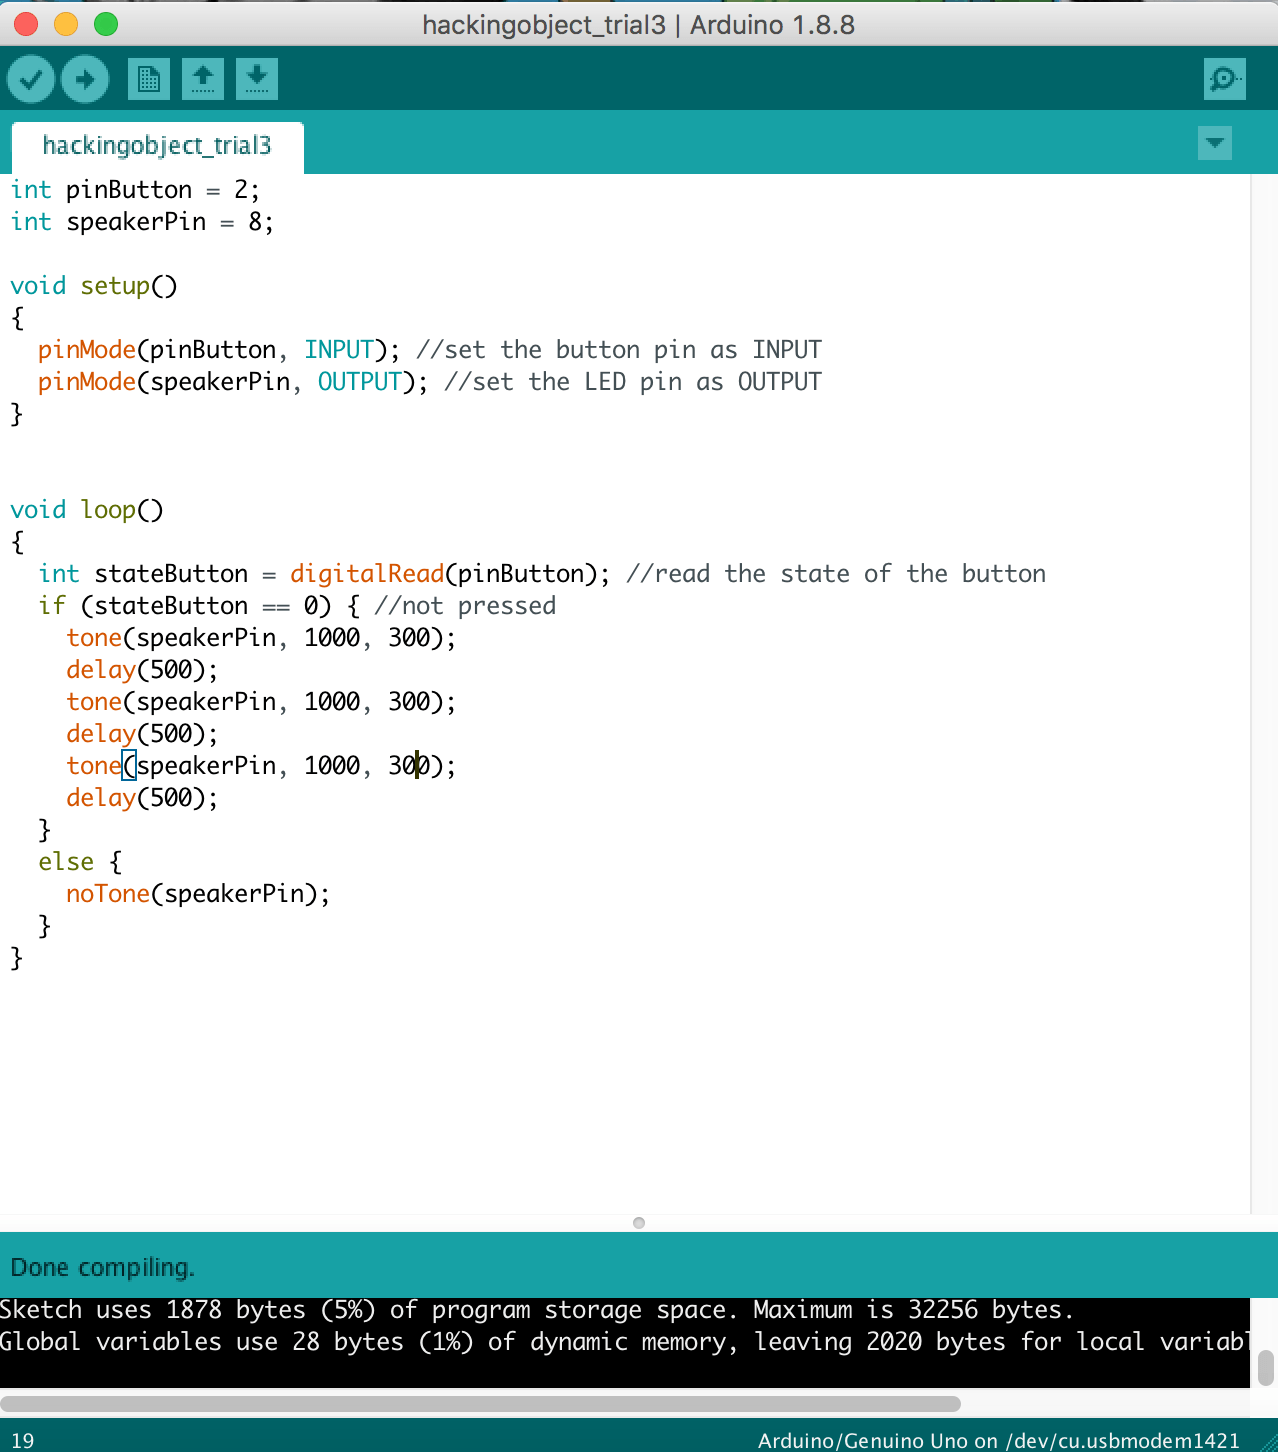

The essential components in our circuit are the switch button which acts a sensor to trigger the beeping sound when the card is removed from the wallet and the sound motor which beeps when it is triggered.
Using reference (below) from Open Source websites and forums, we were able to solve the issues we had which is being able to loop the beeping sound and the switchState to trigger the beeping sound.
- https://forum.arduino.cc/index.php?topic=350943.0
- https://www.electroschematics.com/8964/turn-on-led-button-arduino/
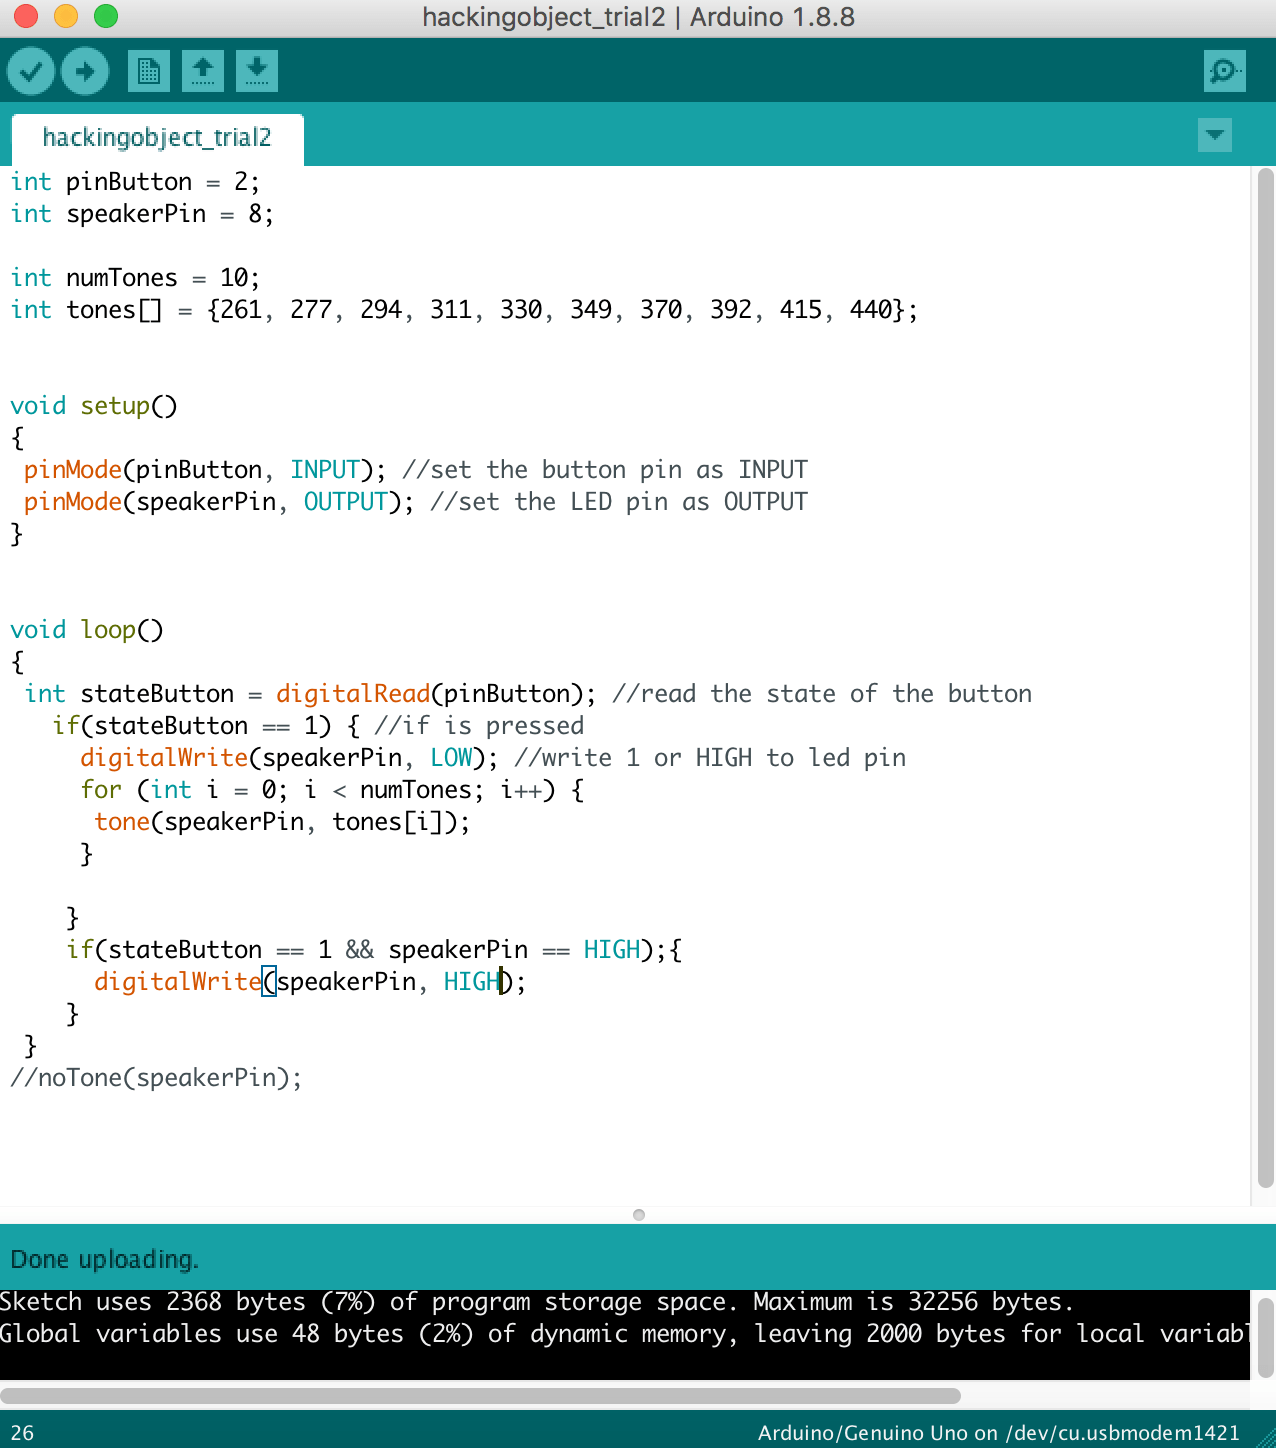
CONSULTATION WITH LEI
We were able to simplify our code and learned the easier way to do the switchState and adjusting the pitch of our beeping sound to make it more annoying.
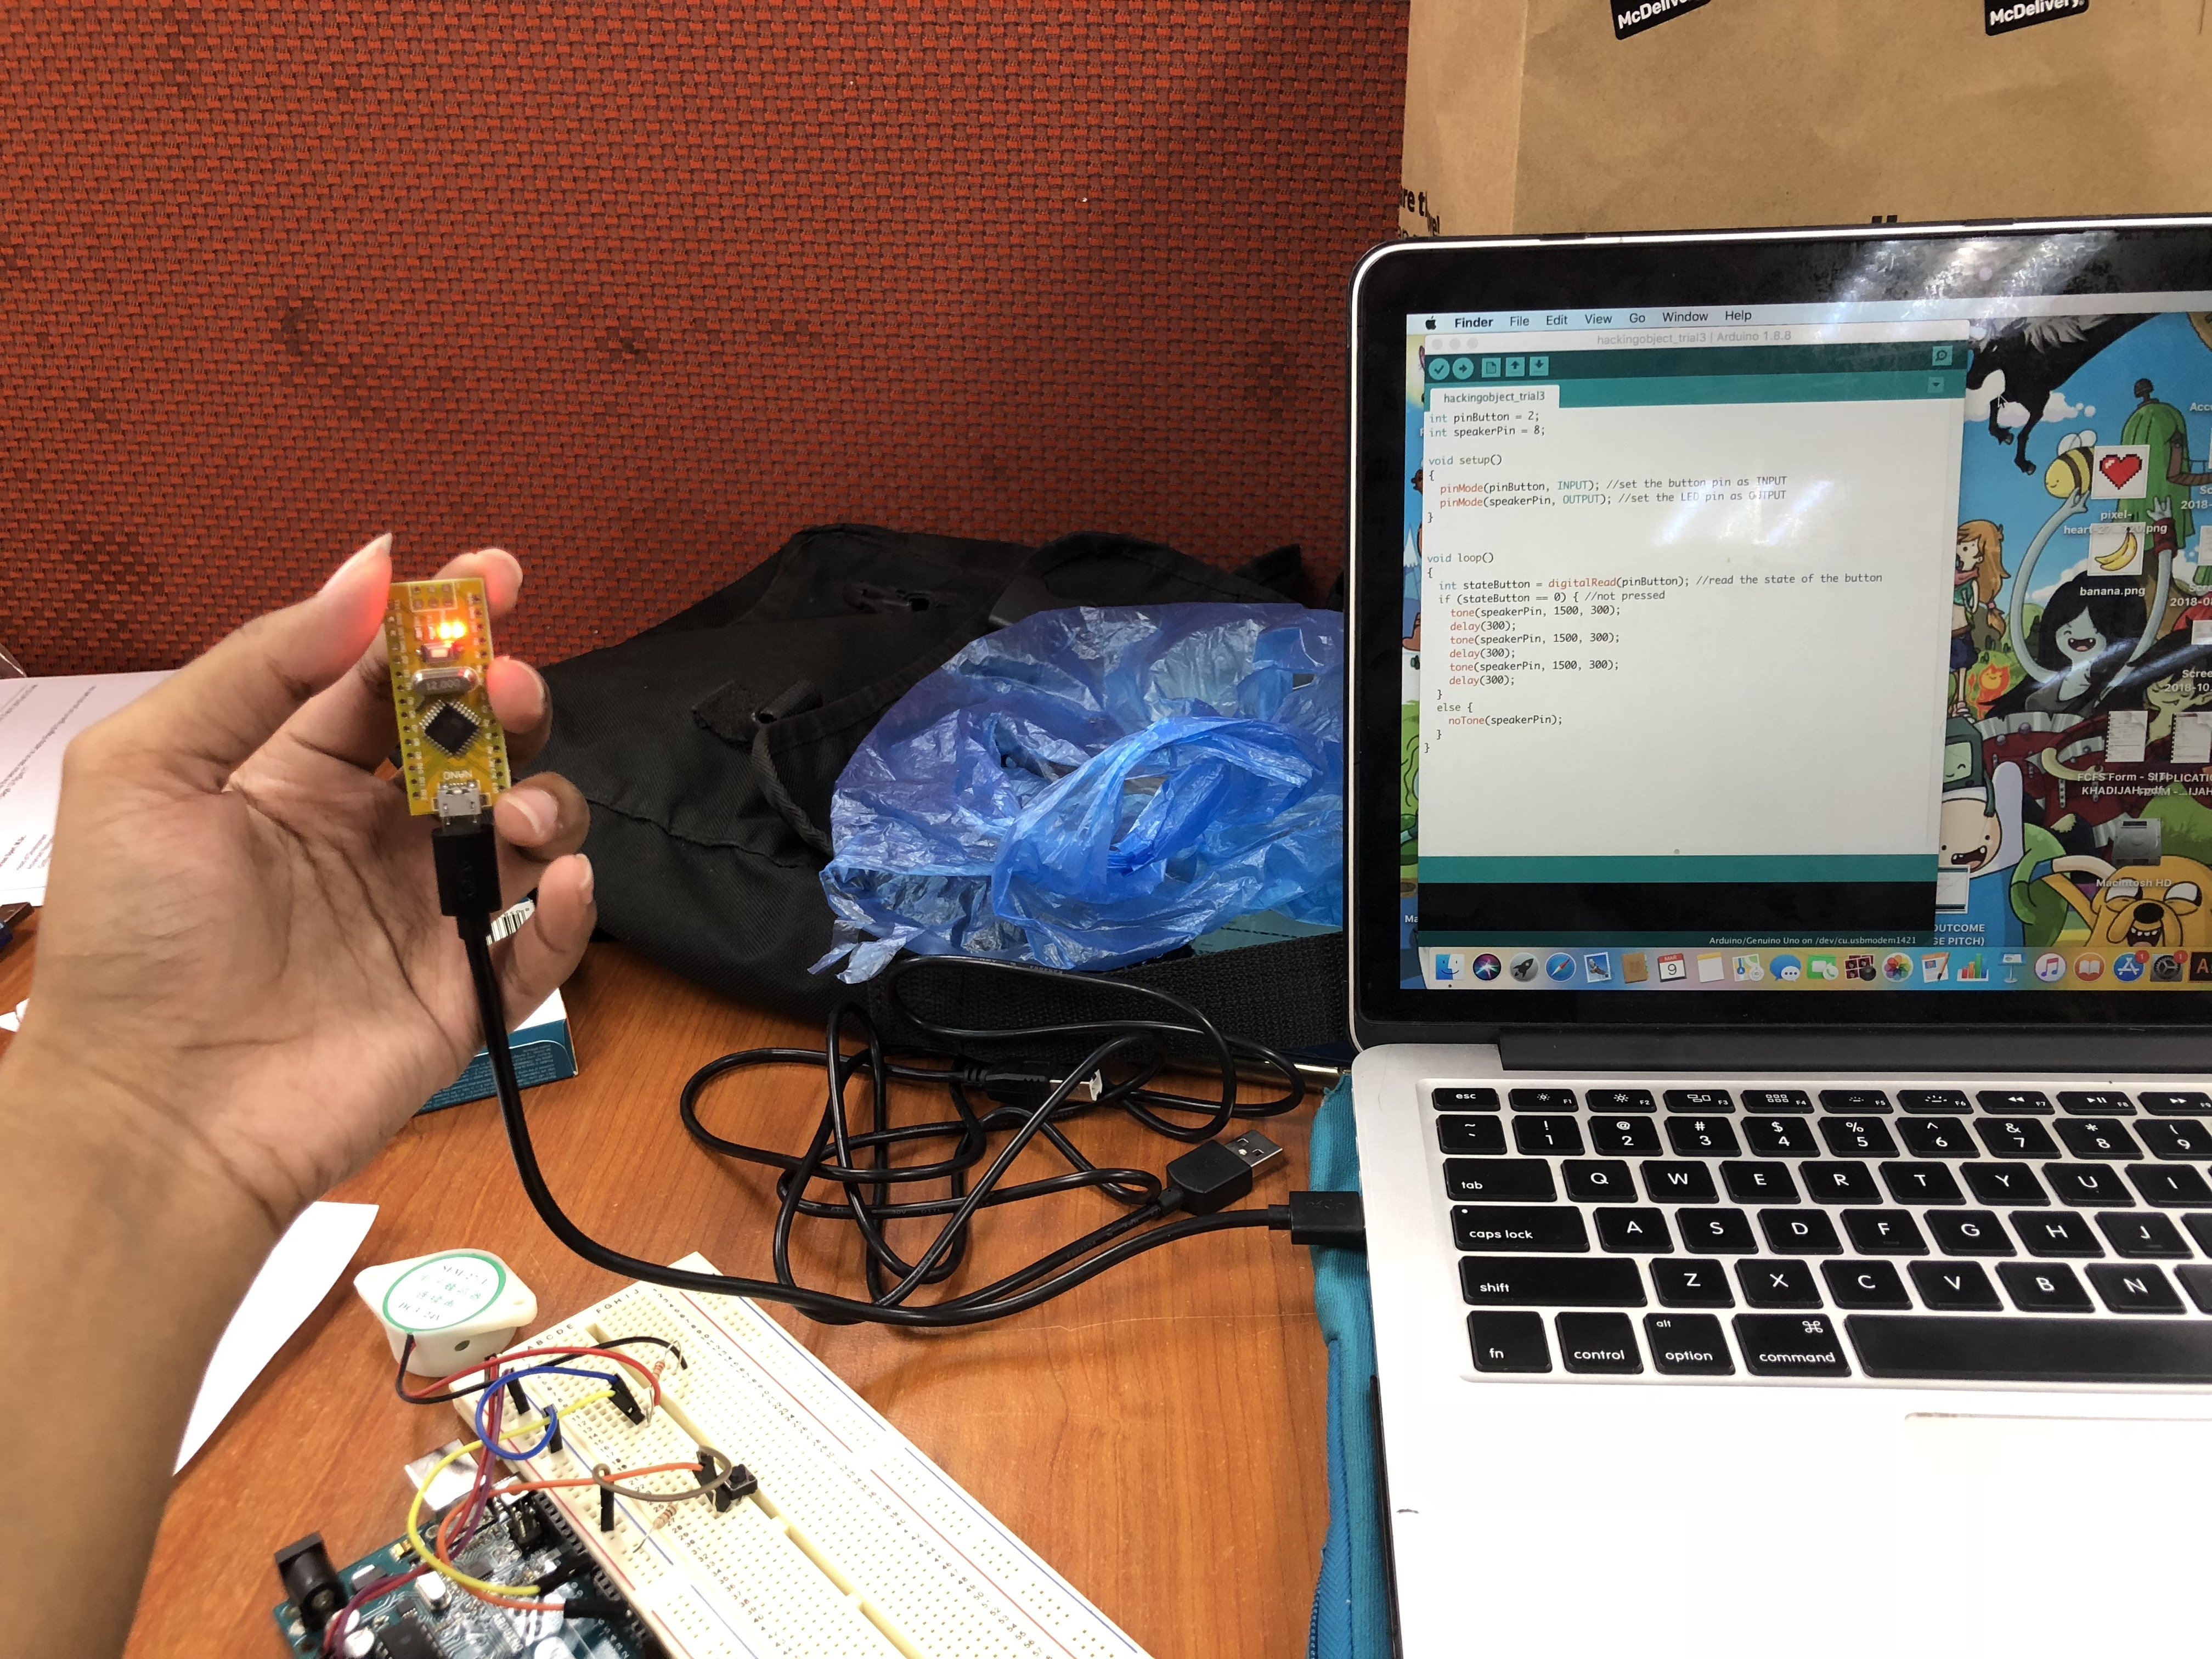
- Circuit Board
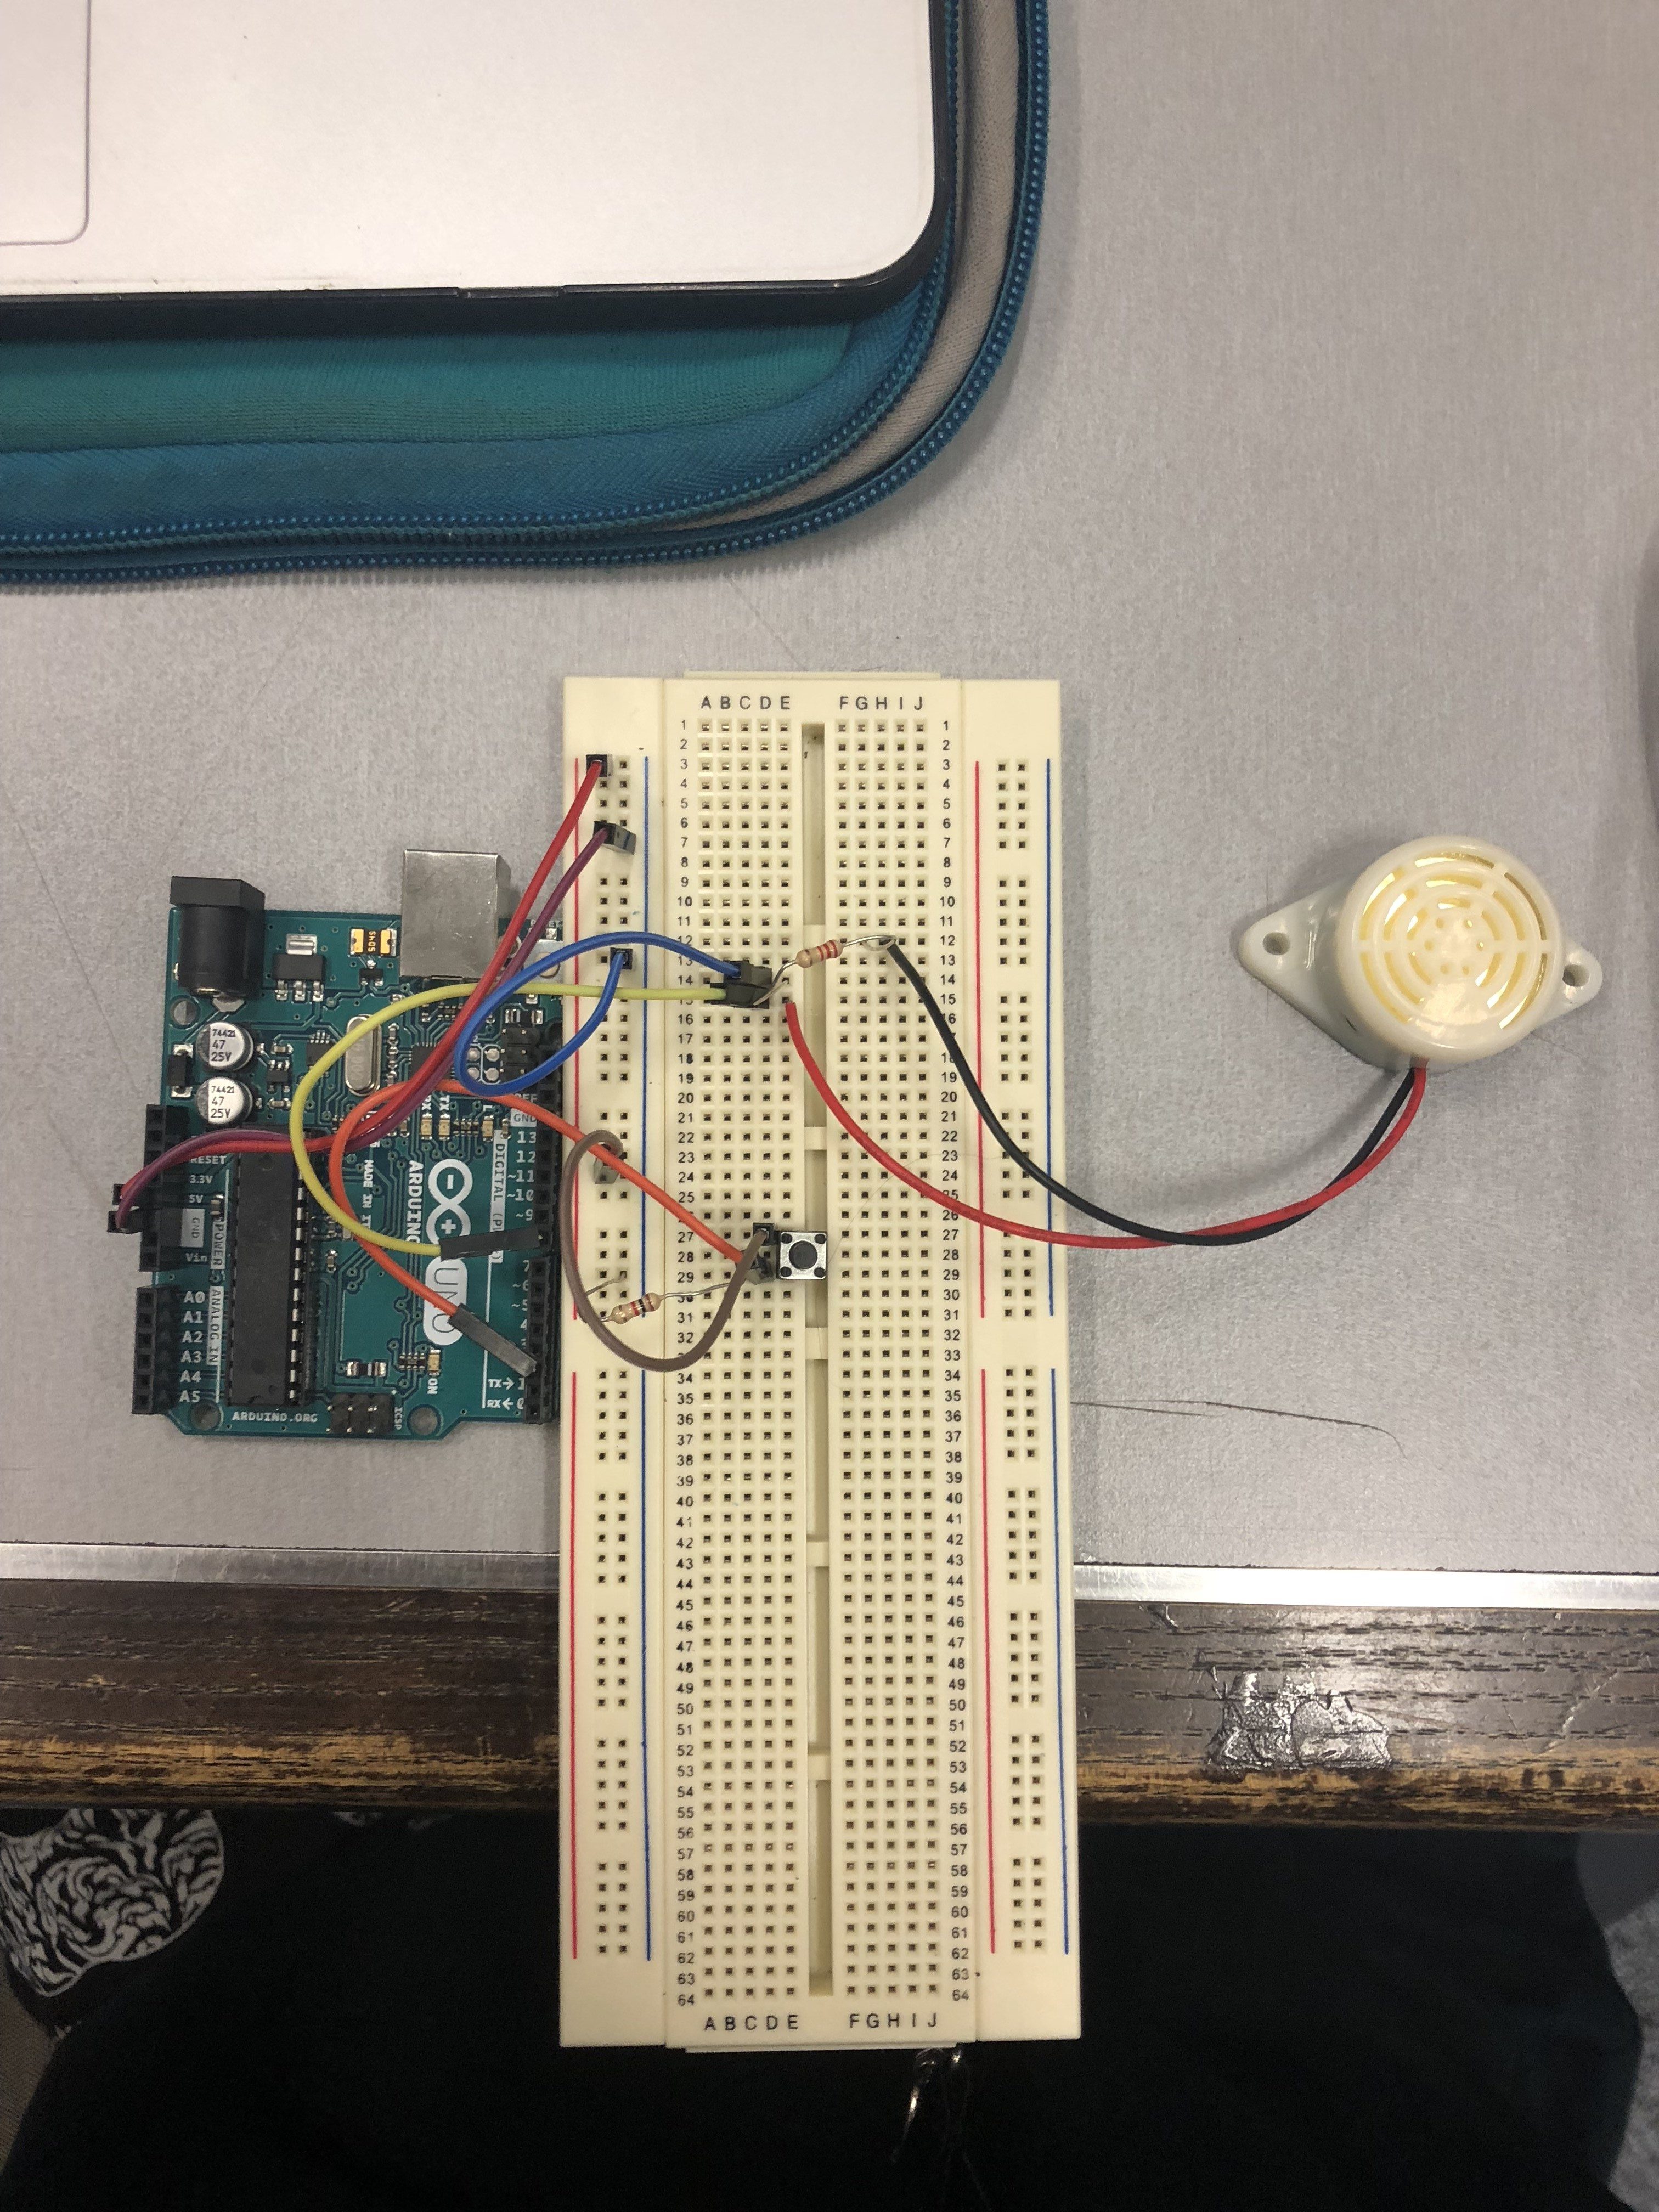
VIDEO: HOW OUR ‘WARNING CIRCUIT’ WORKS?
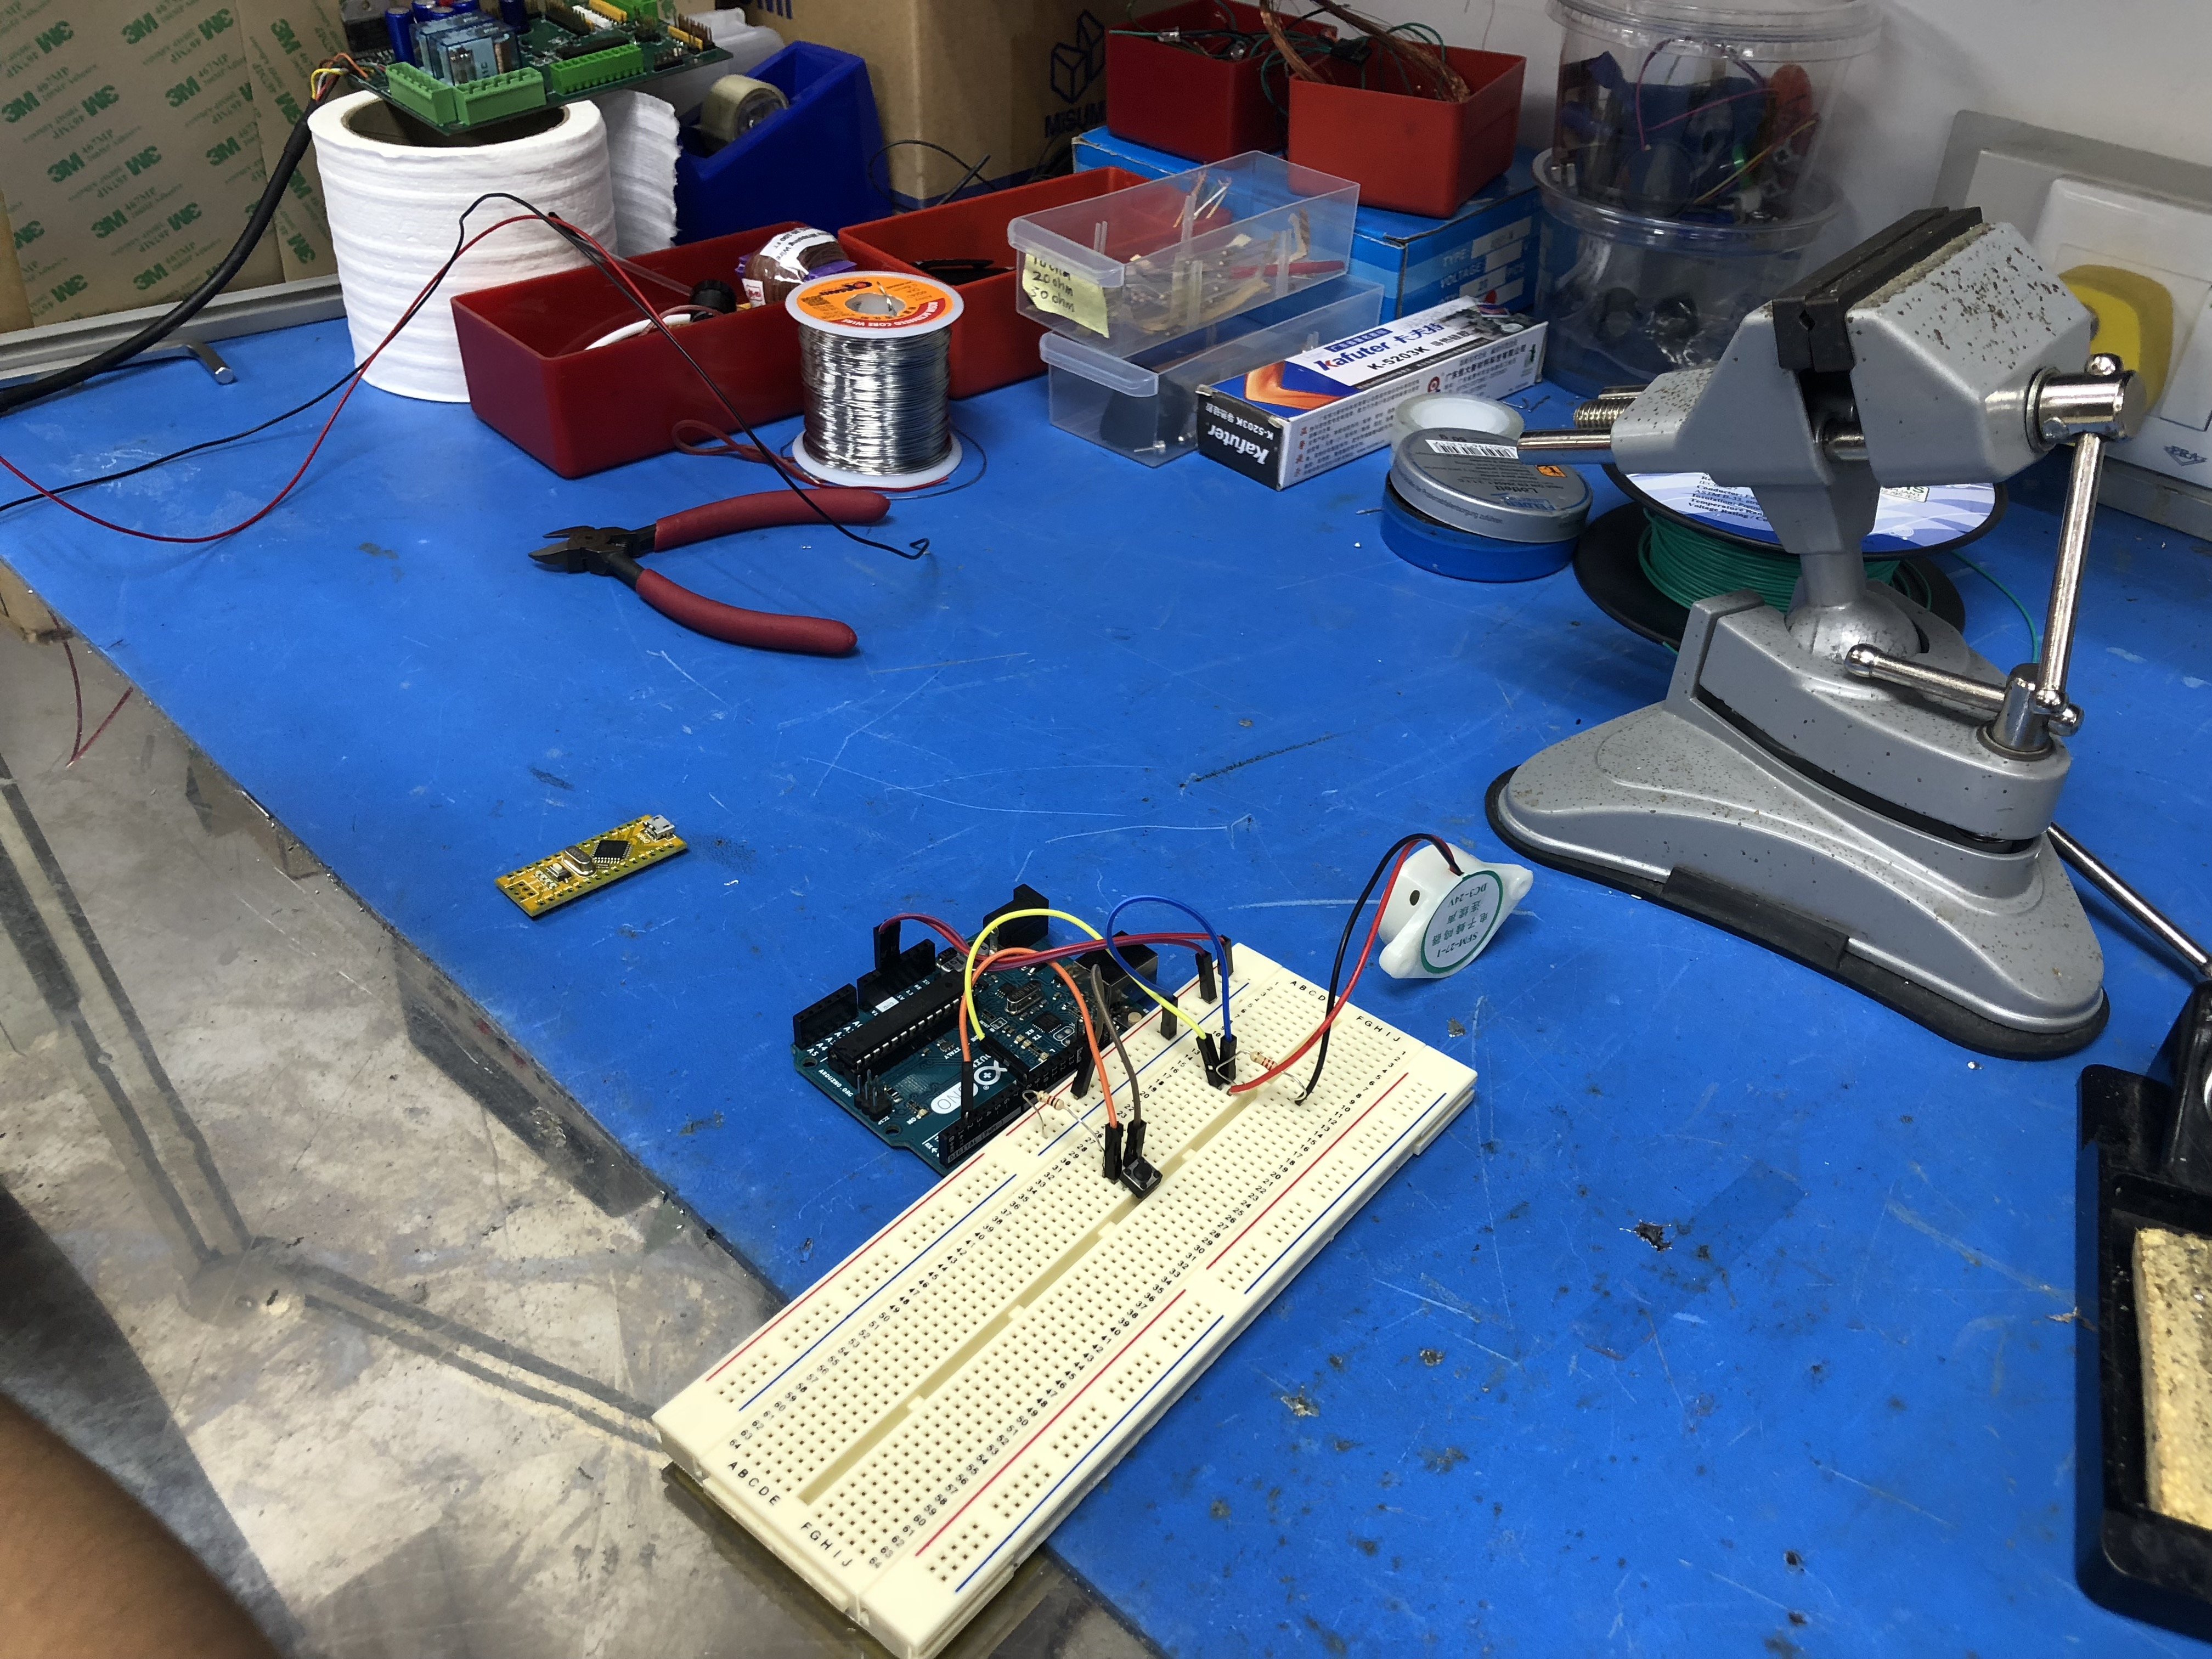
On a breadboard:
We realized that the breadboard was too big to be fitted in the wallet and we wanted our participants to have good user experience with our hacked object. Hence, we consulted some of our friends with an engineering background to solve this issue.
SUGGESTIONS FROM WEIJIE (ENGINEERING FRIEND):
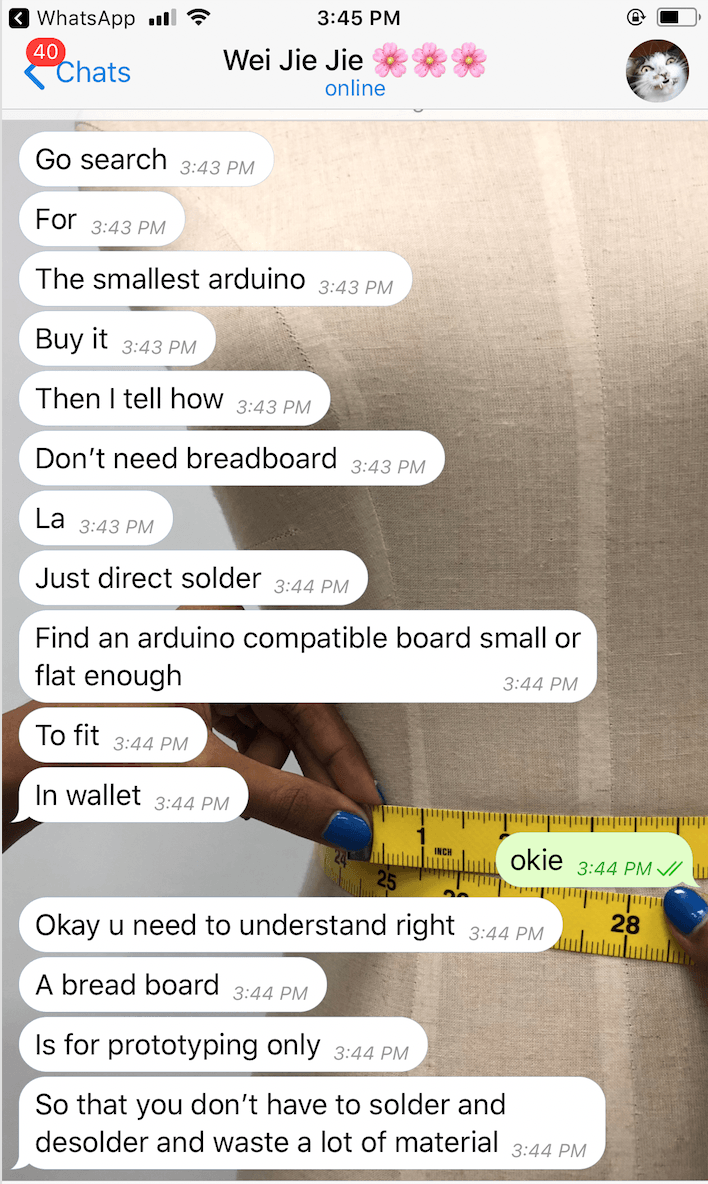
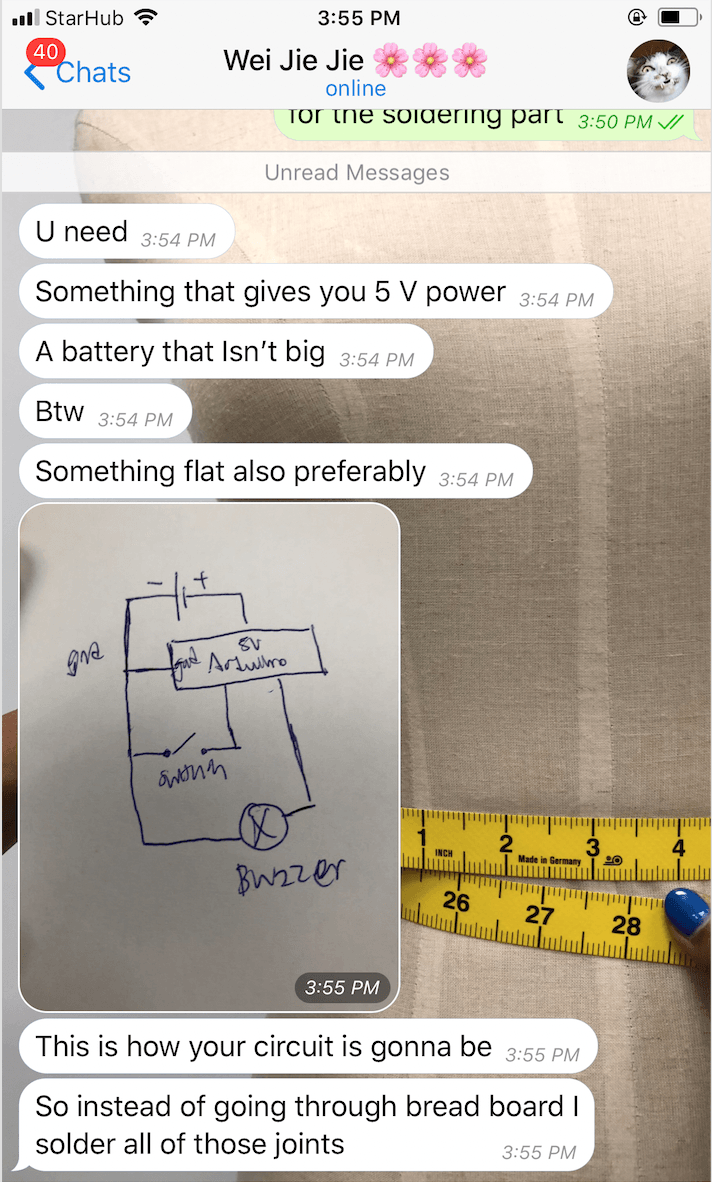

After discussing with each other, our group members decided to:
- Buy an Arduino Nano to make it compact and portable for our ‘Warning Wallet’
- Upload code onto Arduino Nano
- Solder the wires directly onto the Arduino with reference to our circuit on the breadboard
- Create a casing prototype for our circuit
- Process of soldering directly onto Arduino

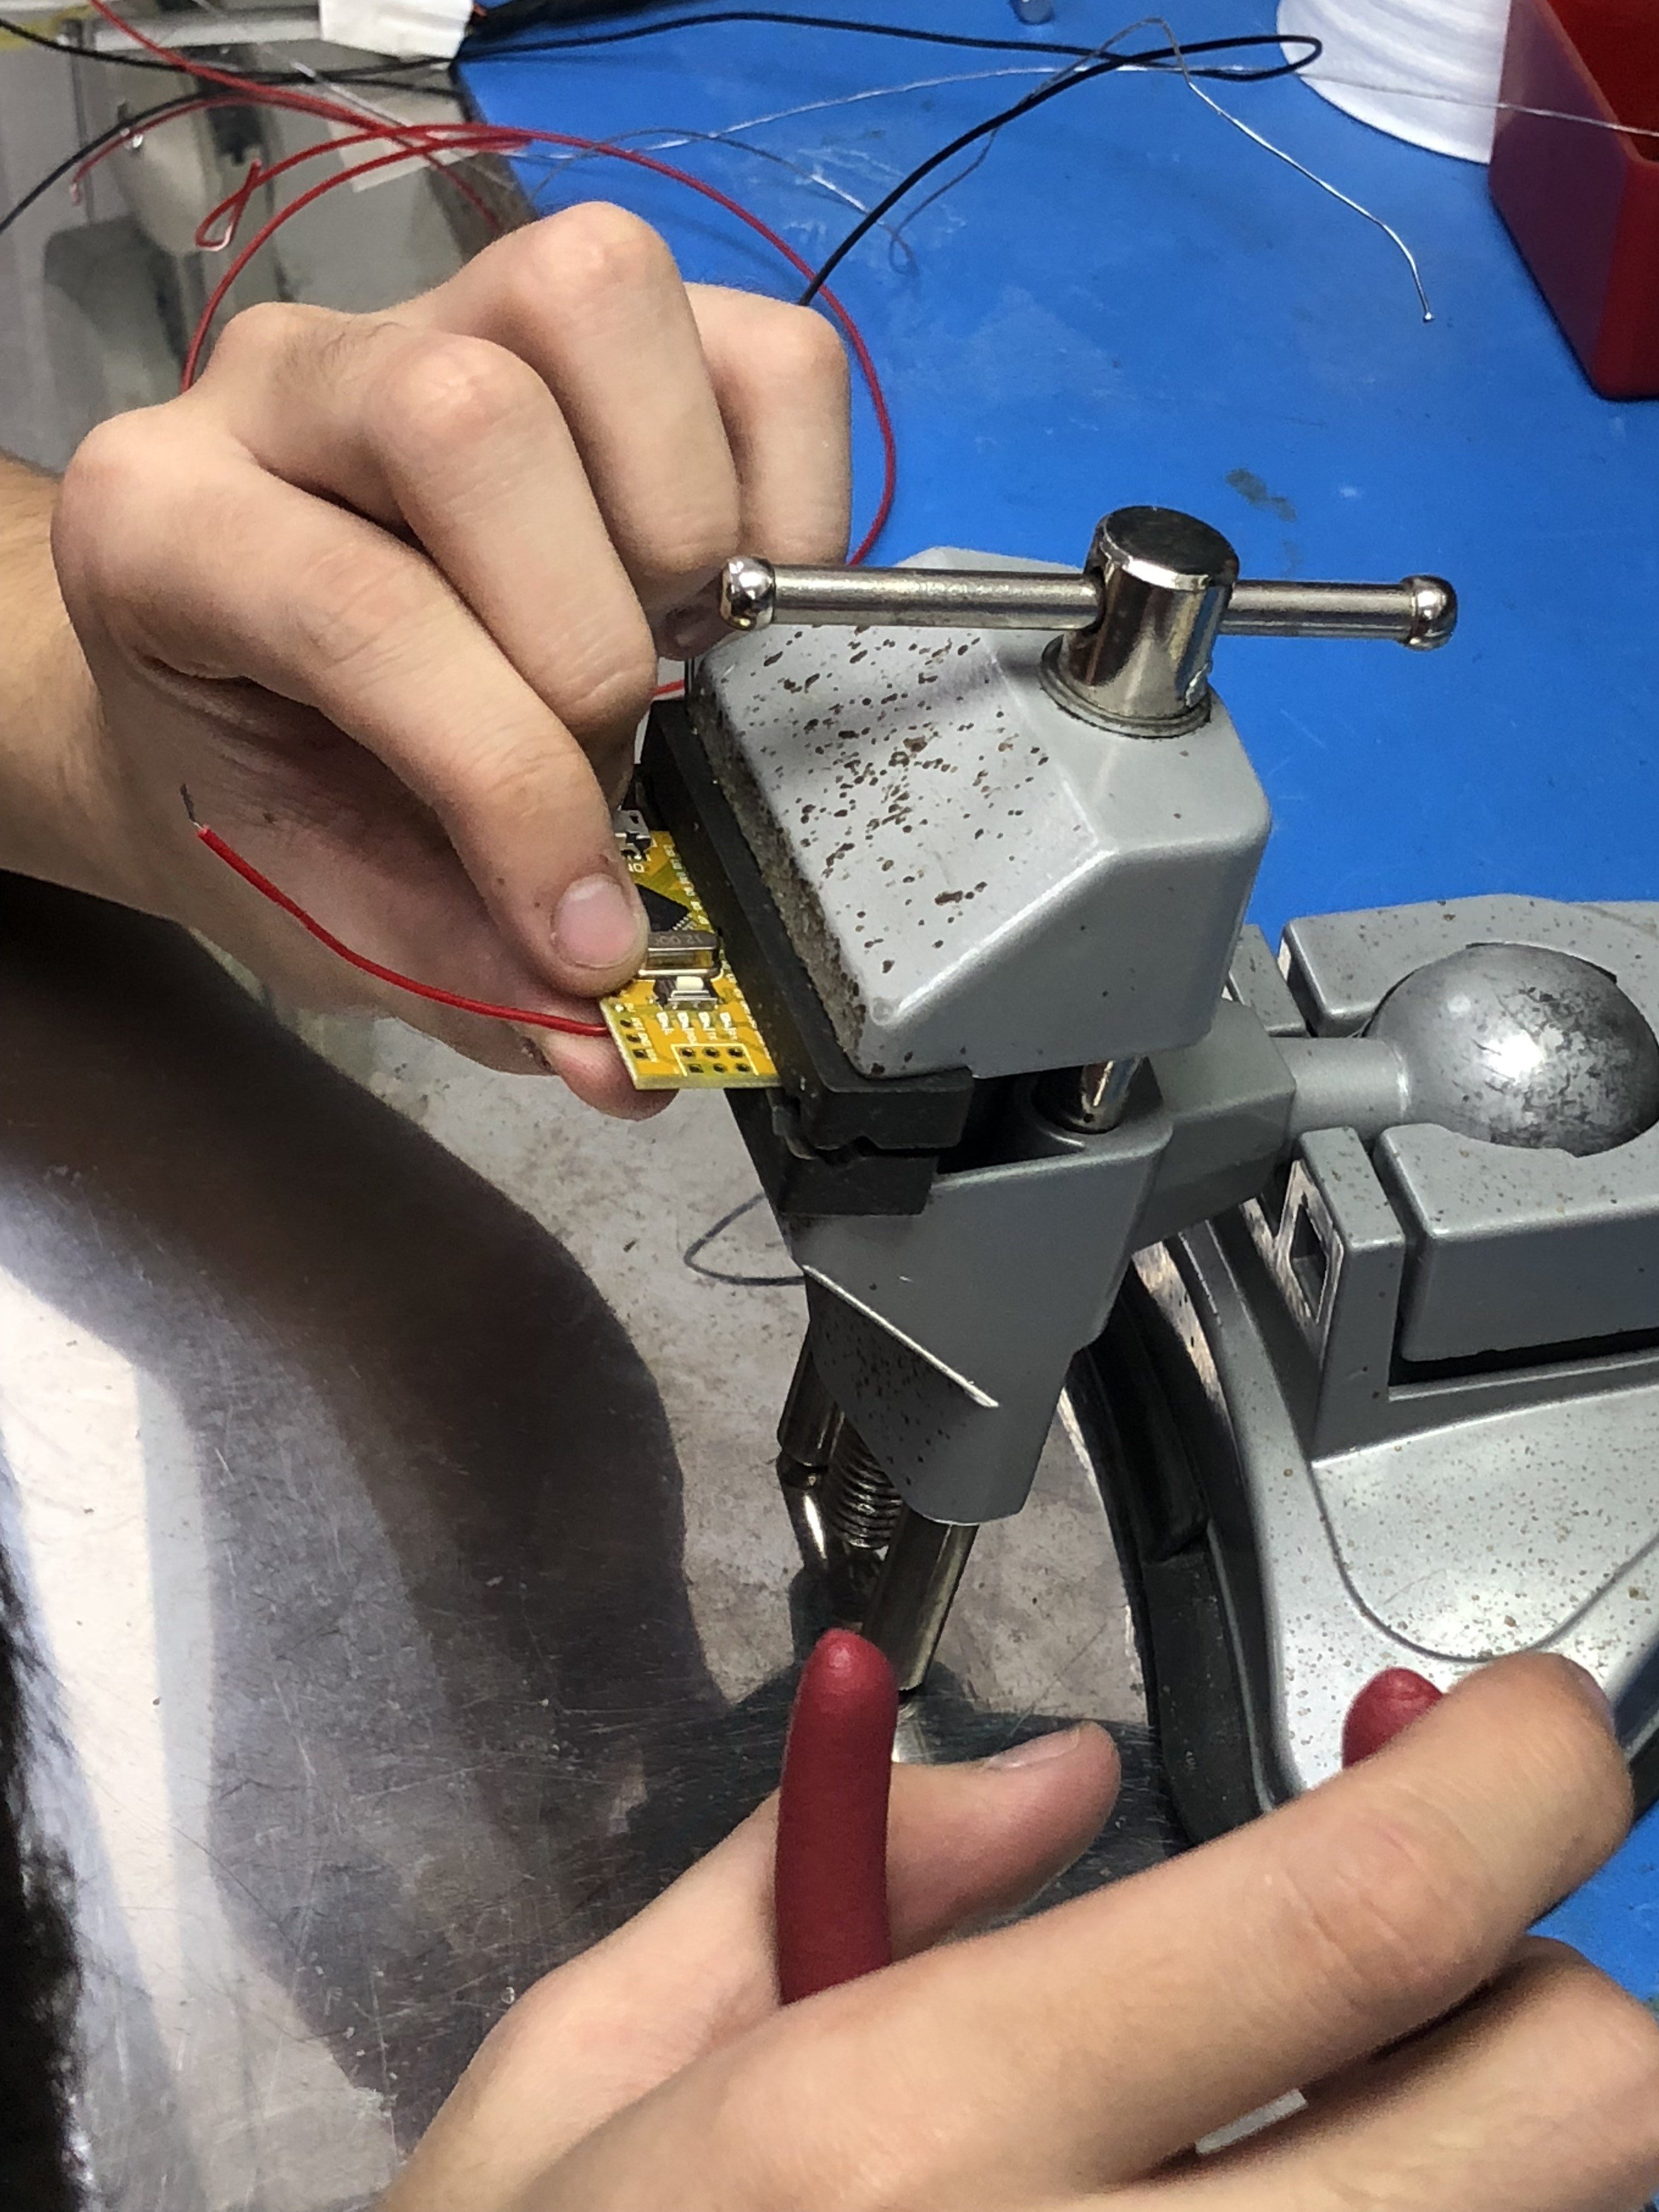

Since we’re are not experienced with soldering, we decided to ask assistance from our engineering friend and learn how to solder all the components together. Through this experience, we were able to learn the ‘hands-on’ making of the project and improve our ability to create a robust and working circuit.
FINAL OUTCOME OF SOLDERING ONTO ARDUINO NANO:


Wejie told us that he decided to solder extra wires connecting the power and the ground to a battery in case, our power bank isn’t working so there’s another alternative to power the hacked object.
VIDEOS: TWO WAYS TO POWER THE ‘WARNING WALLET’
- Powered by Xiaomi power bank – For compatibility and convenience
- Powered by 9V battery – Another alternative
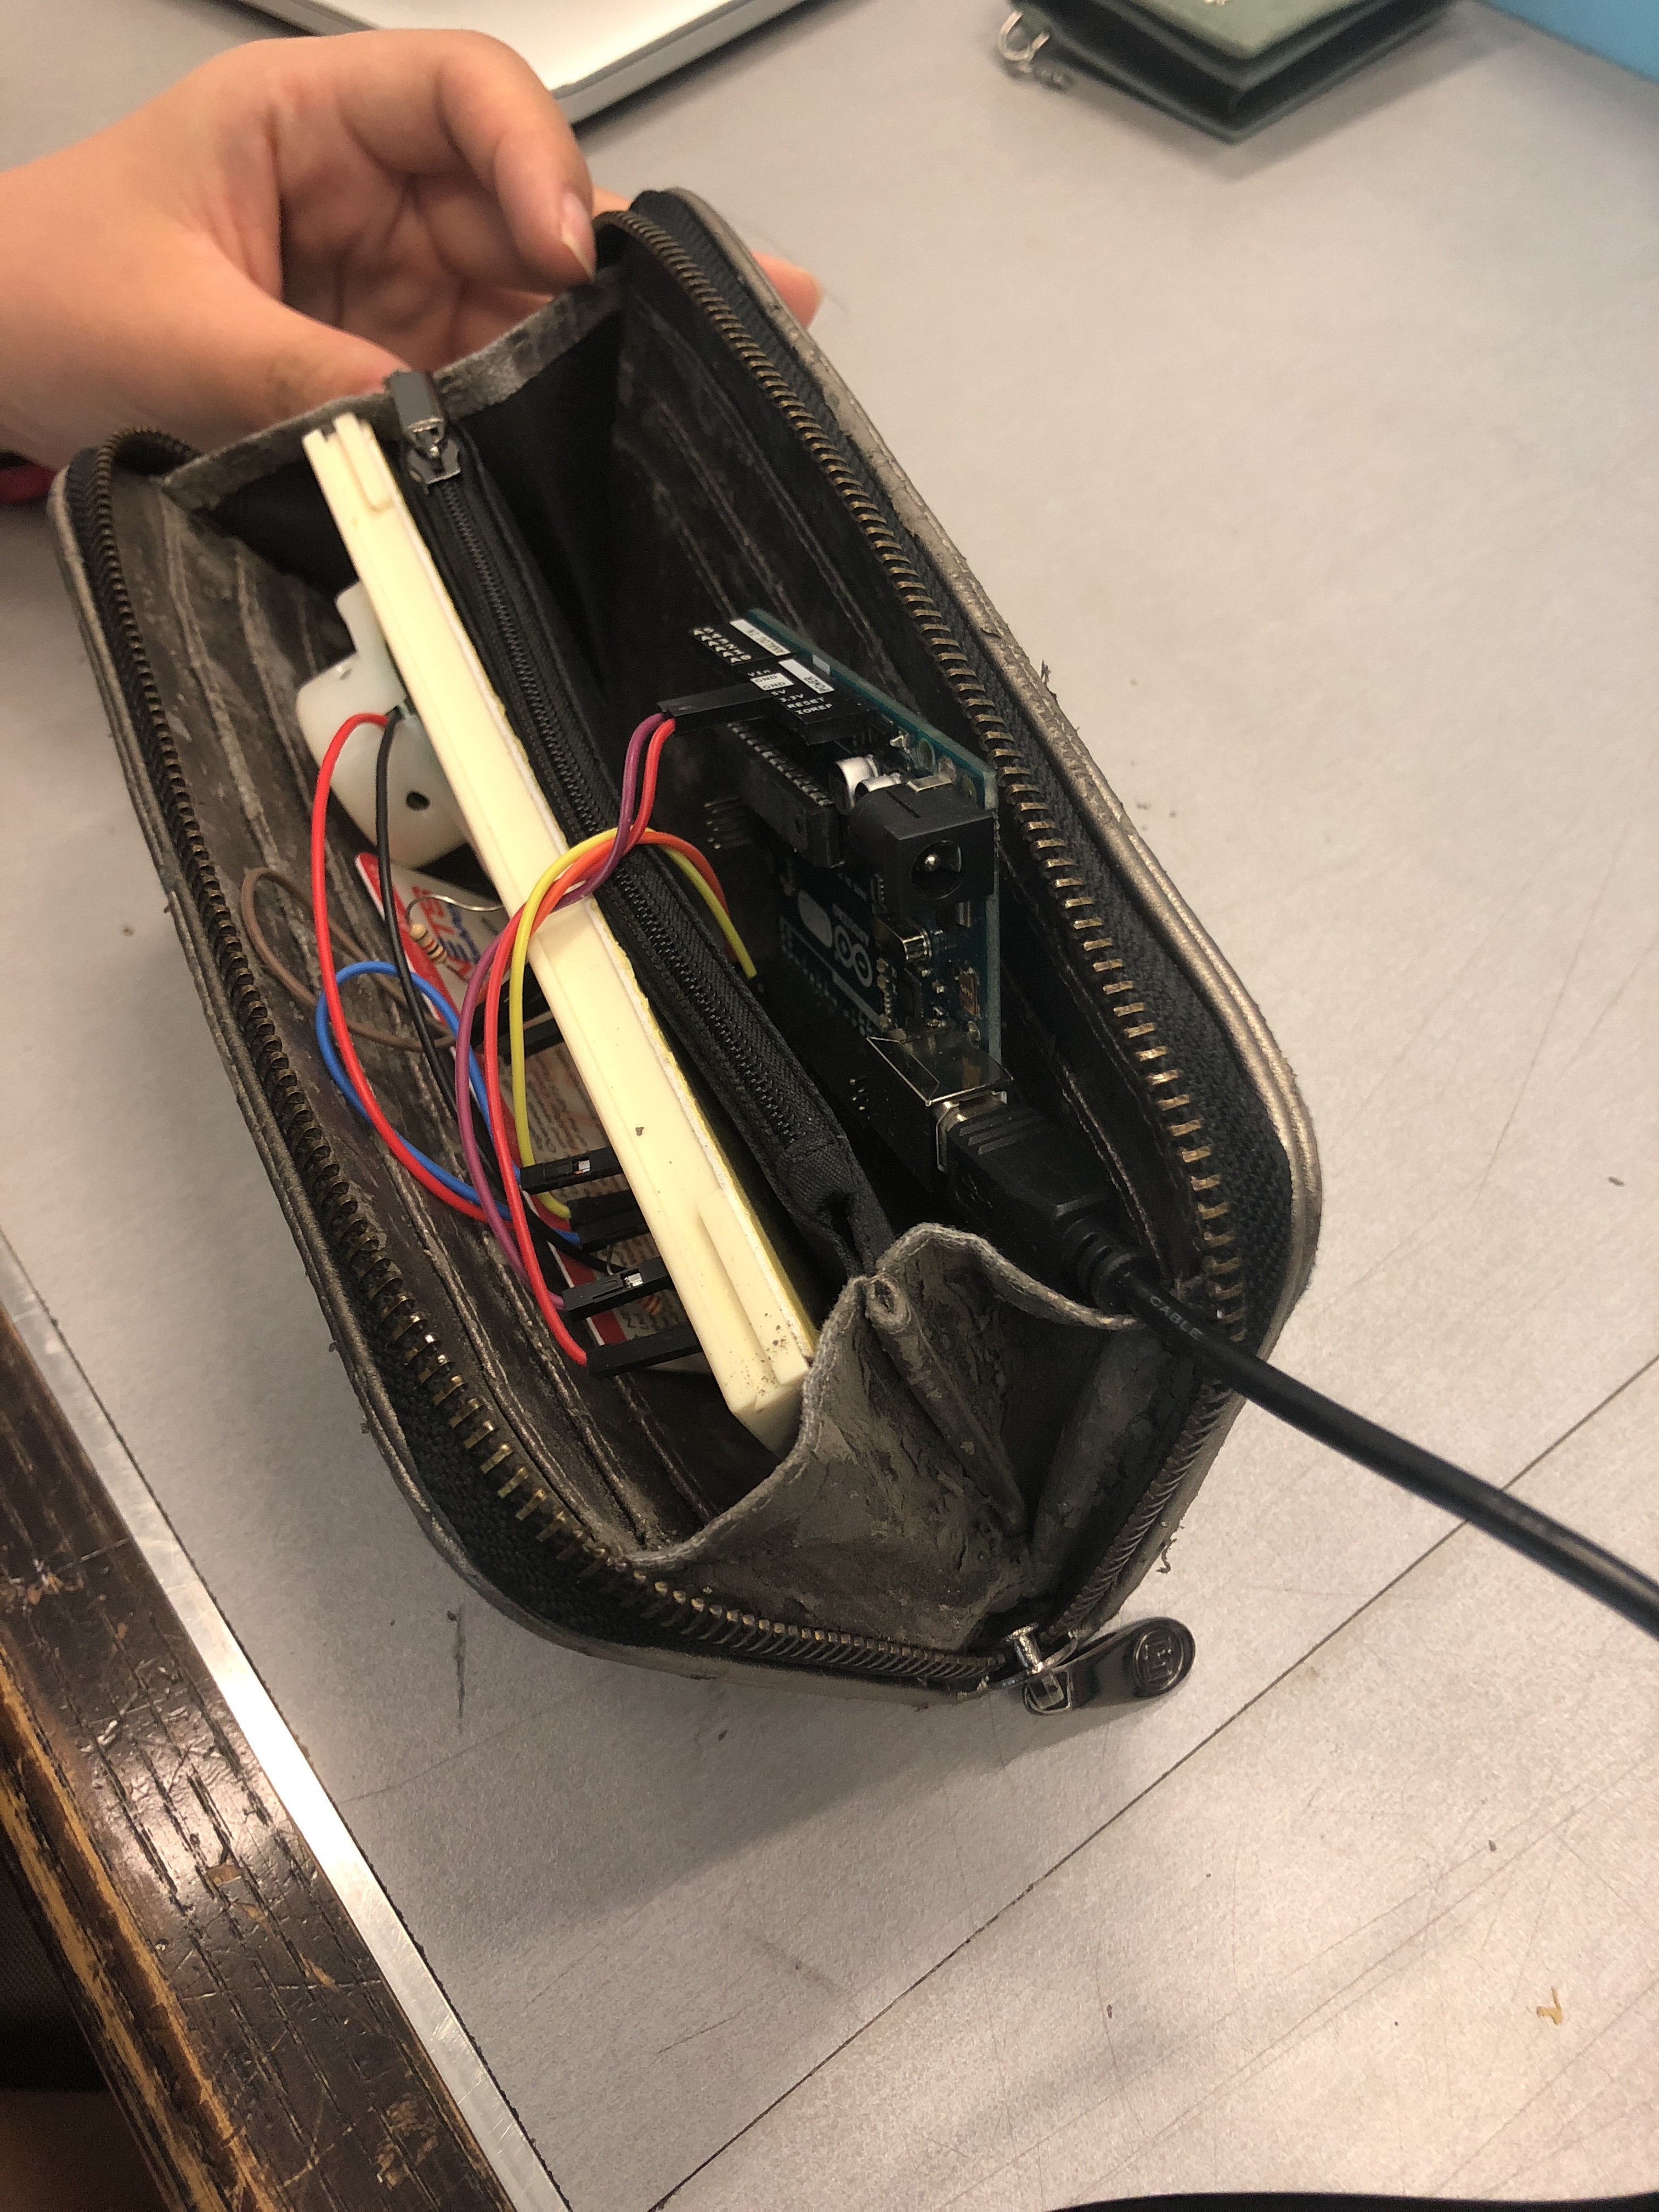
- Prototype casing for ‘Warning Wallet’


Sewn and glued together, a wallet prototype for the circuit. The main objective of this prototype is to create a section in the cardholder for the switch button which will trigger the beeping sound when the card is removed from it.
ISSUES WITH OUR PROTOTYPE CASING – WALLET:
- The card slots in the wallet weren’t tight enough to prevent the switch button from beeping. Hence, I added a clip to add more pressure to press against the switch button as an immediate solution.
*FINAL OUTCOME – ‘WARNING WALLET‘

- VIDEOS
- HARDWARE


- CIRCUIT
- Code
‘WARNING WALLET‘ IN USE IN A REAL LIFE CONTEXT
OUR EXPERIENCE:
- As the users, honestly, we were quite embarrassed because of the loud beeping sound activated in the public and we wanted the purchasing process of buying bread to be over as soon as possible.
- The auntie was wondering where the sound was coming from and kept looking around so, it was amusing to us. Afterward, she realized it was coming from our wallet and informed us about it.
- We felt like we were able to deliver the objective of our hacked object and we’re pleased with the results.
PRESENTATION IN CLASS
ISSUES DURING PRESENTATION:
- During our test trials and runs before the presentation, it was working fine. However, we were unlucky and the wire for the sound motor soldered to the Arduino Nano came off when we’re presenting ):
- Despite this mishap, we had documentation videos of our working prototype and how it works in a real-life situation to present to our peers.
REFLECTIONS
“How does your hacked object behave in a way you least expect it to?”
SITI: A function of a wallet is supposed to store and safeguard valuables such as cash, cards, and identification details. Due to the consumerist culture of purchasing items that we do not need but want, we decided to hack a wallet and create an uncomfortable interaction. When a card is being removed from the wallet, the switch button will be released and trigger a loud beeping sound. Hence, creating an uncomfortable and awkward situation during the process of payment. The participant using the hacked object will be shocked and try to figure out how to stop the looping beeping sound which is by placing the card back into its slot. It serves as a reminder not to overspend and makes the user think whether it’s necessary to purchase an item.
TONG TONG: Our hacked object was designed to respond to the user’s movement, which is to take out the card from the card slot. We made a cardboard wallet and use a clip to exert a force onto the switch to imitate the actual wallet. In all our testing, we were assuming that the user will know how to use the wallet until the wallet is being used by the others, we then release the problem.
“What are some reactions you observed from your participants when they interacted with the object?”
SITI:
- TongTong as the participant
During our test run in a real-life context, our prototype was working fine. When we were making our payment to the pastry store auntie, the beeping sound was activated and she was trying to figure out where the sound was coming from. You can see the confusion and frustration on her face. Personally, we as the participants wanted the whole process to be done as soon as possible but it was hilarious to see her reaction. After the payment is done, we were relieved that the annoying beeping sound has been stopped.
- Brian as the participant
During our presentation, he wasn’t sure how to approach our ‘Warning Wallet’ but he took out the card but our circuit wasn’t working. The soldered wire of the sound motor was not connected properly and it might have been loose during the process of transportation. I should have been more careful in terms of safeguarding the circuit or should have created a protective casing for the wires to prevent such things from happening.
TONG TONG: Our first participant Brian, he was initially confused with how he should approach the object, when he took out the card from the wallet with the wallet being not very responsive, just happened that not to work during the presentation, even though we tried many times before the presentation, he is even more confused.
“What are the challenges involved and how did you overcome them? What problems still exist? How might you overcome them eventually?”
SITI:
We faced a lot of challenges during the process of creating our ‘Warning Wallet’.
As we’re not proficient in coding, we relied on opensource forums and the knowledge we’ve learned in class to figure out the codes suitable to apply for our circuit.
We realized that to make our prototype more realistic during user experience, we had to focus on the compatibility and portability of our ‘Warning Wallet’. With the assistance of our friends with an engineering background, we were given suggestions to change to an Arduino Nano and solder our components directly so it will be compact. In addition, we learned how to solder directly, simplify the circuit and completed the circuit together (DIWO). Personally, it was a meaningful and fun experience collaborating with my friends and I appreciate their skills.
During the process of creating the prototype casing of the ‘Warning Wallet’, the card slots in our spare wallet weren’t tight enough and I had to resort to making a wallet out of cardboard because I didn’t want to destroy our current wallet that works perfectly with the circuit. However, despite creating a prototype casing out of cardboard, the card slot and card were still not tight enough to press against the switch button sensor. I resorted to adding a clip onto the card to exert more force onto the switch button sensor to prevent it from beeping (immediate solution because we didn’t have much time left). Hence, affecting the user experience of our participants for the presentation ):
When we were faced with this issue of making the sensors work, we realized we should have change the sensor from the switch button to a photocell sensor (detects light) which is much better as it doesn’t require force and it will stop beeping when the card is covering the photocell. The user experience of the participants will be much better if we tried multiple sensors for our circuit before finalizing which sensor is the best option for our hacked object! (Lesson learned!)
TONG TONG: There were several challenges that we faced throughout the process, involved hiding the components of the setup. We decided to buy a smaller Arduino board and soldering it so we were able to hide everything inside the wallet. We could have improved on our object by doing user testing, then we will realize the problem of the product. It would have been better if we use an actual wallet instead of the cardboard. Moreover, there was the issue of the choice of sensor, photosensor (detects the presence of visible light) might be a better choice than using the switch (detects the pressure).
THANK YOU!