Category Archives: Surface Design

Smocking & Elastics | week 6

Smocking

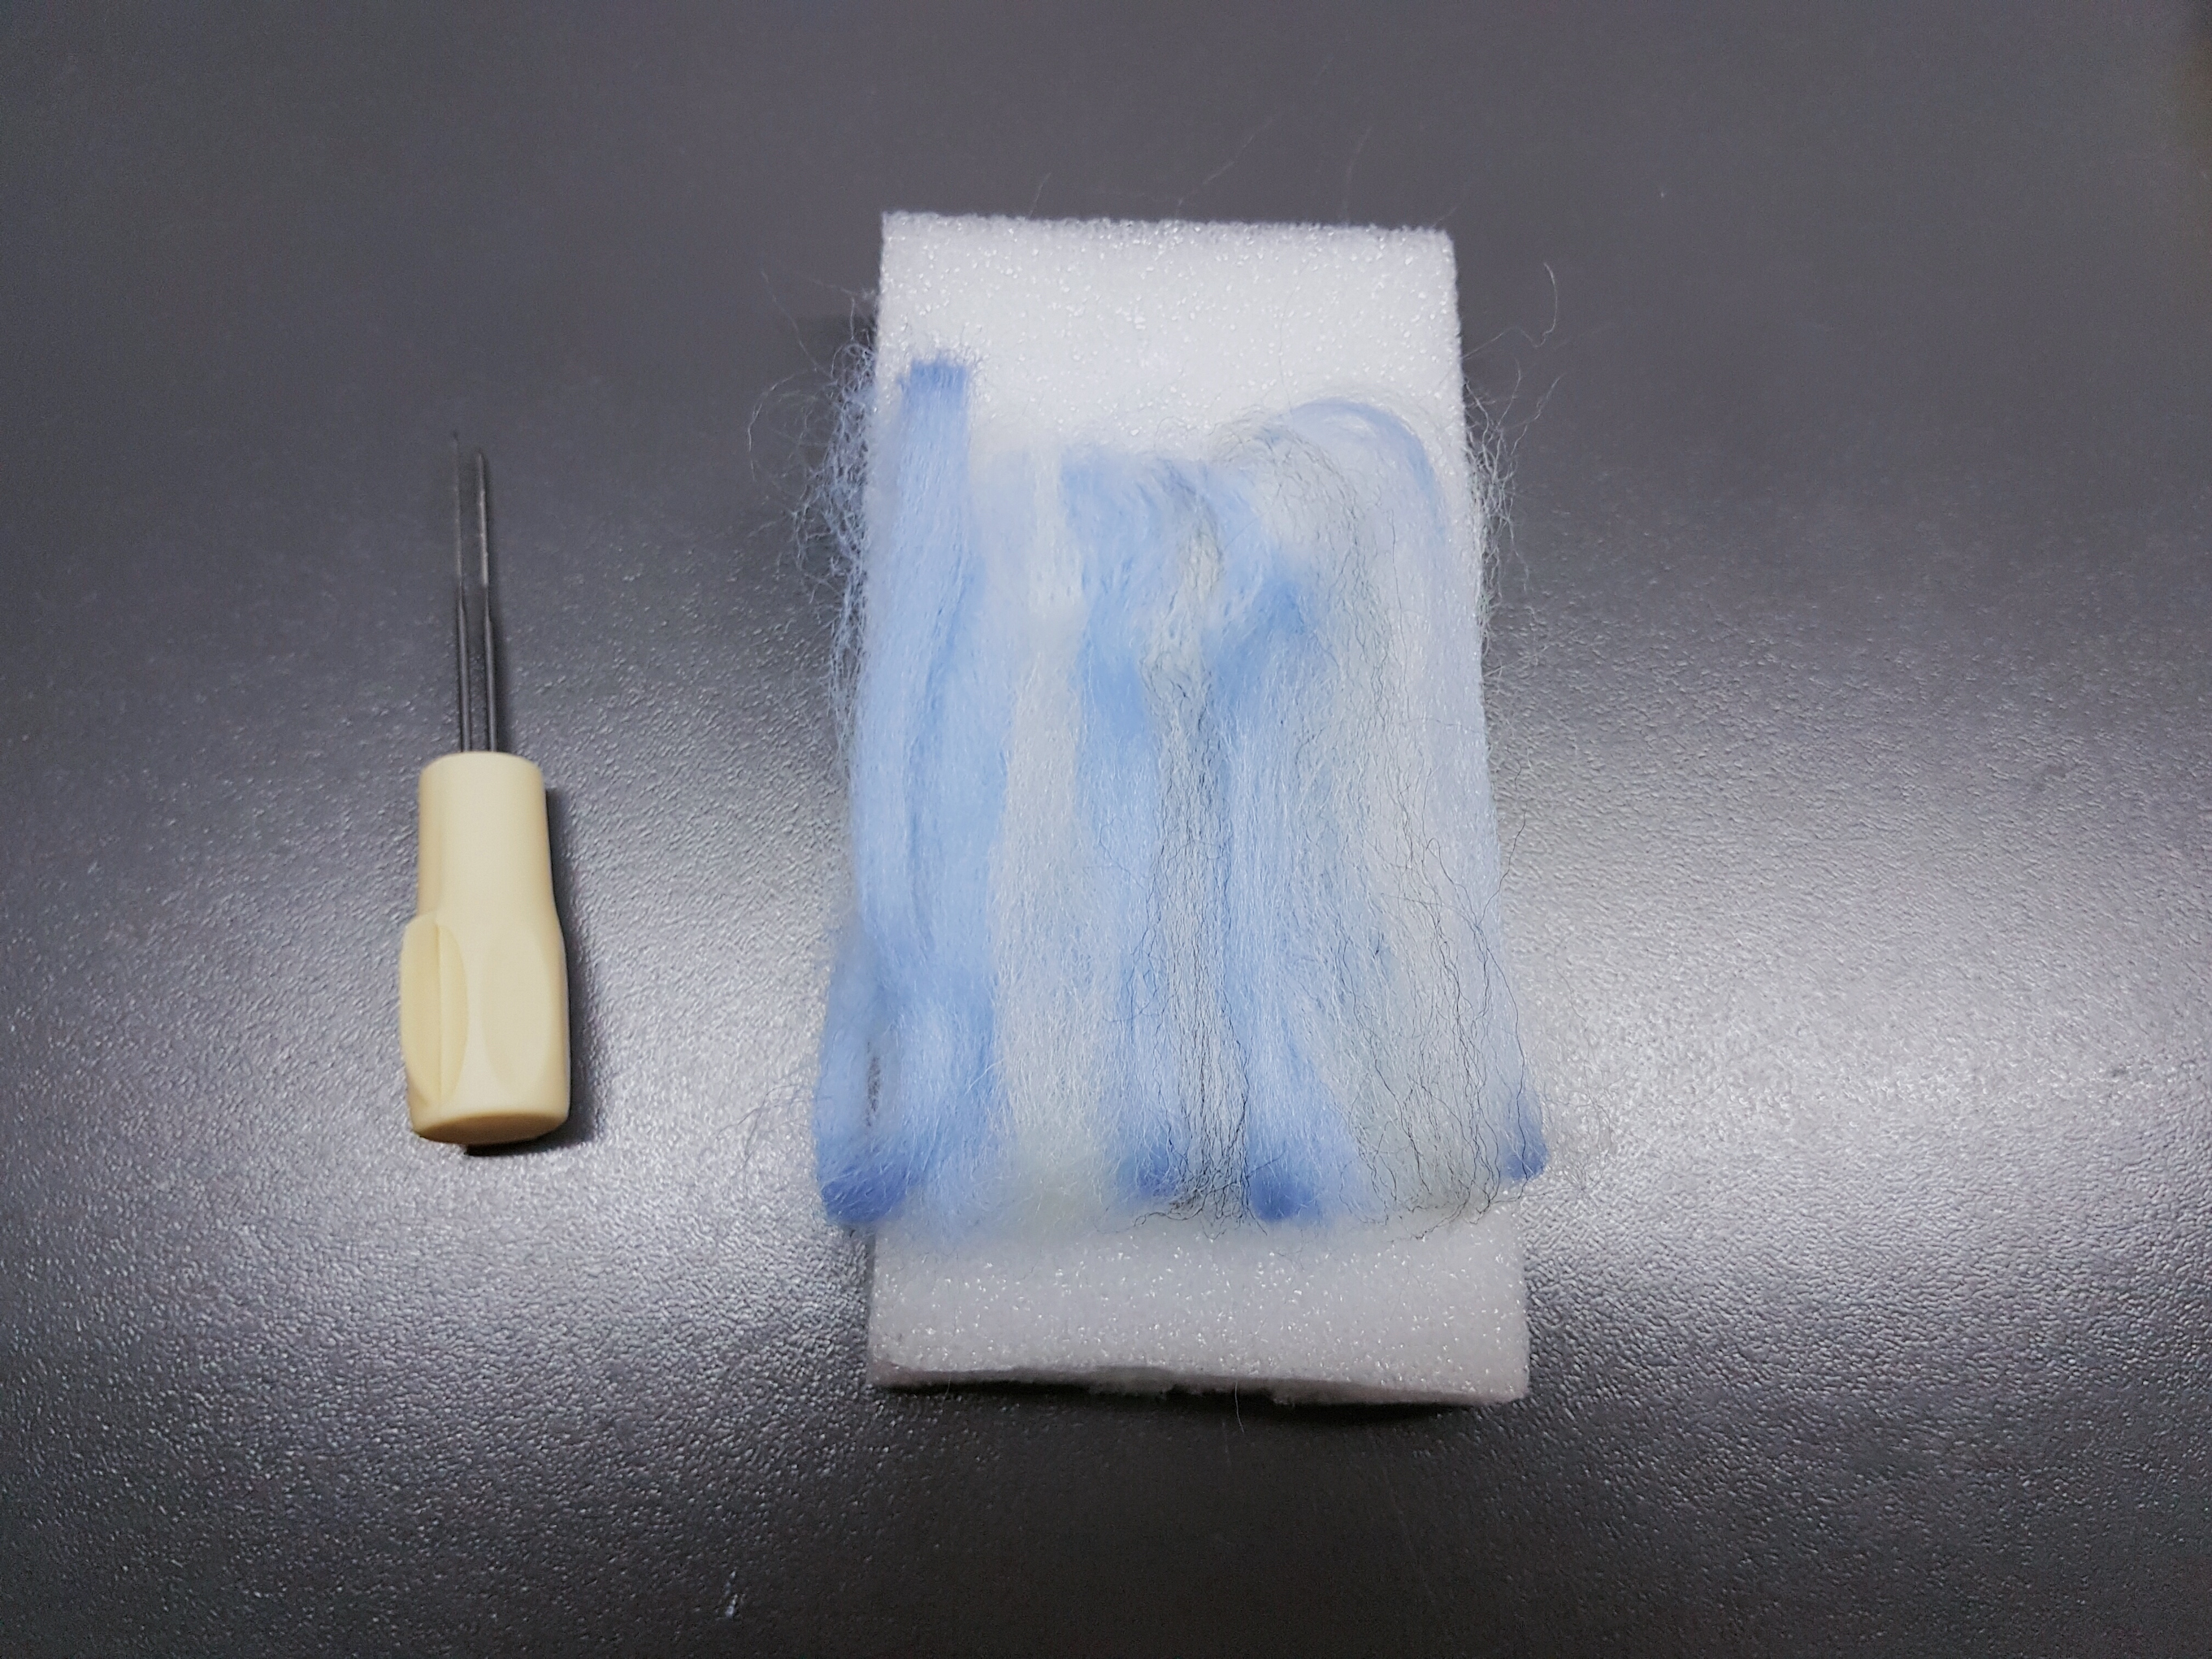
Materials: Fabric of choice (heavy or sheer, plain or patterned), thread, needles, patterns, beads (optional to decorate the darts).

Steps outline
  • Start by drawing a grid and transferring the patterns onto the fabric. Varying the size of the grids will vary the effect.
  • Following the lines, stitch the intersections of the grid together in the same spot to gather the fabric
  • Secure it with a knot
  • Repeat for a few rows and the pattern will start to show!

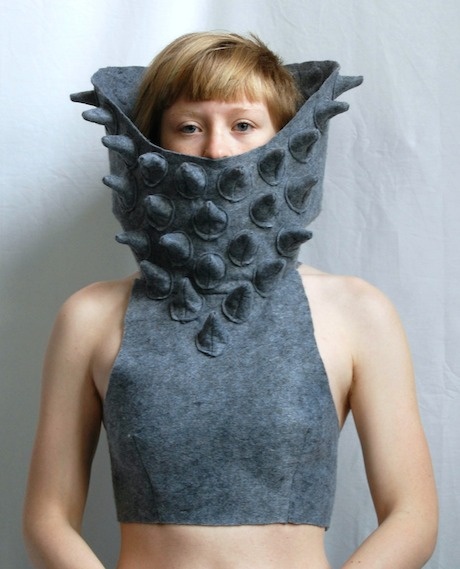
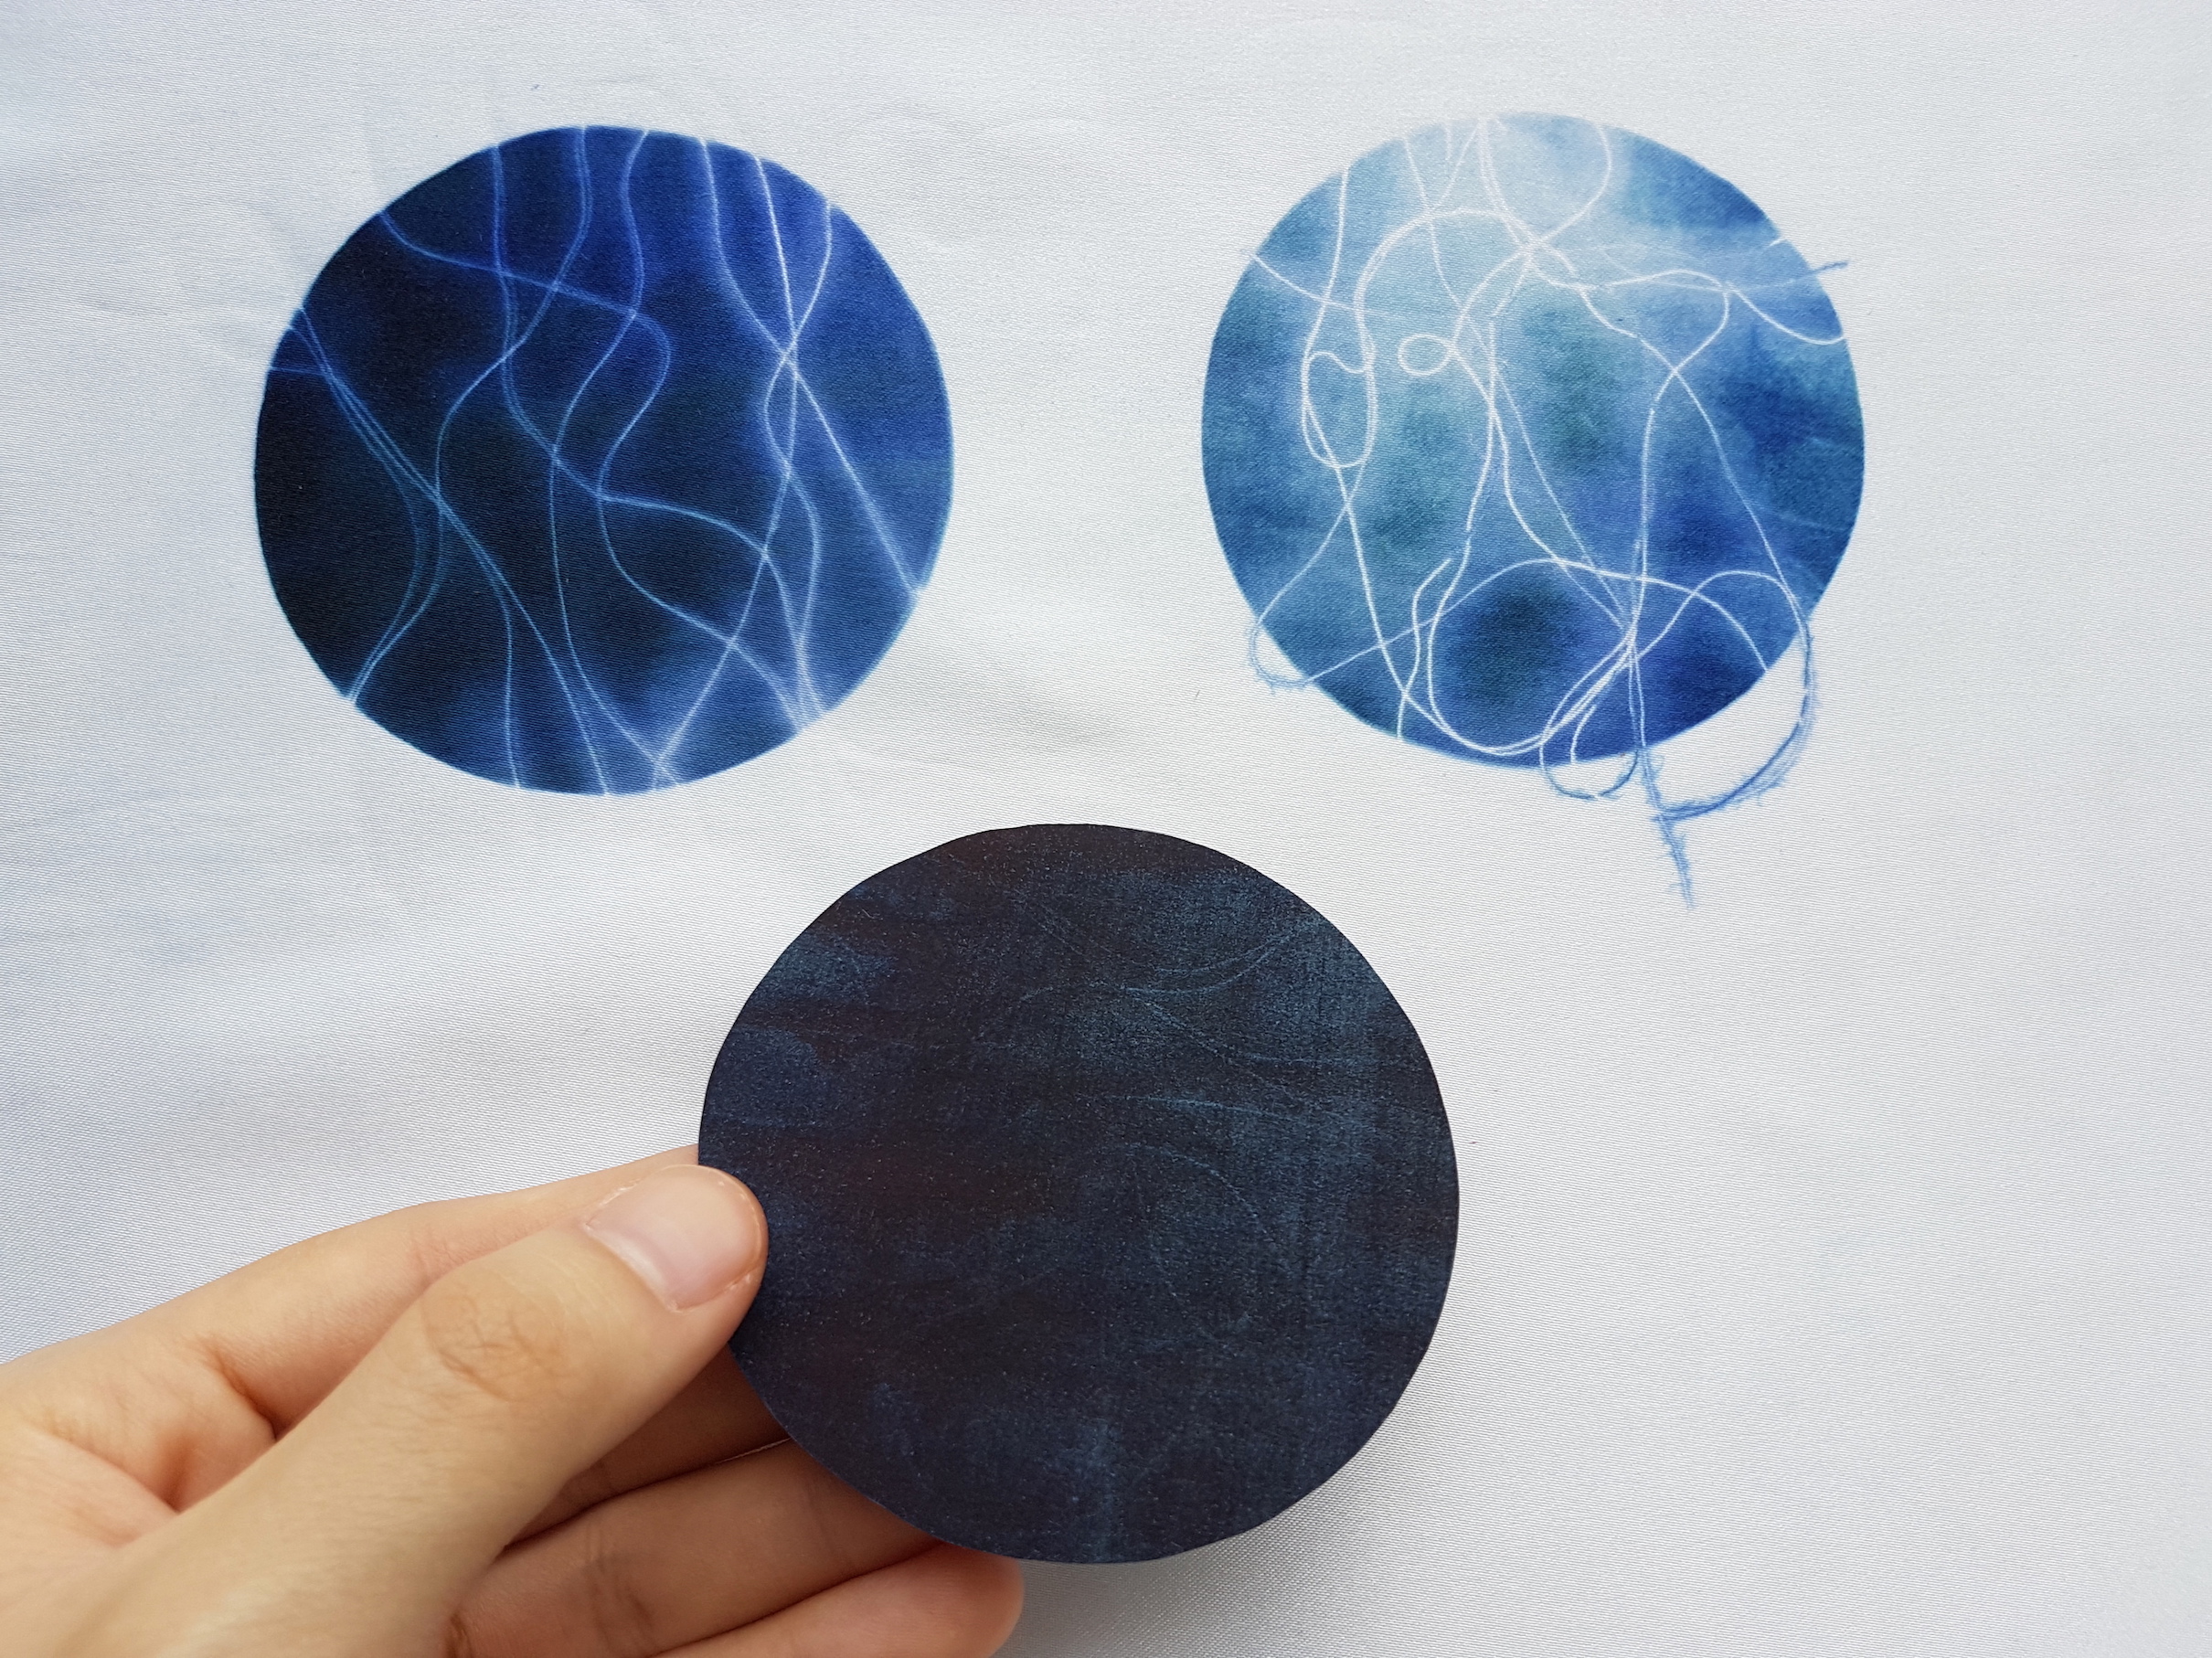
Here is my first smocking sample using a heavy mixed grey felt. Using a stiffer fabric creates a more structured sample; the result feels closer to an object than fabric as it curves to create a new form.

Tracing the patterns for sample 1
50% complete
Completed ‘fish scales’ smocking sample using mixed grey felt
Under-side

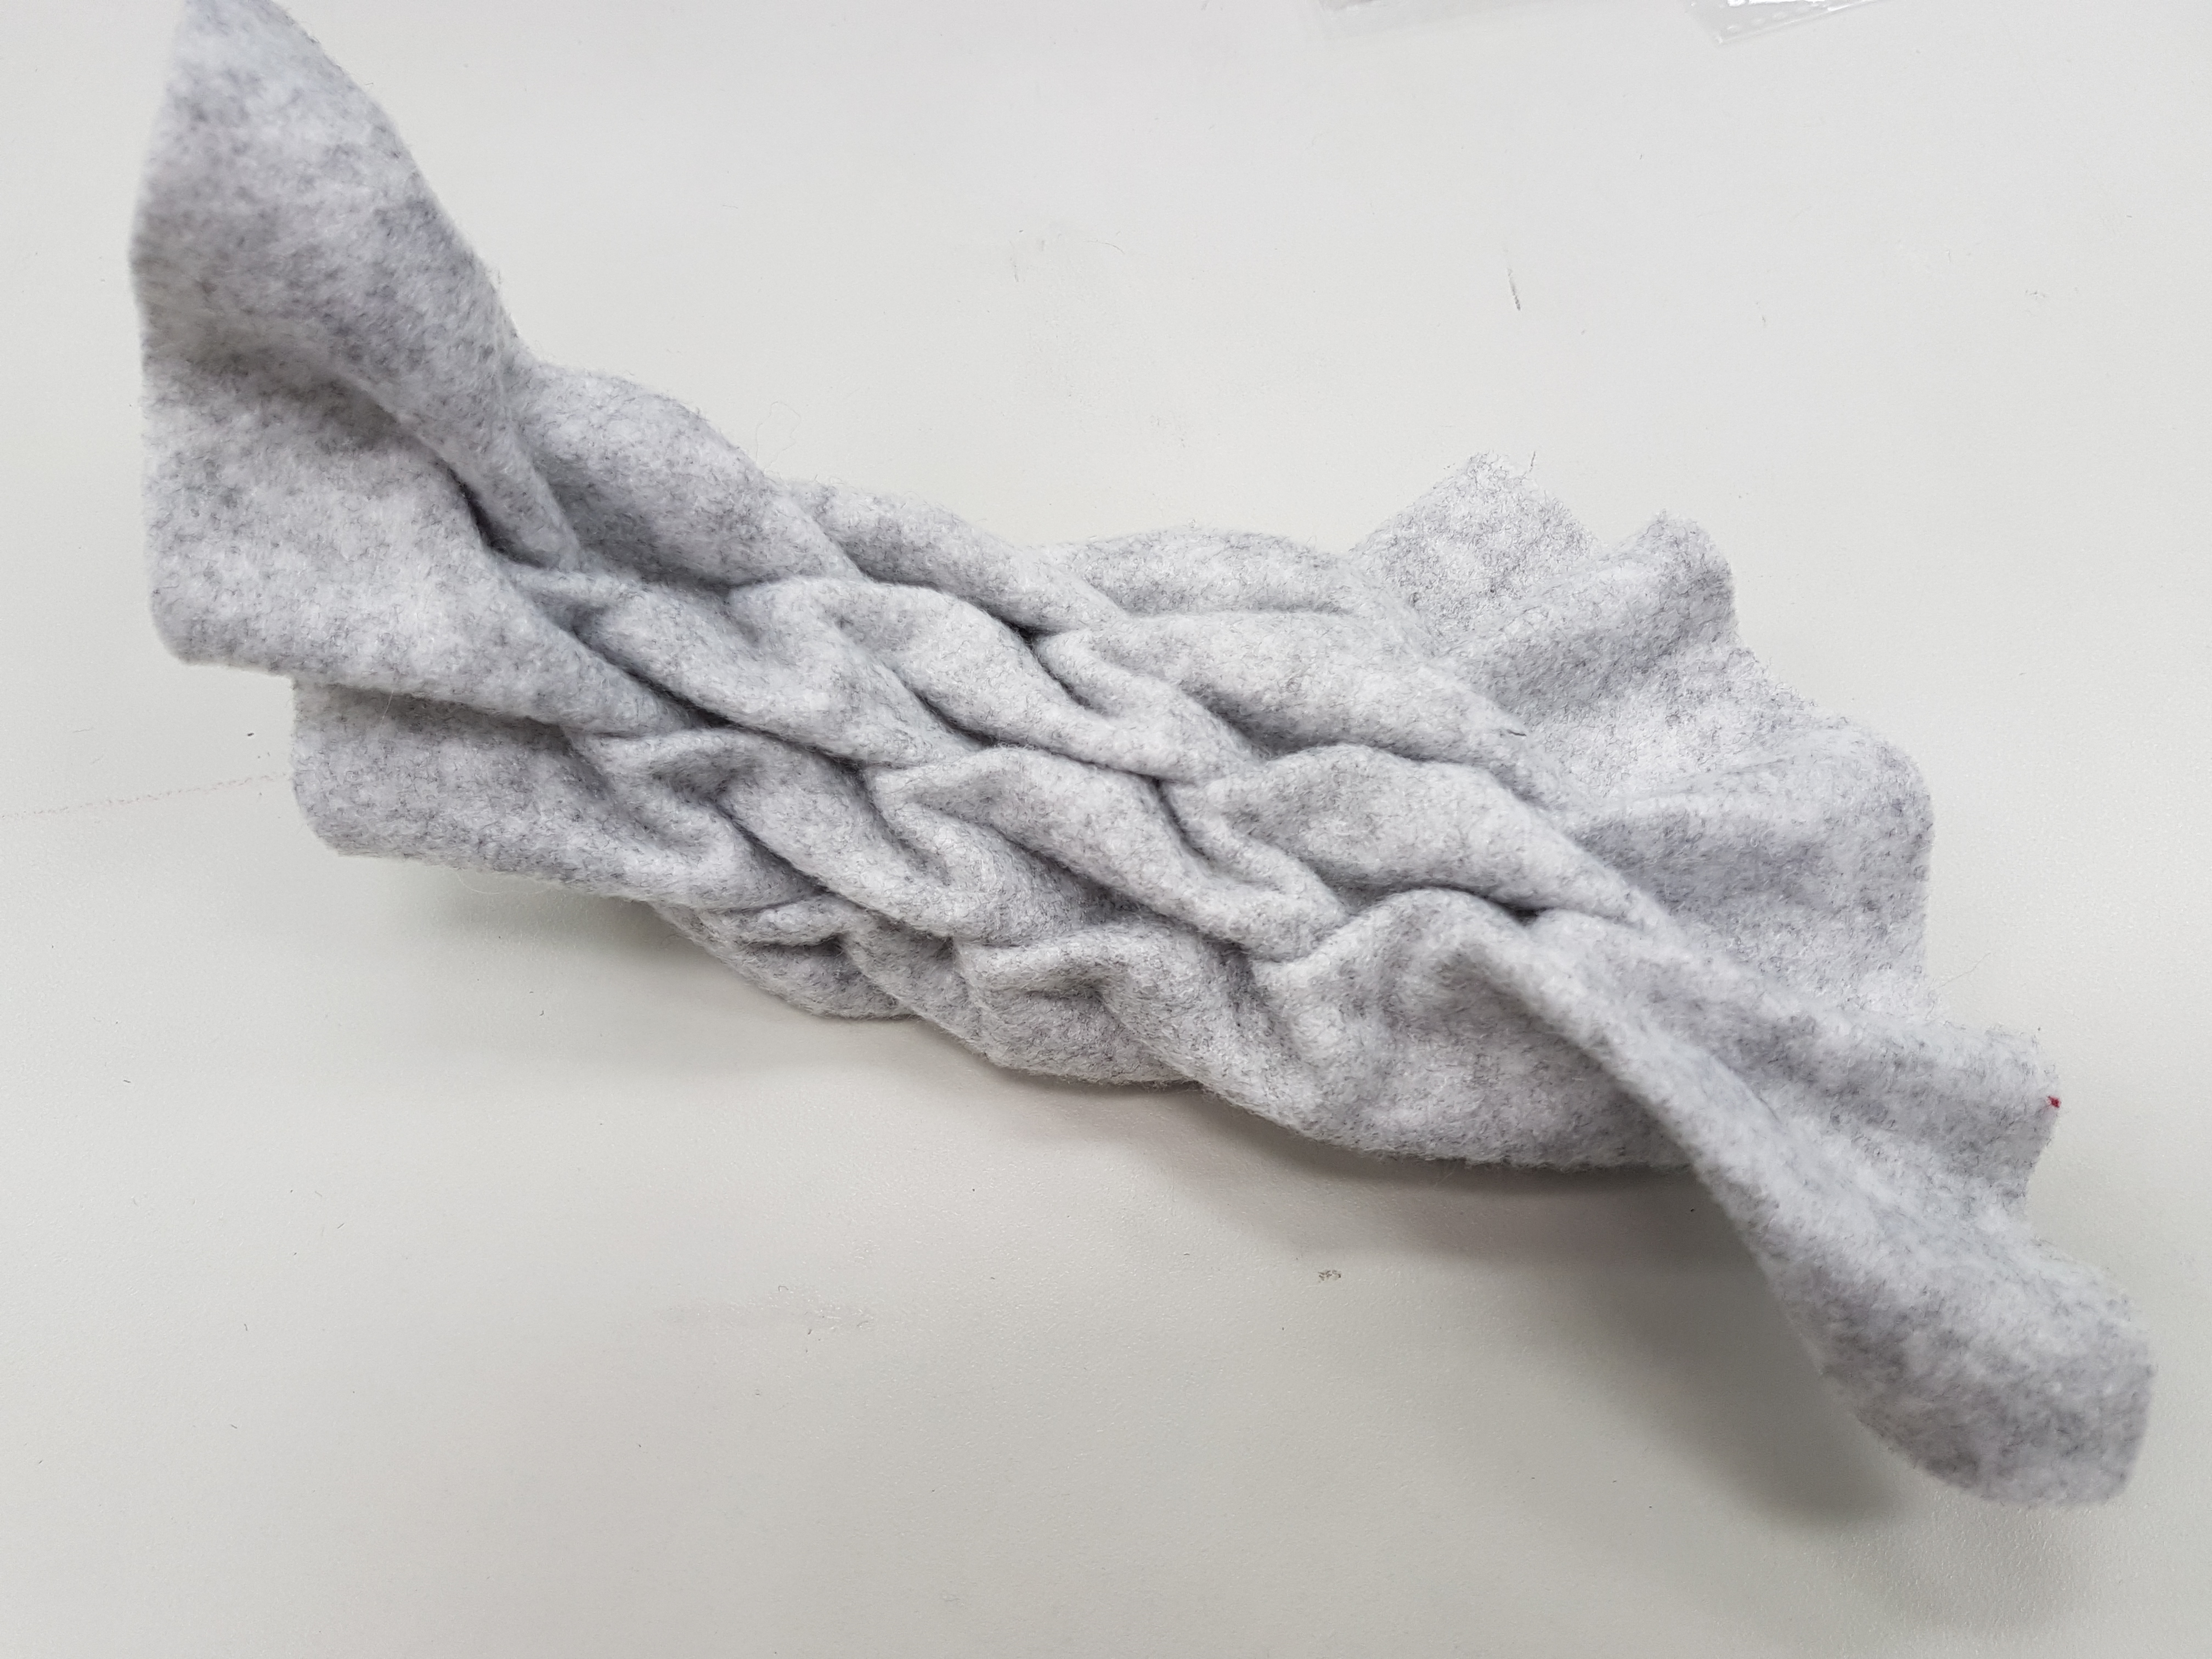
I really like the smocking technique as it can create very intricate and textured results using simple hand-stitching. Different weights and textures of fabric creates varying results. I’ve seen these effects in bags, cushion covers and other decorated items but never knew it was this simple to create!

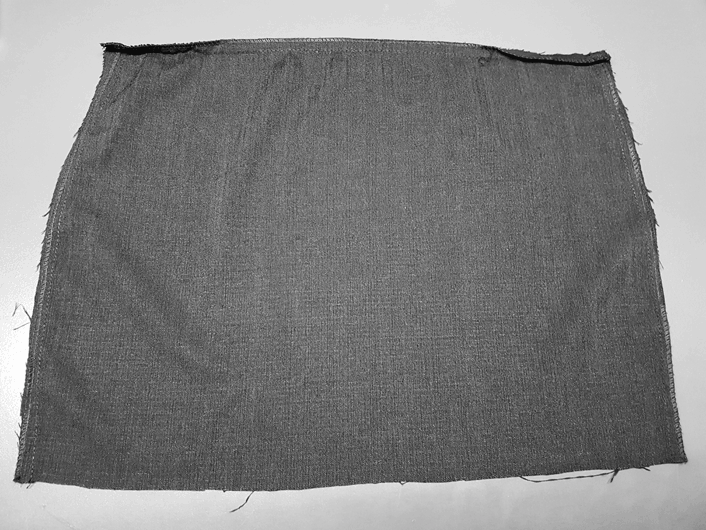
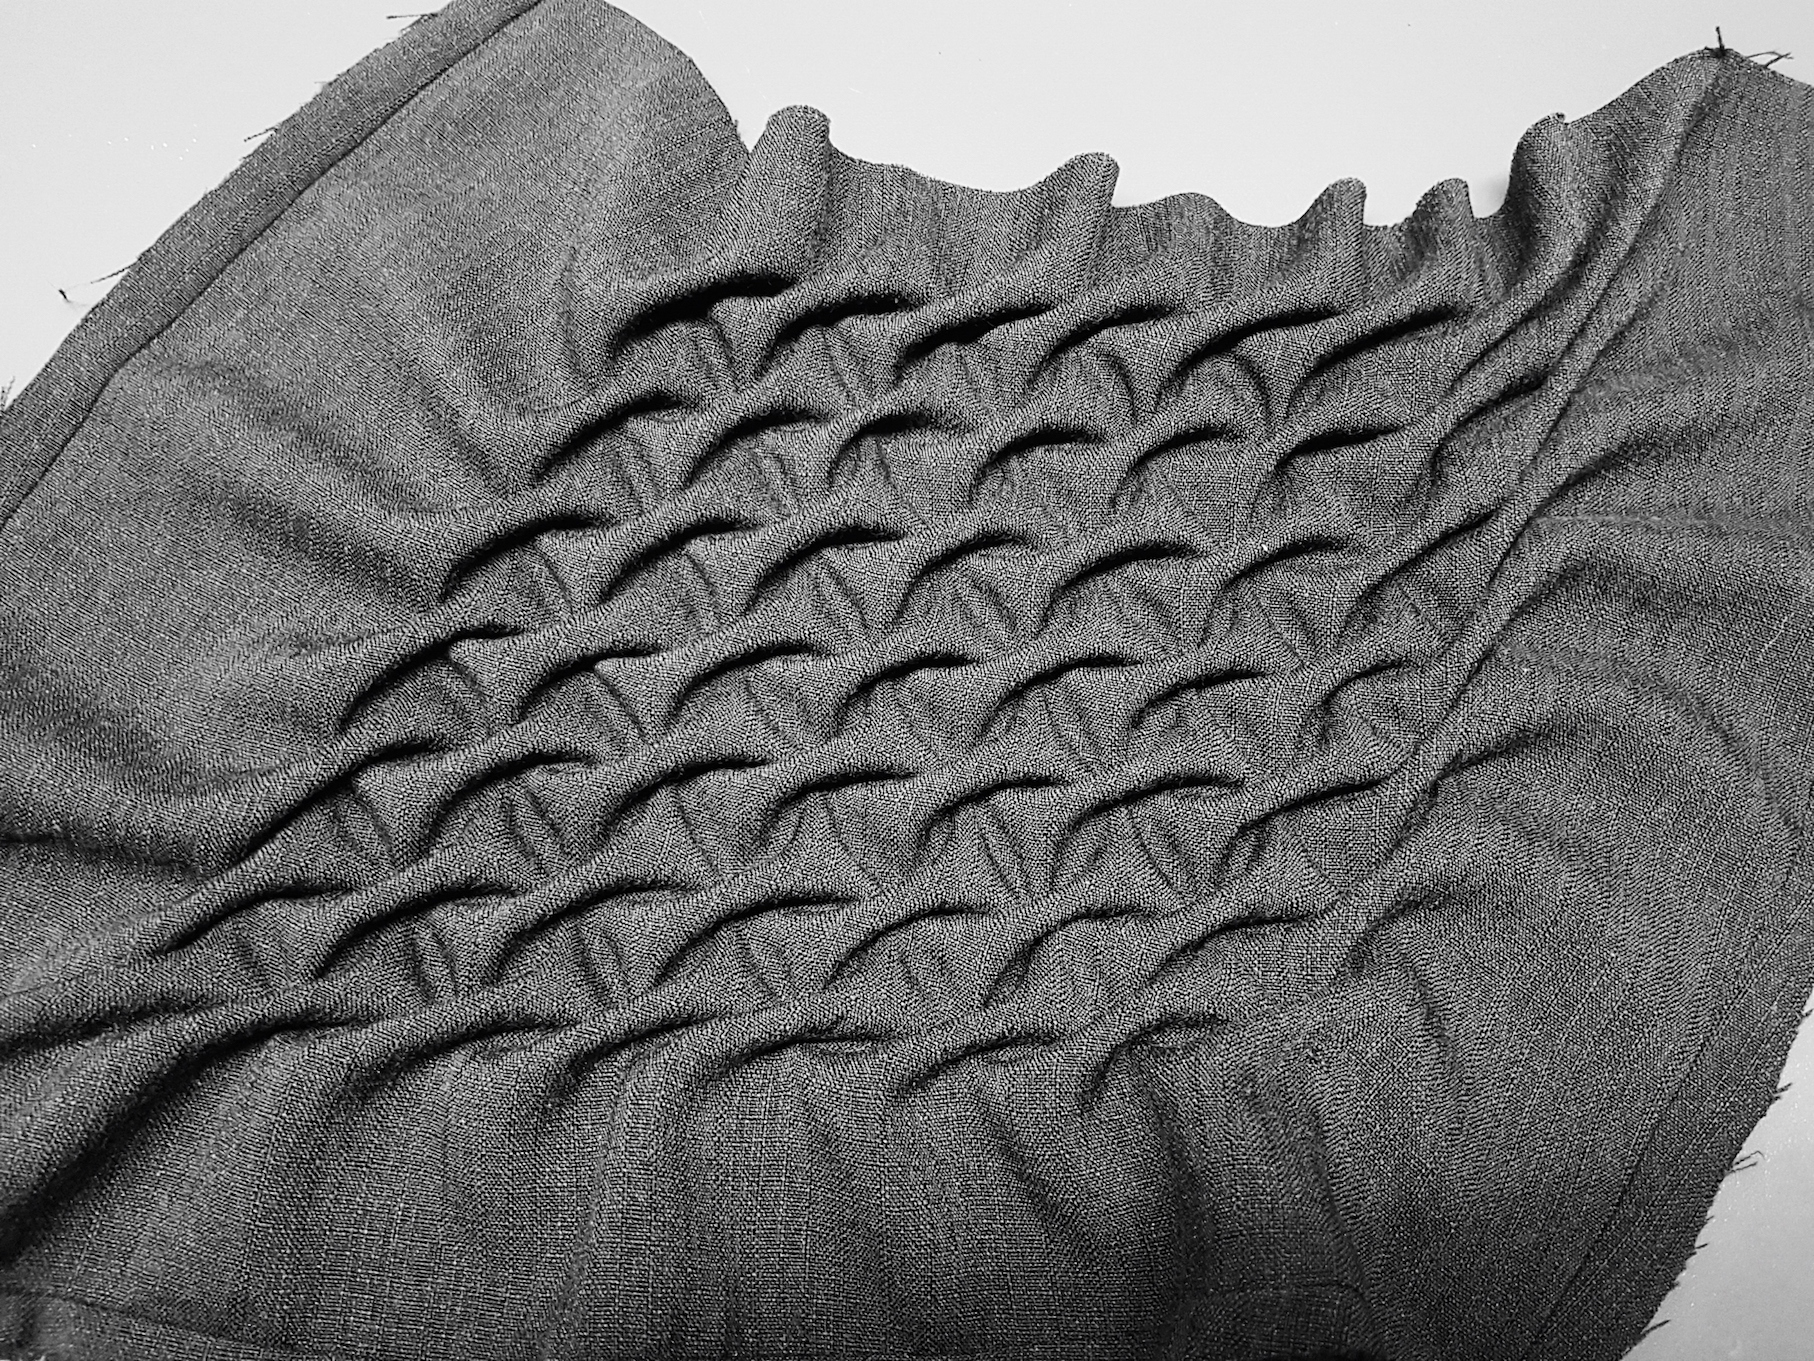
Next, I tried applying this smocking technique onto a thinner fabric (it’s a scrap piece of fabric from an old dress).

Smocking process
Completed ‘Bones’ pattern smocking
Close-up of ‘bones’

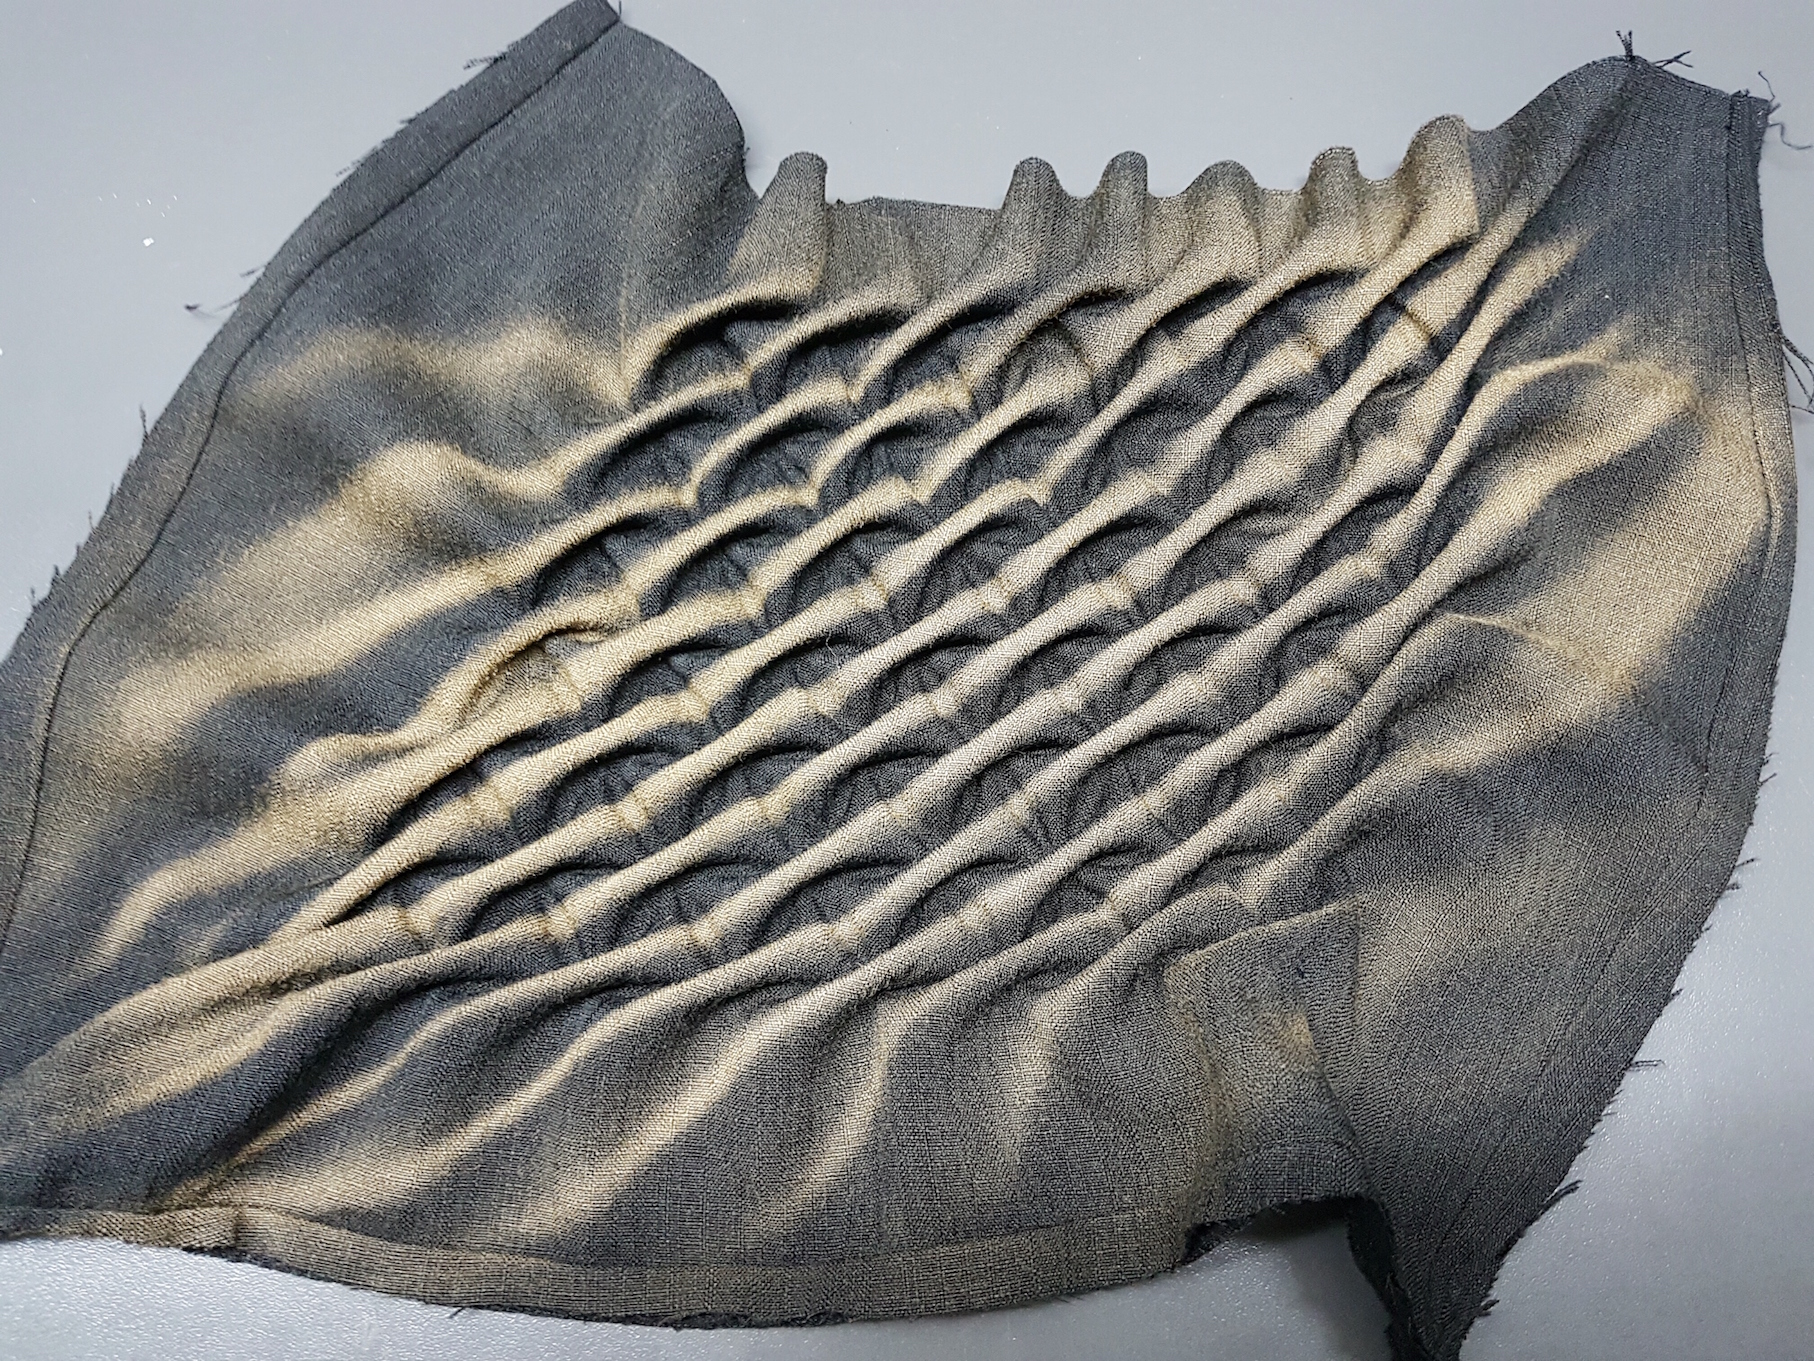
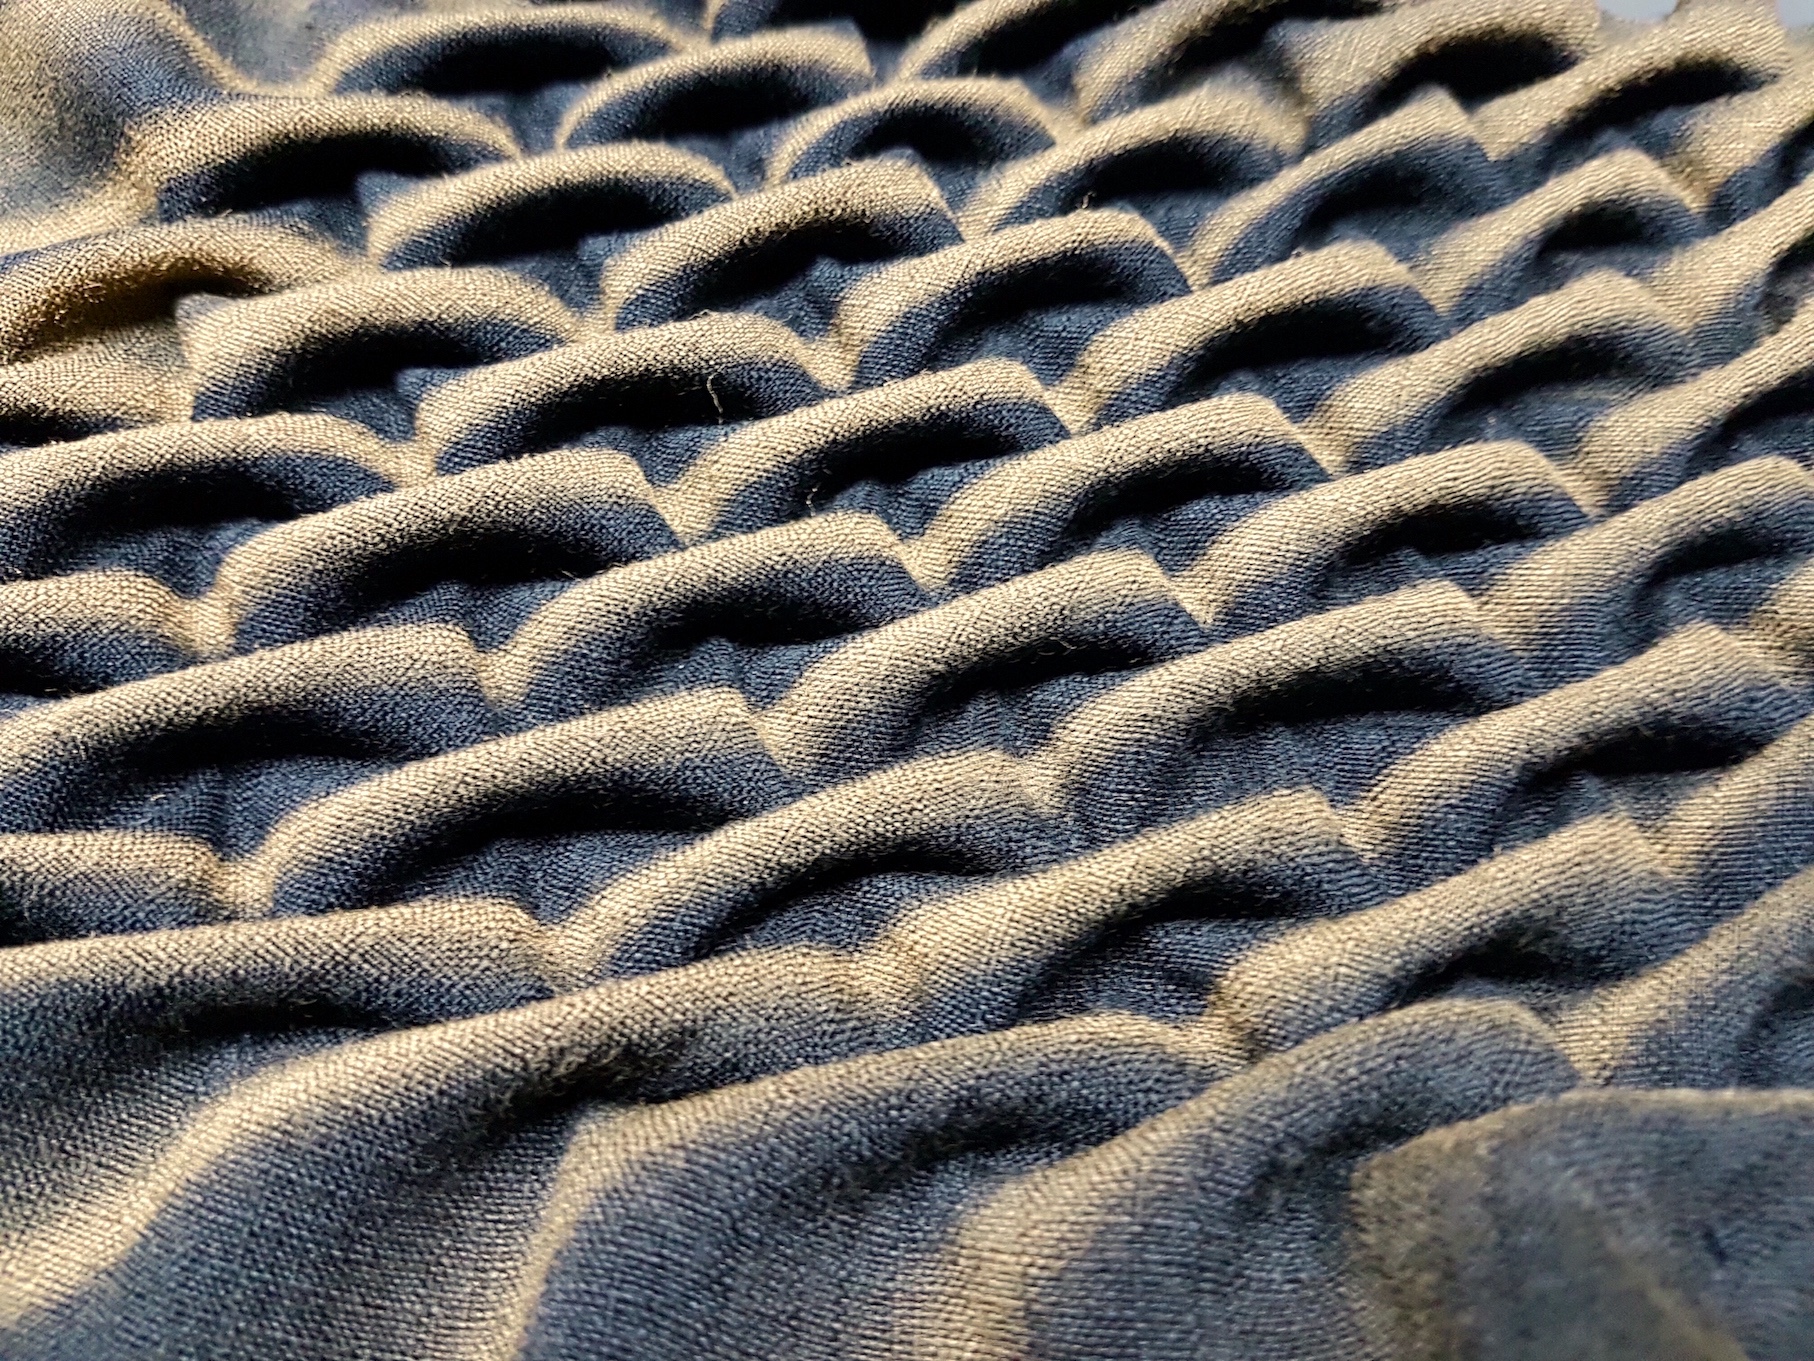
When completed, I was curious to see the effect of colour additions on smocking. So I lightly spray painted this black fabric sample to give it a metallic finish and accentuate the ‘bone’ structure and form. The additional gold colour creates more depth in the smocking.

Golden bones
Close-up of golden bones

More samples and experimentation to come 🙂

Sewing with elastic thread

Materials needed: lightweight/sheer fabric, lace, sewing machine, elastic thread

Work in progress! To be updated 🙂

Felting & Applique | week 5

This week we explored 2 new techniques: Felting and Applique.

Felting

Felting can be used to create both flat textiles and structured 3D objects. There are diverse applications and we can see felting in everyday products in the form of fabrics, hats, bags and handicraft.

Techniques

There are several felting techniques such as wet felting, needle felting and Nuno felting. The basic felting techniques requires these materials: wool, felting needles, hot water, soap, and a soft surface to work on.

To start, gather the colours and arrange it into the intended shape or design. Moisten the wool with some hot water and start massaging; this will help the fibres intertwine and shrink to create a strong and firm material. A little bit of soap can be added to speed up the process and make the massaging easier.

Arranging felting wool

For my first felting attempt, I decided to make a blue rose! I combined both wet and needle felting techniques. I made the individual petals first before felting them together using the needles. The petals in the centre are darker and gradually become lighter on the outer petals.

After felting together several petals to form the rose, to complete this little sample, I used a green metal wire to add a stem and leaves.

Applique

Work in progress… to be updated!

Modern Colony Exhibition | week 3 | thoughts

This week we visited the Modern Colony exhibition at the National Museum of Singapore. It featured many local everyday objects such as clothing, entertainment, household items and furniture from 1925 – 1935 used by people of different socio-economic classes. This decade can be viewed as a turning point in culture amalgamation as well as women’s rights and education. Together, these various objects represent the rich visual and material culture of early 20th century Singapore which was then a fast-developing cosmopolitan city.

1920s: Style and Aesthetics
Embroidery samples
Cotton dress with sash and ladies silver mesh purse
Glass epergne (decorative vase with floral stems)
Hanging lights with fluted lamp shades

During this decade, there seems to be a general stylistic preference for ornamental and intricate details. Floral and curvilinear motifs were popular choices to decorate furniture, lights and vases (either painted on flat or attached). There was also a focus on handicraft and embroidery during this period. This contrasts with today’s more minimal aesthetics which lean towards clean lines and crisp shapes.

I really like these decorative lamp shapes and vases. Their fluted rims resemble flowers. The firm glass contrasts with the fluid folds. The colours are also applied in gradient.

Women’s Identity and Blending Cultures

Many of the objects on display illustrate the dichotomy between east and west in the pre-war British colony of Singapore. These two influences are seen in clothing, shoes and household items, especially from wealthier households.

Women’s shoes in the 1920s – 1930s

Although traditional bound feet shoes (centre) were very pretty, they hindered movement and resulted in many women staying at home. By the 1920s, they were replaced by these exquisitely embroidered high-heeled shoes which were favoured by the modern women in Singapore.

Social dancing shoes with both western and eastern style elements

These shoes did not hinder movement and conversely were used for social and ballroom dancing. This change reflects the evolving role of women at the time and their increasing rights and freedom.

Furthermore, these shoes represent the combination of eastern and western influences, a hallmark of the cosmopolitan city. The designer appropriated style elements from the east and west and applied them to a pair of shoes as seen by the frilly bow (western) and embroidered peony (Chinese) on the toe caps.

Cocktail shaker
Cocktail glasses

Household and luxury items also reflect this blend of East and West such as this golden cocktail shaker and beakers with a four-clawed dragon chasing a pearl. The cocktail shaker, originally an invention of western culture,  is here remade with Chinese aesthetic elements and motifs.

Transfer Printing | week 1 & 2

This week we explored various transfer printing methods such as dry transfer using fabric crayons, wet transfer (direct and indirect printing), and digital transfer. Although these methods are relatively simple, they can create amazing results.

Dry Transfer Printing using Fabric Crayons

Materials needed: Fabric crayons, an iron and some baking paper to protect the iron.

This method involves drawing onto paper using crayons, then transferring the drawn images onto satin polyester using heat. The colours produced are very vibrant and the process is simple and intuitive.

Tartan made using fabric crayons

The same drawing can be printed again, producing a lighter effect.

Crayon on paper before printing
Result after transfer printing
Pattern swatch made using fabric crayons

After drawing with the crayons, we can reframe the pattern by cutting out a specific shape (e.g. square, arch). The use of crayons allows free control and limitless organic shapes. Personally, I think these fluid shapes and organic patterns came out nicer than the earlier tartan prints (straighter and cleaner lines would make a crisper effect)!

Wet Transfer (Direct and Indirect Printing)

Materials needed: Ink, brushes, paper to paint on, flat objects, iron, baking paper.

Direct Printing

For this method, we paint the designs onto paper and transfer them onto satin polyester using heat. The colours produced are very vibrant and beautiful. However, a drawback is that the paints on paper look very different from the end result so it can be slightly unpredictable. Although the heating process requires more time than the crayons, it produces very saturated colours.

Direct printing. Technocolour mushroom
Top: painted ink on paper before printing. Bottom: result
Indirect Printing

Printing with objects in between the paint and the print surface. The flat objects (thread, flowers, yarn, feathers etc.) block out the ink and mark their shape onto the print.

Printing with ink and thread

As seen above, prints can be used more than once. The second print (right) produces a lighter, more ephemeral effect. Applying heat for a longer time produces a more intense colour outcome. Inks can also be mixed and overlaid to create interesting blends and effects.

Printing with ink and thread
Printing with flowers
Right: Gradient made using fabric crayons

Different inks can be overlaid to create denser patterns (top). I like how the ink can be applied in a very raw manner and preserves the brushstrokes.

Especially for thicker objects like flowers, we need to apply more pressure to the iron to get a clear shape of the object. When I first printed the flowers, the shape was quite indistinct so I went over again with more pressure to get crisper lines.

Printing with furry yarn

Digital Transfer

To be updated!