Moving on from the explorations of rectilinear volumes in project one, we are now working with curvilinear forms such as spheres, cones and cylinders. Also, instead of arranging our volumes in perpendicular alignments, we will be experimenting with the angle of tilt.
Angle of tilt
Independent: Smaller than 45 degrees in relation to right angle line,
can hold itself up
Precarious: Greater than 45 degrees in relation to right angle line,
it will fall
Dependent: Volumes are holding each other up and are
dependent on one another
5 Components of our models:
- One Branch
- Cone, Cylinder, Sphere
- Another D, SD or SO
- Ikebana Inspired
- Include elements of season (spring)
Some requirements for the structure is that the volumes are placed on a 5mm thick base and if possible, try to prevent showing the model’s support.
Ikebana Research

https://s3-ap-southeast-2.amazonaws.com/ish-oncourse-scc/2bd5b556-9108-44a1-bfaa-29906685db5c
Ikebana is a disciplined art form revolving around the arrangement of flowers in Japan. “It is steeped in the philosophy of developing a closeness with nature.” The development of floral art in Japan stems from the Japanese love for nature and how much they appreciate natural beauty. As a huge part of their culture, many are often seen displaying flowers as a form of decoration. The art of Ikebana contains a variety of plants, flowers and branches to suggest the whole of nature.
- The main difference between Ikebana and other floral arrangements is its asymmetrical form and use of empty space as a feature in its composition.
- Harmony amongst the material, container, and setting is also very important
Moving along from the consideration and inspiration from Ikebana, we are also required to incorporate elements of a season into our models. Since my season was spring, I decided to brainstorm different elements of it to see which would fit best into my model.
Sketch Model 1
With this project, it was more challenging to create our sketch models since there was more to work with for the different shapes and volumes. To achieve our various volumes, I worked a lot with the cutter as well as the sandpaper in order to smoothen the surfaces out.
First Attempt:
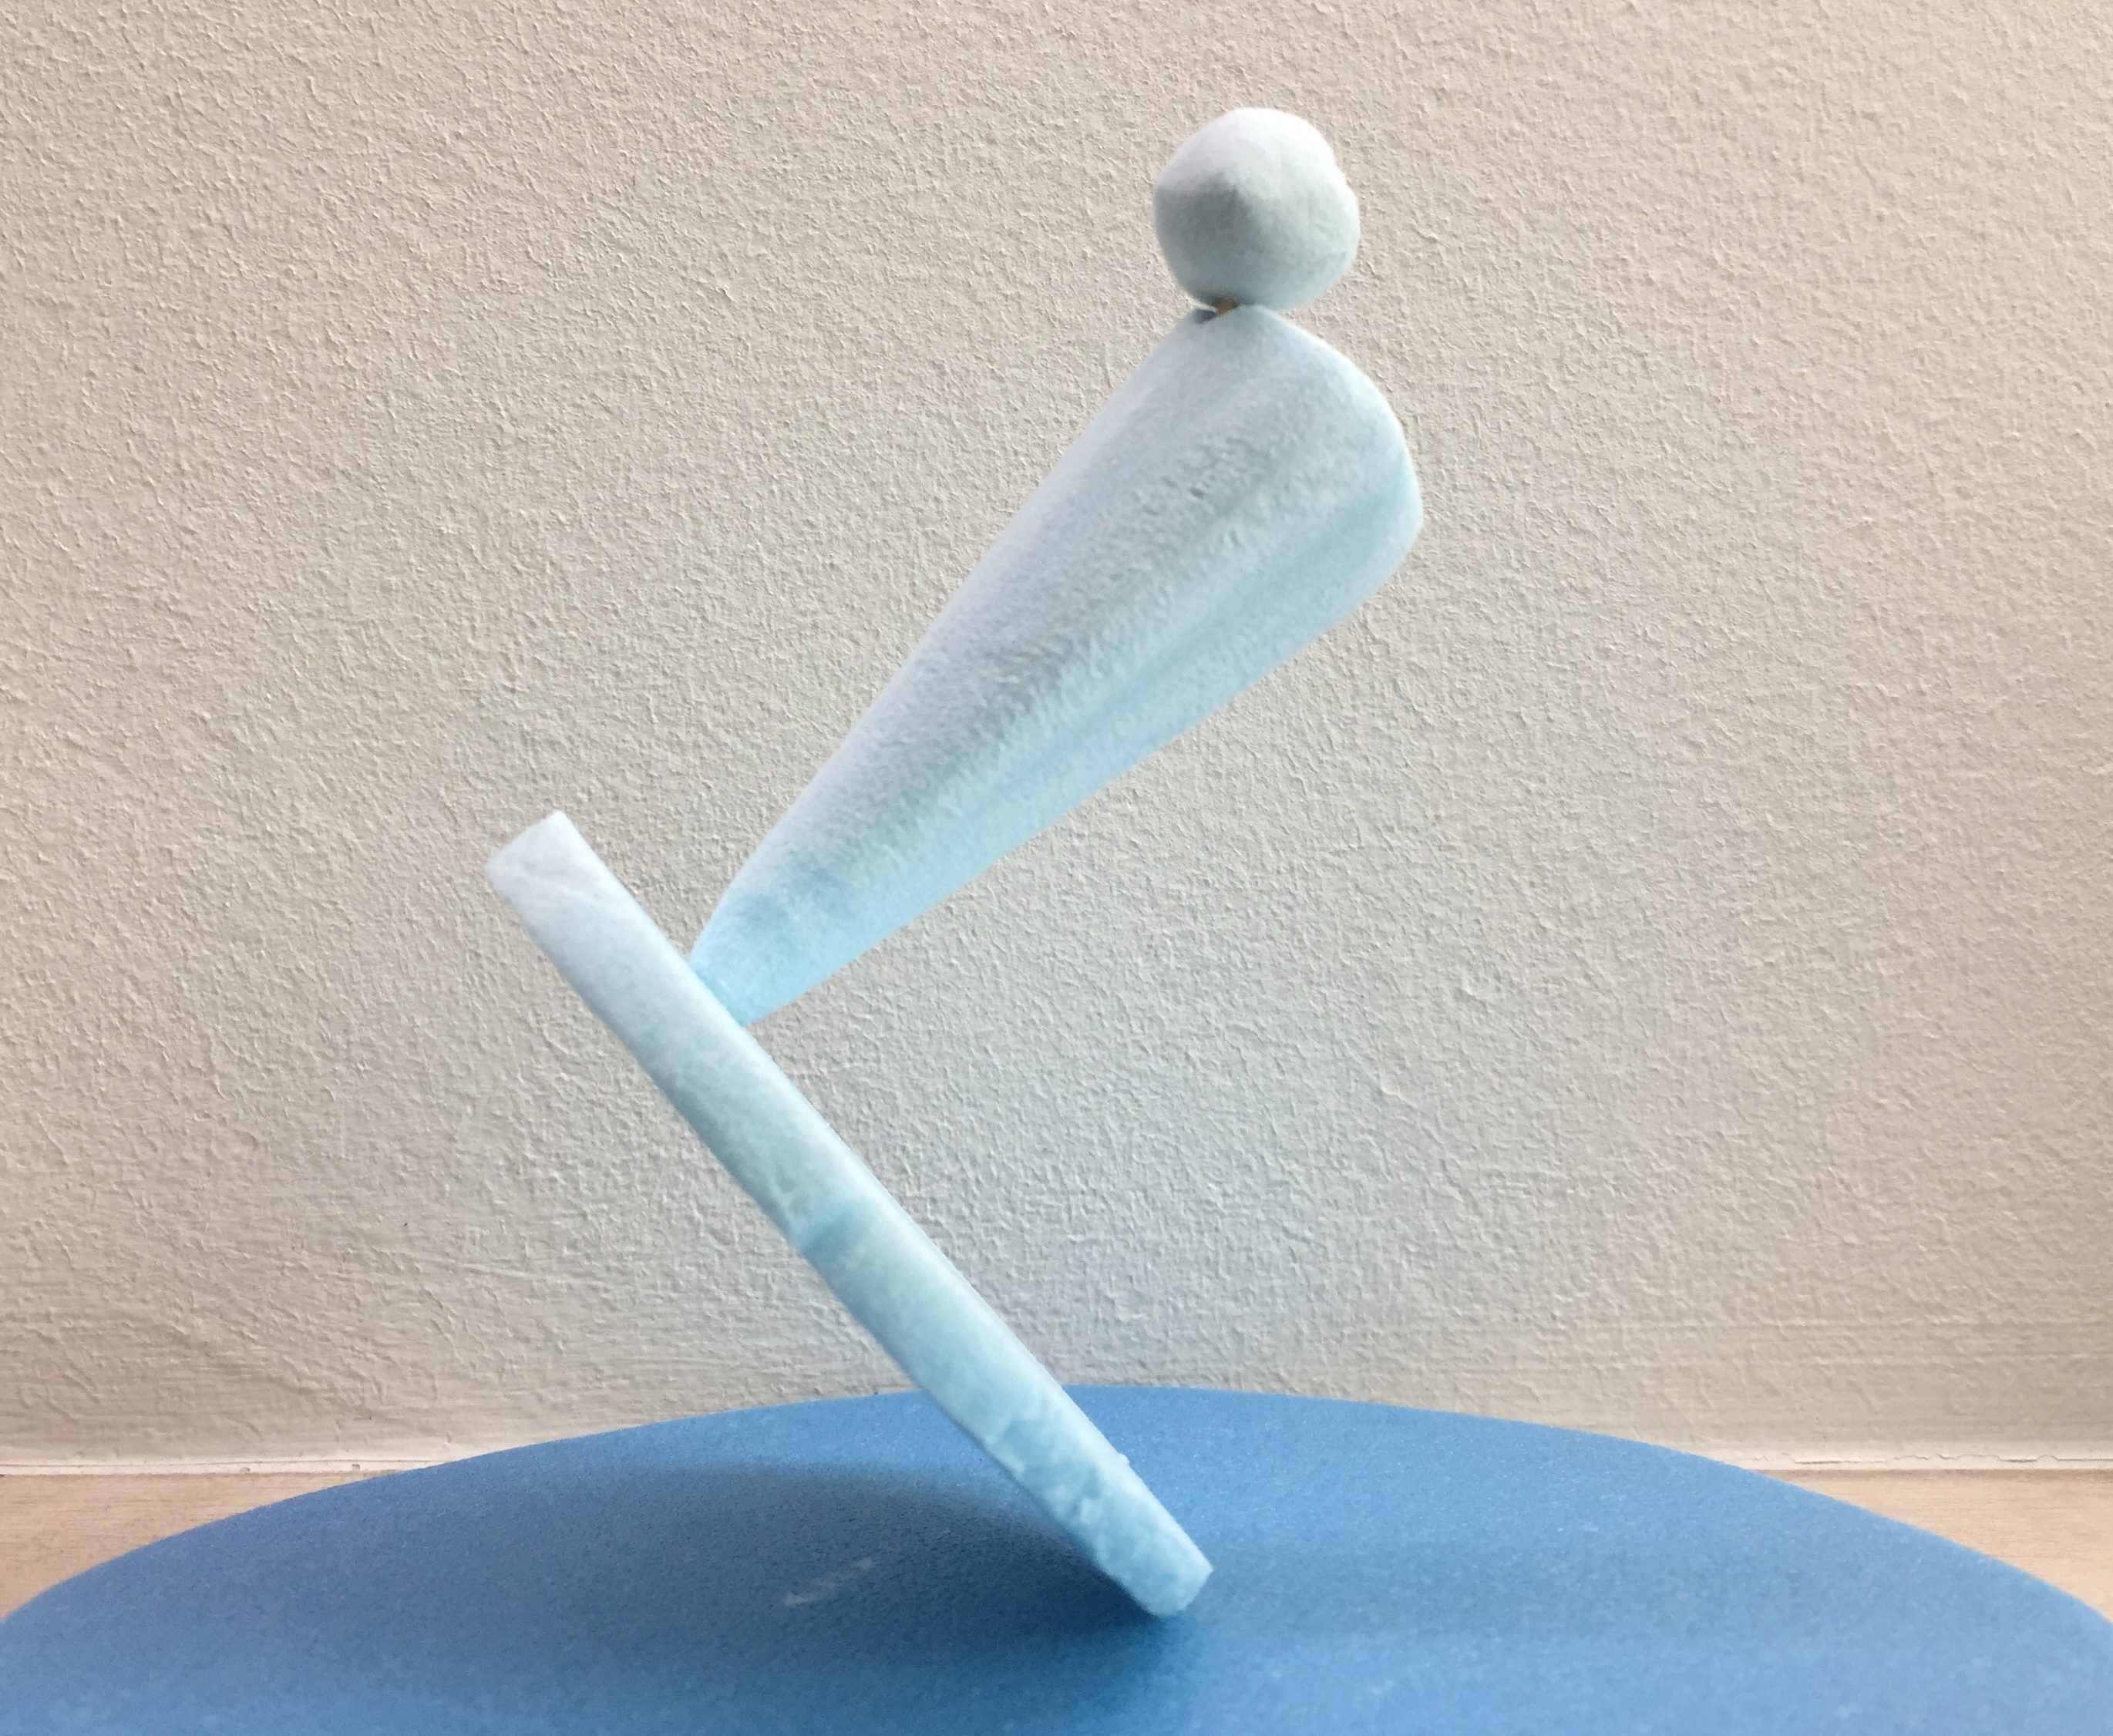
3D Sketch Model 1st attempt
This was the first 3D sketch model that I created. By targeting to place each volume at an angle, the overall model formed a zig-zag motion.
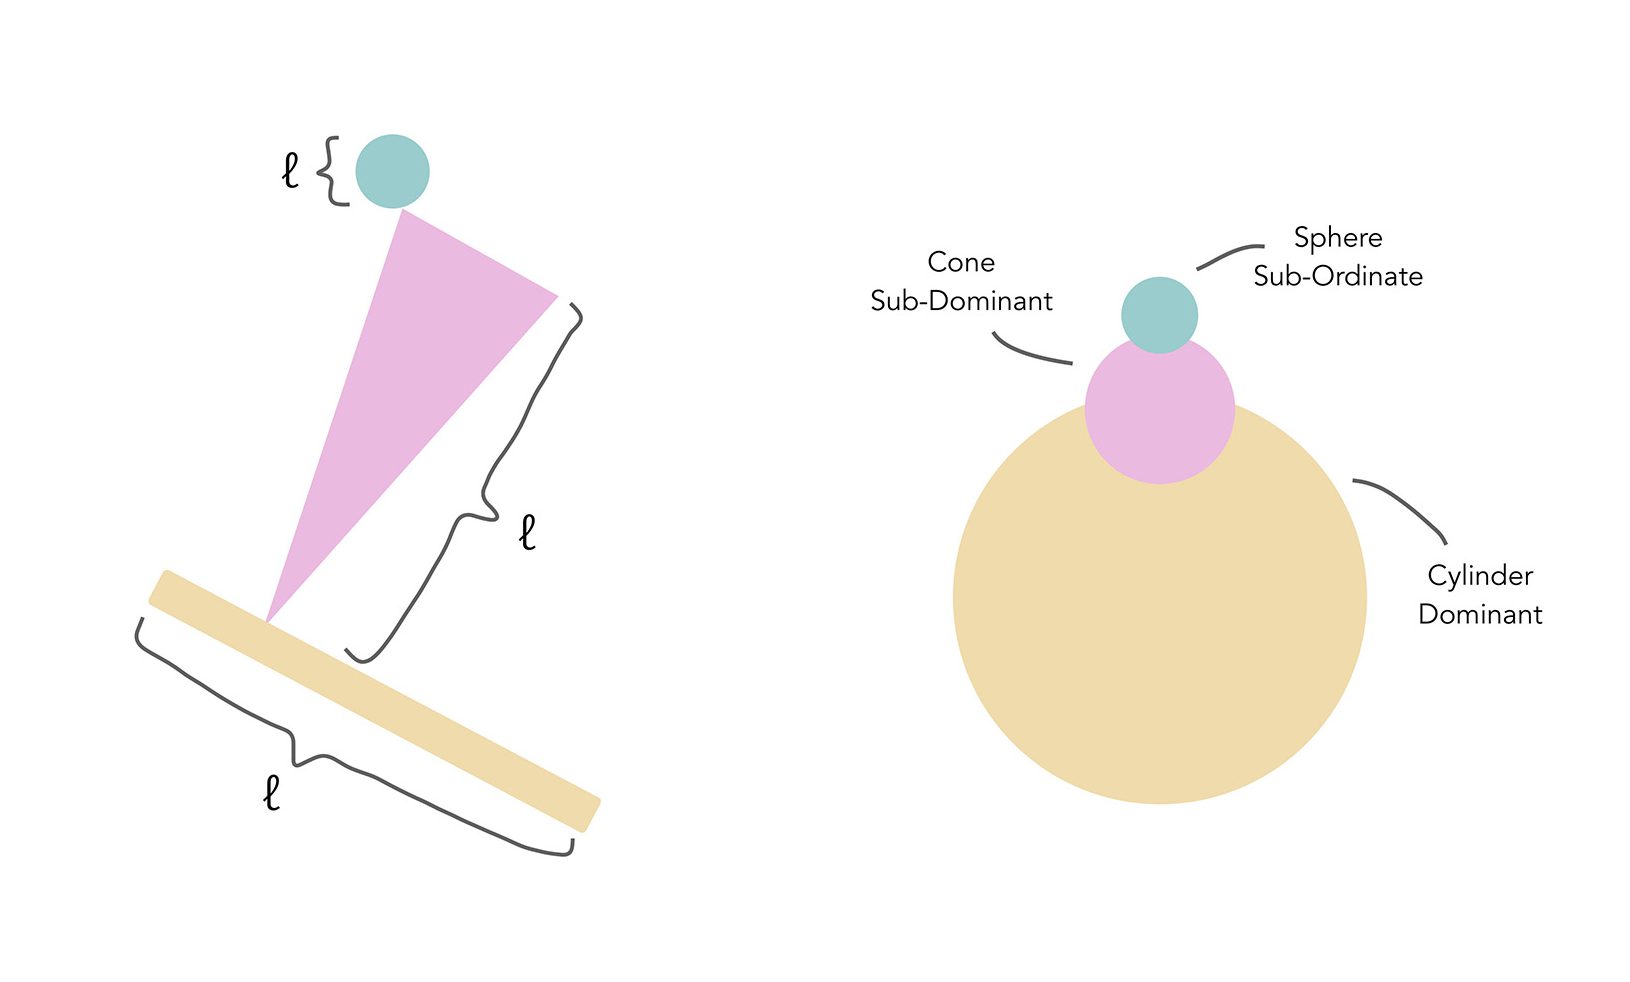
2D Sketch Analysis (1st Attempt) – Model Length ~ Model Diameter
After creating my 2D sketch analysis and observing the length and diameter of the model, I realized that the dominant cylinder was too small in relation to the sub-dominant because the length was almost the same. To improve on that, I just had to change it to a much wider cylinder.
Second Attempt:

3D Sketch Model 2nd attempt
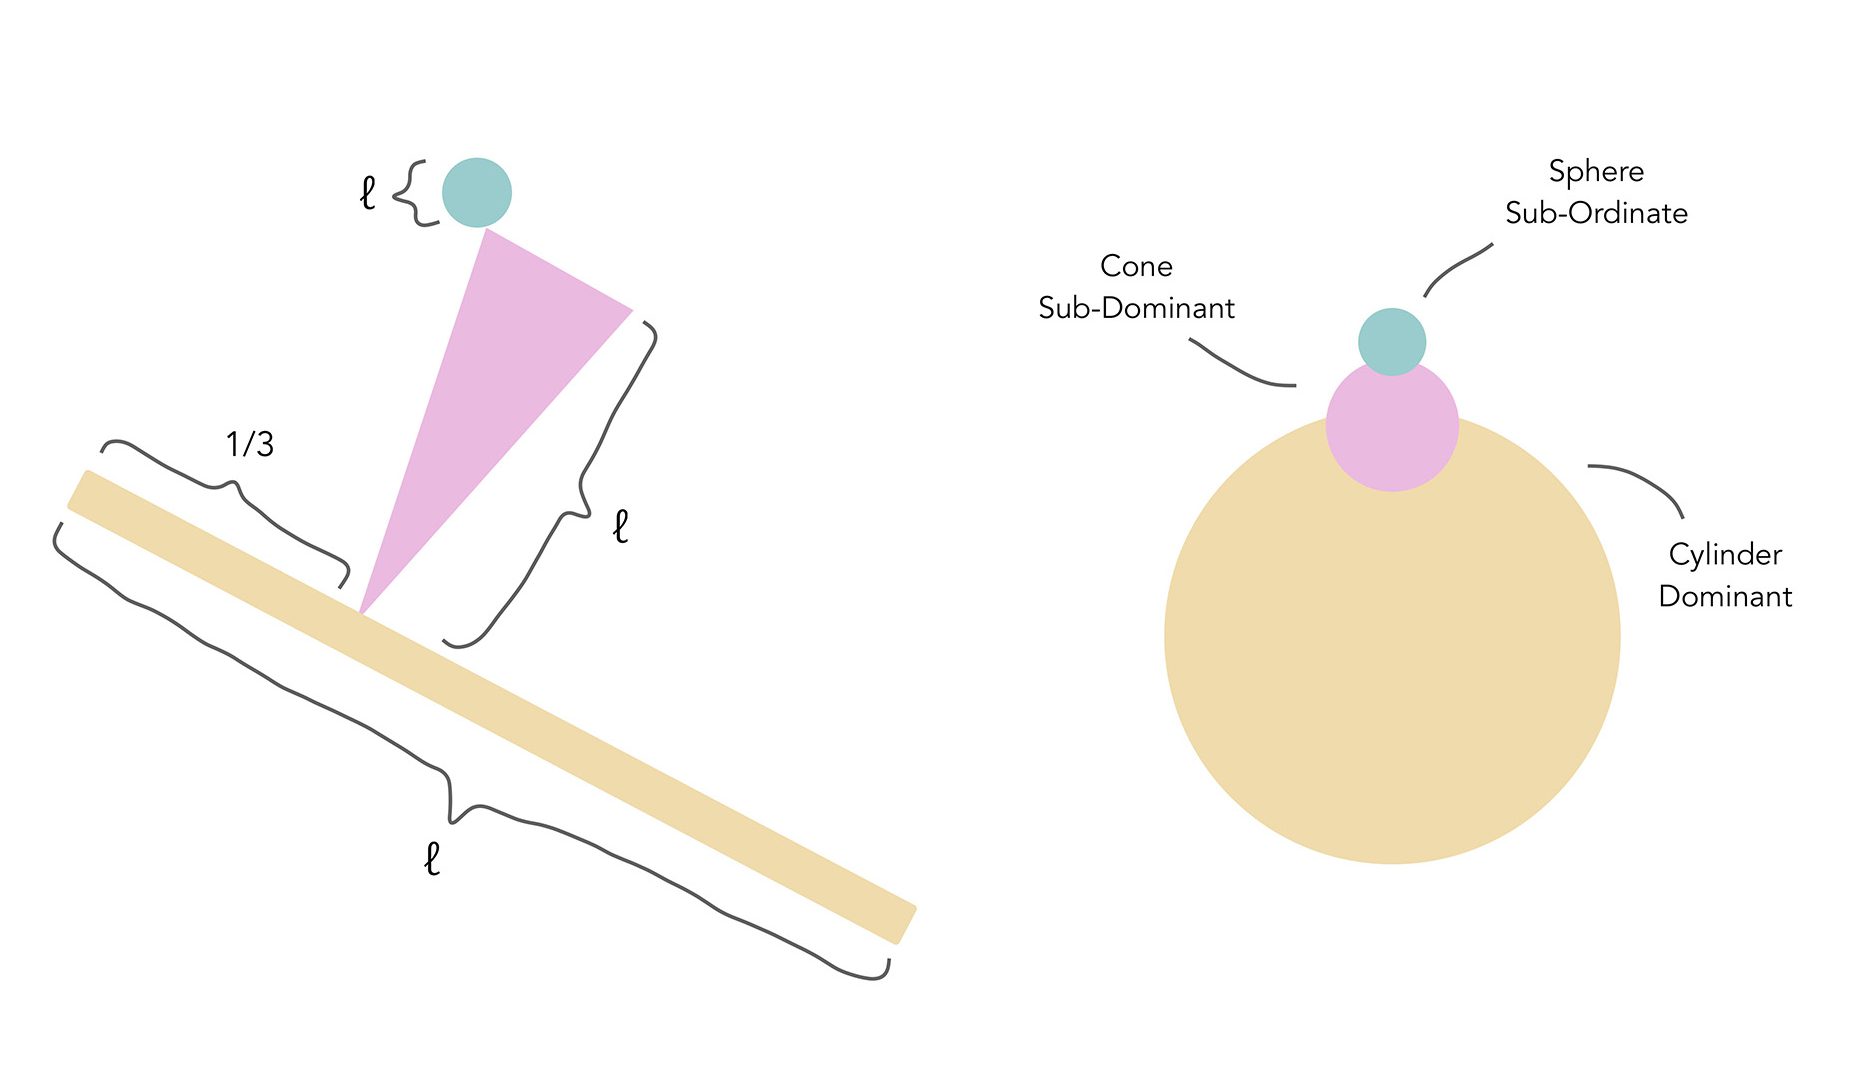
2D Sketch Analysis (2nd Attempt) – Model Length ~ Model Diameter
After altering the size of the cylinder, it has become more evident that the cylinder is the dominant volume while the cone is the sub-dominant.
Sketch Model 2
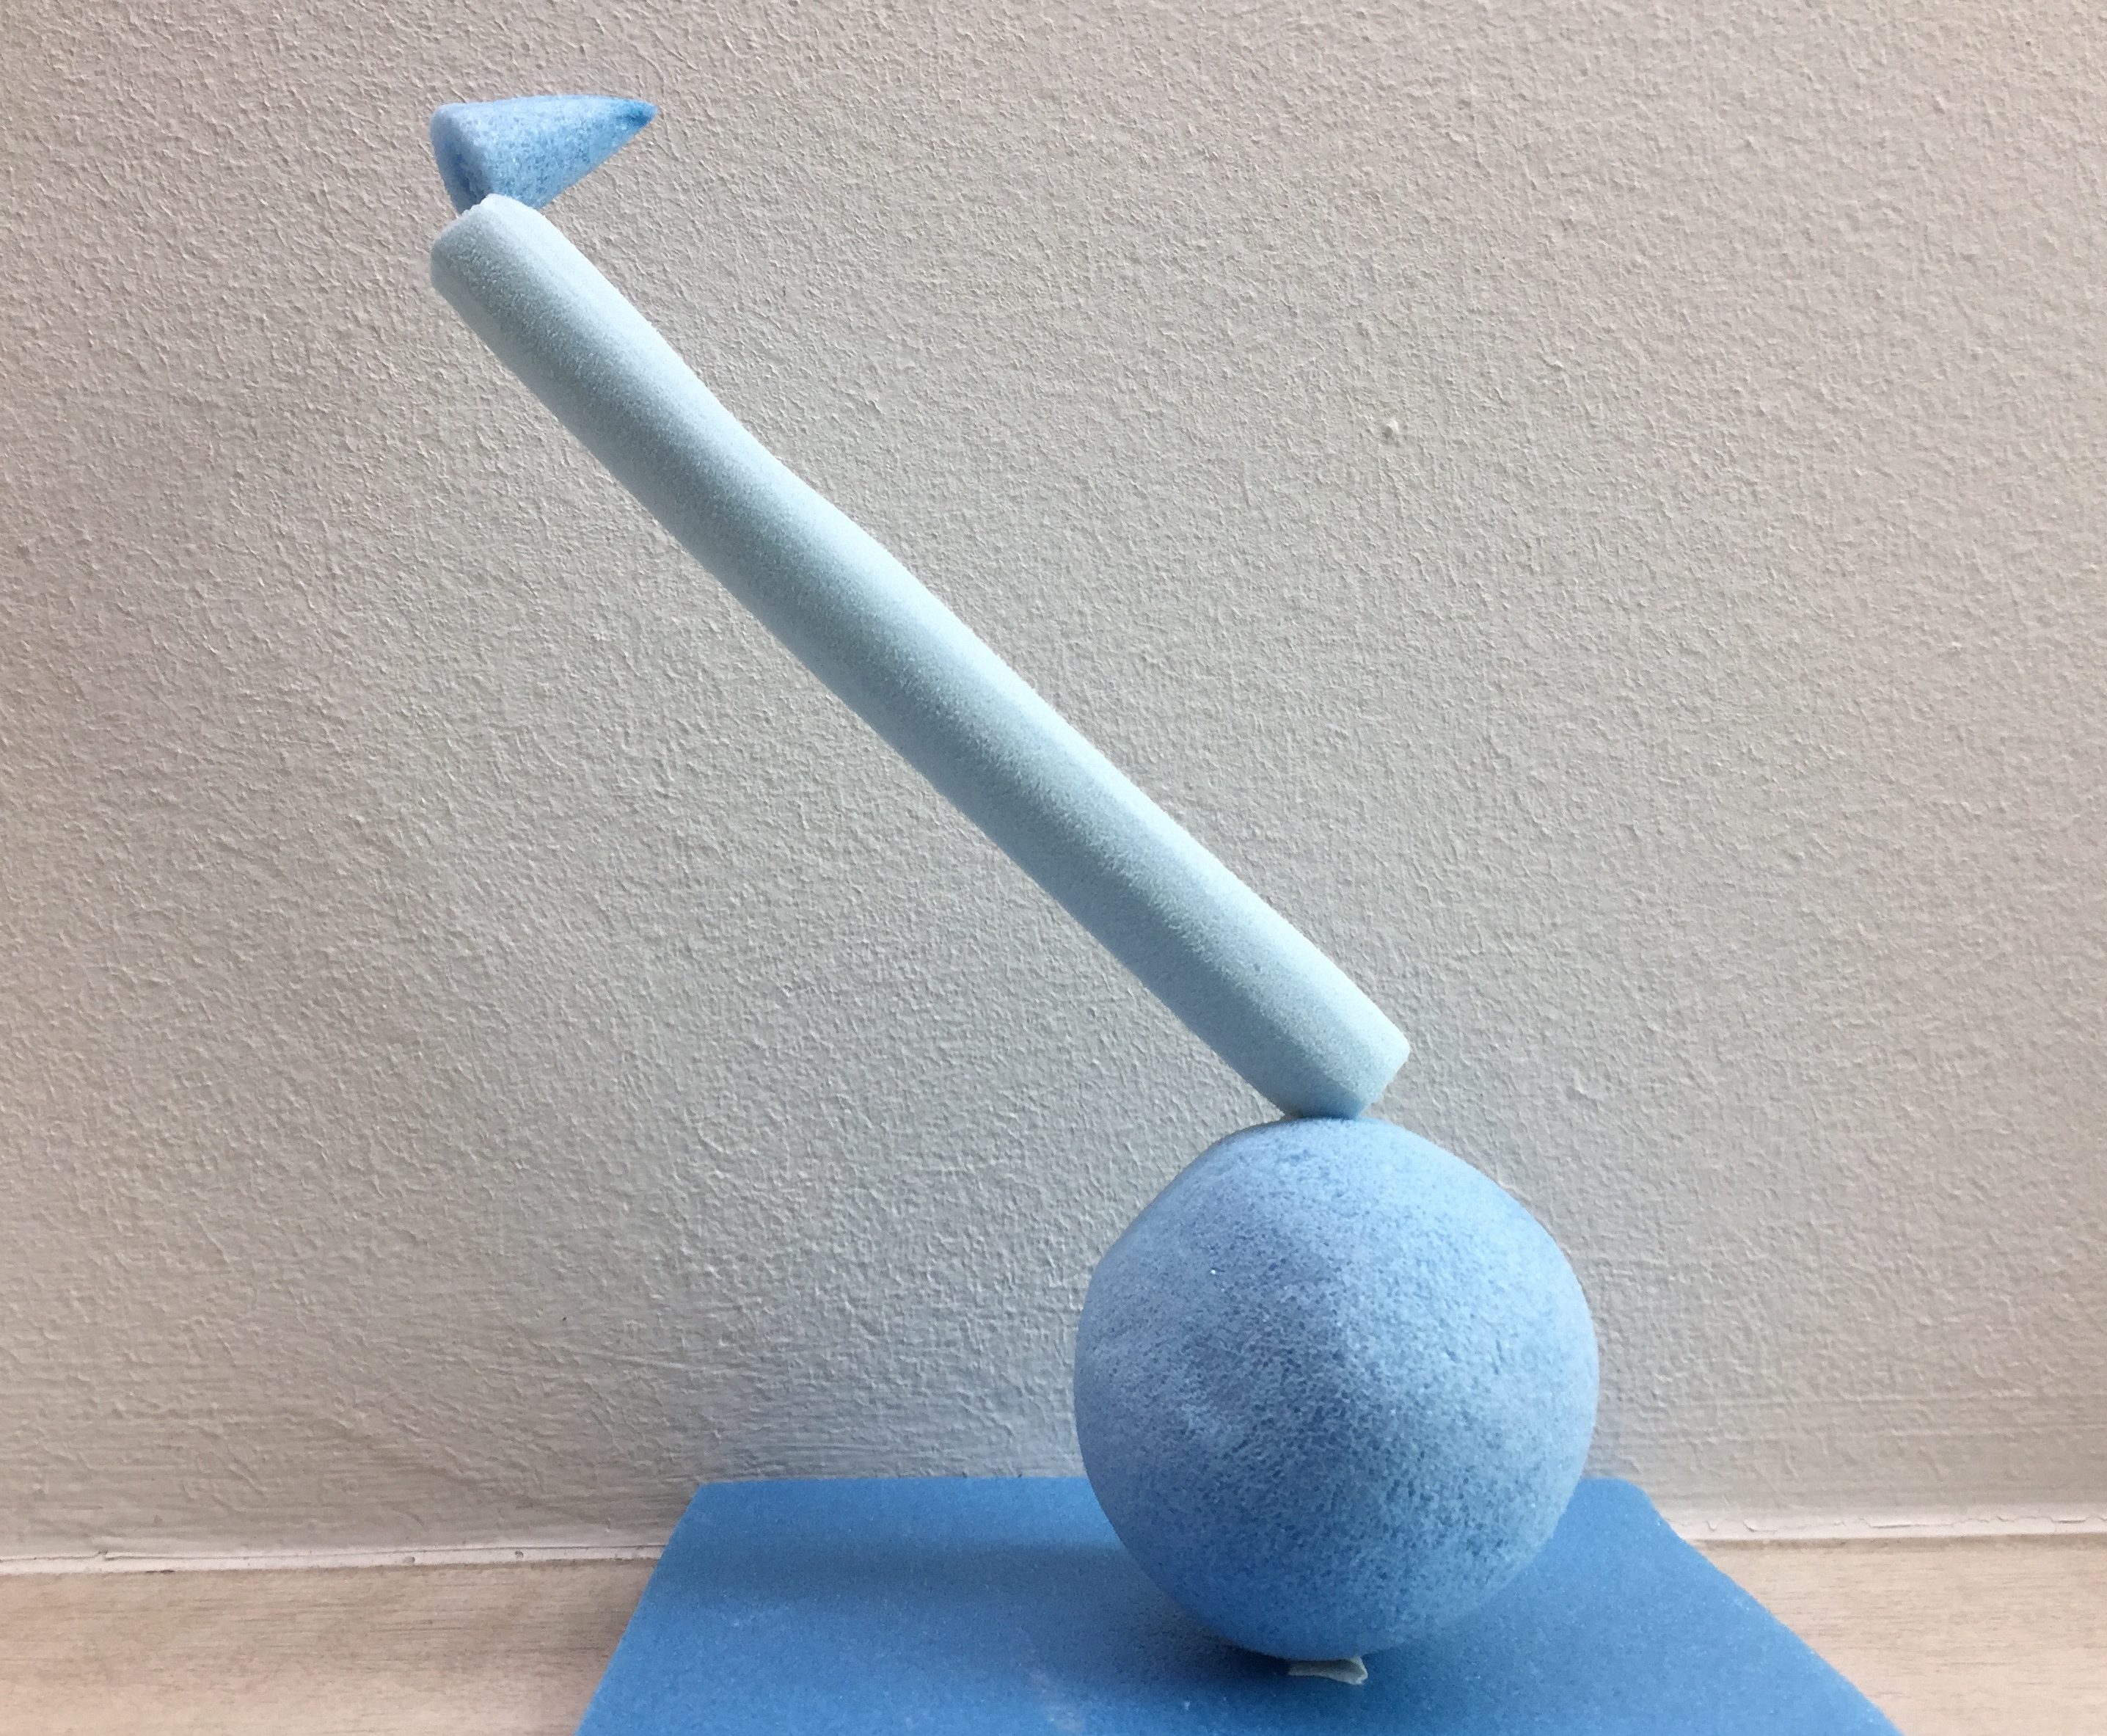
3D Sketch Model
2D Sketch Analysis – Model Length ~ Model Diameter
For my second 3D sketch model, I realized that the length of my cylinder and sphere was quite similar so it would be better if the sphere was larger. As for the diameter of the volumes, the cone and cylinder turned out to be similar so it would be better if my cone had a thinner base.
SPRING SEASON

SPRING Mindmap
Continuing on from the consideration and inspiration of Ikebana, we were also required to incorporate elements of a season into our models. Since my season was spring, I decided to brainstorm different elements of it to see which would fit best into my model.
Food Model
Final Food Model
The plan that I had for my food model was to create a dessert that incorporated elements of spring. Following the structure of my first sketch model, I wanted to make the dominant cylinder a waffle, followed by a raspberry cone and a mint sphere subordinate.
WAFFLE, RASPBERRY, MINT
To create my cylindrical waffle dominant, I bought a pack of butter waffles and hot glue gunned them together in order to form a larger cylinder since I could not find a waffle that was larger enough on its own. Unfortunately, since it was quite a messy procedure, I did not manage to take photos of the process but this was how the waffle turned out to be.

Waffle Dominant
For my raspberry cone, I decided on raspberry because it is a common fruit that is harvested during the spring season and I thought that its bright color would bring a refreshing pop of red into the model. To form the raspberry cone, I started off with a cone foam model as my base. From there, I took my half-chopped raspberries and placed them onto the cone, surrounding the entire foam cone. To keep the raspberries secure in place, I stuck toothpicks through the raspberry and into the foam cone.
Half-chopped raspberry on cone
Surrounding the foam cone
Lastly, for my subordinate, I decided to create a tiny mint sphere ball to add a touch of mintiness into the desert. Working with a box of mint leaves, I wrapped the leaves over and over each other until it formed a small sphere. To hold them together, I secured it with toothpicks again. Unfortunately, the leaves started turning brown after bringing my model to class so the green wasn’t as prominent when the model was looked at as a whole.
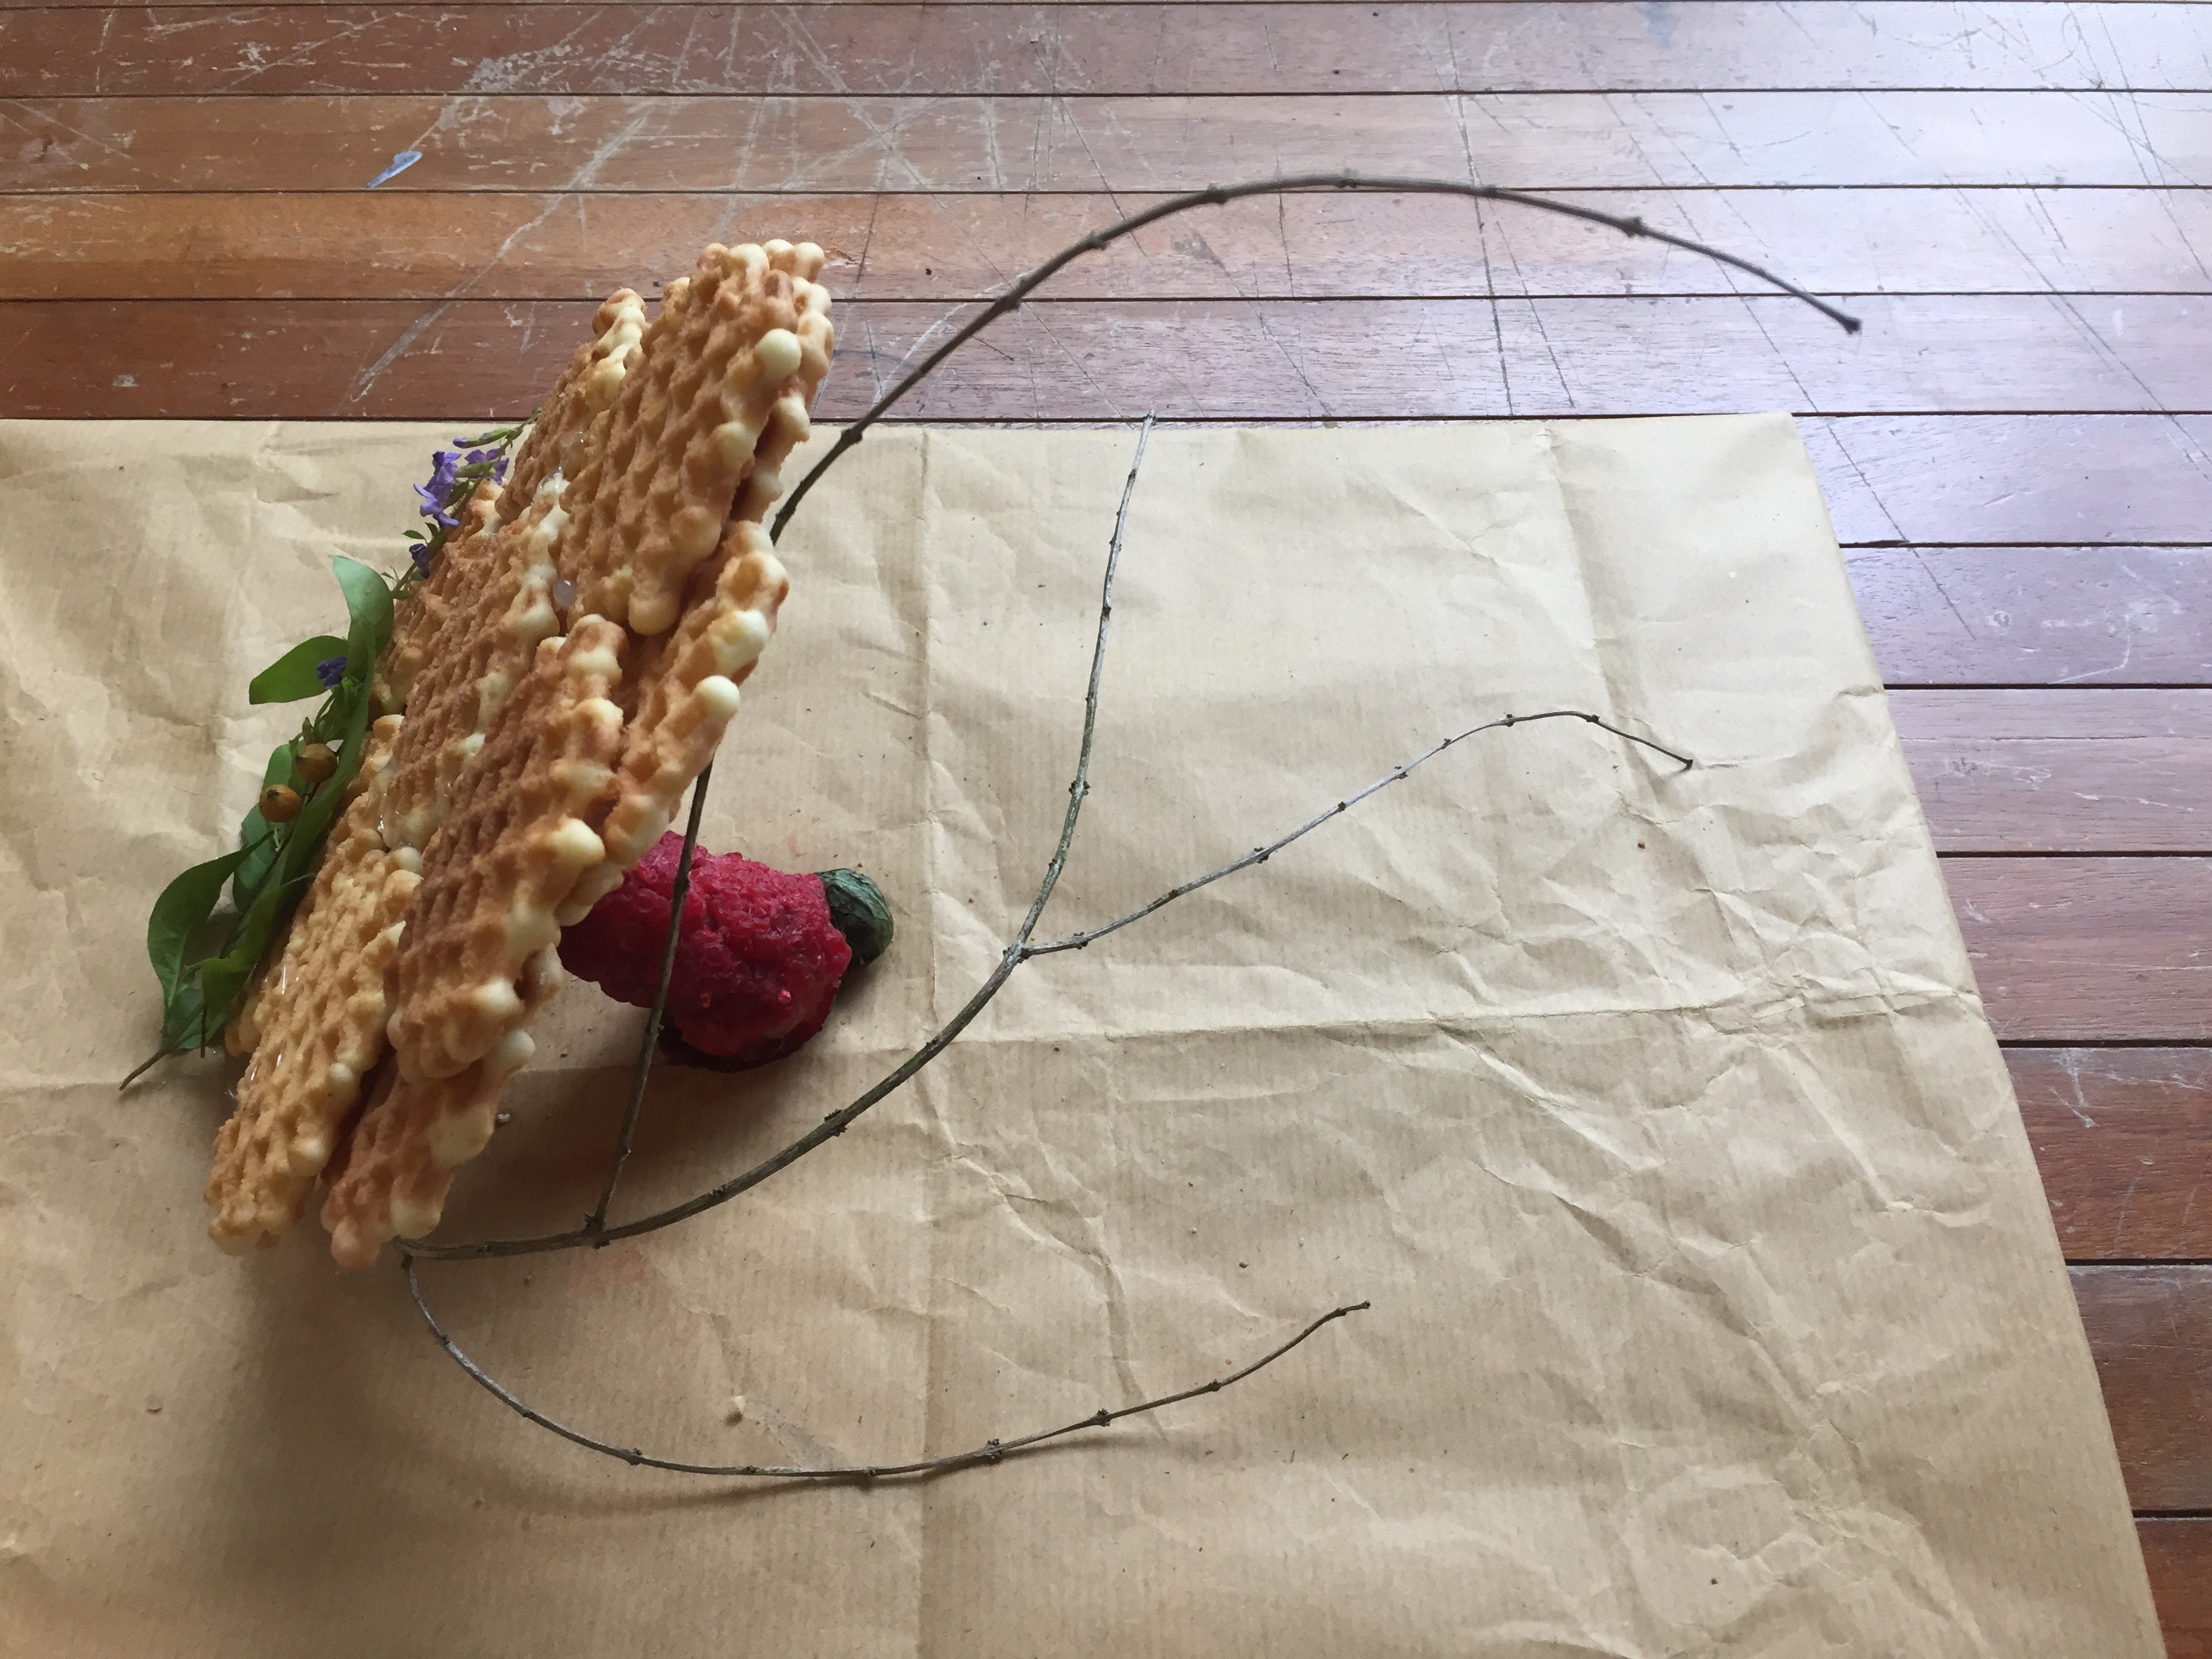
FINAL MODEL

After a long process of piecing each component together, this turned out to be my final food model. It incorporates the three rectilinear volumes, an extra object which is the purple flower on the waffle and lastly a branch. I included the purple flowers and leaves as an added touch of “spring” and choose to curve my branch towards the direction of the waffle to create a nice flow as well as to form a void within that area.
However, as you might have noticed, the arrangement of my volumes here is different from the structure of my first sketch model.
Initially, this was the structure that I planned on following for my food model. However, due to unforeseen circumstances when piecing the food volumes together, it was not very practical due to the weight of the food. After struggling to hold my waffle cylinder up on its own, I realized that the raspberry cone was too heavy and that the waffle did not have enough support for it. Since the original plan did not succeed, my backup alternative was to shift my cone underneath the waffle so that they could support each other up (making them dependent on each other).
 Despite the struggles that I had with the food, especially with the last minute changes of the model structure itself, I am very glad that it all turned out all right. Overall, this project was very fun and it was very inspiring to see everyone else’s model and how they choose to include food differently 🙂
You must be logged in to post a comment.