[Project 2] Bag & Portable Carriers

Final Product 

For our second project, we were tasked to create a paper-based mockup of a bag or portable carrier of our own creation. 

Final: Front View
Final: Back View
Final: Strap Hooks
FInal: Side View
Closure method: Metal clasp
Final: Interior with snacks
Final: Interior
concept

With regards to my final product, I was inspired to create a bag in response to an issue I’ve always had concerning one of my hobbies. One of my favourite activities to do with my friends and family involve going to the movies, and within that long span of 2-3 hours, we always end up getting quite peckish and thirsty. However, cinemas tend to overcharge for their snacks and drinks! Their selection is also usually quite limited. As a result, my friends or family members (my mum, mostly), and myself included, usually end up sneaking our own snacks and drinks into the movie theatre. 

Therefore, to aid us in this first-world problem, I wanted to create a simple sling bag that is designed to hold a variety of snacks in a subtle and discrete manner.

Research & Process

Coming up with the final product involved conceptualising and ideation, experimenting and creating mockups, and eventually doing up the final model. 

Conceptualising

The project first began with us learning and researching more about soft goods, or bags in particular. In addition to being exposed to how the functions of carriers evolved over time, and how designs can be catered to specific functions of bags, we also learned more about how to include different varieties of compartments and closure methods. My group and I presented on the closure methods and compartments of bags. 

For a more detailed post on our findings on closure methods, please refer to: https://oss.adm.ntu.edu.sg/vwong005/bags-closure-methods/

During the ideation stage and inspired by expertly-designed bags I found on Pinterest and other websites, I tried to come up with variations on existing carriers or bags that are catered to some of my hobbies. 

Mindmap
Brainstorming

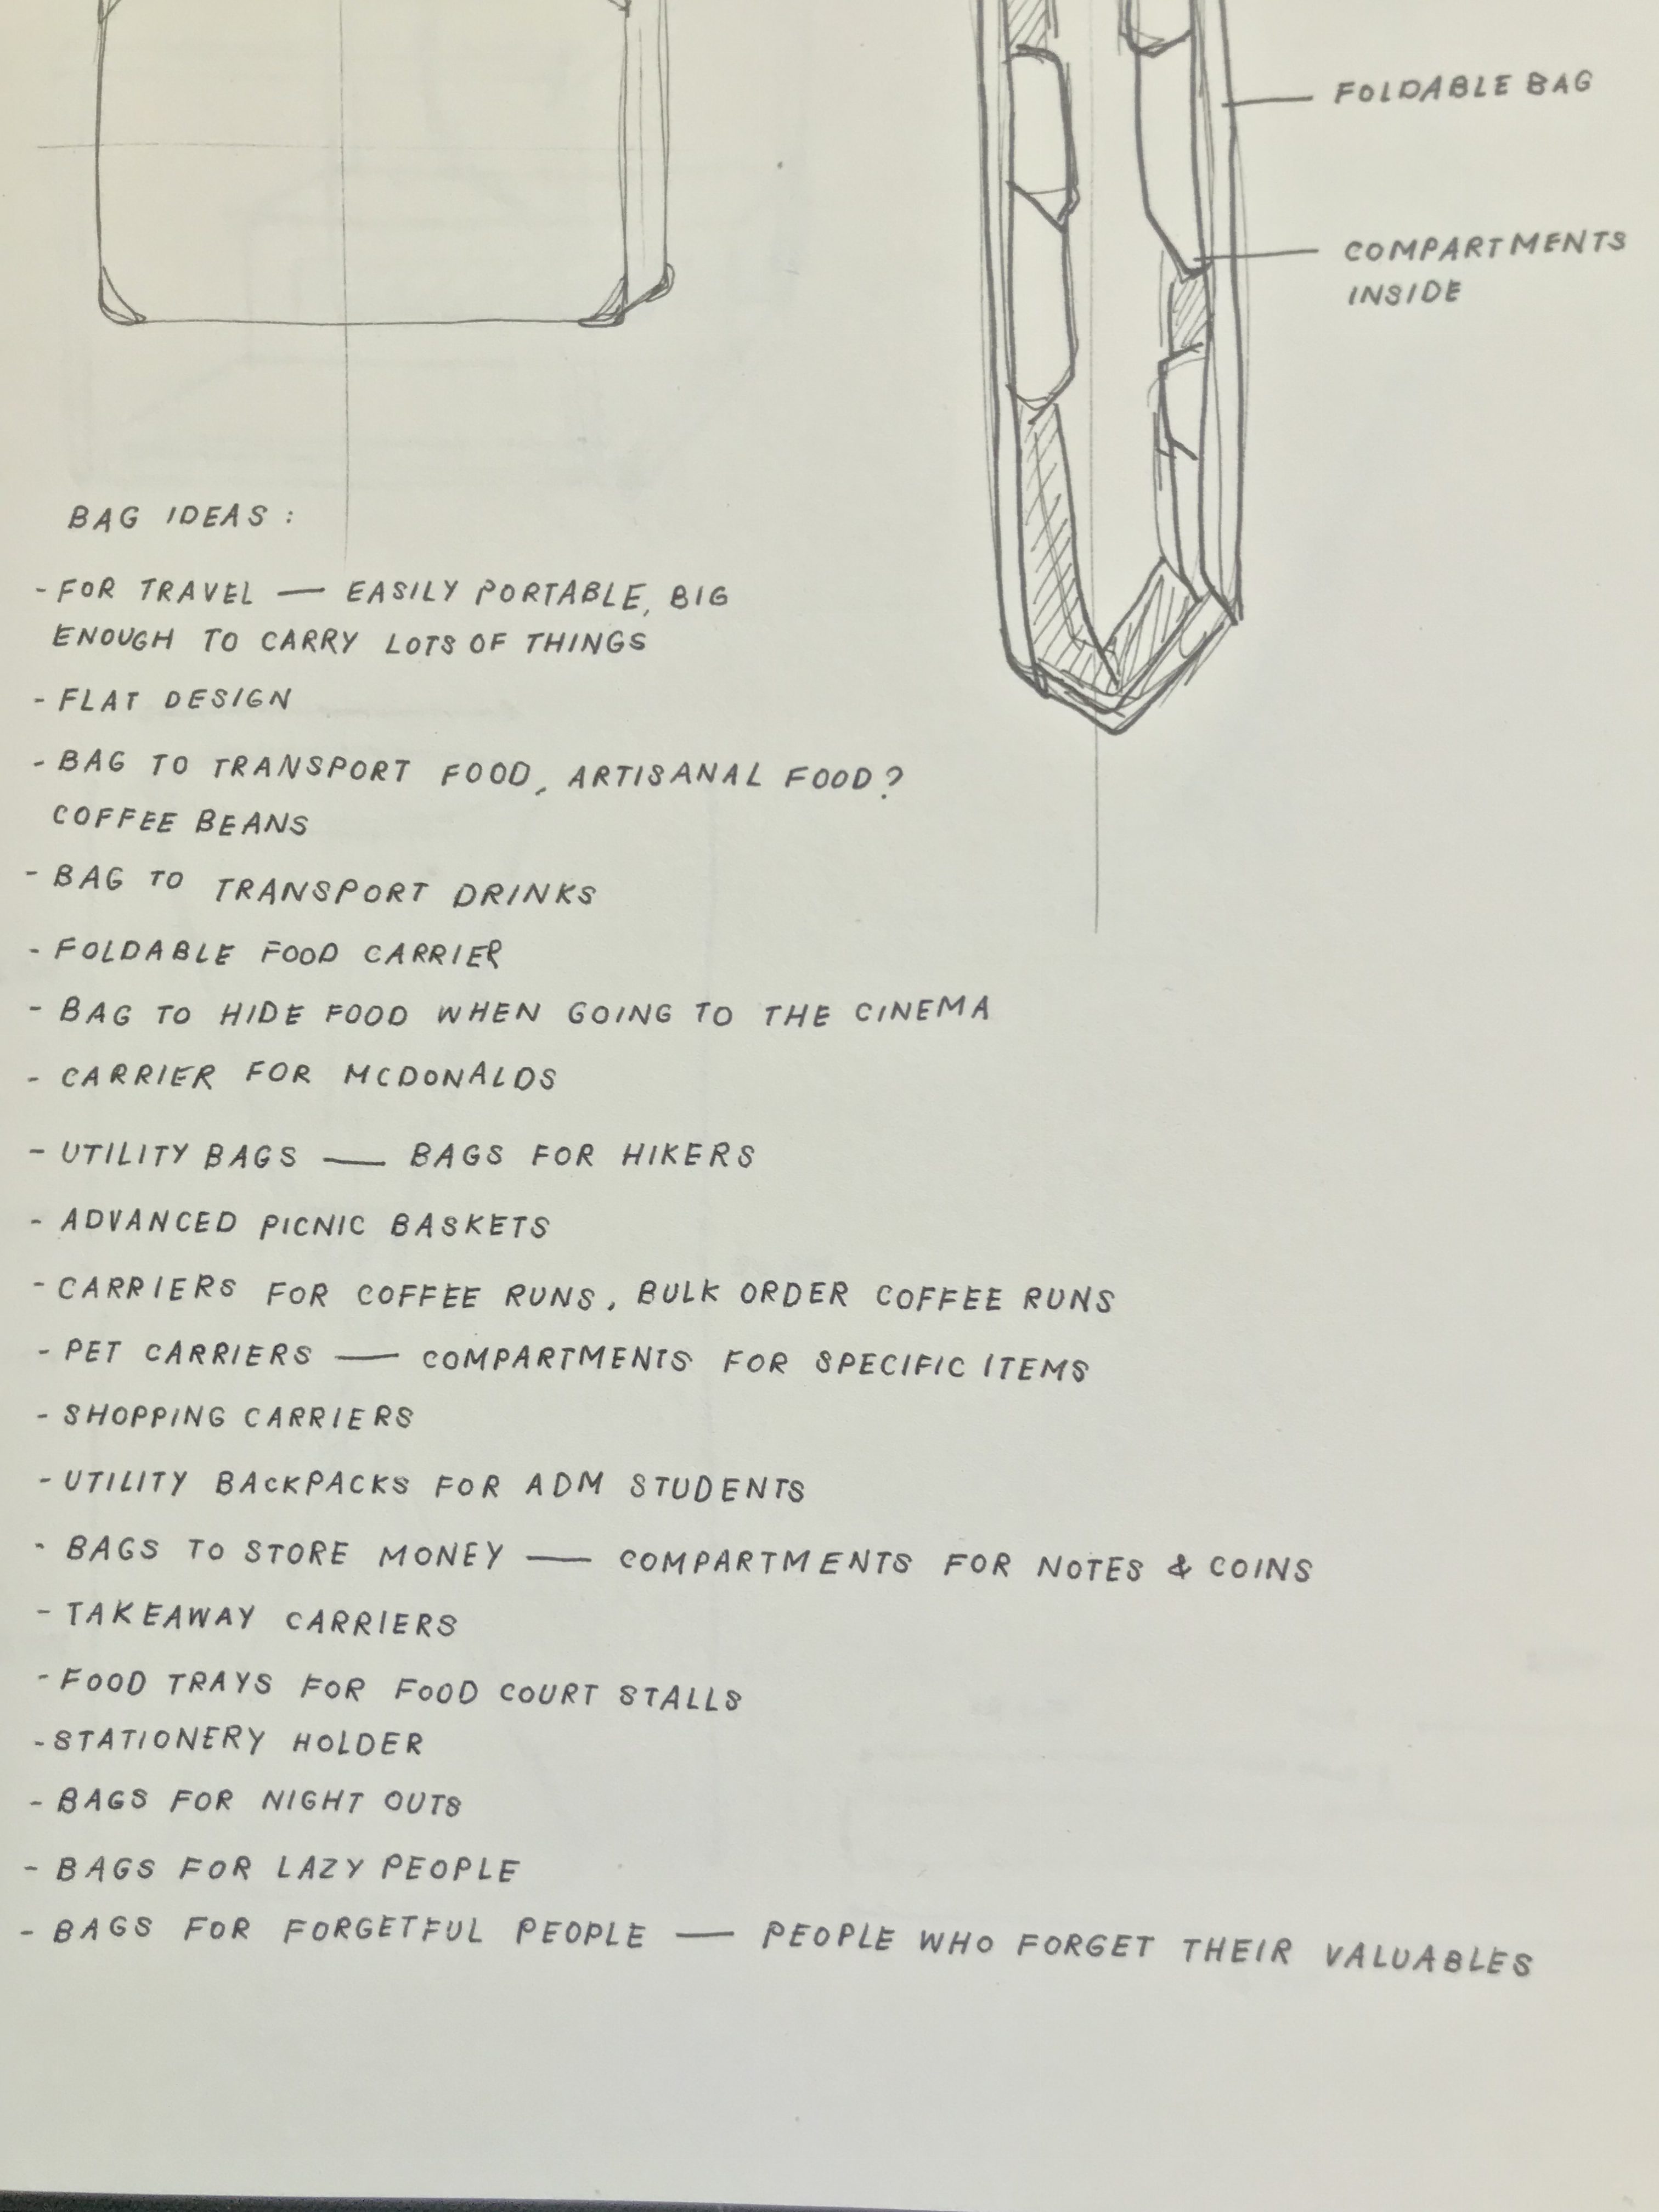
Following that, I looked to Pinterest and other websites again for inspiration and references on interesting designs and compartments I can include in the design of the bag. I was inspired by minimalist, vintage-looking sling bags, expandable bags that could cater to the carrier’s needs when more items needed to be added to it, and the idea of compartments fitted for specific functions (e.g. camera bags). Eventually, I thought it would be interesting to do a take on the ticket pocket and organisational bags, but for food. 

References
Measurements
Measurements
Measurements
Measurements
Final Changes
Mockups

The first mockup involved experimenting with dimensions, determining if it could fulfil its intended function of carrying snacks, and seeing if the general design is visually-appealing. 

Mockup: Front View
Mockup: Back View
Mockup: Interior

Challenges 

  • Creating the hooks to hold the straps in place was quite challenging as I needed to create a hook out of sturdy material that was visually-appealing and able to hold the bag together
  • The expandable pockets were difficult to curve, and ended up not being expandable because of the material used

[Assignment 1] Foam Modelling

Final

To help us better understand foam modelling, we were tasked to create a model of a phone dock with speakers using foam.

Final product: Phone dock with speakers and charging port

My foam model is based on using organic shapes to form more a unconventional phone dock and speaker structure.  I wanted to experiment with using methods in forming organic shapes as opposed to geometric ones. 

Final product: Front view
Final product: Phone holder
Final product: Speaker
Final product: Top view

Process

Ideation

Ideation for the phone dock with speakers first began with conceptualising. Recalling the methods of ideation taught in class (ideation by functions or features, ideation by themes and keywords, reference to unrelated objects, and focusing on aesthetic qualities), I first did a mind map to come up with ideas for a phone dock. The ideas were categorised according to the different ways in which we were taught ideation in class. 

Ideation mind map

After a session of brainstorming, I looked to websites such as Pinterest and Design Inspiration for more ideas on different shapes and functionalities I can use for the phone dock. Looking through existing products and mock-ups, there were many phone docks and speakers that emphasised on functionality and aesthetic quality. 

Reference images

Personally, I really liked the aesthetic quality of organically-shaped phone docks with wooden finishes. I thought the dual functionality as a phone dock with a charging port and speakers coupled with holders for containing small objects (such as coins and keys) was also quite interesting and would be extremely beneficial for users. I also quite liked the ‘industrial’ and ‘vintage’ looking products where simple geometric shapes were used with materials such as metal rods and wooden finishes. I also came across products that functioned as organisers, and the fact that they were collapsible and could be rearranged or stacked on top of one another were interesting and unique. 

Preparation

In preparation of creating our foam models, we were first taught various methods of cutting and carving foam to form different shapes, both geometric and organic. We used methods such as using the wire cutter, where we could angle the wires to cut different shapes (e.g. cones), and pen knives. We also learnt that organic shapes with many edges can be cut out of foam simply by pasting a thick sheet of paper (of the same shape) onto the foam before using the wire cutter. This method especially came in handy when trying to cut perfect circles! 

After conceptualising and looking at reference images online, we were then tasked to do up some orthographic drawings for the foam model. 

These drawings and sketchings helped in identifying the parts needed to form the phone dock, their respective dimensions, and their overall shapes. With this, it was easier to plan the methods and tools needed for cutting the foam, as well as the sizes, to attain the needed shapes. 

Model-Making

At first, with the intention of using wood (paper that resembled wood, in this case) and metal as the materials, I wanted to create a model that was simple and slick, with a rustic finishing. However, due to the nature of my sketch and the foam itself, the model would not be able to hold the weight of a phone. Therefore, I went with a model that focused more on using organic shapes and unconventional aesthetic qualities of designing speakers. 

The process included first cutting out two cones. The cones were cut using the wire cutter with angled wires. The base and ledge were also cut with the wire cutters. Details such as the concave phone holder and opening for charger were carved using a penknife. The speaker area was also carved using a penknife. The foam was later filed using pieces of sandpaper for a smoother finish and better transition between separated segments. 

Challenges

  • Ideation was a challenge as I wanted to base my phone dock on aesthetic quality and dual-functionality, but it was challenging in creating a model based solely on foam and creating collapsible organisers was especially difficult in carving out openings of appropriate sizes. 
  • Working with foam itself is also a challenge. I had to be especially careful with cutting as the slightest movement could cause a sudden jolt in the overall shapes. Filing the foam would also sometimes cause it to be flakey and uneven, unless it was done gently.