
M I R R O R
In our first lesson with Max, we were tasked to do three things to achieve Christian Moeller’s Electronic Mirror effect, whereby the mirror fades to black when a user approaches it, only showing them a clear reflection when they are at a distance.
To-do list:
01 Retrieve & display data from webcam
02 Detect & track size of face + fades to black when near
03 Reflect the output so that it reacts like a mirror
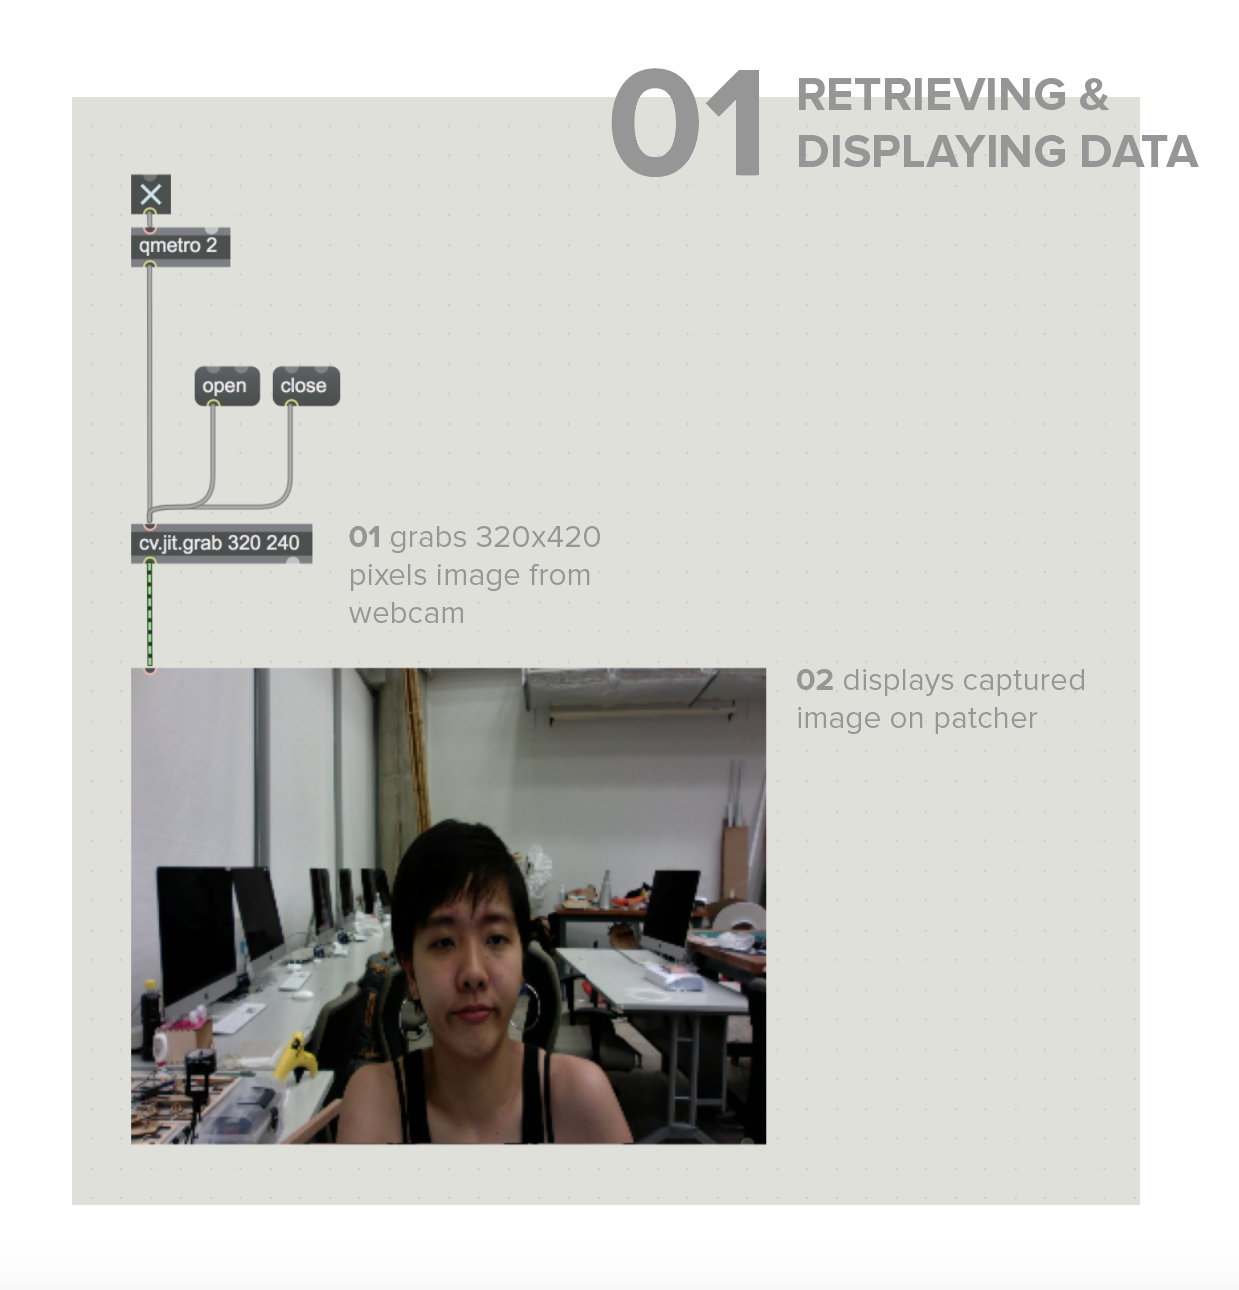
Within p videoin, the functions were kept simple – to only control the flow of input from the webcam using the open and close functions. The image is sent onto the patcher using jit.pwindow, so that we can visualise what is being captured.
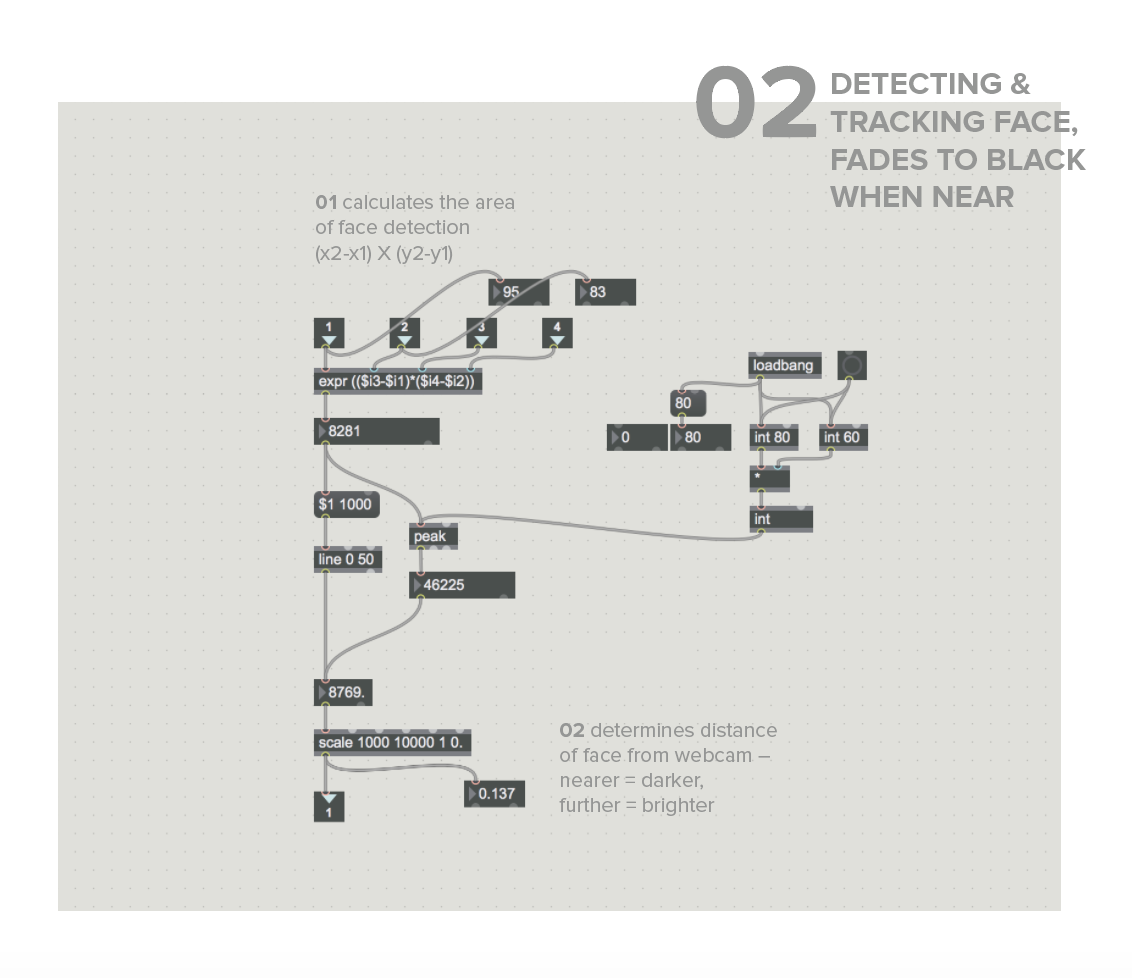
To determine the area of the face, we calculate the position using the maximum values of position x & y. This value is then sent through 2 outputs, the first is to $1 1000 & line 0 50 to smoothen the transition of brightness within 50 milliseconds. The second output is through peak, which tracks the nearest distance that the face was to the camera (aka highest value). The values are then sent through scale, where the maximum and minimum values for distance & brightness is adjusted. In this case, we can change the gradient from bright (1) to dark (0. <), at a distance of 1000 to 10000.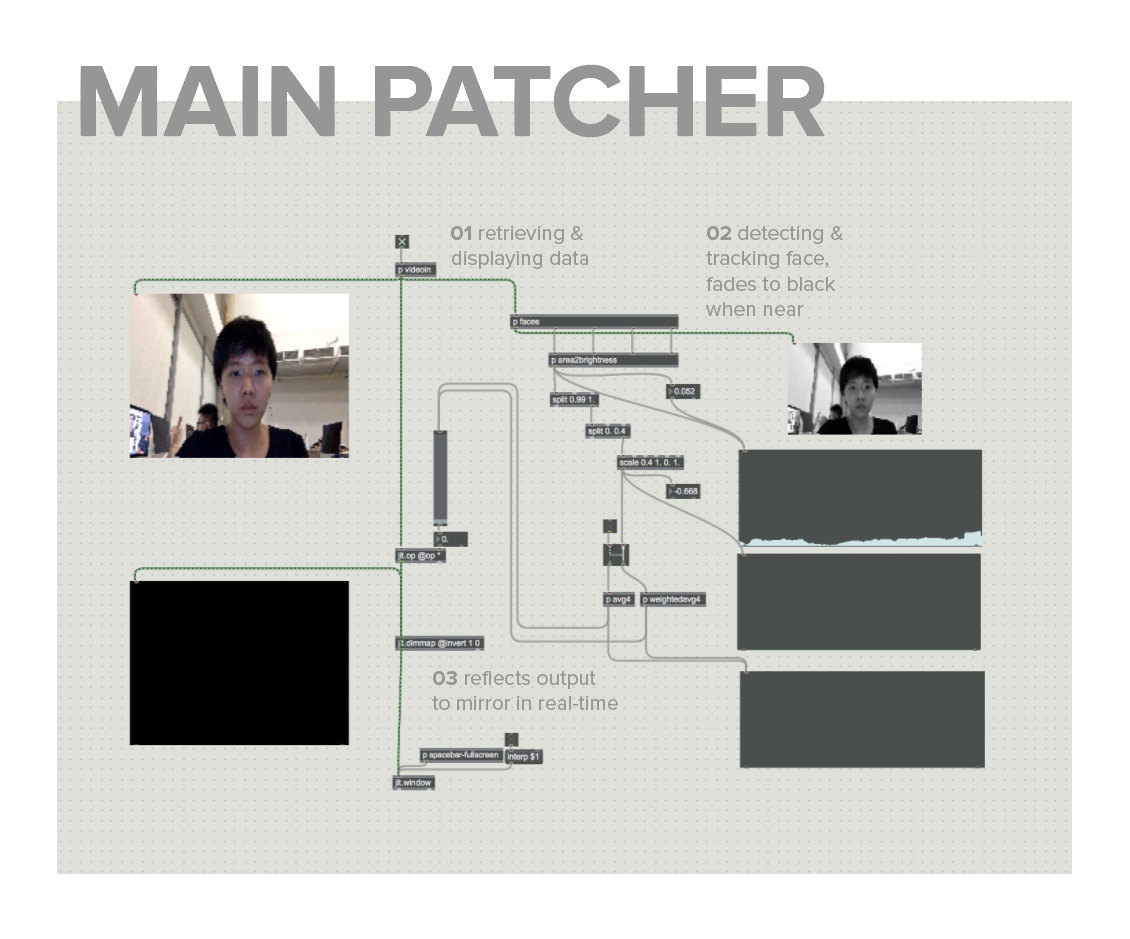
After running through various jit. functions, in an attempt to find one that could invert the image, I finally landed on jit.dimmap, which inverts the output screen. However, it was flipped on a vertical plane, instead of horizontal as I wanted it to be. By including the invert value and playing with the 1 & 0 values through trial and error, it finally reflected to mirror my movements.
E X P L O R A T I O N S
Initially, I tried experimenting with other functions to adjust brightness because the original file looked really complicated and I found it difficult to comprehend what was going on with all the splitting of values. After running through the jit. functions (and getting distracted by many cool things along the way), I landed at jit.brcosa, which adjusts an image’s brightness/contrast/saturation. I soon realised it was not what we really want to achieve here, but it’s worth a try anyway!
Although the transition was not as smooth yet, using jit.brcosa overexposes the output quite drastically.
I tried fiddling with the values and overexposed my face till it was the same white as the background (which is pretty horrifying), but I also realised I was able to change our control by inverting the values and having the image brighter when closer, and darker when further.
In an attempt to smooth the constant flickering, I added an object and typed “smooth”, hoping some magical function would appear. And sure enough, I found Smoothr (no surprise there). This replaces the original method using scale, and also visualises the values in a graph. Although it seems to smooth out quite evenly, the fading seems a bit too slow and obvious.
Changed the smoothing value and it works much better than before! Will definitely work on improving this further and try out other methods of using faces to trigger other changes.