For this project, we were tasked to make an art installation that would be situated in a specific area of ADM.  It was stated that it should be about 2m x 2m x 2m, and we would be making a model that would be at a scale of 1:5 or 1:10. There were also many things we had to take note of and include in our design:

  • Aural Memory/Aural Heightening
  • Site-specific
  • Involve seating/reclining
  • Made from paper cups

Since it had been site-specific, we did an investigation and research on our site, along with seating ergonomics. This had been a pair work, and I did this with Yee Teng.

Our slides are here!


After this, it was individual work and we started to do our prototype models.

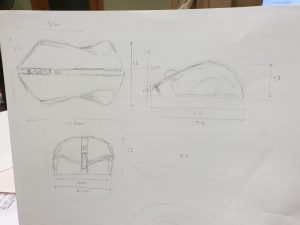
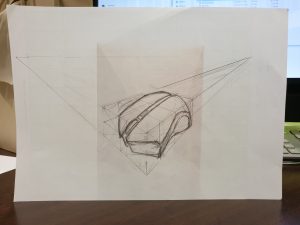
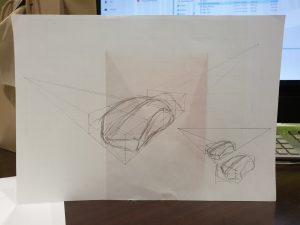
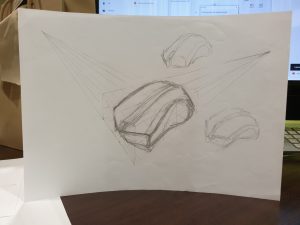
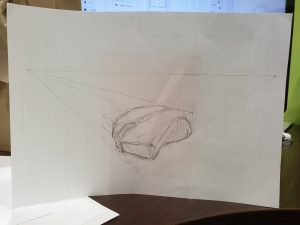
The aural memory I decided to work with was the sound of being underwater, having an enveloping feeling, one that is calm and peaceful. I thus made a sketch of a couple of designs to portray this.

However, I soon scrapped those ideas as it had been difficult to make those form using the unique form of paper cups. I hence decided to just experiment with paper cups.

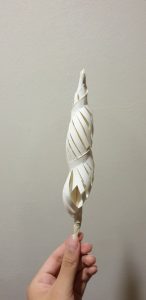
I had a huge issue with this, trying out random forms. I didn’t really like most of my initial prototypes and had no interest in them. Soon, I switch to cutting strips and slits, and made many different forms from it. Of which, I became intrigued with one that happened to interlock when I left it alone, and adopted that design. I also created another curved form that worked well as a seat.

Other prototypes:

Plus many more I did not like one bit.

This became my chosen design and I pieced them together to form the installation shown below:

Spray painted it.

Added chairs.

Larger image here!

For my final model, I had tried making a 1:10 sized model, with different materials.

Initially, I had used a single sheet of paper, which failed spectacularly due to the thinness of it. I then attempted doubling the sheet, which then made it too flimsy. Ideas such as using corrugated cardboard and art card were considered but later also rejected due to it being either too thick or unsuitable.

Finally, I decided on making a 1:20 model by connecting two layers of shallow paper bowls first. This was done just to be safe; ensuring I had a model to work with. It was lucky I had done this as I ended up not having enough time for my other model.

The 1:10 model I wanted to try to make was not finished, due to the lack of time I had. It was made using paper mache and there had been a lot of drying time due to its sheer size.

I first started by making measurements of the initial small cup I used to make the prototype. Then, calculated the different measurements should the cup’s size be multiplied by 4. I then drew it out on drawing block, making a template.

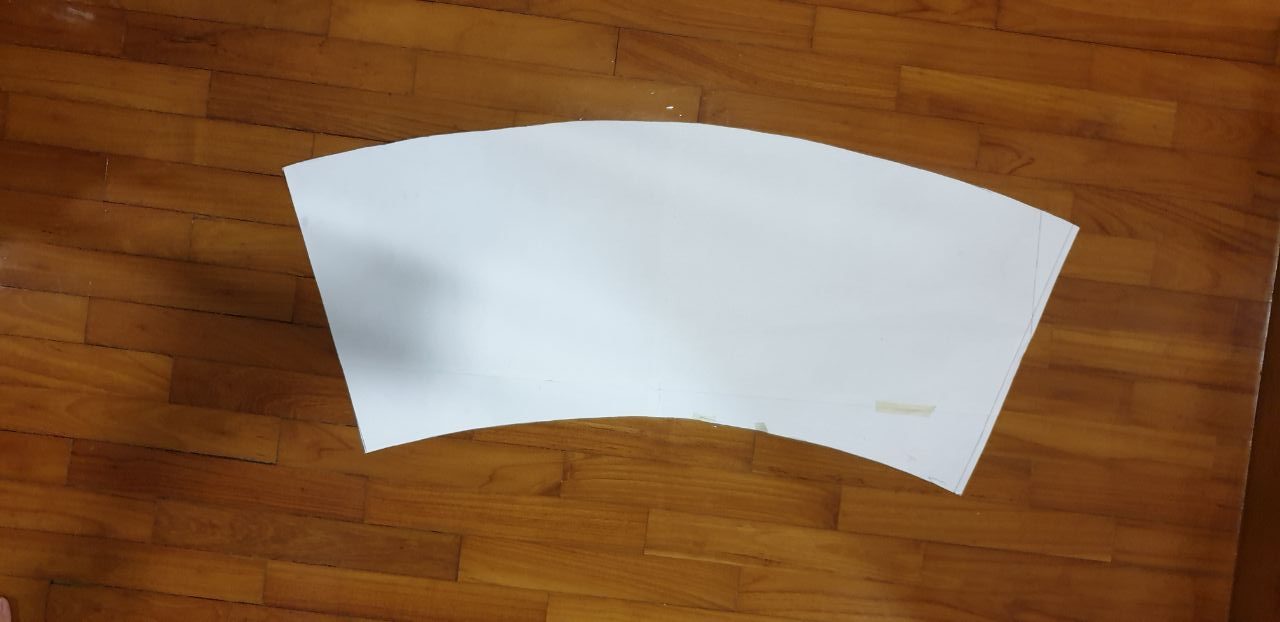
After making the template, I made two plastic cups from the template.

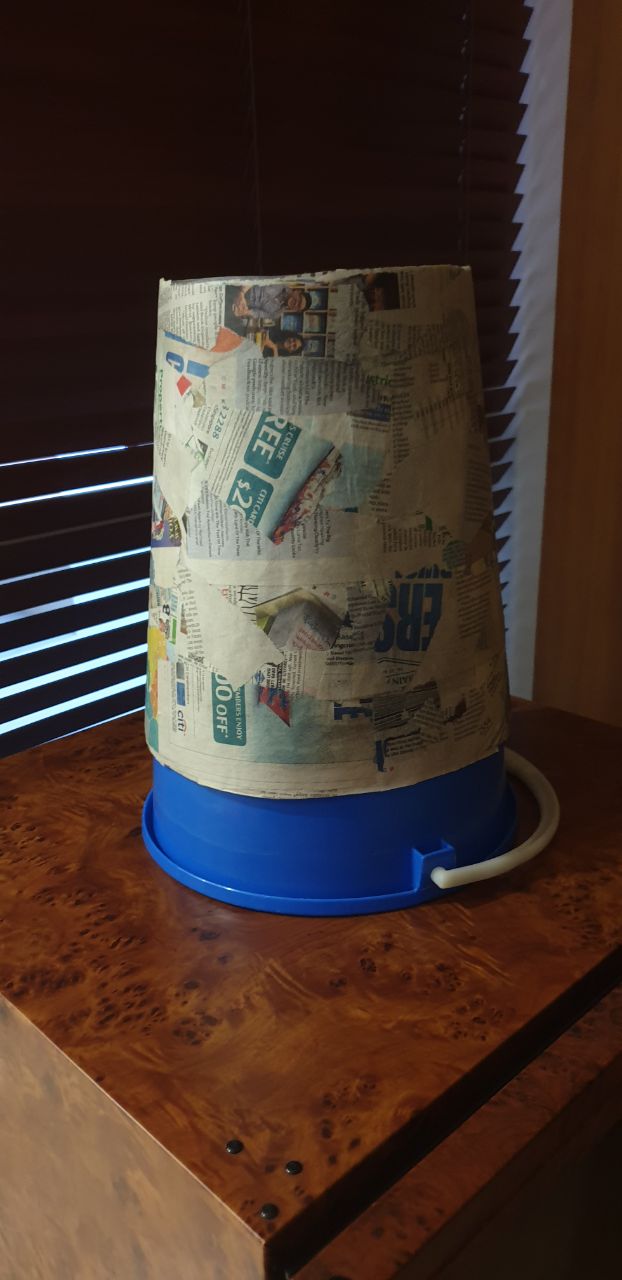
Propping it on a bucket, I made a newspaper cutout of similar size to the template, and then stuck it on the plastic mould, before beginning to paper mache it.

The glue had been self-made from starch and hot water.

I also had to spend much time in between layers, waiting for it to dry.

Dried large cups.

This was difficult to do as it was hard to gauge how many layers were enough. It had to be thick enough to hold its shape but soft enough to bend, making there many trial and errors.

Should I have time, I would attempt to make my model with this. But for now, it shall be left as it is. Paper mache-ing was a fun experience but no doubt a painful one. It took long hours and the results were not consistent, I had to retry multiple times.


All in all, this project had been excruciating and tough, but pushed me to think beyond what I normally would. It had been fun, I suppose, despite multiple sleepless nights and 7 am bleariness.

With Part 1 done, I wanted started to think of ideas for my second part. Really liking and being interested in the two objects below, I wanted to make my vessel based on them.

I later decided to focus on the bound chopsticks and thus began my part 2.

__________________________________________

I unfortunately had much difficulty thinking of an idea. It had been suggested that I make a lantern like shape first and then see if I could work on it further.

I thus started doing some sketches and making a prototype, using collected yakult straws I had in my house that would have been otherwise wasted and thrown away.

The design on top in the first picture, and bottom in the second is the one that I initially planned and then attempted to do a prototype of.


It was a rather interesting shape, however, I wanted to make something that could actually be used, or turn into something that had more use than a lantern. Thus, I decided to make a bag instead, and then drew up the second design in the pictures of my sketches.  The above prototype however was also a fun experience as the smoothness of the straws actually made this prototype a challenge and also opened potential ideas, considering that the joints where able to be slid around freely. This is something I would like to experiment in the future.

Using the same, bound chopstick pattern, I first bound 2 of the same pieces, for the prototype, using straws. I found a reference which I really liked, which is the one shown below.

https://naiise.com/products/mini-origami-bag?variant=25306588752

Sadly, as earlier mentioned, the straws had been too smooth and I hence made it using older chopsticks that had edges; something I did not want in my final piece. 

It had been too plain and I thus decided to the twine on all 4 sides instead of just two.

Deciding I liked the way it looked, I made a cleaner better version with rounded chopsticks to form the piece below. And doubled it, to be used for the frame.

Fooling around with the pieces, I really liked the way it connected when I placed it criss-crossed.

I thus made a piece that could be slot into the already made one. While it was able to stick together just through the arrangement and slotting, I added a tad bit of glue to ensure that it had been well secured.

I then did this for both sides, and then, tried to use the previous prototype to test out how to connect the pieces.

However, I did not really like this method of connection as I thought with the confusing pattern it would have been too boxed up and odd. Hence, I decided to only box up the sides.

Using a leftover carton box, I made a frame for the bag.

I then bought imitation leather, and weaved it.

And then, attached it to the cardboard, making a nice cover.

I then made the base blue, and this was roughly how the bag looked, with the frames crudely taped to the sides.

After this, I went on to add a handle as well as make the insides of the bag blue, using blue imitation leather. The below are pictures of the final product.


__________________________________________

DRAWINGS:

Clearer drawings may be found in the google drive folder in the link below. The orthographic drawings are done in a scale of 1:2.

https://drive.google.com/open?id=1pZ0_HMc5vNESt4MVPLNkzwEs9pknbpES

Orthographic


Isometric drawings


2 pt perspective

For this assignment, we were tasked to make 4 study expressions or sculptures that show a minimum of 2 of the following verbs:

-WRAP  -PUNCTURE  -CRADLE/GRAB  -BIND  -SLIDE  -LIFT

Then making a vessel to be held, worn or carried which incorporates a minimum of 1 detail from part 1.

__________________________________________

As a person who prefers making with an end product in mind, this was one of the first few projects which I let myself experiment freely and attempted different things for the first section before deciding on the vessel to be made.

I first did a couple of really rough what kind of sculptures/study objects I had wanted to make.  ((Below is both initial sketches as some that were added later))

Then, I started thinking about the materials to use.  I had wanted to use wood which I thought complemented the twine; the weave material I decided to use. I also wanted to try using metal, as it would have been a nice contrast.

Since this part of the assignment was near/during Chinese New Year, I actually realised that there were bound to be many metal cans left, and perhaps some leftover chopsticks. I thus wanted to see if I could use them in this project.

__________________________________________


PART 1

Slide (Failed)


For this one, I wanted to do slide with metal, and it would be used to connect 2 different pieces of weave together. I first made it with cardboard then remade it with metal. However, it ended up not really meeting the idea of infusing weave and the other material together, and the weave material was only used for the aesthetics. I initially wanted to use metal from the drink cans for this piece, however, the fixed curved shape of the cans made it impossible to get straight sides and I hence used an aluminium sheet instead.


Bind


For this one, it was made using two exact pieces that were binded together in the middle to create 3 flaps. I used a thick board and the twine was wrapped around tightly, thus making the piece extremely strong and well bonded.


Bind

This was an object which I made solely through experimentation. I wanted to bind 2 chopsticks using only twine and not glue. Here, the goal was achieved, and I then binded the ends and made a unique shape that really interested me.


Puncture & Cradle

This was made using the base of a Coca Cola can, and the twine plaid punctures through the base, and has a button at the end, that is cradled by the curvature of the coke can base. I actually also liked this object and thought metal and twine was an interesting combination.


Bind & Puncture

Twine punctures through the imitation leather to bind it to the chopstick. This was made as I was doing my second part of the assignment, and was also a study on how to fix the imitation leather to the chopsticks.


Bind

The binding of two rattan strips by weaving twine between the pieces and around it in the middle. This was also just more experimentation.


Bind

Another study piece that had been done midway through my second part of the assignment. I was attempting to bind 2 pieces at the ends and seeing if twine had been enough to join the pieces together, once again using glue only to tape the end of the twine down. It had been sufficient.

__________________________________________

With this, my part one was complete and I started to work on Part 2.


Task 1

We were tasked to draw both the 3 sides of an object that was held, worn or carried, and then draw a two point perspective drawing of it.

For this assignment, I decided to use my mouse, which was interesting, due to its many curved lines and form.


Drawing with a scale of 1:1, I used a graph paper to draw the mouse. But this was not before measuring all the dimensions of the mouse.


Drawing of 3 sides

https://drive.google.com/file/d/1pDo6TWrS9ba3JbaJXXQ5wu2RjRPwKJJn/view?usp=sharing


For the two point perspective, it had been harder to draw it as it could not be drawn to scale. Below are a few sketches I tried and experimented with.


Final Drawing

https://drive.google.com/file/d/18JmwOvILCRy_cRtCpcp_fkYqMtpQ5Evb/view?usp=sharing

Folder of all pictures: https://drive.google.com/open?id=18HSbRihF-H1J2cGuBRLGEXlQSM7wQlxu


Task 2

For task 2, it was pair work, and thus the process is under my groupmate’s post.

https://oss.adm.ntu.edu.sg/jtay053/assignment-2b-weave-object-weave-technique-studies/

For this assignment, we were tasked to make a build of minimum 15 pieces, that resembled any known object or form, using either Lego or ready made pieces.

I initially made a giraffe, which I really liked.

However, I decided to challenge myself and make something different. I tried making a sniper rifle, but then soon changed the whole build into a bus stop as shown below.


I then drew out the different parts, and some steps to get started.


Using Photoshop, I then removed the background and separated the respective pieces.


After that, I added colours and made the steps for how to rebuild the bus stop.


https://drive.google.com/file/d/1kYdf8WJj6C2Pzgac6PBTBizTMX7EGlb6/view?usp=sharing