


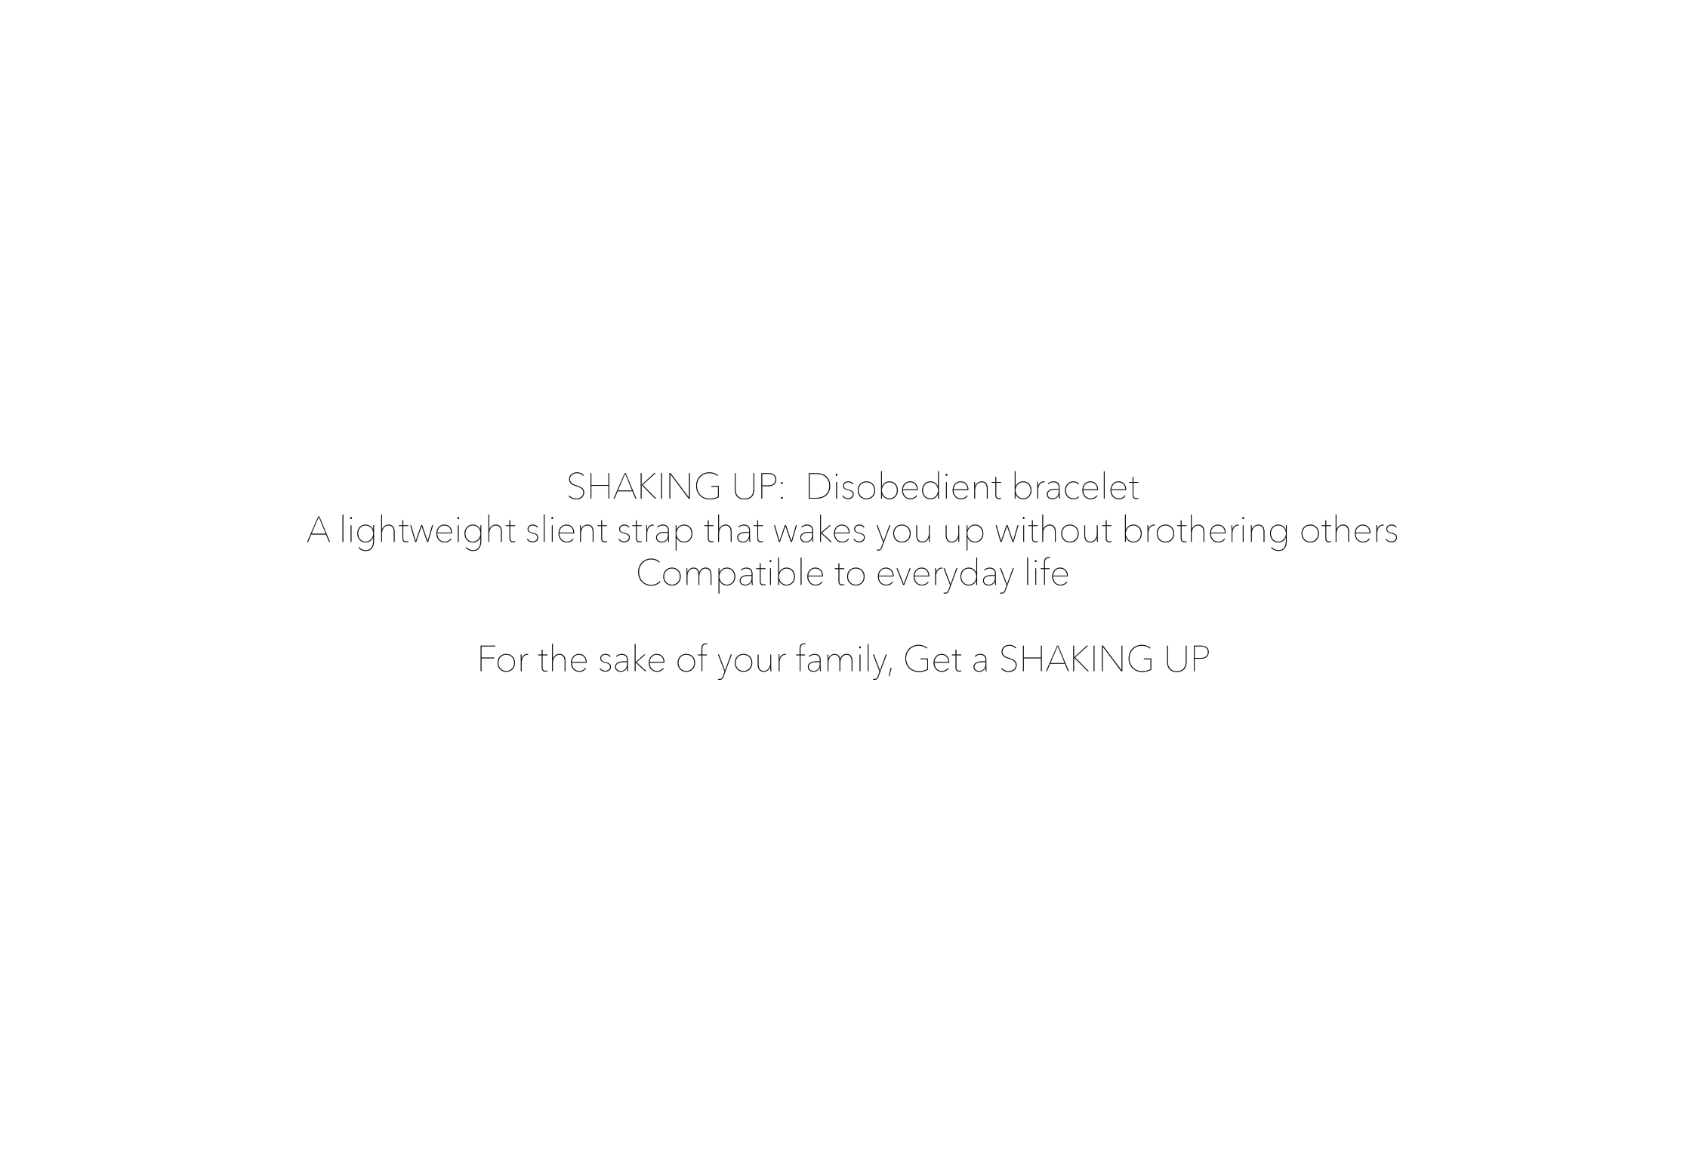
SHAKING UP: Trailer
Initial Sketches
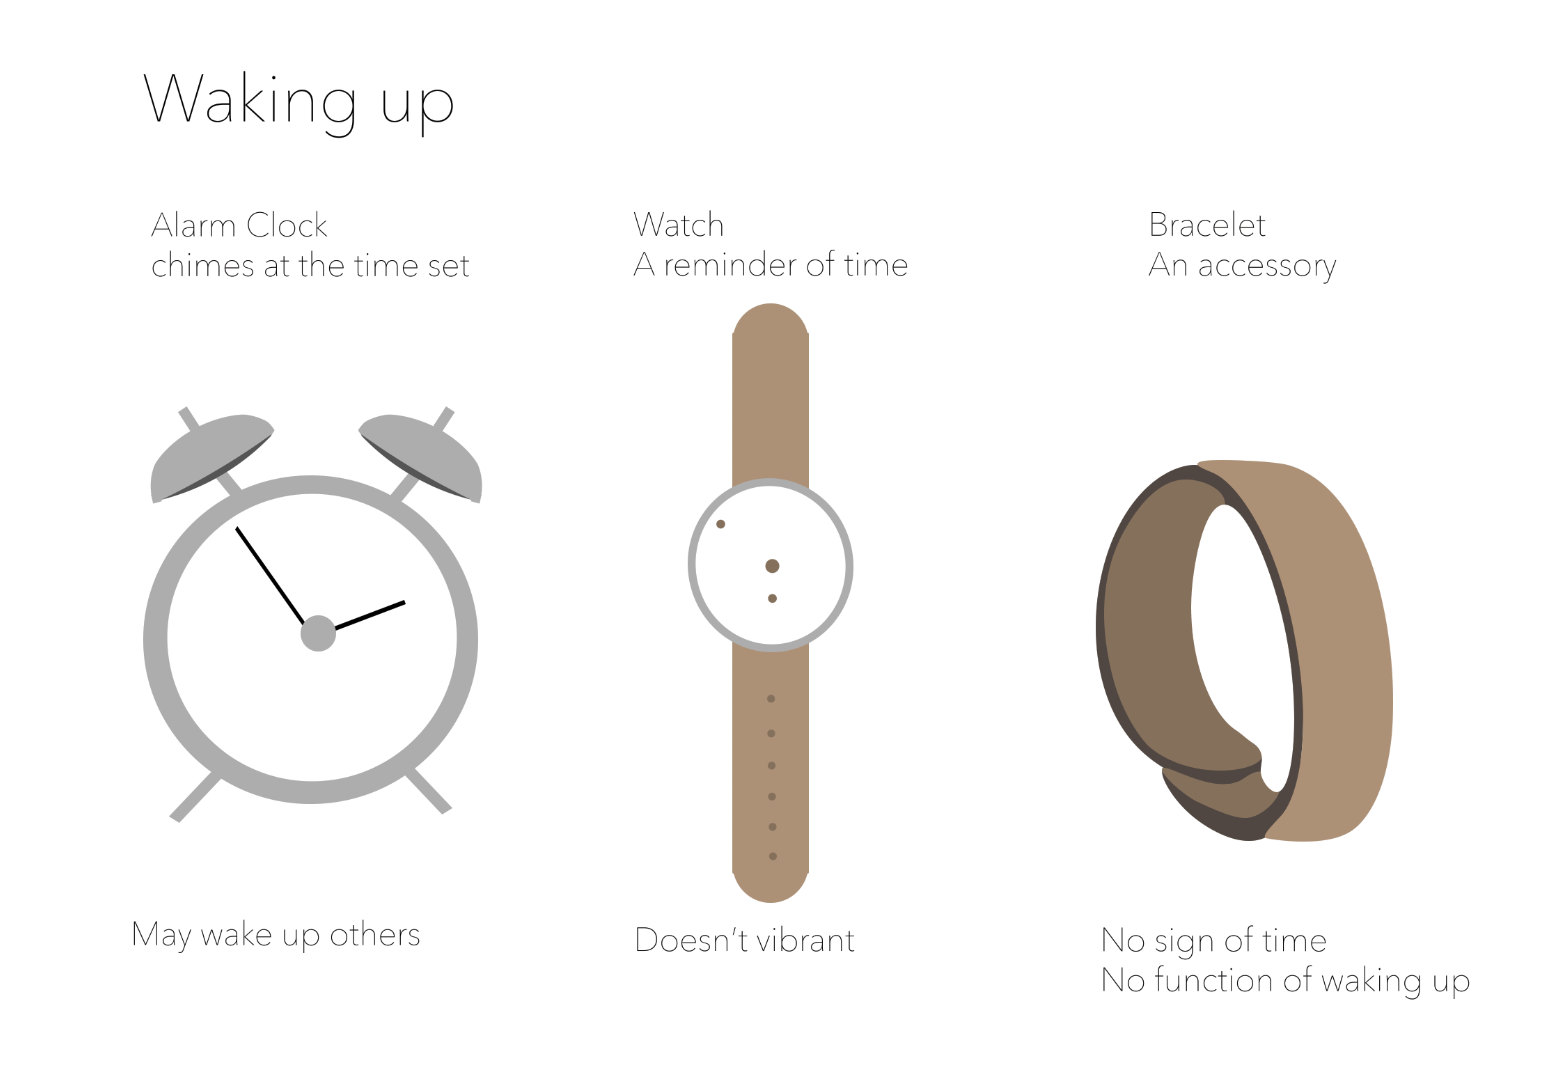
Introduction
Inspiration

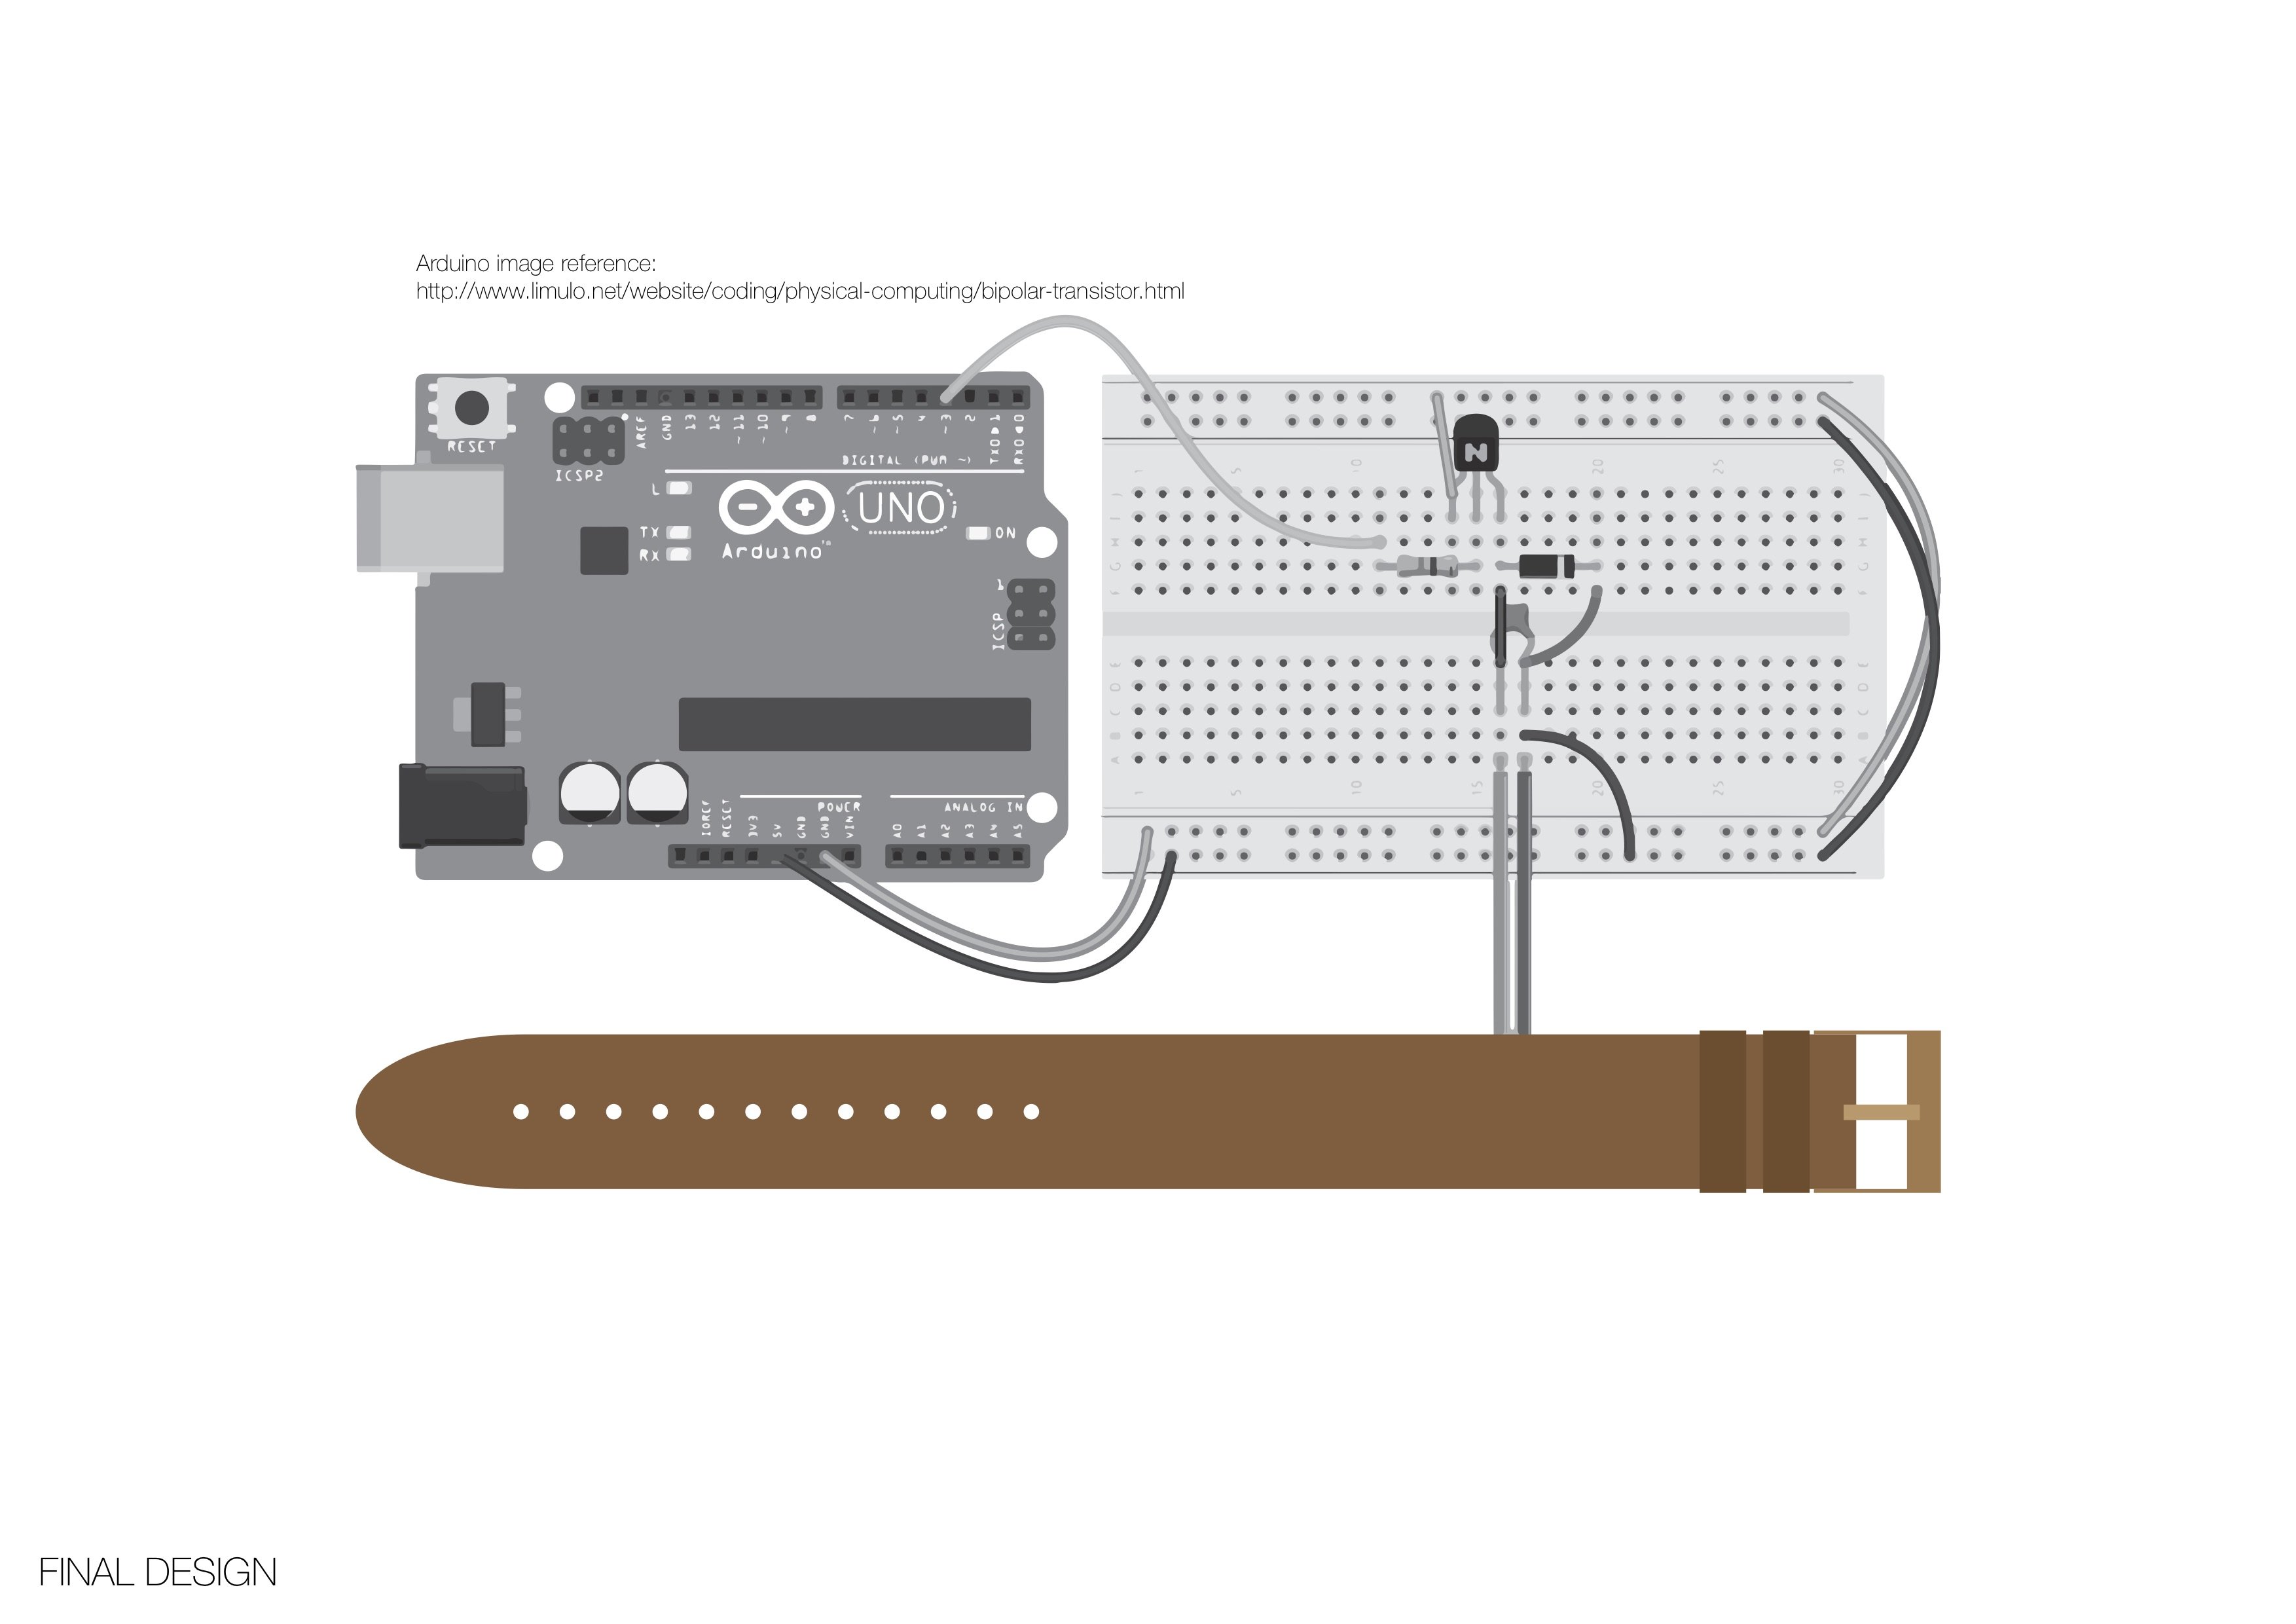
Final design
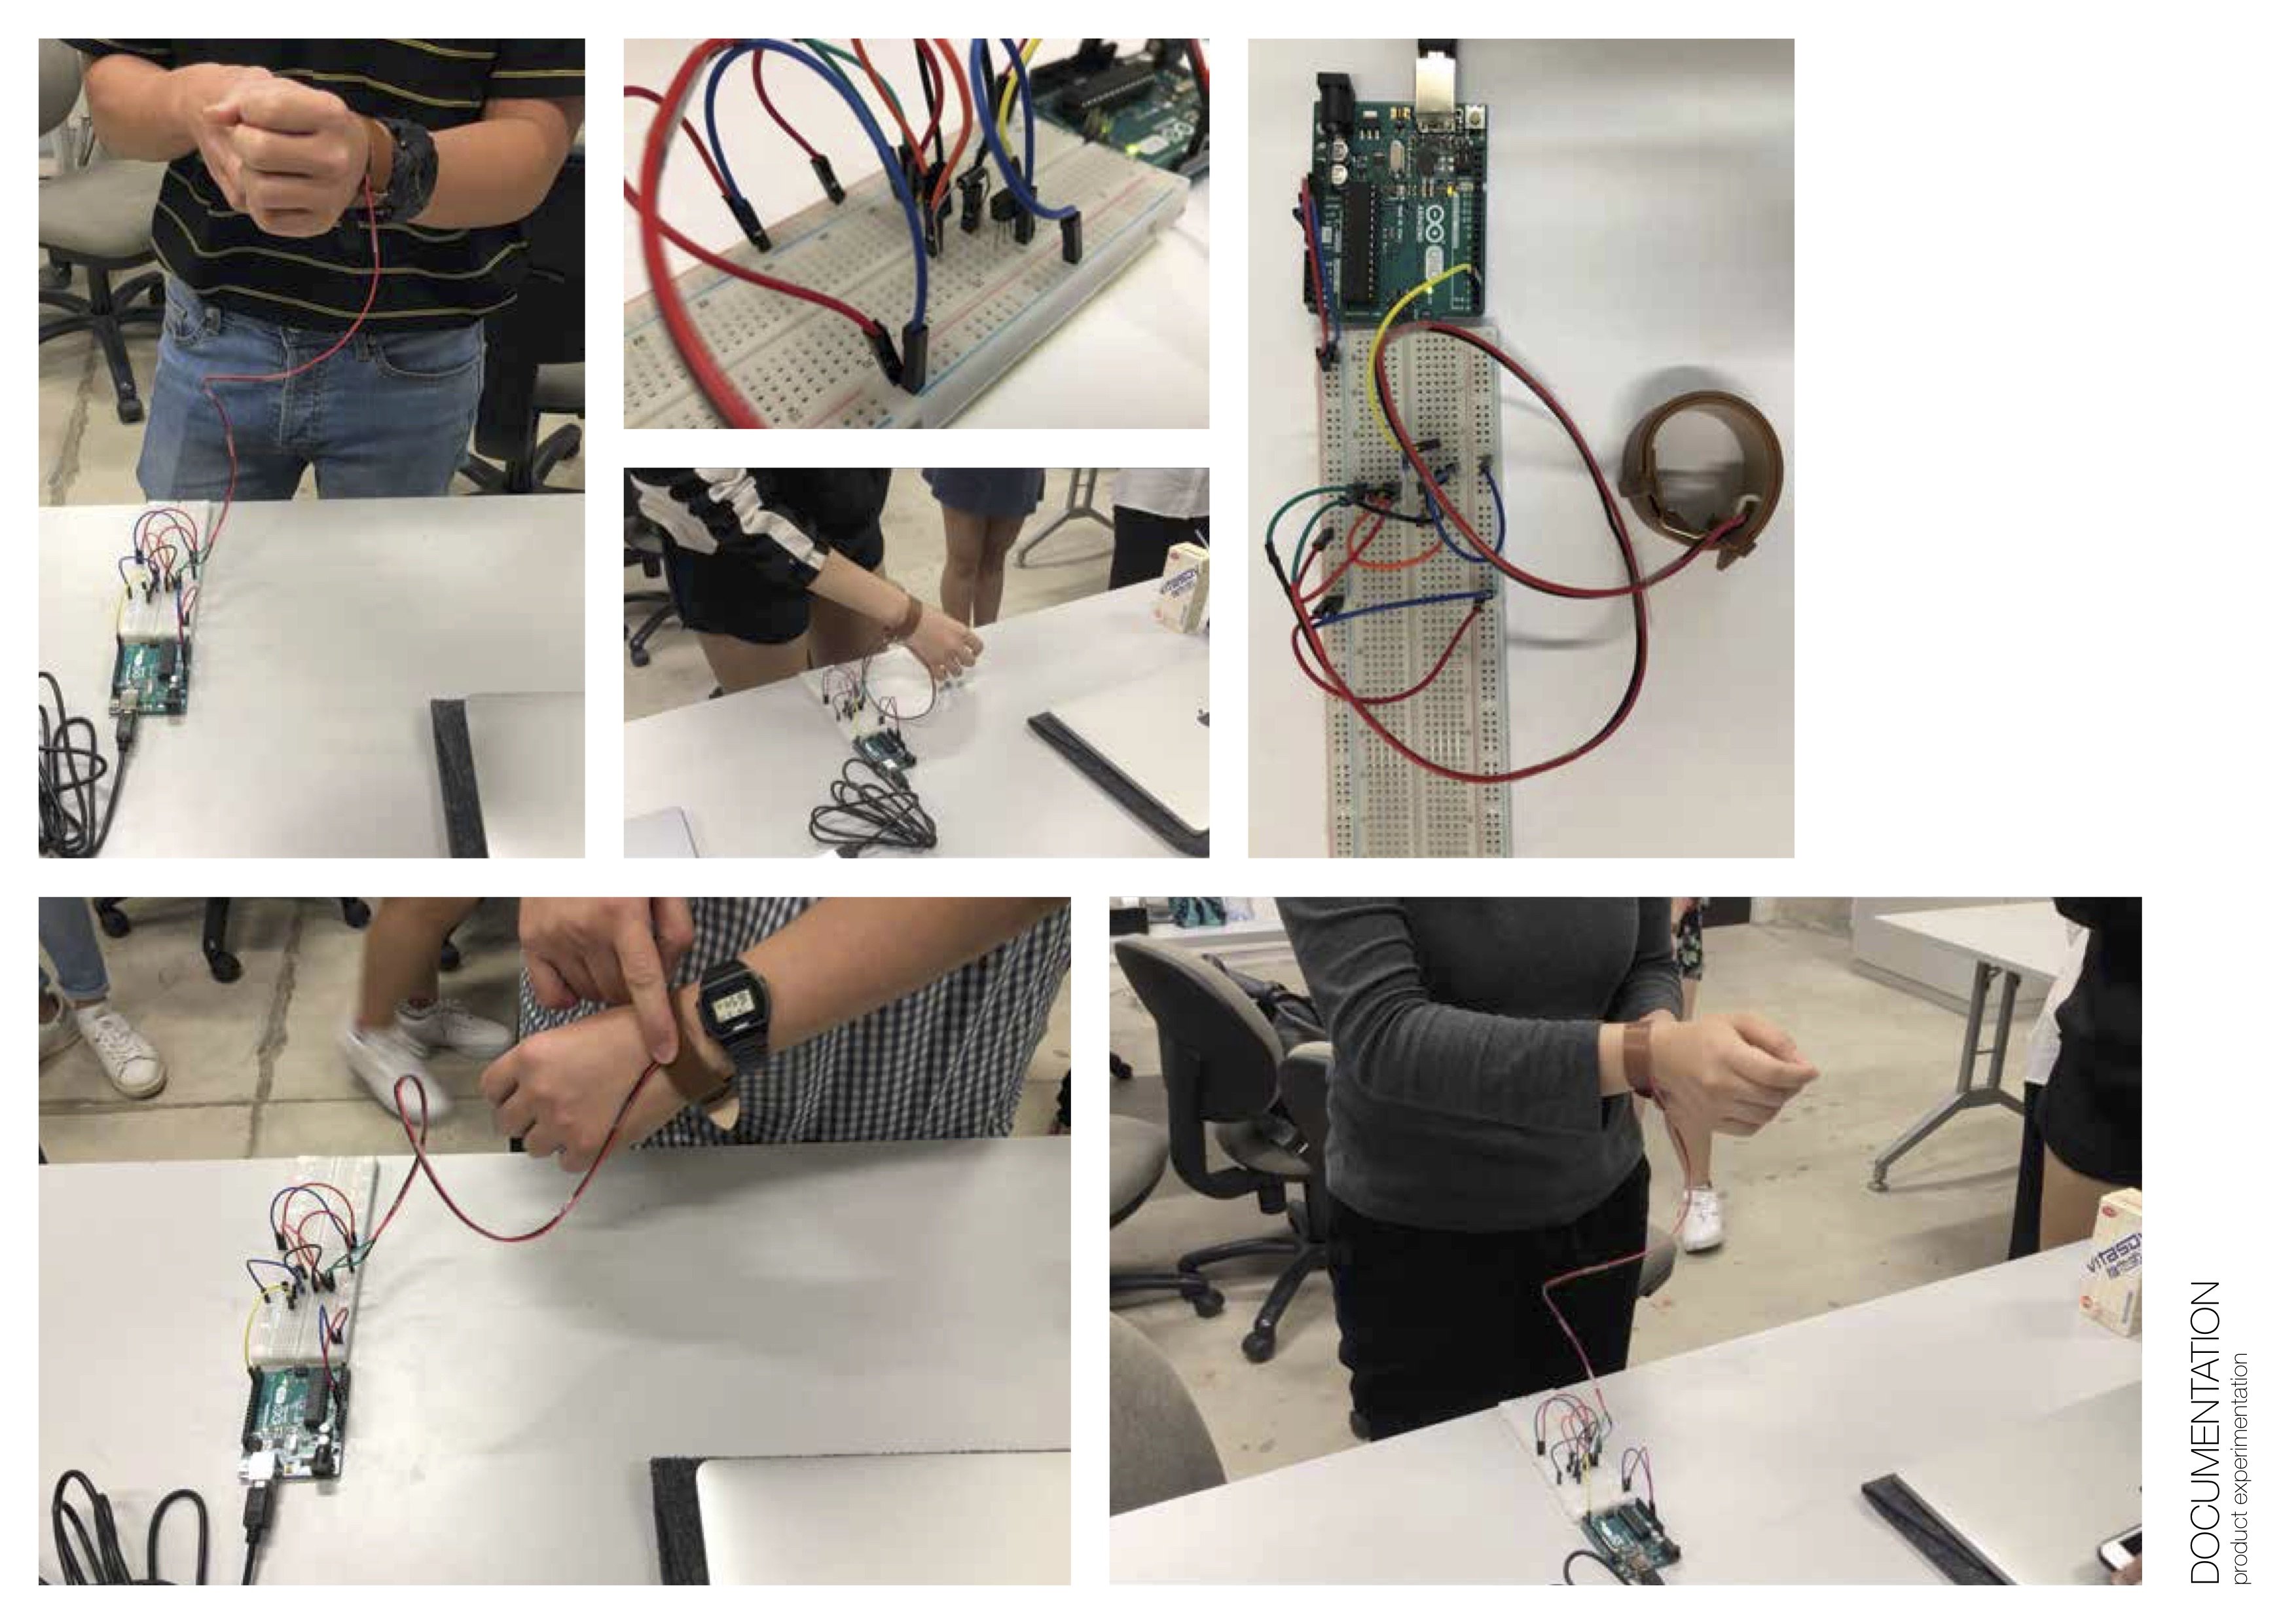
Documentation
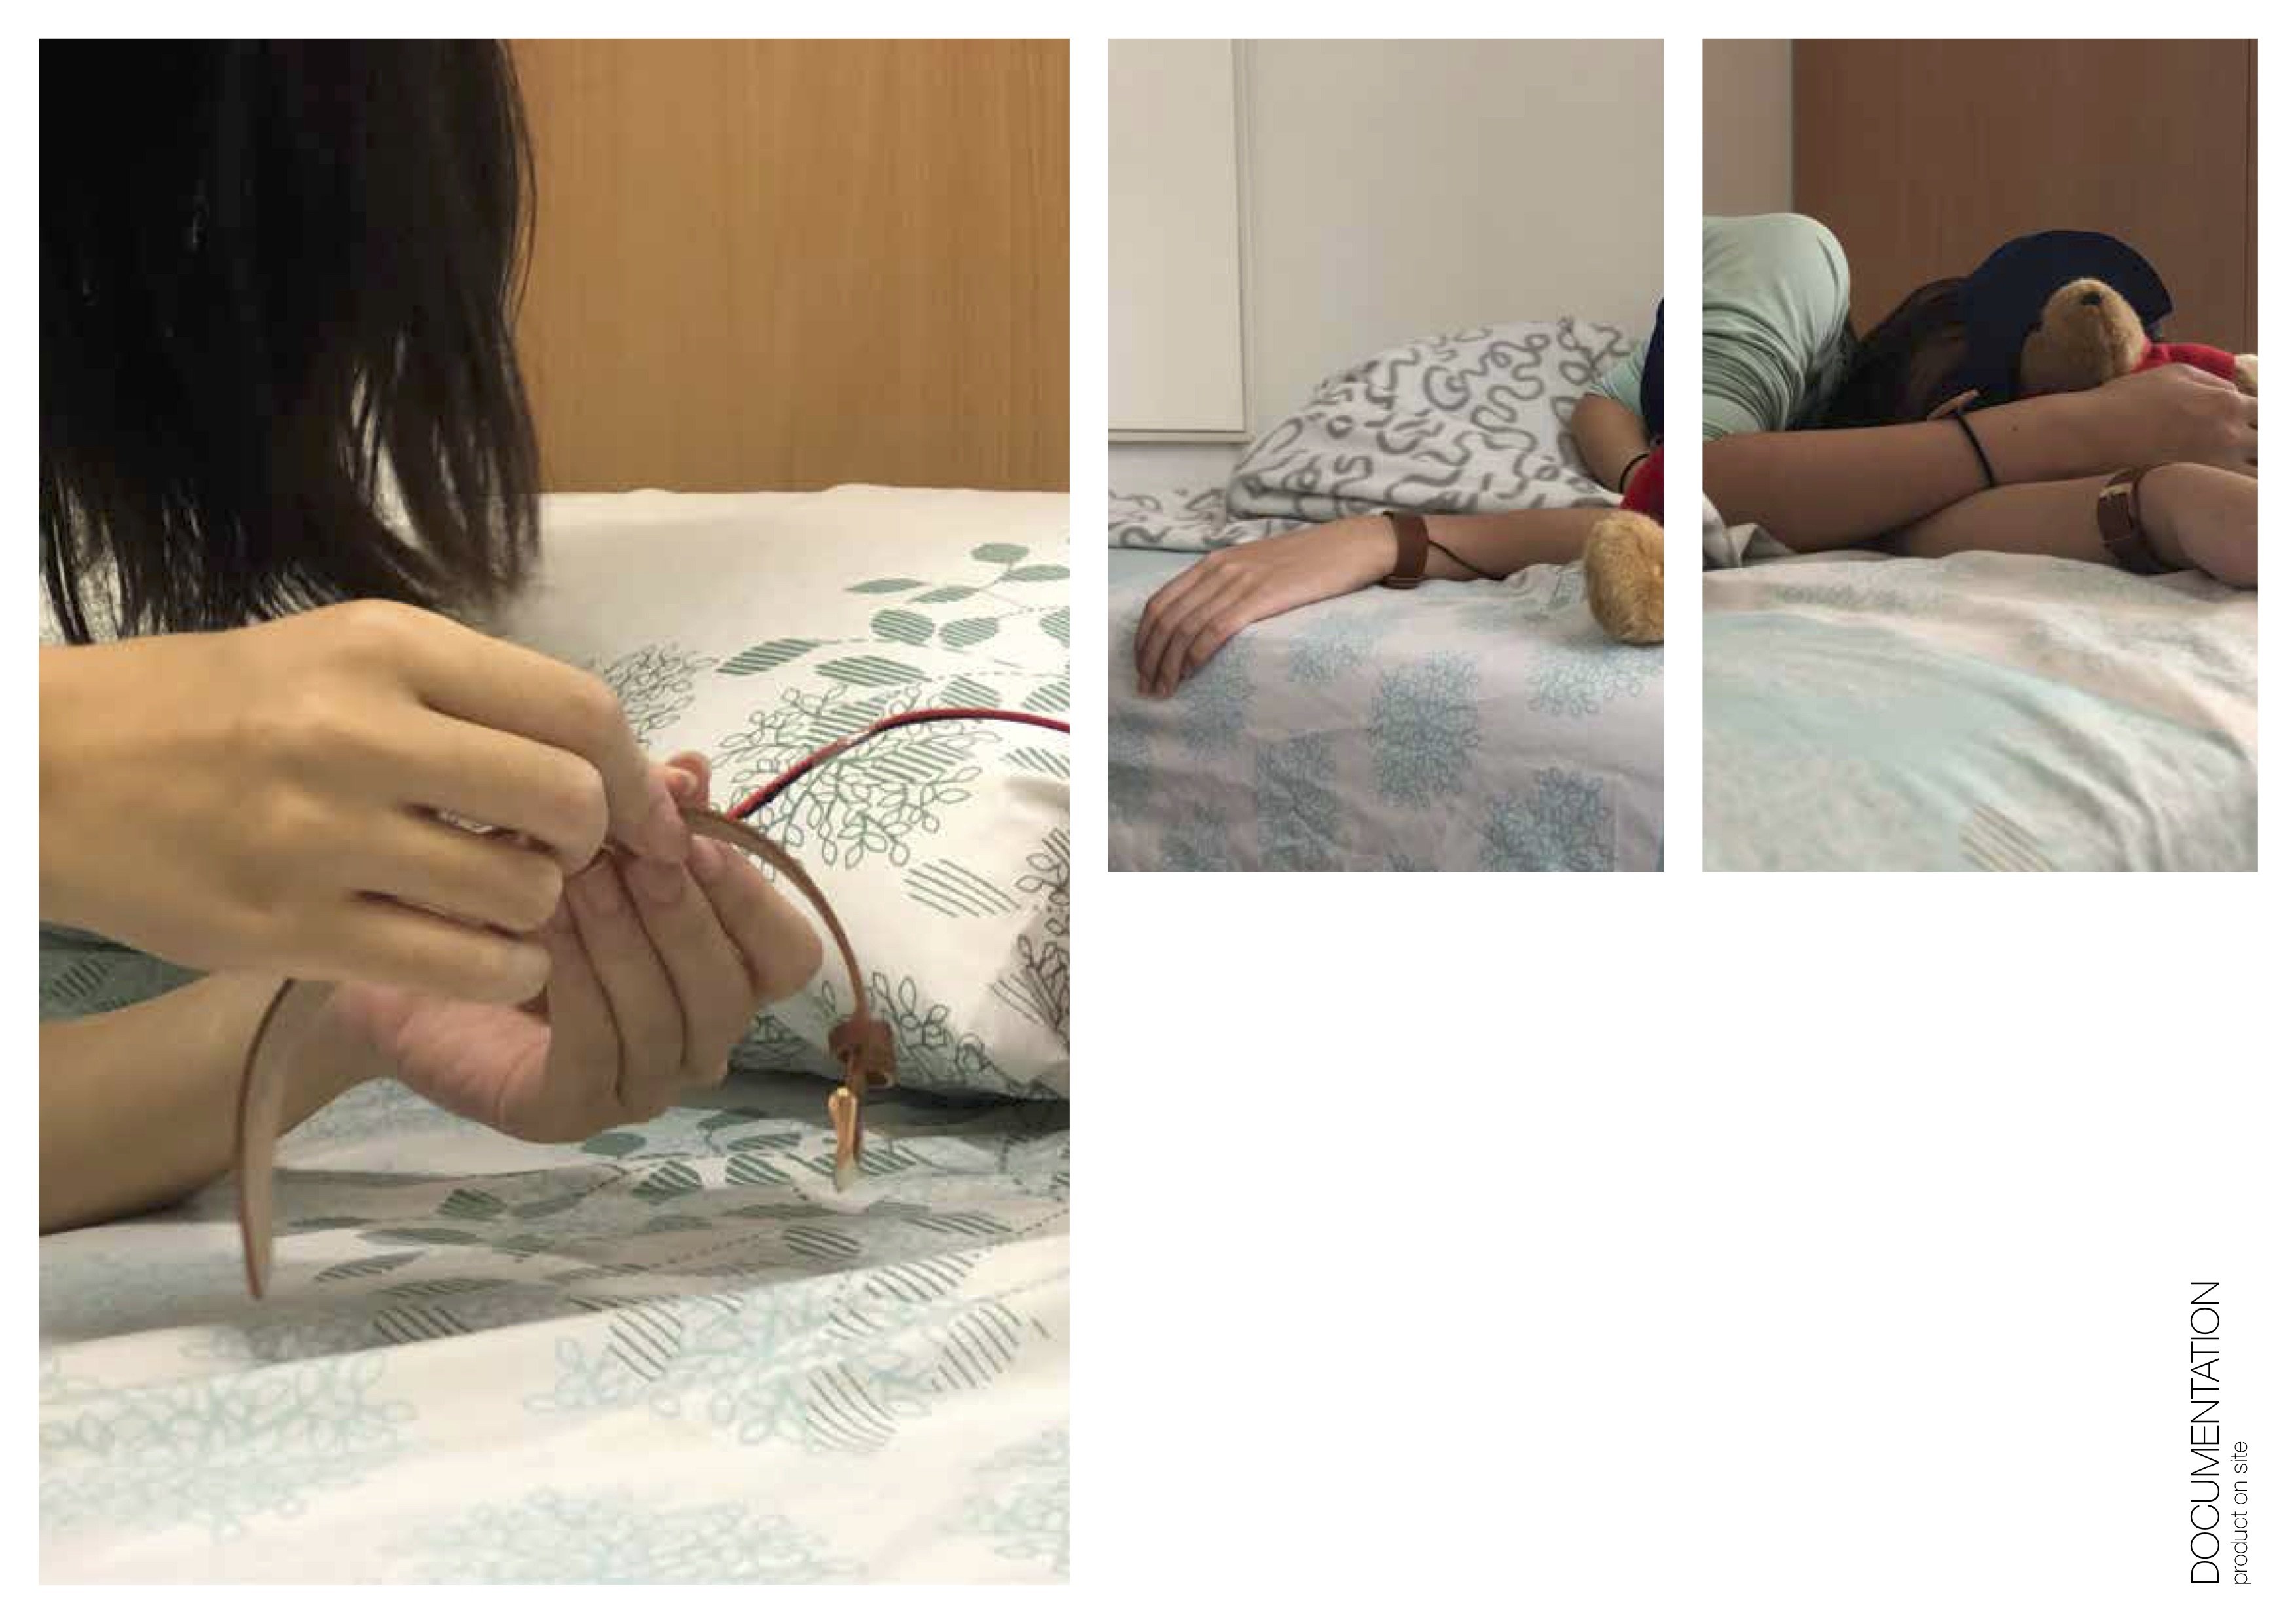
Trying On
Self Reflection
How does your hacked object behaves in a way you least expect it to?
What are some reactions you observed from your participants when they interacted with the object?
What are the challenges involved and how did you overcome them? What problems still exist? How might you overcome them eventually?
EMMA
- Expectation
Our hacked object, the “vibrating bracelet” works exactly like I expect it to behave, vibrates after a certain period of time. At first, my partner Hamimah and I were thinking whether we should add a time display, just like this. After discussing, we decided not to because it would distract the audiences. If we had added the time display, our product would look like a normal watch, with a vibrating function. Therefore, we sticked on the idea of just having a vibration motor.
During class, my classmates had further expanded the discussion: to have a watch surface or not. Somebody said yes, so they can know the time. I personally think that not having the watch surface makes the product works better. I will go back to nap for a while if I know the timing. The strong vibrating is enough to “shake” me up.
- Reactions
Our 1st participant was confused about how to interact with our object. She tried on and noticed the object is vibrating. The 2nd and 3d participants observed the 1st participant and got the idea of the function of our object(vibrates then stops, vibrates and stops). Overall, participants didn’t get the meaning of our object after experiencing. Nevertheless, after explaining and presenting our object, people gave positive feedbacks saying that it really works as a “Shaking Up” object. People became even more interested in our object when they were told the strength of vibration can be adjusted.
- Challenges
When we first came out with this idea, we were very lost as we haven’t learnt how to use a motor. We struggled a lot of from what electronics and electrical needed to how to type for the coding nor how to setup the arduino with the motherboard. Choosing Material for attaching the vibrating motor: a bracelet, an elastic band, etc. We chose a watch strap as it is lightweight and comfortable to wear on, perfect for wearing when sleeping. We thought of placing the vibrating motor on top of the bracelet but instead we placed it at the back so the vibration to user was stronger.
The questions for consulting:
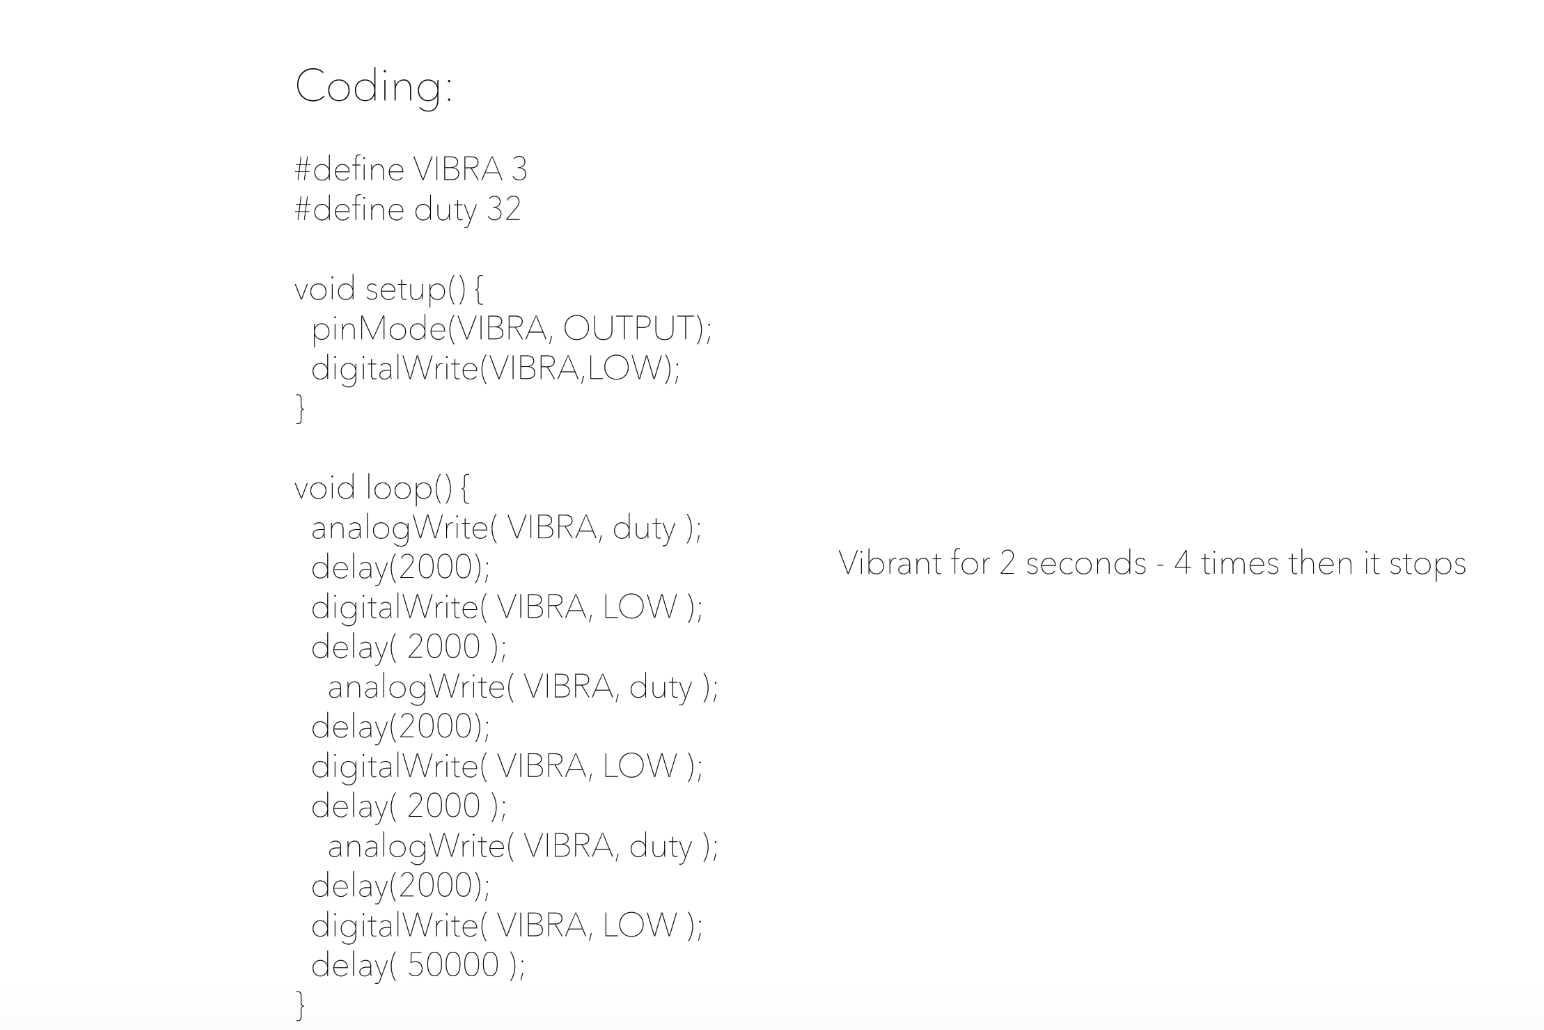
- How to connect the timer with the vibration motor?
- What is const int motorPin? motorPin=3? (we are confuse)
- What does it mean for the speed of motor to be 0 to 255?
- How do we control the strength of the vibration?
The problems were mostly solved during the consultation. I am pleasant to have a slot for consulting our lecturer. The ‘sewing department’ helped us to lengthen the wire of the vibrating motor and Lei helped us to find a sample together showing how to place the electronics. We learnt that a 1 Ω resistor isn’t same as the 5 Ω one and how to control the strength of the vibrating motor (value 0-255, the larger the value, the higher of strength). Also, learning that Arduino Pin3 is used for motors.
1 hour before the Trying On lesson begins, we still couldn’t solve the coding problem. We wanted it to vibrate for a few times then stops, just like how an alarm clock functions. We thought of doing a countdown code but it was too hard for us to construct a workable coding. We ended up using the original researched coding sample.(changing the delay time) We copied and placed some codes but there were errors of the codes. Finally, we solved it by double-checking the connection to the right port and decreasing the times that we wanted it to vibrates(from 5 times to 3 times).
- Reflection
The experiencing could be bettered by including a sensor or more output devices, for example, a LED light, pressure sensor, a buzzor. They can create a more ‘interactive’ experience to the participants. I will say we both learn a lot from this Micro-project, about collaborating with a partner, constructing a interactive product, knowing the materials and electronics needed for creating an Arduino working object. I hope one day I can actually write and put the electronics in the right place without coping codes and following the sample.
HAMI
Both of us understood the brief differently and because of that there wasn’t any unexpected behaviour. The whole layout was set to achieve the expected results. Since our final outcome was a little different from the rest, our first participant was extremely clueless on how to interact with our object. She keep on asking questions on how to approach the object which ended up with one of us have to step in to help her. The other two participants was quite alright since they have the basic knowledge from the first participant. The overall feedbacks we get was that everyone was at loss with our object. However, after our explanation, everyone seems to be aware of what we are trying to approach. There was also a moment of chaos when they learn that they are able to control the strength of the vibration. Overall, the reaction we get was that a few of the class thinks this vibrating bracelet was a cool idea however, there was a handful who thought that this was a useless idea which is quite sad. The whole process was a challenge me and Emma since both of us was completely loss throughout the whole making process. We were lucky that we get a slot for the consultation. The consultation helps a lot. Like seriously a lot. The challenges we faces is 1. Controlling the strength of the vibrating motor . 2. The parts we need for the vibrating motor to work . 3. Getting the right coding for the alarm. The first and second challenges we overcome with Lei helps. The discovery of controlling the strength of the vibrating motor helps most the confusion. But sadly, we still haven’t solve the alarm coding. Our lack of understanding with the code ( with / for ) make it impossible for the alarm to work. We decided to play around with the timer coding (it is the easier way to deal with time) by creating longer delay. The existing problem is perhaps that we are making an alarm object without using the alarm coding. I guess the only way to overcome this situation is when we learn how to make interactions with time.
Comparing Micro Project 4 with 1, 2 and 3, Micro Project 4 is way beyond difficult but I think mostly it’s our fault that we were quite ambitious to try something that wasn’t taught before. Perhaps we should try dealing with LED light and sound sensor. Vibrating sensor was quite a challenge to deal with firstly the different parts that we never heard off before and secondly it deals with time. We learn a lot of things in this project but the main takeaway is that interactions that deals with time is … let’s just say difficult is an understatement. Till today we are still confuse about the whole coding.