Fleas are small, wingless, obligate, blood-feeding insects. Flea includes 2,500 species of small flightless insects that survive as external parasites of mammals and birds. Fleas live by consuming blood or hemaztophagy, from their hosts.
Adult fleas usually live in temporary association with their host. Mammals and birds which do not build nests, or return regularly to specific bedding, lairs or burrows generally do not have fleas.
Tea Making Machine: To mimic the act of your love making a cup of tea for you in the morning. The machine put the tea bag and sugar into the cup automatically. The Tea bag will be taken up after certain period of time.
Isolation Box: Provide user a private space. When people come near to the user, the light bulb on top of the box lights up and the alarm goes off.
Automatic Comb: Comb your hair just like your loved one did for you.
In this project, I want to explore further my favourite place in Singapore: the Marina Bay (including Marina Bay Sands, Satay by the bay, garden by the bay and Art, Science Museum). Marina Bay is a newly developed attractions.As a foreigner, I am not deep-rooted to Singaporean culture. Therefore, I want to explore this attraction in point of view of a foreigner and see how locals view it differently.
One letter for each illustration because i don’t want to overwhelm the viewer and it gives me lesser restrictions while creating.
Overall theme:
Jobs that I dream of…but i don’t think i would achieve/get it
E: Dreamer
Basic idea is Me dreaming. Dreamer: inspired by the movie “The Secret Life of Walter Mitty”
Message:
Don’t stop Dreaming when you are still young. When we are getting older and older, the sense of dreaming big slowly faded. We start to only think about the reality.
Consultation: Try develop other ideas
C: Cat saver/ Hero
First draft:
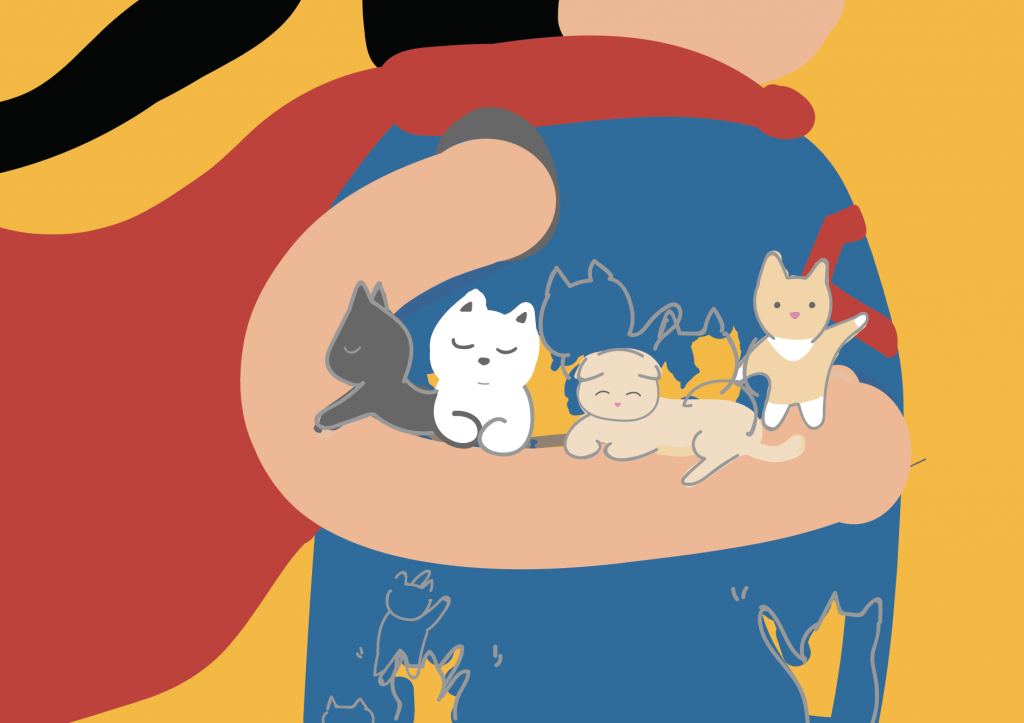
hero that save cat. Cats climbing up to cuddle in my arm(waiting for my help). cats those are rescued are in my arm. ‘C’ is represented by the arm. I try to match This illustration to the first one, so it can be connected.
C for cat hero: C for Cat,
Message: Save Cats, they are waiting for our help! You can be a hero if you make effort
Theme: superhero, hero is not only define by saving human but also animals
Consultation: Try develop other ideas. The cats don’t look they are in danger that need help from human.
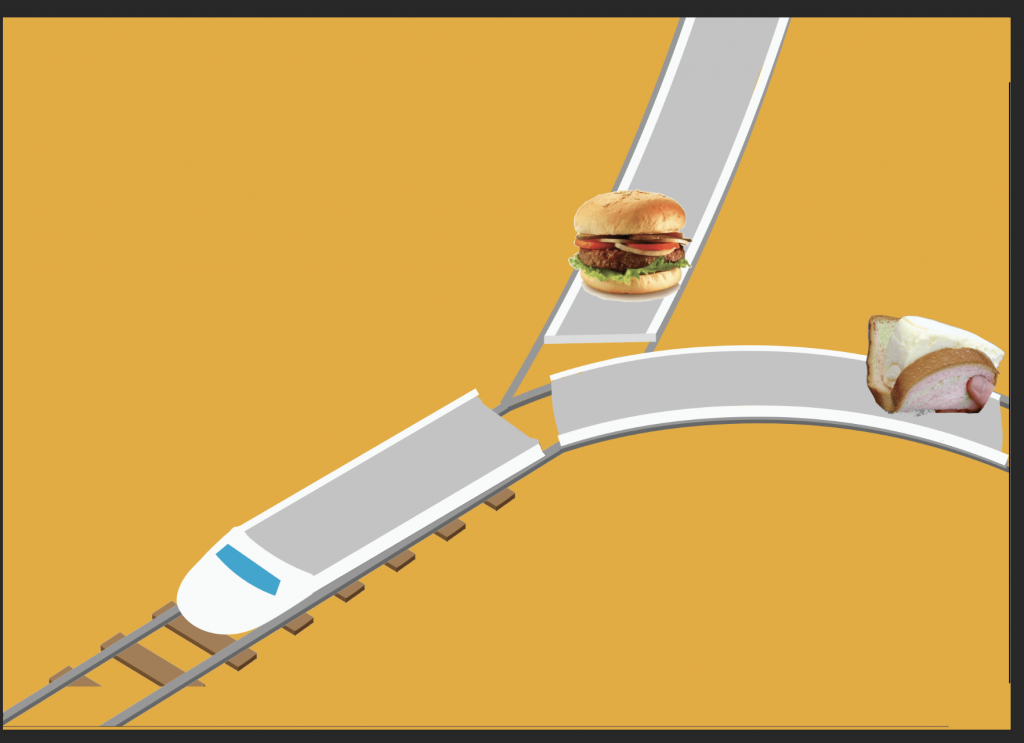
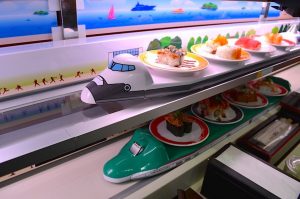
Y: Foodie
First draft:
Y is represented by the train/ or the track. Decided to draw different kind of food that i like on the train. The shape of Y reminds me of the jaw and oesophagus of human structure where the digestion occurs.
Things that i want to add: Castle, roller coaster, balloons, colourful little stores/house. I am thinking to draw an architect climbing around the “W’ to enhance the idea of Builder.
Message:
W reminds me of the roller coaster, which goes up and down. Life is like roller coaster. People should design/ build the ‘joy’ in life just like designing a theme park: place to rest, place to have fun, place for employee, add some greens to improve the environment. similar concept with ‘Foodie-‘enjoy!’
Consultation: The base of the “theme park” can be changed into any other letter. Try to develop other idea that can fit the letter form better.
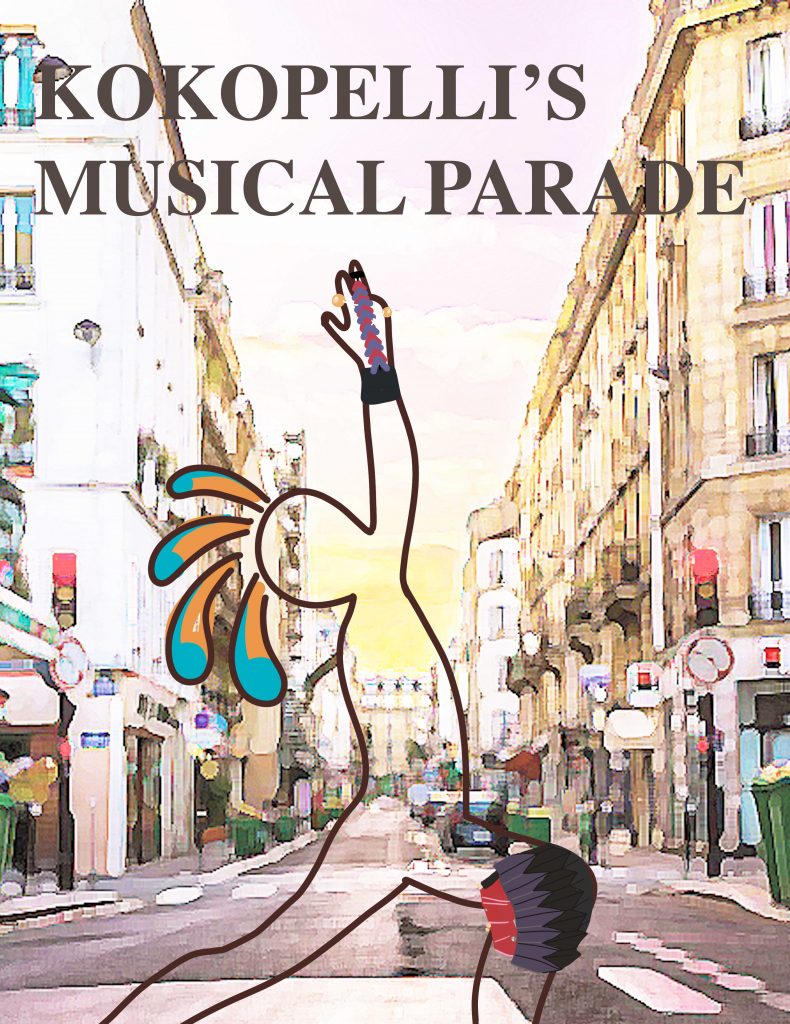
Kokopelli is a parade commander and he is leading a band through the streets, spreading his magical music around through the wearable instruments: wristrument and kneestrument. Through the music produced by KoKo, the city will be blessed with fertility.
1a) Research on Kokopelli:
Flute-playing God, Kokopelli is an ancient God.
A prehistoric, musically talented fertility deity with roots in Native American culture.
Since 1990, Kokopelli has also been seen on tie-dyed t shirts
The figure was very often found on pottery and caves
Kokopelli came out of a mixture of myths deities, personalities, and traits
Some have hunched backs, while others stand tall. Some resemble insects with antennas; others, birds. Then there are those who look more human, complete with long instrument and manhood raised high.
His fertility powers worked for agriculture and for attracting women
In later times, more recently, it symbolises free spirit
The sticks on his head were evolutionary antennas but have been represented as a mohawk nowadays
1b) Chosen sounds and sound lexicons
We were asked to find 2 ADM soundscape to resemble a pleasant and a unpleasant sound.
Sounds Chosen
1.Pleasant Sound: Raining
(a constant shhhhhh sound accompanied by a sharp but continuous hitting of the raindrops on the surface of the umbrella)
2.Unpleasant Sound: The Gate
(DiDiDi sound produced by the card reader in ADM)
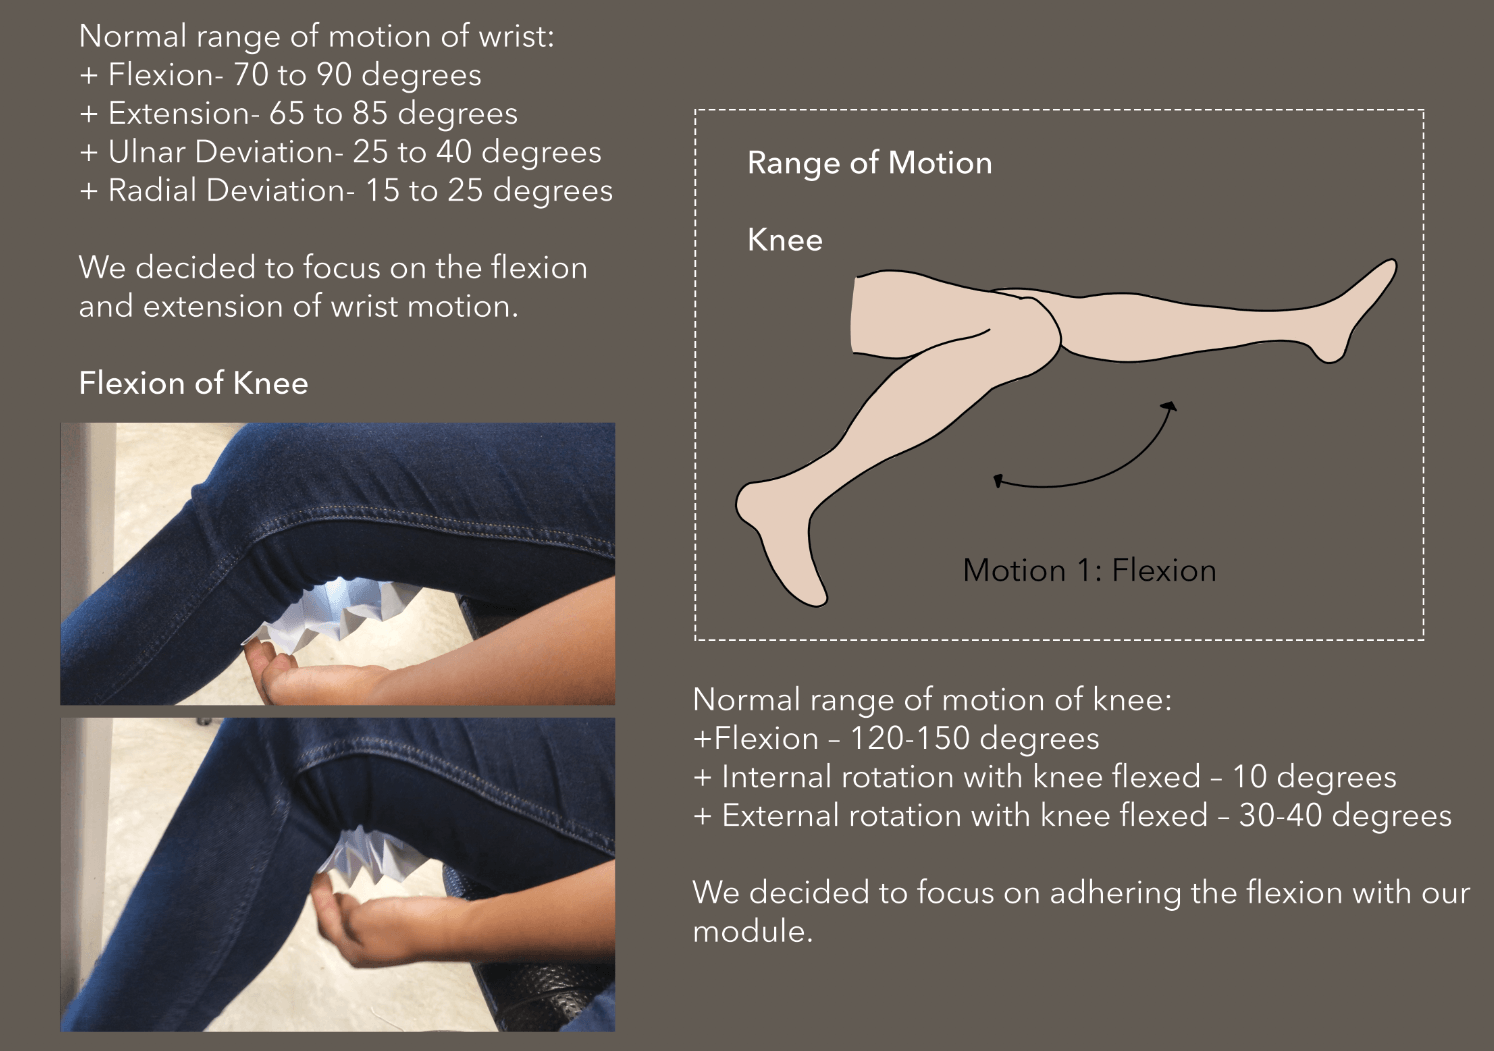
1c) Sound lexicon & 1d) Research on body parts
Initial ideas and Process
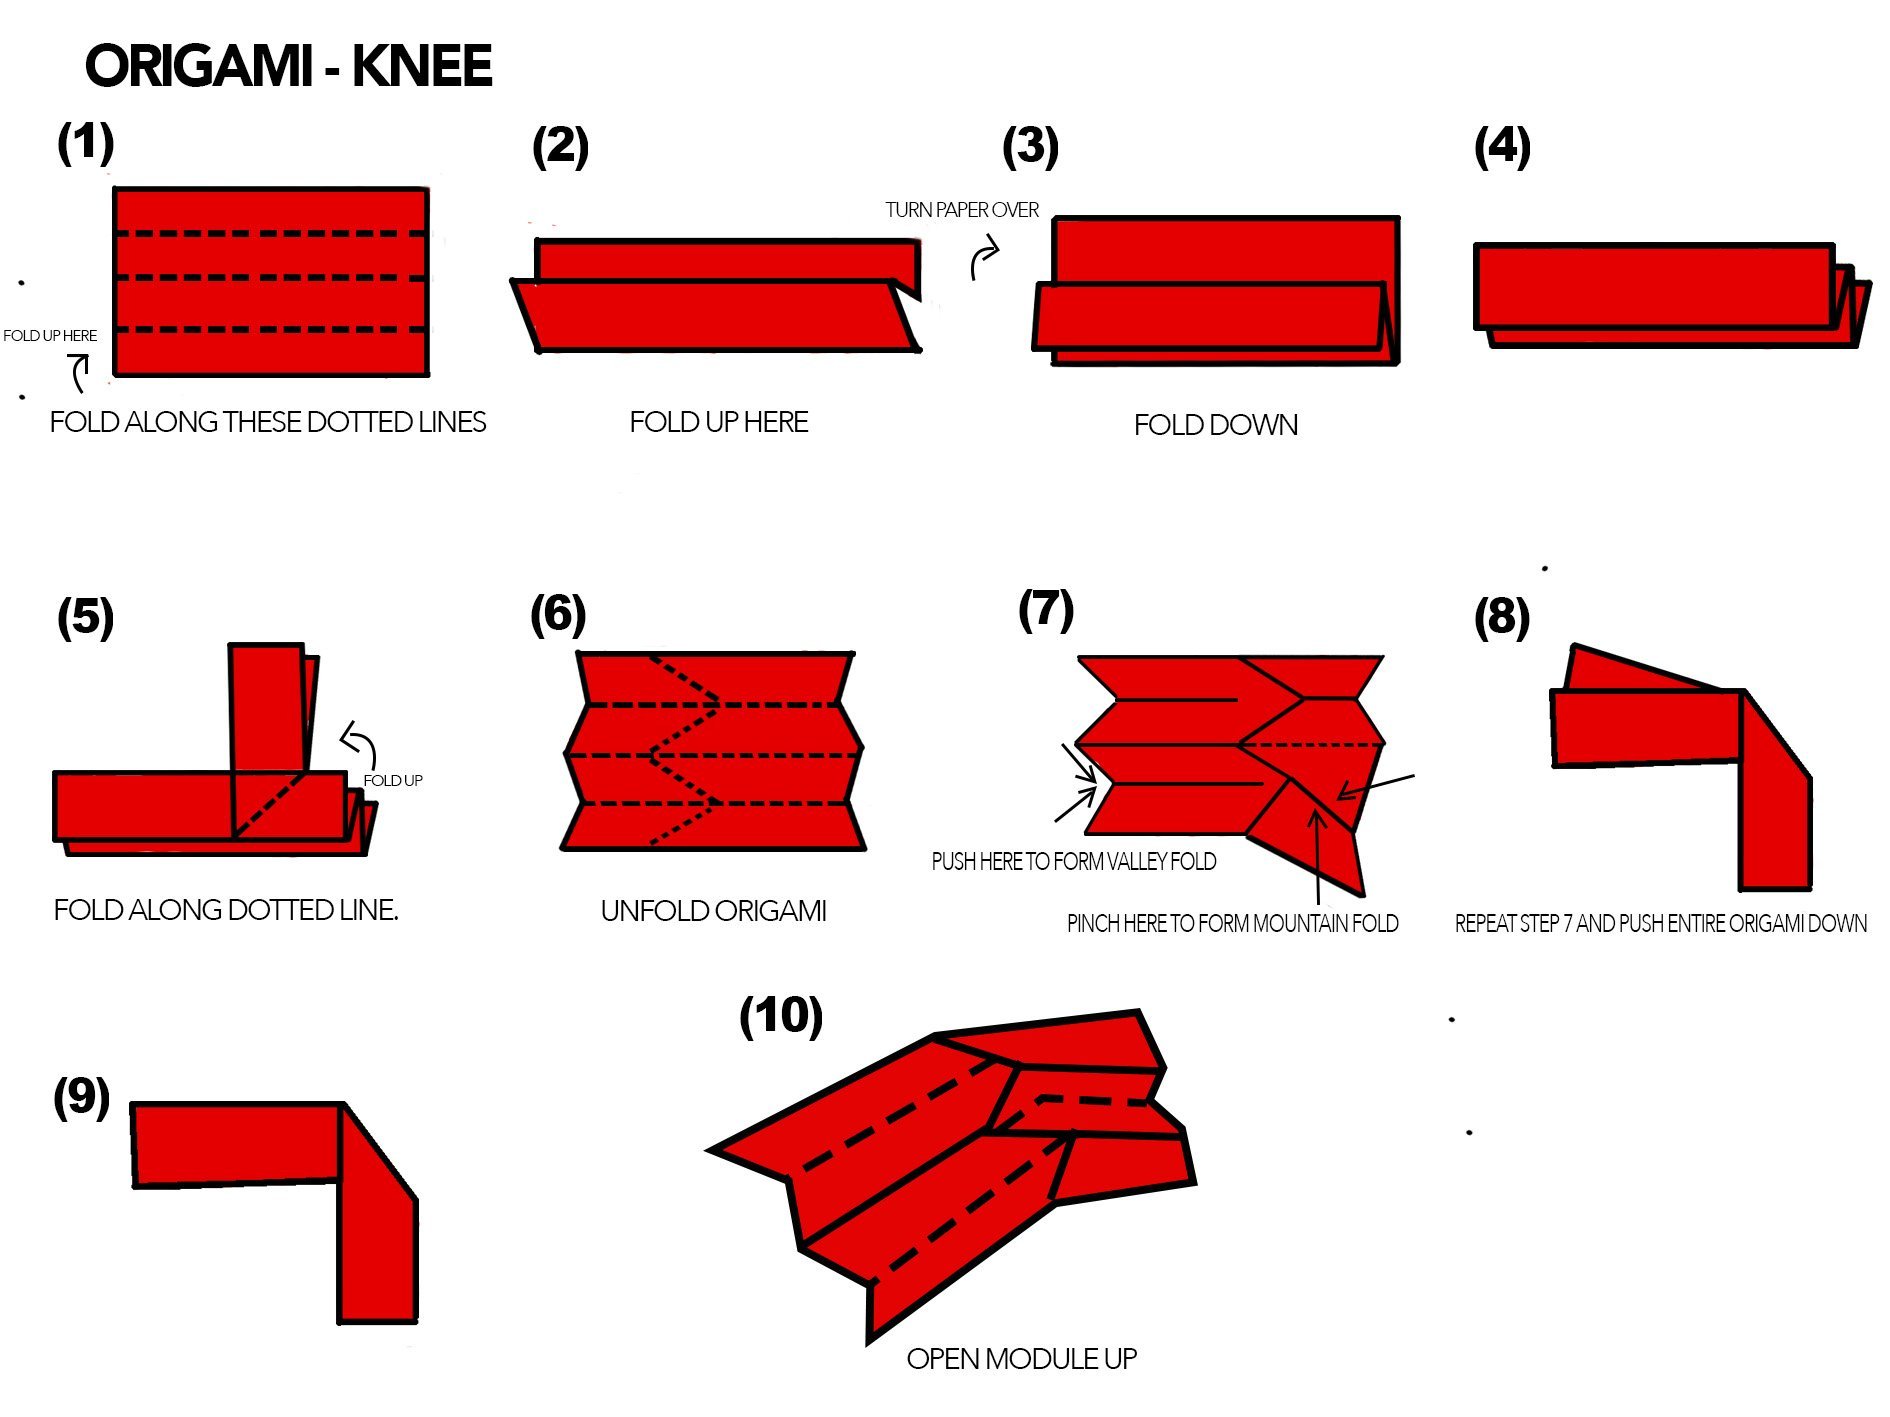
2a) Initial module idea (structure and material)
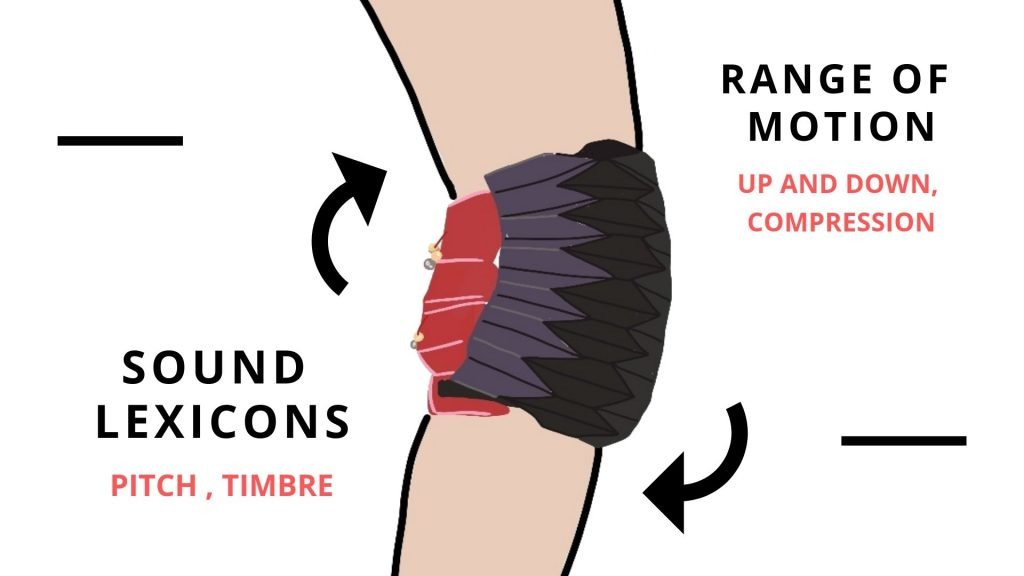
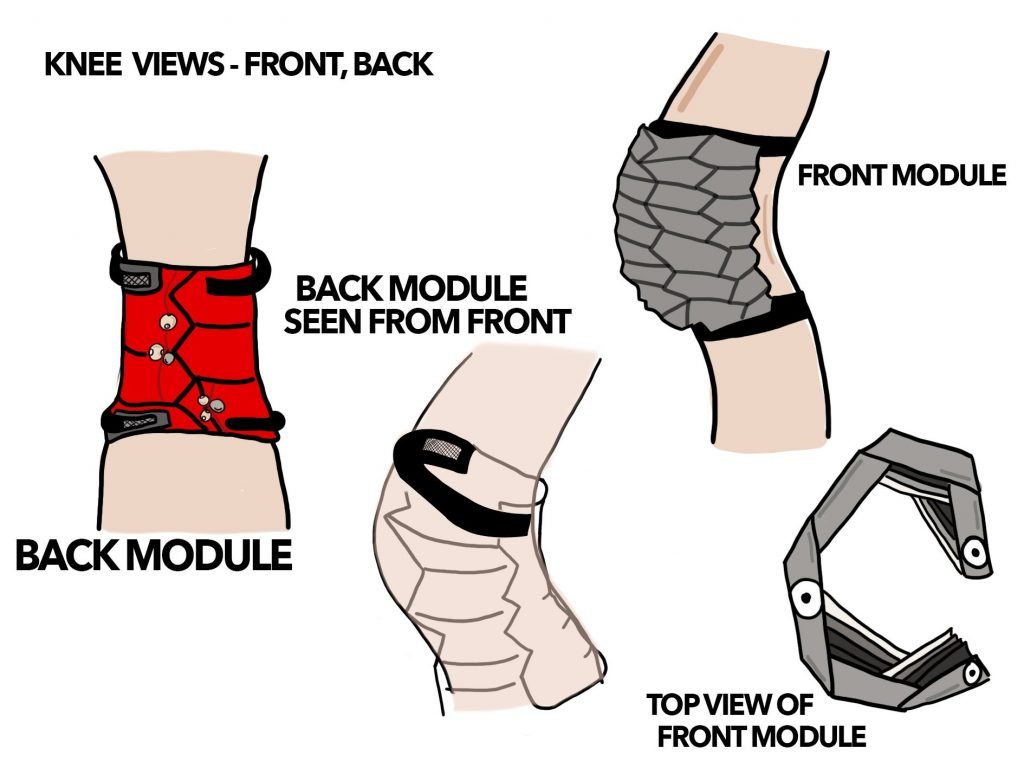
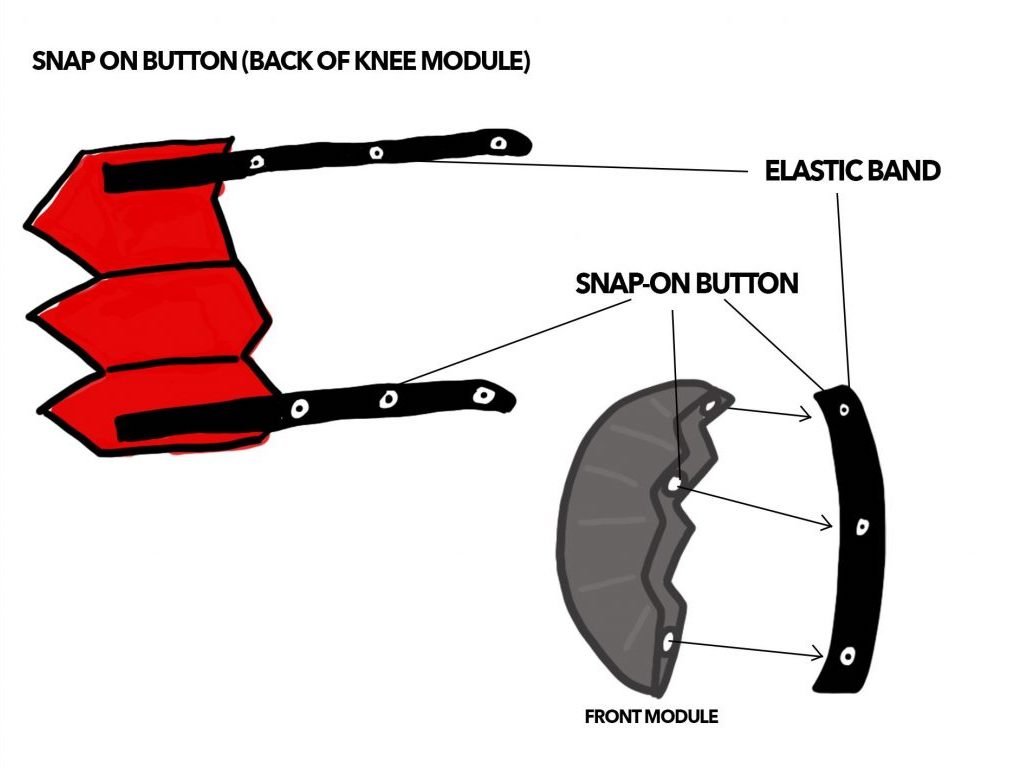
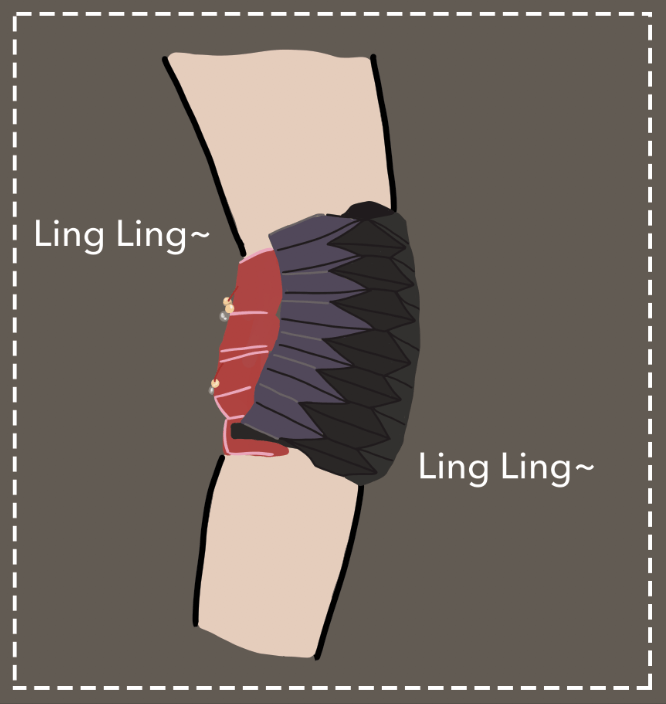
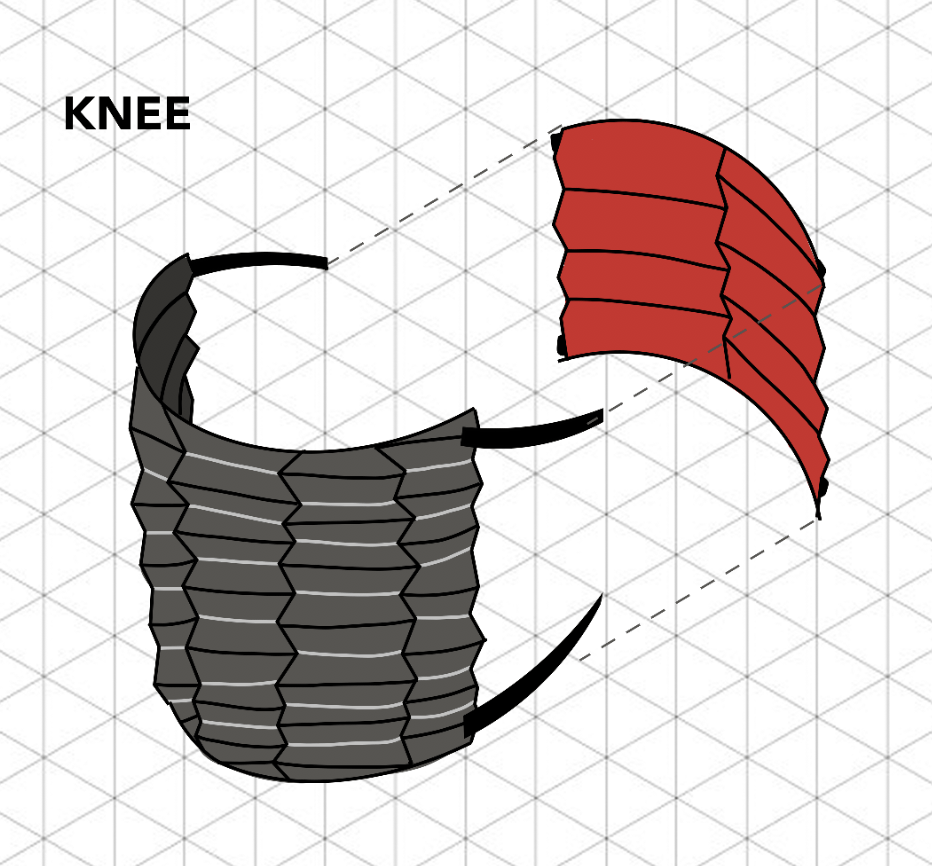
3. Final – Kneestrument
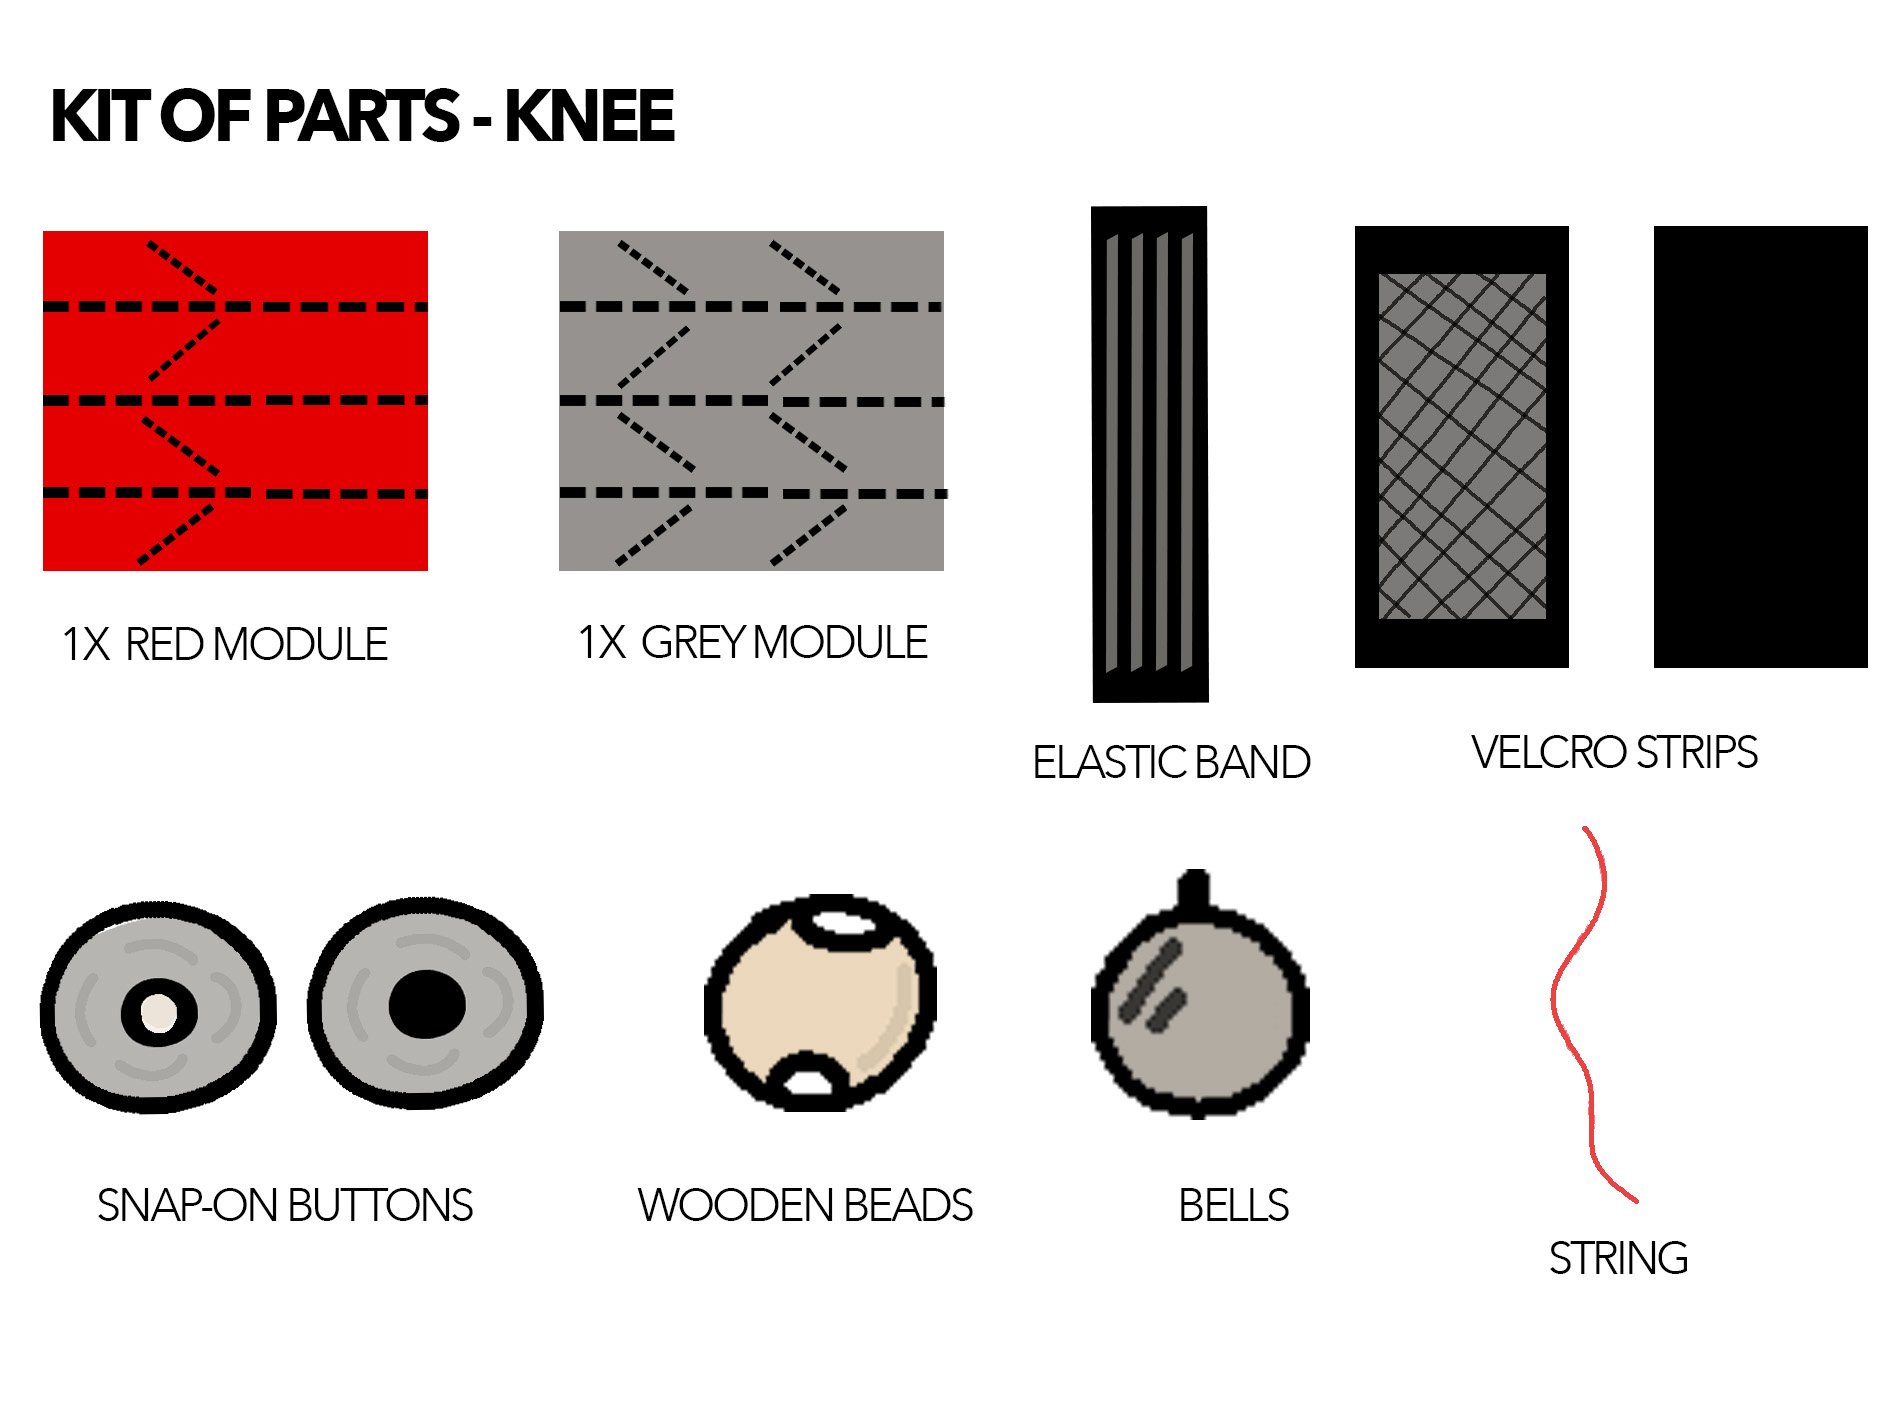
Range of motion: The back fold is connected to the knee with elastic bands that connect to each other with velcro. The front fold is then “snapped” onto the buttons found on the elastic band from the back module. The knee then moves up and down and the modules compress and expand upon movement. This shows how the kneestrument adheres to the range of motion from the knee.
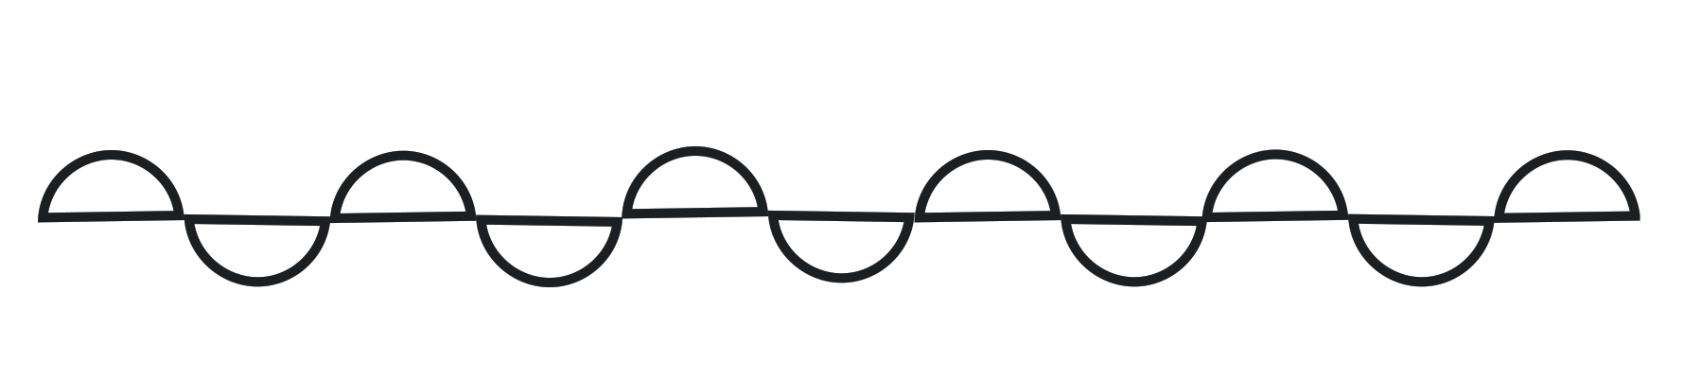
Sound lexicons: The sound lexicon that this kneestrument makes is pitch and timbre.
Pitch comes from the high pitched sounds of the bells attached to the back module. As the module moves, expanding and contracting, the bells ring and jingle with the movement.
The timbre here is unique as the bells and beats hit against each other, with the combination of the high pitched sound from the bells in the folds of the module.
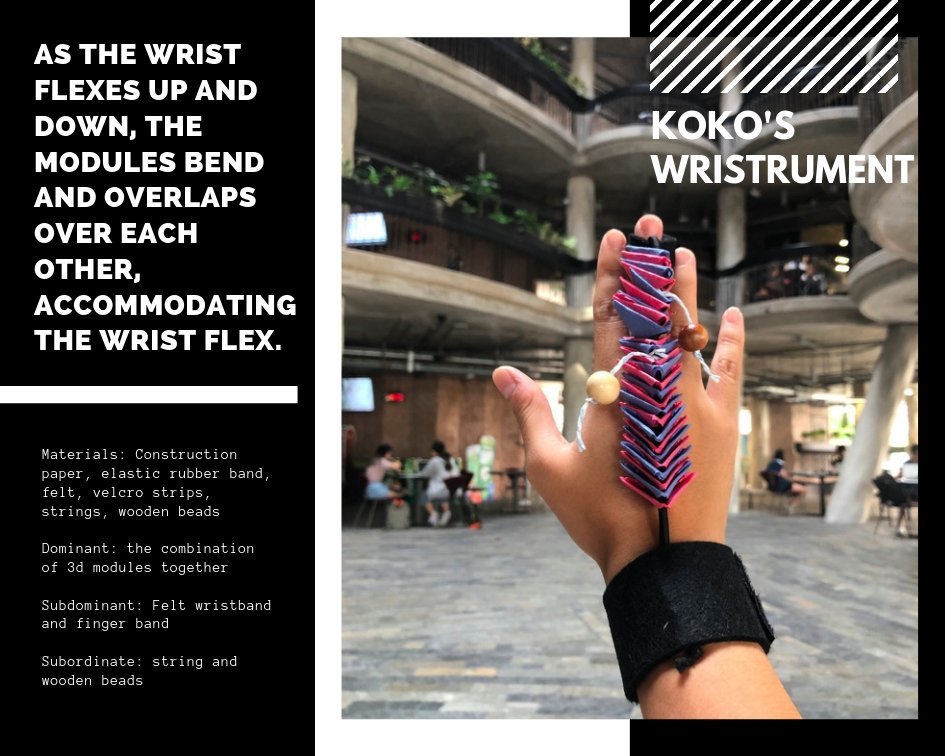
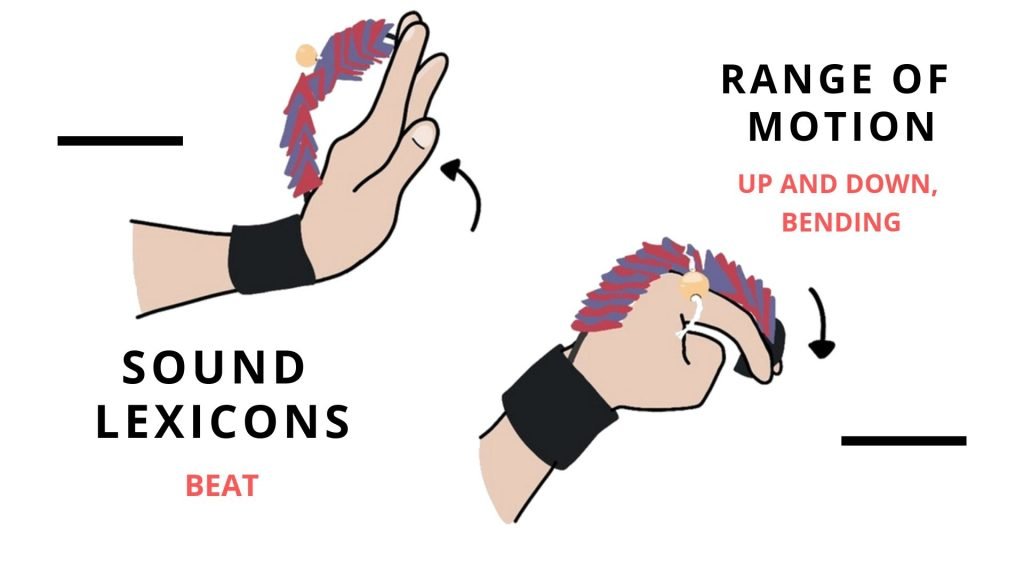
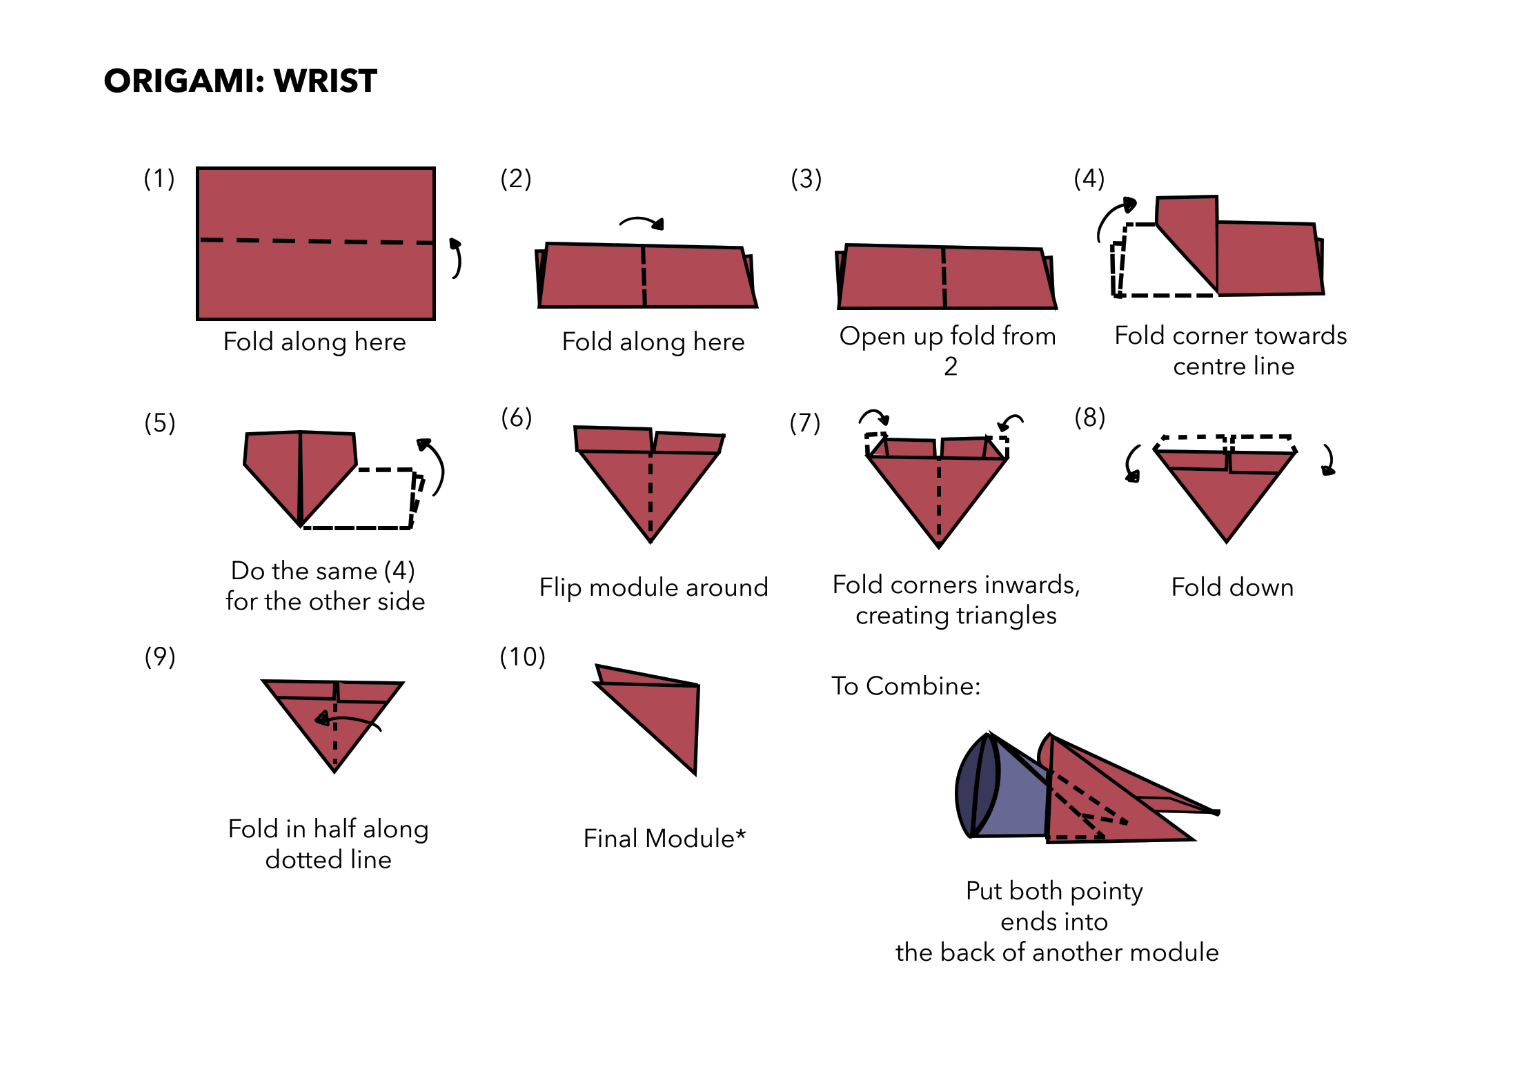
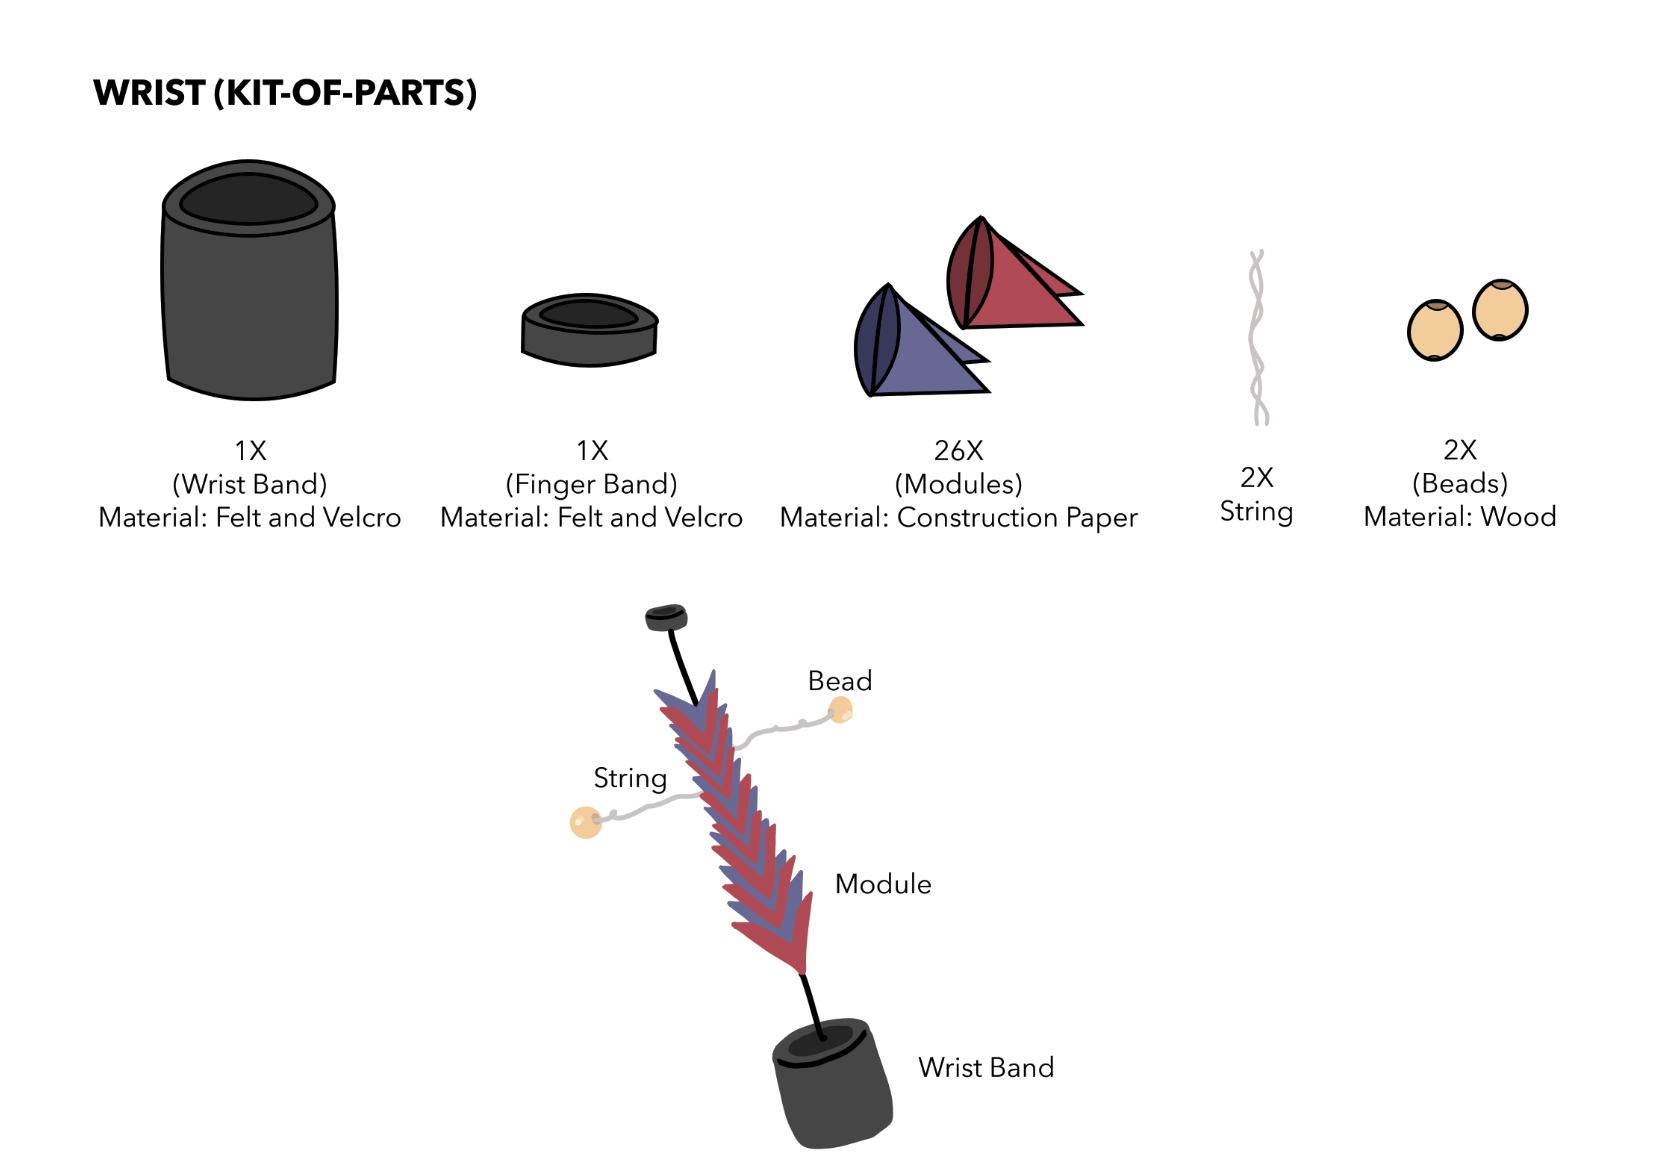
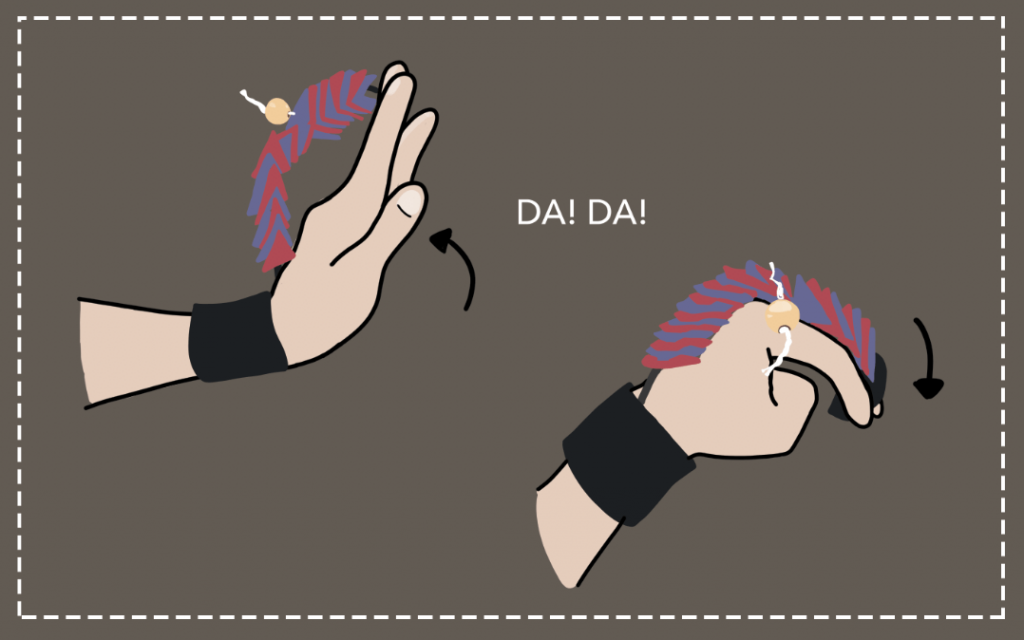
3. Final -Wristrument
Range of motion: the wristband is connected to an elastic band that has 3d modules sewed through the elastic band. At the end of the wristrument is a fingerband connected to the tip of the 3rd finger and as the wrist flexes up and down, the modules bends and overlaps over each other, accommodating the wrist flex.
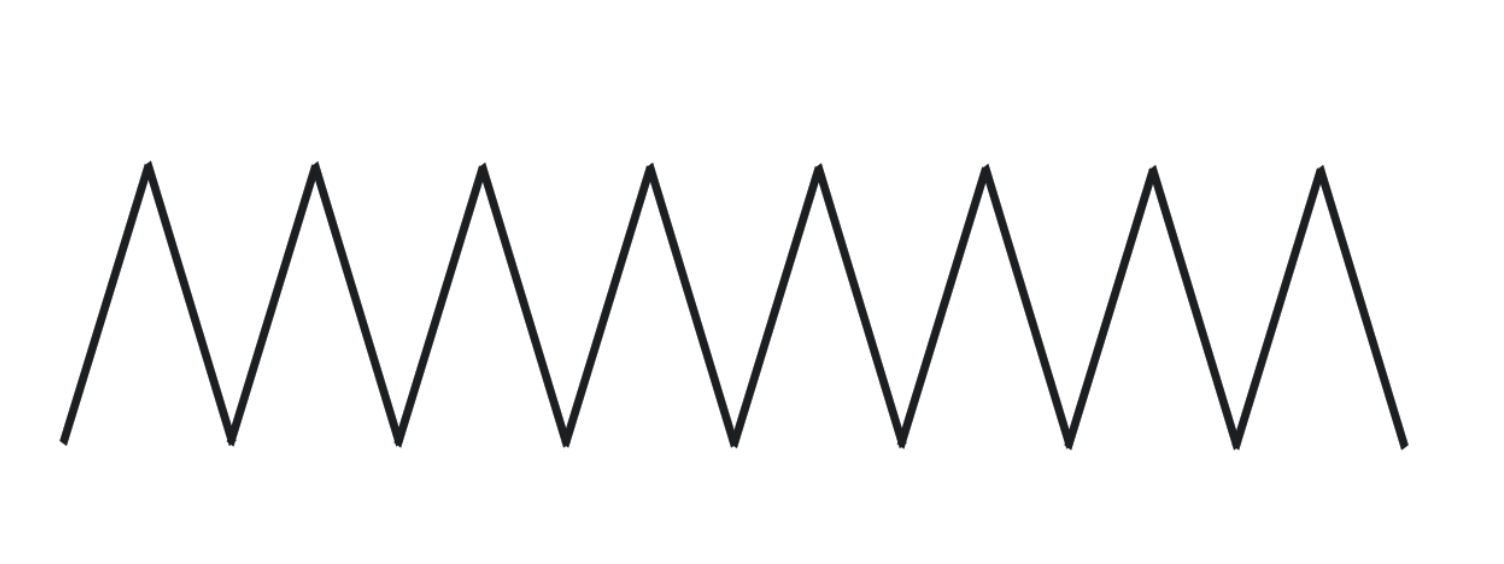
Sound lexicons: The sound lexicon that this wristrument produces is mainly beat. This is created from the wooden beads that hit against the 3d module as the wrist flexes. It is an alternating sound because there are two beads on each side of the module.
4. Isometric drawings
5. Reflections
EMMA
I think we did a good job of resembling the sound we chose with our product, both the wristrument and kneetrument. I went through a lot of challenges with my partner in the beginning from how to link the sound to create a origami. I think the most important part of this project is to find out how a folding could possibly adhere to the range of motion of the body parts. This is the first time to try creating a product that can make sound when using, interesting experience. The main takeaway is to cooperate with a partner to create a collaborative product.
DAENIA
This assignment was tedious and I struggled a lot at the start but I started to enjoy myself once my partner and I finalised on the module. It was also very enriching, analysing body parts and really breaking down their movements to the angle in order to find which material and shape would fit the body part best. I also learnt that tried and testing also makes me understand the topics better. It was also fun learning how to digitally produce origami drawings in photoshop.
FINAL VIDEO!
*click on the vimeo video to hear a clearer representation of the wristrument as the beads knock against the module
How does your hacked object behaves in a way you least expect it to?
What are some reactions you observed from your participants when they interacted with the object?
What are the challenges involved and how did you overcome them? What problems still exist? How might you overcome them eventually?
EMMA
Expectation
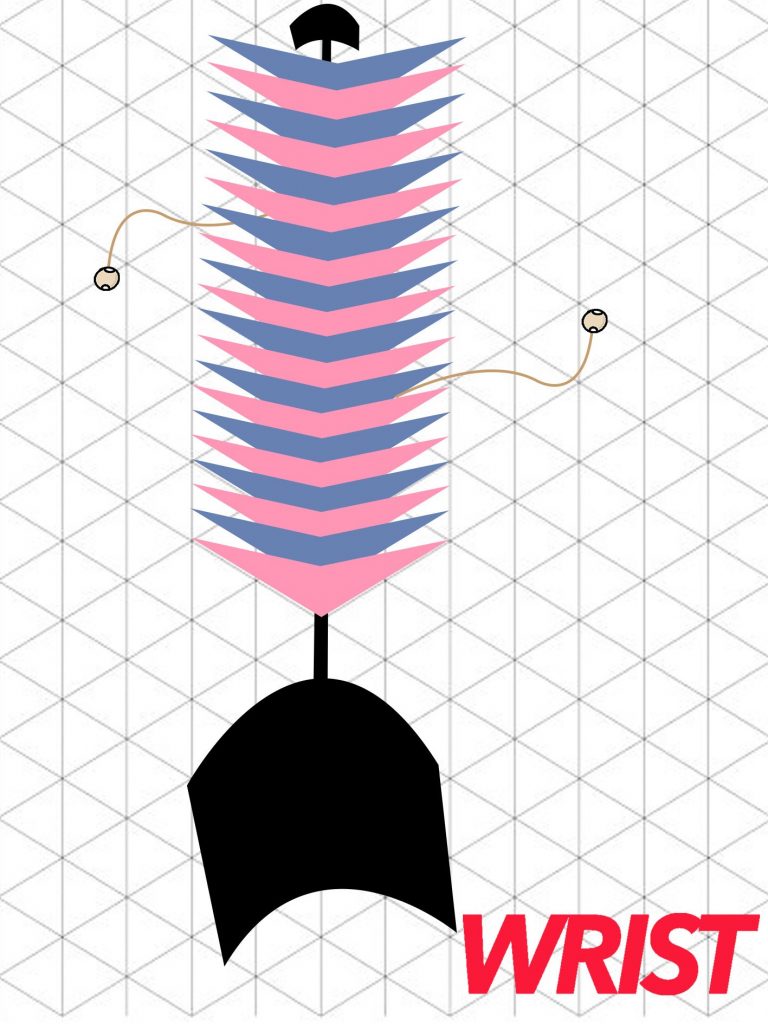
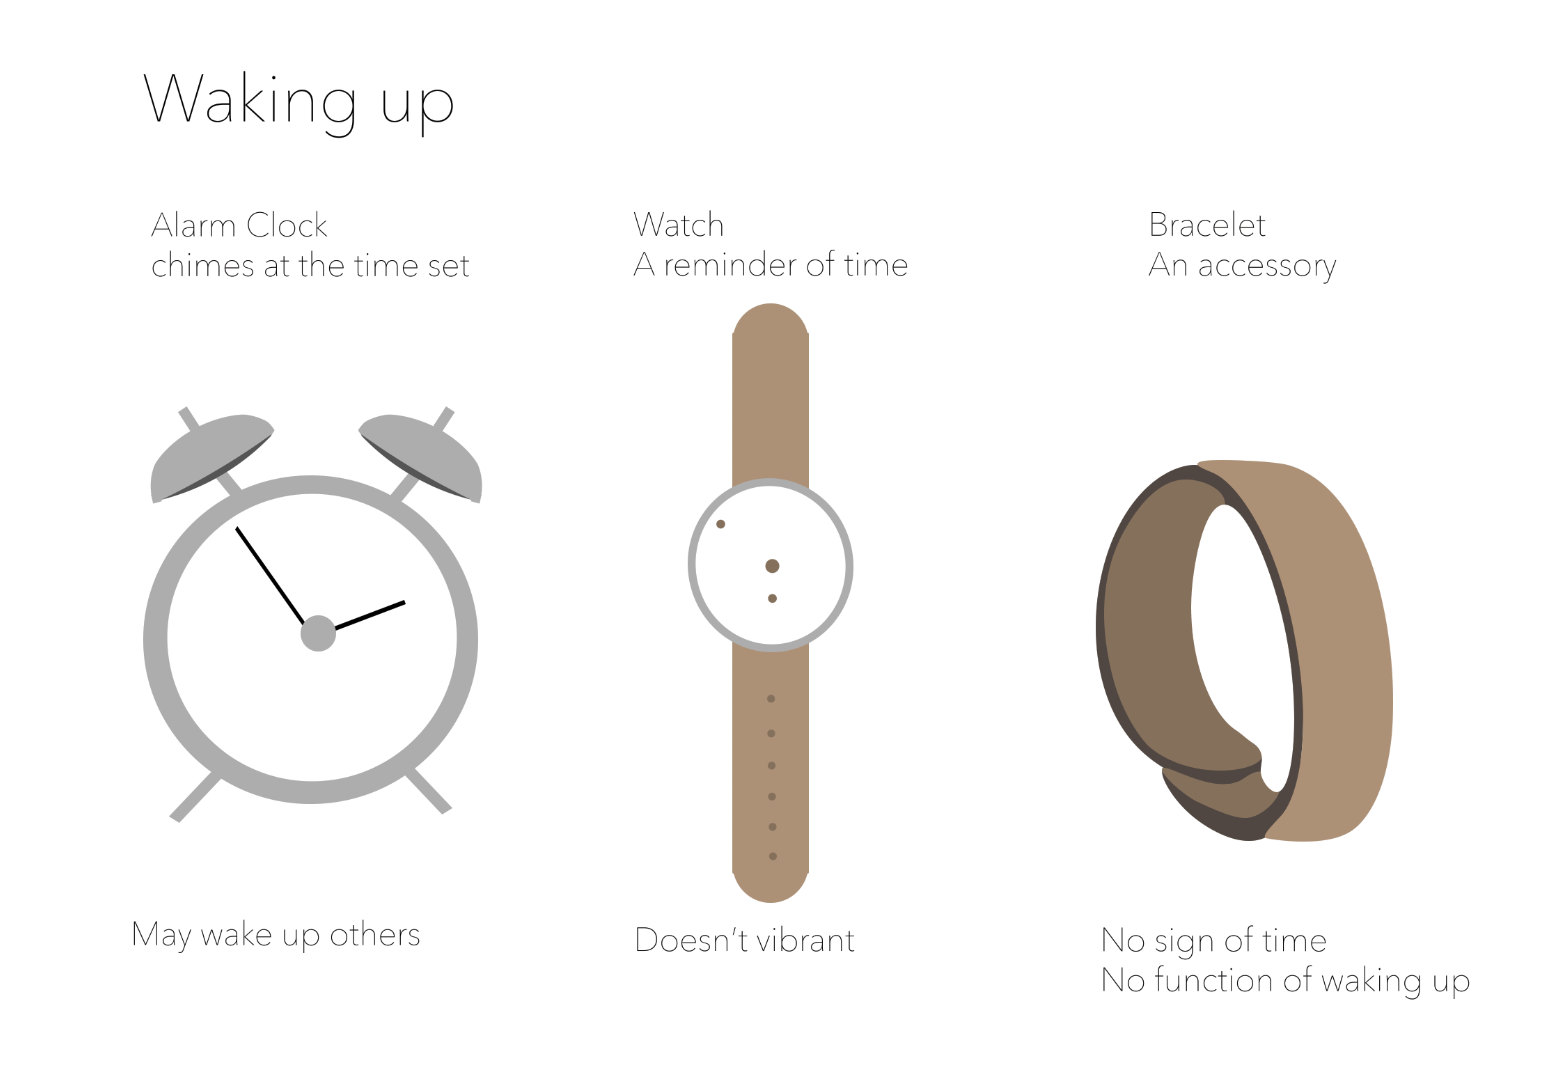
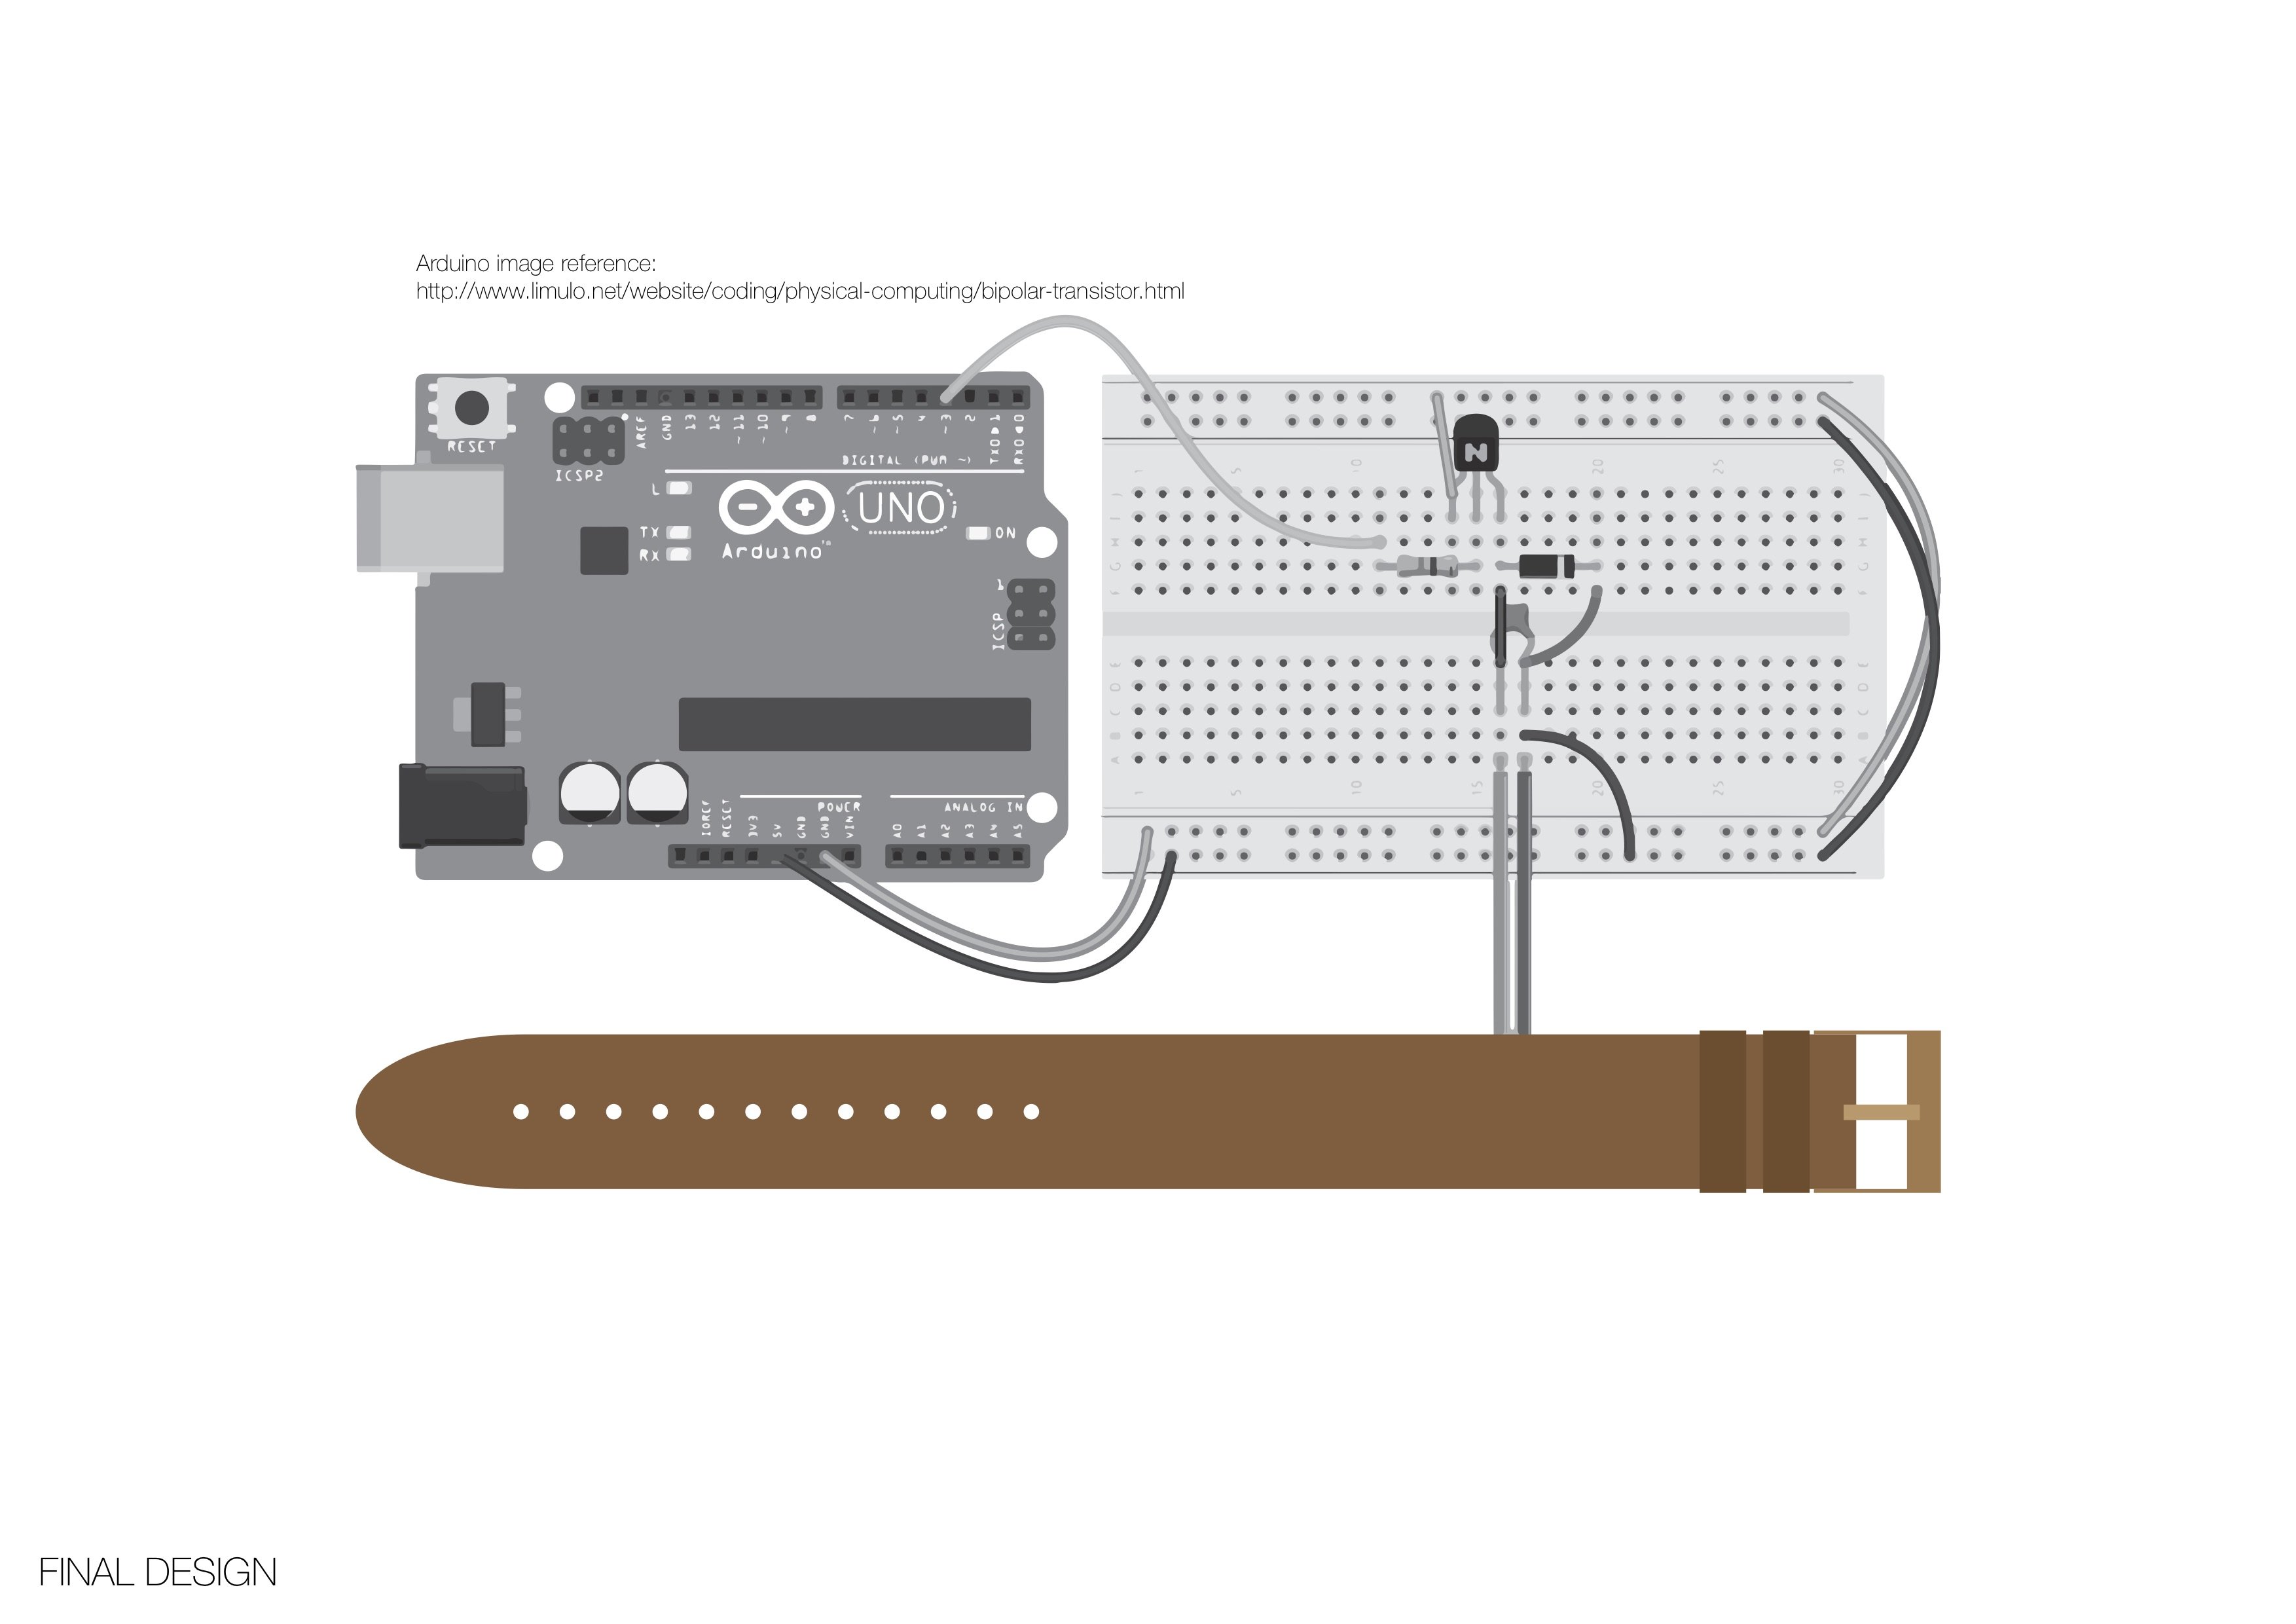
Our hacked object, the “vibrating bracelet” works exactly like I expect it to behave, vibrates after a certain period of time. At first, my partner Hamimah and I were thinking whether we should add a time display, just like this. After discussing, we decided not to because it would distract the audiences. If we had added the time display, our product would look like a normal watch, with a vibrating function. Therefore, we sticked on the idea of just having a vibration motor.
During class, my classmates had further expanded the discussion: to have a watch surface or not. Somebody said yes, so they can know the time. I personally think that not having the watch surface makes the product works better. I will go back to nap for a while if I know the timing. The strong vibrating is enough to “shake” me up.
Reactions
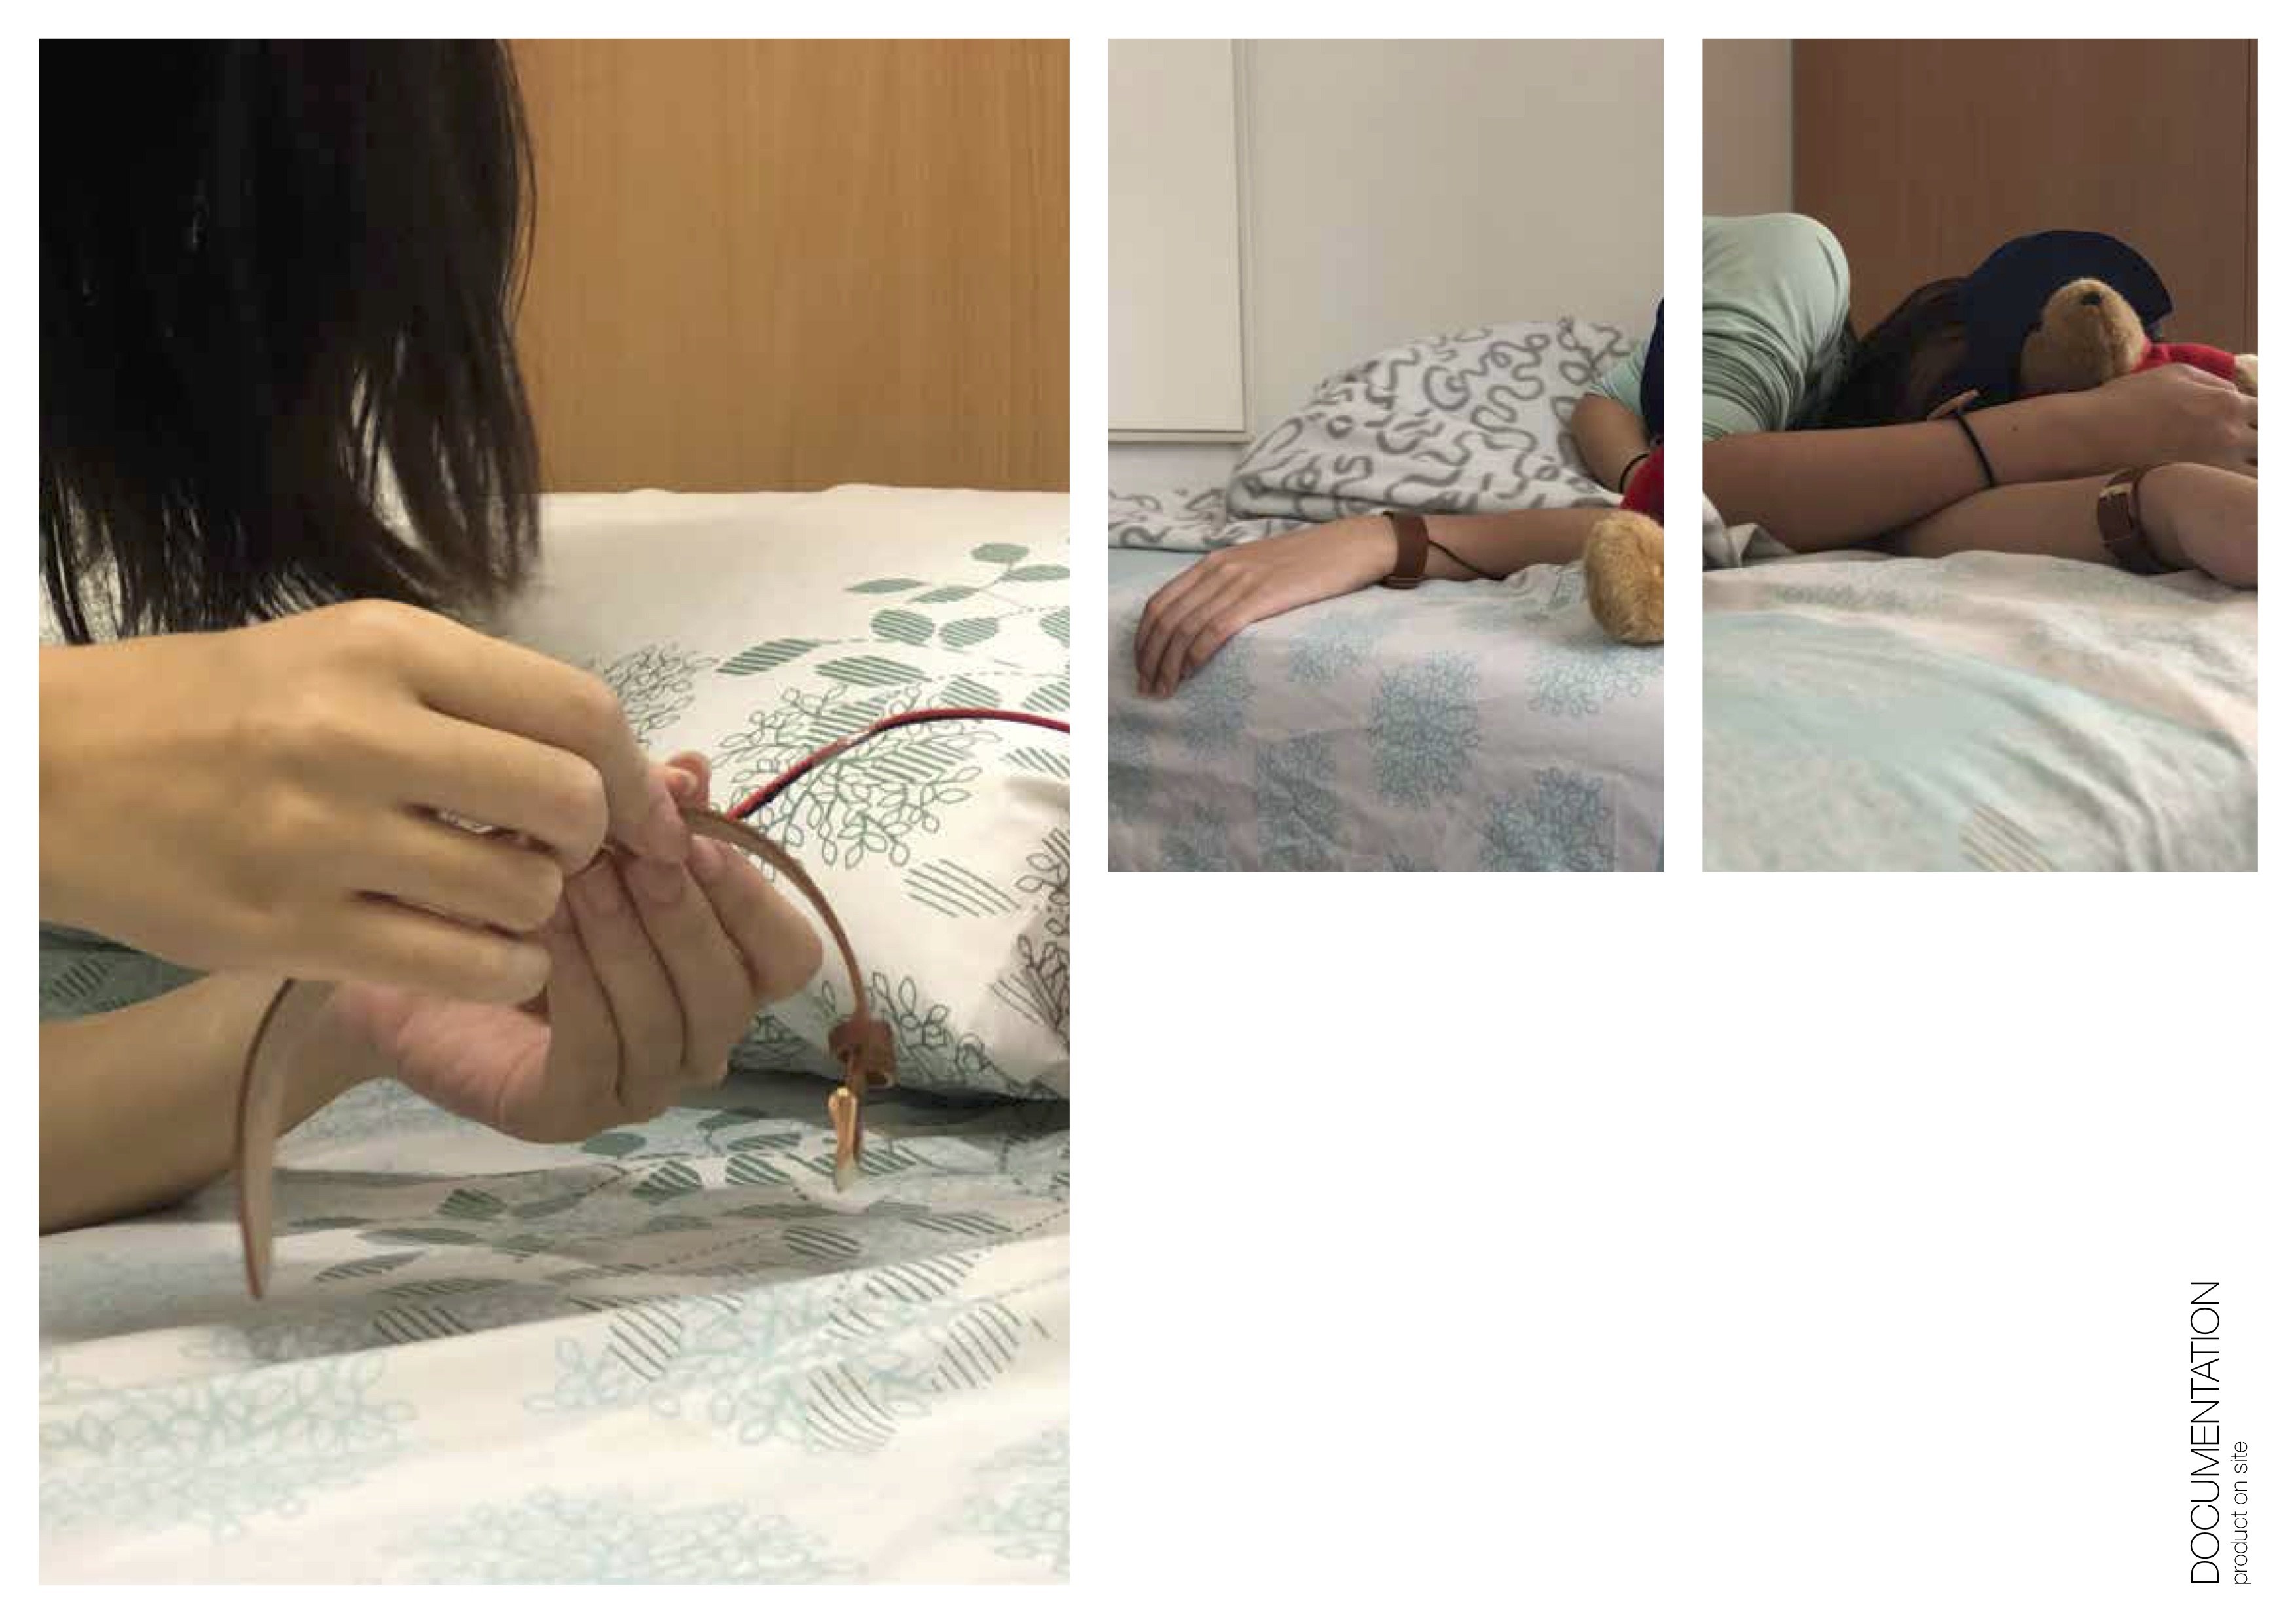
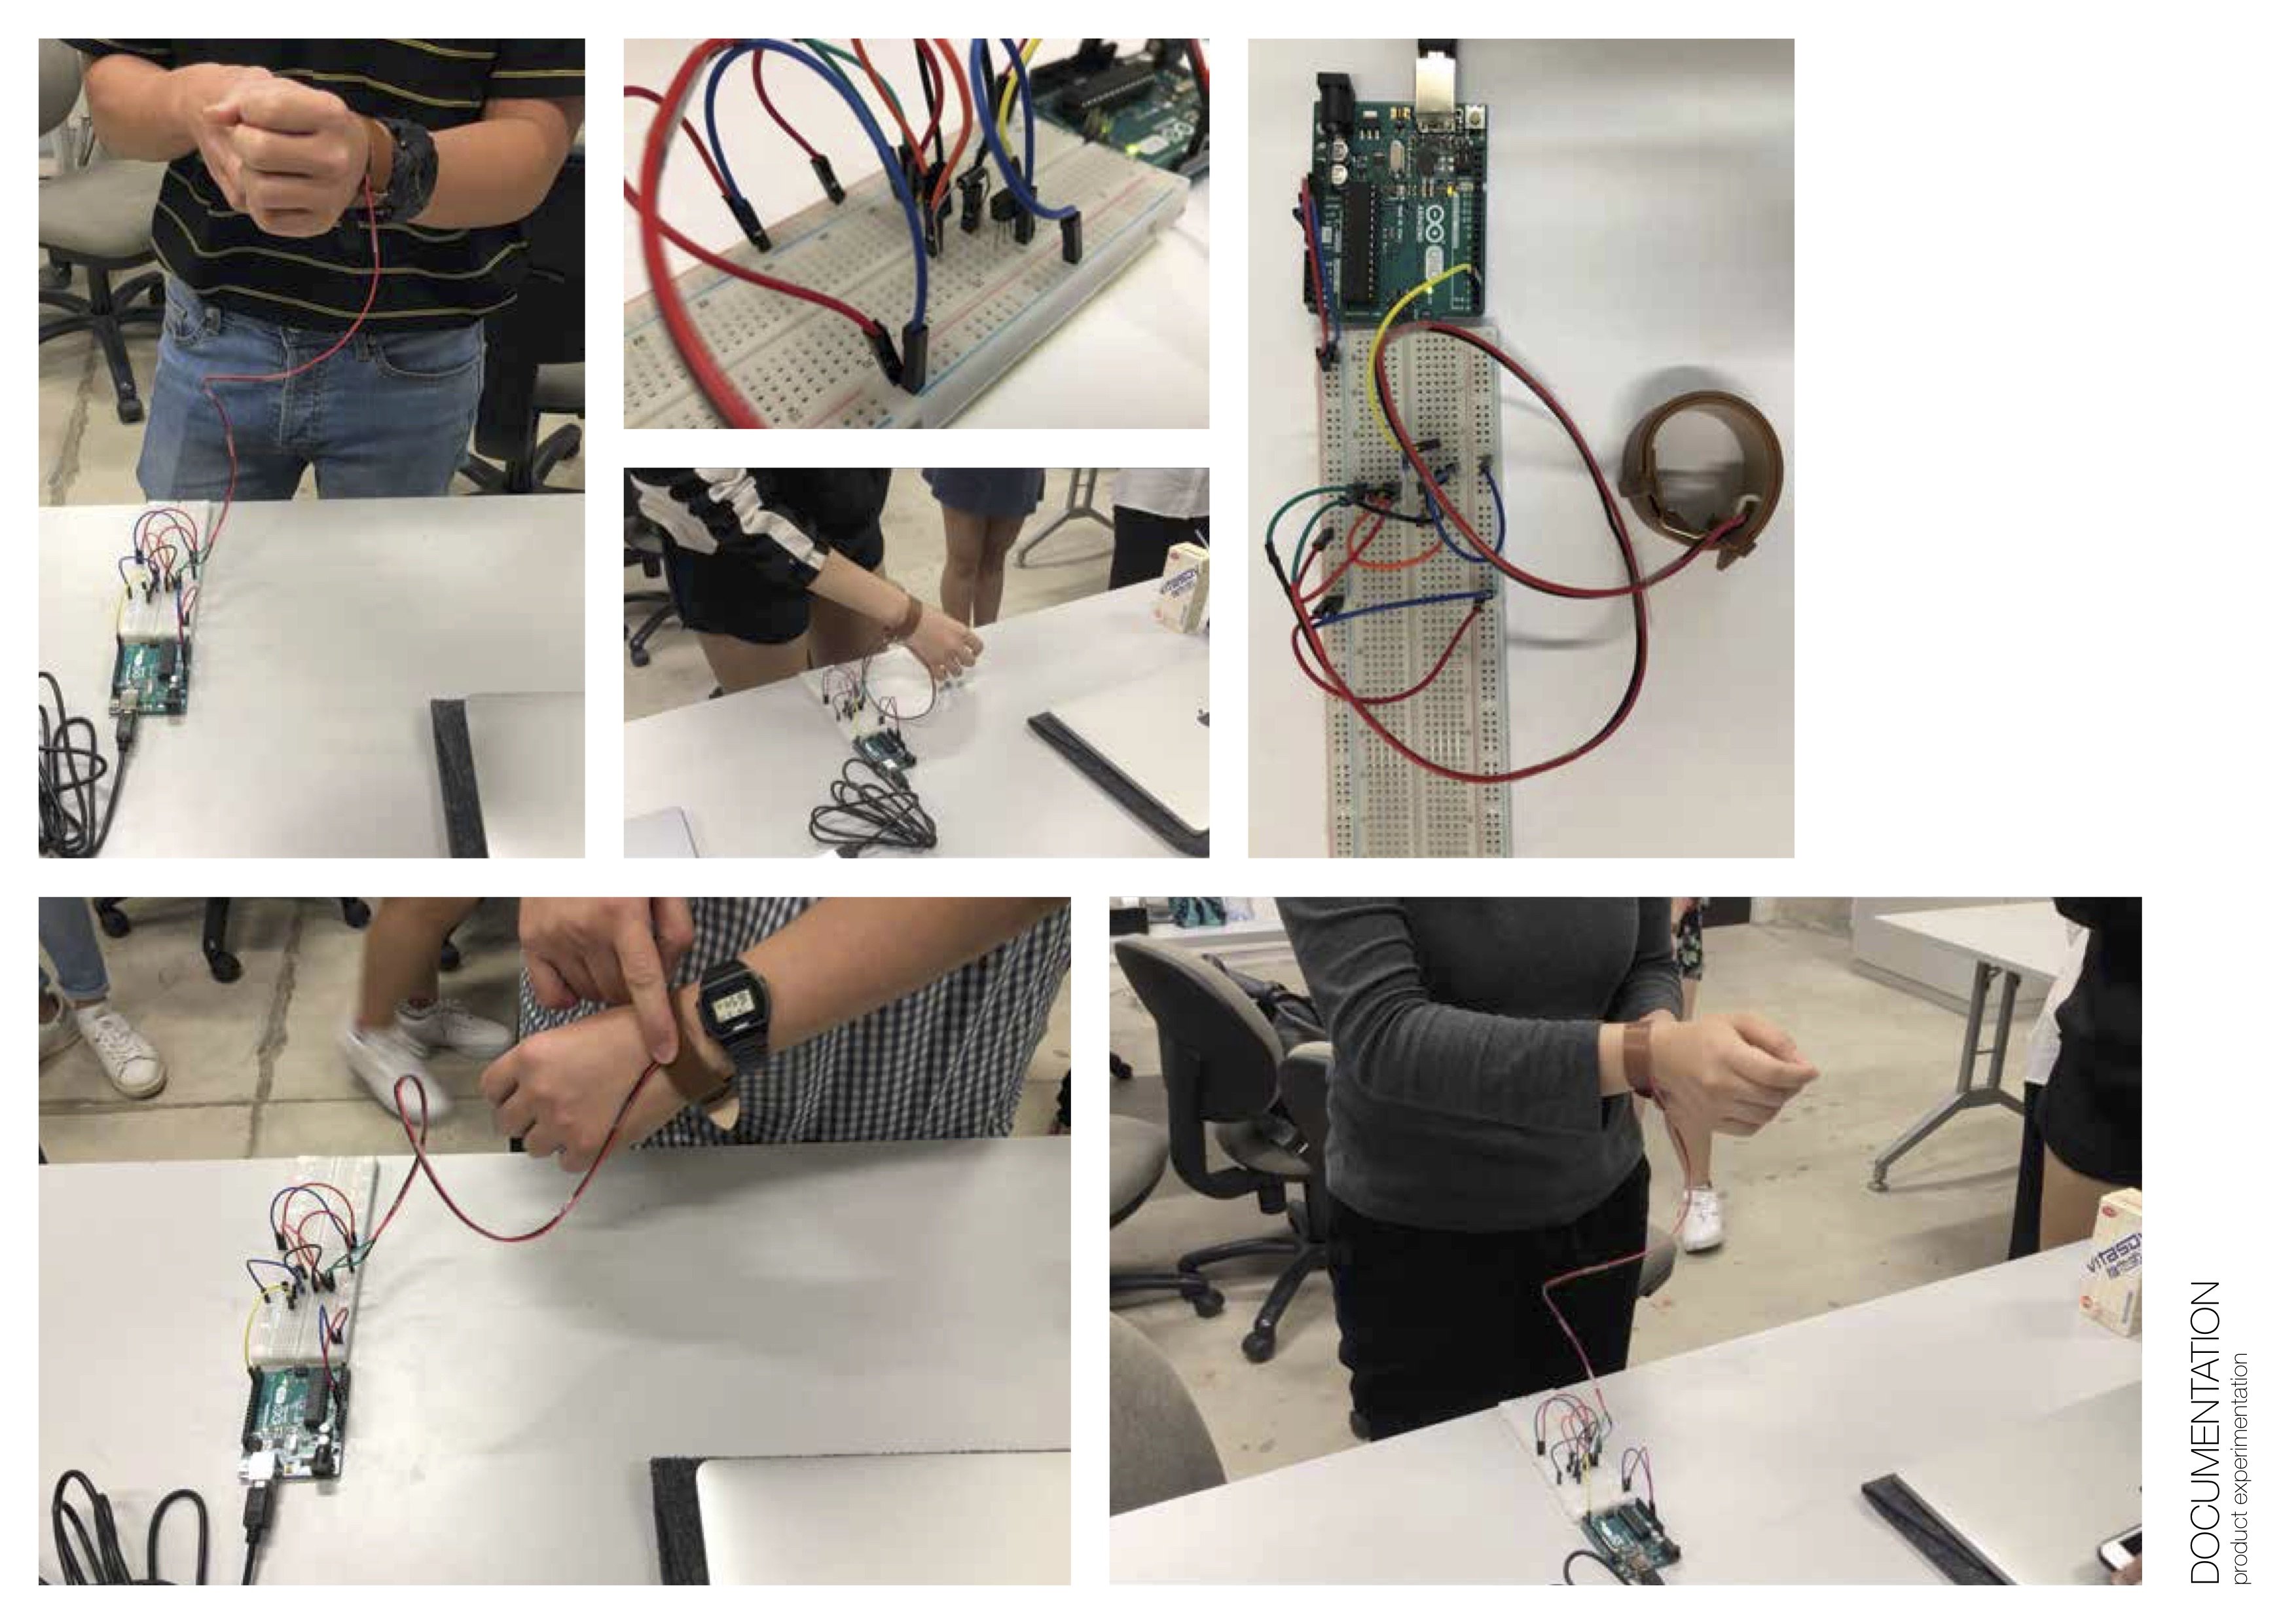
Our 1st participant was confused about how to interact with our object. She tried on and noticed the object is vibrating. The 2nd and 3d participants observed the 1st participant and got the idea of the function of our object(vibrates then stops, vibrates and stops). Overall, participants didn’t get the meaning of our object after experiencing. Nevertheless, after explaining and presenting our object, people gave positive feedbacks saying that it really works as a “Shaking Up” object. People became even more interested in our object when they were told the strength of vibration can be adjusted.
Challenges
When we first came out with this idea, we were very lost as we haven’t learnt how to use a motor. We struggled a lot of from what electronics and electrical needed to how to type for the coding nor how to setup the arduino with the motherboard. Choosing Material for attaching the vibrating motor: a bracelet, an elastic band, etc. We chose a watch strap as it is lightweight and comfortable to wear on, perfect for wearing when sleeping. We thought of placing the vibrating motor on top of the bracelet but instead we placed it at the back so the vibration to user was stronger.
The questions for consulting:
How to connect the timer with the vibration motor?
What is const int motorPin? motorPin=3? (we are confuse)
What does it mean for the speed of motor to be 0 to 255?
How do we control the strength of the vibration?
The problems were mostly solved during the consultation. I am pleasant to have a slot for consulting our lecturer. The ‘sewing department’ helped us to lengthen the wire of the vibrating motor and Lei helped us to find a sample together showing how to place the electronics. We learnt that a 1 Ωresistor isn’t same as the 5 Ω one and how to control the strength of the vibrating motor (value 0-255, the larger the value, the higher of strength). Also, learning that Arduino Pin3 is used for motors.
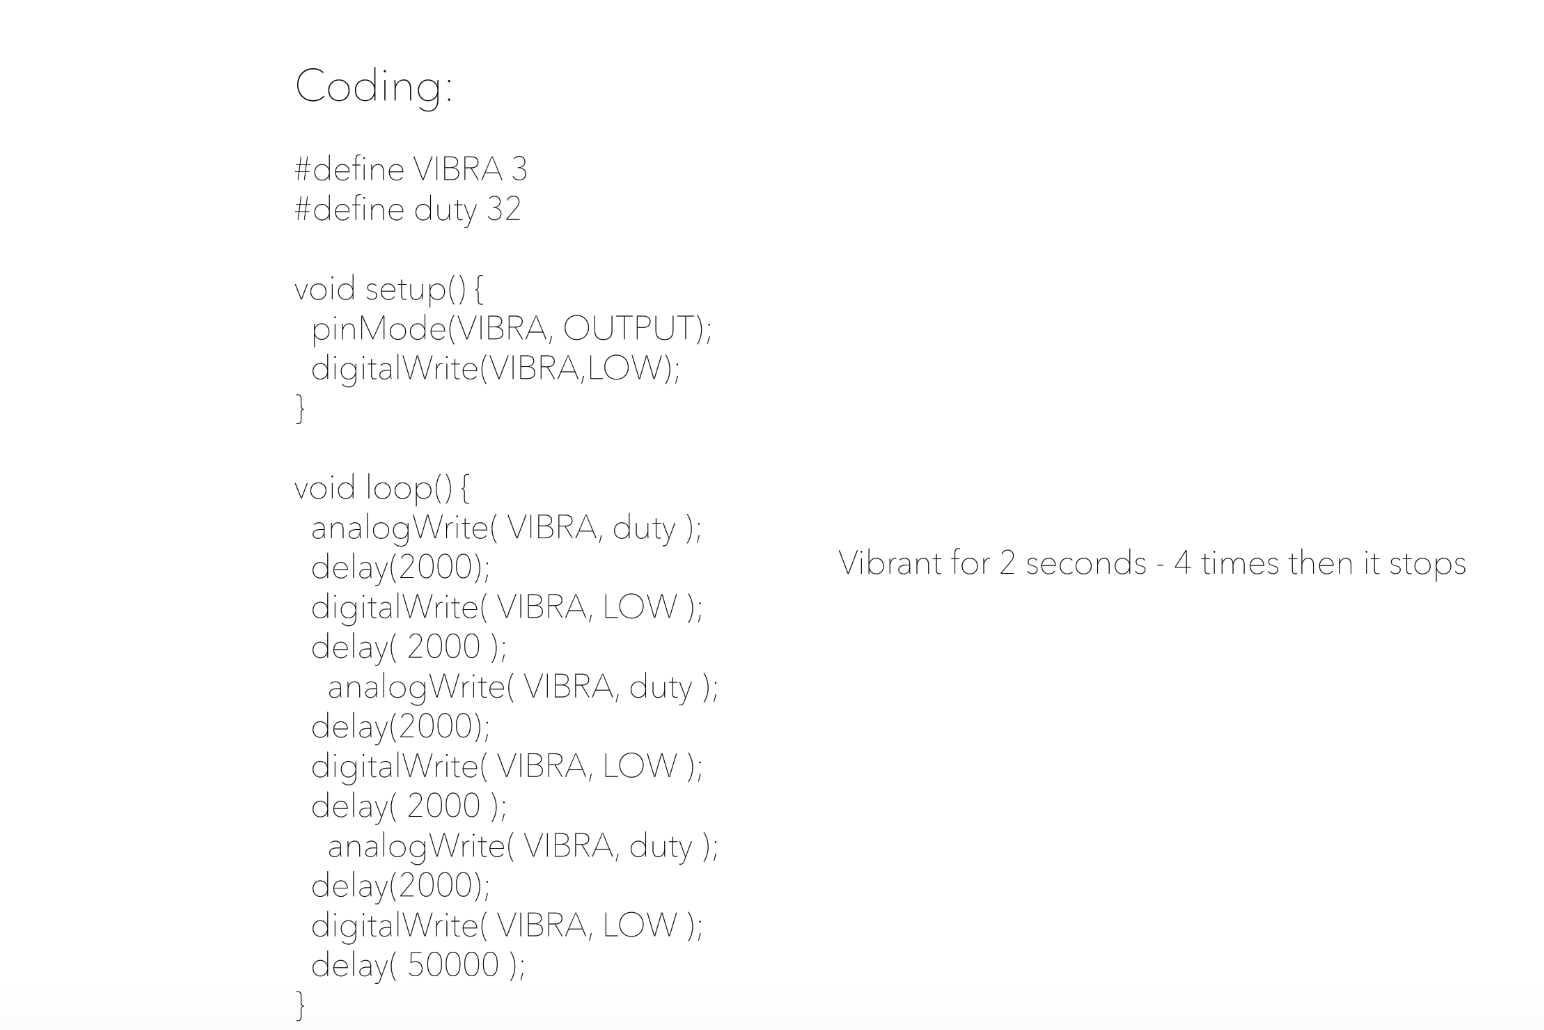
1 hour before the Trying On lesson begins, we still couldn’t solve the coding problem. We wanted it to vibrate for a few times then stops, just like how an alarm clock functions. We thought of doing a countdown code but it was too hard for us to construct a workable coding. We ended up using the original researched coding sample.(changing the delay time) We copied and placed some codes but there were errors of the codes. Finally, we solved it by double-checking the connection to the right port and decreasing the times that we wanted it to vibrates(from 5 times to 3 times).
Reflection
The experiencing could be bettered by including a sensor or more output devices, for example, a LED light, pressure sensor, a buzzor. They can create a more ‘interactive’ experience to the participants. I will say we both learn a lot from this Micro-project, about collaborating with a partner, constructing a interactive product, knowing the materials and electronics needed for creating an Arduino working object. I hope one day I can actually write and put the electronics in the right place without coping codes and following the sample.
HAMI
Both of us understood the brief differently and because of that there wasn’t any unexpected behaviour. The whole layout was set to achieve the expected results. Since our final outcome was a little different from the rest, our first participant was extremely clueless on how to interact with our object. She keep on asking questions on how to approach the object which ended up with one of us have to step in to help her. The other two participants was quite alright since they have the basic knowledge from the first participant. The overall feedbacks we get was that everyone was at loss with our object. However, after our explanation, everyone seems to be aware of what we are trying to approach. There was also a moment of chaos when they learn that they are able to control the strength of the vibration. Overall, the reaction we get was that a few of the class thinks this vibrating bracelet was a cool idea however, there was a handful who thought that this was a useless idea which is quite sad. The whole process was a challenge me and Emma since both of us was completely loss throughout the whole making process. We were lucky that we get a slot for the consultation. The consultation helps a lot. Like seriously a lot. The challenges we faces is 1. Controlling the strength of the vibrating motor . 2. The parts we need for the vibrating motor to work . 3. Getting the right coding for the alarm. The first and second challenges we overcome with Lei helps. The discovery of controlling the strength of the vibrating motor helps most the confusion. But sadly, we still haven’t solve the alarm coding. Our lack of understanding with the code ( with / for ) make it impossible for the alarm to work. We decided to play around with the timer coding (it is the easier way to deal with time) by creating longer delay. The existing problem is perhaps that we are making an alarm object without using the alarm coding. I guess the only way to overcome this situation is when we learn how to make interactions with time.
Comparing Micro Project 4 with 1, 2 and 3, Micro Project 4 is way beyond difficult but I think mostly it’s our fault that we were quite ambitious to try something that wasn’t taught before. Perhaps we should try dealing with LED light and sound sensor. Vibrating sensor was quite a challenge to deal with firstly the different parts that we never heard off before and secondly it deals with time. We learn a lot of things in this project but the main takeaway is that interactions that deals with time is … let’s just say difficult is an understatement. Till today we are still confuse about the whole coding.
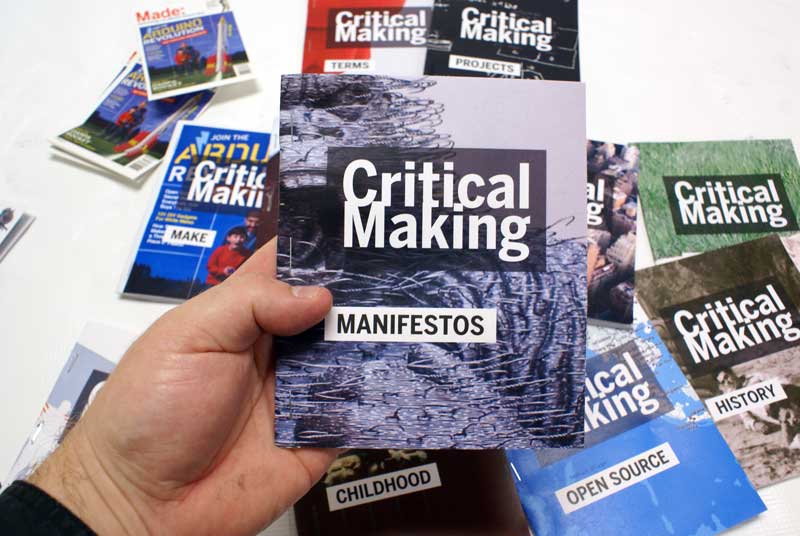
Critical making is a term came up in 2008 by Matt Ratto, a university Associate Professor, and can be defined as a combination of ‘critical thinking’ and ‘making’. It describes processes of material and conceptual exploration, specifically the use of hand-on practices to link technologies to the society, to stimulate critical social reflection. Ratto hoped this term can create incentive to professionals primarily working with language (E.g. fields of communication and science) to work with hands-on activity with “conceptual and linguistic -oriented thinking”.
In short, critical making is to create prototype and explore them using technologies and push users to question and discuss about social norms. Also, according to Ratto, “Critical making emphasizes the shared acts of making rather than the evocative object. The final prototypes are not intended to be displayed and to speak for themselves”. It is the process of constructive and exploring that matters.
Standard methods of technological design mainly produce products based on needs and function. However, there is a lack of emotional, cultural and social value(human-oriented values). It over-emphasizes consumer-oriented values such as production efficiency and the result. This leads to ignorance of connecting consumers to personal emotional level during the production process. Critical making lets designers to rethink about the designing principle and explore a “broader spectrum of human experience”, creating more remarkable products. It reminds people to stand in a different perspective and to care more of their user experience and emotion.
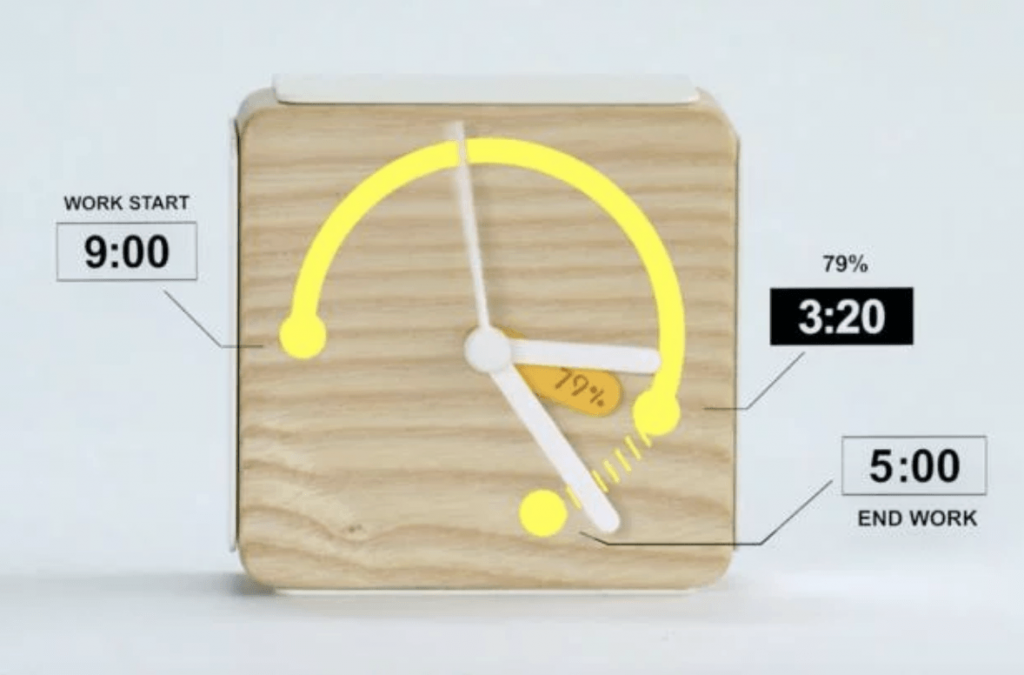
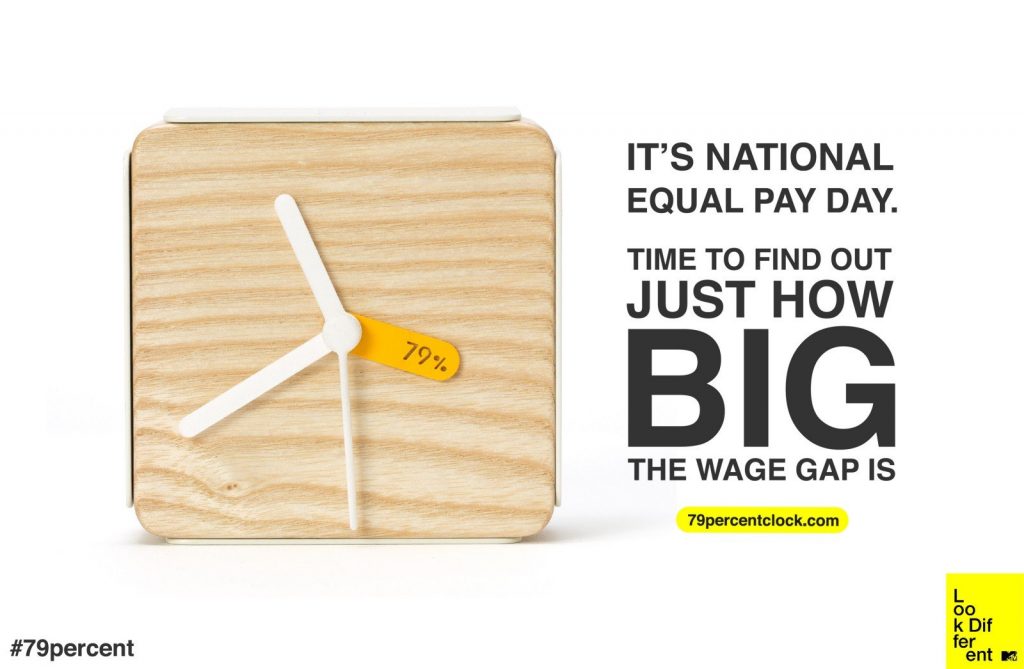
79% Work Clock
“79% Work Clock” is an example of critical making, to “open up and extend social reflection”. It is a product created by PARTY, a creative lab based in New York and Tokyo, with collaboration with MTV’s Look Different campaign.
The 79% is the annual median wage for women compared to men in American, working from 9am to 5pm everyday. The 79% Work Clock is different from the technological designed clock. This is a critical making product that protests towards the discrimination to women regarding their age, race or sexual orientation. It challenges social norms and stimulates social reflection by simply chimes once 79% of the women’s workday is over. This is to remind the colleges(especially male) the unfair situation women employees are suffering. A ordinary clock will only denote the time and chime at the time set. This is a purely functional design that cannot reach user’s personal emotional level. The PARTY website provides an online tool for woman to calculate where the 79% is and when it should chime. It is an informative than practical product that alarms the social issue: gender pay gap in the US.
All in all, I think critical making is an important concept for future designers to understand and apply. The designing principle should be ongoing improving and extending. “A good art should cause resonance with viewers, connect them to personal or emotional level.” Design should not be constraint with only fulfilling function and needs but also have to consider the user experience by linking to social and cultural context to evolve into a better design.
References:
Hertz, G. (n.d.). What is Critical Making? Retrieved February 20, 2019, from http://current.ecuad.ca/what-is-critical-making
Bendix, A. (2016, April 27). Your Newest Reminder of the Wage Gap Is an Alarm Clock. Retrieved February 20, 2019, from https://www.citylab.com/life/2016/04/wage-gap-clock/479973/
Lou, Mary, and Shovova. “12 Contemporary Artists Tell Us What It Takes to Make a Great Piece of Art.” My Modern Met. May 12, 2017. Accessed February 19, 2019. https://mymodernmet.com/what-is-great-art/.