Had my first mono printing lesson and it was extremely fun!
We started our day with Miss Joy by dividing our class into 2.
Our group taped pieces of A2 paper together and brought it downstairs to do a giant mind-mapping session to share our research regarding mark making.
Afterwards, we went to the print lab where Miss Joy showed us how to do mono printing by using mono printing ink, lino-cut, rollers, our mark making choice of items and paper.
 Image 1: Spreading the mono-printing ink onto the lino-cut with the roller.
Mark making tools I have brought were: Twigs, leaves, Q-tips, toothpicks, plastic string, bubble wrap, cling wrap and aluminum foil.
 Image 2: Placing my mark making objects onto the wet lino-cut from Image 1.
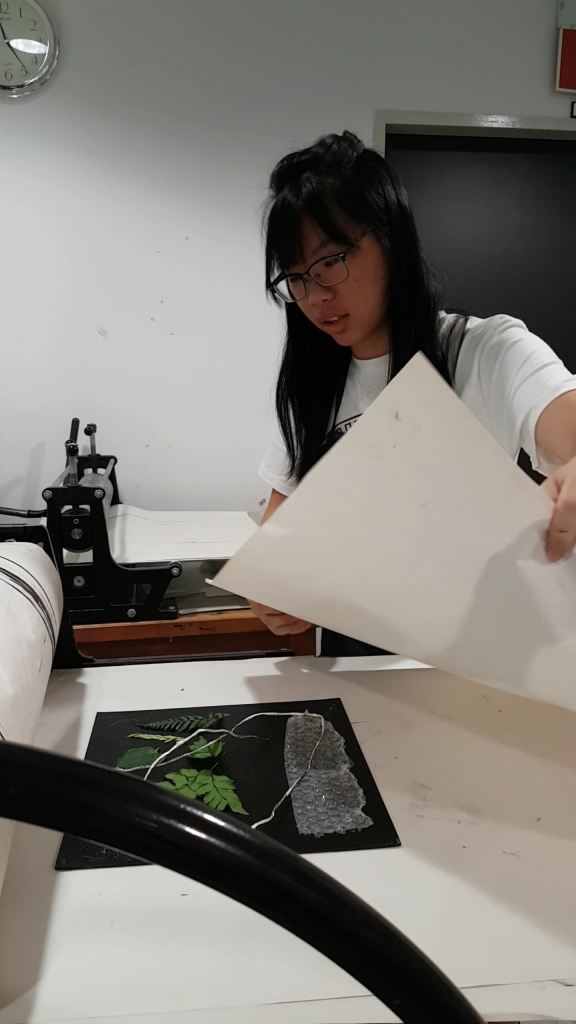 Image 3: Placing a piece of A2 newsprint paper on the lino-cut from Image 2.
 Image 4: Covering my newsprint paper with a stack of A2 newsprint, which acts as a ‘Blanket’ to protect the roller machine from getting stained.
 Image 5: Begin turning the wheel which moves the platform below it, rolling the A2 newsprint over the lino-cut.
Image 6: Return the wheel to its original starting point and peel off your A2 Newsprint to reveal the mono-print you’ve just created! 😀
 Image 7: After gently removing the mark making tools, place another clean A2 Newsprint on top of the lino-cut and repeat the step in Image 6 to achieve a detailed print of the mark making tools!
The rolling machine was very fascinating! And I liked the result where the mark making tools were removed better as more intricate details are printed onto the paper.
I have learnt that an even pressure applied to my paper creates an even and linear ink spreading appearance, as compared to manually using a clean roller to spread the ink on my own table; whereby the direction and uneven pressure I apply can produce unintentional lines that somehow also make the final product pleasant.
Issues faced during session:
I find it frustrating that I couldn’t focus on conveying my emotions into my mark making techniques.
For instance, I would like to express the emotion: Happiness. But I was really concerned about the patterns I have created. “Is it too spiral-ish? Why do I keep repeating the same pattern? It is not symmetrical enough!” Visual aesthetic concerns like this hinder my sincere thought expressions and I think it is something I should work on to resolve.
My possible solutions to my problems:
- Do mark making in a way that I would not be able to see the final product as soon as I begin, as I would worry how it looks before I even end. So I would suggest closing my eyes as I proceed, only revealing the final product to myself when I am done.
- Crop out the portion of my end product that depicts the emotions I want to convey.
I will try out these solutions and see how it works for me! 🙂 Stay tuned for my progress!
Photos are taken by my buddy, Queenie.
Thanks Queenie! 🙂