FYP General Direction 2: Target Segmentation + Initial Approaches.

After the previous post here and presented it in the class, Kristy asked me about what group of people I would like to target for the direction of the FYP. I had not really thought about that before it, but after a week of researches and further thinking about the constraints which I will probably face while doing the FYP, I came up with a few criteria for choosing my target user so as to segment the broad differences of people around the world.

Geographic:

Firstly, people from the developed country. Because I am currently living in Singapore which is relatively advanced, my cultural upbringing, my daily life consist mostly of what a citizen from a developed country would experience, since I do not have sufficient understanding of what I am not used to and could potentially do more harm than good in a developed country, by targeting a people from the first world meant that I could get the researches done and the feedback  I need readily.

Next, out of the developed country, my interest lies in Asia country, more specifically, Japan, South Korea, urban China, Taiwan and Singapore. As I am more inclined towards the cultural aspect of these countries, moreover, these countries are relatively cheaper if I am to go there do my researches(there’s a possibility that I might do so.)

Socio-demographic:

For the FYP, I would like to produce something which could help the life of a students, this is because students are relatively similar throughout the countries which I am interested in. Also I would like to do something that could help the student of age 21 to 28, primarily because most of my friend falls within this category, this is also the age group who started to be legally labeled as adult, although none of the student would seem themselves as one (including me).

Personality:

Mainly someone who would like new technology and with short attention span who are open to changes. This is because I would like to produce something at the end of the FYP which will be tapping into the current technological ecological system like the smart phone or computer, the short attention span of the millennials seemed like a negative aspect, but I think that there are potential to tap into these “negative” behavior and make it into the strength of my FYP, like how the fidget spinner swept the trend a year before, something that make no sense will seemed like an good product in the eyes of the beholder.

Initial Approaches :

For now, I’ve got 4 ideas that I think that it might have some potential in it.

First, it is to create something that will help students in taking notes/writing/ drawing, like a Wacom Cintiq for computer application, or specially designed for note taking like the Wacom bamboo Folio or Sony Digital Paper,  however the Sony digital paper and Cintiq were designed for professional uses and their price point is rather steep for students. The Bamboo Folio is placed in the zone for note takers and scribblers to write/draw on the paper and still have an digital copy of it at an reasonable pricing. These were wonderful technologies which helped greatly in the transition of going from the traditional paper to the digital note taking, which the millennials spent the first half of their life having notes on paper while the recent half in digital notes, while not all will prefer digital notes over physical one, it proves to be a really good tool as the cloud sharing enhanced the capabilities of these students.


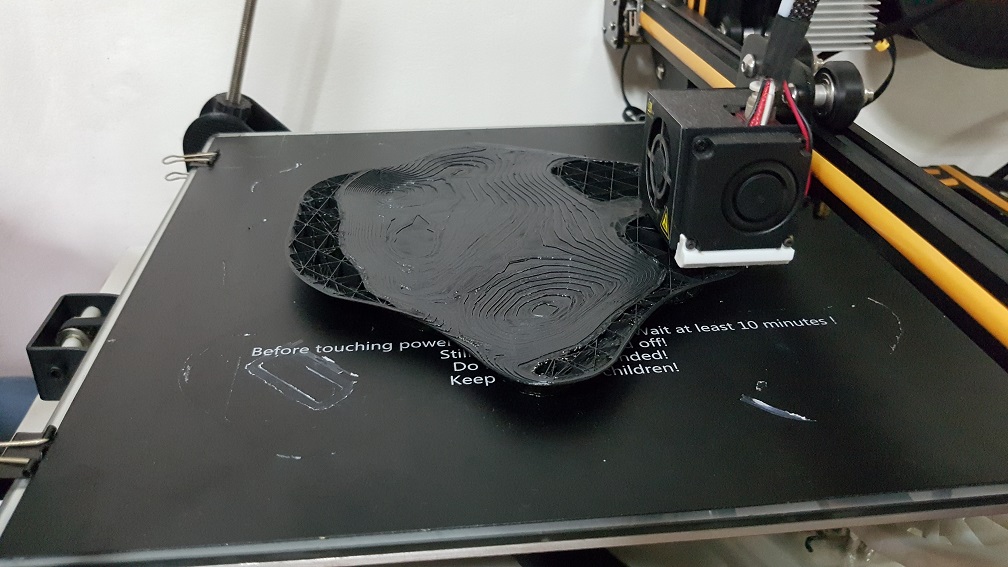
Second idea is to create something that will help to manufacture prototype at a better standing, be it cheaper or faster. As I would like to create something like a 3D printer specially for design student who need to produce physical work throughout the course of their creativity studies, although the current 3D printers in the market generally which suits the need of almost everyone who needs it, there are still room for improvements for these wonderful machines like the ability to print in different materials at a cheaper price. How about 3D foam printer? 3D Glue printer? maybe, maybe not.


My third idea was the idea that I was considering for the longest time and currently is inclined towards, a human powered electricity generating machine which not generate electricity, it would generate digital currency that represents “clean energy points” which could be used in various digital function like an in game currency or the capability to exchanged into discount coupons to be used in real life shop. While this may seemed impossible that there will be any market for this, it might actually be used in the future due to a few reasons..
1) User could use this as an emergency charger to charge their smart phone, which the battery usually last only half a day and the millennials could not live without their phones.
2) The rate of obesity is rising and partly it is due to the lack of exercise, these human powered electricity generating machine could be viewed as a workout to promote better health, at least by a tiny bit. Also, Gamer rarely exercise, so if there’s a game that encouraged them to play by exercising, there’s a possibility that they might. (like what Pokemon Go did when it was first launched, Gamers are walking more than they usually would because of the game.)
3) Incentives will be given to the users and participating shops, by generating electricity through these machines, not only the user could charge their electronics, they could save a slight amount of bills and earn discount from the shop. While participating shop would gain more customer as by having their shop appearing in the app for exchanging, it serves as an advertisement to their shop. Moreover, by participating, the shop could have the positive label of “environmentally conscious”, “taking part to increase clean energy production” which it seemed like what a medium sized cooperation would do for their branding effort.


My last idea of this post is simplest and might be applicable to everyone rather than for the targeted audiences… I would also like to create playful machines, systems, or applications that make people smile through the interaction, if I went along with this idea, I will probably create a diverse series of artifacts(digital or physical) that is funny in hope that they will bring the happy memory along with them after the FYP show.


According to Neurologist David Eagleman, there’s a scientific reason why our first(few) idea isn’t usually our best one: Our brains are lazy, and the first idea we have is usually the handiest idea, rather than the best idea. I understand this fact that the ideas that seemed appealing to me now might not be the best idea, so I am still coming up with new ideas that could contest the idea I am currently having, but for now, that is all I have.


Interactive spaces: Light and Darkness Ver.1 – Analog

after the previous process, process 3

Thanks to Tiffany and Joan for the awesome snippets that were used as the featured image as well as in the videos, and helping with lighting up all the candles + documentations.

Also Thanks to Bao, Fabian and Suhwee for helping me to place all the candles onto the candle platform.

I’ve seen the actual project with real candles in the dark room the first time as the class saw it.

Light & Darkness was created to give a sense of alternative space within an ordinary space, in this project, I wanted to create a space so that the audience will forget that they were in the IM room, the room was build with pure darkness and stability in mind as nothing should collapse as I wanted to hang the candles platform instead of building a table-like structure to give a sense that all the candles were floating in space(which is also the reason why everything, including the candles platform was black), this worked really well as the candle platform would swing gently which increased the magical feeling to my space, Also, all of this will be enhanced in the digital version as I would add a series of stars(LED, not projection) to the room’s wall to increase the feeling of enchantment. The smell of the candles, as well the burnt smell created when extinguishing the candles worked much better than I expected, as I wanted to have smell that is not too overpowering, I’ve used 239 unscented candles with 60 scented candles, this combination worked like a wonder because there is only a faint smell outside of the dark room. another point that worked better than I expected was the random placement of the scented candles created a colourful candle array when they were all lighted up and this increased the overall aesthetic of this project’s analog version greatly.

After this analog version, I’ve noticed a few points to take note of, it is actually quite hard to light up all the candles so more lighters will be needed and the current lighter that I was using appears to be rather difficult to be used, so I’ll probably buy some more lighter which is much easier to be operated and uses lesser strength. Also, I would have to paint the metal wires that was used to hang the candles platform into matt black as the metallic would reduce the magical floating aspect of this project.


Interactive spaces: Light and Darkness Process 2

carry on from the last post, Process 1

I started building my dark room in the corner of IM room.

After the structure is stable, I continued to attempt to secure the walls of the room onto the structure.

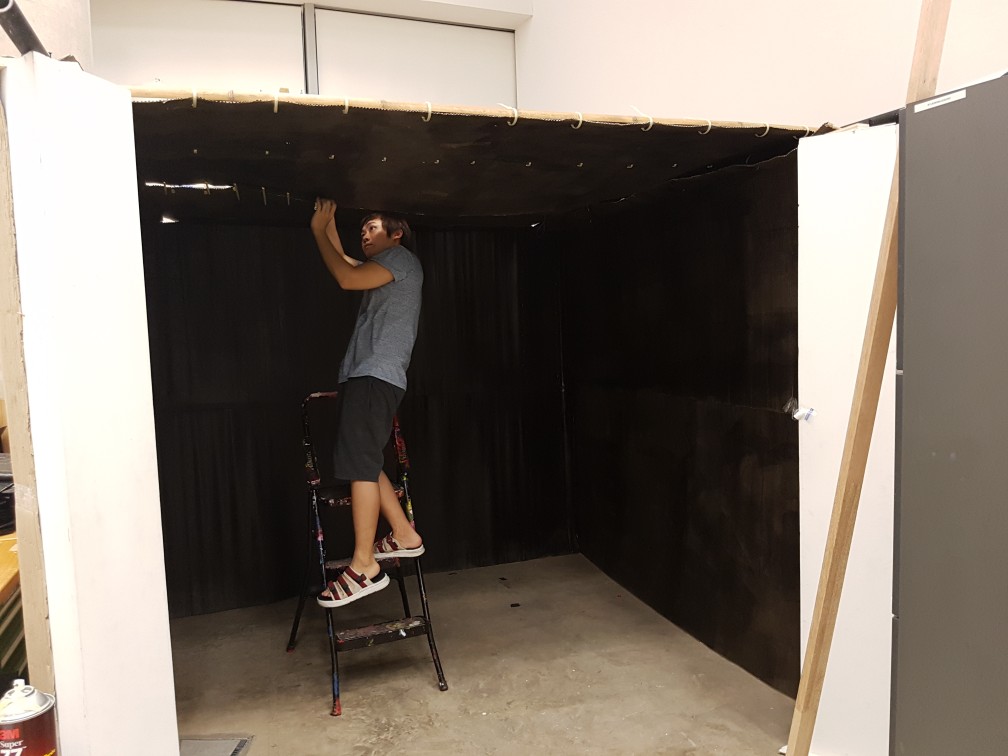
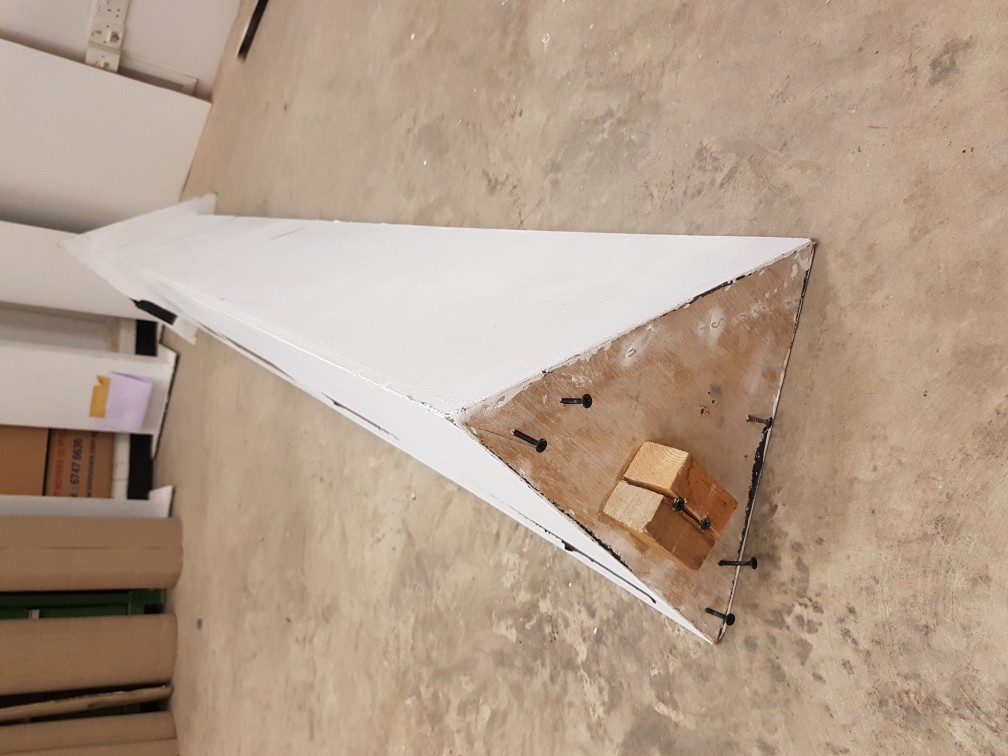
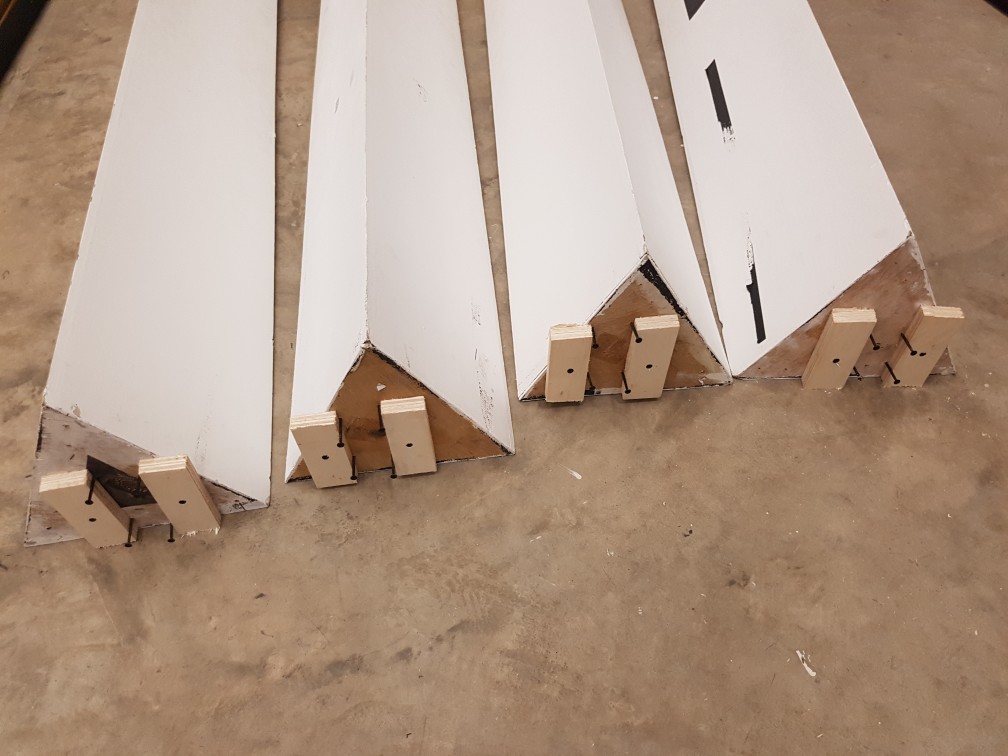
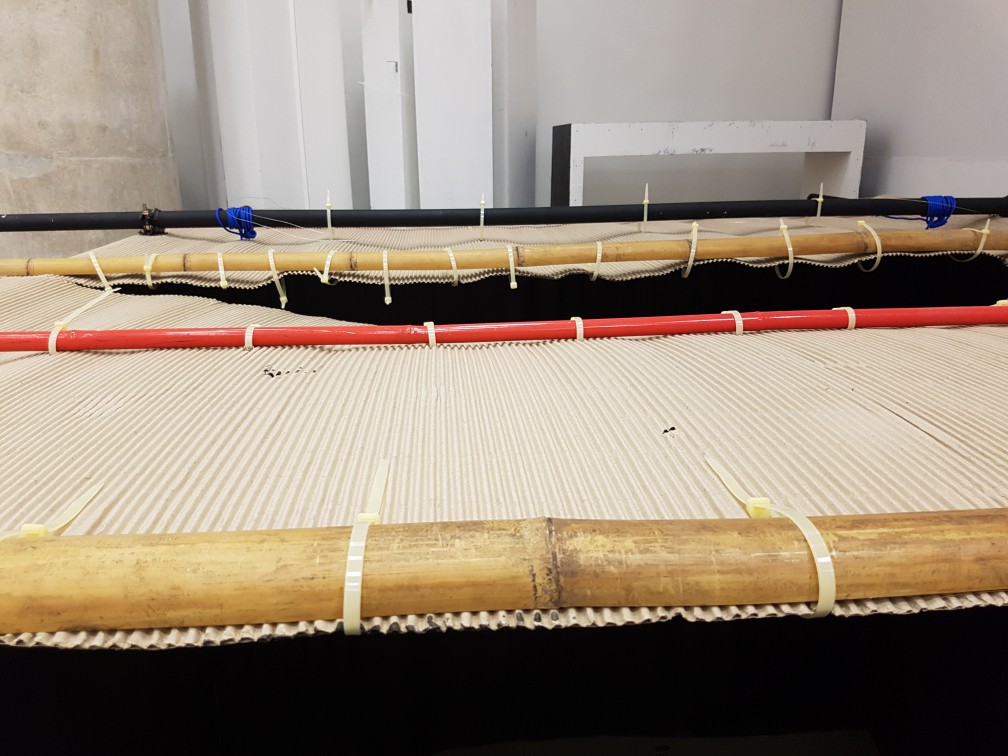
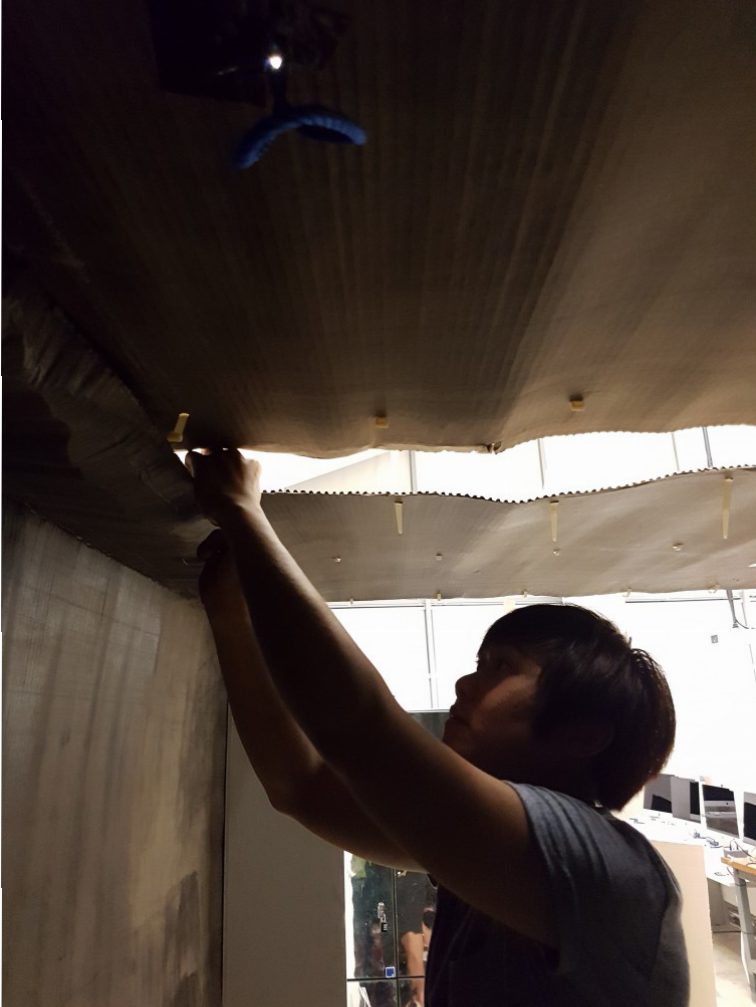
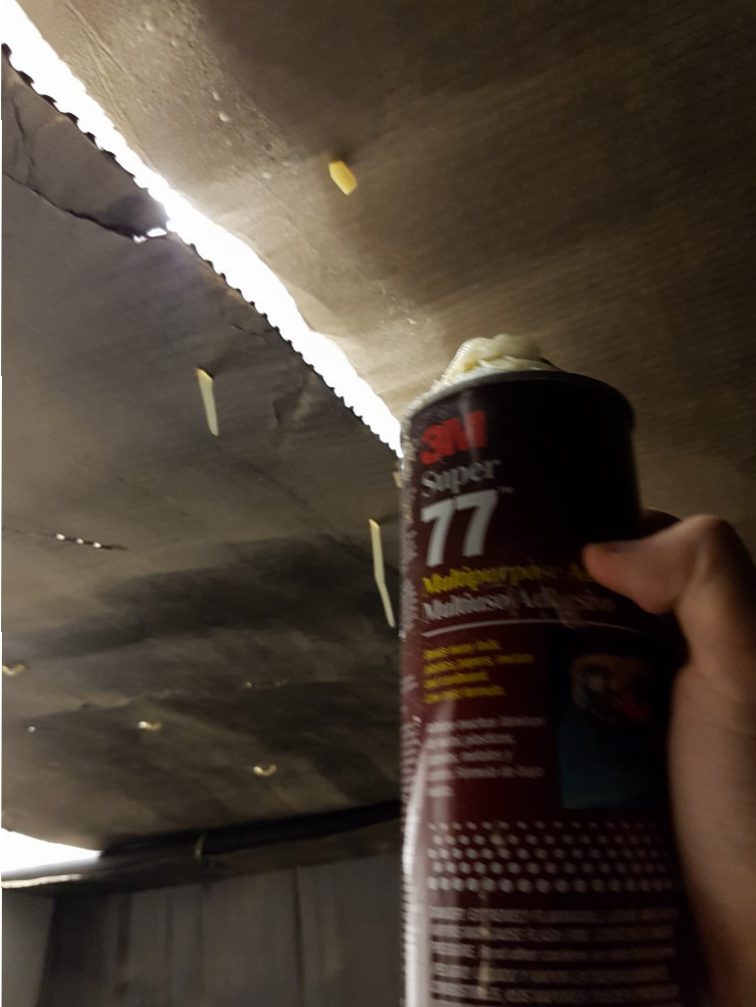
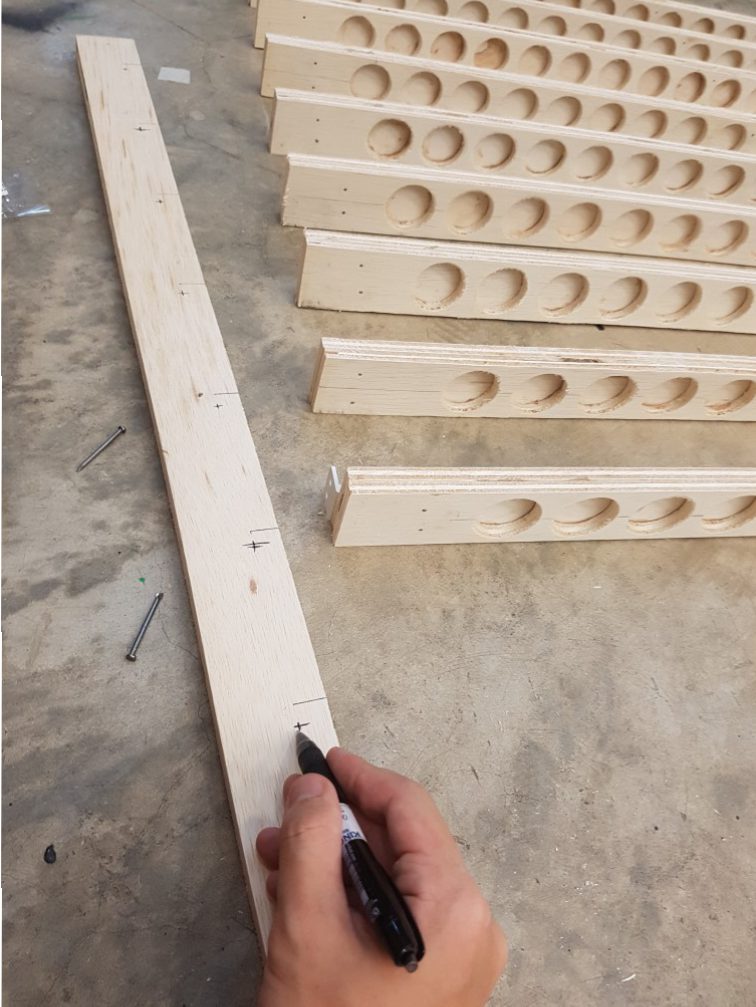
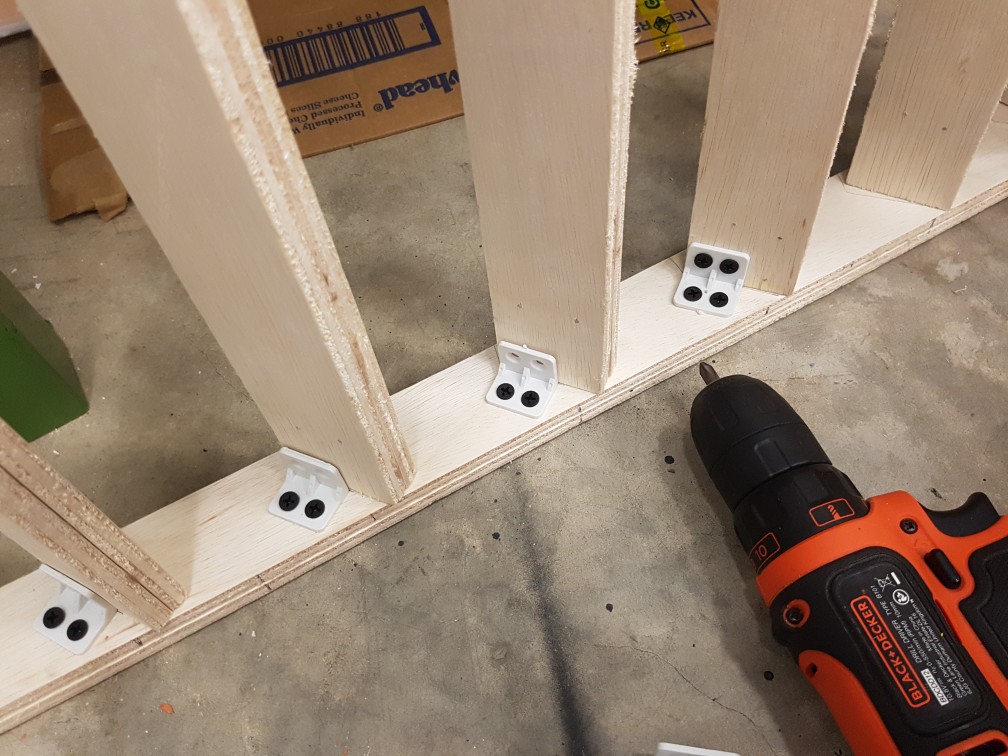
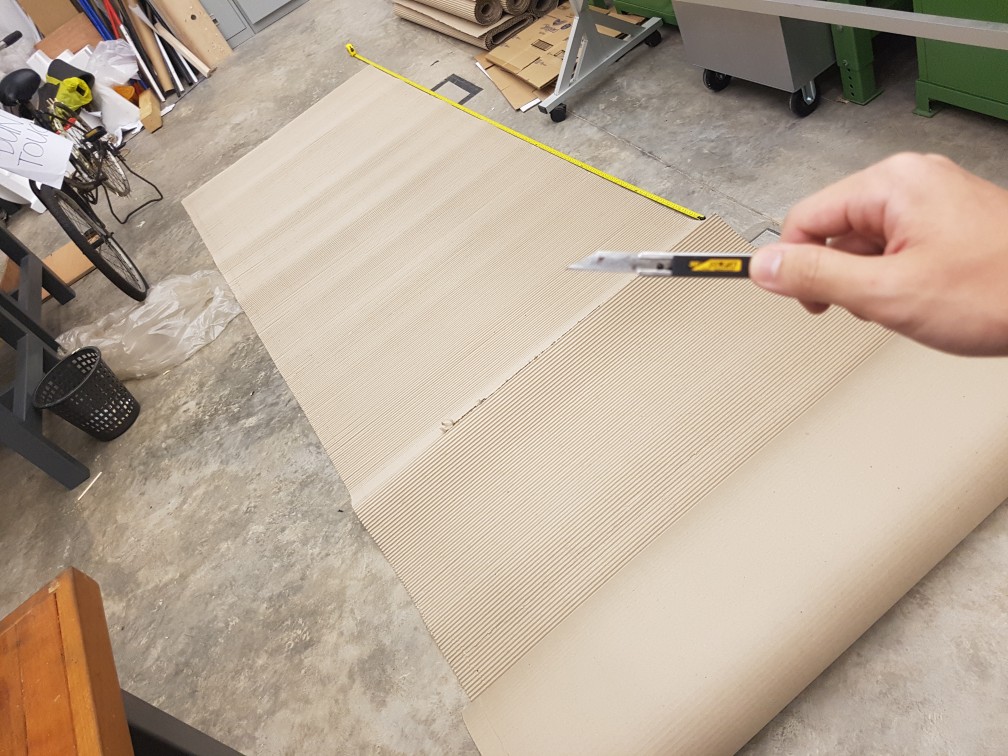
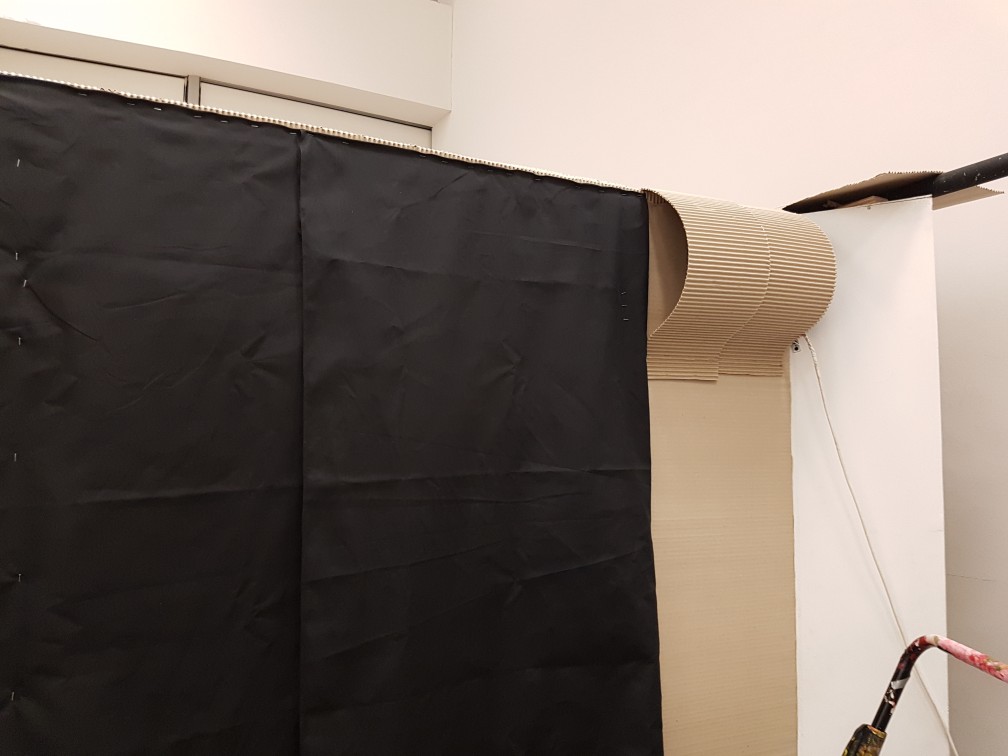
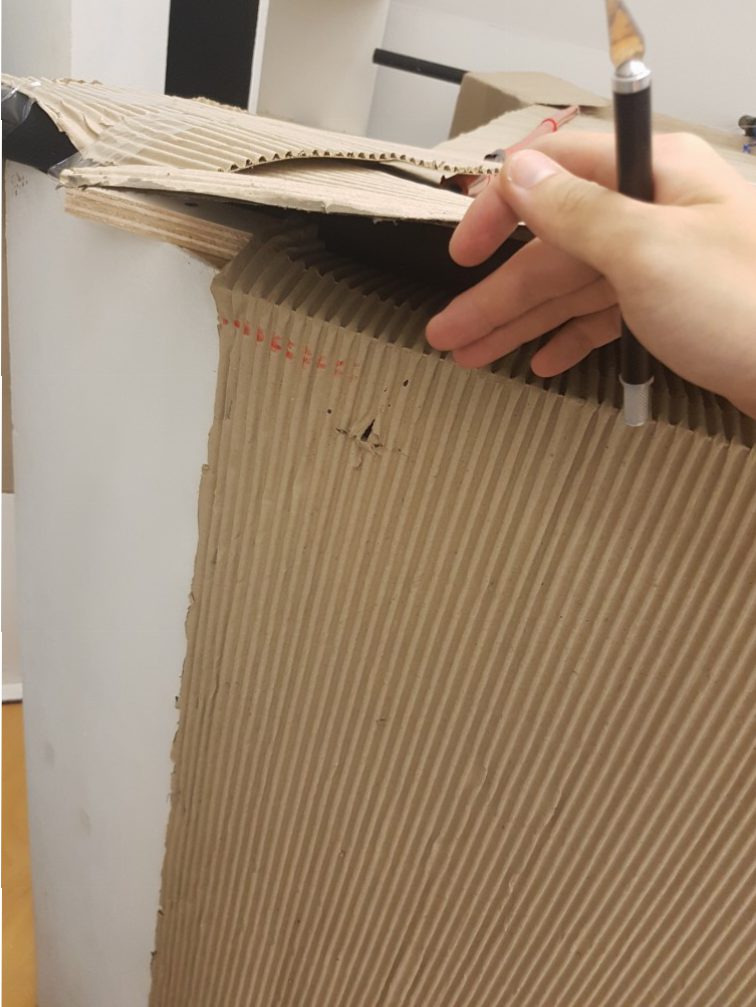
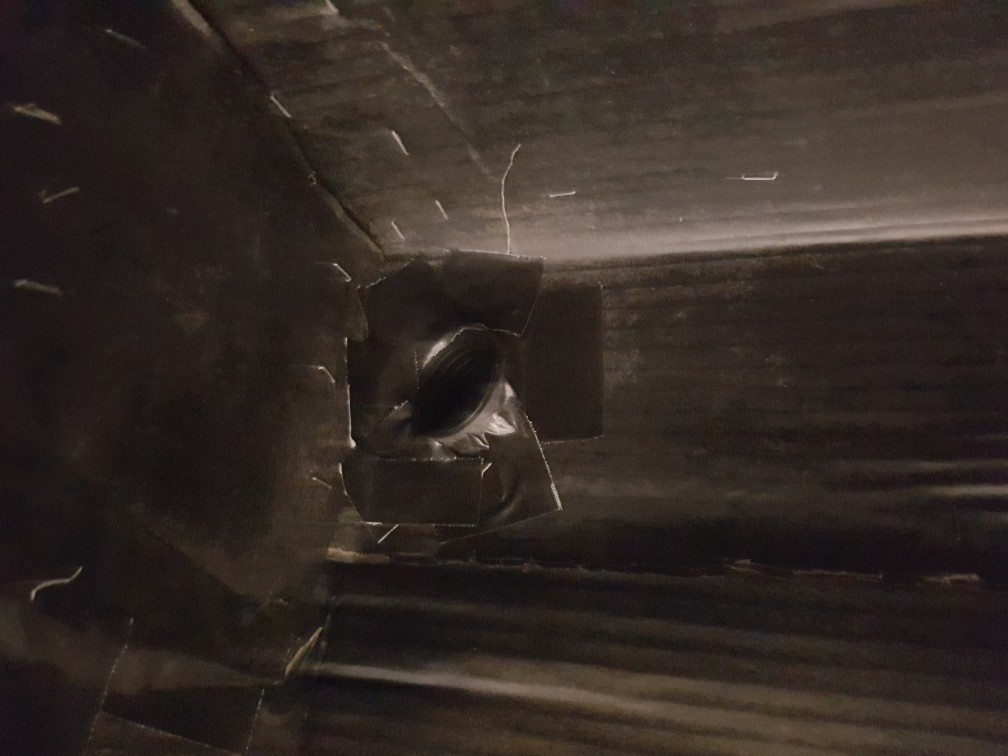
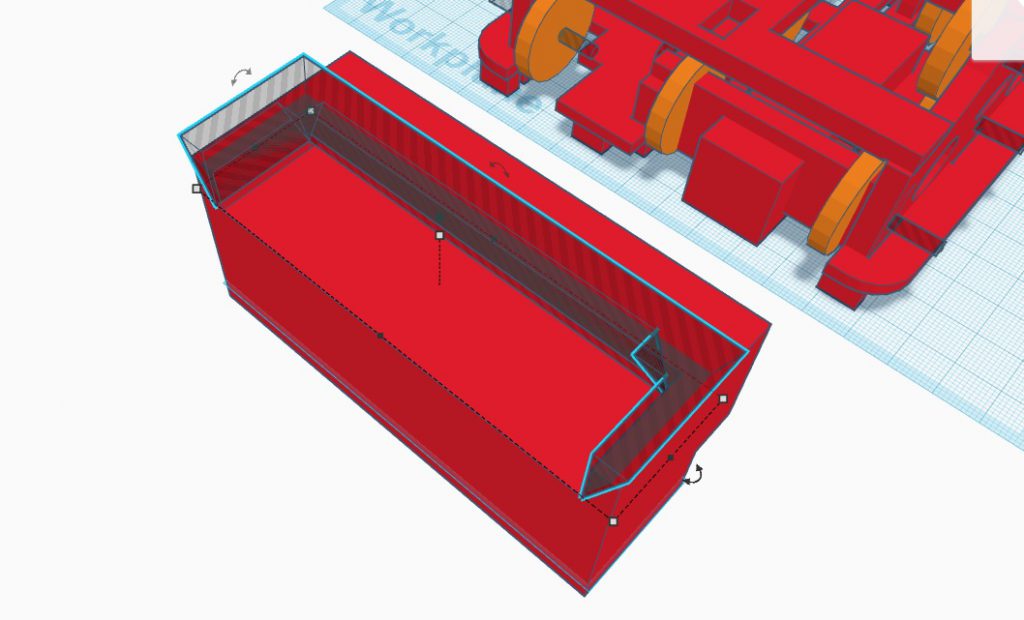
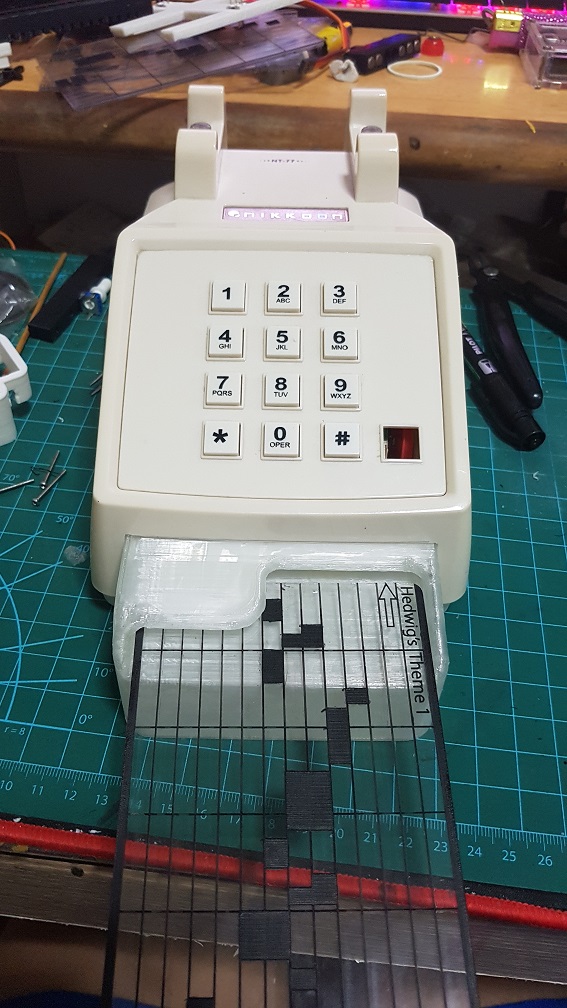
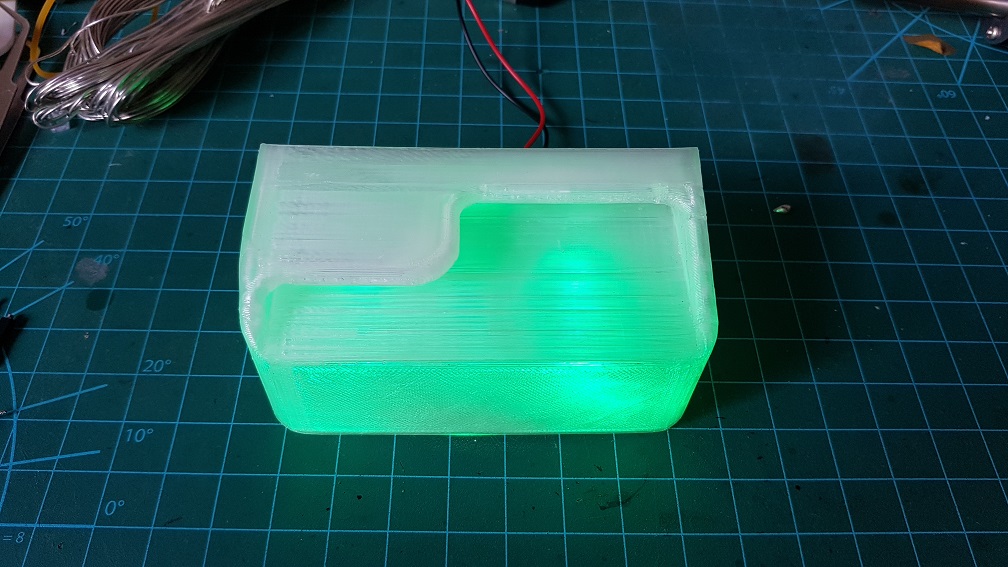
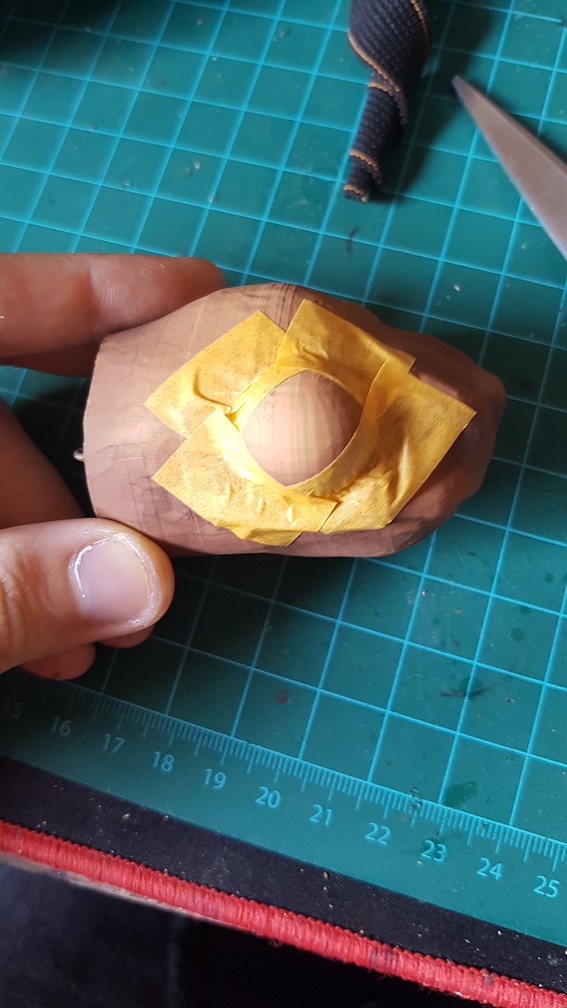
Ive spray mount and tape it at the back on the floor before mounting the side wall as it is SOOOO much easier and nicer to do so!


Afterward, I tied the structural loop which my candle stairs will be attached to it later, it was tied to make sure nothing collapse again.

after I confirmed that the structure and overall look of the dark room, I proceed to build the roof of it, which is the most difficult piece to be build as it is really prone to collapsing and I did not want the structure to be seen inside, What i want to achieve was to have all structures outside of the dark room so it will feel legit like a room when you are in it.

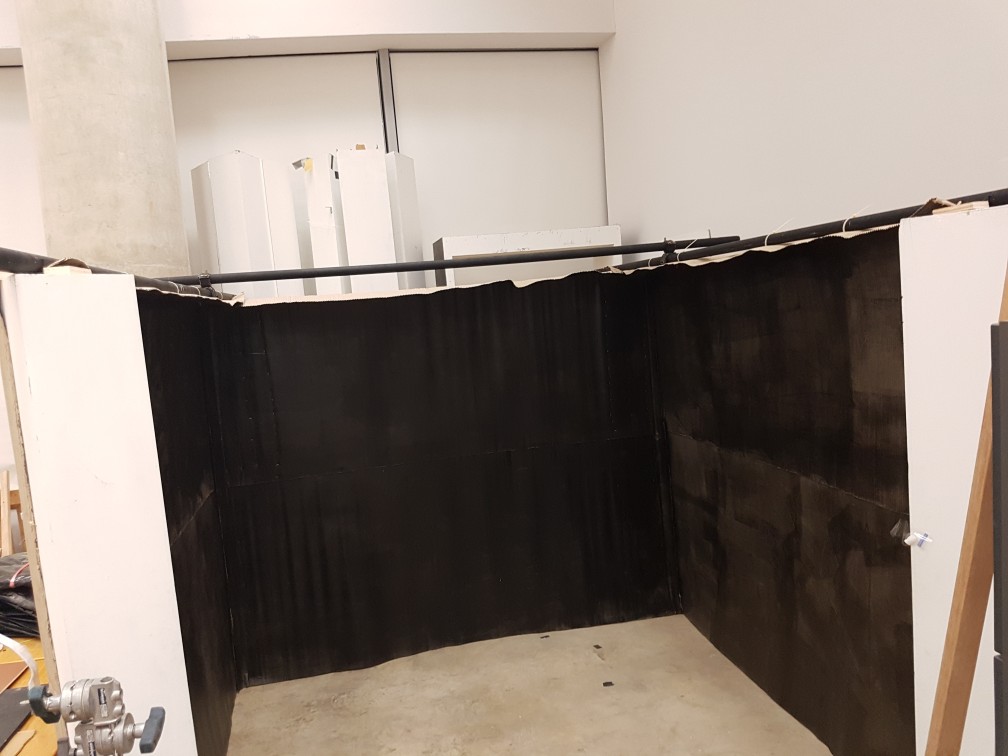
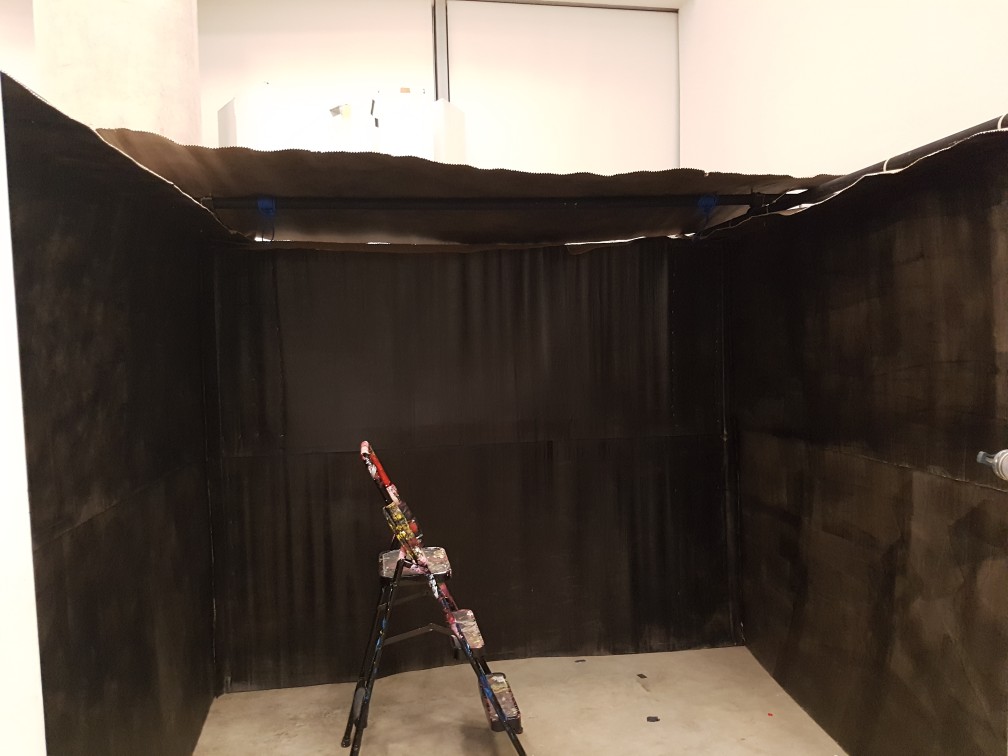
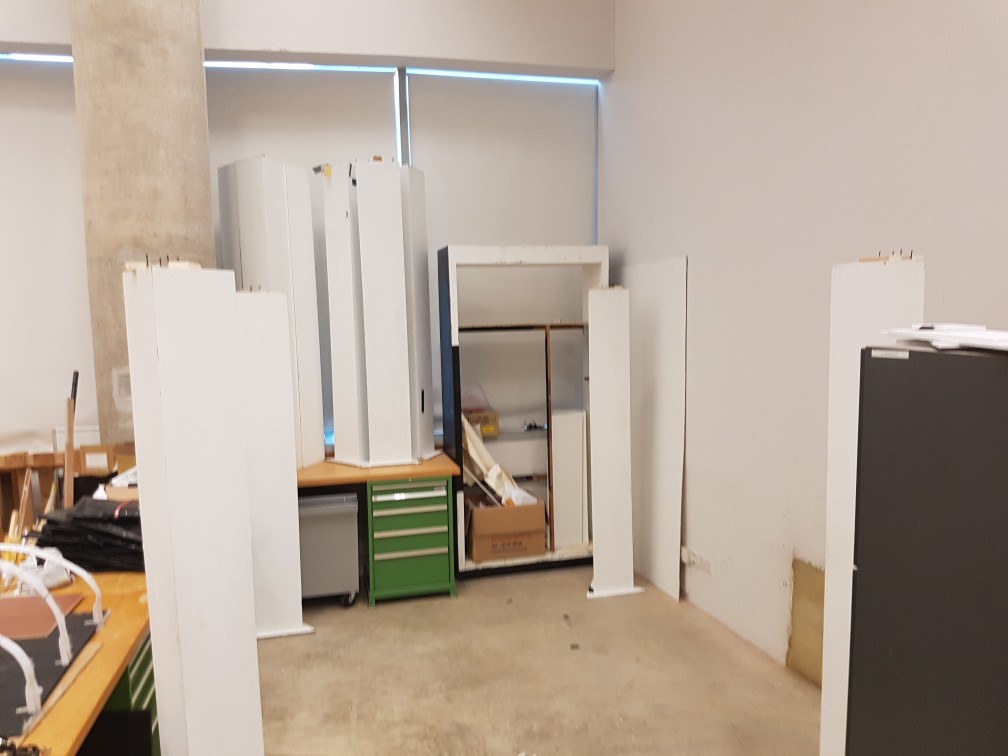
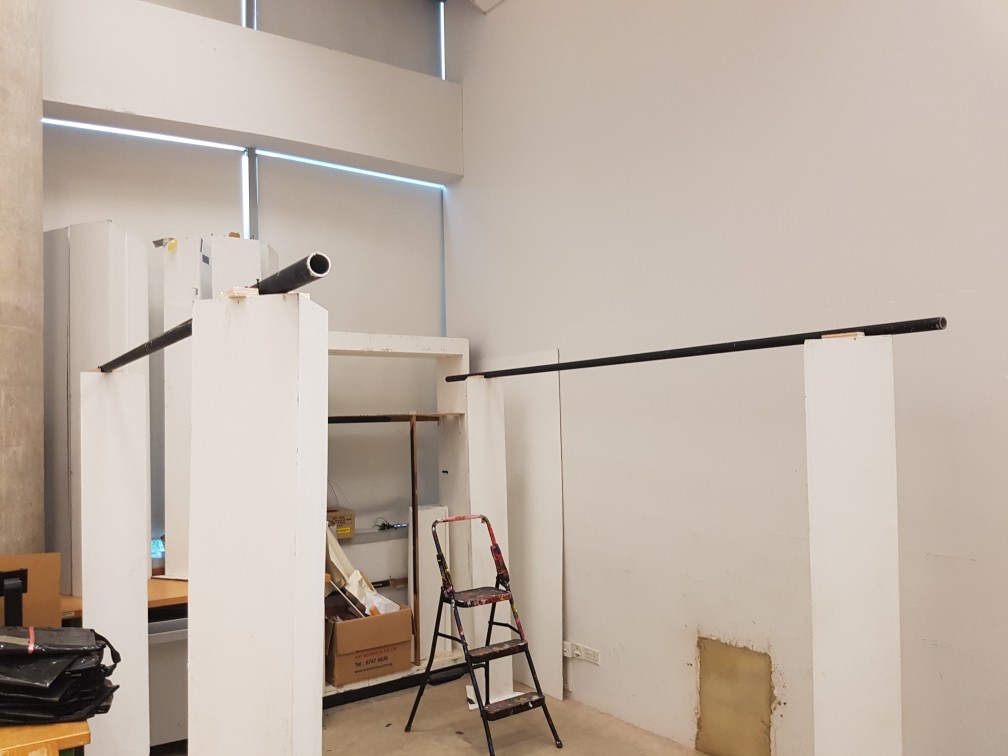
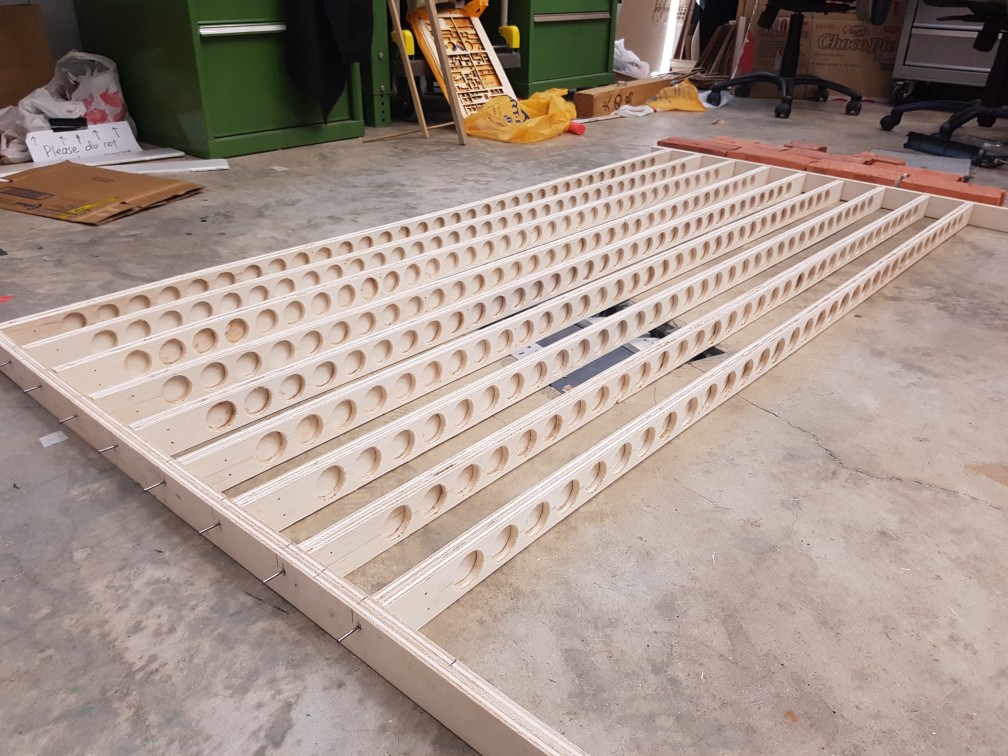
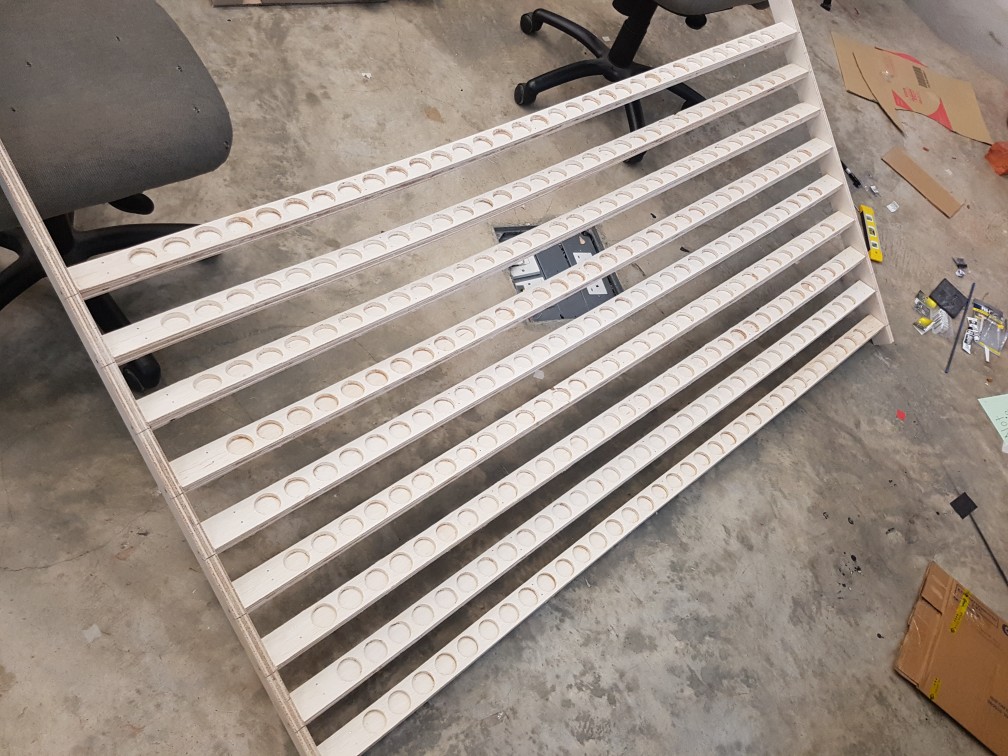
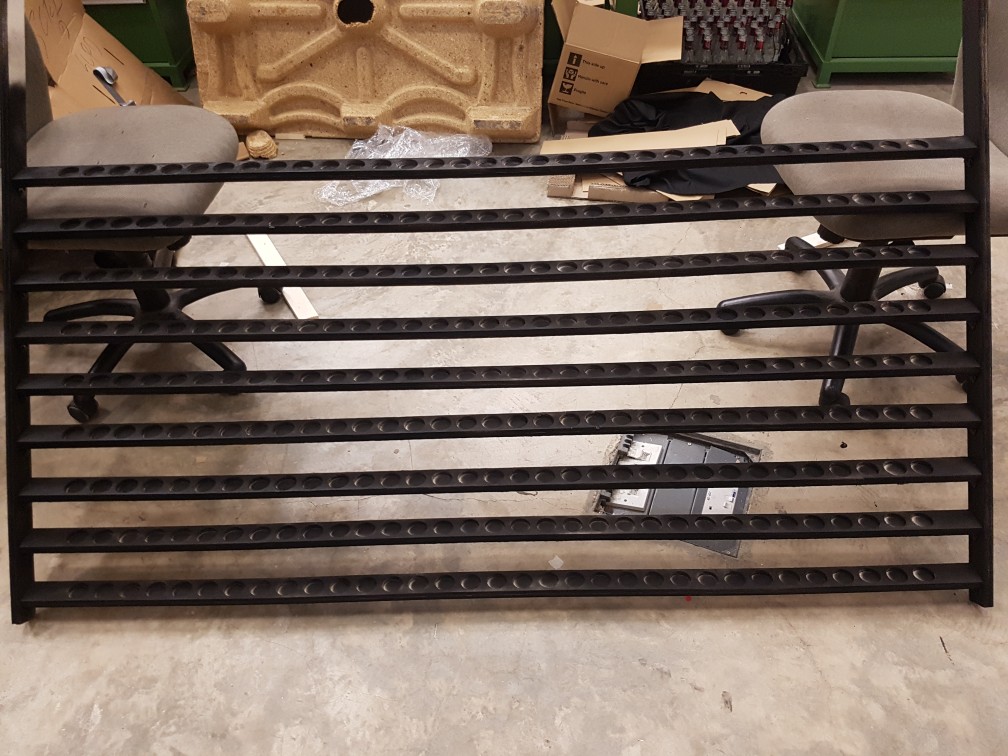
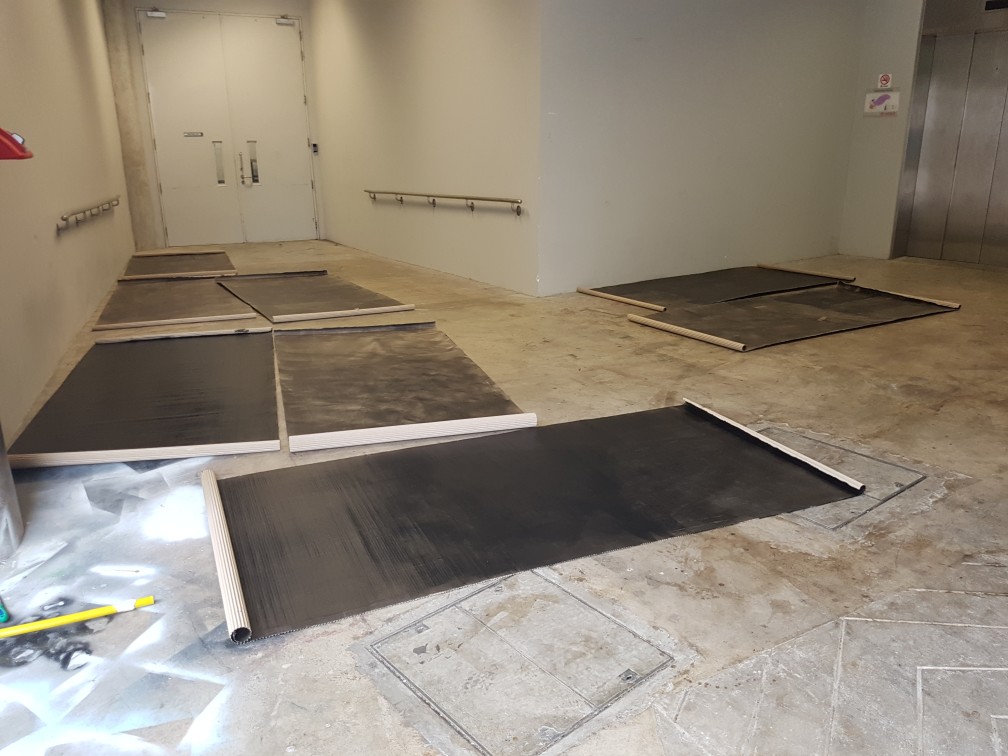
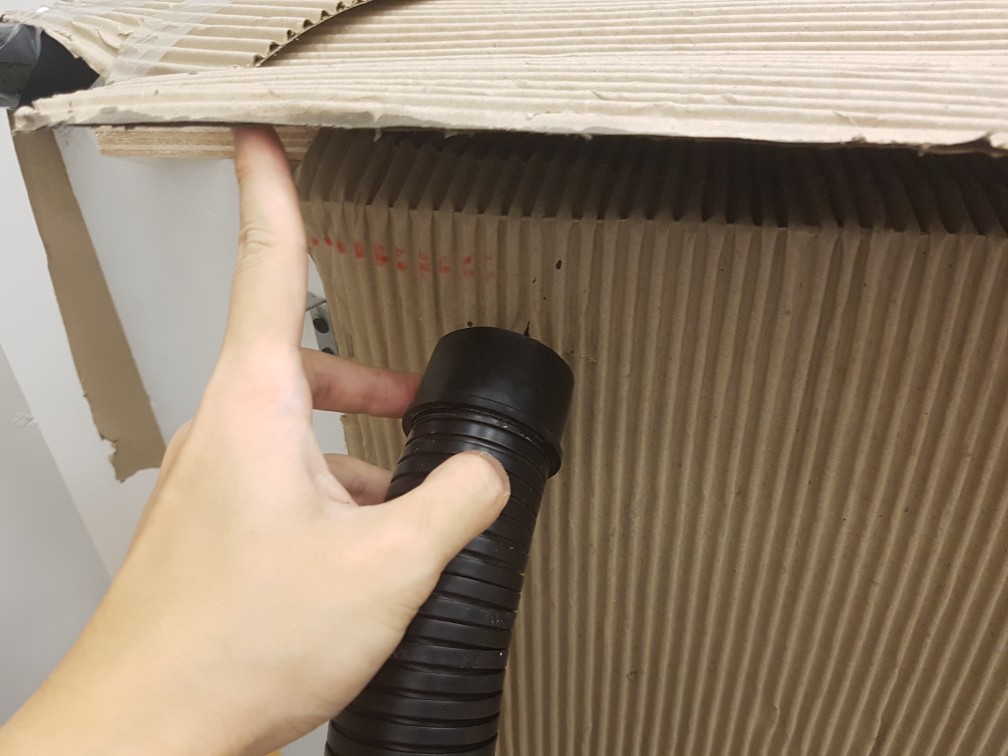
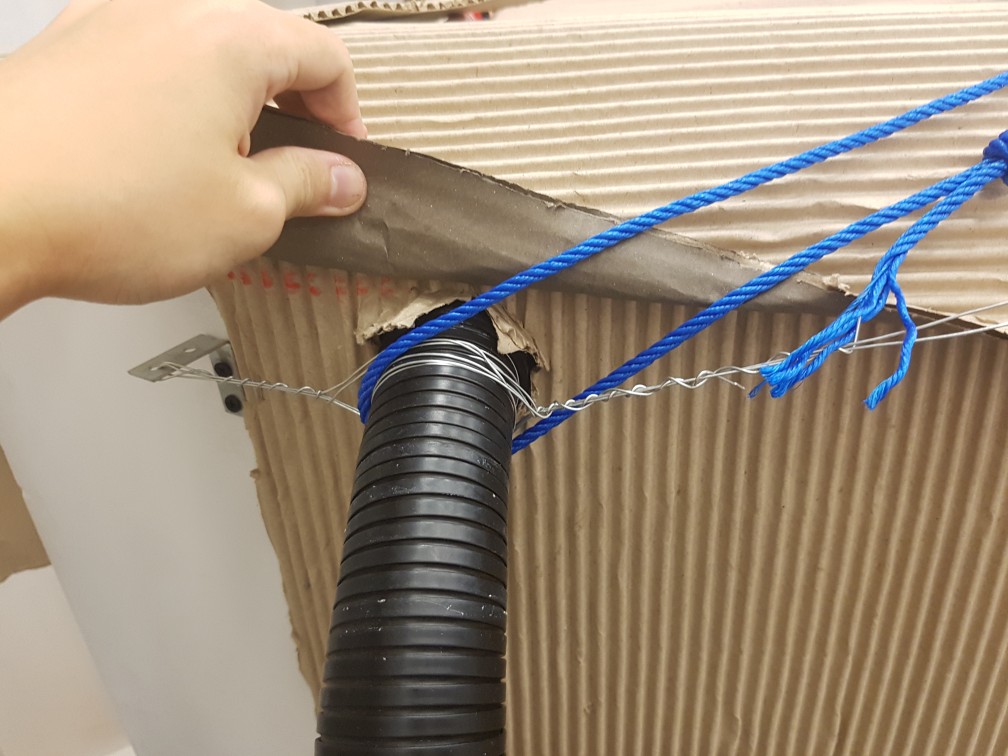
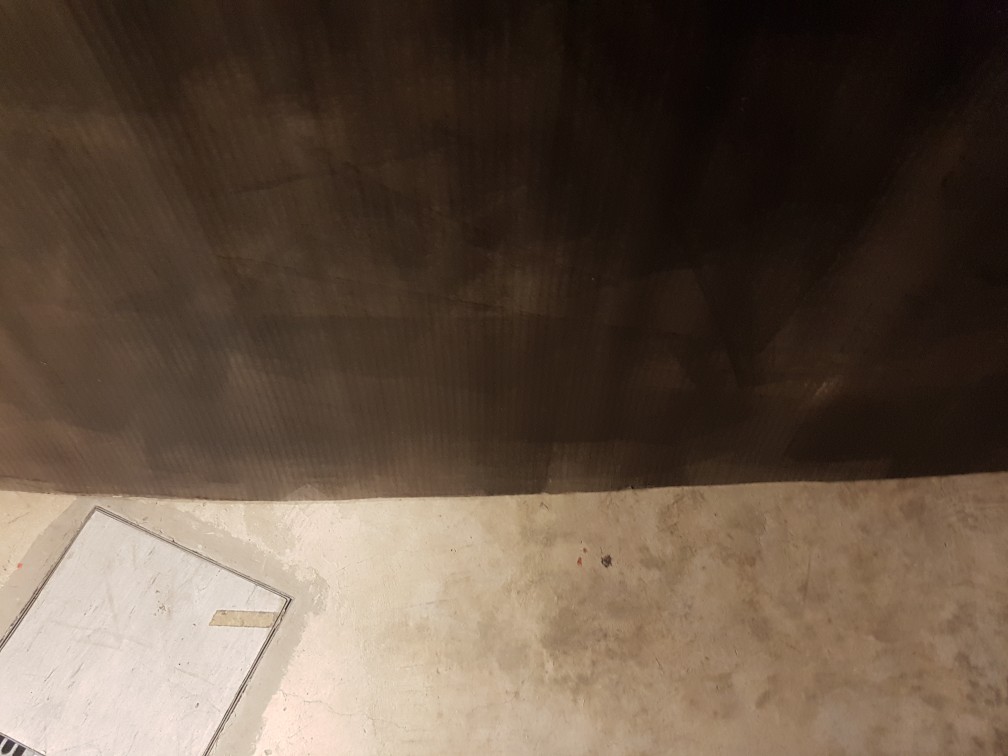
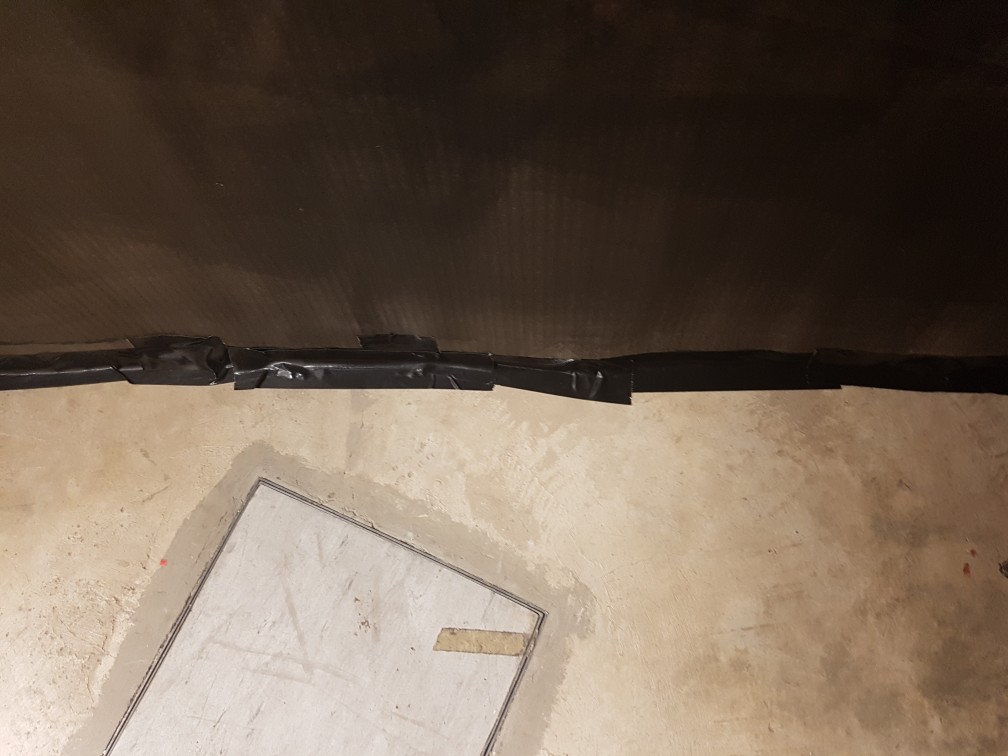
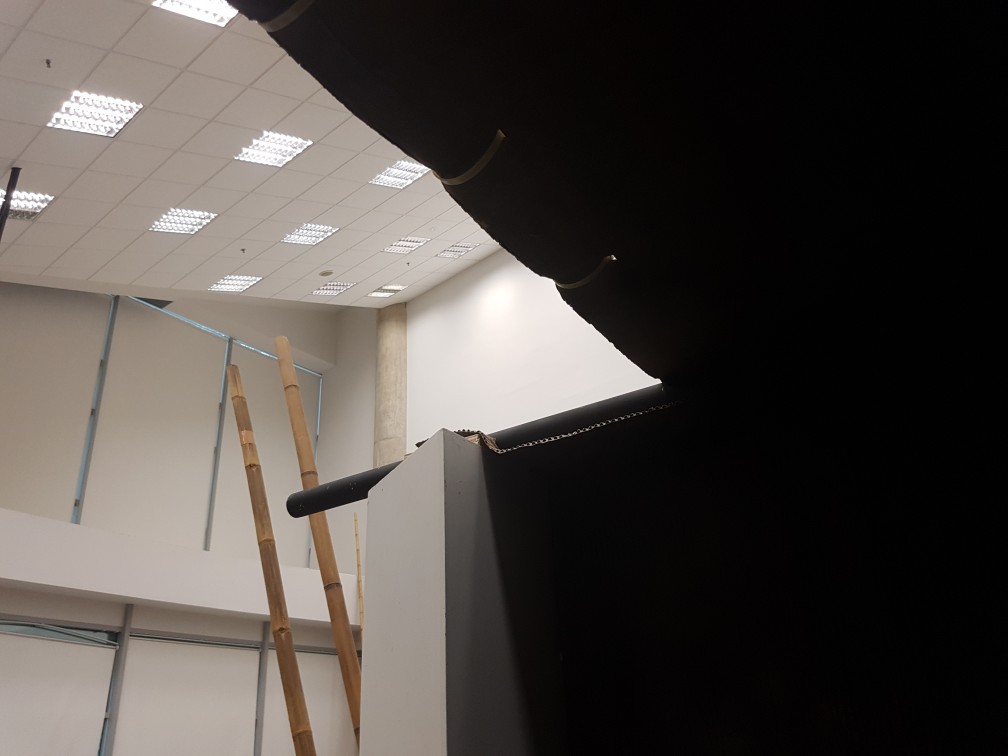
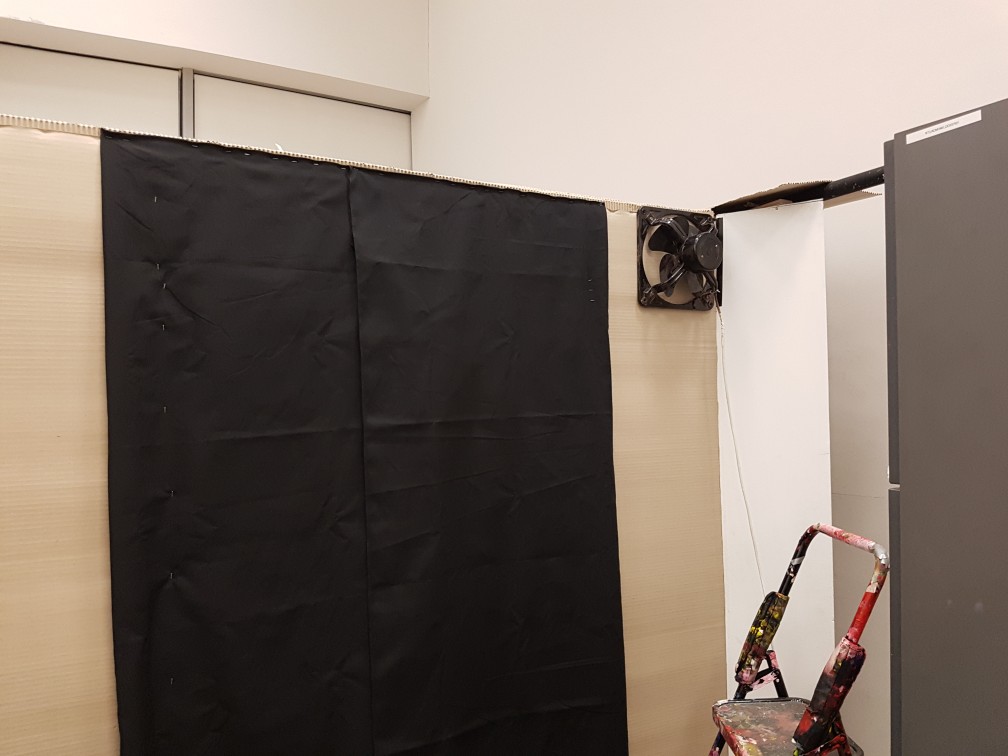
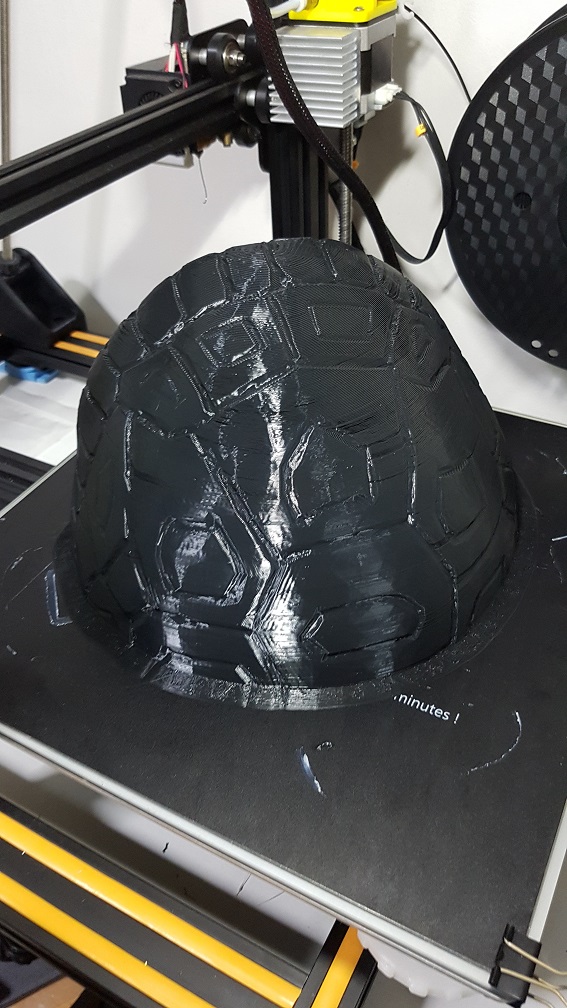
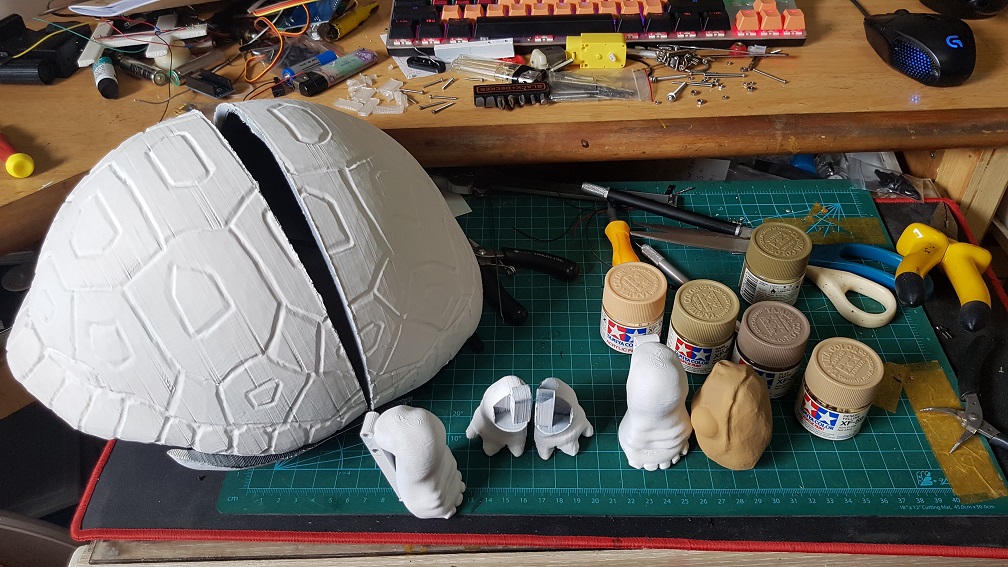
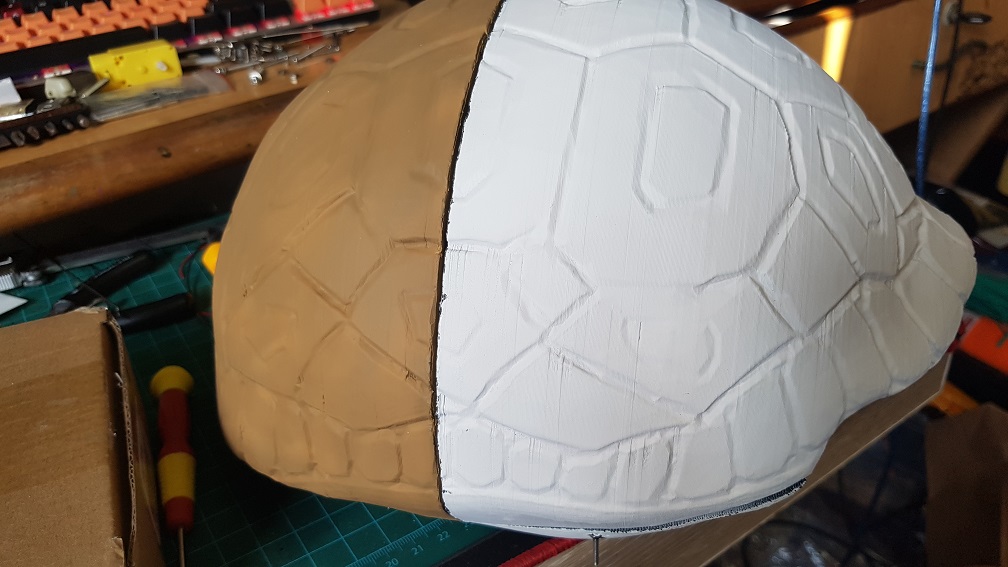
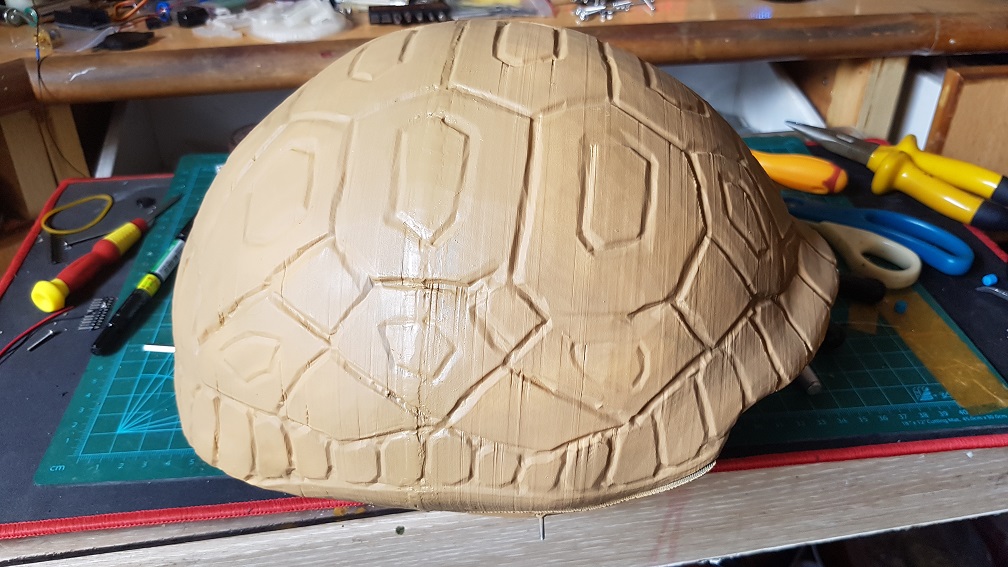
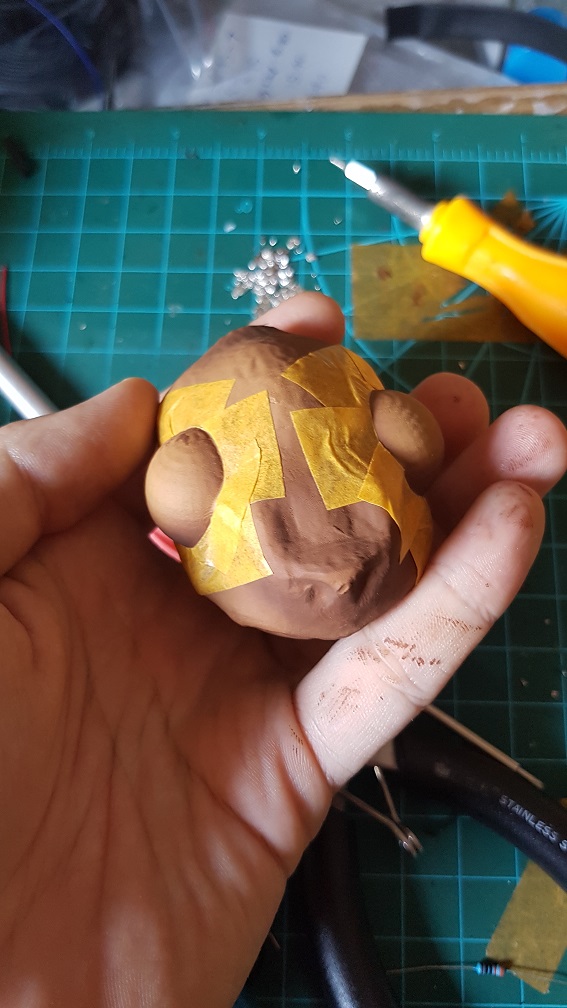
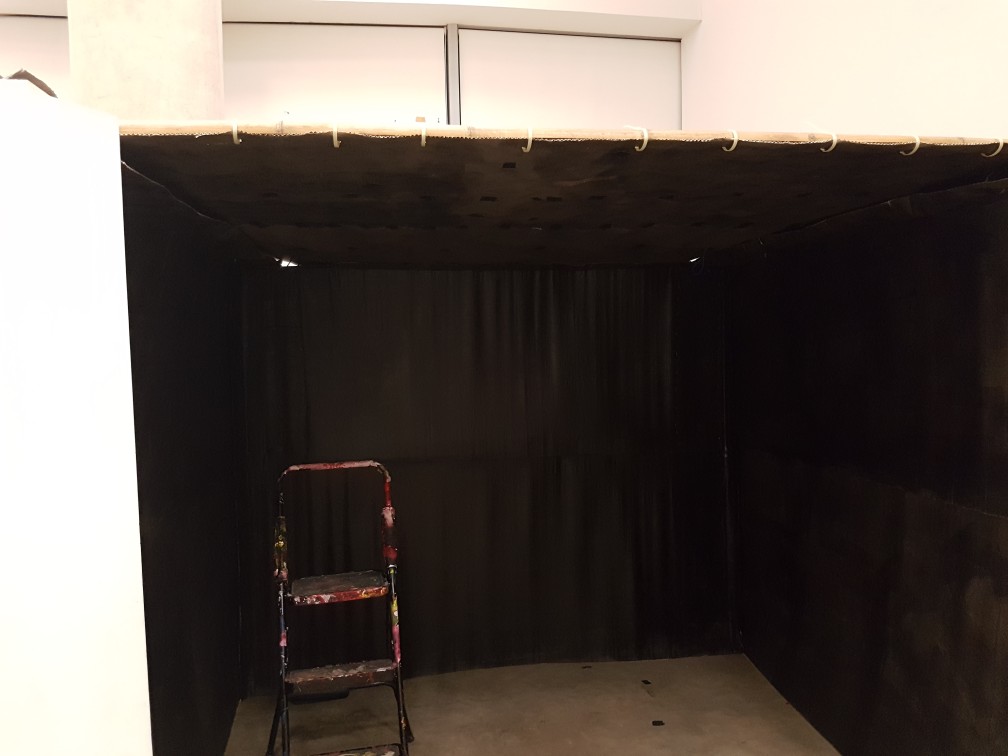
I really like the overall appearance of it for now!

Interactive spaces: Light and Darkness Process 1

To build the stairs for the candle, I’ve estimated the size of it to be 180cm long and each step should be 5cm wide as the candle is 38mm, so having some tolerance for me to drill holes to place the candle into each hole would be really good to prevent the candle from falling off the stairs. I’ve not decided the total number of steps but since they sell 9mm thick plywood in the size of 2400 by 1200, I could possibly get 22 planks of 1800 by 50mm strip of plywood when I give some cutting tolerance to it.

After calculation and calling around to find the cheapest plywood supplier that does cutting service at the cheapest rate, I found Ban Heng Long at  Syed Alwi Road which the plywood is $20 and each cut is 50 cents.

After buying the wood, I measured and marked out the wood for drilling later.

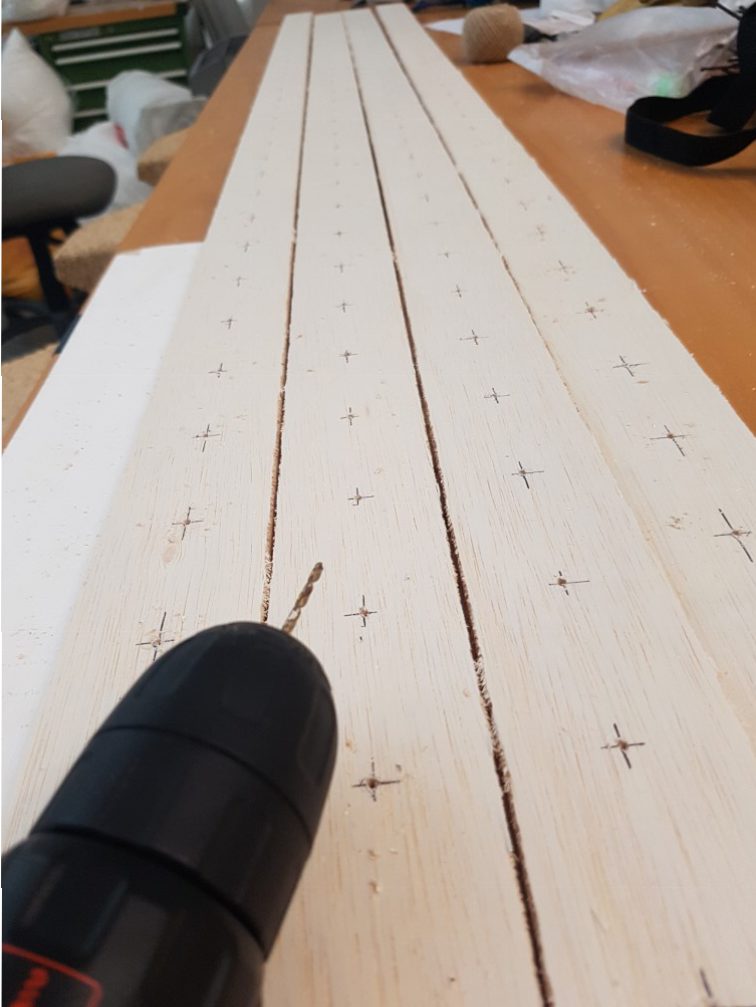
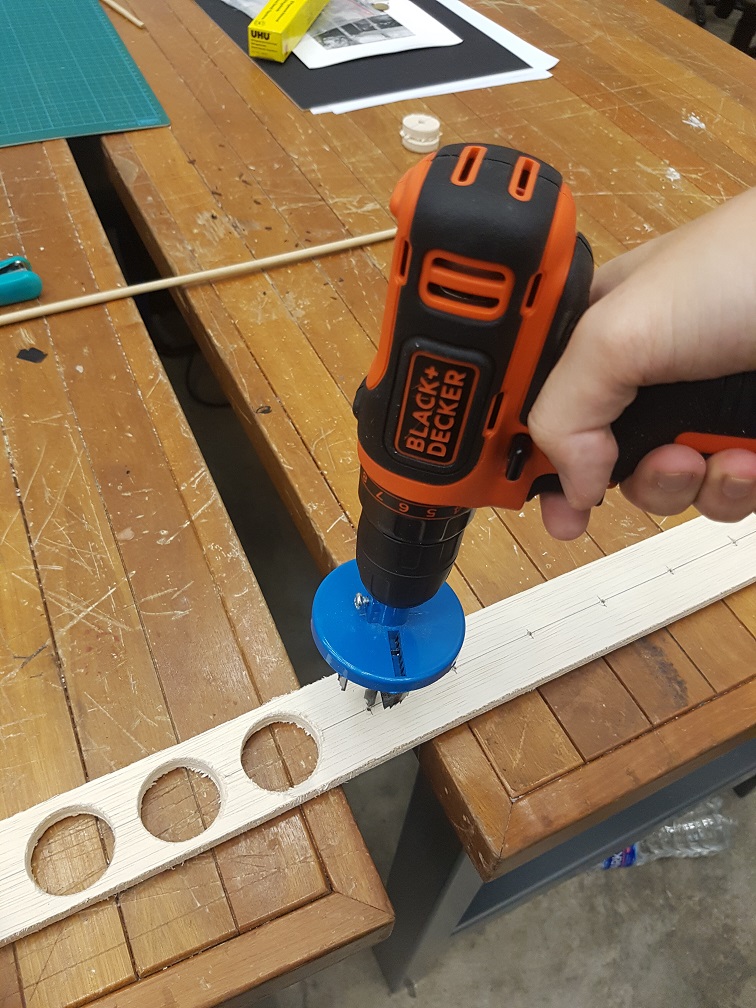
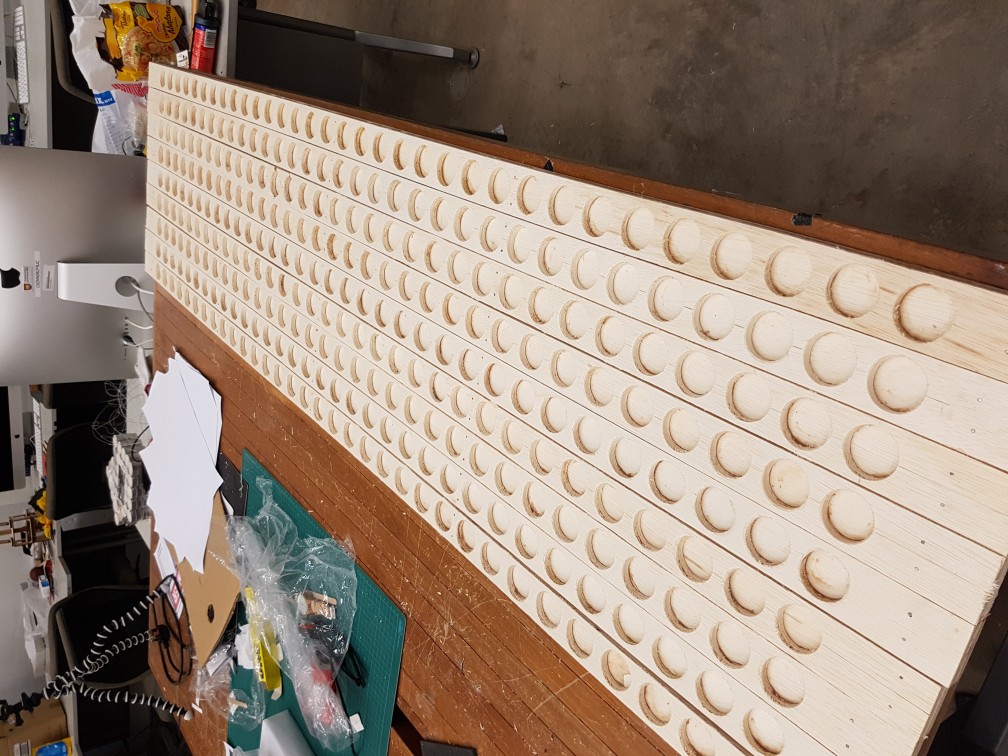
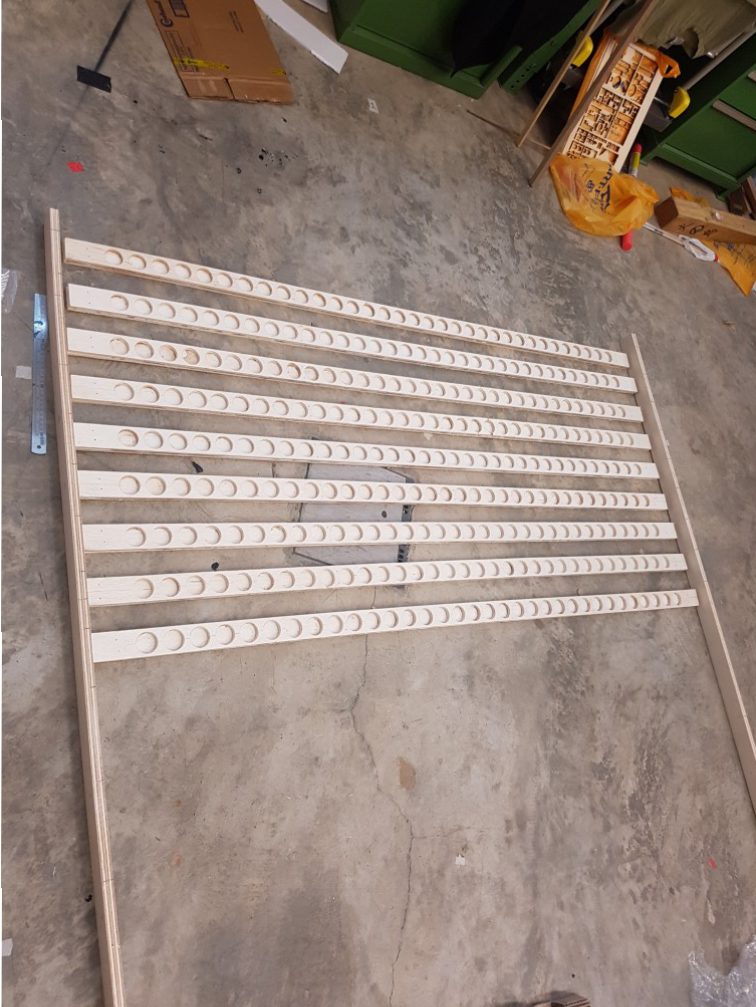
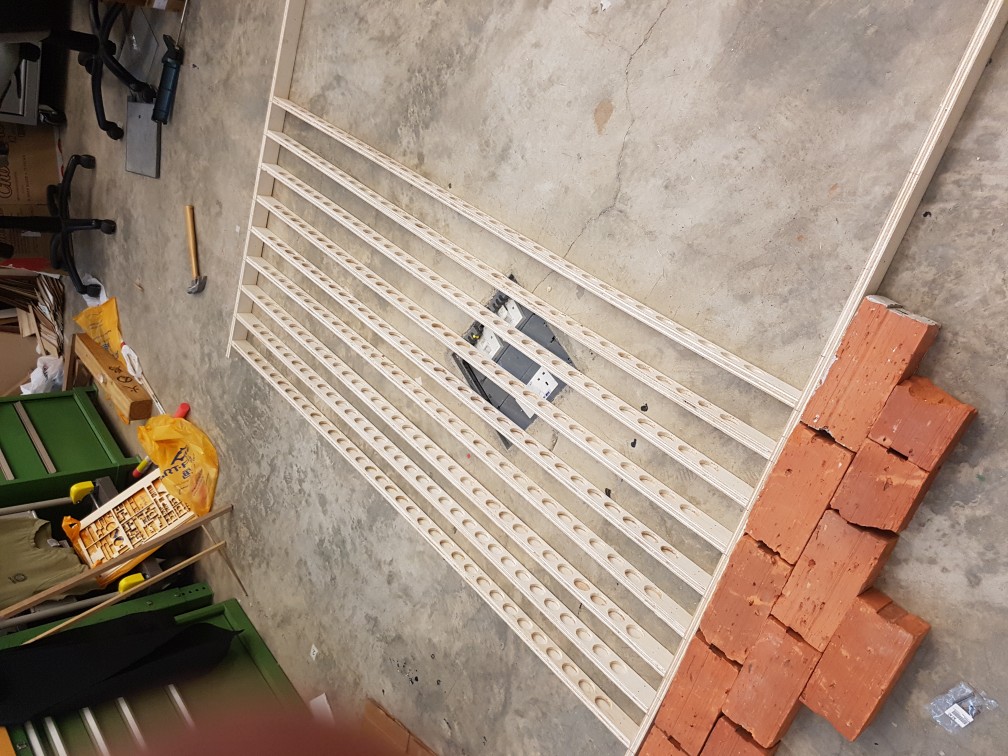
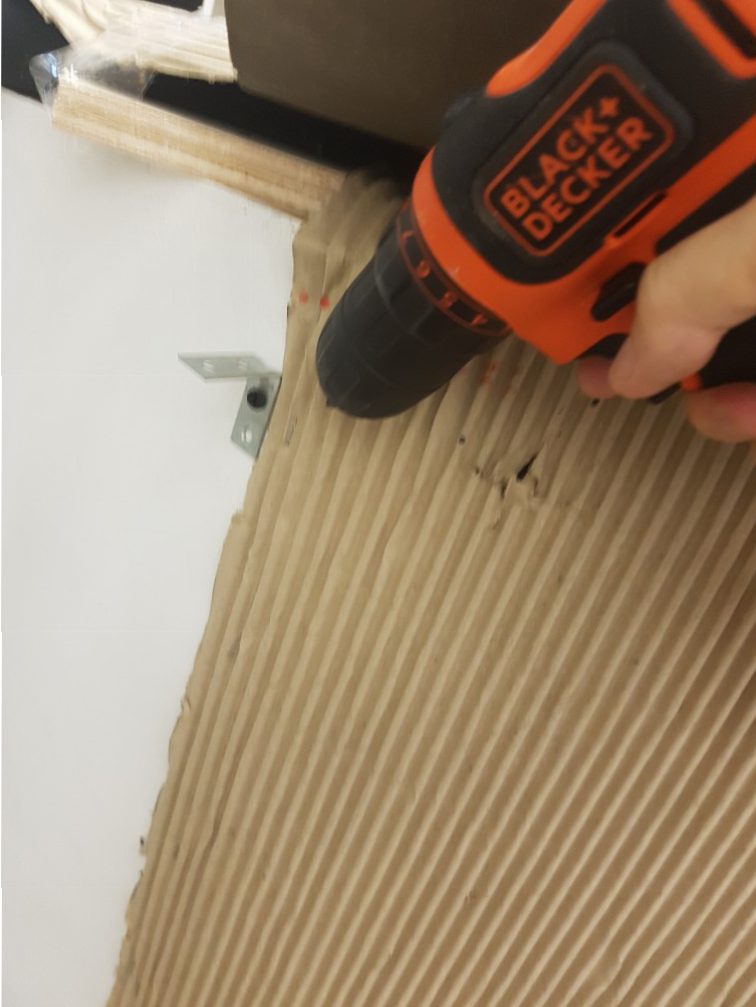
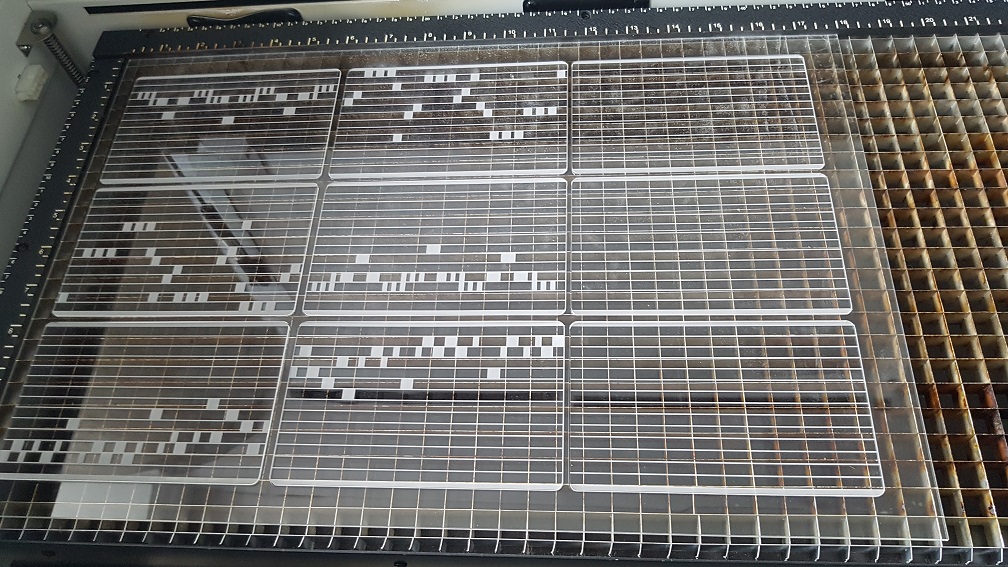
100X speed and a total of 297 holes were drilled.

Sand sand sand at 100X speed
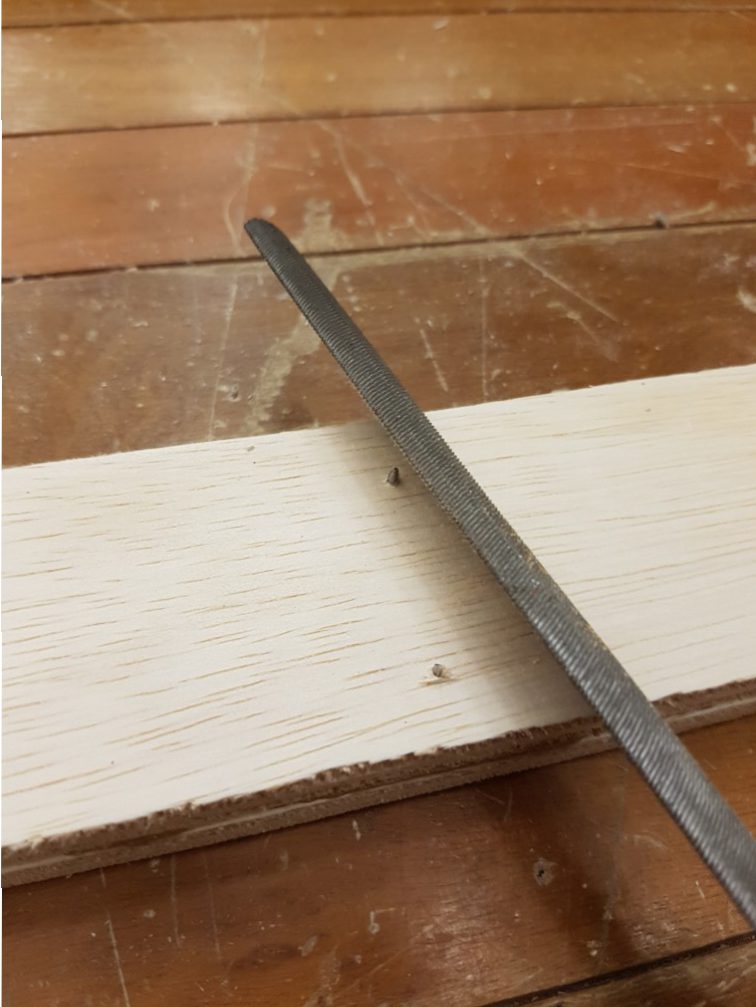
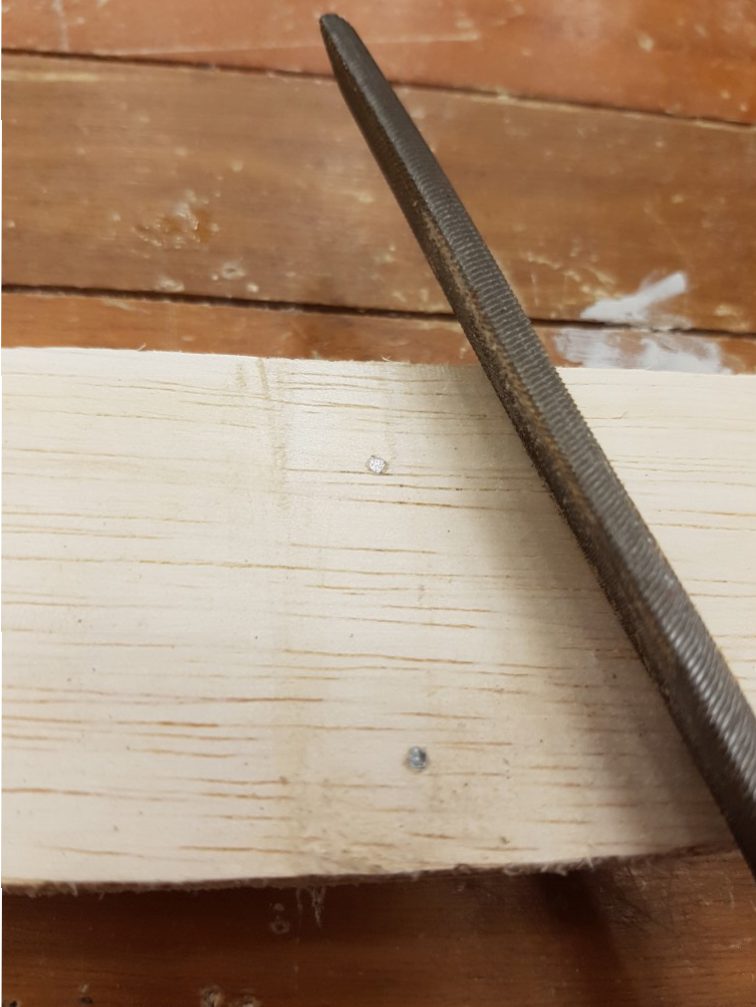
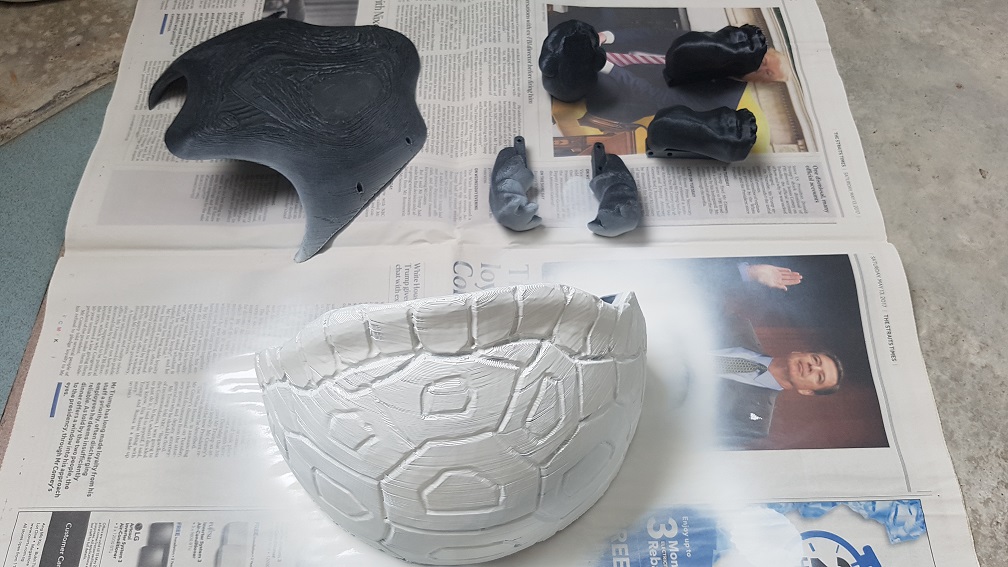
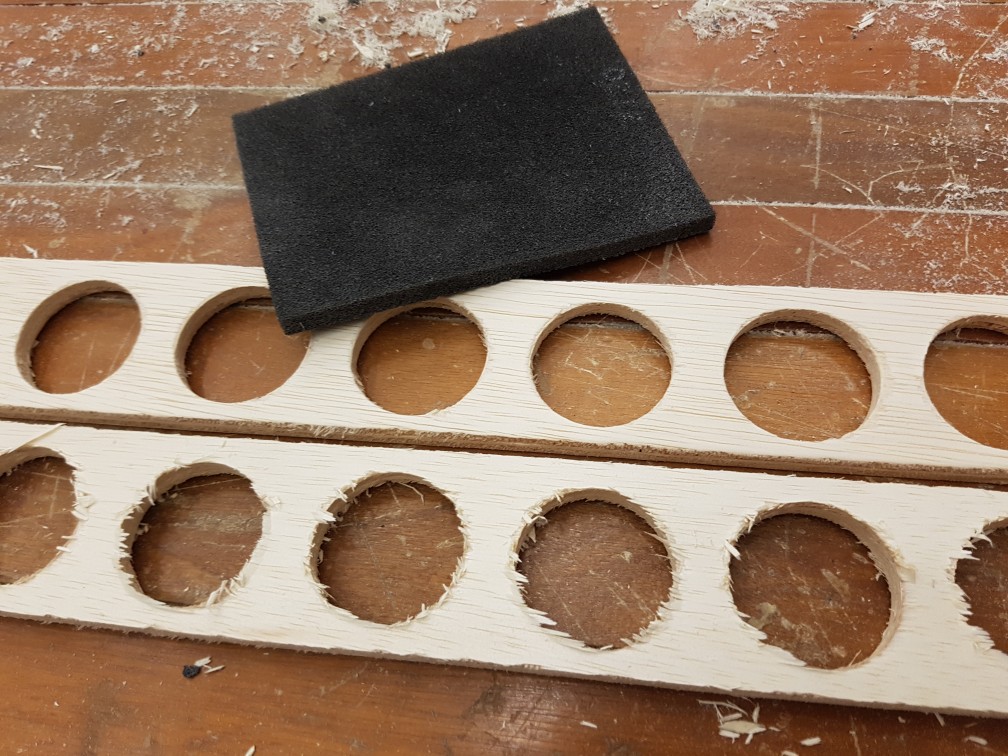
Sanding is so important for the finishing quality

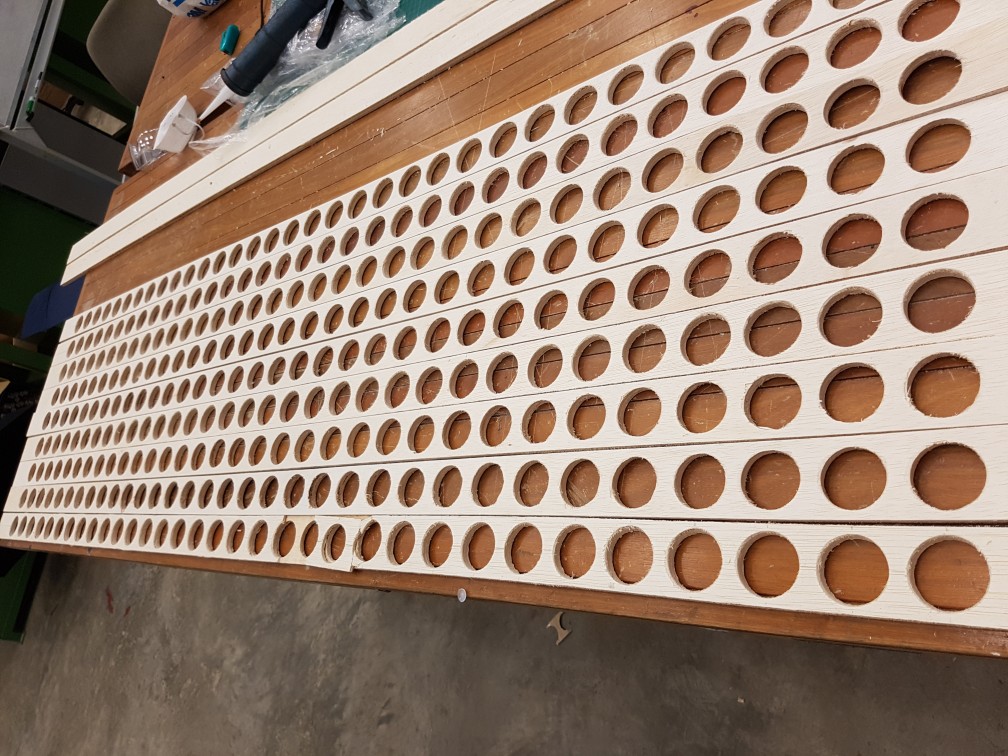
after sanding the 9 planks of 297 holes in total.

Gluing in 100X speed

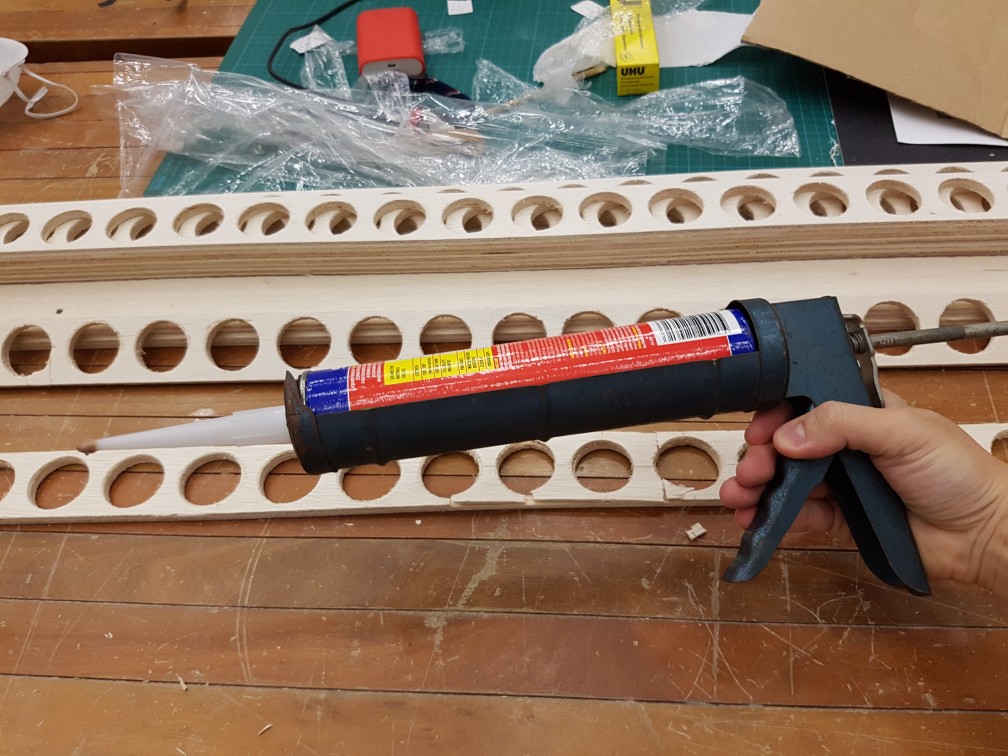
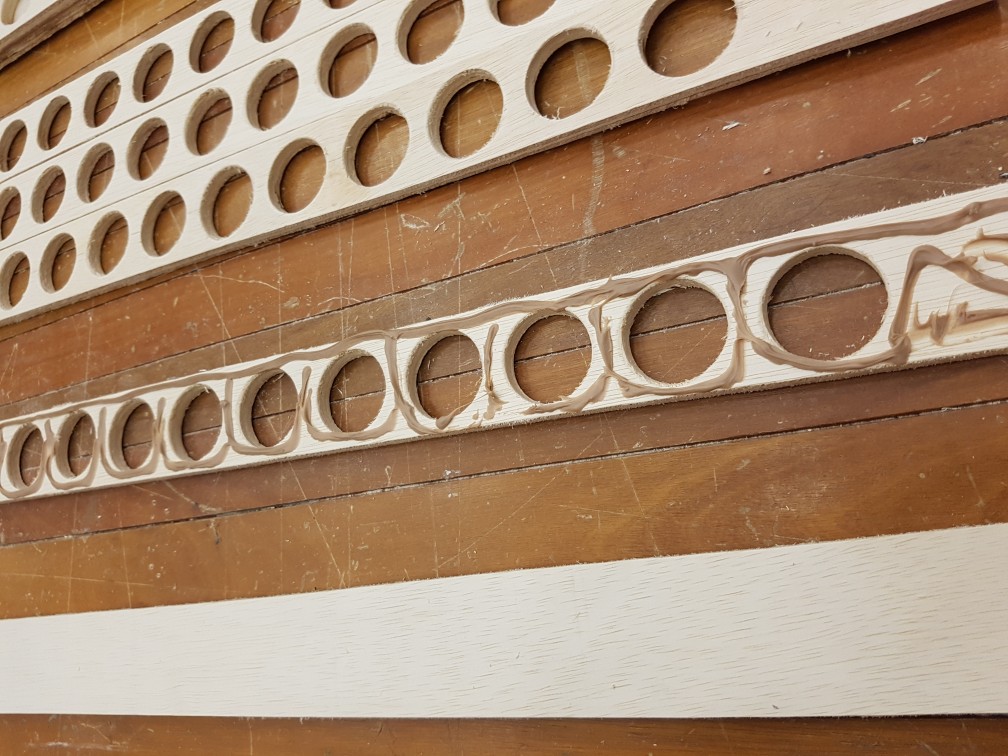
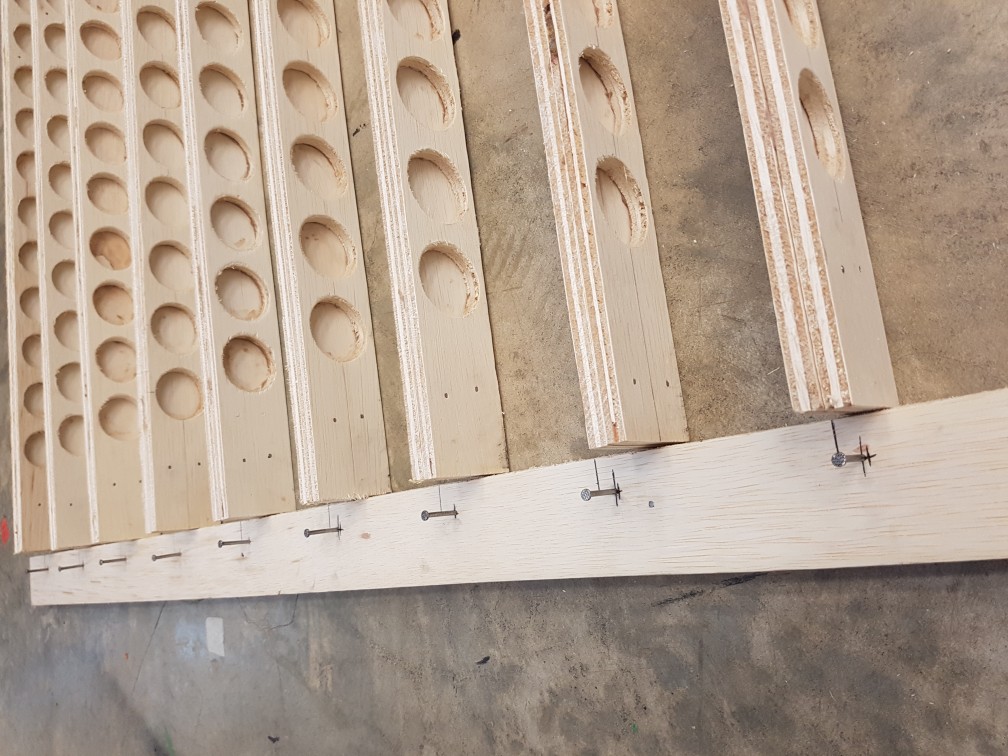
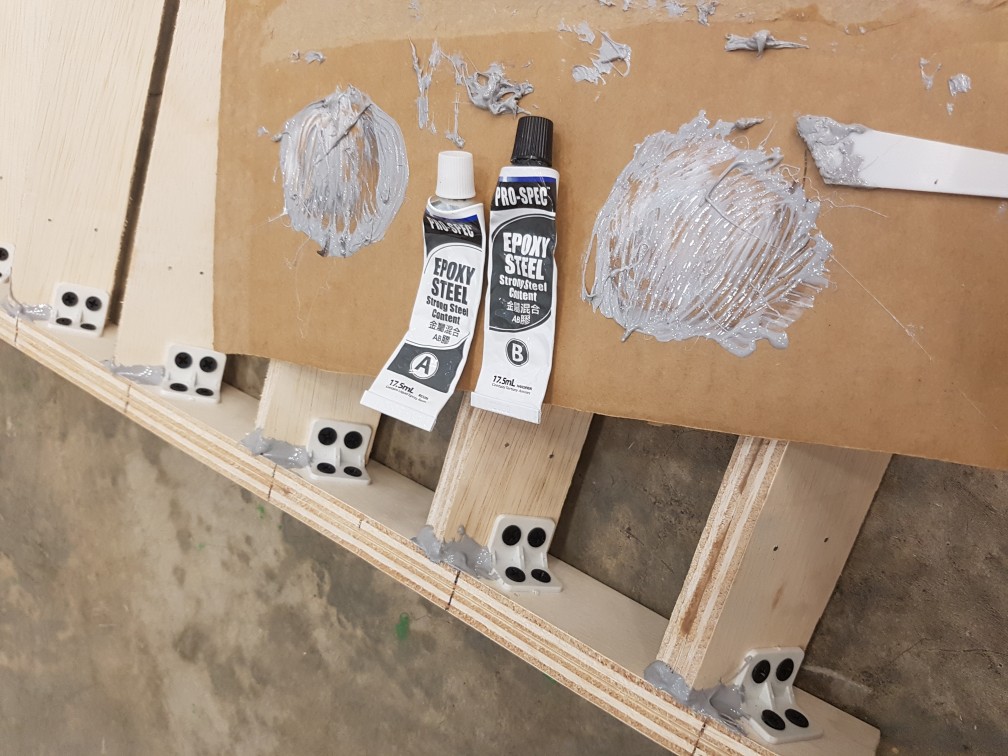
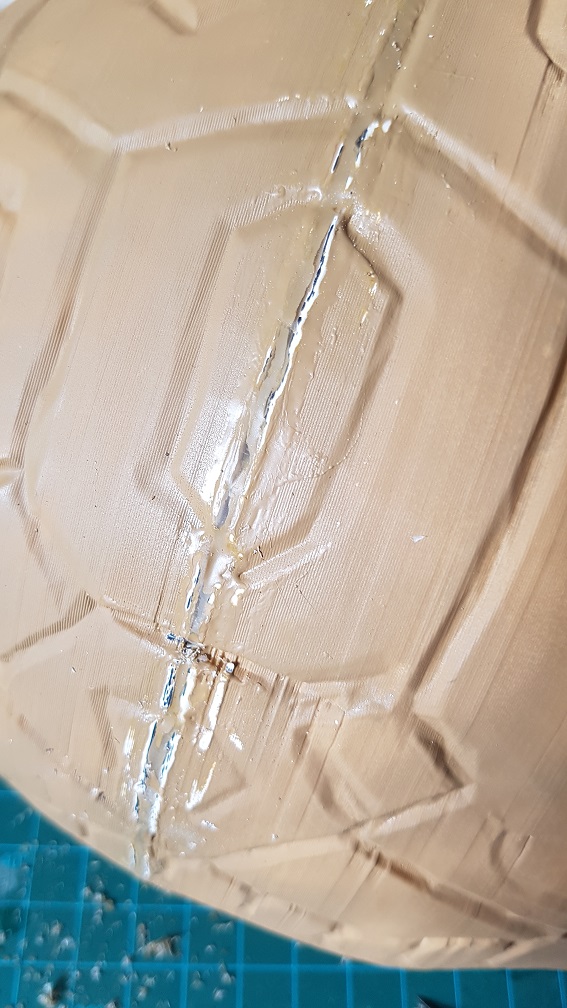
after gluing done and excess glue cleaned up.

securing the frame at 300X speed

After that, I’ve purchase a 30m cardboard roll to build the dark room for my candles as I would really like to give a feeling of a customized space which one wont feel like in the same space when we are in the one I created, which actually is another space within what we are always used to, the IM room.

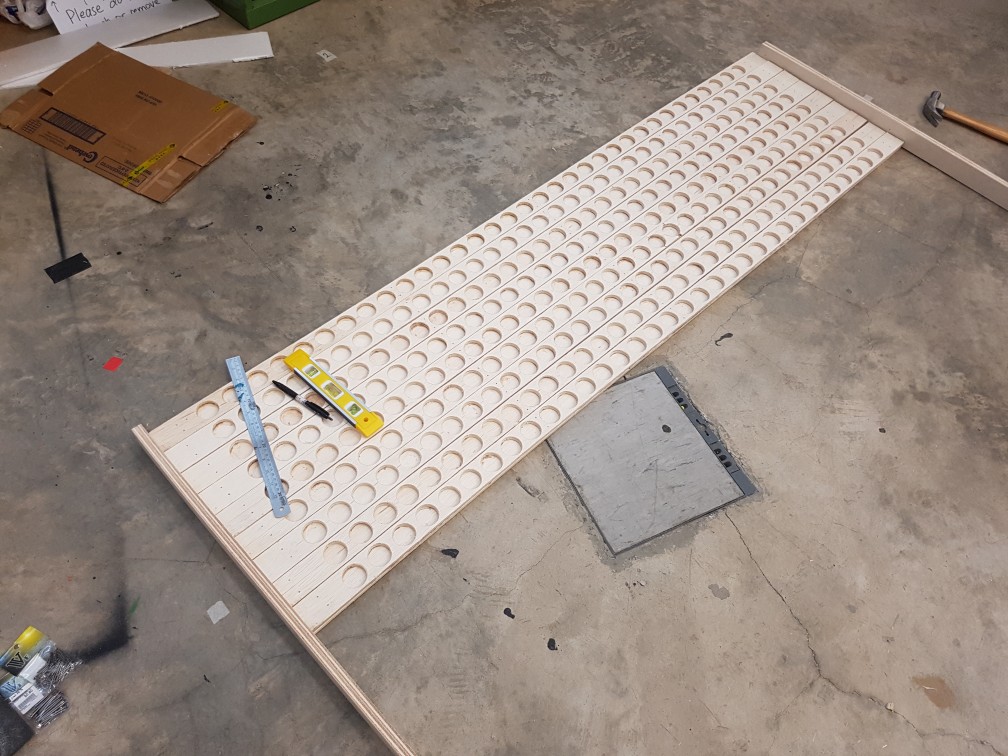
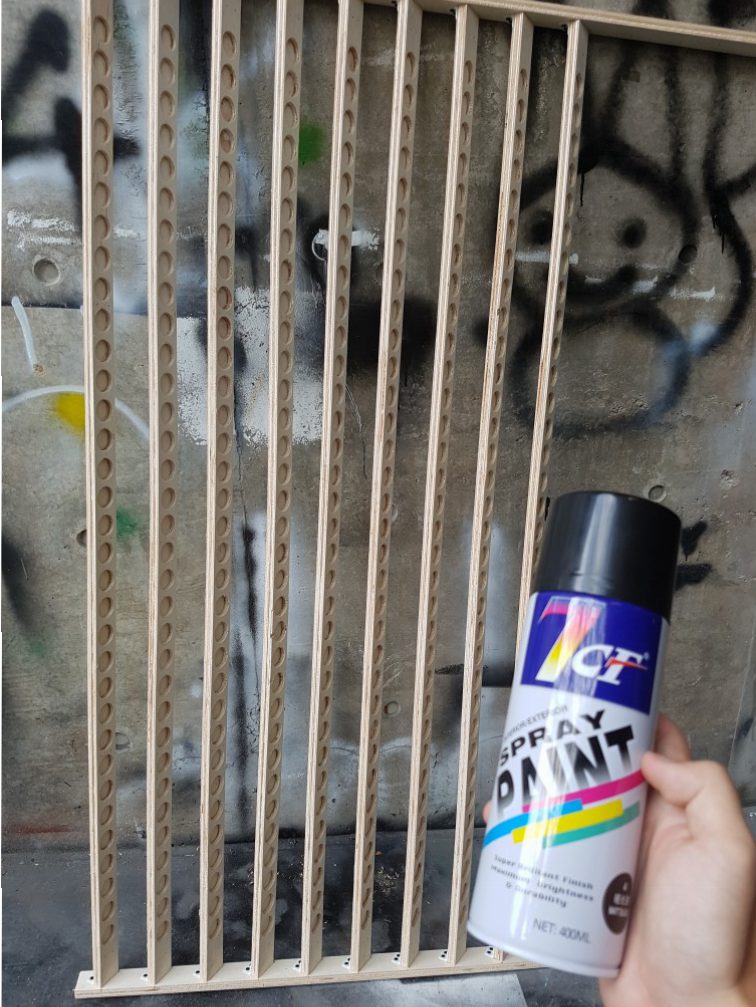
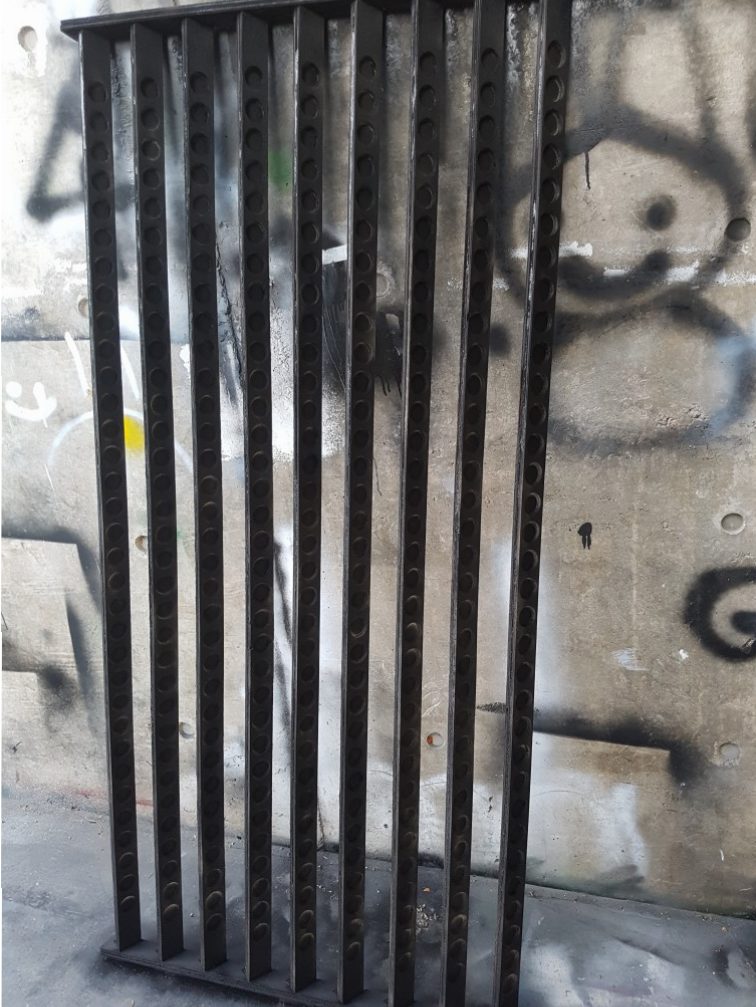
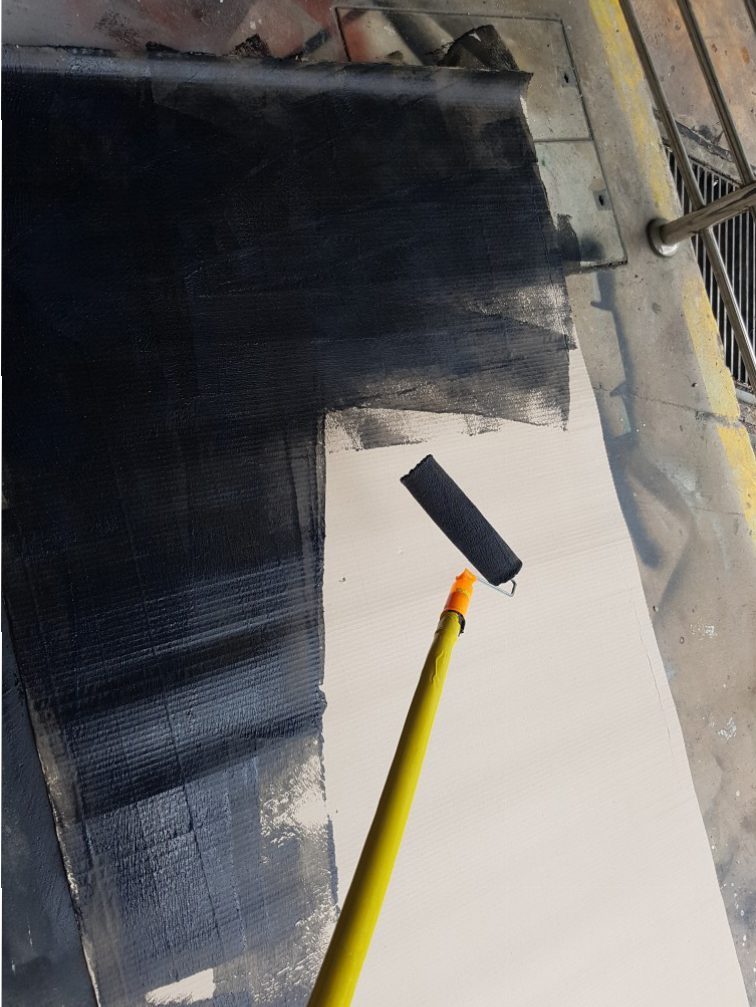
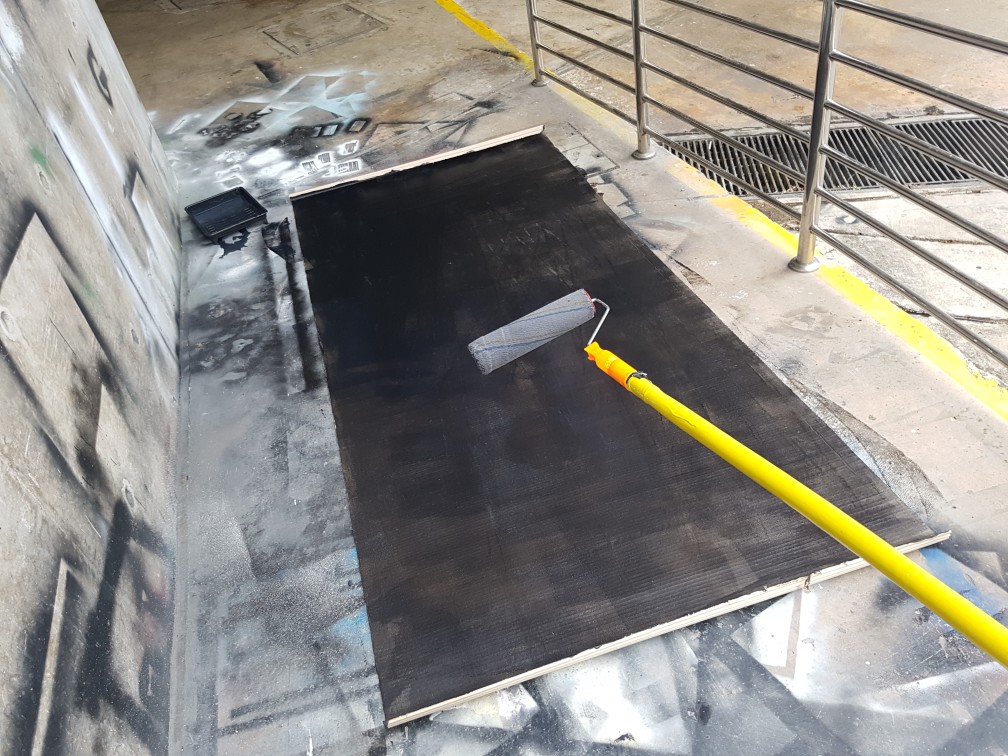
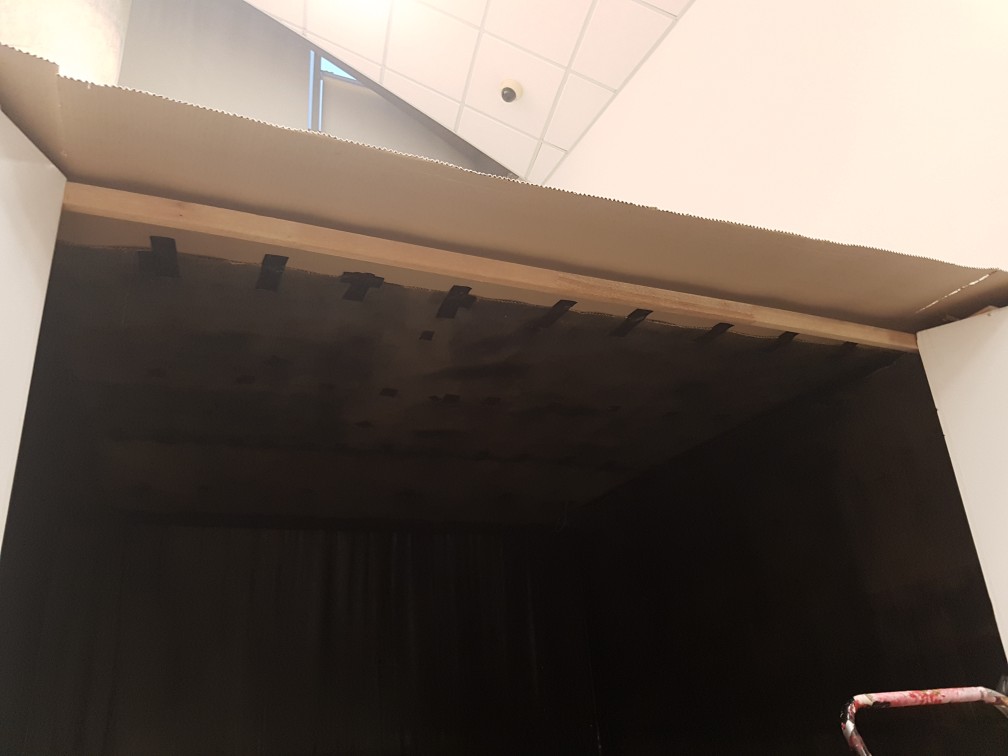
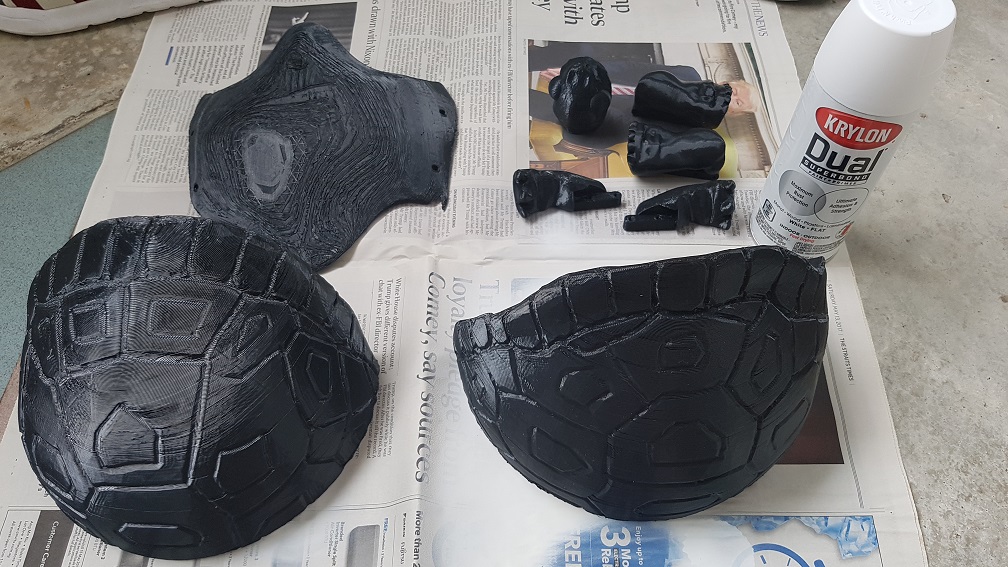
Painting the 8 piece of cardboard roll with waterbased wall paint at 300X speed. the paint is rather expensive so only 2 piece were fully painted in black while the 6 rest were only somewhat black.

After dying, I brought the cardboard pieces up and decided a place to build my dark room… And I’ve decided to use the space that lesser people used in IM room which is the corner with lockers, however I have do do quite a bit of packing up and shifting of the tables to make space.

And finally, end of 1st process post.


Interactive spaces: Light and Darkness Process 3

carry on from the previous post, Process 2

this is the completion of the dark room and to add ventilation to it as i assume it will be really hot and there might be fire hazard if the hot air or smoke is not being ventilated out of IM room.


lastly, i realised that the air flow wasn’t that good so i detached a ventilation fan from my house and attached it onto the dark room.

And the dark room was done!!!

next post will be the final post for the Analog submission for this project.

Interactive spaces Idea Generations part 2: Candles, More Candles.

Why Candles?

I think that Candles are really interesting, not only that they are visually appealing to watch as an therapeutic experience, they also produces smell depending on the nature of the candle, even extinguishing a candle produces a different smell. In short, a candle will utilize 3 out of the traditional five external senses which are sight, smell, touch but not hear and taste.

There are always meaning to everything and many objects have different meaning depending on the cultural context of the objects, However, candle have similar meaning across the globe as the candle symbolizes light in the darkness of life especially individual life, illlumination; it is the symbol of holy illumination of the spirit of truth.

There are festivals among different cultures around the world which uses candles as part of the “rituals”

Judaism – Hanukah, the ‘Festival of Lights’- a candle is lit for each of the 8 nights. Used to ward off evil spirits, life safe as long as candle burns

Hindu – Deepavali, spiritually signifies the victory of light over darkness, good over evil, knowledge over ignorance, and hope over despair.

Western Christian – Halloween, candles were carried from eleven til midnight, if the candle went out it was an evil omen, if it didn’t it meant one year free from witchcraft.

Mahayana Buddhism – the lighting of a candle or an oil lamp represents the light of wisdom illuminating the darkness of ignorance.

 “Thousands of candles can be lighted from a single candle, and the life of the single candle will not be shortened. Happiness never decreases by being shared”


Main Idea

I want to play with the idea of Light and darkness which is the most common way to depict a candle, however the Project should incorporate a sense of aesthetic and should look nice and pleasant (Opinions on the matter vary from person to person) especially in the analogue stage.

Reflection on Rose Bond & Matt Adams.

First and foremost, I think that Rose Bond and Matt Adams live by a different set of ideology whereby their project stemmed from.

Rose Bond

Throughout Rose Bond’s career path, she seemed to be focused on one main element which is the projection of animations, since 1982, her major work was animation and since then, she never left that field until now. We could clearly see the progression of technology within her work as she started out painting on 16mm clear film using vibrant color and it was done frame by frame painstakingly, I was really impressed with hard work of her work as I recently started to tryout doing animation to incorporate into my work which was done digitally that was so much easier than physically painting onto a small film, it was however, still tedious and this was the result that I’ve got from many hours of work.

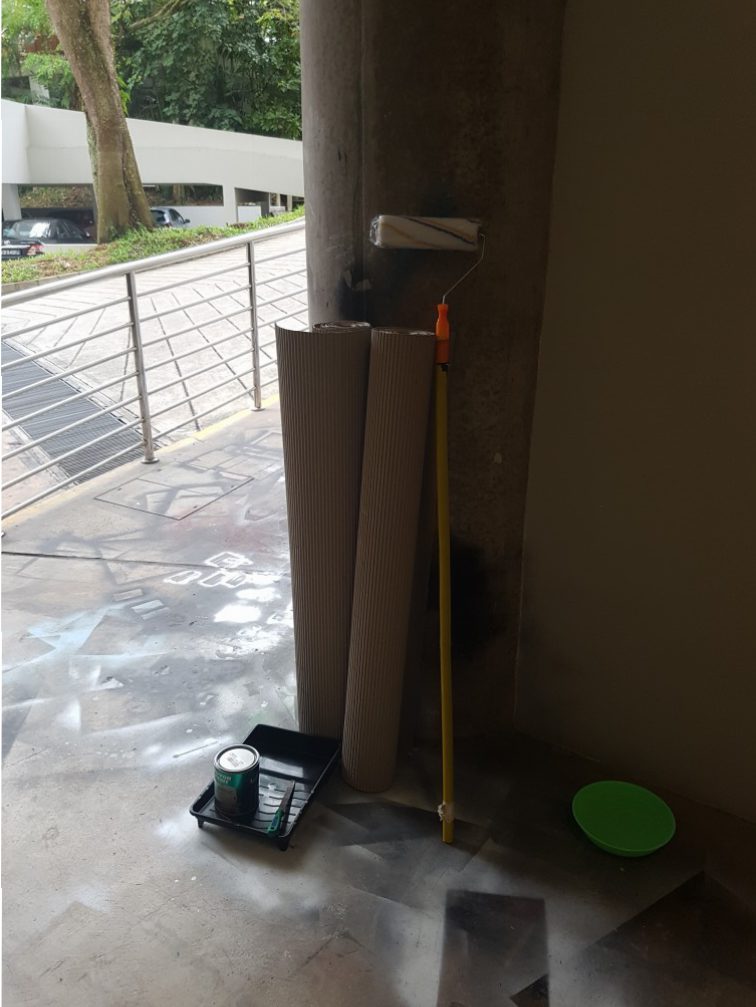
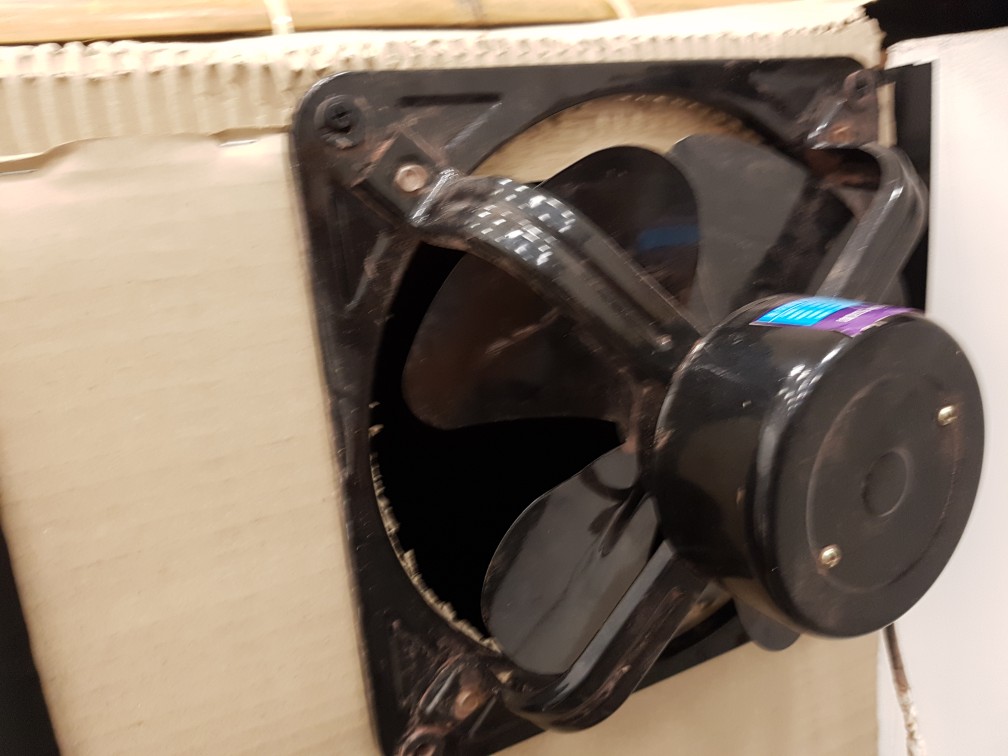
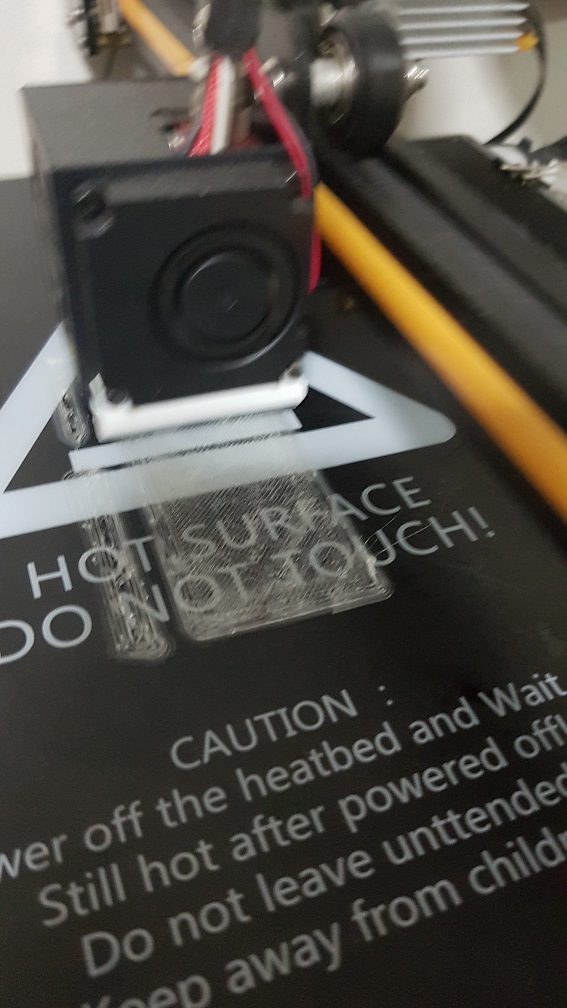
although it seemed really easy, but for a first timer, it took some time away from me.

Therefore I really admire Rose Bond’s passion and perseverance for doing such complex and long animation on a small film. As the time goes by, she shifted to digital animation and along with the support of better projectors, she could produce a larger, more vibrant piece of work onto building to catch the passerby’s attention, which I think is really effective as a form of art.

Matt Adams/Blast Theory

In Matt Adams work, I was more impressed by various field of technology Blast Theory used in their work, there was a high level of technological engineering required to complete each work and I was amazed by how every details worked together, it seemed that their research done and planning was superbly executed and there must be many contingency planned before the actual execution to make sure that every work flows like how it should be expected, since their viewers is usually also the participant, it is really difficult to anticipate what will they do, and as Matt Adam said:

“There will always be people trying to break your game”

yes, no matter how well the project was made, there will always be chance that something will go wrong, and this is why backup plan or recovery plan should be always thought before the execution as I think that a faulty installation which is obvious to most of the viewers, will not be a good installation at all. I got inspired in this by Matt Adams and I should really incorporate contingency plan during my planning stage for FYP so that I could be prepared if something goes wrong or spoils, it should be able to be repaired during the show. *Note to self – Include Maintenance and Recovery in Project Planning for FYP*

In Every of Blast Theory’s work, I was awed by how every project seemed simple to the eye of the viewer/participant but the work done to put these “seemingly simple” systems was so well thought, like Karen for example, as a user, it seemed really easy to navigate around the story just by clicking and especially from the start, the reaction of Karen was expected, but like as Matt Adam said, as the story progresses, Karen would bring back the choice made from the past which will surprise the user when they were caught off guard and this was also used in Can You See Me Now? whereby the user was supposed to put their username as someone whom they hadn’t see for a long time and while they play their game and forgotten about it, the “catcher” of the game will called their name(which was their friend’s name) and the player will be caught off guard by having the name appearing suddenly in which reminds of their friend. Such small task like inputting information into the system could be used in such a way, the thought placed into every small details was what made the project great when build on a fully functioning technological system, in short, the technological system is the base structure of the skyscraper, and the height of the skyscraper will depend on these well thought details.

In Conclusion

I think that Rose Bond and Matt Adams/Blast Theory was the type of artist that I mentioned in my first FYP post,

Rose bond is those artist that knew what she like, locking into just doing related project and tried to master the craft of animation and projection mapping.

Matt Adams/Blast Theory is those artist whom ventured into an unexplored territory, doing something new every time just wanting to see how much boundary(social and technologically) they could push.

If I were to choose my future, both artist is great and it’s only my preference, but I would like to become more like Matt Adams than Rose Bond as I think I would be really bored to do similar things for many years and also I really like to explore stuffs on my own.

Interactive Devices Final Project: Obsoleting Instruments Process 3(Final).

Continue from my previous Process 2.

again, I had progressed much further since that post, mainly in designing the workable electrical and mechanical system that could fit into the Telephone and to write the Arduino code up.

First, lets start with the Final Video!


Back into the Process

Since the previous post which I’ve roughly did the belt system that drives the music card into the laser reader, I had added the motor to the system and tried it, at this point, it seemed to work as I thought all I need was to slow the motor down and it will be alright.

After I cut the hole, I proceed to modelling the card slot and i took inspiration from the ATM just to have the user to have something they’ve experienced and know how to put the Music Card in without instructing them, since subconsciously, I assumed that they interacted with a ATM at some point in their life.

After the modelling which i am really happy with, I proceed to print it.

Since it was looking good, I went ahead and make a nicer LED system for it by soldering 4 LED(3 on the bottom and one for the top).

Next, I Epoxyed the speaker onto the bottom of the front belt drive since there is already a hole in the bottom shell for the speaker.

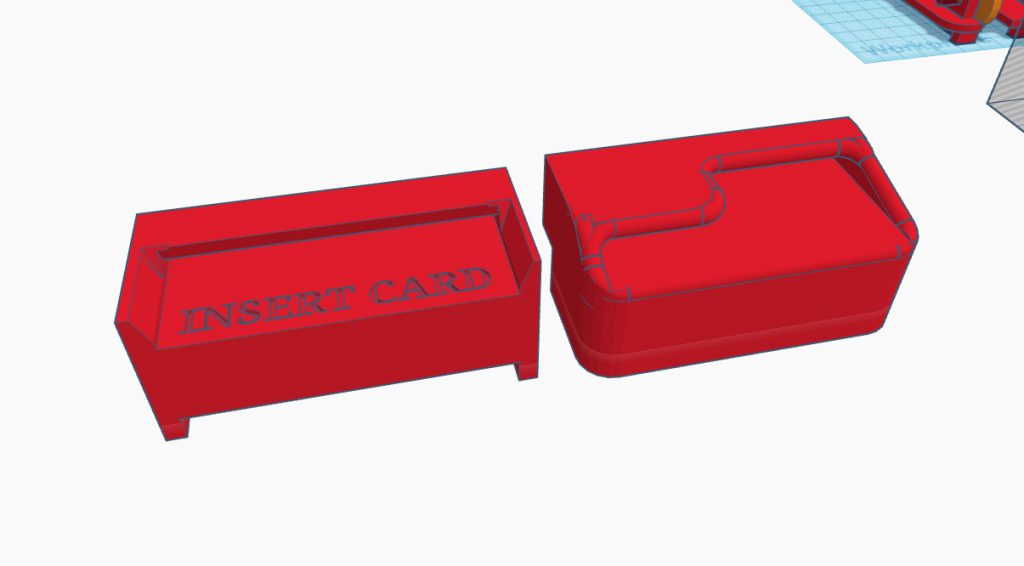
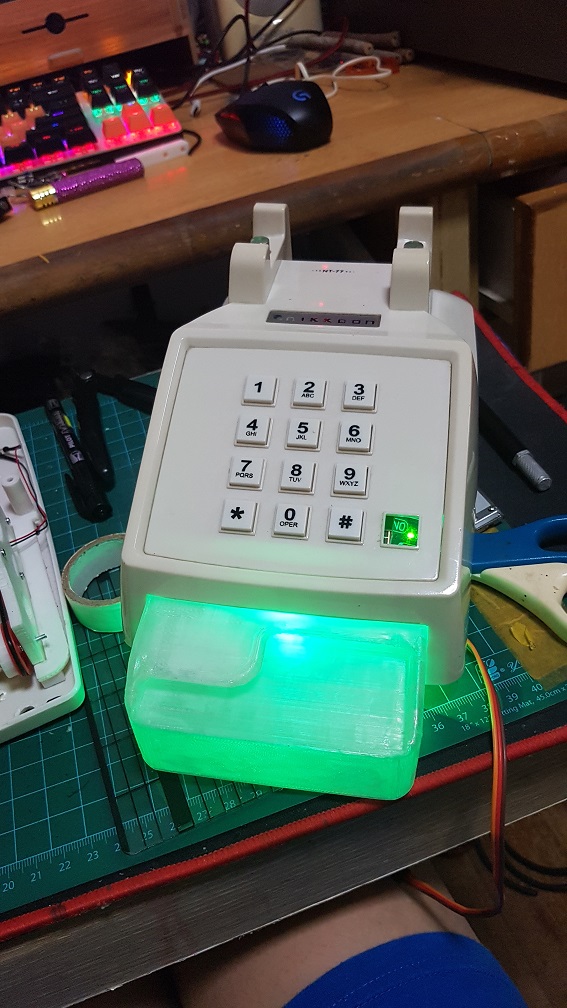
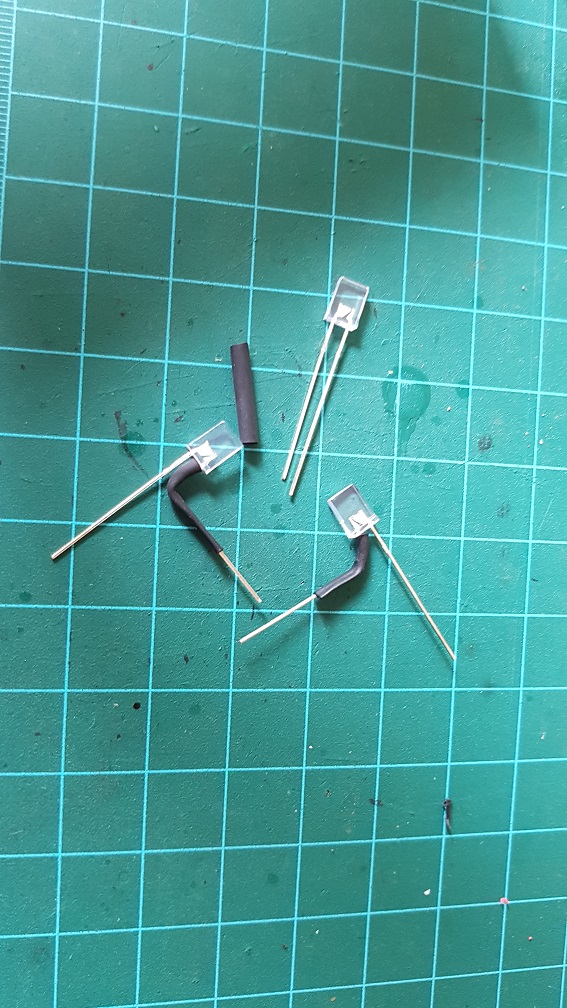
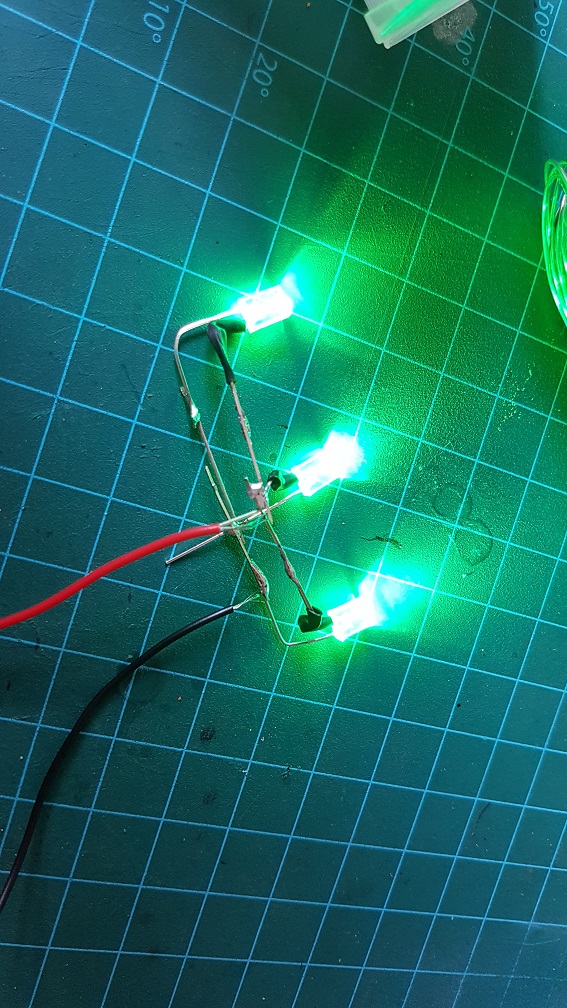
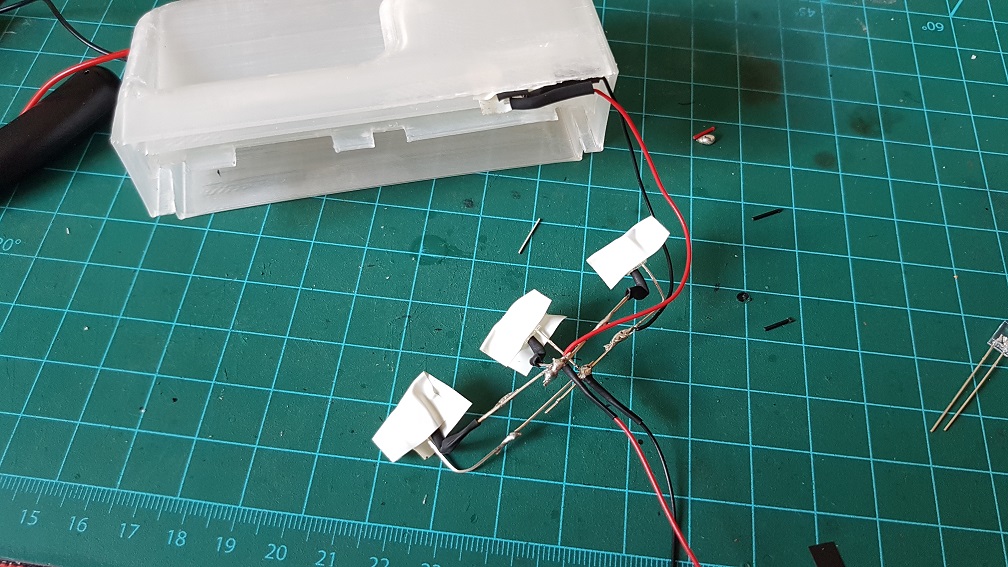
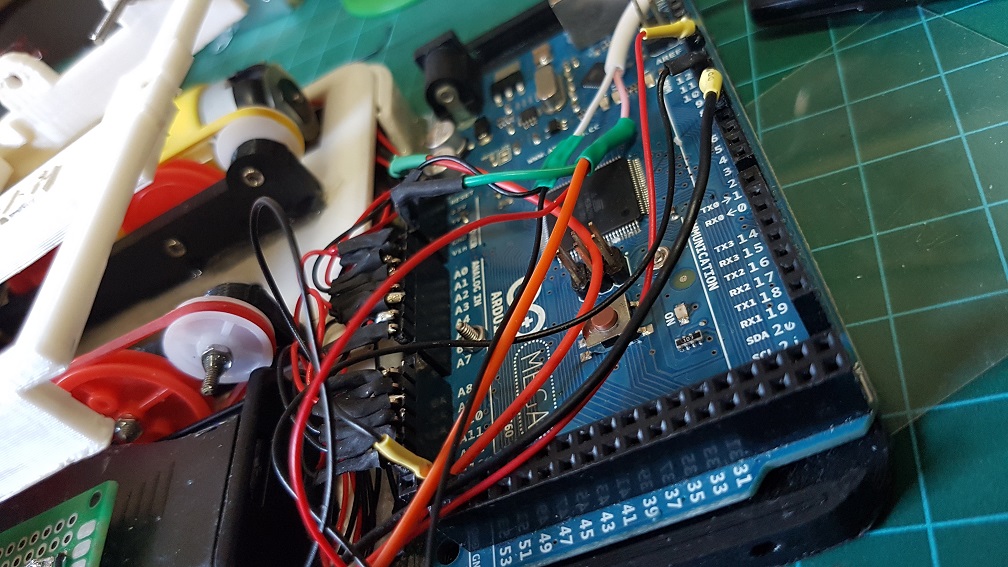
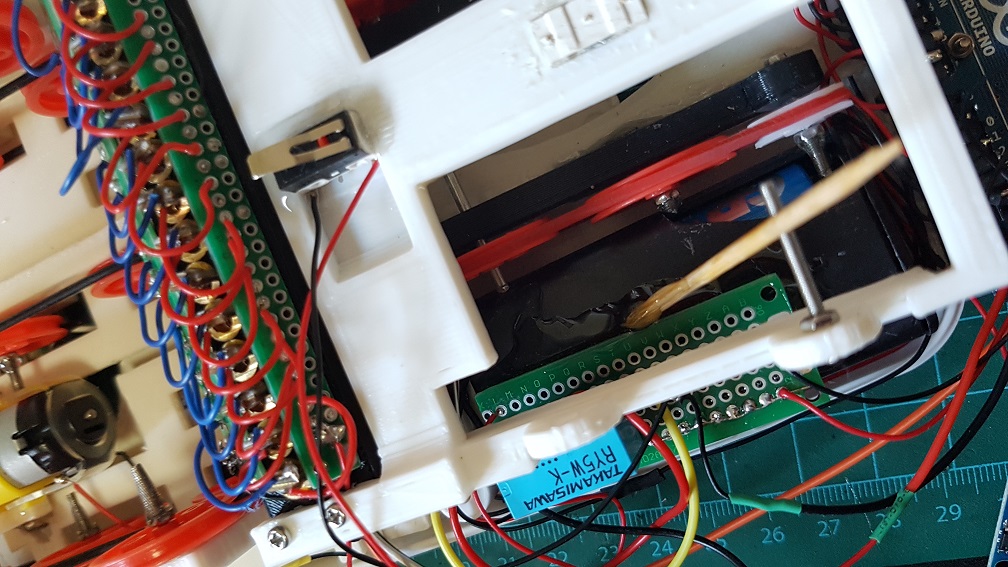
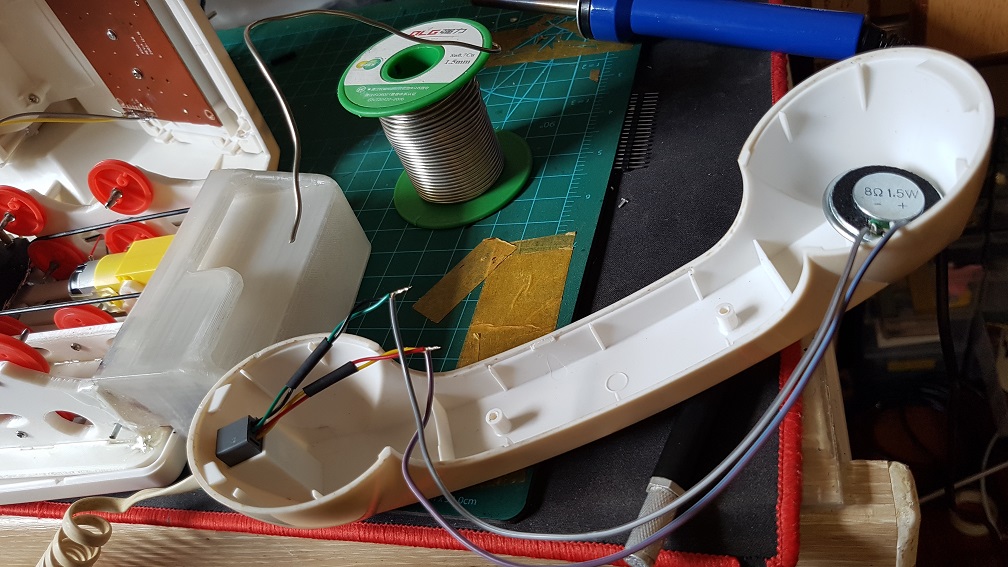
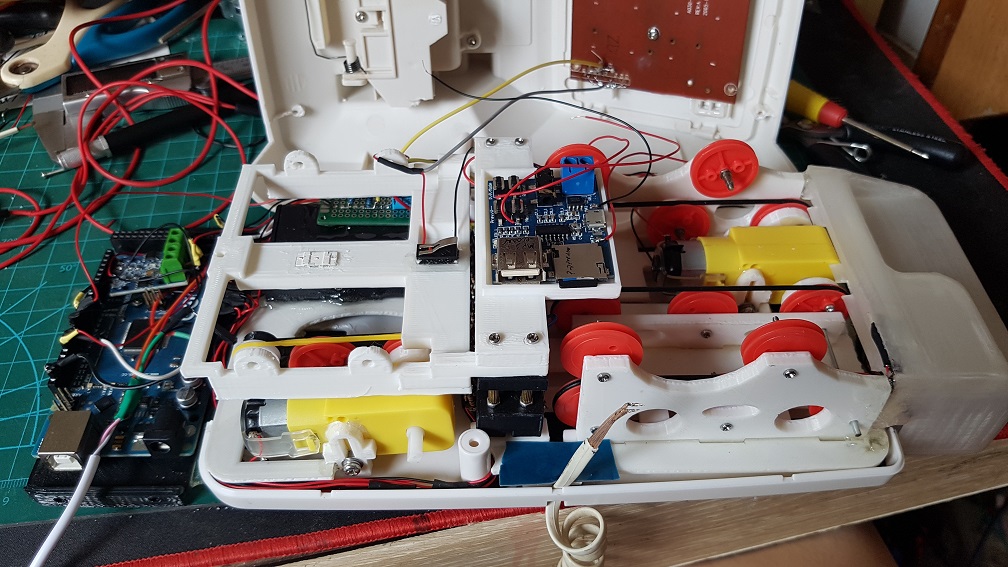
This is a 8 Ohm 0.5watt speaker that will be plugged directly into the Arduino.


I also Epoxyed the 4 LED into the card slot to prevent them from sliding around.

And came the soldering party.

It was at this point then I realized that if i reduce the speed of my DC motor to the speed of the music, I wont have enough torque to pull the card in..


After an afternoon of panicking and finding alternative motor or even thinking to redesigning my whole belt system….

I opened up the current DC motor to see if i could make modification by changing the spur gears to worm gear, which will increase torque and lower speed(after i did some research). but this require me to rebuild the whole gearbox as well as to remodel+reprint the whole of the front and back belt system.

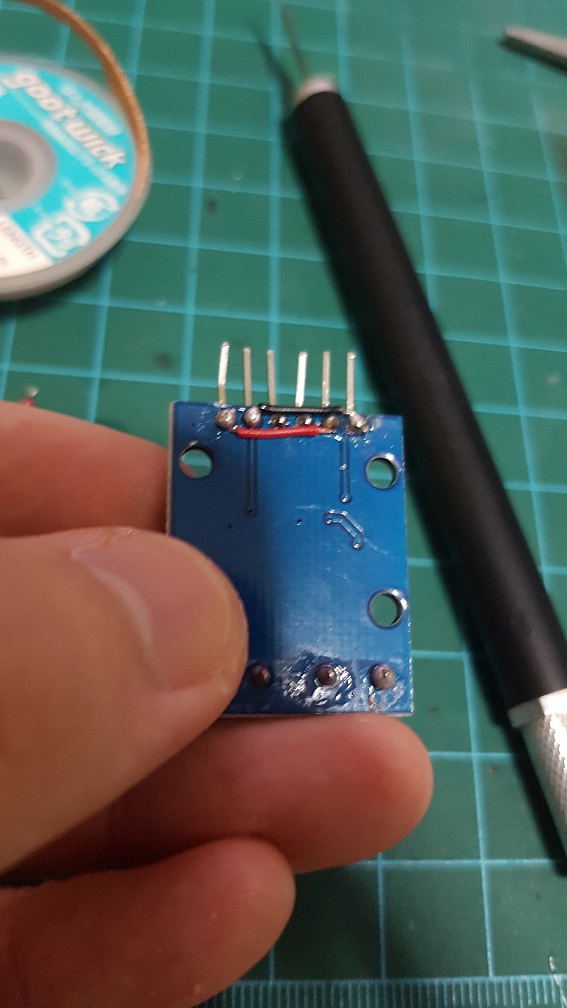
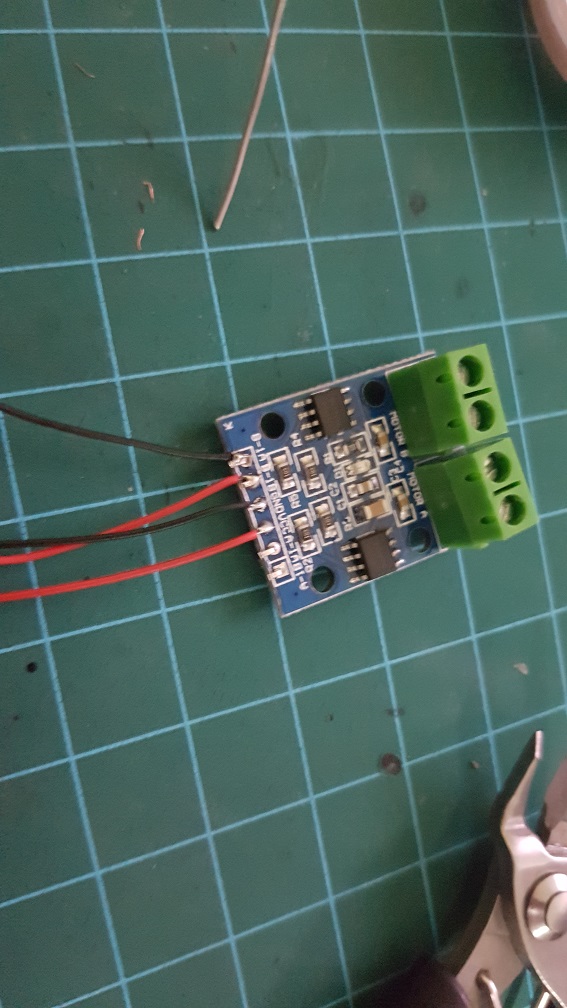
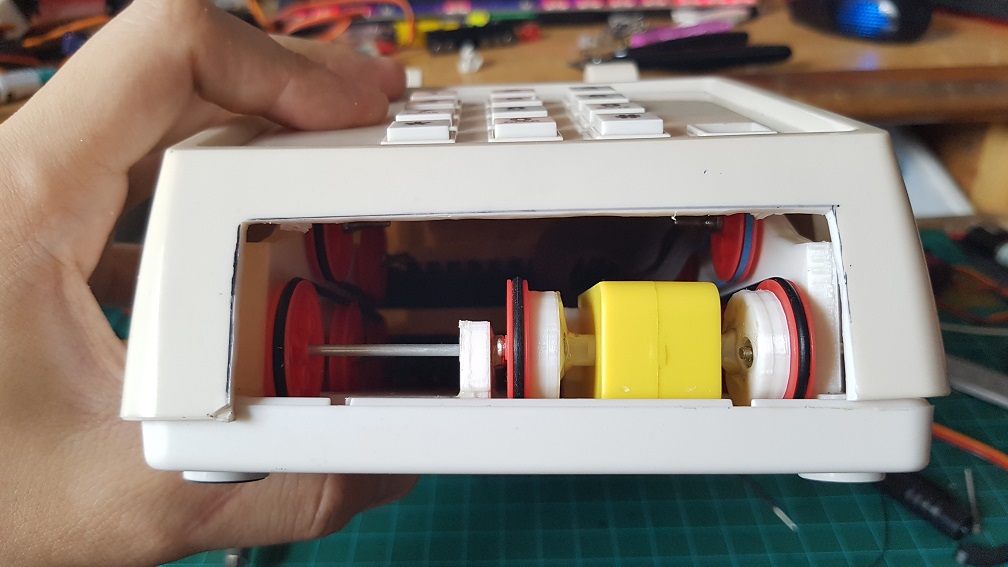
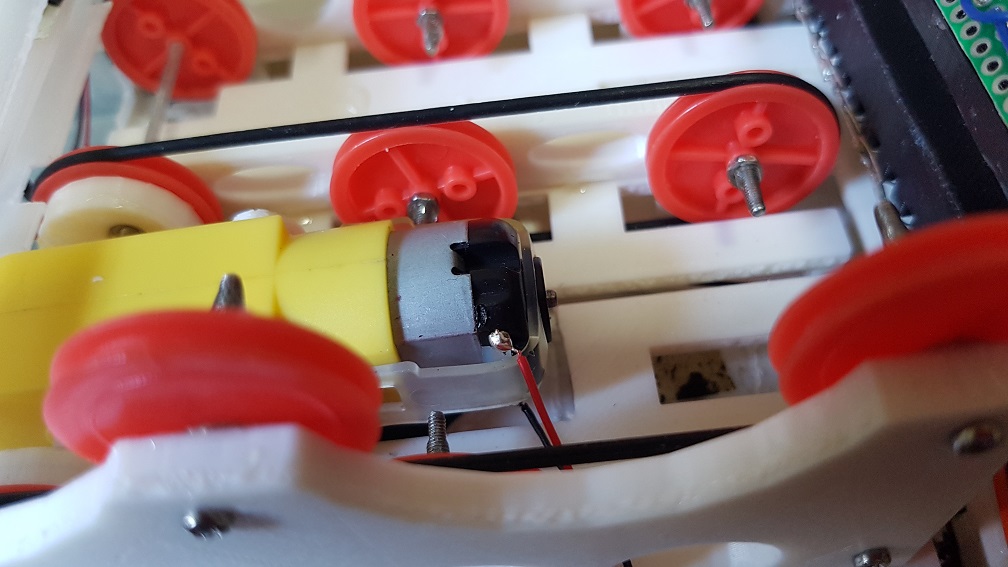
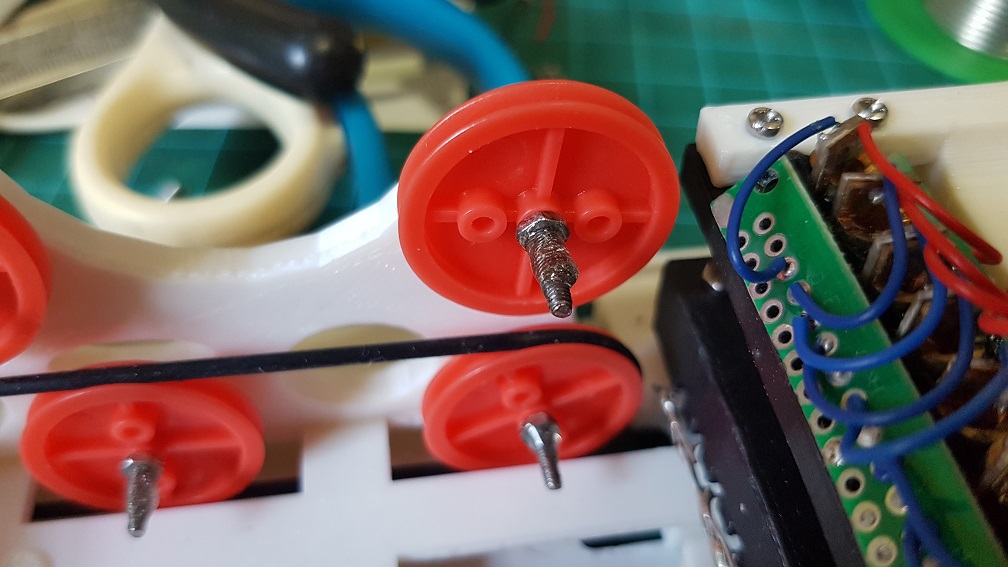
And then I found that I have a longer DC motor with metal gears built into it and i tried to figure our if I can incorporate this gear box into my current system, which is also rather impossible as the ratio for this gear box is about 1:45. when I only need about 1:5 to 1:8. if i use this, I will have the belt driver running too slow. 
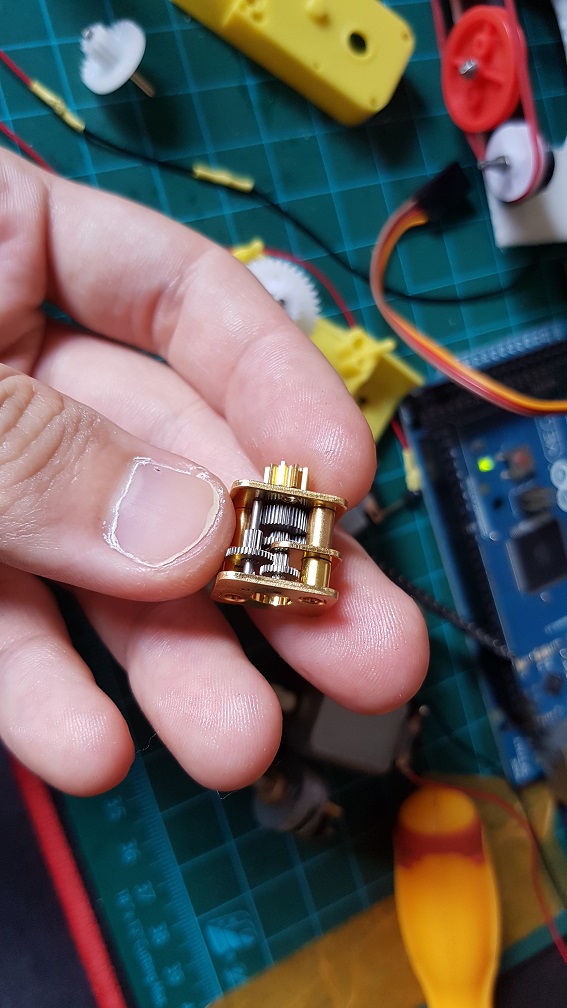
same goes for this, but this is 1:250… even slower.

So to solve this problem, I tried to get the medium speed which is faster than what the song should be and will stuck about 30% of the time and removed the buttons (which detects card when user insert into it that trigger the motor to turn the belt.) that caused more friction. And I also jump start the motor by making it to spin at full speed for half a second to break the initial force required when the motor is starting.

The messy configuration, components and wirings.

It took me some time to sort out these messy wiring and make sure that none of the wires interfere with the track that the Music card is going through.

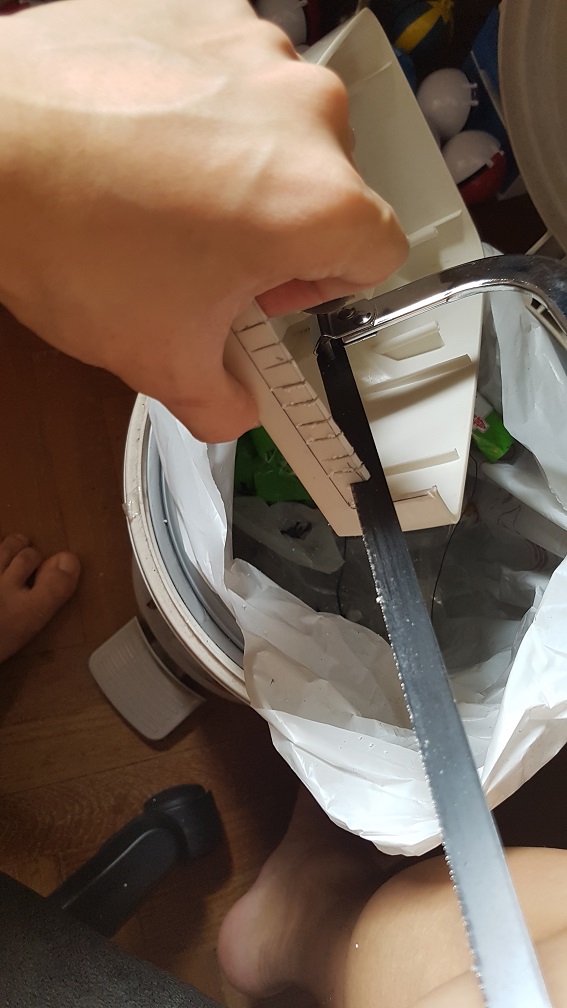
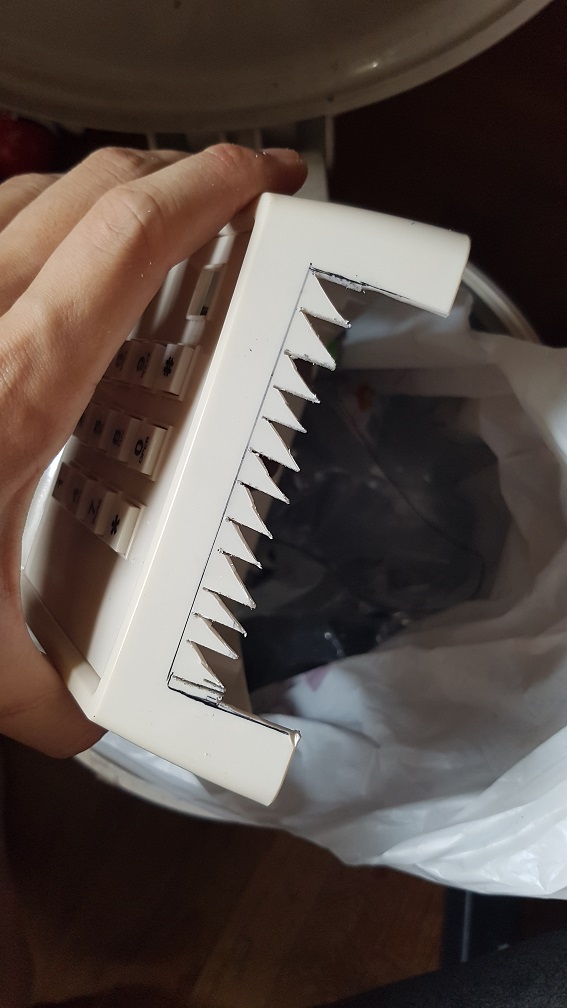
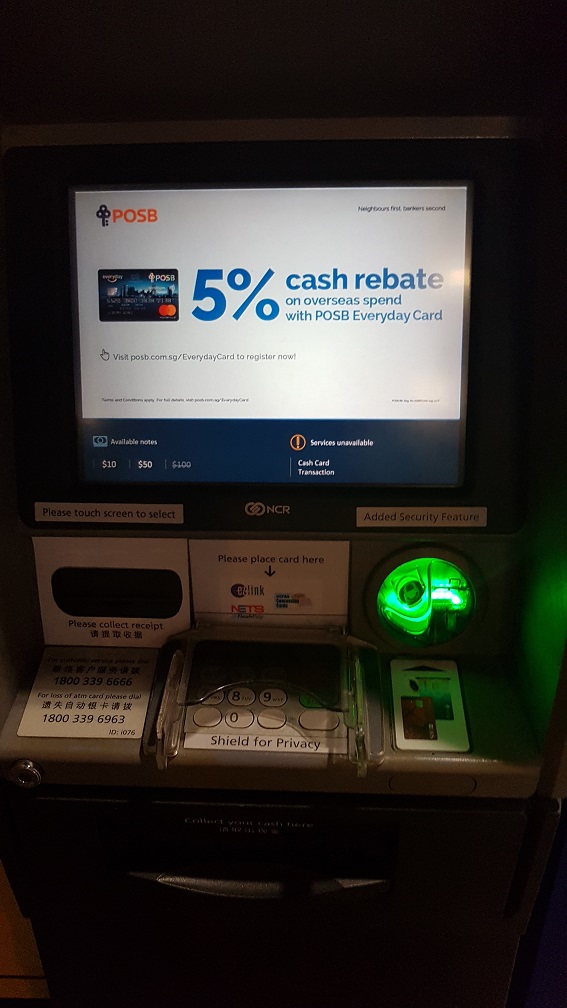
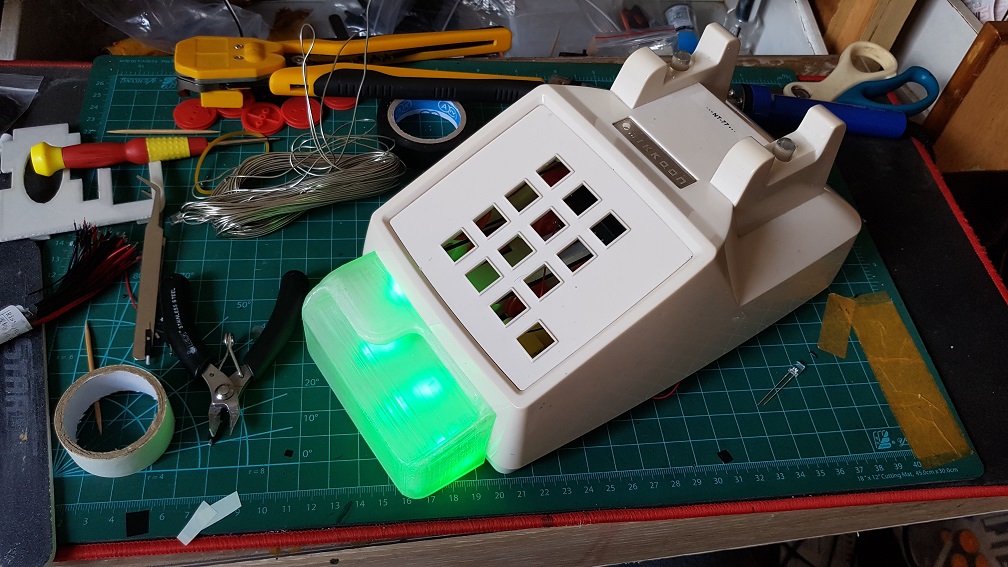
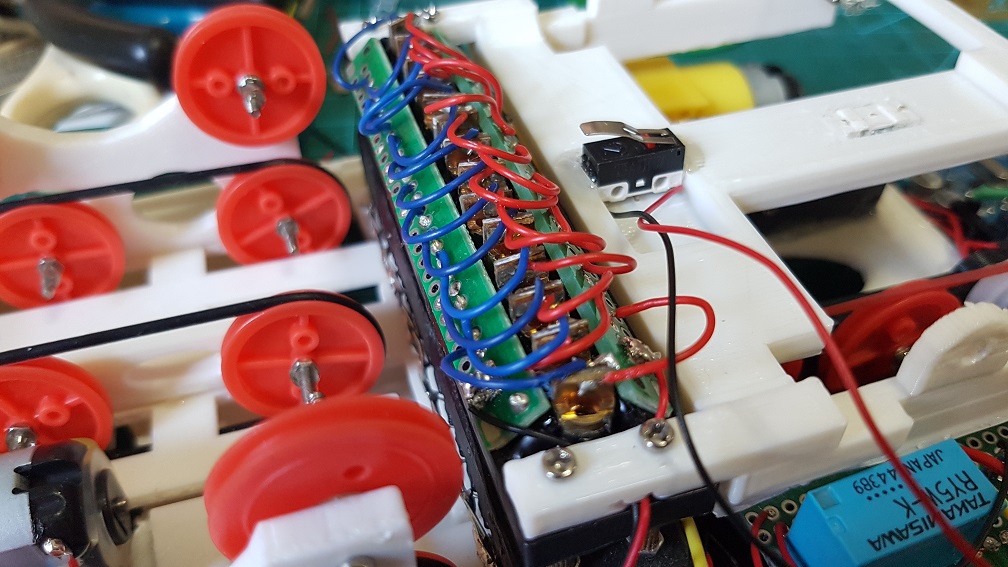
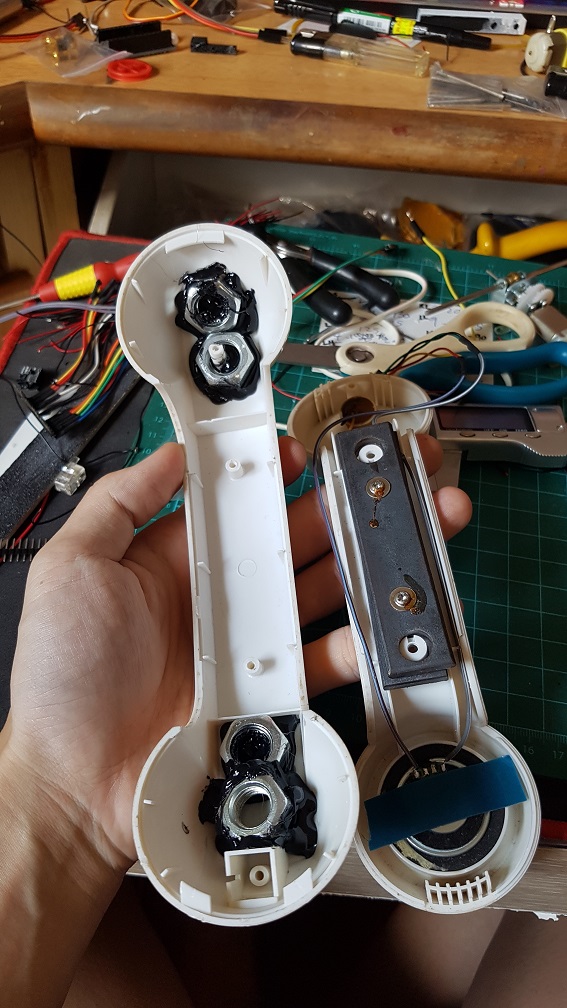
after trying out the workable speed of sound and getting stuck by removing the buttons.

and after this, I tried to code the majority of the code together.

For this, I did not expect to work this well and I am really excited about it!

Towards the end of the project.

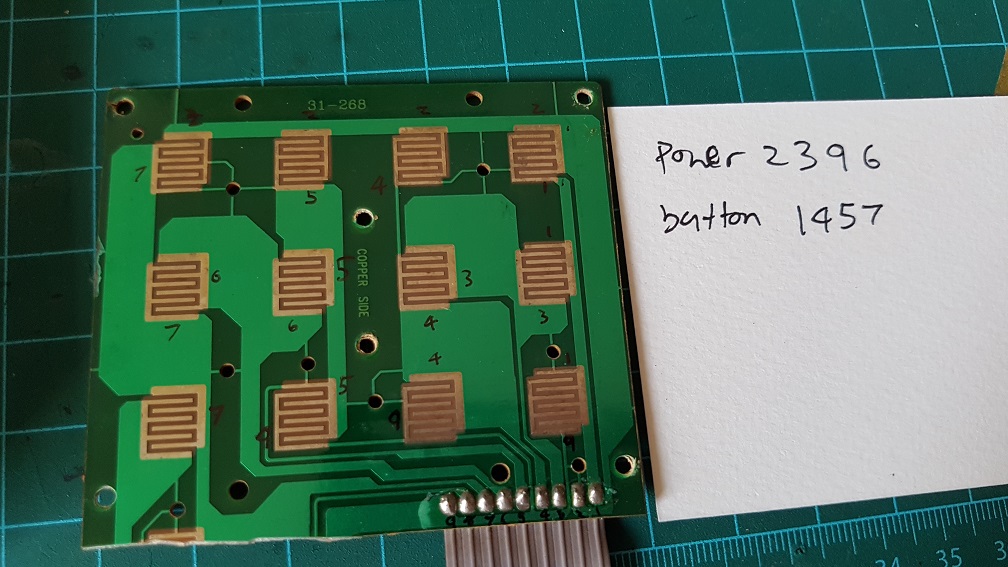
to make use of the original button on the phone, I’ve figured that the 12 buttons runs on 2 different circuit which I could simply solder these number together and make all the 12 buttons into one button, so nomatter which buttons the user pressed, it will be registered as one button pressed.

Because I cut off the Redial button on the phone to make space for my belt driver system, I epoxyed the Redial button back to the case as there are no PCB supporting it.

Some may wonder how did I make the Music Card..

I copied a few from online like Demons by Imagine Dragons, Harrypotter’s Hedwig Theme, and Pokemon Theme song, These were labeled on the card and those that weren’t labeled was What I composed myself. Since I have no music background, I did it by trial and error to give it a tune.

This was screen recorded when I tried to compose my 4th tune for this project:

after this was completed, I screen shot it and import into Illustrator to trace it into the Card layout which I made.

and this was how the cards were made.

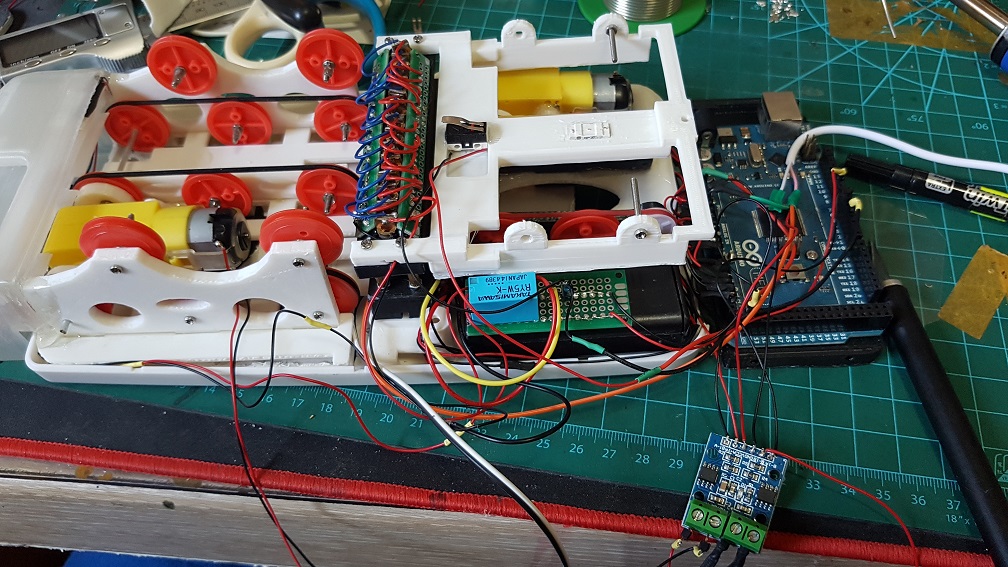
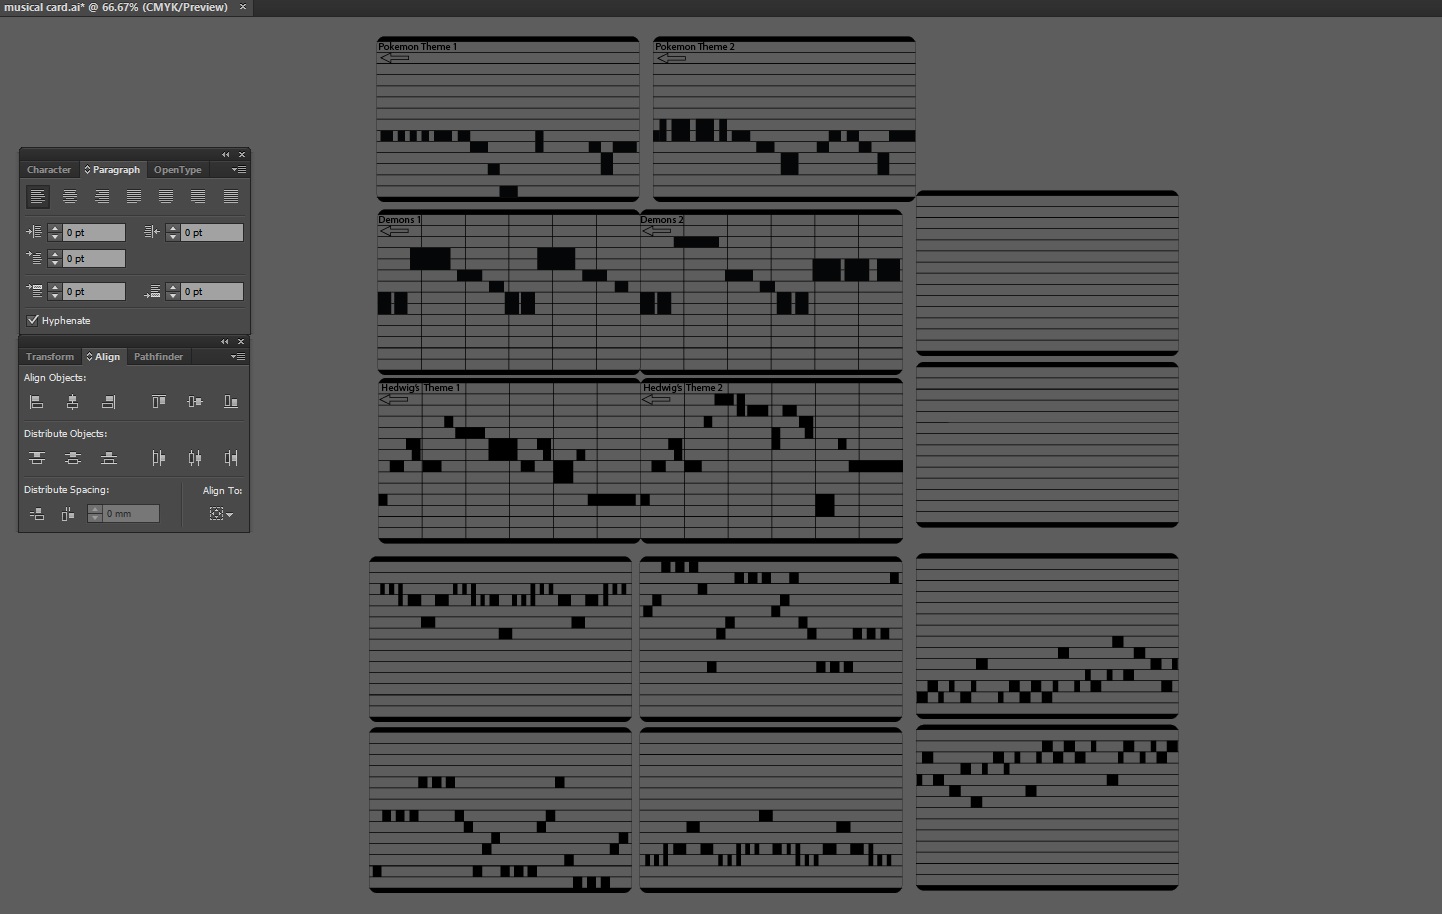
Laser raster and cut in school on 2mm acrylic.

AND how about the voice command in 7 different accent?

well, this is relatively simple, just type whatever I want on Webbased Text to speech reader and have it read it out in different accent and edit them in premiere pro to cut them up to the exact same length(9 seconds) and put them into the SD card within the Obseleting Instrument’s MP3 Decoder.

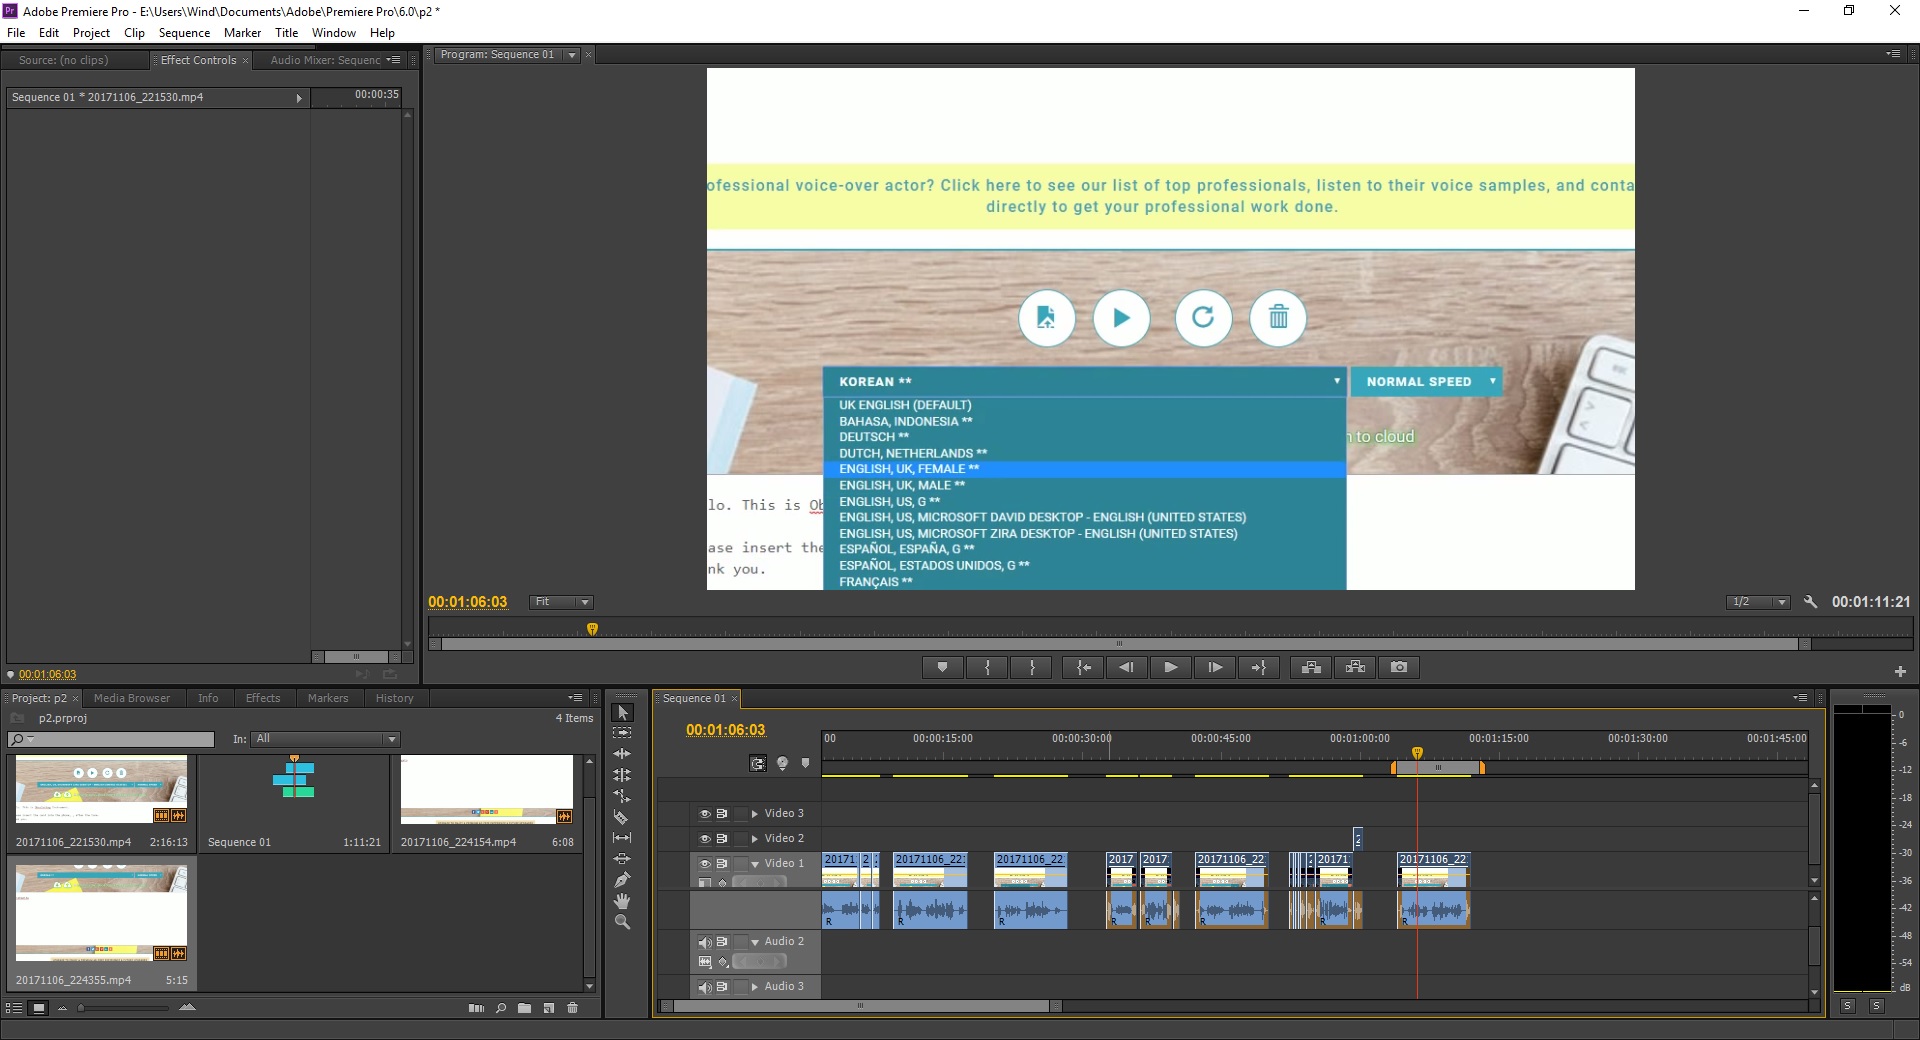
I really like the Japanese and Korean accent, its really funny!

Why did I made it to speak different accent? It was to engage the user and make them feel like there was really life in the system where they called/receive call from a real person, like if they discussed with their friend and their friend said that there was a Indian accent while what they heard was the British accent, they might want to try Obseleting Instrument for a few more time. The accent there is there to add variables in the system.


In Conclusion

Throughout this Project, I’ve learnt many things like how to model objects in Tinkercad and make measurements properly, there are always failures in everything that I modeled before it works, and this is why 3D printing is a good prototype process where I printed it out and tested it to know if it work or not, if it doesnt, I will shave off some piece to see if it fits, if it does, I will make new measurements for the edited model.

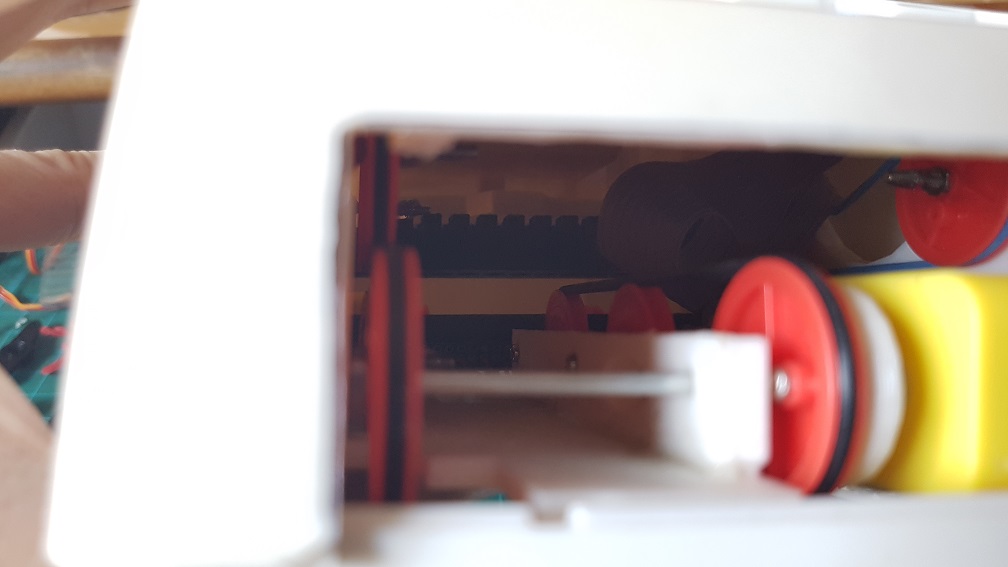
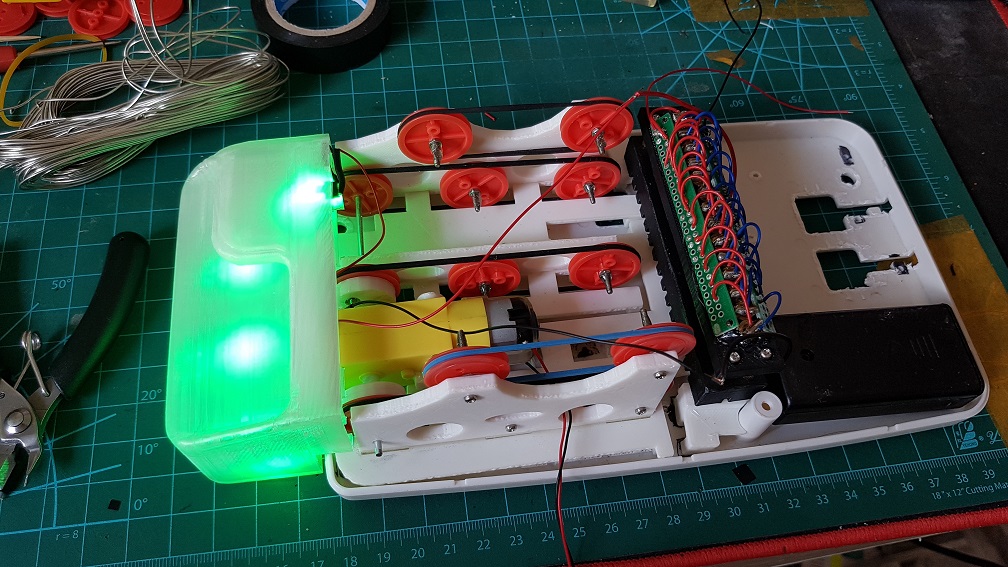
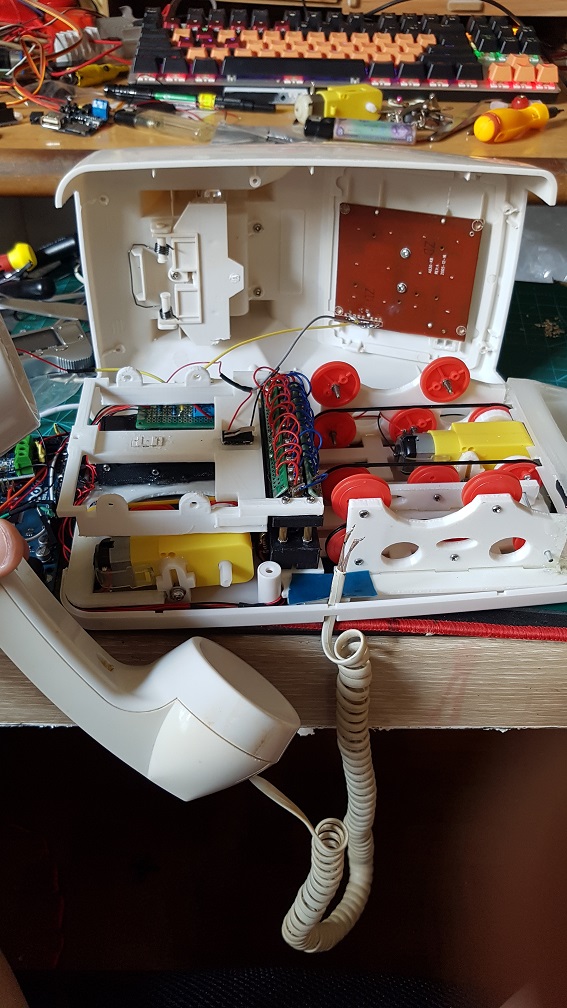
I am really glad that this many piece worked well together and this was the biggest challenge.. since there are so many components working together (electrical and mechanical), even if one of the parts failed, it would not work as well as it is now. So I considered myself really lucky that the parts happened to work well even when there are misalignment everywhere.

Also, to have a Telephone case in the start and scale everything into the Telephone case was really a challenge especially at the start when I could not measure how big the internal was and could only make a guess and print some test print to try it out.

In this project, I realized that if I were to do a project that require multiple fields of knowledge like mechanical and electrical, It was better if I did not know how hard it will be, if I were to know that every part of the project will be something that I don’t know, I will be too afraid to jump into this project. I did something, realized that it doesn’t work and find solution to that single problem and proceed to work on the project and faced another problem, solving and learning one problem at a time lead me to the completion of the project.

Now that I had completed the project and looking back. Obseleting Instrument is really a complicated project as a whole, but thinking about it, I am just putting many small system into one project- like using one laser diode and a photo resistor as a switch,  playing a tune when triggered, a physical button to sense if the phone was picked up, using a relay to control circuits of different voltage, running two DC motor at the same time and so on… Obseleting Instrument is just a collection of small systems, which I personally thinks was what made my journey of doing this project really interesting because I explored the basics of these components and learnt a whole lot through it.

Robotic – Final Project Part 5(Final ) – The Curious & Timid Turtle.

Continue from my part 4 of this project updates,  This is the final part which leads to the completion and is rather long as many things from getting the power supply, modelling, testing, painting, assembling to coding had been done in the past 2 weeks.

First, the final video of The Curious & Timid Turtle.

And then, into the process….

NEW POWER SUPPLY!!!

At the end of last post, I was waiting for the power supply to reach and it did during these 2 weeks so I’ve tested it out, The one that I bought is a AC-DC converter at 6V 20A when all I needed was 6V 8A, i decided to buy the higher Amp one just if i need more amp in the future, and I could also share the supply to my Interactive device project during the End of sem show.
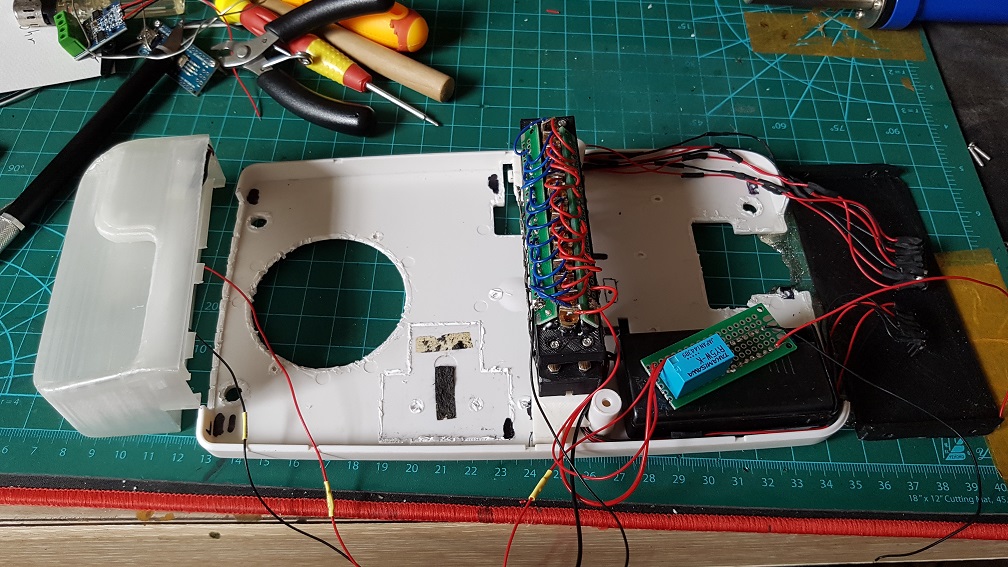
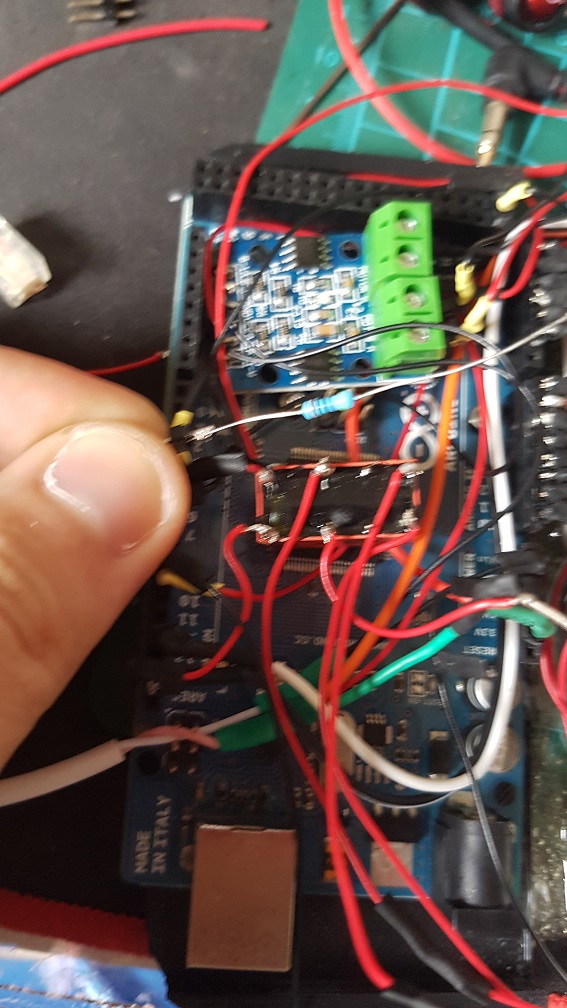
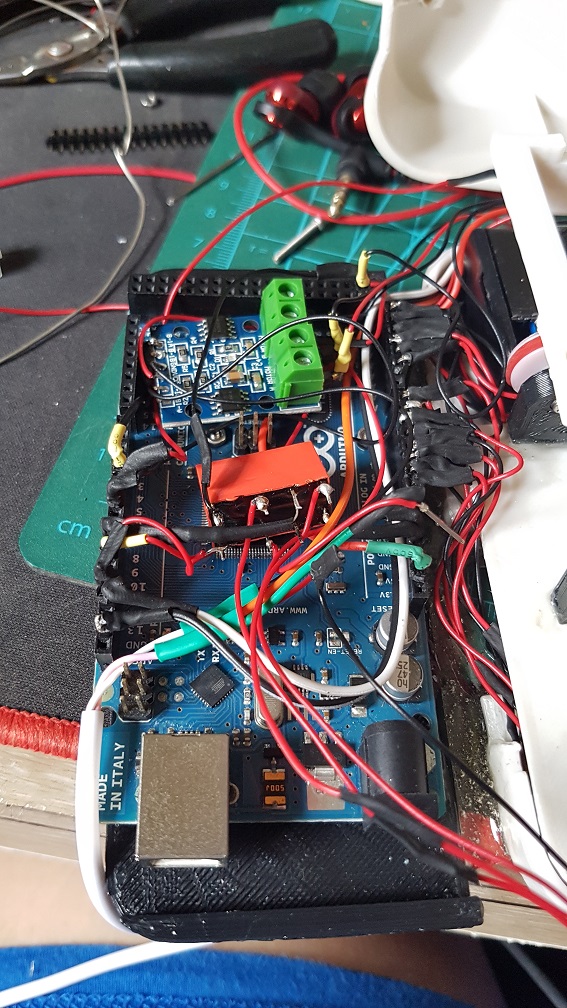
I did some wiring afterwards.

And after the wiring, I did power test, it could easily run 8 servos simultaneously with nothing overheating. which is a great news for me!


NEW LEVER SYSTEM FOR THE LEGS!!

Since the last post that I’ve decided to change the system in the legs to save space and shorten the overall length by stacking a smaller MG90S on the MG966R to act as a lever system to pull control the legs.
After testing this system out and seemed to be working, I merged it with the turtle leg that I’ve modeled in Zbrush, I don’t know about Zbrush before this project and it tool a long time just to model the shell, the legs and the feet.

I merged the leg with the previous test “rod-like” leg because I’ve already gotten the dimension in there so i just need to scale the Zbrush modeled leg accordingly to fit the “rod-like” leg.


changing of the entire base layout to reduce size and increase EFFICIENCY for the back legs.

At this point, I was wondering if I should change the MG966R(metal gears) into SG-5010(plastic gears) due to weight issue I might face later after adding the shell and so on, so I weigh the motors and decided that I should change the back leg to SG5010(but I changed it back to MG966R one day before submission due to the internal gears got loose in SG5010)

Major changes were made for whole layout of the base due to various reasons – the backleg will move differently from the front and since my project is basically a turtle with round shell instead of a flat one, it made more sense to use a smaller but higher layout rather than a flatter and wider one to make use of all the space within the shell.

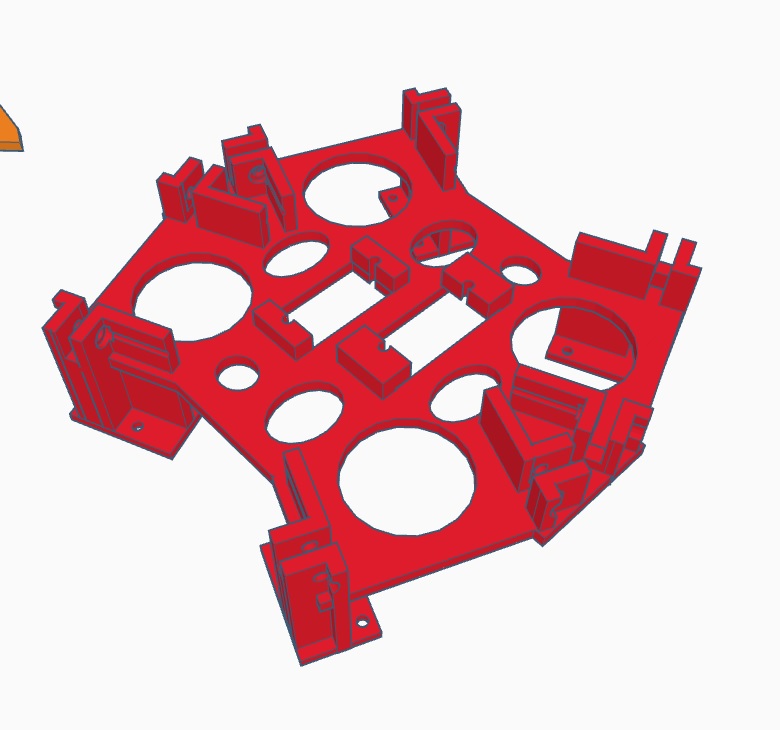
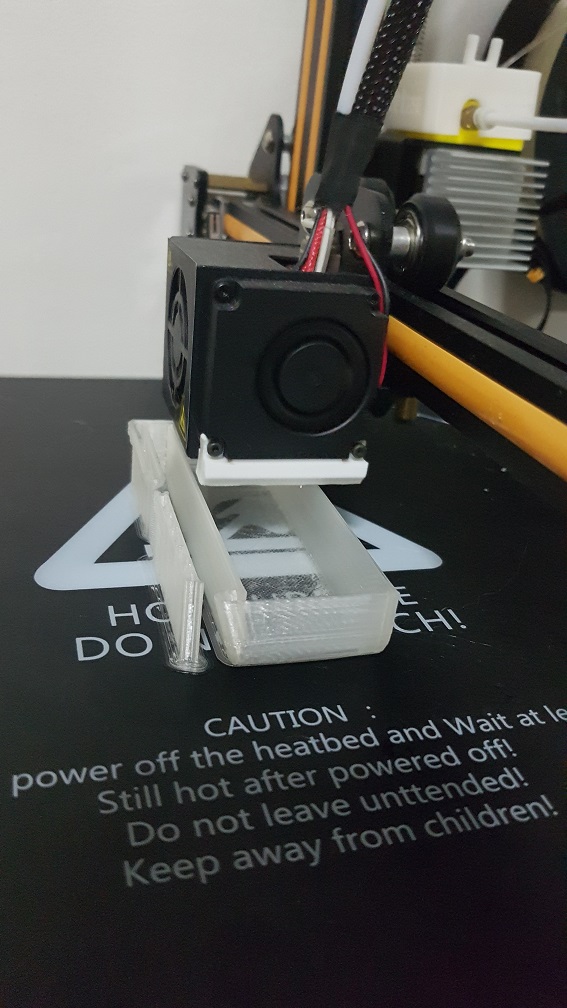
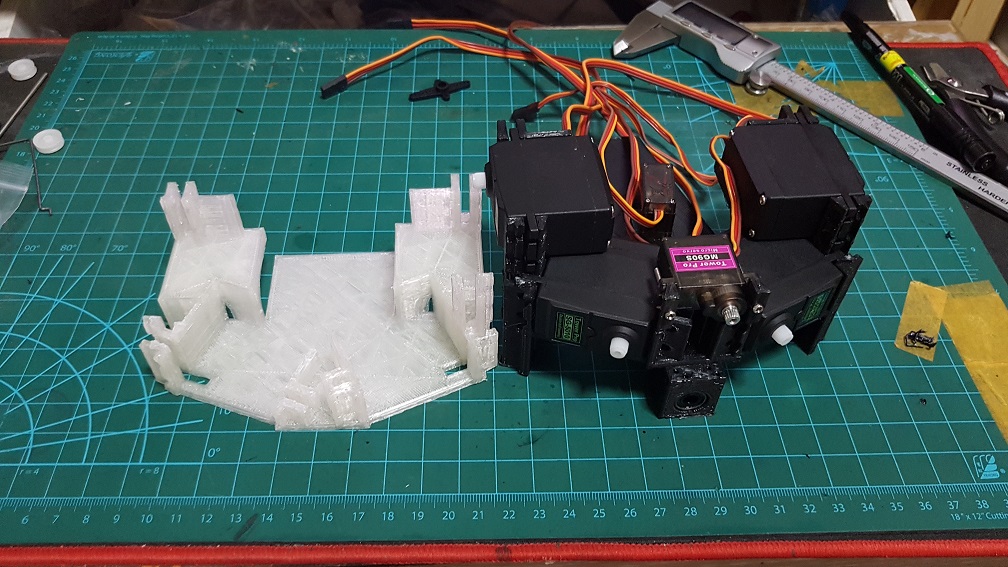
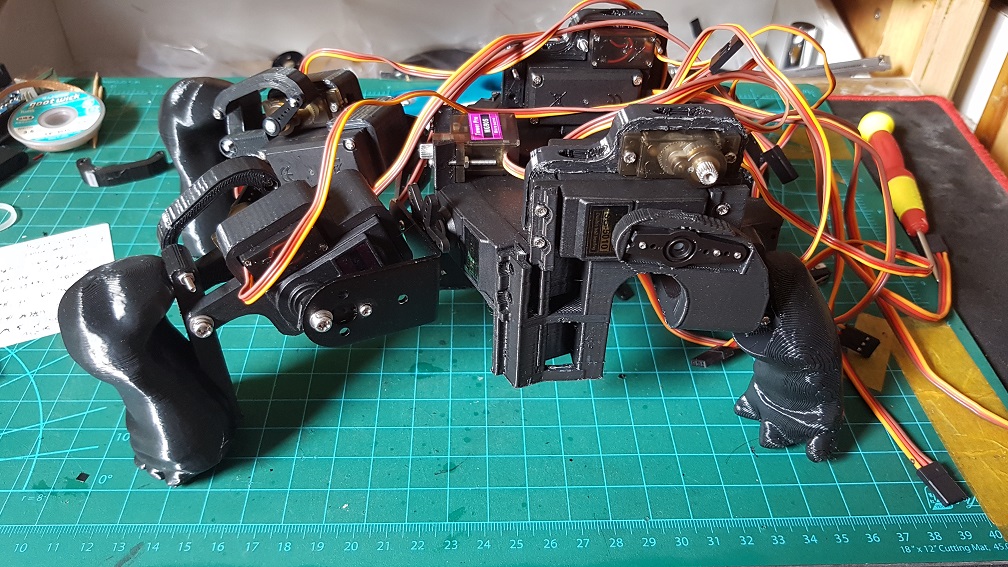
This was quite the final base before I added the mount for the small backleg servo and the servo driver mount which will be attached it using screws.

Zbrush Modelling Nightmare Funfair

Since my Zbrush was cracked, it crash rather often and I did the same thing over and over if I forgot to save frequently and hence it took quite long to model anything, but well~~

As for the shell… it took so much time and crashes to get it right, because the shell cannot be too thin(unable to print later) and cant be too thick (too heavy) and I cant find a function that could allow me to see the thickness (like reduce opacity of the material to see through), so everytime to check the thickness, I have to export into STL, and import into Tinkercad to check the thickness.

Everytime I made major changes to the shell, I’ll have to import to Tinkercad to check the thickness and shape.

The model appear

Nothing is more satisfying in removing the support in one whole chunk(I did alot of cutting before this video so I can pluck out in one piece.)

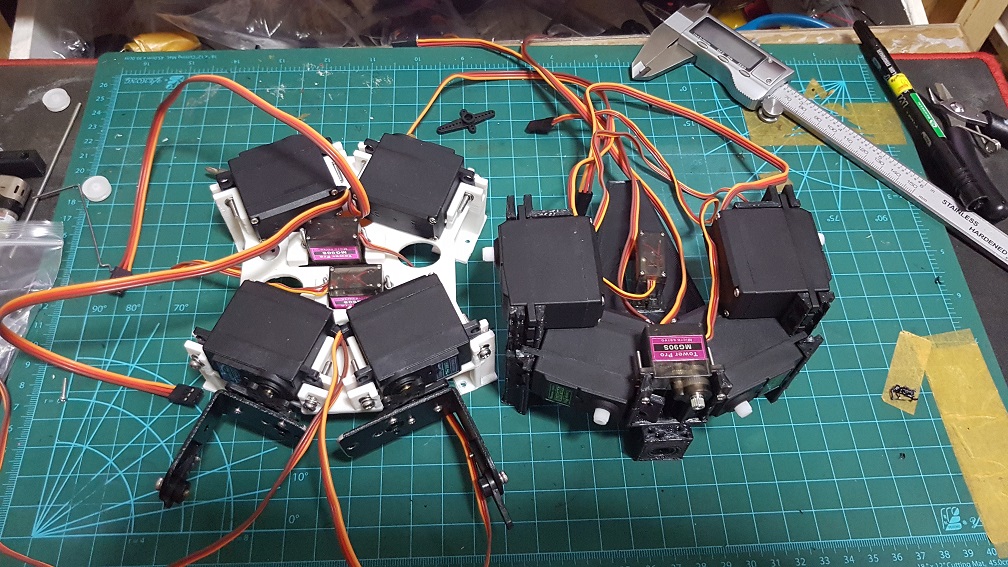
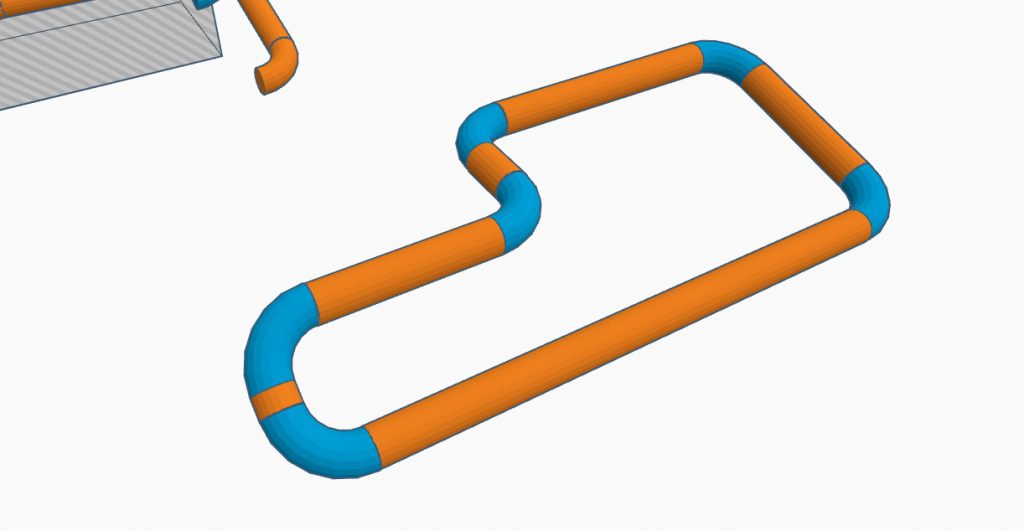
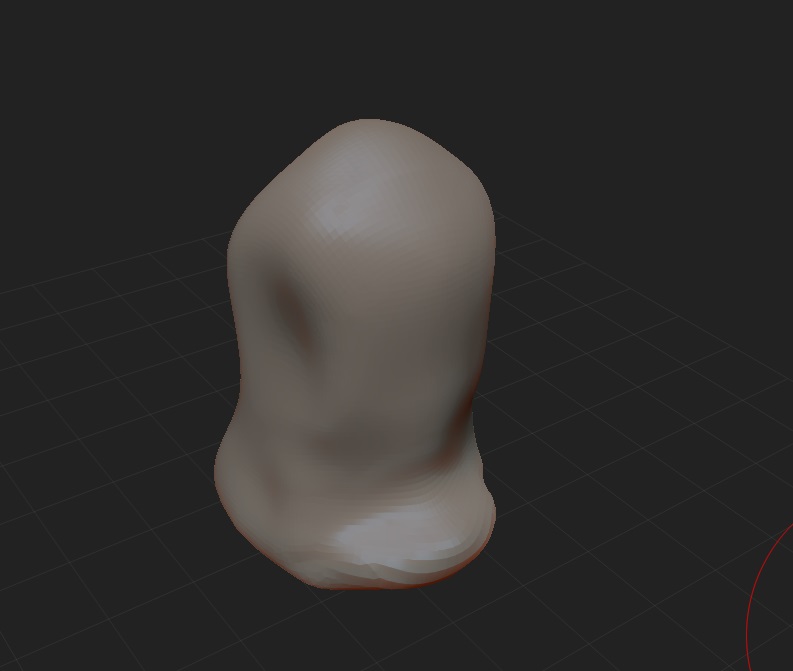
this is the liner slider an an aluminium rod for the head system.

Printing for the base shell:

Printing for the top shell:

And then the finishing(PART1)of the model.


The Final mechanism of the turtle

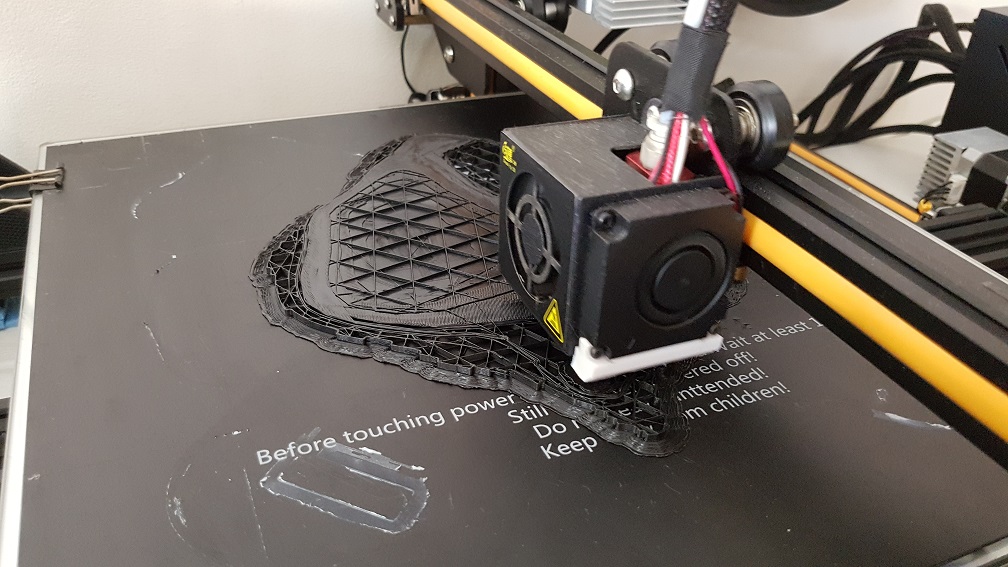
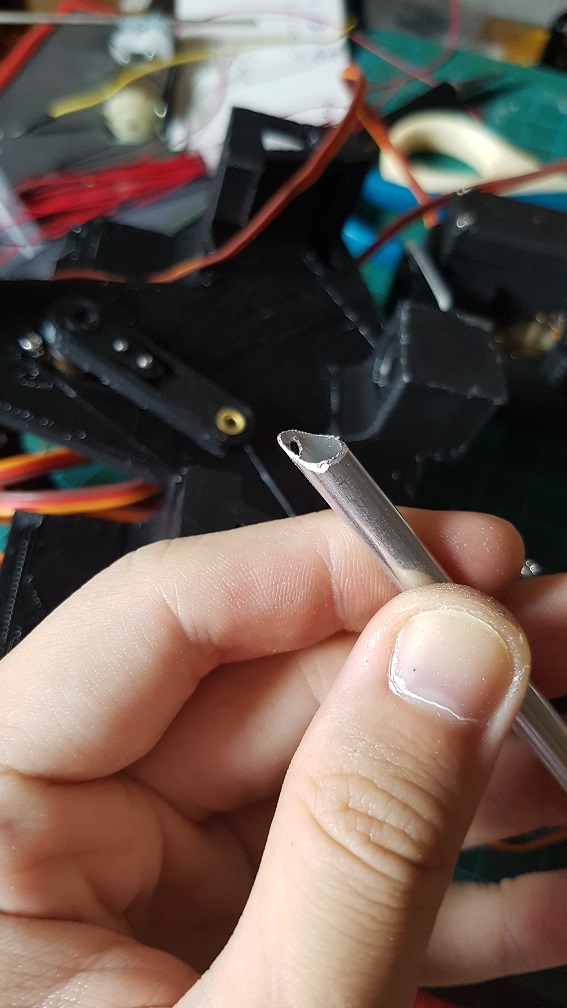
testing out of the head slider and to mark the length I need it to move and cut.

The mechanism to slide the head that I will use after cutting the rod to almost the size I need.

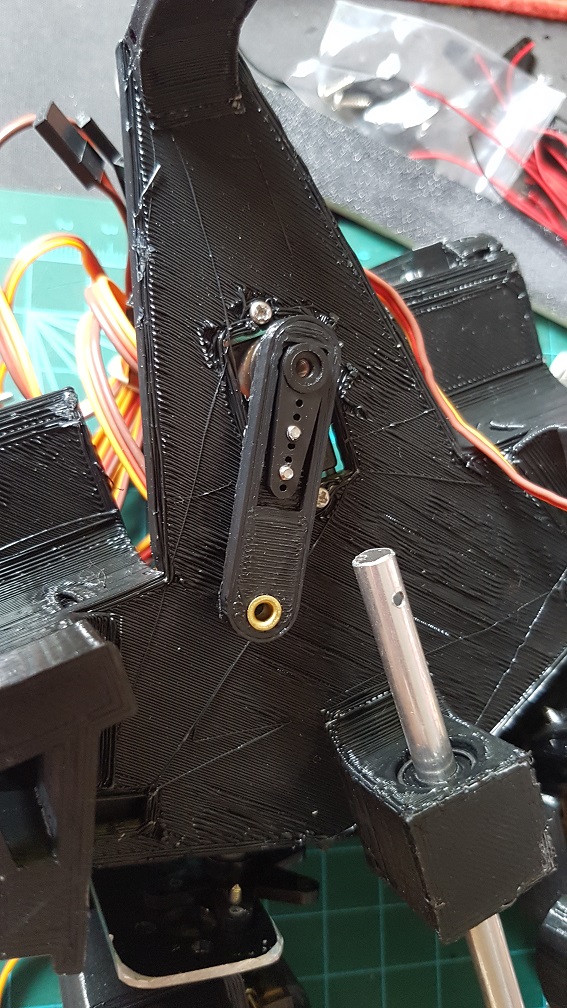
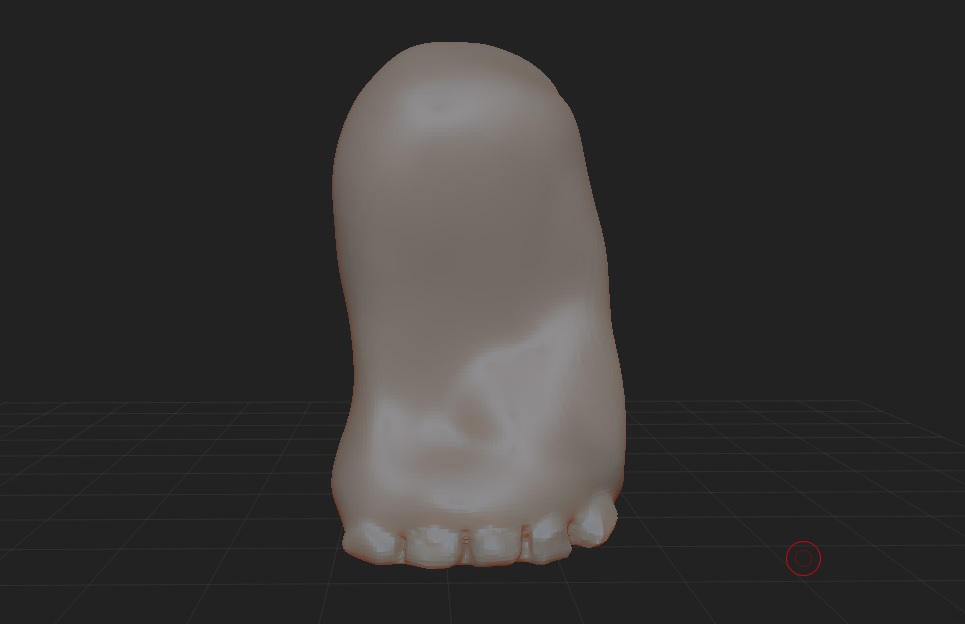
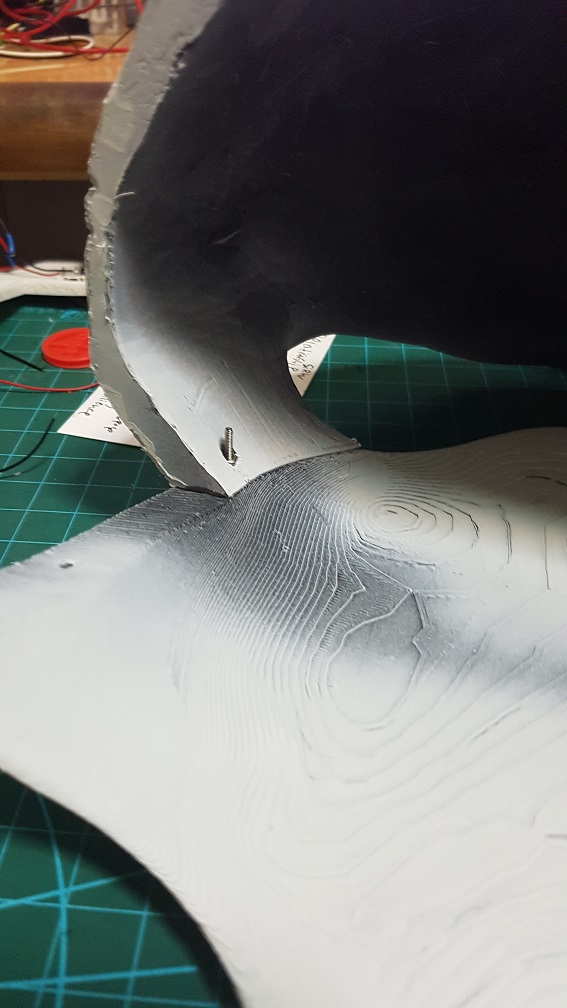
this is the final mechanism for the head after I printed a small piece to prevent the wire from tilting too much when pushing the rod.

the head could be push and pull out nicely even before adding the string to control the tilt of the head.

metal rod were epoxyed into the head to tie the elastic thread to control the tile of the head.

and a elastic thread was added to counter the tension created by the elastic thread to turn the head

And then the finishing(PART2)of the model.

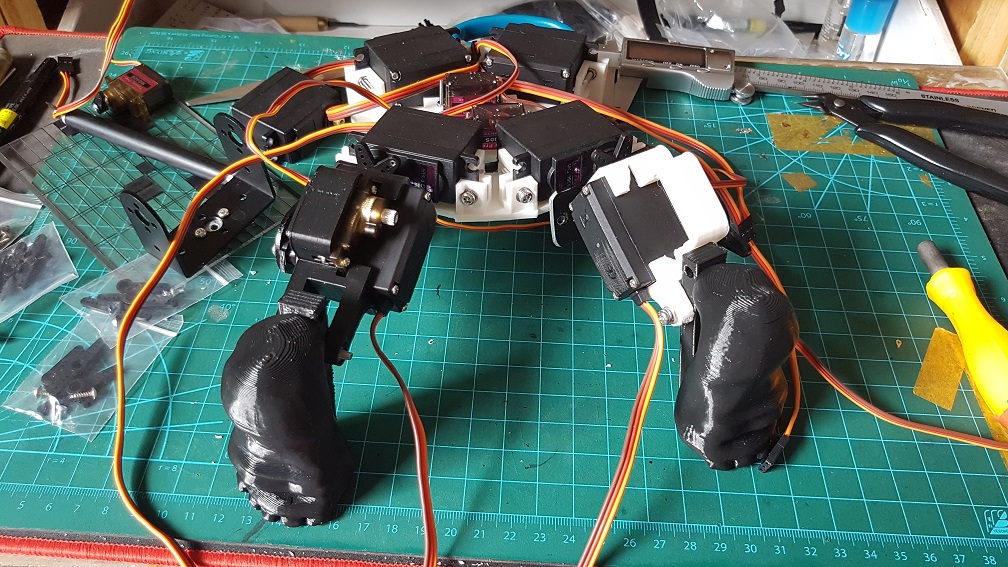
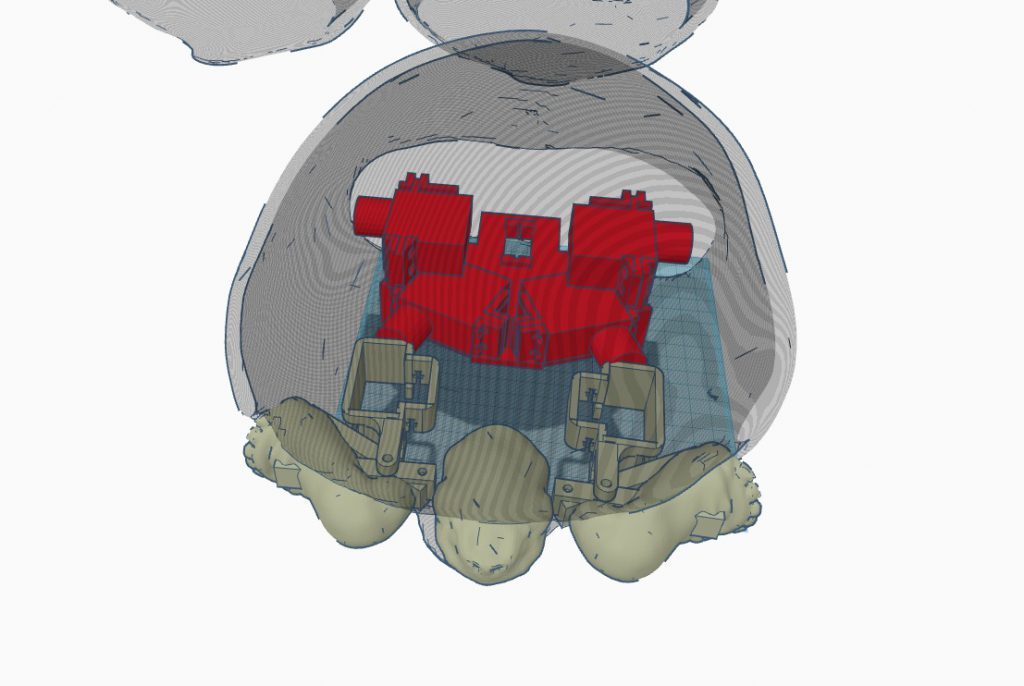
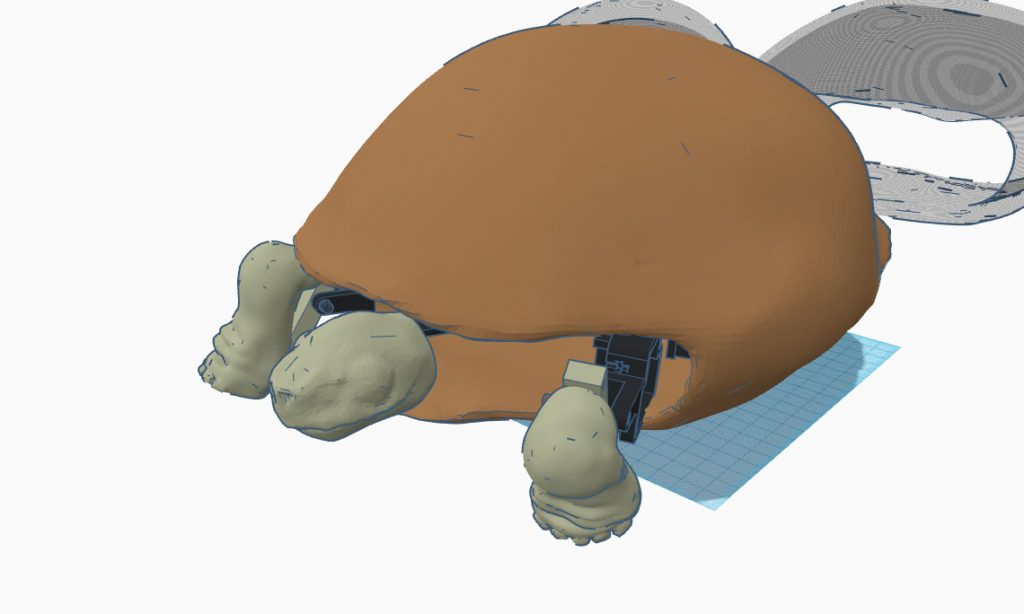
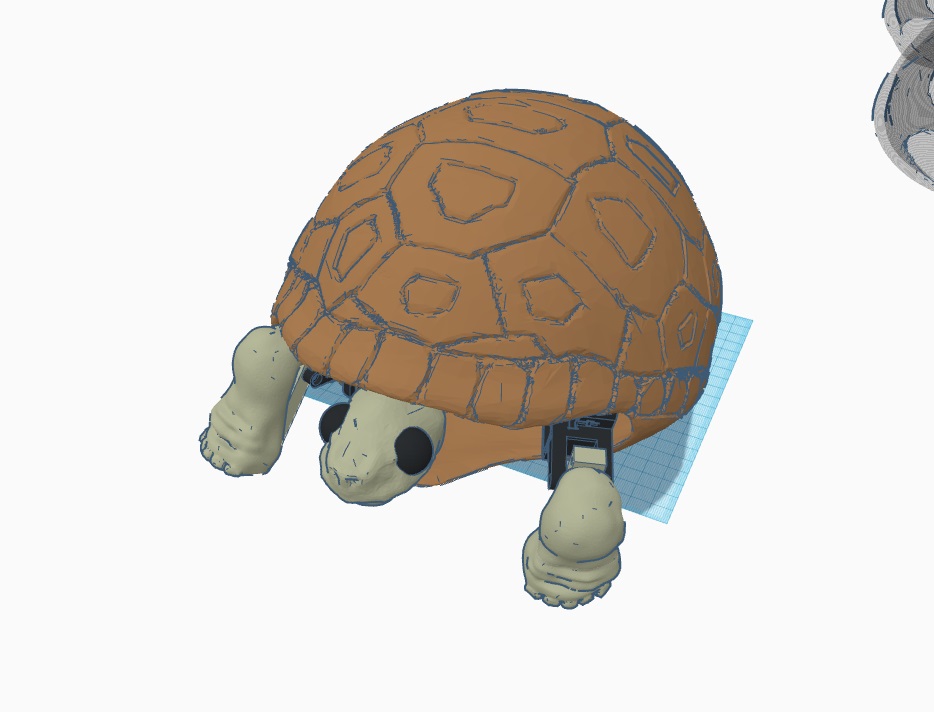
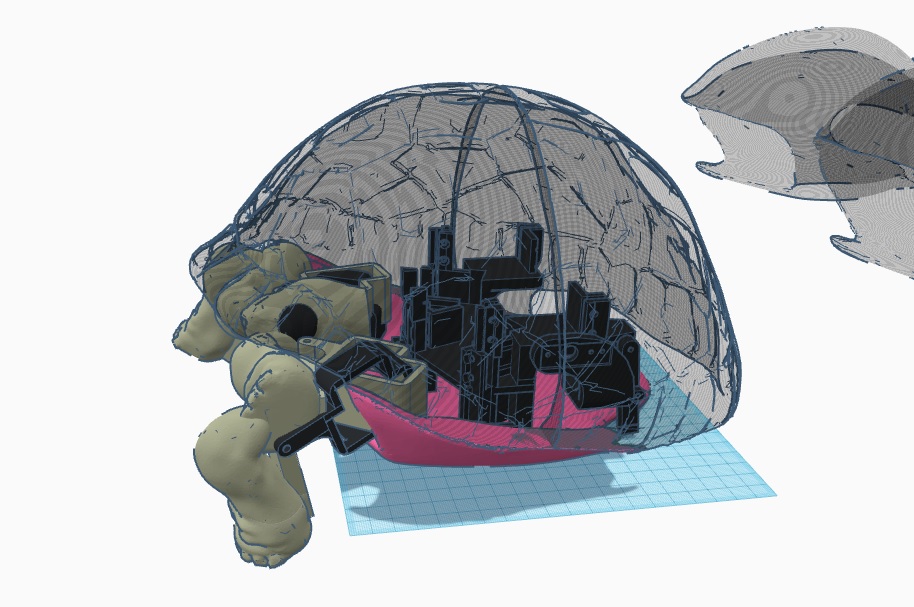
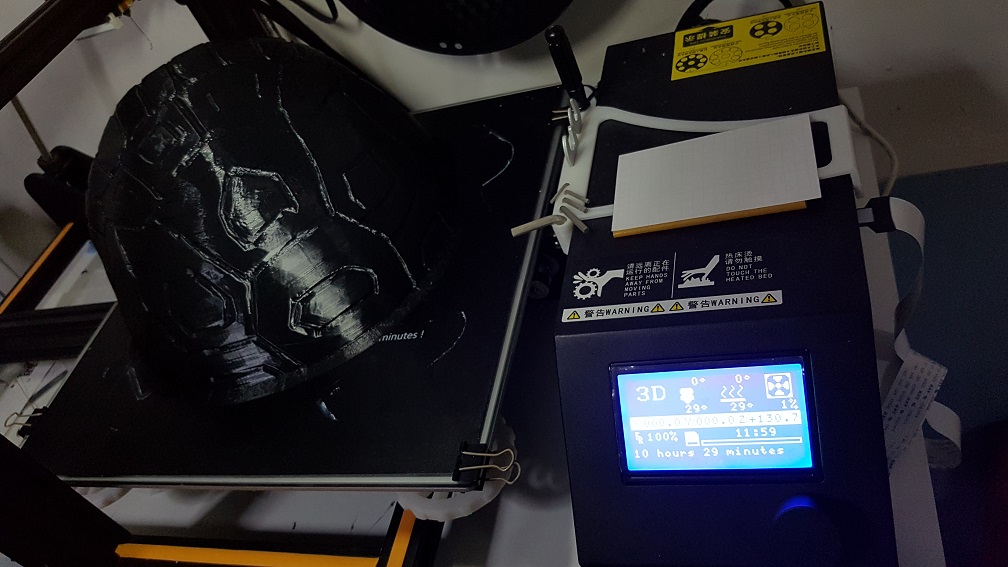
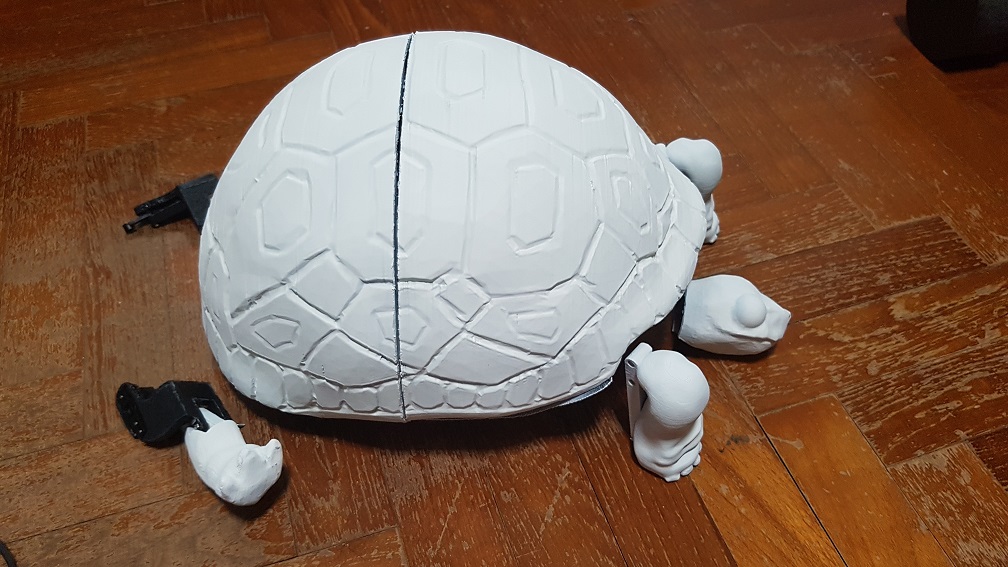
The final test of the turtle before I finally started coding it. The head uses elastic thread because it will go forward and retract, since I dont want anything to be loose and might interfere with the shoulder servo motor, I decided to use elastic thread so that the thread wont be loose when the head is retracted.

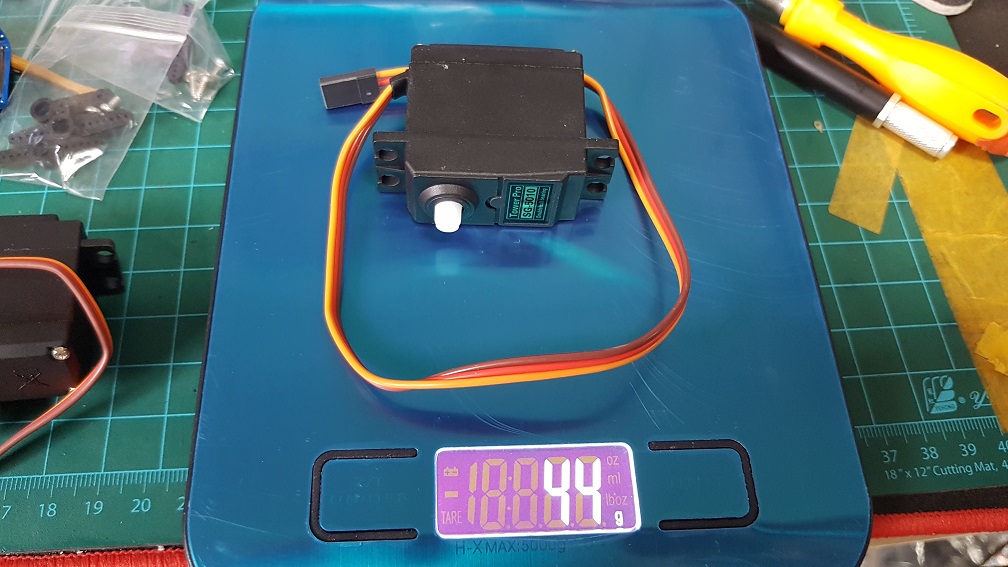
This is the almost completed sequence of action,the turtle’s movement is quite restricted due to the shell and the back leg is unable to push the turtle forward because of the shell’s restriction as well as the weaker servo(MG90S) which is responsible for the forward and backward thrust, while the MG966R is strong enough to lift the turtle up, so the turtle could do movements up and down but not walk.

After this, I added a few lines of code to substitute the button pressed with sound sensor to make the turtle more intractable and a few more actions that made it more timid looking (head peeking out to check the environment before the whole body come out.)

In conclusion:

Overall, I really liked this project although I kind of regretted trying to make a turtle during the process because the shell is giving a lot of layout and movability problem made me kept thinking that if I were to make something without shell, it will be so much easier, but the reason that I first wanted to make a turtle is the best is because the shell naturally hide all components that break the user’s perception that this is a robot and a turtle is my spiritual animal, now that I finished the project, I am really glad that I sticked to my initial idea of making a turtle and persevere through all the problems I faced(mainly hardware and mechanical problems which I changed my system and design so many times.).

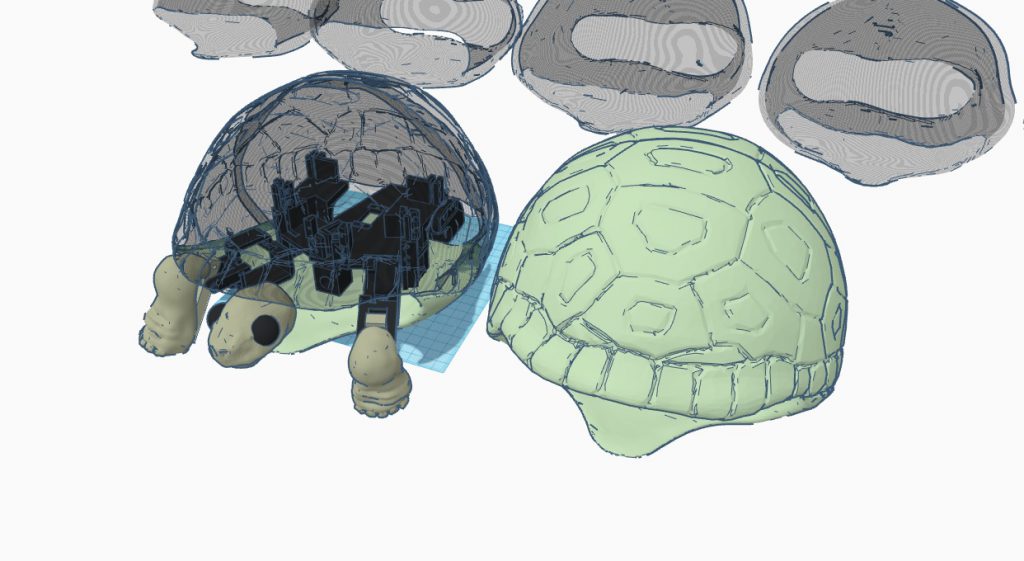
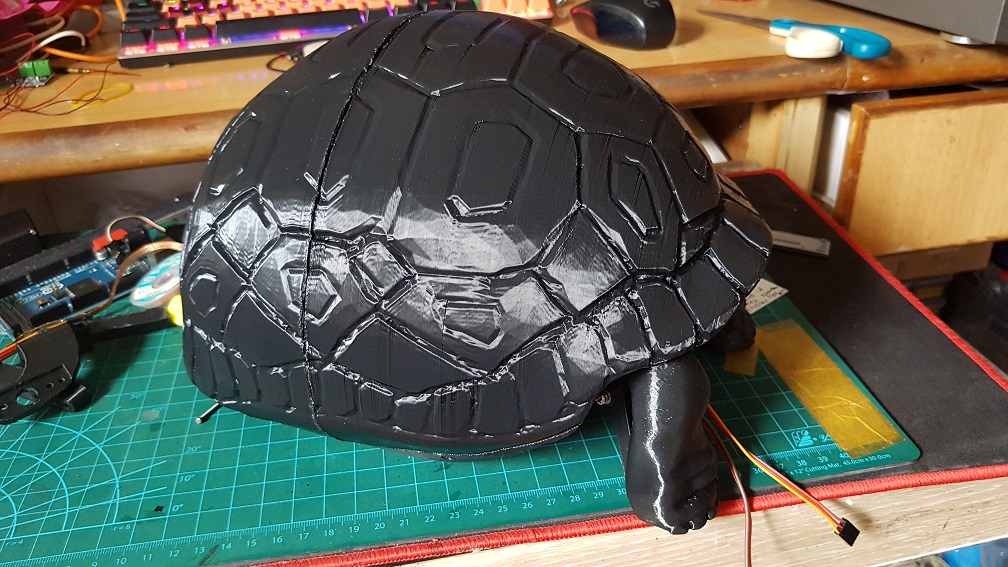
This was what made into my final turtle with many component being edited into the next version.

With more time, I am sure that I could code the turtle be able to be scare back into the shell by another sudden loud noise – I tried to change the delay in my code to Millis multiple times and it do every action in the sequence twice so I sticked to using delay for now, which disabled me to write the activation code for using the sound as a trigger since it is in a delay loop. But, it looked really nice for now even if there is only one sequence of movement and I am glad that people were thinking that the turtle is cute when they saw it.


Telepathic Stroll Final Project with SuHwee, Makoto and Bao

I really like the outcome of our Final Project very much.

This is the link for our video wall, Video Wall on Third Space Network

This is a Screen Record of the Video Wall on Third space Network.


And This is What I did before the wall was made in Premiere Pro to get a general feel of what it will look like and to get the exact timing to start each video in the video wall.


Lastly, this was my Individual Facebook broadcast, Just to re-emphasis on the point, what made our project really interesting was the video wall, every individual Broadcast doesn’t seemed like much, but when we are linked with the rest, we will produce a piece that is much more than itself.

Posted by ZiFeng Ong on Friday, 10 November 2017

we are the third space and first space performers.

The main purpose of our project planning was to begin with the end in mind – To present the four broadcast in a video wall that will be interesting for the viewer to watch, we will be the third space performers by having our broadcasts interact with each other in the third space. Our final presentation in class will be a live performance and I am not taking about the fact that everyone will watch what WAS BROADCASTED LIVE, nor all the audience in class will be watching it in THE PRESENT, but as the timing to click start each of the video must be precise to the miliseconds and will not be replicable when anyone play it again by themselves later as Telepathic Stroll will look vastly different if the time to click play each video are slightly different, so we are making a Live Performance by playing the four video in a way that we think it is for the optimum viewing sensation.

how did we perfected our timing even when not being able to see each other?

This is the reveal of our broadcasting secret! GET READY! CLEAN YOUR EARS(EYES) AND BE PREPARED! We called our system the….*Insert drumroll in your mind*

“THE MASTER CONTROLLER”

so… what is the Master Controller?

Basically, it is a well crafted sound track that is 23 minutes which consist of drum beats that worked like a metronome for syncing our actions and careful instructions to tell each performer what to do at which exact moment and every performer has a personalized sound track because we are doing different task at the same time.

How was it made?
It was made in Premiere Pro and a web based-Text to Speech reader and I screen recorded when it was reading to extract the sound from it into Premiere pro. The whole process to create the soundtracks took more than 18 hours and I’ve lost count of the time afterwards.


So how does it works exactly?
On the basic Idea, we will have the instructions preparing us and telling us what to do like “Next will be half face on right screen. Half face on right screen in, 3, 2, 1, DING!” and we will have our actions/change of camera view being executed on the “DING!” so that all our action will synchronize.

It started when we were at the meeting point where we started the sound track at the same time, counting down to 7 minute to walk to our respective starting point and wait for broadcasting to start, first, I will start broadcasting and then Makoto, SuHwee and then Bao on a 5 second interval, this was done so to allow us to have control when we play the four broadcast in the class to achieve maximum synchronization, if we started the broadcast at the same exact time, we could not click play on all four video in class which will result in de-synchronization. After started the Broadcast, we filmed the environment which was to remove the difference the timing from 30 seconds to 15 seconds depending on the time we started the broadcast and have everything happening afterwards at the exact same time.

Afterwards, we will have different actions at the same time, like when Bao and me entered the screen, Makoto and Suhwee will be pointing at us, this was done by giving different set of instruction in the Master Command at the same time, since each of us could only hear our own track and there will not be confusions among individual and clear instructions were given although I was confused for countless of times during the production of the Master Command because I have to make every command clear and the timing perfect, and it includes countdown on certain actions but not those repeated actions. The hardest part to produce was the Scissor-Paper-Stone part in the broad cast as everyone was doing different actions at the same time

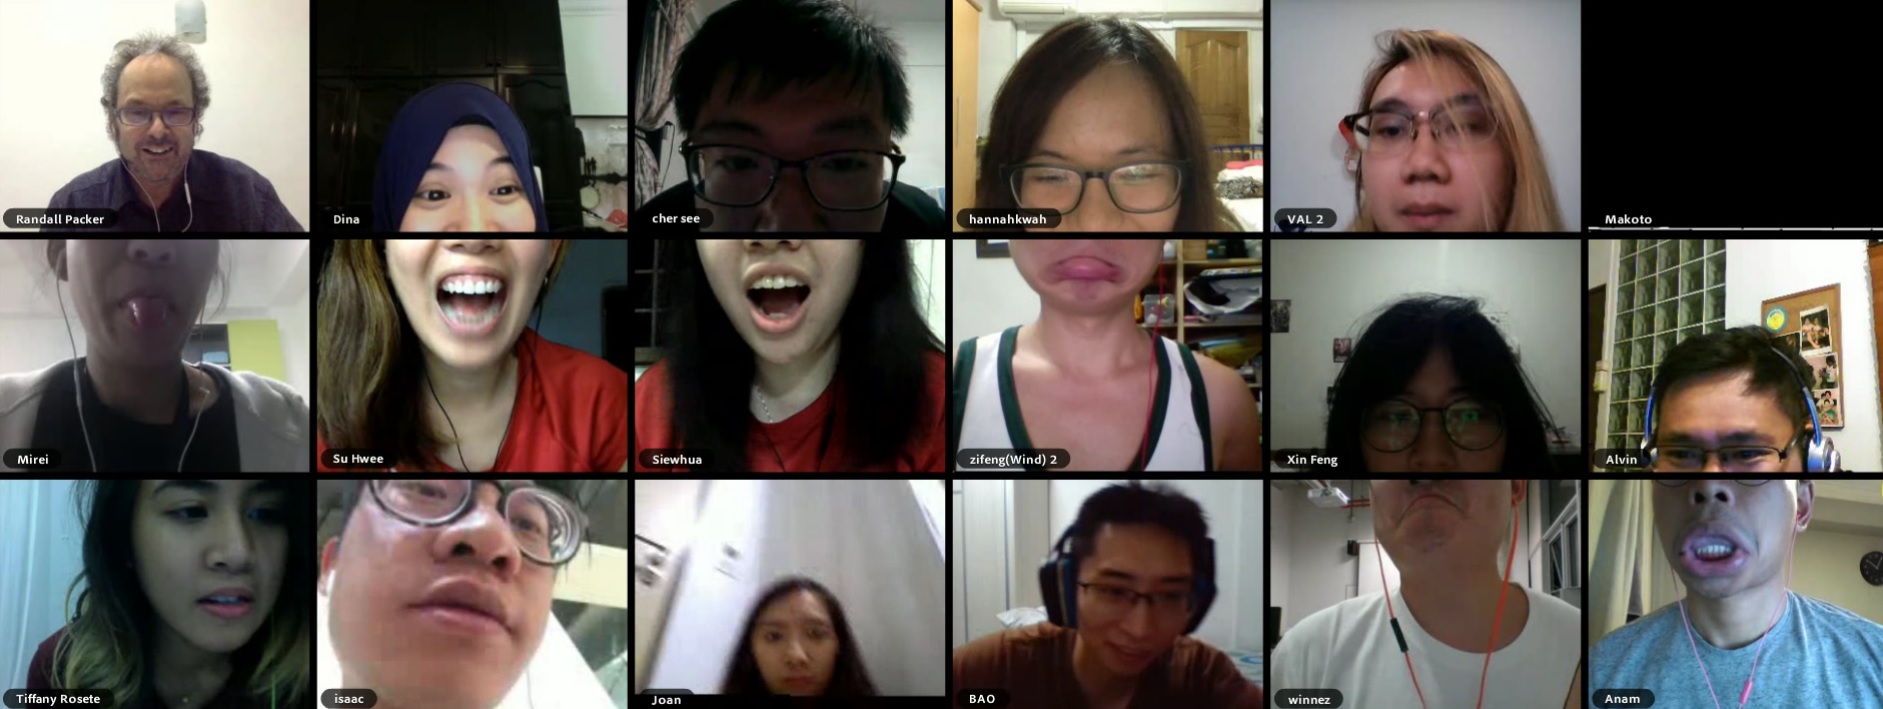
at the end of the scissor paper stone segment, we all synchronized to the same action of the paper and Bao and I were counting on 5, so we all were showing our palm.

Towards the end of the Broadcasting, many of our soundtrack was specially instructing us to pass the phone to a specific person like Bao will have it saying “Pass the phone to ZiFeng. 3, 2, 1, DING!” and “Swap phone with Makoto. 3, 2, 1, DING!” this was done just to avoid confusion during our broadcasting rather than going “pass phone to the left” which is quite ambiguous.

Overall, there was a lot of planning and every details must be thought out carefully when I was making the tracks because every small mistake will affect our final presentation to not as good as it should be, I am lucky that I only made one mistake in the Master Command which was the direction where SuHwee and Makoto will be playing their Scissor Paper Stone with and we clarify it before our final broadcasting.

On the actual day of our broadcast.

The whole week will be raining according to the weather forecast so we did our final broadcast in the rain, luckily for us, the rain wasn’t too heavy and we could just film it in the drizzle. We started our broadcasting dry, and we ended our broadcasting wet.

We explored Botanical Gardens for a bit and decide the path each of us will walk and we walked it 3 times before the actual broadcast – the first time we walk when deciding where and how it will be like, second when we walked back, third was right before we started the broadcast as we walked 7 minute to our starting location so our first 7 minute into the broadcast will be us walking back the same path in the same timing.

we did a latency test by broadcasting a timer for two minute right before the broadcast and we could make some minor changes in our timing if there are some latency issue by calibrating the individual Master Controller to the latency before hand, but luckily for us, non of us were lagging and we had the best connection possible so there was no need to re-calibrate the Master Controller. Also, just to mention, Since Bao and I were having calibrated connection due to the previous Telematic Stroll (NOT Telepathic Stroll), he doesn’t have to calibrate with us again since I am doing it, so we filmed his phone ‘s timer.

Some recap of Telepathic Stroll:


our project inspirations.

Telepathic Stroll was highly influenced by BOLD3RRR and our lesson on Adobe Connect.

On the First glance, one can see the similarity in the association in Adobe Connect lesson with Telepathic Stroll, we had been pointing to the other broadcast, merging faces and trying to (act) interact with each others in the video wall just like the exercise we did during the Adobe Connect lesson,

This was the seed for our project, to live in the third space and interact with others and have a performance by doing things that is only possible in third space like joining body parts and point at things what seemed to be on the same space when its actually not in the first space.

In our discussion before the final idea, we had many different good ideas that was inspired from music videos like this:

In the end, we only used minimal passing of object (our face) in Telepathic Stroll and we grew our idea from a Magic trick kind of performance to an artistic kind of performance.

I feel really weird to have many of my project in this semester being inspired by BOLD3RRR, not in a sense that the style or the appearance or even the presentation, but in the sense of the preparation and the extensively planning before the Live broadcast as I always liked good planning that leads to good execution which I am really inspired by BOLD3RRR in this, especially in using pre-recorded track and incorporate it into a live broadcast to make it blends into the live aspect of it. This time, instead of using pre-recorded tracks and image over the broadcast like in our drunken piece (which was also highly influenced by BOLD3RRR), we evolved from this idea to using a pre-recorded track in the background for us to sync all of the movement even when not being able to see/hear from each other.

In our multiple occasions of class assignment which we went Live on Facebook, we figured out many limitations of Broadcasting

  1. If you go Live, you can’t watch other’s Live unless you have another device to do so and if you can’t watch others live while broadcasting, two way communication is relatively impossible.
  2. even if we have another device to watch, there will be minimum of 7 seconds delay.
  3. If you co-Broadcast, you can see the others in Live, but if we are doing a performance and yet we discussed through the co-Broadcast, since we can see each other and the viewer could also see it and this is not the effect we want in our final project.
  4. Co-Broadcast will have the quality dropped.
  5. There will be possible lagging in the connection that will cause the “!” during live and skips in the recorded playback. This must be overcome by all means.

This is why, doing individual broadcast with careful planning and our Master Command system will overcome all of the limitation we faced and with the calibration before the final broadcast, most of the problem were solved.

our idea of Social Broadcasting

In Telepathic Stroll, we are trying to present the idea of social broadcasting in a way that is like the real world social – the collective social,

In our individual broadcast, we could not know what the other was doing nor feeling, yet when we are placed together in a location(both the physical and third space), we could interact with each other and do amazing thing that individual can’t do. In Telepathic Stroll, even when just doing our own task without knowing the status of each other, by doing these individual task collaboratively, We united as a group forming as a single unit, every member is as important as all of us and if any of us were removed, the whole structure will collapse into a Problematic Stroll, nothing more than just an individual broadcast

If that wasn’t Social, what is?

Team Telapathic Stroll: Signing out.