During the process of adding digital to the analog version, there were more failure than success done throughout, let me start with these failures (and additional works I did which were not used in the end)
The unused Animations
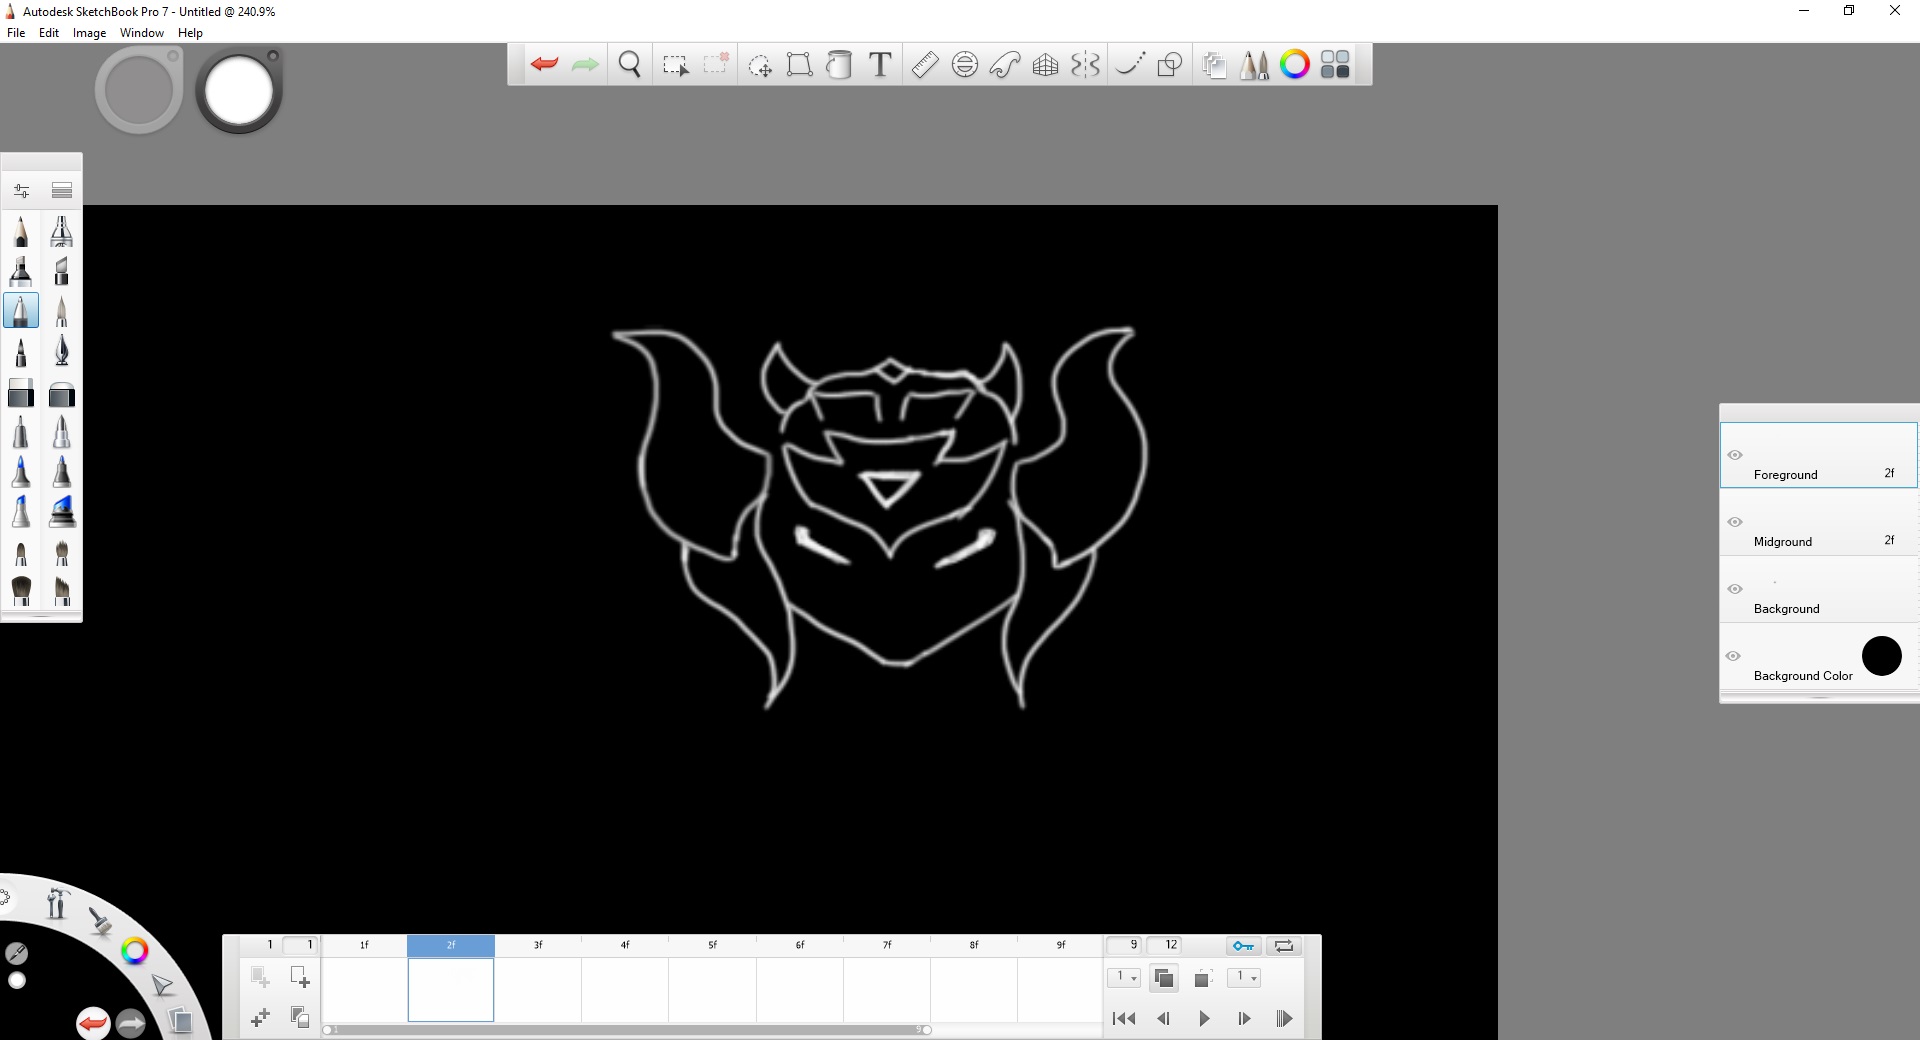
Right after the completion of the analog version, I thought of making a projection of animation from the back of the candles onto a sheet of translucent paper sticked behind the candle shelf, I tried to learn how to make an animation and so I asked my animation friends what program to use to do a simple animation and they suggested Autodesk Sketchbook, so I downloaded it.
I started to draw the head supposed to be shine behind a candle that was unlit.
and slowly completes the overall
And I manage to make it move, although simple, this took around 7hours to make sinply it was the first time.
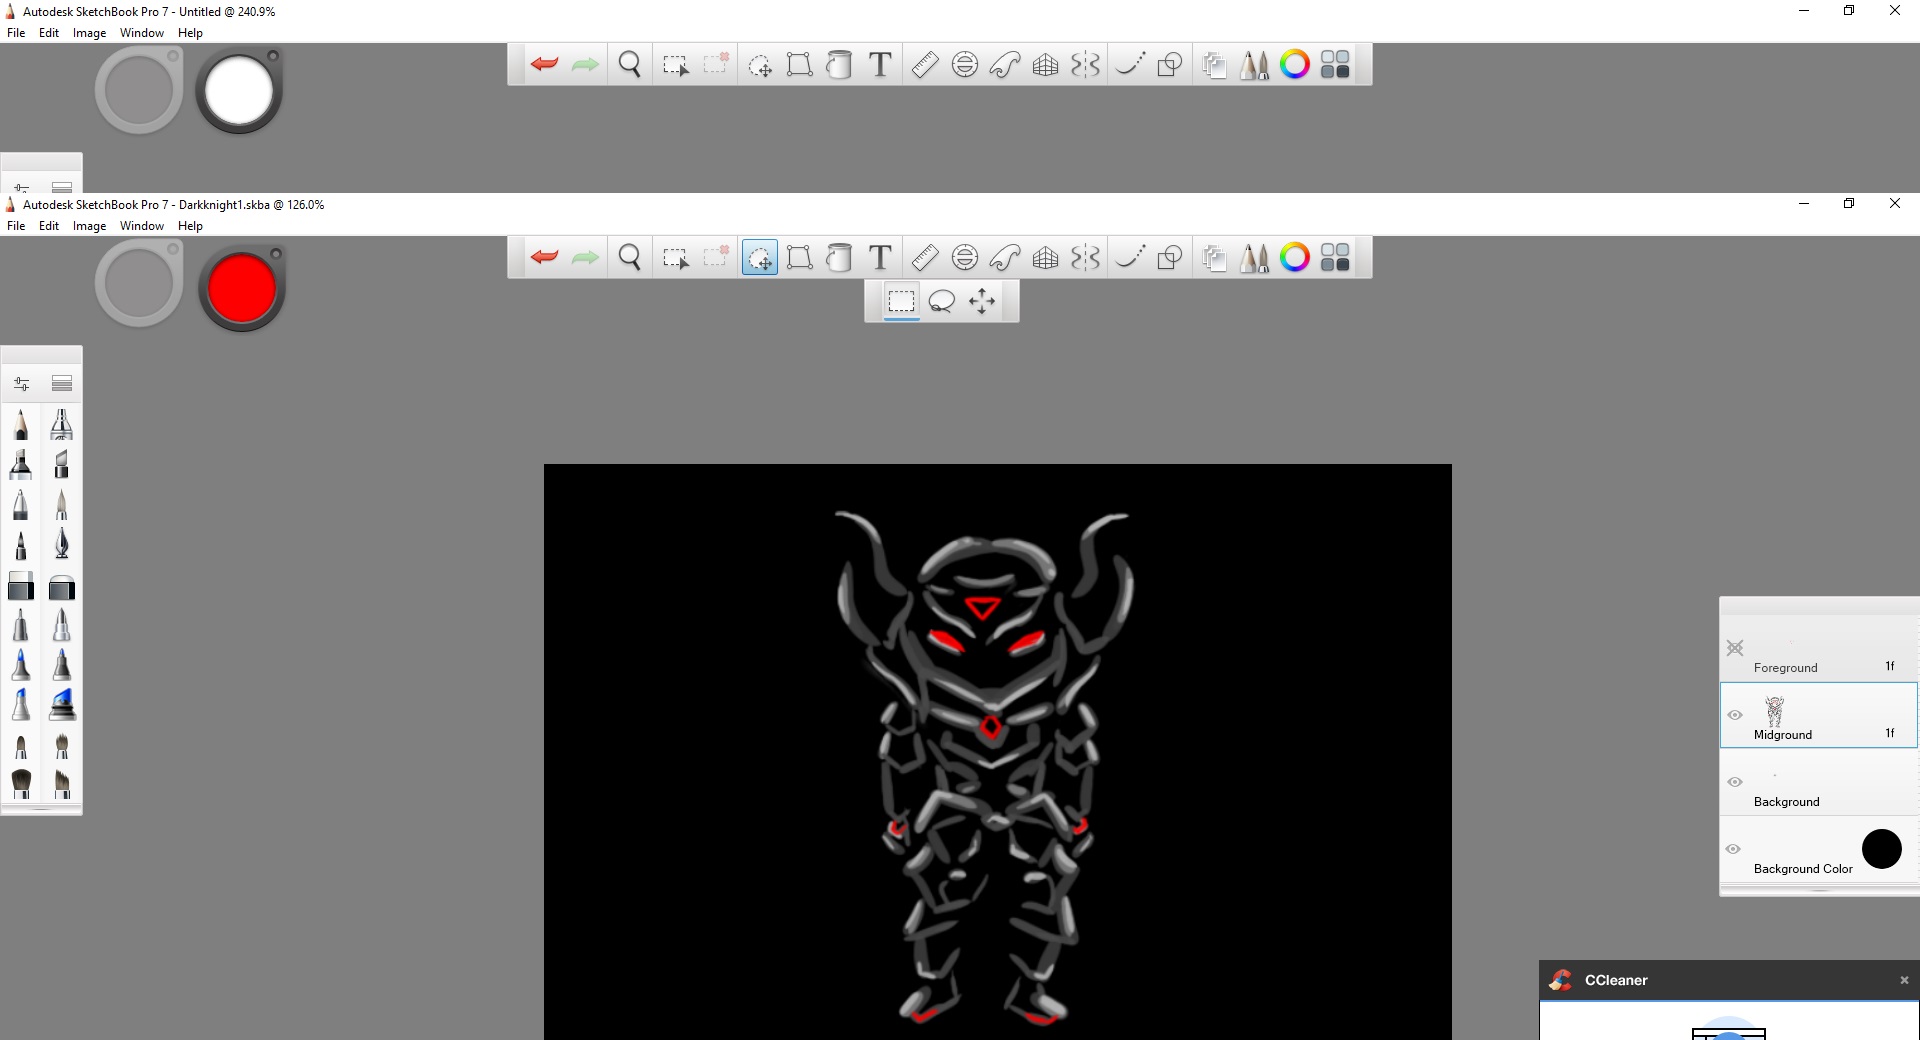
and this is the character that was supposed to be shined behind a lit candle, this is much faster, only took like 1 hour.
The Circuit that works,(or didn’t)
And then the Fairy light I bought from china arrived! I bought 220V fairylight because they are cheaper, and I did not expect them to be these problematic to deal with due to the dimming issue and also 220V = risky.
The light light up really well! they are 10M each and I’ve bought 6 rolls.
and then I cut off the wires
and rewire them to a Solid State Relay, I thought this would work really well as they are relays that dont have mechanical parts, so in theory, they could handle PWM for dimming….
and then I tested the connection,
and I tried adding PWM code to run the LED, It did not work as there was no dimming, all it did was full flash at faster rate. SO IN CONCLUSION, SOLID STATE RELAY IS FAST, BUT NOT FAST ENOUGH FOR PWM!
Since the SSR alone doesnt work, I thought of adding a capacitor to the circuit, as it will hold and release charge, it should smoothen the flashing rate? thats what I thought. In reality, the flashing of the LED is still really obvious so I cant use it too.
I also modeled and printed a case for the SSR as they are 220V, my common sense tells me to cover all exposed 220V metal parts as much as I could.
As the SSR and capacitor combo doesnt work, I thought of using a Mosfet to control the PWM of the 220V circuit… and my arduino blew off instantly after i turn on the 220V switch. yeah, maybe I wired them wrong, but I am not going to try it again as it instant killed my Arduino… one Arduino down, a few left to go….
So I wasnt expecting this to work, I did alot of research about using the super small resistor I have on a 220V circuit, and everything on the web said that I should not use it, but I thought I might as well try to see if it blows up or get heated up really quickly, at most i lose one resistor, I could definitely afford that! so… WOW TO MY SURPRISE, IT WORKED! THE RESISTOR DOESNT HEAT UP!
AND 1M OHM RESISTOR MAKES IT DIMMER!!! SO YEP. IT WORKED LIKE THIS IN THE END. all those expensive components I bought couldn’t be compared to these small resistors… ALL HAIL RESISTORSSS
so I researched about how to calculate the resistance of the resistor, the more parallel there are, the lower resistance = brighter, so I could do a combination of brightness from a 2M( 2*1M in series), 1.5M(1M and 500k in series), 1M, 680K, 91K. With these numbers, i could do a huge variety of resistance to dim the light(like for example, 2M and 1.5M in parallel gives a net resistance of 857k) , i just need to connect these to the SSR(normal relay could work but since i have these already) and select the path to open to create the parallel circuit and hence controlling the resistance to the 220V circuit.
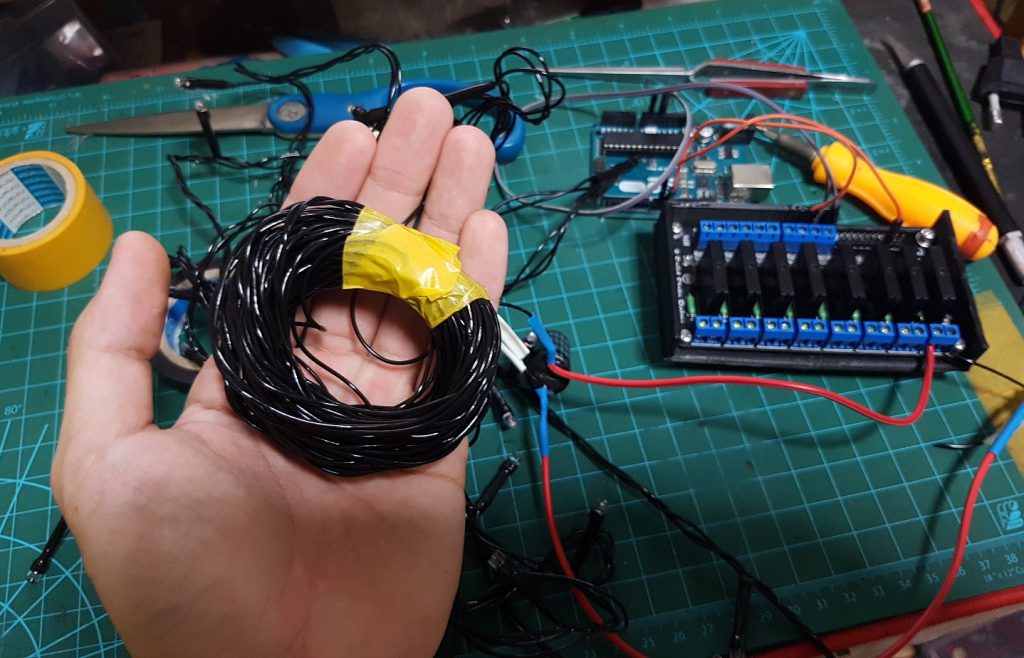
I’ve notice that there are 5 wires in each strip of LED, and only 3 is requires, and I also dont need to chain these 10M rolls anyway, so I decided to savage these wires in case I needed them afterwards.
and although it seemed simple, it took some time as there are a total of 60m.
I am really glad that i savaged these wires, as just nice Makoto needed this so all time savaging was really well spent!
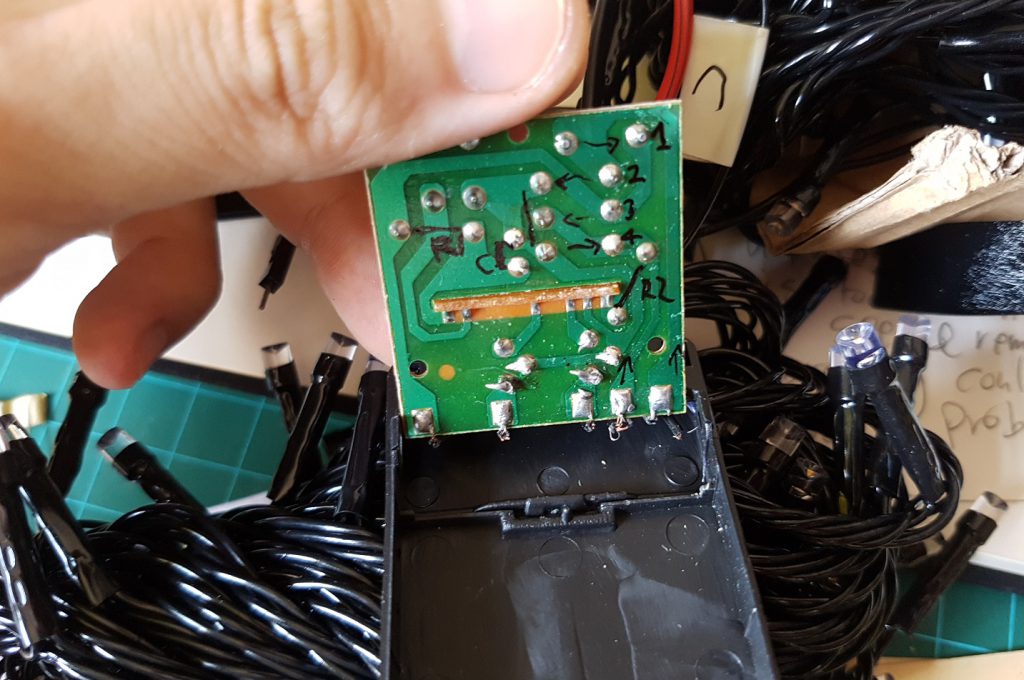
The original adapter and controller have some problem with it as it will automatically switch mode, sometimes to flicker and such, which I just want to have constant brightness controlled through my arduino, so I decided to remove the chip within it by replacing this circuit.
so I tried to understand how this works and mapped it out
and then I re-soldered it to the circuit board
and in the end, this one doesnt work so I found 1 adapter for this kind of LED light and use that instead, which works!
The additions to my “Dark Room”
I’ve picked up this from near my house and thought that I could build a legit door out of it, so I did, and in the end i removed the wooden piece I screwed in and made it a folding door, I also added magnet to the door so that it will stay closed to reduce light leak into the room.
attaching the LED dtrips to the roof of my “Dark Room” is a big problem as the roof is too big for me to puncture a zip tie through it (i can poke one end through, but can’t poke it back to complete a loop), and tape is too not reliable for my project as i need to have it on for atleast a week, so I’ve use a lighter to burn a needle and bend it slowly to a U shape so that I could pierce it and bring it back to sew the LED strip onto the roof, and just the sewing of the LED took 2 days to complete, because I have to carefully organize where I am attaching each point so that it does not go into the line of sight of the camera I will use to sense the candles.
slowly but surely, I attached these LEDS to the roof and wall of the “Dark Room”
and I tried lighting up, the best thing about suspending the LEDs using a thread is that not only it will create a better illusion of stars, it will also prevent a fire hazard as there is a much lesser chance that any wire(220V) will touch the cardboard and setup a fire. so I am sure of the safety of this project.
Coding is a nightmare
as there are 297 candles, the coding to split each candle was simple but tedious, I am sure there are better ways to do thing, but the downside of using max msp was that the exact function to do things the better ways is really difficult to find, so… my mindset was “If I only know “IF”, I can also do unlimited amount of task, “IF” is as powerful as Hercules.” so… I had “IFs” my way through this project, literally. (just to be clear, I tried to find a better ways, and though I found them, but in the end it either doesn’t work or crashed my max msp.)
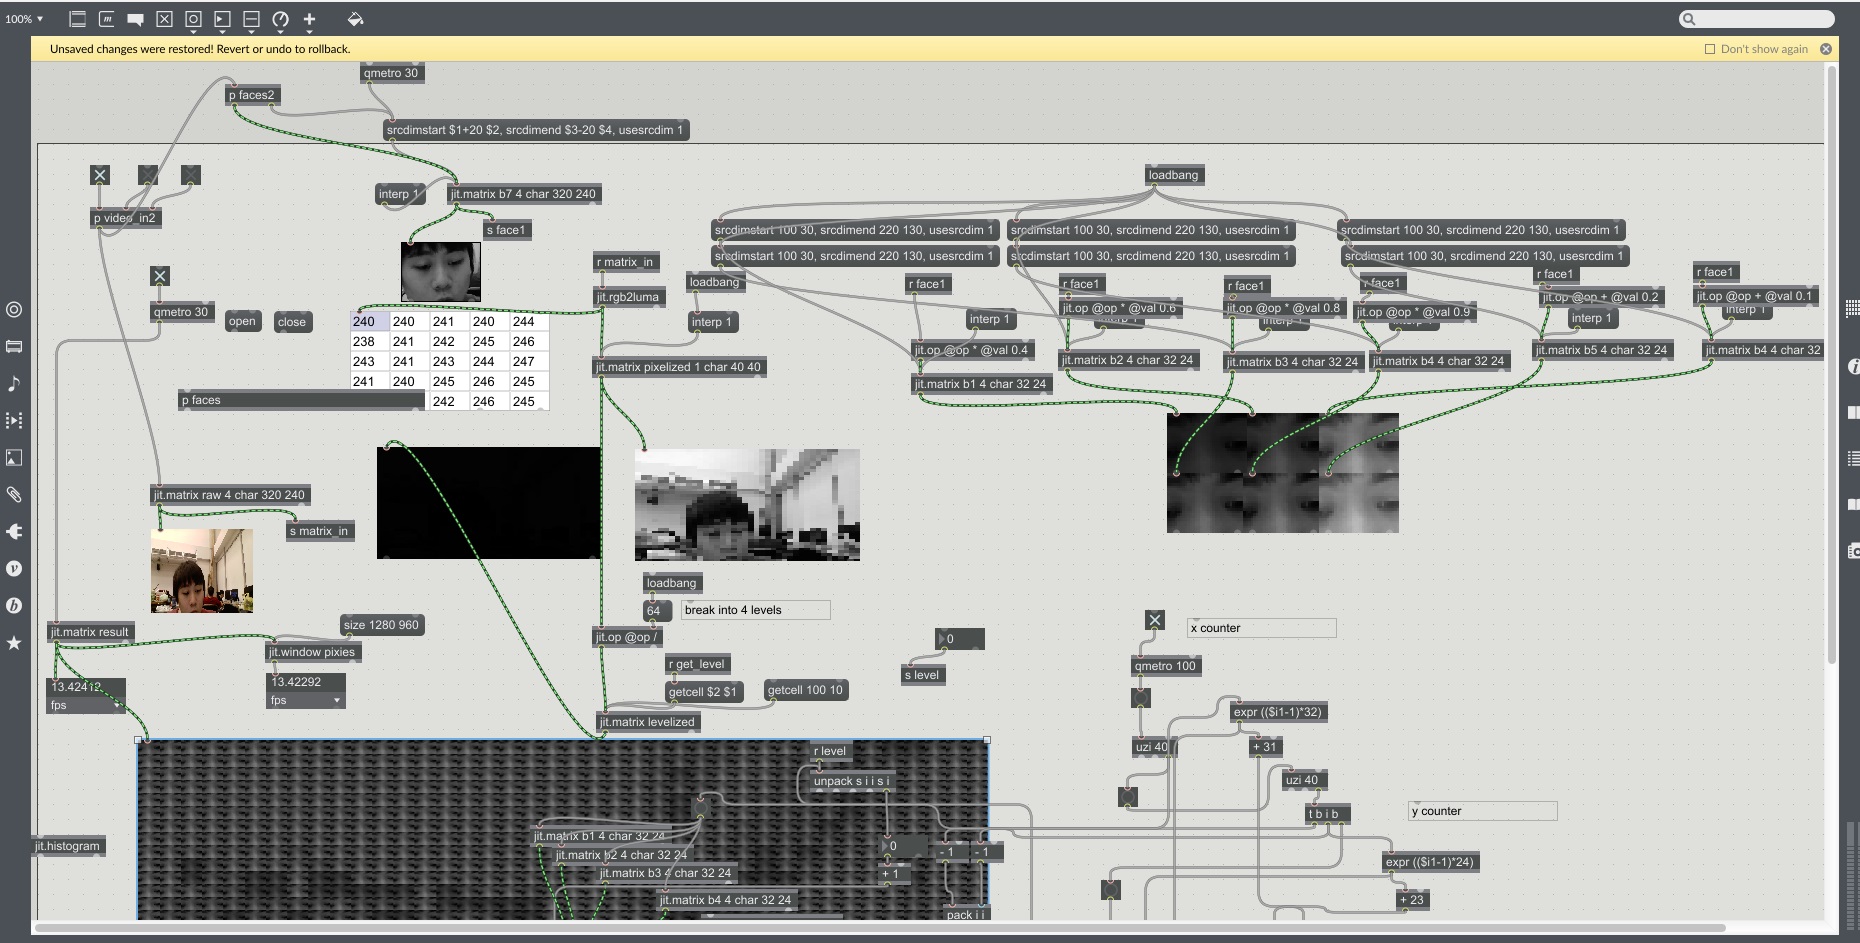
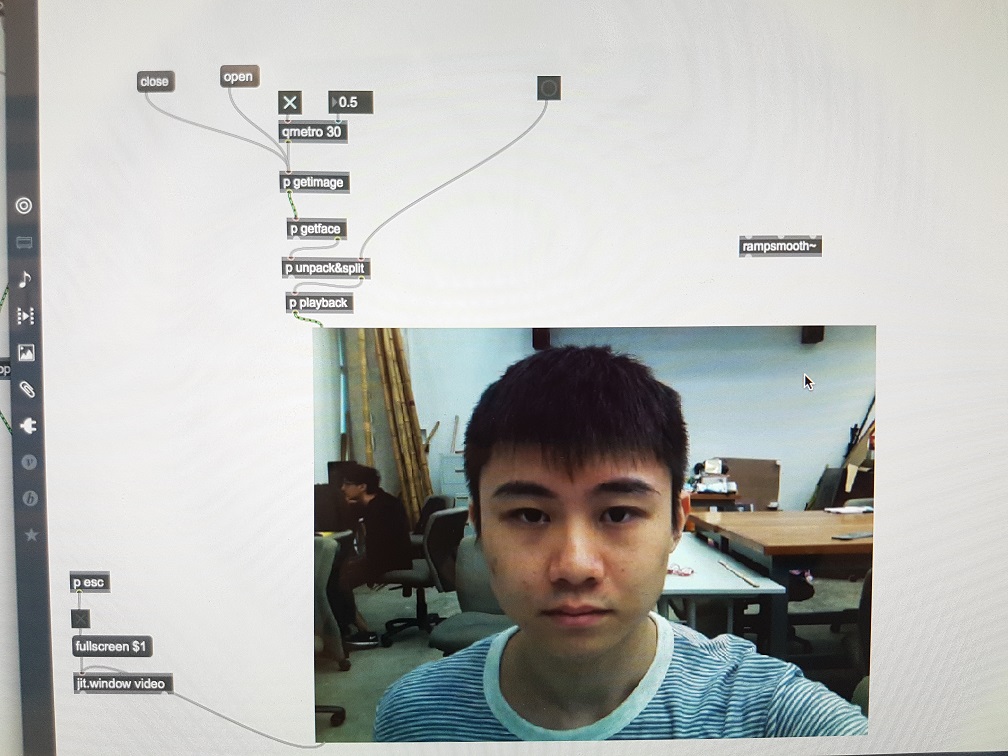
the main patch consist of Jit Grab to get information from the webcam, a lens distortion corrector as I am using a 150 degree webcam, a crop to crop away all details which i dont need and to pixilate the average brightness within a certain region to a bigger area(to see is the camera capture a bright object within a certain area which can be used to see if the candles were lighted up indivitually or not.
the jit.cell which shows the numbers in every squares (33*9), which is the amount of candles I have
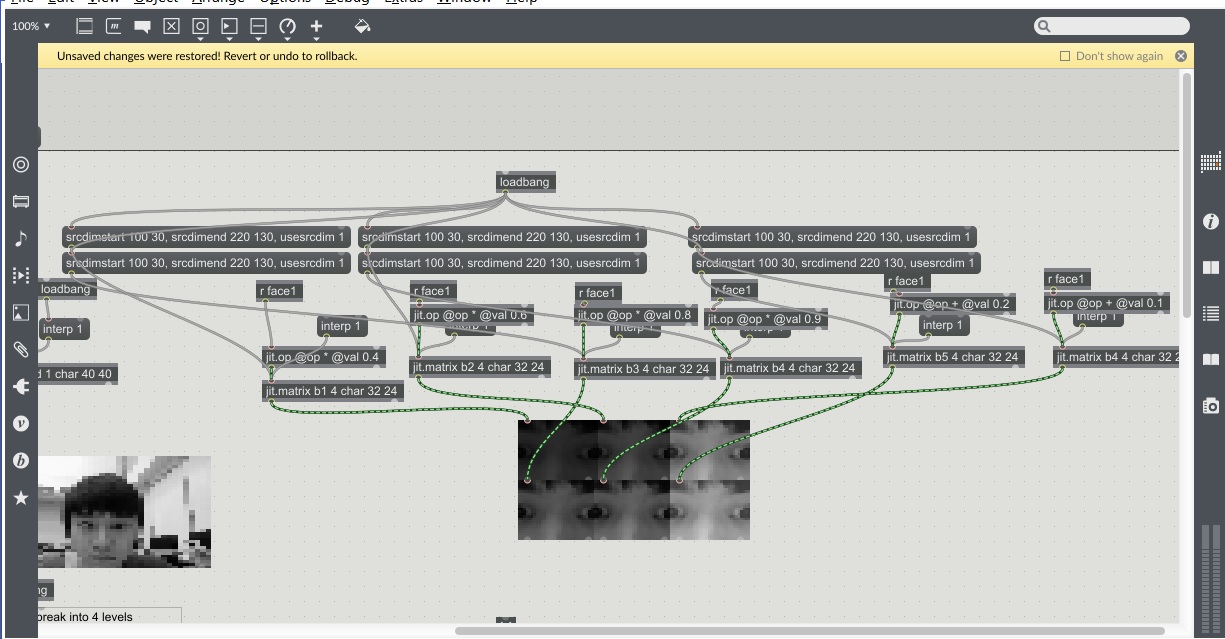
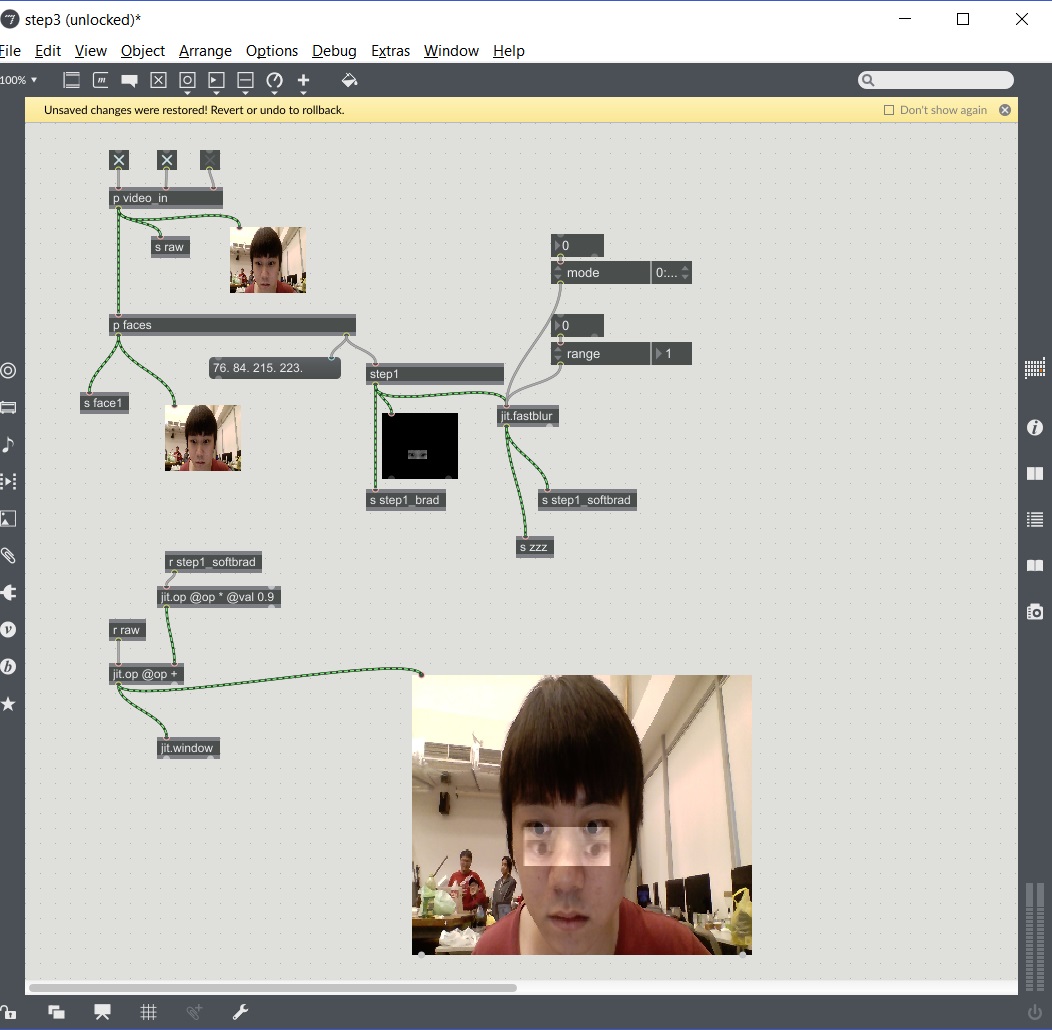
To be frank, I am not sure what to do with this patch to make it unique, so I added my previous patch that track my eye and did a minor adjustment so that the repetitive pattern in this patch will make the eye to look like a wall of continuous eye, since they are happening at real time, it feels like it is the nightmare of those trypophobic.
this still work with parts of the previous patch, by zooming more into the eye and changing the darkness of the clip to make it work.
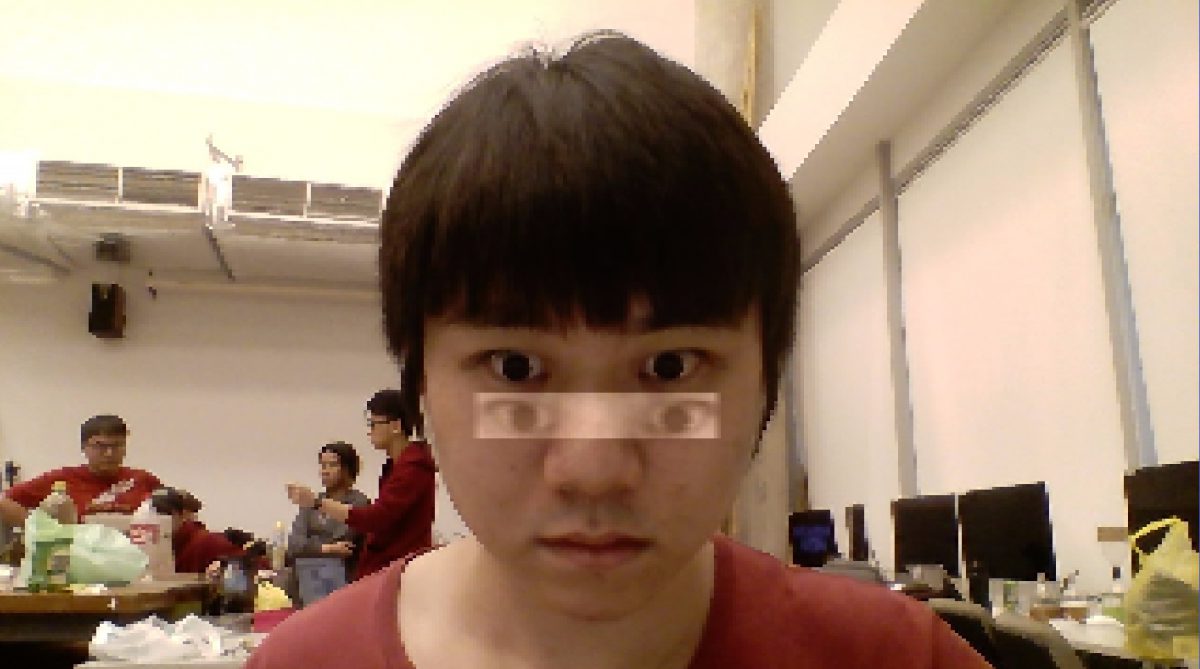
In this Exercise, I’ve used the location of the face tracker and cropped to only the eye area, scale it accordingly and delay video of the eye by using jit.matrixset, after that, I mapped it onto the original location of the face, creating a trippy effect of a four eye monster.
There are a few things that I’m unable to solve.
1 – the alphamask will give a rectangular box and im unable to remove it even with blur.
2-the additional eye is too sensitive and it look like its vibrating, maybe i could line it afterwards.so I added the eye tracker from the value of the jit.face box, while doing it, i realise it looks really cool on this effect for just using only the jit.face and scrdimstart and scrdimend it. it feel like a really old way of fliming drunken scene.
This was the hardest Max patch we wrote up till now as it is logic base and after LPD taught us about the function of different commands –
Clocker(used in the patch to count down the 3,2,1,)
Timer
Speedlim (use in this patch to prevent sound from looping endlessly)
Pipe
Select
Split (used in this patch to split zeros with all other number hence when there is no value = 0 = do nothing)
Route
Trigger
Gate (I tried to use this, but diden fully understand this so i used IF statement)
Onebang(my favourite) (make sure there is only one bang until it is reset)
Counter
Line
LoadBang
Loadmess
Scale
Expr (to put mathemathical expression (x1 + x2)/2 )
Pack and Pak
all of these are basic tools and if one can use them to their fullest by chaining up different object, alot of cool stuffs could be done in just these objects.
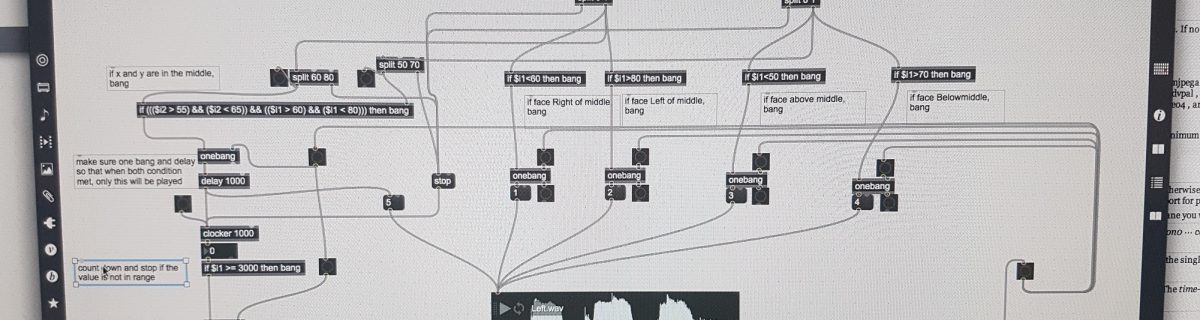
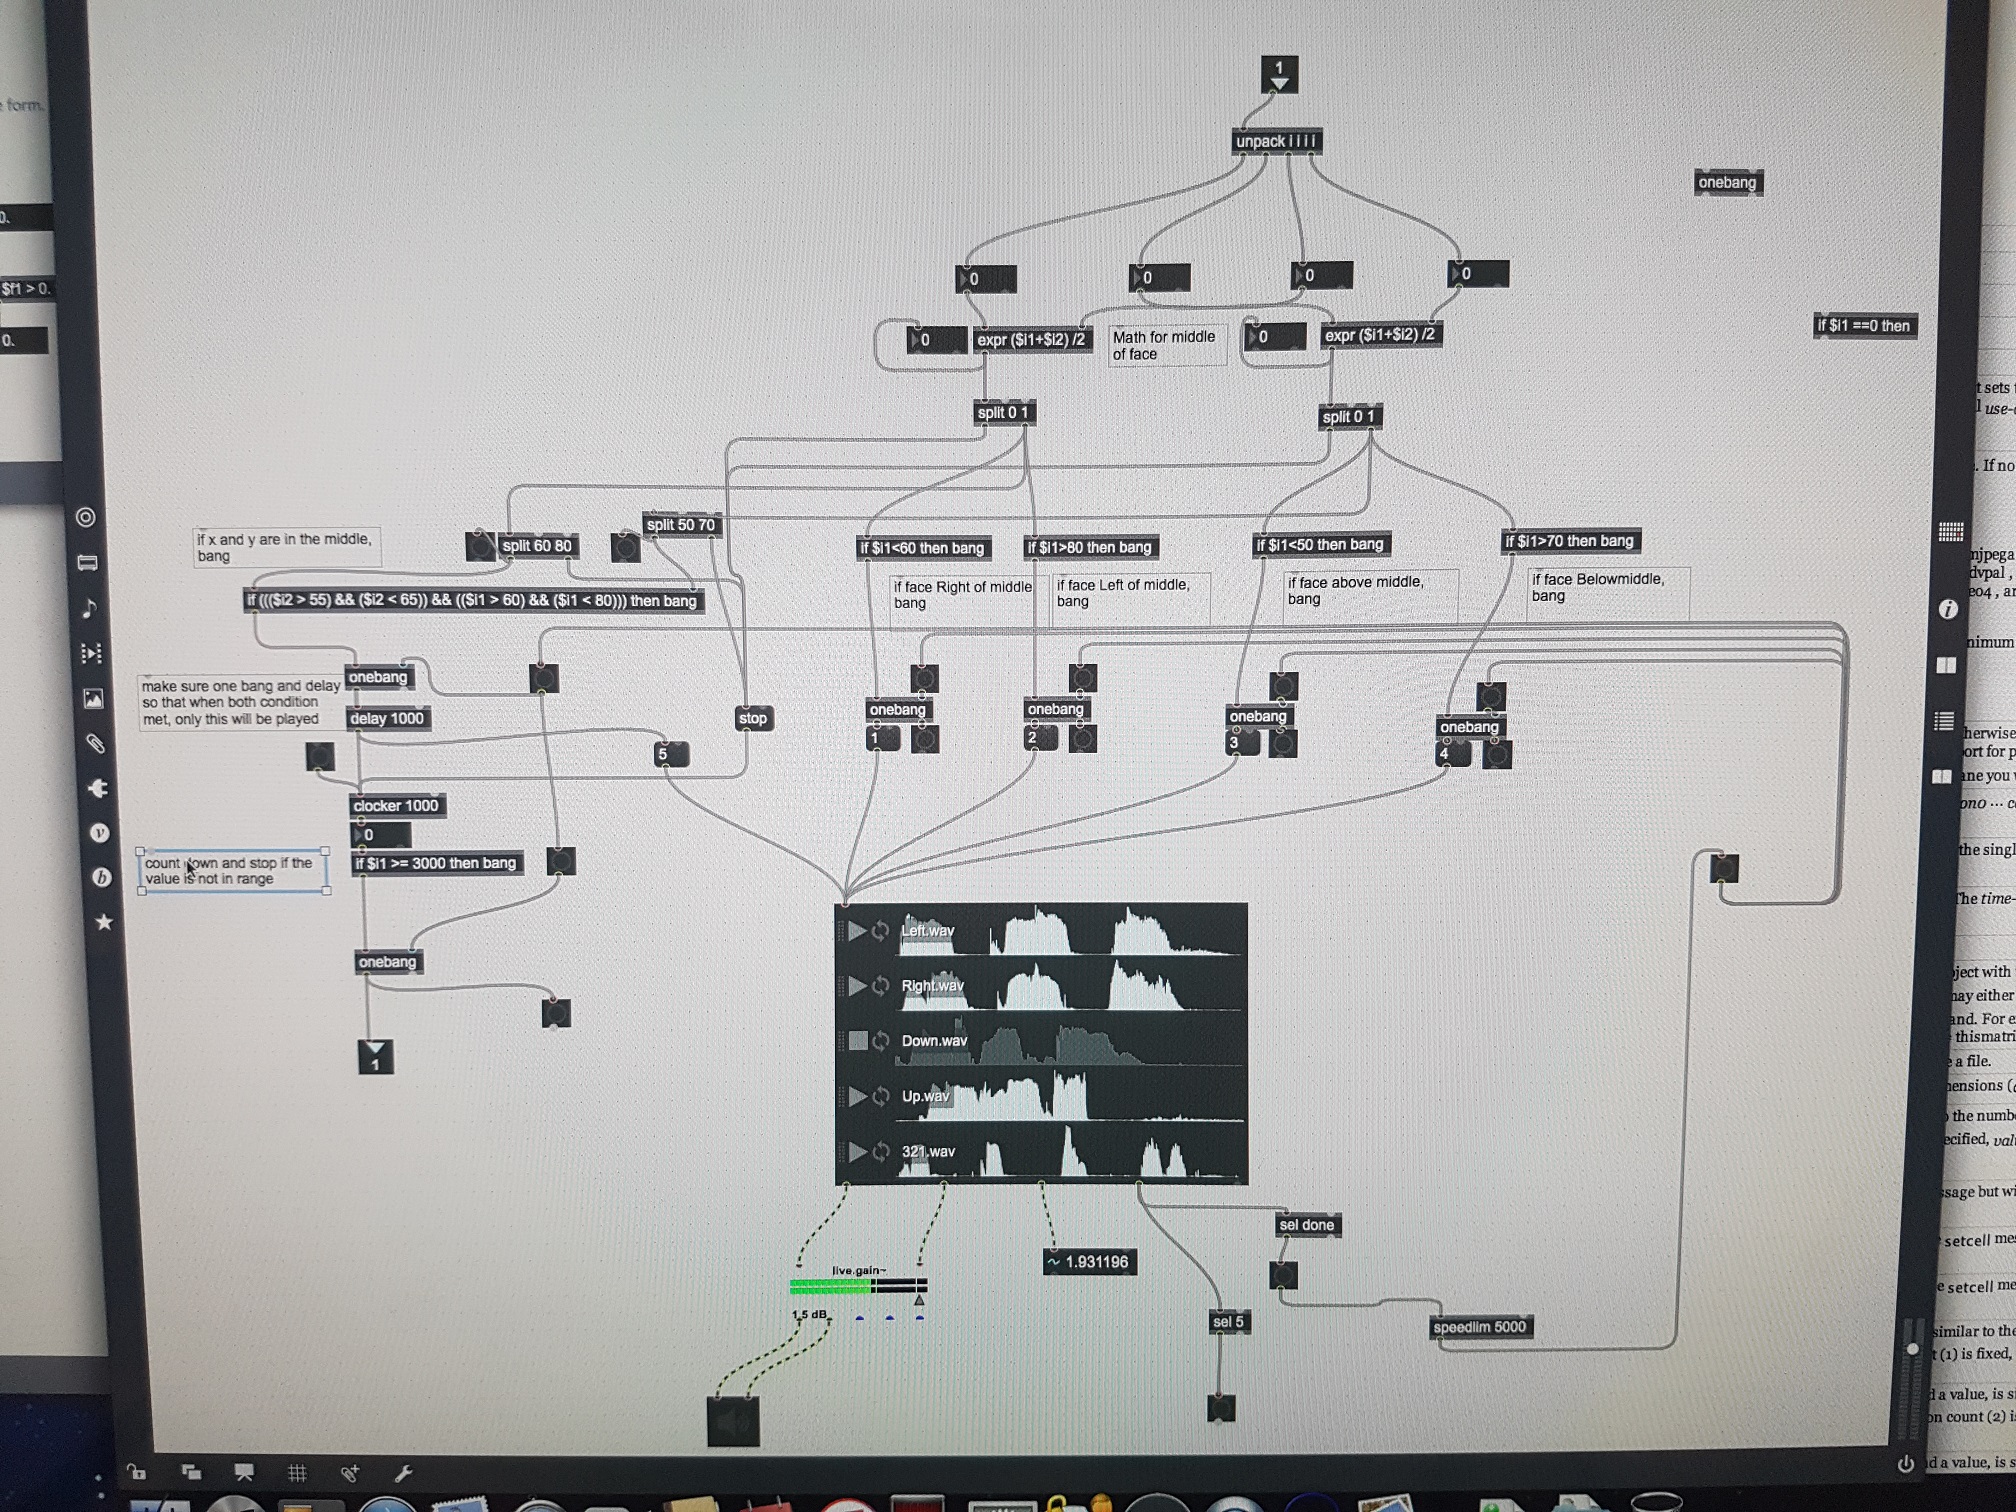
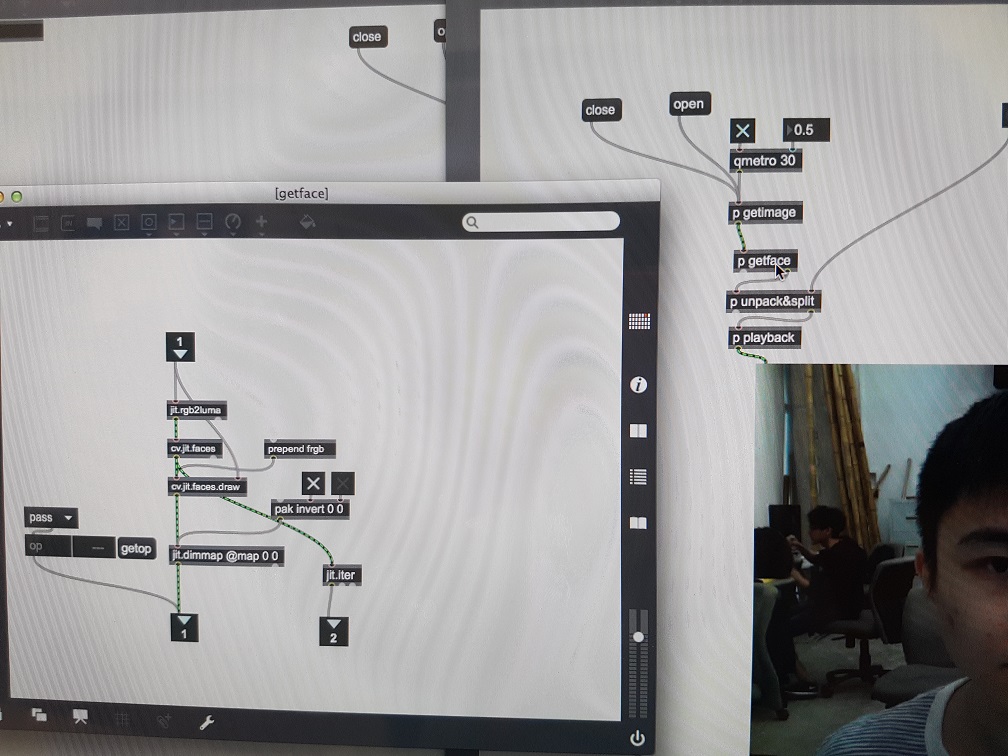
This is the main piece of patcher in my patch, the rest of the patch are very similar to the previous exercise, so in summary, the flow of this patcher
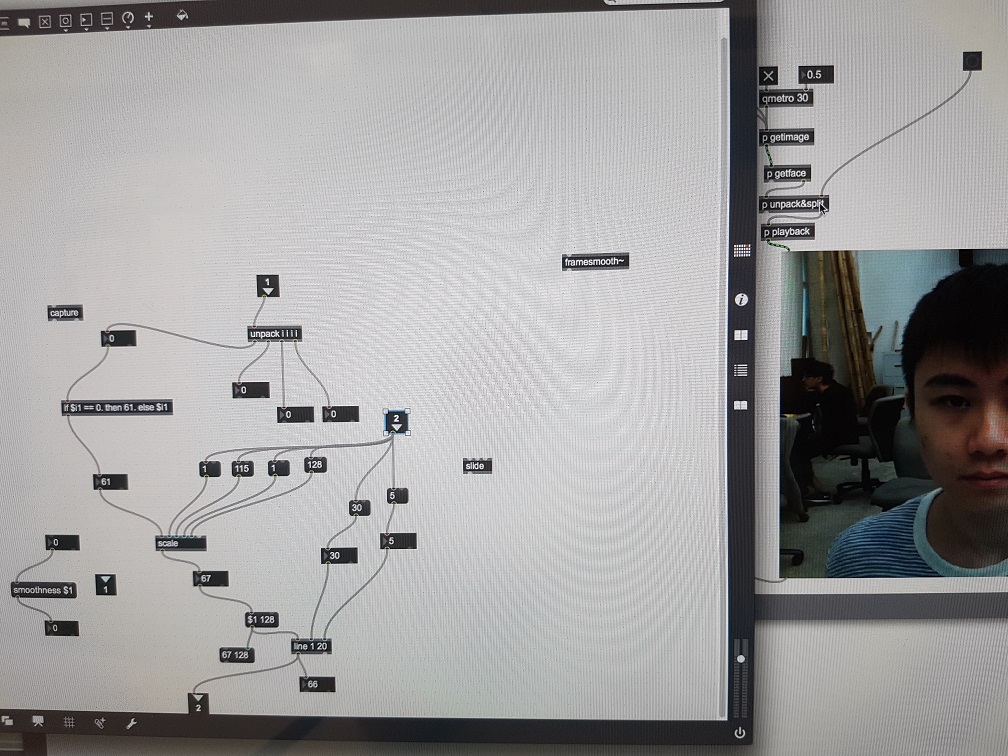
get the square value from face & unpack it
find the middle of the square in terms of X value and Y value
split into 5 zone
1) Middle Zone (MZ) (the zone where X and y value are around the center, for my patch it is 60 < X < 80 and 50 < Y < 70),
2) X higher than MZ
3) X Lower than MZ
4) Y Higher than MZ
5) Y Lower than MZ
For 2 to 5, send the number straight to the audio player
And for 1,send the number to audio player while if the value stays in the zone without X or Y going out of the zone for 3 seconds(using counter and if $i1 >= 3000), then take a photo, else stop the timer(and when the timer resumed, it will auto start from 0
lastly, I used a single playlist of audio player just because i dont want the patch to play more than one sound clip at any given moment, the only way for different soundclip to play is either
1) when one clip finish playing and the condition is still the same, it will playback the same soundclip after 2000ms or
2) when condition changed when a soundclip is playing, it will then stop the current playing soundclip and play another sound clip instantly.
I hope this is relative clear of the flow, through this exercise, I learnt mainly about logic flow, which i think is the most important in every kind of coding.
Featured image warning: “sorry I retard I laughed at myself LOLLLOLL”
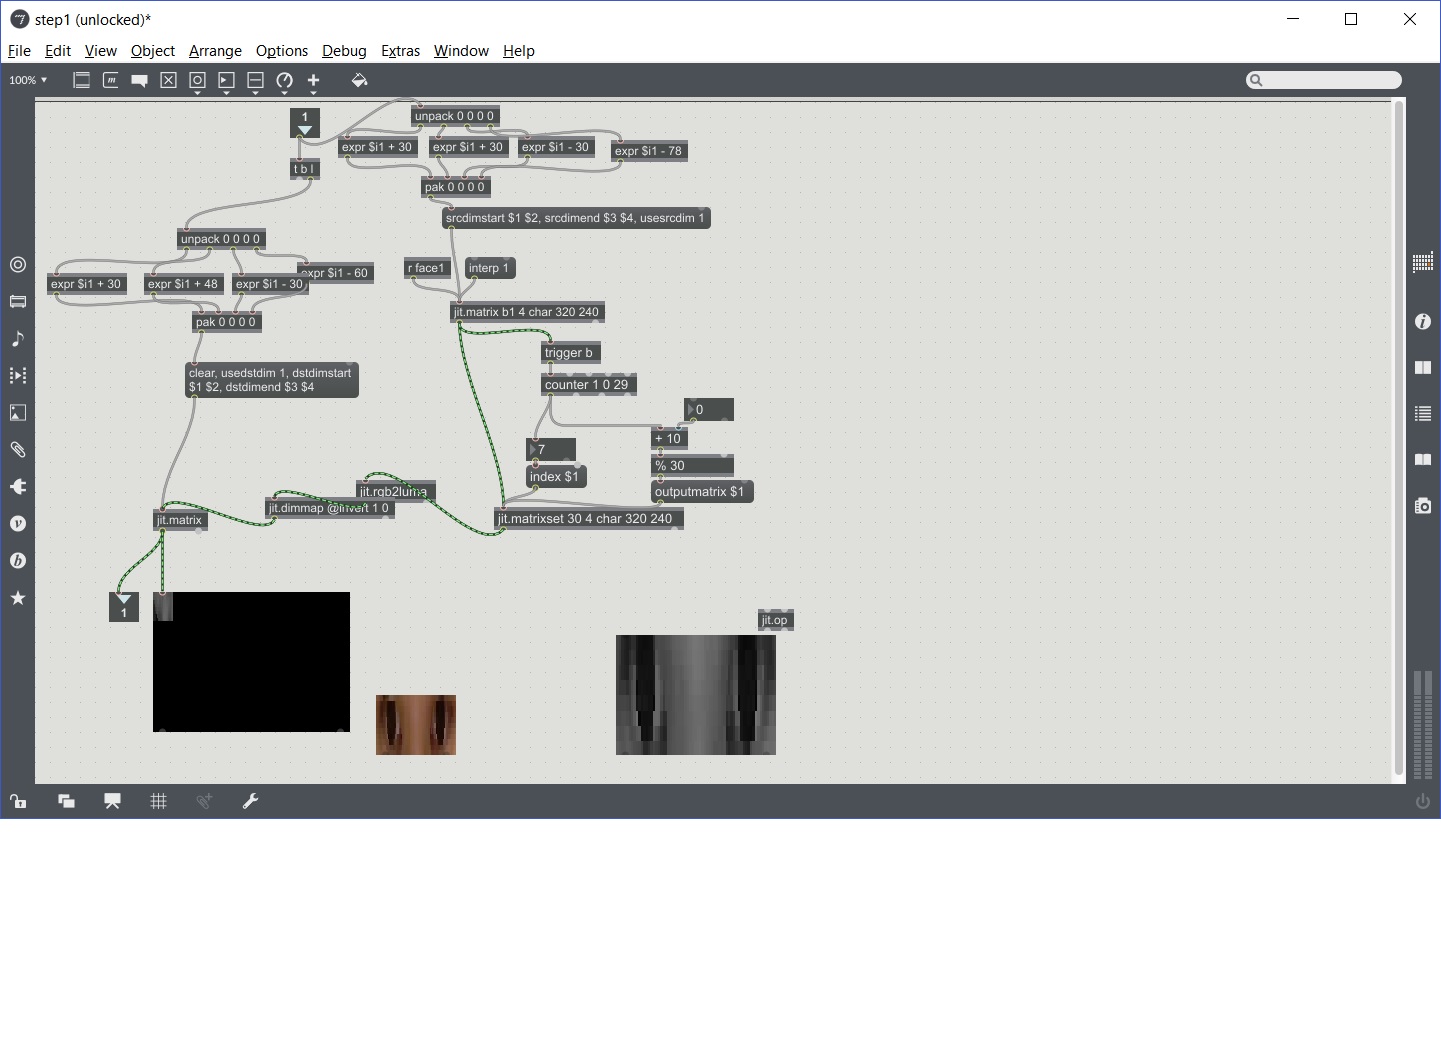
This Exercise was built on top of the previous one where we can use the majority of the exercise 1’s code and add on the playback of another video to it, playing the frame corresponding to the x position of the face detected.
I’ve also added the “if” statement which made the video to “look” at the middle when no face is detected and “line” it so that the face will turn gradually(only somewhat as i do not have enough framecount in my clip to make it really smooth)
in this exercise, I’ve learnt how to:
playback a certain part of video
use the “if”, “then” and “else” statement properly in max


