66 Meters Apart is a project that explores the disruptions in the train of thought when a speaker is articulating their words, as our brain functioned as it should, we’ve forgotten how complex the brain are in these almost instantaneous real time processing of information that we sensed. By using 66 Meters Apart, user will have personal experience of these disruptions within our thought and notice how easily it is to distract our focus even from simple task like reading out loud a few sentences.
The 66 meters refers to the metaphorical distance created between the mouth and the ear through digital latency of 200ms, which is the time for sound to travel approximately 66 meters. As we hear our own voice through bone conduction from our vocal tract to our ear (which is much faster than the speed in which sound travel in air of the same distance), the physical latency it took to hear ourselves speaking is almost instantaneous and we were accustomed to this. By introducing a 200ms latency of us hearing our own voice, it could greatly impede our concentration in thinking as well as speaking in most of us.
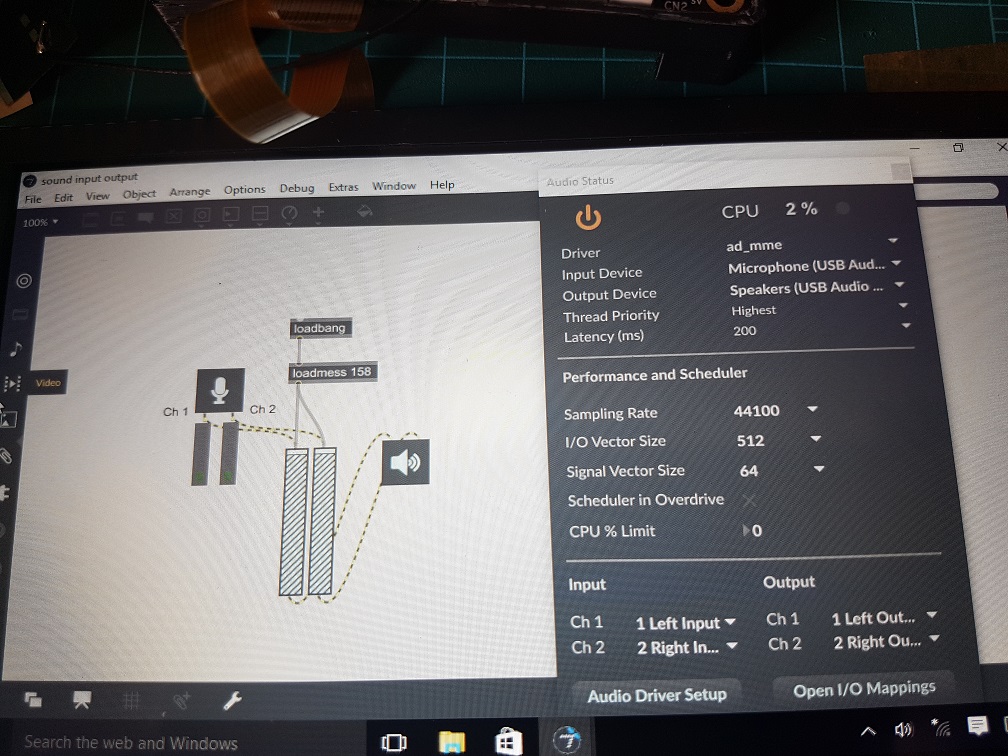
The system which I am using for this project is the Lattepanda, which is a hackable computer and I’ve installed Max MSP into it for this project.
As LattePanda does not come with a sound card for microphone input and the only headphone require input and output jack separately, I had purchased an USB soundcard on carousell and luckily it works.
I was prepared to write the slightly longer code which require to delay the sound from the input to the output, however I found out that there is a “Latency” function in the audio setting and so I used that instead, also, I’ve add an audio gain to the patch to increase the output volume of sound. This is the simplest piece of patch and it works just as I needed so being simple is really good!
again, I had progressed much further since that post, mainly in designing the workable electrical and mechanical system that could fit into the Telephone and to write the Arduino code up.
First, lets start with the Final Video!
Back into the Process
Since the previous post which I’ve roughly did the belt system that drives the music card into the laser reader, I had added the motor to the system and tried it, at this point, it seemed to work as I thought all I need was to slow the motor down and it will be alright.
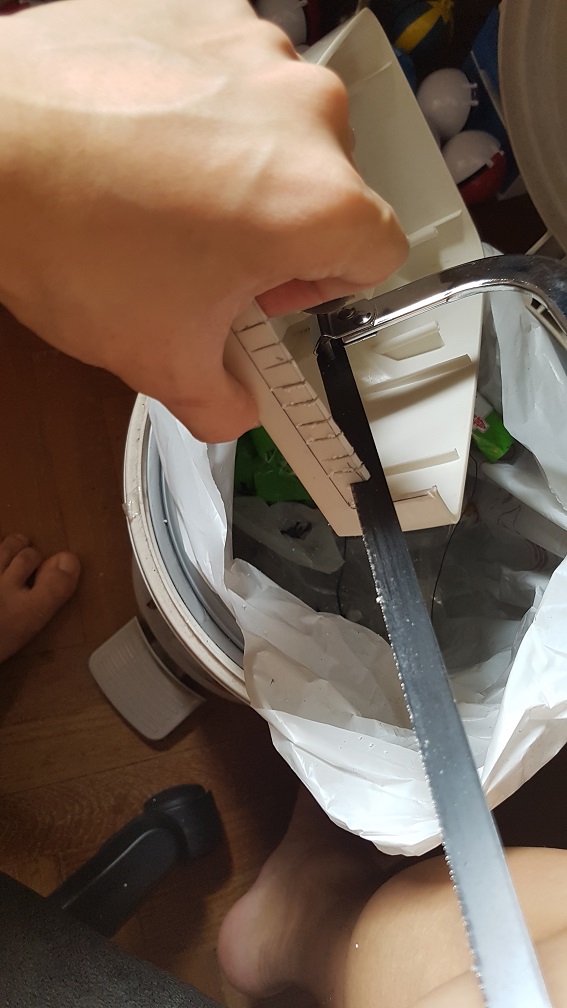
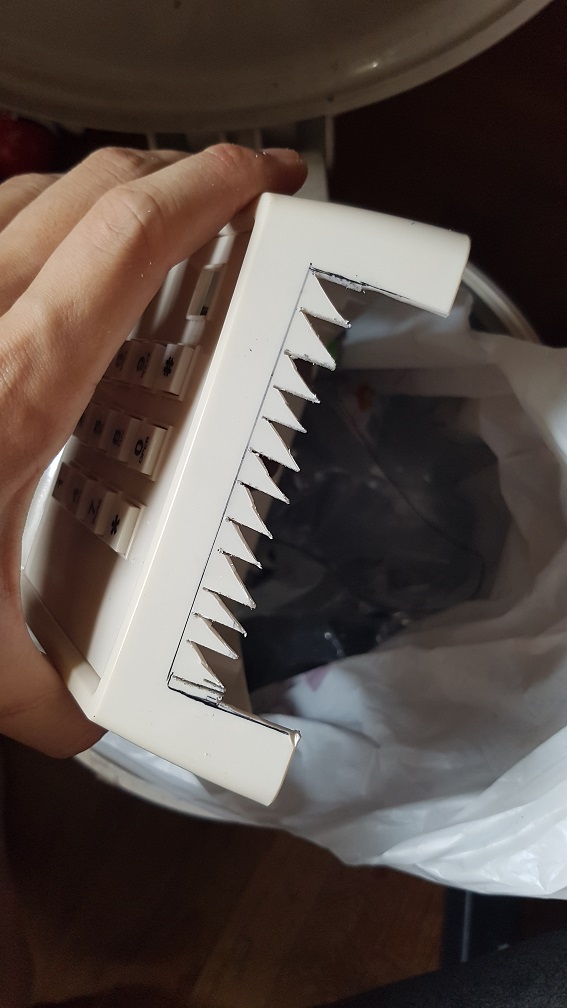
First I sawed the phone to remove the material for me to cut them easily later
and slowly, I cut them up
after chipping the plastic off, i constantly checked the dimension of it and trimmed a little at a time to prevent having a larger hole than I needed.
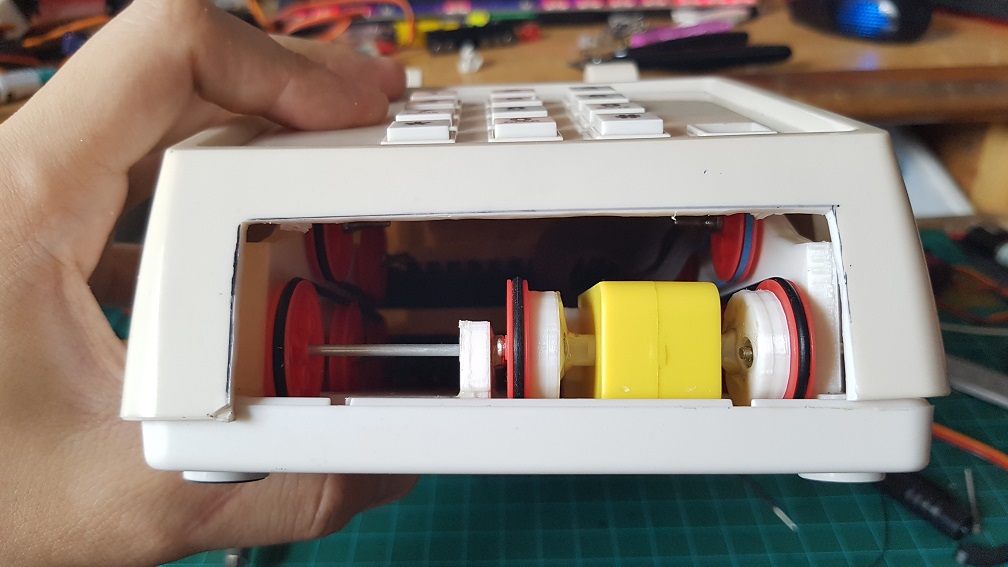
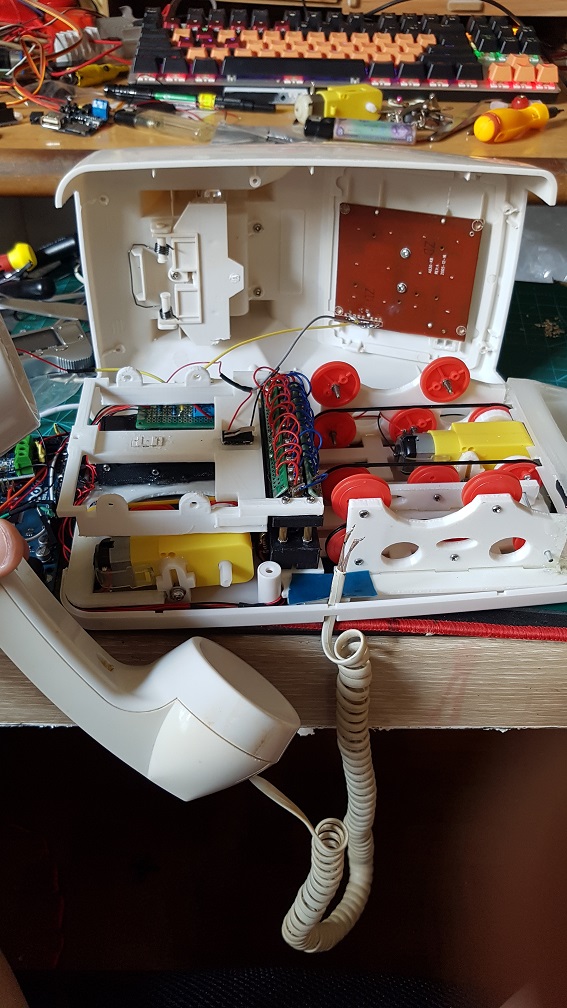
With this hole, I could finally see how it is looking internally and if there are any parts i made which was too tall in the case.
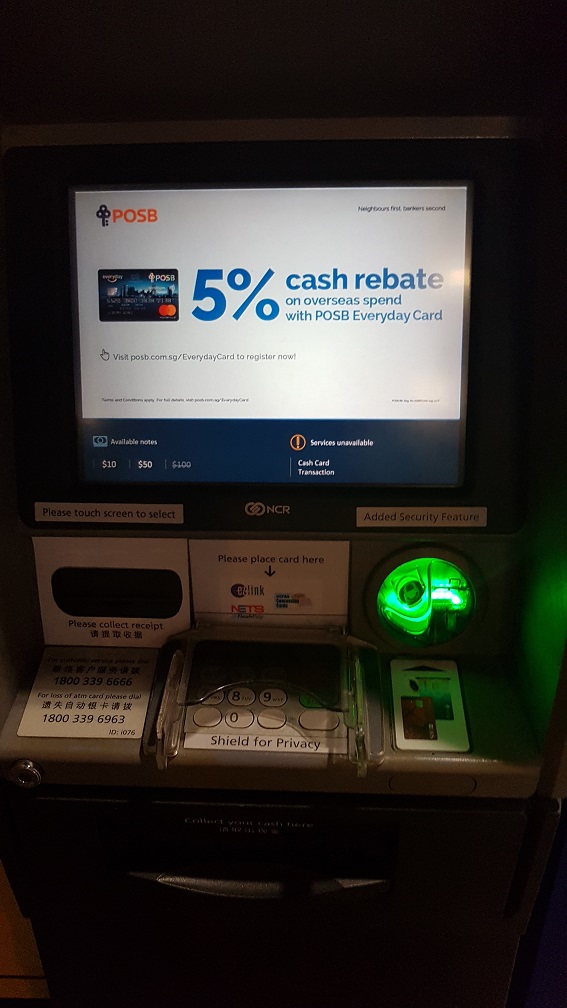
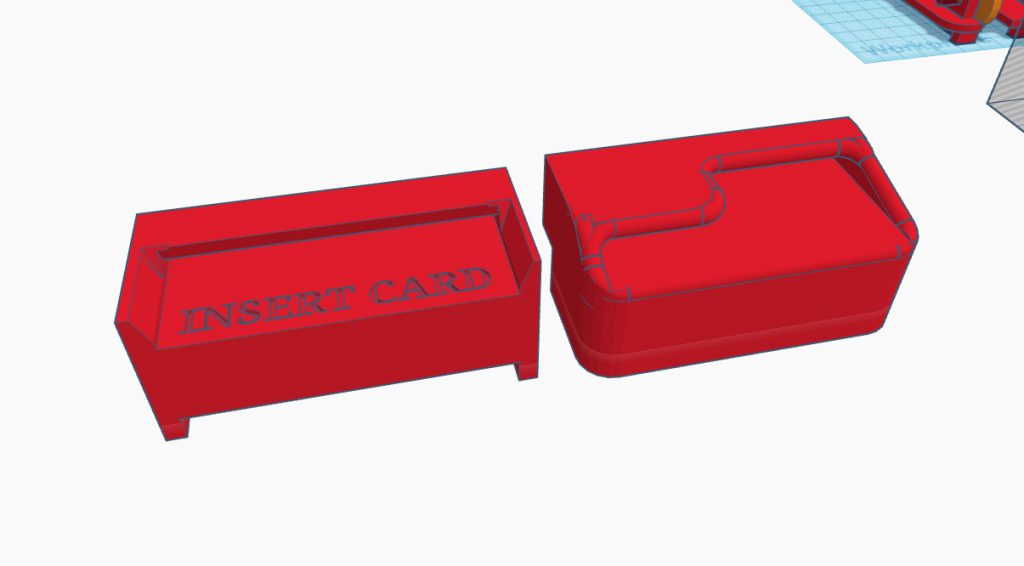
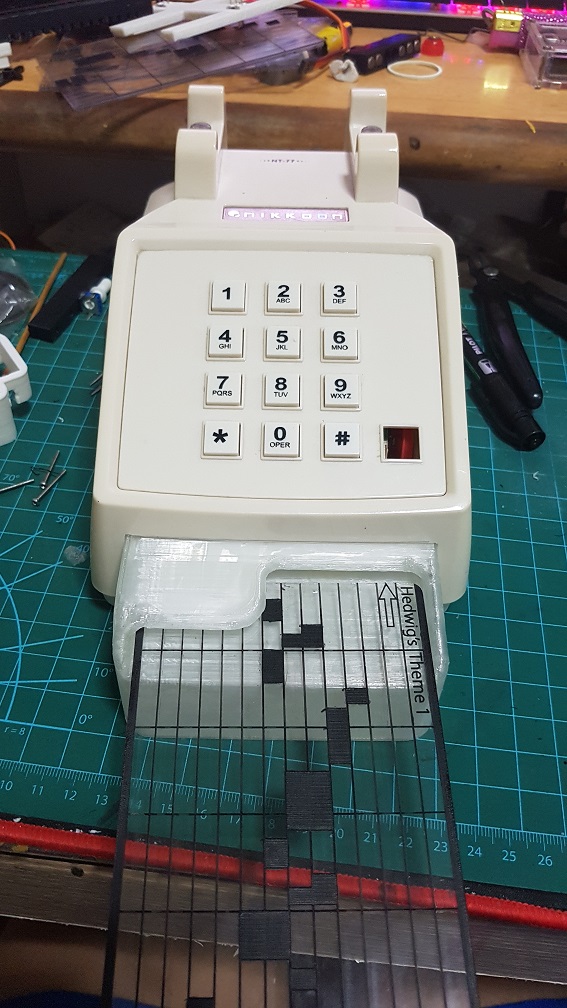
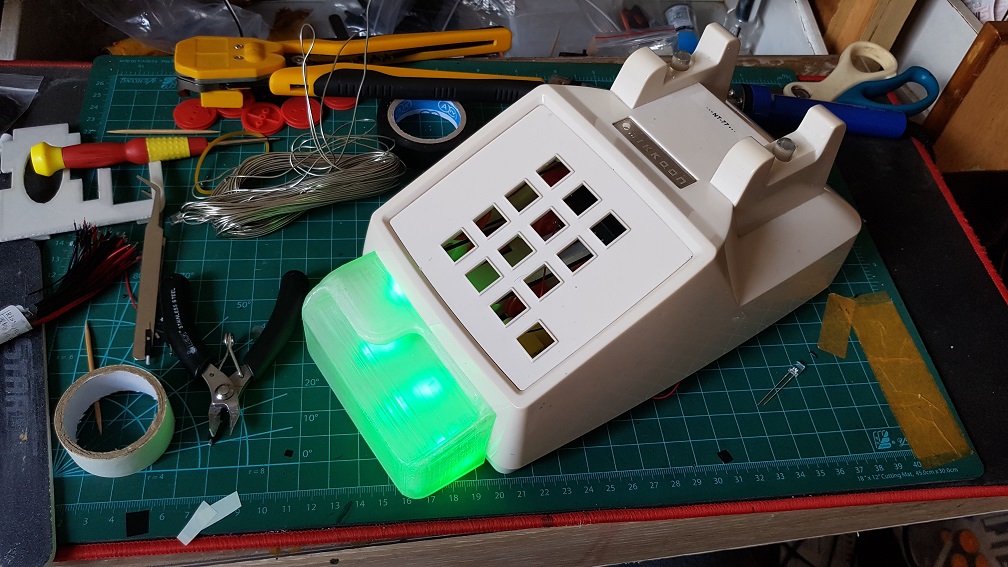
After I cut the hole, I proceed to modelling the card slot and i took inspiration from the ATM just to have the user to have something they’ve experienced and know how to put the Music Card in without instructing them, since subconsciously, I assumed that they interacted with a ATM at some point in their life.
This is the inspiration that I took from
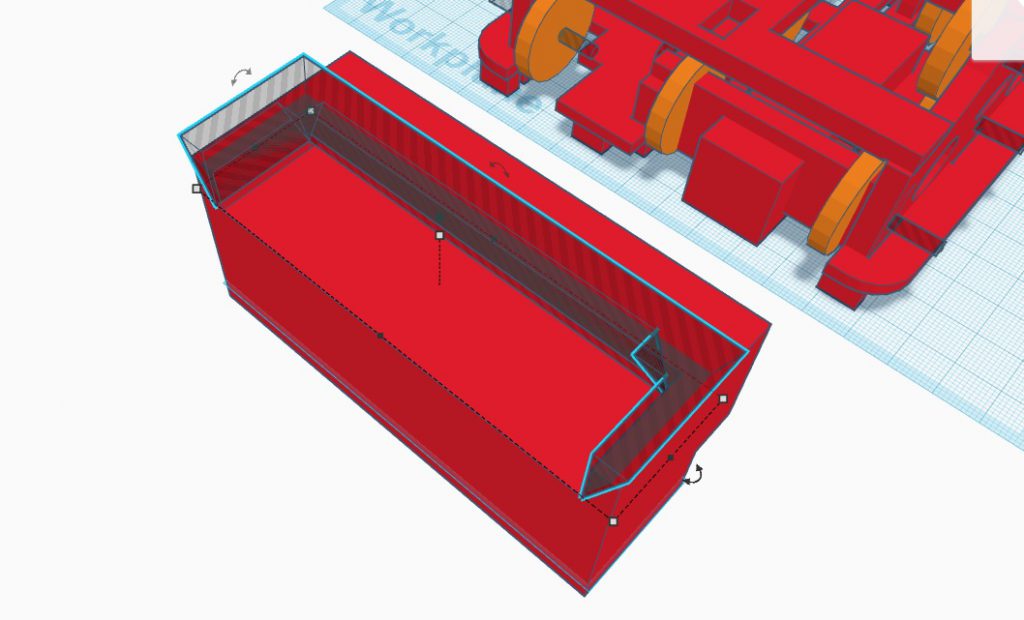
I used Tinkercad to modeled it and the cube like doesnt look like ATM card slot.
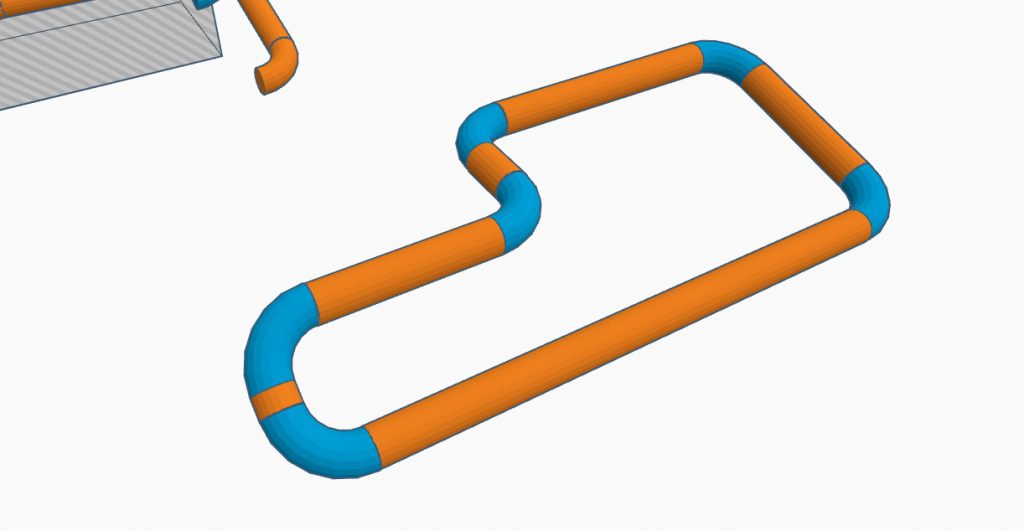
so i tried to use curve lines, and MANNNN Tinkercad was not meant to be used this way!! these angles and tilts of a pipe line was only done by brute force trail and error.
Version 1 on the left and Version 2 on the right.
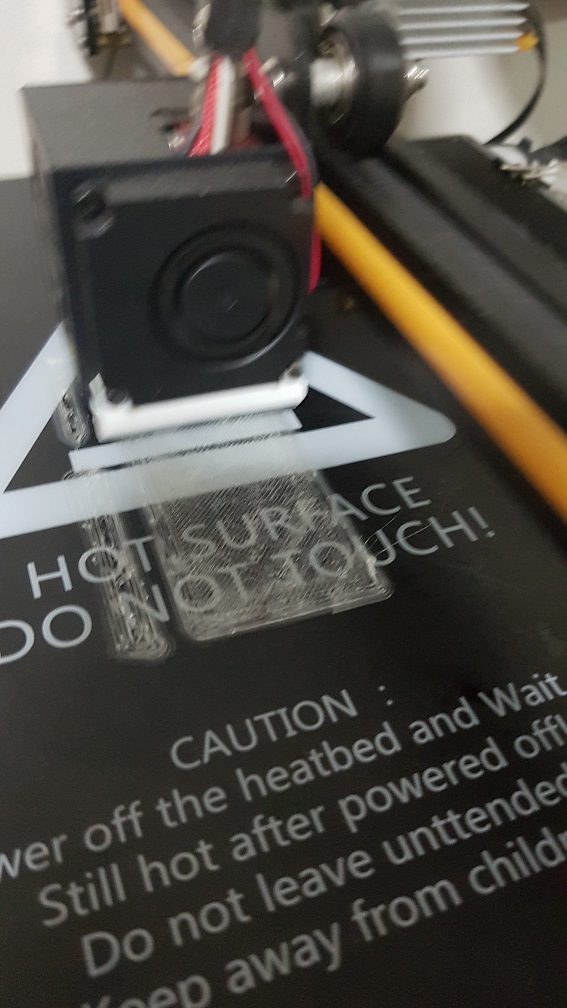
After the modelling which i am really happy with, I proceed to print it.
I changed filament to clear filament to print the card slot which was modeled according to the ATM
Half way printing, its looking really good
test of size with the music cards.
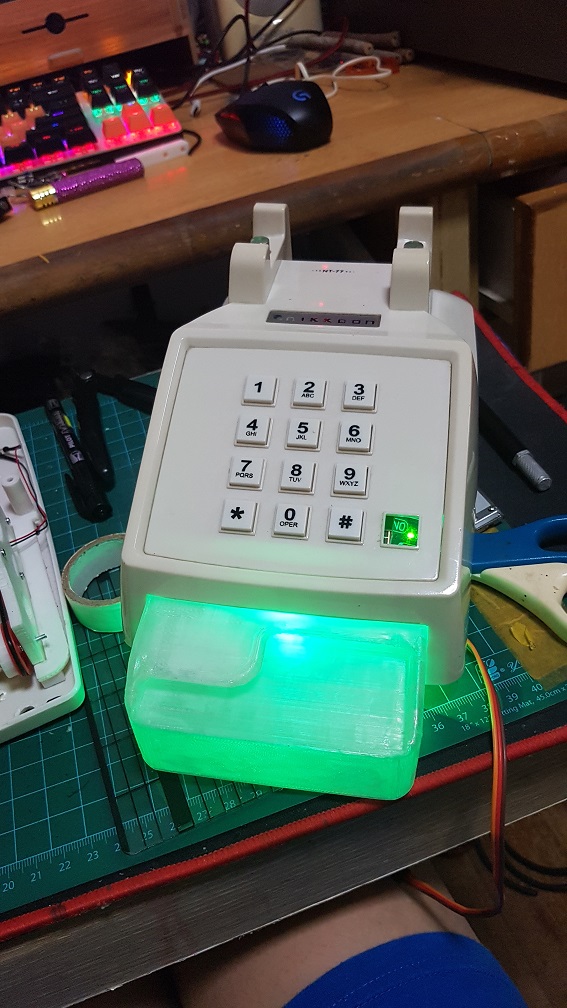
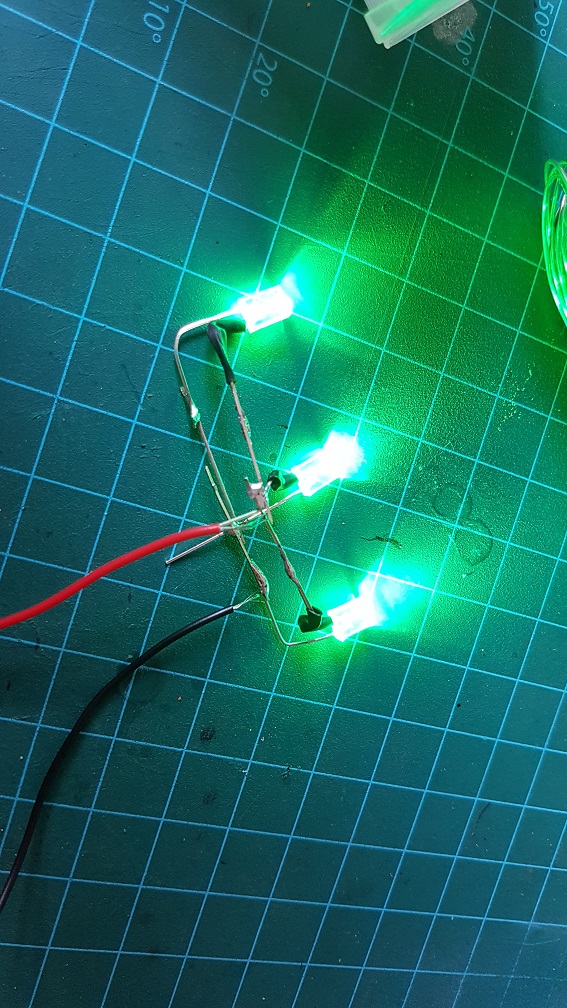
and i tested by plugging in one green LED in it and MANNNNNN IT LOOK SO MUCH NICER THAN I EXPECTED!! I WAS IMPRESSED.
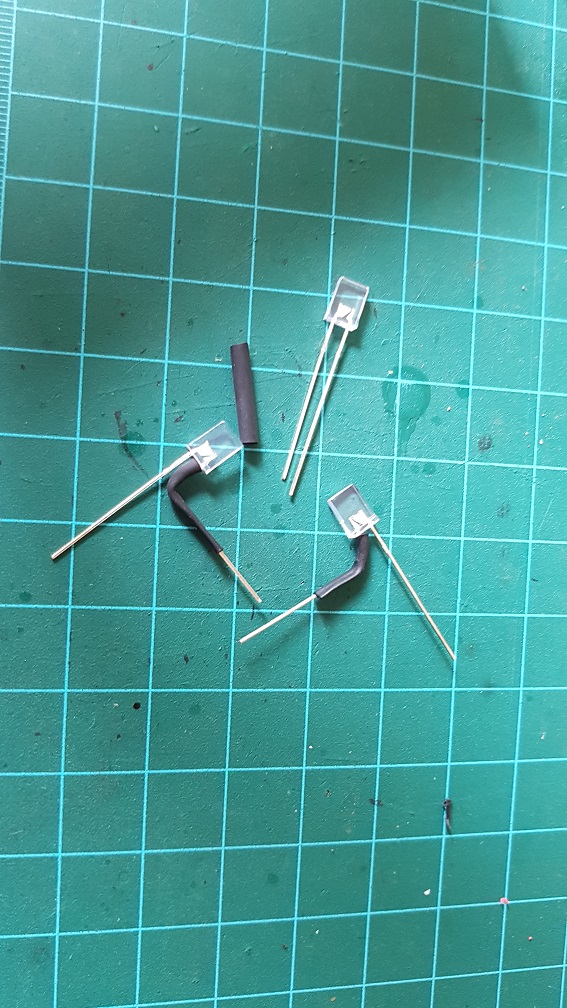
Since it was looking good, I went ahead and make a nicer LED system for it by soldering 4 LED(3 on the bottom and one for the top).
I used the flat and clear when Unlit Green LED so that i could stuck it in the shell on top.
and I soldered the 3 on the bottom and tested it out.
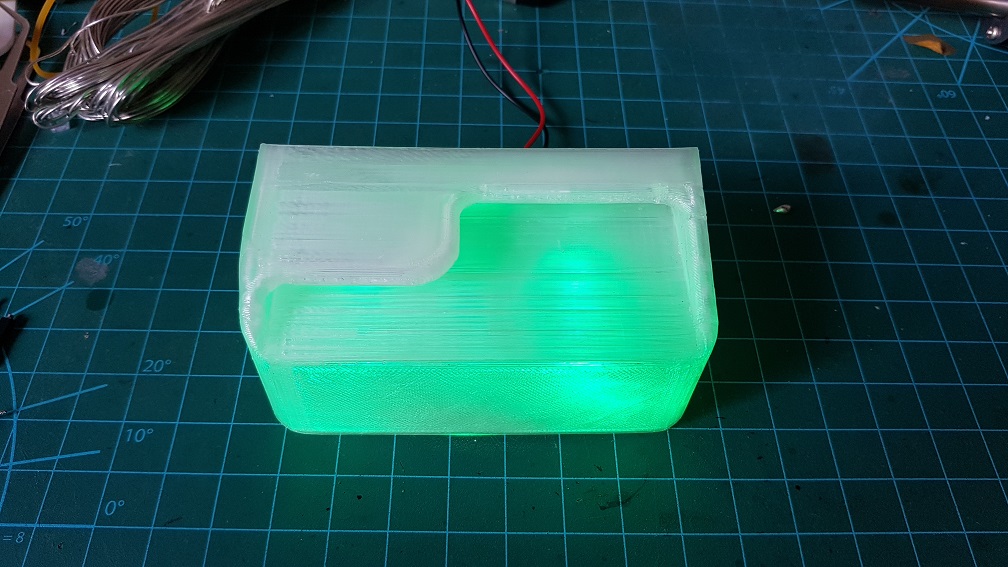
placing it in to see the effect again.
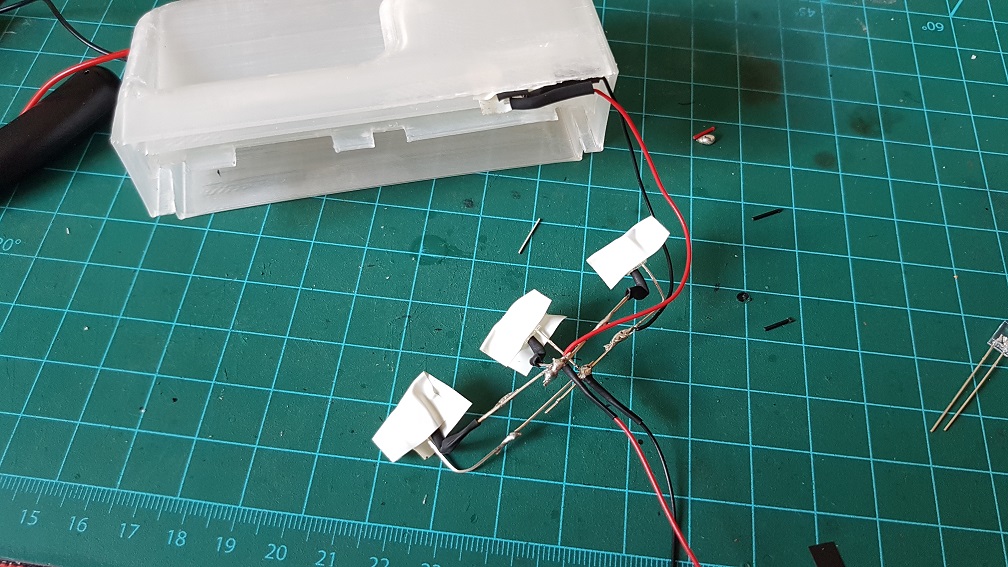
The light was too glaring so I sticked white electrical tape to diffuse the LED to make sure that they glow nicely.
and this is how the system would work.
How the phone should look
Next, I Epoxyed the speaker onto the bottom of the front belt drive since there is already a hole in the bottom shell for the speaker.
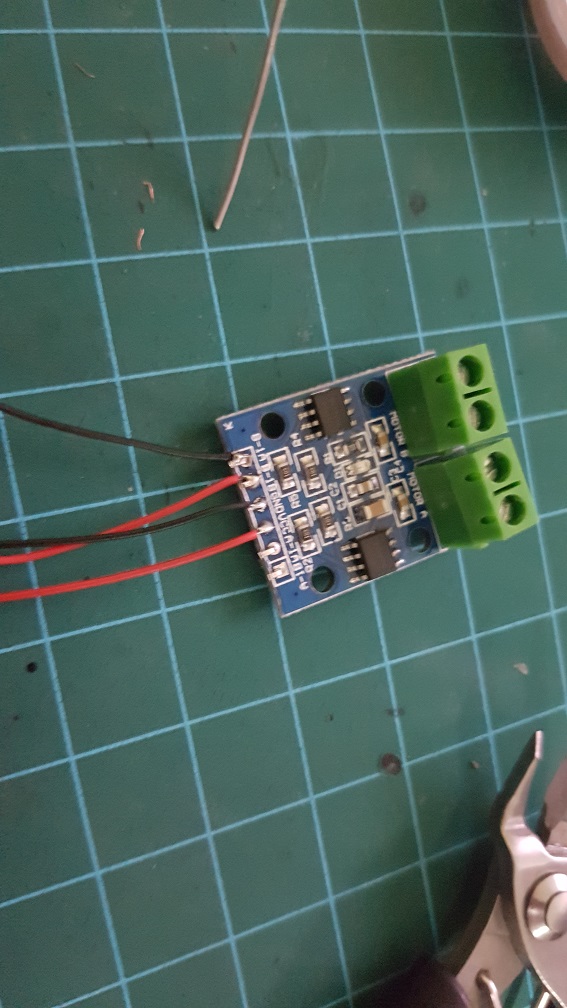
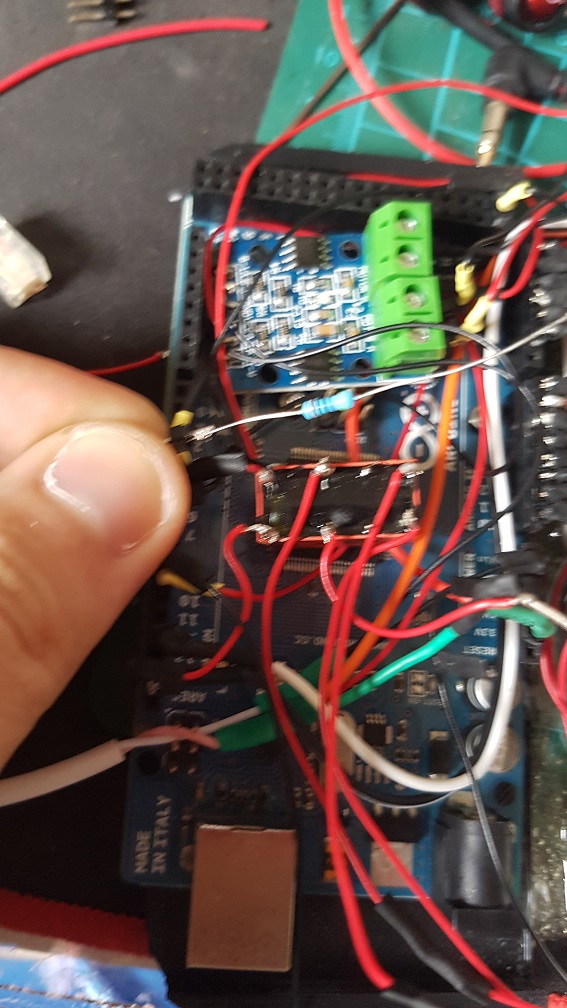
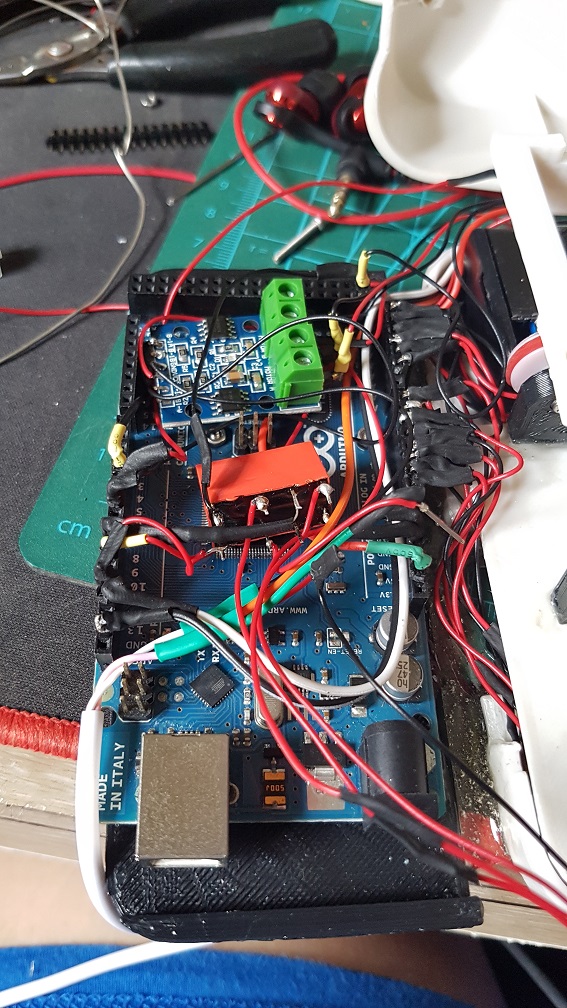
This is the DC motor driver which is used to run the 2 DC motor in the system.
and I soldered the pins too.
I thought I woundn’t need to solder this again… but… i happened to solder this for the 4th times..
I extended the wires and used thinner and softer wires so aid me in the messy wiring withing the telephone afterwards.
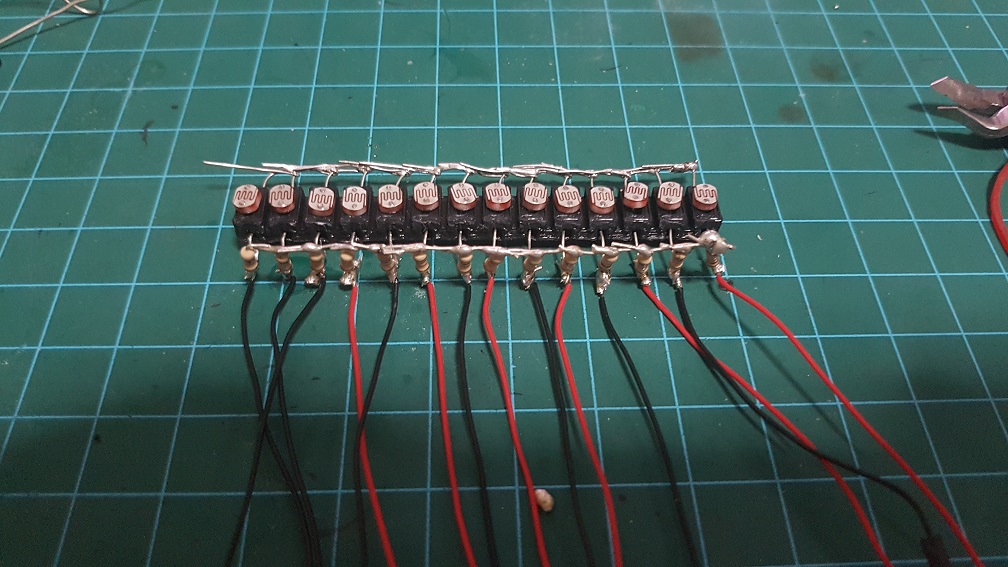
this is the wires for only the photoresistors.
and I soldered the relays which control the 14 laser diodes and the 4 Green LED lights which runs on 2 AA battery to reduce the load on my arduino and to make sure the laser and LED have a stable current flow.
It was at this point then I realized that if i reduce the speed of my DC motor to the speed of the music, I wont have enough torque to pull the card in..
After an afternoon of panicking and finding alternative motor or even thinking to redesigning my whole belt system….
So to solve this problem, I tried to get the medium speed which is faster than what the song should be and will stuck about 30% of the time and removed the buttons (which detects card when user insert into it that trigger the motor to turn the belt.) that caused more friction. And I also jump start the motor by making it to spin at full speed for half a second to break the initial force required when the motor is starting.
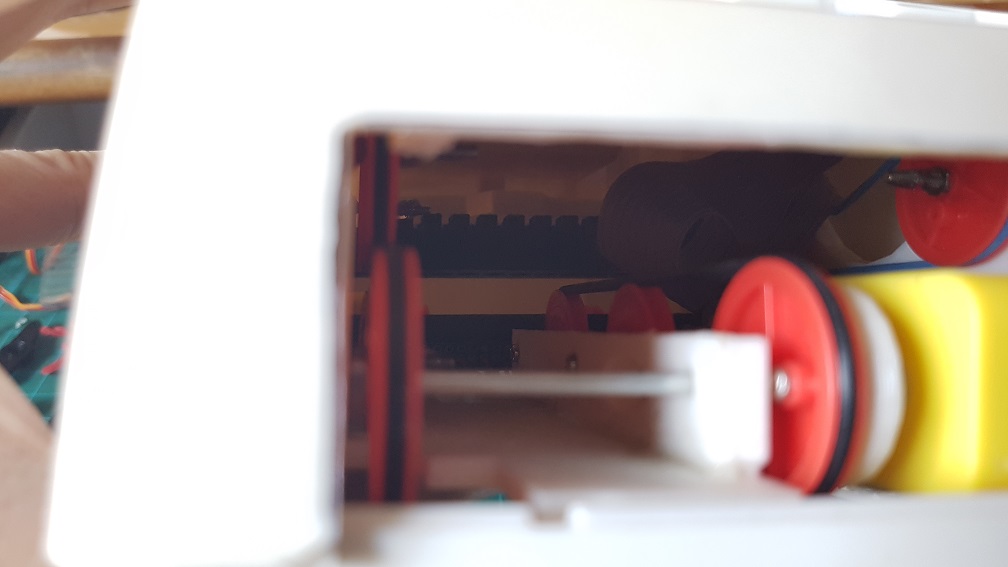
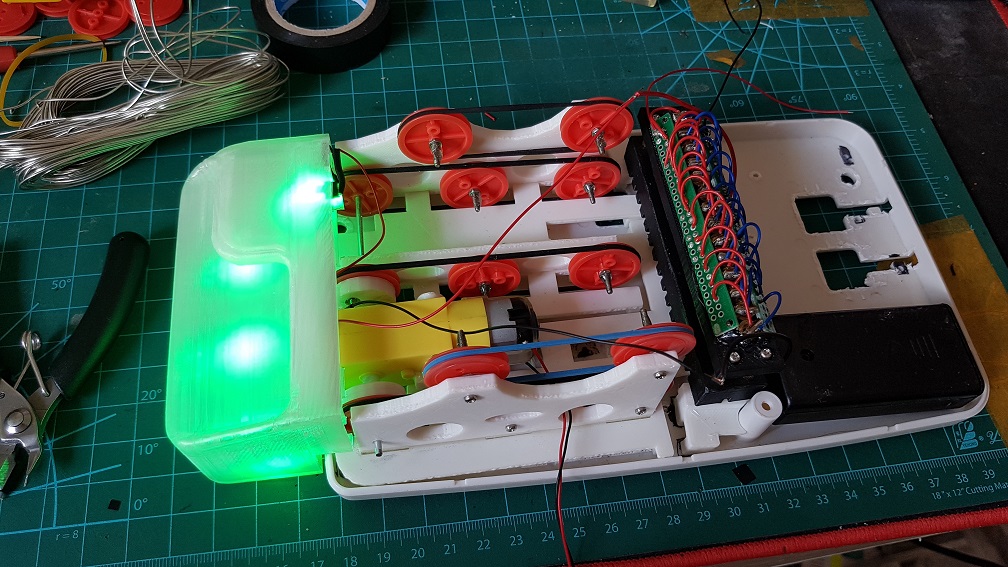
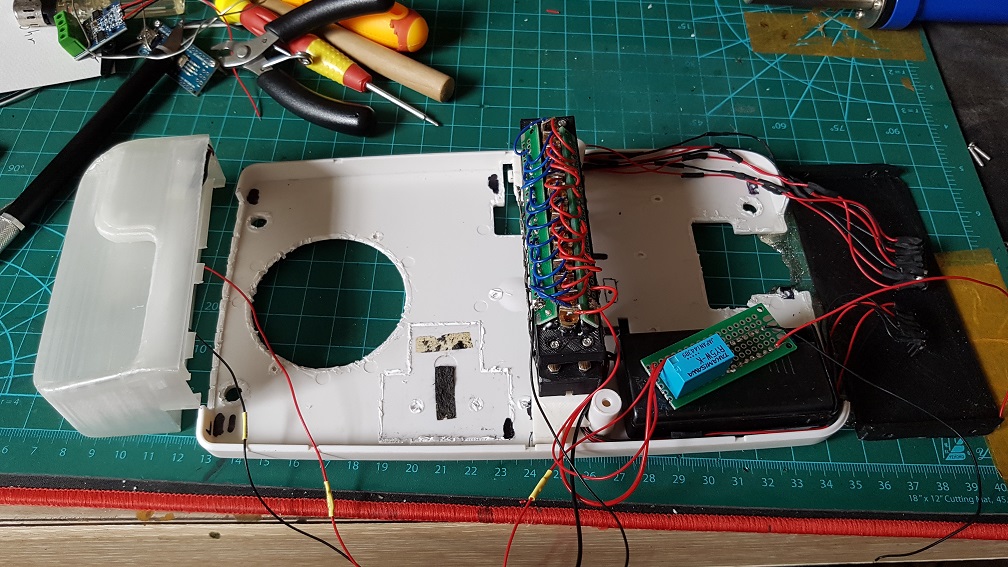
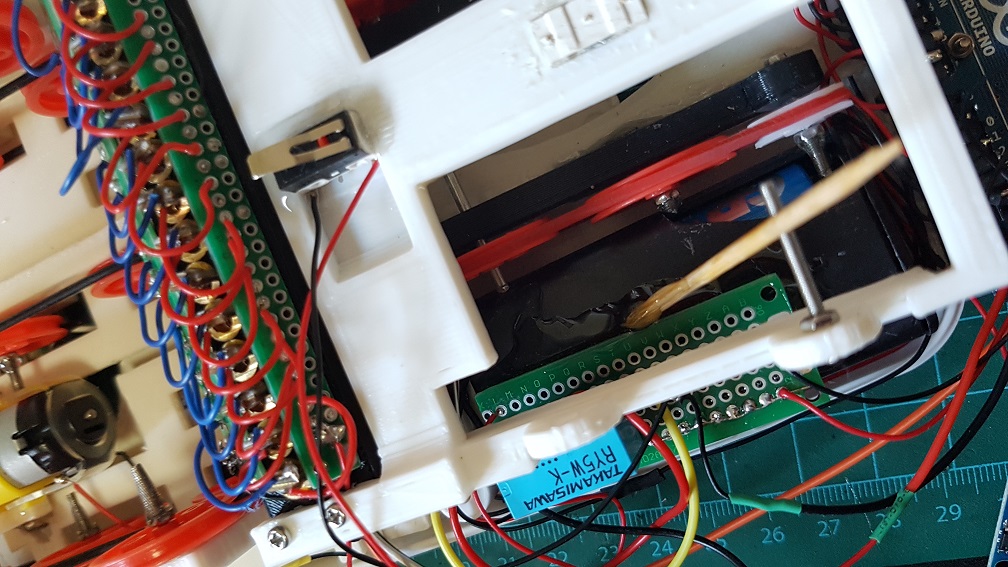
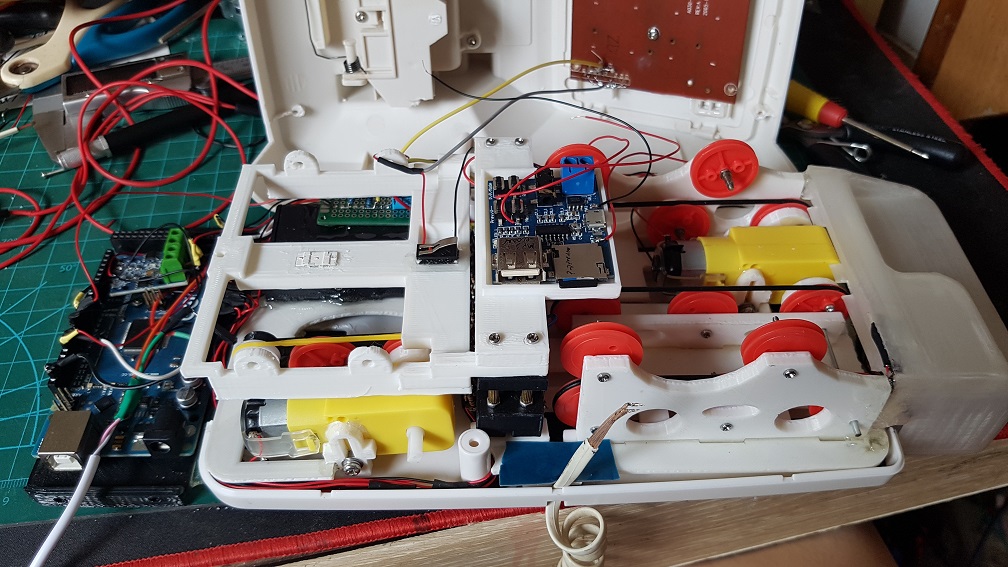
The messy configuration, components and wirings.
It took me some time to sort out these messy wiring and make sure that none of the wires interfere with the track that the Music card is going through.
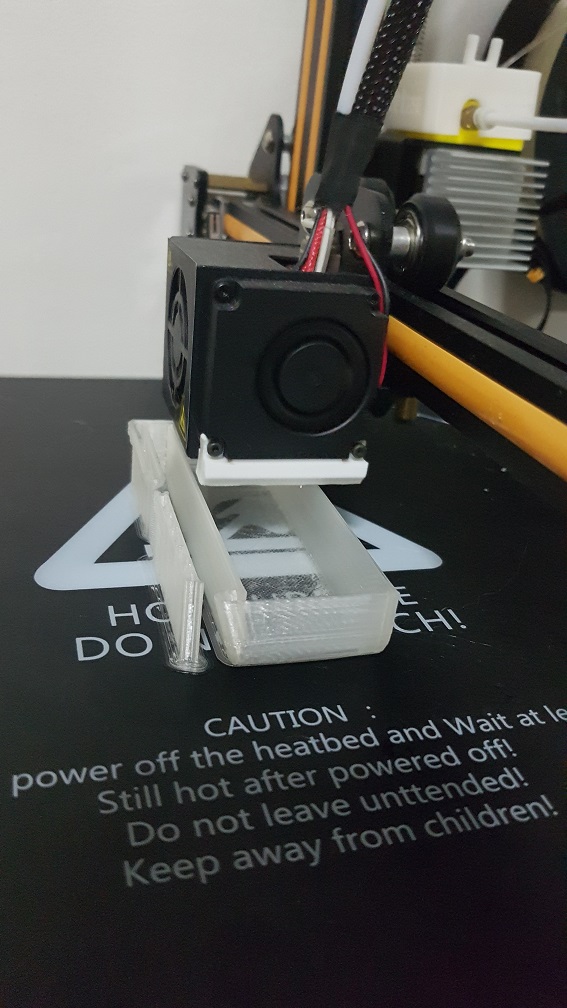
The overall layout before the mp3decoder mount was printed and installed.
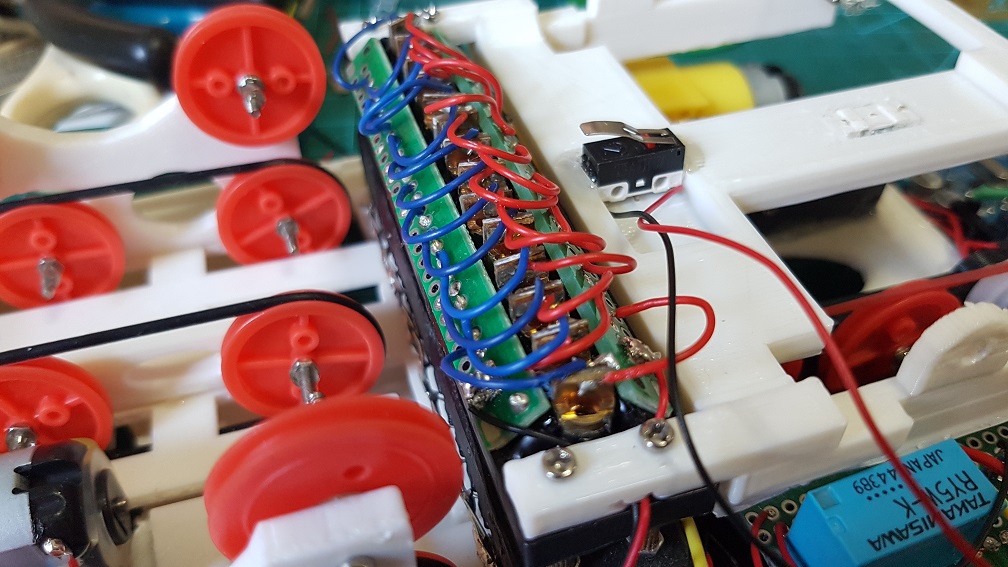
The relay which controls the LED and 14 laser diodes, it work as a ground for other buttons to do the pulldown resistor.
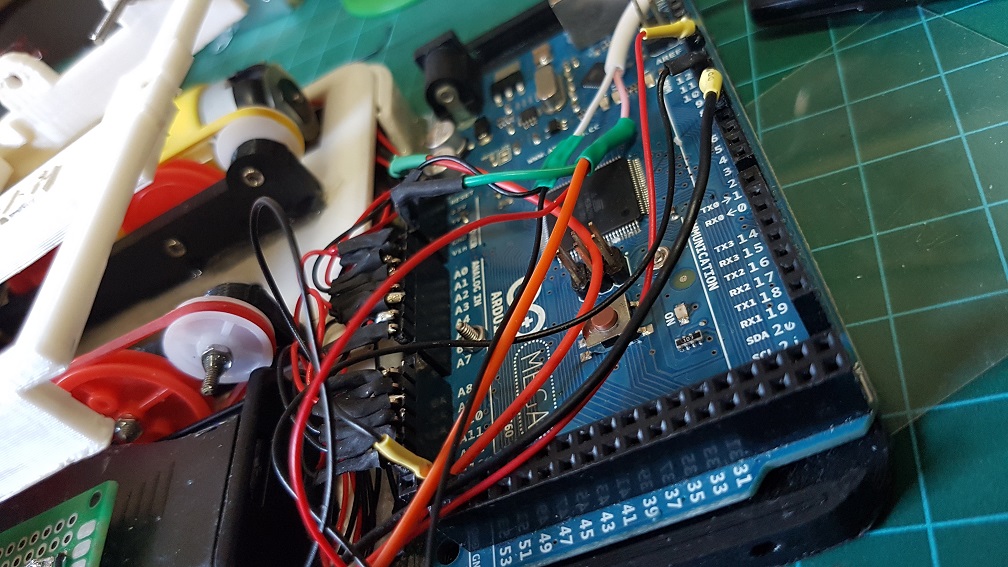
the only part in the whole system that was not soldered was the connection to the Arduino Mega as I intend to reuse it in the future.
Closeup of the 14 Laser Diodes.
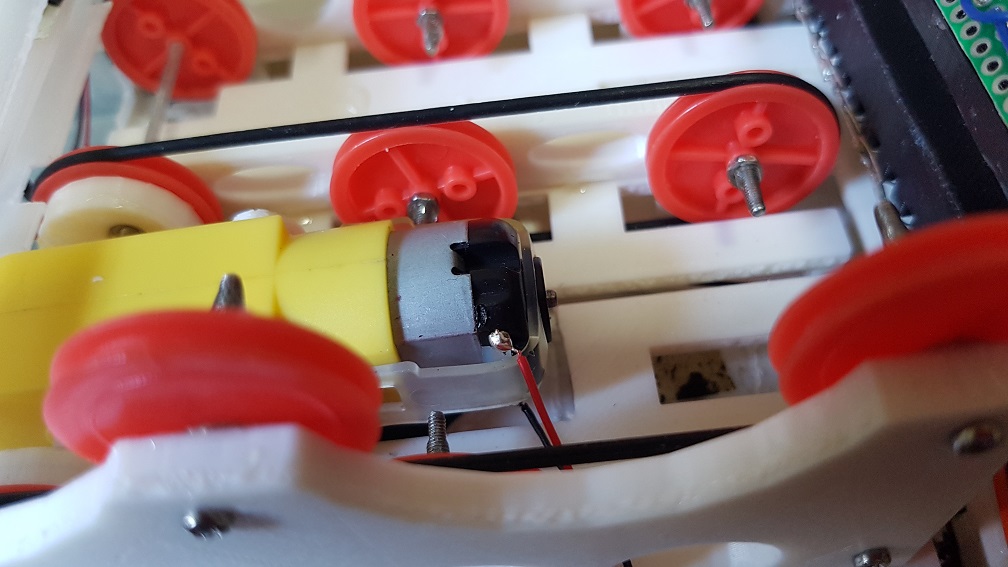
The soldered joint of the DC motor.
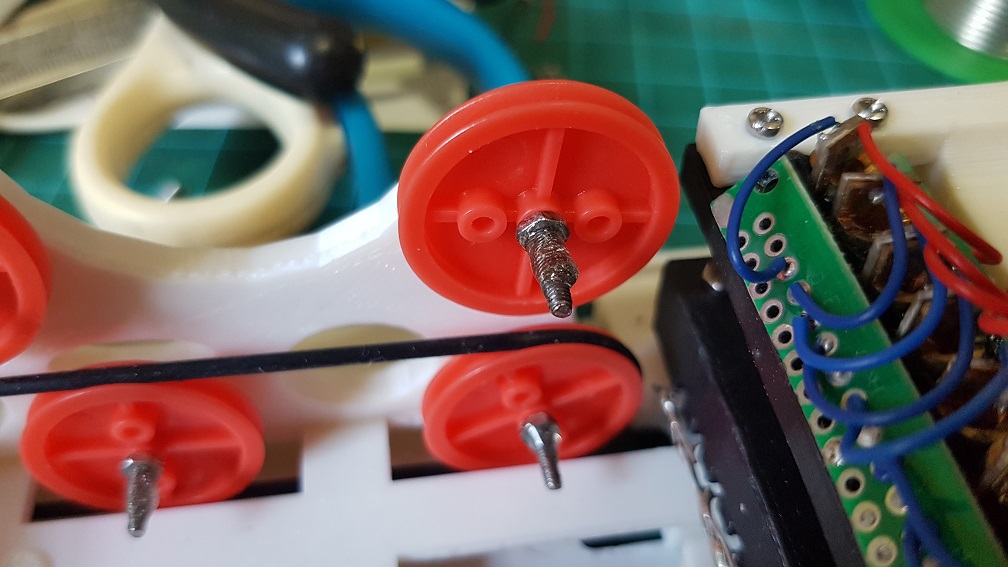
I’ve epoxyed the nuts of all the wheels for the belt drive to make sure they stay where they should be and don’t unscrew/tighten themselves.
I also Epoxyed the relay onto the case of the AA battery to make sure nothing is loose in the case.
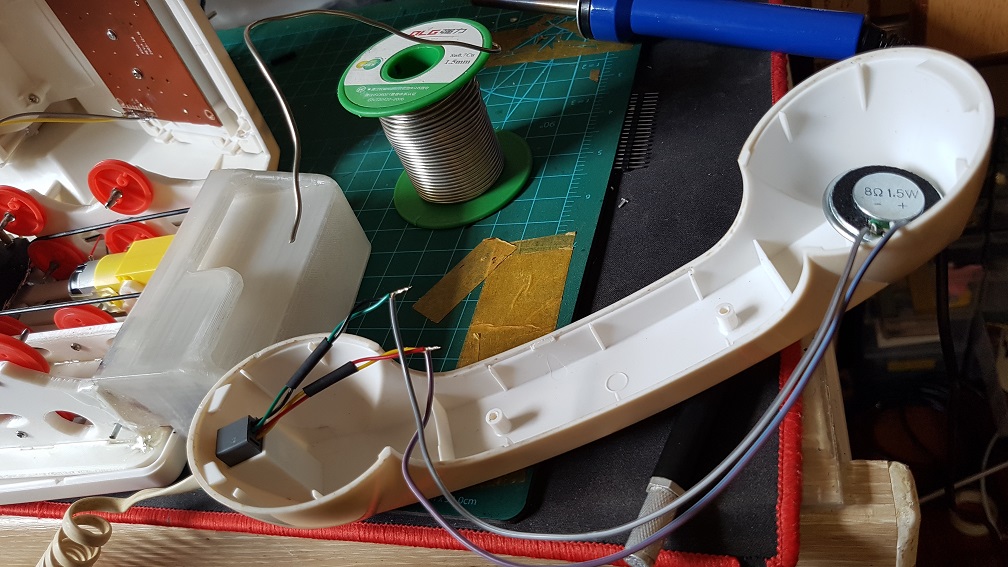
Soldered connection from the phone coil wire to the 8 Ohm 0.5 Watt speaker.
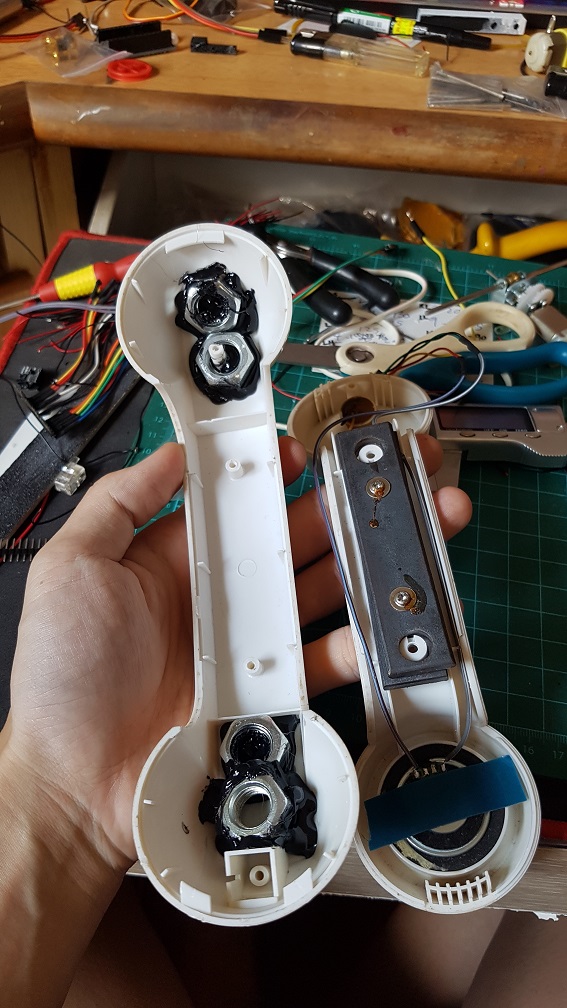
I also Hot-glued four big nuts in the phone to increase it’s weight to make sure that when the phone is in the place, it is heavy enough to press the button down.
the assembled phone
after the MP3decoder mount was modeled and printed, it looks quite good overall!
I used this 400 Ohm resistor to reduce the volume of the tune when playing the music card.
And added a relay that cut the power of the MP3 Decoder since I am not able to control it digitally, the only way was to let it play until it is the start of the next track and cut off the power to stop the voice track. it also switches the circuit of the phone from the MP3 Decoder to the Arduino pin at the same time.
Some may wonder how did I make the Music Card..
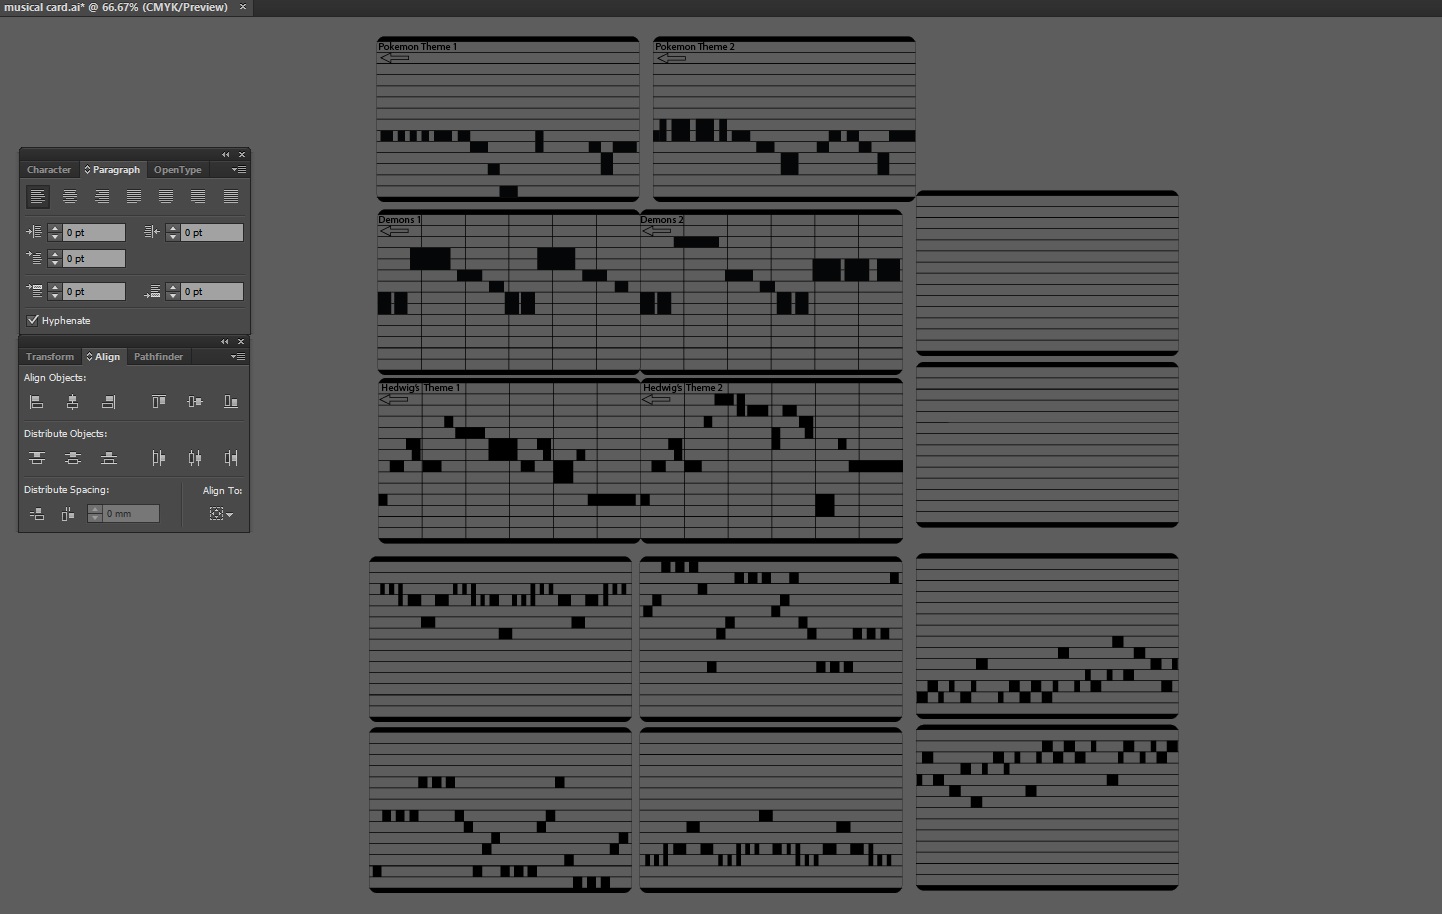
I copied a few from online like Demons by Imagine Dragons, Harrypotter’s Hedwig Theme, and Pokemon Theme song, These were labeled on the card and those that weren’t labeled was What I composed myself. Since I have no music background, I did it by trial and error to give it a tune.
This was screen recorded when I tried to compose my 4th tune for this project:
after this was completed, I screen shot it and import into Illustrator to trace it into the Card layout which I made.
AND how about the voice command in 7 different accent?
well, this is relatively simple, just type whatever I want on Webbased Text to speech reader and have it read it out in different accent and edit them in premiere pro to cut them up to the exact same length(9 seconds) and put them into the SD card within the Obseleting Instrument’s MP3 Decoder.
Why did I made it to speak different accent? It was to engage the user and make them feel like there was really life in the system where they called/receive call from a real person, like if they discussed with their friend and their friend said that there was a Indian accent while what they heard was the British accent, they might want to try Obseleting Instrument for a few more time. The accent there is there to add variables in the system.
In Conclusion
Throughout this Project, I’ve learnt many things like how to model objects in Tinkercad and make measurements properly, there are always failures in everything that I modeled before it works, and this is why 3D printing is a good prototype process where I printed it out and tested it to know if it work or not, if it doesnt, I will shave off some piece to see if it fits, if it does, I will make new measurements for the edited model.
Also, to have a Telephone case in the start and scale everything into the Telephone case was really a challenge especially at the start when I could not measure how big the internal was and could only make a guess and print some test print to try it out.
In this project, I realized that if I were to do a project that require multiple fields of knowledge like mechanical and electrical, It was better if I did not know how hard it will be, if I were to know that every part of the project will be something that I don’t know, I will be too afraid to jump into this project. I did something, realized that it doesn’t work and find solution to that single problem and proceed to work on the project and faced another problem, solving and learning one problem at a time lead me to the completion of the project.
Now that I had completed the project and looking back. Obseleting Instrument is really a complicated project as a whole, but thinking about it, I am just putting many small system into one project- like using one laser diode and a photo resistor as a switch, playing a tune when triggered, a physical button to sense if the phone was picked up, using a relay to control circuits of different voltage, running two DC motor at the same time and so on… Obseleting Instrument is just a collection of small systems, which I personally thinks was what made my journey of doing this project really interesting because I explored the basics of these components and learnt a whole lot through it.
The file size of this presentation was too large to be uploaded so I’ve screen recorded the presentation and uploaded it to youtube.
I’ve chose to narrow down my scope to just Unconventional Musical Instruments mainly because it will be more interesting and fits the time limit nicely.
This is a Screen Record of the Video Wall on Third space Network.
And This is What I did before the wall was made in Premiere Pro to get a general feel of what it will look like and to get the exact timing to start each video in the video wall.
Lastly, this was my Individual Facebook broadcast, Just to re-emphasis on the point, what made our project really interesting was the video wall, every individual Broadcast doesn’t seemed like much, but when we are linked with the rest, we will produce a piece that is much more than itself.
we are the third space and first space performers.
The main purpose of our project planning was to begin with the end in mind – To present the four broadcast in a video wall that will be interesting for the viewer to watch, we will be the third space performers by having our broadcasts interact with each other in the third space. Our final presentation in class will be a live performance and I am not taking about the fact that everyone will watch what WAS BROADCASTED LIVE, nor all the audience in class will be watching it in THE PRESENT, but as the timing to click start each of the video must be precise to the miliseconds and will not be replicable when anyone play it again by themselves later as Telepathic Stroll will look vastly different if the time to click play each video are slightly different, so we are making a Live Performance by playing the four video in a way that we think it is for the optimum viewing sensation.
how did we perfected our timing even when not being able to see each other?
This is the reveal of our broadcasting secret! GET READY! CLEAN YOUR EARS(EYES) AND BE PREPARED! We called our system the….*Insert drumroll in your mind*
“THE MASTER CONTROLLER”
so… what is the Master Controller?
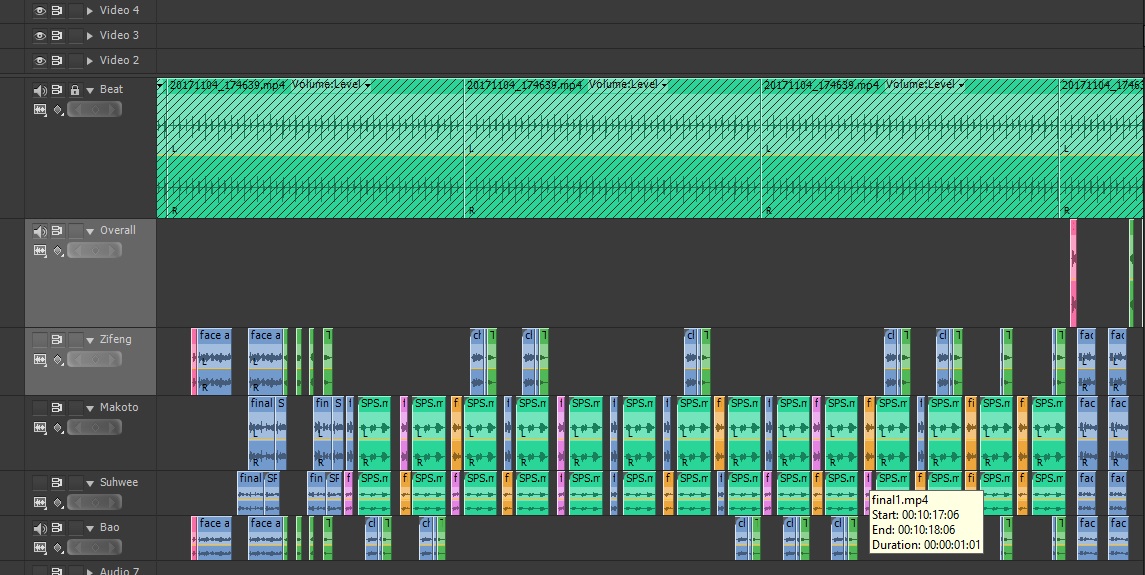
Basically, it is a well crafted sound track that is 23 minutes which consist of drum beats that worked like a metronome for syncing our actions and careful instructions to tell each performer what to do at which exact moment and every performer has a personalized sound track because we are doing different task at the same time.
How was it made?
It was made in Premiere Pro and a web based-Text to Speech reader and I screen recorded when it was reading to extract the sound from it into Premiere pro. The whole process to create the soundtracks took more than 18 hours and I’ve lost count of the time afterwards.
So how does it works exactly?
On the basic Idea, we will have the instructions preparing us and telling us what to do like “Next will be half face on right screen. Half face on right screen in, 3, 2, 1, DING!” and we will have our actions/change of camera view being executed on the “DING!” so that all our action will synchronize.
It started when we were at the meeting point where we started the sound track at the same time, counting down to 7 minute to walk to our respective starting point and wait for broadcasting to start, first, I will start broadcasting and then Makoto, SuHwee and then Bao on a 5 second interval, this was done so to allow us to have control when we play the four broadcast in the class to achieve maximum synchronization, if we started the broadcast at the same exact time, we could not click play on all four video in class which will result in de-synchronization. After started the Broadcast, we filmed the environment which was to remove the difference the timing from 30 seconds to 15 seconds depending on the time we started the broadcast and have everything happening afterwards at the exact same time.
Afterwards, we will have different actions at the same time, like when Bao and me entered the screen, Makoto and Suhwee will be pointing at us, this was done by giving different set of instruction in the Master Command at the same time, since each of us could only hear our own track and there will not be confusions among individual and clear instructions were given although I was confused for countless of times during the production of the Master Command because I have to make every command clear and the timing perfect, and it includes countdown on certain actions but not those repeated actions. The hardest part to produce was the Scissor-Paper-Stone part in the broad cast as everyone was doing different actions at the same time
Towards the end of the Broadcasting, many of our soundtrack was specially instructing us to pass the phone to a specific person like Bao will have it saying “Pass the phone to ZiFeng. 3, 2, 1, DING!” and “Swap phone with Makoto. 3, 2, 1, DING!” this was done just to avoid confusion during our broadcasting rather than going “pass phone to the left” which is quite ambiguous.
Overall, there was a lot of planning and every details must be thought out carefully when I was making the tracks because every small mistake will affect our final presentation to not as good as it should be, I am lucky that I only made one mistake in the Master Command which was the direction where SuHwee and Makoto will be playing their Scissor Paper Stone with and we clarify it before our final broadcasting.
On the actual day of our broadcast.
The whole week will be raining according to the weather forecast so we did our final broadcast in the rain, luckily for us, the rain wasn’t too heavy and we could just film it in the drizzle. We started our broadcasting dry, and we ended our broadcasting wet.
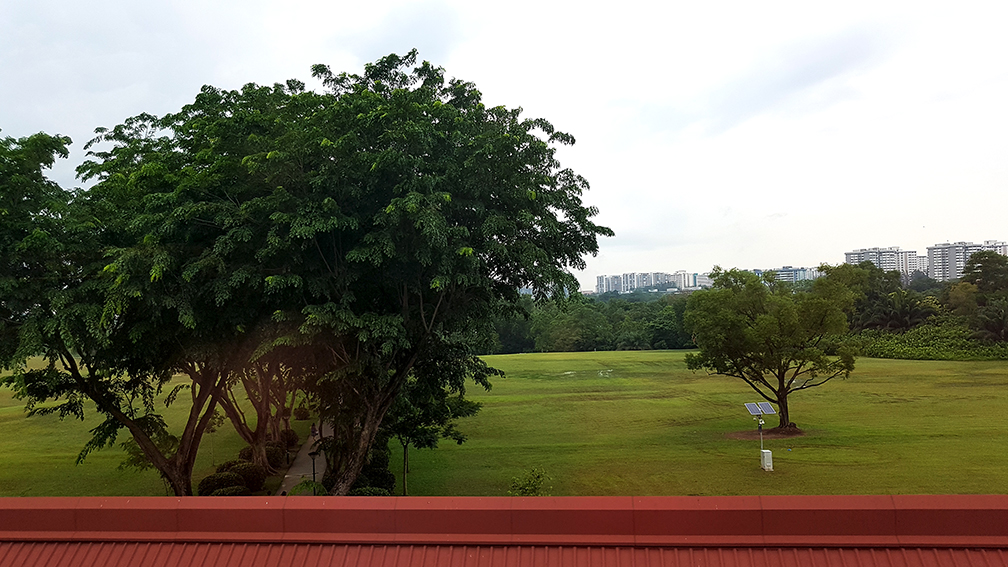
We explored Botanical Gardens for a bit and decide the path each of us will walk and we walked it 3 times before the actual broadcast – the first time we walk when deciding where and how it will be like, second when we walked back, third was right before we started the broadcast as we walked 7 minute to our starting location so our first 7 minute into the broadcast will be us walking back the same path in the same timing.
we did a latency test by broadcasting a timer for two minute right before the broadcast and we could make some minor changes in our timing if there are some latency issue by calibrating the individual Master Controller to the latency before hand, but luckily for us, non of us were lagging and we had the best connection possible so there was no need to re-calibrate the Master Controller. Also, just to mention, Since Bao and I were having calibrated connection due to the previous Telematic Stroll (NOT Telepathic Stroll), he doesn’t have to calibrate with us again since I am doing it, so we filmed his phone ‘s timer.
Some recap of Telepathic Stroll:
We played Scissor Paper Stone in the third space and ended up having all of us showing our palm.
We merged our faces in the third space.
The four of us walked in sync and filming either the merged face or our legs.
Bao saw me and I saw Bao, its a feeling of relief to know that both of us made it back in time
and the moment we finally grouped together, this was a magical feeling back then and in the video wall.
We had Broadcastception
and we went into a weird dance unscripted.
I wiped the rain water off my phone and accidentally minimized the broadcast, and it gave me a 1.5 second jump ahead of time. luckily this was at the end of the broadcast.
we did the old phone swap thing that we did in the test, only much more fluent in it.
The images flow from one frame into the other frame. its wonderful.
and lastly, to end of Telepathic stroll, we made the probably world first Facebook Live Panorama Broadcast!
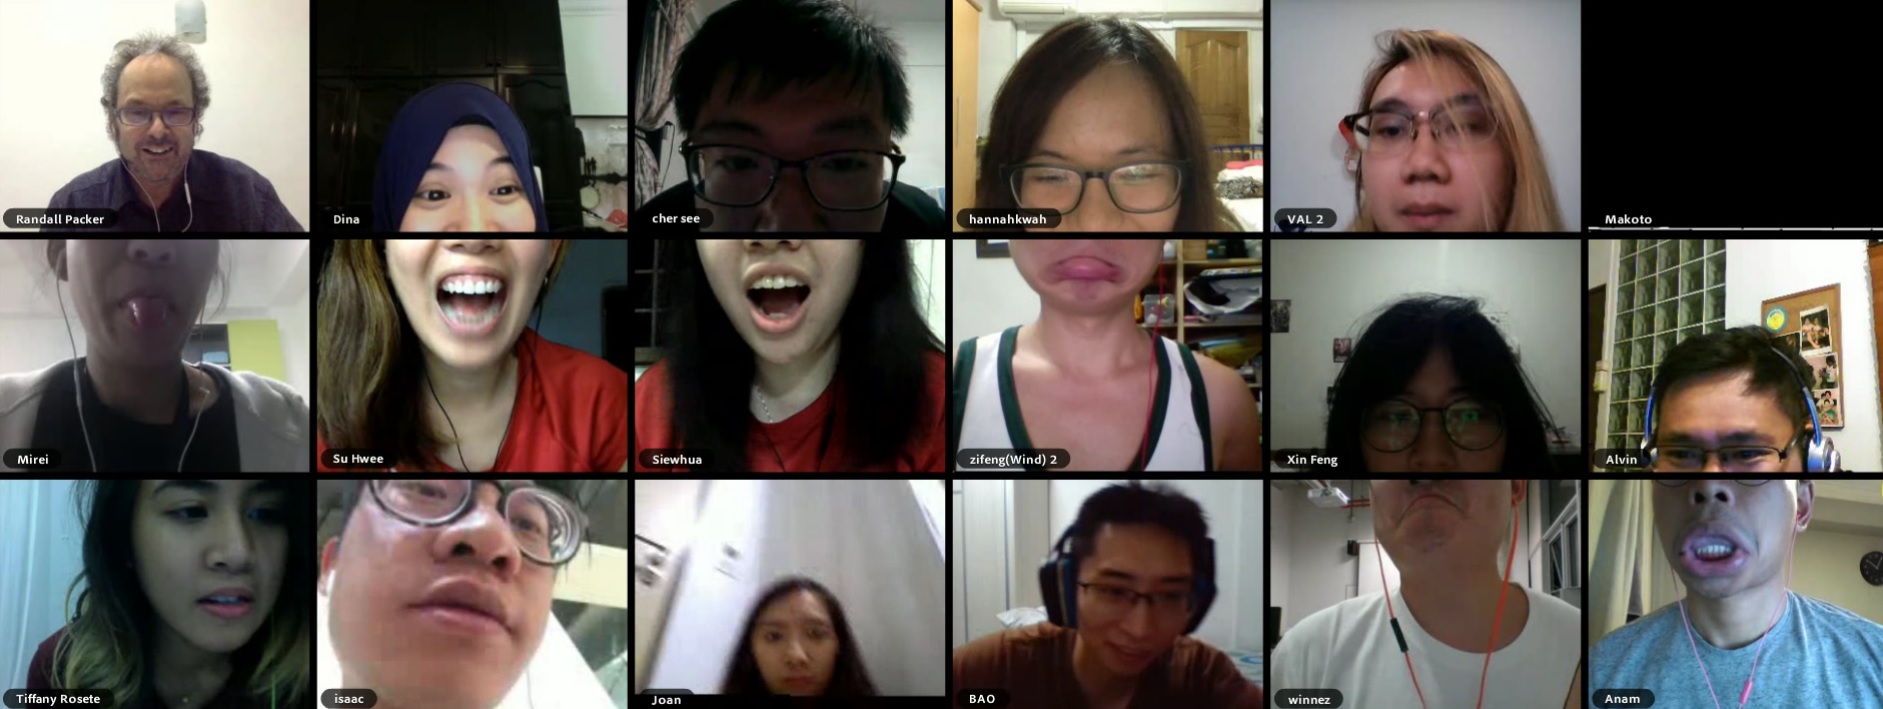
On the First glance, one can see the similarity in the association in Adobe Connect lesson with Telepathic Stroll, we had been pointing to the other broadcast, merging faces and trying to (act) interact with each others in the video wall just like the exercise we did during the Adobe Connect lesson,
This was the seed for our project, to live in the third space and interact with others and have a performance by doing things that is only possible in third space like joining body parts and point at things what seemed to be on the same space when its actually not in the first space.
In our discussion before the final idea, we had many different good ideas that was inspired from music videos like this:
In the end, we only used minimal passing of object (our face) in Telepathic Stroll and we grew our idea from a Magic trick kind of performance to an artistic kind of performance.
I feel really weird to have many of my project in this semester being inspired by BOLD3RRR, not in a sense that the style or the appearance or even the presentation, but in the sense of the preparation and the extensively planning before the Live broadcast as I always liked good planning that leads to good execution which I am really inspired by BOLD3RRR in this, especially in using pre-recorded track and incorporate it into a live broadcast to make it blends into the live aspect of it. This time, instead of using pre-recorded tracks and image over the broadcast like in our drunken piece (which was also highly influenced by BOLD3RRR), we evolved from this idea to using a pre-recorded track in the background for us to sync all of the movement even when not being able to see/hear from each other.
In our multiple occasions of class assignment which we went Live on Facebook, we figured out many limitations of Broadcasting
If you go Live, you can’t watch other’s Live unless you have another device to do so and if you can’t watch others live while broadcasting, two way communication is relatively impossible.
even if we have another device to watch, there will be minimum of 7 seconds delay.
If you co-Broadcast, you can see the others in Live, but if we are doing a performance and yet we discussed through the co-Broadcast, since we can see each other and the viewer could also see it and this is not the effect we want in our final project.
Co-Broadcast will have the quality dropped.
There will be possible lagging in the connection that will cause the “!” during live and skips in the recorded playback. This must be overcome by all means.
This is why, doing individual broadcast with careful planning and our Master Command system will overcome all of the limitation we faced and with the calibration before the final broadcast, most of the problem were solved.
our idea of Social Broadcasting
In Telepathic Stroll, we are trying to present the idea of social broadcasting in a way that is like the real world social – the collective social,
In our individual broadcast, we could not know what the other was doing nor feeling, yet when we are placed together in a location(both the physical and third space), we could interact with each other and do amazing thing that individual can’t do. In Telepathic Stroll, even when just doing our own task without knowing the status of each other, by doing these individual task collaboratively, We united as a group forming as a single unit, every member is as important as all of us and if any of us were removed, the whole structure will collapse into a Problematic Stroll, nothing more than just an individual broadcast
First of all, we did not want to use the Facebook Co-Broadcasting function as our goal of this Telematic Stroll is to test out the system for our final project(there will be four broadcasting at the same time and none of us could see what others are doing, yet we will form a piece together.) ANNDD MANNNNNNN~~ THIS WORKS SOO MUCH BETTER THAN EXPECTED!!
This was the Broadcast which I did and viewing it individually doesn’t seemed like much, its just a random walk-around video which wasn’t impressive at all.
But when linked it with Bao’s Broadcast… Things get a little more interesting.
Both Broadcast were not edited in any way except for putting them side by side, if we create a video wall and play it directly, it will be the exact thing.
The video were done on the spot through Facebook Live without any feedback of the other Broadcaster available to both of us, we only know what we were doing while unable to see the other party, even if we do, there will be a 7 second delay between broadcasting and watching live.
In conclusion, This is Magic.
But how are we doing it? It’s a secret for now and we shall keep it until our final project. For now we are still improving our system and you should just take it as it is a MAGIC. TADAA!! A sense of wonder for a viewer is what we wanted to achieve.
This is our one and only try. Most of the times we were uncoordinated and we did not discussed what to film beforehand while there were mistakes made everywhere throughout the broadcast and we did some of the mistakes at the same time which made it seemed intentional, making it even more magical.
To point out some of the wonderful MAGIC we did.
We did not know where the other broadcaster were in and neither do we know what we will be filming, except for our leg, our face and the sunrise, and we started by going through a bridge AT THE SAME TIME
Also, we managed to synchronize our steps for a rather long time.
We switched the camera to film our face at about the same time.
I really liked this part of the broadcasting, Since the only thing we planned on was to film the sunrise and still I managed to screw it up by filming the wrong direction for about 3 minute then realized that the sun rise from the opposite side. MANNN I WAS WRONGGGGG THE SUN RISE FROM THE TOTALLY OPPOSITE SIDE…. I SCREWED UP BA.. OH HELLO SQUIRREL! OH I STILL SCREWED UP.
The matching of landscape and the tree was totally unintentional and it turned out really beautiful. one was like having the orangy clouds really near and one was REALLLLYYY far. which is amazing
And the switching of camera was so good in this one too!
In this Telematic stroll, we had found out what problem there is during the live broadcasting and will improve it for the final project, also, it had been a really long time since I woke up this early.
we checked the timing for sunrise and it stated that it was 6.47a.m, but the actual sun came up only around 7a.m which is when we finished our Telematic stroll.
Finally, I am REALLY impressed when I put the video next to each other, they worked really well and there is improvements that could be made and we all learnt from it.
For weeks, I’d been thinking that my code was wrong hence I cant move more than 2 motor at the same time or it will corrupt the system….
And in the end, it wasnt my code, as I was using PCA9685 which is a servo driver which I bought online and thought that I could control 16 motors at the same time, Yes, it could and the code can work.. the problem is the power supply. NEVER HAVE A SERVO DRIVER’S MOTOR POWER SUPPLY POWERED STRAIGHT FROM THE ARDUINO!
I finally found out today that was the main reason, when the motor drains too much of the Arduino’s power, it will brownout, causing erratic behaviors in the motors which was my main problem up till now, so instead of limiting myself to code up to two motors to move at the same time, I could potentially move all 16 motors just by finding another power supply.
15:15- 16:10
My Brownout will occur when I run 4 servo at the same time, so 3 servo running simultaneously is the maximum for my current power supply, There are ways which I could solve this problem.
Using a battery which could supply 6V power at 10A or more, after my research, battery are rarely rated at 6V and 10A is just too much for a battery, even if they do, it will drain the battery out really fast unless I am using a HUGE car battery on 12V and step down the supply using a Voltage Regulator.
Using Multiple battery at 5 V or 6V and parallel them to increase their current, since this will be the most expensive out of all option, the only way possible to get this done is to series 4xAA battery and parallel multiple group of 4xAA to create a powerbank, the downside of this will be the voltage drop overtime due to lesser power in the battery.
Using a power adapter with the 5V or 6V at 10A, and this will probably be more feasible due to the availability of 10A power adapter in the market, or I could use a 12V 10A power adapter along with a Voltage Regulator and step down it to 6V. I think this will be relatively doable because it will have a stable supply and I do not have to worry about recharging my battery, moreover, I might be able to supply power to my Arduino at the same time too.
In conclusion
I will try to find suitable power adapter along with voltage regulator, if this still don’t work as well as i thought it would work, I probably can use a capacitor to increase the current rating(I am still not sure how does this work, but I’ll figure out)
Conductive paint had been here for some time and the application for seemed to be really a next level to interactive devices. This is an example of the usage of a conductive paint, Electric Paint Lamp Kit.
The Conductive Paint Lamp Kit is a simple product which springs from the novelty of Conductive Paint and what made it so special is that it is the most basic element of any circuits- forming connections between parts. With conductive paint, we could form electric circuits on any paintable surface which means the possibilities are only restricted by the surface and our imagination, In the Lamp Kit, it uses only simple Light up board, some printed paper and Conductive Paint in different combination to form 3 different variation of lamp, if we were to use other modules of sensors or output, I am sure that it would be really fun to play with these.
Like for example, if we were to use projections on top of the conductive paint on a wall, it would be like so.
This is definitely an interesting project to be done and would be possible for us to complete with our current knowledge after some explorations.
Another project which latches on the idea on a set of more advanced conductive paint is this, the Electroluminescent (EL) Device.
The Electroluminescent Strips could be created by using a few layers of different paints.
and how to create that exactly could be found here:
In Conclusion
The element of interaction within the Lamp kit not only acts like a Lamp, it is also a DIY kit which the user would participate in making it into a final product which gives the user a sense of involvement and increase their liking on the product as it was made by them. Maybe I could incorporate this idea of involvement into my final project where the users could create something that runs in the system which I created.
Also, Conductive Paint seemed really interesting to play with it and the potential of it is endless, we should be able to see better Conductive Paint and Conductive Paint Projects in the market really soon and I probably will purchase one to play with and maybe make it into a project or something.
So, Lets go back to the basis of music… What is music?
Music are basically sound organised in time.
so to break it apart, any thing that produce sound in a timely manner could produce music. right.
and if goes further, sound is vibrations through a medium like gas(Air), liquid(Water) or solid(Bones)
and if we reverse the broken parts back up, anything that vibrates in a timely manner could potentially generate music. YEAH~ a ruler could vibrate, so a ruler is a potentially musical instrument.
As with my previous research about motors, Stepper vibrate more than Servo, so a Stepper is a louder musical instrument than a Servo.
of course, they should not be this loud so they were placed on a table and the vibration will be transferred to the table and it will resonate which amplifies the volume of the sound as the table have larger surface area.
Old floppy disk reader contains motor inside, with programming, they could produce music too:
Musical box instruments.
This is basically the introduction of a music box, I think Music boxes are wonderful instruments that seems really magical considering that they could play music almost automatically minus the winding part at around 200 years ago where electricity were not even used as modern context(not in the sense that Egypt used “Batteries” thousand of years ago.).
Remember the video which Prof Demers showed us during lesson, the Marble Machine by Martin Molin?
I was fascinated and really impressed with the amount of calculations, engineering and mechanical effort used to build just one of these machine. This is a manual musical instrument that the skill of the artist really contributed to the overall work of this piece, imagine if I were to play it, it will definitely not sound like the original.
And I will talk more about the inspiration or the predecessor of The Marble Machine, “The Eighth Wonder Of the World” which is an Orchestrion that incorporate 3 violins in it. This too, the engineering effort within it is astonishing!
The 3 violins were used due to the mechanical aspect of it, since violins have 3 strings, it would made more sense to use 3 violins one string each than to create a complex mechanism that play all 3 strings on one violin.
Futuristic spin on Traditional Instrument
The classic instruments are awesome with limitation, This is why people are programming advancement into classical instruments.
Lets take a the simplified evolution of piano starting with the oldest piano in existence(around 330 years old) for example.
after a lot of version and variations that sound slightly different and with some improvements and then came the Electric piano in late 1920(90+ years old) which is an electro-mechanical instrument.
Piano Eléctrico Wurlitzer, modelo 200A.
and then after many versions of improvements, the more recent evolution of the traditional piano is the roli seaboard risewhich uses sensor which then produce sound electrically, the interfaces still follow the traditional piano, however the sound produce and the means of producing the sound was nothing like the piano any more.
In Conclusion
In these researches of unconventional instruments, music box and the evolution of old instruments, I could see that we could use anything which could produce sound to be the base of a musical instrument, We could revise a traditional instrument like roli seaboard rise, we could build a system that uses old unrelated objects and make them an instruments like the stepper motor music, we could possibly use a system that plays existing musical instruments like “The Eighth Wonder Of the World”
There are no right and wrong ways in making music, the only problem is is it audible?
For Interactive Devices Project, I Intended to do it as a solo project so that I could possibly learn more through the exploration process.
After some research, I’ve got 3 general ideas in mind which I might consider:
Wearable Devices:
Could be for Fashion
– Something that look nice
Could be for Entertainment
– Something that is amusing to the user/viewer
Could be for Practical uses
– Something like an Air-condition system
Could be for medical purposes
Musical Devices:
Could be a totally new instrument that is not available in the market.
Could be a system which plays existing instruments:
– Strum Guitar
– Blow Pipes/Flute
– Ring Bells
Incorporate the pendulum
– Pendulum is a interesting object which produces beats
– is rather amusing
Reads Music sheet and play it automatically
– Could be like a music box
Magnetic Devices:
Magnets have really interesting properties
Could be a combination of permanent magnets and Electrical magnets.
Magnetic could result in levitation of objects which are really amusing
Conclusion
Overall, out of the 3 main categories of Wearable, Music Instrument and Magnetic devices, I like the idea of making an musical instrument more and my initial idea is a device which could read music sheets like a music box. I shall explore more on music box in the next research post.
This is not really related about Narrative or anything about my project,
just that CrashCourse is one of my favorite youtube channel and this series is the “Crash Course Computer Science” series which definitely is related to all IM students. This series more or less is talking about the histories and milestone for computer science, it is also a very new series of CrashCourse which is out only on 15th feb(just nice a month ago).
I highly recommend all of us to watch it as IM dont have a history module unlike all other major in ADM. There are alot of things to be learnt from here, as well as the whole CrashCourse channel. Take a look at the playlist of CrashCourse as there are other interesting topics like history, science, psychology, astronomy, literature, even politics(mainly US…. and maybe the mongols) .
SERIOUSLY, GO WATCH!! YOU WILL BENEFIT FROM THIS YOUTUBE CHANNEL!!

 As LattePanda does not come with a sound card for microphone input and the only headphone require input and output jack separately, I had purchased an USB soundcard on carousell and luckily it works.
 This is a 8 Ohm 0.5watt speaker that will be plugged directly into the Arduino.
 I also Epoxyed the 4 LED into the card slot to prevent them from sliding around.
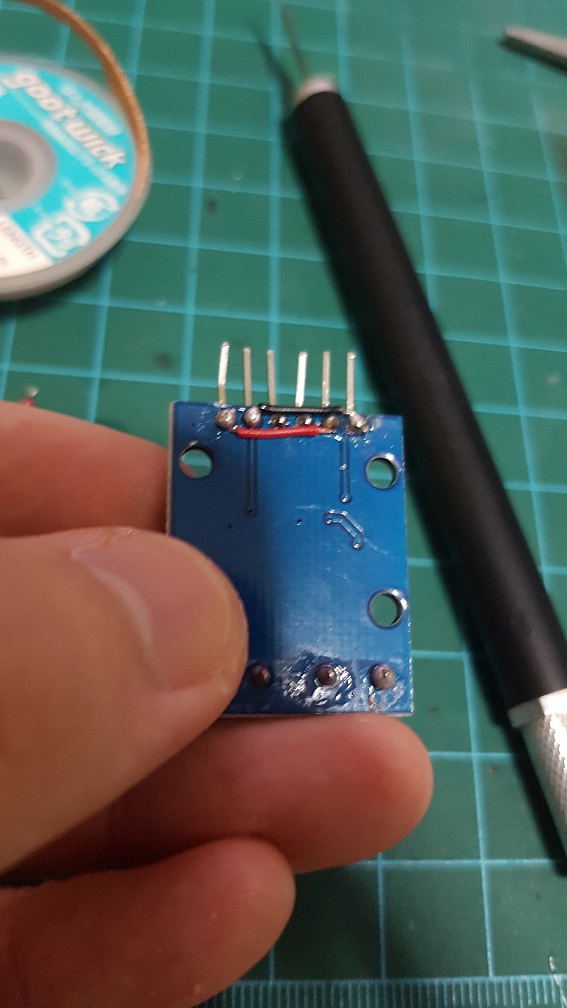


 And then I found that I have a longer DC motor with metal gears built into it and i tried to figure our if I can incorporate this gear box into my current system, which is also rather impossible as the ratio for this gear box is about 1:45. when I only need about 1:5 to 1:8. if i use this, I will have the belt driver running too slow.
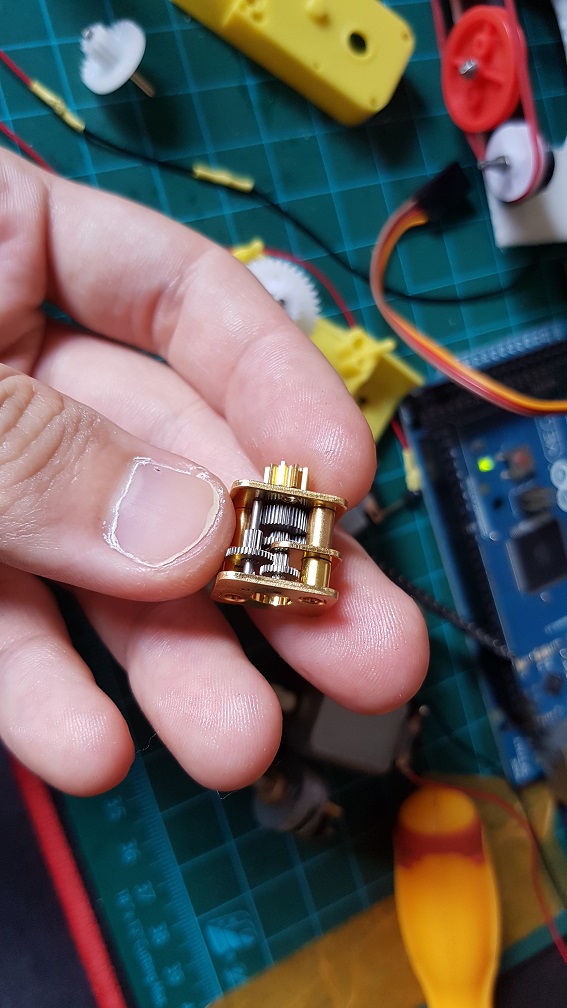 same goes for this, but this is 1:250… even slower.
 after trying out the workable speed of sound and getting stuck by removing the buttons.
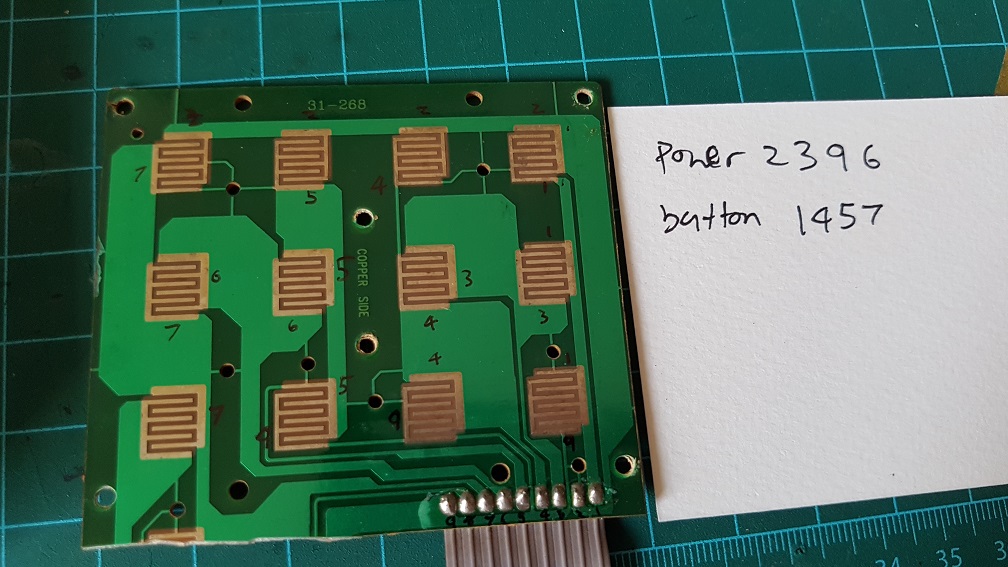 to make use of the original button on the phone, I’ve figured that the 12 buttons runs on 2 different circuit which I could simply solder these number together and make all the 12 buttons into one button, so nomatter which buttons the user pressed, it will be registered as one button pressed.
 Because I cut off the Redial button on the phone to make space for my belt driver system, I epoxyed the Redial button back to the case as there are no PCB supporting it.
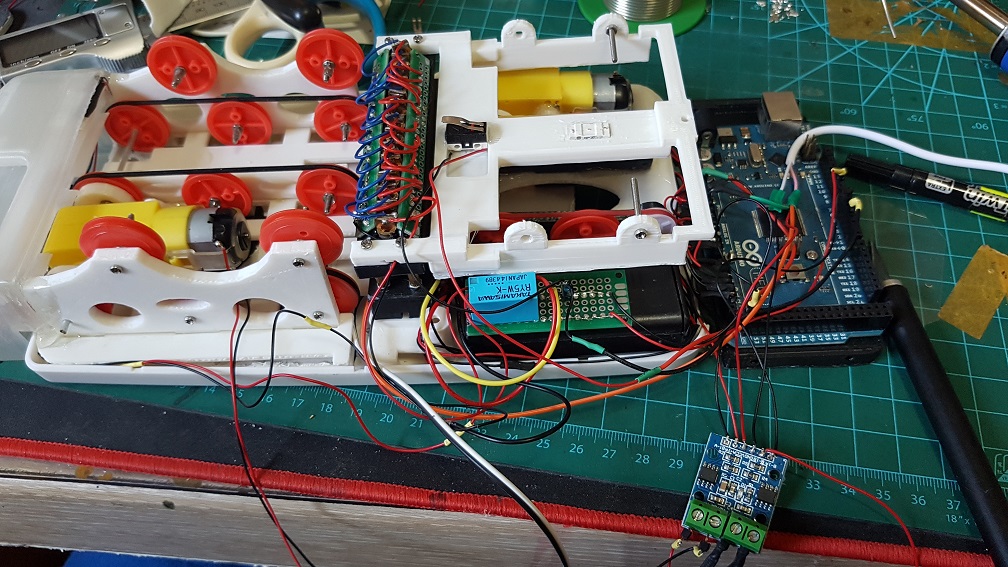

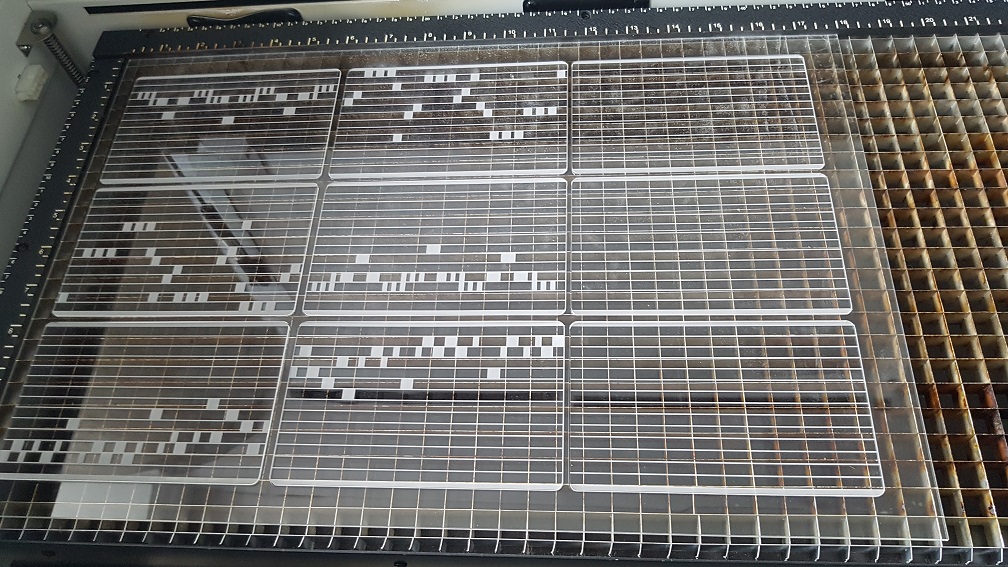 Laser raster and cut in school on 2mm acrylic.
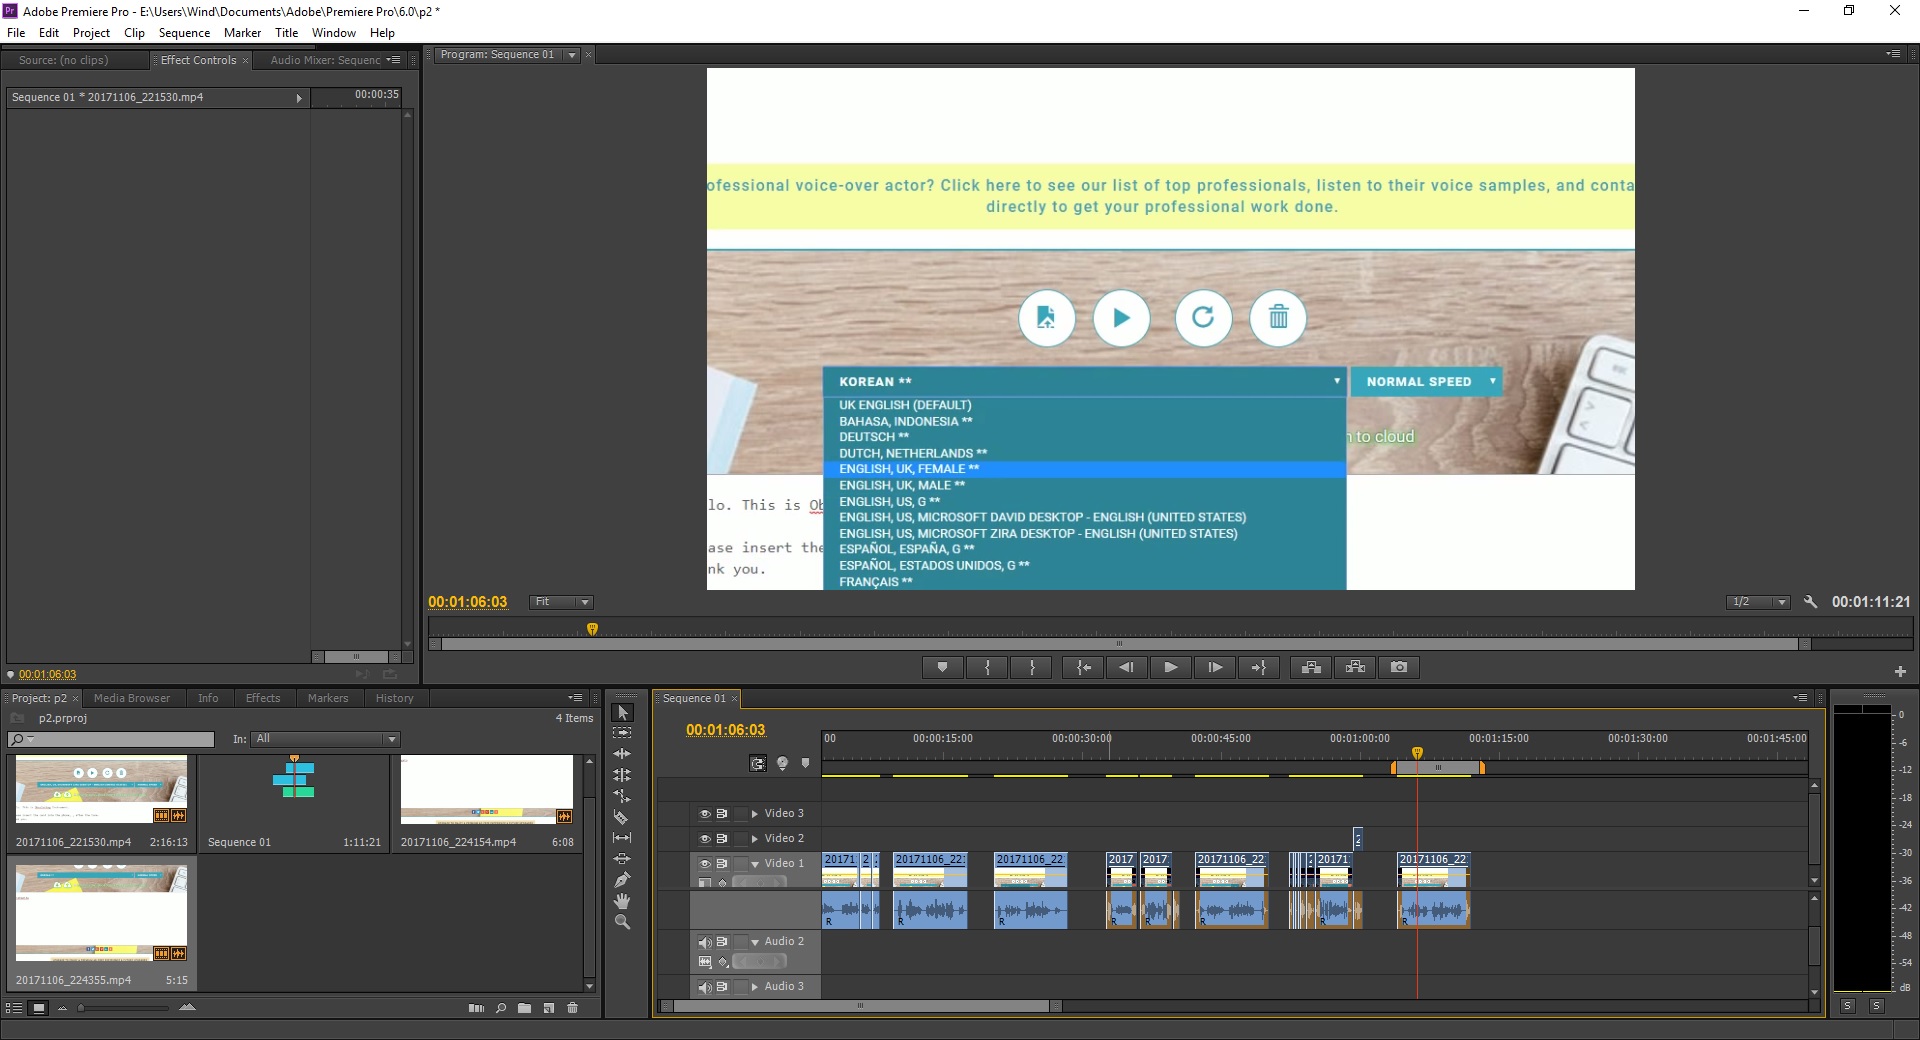 I really like the Japanese and Korean accent, its really funny!
 I am really glad that this many piece worked well together and this was the biggest challenge.. since there are so many components working together (electrical and mechanical), even if one of the parts failed, it would not work as well as it is now. So I considered myself really lucky that the parts happened to work well even when there are misalignment everywhere.

 at the end of the scissor paper stone segment, we all synchronized to the same action of the paper and Bao and I were counting on 5, so we all were showing our palm.


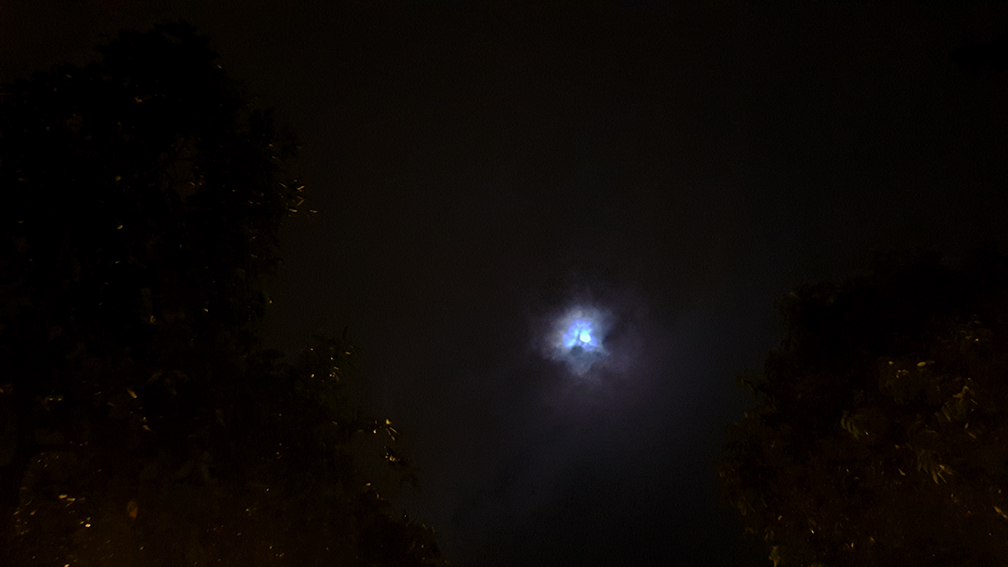
 I really like this random shot before the Stroll.
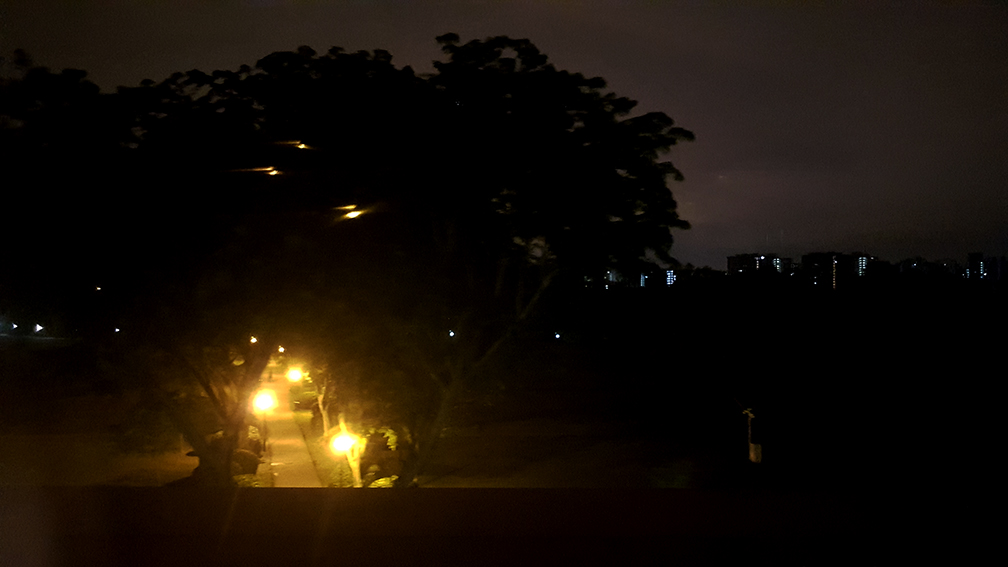
 After the stroll, when the sun finally rise.
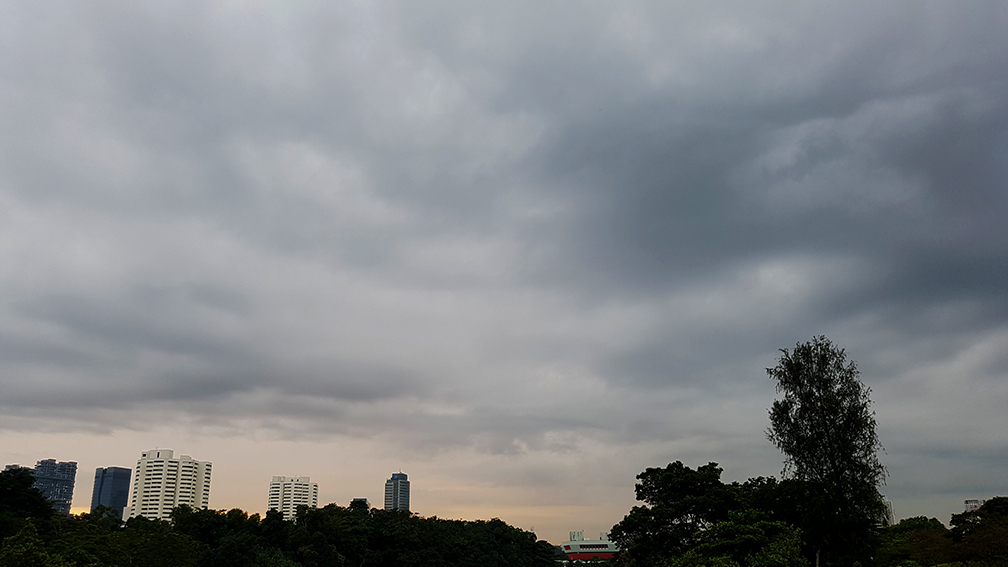 Luckily for me, right after we finished the broadcasting, it started to drizzle. And did I mentioned that we were supposed to do on Monday morning and we woke up at 5a.m. and it was raining so we postpone our stroll, it was really lucky for us that it wasn’t raining on Tuesday morning even when the weather forecast said would.