For Phase 2, I involved wedging and piercing to 2 of the 3 models I created in Phase 1.
The chosen models for Phase 2 was Model 1 and Model 3. They were chosen as both the models could incorporate both piercing and wedging instead of simply wedging for Model 2.
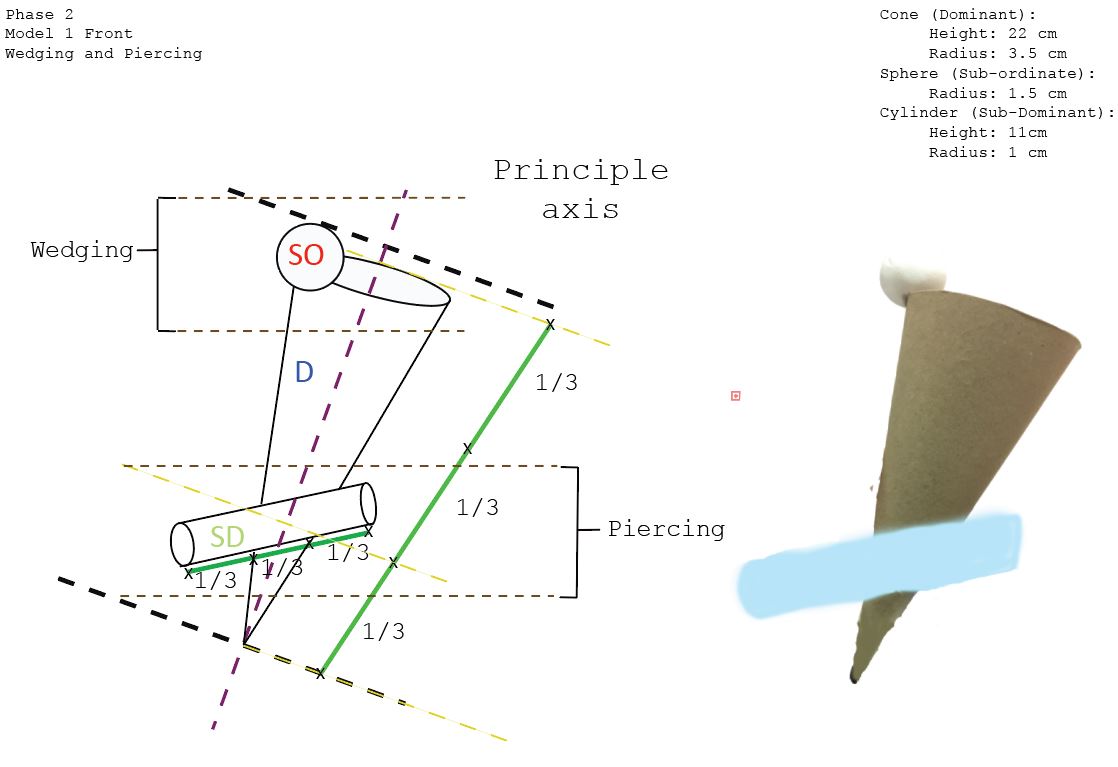
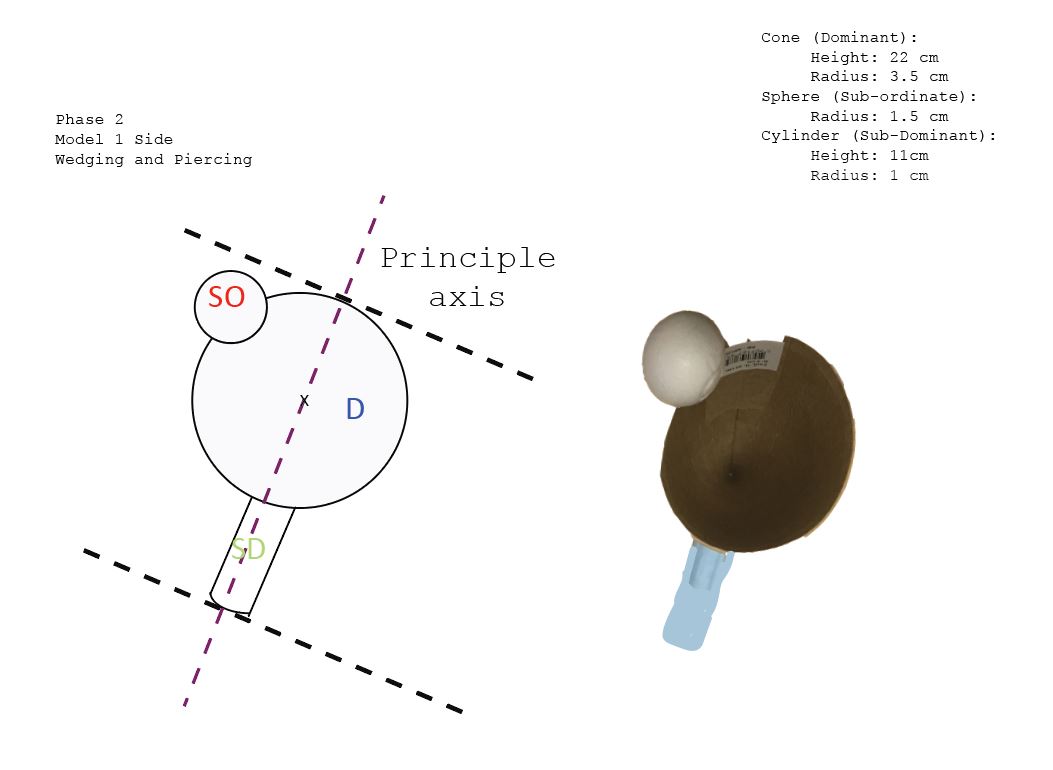
Model 1:
Cone - Dominant

Sphere - Sub- Ordinate

Cylinder- Sub-dominant
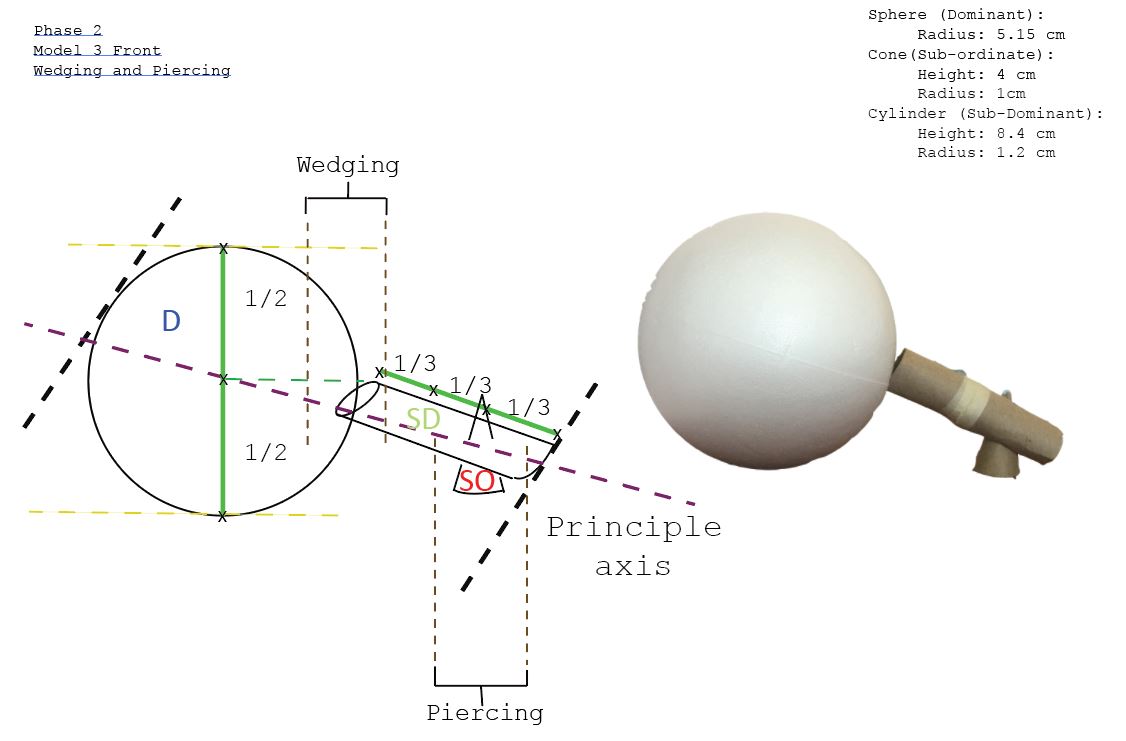
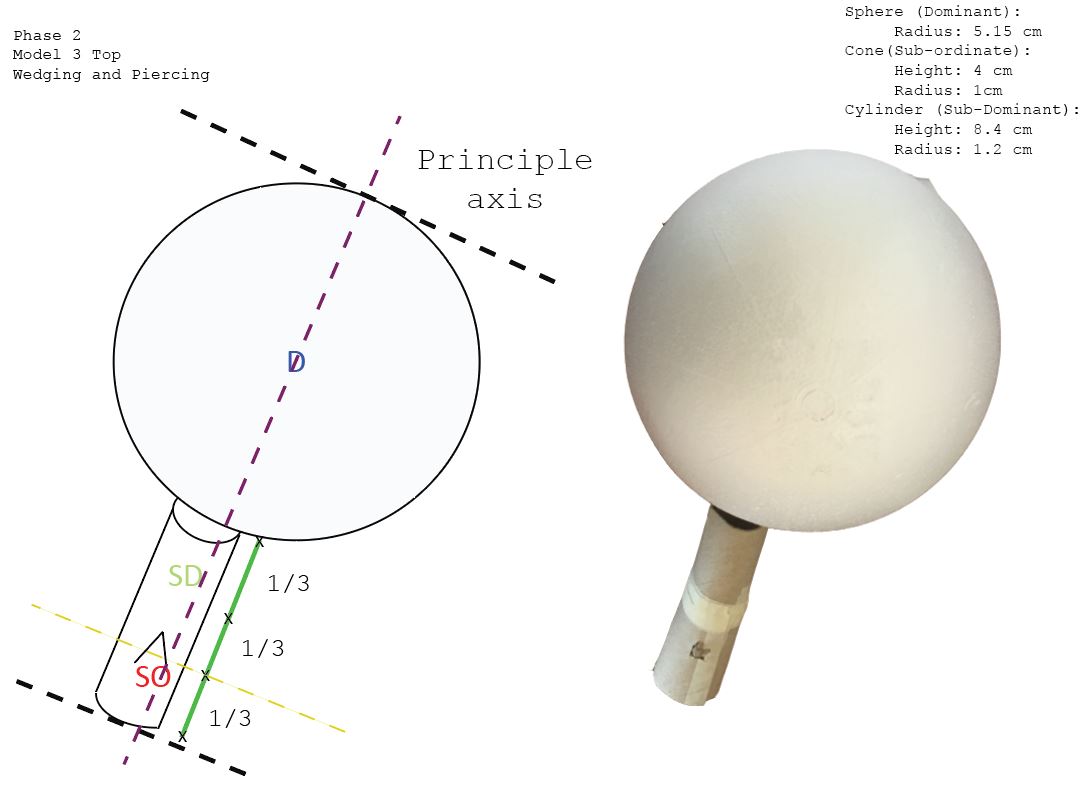
Model 3:
Cone - Sub-dominant

Sphere - Dominant

Cylinder - Sub-ordinate

For the final model, I have decided to use Model 1 instead. I felt that Model 1 would be more of a challenge as it also required me to find the right balance such that the model would not topple. At the same time, I wanted to make use of the tip of the cone, which is unique to the cone, as a point of contact to the base.
For the next post, I would be combining autumn together with ikebana as well as Model 1 in Phase to create a new food.
As mentioned in your Final Food Model post, the (SD) Cylinder should be piereced at 1/3 height from the base of the cone and not conceal the apex of the cone. You got the proportioning of the cylinder right here in the 3D Sketch Model. The SD became too bulky in the Final Food Model.