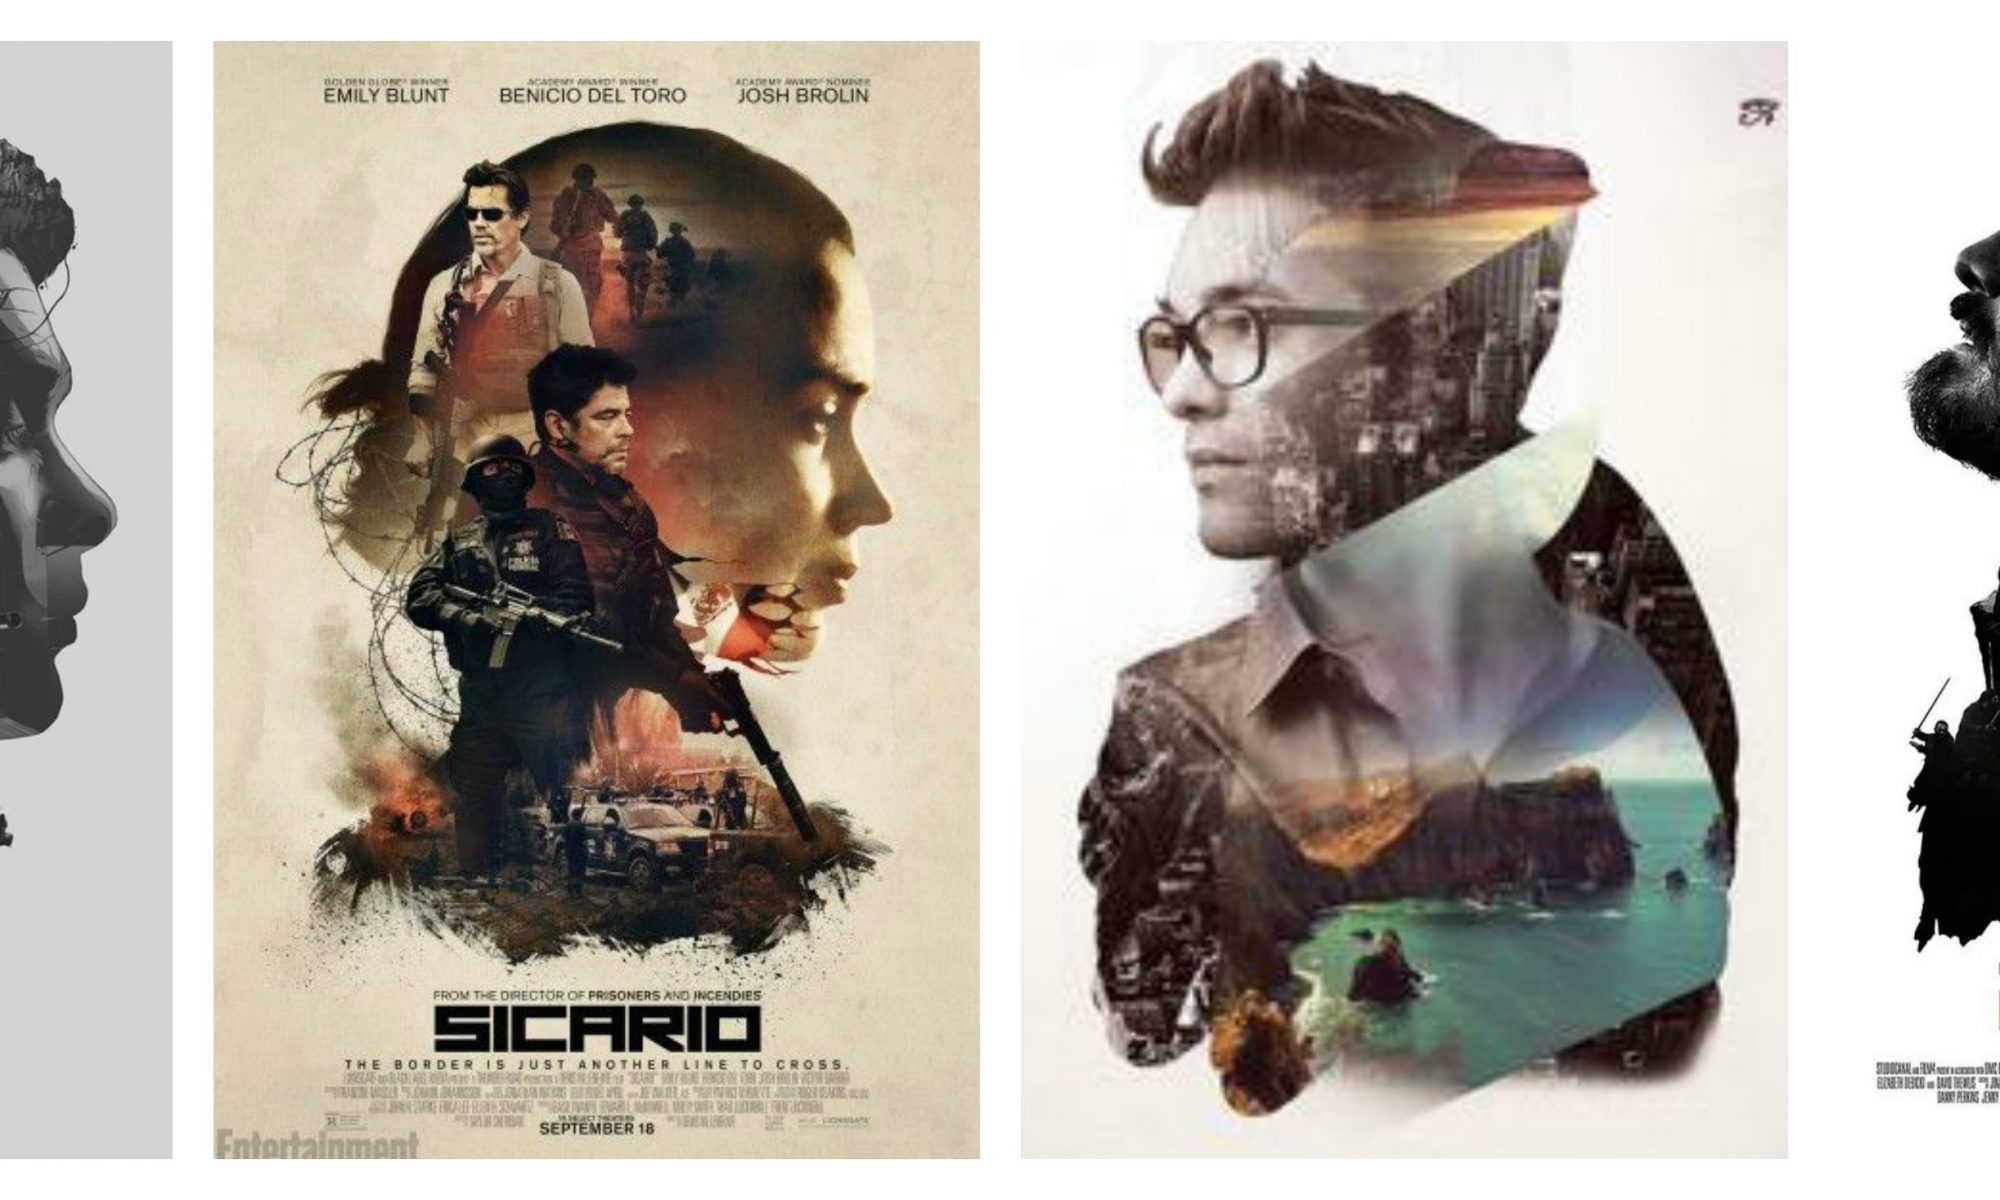
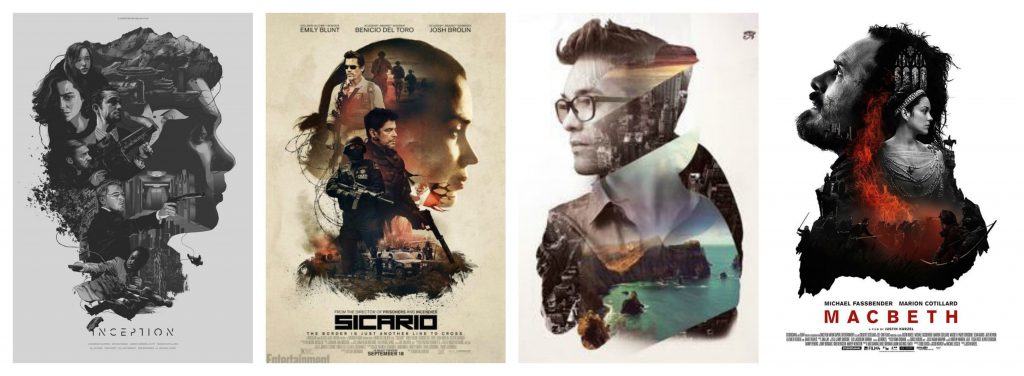
Red Riding Hood Comic – Research, Visual Reference and Process

Visual References

When I thought about this assignment, I wanted to pursue a minimalist simple style as I felt when it comes to comic, little things are the ones that convey the emotion, whether it’s the posture, the foreground and background or what you choose to show and don’t show. I felt with a minimalist approach, there is emphasis on what is seen, unseen, placed in foreground and background and what are the color schemes I use.

I was very inspired by the sort of simple animation that was juxtaposed against the 3D animation of kungfu panda and studied how they created transitions and used a very simple color palette of red, black, white and orange to convey the mood of the scene. 

I realized that they took inspiration from Shadow puppetry, and more specifically, that of Wayang Kulit (a form of shadow puppetry in Indonesia).  

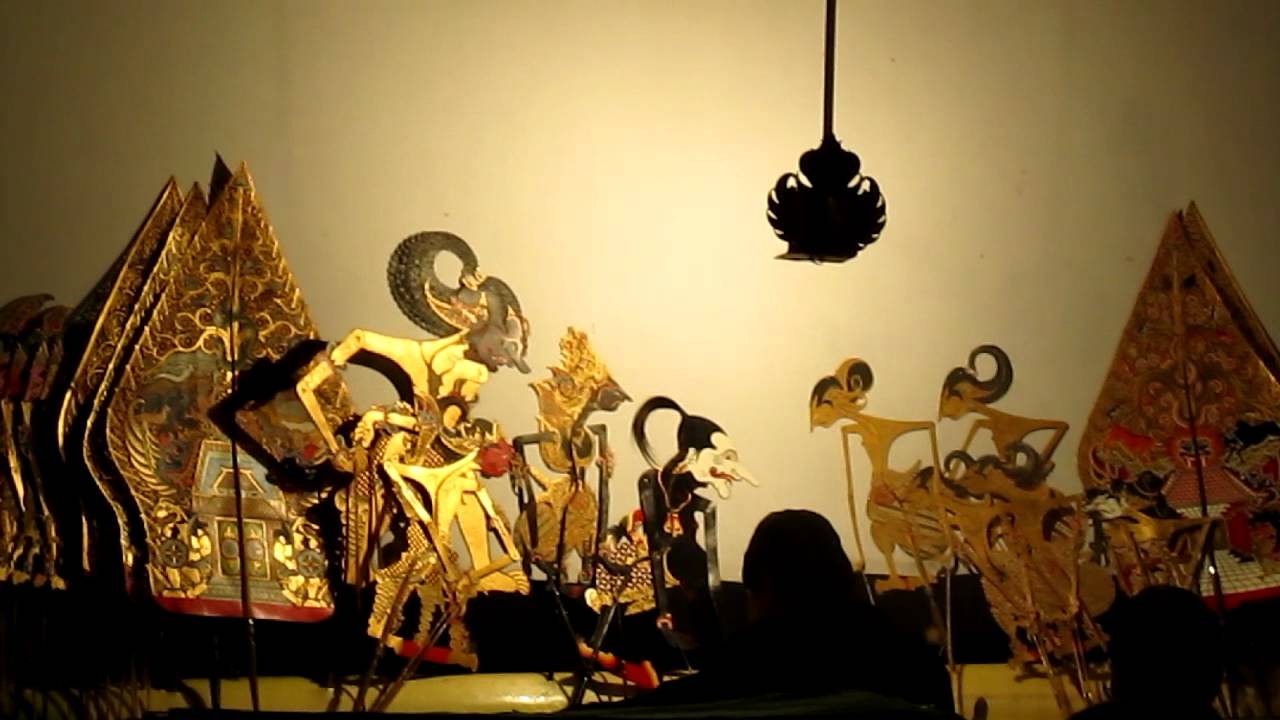
I looked at some example of Wayang Kulit on youtube, and studied how they conveyed storytelling through something as simple as light, shadow and the difficulty of not having a lot to work with

With that, I started drafting ideas on my storyboard.

Having no experience in comic drawing, I realized I had difficulty in the very first step of comic drawing – the panels. I had a lot of questions in my head.

1. How do we determine the size of the panel? Is there a reason why some are big, small, long or short? What about those that cover one whole page? why?

2. What’s the significance of diagonal lines in a comic? What about curved lines? Why do comics do that?

3. How do we plan the comic panels without knowing the whole layout? Is there enough at the start? or is it too fast at the end?

There we so many questions, and after consulting my classmate (Hi, Claire), she told me that it comes with planning and reasons for such decisions are mostly dependent on the style of the comic artist.

She told me diagonal lines might imply movement or to add some motion to the page, diagonal lines are also something of visual interest. She also told me bigger important scenes require bigger frames, smaller panels are to die scenes together so that it makes logical flowing sense.

So, me being curious me, started to look at some examples of comic panels.

Interesting.

I then drafted out how I plan to do my comic – this was a painful process, really. One moment, I had one entire page empty, the next I had the head and tail but no body and the next I had blank panels. It was excruciating but I manged to get my panels out in 2 days.

I then thought about color schemes – something as minimal as drawing being a challenge, now I had to think about colors? What.

Ultimately, I chose these colors – because … I liked the harmony of it. It’s simple and from this color scheme I could already decide what color and what I wanted my elements to be.

Click o see my final comic 
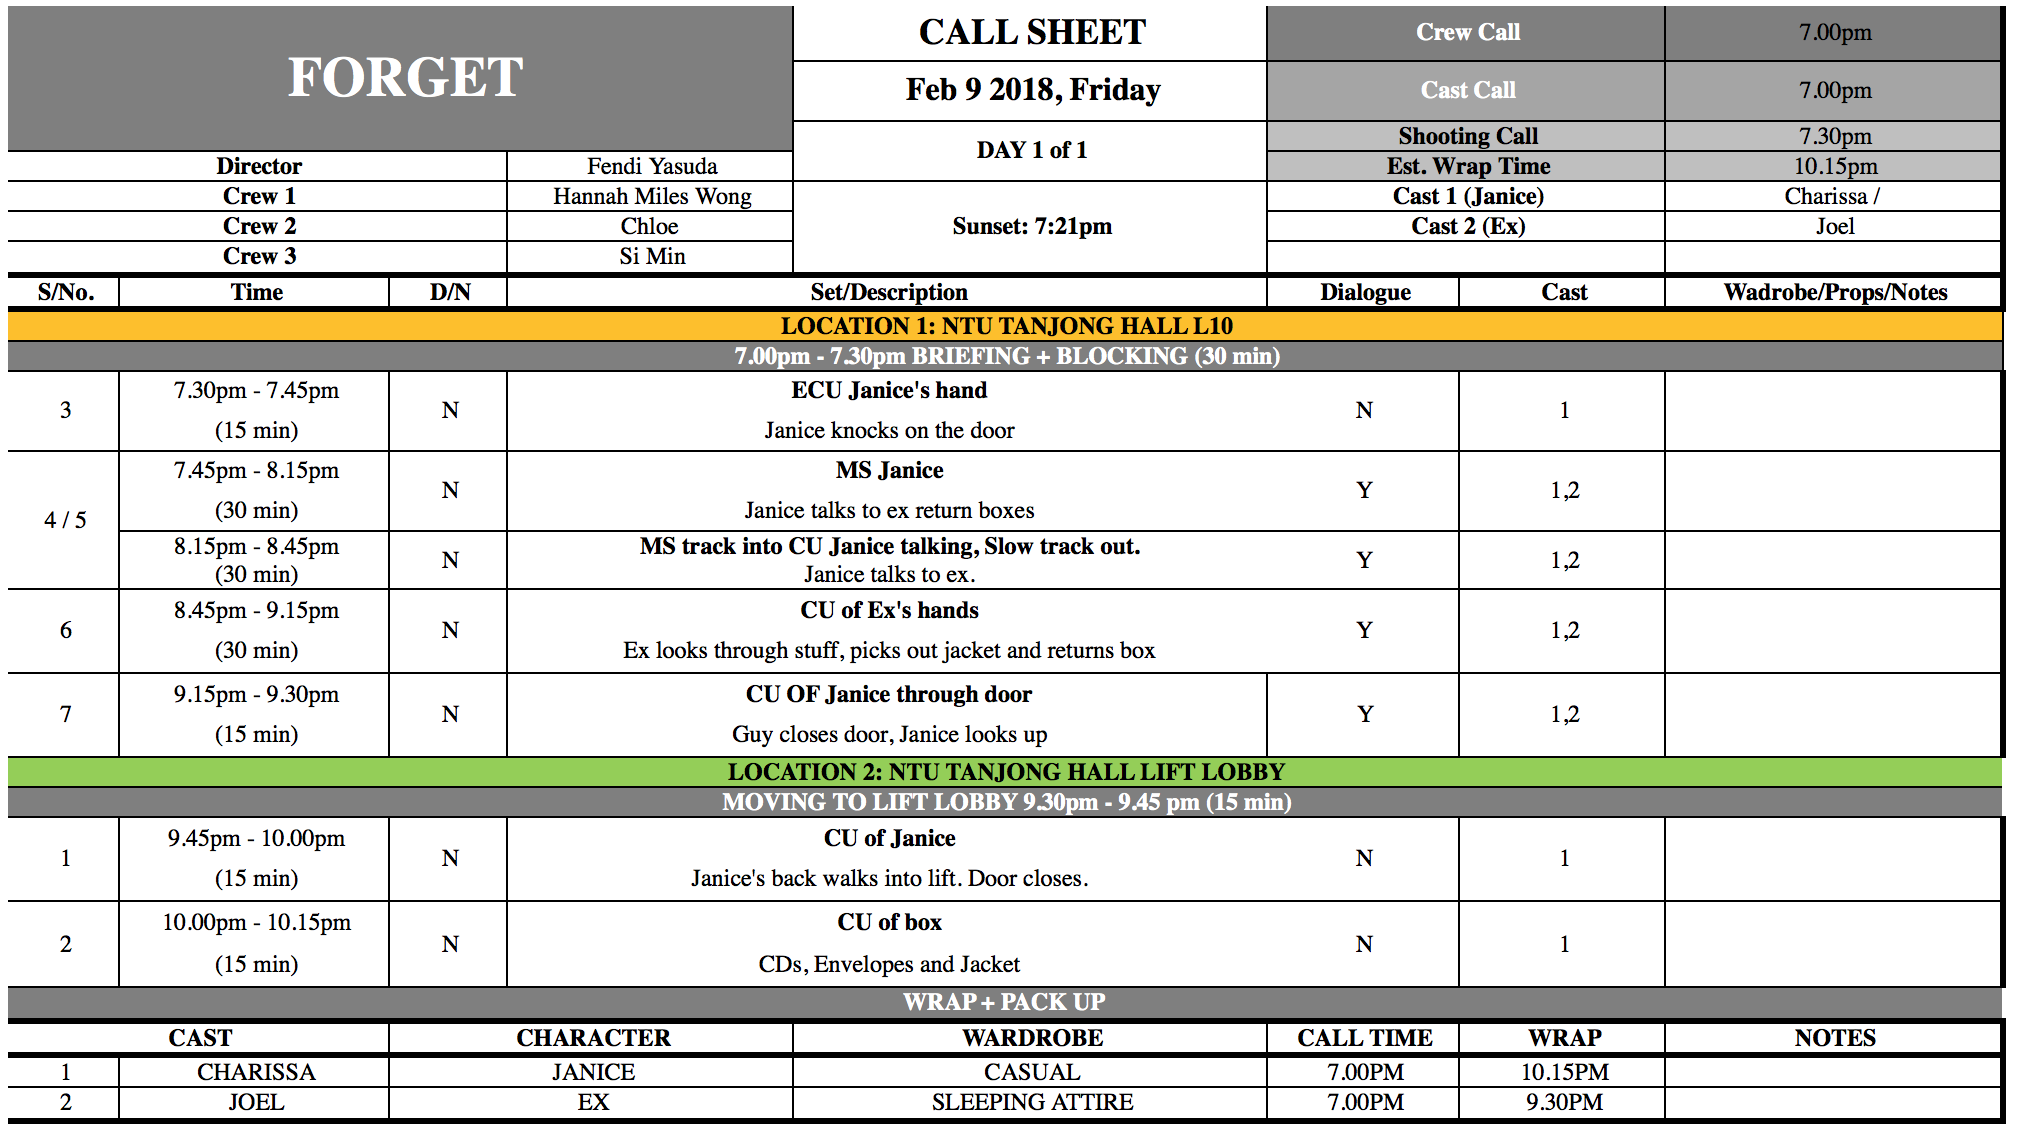
Poster Assignment – Final

Hello world,

Runaways tells the story of two runaway siblings who explore old places to create their new sense of home. Miles (left) is a protective older sibling while Joy (right) is a starry-eyed younger sibling.

The whole reason i chose to work with double exposure is firstly, i wanted to explore the digital technique of double exposure, and secondly it conveys the metaphorical meaning of home throughout the film’s moral. In the film, I explored “how home is a place but a feeling”, a feeling that they realize they find within each other at the end (oops spoiler).

I chose to keep the background a simple and neutral white so that the double exposure becomes more prominent. I layered the text with an image to give texture to the words and allow it to feel more “alive” in the neutral background.

I realized that with a neutral background, textured, dynamic and layered images are more “alive”, and realized this is highlighted when contrasted. So i worked hard to keep it simple and dynamic.

Overall, I liked how simple the poster looks yet upon closer inspection is filled with graphics and visuals.

Touch Points

I picked these three locations as they are areas of high traffic and allows the most number of appropriate audiences to view them.

Bus Stop – With people having nothing to do while waiting for the bus, allows them to look into the film in their free time and perhaps even catch a review or two about the film.

Outside the Cinema – Having it broadcasted to “Coming Soon” allows viewers to anticipate watching a film of similar tone and mood to those being premiering at the current moment.

MRT Board – High traffic (no pun intended) of people, it is also a common place for movie posters to be put. Having it in city hall allows people to view it in a nearby mall at Suntec City.

Banner – Explores other composition styles and a place of high human traffic. Allows people to watch it in cinemas if they are interested, too.

to see my process click here
visual references click here

okay bye.

Poster Assignment – Process

Conceptualization

Conceptualization began with me sketching out some rough ideas of how the posters will look like – I looked into some research materials of what are some examples of double exposure posters.

I thought about the theme, story and genre of the movie.

Theme: Home
Story: Two runaways revisit old places to create their new home.
Genre: 
Drama, Coming-Of-Age

From there I did some sketches of my favorite layouts that I came across while looking at the web.

Notebook sketches of concepts

Visual References for posters

I looked into examples of creative double exposure movie posters and Singaporean film posters (rather than blockbuster Hollywood posters).

I realized there’s a sort of poignant, quaintness, calmness to a local film as compared to something compared to Transformers or Avengers. I noted this observation to allow my film to evoke less explosive tones.

Mood Board

I looked into one of my favorite cinematographers styles and color tones of my favorite movies for inspiration. It was interesting to note how I was very attracted to a certain look and vibe of a shot – such as that from Millennium Mambo, Chungking Express and In the Mood for Love. 

I realized that the vibes, mood and tone of the film was rather dull, cold and muted, so I chose the movies that reflected as such. Cold colors, desaturated and earthy tones of sorts.

I knew as compared to digital painting, photography was a little more restricted in terms of playing around with colors. So I asked my casts to be in earthy, neutral and dull tones, but I knew my source images were going to have purple, green and blue tones.

Post Production

Bonus points if you can see all four photos in the collage.

I played around with some color concepts as well. I consulted my design friends about the colors and they somehow agreed that it was either a dark gray or a neutral white suits the mood and tone of the film best.

Some colors looked too odd against the already complicated portrait of my characters, others drowned my design with matching tones, and the rest just did not match the tone of the film. Some were just plain painful to look at.

I opted for a much simpler neutral white, but my design friend suggested exploring with textures to keep the background interesting. So I went to dig out my canvas and snapped a picture of it.

Some tweaking and feedback from my friends later, I had my final piece!

Poster Assignment – Visual References

For this assignment, I’m exploring double-exposure photography. I was intrigued by this method when it was first introduced to me for it’s ability to show the inner thoughts of a character visually.

I looked up posters and examples of double exposure photography and studied how they composed the various elements into a character.

I then did a quick youtube search on how to double exposure, oh goodness – there are thousands of them too!

7 Shot Narrative – Final Video

Forget Trailer

The film explores the dynamics of two characters – Janice, who wants to forget memories of a previous relationship by returning everything that reminded her of it, and an unknown guy, who wants to get rid of her.

The element of the seen and unseen comes from two characters – the seen, which is Janice, and the unseen, the unknown stranger. The whole reason we do not see this stranger is because we are in the mind of the protagonist, Janice, who seems to be recall this memory and she does not recall his face.

We are thus questioning at the end of the film – are we watching Janice’s memory or are we watching a drama play out before us?

Objective and Subjective Shots

Objective shots.

Objective shots are used in this few examples to provide an “observer” perspective, to allow the audience to interpret the situation from an third-party perspective.

Subjective Shots.

The subject shots, however, allows us an insight into the mind of the characters, sometimes we observe the reactions and draw our interpretation from the perspective of the viewer.

Opening and Closing Shots

Opening and Closing Shot

Opening Frame:

The frame is dimly lit, Janice is framed in isolation and solitude and establishes the mood, genre and POV at the start of the film

The film opens with a one-sided phone call exchange with Janice and the mysterious person. However from her response we can only assume what his response is. From the one-sided dialogue, we establish there is an unknown second character in conflict.

She is constantly framed in an isolated way, to emphasize her solitude and loneliness in the film. We are given a psyche into the mind of the character with the opening frame.

Closing Frame:

The door closing, literally closes the film, and establishes that the connection that was made between the two characters were severed.

Mise-En-Scene

Frame within a Frame

Inspired by Wong Kai Wai’s In the Mood for Love. There are shots with the element of “frame within a frame”, this is to put the characters in a claustrophobic environment where they are locked into this conversation.

Obscured Characters

Another element inspired by the film is the framing of obscured characters. I got inspired by the way Wong Kai Wai hides characters through framing and negative space, and incorporated my own touch of things by adding things we should see in frame such as the box or Janice’s reactions.

Wardrobe

I instructed my casts to wear black and white to juxtapose their personalities and motivations. Janice will always be in the light, however the ex will be in shadow and if he is visible, he will be in black. This further adds visually to their conflict.

Reflection

Overall, I’ve learnt to really plan out my shots better – to think through what are narrative and acting beats and how to hold a shot longer so that a cut can be earned than convenient. I learnt the importance to be more thorough with my shot planning and to tell as much as I can within a single frame than explaining it over a few frames.

I think I could improve on my directing though – to know what to tell actors to get into the psyche of the character that their little actions will speak of the mind and personality of the character better than to explain them action by action in detail about what I’d like them to do.

okay bye.

7 Shot Narrative – Process

Hello world!

I’m finally back into the field of videography.

For this assignment, I chose to explore the idea of the ‘Seen and Unseen’ in the world of memories. 

IDEATION

The theme of the seen and unseen was honestly one of the trickier things I have done. I thought about what could be seen and unseen and thought of memories – how sometimes we remember the events but we don’t remember the specific details, how we remember what happened but we don’t remember who we spent it with. It was a profound concept but I wanted the script to be simple and poignant, like nothing too ambitious (as feedbacked).

I decided to let this film be more of a cinematic study of obscured characters.

 PRE-PRODUCTION

You can read the full script here clicky click

Shot List

Call Sheet

To see my marked out script (my personal notes of beats, sound effects, motivations, camera move and editing notes) click here

I started with the script and considered something simple. Why would a character want to forget? I thought long about all the past experiences I wanted to forget and realized they are usuallylinked to some form of loss or something unpleasant. I re-opened a closed door of things I’ve lost and, considering the constrains of my resources, decided to explore the memory of a relationship forgotten.

I realized to let the male character be the antagonist, as with a faceless character we lack a sense of human-touch and thus it is so hard for us to sympathise. I took this further by making him sound harsh and brutal, justified by being woken up at night (because who is happy being woken up). And thus, the perfect unlikable character was born.

I re-watched one of my favorite film, In the Mood for Love by Wong Kar Wai to study the way they portrayed two unseen critical characters of the movie, you can read my research here.

Director’s Notes

PRODUCTION

The day started with the most difficult shot, which was the long dialogue shot along the corridor. I ran through the lines and motivations with my casts and guided hannah on the dramatic beats to shift the camera forward and back. It took about 8 takes, but I’m glad I managed to get it done with my team.

After that it was a relatively straightforward shoot. I opted not to use any additional lighting as I was relatively satisfied with how the space was lit. I wanted to focus solely on the cast and their acting while entrusting Hannah to get good shots.

I was grateful that my cast and crew were very observant to minor details such as the placement of props, eye line, little gestures and reactions.

Final outcome

POST PRODUCTION

In post-production, I layered dialogues and added the telephone conversation in to establish the moment. I also did some minor color grading to set the mood of the film.

To see the review of the final film click here.

7 Shot Narrative – Research [The Opening and Closing Shot]

In this assignment working with limited shots, there is a lot of pressure on what to shoot and how much can you convey with one frame. This allowed me to think more intimately and in-depth about each and every shot – what was I trying to convey with every shot, what was I trying to speak with the mise-en-scene and how do I include all the little subtle details with each shot, framing and composition?

In this video, they talk about how important it is to think through your opening shot. They mentioned in the video that the opening shot should convey the following.

1.  The themes, genre and mood of the film.
2. The POV or main character and their personality.
3. The conflict between characters.
4. Or major plot points.

And there is a lot of things to consider when shooting the first scene – such as who do we show, what is he doing and wearing, where is he at and what elements are in the frame when we do this (why did I use he in all my question? I don’t really know). And thus, it is so important for the first shot to tell us everything because it is essentially our first impression of the film.

This video talks about how various films ends with their final shot. He describes the “cowboy leaving into the sunset” shot is a way to conclude the film whereby the character is returning back into the familiar world. Sometimes it’s a good thing where we see the protagonist’s lives go on in their world, or it can be eerie where a serial killer is assimilated back into society.

Another type of ending would be (also my personal preference in storywriting) where by the first and last shot are related in a way – be it visually similar, contrasting or metaphorically the same. It allows the film to become full circle and allows us to see how there is change from the first scene the character has entered. It works so well because the last shot, being similar to the first shot, has now an entirely different meaning when the story is told, and there will further emphasize the message of the film and emphasize that there is change.

But at the end of the day, the closing shot has to ultimately answer one question – what do you want your audience to walk away from the movie feeling? 

okay, that is all.

7 Shot Narrative – Research [Wong Kai Wai]

In The Mood for Love

Silly me forgot to upload this when I saved it as a draft. But here it is, my artist research.

Made in 2000, Wong Kar Wai’s In the Mood for Love tells of a story of a man, Mr Chau and and woman, Mrs Chen, whose spouses have an affair together. However, slowly the two characters falls in love with each other.

It is one of my many favourite films for it’s brilliant cinematography – the mise en scene, the framing, the camerawork, the lighting and the thoughts that go into the frame is just brilliant. I decided to use this film as my reference due to its apparent theme of Seen and Unseen in the spouses that are not seen in the film, but play a key role.

I found it intriguing; how do you show two pivotal characters of the film without actually showing them? 

But apart from that, I also explored other distinct stylistic visual elements of the film that I can utilize in my 7 shots.

Frame Within A Frame

The first notable thing about this film is the very strong usage of a frame within a frame.

Firstly, creating a box in a frame creates foreground, midground and background. This creates layers in a frame, thus there is depth in the shot and builds visual interest.

Also, by ‘boxing’ the characters into the scene, we feel claustrophobic and feel like the characters are ‘trapped’ in a situation – this of course builds tension.

Lastly, creating this box illusion is sort of like framing a character into a window. There is a strong tone of of ‘being watched’ in the film with it’s abundance of over-the-shoulder shots, shot through windows or long corridors, these creates a feeling of being an outsider eavesdropping or spying into the private lives of the two characters.

Obscured Characters

In the movie, it tells the story of infidelity of the partners of two character – Mr Chau and Mrs Chen. However what is interesting about it is, despite the film featuring two characters, the story speaks of four characters. Which are the spouses of two characters as well.

But how we see the the spouses is only through dialogue. Wong Kar Wai establishes a conversation between the two characters without featuring them by playing on our knowledge of the fundamentals of film language – the shot-reverse-shot and eye lines.

We see the character looking at someone and we hear dialogue but never know what the character looks like.

Through the clever use of cinematography, Wong Kar Wai builds an almost one-sided dialogue between the two characters, and by giving them a faceless identity, we are rooting for one character more than the other. But at the same time, he builds interest and curiosity on who this faceless character is, and how he or she might look like.

Framing Dialogue

When the two characters are in dialogue, Wong Kar Wai established dialogue in mostly two ways – one being the classic over the shoulder shot-reverse-shot and the other is dynamic framing where the characters weave between in and out of each other to establish their relationship in terms of space.

It is evident that there is a clear difference between the over-the-shoulder and when the camera is between them.

When the shot is done over-the-shoulder, it feels as though we are eavesdropping on the two characters (which is a prevalent theme for in the mood for love, that being constantly watched and gossiped) and if the shot is placed between the characters and shot on a wide angle, we are part of the conversation, as though we are the speaker, in the situation.

You can watch the full video of the ‘frame within a frame’ being explained here Or watch the ‘shot reverse shot’ concept explained here


Mise En Scene Research – Inception, 2010

Inception (2010)
dir. Christopher Nolan
Winner of Academy Award Best Cinematography in 2010

Mise-En-Scene Elements

1. Setting and Props

  • Bottles of chemicals in foreground and background implies his job as a chemist to create sedative.
  • Set in a medicinal shop, further establishing his job.
  • Set in a slightly rundown location instead of a slick clean white hospital, implies his financial status as not the most successful chemist/medicine dispenser.
  • Organised bottles, implies his neat and meticulous personality.
  • Cat on frame left – metaphorical for his independent and intelligent nature

2. Costume , Hair and Make up 

  • Slightly bushy hair and simple jacket – implies he is above middle classed in financial wealth, but not the highest

3. Blocking, Facial Expressions and Body Language

  • Remains seated, implies his power as equals to the character he is talking to (Cobb, in this scene)
  • Comfortably seated – implies he is comfortable in the relationship.
  • Fingers interlocked is a subtle body language of his secretive nature.

4. Lighinting and Color

  • High-Key lighting, low contrast in the lighting.
  • Shadows in various parts of the frame metaphorical that there are secrets around the room
  • Warm tones to imply a homely feel to the shop instead of an industrial or clinical look.

5. Arrangement of Elements in Frame.

  • Diagonal lines brings attention to the character.
  • Framed at lower right third of the frame, building visual interest
  • Cat on frame left is not a subject of the scene but rather a foreshadowing or metaphor of his character.
  • Bottles, paper and stamp on his table implies he was mid work before scene (maybe he’s a busy man?) or he is just messy (like me, haha).