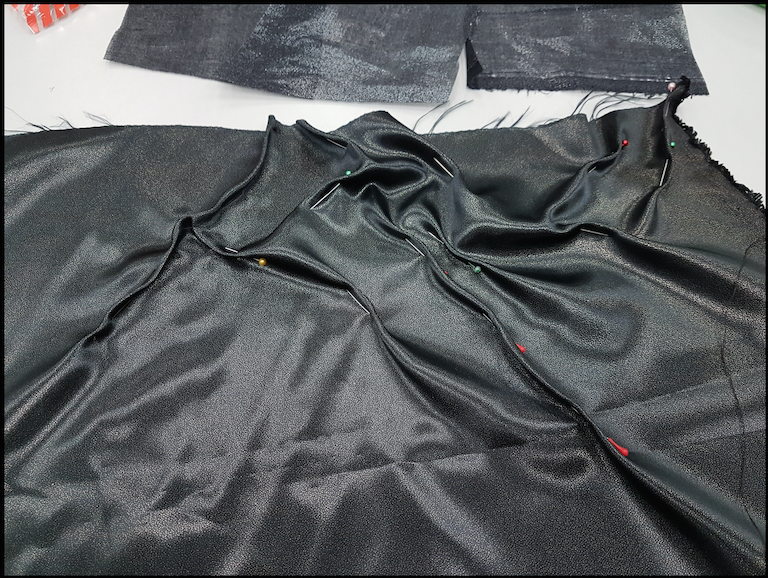
creating the inner bustier. First, we cut out the pattern pieces. Then, to form the organic pleating pattern I pinned and sewed the pieces and ironed it on a fabric with glue which hardens and forms the pattern.
The bustier is not easy to make as it took me really long.
1. form the patterns with pins
2. sew on the pleating to prepare for ironing
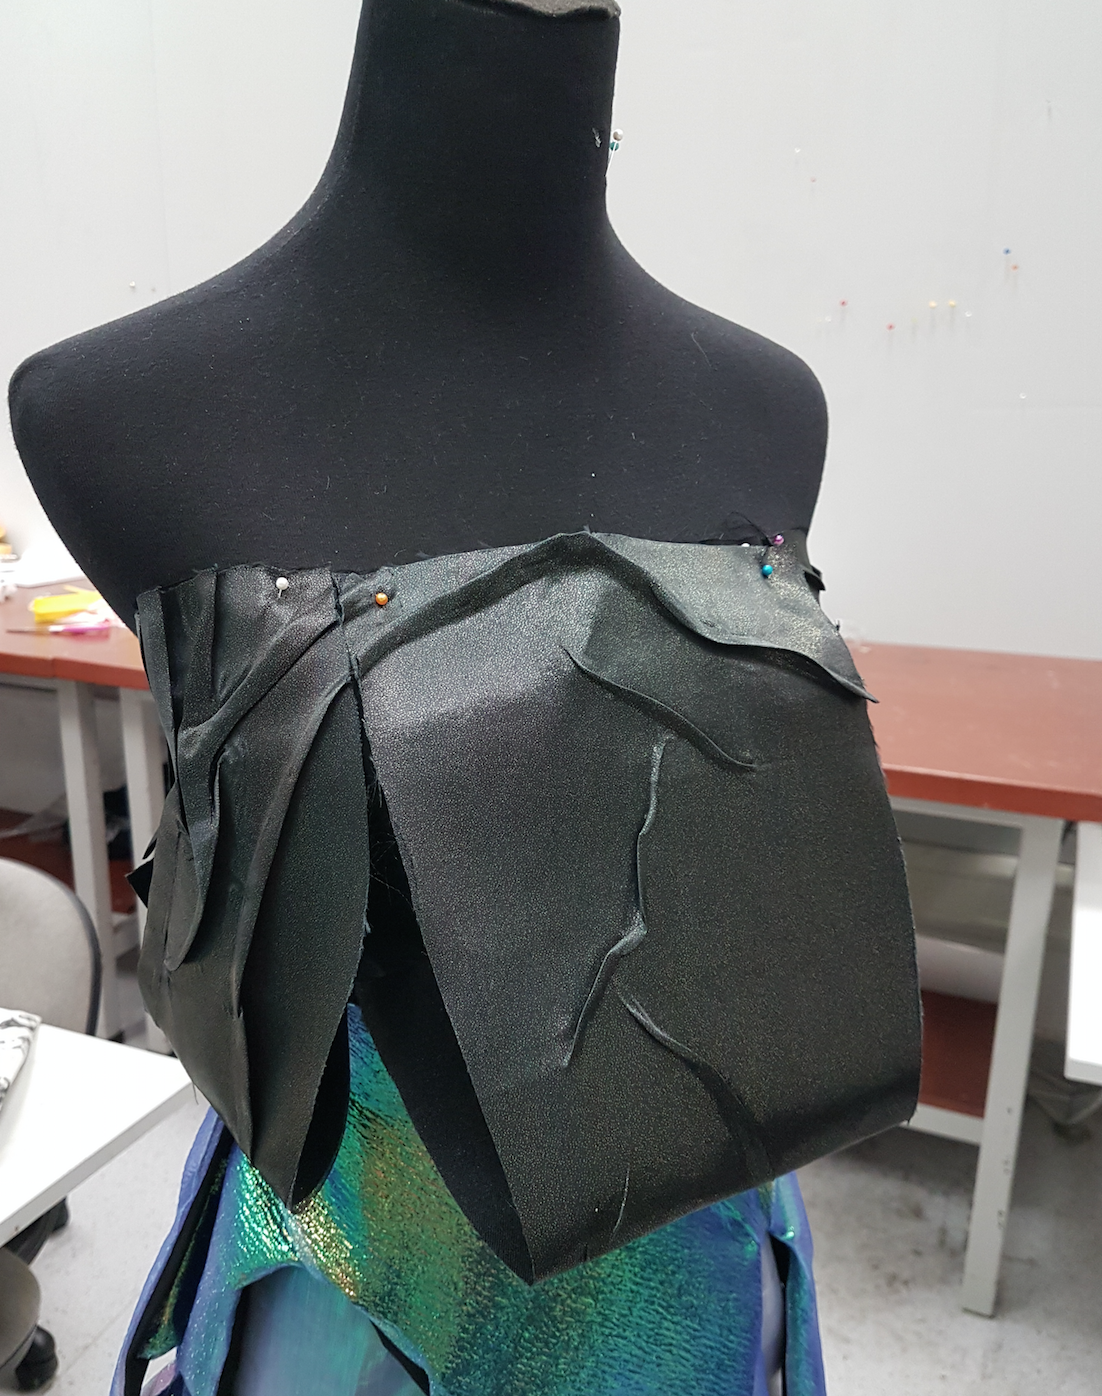
3. ironing the piece on the fabric with glue
4. cutting out the shapes of the pieces
5. creating the next piece with the steps above but make sure the pleating flows from one piece to another.
The picture shows how i make the pleating to each other by pinning it on the mannequin.

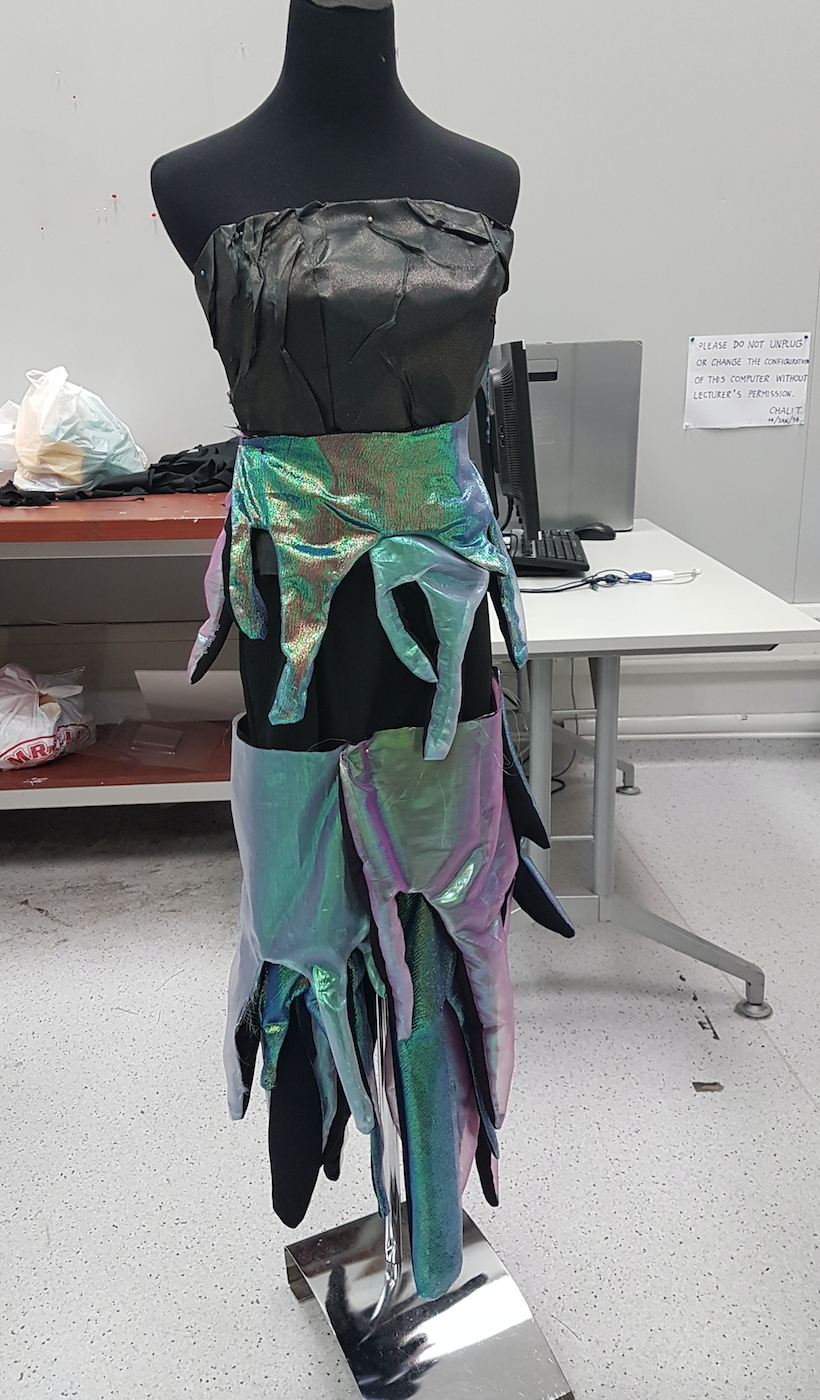
Ta da the bustier is done! with all the pleating and pieces joined together. For the final touches, I will be adding beads along the pleating to make it more intricate and have more dimension.
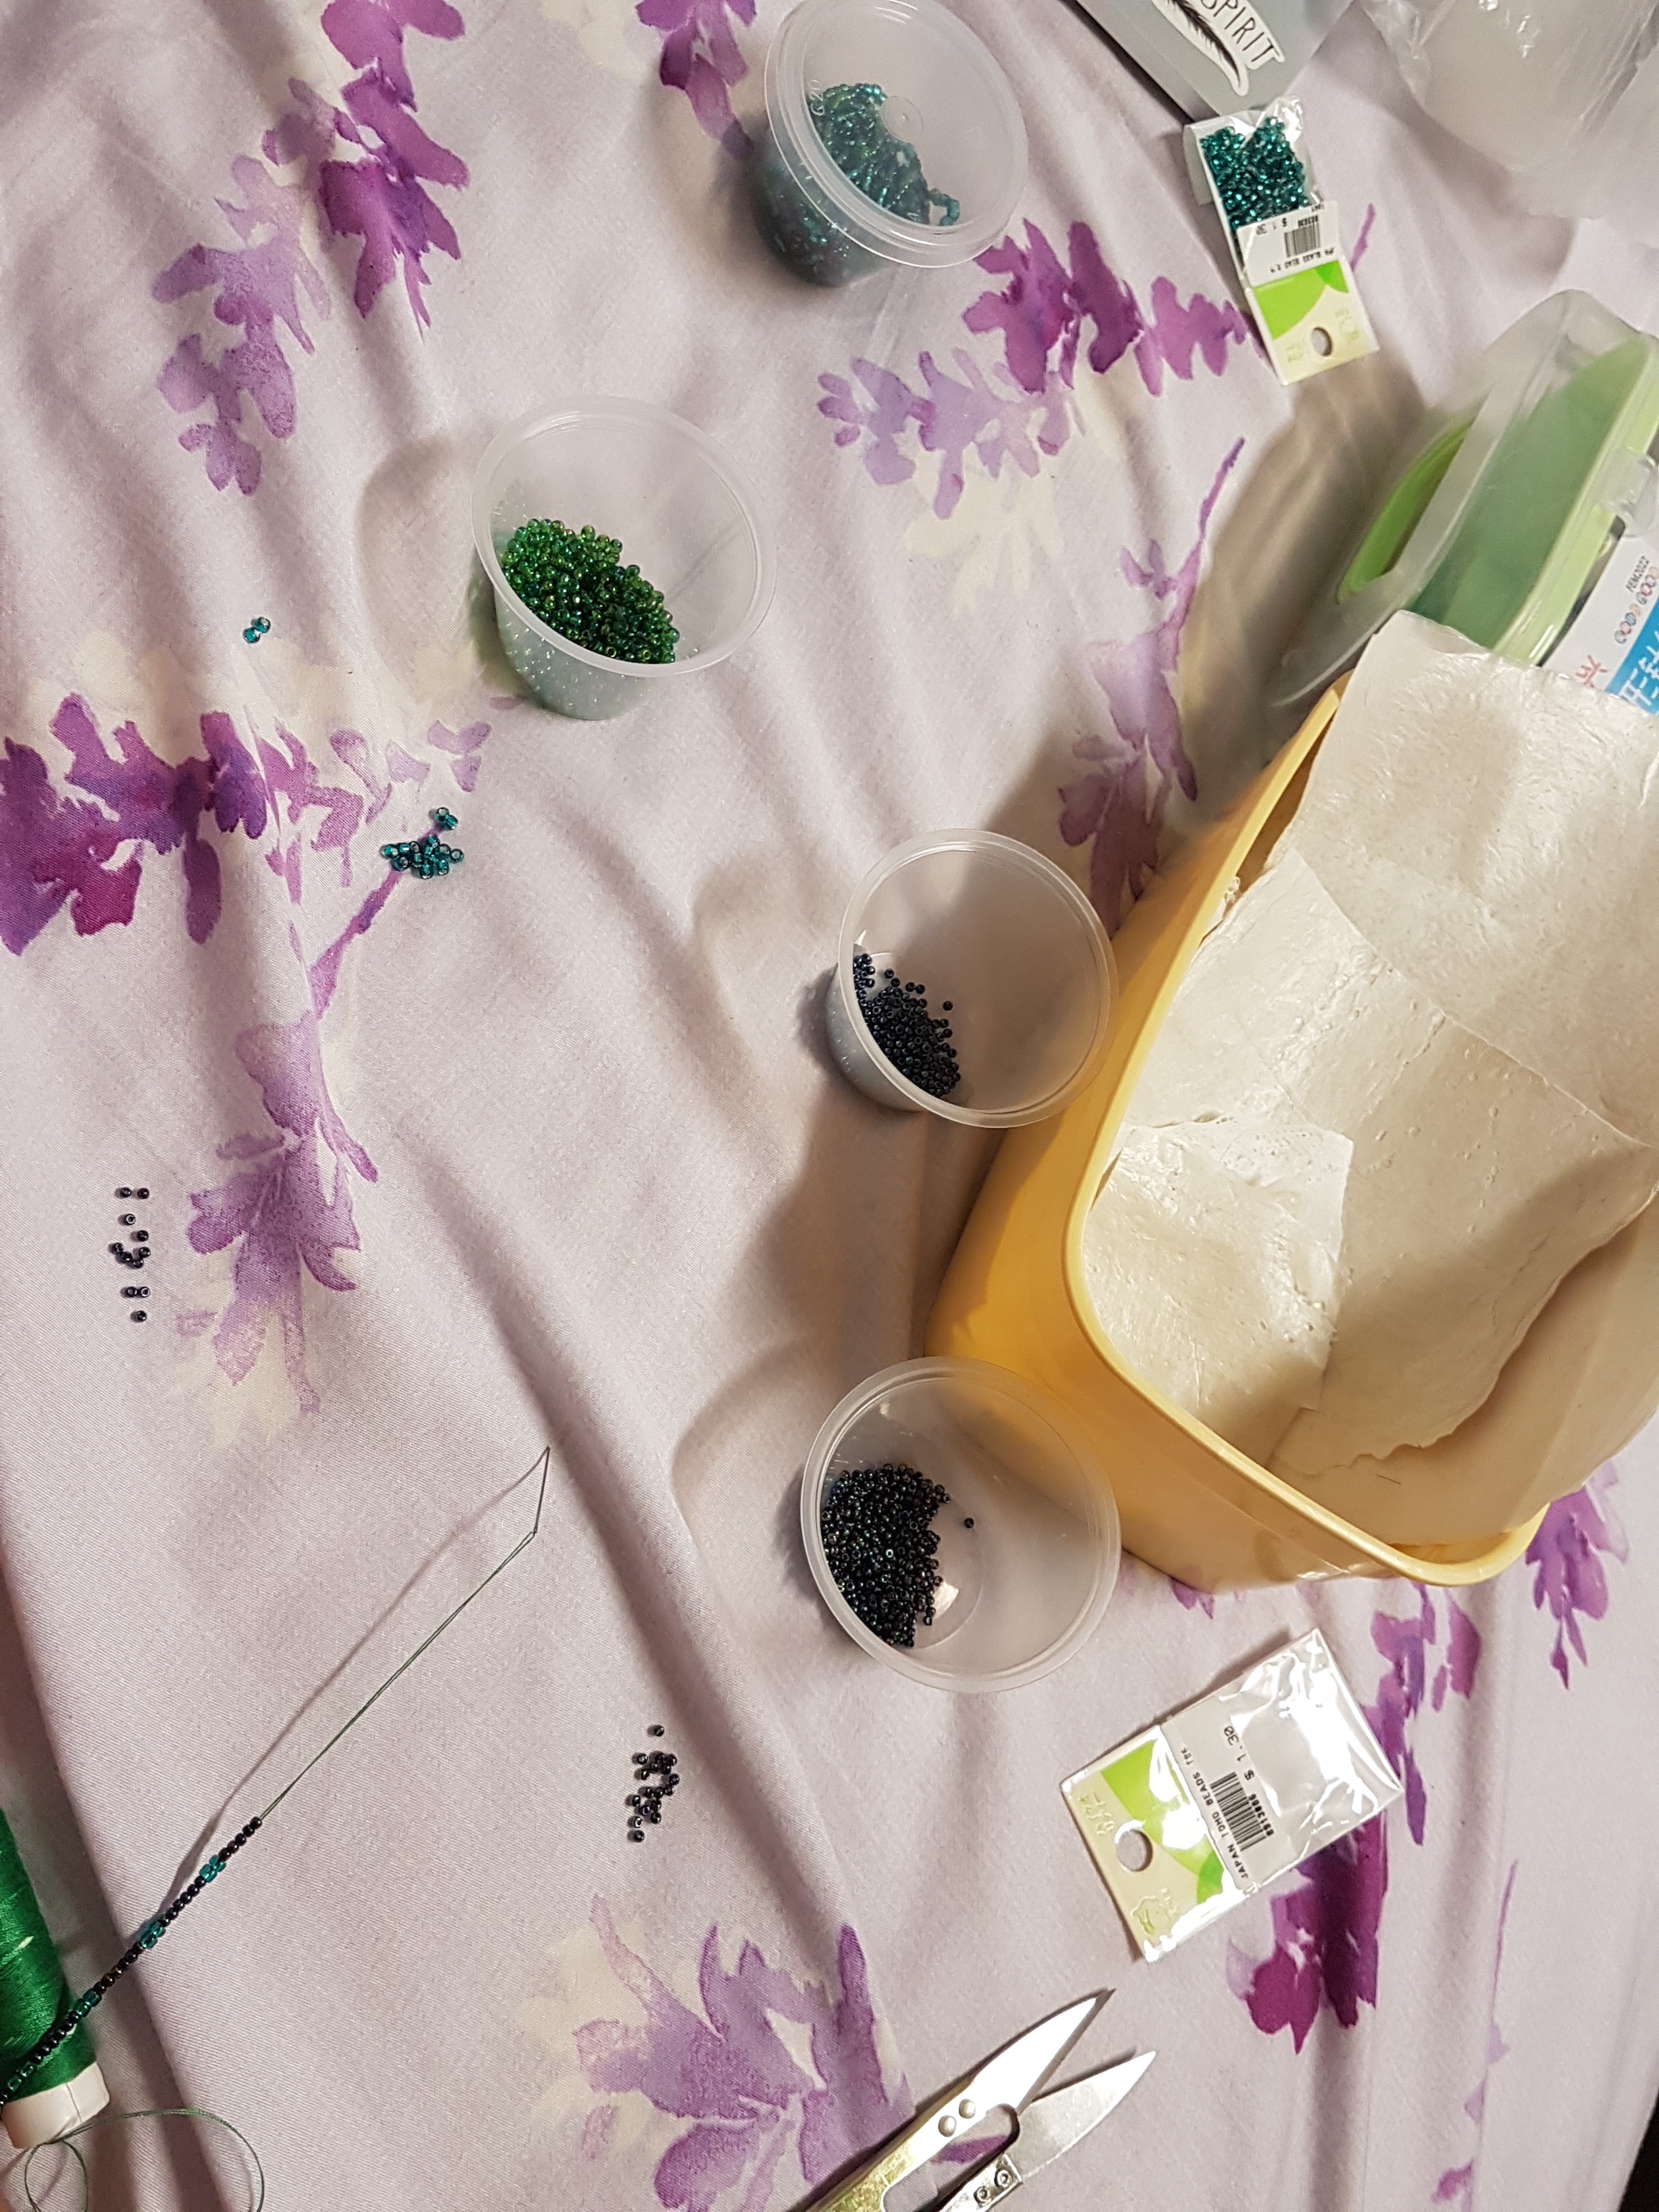
Beading. To make things easier for me, I threaded the beading into strings of beads so that it would be easier for me to sew on the bustier. I can come up with many different combinations of the beads as I want. But this process takes a really long time as the beads are really small and I am threading beads of different shapes and colours.
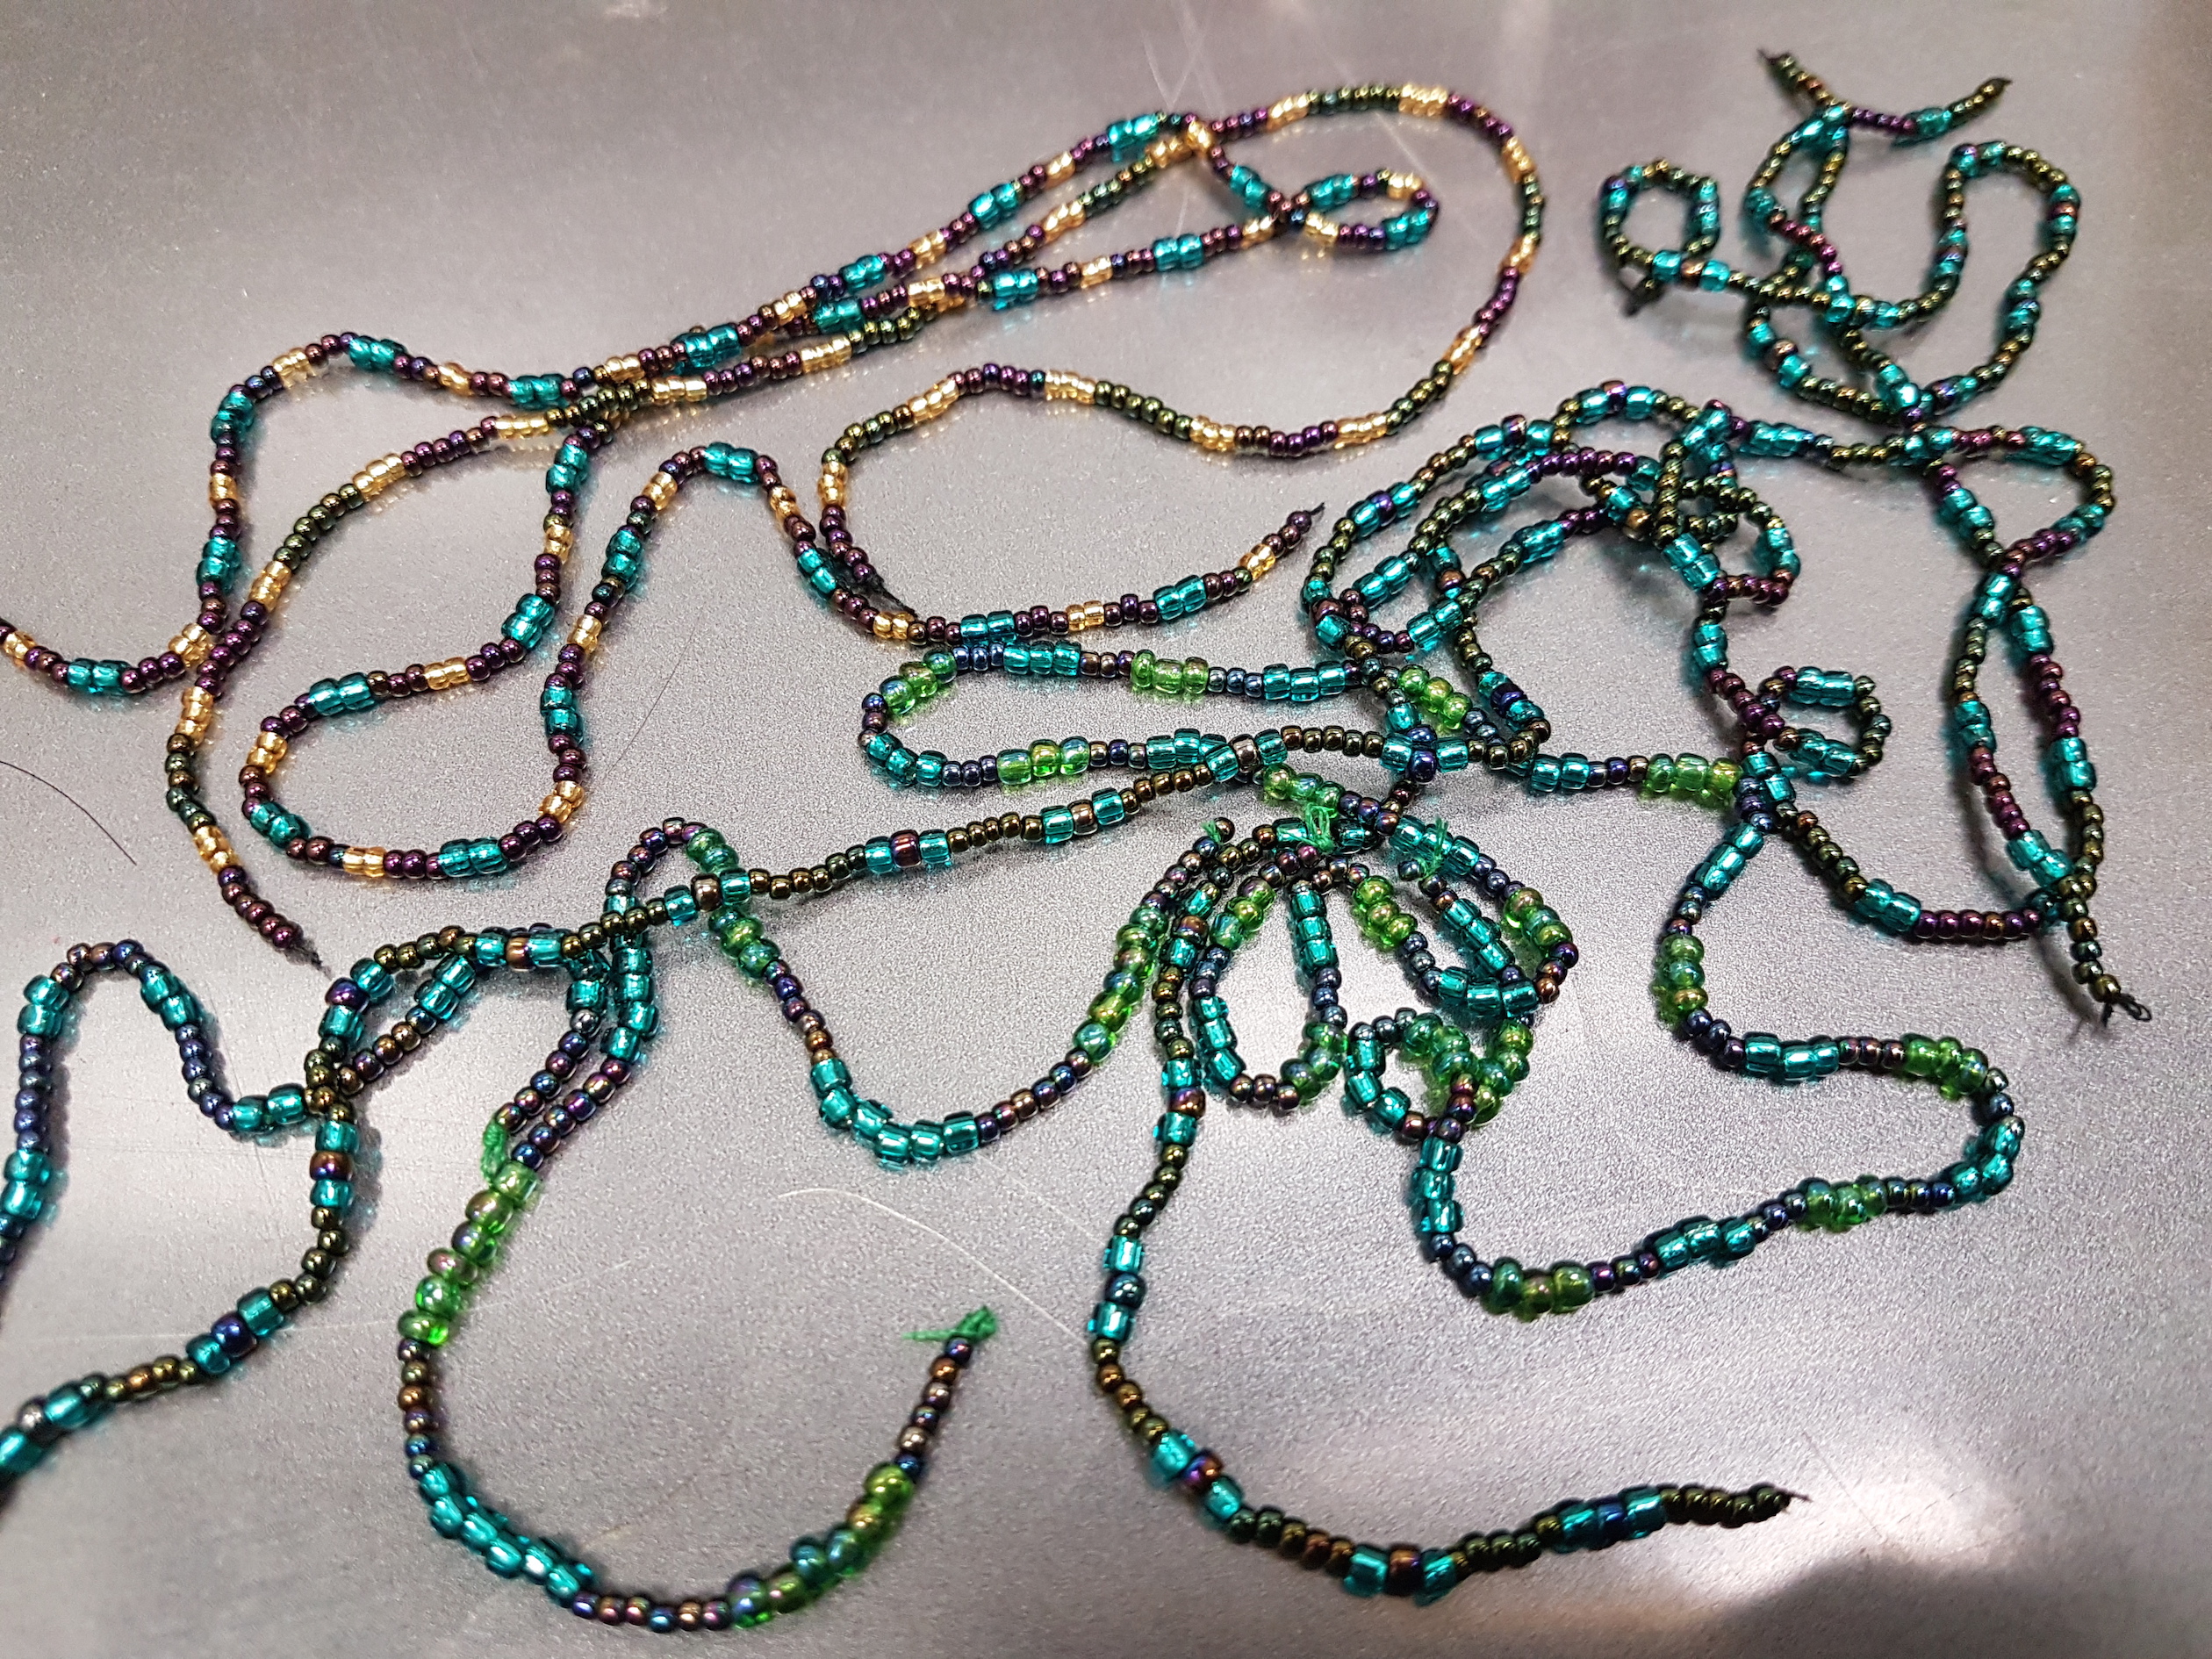
All the strings of beads have different combinations.
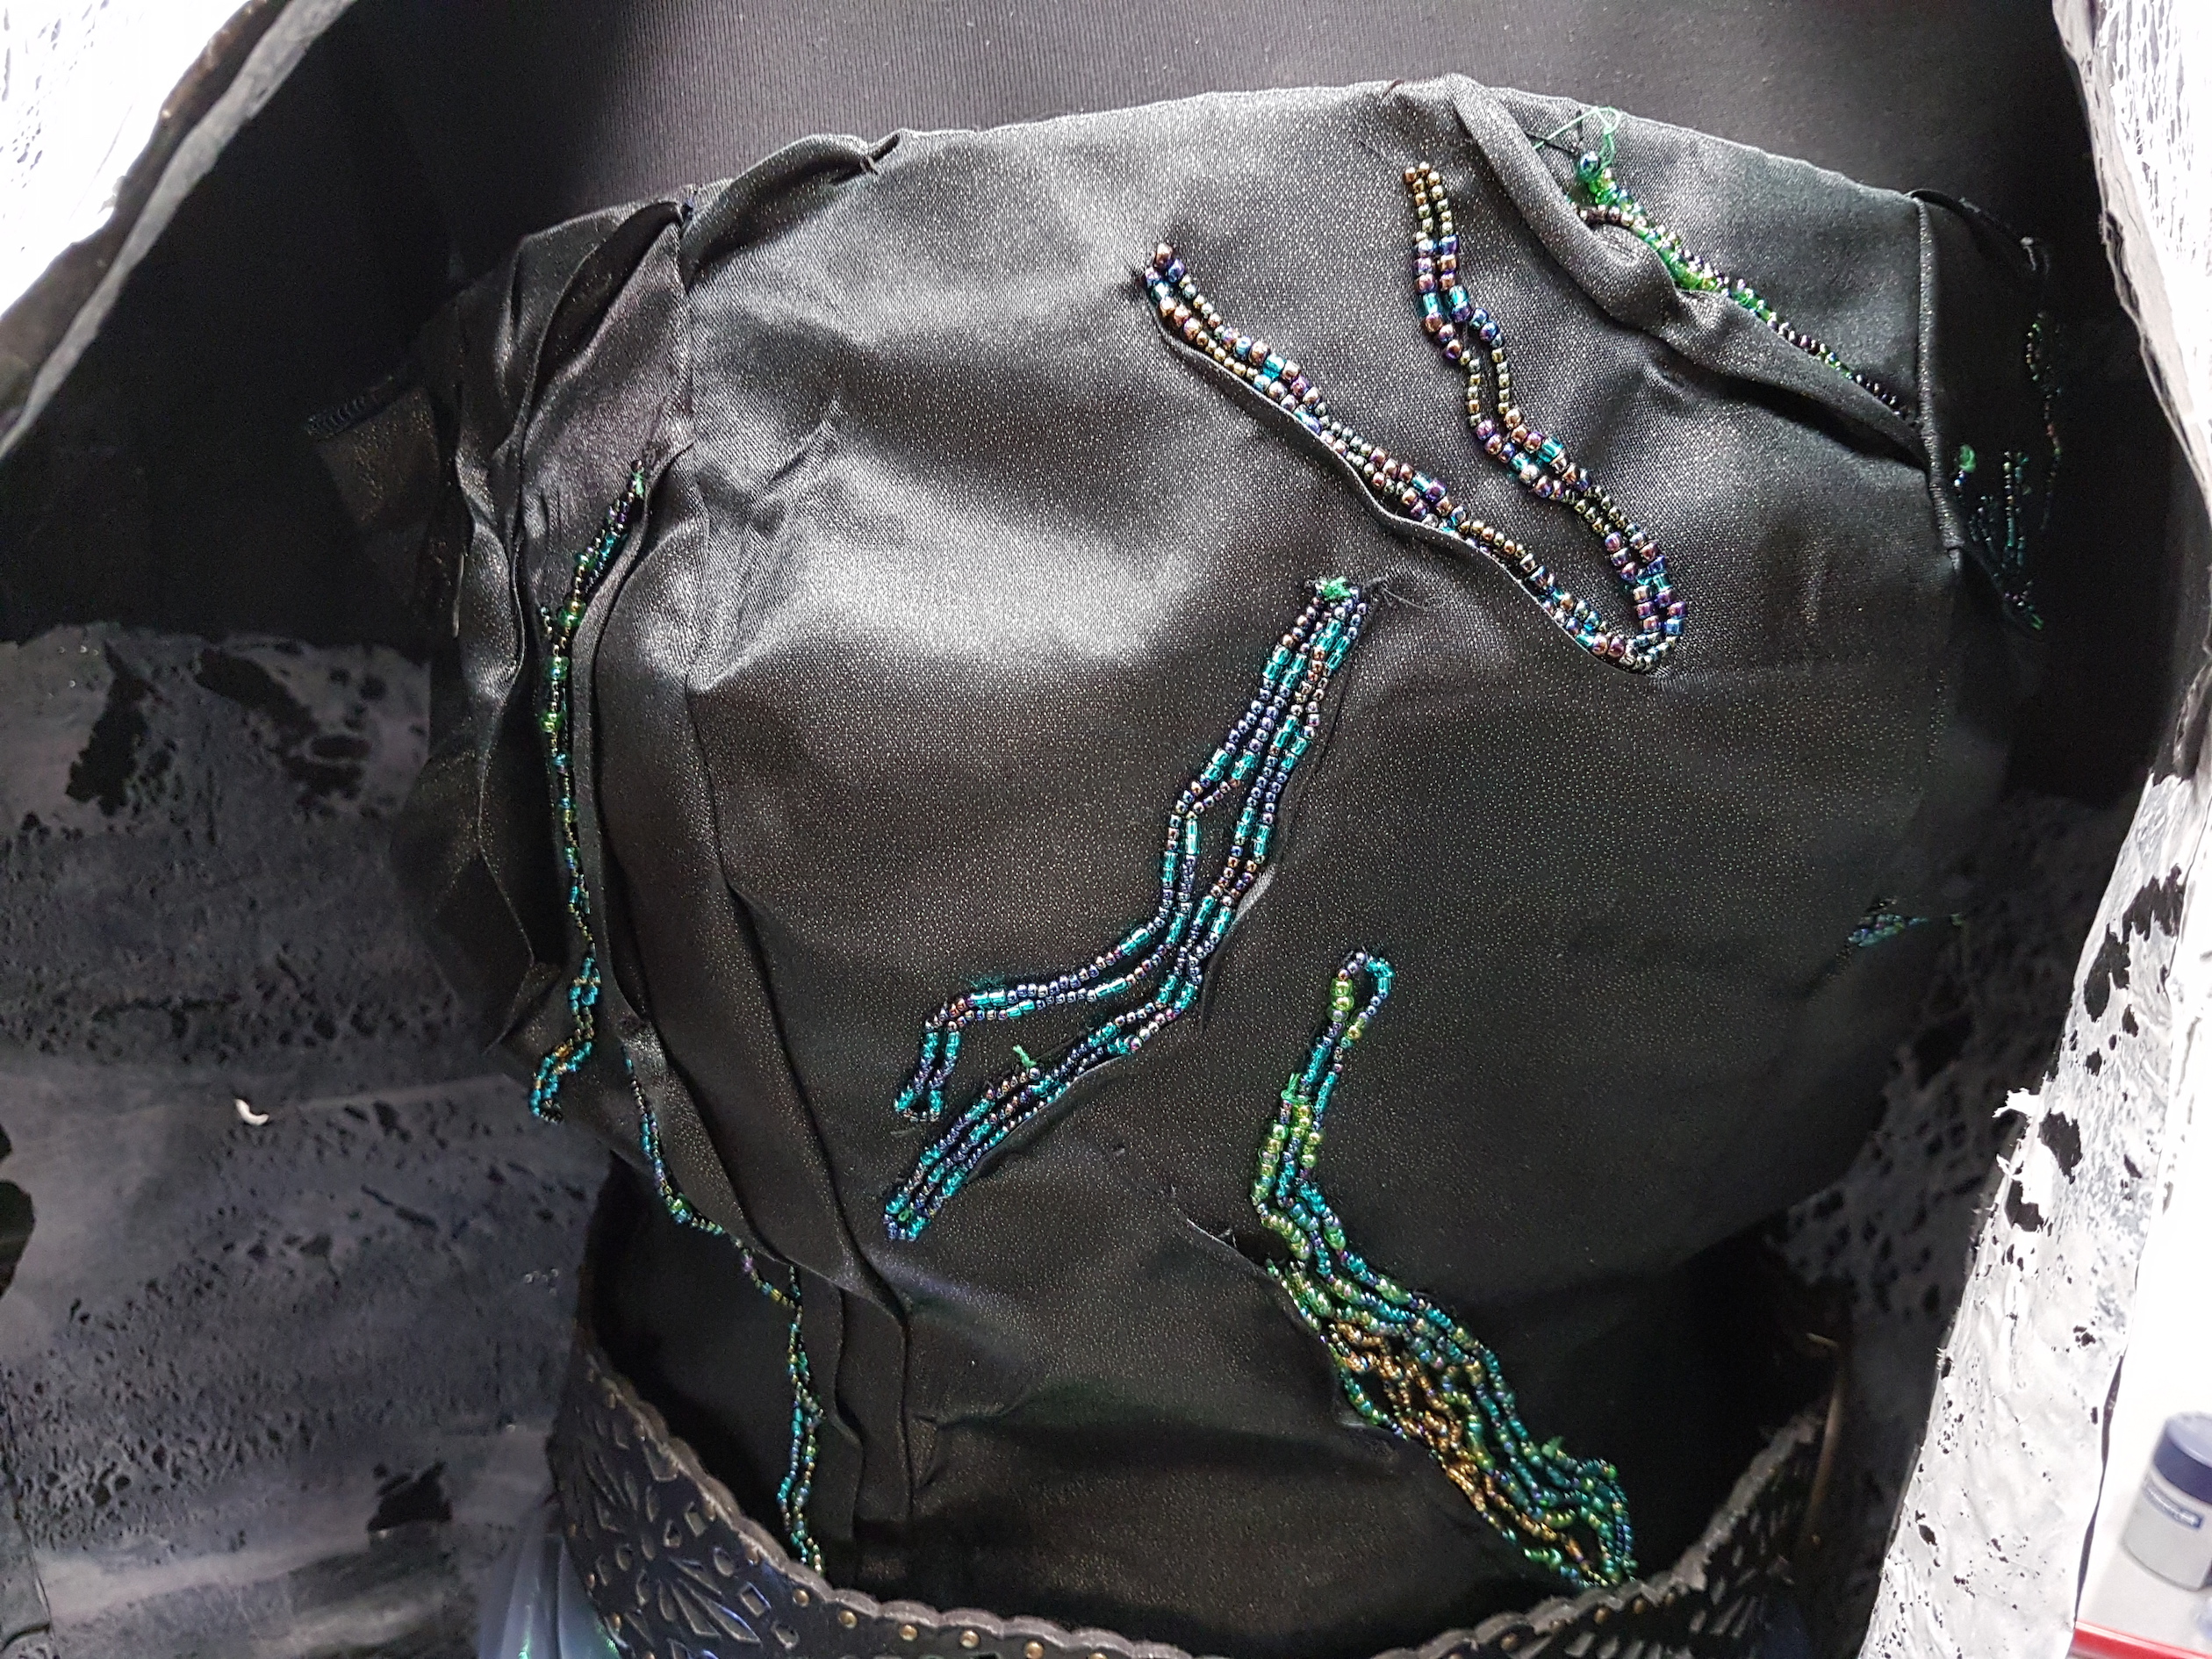
The beading details to give it more dimension.