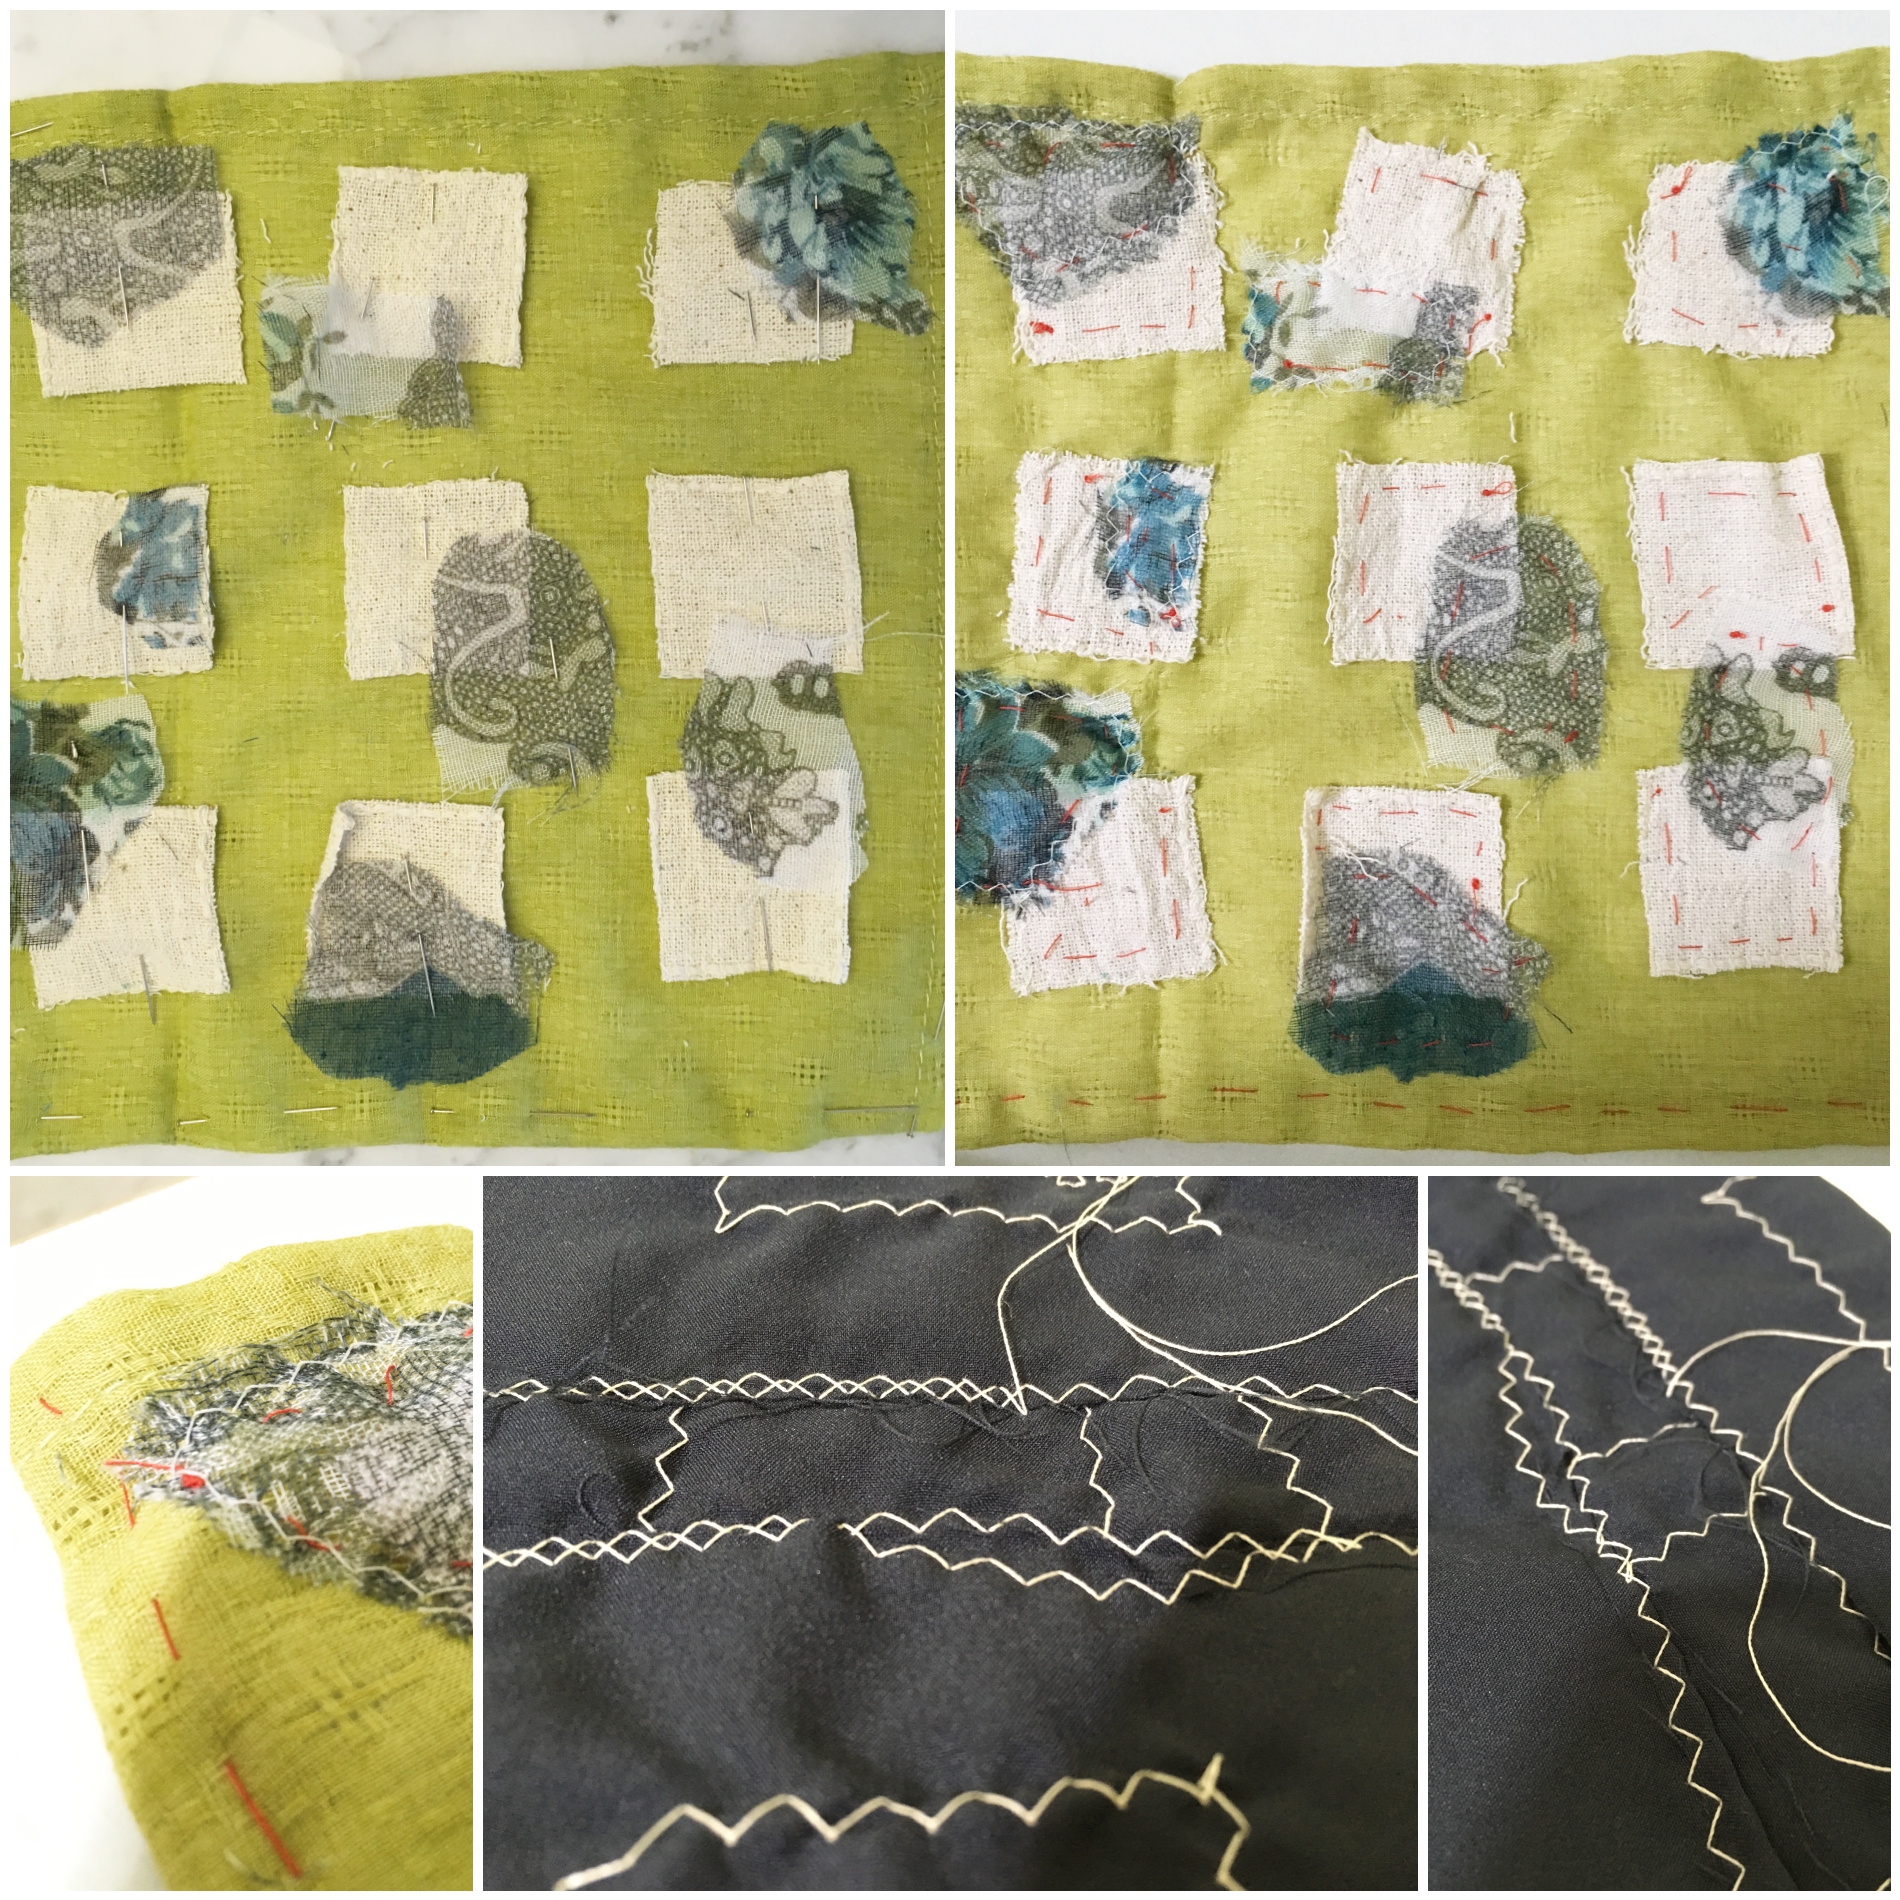
Appliqué is a needlework technique where smaller pieces of fabric or other materials are sewn unto a larger piece to form a picture or pattern.
Materials required:
Sewing machine
Sewing pins
Scraps of fabric, felt and leather, beads, etc
Technique:
Arrange the materials on the base fabric and secure with sewing pins
Stitch the materials unto the fabric using the sewing machine
Using the zig-zag stitch prevents unravelling
Testing of applique techniques (Hand-sewn and machine-sewn)
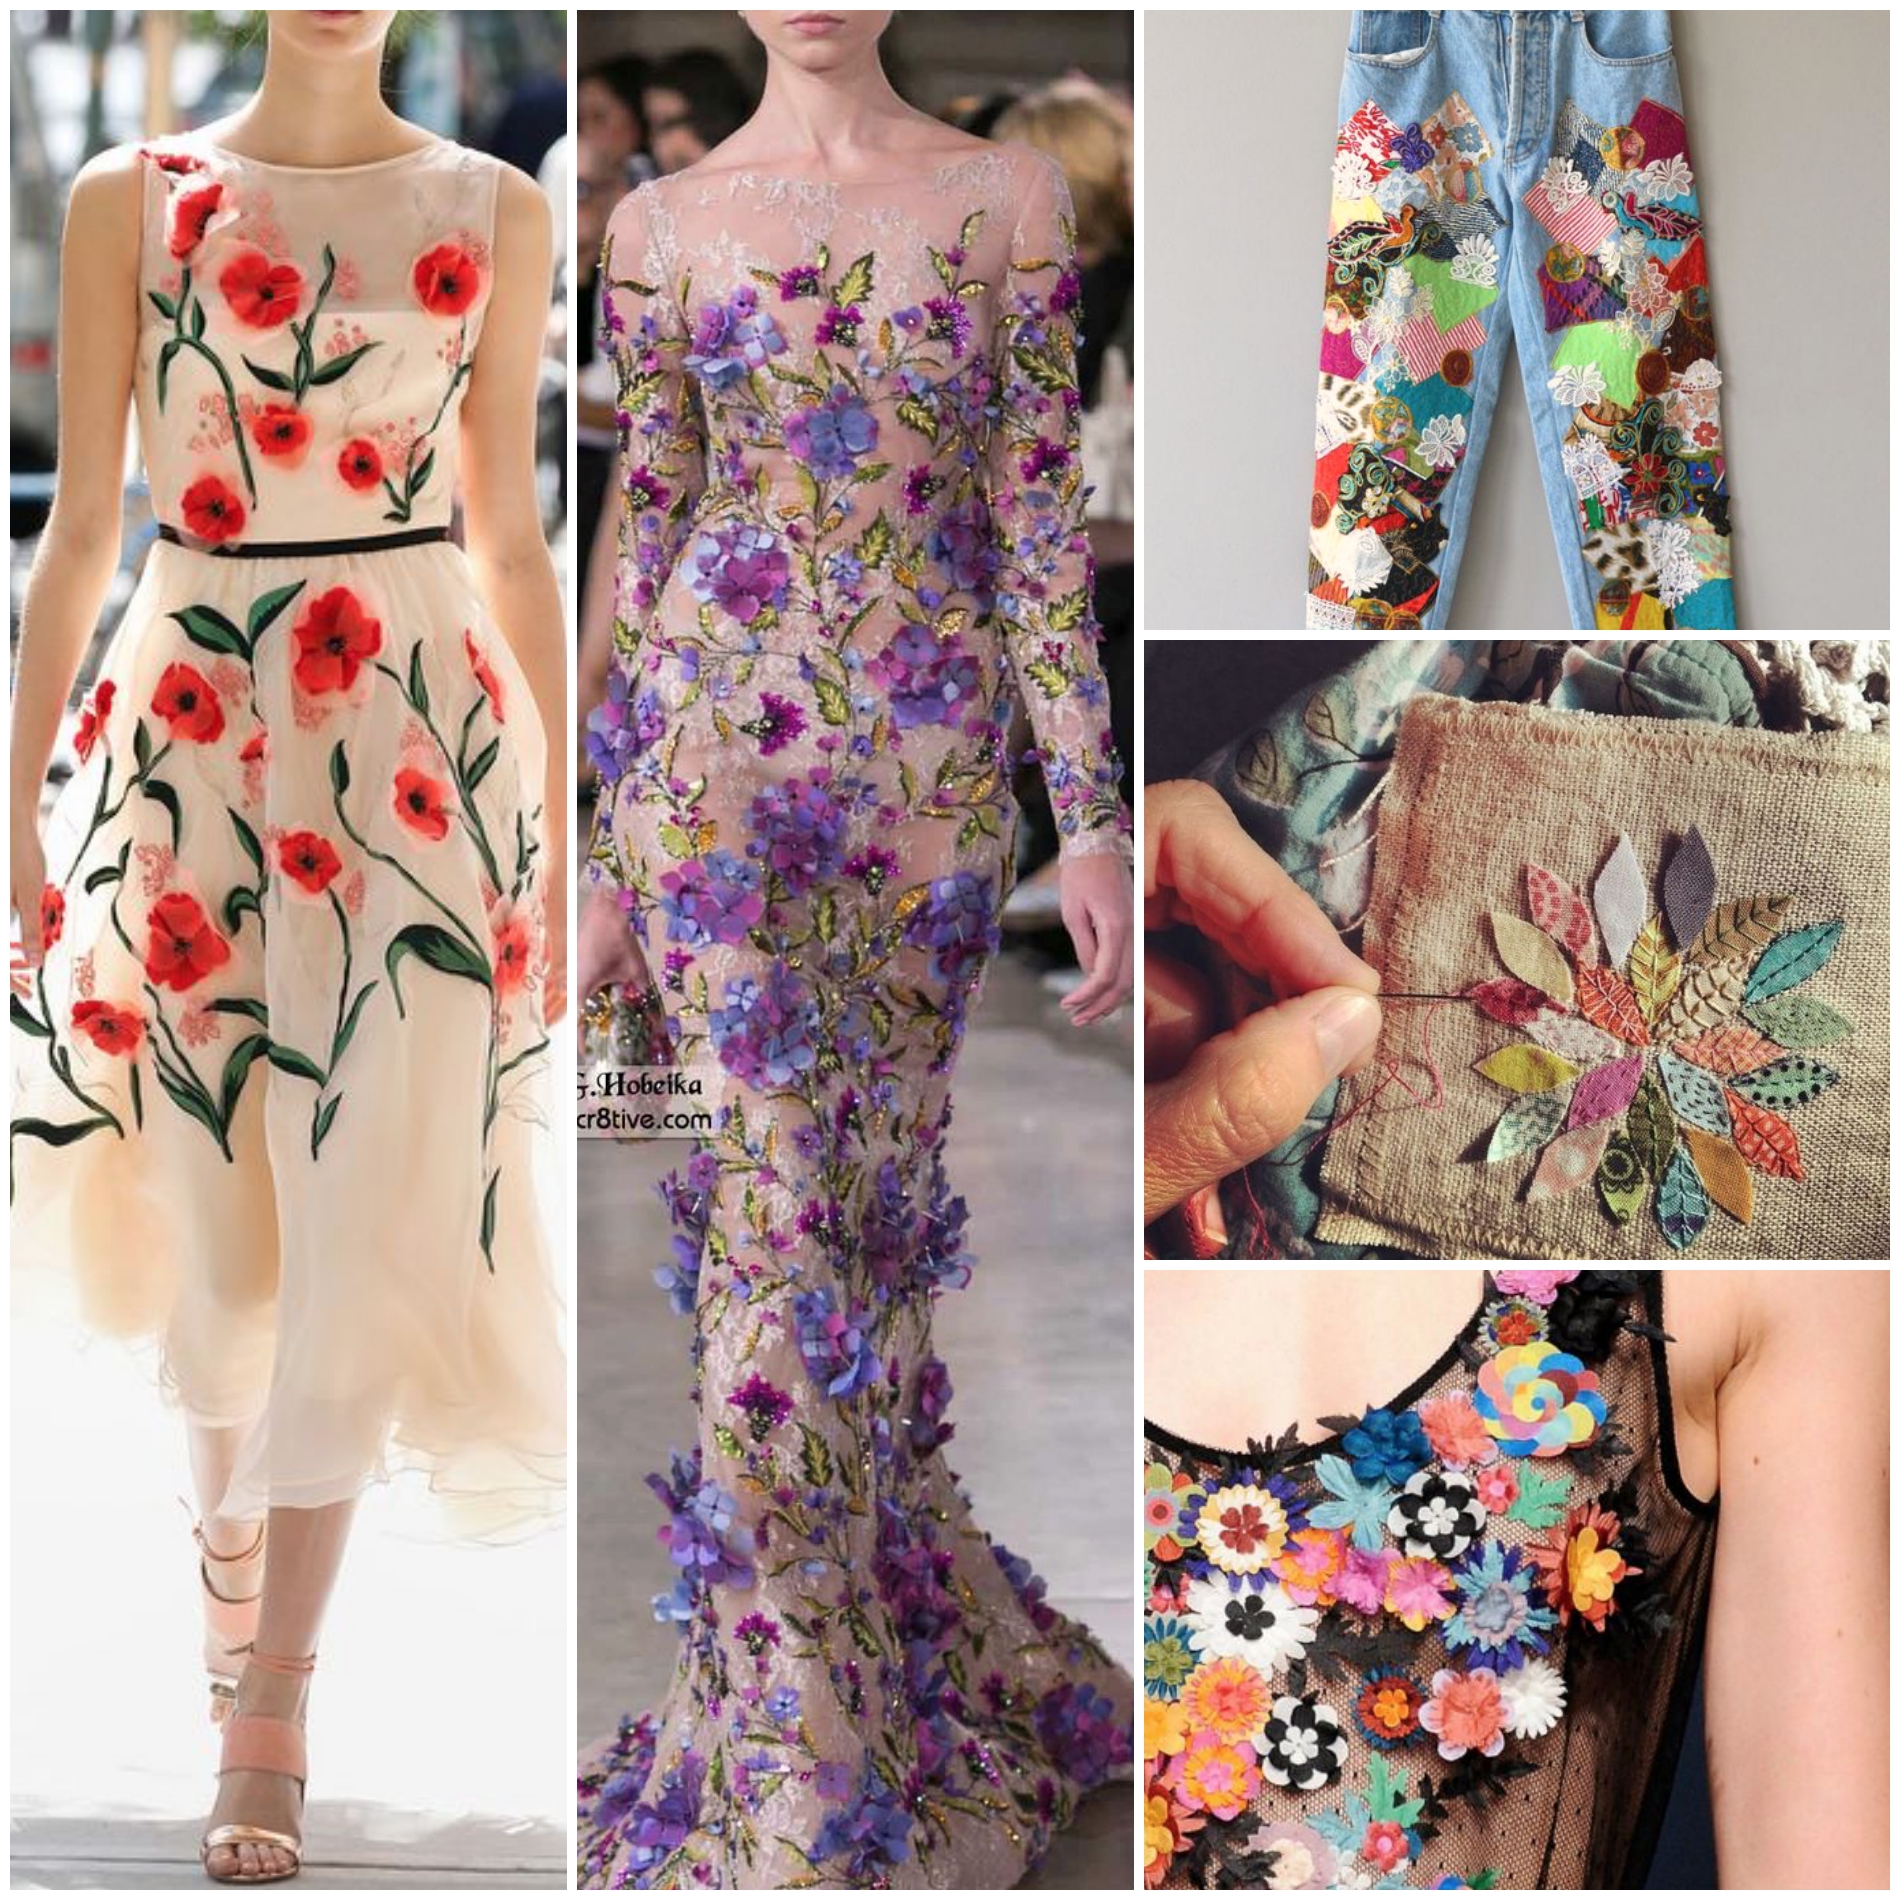
Applications include:
This technique is decorative and can be used on wearables, furnishings, and even on paper
It can be hand or machine sewn
Images sourced from Pinterest
Personal reflections:
This technique reminds me of decoupage where the surface is built up through the addition of interesting materials, resulting in a meaningful piece of work even if the elements are distinctly different. Also, the stitches play a role in the final appearance!
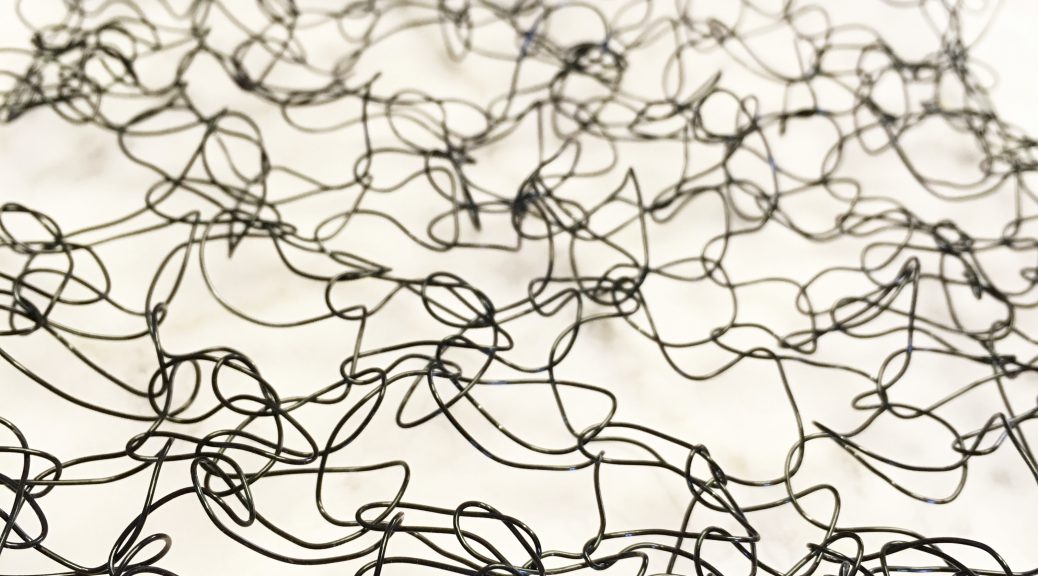
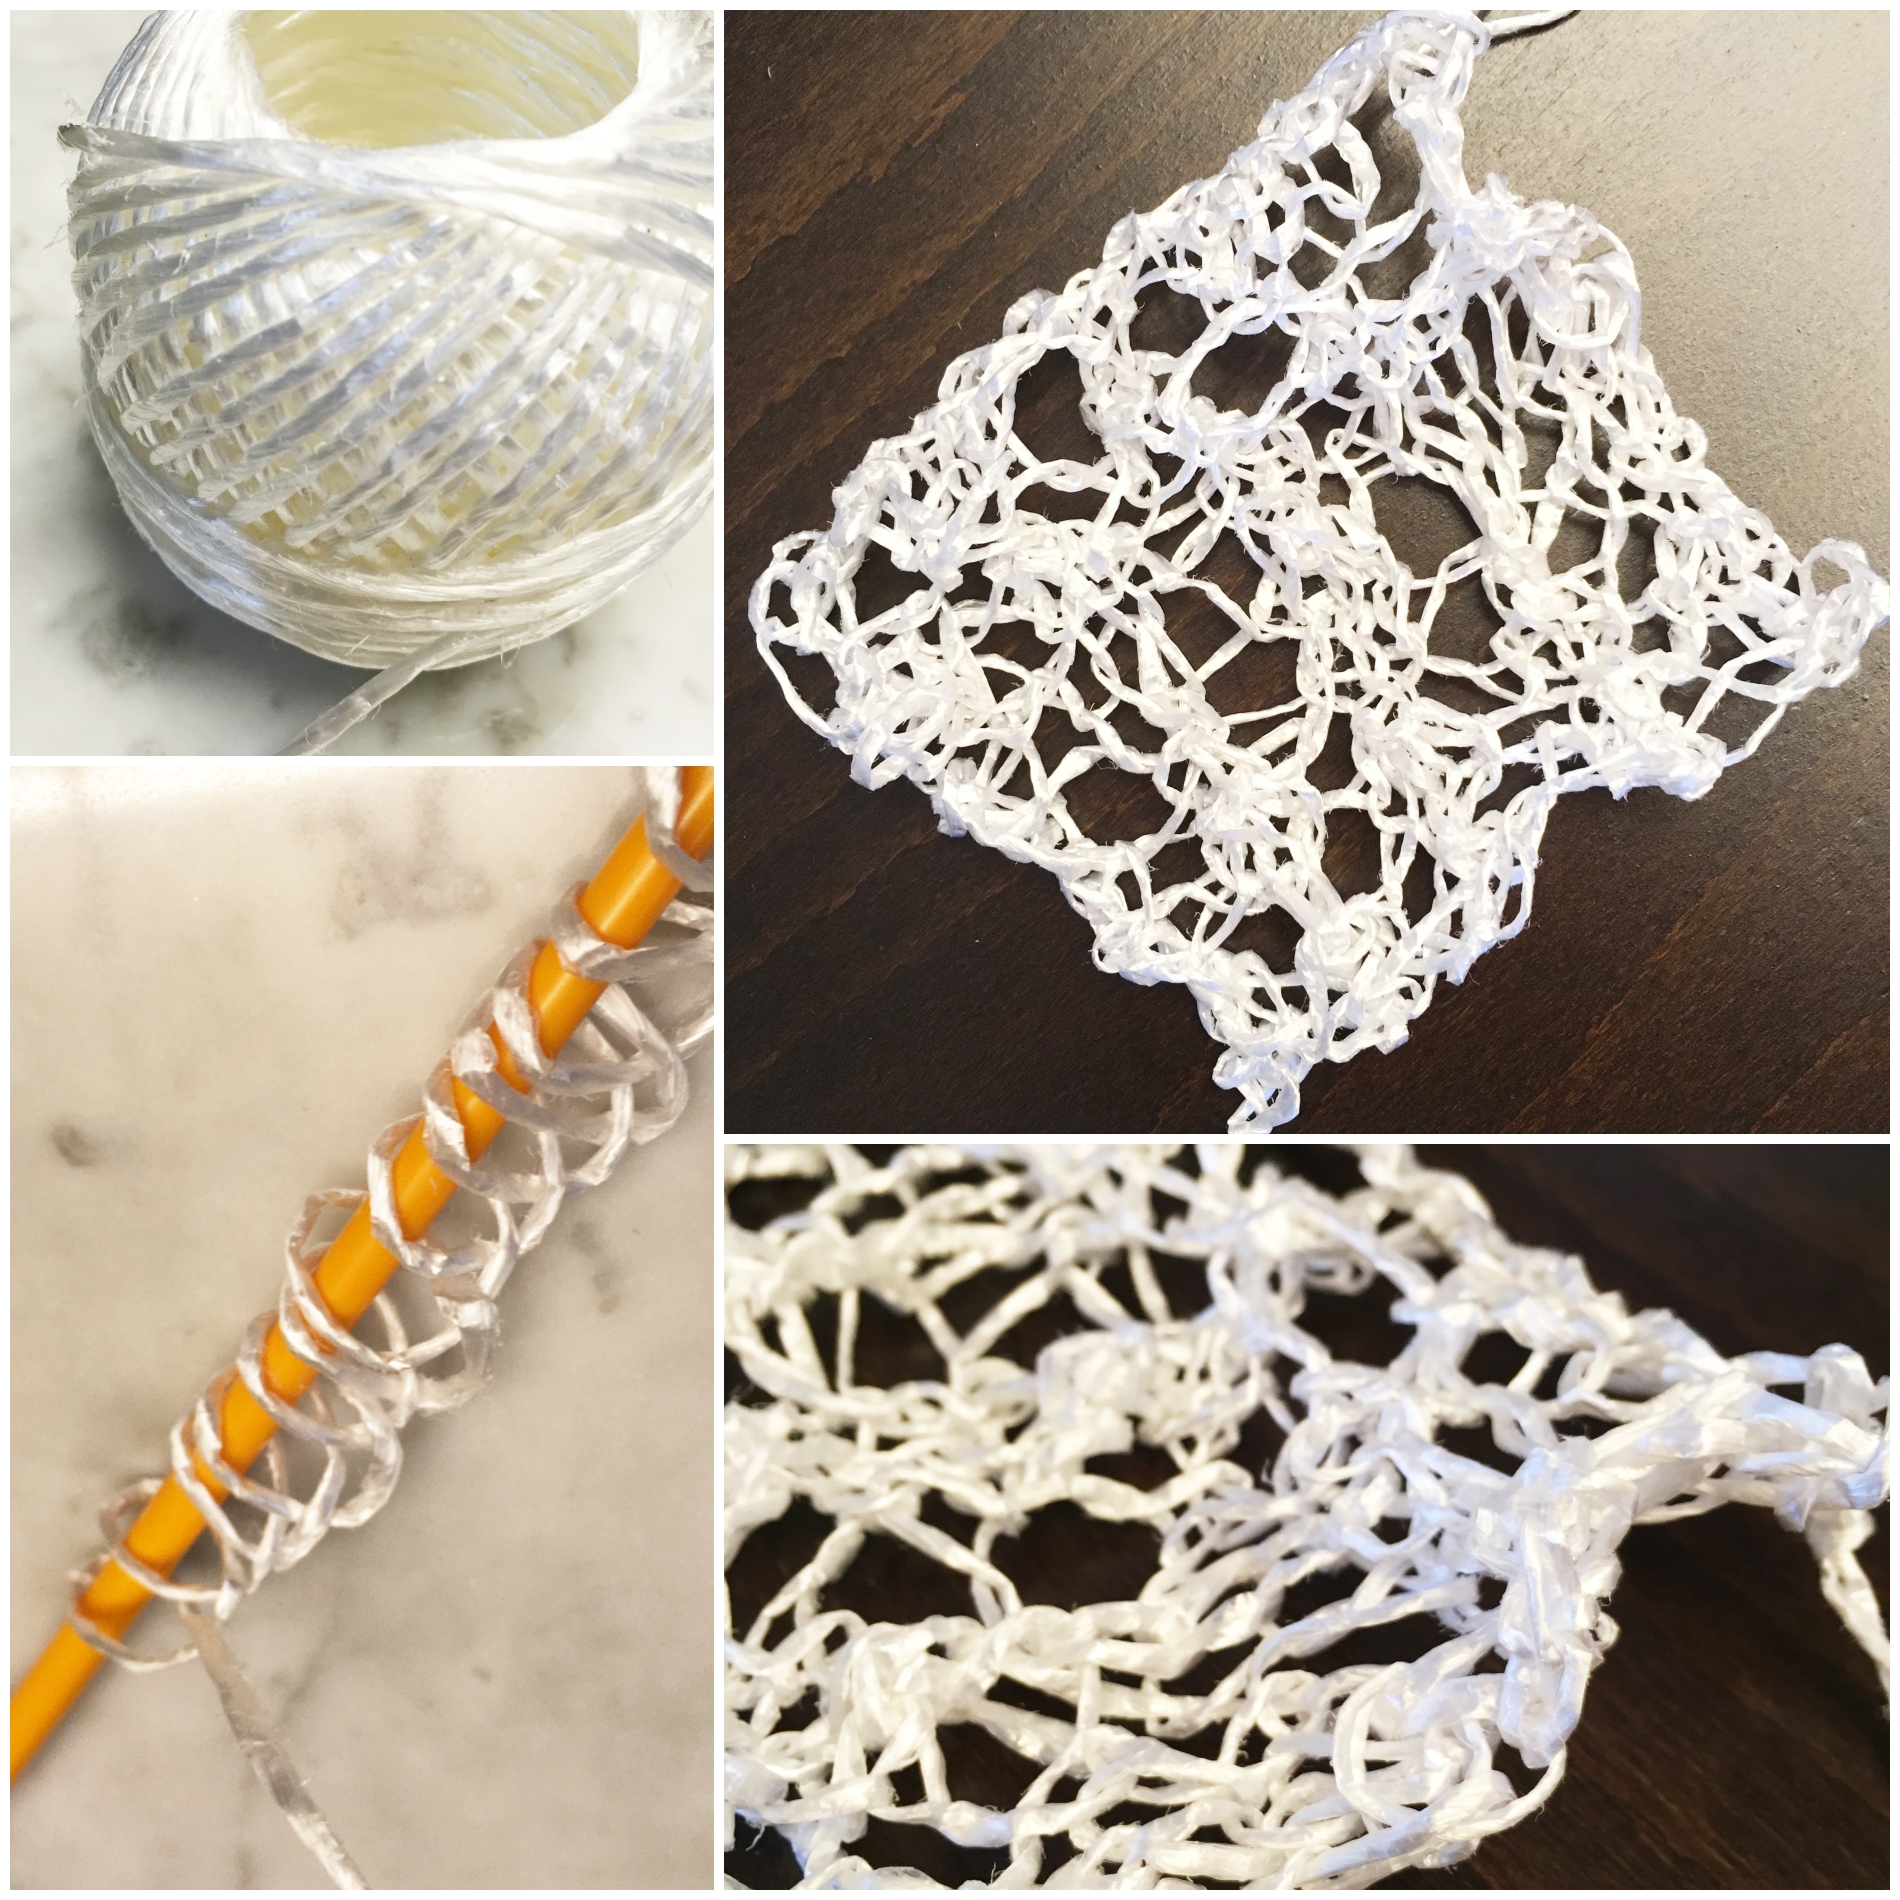
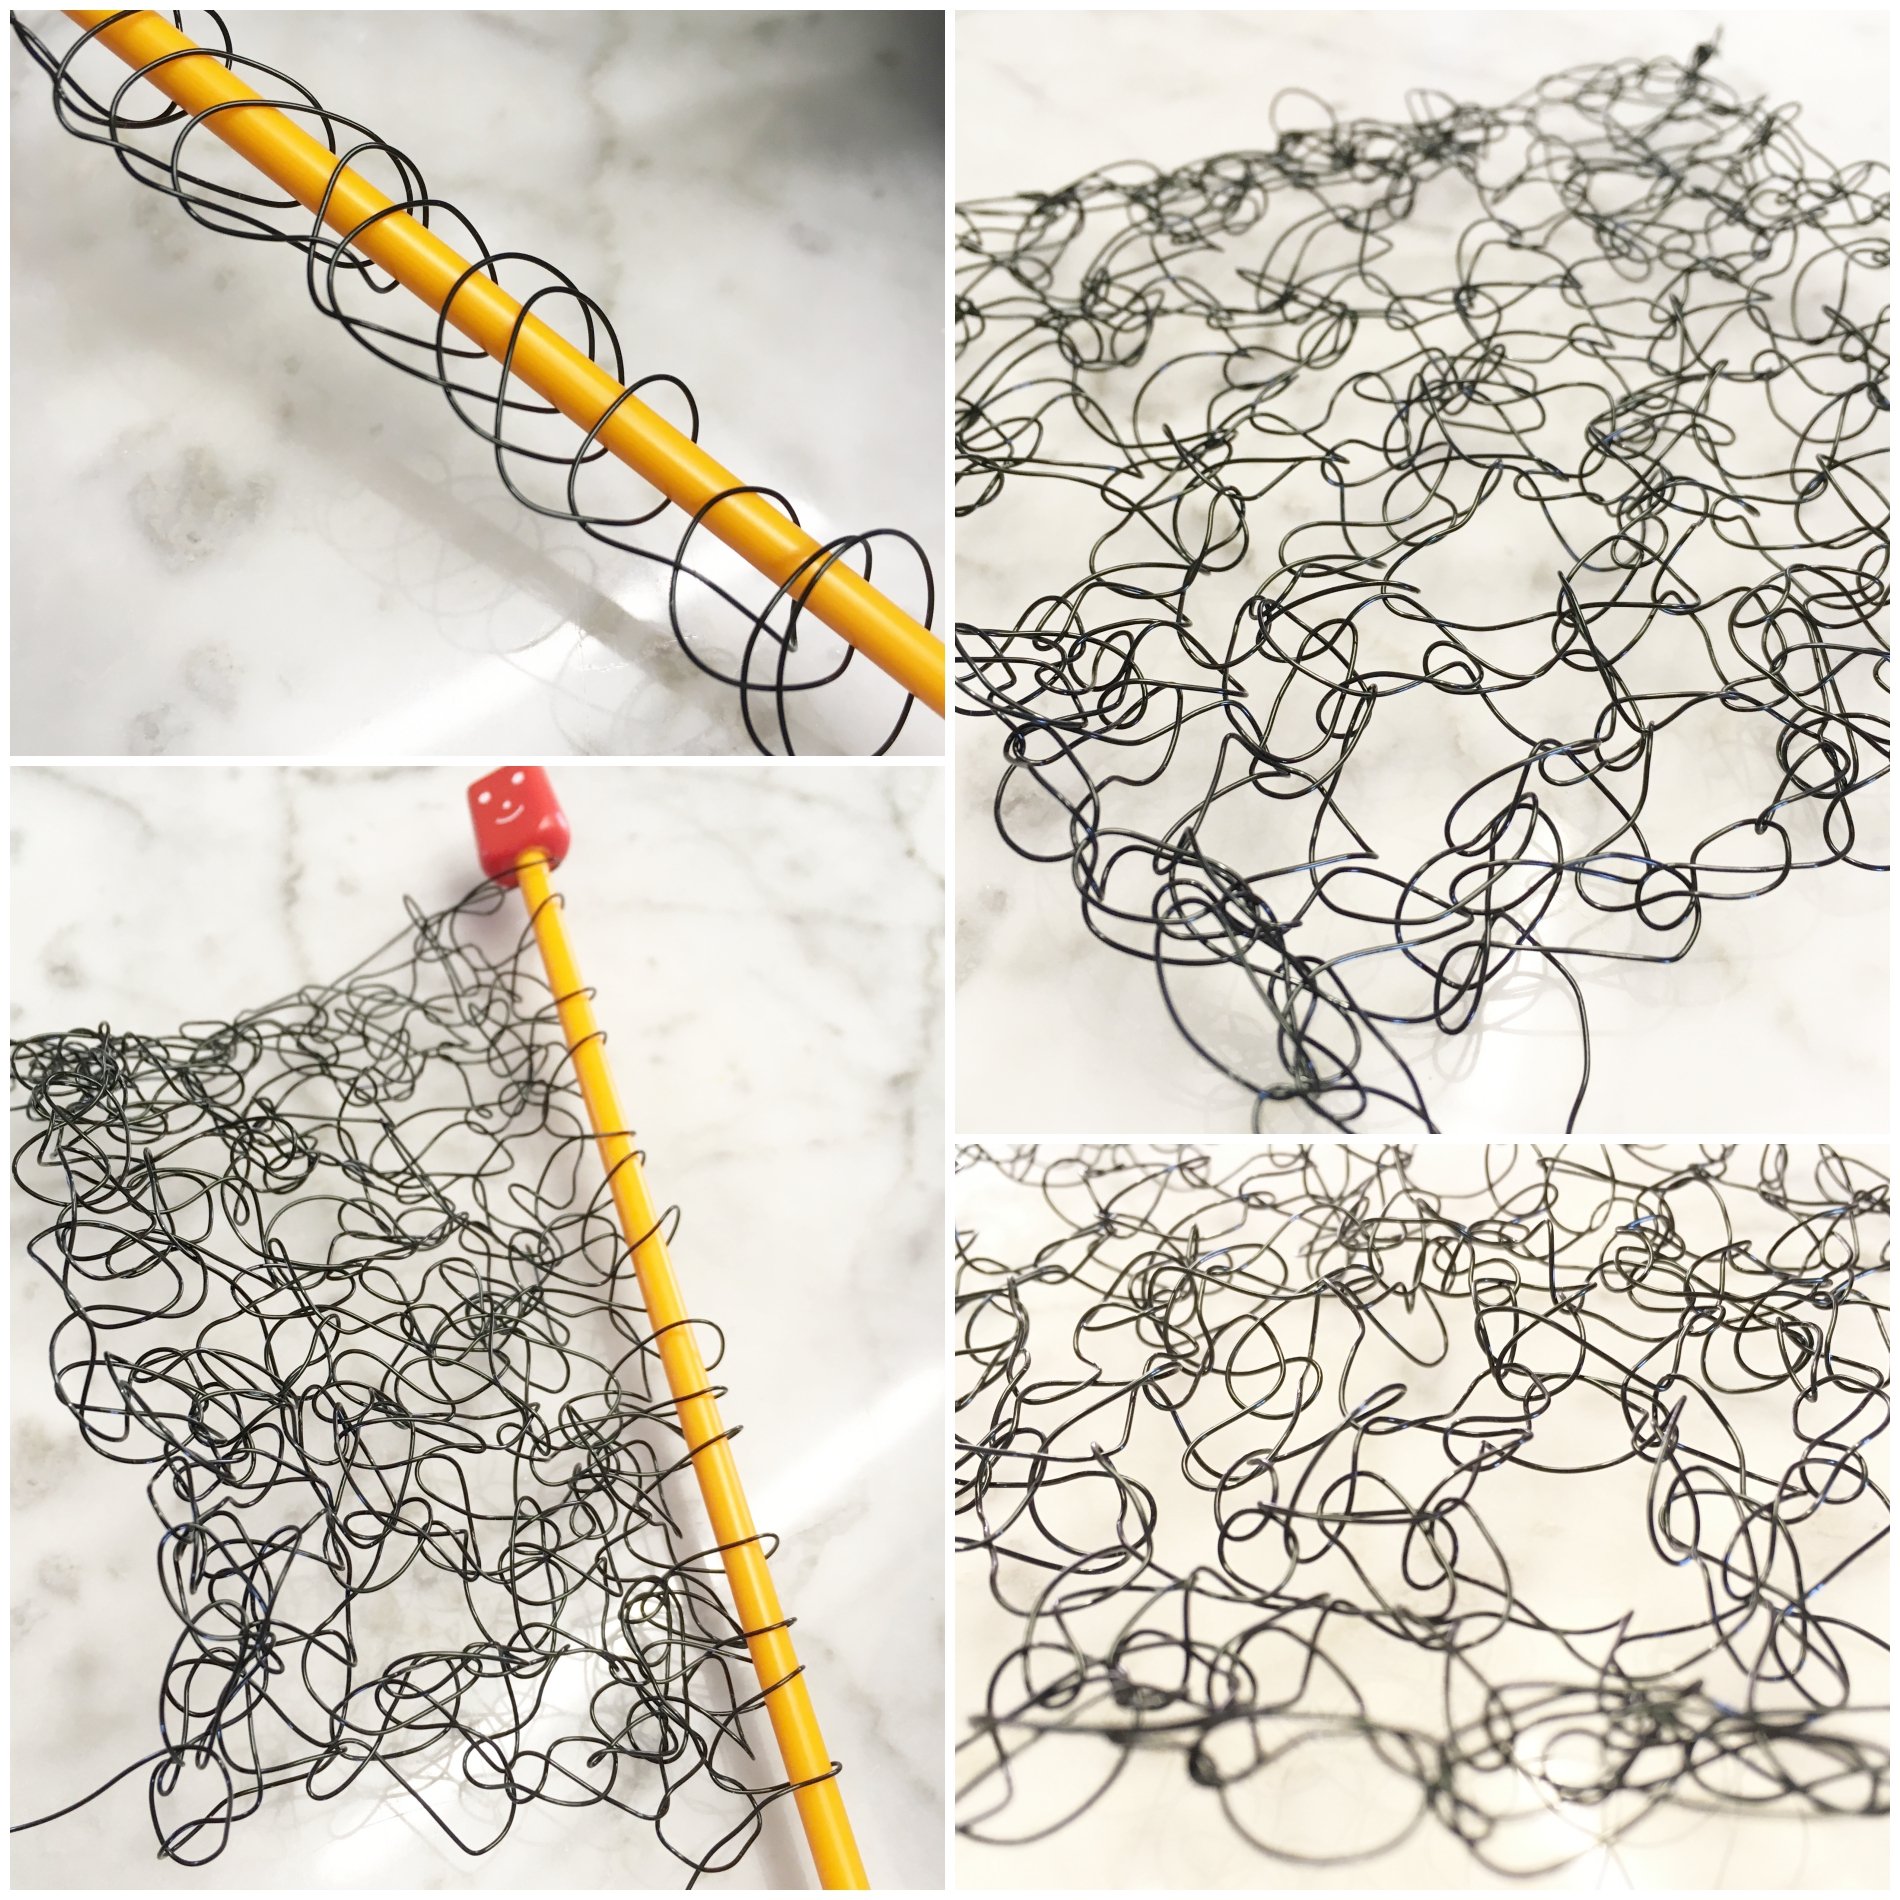
Yarn and other kinds of threads can be woven in loops to create a cloth. There are multiple techniques for knitting, and the effect varies with the texture, colours and weight of the yarn used as well as the type of needle.
Materials required:
Yarn, ribbons, etc
Plastics, cords and wire
Knitting needles
Technique:
The internet is a treasure trove of tutorials! With both video and pictures, patterns and stitches can be learnt through practice.
Using the woolyarn, techniques like casting on, purl stitch, knit stitch, slip stitch, “yarn over”, increasing, decreasing and binding off were practiced. It progressed to the incorporation of lace patterns such as those in the images below.
For the wire knit, Lace Pattern 4 was followed. Wire was a challenge to manipulate, however, the resulting strength and elasticity gives the material a new character.
Knitted square made of wire
Applications include:
Variations of thick, thin, sparse and tight-knit surfaces for different uses
Making “Plarn” (plastic yarn) products, reusing old plastic bags
Wire meshes that layer atop each other to create dimension ( decorations, lampshades, baskets, accessories)
Knitted pieces found on Pinterest (yarn, plastic, metal)
Personal Reflections:
The technique is similar to macrame. However knitting allows more stretchability while macrame makes use of knotting to secure the threads. Perhaps both can be combined in one fabric to give mixed properties?
We often think the knitted wear is meant for winter but there are also ways to make knitted materials cooling though the use of spacing and thinner thread (e.g. linen). Combining the different stitches into one piece make it interesting especially when the build-up is slow!
The presence of 3D knitting machines (where the digital design is turned into a knitted piece) allows us to contemplate how our knitted works can be different from the industrial-made
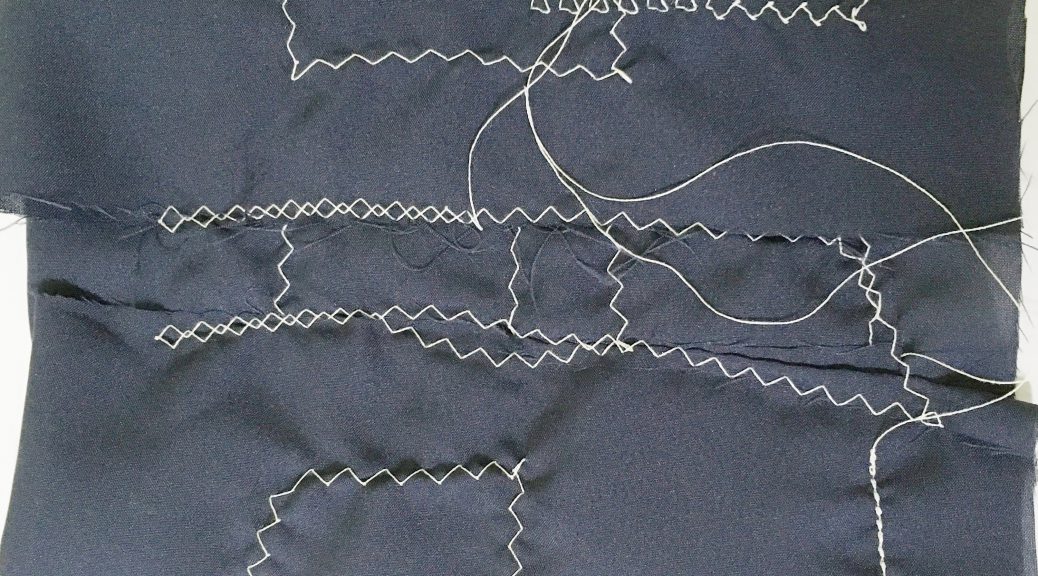
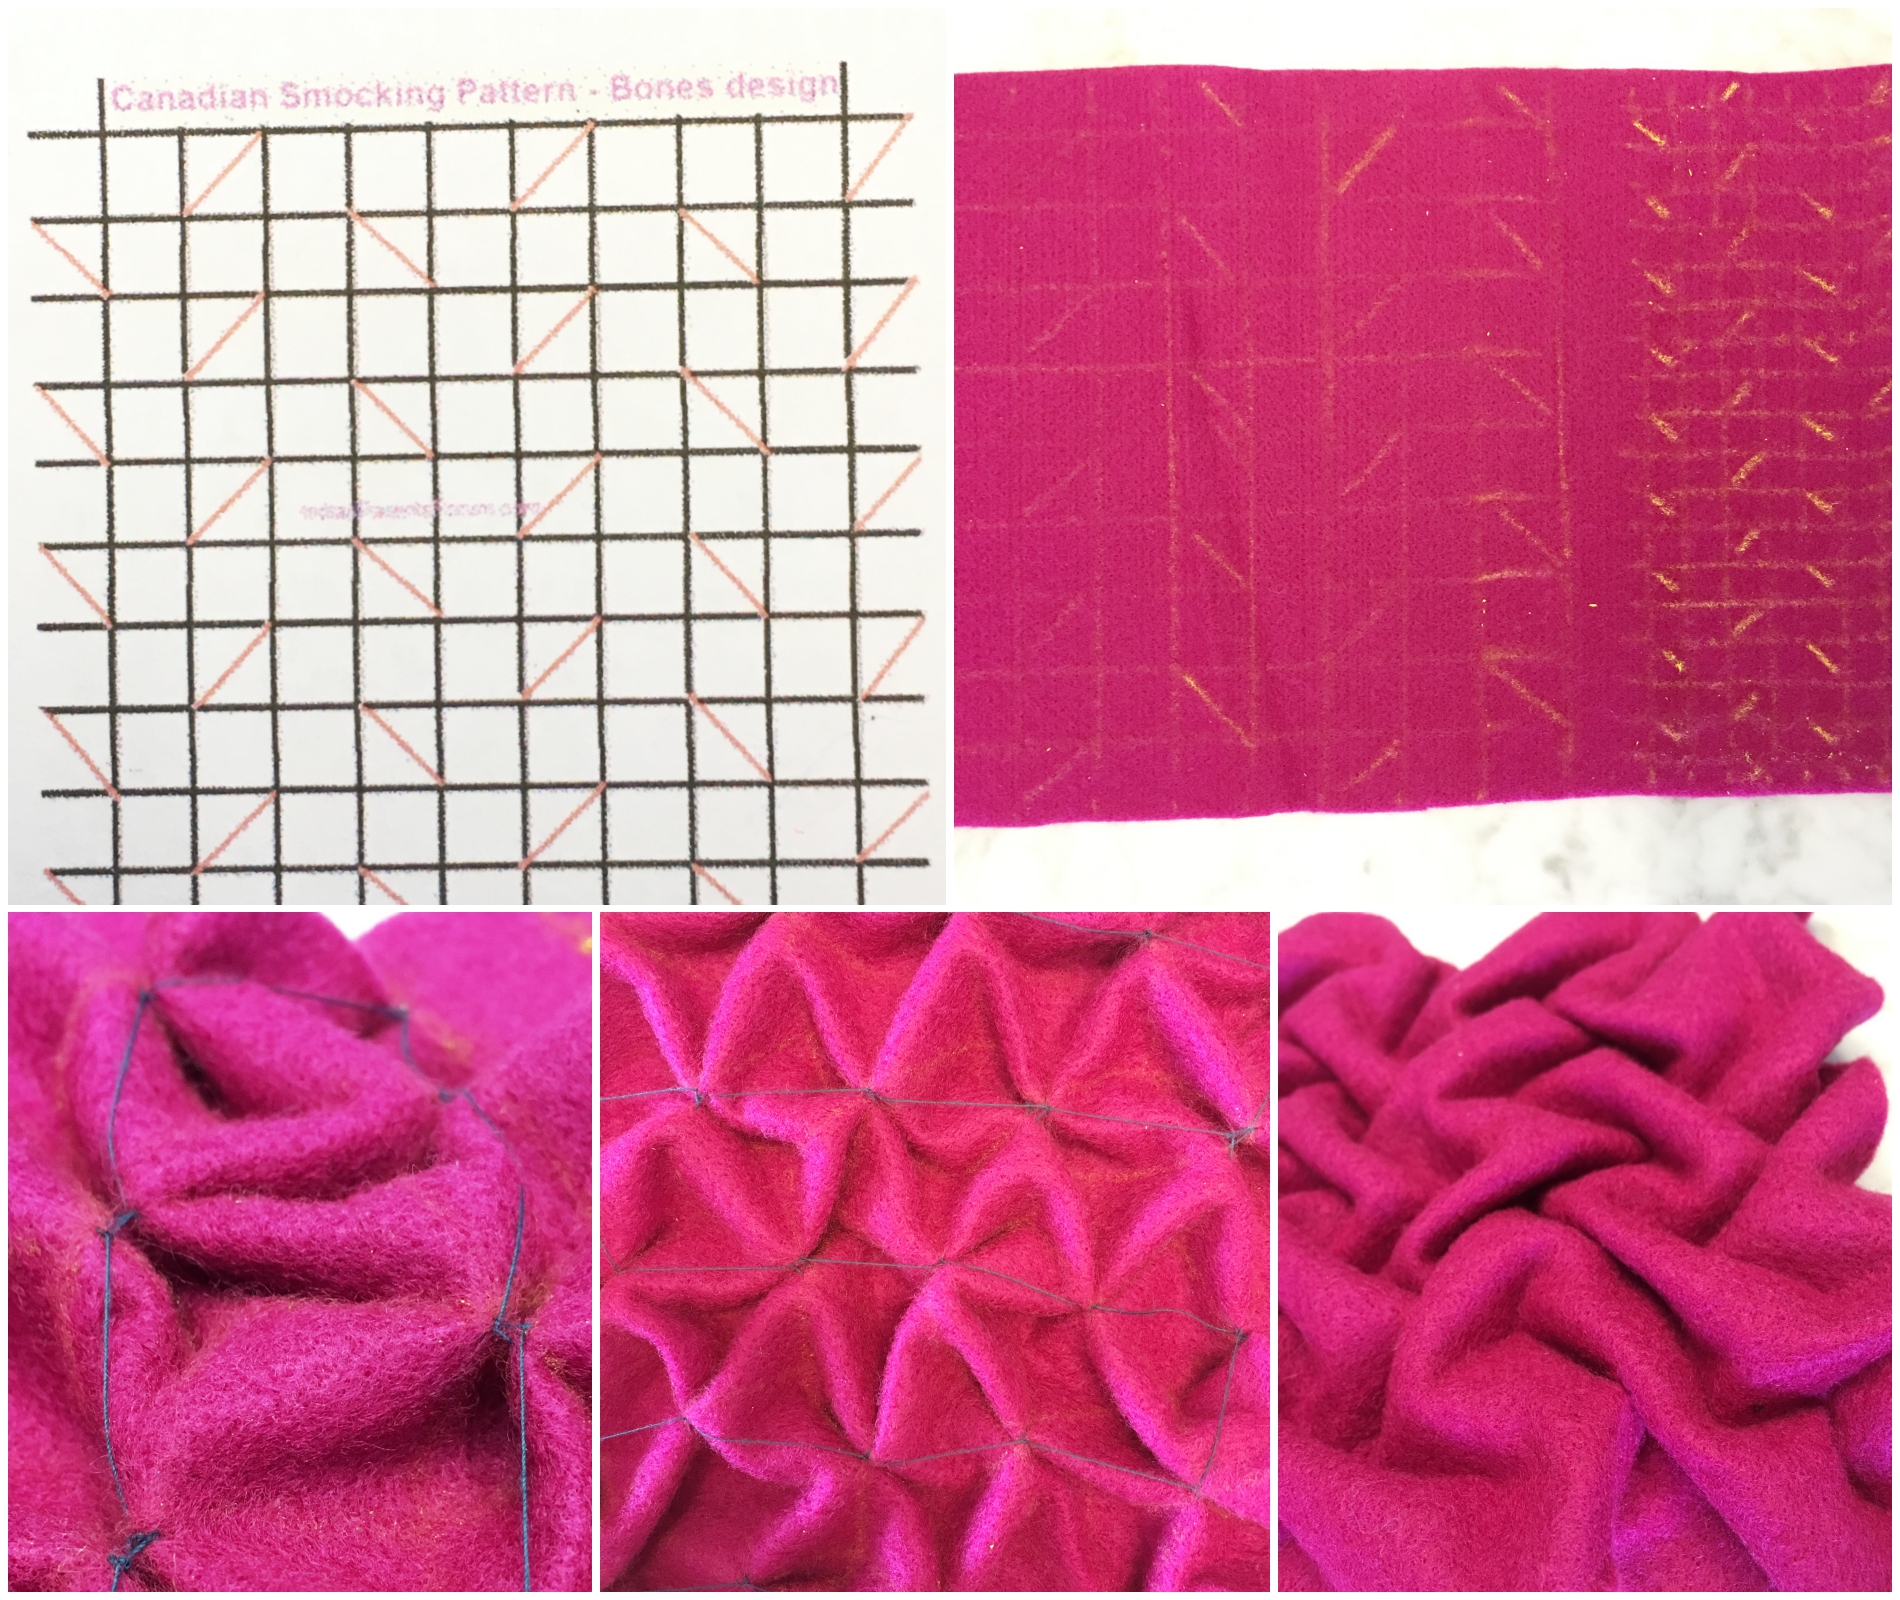
Smocking is an embroidery technique which gathers fabric together into pleats to allow stretching. It is also used to add texture and decoration to the fabric. It was used before elastics were produced.
Materials required:
Needle and thread
Thick or stiff fabric (e.g. felt), striped fabric
Smocking template
Fabric chalk
Technique:
Draw the grid or dots unto the wrong side of the fabric with the fabric chalk
Stitch with the needle and thread according to the guide
Smocking technique 1Back and front surfaces, with gradation in sizesSmocking technique 2Back and front surfaces, with gradation in sizes
Applications include:
Controlling the fullness of fabric (e.g. in garments, curtains, upholstery)
Adding vibrant decorative elements to any fabric
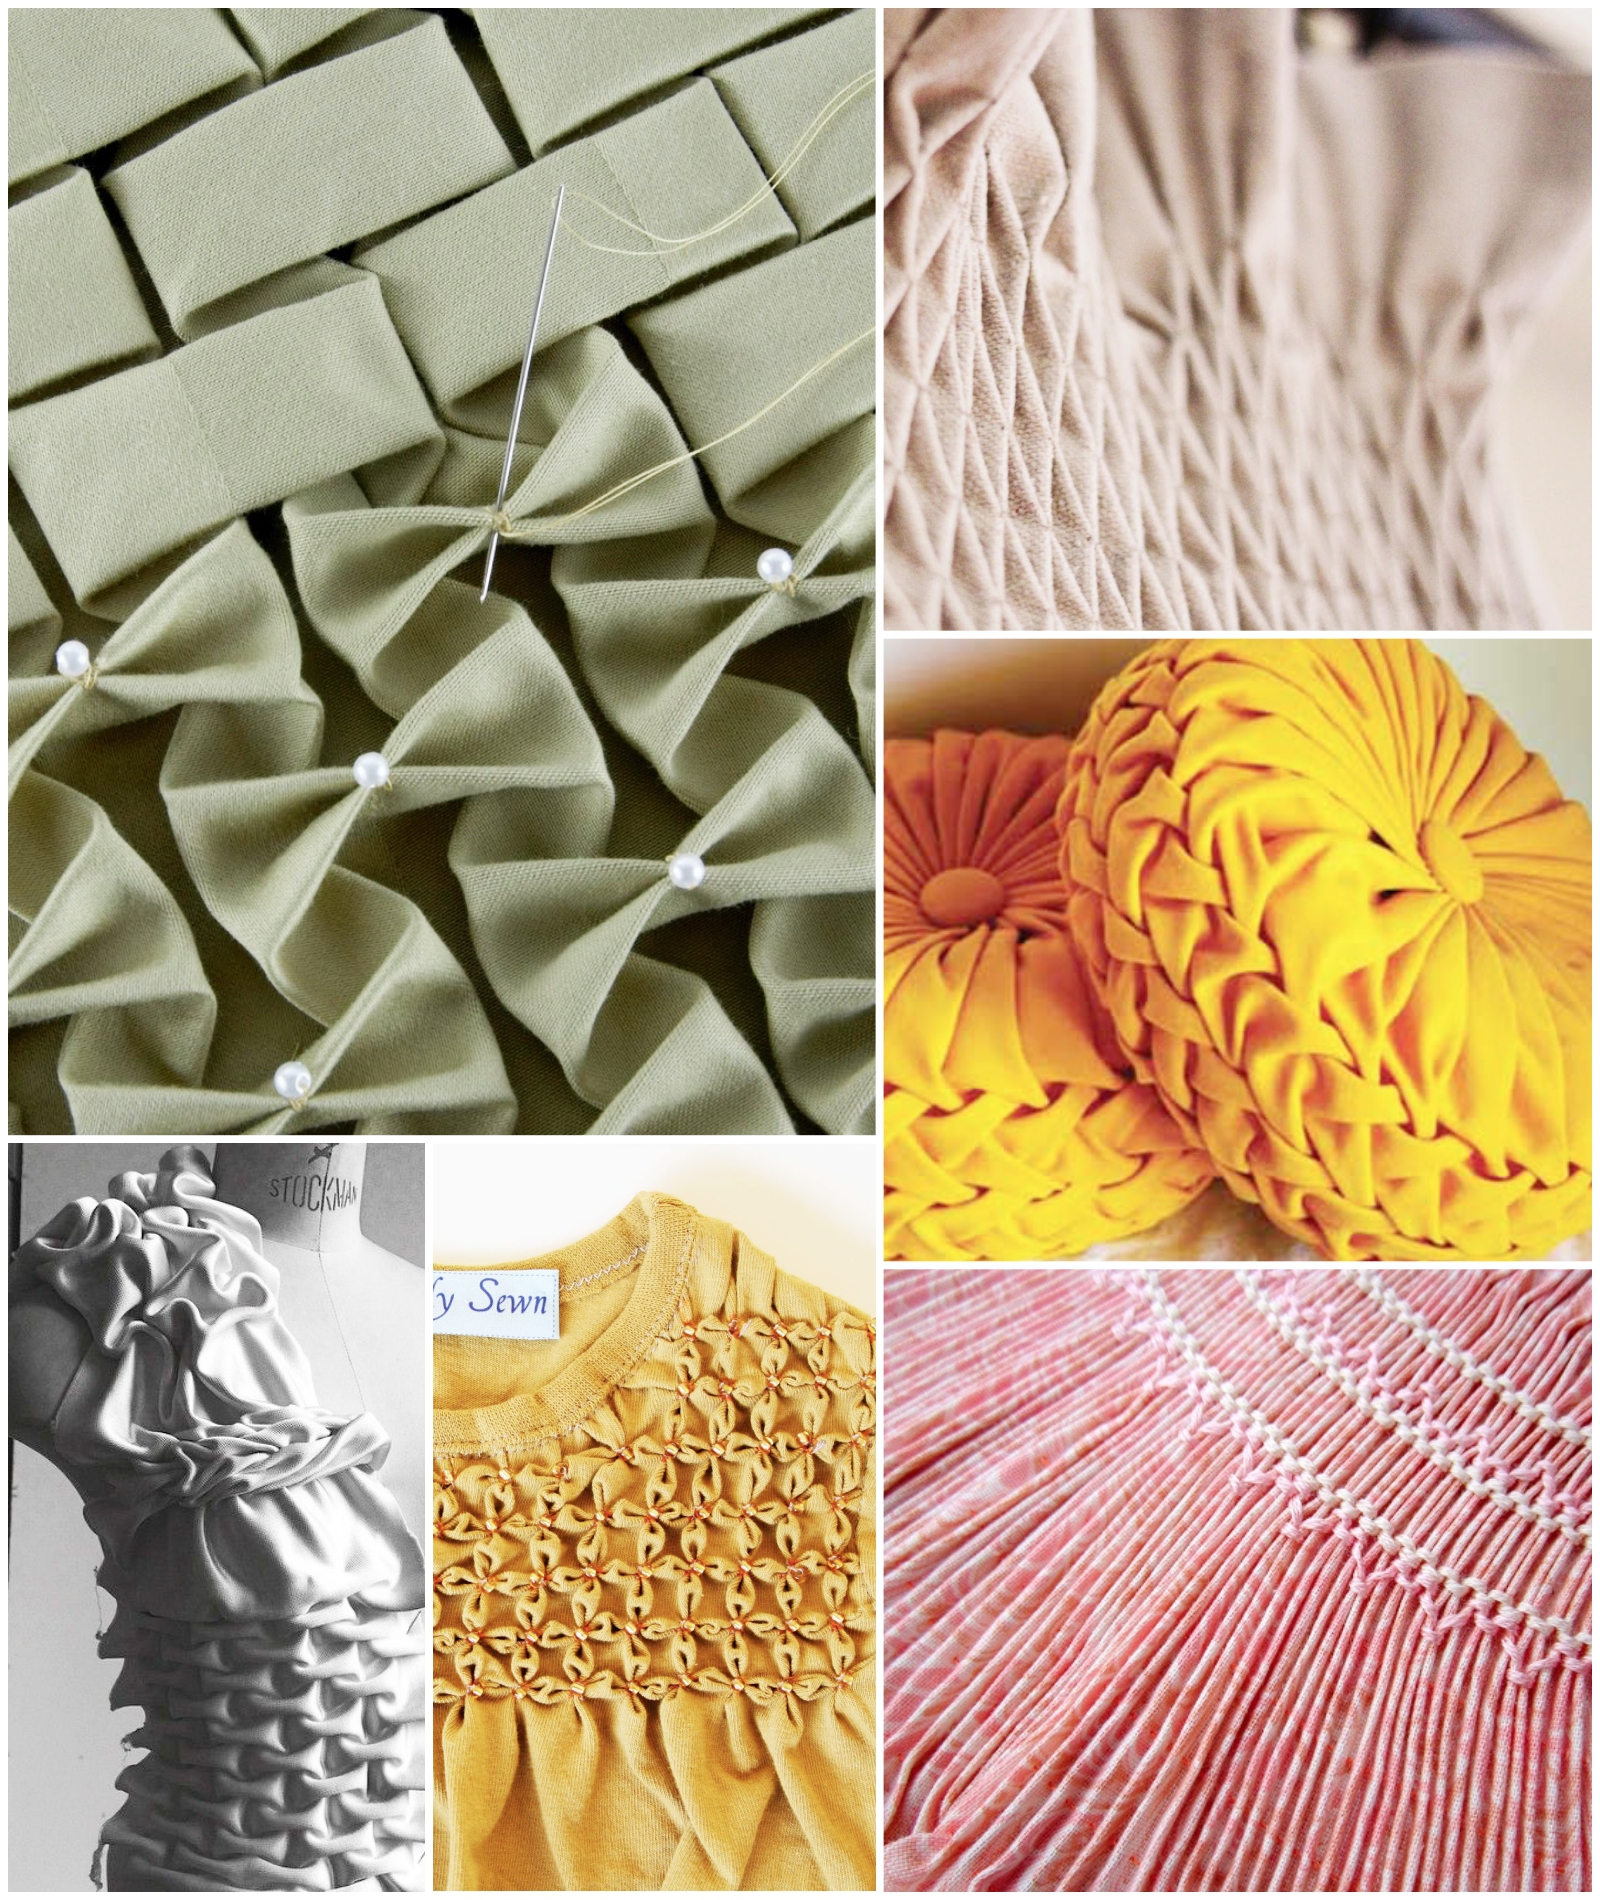
Applications of smocking found on the internet
Personal reflections:
The end products were surprising as the gathering of stitches transformed the qualities of the fabric. The two templates chosen had the same dimensions and directions of stitches that were simply arranged in different configurations. However, the patterns created by the distinct shadows and folds were both unique. The gradation of the grid sizes in the same fabric also yielded more fluidity.
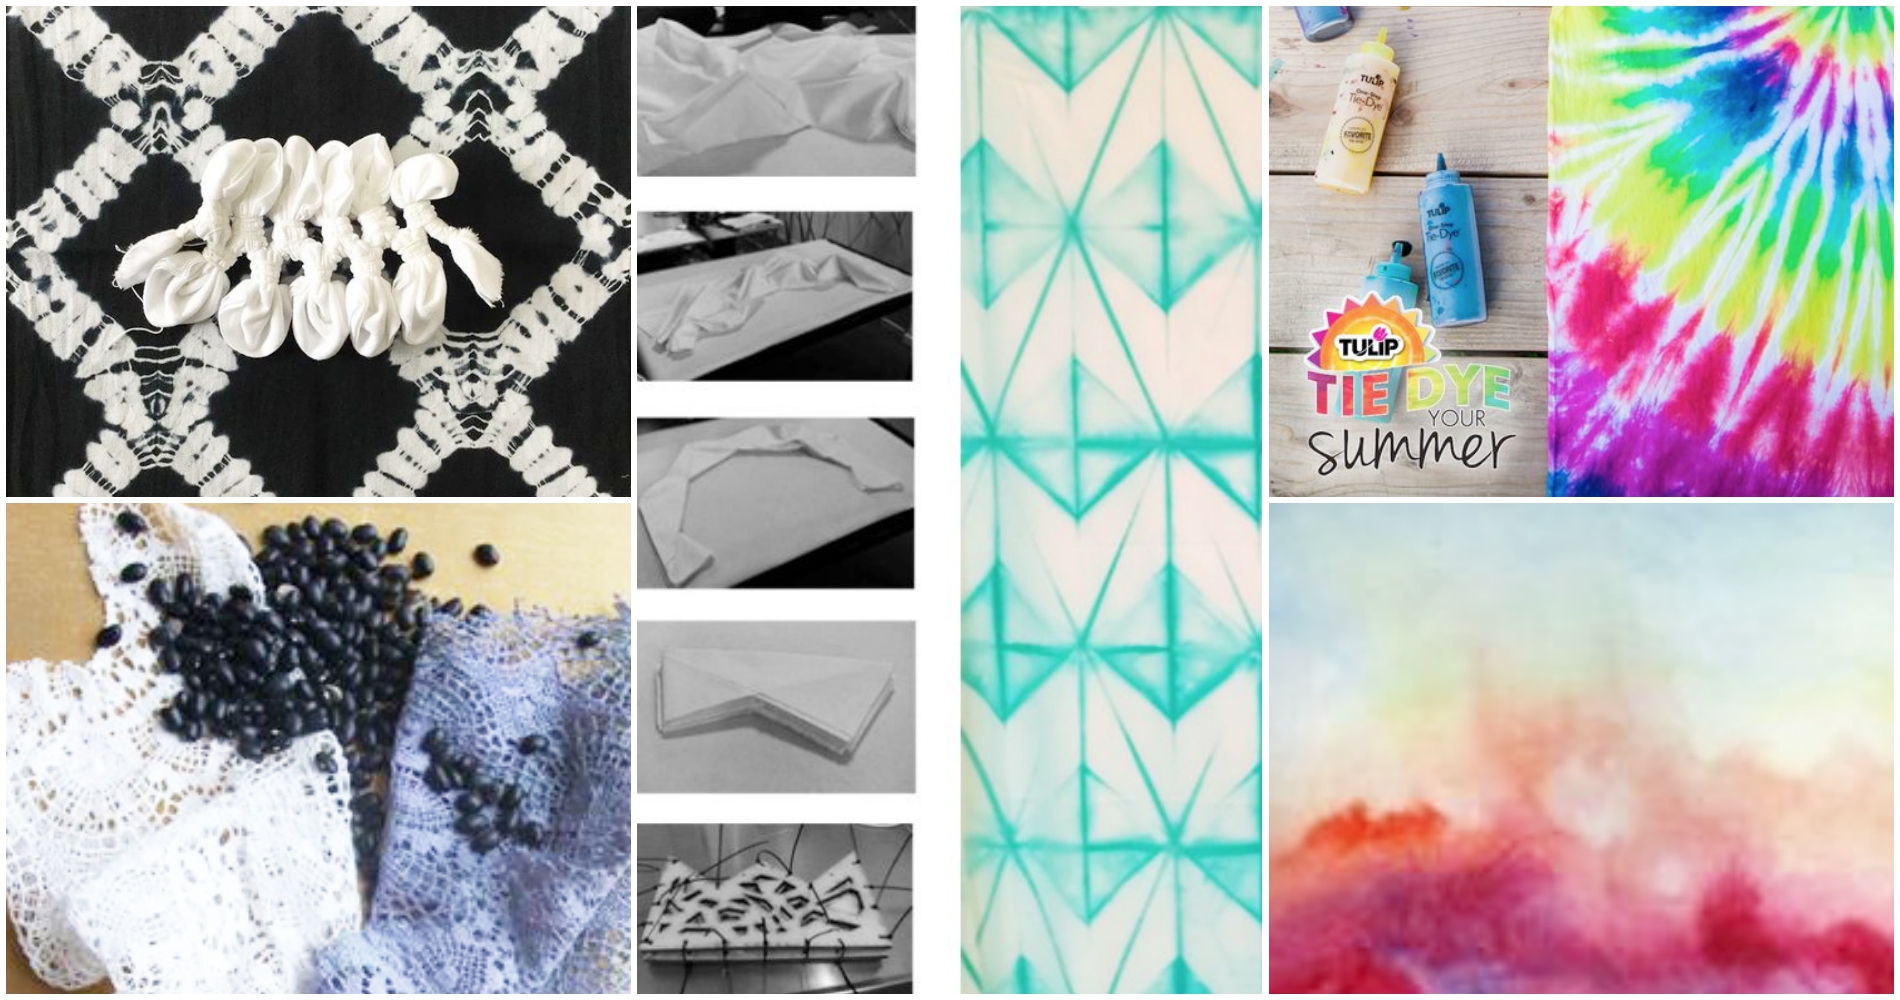
Dyeing is the addition of colour to textiles, and requires natural fibres (e.g. wools, twine, linen, cotton). There are also natural and man-made dyes
Materials required:
Fabric dye (and salt, if required)
Clips, string or rubber bands
Natural fabric
Container (for dye and hot water)
Technique:
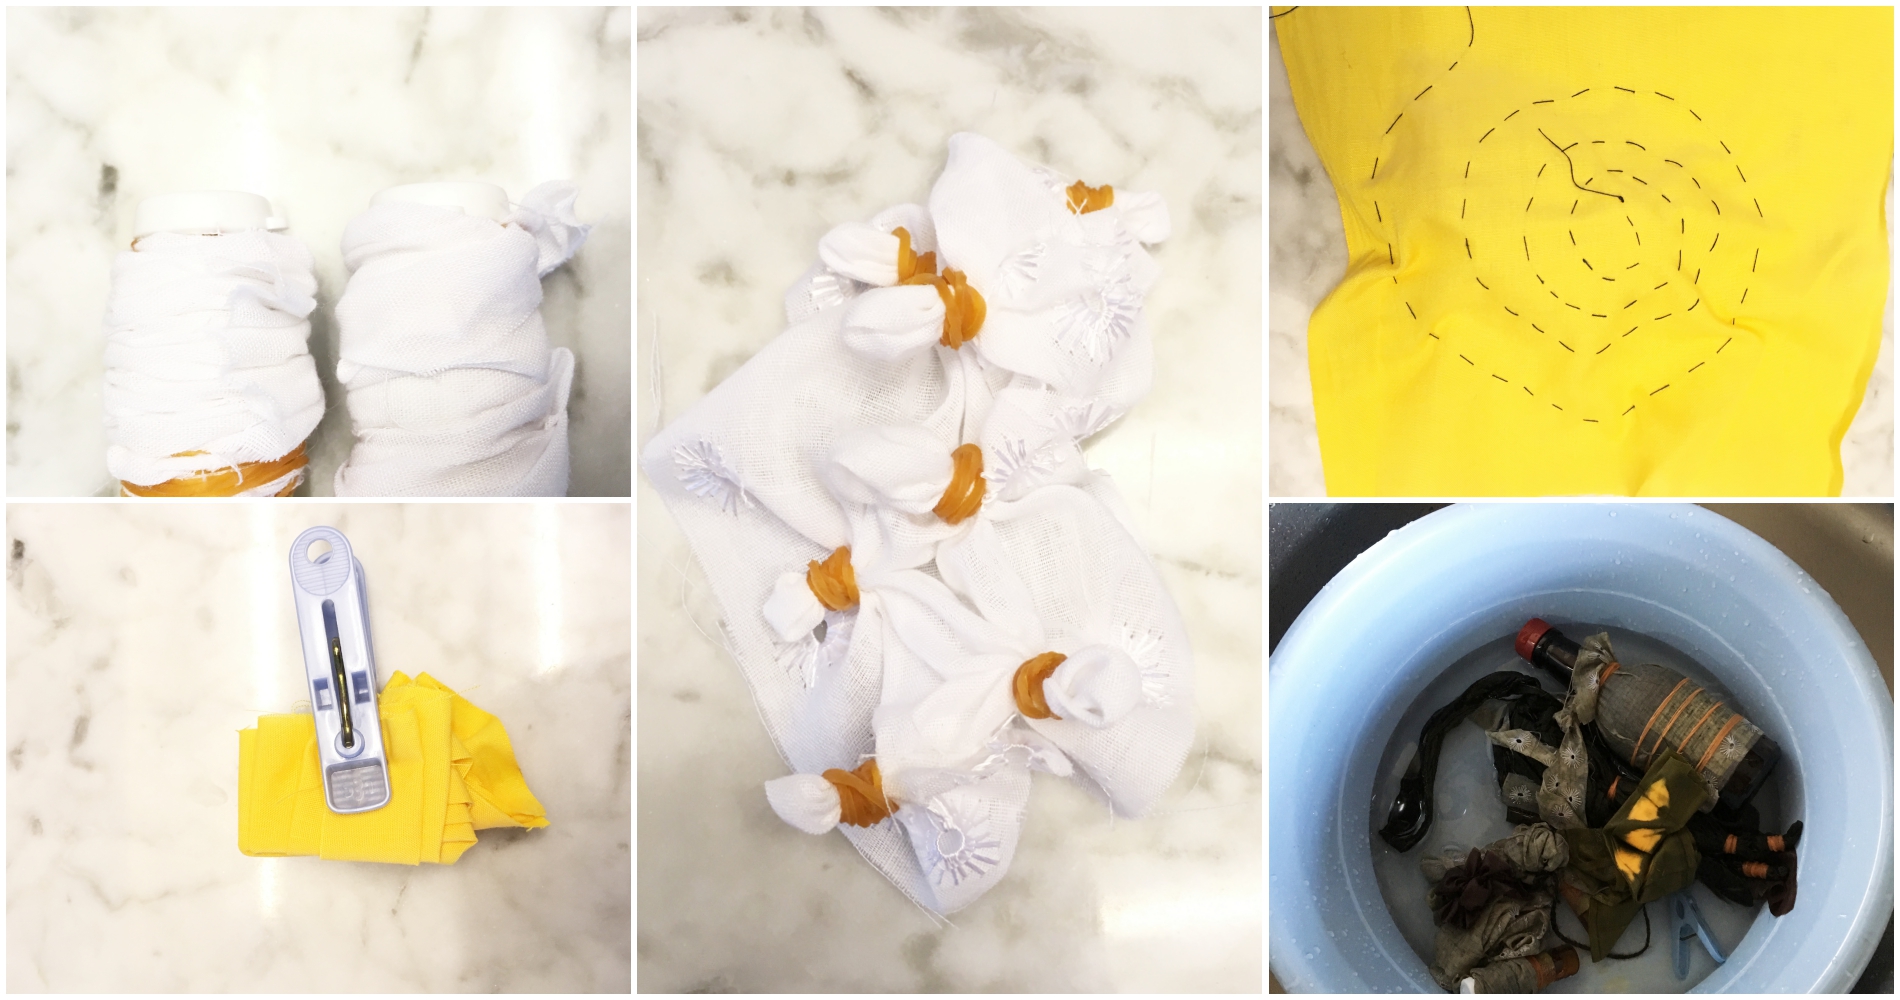
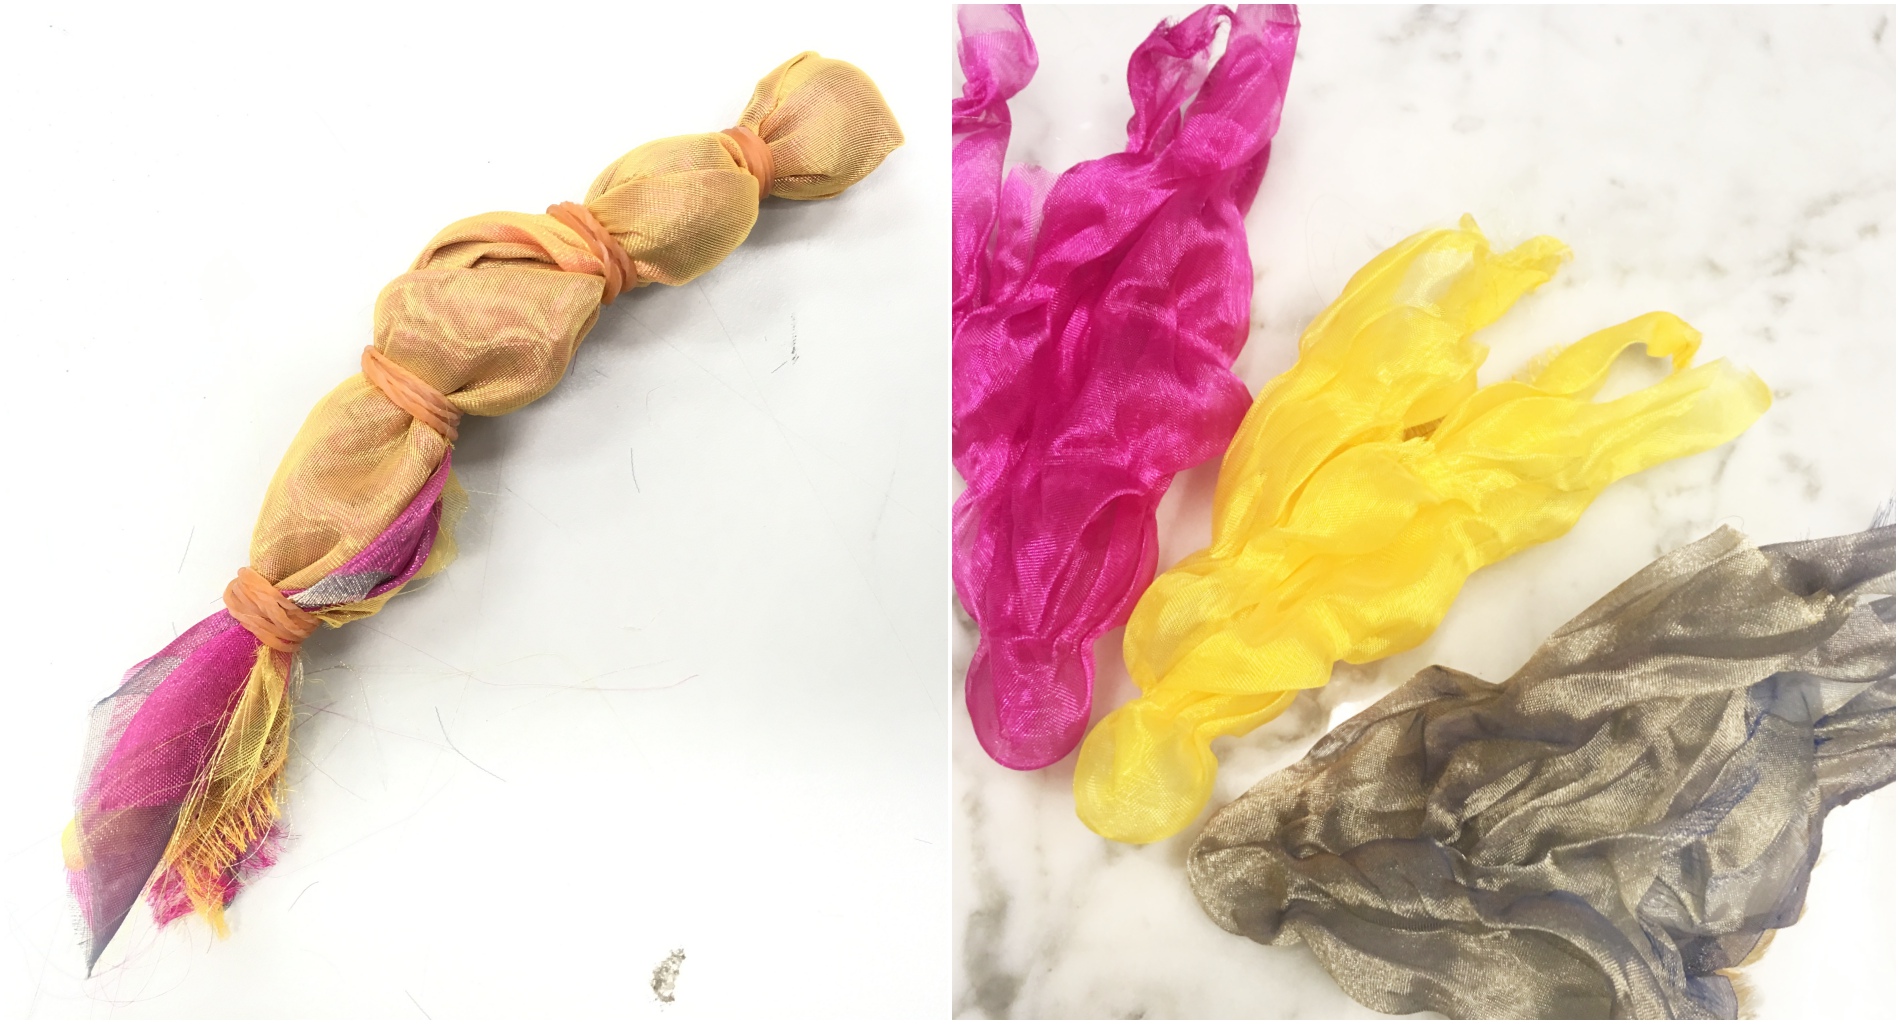
Tie, fold wrap, crumple or stitch the fabric in any manner
Mix the dye in boiling water
Moisten the fabric before immersing in the container
Stir and allow the fabric soak in the dye solution for at least 20 minutes (depending on the dye purchased)
Remove the fabric and wash with cool water
Air dry
Dyeing process: tying/clipping/wrapping, soaking in dye solutionDyeing results
Applications include:
Adding decorative elements to shirts, scarfs, bags, etc
Adding colour to light coloured objects like strings
Fabric dyeing applications from Pinterest
Personal reflections:
The usage of just one colour can result in mesmerising organic patterns. Multi -coloured patterns could be explored! Also, we could consider making dyes from natural sources like fruits. It was observed that the polyester blend also took on the creases made by the during the dyeing process.
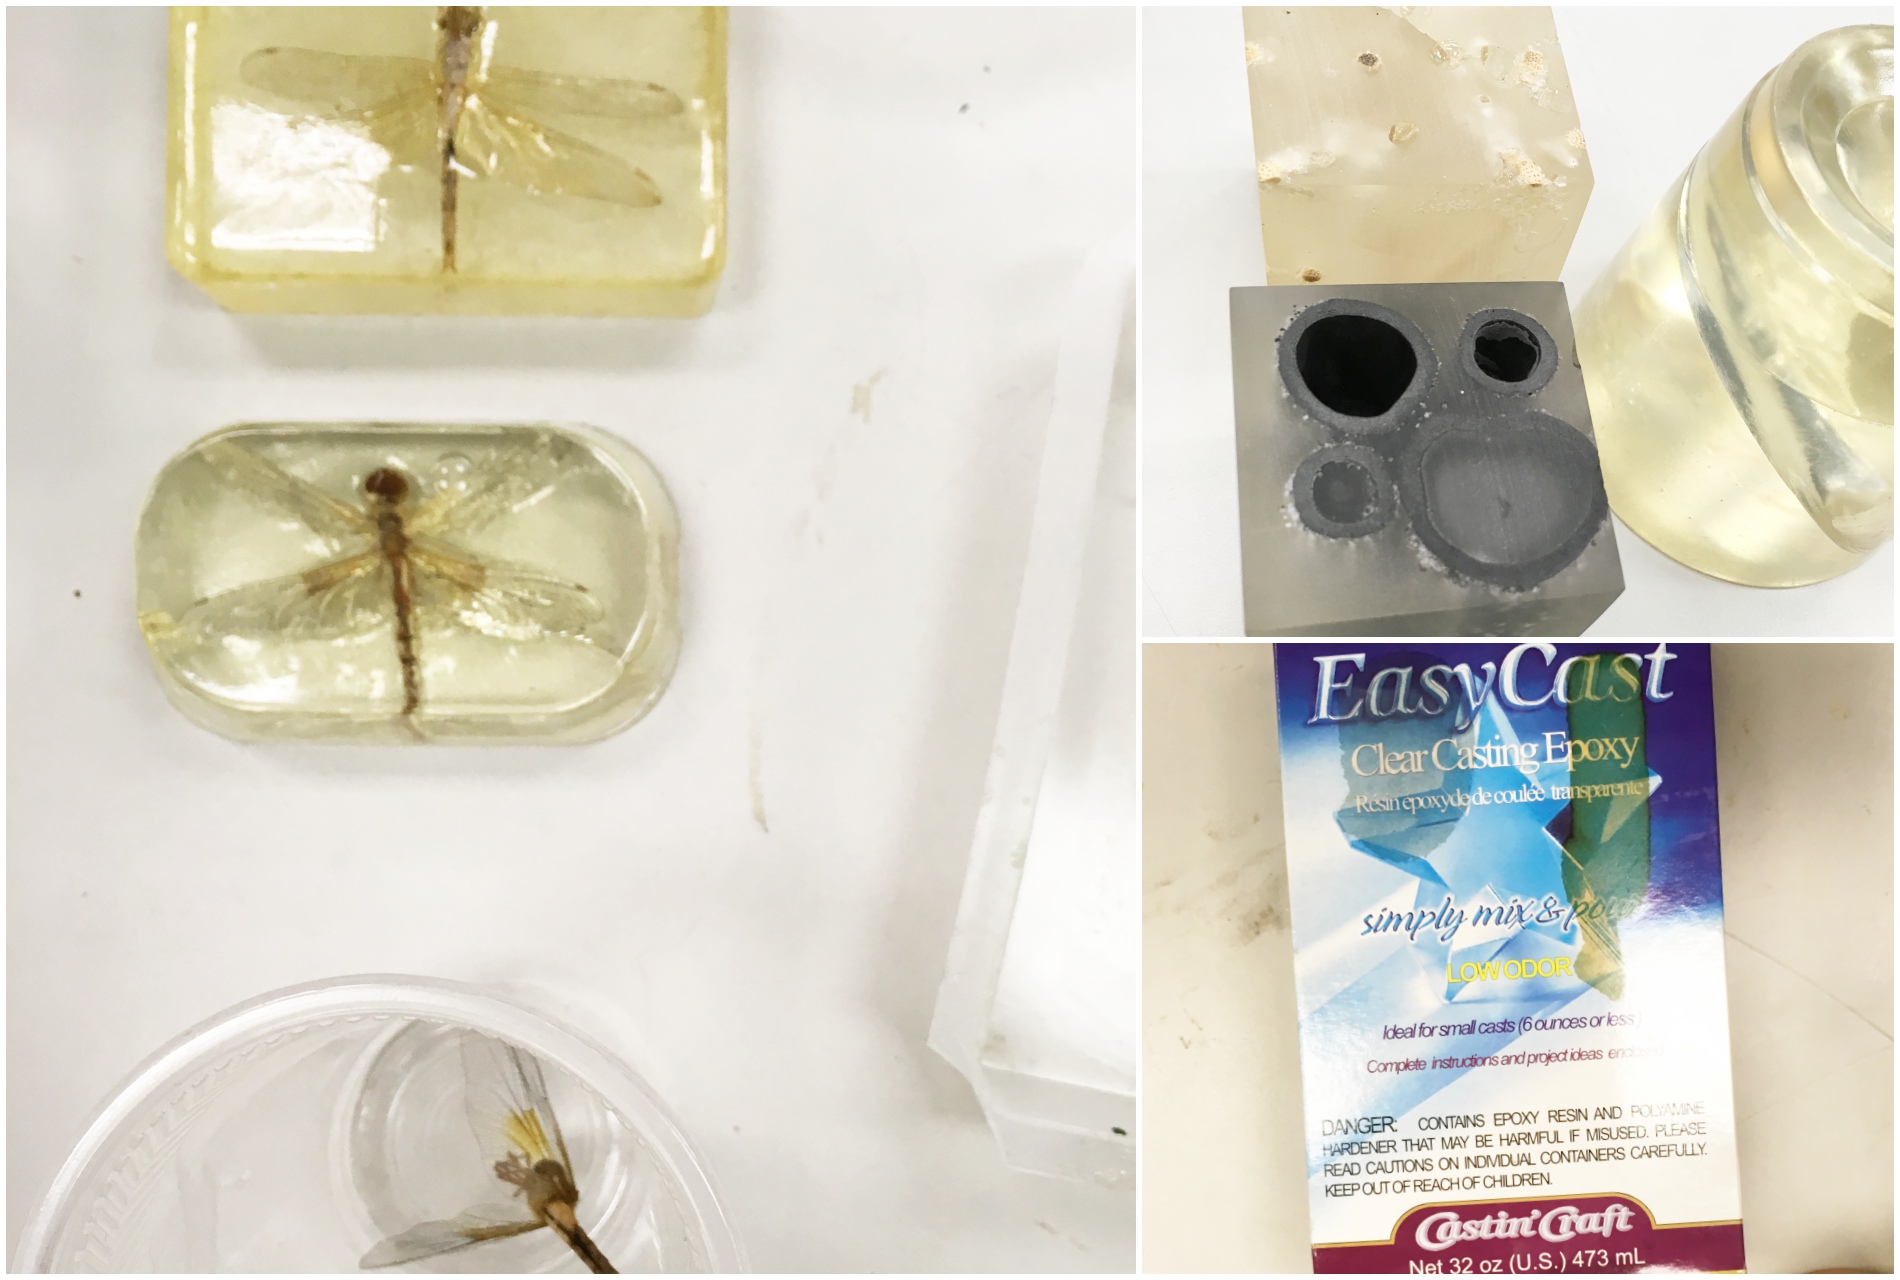
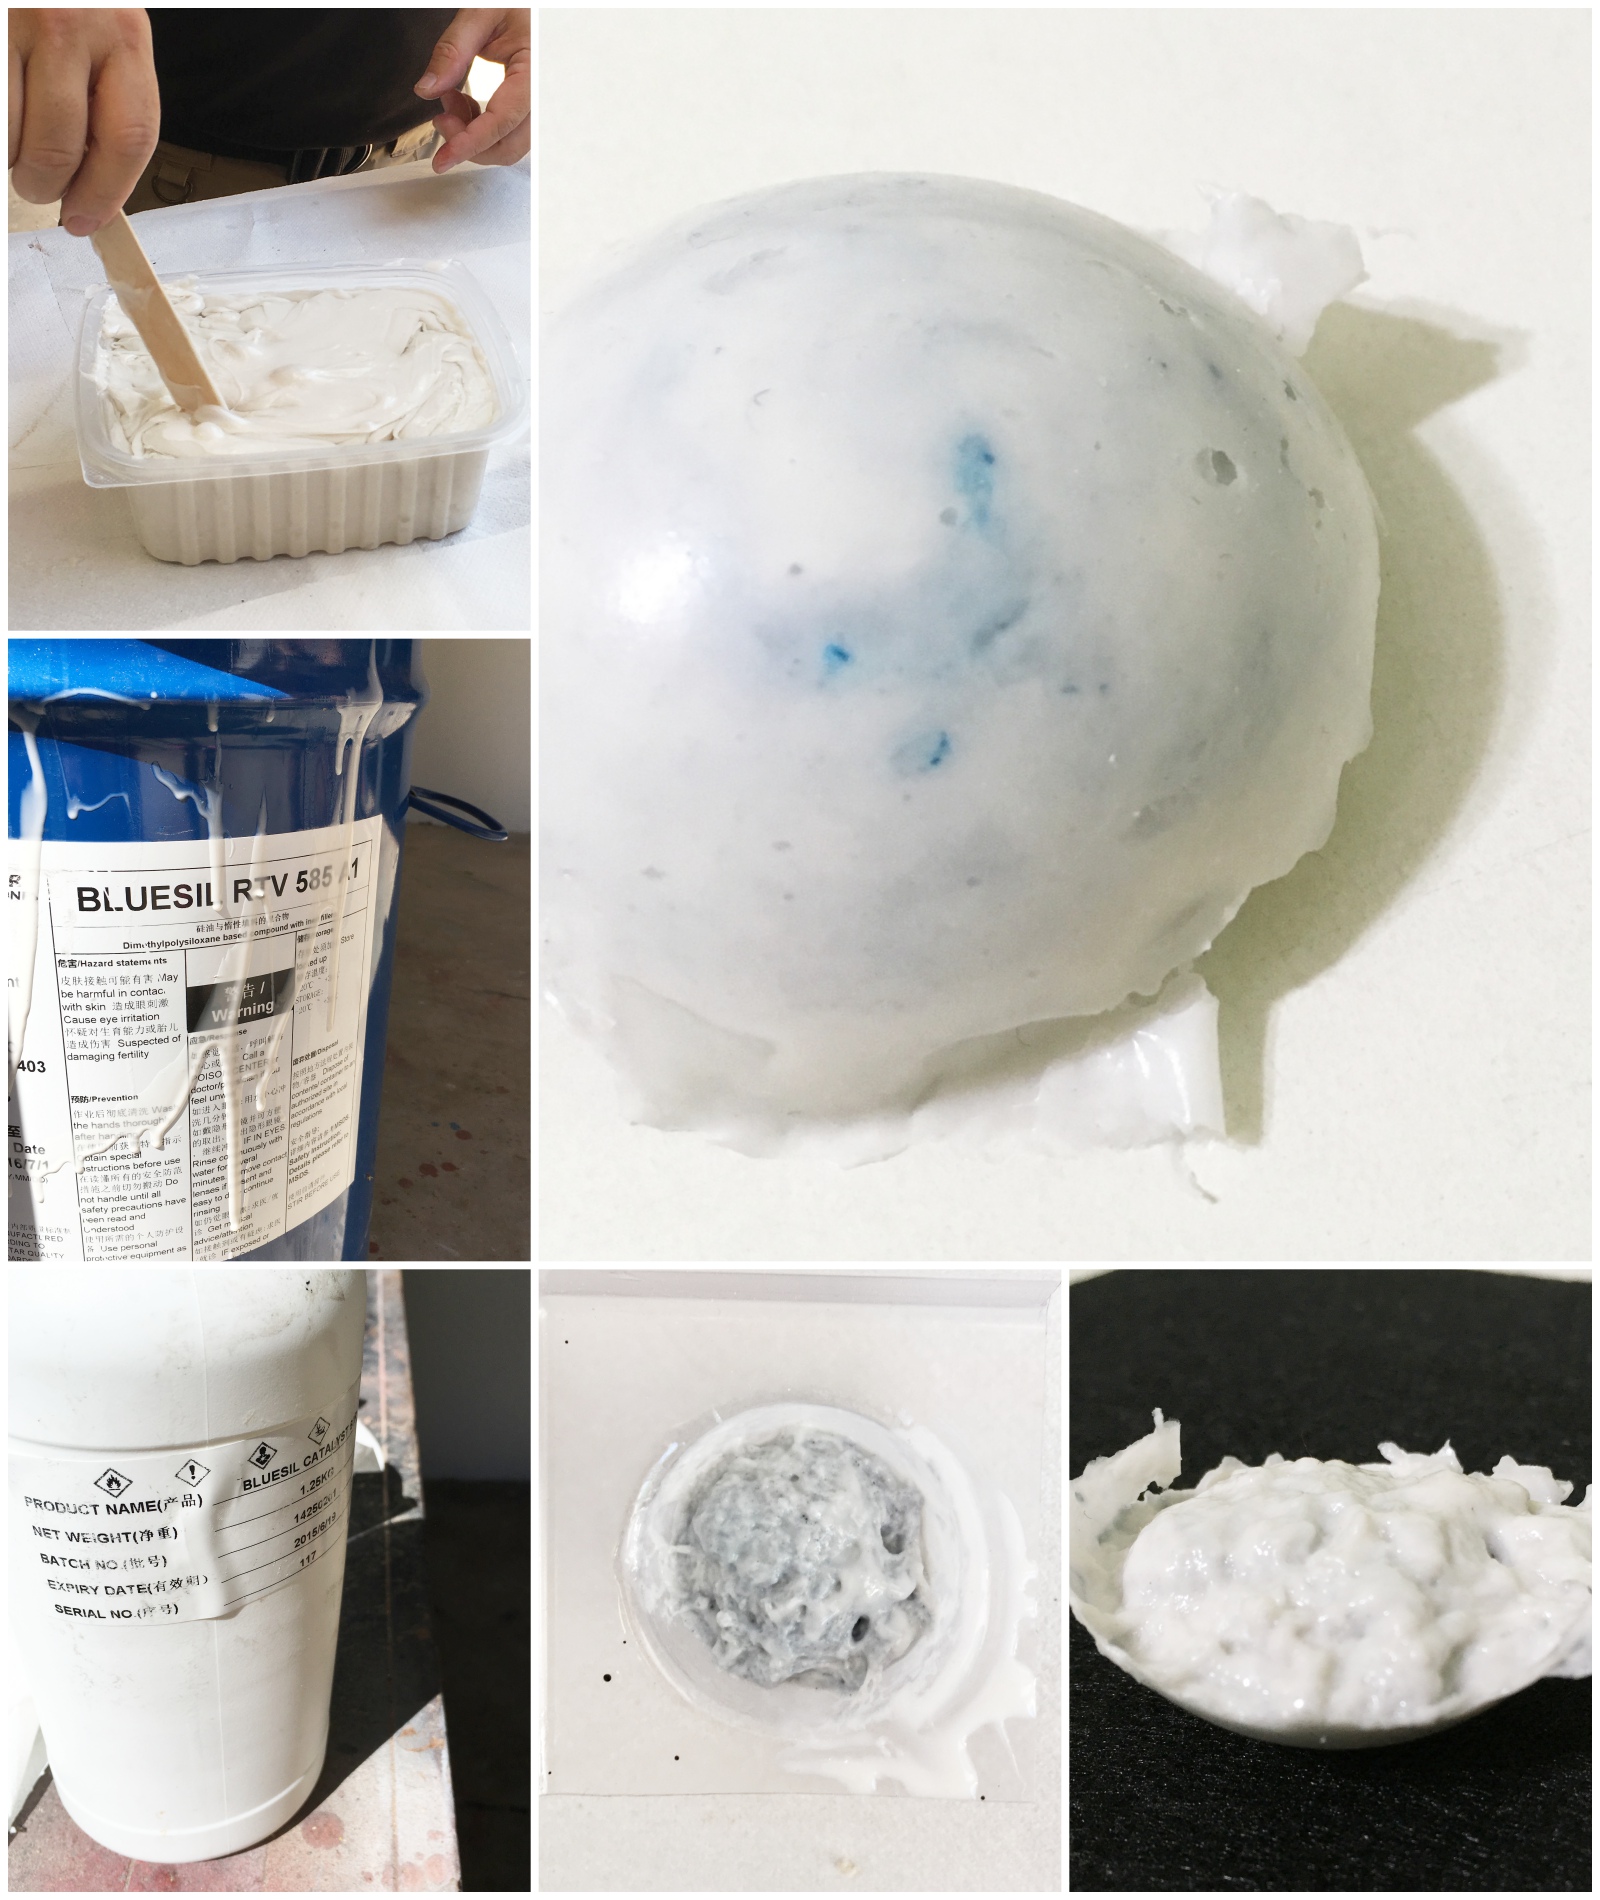
There are three main types of resin casting (Information from Environ Molds) :
Polyester– commonly used in moulded reinforced fibre and composite products. It is a viscous liquid that requires catalysts to complete the curing process. It is considered unsafe due to the harmful fumes released (need well-ventilated areas and masks). It will also yellow over time when exposed to UV.
Epoxy– more expensive but clearer. It takes several hours to days for complete curing.
Polyuerethane– sets faster at around five to twenty minutes, and is less odorous.
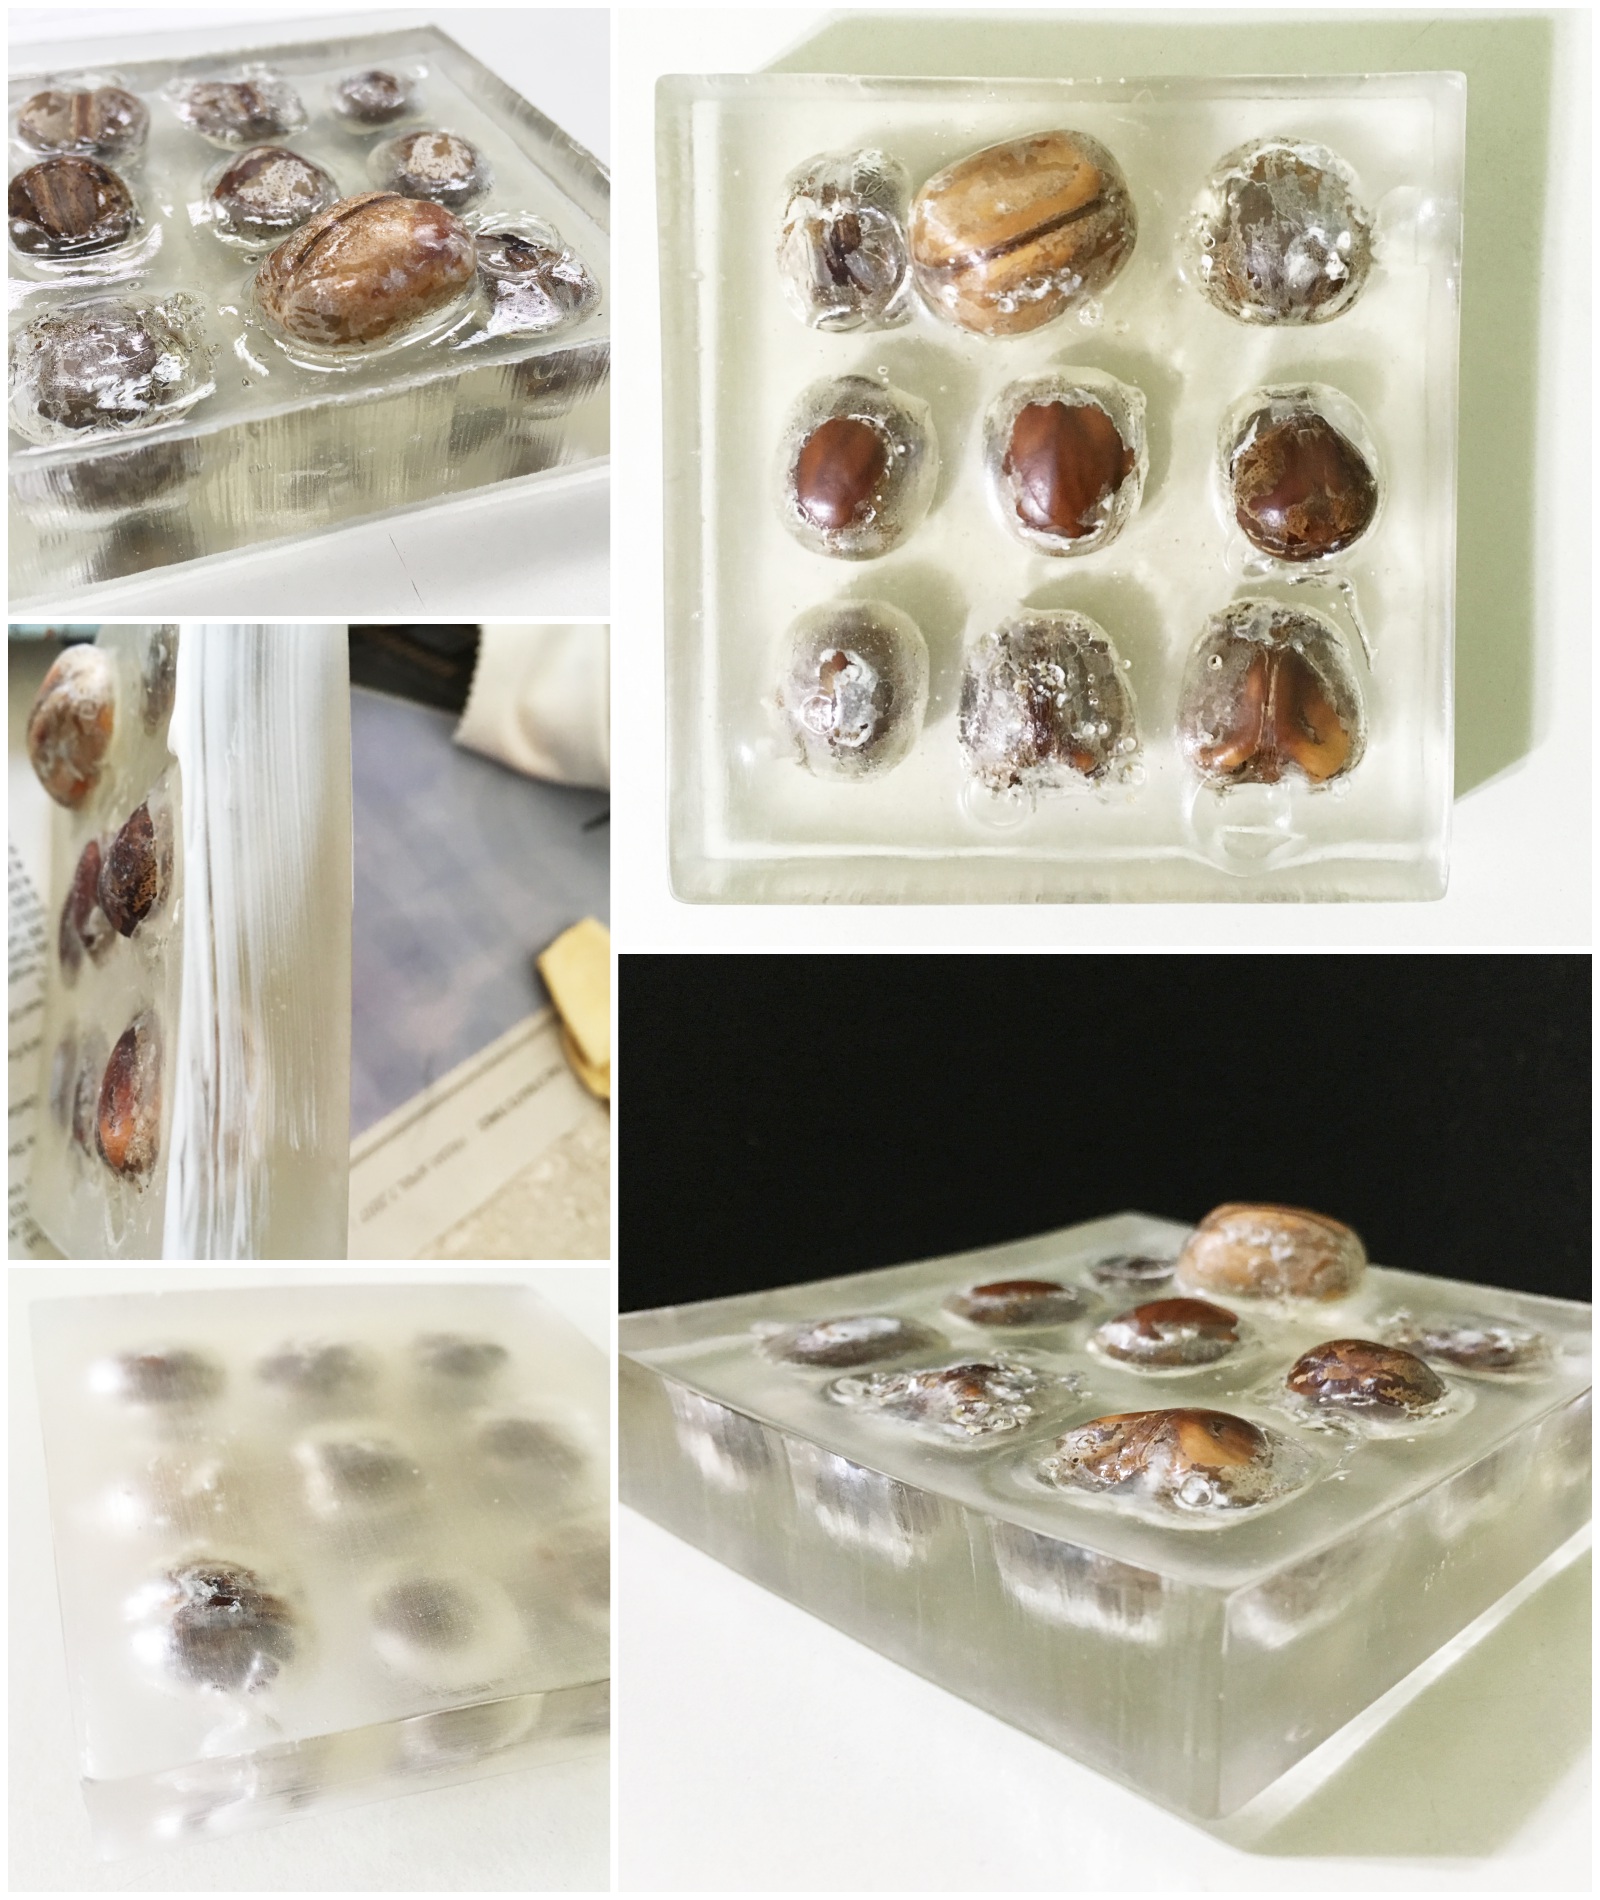
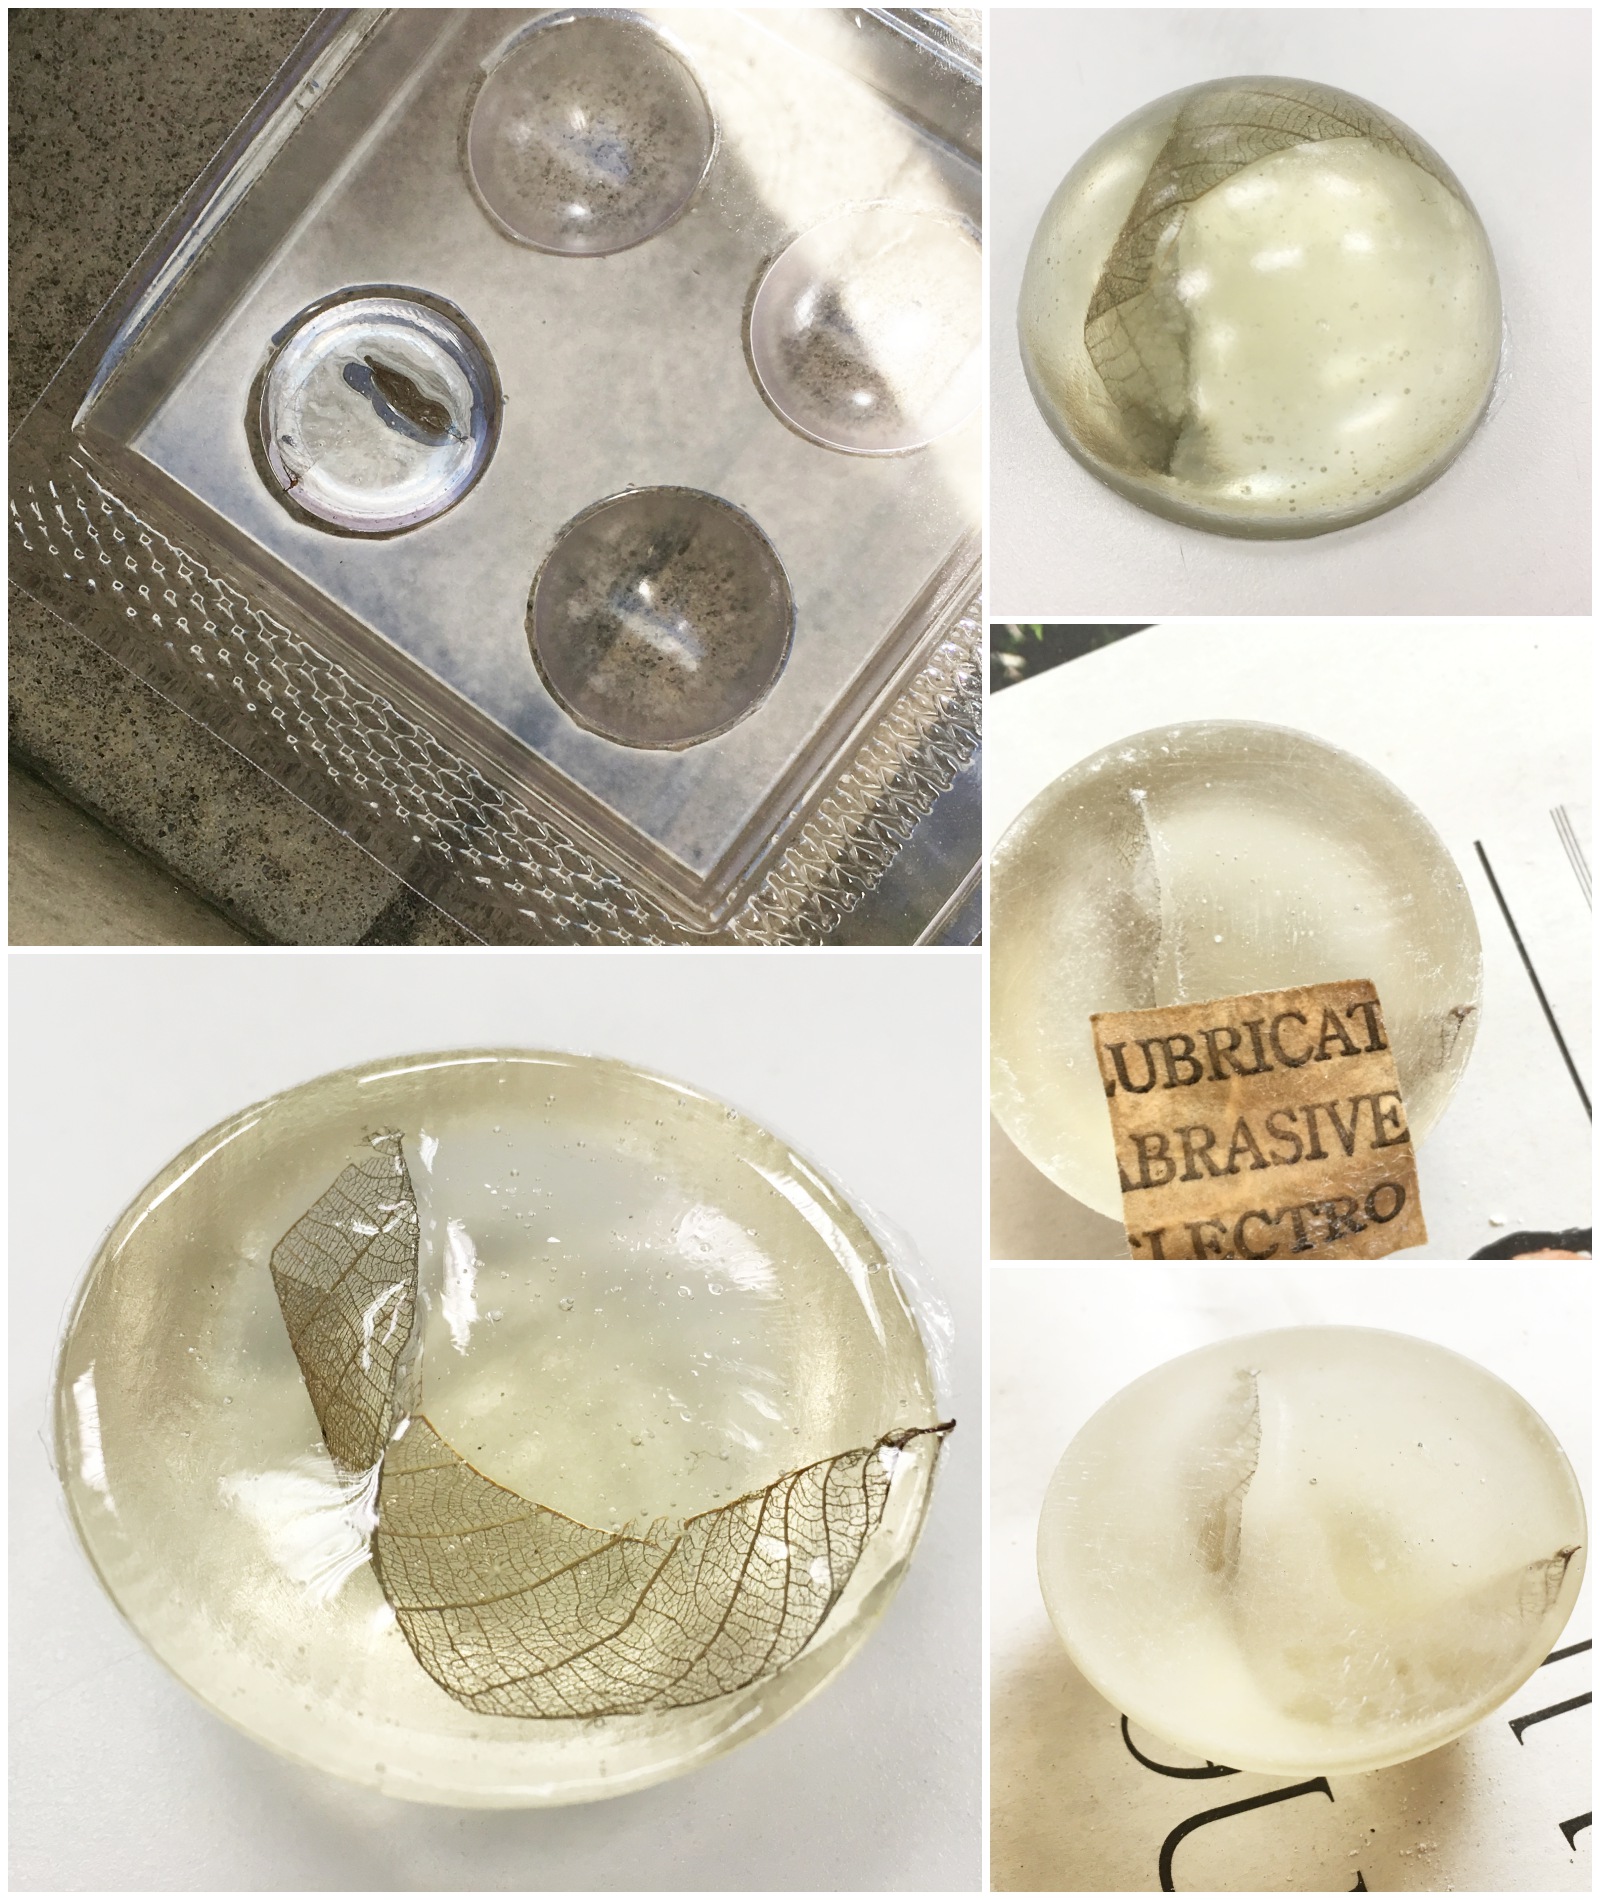
Samples seen in class
Materials required:
Mould (no bigger than 12 by 8 cm)
Liquid resin
Resin spray
Things to encapsulate (leaves, wood, fabric, etc)
Technique:
Dust the container
Spray the mould with resin spray
Arrange the object in the mould (unless the object is to be placed midway in the resin)
Pour out the resin into a large container and weigh it
Add in the hardener (3% of the weight of the resin)
Stir well and pour the mixture into the mould with the object
Remove bubbles by poking with a pin
Allow the resin to dry
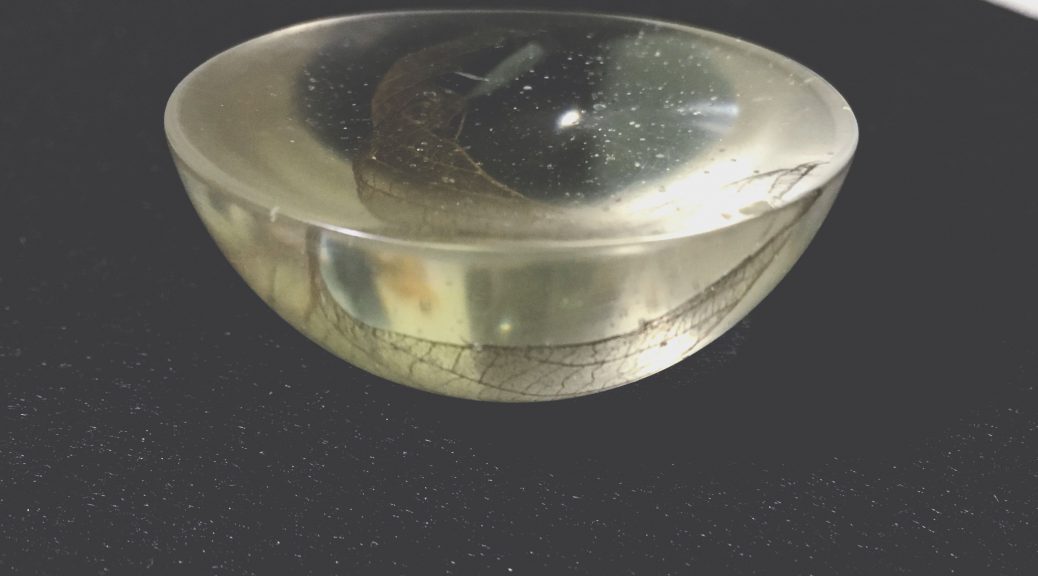
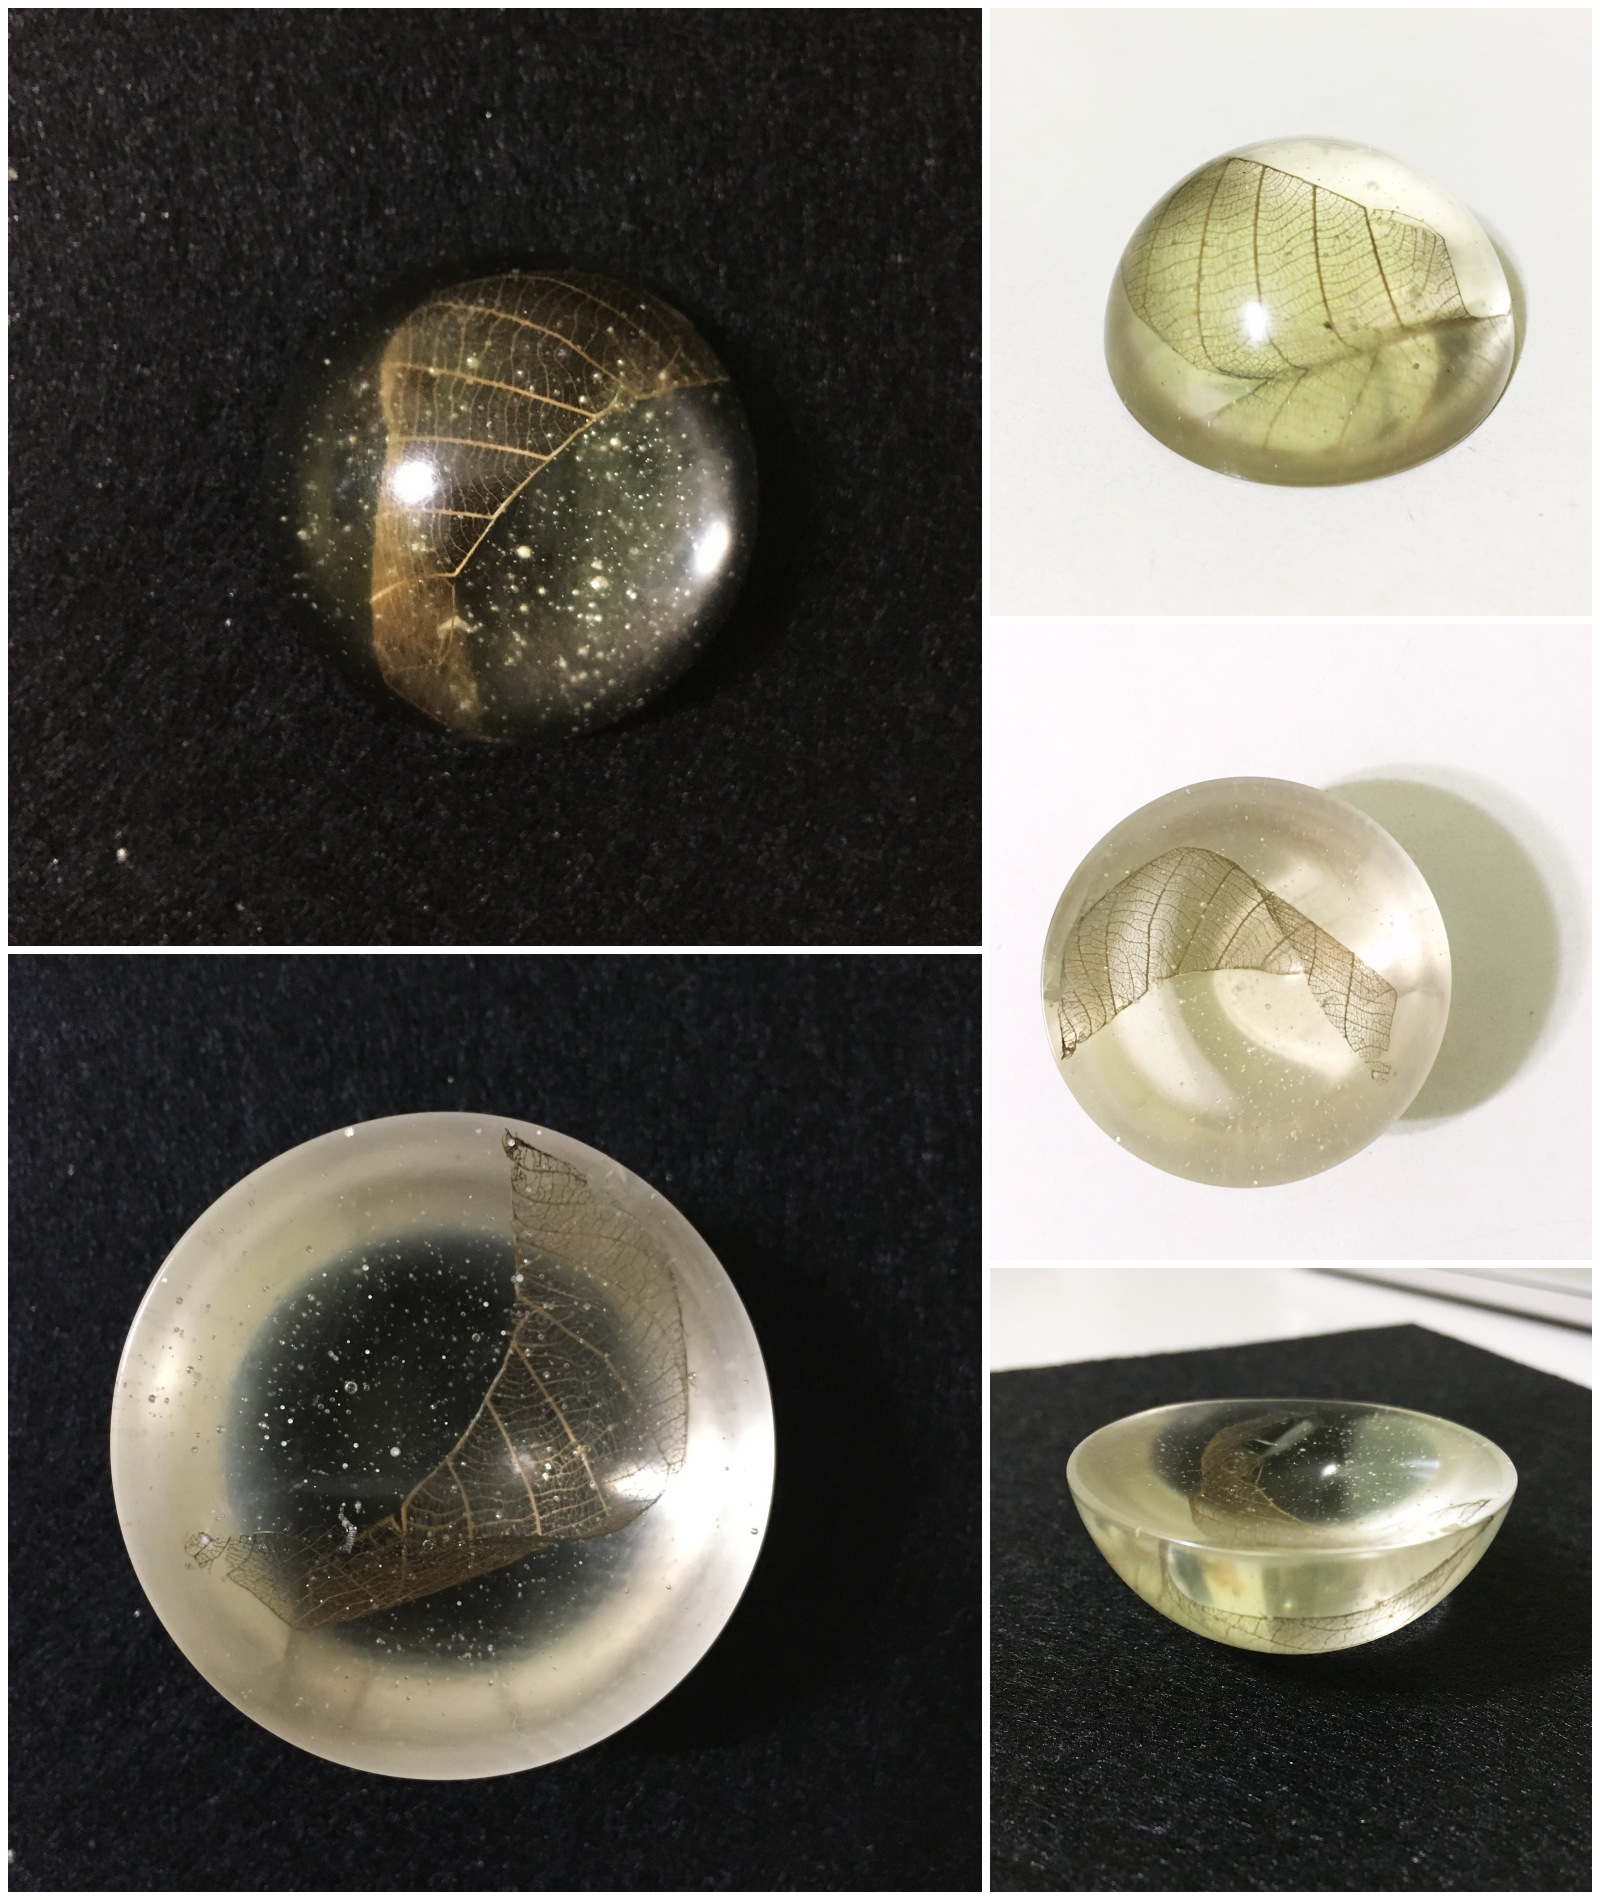
Resin-making process (Rubber seeds)Resin-making process (Sanding and attempt at polishing)Resin-making process (Leaf vein)Finished outcome (Leaf vein)
Decided to try sand off any excess or sharp edges (followed by buffing with toothpaste as suggested by the internet, and then applying wax to polish the surface)
(however, it was not as shiny and transparent as it could be)
Plastic polishing website
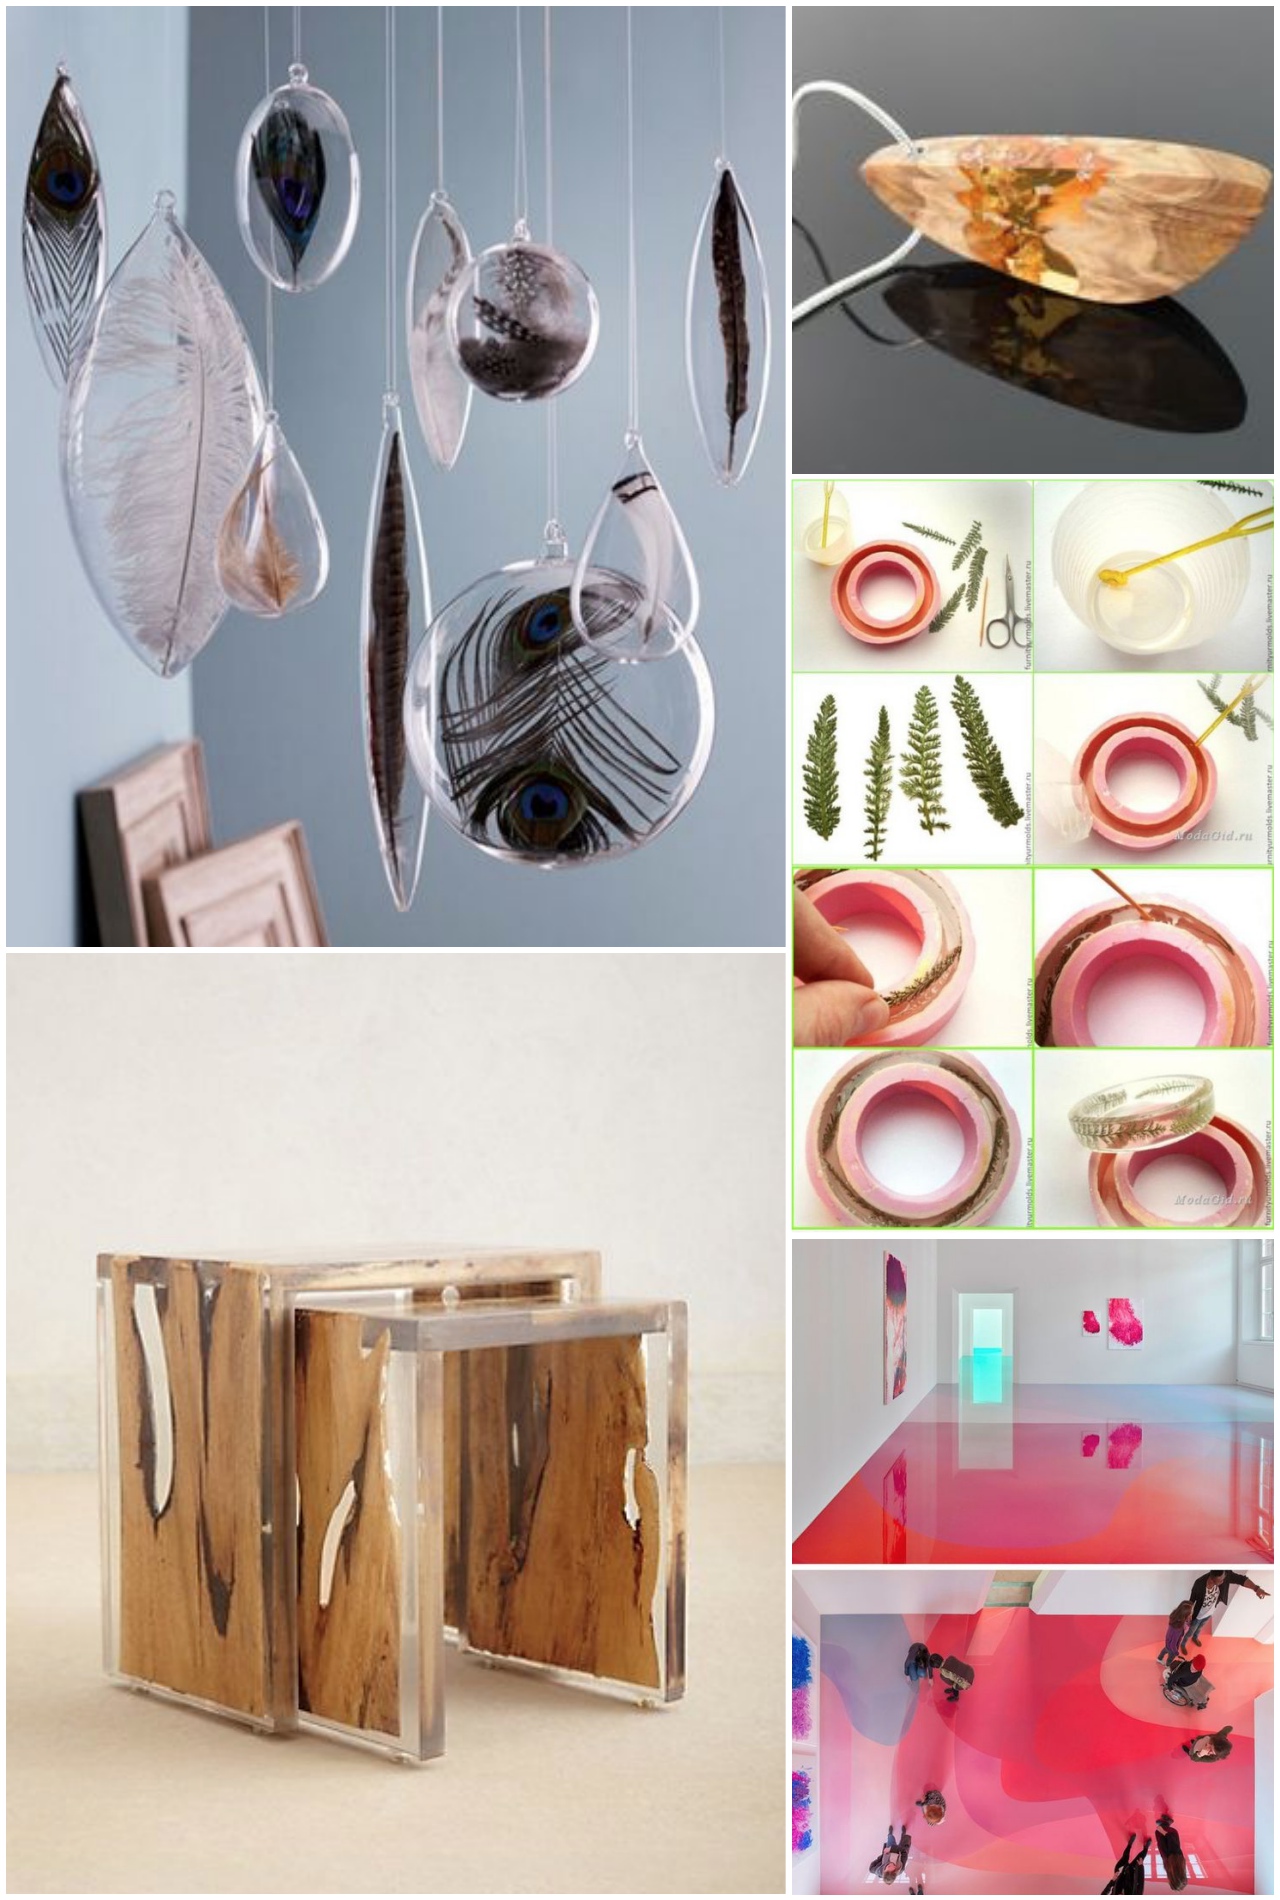
Applications include:
The very small (jewellery) and the large (floors and walls)
Display of specimens
Objects that utilises its qualities (transparent, high density, strong)
Images sourced from Pinterest
Personal reflections:
The transparency and the density of the resin causes refraction of light, enlarging the encapsulated object, manipulating the image of the background as well as cast shadows. These optical effects are particularly apparent while photographing the finished resin. The unique, three-dimensional frame around the chosen articles somehow creates a sense of stillness. I love such accidental discoveries!
Latex
Latex is a natural ingredient from rubber trees and they become sticky when drying. It solidifies and shrinks slightly into a rubbery material. It can be used as an adhesive as well. (information from Wikipedia)
Samples seen in class
Materials required:
Mould
Liquid latex
Colours (food dye or acrylic paint)
Technique:
Pour out the latex into a large container and weigh it
Add in the hardener (3% of the weight of the latex)
Stir well and pour the mixture into the mould
Add in desired colours and stir
Allow the latex to dry
Latex making process
Applications include:
Props, masks, balloons
Mats and wall coverings
Lamps and other objects that can utilises its qualities (flexible, water proof, translucent, absorbent, soft)
Images sourced from Pinterest
Personal reflections:
This seemed rather tough to handle as the latex hardened faster than we could manage. Although the resulting form was messy, the introduction to latex was fun and invokes that sense of childhood (those strange rubbery toys we had?). Upon reading more about the applications of latex, I realised that it was intended for industrial purposes rather than art. It is inspiring how putting a creative spin on a material can inject new life into it.
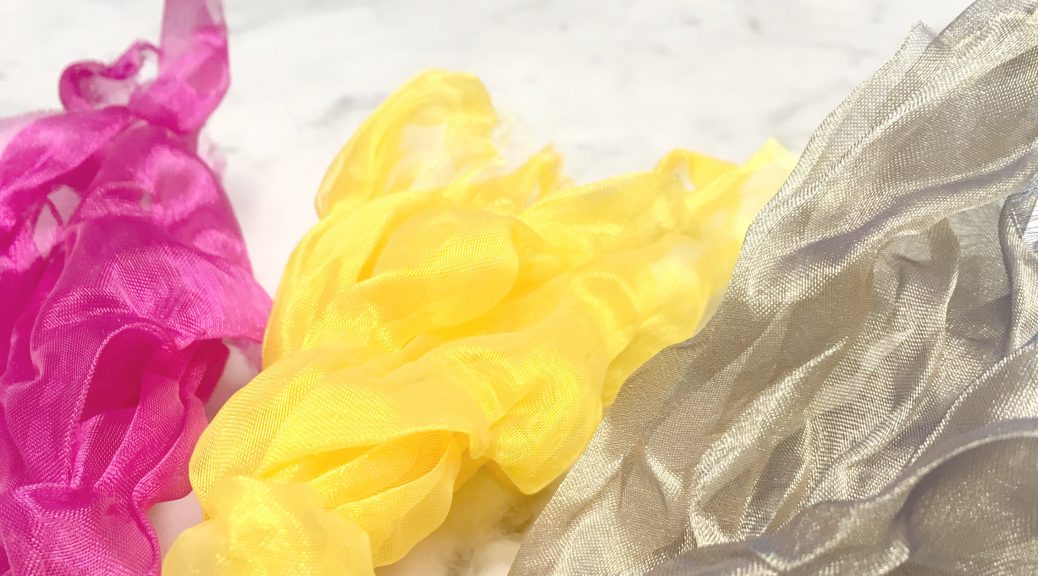
“Heat setting is a heat treatment by which shape retention, crease resistance, resilience and elasticity are imparted to the fibres. It also brings changes in strength, stretchability, softness, dyeability and sometimes on the colour of the material. All these changes are connected with the structural and chemical modifications occurring in the fibre.” – Textile Learner
Thermoplastics can be reshaped with heat (polyesters are thermoplastic synthetic fibres)
Samples from class ( crumpled polyester, folded paper)
Materials required:
100% polyester organza
Marble, wooden or plastics that do not melt
Rubber bands
Aluminium foil
Pot (to steam or boil the cloth in)
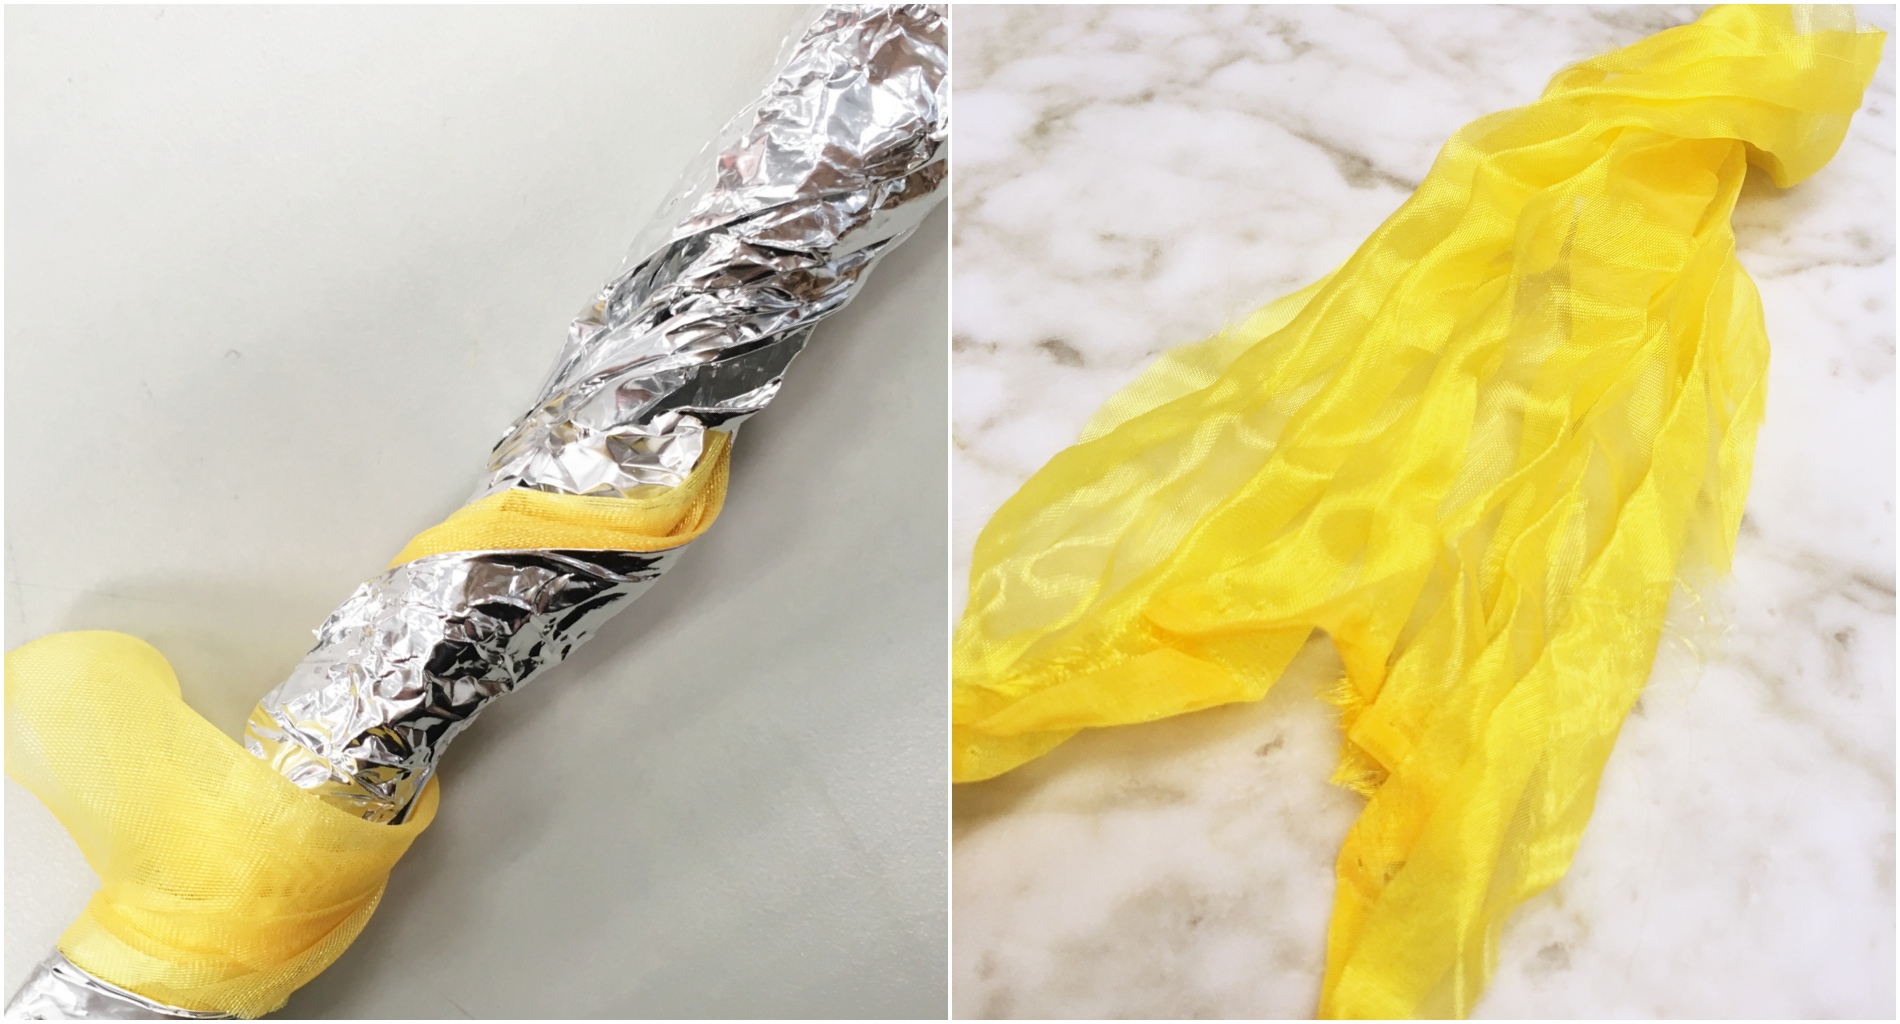
Technique:
Place the moulds and tightly wind rubber bands around it
Wrap in aluminium foil
Or: fold the polyester between two aluminium foils (pleating/ origami/ etc)
Or: use foil to create spikes
Steam or boil for at least 45 minutes
Remove the cloth from the pot and allow them to cool
Remove the foils and moulds
Using marbles secured with rubber bandsPleats folded in between aluminium foilsPleated cloth twirled between aluminium foilsThree pieced of cloth with marbles bound inside
Applications include:
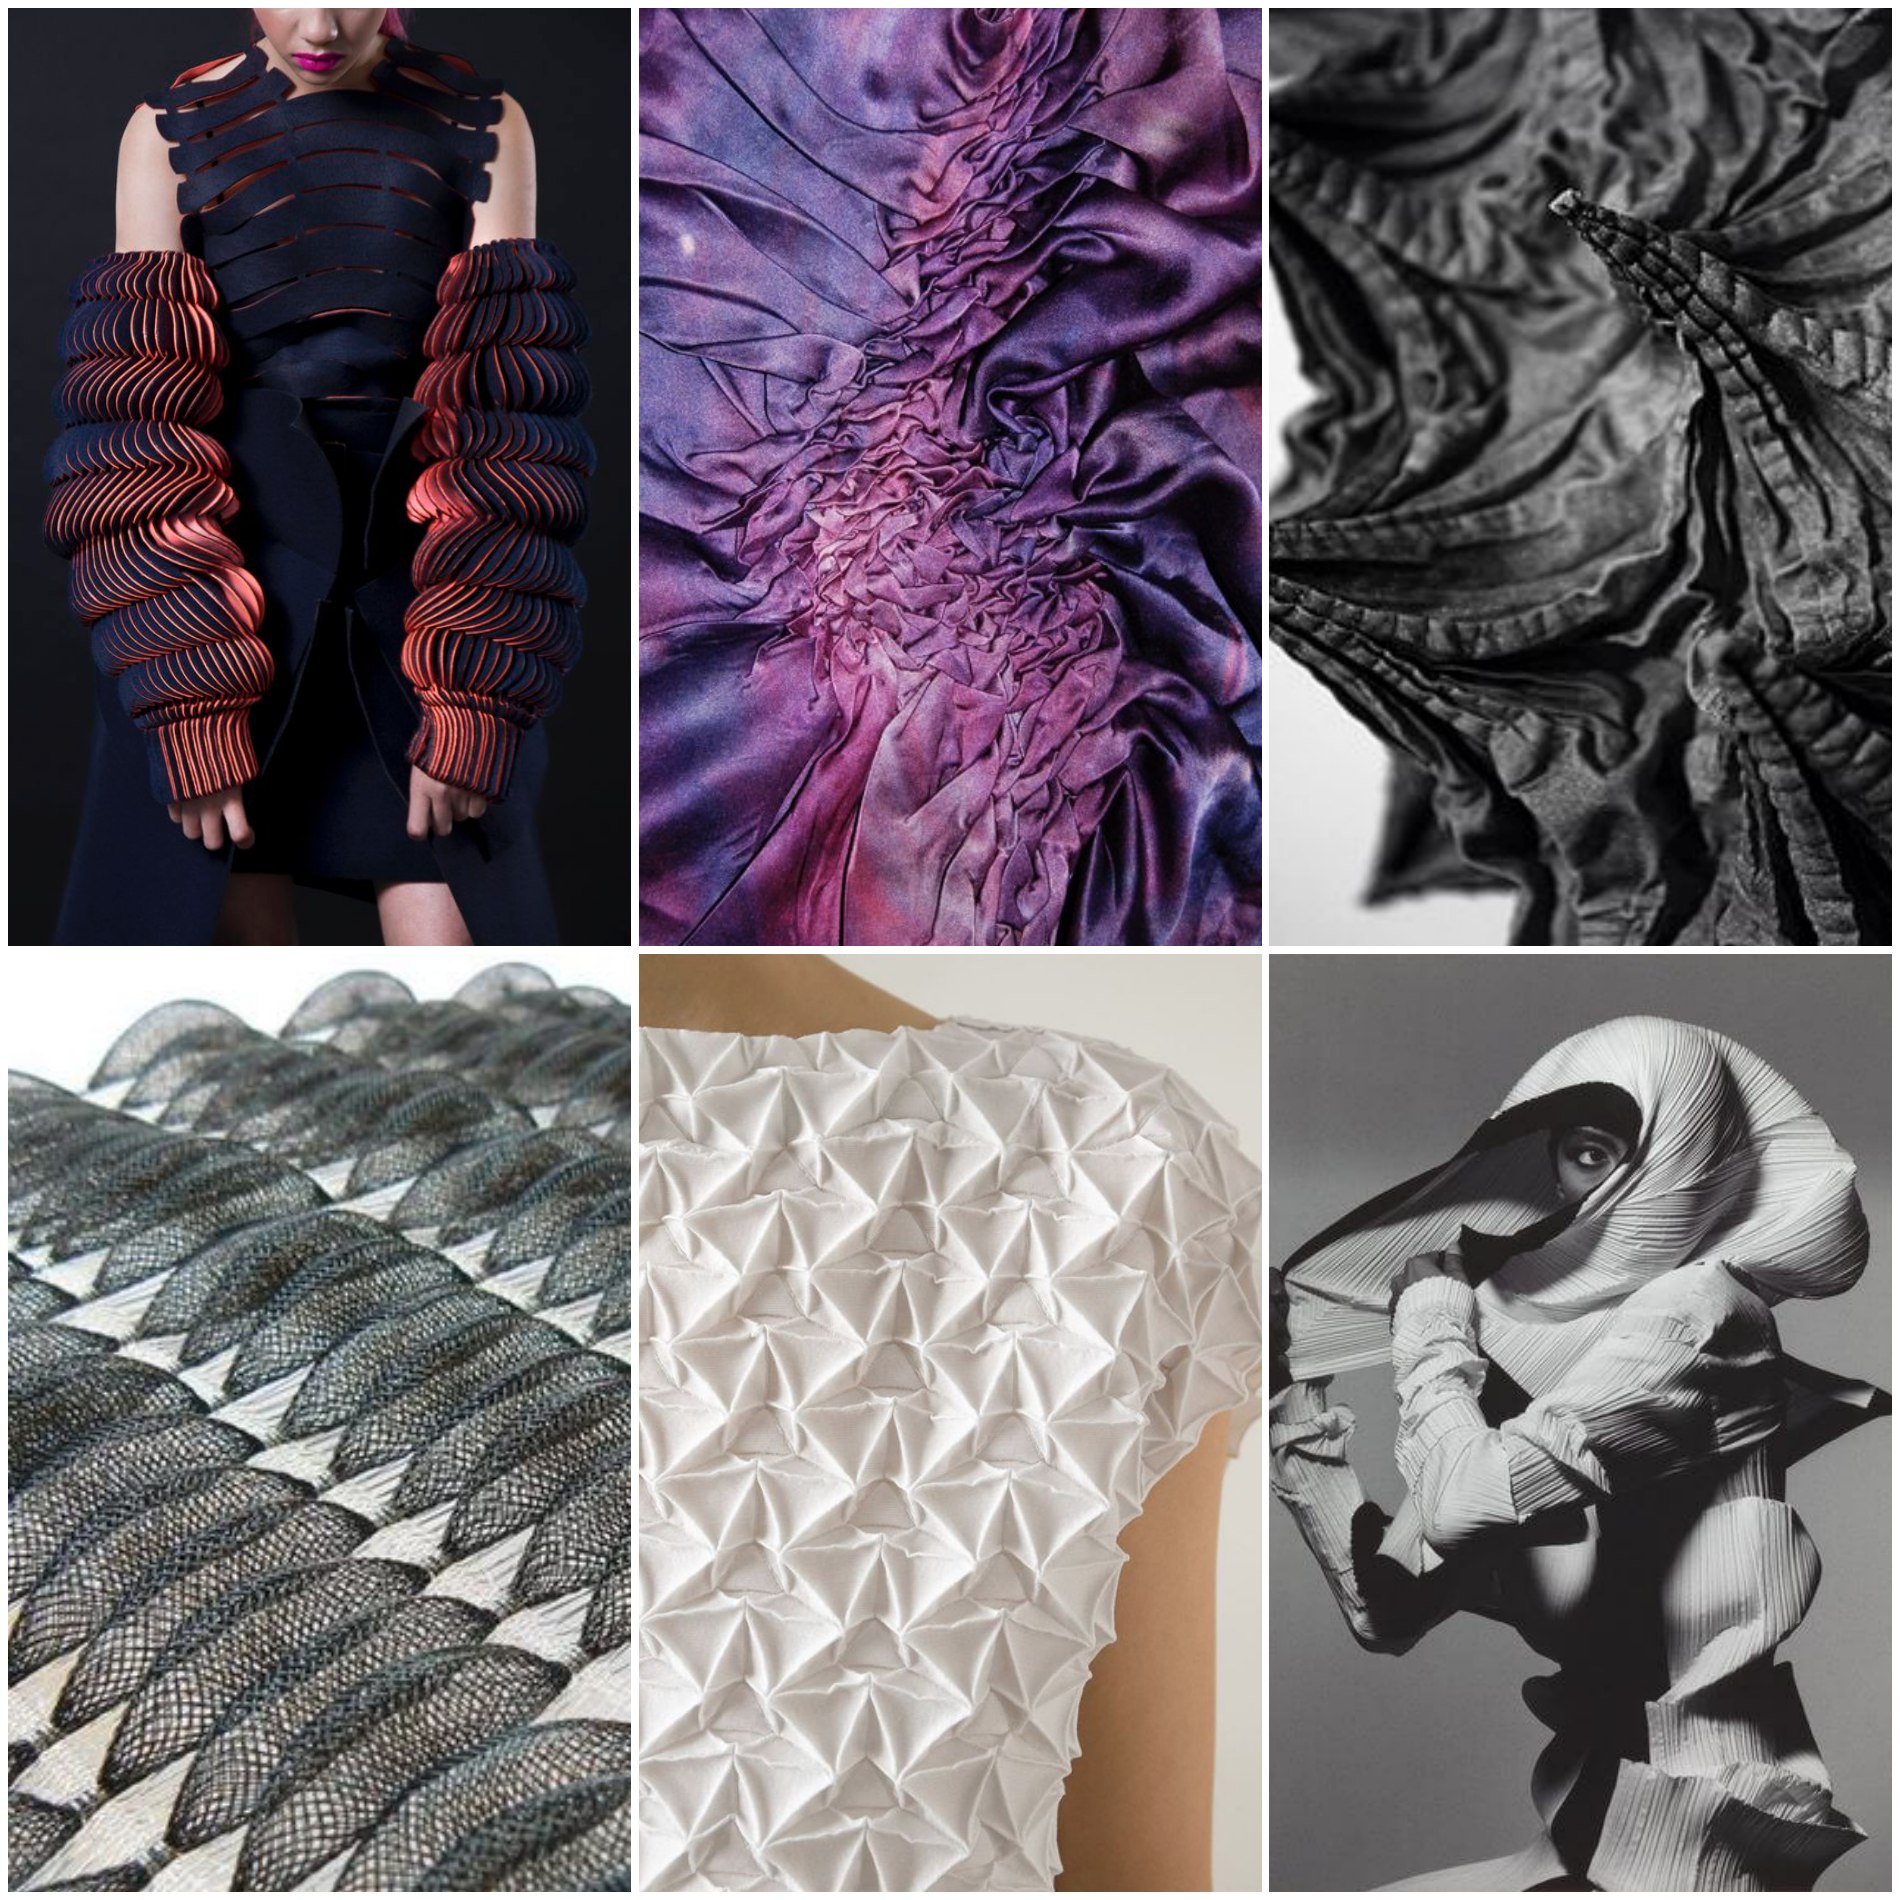
Fashion items that require flexibility. A good example is Issey Miyake’s pleated garments
Perhaps toys for children could incorporate such techniques too, creating tactile experiences that are safe to explore
Images found on Pinterest
Personal reflections:
It was fascinating to manipulate fabric, giving it a sense of elasticity and fluidity. The technique is also simple to do, but the material is limited to thermoplastics. Nevertheless, it can also be highly useful as a non-wearable like shop front designs and curtains
Vacuum Forming
A sheet of plastic is heated and stretched over a mould, thus taking the shape of that object
Materials required:
PVC sheet
Vacuum forming machine
Mould that has draft angles and no undercuts
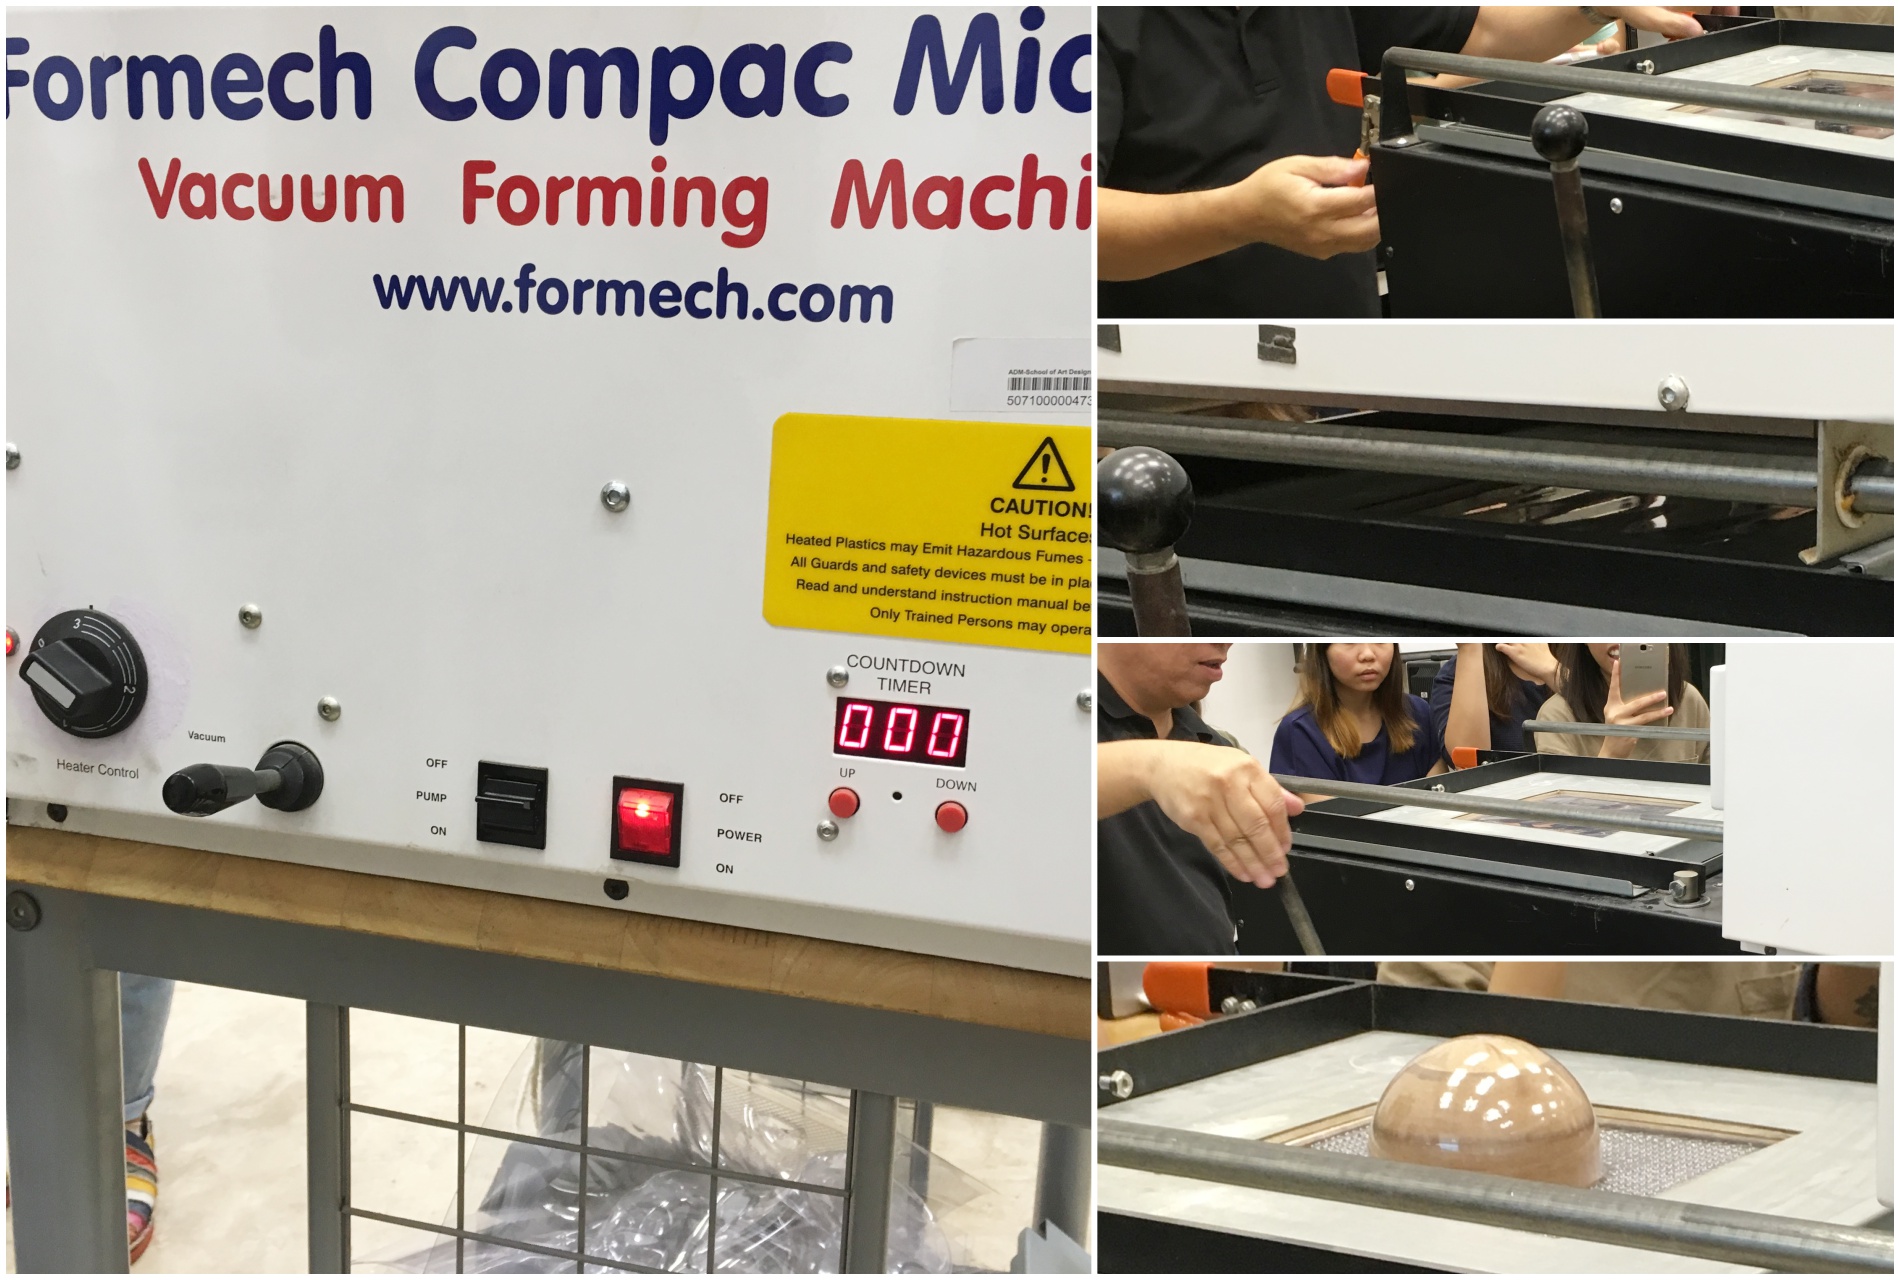
Technique:
Allow the machine to heat up
Place the mould on the grill and lower it into the machine
Secure the plastic sheet in between the frames
Shift the heater over the plastic sheet
When the plastic is heated sufficiently it will sag evenly
The heating element is to be pushed away
The vacuum is turned on and the mould raised
Holes can be drilled into the mould if the corners of the plastic need to be sharp
Also, if the mould is tall, pressure can be applied to the plastic first to stretch it
Process of vacuum formingResults of the moulded PVC
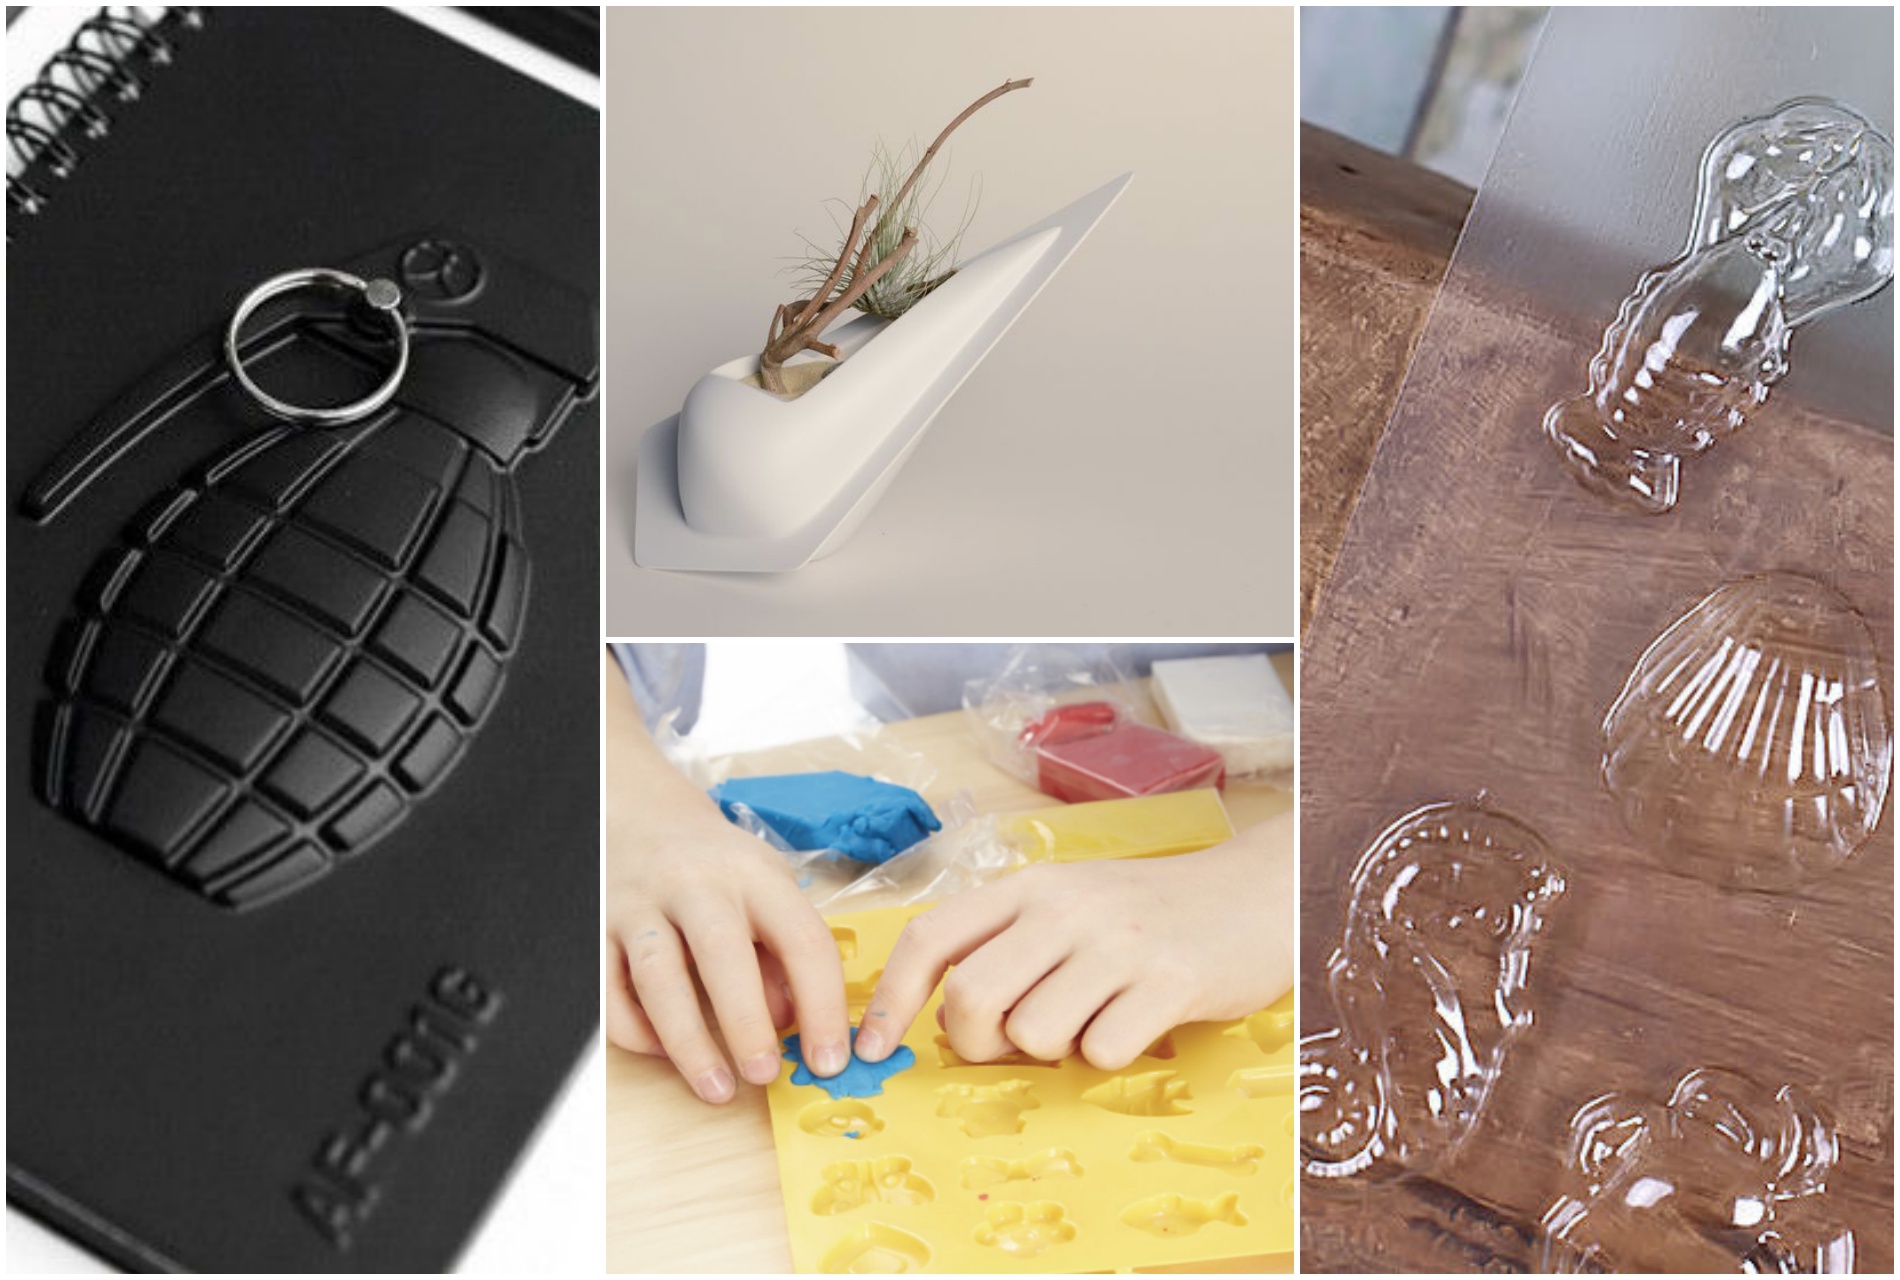
Applications include:
Packaging
Containers
Prototyping
Arts and craft sets
Mould for resin, clay, etc
Images sourced from the internet
Personal reflections:
The possibilities seem boundless with vacuum forming as the PVC is highly pliable. The plastic is able to capture the large and small details of the mould. The end result is also neat (unless the mould is trapped within the plastic).
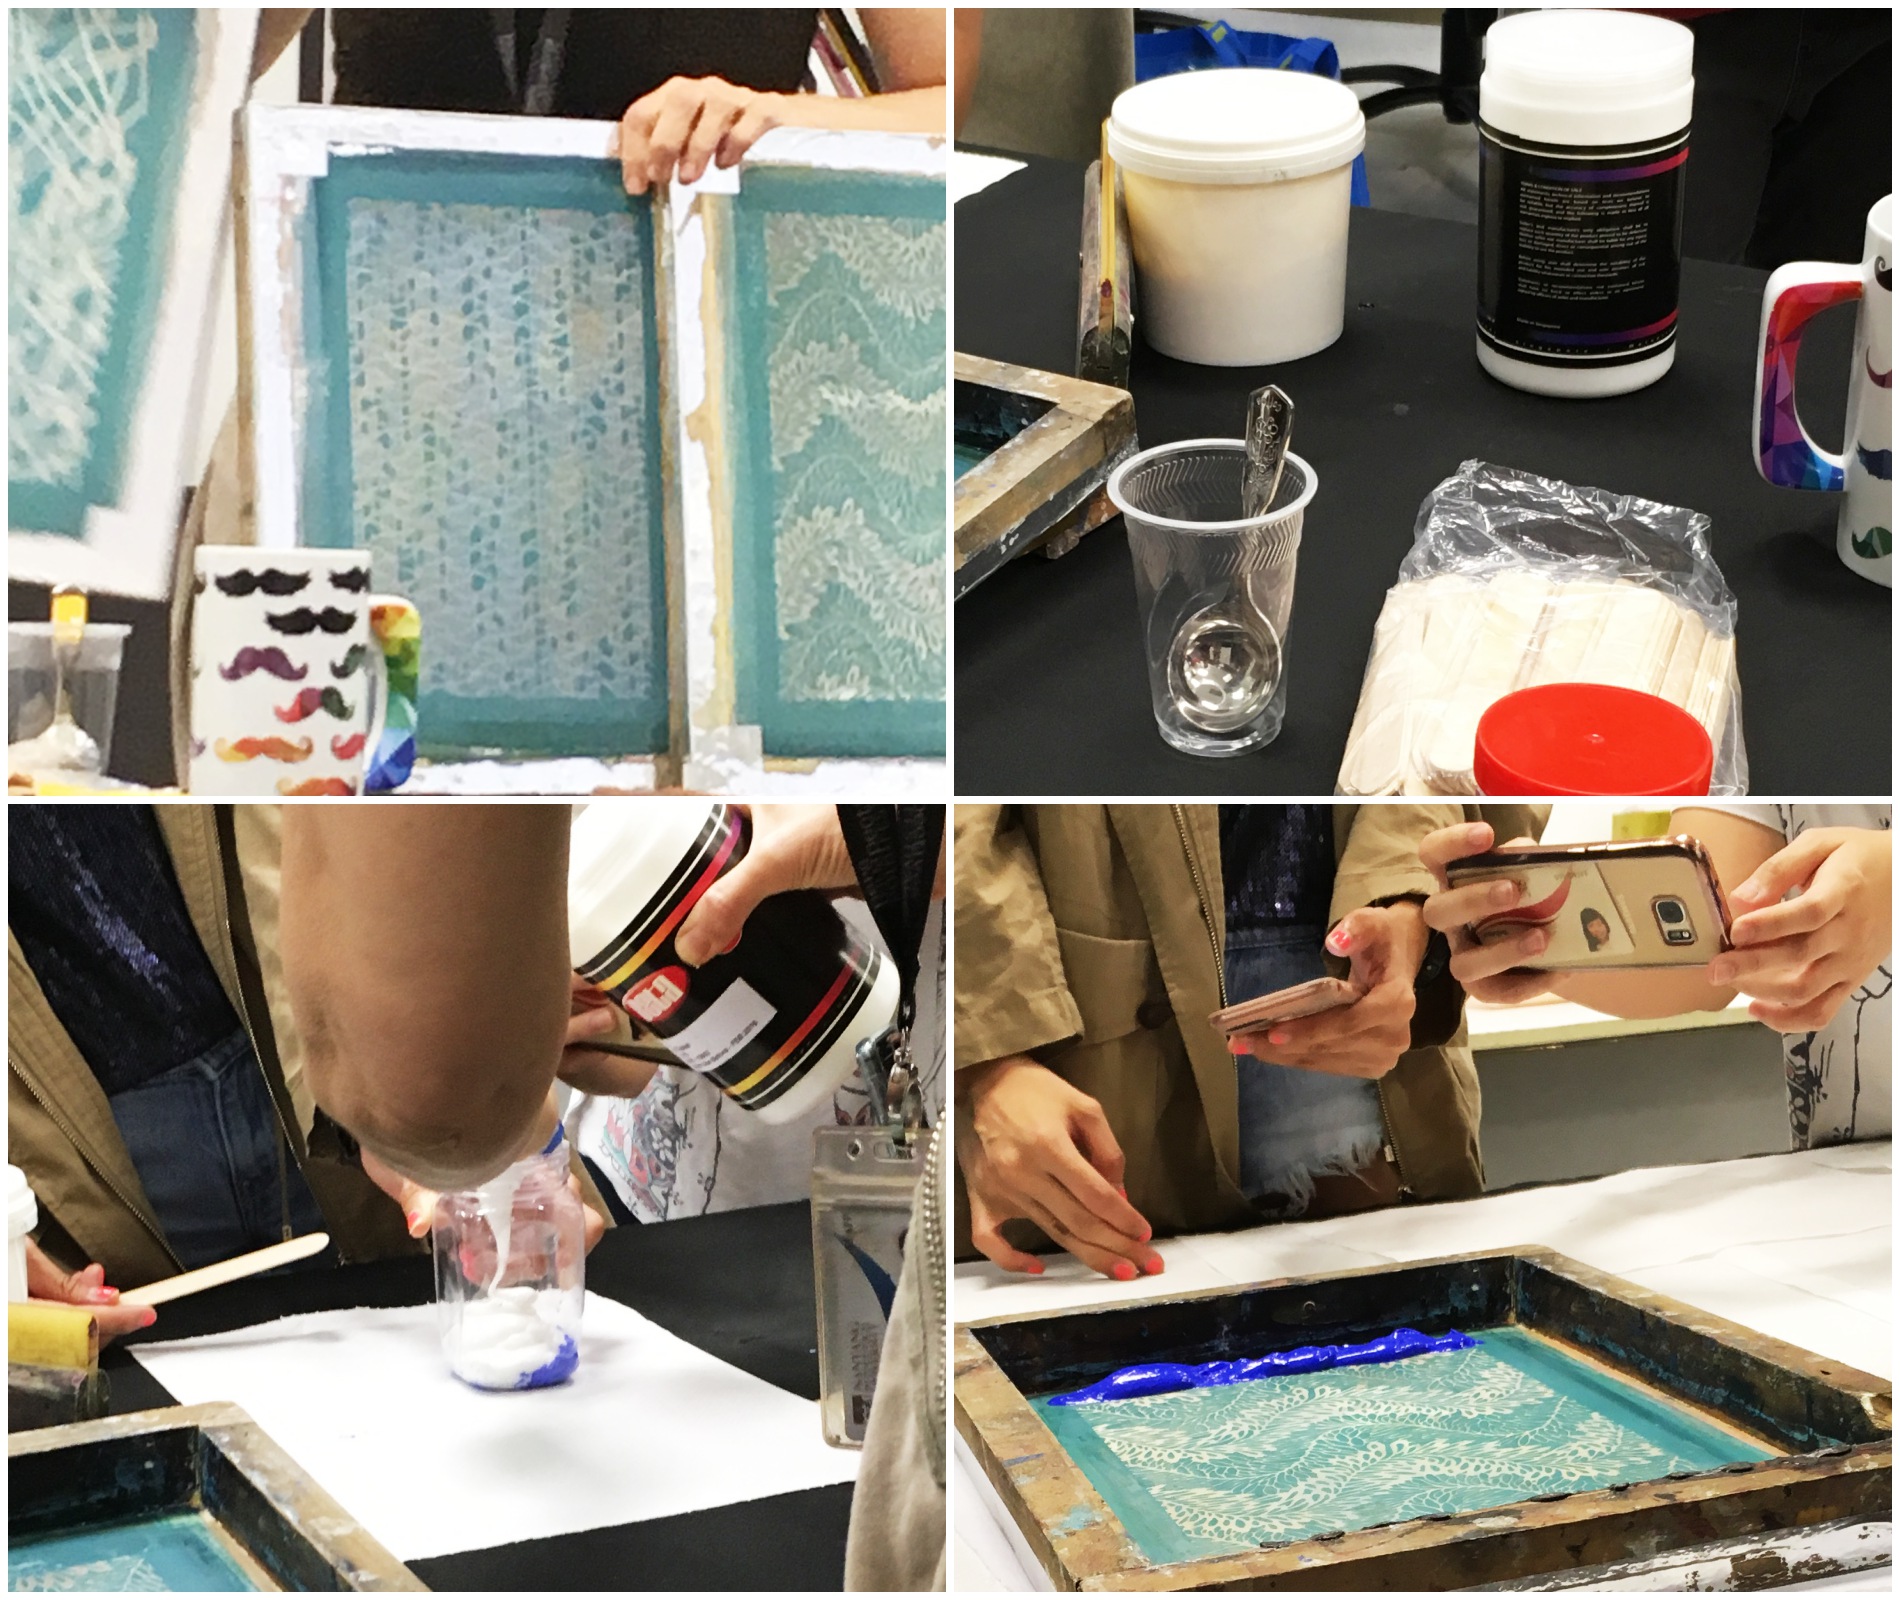
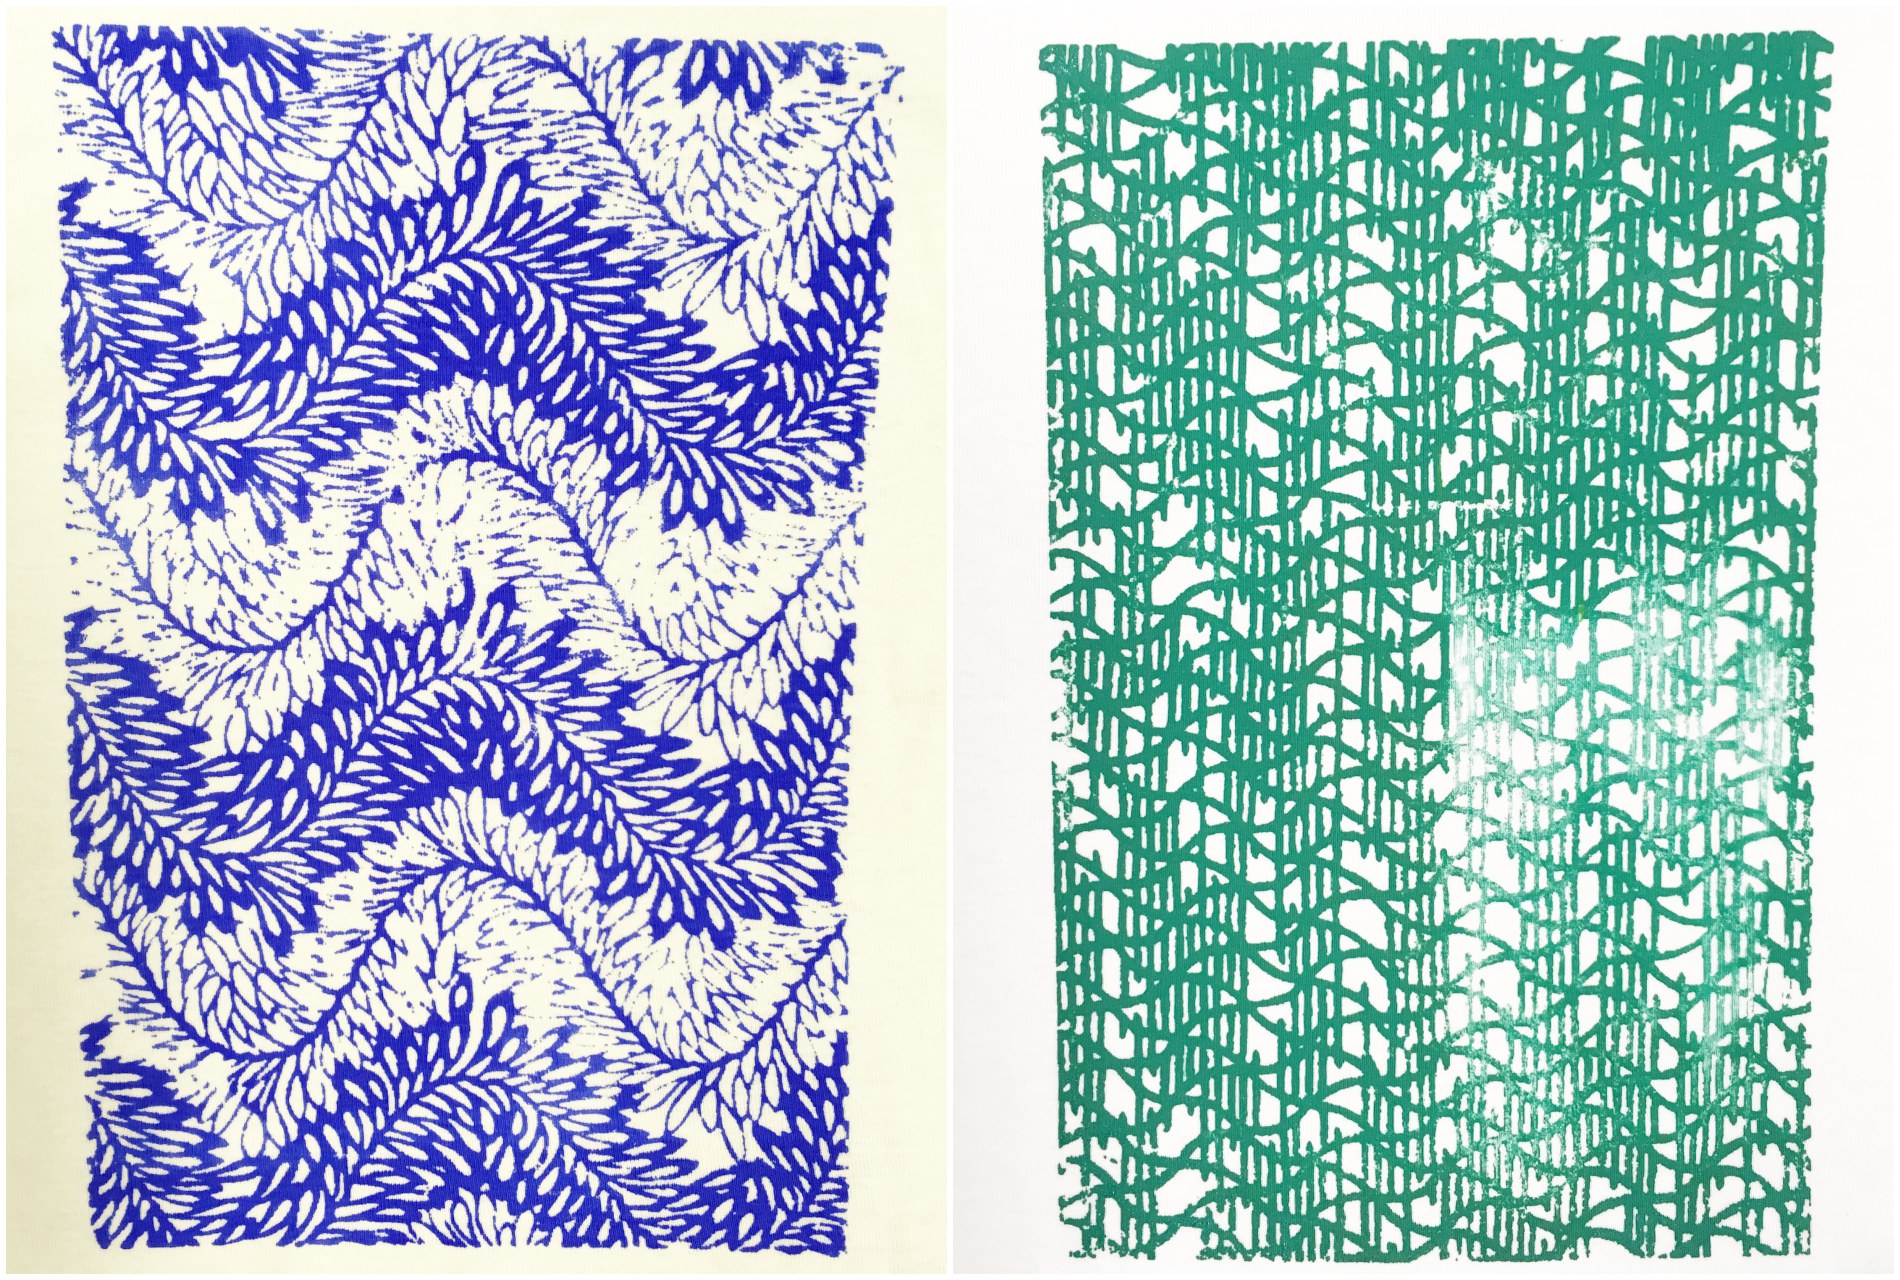
Thermochromic inks change from the colourless to colourful or vice versa with the changes in temperature. These inks make use of thermochromism, which refers to “materials that change their hues in response to temperature fluctuations”. These inks are also know as leucodyes, which are organic (carbon-based) chemicals that change in molecular structure due to heat energy. The varied interactions with light result in different colours seen by the eye.
Materials required:
Thermochromic pigments
Clear base (like resin, glue, polymorph, etc)
Silkscreen
Light coloured fabric
Thermochromic pigment
Technique:
Mix the pigment in paint, resin, glue, Polymorph, etc to create the ink
Spread the ink unto a silkscreen
Apply unto a light coloured fabric
Allow to air-dry
The print turns colourless when exposed to temperature around 22 degree celsius
However, if over heated to above 200 degree celsius, irreversible damage to the dye might occur
Also, note that mixing the pigment in non-clear bases mightnot produce the same results
Preparation of materialsResulting prints
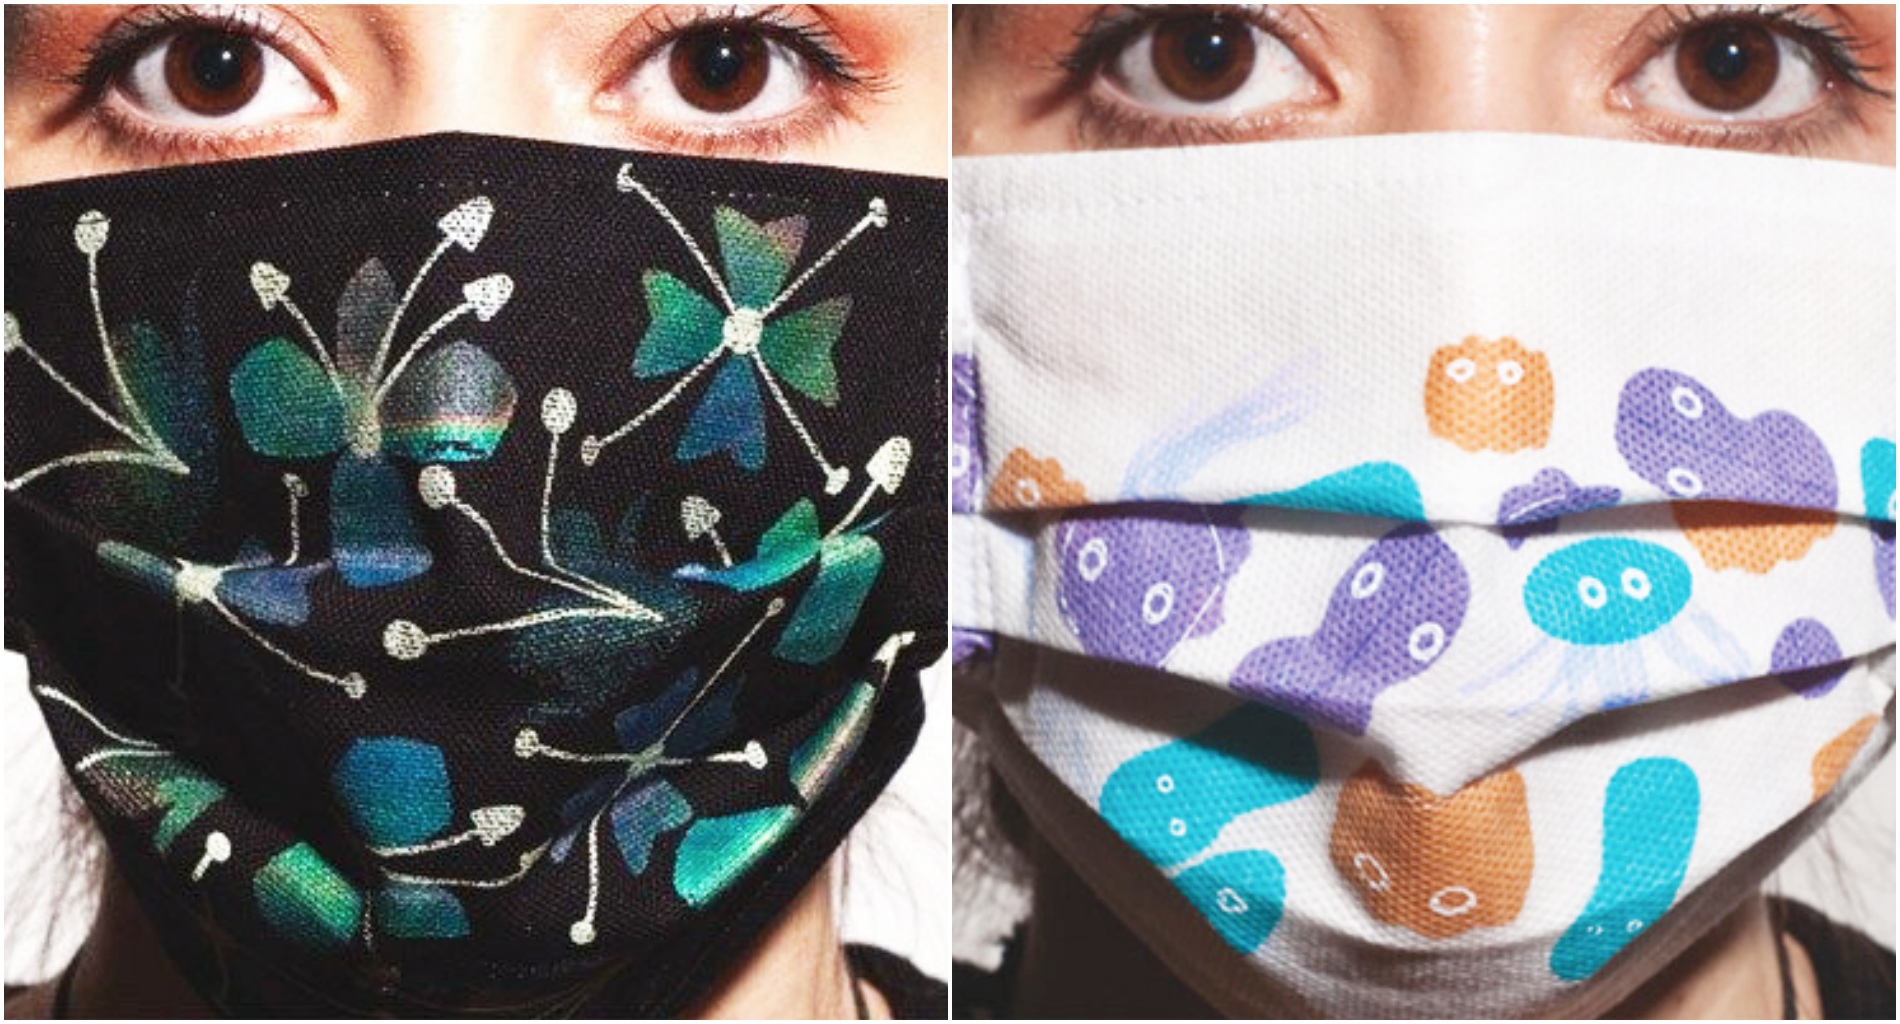
Applications include:
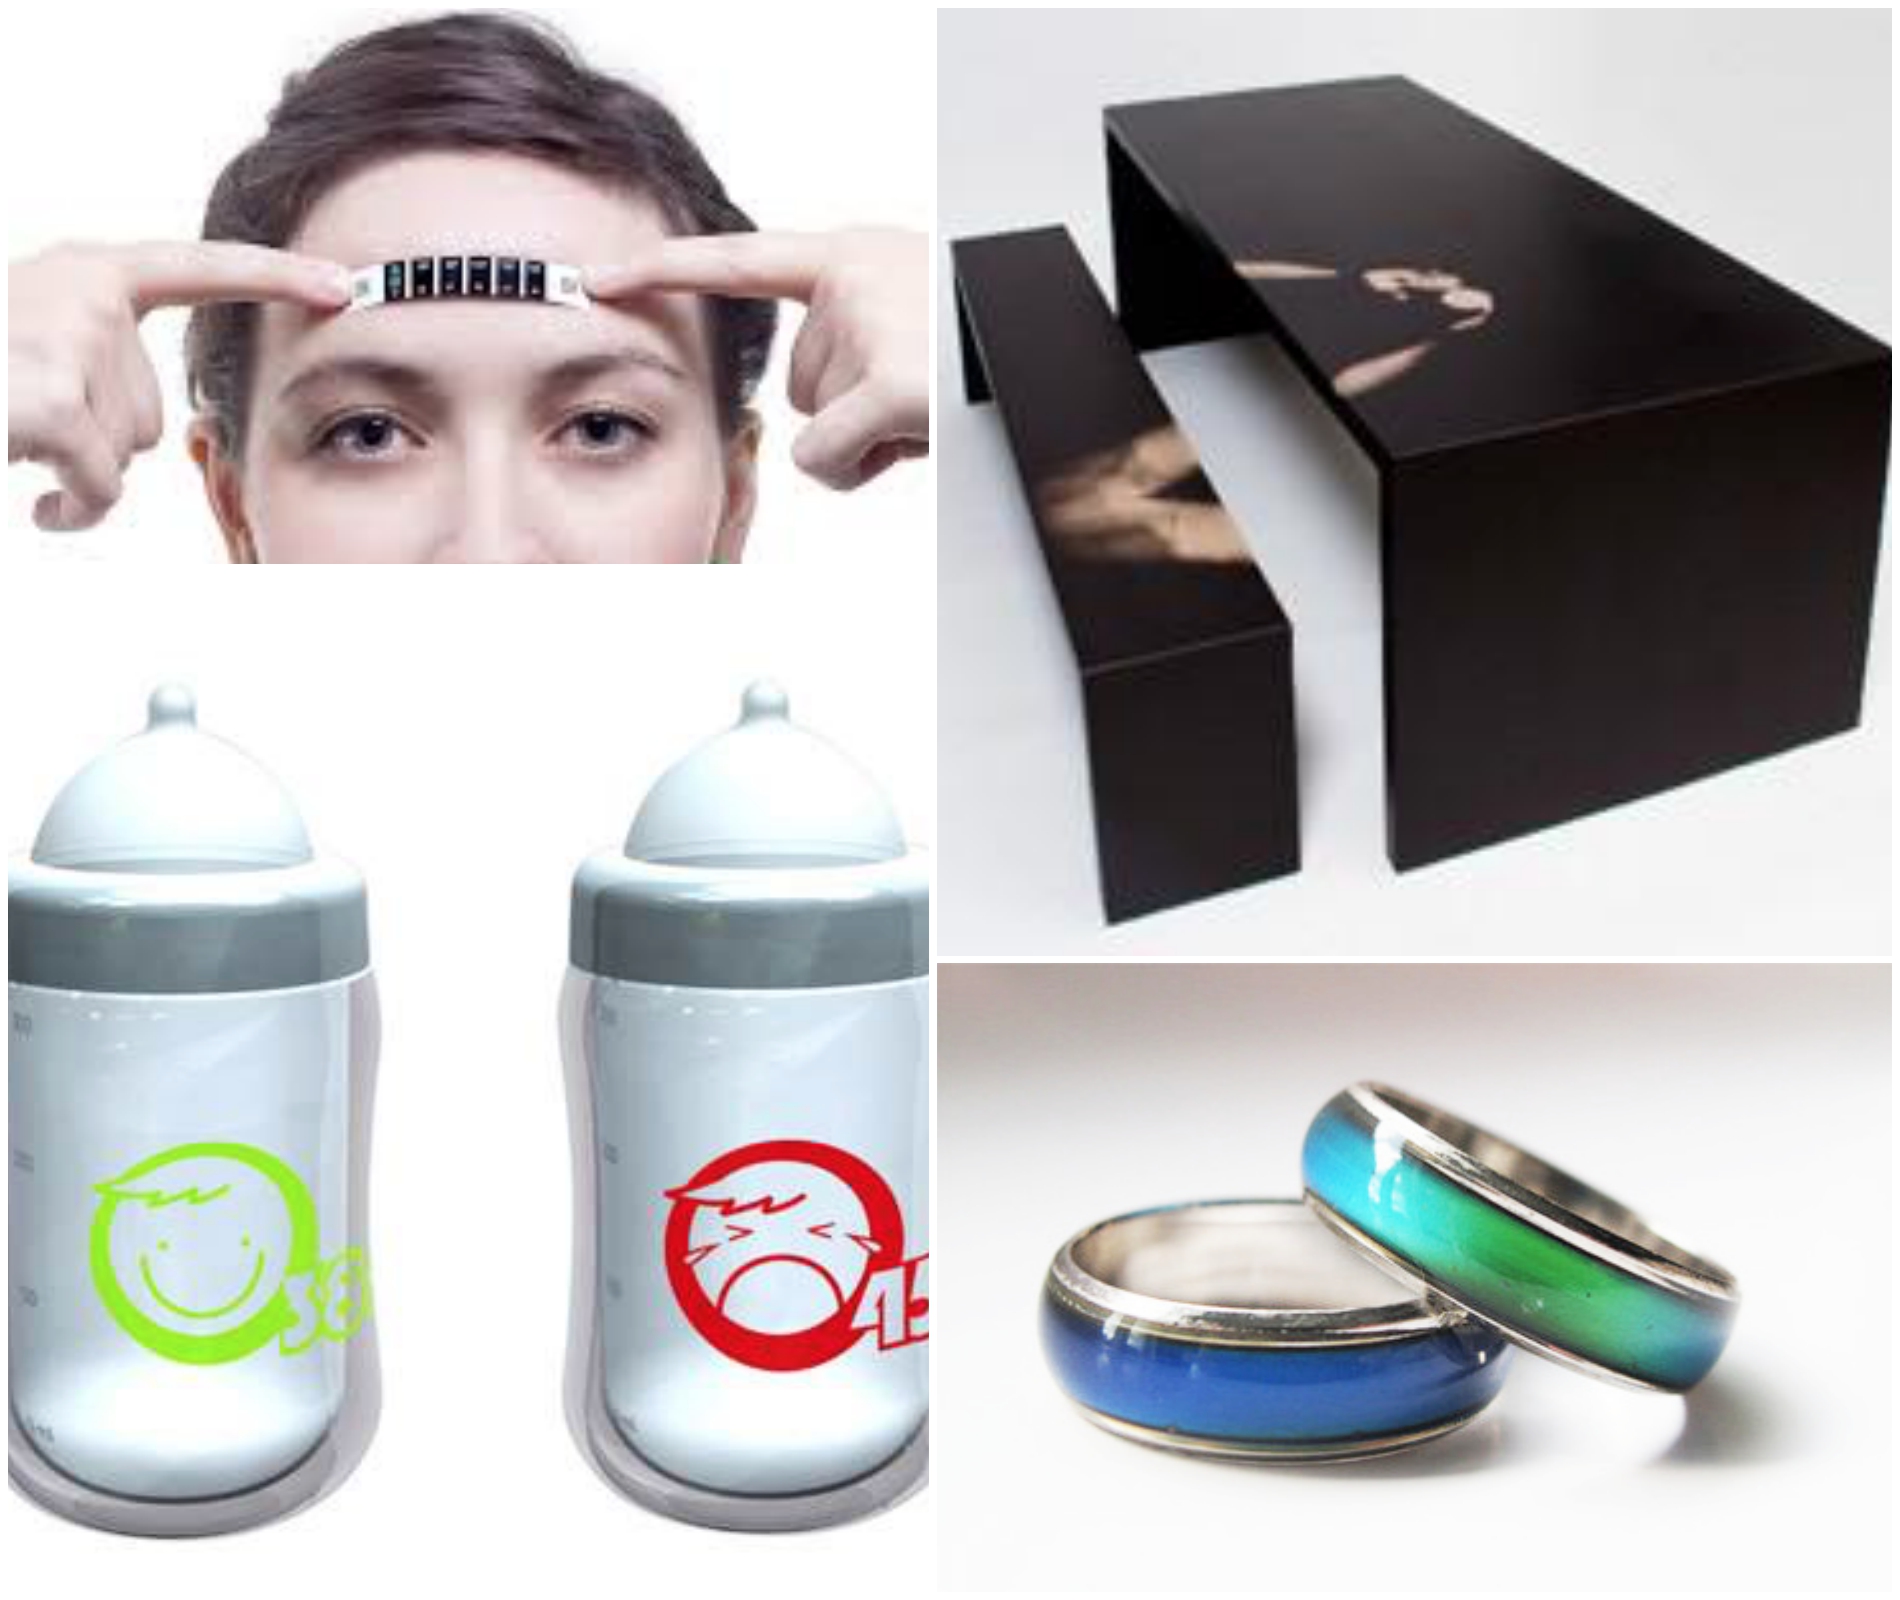
Products naturally exposed to the human heat, creating interaction in the mundane.
An example is the masks designed by Marjan Kooroshnia, a Swedish textile-design student
Thermochromic masksThermochromic thermometer, furniture, baby bottle and mood ring found on the Internet
Personal reflection:
Chemistry really plays a big role in this application! New technologies and inventions bring about a wave of uses and solutions to problems.
It also takes some experimentation in the application of these pigments and dyes. When the light yellow thermochromic dye was mixed with blue acrylic paint, the resulting print could not change in colour.
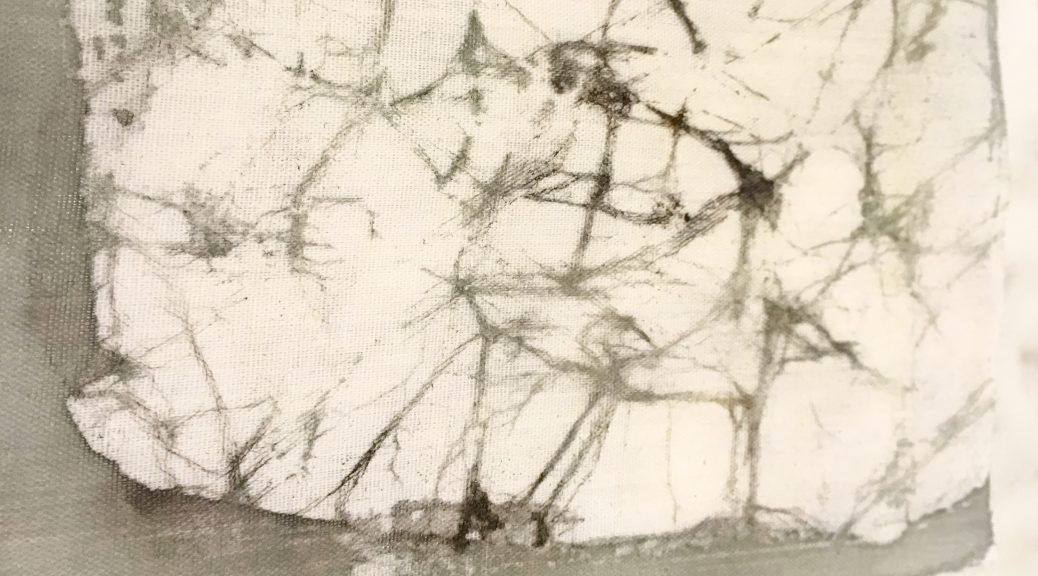
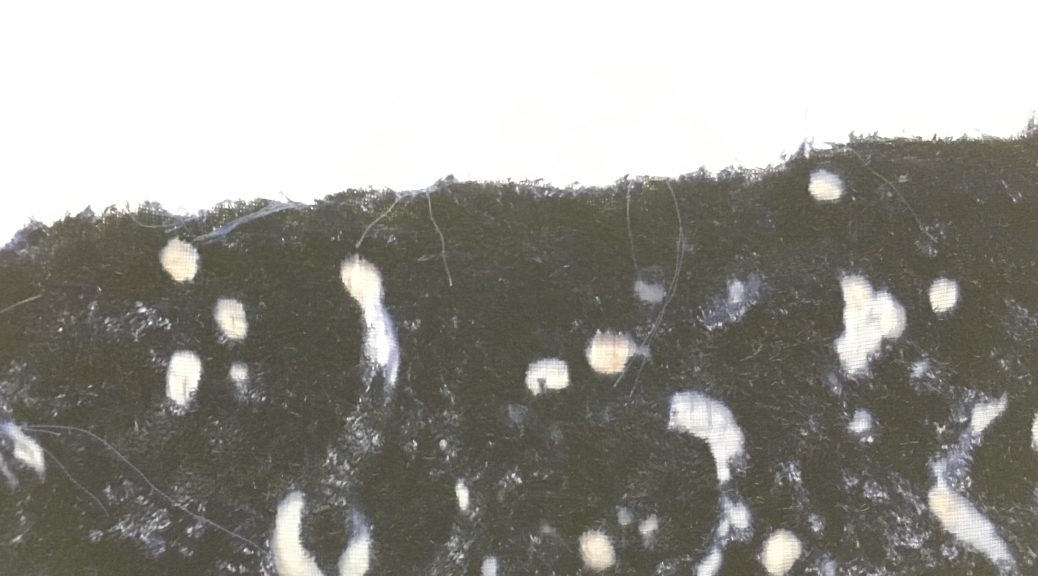
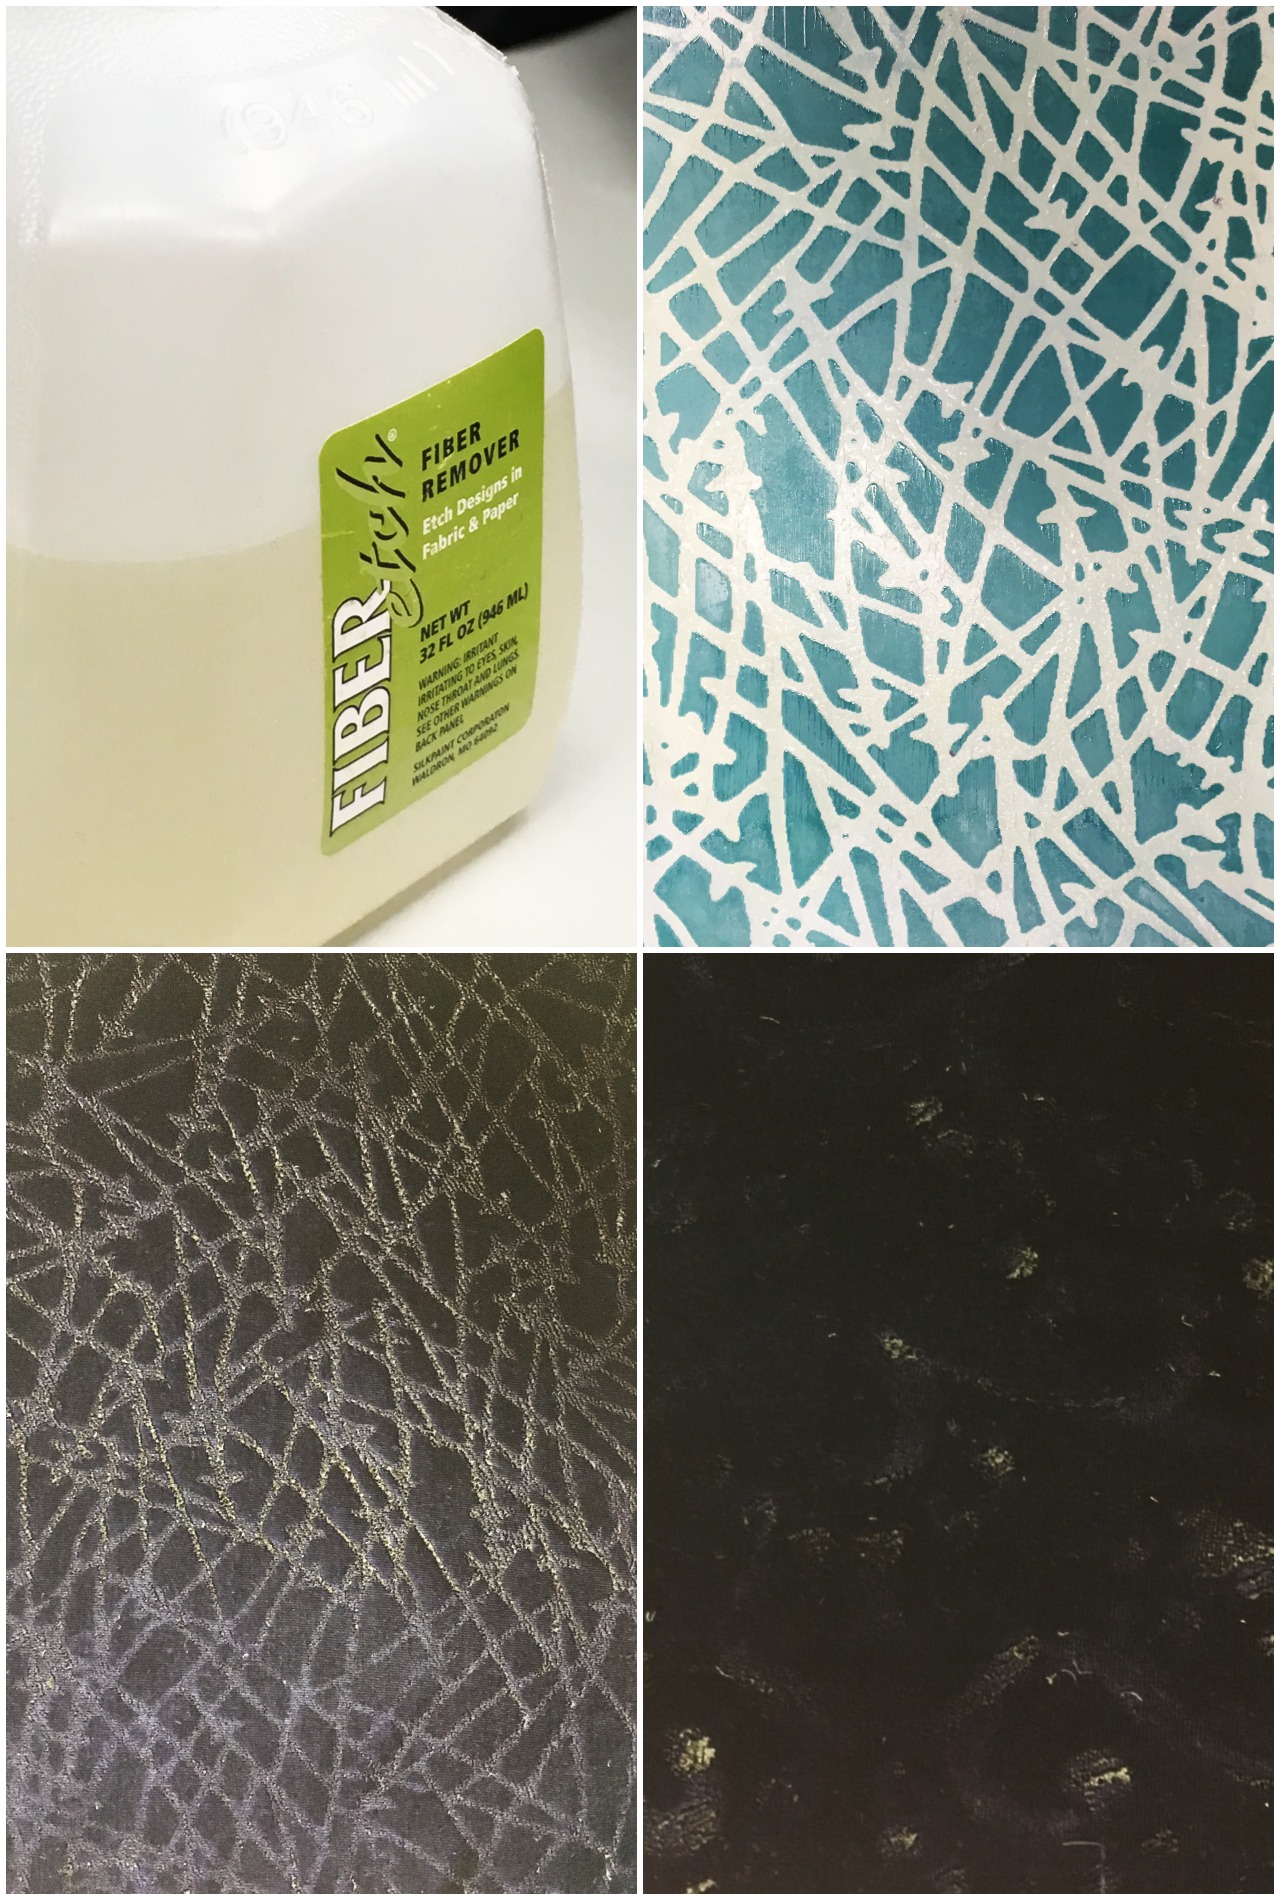
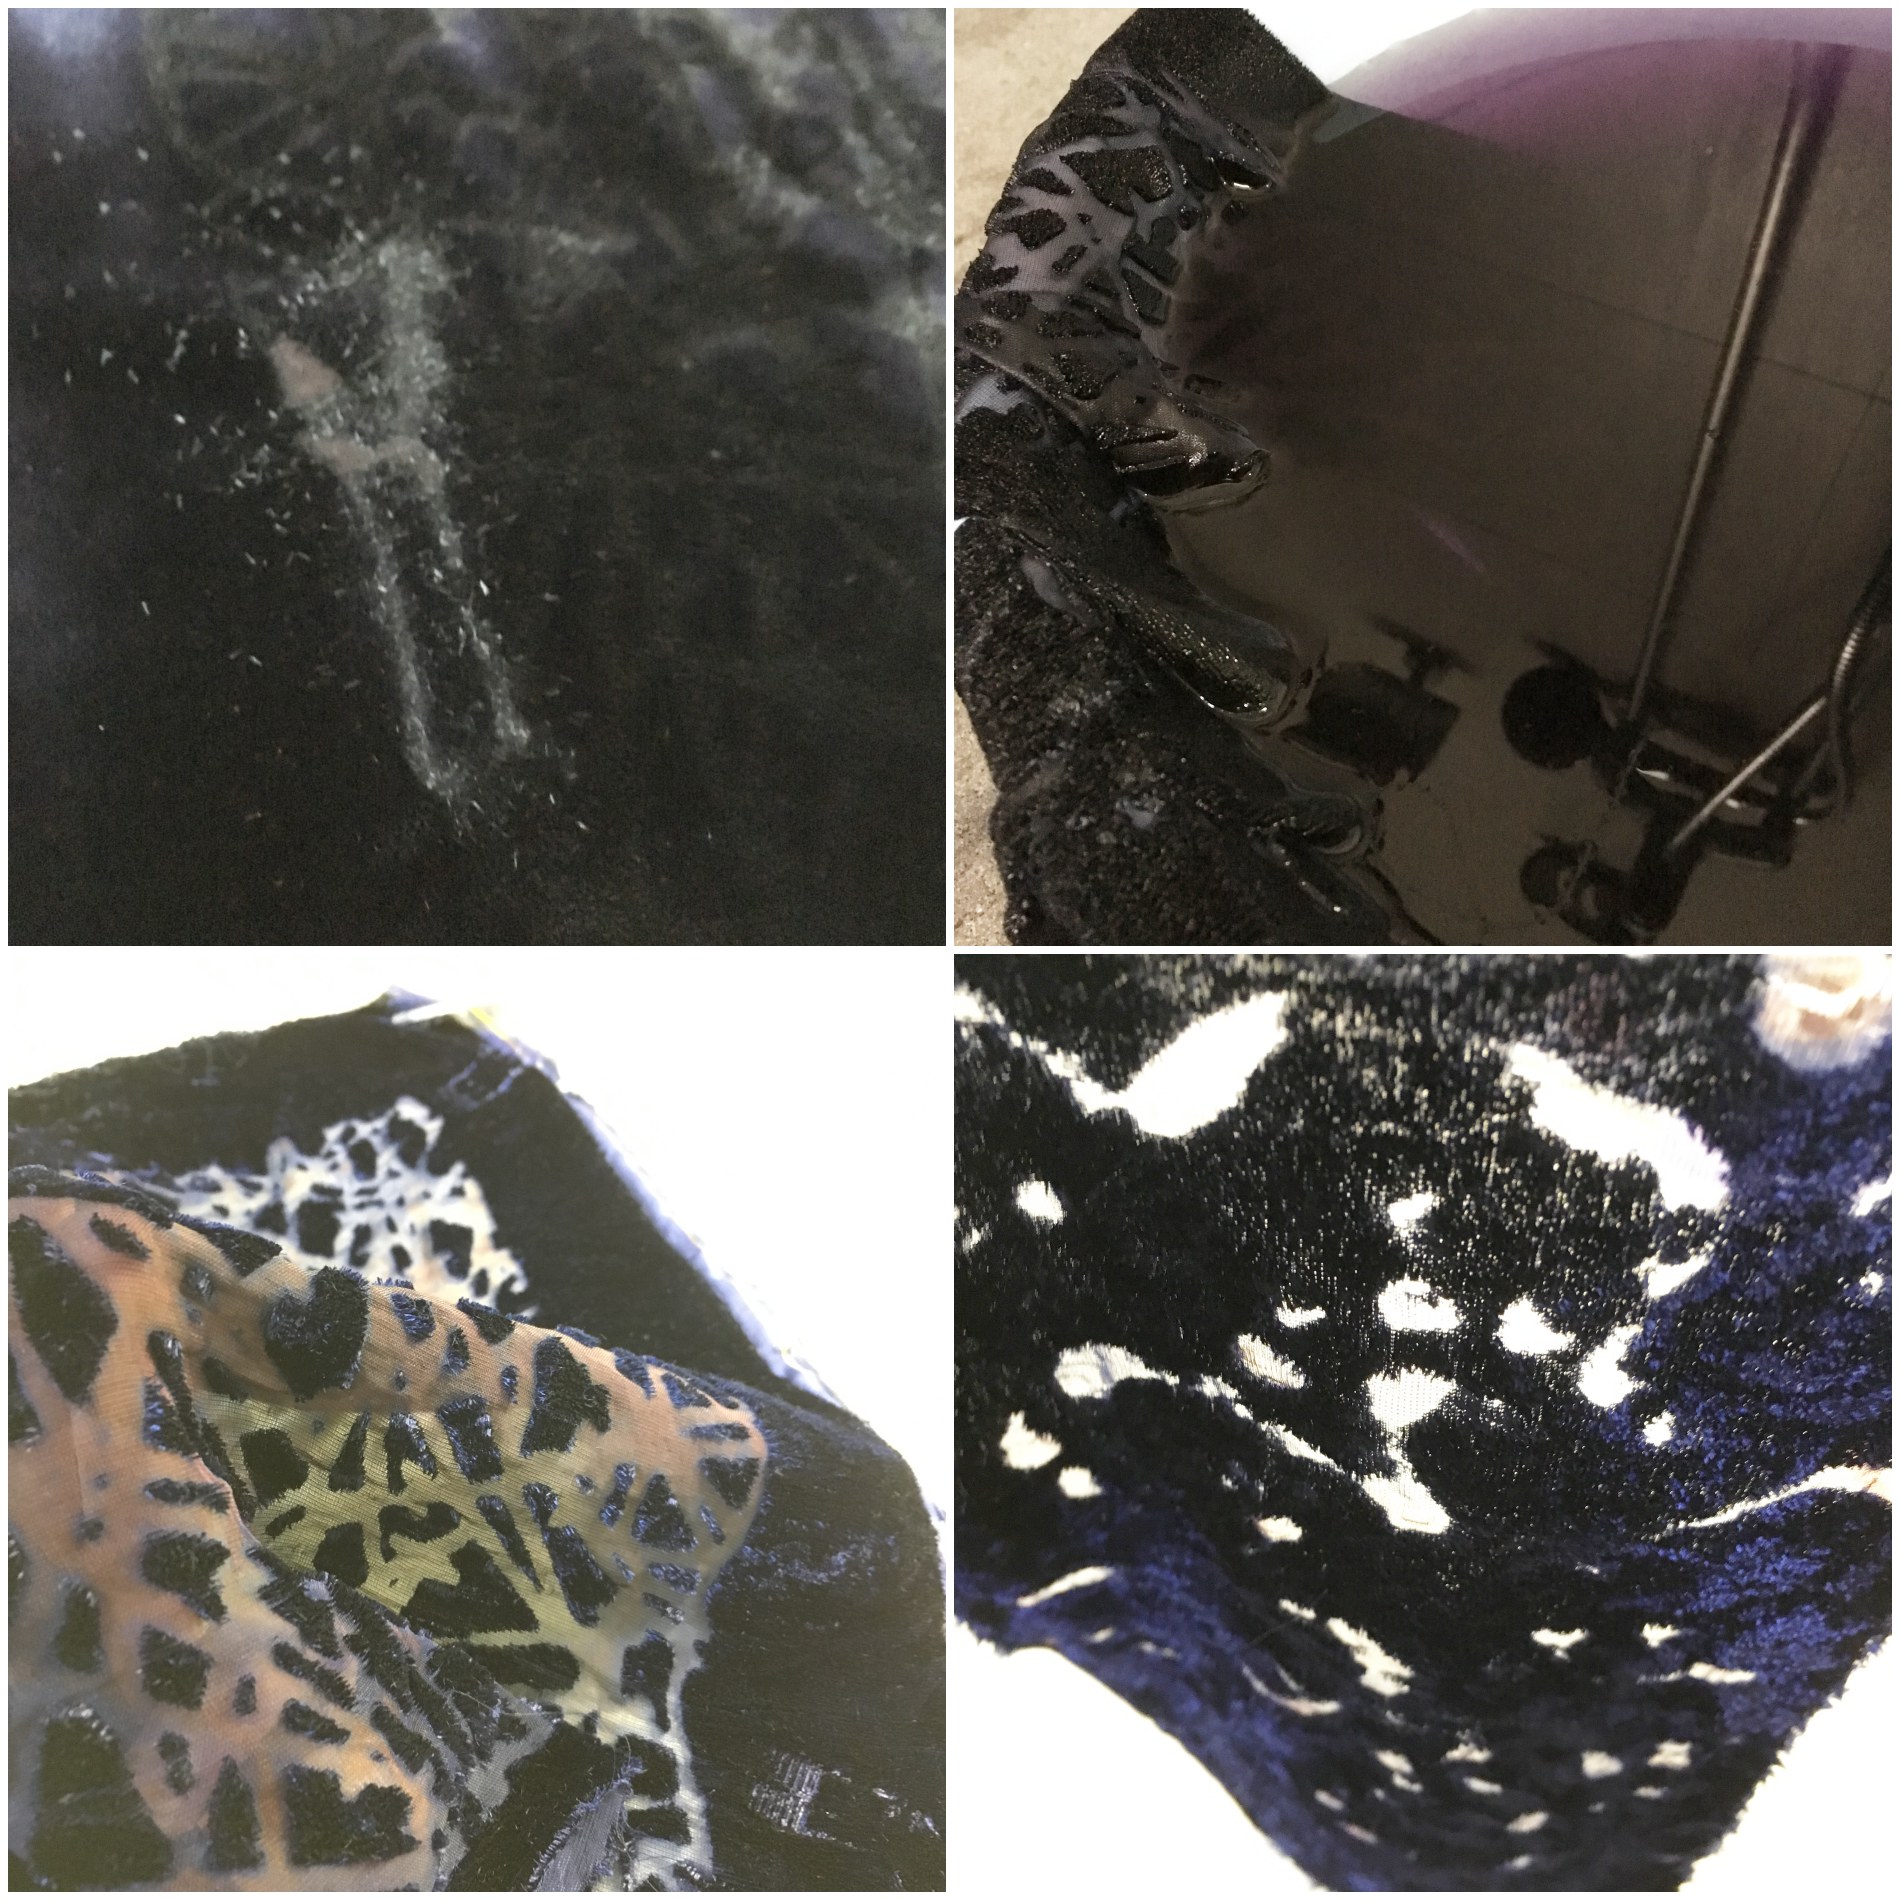
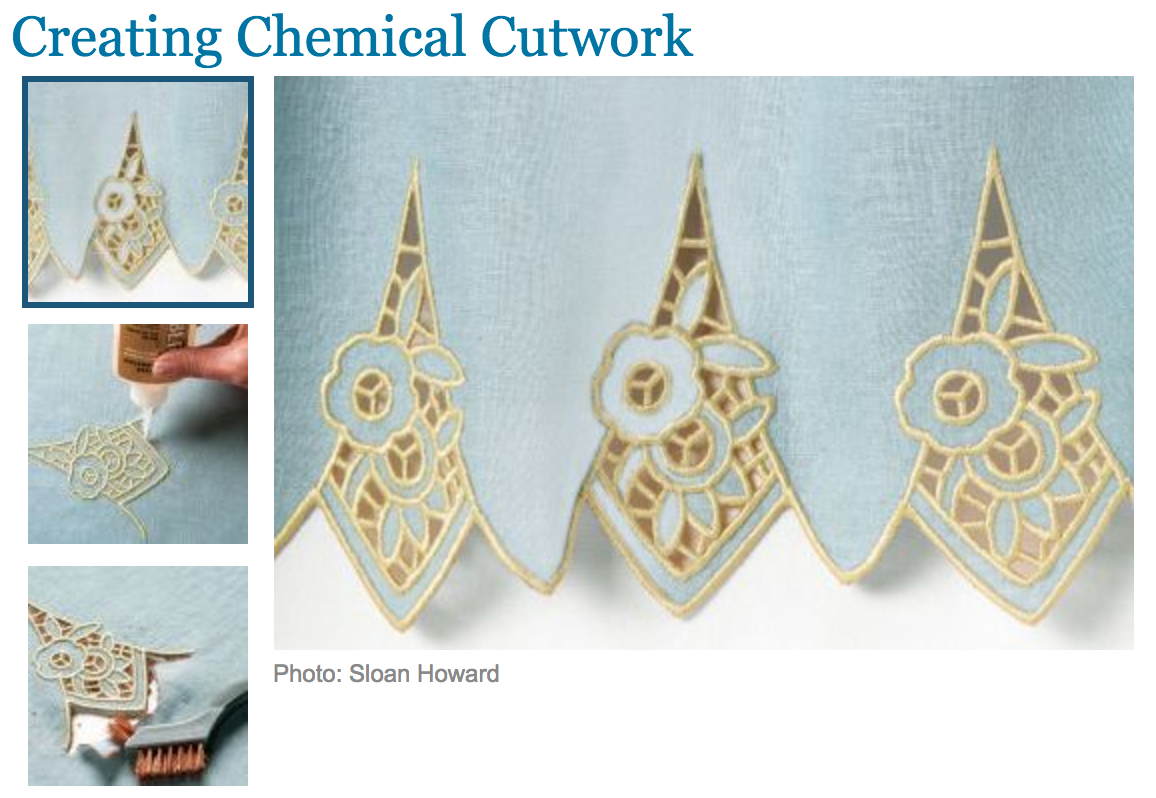
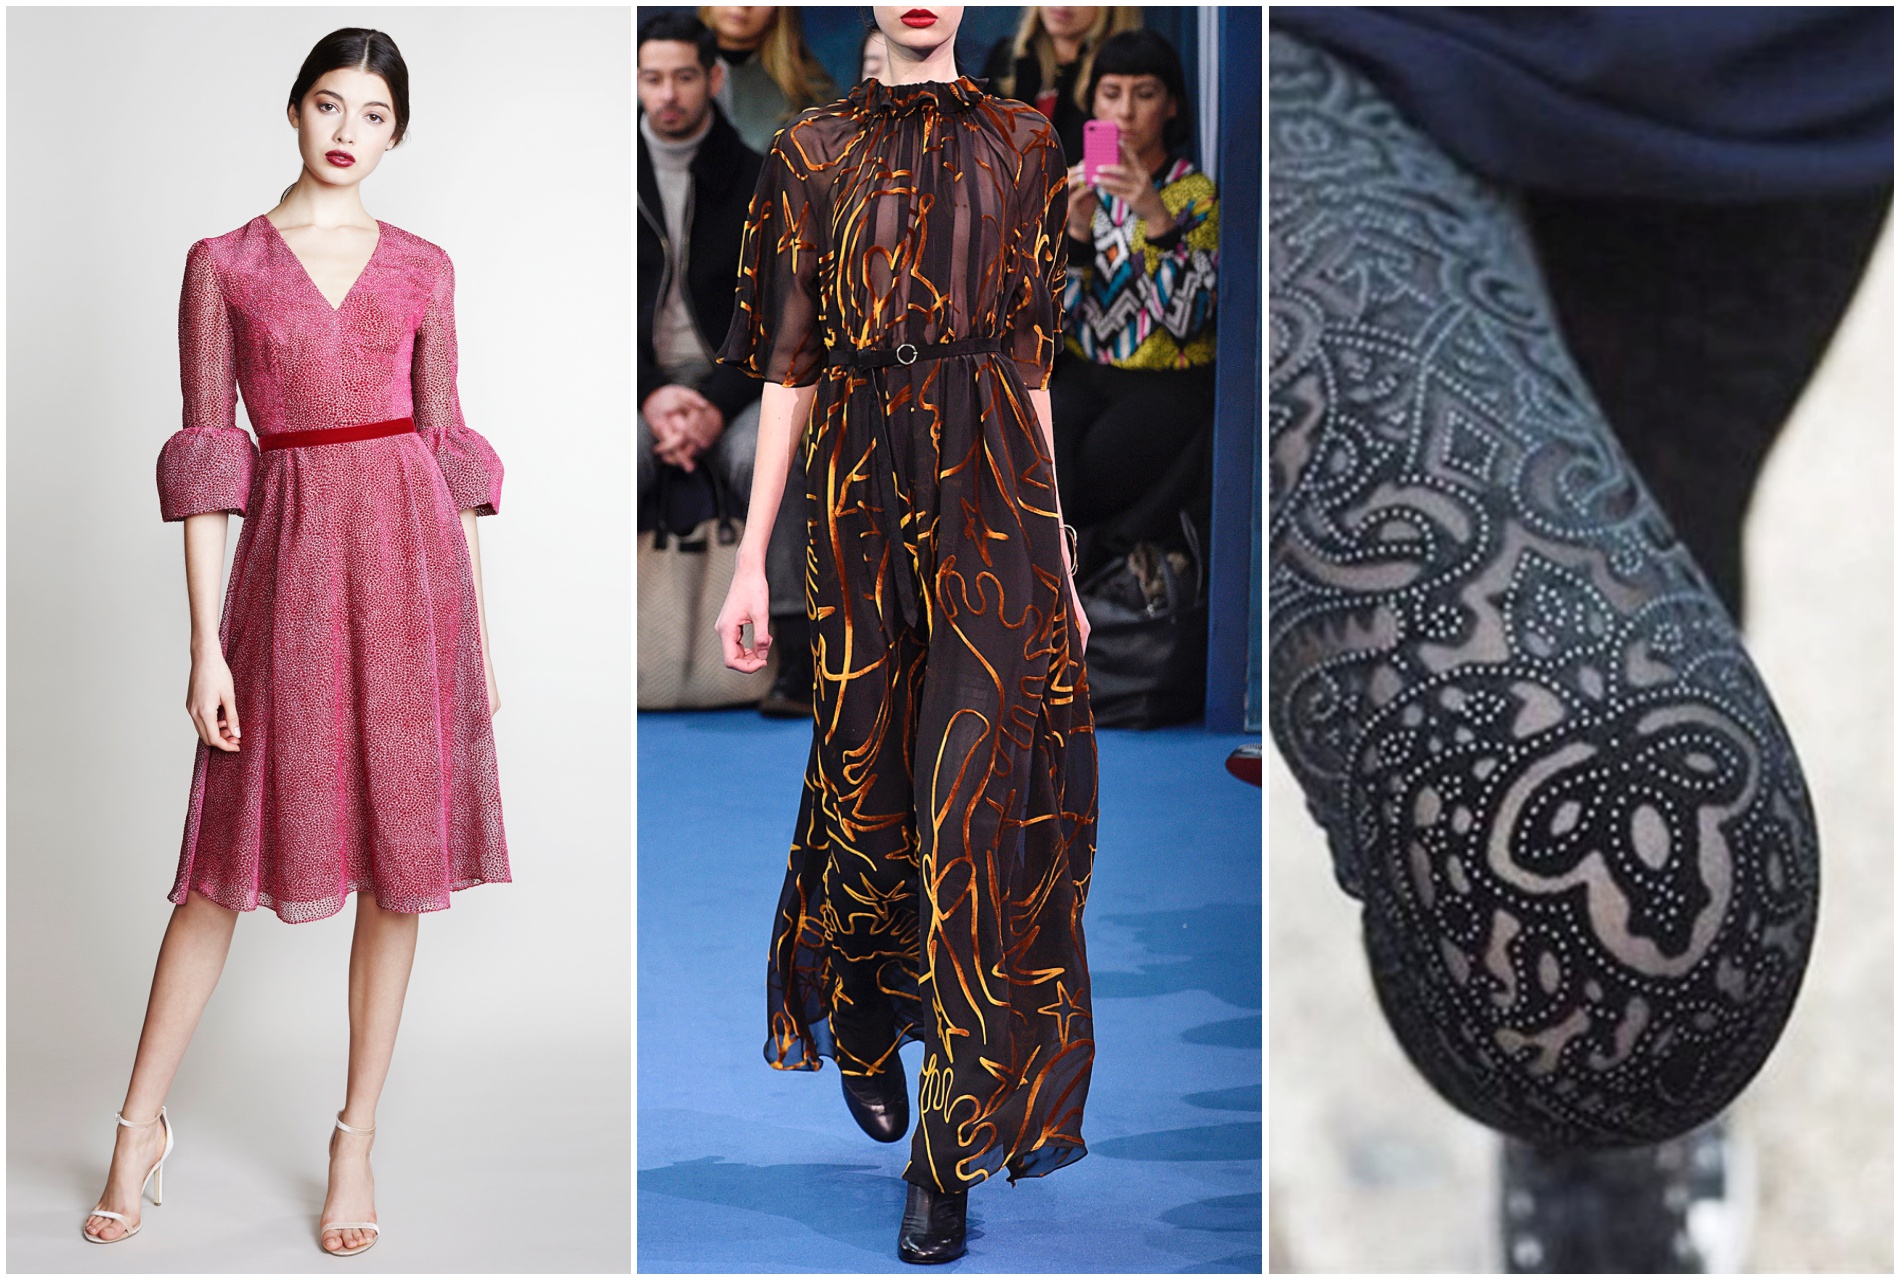
Fibre etching (or Devore ) is done using a fibre removing gel that removes plant fibres (like cotton, linen, rayon and paper). It can be used on fabric blends, paper and wood. Upon further research online, I discovered a treasure trove of details we could take note of.
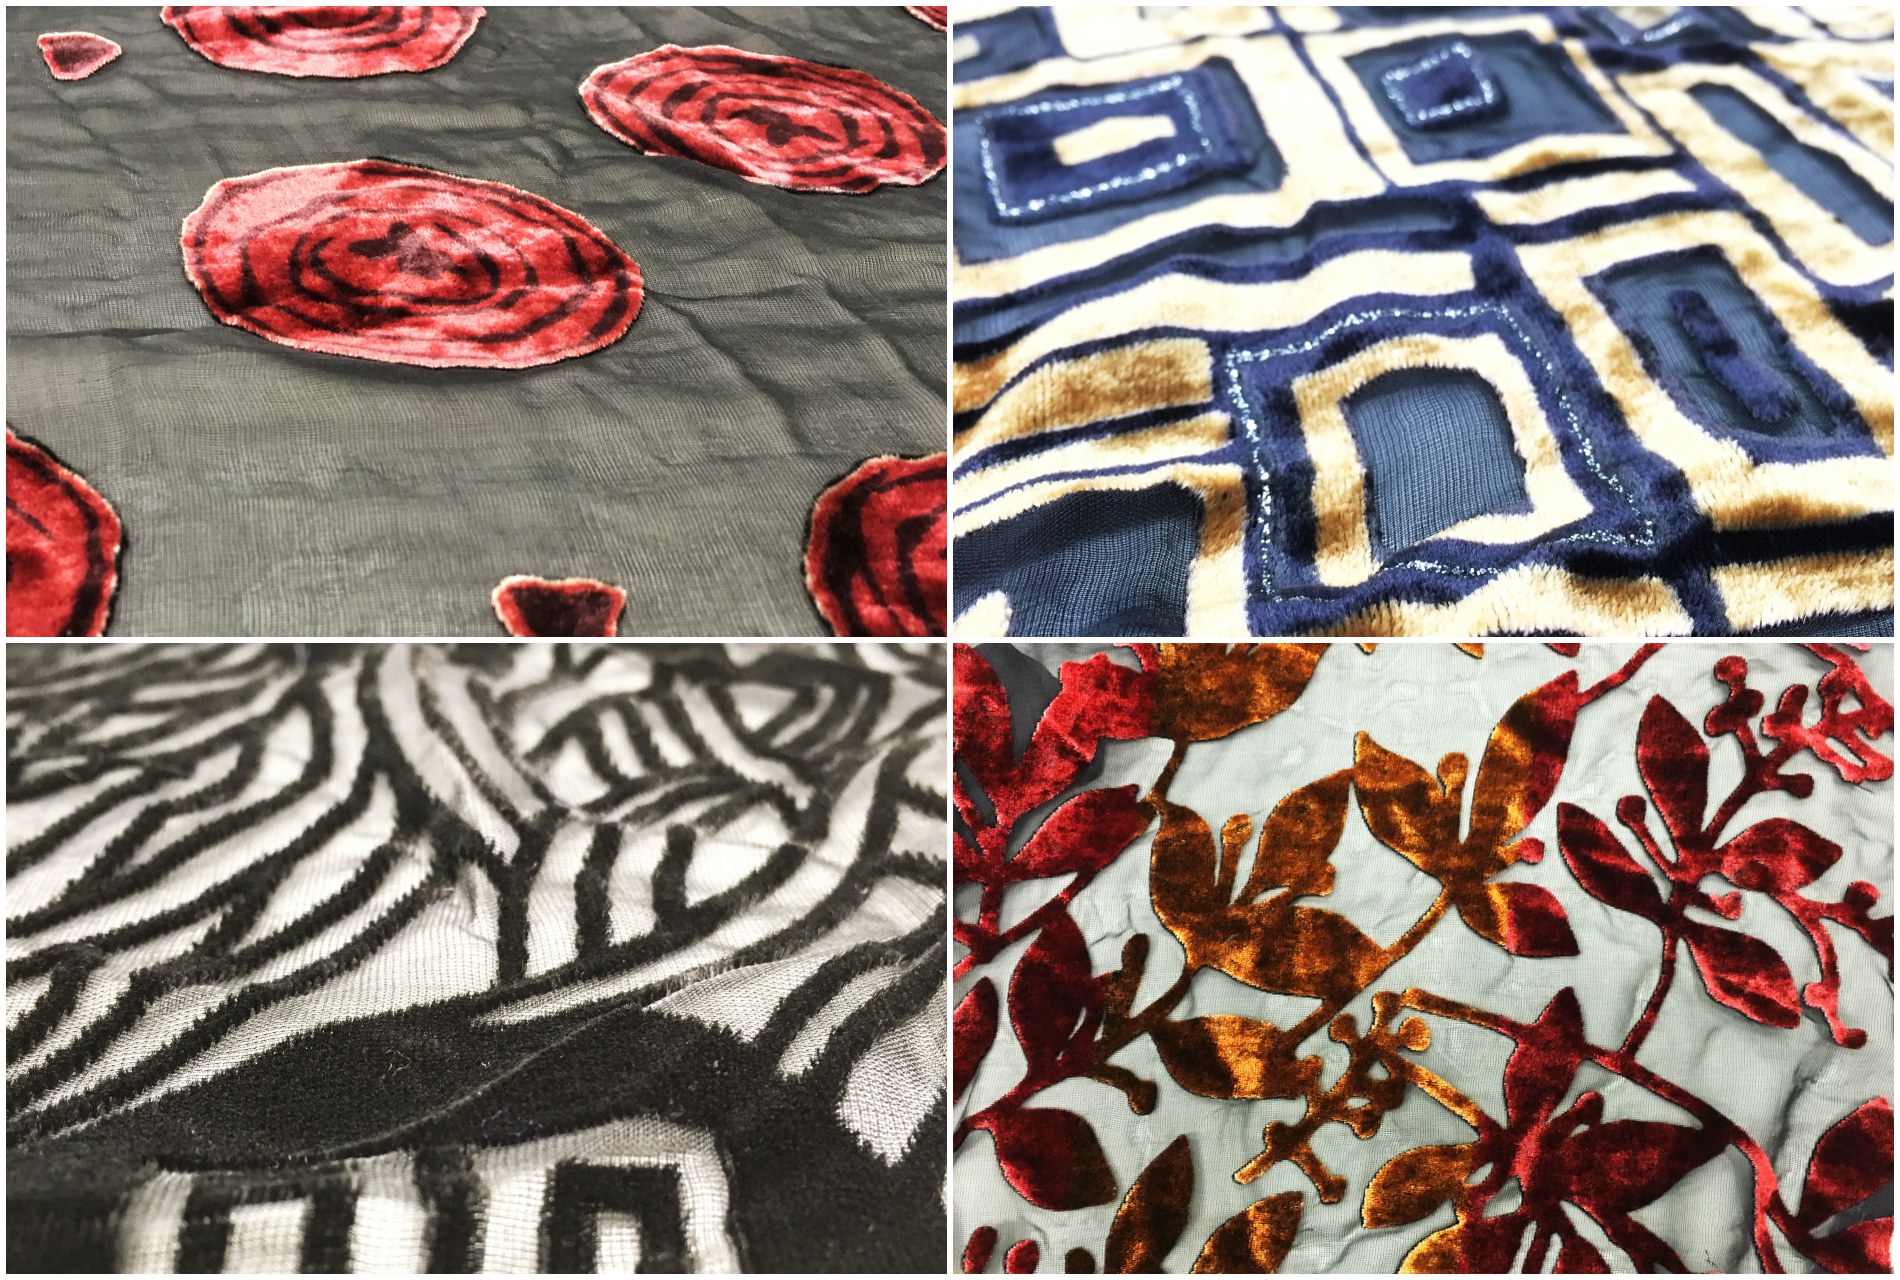
Fibre etch and embroideryDevore curtains and upholstery found on PinterestDevore fashion found on Pinterest
Personal reflections:
I did not silkscreen-print the ink onto the back, but the front of the velvet. The second piece of velvet was painted with swirls but only patches emerged after ironing. Perhaps applying the gel unto the back of the cloth would be more successful as the base of the velvet fibre would directly absorb it. Nevertheless, the final effect of devore is stunning and I would love to explore it in the future.
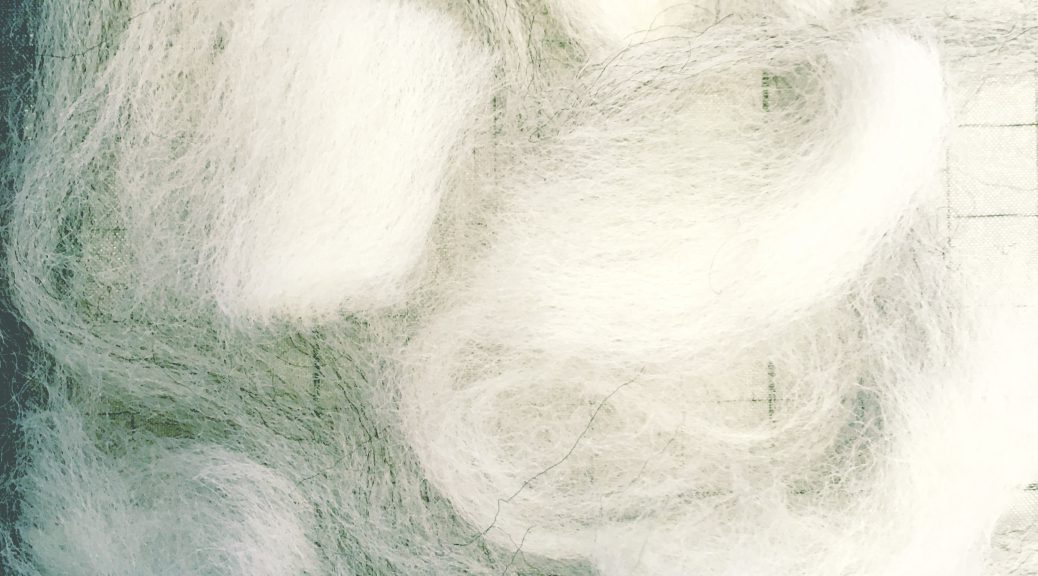
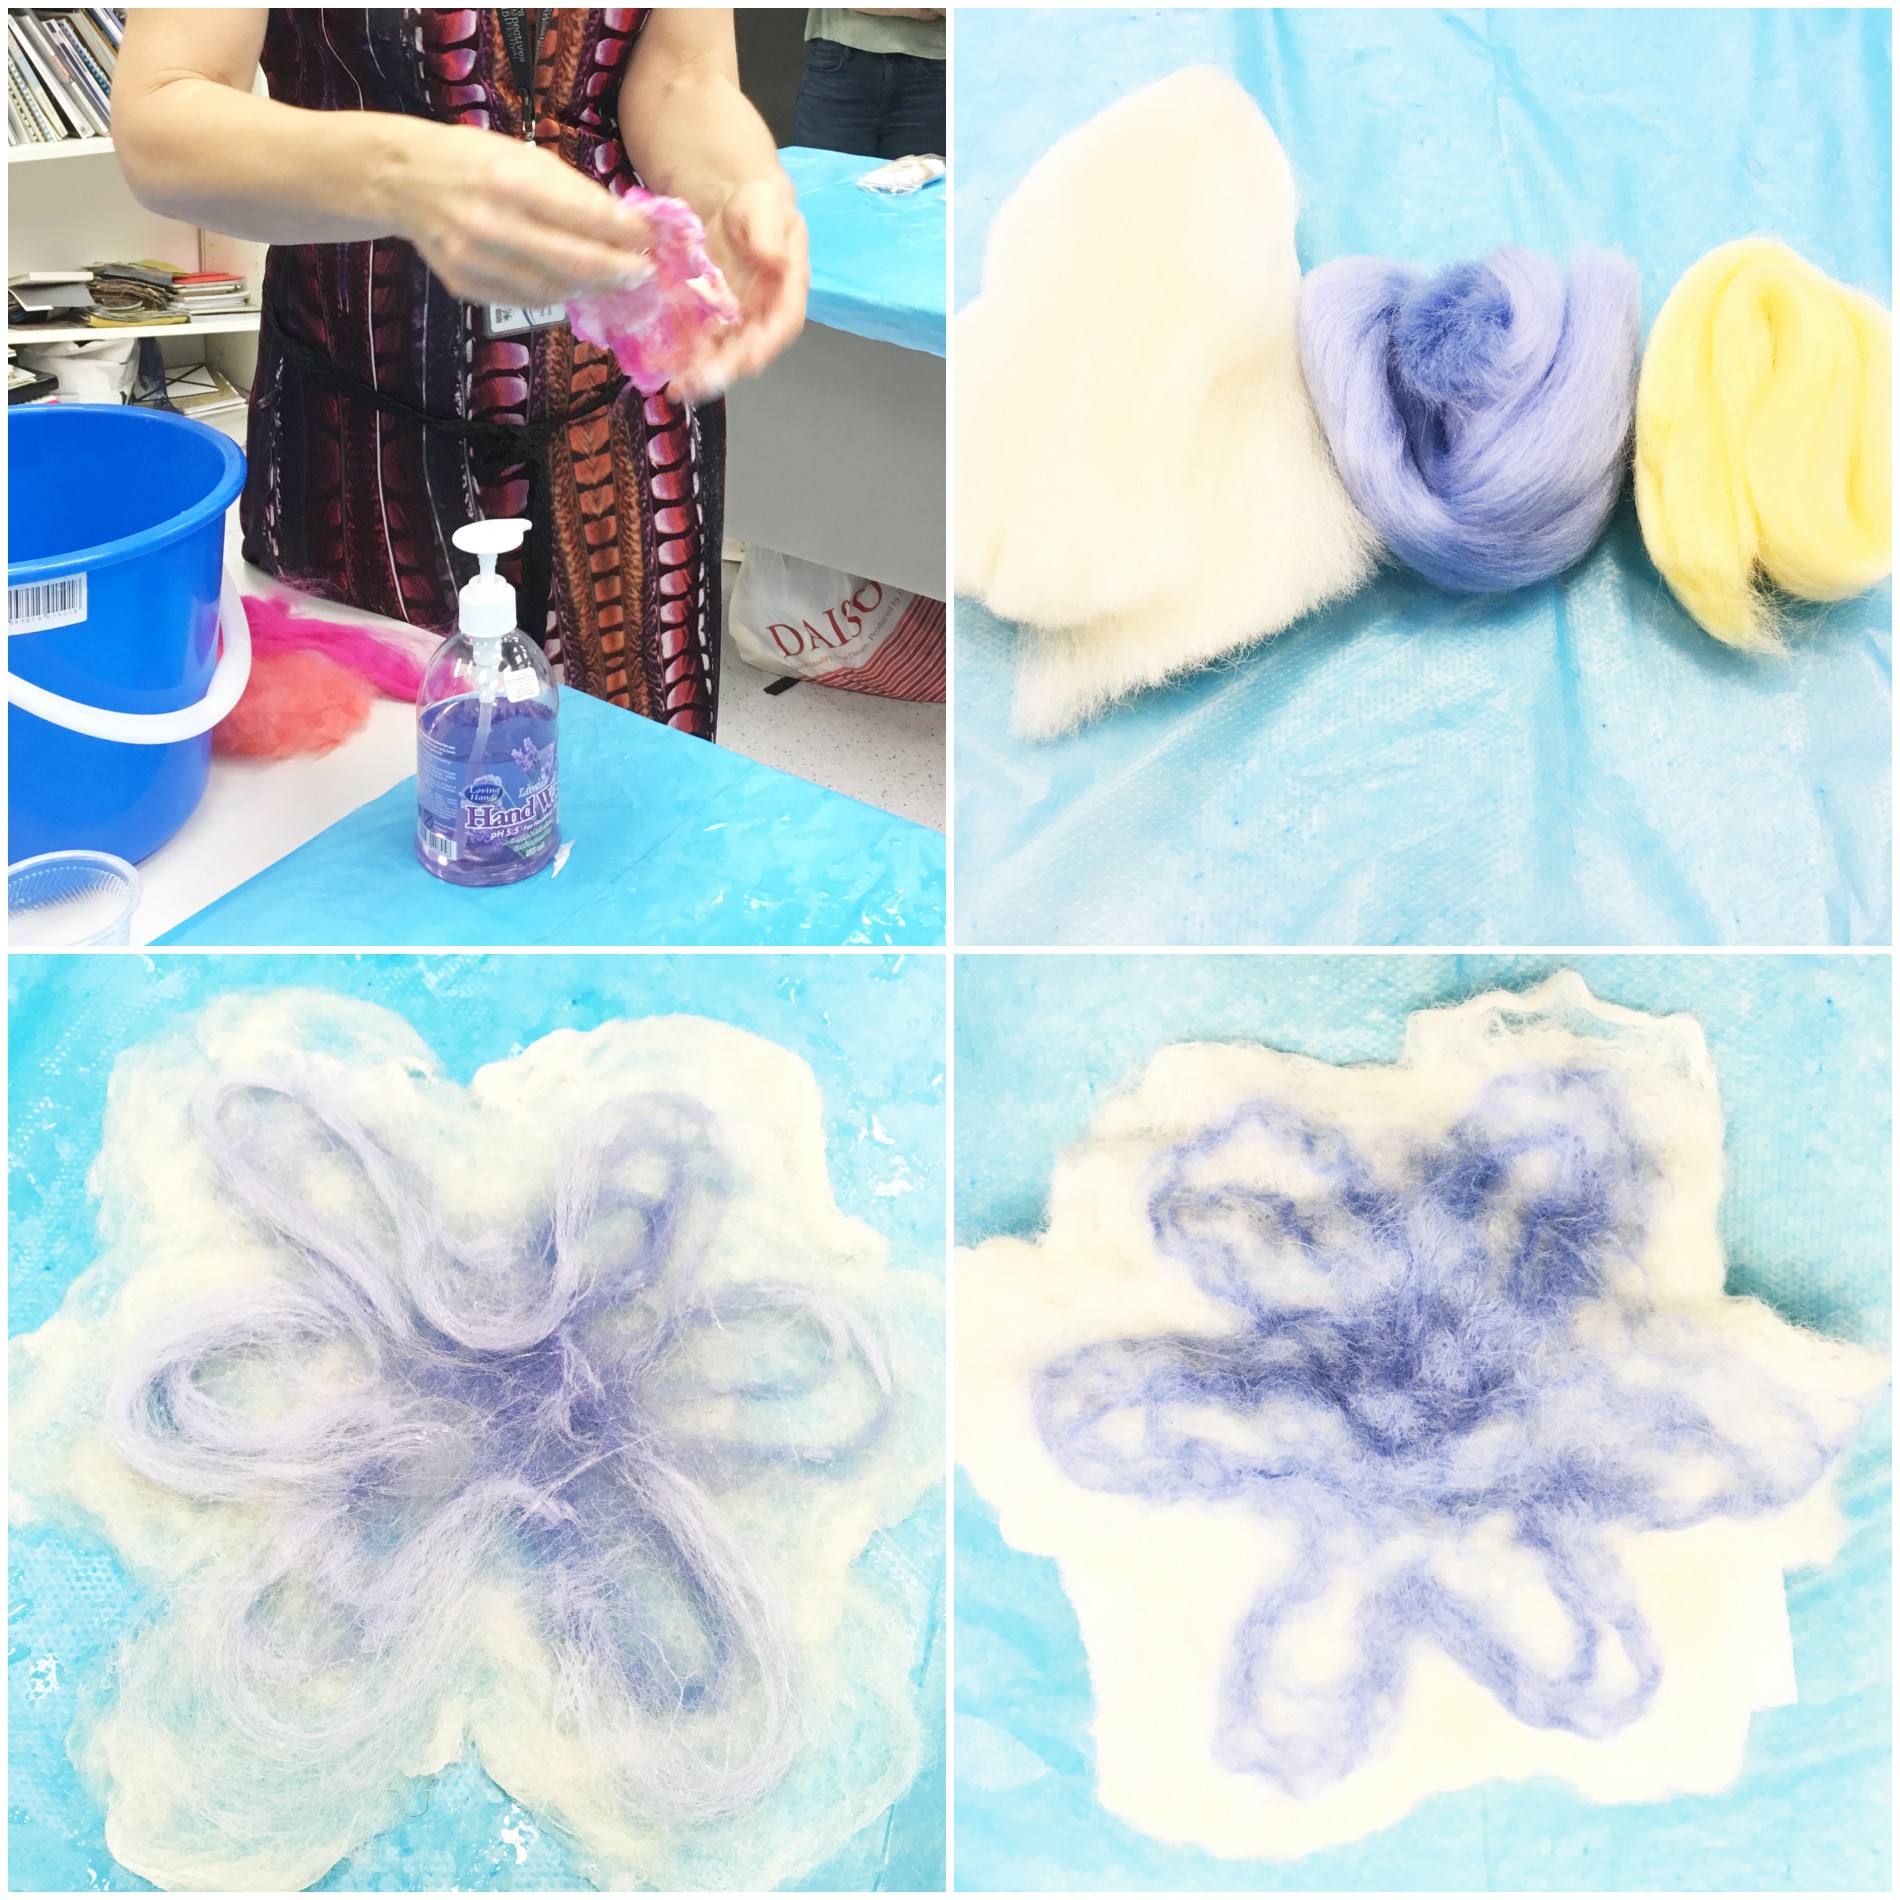
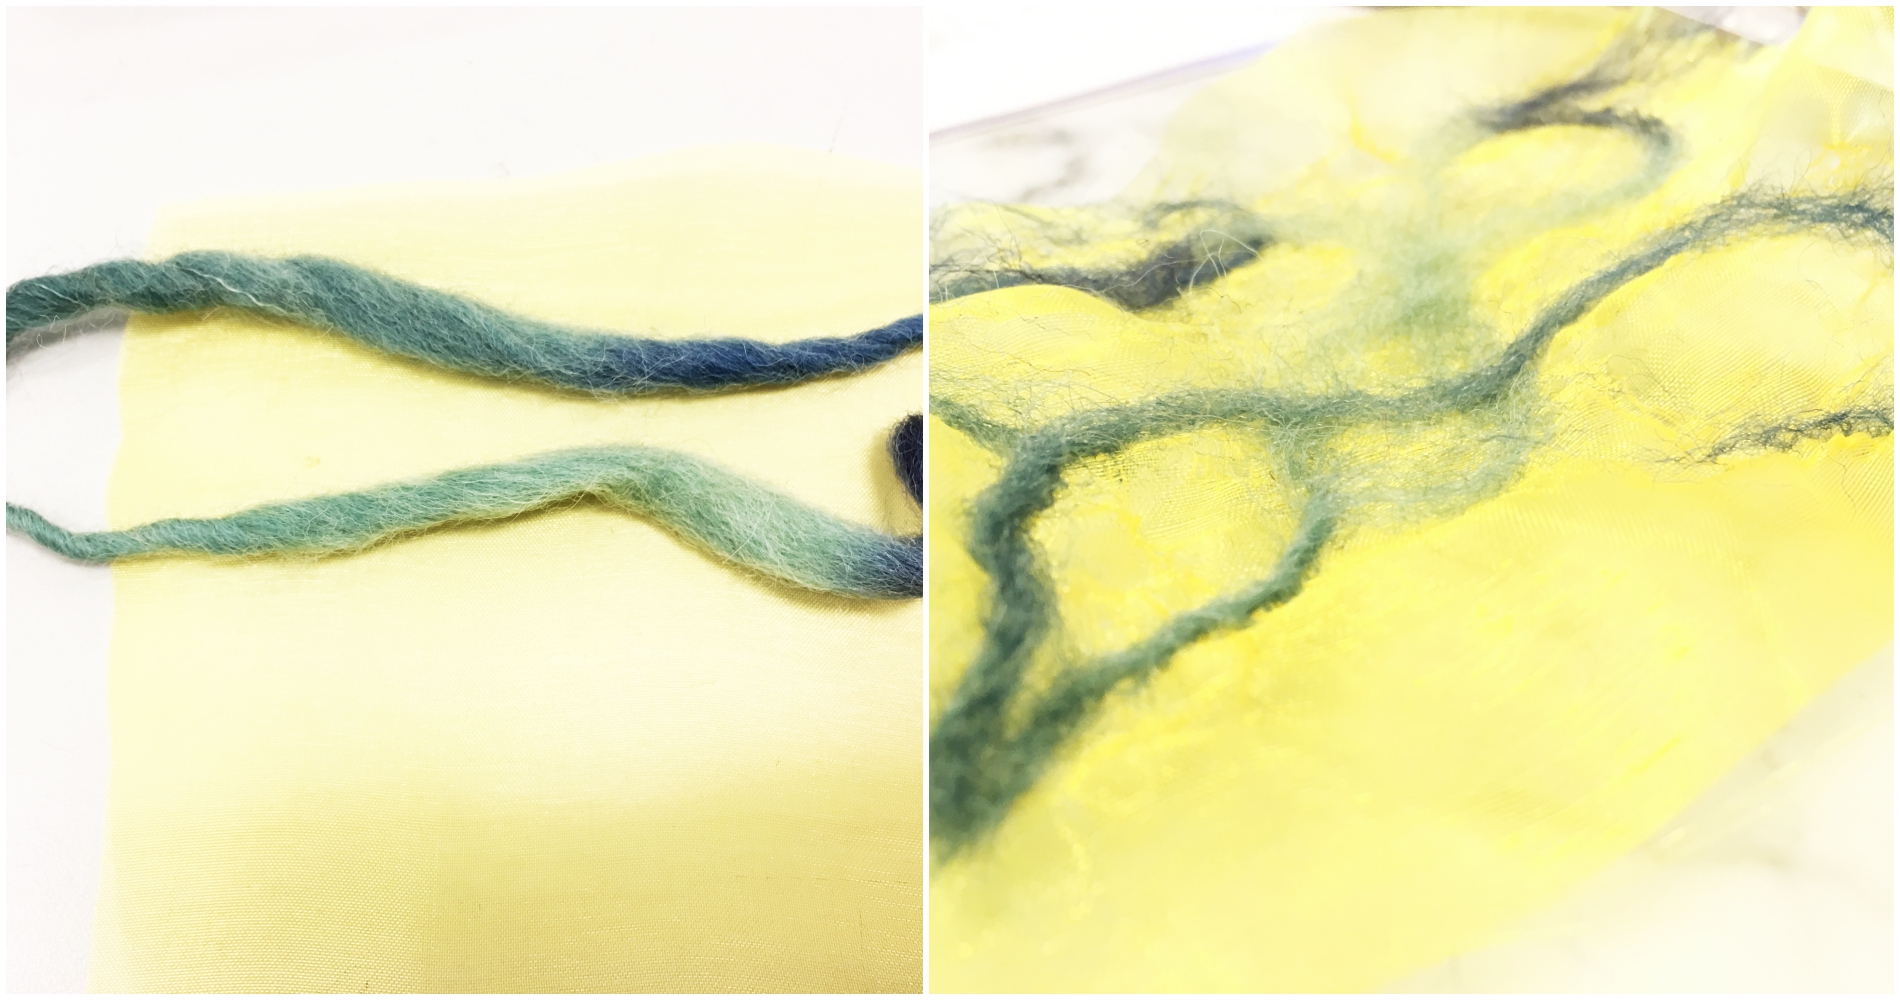
Felting is done when animal fibres are separated, tangled and relocked. In wet felting, tiny scales in the fibres are separated using heat (warm water or friction), and tangled again using various tools. Interlocking occurs when the fibres cool. In needle felting, the scales are interlocked using barbed needles.
Materials required:
Wool, natural fibres
Warm soapy water
Plastic sheet
Felting needles
Sheer fabric (like silk)
Flat spongey support
Technique:
a) Wet felting:
Arrange the wool or yarn and wet it with soapy water
Rub the wool until the surface grows thicker and more stable
You can also roll it in a bamboo mat
If using artificial fibres, a minimum of 30% wool content is still required
Wet felting process
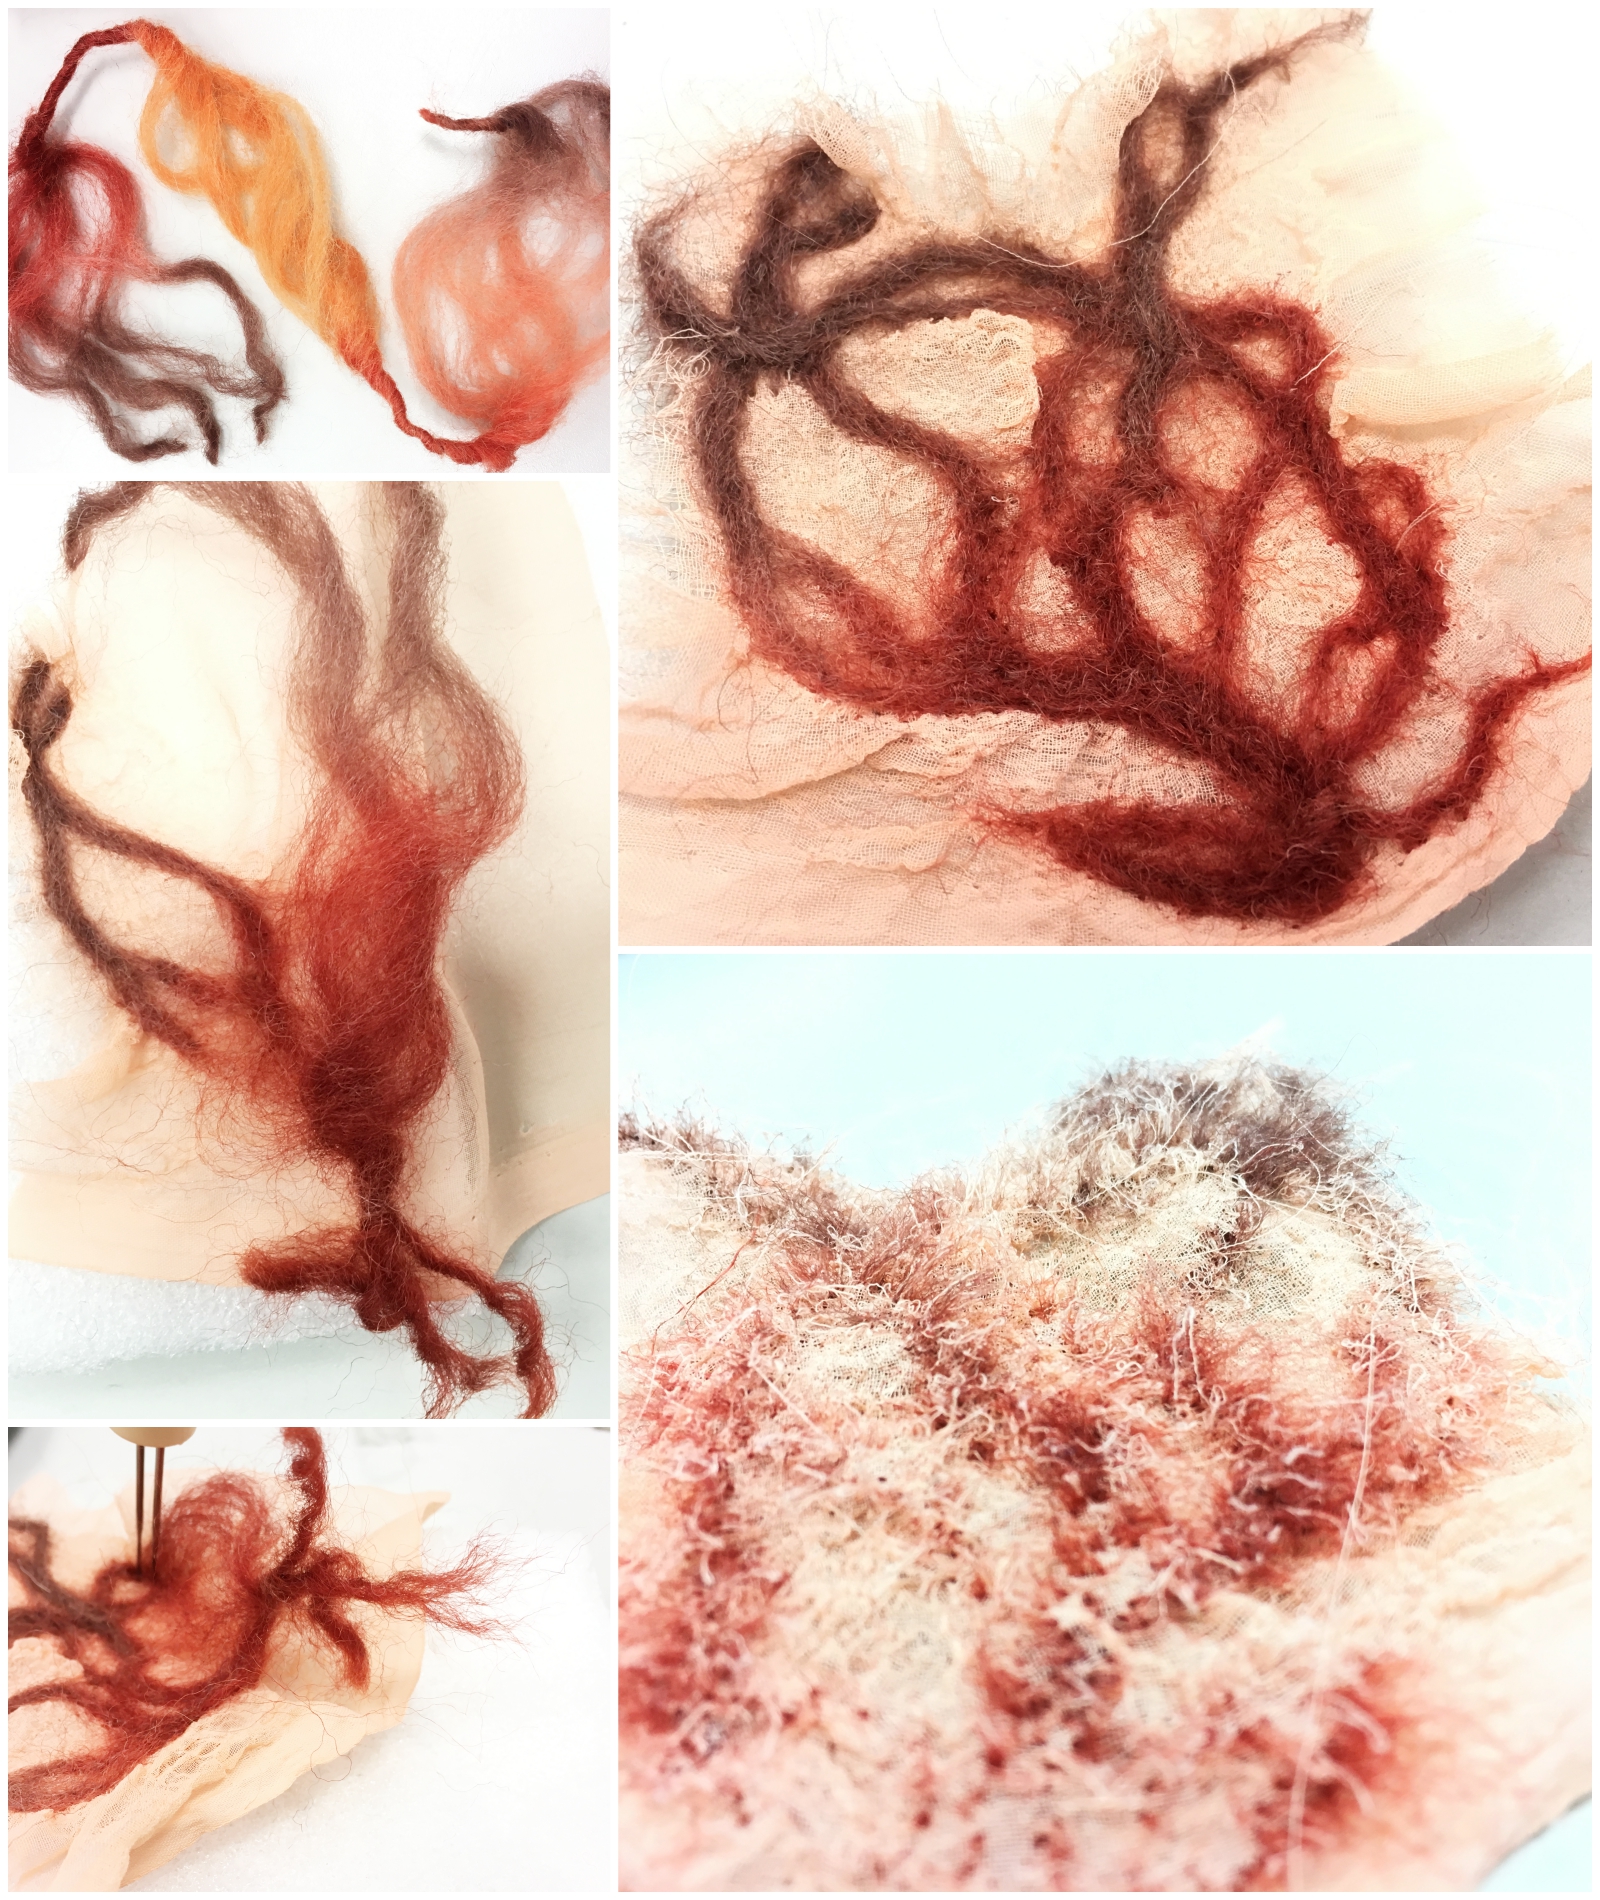
b) Needle felting:
Arrange the wool in the manner desired
Poke the wool with the felting needles until structure is firm
This technique is suitable for both 2D and 3D felted works
Needle felting process (continuation from wet felting)
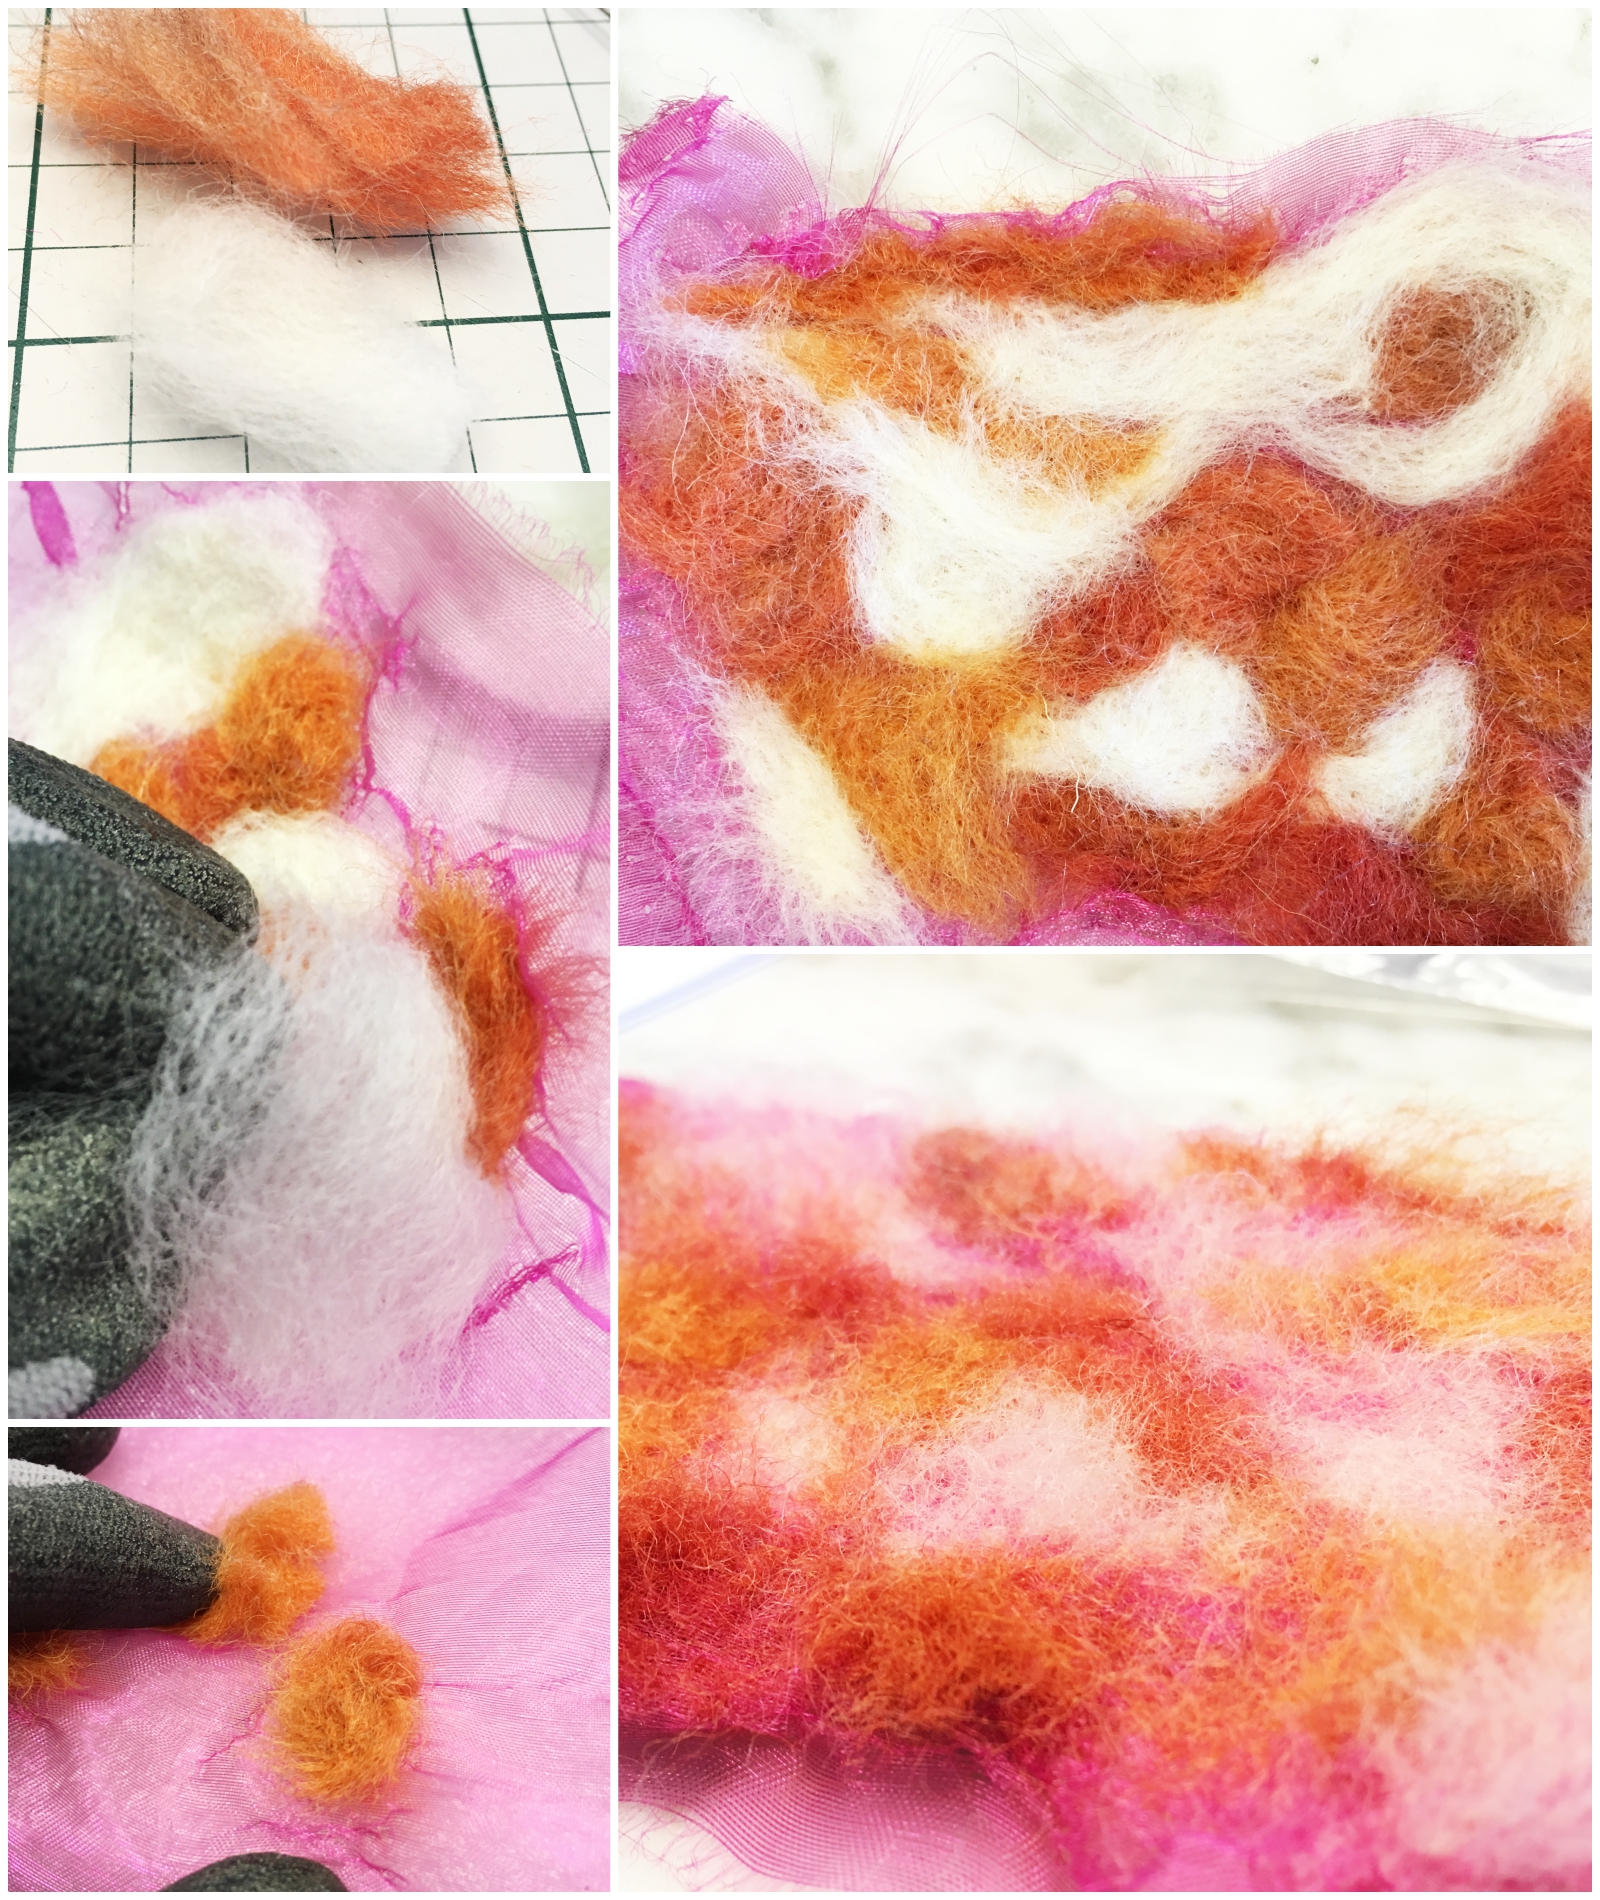
c) Nuno felting:
Arrange the wool or other natural fibres on the fabric placed atop the sponge
Poke the wool with the felting needles until structure is firm
The effects of different fibres on different background fabric can be explored
Nuno felting process
Applications include:
Making of very stiff object (like winter coats, boots and bags)
Delicate objects (like scarfs and accessories)
Mixing both properties to achieve intriguing designs
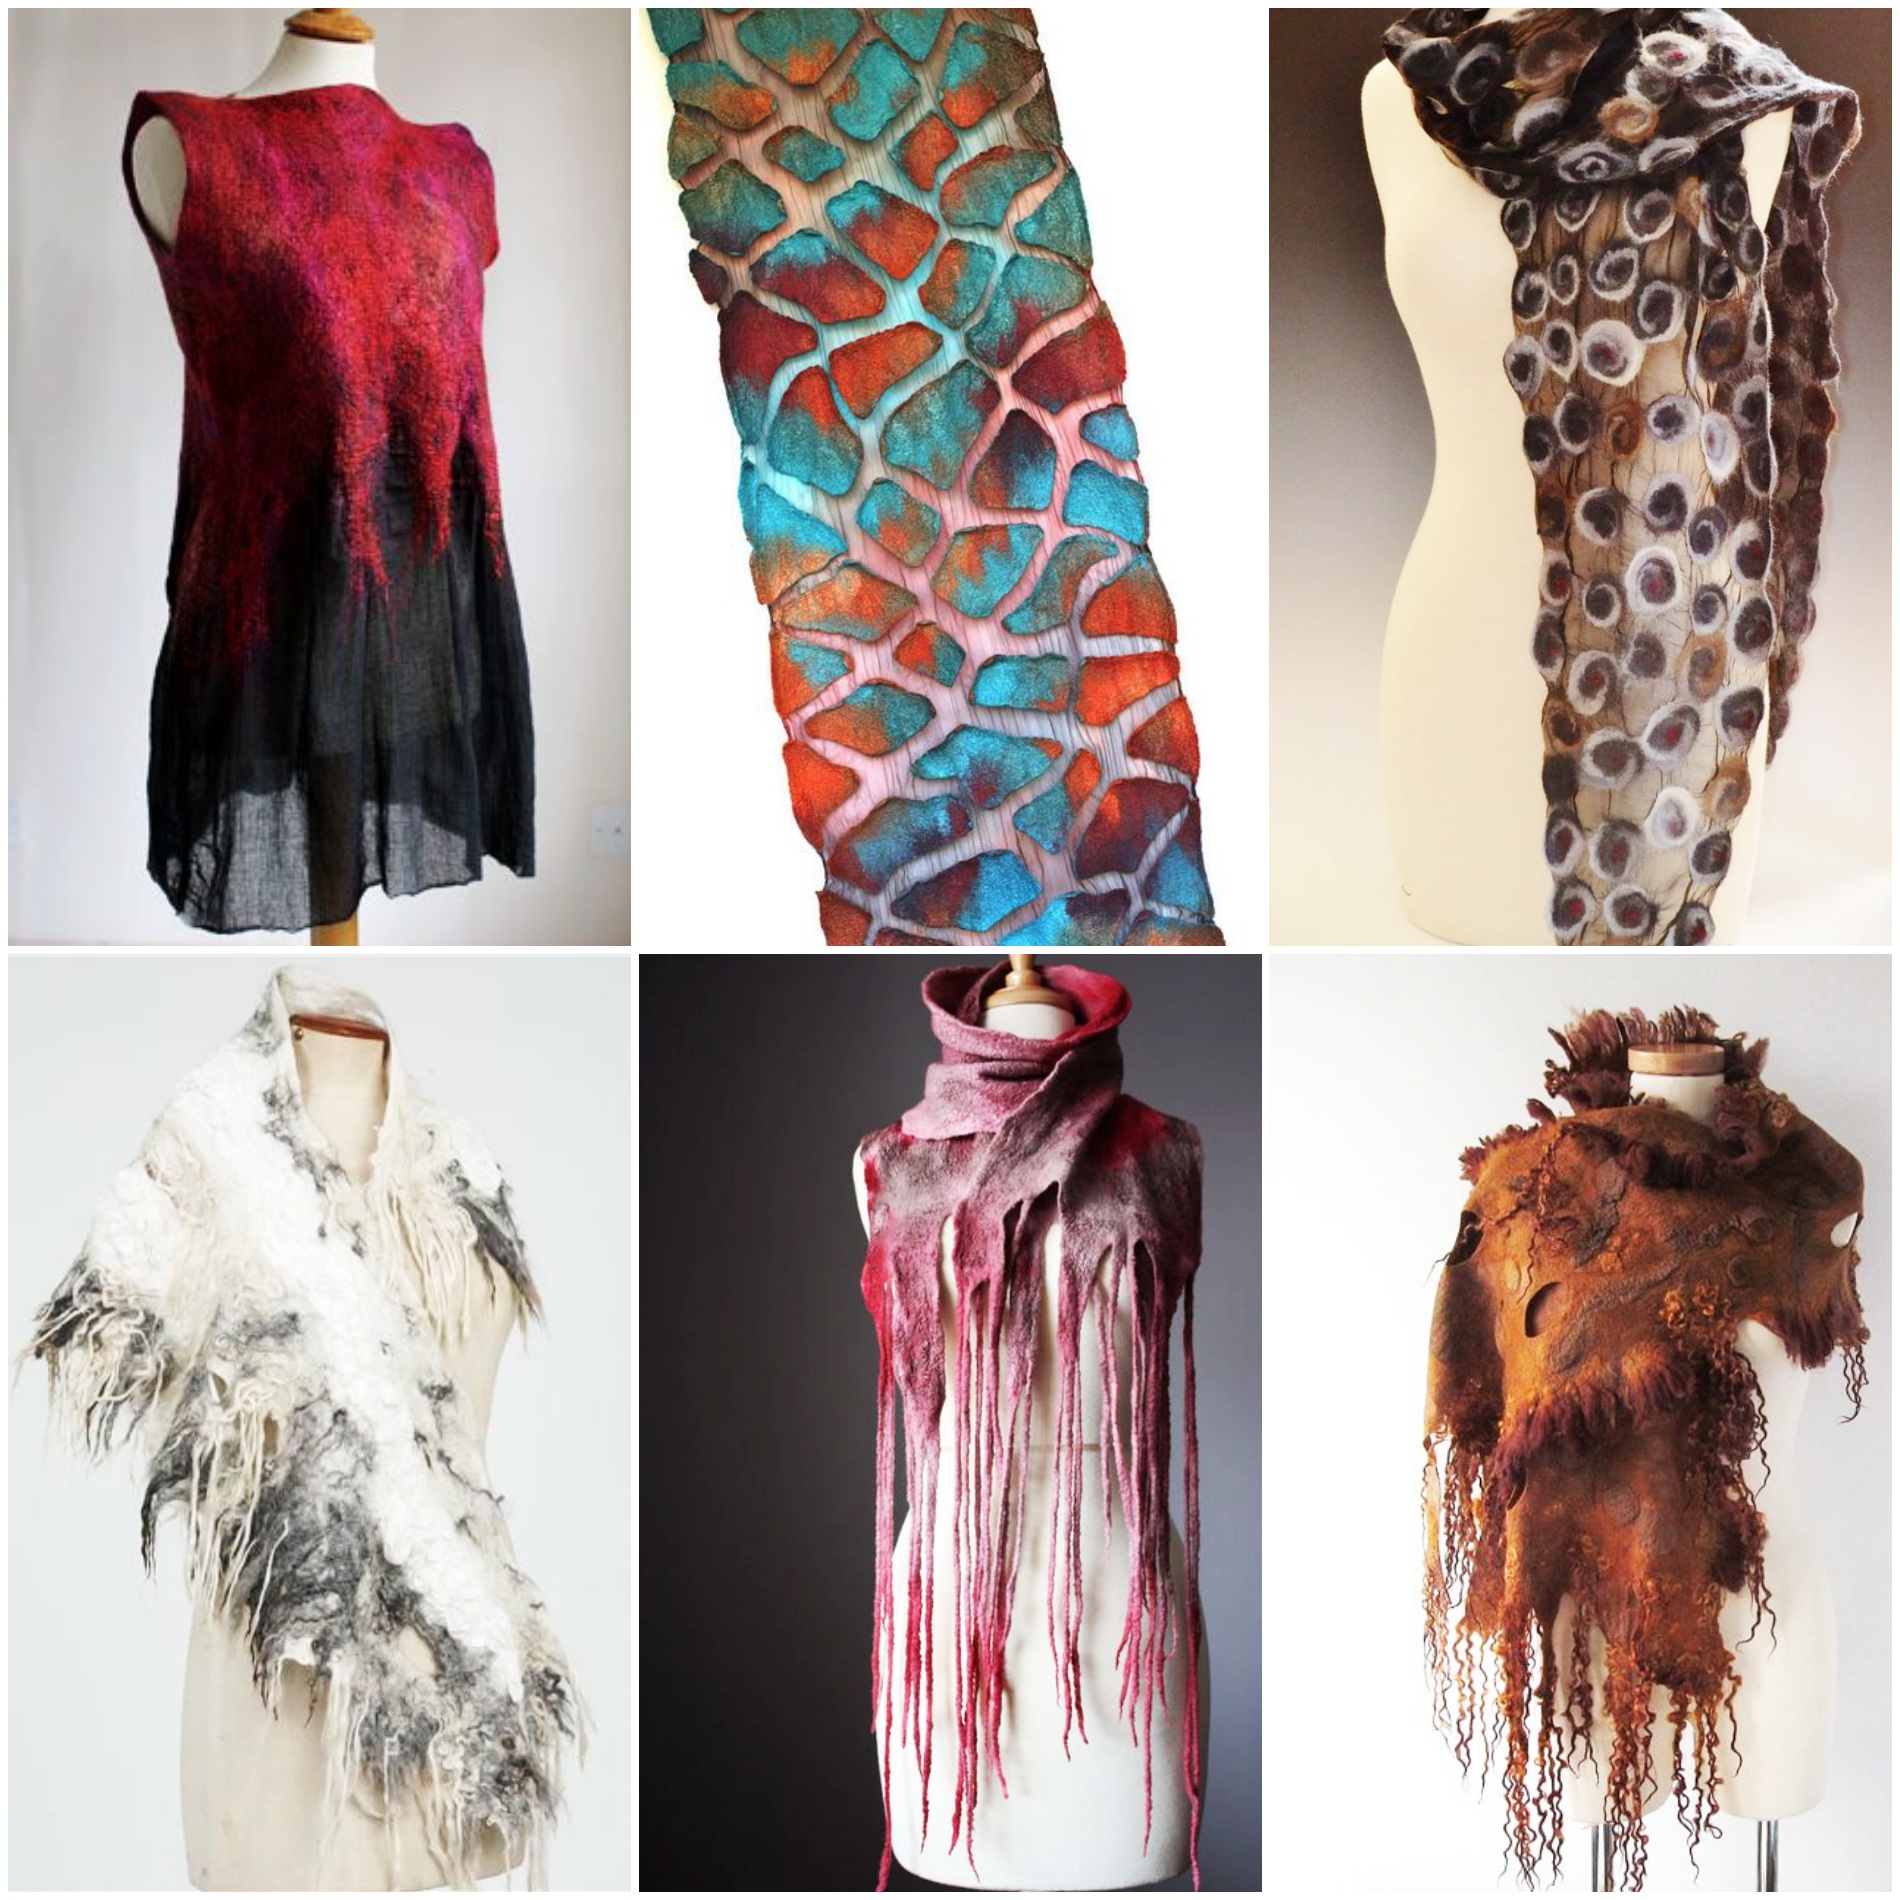
Felted fashion items sourced from Pinterest
Personal reflection:
I do enjoy the long and tedious process of felting as the end result is somewhat unpredictable. The resulting textures on the back surface of nuno felting was a unexpectedly delightful as well. The soothing and warm tactility of woollen surfaces makes the process worthwhile and highly therapeutic!