Desert Dragon – Final

After much work, here is our final product!

Here are the individual panels:

We start away from the dragon, viewing the dragon twist and turn around the screen, it’s skin the colour of sand.

We are then moved closer in to see the individual scales of the dragon as its body worms past the screen. Its scales are reflective.

Finally, we are brought inside the dragon. It’s like a tunnel that snakes and moves as we travel through it to reach the end, suggesting the winding and turbulent road travelled by merchants who journeyed across the silk road.


Elphi – Storyboard and Prototypes

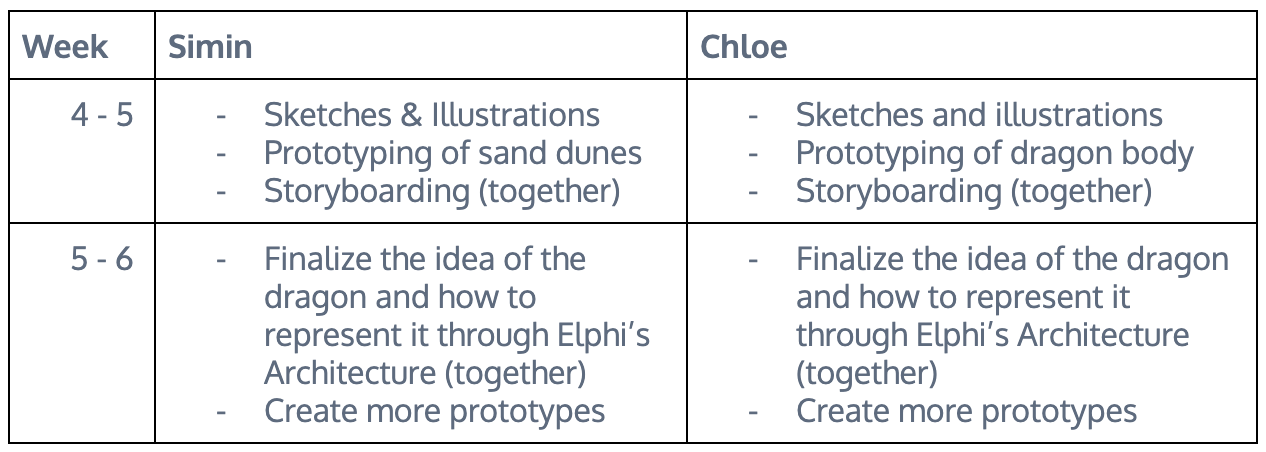
Storyboard and colour scheme:

We plan to have 3 clips to our entire video, each running about 30-40 seconds long.

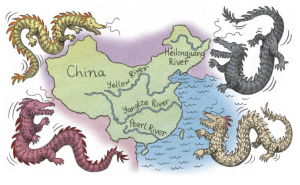
First panel: Our first clip shows the dragon’s exterior. Its body is rocky, mimicking the trails of the silk road that traders had to cross to reach foreign lands to trade. The body wraps the top and bottom of the frame and its body simultaneously moves inwards and outwards, as if circling the frame.

Second Panel: We move closer towards the dragon’s body to reveal its scales. The body snakes side to side and we see the light reflect on its scales.

Last Panel: We finally move inside the dragon. We move through its body as it moves. It is as if we are journeying through the silk road itself as we move through the dragon’s body and head towards the light.

Prototypes:
Prototypes and Development for First Panel:

The first panel was inspired by the mountainous landscapes of the silk road. We wanted to use these silhouettes of the landscape to mimic the scaly skin of a dragon, and have the layers of landscape move in and out of the screen to show the movement of the dragon. It gives the overall idea that the silk road is the dragon.

taking reference from the first image above, we came up with our first prototype:

For this prototype, we had the landscapes mirror each other on the top and bottom diagonal of the frame. while one landscape moves inwards, the other moves out. This gave the idea that the dragon was moving around the frame. We also overlayed the architecture of the Elphi building in the second reference photo above to create textures on the mountains.

After a consultation session with Prof Ina, we realized this panel did not match up to the other panels we had made due to its 2D nature as compared to the more 3D nature of the other 2 panels. We decided to reveal the dragon’s body more in this panel, while still using the textures from the Elphi building to create the scales of the dragon.

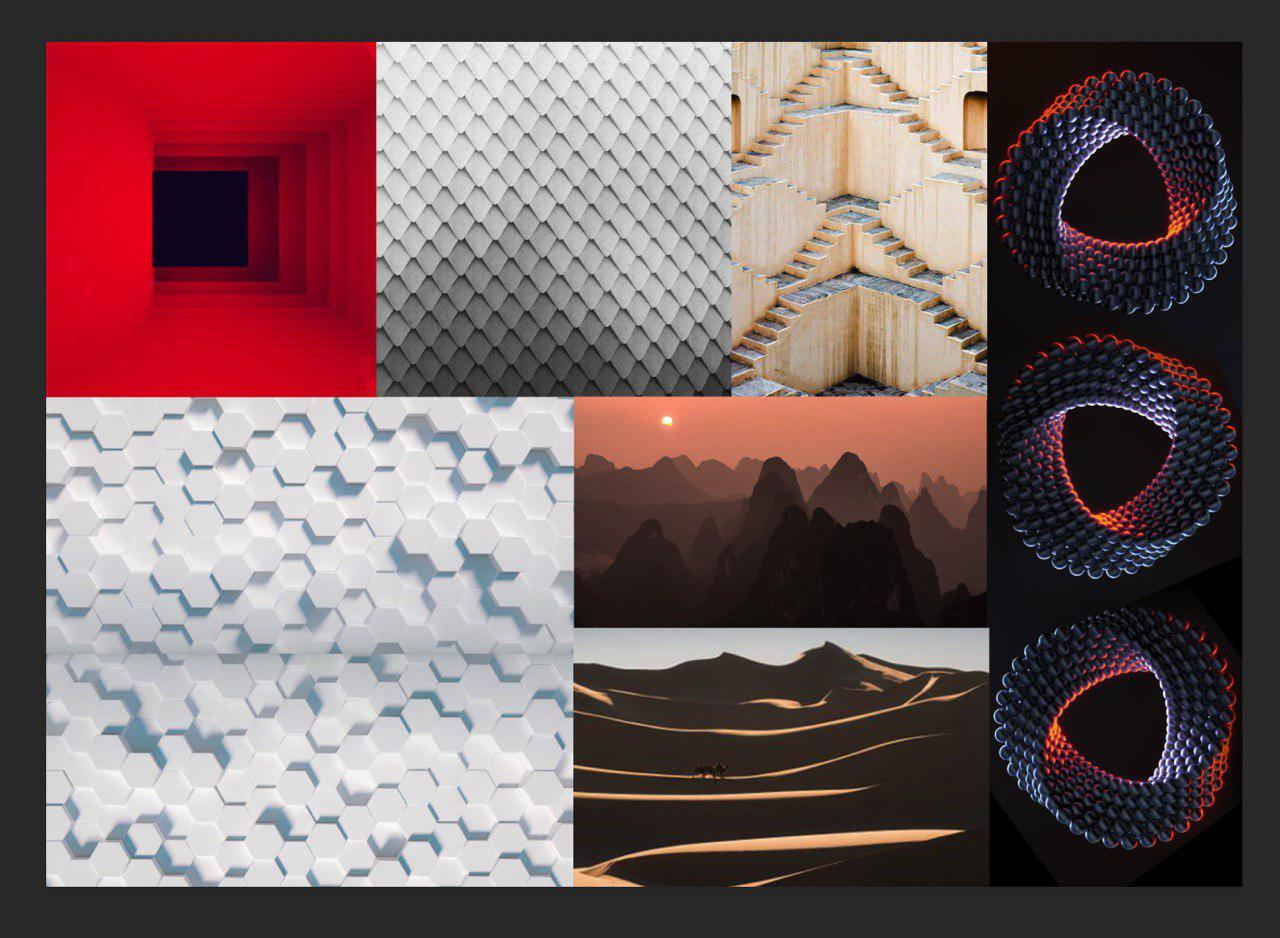
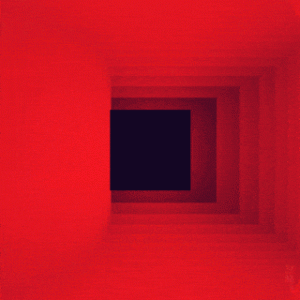
Above are some examples of images and shapes that we took reference from.

Here is the prototype we designed:

We moved from Adobe Illustrator to using Trapcode Tao in After Effects to create the dragon’s body. The dragon snakes around the frame of the screen. We made an organic ring that twists and turn as time progressed. Upon further consult with Ina, we realized that there was too much negative space visible on the screen. We decided to make the dragon’s body longer and more winding.

We layered and animated individual rings of the dragon’s body to fill up the screen and give the impression that the dragon’s body is twisting and turning in front of the viewers’ eyes.

Prototypes and Development for Second Panel:

Our inspiration for the lights and scales came from these images of the Elphi building in the design brief shared by Thorsten Bauer. We used the first image to create light patterns for the scales in our first prototype:

Upon further feedback, we added more light and dimension to the scales:

Prototypes and Development for Last Panel:

This last panel is inspired by the hallways and their winding like nature in the Elbphilharmonie.

We were also inspired by this specific design shown on a youtube video tutorial on Tao Trapcode:

We begin first by creating layers of outlined rectangles on After Effects and made them sway left to right to mimic a dragon moving, as well as moved the rectangles closer to the screen to make it look as if the viewer is moving through the dragon:

This prototype helped us visualize better how we would like the movement of the dragon to look like. With that, we tried our hands at Trapcode Tao and attempted to recreate the image we saw in the video:

While we achieved a tunnel effect, the tunnel was too geometric and not organic enough. Through more research and experimenting with the software, we discovered another method through the tutorial here.

We hence created a more seamless tunnel above that could also move and “evolve” to mimic the dragon’s moving body.

Finally, we added scale-like textures to the body and refined its shape to give it a more organic look:


Elphi – MOODBOARD: Desert Dragon

  1. Beginning: Our mind map, with focused points highlighted

2. Write up and Inspiration

One thing that came to our minds while we were discussing different concepts was the idea of dragons that are very often used in Chinese folklore that both of us were extremely familiar with. Growing up listening to tales of flying dragons inspired us to materialise and make tangible what we think dragons look like, based on the stories that we grew up listening to, as well as our own imagination.


Dragons have served to be a source of guidance and hope in Chinese folklore and even in modern-day stories as well. In the Chinese folklore, The Four Dragons, four dragons bring water to the desperate villagers in China, and ultimately selflessly transform themselves into the four winding rivers of China. In this folklore, not only do the dragons provide water for the villagers, but they also become the resource itself – the rivers – that act as life-giving and guiding sources for the Chinese. Similarly, Mushu in the movie Mulan acts as a form of guidance and protection for the protagonist throughout the film. We want to tie this in with this year’s theme of the “Silk Road” by combining elements of the dragon and the silk road together. We want to bring forth the idea of the dragon as a source of guidance and resource for merchants during their journey on the silk road, as well as the idea of the long and winding body of the dragon resembling the winding paths of the silk road.


While doing some research on how dragons look and the way they move, we realised that each artist has their own individual take on these magical creatures, hence we decided to take on the challenge of creating a new image for dragons to pay homage to what the creature stands for. 


What we want to focus on for this project is not on how the dragon looks like as a whole, but instead we want to focus on what it represents and what we find the most intriguing about these magical creatures, while holding on to the element of mystery. Hence, we decided to focus on the unique texture and movement of a dragon for this particular project, as it is simple yet captivating.

3. Artist Reference

A simple inspiration board created with photos from Pinterest.


A gif from the inspiration board

4. Methods and Techniques
  • We want to focus on one or two colours and the experimentation of its tones. Here are the colours and shades we will be experimenting with.

  • We want to focus on keeping the video monochrome with some sand shades.
  • We also want to focus on the organised movement of Geometric shapes (as seen from our inspiration board)
  • Tools we want to use:
    – After effects
    – Illustrator
    – Cinema 4D
  • We are also considering overlaying sandy/grainy textures over our videos.
5. Individual Timeline (As of now)

Experimental Filmmaking – Assignment 1

Response to experimental film in a 10 photo series

My series represents my response/reaction to film making. Through these accidental shots/film developmental accidents, my photos express my attempt at grasping the concepts of these experimental films. How I understand but yet don’t understand (the familiar and unfamiliar in these photos, the blurred images, etc)

8:00 AM [Reflection]

POST 8:00 AM PRODUCTION  REFLECTIONS

Shooting 8:00 AM for our assignment – although pretty stressful –was a great refresher for me on production protocol. From doing up the call sheets, storyboards and shot lists (with my DOP), and casting my actress, to the crazy travelling between locations on shoot  and shooting the film itself, to the editing, experimenting with sound and visuals, it was an overall pretty fufilling experience.

There were definitely some tense and stressful periods during the production of 8:00 AM such as making sure I have all my details planned out and all the forms I need before the shoot days, and making sure everyone has something to do and that everyone (especially my actress) is happy or at least not feeling tired or annoyed.

To cope with these problems I made sure everything was ready for shoot. I spent a day location scouting at the timings that I would have my shoot (as seen in my production folder). I had a lot of difficulties finding this one location I really wanted for my shoot which was this back alley at joo chiat (pic below).

A picture captured by the photography company AndriodsinBoots for the wedding of the founders of A for Arcade. Image from: https://singaporebrides.com/articles/wp-content/uploads/2017/03/aforarcade-founders-wedding-at-grand-hyatt-singapore-4.jpg

I didn’t manage to find it during the scout itself and desperately tried to find it via google maps and a lot of asking around. Thankfully the photographer from Andriod in Boots who I messaged replied me and willingly gave me the location of this place!

Besides that, I had my actress, DOP and AD come with me the day before the shoot to take a look at the locations we will be at. I had my actress familiarise herself with the spaces, and I talked to my DOP on the kind of shots I wanted and we looked through which settings and lenses would be best for each shot. I also talked to my AD, letting her know what the schedule will be like and what needs to be done at every location (such as getting the sound girl to record some ambience sounds)

It was definitely hard to keep everyone in high spirits for the 2 days of shoot because a lot of them were tired given the shoots were early in the morning, and the first day of shoot was a long day. But overall everyone was really co-operative and helped me out a lot (-:

Some photos from Pre-production and production:

My casting call poster
Bringing my crew and actress to locations before the shoot
Shoot day 1
Shoot day 1
Shoot day 1: Talking to my actress, giving her some directions. Going up to her instead of talking at her by the DOP
Shoot day 1: Celine, my sound woman helping me get some atmos audio
Shoot day 1
Shoot day 1: Indoor location, directing my actress
Shoot day 1: Kudos to Jin Cheng and Alvin for helping me with the lights
Shoot day 2: Lift scene
Shoot day 2
Finding a beautiful location on our way to another location and having a spontaneous shoot there. (eventually used as my credits sequence)


Thoughts after editing 8:00 AM:

My film definitely ran over 5 minutes given that it was a script with no dialogue and was 4 pages long… There were some scenes I had to completely cut out such as the very long scene of the girl pacing back and forth at the doorway as she was deciding whether or not to leave her house and the other scene at the elevator. I felt these two scenes were pretty good at bringing up her hikikomori character but the shots I used were mostly long, one takes and the scene of her first encounter outdoors was stronger than the other 2 so I decided to shorten/cut those two scenes out completely. I wanted to squeeze in the spontaneous scene we shot at the void deck because my film focuses on the girl’s curious journey but there was not enough time and I hence used it as part of my credits sequence which I felt added a rather cute and serene feel to my short.

One issue I realized also was that some of my shots were overexposed. It was really hard to tell during the shoot itself because we didn’t have a separate and bigger monitor for my DOP and myself to look at. I tried to correct the footage a little but not much can be done when the data is lost haha. What I can do is to just take note of this in future productions.

Raw footage
Final image after colour grading


There were also actually other things I wanted to try-out like putting a stocking over the camera lens to create a dreamy vintage effect for the scenes of the girl on her journey to the post office but I had forgotten to get the stockings.. (-‘: O well, I was still pretty satisfied with the outcome.

POST SCREENING REFLECTIONS

There were definitely a lot of people whose production quality was much higher than mine and whose stories had a proper arch and conveyed very strong emotions. I felt to me these were very strong films. For me, however, I wanted to try and create a quieter and introspective film, allowing my audience’s eyes to wander around the screen and explore the places like the girl does. Though I feel that I could have definitely conveyed it stronger.

Another issue I found, and as said by Nicole, was that the girl being a recluse wasn’t very easy to identify and the art direction could have been stronger (the mess on the floor and the girl’s clothes). With such a quirky character, I should have paid more attention to these smaller details. Something for me to take note in the future: Build/flesh out my character.