Assignment 2: Pencil Comps

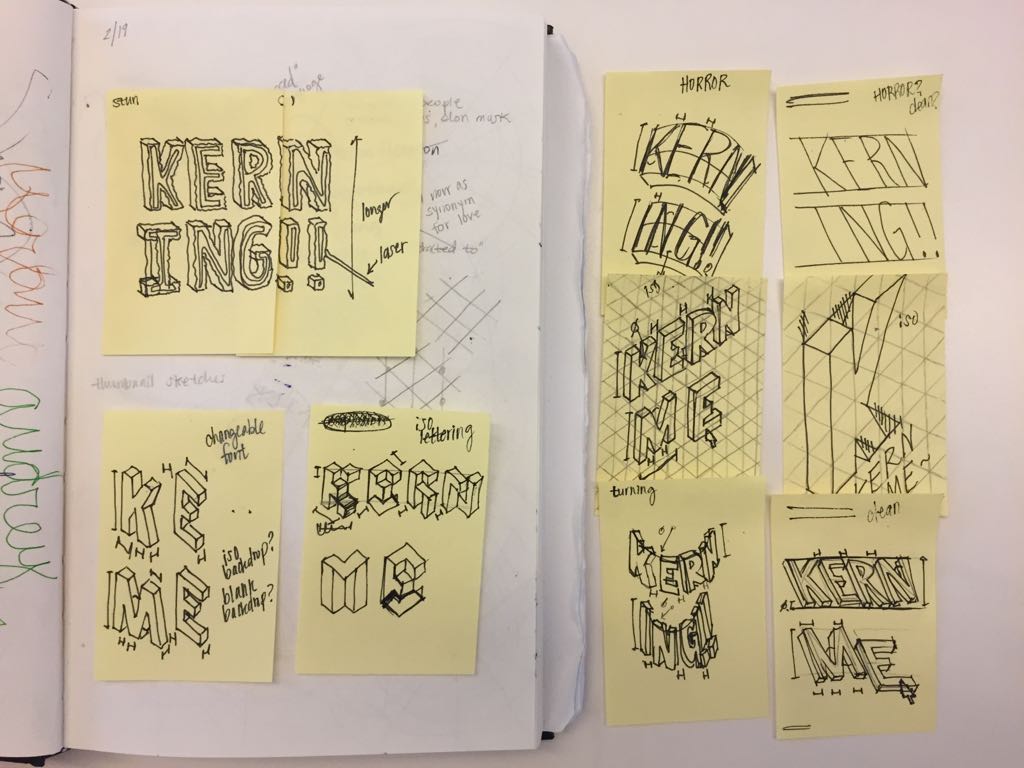
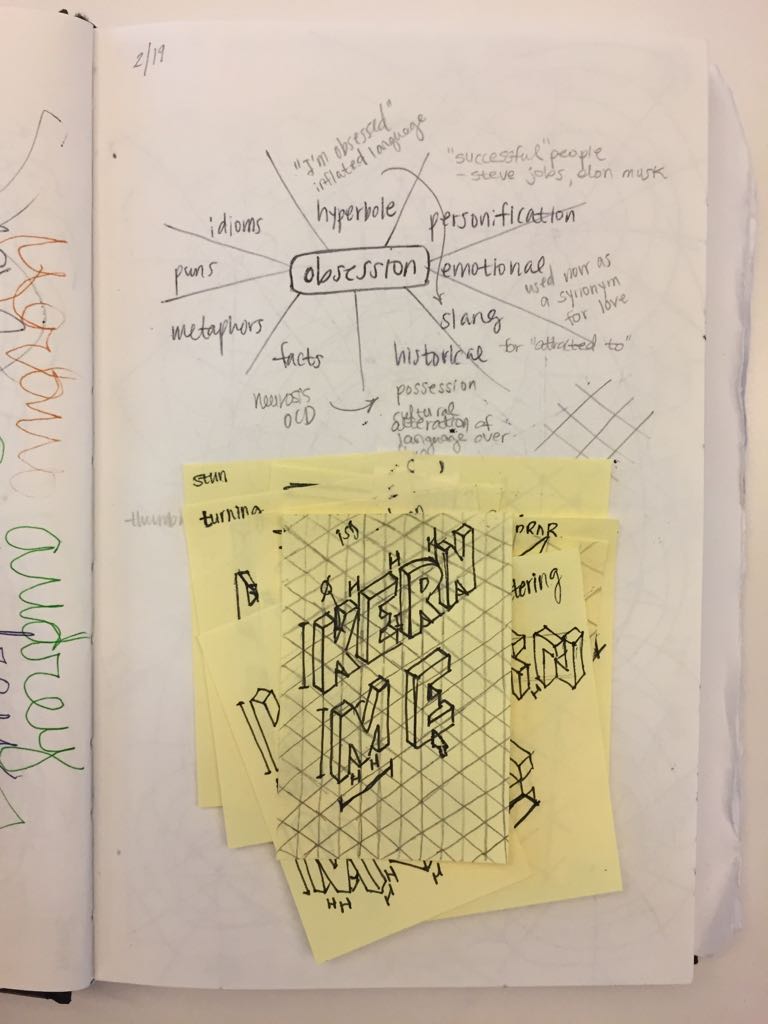
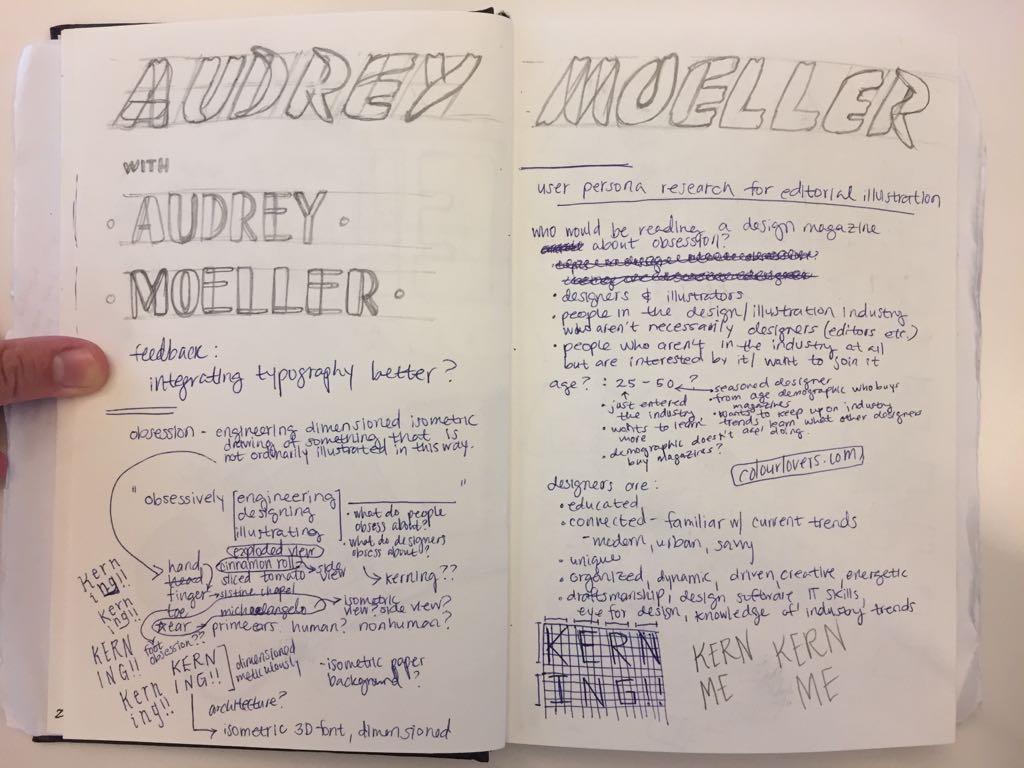
I first did some brainstorming on an iso grid. 

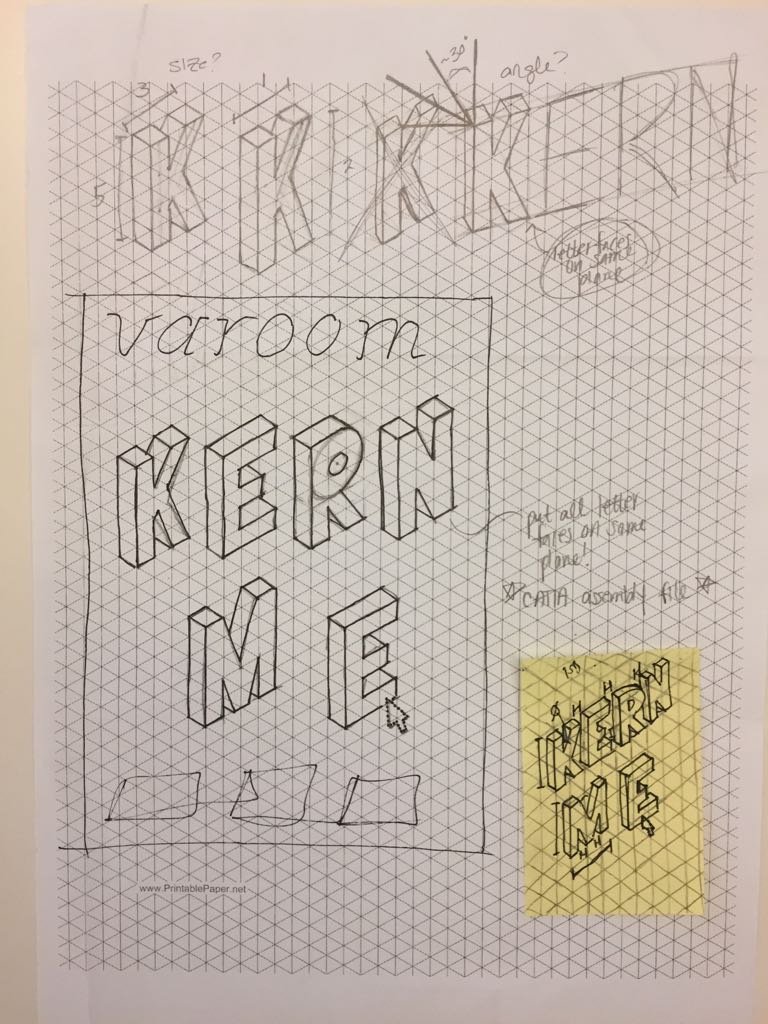
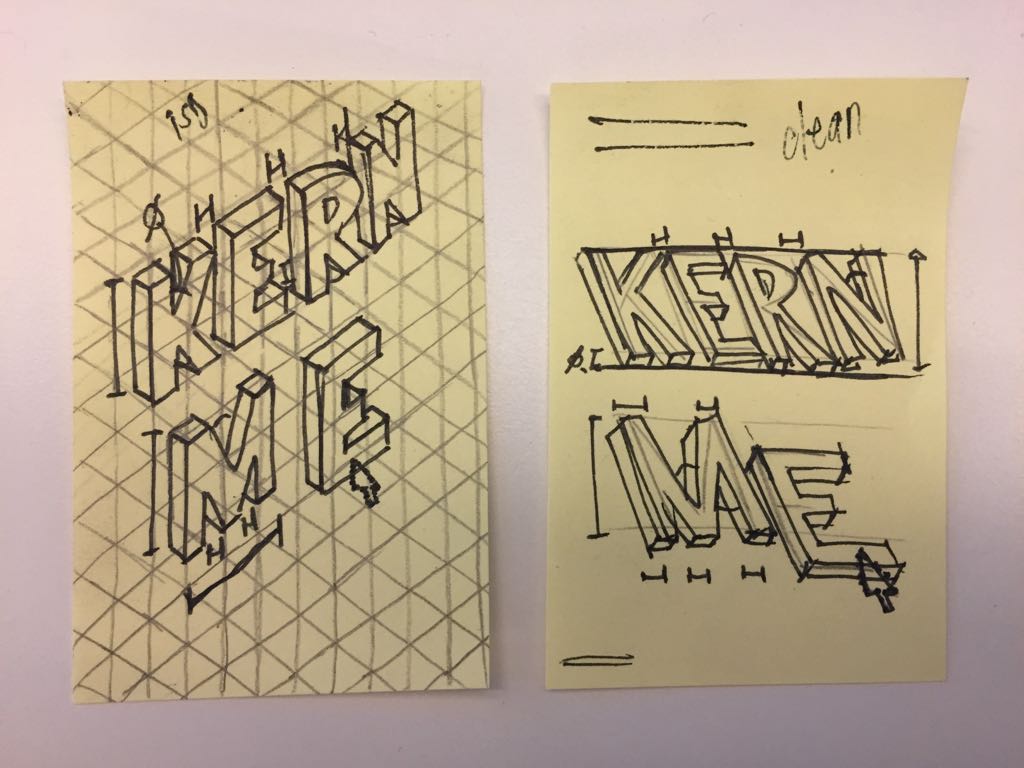
I looked at dimensions of the letters and decided that ~5×3 looked the best, which makes sense because 5×3 measurement is a widely agreed upon good design practice. This version does not have the dimensions included but they should be.

I traced the first comp to make a version with no iso grid. It looks more clean this way, and the dimensions have been included. This is not how the final dimensions would look, but it gives you an idea. After doing these two comps, I realized I wanted the front faces of the letters to lie on the same plane, which I implemented next.

I prefer this composition to the rest. Having the letter faces on the same plane creates a cohesion that the other compositions lack. In this version, I also tilted the front faces of the letters more toward the viewer, which I think looks better and is a better use of space. The tricky part of this one is that it does not use the standard isometric grid, it’s roughly a 60° cabinet oblique projection. In isometric drawing, the axes are equally spaced 120° apart, but in oblique drawings, the x- and y-axes are shown to true scale from the front while the z-axis is projected at some other angle.

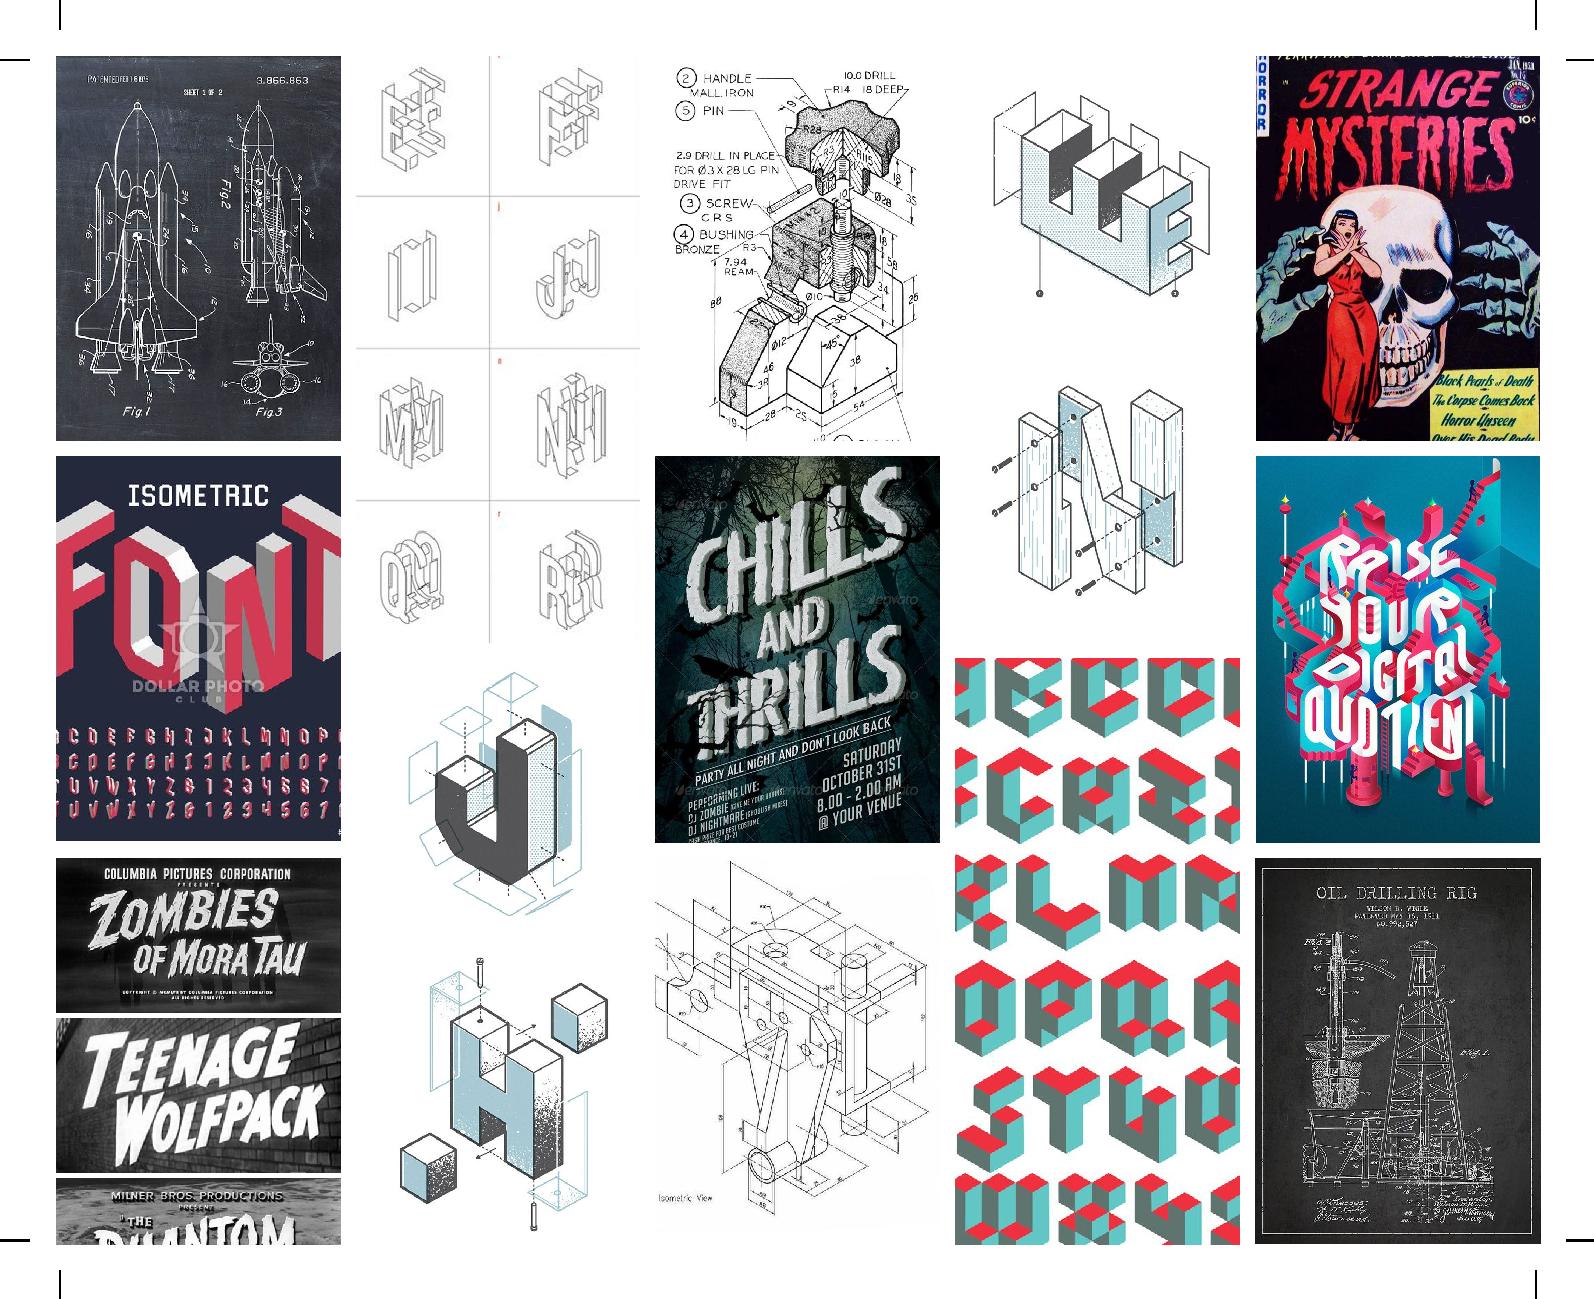
Here’s a good graphic to show some different oblique projections:

Cabinet Projection – tile map editor

So basically I will have to either create my own grid (which shouldn’t be too hard) to trace over, or model the letters in a 3D CAD program and rotate the assembly to a nice looking angle, and then convert it into a drawing file. I’m not sure which will take less time, but I’m tempted to go with the custom grid option. Although, the CAD option would be a fun and more interesting process to experiment with. I still plan to play with the iso grid background, I could make it light blue or green and very subtle. And of course, there will be dimensions overlaying the drawing which I did not include in the sketch.

Assignment 2: Thumbnail Sketches

The big decision that needed to be made in this stage was the phrase to be illustrated.  I considered what a designer reading Varoom might be obsessed with. I made a word association chart as a class activity but ultimately my final idea came from elsewhere.


There is one thing all designers are simultaneously obsessed with and enraged by: Kerning. When I suggested this topic to my professor, it produced a series of visceral reactions from her, and that’s when I knew I had to do it. Done correctly, I think all if not most designers who pick up a copy of the magazine will find it humorous and relatable. But I have to do it perfectly or all will be for naught!

I compared the two phrases, “KERNING!!” and “KERN ME”

I like the idea of “KERNING!!” because it reminds me of the horror posters in my mood board. It’s very dramatic and if it is illustrated in a horror style, it will appear daunting and intimidating. Plus I just really like horror.

But I want to appeal to as many designers as possible, and I think “KERN ME” is more innately humorous. I would illustrate this phrase in a clean style instead of a horror style, which lends itself better to dimensioning.

I ultimately went with “KERN ME.”

I experimented with a few different orientations and grid types. If this were an actual engineering drawing, it would be done on an isometric grid and the grid removed later. I will play with turning the grid on and off in the final piece. I took these ideas to the pencil composition stage.

Assignment 2: Mood Board

My mood board includes several dimensioned technical drawings and exploded view drawings of letters because I would like to illustrate isometric typography for this assignment. I have included lettering from horror posters because I admire the energy and drama evoked by this type of typography and would like to attempt to emulate this emotion with my project. As for the color, I like the navy blue, light red, light blue, and white palette used in several of these images. I think this palette is very dramatic but also very rational, which is something my persona, Nathan, would enjoy.

Assignment 2: Persona

For this assignment, we are required to create a persona. This person is a user of Varoom magazine, and our designs must appeal to them.

—— Research ——

I did a bit of research by looking at demographic statistics in the design industry and drew some conclusions as to what my user should resemble:

I decided that my user should be someone in the design industry, probably under the age of 30, who wants to stay connected and keep up with trends, and who is educated, organized, unique, and creative.

—— Persona ——


Nathan

Age: 26

New York City, Freelance Graphic Designer

Behavior:

  • Organized to a fault, modern, tech savvy, creative and energetic but still professional and composed.
  • Broad skill set- knowledge of trending design softwares/technologies, IT skills, business skills
  • An all-around chill guy that probably listens to smooth jazz and appears classy in all facets of life. Drinks his coffee black.

Why he purchases Varoom:

Nathan strives to keep up on modern design trends. Varoom gives him insight into the current work of other people in his field. It’s important for him to be constantly updated and connected. Plus, he likes the feeling of reading a tangible text from time to time.

Assignment 2: Theme

For our second assignment, an editorial illustration for the cover of Varoom magazine, we were given the option of designing for the theme of “obsession”, “style”, or “empathy.”

I chose “obsession” because I want to experiment with engineering drawings and illustration, and I think this theme will lend itself well to that medium. I want my final piece to be an intricately, obsessively dimensioned isometric line drawing that is also a good illustration and can appeal to designers (users of Varoom), which I think should be a good challenge. It may be worth mentioning that I am an engineering student with experience in technical drawing as well as the CAD programs used to create them.

Assignment 1: Finalized Piece

Before the piece was finalized, I received feedback that the typography across the top was not well-integrated in the piece, which I agreed with. Below are a few of the previous renditions of the title:


I had to make sure the face remained the focal point, and that the text didn’t look like it was just laid on top . By adding the shadow behind both the text and the head, some depth was created and as a result I think it looks less flat. Additionally, the green border behind the title gives it more contrast to the darkness behind it and therefore looks more purposeful. I am quite happy with the final version.

Assignment 1: Progress

Rough Sketches

In describing myself with a word list, I ended up deciding that I wanted to portray myself as happy, because I am an extremely optimistic person, but also illustrate my affinity for the macabre, which I consider to be an important part of my identity. I also knew that I wanted to caricature myself a bit because I have never done that before and I greatly admire graphic novel style illustration. My goal was to create a piece that looks entirely recognizable as myself while not being photo-accurate and also to appear happy/smiling while gory, which is a good challenge.


Final Sketch

I ended up using cross-hatching on the finalized sketch to better convey shadows, but I knew I wanted to stick to mostly one-directional line shading when I digitized it. To cartoon-ize myself, I enlarged my eyes and made my head more round. It was quite challenging to get the open mouth at the right angle and I don’t think I accomplished that with this sketch. I made quite a few changes to the proportion/angle of the jaw in the digitized version.


Digital Progress

Since I wasn’t sure what color palette I wanted to go with, I made my skin and hair their natural hue with the idea that I would experiment with them later. This was my first time using the Wacom pen and monitor, so I spent a fair bit of time figuring out the best way to separate the layers. I tried to use several different line widths, and I did some reverse-cross-hatching instead of one-directional shading for the white highlights for a different texture. If I were to change something, I would experiment with different line widths and directions for the shading on the face.

After receiving feedback, I decided to look to classic horror posters for color palette inspiration. It didn’t take me long to decide on Frankenstein, as it’s my favorite horror series. The poster uses a classic and well-balanced color palette that is exciting to view, and I drew inspiration from the background and typography as well:


Assignment 1: Sketching Activity

The sketching activity challenged me because, while I have some experience drawing from life, it’s not something I do very often. I find myself trying to draw from multiple angles/perspectives, and trying to focus my sight into one view is difficult. I enjoyed practicing my cross-hatching, and I’m glad there was a time-limit, because I tend to get carried away with that and make my drawings too dark. This was good practice for the self portrait because I thought about how I’d like to extend the techniques I tested here onto a digital platform, and how I’d like to change it. For one thing, I think the cross-hatching can get a bit muddy unless one is very careful, so I went with mostly one-directional line shading in my final portrait. The one-directional lines are challenging as well, because one must be very precise when attempting to build up shadows.

I am not very happy with this sketch, but then I’m never really happy with any sketch I do. If I could change something about it, I’d erase the shading on the face and spend more time making her skin and facial features look more realistic. I think she looks a bit like she’s wearing a mask, they way I’ve done it.


Assignment 1: Inspiration

Each of these artists has sharp line work in common. It’s a technique I adore and use frequently in my drawing, as well as something I’d like to improve upon this semester.

Kevin Tong

I’m very inspired by Tong’s line work. His Instagram page is especially helpful for me as I learn to use Photoshop because he includes progress photos for almost all of his pieces. To see the full process from pencil, to black ink, to Photoshop is very interesting and educational. I also love his color palettes and his use of layers for screen printing. His works are usually visually dark yet still vibrant, with poignant highlights or bright shapes adding contrast. I will keep these things in mind as I plan out future projects. I want to practice layering colors in a screen printing style more as I use Photoshop on future projects, as well as improving my line work. hawkmoth-fox-the-understand

Jenn // Specimen Illustrations

This artist’s line-work style strikes a chord with me, and is exactly what I’d like to be able to do. It’s very detailed but still very free-form. She focuses specifically on nature and animal subjects, but I’d like extend this style myself onto more modern subjects like machine parts or architecture.

CAS // Crap Panther

I take a lot of inspiration from this artist’s horror content. Once again, her line-work is very sharp, strong, and detailed. I also admire her color palette choices- they are kept simple and are slightly different for each piece, but her entire body of work shares a strong, cohesive palette.