Tag Archives: design

2D II ZINE – Process

2D II,  ZINE PROCESS

Assigned Location: Bukit Batok

After my initial research of the area of Bukit Batok, I narrowed it down to the neighbourhood’s nature parks. And within those nature parks, I picked the topic of lamp-posts to investigate and display in my final zine. 

The process has been a very educational one; I’ve learned so many things from using InDesign to developing an actual product and figuring out what would look best visually to convey my message. 


Learning InDesign – –

One of the biggest areas in my process documentation was learning InDesign itself as a software. I have had no prior knowledge or use of the application and it was a really useful experience to understand what terms like ‘bleed’ and ‘slug’ were. I was taught to format a product with the end result in mind, and having to think about the printing helped in the process of construction my zine.

Specifications for the A5 zine document.

Crafting the Zine – –

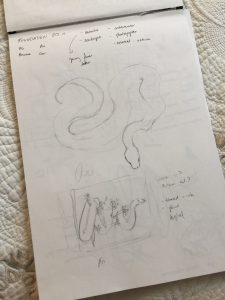
I started the process of creating a zine with the idea of ‘lamp posts of Bukit Batok’. I knew that I wanted to do illustration in my zine, rather than use photographs, so I just used my photos as reference and created illustrations based on them. At first, I found it extremely hard to figure out what colours to use. Admittedly, I hadn’t planned out the actual narrative/storyline to my zine, I only knew that I wanted to characterise and bring the lamp posts that I saw so often to life. However, the more I worked on the zine, the more I started to figure out what I wanted to do.

In the end, I would create a narrative with dawnnoon, and twilight and attribute these times in the day to different ‘guardians’ – that is, the lamp posts. I ended up with 15 total versions of my zine, from start to finish as I tried to figure out what I wanted to show visually. Below is the progression of my zine from start to finish in screenshots.

The first draft of the cover page of my zine.
The second draft of my cover.

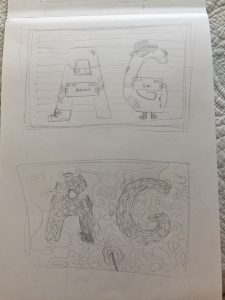
I knew that the illustration above was one that I wanted to keep – it had good composition and it showed that I wanted to talk about lamp posts in Bukit Batok’s environment. However, I was frustrated with the colours as well as the font – consulting with Shirley showed me that the fonts you use are very important to the tone that you want to convey. And at this point, the font was too serious. I didn’t want a goofy, silly font that was child-like, but I still wanted to show that I was telling a story rather than an information pamphlet.

Changed the colours on the previous illustration.

The first thing I did to try and fix the problem was change the colours of the illustration so that they were more cohesive and aesthetically pleasing. I liked this illustration much better than the one before and this is the final one I would use for my zine’s cover page. Then I went on to experiment and play around with different fonts that would help convey my message better (and not be so serious!) Below is the final cover page, where I made the font more light-hearted and ‘story-like’ (if you will) and fit it into the page so that it would look cohesive as an entire layout. I am quite pleased with this cover and prefer it enormously over my two earlier versions.

Final zine cover layout.
The Rest of the Zine – –

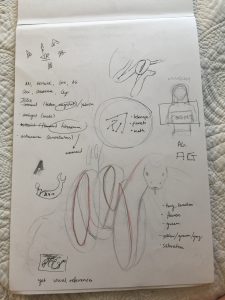
After jumping over the tough hurdle of the zine cover, I moved onto the rest of the zine. Like I mentioned before, I want to convey a story that takes us from dawn to noon to twilight and associate different lamp posts with these timings (e.g. the dawn lamp post would be shy and quiet, like the dawn as an entity itself). Dawn was relatively easy to do; it was harder later on to craft the noon spread and the twilight spread.

The first spread.
The second spread.

Above is the final end look of the second spread in my zine. It was hard at first to figure out what I wanted to do with this page, because I wanted to use this illustration:

But the illustration itself would obviously not cover the entire spread. I needed to think about what I wanted to do with the spread, so then I tried to balance out one area with empty space and the other with more complicated designs and patterns. Heavy on one side, and light on the other. Below is my process of trying to figure out the composition for the spread. 

After I was satisfied with the composition, I tried to follow the rule of thirds with placement of the texts and kept them from being right in the centre or the middle of the spread. This was to provide more visual interest. I like the contrast between the empty right side and the heavier left side.

The final spread.

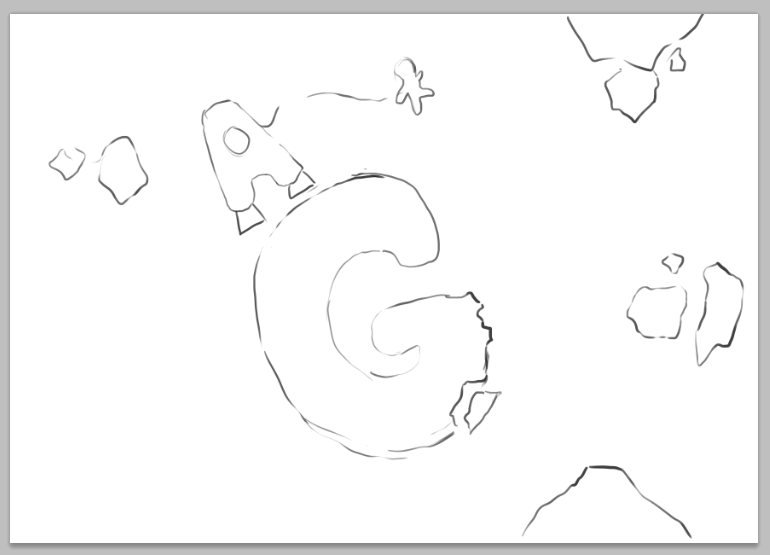
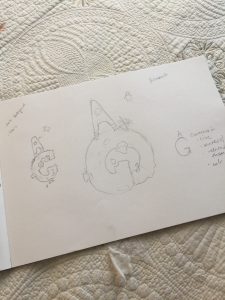
Above is the final spread – the ‘twilight’ guardian. So as I reached the end of the zine, I tried to progress it throughout the timings of a single day; dawn to dusk. For this spread, I had some troubles with choosing colour. Initially, I was going to use this image:

But obviously, the style of the above illustration doesn’t match the other two spreads or the cover page. So I went back to the reference photo used:

And created a new illustration that would keep the consistency across the zine. The final illustration for the twilight spread has a common colour scheme of warm browns and oranges and tries to communicate a sense of dusk/twilight. 

I had fixed up the odd green/blue/yellow colour scheme and replaced it with one that would match better with the rest of the zine. But I then had issues with adjusting the colours of the text. 


As you can see above, the word ‘twilight’ is different – one is yellow, the other is blue. I was struggling between which one would give more visual interest. In the end, I decided on blue because it would match the blue of the previous noon spread and also makes the word stand out.


Learning Points + Takeaways – –

This entire project has taught me many things, from softwares to composition and thinking about end products. One of the biggest things that I had to think about was both colour and composition. Using different elements of design like the rule of thirds and so on really helped me create a zine that would be more interesting to look at. For example, in the beginning I would split up the composition of the spreads down the middle because of the left and right pages, but then after consultations, I realised that I could bring images across the middle divide to create the rule of thirds and so on. Thinking about consistency across a product is also an interesting aspect of this project. Usually when I create artwork or paint, I only have to think about a single frame on a page. In a zine, not only do I have to think about individual spreads, but also about how they transition from each other and the consistency across the entire document. I enjoyed this project very much and it represents learning milestones in my design career.


2D – Que Sera Sera FINAL

These are the final pieces for my Que Sera Sera project.


FISHERMAN

fisherman2

I used the symbols of the boats to help contextualise the fact this is in fact, a fishing environment at night, and the water ripples help separate the water from the air. I used basic symbols for the fish without going into too much detail – the pattern of the lines on the net would help fill in the detail for this piece. The hook also serves a dual function as the moon – just to add a little quirkiness to the night scene.


ASTRONAUT

astronaut2

The G is the planet that rocket A is landing on – I followed the bright colours of some of my research photos to make the shapes stand out against the dark space background. Though not the same colour, they’re still under the category of warm colours and so I grouped them together that way. Texturing of the rocks showed the bumpy nature of asteroids and planetary shapes, while the rocket remained smooth and unmarked – manmade. I also made the texture of the background star-speckled, but blurry. I thought it would be nice to have motion in the background and give the impression of being ‘suspended’ in space in contrast with the moving planets and orbital nature of rocks, which I hear is often what space travel is like. I think the colours used and simple textures communicate a children’s book vibe, which is what I was going for.


ARCHITECT


architect2

Blueprint texturing is often a faint grid in the background, so I started out with that first. Then making the perspective more intense than my initial pencil sketch, I included faint perspective lines to make it look more ‘sketchy’, like an architect had just spent his time working and drawing over the print. I also used lighter sections to make the A and the G stand out agains the blue, and tried to make it look chalky and written – hence the notes and the different scribbles that I imagine an architect would make (from what I’ve seen from my research). The perspective here took a long time to get right, because sometimes my sizing and my angle for the two different letters would look odd together. I think the blue and the white work well together to communicate a blueprint as well as to make it look professional.


HERPETOLOGIST

herpetologist-copy

Out of all my pieces, I feel like this is the most artistic and vintage-style. I started the watercolour painting and then scanned it into the computer. Using watercolour as a medium helped set the paper-texture that I was going for; I painted first with browns and yellows and then enhanced this texture using photos of papers and overlaying them over the painting. The snakes stand out with the use of colours like red and green – warm and bright agains the pale yellow to contrast the two. I also included scribbles and writing to make it look like a diagram of an actual species of snake.


Overall, this project was enjoyable for me to see what I could make out of symbols and textures and colour to communicate my initials, AG. What I found the hardest was visualising original ways to communicate the jobs I wanted to portray, which is why I went through so many thumbnails and ideas. I’ve never done typography before so it was a new challenge to tackle.

2D – Que Sera Sera PROCESS

After all the initial research that went into my jobs, I started the visualisation of my final pieces. Like I said before, I went through many revisions of different jobs (e.g I thought about criminals but I ended up scratching that idea) but there are a lot of thumbnail sketches of possible compositions that I came up with.

Some of the different thumbnails I did are here  below:

img_4603 img_4604 img_4605

I focused a lot on the fisherman job, because it was the one I was most excited about, but I also did preliminary sketches of possible ways I wanted other jobs to look too. Especially for herpetology, I sketched out snakes in many different ways to make the A and the G look very prominent. I also worked on the composition for the astronaut; I wanted the G to be the planet and the A to be a rocket (since A is easier to manipulate into a rocket than G is). Consulting with Shirley reinforced my idea: she like the contrast of colour, shape, while all still under the umbrella of the same space-theme.

img_4601 img_4602 img_4606img_4607

For two of the jobs, I started out doing traditional mediums of pencil and watercolour first (and some marker) to see what they would look like. I did this for the architect and for the herpetologist because I thought that both of these jobs were especially close to the use of traditional mediums.

Herpetology – because like my research showed,  there’s a sepia/vintage like vibe to it. I imagine coffee stains and other debris as a herpetologist works on the diagrams of the animals he studies. So I tried to emulate that with my own watercolour painting.

img_4608

I will later digitalise this so that it can make for a clean print.

Architect – you often imagine an architect drawing and sketching out buildings. Though I know that perspective is a very inaccurate tool in drawing and architects don’t use it, I decided to include perspective to give it more of an ‘artistic flair’. But I felt that the pencil drawing still remained a little plain and messy, so I eventually will change the medium to digital and use the colours of white and blue like blueprints.

img_4609

As for the other two, I started out digitally and continued to just work on them digitally. A process screenshot for the astronaut can be seen below:

screen-shot-2017-02-09-at-10-00-24-pm


2D – Que Sera Sera RESEARCH

The prompt for this project was to portray our names (whether our full name, real name, nick name, initials, what have you) in relation to a future job ambition.

I wanted to use my initials ‘A.G.’ so I explored that, with the jobs that I had in mind. Initially, I wanted to be a zoologist, a criminal, a fisherman, and an astronomer, but eventually as I started sketching out and planning the way my deliverables would look, I ended up with these 4 jobs as the finals:

  1. Fisherman
  2. Astronaut
  3. Herpetologist
  4. Architect

For all of these jobs, I will use only AG and try and explore different ways that I can incorporate it into the job-type to see if it can be expanded to be used as an actual font.


RESEARCH

First of all, I started out researching the type of visual aids that are related to the jobs that I picked.

Fishermen are often associated with nets and fish (obviously!) and so I thought it would be best to look at photos of nets and see what kind of ideas I could come up with.

2011-11-21-12-22-311

Bozo fisherman using a net on the River Niger, Mopti, Mali

Often with these photos of fishermen, there isn’t much in the background except the sky and the water. I thought this contrast in detail (the cluttered texturing of the net vs the clear and vast sky) could be an important part of my composition. Symbols of the boats would also help.

Astronauts are obviously associated with space, planets, asteroids, and rockets. Since planets and asteroids come in different shapes, I thought maybe I could use these to create the letters “A, G”. I came across cute clipart/cartoon pictures of astronauts on the internet and liked the way they looked.

flat800x800070f-u3

For this one, I especially like the colours of yellow and red for the planet and the rocket. They work well together to stand out against the dark background.

Herpetologists are experts in the study of reptiles and snakes. I actually initially wanted to do something with snakes because I am a big fan of some artists on instagram that do insane art with snakes. (e.g  @christinamrozikart).

screen-shot-2017-02-12-at-5-50-53-pm

I think snakes are a fun, organic way to make letters, and I was into the idea of making a cursive font in the midst of all the other blockish fonts I was visualising. Herpetologist’s diagrams are also often pictured on sepia-type backgrounds – a kind of vintage scientist vibe that I wanted to capture.

5869060710_a6fdbbd9ed_b 41dkeoq6w4l-_sx331_bo1204203200_

Architects work with blueprints. I like the look of a strictly white and blue colourscheme, with all the little lines and details in places that outline a building. I looked at a few blueprints (like the ones below) to give me some reference for my own piece.

architecture-blueprints-3d-ideas-6 e89739324c81c7f4885796eb6f4683be white-house-blue-print

2D Project 2 – Forrest Gump Compositions (final)

These are my final compositions for this project. Each goes with a quote from Princess Mononoke (1997).


ONE

screen-shot-2016-10-11-at-11-54-24-pm

In this composition, I wanted to contrast the ideas of being ‘tame’ and being ‘wild’. Wolves in general are uncontrollable, wild beasts, but with this quote, it was about the wolf’s head and the power the wolf has, even in death. So the rest of the body of the wolf is within the confines of the circle (aesthetically ‘taming’ him), while his head sticks out, suggesting the notion of pushing the boundaries and refusing to stay within the constraints. I also included a deer because they are symbolic of prey animals – it adds the feeling of a threat to the deer on the wolf’s behalf. The lines pierce through the deer to emphasise this threat; I think the use of two subjects is interesting.

Movement was a prominent principle of design in this piece as I wanted to show the left to right movement of the wolf and carry the eye across the piece, to view the wolf and then the deer. And so, the balance of the piece also weighs more on the right side. There is also emphasis on the wolf and the deer as the most of the design comprises of thin linework, as opposed to block-y pattens that are on both the subjects.


TWO

screen-shot-2016-10-11-at-11-54-33-pm

I think crows are symbolic of a lot of bitterness and hatred. Combining them with storm-clouds and lightning encompasses the intensity that exists in an emotion like hatred. The quote says to see with eyes unclouded by hate. In the context of the film, this was said as though “seeing without hatred” was a goal of the protagonist. However, I thought it would be interesting to portray someone still seeing with eyes literally clouded (hence, the storm-clouds) by darkness and hate still. The constellation-type things are there to show the complicated nature of this quote; easier said than done.

Unity is quite prominent in this piece as most of the work is dark toned, so the piece harmonises in value. Repetition is created with the mass shapes of the crows that make this artwork seem active, to express the fact that hate is an active emotion that moves and breathes.


THREE

screen-shot-2016-10-11-at-11-54-40-pm

I think fate is as vast as mountains and as unexplored as the universe. And I think, like koi fish swimming downstream, we all tend to have no other choice but to go with the flow (which is downstream) and accept our fate. The notion of rising and meeting fate is a scary and dark space. Rising to meet fate is something that takes time, and I wanted to show that by angling the largest fish more to the side (to imply that it might perhaps stray from the movement of downstream swimming like the other two fish and go in another direction, like meeting its fate).

The principle of design that is most strongly used here is the feeling of emphasis, which is executed by using central composition as well as the values – contrasting between black and white. The koi fish all stand out, but are also balanced by downsizing the other two fish that make it more interesting, but not too repetitive and dull. There is also movement down to the bottom right corner of the artwork. The lines of movement contrast as the fish move down while the mountain moves up. The stark contrast and emphasis is complimented by the pattern of the stars, which delivers another element of balance and stability.

This is the design I used for my tote bag.


FOUR

screen-shot-2016-10-11-at-11-54-16-pm

I personally really love this composition. The quote is a side character talking to the protagonist, and I think it tells a lot about how each of us are in our own little worlds, obsessed with our own predicaments. We centralise ourselves, like the subject above – blind to anyone but their own thoughts. However, the world looms (also suggested by the fact that it extends out of the frame of the composition), it still exists even if we shut it out. The constellations in the background also imply a larger universe beyond, but the central figure (outlined in white) represents us, and how we make ourselves literally, the centre of the universe.

By having a centralised composition but with the placement of the earth at the side, there is a diagonal pull from the bottom left corner to the upper right, making one see the human figure first and then realising the world is there – which, in effect, is very visually explanatory of the quote itself. The rhythm of the stars in the background add visual interest and the emphasis (by using the white outline) is on the figure and on the earth as well.

2D – “Forrest Gump” Project: Process Post

I have thoroughly enjoyed Project 2 so far. From being able to have the freedom to take quotes from movies we want to designing our own interpretations of those quotes, this project has been really fun and interesting – I’ve learnt new things in the process as well.

The process of silkscreen printing is something that I haven’t done before and I thought it was really fascinating,

Last week we coated our silkscreens with emulsion and left them to dry, taking care not to let white light hit the emulsion (or it would become exposed).

Then we exposed the screen’s emulsion layer by putting our transparency on top of it and putting it in the machine below:

img_3384

Afterwards, we cleaned off the area of the emulsion that was exposed using a water gun. Slowly but surely, our designs emerged as we continued barrelling water at the screens.

img_3388 img_3391

In the end, my screen looked like this, where all of the emulsion washed off in the areas that were exposed to the light. Then it was left to dry (it no longer needed to be protected from white light).

img_3392

It was such an interesting experience. This week (the lesson after the one above), I finally tried silkscreen printing.

The screen went from brilliantly blue to stained with black, but that was all part of the process of printing out the ink onto a surface, which you can see below:

img_3490 img_3491 img_3492 img_3493 img_3494

In addition to printing on a tote bag, I also brought my own shirt along to try on out other fabric and I think it turned out well!! This was an overall very educational and enjoyable assignment and it has piqued my interest in silkscreen printing.