Volumetric Lighting Effects Test & Breakdown

This is a continuation from previous posts.

Part 0 (Ideation)

Part 1 (Modelling, texturing)

Part 2 (Sand simulations)

Part 3 (VFX)

This is Part 4 and the post will cover Lighting.

Combining all the effects + Breakdown:

In week 7, we discussed the possibility in class, to play with lighting. Light beams could stream in from several sources in varied directions. We could also play with depth to use light to show and hide the gears.
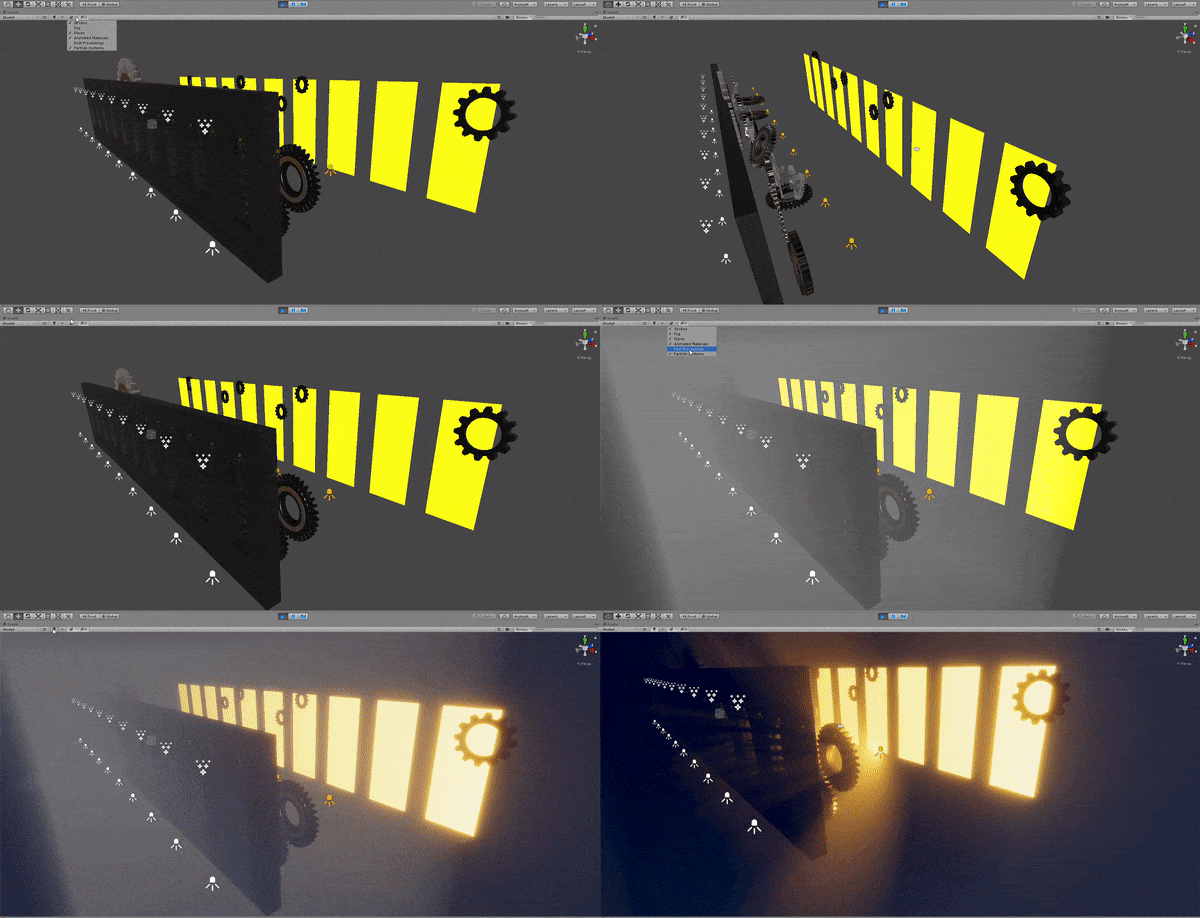
Using volumetric lighting to pump up visual fidelity from raw to final look

Above, I toggle the volumetrics on, followed by post processing, followed by lights, so you can see the impact they make on the scene visuals.

We used a total of 30 lights for the scene shown above and they are all rendering in real-time. We use 10 walls for this set up, spaced out evenly. Each wall has a rim light, an angled front light, and a top spot light.

To have our spot lights cast visible light beams, we pump up the density of our air particles in the air, using a component known as a Density Volume.

This mimicks fog or haze in a certain region, and the thickness of the air particles can be controlled to our heart’s desire.
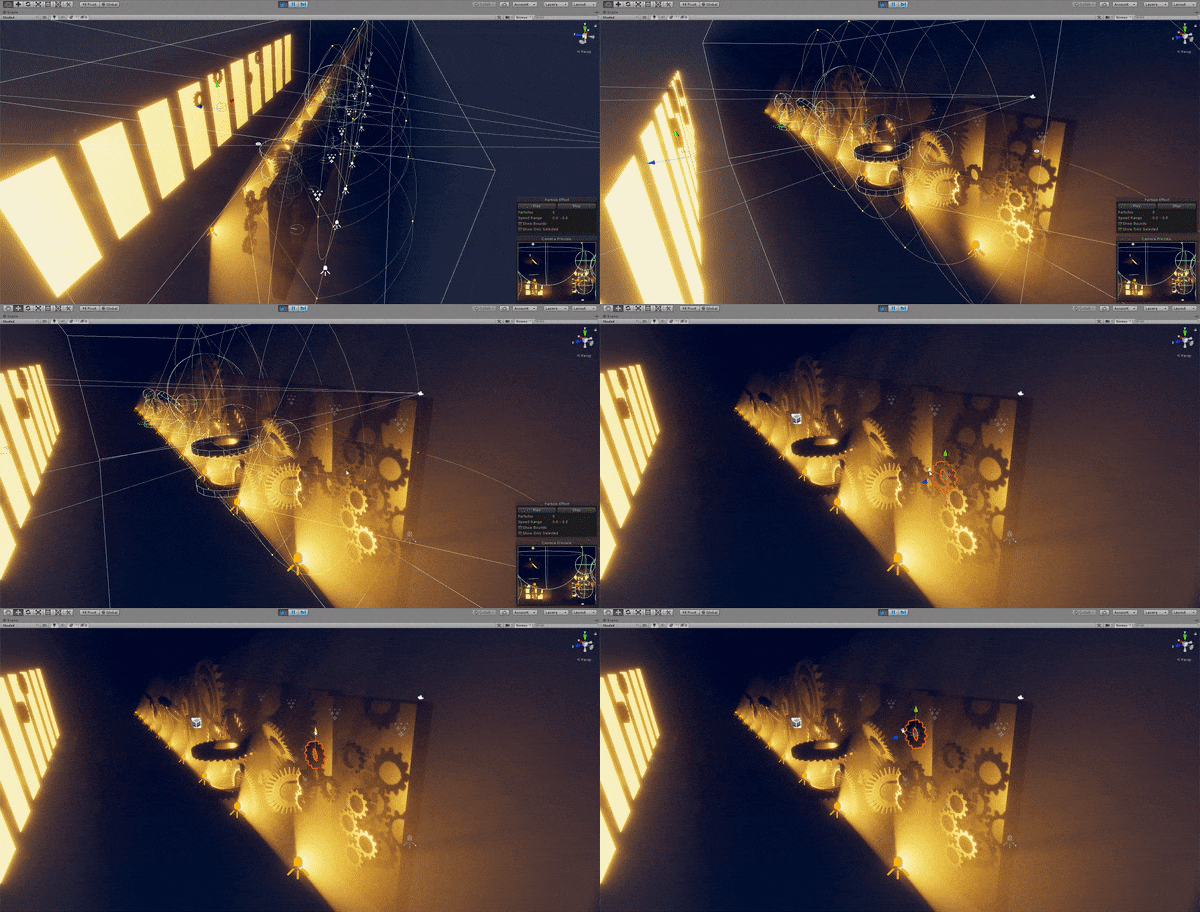
Moving objects freely update shadows and lighting in realtime

The volumetric lighting is interacts dynamically with our objects. We are able to move objects in our 3D scene to arrange the composition as how we like.

This is crucial to our highly iterative process.

All lights are interactive and have option to react with fog
Final Test Result, 3840 x 480, for Media Art Nexus wall test

To get clean lighting and high control over lights, we use shadow-casting meshes that are set to shadows only. These meshes are not rendered to the camera, but act as light ‘blockers’ to stop light from reaching certain areas of the scene. This was essential for perfecting the desired composition during much of the fine-tuning phase.

This method was more effective than light layers. Light layers is a technique to categorize lights and objects into ‘layers’, (like layers in Photoshop), and lights will only affect objects in the same layer as it. While light layers also provide the same functionality, there are too many lights to do that manually on a per-light basis. Shadow casters are slightly more performance heavy, but not significantly, so the faster workflow was preferred.


Fun with VFX

After watching a visual effect shot in Prince of Persia: Sands of time, shared by my groupmate, Ayesha, I was heavily inspired to make my own cool visual effect as well. I decided to start by learning a tool called VFX Graph (within Unity). This is different from the Particle System previously used for sand simulations. I wanted to see if I could make cool things with it.

After watching a tutorial to get me started with this feature, I had managed to create a simple effect, while understanding how the VFX graph works.

Killing two birds with one stone: Learnt a new tool and made myself a screensaver

To create the effect of my name appearing in the title GIF, I first had a model of my name as a 3D text mesh in Maya.

I imported it into Unity as an .fbx file.

Then, I created a basic particle emitter to emit in a rectangle.

Then using a tool, I created a Signed Distance Field (SDF) of my name. I think of an SDF as a texture, but instead of storing colors in each pixel, it stores directions. It is like a wind current. Any air particle that gets caught in the wind will flow along it.

Imagine the above, but in a 3D volumetric representation, so there are 3D arrows in space telling how particles should move. This is how I control seemingly random particles to flow into the direction or into a space I want them to go to.

By assigning the SDF file as input into the VFX emitter, and adjusting how much I want the particles to ‘stick’ to the SDF, I create the effect below.

Forming my nickname with VFX

After writing some code, I exposed the parameters of the VFX graph to be editable in real-time, without having to simulate the entire VFX every time an attribute is changed.

I added interactive sliders at the top right to allow myself or anyone to play with my VFX

For those interested, here is how the Signed Distance Field part of my VFX graph looks like:

A portion how the VFX graph looks like, focused on the SDF node on the right side

The VFX Graph is a node-based system, meaning no programming is required unless you wish to add interactivity. The pros of the VFX Graph is that it is heavily optimized and able to simulate millions of particles in real-time.

Having learnt this earlier on, there could be options that could be explored for this project – for example, using VFX to materialize our compass or the chinese symbols in our earlier video draft.

For reference, I used this SDF baker tool to assist me in generating the Signed Distance Field asset within Unity, without going through an external DCC like Houdini, reducing the need to jump through multiple software.

https://github.com/xraxra/SDFr

References & Inspiration