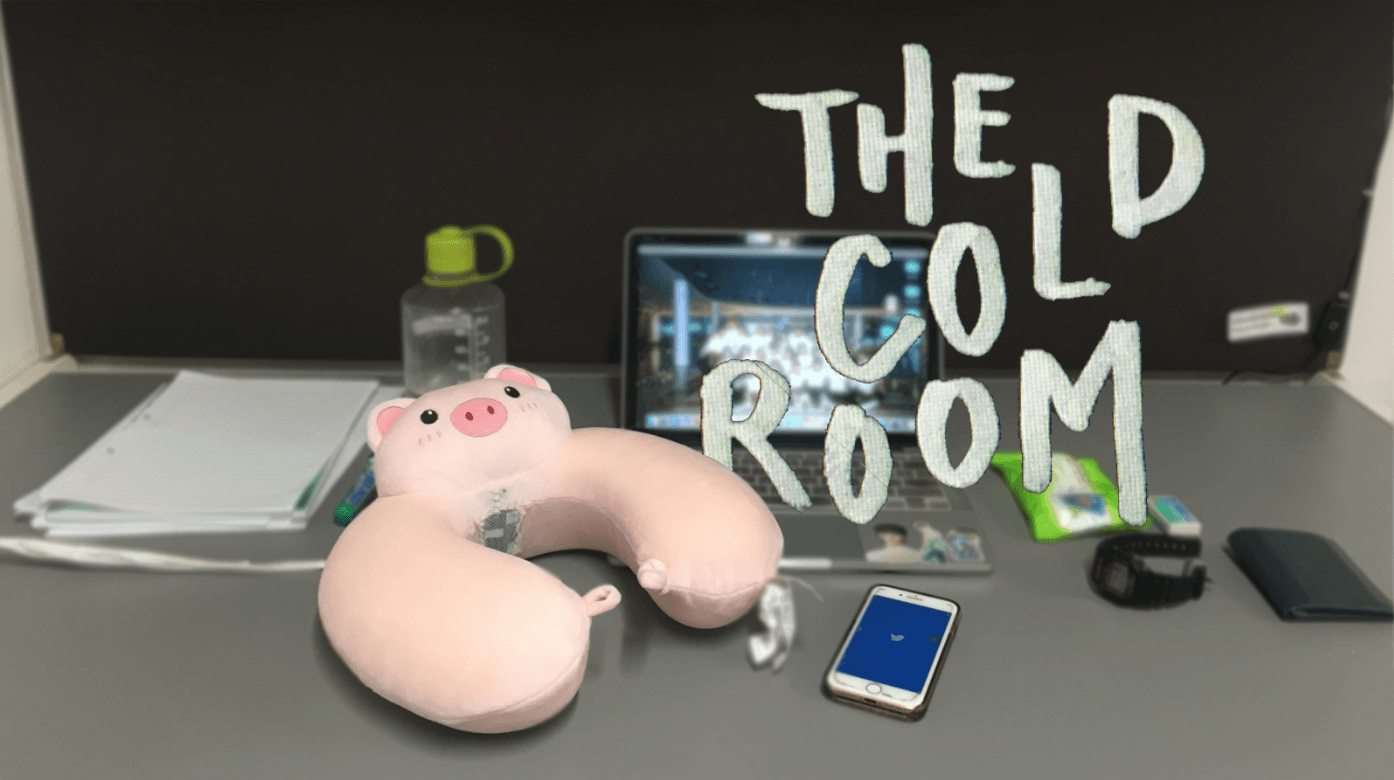
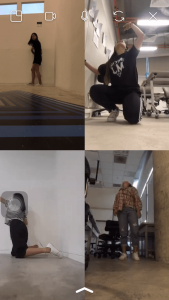
FINAL PROJECT: The Cold Room

DN1010 EXPERIMENTAL INTERACTION 

FINAL PROJECT DOCUMENTATION

DN1010 G02 – Ginnie Lee, Nicole Chen

“The Cold Room”
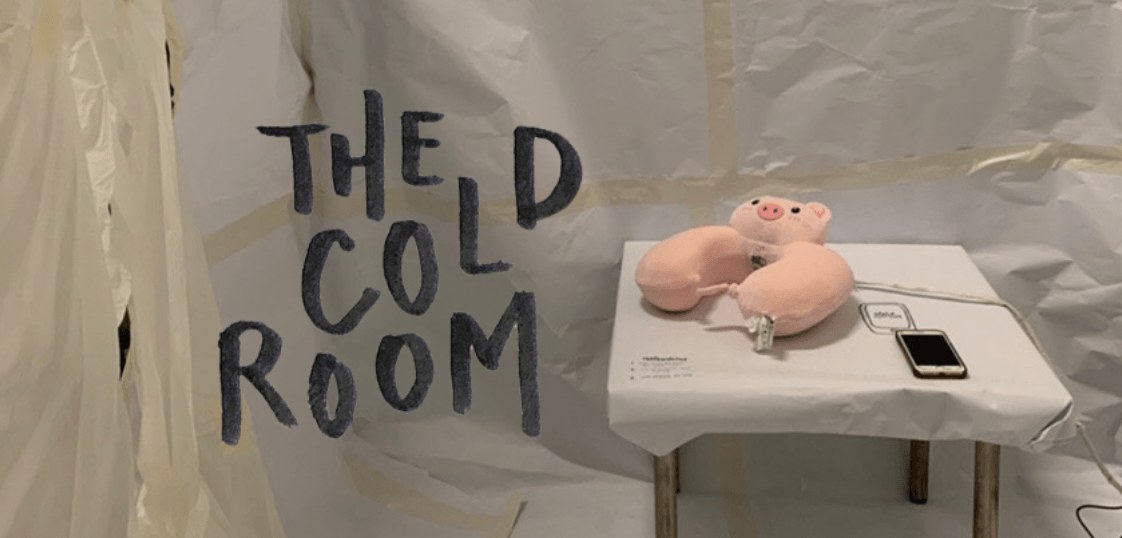
Project brief: 

Dark Object – Design and build an object that facilitates emotions of loss, loneliness, and self-pity associated with a person who has just been abandoned by someone they loved.

Our project

Nowadays, people are getting connected more and more online and even during meal times or time spent with your loves ones, we stare down at our phones and use social media / messaging applications instead of attempting to connect with our loved ones with us physically. The more we are on our phones to stay connected online, the more we neglect those around us, creating a disconnection in real life. This project aims to bring out the loneliness we feel when we are “abandoned” by our loved ones or when we “abandon” our loved ones in exchange for connectivity online. The more we wish to be connected online, the lonelier we feel offline.

Video describing your project and showing in the actual place or context of use:

Please click here for the video.

Observational documentation for user tests:

Body storming (Week 10) 

During body-storming, we brought in a jacket and simulated the test with the use of cardboard. 2 of our classmates helped us test the process of the interaction, and based on the comments given, we refined and improved on our idea.
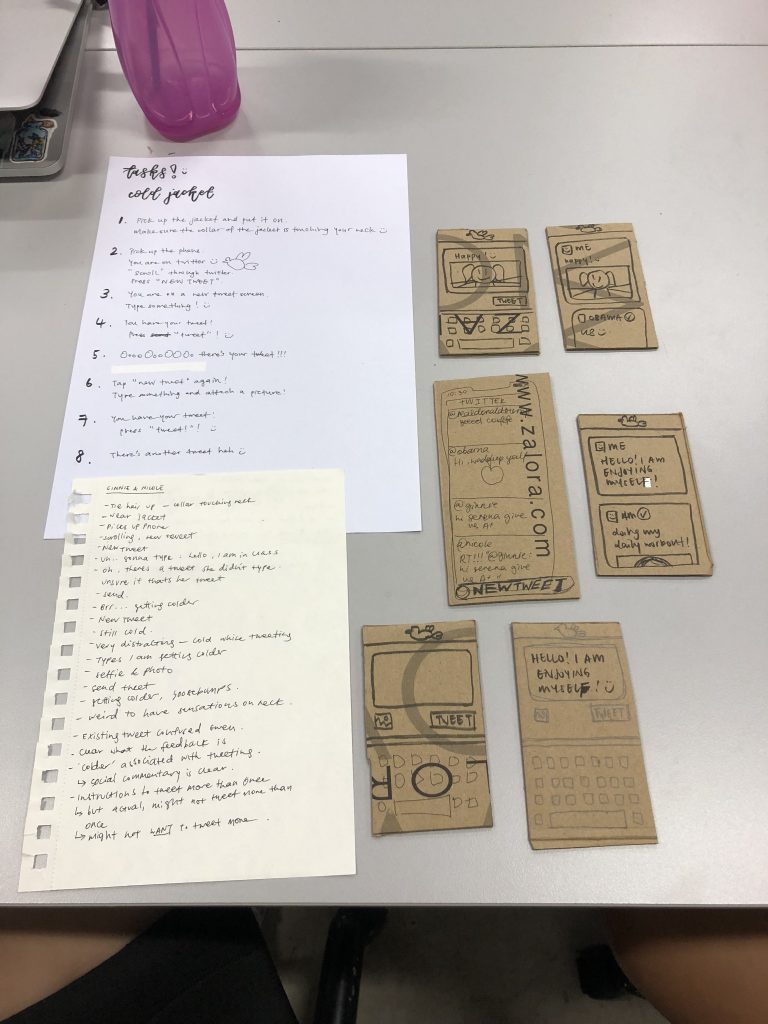
The documentation and reflections of the Body-storming process can be found here.

Play Test (Week 12)

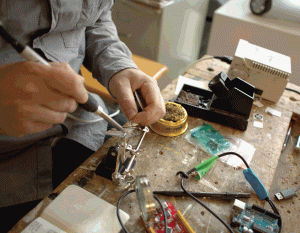
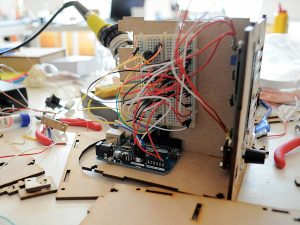
For the Play Test, we didn’t manage to complete the entire set up of connecting twitter to Arduino and hence only brought in our circuit with Arduino connected to the Peltier module. To simulate the  process of tweeting causing the Peltier to react, we manually pressed the button in the circuit when a new tweet is sent to close the circuit and hence allowing the Peltier to turn cold. Below is the circuit we brought in into class for the Play Test (with the fan under the heat sink).

Participants tested our circuit during the play test, and tweeted while placing a finger on the Peltier module to test it’s temperature.

Attached below is the video taken during the play test.

Video of Play Test

Notes taken during the play test (curtesy of Mun Cheng) :

Amanda

Tweets –> turn cold

A series of continuous tweets will make it cold constantly

Charm

Getting colder as she tweets

Gwen

It gets less cold

The more tweets there are, the Peltier will just remain cold // The Peltier will not get colder with each new tweet

You have to tweet, wait –> tweet again

The interaction have to be planned in a way where Peltier can rest (to cool down) before next user uses it.

———————————————————————————————-

After the play test, we decided that there were some things we wanted to improve on based on our current idea. Firstly, we decided to change the jacket to a head pillow, as we realised that there was a significant weight when the Peltier module is attached to the heat sink and the cooling fan. This weight would cause the already flimsy collar to flap downwards and not be able to have contact the user’s neck when the Peltier is attached to the collar of the jacket. The neck pillow was also a better choice as we could cut out the filling of the pillow and insert the Peltier module attached to the heat sink and the cooling fan into the pillow itself. That way, we can have a better finishing and also at the same time combat the problem of the Peltier not being able to have contact with the participants’ neck.

A problem brought up during the play test was also that (as seen in the notes) the Peltier module tends to get less cold as time passes and the Peltier needs time to cool down before the original effect of cooling can be achieved again. We considered getting a bigger fan to help dissipate the hate faster, but decided against it as the entire Peltier combo would then become even bulkier and heavier and will not be able to fit into the neck pillow comfortably/ let the participant using the neck pillow use it comfortably. During the process of inserting the Peltier into the neck pillow, we tried to time the length of time the Peltier takes to lose the coldness (to reach room temperature), and initially, it was only able to stay cold for 1.5 minutes due to the fan being inside the neck pillow with the hot air sucked in by the cooling fan trapped inside the neck pillow.

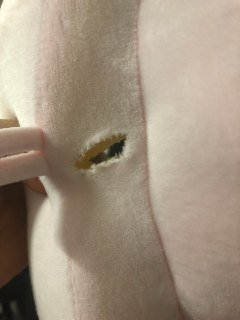
Hence, we decided to cut an opening through the back of the neck pillow to allow the hot air to dissipate out. After cutting the opening, the Peltier could stay cold twice (up to 3 mins) as long as when the neck pillow didn’t have an opening.

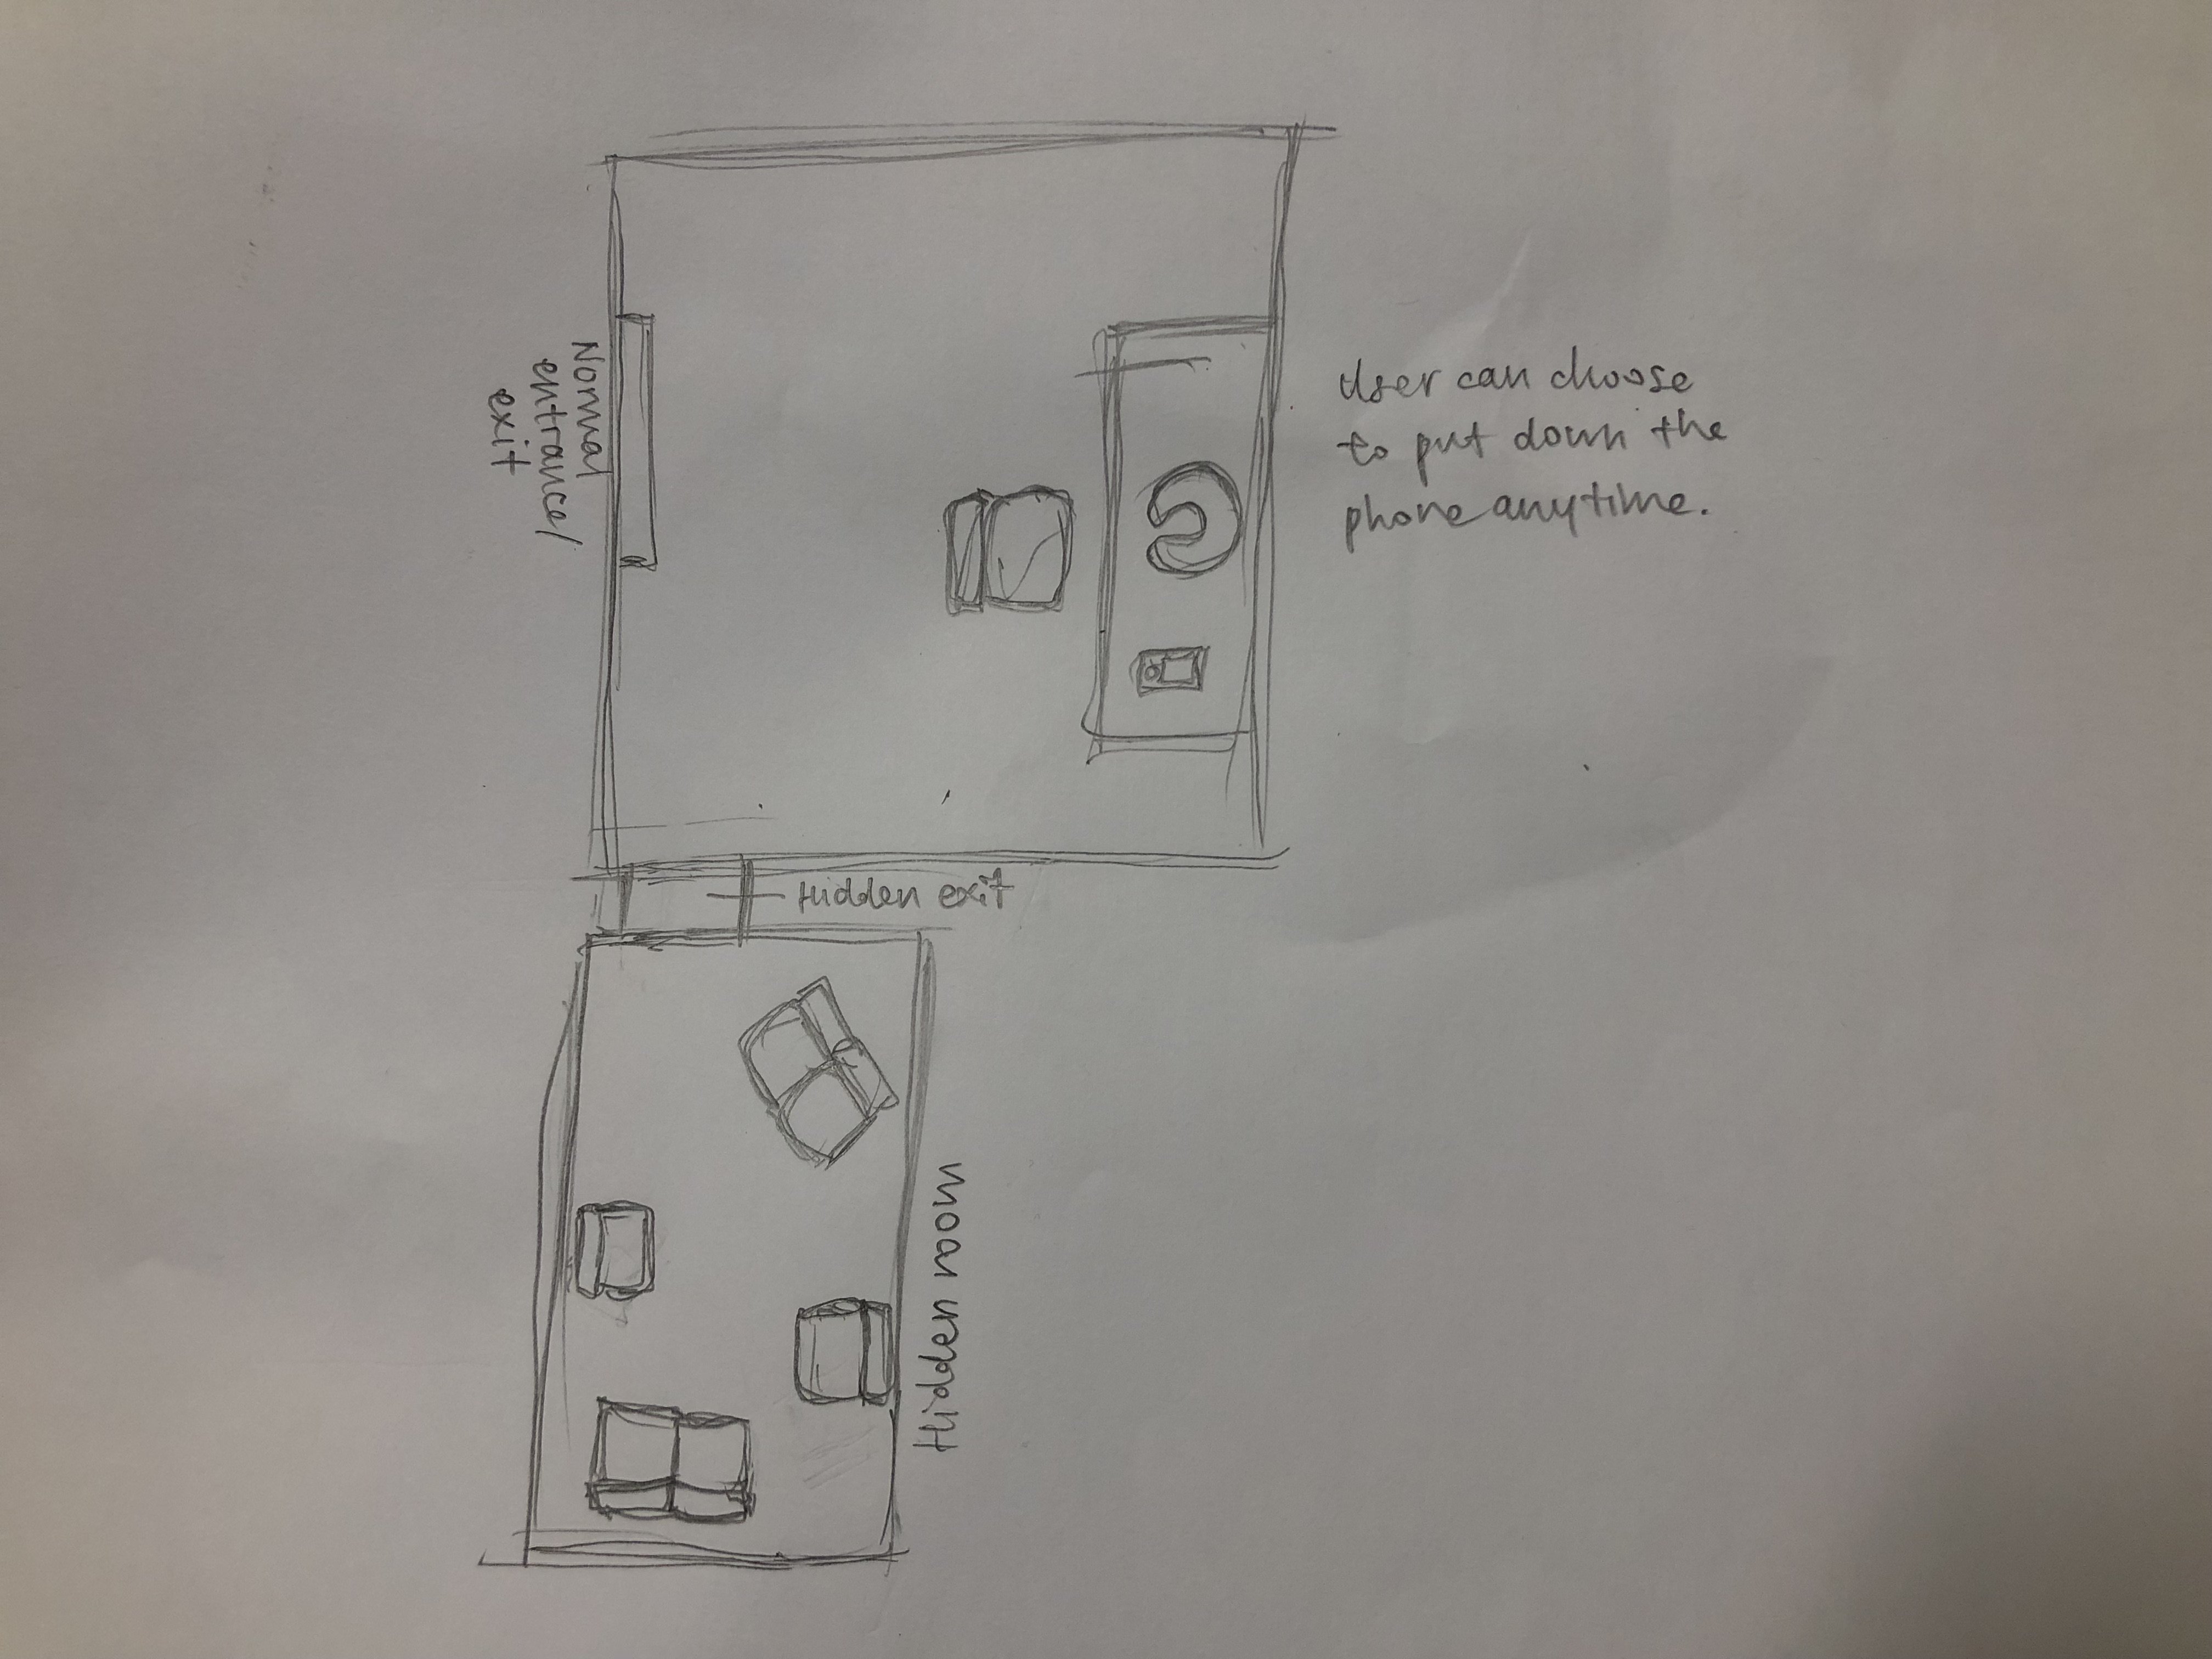
Thereafter, we also came up with the idea of building a room with 2 exits, one being the entrance the participants come in from and one hidden exit that leads to another room. The other room will have people and other previous participants in it, allowing the participants who exit through the hidden exit to connect with those people, hence alluding to connecting with people physically offline, away from social media and our phones.

Design Process Documentation:

Initial Ideation

“Cold Jacket”

Our original idea was to create a jacket, something that is made to provide warmth, to turn cold when a certain volume of activity is detected in the mobile phone (in terms of notifications). The jacket, made to keep us warm, can ironically make us cold with the increase in activity in our phones.

The cold felt from the jacket is a physical manifestation of the loneliness. Furthermore, based on a  study by Psychologists Chen-Bo Zhong and Geoffrey Leonardelli from the University of Toronto’s Rotman School of Management, social isolation can actually allow people to feel cold physically. A group of volunteers were divided into 2,  with one group recalling the personal experience of being socially excluded and the feelings of loneliness and isolation, and the other recalling an experience of being socially included (in other words, being accepted and hence not being isolated). The 2 groups were then asked to enter the same room and estimate the temperature in the room. Those who were told to think about a socially isolating experience gave lower estimates of the room temperature. In other words, the recalled memories of being ostracised actually made people feel colder and experience the ambient temperature as colder.

Hence, we wanted to amplify on the feelings of loneliness and isolation through the drop in temperature. The loneliness we wanted to project when we are getting “abandoned” or “abandoning” others in exchange to be connected online is translated into physical coldness.

(Refer to Project Development Drawings for more details on initial ideation.) 

Final Ideation

Below is the plan for how the circuit will be connected, from Twitter to Arduino (through blynk and IFTTT app)  to the Peltier Module via the relay module and with an external power source.
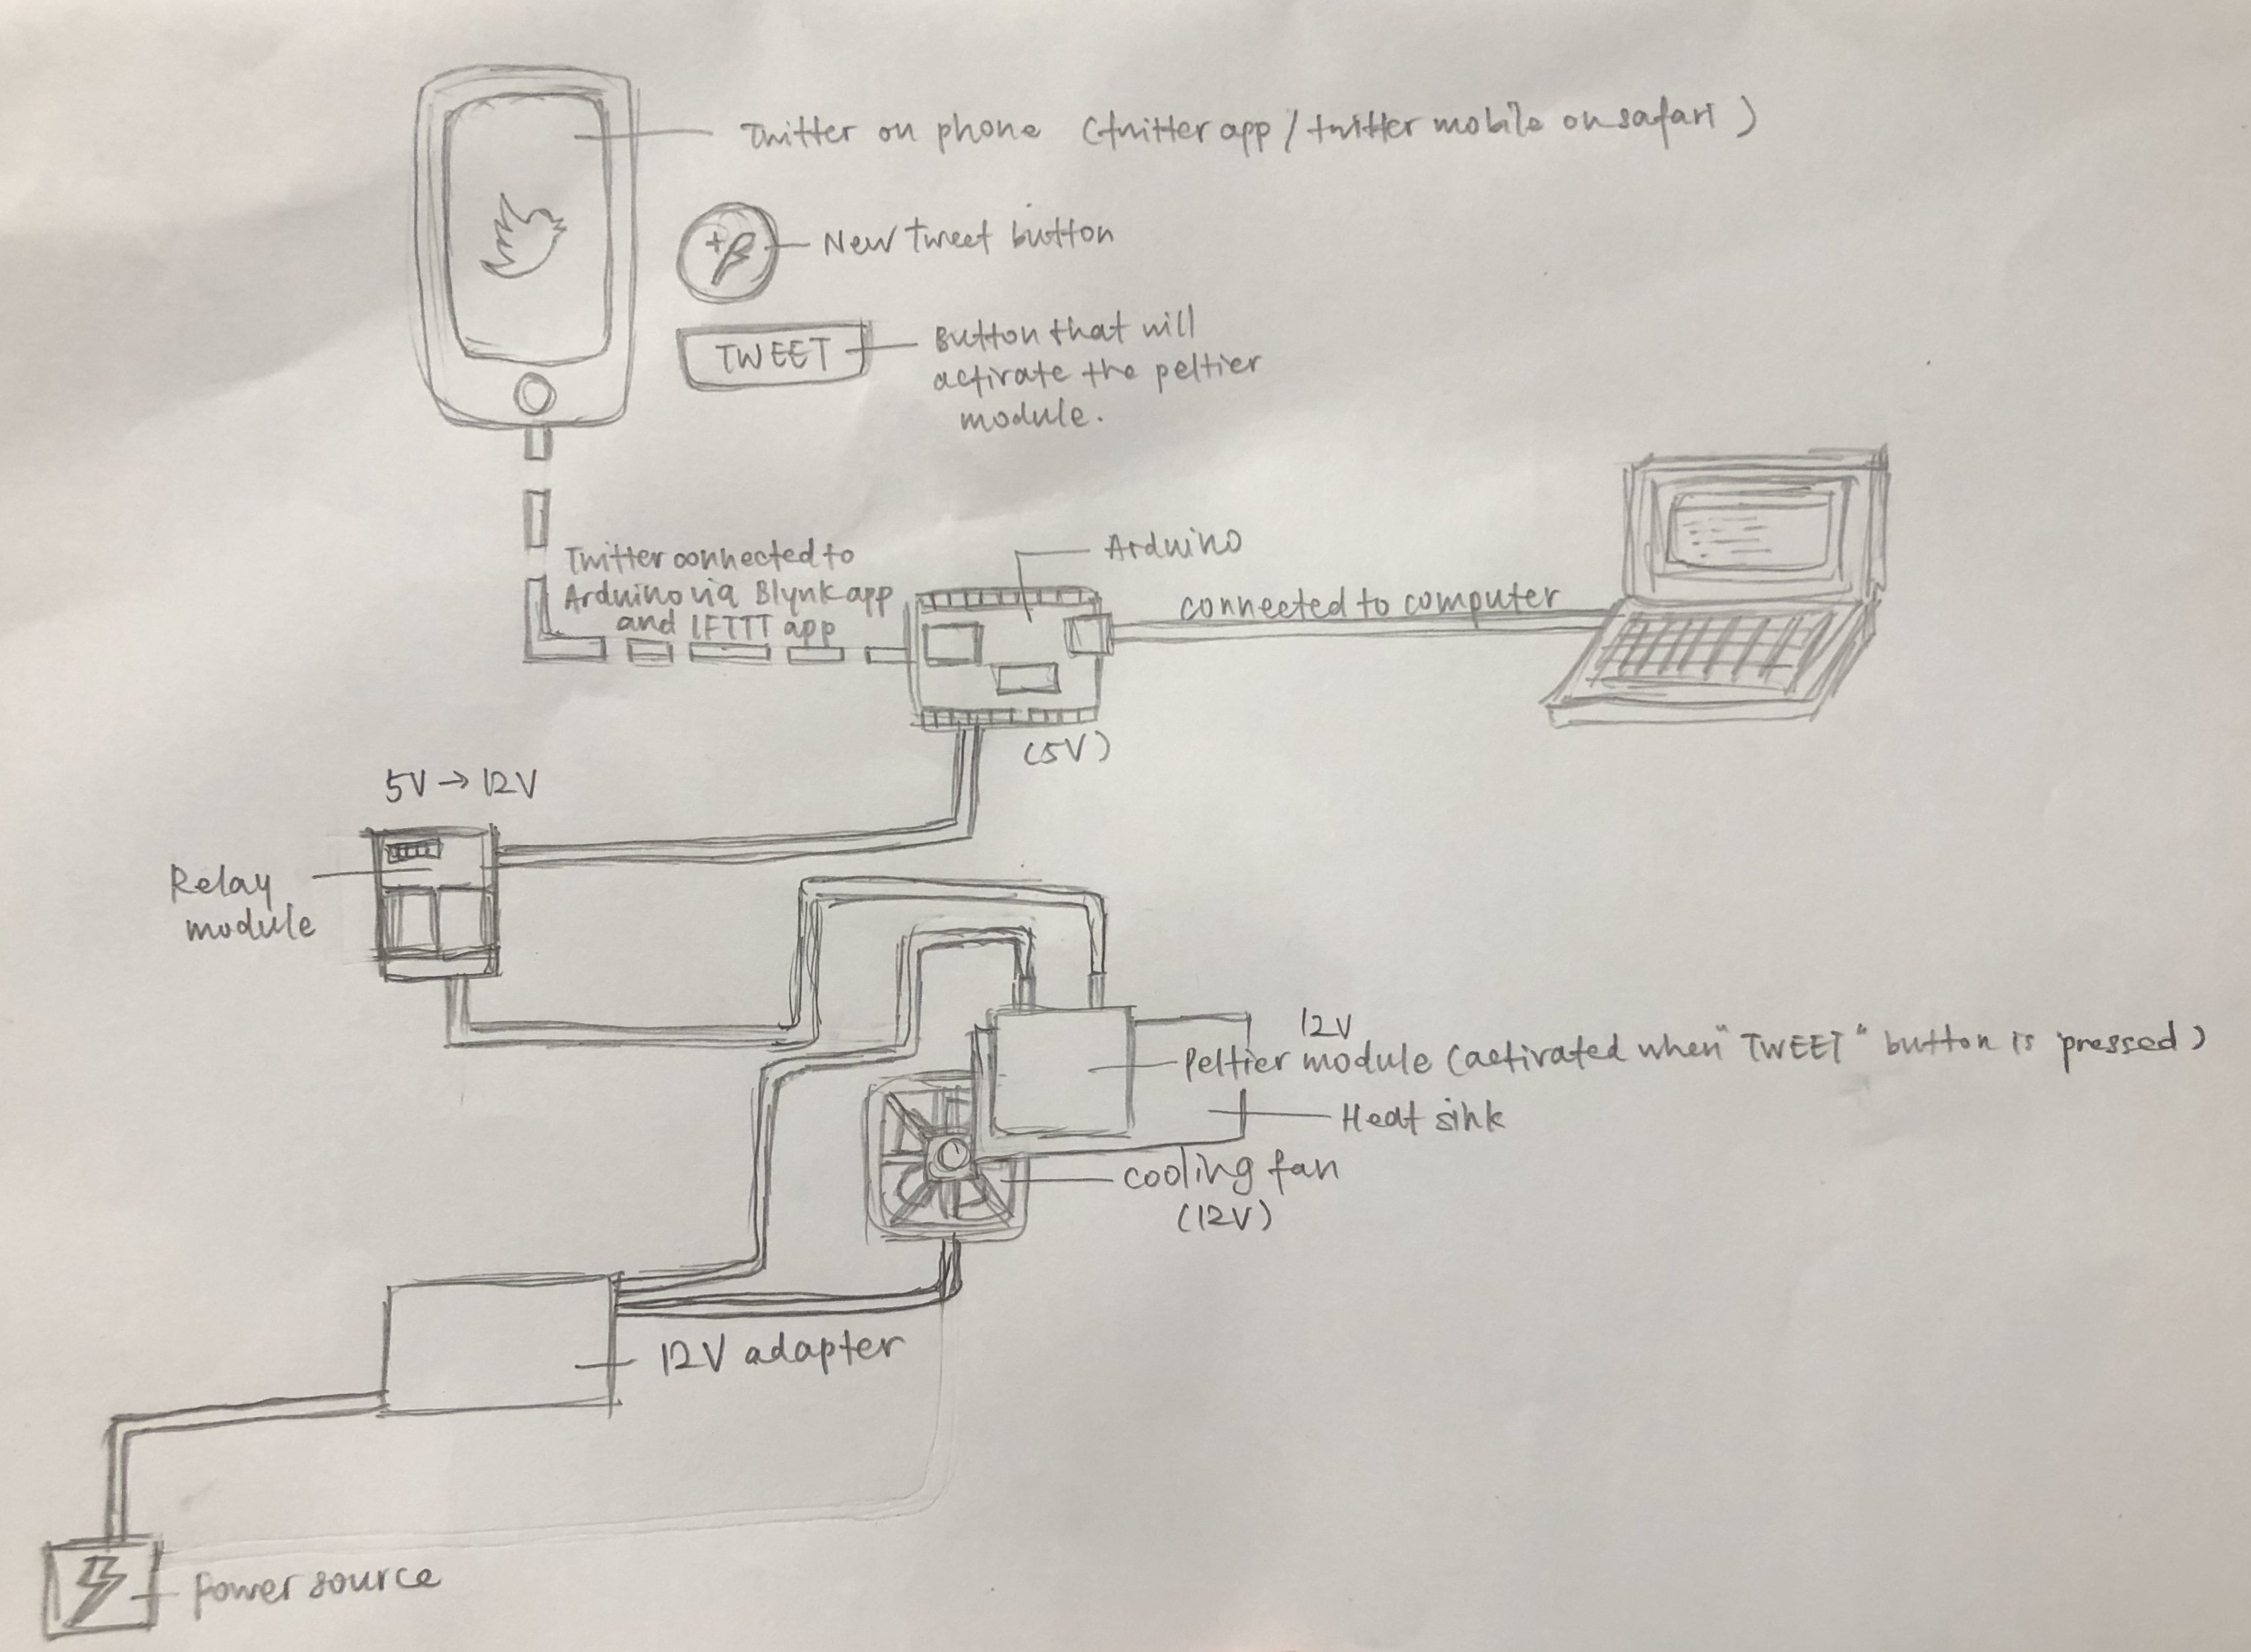
Furthermore, we wanted to create a room that can help to enhance our object, with the room having a lone table and having a hidden exit that leads to another room in which participant can connect with others.

Below is the room plan for the proposed room.
Instructables (Making of the work)

For a neater and more organised version of the same instructables, please refer to the document below.

DN1010 FINAL : INSTRUCTABLES

The Cold Room 

A Peltier module connected to Arduino which is connected to Twitter and hence controllable through Twitter. The Peltier module is inserted into a neck pillow and the neck pillow is situated in a all white room, which has a hidden exit that leads to a secret room.

Step 1: Get materials

Materials needed for this project:

  • Arduino
  • Breadboard
  • 12V Peltier Module
  • Relay Module
  • Jumper wires
  • Male to female jumper wires
  • 12V Power adapter
  • Heat sink
  • Cooling fan
  • 10V resistor
  • Crocodile / alligator clips
  • Button
  • Testpen
  • Blynk app
  • IFTTT app
  • Mahjong paper
  • White trash bag
  • Tape
  • Table

Step 2: Connecting the Peltier module to Arduino
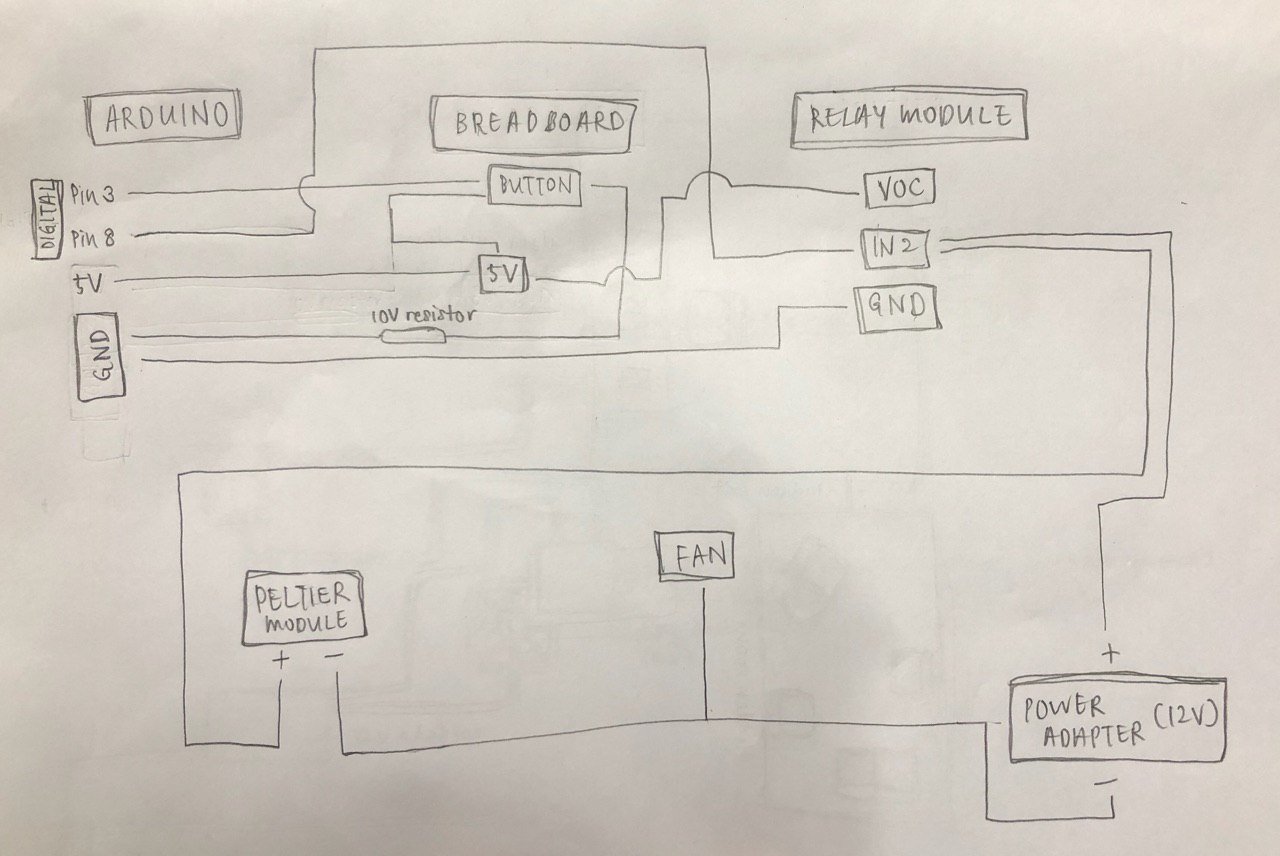
Based on the above drawing, the positive end of the Peltier module (denoted by the red wire), is connected to the Common of 2nd relay module on our 2 module relay. The negative end of the Peltier module (denoted by the black wire), is connected to the negative end of the 12V Power adapter. The positive end of the 12V power adapter is then connected to NC (Normally Closed) of the 2nd relay module. The IN2 pin of the relay module is then connected to Digital Pin 8 on Arduino with a female to male jumper wire. The GND (Ground) of the Relay module is connected to the GND of Arduino.

Next, the 5V of Arduino is drawn to the Breadboard. This 5V that is drawn to the Breadboard is then connected to VOC on the relay module and to one side of the button. The other side of the button is connected to GND through a 10V resistor and to Digital Pin 8 of Arduino.

This is to connect the Peltier module to Arduino and to the button, which controls the opening and closing of the circuit. When the button is pressed, the circuit is closed and it is then will the Peltier module react with a drop in temperature.

Step 3: Input of the code in Arduino 

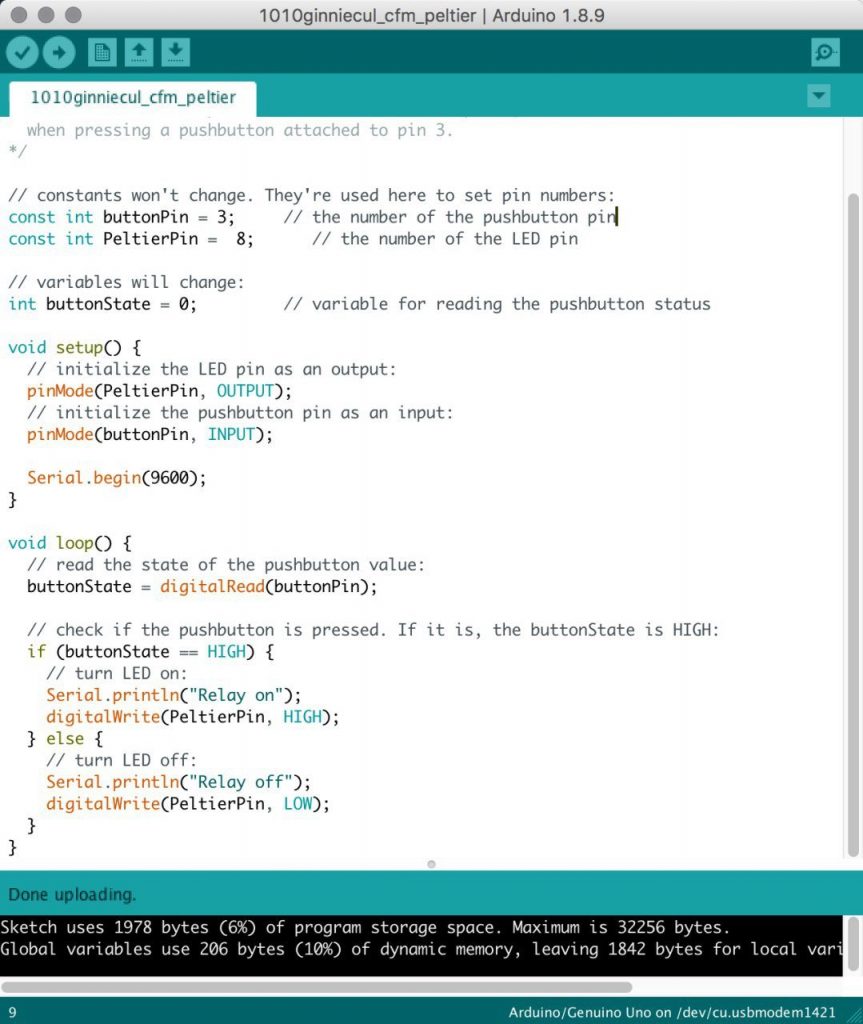
The code below is keyed in into Arduino on computer and thereafter sent to Arduino.

_____________________________________________________________________

/*

Button

Turns on and off a peltier module attached at pin 8,

when pressing a pushbutton attached to pin 3.

*/

// constants won’t change. They’re used here to set pin numbers:

const int buttonPin = 3;     // the number of the pushbutton pin

const int PeltierPin =  8;      // the number of the LED pin

// variables will change:

int buttonState = 0;         // variable for reading the pushbutton status

void setup() {

// initialize the LED pin as an output:

pinMode(PeltierPin, OUTPUT);

// initialize the pushbutton pin as an input:

pinMode(buttonPin, INPUT);

Serial.begin(9600);

}

void loop() {

// read the state of the pushbutton value:

buttonState = digitalRead(buttonPin);

// check if the pushbutton is pressed. If it is, the buttonState is HIGH:

if (buttonState == HIGH) {

// turn LED on:

Serial.println(“Relay on”);

digitalWrite(PeltierPin, LOW);

} else {

// turn LED off:

Serial.println(“Relay off”);

digitalWrite(PeltierPin, HIGH);

}

}

_____________________________________________________________________
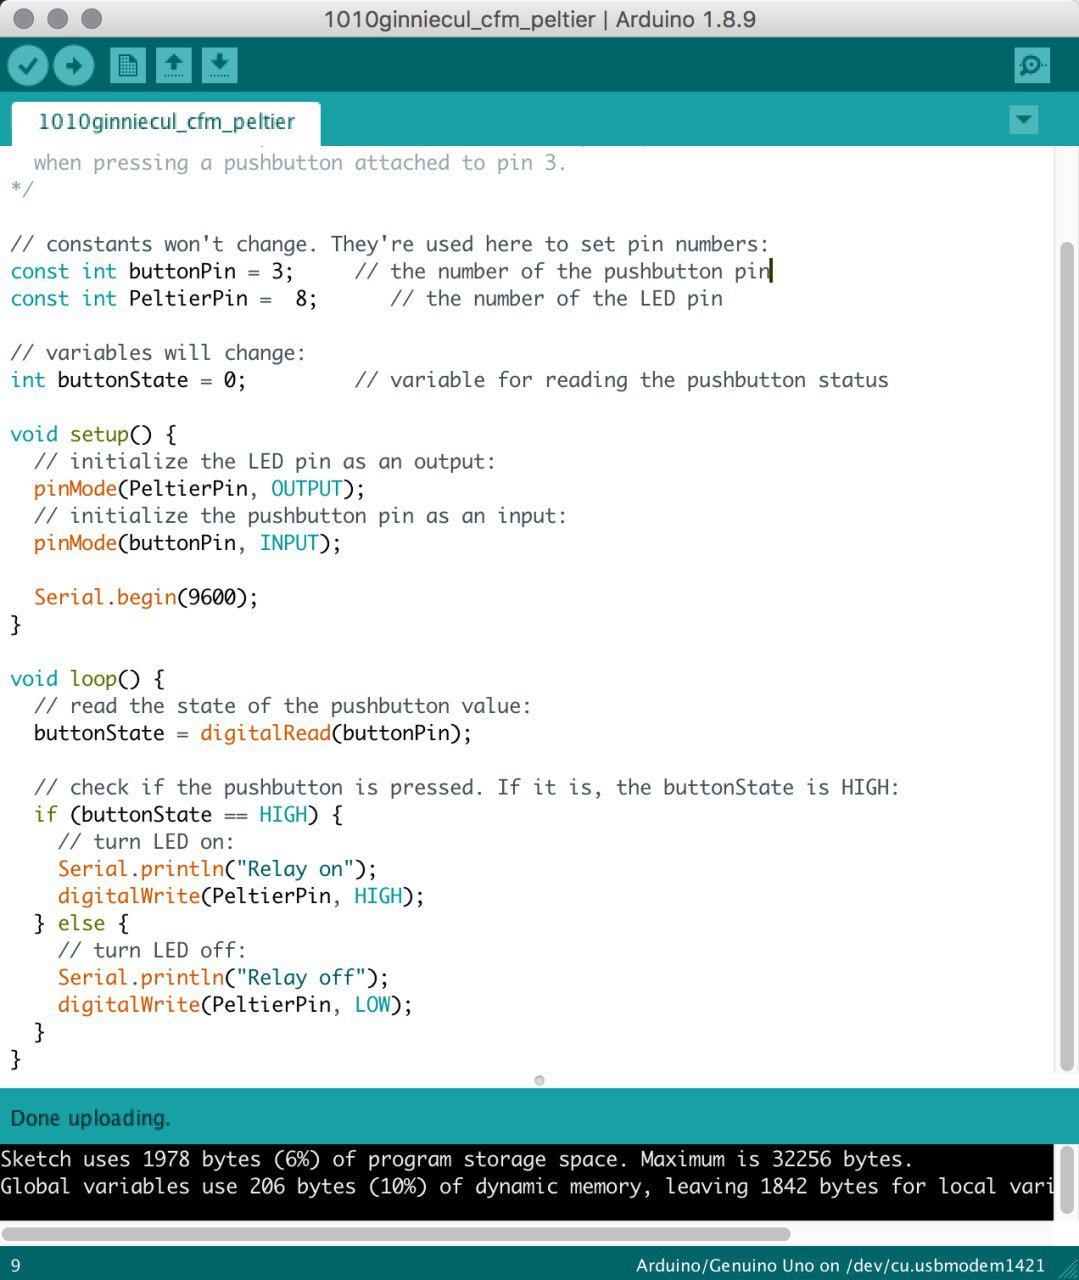
With this code sent to Arduino, the Peltier module is then able to react with a drop in temperature when the button is pressed.

Step 4: Connect the cooling fan (12V) to the power source.

By connecting the cooling fan to the power adapter, the fan will then work when the power adapter is connected and hence is able to help suck out the heat produced on the other side of the Peltier module to ensure the cold side can stay cold for a longer time.

As the fan need not be controlled by Arduino and only needs to work to cool down the Peltier, it can be directly connected to the power adapter that supplies the 12V needed for the fan.

Step 5: Attaching the fan and the heat sink to the Peltier module.

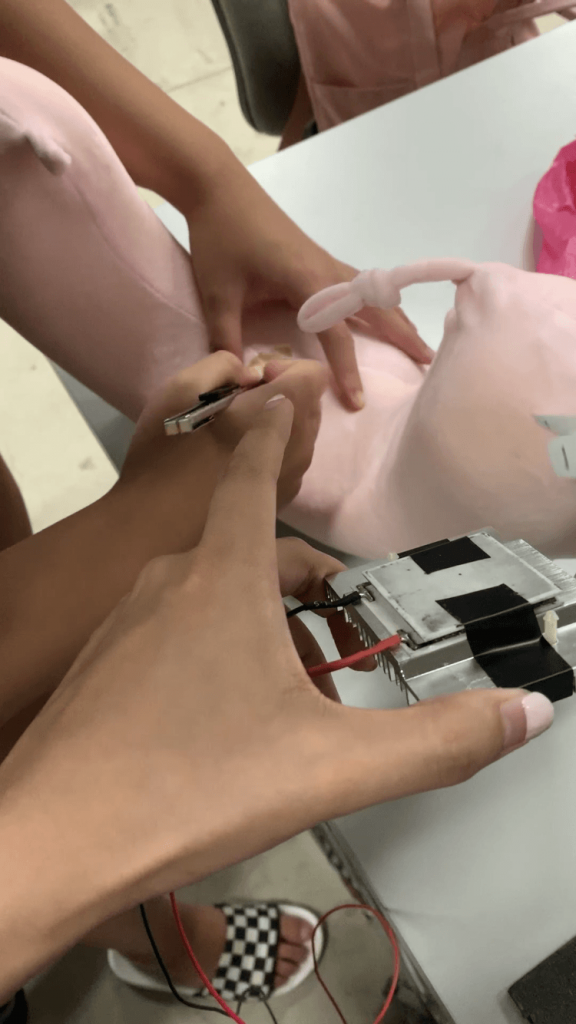
We then placed the Peltier module onto the heat sink with the hot side down and attached the cooling fan under the heat sink. The entire thing is bounded together by insulating tape.
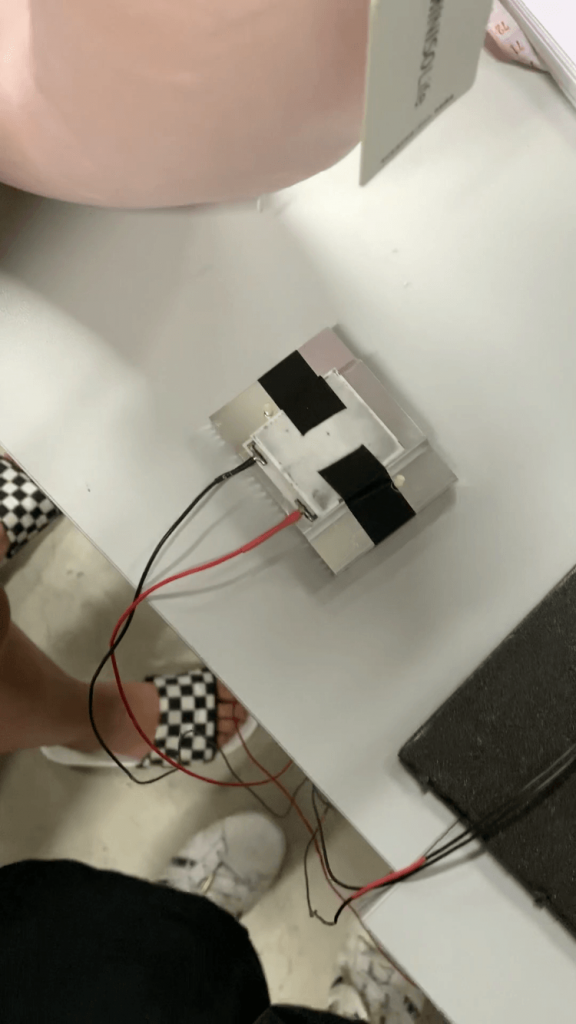
The circuit can now be tested for workability through the use of the button.
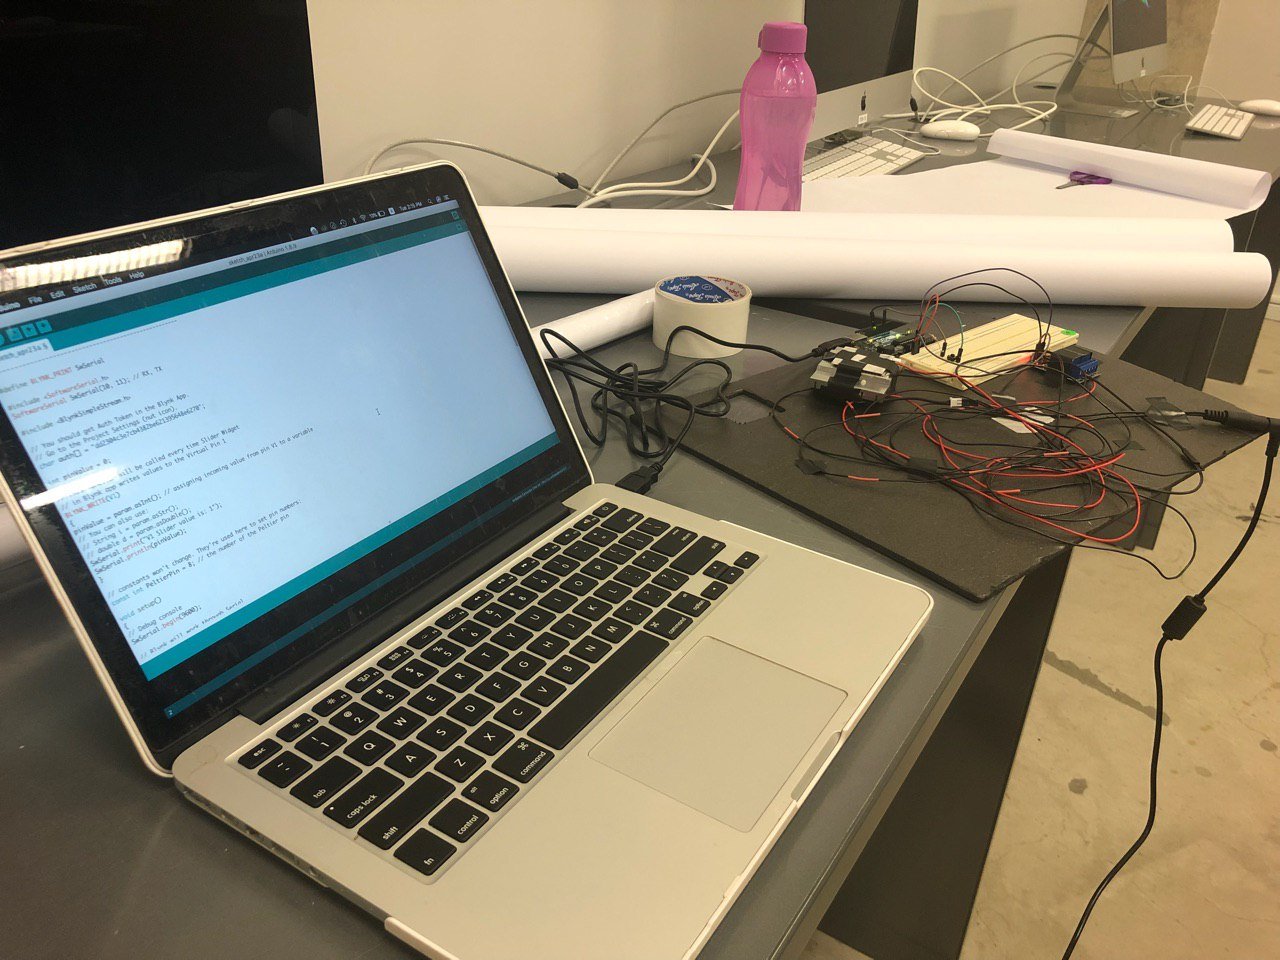
Video – Button test 1

Video – Button test 2

Step 6: Connecting Blynk to the computer

Following instructions on OSS, we then connected the Blynk app to the computer. We tested the workability of the Blynk app afterwards with a LED light.
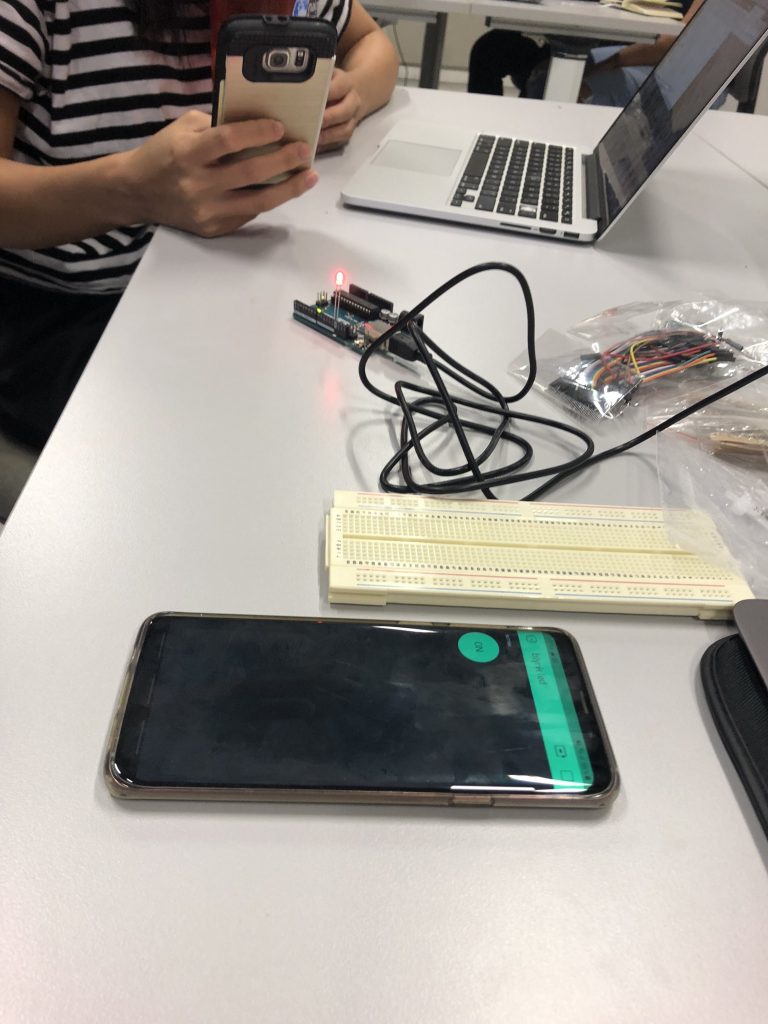
Video – Blynk app to LED

Step 7: Connecting Twitter to Arduino via the IFTTT app and Blynk.

Thereafter, we created a separate project for the Peltier and connected the button to V1 (Virtual 1). This allows Blynk to control the Peltier module via Arduino.
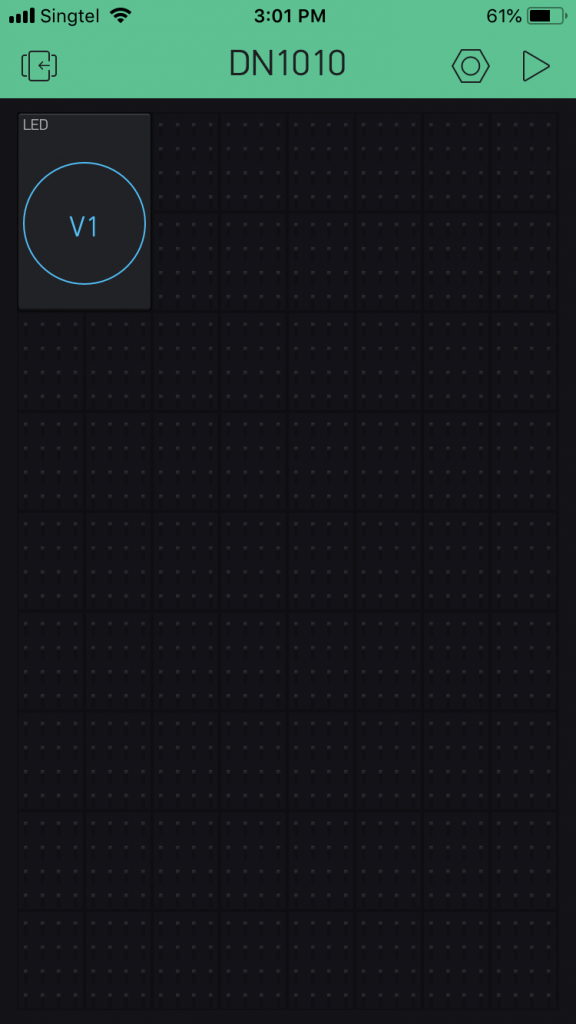
Video – Connecting Blynk app to Arduino 

We then created a link via webhooks on IFTTT to connect Twitter to Arduino.
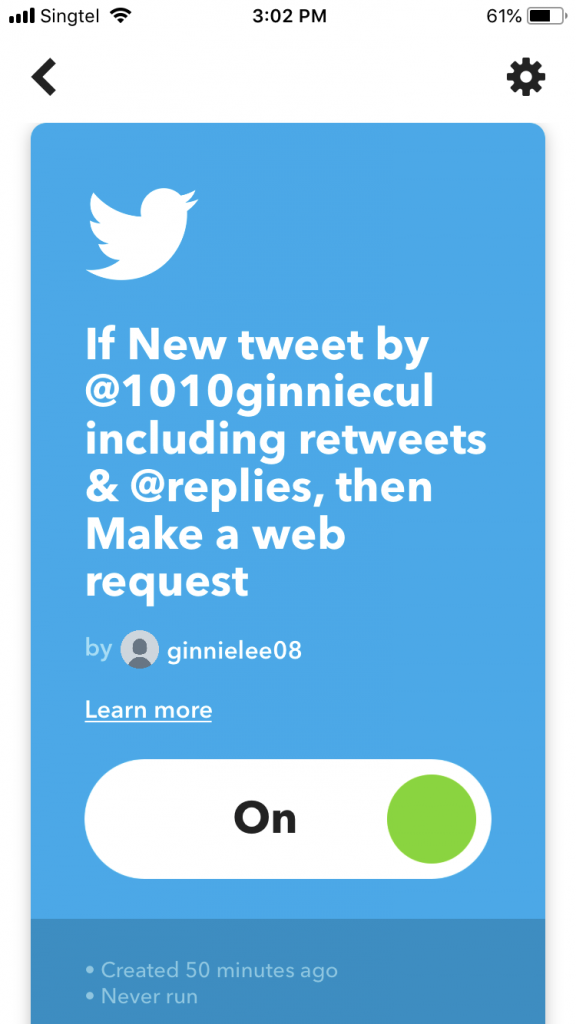
Video – Connecting Twitter to Arduino

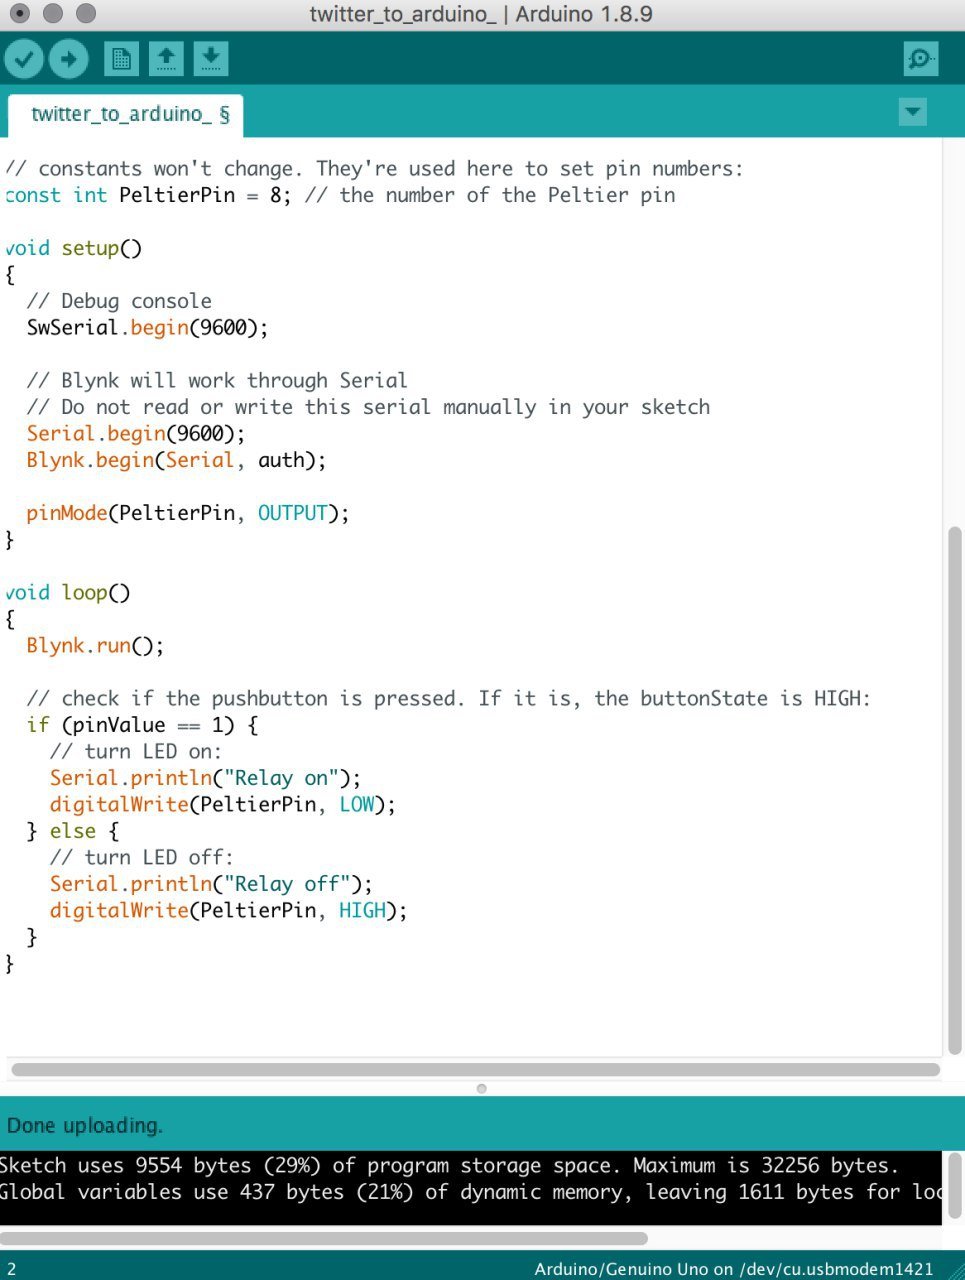
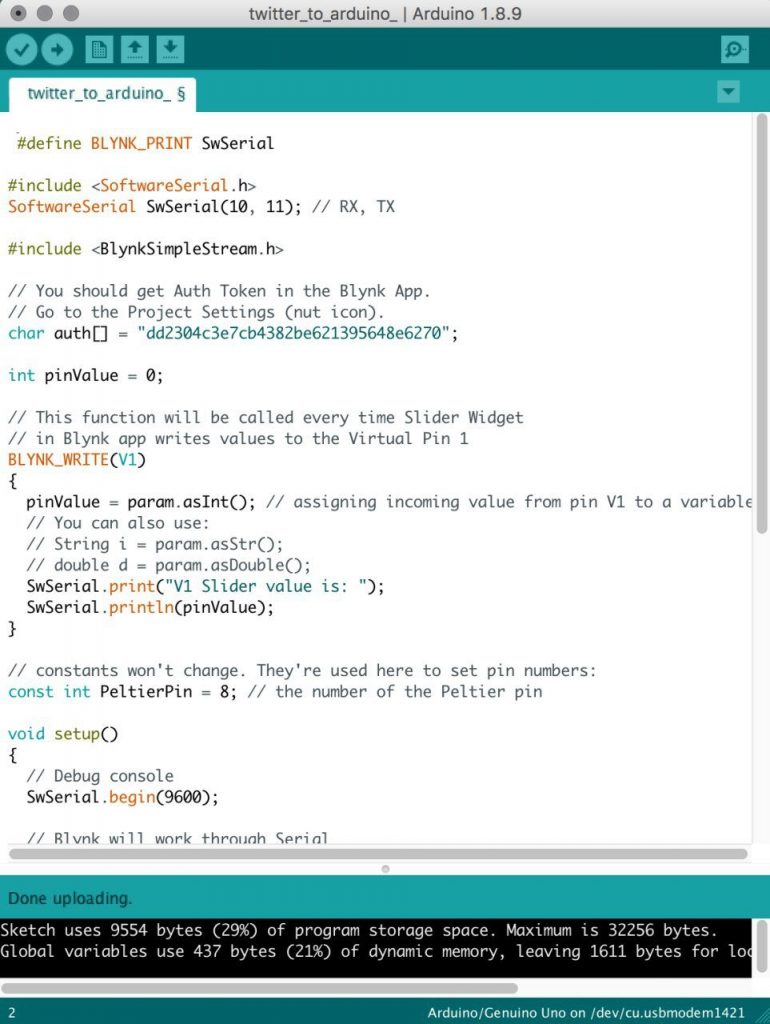
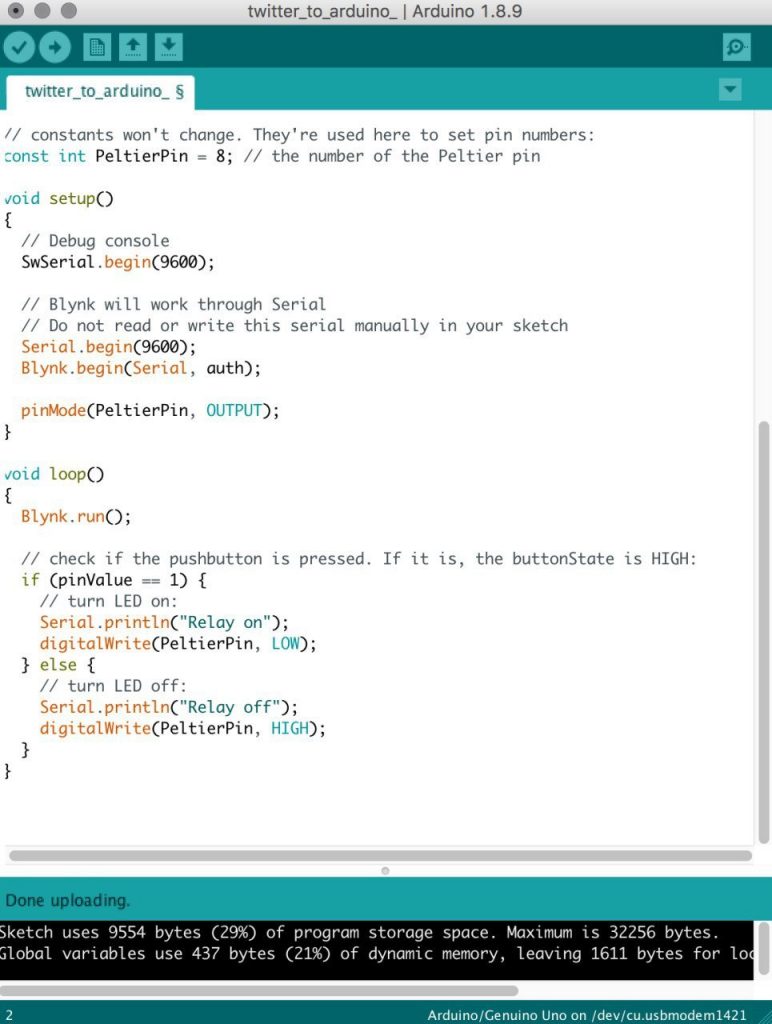
The code below is used to allow Twitter to control the Peltier module through Arduino.

_____________________________________________________________________

#define BLYNK_PRINT SwSerial

#include <SoftwareSerial.h>

SoftwareSerial SwSerial(10, 11); // RX, TX

#include <BlynkSimpleStream.h>

// You should get Auth Token in the Blynk App.

// Go to the Project Settings (nut icon).

char auth[] = “dd2304c3e7cb4382be621395648e6270”;

int pinValue = 0;

// This function will be called every time Slider Widget

// in Blynk app writes values to the Virtual Pin 1

BLYNK_WRITE(V1)

{

pinValue = param.asInt(); // assigning incoming value from pin V1 to a variable

// You can also use:

// String i = param.asStr();

// double d = param.asDouble();

SwSerial.print(“V1 Slider value is: “);

SwSerial.println(pinValue);

}

// constants won’t change. They’re used here to set pin numbers:

const int PeltierPin = 8; // the number of the Peltier pin

void setup()

{

// Debug console

SwSerial.begin(9600);

// Blynk will work through Serial

// Do not read or write this serial manually in your sketch

Serial.begin(9600);

Blynk.begin(Serial, auth);


pinMode(PeltierPin, OUTPUT);

}

void loop()

{

Blynk.run();

// check if the pushbutton is pressed. If it is, the buttonState is HIGH:

if (pinValue == 1) {

// turn LED on:

Serial.println(“Relay on”);

digitalWrite(PeltierPin, LOW);

} else {

// turn LED off:

Serial.println(“Relay off”);

digitalWrite(PeltierPin, HIGH);

}

}

_____________________________________________________________________

Step 8: Packaging the Peltier module into the neck pillow 

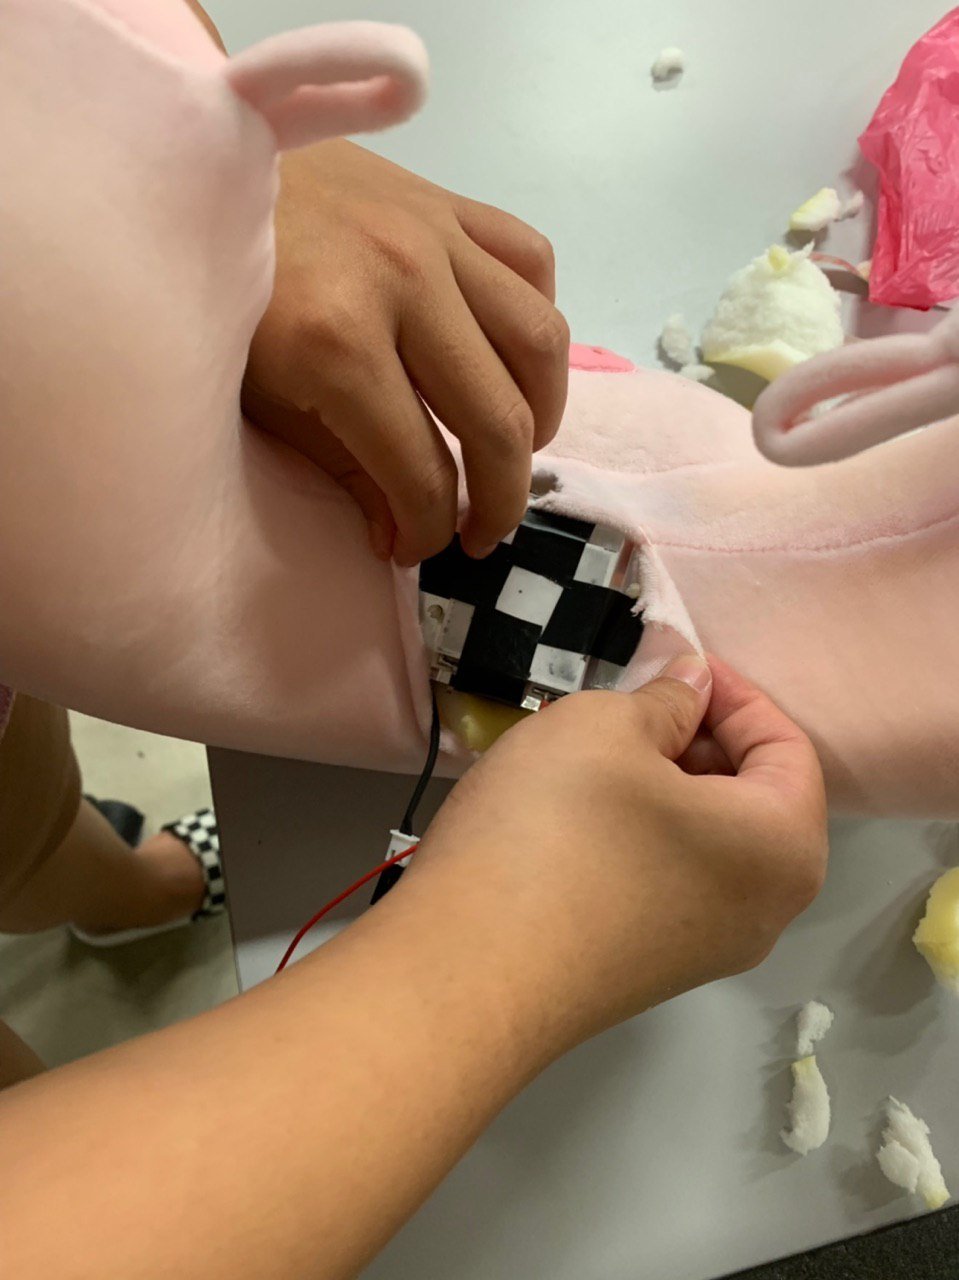
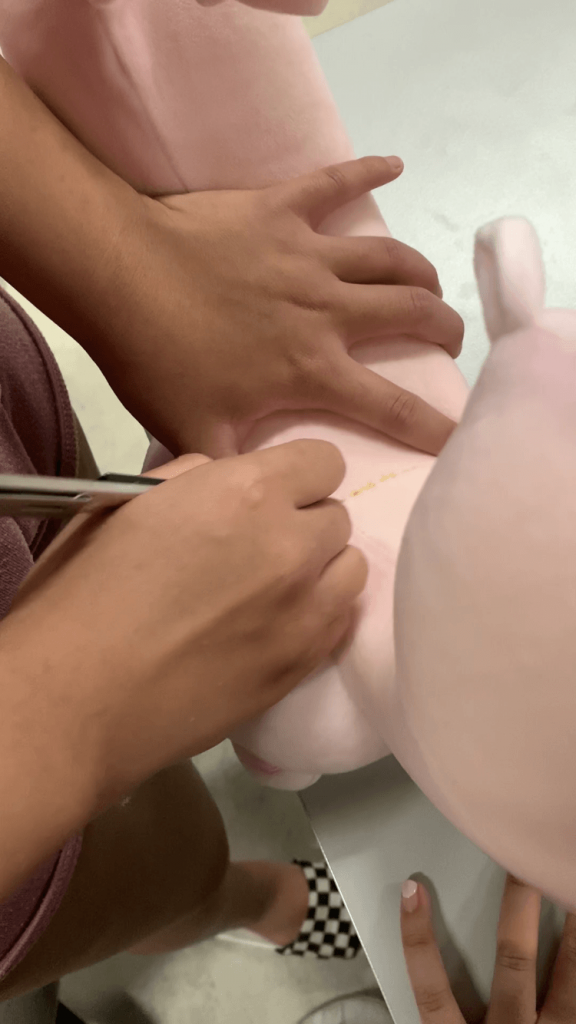
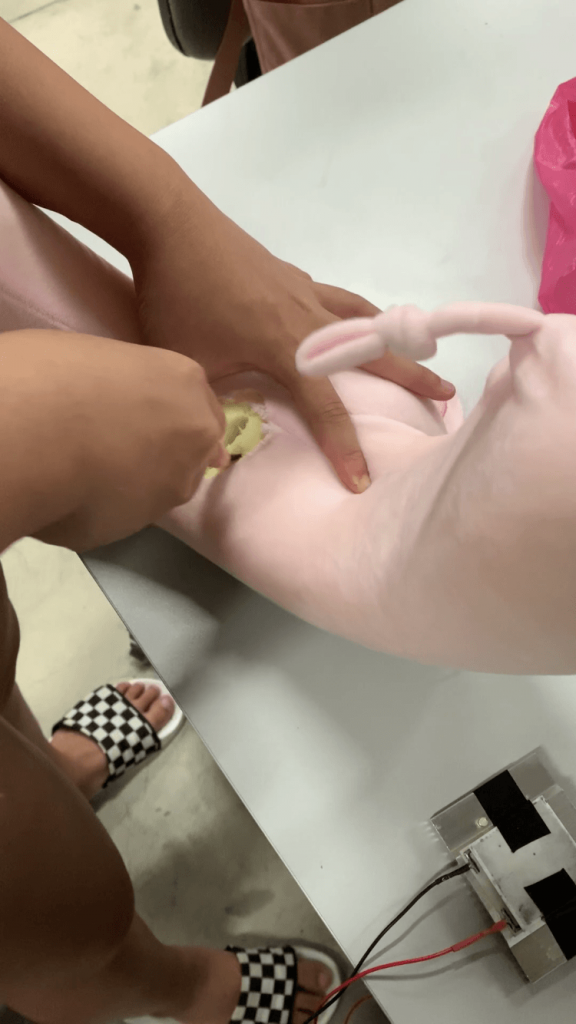
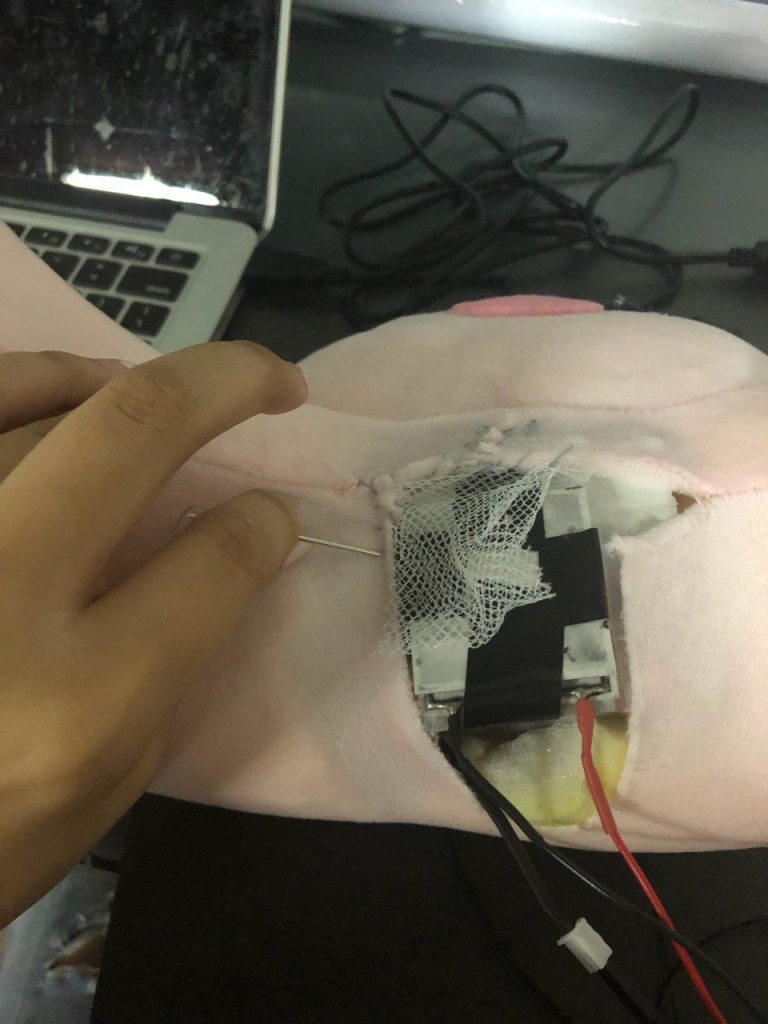
Thereafter, we cut a hole in the neck pillow where the neck would be and pulled out the stuffing in that area to fit the Peltier module in as well as allow space for the fan to spin inside the neck pillow.
Step 9: Cutting a hole through the back of the neck pillow

By cutting a hole through the back of the neck pillow, the heat generated by the other side of the Peltier module is then allowed to escape.

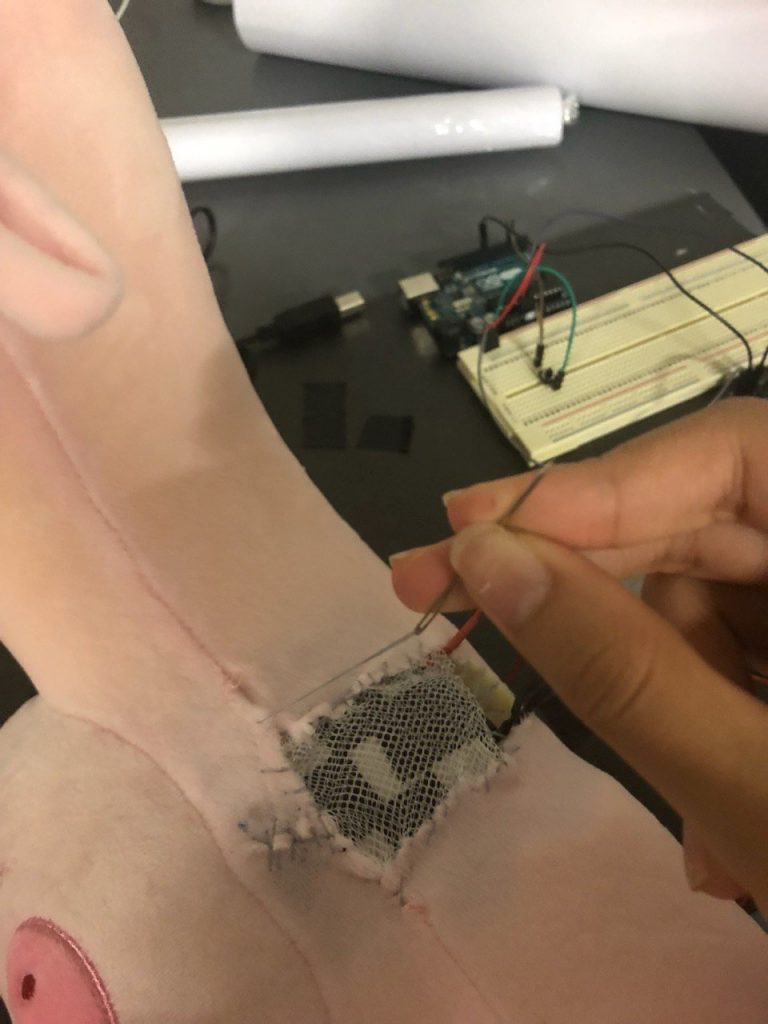
Step 10: Stitching the neck pillow back together

Thereafter, the neck pillow is sewed back together, with a mesh covering the Peltier to ensure that the temperature can be felt but at the same time ensure that the user does not get burnt if the heat is not dissipated fast enough and affects the cold side of the Peltier too.
Step 11: Setting up of the room

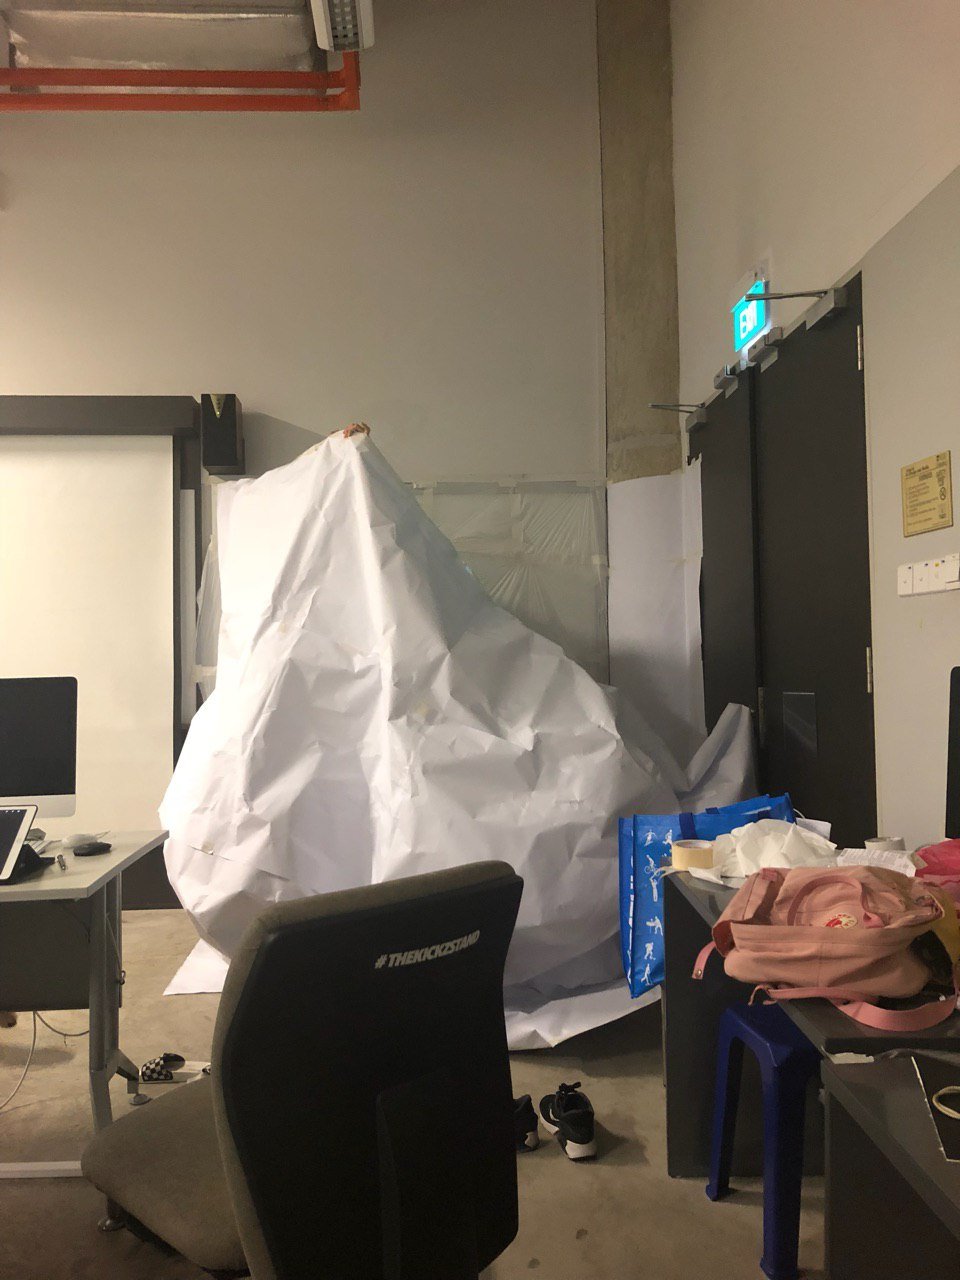
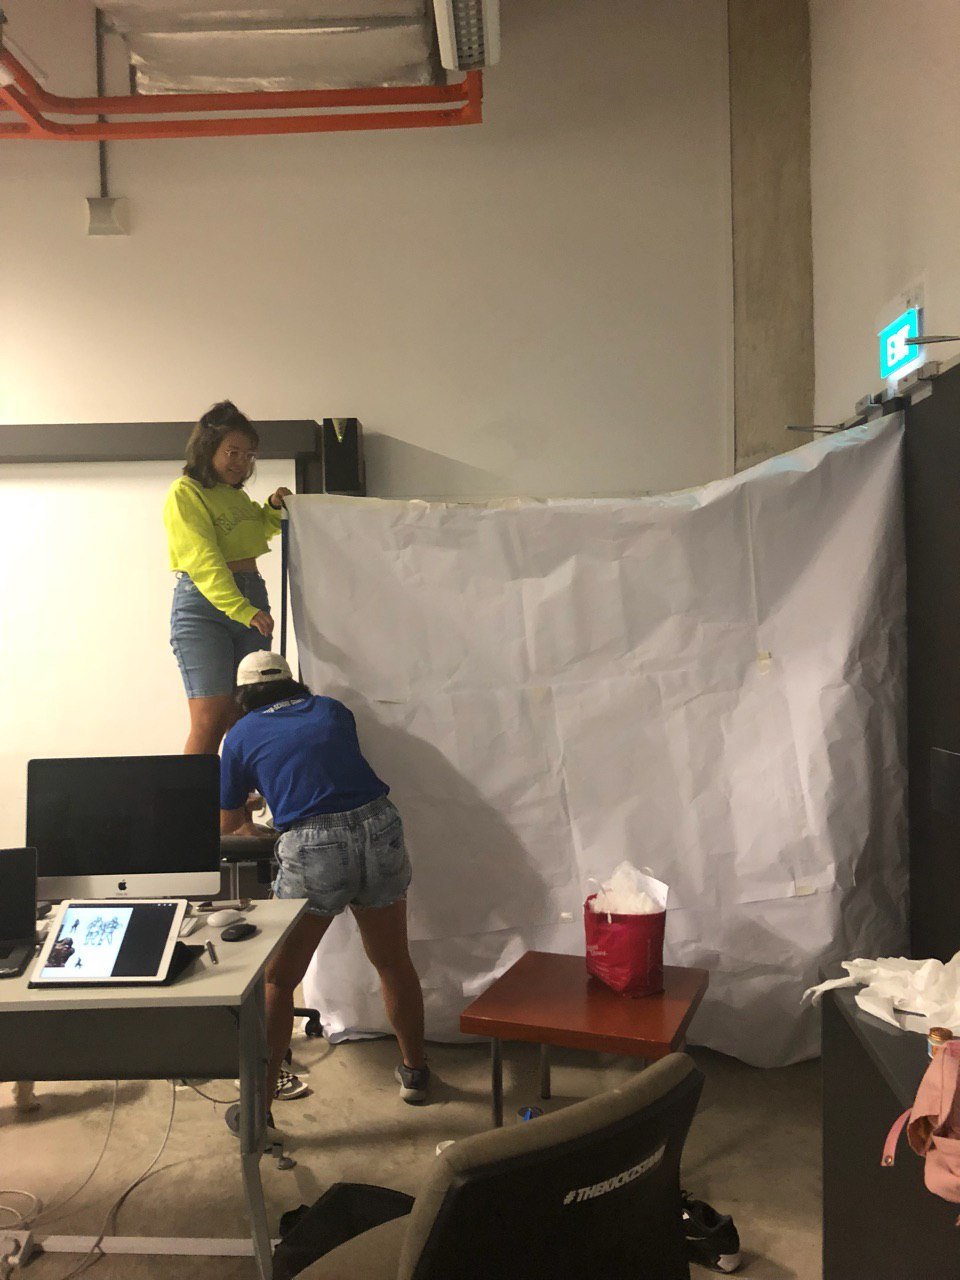
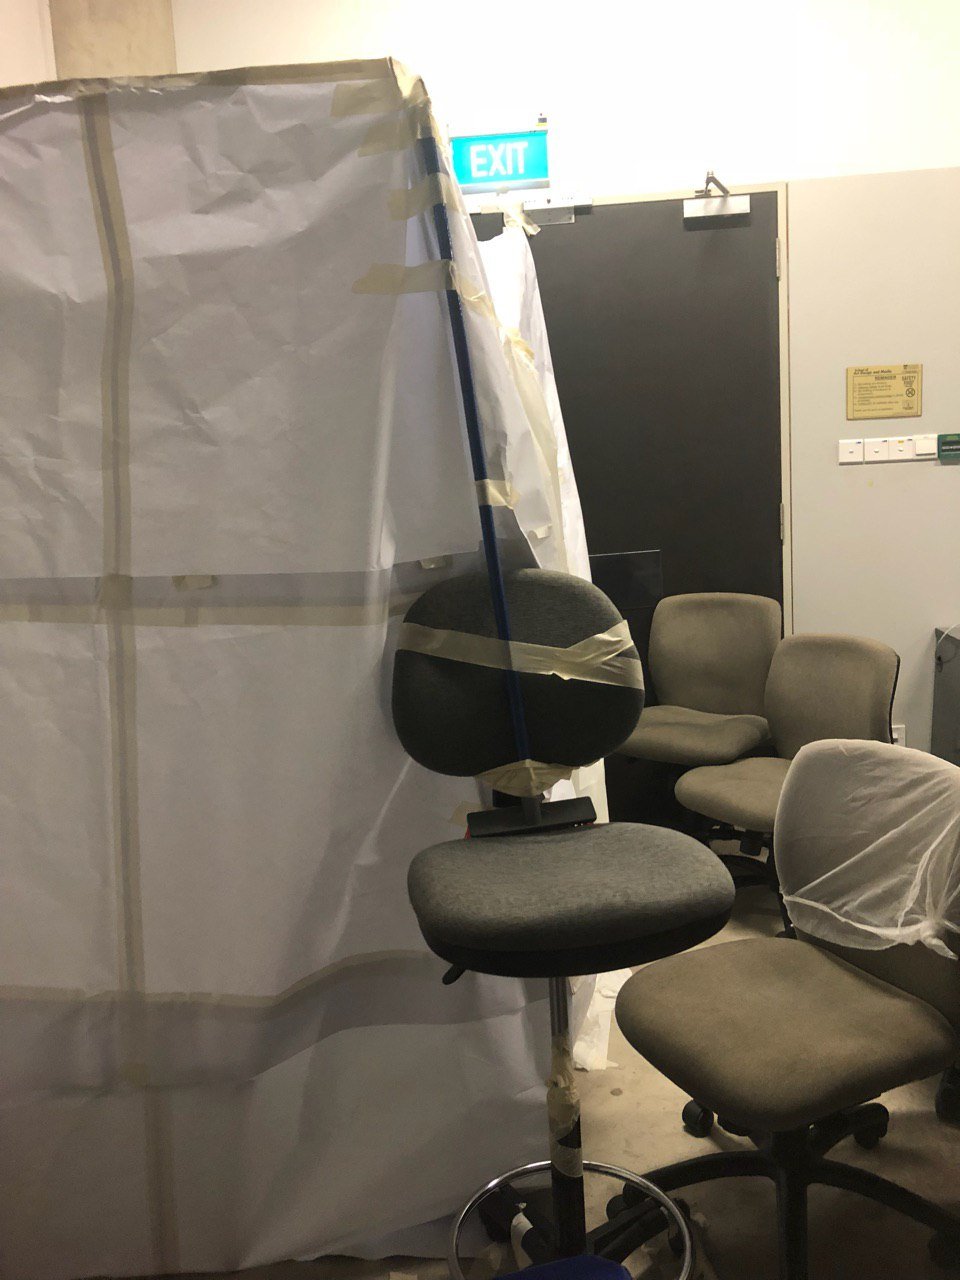
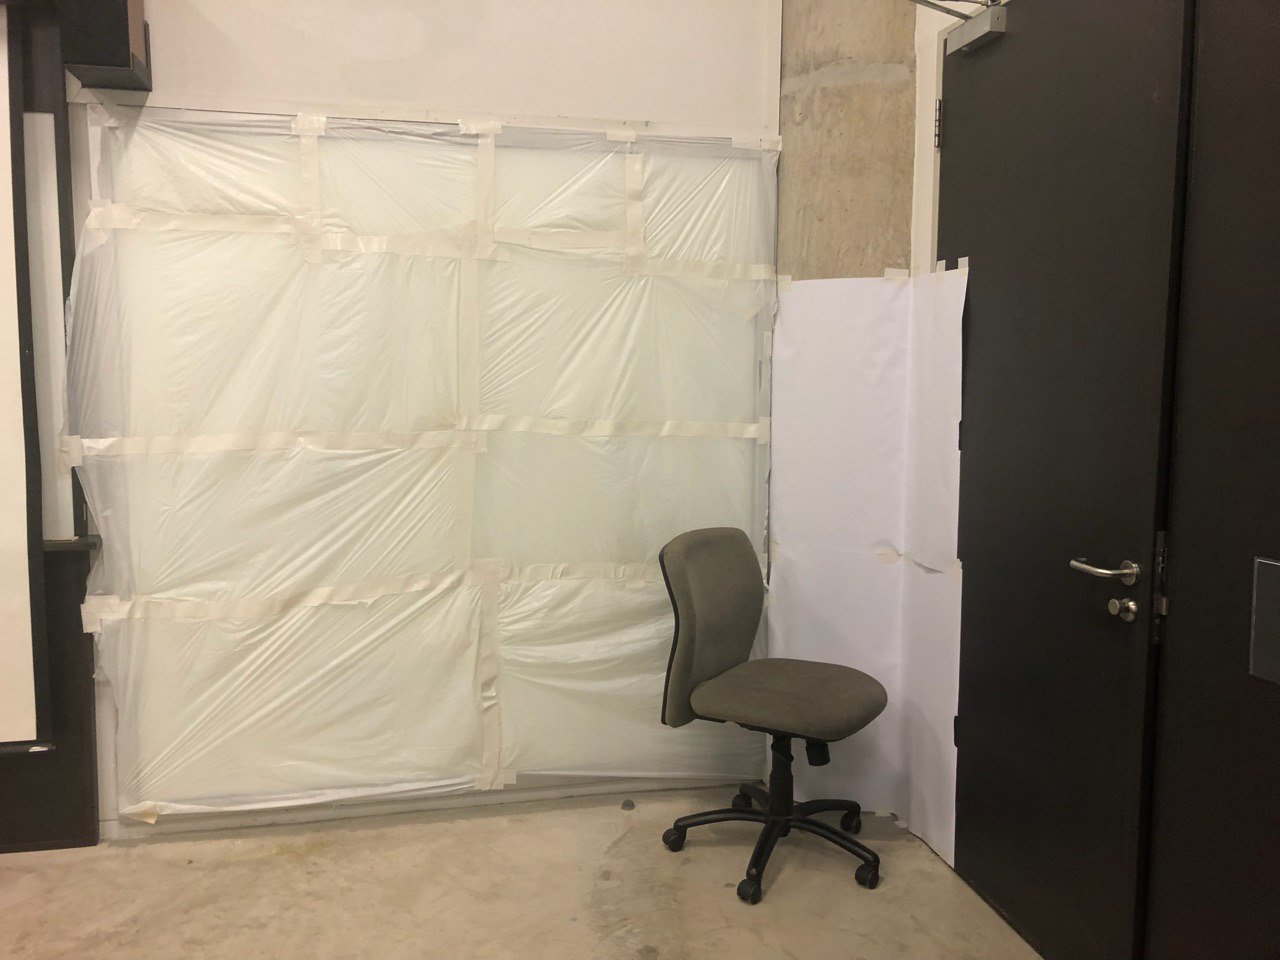
Thereafter, we started setting up the room. As we wanted the entire room to be white, we bought mahjong paper and sourced for white trash bags to cover / create the walls and floor for the room. We selected a room to build our room in and since there was a mirror, covered the mirror with white trash bags so that the entire wall is covered.
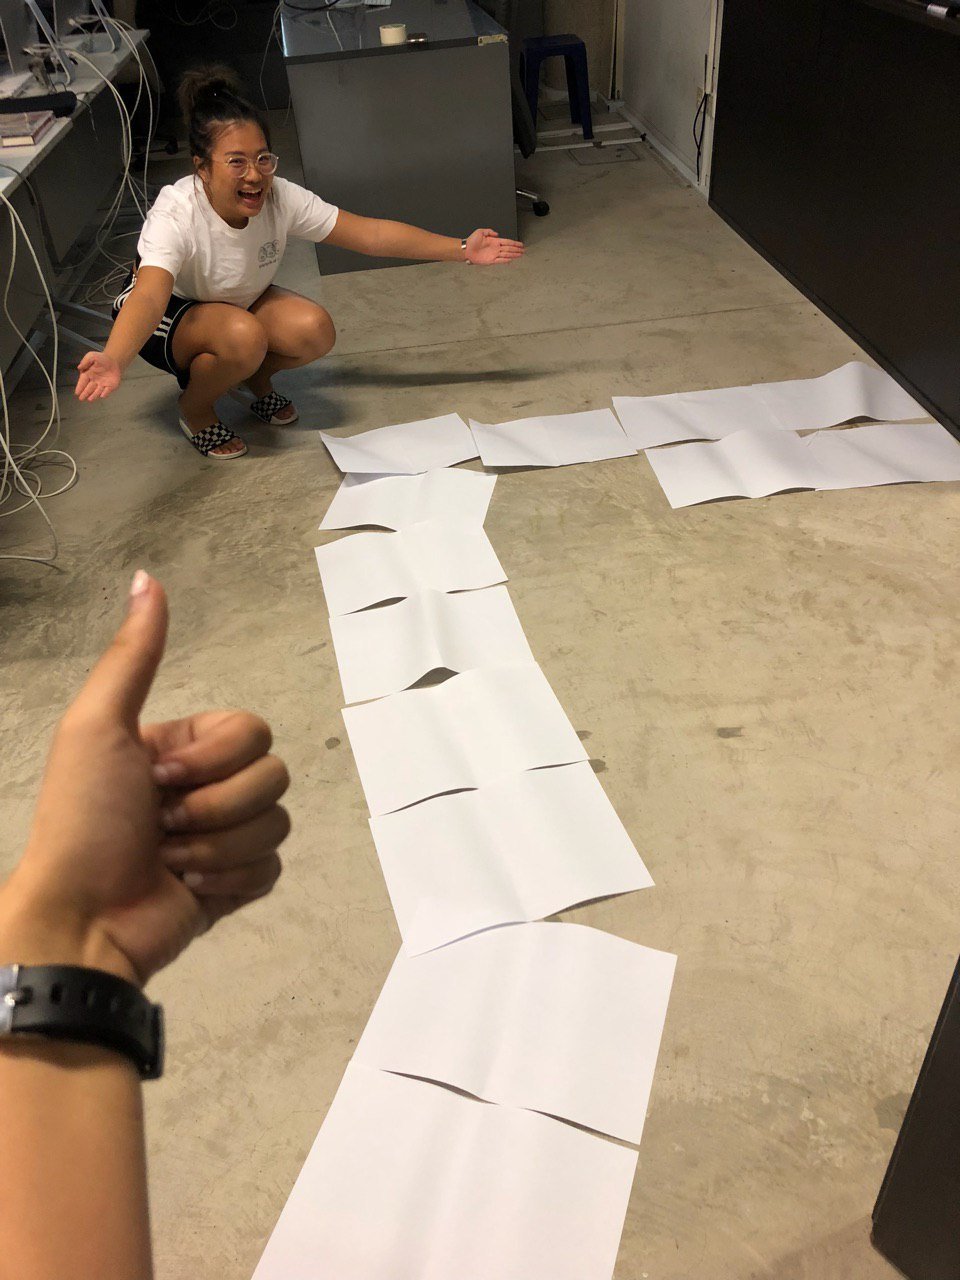
We then used mahjong paper to cover the floor of our room, and similarly used mahjong paper to build the remaining walls of the room.
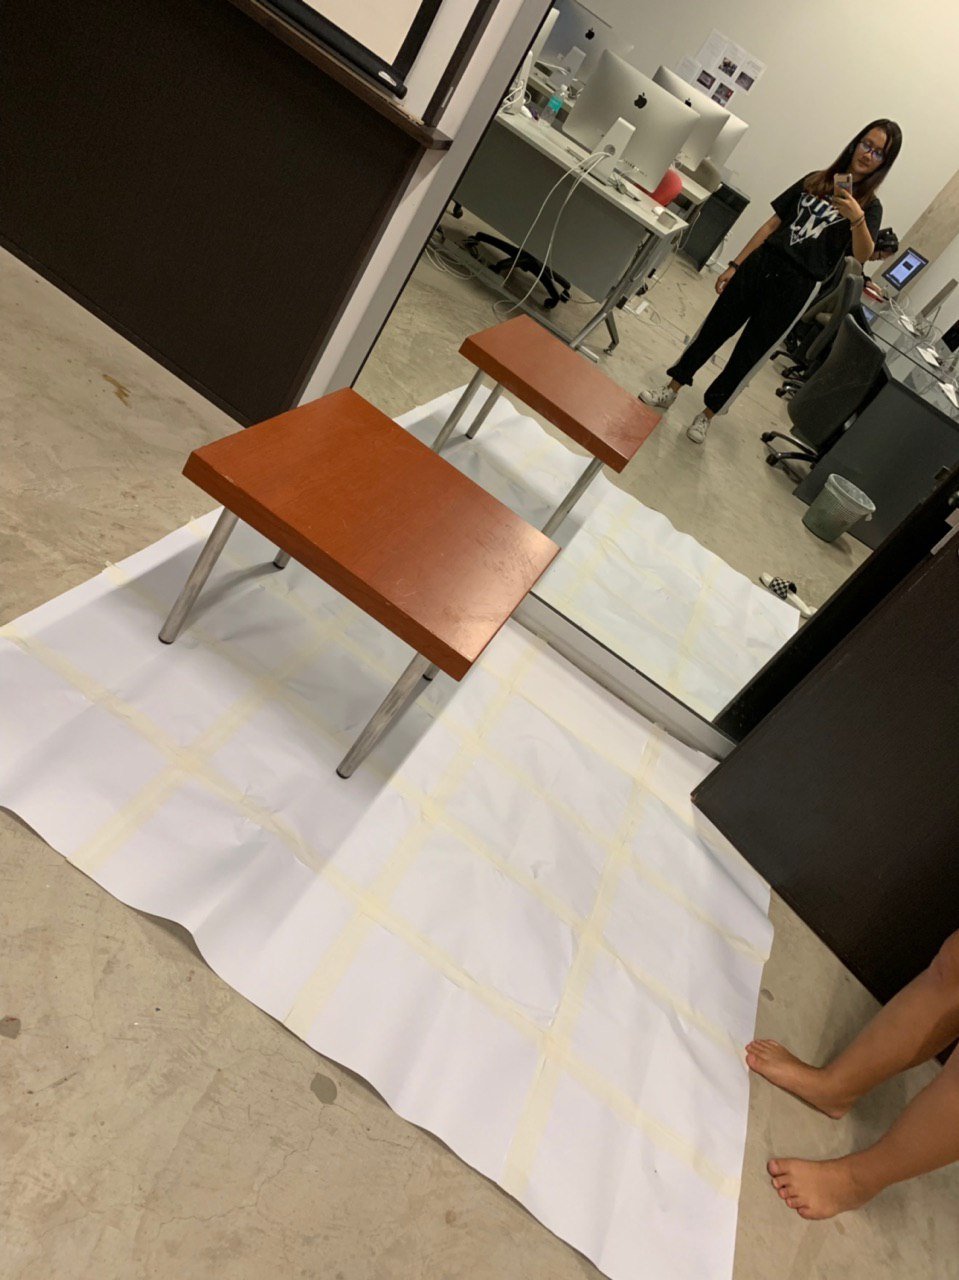
For the hidden exit, we cut a hole in the mahjong paper wall and replaced the opening with cascading white trash bags.

Step 12: Setting up within the room

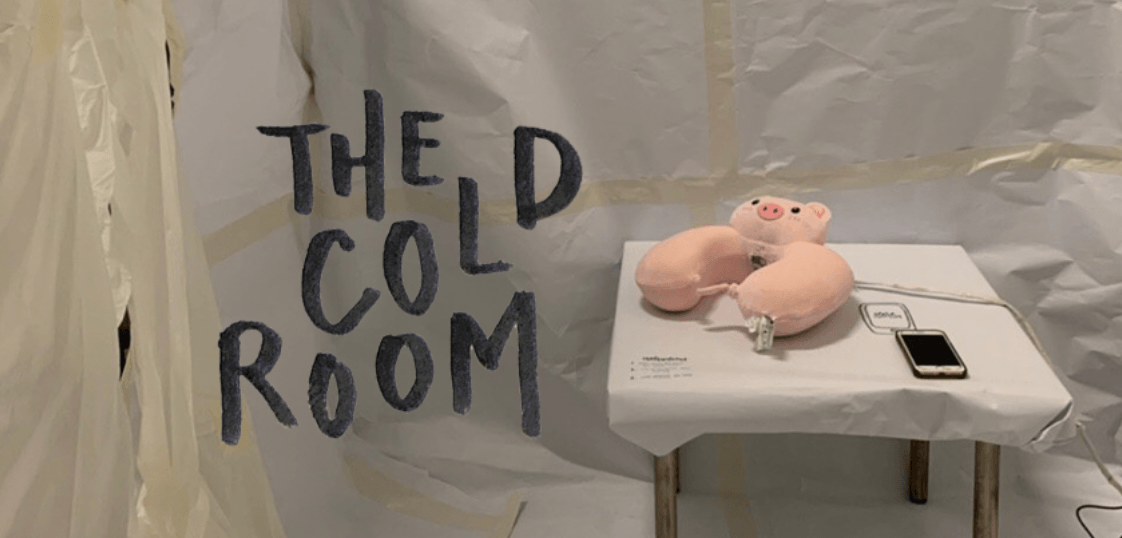
The table was then brought into the white room and covered with white mahjong paper. Simple instructions was then written on the table surface.

Instructions include:

  1. Pick up the phone. Start tweeting.
  2. Reply all responses to your tweet. Interact online.
  3. Leave whenever you want.

We then placed the neck pillow on the table, taping visible wires with white cloth tape before hiding the entire rest of the circuit behind  the white wall.
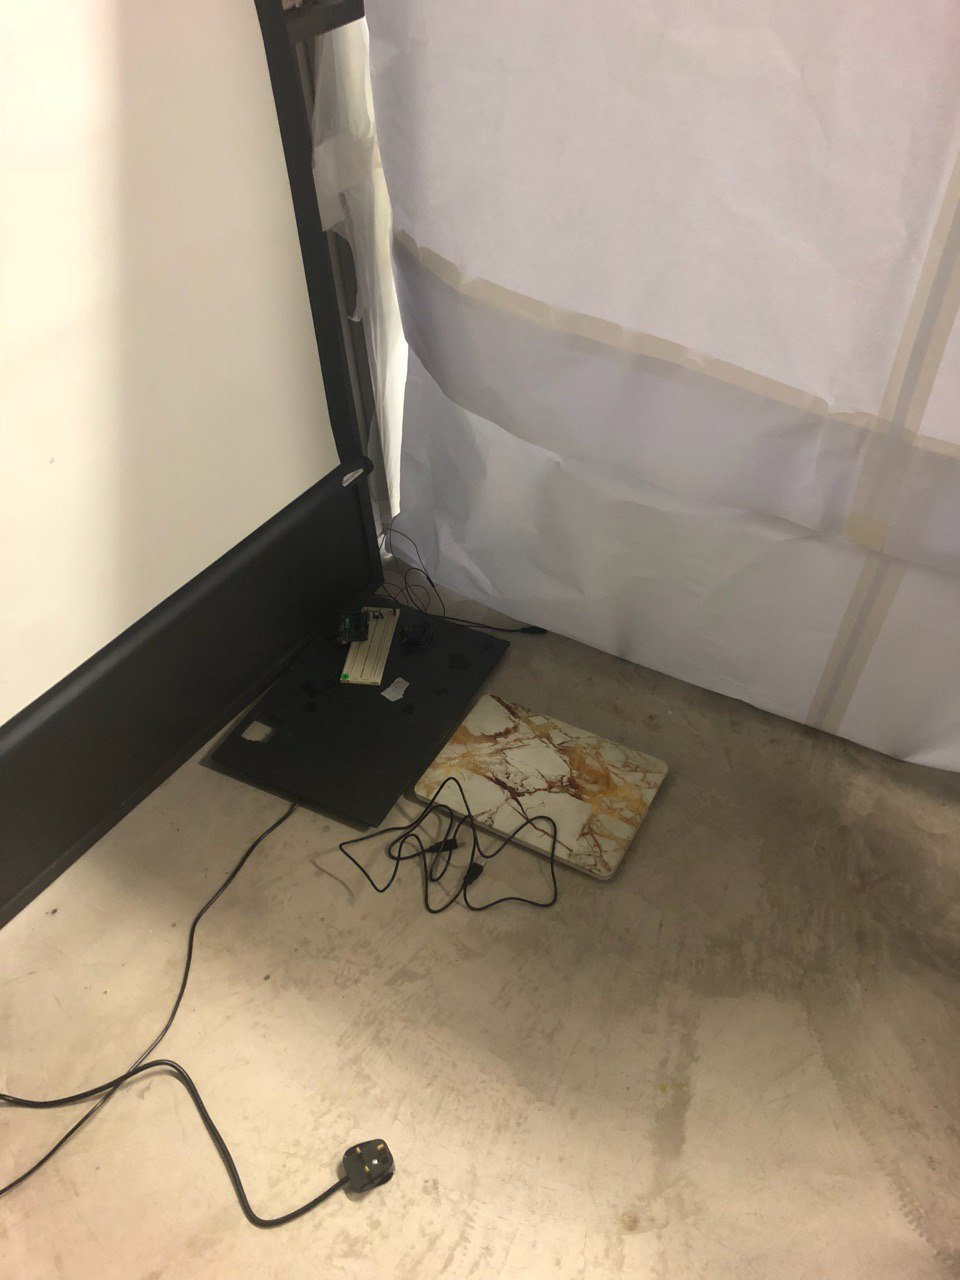
Step 13: Set up of the hidden room

Chairs were arranged in a semi circle behind the hidden door and some seats were filled with people to welcome the participants who walk through the hidden door.

Step 14: Placing of the neck pillow

The neck pillow was then placed on the table with the rest of the circuit placed behind one of the white walls. The installation is now ready for its participants!

Codes / Circuit design used to build prototype:

Below is the code used for the project. Coding was done with help from Lei.
Original code used for the circuit that was controlled by a button (when Twitter was still not connected) :
Circuit design:

Above is the drawing and photo of how the circuit is connected.

Final Presentation

Videos from final presentation:

Participant 1

Participant 2

Notes from final presentation (curtesy of Natalie):

No access to camera
Left when it got hot

People more connected online due to phones, talk to real life people less

White room for isolation – neck pillow is comfort (but uncomfortable cos it gets cold)
– pink, for the warmth but it doesn’t give warmth
– People planted at another exit, another option instead of leaving through the main way

Exit made abit more clear – but creators did not want it to be obvious – more on the participants to look carefully around themselves
Gwen’s thoughts: can see wires so more careful, first time tweeted then got colder, but after that not much diff, tweeted more & more to see if got diff
Introduced to room so wouldn’t look around much

Munch thought she wasn’t allowed to go another way

Wires make participants frightened in case they ruin it
Small space made people not want to disturb the space and maybe not look around the room as much
Can afford another type of entry like got curtain or people you planted are talking (about why the participant is always on their phone) to get the participants curious and want to exit that way

Reflections

As we have never learnt coding and have never been exposed to Arduino or coding beforehand, the setting up of the circuit and coding was extremely challenging for us. With no sense of direction, I headed to Sim Lim Tower for the first time to get additional materials we needed. Not knowing what exactly was needed, I asked around the store and everyone referred me to someone else in the store until I got referred to a young technician. The technician was kind enough to explain to me how I should connect the circuit and even drew out the circuit for me.

However, when I came back and we tried to connect the circuit, we realise that I bought a wrong wire (was supposed to buy a female power connector but got a male power connector instead), and ended up not being able to connect the power adapter to the circuit.

Even after buying the right power connector, we still weren’t able to make our circuit work and hence we went for consult. During consult, our code was checked and there was indeed problems with our code, when we coded HIGH when it was supposed to be LOW and vice versa. The circuit was then able to work after that.

The connecting of Twitter to Arduino was also very challenging. Initially when we tried with the code Lei sent us to help us, the Peltier module reacted immediately after the code was sent to Arduino although no button was pressed / no tweets were sent. We tried changing the code and the circuit but yet still unable to succeed.

We then consulted Lei again and figured out how to connect Twitter properly to Arduino, and it was because we didn’t configure the computer to connect to Blynk properly.

Also, tapping on experience with the previous micro-project where we didn’t solder the wires and had to tape the wires together to connect them, we went for consults and with Serena’s help, soldered our wires together and hence had stronger wires connected compared to our micro-project.

During the Final Presentation, our plan to have the participants enter the secret room did not happen, as participants were unsure of whether they can enter the room or not. If there are further developments of this project, it would be best if there were clues that can lead the participants to the secret room (through sound/  visual cues).

Throughout the duration of this project, we went for consult many times and the professors helped us a lot during the process. While it was challenging learning something completely new, I learnt a lot through trying the many different (wrong) ways and through failing and asking questions. The basic knowledge of Arduino I gained will be useful for me as a designer in the future, and I’m glad to have went through this learning process, albeit stressful. I’ve learnt how to overcome adversities and have learnt the importance of time management through this and the things learnt would definitely help me in the future.

Final Project Development Drawings

Project Development Drawings

“The Cold Jacket” –> “The Cold Room”

G02 Ginnie Lee, Nicole Chen

Initial Ideation

Our original idea was to create a jacket, something that is made to provide warmth, to turn cold when a certain volume of activity is detected in the mobile phone (in terms of notifications). The jacket, made to keep us warm, can ironically make us cold with the increase in activity in our phones.

The cold felt from the jacket is a physical manifestation of the loneliness. Furthermore, based on a study by Psychologists Chen-Bo Zhong and Geoffrey Leonardelli from the University of Toronto’s Rotman School of Management, social isolation can actually allow people to feel cold physically. A group of volunteers were divided into 2,  with one group recalling the personal experience of being socially excluded and the feelings of loneliness and isolation, and the other recalling an experience of being socially included (in other words, being accepted and hence not being isolated). The 2 groups were then asked to enter the same room and estimate the temperature in the room. Those who were told to think about a socially isolating experience gave lower estimates of the room temperature. In other words, the recalled memories of being ostracised actually made people feel colder and experience the ambient temperature as colder.

Hence, we wanted to amplify on the feelings of loneliness and isolation through the drop in temperature. The loneliness we wanted to project when we are getting “abandoned” or “abandoning” others in exchange to be connected online is translated into physical coldness.


To do that, we will connect the Peltier module to Arduino via a relay module, as Arduino runs on 5V while the Peltier module runs on 12V. An external power source is also needed, and we will use a 12V adapter to connect to the Peltier module to supply the 12V power the Peltier needs to run. Twitter will then be connected to Arduino via the blynk app and the IFTTT app to act as a button to control the circuit. A new tweet posted would close the circuit and allow the Arduino to send information to the Peltier to change temperature.

Because the Peltier module is cold on one side and hot on the other, the side which emits heat must be attached to a heat sink and also a cooling fan to help to dissipate the heat so that the heat will not spread to the cold side and affect the coldness of the cold side.

Research on loneliness

Reflections

Ginnie

How does your audience experience your project?

The participants will wear the jacket and physically interact with our project. The jacket will be located in a room and this room provides the context and helps the participant experience the feelings more intensely with the surroundings set up in context rather than just with the item itself. The participants will feel a direct physical manifestation of an abstract feeling, loneliness, while tweeting. The participant will realise that his/her own actions (in the case of our installation, tweeting), will affect the temperature he/she experiences.

Is it for a single person to engage with your project or for multiple participants concurrently?

Our project aims to evoke the feeling of loneliness, and hence the environment the person is in must be void of other people and hence, our project is meant for a single person to experience it, one at a time. However, multiple participants can interact with the project one after another, but not together.

What is the interaction or situation you are creating for your audience?

We’re creating a situation where the participant’s actions will directly impact the output of this project and the resulting outcome is an uncomfortable one, to simulate the negative emotions involved in this particular action.

What is the intention of this interaction?

The intention is to clearly allow the participant to experience the connectivity between social media and the feedback (output). The situation created (a person getting colder while tweeting) helps the participant link their actions on social media to their physical environment. This then helps brings out our message of the increase of usage of social media (i.e. the more connected you are online) affecting the temperature of the cooling pads (i.e the stronger the feedback projected).

Nicole

How does your audience experience your project?

We intend to build a mock up of a room so that the audience can have a mental preparation on how to experience the exhibition. This means that when they walk into the “room” it is already set up with a homier feel. So when they pick up the jacket and start using social media, the coldness they experience would be more impactful and contrasting to their surrounds. This would enable a stronger reaction as well as understanding regarding what we are trying to put across.

Is it for a single person to engage with your project or for multiple participants concurrently?

We require people to go one person at a time, but the exhibition can allow for multiple participants, one after the other.

What is the interaction or situation you are creating for your audience?

We are setting a space of a room, and showing isolation through usage of social media. The more you are active online, the lesser your offline persona experiences tangible. We are bringing this correlation into a literal aspect by making them experience coldness, associated with isolation.

What is the intention of this interaction?

It is to show the adverse side of what advancement in technology has done in our lives. While also rewarding the participant for taking time off from the online world.

Other ideas 

Idea #2

Hacking an Umbrella

Idea #3

Hacking an earpiece

Idea #4

Hacking a bracelet

Drawings

Reason for choosing the jacket to hack for our final project

We were most intrigued by the idea of the cooling pad/ temperature changing modules and also thought that the jacket was something very close to the body and hence can enhance the experience of the participants.

We also think that the coldness of the jacket can also best convey the feelings on loneliness (based on the research done) and hence we chose to hack the jacket.

FINAL: Project Development Body Storming

Notes from Charm

Italics – Actions

Bold – What is said by the tester

  • – Tie hair up — instructions said to have the collar touch the neck
  • – Wear jacket
  • – Picks up phone
  • – Scrolling
  • – Click new tweet
  • – Typing: Hello, I am in class
  • – A tweet appears, oh, its a tweet she didn’t type – unsure if that’s her tweet
  • – Sends tweet 
  • – Brr.. it’s getting colder
  • – Click new tweet
  • – Still cold 
  • – Very distracting – cold while tweeting
  • – Types I am getting colder, takes a selfie
  • – Send tweet – again a tweet that she didn’t type
  • – Getting colder
  • – Weird to have sensations on neck
  • – Existing tweet confused Gwen 
  • – Clear what the feedback is
  • – ‘Colder’ associated with tweeting –> social commentary is clear
  • – Instructions to tweet more than once –> but actual, might not tweet more than once / might not WANT to tweet more than once 
  • – From observers:
  • – Cold – Use something else to present the coldness – e.g mini fan etc
  • – Can the participants tweet anything? Any forms of tweet?
  • – When using Twitter to Arduino – use MOCK account tweet and ONLY tweets from that account will work

Our project

We wanted to stimulate the feeling of loneliness offline when someone is connected online through a physical manifestation of loneliness. Hence, when the participant tweets, the cooling pad on his/her neck will turn cold.

Plan for Body-Storming in class

We drew out the things we needed to prepare for the body-storming session and cut out and prepared the materials for the body-storming based on this plan.

We cut out cardboard “cooling pads” and cardboard phone screens to simulate the tweeting process and the process of the temperature drop.

We cut out small pieces of cardboard and stuck on the collar of a jacket to simulate where the cooling pad will be.

We also prepared a cardboard phone and different phone screens to simulate the participant’s tweeting during the body-storming process.

During the body storming process, we then changed the cardboard according to the situation.

Video of Body-Storming Session

Reflections

1. What did you learn from the process?

GINNIE

The body storming process allowed us to observe the possible interactions others will have with our project and the interaction helped to point out possible challenges and possible unclear points in terms of the presentation of our installation. When we were doing the body storming, we used pre cut cardboard to signify the phone screen and wrote pre made tweets on the cardboard. Hence, the tester of our installation was confused when using the cardboard phone to tweet as tweets that “she did not type” appeared, but this would be solved when the actual twitter interface is used.

Also, we wanted to try out which part would be the best to have to place the cooling pads (Peltier Module), and tried to put the cardboard mock ups at the neck area of the jacket. The feedback given was that she felt “weird to have sensations on her neck” and hence we decided to fix the location of the cooling pad on the neck area.

For our installation, the more the user tweet, the colder he/she will get. The feedback given was that there were no specific instructions and hence the user may not continue tweeting or may not want to continue tweeting due to the cold. Hence, this is a problem that we have to try to solve for our final project presentation.

NICOLE

I learnt that having the installation out of context (if we displayed it just on the classroom table) might not have that much of an impact as compared to building a mini “set”. I also feel that we might need to have an instructing voice behind the exhibition (the voice of social media itself) to keep the participant engaged.

2. What surprised you while going through the process?

GINNIE 

Our project was pretty straightforward and the cause and effect was clear, and hence the participant was not confused other than the tweeting part. The process was pretty smooth sailing and clear for the participant (“clear what the feedback is”), so what was surprising for me was only the part where the pre-written tweets confused the participant as we did not intent the tweets to affect anything and didn’t think that the tweets will affect the interaction.

NICOLE

That the participant can “hack” the project by refusing to continue tweeting.

3. How can you apply what you have discovered to the designing of you installation?

GINNIE 

We could provide a better context (instead of just having only the phone and the jacket) and/or relay better instructions to the participant participating in our installation, for example, we can try to build a scenario where instructions can be better relayed and hence the user will then be able to be less confused and also ensure a smoother execution of our intention for this installation.

Based on some feedback on other groups too, I think our current installation is too straightforward and there is no clear reward/punishment system, i.e although there is a clear relationship between the tweet activity and the temperature on the jacket, there is no reward or punishment system or a proper ending to our installation and hence I think we can work on this area more and establish a better way to tie up our entire project/ better way to end the experience for the participant experiencing our installation.

NICOLE

Adding more context by placing the entire exhibition in a “situation” as well as adding instructions would be beneficial to the success of the project.

Micro Project 4: Disobedient Object

DN1011 EXPERIMENTAL INTERACTION

Micro-Assignment 4: Disobedient objects

INITIAL IDEAS AND SKETCHES

Idea #1: Misbehaving spoon

Spoons are useful tools to aid us during meals, especially with liquid foods. This idea of a misbehaving spoon is to allow the spoon to do the exact opposite of what it’s supposed to do – to disallow its’ user to be able to feed themselves instead of aiding the user with the feeding process. For example, the user uses the spoon to scoop a spoon of hot soup and sends it to his/her mouth, but the spoon snaps downwards and spills the soup back into the bowl.

The idea was to create a spoon that snaps downwards when in contact with heated food such was soup. This would require the use of a thermo sensor (thermistor) that is attached to the end of the spoon and a motor at the handle that can allow the handle to snap downwards when the thermo sensor reads a value over a certain temperature.

This would be the most challenging to execute out of all 3 of our ideas.

Idea #2: Overweight chair

While chairs are made to hold people’s weights and allow users to sit comfortably on them, this idea of an overweight chair is made to annoy users and produce a sound when users sit on the chair. Based on the weight of the user, the chair will produce sounds of different frequency, the bigger the weight detected, the higher the sound frequency.

To do this, a pressure sensor must be attached to the seat of the chair and a speaker must be attached to the bottom of the chair/ an unseen part of the chair. The pressure sensor would then sense the amount of pressure on the seat (based on the user’s weight) and the speaker would make sounds of different frequencies respectively.

This is the easiest idea to execute out of all 3 of our ideas.

Idea #3: Mirror for the Narcissistic

The initial idea for this mirror was to tweak the original function of the mirror and make this disobedient mirror an annoying one. Hence, we wanted the mirror to sound when people go near it to look at themselves, making the mirror less of a functional item and more of a playful object.

We decided that a light sensor should be placed on top of the mirror so that the distance of the user to the mirror can be detected based on the amount of light near the sensor (i.e the nearer the user is to the sensor, the more the shadow there is casted on the sensor, and hence the light sensor can detect the proximity of the user based on the amount of light received. Thereafter, based on the amount of light detected, a speaker will then make sounds based on the amount of light received.

We decided to go ahead with this idea since it wasn’t too hard to execute but also was challenging for us. To add on to the challenge, we decided to add on a light at the top of the mirror to mimic a siren going off whenever someone approaches the mirror.

Video of Mirror in situ 🙂 

PROCESS

We are both really bad at coding, and hence we ran into many problems while trying to code. Initially, we found a code online that could allow a buzzer and light to go off when light is detected in the light sensor. Hence, we decided to use the code but tweak it a little so that we can achieve the same effect but with the opposite input – we were aiming to let the sound and light go off when light is reduced.

However, when coding and trying to tweak the code, we made many mistakes, such as forgetting to code Write/Print when we coded Read, and we also didn’t know how to configure the light settings and hence we were able to make the sound and light go off but we didn’t know how to stop the sound although we could make the speaker play different tones with different light intensities.

Hence, we requested help from a friend who had learnt arduino last semester, to help check what was wrong. He then explained the problems with our coding and what was missing, and taught us what other codes to input and how the codes work. We then re-coded with his guidance. For the blinking light, we just copied and added on the circuit to the speaker that we learnt from the first arduino lesson. Initially, we forgot to add the resistor to the circuit and busted a lightbulb haha. 🙁

REFLECTIONS

  1. How does your hacked object behaves in a way you least expect it to? 

GINNIE

Mirrors are essential to our daily life. The moment we wake up, we find ourselves brushing our teeth in front of a mirror, putting on skin care products in front of a mirror, looking at ourselves through the mirror before we go out and so on. The mirror’s function is to allow the user to look at themselves and check how they look like.

Our hacked object aims to be “disobedient” by rejecting a user when the user wants to look at themselves. A mirror is not supposed to makes noises or have warning lights flashing in the user’s face and hence, when the mirror flashes a warning siren and produces loud sounds when a user wants to look at themselves, it is something that is least expected from a mirror.

NICOLE

It is a mirror that sends a sharp annoying noise when it is being looked into. The noise grows more annoying the closer you are to it.

2. What are some reactions you observed from your participants when they interacted with the object?

Reaction video 1

Reaction video 2

Reaction video 3

GINNIE

The participants that interacted with our object thinks that it is a very intuitive to just approach the mirror when they see one, and most of them would try to adjust the distance between themselves and the mirror where the light sensor is to see how far they can go before activating the alarm. Some of the participants also tried using their bodies and their hands to make the alarm sound.

All the participants used the object the way we wanted them to but only one managed to go close enough to realise that the amount of light received by the light sensor affects the pitch of the sound too. Most of the participants also moved away when the mirror sounded, which was something we wanted to achieve – for the disobedient object to deter the user from using the object for its origins function.

An interesting finding that we have not thought about during the process of this project was the combination of a light sensor to a mirror. A mirror reflects light and by putting the light sensor right above the mirror, the light received by the light sensor would not be accurate / same for every user. For example, during our presentation, the participants wearing white had a harder time using the shadows from their bodies to activate the alarm, whereas participants who wore black could activate the alarm from just simply approaching the object and not needing to even look into the mirror at themselves. This is due the the different amount of light the mirror reflects based on the colour of the participants’ shirts, and could be explored further.

One of our classmates posed a question to ask why we used a light sensor instead of a proximity sensor. While a proximity sensor would allow the mechanism to work the same way, but we would prefer to use a light sensor as the light sensor can be more sensitive and reactive. As observed from the interactions, the light sensor is very sensitive and would sound as soon as shadow is detected as shadow lowers the value of light detected by the sensor.

NICOLE

Some were very taken aback by the sudden ringing noise, and tried to look into the mirror at an angle where it will not beep. It was very entertaining to see some of the participants creep up to the mirror to try and avoid the sound. In another instance, when prof Lei came up to the mirror, it did not ring. There was a moment of confusion and jokes were passed around, the main reaction being amusement. I found it very funny as the sudden lack of response made it seem like the mirror was filtering who was passable or who failed the “mirror test”. We then realised it was because she was wearing white. We made Bai stand in front of the mirror to confirm our assumption and it was true. It then gave me an idea, if we were given a chance to further develop this idea, it would be fun to find a way to get a photocell sensor that could respond to coloured light and setting some colours to trigger the sound, and some not. It would leave participants wondering what exactly is the requirement to not get beeped.

3. What are the challenges involved and how did you overcome them? What problems still exist? How might you overcome them eventually? 

GINNIE

The challenges we faced were generally in terms of coding and in terms of connecting the circuit to our object. Initially, we found a code online that allows a buzzer and a light to go off with a light sensor, but what was different about the code compared to what we wanted was that the code we found allowed the light and buzzer to go off when a certain amount of light is detected. Hence, the code we found online created the opposite effect we wanted and as a result, we tried to follow the coding and reverse it so it would create the opposite effect.

However, the coding process was harder than we expected it to be, and with both of us not well versed with coding, we could make the speaker change tones with the different degree of light received but couldn’t seem to stop the speaker from making noises. We also realised that the only speaker we had, the Piezo speaker, is different from the buzzer that was used in the code online, and hence tried to tackle that problem too.

After some time, we decide to ask a friend who had learnt coding with Arduino to help us diagnose the problem with our code. While trying to inverse and modify the code online to fit our project, we have missed out important values and did not realise that we had to configure the amount light detected by the light sensor before the alarm goes off. We also coded to read the light values detected by the sensor but did not code ‘print’ below and hence, when we opened the window to view to values, all we saw was a blank screen.

Hence, with the friend’s guidance, we managed to learn how to get the values of the amount of light detected, used that to configure the value of the amount of light detected before the sound goes off, and also amend our code so that the speaker could work correctly.

For the light, we followed the circuit and codes taught in class and added it to the coding done for the speaker.

Physically, we needed to extend the light bulb and the light sensor to fix them to our mirror, but because we didn’t have the right materials for soldering, we tried to tape the wires together instead, and it took some time before we were able to properly connect the wires together.

A problem that still exists would be the problem of the light sensor. Due to its’ nature and the difference in lighting for different places, the object would require configuration every time it is shifted to a new location. A possible way to solve this would be to follow the participant’s suggestion and replace the light sensor with a proximity sensor, which does not require configuration with a change in location.

NICOLE
We referred to the lecture slides and coded our Arduino. However, the only set back was that it did the reverse. It made noise and only would stop when we covered the photocell pin. We then asked our friend from engineering to check what was wrong and rectified the code. In order for us to learn from our mistakes, we labeled the instructions of the code as well to help us familiarise ourselves with the instructions. The issue that we now face is the white reflecting light, resulting in the photocell pin reading to be above the limit we set. An easy way to solve this would be to place the sensor/mirror at neck level, so it captures the light being reflected above the neck. Hence, clothing colour would not be an issue.

Research Critique 3 – Critical Making

Critical Making is a term coined initially by Matt Ratto in 2008 and first used in 2009 to describe the combination of critical thinking and hands-on reading. It seeks to combine material engagements with technologies to make social statements, opening up and extending critical social reflection. It combines ‘critical thinking’ and ‘ making’, acting as a glue between the conceptual theory and physical hands-on work. Critical making also has similarities with the practice of critical design, in which both pushes users into more complex emotional and psychological territory by questioning social norms and stimulating discussion and criticism of design itself. Critical making is very focused on the process of making the art/object itself than being focused on the final product. It is process-oriented, scholarship-oriented and the final prototypes can speak for themselves.

https://vimeo.com/68082605

The issues with standard methods of technological design now often produce standards and systems that lack cultural richness, emotion, and human-oriented values. Principles like efficiency and productivity are overemphasised by the industry, and this causes and contributes to a overworking, overproducing and over-consuming consumer-oriented culture.

Critical Making counters this by giving designers and the public a chance to break out of this cycle, step back and reconsider and rethink a broader spectrum of human experience. It can also help to highlight and bring attention to people, perspective and practices that are forgotten in conventional product development workflows, and consider what it means to be human. Critical making can help reintroduce criticality back into the post-2010 maker culture, so that it can un-sanitize, un-smooth and re-politise. At the same time, Critical Making can make actionable design strategies accessible to the public, interaction design community and translatable to the practices of technology designers. The public can also be more informed by perspectives in philosophy of technology as the prototypes produced materially articulate particular stances and ideas. They can operate as a type of boundary negotiating artefact or boundary object. All these helps increase public legibility. Moreover, materials speculations can mediate exchanges among scholars of different fields. Critically engaged artworks can do a detailed breakdown of a topic, but critically made objects and appeal to audience’s emotions and can get the message across clearly if through fully implemented.

Attached below is a video of a booklet made critically from a workshop led by Garnet Hertz.

https://www.youtube.com/watch?v=dv3YBDdg9Ds

79% Work Clock

Attached is my slides for the research done for Researcher of the Week. 🙂

DN1010 Researcher of the Week


Micro-project 3 – TOGETHER SPLIT

https://vimeo.com/user89612512/review/316706681/75bd29c839

TOGETHER SPLIT

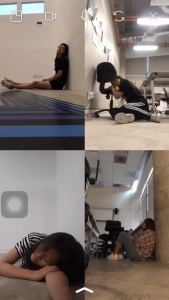
For Micro-Project 3, we experimented with the video call function on social media, in our case, instagram, to perform a piece. We crafted a storyline of 4 girls being trapped in a house after being kidnapped, and used the split screens to signify 4 different neighbouring rooms in the same house. We chose different spots in adm (in classrooms, outside along the corridor, in the toilet etc) while video calling, and even though we were in a different physical space, we played with the idea of the split screen on our phone screens to create another space (‘house’) that had many rooms and that we were in rooms only right next to one another.

Through this, we better understood the creation of a third space as well as the idea of Do-It-With-Others (DIWO). This project’s final product was only possible because our teams worked together for the final product through the use of social media tools.

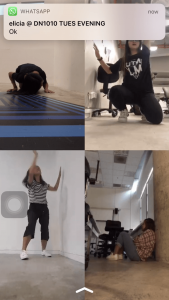
Our group initially had a script we wanted to follow so that we were able to finish the narrative the way we wanted it to be. But as time passed and the number of failed attempts taken, we realised that it was faster and more efficient if we just improvised on our own, and hence we threw away the idea of following the script. Moreover, the order of the screens differ on each screen, and hence made it even harder for us to coordinate since we were at different physical space and needed to follow the order of the screens on the phone screen that was in charge of recording. The third space that we created was also easily disturbed by outside online platforms such as whatsapp, as shown below.

Out of the 3 Micro-projects,

      1. The project I felt that I had the most

creative control

     over was the second micro-project, crowd-soured art. This was because although my group’s project was based on the responses that were collected on instagram story’s poll function, the final art piece we envisioned to make was still based on us (the artists) and whether we choose to use the data as it is or tweak it to adhere to our ideas.
      2. The project with the most

unpredictable outcome

     would be the third project, the project above. We initially wanted to follow a script and had spent most of the time planning out our scenes, but yet when we were filming, nothing went out way and we ended up improvising everything.
      3. The project the best illustrates the concepts of

DIWO & Open Source 

    was the second project, which taps on the use of a public platform that the public has access to (albeit it being instagram – with the limitations being that only users with internet and an account with instagram will be able to access), and at the same time engaging with the public to influence our art.
    DIWO allows many more possibilities to art as compared to individual art/making and hence introduces many more ideas and creativeness into the art scene. Open source is inclusive given its public nature and allows active participation to the once passive audiences. Now, audiences can become co-creators, opening up new beginnings and new inspirations to the art scene.

MICRO-PROJECT 2 – CROWD-SOURCED ART

What is the content of the work and who is creating it?

For this micro-assignment, my group has decided to use Instagram as a platform for crowd sourcing and the crowd-source community we are targeting are the followers on 2 of our members’ private Instagrams and the followers on one of our public art accounts on Instagram. We tagged on the poll function on Instagram story and drafted questions for our followers to answer and these questions start from general questions and slowly become increasingly more private and personal. At the end of the 5 questions, we prompted our followers to tell us a secret using the short answer function on Instagram story.


We wanted to test out the response level for each question, and observe to see whether the responses will differ across the different questions. The percentage bars that result from the polls can be then used to collage into an art piece. Each account’s responses are different, so each art piece generated from this questions from one Instagram account will differ from the other. This then requires our follower’s responses in order for us to rearrange the question bars and make such a collage, hence this project leverages on the Do-It-With Others (DIWO) concept.

There is, however, another ‘art’ we would like to bring out, which is the freewill to the right to their answer to such questions. Although there is a disclaimer at the start of questionnaire that the survey would be 100% anonymous, once the answer is submitted, the organise now has his/her own choice whether to keep the answers a secret or tell everybody about it. Hence, our group thinks that there is beauty in the transference of such rights and answers and also the physical manifestation of trust.

We also gave our followers choice to either answer all the questions, answer a few and skip those they do not want to answer, or not answer at all. As we have expected, the number of people who answered each progressive question got lesser and lesser. This brings out the social aspect of our artwork, where some topics are still taboo to some people in society.

Where does this work take place?

This work takes place on Instagram itself, an online social media platform. This means that this work takes place in a virtual online space, accessible only to those who has internet as well as an Instagram account. With this in consideration, we are aware that there will be certain groups not representation in this questionnaire because of certain ‘privedges’ that those who have access to the internet have.

How does this work involve social interaction?

This work involved social interaction as people react and interact with our Instagram stories to contribute to the percentage bars (Refer to pictures below) for each question.

This allows the interaction between the organiser and the participants, allowing the participants to join in and aid in creating the art piece alongside the artist.

How is your crowd-sourced project different from one that is created by a single artist/creator?

In an artwork presented and created by only one single artist/creator, the artist or creator himself/herself is the only person working on this object and hence all ideas for such piece will only be from the artist themselves. The final piece will only allow the audiences to be able to see the artist’s work.

However, crowd-sourced projects tags on the usage of public opinion and also ideas other people may have. This makes the artwork that is to be done a lot less predictable and the artist will then lose some of this control over the artwork itself.

Micro assignment 1: Creating the third space

For this project, we were told to photograph a place that held significant to us in ADM and hence I interpreted it as a place that means the most to me and my favourite places. Below are my photos for this project, posted on instagram.

Why did you choose this space or object to photograph?

I chose to photograph the sunken plaza in ADM as it held memories from orientation when I first started as a freshman, and the place that my orientation group bonded at reminds me of the apprehension, fear and excitement when I first joined the school. This place brings back nostalgia and also reminding me of why I chose to join ADM in the first place, helping me find myself in times of uncertainty.

By posting this online on our social media accounts and by tagging the hashtag in our posts, we have created another virtual space that allows like-minded people to communicate in such space.

What are some of the characteristics of this alternative virtual space you had created collectively?

By posting pictures of the places / objects that have significance to each and everyone of us on instagram, we create a virtual space online, we have created an inclusive space that allows us to share our own experiences as well as learn about others’.

This alternative virtual space is also a public space where any user, including users that do not own instagram accounts. By posting these pictures online, these pictures are released onto the internet, where access is granted to everybody who can access the internet. However, at the same time, the created space is also an exclusive space, one that is only accessible if the user knows the hashtag #1010adm. These 2 characteristics are hence somewhat paradoxical, making the space accessible to only an exclusive bunch of the public, if the public knows about the hashtag through a friend’s post or comment, or if the public accidentally stumble upon such hashtag.

Under what circumstance will this alternative virtual space change?

This alternative virtual space will change, when people change it. Since this space is created by people, the space is susceptible to change when people change the types of photos they post on this account, or change the people that know about this particular space. This virtual space is also bound to change if the system on instagram changes, such as when instagram changes its algorithm.

How does this project relate to what we discussed in the lecture regarding co-creation, the concept of Do-It-Yourself (DIY), Do-It-With-Others (DIWO)?

This project allowed us to build a virtual space on a social media platform, compiling all of our favourite and most meaningful places in our school. This virtual space is co-created by us, as this space can only exist if all of us contribute to the hashtag.

This project tags on the concept of Do-It-Yourself (DIY) in the sense that we partake in our own individual efforts to find places that hold meaning to us and to photograph these places, creating content for the hashtag. It is also DIY in the sense that we can interpret the given prompt anyway we want as individuals and create content based on our interpretations that may or may not differ from others sharing in the same virtual space.

At the same time, it also tags on the concept of Do-It-With-Others (DIWO) as the space was created on a social media platform. This allows our creations / posts to be seen by our followers and hence encourage discussion through the use of the comments section under each photo. This discussion will then generate more ideas and people with differing thoughts can interact and learn from one another.