

DN1011 EXPERIMENTAL INTERACTION
Micro-Assignment 4: Disobedient objects
INITIAL IDEAS AND SKETCHES
Idea #1: Misbehaving spoon

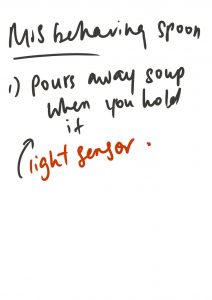
Spoons are useful tools to aid us during meals, especially with liquid foods. This idea of a misbehaving spoon is to allow the spoon to do the exact opposite of what it’s supposed to do – to disallow its’ user to be able to feed themselves instead of aiding the user with the feeding process. For example, the user uses the spoon to scoop a spoon of hot soup and sends it to his/her mouth, but the spoon snaps downwards and spills the soup back into the bowl.
The idea was to create a spoon that snaps downwards when in contact with heated food such was soup. This would require the use of a thermo sensor (thermistor) that is attached to the end of the spoon and a motor at the handle that can allow the handle to snap downwards when the thermo sensor reads a value over a certain temperature.
This would be the most challenging to execute out of all 3 of our ideas.
Idea #2: Overweight chair

While chairs are made to hold people’s weights and allow users to sit comfortably on them, this idea of an overweight chair is made to annoy users and produce a sound when users sit on the chair. Based on the weight of the user, the chair will produce sounds of different frequency, the bigger the weight detected, the higher the sound frequency.
To do this, a pressure sensor must be attached to the seat of the chair and a speaker must be attached to the bottom of the chair/ an unseen part of the chair. The pressure sensor would then sense the amount of pressure on the seat (based on the user’s weight) and the speaker would make sounds of different frequencies respectively.
This is the easiest idea to execute out of all 3 of our ideas.
Idea #3: Mirror for the Narcissistic

The initial idea for this mirror was to tweak the original function of the mirror and make this disobedient mirror an annoying one. Hence, we wanted the mirror to sound when people go near it to look at themselves, making the mirror less of a functional item and more of a playful object.
We decided that a light sensor should be placed on top of the mirror so that the distance of the user to the mirror can be detected based on the amount of light near the sensor (i.e the nearer the user is to the sensor, the more the shadow there is casted on the sensor, and hence the light sensor can detect the proximity of the user based on the amount of light received. Thereafter, based on the amount of light detected, a speaker will then make sounds based on the amount of light received.
We decided to go ahead with this idea since it wasn’t too hard to execute but also was challenging for us. To add on to the challenge, we decided to add on a light at the top of the mirror to mimic a siren going off whenever someone approaches the mirror.


PROCESS
We are both really bad at coding, and hence we ran into many problems while trying to code. Initially, we found a code online that could allow a buzzer and light to go off when light is detected in the light sensor. Hence, we decided to use the code but tweak it a little so that we can achieve the same effect but with the opposite input – we were aiming to let the sound and light go off when light is reduced.
However, when coding and trying to tweak the code, we made many mistakes, such as forgetting to code Write/Print when we coded Read, and we also didn’t know how to configure the light settings and hence we were able to make the sound and light go off but we didn’t know how to stop the sound although we could make the speaker play different tones with different light intensities.
Hence, we requested help from a friend who had learnt arduino last semester, to help check what was wrong. He then explained the problems with our coding and what was missing, and taught us what other codes to input and how the codes work. We then re-coded with his guidance. For the blinking light, we just copied and added on the circuit to the speaker that we learnt from the first arduino lesson. Initially, we forgot to add the resistor to the circuit and busted a lightbulb haha. 🙁


REFLECTIONS
- How does your hacked object behaves in a way you least expect it to?
GINNIE
Mirrors are essential to our daily life. The moment we wake up, we find ourselves brushing our teeth in front of a mirror, putting on skin care products in front of a mirror, looking at ourselves through the mirror before we go out and so on. The mirror’s function is to allow the user to look at themselves and check how they look like.
Our hacked object aims to be “disobedient” by rejecting a user when the user wants to look at themselves. A mirror is not supposed to makes noises or have warning lights flashing in the user’s face and hence, when the mirror flashes a warning siren and produces loud sounds when a user wants to look at themselves, it is something that is least expected from a mirror.
NICOLE
It is a mirror that sends a sharp annoying noise when it is being looked into. The noise grows more annoying the closer you are to it.
2. What are some reactions you observed from your participants when they interacted with the object?
GINNIE
The participants that interacted with our object thinks that it is a very intuitive to just approach the mirror when they see one, and most of them would try to adjust the distance between themselves and the mirror where the light sensor is to see how far they can go before activating the alarm. Some of the participants also tried using their bodies and their hands to make the alarm sound.
All the participants used the object the way we wanted them to but only one managed to go close enough to realise that the amount of light received by the light sensor affects the pitch of the sound too. Most of the participants also moved away when the mirror sounded, which was something we wanted to achieve – for the disobedient object to deter the user from using the object for its origins function.
An interesting finding that we have not thought about during the process of this project was the combination of a light sensor to a mirror. A mirror reflects light and by putting the light sensor right above the mirror, the light received by the light sensor would not be accurate / same for every user. For example, during our presentation, the participants wearing white had a harder time using the shadows from their bodies to activate the alarm, whereas participants who wore black could activate the alarm from just simply approaching the object and not needing to even look into the mirror at themselves. This is due the the different amount of light the mirror reflects based on the colour of the participants’ shirts, and could be explored further.
One of our classmates posed a question to ask why we used a light sensor instead of a proximity sensor. While a proximity sensor would allow the mechanism to work the same way, but we would prefer to use a light sensor as the light sensor can be more sensitive and reactive. As observed from the interactions, the light sensor is very sensitive and would sound as soon as shadow is detected as shadow lowers the value of light detected by the sensor.
NICOLE
Some were very taken aback by the sudden ringing noise, and tried to look into the mirror at an angle where it will not beep. It was very entertaining to see some of the participants creep up to the mirror to try and avoid the sound. In another instance, when prof Lei came up to the mirror, it did not ring. There was a moment of confusion and jokes were passed around, the main reaction being amusement. I found it very funny as the sudden lack of response made it seem like the mirror was filtering who was passable or who failed the “mirror test”. We then realised it was because she was wearing white. We made Bai stand in front of the mirror to confirm our assumption and it was true. It then gave me an idea, if we were given a chance to further develop this idea, it would be fun to find a way to get a photocell sensor that could respond to coloured light and setting some colours to trigger the sound, and some not. It would leave participants wondering what exactly is the requirement to not get beeped.
3. What are the challenges involved and how did you overcome them? What problems still exist? How might you overcome them eventually?
GINNIE
The challenges we faced were generally in terms of coding and in terms of connecting the circuit to our object. Initially, we found a code online that allows a buzzer and a light to go off with a light sensor, but what was different about the code compared to what we wanted was that the code we found allowed the light and buzzer to go off when a certain amount of light is detected. Hence, the code we found online created the opposite effect we wanted and as a result, we tried to follow the coding and reverse it so it would create the opposite effect.
However, the coding process was harder than we expected it to be, and with both of us not well versed with coding, we could make the speaker change tones with the different degree of light received but couldn’t seem to stop the speaker from making noises. We also realised that the only speaker we had, the Piezo speaker, is different from the buzzer that was used in the code online, and hence tried to tackle that problem too.
After some time, we decide to ask a friend who had learnt coding with Arduino to help us diagnose the problem with our code. While trying to inverse and modify the code online to fit our project, we have missed out important values and did not realise that we had to configure the amount light detected by the light sensor before the alarm goes off. We also coded to read the light values detected by the sensor but did not code ‘print’ below and hence, when we opened the window to view to values, all we saw was a blank screen.
Hence, with the friend’s guidance, we managed to learn how to get the values of the amount of light detected, used that to configure the value of the amount of light detected before the sound goes off, and also amend our code so that the speaker could work correctly.
For the light, we followed the circuit and codes taught in class and added it to the coding done for the speaker.
Physically, we needed to extend the light bulb and the light sensor to fix them to our mirror, but because we didn’t have the right materials for soldering, we tried to tape the wires together instead, and it took some time before we were able to properly connect the wires together.
A problem that still exists would be the problem of the light sensor. Due to its’ nature and the difference in lighting for different places, the object would require configuration every time it is shifted to a new location. A possible way to solve this would be to follow the participant’s suggestion and replace the light sensor with a proximity sensor, which does not require configuration with a change in location.
NICOLE
We referred to the lecture slides and coded our Arduino. However, the only set back was that it did the reverse. It made noise and only would stop when we covered the photocell pin. We then asked our friend from engineering to check what was wrong and rectified the code. In order for us to learn from our mistakes, we labeled the instructions of the code as well to help us familiarise ourselves with the instructions. The issue that we now face is the white reflecting light, resulting in the photocell pin reading to be above the limit we set. An easy way to solve this would be to place the sensor/mirror at neck level, so it captures the light being reflected above the neck. Hence, clothing colour would not be an issue.